Multibranch Pipeline in SonarQube Community Edition
 vikas bhaskar vooradi
Table of contents
- Step 1 : Prepare Your Repository
- Step 2 : Add Repository Access Credentials
- Step 3 : Configure SonarQube Credentials
- Step 4 : Create a Multibranch Pipeline
- Step 5 : Add this Jenkfile script in each branch of the repository for Sonar analysis
- Step 6 : Trigger the Multibranch Pipeline Scan in Jenkins
- Step 7 : Review Analysis Results in SonarQube
When working with SonarQube Community Edition, it’s important to note that this version does not support branch-level scanning. This feature is available only in the Developer Edition or higher, which are licensed versions.
In licensed editions, branch-level scans consolidate all branch reports under a single project key, providing a unified view of code quality for all branches. Unfortunately, this functionality isn’t available in the Community Edition.
However, there is a workaround to achieve similar results to some extent. In this approach:
Instead of using a single project key for all branches, each branch's scan results are associated with separate project keys. While this does not provide the convenience of consolidated branch-level insights under one key, it allows you to maintain visibility for each branch individually.
This alternative can be useful for teams that rely on the Community Edition but still want to implement multibranch pipelines in Jenkins for static code analysis.
Step 1 : Prepare Your Repository
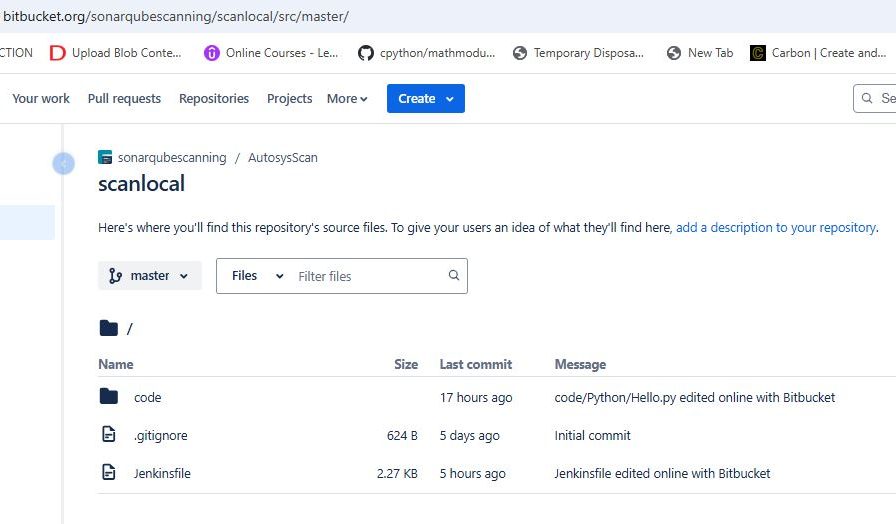
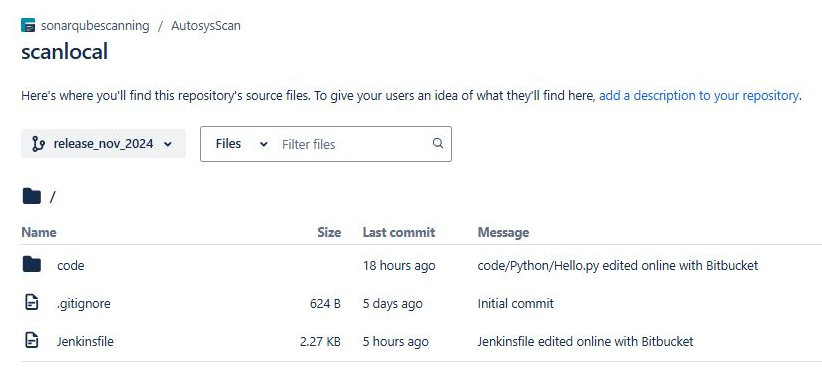
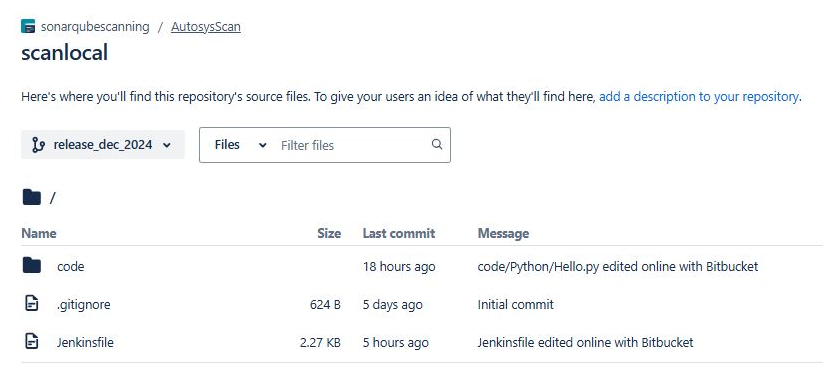
Ensure you already have a repository. If not, create one (e.g., in Bitbucket) with your branches, including master and release branches. For each branch, add a Jenkinsfile that defines your pipeline configuration.
Master branch
My release branches
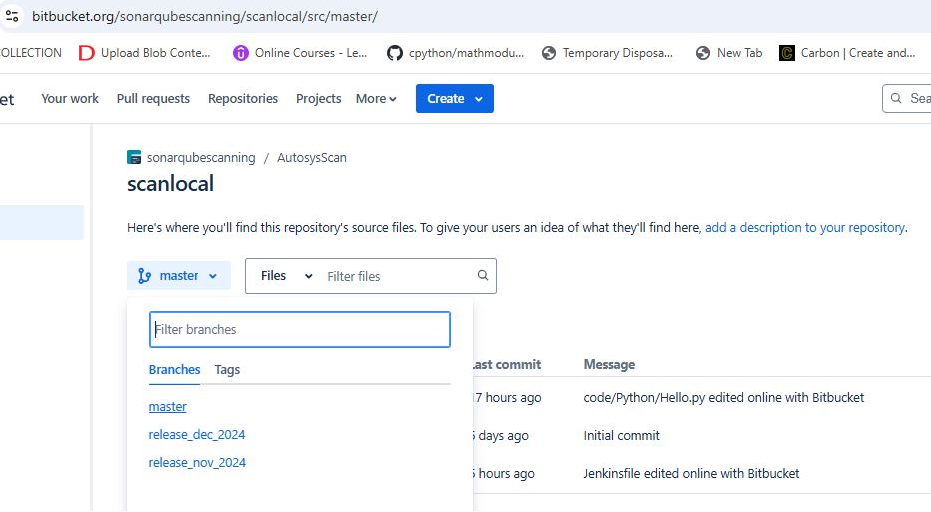
release_nov_2024
release_dec_2024
Step 2 : Add Repository Access Credentials
Go to Manage Jenkins > Credentials.
Add the credentials required for connecting to your Bitbucket repository (e.g., username/password or SSH key).
Assign these credentials to the appropriate domain or scope.
Step 3 : Configure SonarQube Credentials
Navigate to Manage Jenkins > Credentials again.
Add the SonarQube authentication details, such as a token or username/password.
Use these credentials in your pipeline or global SonarQube settings for seamless integration.
Bitbucket and Sonarqube credentials

Step 4 : Create a Multibranch Pipeline
Go to New Item, enter a name, select Multibranch Pipeline, and click OK.
Add details as mentioned
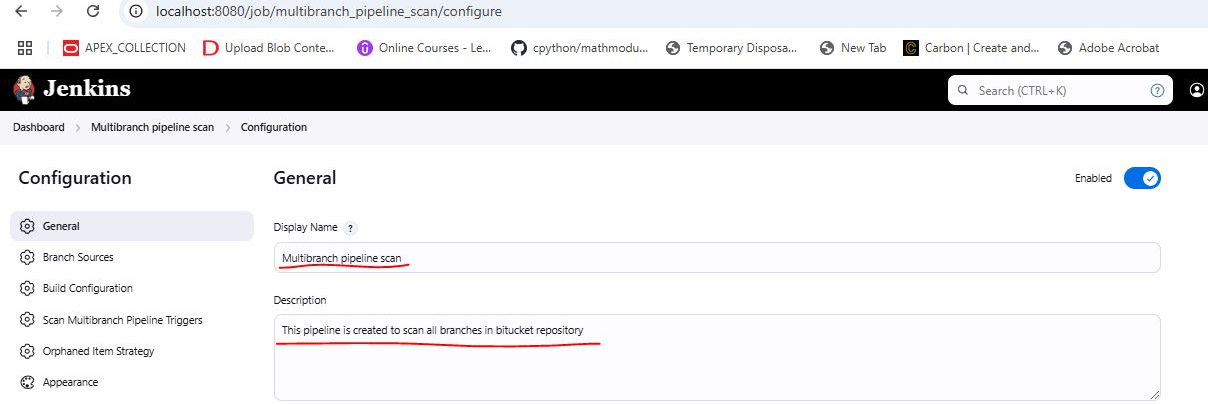
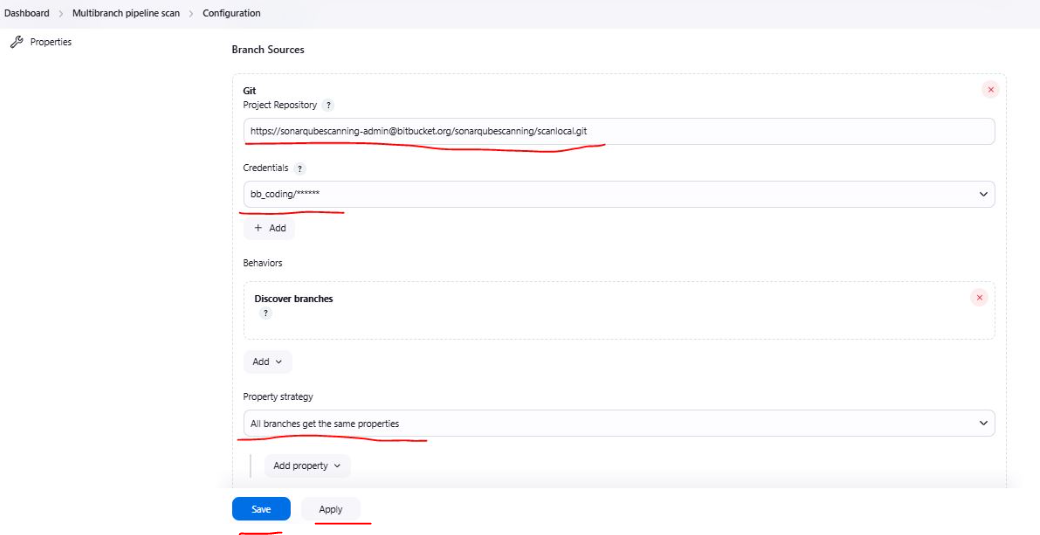

After making above changes SAVE it.
Step 5 : Add this Jenkfile script in each branch of the repository for Sonar analysis
pipeline {
    agent any

    environment {
        SONAR_SCANNER_PATH = 'C:\\ProgramData\\Jenkins\\.jenkins\\tools\\hudson.plugins.sonar.SonarRunnerInstallation\\sonar-scanner\\bin\\sonar-scanner.bat'
        SONAR_HOST_URL = 'http://localhost:9000/'
        SONAR_PROJECT_BASE_KEY = 'scanlocal'
        SONAR_PROJECT_VERSION = '1.0'
        SONAR_SOURCE_ENCODING = 'UTF-8'
        GIT_REPO_URL = 'https://sonarqubescanning-admin@bitbucket.org/sonarqubescanning/scanlocal.git'
        GIT_CREDENTIALS_ID = 'bb_coding'
    }

    stages {
        stage('Clone Repository') {
            steps {
                echo "Cloning repository ${GIT_REPO_URL}..."
                git branch: "${env.BRANCH_NAME}",
                    url: "${GIT_REPO_URL}",
                    credentialsId: "${GIT_CREDENTIALS_ID}"
            }
        }

        stage('SonarQube Analysis') {
            steps {
                script {
                    // Create a unique project key and name per branch
                    def branchKey = env.BRANCH_NAME.replaceAll('/', '_')
                    def sonarProjectKey = "${SONAR_PROJECT_BASE_KEY}_${branchKey}"
                    def sonarProjectName = "${env.BRANCH_NAME}"

                    withSonarQubeEnv('SonarQube') {
                        echo "Starting SonarQube analysis for ${sonarProjectKey}..."
                        bat """
                        "${SONAR_SCANNER_PATH}" ^
                            -Dsonar.host.url=${SONAR_HOST_URL} ^
                            -Dsonar.projectKey=${sonarProjectKey} ^
                            -Dsonar.projectName=${sonarProjectName} ^
                            -Dsonar.projectVersion=${SONAR_PROJECT_VERSION} ^
                            -Dsonar.sourceEncoding=${SONAR_SOURCE_ENCODING} ^
                            -Dsonar.sources=. ^
                            -Dsonar.inclusions=**/*.sql,**/*.plsql,**/*.py,**/*.sh ^
                            -Dsonar.verbose=true
                        """
                    }
                }
            }
        }
    }

    post {
        always {
            echo 'Pipeline execution completed.'
        }
        success {
            echo 'SonarQube scan completed successfully!'
        }
        failure {
            echo 'SonarQube scan failed.'
        }
    }
}
Step 6 : Trigger the Multibranch Pipeline Scan in Jenkins
In Jenkins, navigate to your Multibranch Pipeline job.
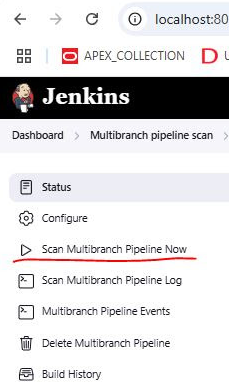
Click on Scan Multibranch Pipeline Now to trigger the pipeline execution.
Wait for the scan to complete.
Once the build is finished, the code analysis report will be generated and available in SonarQube.
Step 7 : Review Analysis Results in SonarQube
After the scan completes successfully in Jenkins, navigate to SonarQube.
Go to the project dashboard to view the analysis results.
Review any issues, such as bugs, vulnerabilities, and code smells, reported by SonarQube.
Address the identified issues to improve code quality.
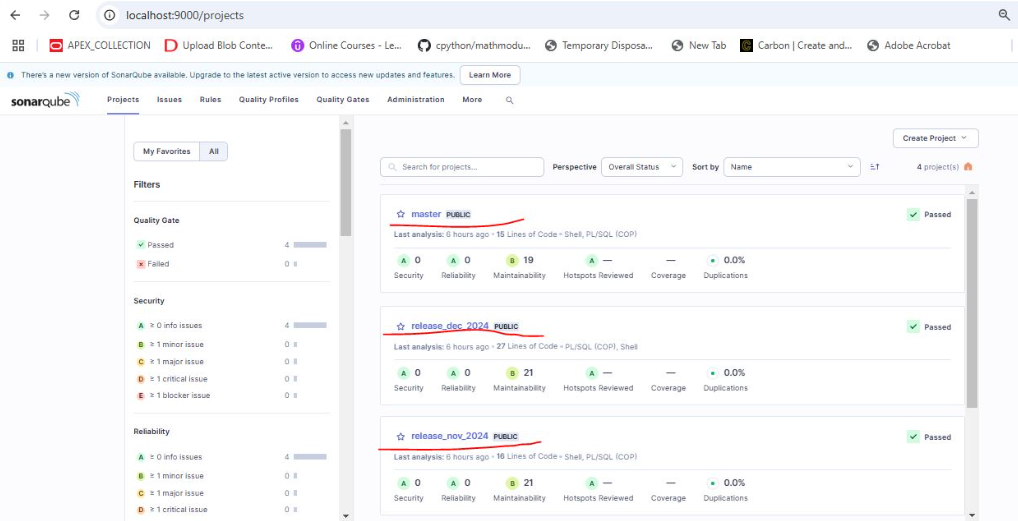
Scan report generated on Sonarqube
Subscribe to my newsletter
Read articles from vikas bhaskar vooradi directly inside your inbox. Subscribe to the newsletter, and don't miss out.
Written by

vikas bhaskar vooradi
vikas bhaskar vooradi
In my free time, I enjoy coding, blogging, and exploring technology-related content on the internet.
