Information Gathering in Bug Bounty
 FIKARA BILAL
In the context of Bug Bounty or security testing, information gathering is a step that involves collecting as much data as possible about a target. The goal is to better understand its environment and, above all, identify potential vulnerabilities. This step relies on various techniques, and we’ll dive into some of them later. In this article, we’ll break down a few tools that are super handy for information gathering.
Google Dorking
Google Dorking is a search technique that uses advanced queries to find sensitive information that isn’t accessible through a standard Google search. It helps narrow down the results to uncover web pages, files, and other hidden data.
Options
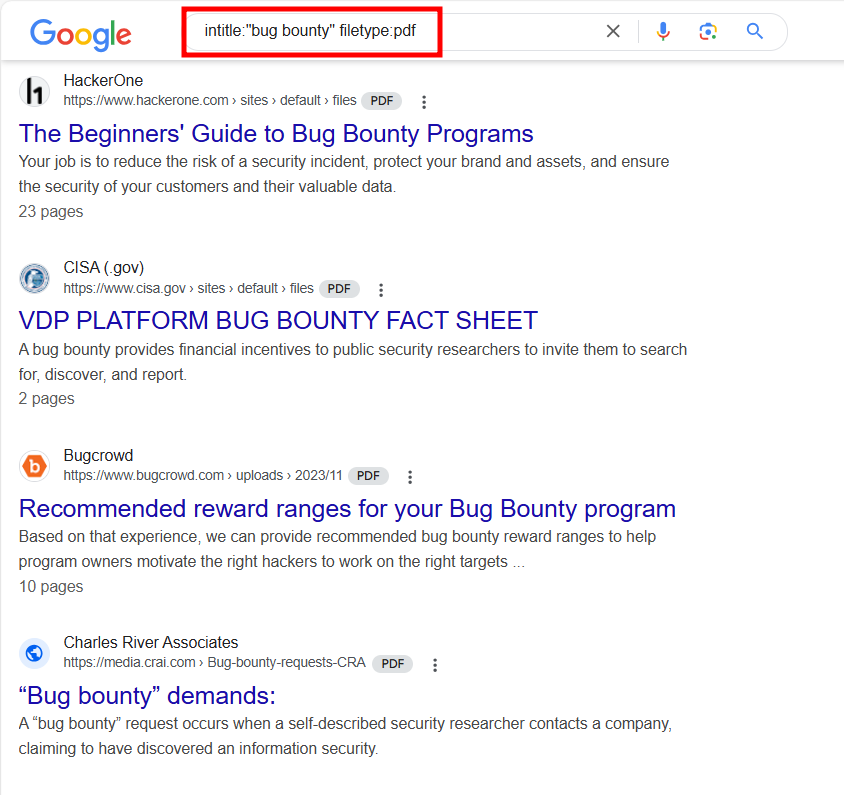
<keyword> site:www.website.com filetype:pdfsite:limits the search to the specified website.filetype:searches for specific file types, like PDFs in this case.
intitle:<keyword> inurl:<keyword> cache:<keyword>intitlefinds web pages where the specified keyword appears in the title.inurl: searches for web pages with the keyword in the URL. This is useful for finding specific pages, directories, or files that include the keyword.cache: displays the cached version of a web page, essentially a backup saved by a search engine. Often used to view pages that have been deleted but are still accessible in the search engine’s cache. Also helpful for seeing how a site looked before major changes.
In the image below, we can see that the search only returns PDFs file that have “bug bounty“ term in their titles
We can use Google Dorks for more sensitive informations.
intitle:"index of" "server-status" site:www.website.com: this query searches for pages on the site that contains “index of“ and “server-status“ in the title. This can provide some informations about the server or web server status pages."public" "key" filetype:pem site:www.website.com: this query is used to search for PEM files on the site that contains the words “public“ and “key“. Theses files are often used to store cryptography keys. So, we can potentially find exposed public keys
Google Dorks can be effective means to identify vulnerabilities in a system. There are also files and lists available on Internet containing Google Dorks fot various searches.
Bug Bounty Search Engine
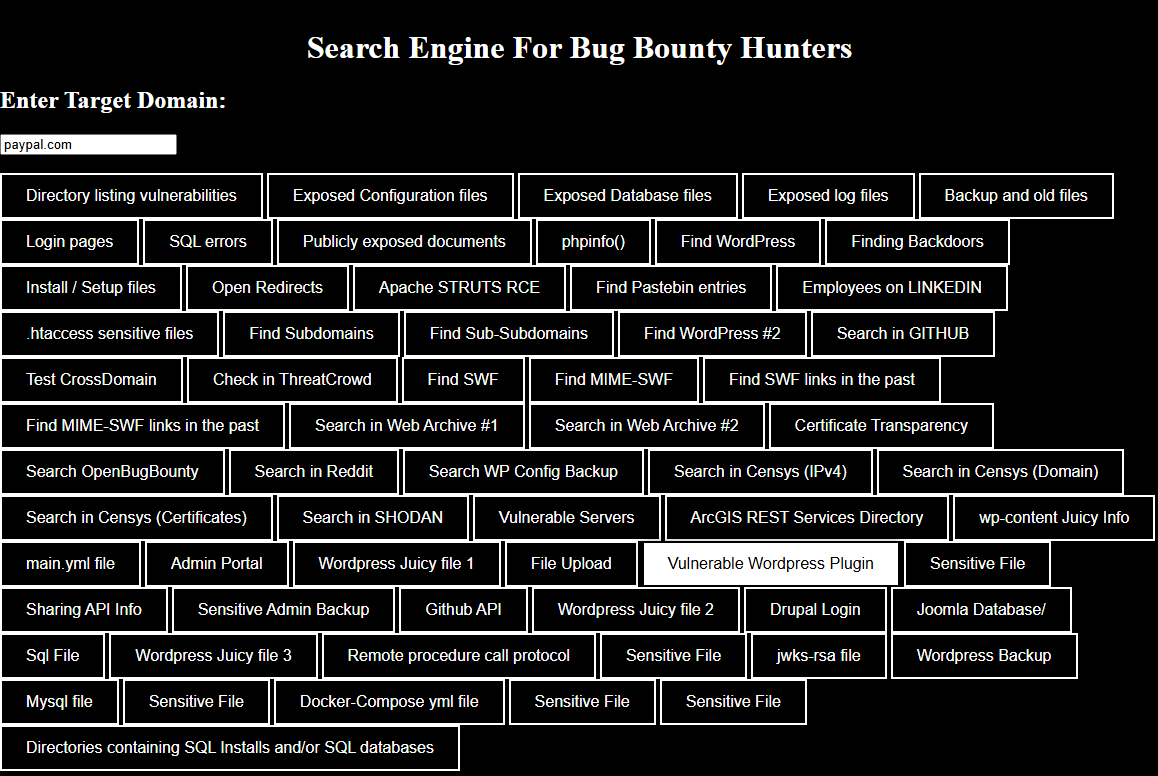
BugBountySearchEngine is a search engine that consolidates many methods for searching vulnerabilities and sensitive information on domains, websites, and even individuals. It offers options to find configuration or backup files, exposed databases, subdomains, and more. You can also search for specific datas on public sources like Github, Shodans, Censys and more.
The tool is availaible here.
To use it, enter a target domain in the textbox. Then select one of the predefined searches based on the information you are looking for.
Github Recon
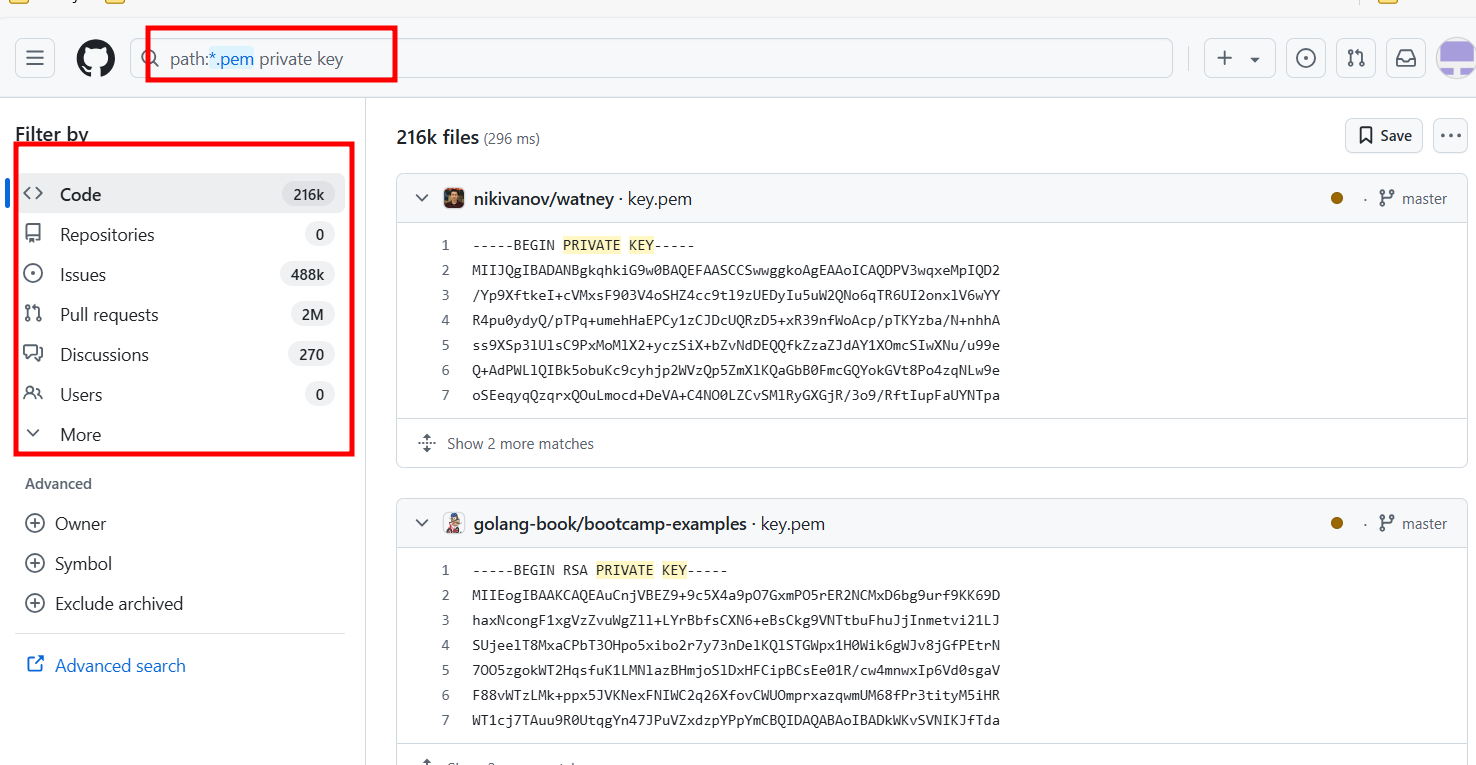
Github Recon is a technique used to search information on projects, organizations or even individuals by exploring Github repositories. It involves analyzing commit histories and monitoring activities to discover sensitive information. You can also use Github Dorks to refine searches. Sometimes, developers may accidentally leave sensitive information such as API keys, default passwords, and more.
In the search bar, just enter the desired dorks or queries. Then, examine the code and commits to gather information that can be useful.
Censys
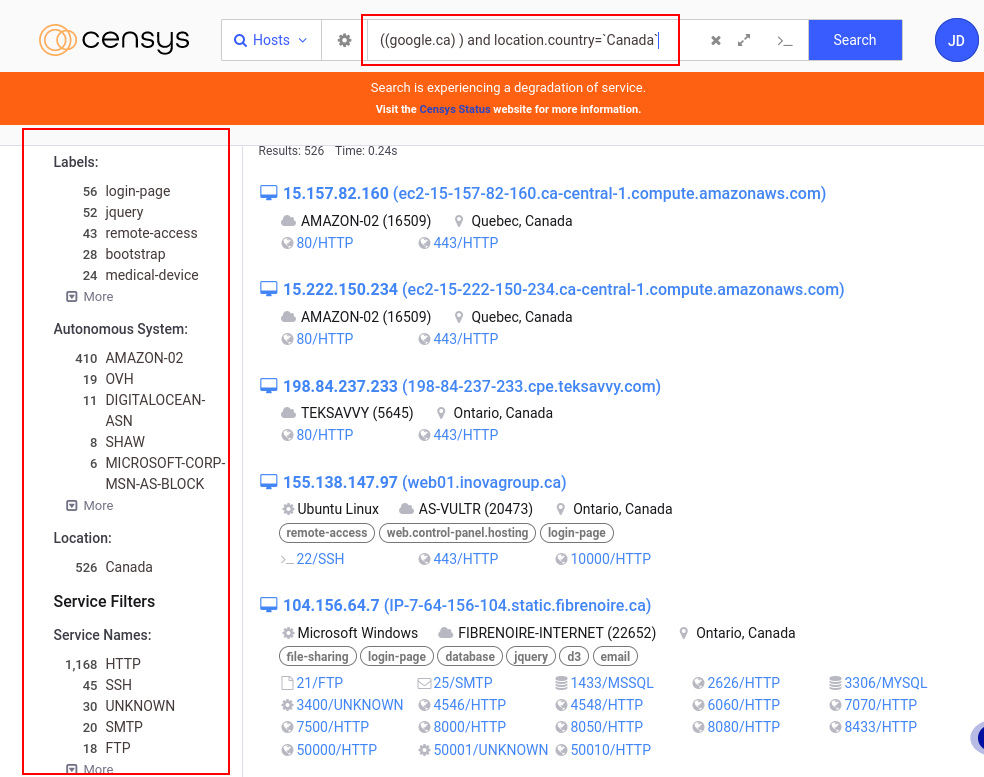
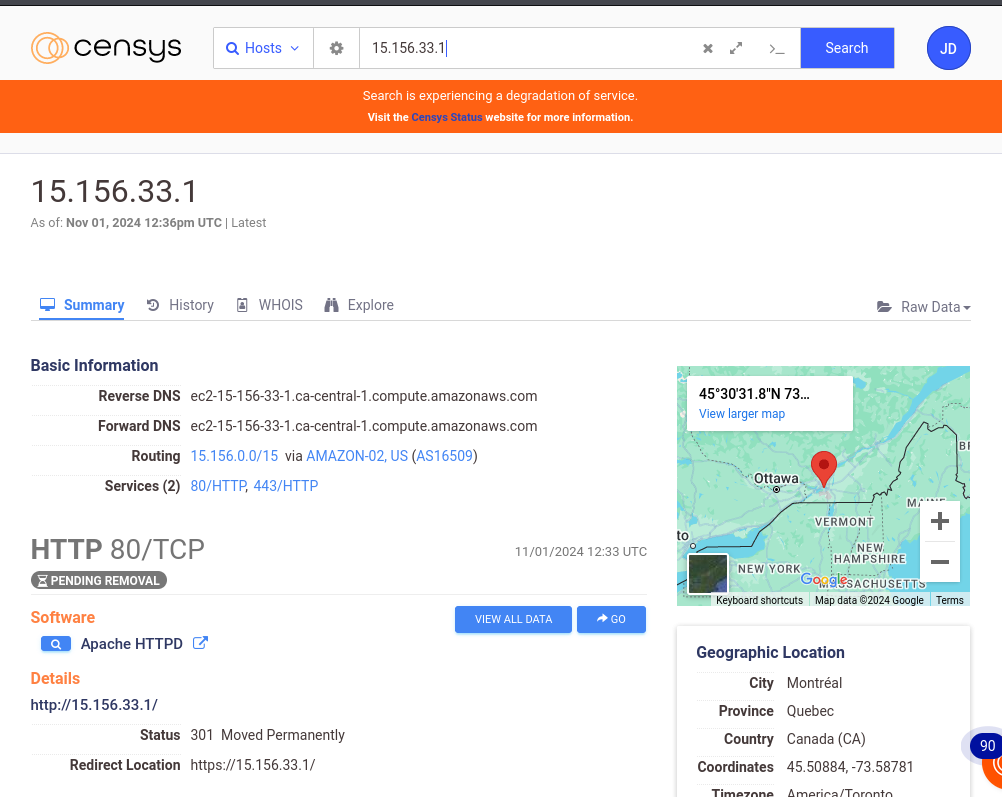
Censys is a search engine and plateform that contains data from various sources about internet-connected infrastructures. It provides real-time data and returns informations on devices, services or domains. It can therefore be very useful in a process of gathering information on a target.
Censys is used to collect information such as IP adresses, services and open ports. With advanced filters, we can refine the results according to the labels (IPv6 hosts, remote access, email, etc…), server locations, and software providers (Amazon, Akamai, Google, Apache, nginx).
By doing a Google search, you can see that you have access to a lot of information, and the search result returns a lot of hosts that could be analyzed.
By selecting a host, you can access additional information such as routing, services, location, associated event history, and a Whois tab that provides details about the owner of the IP address.
Enum4Linux
Enum4linux is an enumeration tool used to extract data from systems using the SMB (Server Message Block) protocol. It allows the collection of various information about user accounts, domain names, local groups, and shared folders on a network.
Options
enum4linux -U -S -P -G [ip_adress]The
-Uoption lists the users on the target system.The
-Soption lists the available shares on the target system.The
-Poption displays the password policy.The
-Goption lists the groups on the system.The
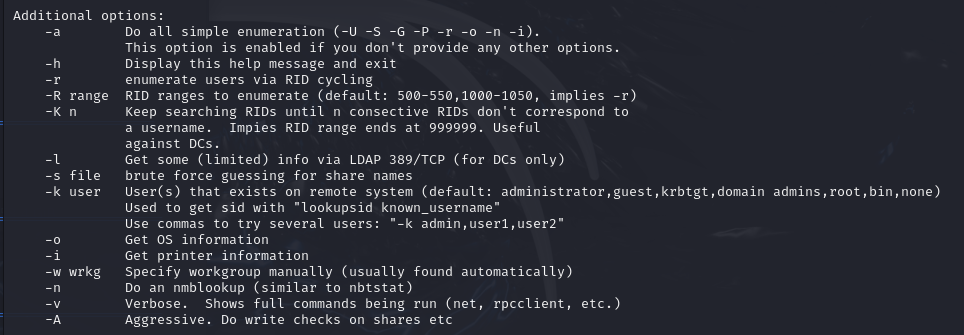
-aoption combines all options (-U -S -G -P -r -o -n -i). It is the default option when none is selected.
enum4linux -u [username]-p [password] -U [ip_adresss]- The
-uand-poptions specify a username and a password.
- The
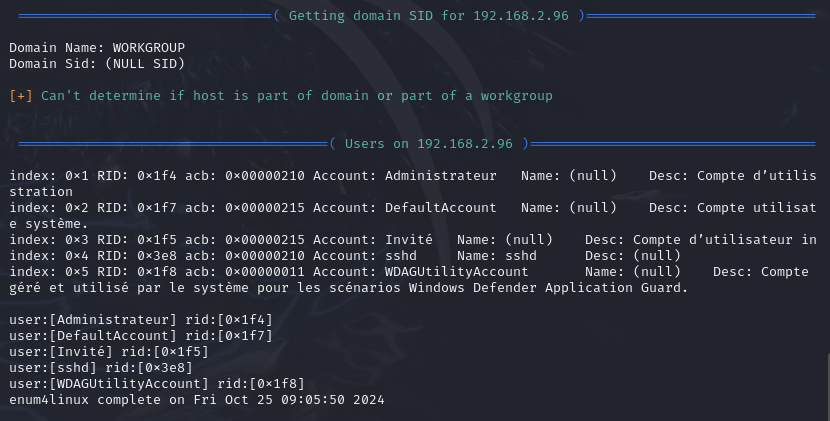
You can see several users on the system: Administrator, Guest, etc.
Enum4linux can be very useful because information such as users, file shares on the network, and groups and permissions can be exploited to identify potential vulnerabilities.
WaybackURL
WaybackURL is a service that allows access to old or archived versions of websites using the Internet Archive, a web page archiving service. It is used to view old versions of websites, and even if they have been modified, they may still contain vulnerabilities that have not been fixed or are still accessible through these archives.
The official documentation can be found on GitHub.
To install WaybackURL, use the following command:
go install github.com/tomnomnom/waybackurls@latest
Options
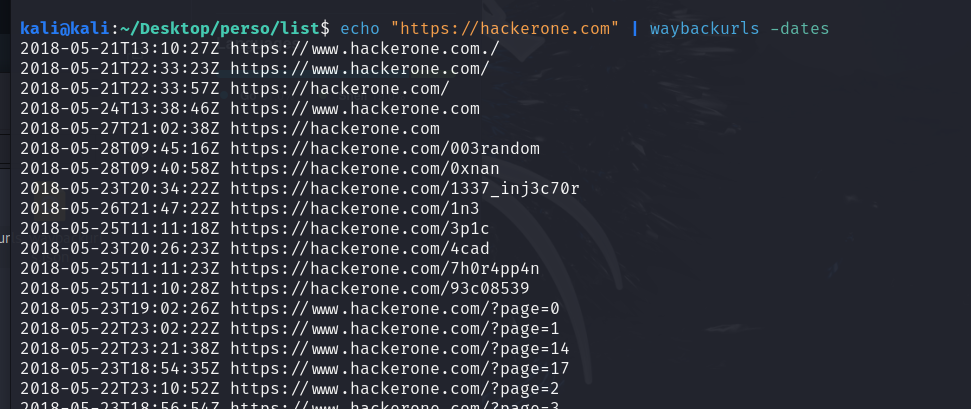
waybackurls -h: The-hoption lists all the options for waybackurls.waybackurlshttps://site.com-dates | grep [word]the
-datesoption displays the archival date of each URL.grepfilters the results to show only the URLs containing the term "word".
cat domains.txt | waybackurls | grep -vE "\.(js|txt)$" > urls.txtThis command reads the file
domains.txtand pipes the output to waybackurls. The results are then stored in the fileurls.txt.The
-vEoption excludes lines matching the expression specified immediately after (with the-voption) and enables extended regular expressions (with the-Eoption).The expression
"\.(js|txt)$"is used to match strings that end with.jsor.txt.Therefore, this command will list the archived URLs, excluding those that end with
.jsor.txt.
echo "https://hackerone.com" | waybackurls -no-subsThe
-no-subsoption excludes subdomains of the target domain from the results.This command will display all archived URLs of hackerone.com.
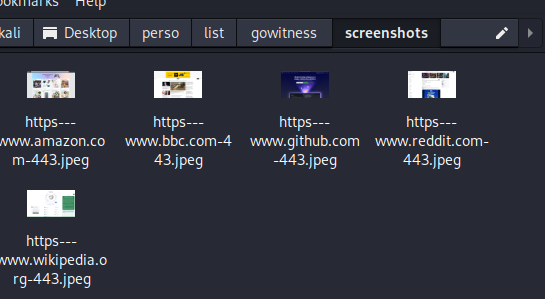
Gowitness
Gowitness is a tool used to take screenshots of websites, collect information on HTTP headers, and create reports on visited sites in an automated manner.
This tool, although it might seem "useless" because one could simply visit the web pages, is actually very practical when there are multiple sites to check without wasting a lot of time opening them one by one.
To install Gowitness, use the following command:
go install github.com/sensepost/gowitness@latest
Options
gowitness -h: This option lists all the options for gowitness.gowitness scan -h: Shows the available options for performing scans.gowitness scan single --urlhttps://google.com--screenshot-path ./PATH --screenshot-format png --screenshot-fullpage:The
--urloption specifies the URL to capture.The
--screenshot-pathoption sets the path where the screenshot will be saved.The
--screenshot-formatoption sets the format of the screenshot. The default is JPEG, but only JPEG and PNG are valid formats.The
--screenshot-fullpageoption captures the entire page, rather than just the visible part. This is useful for pages with a lot of scrolling content.
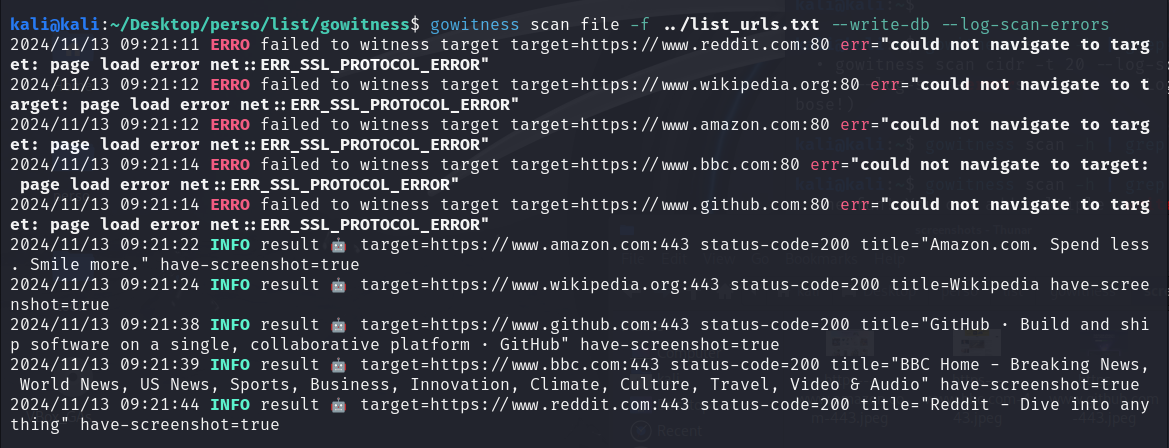
gowitness scan file -f ./PATH --log-scan-errors --write-dbThe
file -foption specifies a file containing a list of URLs to display.The
--log-scan-errorsoption reports errors that occurred during the scans.The
--write-dboption saves the results in a database for later consultation.
The image below shows the execution of a command with gowitness. Messages indicate a failed attempt via port 80 for unsecured HTTP connections. However, the connection succeeded via port 443 for HTTPS connections, with screenshots taken.
KarmaV2
KarmaV2 is an OSINT reconnaissance tool that allows you to find public and in-depth information about a target. The official documentation can be found on GitHub.
You can install KarmaV2 with the following commands.
Clone the repository:
git clone https://github.com/Dheerajmadhukar/karma_v2.gitInstall Shodan and the Python module mmh3.
python3 -m pip install shodan mmh3Install the JSON parser JQ if it is not already installed.
apt install jq -yInstall httprobe
  go install -v github.com/tomnomnom/httprobe@master
  cd httprobe
  go build main.go
  mv main httprobe
  sudo mv httprobe /bin/
Install Interface
  git clone https://github.com/codingo/Interlace.git
  cd Interlace
  pip install -r requirements.txt
  sudo python3 setup.py install
Install Nuclei
go install -v github.com/projectdiscovery/nuclei/v2/cmd/nuclei@latestInstall Lolcat
apt install lolcat -yInstall anew
  git clone https://github.com/tomnomnom/anew.git
  cd anew
  go build main.go
  mv main anew
  sudo mv anew /bin/
Create an account on Shodan.io to obtain your Shodan API key.
Insert the key into the
.tokenfile in the/karma_v2directory.nano ./token SHODAN_API_KEY_FROM_SHODANRun karma with the following command
bash karma_v2 -h
Depending on your system, you may need to run karma_v2 in a virtual environment.
Options
bash karma_v2 -h: To see the list of all options for Karma_v2.bash karma_v2 -d [DOMAIN] -l [INT] -ip -cveThe
-doption specifies the domain.The
-ipoption searches for IP addresses associated with this domain.The
-loption specifies the number of results to return. You can specify-1to indicate an unlimited number of results.The
-cveoption searches for vulnerabilities associated with the domain.
The options
-d,-l, and the mode options (-ip,-asn,-cve, etc.) are required to run karma_v2.The
-deepoption supports all options: count, ip, asn, cve, favicon, leaks.

Crunchbase
Crunchbase is a paid platform that provides information on companies and investors. It offers data that allows for the analysis of company acquisitions in the market, such as startups, as well as information about company members.
Arjun
Arjun is a tool that helps discover hidden HTTP parameters in GET and POST requests that could be vulnerable in web applications. It identifies potential entry points for attacks by testing multiple possible parameters. For context, GET and POST requests are methods for sending data to a web server. The GET method sends data via the URL, meaning it appears in the browser's address bar. The POST method sends data in the body of the HTTP request, making it invisible in the URL. Arjun is used to search for these parameters in applications.
The official documentation can be found on GitHub.
To install Arjun, use the following command:
pipx install arjun
Options
arjun -h: This option displays all the options for the tool.arjun -u http://website.com -m POST -o output.json -oBThe
-uoption specifies the site to analyze.The
-ooption saves the data to a file.The
-moption sets the HTTP method to use for the request. Valid formats are GET or POST for the HTTP method and JSON or XML for the request body.The
-oBoption redirects traffic through Burp Suite for analysis. By default, Burp listens on127.0.0.1:8080, allowing you to view the requests and responses intercepted by Burp.
arjun -i urls.txt -w /PATH/TO/FILE --include “token=qwerty“The
-ioption specifies a file with a list of URLs to analyze.The
-woption allows you to specify a file containing a list of words. This list includes potential parameter names that Arjun will use to test the target URL. By default, the tool uses a built-in word list located at{arjundir}/db/large.txt.The
--includeoption allows you to insert data for each request. The variabletokenwith a specific value is used in applications requiring authentication tokens. You can include any type of data, such as API keys, authentication keys, and others.You can also use the options
-m XML --include='<?xml><root>$arjun$</root>'to include a specific XML structure in the request. The marker$arjun$is where the tool will insert the parameters it tests.
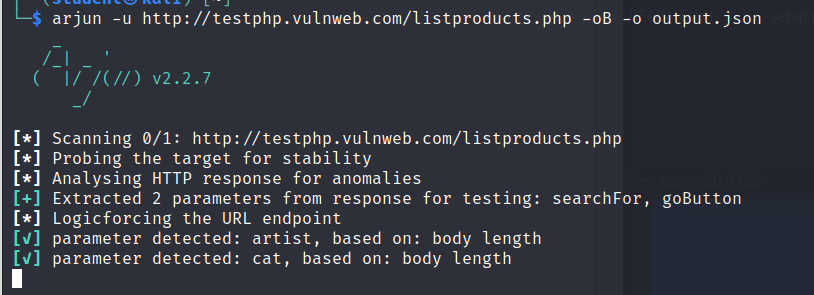
Interpretation of the results.
The image above shows the command arjun -u http://testphp.vulnweb.com/listproducts.php -oB -o output.json executed.
It shows that the command identified the parameters artist and cat in the response body.
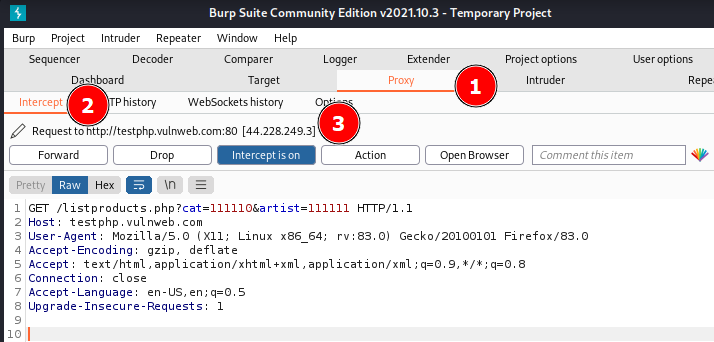
For the -oB option to work, Burp must be open and configured to intercept requests. You can open a terminal and launch Burp with the command burpsuite. Go to the Proxy settings and ensure that the proxy address in Burp is configured to 127.0.0.1:8080. Then, enable interception.
You can see two query parameters, "cat=111110" and "artist=11111", along with other details such as the host, client software, etc.
These tools are suitable for the reconnaissance phase in a security test or bug bounty, where the goal is to discover potential vulnerabilities by gathering data on the target.
It is important to note that the use of these tools should always be conducted within a legal framework.
Subscribe to my newsletter
Read articles from FIKARA BILAL directly inside your inbox. Subscribe to the newsletter, and don't miss out.
Written by
FIKARA BILAL
FIKARA BILAL
As a newcomer to the cybersecurity industry, I'm on an exciting journey of continuous learning and exploration. Join me as I navigate, sharing insights and lessons learned along the way