Mobile Application Penetration Testing Setup In Linux
 Bhuwan Bhetwal

Download Genymotion with virtual box: https://www.genymotion.com/product-desktop/download/
Installing Genymotion
1. You can see something like “genymotion-3.X.X-linux_x64.bin” in your Downloads directory.
2. Open your terminal and navigate to your Downloads folder: Cd Downloads
3. Give run permission to the Genymotion installer binary file:
$ chmod +x genymotion-3.X.X-linux_x64.bin
$ ./genymotion-3.X.X-linux_x64.bin -d {Genymotion_install_path}
Installing Virtual Box (If you have genymotion without virtual box)
$ sudo apt install virtual box
$ sudo apt update && sudo apt upgrade && sudo reboot
Launch genymotion either by searching genymotion or by navigating to the installation path, for example you have installed it in /usr/share/genymotion
So, go to
$ cd /usr/share/genymotion
$ ./genymotion
Or, directly run from search bar.
Once the emulator is successfully running install the preferred virtual device from (+) icon on the top right side. I have installed Google Pixel with Android API (8.1 — API 27)
After the device is successfully installed, click on three dots on the right side and click on edit, make sure the emulator is not running. Change the Network mode to Bridge and run your emulator.
Try installing any apps by drag and drop method, if you get an error something like this “An error occurred while deploying the file.
This probably means that the app contains ARM native code and your Genymotion device cannot run ARM instructions.”
Just go to “https://github.com/m9rco/Genymotion_ARM_Translation"
There you can see Android version mapping. As i told you before i have installed Android 8.1
Check yours by launching genymotion and take a look at your virtual device Android version.
Just Click on yours android version mapping accordingly. For me it’s 8.0. Click on Download.
After successfully downloaded. Just Drag and Drop it to the Phone that is running. It will ask to flash it to the virtual device. Click OK.
If you want to flash it manually then you can try:
$ adb shell
$ cd /sdcard/Download/
$ sh /system/bin/flash-archive.sh /sdcard/Download/Genymotion-ARM-Translation.zip
$ adb reboot
Reboot the virtual device. You can now Install apps freely.
What? You don’t have a Play store? Don’t worry. Just a Click ahead.
After the virtual device is running. Look at Your Right Side. You can see “Open GApps”. Just Click and Download it.
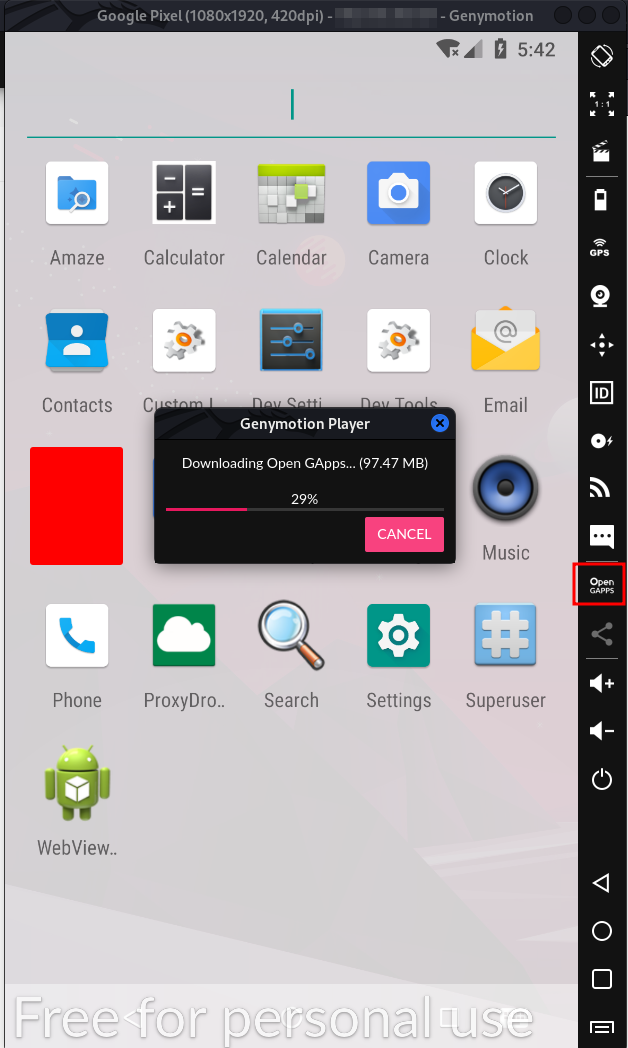
Downloading Open GApps
Restart the virtual device. You will see your play store installed.
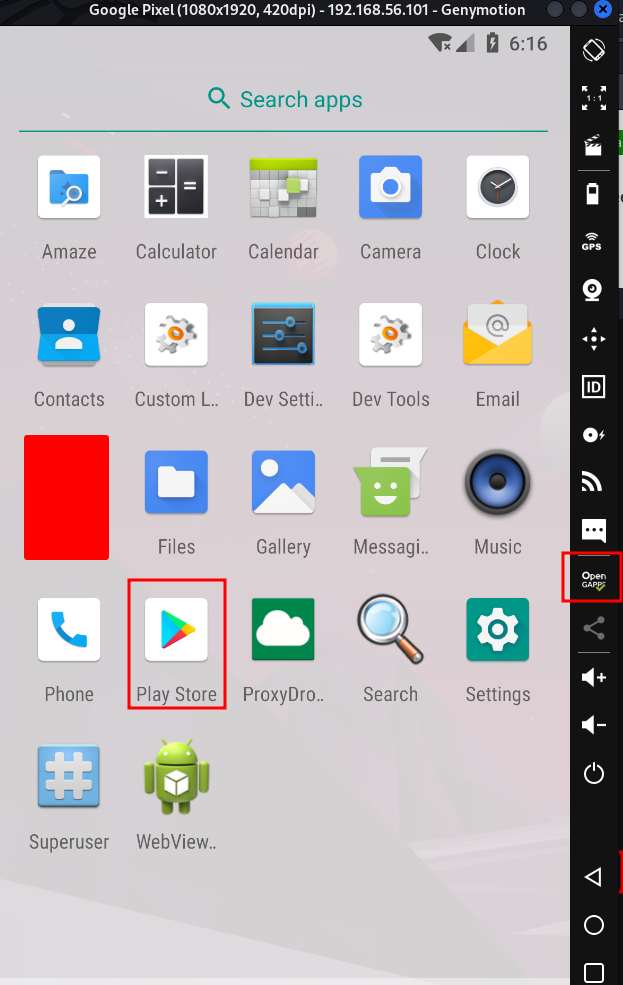
Open GApps Installed
Genymotion with Burp suite
Installing Burp Certificate in Virtual Device (Mobile Phone)
Reference from: https://www.youtube.com/watch?v=_O_-JQUehEY&t=639s
1. Open Burp suite > Proxy > Options
2. Click on “Import / export CA certificate”
3. Select the first option “Certificate in DER Format” and click Next Click on Select File.
4. Now navigate to the desired directory where you want to save the Certificate file. Enter the certificate name in the File.
Make sure to save it in .der format. Click Save and click Next. The certificate is exported successful.
Now open your terminal and go to the same directory where the file is exported. Type the command as below:
$ openssl x509 -inform DER -in Certificate.der -out Certificate.pem
$ openssl x509 -inform PEM -subject_hash_old -in Certificate.pem |head -1
You will see a hash value (9a5ba575.0). Yours maybe different.
Now, rename Certificate.pem to 9a5ba575.0 by command “mv Certificate.pem 9a5ba575.0”
Now, “adb push 9a5ba575.0 /sdcard”
$ adb shell
$ mv /sdcard/9a5ba575.0 /system/etc/security/cacerts
An error message appears, which says: “Read-Only File System”. Enter the following commands:
$ exit
$ adb remount
If the remount is not working. Try this
$ adb shell
$ su
$ mount -o rw,remount /
$ mv /sdcard/9a5ba575.0 /system/etc/security/cacerts/
$ chmod 644 /system/etc/security/cacerts/9a5ba575.0
Don’t forget to reset the state to ‘ro’.
Now, do
$ mount -o ro,remount /
$ reboot
You can check the installed certificate by:
1. Go to virtual machine (mobile) settings.
2. Search for encryption & credentials.
3. Click on Trusted Credentials
4. Scroll down to see the Portswigger certificate.
Managing the Proxy.
Start the virtual device in genymotion.
Go to wifi settings. Tap and hold the wifi, Click on Modify Network
OR Open wifi settings, you can see a gear icon on right side of your connected wifi. Click on it and click on the pen icon on the top. On proxy click Manual.
Enter the IP address of your machine (The same IP that you entered on Burp suite Proxy).
Open your Burp suite > Proxy > Options and click on edit, select specific address and select your machine IP. Bind the port to 8080.
To check your machine IP go to terminal and enter “ifconfig”. Select the same IP on Burp Suite on the specific address. Also, Click on Request handling and click the Support invisible proxying options.
The easy way for Managing proxy in virtual device (Recommended)
Download and Install Proxy Droid on your virtual device (Mobile).
Drag and drop it on your virtual device and install it.
Open Proxy Droid. Click on Host and enter you Machine IP (The same IP that you entered on Burp suite Proxy).
Click on Port and enter 8080.
Now Turn on the Proxy Droid
Setting Up Frida
You can use pip command to install frida.
$ pip install frida-tools
Verify whether it is working or not by using the command below:
$ frida-ps : It will show you the running process name and its PID.
Some Frida Commands
$ frida — version : Check frida version
$ frida-ps -U : View the running Process id’s and names from your device terminal
$ frida-ls-devices : List all the attached devices.
$ frida-ps -D 192.168.59.101:5555 : This command is used to connect frida to the specific device listed from frida-ls-devices.
$ frida-ps -Uai : This will list the installed applications in the device
$ frida-ps -Ua : This will list all the running applications in the device.
$ frida -U -f owasp.mstg.uncrackable1 -l disableroot.js : This command can help in loading external scripts (js) into the application by adding -l options with JavaScript file. Option -f is for finding the application, and then to hook it. Use “exit” command to exit the process.
Setting up Frida on Android
For this you need a rooted android device or rooted emulators. Let me assume that you have the rooted device ready to install frida server.
You will need to have ADB tool. Now, download the Frida Server for your specific android platform (arm, arm64, X86, X86_64). Just go to the official release page: https://github.com/frida/frida/releases . Scroll down to frida server and download the required one. For me i downloaded “frida-server-15.1.24-android-x86.xz” as my genymotion did not support x64.
After you have downloaded the frida server zip file, unzip and rename it to frida-server.
Copy the frida-server file to the android phone’s tmp directory using the following commands:
$ adb push frida-server /data/local/tmp
Now change the permission of the frida-server file
$ adb shell
$ chmod 755 /data/local//tmp/frida-server
$ /data/local/tmp/frida-server &
Now, remember that every time, you will need to run the frida-server to connect with the Linux terminal. Now, connect the virtual device and confirm it by checking for available devices.
$ adb devices
If you are not connected to the device. Connect it by:
$ adb connect IP:5555
To disconnect the device:
$ adb disconnect
Now after connecting the device and everything is ready. From Linux terminal, we can connect frida-server by following command:
$ frida-ps -U
If everything’s good, the above command will give you the running process id’s and names from your device. Now, you are good to go with frida.
Setting up MobSF (If you are facing errors, else jump to direct installation via mobsf git repo)
To Install MobSF you will need some other few requirements.
Install Git
sudo apt-get install gitInstall Python 3.8+
sudo apt-get install python3.8Install JDK 8+
sudo apt-get install openjdk-8-jdkInstall pip and Virtual Environment:
sudo apt install python3-pip && sudo apt install python3.9-venvInstall the following dependencies :
sudo apt install python3-dev python3-venv python3-pip build-essential libffi-dev libssl-dev libxml2-dev libxslt1-dev libjpeg8-dev zlib1g-dev wkhtmltopdf
If you get error while installing libjpeg8-dev dependency. Install another version of it called libjpeg62-turbo-dev with the command below:
sudo apt install libjpeg62-turbo-dev
If you like to generate PDF documents of the MobSF report then install wkhtmltopdf too: sudo apt install wkhtmltopdf
Steps to Install MobSF from GitHub:
git clone https://github.com/MobSF/Mobile-Security-Framework-MobSF.git
cd Mobile-Security-Framework-MobSF
./setup.sh
Running MobSF:
./run.sh It will start a server in localhost:8000, you can browse it your preferred browser.

after running ./run.sh
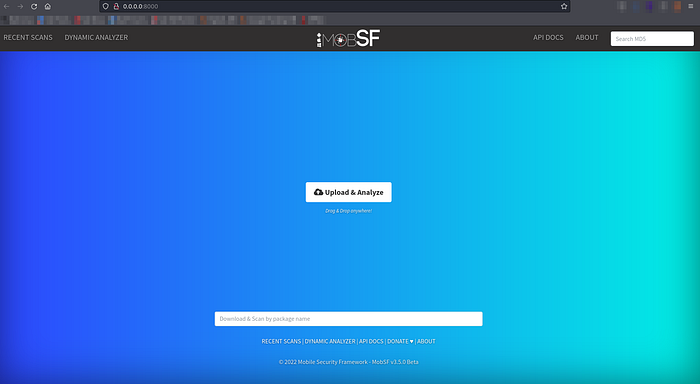
MobSF local host Homepage
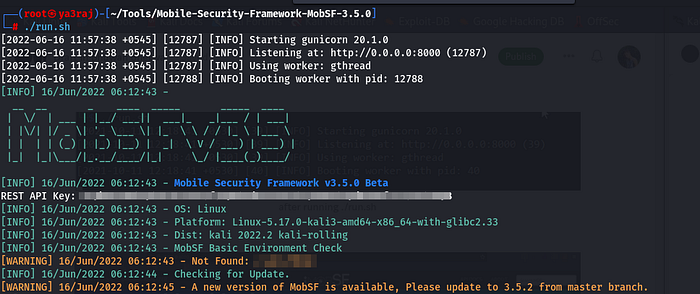
MobSF process in terminal
To Update MobSF:
cd Mobile-Security-Framework-MobSF/
git pull origin master
. venv/bin/activate
pip install --no-cache-dir --use-deprecated=legacy-resolver -r requirements.txt
python manage.py makemigrations
python manage.py makemigrations StaticAnalyzer
python manage.py migrate
deactivate
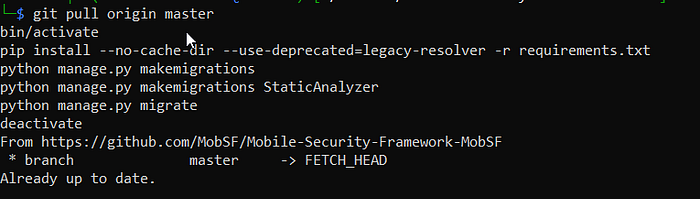
MobSF Update
If you are performing a dynamic analysis with MobSF the proxy settings me be misconfigured and you won’t be able to fix them from the GUI. You can fix the proxy settings by doing:
$ adb shell settings put global http_proxy :0
OK, so you maybe wondering how do i get the legit apk file for MobSF. If you want the apk file directly from the play store, follow the steps:
Install an app from Playstore, for example: spiderman.apk
After the app is successfully installed, open your Linux terminal and give command:
$ adb shell pm list packages | grep “spiderman”
The package name appears on your terminal. for example:com.mcu.spiderman
$ adb shell pm path com.mcu.spiderman
Now pull the base.apk with its absolute path $ adb pull /data/app/../base.apk
Intercepting Traffic in IOS:
Refer to: https://bhattsameer.github.io/2021/06/23/Intercepting-flutter-iOS-application.html
Proper Android Penetration Testing Checklist : https://github.com/nirajkharel/NotJustAChecklist/blob/main/Android.md
Subscribe to my newsletter
Read articles from Bhuwan Bhetwal directly inside your inbox. Subscribe to the newsletter, and don't miss out.
Written by
Bhuwan Bhetwal
Bhuwan Bhetwal
Hi, I’m a Penetration Tester. My job is to intentionally make applications do things they’re not supposed to—finding flaws and exploiting them to ensure they’re secure. I specialize in Web, API, Android, and iOS security.