🔥 All The New Features In React
 Tuan Tran Van
Table of contents
- React 19
- Automatic Memoization
- How React Compiler performs on real code
- React Server Components: Enhanced Support for Pre-Rendering Components
- Server Actions: Streamlining Server-Side Logic in React 19
- React’s cache
- Async Transitions: Simplifying State Changes
- useOtimistic: Managing optimistic updates with ease
- useActionState: Simplifying Action State Management
- React DOM: useFormStatus — Simplifying Form State Management With Actions
- use: A New API for Reading Resources in Render
- Ref as a Prop: Simplifying Ref Management in Function Components
- Cleanup Functions for Refs: Ensuring Proper Cleanup and Resource Management
- Built-in Document Metadata Support
- React 18
- React 17
- React 16.0 - 16.8
- Returns multiple elements from components with fragments
- Returning strings and numbers from components
- Cancelling setState() to avoid rendering
- Avoid prop drilling with the official Context API (16.3)
- Updating state based on props with getDerivedStateFromProps()
- Rendering function components on props change with React.memo() (16.6)
- Other new features
- Conclusion
- References

React’s journey began in 2011 when Facebook engineers created it to manage the increasingly complex interface of their rapidly growing platform. React’s initial focus was on re-rendering only the necessary parts of the UI, leading to improved performance and smoother user experiences. Over the years, React has evolved significantly, incorporating new features like Hooks, concurrent rendering, and server-side rendering.
Today, we will list those new features together over several updates to React.
Let’s get started!!!
React 19
The release of React 19 brings a host of exciting new features and updates that enhance developer productivity, offer performance, and provide greater flexibility.
Automatic Memoization
Do you remember React Forget, introduced by Huang Xuan at React Conf 2021?

Now, it’s here.
It’s a compiler that has been already applied in Instagram’s production environment. The React team plans to apply it in more platforms within Meta and will make it open-source in the feature.
Before using the new compiler, we used useMemo, useCallback, and memo to manually cache states to reduce unnecessary re-renders. Although this implementation is feasible, the React team believes it is not the ideal way they envision. They have been looking for a solution that allows React to automatically and only re-render the necessary parts when the state changes. After years of effort, the new compiler has successfully landed.
The new React compiler will be an out-of-the-box feature, representing another paradigm shift for developers. This is the most anticipated feature of v19.
Interestingly, the React team did not mention “React Forget“ when introducing the new React compiler, which led to a humorous comment from the community: They forget React Forget & forget to mention Forget in the Forget section 😂
How React Compiler performs on real code
In the last few years, one of the biggest sources of excitement and anticipation in the React community has been a tool known as React Compiler (previously React Forget). And for a good reason, the central premise of the compiler is that it will improve the overall performance of our React applications. As a nice consequence, we will never have to worry about re-renders, memorization, and useMemo and useCallback hooks.
But what’s the problem with React’s performance in the first place? And why do half of the devs desperately want to forget about memorization and those hooks? And how realistic in this promise?
The problem of re-renders and memorization in React?
So, what exactly is the problem here?
Most of the React apps out there are written to show some interactive UI (User Interface) to the user. When the user interacts with the UI, we usually want to update the page with some new information derived from that interaction. To do this in React, we trigger what is known as re-renders.
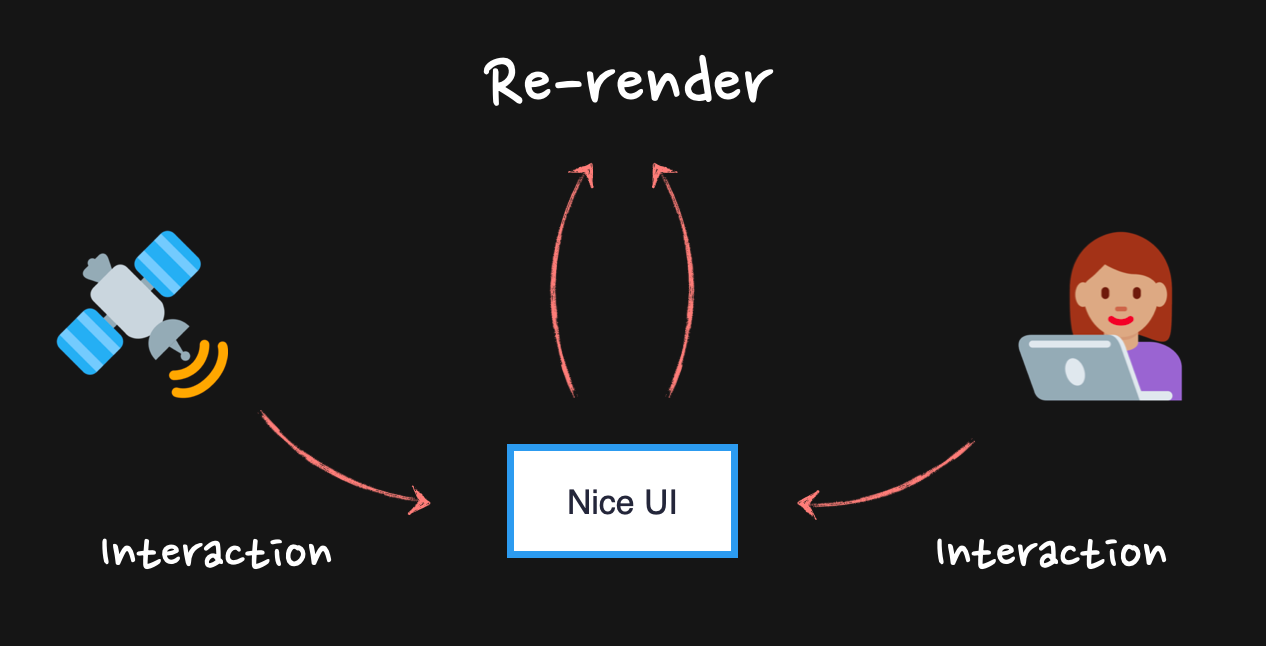
Re-renders in React normally are cascading. Every time a re-render of a component is triggered, it triggers a re-render of every nested component inside, and so on and so forth, until the end of the React components is reached.

Normally, this is not something to worry about — React is pretty fast these days. However, if those downstream re-renders affect some heavy components or components that just re-render too much, this might cause performance problems. This app will become slow.

One way to fix this slowness is to stop the chain of re-renders from happening.

We have multiple techniques to do that, moving state down, passing components as props, extracting state into a Context-like solution to bypass props drilling, to name a few. And memorization, of course.
Memorization starts with React.memo — a higher-order component was given to us by the React team. To make it work, all we need to do is wrap our original component with it and render the “memoized“ version in its place.
// memoize a slow component here
const VerySlowComponentMemo = React.memo(VerySlowComponent);

const Parent = () => {
  // trigger re-render somewhere here

  // render the memoized component in place of the original
  return <VerySlowComponentMemo />;
};
Now, when React reaches this component in the tree, it will stop and check whether its props have changed. If one of the props changes, the re-renders will be stopped. However, if even one single prop has changed, React will continue with its re-renders as if no memorization had happened.
That means that for the memo to work properly, we need to make sure that all props stay exactly the same between the re-renders.
For primitive values, like strings and booleans, it’s easy; we don’t need to do anything other than just not changing those values.
const VerySlowComponentMemo = React.memo(VerySlowComponent);

const Parent = () => {
  // trigger re-render somewhere here

  // "data" string between re-renders stays the same
  // so memoization will work as expected
  return <VerySlowComponentMemo data="123" />;
};
Non-primitive values, like objects, arrays, and functions, however, need some help.
React uses referential equality to check for anything between re-renders. So, if we declare those non-primitives inside the component, they will be re-created on every re-render, reference to them will change and memorization won’t work.
const VerySlowComponentMemo = React.memo(VerySlowComponent);

const Parent = () => {
  // trigger re-render somewhere here

  // "data" object is re-created with every re-render
  // memoization is broken here
  return <VerySlowComponentMemo data={{ id: "123" }} />;
};
To fix this, we have two hooks: useMemo and useCallback. Both of those will preserve the reference between re-renders. useMemo is typically used with objects and arrays, and useCallback with functions. Wrapping props into those hooks is what we usually know as "memoizing props".
const Parent = () => {
  // reference to { id:"123" } object is now preserved
  const data = useMemo(() => ({ id: "123" }), []);
  // reference to the function is now preserved
  const onClick = useCallback(() => {}, []);

  // props here don't change between re-renders anymore
  // memoization will work correctly
  return (
    <VerySlowComponentMemo
      data={data}
      onClick={onClick}
    />
  );
};
Now, when React encounters the VerySlowComponentMemo component in the render tree, it will check whether its props have changed, will see that none of them have, and will skip its re-renders. The app is not slow anymore.
This is a very simplified explanation, but it’s quite complex already. To make the situation even worse, if we pass those memorized props through a chain of components, it becomes even more complicated; any change to them would require tracing those chains back and forth to make sure the reference is not lost in between.
As a result, it’s easier just not to do it at all or memorize everything everywhere just in case. Which, intern, turns our beautiful code into a comprehensible and unreadable of useMemo and useCallback.

Solving this situation is the main promise of React’s Compiler.
React Compiler to the rescue
React Compiler is a Babel plugin developed by the React core team, with the Beta version released in October 2024.
During build time, it tries to convert the “normal“ React code into the code where components, their props, and the dependencies of hooks are memoized by default. The end result is the “normal“ React code that behaves as if everything is wrapped in memo, useMemo, and useCallback.

Almost! In reality, it does many more complicated conversions and tries to adjust to the code as efficiently as possible. For example, something like this:
function Parent() {

  const data = { id: "123" };
  const onClick = () => {

  };

  return <Component onClick={onClick} data={data} />
}
Will be transformed into this:
function Parent() {
  const $ = _c(1);
  let t0;
  if ($[0] === Symbol.for("react.memo_cache_sentinel")) {
    const data = {
      id: "123",
    };
    const onClick = _temp;
    t0 = <Component onClick={onClick} data={data} />;
    $[0] = t0;
  } else {
    t0 = $[0];
  }
  return t0;
}
function _temp() {}
Notice how onClick is cached as a _temp variable, but data is just moved inside the if statement. You can play around with it some more in the Compiler Playground.
The mechanics of how it works are fascinating, so if you want to know more, there are a few videos by the React core team available, such as the Deep Dive into the Compiler talk.
I am more interested in whether expectations from the compiler match the reality and whether it’s ready for use by the broader public, like me.
The main questions that immediately come to mind for almost everyone when they hear about “the Compiler will memorize everything“ are:
What about the initial load performance? One of the bug arguments against “memorizing everything by default“ has always been that it can negatively affect it since React has to do much more stuff in advance when everything is memorized.
Will it have a positive performance impact at all? How much of a problem are re-renders really?
Can it really catch all re-renders? JavaScript is notorious for being fluid and ambiguous. Is the Compiler smart enough to really catch everything? Is it true that we will never have to think about memorization and re-renders again?
To answer those questions, check out this useful article.
React Server Components: Enhanced Support for Pre-Rendering Components
React Server Components, introduced experimentally in React 18, are getting a boost in React 19. They allow components to run on the server during the initial render, fetching data and performing other server-side logic before sending HTML to the client. This leads to faster initial page loads, improved SEO, and a better overall user experience.
But let’s get something straight before we dive in:
RSC is not a new standard, engine, or framework.
It’s a low-level React API that enables you to render components entirely on the server, stream to the client, and hydrate only the parts that need interactivity.
Each framework (like Next.js, Remix, Hydrogen, etc.) builds its own opinionated implementation of RSC, deciding on key points.
How server rendering is integrated
How data is fetched
How streaming works
How the server transfers data to the browser
How caching and revalidations are handled
So, if you are using Next.js App Router, you are using RSC’s implementation specifically, not just “React Server Components“ in the abstract.
Why do we need Server Components?
Server Components aim to solve long-standing web application pain points that were progressing over time, and the release of new tools, frameworks, and requirements:
- Less JavaScript shipped to the client
Yes! The problem that we have heard for decades, and with each new tool, convinces us that the problem is finally solved. But the ideal is straightforward: render everything on the browser and pass it to the client.
- Direct server-side data access
There are still common issues and hot topics for lots of developers on “How should I fetch the data, and how does it affect my page rendering?“ We no longer need it, since components can talk directly to databases, file systems, or other APIs.
- Faster initial loads via streaming
No need to wait for full page rendering, especially when it contains some heavy parts; you can start sending your HTML chunk by chunk as soon as they are ready.
- Improved developer experience
You can write UI and data fetching altogether in a single place, without worrying about serialization and fetching life cycles.
Those old days when we just had an Express Server with Handlebars (or PHP or Rails), and rendering the whole template on the server and just sending it to the client. The difference? It’s just React — with streaming, selective hydration, and all the modern bells and whistles.
Server Components Trade-Offs
As I already mentioned, you should keep an eye on the exact implementation of server components for a specific component, because implementations are unique; there is no standard, so whatever was working for you in one framework might work absolutely differently in another framework.
But besides that, we need to consider RSC changes where and how rendering happens:
Every render of a Server Component happens on the server, not in the browser.
Browser no longer receives compiled JavaScript with your page bundle, which to render on the client - it receives a serialized “Flight” payload, which is telling it how to rebuild UI (rsc specific format).
Client Components still exist in bundle, but they form hydration islands inside the server-render tree.
Crossing a Server <> Client boundary is a serialization cost you pay every time.
These differences bring new pitfalls that we need to consider, and in the meantime, it does not remove the rest of the pitfalls that we had for SSR apps, which we still need to consider as well.
The Real Performance Costs of Server Components
- Flight Payload Overhead (Server <> Client Boundaries)
In RSC, only Client Components hydrate — so any props passed from Server to Client must be serialized onto a Flight payload. Large or deeply nested props bloat the payload and delay hydration.
// ❌ Large object crossing boundary → huge Flight payload
export default async function ServerPage() {
  const bigData = await getLargeDataset(); // thousands of rows
  return <ClientChart data={bigData} />; // sent in Flight payload
}

// ✅ Send only what’s needed
<ClientChart data={summaryRows} />
Mental picture:
It’s like shipping an entire warehouse to the customer’s house when they only ordered a single chair — and having them unpack it before they can use anything.
2. Streaming Delays for long and heavy components. Suspense order matters!
RSC supports streaming — sending UI chunks to the browser as they are ready. If a slow server component sits above others without a Suspense boundary, it blocks the whole stream until it finishes.
// ❌ One slow server call holds up the entire page
export default async function Page() {
  const data = await slowFetch();
  return <MainContent data={data} />;
}

// ✅ Wrap slow sections in Suspense
export default function Page() {
  return (
    <>
      <Header />
      <Suspense fallback={<Loading />}>
        <SlowSection />
      </Suspense>
    </>
  );
}
Mental picture:
Like waiting for the slowest dish at a restaurant before you’re allowed to eat anything.
3. Use client scope explosion
Putting “use client” at the top of a big/shared file promotes that file (and often its imports) to a Client Component, erasing the “no JS for server code” benefit and inflating bundles. Which might be okay for some of the cases, but it still requires an additional learning curve for developers and understanding application specifics.
4. Community support
RSC changes the rules - and many libraries still aren’t ready for it. Some require “use client” to function, which negates many of RSC’s benefits. Be prepared: your favorite library might not yet work well in a Server Component environment. For example, most CSS-in-JS frameworks (MUI, Chakra, Stitches, etc.) currently require “use client”.
How React Server Components Work
RSCs are rendered on the server and send a special data format (called the React Server Component Payload) to the client. This payload describes the component tree and its properties. The client-side React runtime then uses this payload to hydrate the HTML and make the application interactive.
Here’s a simplified illustration:
Request: The user requests a page
Server Rendering: The server renders the RSCs, fetching data and generating HTML, and the React Server Component Payload
Response: The server sends the HTML and the payload to the client.
Client Hydration: The client-side React runtime hydrates the HTML using the payload, making the application interactive.
// Server Component (server-side)
async function ProductDetails({ productId }) {
  'use server'; // Marks this as a Server Component
  const product = await fetchProductData(productId); // Fetch data on the server
  return (
    <div>
      <h1>{product.name}</h1>
      <p>{product.description}</p>
      {/* ... */}
    </div>
  );
}

// Client Component (client-side)
'use client'; // Marks this as a Client Component
import ProductDetails from './ProductDetails';

function ProductPage({ productId }) {
  return <ProductDetails productId={productId} />;
}
In this example, the ProductDetails component is a Server Component that fetches product data on the server and renders the HTML. The ProductPage component is a Client Component that renders the ProductDetails component.
SSR vs. React Server Components: Key Differences
Server-Side Rendering (SSR) is the classic approach: on each request, the server renders React components to HTML and sends it to the browser. The browser then downloads the JavaScript bundle and hydrates the static HTML to make it interactive. This drastically improves time-to-first-byte and SEO, since crawlers get the full markup immediately. The diagram below illustrates this flow:
Figure: Traditional SSR flow. The client requests a page, the server renders full HTML (optionally fetching data), and returns it. The browser shows content quickly, then fetches the React bundle to hydrate and become interactive.
ReactDOM’s streaming APIs (e.g renderToPipeableStream) in React 18+, let the server send HTML in chunks. Wrapping parts of your app in <Suspense> boundaries can stream fallbacks first. For example, wrapping a slow <Posts /> component in <Suspense> sends the loading fallback immediately, then streams the post’s HTML later. This means the page displays content faster while waiting for data (React 18’s streaming SSR).
BY contrast, React Server Components (RSC) are a newer paradigm (made stable in React 19) that lets you mark the entire component to run only on the server. A Server Component can fetch data or use server-only APIs, but its code is never sent to the client.
Instead, Next.js (or another framework) will send a compact “RSC Payload” of HTML and instructions for client components. The browser first displays a fast HTML snapshot, and React hydrates only the client components for interactivity. The figure below shows this split rendering: the server first sends a page shell, then streams the remaining HTML and component payload to the client for hydration.
Figure: React Server lifecycle (Next.js App Router). The server renders a page shell and streams React Server Components payloads. The client shows initial HTML quickly, then uses the RSC payload to hydrate client-side components.
Key differences summarized:
Execution environment: SSR components (in frameworks) run on the server on every request (or at build time), then hydrate on the client. RSC runs on the server and never hydrates at all (no state, effects), reducing JS sent to the browser.
Bundling: Traditional SSR still ships the full React app bundle for hydration. RSC lets you exclude code: only client components (marked with ‘use client‘) are bundled to the browser. This yields smaller client bundles and fewer JS dependencies.
Data fetching: SSR can fetch data on the server (often via
getServerSidePropsor loaders). RSC can useasync/awaitdirectly in component code (React 19+ supportsasynccomponents), so you canawaitdatabase/API calls within a Server Component.Interactivity: With SSR, hydration makes the entire UI interactive. With RSC, only designated client components hydrate. You “opt in” with
'use client'directives for interactive parts, keeping the rest static.Relationship: RSC does not replace SSR — they complement it. In practice, you still do an initial SSR render, but many components can be RSC so less Js/state is shipped.
In React 19+(end of 2024), RSC features are stable and can run *ahead of time (*e.g, at build time) or per request. That means you can use RSC for both static generation and dynamic SSR. The React 19 release notes explain that Server Components can be executed in a “separate environment” (your server) and target React 19 via the new react-server export condition.
There are some rules you can’t break, but overall, you are free to mix and match components.
The only limitations:
Server-side components can’t be imported by client-side components. After all, the server-side one might have server-specific code that won’t work on the browser.
You can pass props between server and client components, but the data in them needs to be serializable. This is obvious if you think about it, after all, there is no easy way to transfer a class or a date object between server and client. And whether you realize it or not, that’s what you are doing by sharing props; you are transferring data between both environments.
How do you define a server component in Next.js 13?
This is the best part; doing this is trivial.
To define a client component, simply add the ‘use client’ directive at the top of the file.
You only have to do that with the components you specifically want to be rendered on the client; otherwise, Next will decide where to render them based on the code you are using.
For example, if you don’t specify a directive, and inside your component, you use useEffect or useState Next, it will still render it inside the browser.
However, if you write it like this, the component will be rendered on the back end.
async function getActivity() {
    let result = await fetch("https://www.boredapi.com/api/activity?type=recreational")
    const obj = await result.json()
    return { activity: obj.activity }
}

export default async function Bored () {

    let activity = await getActivity();

    return (
       <div><h1>
        Your activity
       </h1>
       <p>
        {activity.activity}
       </p>
       </div>)
}
This code defines an async function that will render the component. It also performs a async fetch operation to get some data from an external API.
The rendered output from this component and the app using it is the following:

The screenshot shows the dev tools on Firefox. You can see there are no XHR requests for the site. That’s because this component was rendered on the server.
You can’t even get the source code for this component in the dev mode, because all we get on the browser is the result.
Server Actions: Streamlining Server-Side Logic in React 19
React 19 introduces Server Actions, a new feature that allows you to run server-side logic directly from your React components without needing to set up separate API endpoints. This approach simplifies server interactions, reduces the client-side JavaScript payload, and improves performance by executing heavy or secure operations on the server.
Server Actions are especially useful for handling operations like form submissions, database mutations, and other server-only logic directly within the React component tree. They seamlessly integrate server-side execution into the React application flow.
How Server Actions Work
Server Actions work by marking specific functions as server-side with a ‘use server’ directive. This lets React know that the code should run on the server, not the client, which keeps sensitive logic off the user’s device and improves security.
Code Snippet: Using Server Actions in React 19
Here’s an example demonstrating how to use Server Actions to handle a form submission without setting up separate API endpoints:
// components/SubmitForm.js
'use server'; // This directive tells React that this function runs on the server

export async function submitForm(data) {
  // Simulate a server-side operation, like saving to a database
  console.log('Processing data on the server:', data);

  // Example of server-side logic
  const response = await fetch('https://api.example.com/save', {
    method: 'POST',
    headers: {
      'Content-Type': 'application/json',
    },
    body: JSON.stringify(data),
  });

  if (!response.ok) {
    throw new Error('Failed to save data on the server.');
  }

  return response.json();
}
Component Using the Server Action
// app/FormComponent.js
'use client'; // This is a client component

import { useState } from 'react';
import { submitForm } from '../components/SubmitForm'; // Import the server action

export default function FormComponent() {
  const [formData, setFormData] = useState({ name: '', email: '' });
  const [message, setMessage] = useState('');

  const handleSubmit = async (e) => {
    e.preventDefault();
    try {
      const result = await submitForm(formData); // Call the server action directly
      setMessage('Form submitted successfully!');
      console.log('Server response:', result);
    } catch (error) {
      setMessage('Error submitting form.');
      console.error('Error:', error);
    }
  };

  return (
    <form onSubmit={handleSubmit}>
      <input
        type="text"
        value={formData.name}
        onChange={(e) => setFormData({ ...formData, name: e.target.value })}
        placeholder="Name"
      />
      <input
        type="email"
        value={formData.email}
        onChange={(e) => setFormData({ ...formData, email: e.target.value })}
        placeholder="Email"
      />
      <button type="submit">Submit</button>
      {message && <p>{message}</p>}
    </form>
  );
}
React 19 Server Actions provide a streamlined way to manage server-side logic directly within your React components. This reduces the need for separate API layers and enhances overall application performance. By leveraging this feature, developers can create more responsive, secure, and maintainable applications.
https://javascript.plainenglish.io/react-v19-hooks-in-action-50e3a2b5face
React’s cache
React 19 introduced a new feature that improves data fetching in server-side React apps. One of them is the cache function, a built-in mechanism for memorizing the results of function calls on the server. In simpler terms, the cache function allows to to avoid repeating expensive computations or data fetches when the same inputs occur during a single render cycle. It does this through memorization, storing the results of the function calls and reusing them if the same arguments are passed in the future.
This behavior saves resources and boosts speed.
The cache API is only available in React Server Components (RSC). In client-side React, you would use other techniques (like hooks useMemo and useEffect) for caching, but on the server, the cache function is the right tool.
The problem of redundant data fetches
In a framework such as Next.js 15, it’s common to break pages into components and even use parallel routes (multiple segments rendered concurrently). These components might need the same data. For example, two different parts of the page both require a user’s profile or a list of products.
Without caching, this often means making duplicate database (DB) or API calls. For instance, if two sibling components (or parallel route segments) each query the DB for the user’s info, you would normally end up hitting the DB twice for the same query. This slows your app, increases server loads, and potentially leads to inconsistent data if one request finishes before the other.
In the past, avoiding redundancy required workarounds like lifting data fetching up to a common parent and passing props down, or implementing a manual caching layer. However, lifting the state up makes your component less modular. Custom caching logic also gets messy. What we want is a way for each component to request the data it needs independently while automatically deduplicating identical requests during the render cycle. This is exactly the use case React’s cache function is designed to handle.
How React’s cache works
React’s cache function creates a memoized version of any asynchronous function. When you wrap a function with cache, React will store its results in memory the first time it’s called. Subsequent calls to the cached function with the same arguments will return cached results instantly, skipping the actual function execution. In other words, the first call is the cache miss (triggers the real fetch or computation), and later calls (with identical parameters) are cache hits that reuse the result.
This cache is scoped to a single server render cycle. During a server-side render, if multiple server components invoke the same cached function with the same arguments. React runs the underlying operations (e.g., the DB query) only once. It prevents redundant, expensive operations by reusing cached results. This avoids unnecessary network requests. This means fewer DB hits or API calls for that page render, leading to better performance and consistency. All components get the same result object, so they stay in sync.
Equally important, the cache is automatically cleared after the render is complete. React clears the cache after every server request. It invalidates all cached results at the end of each server request/render, so the next time you render that page (or another user requests it), React fetches fresh data.
There’s no need to worry about manual cache invalidation or stale data in subsequent requests. By design, each new request gets a new, empty cache. This makes the cache function a per-request memoization. Each call to cache(fn) returns a new memoized function with its own storage, and errors are cached the same way as successful results.
It differs from persistent caches (like data cached to disk or long-lived in-memory caches). Those would need explicit invalidation strategies, but this built-in cache is transient and lives only for the duration of the render. As the Next.js doc notes, the cache (for memoized fetches or functions) "lasts the lifetime of a server request until the React component tree has finished rendering" and is not shared across requests.
In practice, this means each page load or navigation gets fresh data, which is ideal for most cases where you want real-time updated info on a new request.
Using React’s cache in a Next.js App (Supabase Example)
Let’s walk through a concrete example to see the cache function in action. With a Next.js app using the App Router, you have two parallel route segments on a dashboard page, say, a user profile section and a sidebar with user stats. Both segments need to retrieve the user's profile data from the DB. We'll use Supabase as the DB client for this example (Supabase provides a JS client to query your DB directly from server code).
First, we can set up a Supabase client (for example, using the project URL and anon key in an environment config). Then we write a data-fetching function to get the user profile. We’ll wrap this function with the cache function:
Next.js 15 defaults
fetchtocache: 'no-store'. Identical calls are still deduplicated in one render, but each new request fetches fresh data unless you opt in withcache: 'force-cache'or revalidation.
// utils/dataFetcher.ts
import { createClient } from '@supabase/supabase-js';
import { cache } from 'react';

const supabase = createClient(SUPABASE_URL, SUPABASE_ANON_KEY);

// Define a cached function to fetch a user profile by ID
export const getUserProfile = cache(async (userId: string) => {
  const { data, error } = await supabase
    .from('profiles')
    .select('*')
    .eq('id', userId)
    .single();

  if (error) throw error;

  return data;
});
In the code above, getUserProfile is a memoized function. The first time you call getUserProfile('abc123') for a given request, it will actually run the query against Supabase. If you call getUserProfile('abc123') again (anywhere else in the React tree during the same render), it will instantly return the cached result instead of querying the DB a second time. This pattern can be seen in real projects. For example, a Supabase utility might export cached queries like this to prevent duplicate calls.
Now, suppose our Next.js page uses parallel routes or multiple components that need this data:
// app/dashboard/@main/page.tsx
import { getUserProfile } from '@/utils/dataFetcher';

export default async function MainSection({ userId }) {
  const user = await getUserProfile(userId);
  return <ProfileDetails user={user} />;
}

// app/dashboard/@sidebar/page.tsx
import { getUserProfile } from '@/utils/dataFetcher';

export default async function Sidebar({ userId }) {
  const user = await getUserProfile(userId);
  return <UserStats user={user} />;
}
In this simplified example, MainSection and Sidebar are two parallel segments (or could simply be two sibling server components) that both fetch the user’s profile. Thanks to React’s cache, the database is hit only once for getUserProfile(userId) during the server render. The first call (say, in MainSection) will query the DB (cache miss), and the second call (in Sidebar) will find the result already in cache (cache hit), avoiding another DB round-trip. Without the cache, we would have executed two identical queries to Supabase. With cache, React makes sure those components share the work and render the same snapshot of data.
It’s worth noting that this caching works for any kind of function, not just DB calls. You could use it to memoize expensive calculations or calls to other APIs or CMS systems. The key is that the function should be called within the React server render cycle (e.g., inside an async server component or during data fetching in a Next.js route).
If you try to call the cached function outside of rendering (for example, at the top level of your module when defining it or in a non-React context), it will still execute but won’t use React’s cache. React only provides cache access during the rendering of components. In practice, you usually call the cached function inside your server components as shown above, which is the correct usage.
Benefits of Using React’s cache
Fewer DB/API calls: By deduplicating identical requests, you drastically cut down on redundant calls. The same function called multiple times with the same arguments will hit the server or DB only once. This reduces server workload and network traffic.
Improved Performance: Reusing cached data results in faster response times and a smoother user experience. The page can render faster since subsequent components don’t have to wait for repeat fetches. In our example, the second component gets the data almost instantly from memory.
Consistent Data: When multiple parts of the UI request the same info, using a single cached result means they all render with the same data. There’s no risk of one component showing stale data while another fetches fresh data moments later. During that render, they share the exact result.
Simplified Code: React’s
cachelets each component fetch what it needs without complex prop drilling or higher-level coordination. This keeps components more independent and readable, while the caching happens transparently under the hood. You don’t need ad hoc context providers or singletons to share data. Just call the cached function wherever needed.No Manual Invalidation Needed: Because the cache resets on every new request, you get fresh data on the next render by default. This ephemeral caching means you don’t have to write extra logic to invalidate or update the cache for new requests. (If you do want to cache across requests, you’d use other Next.js opt-in caching features, but that’s a different mechanism beyond our scope here.)
Async Transitions: Simplifying State Changes

React 19 introduces Async Transitions, a powerful new feature designed to simplify the management of complex state updates that involve asynchronous operations, such as data fetching or animations. This feature builds upon the existing useTransition hook, providing a more elegant and efficient way to handle UI updates that depend on asynchronous results.
The Problem with Traditional State Transitions
Managing state updates that depend on asynchronous operations often requires complex logic and careful coordination of multiple state variables. This can lead to code that is difficult to read, maintain, and reason about.
Consider a scenario where you are fetching the data and updating the UI based on the result:
import { useState, useEffect } from 'react';

function MyComponent() {
  const [data, setData] = useState(null);
  const [isPending, setIsPending] = useState(false);
  const [error, setError] = useState(null);

  useEffect(() => {
    const fetchData = async () => {
      setIsPending(true);
      try {
        const response = await fetch('/api/data');
        const json = await response.json();
        setData(json);
      } catch (err) {
        setError(err);
      } finally {
        setIsPending(false);
      }
    };

    fetchData();
  }, []);

  if (isPending) {
    return <div>Loading...</div>;
  }

  if (error) {
    return <div>Error: {error.message}</div>;
  }

  return <div>Data: {JSON.stringify(data)}</div>;
}
This code uses multiple state variables (data, isPending, error) to manage the asynchronous operation and its effects on the UI. This pattern can become even more complex when dealing with multiple asynchronous operations or more intricate UI updates.
Simplifying State Updates With Async Transitions
Async Transitions simplifies this process by providing a way to perform asynchronous operations within a transition. This allows React to handle the pending state and prioritize user interactions during the asynchronous operation.
The useTransition hook now supports asynchronous functions as the update parameter. This allows you to directly perform asynchronous actions within a transition.
import { useState, useTransition } from 'react';

function MyComponent() {
  const [data, setData] = useState(null);
  const [isPending, startTransition] = useTransition();

  const handleClick = () => {
    startTransition(async () => {
      try {
        const response = await fetch('/api/data');
        const json = await response.json();
        setData(json);
      } catch (err) {
        // Handle error
        console.error(err)
      }
    });
  };

  return (
    <div>
      <button onClick={handleClick} disabled={isPending}>
        Fetch Data
      </button>
      {isPending && <div>Loading...</div>}
      {data && <div>Data: {JSON.stringify(data)}</div>}
    </div>
  );
}
In this example, the asynchronous data fetching is wrapped within startTransition. React automatically manages the isPending state during the fetch. This results in cleaner code and a more streamlined approach to managing asynchronous state updates.
Key Benefits of Async Transitions
Simplified State Management: Reduces the need for multiple state variables to manage asynchronous operations.
Improved User Experience: Ensures that user interactions are prioritized during asynchronous operations, preventing the UI from becoming unresponsive.
Cleaner Code: Makes code that deals with asynchronous state updates more concise and easier to read.
Built-in Pending State Handling: React automatically manages the pending state, reducing the boilerplate code.
Integration with Suspense: Async Transitions work well with Suspense for more declarative loading states.
Async Transitions provide a powerful and elegant way to manage complex state changes involving asynchronous operations. By simplifying state management and improving user experience, Async Transitions contribute to building more performant and maintainable React applications.
useOtimistic: Managing optimistic updates with ease
React 19 introduces the useOtimistic hook, a powerful tool for simplifying the implementations of optimistic updates. Optimistic updates drastically improve user experience by providing the illusion of instant UI changes, even before the corresponding server-side operations are confirmed. This creates a more responsive and fluid interaction.
The Problem with Traditional Optimistic Updates
Traditionally, implementing optimistic updates in React involved manual state management. This often led to several challenges:
Complex State Logic: Developers had to manually manage the optimistic state alongside the actual data, often requiring intricate logic to update and revert changes. This could lead to complex and hard-to-maintain code.
Potential for Inconsistencies: Manually managing states increases the risk of inconsistencies between the UI and the actual data. For instance, forgetting to revert an optimistic update after a failed server request could lead to a desynchronized user interface.
Boilerplate code: Implementing optimistic updates often requires a significant amount of boilerplate code to handle state updates, error handling, or reverting changes. This increases development time and makes the code less readable.
Difficulty in Handling Complex Updates: When dealing with more complex data structures or multiple concurrent updates, manually managing the optimistic state becomes even more challenging, increasing the likelihood of bugs.
Consider a simple example of adding a new item to a list. Without useOptimistic, you might have code that looks something like this:
import { useState } from 'react';

function ItemList() {
  const [items, setItems] = useState([]);
  const [isAdding, setIsAdding] = useState(false);

  const addItem = async (newItem) => {
    setIsAdding(true); // Indicate loading state
    setItems([...items, { ...newItem, tempId: Date.now() }]); // Optimistic update

    try {
      const response = await fetch('/api/items', { method: 'POST', body: JSON.stringify(newItem) });
      const data = await response.json();
      setItems(items.map(item => item.tempId === newItem.tempId ? data : item)); // Replace temp item
    } catch (error) {
      // Handle error and revert
      setItems(items.filter(item => item.tempId !== newItem.tempId));
      console.error("Error adding item:", error);
    } finally {
      setIsAdding(false);
    }
  };

  // ...
}
This code, even in simplified form, demonstrates the complexity involved in manually managing optimistic updates.
Simplifying Optimistic Updates With useOptimistic
useOptimistic addresses these issues by providing a declarative and streamlined way to manage optimistic updates. It simplifies the process by abstracting away the complexities of manual state management.
The useOptimistic hook takes 2 arguments:
initialValue: The initial value of the state
updateFn: The function that receives the current optimistic value and the update argument and returns the new optimistic value.
It returns an array containing:
optimisticValue: The current optimistic value
addOptimistic: A function to apply an optimistic update
Using the same “add item“ example, we can rewrite it using useOptimistic:
function ItemList() {
  const [items, setItems] = useState([]);
  const [optimisticItems, addOptimisticItem] = useOptimistic(items, (prevItems, newItem) => [...prevItems, { ...newItem, isOptimistic: true, id: `temp-${Date.now()}` }]);

  const addItem = async (newItem) => {
    addOptimisticItem(newItem);

    try {
      const response = await fetch('/api/items', { method: 'POST', body: JSON.stringify(newItem) });
      const data = await response.json();
        setItems(prev => prev.map(item => item.id.startsWith("temp-") ? data : item))
    } catch (error) {
        setItems(prev => prev.filter(item => !item.id.startsWith("temp-")))
      console.error("Error adding item:", error);
    }
  };

  // ...
}
This version is significantly cleaner and easier to understand, useOptimistic and handles the optimistic update logic, making the code more concise and less prone to errors. Key improvements include:
Simplified Logic:
useOptimisticabstracts away the complexities of managing an optimistic state.Declarative Approach: The
updateFnclearly defines how the optimistic state should be updated.Reduced Boilerplate: Less code is required to achieve the same functionality.
By using useOptimistic, developers can focus on the core logic of their applications rather than getting bogged down in manual state management, leading to more maintainable and robust code.
useActionState: Simplifying Action State Management
React 19 introduces useActionState, a new hook designed to simplify the management of state related to asynchronous actions, such as form submissions or API calls. This hook streamlines the process of tracking loading states, errors, and the results of these actions, leading to cleaner and more maintainable code.
The Problem With Traditional Action State Management
Managing the state of asynchronous actions manually often leads to verbose and repetitive code. Common patterns involve using multiple state variables to track different aspects of the action:
Loading State: A boolean variable to indicate whether the action is in progress.
Error State: A variable to store any errors that occur during the action.
Result State: A variable to store the result of the action (e.g, the data returned from an API call)
Consider a typical example of submitting a form:
import { useState } from 'react';

function MyForm() {
  const [formData, setFormData] = useState({ name: '', email: '' });
  const [isLoading, setIsLoading] = useState(false);
  const [error, setError] = useState(null);
  const [result, setResult] = useState(null);

  const handleSubmit = async (e) => {
    e.preventDefault();
    setIsLoading(true);
    setError(null);

    try {
      const response = await fetch('/api/submit', {
        method: 'POST',
        body: JSON.stringify(formData),
      });
      const data = await response.json();
      setResult(data);
    } catch (err) {
      setError(err);
    } finally {
      setIsLoading(false);
    }
  };

  // ...
}
This code snippet, even in its simplified form, demonstrates the boilerplate involved in manually managing the action state. Each action requires managing multiple state variables and updating them within the action handler, which becomes increasingly cumbersome as the application's complexity grows.
Simplifying Action State Management with useActionState
useActionState simplifies this process by encapsulating the state management logic within a single hook. It takes an asynchronous function (the action) as an argument and returns an array containing:
action: A function that triggers the asynchronous action
state: An object containing the action’s state:
pending: A boolean indication of whether the action is in progress
error: Any error that occurred during the action
data: The result of the action
Using useActionState, the previous form example can be written as follows:
import { useActionState, useState } from 'react';

function MyForm() {
  const [formData, setFormData] = useState({ name: '', email: '' });
  const [submit, submitState] = useActionState(async (data) => {
    const response = await fetch('/api/submit', {
      method: 'POST',
      body: JSON.stringify(data),
    });
    return await response.json();
  });

  const handleSubmit = (e) => {
    e.preventDefault();
    submit(formData);
  };

  return (
    <div>
        {submitState.pending && <p>Submitting...</p>}
        {submitState.error && <p style={{color: "red"}}>{submitState.error.message}</p>}
        {submitState.data && <p>Success: {JSON.stringify(submitState.data)}</p>}
        <form onSubmit={handleSubmit}>
            <input type="text" name="name" value={formData.name} onChange={e => setFormData({...formData, name: e.target.value})} />
            <input type="email" name="email" value={formData.email} onChange={e => setFormData({...formData, email: e.target.value})} />
            <button type="submit" disabled={submitState.pending}>Submit</button>
        </form>
    </div>
  );
}
This version is significantly cleaner and more concise, useActionState handles the state management behind the scenes, reducing boilerplate and improving code readability. Key improvements include:
Encapsulated State: All action-related state is managed within a single hook, making the component logic cleaner.
Reduced Boilerplate: Significantly less code is required to manage loading states, errors, and results.
Improved Readability: The code is easier to understand and maintain due to the simplified structure.
By using useActionState, developers can streamline the management of asynchronous actions, resulting in more maintainable and efficient React applications. It promotes cleaner code by abstracting away the repetitive logic of manual state management for actions.
React DOM: useFormStatus — Simplifying Form State Management With Actions
React 19 introduces useFormStatus, a new hook specifically designed to simplify form-state management when used in conjunction with React Server Components and Actions. This hook provides valuable information about the status of a form submission, making it easier to provide feedback to the user and manage the form’s state.
The problem with traditional form state management with actions
Traditionally, managing form submissions with server actions, especially in the context of React Server Components, required manual tracking of loading states and potential errors within the action itself. This could lead to scattered logic and make it difficult to provide a cohesive user experience.
Consider a typical form submission using a server action:
// Server Action (server-side)
async function submitForm(formData) {
  'use server';
  try {
    // Perform server-side logic (e.g., database update)
    await someDatabaseOperation(formData);
    return { success: true };
  } catch (error) {
    return { success: false, error: error.message };
  }
}

// Client Component (client-side)
'use client';
import { useState } from 'react';

function MyForm() {
    const [message, setMessage] = useState(null)
  async function handleSubmit(formData) {
    const result = await submitForm(formData);
    if (result.success) {
        setMessage("Success!")
    } else {
        setMessage(result.error)
    }
  }

  return (
    <form action={handleSubmit}>
      {/* Form inputs */}
        {message && <p>{message}</p>}
      <button type="submit">Submit</button>
    </form>
  );
}
With this approach, it lacks direct integration with the form’s submission process. There is no built-in way to easily access the pending state of the submission directly within the client component.
Simplifying Form State Management With useFormStatus
useFormStatus addresses this limitation by providing direct access to the form’s submission status. It’s designed to be used in the client component that renders a form element associated with a server action. The hook returns an object containing the following properties:
- pending: A boolean indicating whether the form is currently being submitted.
Using useFormStatus, the previous form example can be significantly improved:
// Server Action (server-side)
async function submitForm(formData) {
  'use server';
  try {
    // Perform server-side logic
    await someDatabaseOperation(formData);
    return { success: true };
  } catch (error) {
    return { success: false, error: error.message };
  }
}

// Client Component (client-side)
'use client';
import { useFormStatus } from 'react-dom';

function MyForm() {
  const { pending } = useFormStatus();

  return (
    <form action={submitForm}>
      {/* Form inputs */}
      <button type="submit" disabled={pending}>
        {pending ? 'Submitting...' : 'Submit'}
      </button>
    </form>
  );
}
This version is much cleaner and more directly integrated with the form’s submission process. Key improvements include:
Direct Access To Submission Status:
useFormStatusprovides a simple way to check if the form is pending submission.Improved User Experience: The pending state can provide immediate feedback to the user, such as disabling the submit button or displaying a loading indicator.
Simplified Logic: No need for manual state management within the client component to track the submission status.
useFormStatus streamlines form handling with server actions, especially in React Server Components, leading to better user experiences and cleaner code. It also simplifies providing feedback during form submissions by directly exposing the submission state.
use: A New API for Reading Resources in Render
React 19 introduces use, a new API is designed to simplify reading resources like Promies, Context, or other data sources directly within the render phase of components. This significantly streamlines data fetching and context consumption, making code cleaner and more expressive.
The Problem With Traditional Resource Reading in Render
Traditionally, reading resources during rendering required different approaches depending on the type of resources:
Promises (Data Fetching): Components had to manage loading states and error handling using state variables and
useEffector similar lifecycle methods. This often led to verbose code and complex state management.Context: Context values were accessed using
useContext, which worked well, but could lead to re-renders if the context value changed frequently.Other Resources: Reading other types of resources often requires custom solutions, further increasing complexity.
Consider a typical example of fetching data using useEffect:
import { useState, useEffect } from 'react';

function MyComponent() {
  const [data, setData] = useState(null);
  const [isLoading, setIsLoading] = useState(true);
  const [error, setError] = useState(null);

  useEffect(() => {
    async function fetchData() {
      try {
        const response = await fetch('/api/data');
        const json = await response.json();
        setData(json);
      } catch (err) {
        setError(err);
      } finally {
        setIsLoading(false);
      }
    }

    fetchData();
  }, []);

  if (isLoading) {
    return <div>Loading...</div>;
  }

  if (error) {
    return <div>Error: {error.message}</div>;
  }

  return <div>Data: {JSON.stringify(data)}</div>;
}
This code illustrates the boilerplate involved in managing asynchronous data fetching. Similarly, accessing context required using useContext which, while simple, could trigger unnecessary re-renders in some scenarios.
Simplifying Resource Reading with use
The use API simplifies these scenarios by providing a single, consistent way to read resources within the render phase. It works with Promise, Context, or other resource types.
Promises: When use is called with Promise, React suspends the rendering until the Promise resolves. If the Promise rejects, React throws the error, which can be caught by an error boundary.
Context: When
useis called with a Context object, it returns the current context values. UnlikeuseContext,useintegrates with Suspense and can prevent unnecessary re-renders.
Using use, the previous data fetching example can be written as follows:
import { use } from 'react';

async function fetchData() {
    const response = await fetch('/api/data')
    return response.json()
}

function MyComponent() {
  const data = use(fetchData());

  return <div>Data: {JSON.stringify(data)}</div>;
}
This version is significantly cleaner and more concise. Key improvements include:
Simplified Data Fetching: No more manual state management for loading or error states.
Suspense Integration:
useworks seamlessly with Suspense, allowing for declarative loading states.Consistent API: A single API for reading different types of resources.
Improved Performance (With Context):
usecan prevent unnecessary re-renders when used with Context.
Here is an example with contexts:
import { createContext, use } from 'react';

const ThemeContext = createContext('light');

function ThemedComponent() {
    const theme = use(ThemeContext);
    return <p>The theme is: {theme}</p>
}

function App() {
    return (
        <ThemeContext.Provider value="dark">
            <ThemedComponent />
        </ThemeContext.Provider>
    )
}
The key difference is that use() unlike other hooks, it can be called conditionally or in loops without violating the rules of Hooks. But use() has a special exemption, you could wrap it in an if statement or a loop, and React is okay with it. For example:
function ThemedDivider({ show }) {
  if (!show) {
    return null;
  }

  const theme = use(ThemeContext); // only called when show is true
  return <div className={theme} />;
}
In earlier React versions, you couldn’t do this; you might have had to split the component into two to conditionally consume context. React 19’s use() lifts that restriction. This means cleaner logic (no need for workarounds) and even some performance benefits - if show is false, we never consume the context at all, potentially skipping work when context updates.
By using use, developers significantly simplify resource reading in their React components, leading to cleaner, more maintainable, and more performant code. It provides a more declarative way to handle asynchronous operations or context consumption, improving the overall developer experience.

Ref as a Prop: Simplifying Ref Management in Function Components
React 19 introduces the ability to pass a ref as a regular prop to a function component. This simplifies ref management, especially when working with reusable components or needing to access DOM elements within deeply nested component structures. It eliminates the need for forwardRef in many common scenarios, leading to cleaner and more concise code.
The Problem with Traditional Ref Management in Function Components
Traditionally, If you needed to access a DOM element inside a function component inside a parent component, you had to use forwardRef. This added a bit of boilerplate and could make the code slightly more complex, especially for simple cases.
Consider a reusable input component:
import React, { forwardRef } from 'react';

const MyInput = forwardRef((props, ref) => (
  <input ref={ref} {...props} />
));

function ParentComponent() {
  const inputRef = React.useRef(null);

  React.useEffect(() => {
    if (inputRef.current) {
      inputRef.current.focus();
    }
  }, []);

  return <MyInput placeholder="Enter text" ref={inputRef} />;
}
In this example, forwardRef is necessary to pass the ref from ParentComponent down to the underlying <input> element in MyInput. While this works, it adds extra code and can be slightly confusing for simpler use cases.
Simplifying Ref Management with Ref as a Prop
React 19 simplifies this by allowing you to pass ref as a regular prop to function components. This means you no longer need forwardRef in many common scenarios.
The previous example can now be written as follows:
import React from 'react';

const MyInput = (props) => (
  <input ref={props.ref} {...props} />
);

function ParentComponent() {
  const inputRef = React.useRef(null);

  React.useEffect(() => {
    if (inputRef.current) {
      inputRef.current.focus();
    }
  }, []);

  return <MyInput placeholder="Enter text" ref={inputRef} />;
}
As you can see, forwardRef is no longer needed. The ref prop is passed directly to the MyInput component and then forwarded to the underlying <input> element.
Important Considerations
Explicitly Forwarding the Ref: It’s crucial that the function component explicitly forwards the
refprop to the underlying DOM element or component that needs it. If therefprop isn't used within the function component, it won't work as expected.Caveats with Class Components: This new feature only applies to function components. You still need
forwardRefwhen working with class components.Use Cases where forwardRef is still needed: If you need to manipulate the ref before passing it down (e.g. adding a custom property to the ref object) you will still need
forwardRef.
Benefits of Ref as a Prop
Simplified Syntax: Eliminates the need for
forwardRefin many common cases, making the code shorter and easier to read.Improved Readability: The code is more straightforward and easier to understand, especially for simple ref usage.
Reduced Boilerplate: Reduces the amount of code required to manage refs in function components.
More Intuitive API: Makes ref management more consistent with other prop passing mechanisms.
By allowing ref to be passed as a regular prop, React 19 simplifies ref management in function components, leading to cleaner, more concise, and more readable code. This change streamlines a common pattern in React development and contributes to a smoother developer experience.
Cleanup Functions for Refs: Ensuring Proper Cleanup and Resource Management
React 19 provides cleanup functions for refs, addressing potential memory leaks and ensuring proper resource management, especially when working with imperative APIs or external libraries. This enhancement provides a more robust and predictable way to handle resources associated with refs.
The Problem with Traditional Ref Management
Traditionally, ref provides a way to access the underlying DOM element or a component instance. However, there is no built-in mechanism to perform cleanup when the component is unmounted or the ref changed. This could lead to issues in certain scenarios:
Memory Leaks: if a ref was used to create subscription event listeners or external resources, these resources might not be released when the component is unmounted, leading to memory leaks.
Stale References: If a ref pointed to a DOM element that was removed from the DOM, accessing it could lead to errors.
Unpredictable Behavior: Without cleanup, the behavior of components using refs could become unpredictable, especially in complex applications with dynamic rendering.
Consider a scenario where you are integrating with a third-party charting library that requires a DOM element to render a chart:
import { useRef, useEffect } from 'react';
import ChartLibrary from 'external-chart-library';

function MyChart() {
  const chartRef = useRef(null);

  useEffect(() => {
    if (chartRef.current) {
      const chart = new ChartLibrary.Chart(chartRef.current, { /* chart options */ });
      // No cleanup here! Potential memory leak
    }
  }, []);

  return <div ref={chartRef} />;
}
In this example, if the MyChart component unmounts, the chart instance created by the third-party library might not be properly destroyed, leading to memory leaks.
Enhancing Refs with Cleanup Functions
React 19 addresses these issues by allowing you to provide a cleanup function when setting a ref. This cleanup function will be called when the component unmounts or when the ref changes to a different element.
You can now pass a function to the ref callback. This function will be called with the old ref value when it changes or when the component unmounts.
<div ref={(node) => {
    // Set the ref
    myRef.current = node;
    return () => {
        // Cleanup logic here. 'node' is the old value
        if(node) {
            // e.g. node.removeEventListener(...) or destroy external instance
        }
    }
}} />

import { useRef, useEffect } from 'react';
import ChartLibrary from 'external-chart-library';

function MyChart() {
  const chartRef = useRef(null);
    const chartInstance = useRef(null)

  useEffect(() => {
    return () => {
        if(chartInstance.current) {
            chartInstance.current.destroy() // Properly destroy the chart
        }
    }
  }, [])

  return <div ref={(node) => {
      if(node) {
          chartInstance.current = new ChartLibrary.Chart(node, { /* chart options */ });
      }
      return () => {
          if(chartInstance.current) {
              chartInstance.current.destroy()
              chartInstance.current = null
          }
      }
  }} />;
}
Now, when MyChart component unmounts, the cleanup function will be called, destroying the chart instance and preventing a memory leak.
Benefits of Cleanup Functions for Refs
Prevent memory leaks: Ensures that resources associated with refs are properly released
Avoid stale references: Prevents errors caused by accessing the DOM element that has been removed.
Improved resource management: Provides a more robust and predictable way to manage resources.
Cleaner code: Makes code that interacts with imperative APIs or external libraries cleaner and easier to reason about.
By adding cleanup functions for refs, React 19 provides a crucial mechanism for ensuring proper resource management and preventing potential issues related to memory leaks and slate references. This enhancement makes React a more robust and reliable platform for building complex applications.
Built-in Document Metadata Support
React 19 simplifies SEO by adding built-in support for managing metadata like titles, descriptions, and meta tags. Previously, developers had to rely on libraries like react-helmet for this functionality. Now, React handles it out of the box.
Example:
import { Metadata } from 'react';

export const metadata = {
  title: 'React 19 Stable Release',
  description: 'Discover the features of React 19 and how it improves development.',
};
export default function Page() {
  return <h1>Hello, React 19!</h1>;
}
React 18
React 18 was released on March 29, 2022. React provides many exciting features that are out of the box. These are not only enhancing the user experience but also making de lives easier. So, here are three main features that are going to be released this time.
A Big Challenge with React Application
Concurrency
Concurrency is a major challenge for heavy React apps. In a React app, concurrency can arise when multiple components render simultaneously, when different parts of the app perform complex tasks concurrently, or when network requests are made concurrently.
Managing concurrently effectively requires careful planning and coordination to ensure that the app’s components and processes work together seamlessly and avoid conflicts or race conditions. Without proper handling of concurrency, a React app may experience performance issues, crashes, or other problems.
Improper setState Usage
Improper use of the setState method in the React app can lead to performance degradation because it can trigger unnecessary re-renders of components. When setState is called, it triggers a re-render of the component and all of its children, which can be computationally expensive if the component tree is large or if the components have expensive render methods.
To avoid unnecessary re-renders and improve performance, it’s important to use setState judiciously and only when necessary, and to consider using alternative methods such as useReducer or useState with functional updates to minimize the number of re-renders. Properly managing the use setState can help ensure that your React app remains performant and responsive.
React Concurrent Mode
React Concurrent Mode is a cutting-edge feature designed to transform the way React applications handle rendering, bringing a new level of responsiveness and performance. Unlike the traditional synchronous rendering mode, where React processes updates sequentially, the Concurrent Mode enables the framework to manage multiple tasks simultaneously. This allows React to interrupt and prioritize tasks based on user interactions, ensuring that the UI remains fluid even during intensive computations.
Key Concepts in Concurrent Mode
Time Slicing: Time Slicing is a fundamental feature of Concurrent Mode. It enables React to divide rendering work into small, manageable units that can be spread across multiple frames. This ensures that the main thread remains unblocked, allowing high-priority tasks like user interactions or animations to be handled promptly. Time Slicing allows React to work on the UI in segments, pausing to address more urgent tasks before resuming where it left off. This results in a smoother and more responsive user experience.
Suspense for Data Fetching: Suspend is another powerful feature that complements Concurrent Mode. It allows React to “suspend“ the rendering of a component until a specific asynchronous, such as data fetching, is complete. During this waiting period, React can continue rendering other parts of a UI or displaying a fallback component (like a loading spinner) to keep the user informed. When combined with Concurrent Mode, Suspense significantly enhances the user experience, particularly in applications that rely heavily on asynchronous data fetching.
Interruptible Rendering: Interruptible is a game-changing concept for maintaining a responsive UI. In traditional React, rendering can not be interrupted once it starts, leading to potential UI freezes. Concurrent Mode allows React to interrupt rendering to prioritize higher-priority updates. For instance, if the user interacts with the UI while React is rendering, React can pause the current rendering process, handle the interaction, and then resume rendering. This capability ensures that user interactions are reflected in the UI without delay, leading to a more responsive application.
Selective Hydration: Selective Hydration is an advanced concept within Concurrent Mode, particularly useful in server-side rendering (SSR) scenarios. It allows React to hydrate (i.e, make interactive) only the parts of the page currently visible to the users, deferring less critical sections until they are in view. This prioritization improves the perceived loading time of the application.
Example: Time Slicing
Consider an application that needs to render a large list of items. Without Concurrent Mode, rendering a large list could cause the UI to freeze, leading to a poor user experience. With Concurrent Mode, React can break down the rendering process into smaller tasks that are processed over multiple frames, maintaining UI responsiveness.
import React, { useState } from 'react';

function ListItem({ item }) {
  // Simulate heavy computation
  let now = performance.now();
  while (performance.now() - now < 20) {
    // Block CPU for 20ms
  }
  return <div>{item}</div>;
}

function App() {
  const [items] = useState(Array.from({ length: 1000 }, (_, i) => `Item ${i + 1}`));
  return (
    <div>
      {items.map((item) => (
        <ListItem key={item} item={item} />
      ))}
    </div>
  );
}

export default App;
In this example, rendering 1000 items might normally cause noticeable lag. However, with Concurrent Mode, React slices the work into smaller, manageable chunks that are processed over multiple frames, ensuring that the UI remains responsive throughout.
Example: Suspense for Data Fetching
Suspense allows you to defer the rendering of a component until its required data is loaded, preventing the UI from being blocked while waiting for asynchronous operations to complete. This enhances the overall user experience by providing immediate feedback.
import React, { Suspense } from 'react';

const fetchData = () => {
  return new Promise((resolve) => {
    setTimeout(() => resolve('Data loaded'), 3000);
  });
};

const DataComponent = React.lazy(() => fetchData().then(data => ({
  default: () => <div>{data}</div>,
})));

function App() {
  return (
    <div>
      <Suspense fallback={<div>Loading…</div>}>
        <DataComponent />
      </Suspense>
    </div>
  );
}

export default App;
Here, DataComponent is a lazy-loaded component that fetches data. The Suspense component wraps DataComponent and provides a fallback UI (Loading…) while the data is being fetched. With Concurrent Mode, React can continue rendering other parts of the UI while waiting for the data to load, improving perceived performance.
How to Enable Concurrent Mode
Concurrent Mode is currently an experimental feature and must be explicitly enabled in your application. Here’s how you can set it up:
- **Install React Experimental Versions:
**You need to use the experimental versions of React to enable Concurrent Mode.
npm install react@experimental react-dom@experimental
2. Enable Concurrent Mode in Your Root Component:
Wrap your root component with createRoot and set the concurrent flag to true.
import React from 'react';
import { createRoot } from 'react-dom';
import App from './App';

createRoot(document.getElementById('root'), { concurrent: true }).render(<App />);
Additional Information
Gradual Adoption: Concurrent Mode can be adopted incrementally. As it is still experimental, it’s wise to apply it to smaller parts of your application first. This approach allows you to assess the impact on performance and responsiveness before fully integrating it into your app.
Development Tools: New developer tools are available with Concurrent Mode to help visualize how React prioritizes and handles tasks. These tools are invaluable for debugging performance issues and understanding the improvements Concurrent Mode brings to your application.
Compatibility: Since Concurrent Mode is still in the experimental phase, some third-party libraries may not fully support it yet. It’s important to test and ensure compatibility with the libraries used in your application.
Automatic Batching
Batching is when React groups multiple state updates into a single re-render for better performance.
For example, if you have 2 state updates inside of the same click event, React has always batched these into one re-render. If you run the following code, you will see that every time you click, React only performs only render, although you set the state twice.

This is great for performance because it avoids unnecessary re-renders. It also prevents your component from rendering “half-finished“ states where only one state variable was updated, which may cause bugs. This might remind you of how a restaurant waiter doesn’t run to the kitchen when you choose the first dish, but waits for you to finish your order.
However, React wasn’t consistent about when it batches updates. For example, if you need to fetch data and then update the state in the handleClick above, the React would not batch the updates and perform two independent updates.
This is because React used to batch update only during a browser event (like a click), but here, we are updating the state after the event has already been handled (in the fetch callback).

In automatic batching (after upgrading to React 18), no matter where the states originate, they will always be re-rendered once.
What if I don’t want to batch?
In this case, you will have to use flushSync in order to re-render the component.

SSR support for Suspense
The Loading Problem with Traditional React
Not long ago, most React apps relied entirely on client-side rendering. You would show a spinner, wait for data to load, and finally render your UI. Later, with frameworks like Next.js, SSR (server-side rendering) became mainstream, mostly for performance and SEO. But this came at a cost:
You had to fetch everything before you could show anything (fetch data for the entire app and send the HTML)
You had to load everything before you could hydrate anything (on the client, load the JavaScript for the entire app)
You had to hydate everything before you could interact with anything (add JavaScript to all pre-built HTML on the server)
The main problem was that all these steps had to be done before each other, so the next step could start. This was not efficient. Why did the user have to wait for everything to load just to click on a button on the sidebar?

That is where React Suspend and its streaming model came in, not to break its waterfall but to rethink its ways of making a user-first experience. React changed the game by letting us perform these steps independently — per component — instead of waiting for the whole app.
How React Suspense Transforms Loading
There are two major changes in React 18 unlocked by Suspense:
Streaming HTML on the server
Selective hydration of the client
Imagine that we have a website that has a Header, Sidebar, Blogs, and a Project section. With the traditional approach, we had to first render all HTML like this:
<main>
      <header className="h-20 bg-gray-200 flex items-center justify-center">
        <ul className="flex items-center justify-center gap-x-4">
          <li>home</li>
          <li>blogs</li>
          <li>projects</li>
        </ul>
      </header>
      <section className="border border-black space-y-10">
              <header>
                <h1 className="font-bold text-2xl">Hello Streaming</h1>
              </header>
              <div className="flex border gap-5 border-red-500">
                <aside className="w-full max-w-[300px] flex items-center justify-center bg-gray-200">
                  sidebar
                </aside>
                <section className="flex-[1] space-y-5">
                  <div className="h-40 bg-gray-200 flex items-center justify-center">
                    projects
                  </div>
                  <div className="h-40 bg-gray-200 flex items-center justify-center">
                    blogs
                  </div>
                </section>
              </div>
       </section>
    </main>
And the client would eventually get this as a result:

When the JavaScript was sent and loaded on the client, the event handlers and everything were attached to the DOM items, and they would become responsive to interactions. This process is called Hydration. The outcome would be like this — by green color, I mean the section is totally interactive.

Stream SSR: Breaking the Loading Bottleneck
Before diving into Suspense and Fallback UIs, it’s important to understand how React enables streaming in the first place. Under the hood, React uses a function called renderToPipeableStream() which begins rendering HTML immediately as a stream instead of waiting for the entire tree to be ready. This allows the server to send HTML to the browser in chunks, unlocking partial rendering and faster Time To First Byte (TTFB).
import { renderToPipeableStream } from 'react-dom/server';

const { pipe } = renderToPipeableStream(<App />, {
  onShellReady() {
    pipe(response);
  },
});
This function is the backbone of streaming SSR — it lets React “flush“ whatever part of the HTML is ready and postpone slower parts (like Suspense boundaries) for later. Use it in server frameworks like Express or Node handlers.
So, with the new model, we can wrap a part of our page within Suspense. For example, the Blogs component. This Suspense gets a fallback prop that accepts the UI to be shown in place of the main component.
<main>
      <header className="h-20 bg-gray-200 flex items-center justify-center">
        <ul className="flex items-center justify-center gap-x-4">
          <li>home</li>
          <li>blogs</li>
          <li>projects</li>
        </ul>
      </header>
<section className="border border-black space-y-10">
        <header>
          <h1 className="font-bold text-2xl">Hello Streaming</h1>
        </header>
        <div className="flex border gap-5 border-red-500">
          <aside className="w-full max-w-[300px] flex items-center justify-center bg-gray-200">
            sidebar
          </aside>
          <section className="flex-[1] space-y-5">
            <div className="h-40 bg-gray-200 flex items-center justify-center">
              projects
            </div>
            <Suspense fallback={<div>Loading blogs...</div>}>
              <Blogs />
            </Suspense>
          </section>
        </div>
      </section>
    </main>
What does the above code mean? It will tell React that it does not have to wait for the Blogs content to start streaming the HTML for the rest of the page. So, show the fallback UI instead, and will send this:
<main>
      <header className="h-20 bg-gray-200 flex items-center justify-center">
        <ul className="flex items-center justify-center gap-x-4">
          <li>home</li>
          <li>blogs</li>
          <li>projects</li>
        </ul>
      </header>
<section className="border border-black space-y-10">
        <header>
          <h1 className="font-bold text-2xl">Hello Streaming</h1>
        </header>
        <div className="flex border gap-5 border-red-500">
          <aside className="w-full max-w-[300px] flex items-center justify-center bg-gray-200">
            sidebar
          </aside>
          <section className="flex-[1] space-y-5">
            <div className="h-40 bg-gray-200 flex items-center justify-center">
              projects
            </div>
             <!--$?-->
                <template id="B:0"></template>
                <div>Loading blogs...</div>
             <!--/$-->
          </section>
        </div>
      </section>
    </main>
The result of this will be.

But the story doesn’t end here. When the page first loads, React inserts a fallback — like a loading skeleton and assigns it a unique ID, such as id="B:0". Meanwhile, the real content (for example, the blog posts) is still being processed and streamed.
Once it’s ready, React includes it in the ongoing HTML stream, along with a lightweight <script> that handles the magic: replacing the placeholder (B:0) with the actual content.
This makes the transition feel smooth and effortless to the user — no full rerenders, no flickers, just progressive enhancement.
<script>
            self.__next_f.push([1, "25:[\"$\",\"div\",null,{\"children\":\"✅ Comments loaded!\"},\"$26\",[[\"Comments\",\"file:///C:/Users/Abolfazl/Desktop/cache-practice/.next/server/chunks/ssr/src__components_comments_tsx_436f2c30._.js\",15,263]],1]\n"])
        </script>
        <div hidden id="S:0">
            <div>✅ Comments loaded!</div>
        </div>
        <script>
            $RC = function(b, c, e) {
                c = document.getElementById(c);
                c.parentNode.removeChild(c);
                var a = document.getElementById(b);
                if (a) {
                    b = a.previousSibling;
                    if (e)
                        b.data = "$!",
                        a.setAttribute("data-dgst", e);
                    else {
                        e = b.parentNode;
                        a = b.nextSibling;
                        var f = 0;
                        do {
                            if (a && 8 === a.nodeType) {
                                var d = a.data;
                                if ("/$" === d)
                                    if (0 === f)
                                        break;
                                    else
                                        f--;
                                else
                                    "$" !== d && "$?" !== d && "$!" !== d || f++
                            }
                            d = a.nextSibling;
                            e.removeChild(a);
                            a = d
                        } while (a);
                        for (; c.firstChild; )
                            e.insertBefore(c.firstChild, a);
                        b.data = "$"
                    }
                    b._reactRetry && b._reactRetry()
                }
            }
            ;
            $RC("B:0", "S:0")
        </script>
During streaming, React inserts the fallback UI in the HTML where the content isn’t ready yet. Later, when that content becomes available, React sends a small <script> like this: $RC("B:0", "S:0")
In this script:
B:0refers to the placeholder block (like your loading spinner)S:0Is the actual content to be inserted
React’s client-side runtime uses an internal function decodeReply() to manage incoming streamed data and match it with placeholders created during rendering.
This function is responsible for:
Receiving streamed segments (like blog post content)
Locating the right fallback (like B:0)
Replacing it in the DOM, without rerendering the full page
It’s a part of React’s internal streaming runtime and not something you use manually, but understanding it helps connect the dots between the fallback you see on screen and the moment it’s seamlessly replaced by the real content.
While this isn’t exposed directly, you can observe its behaviors through <script/> tags injected during server-side streaming, which execute logic like:
<script>
  $RC("B:0", "S:0")
</script>
💡 This is what makes the streaming experience feel seamless — your UI gradually fills in, piece by piece, as content becomes ready. This process will solve the first problem we had (You have to fetch everything before you can show anything).
Selective Hydration: Fast Interaction Where It Counts
Now, even if we streamed the initial HTML quickly, there’s still a problem: The page can’t become fully interactive until the JavaScript bundle for each widget (like the blog post list) is downloaded and executed. If that JS is large, hydration will be delayed, and so will user interaction. To solve this, we use code splitting. It lets us separate parts of the app into smaller bundles. That way, low-priority features can load later, improving initial load time. For example, you can use React.lazy() to split the Blogs section out of the main bundle and load it only when needed.
import { lazy, Suspense } from "react";
const Blogs = lazy(() => import("../_components/comments"));

<Suspense fallback={<div>Loading blogs ...</div>}>
    <Blogs />
</Suspense>
React 18 changes the game: even if the blog posts haven’t loaded yet, hydration can begin. The result? From the user’s perspective, the page starts responding much sooner — no more waiting for all components to be ready.


Since the blog post code isn’t available yet, React doesn’t wait around. It hydrates the parts of the UI that are ready — like the navigation or footer — so the user can interact with them immediately.
This is a clear example of Selective Hydration in action. By wrapping the blog post section in a <Suspense> boundary, you're telling React:
"Don't let this part block the rest of the page." And React takes it one step further — it doesn’t just continue streaming the rest of the HTML; it also starts hydrating other parts of the page immediately.
💡 That solves a major bottleneck: you no longer need to wait for all JavaScript to load before hydration begins. Instead, React hydrates what’s ready and returns to the rest once its code finishes loading.

The beauty of it is that React handles all of this for you automatically. Let’s say the HTML is delayed, but the JavaScript bundle arrives first. React doesn’t wait. It begins by hydrating the parts of the page that are ready, even if some HTML hasn’t been received yet. This ensures your app becomes interactive as soon as possible, without blocking slower sections.
Bonus: Smarter Hydration for Smoother Interaction
When we wrapped the blog posts in a <Suspense> boundary, something subtle but powerful also happened behind the scenes. Their hydration no longer blocks the browser from handling other tasks. For example, imagine the blog posts are still being hydrated, and the user clicks on the sidebar. In React 18, hydration inside Suspense boundaries happens in small chunks, allowing the browser to briefly pause React’s work to handle that click. This means the UI stays responsive, even during long hydration processes, especially helpful on low-end devices. The user can interact, navigate away, or trigger events without the page feeling stuck.
Now, imagine if the sidebar were also inside a Suspense boundary, just like the blog posts. Both could stream from the server independently, right after the initial HTML shell (which might contain the header and navigation).
Once the JavaScript bundle containing the code for both the sidebar and the blog posts arrives, React attempts to hydrate both components. By default, React starts with the first Suspense boundary it encounters in the tree — in this case, the sidebar. But now, imagine the user clicks on the blog section before it’s hydrated. Instead of waiting for the sidebar to finish, React intercepts the event during the capture phase and synchronously hydrates the blog section first, so the interaction works immediately.
🎯 This is Selective Hydration in action — solving the third major SSR problem — You no longer have to hydrate everything before interacting with anything.
React begins hydration as soon as possible, but it prioritizes what matters most to the user — the part they touch. This creates the illusion of instant hydration because interactive components are hydrated first, even if they’re deeper in the component tree.
Transition
This is an incredible feature going to be released. It lets users resolve the issue of frequent updates on large screens. For example, consider typing in an input field that filters a list of data. You need to store the value of the field in the state so you can filter the data and control the value of that input field. Your code may look something like this:
// Update the input value and search results
setSearchQuery(input);
Here, whenever the user types a character, we update the input value and use the new value to search the list and show the results. For large-screen updates, this can cause lag on the page while everything renders, making typing or other interactions feel slow and unresponsive. Even if the list is not too long, the list items themselves may be complex and different with every keystroke, and there may be no clear way to optimize their rendering.
Conceptually, this issue involves two different updates that need to happen. The first is urgent, changing the value of the input field and potentially some UI around it. The second is less urgent, showing the search results.
// Urgent: Show what was typed
setInputValue(input);

// Not urgent: Show the results
setSearchQuery(input);
The new startTransition API solves this issue by giving you the ability to mark updates as “transitions“:
import { startTransition } from 'react';
// Urgent: Show what was typed
setInputValue(input);
// Mark any state updates inside as transitions
startTransition(() => {
  // Transition: Show the results
  setSearchQuery(input);
});
5 New Hooks in React 18
useTransition
useTransition() is a hook for transition. It returns the transition state and a function to start the transition:
const [isPending, startTransition] = useTransition();
React state updates are classified into two categories:
Urgent updates: They reflect direct interaction such as typing, clicking, pressing, dragging, etc.
Transition updates: They transition the UI from one view to another.
import { useEffect, useState, useTransition } from 'react';

const SlowUI = ({ value }) => (
  <>
    {Array(value)
      .fill(1)
      .map((_, index) => (
        <span key={index}>{value - index} </span>
      ))}
  </>
);

function App() {
  const [value, setValue] = useState(0);
  const [value2, setValue2] = useState(100000);
  const [isPending, startTransition] = useTransition();

  const handleClick = () => {
    setValue(value + 1);
    startTransition(() => setValue2(value2 + 1));
  };

  return (
    <>
      <button onClick={handleClick}>{value}</button>
      <div
        style={{
          opacity: isPending ? 0.5 : 1,
        }}
      >
        <SlowUI value={value2} />
      </div>
    </>
  );
}

export default App;
The above application is composed of two components (lines 25–32):
button(line 25): It is a simple button. The display number is controlled byvalueat line 14. Clicking the button increasesvalue(line 19, urgent and fast update) andvalue2(line 20, transition and slow update).SlowUI(lines 26–32): The component is defined in lines 3–11, which generates100000+spanelements controlled byvalue2at line 15. It takes a longer time to update so many elements.useTransitionat line 16 returns the transition state,isPending, and the function to start the transition,startTransition. WhenstartTransitionis called on line 20,isPendingturnstrue, andSlowUIis half opaque (light colored) with stale data (line 28). When the transition finishes,isPendingturnsfalse, andSlowUIbecomes fully opaque (solid colored) with updated data.
Try to remove startTransition line 20 to call setValue2(value2 + 1) directly. You can see that the UI is no longer functional with so many updates happening simultaneously.
The useTransition hook returns isPending and startTransition. If you do not need to show special UI for isPending, remove line 16, and add the following line at the top of the code.
import { startTransition } from 'react';
useDeferredValue
useDeferredValue(value) is a hook that accepts a value and returns a new copy of the value that will defer to more urgent updates. The previous value is kept until urgent updates have been completed. Then, the new value is rendered. This hook is similar to using debouncing or throttling to defer updates.
import { useDeferredValue, useState } from 'react';

const SlowUI = () => (
  <>
    {Array(50000)
      .fill(1)
      .map((_, index) => (
        <span key={index}>{100000} </span>
      ))}
  </>
);

function App() {
  const [value, setValue] = useState(0);
  const deferredValue = useDeferredValue(value);

  const handleClick = () => {
    setValue(value + 1);
  };

  return (
    <>
      <button onClick={handleClick}>{value}</button>
      <div>DeferredValue: {deferredValue}</div>
      <div>
        <SlowUI />
      </div>
    </>
  );
}

export default App;
The above application is composed of three components (lines 23–27):
button(line 23): It is a simple button. The display number is controlled byvalueat line 14. Clicking the button increasesvalue(line 18, urgent and fast update).div(line 24): It displaysdeferredValue.SlowUI(lines 25–27): The component is defined at lines 3–11, which generates50000fixed-numberspanelements. Although the component does not have props and visually does not update, it takes a long time to update so many elements.
useDeferredValue can be used in conjunction with startTransition and useTransition.
useId
In a Web application, there are cases that need unique IDs, for example:
<label for="ID">, where theforattribute must be equal to theidattribute of the related element to bind them together.aria-labelledby, where thearia-labelledbyattribute could take multiple IDs.
useId() is a hook that generates a unique ID:
This ID is stable across the server and the client, which avoids hydration mismatches for server-side rendering.
This ID is unique for the entire application. In the case of multi-root applications,
createRoot/hydrateRoothas an optional prop,identifierPrefix, which can be used to add a prefix to prevent collisions.This ID can be appended with prefixes and/or suffixes to generate multiple unique ids that are used in a component. It seems trivial. But,
useIdwas evolved fromuseOpaqueIdentifier, which generates an opaque ID that cannot be operated upon.
import { useId } from 'react';

const Comp1 = () => {
  const id = useId();
  return <div>Comp1 id({id})</div>;
};

const Comp2 = () => {
  const id = useId();
  return (
    <>
      <div>Comp2 id({id})</div>
      <label htmlFor={`${id}-1`}>Label 1</label>
      <div>
        <input id={`${id}-1`} type="text" />
      </div>
      <label htmlFor={`${id}-2`}>Label 2</label>
      <div>
        <input id={`${id}-2`} type="text" />
      </div>
    </>
  );
};

const Comp3 = () => {
  const id = useId();
  return (
    <>
      <div>Comp3 id({id})</div>
      <div aria-labelledby={`${id}-a ${id}-b ${id}-c`}>I am Comp3</div>
    </>
  );
};

function App() {
  return (
    <>
      <Comp1 />
      <Comp2 />
      <Comp3 />
    </>
  );
}

export default App;
The above application is composed of three components (lines 38–40):
Comp1: It is defined in lines 3–6, which generates and displays one id,:r0:.Comp2: It is defined in lines 8–23, which generates one id,:r1:. From this one id, it derives two unique IDs,:r1:-1(forLabel 1+ the input field) and:r1:-2(forLabel 2+ the input field).Comp3: It is defined in lines 25–33, which generates and displays one id,:r2:. From his one ID, it derives three unique IDs,:r1:-a,:r1:-b, and:r1:-c, for thearia-labelledbyattribute.
Execute the code by npm start. We see the following UI, along with the generated HTML elements in Chrome DevTools.

useSyncExternalStore
useSyncExternalStore is a hook recommended for reading and subscribing to external sources (stores):
Here is the signature of the hook:
const state = useSyncExternalStore(subscribe, getSnapshot[, getServerSnapshot]);
This method accepts three arguments:
subscribe: It’s a function to register a callback that is called whenever the store changes.getSnapshot: This is a function that returns the current value of the store.getServerSnapshot: It is the function that returns the snapshot used during server rendering. This is an optional parameter.
This method returns the value of the store, state.
We created an example of useSyncExternalStore, which reads the browser window width and displays it on the screen.
import { useSyncExternalStore } from 'react';

function App() {
  const width = useSyncExternalStore(
    (listener) => {
      window.addEventListener('resize', listener);
      return () => {
        window.removeEventListener('resize', listener);
      };
    },
    () => window.innerWidth
    // () => -1,
  );

  return <p>Size: {width}</p>;
}

export default App;
The above application calls useSyncExternalStore:
subscribe(lines 5–10): It registers a callback for the windowresizeevent listener.getSnapshot(line 11): It returns the current browser window width.getServerSnapshot(line 12): It is for server rendering, which is not needed here, or simply returns-1.
Execute the code by npm start. The following video shows that the UI displays the browser window width while resizing.
useInsertionEffect
useEffect(didUpdate) accepts a function that contains imperative, possibly effective code, which are mutations, subscriptions, timers, logging, and other side effects. By default, effects run after every completed render, but the invocation can be controlled with an array of second arguments.
useLayoutEffect has the same signature as useEffect, but it fires synchronously after all DOM mutations. it’s fired before useEffect. It’s used to read the layout from the DOM and asynchronously re-render. Updates scheduled inside useLayoutEffect will be flushed synchronously before the browser has a chance to paint.
useInsertionEffect is introduced in React 18. It has the same signature as useEffect, but it fires synchronously before all DOM mutations. i.e., it is fired before useLayoutEffect. It is used to inject styles into the DOM before reading the layout.
useInsertionEffect is intended for CSS and JS libraries, such as styled-components. Since this hook is limited in scope, this hook does not have access to refs and cannot schedule updates.
The following example, placed in src/App.js, compares useEffect, useLayoutEffect, and useInsertionEffect:
import { useEffect, useInsertionEffect, useLayoutEffect } from 'react';

const Child = () => {
  useEffect(() => {
    console.log('useEffect child is called');
  });
  useLayoutEffect(() => {
    console.log('useLayoutEffect child is called');
  });
  useInsertionEffect(() => {
    console.log('useInsertionEffect child is called');
  });
};

function App() {
  useEffect(() => {
    console.log('useEffect app is called');
  });
  useLayoutEffect(() => {
    console.log('useLayoutEffect app is called');
  });
  useInsertionEffect(() => {
    console.log('useInsertionEffect app is called');
  });
  return (
    <div className="App">
      <Child />
      <p>Random Text</p>
    </div>
  );
}

export default App;
The above application has an App (lines 15–31) and a Child component (lines 3–13). Both of them call useEffect, useLayoutEffect, and useInsertionEffect.
Execute the code by npm start, and we see the displayed text and console output.

These effects are called in the following order:
useInsertionEffectchild is called.useInsertionEffectapp is called.useLayoutEffectchild is called.useLayoutEffectapp is called.useEffectchild is called.useEffectapp is called.
This is the expected order.
But why are they called twice?
With the release of React 18, StrictMode gets an additional behavior called strict effects mode. When strict effects are enabled, React intentionally double-invokes effects (mount -> unmount -> mount) for newly mounted components in development mode. Interestingly, useInsertionEffect is not called twice.
Execute npm run build, and serve -s build. We can verify that in production mode, this app is only mounted once.
Let’s go back to the development mode. After npm start, modify the text to Random Text is changed, and save src/App.js. The additional console log shows how these effects are called upon by changes.

useInsertionEffect is the hook to be used if we want it to fire before all DOM mutations? However, useInsertionEffect is intended for CSS-in-JS libraries. For normal application developers, useEffect or useLayoutEffect are used more commonly.
React 17
Over two years after React 16 was launched, the long-awaited React 17 was released in October 2020. While the update introduced numerous great changes as always, this release is unique because it contains no new developer-facing features. While React 16 added significant features like Hooks and the Context API, React 17 is mostly considered a stepping stone to ease the transition for feature releases.
New JSX Enhancements
A superficial examination of React 17 is sure to leave you unimpressed. What is fascinating is not the new features but the way React is compiled.
To understand these better, let’s examine the compiled code of JSX in a component that uses an older version of React.

You might notice that the compiled version uses React.createElement, where React dependency should be available in the scope. That’s why you need to import React in the first place in each of the components.
Now let’s take a look at how it works with React 17
With React 17, you don’t need the React import for JSX.
I hope that gives you a clue that the compiled version doesn’t require the React import. As you can see in the following image, the React 17 compiler imports a new dependency from react/jsx-runtime, which handles the JSX transformation.

So as developers, once you upgrade to React 17, you can remove the React import from your component’s code if it’s only there for JSX.
With the removal of React import, your compiled bundled output will become slightly smaller. I hope it becomes evident since we need to remove the React import from each of the components where the compiler replaces it with a submodule in React, as shown below:
import {jsx as _jsx} from 'react/jsx-runtime';
Event Delegation
In React (version < React 17), whenever we write any event handlers on elements, it doesn't attach events to the specific DOM nodes, instead, it attaches each handler to the document node. This is called event delegation.
To enable gradual updates, this is the problem if you have multiple React versions on the same page and they all register handlers at the document level.
To fix this, in React 17, all handlers will be attached to the root DOM container defined in your React app where you render the root App component.
React 17 will no longer attach event handlers at the
documentlevel. Instead, it will attach them to the root DOM container into which your React tree is rendered.

Effect Cleanup Timing
In React 16, the cleanup function timing in useEffect was synchronous, which meant that when the component was in the unmounting phase, the cleanup function would run first, and then the screen would get updated. If the cleanup logic was computationally expensive or involved asynchronous operations, such as subscribing to an event listener or canceling a network request, it could delay the screen update. This delay was noticeable in heavy apps where multiple components with cleanup logic were being unmounted simultaneously.
Users would perceive a lag in UI responsiveness during transitions or component unmounts. For example, removing a modal or switching views might take longer because the cleanup function execution blocks the screen update.

React 17 fixes this by making the cleanup function asynchronous. This improves performance.
According to the React blog, “In React v17, the effect cleanup function always runs asynchronously - for example, if the component is unmounting, the cleanup runs after the screen has been updated.”
React 16.0 - 16.8
React 16 had 14 sub-releases from 16.0.0 to 16.14.0. Each release introduced improvements, bug fixes, and new features while maintaining backward compatibility.
Returns multiple elements from components with fragments
Splitting UI into multiple reusable small components may lead to the creation of unnecessary DOM elements, like when you need to return multiple elements from a component. React 16 has several options to avoid that:
// React 15: extra wrapper element
const Breakfast = () => (
  <ul>
    <li>Coffee</li>
    <li>Croissant</li>
    <li>Marmalade</li>
  </ul>
);

// React 16.0: array (note that keys are required)
const Breakfast = () => [
  <li key="coffee">Coffee</li>,
  <li key="croissant">Croissant</li>,
  <li key="marmalade">Marmalade</li>
];

// React 16.2: fragment
const Breakfast = () => (
  <React.Fragment>
    <li>Coffee</li>
    <li>Croissant</li>
    <li>Marmalade</li>
  </React.Fragment>
);

// React 16.2: fragment (short syntax)
const Breakfast = () => (
  <>
    <li>Coffee</li>
    <li>Croissant</li>
    <li>Marmalade</li>
  </>
);

// React 16: fragments composition
const Meals = (
  <ul>
    <Breakfast />
    <Lunch />
    <Dinner />
  </ul>
);
Note that the short syntax may not be supported by the tools you are using.
Returning strings and numbers from components
React 16 components can return strings and numbers. This is useful for components that don’t need any markup, like internationalization or formatting:
// React 15
const LocalDate = ({ date }) => (
  <span>
    {date.toLocaleDateString('de-DE', {
      year: 'numeric',
      month: 'long',
      day: 'numeric'
    })}
  </span>
);

// React 16
const LocalDate = ({ date }) =>
  date.toLocaleDateString('de-DE', {
    year: 'numeric',
    month: 'long',
    day: 'numeric'
  });
Cancelling setState() to avoid rendering
In React 15, it wasn’t possible to cancel setState() and avoid rendering if your next state was based on the previous state. In React 16, you could return null in setState()’s callback.
// React 16
handleChange = event => {
  const city = event.target.value;
  this.setState(
    prevState => (prevState.city !== city ? { city } : null)
  );
};
In this example calling handleChange() with the same city name as in the state won’t cause a rerender.
Avoid prop drilling with the official Context API (16.3)
Prop drilling is when you pass some data to a deeply nested component using a prop. You have to add this prop to each layer of your React component tree between a component that owns the data and a component that consumes it.
class Root extends React.Component {
  state = { theme: THEME_DARK };
  handleThemeToggle = theme =>
    this.setState(({ theme }) => ({
      theme: theme === THEME_DARK ? THEME_LIGHT : THEME_DARK;
    }));
  render() {
    return (
      <Page
        onThemeToggle={this.handleThemeToggle}
        {...this.state}
        {...this.props}
      />
    );
  }
}
// Each layer will have to pass theme and theme toggle handler props
<SomeOtherComponent
  onThemeToggle={props.onThemeToggle}
  theme={props.theme}
/>;
// Many layers below
const Header = ({ theme, onThemeToggle }) => (
  <header className={cx('header', `header--${theme}`)}>
    ...
    <button onClick={onThemeToggle}>Toggle theme</button>
  </header>
);
That is a lot of boilerplate code! With the Context API, we can access our theme props anywhere in the component tree.
const ThemeContext = React.createContext(THEME_DARK);
// We should wrap our app in this component
class ThemeProvider extends React.Component {
  state = { theme: THEME_DARK };
  handleThemeToggle = theme =>
    this.setState(({ theme }) => ({
      theme: theme === THEME_DARK ? THEME_LIGHT : THEME_DARK
    }));
  render() {
    return (
      <ThemeContext.Provider
        value={{
          onThemeToggle: this.handleThemeToggle,
          theme: this.state.theme
        }}
      >
        {this.props.children}
      </ThemeContext.Provider>
    );
  }
}
// And then use theme consumer anywhere in the component tree
const Header = () => (
  <ThemeContext.Consumer>
    {({ theme, onThemeToggle }) => (
      <header className={cx('header', `header--${theme}`)}>
        ...
        <button onClick={onThemeToggle}>Toggle theme</button>
      </header>
    )}
  </ThemeContext.Consumer>
);
Updating state based on props with getDerivedStateFromProps()
The getDerivedStateFromProps() lifecycle method is a replacement for componentWillReceiveProps(). It’s useful when you have a prop with a default value for a state property, but you want to reset the state when that prop changes. For example, a modal that has a prop that says if it’s initially open, and a state that says if a modal is open now.
// React 15
class Modal extends React.Component {
  state = {
    isOpen: this.props.isOpen
  };
  componentWillReceiveProps(nextProps) {
    if (nextProps.isOpen !== this.state.isOpen) {
      this.setState({
        isOpen: nextProps.isOpen
      });
    }
  }
}

// React 16.3
class Modal extends React.Component {
  state = {};
  static getDerivedStateFromProps(nextProps, prevState) {
    if (nextProps.isOpen !== prevState.isOpen) {
      return {
        isOpen: nextProps.isOpen
      };
    }
  }
}
The getDerivedStateFromProps() method is called when a component is created and when it receives new props, so you don’t have to convert props to state twice (on initialization and in componentWillReceiveProps()).
Rendering function components on props change with React.memo() (16.6)
React.memo() does the same for function components as PureComponent does for class components: only the rerendered component if its props change.
const MyComponent = React.memo(props => {
  /* Only rerenders if props change */
});
Other new features
forwarding refs (16.3)
the new Context API (16.3)
StrictMode component (16.3)
pointer events (16.4)
profiler (16.5)
React.lazy (16.6)
Understanding React 16.8 life cycles, Hooks, Context API, Lazy and Suspense (16.8)
Conclusion
By staying up-to-date with these new methods, developers can leverage the full potential of React.js, writing cleaner and more maintainable code. These advancements reflect React’s commitment to improving developer productivity and delivering high-quality user experiences. Whether you are building a complex web application or a simple component, incorporating these new methods into your workflow can lead to significant improvements in both performance and usability.
References
https://medium.com/gradeup/upgrading-to-react-17-5a5aad38057f
https://javascript.plainenglish.io/what-you-need-to-know-about-react-18-54070f6bc4a1
https://betterprogramming.pub/5-new-hooks-in-react-18-300aa713cefe
https://blog.bitsrc.io/new-jsx-enhancements-in-react-17-e5f64acbea89
https://medium.com/hackernoon/react-16-0-16-3-new-features-for-every-day-use-f397da374acf
Subscribe to my newsletter
Read articles from Tuan Tran Van directly inside your inbox. Subscribe to the newsletter, and don't miss out.
Written by
Tuan Tran Van
Tuan Tran Van
I am a developer creating open-source projects and writing about web development, side projects, and productivity.