Multifactor Authentication (MFA), Password Policy and Administrative Units (AU).
 Theodora Egburedi
What is Multifactor Authentication (MFA)?
Multifactor Authentication (MFA) is a security measure or process that requires users to provide multiple or additional forms of identification before accessing an account or system. This typically involves something you know (like a password), something you have (like a smartphone or security token), and something you are (like a fingerprint or facial recognition).
This is done to enhance the security of user(s) in an organization or a standalone person, making it much harder for unauthorized users to gain access.
How Does It Work?
Multifactor Authentication (MFA) works by requiring users to provide additional forms of identification before accessing an account or system. Here’s the breakdown.
1. Something You Know: This is usually a password or PIN, a security question. It's usually the first layer of security.
2. Something You Have: This could be a smartphone, security token, or a smart card. After entering your password, you'll receive a code or prompt on your device that you need to confirm. Second layer of security.
3.Something You Are: This involves biometric verification, such as a fingerprint, facial recognition, or retina scan.
In M365, there are a number of MFA verification methods, we have the Microsoft Authentication method, we have OAuth or Open Authentication, and this is the use of Soft Tokens or hard Tokens. There is also Security Keys etc.
MFA can be implemented on the Microsoft 365 platform using the Entra Admin center. Ther are many ways deploying MFA with Microsoft Entra. The best way to use MFA in the cloud and to apply it to users is by using the Conditional Access.
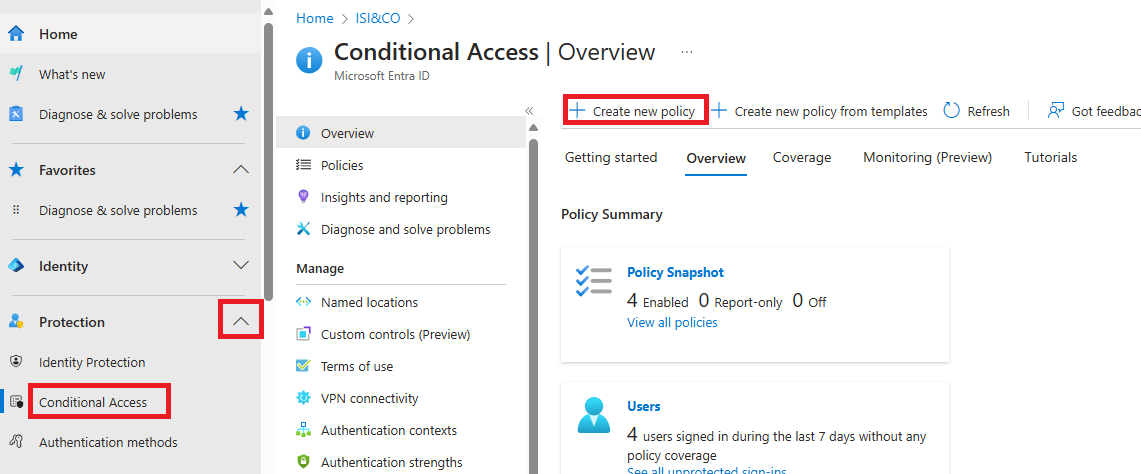
To access Conditional Access in the Entra admin center, go to Protection, click on the dropdown and select Conditional access. To use the conditional access, you need to create a policy. A policy is like a laid down rules within an organization.
Here’s, how to configure a Conditional access policy
In the Entra Admin center, go to Protection and click on the dropdown, select Conditional access. Select Create new policy and fill in the details as shown in the screenshot.
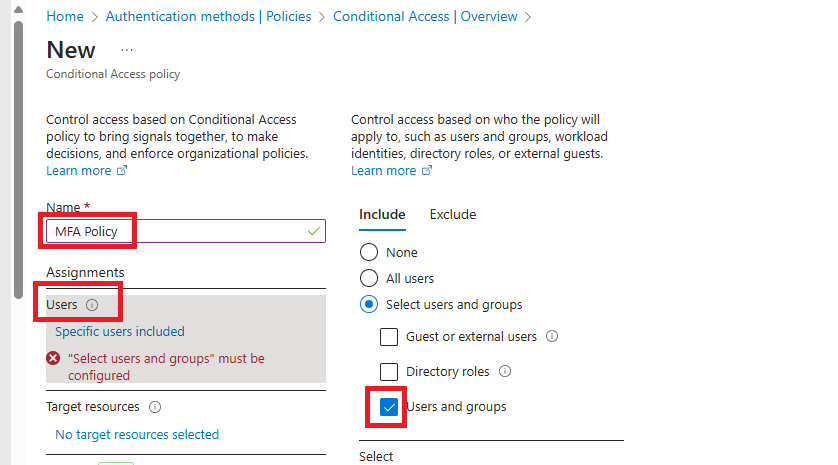
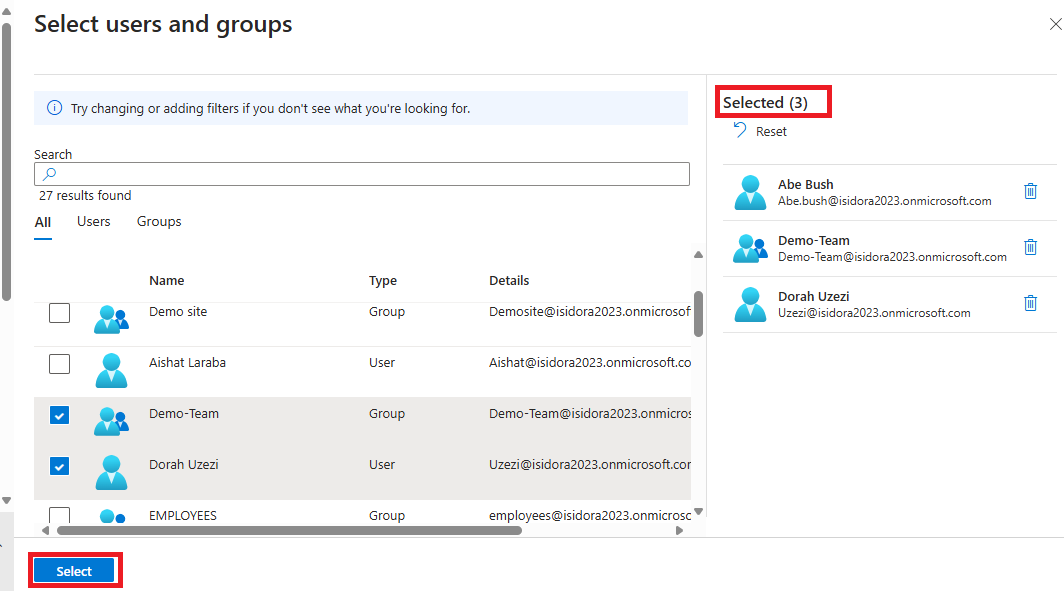
Next, Give the policy a name and click the users and groups you want to apply the policy and click on select. For this demo, I selected two users and one group.
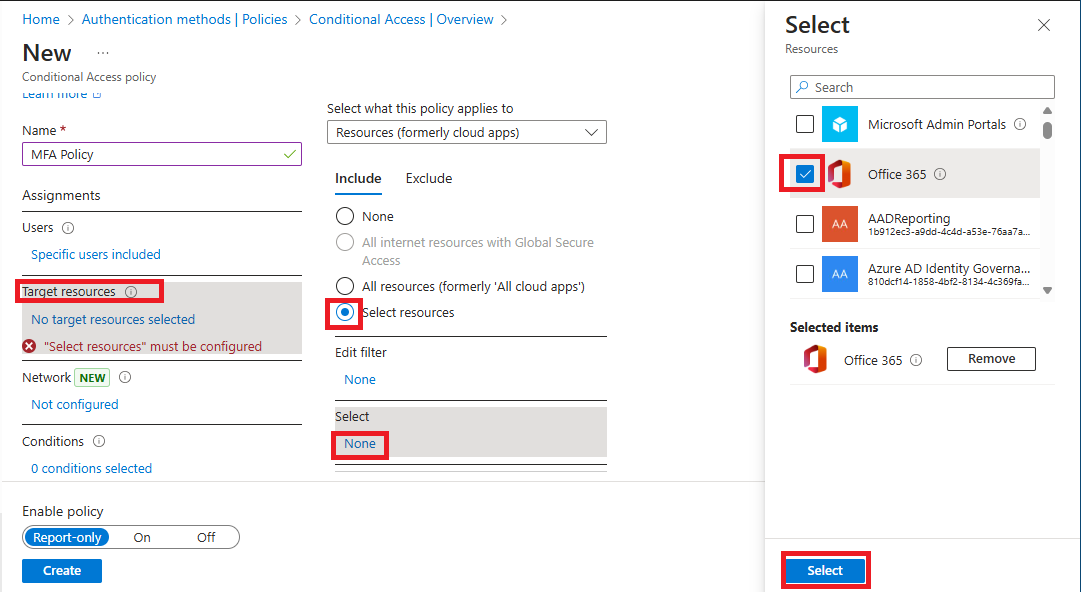
Next is the Target Resources to apply the policy and since we are dealing with M365, we select office 365 as the Target Resource
Next is Access Control. This is the most important thing when you are trying to setup Multifactor Authentication. You either Grant access or Block access. Check the Box Required MFA and click on select.
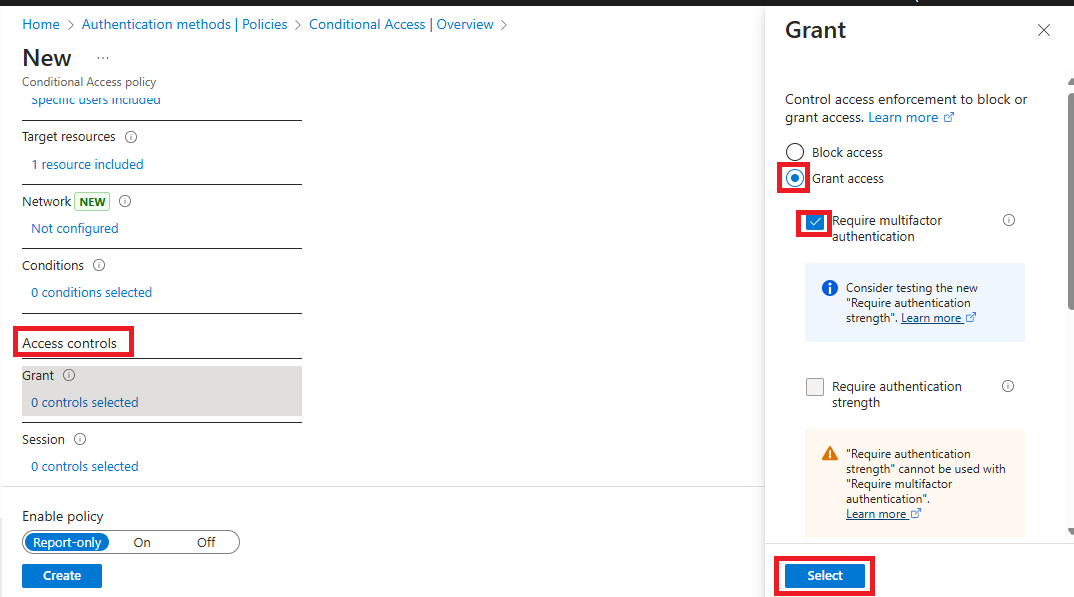
Next is Sessions. This not really import but some organization apply it, especially when users complain about how frequently they are required to use MFA. Here you setup the MFA to maybe once in 30 days or 14 days depending on the organization. The important thing to look out for under Session is Sign-in Frequency to configure the periodic reauthentication.
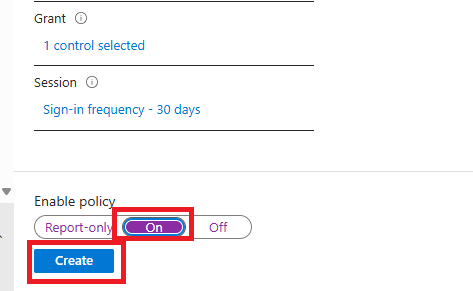
Next is Enable policy by selecting ON. After that, click on create.
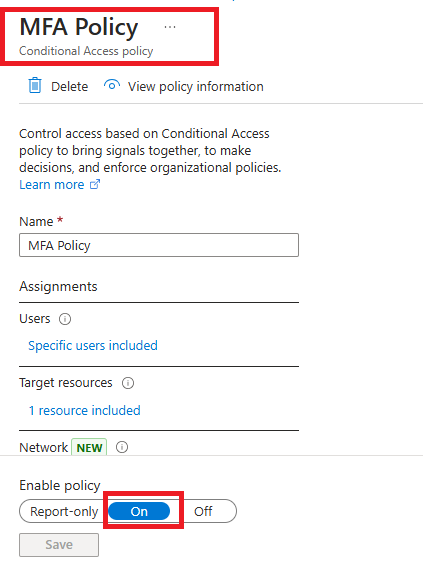
The Policy has been Successfully Created, and you can find it under Policies.
What Is Password Policy?
Password Policy is a set of rules designed to enforce the creation and use of strong, secure passwords to protect systems and sensitive information.
Simply put, Password Policy is a service that help you manage how password is been generated in the organization.
Some key elements of Password policy include.
Password Length, Complexity Requirement, Expiration, Password History, Lockout Policy, Prohibited Passwords etc. etc.
How To Configure Password Policy in The Microsoft Entra Admin center.
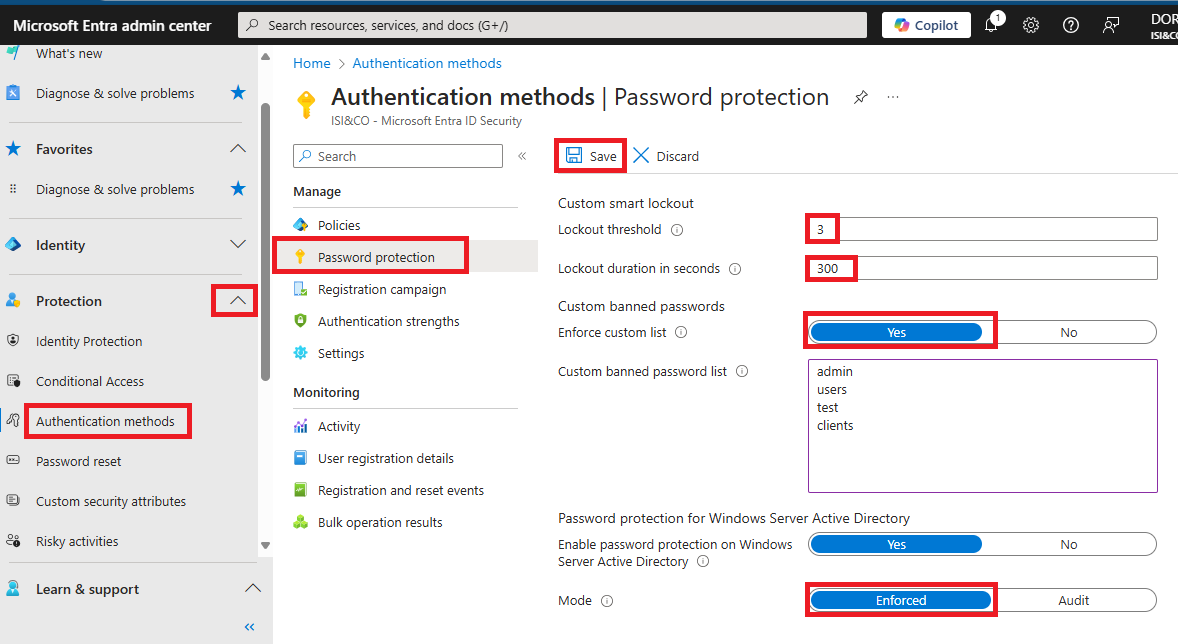
To Implement Password Policy: Login to your Entra admin portal and go to Protection click on the dropdown and select Authentication Methods. Click on Password Protection and set up password policy according to organization rules and when you are done, click on save.
Administrative Units.
An Administrative Unit in Microsoft Entra ID is used to group resources and delegate management to specific administrators.
Admin unit is a service that acts as a container for every Entra ID or Active Directory Resource in the M365 platform or Azure platform.
How does it work?
It uses the principle of least privilege to allow an organization grant admin permissions restricted to specific part of the organization such as department or region.
This means you can delegate management tasks to specific administrators without giving them full access to the entire organization.
How To Create Administrative Unit.
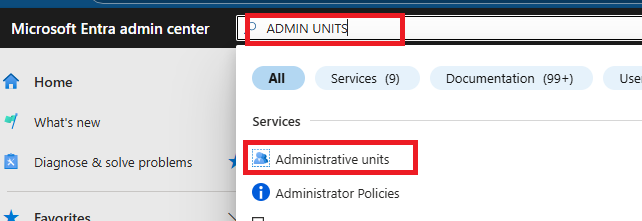
To create Admin Unit, you either search for Administrative Unit the search bar of Entra Admin portal or go to show more on the portal.
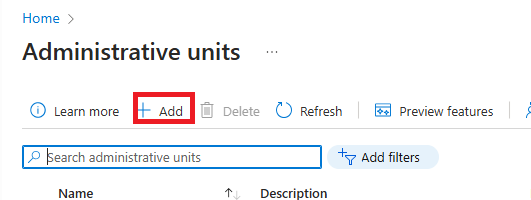
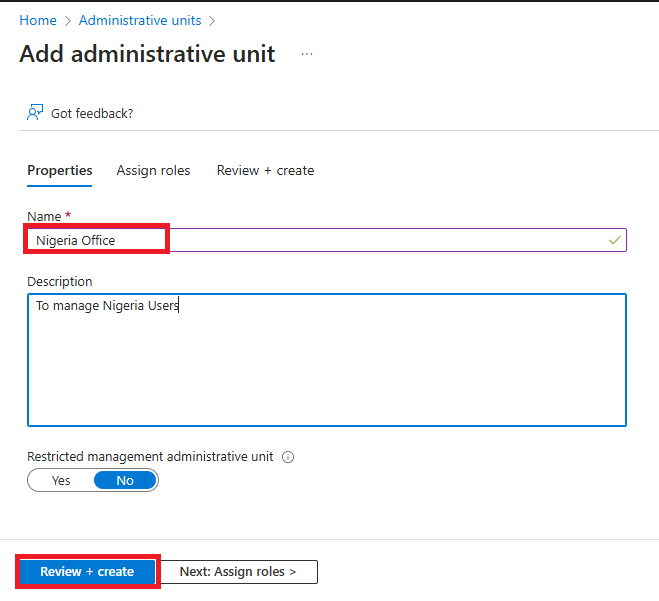
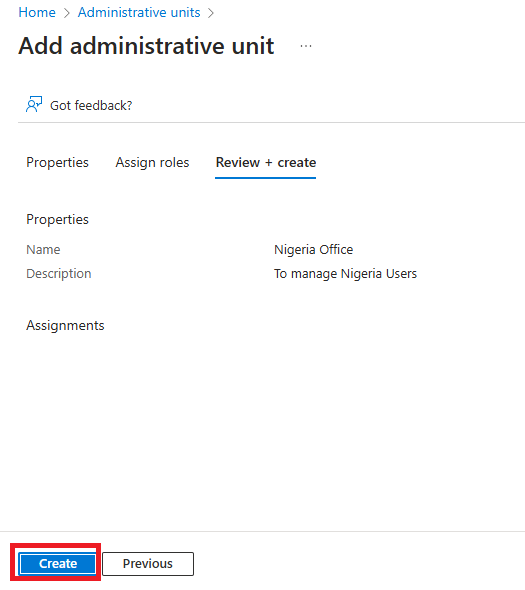
Then click on Roles and Admin and select Admin Unit. On the Admin Unit Pane click on Add and fill the information as required. Don’t assign roles at this point and click on Review and create and click on create.
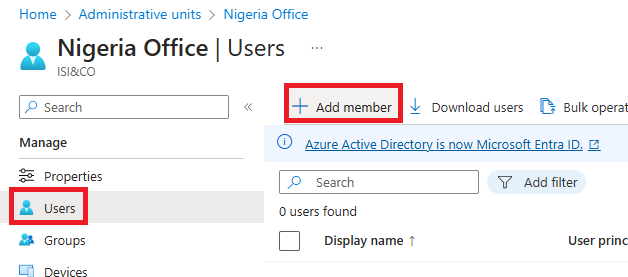
Open the Admin Unit you just created and select Users.
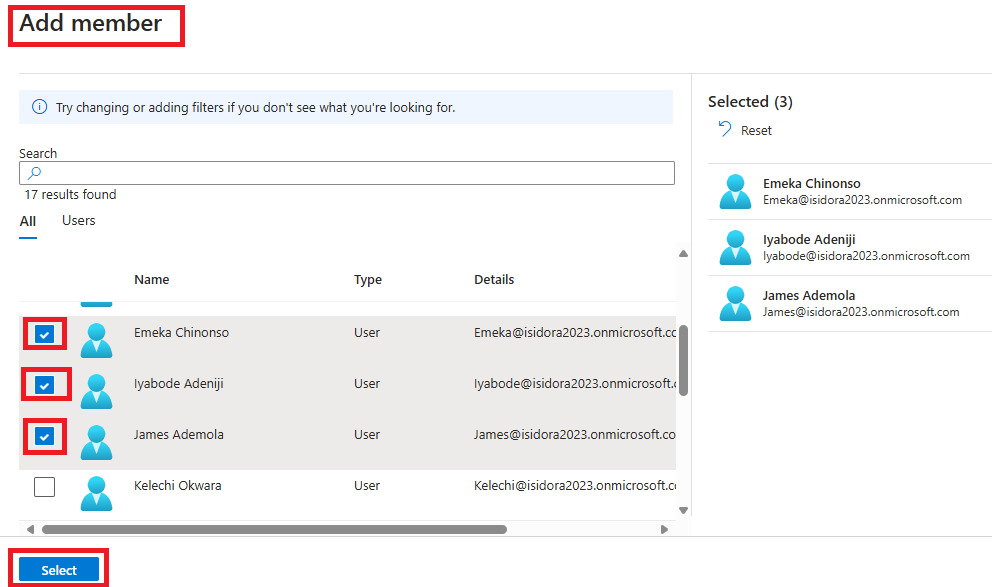
Click on Add members and select the users you want add and click on select.
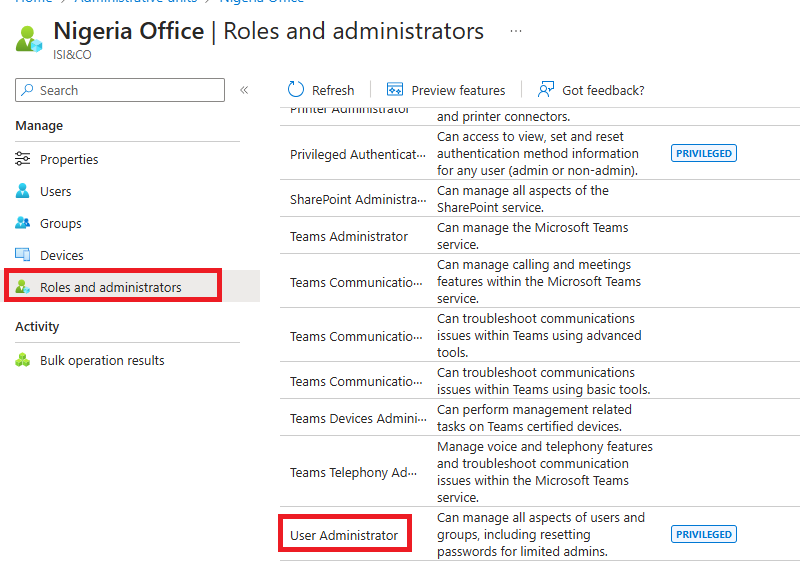
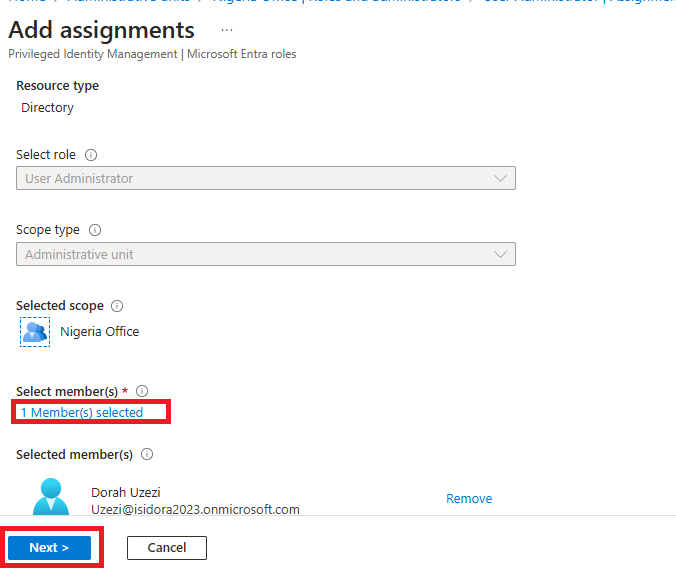
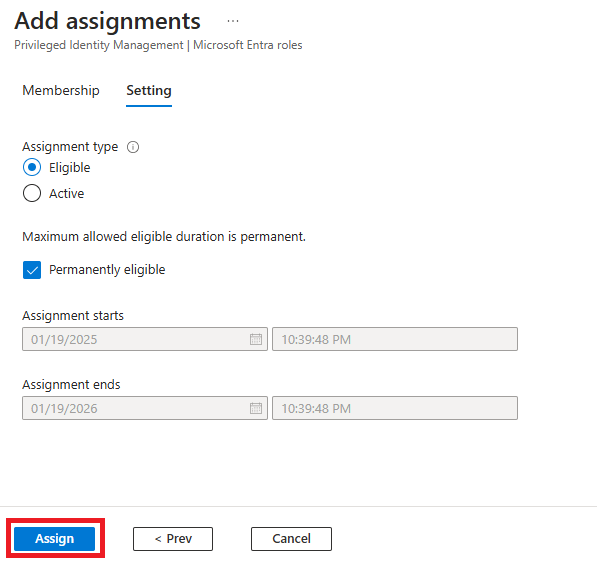
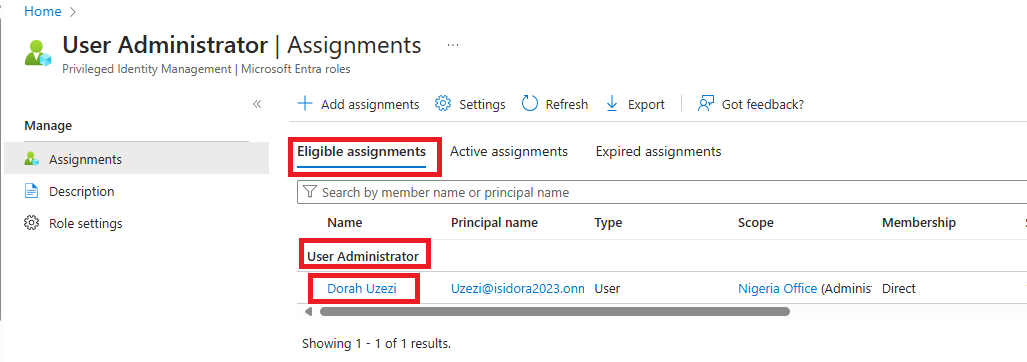
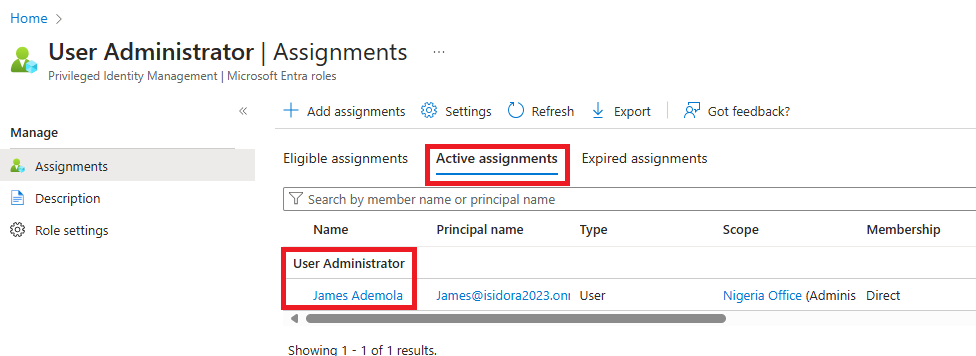
To make a user the Administrator of the Unit
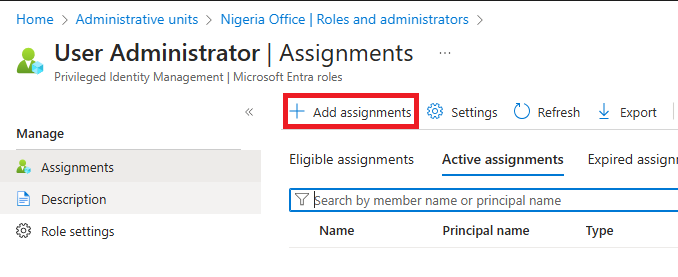
Go to Roles and Administrators and select User Administrator role, search and select the user or click on Add Assignment and click on the user you want to make the Administrator and select Add.
Below is the screenshot of how to Create, Add members and Assign roles to Administrative Unit.
Please Like and Comment.
My Name is Theodora Egburedi
M365 Technical Support Engineer.
Subscribe to my newsletter
Read articles from Theodora Egburedi directly inside your inbox. Subscribe to the newsletter, and don't miss out.
Written by

Theodora Egburedi
Theodora Egburedi
M365 Technical Support Expert with hands-on experience in IT support. Proficient in managing and troubleshooting various M365 services, including Exchange Online, SharePoint, Teams, and OneDrive. Committed to providing excellent technical assistance and ensuring seamless user experiences.