Streamline Microservices Deployment on AKS Using Azure DevOps CI/CD and GitOps
 Ritesh Kumar Nayak
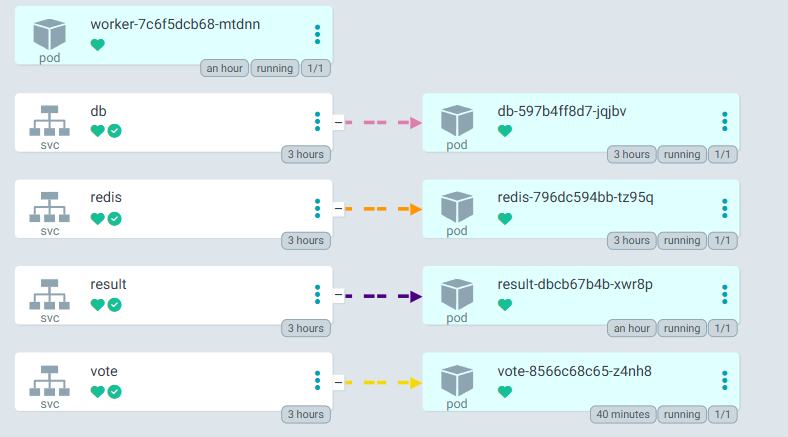
In this project, we’ll streamline the deployment of a sample voting application using Azure DevOps. Our target deployment environment will be AKS. This application is publicly available at the Docker Samples repository, and we aim to demonstrate its CI/CD using Azure DevOps.
Here we’ll use all the Azure managed services such as:
Azure Repos for version control
ACR (Azure Container Registry) for strong docker images
AKS (Azure Kubernetes Services) for deployment of the application to the K8S cluster
Setting up Azure Repo
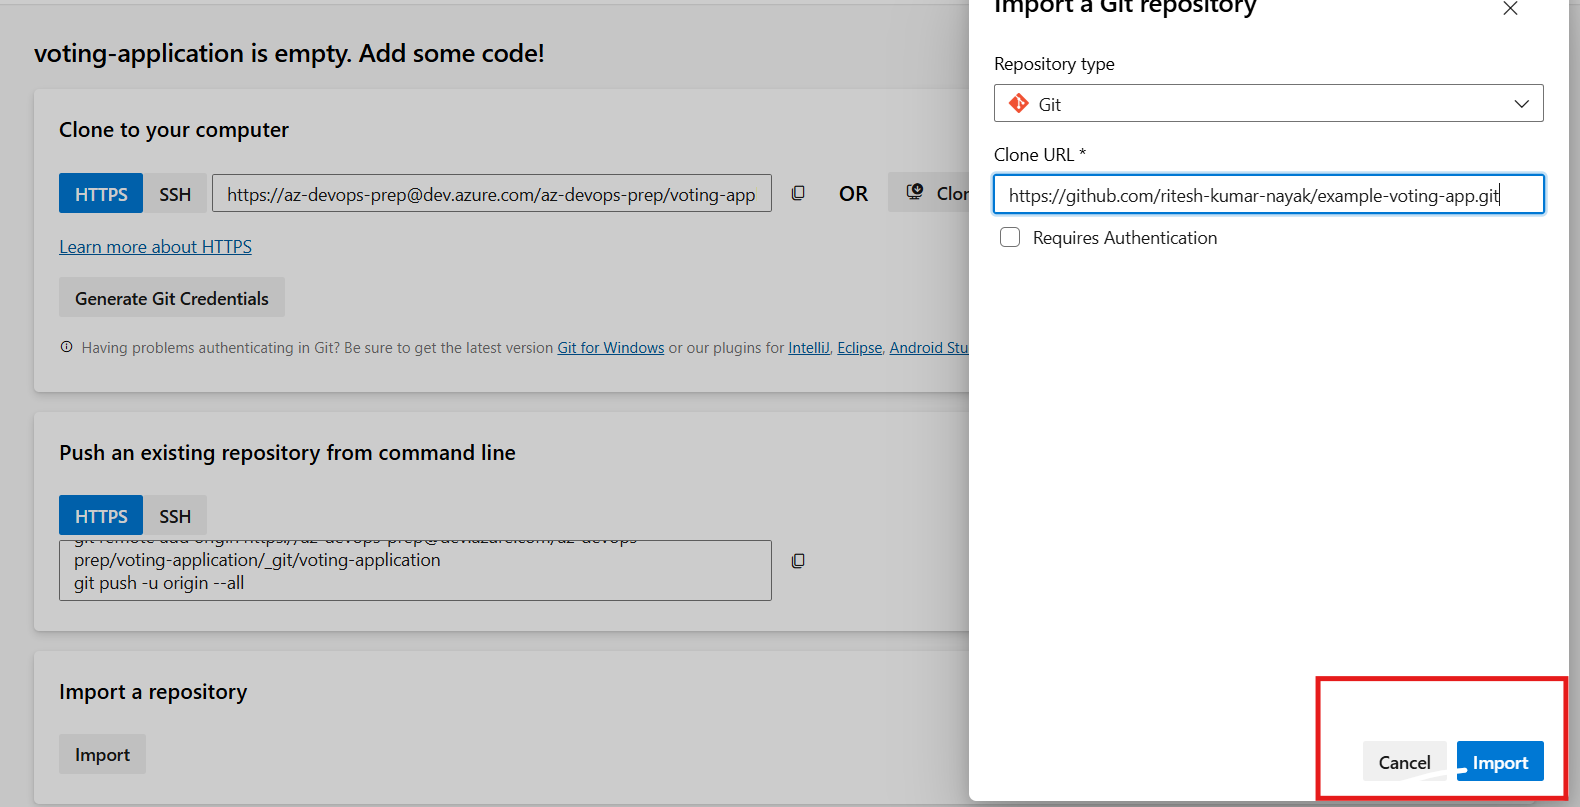
As a very first step we’ll import the publicly available code to Azure Repos inside our project and to do so below are the steps
Import Code from the public GitHub repository to the Private Azure Repo
Verify the build branch is configured to the Main branch
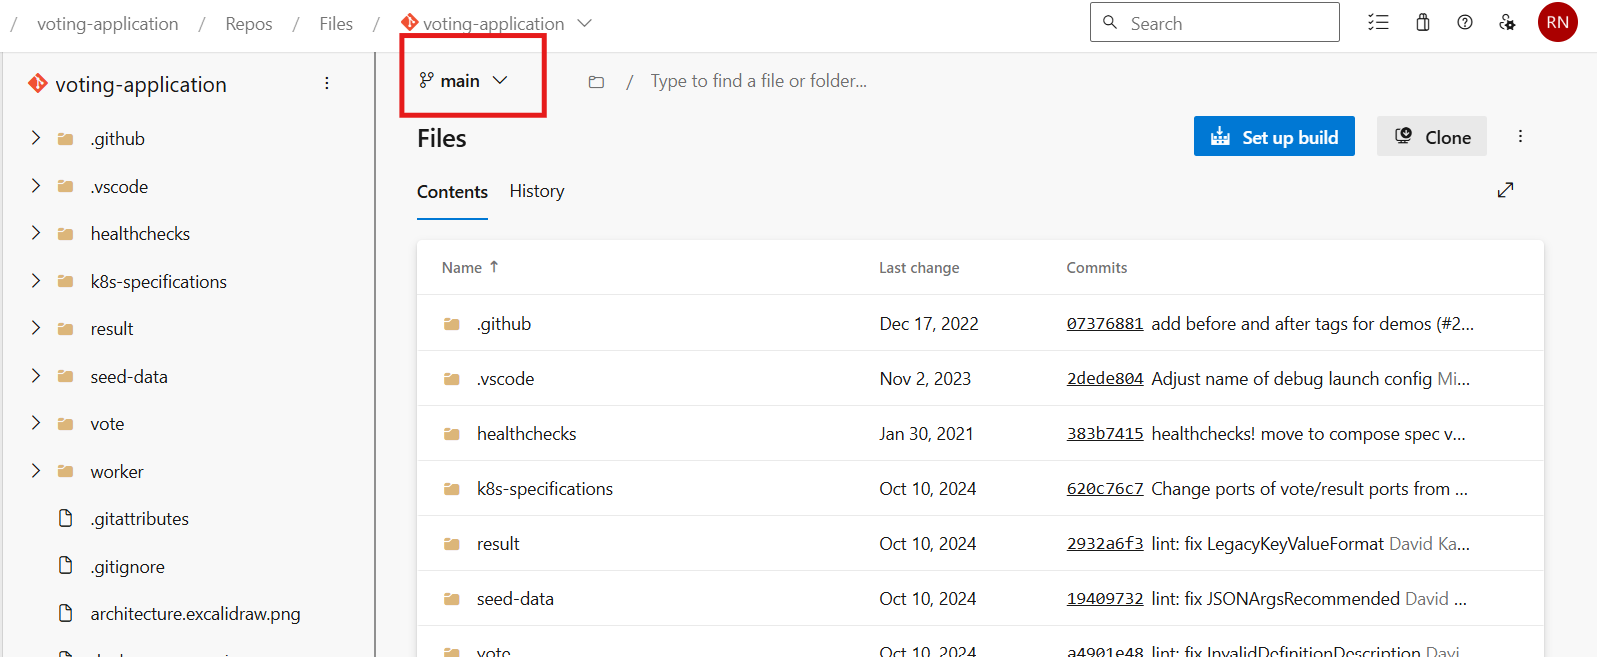
The main branch will have the latest code changes and our target build branch will be the main form where code will be checked out
Create ACR (Container Registry)
Here we’ll create the resources using Azure CLI for faster deployment of resources.
Login to Azure CLI using
az loginCreate Resource Group
az group create --name votingapp-deploy --location uksouthCreate the container registry
az acr create --resource-group votingapp-deploy --name votingappacr001 --sku standard --location uksouth

Build Pipeline Creation (Continuous Integration)
In this project we have 3 microservices below is the architecture:
Vote: this component is created using Python
Worker: this component is created using .Net Core
Result: this is created using NodeJS
DB: Postgres db is used for storing data
Caching**: Redis** is used as in-memory caching
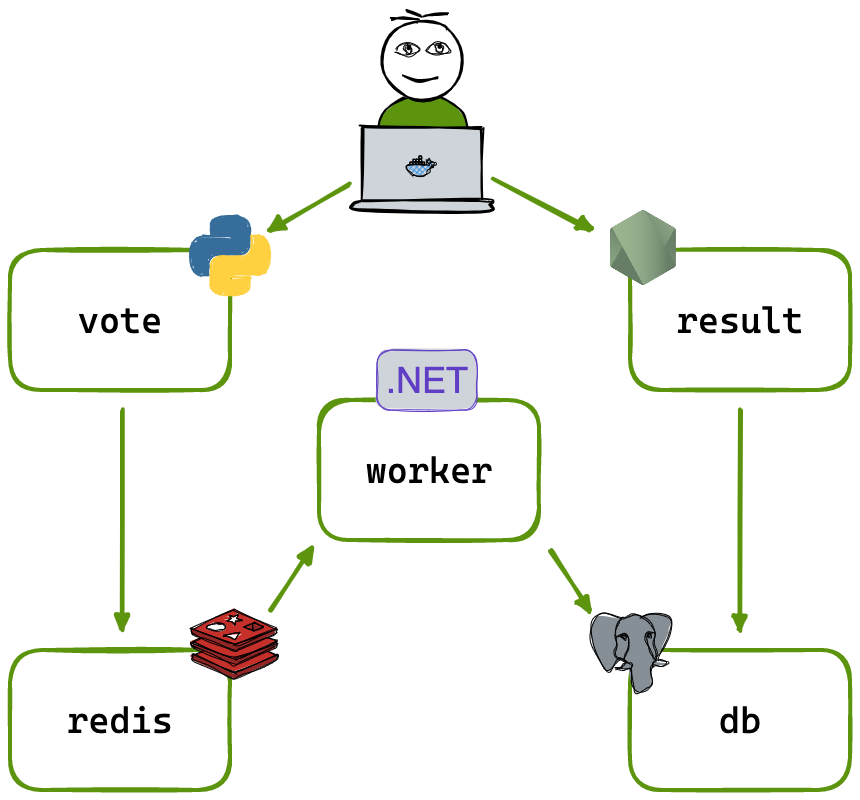
Using this architecture, we will develop three separate build pipelines for each microservice. This approach will allow for the independent construction of applications, which aligns with the primary goal of microservice architecture.
Pipeline for Result Microservice
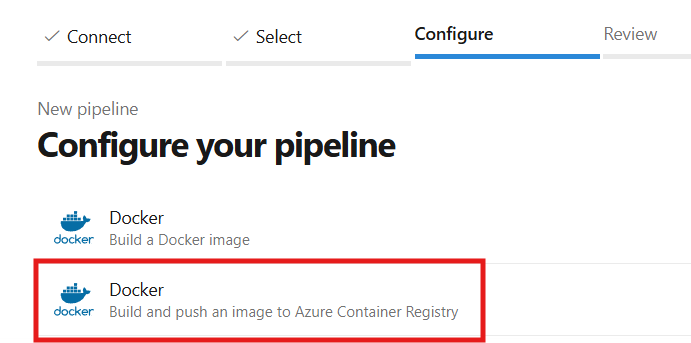
In the pipeline section, we’ll first connect the pipeline with Azure Repos Git followed by selecting the repository i.e. voting-application followed by the configure section where we can select a template for our application to get started with. Our application is a containerized application that needs to be integrated with the container registry, we’ll select the below template:
# Docker
# Build and push an image to Azure Container Registry
# https://docs.microsoft.com/azure/devops/pipelines/languages/docker

trigger:
  paths:
    include:
      - result/*

resources:
- repo: self

variables:
  # Container registry service connection established during pipeline creation
  dockerRegistryServiceConnection: 'XXXXXX-XXXXX-XXXXXXX'
  imageRepository: 'resultapp'                # only for result app
  containerRegistry: 'votingappacr001.azurecr.io'
  dockerfilePath: '$(Build.SourcesDirectory)/result/Dockerfile'   # Docker file path for result app
  tag: '$(Build.BuildId)'

  # Agent VM image name
pool:
  name: azureagent

stages:
- stage: ImageBuild
  displayName: Build Result Image
  jobs:
  - job: Build
    displayName: Build
    steps:
    - task: Docker@2
      displayName: Build Image
      inputs:
        containerRegistry: '$(dockerRegistryServiceConnection)'
        repository: '$(imageRepository)'
        command: 'build'
        Dockerfile: 'result/Dockerfile'
        tags: '$(tag)'
- stage: ImagePush
  displayName: Push Result Image
  jobs:
    - job: Push
      displayName: Push Image
      steps:
      - task: Docker@2
        displayName: Push Image
        inputs:
          containerRegistry: '$(dockerRegistryServiceConnection)'
          repository: '$(imageRepository)'
          command: 'push'
          Dockerfile: 'result/Dockerfile'
          tags: '$(tag)'
Pipeline for Vote Microservice
With this pipeline, we’ll follow a similar approach for building and pushing the vote microservice docker image to ACR. Here we have implemented a path filter for triggering the pipeline which means, the pipeline will trigger whenever there are any changes made to the vote microservice directory. The same approach has been implemented for the result microservice above as well
# Docker
# Build and push an image to Azure Container Registry
# https://docs.microsoft.com/azure/devops/pipelines/languages/docker

trigger:
  paths:
    include:
      - vote/*

resources:
- repo: self

variables:
  # Container registry service connection established during pipeline creation
  dockerRegistryServiceConnection: 'XXXXXX-XXXXXXXX-XXXXXXXXXX'
  imageRepository: 'votingapplication'
  containerRegistry: 'votingappacr002.azurecr.io'
  dockerfilePath: '$(Build.SourcesDirectory)/vote/Dockerfile'
  tag: '$(Build.BuildId)'

  # Agent VM image name
pool:
  name: azureagent  # Self-hosted agent

stages:
- stage: ImageBuild
  displayName: Build Vote Image
  jobs:
  - job: Build
    displayName: Build
    steps:
    - task: Docker@2
      displayName: Build
      inputs:
        containerRegistry: '$(dockerRegistryServiceConnection)'
        repository: '$(imageRepository)'
        command: 'build'
        Dockerfile: 'vote/Dockerfile'
        tags: '$(tag)'
- stage: ImagePush
  displayName: Push Vote Image
  jobs:
    - job: Push
      displayName: Push Image
      steps:
        - task: Docker@2
          inputs:
            containerRegistry: '$(dockerRegistryServiceConnection)'
            repository: '$(imageRepository)'
            command: 'push'
            Dockerfile: 'vote/Dockerfile'
            tags: '$(tag)'
Pipeline for Worker Microservice
# Docker
# Build and push an image to Azure Container Registry
# https://docs.microsoft.com/azure/devops/pipelines/languages/docker

trigger:
  paths:
    include:
      - worker/*

resources:
- repo: self

variables:
  # Container registry service connection established during pipeline creation
  dockerRegistryServiceConnection: 'XXXXXXX-XXXXXXXXXXXXXXX-XXXXXXXX'
  imageRepository: 'workerapplication'
  containerRegistry: 'votingappacr003.azurecr.io'
  dockerfilePath: '$(Build.SourcesDirectory)/worker/Dockerfile'
  tag: '$(Build.BuildId)'

  # Self-hosted agent
pool:
  name: azureagent

stages:
- stage: Build
  displayName: Build Worker Image
  jobs:
  - job: Build
    displayName: Build Docker Image
    steps:
    - task: Docker@2
      displayName: Build Image
      inputs:
        containerRegistry: '$(dockerRegistryServiceConnection)'
        repository: '$(imageRepository)'
        command: 'build'
        Dockerfile: 'worker/Dockerfile'
        tags: '$(tag)'

- stage: Push
  displayName: Push Worker Image
  jobs:
  - job: Push
    displayName: Push Docker Image
    steps:
    - task: Docker@2
      displayName: Push Image
      inputs:
        containerRegistry: '$(dockerRegistryServiceConnection)'
        repository: '$(imageRepository)'
        command: 'push'
        tags: '$(tag)'
Docker files for Microservices
NOTE: These docker files are provided by the developer of the application, we have just used them here for building the application and demonstrating CI/CD.
Docker file for Result Service
The result application is developed on NodeJS so the following will be the docker file based on the node-18 image
FROM node:18-slim

# add curl for healthcheck
RUN apt-get update && \
    apt-get install -y --no-install-recommends curl tini && \
    rm -rf /var/lib/apt/lists/*

WORKDIR /usr/local/app

# have nodemon available for local dev use (file watching)
RUN npm install -g nodemon

COPY package*.json ./

RUN npm ci && \
 npm cache clean --force && \
 mv /usr/local/app/node_modules /node_modules

COPY . .

ENV PORT=80
EXPOSE 80

ENTRYPOINT ["/usr/bin/tini", "--"]
CMD ["node", "server.js"]
Docker file for Vote Service
The voting service is based on Python so the base image is Python 3.11
# base defines a base stage that uses the official python runtime base image
FROM python:3.11-slim AS base

# Add curl for healthcheck
RUN apt-get update && \
    apt-get install -y --no-install-recommends curl && \
    rm -rf /var/lib/apt/lists/*

# Set the application directory
WORKDIR /usr/local/app

# Install our requirements.txt
COPY requirements.txt ./requirements.txt
RUN pip install --no-cache-dir -r requirements.txt

# dev defines a stage for development, where it'll watch for filesystem changes
FROM base AS dev
RUN pip install watchdog
ENV FLASK_ENV=development
CMD ["python", "app.py"]

# final defines the stage that will bundle the application for production
FROM base AS final

# Copy our code from the current folder to the working directory inside the container
COPY . .

# Make port 80 available for links and/or publish
EXPOSE 80

# Define our command to be run when launching the container
CMD ["gunicorn", "app:app", "-b", "0.0.0.0:80", "--log-file", "-", "--access-logfile", "-", "--workers", "4", "--keep-alive", "0"]
Docker file for Worker Service
The worker service is based on .NET so the .NET SDK has been taken as base image from Microsoft for this application
# because of dotnet, we always build on amd64, and target platforms in cli
# dotnet doesn't support QEMU for building or running.
# (errors common in arm/v7 32bit) https://github.com/dotnet/dotnet-docker/issues/1537
# https://hub.docker.com/_/microsoft-dotnet
# hadolint ignore=DL3029
# to build for a different platform than your host, use --platform=<platform>
# for example, if you were on Intel (amd64) and wanted to build for ARM, you would use:
# docker buildx build --platform "linux/arm64/v8" .

# build compiles the program for the builder's local platform
FROM --platform=linux mcr.microsoft.com/dotnet/sdk:7.0 AS build
ARG TARGETPLATFORM
ARG TARGETARCH
ARG BUILDPLATFORM
RUN echo "I am running on $BUILDPLATFORM, building for $TARGETPLATFORM"

WORKDIR /source
COPY *.csproj .
RUN dotnet restore

COPY . .
RUN dotnet publish -c release -o /app --self-contained false --no-restore

# app image
FROM mcr.microsoft.com/dotnet/runtime:7.0
WORKDIR /app
COPY --from=build /app .
ENTRYPOINT ["dotnet", "Worker.dll"]
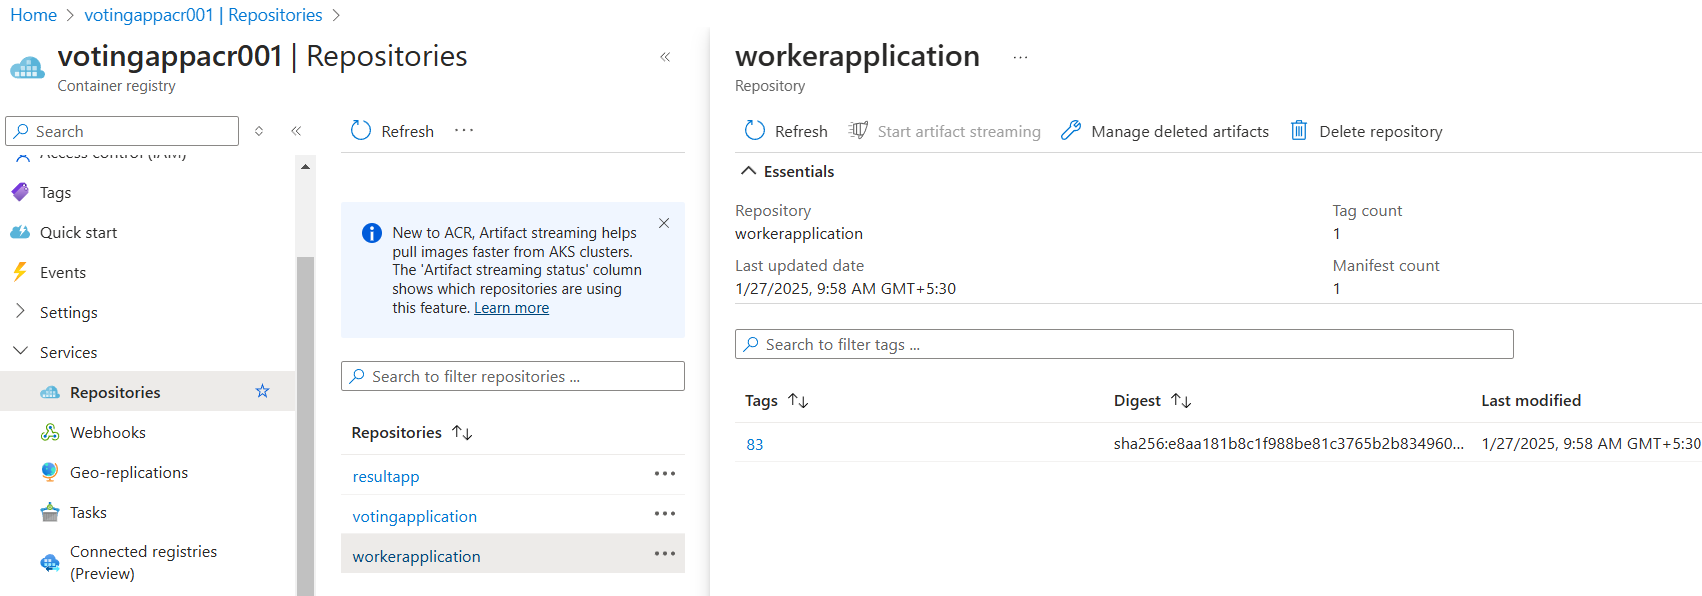
With this, the build process is concluded and the image is stored in ACR as shown below
Continuous Delivery (GitOps)
The continuous delivery part will be taken care of by the tool called ArgoCD which will continuously look for the changes in Kubernetes manifests. Once any changes are found, it will deploy the new build to AKS.
NOTE: In the project, we have deployment files, service files, DB deployment, and DB. service files, which will be updated with the latest docker image using a shell script. This shell script will be part of our CI pipeline in Azure DevOps, which will be executed after the push stage. It will fetch the image details and append them to the Kubernetes manifest files.
Why GitOps
GitOps takes care of continuous reconciliation, which keeps tracking the changes between the K8S cluster and K8S manifest files. We can put all the K8S-related files in GitOps and let them be monitored by GitOps so that we’ll have flawless cluster management. It also makes sure manifest drifts are automatically detected and fixed.
To achieve this entire delivery process we have to follow the following points:
Create the AKS cluster and log into it
Install ArgoCD side AKS cluster
Configure ArgoCD within the K8S cluster
Prepare the shell script to update the repository with the latest image pushed to ACR
AKS Cluster Creation and login
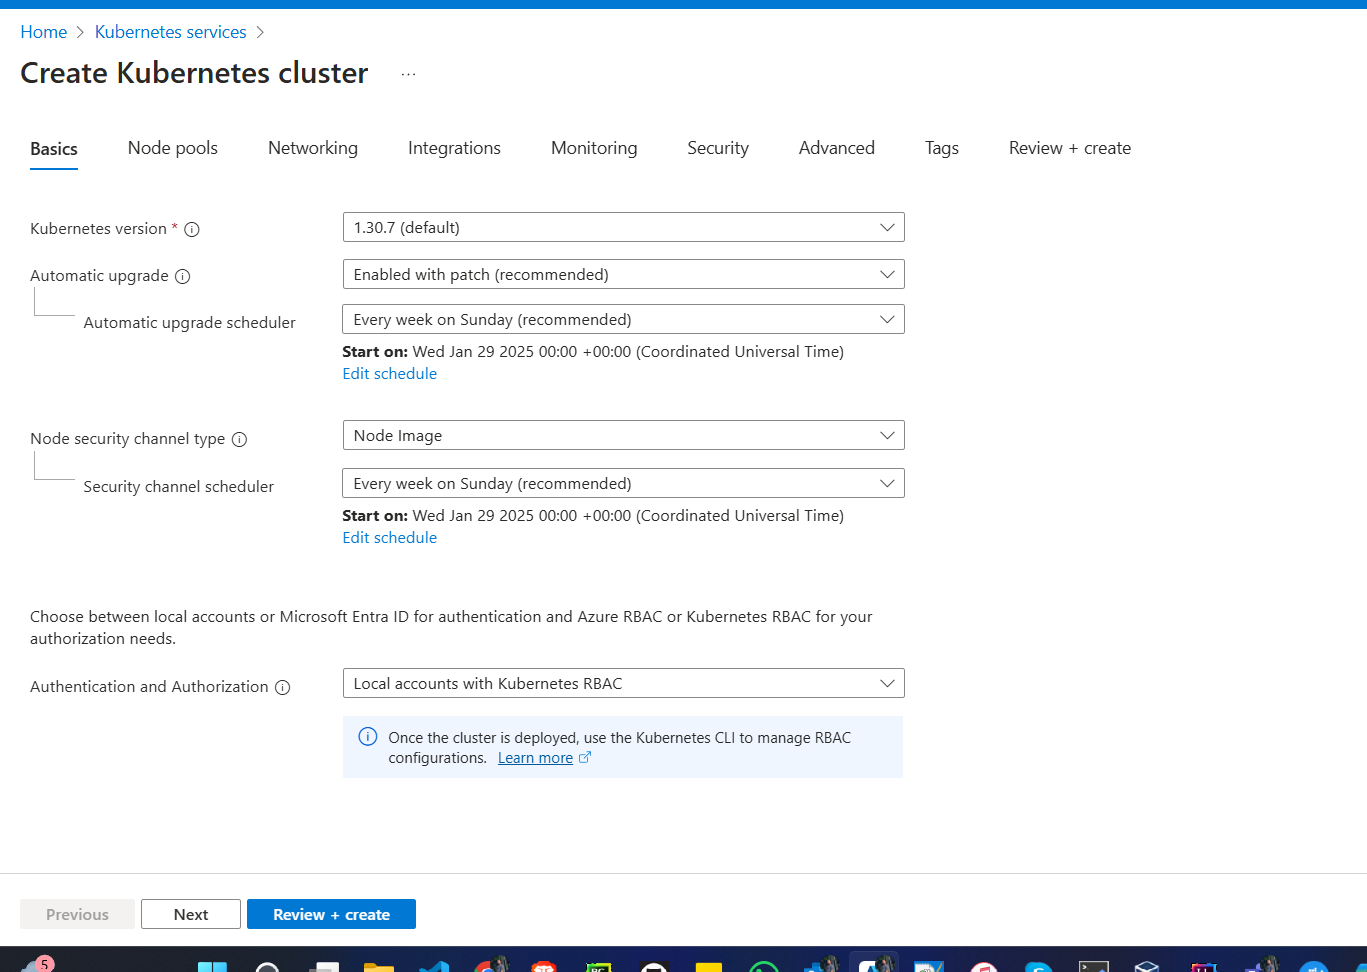
The cluster has been created:

Log into the cluster
az aks get-credentials --resource-group <resource-group-name> --name <aks-cluster-name>We can use the above command to log into the cluster and get access via CLI. Once done, the aks cluster will be now merged with our local machine and we can manage the cluster from local machine itself

ArgoCD Installation in AKS Cluster
Installing ArgoCD is pretty straight forward just got to their official documentation or just run the below commands
kubectl create namespace argocdkubectl apply -n argocd -fhttps://raw.githubusercontent.com/argoproj/argo-cd/stable/manifests/install.yaml
Configure ArgoCD

You can post installation the argocd pods are now running.
Now to configure argocd we have to take the following steps:
Login to argoc:
To login to argocd, first get the secret values with following commands
kubectl get secrets -n argocd
kubectl edit secret argocd-initial-admin-secret -n argocdwhen kubectl edit command is executed it will open the secrets as follows which will be in a base64 encoded format

And to decode this you can use the following command
echo <secret values> | base64 -d
Now we have the admin secret value which will allow us to access the ArgoCD UI
Access ArgoCD on Browser
Now, to access ArgoCD on the browser, we need to expose the ArgoCD in LoadBalancer mode.
Get the service details:
kubectl get svc -n argocdand below is the argocd server that we need to expose with LoadBalancer which is currently in Cluster mode
Now to get it exposed on NodePort we have to edit the service file and change the service type from ClusterIP to LoadBalancer

The above type is now modified to LoadBalancer
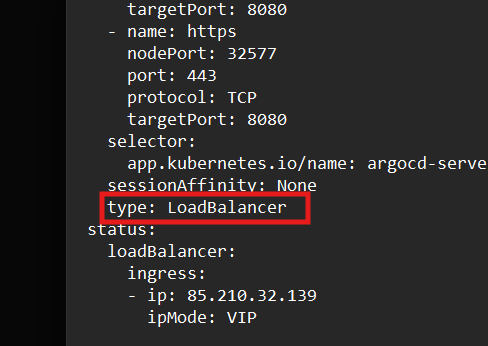
Now you can see it is changed to LoadBalancer and we can you external IP to directly access ArgoCD

Now we are able to access the ArgoCD
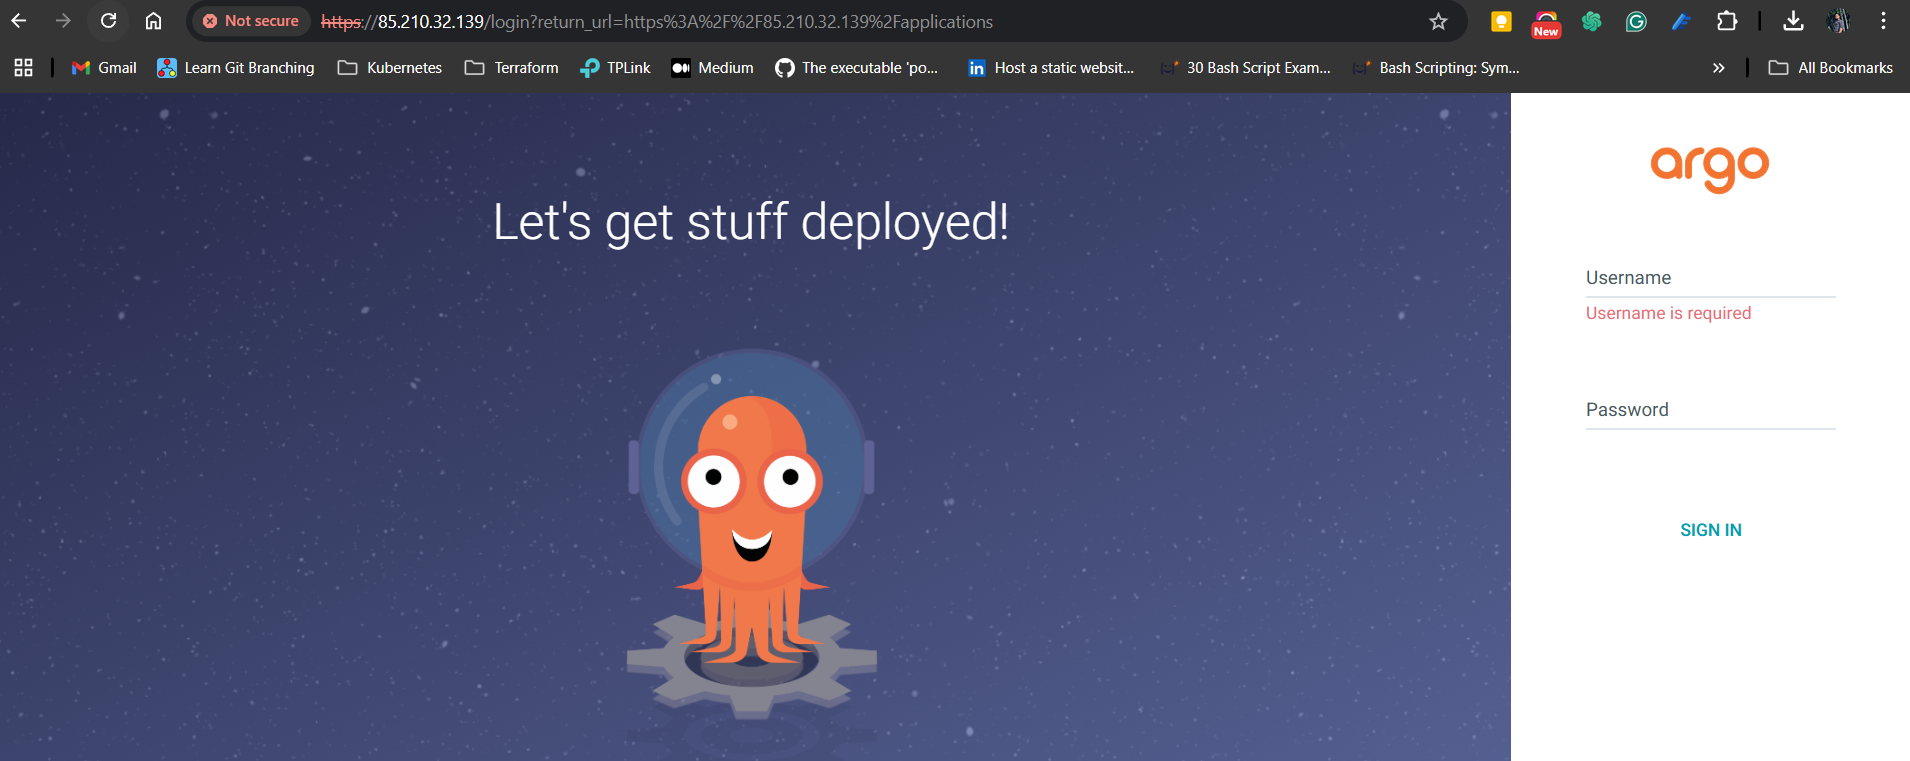
We can log in with the username as admin and password as the decoded secret.
Connecting ArgoCD to Azure Repo
ArgoCD needs to have access to the Azure Repos where the K8S manifests files are present then only, it will be able to access the manifests. To establish the connection we need to get the access token with only Read Permission as the ArgoCD only needs to read the manifests and I already have an access token ready with me that I can reuse.
Once the token is ready, move to Settings —> Repository in ArgoCD and click on Connect Repo

Fill in the necessary repository details to clone the repository. Here I have replaced Azure DevOps Organization Name with the Access Token
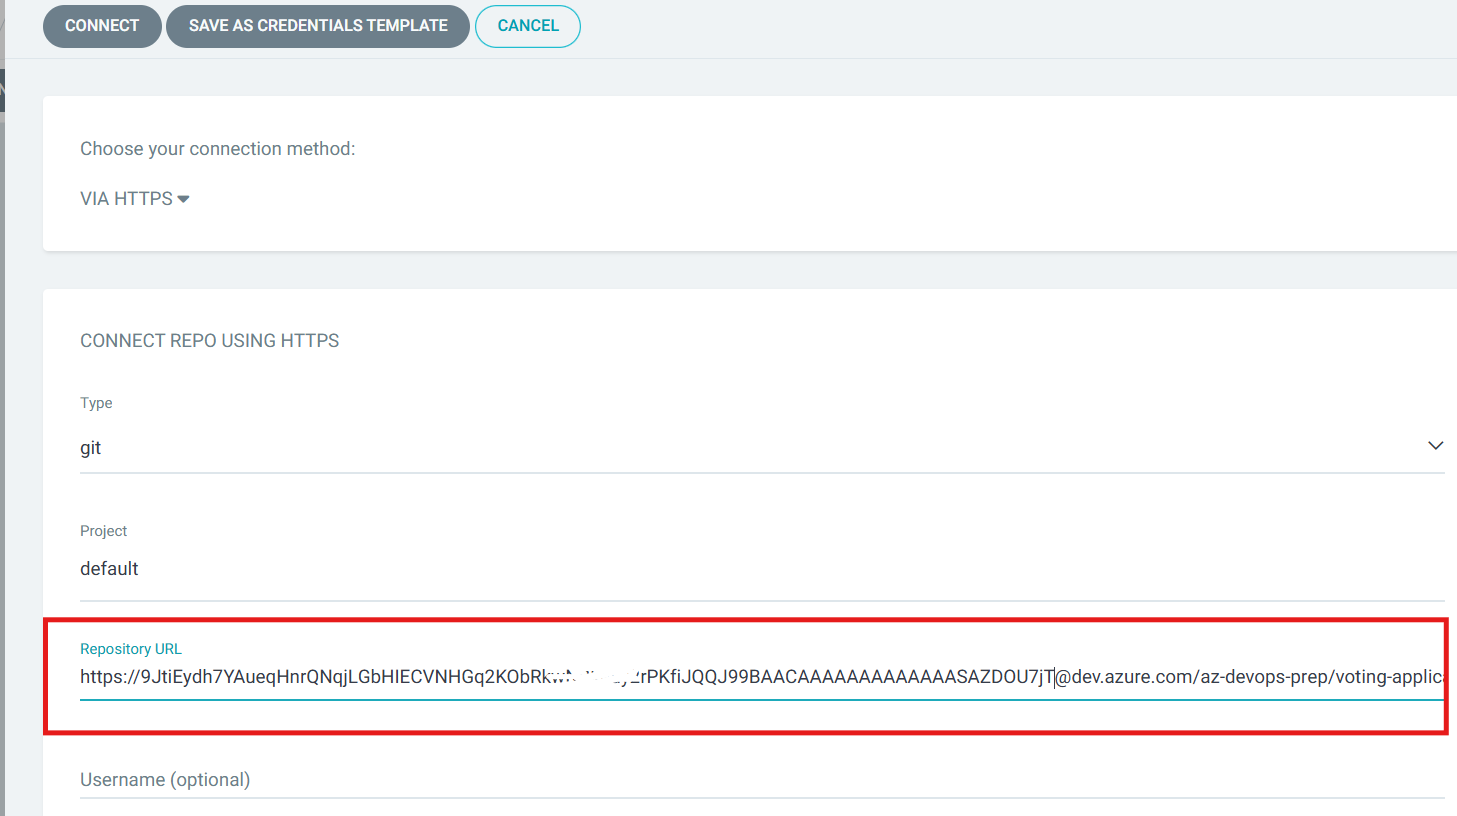
And now, ArgoCD is connected to my Azure Repo

Adding Manifests to ArgoCD
Now to let the ArgoCD know where to pick the deployment and service manifests click on Applications —> Create Application and follow the pages
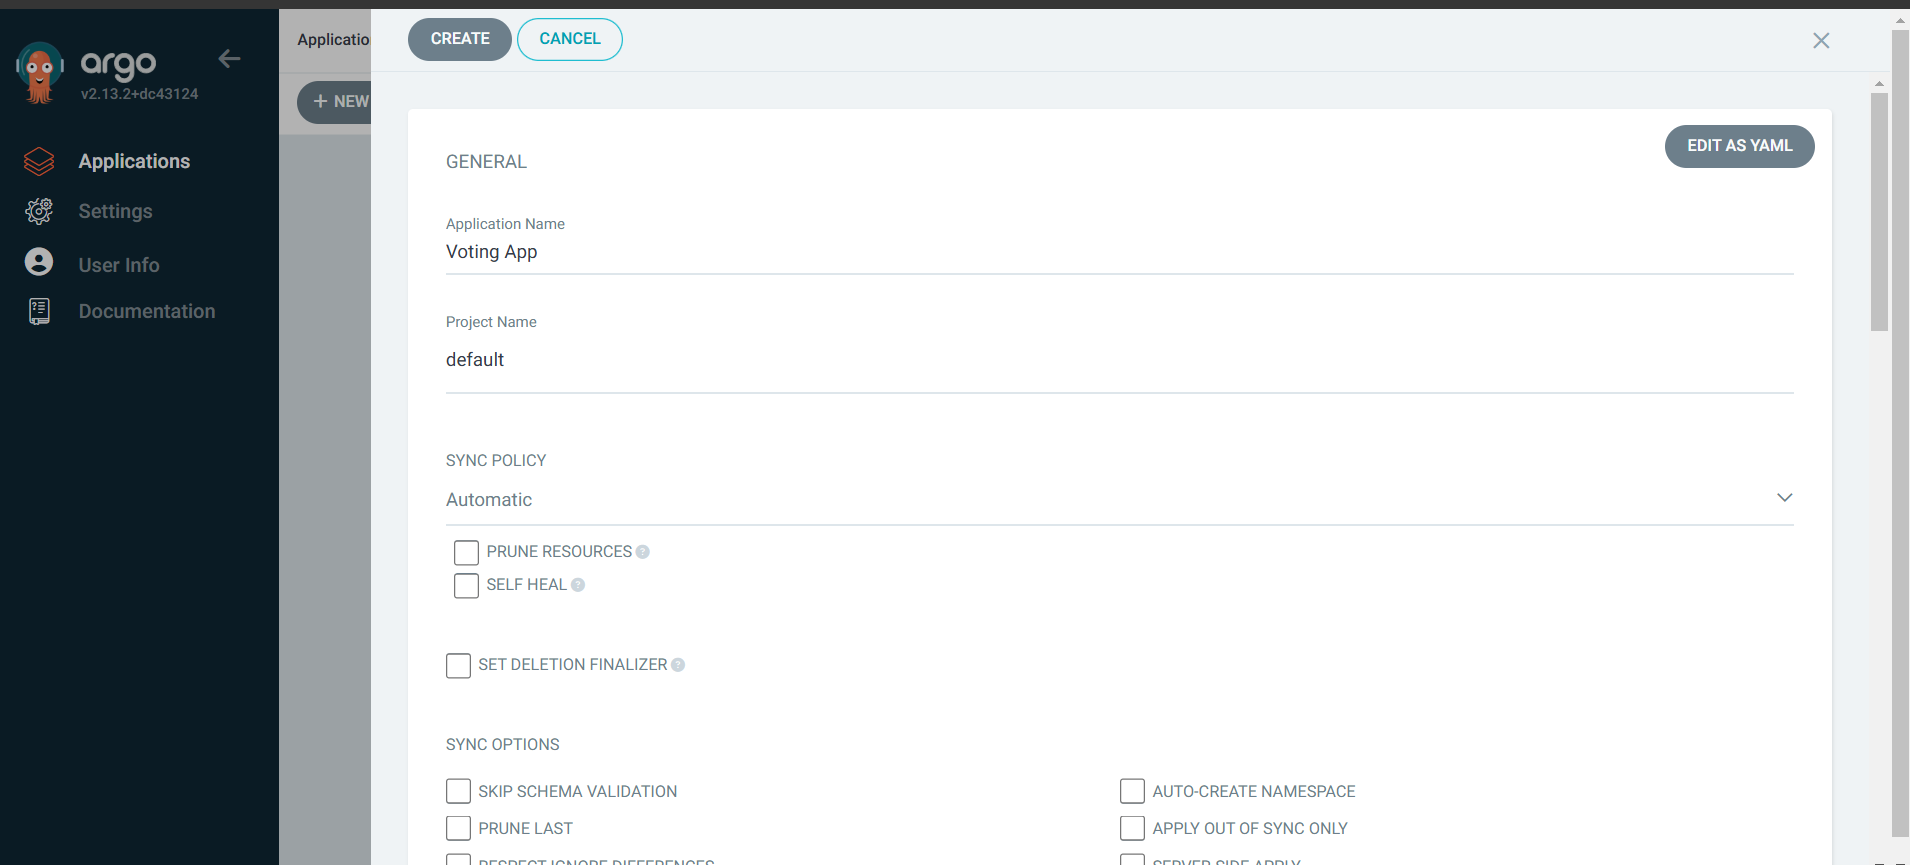
Below is the important section where we are letting argoCD know to which directory to look for changes inside the repository in our case it’s K8S Specification as shown below and click on Create.
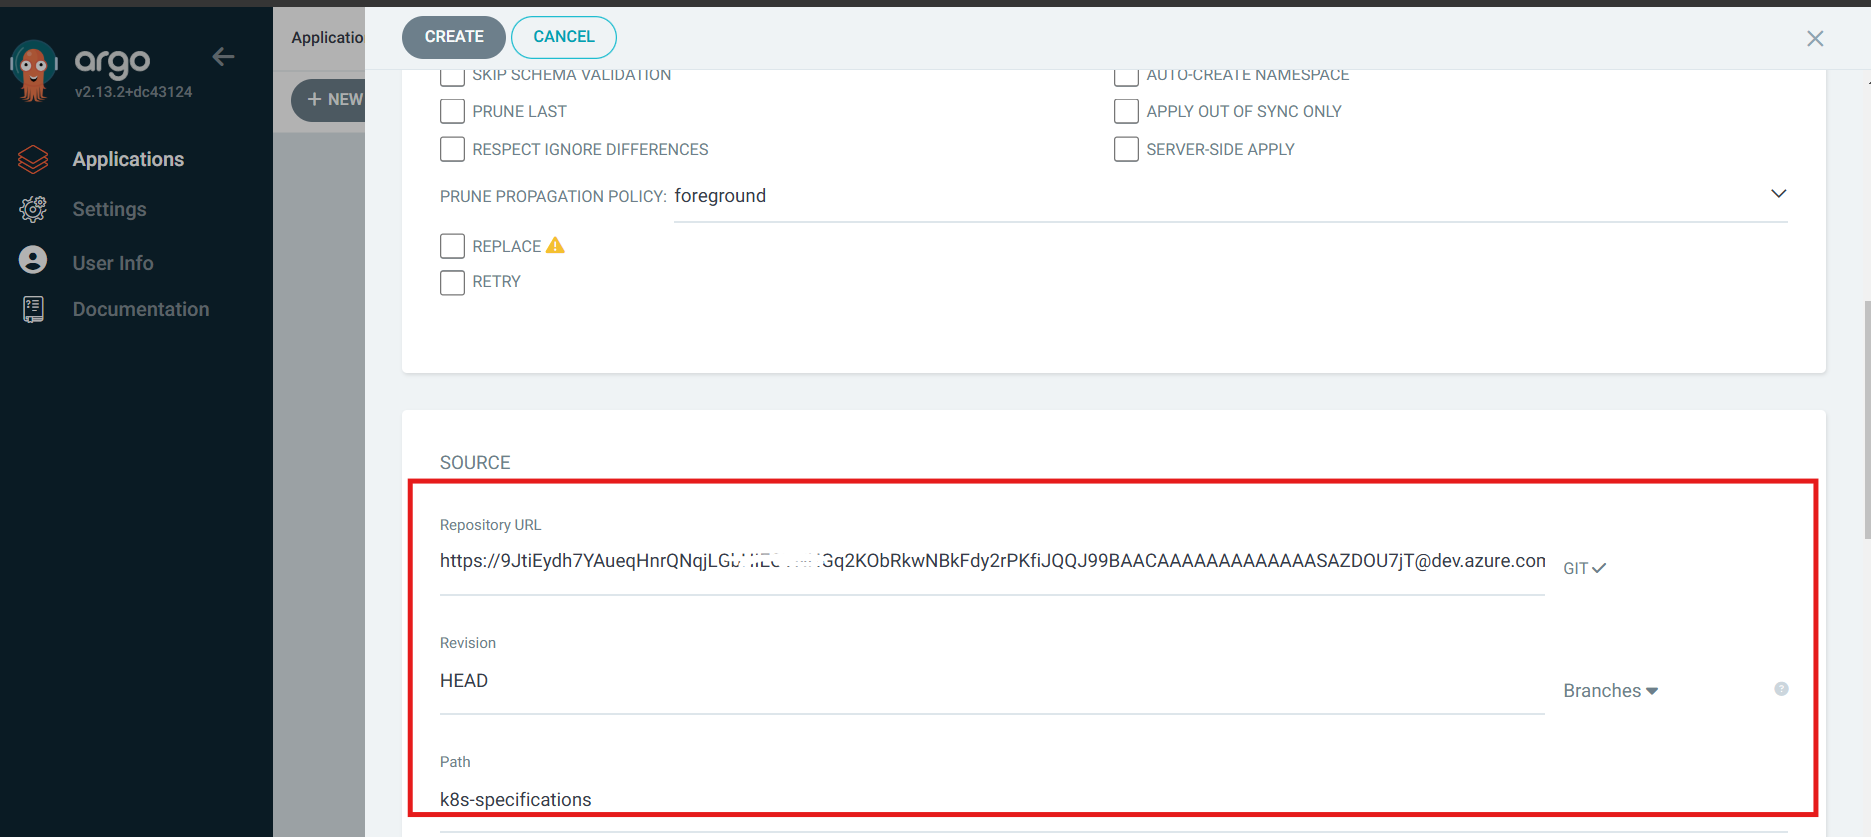
Now finally ArgoCD is configured successfully and it is has synced the deployment files
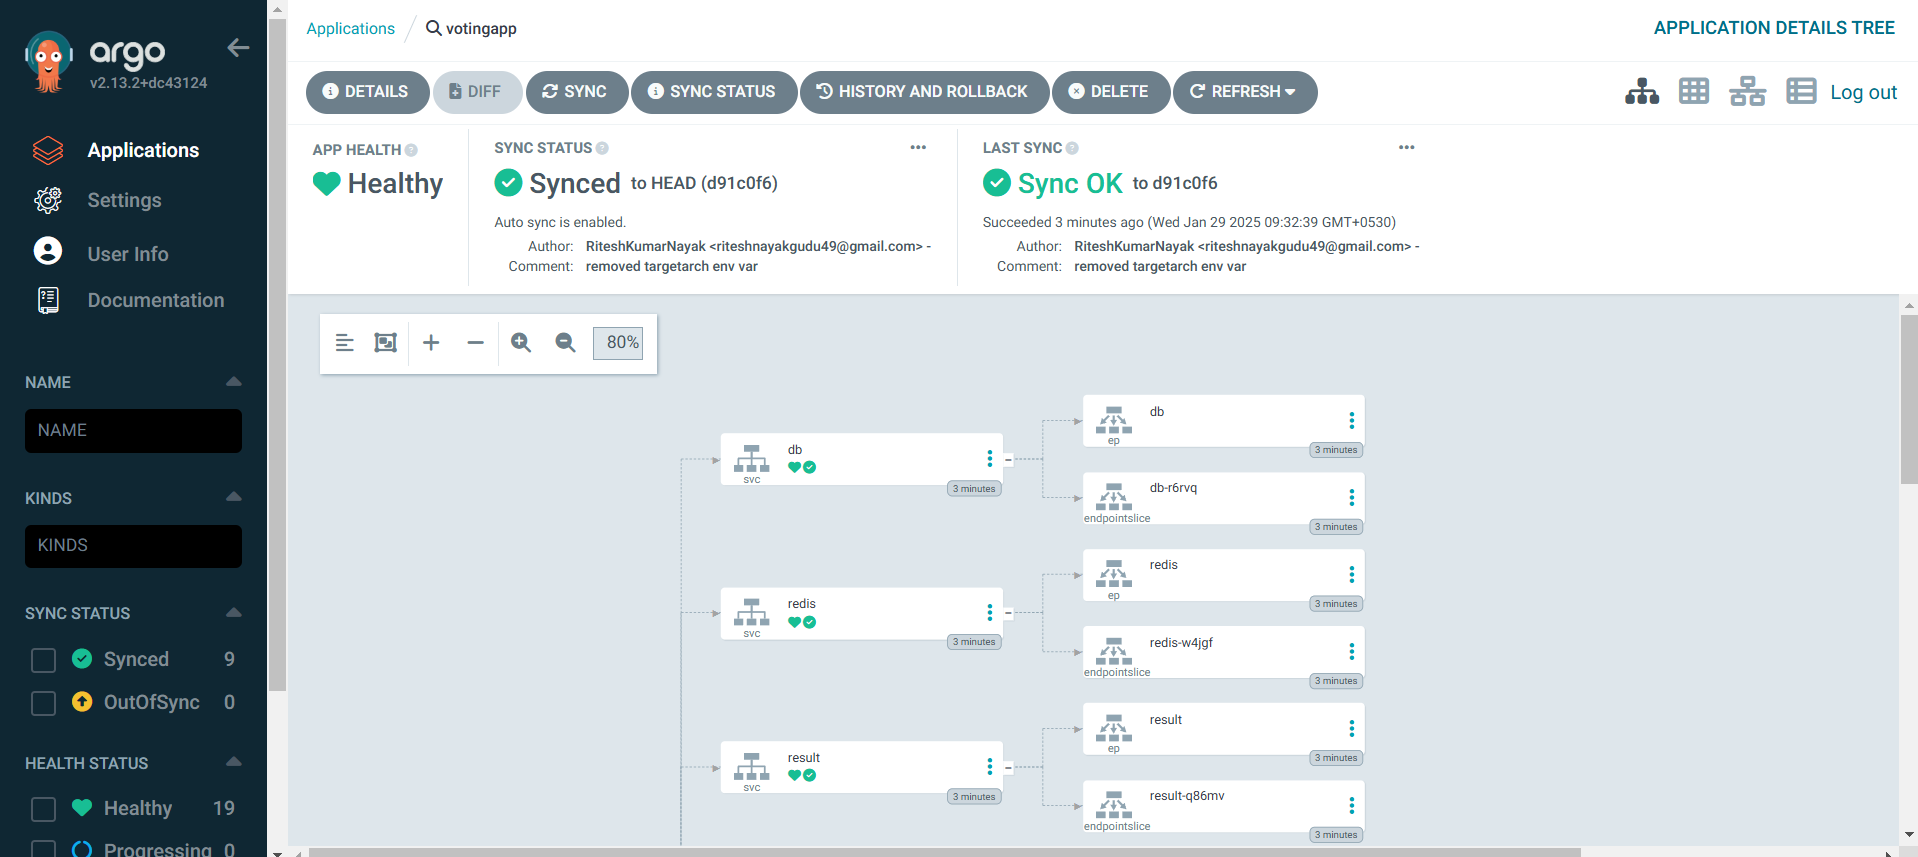
From now on, if there are any changes made to K8S Specification directory, ArgoCD will detect the changes and update the K8S cluster.
Establish Connectivity between Deployment manifests and ACR
This step is necessary because K8S deployment should be able to fetch the image from our Private Registry. Below is a kubectl command which will create a secret in Kubernetes that we can refer to in you deployment manifests
kubectl create secret docker-registry <secret name> \
    --namespace default \
    --docker-server=<RegistryName>.azurecr.io \
    --docker-username=<User name> \
    --docker-password=<Registry Password>
Below is how the secret is referred to in deployment manifests
    spec:
      containers:
      - image: votingappacr001/votingapplication:89
        name: vote
        ports:
        - containerPort: 80
          name: vote
      ImagePullSecrets:
        - name: acrsecret # this is the secret name which is created above
Integrating Azure DevOps for Auto-updating K8S Manifests
We’ll be adding another stage to the Azure CI Pipeline to achieve this which will execute a shell script to further update the deployment files. This stage will be created in all 3 pipelines for respective services
- stage: Update
  displayName: Update vote app Deployment Manifests
  jobs:
    - job: Update
      displayName: Update vote app Deployment Manifests
      steps:
      - task: ShellScript@2
        inputs:
          scriptPath: 'scripts/updatek8manifests.sh'
          args: 'vote $(imageRepository) $(tag)'
        displayName: Update vote app Deployment Manifests
K8S Deployment Manifest update Script
#!/bin/bash

set -x

# Set the repository URL
REPO_URL="https://azuredevopsprep@dev.azure.com/az-devops-prep/voting-application/_git/voting-application"

# Clone the git repository into the /tmp directory
git clone "$REPO_URL" /tmp/temp_repo

# Navigate into the cloned repository directory
cd /tmp/temp_repo

# Make changes to the Kubernetes manifest file(s)
# For example, let's say you want to change the image tag in a deployment.yaml file
sed -i "s|image:.*|image: votingappacr001.azurecr.io/$2:$3|g" k8s-specifications/$1-deployment.yaml

# Add the modified files
git add .

# Commit the changes
git commit -m "Update Kubernetes manifest"

# Push the changes back to the repository
git push

# Cleanup: remove the temporary directory
rm -rf /tmp/temp_repo
Here $1, $2, and $3 represent the arguments passed in the Update stage in the pipeline i.e. args: 'vote $(imageRepository) $(tag)' respectively.
This script will update the deployment manifests with the latest image tags after the image is pushed to ACR and when the change is detected by ArgoCD, it will re-deploy the pods to containers with the latest image.
Conclusion
With this, we have implemented Continuous Integration and Continuous Delivery for 3 microservices along with GitOps implementation via ArgoCD
Subscribe to my newsletter
Read articles from Ritesh Kumar Nayak directly inside your inbox. Subscribe to the newsletter, and don't miss out.
Written by

Ritesh Kumar Nayak
Ritesh Kumar Nayak
Passionate about helping organizations build scalable infrastructure and DevOps solutions with cloud technologies. Experienced in designing robust systems, automating processes, and driving efficiency through innovative cloud solutions. Advocate for best practices in DevOps and cloud computing, committed to enabling teams to achieve their full potential.