How to Use Prisma as a Layer in AWS Lambda with AWS SAM
 Julissa Rodriguez
Hello everyone!
Are you using AWS SAM and haven't tried Prisma yet? After working with Prisma for a while, I can't imagine going back to working without its type safety. If you're interested in adding it to your Lambda functions, I'll show you how to integrate it using layers - it's simpler than you might think.
To begin, let's look at what we'll learn in this post:
What is AWS SAM?
What is AWS Lambda?
What is Prisma?
What is a Layer?
Why use Prisma as a layer?
What is AWS SAM?
Looking at AWS documentation, we'll find that AWS SAM is a framework for building serverless applications. It supports various programming languages and significantly simplifies the serverless development process.
What is AWS Lambda?
In AWS documentation, it's described as a serverless computing service that runs code in response to various events. It's perfect for APIs, data processing, and task automation.
What is Prisma?
It's an open-source ORM that has 3 fundamental parts:
Prisma Client (auto-generated for Node.js and TypeScript)
Prisma Migrate (migration system)
Prisma Studio (GUI for viewing and editing data in your database)
What is a Layer?
Layers are a means by which we can optimize our AWS Lambda functions. It's an excellent strategy for sharing code, libraries, and other resources across lambda functions.
Why use Prisma as a layer?
Using Prisma as a layer in AWS Lambda offers several key benefits:
Resource optimization: By sharing the Prisma library across multiple functions, you significantly reduce the size of each individual function.
Consistency: You ensure that all your functions use the same version of Prisma and the same configuration.
Maintainability: Prisma updates can be managed centrally in the layer.
Better performance: Being in a layer, Prisma can be cached between function invocations.
What do we need to achieve this?
To reproduce this, we need:
An AWS account
A basic project for testing
AWS CLI installed and configured
Node.js and npm/yarn installed
Let's Get Started
Initial AWS Configuration
First, let's create a new profile on our machine (if you already have one, you can skip this step). Using AWS CLI, we'll use the following command, which will ask for your AWS Secret Key, AWS Secret Access Key, Default AWS Region, and output format.
aws configure --profile codeanding
Project Structure
Once our AWS profile is configured, the next step will be to start the project with a simple structure:
prisma-lambda-layer/
├── layers/          # where we'll include our new layer
├── scripts/         # where we'll include deployment scripts
└── src/            # where we'll include handlers to use prisma
    ├── handlers/
    └── services/
Installing Dependencies
Let's install the necessary dependencies for the project:
| Dependencies | Development Dependencies |
| @prisma/client | @types/aws-lambda |
| aws-lambda | @types/node |
| prisma | |
| typescript |
Prisma Configuration
When we add Prisma, it will generate a new folder called prisma with a schema.prisma file inside. Here are the changes we'll make:
generator client {
  provider      = "prisma-client-js"
  binaryTargets = ["native", "rhel-openssl-1.0.x", "linux-arm64-openssl-1.0.x"]
}

datasource db {
  provider = "postgresql"
  url      = env("DATABASE_URL")
}

model Country {
  id        Int      @id @default(autoincrement())
  name      String   @unique
  dishes    Dish[]
  createdAt DateTime @default(now())
  updatedAt DateTime @updatedAt
}

model Dish {
  id          Int          @id @default(autoincrement())
  name        String
  description String
  countryId   Int
  country     Country      @relation(fields: [countryId], references: [id])
  ingredients Ingredient[]
  createdAt   DateTime     @default(now())
  updatedAt   DateTime     @updatedAt
}

model Ingredient {
  id        Int      @id @default(autoincrement())
  name      String
  dishes    Dish[]
  createdAt DateTime @default(now())
  updatedAt DateTime @updatedAt
}
Services Implementation
In our services folder, we'll add a class to expose Prisma:
import { PrismaClient } from '@prisma/client';

let prisma: PrismaClient | undefined;

export function getPrismaClient(): PrismaClient {
    if (!prisma) {
        try {
            prisma = new PrismaClient({
                log: ['query', 'error', 'warn'],
                errorFormat: 'minimal',
            });
        } catch (error) {
            console.error('Error initializing Prisma:', error);
            throw error;
        }
    }
    return prisma;
}
Next, we'll add a class to handle operations related to the country model:
import { getPrismaClient } from './prisma';

export class CountryService {
    async findAll() {
        return getPrismaClient().country.findMany();
    }

    async findById(id: number) {
        return getPrismaClient().country.findUnique({ where: { id } });
    }

    async create(data: { name: string }) {
        return getPrismaClient().country.create({ data });
    }

    async update(id: number, data: { name: string }) {
        return getPrismaClient().country.update({ where: { id }, data });
    }

    async delete(id: number) {
        return getPrismaClient().country.delete({ where: { id } });
    }
}
Handlers Implementation
In the handlers folder, we'll add the class that exposes the country-related handlers:
import { APIGatewayProxyEvent, APIGatewayProxyResult } from 'aws-lambda';
import {
    badRequest,
    formatHttpResponse,
    internalServerError,
    notFound,
} from '../helper/response';
import {
    CreateCountryDTO,
    UpdateCountryDTO,
} from '../interfaces/country.interface';
import { CountryService } from '../services/country';

export class CountriesHandler {
    static async getAllCountries(
        event: APIGatewayProxyEvent
    ): Promise<APIGatewayProxyResult> {
        try {
            const service = new CountryService();
            const countries = await service.findAll();
            return formatHttpResponse(200, countries, event);
        } catch (error) {
            console.error(error);
            return internalServerError(event);
        }
    }

    static async getCountryById(
        event: APIGatewayProxyEvent
    ): Promise<APIGatewayProxyResult> {
        try {
            const service = new CountryService();

            const id = parseInt(event.pathParameters?.id || '');
            if (isNaN(id)) return badRequest(event, 'Invalid ID');

            const country = await service.findById(id);
            return country
                ? formatHttpResponse(200, country, event)
                : notFound(event, 'Country not found');
        } catch (error) {
            return internalServerError(event);
        }
    }

    static async createCountry(
        event: APIGatewayProxyEvent
    ): Promise<APIGatewayProxyResult> {
        try {
            const service = new CountryService();

            const body: CreateCountryDTO = JSON.parse(event.body || '{}');
            if (!body.name) return badRequest(event, 'Name is required');

            const newCountry = await service.create({ name: body.name });
            return formatHttpResponse(201, newCountry, event);
        } catch (error) {
            return internalServerError(event);
        }
    }

    static async updateCountry(
        event: APIGatewayProxyEvent
    ): Promise<APIGatewayProxyResult> {
        try {
            const service = new CountryService();

            const id = parseInt(event.pathParameters?.id || '');
            const body: UpdateCountryDTO = JSON.parse(event.body || '{}');

            if (isNaN(id) || !body.name) return badRequest(event, 'Invalid data');

            const updatedCountry = await service.update(id, { name: body.name });
            return formatHttpResponse(200, updatedCountry, event);
        } catch (error) {
            return internalServerError(event);
        }
    }

    static async deleteCountry(
        event: APIGatewayProxyEvent
    ): Promise<APIGatewayProxyResult> {
        try {
            const service = new CountryService();

            const id = parseInt(event.pathParameters?.id || '');
            if (isNaN(id)) return badRequest(event, 'Invalid ID');

            await service.delete(id);
            return formatHttpResponse(204, {}, event);
        } catch (error) {
            return internalServerError(event);
        }
    }
}
Deployment Scripts
In the scripts folder, we'll add the following files to facilitate deployment:
prisma-layer.sh:
#!/bin/sh

set -e
LAYERS_DIR="layers"
PRISMA_LAYER="$LAYERS_DIR/prisma-layer"
NODEJS_PATH="$PRISMA_LAYER/nodejs"

echo "🧹 Cleaning previous layer directory..."
rm -rf "$PRISMA_LAYER"
mkdir -p "$NODEJS_PATH/prisma"

echo "📋 Creating specific package.json for layer..."
cat > "$NODEJS_PATH/package.json" << EOF
{
  "name": "prisma-layer",
  "version": "1.0.0",
  "dependencies": {
    "@prisma/client": "6.3.0"
  },
  "devDependencies": {
    "prisma": "6.3.0"
  }
}
EOF

echo "📝 Copying schema.prisma to layer..."
cp prisma/schema.prisma "$NODEJS_PATH/prisma/"

echo "📦 Installing dependencies in layer..."
cd "$NODEJS_PATH"

# install dependencies
yarn install
echo "⚙️ Generating Prisma client in layer..."
NODE_ENV=development yarn prisma generate

echo "🧹 Cleaning devDependencies..."
yarn install --production

echo "📁 Verifying directory structure..."
mkdir -p node_modules/.prisma/client

echo "🗜️ Creating layer ZIP file..."
cd ..
zip -r "../prisma-layer.zip" nodejs/

echo "↩️ Returning to main directory..."
cd ../../

echo "✅ Prisma layer successfully prepared"
deploy.sh:
#!/bin/sh

set -e  # Stop script if there's an error

echo "🧹 Cleaning previous directories..."
rm -rf dist
rm -rf layers/prisma-layer/nodejs/node_modules

echo "📦 Installing project dependencies..."
yarn install

echo "🔄 Running prisma generate for main project..."
npx prisma generate

echo "🔄 Preparing Layers..."
sh $(dirname "$0")/prisma-layers.sh

echo "🔨 Compiling TypeScript code..."
yarn build

echo "📦 Building with AWS SAM..."
sam build --use-container

echo "🚀 Deploying to AWS..."
sam deploy --profile codeanding \
  --template-file template.yml \
  --s3-bucket codeanding \
  --stack-name sample-api \
  --capabilities CAPABILITY_IAM \
  --no-confirm-changeset

echo "✅ Deployment successfully completed."
Required Permissions
Before proceeding, we need to ensure that the user we're using has the following permissions:
S3
Secrets Manager
API Gateway
IAM
CloudFormation
Lambda
A quick disclaimer here: the recommendation is to start with basic permissions, following the "least privilege" principle.
Testing the API
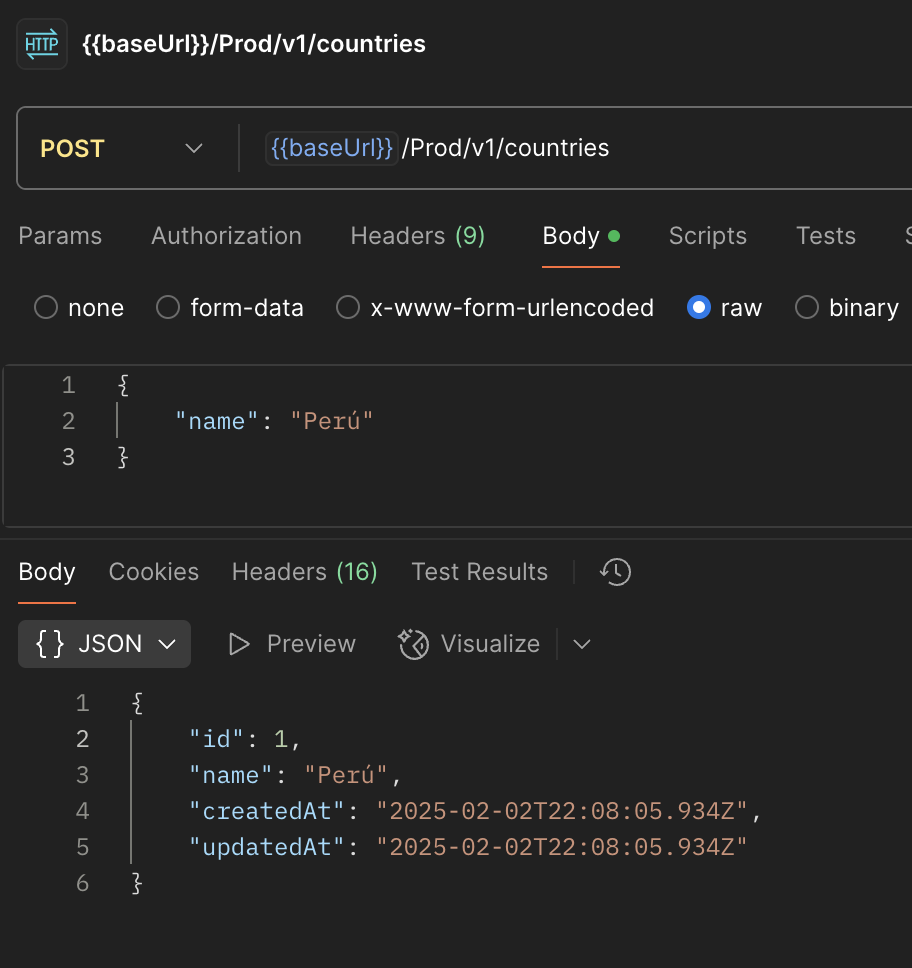
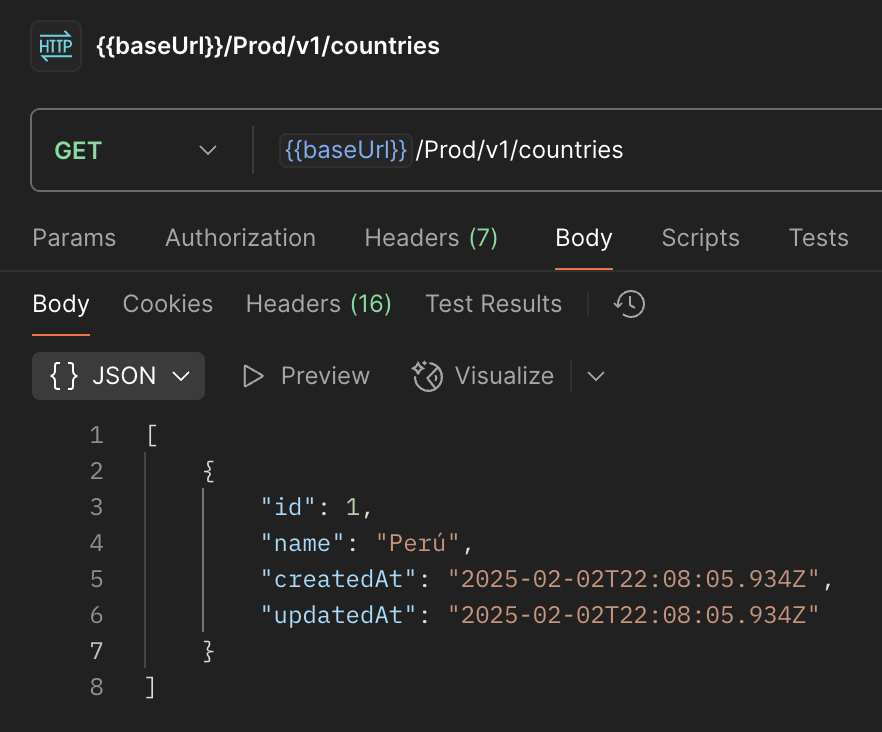
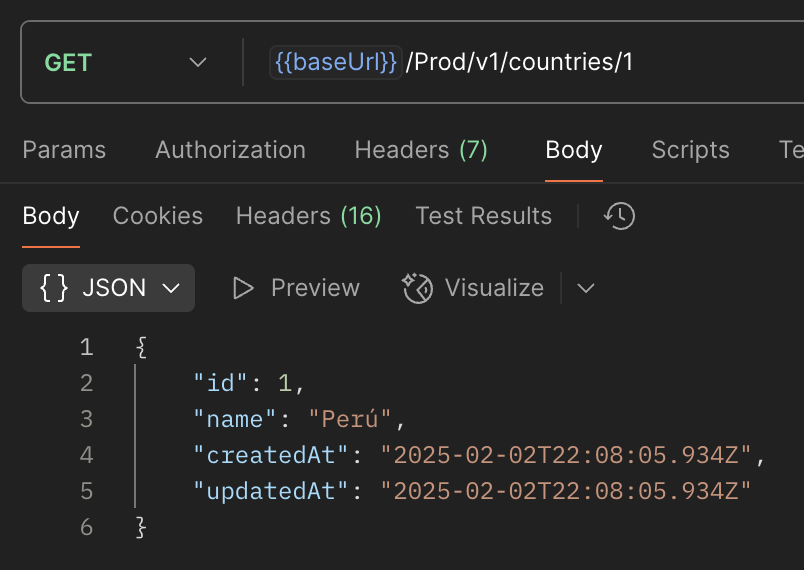
Now, let's verify that our API works correctly. We'll use Postman to test each of the endpoints.
First, we'll test creating a country using the POST method on the /v1/countries resource:

Then, we'll verify that we can retrieve all countries using the GET endpoint:

Finally, we'll check that we can retrieve a specific country using its ID:

Next Steps
For production projects, consider:
Adding authentication and authorization
Implementing cache to optimize performance
Setting up CI/CD to automate deployments
Remember to evaluate the use case for which you need to use lambdas, considering aspects such as cold start and other performance factors.
Resource Cleanup
If you've been following along with this tutorial, don't forget to clean up your resources to avoid unnecessary charges. You can remove all the resources using:
sam delete --stack-name sample-api --profile codeanding
Get Involved
Want to explore the complete code? You can find the entire project in this repository: GitHub - AWS Lambda Prisma Layer
I hope you found this guide helpful! If you have any questions or suggestions, please leave your comments below - I'd love to hear your thoughts and experiences.
Until the next post, let's keep coding and learning together!
Subscribe to my newsletter
Read articles from Julissa Rodriguez directly inside your inbox. Subscribe to the newsletter, and don't miss out.
Written by
