Starter Guide: Configuring Your Remote Server for Application Deployment
 Abhijeet Gautam
Table of contents
In this article, I will guide you through setting up and securing a remote server, ensuring it is ready for deploying your applications while keeping potential attackers at bay. We will begin by discussing the initial setup of your server and configuring the necessary software packages. Next, we will delve into securing your server by implementing best practices such as configuring SSH access and disabling root-level access.
By the end of this article, you will have a robust and secure server environment ready for confidently deploying your applications, along with the necessary knowledge of all the key concepts, tools, and terminologies.
Why deploy apps online?
Any app residing on the local machine (i.e., the local host) is inaccessible to others, so we must deploy our applications online for global accessibility. Moreover, a deployed backend application lets developers test it in real conditions and learn production-grade development scenarios.
Pre-requisites
Firstly, this tutorial assumes that you are comfortable working with the Linux CLI and have a basic knowledge of Linux commands, like cd, pwd, mv, cp, mkdir, touch etc.
I. Linux-based Operating System
We will use Ubuntu OS (an operating system built on the Linux kernel) on our local machine and remote host. You don’t need to know the specifics of Ubuntu OS (or Linux) in detail; I will cover everything required in this article.
Windows Subsystem Linux (WSL)
Windows Subsystem Linux (WSL) is a compatibility layer developed by Microsoft that allows users to run Linux distributions (simply Linux-based OS, like Ubuntu in our case) on their Windows machines. It provides nearly native Linux experience while letting the developers work from the Windows OS.
Installing Ubuntu on Windows using WSL
Step-1: Open Windows Powershell as administrator and run
wsl —install.Step-2: Open Microsoft Store and install Ubuntu.
Step-3: Open Ubuntu from the Start menu. Create a username & password for the Ubuntu configuration to be used in this Linux environment in future (if needed).
Note: In the entire article, the term “terminal“ refers to the Linux terminal, specifically the Ubuntu OS terminal. Although you can theoretically use any terminal of your choice (that supports Linux commands), it is better to stay on the same page for the sake of this article.
II. Virtual Private Server (VPS)
What is a VPS?
A Virtual Private Server (VPS, also called a remote host or a remote server) is a part of a dedicated server with some resources of its own. In simple terms, a physical server (at a data center) is virtually partitioned into multiple virtual servers (called a VPS instance), each with its own CPU, RAM, and storage. Each VPS instance operates independently of the other VPS instances of the physical server. VPS is a cost-effective alternative to dedicated servers.
Buying a VPS
Head over to any hosting provider (AWS, Digital Ocean, Hetzner, Hostinger, etc.) and buy any entry-level VPS hosting with low resources to save costs.
In this article, I’ll be using the KVM-1 VPS by Hostinger. Click here for a short tutorial on how to buy a VPS on Hostinger. The process remains the same for all other providers.
Access the VPS
After purchasing a VPS, you must access it from your local machine. There are different ways to access a VPS, but we will focus on the most common: SSH or Secure Shell.
Secure Shell (SSH)
Simply put, SSH is a network protocol (set of rules) that allows two computers to connect securely over an unsecured network. Here are some key features of SSH:
Secure authentication methods: via public-private key pairs or password-based logins. (We’ll see them in action later in this article!)
Secure file transfers: it can be used with tools like SCP (Secure Copy Protocol) to securely transfer files from the local machine to the remote host. (Again, we will use SCP later in this article).
SSH into the VPS using the Root Password
If you buy a VPS from any previously mentioned providers, you will most likely get one with “root login” enabled (except for AWS EC2).
What is root login in a VPS?
Root login means you will have all the administrative permissions for that VPS and can change the server configurations, files, and services.
Head over to your VPS provider's control panel (or dashboard) and get the following details about your VPS: IP Address, username, and password. For Hostinger’s KVM server, this is where you can find these details.
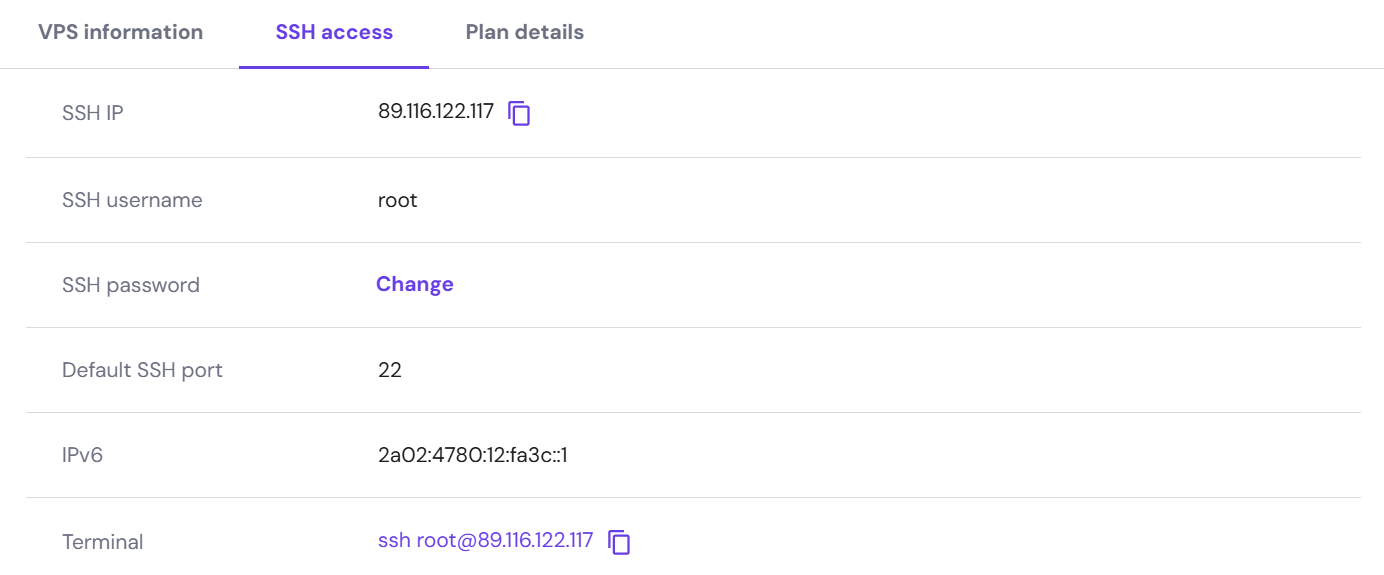
Open the terminal (for Windows users, open the Ubuntu from the Start Menu) and run the following command:
ssh username@hostIPaddress(Replaceusername&hostIPaddresswith those in your VPS control panel*).*Enter the root password when asked, and you will be logged into the VPS Linux terminal.
Note: While you type the password, it will not be visible on the screen for privacy reasons. You have to type it correctly and responsibly.
After SSH-ing into the VPS (that is, after entering into the VPS), the terminal will look something like this:
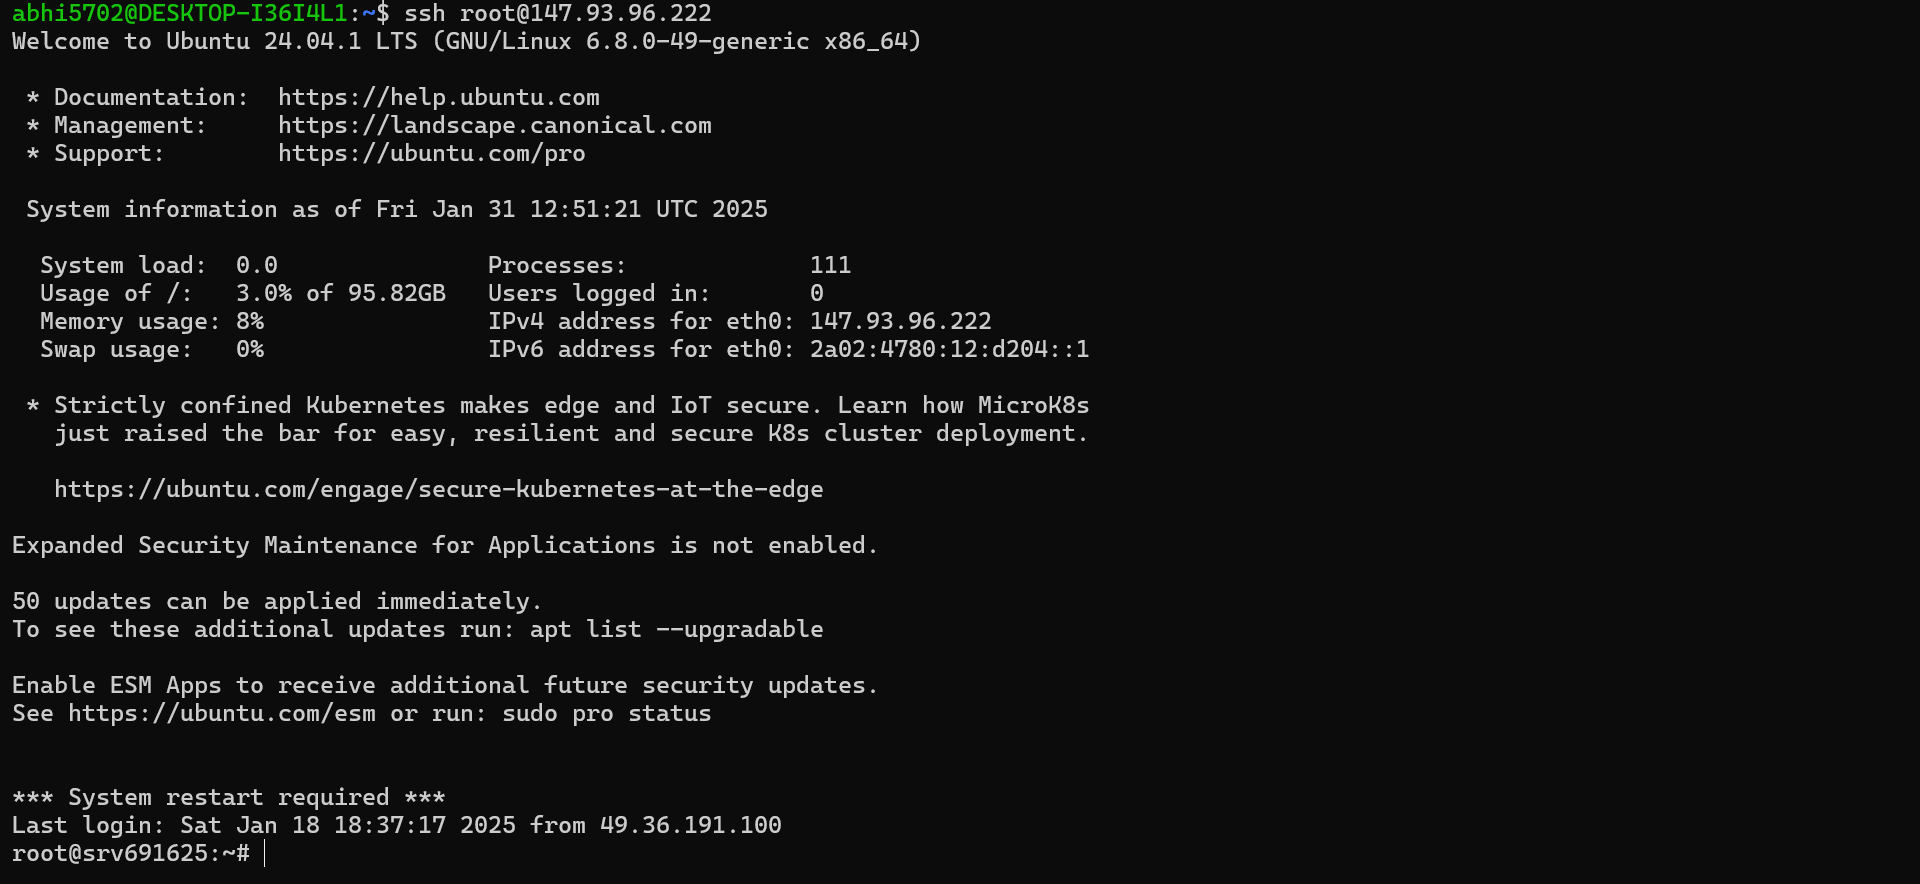
Don’t get overwhelmed by the terminal screen. It just shows the resources that the VPS is using, its public IP Address, and some links to the Ubuntu documentations - that’s all!
For now, exit the connection to the VPS by typing exit in the terminal. You will get back to the terminal screen of your local machine.
Let us understand a few other things before working on the VPS again.
SSH Key
An SSH Key is a cryptographic pair of public and private keys that are used to securely access a server without using the passwords. The public key is stored on the server, and the private key is stored securely on the user's local machine (or the VPS administrator).
Why need an SSH Key when we have password-based VPS access?
Password-based login poses certain security threats to the server, a few of them are listed below:
Users tend to choose small passwords that are easy to remember and even easier to guess. Therefore, passwords are more prone to phishing attacks.
Passwords are generally weaker than encrypted keys (SSH Keys, which we’ll see in the next section) and can easily be compromised.
Authentication via an SSH Key has some obvious benefits over password-based authentication:
You don’t have to remember the password or repeatedly type it whenever you access the remote server.
Unlike passwords (that can be guessed easily), SSH Keys, on the other hand, use strong cryptographic algorithms and are way safer than passwords.
Create an SSH Key
Follow the given steps to create an SSH Key pair for your VPS:
Open the terminal (remember to exit the VPS connection as instructed above) and run the following command:
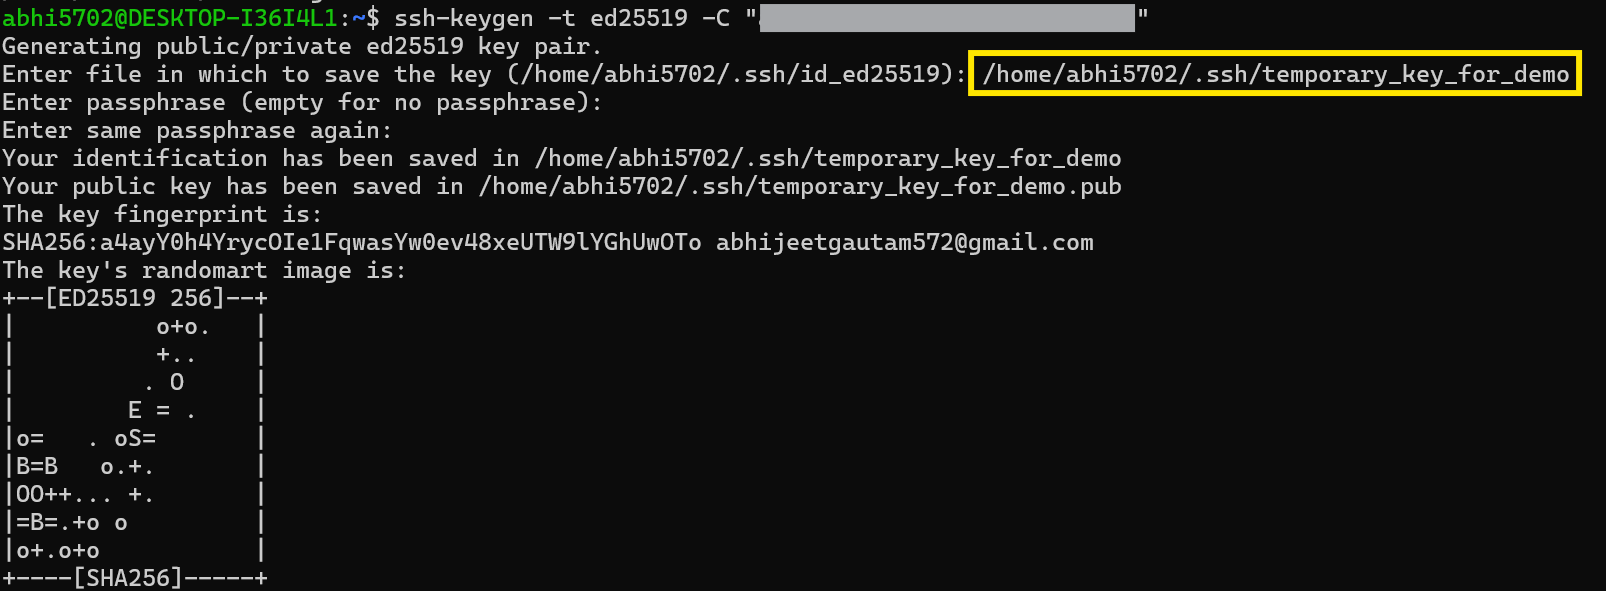
ssh-keygen -t ed25519 -C "your_email@example.com"On a high level, this command generates an SSH key pair using a highly secure
Ed25519cryptographic algorithm (-tflag). Your email is added as a comment (-Cflag) for easy distinction in case you have multiple SSH keys in the future (you surely will!)The terminal will prompt you to a default location to save your key pair. Since you are generating a key pair for the first time, simply press enter.
If you wish, you can change the location or filename but then you will have to remember them all the time. If you created SSH keys previously,
ssh-keygenmay ask you to rewrite another key, in which case we recommend creating a custom-named SSH key.In such a case replace the `FILENAME` with your custom file name.
> Enter a file in which to save the key (/home/YOU/.ssh/id_ALGORITHM): /home/YOU/.ssh/custom_key_name
- Finally, it will prompt you to type a passphrase. You can leave it empty by pressing ENTER.
You can see all the SSH keys stored in your machine by navigating to the /home/YOU/.ssh directory and typing ls

You will see the key pair that was generated just now (default name id_ed25519 or your custom name). The key with .pub extension is the public key, which will reside on the VPS to establish a secure connection between the VPS and the local machine.
- Run the following command on the terminal to copy the public SSH key into the VPS.
ssh-copy-id -i "~/.ssh/id_ed25519.pub" username@hostIPaddress

# Remember that the default name for the SSH key will be id_ed25519 unless you change anything while creating the key
# Write the appropriate username and IP Address
It might be possible that
ssh-copy-idis not installed in your system. If that is the case:
Run
sudo apt update && sudo apt install openssh-clientto install openssh-client.Run
command -v ssh-copy-idand confirm if the CLI returns something.Congrats!
ssh-copy-idis now successfully installed and you can now repeat Step-4 above to copy your SSH Key (Public) to the VPS.
SSH into the VPS using SSH Key
Now that we have configured the SSH Key on the local machine and the VPS, we can now access the VPS passwordless:
ssh -i "~/.ssh/id_ed25519.pub" username@hostIPaddress

# If the filename is kept to default, then the following command will also work
ssh username@hostIPaddress
Now that we have enabled SSH Key-based login in our VPS, the next step would be to disable password-based login in the VPS.
Disable Password Login
We disable password-login in the VPS by changing a few configurations:
SSH into the server.
Run
nano /etc/ssh/sshd_configand thesshd_configfile will open in the nano-editor (a simple CLI-based editor).Locate
PasswordAuthentication yesand set it toPasswordAuthentication noPress
CTRL + X, thenYand thenENTERto save and exit the file.Run
cd /etc/ssh/sshd_config.d/directory and locate a*.conffile (the name could go something like50-cloud-init.confor similar)Again locate
PasswordAuthentication yesand set it toPasswordAuthentication noAgain, press
CTRL + X, thenYand thenENTERto save and exit the file.Run
service ssh restartto restart the SSH service so that the changes can apply.
Create a non-root user
Why create a non-root user at all?
Although most VPS come with root access (except AWS EC2), operating the server with root-level privileges is generally not recommended. Here are a few reasons why:
Most brute-force hacking attacks on a server occur on the
rootusername.It is easy to destroy the entire server system if someone gains root access.
A non-root user (also called a sudo group user) provides improved security as the attacker must guess the correct sudo username to enter the system. Moreover, a sudo user has restricted access to the commands in the server.
A sudo user can perform root-level operations by using the
sudokeyword before the command. This is still better than operating as a root user because:
It can save the server from unintentional damage as it is compulsory to write
sudobefore every root-level command (therefore, it makes the user think of every action being performed).Every time a command is prefixed with
sudo, it is logged into the server and the specific sudo-user can be tracked down in case of any mistakes.
Steps to create a non-root user
Follow the given steps to create a non-root user in your VPS:
SSH into the VPS as root
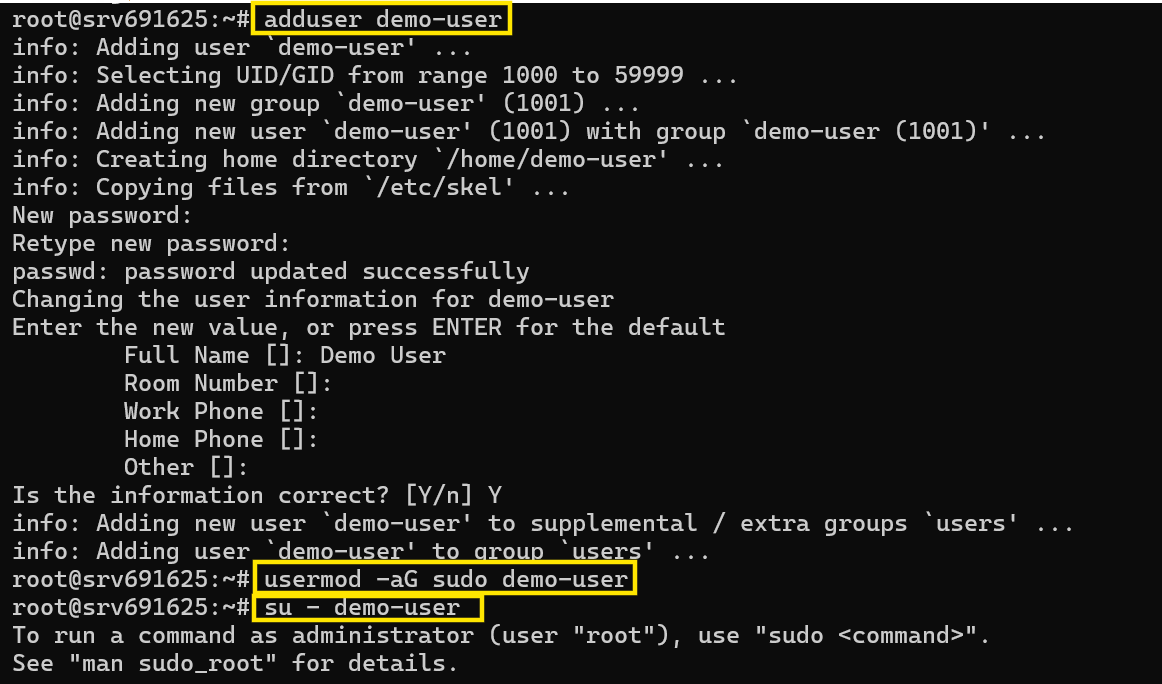
ssh root@hostIPaddressCreate a new user
Enter a password of your choice and remember it.
 adduser nonRootUserName
 # Replace nonRootUserName with a username of your choice
Add the non-root user to the
sudogroupusermod -aG sudo nonRootUserNameSwitch to the new user
su - nonRootUserName
Enable SSH access to the non-root user
Follow the given steps to enable SSH access to the non-root user:
Switch to the new user using
su - nonRootUserNameCreate an SSH directory & change its permissions
mkdir -p ~/.ssh sudo chmod 700 ~/.ssh # try running this command without the `sudo` keywordchmodcommand changes the permissions of the.sshdirectory and700means the owner (i.e.,nonRootUserName) has permission to read, write & execute. All other groups and users have no permissions and cannot do anything with the.sshdirectoryCopy the public SSH key from the root
.sshfoldersudo cp /root/.ssh/authorized_keys ~/.ssh/ # Run `cat ~/.ssh/authorized_keys` command to see the content inside the copied filecp <source_path> <destination_path>command is used to copy files andcat <file_path>command is used to view the contents inside a file.Change the permissions of the
authorized_keysfile & ownership of.sshdirectorysudo chmod 600 ~/.ssh/authorized_keys sudo chown -R nonRootUserName:nonRootUserName ~/.sshchmod 600means the owner has permission to read and write only (no execution).chown nonRootUserName:nonRootUserName ~/.sshmeans change the ownership of the.sshfolder tononRootUserNameuser.Run
ls -la ~/to see the ownership of the.sshfolder
Open a new terminal and try accessing the VPS using the non-root username
ssh nonRootUserName@hostIPaddress
Disable Root Login
After disabling the root login, you will not be able to SSH into the VPS using ssh root@hostIPaddress anymore. The only way to access the VPS will be through the non-root user.
Follow the given steps to disable root login in your server.
SSH into the server using root
ssh root@hostIPaddressOpen the
sshd_configfile & changePermitRootLogin yestoPermitRootLogin nonano /etc/ssh/sshd_configSave & exit (
CTRL+X, thenY, thenENTER)Restart the SSH service
service ssh restartOpen a new terminal and try accessing the VPS using the root (It will throw an error!)
 ssh root@hostIPaddress

 # The terminal will throw an error
 > Permission denied (publickey)
Set up & secure the server
Update the server
Updating and upgrading the OS packages and services must be the first step whenever you log into the VPS system.
You can use apt (Advanced Package Tool) to install dependencies and packages in your VPS.
apt(Advanced Package Tool) is a CLI-based package manager for Linux-based distributions like Ubuntu. It helps users install, update, upgrade, and remove software packages efficiently.
sudo apt update && sudo apt upgrade
Difference between
sudo apt updateandsudo apt upgrade?The VPS system keeps a list of available packages and their versions in an index.
sudo apt updatelooks for all the packages whose newer versions are available and updates the local package index, but does not install them.
sudo apt upgradelooks at the local package index and installs the newer versions of the packages already installed in the VPS while keeping the older versions (to avoid breaking any dependency).
Protection from brute-force login attacks
You can set up a service to prevent brute-force login attempts from attackers. Fail2Ban is a service that monitors login attempts and bans IPs that fail multiple login attempts in a short span of time.
Follow the given steps to install and configure Fail2Ban:
Install
fail2bansudo apt install fail2ban -yCreate a local configuration file
cp /etc/fail2ban/jail.conf /etc/fail2ban/jail.localEdit the local configuration file
sudo nano /etc/fail2ban/jail.localModify the
[sshd]section[sshd] enabled = true port = 22 maxretry = 5 bantime = 3600maxretry = 5: A maximum of 5 failed login attempts will be allowedbantime = 3600: After 5 failed login attempts, the IP will be banned for 3600 seconds (1 hour)Restart the service
sudo service fail2ban restart
You can view the banned IPs by running
sudo fail2ban-client status sshdcommand.
Conclusion
In this article, we learned how to configure a VPS from scratch properly and set it up to deploy our applications securely. We covered server access, root-level access, SSH keys, creating users, and adding them to groups, along with some best practices for protecting a server from brute-force attacks. Although this article contains much information, it only scratches the surface.
Next steps
Although fairly detailed, this article is not exhaustive. There are many other things a server administrator can do (and should do) to secure a server from phishing and hacking attacks. I would suggest you read about the following topics to strengthen your server administration skills:
Setting up firewalls and restricting ports:
A firewall acts as a shield and blocks unauthorized access to the VPS by blocking or allowing specific ports only
Restricting the root-level commands for the sudoers:
A sudoer (non-root sudo group user) can technically do all root-level operations using thesudokeyword. So, it becomes critical to restrict and specify the root-level commands for the sudoers.Setting up 2FA (Two Factor Authentication) for more secure access to the VPS:
Even if an attacker gets hold of your SSH key (by compromising your local machine) and tries to access the VPS, they can not do so if a two-factor authentication is set up in the VPS.
Final thoughts
Although they might feel overwhelming for a beginner developer, server configuration and security are necessary and must-have skills for every developer looking to deploy secure and scalable applications online.
I hope this article was able to teach you something.
Subscribe to my newsletter
Read articles from Abhijeet Gautam directly inside your inbox. Subscribe to the newsletter, and don't miss out.
Written by

Abhijeet Gautam
Abhijeet Gautam
I'm a full stack developer primarily involved in building open-source SaaS applications. I build web apps in NEXT + Node. I'm here to share high quality articles on different programming patterns & paradigms.