Creating a Shared Access Signature on a Private Azure Blob Storage
 Kolawole
There are instances when you would like to create a Blob Storage and make it private in order to restrict access to it but at the same time share access to the Blob for a specific period of time without comprising the private status of the Blob.
Below are the implementation steps to achieving this.
Step 1: Create a Container
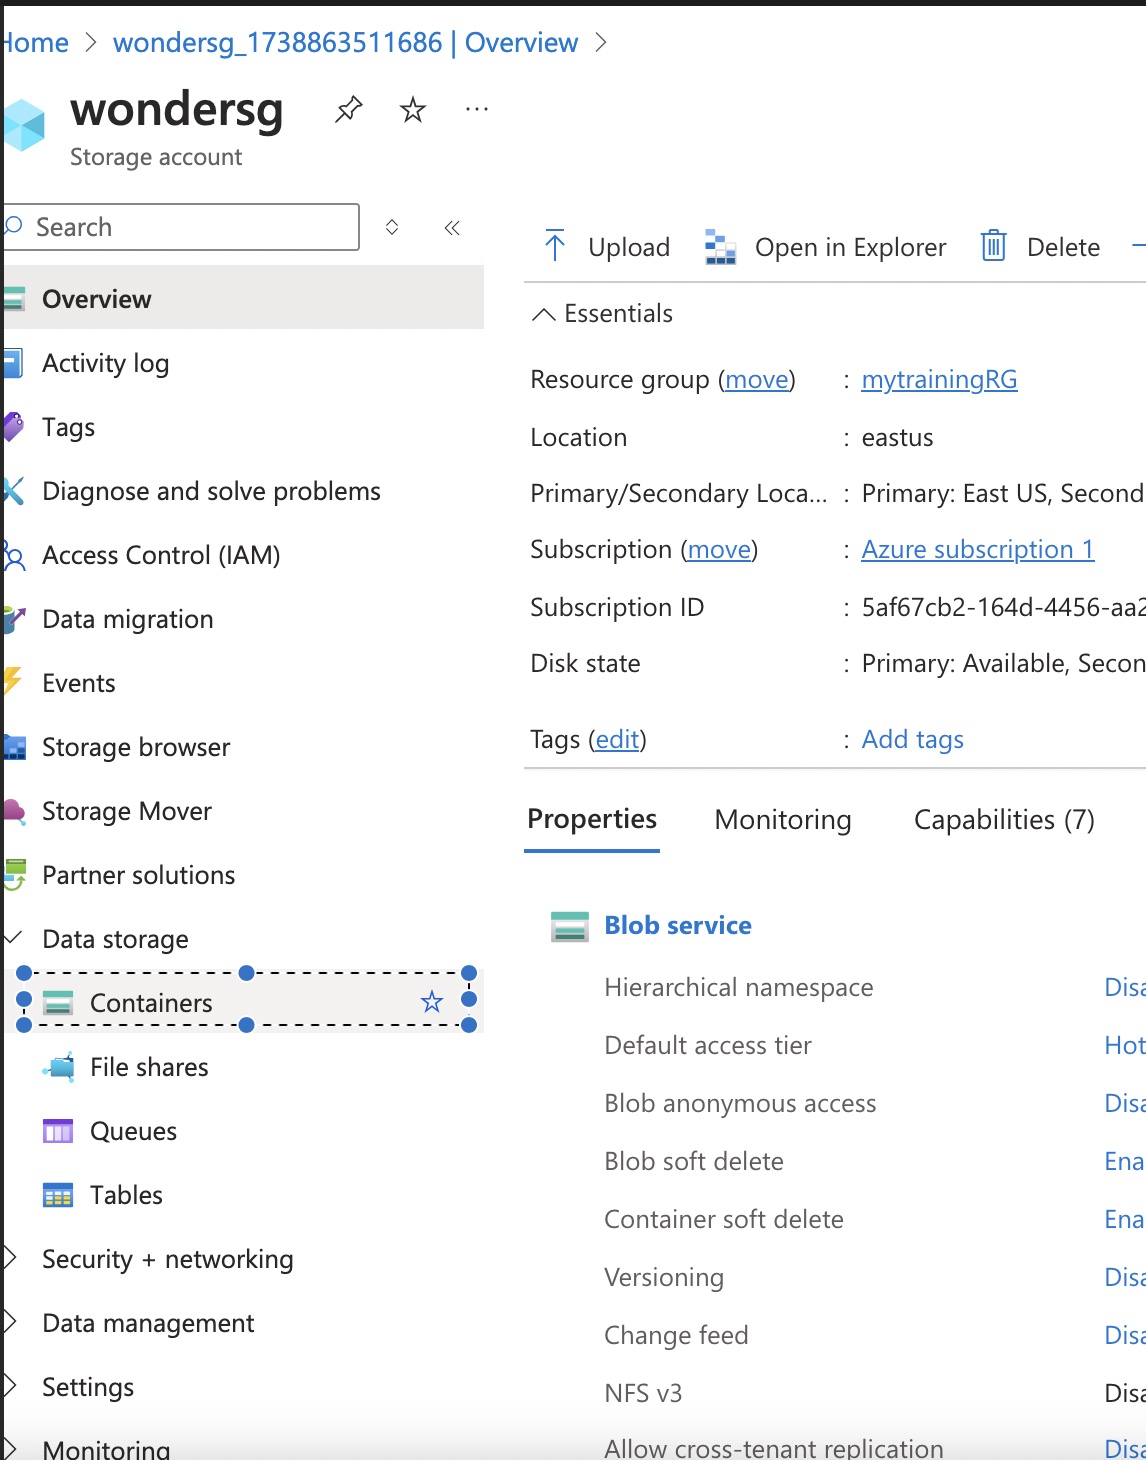
a. Open Data Storage on the left hand side of the storage page and click on Containers.
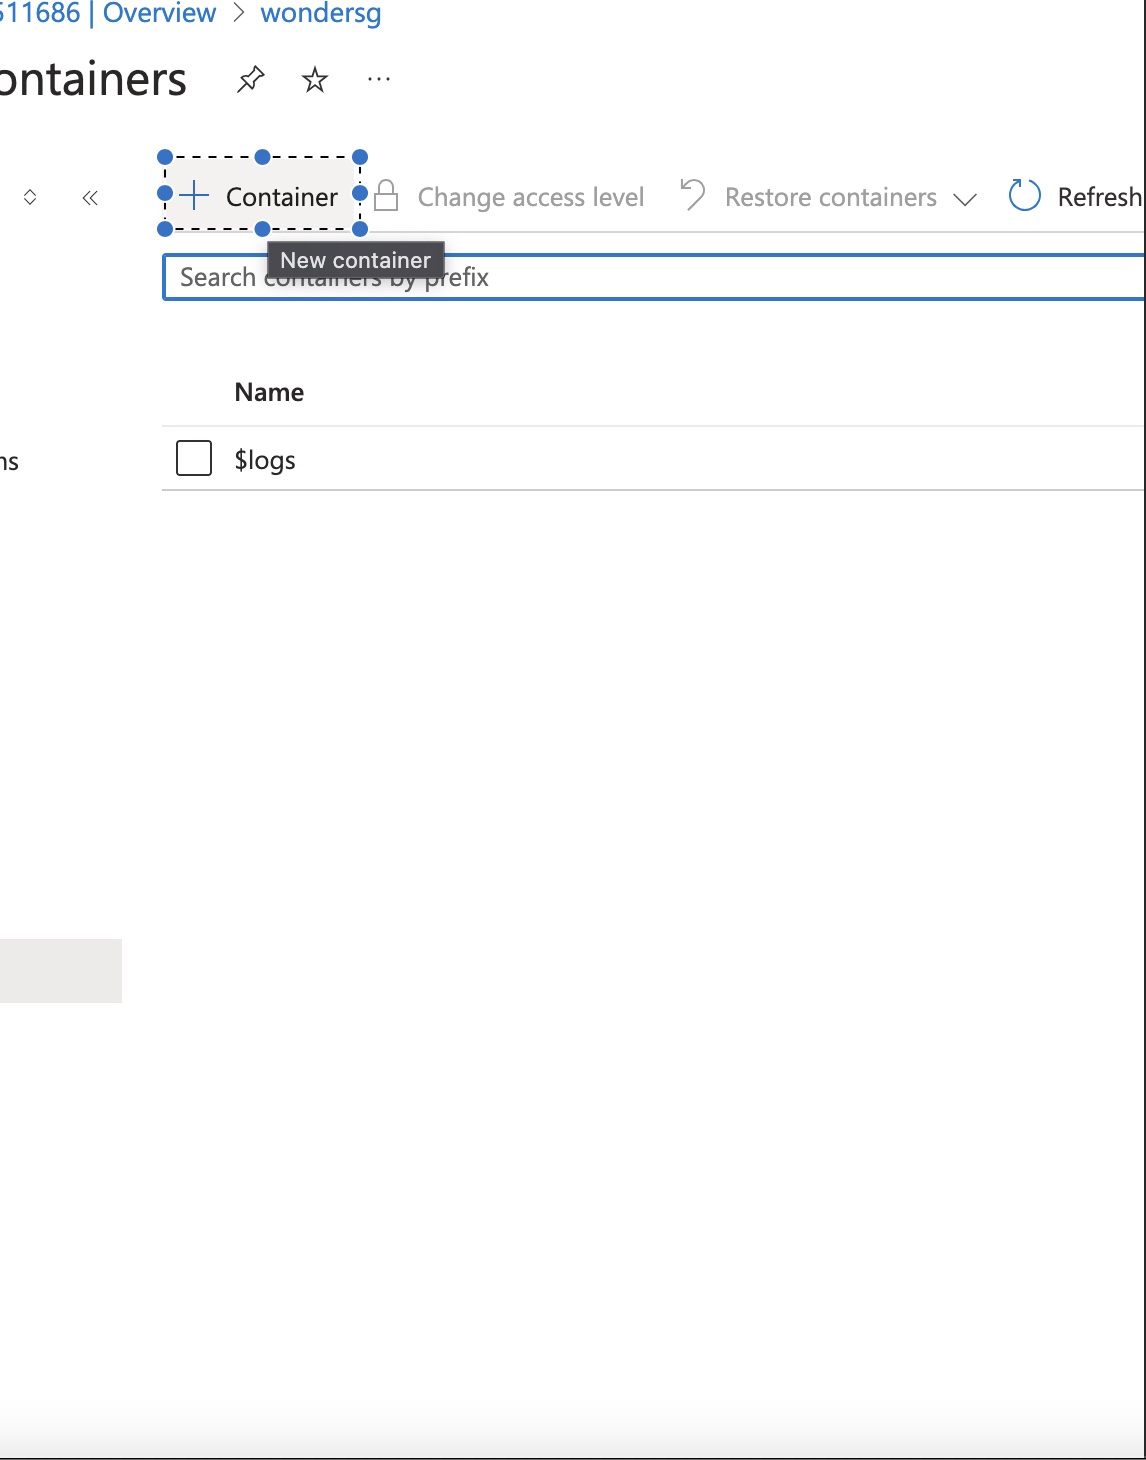
b. Click on the +Container icon on the canvas menu
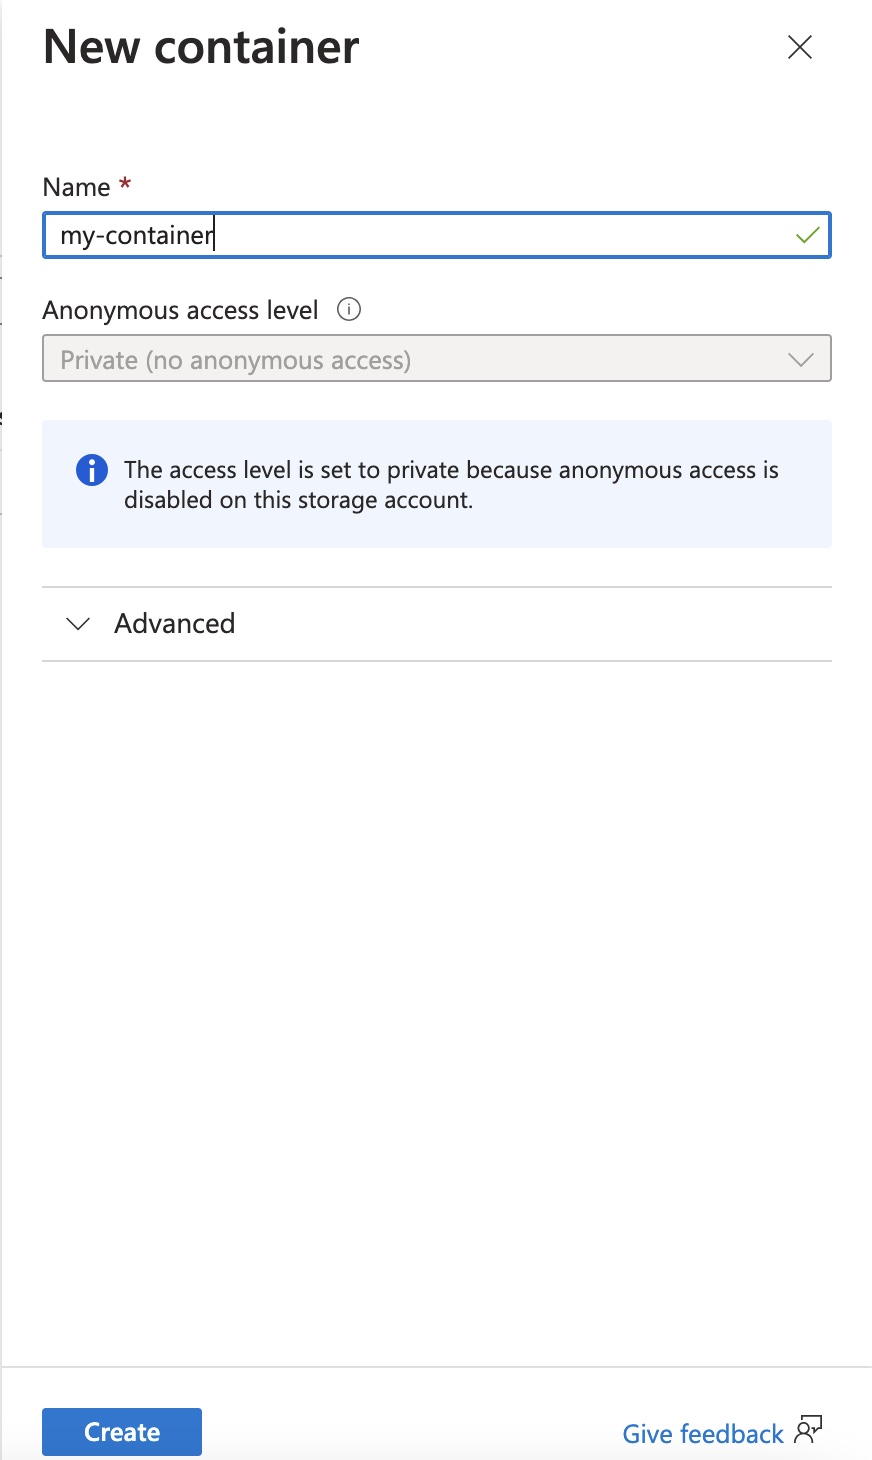
Step 2: Enter the container name and click on Create
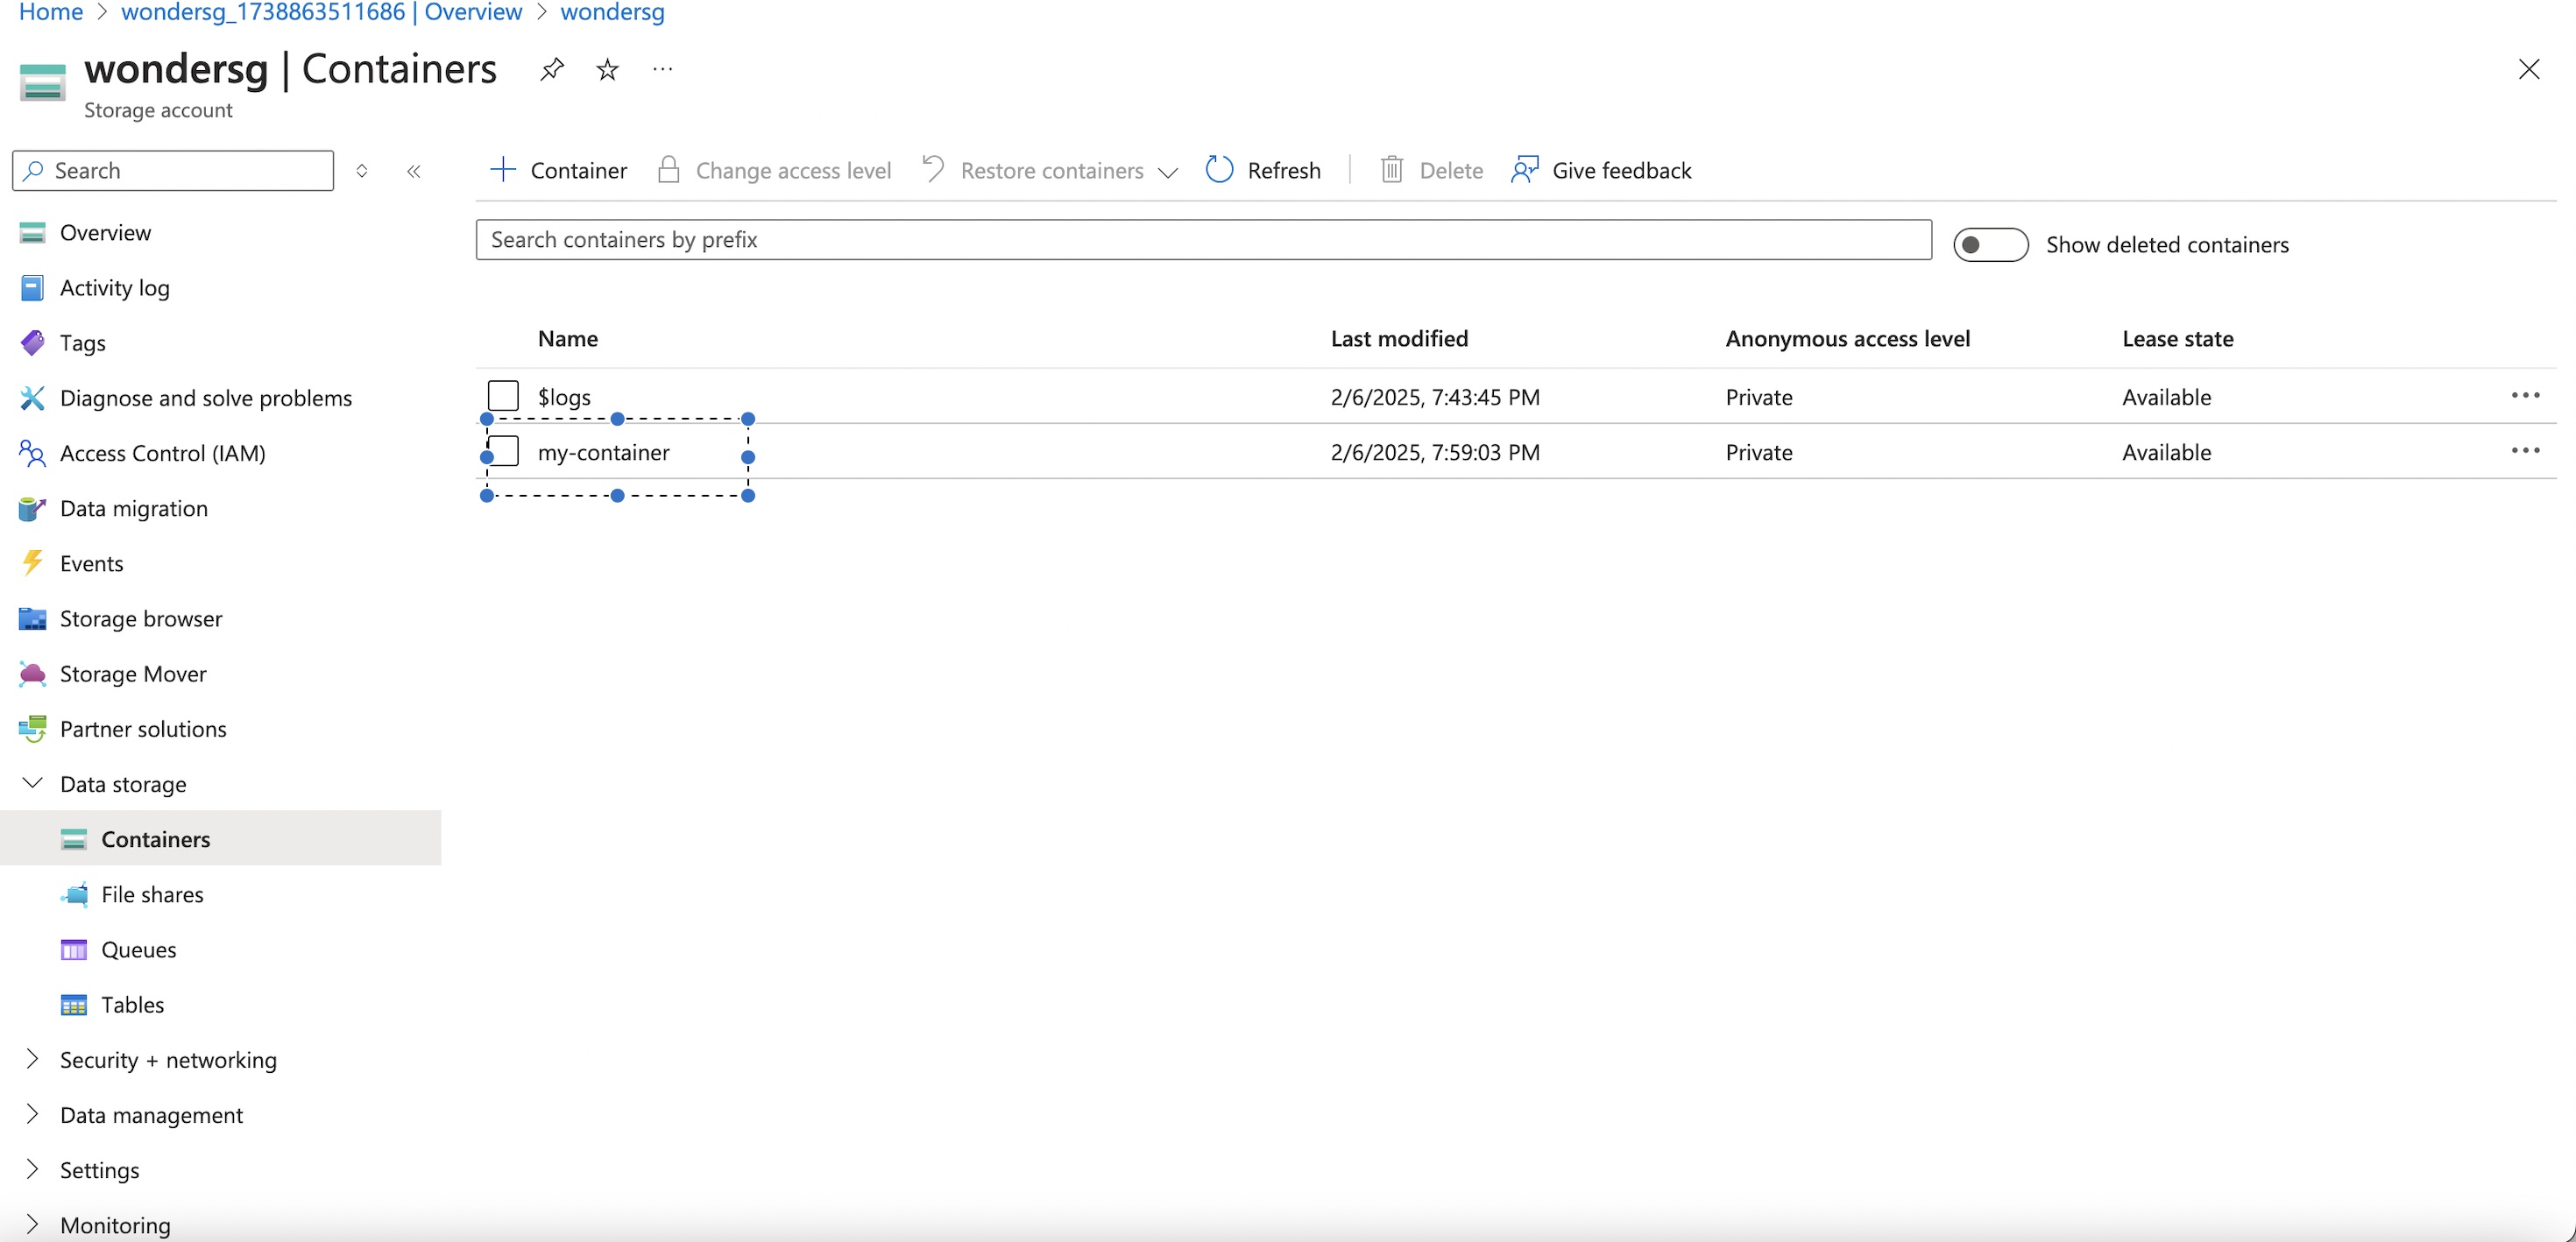
The container would be created with the name provided (e.g. my-container).
Step 3: Double click on the container name
This will open up a new page for the uploading of your blob.
Step 4: Click on the Upload tab on the canvas

Step 5: Browse for your file
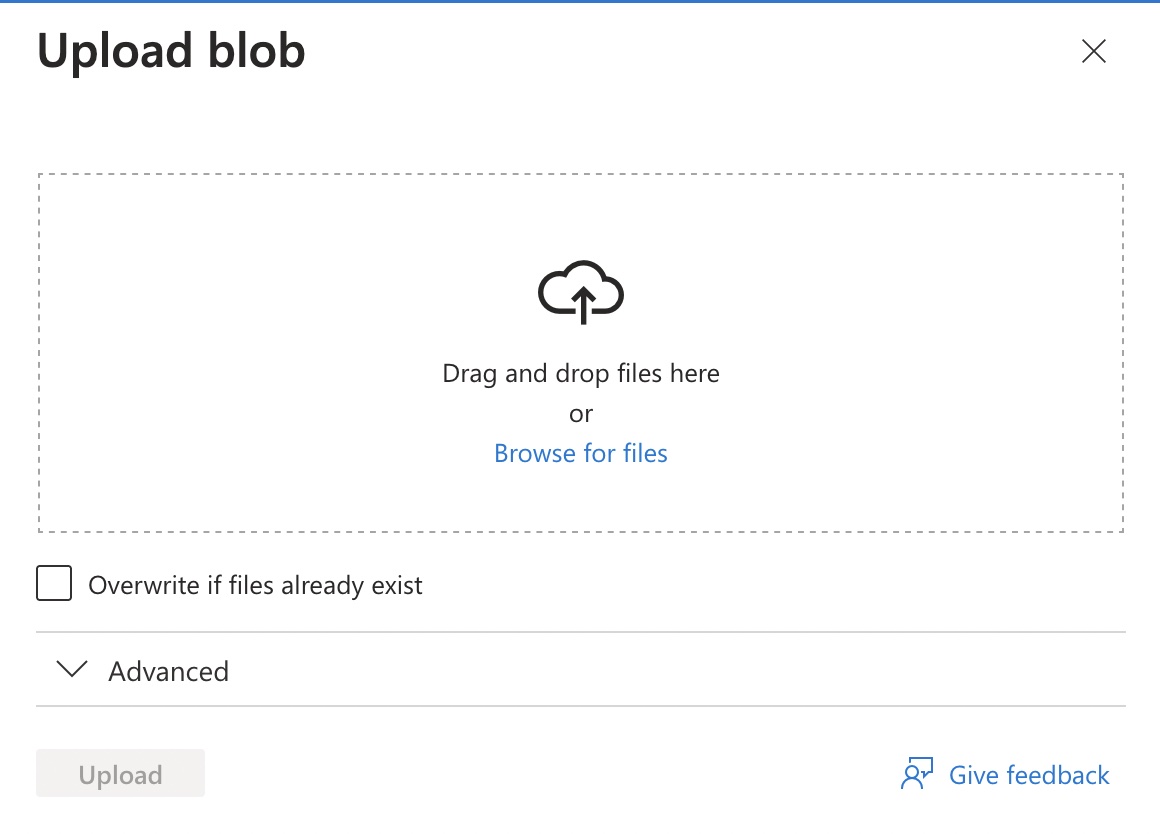
Step 6: Choose the desired file (blob)
After choosing the file you can then click on Upload.
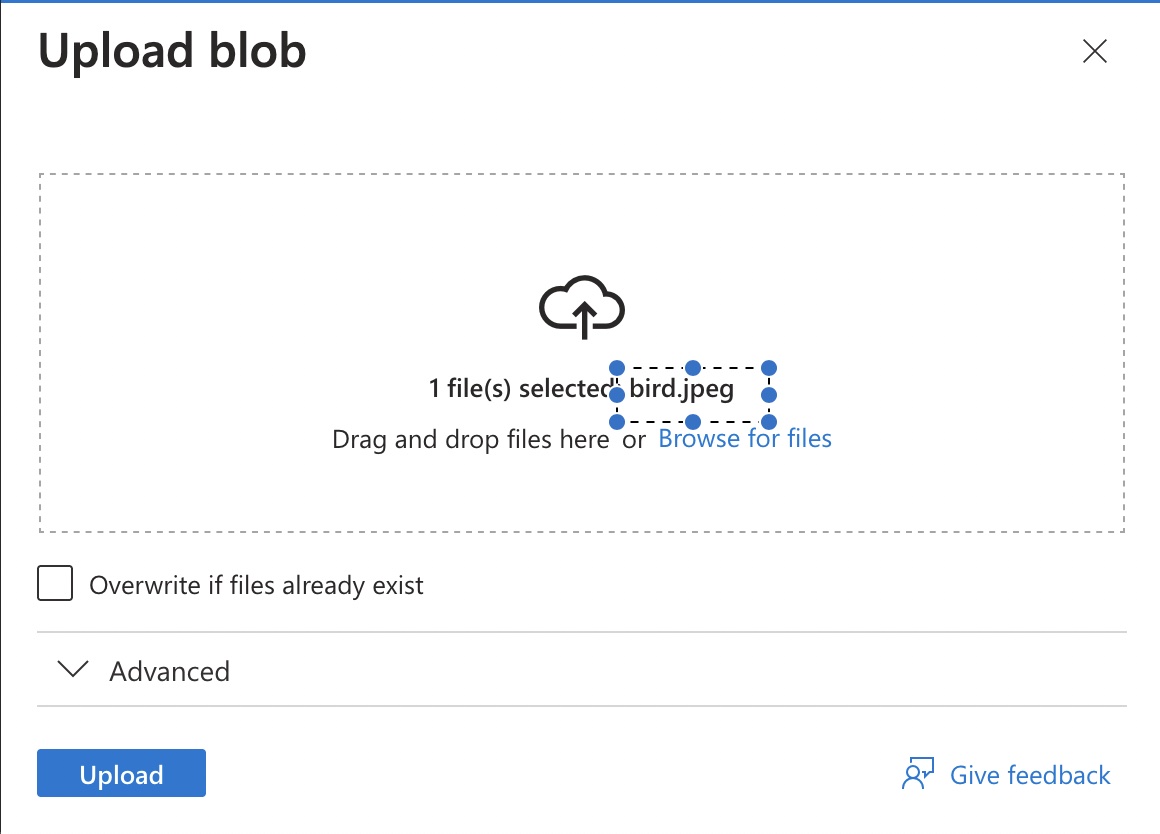
Step 7: Click on the three dots at the end of the uploaded file
This will display a drop down.

Step 8: Click on Generate SAS on the drop down
This is to generate the Shared Access Signature (URL) for the blob.
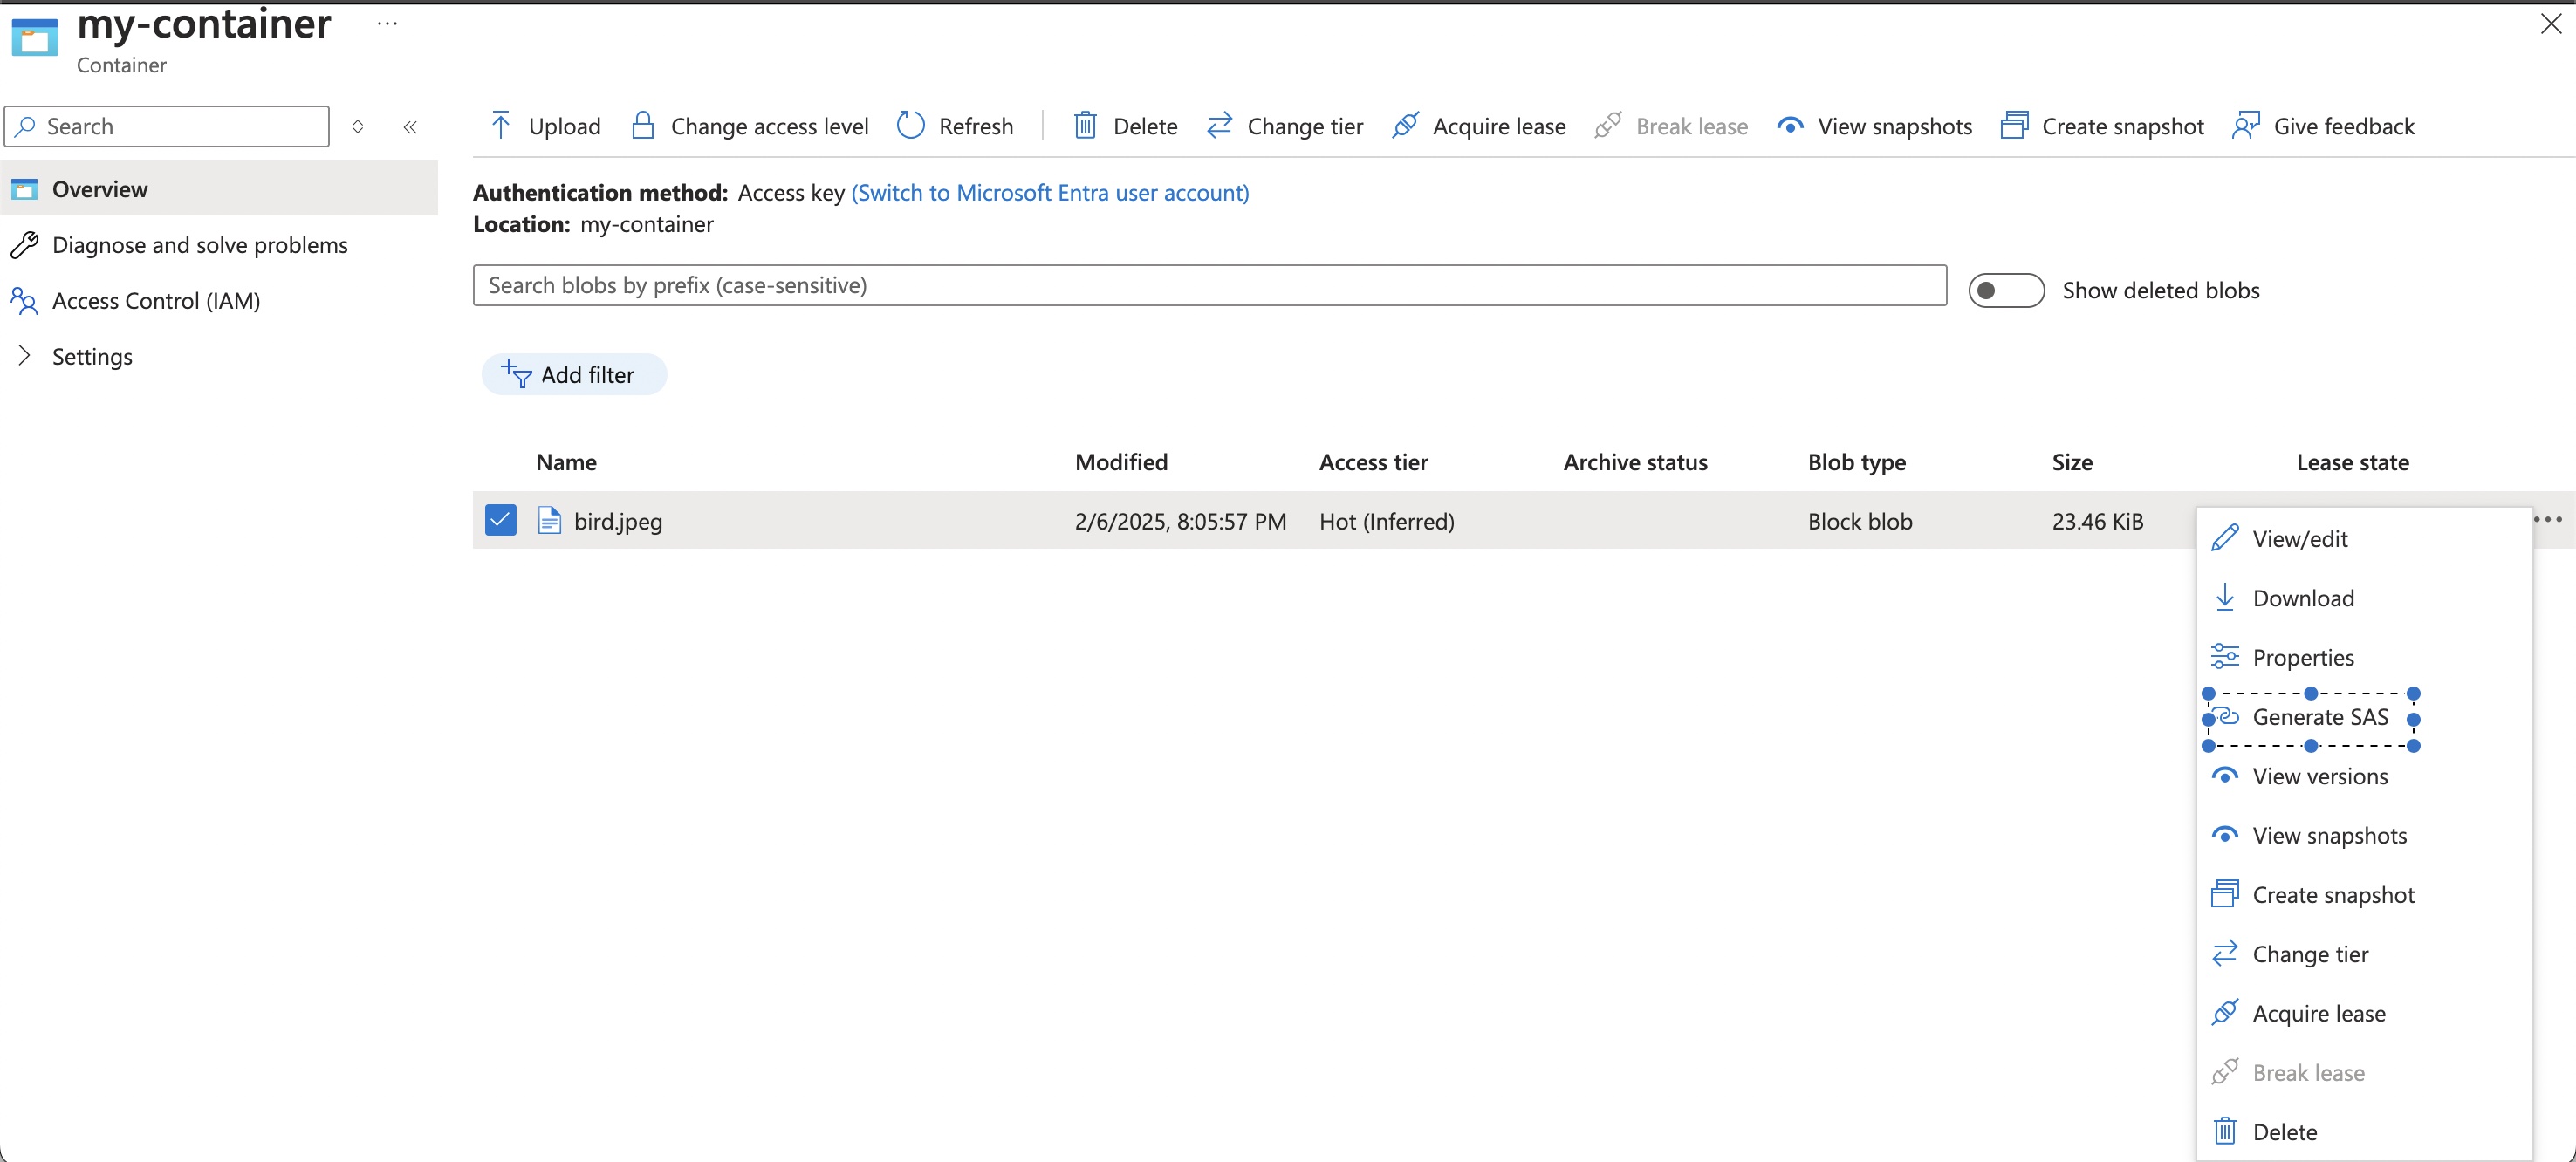
Step 9: A new page will be displayed to enter the details to Generate SAS.
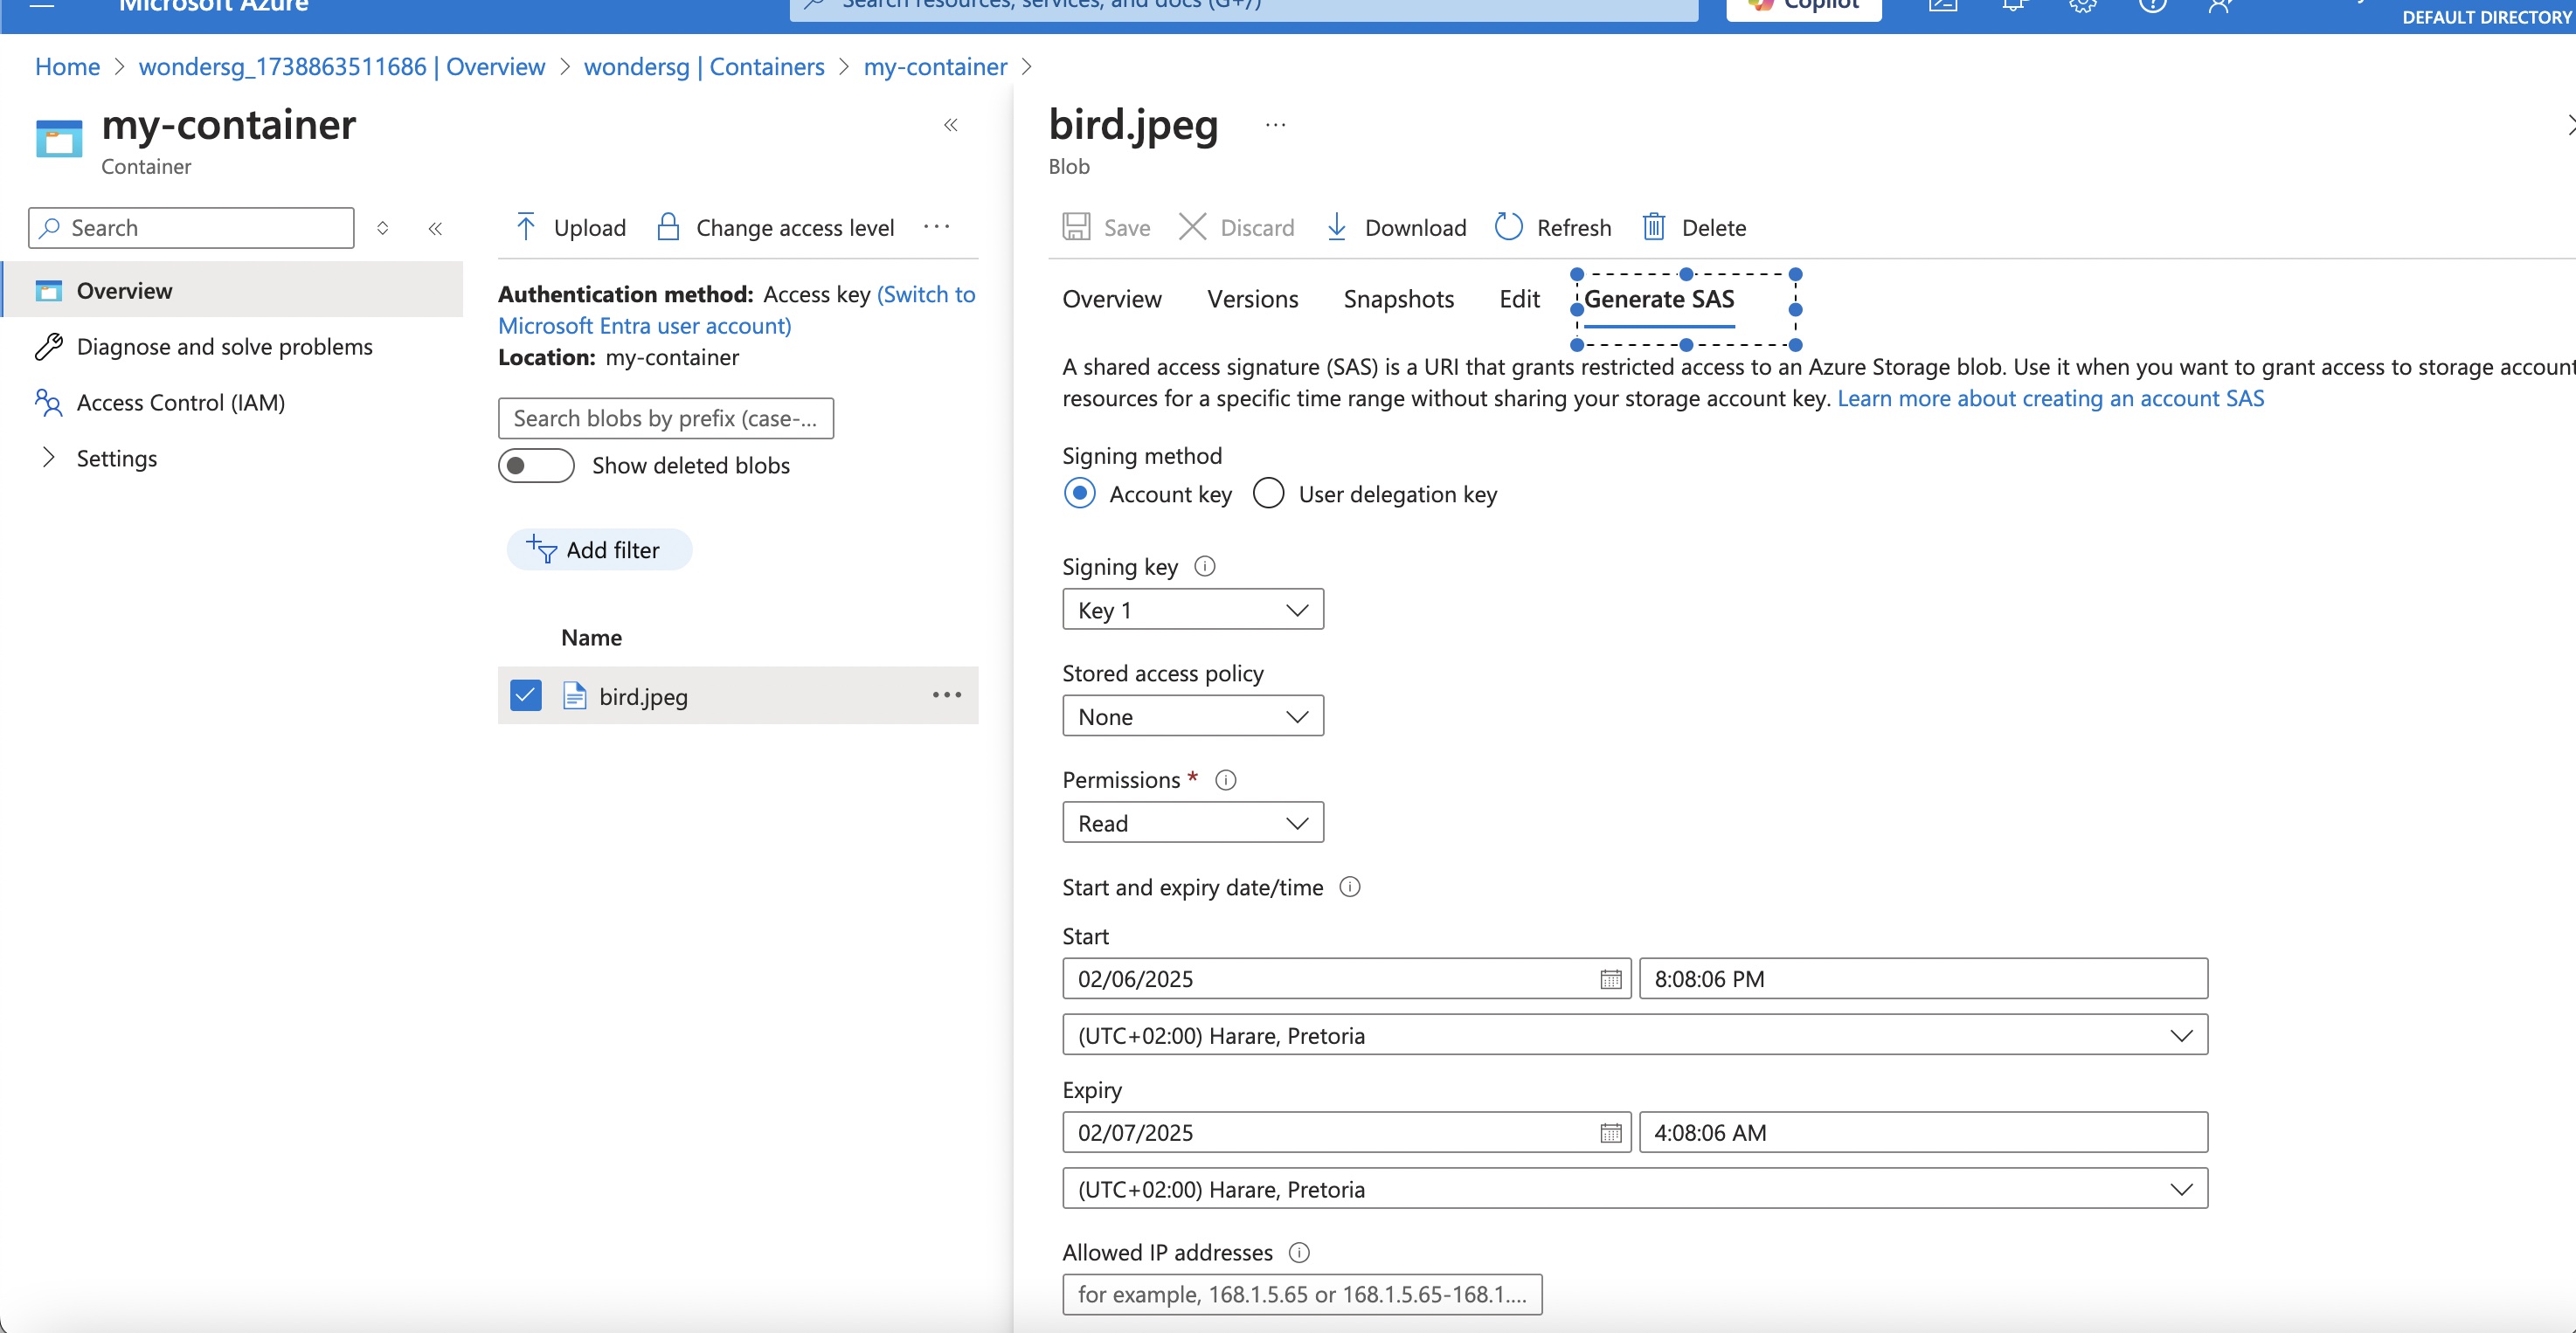
Step 10: Choose the Start date/time and Expiry date/time
This is the time interval you want the user to access the blob. Anytime outside this time-bound will render the blob inaccessible.
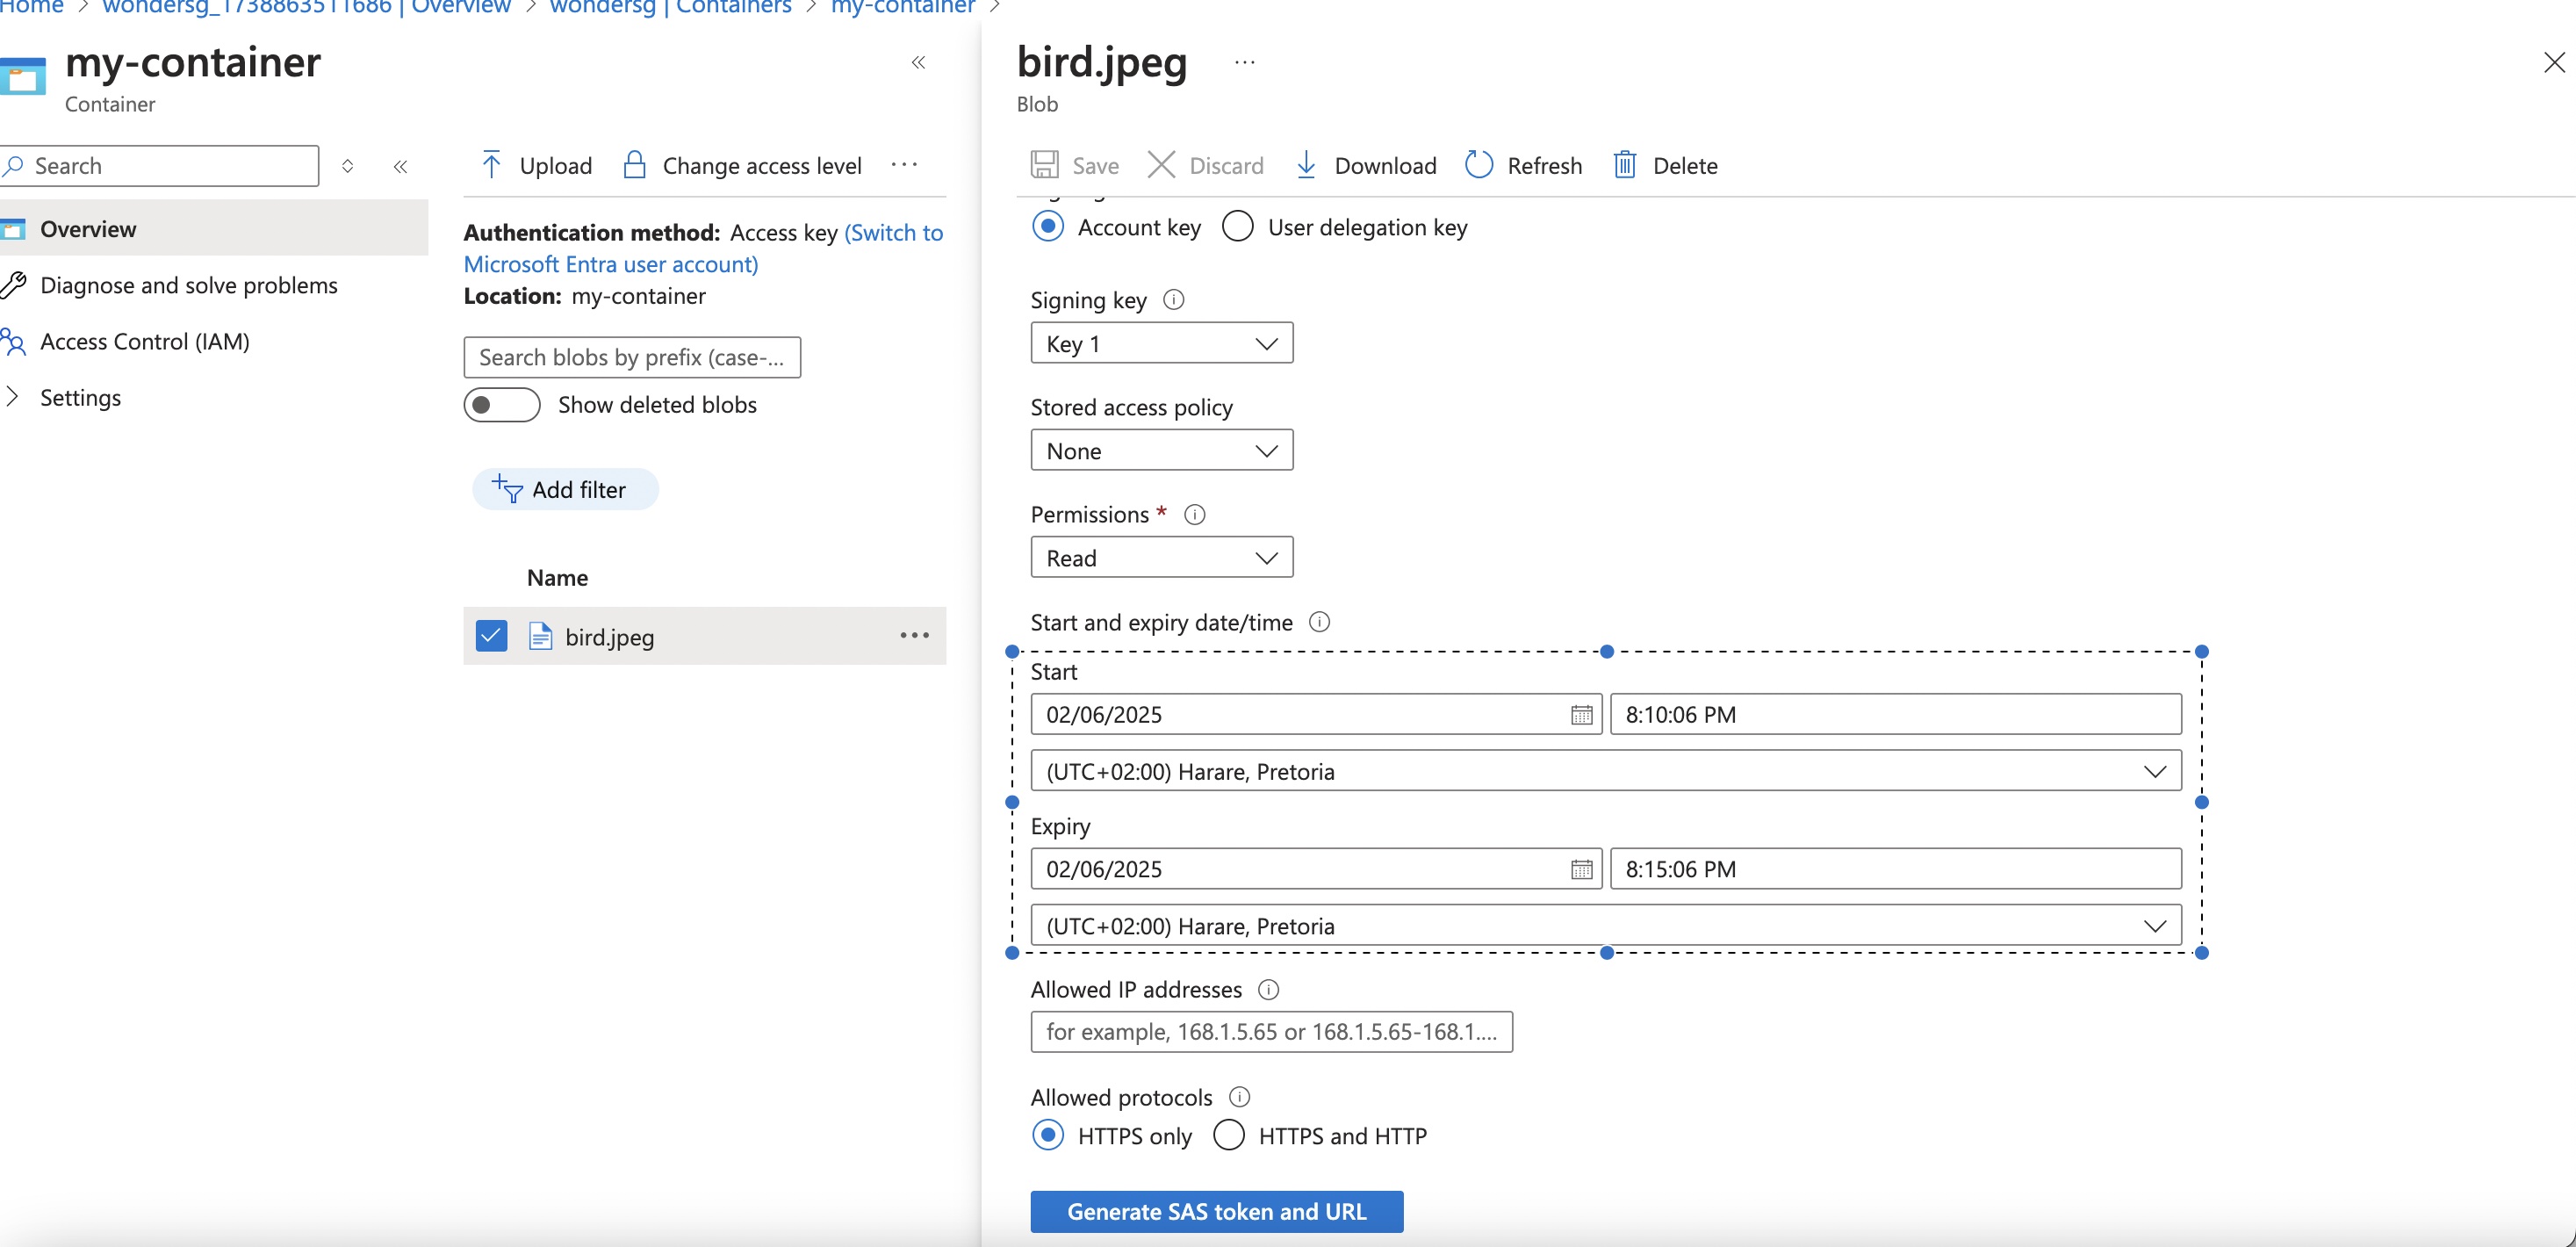
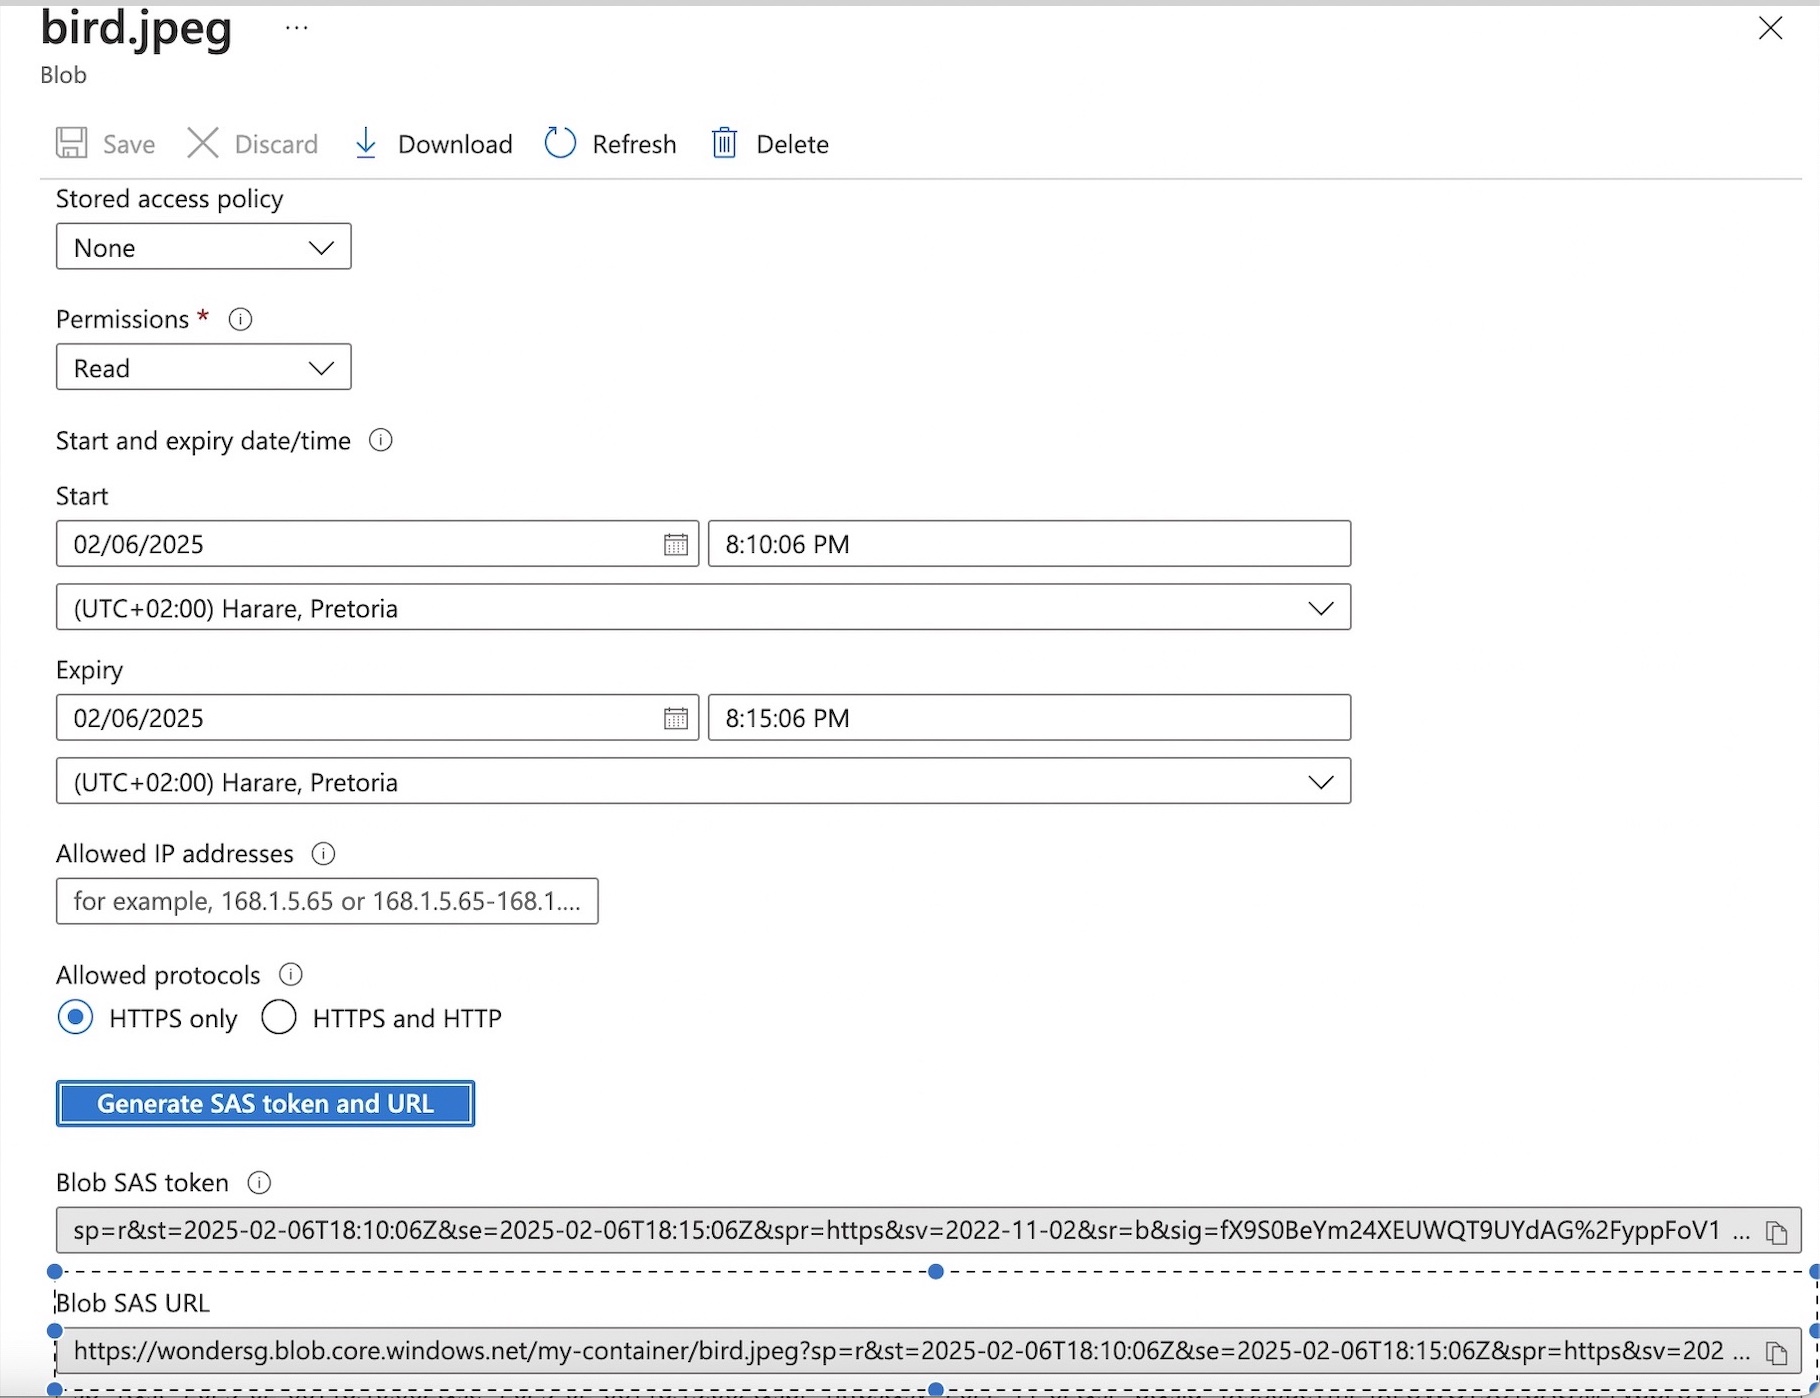
Step 11: Click on Generate SAS token and URL at the lower part of the page
The generated Blob SAS URL can be shared with the user.
Subscribe to my newsletter
Read articles from Kolawole directly inside your inbox. Subscribe to the newsletter, and don't miss out.
Written by
