Disaster Recovery and Data Mitigation using Velero.
 Sibasish Satapathy
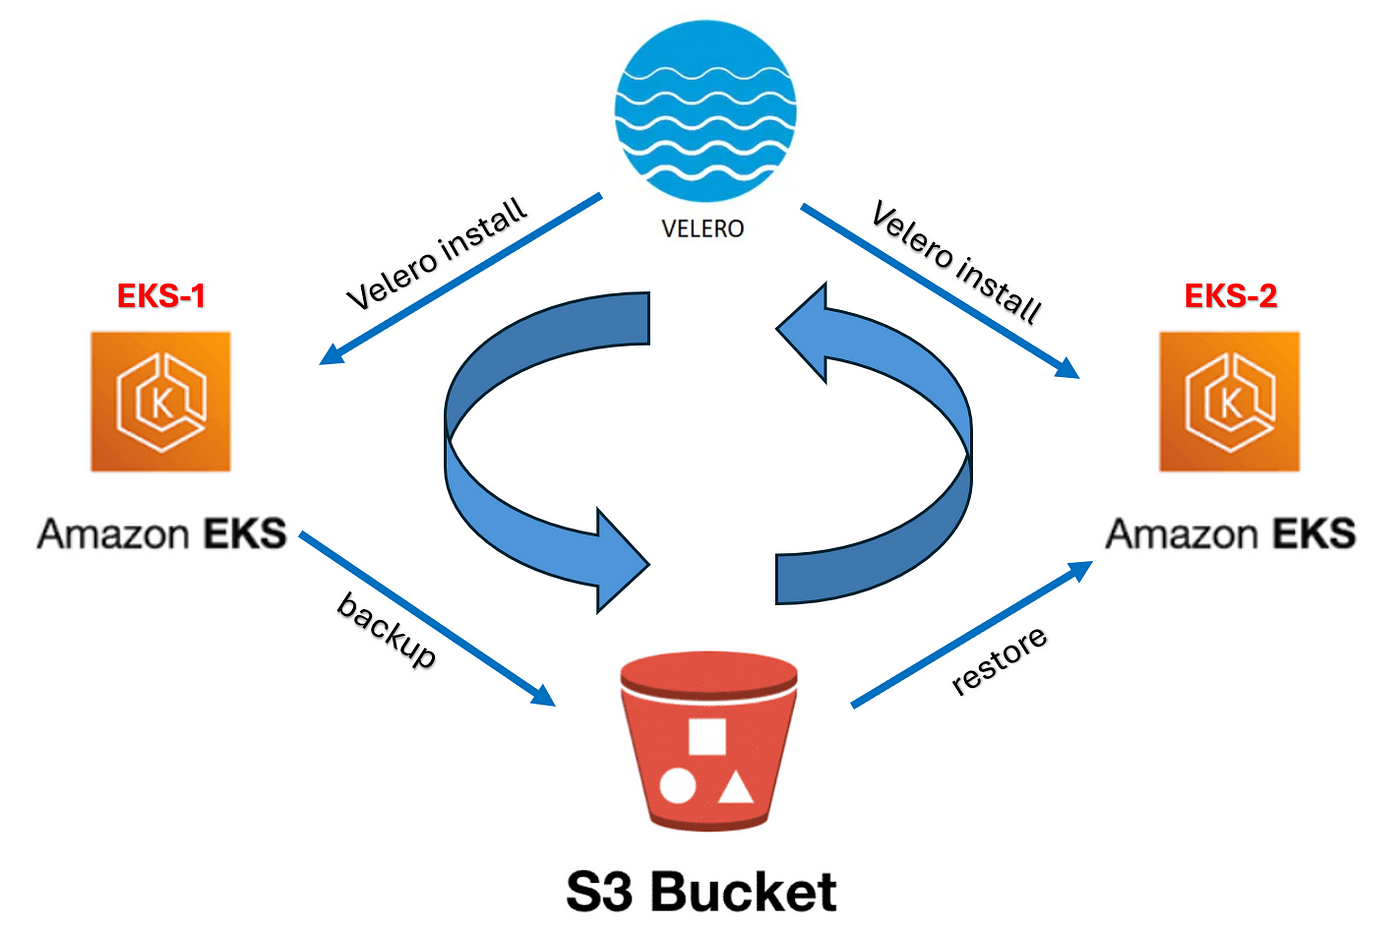
Velero is an open source tool to safely backup and restore, perform disaster recovery, and migrate Kubernetes cluster resources and persistent volumes.
There are other ways which I have tried of setting of the Disaster Recovery and Migration of the kubernetes cluster resources are:-
Creating a DR cluster in another region:- With this approach you need to have another kubernetes cluster up and running in another region and you can configure mutli cluster deployment using argocd and keep both the clusters in sync.
The Pros of the approach is that:-
Automated Synchronization: ArgoCD ensures the DR cluster remains in sync with the main cluster, reducing manual intervention and configuration drift.
Faster Recovery: In case of failure, the DR cluster is already pre-configured with the latest deployments, reducing downtime.
Version Control & Rollback: Since ArgoCD operates with GitOps principles, all configurations and application states are version-controlled, allowing easy rollbacks if needed.
Scalability & Flexibility: You can apply selective synchronization for critical workloads, reducing resource consumption in the DR cluster until failover is required
The Cons of this approach is that:-
Data Synchronization Challenge: ArgoCD only syncs Kubernetes manifests; it doesn't handle database or persistent storage replication, which must be managed separately.
Cost Overhead: Maintaining a fully functional DR cluster in another region incurs significant infrastructure costs, especially if running 24/7.
Potential Configuration Drift: If external services (databases, secrets, IAM roles) differ between regions, ArgoCD may struggle to keep everything identical.
But with velero you just need to backup location to set and setup velero to ensure that all the backup of the kubernetes cluster in that location.
This blog is about Velero, which I used in a recent project for Kubernetes backup and disaster recovery. It includes a demo of Velero. If you're using a different tool, please let me know in the comments..
Process to set up velero in the kubernetes cluster and installing velero CLI.
Installing the velero CLI in your own system which is a command line tool to interact with Velero.
 #IF You have a windows system :- Then you can use chocolatey to install and configure velero CLI
 choco install velero
 # On macOS, you can use Homebrew to install the velero client:
 brew install velero
 # on Linux/Unix system follow the following steps to install velero:-
 check the latest release of velero in the following repo:-
 https://github.com/vmware-tanzu/velero/releases/latest ( and download the binary file according to
 your OS)
 # extract the binary file
 tar -xvf <RELEASE-TARBALL-NAME>.tar.gz
 sudo mv <RELEASE-TARBALL-NAME>/velero /usr/local/bin/velero
For this demo I am using kind which is:- kind (Kubernetes IN Docker) is a tool for running local Kubernetes clusters using Docker containers. It is mainly used for testing Kubernetes environments in a lightweight and fast manner.
You can create a kind cluster using the following configuration file:-
 # Kind-cluster-config.yaml
 kind: Cluster
 apiVersion: kind.x-k8s.io/v1alpha4
 nodes:
   - role: control-plane
     image: kindest/node:v1.30.0@sha256:047357ac0cfea04663786a612ba1eaba9702bef25227a794b52890dd8bcd692e
   - role: worker
     image: kindest/node:v1.29.4@sha256:3abb816a5b1061fb15c6e9e60856ec40d56b7b52bcea5f5f1350bc6e2320b6f8

 # RUn the following command to create a kind cluster:-
 kind create cluster --name K8-cluster-1 --config Kind-cluster-config.yaml
 # Run the following command to delete the kind cluster
 kind delete cluster --name K8-cluster-1.

 # Note:- You need to install Kind and Docker in your system to create a kubernetes cluster with kind
After the creating the kind cluster create some of the kubernetes resource like configmap, secrets, service and deployments.
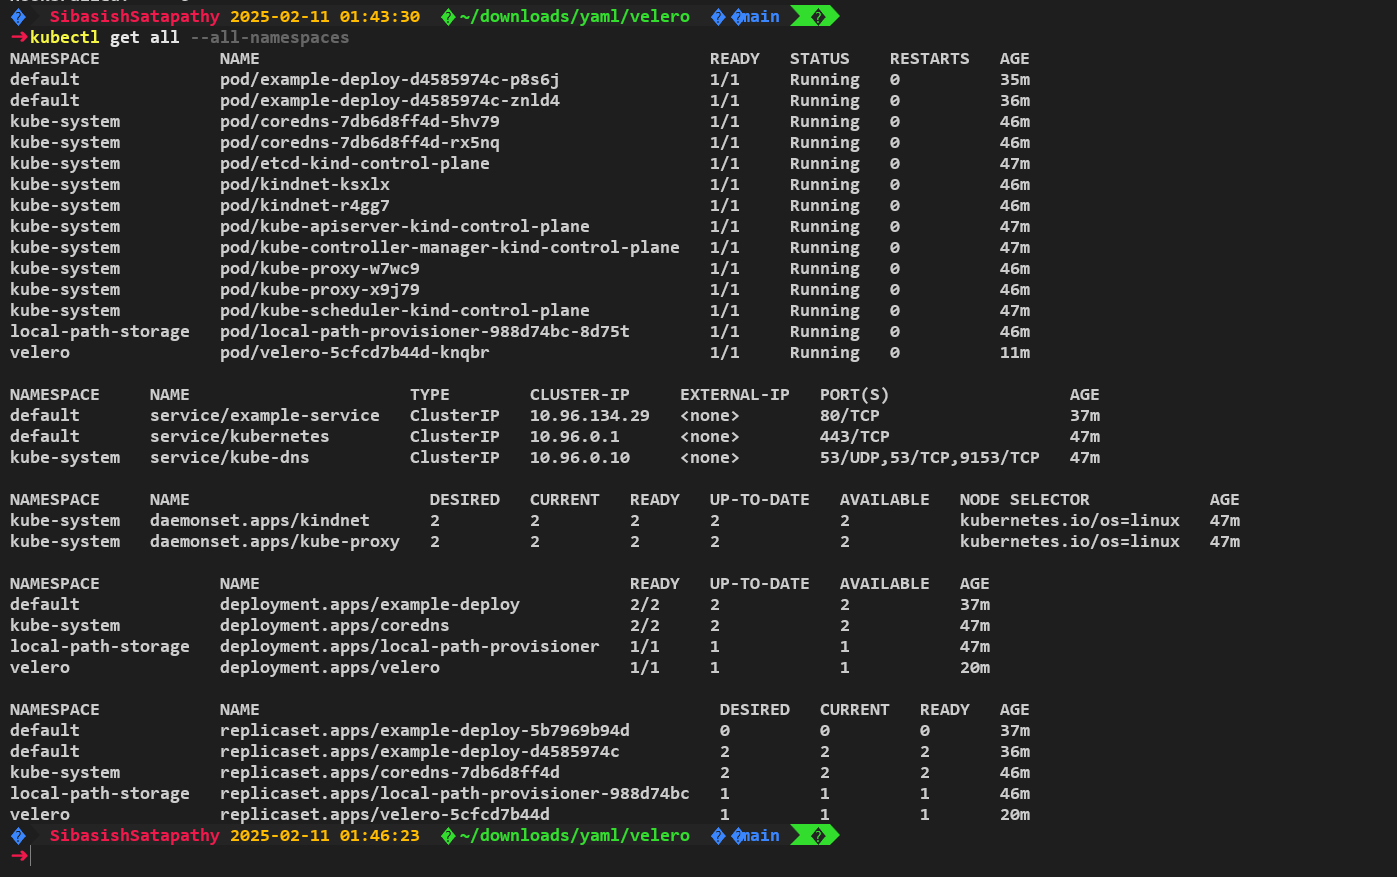


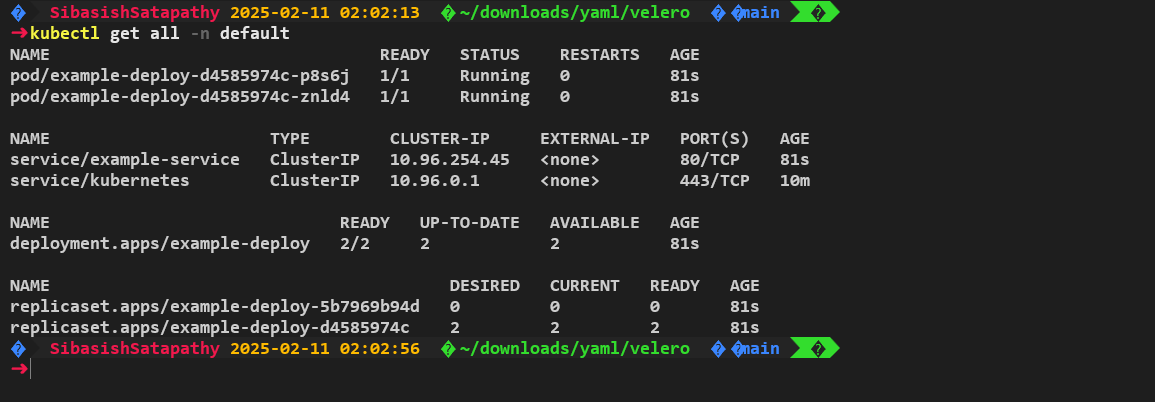
I have deployed all the resources present in the default namespace which will be backup using velero into the DR cluster.
In order to setup the velero into your cluster you need have a storage account first. It can be AWS S3 or Azure Blob storage.
In order to setup the AWS S3 follow this steps:-
Create a s3 bucket, you can create it from the console and I would like to create using the aws cli.
In order to do so:-
first configure your user credentials by running the aws configure command.
Then run the following command to create a s3 bucket.
 BUCKET=<your bucket name>
 REGION=<region where you want to create the bucket>
 aws s3api create-bucket --bucket $BUCKET --region $REGION --create-bucket-configuration LocationConstraint=$REGION

Then you need to create a user for velero and provide a custom policy to give velero access to the s3 bucket and store the backups files in that bucket.
# AWS CKI command to create a user called velero.
aws iam create-user --user-name velero

cat > velero-policy.json <<EOF
{
    "Version": "2012-10-17",
    "Statement": [
        {
            "Effect": "Allow",
            "Action": [
                "ec2:DescribeVolumes",
                "ec2:DescribeSnapshots",
                "ec2:CreateTags",
                "ec2:CreateVolume",
                "ec2:CreateSnapshot",
                "ec2:DeleteSnapshot"
            ],
            "Resource": "*"
        },
        {
            "Effect": "Allow",
            "Action": [
                "s3:GetObject",
                "s3:DeleteObject",
                "s3:PutObject",
                "s3:AbortMultipartUpload",
                "s3:ListMultipartUploadParts"
            ],
            "Resource": [
                "arn:aws:s3:::${BUCKET}/*"
            ]
        },
        {
            "Effect": "Allow",
            "Action": [
                "s3:ListBucket"
            ],
            "Resource": [
                "arn:aws:s3:::${BUCKET}"
            ]
        }
    ]
}
EOF

aws iam put-user-policy \
  --user-name velero \
  --policy-name velero \
  --policy-document file://velero-policy.json

# create the access key and secret key for that user.

aws iam create-access-key --user-name velero > /tmp/key.json

AWS_ACCESS_ID=`cat /tmp/key.json | jq .AccessKey.AccessKeyId | sed s/\"//g`
AWS_ACCESS_KEY=`cat /tmp/key.json | jq .AccessKey.SecretAccessKey | sed s/\"//g`
Then create a file and store the credentials of the user velero and install velero in the cluster using the following command.
# create a velero credentials file:-
cat > /tmp/velero-creds <<EOF
[default]
aws_access_key_id=$AWS_ACCESS_ID
aws_secret_access_key=$AWS_ACCESS_KEY
EOF

# As I am using a windows environment therefore I have stored the file in the velero directory
# and using in the velero cli command.

# velero cli command to install velero in the cluster.

velero install \
    --provider aws \
    --plugins velero/velero-plugin-for-aws:v1.11.0 \ # always check the latest version of aws plugin in the velero docs.
    --bucket $BUCKET \
    --backup-location-config region=$REGION \
    --snapshot-location-config region=$REGION \
    --secret-file /tmp/velero-creds
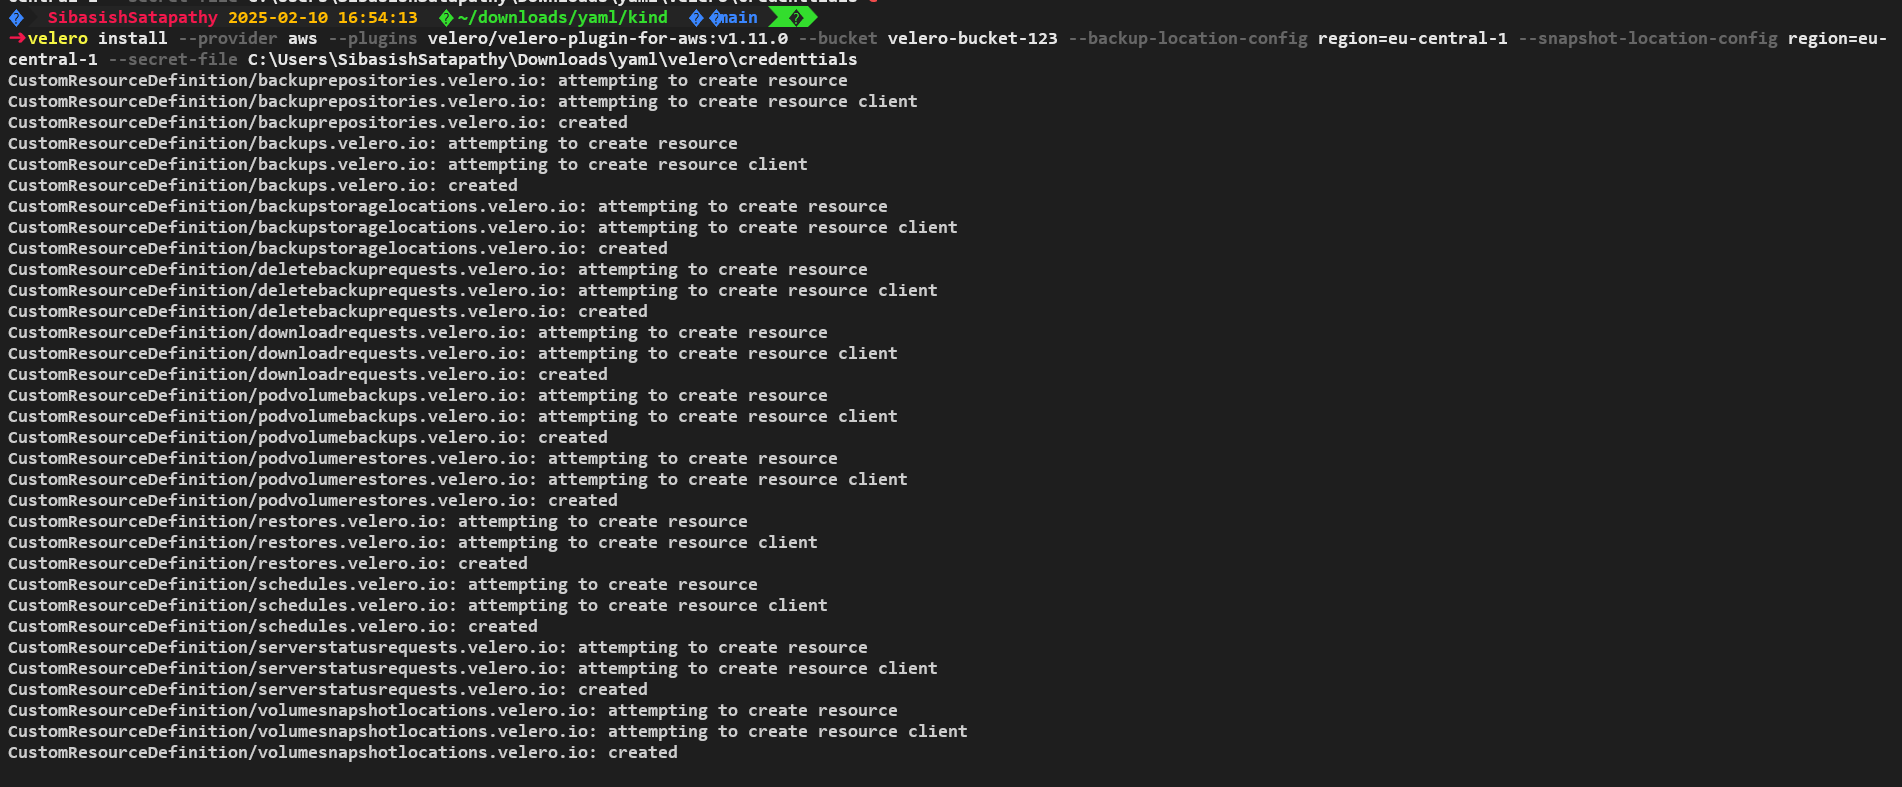

In order to check the in installation of the velero is successfull and is ready to take backups is:-
# check the logs of the velero pod or deployment and it should not have any error.log.

kubectl -n velero get pods
kubectl logs deployment/velero -n velero


There is another method to check that the velero is able to install in the kubernetes cluster and is ready to send backup to the s3 buckets is through using velero cli command.
velero backup-location get

# it should give the output as it shown below in the snip.

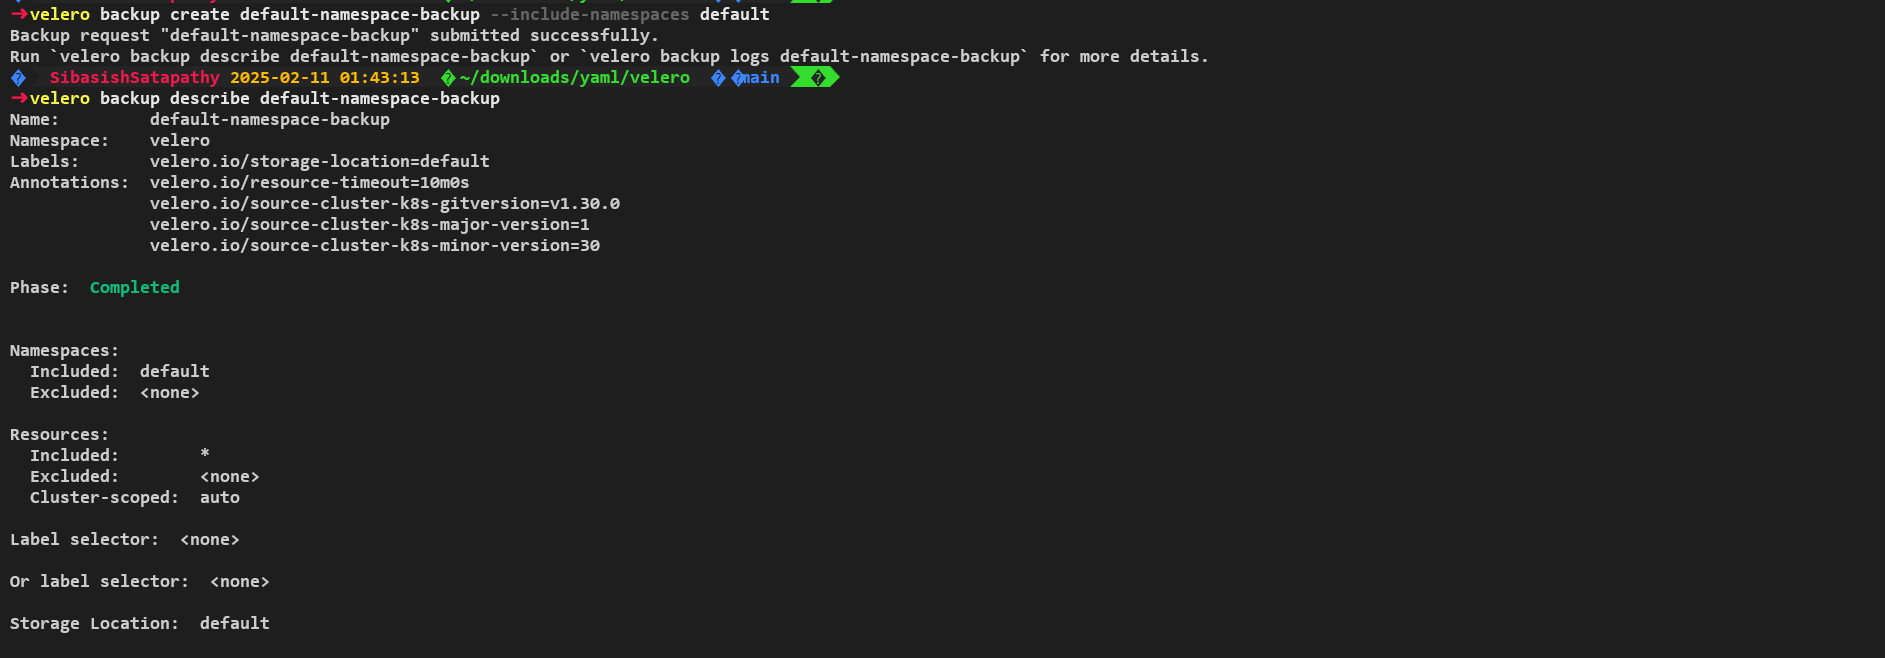
In order to take backup of the resources in your kubernetes cluster of the particular namespaces use this command.
velero backup create default-namespace-backup --include-namespaces default

# inorder to include other namespaces you can add them as:-

velero backup create default-namespace-backup --include-namespaces <namespace-1>, <namespace-2>

# OR You can use a manifest also to create the similar resource.
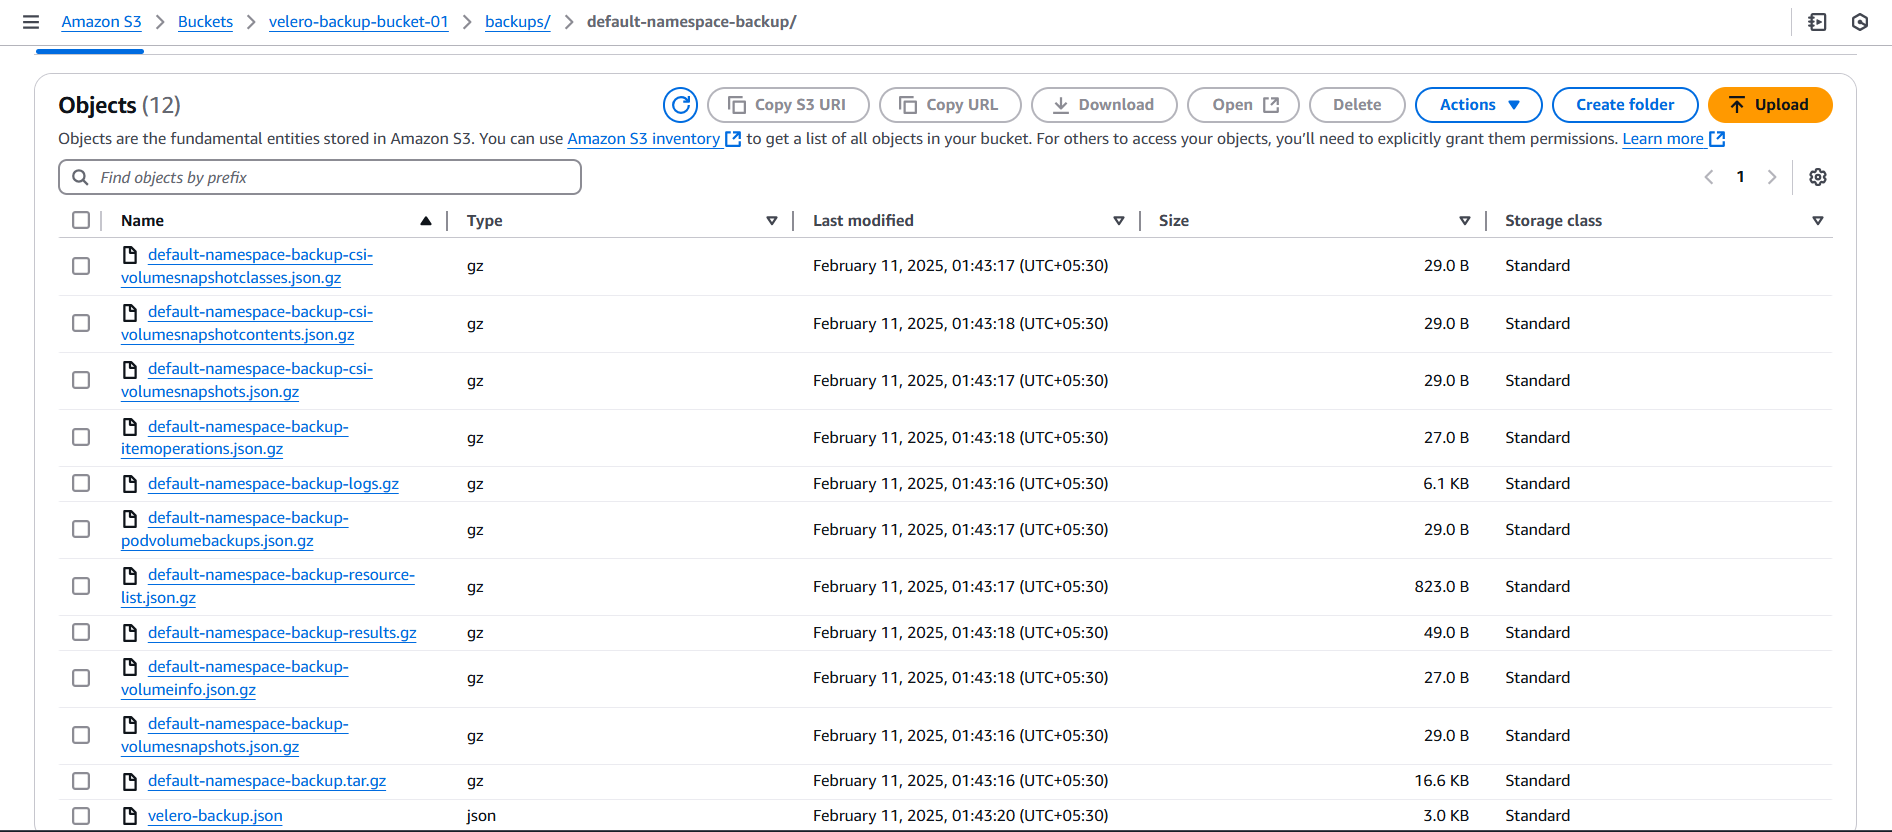
In order to create a disaster I have deleted my primary cluster and let us see how velero restores everything.

I have created a new cluster using kind as mentioned above and I will restore the backup which is present in the s3 bucket in this cluster and let see how velero help us in this.
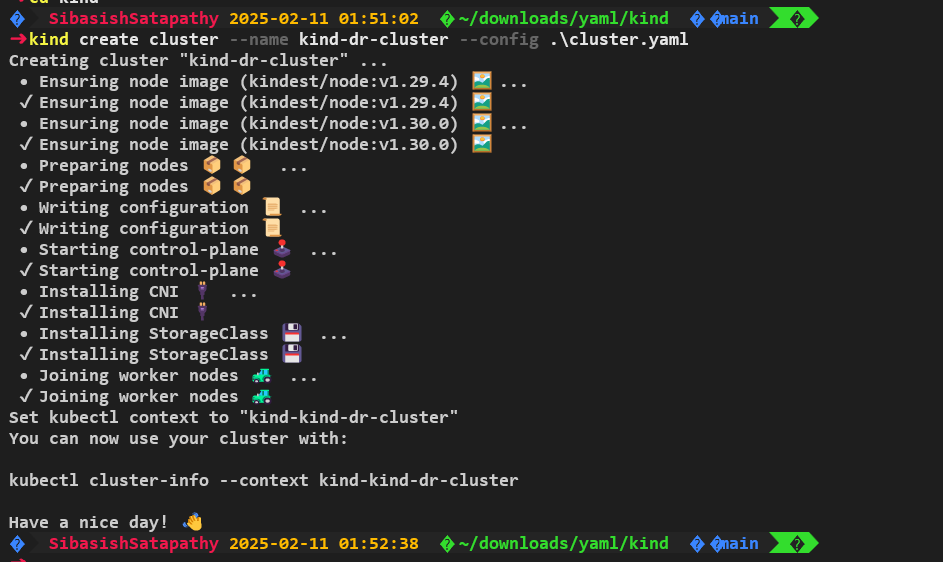
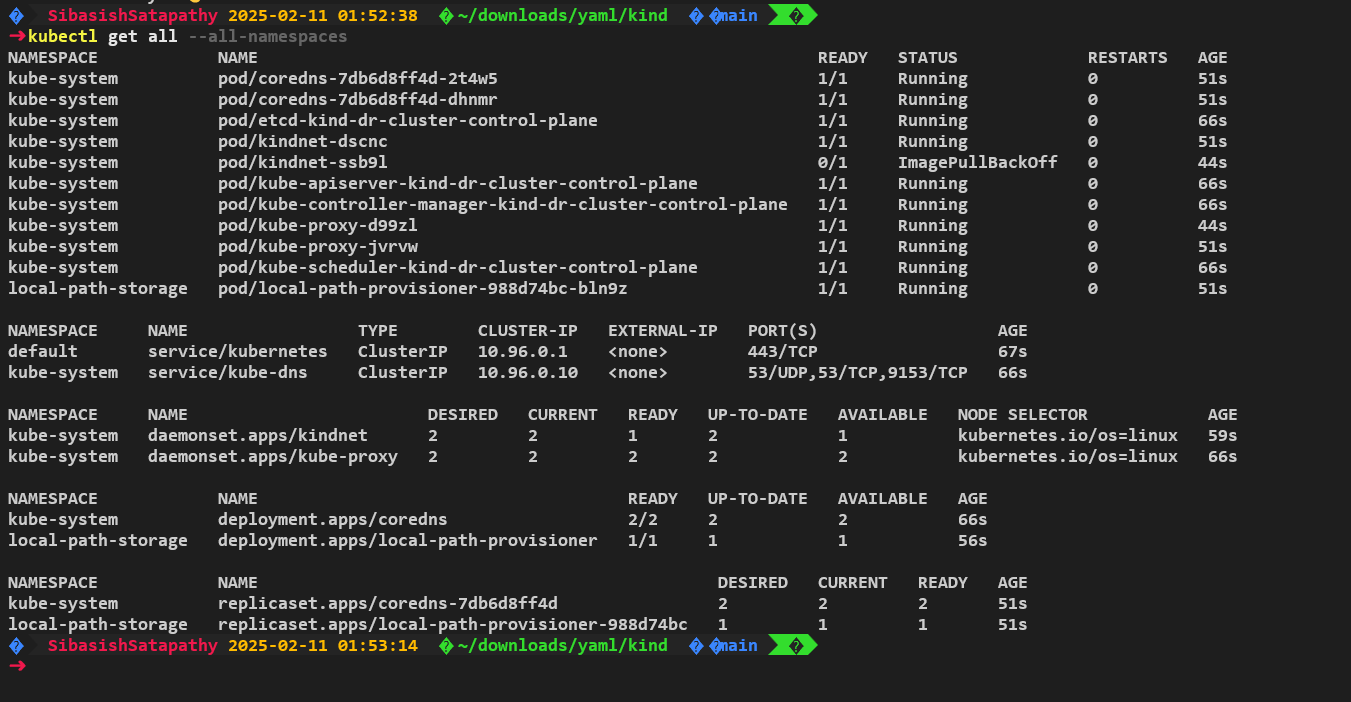
Now you see the output of the resources present in the kubernetes-dr-cluster and you can see that there is not resource in the default namespace and velero is not installed in this new cluster.

Now installed velero in this new cluster using the same s3 bucket and credentials of the same user called velero.
After installing velero check the logs of the velero pod and it should have any error logs in it. Once the velero is sync with the s3 bucket which has all the backups. Its time to restore.
In order to restore the command is:-
velero restore create default-namespace-backup --from-backup default-namespace-backup # this will help
# you in restoring.

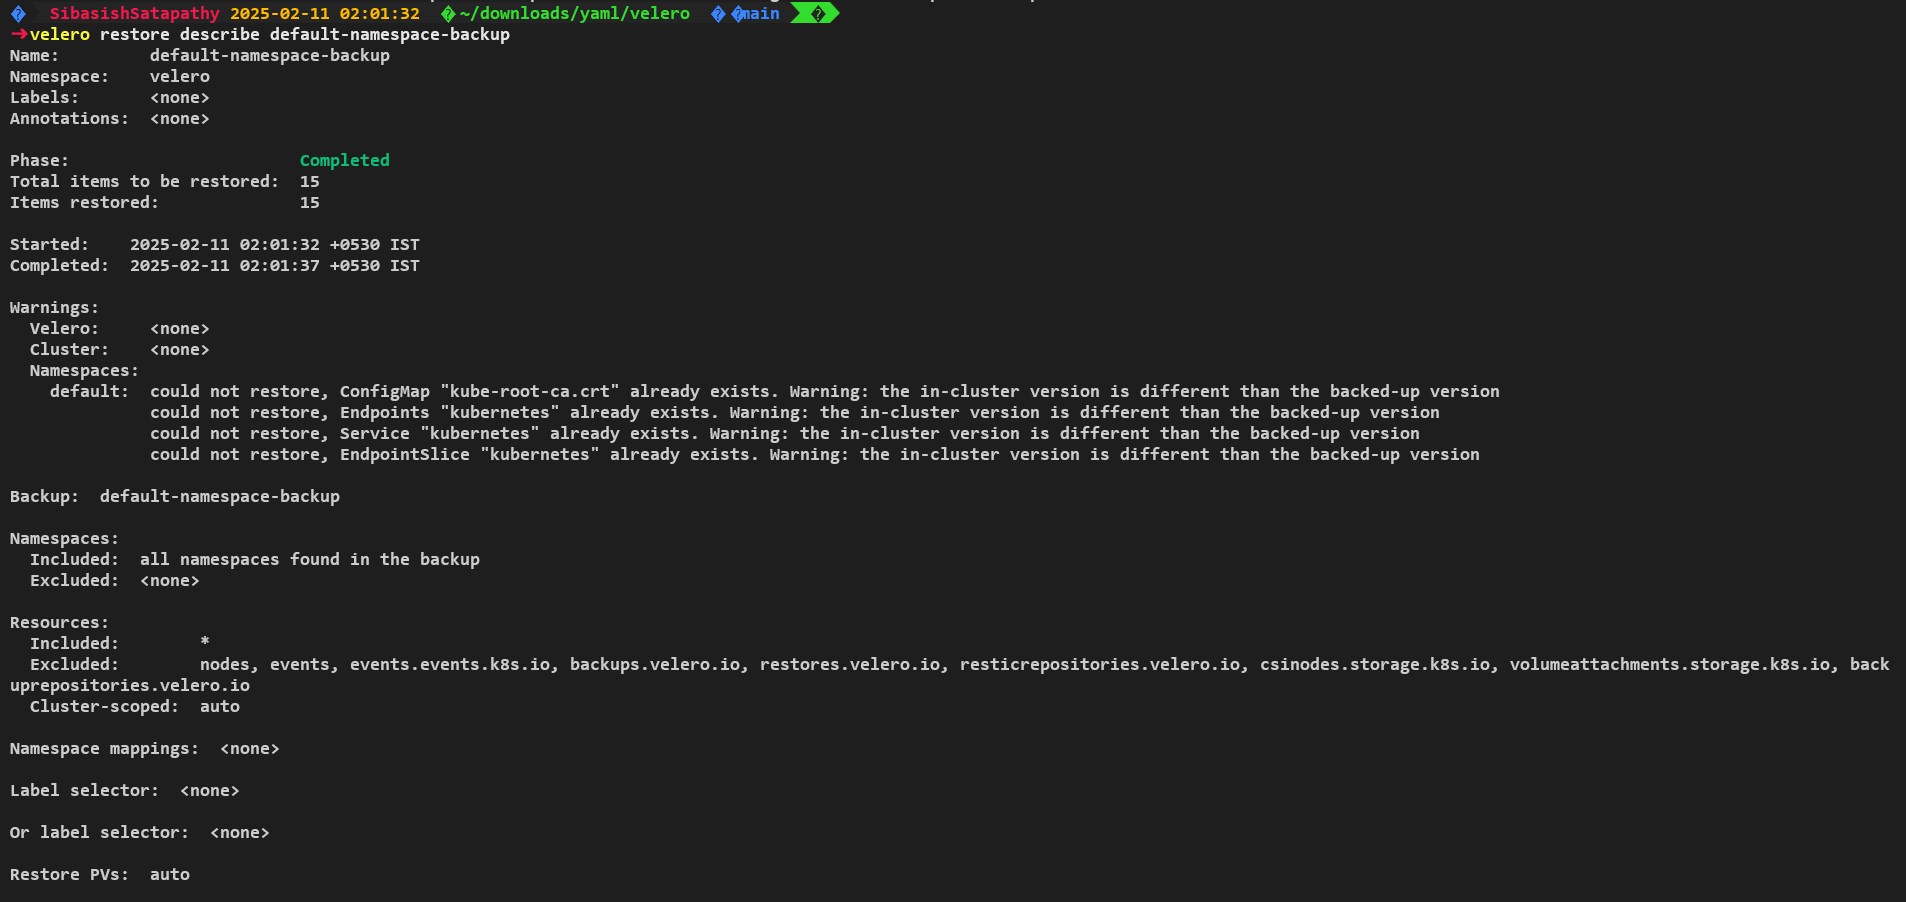
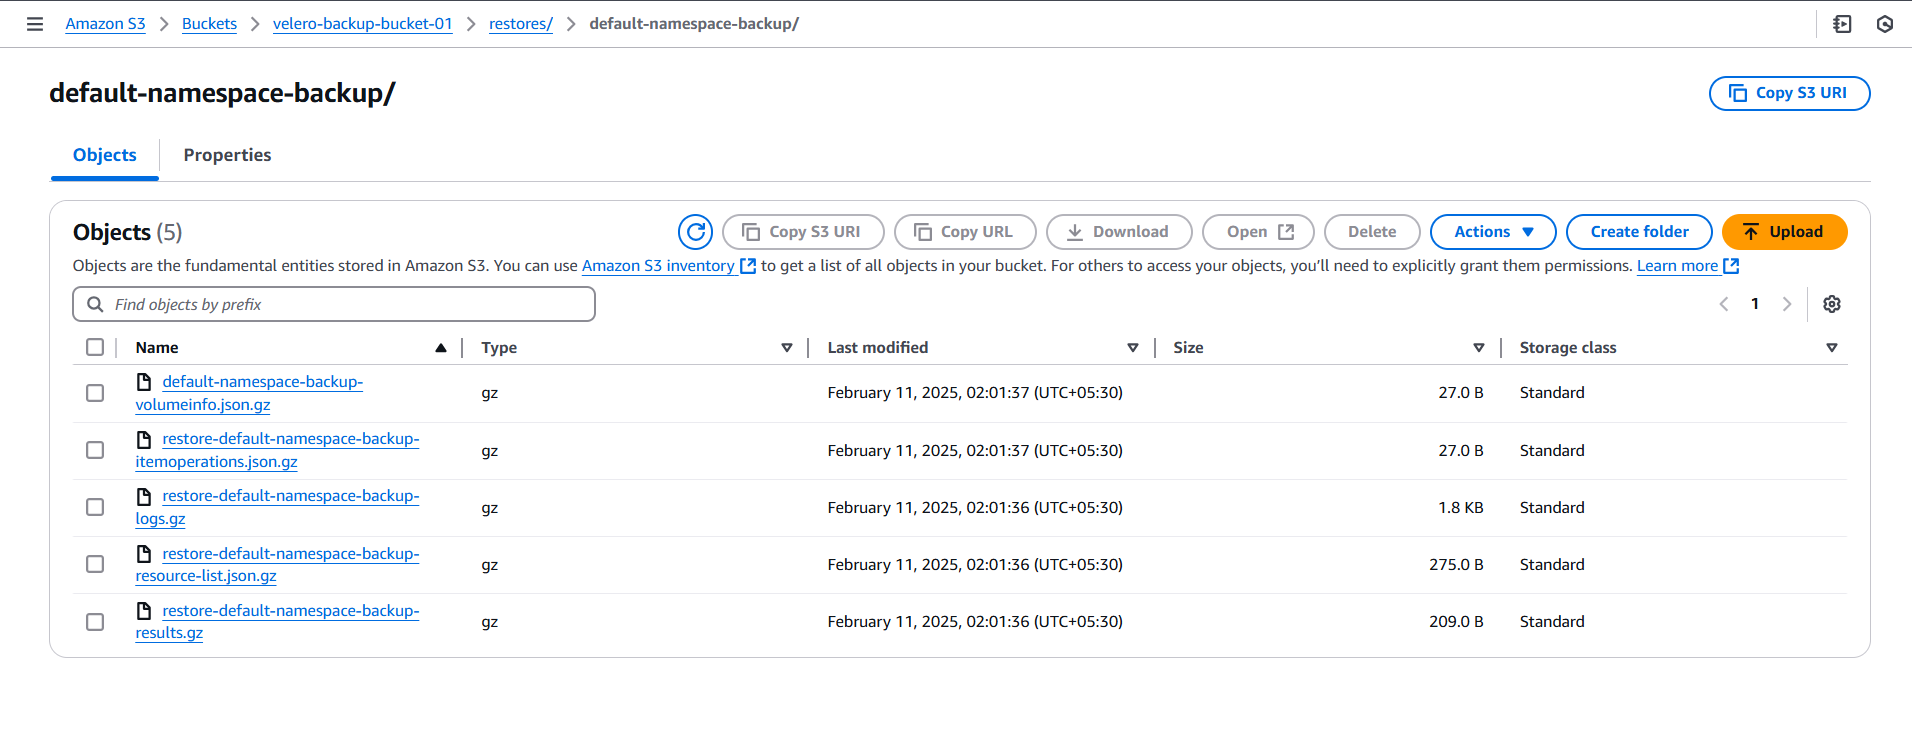
After the restoration phase is complete you can check that all the resources which were deployed in the default were created automatically by velero and without any manual workload.
Additional Section:-
You can even schedule the backups in the primary kubernetes cluster which is a feature of the velero. In order to achieve these are some example which you can try according to your need and requirement.
1. velero create schedule name --schedule="0 */6 * * *" # create a backup every 6 hours
2. velero create schedule name --schedule="@every 6h" # create a backup every 6 hours with the @every notation
3. velero create schedule name --schedule="@every 24h" --include-namespace web # create a daily backup of the web namespace
4. velero create schedule name --schedule=@every 168h" --ttl 2160h0m0s # create a daily backup each living for 90 days
Velero is a powerful and flexible tool for Kubernetes backup and disaster recovery. Whether you're protecting workloads from accidental deletions, migrating clusters, or ensuring business continuity, Velero simplifies the process with its efficient backup, restore, and migration capabilities.
By leveraging its features like incremental backups, namespace-specific restores, and cloud storage integration, you can confidently manage your Kubernetes data with minimal effort.
If you haven't tried Velero yet, now is the perfect time to set it up and ensure your cluster is resilient. Need help getting started? Check out the official documentation.
Thank You.
Subscribe to my newsletter
Read articles from Sibasish Satapathy directly inside your inbox. Subscribe to the newsletter, and don't miss out.
Written by
