Securing .NET API with Microsoft Entra ID
 Raul Naupari
In this article, we delve into securing .NET APIs using Microsoft Entra ID, with a focus on scenarios where the API's client is a Single-Page Application. Following the OAuth 2.0 guidelines, we will implement the Authorization Code Flow with Proof Key for Code Exchange (PKCE) as our chosen authorization mechanism.
API App Registration
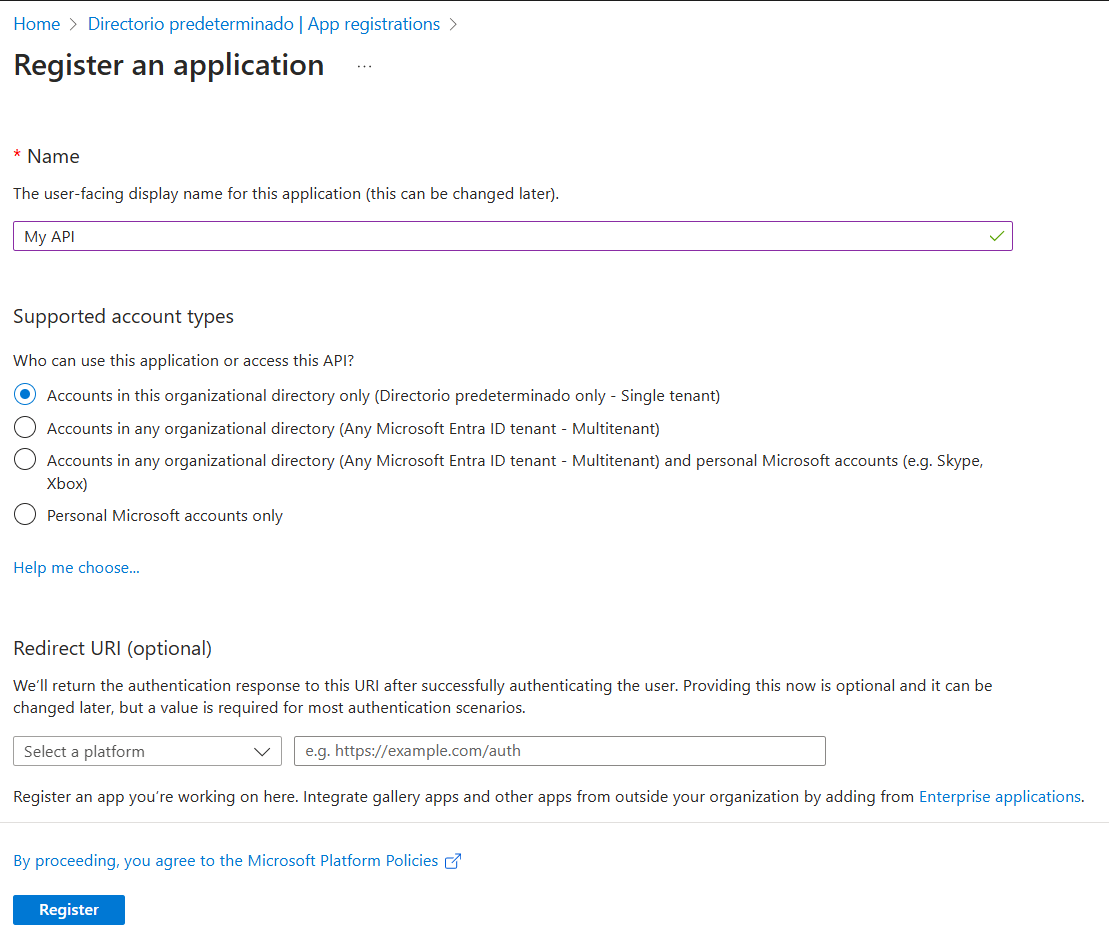
Let's start creating the App registration for our API.
Go to the Expose an API option and click Add a scope:
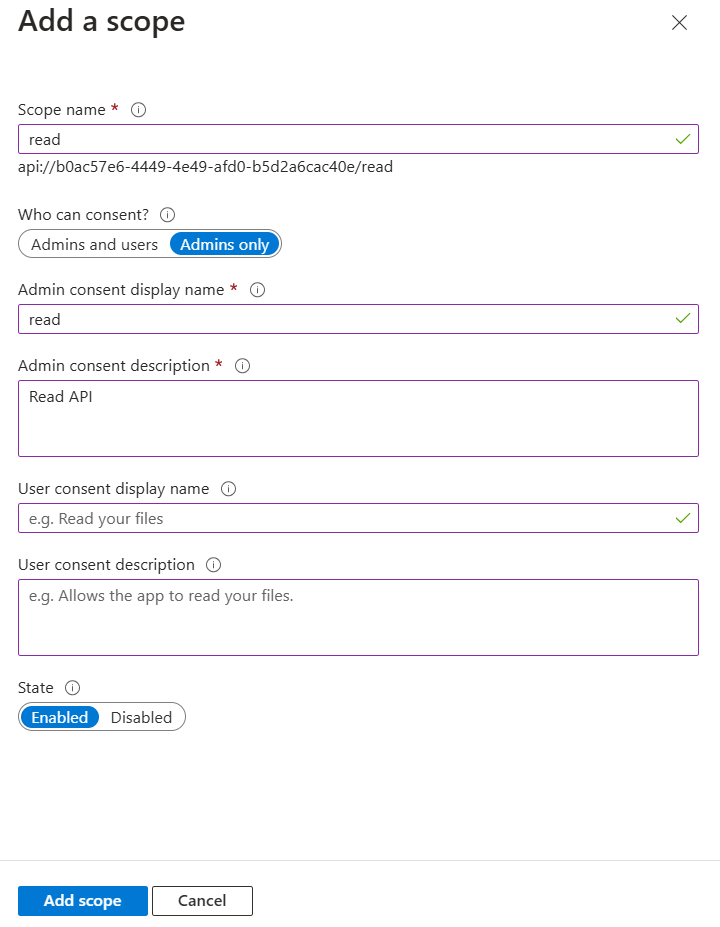
At this point, we can use any name for our scopes. In this case, we created a read scope. Before adding our first scope, Microsoft Entra ID might ask us to confirm the Application ID URI. Just use the default value, the ClientID of our App Registration.
Scope is a mechanism in OAuth 2.0 to limit an application's access to a user's account. An application can request one or more scopes, this information is then presented to the user in the consent screen, and the access token issued to the application will be limited to the scopes granted.
SPA App Registration
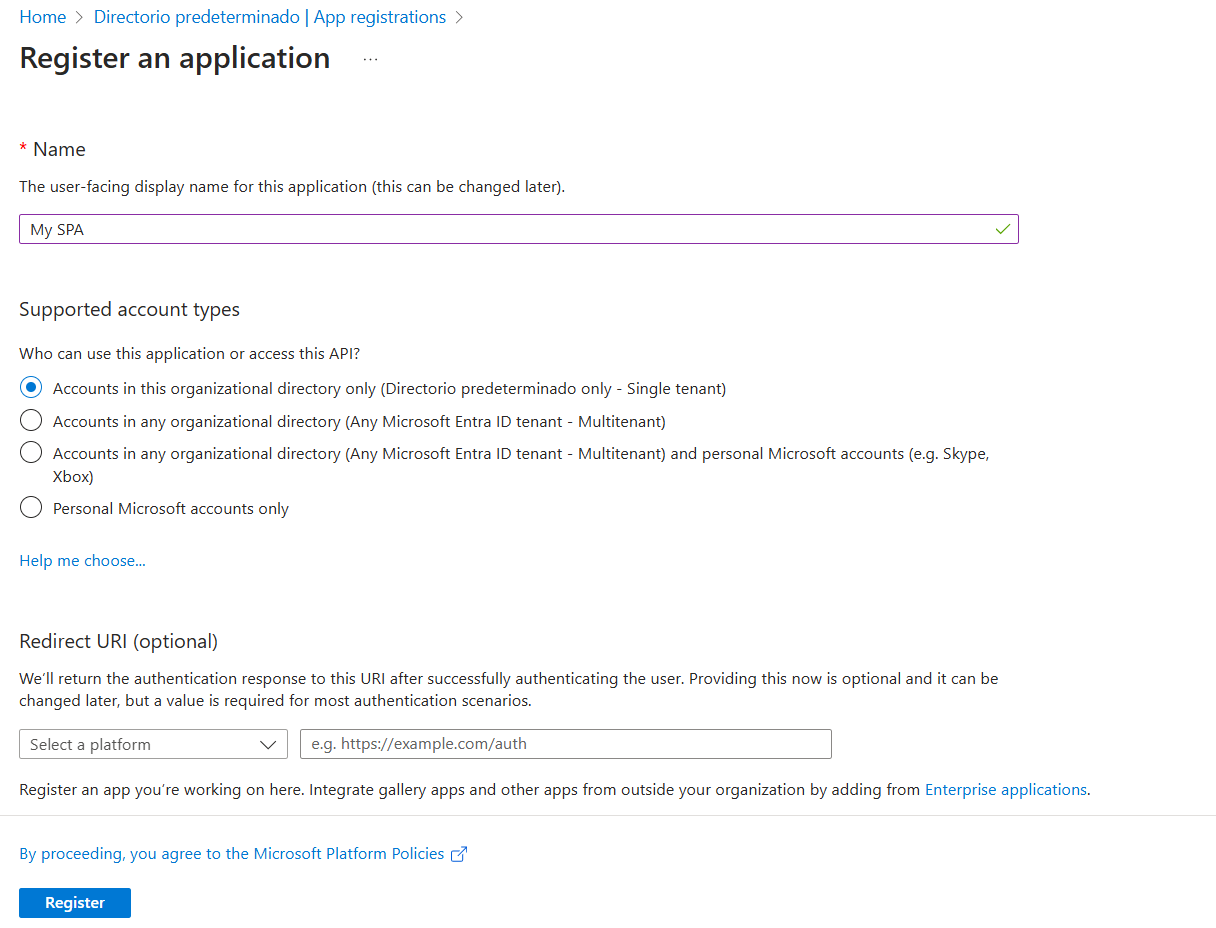
Let's create the app registration for our SPA:
Go to the Authentication option, click Add a platform, and select Single-page application:
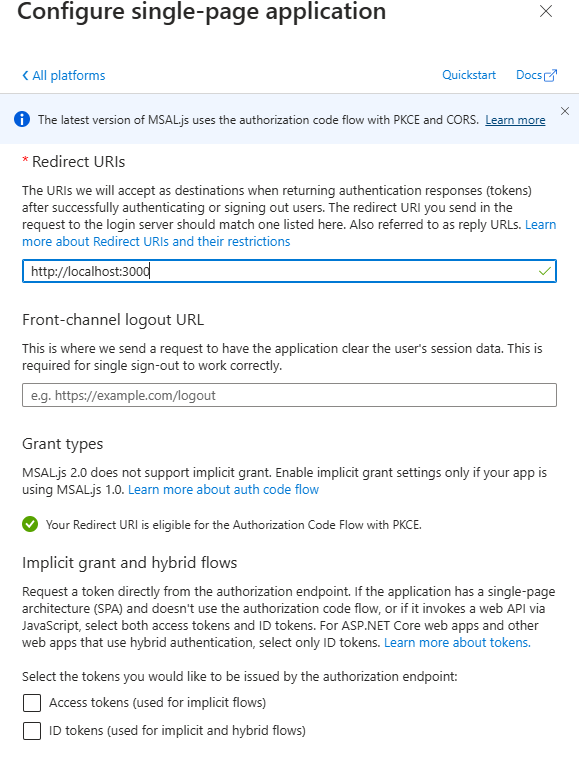
Locally, the SPA will run on port 3000, which is why we are using that as the redirect URI. Go to the API permissions option, click Add a permission, select APIs my organization uses, and search for My API:
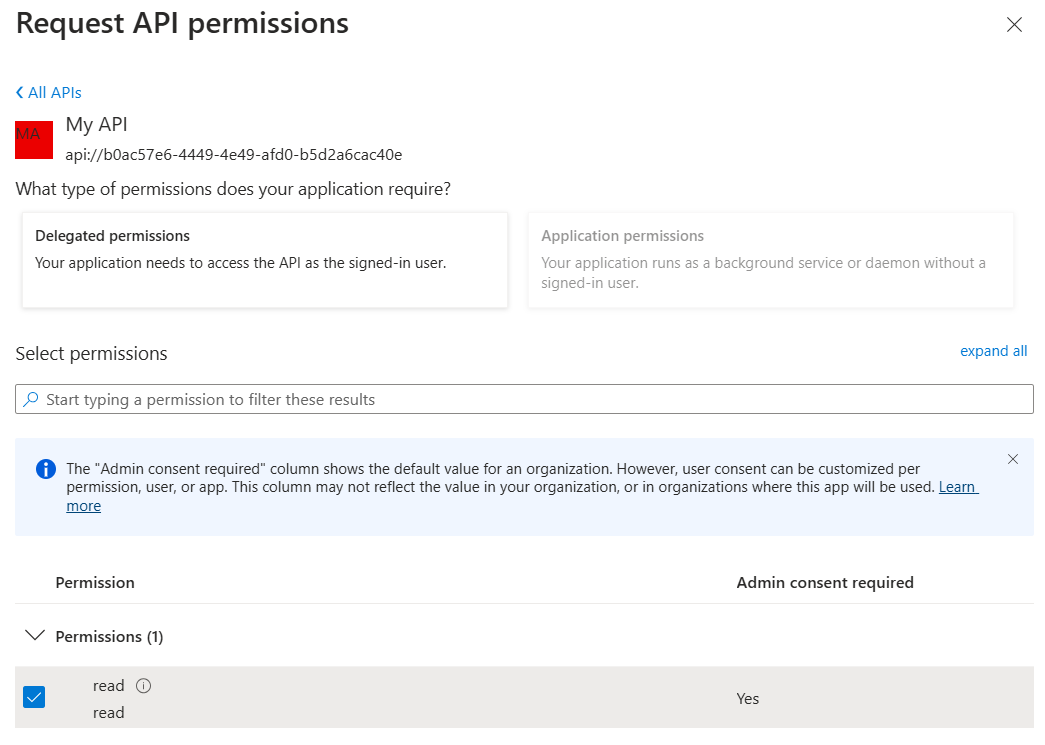
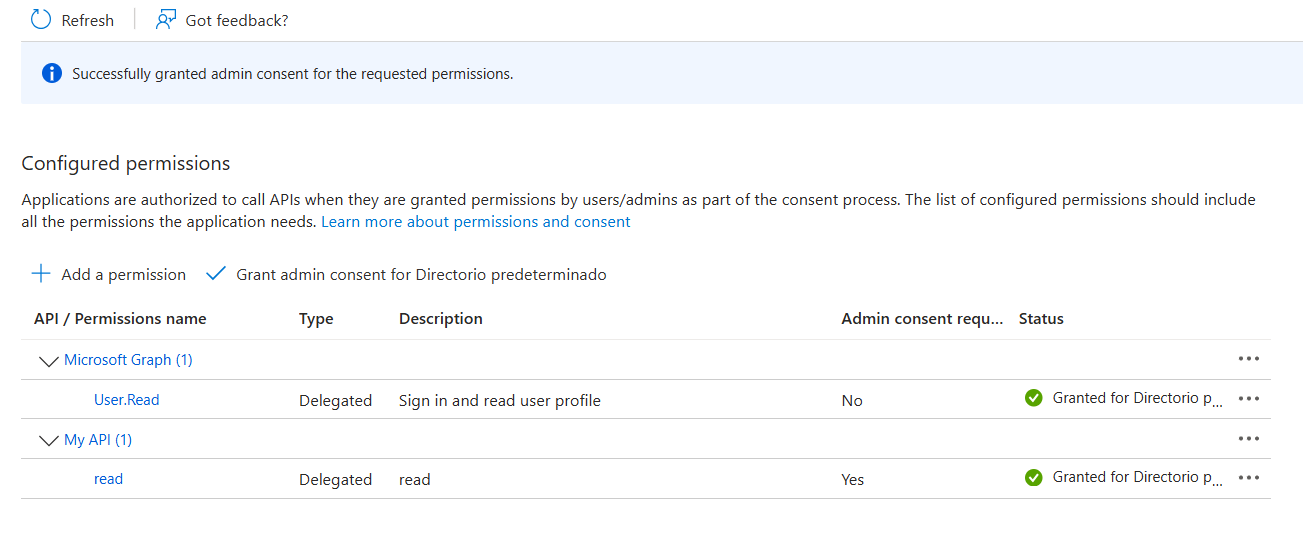
Select the read permission. Once the permission is added, click on the option Grant admin consent:
API
Run the following commands:
dotnet new webapi -n MyWebApi
dotnet new sln -n Sandbox
dotnet sln add --in-root MyWebApi
Open the Program.cs file and update the content as follows:
using Microsoft.AspNetCore.Authentication.JwtBearer;

var builder = WebApplication.CreateBuilder(args);
builder.Services.AddEndpointsApiExplorer();
builder.Services.AddSwaggerGen();
builder.Services.AddCors();
builder.Logging.SetMinimumLevel(LogLevel.Debug);
builder.Services.AddAuthentication(options =>
{
    options.DefaultAuthenticateScheme = JwtBearerDefaults.AuthenticationScheme;
})
.AddJwtBearer(options =>
{
    options.Authority = "https://login.microsoftonline.com/<MY_TENANT>/";
    options.Audience = "api://<MY_API_CLIENT_ID>";
});
builder.Services.AddAuthorization();
var app = builder.Build();

if (app.Environment.IsDevelopment())
{
    app.UseSwagger();
    app.UseSwaggerUI();
}
app.UseAuthentication();
app.UseAuthorization();
app.UseHttpsRedirection();
app.UseCors(cp => cp
    .AllowAnyHeader()
    .SetIsOriginAllowed(origin => true)
    .AllowCredentials()
    );

var summaries = new[]
{
    "Freezing", "Bracing", "Chilly", "Cool", "Mild", "Warm", "Balmy", "Hot", "Sweltering", "Scorching"
};

app.MapGet("/weatherforecast", () =>
{
    var forecast =  Enumerable.Range(1, 5).Select(index =>
        new WeatherForecast
        (
            DateOnly.FromDateTime(DateTime.Now.AddDays(index)),
            Random.Shared.Next(-20, 55),
            summaries[Random.Shared.Next(summaries.Length)]
        ))
        .ToArray();
    return forecast;
})
.WithName("GetWeatherForecast")
.RequireAuthorization()
.WithOpenApi();

app.Run();

record WeatherForecast(DateOnly Date, int TemperatureC, string? Summary)
{
    public int TemperatureF => 32 + (int)(TemperatureC / 0.5556);
}
In the code above, the AddAuthentication method sets the default authentication scheme to JWT. The AddJwtBearer method specifies the authority and audience to validate the token. Remember to use the AddAuthorization method, along with the two middlewares: UseAuthentication and UseAuthorization. Another important piece of the code is the RequireAuthorization method under the /weatherforecast endpoint. Press F5 to start the API.
SPA
At the solution level, create a Client folder and include an index.html file with the following content:
<!DOCTYPE html>
<html lang="en">
<head>
    <meta charset="UTF-8">
    <title>Azure Entra ID Authentication</title>
</head>
<body>
    <h1>SPA with Azure Entra ID</h1>
    <button id="login">Login</button>
    <button id="callAPI" style="display:none;">Call API</button>
    <p id="userInfo"></p>
    <p id="token"></p>
    <p id="response"></p>
    <script src="https://alcdn.msauth.net/browser/2.32.1/js/msal-browser.min.js"></script>
    <script>
        const msalConfig = {
            auth: {
                clientId: "<MY_SPA_CLIENT_ID>",
                authority: "https://login.microsoftonline.com/<MY_TENANT>",
                redirectUri: "http://localhost:3000"
            }
        };

        const client = new msal.PublicClientApplication(msalConfig);

        let account;

        async function login() {
            try {
                const loginRequest = {
                    scopes: ["openid", "profile", "offline_access"]
                };
                const loginResponse = await client.loginPopup(loginRequest);
                console.log("Login successful:", loginResponse);
                document.getElementById("userInfo").innerText = `Hello, ${loginResponse.account.username}`;
                document.getElementById("callAPI").style.display = "block";
                account = loginResponse.account;
            } catch (error) {
                console.error("Login failed:", error);
            }
        }

        async function getAccessToken() {
            try {
                const tokenRequest = {
                    scopes: ["api://<MY_API_CLIENT_ID>/read"],
                    account: account
                };
                const tokenResponse = await client.acquireTokenSilent(tokenRequest);
                console.log(tokenResponse);
                document.getElementById("token").innerText = tokenResponse.accessToken;
                return tokenResponse.accessToken;
            } catch (error) {
                console.error("Token acquisition failed:", error);
            }
        }

        async function callAPI() {
            const token = await getAccessToken();
            if (!token) return;

            const response = await fetch("https://localhost:7063/weatherforecast", {
                method: "GET",
                headers: {
                    "Authorization": `Bearer ${token}`
                }
            });
            console.log("API Response:", response)

            const data = await response.text();

            document.getElementById("response").innerText = data;
        }

        document.getElementById("login").addEventListener("click", login);
        document.getElementById("callAPI").addEventListener("click", callAPI);
    </script>
</body>
</html>
Our SPA is built with plain JavaScript. There are two buttons: one for logging in and another for calling the API. We use the MSAL 2.0 library, which defaults to using the authorization code flow with PKCE. To run this application, execute npx serve . inside the Client folder (make sure Node.js is installed).
servehelps you serve a static site, single page application or just a static file

Go to http://localhost:3000 and start using the application:

Lessons Learned Requesting Tokens
All the scopes must belong to a single resource (app registration).
The resource owner of the scopes must match the audience specified in our API.
When no scope is specified, our token's audience defaults to
00000003-0000-0000-c000-000000000000, which corresponds to Microsoft Graph.An app registration can have scopes from multiple resources.
All the code can be found here. Thanks, and happy coding.
Subscribe to my newsletter
Read articles from Raul Naupari directly inside your inbox. Subscribe to the newsletter, and don't miss out.
Written by

Raul Naupari
Raul Naupari
Somebody who likes to code