Data Warehousing with AWS Redshift
 Avinash Reddy
Businesses these days require efficient ways to query and analyze vast amounts of data quickly. AWS Redshift is one way to fully manage your data warehouse, along with scalability, speed and integration with AWS services.
In my recent Proof of Concept (POC), I demonstrated how to set up and use AWS Redshift to query large datasets remotely with speed and efficiency.
By the end of this blog, you will understand:
How to set up an AWS Redshift cluster
How to integrate Redshift with SQL Workbench
How to store and retrieve large datasets from Amazon S3
How to use AWS QuickSight for designing dashboards out of raw data
Let’s go!
Prerequisites
An AWS account with appropriate permissions
Basic knowledge of SQL
SQL Workbench and Java Development Kit (JDK 8)
An Amazon S3 bucket for data storage
Step 1: Launching a Windows EC2 Instance
Since we’ll be using SQL Workbench to interact with Redshift, we need an environment.
Create a Windows instance from EC2, with at least 4GB RAM.
Connect to the instance via RDP (Remote Desktop Protocol).
Download and install SQL Workbench.
Install JDK 8 to enable the Redshift JDBC driver.
Step 2: Setting Up an AWS Redshift Cluster
Now, let’s create a Redshift cluster to handle our data warehousing needs.
Create a subnet group in a VPC as you wish.
Open the AWS Redshift console.
Click Create Cluster and configure the following:
Cluster Type: Single Node (for POC, use a free-tier eligible option)
Node Type: dc2.large
Database Name:
redshift_pocMaster Username:
adminMaster Password:
yourpassword
Click Create Cluster and wait for it to be available.
Once the cluster is running, copy the Endpoint URL from the cluster’s details.
Step 3: Connecting SQL Workbench to Redshift
To query Redshift, we need to connect it with SQL Workbench.
From the windows instance that is setup, open SQL Workbench
Download the AWS Redshift JDBC driver and configure it.
Create a new connection and enter the following details:
Driver: Select Redshift JDBC
Get the jar file from Redshift
URL:
jdbc:redshift://your-cluster-endpoint:5439/redshift_pocUsername:
adminPassword:
yourpassword
Click Test Connection to ensure connectivity.
Step 4: Creating a Table in Redshift
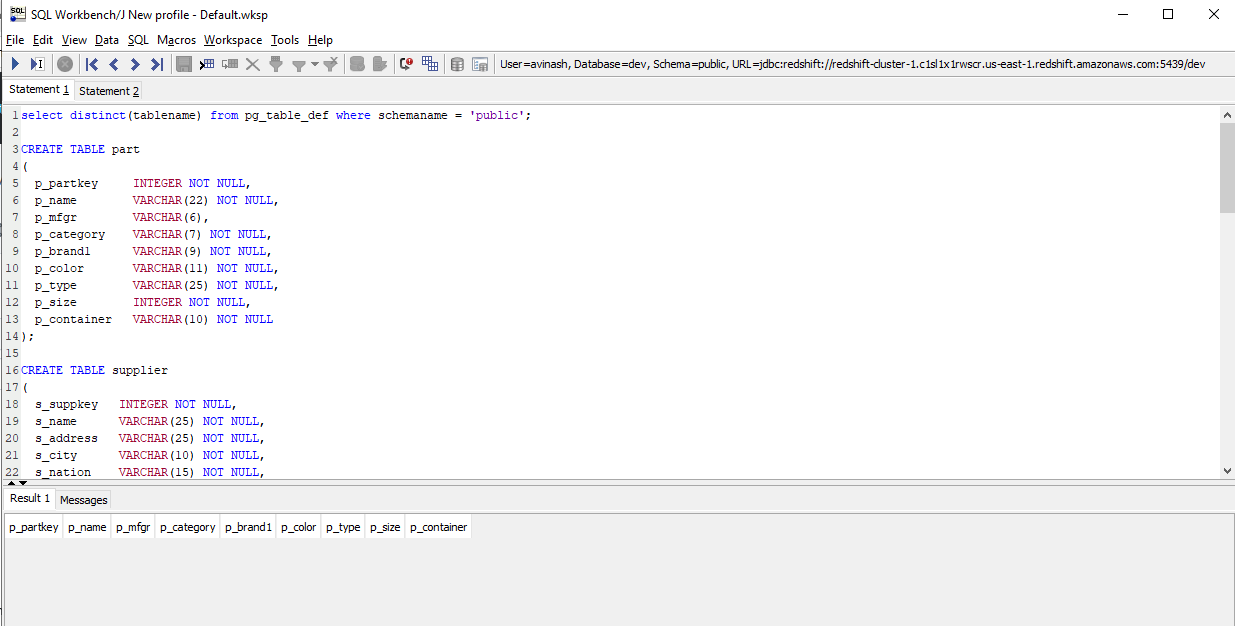
We will create a table in Redshift and later load data from an Amazon S3 backup. You can checkout my Github repo for the script.
select distinct(tablename) from pg_table_def where schemaname = 'public';

CREATE TABLE part
(
  p_partkey     INTEGER NOT NULL,
  p_name        VARCHAR(22) NOT NULL,
  p_mfgr        VARCHAR(6),
  p_category    VARCHAR(7) NOT NULL,
  p_brand1      VARCHAR(9) NOT NULL,
  p_color       VARCHAR(11) NOT NULL,
  p_type        VARCHAR(25) NOT NULL,
  p_size        INTEGER NOT NULL,
  p_container   VARCHAR(10) NOT NULL
);
select * from part
CREATE TABLE supplier
(
  s_suppkey   INTEGER NOT NULL,
  s_name      VARCHAR(25) NOT NULL,
  s_address   VARCHAR(25) NOT NULL,
  s_city      VARCHAR(10) NOT NULL,
  s_nation    VARCHAR(15) NOT NULL,
  s_region    VARCHAR(12) NOT NULL,
  s_phone     VARCHAR(15) NOT NULL
);

CREATE TABLE customer
(
  c_custkey      INTEGER NOT NULL,
  c_name         VARCHAR(25) NOT NULL,
  c_address      VARCHAR(25) NOT NULL,
  c_city         VARCHAR(10) NOT NULL,
  c_nation       VARCHAR(15) NOT NULL,
  c_region       VARCHAR(12) NOT NULL,
  c_phone        VARCHAR(15) NOT NULL,
  c_mktsegment   VARCHAR(10) NOT NULL
);

CREATE TABLE dwdate
(
  d_datekey            INTEGER NOT NULL,
  d_date               VARCHAR(19) NOT NULL,
  d_dayofweek          VARCHAR(10) NOT NULL,
  d_month              VARCHAR(10) NOT NULL,
  d_year               INTEGER NOT NULL,
  d_yearmonthnum       INTEGER NOT NULL,
  d_yearmonth          VARCHAR(8) NOT NULL,
  d_daynuminweek       INTEGER NOT NULL,
  d_daynuminmonth      INTEGER NOT NULL,
  d_daynuminyear       INTEGER NOT NULL,
  d_monthnuminyear     INTEGER NOT NULL,
  d_weeknuminyear      INTEGER NOT NULL,
  d_sellingseason      VARCHAR(13) NOT NULL,
  d_lastdayinweekfl    VARCHAR(1) NOT NULL,
  d_lastdayinmonthfl   VARCHAR(1) NOT NULL,
  d_holidayfl          VARCHAR(1) NOT NULL,
  d_weekdayfl          VARCHAR(1) NOT NULL
);

CREATE TABLE lineorder
(
  lo_orderkey          INTEGER NOT NULL,
  lo_linenumber        INTEGER NOT NULL,
  lo_custkey           INTEGER NOT NULL,
  lo_partkey           INTEGER NOT NULL,
  lo_suppkey           INTEGER NOT NULL,
  lo_orderdate         INTEGER NOT NULL,
  lo_orderpriority     VARCHAR(15) NOT NULL,
  lo_shippriority      VARCHAR(1) NOT NULL,
  lo_quantity          INTEGER NOT NULL,
  lo_extendedprice     INTEGER NOT NULL,
  lo_ordertotalprice   INTEGER NOT NULL,
  lo_discount          INTEGER NOT NULL,
  lo_revenue           INTEGER NOT NULL,
  lo_supplycost        INTEGER NOT NULL,
  lo_tax               INTEGER NOT NULL,
  lo_commitdate        INTEGER NOT NULL,
  lo_shipmode          VARCHAR(10) NOT NULL
);

Step 5: Storing and Loading Data from Amazon S3
AWS Redshift allows us to pull large datasets from Amazon S3, making it efficient for analytics.
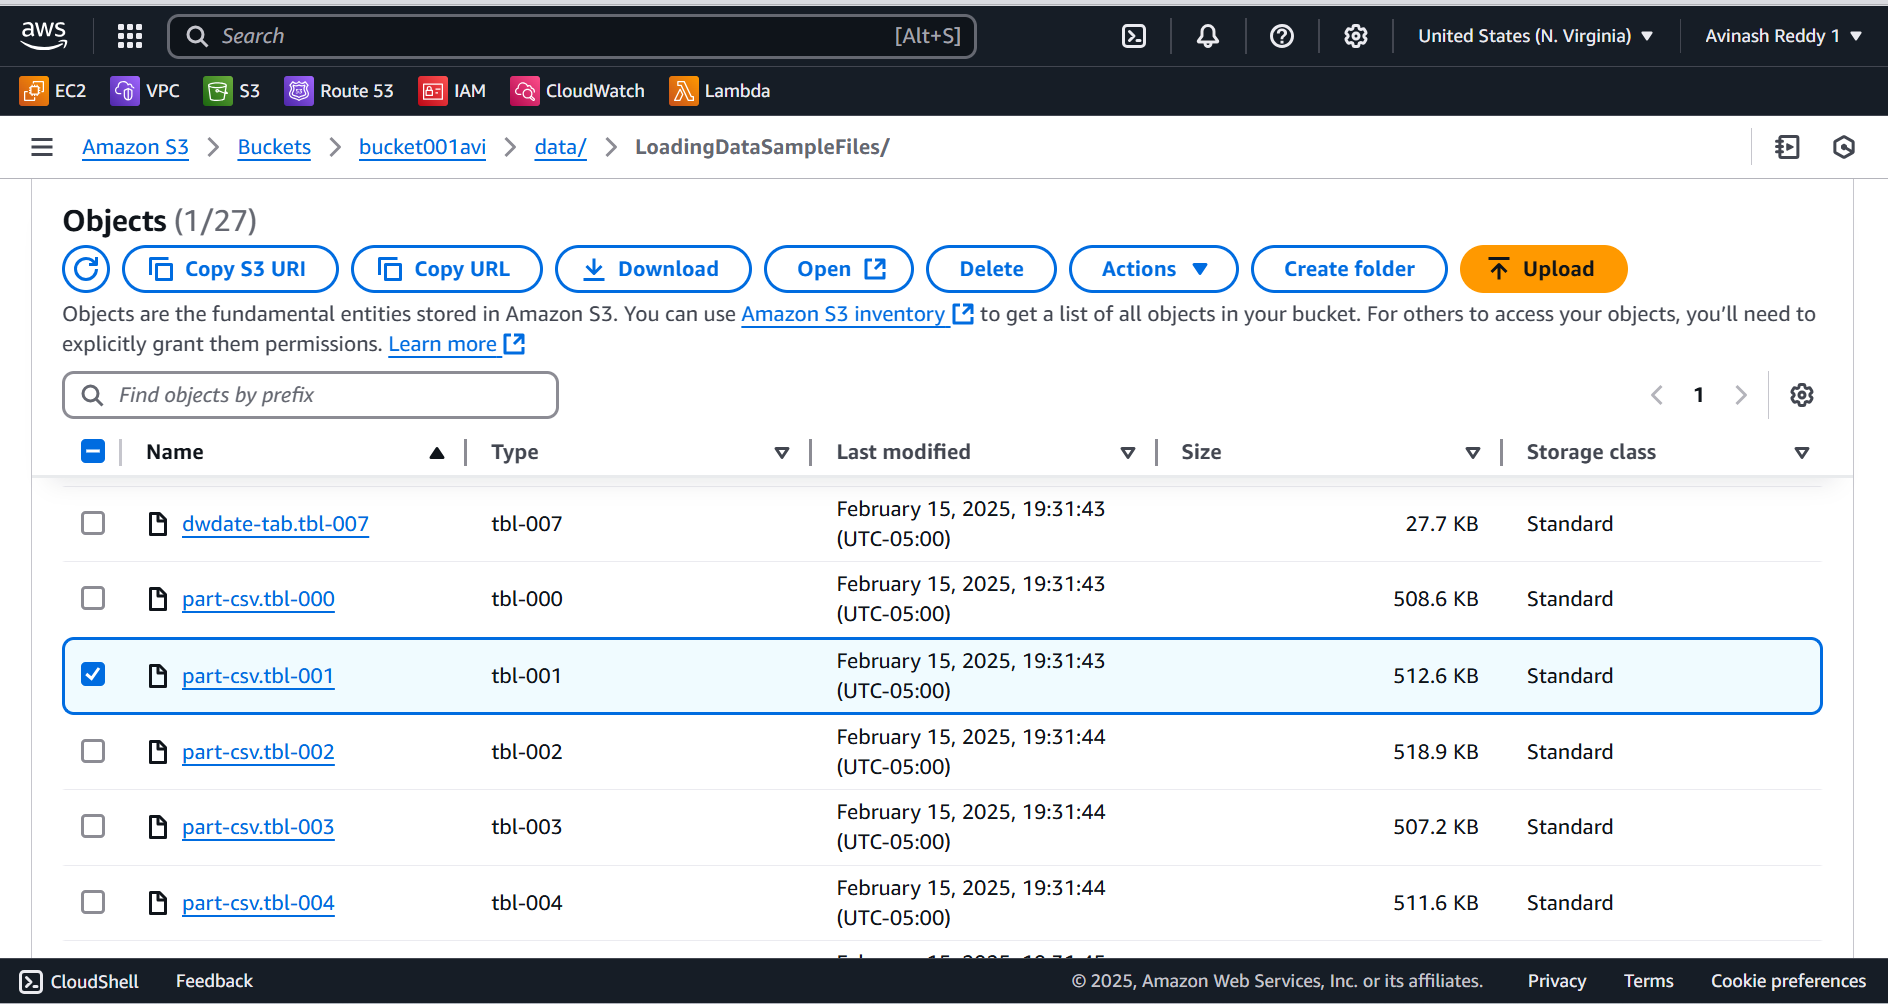
Upload a sample dataset to an S3 bucket. (you can make use of this one)

Create an IAM Role that allows Redshift to access S3.
Attach this role to your Redshift cluster.
Also create an IAM user for access keys to connect workbench to S3.
Run the following command in Workbench from Windows instance to load data from S3:
copy part
from 's3://bucket001avi/data/LoadingDataSampleFiles/part-csv.tbl-001'
credentials 'aws_access_key_id=xxxxxxxxxx;aws_secret_access_key=xxxxxxxxx'
csv
null as '\000';
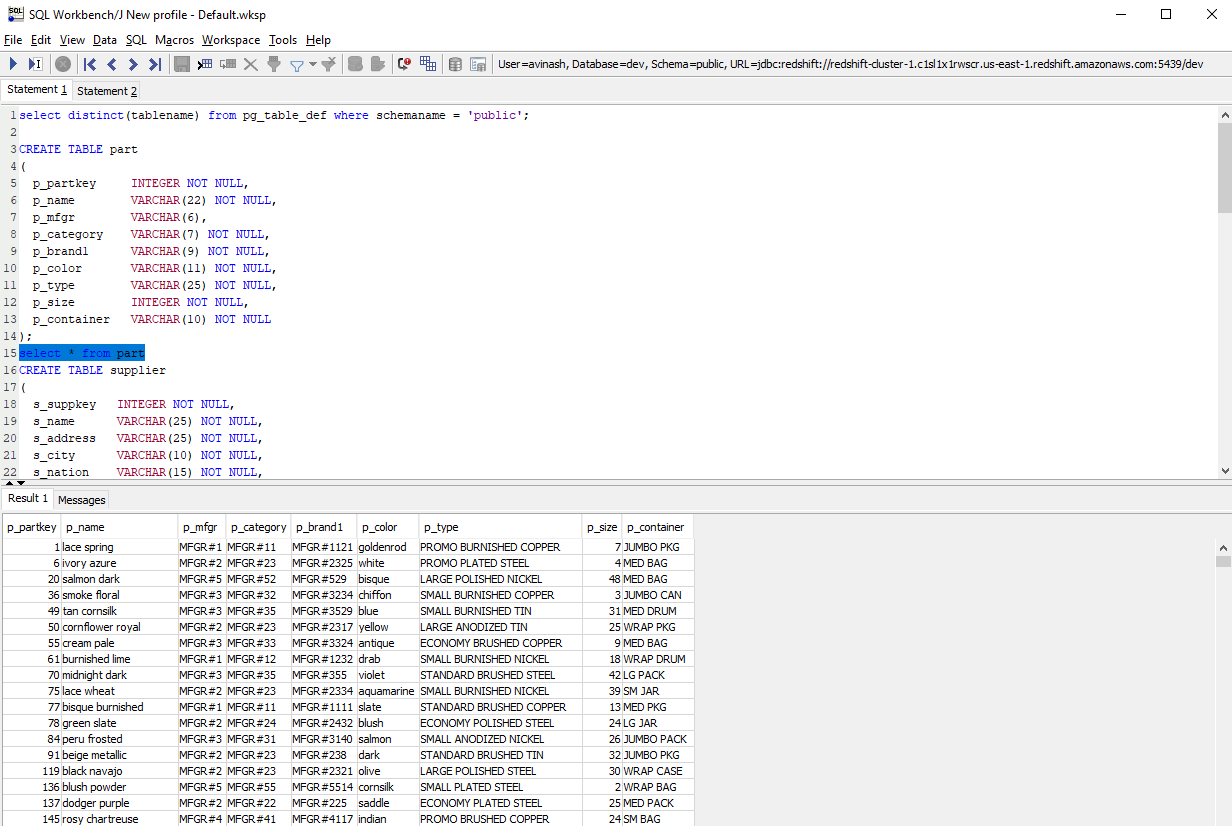
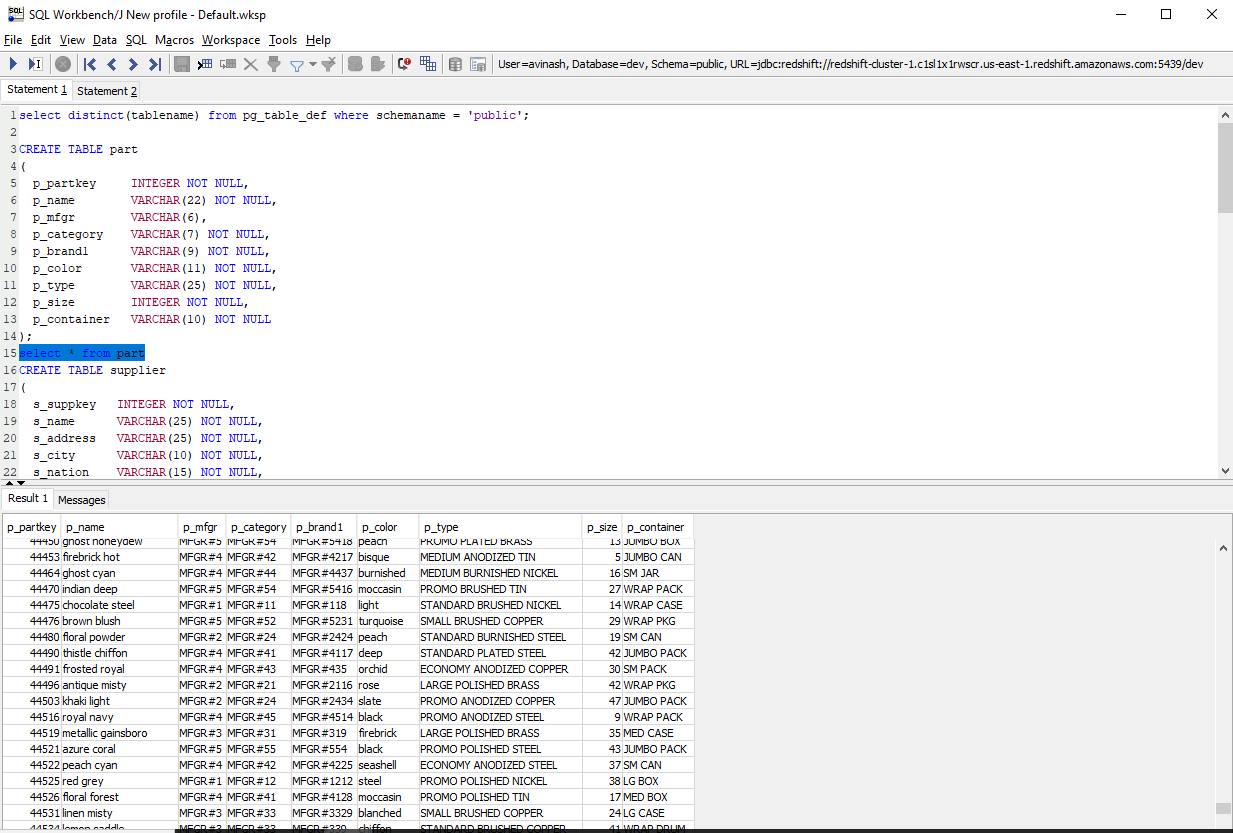
This populates the data to Workbench from S3.
Step 6: Querying the Data
Once the data is loaded, queries can be performed efficiently.


This query helps pull out details about parts in that company.
Real-time Use Cases
An e-commerce company can analyze customer purchases and browsing patterns to personalize recommendations.
A bank can monitor unusual credit card transactions in real time to flag potential fraud.
A smart city traffic system can collect and process live traffic data to optimize signal timings.
Conclusion
My POC demonstrated how AWS Redshift efficiently queries large amounts of data quickly and handles large datasets by integrating with Amazon S3 and SQL Workbench, making Redshift an excellent choice for data warehousing solutions.
Let me know your thoughts on this. Cheers!
Credits: Saikiran P. on YT
#AWS #Redshift #SQL #Data
Subscribe to my newsletter
Read articles from Avinash Reddy directly inside your inbox. Subscribe to the newsletter, and don't miss out.
Written by
