Deploying EC2 Instances with Shared EFS Storage on AWS.
 Teslim Lawal
Virtual machines (VMs) that operate on the Amazon Elastic Compute Cloud (EC2) service are known as EC2 instances. These instances offer scalable computing power for executing programs, hosting webpages, and carrying out mathematical operations. You may deploy and manage your apps in a very flexible environment with EC2 instances. You just pay for what you use, and you can select multiple configurations according to your demands (CPU, RAM, storage, etc.).
AWS offers a scalable, fully managed network file system called Amazon EFS (Elastic File System). Because it is made to work with Amazon EC2 instances, you can transfer files across several instances at once. This blog will show how to deploy an EC2 instance and enable an elastic file system on it (EFS).
Step 1:
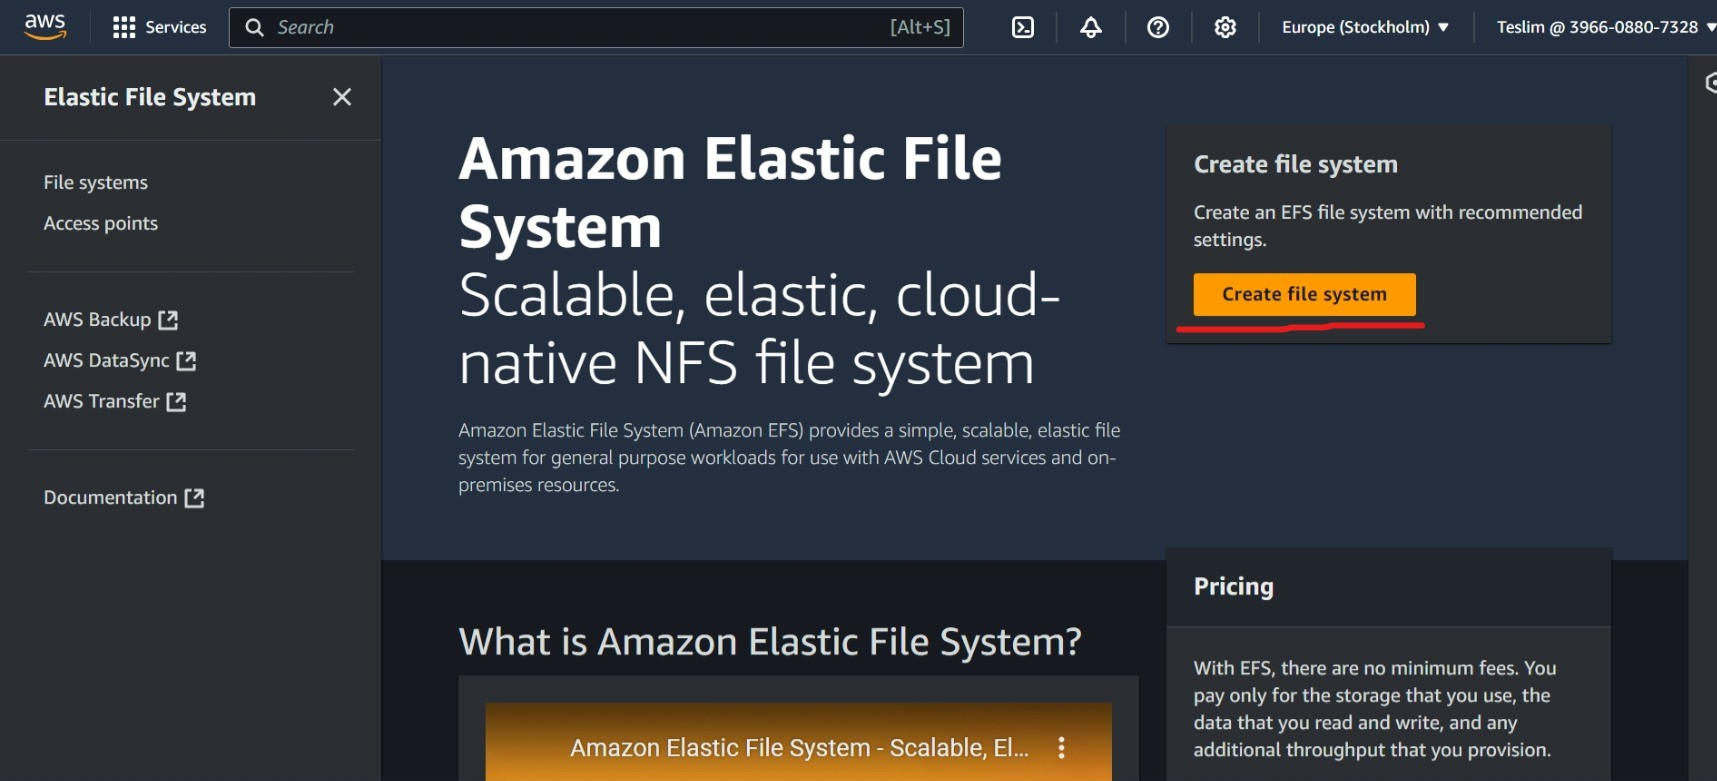
Click "create file system" after authenticating into your AWS account and searching for "EFS."
Step 2:
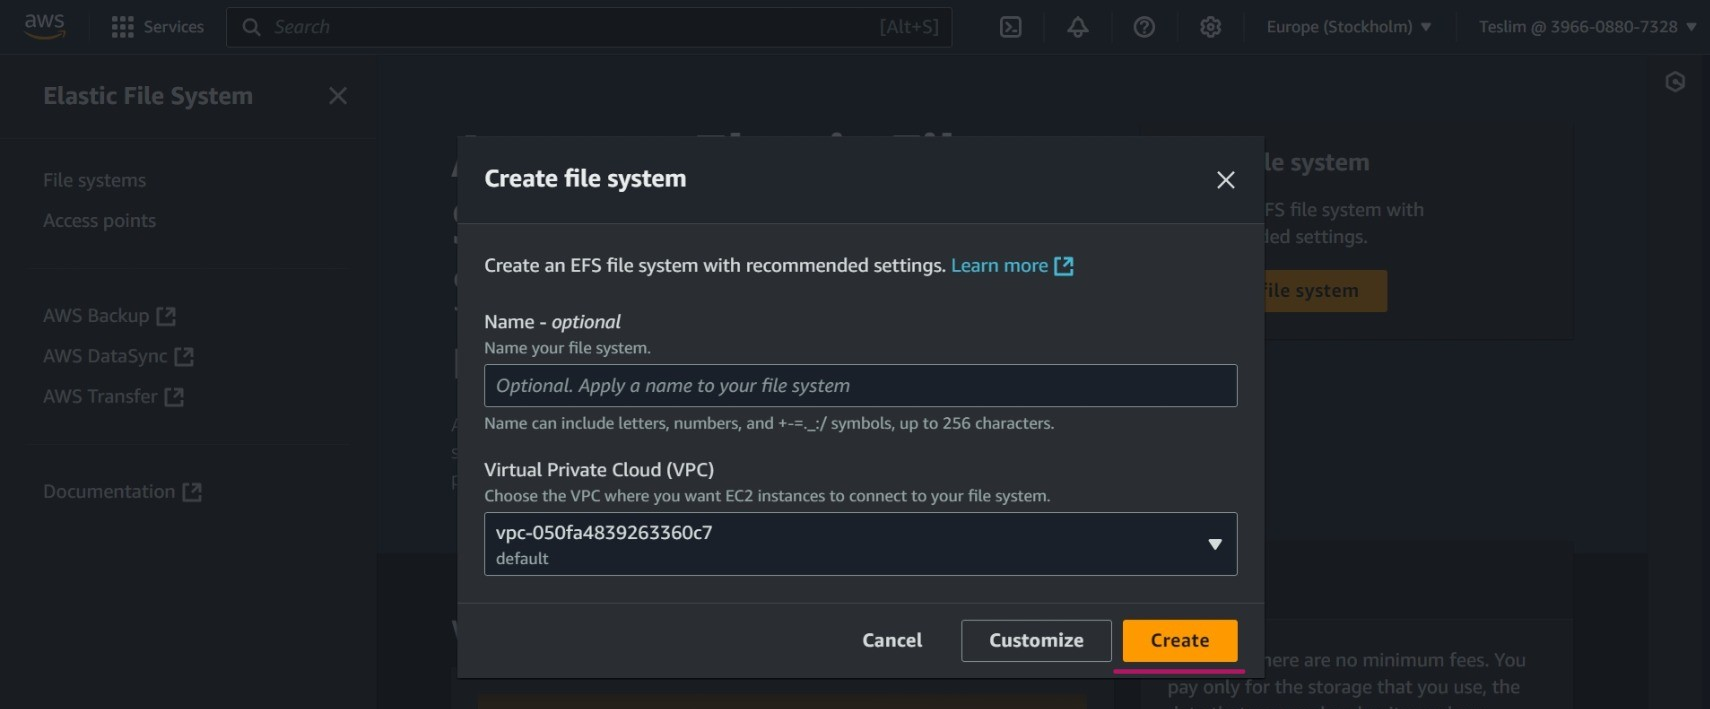
Give the file a unique name and click “create.”.
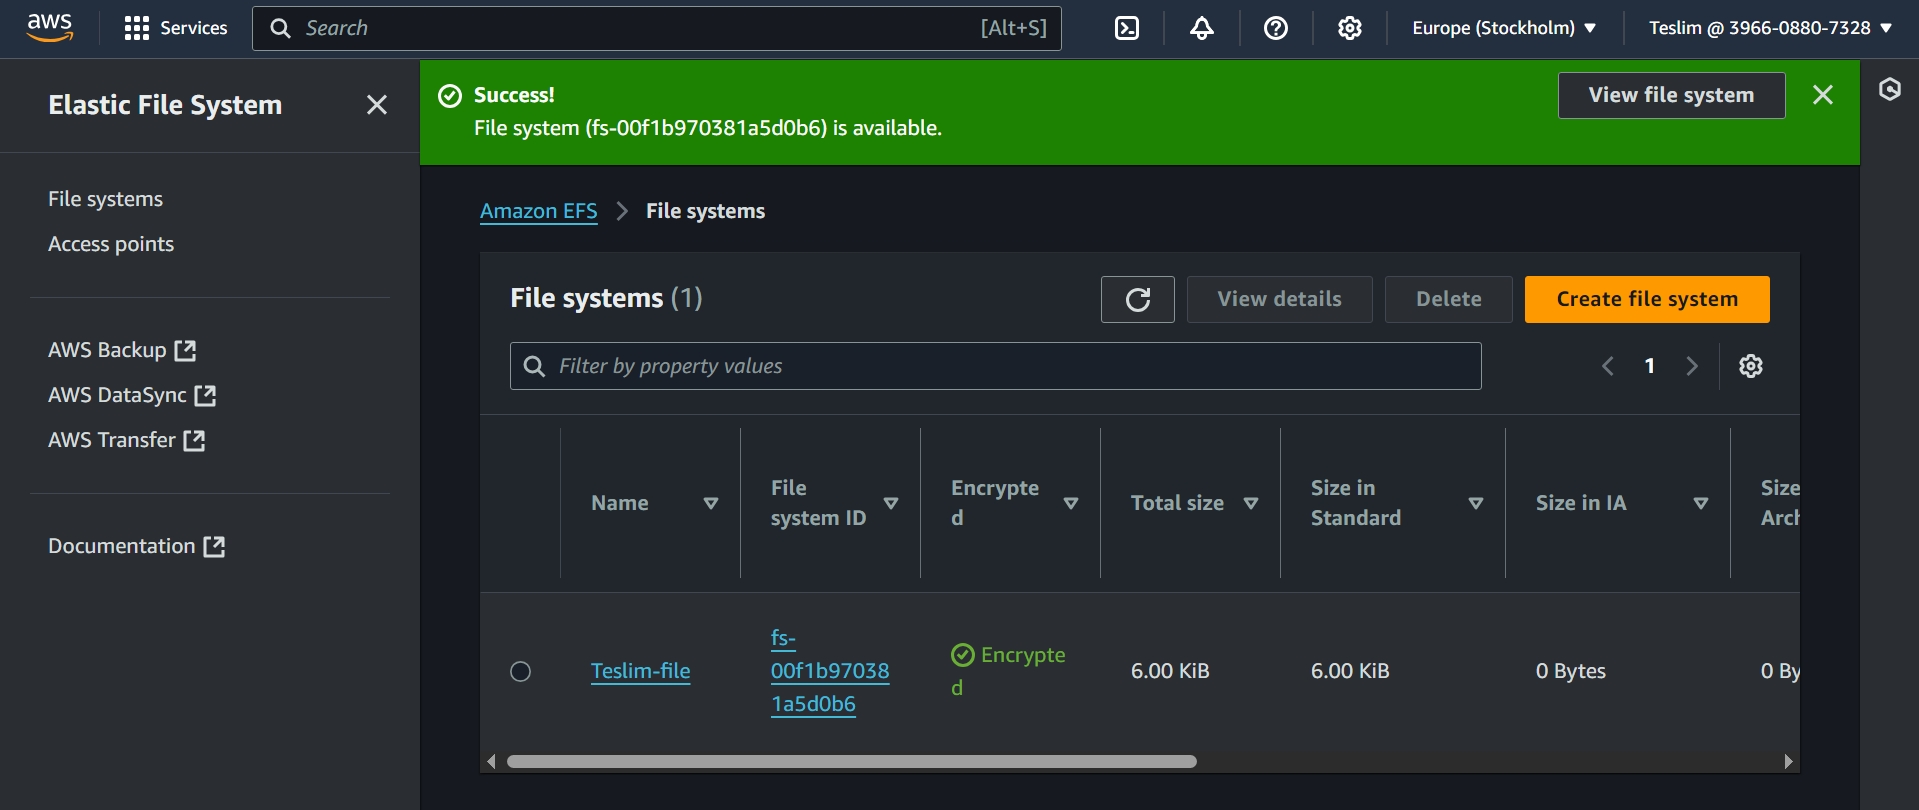
This is how the file will look after successful creation.
An EFS file needs to be attached/mounted on a Linux EC2 instance, so let’s create it.
Step 3:
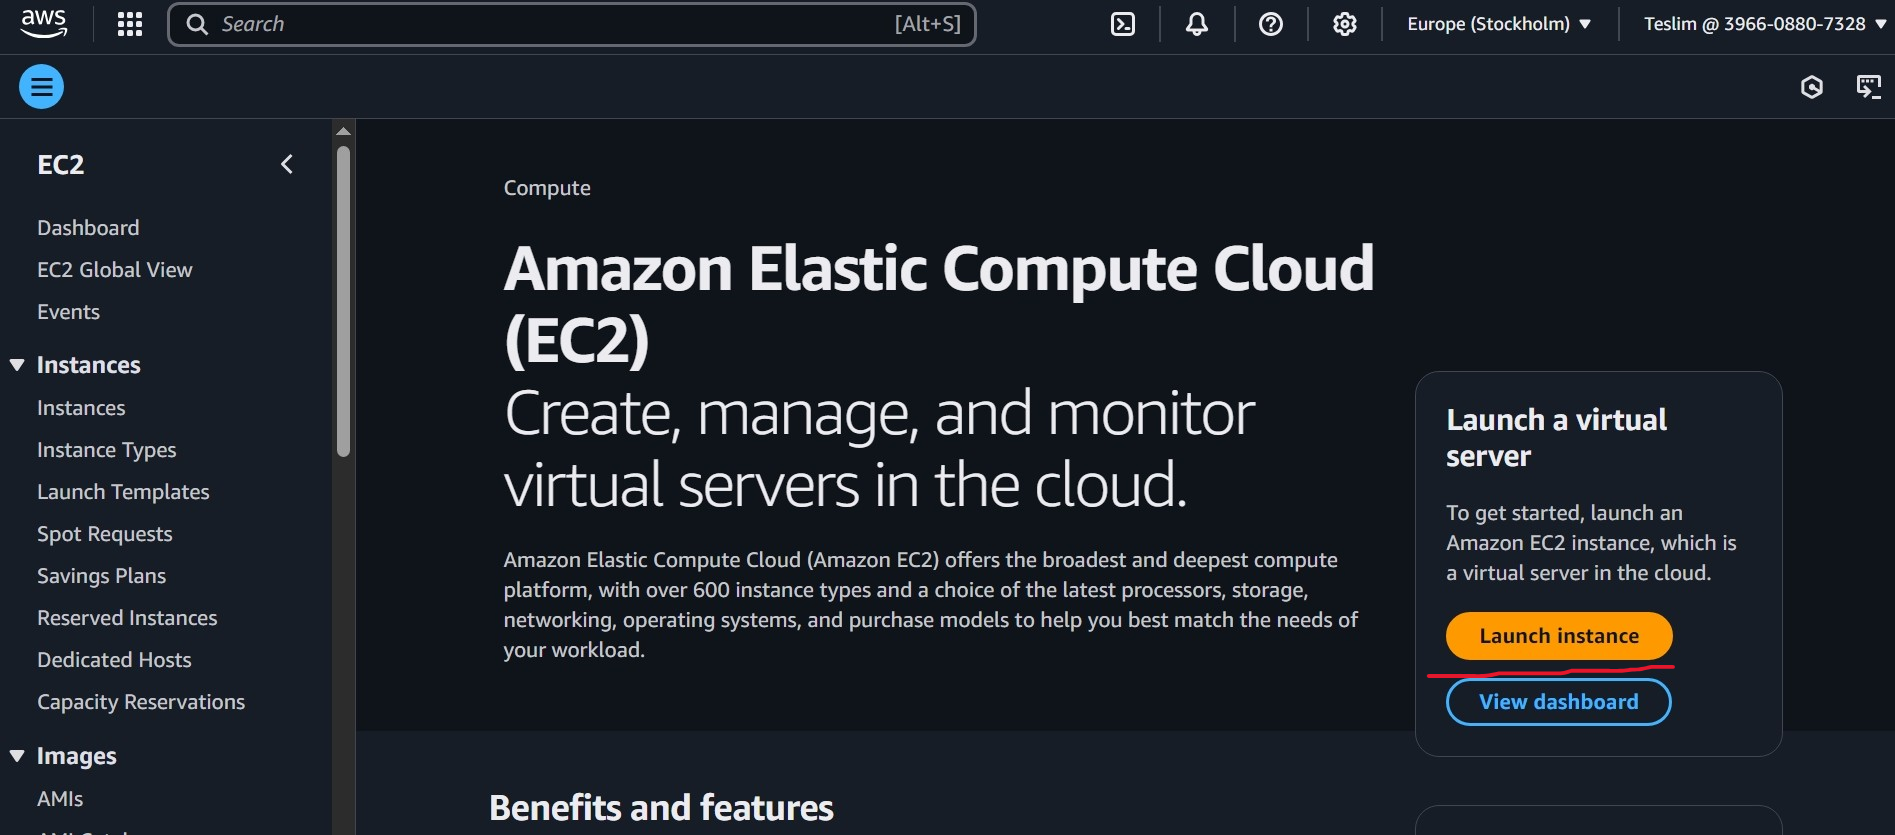
To create a Linux EC2 instance, go to the search bar and search “EC2.” Then click “launch instance.“
Give the server a name related to the EFS file, and select the Linux operating system.
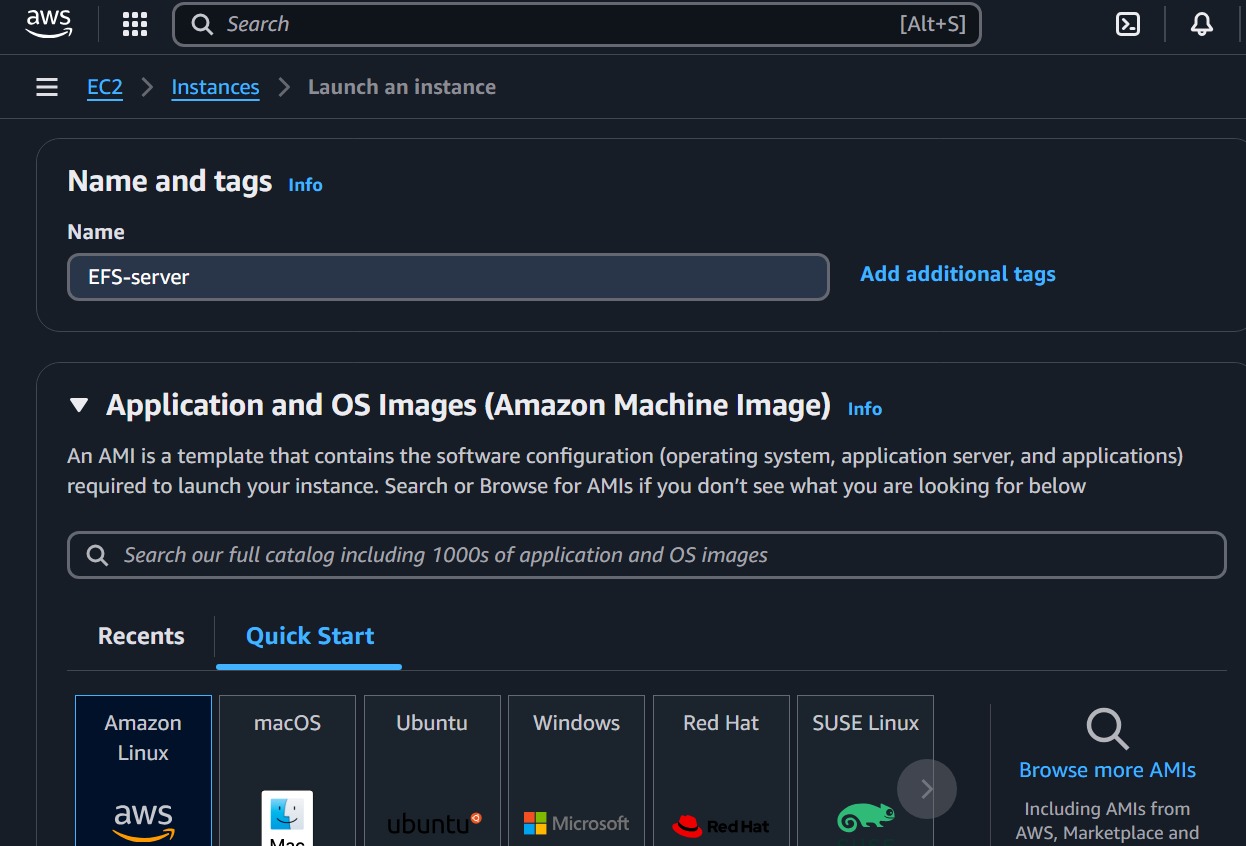
Click on the key pair name dropdown and click on proceed without key pair even though its not recommended.
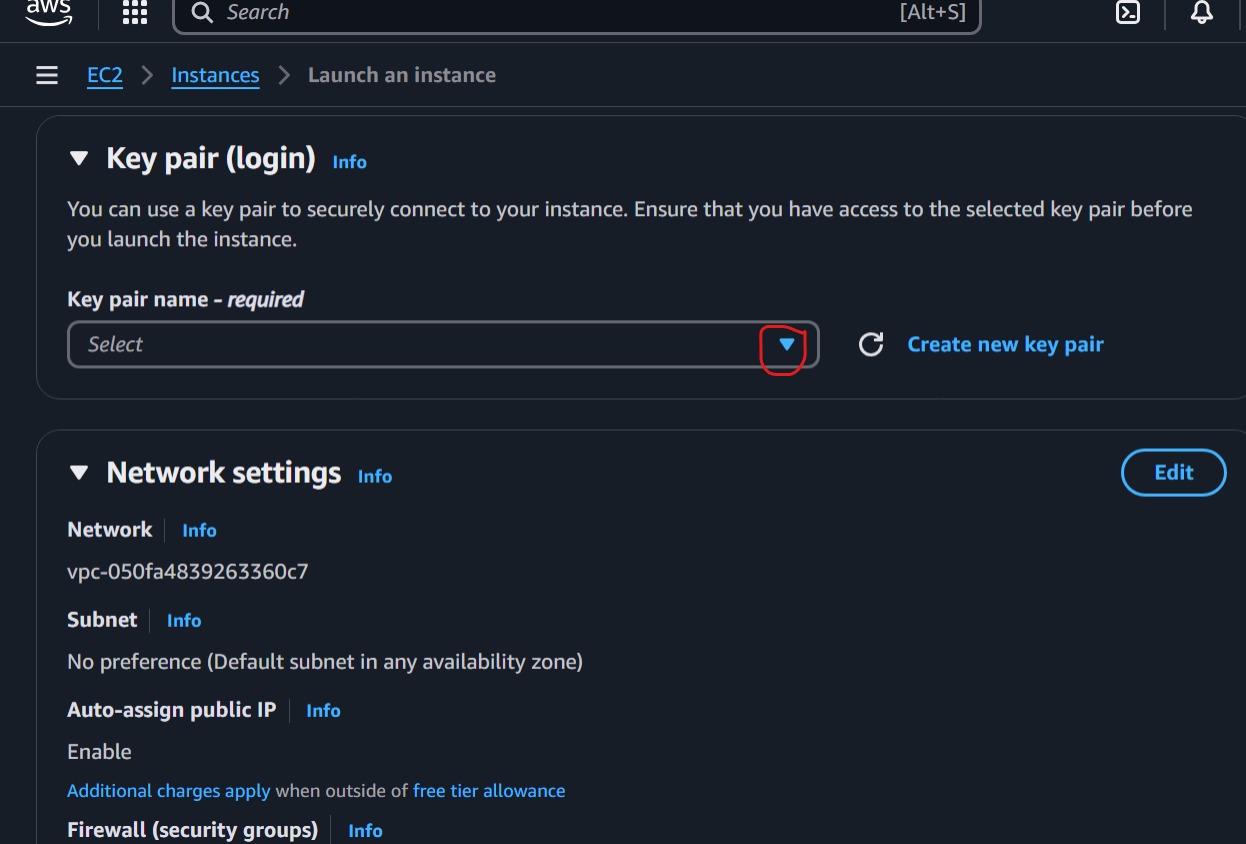
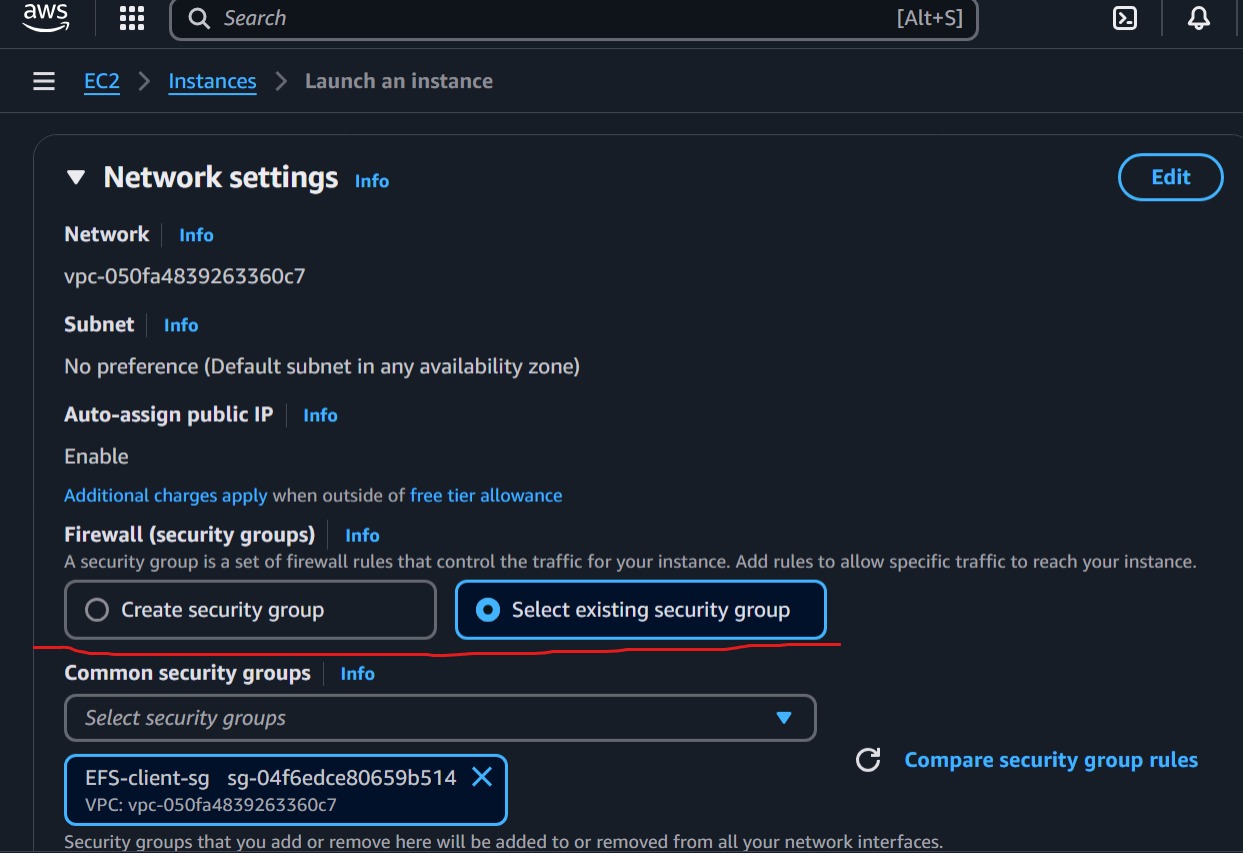
You can decide to create a new security group or select an existing one, then click “launch instance.”
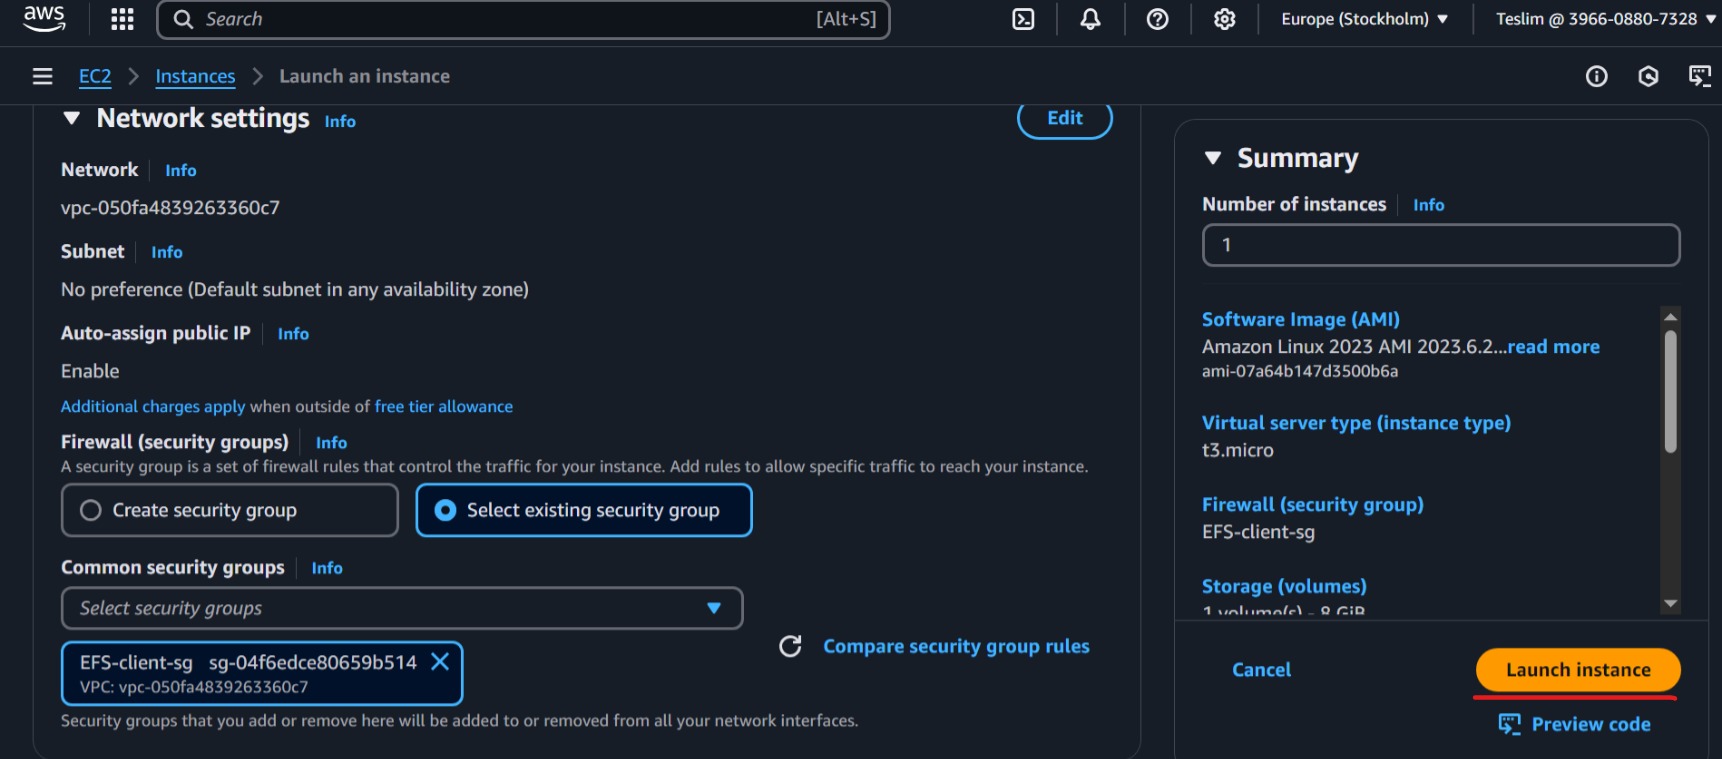
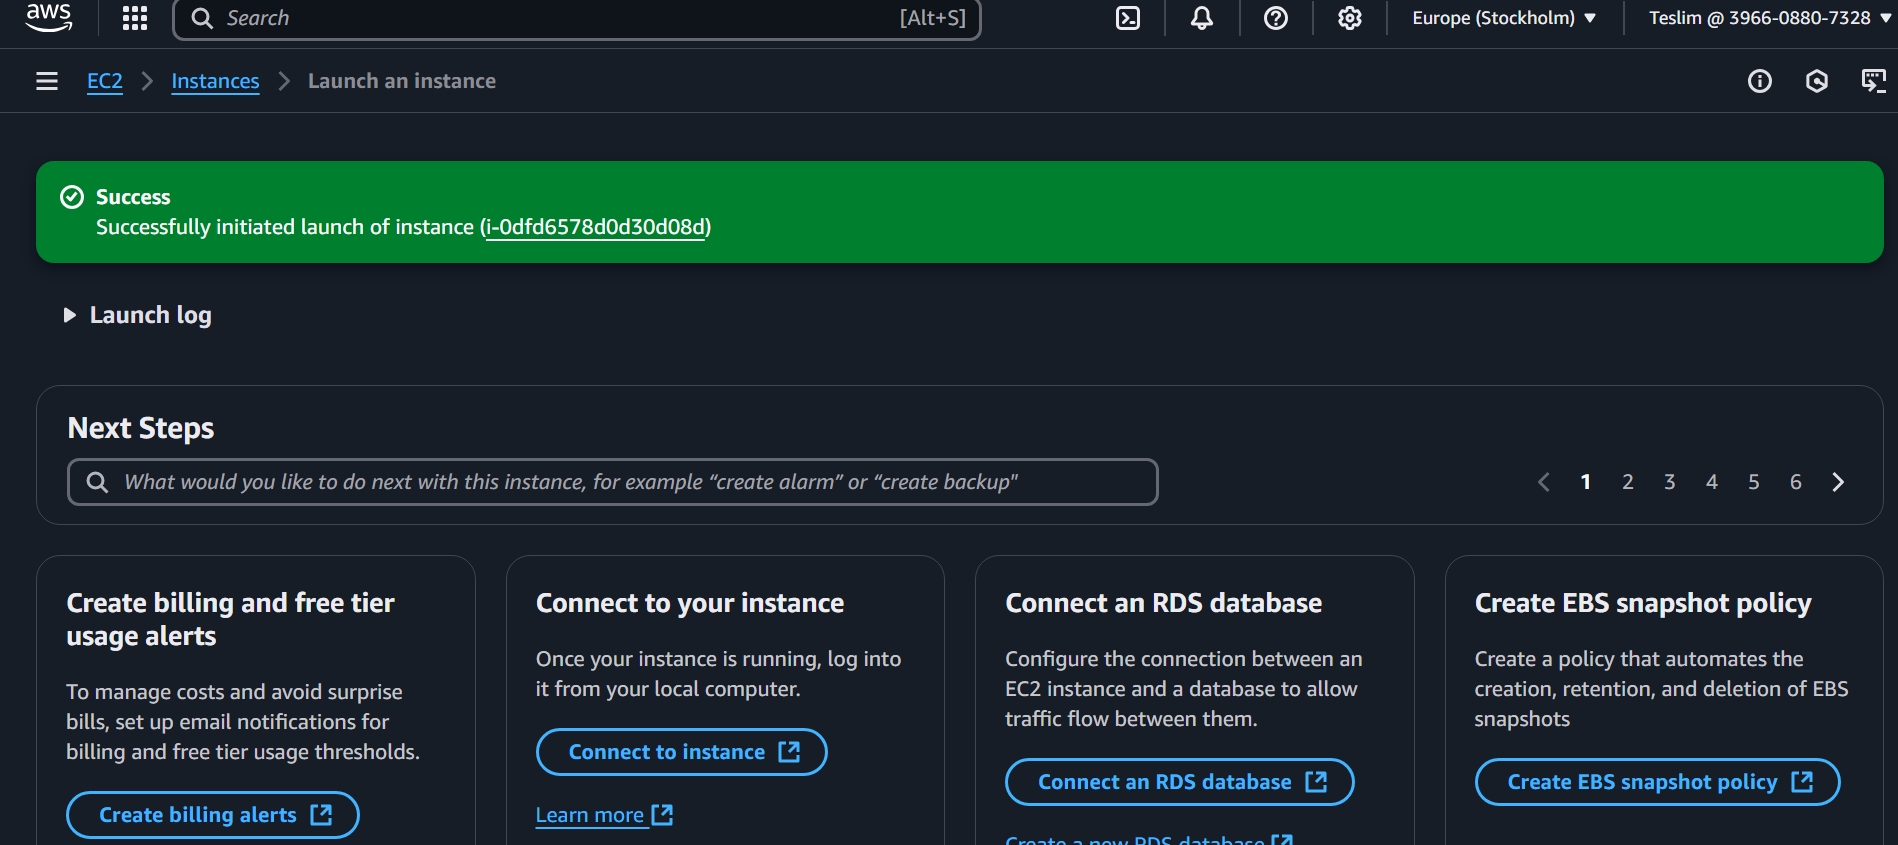
This should be the result of launching the instance. Click “view all instances.”
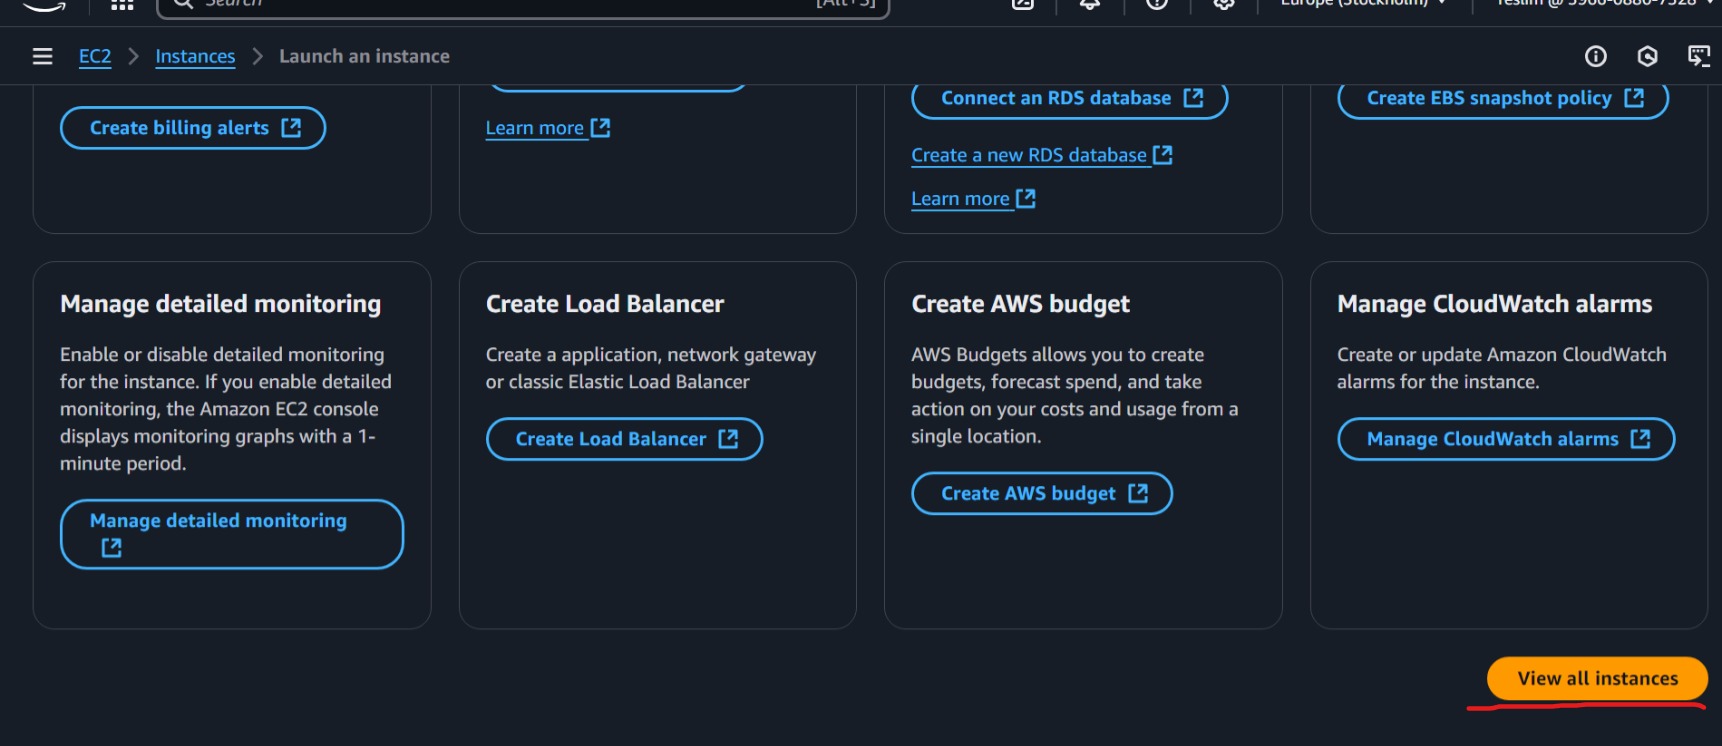
Step 4:
click on security groups
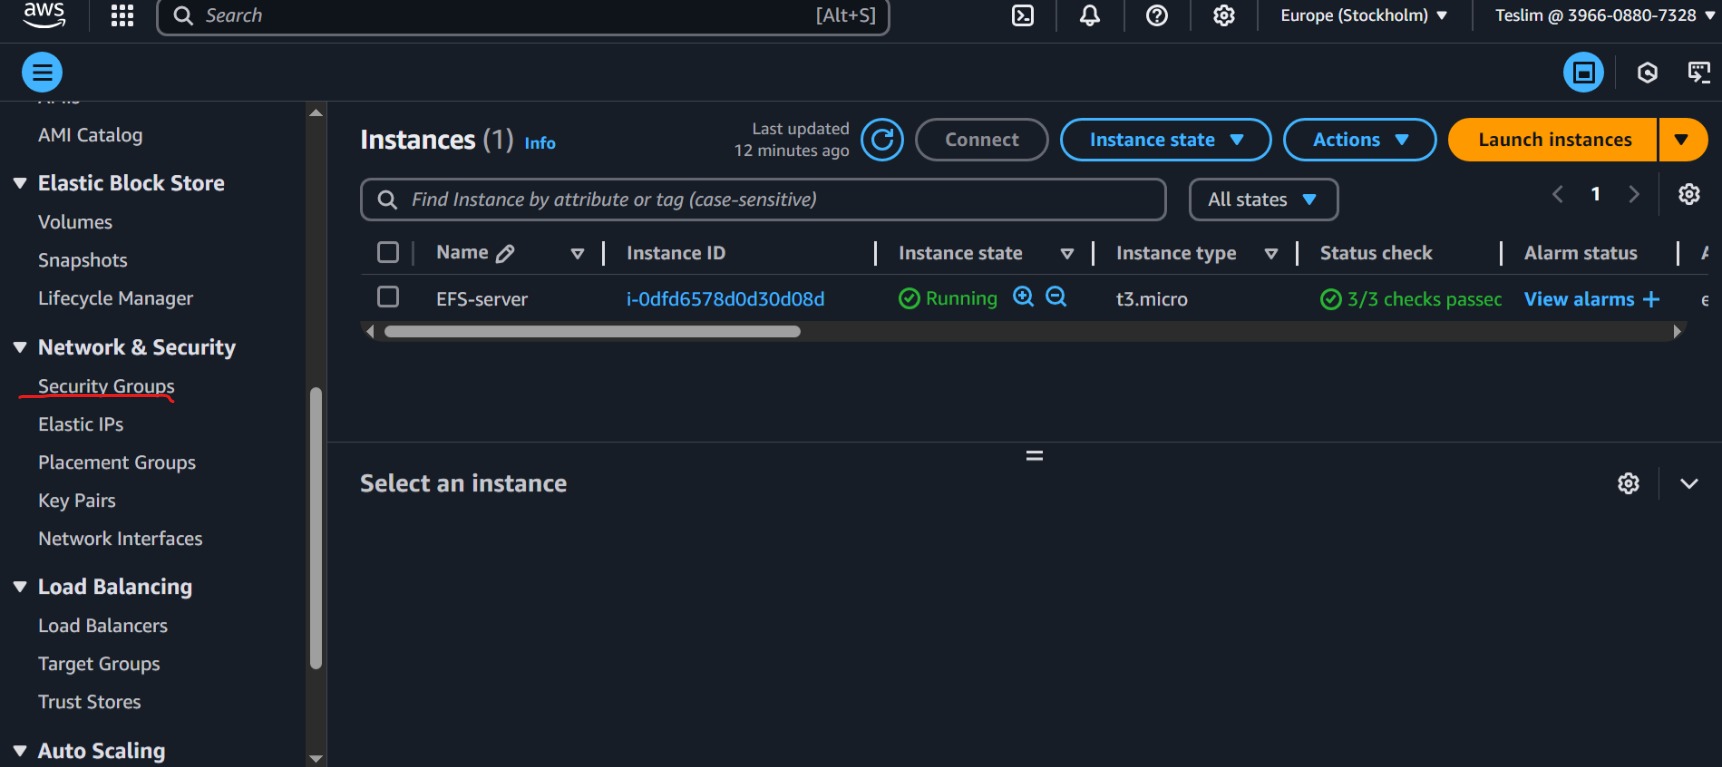
select the default security group
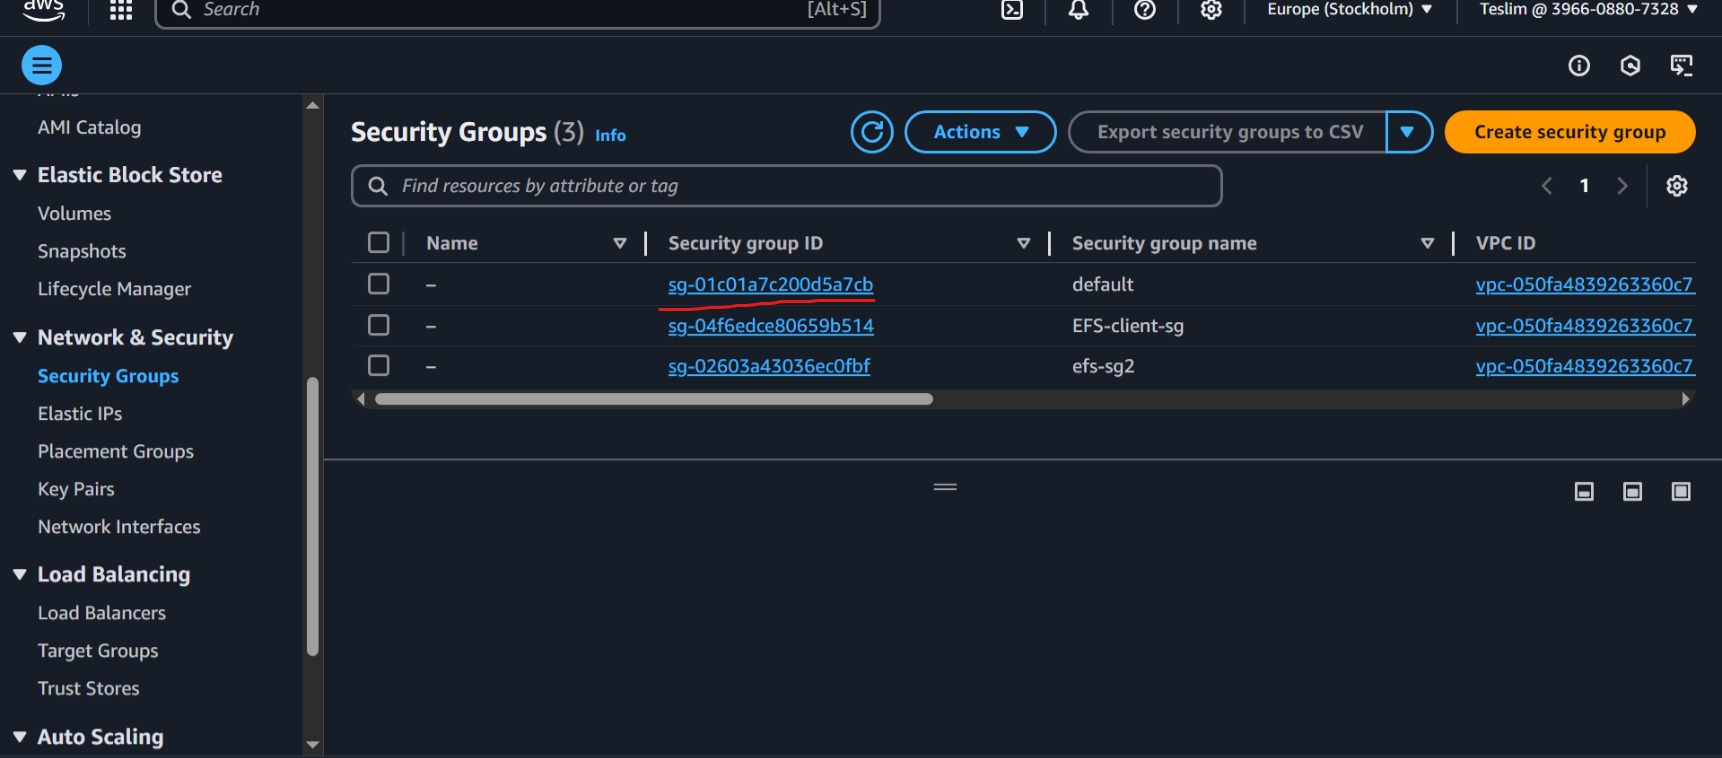
Click “edit inbound rules.”
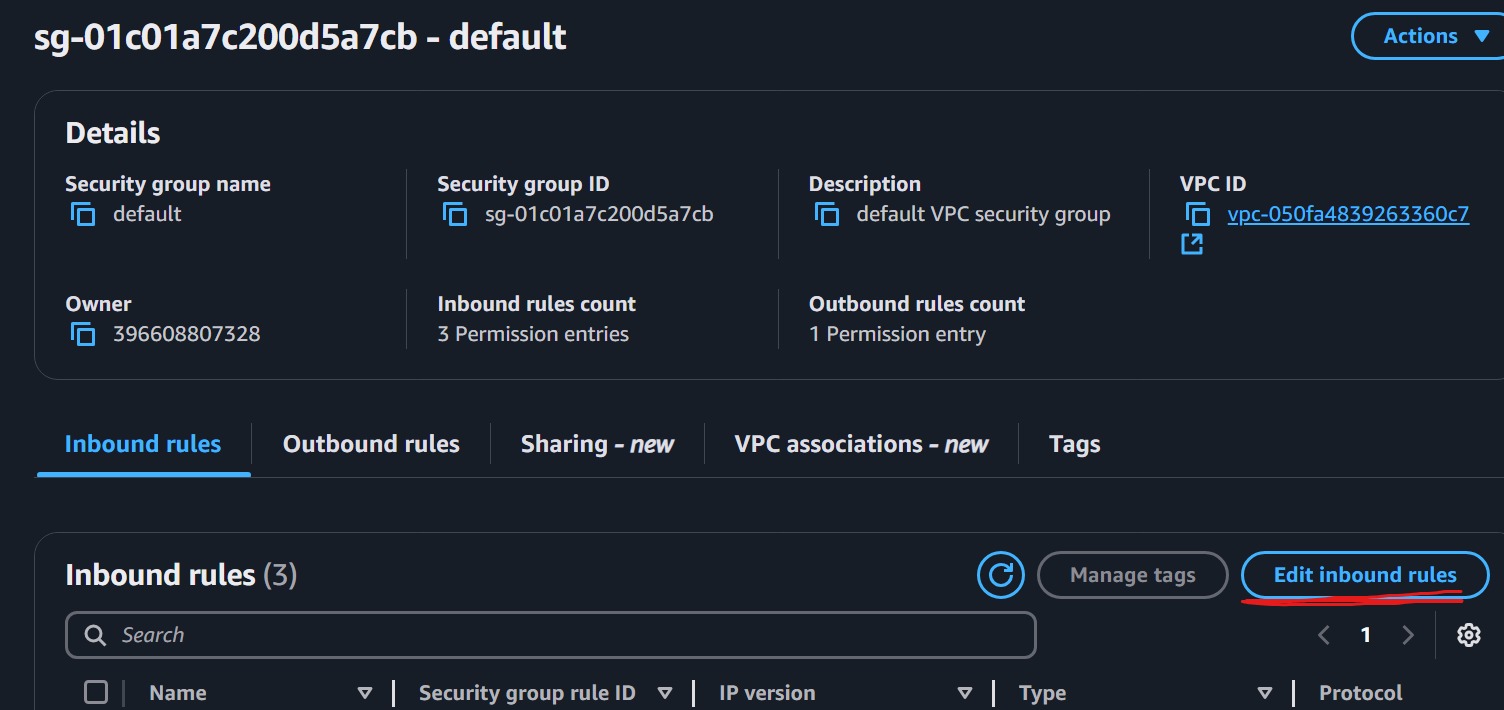
Click on “Add Rule.”
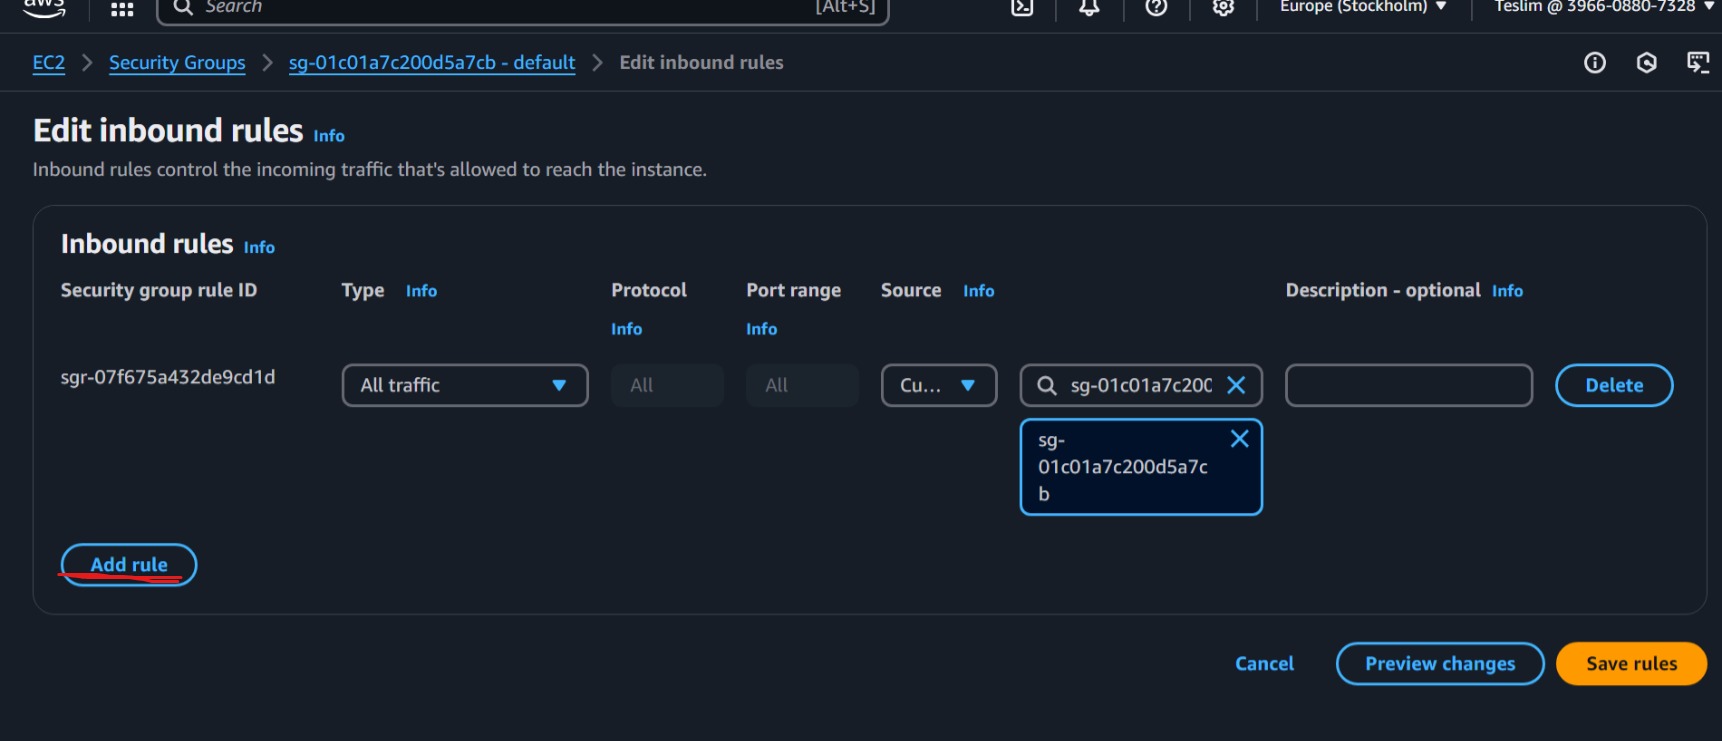
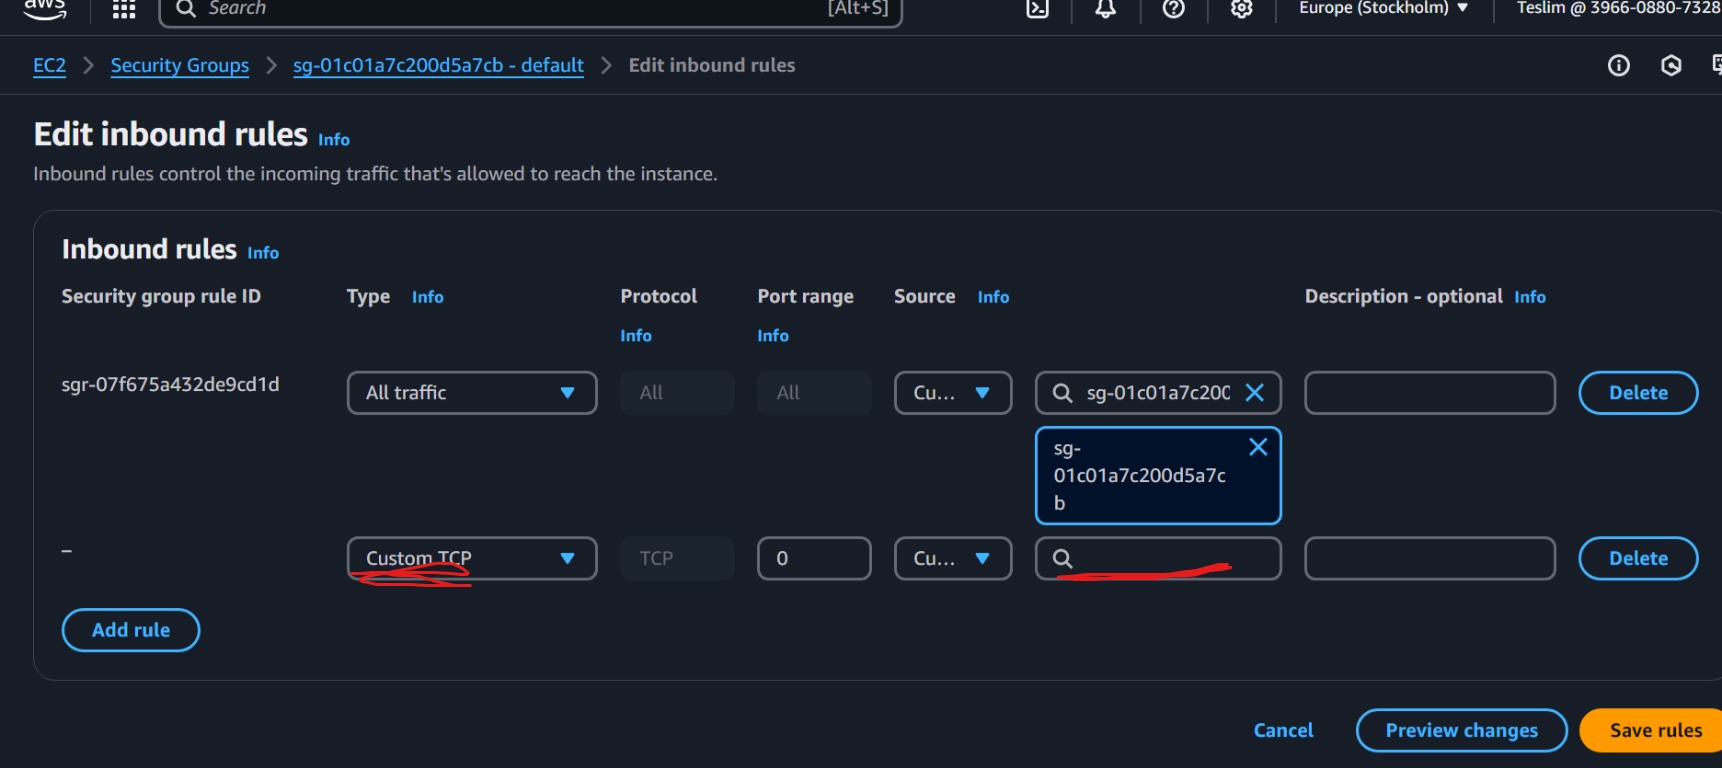
Click on custom TCP and change it to NFS; also, click on the rule search bar and look for the security group you created or selected, then click save rules.
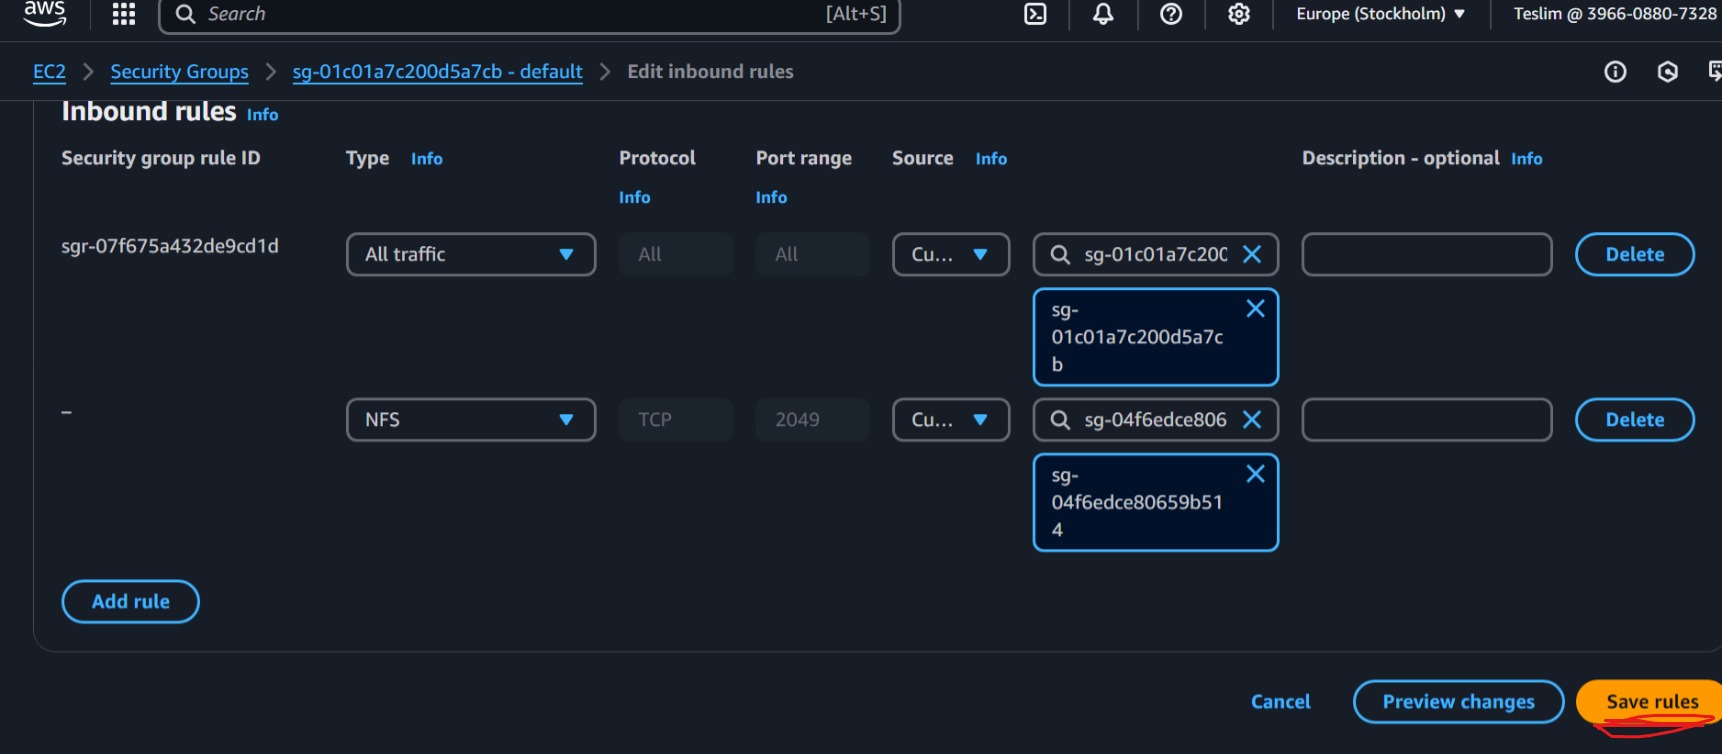
Go back to your instances and click on the instance, then click connect.
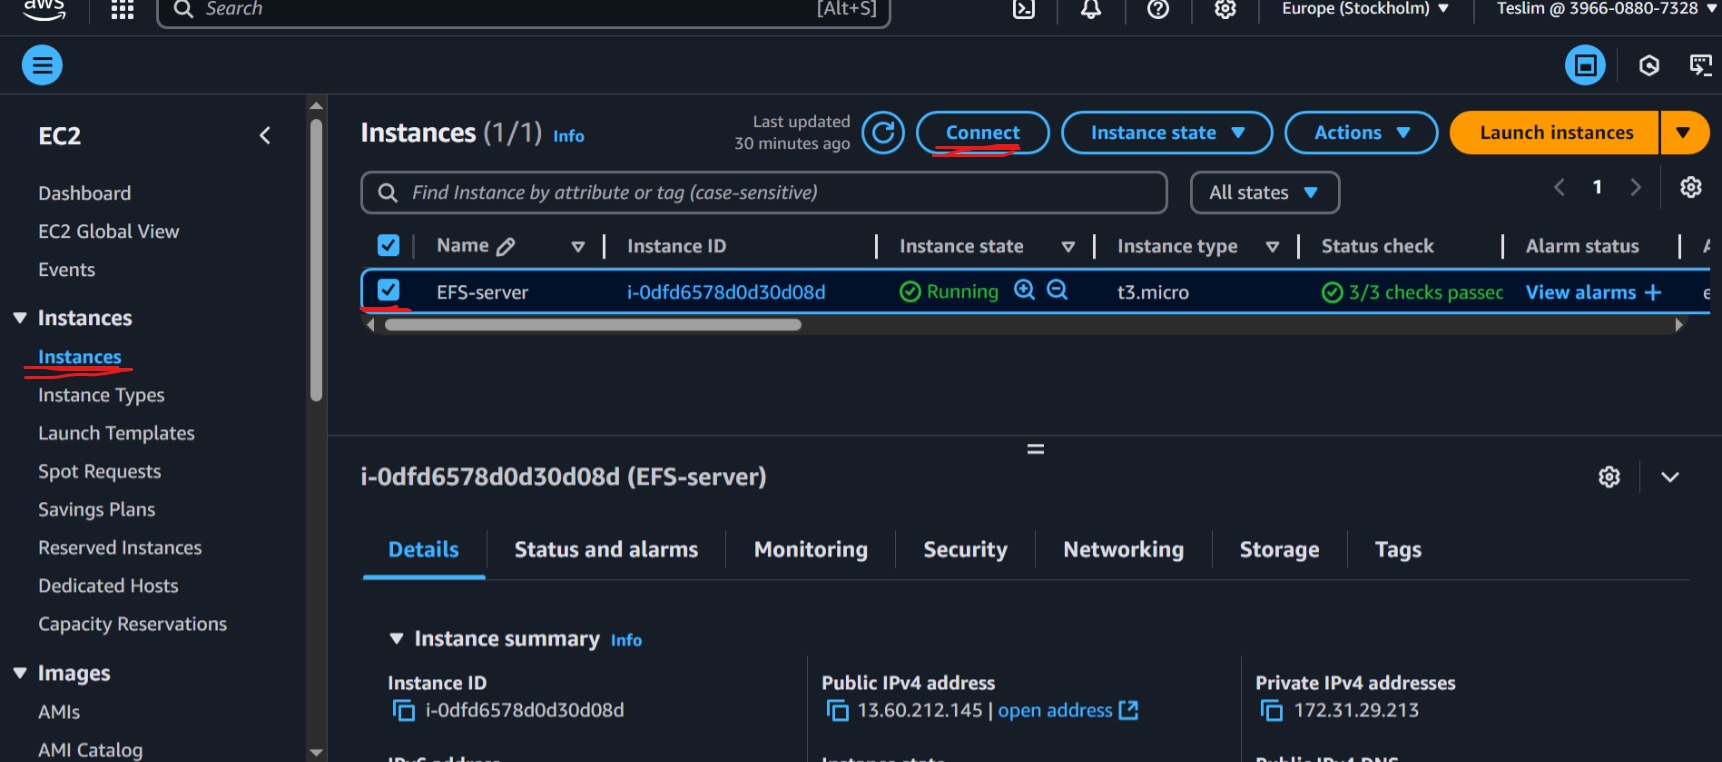
Click on connect
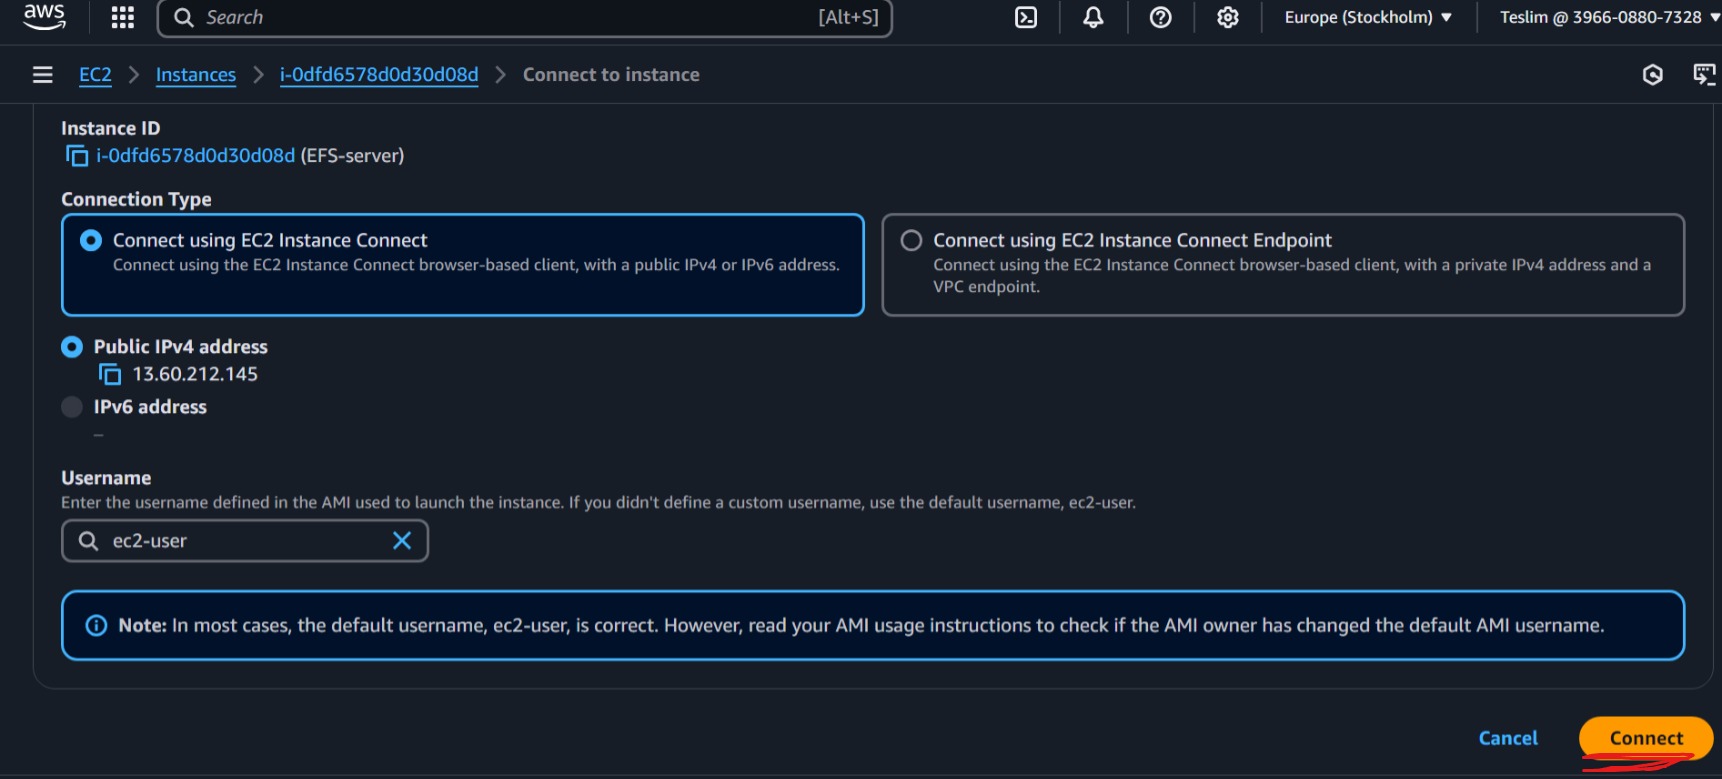
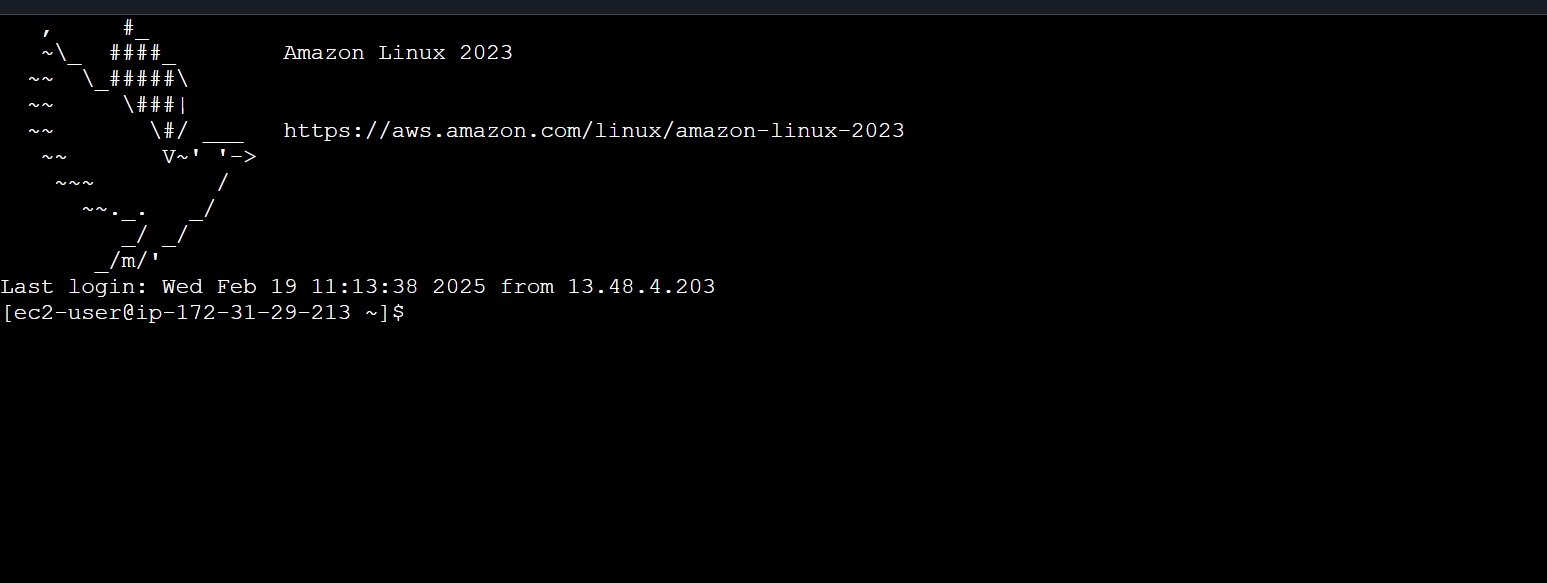
This indicates a successful connection.
Now there are codes to be run in order to set up your instance.
Step 5:
Run (type) “sudo dnf install -y amazon-efs-utils.” After running, it should show complete.
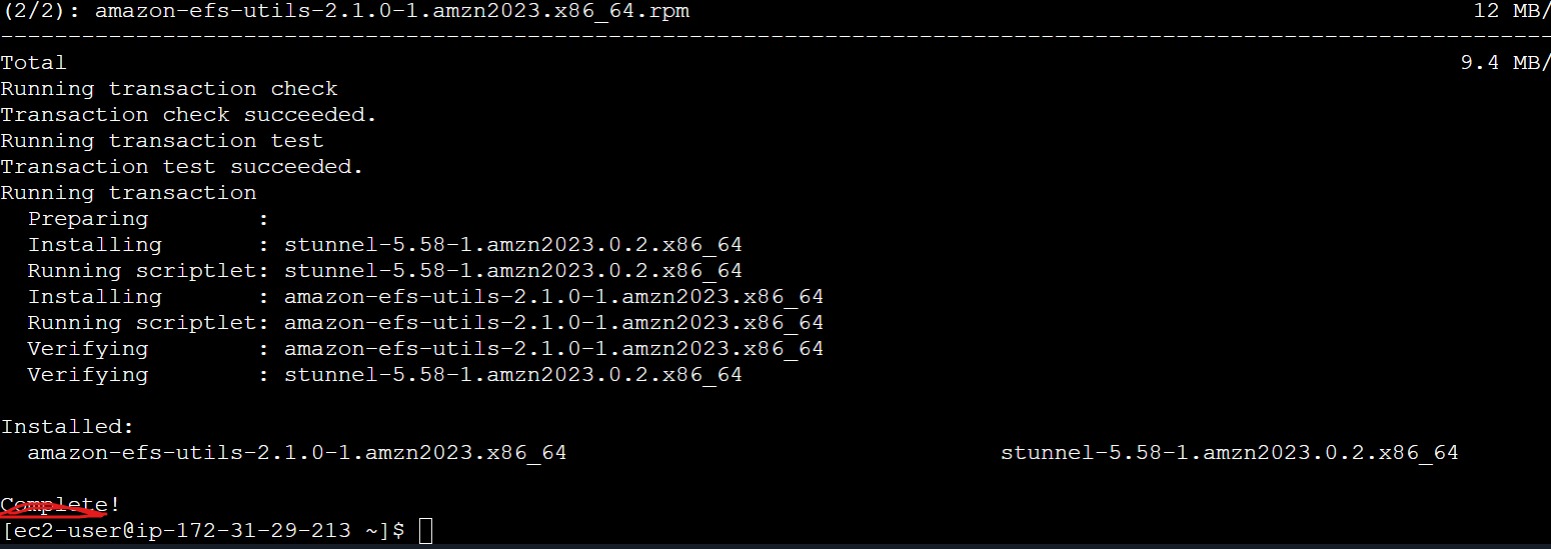
Next, create a directory by running “sudo mkdir (name of directory).”
Go back to AWS and search for EFS, then click on the file, click on attach, and copy the “Using the EFS mount helper” code.
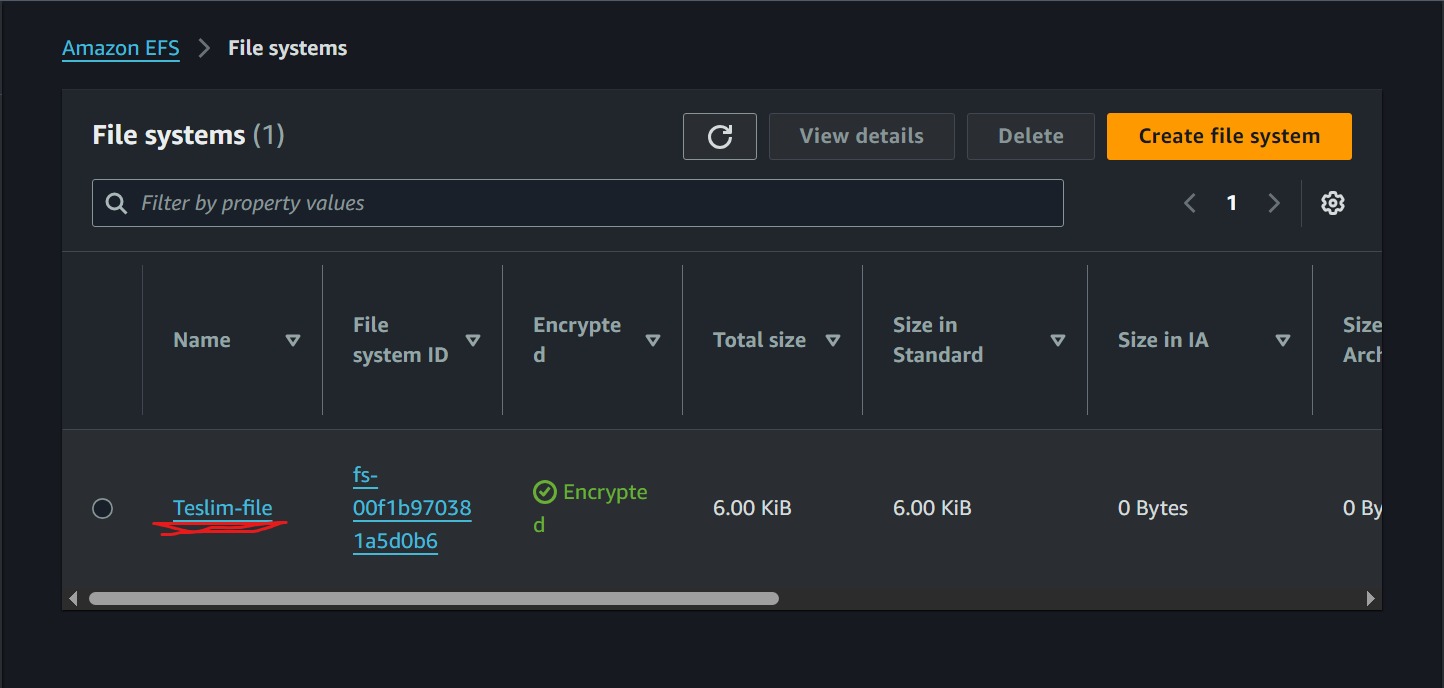
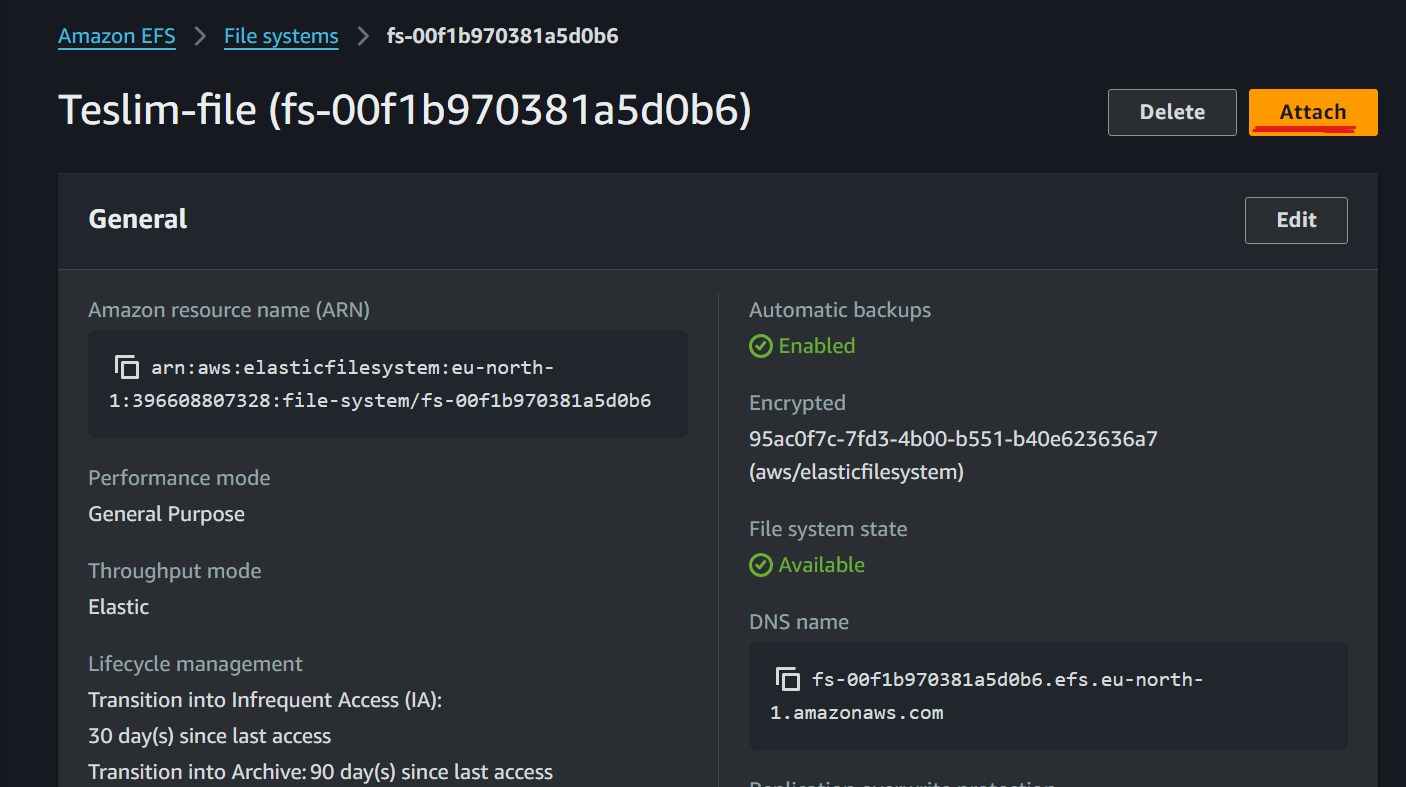
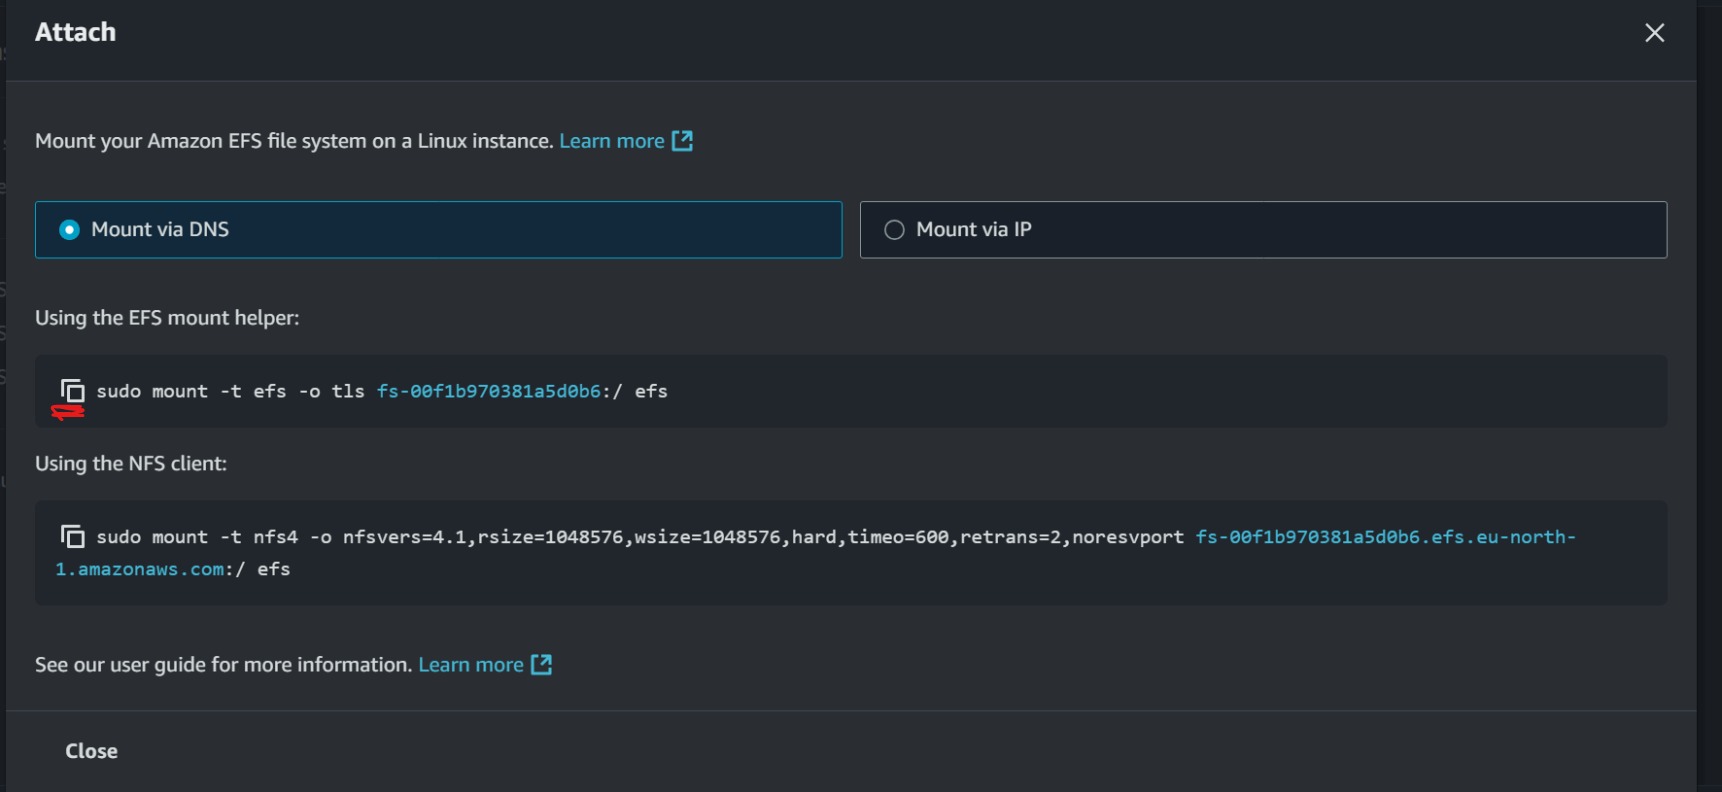
Paste the code in your terminal and run it.
Run the command “df -T.“ It should show complete.
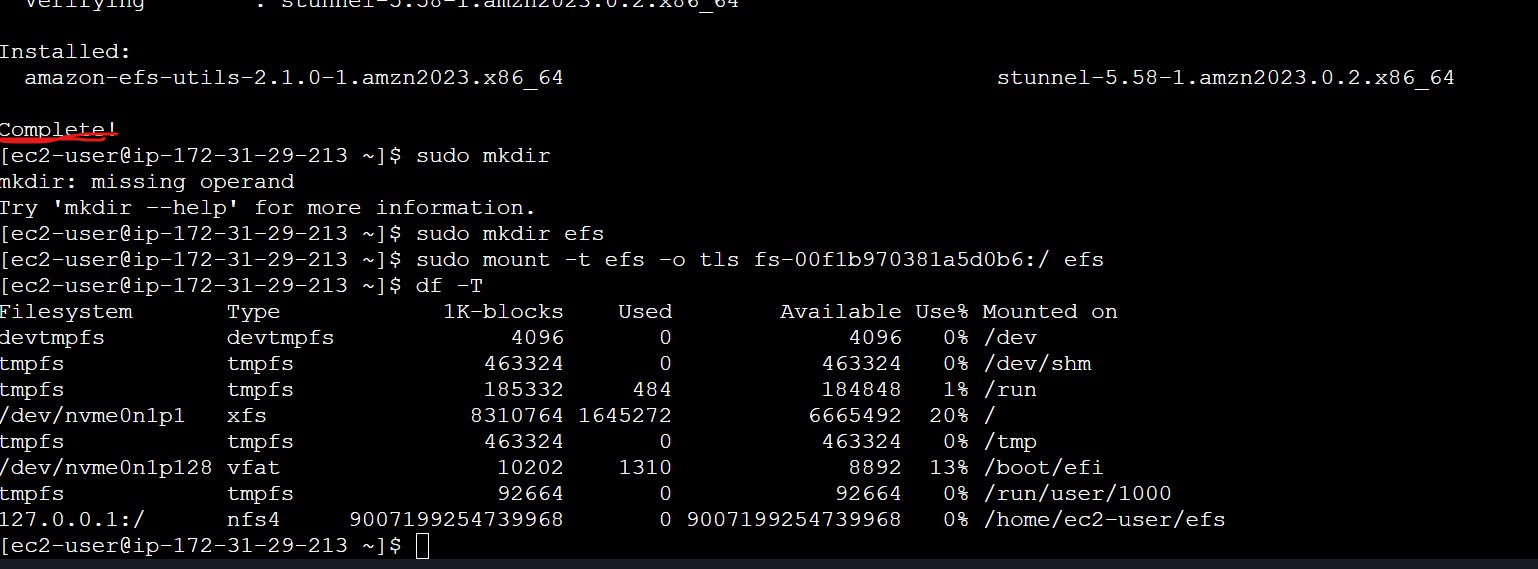
Run “cd (name of directory)/“ in order to enter the directory.
Run “sudo touch (name of file).”
Run “ls” to see the content of the directory.
Close the terminal and reconnect.
Run “sudo chown ec2-user efs/“ to change ownership.
Run “cd (name of directory)/“ in order to enter the directory.
Run “ls -l.”
Run “wget https://wordpress.org/latest.tar.gz.

This is the result of running the command.
Run “ls -l.”
Step 6:
Create another instance by repeating step 3. When adding a rule, you will add it for the second EC2 instance created.
Run “sudo dnf install -y amazon-efs-utils.” After running, it should show complete.
Run “sudo mkdir (same name of directory as in first terminal).”
Copy the “Using the EFS mount helper” code and paste it in the terminal to mount the EFS file.

Run “sudo chown ec2-user efs/“ to change ownership.
Run the command “df -T.“ It should show complete.

Run “cd (name of directory)/“ in order to enter the directory.
Run “ls -l.”
This will show that the file is shared here when it wasn’t created here.
Subscribe to my newsletter
Read articles from Teslim Lawal directly inside your inbox. Subscribe to the newsletter, and don't miss out.
Written by
