Guide: How to Monetize Your IoT Devices Stream Data & Earn with Raspberry Pi
 AYDO
AYDO
Hi! This guide will help you install the AYDO server on a Raspberry Pi and connect your Zigbee devices using Zigbee2MQTT. With AYDO, you can manage all your smart devices effortlessly and earn $AYDO Points for streaming your data.
What You’ll Need
Hardware:
- Raspberry Pi:
Works with Raspberry Pi 3B, 3B+, 4, or newer. Tip: A Raspberry Pi 4 with 2GB or 4GB of RAM is ideal. SD
- Card:
At least 8GB (we recommend 16GB or more, class 10 or higher).
- Power Cable:
Make sure it provides stable power (e.g., 5V and 3A for Raspberry Pi 4).
- Ethernet Cable:
Use this for a reliable internet connection (Wi-Fi works too!).
- Card Reader:
Needed to write the OS image to your SD card.
- Zigbee Coordinator:
We suggest the Sonoff Zigbee 3.0 USB Dongle Plus ZBDongle-E for a hassle-free connection.
- Zigbee End Devices:
Think smart sensors like temperature, humidity, or air quality monitors. Brands like Aqara and Sonoff are great choices.
Software:
- Raspberry Pi Imager:
- SSH Client:
Use PuTTY on Windows (Download PuTTY) or your built-in terminal on macOS/Linux.
- Web Browser:
For accessing the Zigbee2MQTT interface and the AYDO web client.
- AYDO Server Installer:
We’ll run a simple command to install it. Before starting, double-check you have everything ready and a good internet connection.
Installation Instructions
Check out our walkthrough video:
Step 1: Get Your Raspberry Pi Ready
Download & Install Raspberry Pi Imager:
Head over to the official Raspberry Pi website to grab the imager.
Write the OS Image:
Open Raspberry Pi Imager.
Under OS, choose Raspberry Pi OS Lite (64-bit).
Pick your SD card under SD Card.
Click Write and let the magic happen.
Enable SSH:
After writing the image, create an empty file named ssh (no extension!) in the root directory of the SD card.
On Linux/macOS, you can simply run: touch /path/to/sdcard/ssh
Plug in Your Zigbee Adapter:
Insert the Zigbee USB adapter into your Raspberry Pi.
Power Up:
Insert the SD card into your Raspberry Pi, connect the power, and plug in an Ethernet cable (or set up Wi-Fi).
Step 2: Find Your Raspberry Pi’s IP Address
You’ll need the IP address to connect via SSH:
Option 1: Check your router’s device list.
Option 2: Open a terminal and run: ping raspberrypi.local
Option 3: Use a network scanner like Fing or Angry IP Scanner.
Step 3: Connect to Your Raspberry Pi via SSH
Open your SSH client—launch PuTTY on Windows or open your terminal on macOS/Linux.
Connect by running:ssh pi@<Raspberry Pi IP Address>
When prompted, enter the default password (raspberry) and change it immediately using: passwd
Once logged in, you'll see the Raspberry Pi command prompt. For full access, switch to root and navigate to the root directory by running: sudo -i
cd /
Step 4: Install the AYDO Server
Make Sure Your Zigbee Adapter is Connected.
Install AYDO Server:
In your SSH session, run:wget -qO- "https://cloud.aydo.ai/setup" | sudo bash
This command installs NodeJS (v18), Zigbee2MQTT (v1.22), the AYDO server, its Zigbee2MQTT plugin, and all necessary components.

Check That Everything is Running:
Use:sudo service aydo status
You should see a message confirming the server is up and running.
Step 5: Set Up Your AYDO Hub Access the AYDO Interface:
Open your browser and go to:http://<Raspberry Pi IP Address>
You’ll see the AYDO server interface.

Copy Your Token and Hub ID:
You’ll need these details to link your device.
Log In to the AYDO Web Client:
Visit AYDO Web Client, log in or create an account.
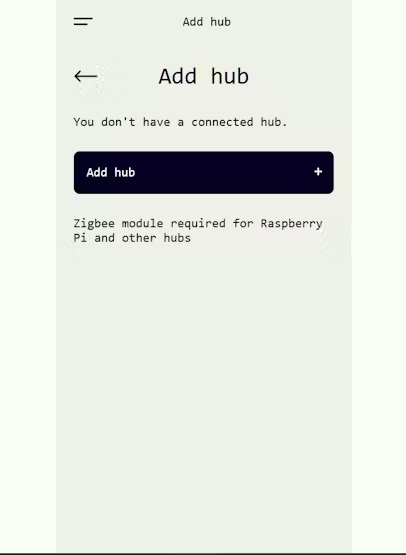
Go to the Devices page and click Add hub.
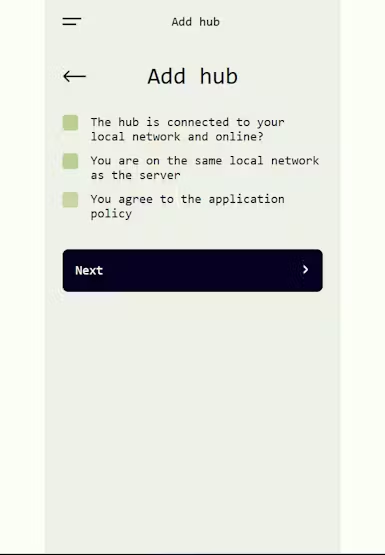
Finish Setting Up the Hub:
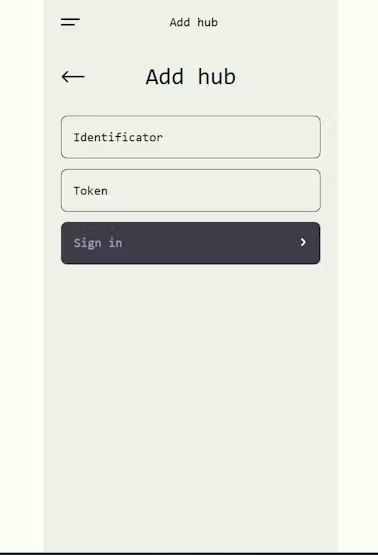
Check all boxes, click Next, then enter the hub ID and token.
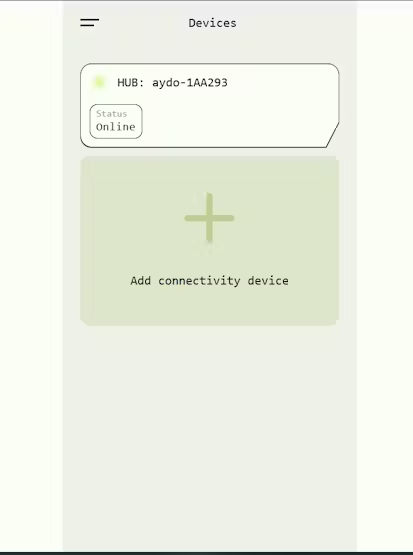
Click Sign in to add your hub. Your new hub should appear in the devices list!
Step 6: Add Your Zigbee2MQTT Coordinator
Navigate to the Devices section where your hub is displayed.
Click the big green plus sign to add a new device and select Zigbee Coordinator.
Double-click your coordinator in the Zigbee Device field to open its settings, adjust details as needed (like its map location), and then click Save device.
Verify that your coordinator now appears correctly in the AYDO interface.
Step 7: Add Your Zigbee Devices
Add More Devices:
In the Devices section, click Add other device, then select Zigbee Device.
Follow your device’s pairing instructions (usually a 5-second button press or a triple-click).
Confirm the Device is Added:
If the device doesn’t show up, restart the AYDO service:sudo service aydo restart
Wait about 30 seconds and refresh your page.
Note: Some devices sleep deeply. Try interacting with them (e.g., a gentle blow or slight heat) to wake them up.
Optional: Check the Zigbee2MQTT Interface:
Open your browser and navigate to:http://<IP-address>:8080
If it doesn’t load, use:sudo journalctl -u zigbee2mqtt.service
And for AYDO issues, check:sudo journalctl -u aydo.service
AYDO Points
How do points work? You earn AYDO Points in two main ways:
Streaming Data: Connect your IoT devices and share data continuously—the more data you stream, the more points you earn.
Completing Quests: Participate in fun challenges, verify your email, and join special events to earn extra points. Once a quest is marked as "Completed, " the reward points are added to your balance.
Keep an eye on your rewards block to watch your points grow as you actively use the system.
Feedback & Community
Got questions or cool ideas? Join our Discord to chat with the community, ask questions, and report any bugs you find. Your feedback helps make the project better—and you can earn some exclusive rewards like the AYDO Bughunter role!
Have fun experimenting with different Zigbee devices and sharing your experiences. And remember, every bit of data you stream earns you $AYDO Points!
Subscribe to my newsletter
Read articles from AYDO directly inside your inbox. Subscribe to the newsletter, and don't miss out.
Written by
AYDO
AYDO
The project's mission is to bring DePIN to mass adoption by making it economically viable, through lowering costs and facilitating easier access to data buyers. AYDO solves a critical problem: currently, DePIN projects require users to purchase expensive branded hardware that takes a long to ship and only works in isolated ecosystems. AYDO's solution allows users to connect over 7,000 third-party IoT devices and sensors to supported DePIN projects, enabling users to save 5-20 times on hardware costs without being locked into a single ecosystem.