Step-by-Step Guide to Configuring Amazon EFS for EC2 Instance For File Sharing
 tolulope adelugba
Introduction
In today’s cloud-driven world, businesses increasingly rely on distributed applications that require seamless access to shared data across multiple servers. Whether you’re running a web application, processing big data, or managing a content management system (CMS), having a reliable and scalable file storage solution is critical. This is where Amazon Elastic File System (EFS) comes into play.
Amazon EFS is a fully managed, scalable, and shared file storage service designed for use with Amazon Elastic Compute Cloud (EC2) instances. It provides a simple, scalable, and elastic file system that can be accessed by multiple EC2 instances simultaneously, making it an ideal solution for workloads that require shared storage.
Whether you’re building a distributed application, hosting a website, or processing large datasets, Amazon EFS provides the reliability, performance, and scalability you need to succeed in the cloud. In the next section, we’ll dive deeper into how to set up and configure Amazon EFS for real-time file sharing between EC2 instances.
Purpose of the Guide
The purpose of this guide is to provide a comprehensive, step-by-step walkthrough for setting up and configuring Amazon Elastic File System (EFS) for file sharing between Amazon EC2 instances. By following this guide, users will gain a clear understanding of how to leverage Amazon EFS to create a scalable, reliable, and efficient shared file storage solution, enhancing their ability to manage distributed applications, host websites, and process large datasets effectively in the cloud.
Understanding Amazon EFS
What is Amazon EFS?
Amazon EFS is a cloud-based file storage service that offers a simple interface for creating and configuring file systems. It is built to be highly available, durable, and scalable, making it suitable for a wide range of use cases, from small-scale applications to enterprise-level workloads.
Benefits of Using Amazon EFS for EC2 Instances
Amazon EFS is a great solution for scenarios where multiple EC2 instances need to access the same data simultaneously. Here’s why we chose it:
Shared File System: EFS provides a shared file system that can be accessed by multiple EC2 instances across different Availability Zones (AZs).
Scalability: EFS automatically scales storage capacity up or down as you add or remove files.
Durability and Availability: EFS is designed to be highly durable and available, with data stored redundantly across multiple AZs.
Ease of Use: EFS is fully managed, so you don’t need to worry about provisioning or maintaining storage infrastructure.
Use Cases
Amazon EFS is particularly useful in scenarios where multiple servers or applications need to access the same data simultaneously. Here are some common use cases:
Web Serving and Content Management:
- Host shared website files or CMS content that needs to be accessed by multiple web servers.
Big Data and Analytics:
- Store and process large datasets that require parallel access from multiple compute instances.
Application Development and Testing:
- Share code and build artifacts across development and testing environments.
Media and Entertainment:
- Store and process large media files, such as videos and images, for editing and rendering.
Machine Learning:
- Share training data and models across multiple instances for distributed machine learning workloads.
Prerequisites
Before we begin, ensure you have the following:
An AWS account with the necessary permissions to create and manage EFS, EC2, and security groups.
Two Amazon EC2 instances running in the same AWS region.
Both EC2 instances should have an Amazon Linux 2023 or a compatible Linux distribution installed (EFS is also supported on Windows, but this guide focuses on Linux).
Security Groups: Security groups configured for the EC2 instances and EFS mount targets
Creating an Amazon EFS File System
- Navigate to the Amazon EFS console in the AWS Management Console by typing “EFS” in the search window.

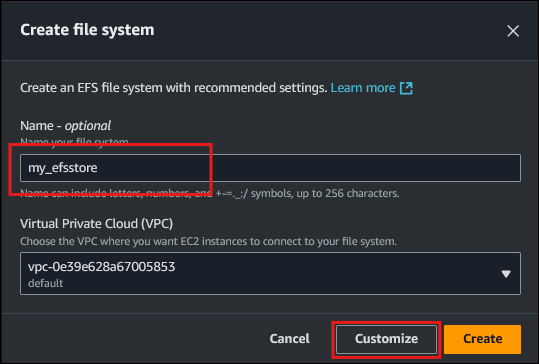
- Click "Create file system" and provide a name for your file system using the Name tag.
- Customize the settings such as File System settings, Network access and File System policy, by clicking the Customize button.
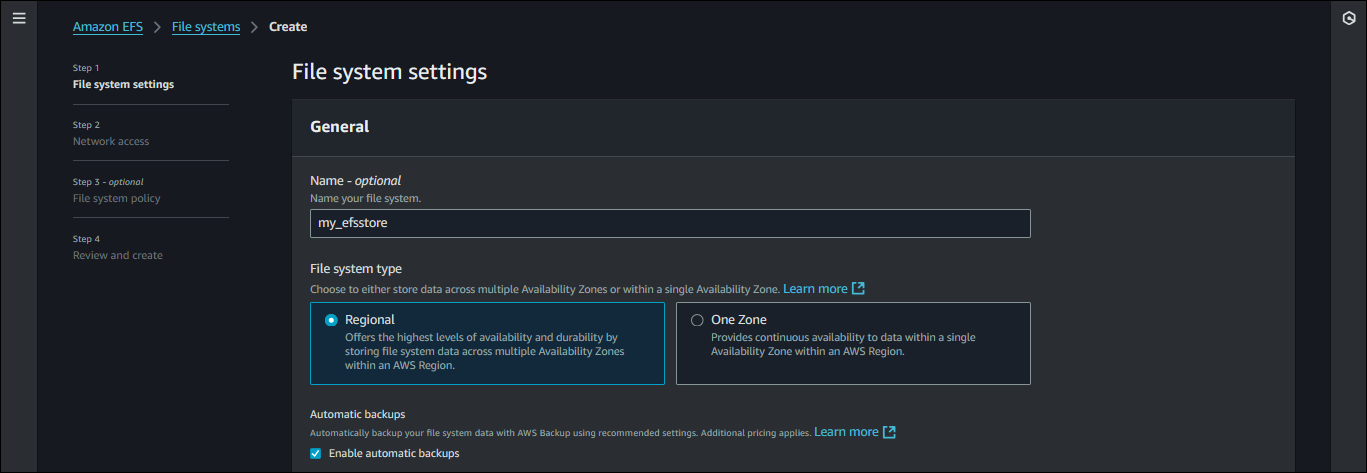
- You can enable File encryption on transit
- Review and create the file system.
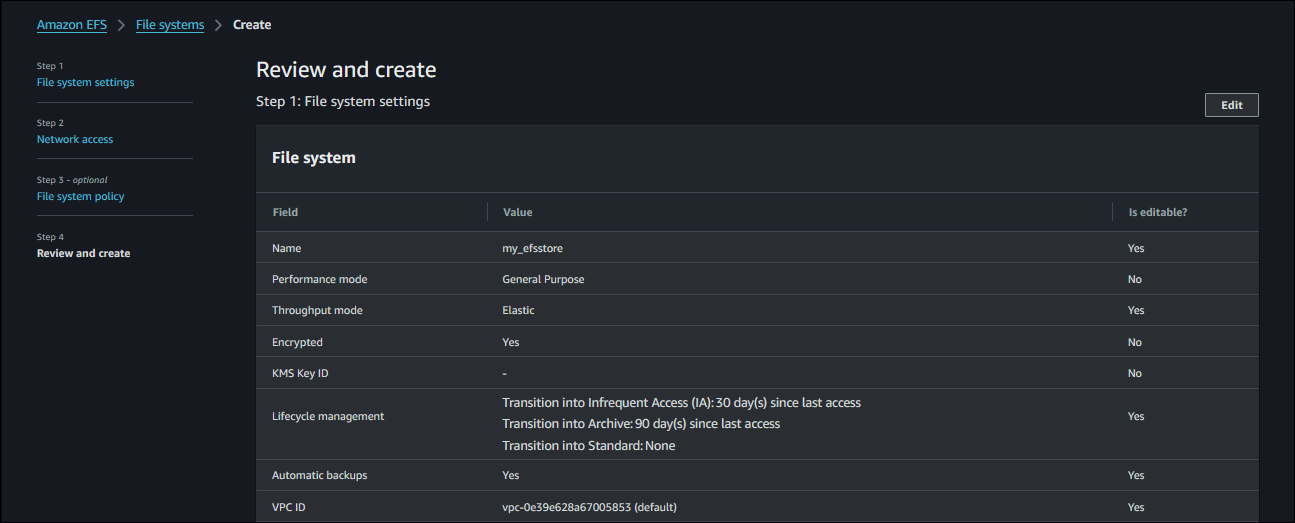
- Upon successful creation, you are presented with the screenshot below.
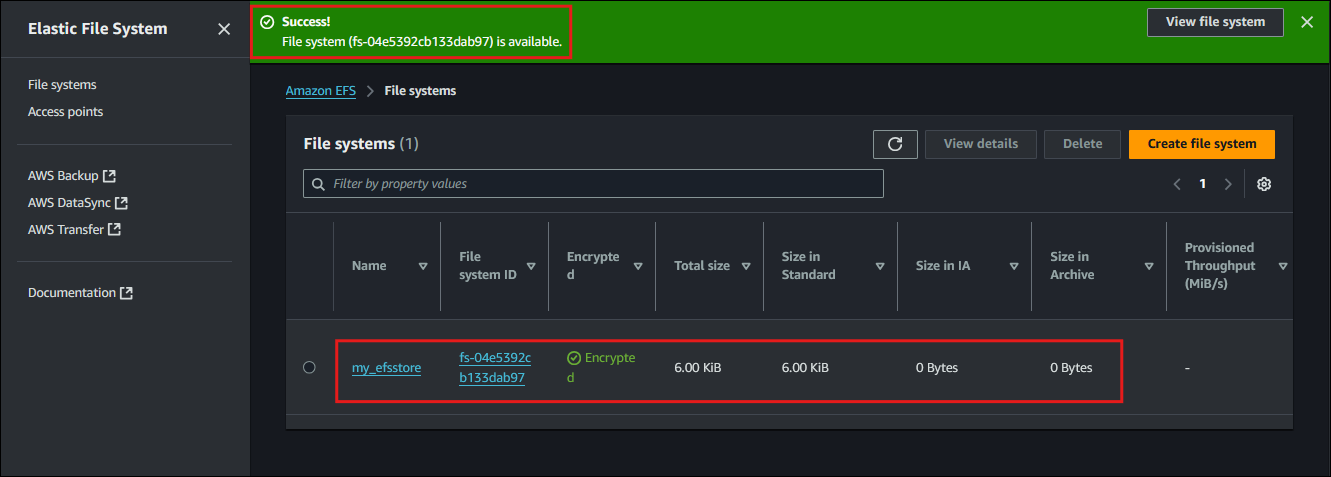
Mounting EFS on EC2 Instances
Next we need to create the two EC2 instances needed where the EFS instance will be mounted for file sharing.
From the Amazon console, navigate to the EC2 console by searching EC2 from the search bar
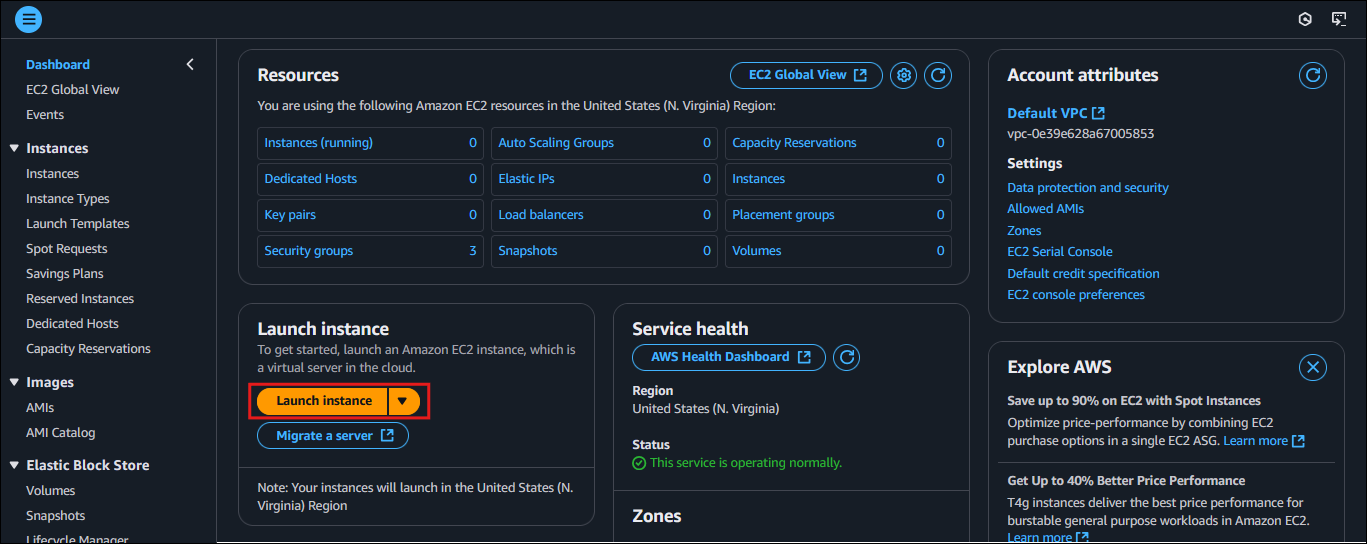
Click “Launch instance” to create a virtual machine instance
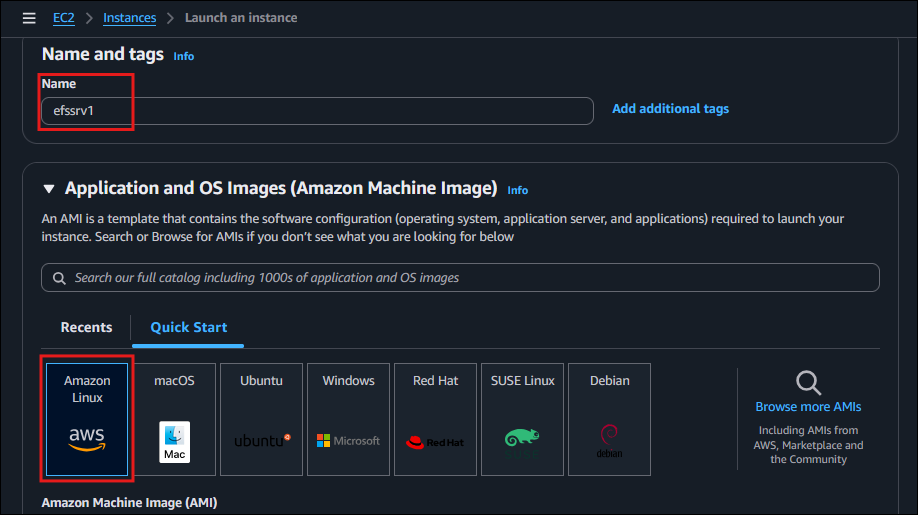
- Give a name to your instance, in my case I used “efssrv1” as the name for one of the two needed instance. For Application and OS image, select Amazon Linux image
- For the instance type, a t3.micro instance type was selected. This can be selected by clicking the drop down and either searching by typing t3 or scrolling down the listed options.
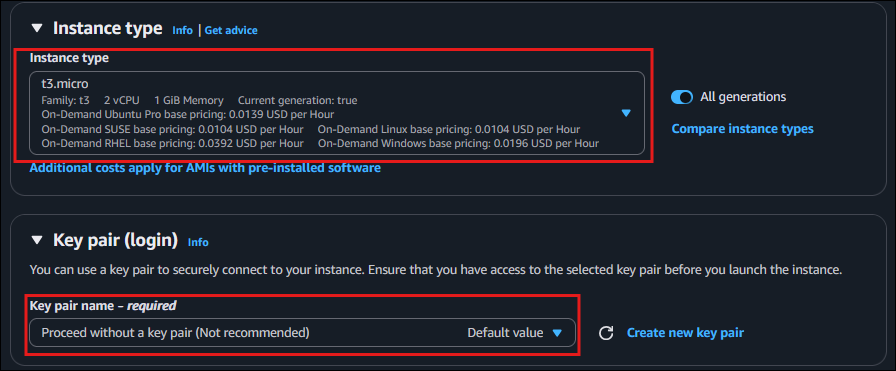
For key pair, you can either create a new key pair or leave as default. For this, I have decided to go with the default option of Proceed without a pair key.
Next we edit the network settings by clicking on edit. We need to change the security group name for this EC2 instance from the default value to a more descriptive name.
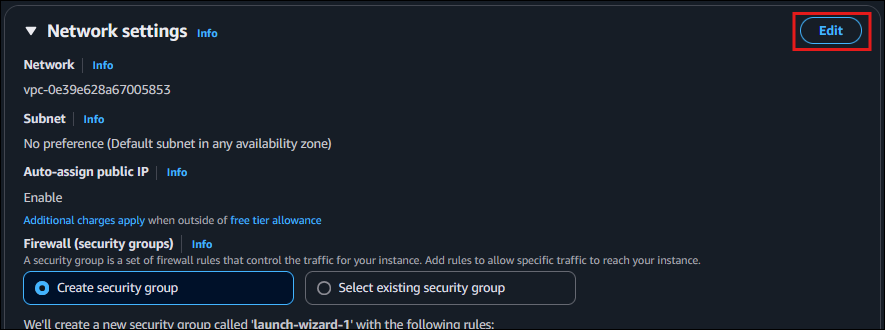
- Change the security group name from launch-wizard-1 to a name of your choosing which describes your EC2 instance.

- Once done, click launch instance.

- Repeat steps to create the second EC2 instance named efssrv2.
Configuring Security Groups for EC2
For the EC2 instances to be able to mount and access the EFS file system, we need to create NFS inbound rules under the default security group.
From the Network and Security menu, select Security Groups
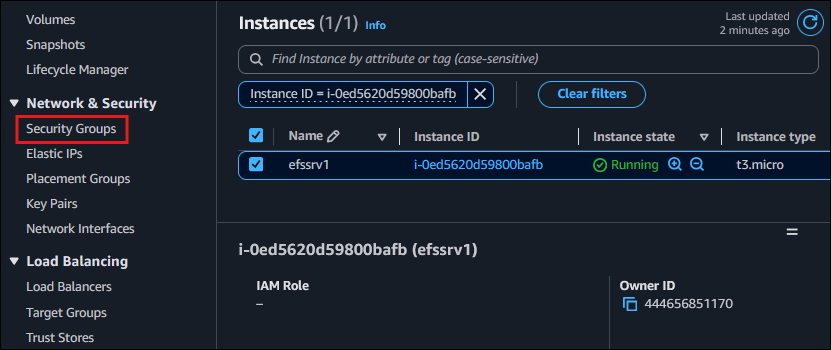
Select the default Security Group and click edit inbound rules.


Click add rule. For the Type, select NFS. For Source, search for the security group name of the efssrv1 that was created when creating the instance.

Click save rules.
Repeat steps for the second EC2 instance.

Connecting to the EC2 Instance
After successfully creating your EC2 instances, which you can verify by the 3/3 checks passed under the status check, you can launch it by selecting the instance name and clicking connect.
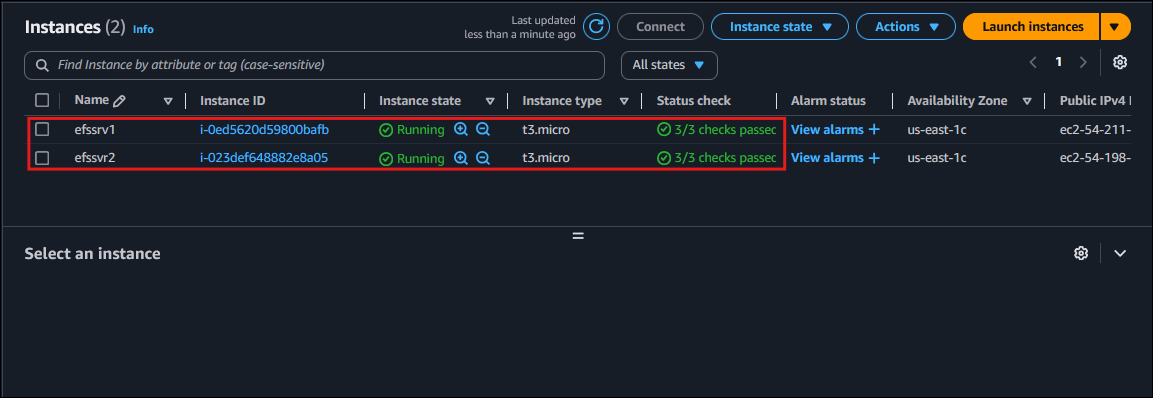
This opens up the EC2 instance connection options.
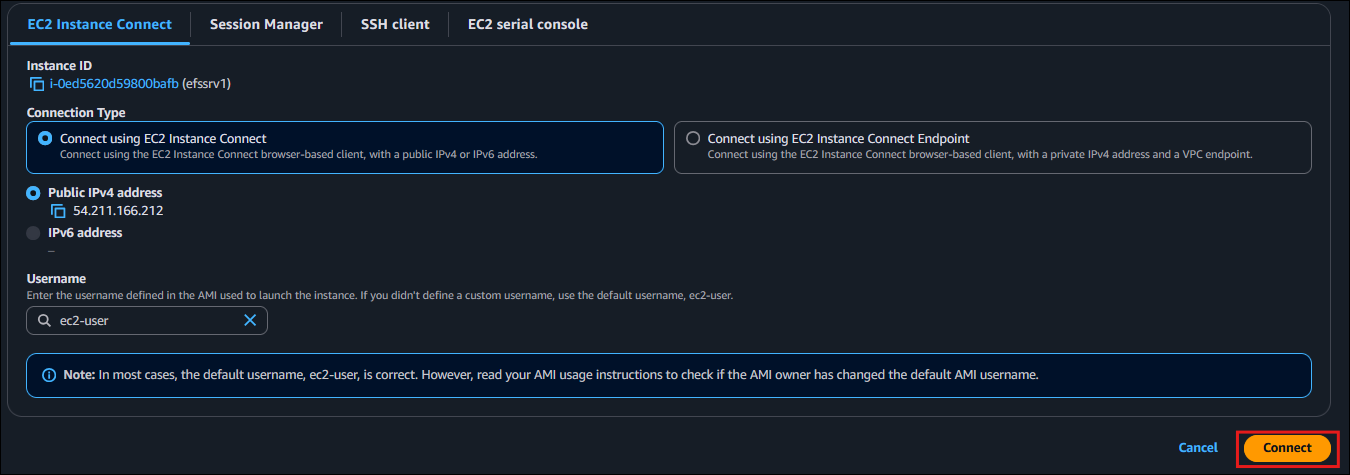
Leaving the default option selected, click on connect.
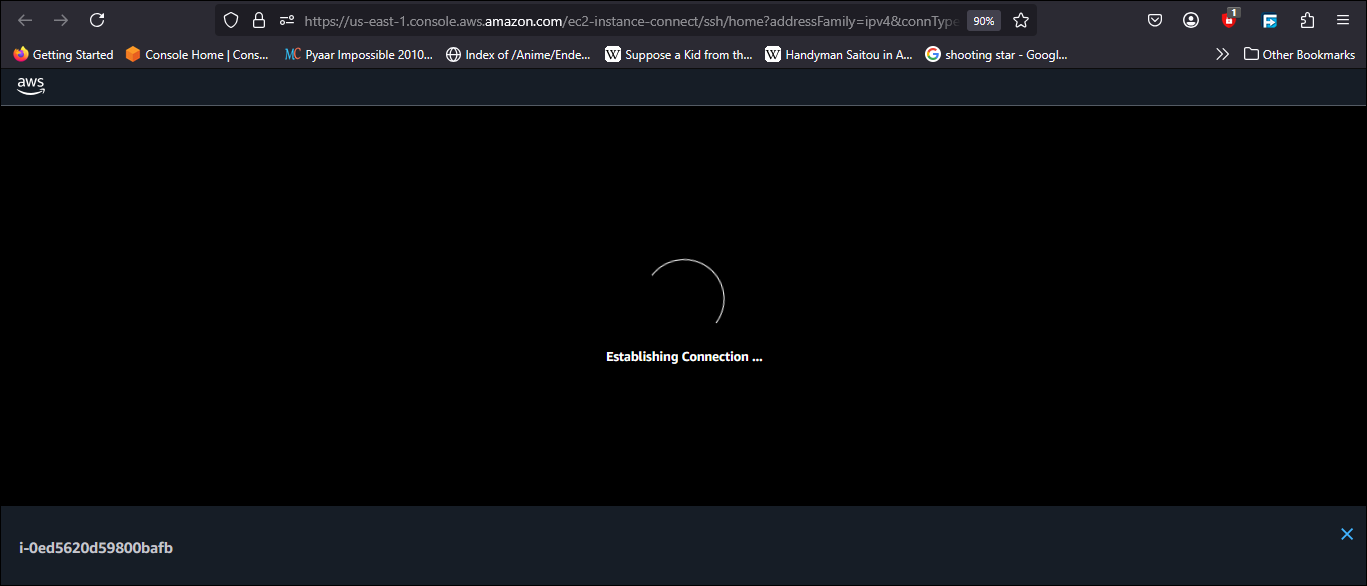
This opens up the instance connection in a new tab.
Installing Required EFS Tools
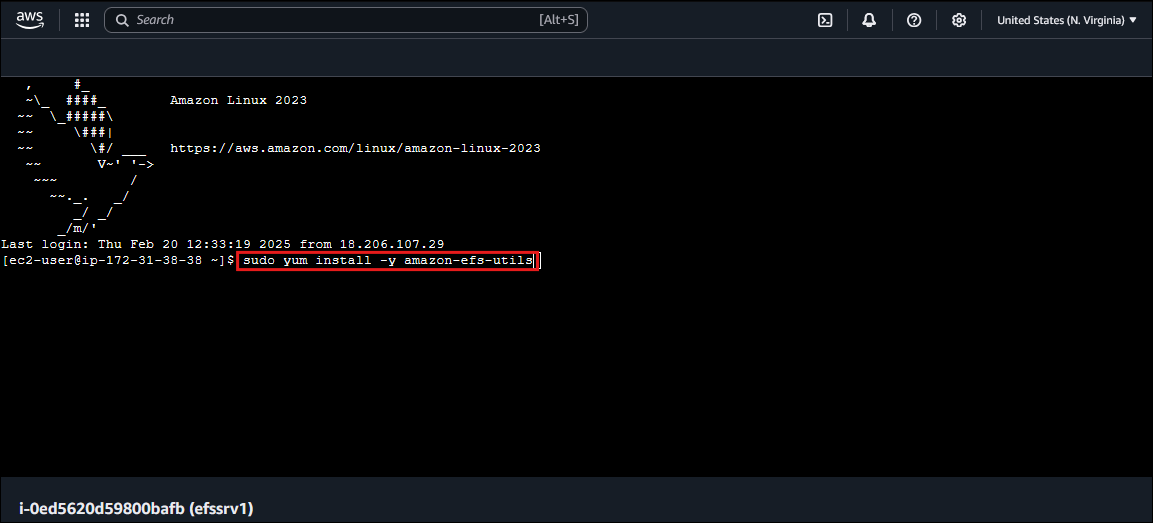
Next we install the required EFS tools on the efssrv1 instance by typing the following command and then enter.
Sudo yum install -y amazon-efs-utils
Mounting EFS Using the Mount Helper
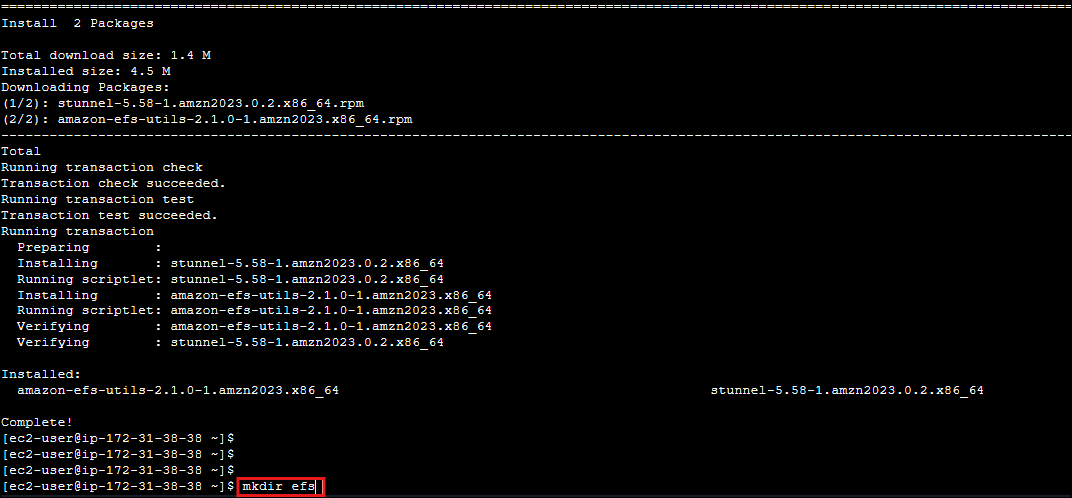
To mount the EFS, first we create a new directory by typing mkdir filename. For this blog purpose a directory name of “efs” was used.
To mount the EFS file system, we use the mount helper, by navigating back to the EFS console
Click on the created EFS File System instance
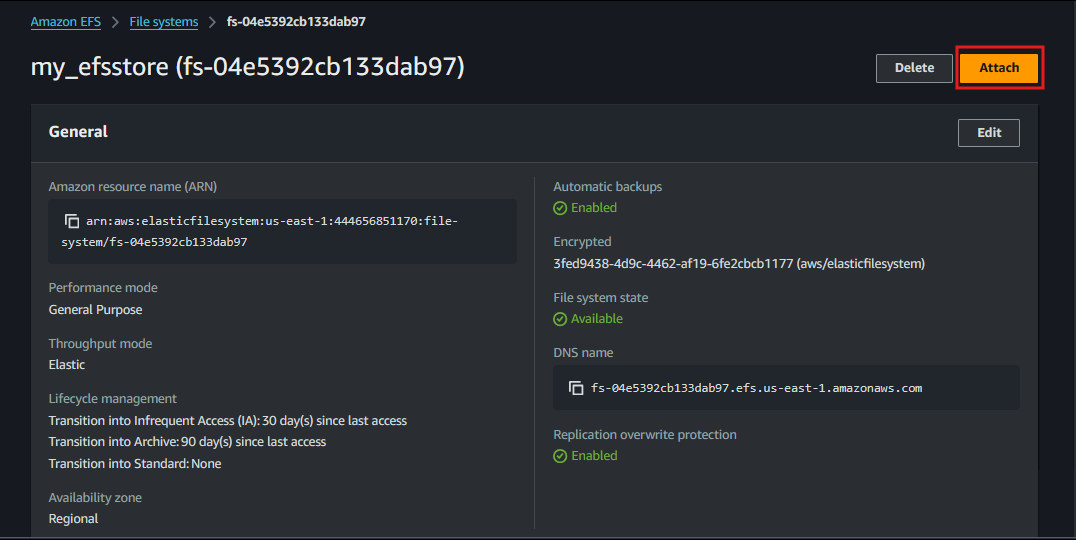
Click on attach, and copy the Using the EFS mount helper command:
sudo mount -t efs -o tls “efs instance name”:/ efs
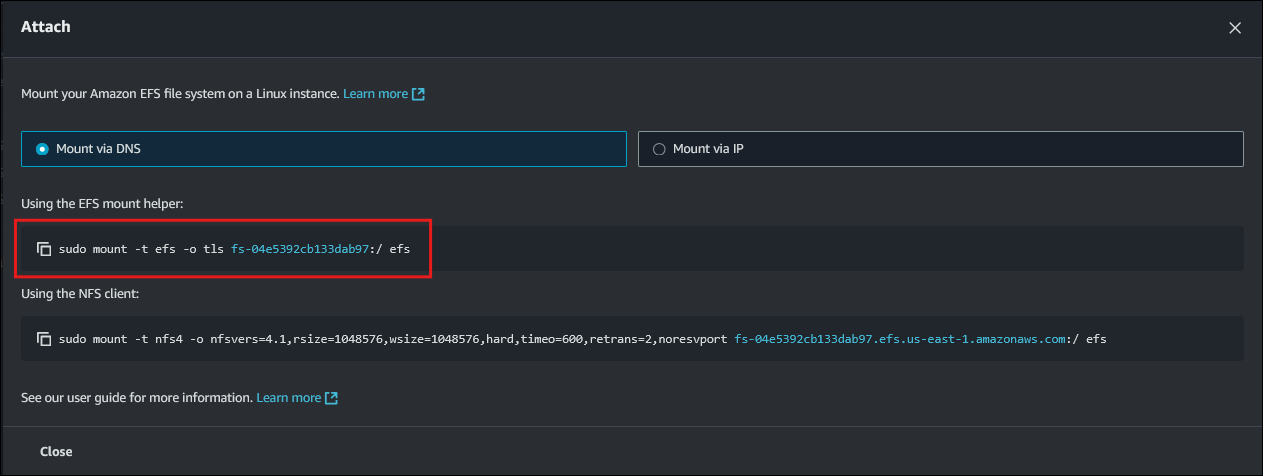
Paste this command in your EC2 efssrv1 instance and press enter. This mounts the EFS file system on the efs directory.

Next we change the ownership of the efs directory from root to ec2-user by typing sudo chown ec2-user efs/.
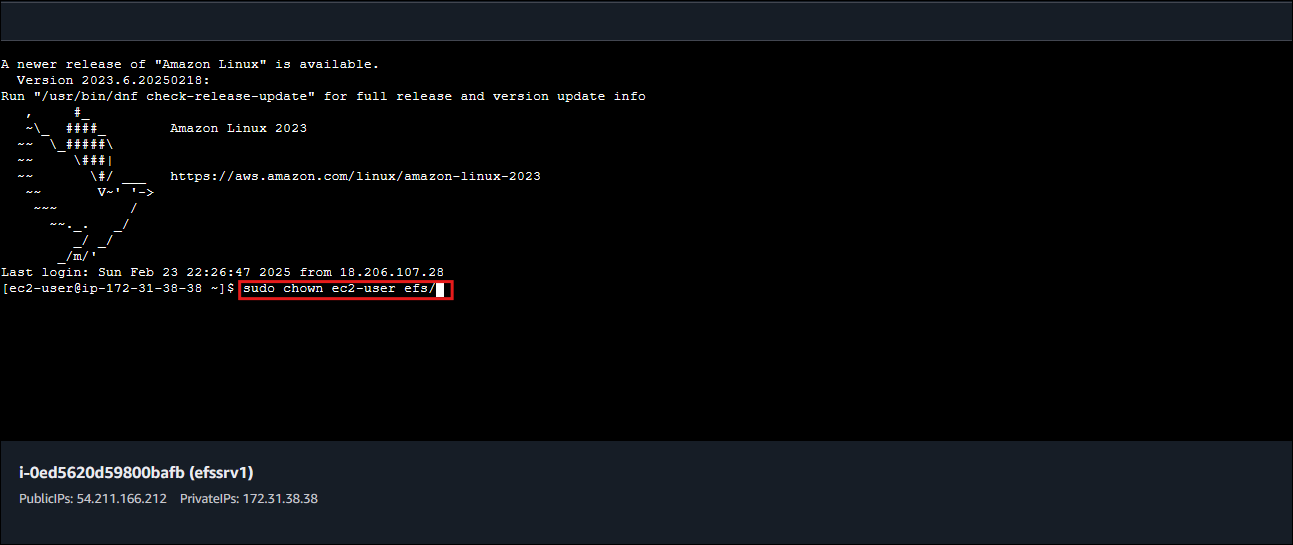
Verifying the Mount
You can verify the mount by typing: df -T then enter.

We can test the mounted file system by creating some files in it using the touch command and also downloading a wordpress package using wget https://wordpress.org/latest.tar.gz in it by changing directory using the cd command.
Typing ls -l list all the contents in the mounted file system.

Connecting the second EC2 instance
Repeat the steps to mount the EFS file system on the second EC2 efssrv2 instance. Verify that it is properly mounted and then type ls -l to list the contents of the directory. This should display the same contents on the first EC2 instance name efssrv1 as seen below.
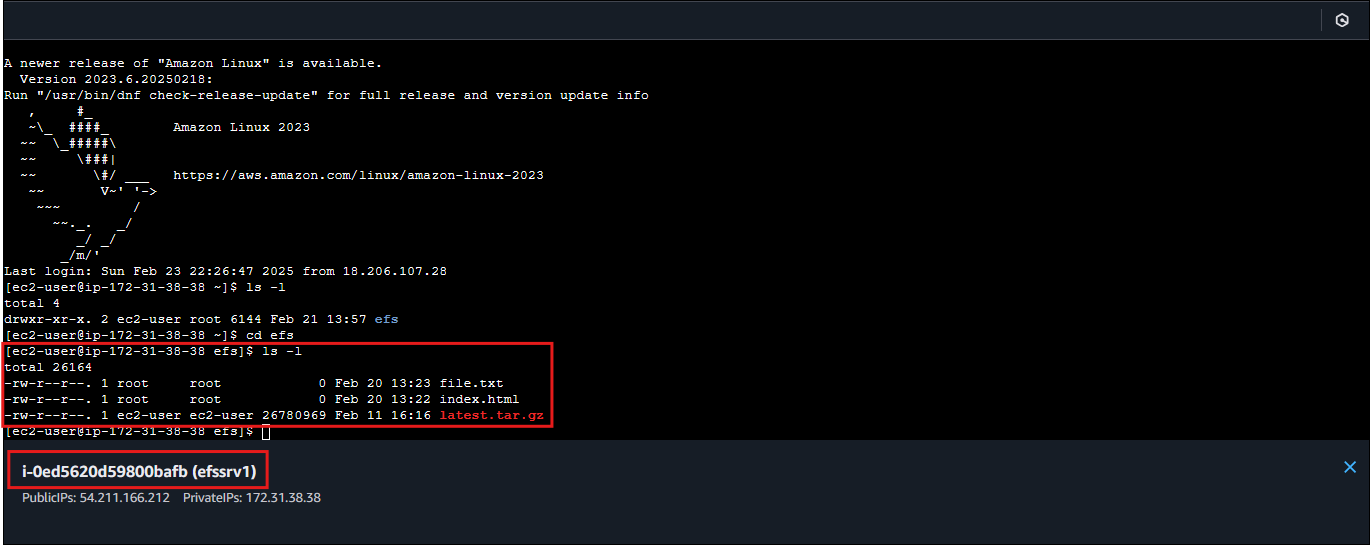
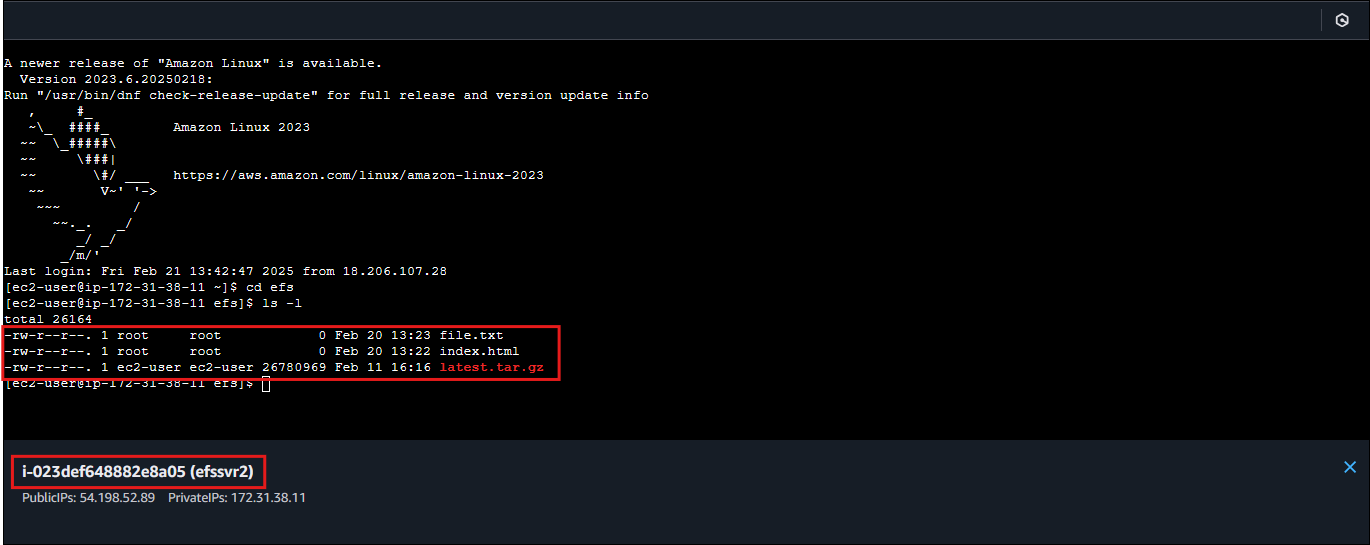
In this guide, we explore setting up Amazon Elastic File System (EFS) to enable seamless file sharing between Amazon EC2 instances. Amazon EFS offers a managed, scalable, and shared file storage solution ideal for distributed applications, web hosting, big data processing, and more. The guide covers prerequisites, EFS creation, security group configuration, EC2 instance setup, tool installation, and verification, providing a step-by-step process to leverage EFS effectively for enhanced cloud performance and shared storage access across multiple servers.
If you have found this blog helpful, please like and drop a comment.
Thanks
Subscribe to my newsletter
Read articles from tolulope adelugba directly inside your inbox. Subscribe to the newsletter, and don't miss out.
Written by
