Deploying EC2 Instances with Shared EFS Storage: A Step-by-Step Guide
 Benjamin Gbolaru
In today's cloud-first world, ensuring seamless data sharing between distributed applications is crucial. One effective way to achieve this on AWS is by using Amazon Elastic File System (EFS), which allows multiple EC2 instances to share files in real time. Whether you are running a web application, a content management system, or a machine learning workload, setting up shared storage can significantly improve collaboration and efficiency.
In this guide, I'll walk you through deploying two EC2 instances that share an EFS file system, ensuring high availability and security. Let's get started!
Objective
The goal here is to set up two Amazon EC2 instances that can share files in real-time using Amazon EFS. This setup ensures data consistency and availability, making it ideal for distributed applications.
Solution Overview
Here's the detailed step-by-step breakdown:
Configure EFS: Create an EFS file system and configure it for shared access.
Set Up EC2 Instances: Launch two EC2 instances in the same region and availability zone.
Configure the Security Group: Set up Inbound Rule and permissions.
Mount EFS on EC2: Connect the EFS storage to both EC2 instances.
Test the Setup: Verify real-time file sharing and synchronization.
Monitor Performance: Check available and used disk space
Step 1: Create and Configure EFS
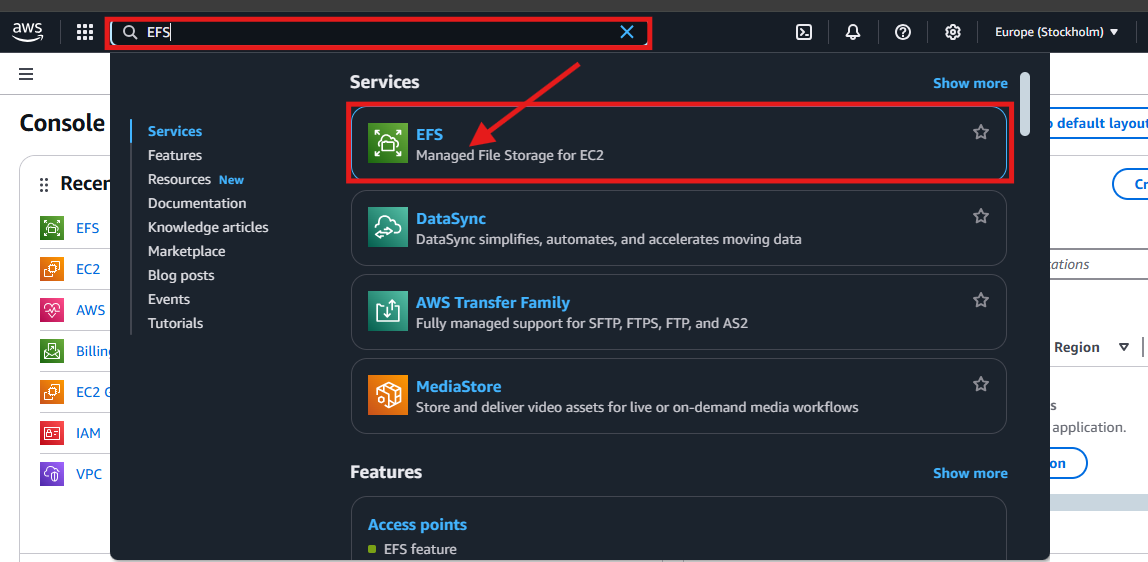
- Search for EFS in the search bar and navigate to the EFS Dashboard in the AWS Console.
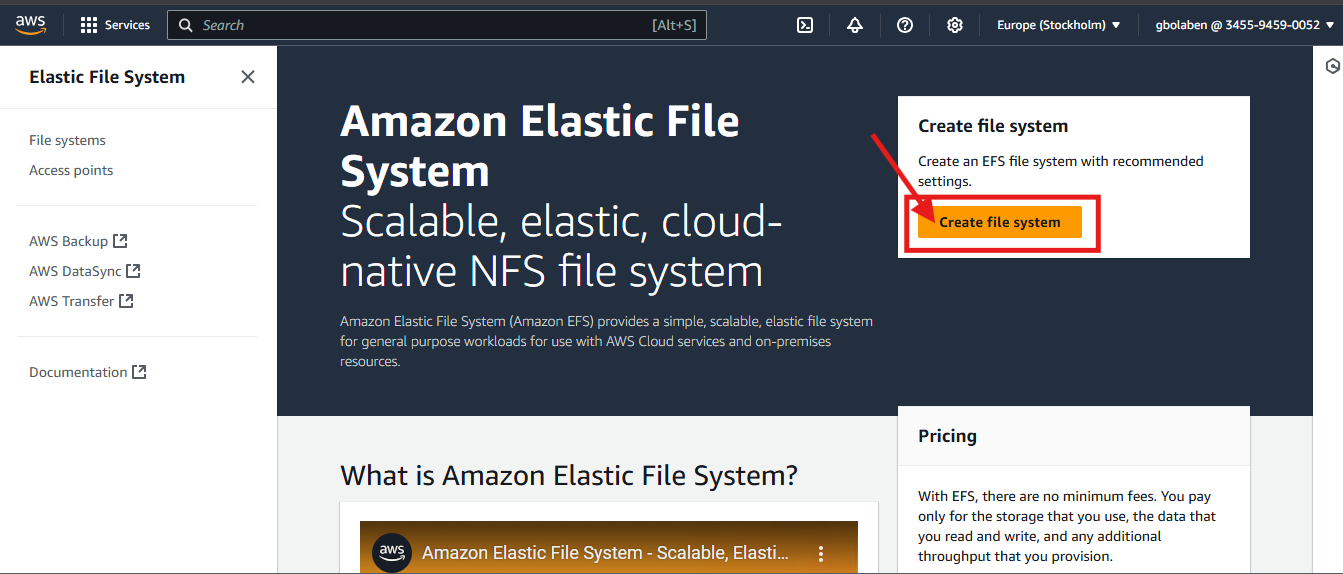
- Click Create File System and configure:
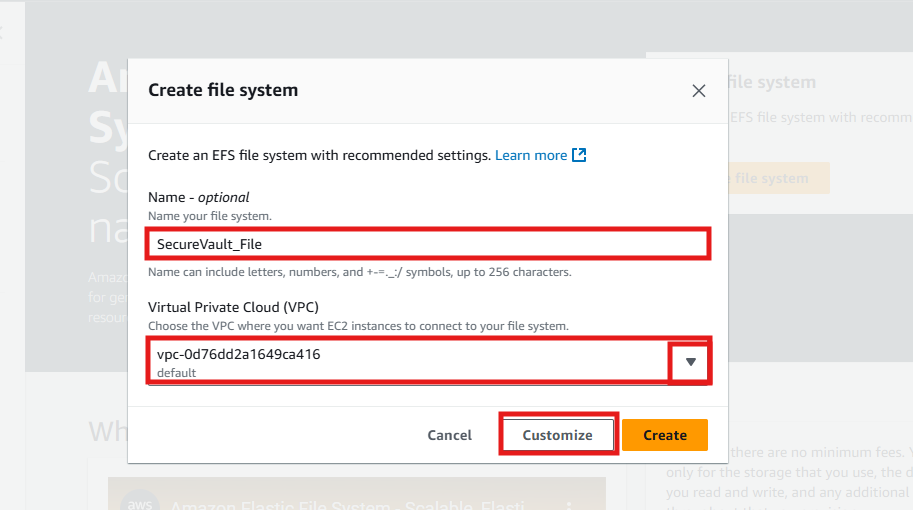
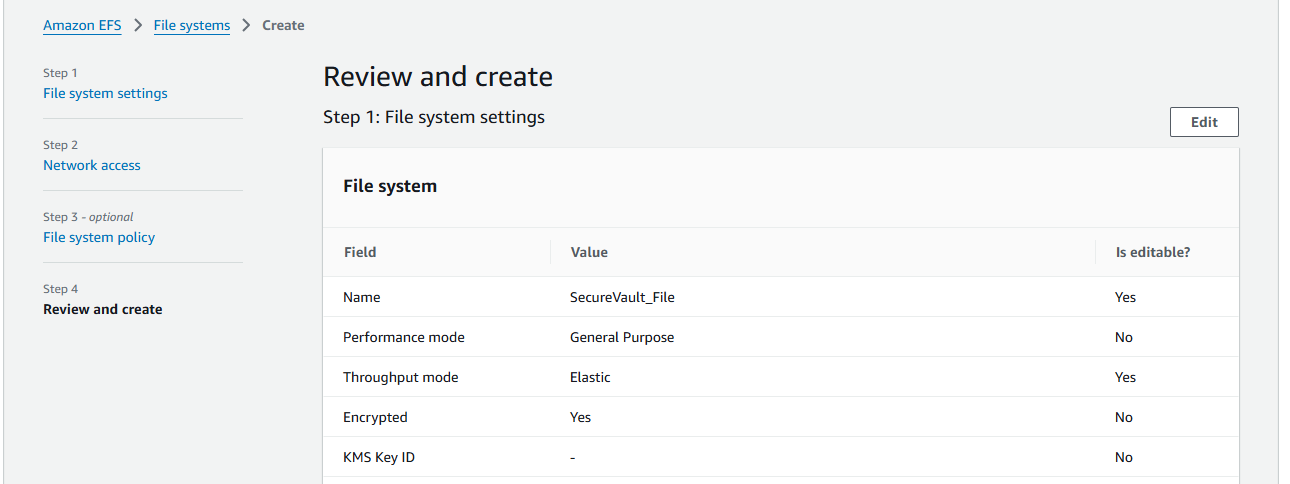
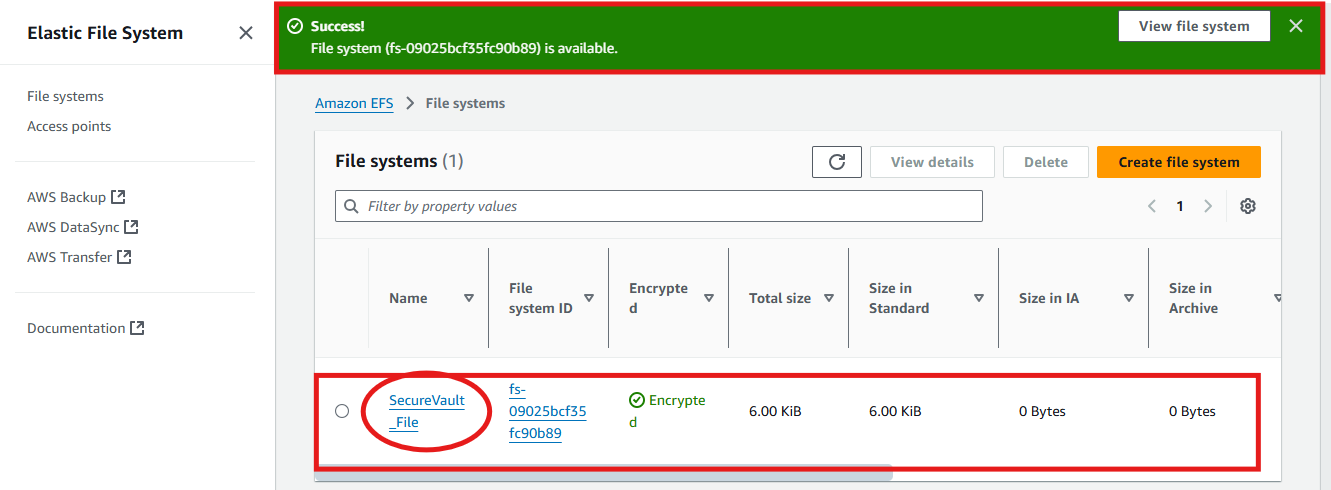
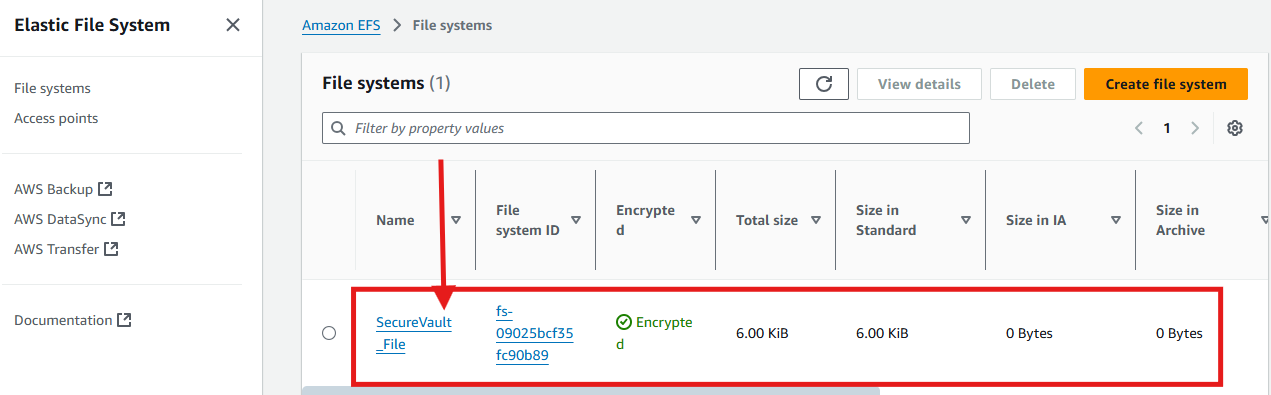
- Name your file and choose the default VPC (Virtual Private Cloud) where you want the EC2 instances to connect to your file system. I named my file SecureVault_File as seen below. Then, click on "Customize".
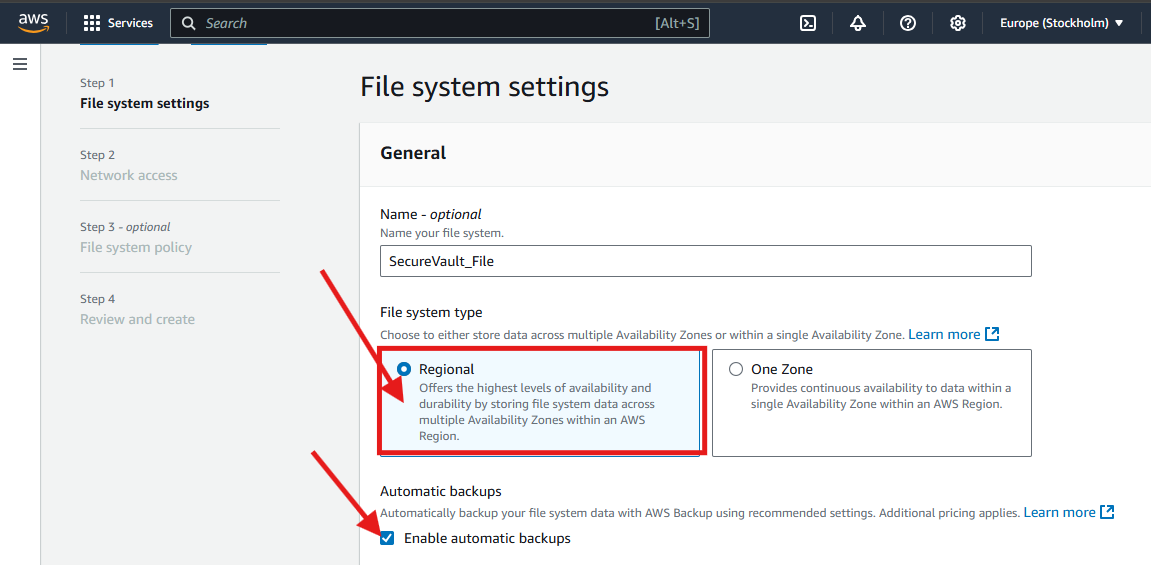
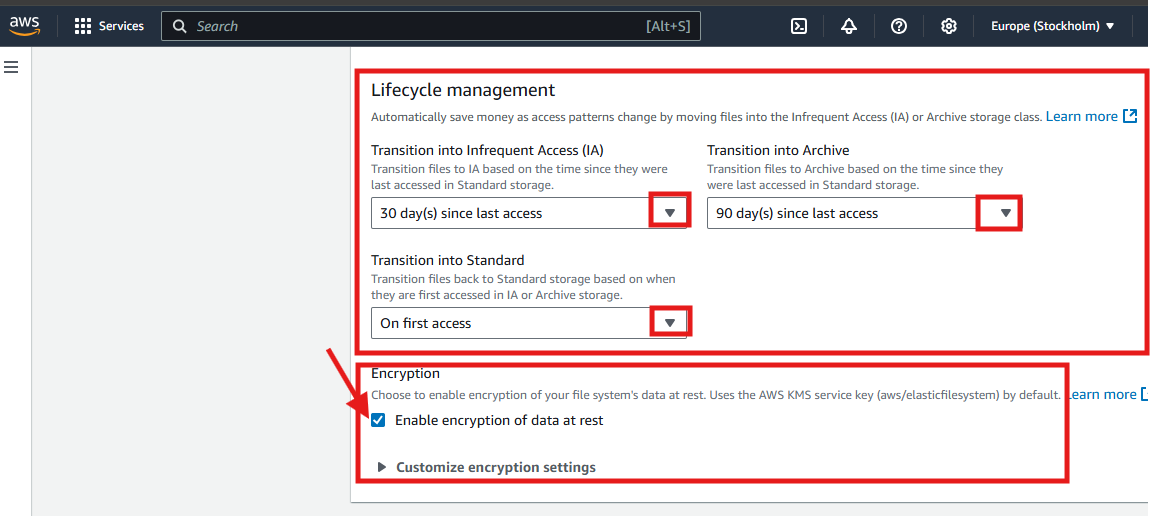
- Configure file system settings, including file system type, automatic backups, lifecycle management, Encryption, and performance settings.
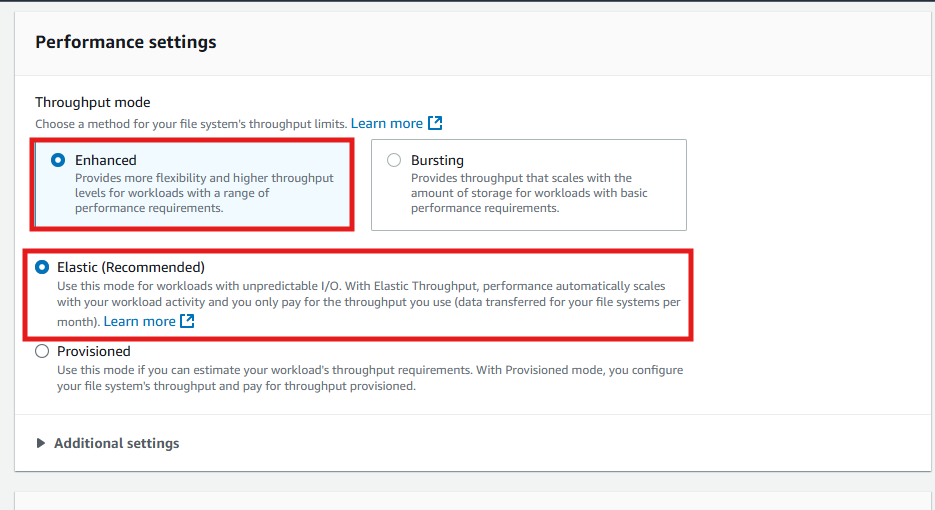
- Configure the Performance settings by choosing a method for your file system's throughput limits. Preferably, it's better to choose "Enhanced" because it provides more flexibility and higher throughput levels for workloads with a range of performance requirements. Additionally, consider choosing "Elastic" mode for workloads with unpredictable I/O patterns. With Elastic Throughput, performance automatically scales with your workload activity, and you only pay for the throughput you use.
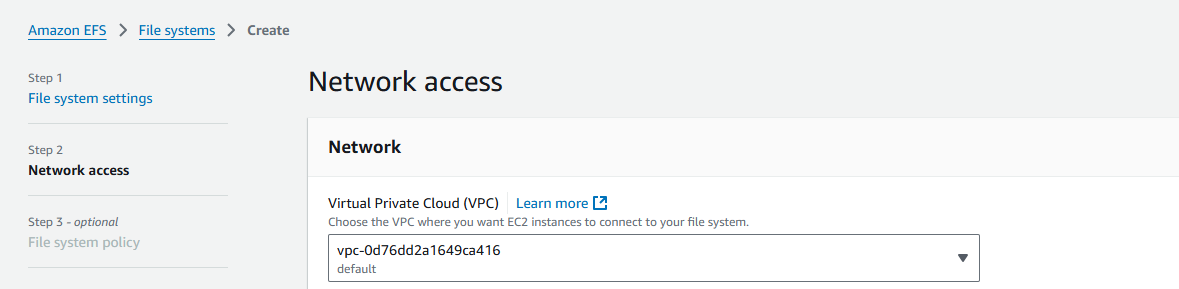
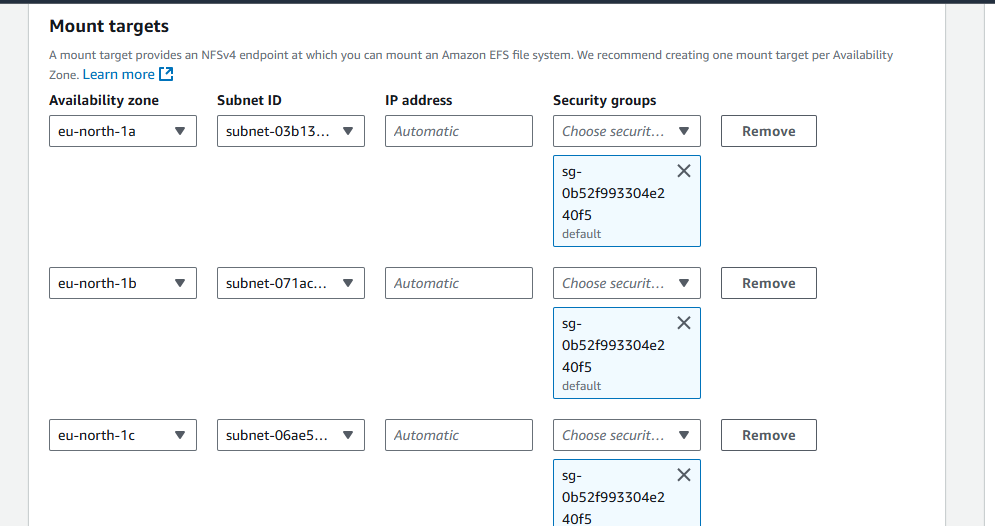
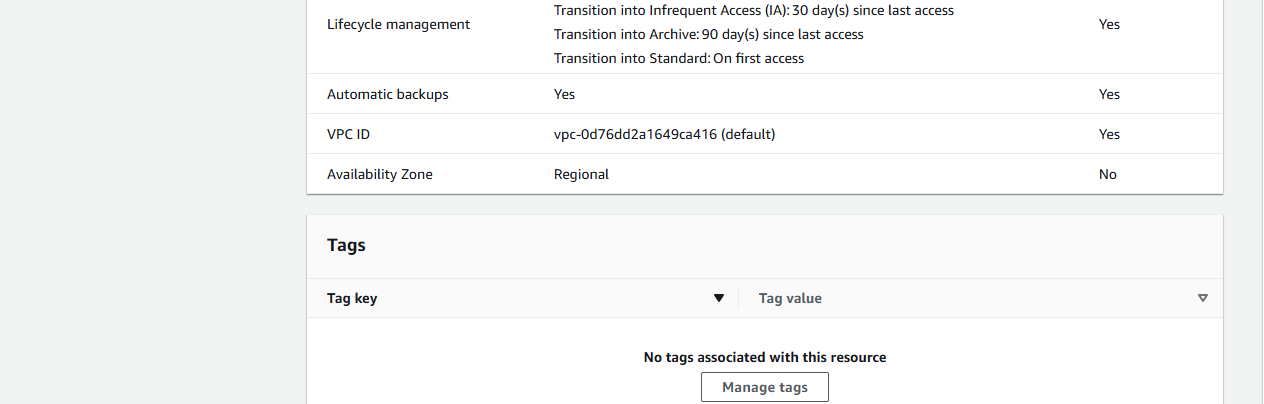
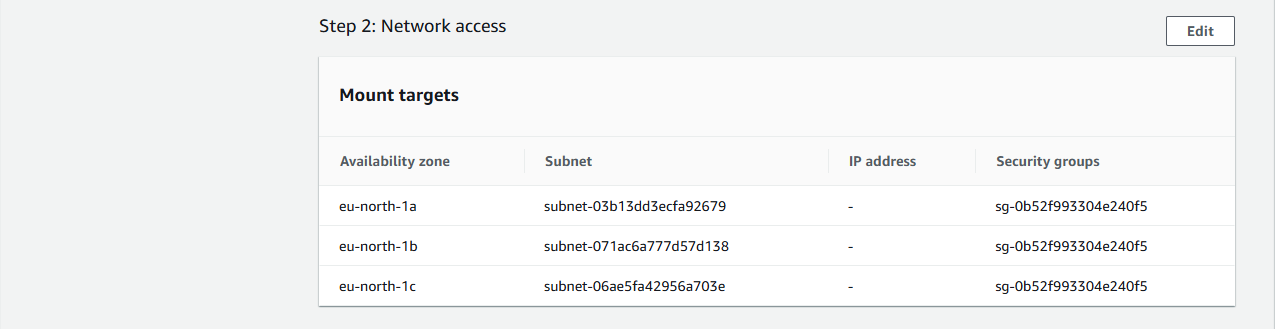
Configure Network access by choosing the default VPC, which we previously selected when naming the EFS file (SecureVault_File). Also, leave the default Mount targets settings unchanged, which include:
Availability Zone
Subnet ID
IP address
Security groups
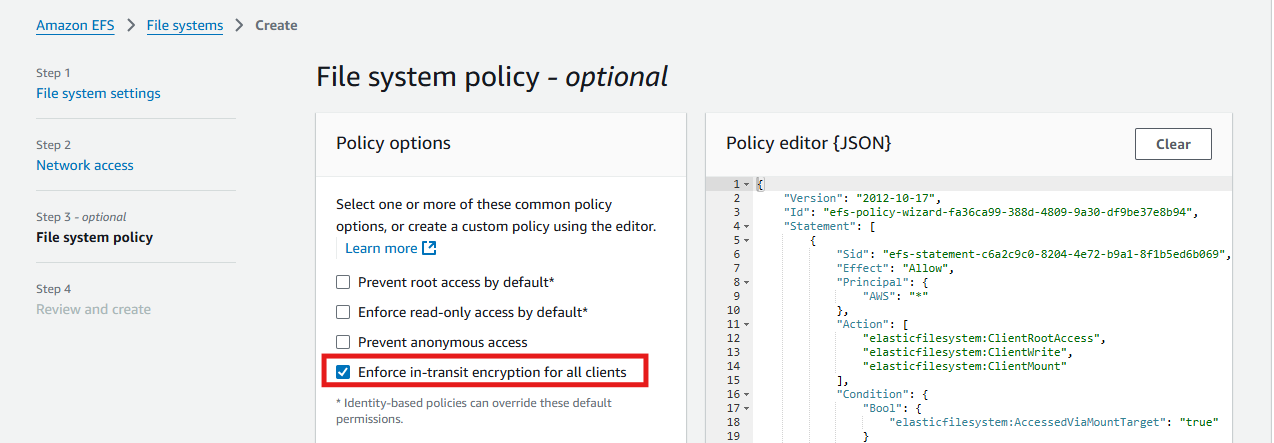
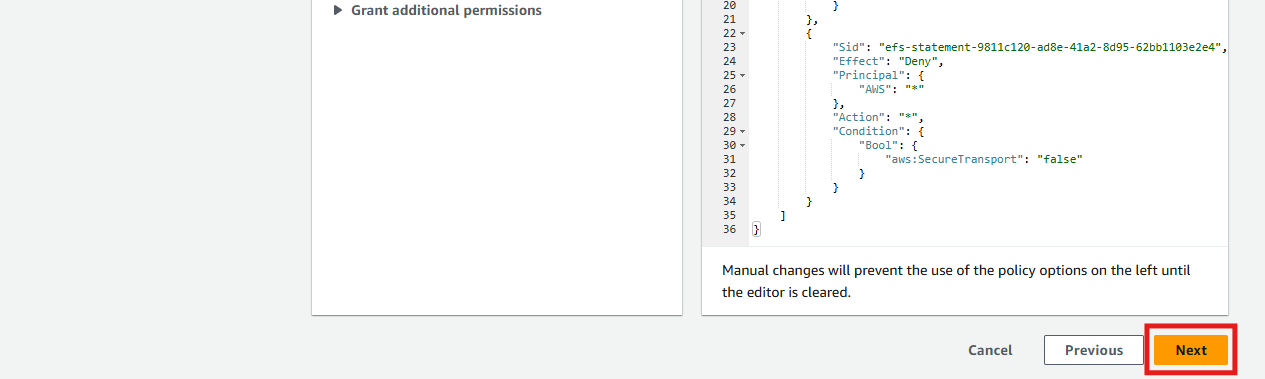
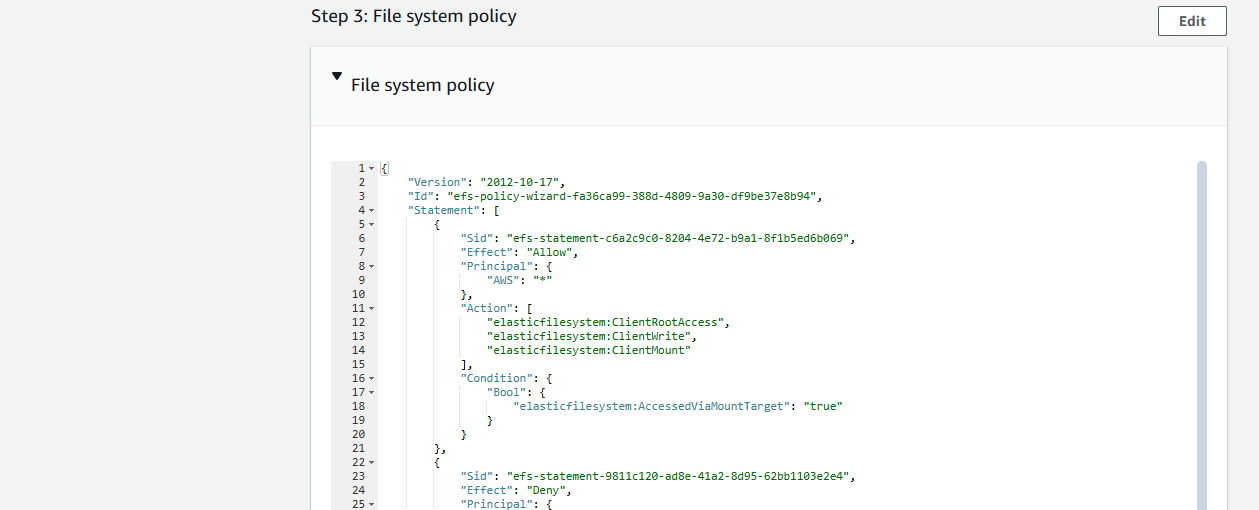
- Configure the File system policy by enforcing in-transit encryption for all clients, ensuring that data is securely transmitted between the clients and the EFS file system
- Review the configuration settings for the EFS file system (SecureVault_File) and click "Create" to provision the file system.

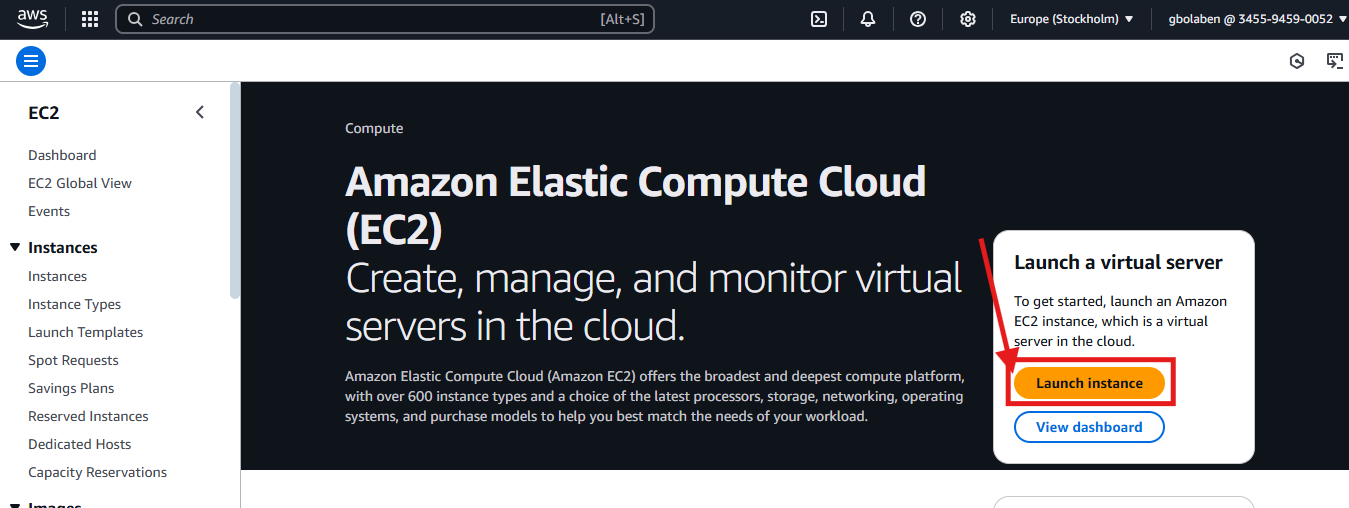
Step 2: Launch EC2 Instances
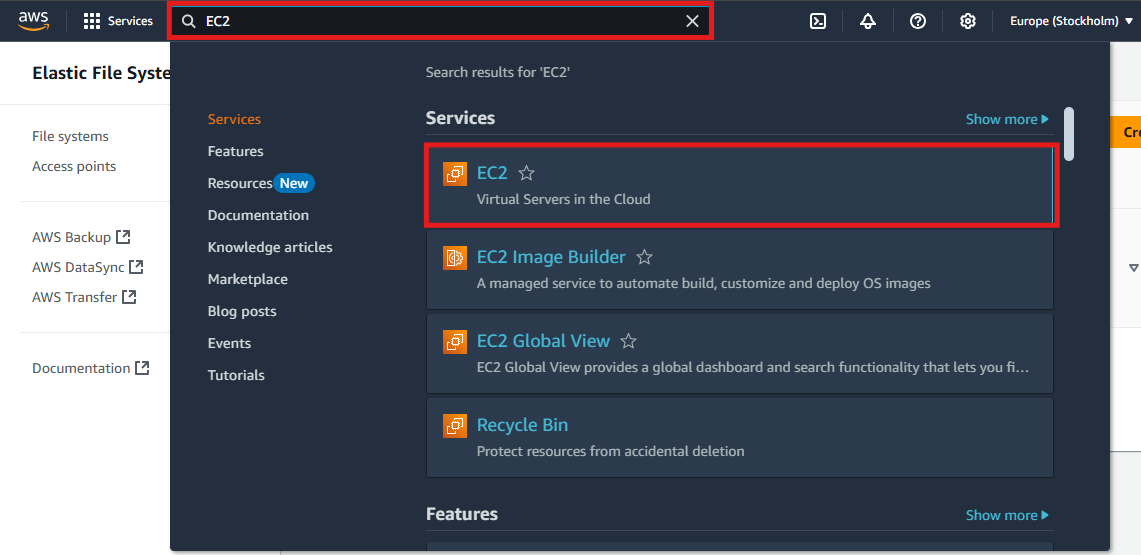
- Search for "EC2" in the search bar to navigate to the EC2 Dashboard in the AWS Management Console.
- Click Launch Instances and configure:
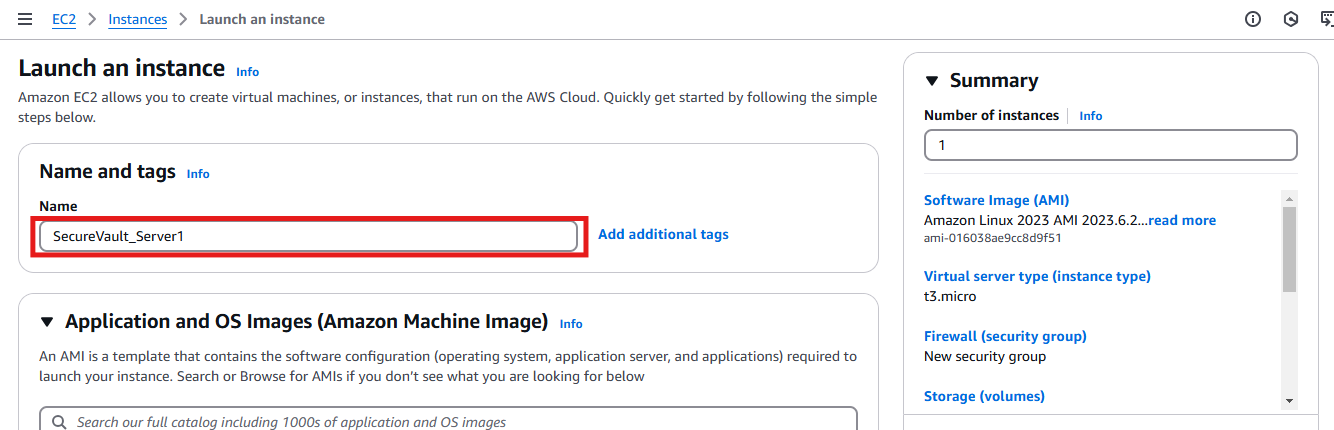
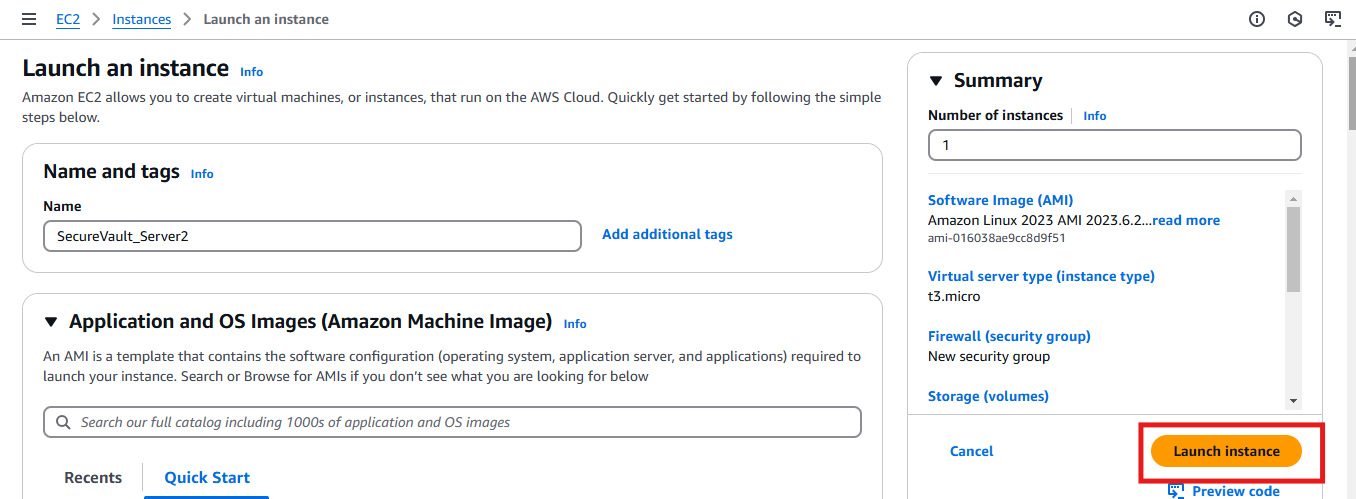
- Give your Instance a Name: I give my instance “SecureVault_Server1” as shown below.
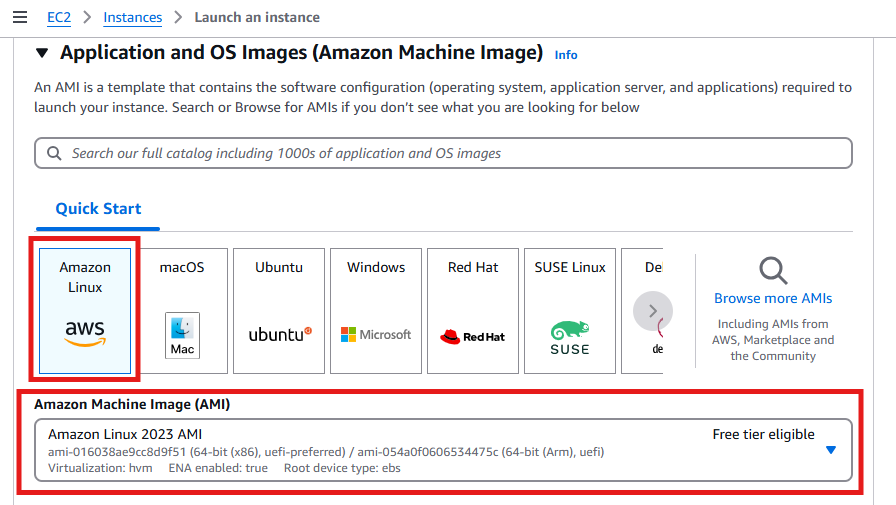
- Choose an Amazon Machine Image (AMI): Choose Amazon Linux as Application and OS Images.
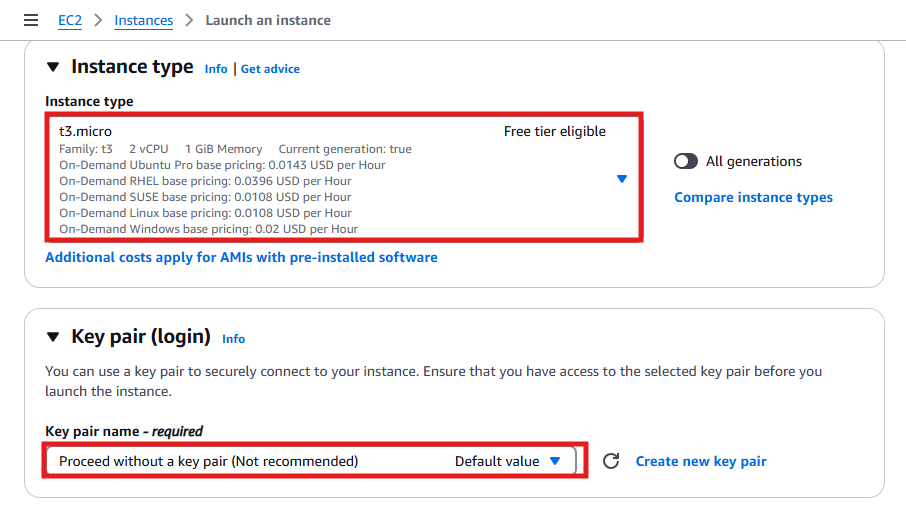
- Select t3.micro for Instance type. Then, select “Proceed without a key pair” or create a new key pair.
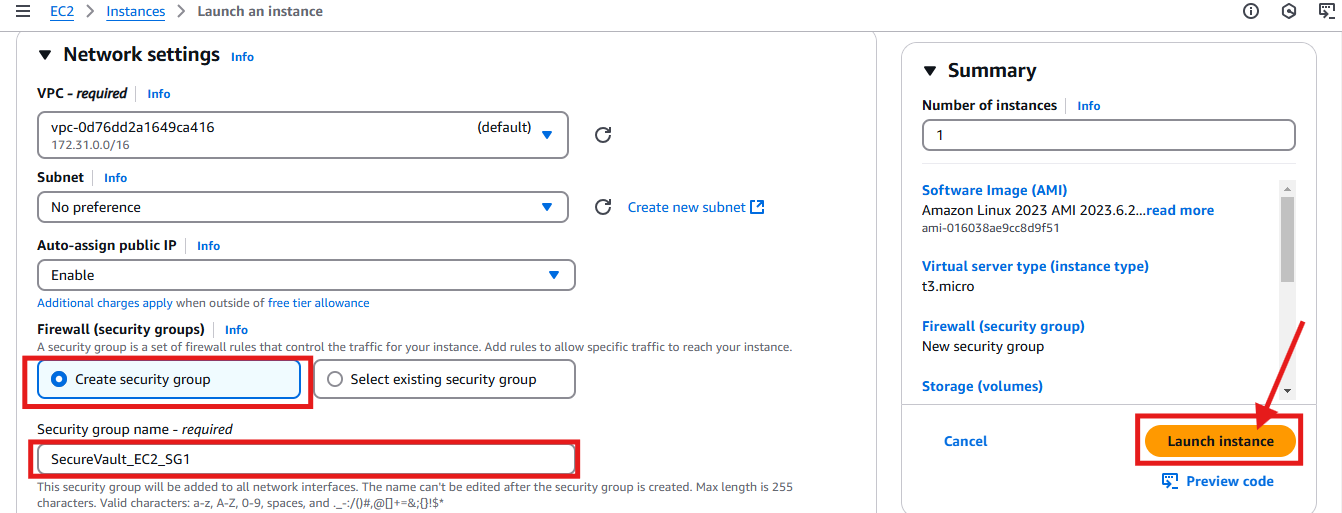
- Configure the Networking Settings, give the Security group a name (e.g SecureVault_EC2_SG1), and leave the rest as default, then click on "Launch Instance".
- Create and launch another EC2 Instance, following the same steps as the first EC2 Instance. I name the second EC2 instance "SecureVault_Server2", give the Security group a name, and leave the rest as default, then click on "Launch Instance".

Step 3: Configure the Security Group and Inbound Rule
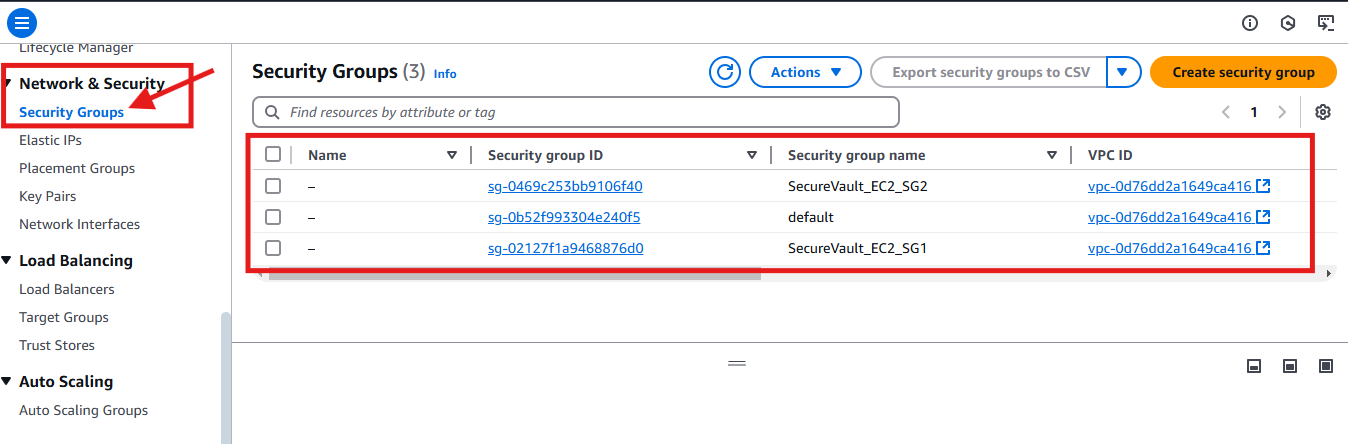
- Navigate to Network & Security in the left pane in the EC2 portal and click on "Security Groups". In the screenshot below, you will notice that there are 3 security groups: a default group and two other security groups for the 2 instances we launched.
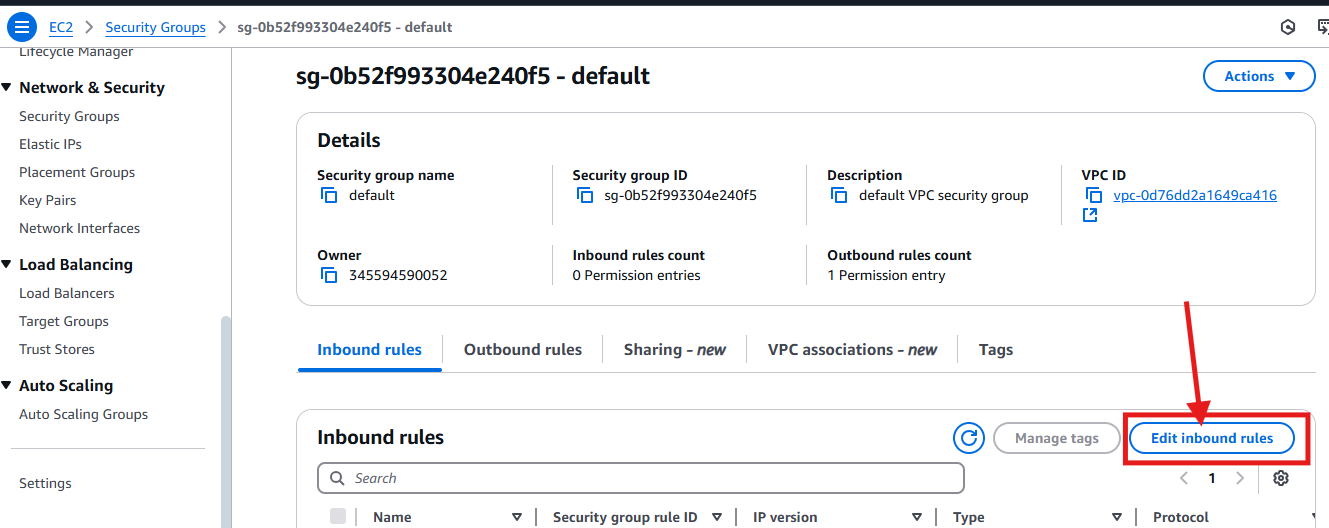
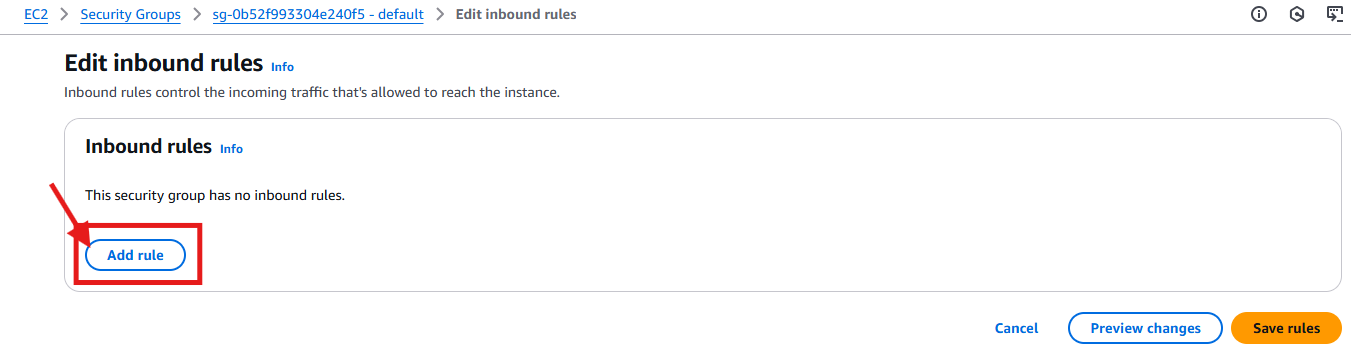
- Click on the Default security group to edit the inbound rule, allowing us to successfully mount the EFS server on the EC2 instances, SecureVault_Server1 and SecureVault_Server2.

- Click on "Edit inbound rules" to modify the inbound traffic rules for the default security group.
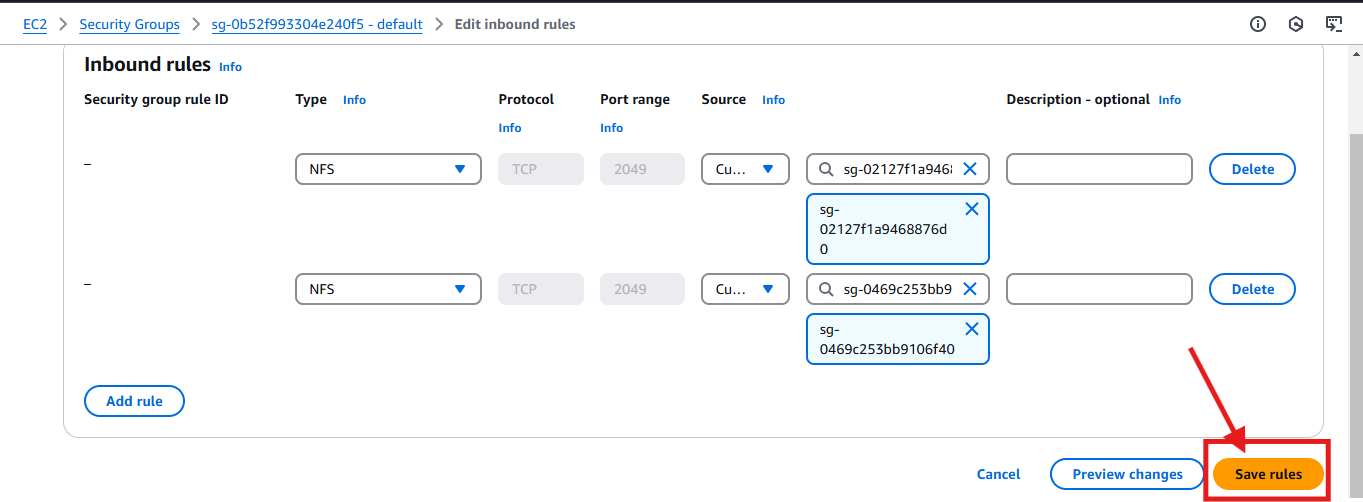
- Click on "Add rule". Select "NFS" as the inbound rule type, set the source as "Custom", and search for the security group of the first instance we created. Select it.
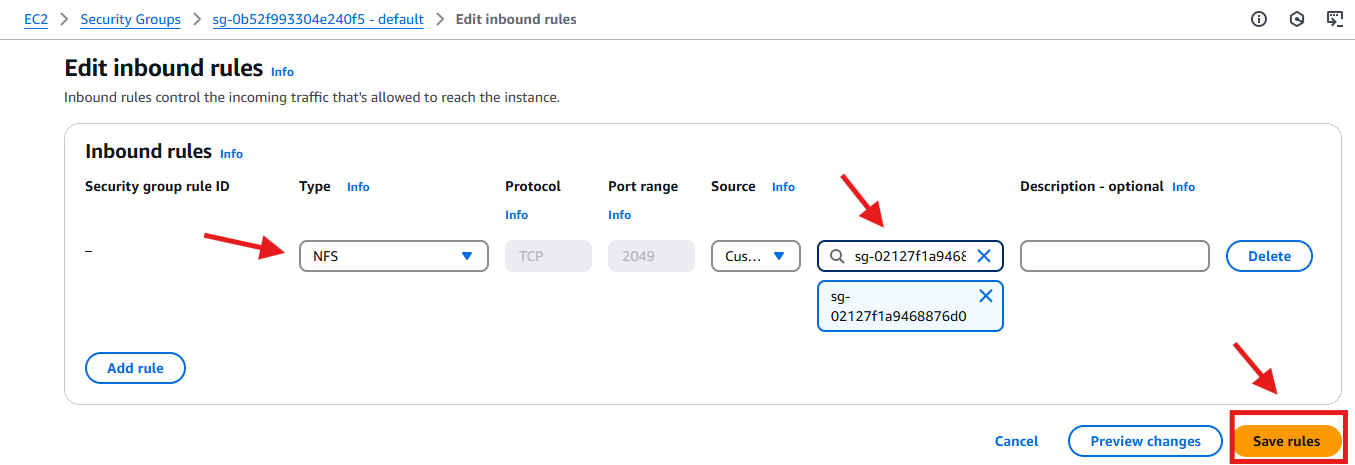
- Repeat the same process for the second instance by clicking on "Add rule", selecting "NFS" as the inbound rule type, setting the source as "Custom", searching for the security group of the second instance we created, and selecting it.
Step 4: Mount EFS on EC2 Instances
To mount the EFS to the EC2 instances, navigate to the EC2 portal and connect to the instances.
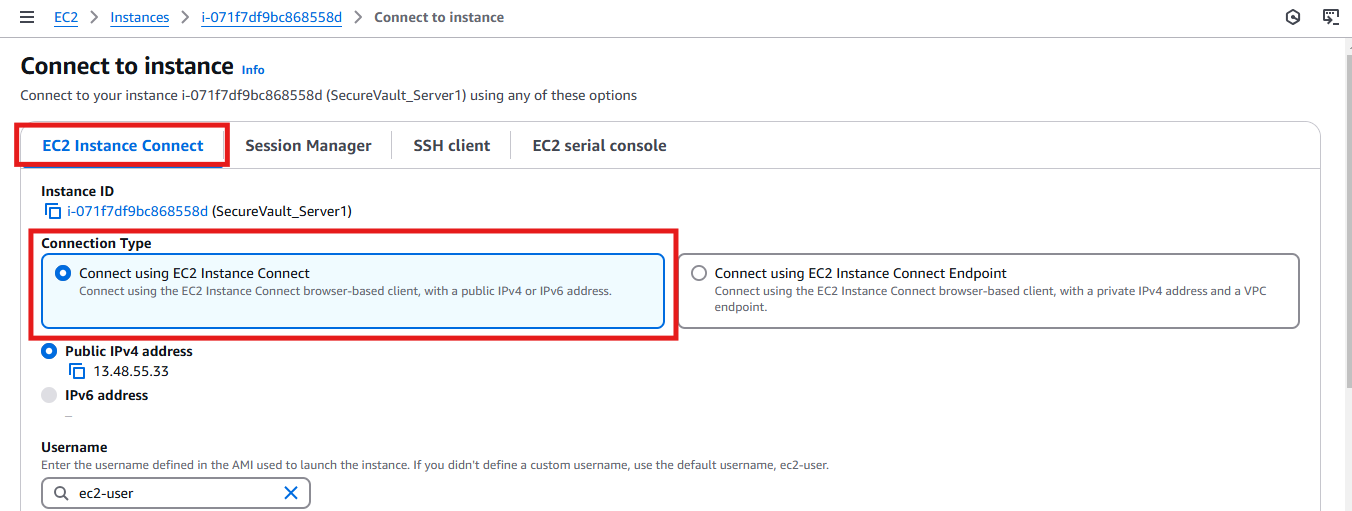
Connect to the first instance (SecureVault_Server1).
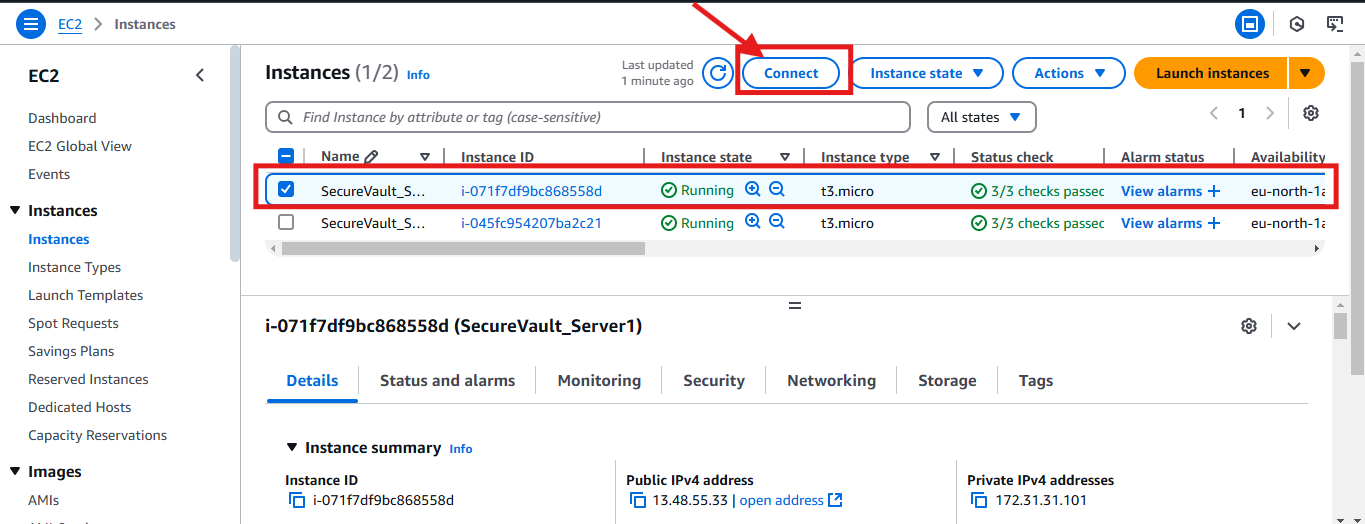
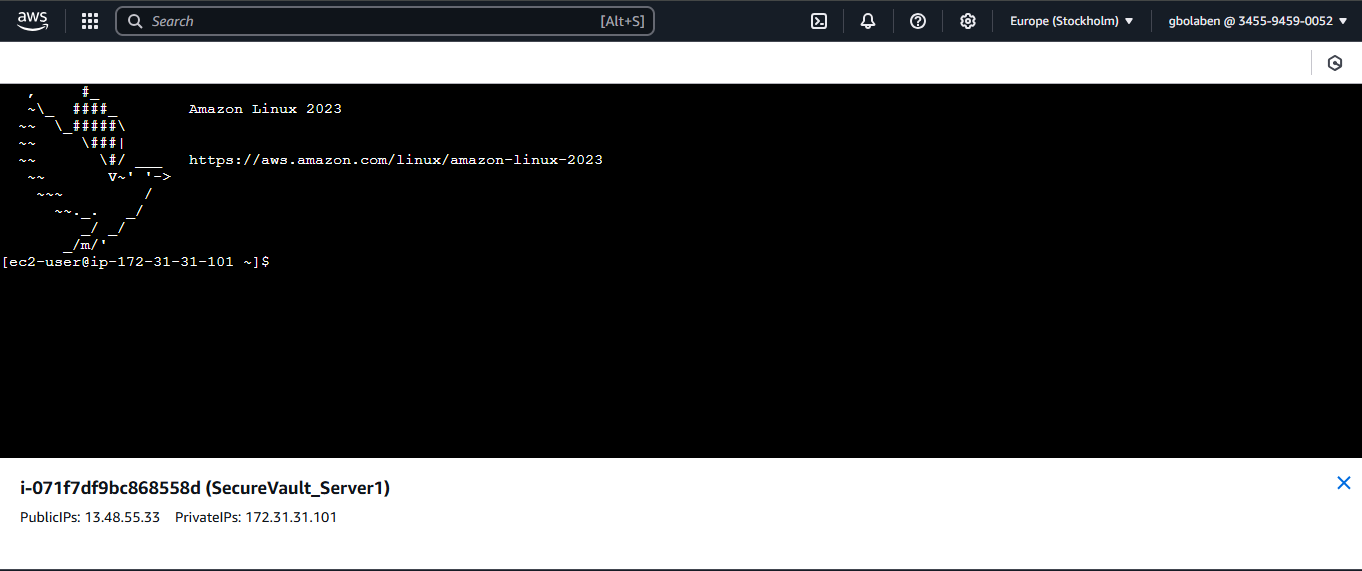
- Select "Connect using EC2 Instance Connect" as the connection type and click “Connect”. The screenshot below shows a terminal after clicking "Connect".

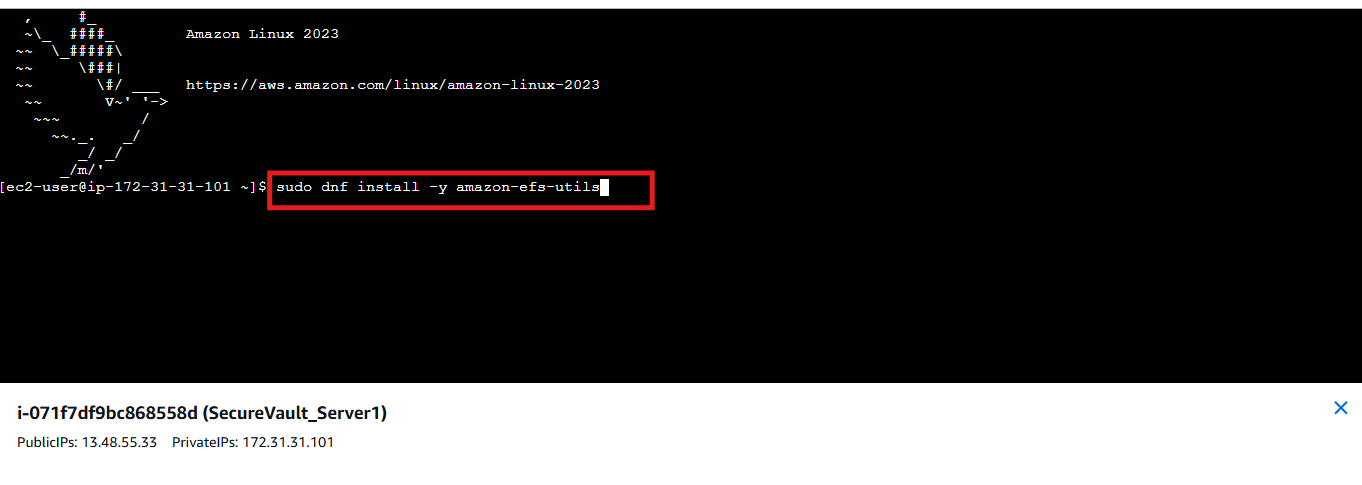
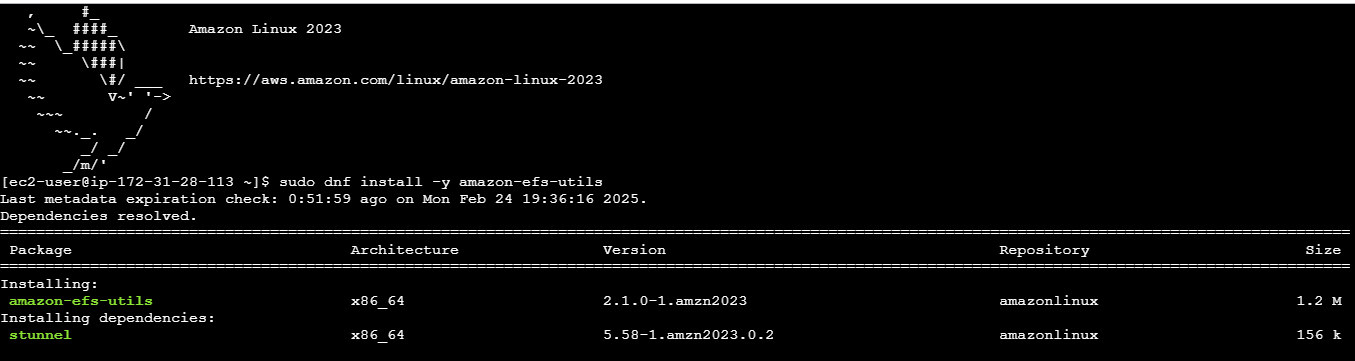
- To mount an Amazon Elastic File System (EFS) on an Amazon Elastic Compute Cloud (EC2) instance, you need to install the amazon-efs-utils package. To do this, run the following command:
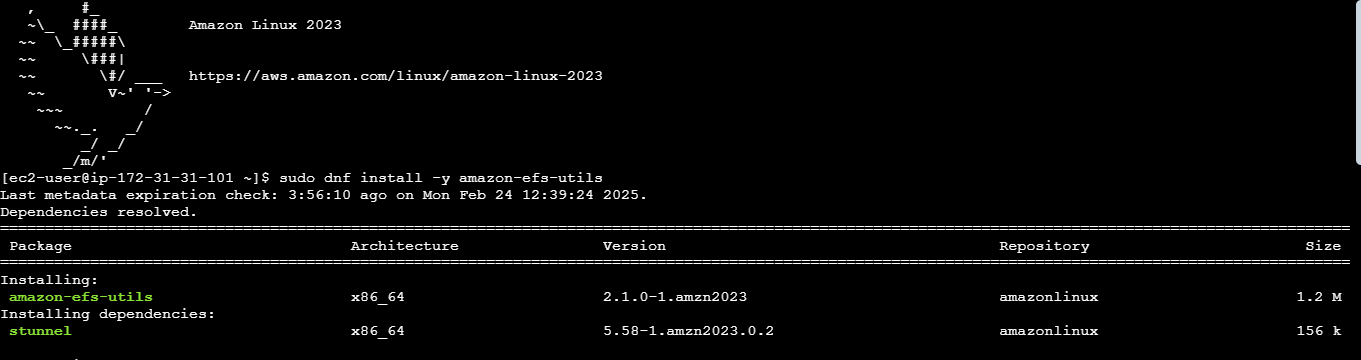
sudo dnf install -y amazon-efs-utils. The screenshot below shows how I ran the command and how the amazon-efs-utils package was installed successfully.


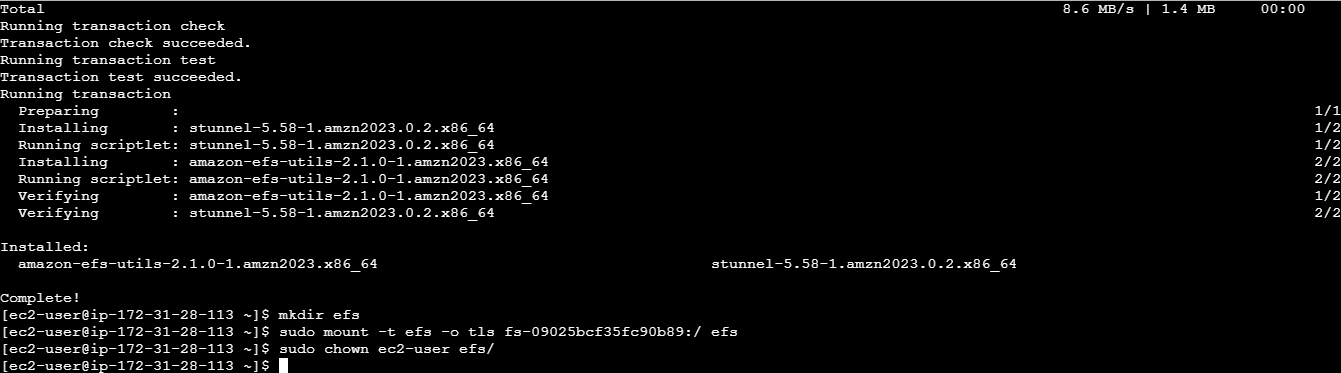
- Create a directory by running the following command:
sudo mkdir efs(You can replace "efs" with your desired directory name).

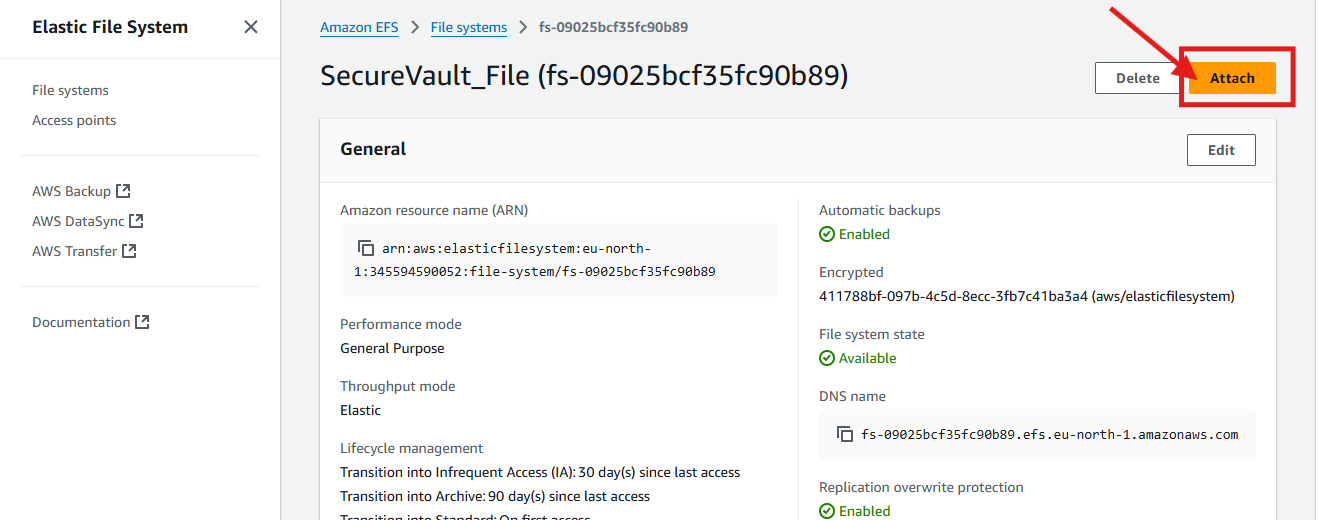
- Go back to the EFS portal and locate the EFS file you created in Step 1. Click on the file and then click the "Attach" button.
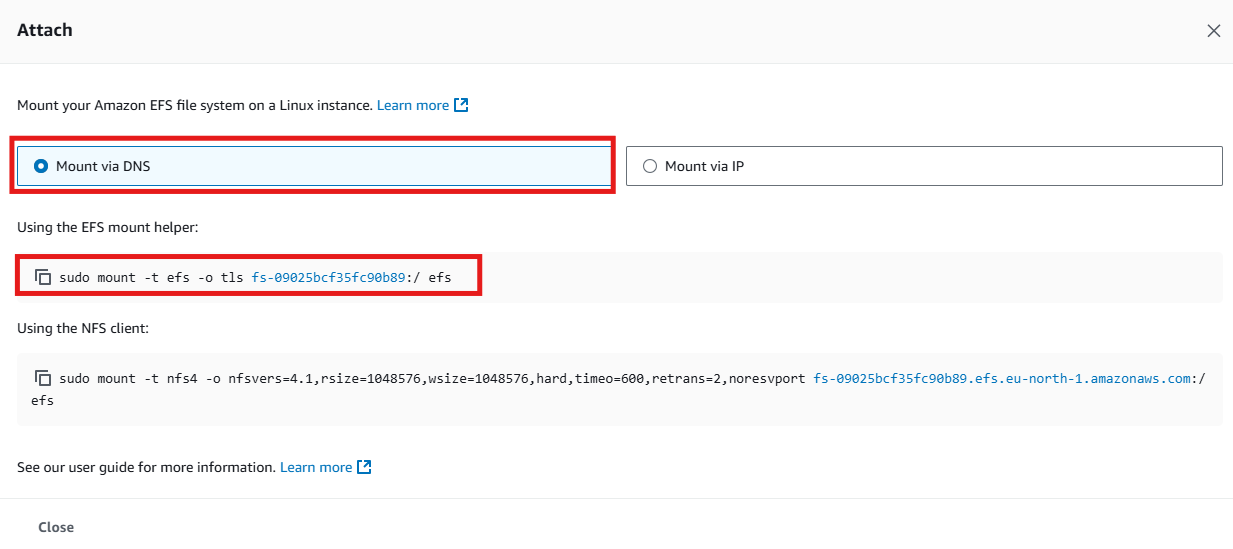
- Select "Mount via DNS" and copy the mount command. Using the EFS mount helper, you will use this command in the next step.
- Navigate back to the terminal and paste the command you just copied. Press Enter to execute the command. This action will confirm that you have successfully mounted the EFS file on the EC2 instance.

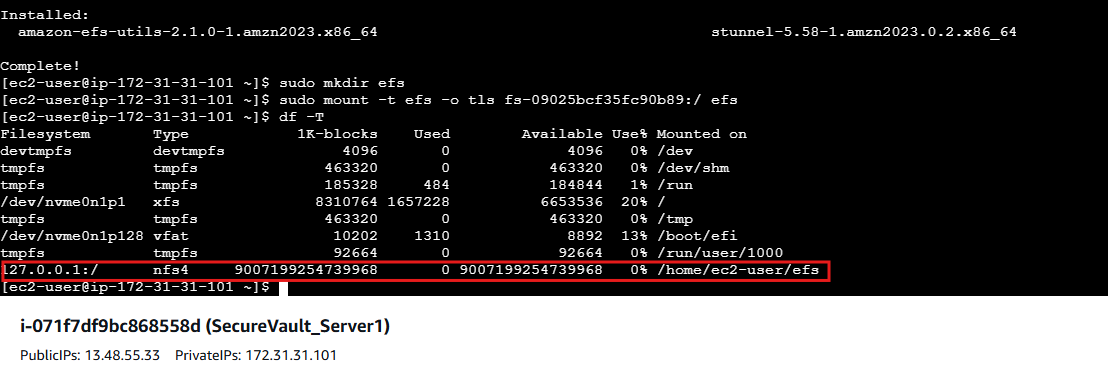
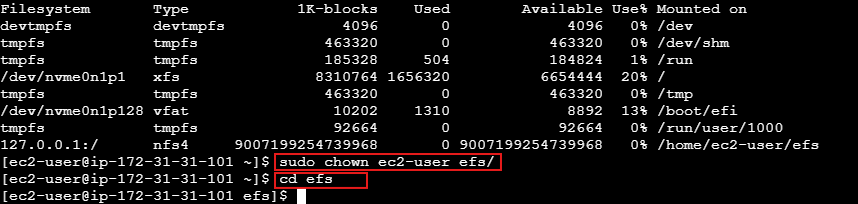
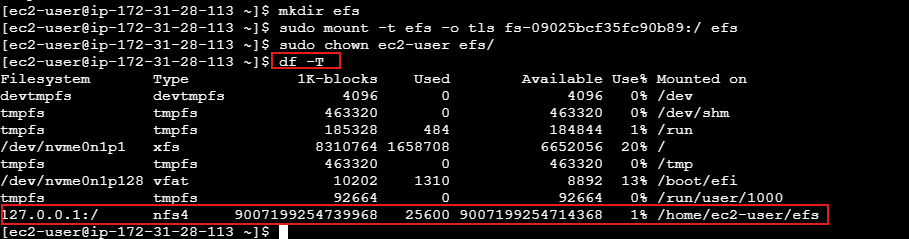
- To verify that you have successfully mounted the EFS file, run the command
df -T. This will display a list of mounted file systems, including your EFS file, as shown in the screenshot below.
- Run the command
sudo chown ec2-user efs/(replace "efs" with the name of your EFS directory) to change the ownership of the EFS file system to the EC2 instance user (ec2-user), allowing for read and write access. Then, runcd efsto navigate into the EFS directory.
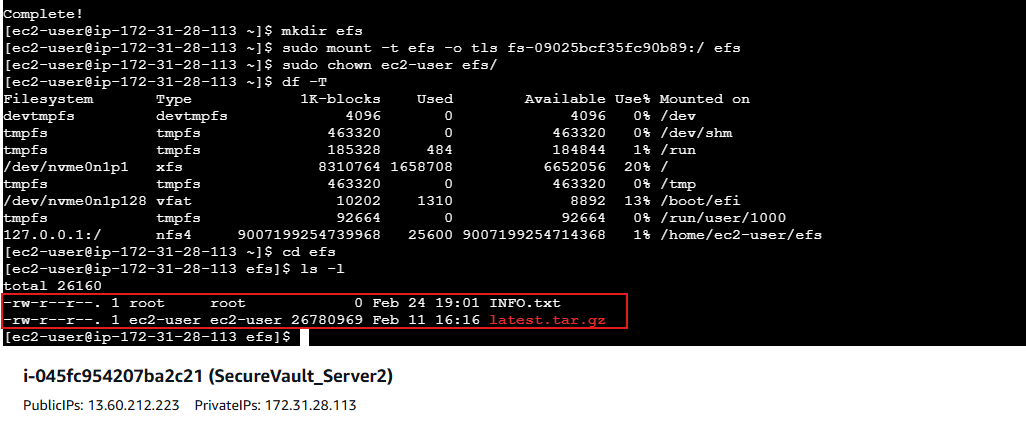
- Create a file (e.g., text file) with this command:
sudo touch filename.txt.Replace "filename" with your desired file name (e.g., INFO.txt.). Then, run thelscommand to see your file.

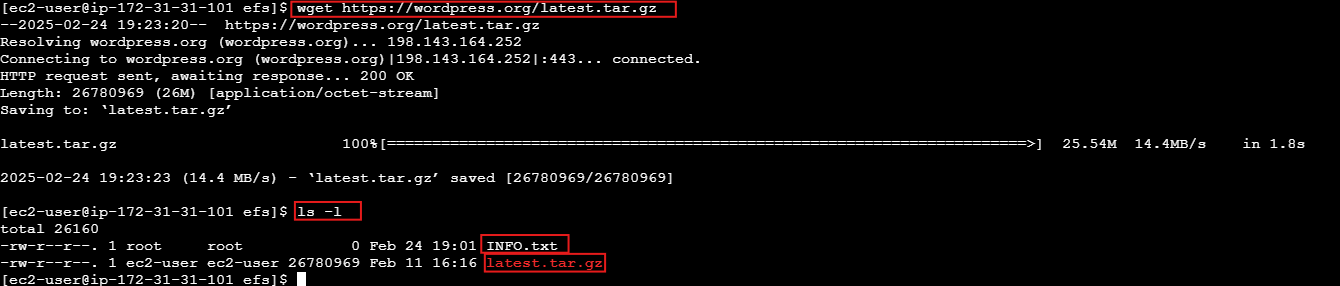
- You can create another file, this time a WordPress file, by running the following command:
wgethttps://wordpress.org/latest.tar.gz. This command will download the latest version of WordPress in a compressed .tar.gz format from the official WordPress website to your current directory. After runls -l, you'll see a detailed list of files, including the newly downloaded latest.tar.gz file.
Step 5: Verify Shared Access
Connect to the second EC2 instance and mount the EFS file system on it by following the same steps we took in Step 4:
Install the amazon-efs-utils package by running:
dnf install -y amazon-efs-utilsCreate a directory to mount the EFS file system:
mkdir efsGo to the EFS portal, select the EFS file system created in Step 1, and click on Attach.
Choose Mount via DNS and copy the mount command using the EFS mount helper.
Run the copied mount command on your EC2 instance to mount the EFS.
Change the ownership of the mounted directory to the ec2-user:
sudo chown ec2-user efs/
Run the following command to verify that the EFS file system is successfully mounted and to check the filesystem type:
df -T.This will display a list of mounted filesystems along with their types. You should see an entry with nfs4, confirming that the EFS is mounted correctly.
Next, navigate to the efs directory where the EFS file system is mounted by running:
cd efsThis allows you to access and manage files stored on the EFS.

Now, check the contents of the efs directory from this second EC2 instance to verify if the shared storage is working correctly. You should see the files INFO.txt and latest.tar.gz that were created on the first EC2 instance.
Run the following command to list the directory contents with detailed information:
ls -lIf the EFS is mounted properly, you will see these files, confirming that the shared storage is functioning correctly.
As shown in the screenshot below, we have access to both files created in the first EC2 instance.
Monitor Performance
To monitor the performance of the EFS file system, you can perform the following checks:
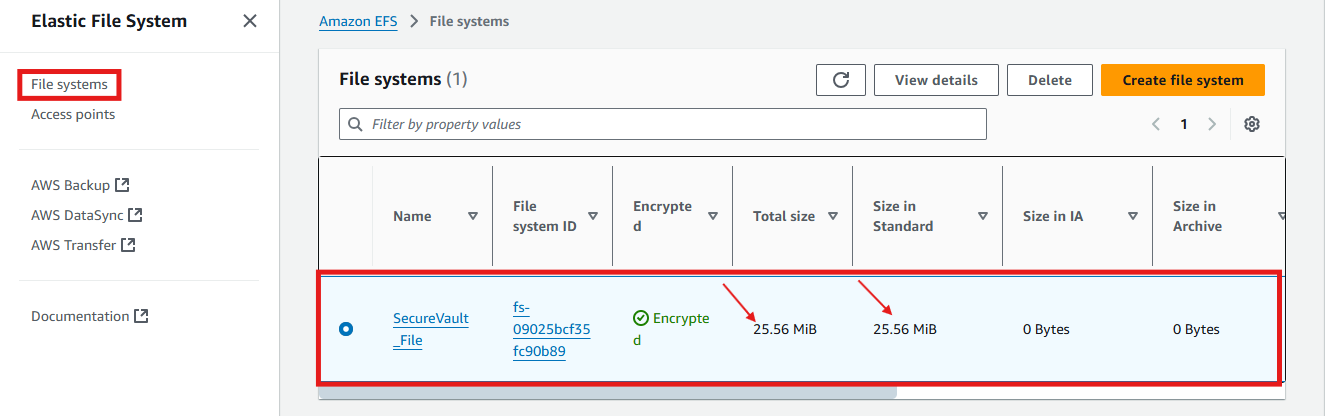
Check the space being used on the EFS file system:
Navigate to the efs directory and run:du -hor go to EFS portal, navigate to File system then locate the EFS file you created.This will display the disk usage of the files and directories in a human-readable format, helping you track storage consumption on the EFS.
As shown in the screenshot below, the amount of space we have used on the EFS file is 26M.

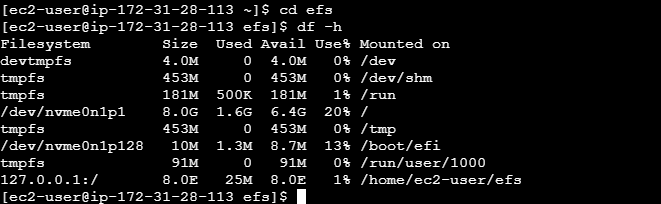
Check available and used disk space:
Run the following command to view the total, used, and available space on the EFS:df -hThis provides an overview of the disk space usage across all mounted filesystems, including your EFS as shown in the screenshot below.
Final Thoughts
Setting up shared storage with EFS allows EC2 instances to work together smoothly, ensuring consistent data access and high availability. This solution is commonly used for web hosting, application development, and big data processing.
By implementing proper security measures, regular monitoring, and backups, you can make your cloud infrastructure resilient and scalable.
Now that I've shown you how to set up EC2 instances with shared EFS storage, follow me for more exciting cloud projects to support your cloud journey! Feel free to share your thoughts or ask questions in the comments, I’d love to hear from you!
Subscribe to my newsletter
Read articles from Benjamin Gbolaru directly inside your inbox. Subscribe to the newsletter, and don't miss out.
Written by