TalosOS: The Operating System Kubernetes deserves
 Siegfried Stumpfer
What is TalosOS?
TLDR:
it is immutable
it is atomic
it is ephemeral
it is minimal
it is secure by default
it is managed via a single declarative configuration file and gRPC API
It is a OS specifically designed to be used for Kubernetes(k8s) and k8s only. It is not possible to run any non k8s workloads on a TalosOS machine. Being designed for such a narrow use case it does everything to keep itself as minimal as possible, even skipping things like SSH and having a terminal for commands.
Besides being minimal it also is only configurable via a single configuration file which is applied via an API. This means that the OS is deterministic from your YAML file which is great for quickly spinning up similar machines.
Setting up a Talos Cluster
The first thing you need is a place to run Talos. While Talos does have a docker version this is mainly meant for use in local testing and CI pipelines, and is not recommended for running real workloads on. In my case I am using a local Proxmox server but feel free to use any VM-Hypervisor or Cloud Provider you want to host these VMs. You could also use bare metal hardware, but I would not recommend this for a beginner approach.
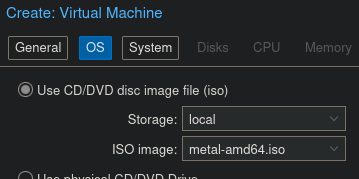
The next step is to get the fitting Talos ISO for your system. Most VMs will need the metal-arm64.iso.

Then you can use this to create your VM. I would recommend creating two nodes for the start one control-plane node and one worker node (they use the same ISO. This is configured later). For test purposes 2 GB of ram should be enough, for use in production systems see the recommend Talos specs.
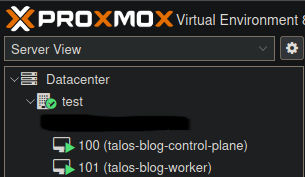
Once you start your VM it will automatically start installing the TalosOS. Once the install is finished (should take about 1 min) you should be greeted by a similar dashboard.
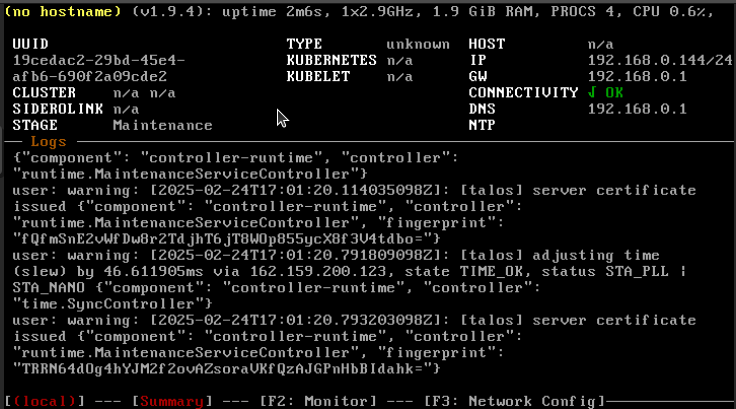
The machine gets itself an IP over DHCP, if this did not work or you want to configure a custom IP you can use F3 to manually enter a network configuration. This is the only operation you can do in this dashboard. All other functionalities are locked behind the API meaning if you write down your IP (In my case 192.168.0.144) you do not have to ever access the machine again directly.
IPs of the machines:
Control-plane: 192.168.0.144 (seen in the dashboard screenshot above)
Worker: 192.168.0.100 (screenshot of the dashboard not shown)
Congrats you now have the infrastructure of your Talos cluster done!
Configuring and accessing Talos
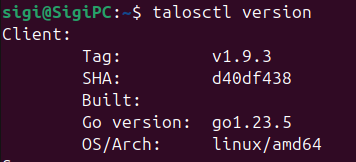
Because Talos is meant to be configured via an API you need a machine to configure it from. For this we us the talosctl. You also want to install kubectl to manage your cluster once it has been created. You can check if both of these are installed using the version commands.
talosctl version
kubectl version

With those installed we can now start setting up our talosctl connection.
First it is recommended to generate secrets.
talosctl gen secrets -o secrets.yaml
Then based on those secrets we generate a configuration. For this we need to first understand what a endpoint and what a node is in Talos. To keep it simple:
endpoint: IPs of the control-planes in your cluster you use to access the cluster
node: IPs of ALL nodes including control-planes and workers
To generate the configuration you need to use the IP address of your control plane and add the https:// prefix and add the port (6443 by default) for the connection. This is only necessary when generating the config.
talosctl gen config {YOUR-CLUSTER-NAME} https://{CONTROL-PLANE-IP}:6443 --with-secrets secrets.yaml

This generates 3 Files
controlplane.yaml: Machine definition of our control-plane
worker.yaml: Machine definition of our worker.yaml
talosconfig: Our connection configuration for the cluster. Currently it only has the certs included.
The YAML files are quite big because they have all example configurations commented out in the file. The default configuration should be fine for our use-case, although I do like to change one attribute in the controlplane.yaml (I mainly do this for test setups). You can either open it in an editor or edit it in your terminal. Way at the end of the file there is the line: # allowSchedulingOnControlPlanes: true there simply remove the ‘#’ to allow workloads to be scheduled on your control-plane.

Now we need to apply these configurations to our nodes. The syntax is as follows for the control-plane:
talosctl apply-config --insecure -n {CONTROL-PLANE-IP-ADRESS} -f controlplane.yaml
And as follows for the worker node:
talosctl apply-config --insecure -n {WORKER-IP-ADRESS} -f worker.yaml
After about 1 minute your configs should be applied. Generally applying configs is how you configure your Talos nodes.
Now its time to bootstrap your k8 cluster. This is done quite easily with the following command:
talosctl bootstrap -e {CONTROL-PLANE-IP} -n {CONTROL-PLANE-IP} --talosconfig talosconfig
Congrats you should now have bootstrapped talos cluster. I like to run a get disks command to see if it worked:
talosctl get disk -e {CONTROL-PLANE-IP-ADRESS} -n {CONTROL-PLANE-IP-ADRESS},{WORKER-IP-ADRESS} --talosconfig talosconfig

Now the only thing left to do is to get the kubeconfig for your cluster so you can start running k8s commands. This commands add the context to your kubeconfig and sets it as current working context:
talosctl kubeconfig -e {CONTROL-PLANE-IP-ADRESS} -n {CONTROL-PLANE-IP-ADRESS},{WORKER-IP-ADRESS} --talosconfig talosconfig
Congratulations you can now have a working Talos cluster🎉! You can access your OS using the talosctl and you can access k8s using kubectl🎉!
talosconfig
If you do not want to manually specify every node, every endpoint and the talosconfig in every command you adjust the default talosconfig. This is in $HOME/.talos/conf per default. First you can add the nods and endpoints to your talosconfig file.
  talosctl --talosconfig=./talosconfig \
    config endpoint {YOUR-CONTROl-PLANE-IP}
  talosctl --talosconfig=./talosconfig \
    config node {YOUR-CONTROl-PLANE-IP} {YOUR-WORKER-IP}
This adds entries to your talosconfig file. Now in you would only need to use - -talosconfig flag not the -n and the -e flag anymore. But you can also merge your talosconfig file into your main talosconfig using:
talosctl config merge ./talosconfig
Now you can execute talosctl commands without having to specify -n, -e or - -talosconfig🎉!
Additional Facts
TalosOS runs only in Memory using SquashFS leaving your Disk entirely for Kubernetes
TalosOS has atomic updates meaning if applying a config file fails it is automatically rolled back to the previous state with out any leftover fragments
TalosOS contains only 10 (+ 2 Virtual ones) binaries. Read more
TalosOS implements all recommendations by the Kernel Self Protection Project and CIS
All API connections are secured via TLS
The owners of TalosOS(Sidero) make money from TalosOS selling a managed SaaS solution for managing Talos clusters called Sidero Omni. (I have heard good things about it but I ain’t paying for it)
Outro
Thank you for taking the time to read this blog post. If you have any questions feel free to contact me on my LinkedIn or post them in the comments on this blog. I would also appreciate any feedback as this is my first time writing such a long tech blog post.
I plan on also turning this blog post into a tutorial YouTube video on my channel Tech with Siegfried but this will probably still take a bit.
Enjoy exploring!
Subscribe to my newsletter
Read articles from Siegfried Stumpfer directly inside your inbox. Subscribe to the newsletter, and don't miss out.
Written by
