Deploying a Node.js Application with Docker and Kubernetes
 Anas
AnasHey there! Today, I want to share my experience of deploying a Node.js application using Docker and Kubernetes. It was quite a journey, and I learned a lot along the way. If you’re looking to do something similar, I hope this step-by-step guide helps you out!
What You’ll Need
Before we dive in, make sure you have the following tools installed on your machine:
Docker: For containerizing our application.
Kubernetes: I used Kind, but you can use any local setup you prefer.
kubectl: The command-line tool for interacting with Kubernetes.
Git: To clone the project repository.
Step 1: Setting Up the Project
First things first, I created a directory for my project. Here’s how I did it:
mkdir k8s-production
cd k8s-production
Next, I cloned my Node.js application repository. Just replace <repository-url> with your actual repo URL:
git clone https://github.com/mansurianas/node-phontiqe.git
cd node-phontiqe
Docker File
# Use a lightweight Node.js image
FROM node:alpine

# Set the working directory inside the container
WORKDIR /app

# Copy only the necessary files for npm install
COPY . .
COPY package*.json ./

# Install dependencies
RUN npm install

# Copy the rest of the application files
COPY . .
#copy  the public directory to the root
COPY ./client/public /public
# Expose the port the app will run on
EXPOSE 3000

# Command to run the application
CMD ["node", "server.js"]
Step 2: Logging into Docker
Before I could push my Docker image, I needed to log in to my Docker account. This is super easy:
docker login
Just enter your credentials, and you’re good to go!
Step 3: Building the Docker Image
Now it was time to build the Docker image for my Node.js app. I made sure I had a Dockerfile in my project directory, and then I ran:
docker build -t anas011/nodejs:latest .
This command builds the image and tags it as anas011/nodejs:latest.
docker run -p 3000:3000 anas011/nodejs:latest
Step 4: Tagging the Docker Image
After building the image, I needed to tag it for my Docker Hub repository. Here’s the command I used:
docker image tag anas011/nodejs:latest lucky0111/nodejs:latest
Step 5: Pushing the Docker Image
With the image tagged, it was time to push it to Docker Hub. I ran:
push lucky0111/nodejs:latest
I was excited to see the output showing that my image layers were being pushed:
The push refers to repository [docker.io/lucky0111/nodejs]
f5e2a07ec7c2: Pushed
70e7c4b7ec0c: Pushed
...
latest: digest: sha256:...
Step 6: Creating Kubernetes Configurations
Next, I created a directory for my Kubernetes configuration files:
 k8s
cd k8s
Deployment Configuration
I created a file named deployment.yml with the following content:
kind: Deployment
apiVersion: apps/v1
metadata:
  name: nodejs-deployment
  namespace: nodejs
  labels:
   app: nodejs-app
spec:
  replicas: 3
  selector:
    matchLabels:
      app: nodejs-app
  template:
    metadata:
      labels:
        app: nodejs-app
    spec:
      containers:
        - name: nodejs-app
          image: lucky0111/nodejs:latest
          ports:
            - containerPort: 3000
Namespace Configuration
Next, I created a file named namespace.yml:
kind: Namespace
apiVersion: v1
metadata:
  name: nodejs
Service Configuration
Finally, I created a file named service.yml:
kind: Service
apiVersion: v1
metadata:
  name: nodejs-service
  namespace: nodejs
spec:
  selector:
    app: nodejs-app
  ports:
    - protocol: TCP
      targetPort: 3000
      port: 3000
Applying Kubernetes Configurations
Now it was time to apply all the configurations to my Kubernetes cluster. I ran:
kubectl apply -f namespace.yml
kubectl apply -f deployment.yml
kubectl apply -f service.yml
I was relieved to see the output indicating that everything was created or unchanged:
deployment.apps/nodejs-deployment created
namespace/nodejs unchanged
service/nodejs-service unchanged
Step 8: Verifying the Deployment
To check if everything was running smoothly, I used:
kubectl get all -n nodejs
I was thrilled to see my pods running and the service created:
NAME                                    READY   STATUS    RESTARTS   AGE
pod/nodejs-deployment-f5b496ff7-9v89j   1/1     Running   0          49s
pod/nodejs-deployment-f5b496ff7-lqtnc   1/1     Running   0          49s
pod/nodejs-deployment-f5b496ff7-wcgdh   1/1     Running   0          49s

NAME                     TYPE        CLUSTER-IP     EXTERNAL-IP   PORT(S)    AGE
service/nodejs-service   ClusterIP   10.96.54.245   <none>        3000/TCP   115m

NAME                                READY   UP-TO-DATE   AVAILABLE   AGE
deployment.apps/nodejs-deployment   3/3     3            3           50s
Step 9: Port Forwarding
To access my application, I needed to set up port forwarding. I ran:
kubectl port-forward service/nodejs-service -n nodejs 3000:3000 --address=0.0.0.0
I was happy to see the output confirming that the port was being forwarded:
Forwarding from 0.0.0.0:3000 -> 3000
Handling connection for 3000
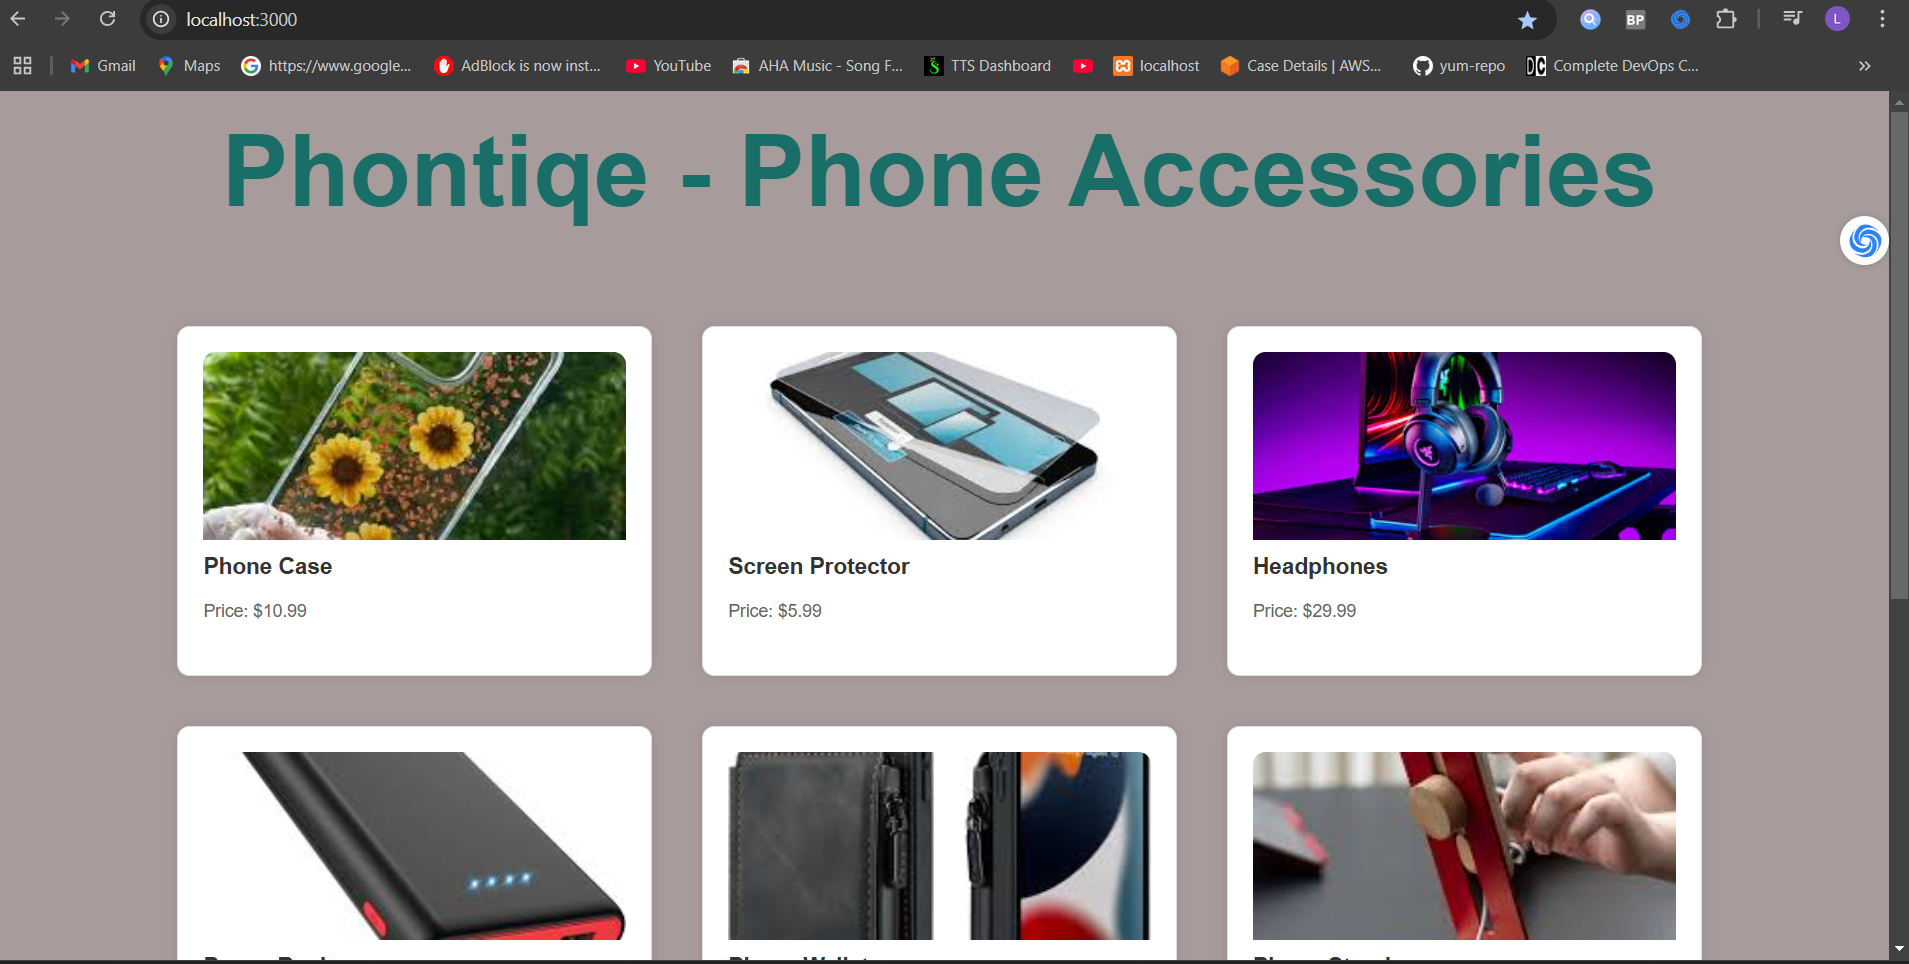
Now, I could access my Node.js application by navigating to http://localhost:3000 in my web browser. It was such a rewarding moment to see my application up and running!
And there you have it! I successfully deployed my Node.js application using Docker and Kubernetes. This whole process taught me a lot about containerization and orchestration, and I hope my experience helps you on your journey too. If you have any questions or thoughts, feel free to drop them in the comments below.
Subscribe to my newsletter
Read articles from Anas directly inside your inbox. Subscribe to the newsletter, and don't miss out.
Written by