The Ultimate CI/CD Corporate DevOps Pipeline Project
 Harshit Sahu
The project Mission represents a typical DevOps pipeline, starting from infrastructure setup, source code management, continuous integration, and delivery, and finally deploying and monitoring the application.
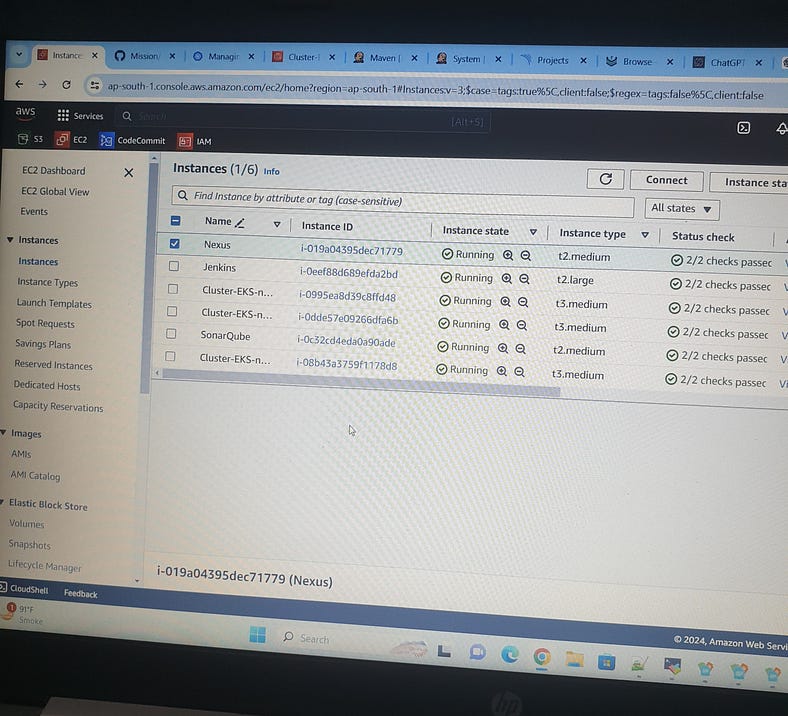
Phase-1: Infrastructure Setup:
Jenkins-EC2 instance type t2.large
SonarQube-EC2 instance type t2.medium
Nexus-EC2 instance type t2.medium
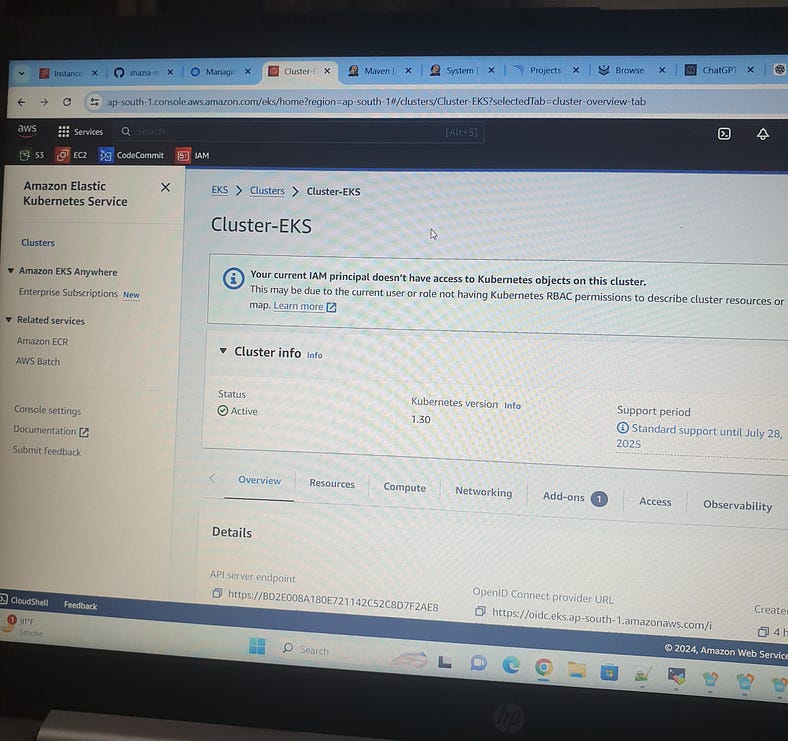
EKS Cluster Setup (setup tools & cluster)
First create AWS IAM user (eks-cluster-user)with attach policies:
-AmazonEC2FullAccess
-AmazonEKS_CNI_Policy
-AmazonEKSClusterPolicy
-Amazon EKSWorkerNodePolicy
-AWSCloudFormationFullAccess
-IAMFullAccess
-One inline policy (eks-inline-policy)
{
    "Version": "2012-10-17",
    "Statement": [
        {
            "Sid": "VisualEditor0",
            "Effect": "Allow",
            "Action": "eks:*",
            "Resource": "*"
        }
    ]
}

To connect Jenkins VM using MobaXterm. First install AWSCLI, KUBECTL, EKSCTL after that aws configure with access key and secret access key.
#sudo apt update
#mkdir scripts
#cd scripts
#vi 1.sh

curl "https://awscli.amazonaws.com/awscli-exe-linux-x86_64.zip" -o "awscliv2.zip"
sudo apt install unzip
unzip awscliv2.zip
sudo ./aws/install

url -o kubectl https://amazon-eks.s3.us-west-2.amazonaws.com/1.19.6/2021-01-05/bin/linux/amd64/kubectl
chmod +x ./kubectl
sudo mv ./kubectl /usr/local/bin
kubectl version --short --client

curl --silent --location "https://github.com/weaveworks/eksctl/releases/latest/download/eksctl_$(uname -s)_amd64.tar.gz" | tar xz -C /tmp
sudo mv /tmp/eksctl /usr/local/bin
eksctl version

#sudo chmod +x1.sh
#./1.sh
# aws configure (access key, secret access key, region)
Create EKS Cluster:
eksctl create cluster --name=Cluster-EKS \
--region=ap-south-1 \
--zones=ap-south-1a,ap-south-1b \
--version=1.30 \
--without-nodegroup
OpenID Connect(OIDC) identity providers — a method to authenticate user to the cluster.
eksctl utils associate-iam-oidc-provider \
--region ap-south-1 \
--cluster Cluster-EKS\
--approve
A node group in Amazon EKS is a collection of Amazon EC2 instances that are deployed in a Kubernetes cluster to run application workloads. These worker nodes run the Kubernetes workloads, including applications, services, and other components.
eksctl create nodegroup --cluster=Cluster-EKS \
--region=ap-south-1 \
--name=node2 \
--node-type=t3.medium \
--nodes=3 \
--nodes-min=2 \
--nodes-max=4 \
--node-volume-size=20 \
--ssh-access \
--ssh-public-key=DevOps \
--managed \
--asg-access \
--external-dns-access \
--full-ecr-access \
--appmesh-access \
--alb-ingress-access
“To open inbound traffic in an additional security group on an EKS cluster, navigate to EKS > Networking > additional security group > Inbound rules, and add an inbound rule with the source 0.0.0.0/0."
In order to set up Jenkins, we need Java as a prerequisite.
# java
# sudo apt install openjdk-17-jre-headless -y
Install Jenkins:
# cd script
#  vi jen.sh

sudo wget -O /usr/share/keyrings/jenkins-keyring.asc \
  https://pkg.jenkins.io/debian/jenkins.io-2023.key
echo "deb [signed-by=/usr/share/keyrings/jenkins-keyring.asc]" \
  https://pkg.jenkins.io/debian binary/ | sudo tee \
  /etc/apt/sources.list.d/jenkins.list > /dev/null
sudo apt-get update
sudo apt-get install jenkins -y

# sudo chmod +x jen.sh
# ./jen,sh

Check if Jenkins is installed
<ip:8080>
# sudo cat /var/lib/jenkins/secrets/initialAdminPassword

We need to install Docker for Jenkins usage and Trivy for later use in the pipeline.

# docker
# sudo apt install docker.io -y
# sudo chmod 666 /var/run/docker.sock

# trivy
# cd script
# vi trivy.sh

sudo apt-get install wget apt-transport-https gnupg lsb-release
wget -qO - https://aquasecurity.github.io/trivy-repo/deb/public.key | sudo apt-key add -
echo deb https://aquasecurity.github.io/trivy-repo/deb $(lsb_release -sc) main | sudo tee -a /etc/apt/sources.list.d/trivy.list
sudo apt-get update
sudo apt-get install trivy -y
Install SonarQube VM:
# sudo apt update
# docker
# sudo apt install docker.io -y

Changing the permissions of /var/run/docker.sock to 666 allows applications and users to communicate with the Docker daemon without requiring root privileges
# sudo chmod 666 /var/run/docker.sock
Install SonarQube:
# docker run -d --name sonar -p 9000:9000 sonarqube:lts-community
Check if SonarQube is installed
# <ip:9000>
Log in to SonarQube with the admin username and password, then change it later.
Install Nexus:
# sudo apt update
# docker
# sudo apt install docker.io -y

Changing the permissions of /var/run/docker.sock to 666 allows applications and users to communicate with the Docker daemon without requiring root privileges

# sudo chmod 666 /var/run/docker.sock
Install Nexus:
# docker run -d --name nexus3 -p 8081:8081 sonatype/nexus3
Check if Nexus is installed
# <ip:8081>  ( it takes some time to come up)
"Sign in with username 'admin'; the password can be found at this location /nexus-data/admin.password."

# docker ps
# docker exec it <docker id> /bin/bash
# ls
# cd sonatype-work
# ls
# cs nexus3/
# admin.password
# cat admin.password
Donot copy bash>>then sign in the put new password>> Enable anonymous access
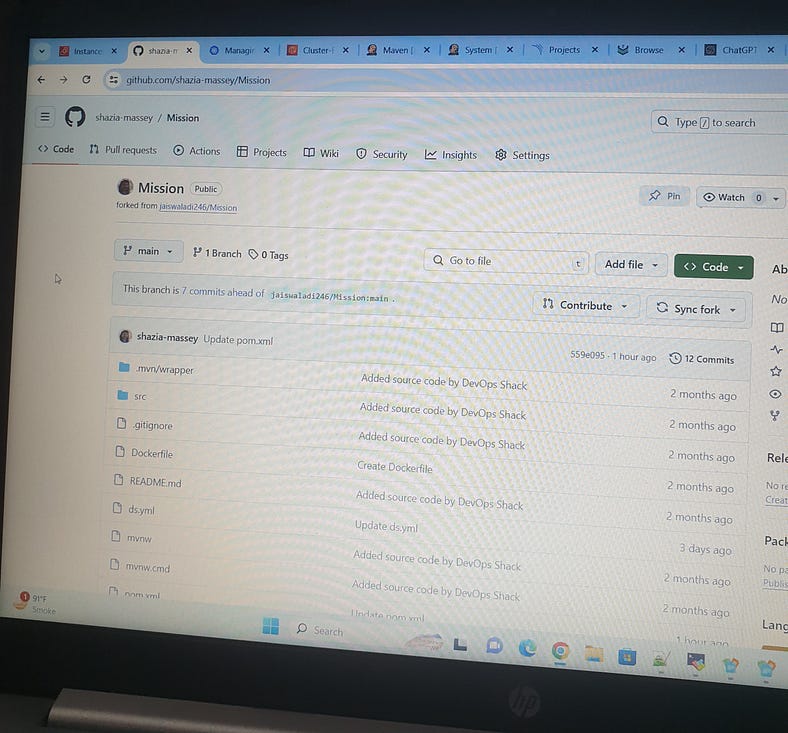
Phase-2: Git Repo:
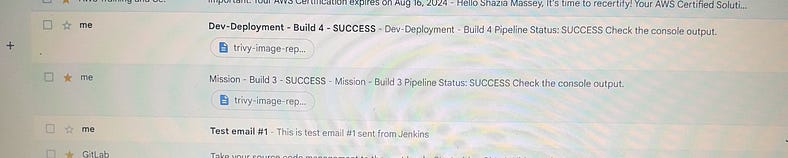
Phase-3: CI/CD pipeline & Mail notification:
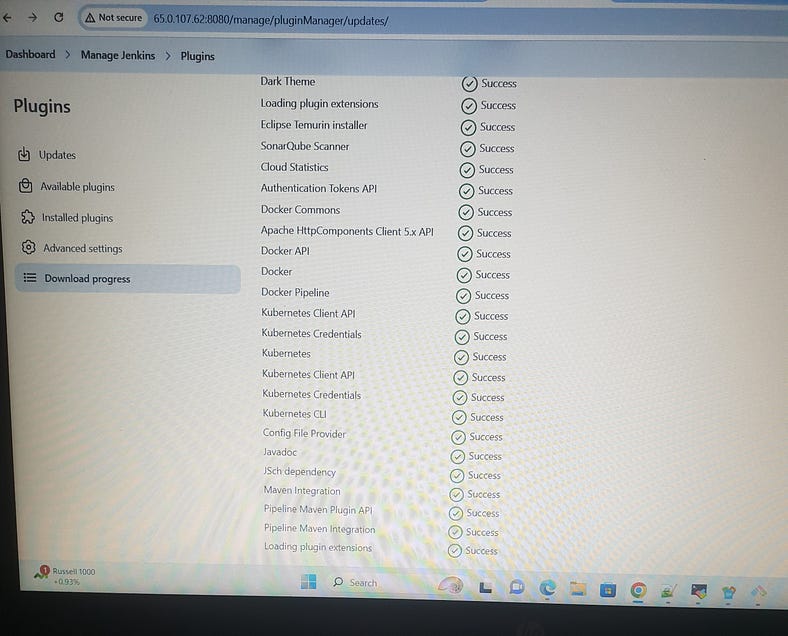
Jenkins Plugins Installation:
Manage Jenkins>> Plugins (JDK —> Eclipse Temurim installer, SonarQube Scanner, docker, Docker pipeline, Kubernetes, Kubernetes CLI, config file provider, maven —> maven pipeline Integration, maven Integration)
Jenkins Configuration:
Manage Jenkins>> Tools:
JDK installations\>>Name — - jdk17 >>Install automatically(Install from adoptium.net, version: jdk-17.0.11+9)
SonarQube Scanner installations\>> Name — - sonar-scanner >> Install automatically( Install from Maven Central, version: SonarQube Scanner 5.0.1.3006)
Maven installations\>> Name — maven3\>>Install automatically(Install from Apache, version:3.6.3)
Docker installations\>> Name — docker >> Install automatically(Download from docker.com, version: latest)
Manage Jenkins >> System:
- SonarQube installations>> Name — sonar\>> Server URL(http://localhost:9000)>> Server authentication token(SonarQube server-Administration-Security User-generate token-Name: sonar-token)
Manage Jenkins >> Credentials:
Git >> Repository URL>>branch>> credential — Git username — instead of password we provide token>> ID git-cred
Docker\>> DockerHub username>> personal access token>> ID>>docker.cred
SonarQube\>> Kind >> secret >>ID>>sonar-token
Kubernetes\>> Kind>> secret>>ID>>k8-token
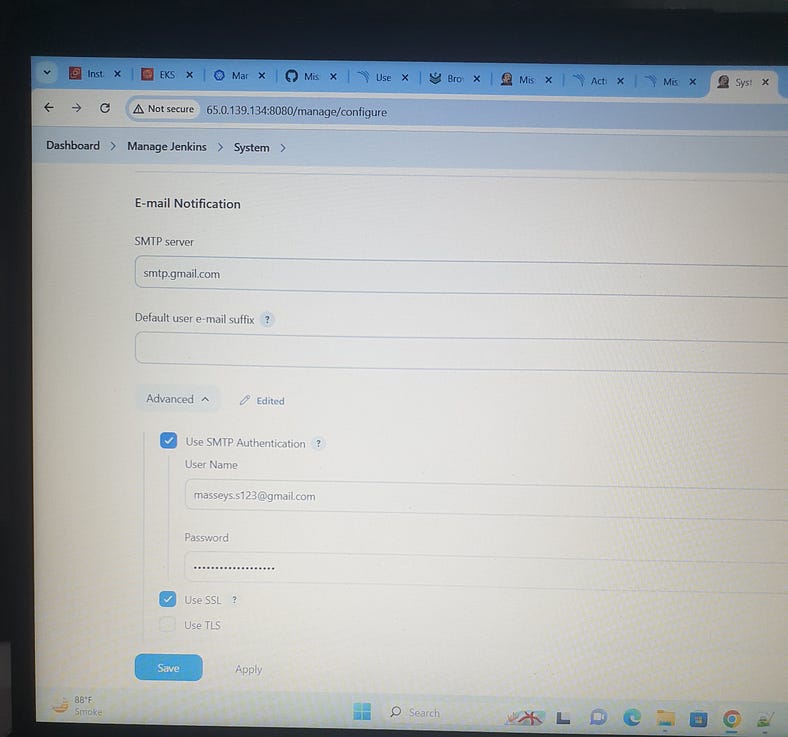
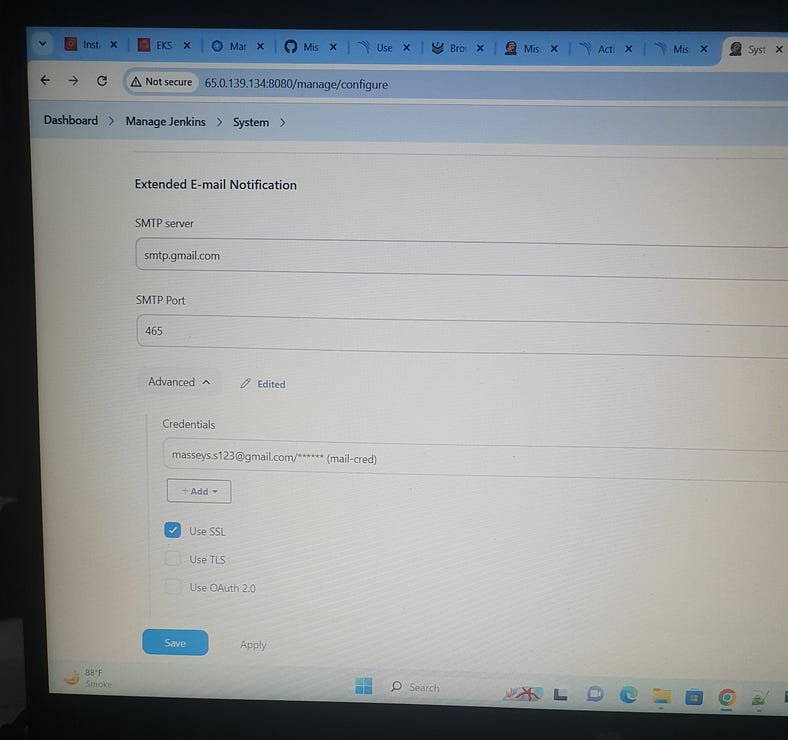
SMTP>> UserName>>emailaddress>> app password>>mail.cred
First we do Lower Environment Deployment:
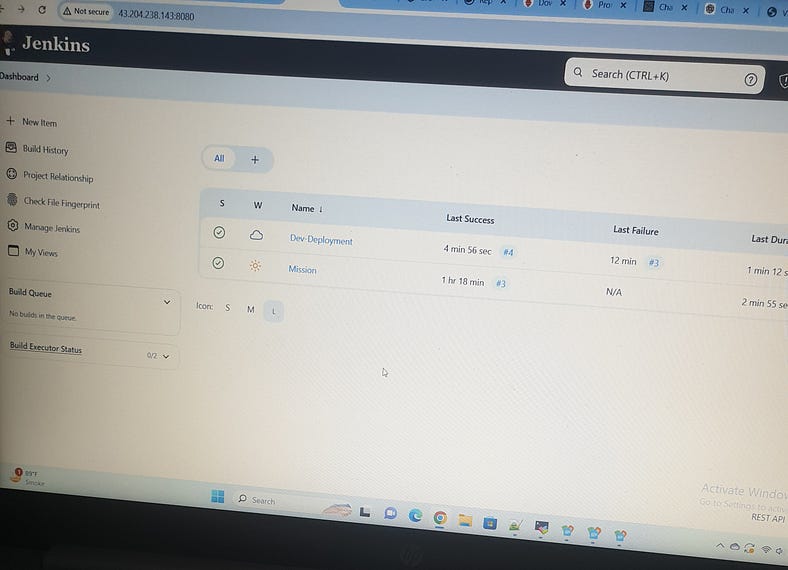
Jenkins Dashboard >> New Item >> Dev-Deployment
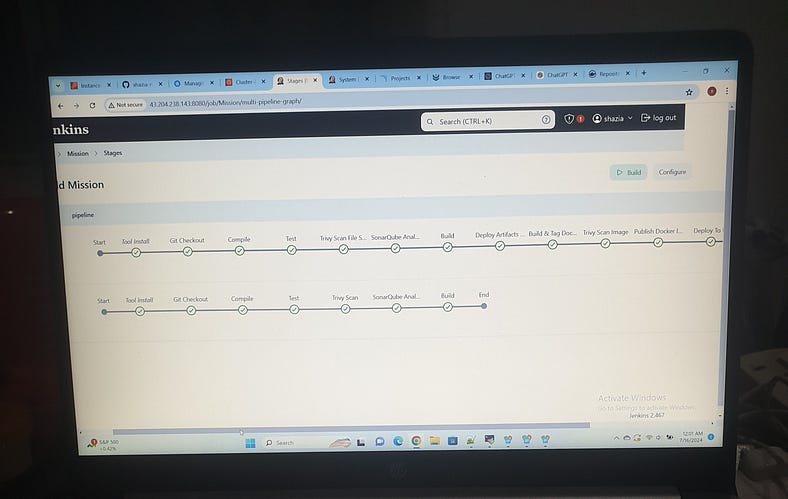
Jenkins pipeline stages for Dev-Deployment are as follows:
pipeline {
agent any
tools {
jdk 'jdk17'
maven 'maven3'
}
environment {
SCANNER_HOME= tool 'sonar-scanner'
}
stages {
stage('Git Checkout') {
steps {
git branch: 'main', changelog: false, credentialsId: 'git-cred', poll: false, url: 'https://github.com/shazia-massey/Mission.git'
}
}
stage('Compile') {
steps {
sh "mvn compile"
}
}
stage('Test') {
steps {
sh "mvn test -DskipTests=true"
}
}
stage('Trivy Scan File System') {
steps {
sh "trivy fs --format table -o trivy-fs-report.html ."
}
}
stage('SonarQube Analysis') {
steps {
withSonarQubeEnv('sonar') {
sh '''
$SCANNER_HOME/bin/sonar-scanner \
-Dsonar.projectKey=Mission \
-Dsonar.projectName=Mission \
-Dsonar.java.binaries=target/classes
'''
}
}
}
stage('Build') {
steps {
sh "mvn package -DskipTests=true"
}
}
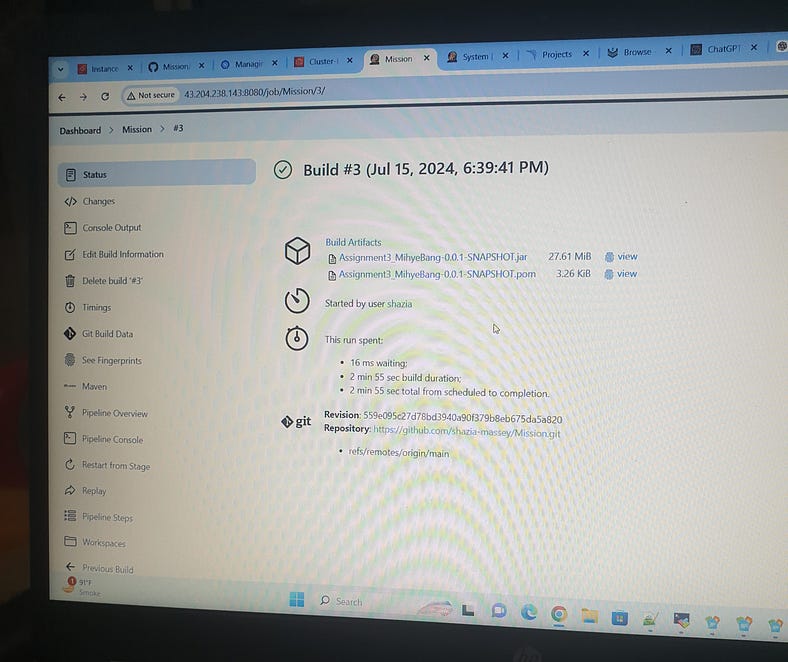
stage('Deploy Artifacts To Nexus') {
steps {
withMaven(globalMavenSettingsConfig: 'maven-setting', jdk: 'jdk17', maven: 'maven3', mavenSettingsConfig: '', traceability: true) {
sh "mvn deploy -DskipTests=true"
}
}
}
stage('Build & Tag Docker Image') {
steps {
script {
withDockerRegistry(credentialsId: 'docker-cred', toolName: 'docker') {
sh "docker build -t masseys/mission:latest ."
}
}
}
}
stage('Trivy Scan Image') {
steps {
sh "trivy image --format table -o trivy-image-report.html masseys/mission:latest "
}
}
stage('Publish Docker Image') {
steps {
script {
withDockerRegistry(credentialsId: 'docker-cred', toolName: 'docker') {
sh "docker push masseys/mission:latest "
}
}
}
}
stage('Deploy To Container') {
steps {
script {
withDockerRegistry(credentialsId: 'docker-cred', toolName: 'docker') {
sh "docker run -d -p 8083:8080 masseys/mission:latest "
}
}
}
}
post {
always {
script {
def jobName = env.JOB_NAME
def buildNumber = env.BUILD_NUMBER
def pipelineStatus = currentBuild.result ?: 'UNKNOWN'
def bannerColor = pipelineStatus.toUpperCase() == 'SUCCESS' ? 'green' : 'red'
def body = """
<html>
<body>
<div style="border: 4px solid ${bannerColor}; padding: 10px;">
<h2>${jobName} - Build ${buildNumber}</h2>
<div style="background-color: ${bannerColor}; padding: 10px;">
<h3 style="color: white;">Pipeline Status: ${pipelineStatus.toUpperCase()}</h3>
</div>
<p>Check the <a href="${BUILD_URL}">console output</a>.</p>
</div>
</body>
</html>
"""
emailext (
subject: "${jobName} - Build ${buildNumber} - ${pipelineStatus.toUpperCase()}",
body: body,
to: 'masseys.s123@gmail.com',
from: 'jenkins@example.com',
replyTo: 'jenkins@example.com',
mimeType: 'text/html',
attachmentsPattern: 'trivy-image-report.html'
)
}
}
}
}

Production Deployment:
First for Production deployment we need to create Service Account
RBAC (role base access control)
Bind the role to service account
# cd script
# kubectl get nodes
# vi svc.yml


apiVersion: v1
kind: ServiceAccount
metadata:
  name: jenkins
  namespace: webapps

# kubectl create namespace webapps
# kubectl apply -f svc.yml
# vi role.yml


apiVersion: rbac.authorization.k8s.io/v1
kind: Role
metadata:
  name: app-role
  namespace: webapps
rules:
  - apiGroups:
        - ""
        - apps
        - autoscaling
        - batch
        - extensions
        - policy
        - rbac.authorization.k8s.io
    resources:
      - pods
      - secrets
      - componentstatuses
      - configmaps
      - daemonsets
      - deployments
      - events
      - endpoints
      - horizontalpodautoscalers
      - ingress
      - jobs
      - limitranges
      - namespaces
      - nodes
      - pods
      - persistentvolumes
      - persistentvolumeclaims
      - resourcequotas
      - replicasets
      - replicationcontrollers
      - serviceaccounts
      - services
    verbs: ["get", "list", "watch", "create", "update", "patch", "delete"]

# kubectl apply -f role.yml
# vi rb.yml

apiVersion: rbac.authorization.k8s.io/v1
kind: RoleBinding
metadata:
  name: app-rolebinding
  namespace: webapps
roleRef:
  apiGroup: rbac.authorization.k8s.io
  kind: Role
  name: app-role
subjects:
- namespace: webapps
  kind: ServiceAccount
  name: jenkins

# kubectl apply -f rb.yml


# vi svc-secret.yml

apiVersion: v1
kind: Secret
type: kubernetes.io/service-account-token
metadata:
  name: mysecretname
  annotations:
    kubernetes.io/service-account.name: jenkins

# kubectl apply -f svc-secret.yml -n webapps
# kubectl describe secret mysecretname -n webapps
Jenkins pipeline stages for production Deployment are as follows:
pipeline {
agent any
tools {
jdk 'jdk17'
maven 'maven3'
}
environment {
SCANNER_HOME= tool 'sonar-scanner'
}
stages {
stage('Git Checkout') {
steps {
git branch: 'main', changelog: false, credentialsId: 'git-cred', poll: false, url: 'https://github.com/shazia-massey/Mission.git'
}
}
stage('Compile') {
steps {
sh "mvn compile"
}
}
stage('Test') {
steps {
sh "mvn test -DskipTests=true"
}
}
stage('Trivy Scan File System') {
steps {
sh "trivy fs --format table -o trivy-fs-report.html ."
}
}
stage('SonarQube Analysis') {
steps {
withSonarQubeEnv('sonar') {
sh '''
$SCANNER_HOME/bin/sonar-scanner \
-Dsonar.projectKey=Mission \
-Dsonar.projectName=Mission \
-Dsonar.java.binaries=target/classes
'''
}
}
}
stage('Build') {
steps {
sh "mvn package -DskipTests=true"
}
}
stage('Deploy Artifacts To Nexus') {
steps {
withMaven(globalMavenSettingsConfig: 'maven-setting', jdk: 'jdk17', maven: 'maven3', mavenSettingsConfig: '', traceability: true) {
sh "mvn deploy -DskipTests=true"
}
}
}
stage('Build & Tag Docker Image') {
steps {
script {
withDockerRegistry(credentialsId: 'docker-cred', toolName: 'docker') {
sh "docker build -t masseys/mission:latest ."
}
}
}
}
stage('Trivy Scan Image') {
steps {
sh "trivy image --format table -o trivy-image-report.html masseys/mission:latest "
}
}
stage('Publish Docker Image') {
steps {
script {
withDockerRegistry(credentialsId: 'docker-cred', toolName: 'docker') {
sh "docker push masseys/mission:latest "
}
}
}
}
stage('Deploy To k8') {
steps {
withKubeConfig(caCertificate: '', clusterName: ' Cluster-EKS', contextName: '', credentialsId: 'k8-token', namespace: 'webapps', restrictKubeConfigAccess: false, serverUrl: 'https://BD2E008A180E721142C52C8D7F2AE818.gr7.ap-south-1.eks.amazonaws.com') {
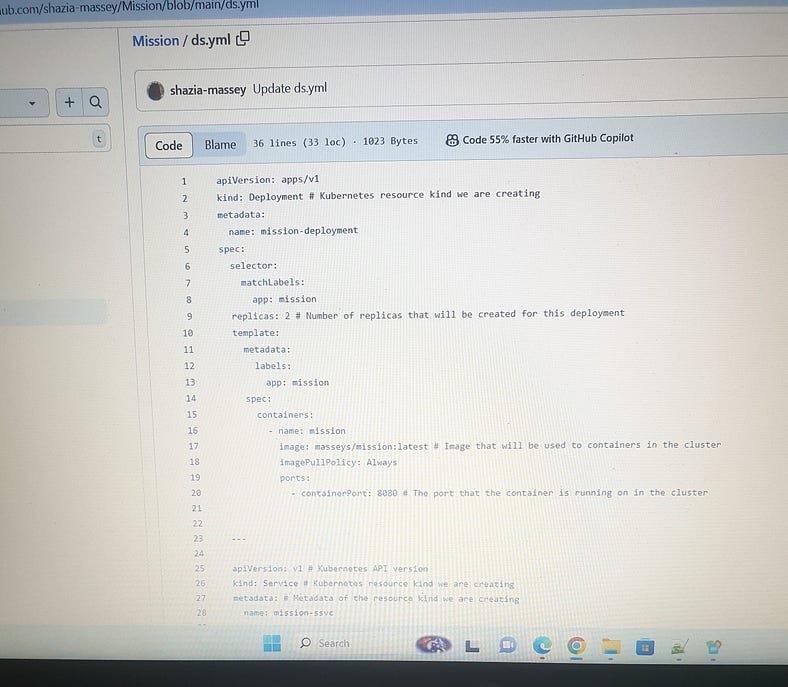
sh "kubectl apply -f ds.yml -n webapps"
sleep 60
}
}
}
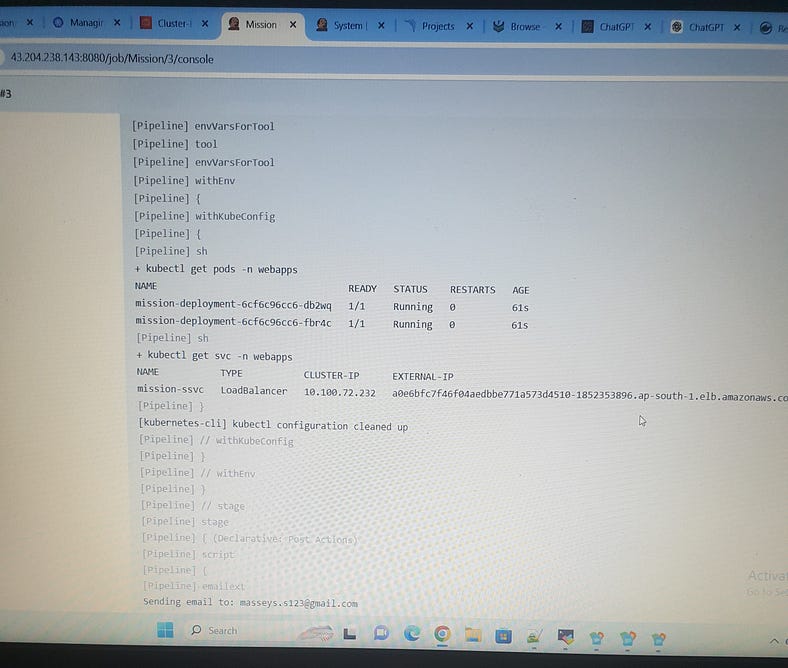
stage('Verify Deplotment') {
steps {
withKubeConfig(caCertificate: '', clusterName: ' Cluster-EKS', contextName: '', credentialsId: 'k8-token', namespace: 'webapps', restrictKubeConfigAccess: false, serverUrl: 'https://BD2E008A180E721142C52C8D7F2AE818.gr7.ap-south-1.eks.amazonaws.com') {
sh "kubectl get pods -n webapps"
sh "kubectl get svc -n webapps"
}
}
}
}
post {
always {
script {
def jobName = env.JOB_NAME
def buildNumber = env.BUILD_NUMBER
def pipelineStatus = currentBuild.result ?: 'UNKNOWN'
def bannerColor = pipelineStatus.toUpperCase() == 'SUCCESS' ? 'green' : 'red'
def body = """
<html>
<body>
<div style="border: 4px solid ${bannerColor}; padding: 10px;">
<h2>${jobName} - Build ${buildNumber}</h2>
<div style="background-color: ${bannerColor}; padding: 10px;">
<h3 style="color: white;">Pipeline Status: ${pipelineStatus.toUpperCase()}</h3>
</div>
<p>Check the <a href="${BUILD_URL}">console output</a>.</p>
</div>
</body>
</html>
"""
emailext (
subject: "${jobName} - Build ${buildNumber} - ${pipelineStatus.toUpperCase()}",
body: body,
to: 'masseys.s123@gmail.com',
from: 'jenkins@example.com',
replyTo: 'jenkins@example.com',
mimeType: 'text/html',
attachmentsPattern: 'trivy-image-report.html'
)
}
}
}
}
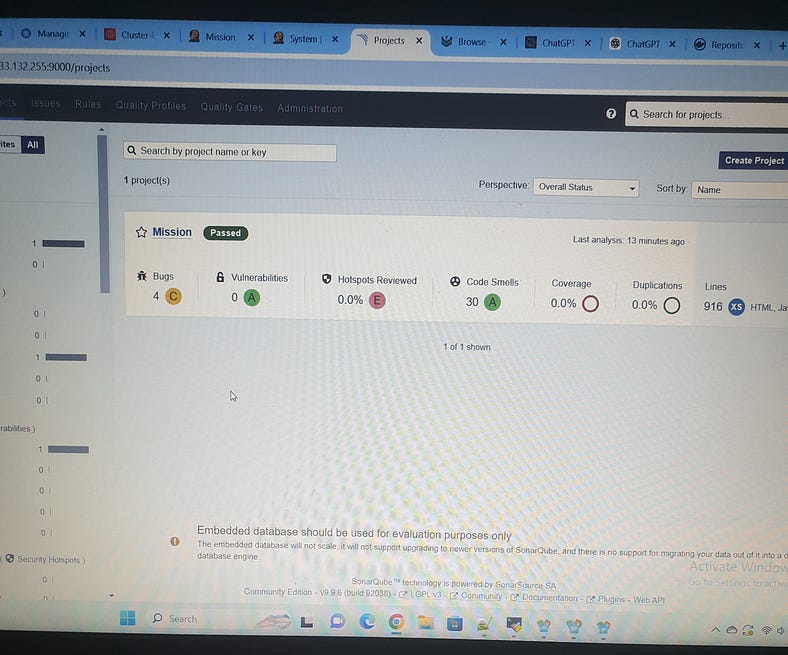
SonarQube Analysis for Project Mission:

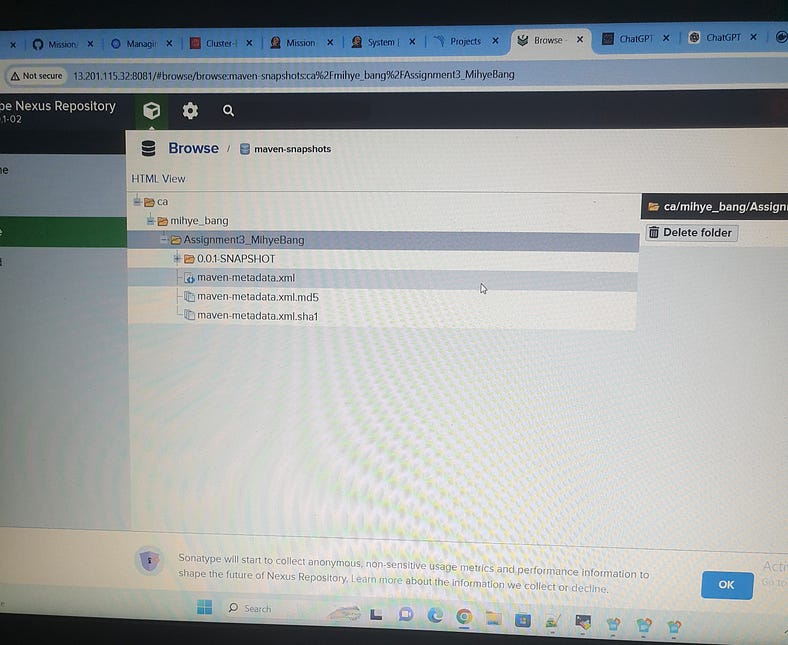
Nexus Stages:
We need to configure the pom.xml file in the Git Repo/Mission repository. Add the Nexus stages under the < Distribution Management> section and provide URLs for maven-releases and maven-snapshots.

For E-mail Notification, first create app password
https://myaccount.google.com/apppasswords
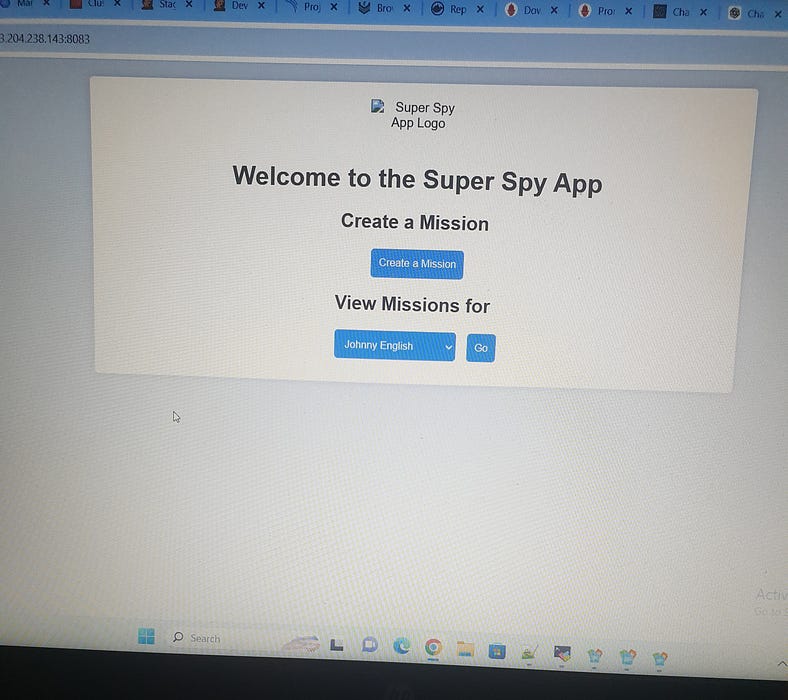
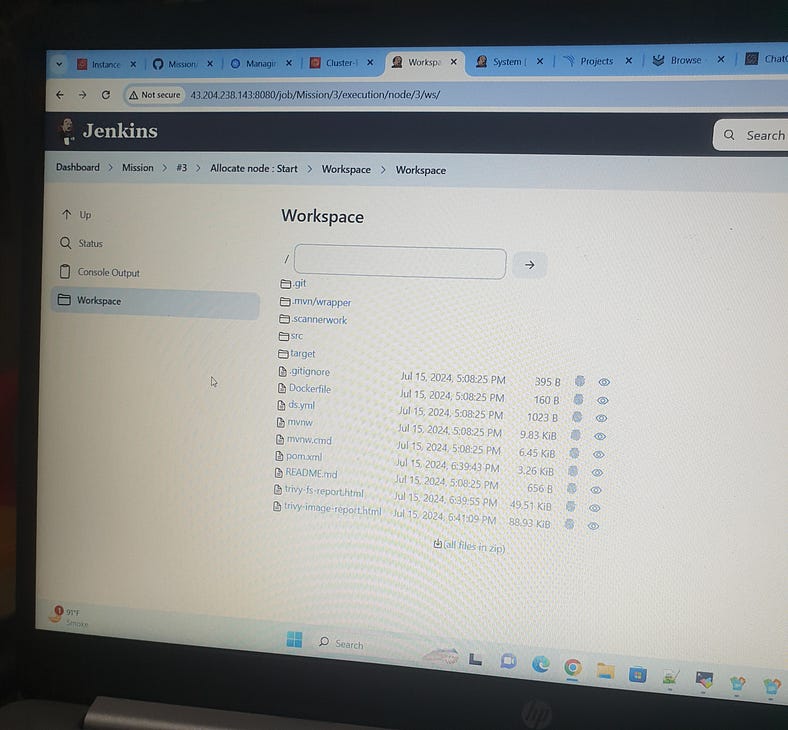
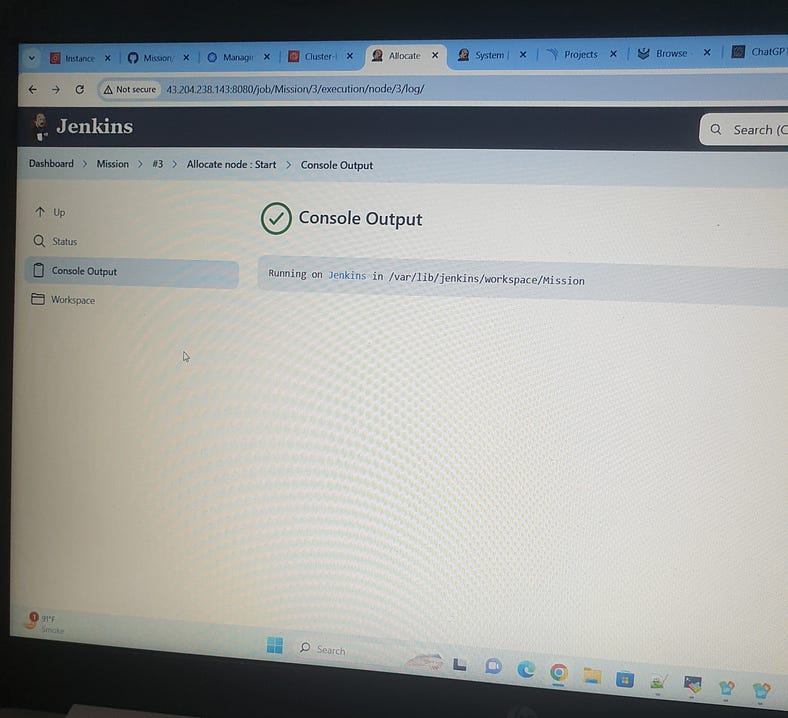
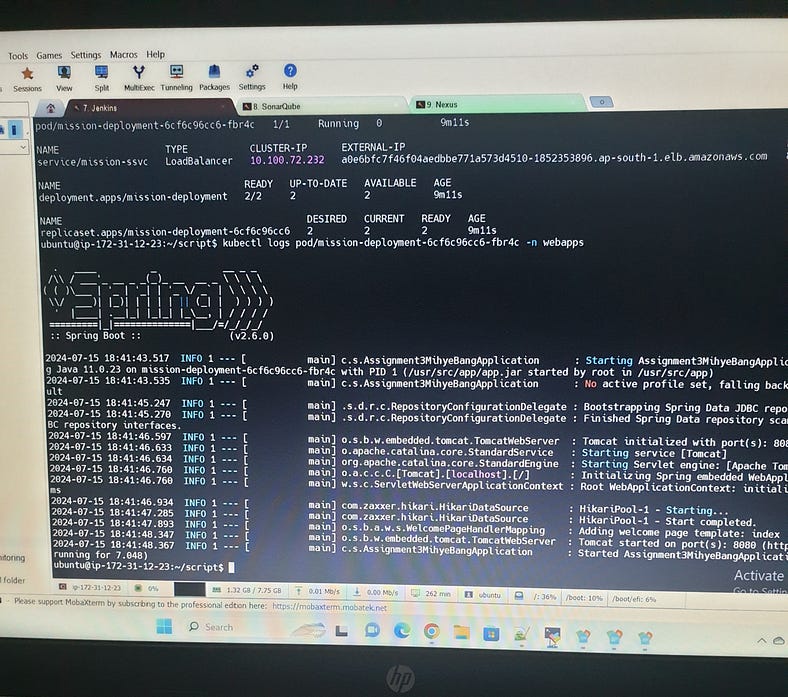
Check if the application is running:
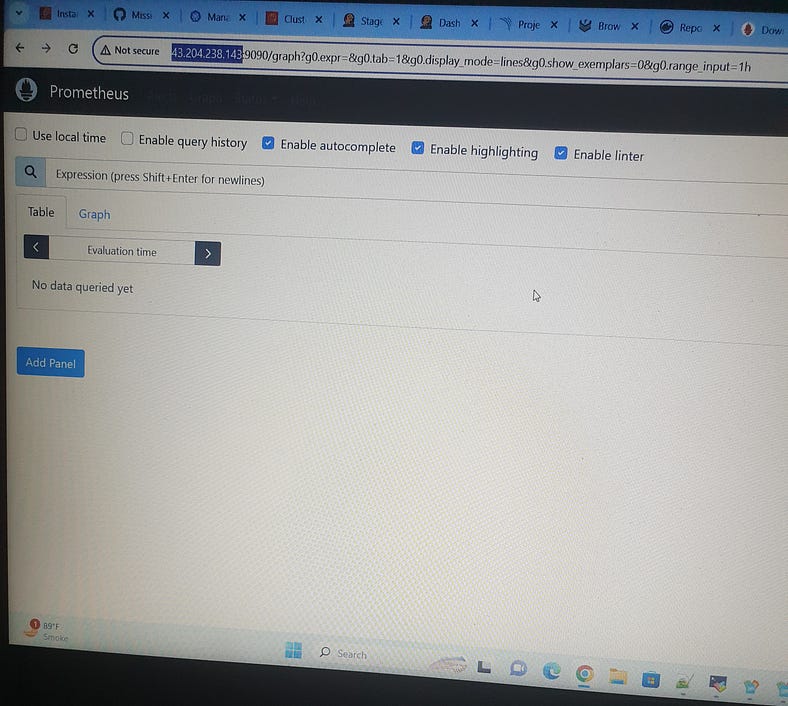
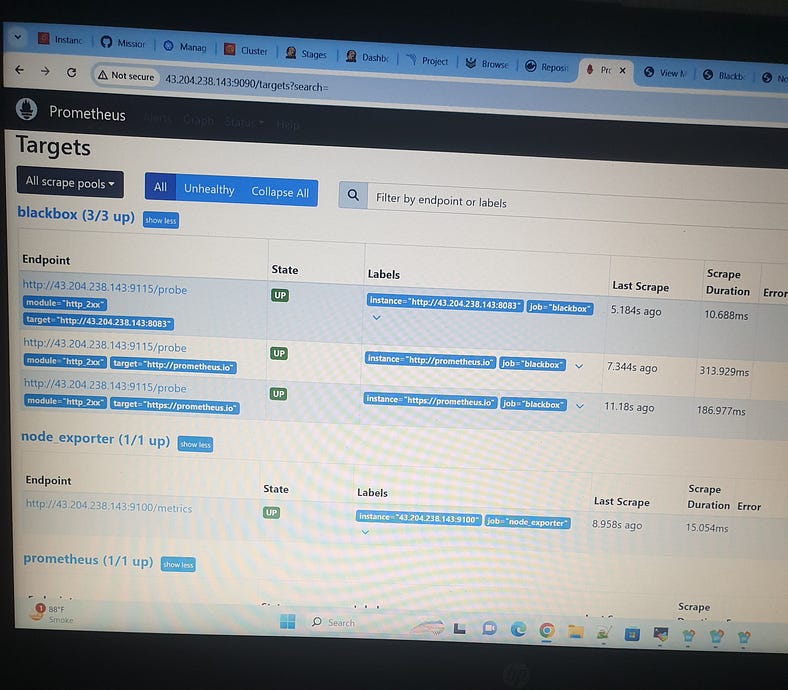
Phase-4: Monitoring: (Prometheus, Node exporter, Blackbox_exporter):
prometheus.io/download/
Jenkins VM:
# mkdir monitoring
# cd monitoring
# wget https://github.com/prometheus/prometheus/releases/download/v2.53.1/prometheus-2.53.1.linux-amd64.tar.gz
# tar -xvf prometheus-2.53.1.linux-amd64.tar.gz
# mv prometheus-2.53.1.linux-amd64/  prometheus
#rm prometheus-2.53.1.linux-amd64.tar.gz
# ls
# cd prometheus
# ./prometheus &
# <IP:9090>
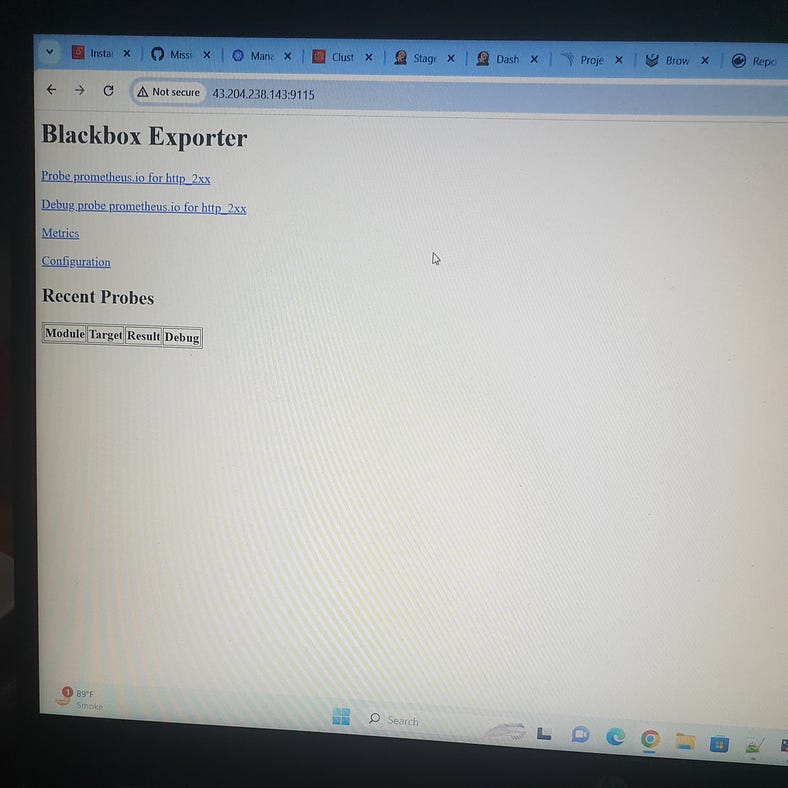
Blackbox_exporter:
# cd monitoring
# wget https://github.com/prometheus/blackbox_exporter/releases/download/v0.25.0/blackbox_exporter-0.25.0.linux-amd64.tar.gz
# tar -xvf blackbox_exporter-0.25.0.linux-amd64.tar.gz
# mv blackbox_exporter-0.25.0.linux-amd64/  blackbox_exporter
# rm blackbox_exporter-0.25.0.linux-amd64.tar.gz
# ls
# cd blackbox_exporter
# ./blackbox_exporter &
# <IP:9115>
Node_Exporter:
# cd monitoring
# wget https://github.com/prometheus/node_exporter/releases/download/v1.8.2/node_exporter-1.8.2.linux-amd64.tar.gz
# tar -xvf node_exporter-1.8.2.linux-amd64.tar.gz
# mv node_exporter-1.8.2.linux-amd64/  node_exporter
# rm node_exporter-1.8.2.linux-amd64.tar.gz
# ls
# cd node_exporter
# ./node_exporter
# <IP:9100>

# ls
# blackbox_exporter  node_exporter   prometheus
# cd prometheus
# vi prometheus.yml


- job_name: node_exporter
  static_configs:
     - targets: ['43.204.238.143:9100']

- job_name: blackbox
  metrics_path: /probe
  params:
    module: [http_2xx]
  static_configs:
    - targets:
        - http://prometheus.io
        - https://prometheus.io
        - http://43.204.238.143:8083/
  relabel_configs:
    - source_labels:
        - __address__
      target_label: __param_target
    - source_labels:
        - __param_target
      target_label: instance
    - target_label: __address__
      replacement: 43.204.238.143:9115


# stop prometheus
# pgrep prometheus
# kill 106377
# ./prometheus &
Install Grafana (Linux):
# mkdir grafana
# sudo apt-get install -y adduser libfontconfig1 musl
# wget https://dl.grafana.com/enterprise/release/grafana-enterprise_11.1.0_amd64.deb
# sudo dpkg -i grafana-enterprise_11.1.0_amd64.deb
# sudo /bin/systemctl start grafana-server
# <IP:3000>
# sign in
# Establish connections
Home> Connections> Add new connection
# prometheus > add new data store > Connection > prometheus server URL<43.204.238.143:9090>
# save and test
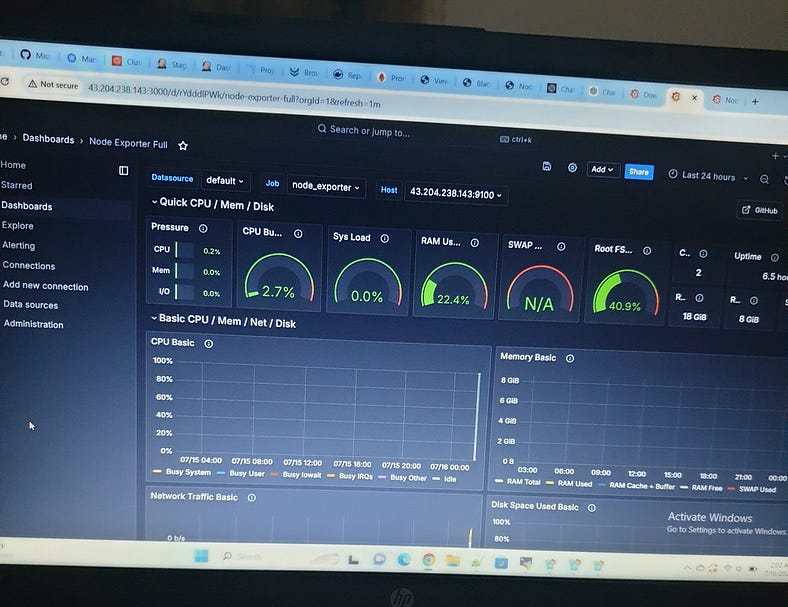
Node Exporter DashBoard:
# find the ID
# Then go back to grafana > new dashboard >import dashboard put the ID here > load > Select a prometheus data source
# click on import
Node Exporter dashboard:
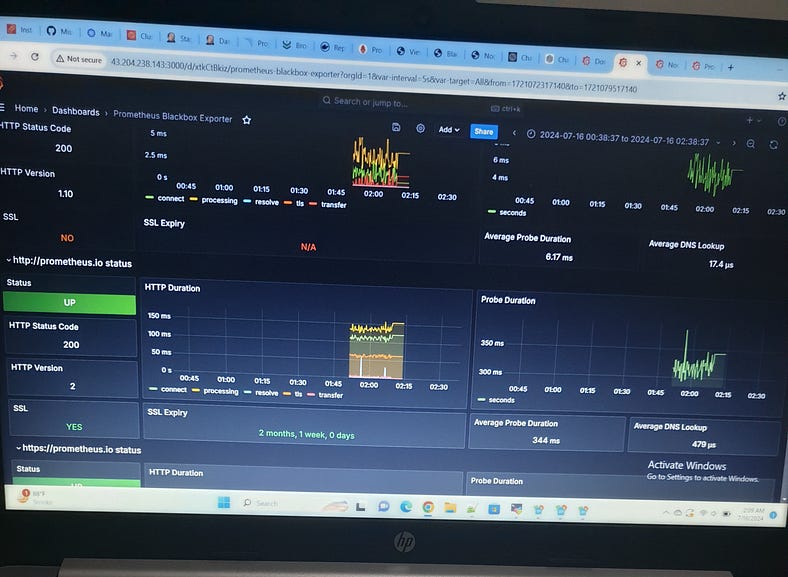
# blackbox exporter grafana dashboard
# find the ID
# Then go back to grafana > new dashboard >import dashboard put the ID here > load > Select a prometheus data source
# click on import
Blackbox Exporter Grafana dashboard:
The Project Mission’s CI/CD pipeline not only streamlined the development and deployment processes but also established a robust foundation for continuous delivery and improvement. Moving forward, it is essential to implement more advanced monitoring and logging mechanisms to gain deeper insights into application performance and issues.
Subscribe to my newsletter
Read articles from Harshit Sahu directly inside your inbox. Subscribe to the newsletter, and don't miss out.
Written by
Harshit Sahu
Harshit Sahu
Enthusiastic about DevOps tools like Docker, Kubernetes, Maven, Nagios, Chef, and Ansible and currently learning and gaining experience by doing some hands-on projects on these tools. Also, started learning about AWS and GCP (Cloud Computing Platforms).