AWS VPC to VPC Peering Project (Networking)
 Sahil Soni
Introduction
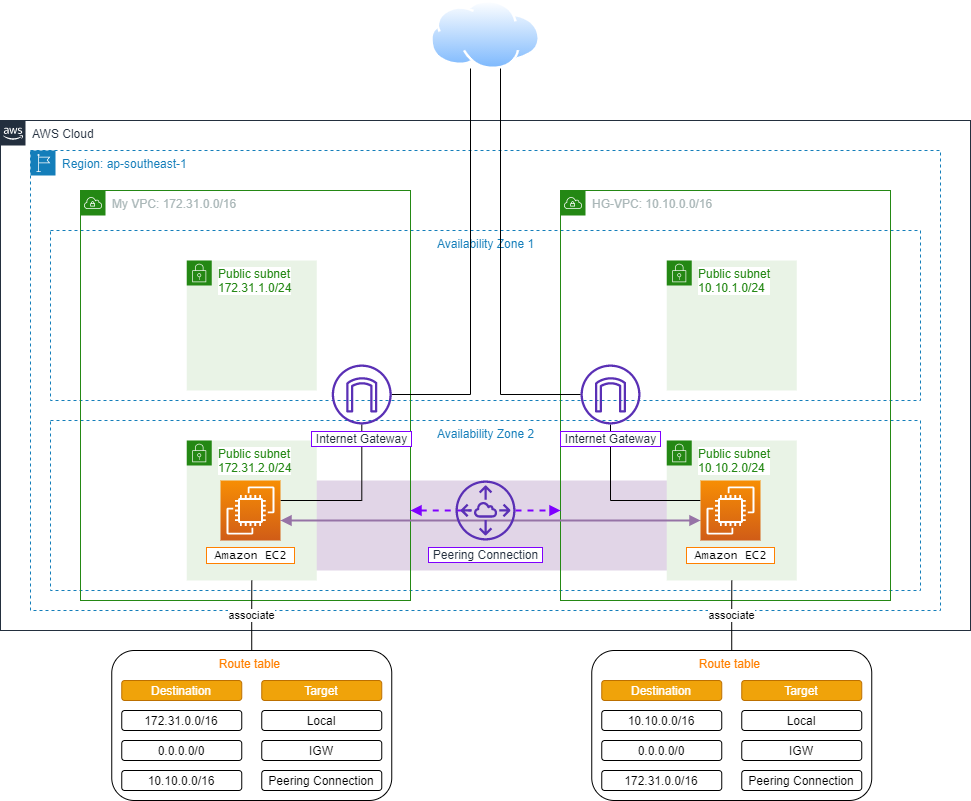
AWS VPC Peering enables direct network communication between two Virtual Private Clouds (VPCs), facilitating secure and efficient connectivity. This guide walks through setting up two VPCs (Test VPC & Prod VPC), configuring subnets and EC2 instances, setting up Internet Gateways and Route Tables, establishing a VPC Peering connection, implementing security configurations, and testing connectivity.
Step 1: Creating Test VPC and Prod VPC
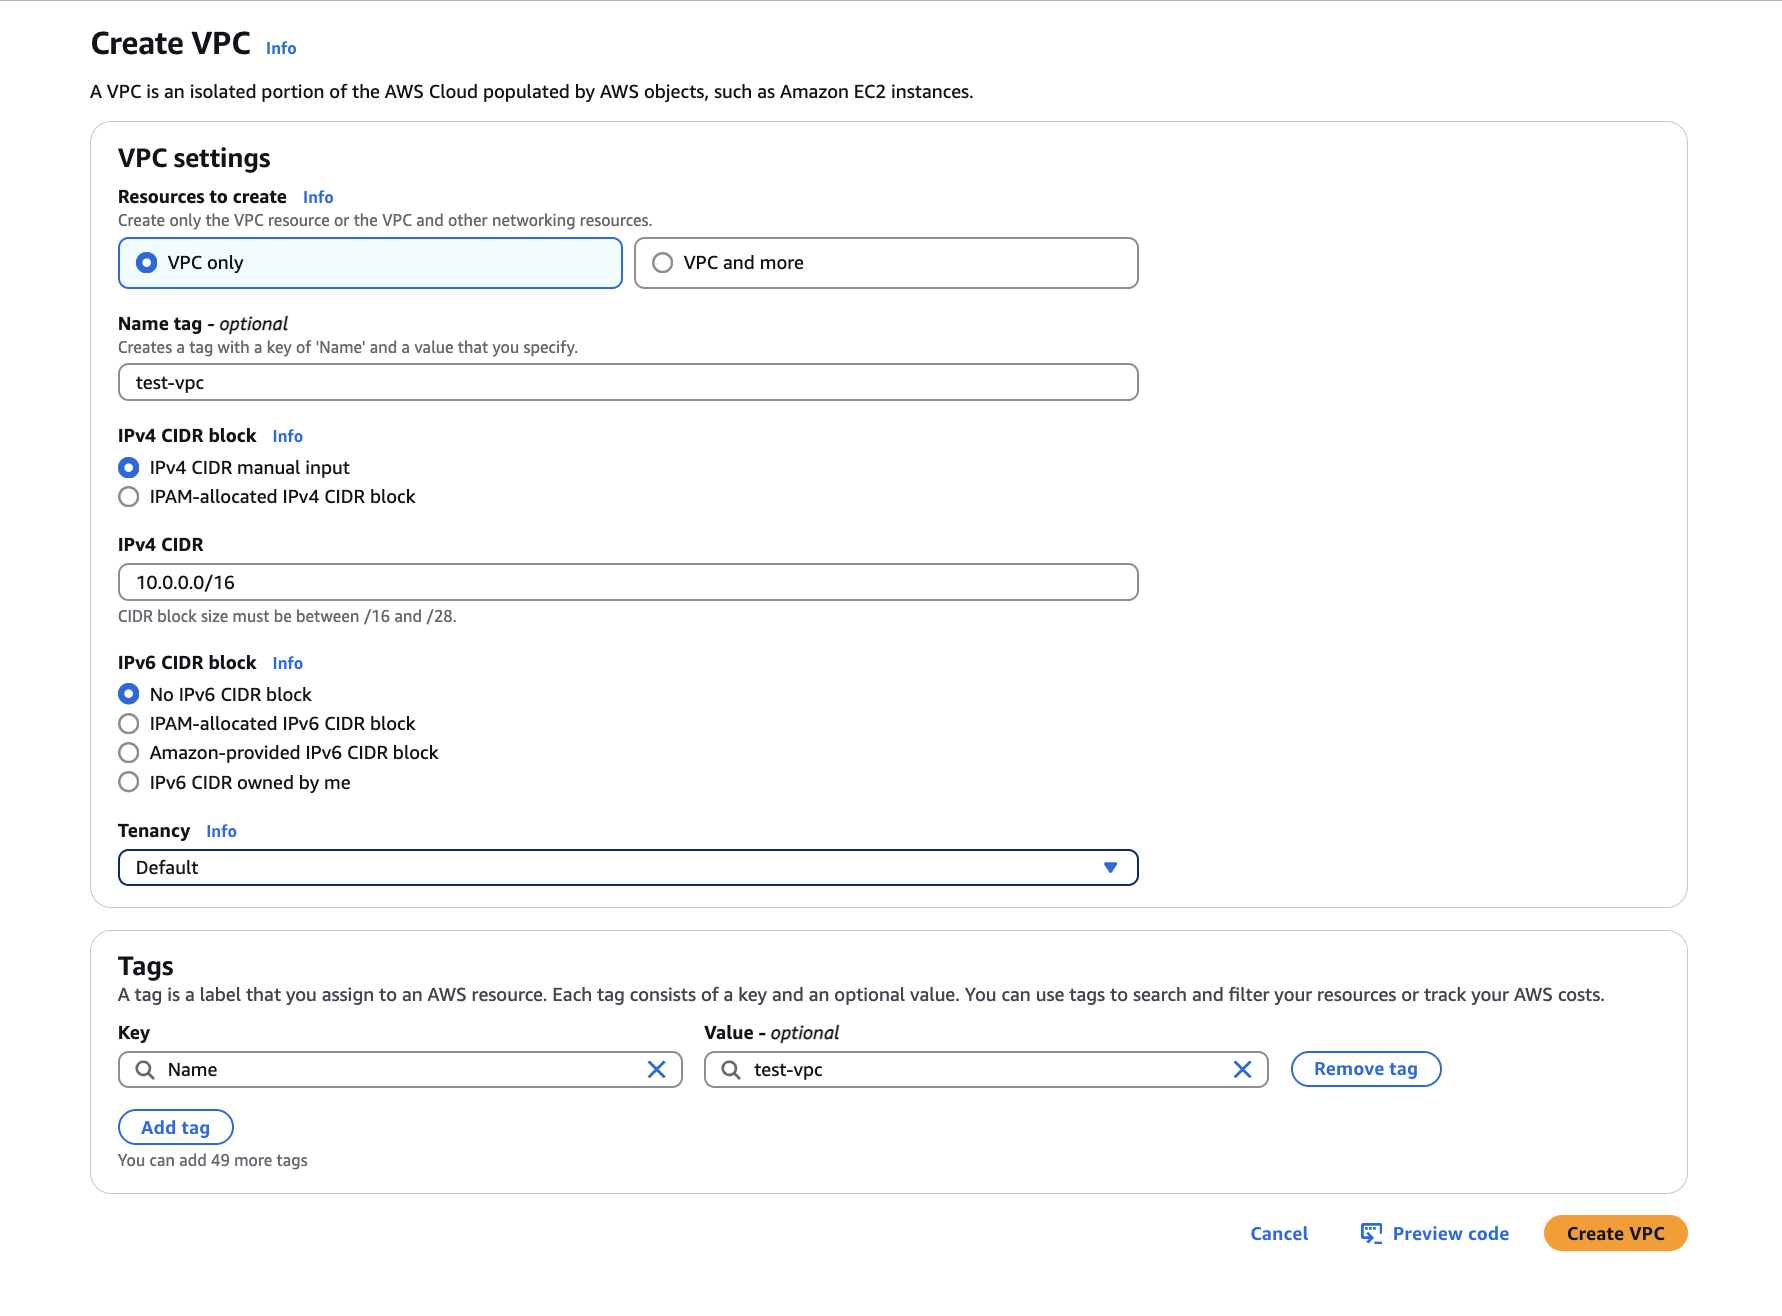
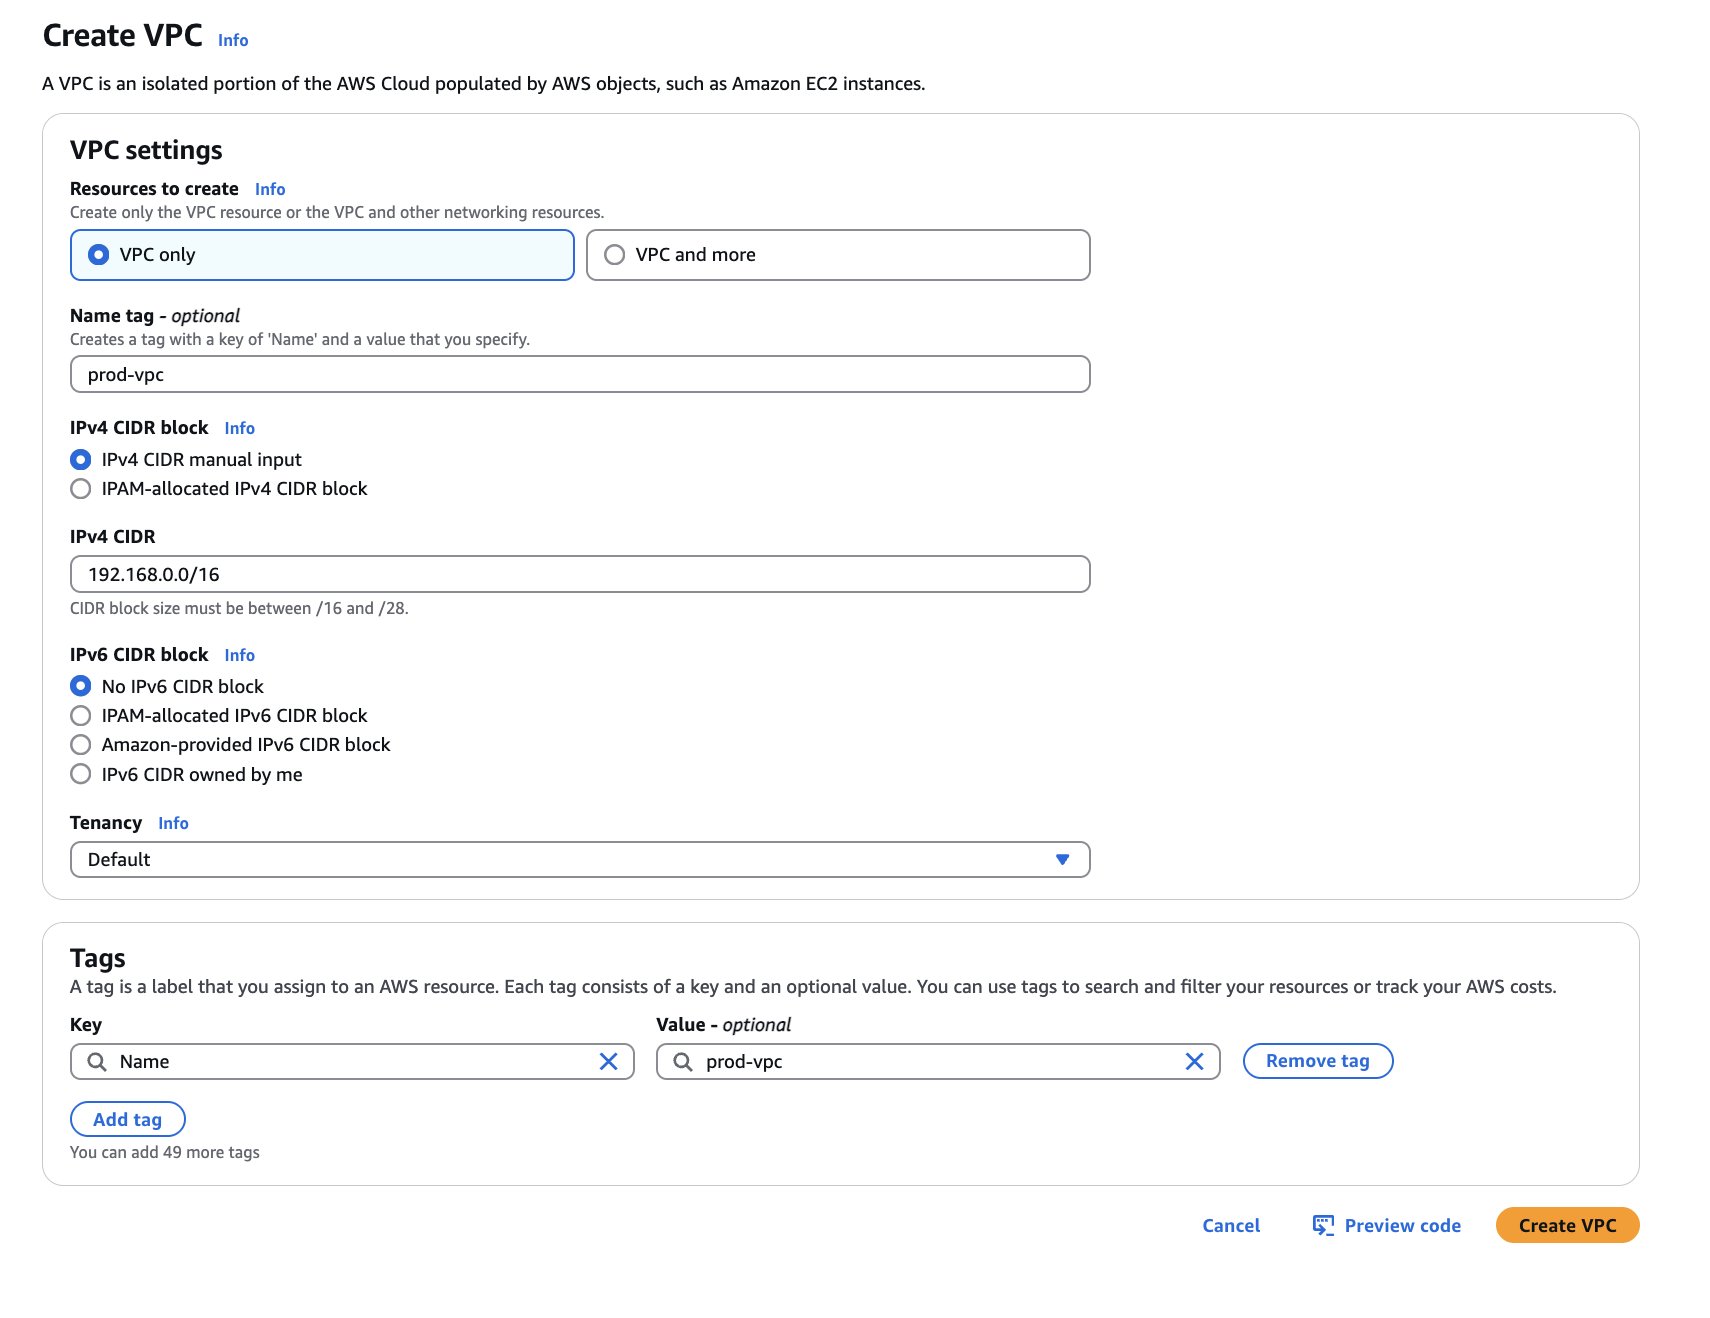
Open AWS Management Console and navigate to VPC Dashboard → Create VPC.
Create Test VPC with:
Name: Test VPC
IPv4 CIDR Block:
10.0.0.0/16
Create Prod VPC with:
Name: Prod VPC
IPv4 CIDR Block:
192.168.0.0/16
Click Create VPC for both.
Step 2: Configuring Subnets and EC2 Instances
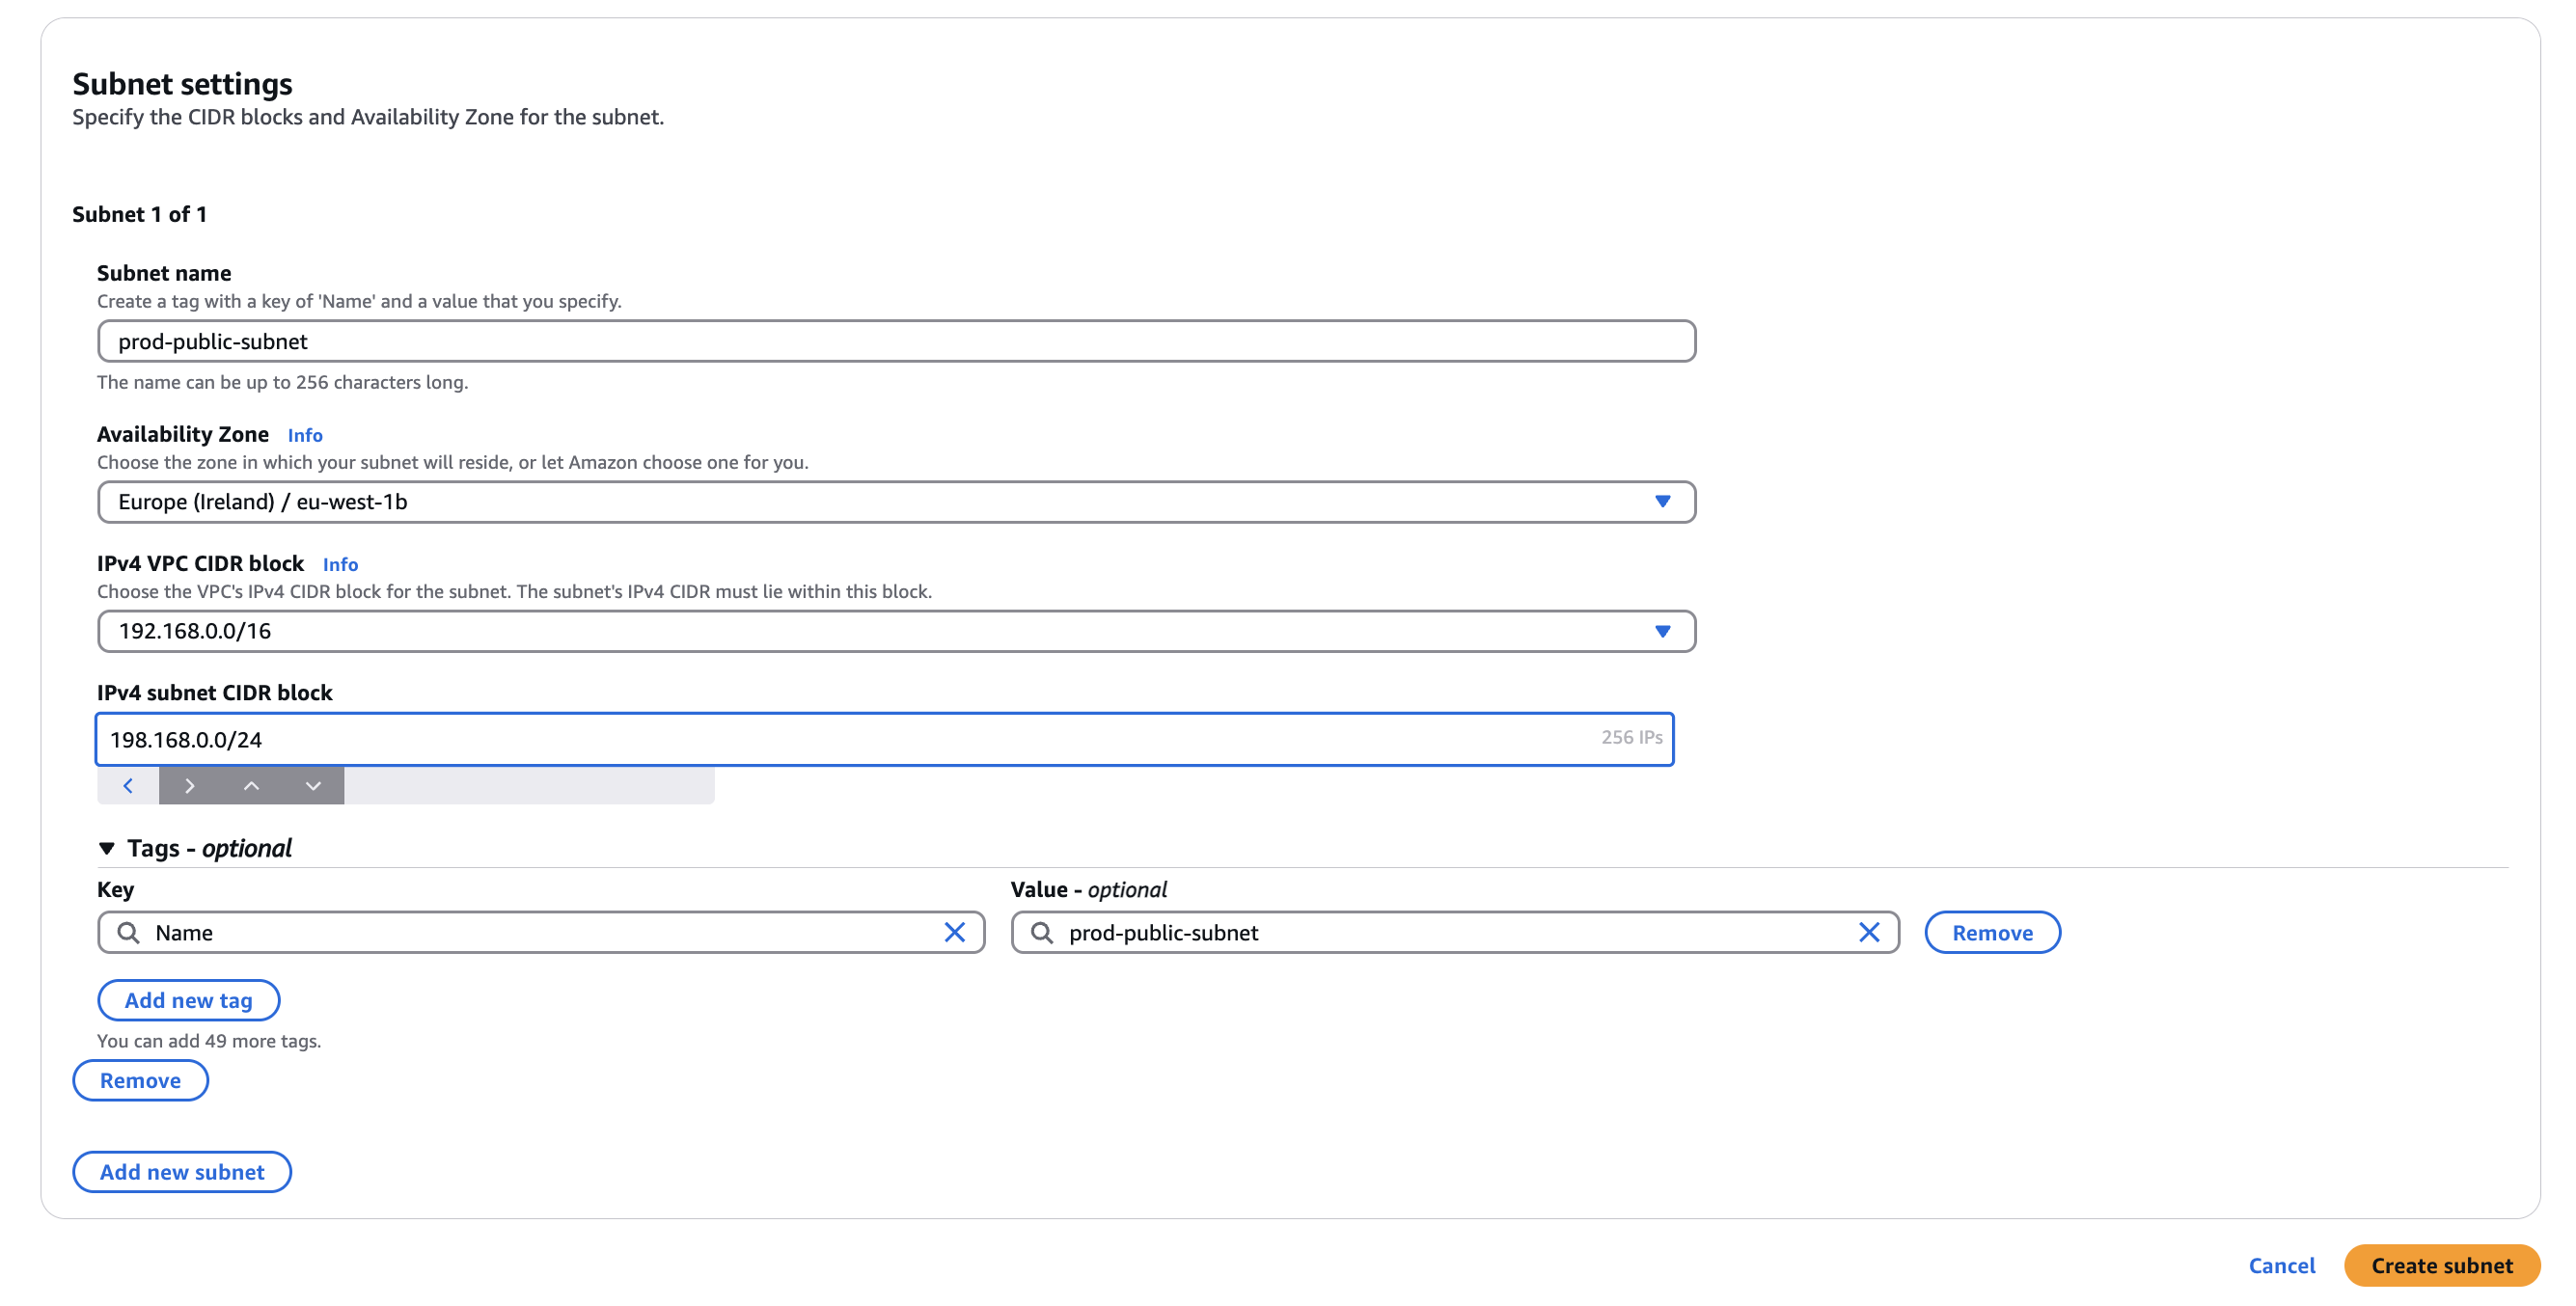
2.1 Create Subnets
Navigate to VPC Dashboard → Subnets.
Click Create Subnet.
Configure subnets:
Test VPC:
10.0.1.0/24(Test Subnet)Prod VPC:
192.168.1.0/24(Prod Subnet)
Click Create Subnet for both.
2.2 Launch EC2 Instances
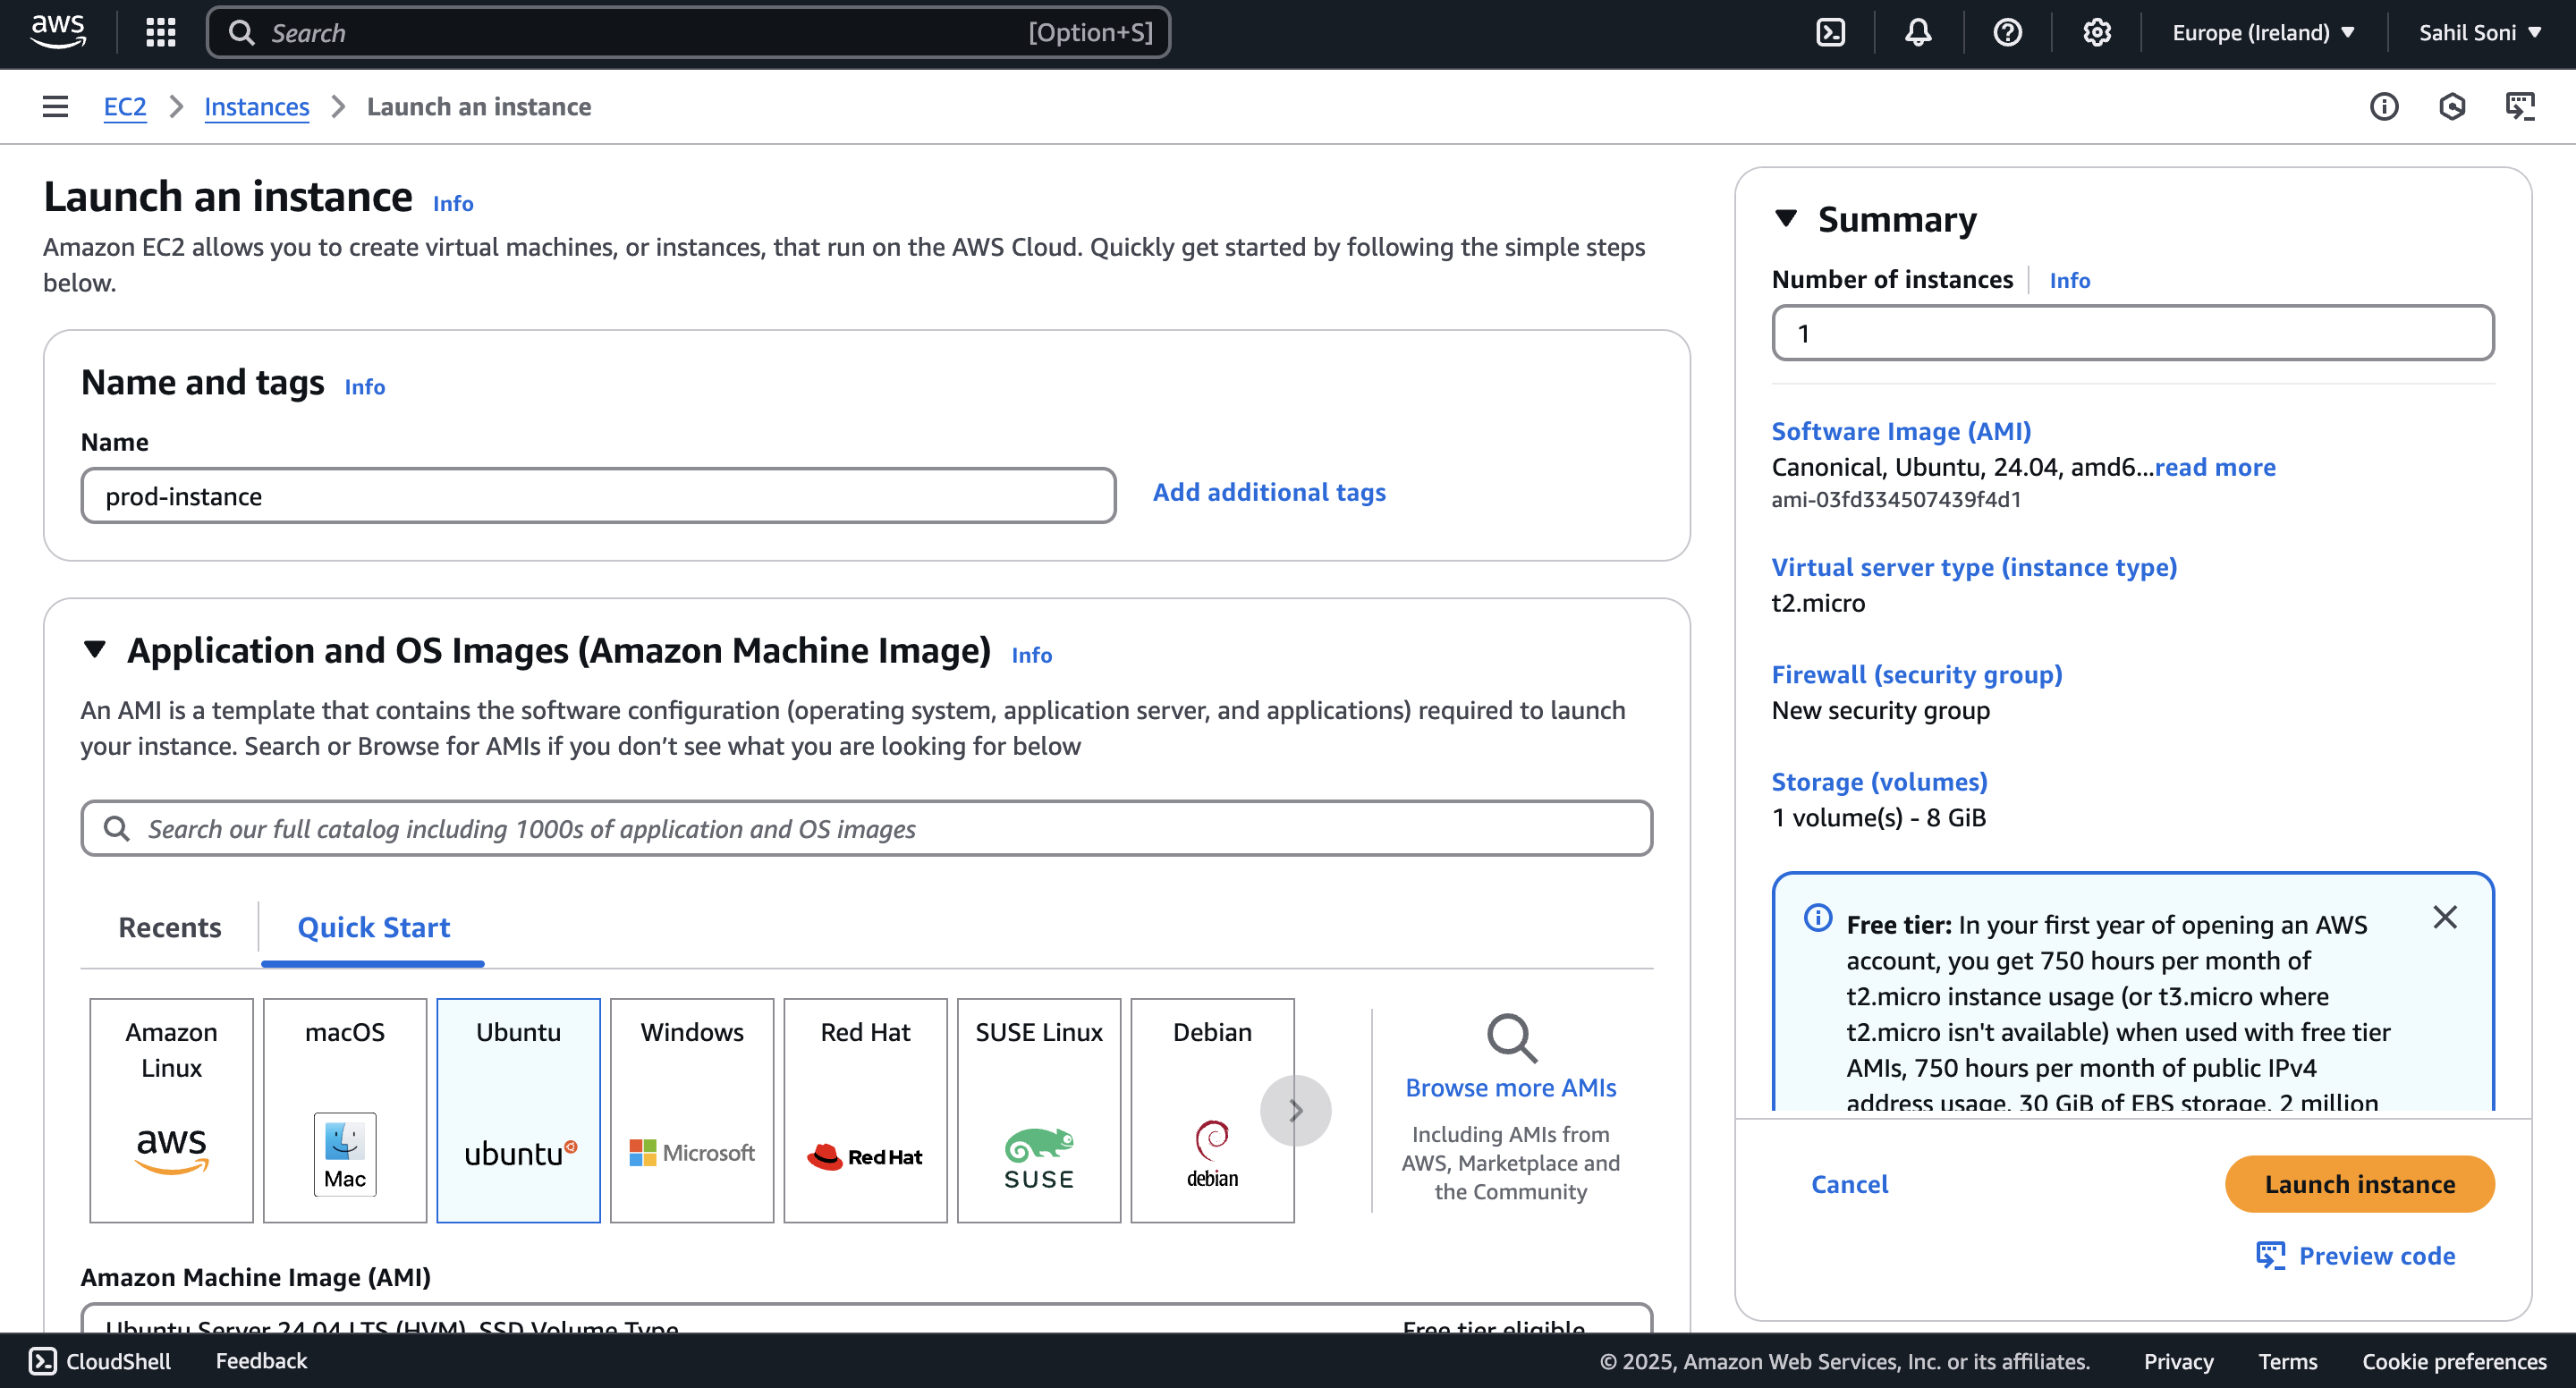
Navigate to EC2 Dashboard → Launch Instance.
Select Amazon Linux 2 AMI.
Assign one EC2 to Test VPC and one to Prod VPC.
Set Auto-assign Public IP: No (for private instances).
Launch instances and connect via SSH.
Step 3: Setting Up Internet Gateways and Route Tables
3.1 Attach Internet Gateways
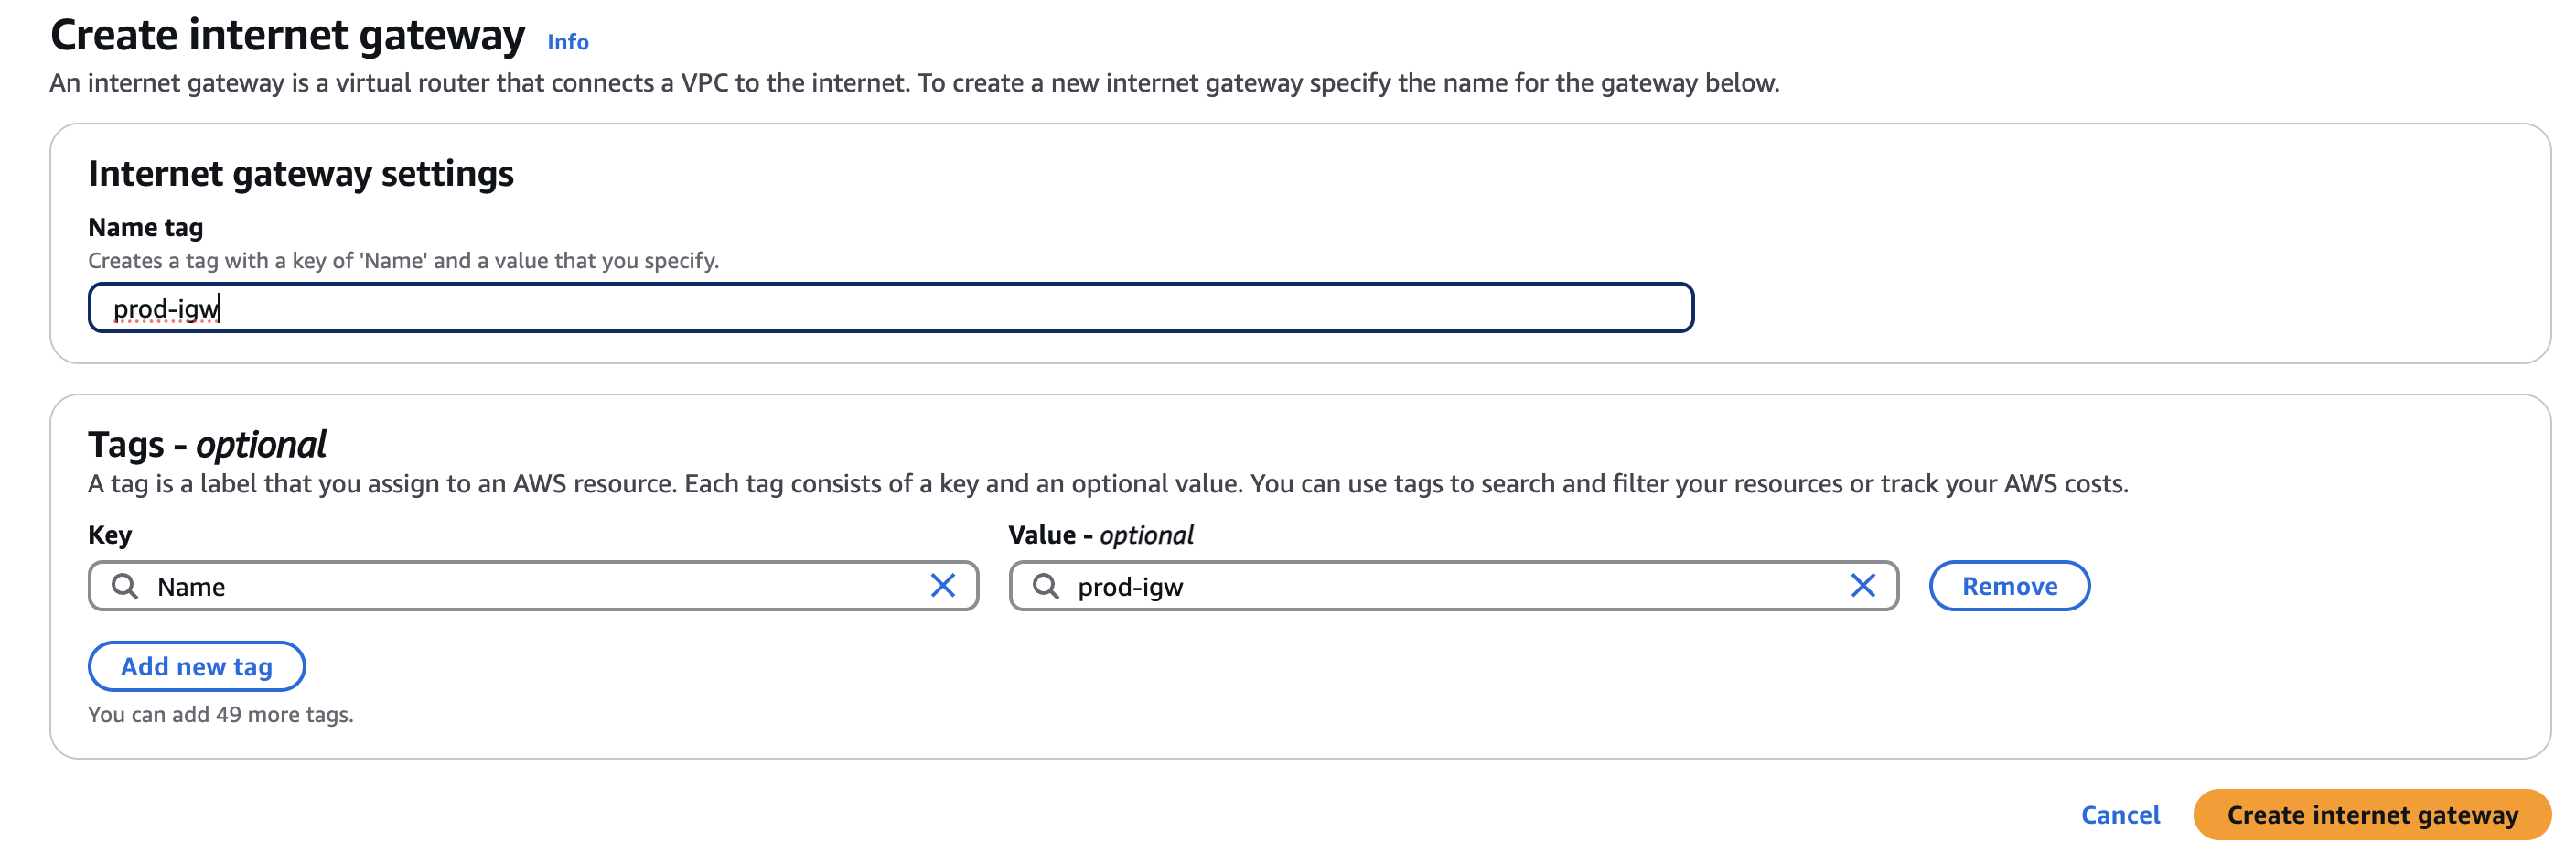
Go to VPC Dashboard → Internet Gateways.
Click Create Internet Gateway.
Attach to corresponding VPCs:
Test-IGW → Test VPC
Prod-IGW → Prod VPC
3.2 Update Route Tables
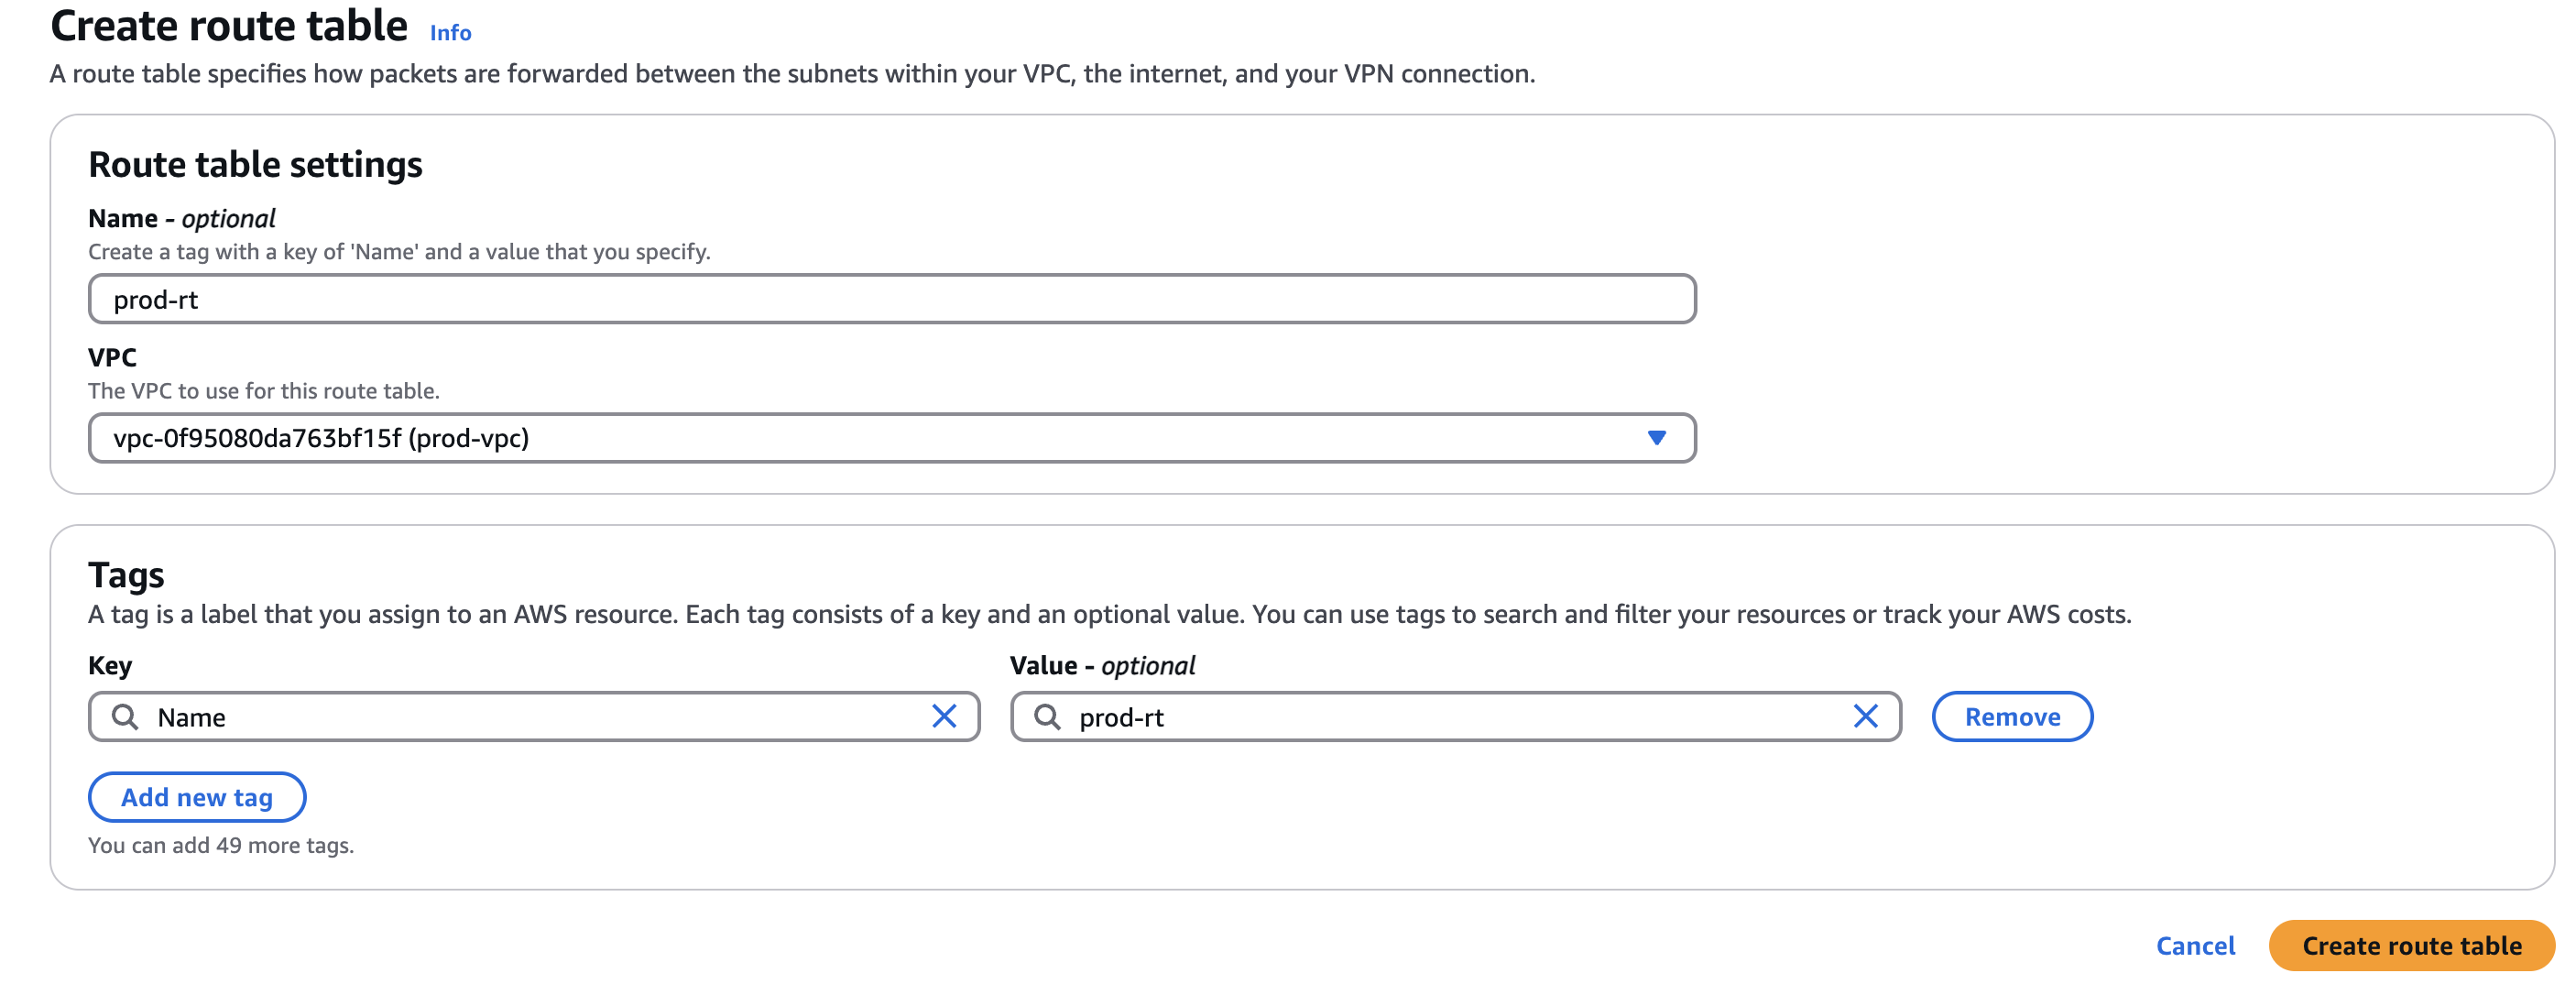
Navigate to Route Tables.
Select Test VPC Route Table and Prod VPC Route Table.
Configure routes:
Test VPC:
0.0.0.0/0→Test-IGWProd VPC:
0.0.0.0/0→Prod-IGW
Click Save Routes.
Step 4: Establishing VPC Peering
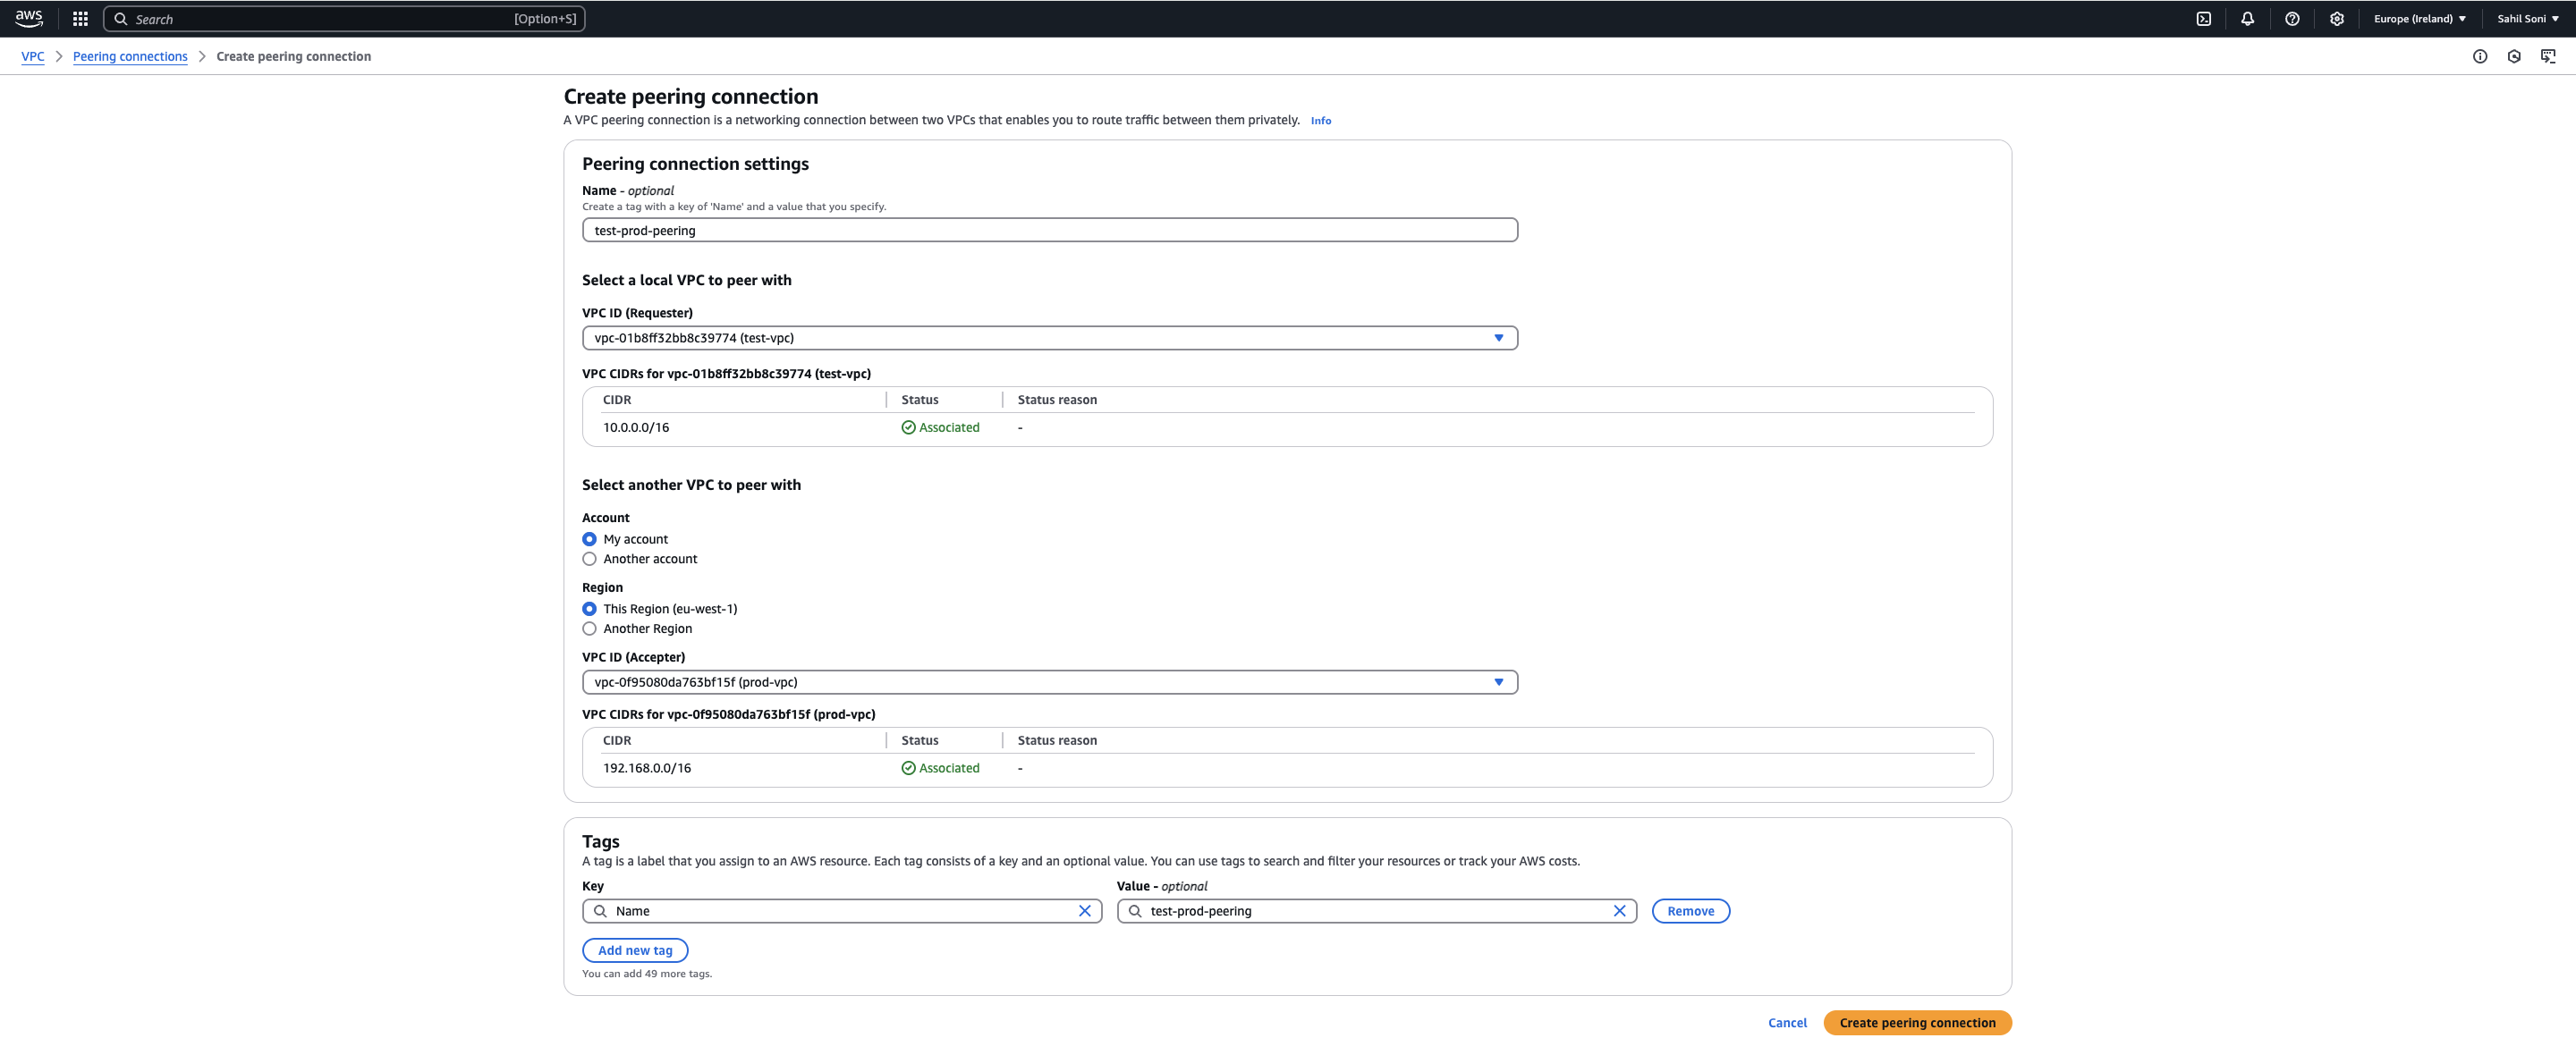
4.1 Create a Peering Connection
Navigate to VPC Dashboard → Peering Connections.
Click Create Peering Connection.
Enter details:
Peering Name:
Test-Prod PeeringRequester VPC: Test VPC
Accepter VPC: Prod VPC
Click Create Peering Connection.
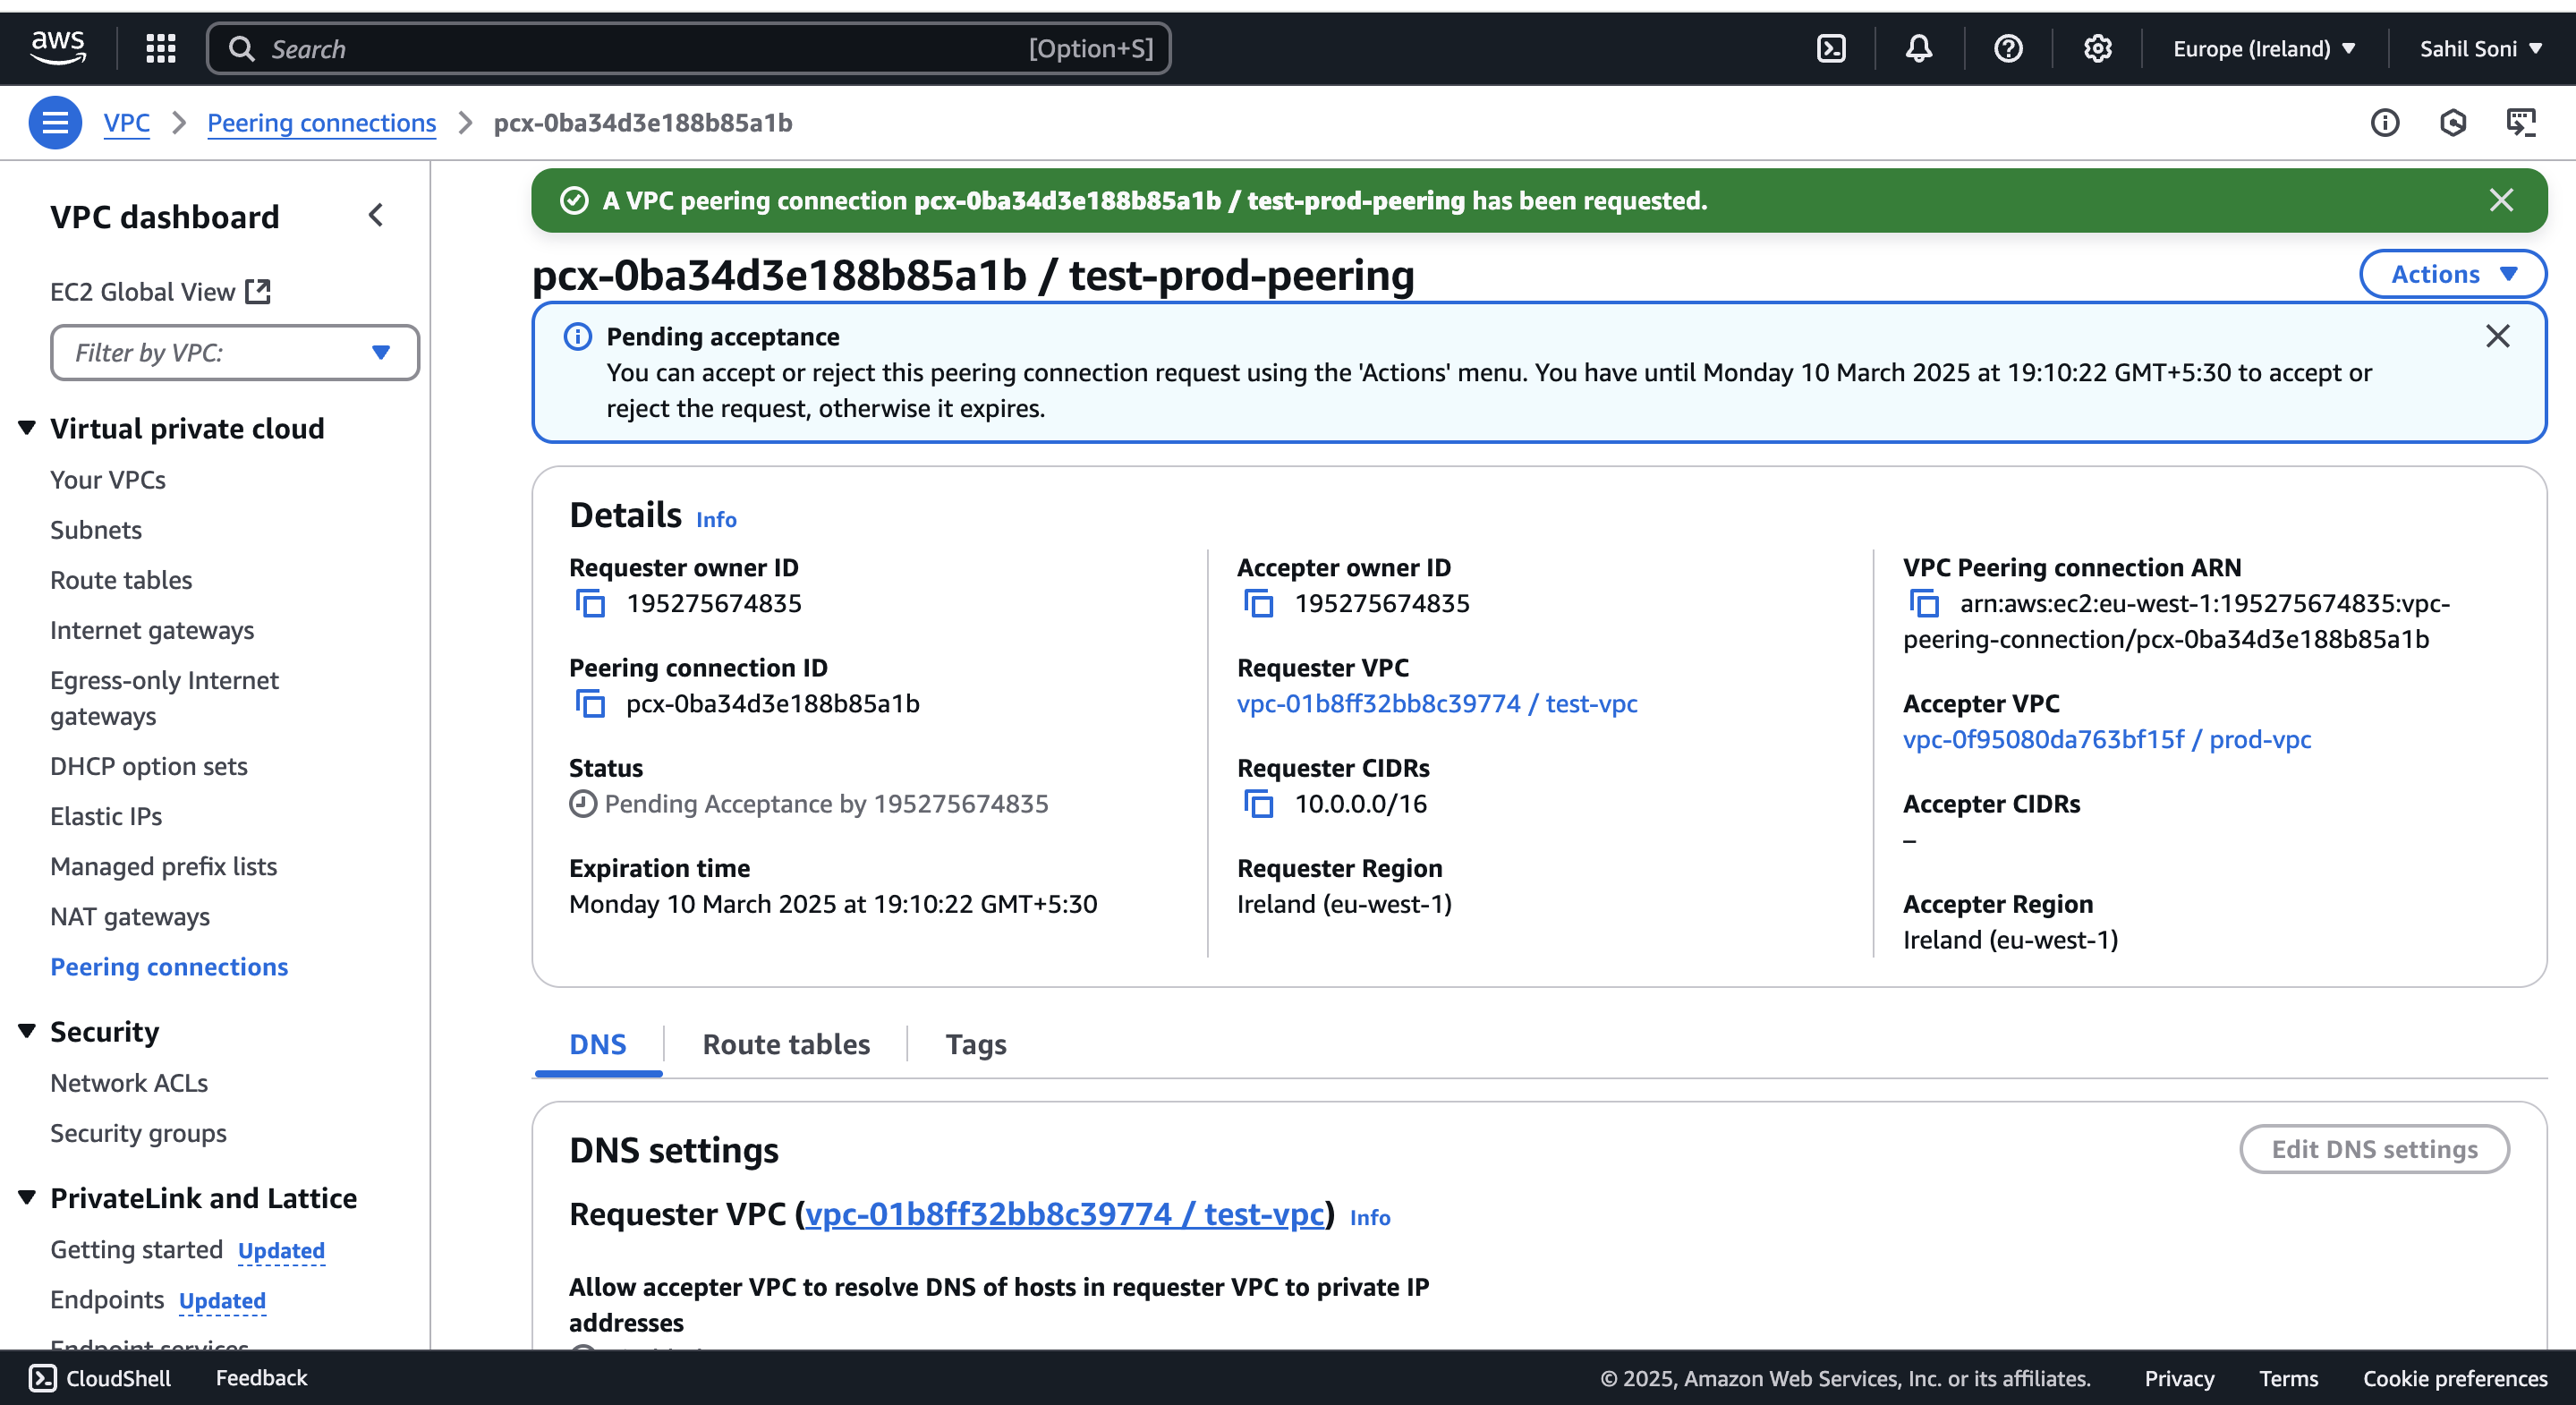
4.2 Accept the Peering Request
Navigate to Peering Connections.
Select the pending request and click Accept.
4.3 Update Route Tables for Peering
Test VPC Route Table: Add a route:
Destination:
192.168.0.0/16Target: Peering Connection
Prod VPC Route Table: Add a route:
Destination:
10.0.0.0/16Target: Peering Connection
Click Save Routes.
Step 5: Testing VPC Peering Connection
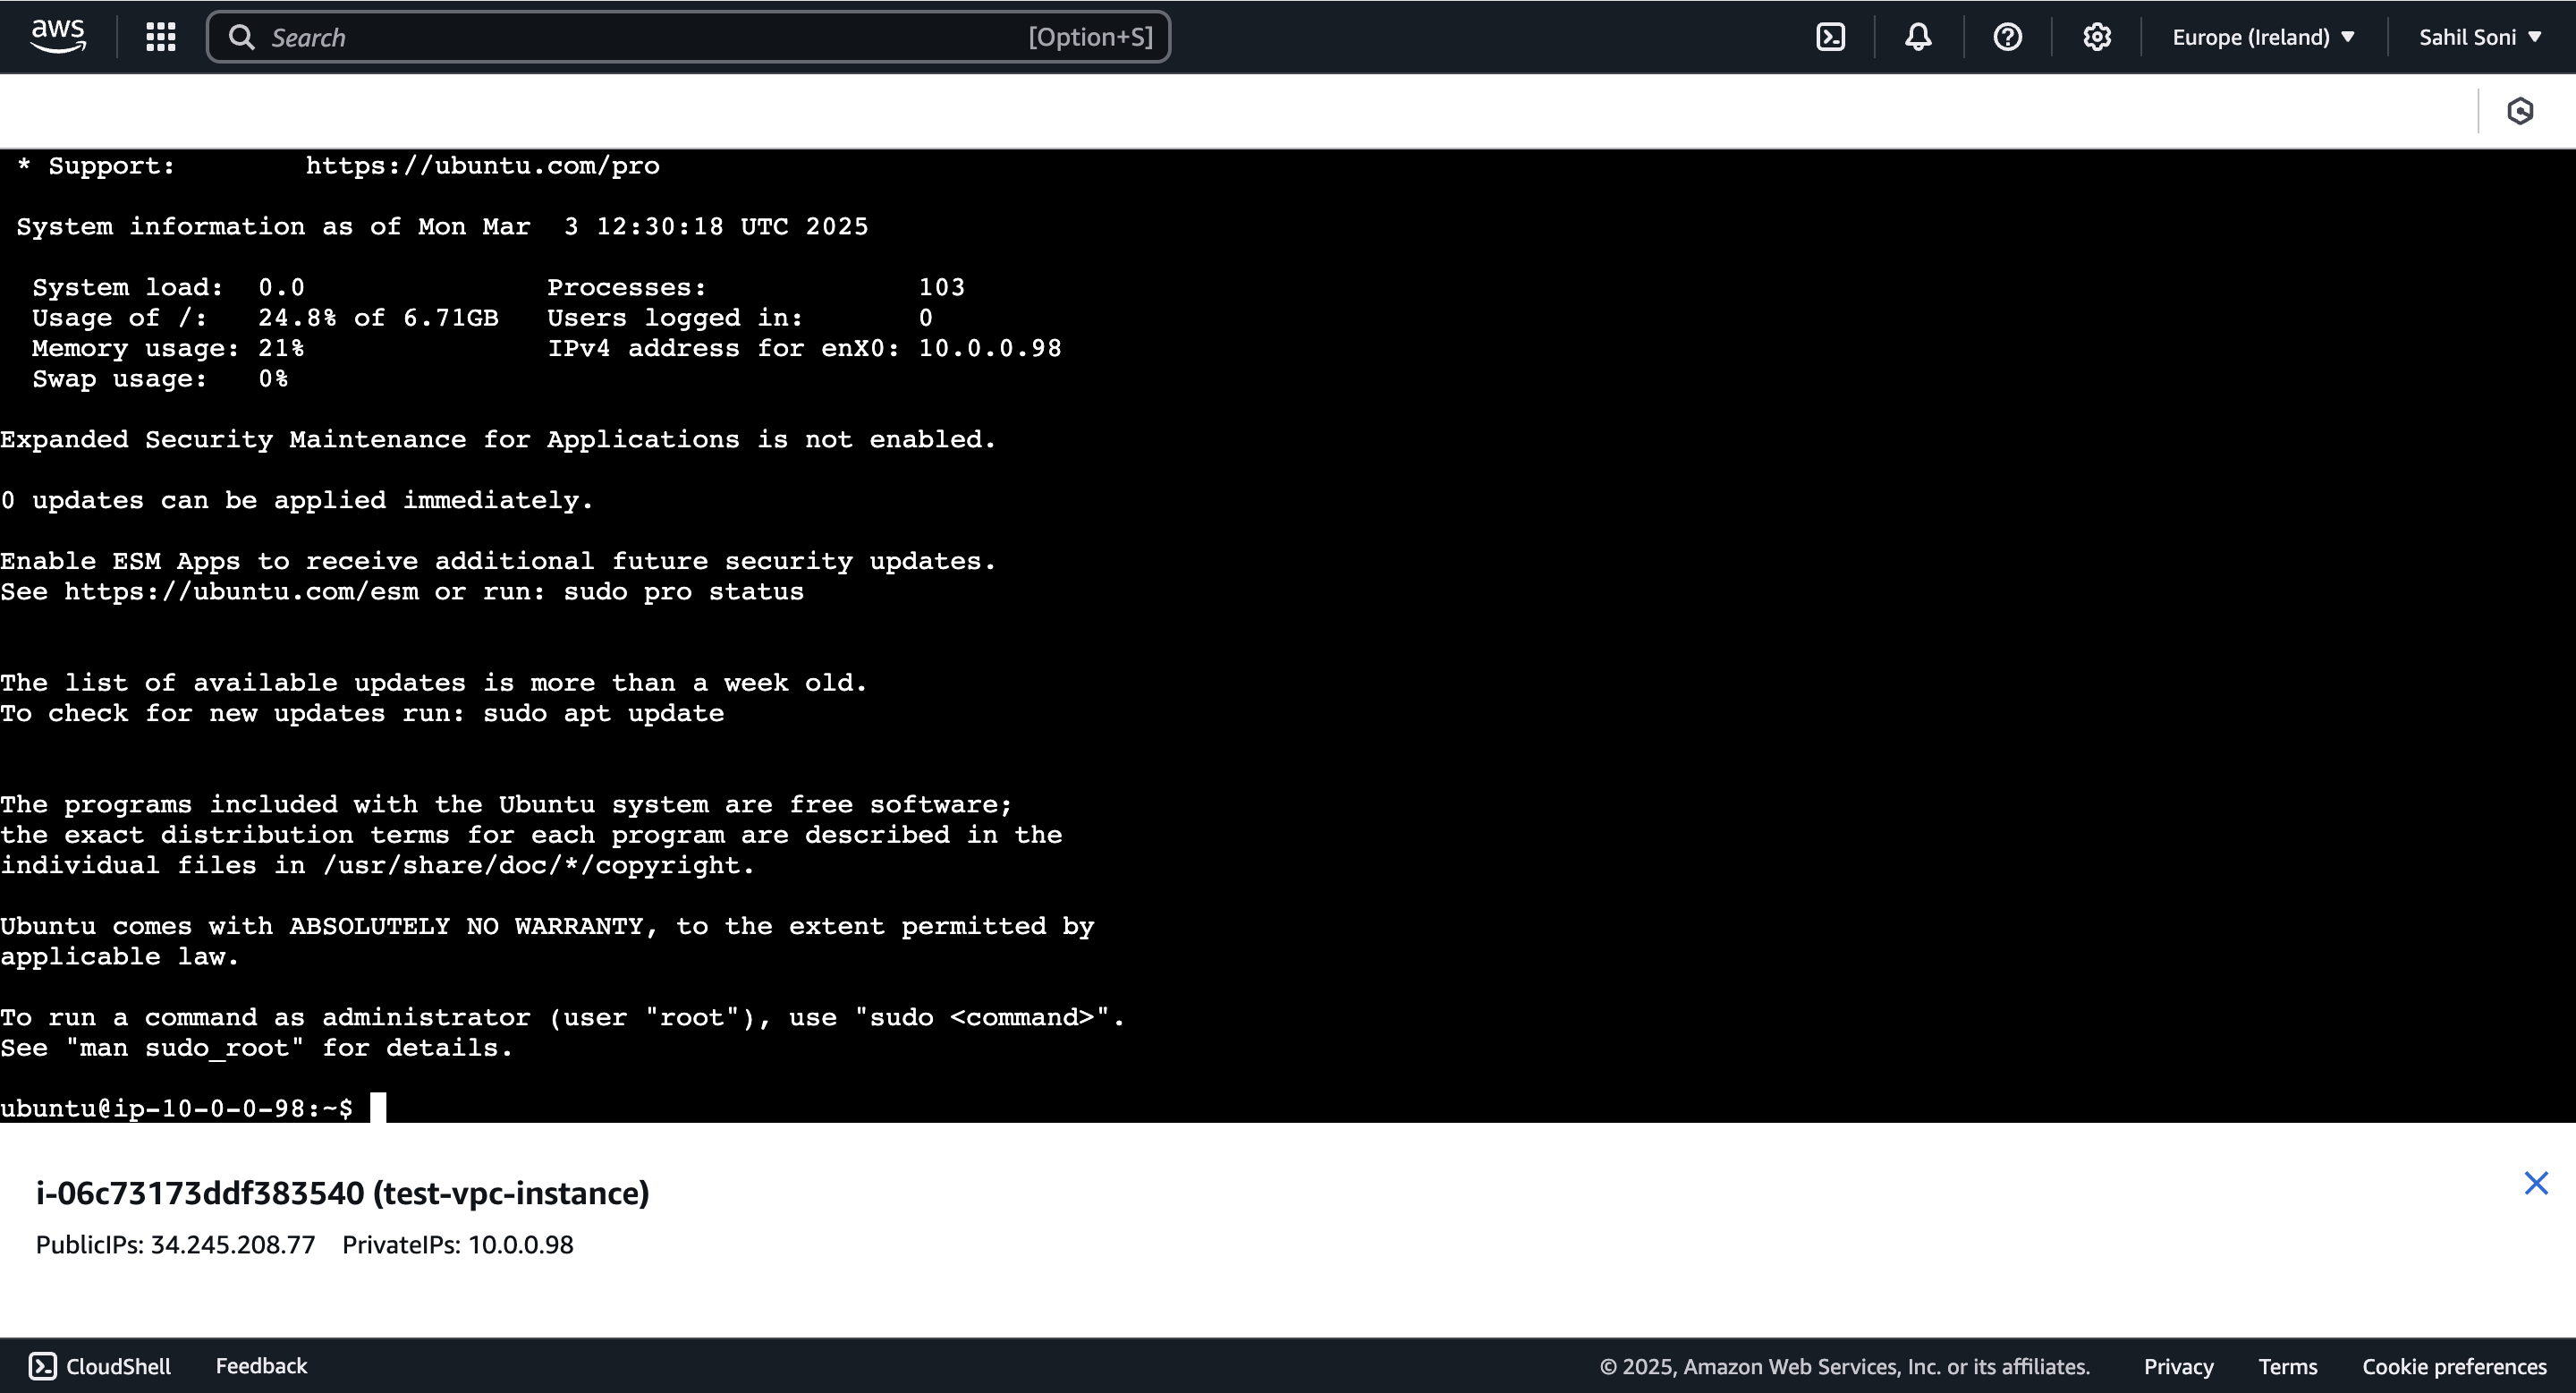
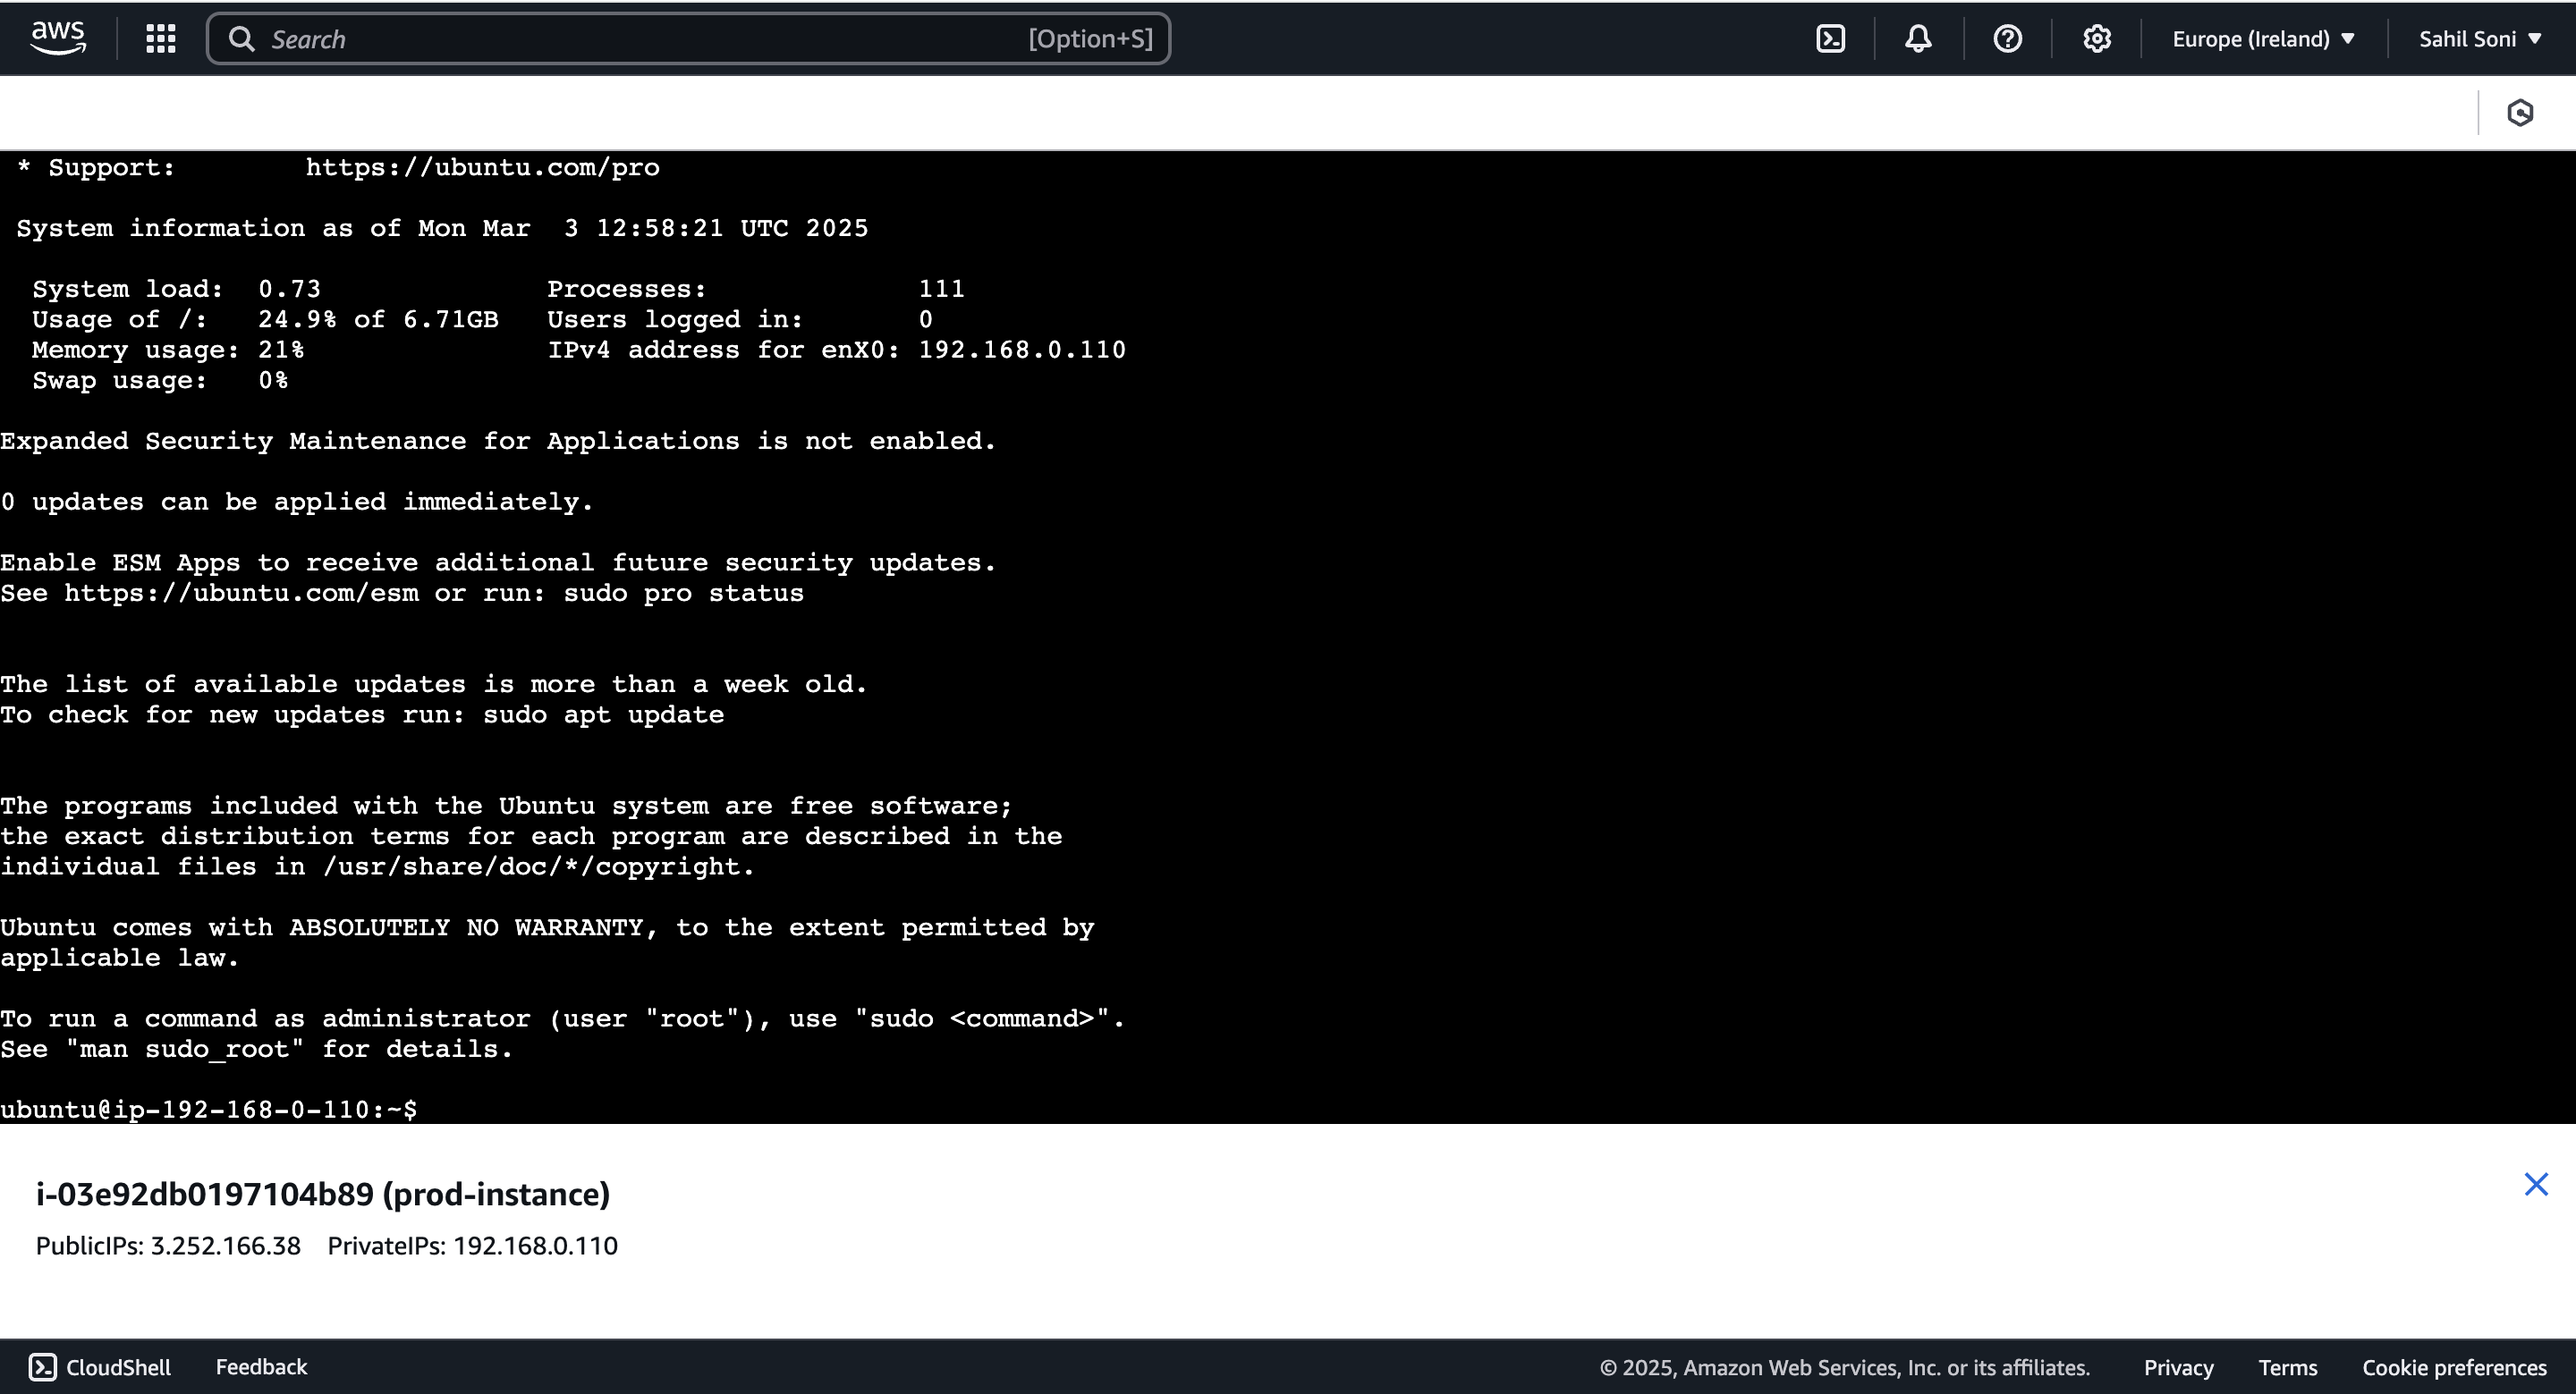
Connect to the EC2 instance in Test VPC via SSH.
Run the following command to test connectivity:
ping <Private IP of EC2 in Prod VPC>If ping is successful, VPC Peering setup is complete!
Step 6: Security Configurations
6.1 Security Group Rules
Modify Security Groups for EC2 instances in both VPCs:
Inbound: Allow
ALL ICMP - IPv4from192.168.0.0/16(for Test VPC)Outbound: Allow traffic to
192.168.0.0/16
Limitations of AWS VPC Peering
No transitive peering – Direct VPC-to-VPC connection only.
Manual route table updates are required.
Higher costs for cross-region peering.
Limited scalability – Transit Gateway is better for large architectures.
VPC Peering vs. AWS Transit Gateway
| Feature | VPC Peering | AWS Transit Gateway |
| Connectivity | Direct | Centralized hub |
| Transitive Traffic | ❌ No | ✅ Yes |
| Scalability | Limited | High |
| Cost | Low | Higher but scalable |
Conclusion
AWS VPC Peering is an efficient, low-latency way to connect VPCs, ensuring secure communication. Follow best practices to optimize connectivity and security. For complex architectures, consider AWS Transit Gateway.
Reference
This guide was created based on the tutorial: AWS VPC Peering Tutorial.
Subscribe to my newsletter
Read articles from Sahil Soni directly inside your inbox. Subscribe to the newsletter, and don't miss out.
Written by
