Linux Training : Section 7 (Part-4)
 Aditya Dev Shrivastava
NGINX
- NGINX (pronounced "engine x") is a free, open-source web server that can also be used as a reverse proxy, load balancer, and more. It's known for its high performance and low resource usage.
Features-
Web serving: NGINX is a popular web server that can route requests to FastCGI servers
Reverse proxying: NGINX can be used as a reverse proxy to route requests to a proxied server
Load balancing: NGINX can distribute requests across multiple servers to avoid overloading a busy server
Caching: NGINX can cache content to improve performance
Media streaming: NGINX can be used for media streaming
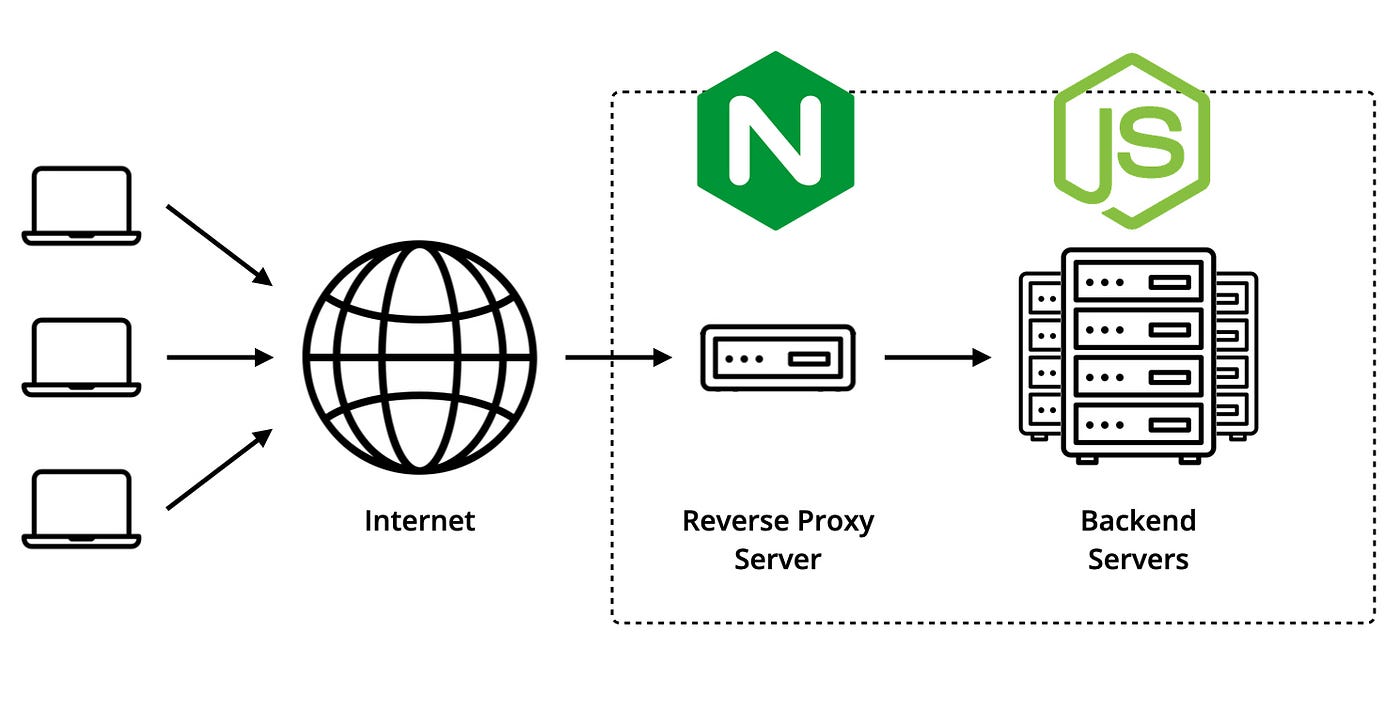
The NGINX is just like the receptionist at the hotel, where it will catch all the information from you and then it will re-direct to the exact and desired server. NGINX makes sure that websites load fast and can manage lot of traffic even during peak time.
LAB-
Check for the package-

Start and Enable Nginx Services-
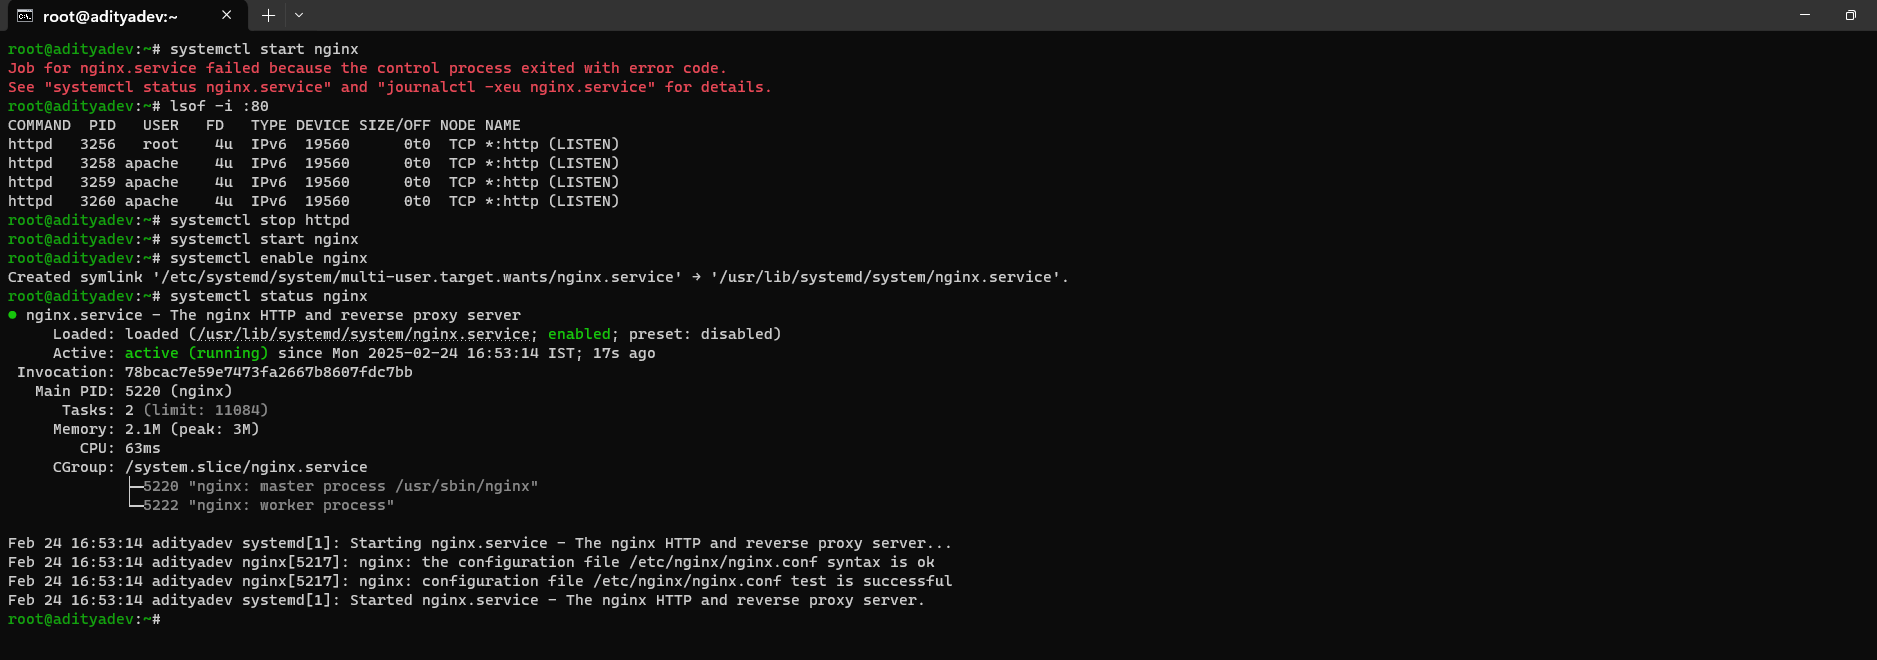
NOTE: We got error, because NGINX runs on port 80 and on 80 port httpd was already running. So, we have first disabled httpd, now it is working fine.
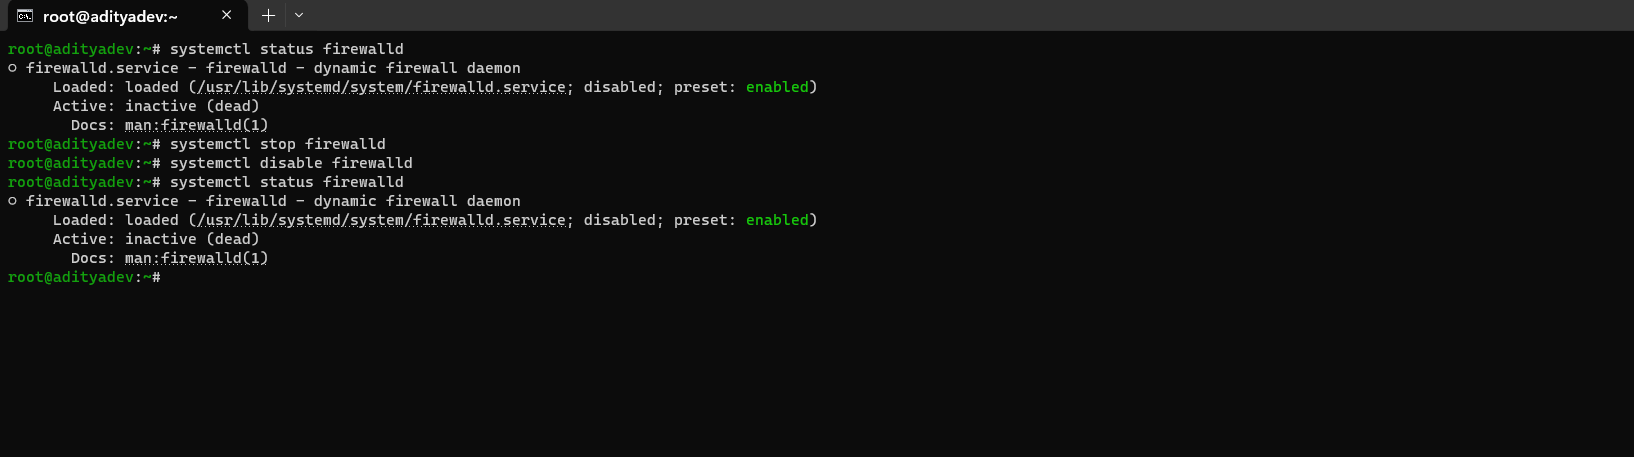
Disable Firewall-
Configuring NGINX-
vi /etc/nginx/nginx.confvi /etc/nginx/conf.d/myfirstlinuxos.conf
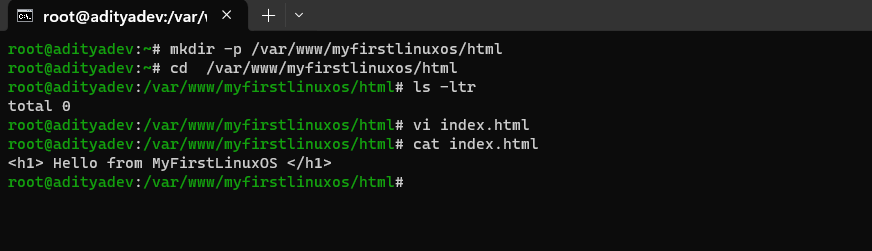
Creating the directory and content-
Testing configuration & Accessing the website-
Test the file-

Restart the service-
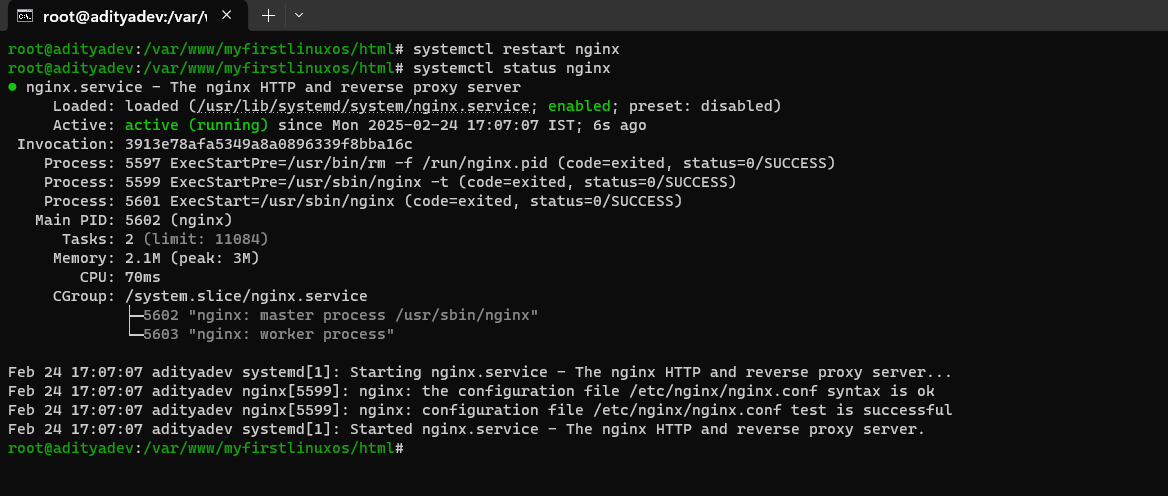
Check for the website content-

Repeat the process of installation and configuration on the new machine-
dnf install nginx -y
systemctl start nginx
systemctl enable nginx
systemctl stop firewalld
systemctl disable firewalld
vi /etc/nginx/nginx.conf
vi /etc/nginx/conf.d/centosserver.conf
server
{
listen 80;
server_name 192.168.100.162;
root /var/www/centosserver/html;
index index.html;
location / {
try_files $uri $uri/ =404;
}
}
mkdir -p /var/www/centosserver/html
cd /var/www/centosserver/html/
vi index.html
<h1> Hello from CentOS Server </h1>
nginx -t
systemctl restart nginx
http://192.168.100.162
NOTE: faced 403 forbidden error, use below commands-
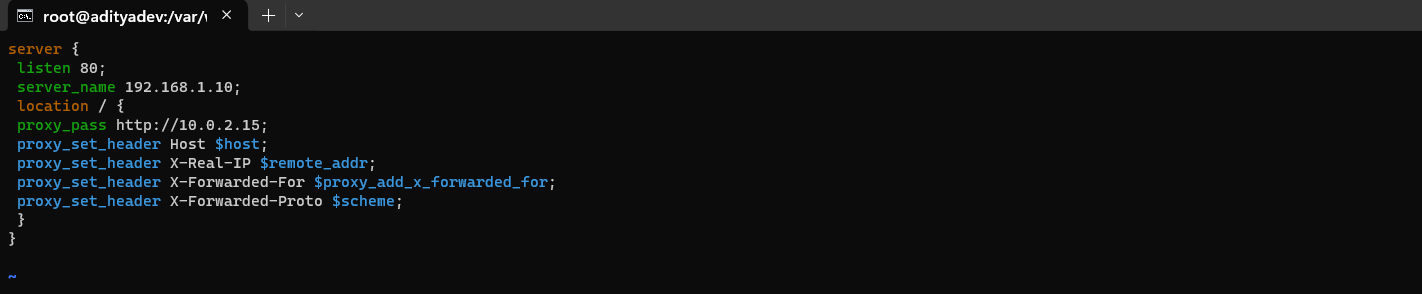
Setting up a reverse proxy-
Copy the content in a first machine file-
NOTE:
Final Testing & Accessing Website Through Reverse Proxy-
nginx -t

systemctl restart nginx

198.162.1.10
During this execution, we will get the below error-

Resolve this, use the below step-


NOTE : After using this step, getting timeout error, due to this not able to check the final status.

NOTE: Using this we are trying to setup a reverse proxy, by which we will be able to get the CentOS machine data using the FirstLinuxOS machine. The FirstLinuxOS machine will act as a middleware/proxy server, whenever we will try to fetch the data from FirstLinuxOS machine it will pull the data from CentOS machine. This process is just similar as a Forwarding a call to another number!!
Central Logger(RSYSLOG)
Purpose» General logs or collect logs form other servers
Service or Package name » rsyslog
Configuration File » /etc/rsyslog.conf
Service » systemctl restart/enable rsyslog
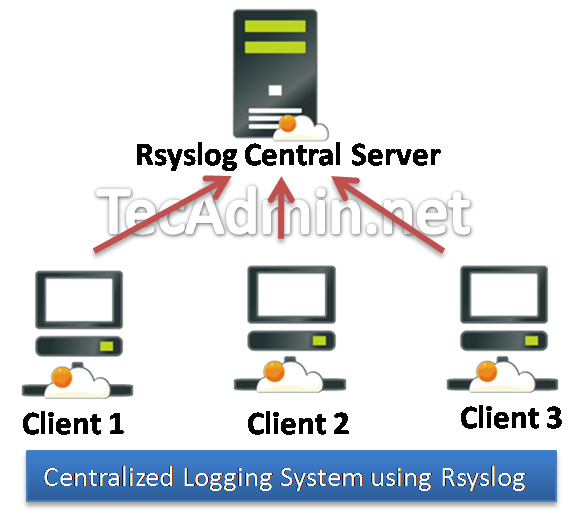
Let’s say, in our daily-to-day activity, the machine are having some error/problem and we need to check the log. one way is to go to each machine and check the logs but there is one more efficient way available to achieve this task i.e., Rsyslog thing.
Nagios
Nagios is an event monitoring system that offers monitoring and alerting services for servers, switches, applications and services. It alerts users when things go wrong and alerts them a second time when the problem has been resolved. Alerts can be send via message, email, phone call.
Nagios is popular by flexibility
Nagios has strong community support
LAB-
Check for package
dnf install httpd php gcc glibc glibc-common gd gd-devel make net-snmp unzip wget -yCreate Nagios User and Group
useradd nagiosgroupadd nagcmdusermod -a -G nagcmd nagiosusermod -a -G nagcmd apache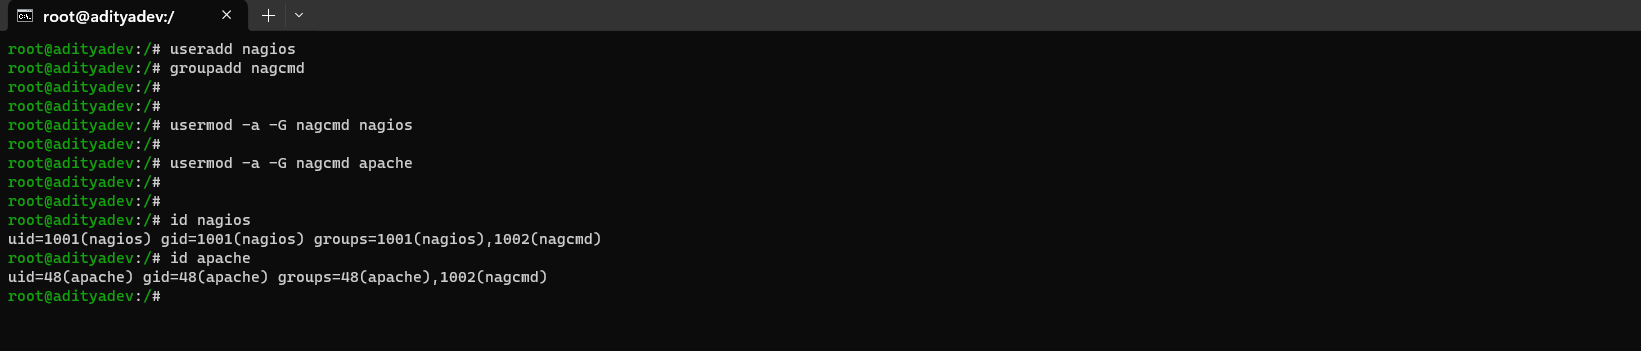
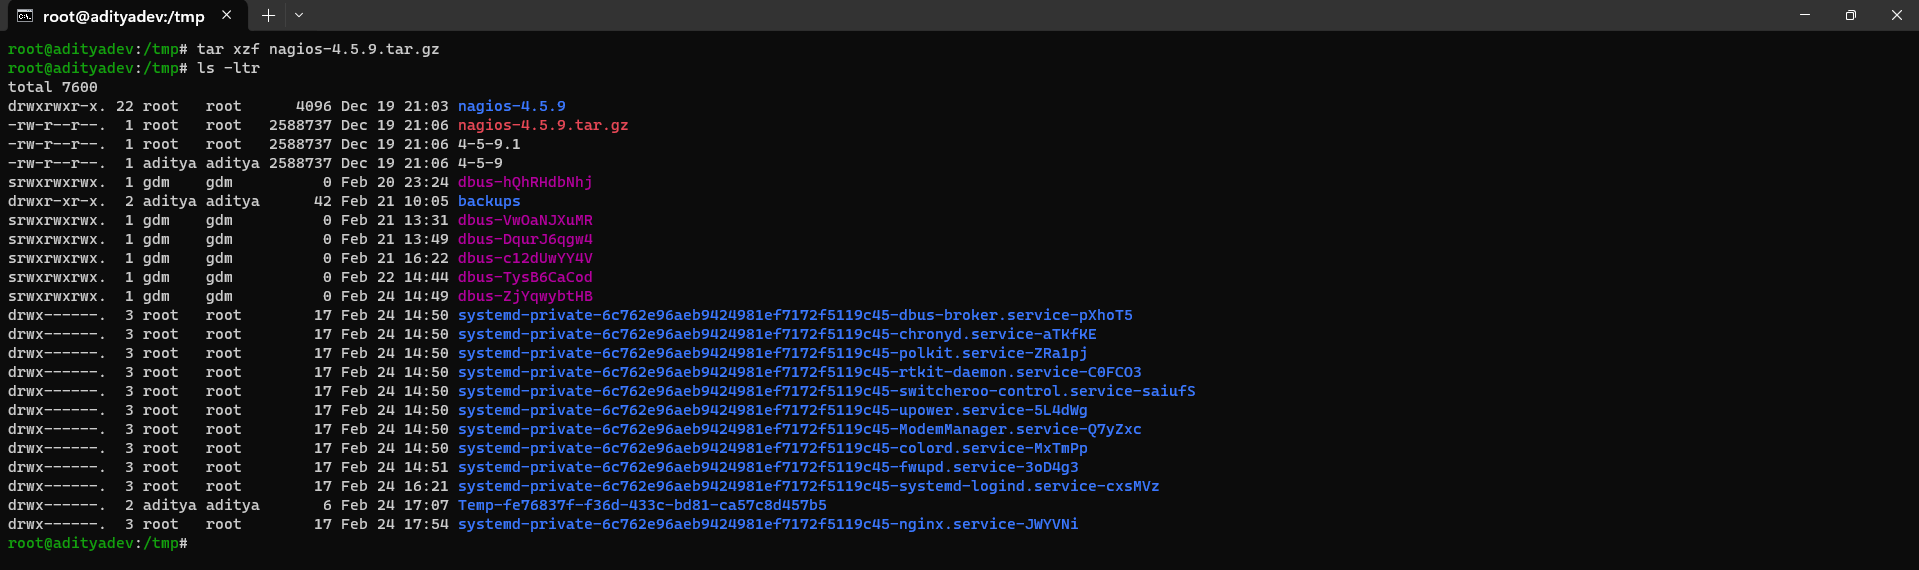
Download and Extract Nagios Core
cd /tmpwget -O nagios-4.5.4.tar.gzhttps://go.nagios.org/l/975333/2024-08-14/6dqd8tar xzf nagios-4.5.4.tar.gzcd nagios-4.5.4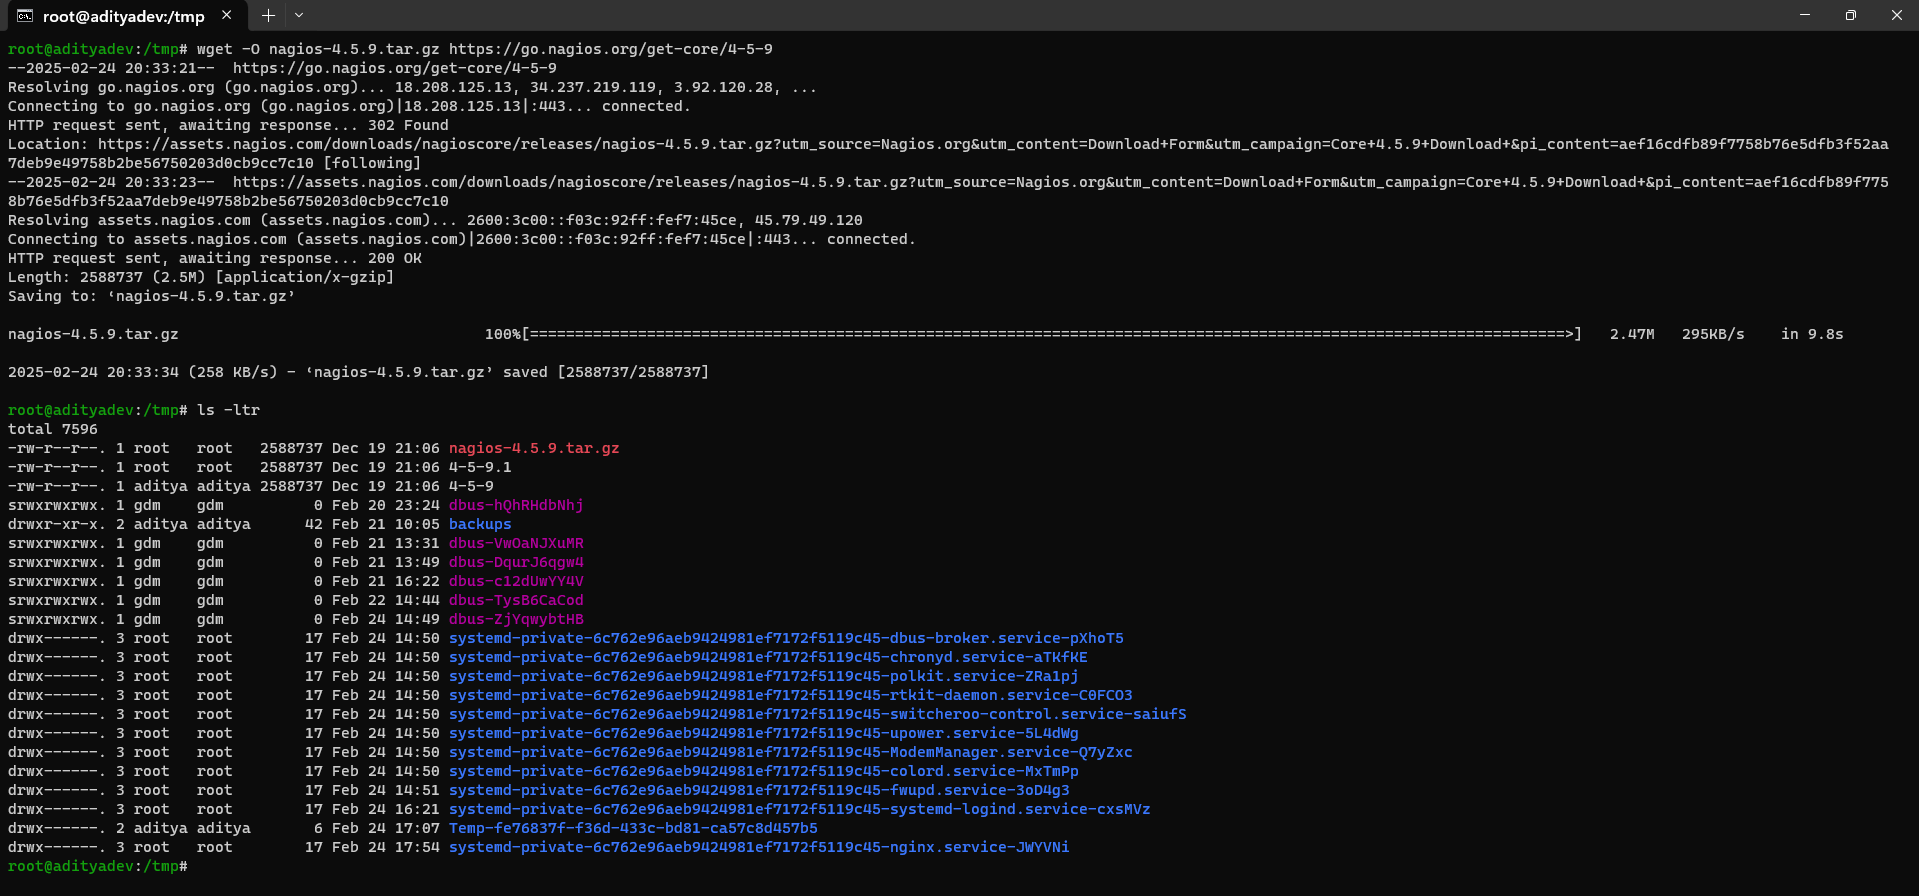
Get the link from the NAGIOS website (nagios-core).
Configure Nagios Core
dnf install openssl-devel./configure --with-command-group=nagcmd

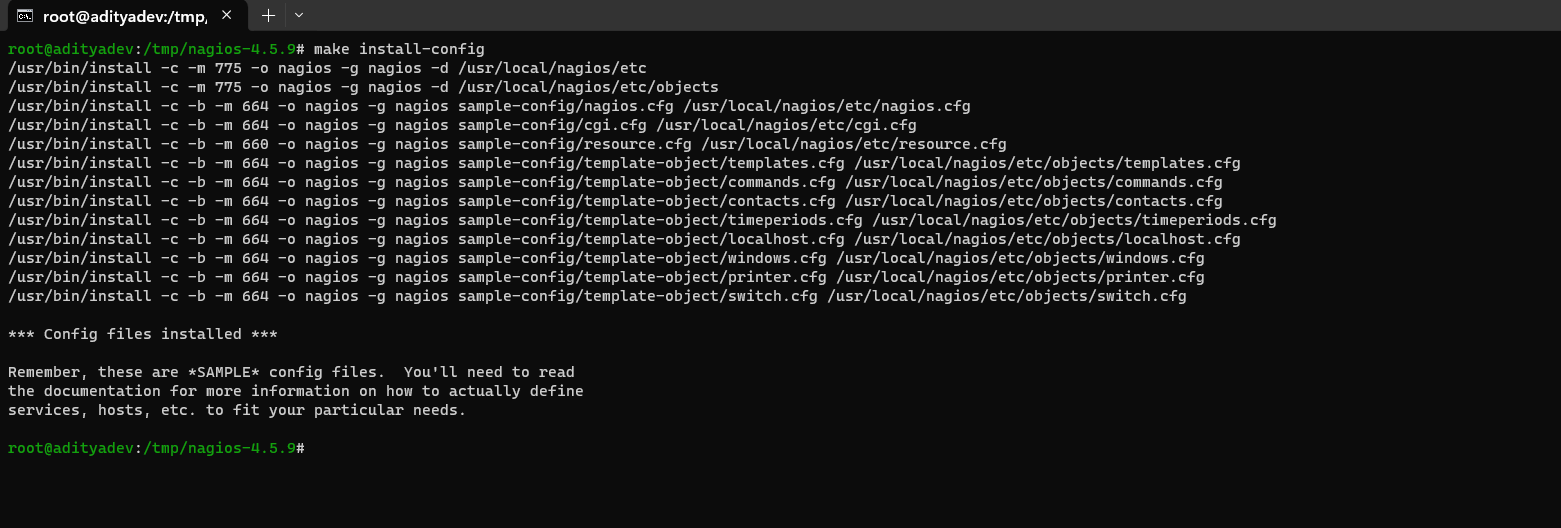
Install Nagios Core
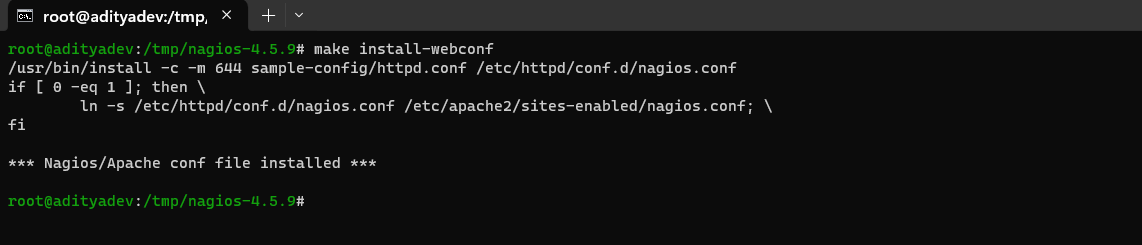
make allmake installmake install-commandmodemake install-initmake install-configmake install-webconf


Download, Install Nagios Plugins and Disable the Firewall
cd /tmpwgethttps://nagios-plugins.org/download/nagios-plugins-2.4.11.tar.gz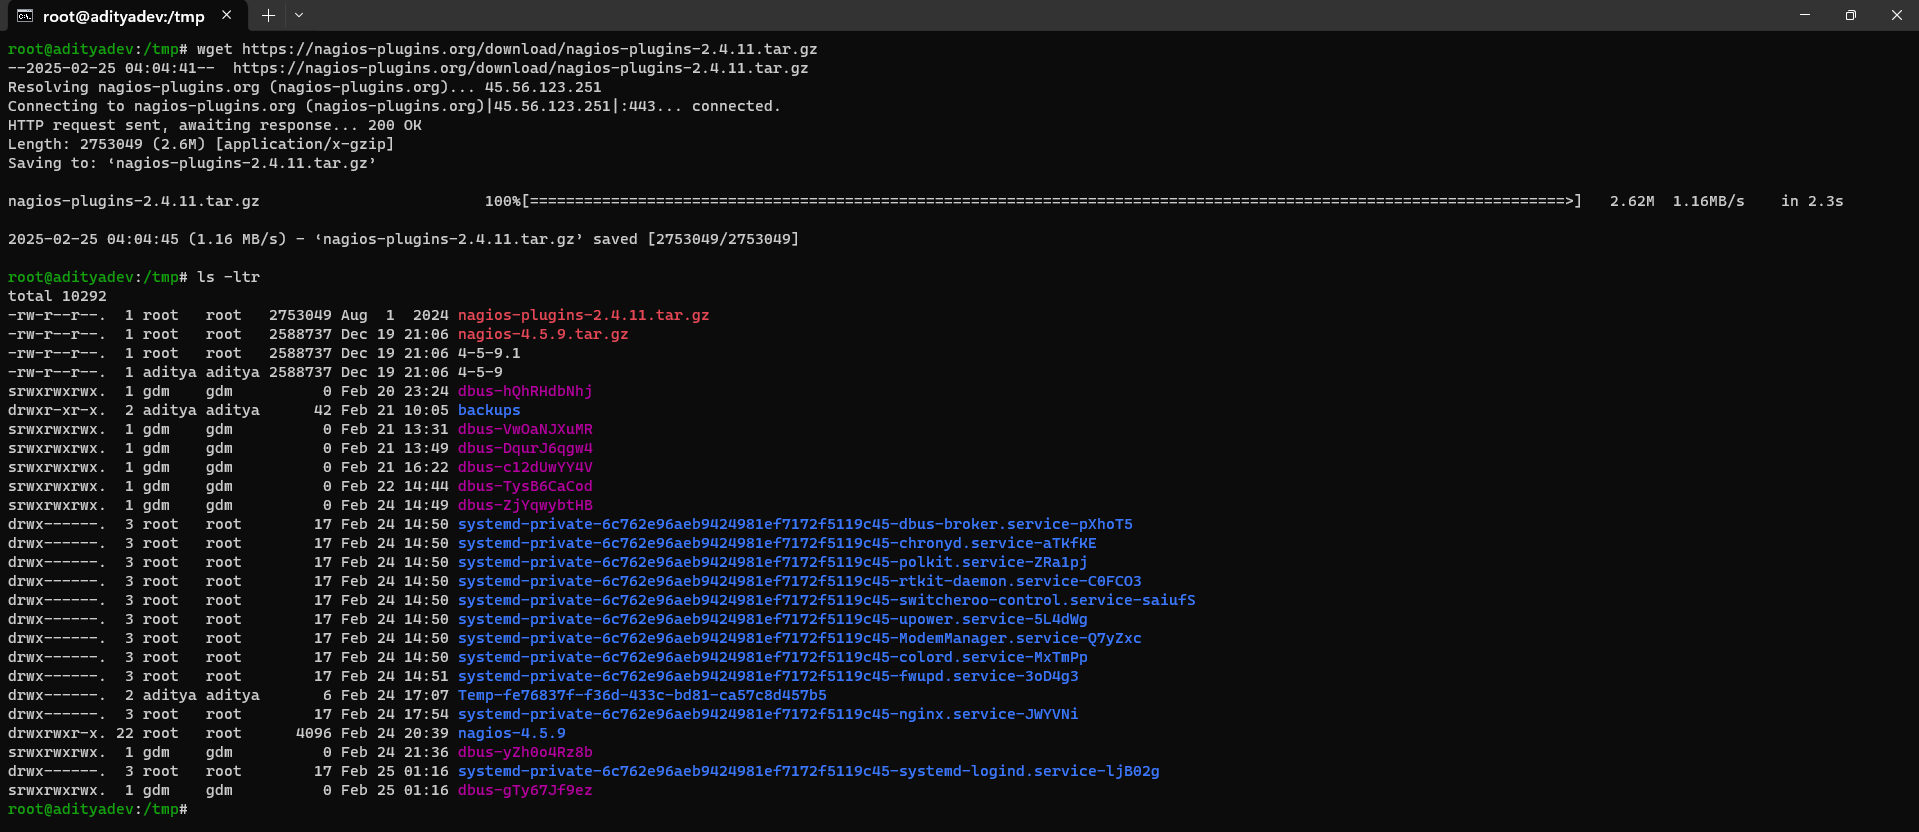
tar xzf nagios-plugins-2.4.11.tar.gzcd nagios-plugins-2.4.11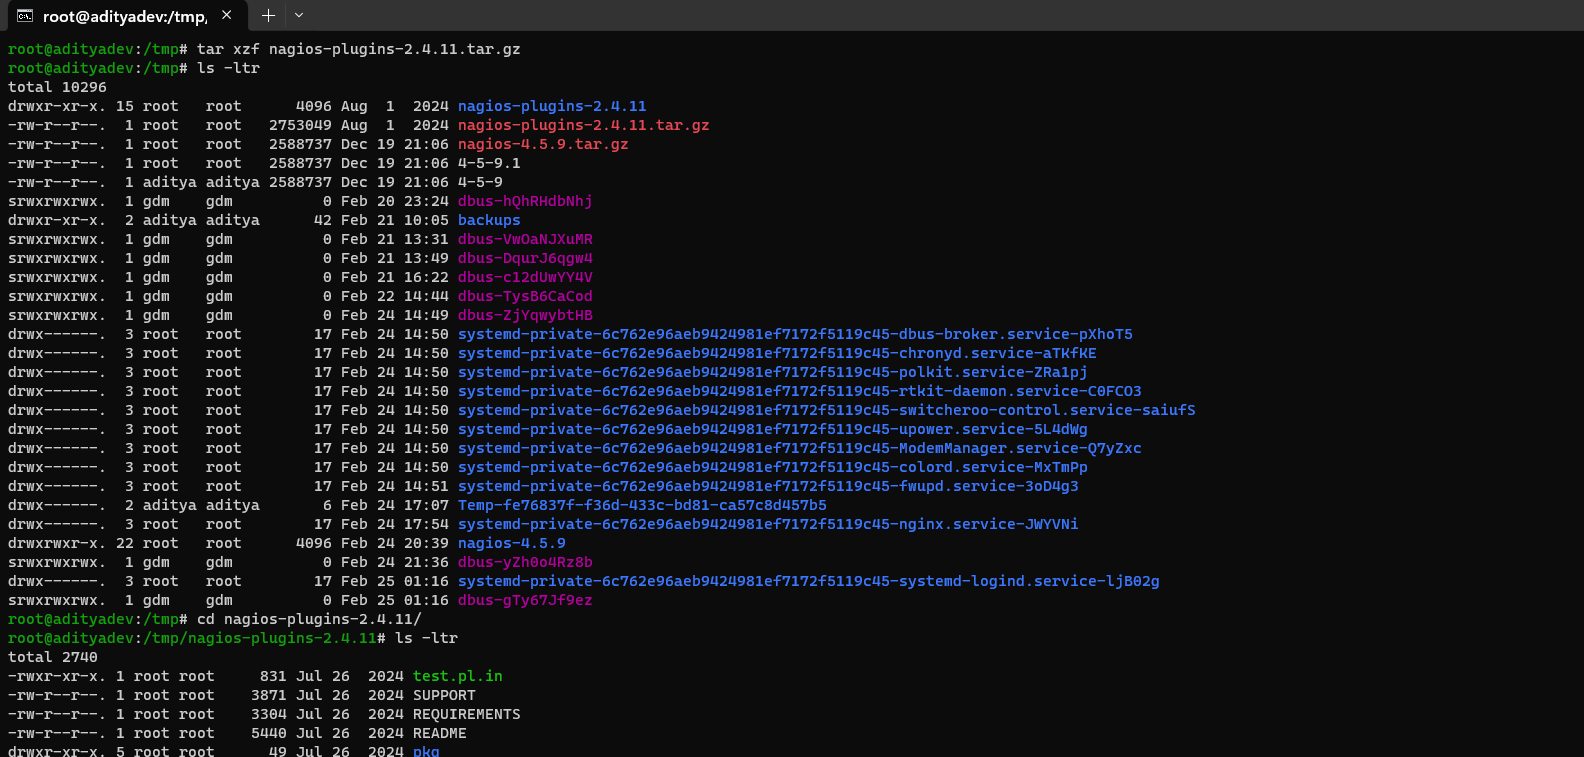
./configure --with-nagios-user=nagios --with-nagios-group=nagiosmakemake installsystemctl stop firewalldsystemctl disable firewalld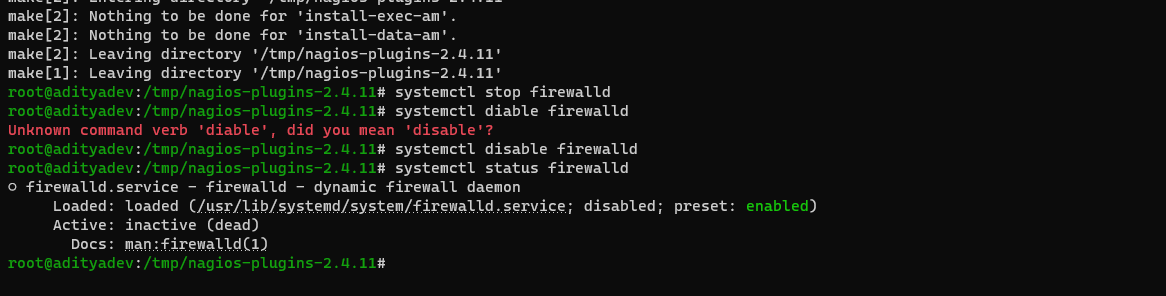
Create Nagios Web Interface Password and Start and Enable Services
htpasswd -c /usr/local/nagios/etc/htpasswd.users nagiosadmin
systemctl start httpdsystemctl enable httpd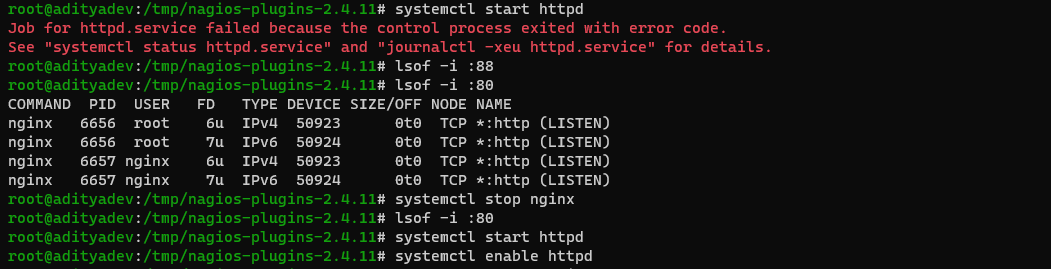
systemctl start nagiossystemctl enable nagiossystemctl status nagiosNOTE: Getting below error and due to this, not able to start the nagios service. and not able to proceed further.

Configure hosts in Nagios
cd /usr/local/nagios/etc/objects/ls -ltrvilocalhost.cfgvi hosts.cfg
define host {use linux-serverhost_name CentosServeralias My First Serveraddress 192.168.100.162max_check_attempts 5check_period 24x7notification_interval 30notification_period 24x7 }define service {use generic-servicehost_name CentosServerservice_description PINGcheck_commandcheck_ping!100.0,20%!500.0,60%max_check_attempts 5normal_check_interval 5retry_check_interval 1check_period 24x7notification_interval 30notification_period 24x7 }Update Nagios Configuration
cd /usr/local/nagios/etc/vi nagios.cfgcfg_file=/usr/local/nagios/etc/objects/hosts.cfgVerify, Restart and Run Nagios
cd /usr/local/nagios/etc/vi nagios.cfgcfg_file=/usr/local/nagios/etc/objects/hosts.cfghttp://192.168.100.161/nagios
Securing Linux Machine (OS Hardening)
OS hardening in Linux is the process of applying security measures to the operating system to protect against threats.
User Account
Remove un-wanted packages
Stop un-used services
Check on Listening Ports
Secure SSH Configuration
Enable Firewall(iptables/firewalld)
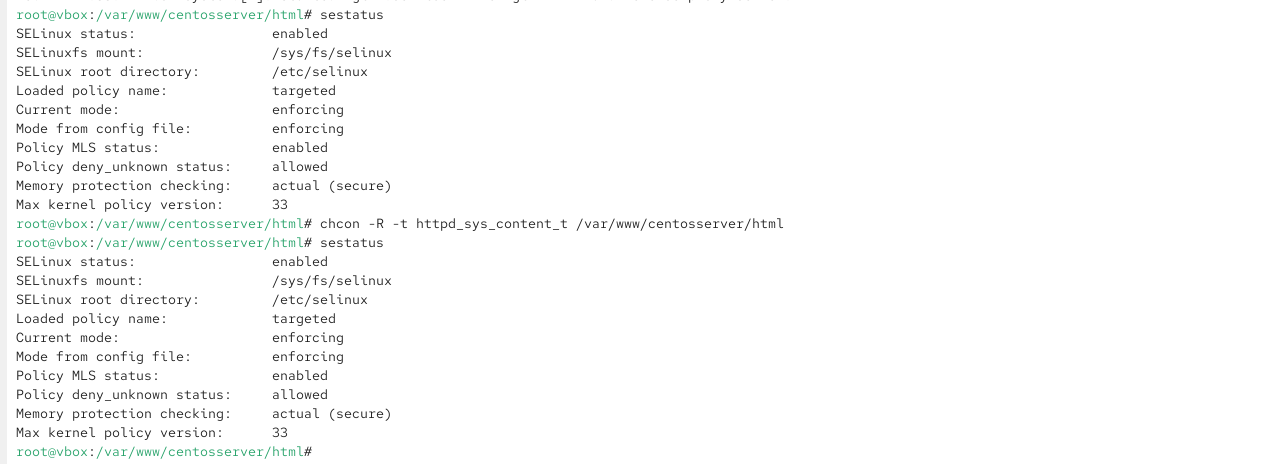
Enable SELinux
Change Listening Services Ports Numbers
Keep your OS up to date(Security Patching)
Security-Enhanced Linux (SELinux) is a security module for Linux that controls access to files, processes, and applications. It's a mandatory access control (MAC) system that's more restrictive than the discretionary access control (DAC) system that Linux traditionally uses.
Commands-
chage -l aditya
cat /etc/passwd
cat /etc/shadow
more /etc/login.defs
rpm -qa
rpm -qa | wc -l
systemctl -a
netstat -tunlp
cd /etc/ssh/ » more sshd_config
firewall-config
firewall-cmd --help
iptables --help
sestatus
OpenLDAP
OpenLDAP is a free, open-source implementation of the Lightweight Directory Access Protocol (LDAP). It's used in many Linux distributions to support LDAP.
OpenLDAP Service » slapd
Start or Stop the service » systemctl start/enable/stop/disable slapd
Configuration Files » /etc/openldap/slapd.d
Tracing Network Traffic (traceroute)
The traceroute command is used in Linux to map the journey that a packet of information undertakes from its source to its destination. One use for traceroute to locate when data loss occurs throughout a network, which could signify a node that’s down.
Because each hop in the record reflects a new server or router between the originating PC and the intended target, reviewing the results of a v scan also lets you identify slow points that may adversely affect your network traffic.
Command »
traceroute www.google.com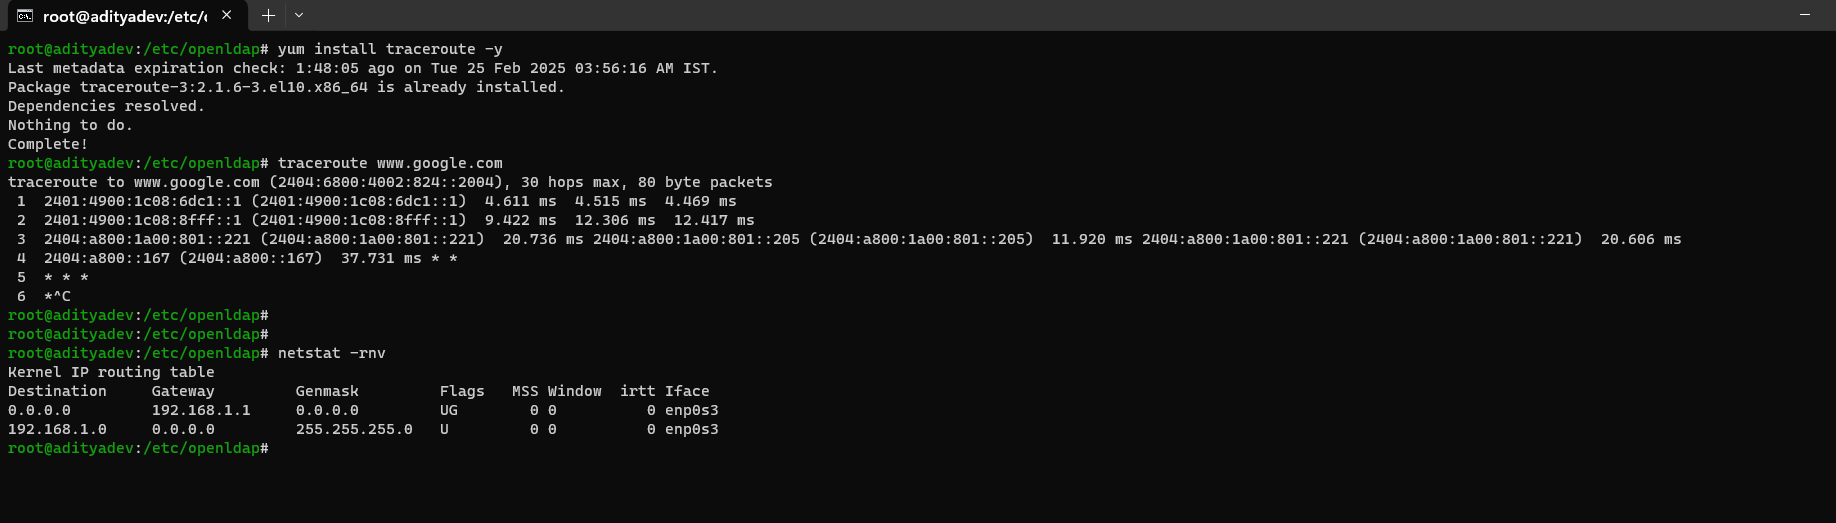
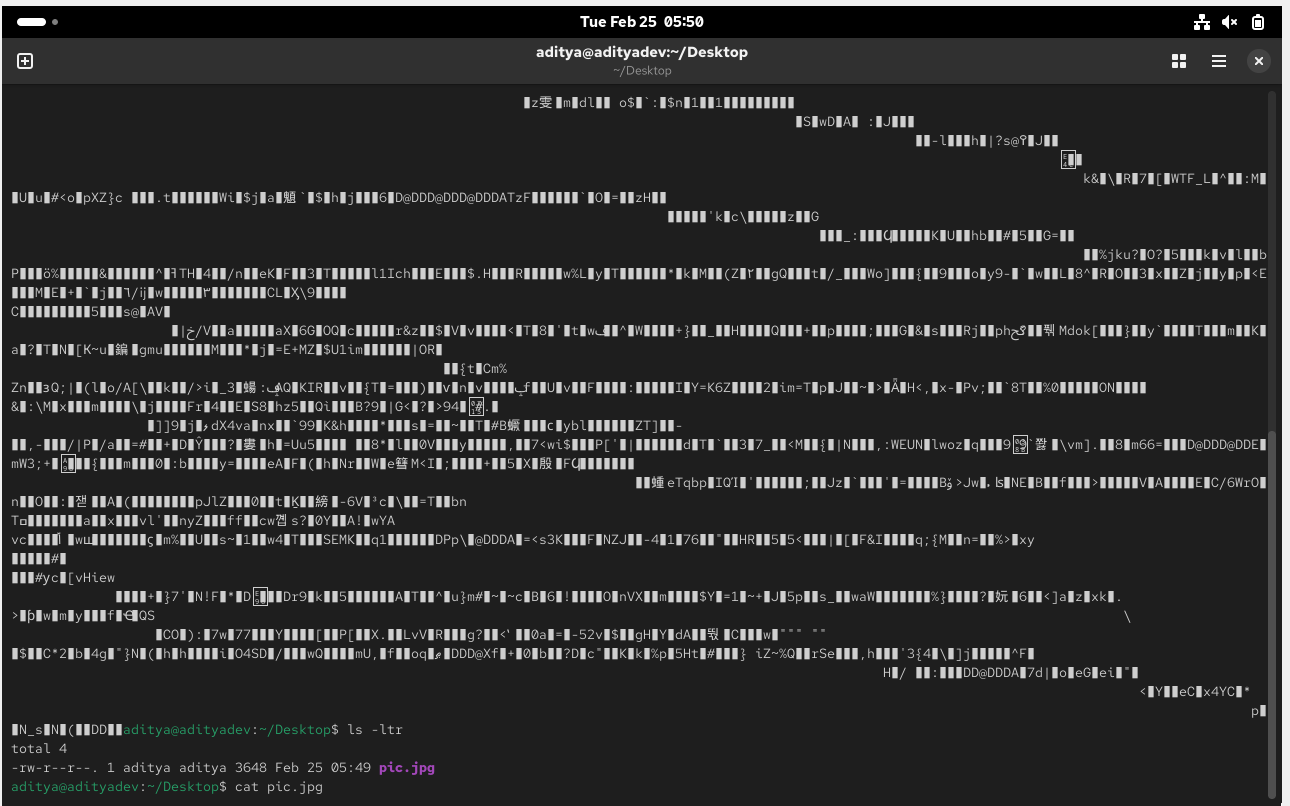
How to Open Image File Through Command Line
Using GUI, we can directly click and open the image but in cmd line we can’t do this, Let’s say, I’m having a image in my linux machine desktop and will try to open it using cat cmd-
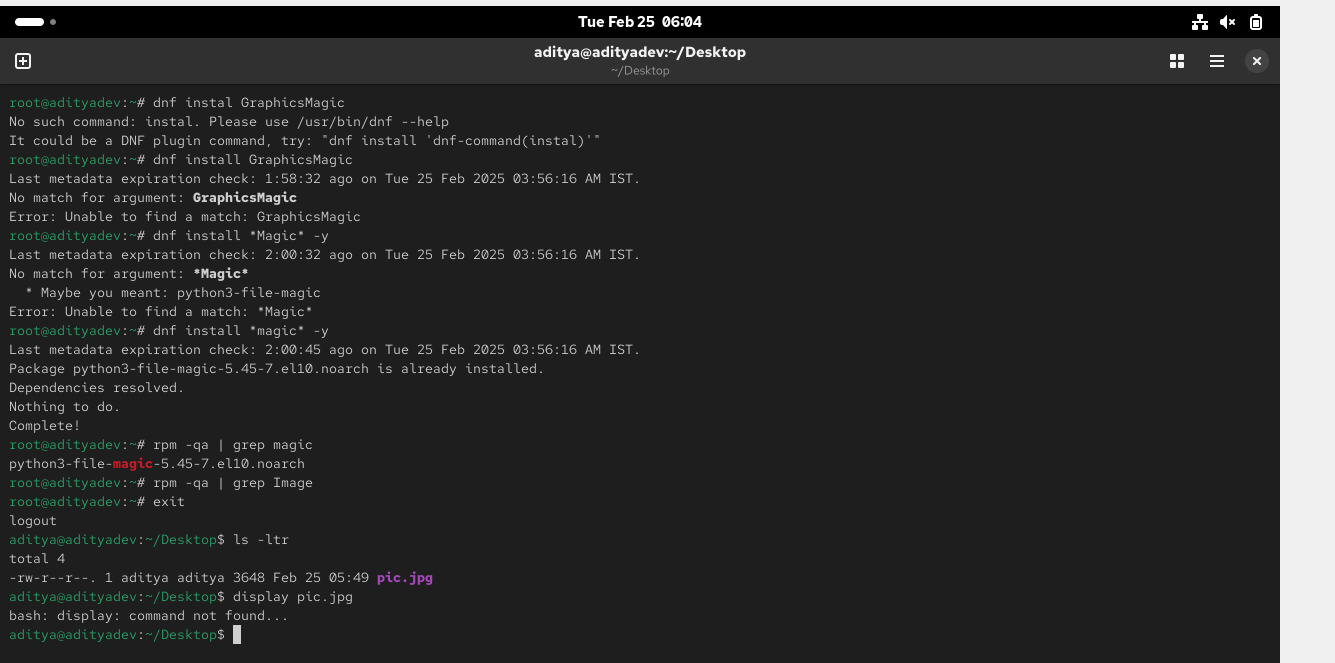
Now, install a package which will help us to fetch this image-
NOTE: In CentOS10, ImageMagick and GraphicsMagic both packages are not getting install due to this not able to open the image file-
Thanks for going through this blog, Happy Learning !! 😁
Subscribe to my newsletter
Read articles from Aditya Dev Shrivastava directly inside your inbox. Subscribe to the newsletter, and don't miss out.
Written by