Deploying to Azure Container Apps
 Ronney Otieno
In this workshop, you'll learn how to deploy a containerized application to Azure Container Apps. Azure Container Apps allows you to deploy containerized applications without having to manage the underlying infrastructure, leaving you to focus on your application.
If you want to know more about containers and container security, check out this blog
Objectives
You'll learn how to:
Create an Azure Container Apps environment,
Deploy a web application to Azure Container Apps from a local development space
Edit and update the web application
Prerequisites
| Azure account | Get a free Azure account |
| Azure CLI | Install Azure CLI |
| Docker | Install Docker |
| Git | Install Git |
Step 1
Set up Local Development Space
In this section, you'll clone a GitHub repository to get the workshop’s code on your local computer.
Open up your preferred terminal (This tutorial has powershell and bash instructions). If you'd like, make a folder to contain your work:
mkdir csk-containers-demo
cd csk-containers-demo
Clone the Deploying to Azure Container Apps repository to your local machine using the following command:
git clone 'https://github.com/0tieno/deploying-to-aca.git'
Change into the root of the repository:
cd deploying-to-aca
Add the containerapp extension to the Azure CLI #
Run the following command to add the containerapp extension to the Azure CLI:
az extension add --name containerapp
You now have code on your local device.
Step 2
Set up Azure Resources
Next, we need to set up the Azure resources that will support our work.
Log in to the Azure CLI
Run the following command to log in to the Azure CLI:
az login
Create a resource group
#PowerShell

$resource_group='myResourceGroup'
$location='northcentralus'

az group create `
--name $resource_group `
--location $location
#bash
resource_group='myResourceGroup'
location='northcentralus'

az group create \\
--name $resource_group \\
--location $location
Create an Empty Container Registry
Next, run the following command to deploy an Azure Container Registry instance:
#PowerShell

$random = Get-Random -Minimum 1000 -Maximum 9999
$acr_name="myregistry$random"

az acr create `
  --name $acr_name `
  --resource-group $resource_group `
  --sku Basic `
  --admin-enabled true `
  --location $location
#Bash

random=$RANDOM
acr_name="myregistry$random"

az acr create \\
--name $acr_name \\
--resource-group $resource_group \\
--sku Basic \\
--admin-enabled true \\
--location $location
Log in to Azure Container Registry
Run the following commands to log in to your ACR instance:
az acr login --name $acr_name
Create an Azure Container Apps environment
An Azure Container Apps environment is a logical grouping of resources that are used to deploy containerized applications. Within an environment, you can deploy one or more container apps and share resources such as a container registry and secrets.
Run the following command to create an Azure Container Apps environment.
#powershell
$container_app_environment_name='myContainerAppEnvironment'

az containerapp env create `
  --name $container_app_environment_name `
  --resource-group $resource_group `
  --location $location
#Bash

container_app_environment_name='myContainerAppEnvironment'

az containerapp env create \\
--name $container_app_environment_name \\
--resource-group $resource_group \\
--location $location
Step 3
Build and Push the Container Image
In this section, you'll build and push a container image to Azure Container Registry (ACR). That image will be used in the next section to deploy a container app to Azure Container Apps.
Create a container image and push it to ACR
Build the container image using the following command:
#PowerShell

$image_name='webapp'
$tag='v1.0'
$server="$acr_name.azurecr.io"

az acr build --registry $acr_name --image "$server/${image_name}:${tag}" .
#Bash

image_name='webapp'
tag='v1.0'
server="$acr_name.azurecr.io"

az acr build --registry $acr_name --image "$server/$image_name:$tag" .
Step 4
Deploy a Container Image to Azure Container Apps
In this section, you'll deploy a containerized Go web application to Azure Container Apps. The application will be accessible via an external ingress and will use environment variables and Azure Container Registry secrets to modify the application's behavior.
Create the container app
Container apps define the container image to deploy, the environment variables to set, and the secrets and or volumes to mount. You can pull images from the Azure Container Registry or Docker Hub and set environment variables and secrets from the Azure Key Vault. Container apps can also be deployed with an external ingress, which allows you to access the application from outside the environment. Internal ingress is also available, which allows you to access the application from within the environment.
Run the following commands to create a container app:
PowerShell
  $container_app_name='my-container-app'
  $password=az acr credential show --name $acr_name --output tsv --query "passwords[0].value"

  az containerapp create `
      --name $container_app_name `
      --resource-group $resource_group `
      --environment $container_app_environment_name  `
      --image "$server/${image_name}:${tag}" `
      --target-port 8080 `
      --ingress 'external' `
      --registry-server $server `
      --registry-username $acr_name `
      --registry-password $password `
      --query properties.configuration.ingress.fqdn `
      --output tsv
Bash
  container_app_name='my-container-app'
  password=$(az acr credential show --name $acr_name --output tsv --query "passwords[0].value" | tr -d '\\r')

  az containerapp create \\
  --name $container_app_name \\
  --resource-group $resource_group \\
  --environment $container_app_environment_name \\
  --image "$server/$image_name:$tag" \\
  --registry-server $server \\
  --registry-username $acr_name \\
  --registry-password $password \\
  --target-port 8080 \\
  --ingress 'external' \\
  --query properties.configuration.ingress.fqdn
Browse to the URL returned by the command to view the application.
Step 5
Update Your App
In this section, you'll update your container app.
Revisions allow you to deploy new versions of the container app without having to create a new container app. Revisions can be deployed with a new container image, environment variables, secrets, and volumes.
You'll trigger a new deployment by updating updating the container app's environment variables using a container app secret.
Create a secret
In the Azure Portal, navigate to the Azure Container App that was deployed to the myResourceGroup resource group.
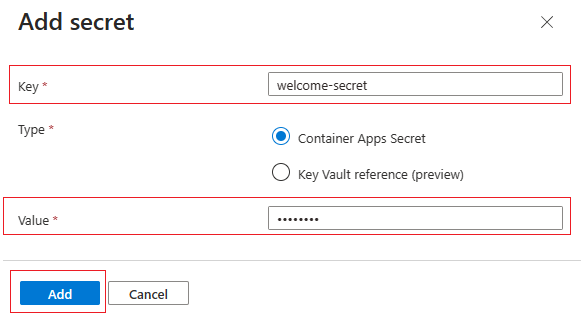
Next, follow the steps below to create a secret:
Select Secrets from the left-hand menu under Settings.
Select + Add.
Enter
welcome-secretas the secret's Key.Leave Container Apps Secret selected.
Enter your name for the Value.
Click Add.
Edit the container app
Next, you need to update the container app to use the new secret as an environment variable to change the configuration of the web app. Once the seed is updated, a new revision will be deployed.
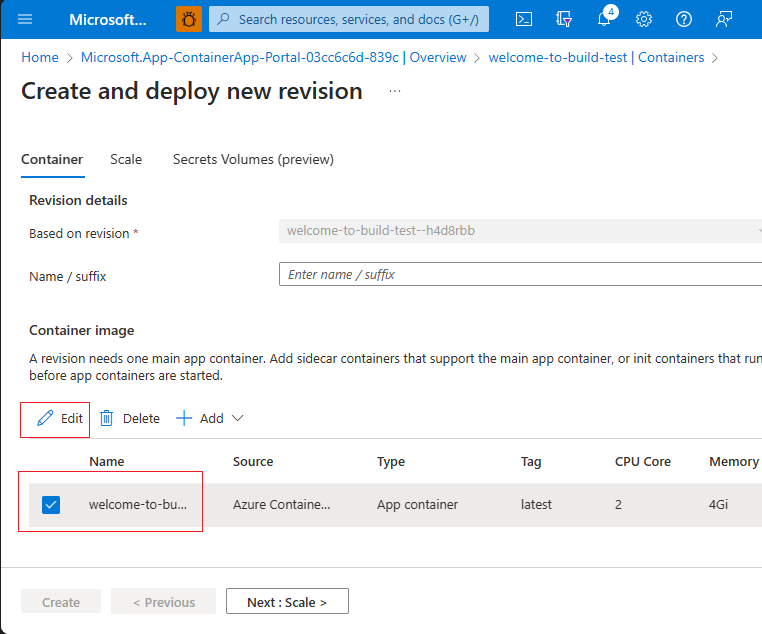
Follow the steps below to update the container app:
Select Containers from the left-hand menu under Application.
Click Edit and Deploy.
Check the box next to your container app and then click Edit.
Add the secret to the container app as an environment variable
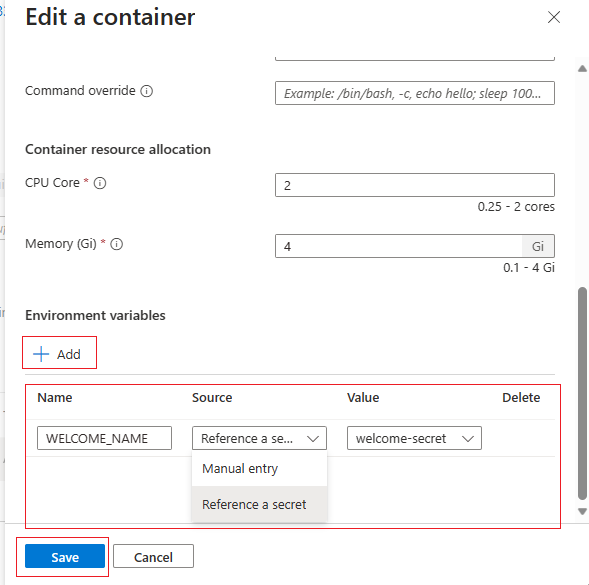
Once the container app is open for editing, follow the steps below to add the secret as an environment variable:
Under Environment Variables, click + Add.
Enter
VISITOR_NAMEfor the Name.Select
Reference a secretas the source.Then, select
welcome-secretas the Value.Click Save.
Click Create to deploy the new revision.
View the new revision
Once the container app is updated, a new revision will be deployed. Azure Container apps support zero downtime deployment. As the new revision is provisioned, the older revision will receive all the traffic. Only once the new revision is fully provisioned will the container app switch traffic to the new revision. This way, the app has no downtime.
Follow the steps below to track the update:
Select Revision Management from the left-hand menu under Application.
Refresh the page to see the revisions’ change status and traffic.
Once the more recently created revision has 100% traffic, the app will be updated.
After the new revision is set, the previous revision will be deactivated. View older revisions in the "inactive Revisions" tab
Return to the Web App and refresh the page to see the new message.
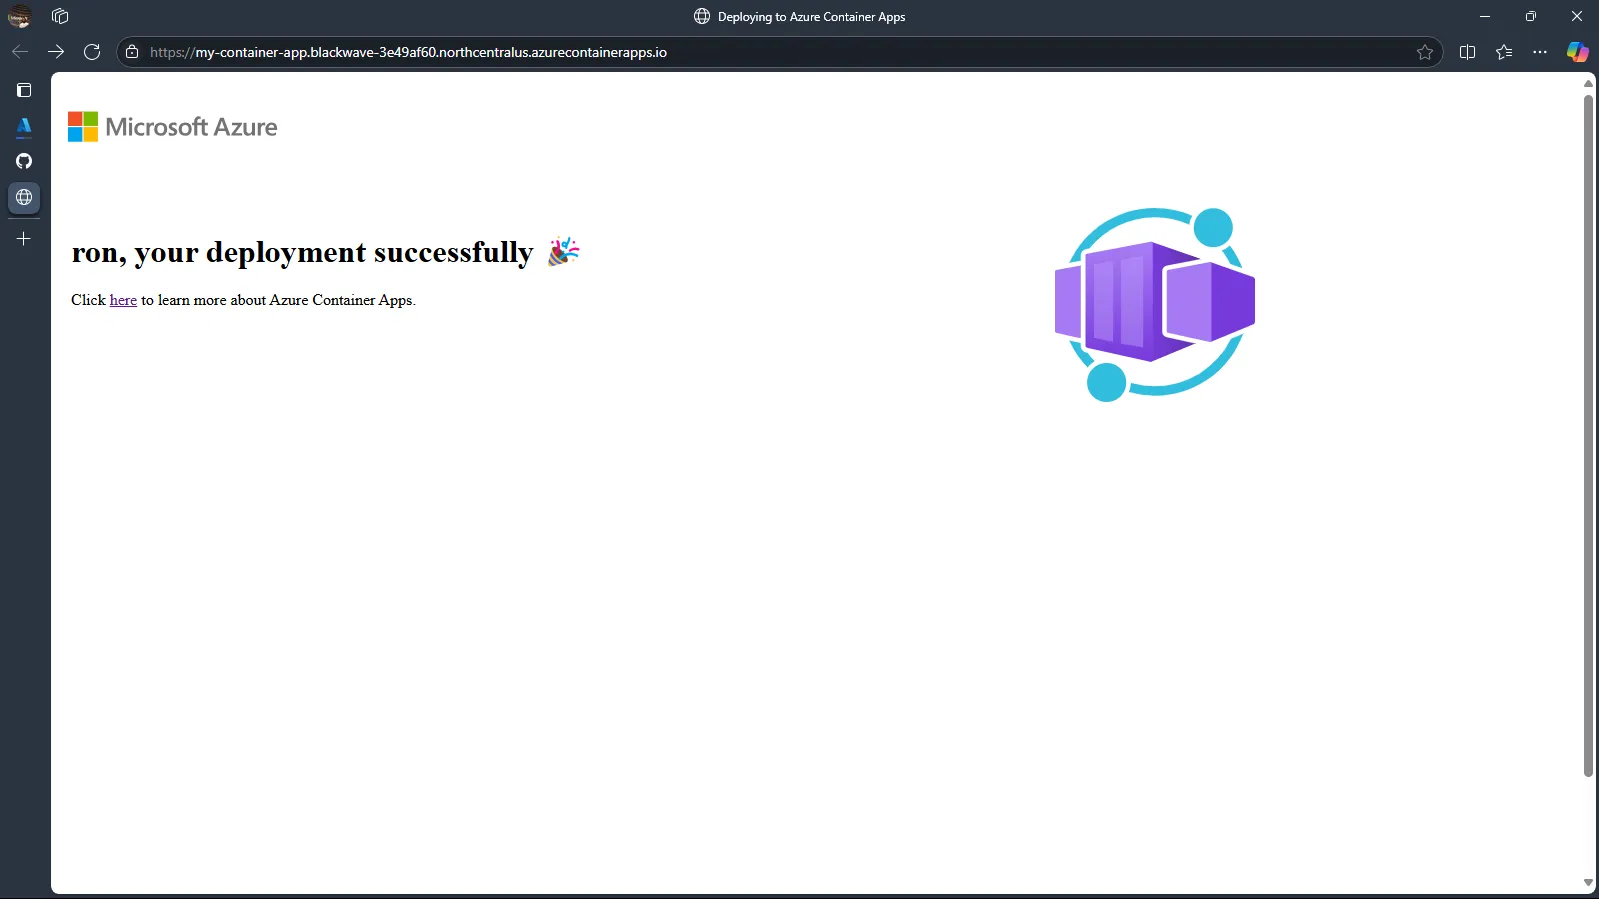
Congratulations! You’ve just learnt how to deploy containerized applications to Azure container apps.
Remember to clean up your resources to avoid unnecessary charges.
Further Resources
very important!
Subscribe to my newsletter
Read articles from Ronney Otieno directly inside your inbox. Subscribe to the newsletter, and don't miss out.
Written by

Ronney Otieno
Ronney Otieno
"Cloud Security Engineer | Exploring Cloud Security, DevOps, and Software Engineering | Sharing my learning journey to inspire and grow 🚀 | Open to internships and collaborations in Cloud Security."