Traditional Partitioning vs. Logical Volume Management (LVM): Why LVM is the Better Choice in Linux Systems
 Yash Patil
The Usual Approach: Fixed Partitions and Their Limitations
In a standard partitioning scheme, storage is divided into fixed partitions during disk setup. Each partition is formatted with a filesystem and mounted for use. However, this method has some critical limitations:
Rigid Allocation: Once a partition is created with a specific size, resizing it (especially increasing it) is complex and often requires unmounting, shrinking, or moving data.
Wasted Space: If a partition is allocated more space than needed, the excess remains unused, while other partitions may run out of space.
Difficult Expansion: Expanding storage often requires adding a new disk and manually adjusting mount points.
Limited Flexibility: If a filesystem or application requires more space, you might need to back up data, reformat, and restore it—causing downtime.
Check out my previous blog where i have discussed the standard partitioning scheme using gdisk and using the partitions as mounts for our filesystem.
Why LVM is a More Efficient Solution
Logical Volume Management (LVM) overcomes these challenges by introducing a more dynamic and flexible approach to storage management.
- Dynamic Storage Allocation: Instead of fixed partitions, LVM groups physical storage (disks or partitions) into a Volume Group (VG), from which Logical Volumes (LVs) are created. These LVs can be resized as needed.
- Easier Expansion & Shrinking: Unlike traditional partitions, LVM allows you to increase the size of a logical volume on the fly, without unmounting or rebooting. If you attach a new disk, LVM can absorb it into the existing volume group effortlessly.
- Better Disk Utilization: Since all space is pooled together, storage is used efficiently. You can allocate more space only when needed, avoiding wasted capacity.
Components of LVM
Physical Volume (PV): A raw storage device (disk or partition) initialized for use with LVM. It forms the base layer of LVM.
Example: /dev/xvdb, /dev/sdb1Volume Group (VG): A pool of storage created by combining one or more Physical Volumes (PVs). It acts as a flexible storage container.
Example: my_vg (created from /dev/xvdb and /dev/xvdc)Logical Volume (LV): A virtual partition carved out of a Volume Group (VG). It functions like a traditional partition but can be resized dynamically.
Example: /dev/my_vg/my_lv (mounted as /data)
In short:
PVs → Combined into a VG → From which LVs are created and used as storage. 🚀
Now create 2 EBS volumes which will act like raw disks which we will convert into Physical Volumes. Then create a Volume Group out of these 2 Physical Volumes. Finally we will carve out Logical Volumes out of it and also try to resize them!
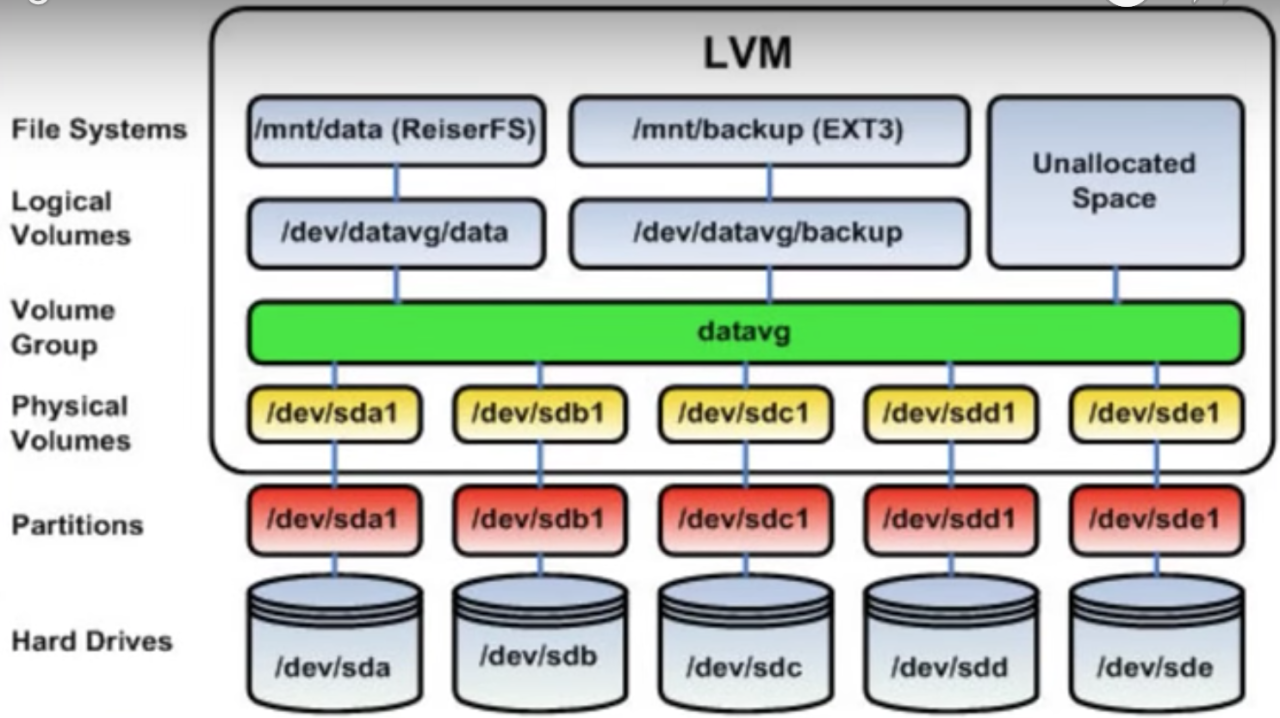
To demonstrate this lets create an EC2 Instance and attach 2 EBS volumes of size 10Gb and 12Gb to it. Once attached they will be available under /dev directory as block devices. Then we will convert them into physical volumes using LVM, create a volume group from these 2 physical volumes and once the volume group is created we will carve out Logical Volumes out of it!
Created this EC2 Instance :

Attached 2 EBS Volumes of sizes 10gb and 12gb to it under
/dev/xvdfand/dev/xvdg:
The 8gb volume is the default volume that is used as the boot volume by the VM for its Ubuntu OS.
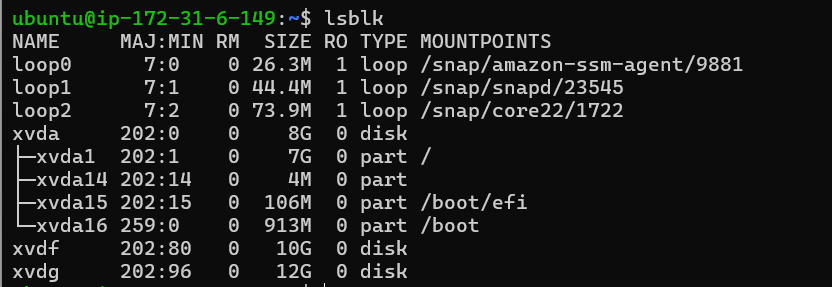
As you can see xvda is the default 8gb volume of the VM and we just attached 2 more block volumes under
/dev/xvdfand/dev/xvdg.Now lets carry out the magic of LVM(Logical volume manager):
Create Physical Volumes of
xvdfandxvdgblock devices :pvcreate /dev/xvdf /dev/xvdg
To display the physical volumes created :
pvdisplay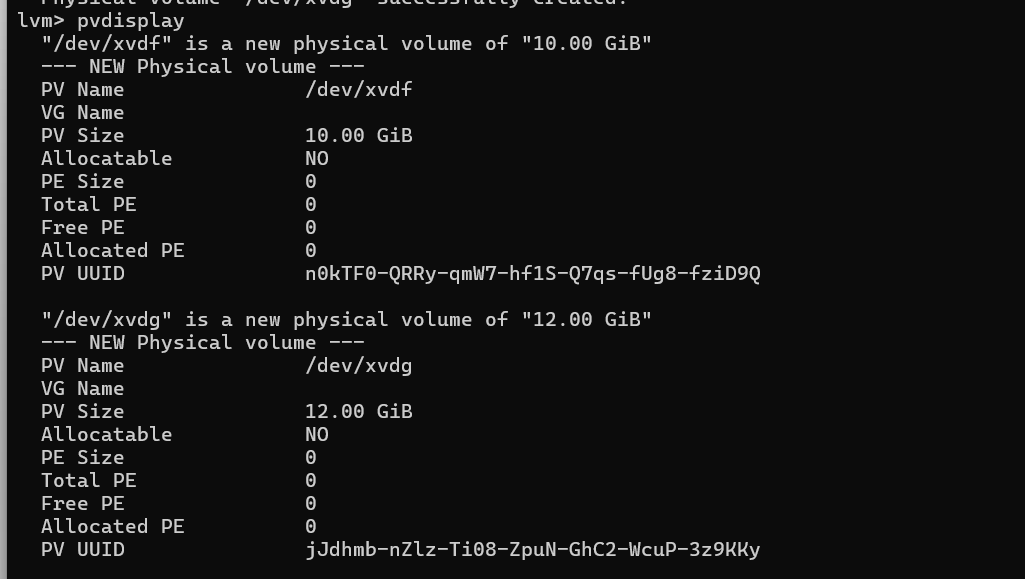
As you can see our Physical Volumes are created but they are yet to be used to make a volume group so lets do that now!
Creating Volume Group out of physical Volumes :
vgcreate demo_vg /dev/xvdf /dev/xvdg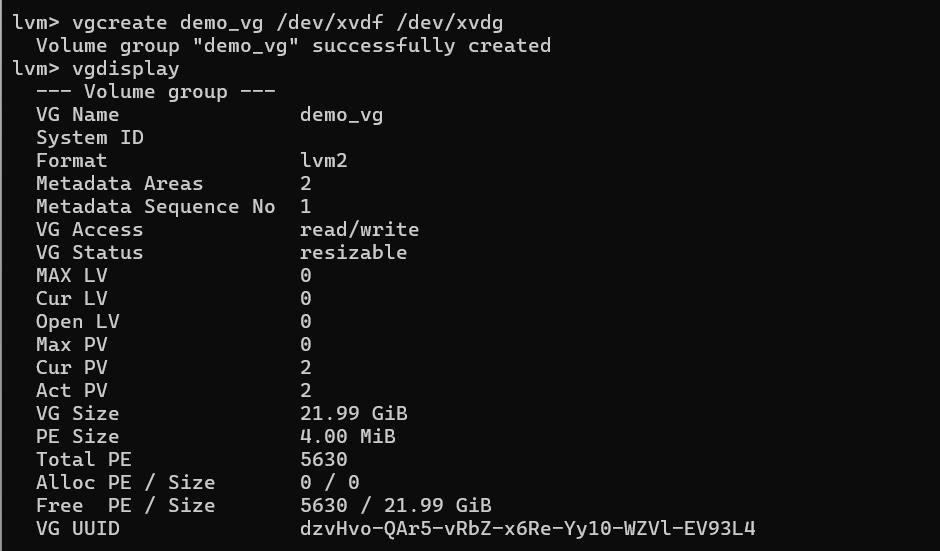
Volume group has been created of size 22GB (xvdf : 10Gb and xvdg : 12Gb). Now that this is done lets create logical volumes out of this volume group storage pool and mount them to the filesystem.
Creating Logical Volumes from our demo_vg Volume group :
lvcreate -L 5G -n volume_name demo_vg
I just created 2 Logical Volumes of size 5Gb each from the Volume Group demo_vg. To list the logical volumes use :
lvdisplayTo get additional info about your logical volumes.
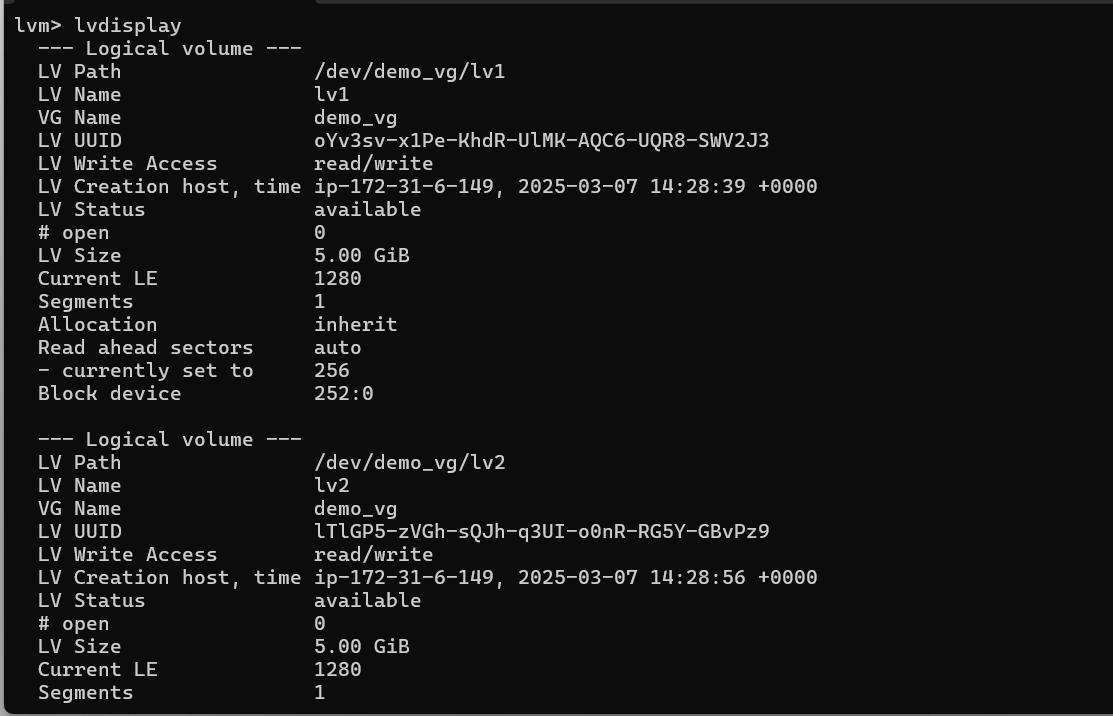
Now lets format these volumes using ext4 filesystem and mount them to different locations in the system which can be used for different purposes.
Make two directories where we can mount our 2 Logical Volumes :

Now Format both Logical volumes using ext4 filesystem :
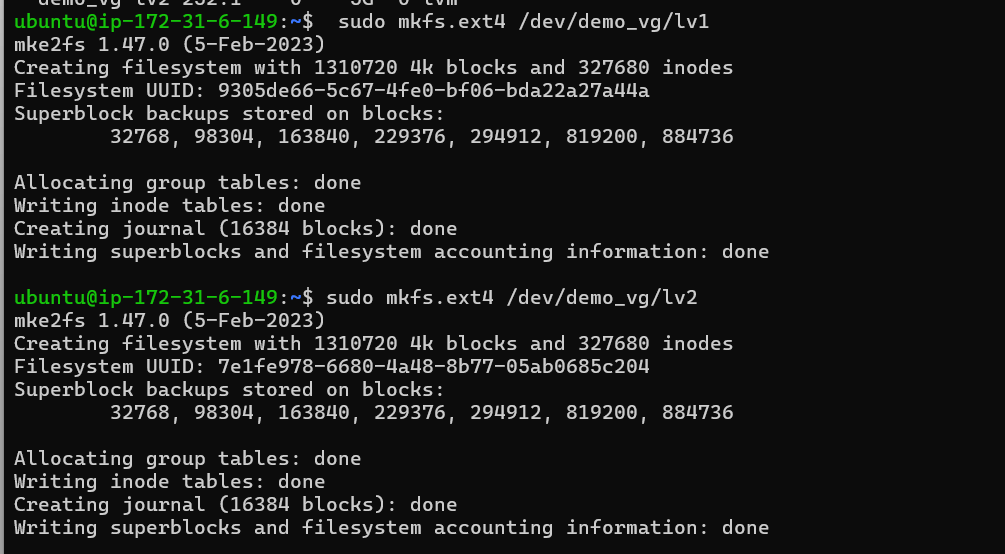
And finally mount these logical volumes to our created mount path :

To verify if these logical volumes are mounted successfully use
lsblk:
Well there you go, we have successfully mounted both the logical volumes to 2 different path in our EC2 system and now we can use these to store our data.

Resizing the logical volumes without needing to unmount them and migrate data :
To resize existing logical volumes use :
lvresize -L +1G -n /dev/demo_vg/lv1
Using this, only the logical volume is resized and not the mounted filesystem we created on it.
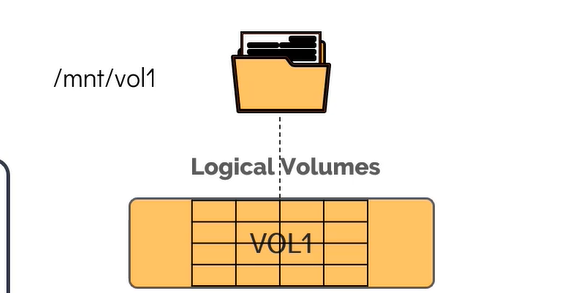
To reflect the changes to the filesystem make use of :
resize2fs location_of_logical_volume
Once the command is run the filesystem created inside the logical volume is resized as well to match the size we specified. To verify this :

As you can see above the size has been increased from 5Gb to 6Gb. And all on this has been done without needing to unmount our filesystem or migrate any data. Our file1 still exists in the mount path as you can see below:

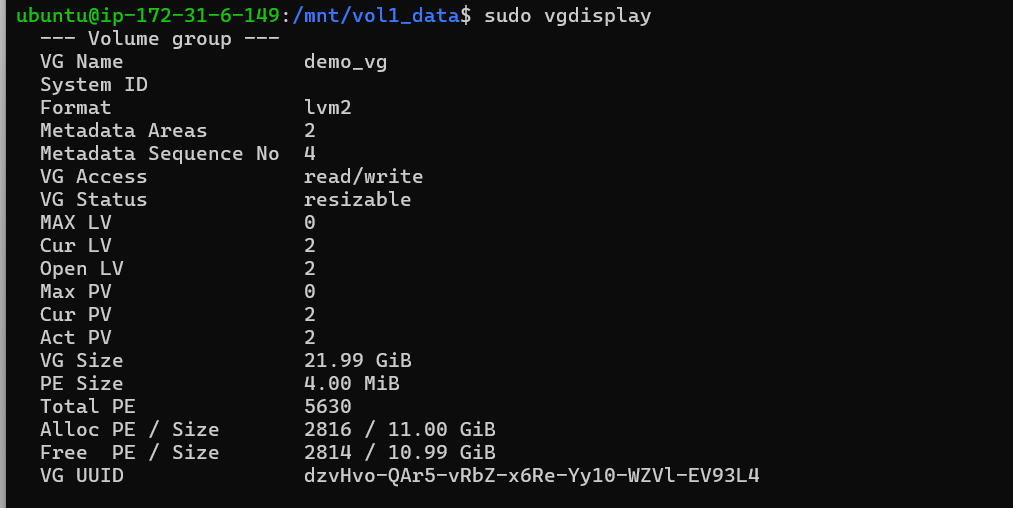
So taking a look at our volume group as you can see now :
VG Size : 22GB i.e
xvdfphysical volume of size 10GB +xvdgphysical volume of size 12GBAllocated Size : 11GB i.e logical volume
lv1of size 6GB + logical volumelv2of size 5GBFree Size : 11 GB
Conclusion
While traditional partitioning works for simple cases, LVM offers a far superior, flexible, scalable, and efficient way to manage storage—especially in dynamic environments like cloud computing, where resizing and storage optimization are crucial.
And this marks the end of our Linux Fundamental series where so far we have covered :
The History of Linux
How does a Linux Kernel works
Linux Boot Sequence
Shells and Environmental variables
User Management
File permissions and Ownerships
Traditional partitioning scheme using GPT
Package Management
And Finally Logical Volume Manager(LVM)
If needed I’ll be back with more! :)
Subscribe to my newsletter
Read articles from Yash Patil directly inside your inbox. Subscribe to the newsletter, and don't miss out.
Written by
