AWS Route 53 :: Routing 53 Policies & Routing Methods
 Apurv Samadder
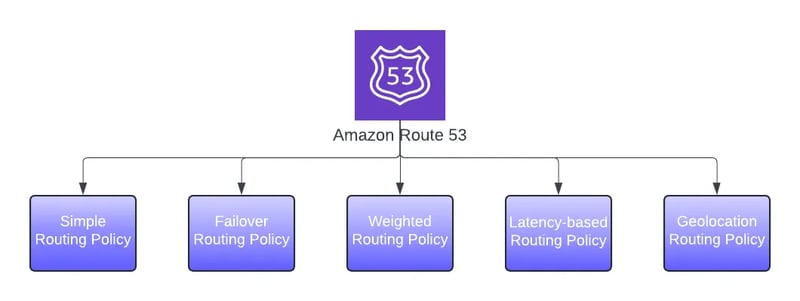
Route 53 is Basically a managed DNS services provided by AWS. So whenever we try to access any Domain Hosted on AWS or whose Infrastructure are hosted on AWS, Route 53 plays a very important role in it. Route 53 Actually takes all the traffic and make sures that it has be server by correct and healthy instances. Now Route 53 does look towards Load balancer in terms of routing the traffic but , it also checks if the Instance are serverd by healthy instance . But hows would it determine the instance are healthy. Route 53 Policies are responsible to check that
Amazon Route 53 Policies: These policies are used to manage traffic, optimize resource usage, and protect against unauthorized access. [Reffer to below Link for more detailed info]
https://docs.aws.amazon.com/Route53/latest/DeveloperGuide/routing-policy.html
Types of Route 53 policies
Simple routing policy: Used for a single resource, like an Amazon EC2 instance
Weighted routing policy: Assigns weights to resource record sets, allowing you to control the portion of requests that go to each resource
Latency-based routing policy: Routes requests to the AWS region with the lowest latency for the end user
Failover routing policy: Configures active-passive failover
Geolocation routing policy: Directs requests to specific endpoints based on the geographic location of the request
Multivalue answer policy: Responds to DNS queries with up to eight healthy records selected at random
IP-based routing policy: Routes requests to targets based on the end user's IP
We will setup Latency Routing policy in this
Few steps will be similar to for all the Policies we will implement that.
Step 1 ) Create an AMI image with below code and copy the image in othere region as well (eg .Mumbai). Please reffer below link to get guide for creating AMI
https://hashnode.com/edit/cm74q49vc000208ld6n9qdz60
Below is the Link to gihub repo for scripts used in AMI
https://github.com/ApurvDevops/AMI_FOR_ROUTE53
Step 2) Once its done, we need to create instance in both the region using the AMI image we created
step 3) Go to Route 53 Create a Health Checks

step 4) Create a Record in Hosted Zone , under the Domain you created
Hosted ZOne —> Inside the DNA record —> Create Record —> Latency Routing —> Record Name “latency”

Make two record 1 for USA and 1 for INDIA


Once the record is created , you can see it in Record list

Now just go and paste the link in browser (failover.apurvtech.xyz), when trying from India Location

When trying to search from USA

#Geolocation Routing policy
Step 1 and Step 2 are same
Step 3 ) Go to route 53 and create a Health Check as told above, and if already there no need to create
Step 4 ) Create a Record in Hosted Zone , under the Domain you created
Hosted ZOne —> Inside the DNA record —> Create Record —> Geolocation Routing —>
In record name you need to give “geolocation” PFB the snapshots

IP address of your USA Instance and Location as US. Select the Healthc check which has instance from USA. Similary create for INDIA


When trying to access from INDIA

When trying to access from USA

Failover Routing policy
Step 1 and Step 2 are same
Step 3 Create a Record in Hosted Zone , under the Domain you created
Hosted ZOne —> Inside the DNA record —> Create Record —> Failover Routing —> Record name as failvoer

Define Failover records


When PRIMARY Site USA is working

We will stop nginx in USA and then try


Weighted Routing policy
Step 1 and Step 2 are same
Step 3 Create a Record in Hosted Zone , under the Domain you created
Hosted ZOne —> Inside the DNA record —> Create Record —> Weighted Routing —> Record name as “weighted”

Define Record
In Weighted record , we need to give weight number between 0-255, for USA i am giving 50 and for INDIA will give 100


Now as we have given the Weight of India max, so traffic will come to INDIA server

lets change the weight and see USA 100 and INDIA 50


################################################################################
####################### TROUBLESHOOTING STEPS ##################################
################################################################################
Insted of using the above script to create a AMI image, there could be possiblity that it dosent configure the files in nginx folder, to over come from that issue and hit your requested URL , follow below steps
- 🚀 Go inside the nginx directly 🚀
/var/www, and create folder apurvtech.xyz/html and filed inside it index.html
put the below content in it
          <html>
              <head>
                  <title>Welcome to apurvtech.xyz!</title>
              </head>
              <body>
                  <h1>Success! The apurvtech.xyz server block is working!</h1>
              </body>
          </html>
2 ) 🚀 Go inside 🚀
/etc/nginx/sites-available
and create a file apurvtech.xyz
and insert below script in it
          server {
              listen 80;
              listen [::]:80;
              root /var/www/apurvtech.xyz/html;
              index index.html index.htm;
              server_name apurvtech.xyz failover.apurvtech.xyz latency.apurvtech.xyz weighted.apurvtech.xyz geolocation.apurvtech.xyz www.apurvtech.xyz;
              location / {
                  try_files $uri $uri/ =404;
              }
          }
after this run below 2 commands
          sudo ln -s /etc/nginx/sites-available/apurvtech.xyz /etc/nginx/sites-enabled/
          sudo systemctl restart nginx
Finally you should be able to get the above desired outptu !!!🚀
Subscribe to my newsletter
Read articles from Apurv Samadder directly inside your inbox. Subscribe to the newsletter, and don't miss out.
Written by