Step into the Cloud: Begin Your Journey with AWS EC2
 Jasai Hansda
In this blog, we'll explore how to launch and connect to an EC2 instance. An instance is essentially a virtual server in the AWS Cloud. With Amazon EC2, you have the flexibility to set up and configure the operating system and applications that run on your instance.
Overview
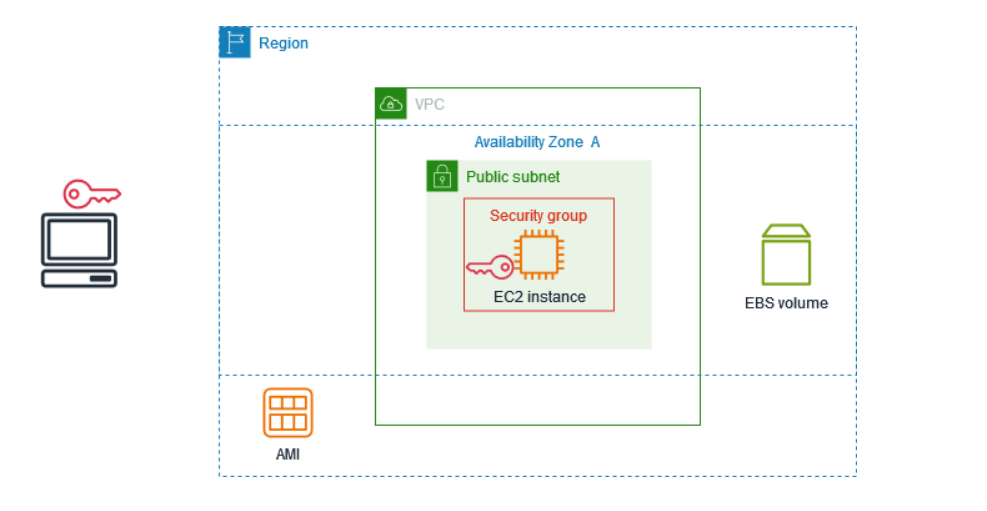
The following diagram shows the key components to start with:
An image – A template that contains the software to run on your instance, such as the operating system.
A key pair – A set of security credentials that you use to prove your identity when connecting to your instance. The public key is on your instance and the private key is on your computer.
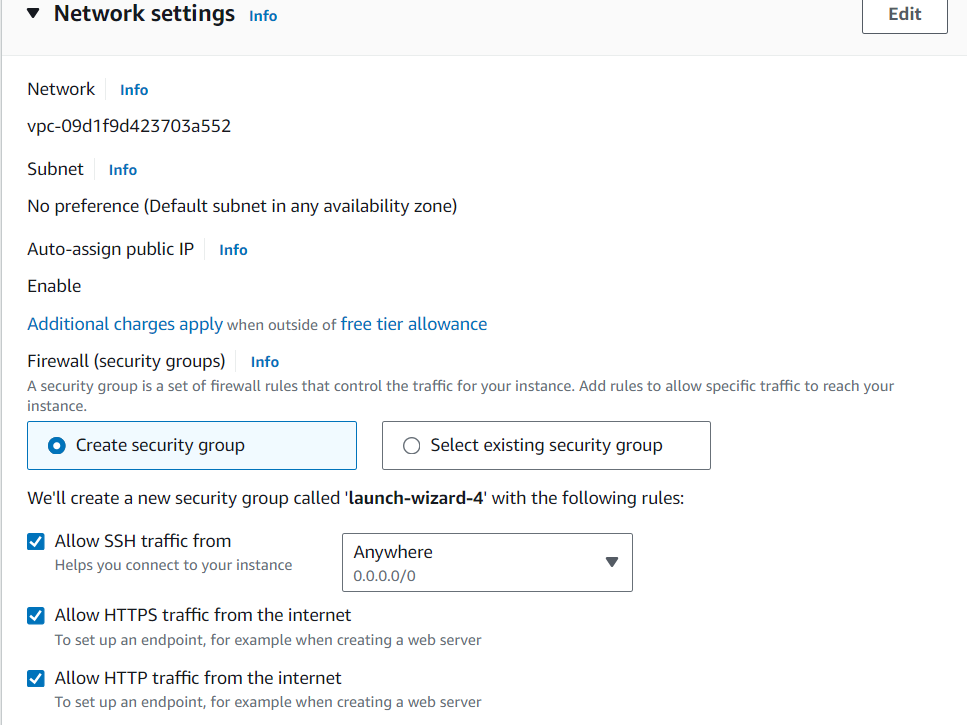
A network – A virtual private cloud (VPC) is a virtual network dedicated to your AWS account. To help you get started quickly, your account comes with a default VPC in each AWS Region, and each default VPC has a default subnet in each Availability Zone.
A security group – Acts as a virtual firewall to control inbound and outbound traffic.
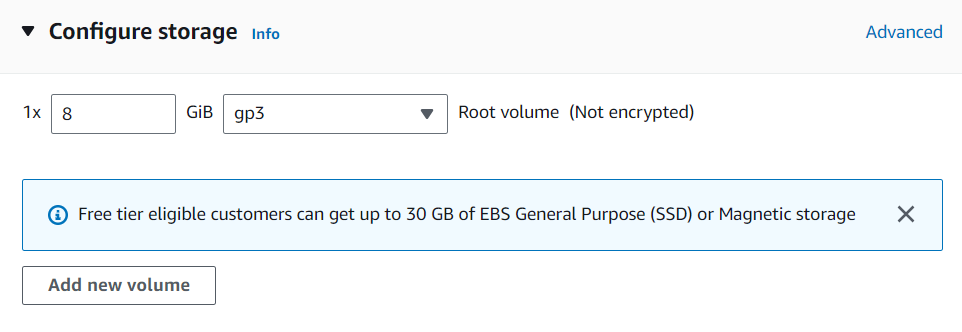
An EBS volume – We require a root volume for the image. You can optionally add data volumes.
Setting up the Server
Create your EC2 resources and launch your EC2 instance:
You can refer to the official docs for detailed EC2 instance creation- https://docs.aws.amazon.com/AWSEC2/latest/UserGuide/EC2_GetStarted.html#ec2-launch-instance
Steps for launching an EC2 instance in the free tier service
Log in to AWS Management Console: Navigate to the EC2 Dashboard.
Launch Instance: Click on the "Launch Instance" button.
Name your server

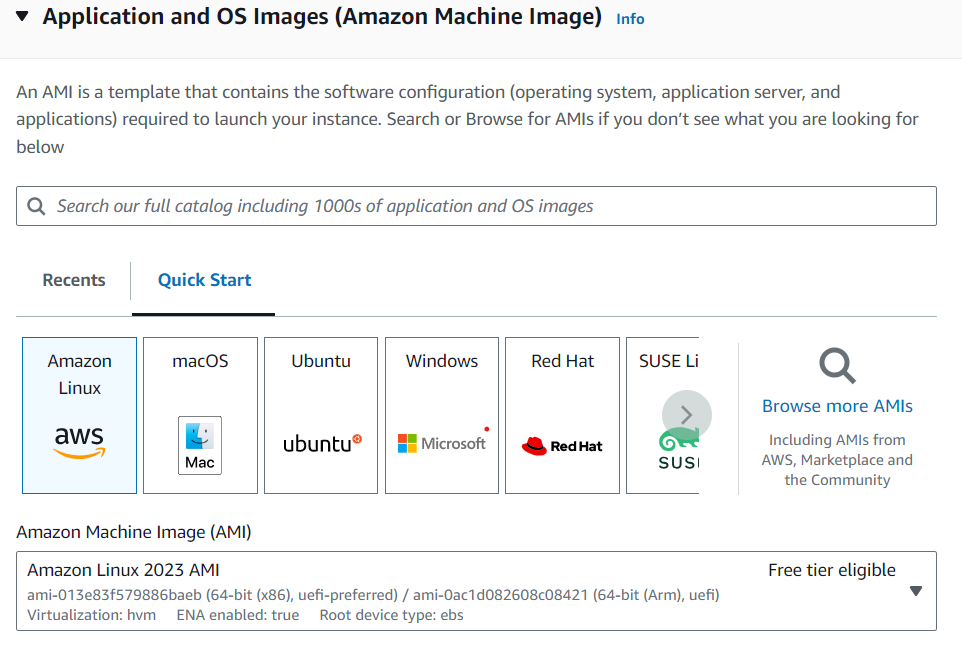
Choose an Amazon Machine Image (AMI):
Select an Amazon Linux 2023 AMI (Free tier eligible).
Choose an Instance Type:
Select an instance type (e.g.,
t2.microfor free tier eligibility).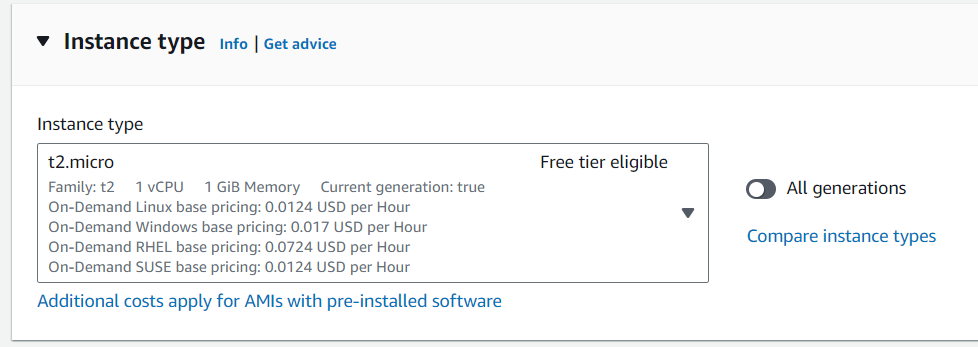
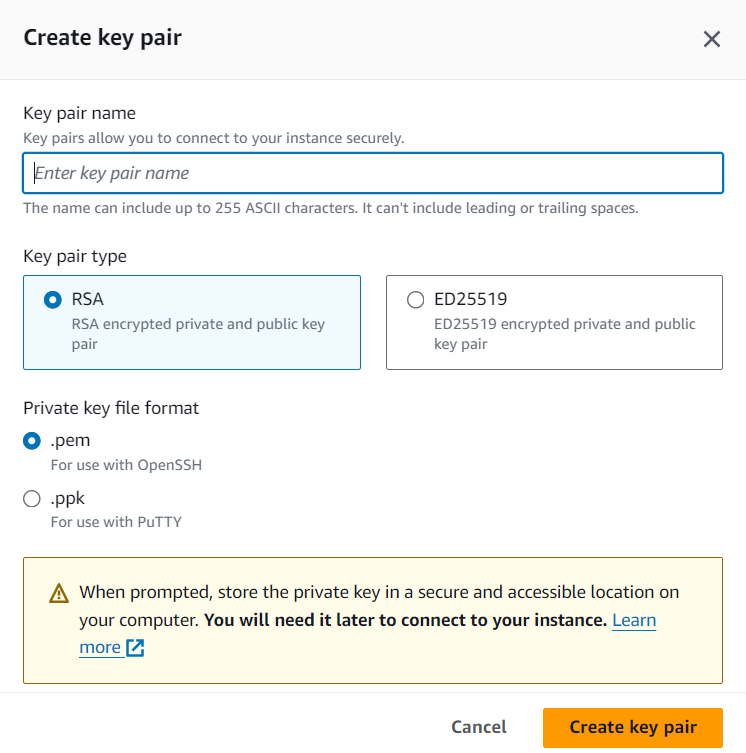
Create key pair:
Create a key pair to connect with the instance securely.

Configure Instance:
Proceed with the default settings, or adjust according to your needs.
Add Storage:
Modify the storage options if necessary.
Launch Your instance:

Connecting securely to Amazon EC2 instance

AWS Document to Connect to Your Instance Using SSH
Putty
Step 1: Download and Install PuTTY
Download PuTTY and PuTTYgen from the official site:
🔗 https://www.chiark.greenend.org.uk/~sgtatham/putty/latest.htmlInstall PuTTY on your computer.
Step 2: Convert the .pem Key to .ppk Using PuTTYgen
AWS provides a .pem key, but PuTTY requires a .ppk key. Convert it using PuTTYgen:
Open PuTTYgen.
Click "Load" and select your
.pemprivate key.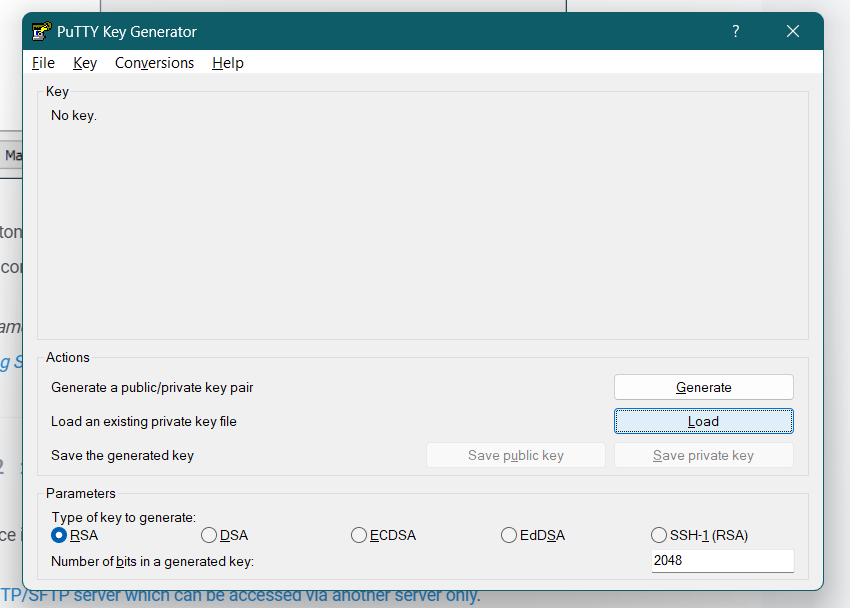
Click "Save private key", give it a name, and save it as a
.ppkfile.
Step 3: Get the Public IP of Your EC2 Instance
Log in to AWS Console → Open EC2 Dashboard.
Select your running EC2 instance.
Copy the Public IPv4 Address (e.g.,
52.15.220.100).
Step 4: Connect to EC2 Using PuTTY
Open PuTTY.
In the Host Name (or IP Address) field, enter:
Example:
ec2-user@52.15.220.100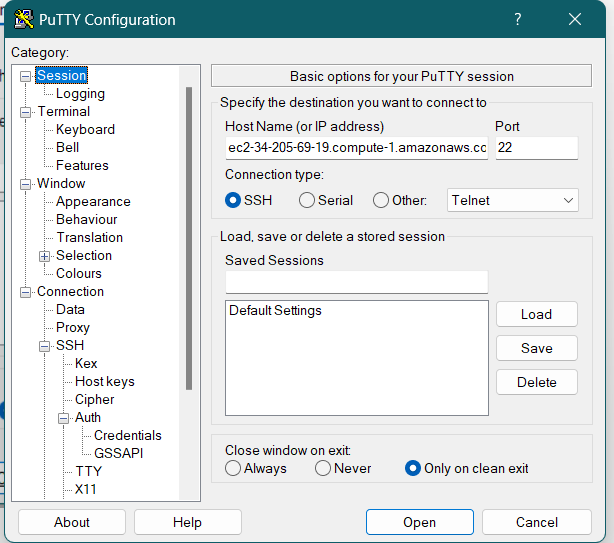
In the Category section (left sidebar), expand SSH → Select Auth → Credentials.
Click Browse and select the
.ppkprivate key file you converted.Click Open to start the session.
If prompted with a security alert, click Yes.
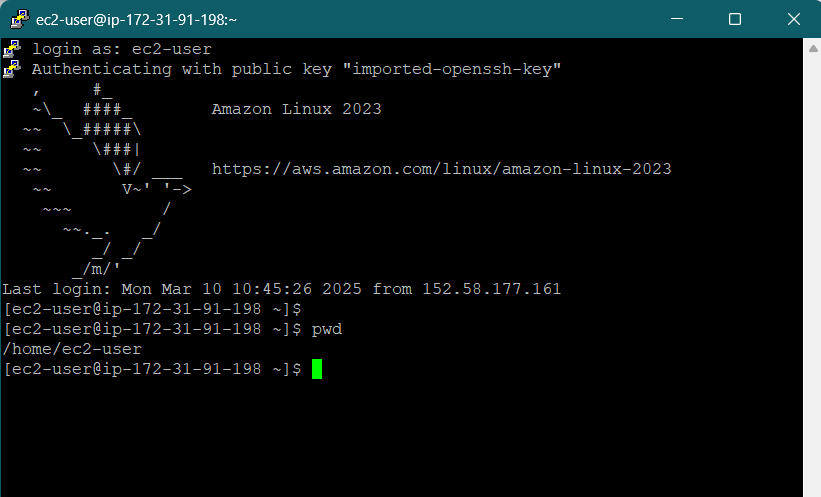
Step 5: Login to EC2 Instance

If using an Amazon Linux/Ubuntu instance, enter: ec2-user
If using an Ubuntu instance, use: ubuntu
For CentOS, use: centos
Once logged in, you can run commands on your EC2 instance!
Alternatives to PuTTY
Windows PowerShell (with OpenSSH)
MobaXterm
Termius
Git Bash (for Windows)
WSL (Windows Subsystem for Linux)
WinSCP
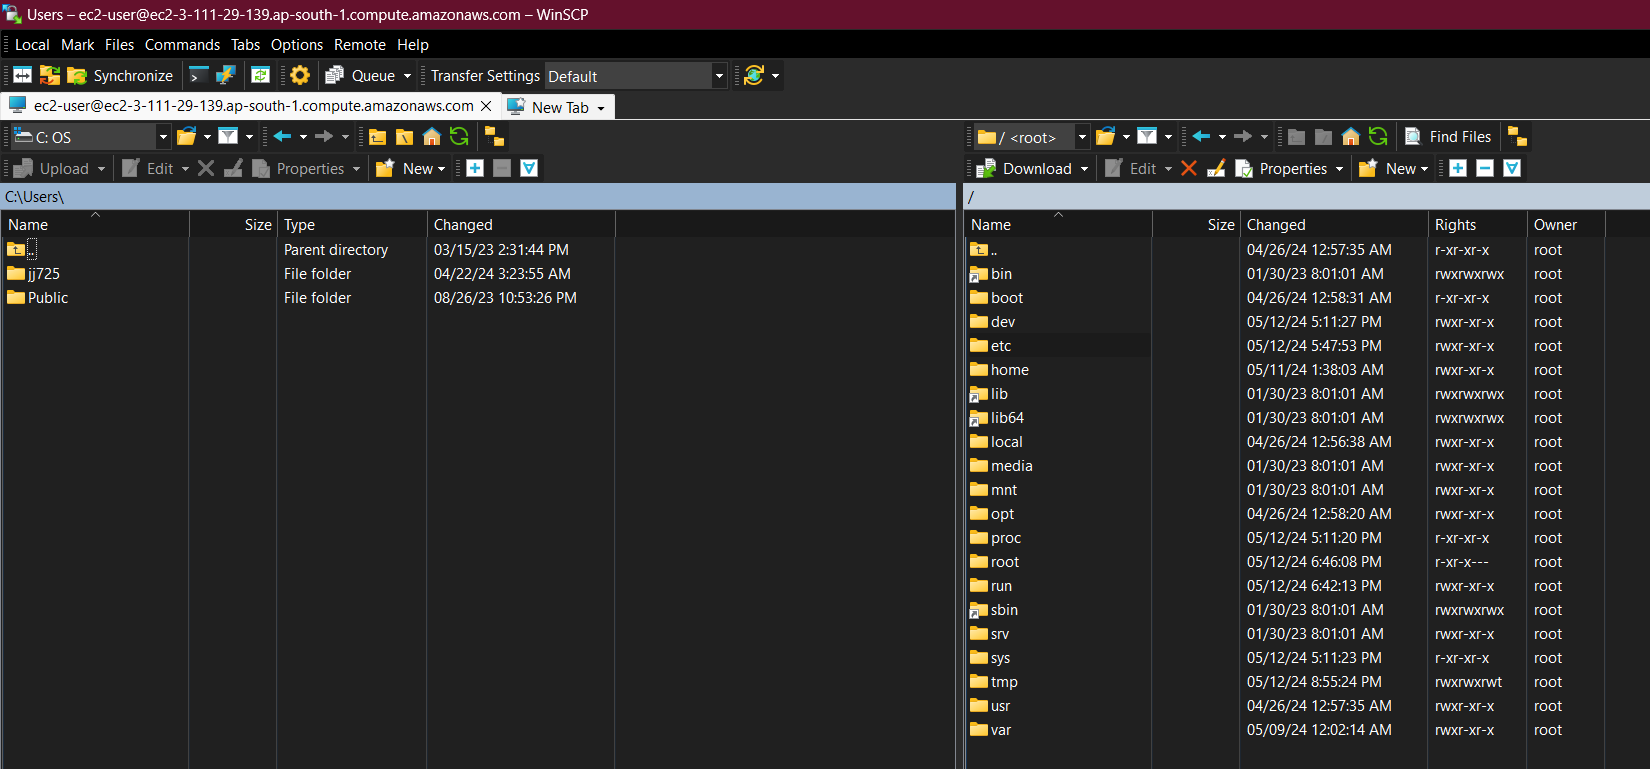
For easy configuration and file transfer from your Windows system, you can use WinSCP.
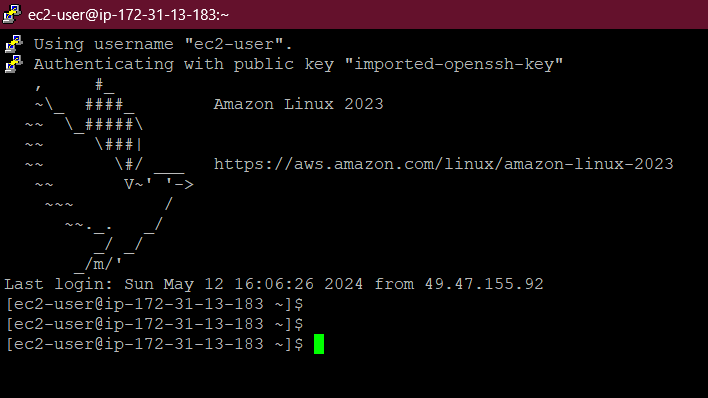
Additionally, you can utilize the Putty terminal for the command line.
Download-
WinSCP :: Official Site :: DownloadConnecting securely to Amazon EC2 server with SFTP :: WinSCP
With WinSCP you can easily upload and manage files on your Amazon EC2 (Elastic Compute Cloud) instance/server over SFTP protocol.

Conclusion
Launching and connecting to an AWS EC2 instance is a straightforward process that involves setting up key components such as an image, key pair, network, security group, and EBS volume. By following the steps outlined, you can successfully create and manage your virtual server in the AWS Cloud. Whether using PuTTY or WinSCP, you can securely connect to your instance and manage files efficiently. This guide provides a solid foundation for getting started with AWS EC2, enabling you to harness the power of cloud computing for your applications and services.
Subscribe to my newsletter
Read articles from Jasai Hansda directly inside your inbox. Subscribe to the newsletter, and don't miss out.
Written by

Jasai Hansda
Jasai Hansda
Software Engineer (2 years) | In-transition to DevOps. Passionate about building and deploying software efficiently. Eager to leverage my development background in the DevOps and cloud computing world. Open to new opportunities!