3-Tier Ultimate DevOps CICD Pipeline Project
 Amit singh deora
Step-by-Step Guide to Deploying a 3-Tier Yelp Camp Application with Database Integration
Introduction to the 3-Tier Application
A three-tier application consists of three layers:
Frontend (Client-side UI) - The user interface where users interact with the application.
Backend (Server-side Logic) - Processes requests, manages authentication, and business logic.
Database (Data Storage) - Stores and manages application data.
The application we are working with is called Yelp Camp.
It allows users to create camps and provide reviews.
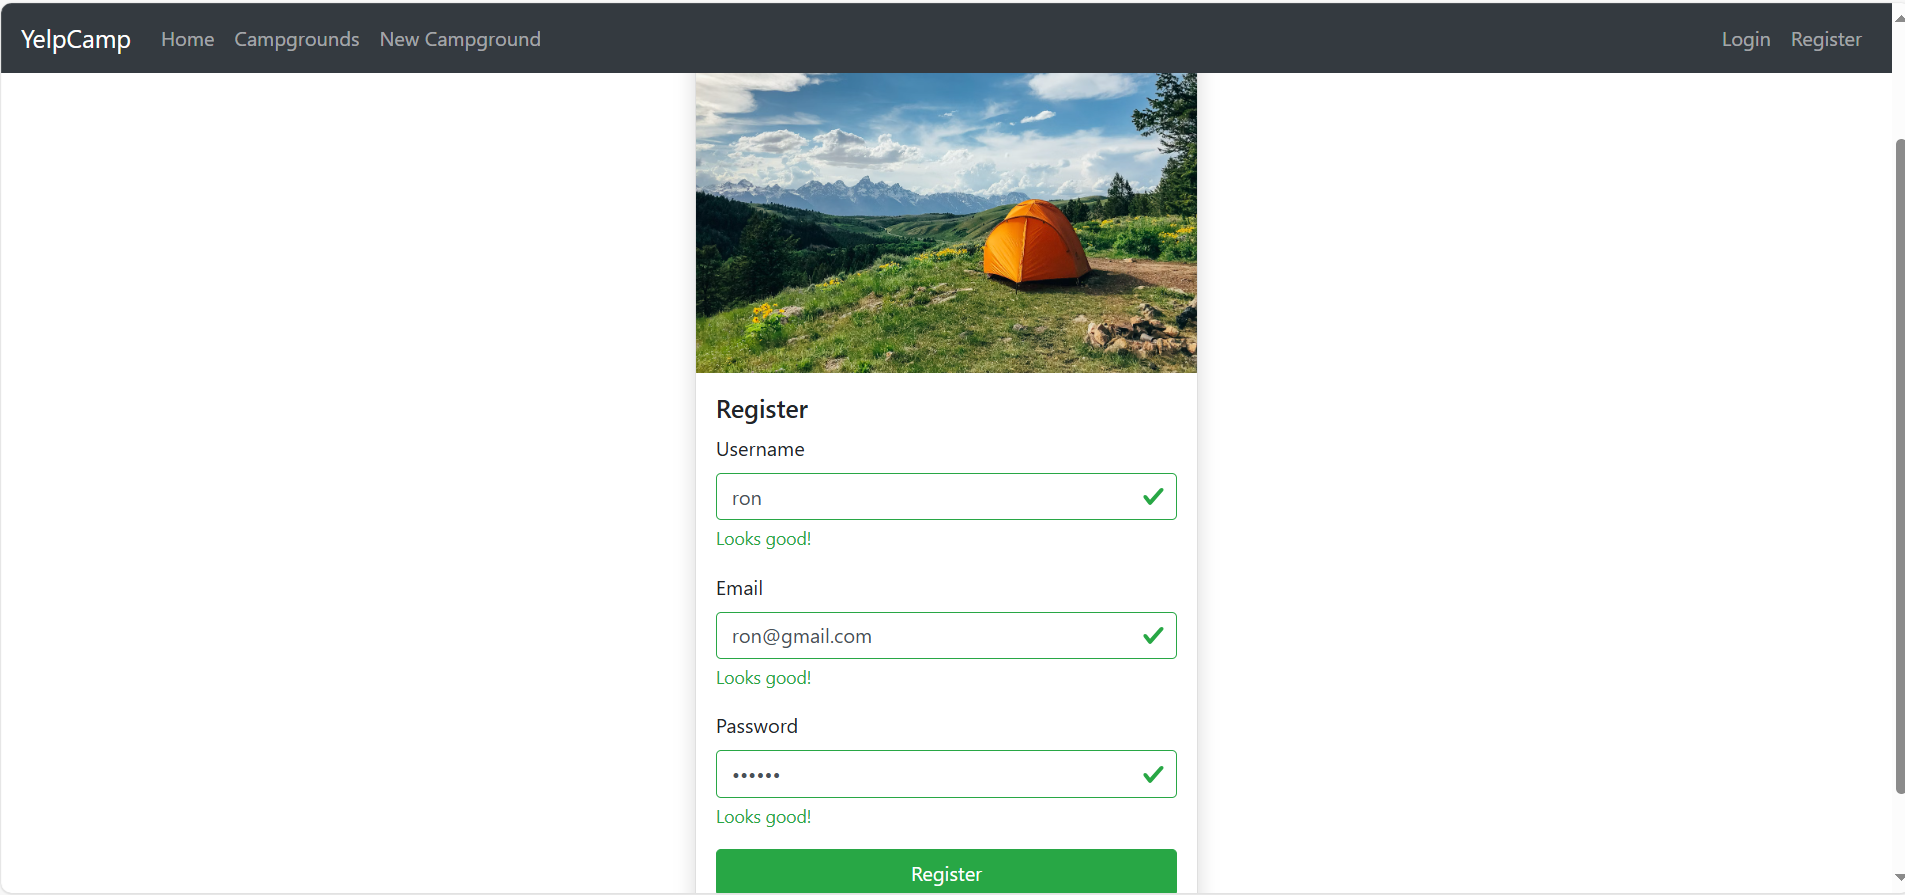
It includes a user registration system.
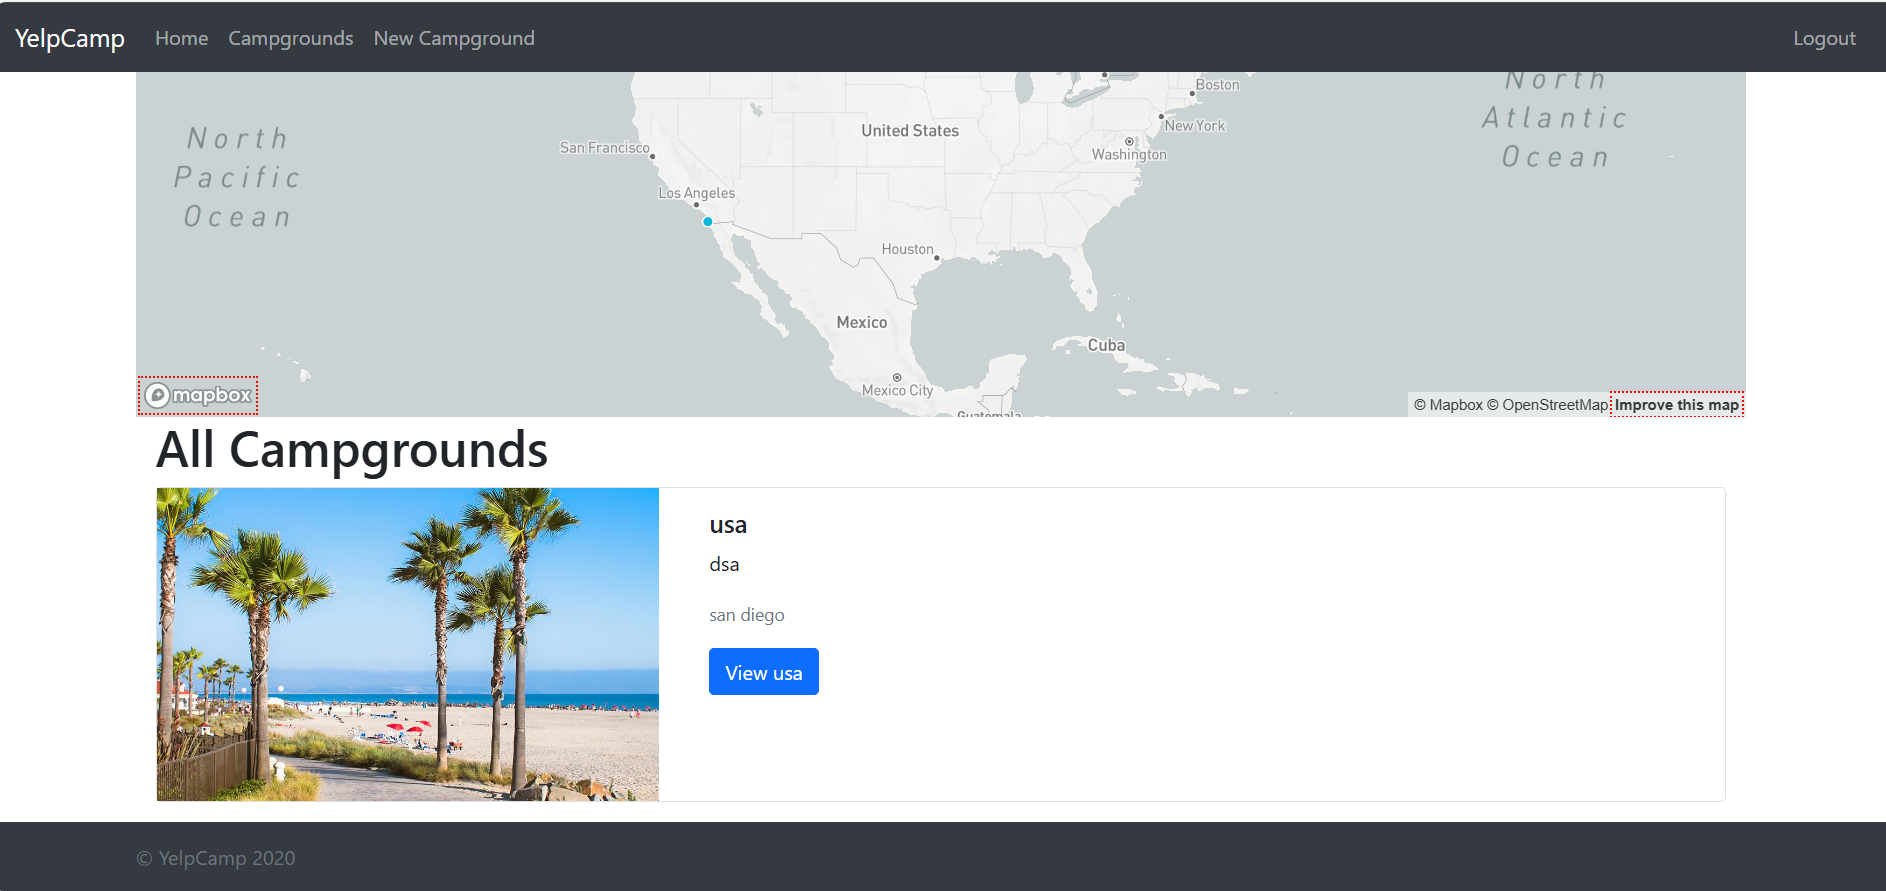
Features a map-based UI to display camp locations dynamically.
Users can upload images via a third-party service (Cloudinary).
Application Walkthrough
User Registration
Users can register with a username, email, and password.
No email verification is required at the time of registration.
If an email is already in use, registration will be denied.
Campground Features
Users can view different campgrounds stored in a MongoDB database.
Each campground includes:
Location details (mapped using Mapbox API).
Reviews (previously added by users).
User-uploaded images (via Cloudinary integration).
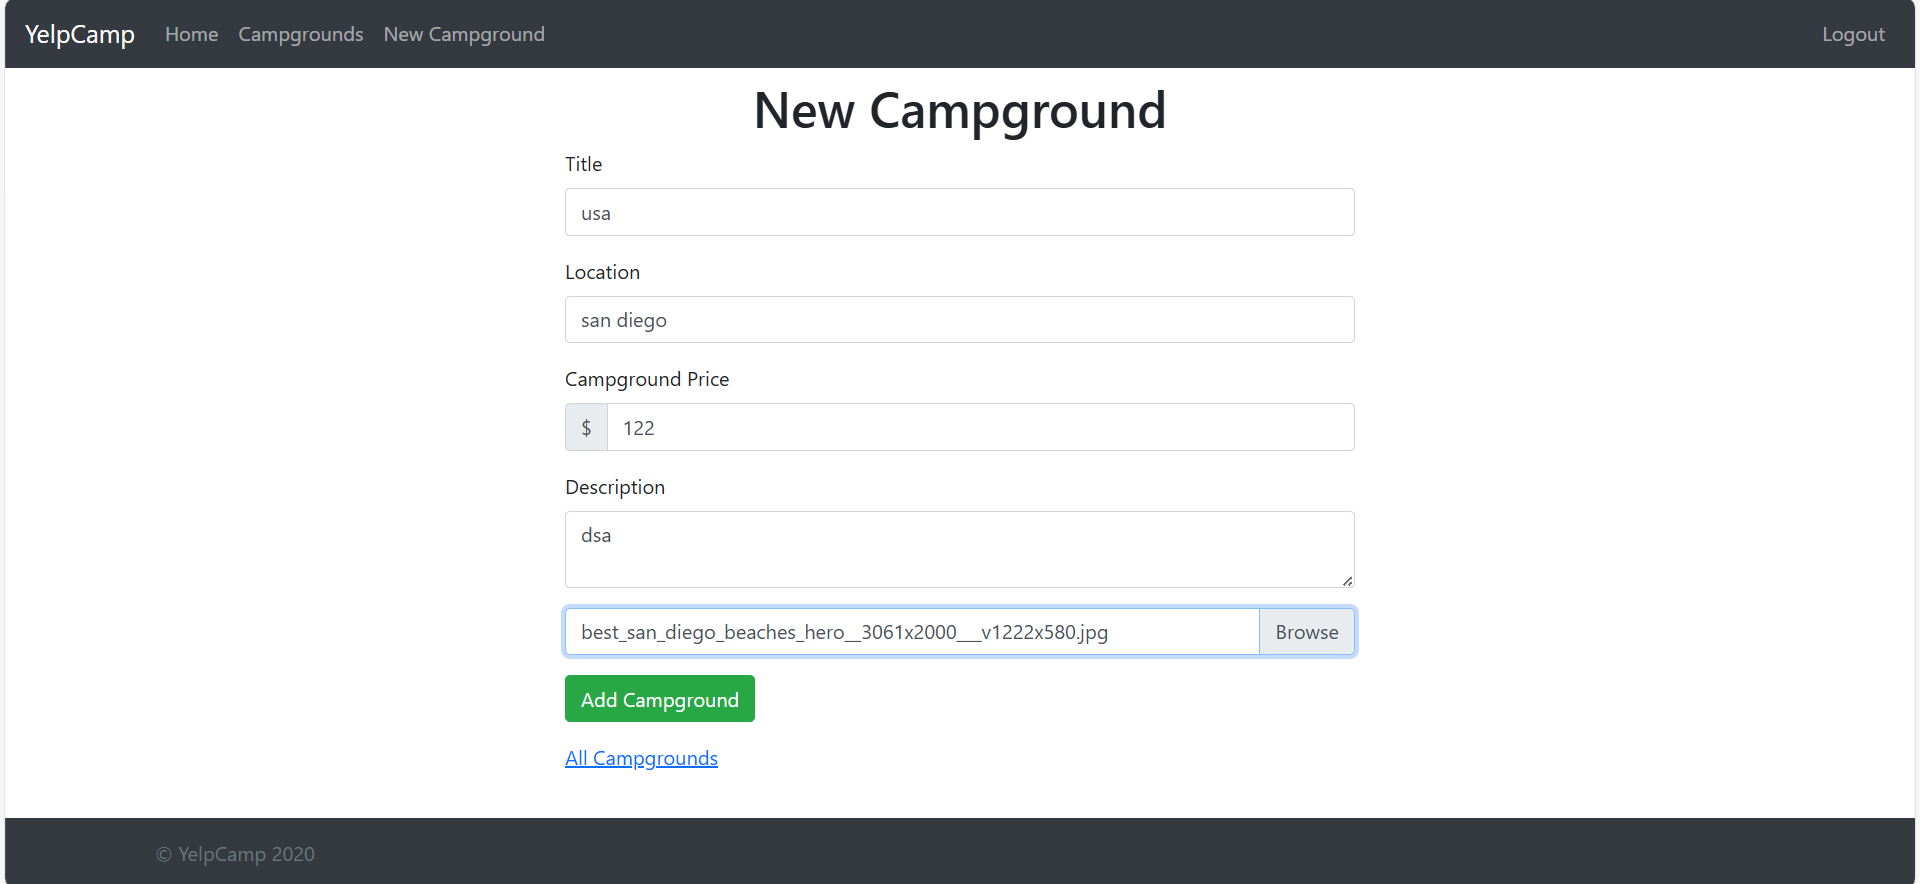
Users can add new campgrounds by providing:
Campground Name
Location
Price
Description
Images
Campground locations are dynamically displayed on the map.
Users can delete their own reviews.
Database Selection and Deployment Options
Choosing Between Local or Cloud Database
Two main options for MongoDB deployment:
MongoDB as a Docker container
MongoDB as a cloud service (MongoDB Atlas)
MongoDB as a Docker Container
Required components in Kubernetes:
Deployment to create a pod for the database.
Services to expose the database.
Persistent Volume & Persistent Volume Claim (PV & PVC) to ensure data persistence.
Challenges:
Managing failures (e.g., pod crashes, volume failures).
Potential downtime if backup is not maintained.
Cost associated with persistent storage.
MongoDB as a Cloud Database (MongoDB Atlas) we will go with this
Benefits:
No need to create and manage pods, services, or volumes.
Fully managed by MongoDB.
UI-based management without command-line complexity.
Cons:
- Paid service, but a free tier is available for small-scale projects.
Environment Variables for application to work
Cloudinary Credentials (for image storage):
CLOUDINARY_CLOUD_NAMECLOUDINARY_KEYCLOUDINARY_SECRET
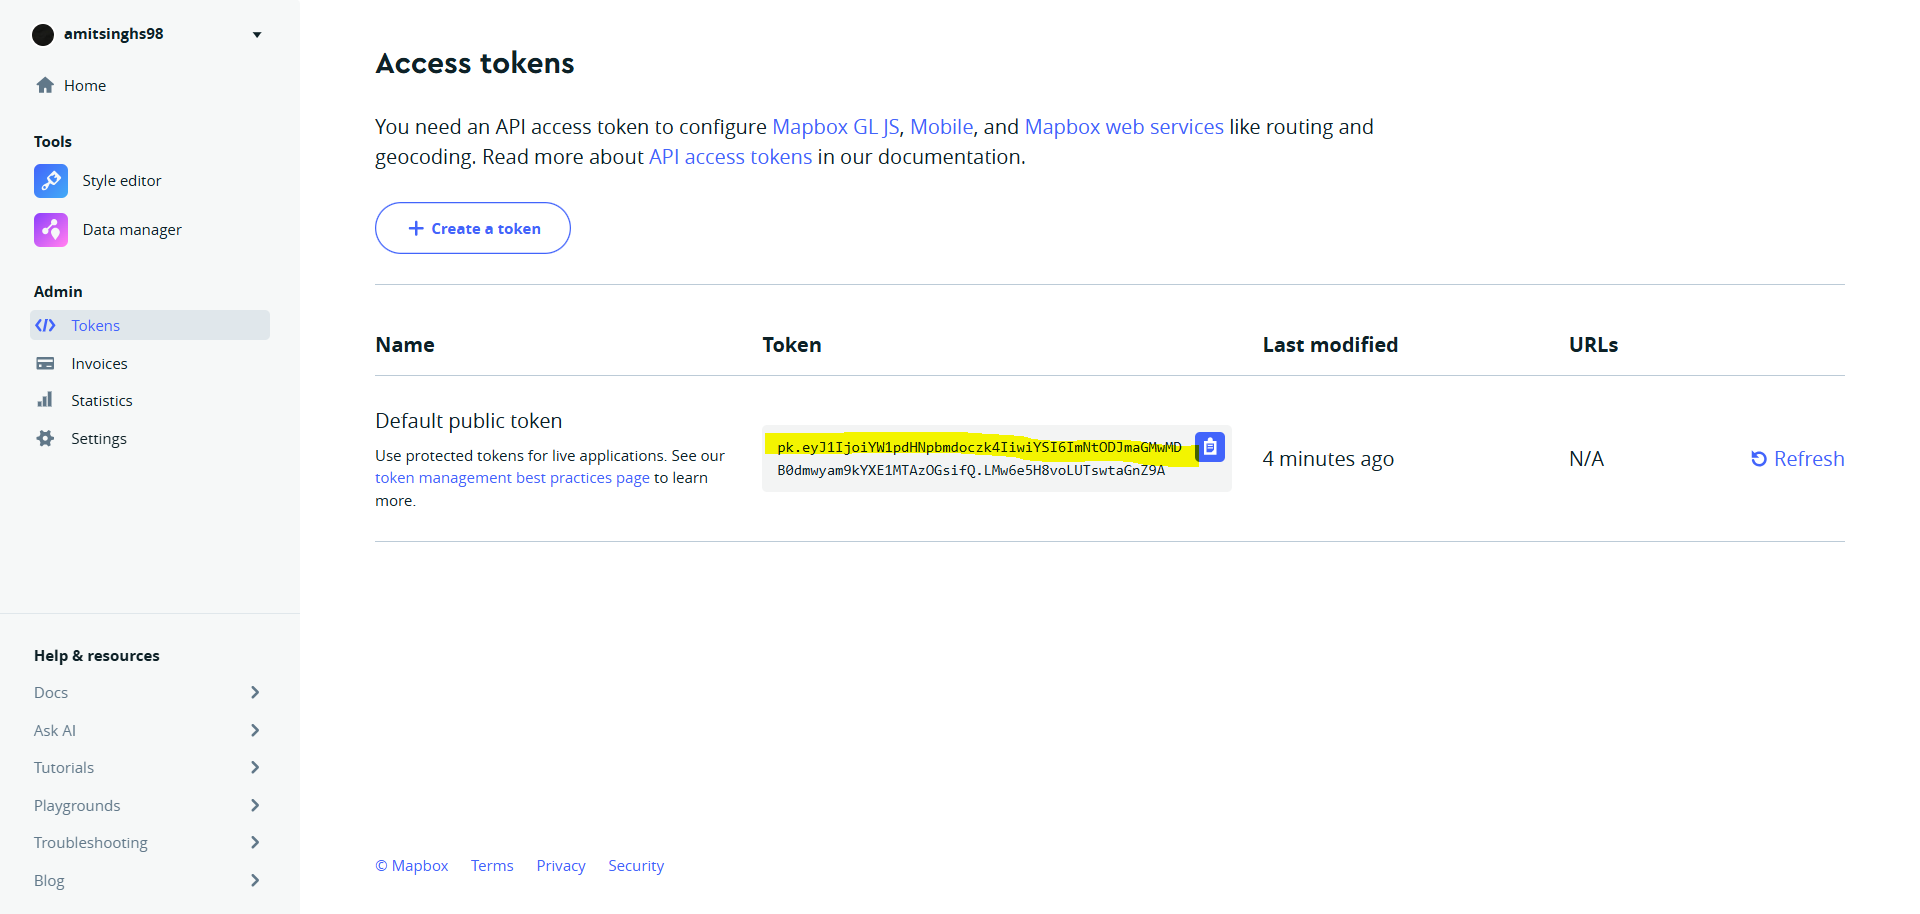
Mapbox Token (for mapping campground locations):
MAPBOX_TOKEN
Database URL (MongoDB connection string)
DB_URL
Secrets: Put any name here.
Setup Cloudinary:
Go to cloudinary and login.
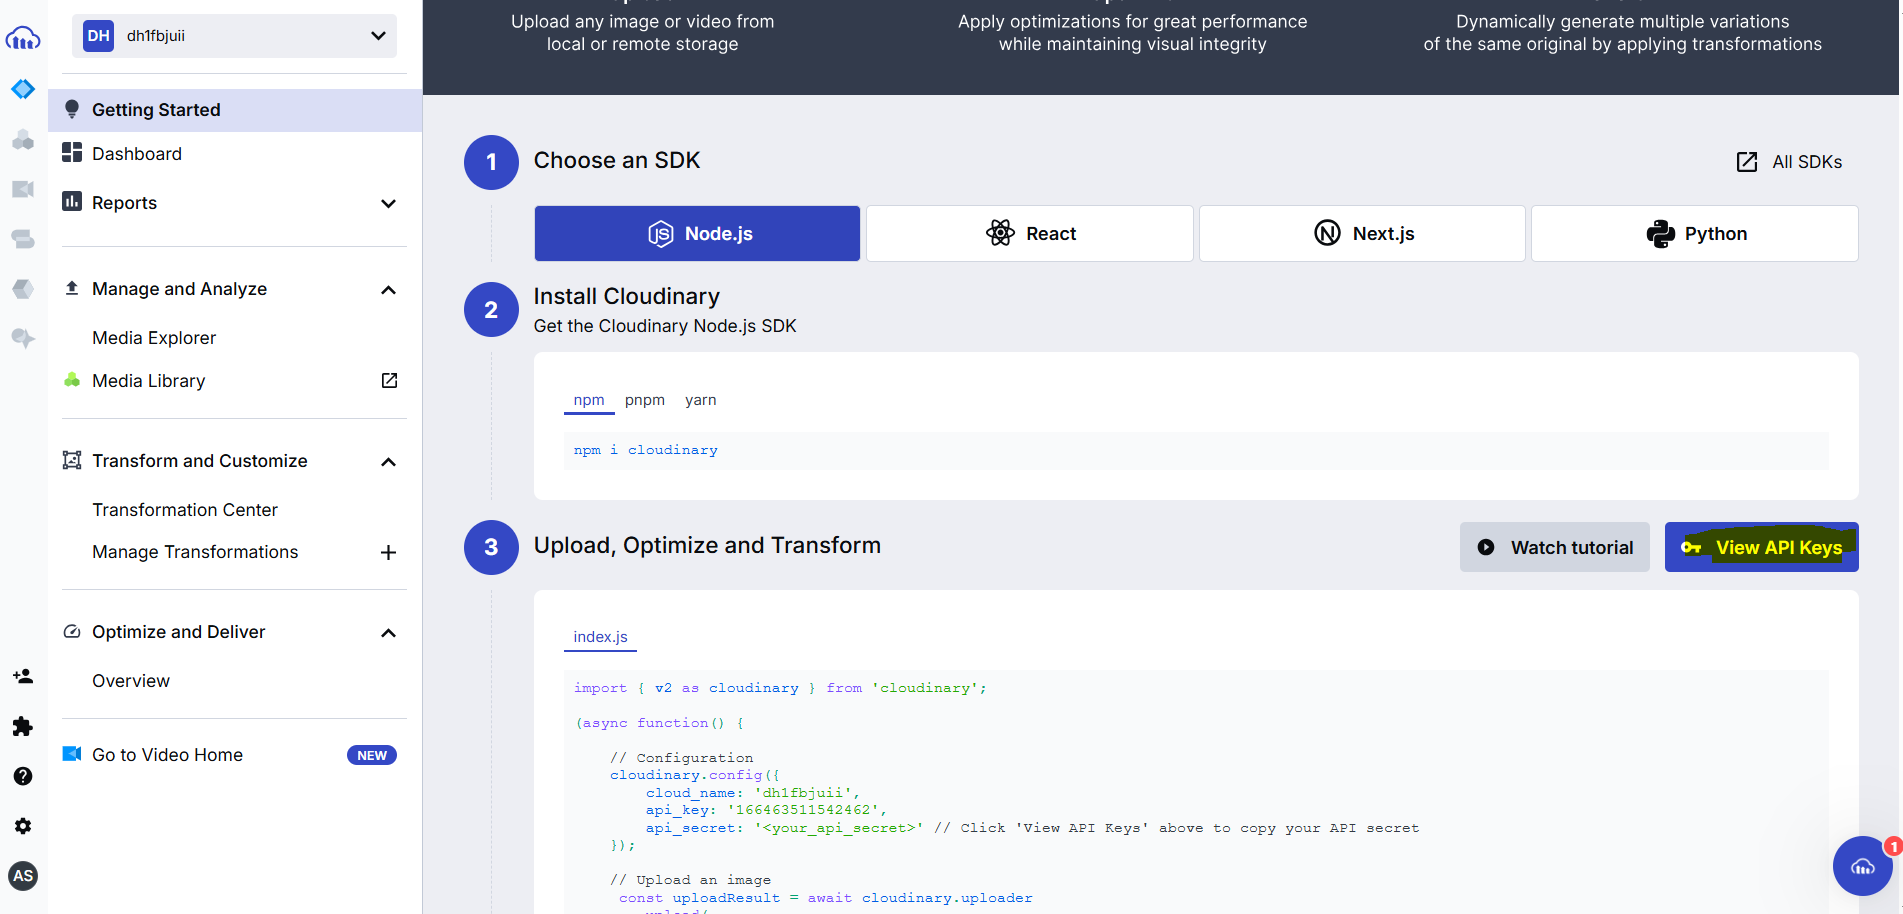
Click on view API Key:
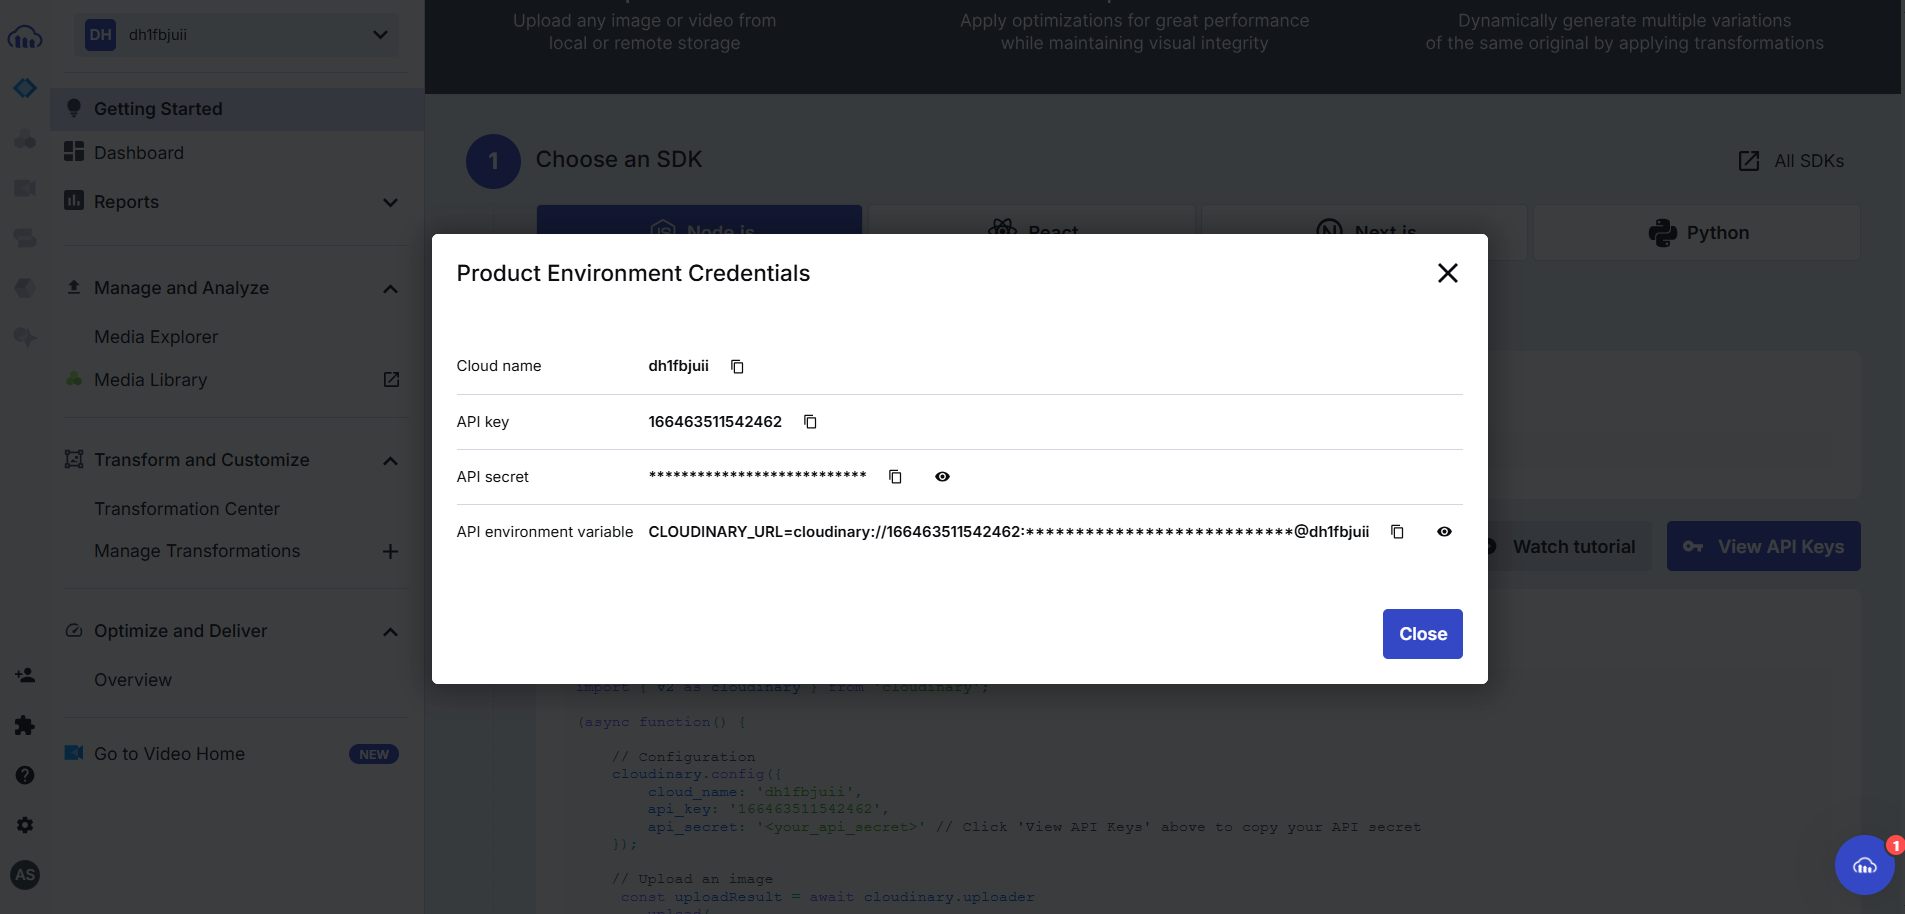
Store them somewhere safe, we will use them later. We got env variables of cloudinary.
Setup Mapbox Token
Go to Mapbox and Login
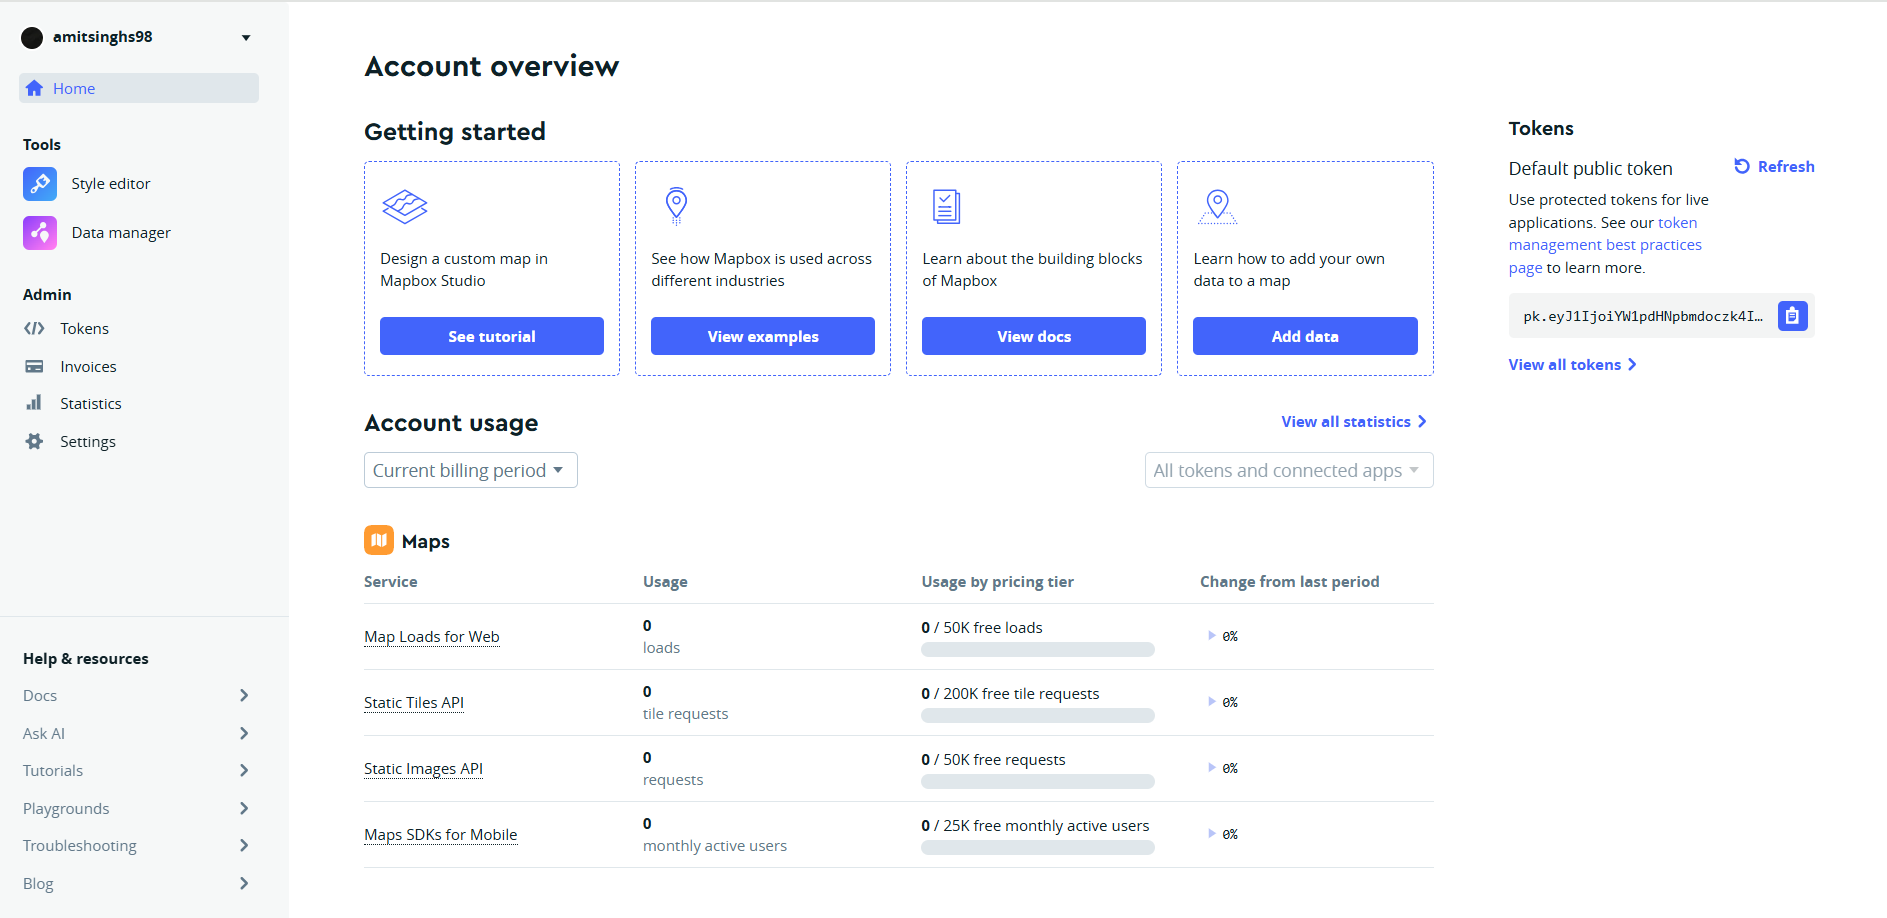
Use the “default token”
Setup Cloud MongoDB Atlas
- Go to MongoDB Atlas and login
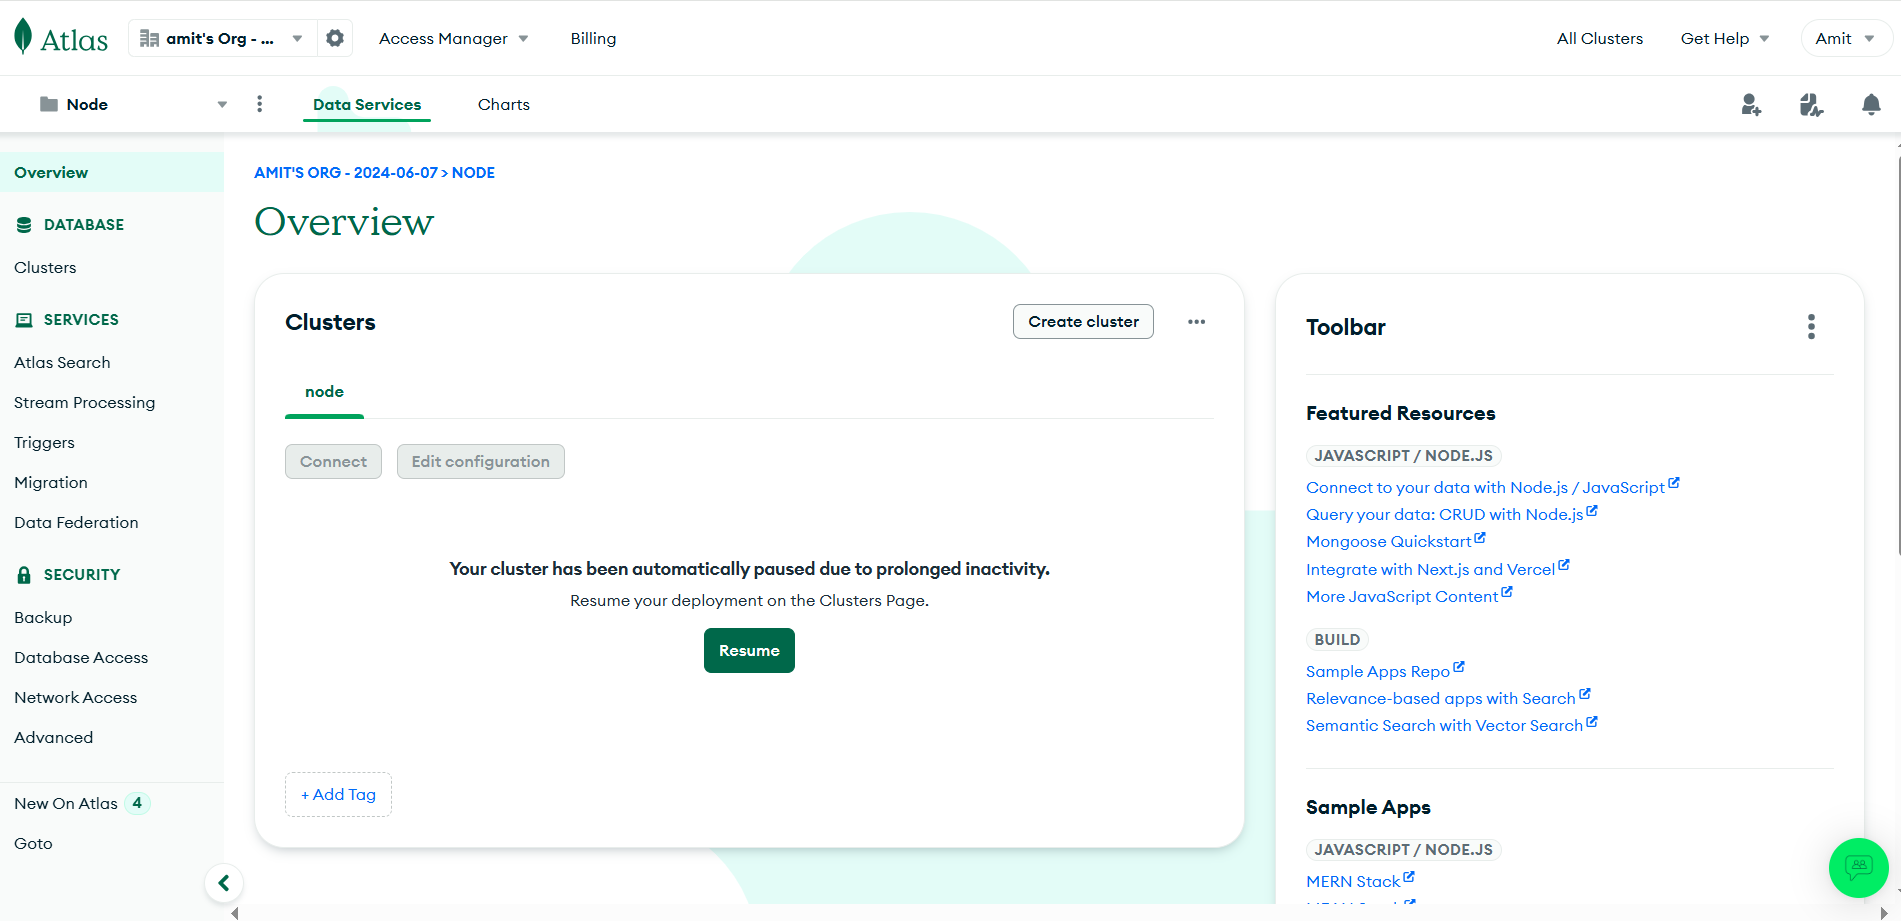
Create new cluster
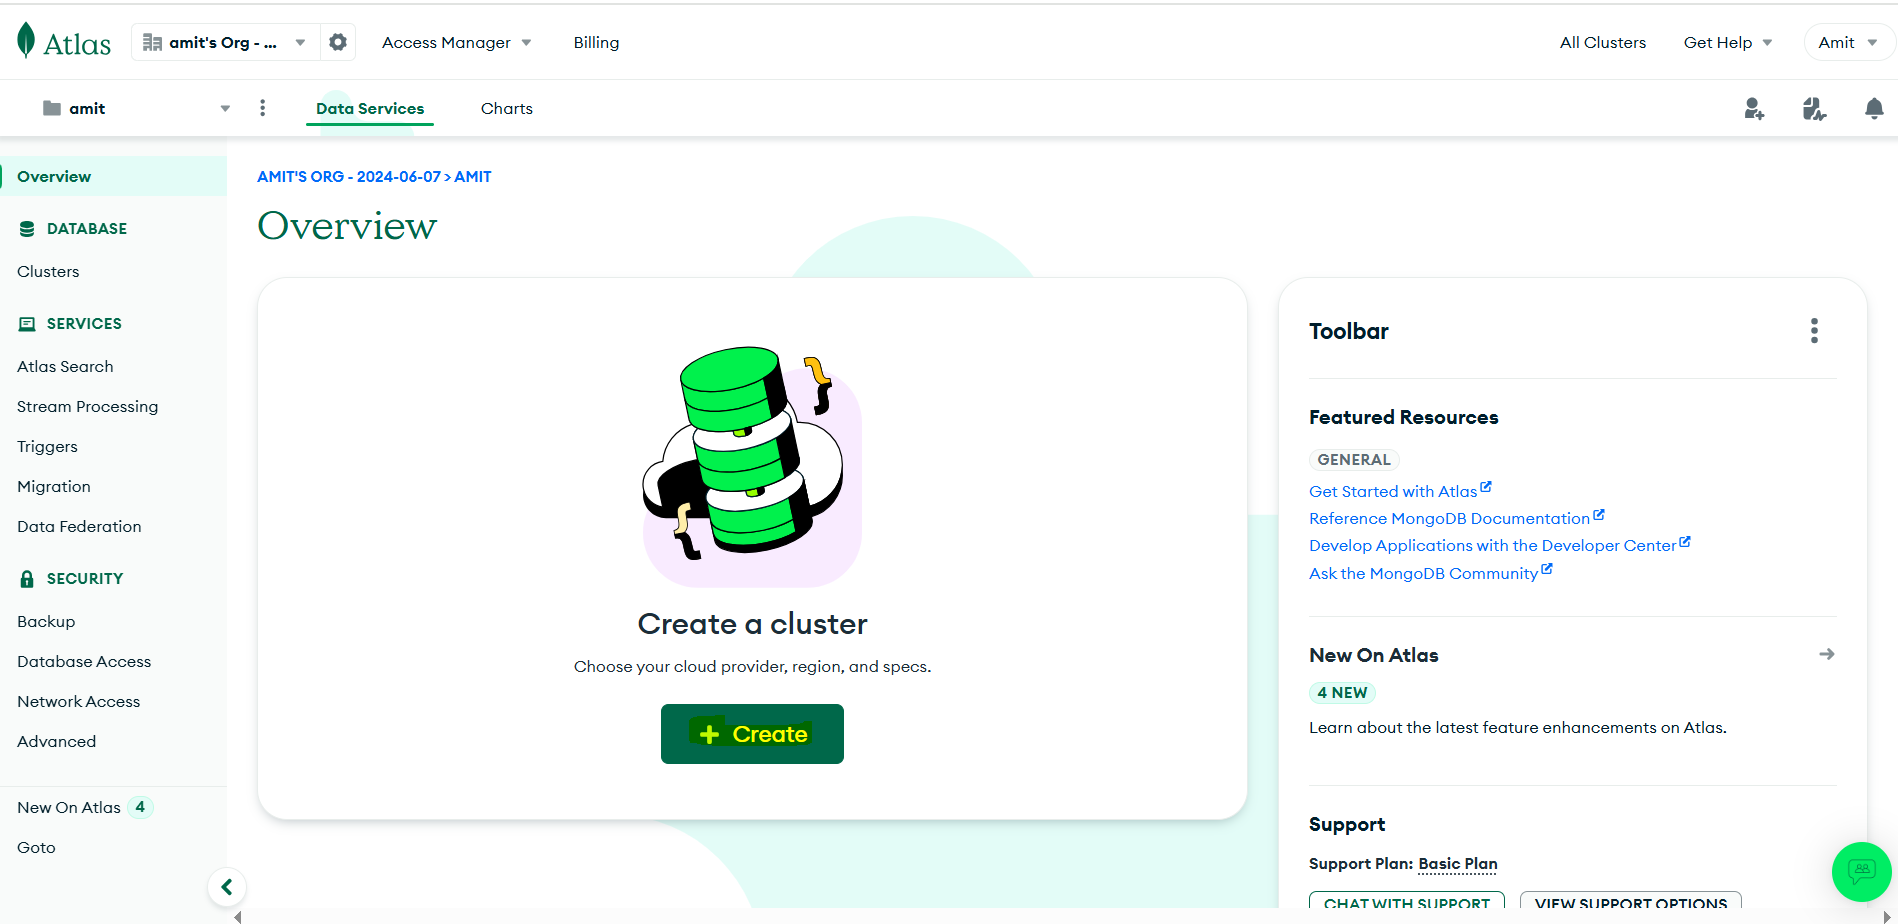
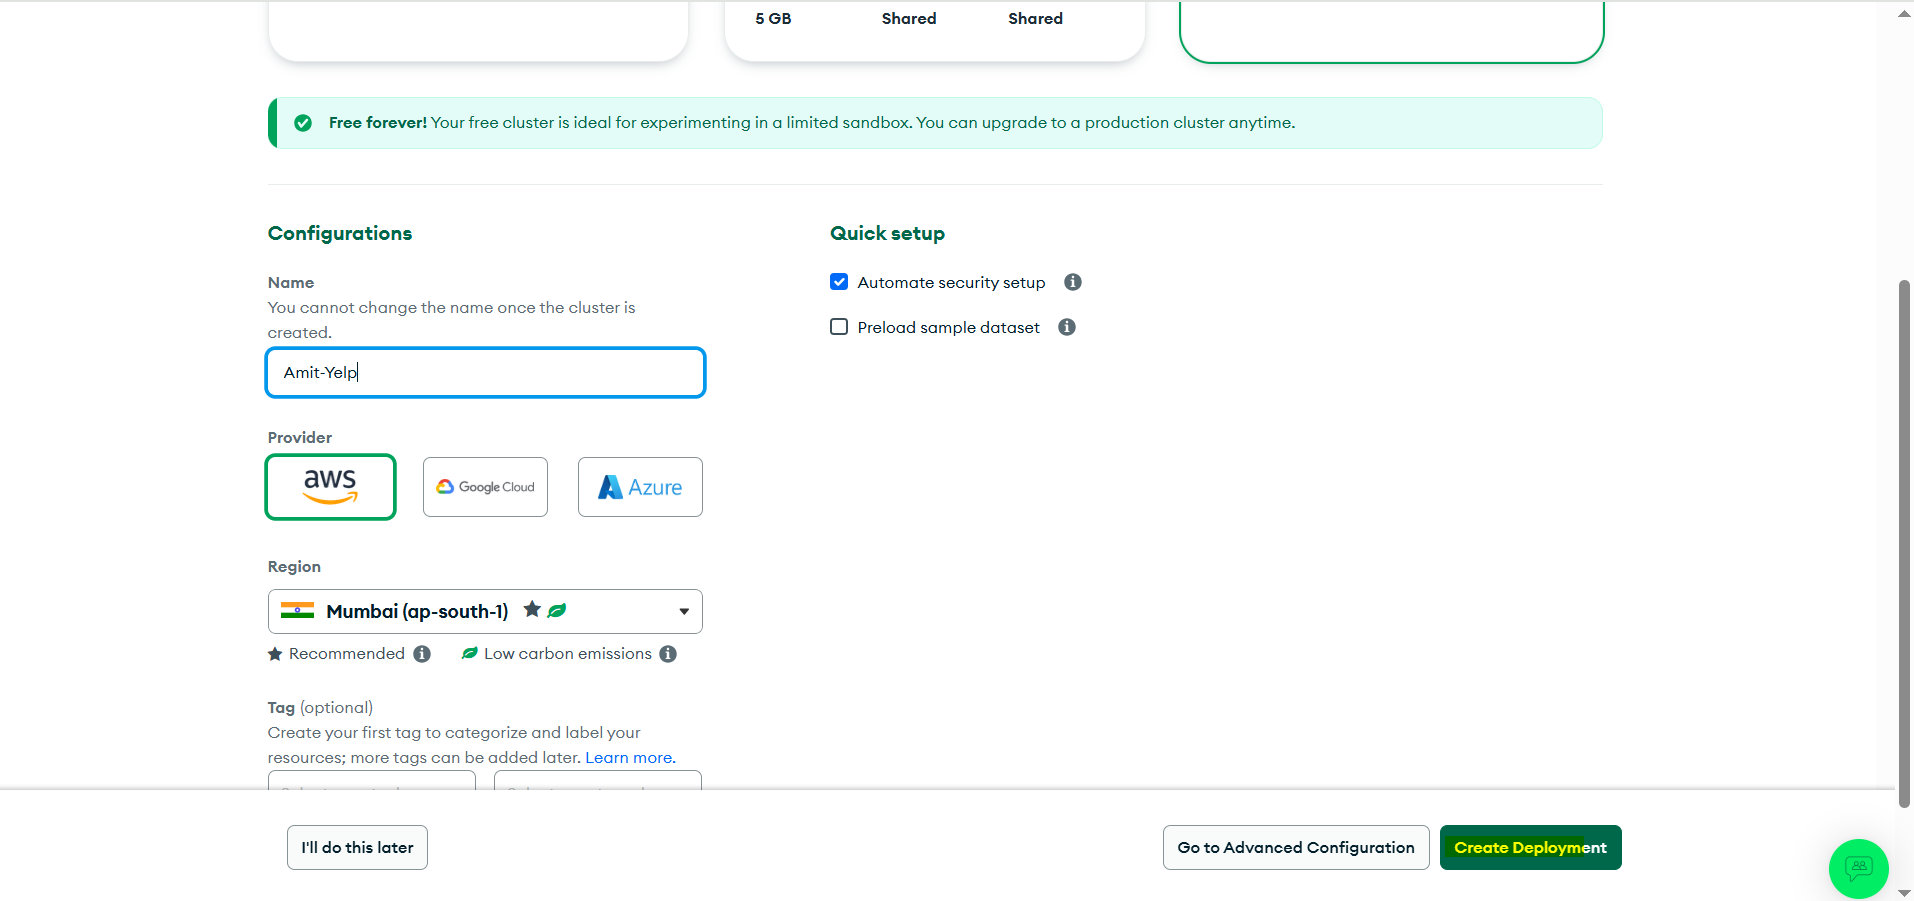
Create Deployment
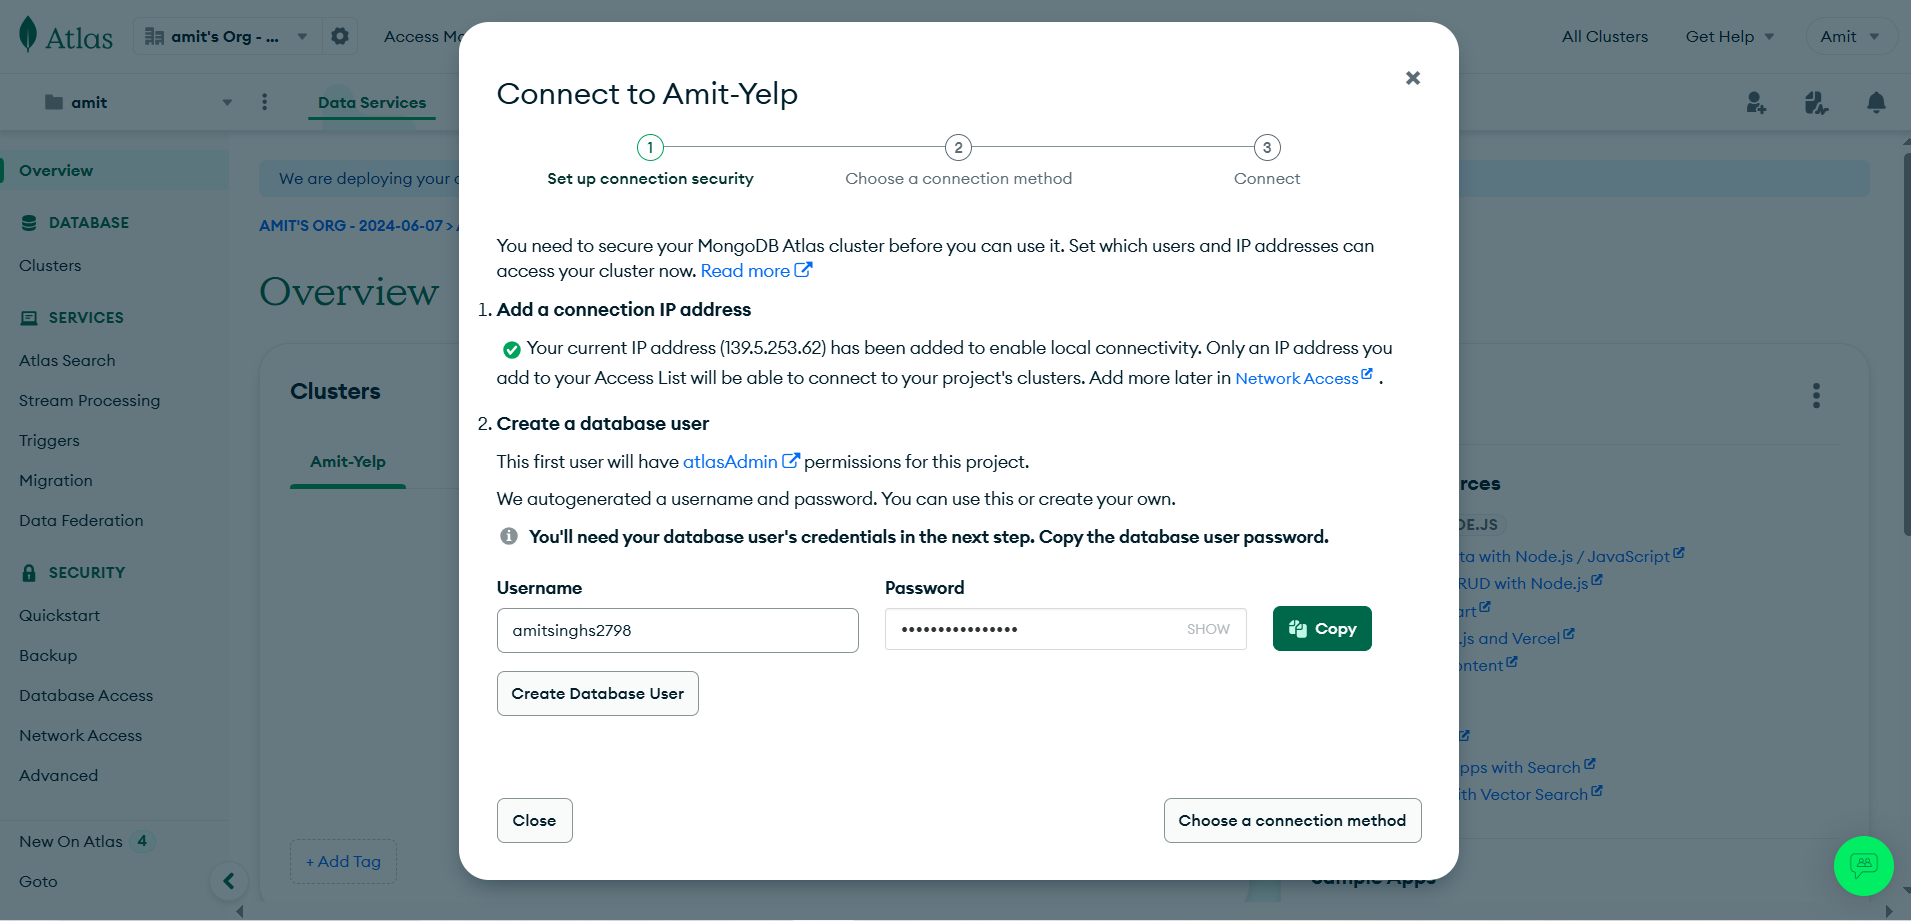
Click on create database user and Copy username & password to somewhere
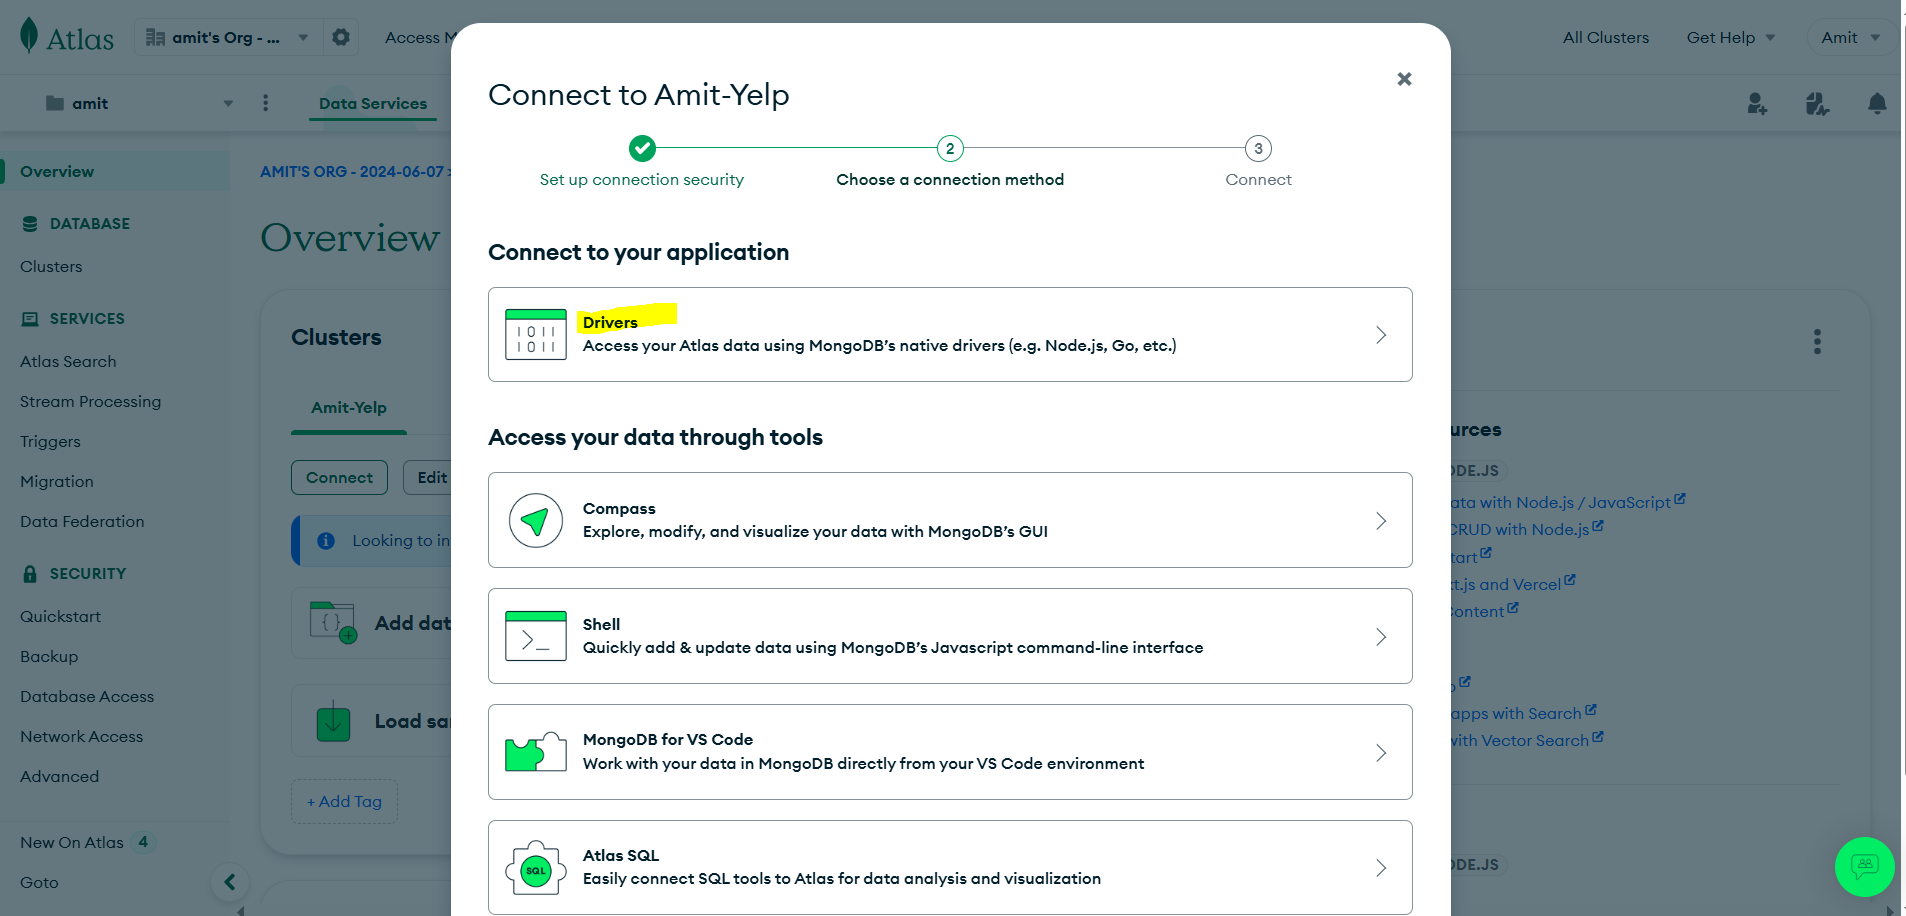
- Choose a connection method
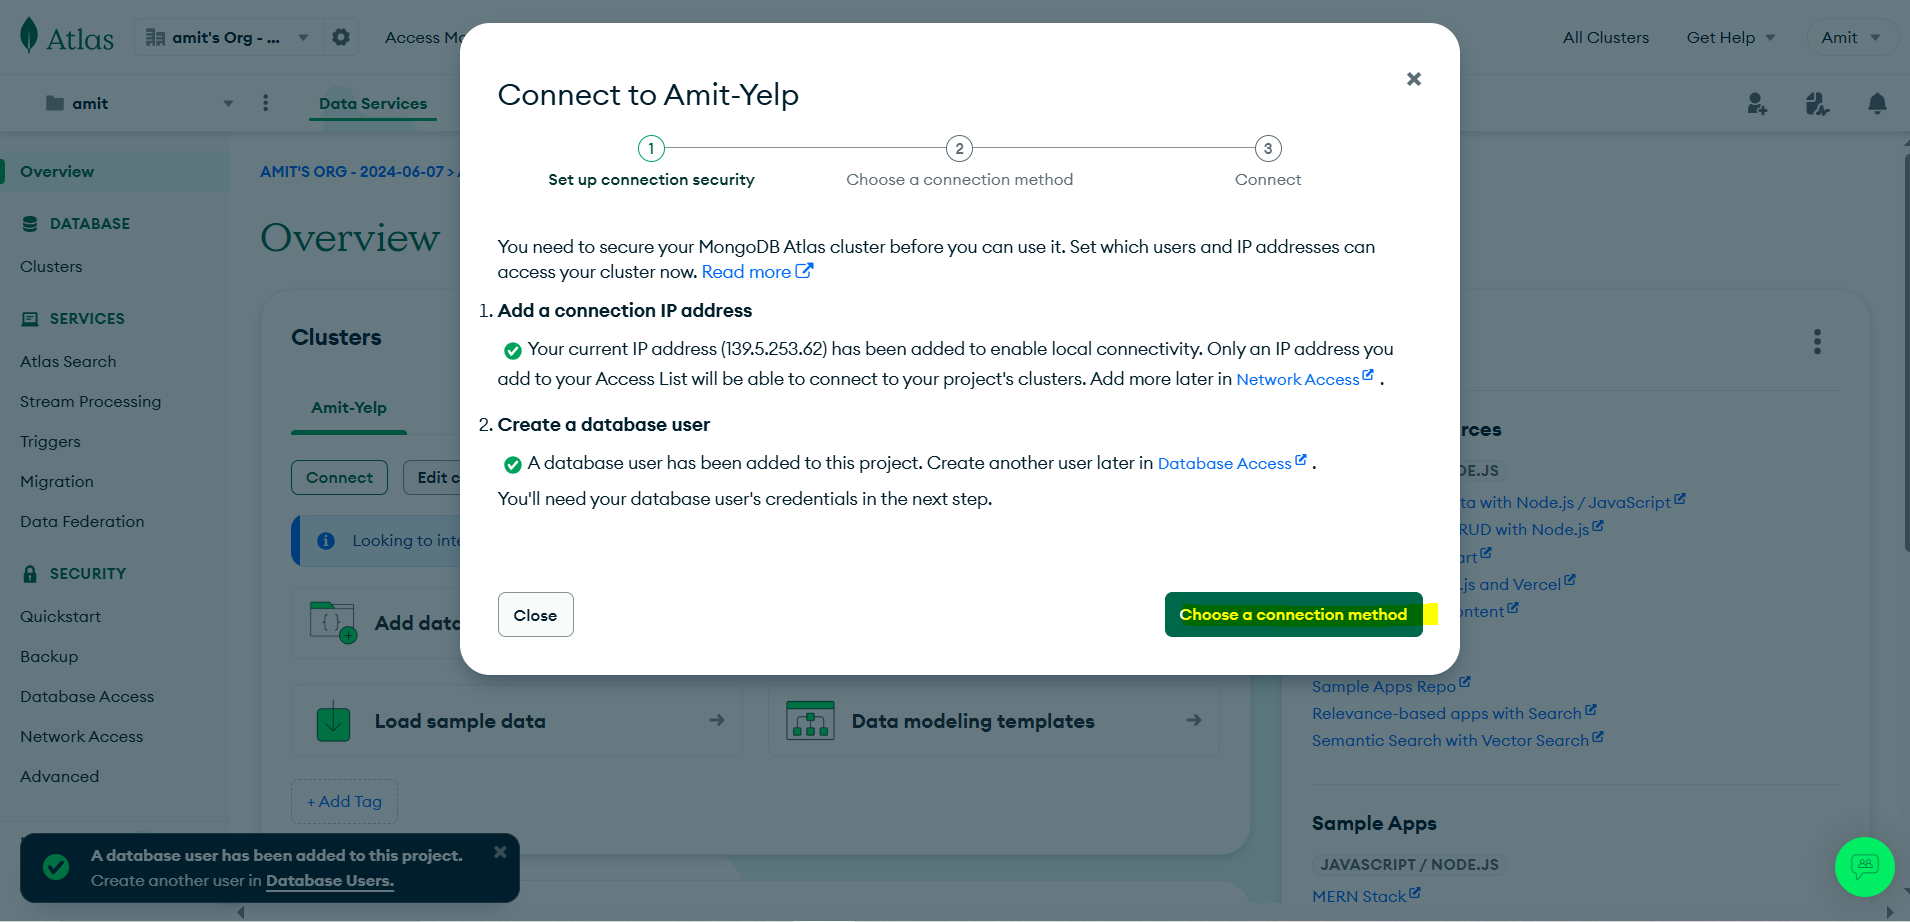
- Click on “drivers”
- You will get mongodb url
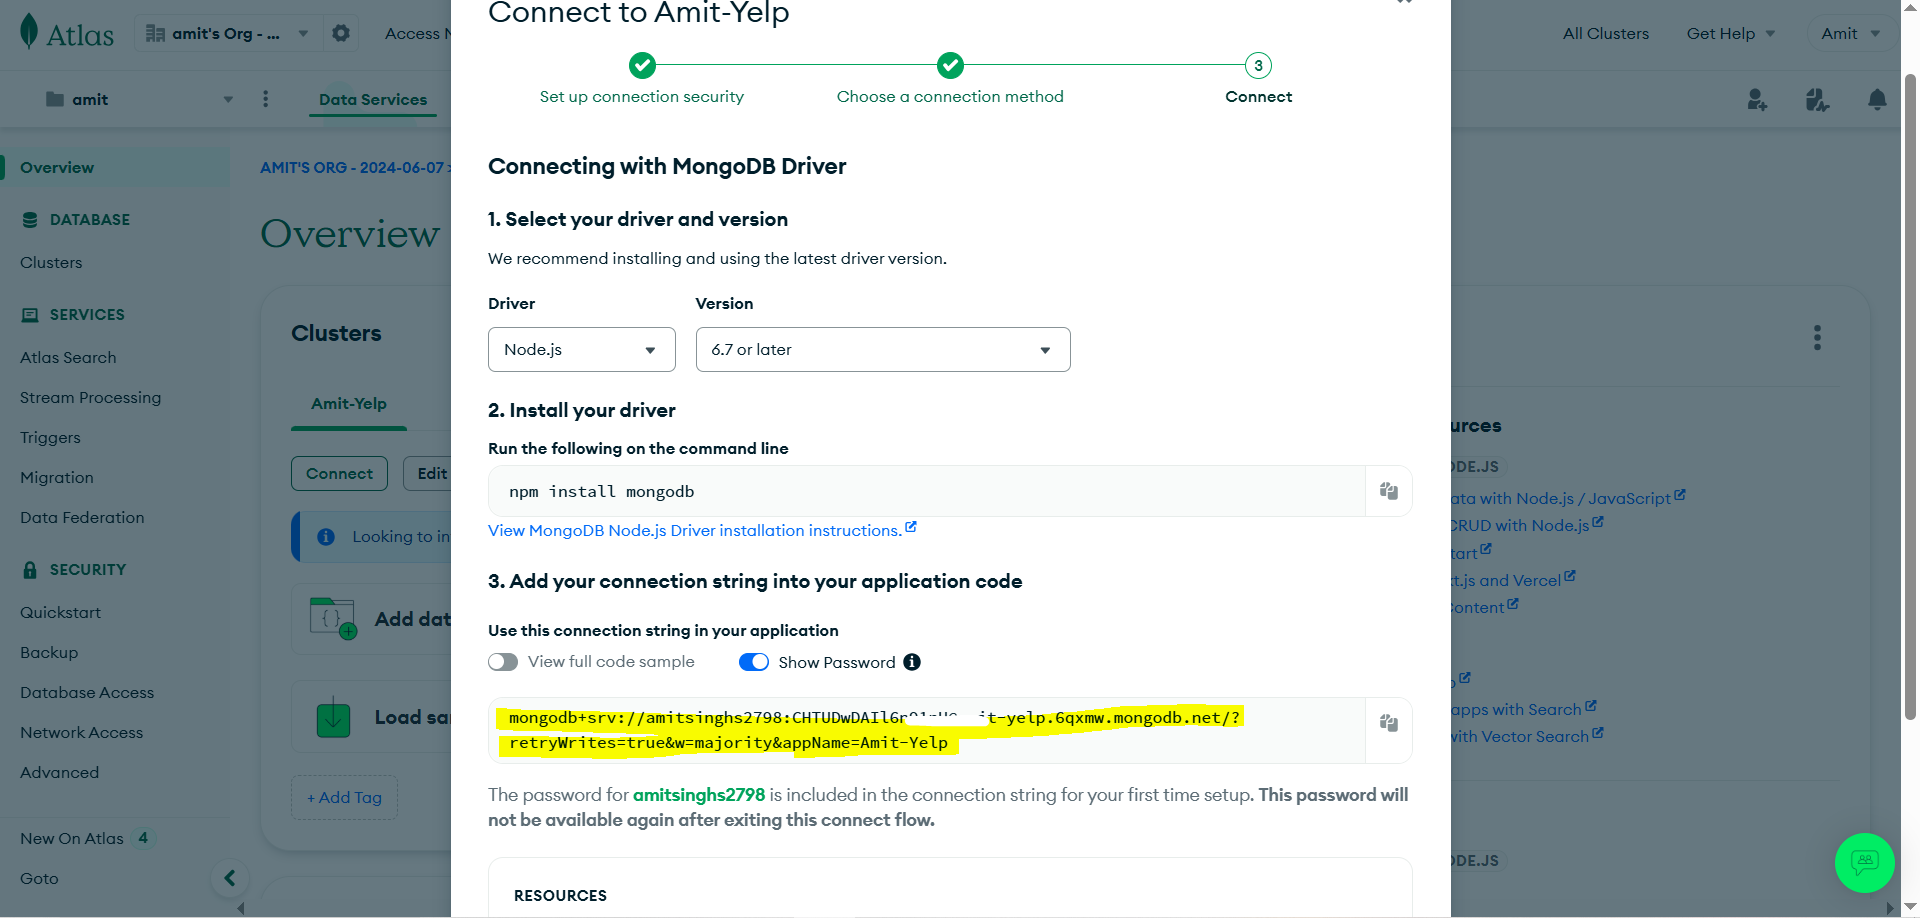
Save in double quotes: Because it’s not one string there are many symbols, to make everything fall at one pace we save in ““.
- Go to network access > Add New IP Address
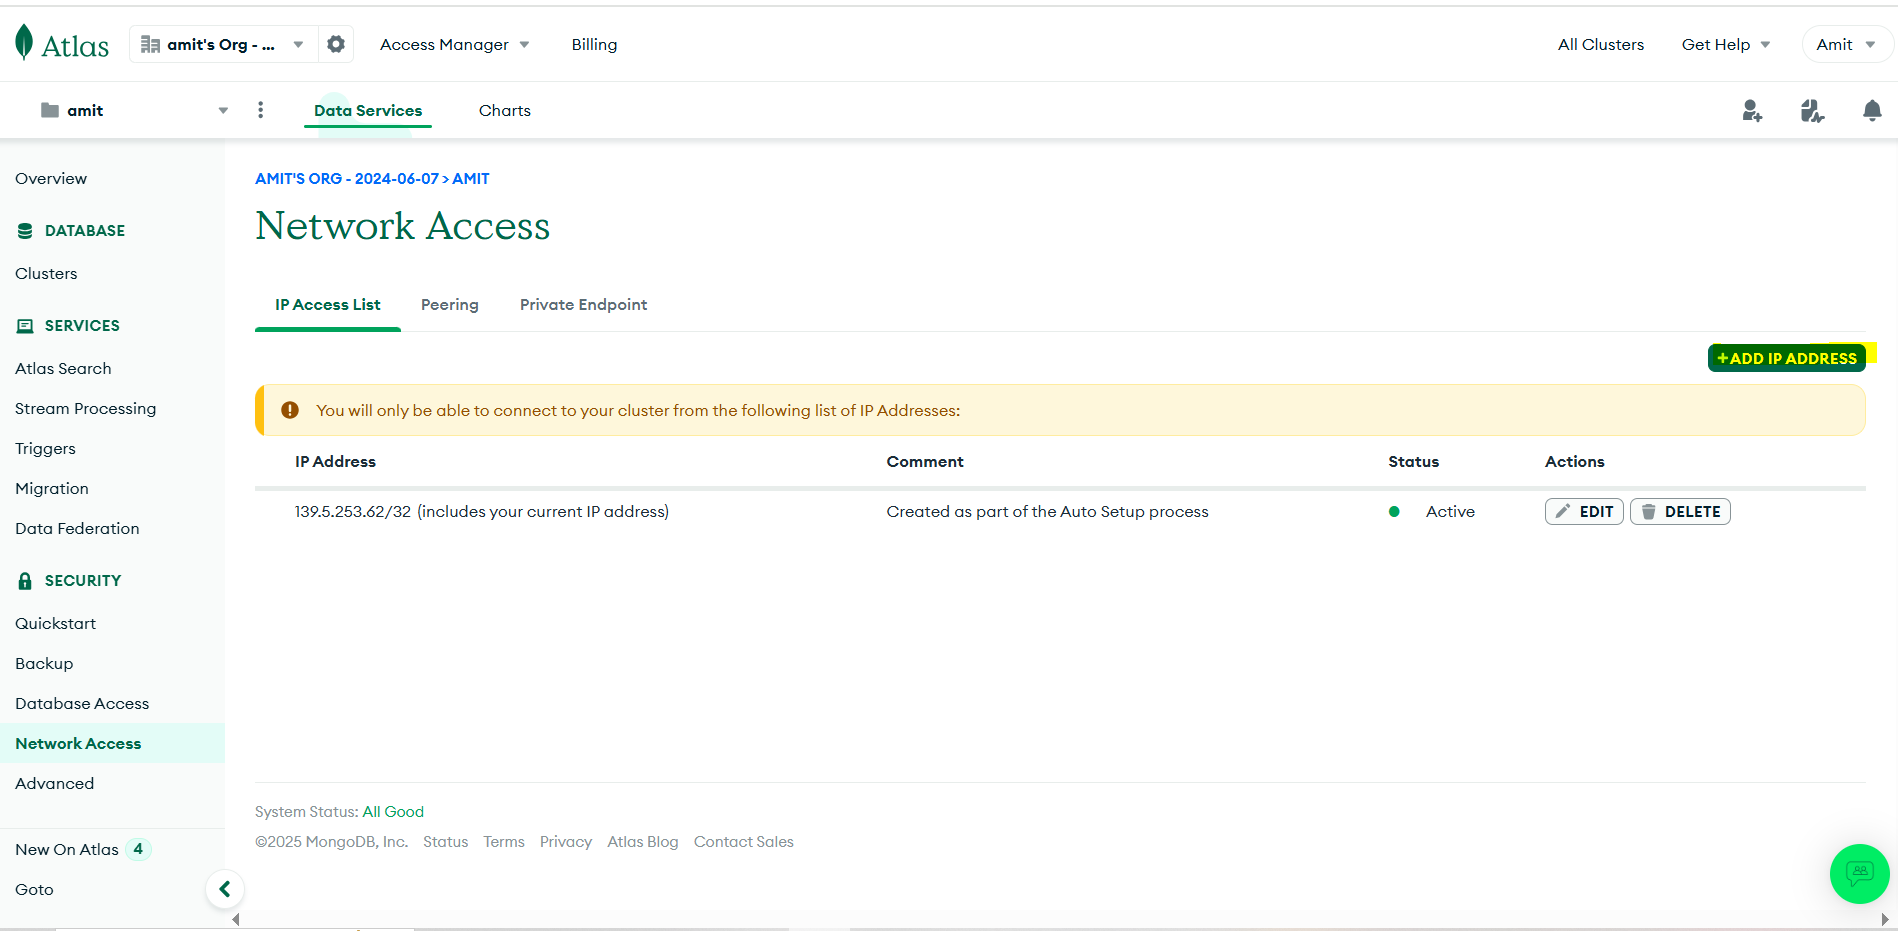
- We are adding new IP Address so that our Database base is accessible from anywhere, by default it’s accessible only locally.
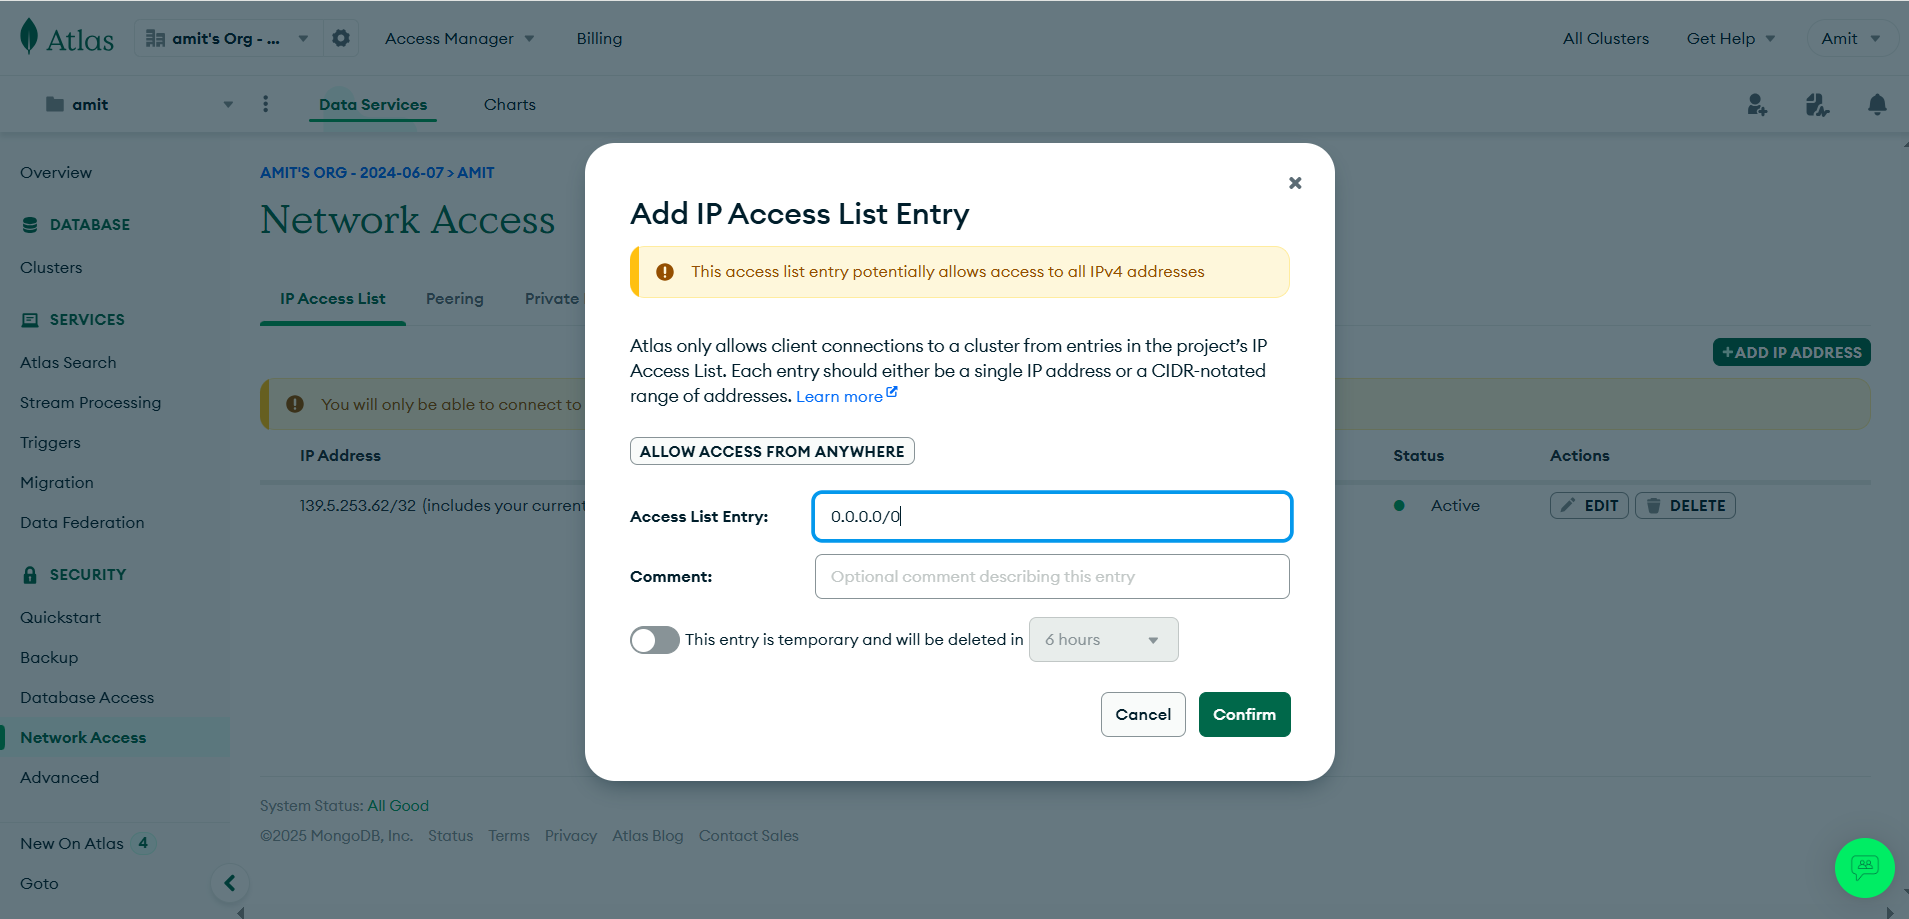
- Note: In database > Browse Collections: You can see all the activity related to your DB
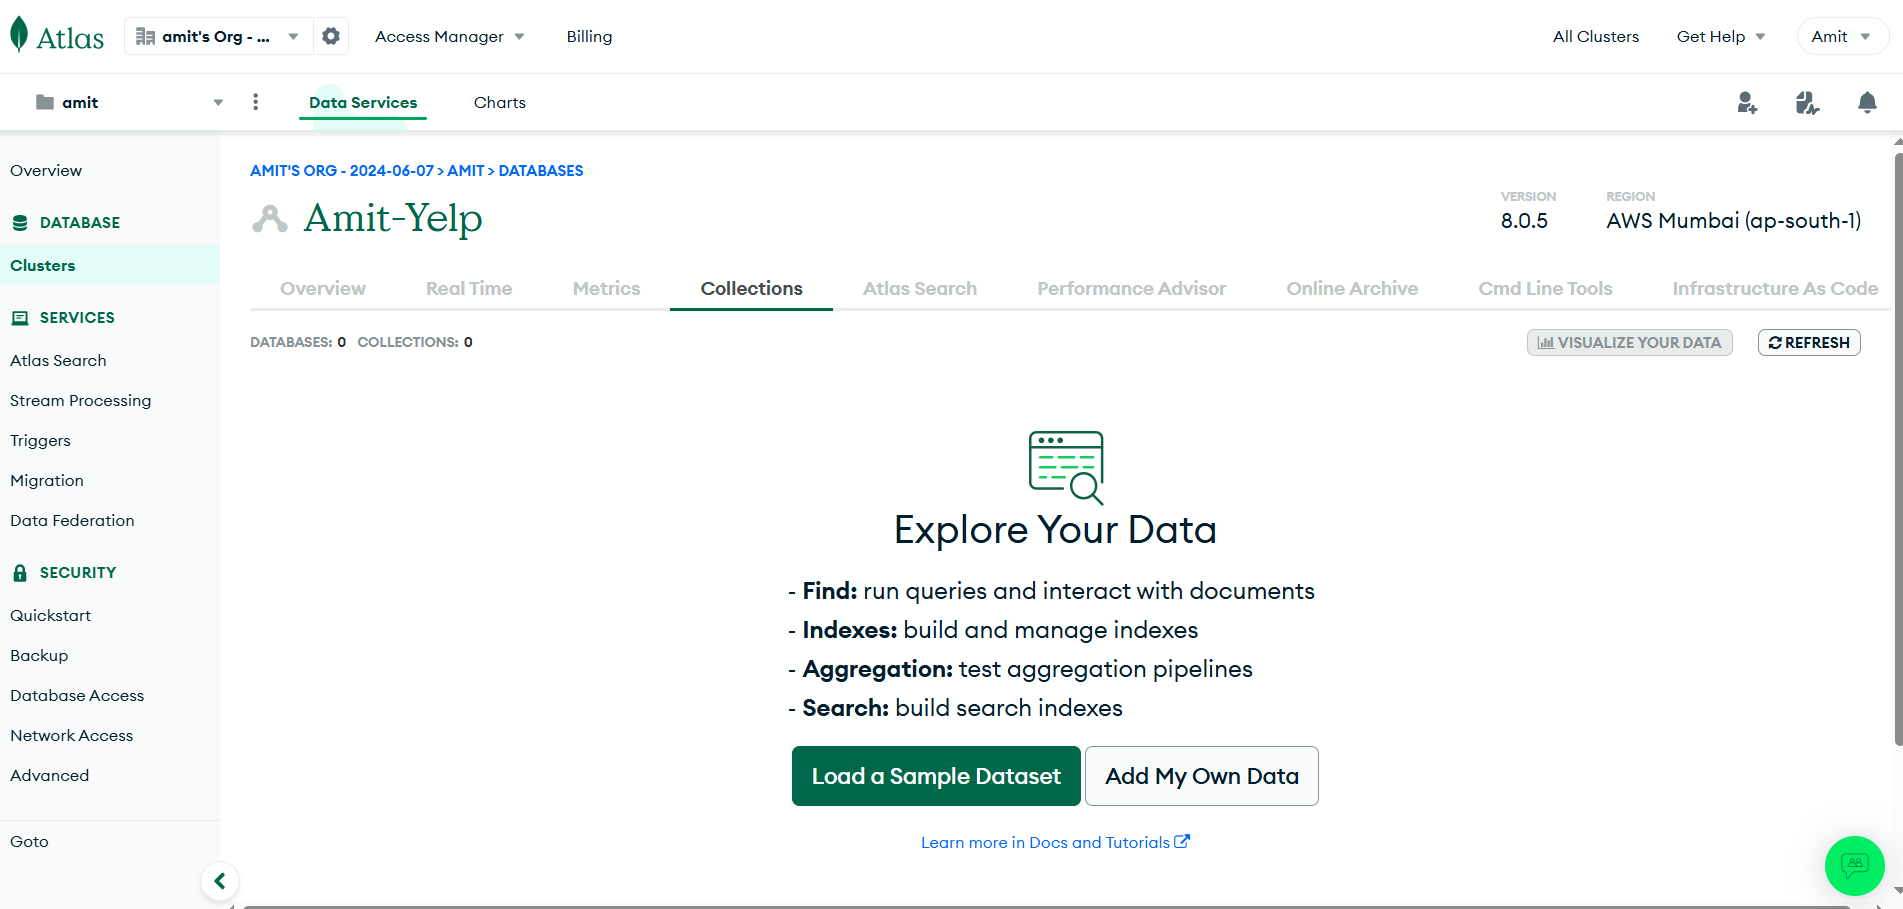
Successfully setup done for MongoDB.
Deployment Strategies as Per Real-time
Types of Deployment
Local Deployment (Developer testing on a laptop)
Container Deployment (Using Docker on Kubernetes for development environments)
Amazon EKS Deployment (For production-ready cloud environments)
Local Deployment
Why? Developers need to test the application locally before moving to staging or production.
Steps:
Set up a virtual machine (VM) or use a local system.
We will setup an EC2 instance with 15GB Storage with t2.medium.
Install Node.js and npm to install dependencies.
 # Download and install nvm:
 curl -o- https://raw.githubusercontent.com/nvm-sh/nvm/v0.40.1/install.sh | bash
 # in lieu of restarting the shell
 \. "$HOME/.nvm/nvm.sh"
 # Download and install Node.js:
 nvm install 23
 # Verify the Node.js version:
 node -v # Should print "v23.9.0".
 nvm current # Should print "v23.9.0".
 # Verify npm version:
 npm -v # Should print "10.9.2".
Clone the github repo
git clone https://github.com/amitsinghs98/3-Tier-Full-Stack-yelp-camp.git
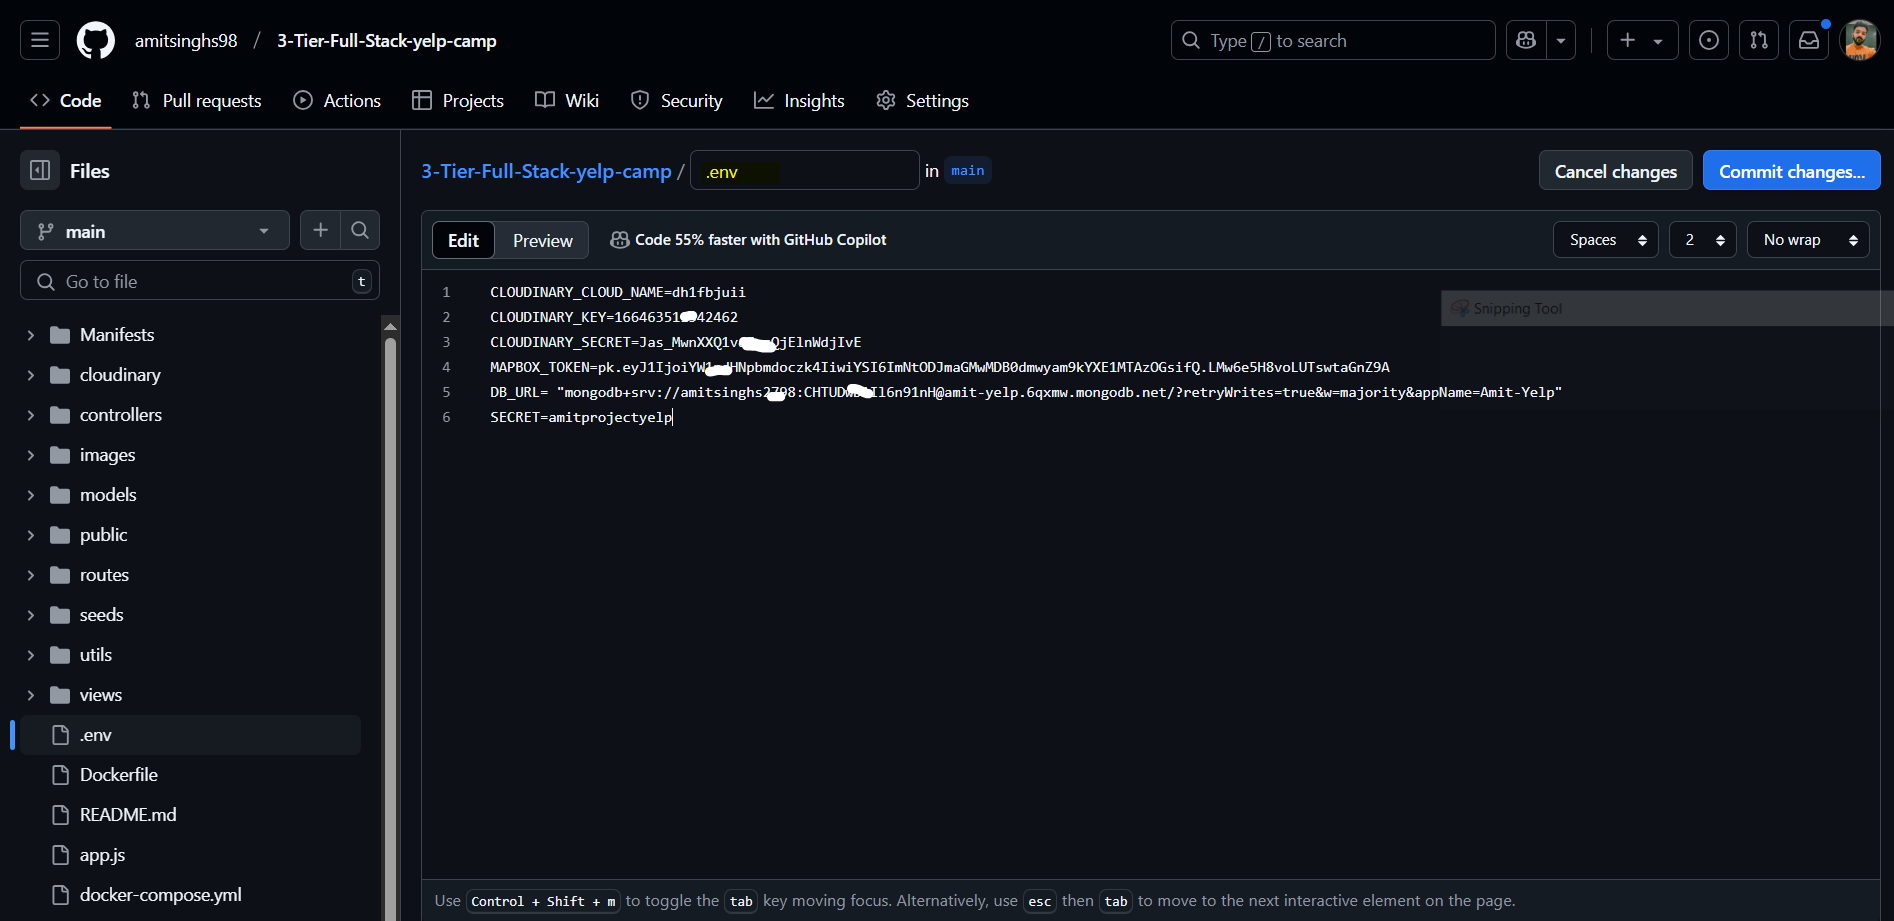
To get this application up and running, you'll need to set up accounts with Cloudinary, Mapbox, and MongoDB Atlas. Once these are set up, create a
.envfile in the same folder asapp.js. This file should contain the following configurations: Go to your repo inside local and create .env fileCLOUDINARY_CLOUD_NAME=[Your Cloudinary Cloud Name] CLOUDINARY_KEY=[Your Cloudinary Key] CLOUDINARY_SECRET=[Your Cloudinary Secret] MAPBOX_TOKEN=[Your Mapbox Token] DB_URL=[Your MongoDB Atlas Connection URL] SECRET=[Your Chosen Secret Key] # This can be any value you preferRun the application locally using:
 npm install #This will install all the dependencies required
 npm start #This will start your app in local env

- Test the application in Web : PORT 3000
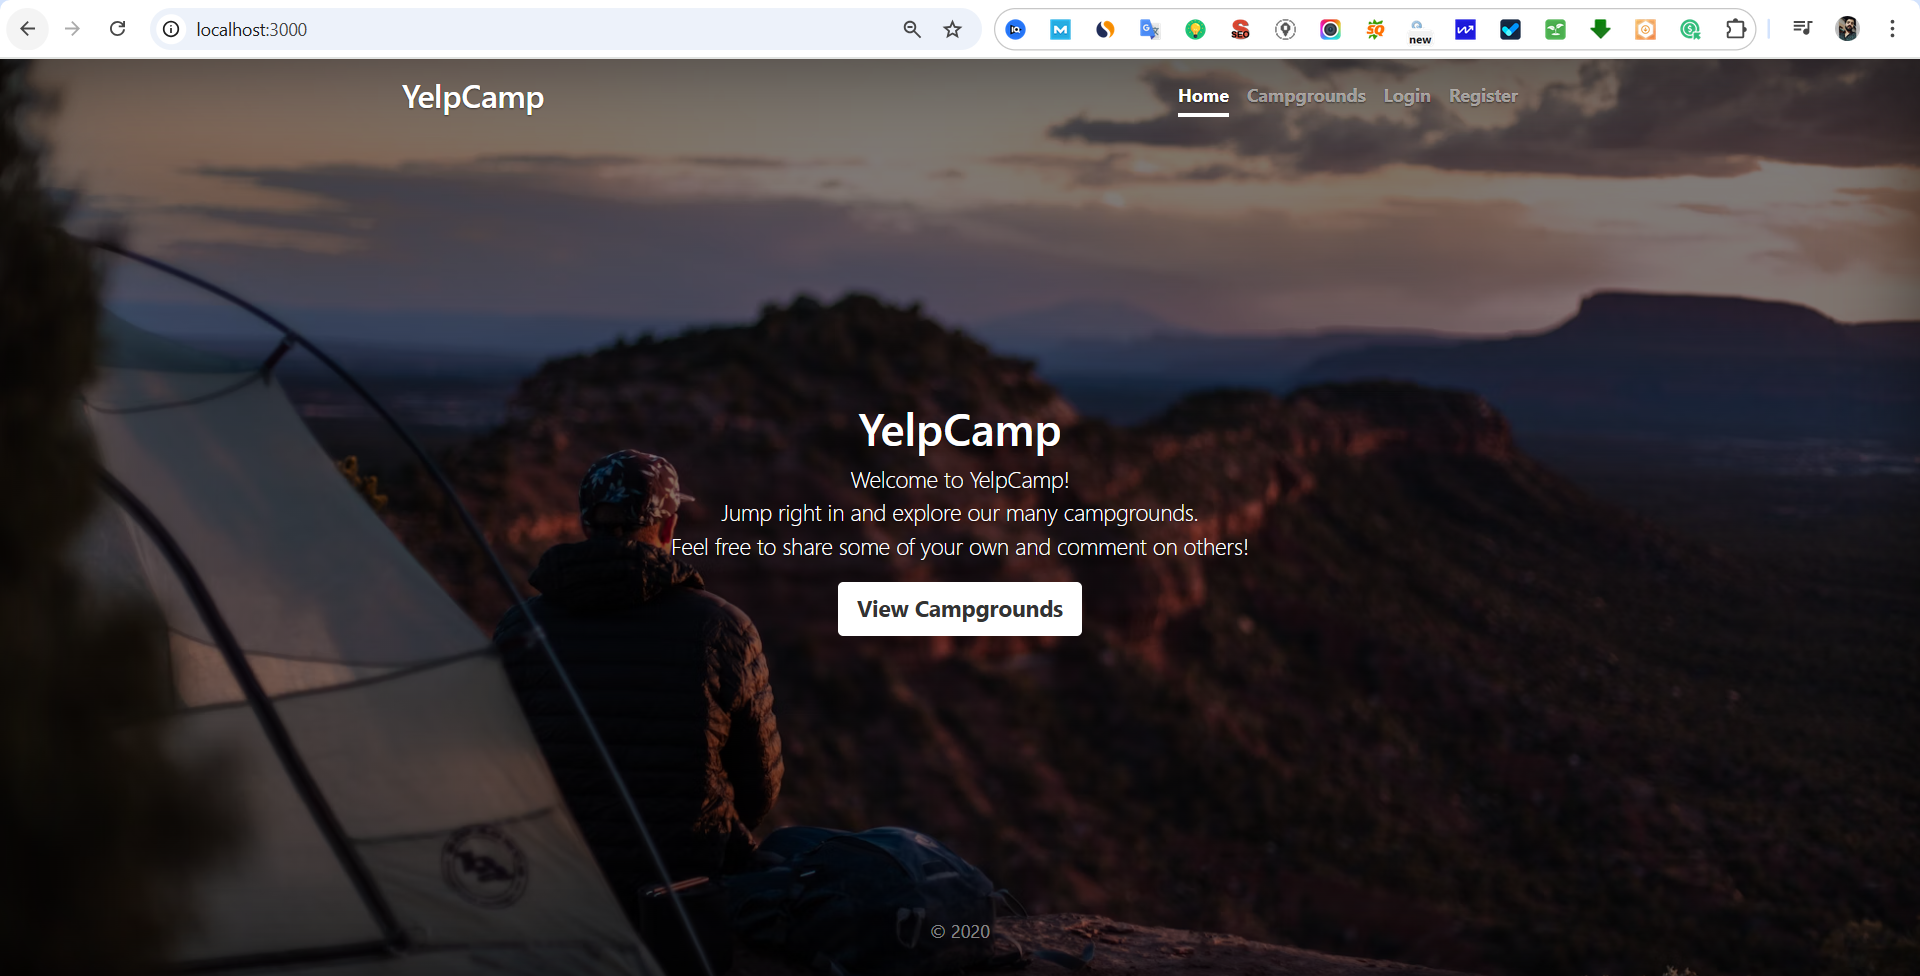
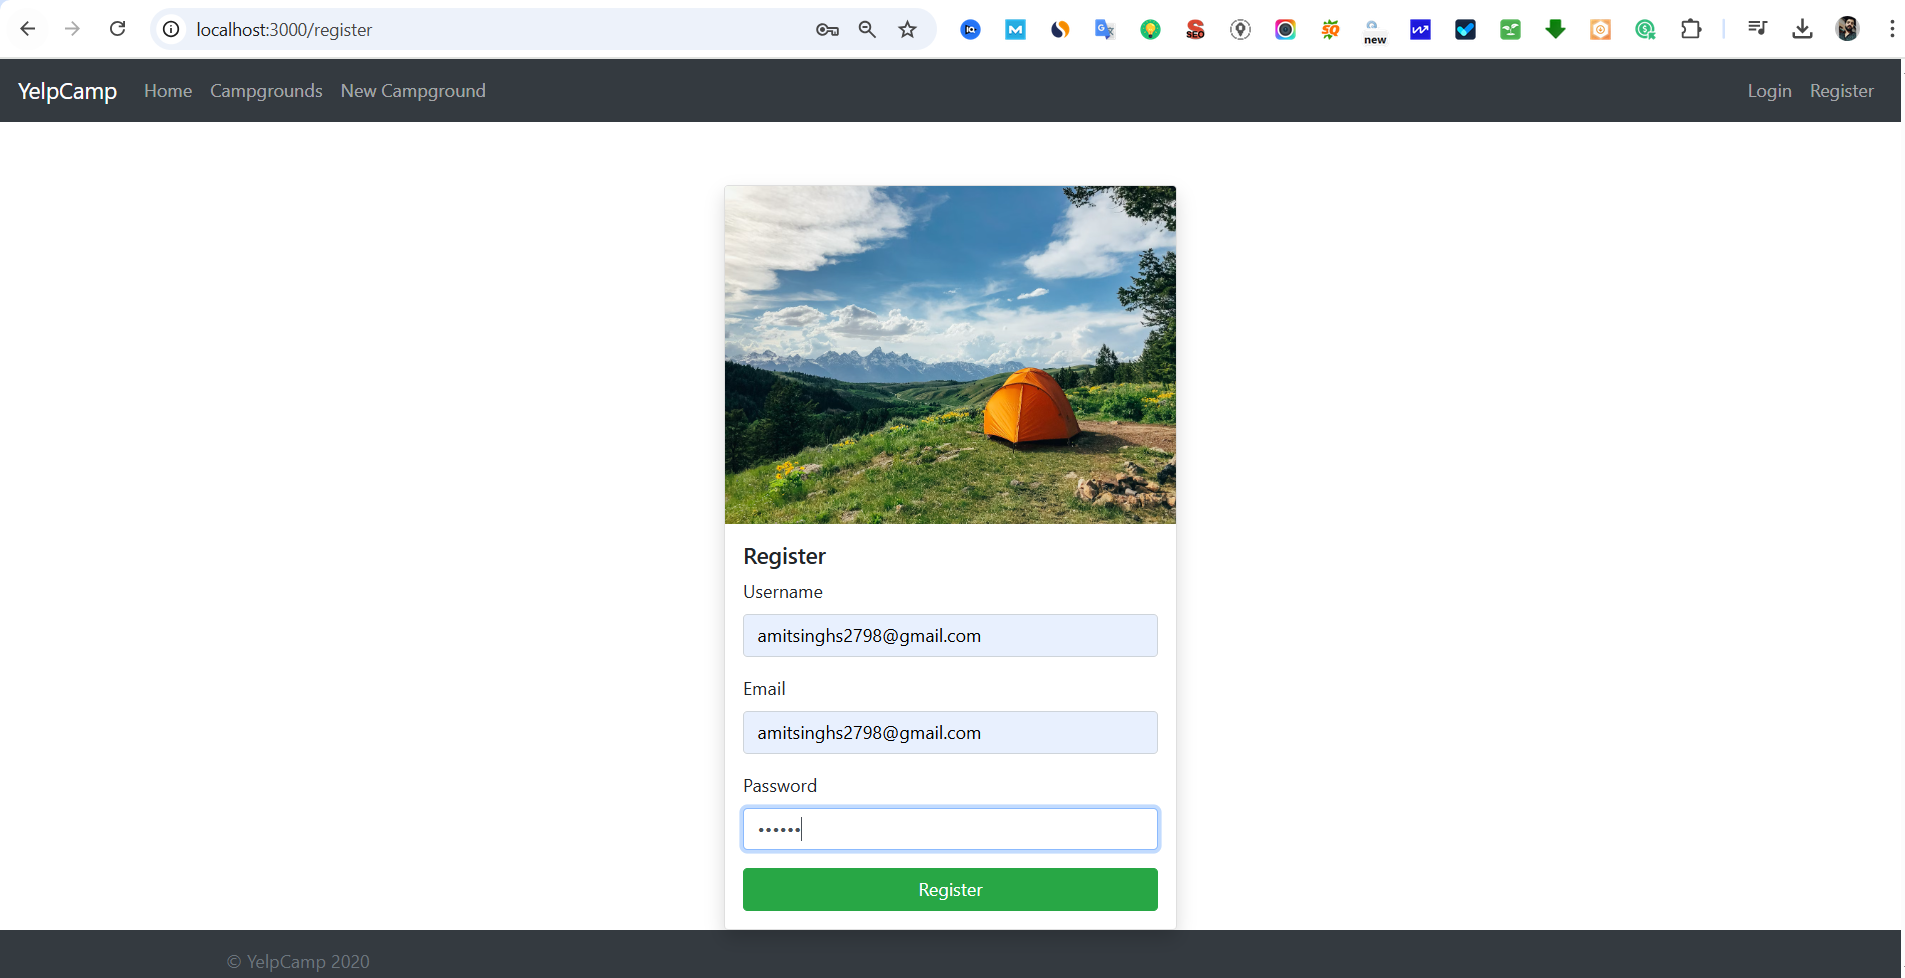
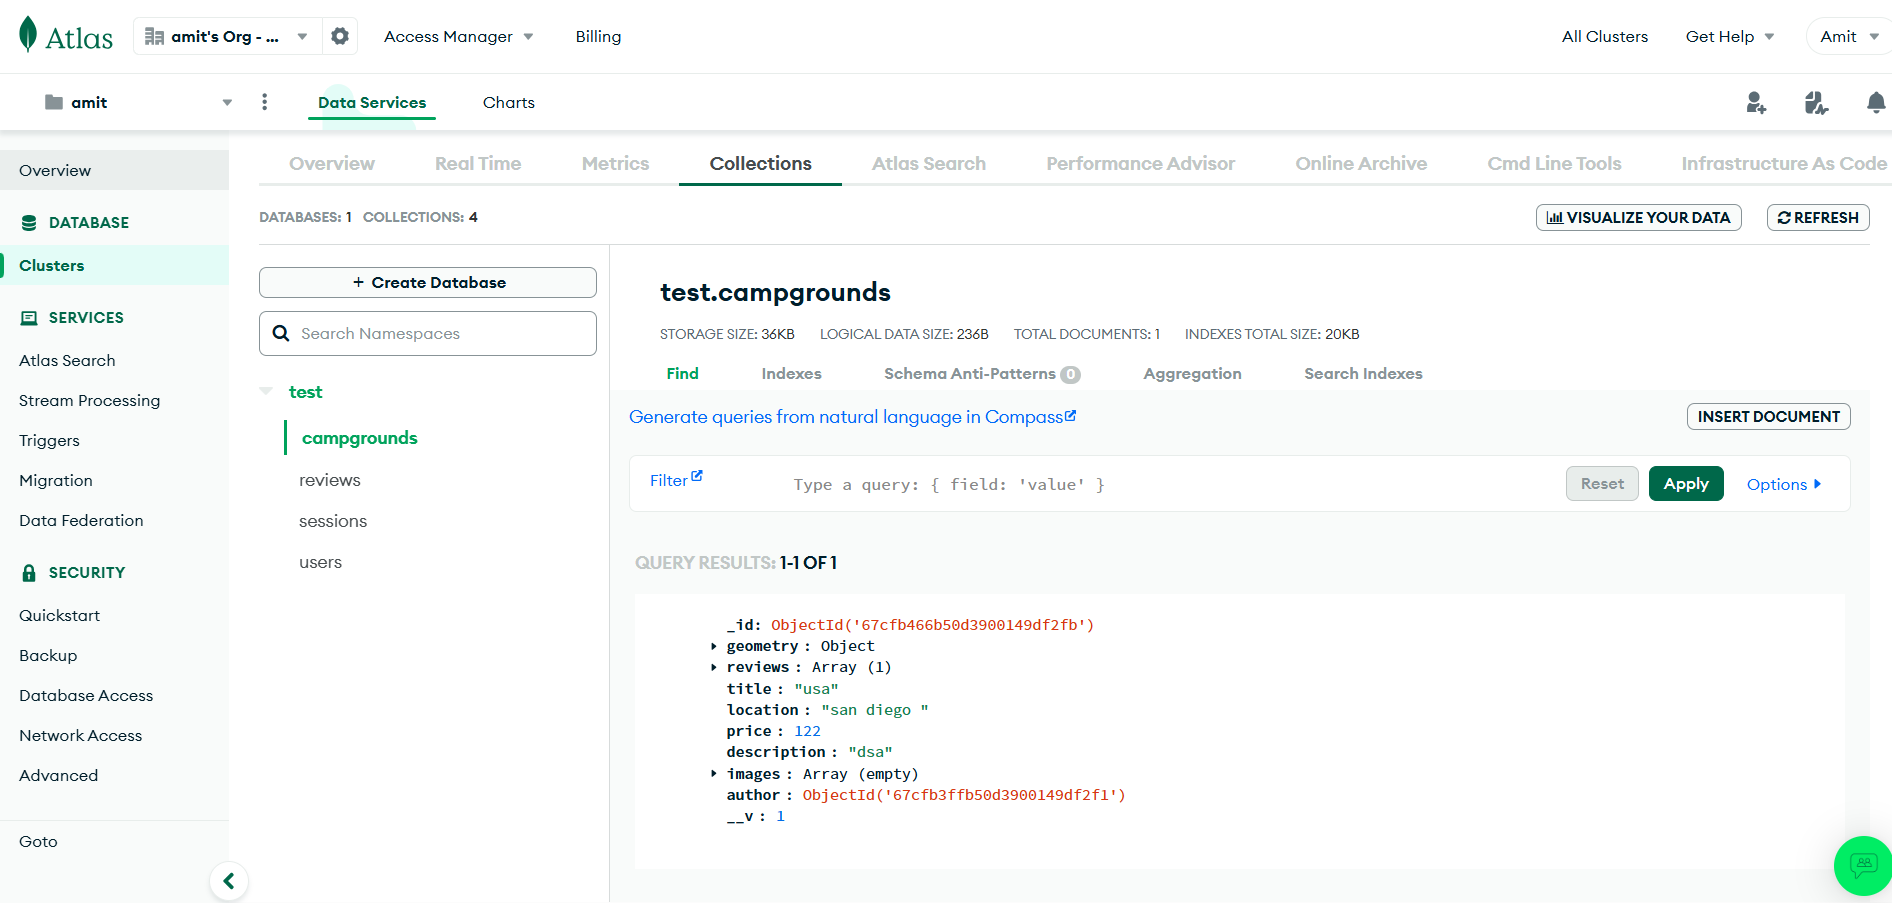
- Since you have registered, check the entries in your MongoDB
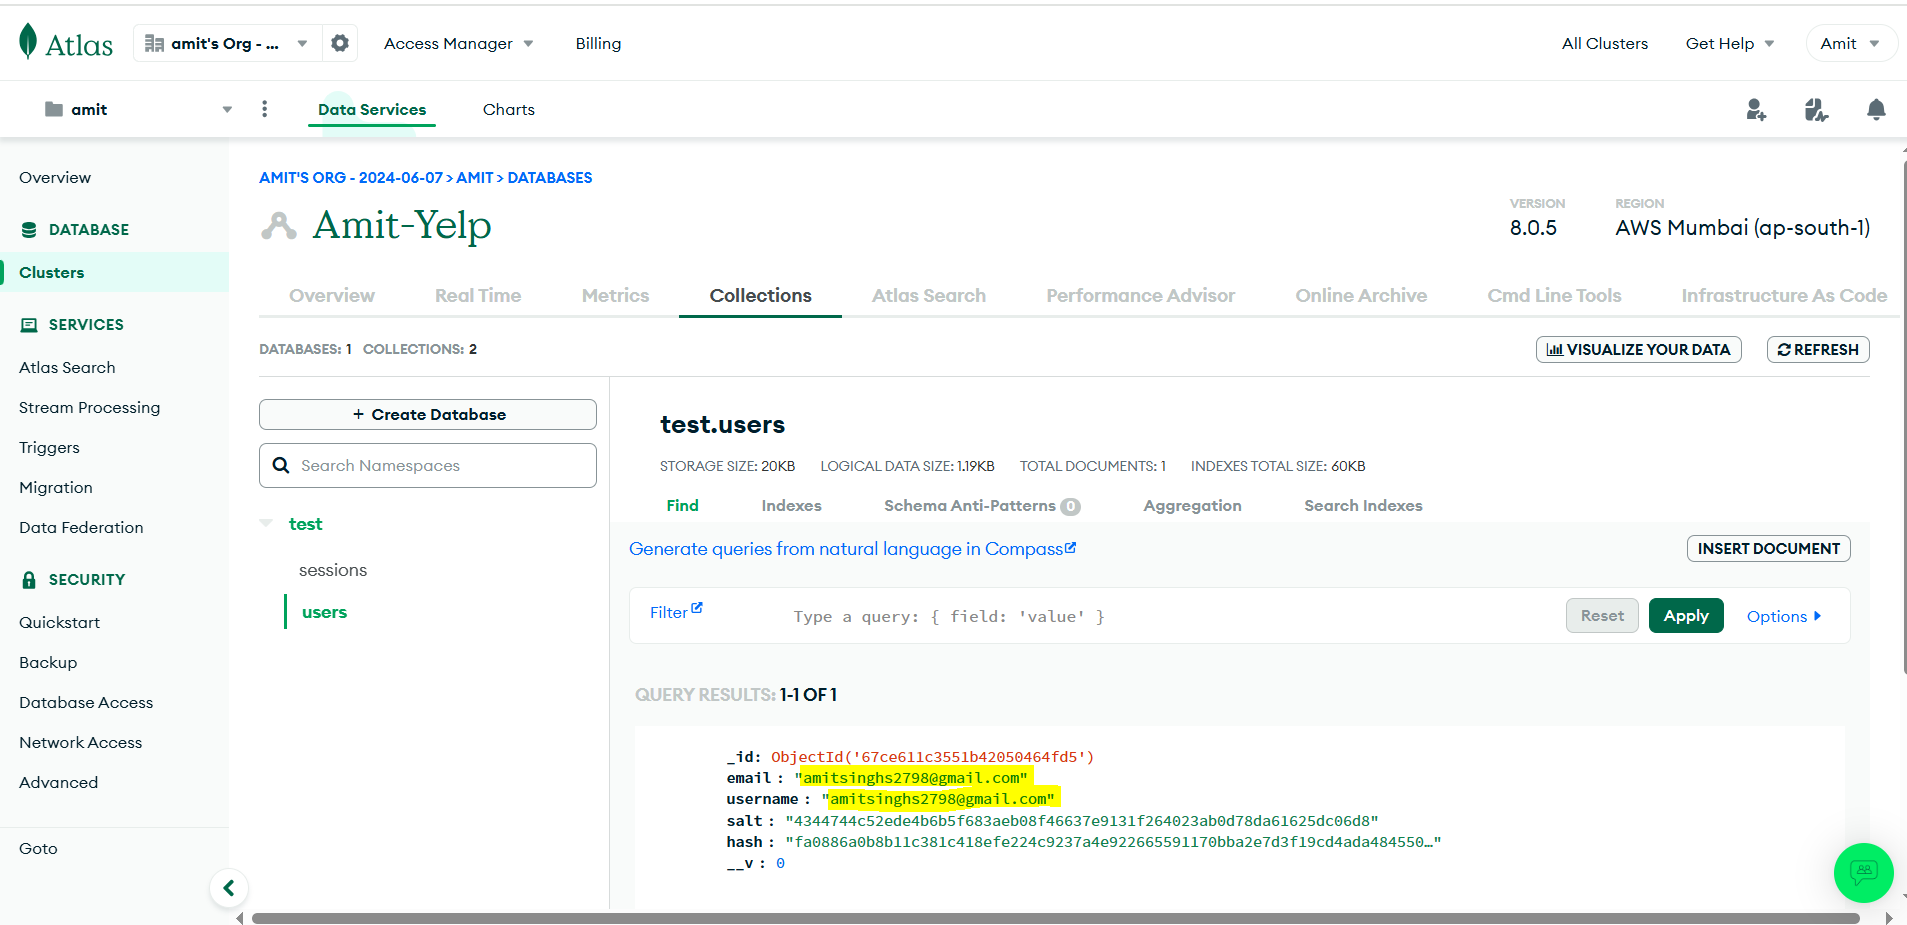
Ensure that the database connection works before proceeding. As we can see it’s filling the entries now it’s successful.
So, till now we have seen our application is working fine with all the environment variable including MongoDB database integration with help of Atlas platform on cloud.
Dev Deployment
We are going to setup an Jenkins pipeline here for dev deployment.
We require two machines (EC2 Instances)
Jenkins EC2
Configurations: t2.large / 25GB Storage
SonarQube EC2
Configurations: t2.medium / 15GB Storage
Jenkins Setup EC2 instance
Install java headless, jenkins, trivy and docker. Give permissions to docker in jenkins group.
Don’t forget to add the env variable in your github repo .env file
Login Jenkins: http://url:8080
Install Plugins in Jenkins:
Go to Manage Jenkins → Manage Plugins → Available Plugins, search for and install:
Nodejs
SonarQube Scanner
Docker
Docker pipeline
Kubernetes
Kubernetes CLI
Configure Nodejs 21, SonarQube and Docker in Jenkins for Dev Pipeline
Integrate SonarQube and Jenkins
Defining Sonar-scanner
So, for defining the sonar-scanner plugin: Go to > Manage Jenkins > Tools > SonarQube Scanner > Name: sonar-scanner

Go to
Sonarqube > Administration
First create user in Sonarqube
Go to
Sonarqube > Security > user
Create a token in Administrator to authenticate jenkins

Login to Jenkins: to add SonarQube token in Jenkins
Go to
manage Jenkins > CredentialsGo to
global > Add credentials
Click on
“add credentials”
Add credentials:
The one we copied the token from sonarqube

Now adding SonarQube Server inside Jenkins
Go to Jenkins > Manage Jenkins > System > SonarQube Installation

Congrats! You have successfully integrated Sonar and Jenkins
Running the SonarQube Container in SonarQube EC2 Instance
Once we have our Docker image, we can execute the following command to run the SonarQube container:
docker run -d --name sonar -p 9000:9000 sonarqube:lts-community
-d: Runs the container in detached mode.--name sonar: Assigns the container the name sonar.-p 9000:9000: Maps port 9000 of the container to port 9000 on the host machine.sonarqube:lts-community: Uses the SonarQube LTS Community Docker image.
Once you execute this command, the container will start running in the background.
Dev Pipeline Script
Go to Jenkins → Pipeline
pipeline {
    agent any
    tools {
        nodejs 'node21'
    }
    environment {
        SCANNER_HOME = tool 'sonar-scanner'
    }
    stages {
      stage('Git Checkout') {
    steps {
        git credentialsId: 'git-credd', url: 'https://github.com/amitsinghs98/3-Tier-Full-Stack-yelp-camp.git', branch: 'main'
        // Debugging command to verify the repository state
        sh 'git status'
    }
}
        stage('Install Package Dependencies') {
            steps {
                sh "npm install"
            }
        }

        stage('Unit Tests') {
            steps {
                sh "npm test" #Get the test name from package.json file
            }
        }

        stage('Trivy FS Scan') {
            steps {
                sh "trivy fs --format table -o fs-report.html ."
            }
        }

        stage('SonarQube') {
            steps {
                withSonarQubeEnv('sonar') {
                    sh "$SCANNER_HOME/bin/sonar-scanner -Dsonar.projectKey=Campground -Dsonar.projectName=Campground"
                }
            }
        }

        stage('Docker Build & Tag') {
            steps {
                script {
                    withDockerRegistry(credentialsId: 'docker-cred', toolName: 'docker') {
                        sh "docker build -t amitsinghs98/camp:latest ."
                    }
                }
            }
        }

        stage('Trivy Image Scan') {
            steps {
                sh "trivy image --format table -o fs-report.html amitsinghs98/camp:latest"
            }
        }

        stage('Docker Push Image') {
            steps {
                script {
                    withDockerRegistry(credentialsId: 'docker-cred', toolName: 'docker') {
                        sh "docker push amitsinghs98/camp:latest"
                    }
                }
            }
        }

        stage('Docker Deploy To Local') {
            steps {
                script {
                    withDockerRegistry(credentialsId: 'docker-cred', toolName: 'docker') {
                        sh "docker run -d -p 3004:3000 amitsinghs98/camp:latest"
                    }
                }
            }
        }
    }
}
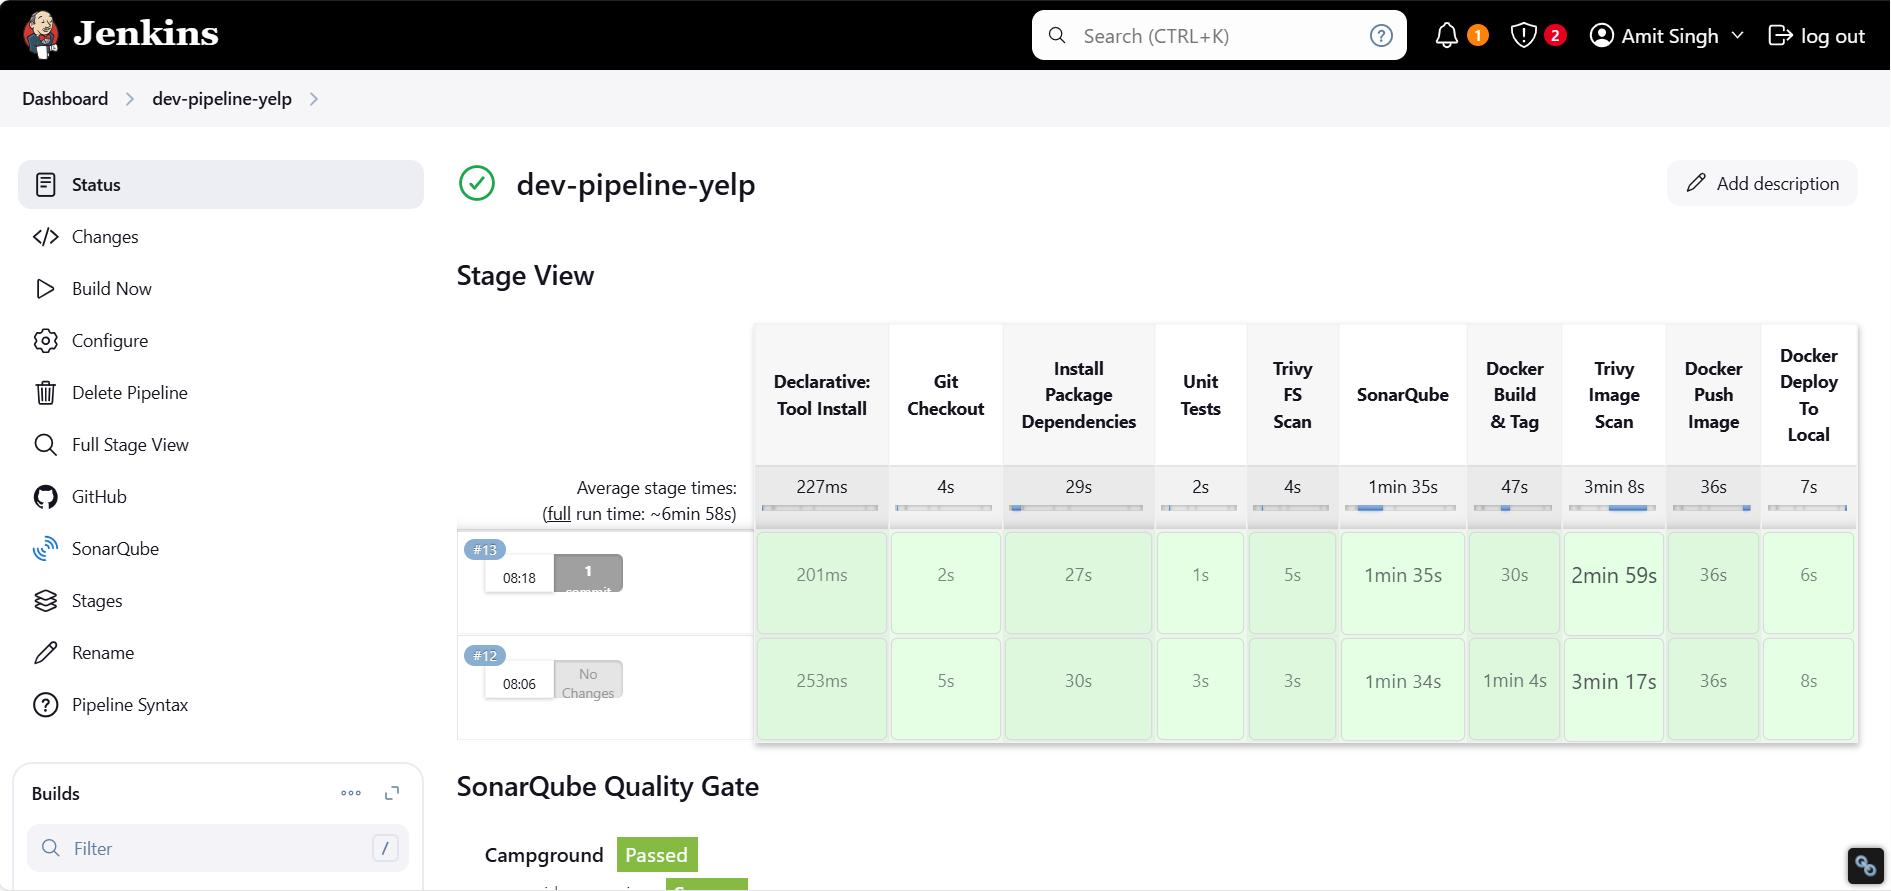
Run Jenkins Pipeline Build
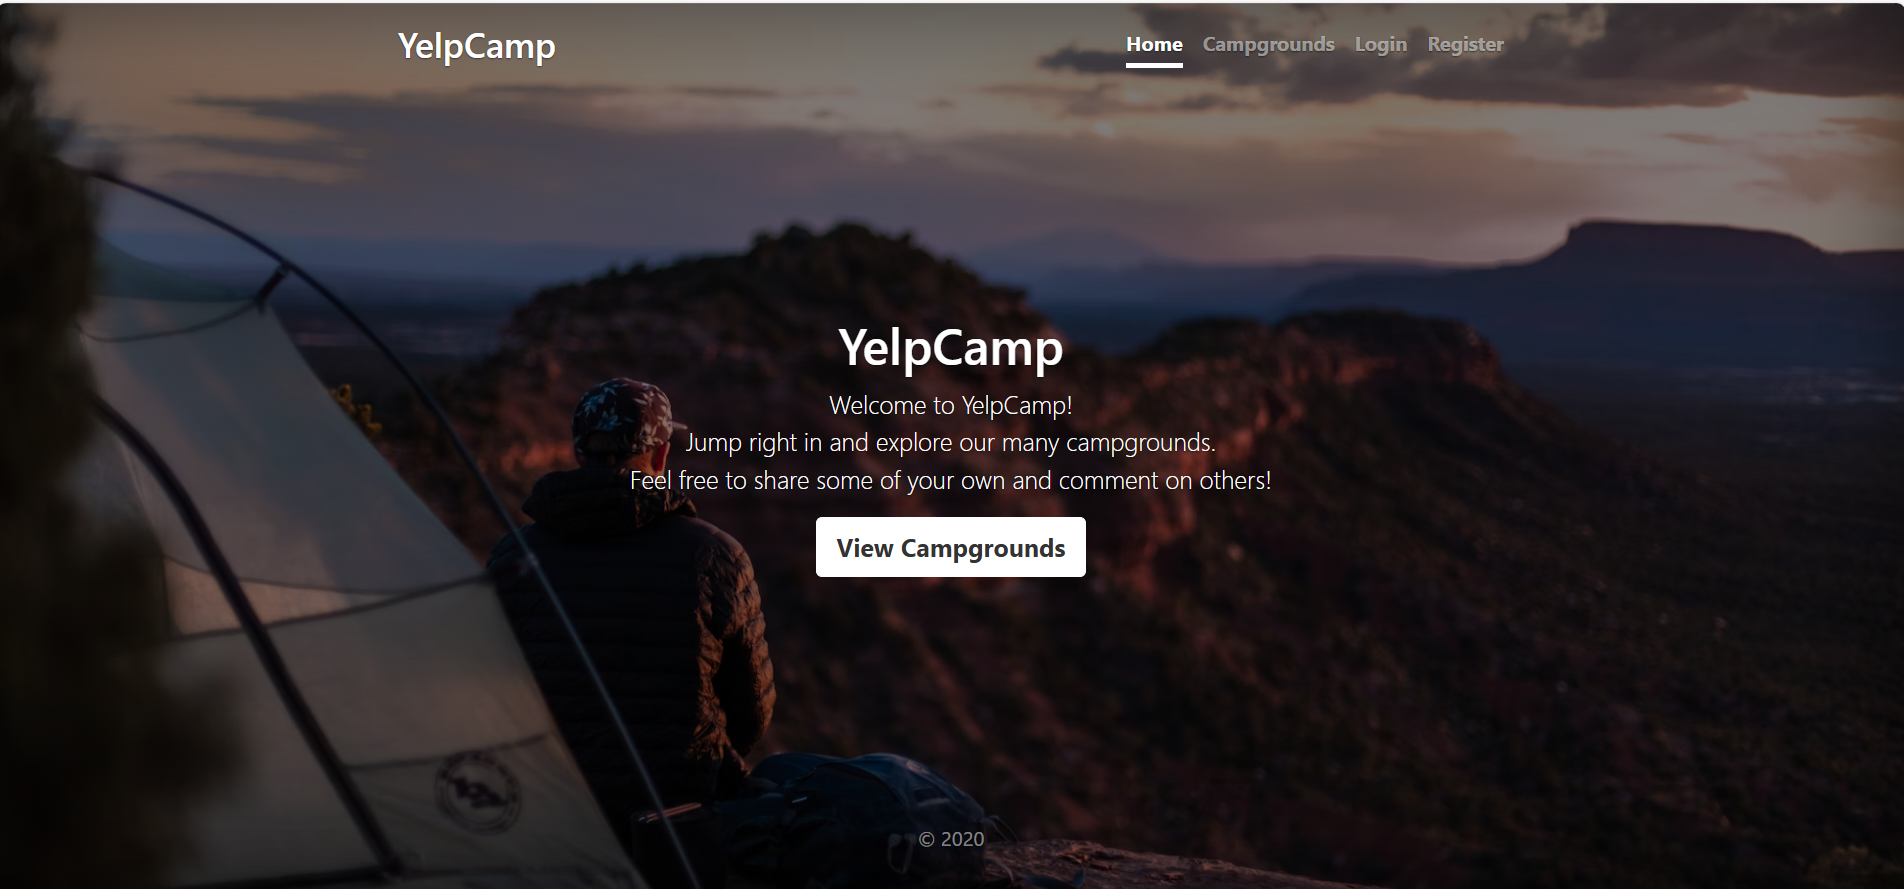
Run the application once you have deployed the application using docker containers
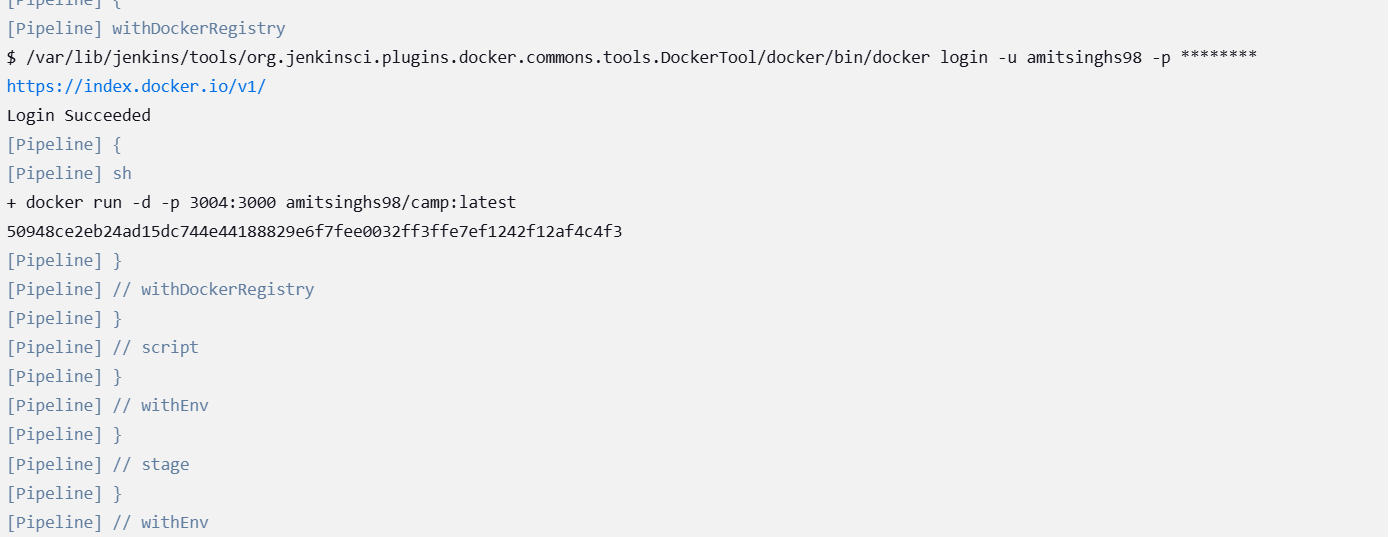
Go to http://<url>:3004
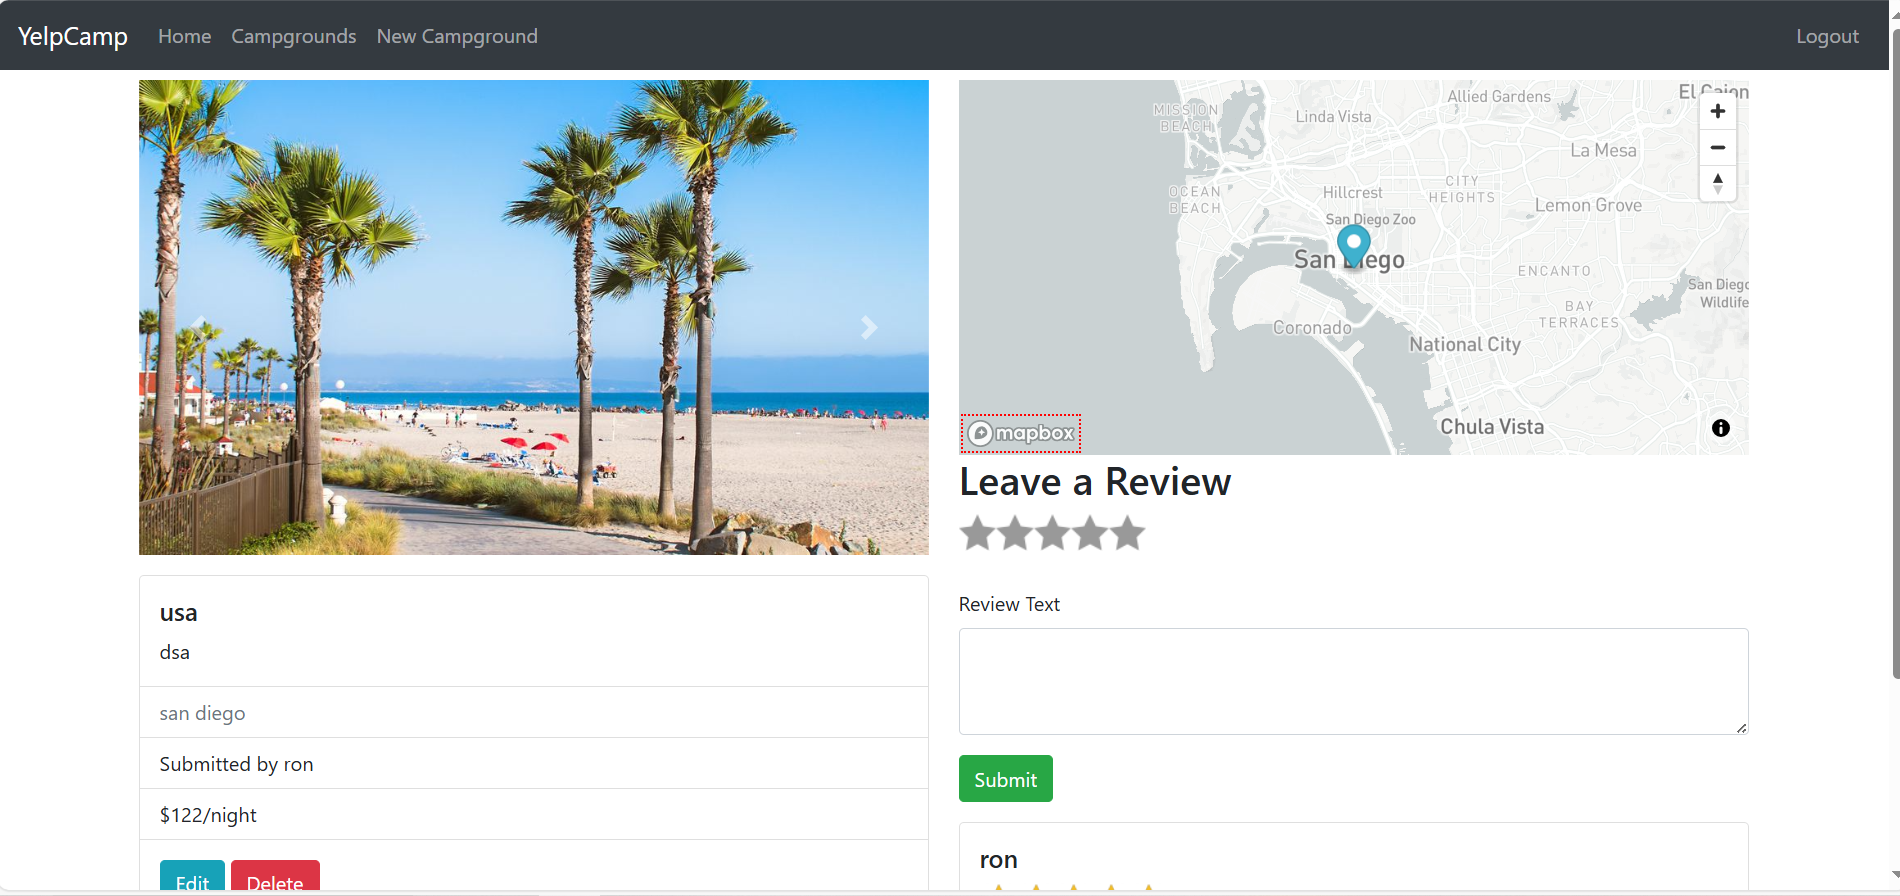
Check MongoDB Data
Amazon EKS Deployment (For production-ready cloud environments)
Install Required CLIs
You need the following:
✅ AWS CLI → To communicate with your AWS account
✅ kubectl → To manage Kubernetes clusters
✅ eksctl → To create and manage EKS clusters
Setting up EKS:
AWS CLI Installation
curl "https://awscli.amazonaws.com/awscli-exe-linux-x86_64.zip" -o "awscliv2.zip"
sudo apt install unzip
unzip awscliv2.zip
sudo ./aws/install
aws configure
kubectl Installation
curl -o kubectl https://amazon-eks.s3.us-west-2.amazonaws.com/1.19.6/2021-01-05/bin/linux/amd64/kubectl
chmod +x ./kubectl
sudo mv ./kubectl /usr/local/bin
kubectl version --short --client
eksctl Installation
curl --silent --location "https://github.com/weaveworks/eksctl/releases/latest/download/eksctl_$(uname -s)_amd64.tar.gz" | tar xz -C /tmp
sudo mv /tmp/eksctl /usr/local/bin
eksctl version
Set Up AWS IAM User
Create a new IAM user (
eks-user)Attach necessary policies
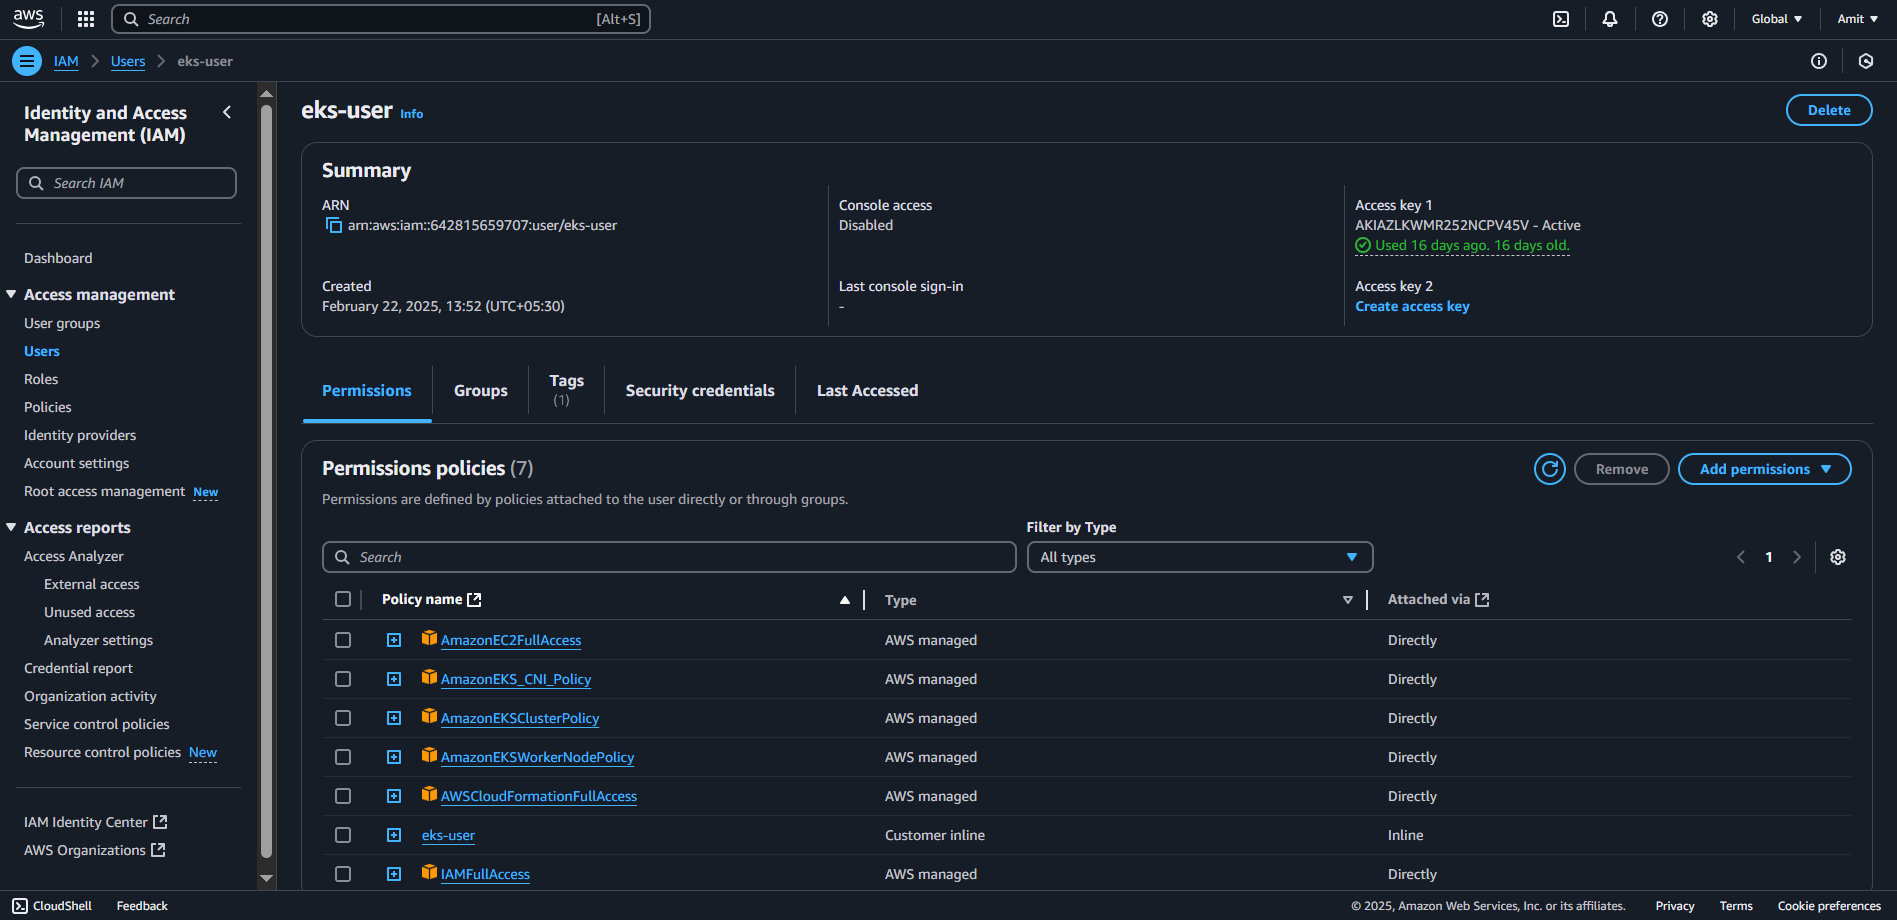
- Create an access key and store the credentials
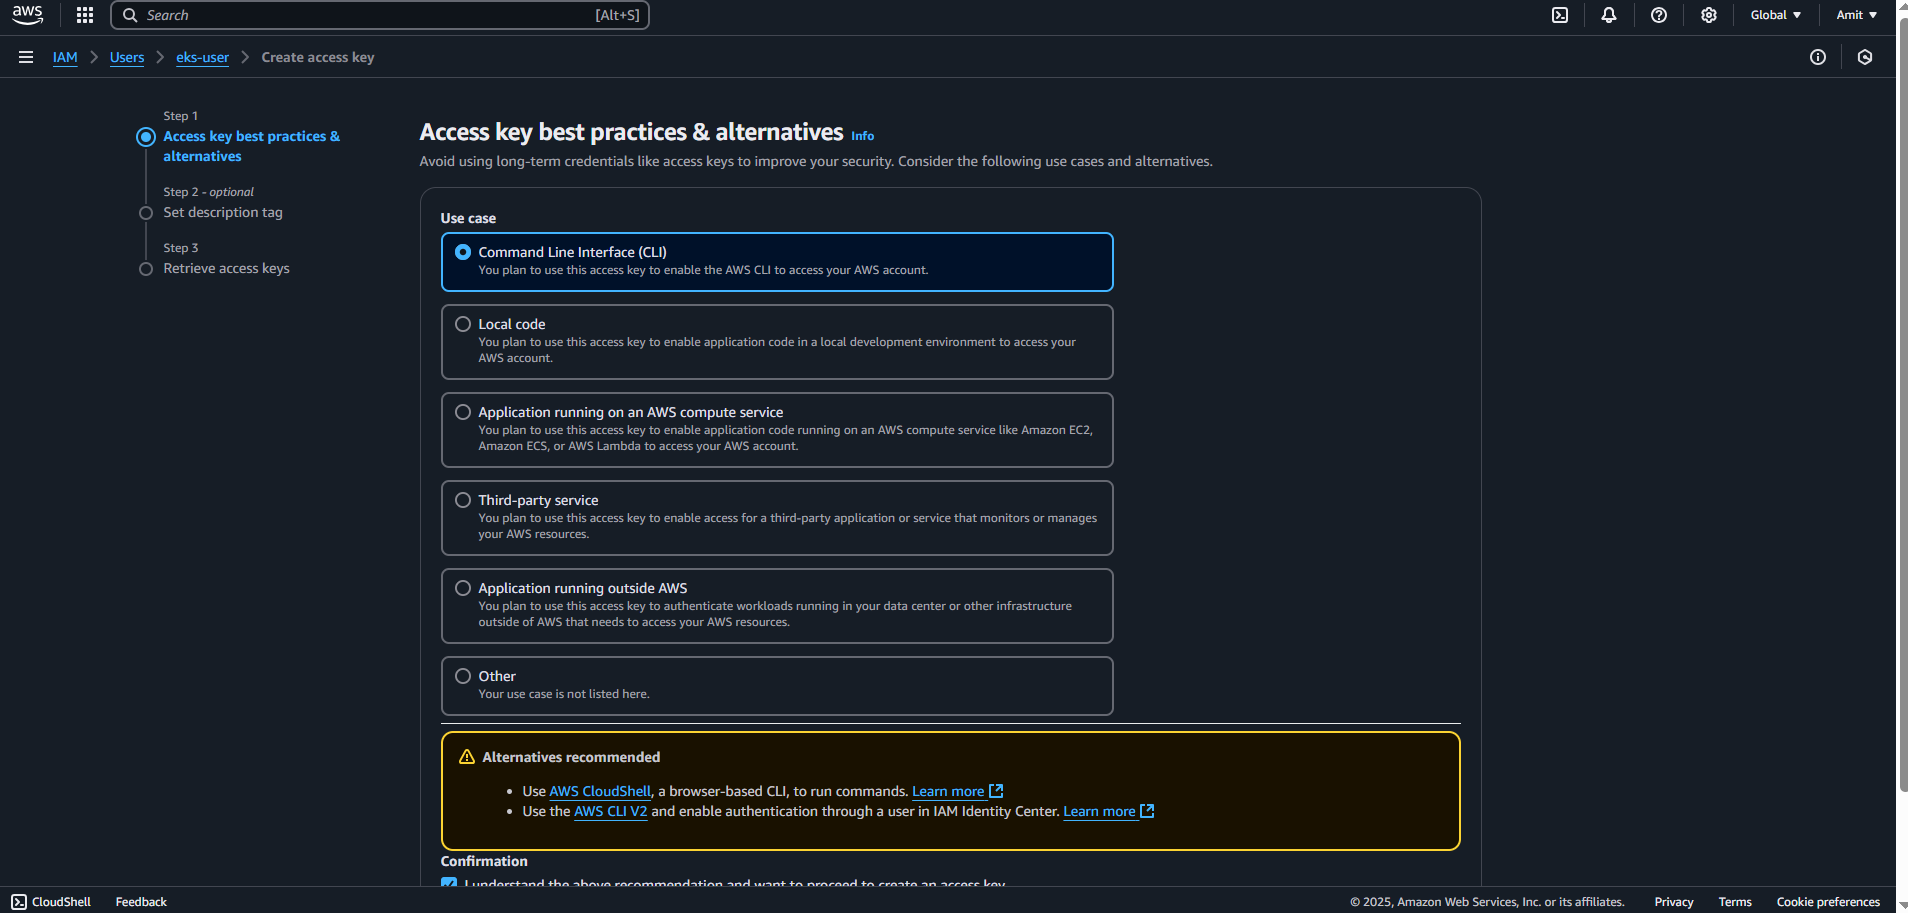
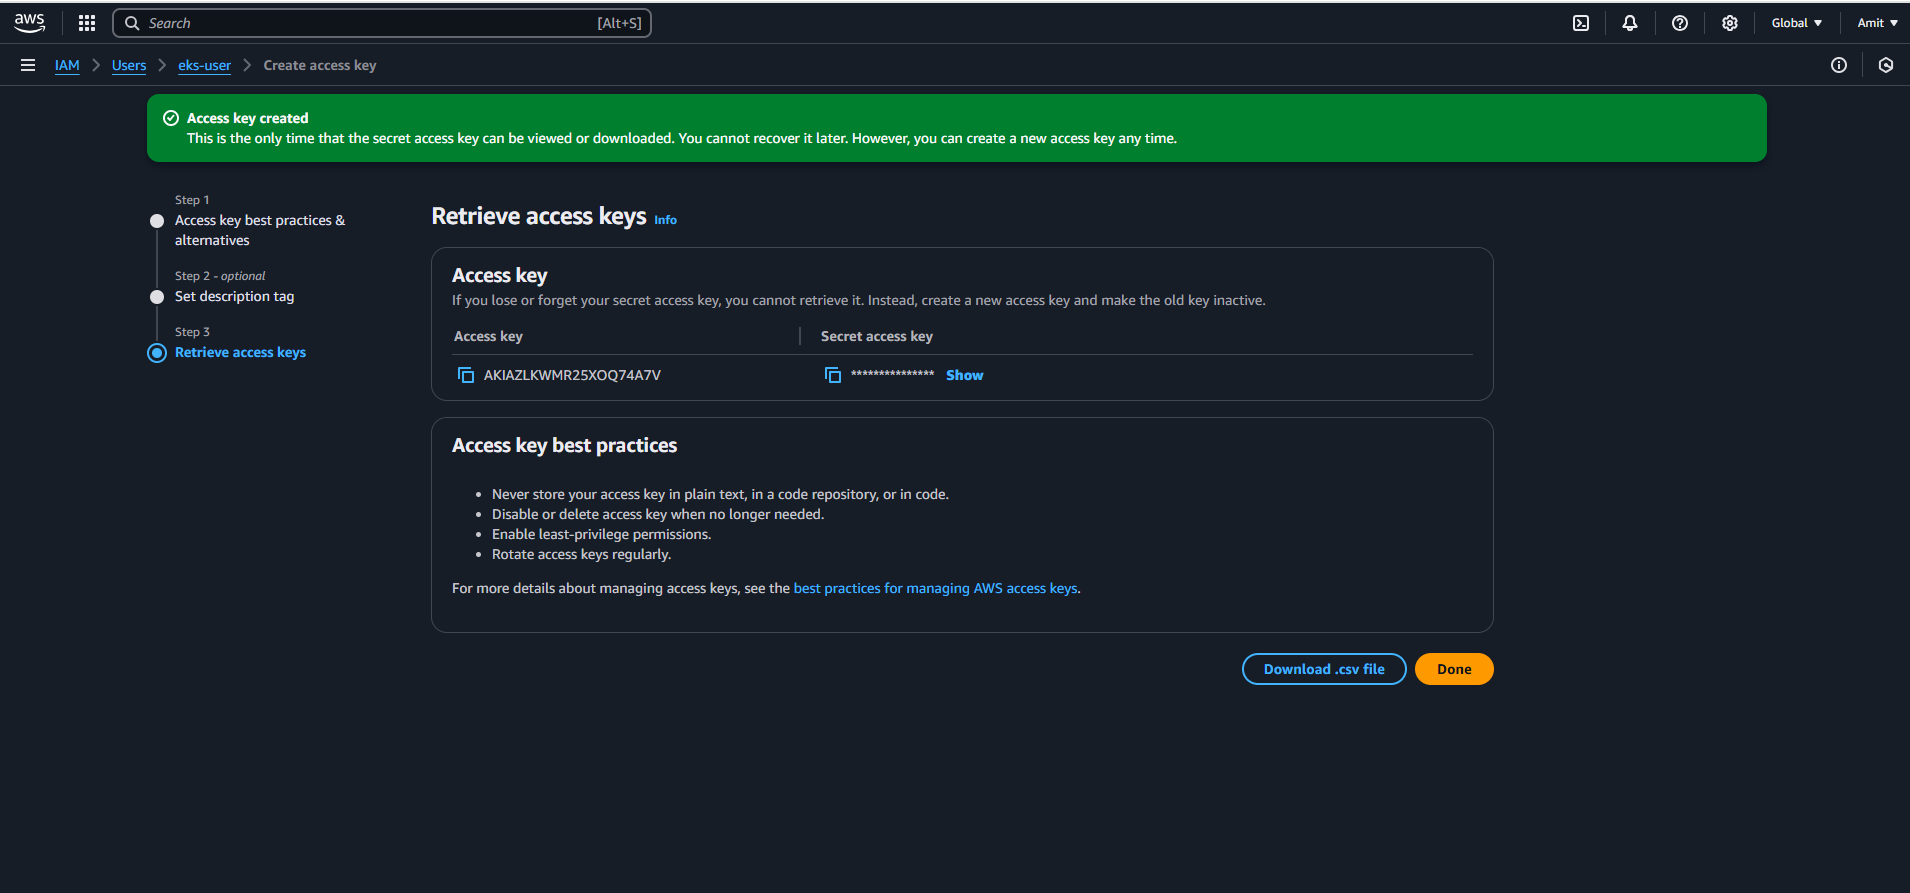
This EKS USER Access key will be used for AWS Configure.
Configure AWS CLI with the EKS user credentials:
aws configure

Creating EKS Cluster
eksctl create cluster --name=EKS-YELP \
--region=ap-south-1 \
--zones=ap-south-1a,ap-south-1b \
--without-nodegroup
You can name your EKS Cluster, and we are creating EKS without nodegroup because in later steps we will create node group with autoscale enabled.
eksctl utils associate-iam-oidc-provider \
--region ap-south-1 \
--cluster EKS-YELP \
--approve
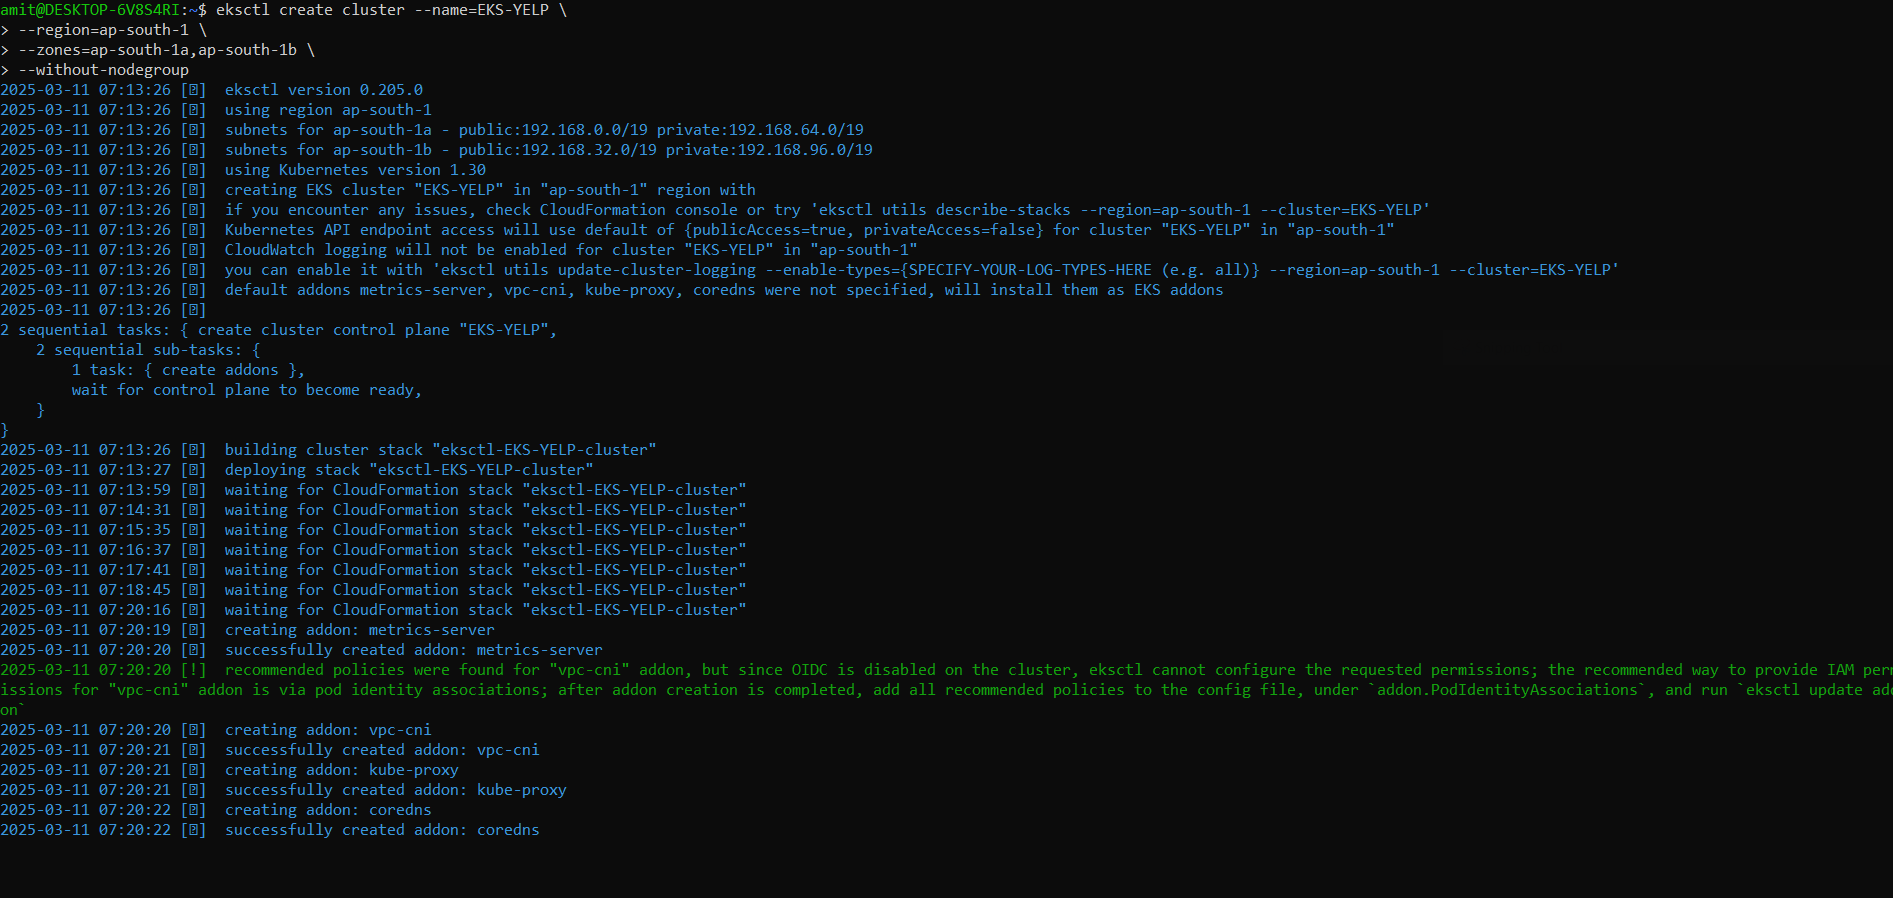
IAM OIDC: Open ID Connect Provider, used for the resources we create in our eks cluster like pods. Sometime they might need some permissions to create resources in our AWS Account. This allows Kubernetes resources like Pods to assume IAM roles.
eksctl create nodegroup \
    --cluster=EKS-YELP \
    --name=node2 \
    --node-type=t3.medium \
    --nodes=3 \
    --nodes-min=2 \
    --nodes-max=4 \
    --node-volume-size=20 \
    --ssh-access \
    --ssh-public-key=DevOps \
    --managed \
    --asg-access \
    --external-dns-access \
    --full-ecr-access \
    --appmesh-access \
    --alb-ingress-access

Note: Creating node group and worker node for our application and we are enabling auto scaling.
--ssh-public-key=DevOps # this is the key I have in my local for ssh
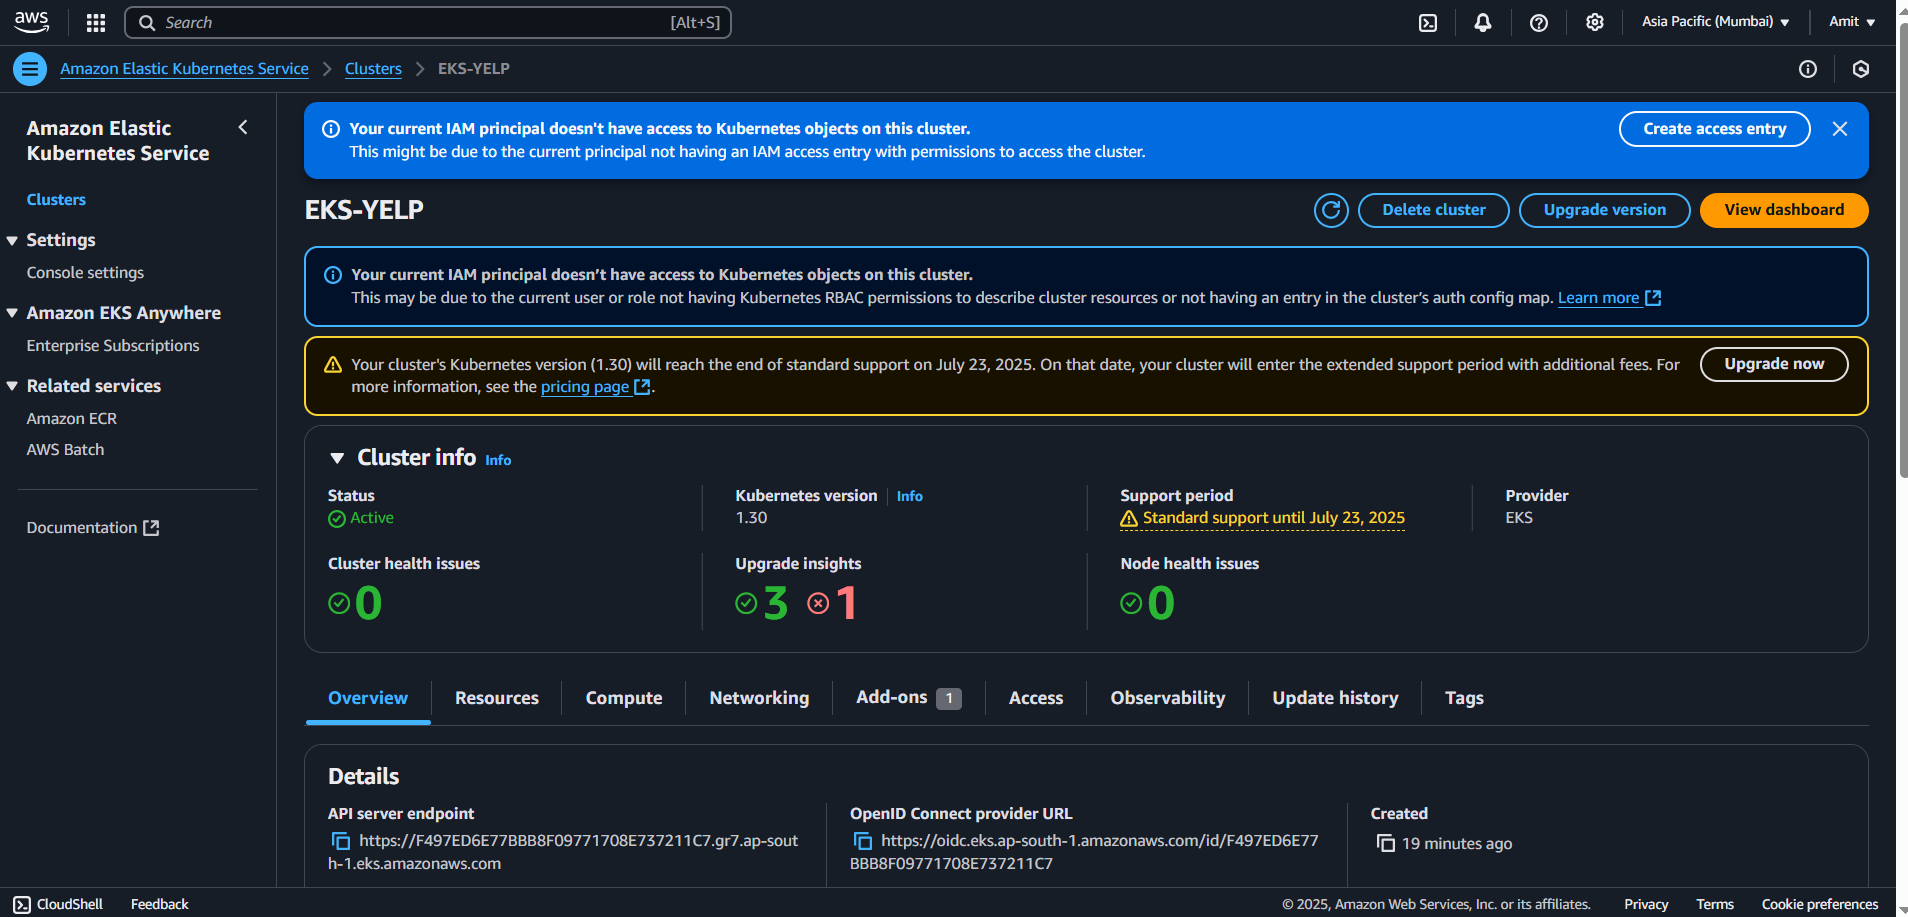
Check if your EKS Cluster has been created
Make changes in security group first: ec2 > Cluster Security Group
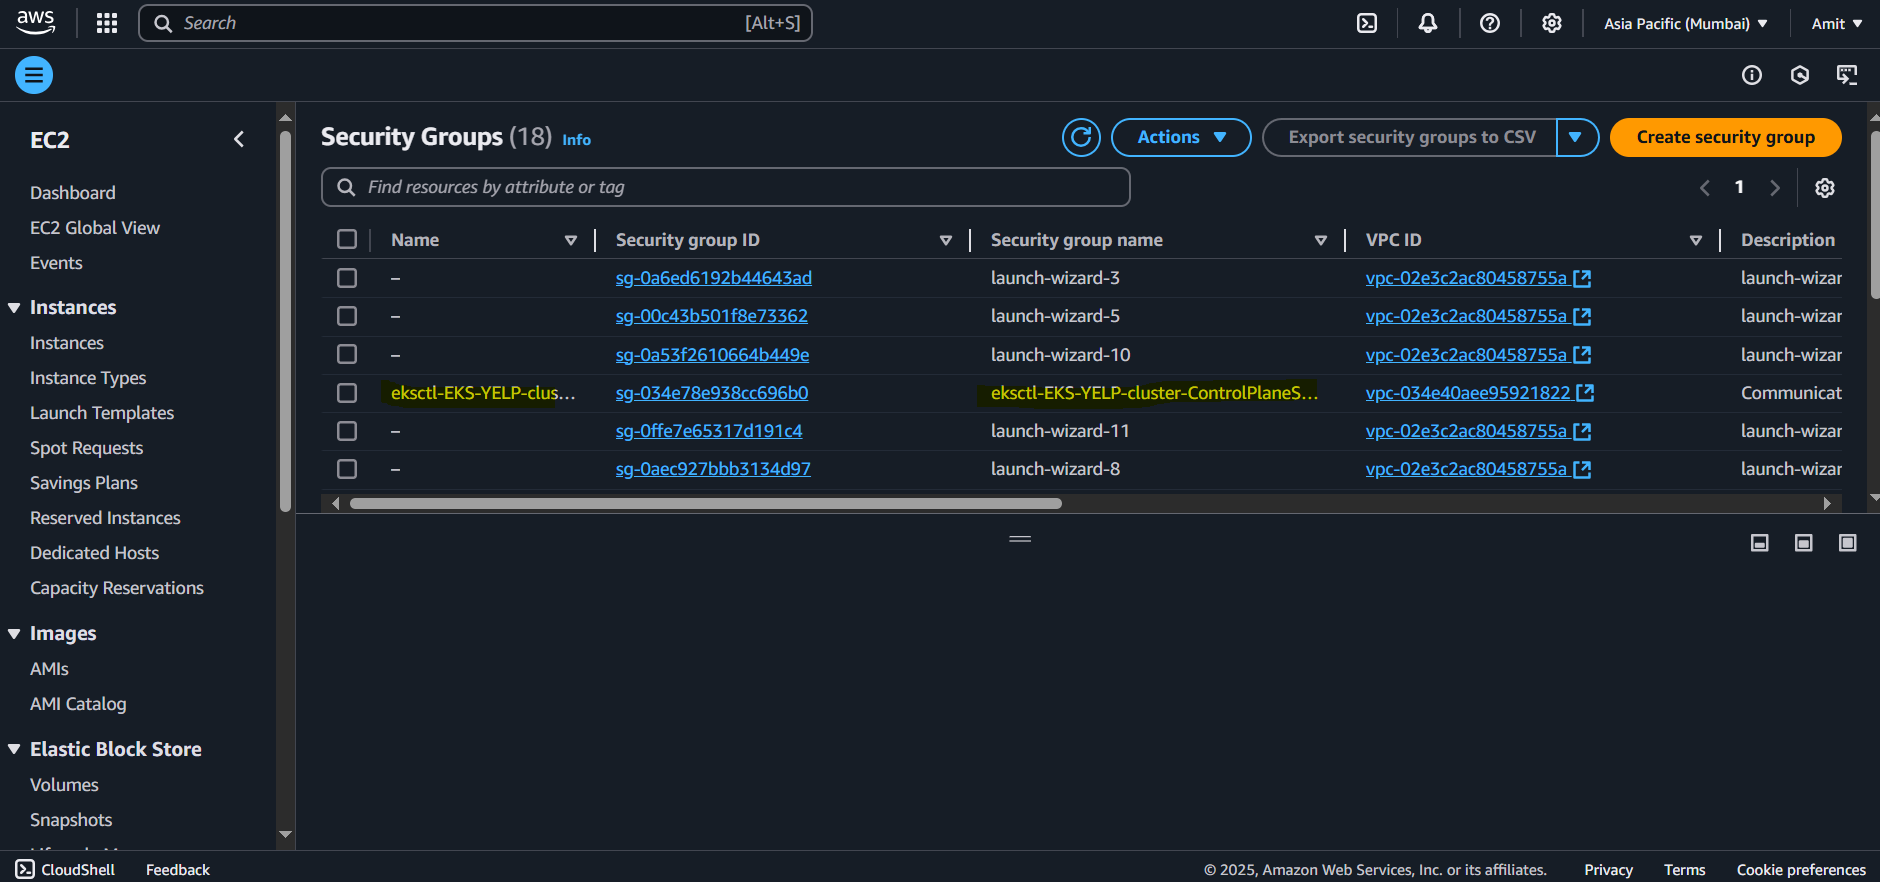
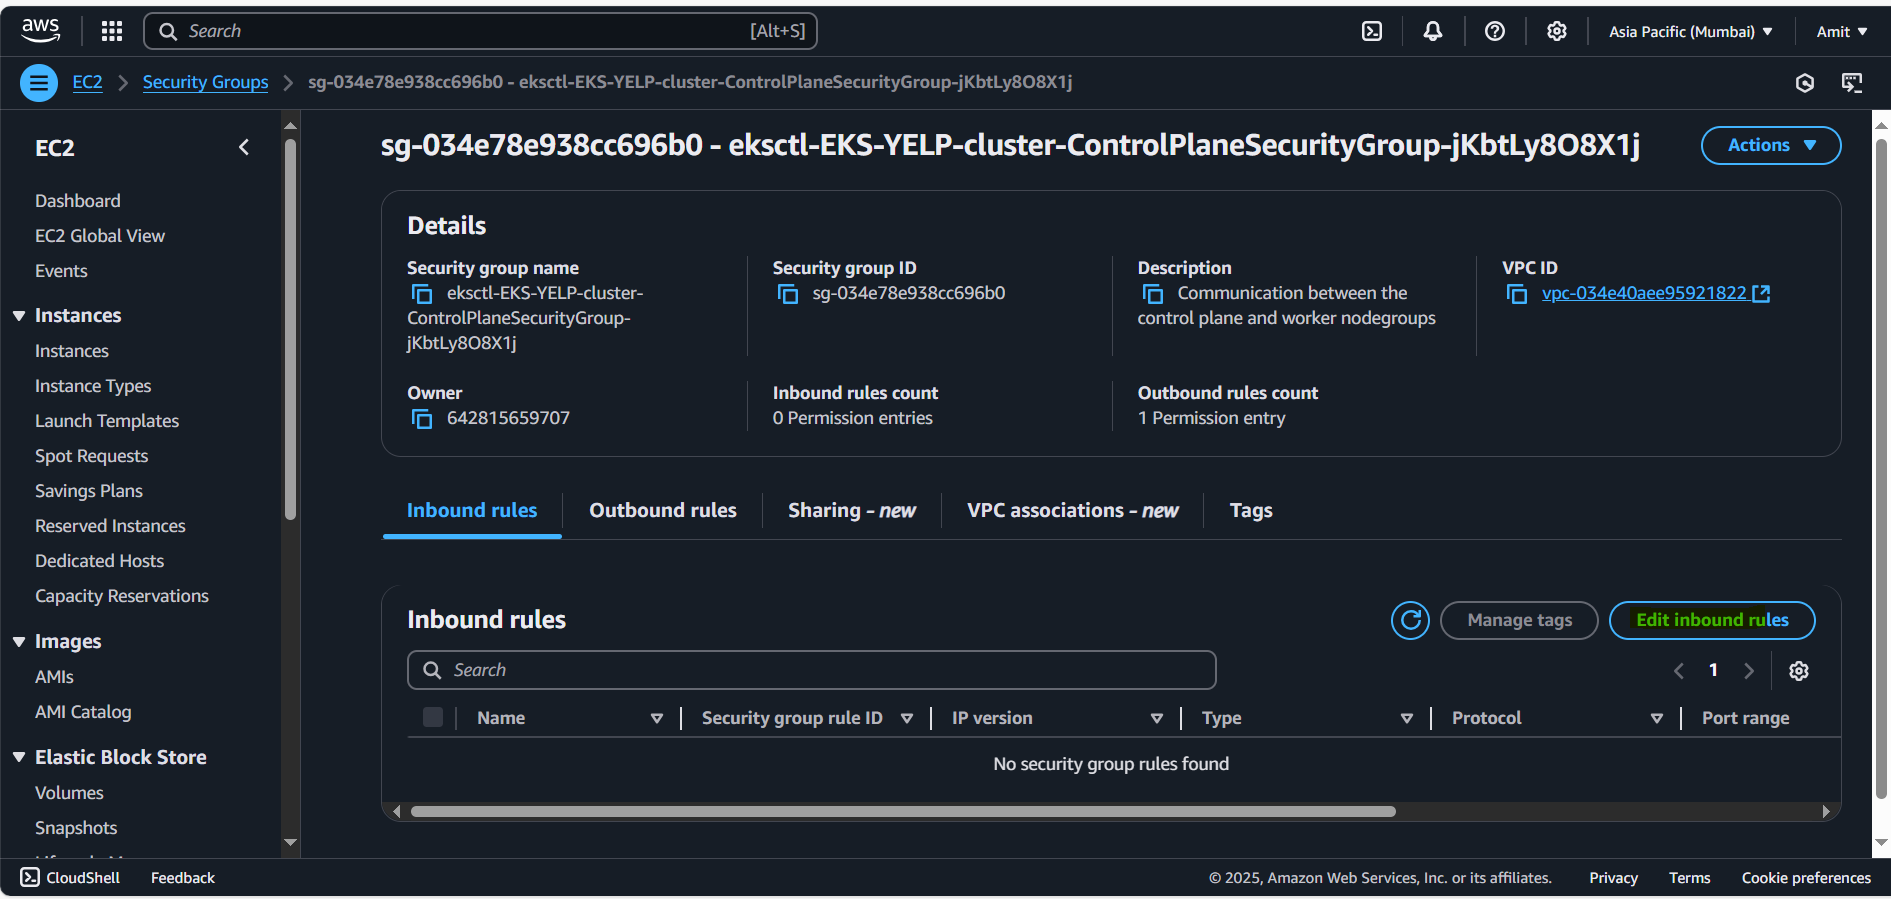
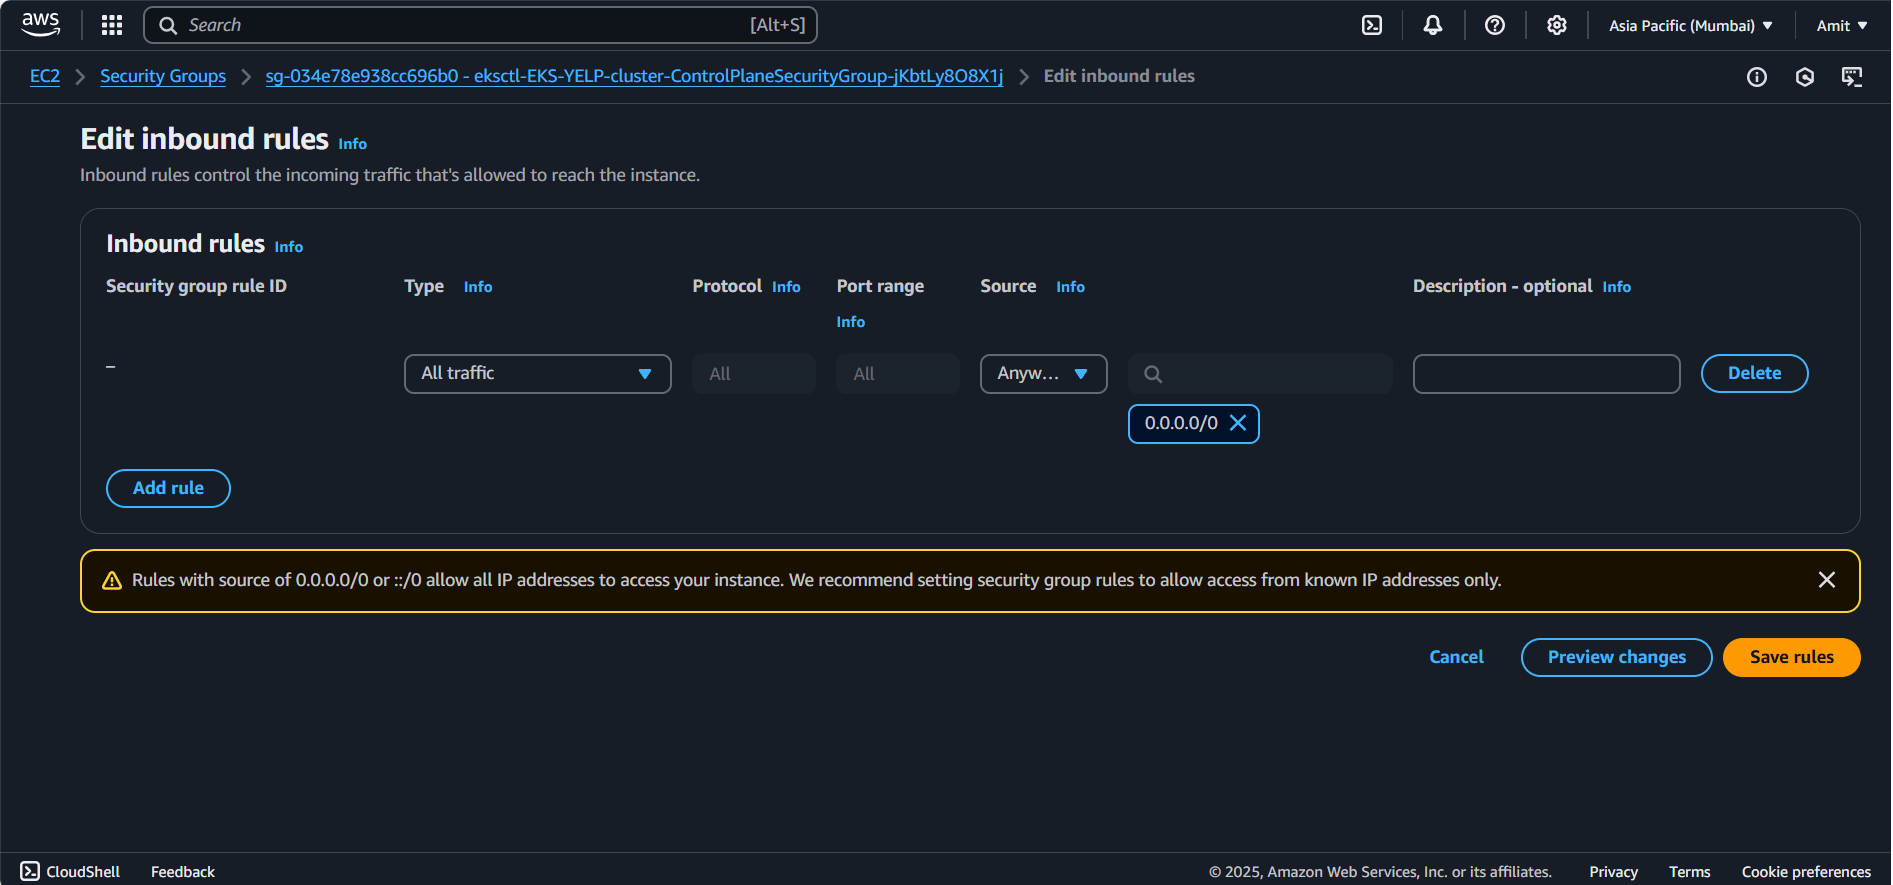
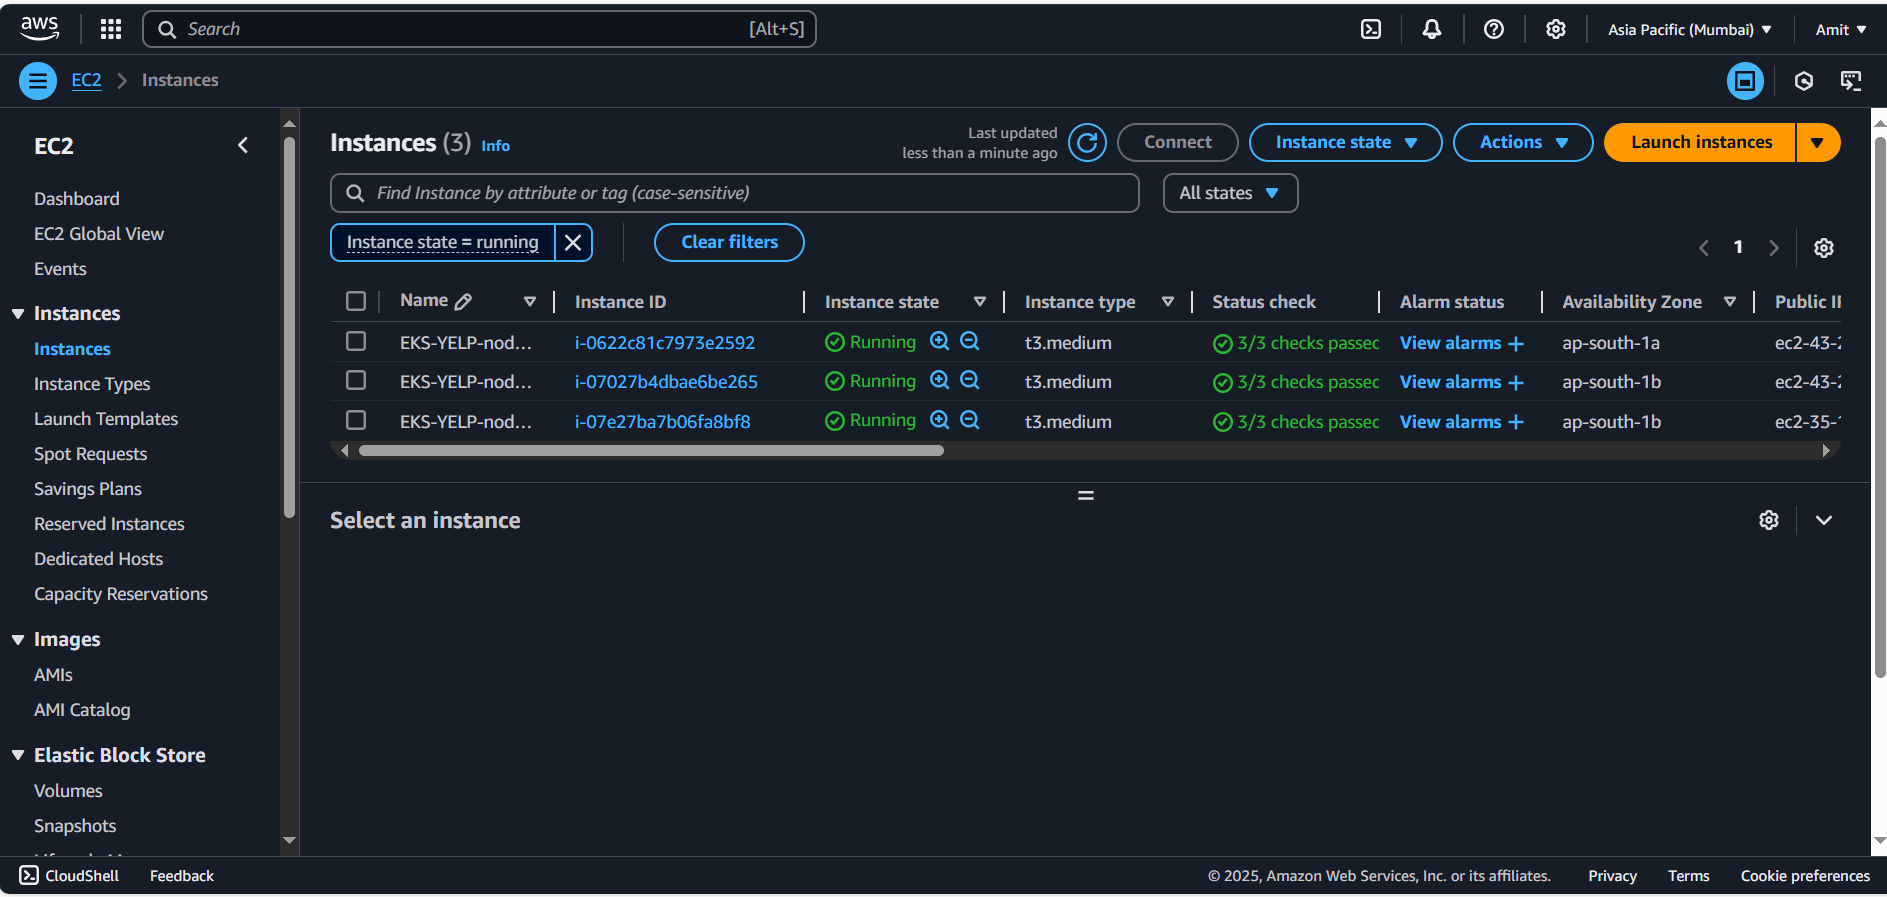
Configuring Kubernetes now
Create a namespace
kubectl create namespace webapps
Creating Service Account: To ensure security is maintained and only svc ac will be able to make changes
vim svc.yml
apiVersion: v1
kind: ServiceAccount
metadata:
  name: jenkins
  namespace: webapps
kubectl apply -f svc.yml
Create Role
vim role.yml
apiVersion: rbac.authorization.k8s.io/v1
kind: Role
metadata:
  name: app-role
  namespace: webapps
rules:
  - apiGroups:
        - ""
        - apps
        - autoscaling
        - batch
        - extensions
        - policy
        - rbac.authorization.k8s.io
    resources:
      - pods
      - componentstatuses
      - configmaps
      - daemonsets
      - deployments
      - events
      - endpoints
      - horizontalpodautoscalers
      - ingress
      - jobs
      - limitranges
      - namespaces
      - nodes
      - pods
      - persistentvolumes
      - persistentvolumeclaims
      - resourcequotas
      - replicasets
      - replicationcontrollers
      - serviceaccounts
      - services
    verbs: ["get", "list", "watch", "create", "update", "patch", "delete"]
kubectl apply -f role.yml
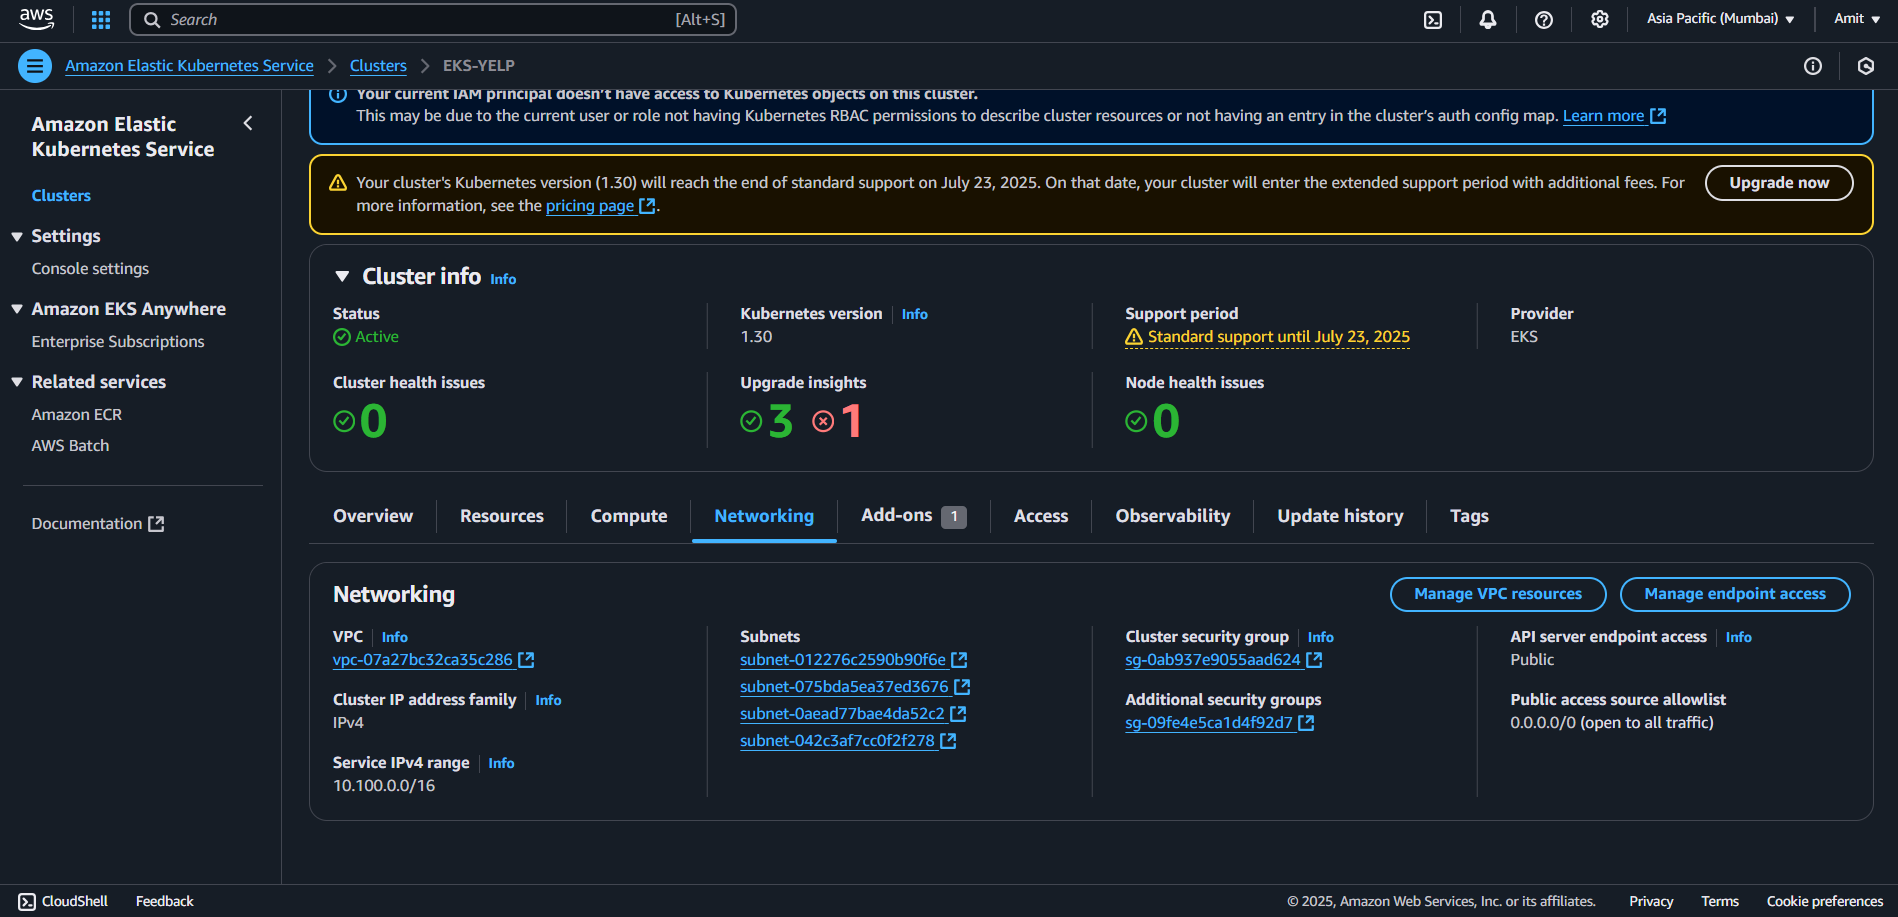
Bind the role to service account
This command will assign the role to svc (account which is Jenkins, confirm in the svc.yml file our service account metadata: Jenkins). So our Jenkins service account will have permissions mentioned in the role.yml file
vim bind.yml
apiVersion: rbac.authorization.k8s.io/v1
kind: RoleBinding
metadata:
  name: app-rolebinding
  namespace: webapps
roleRef:
  apiGroup: rbac.authorization.k8s.io
  kind: Role
  name: app-role
subjects:
- namespace: webapps
  kind: ServiceAccount
  name: jenkins
kubectl -f apply bind.yml
Now role is bind to the svc account.
Creating a Token for the Service Account used for Authentication
To generate the token, follow these steps:

Click on the "Create Token" link, which will redirect you to the Kubernetes documentation page.
There, you will find a YAML file that helps in creating the Service Account Secret.
Copy the YAML content and create a new file named
sec.yamlin your local environment.Open the file and ensure that the Service Account Name matches the one you created earlier. For example, if you created a Service Account named "Jenkins", update the YAML accordingly.
vim sec.ymlapiVersion: v1 kind: Secret type: kubernetes.io/service-account-token metadata: name: mysecretname annotations: kubernetes.io/service-account.name: jenkinsApply the YAML file to create the secret:
kubectl apply -f sec.yml -n webappsSince the namespace is not mentioned in the YAML file, we need to specify it explicitly using
-n webapps.
Retrieving the Token from the Secret
Once the secret is created, retrieve the token using the following command:
#kubectl describe secret <SECRET_NAME> -n webapps
kubectl describe secret mysecretname -n webapps
Copy the token from the output and store it securely, as we will use it in Jenkins for authentication.

Adding Kubernetes CLI in Jenkins
While configuring stage, our first stage will be “Deploy to kuberentes” and this will be generated with help of Pipeline syntax generator.
Open Pipeline Syntax Generator in Jenkins.
Look for the option "Configure Kubernetes CLI".
Click on "Add Credentials" → Select "Secret Text".

Paste the token generated earlier and give it an ID (e.g.,
k8-token).
Encode the Environment Value to base64 before putting in secrets file of kubernetes
I'll show demo of one rest you can try.
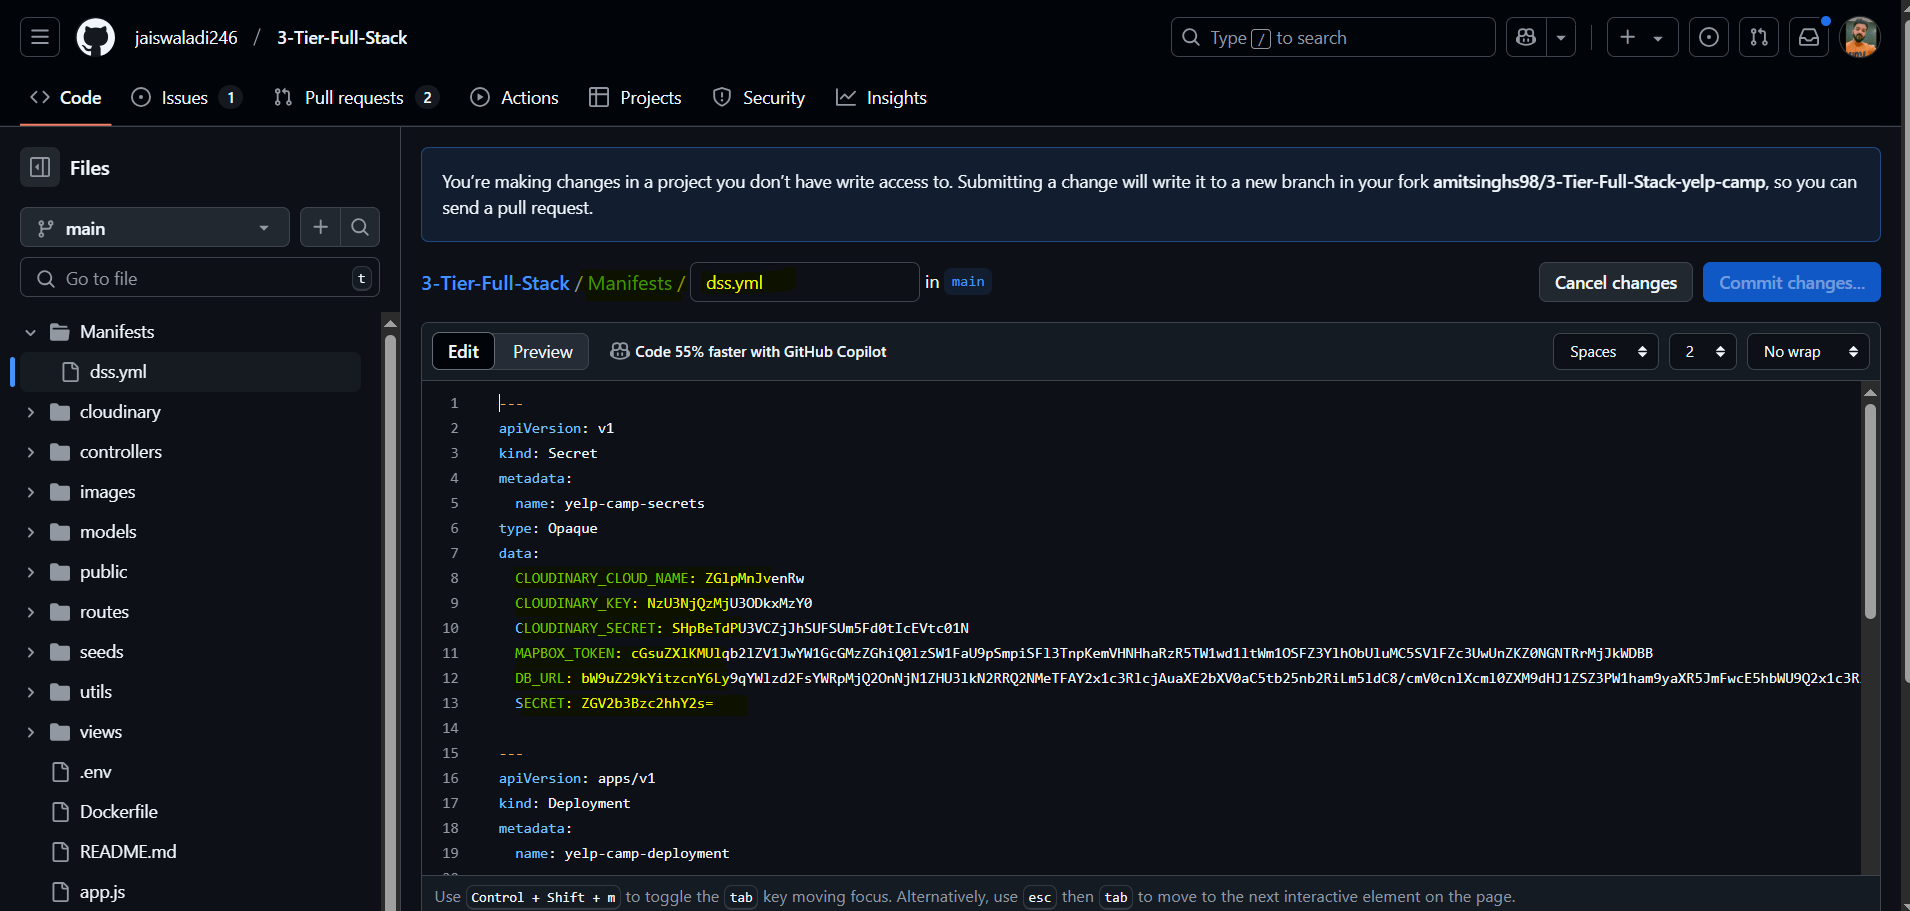

Note: When you encode mongodb url take the ““ along.

Once you have encoded the values in kubernetes manifest file.
Change docker image name in kubernetes manifest
Note: We have added liveness and readiness probe, if our kubernetes is able to accept traffic or not and our container is up or running
Make sure in server URL section you add > API server endpoint of EKS
stage('Deploy To EKS') {
            steps {
                withKubeCredentials(kubectlCredentials: [[caCertificate: '', clusterName: 'EKS-YELP', contextName: '', credentialsId: 'k8-token', namespace: 'webapps', serverUrl: 'https://F497ED6E77BBB8F09771708E737211C7.gr7.ap-south-1.eks.amazonaws.com']]) {
                    sh "kubectl apply -f Manifests/"
                    sleep 60
                }
            }
        }
Jenkins Pipeline for Kubernetes Deployment
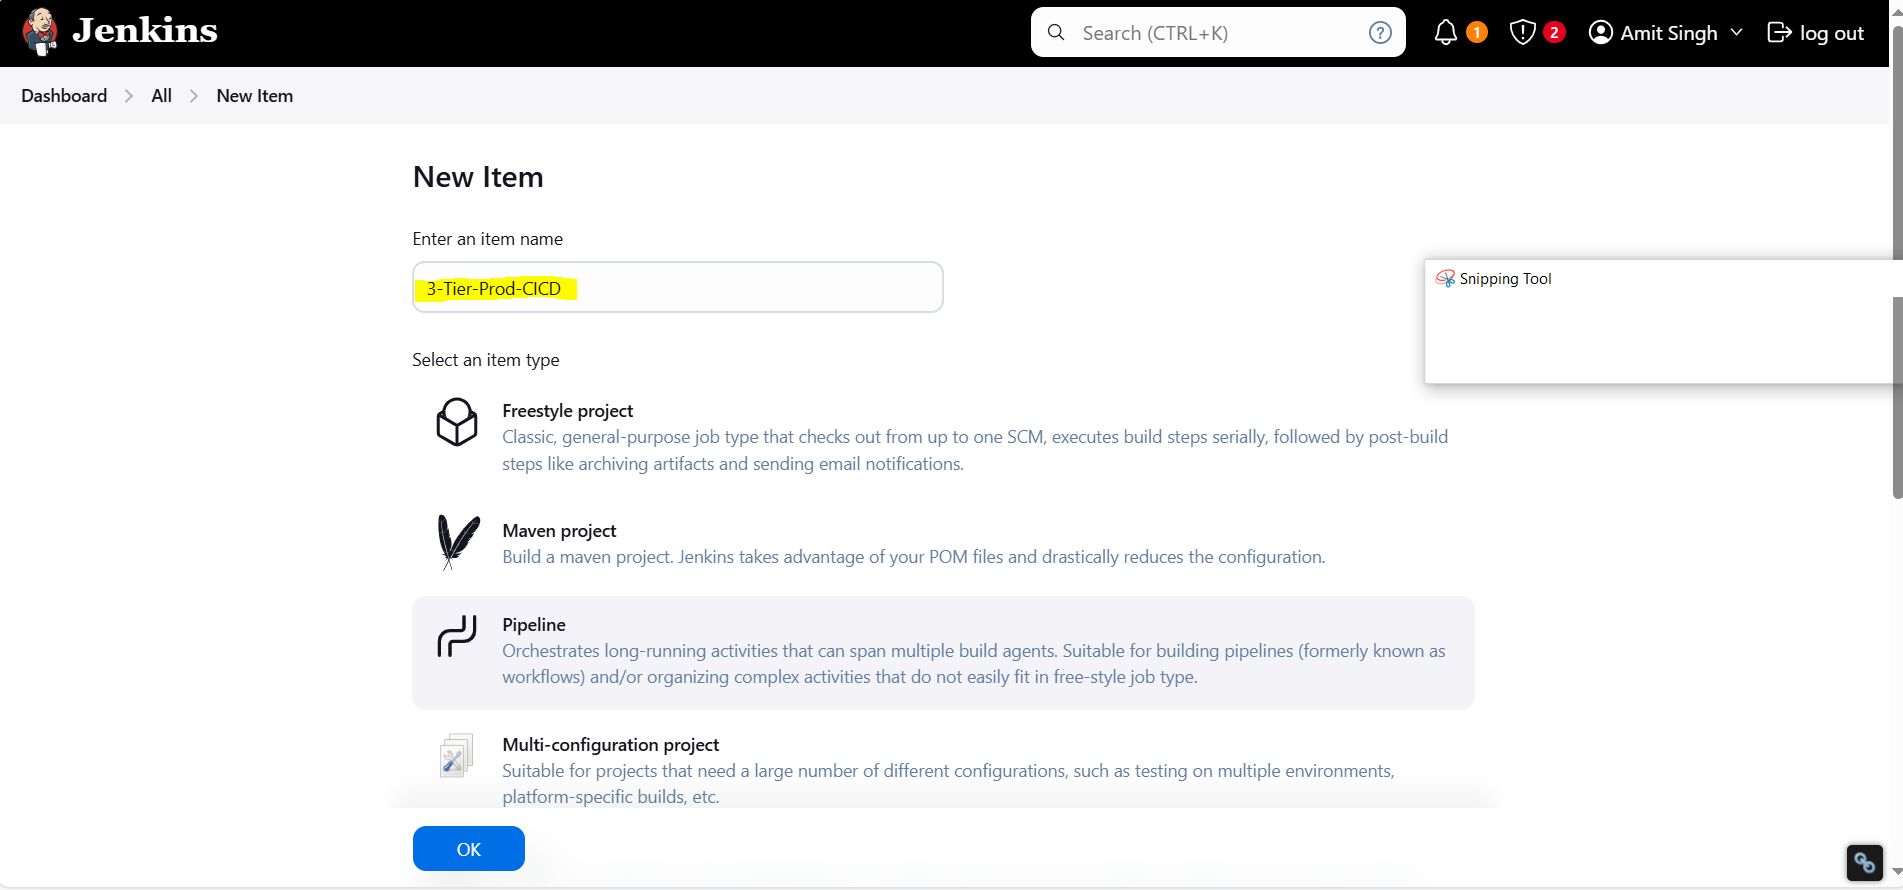
pipeline {
    agent any

    tools {
        nodejs 'node21'
    }

    environment {
        SCANNER_HOME = tool 'sonar-scanner'
    }

    stages {
        stage('Git Checkout') {
          steps {
             git credentialsId: 'git-credd', url: 'https://github.com/amitsinghs98/3-Tier-Full-Stack-yelp-camp.git', branch: 'main'
          }
        }

        stage('Install Package Dependencies') {
            steps {
                sh "npm install"
            }
        }

        stage('Unit Tests') {
            steps {
                sh "npm test"
            }
        }

        stage('Trivy FS Scan') {
            steps {
                sh "trivy fs --format table -o fs-report.html ."
            }
        }

        stage('SonarQube') {
            steps {
                withSonarQubeEnv('sonar') {
                    sh "$SCANNER_HOME/bin/sonar-scanner -Dsonar.projectKey=Campground -Dsonar.projectName=Campground"
                }
            }
        }

        stage('Docker Build & Tag') {
            steps {
                script {
                    withDockerRegistry(credentialsId: 'docker-cred', toolName: 'docker') {
                        sh "docker build -t amitsinghs98/campa:latest ."
                    }
                }
            }
        }

        stage('Trivy Image Scan') {
            steps {
                sh "trivy image --format table -o fs-report.html amitsinghs98/campa:latest"
            }
        }

        stage('Docker Push Image') {
            steps {
                script {
                    withDockerRegistry(credentialsId: 'docker-cred', toolName: 'docker') {
                        sh "docker push amitsinghs98/campa:latest"
                    }
                }
            }
        }

        stage('Deploy To EKS') {
            steps {
                withKubeCredentials(kubectlCredentials: [[caCertificate: '', clusterName: 'EKS-YELP', contextName: '', credentialsId: 'k8-token', namespace: 'webapps', serverUrl: 'https://F497ED6E77BBB8F09771708E737211C7.gr7.ap-south-1.eks.amazonaws.com']]) {
                    sh "kubectl apply -f Manifests/"
                    sleep 60
                }
            }
        }

        stage('Verify the Deployment') {
            steps {
                withKubeCredentials(kubectlCredentials: [[caCertificate: '', clusterName: 'EKS-YELP', contextName: '', credentialsId: 'k8-token', namespace: 'webapps', serverUrl: 'https://F497ED6E77BBB8F09771708E737211C7.gr7.ap-south-1.eks.amazonaws.com']]) {
                    sh "kubectl get pods -n webapps"
                    sh "kubectl get svc -n webapps"
                }
            }
        }
    }
}
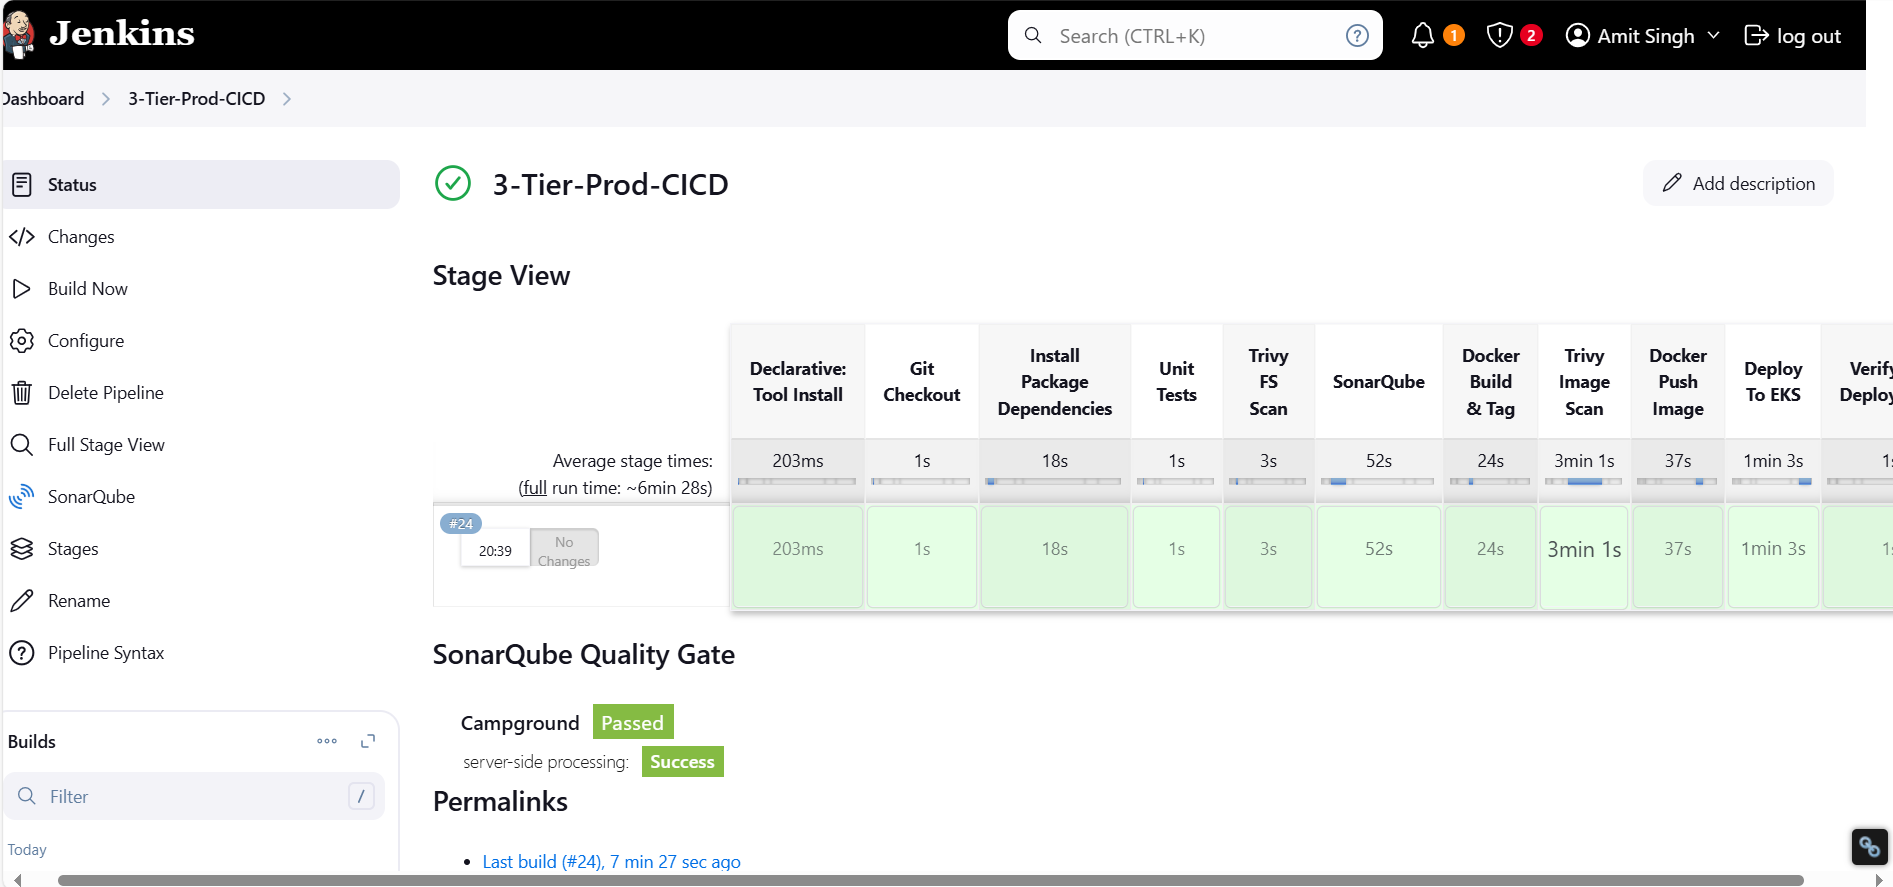

Installed required CLIs (
awscli,kubectl,eksctl)Created an EKS Cluster and Node Group
Configured IAM, Security Groups, and RBAC
Deployed an application with Secrets, Deployment, and Service
Automated deployment using Jenkins Pipeline
Subscribe to my newsletter
Read articles from Amit singh deora directly inside your inbox. Subscribe to the newsletter, and don't miss out.
Written by

Amit singh deora
Amit singh deora
DevOps | Cloud Practitioner | AWS | GIT | Kubernetes | Terraform | ArgoCD | Gitlab