Guide to deploy web app on Azure
 Ms. B
Ms. B
On today’s episode of documenting my cloud journey, I will be taking you through the steps of deploying webapp on Azure.
Azure Web Apps is a specific type of Azure Web Services that is focused on hosting web applications. It is a Platform-as-a-Service (PaaS) model. Azure web apps provide an auto-scaling option that allows us to scale our applications up or down based on the demand. It is a better option for traffic management. Azure Web Apps provide various deployment options to deploy our code. It supports various options like Git, GitHub, etc. There are also options to set up CI/CD process for continuous deployment.
STEPS TO TAKE FOR THE DEPLOYMENT OF WEBAPP ON AZURE
PHASE 1: VERSION CONTROL WITH GITHUB
Step 1: a. Open git bash and enter the following commands
git config —global user.name <your username on GitHub>
git config —global user.email <your email registered with your GitHub account>
The above commands are used to configure your GitHub account for you to be able to carry out your task. When you have run the above commands, you would get a pop-up message asking you for authentication of your GitHub account. Authenticate it and move to the next step.
b. If you’re creating a new project, open Git bash and create a new directory for your project. You can also choose to clone a repository.

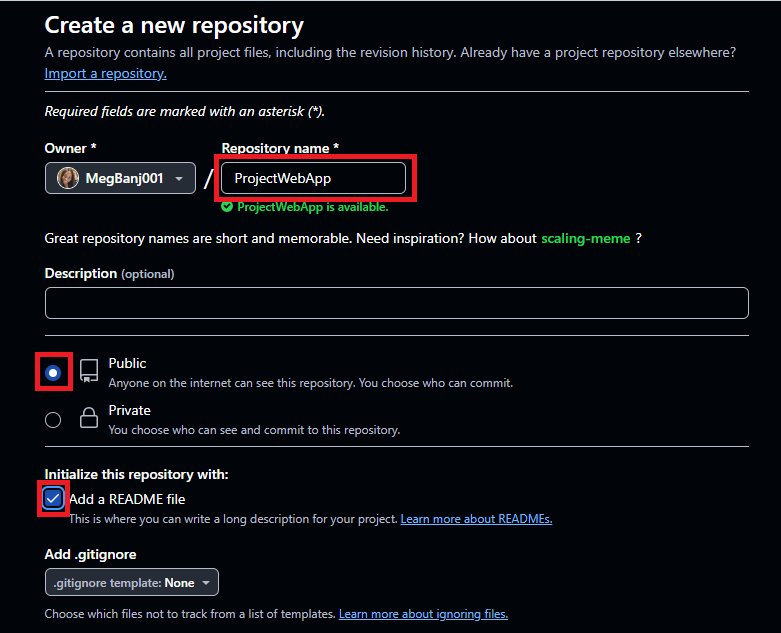
c. Go back to bash and create a directory or folder following the commands below;
mkdir AlayeCabbie
cd AlayeCabbie
Step 2: Initialize the Git repository
a. You have to initialize the directory as it is on the remote location. Type git init

b. Create a file in the folder with touch cabbie.txt

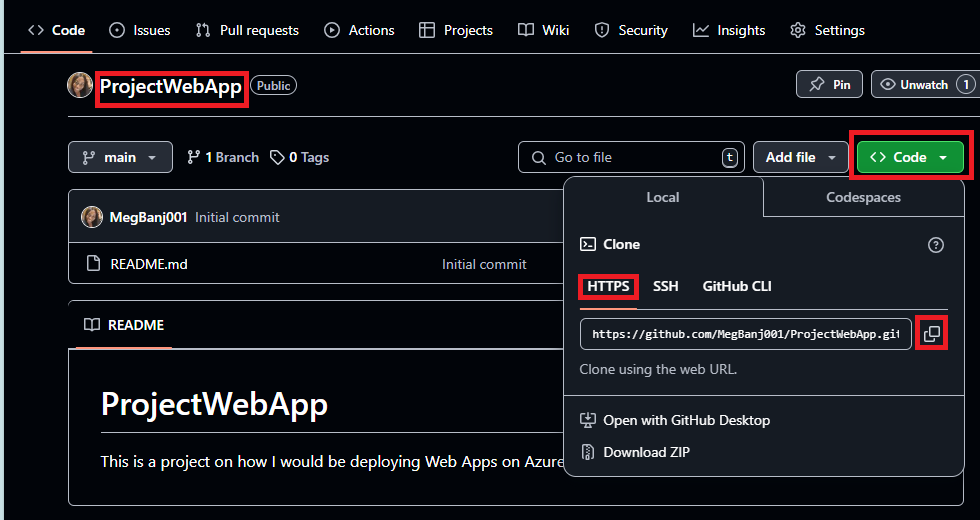
c. Next you run the command git remote add origin <url of repository>

To get the URL of your repository, click on the repository you’re working on and following the steps as shown in the diagram.
d. Next you add the file to your repo by typing, git add <filename>

e. Check the status with git status

f. Next, you commit the file and add a commit message by typing git commit -m “commit message“. A commit message can be anything from a short explanation or description to just a short message.

g. Run the git status command again to know the status of your file and repo.

h. Finally, you push your file to your GitHub with git push origin master command.
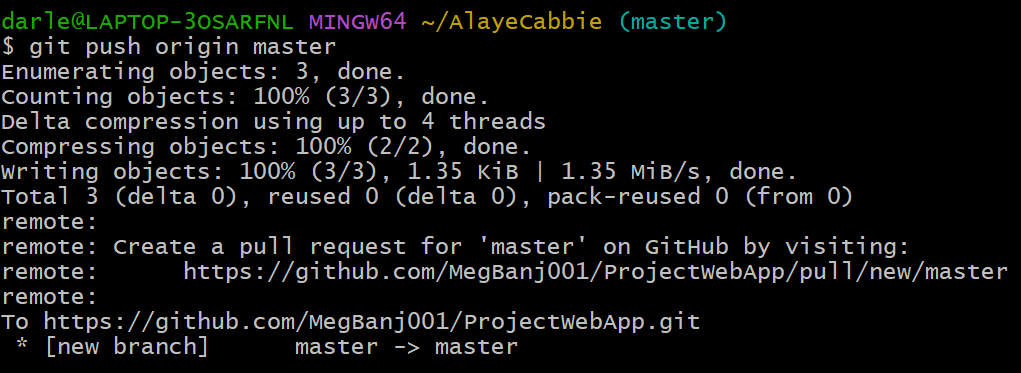
i. Go to GitHub and you would see something like this. Click on Compare & pull request.
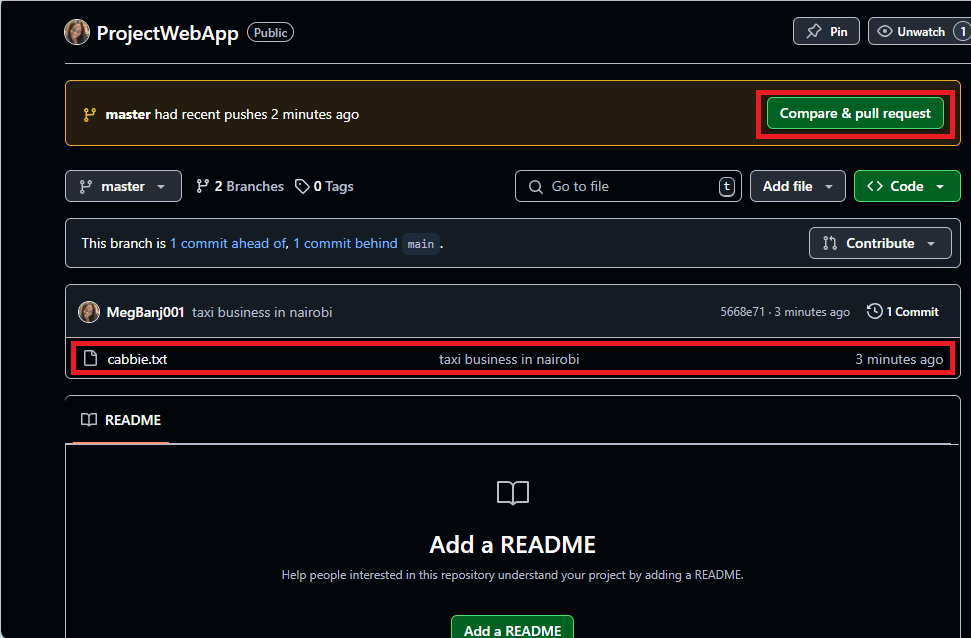
j. Next, click on Merge and the branches would be merged together. That way, all that you have done on the Master branch or whatever the new branch is named, would be in the Main branch.

PHASE 2: AZURE APP SERVICE SETUP
- Install Azure CLI
- If you don’t have Azure CLI installed, download and install it from here
Log in to Azure
By typing the command
az loginon Bash, you would get a message to choose the account to log in. On the pop-up, choose the Azure account you wish to sign in and press Continue.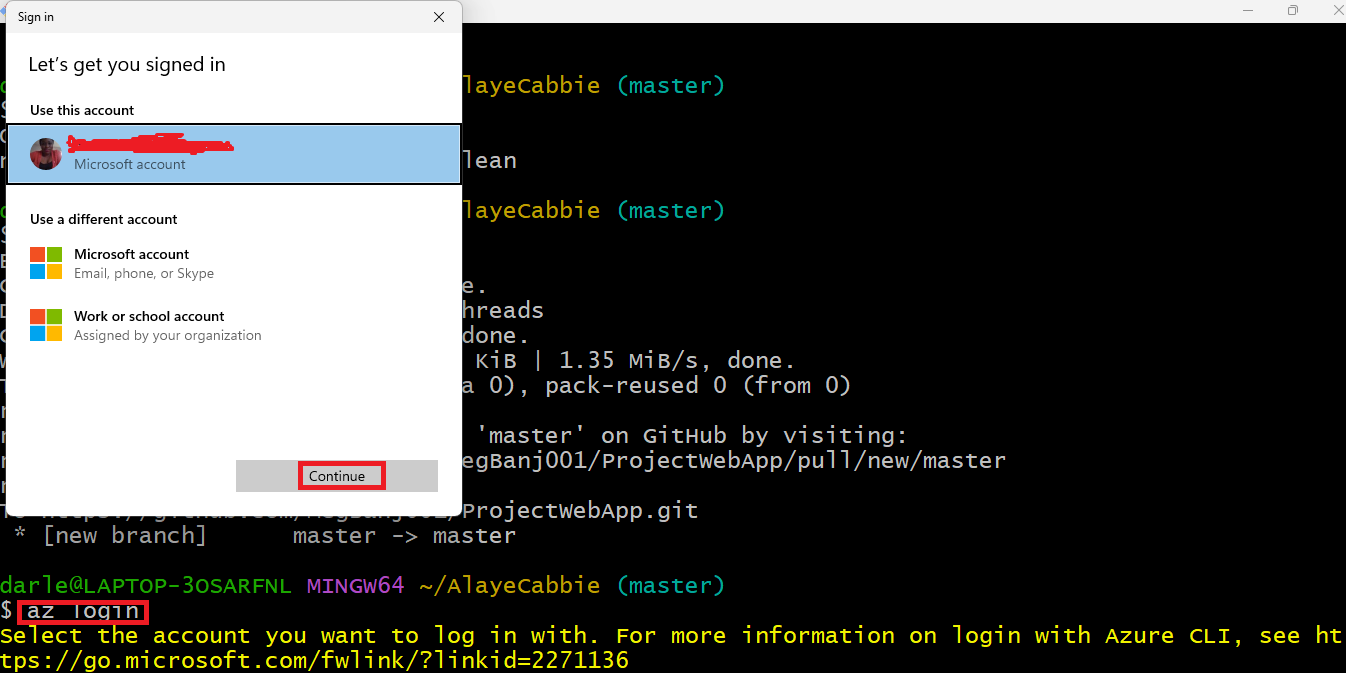

Create a Resource Group
Run
az group create --name MyResourceGroup --location uksouth. MyResourceGroup should be replaced with the name of the resource group you want to create and for the location, you type the location you want to create the resource group in.
Create an App Service Plan
Run
az appservice plan create --name MyAppServicePlan --resource-group MyResourceGroup
While I was trying to create the App service, I encountered some error message as indicated in the image above. I was able to sort it out by creating another resource group in another location as shown in the diagram below.

I ran the command again after I had created a new resource group.

Create an Azure Web App
Run
az webapp create --name MyWebApp --resource-group MyResourceGroup --plan MyAppServicePlan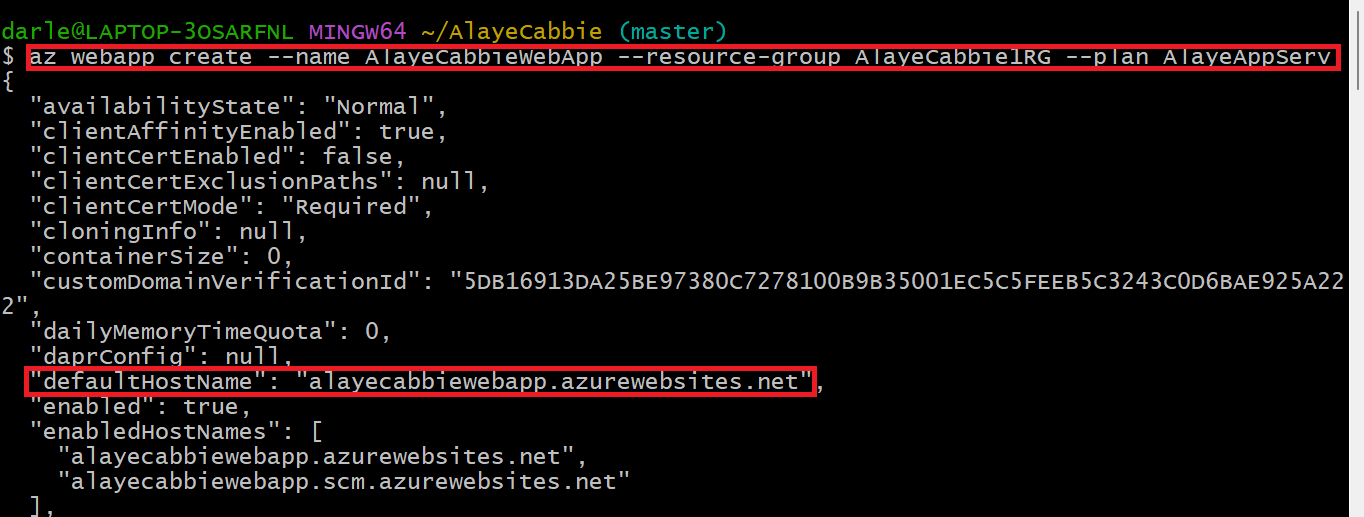
PHASE 3: DEPLOYMENT
Deploy the Web Application from GitHub
Run
az webapp deployment source config --name MyWebApp --resource-group MyResourceGroup --repo-url --branch main --manual-integration
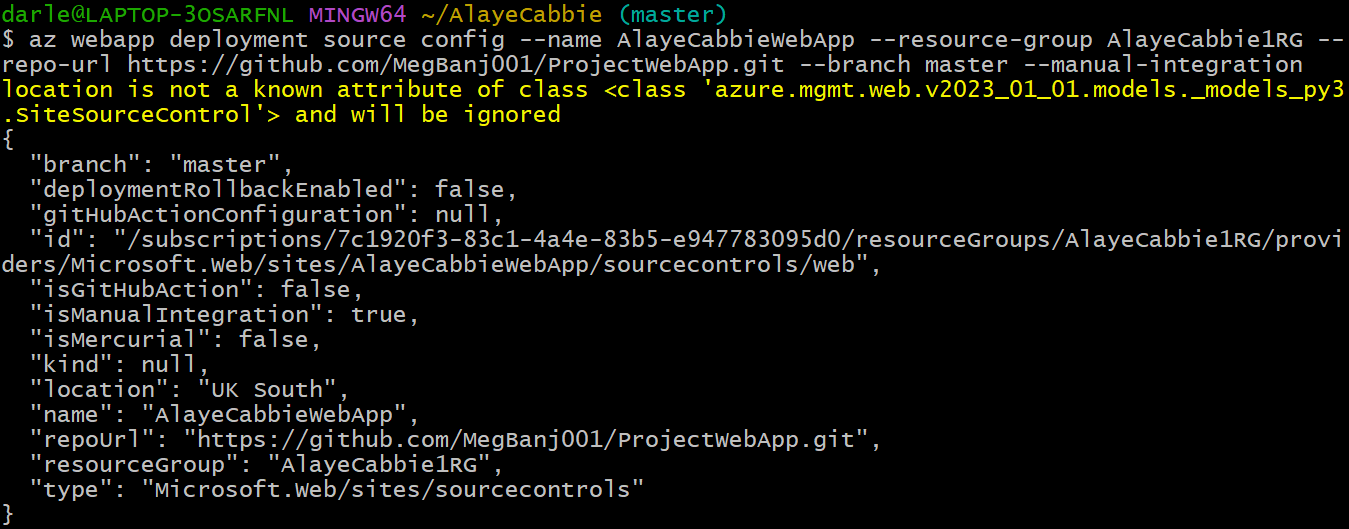
Finally, you can always check on Azure and you would see the App service, Web App and Resource Group that was created on bash. The default domain alayecabbiewebapp.azurewebsites.net would direct you to the site that you have deployed.
I have drafted my whole experience of my hand's on experience with troubleshooting steps when I encountered some errors.
I want to believe I have been able to help you with this guideline. Let me know if you have any questions or suggestions. Feel free to follow for more documentation of my cloud journey and experience using different cloud providers and tools to solve problems.
Please do not forget to like, comment and share.
Subscribe to my newsletter
Read articles from Ms. B directly inside your inbox. Subscribe to the newsletter, and don't miss out.
Written by

Ms. B
Ms. B
Hi, I'm a tech enthusiast who has decided to document her cloud journey as the day goes by. Stay tuned and follow me through this journey which I believe would be a wonderful experience. I'm also a team player who loves collaborating with others to create innovative solutions.