Building a Secure, Fast & Scalable Static Website on AWS - MindfulCloud
 Suraj
SurajTable of contents
- Introduction
- Implementation
- Step 1: Setting Up an S3 Bucket for Static Website Hosting
- Step 2: Configuring AWS ACM (SSL Certificate) for HTTPS
- Step 3: Setting Up a Route 53 Hosted Zone
- Step 4: Setting Up CloudFront for CDN & Caching
- Step 5: Connecting Namecheap Domain to AWS
- Step 6: Enhancing Security with AWS WAF
- Step 7: Enabling CloudWatch Monitoring & Logging
- Step 8: Implementing Reliability & Disaster Recovery
- Send the requests to your website to check the performance, WAF security and other metrics.
- The end!!!
Introduction
The Problem It Solves
Anyone can host a static website on AWS, but that’s not enough in today's landscape. The real challenge is building a secure, fast, and scalable website that efficiently uses AWS resources.
Security Risks: Hackers are everywhere, and a simple HTML file won’t stop them.
Performance Issues: Users expect lightning-fast websites. Anything over a second and they bounce.
Cost Management: Resources need to be allocated smartly to avoid unnecessary spending.
This blog walks you through building a highly secure, performance-optimized static website leveraging AWS services.
How I Built It
The AWS services used:
AWS S3: Foundation for static site storage.
CloudFront: Distributes content worldwide for ultra-fast loading.
Certificate Manager: Manages HTTPS encryption.
AWS WAF: Protects against cyber threats like DDoS, XSS, and SQL Injection.
CloudWatch: Monitors traffic, security, and performance with alerts.
AWS Route 53: Manages the custom domain.
This is the architecture for Hosting a Static Website

Understanding the Architecture: The Complete Flow
1️⃣ User Request (Entry Point)
A user visits https://mindfulcloud.devsuraj.me.
The request is sent to Amazon Route 53, which maps the domain to CloudFront.
2️⃣ Route 53 → CloudFront
Route 53 forwards the request to Amazon CloudFront (CDN).
CloudFront serves cached content to it’s edge locations near to the users for lower latency.
3️⃣ Security Layer
AWS WAF protects against:
SQL Injection
Cross-site Scripting (XSS)
DDoS attacks
AWS ACM (AWS Certificate Manager) enables SSL/TLS encryption.
4️⃣ Fetching Content from S3
If CloudFront doesn’t have the content cached, it fetches it from Amazon S3.
S3 acts as the origin server for static assets like HTML, CSS, JavaScript, and images.
5️⃣ Monitoring & Logging
AWS CloudWatch tracks:
CloudFront request logs, cache hit ratio, and performance metrics.
S3 storage access patterns.
Alerts notify about security threats or traffic spikes.
Implementation
Step 1: Setting Up an S3 Bucket for Static Website Hosting
Go to AWS Console S3 service and Create Bucket.
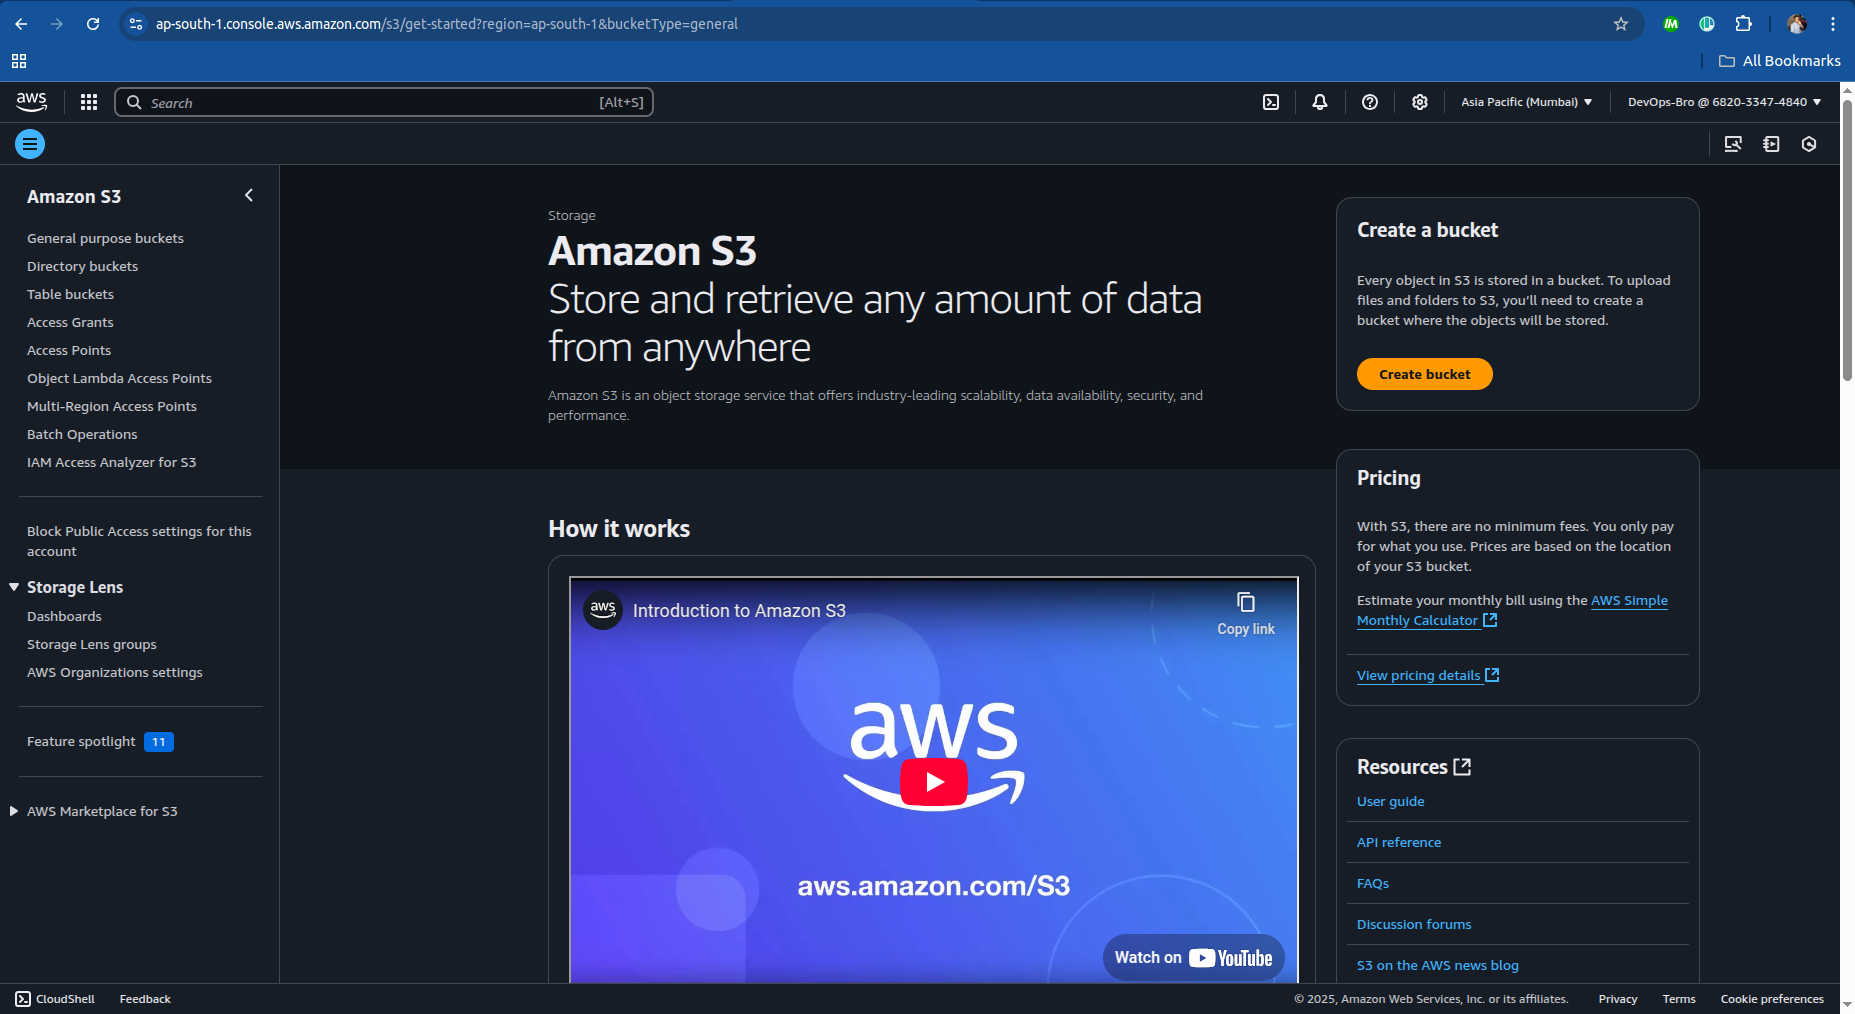
Enter a unique bucket name (e.g., mindfulcloud.devsuraj.me).
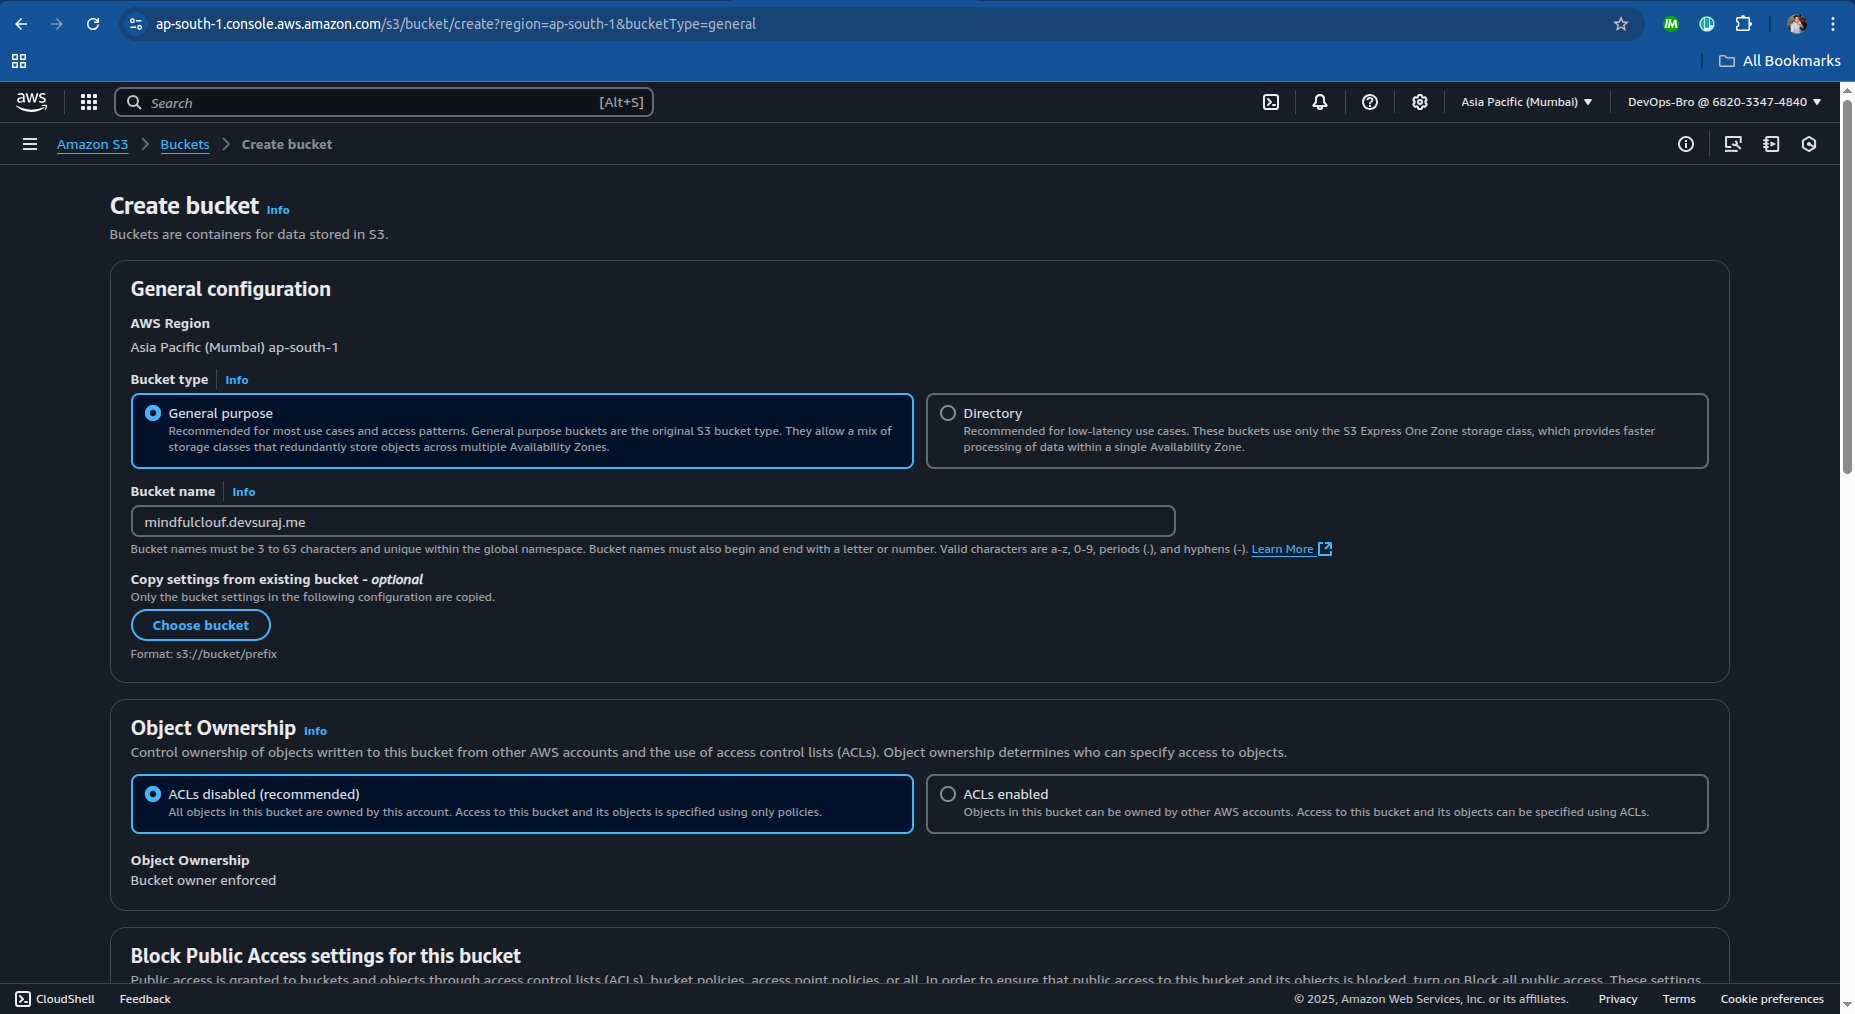
Choose public or private access (public if hosting static content).
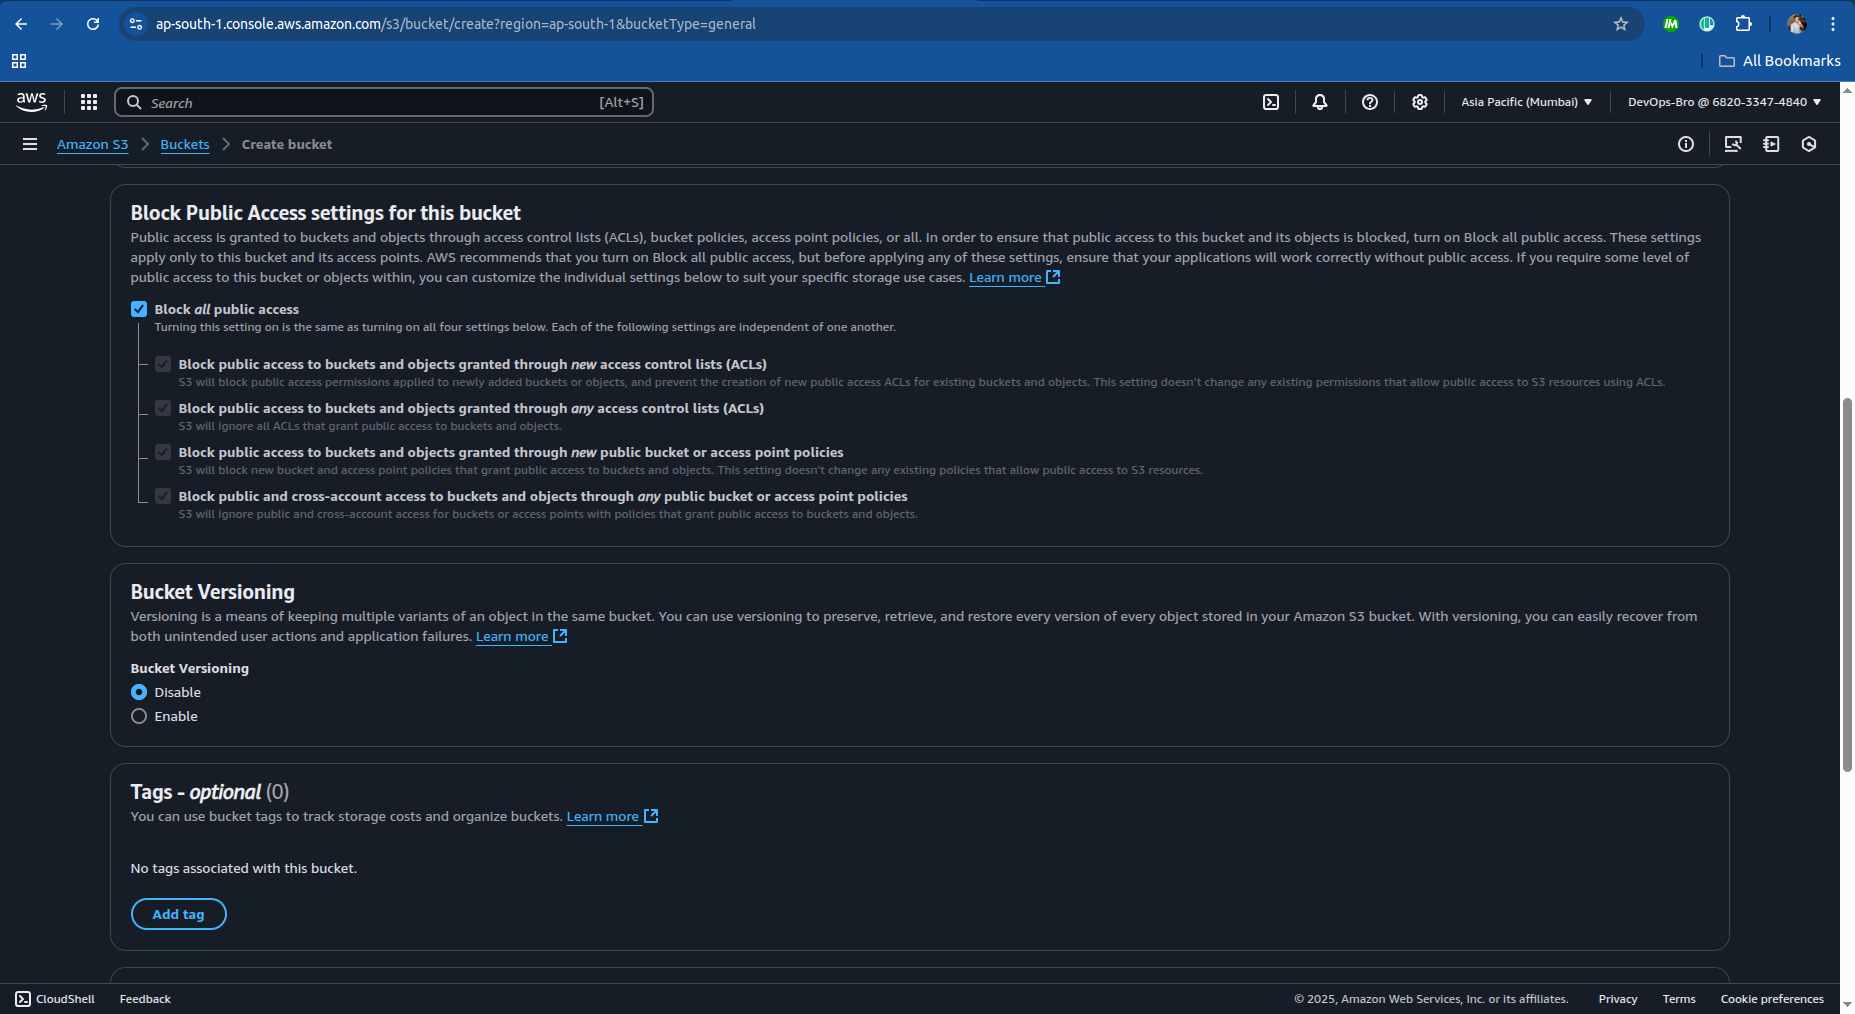
Enable static website hosting under Properties.

Scroll down below and enter the Index document and save it.
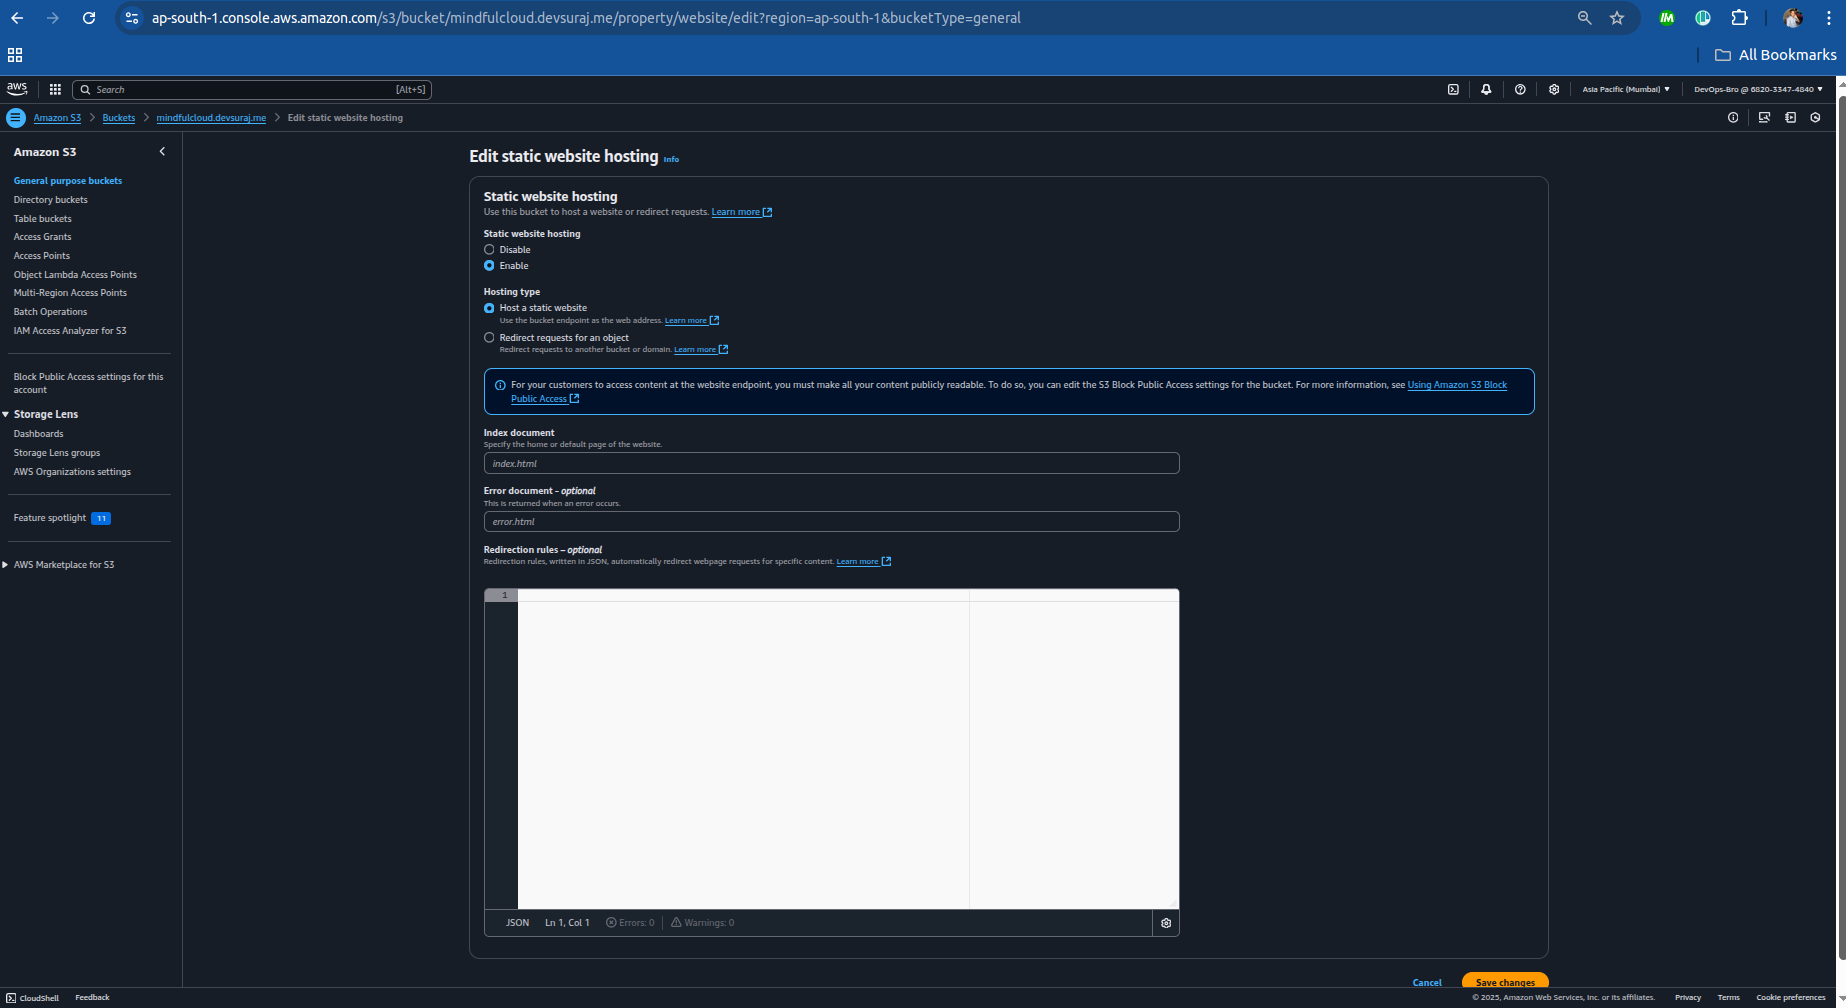
Upload your static website files (HTML, CSS, JS).

Step 2: Configuring AWS ACM (SSL Certificate) for HTTPS
Go to AWS Certificate Manager (ACM) → Request a Certificate.
You should create the certificate in the N.Verginia otherwise you’ll not be able to see it when you select the certificate in the cloudfront.
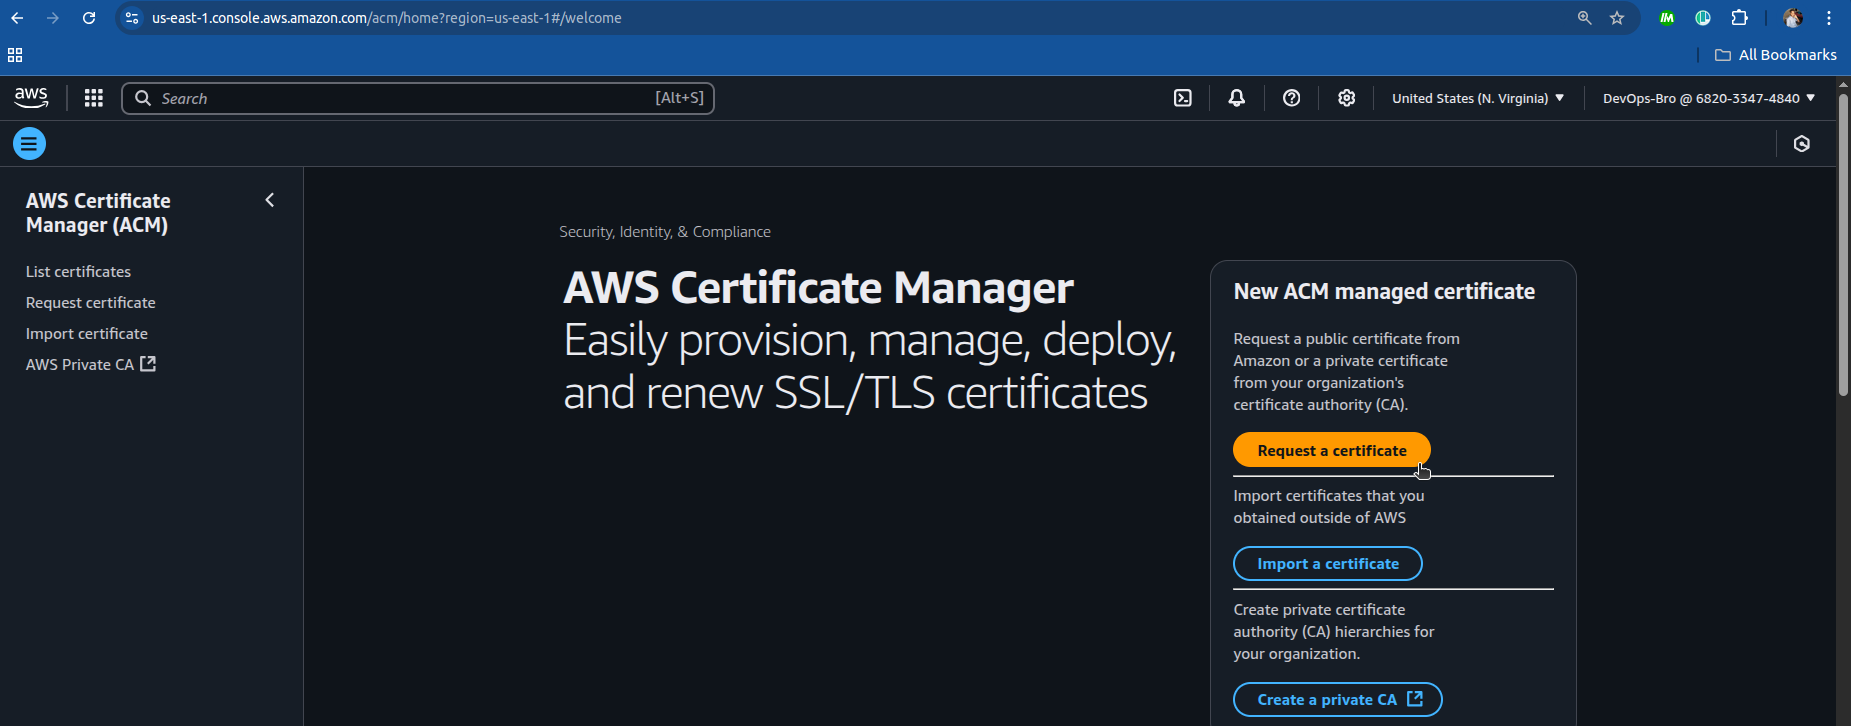
Choose Public Certificate → Enter domain name (e.g., mindfulcloud.devsuraj.me).
In my case I have my root domain which
devsuraj.meso I want subdomain to attach it and above I have mentioned.Choose DNS validation (faster & recommended).
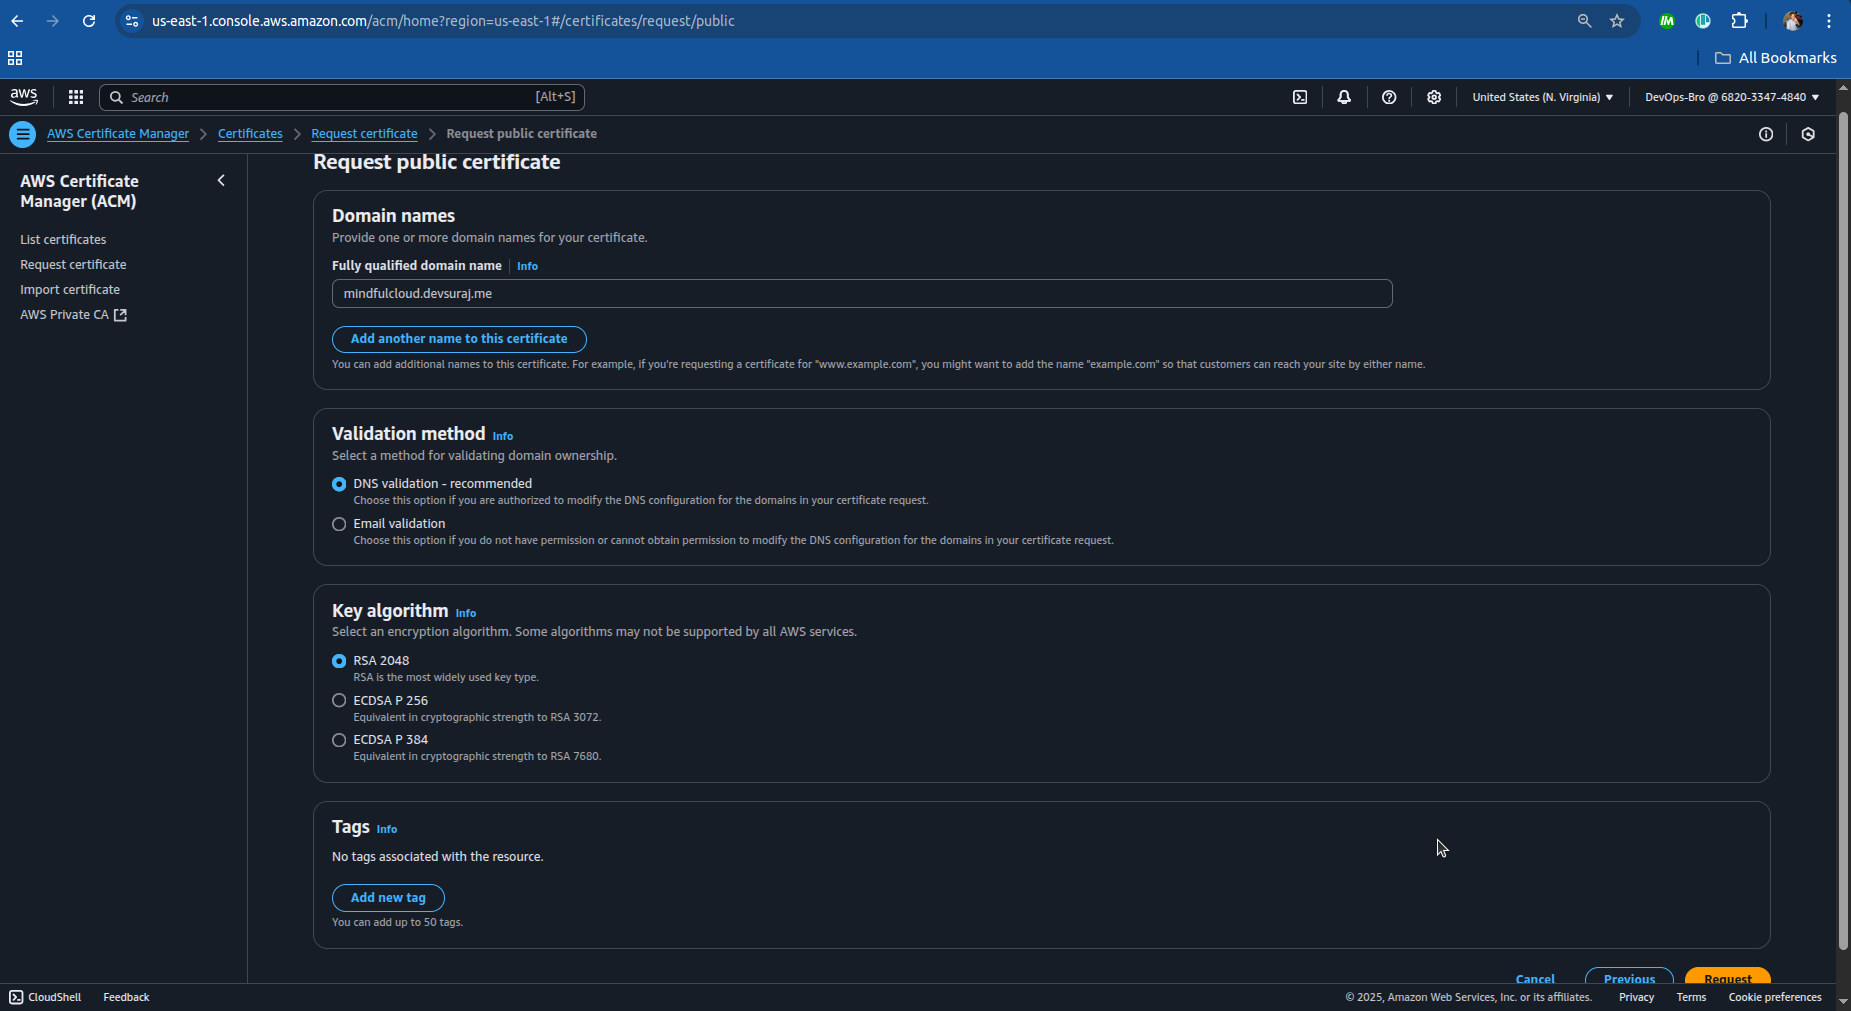
ACM provides CNAME records; add them to your Namecheap DNS settings.
Copy the CNAME name and CNAME value.
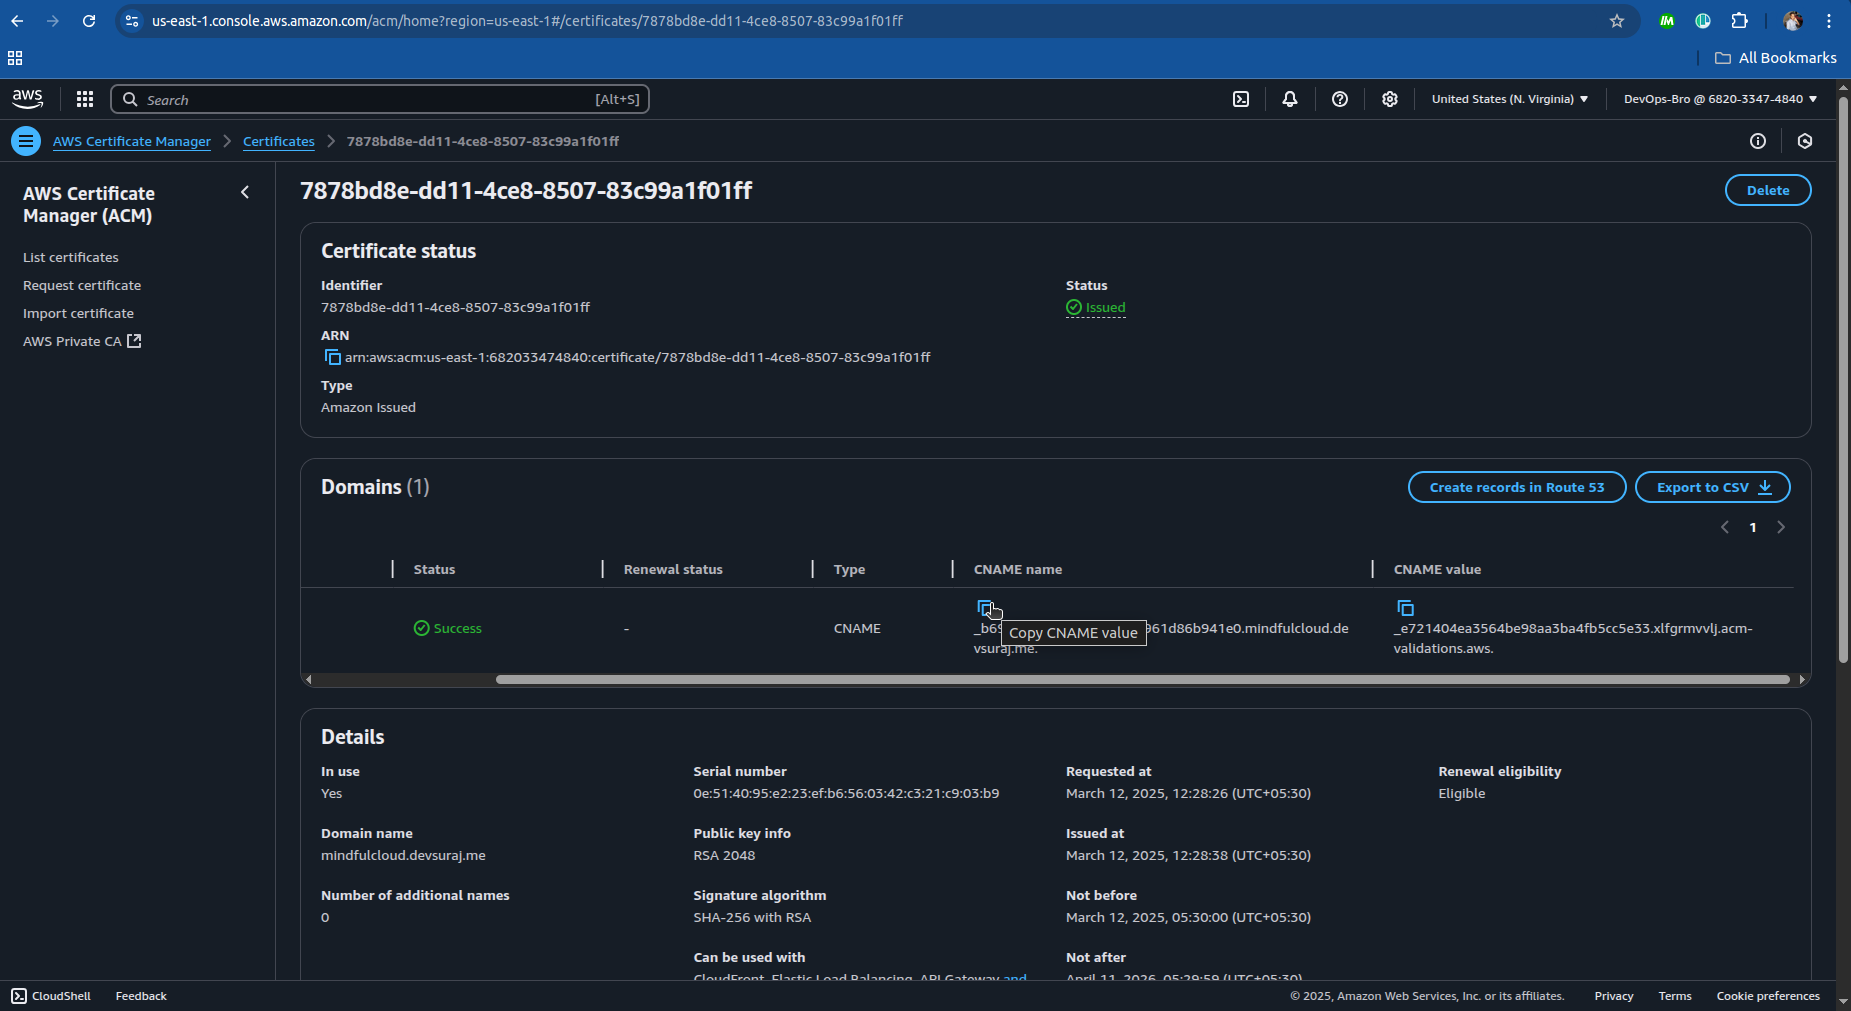
Add it to the DNS service provide you have in my case I have Namecheap:
After login to you namecheap to domain list and click on manage and go to the advanced DNS.


Now create new record
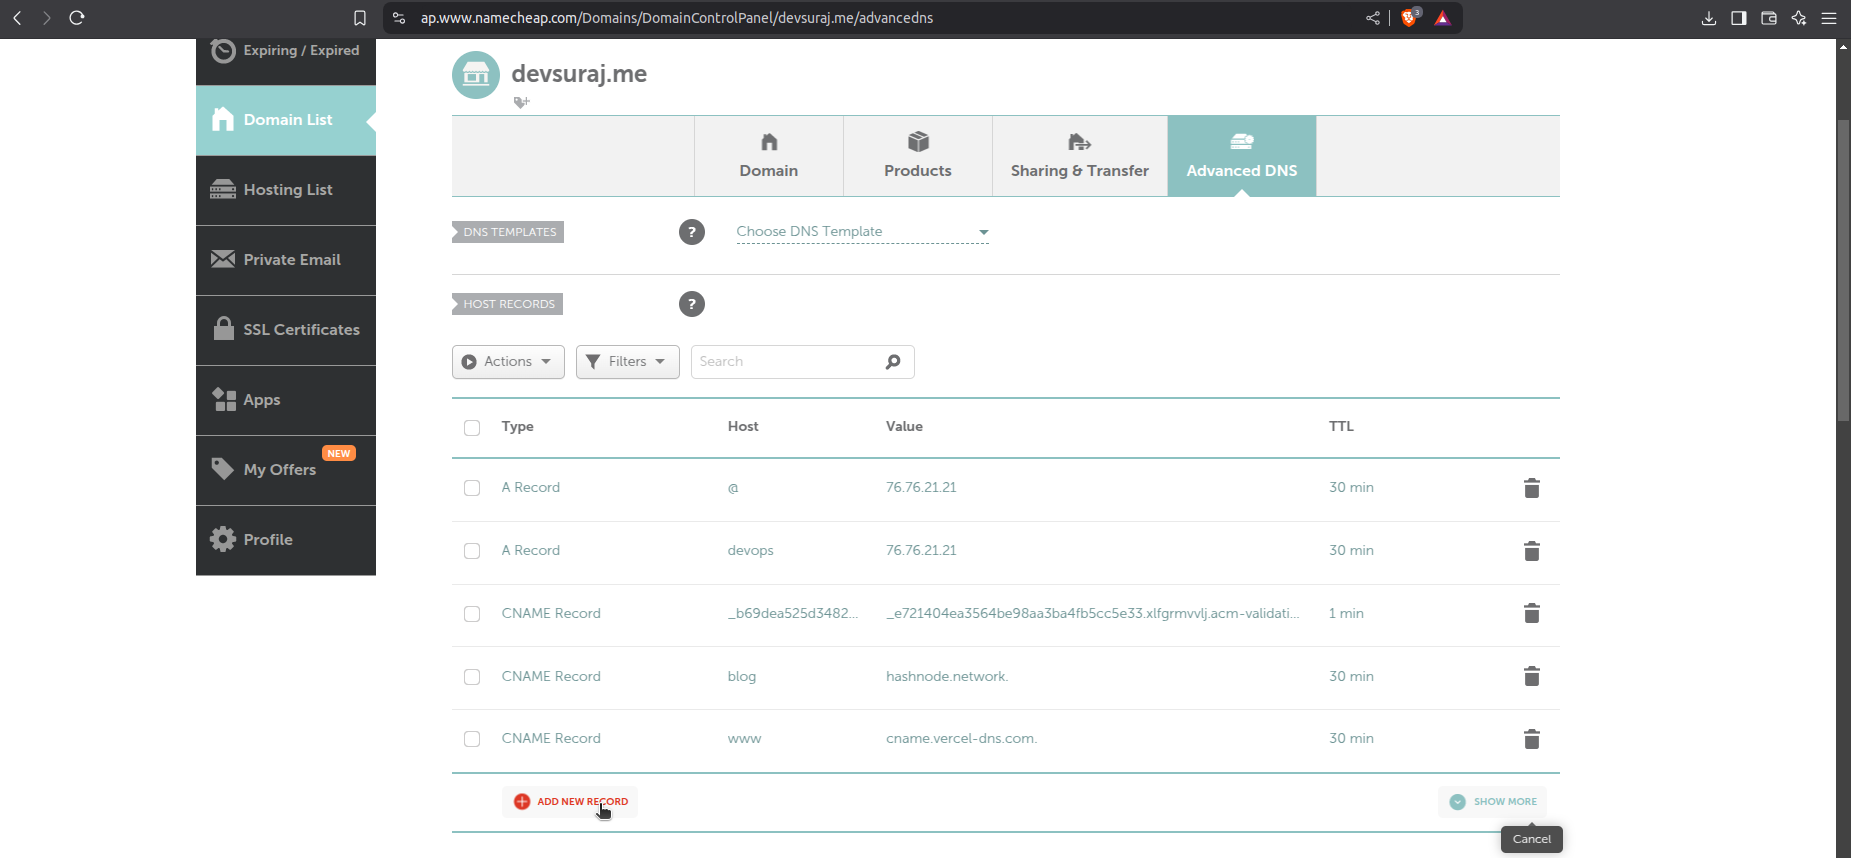
Enter the CNAME and The Value

Now you’re done with ACM, wait for validation (may take a few minutes to hours).
Step 3: Setting Up a Route 53 Hosted Zone
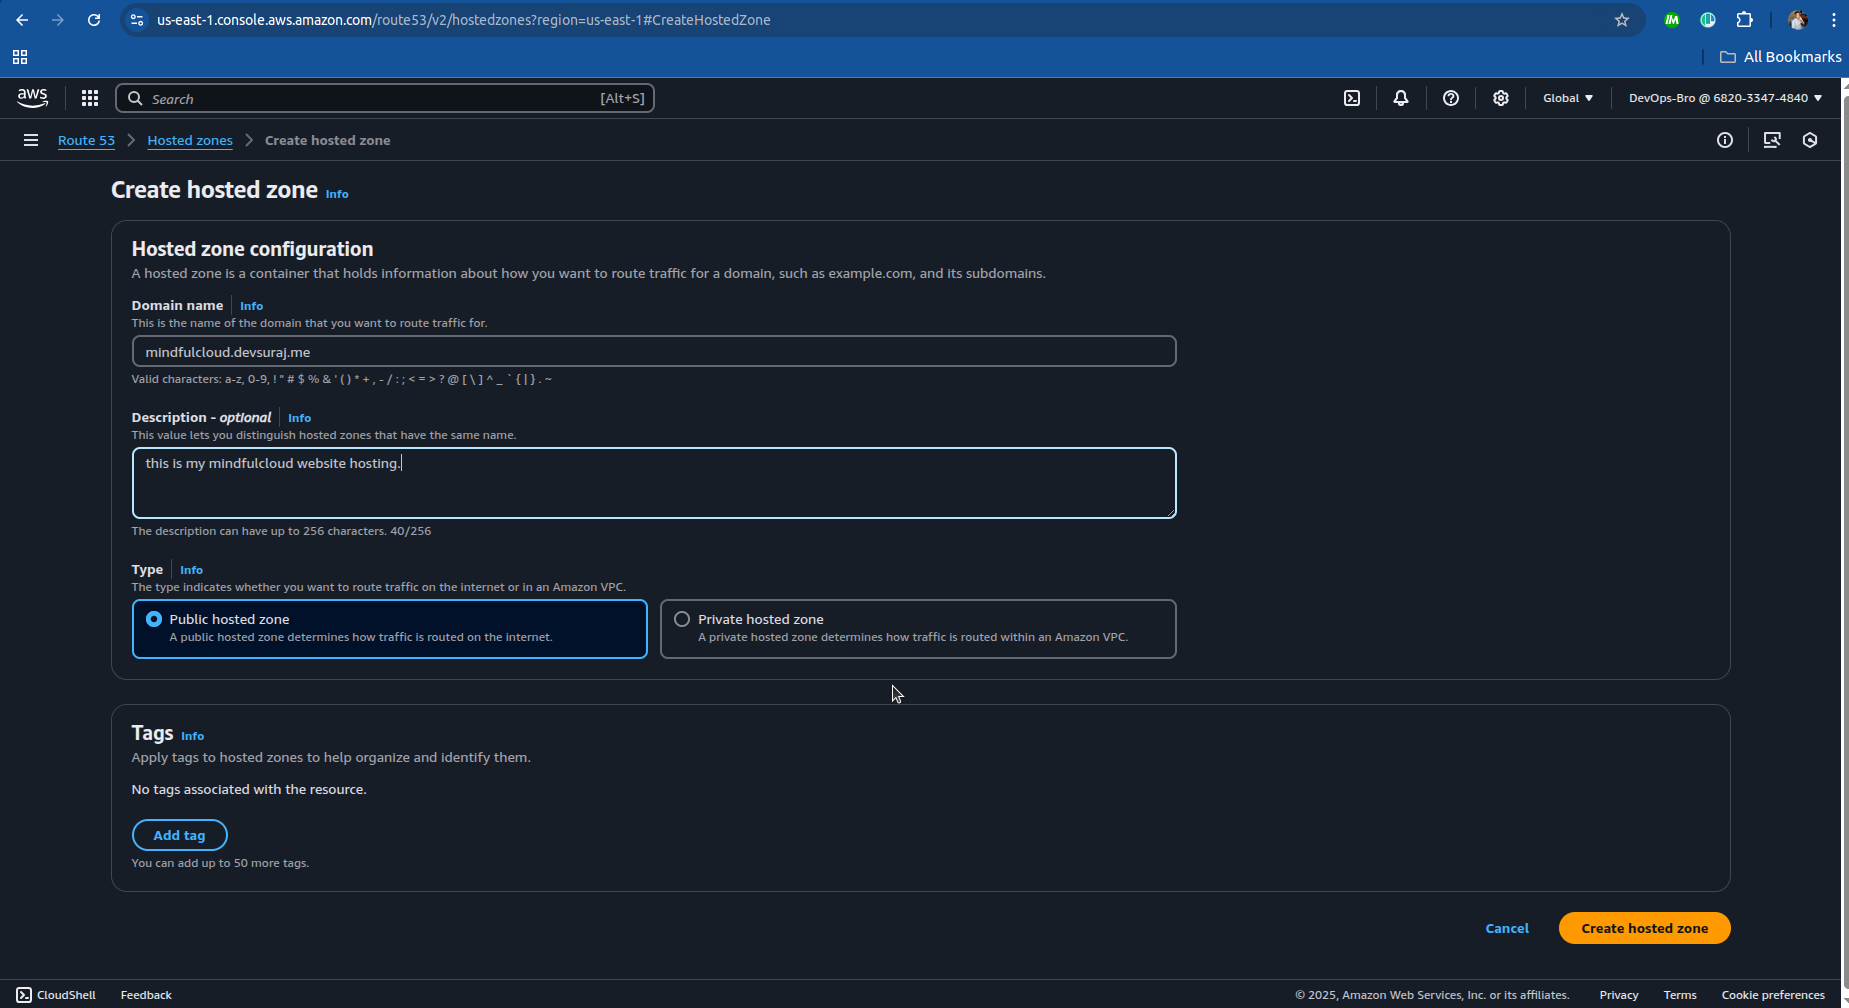
Go to AWS Route 53 → Create Hosted Zone.

Enter your subdomain (e.g., mindfulcloud.devsuraj.me).
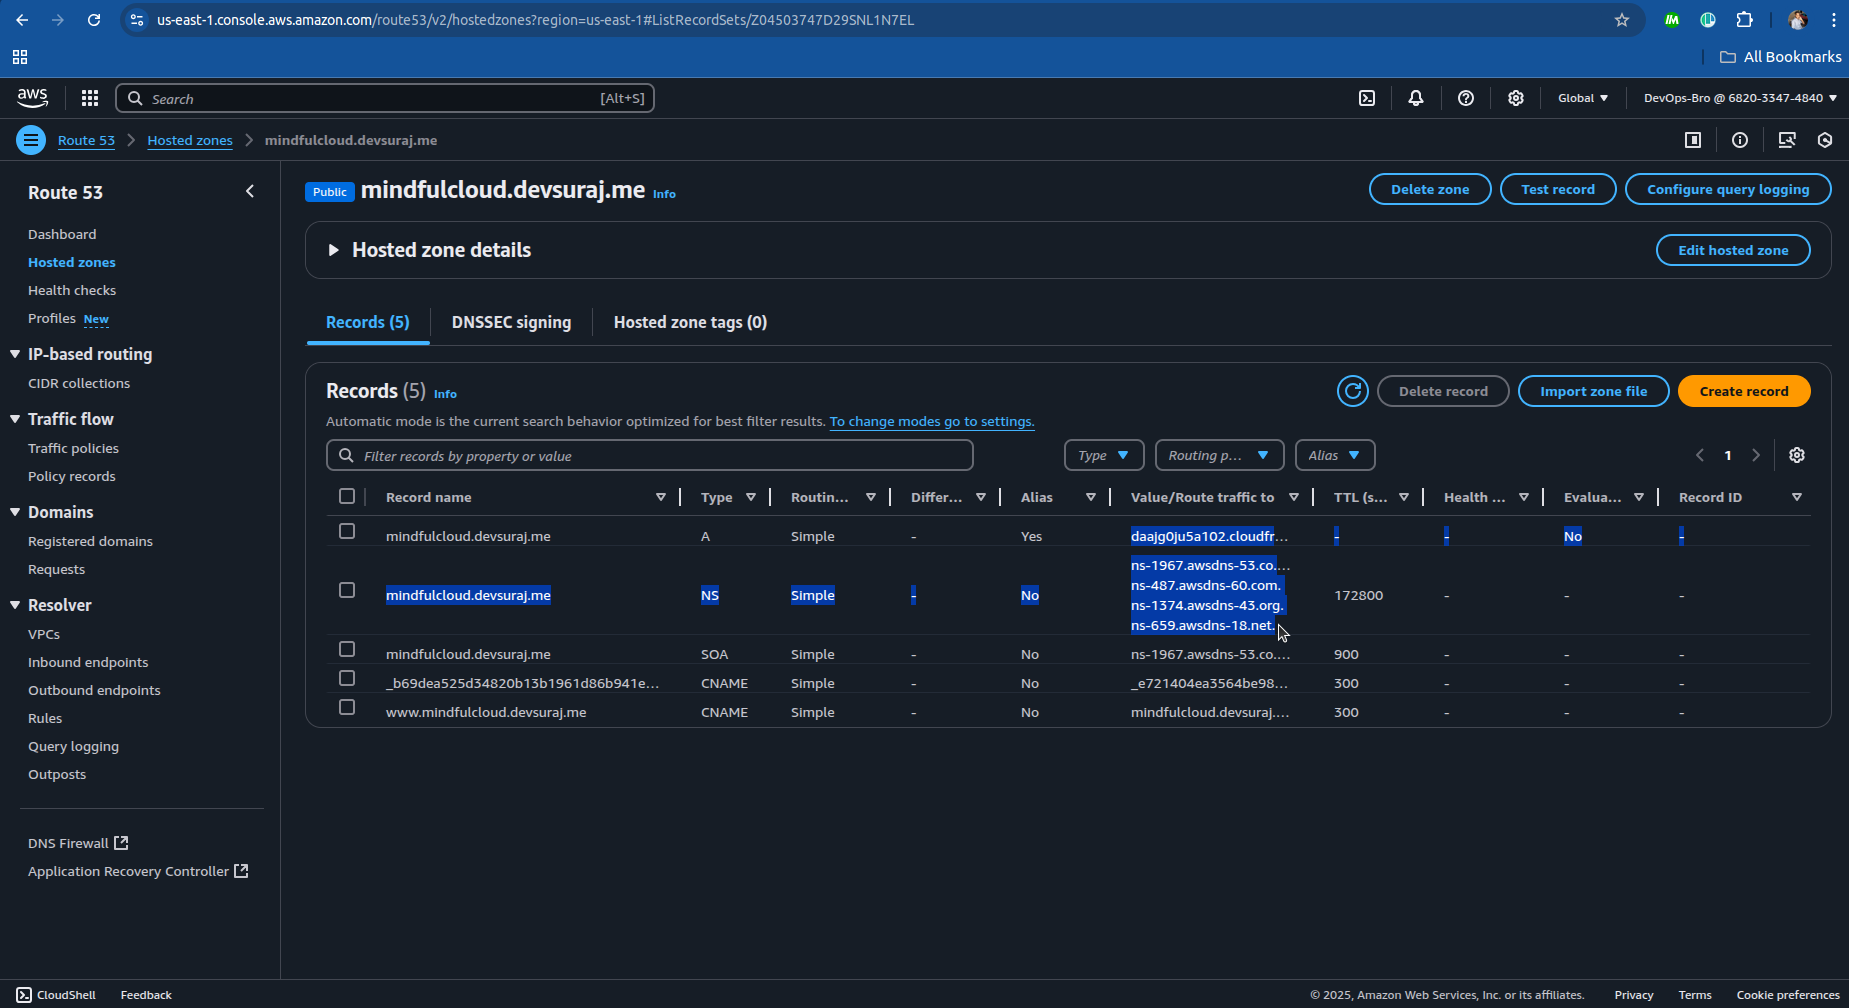
Copy the provided NS (Name Server) records and update them in Namecheap’s DNS settings.

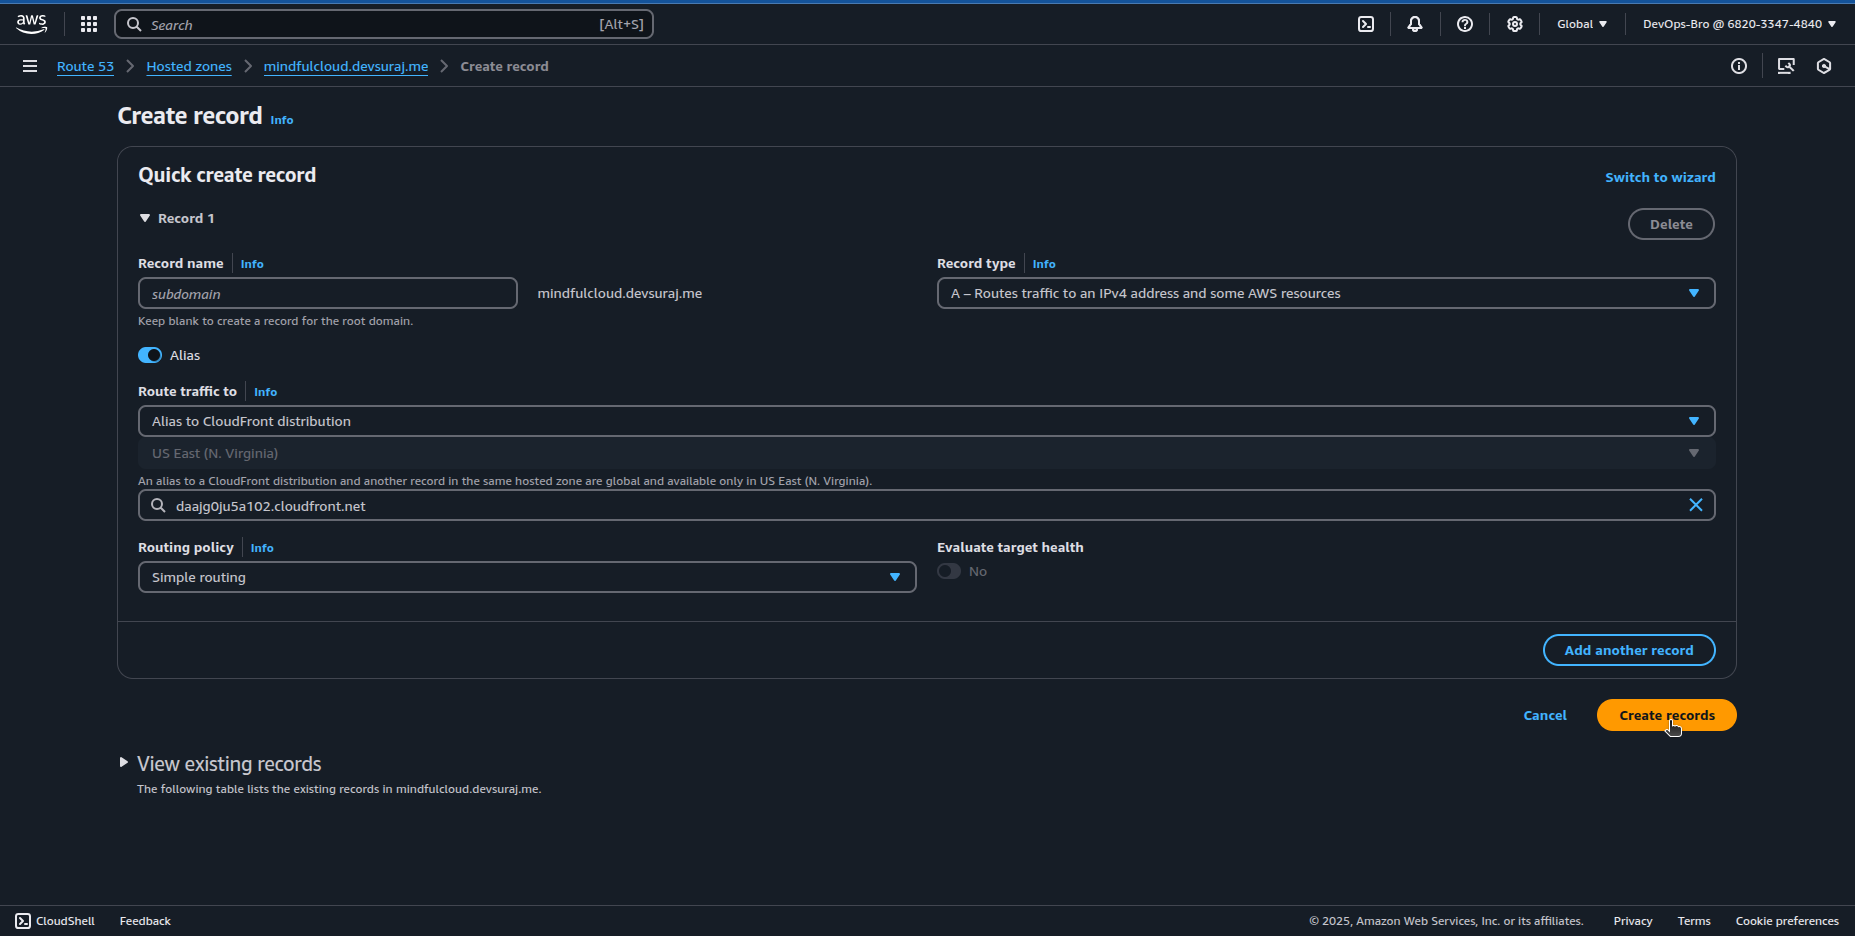
Create an A record (alias) pointing to CloudFront Distribution.
Step 4: Setting Up CloudFront for CDN & Caching
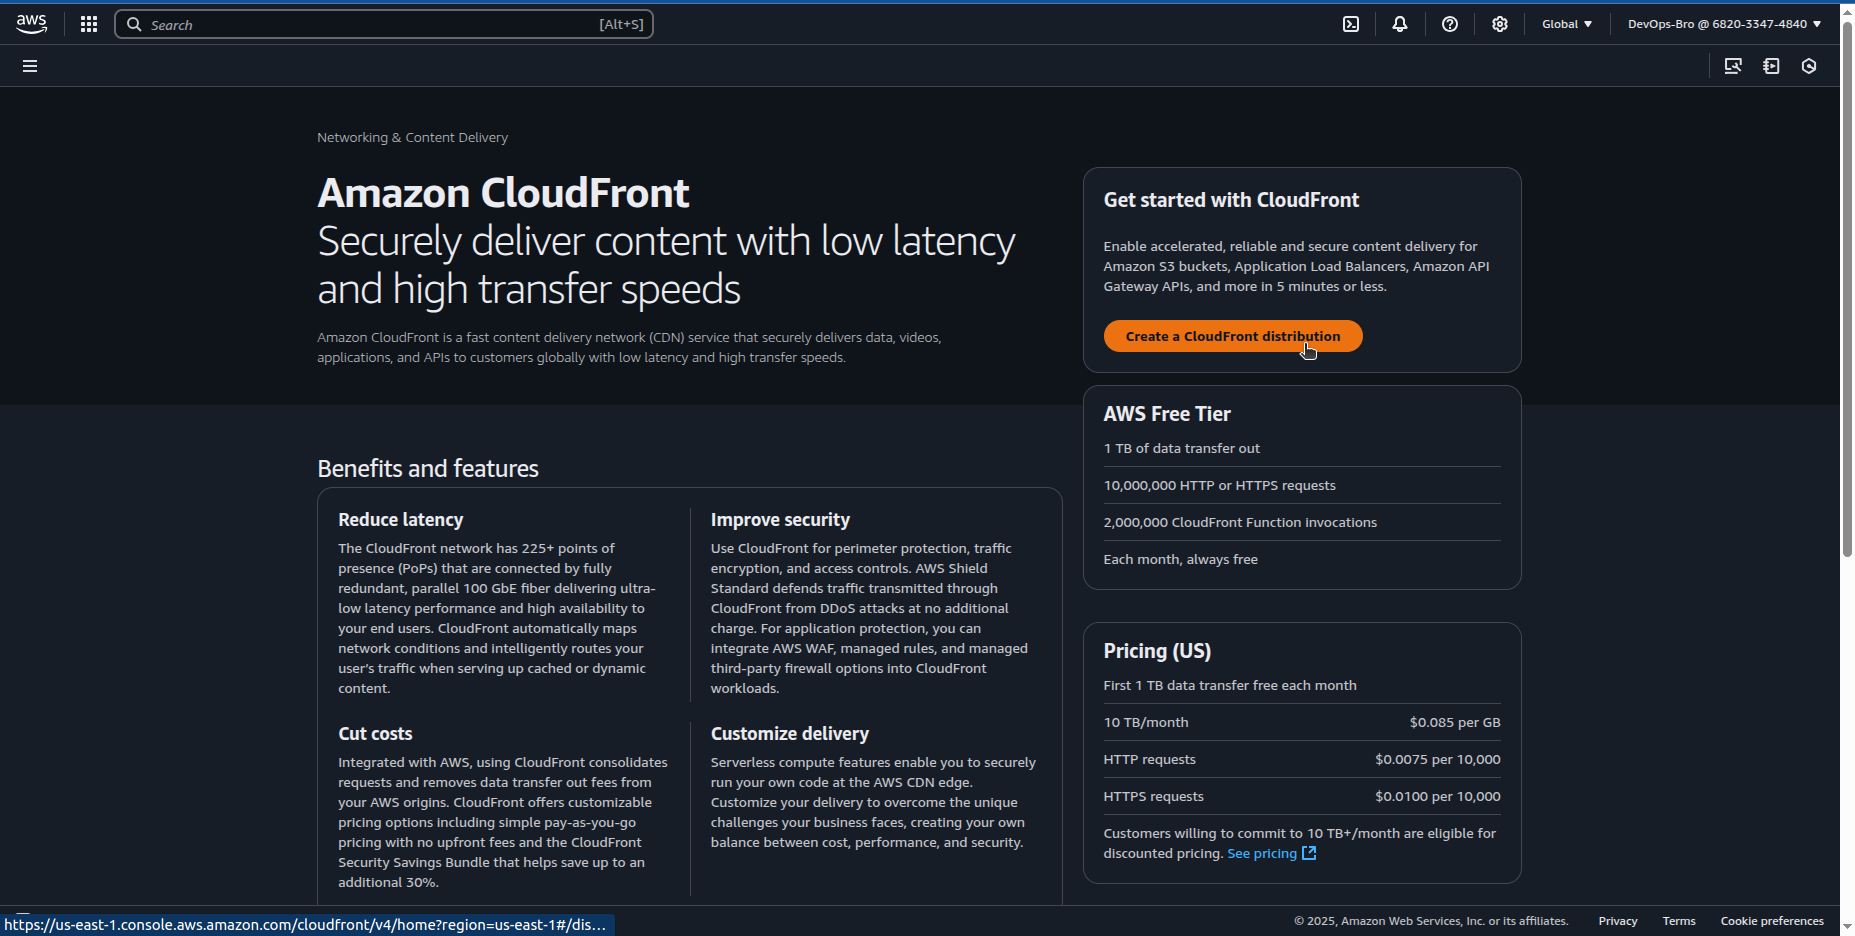
Go to AWS CloudFront → Create Distribution.
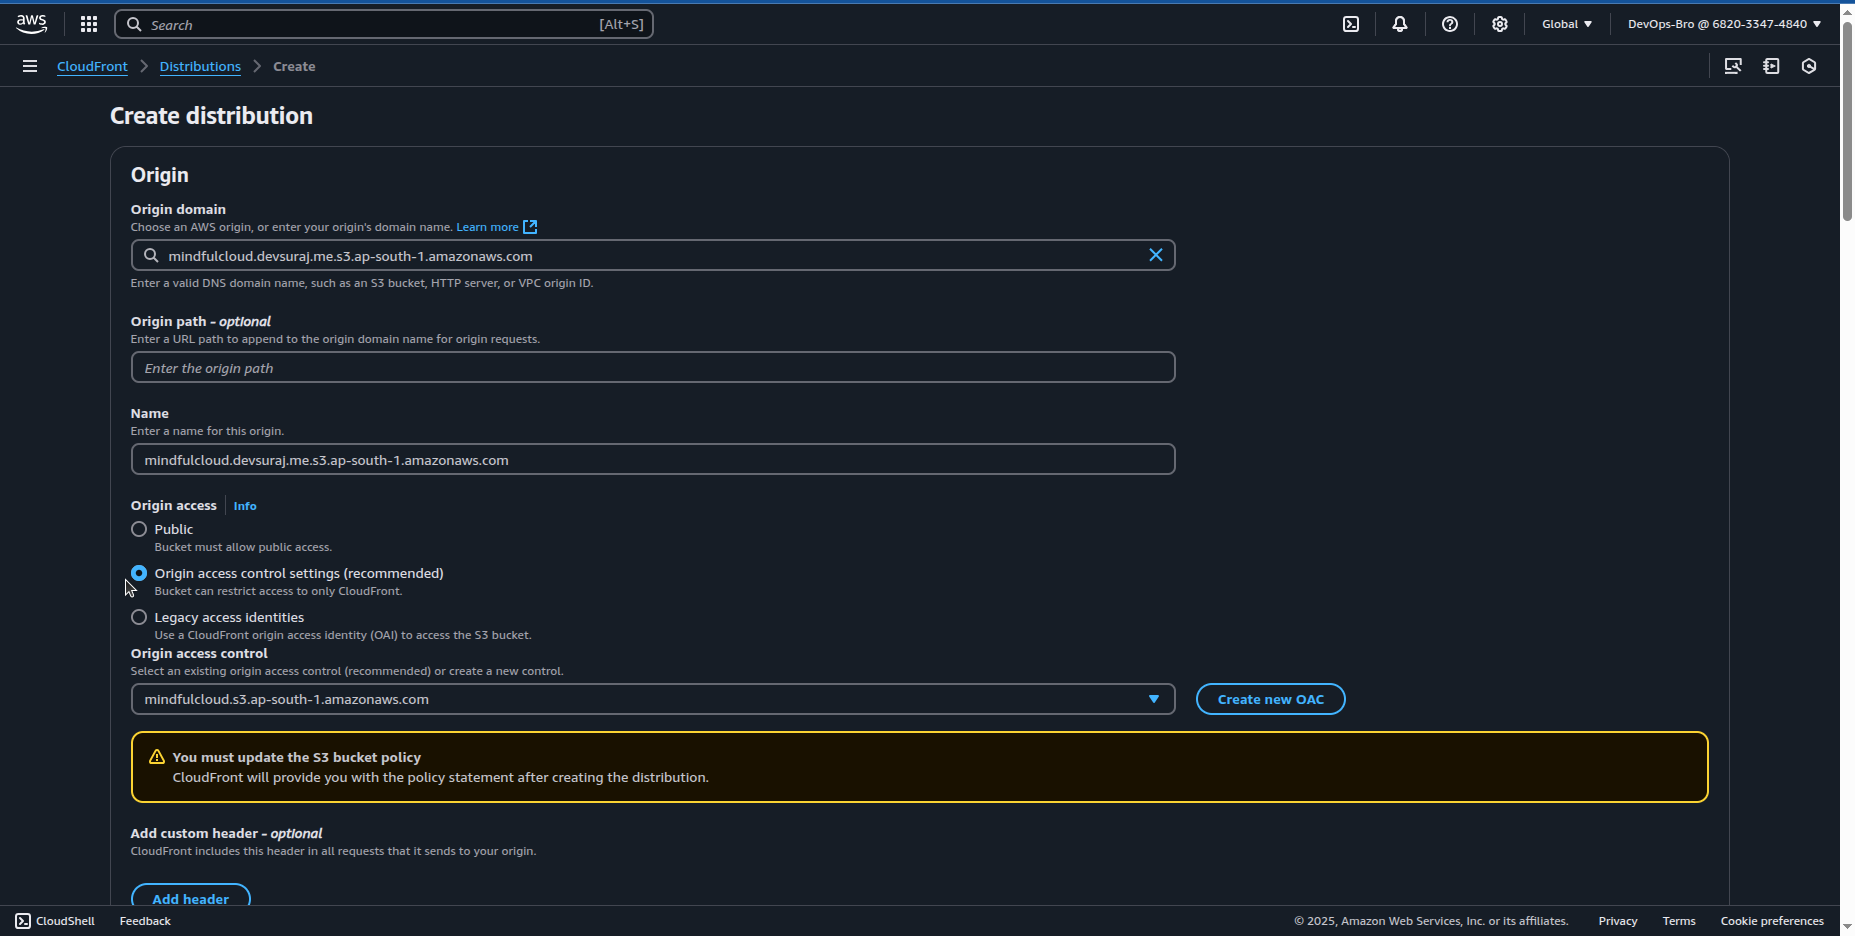
Set Origin Domain as your S3 bucket.
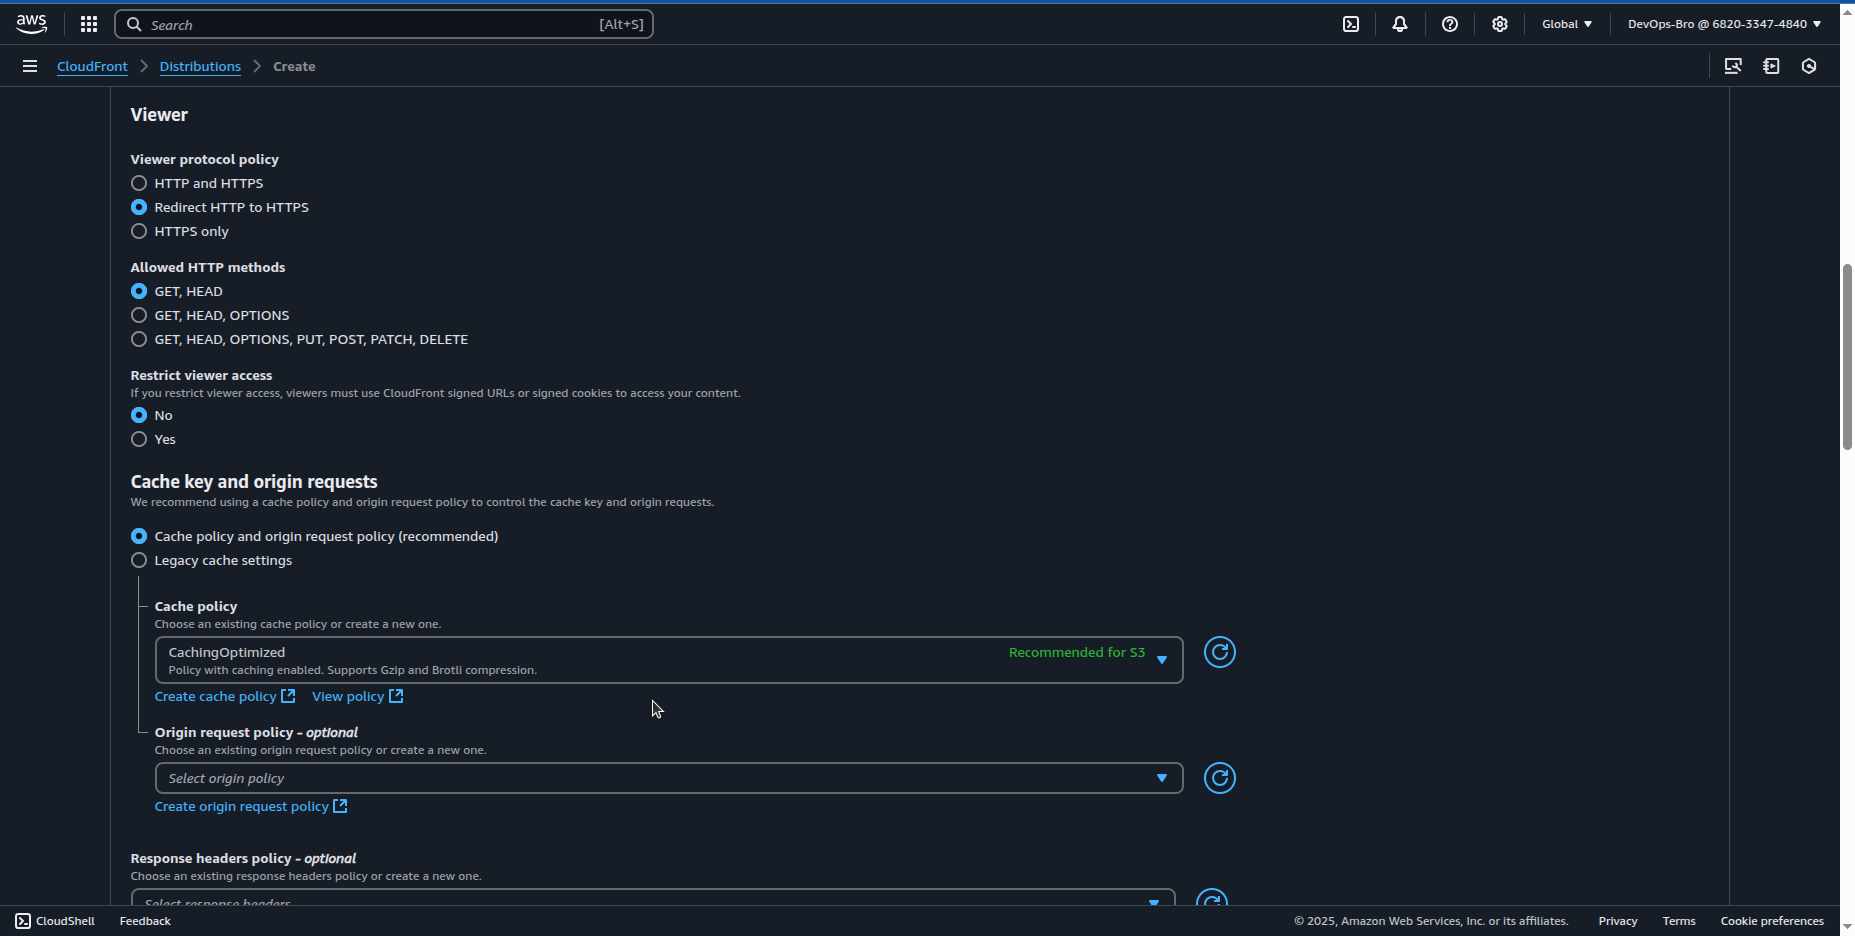
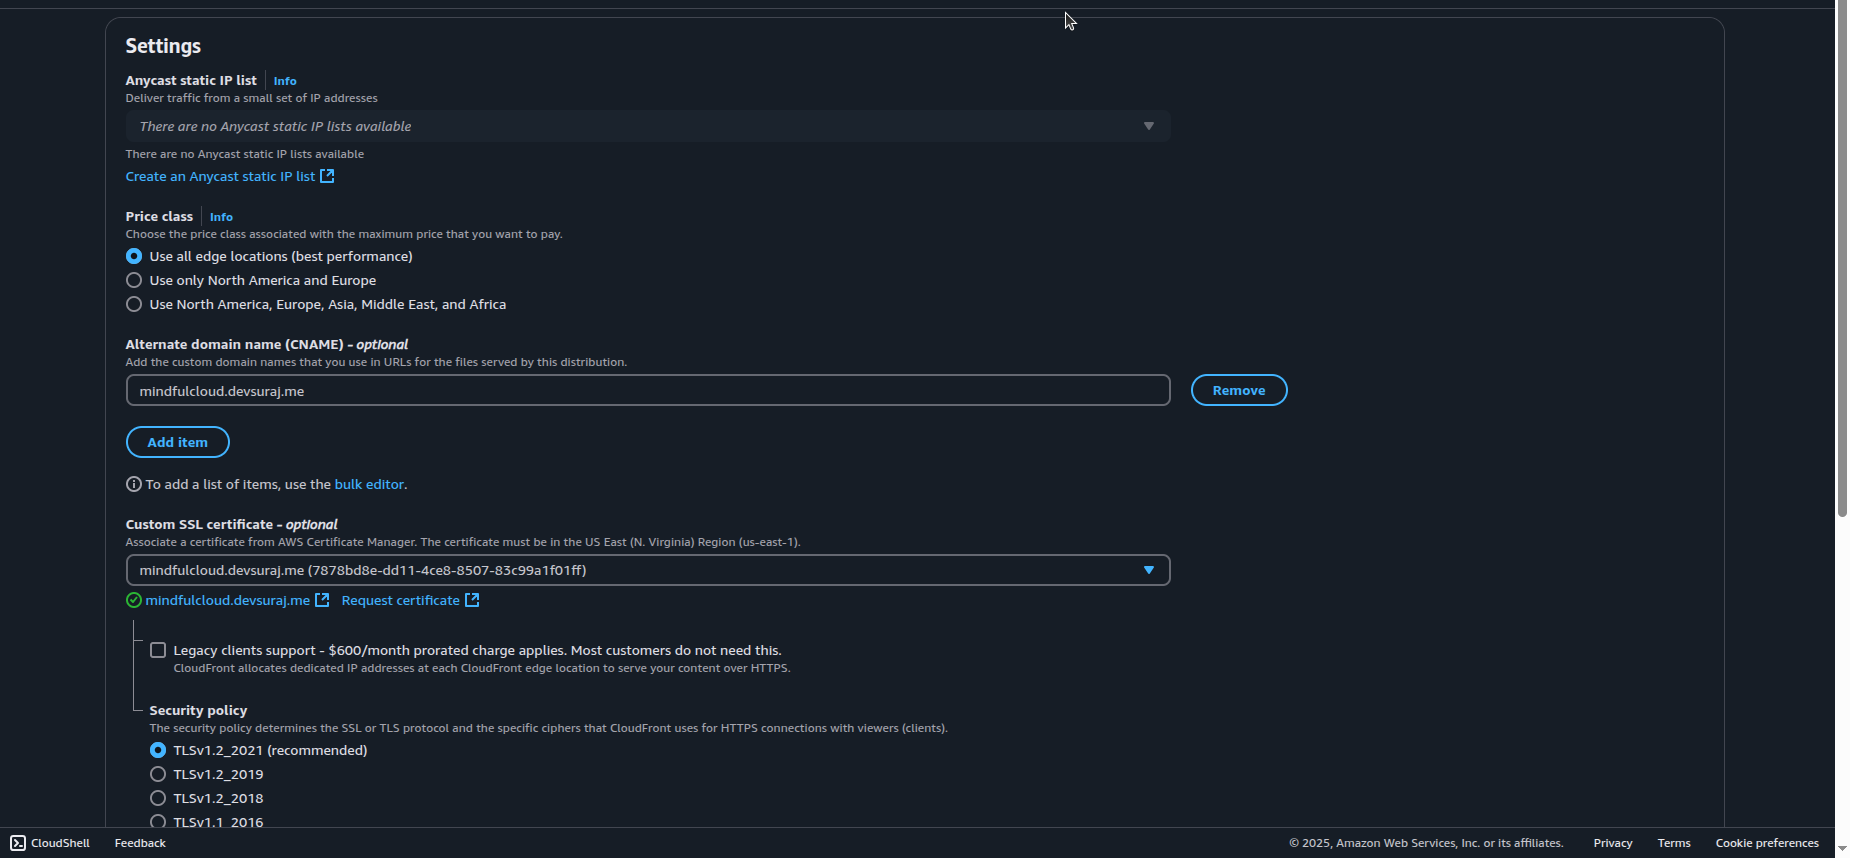
Enable HTTPS using your ACM certificate.
Select you ACM certificate:
Configure default root object (index.html).
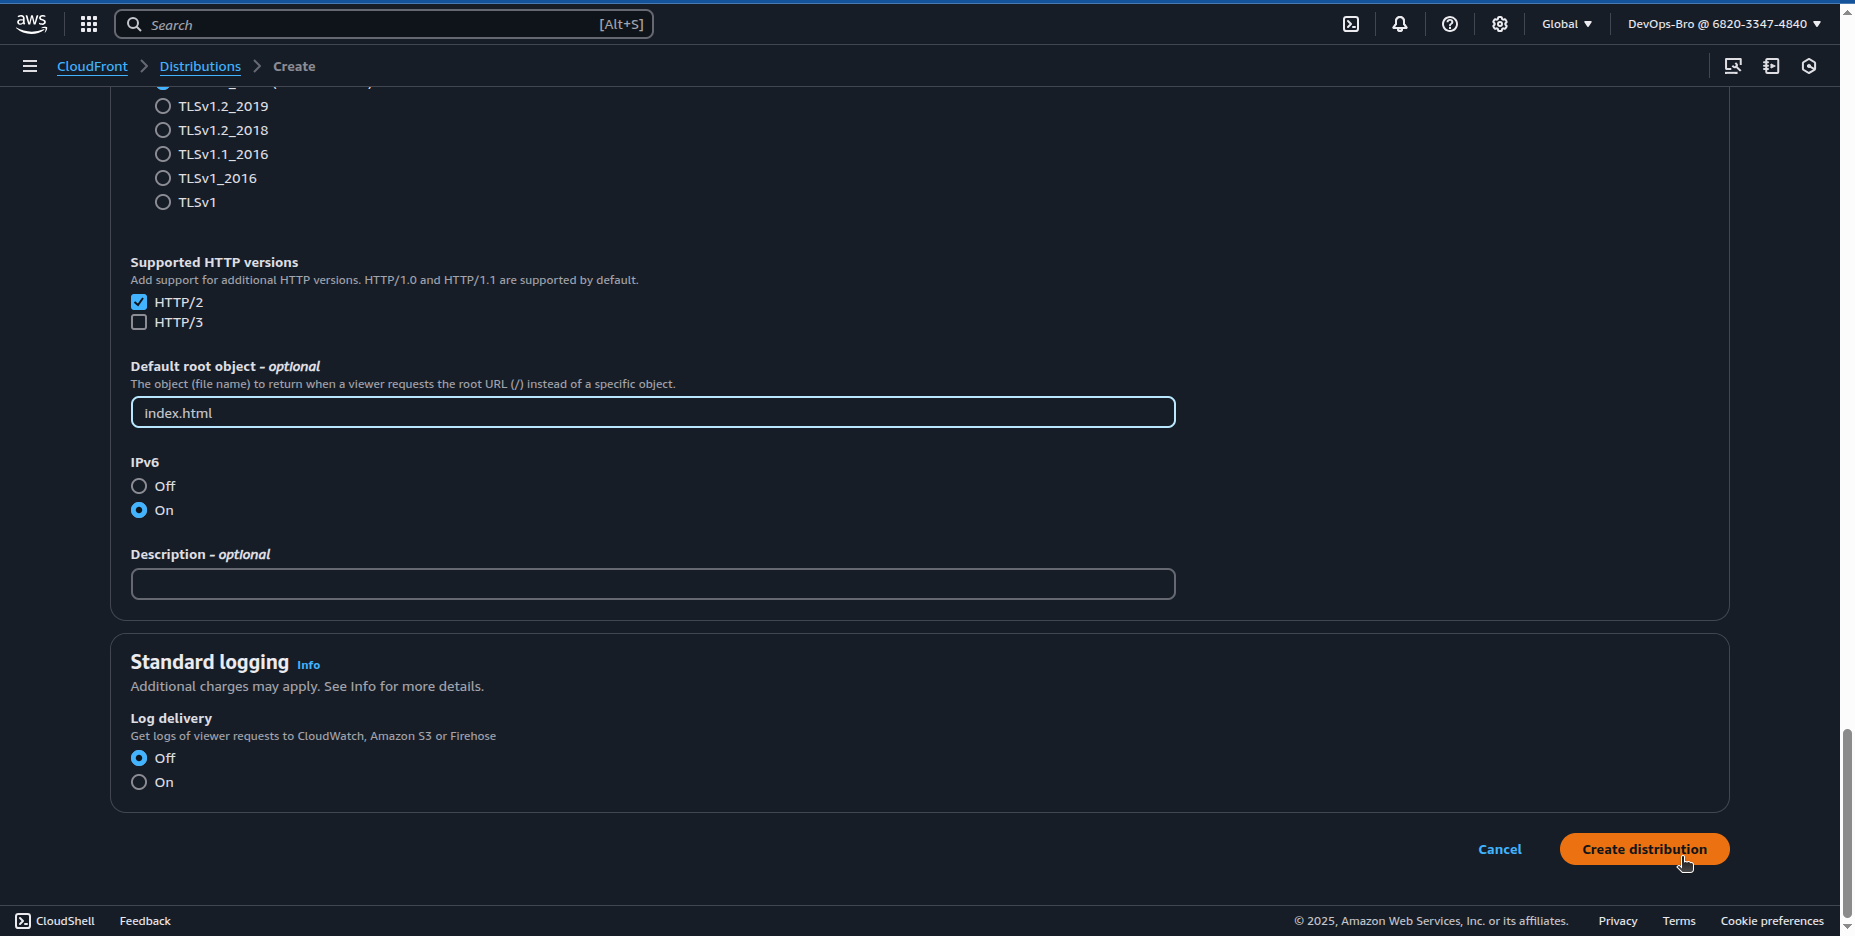
Deploy the distribution and note the CloudFront URL.
After creating the distribution it you’ll give you the bucket policy to you just copy that and paste it in the bucket you created:
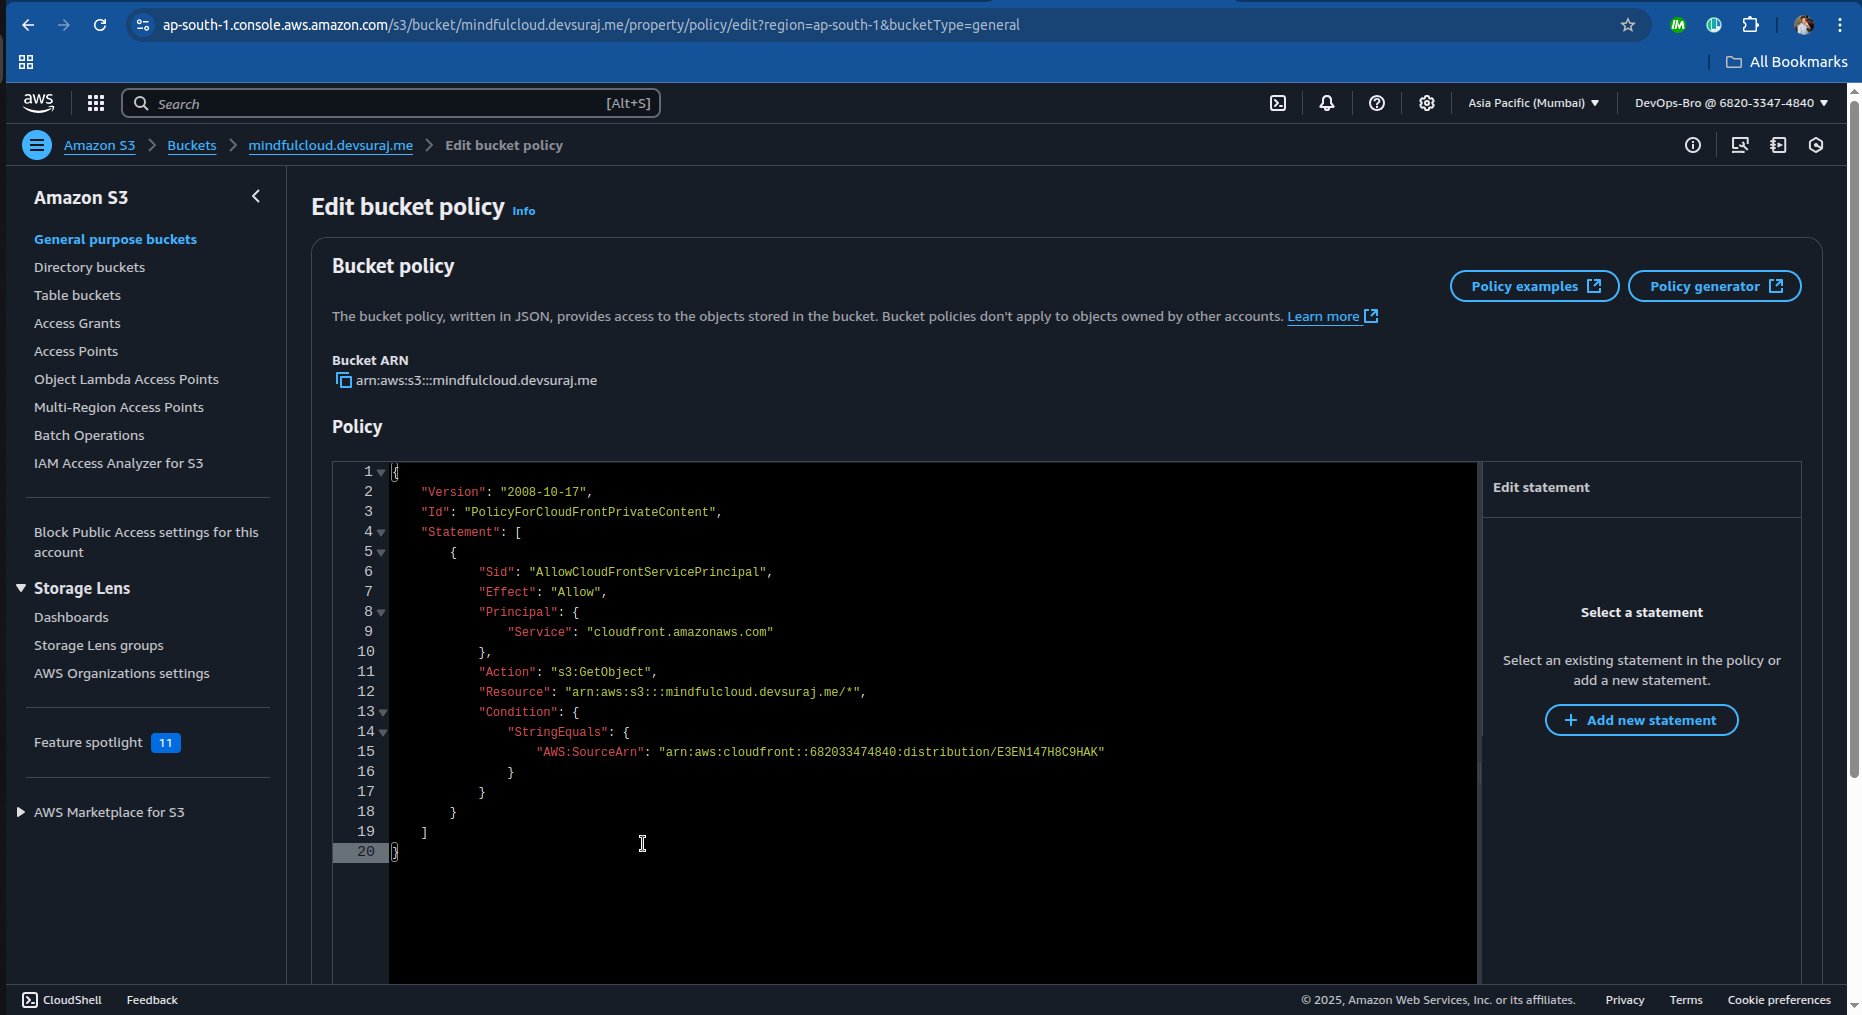
Step 5: Connecting Namecheap Domain to AWS
1️⃣ Go to Namecheap DNS Settings
- Log in to Namecheap → Domain List → Manage your domain → Advanced DNS.
2️⃣ Verify NS Records are correct( as we did this in step 3)
- Ensure Nameservers are set to Custom DNS with Route 53 NS records.
3️⃣ Save & Wait for Propagation
Click Save Changes → Wait a few minutes to 24 hours.
Open
https://yourdomain.comin a browser to confirm it works.

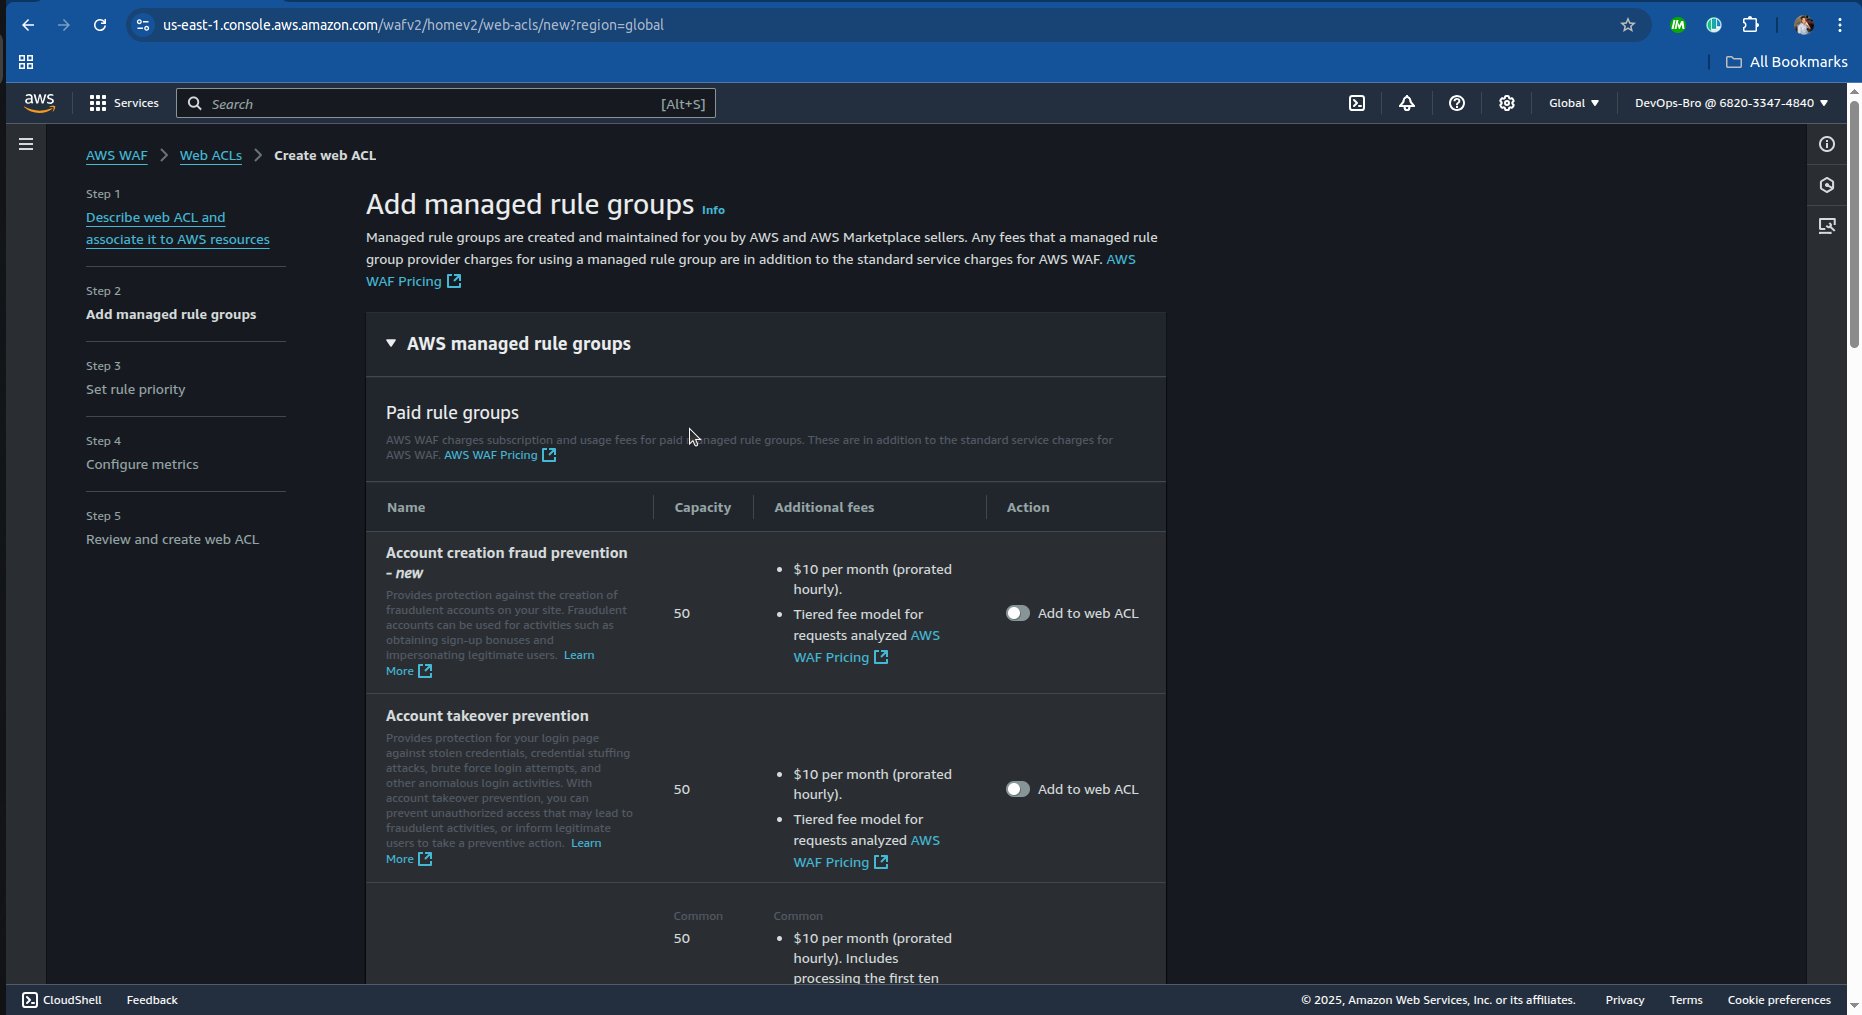
Step 6: Enhancing Security with AWS WAF
Go to AWS WAF → Create WebACL.
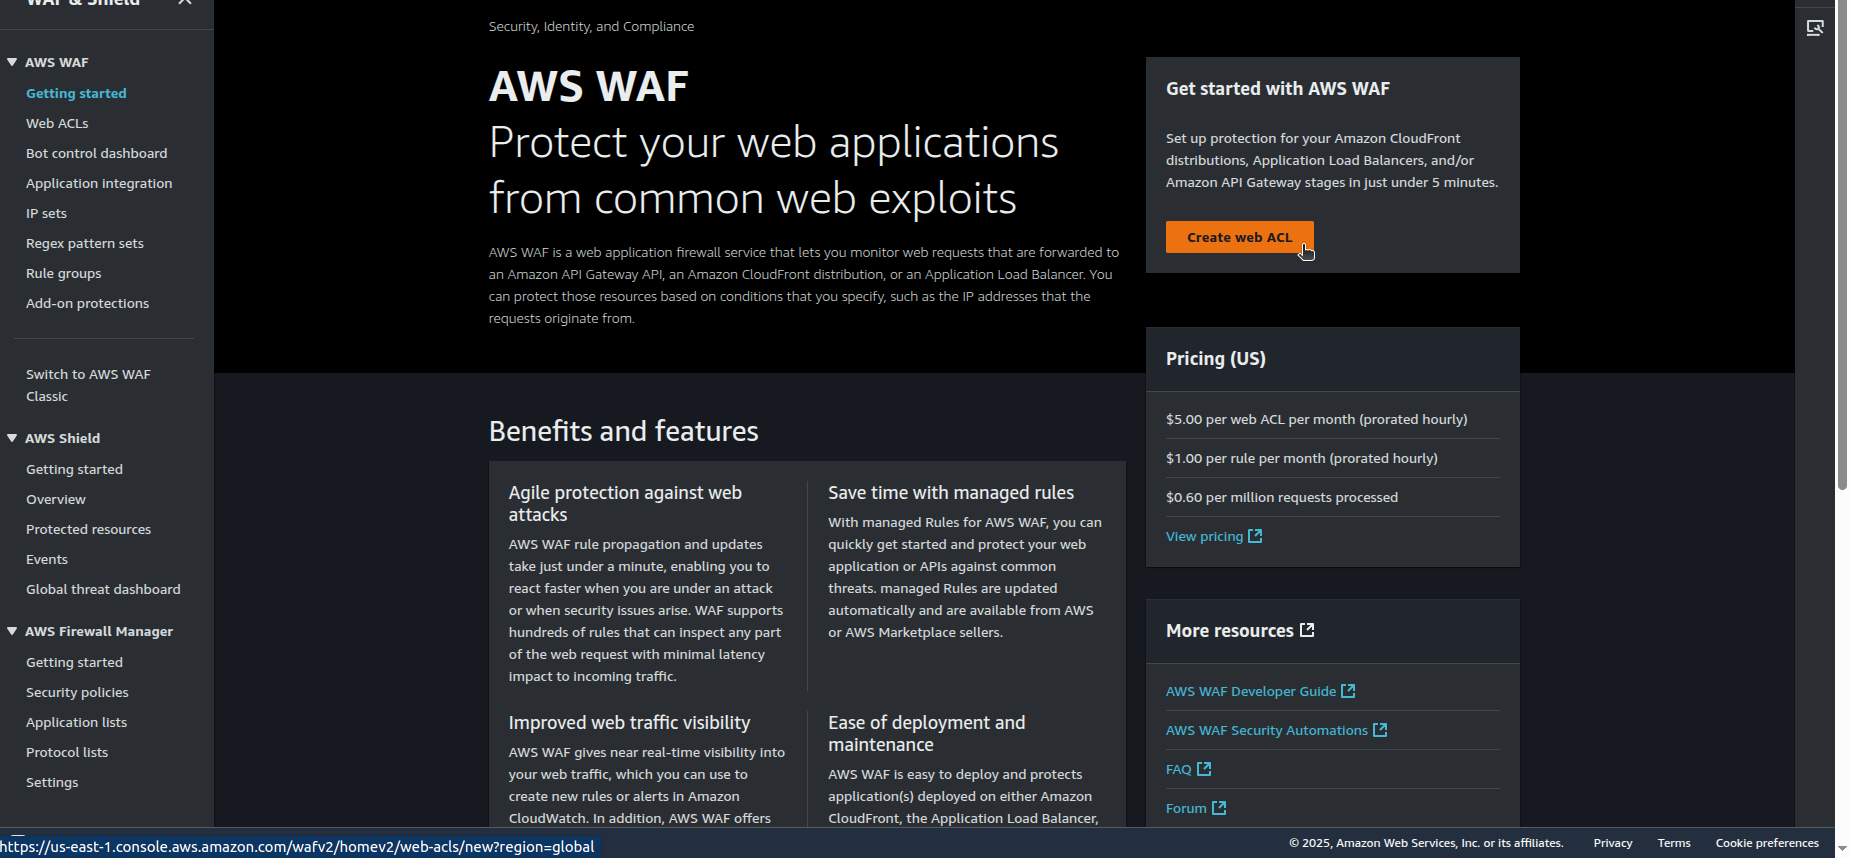
Attach it to CloudFront Distribution.
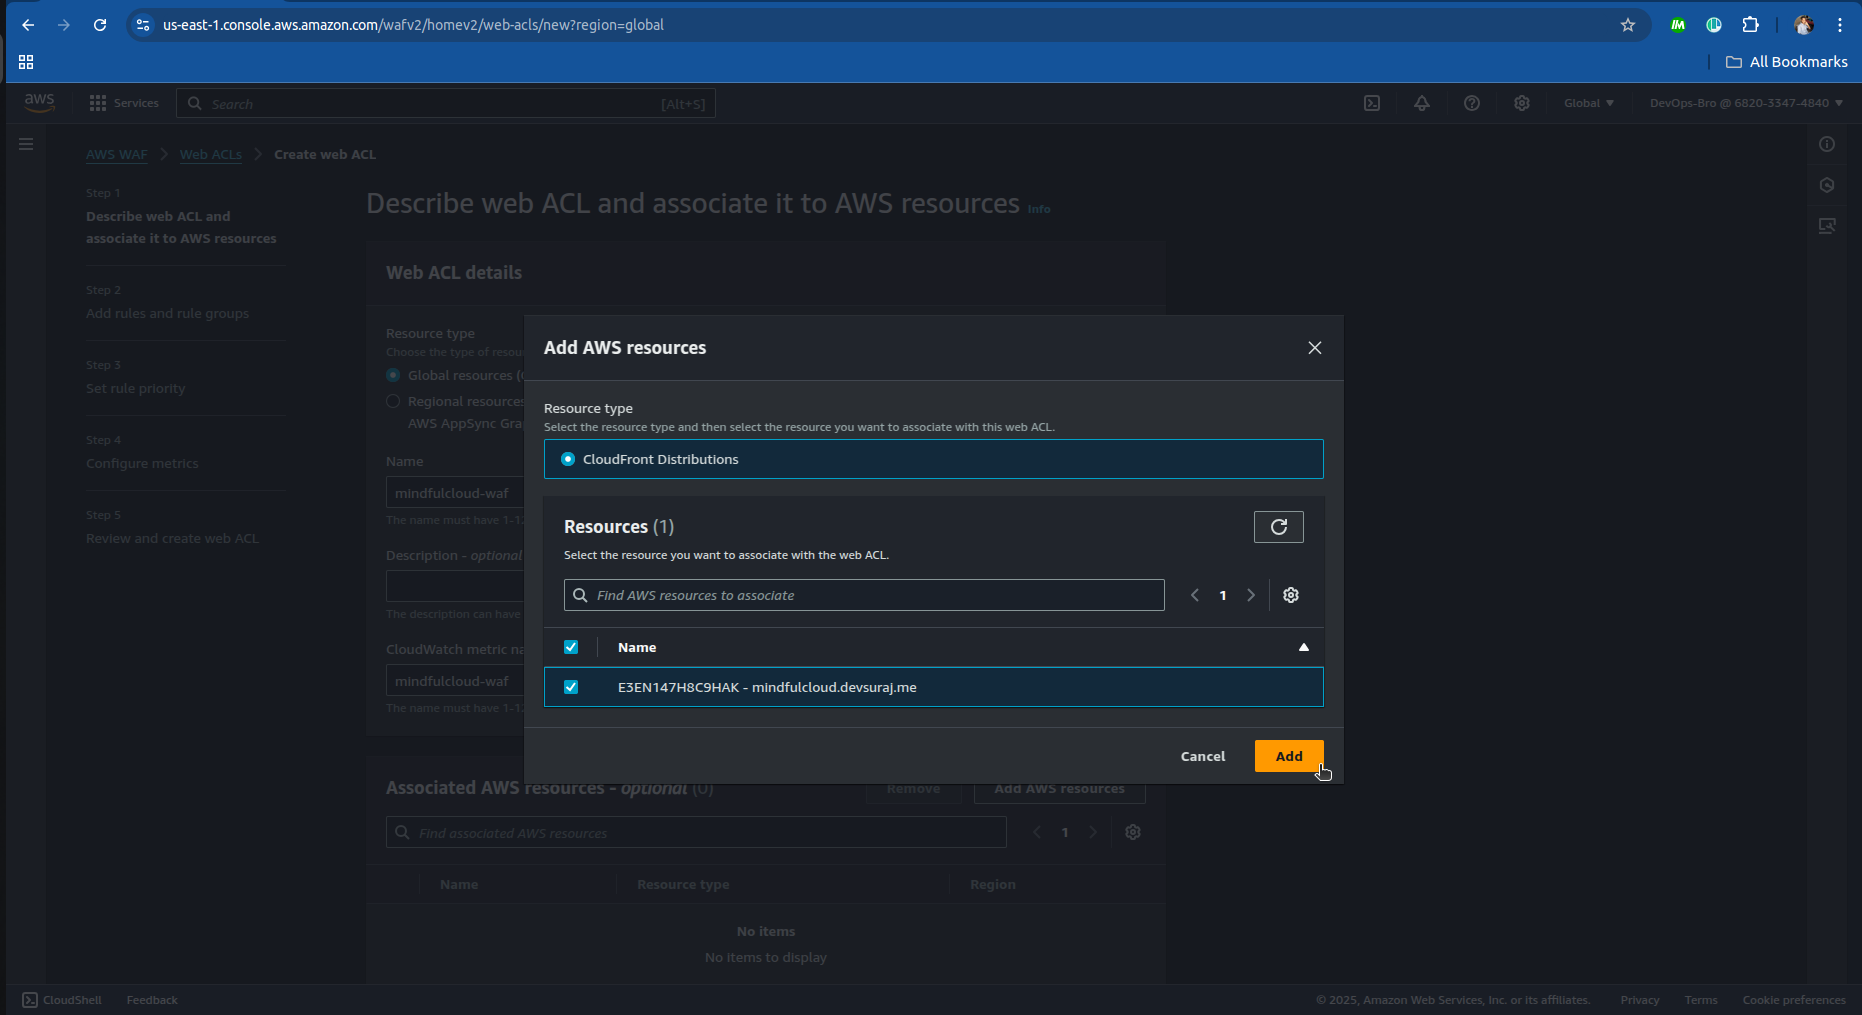
Add security rules:
Block common threats (DDoS, SQL Injection, XSS attacks).
Rate limiting for excessive requests.
Geo-restriction to block traffic from unwanted locations.
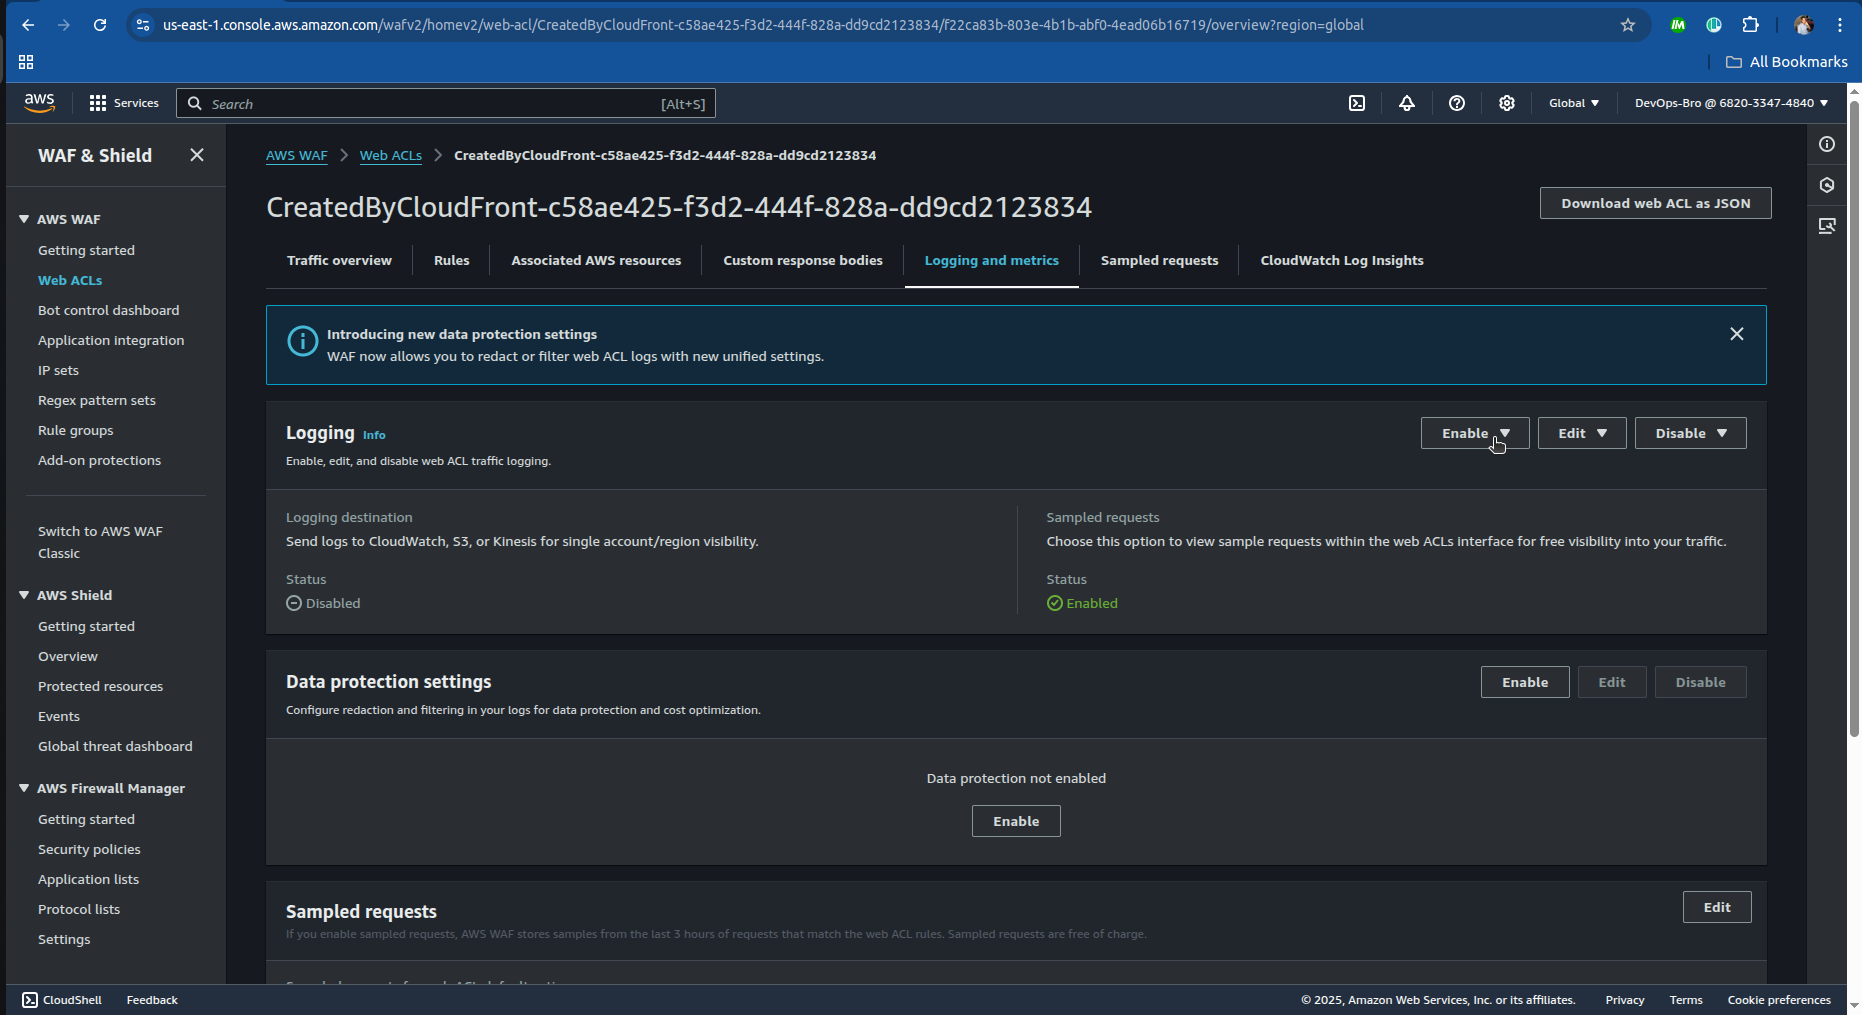
Enable AWS WAF logging to monitor security threats.
Step 7: Enabling CloudWatch Monitoring & Logging
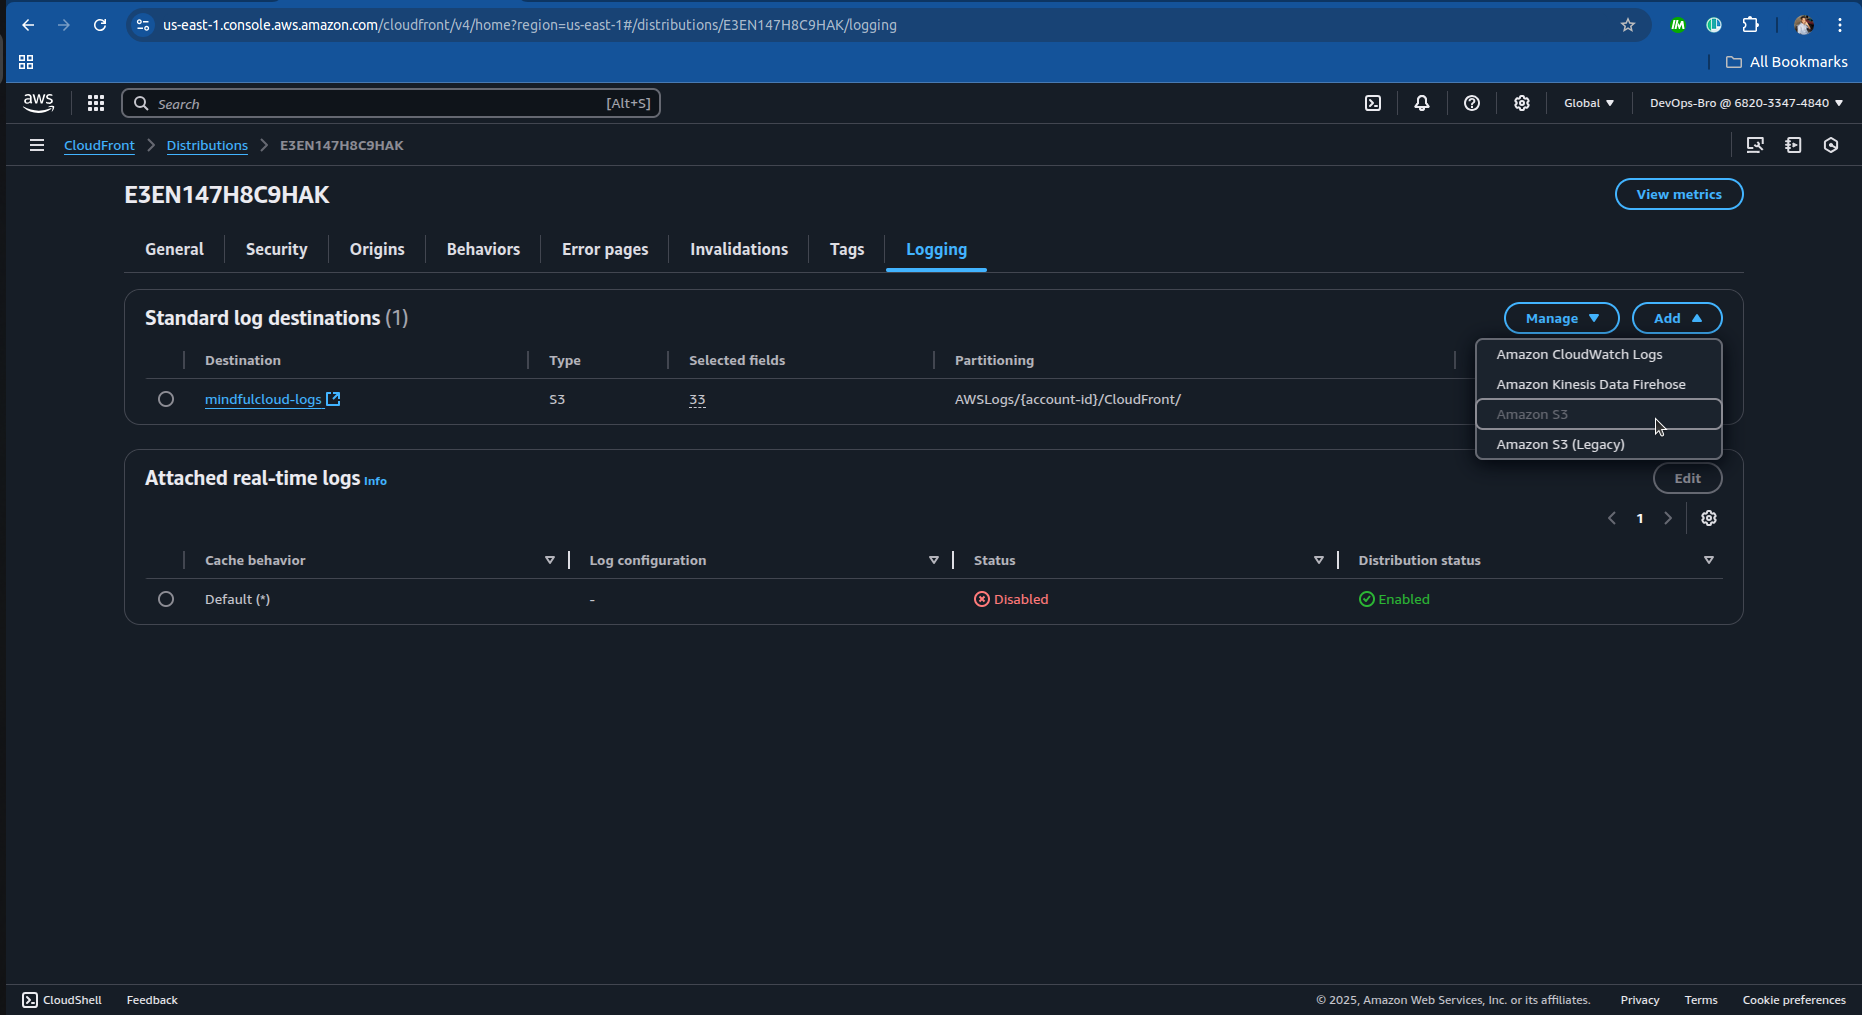
Enable CloudFront Logging:
Go to CloudFront → Enable Standard Logging.
Choose an S3 bucket to store logs.
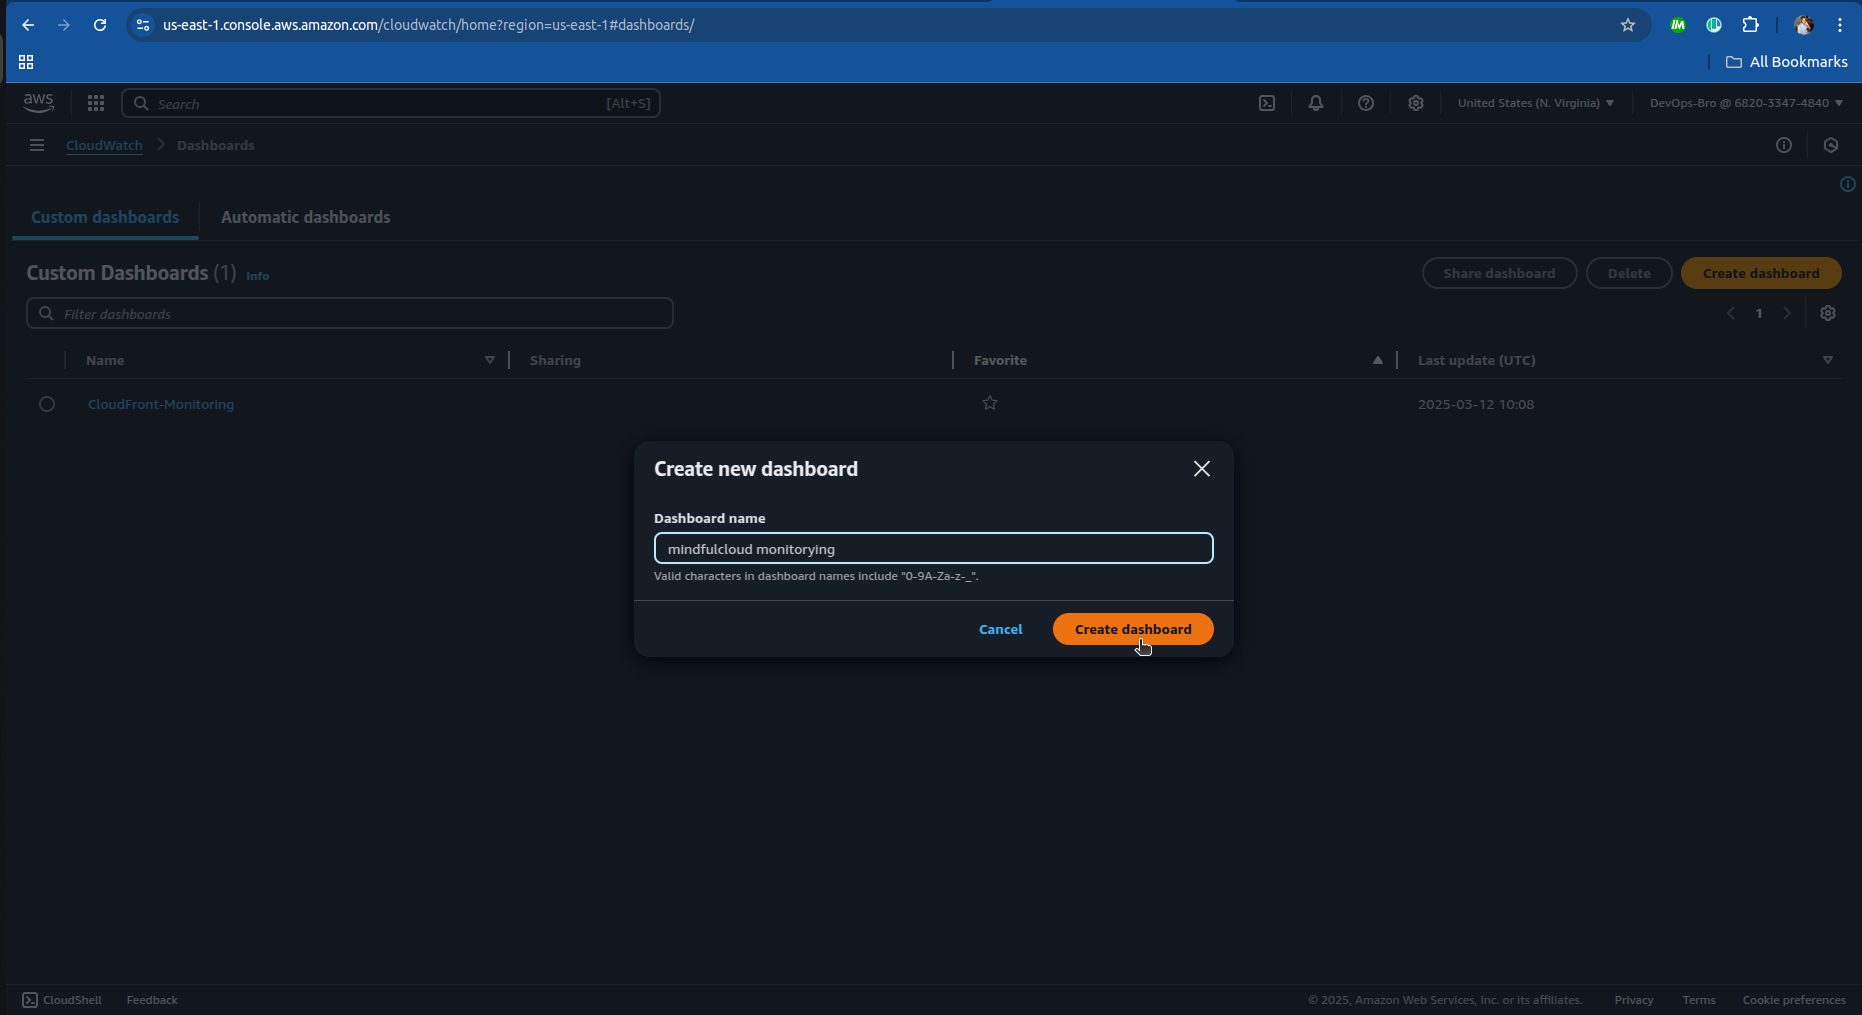
Create CloudWatch Dashboards:
Monitor requests, latency, cache hit ratio.
Set up CloudWatch alarms for security events.
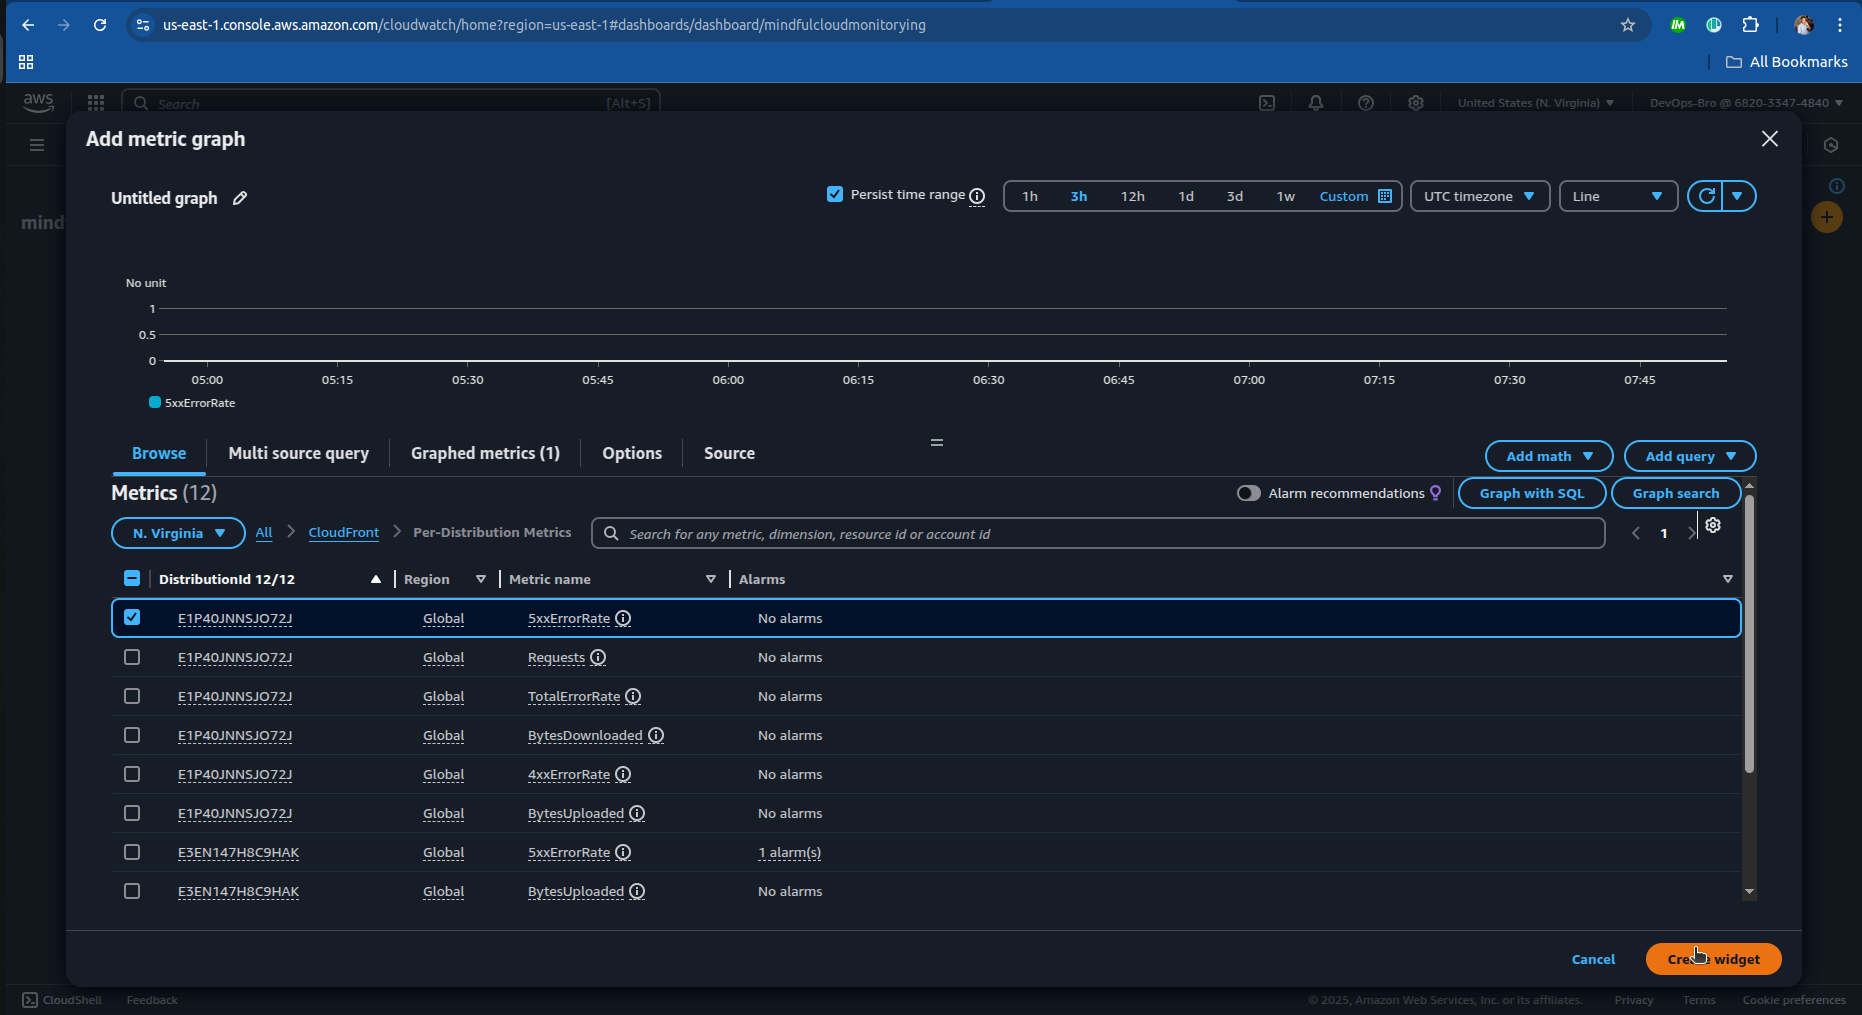
Set Up Alerts:
Use AWS SNS (Simple Notification Service) to receive alerts via email/SMS.
Example: Alert if CloudFront request count exceeds a threshold.
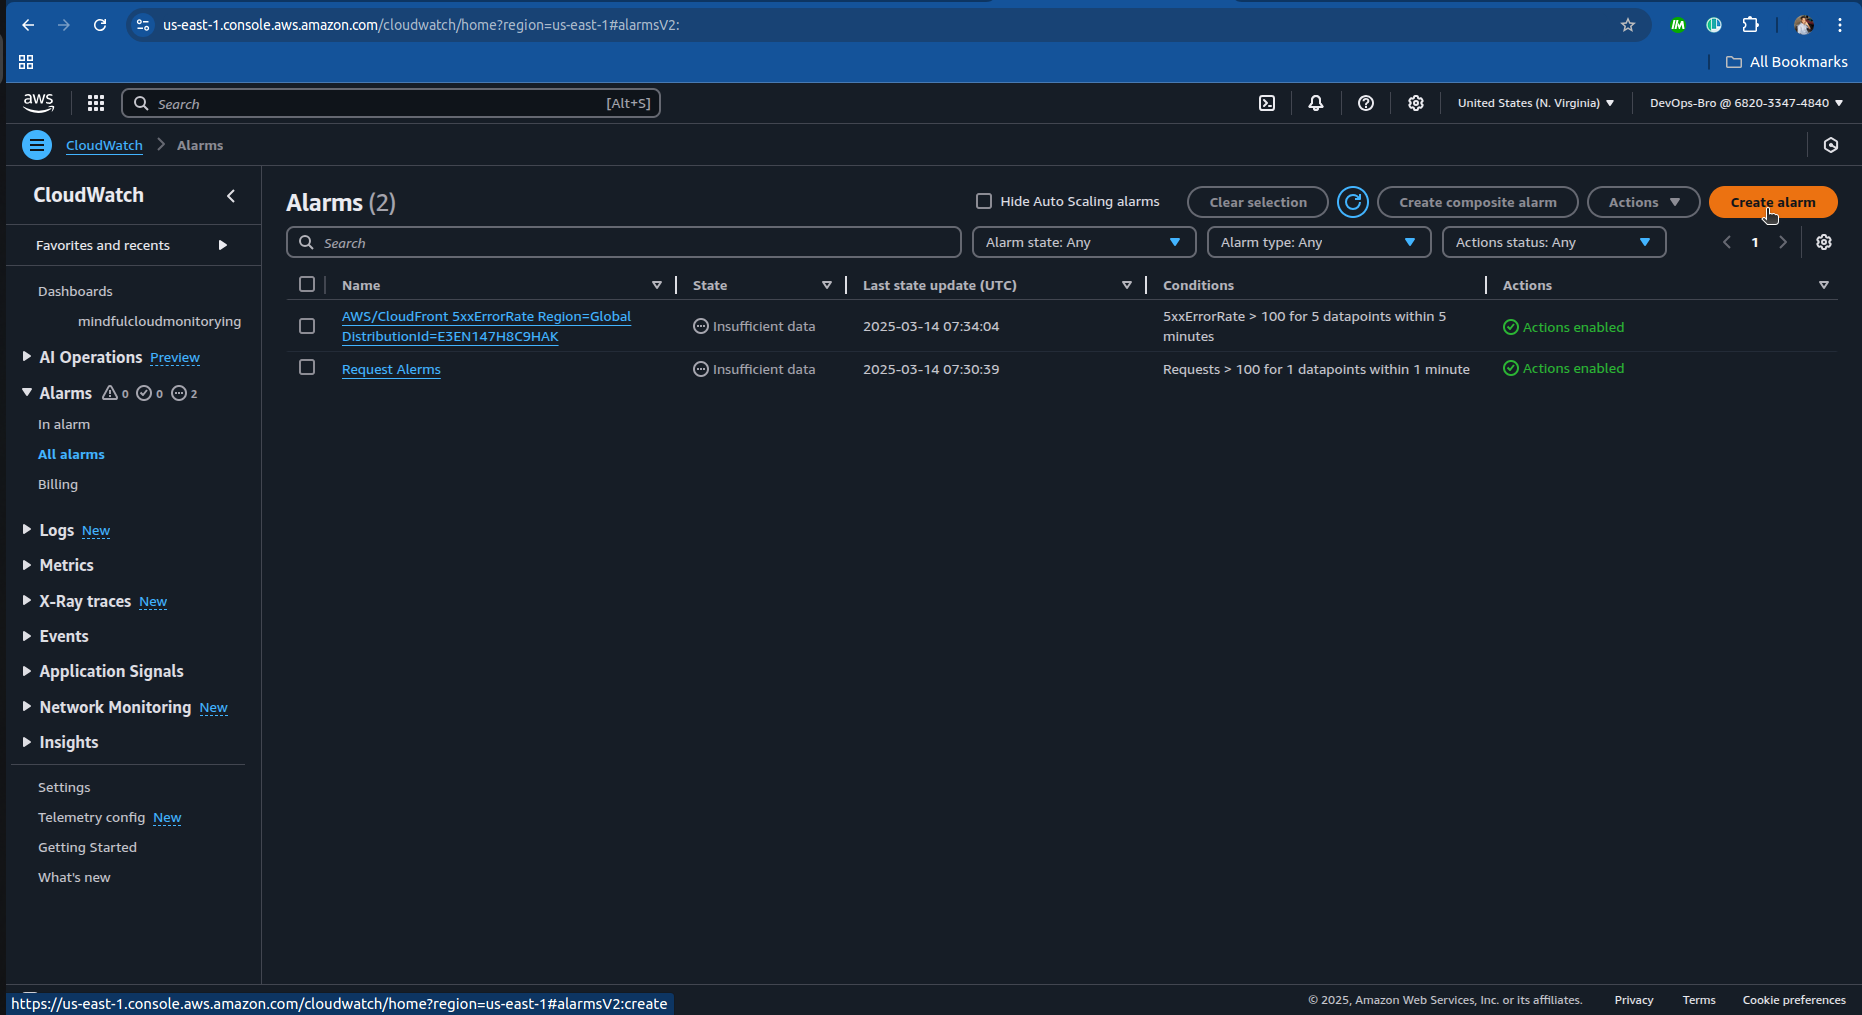
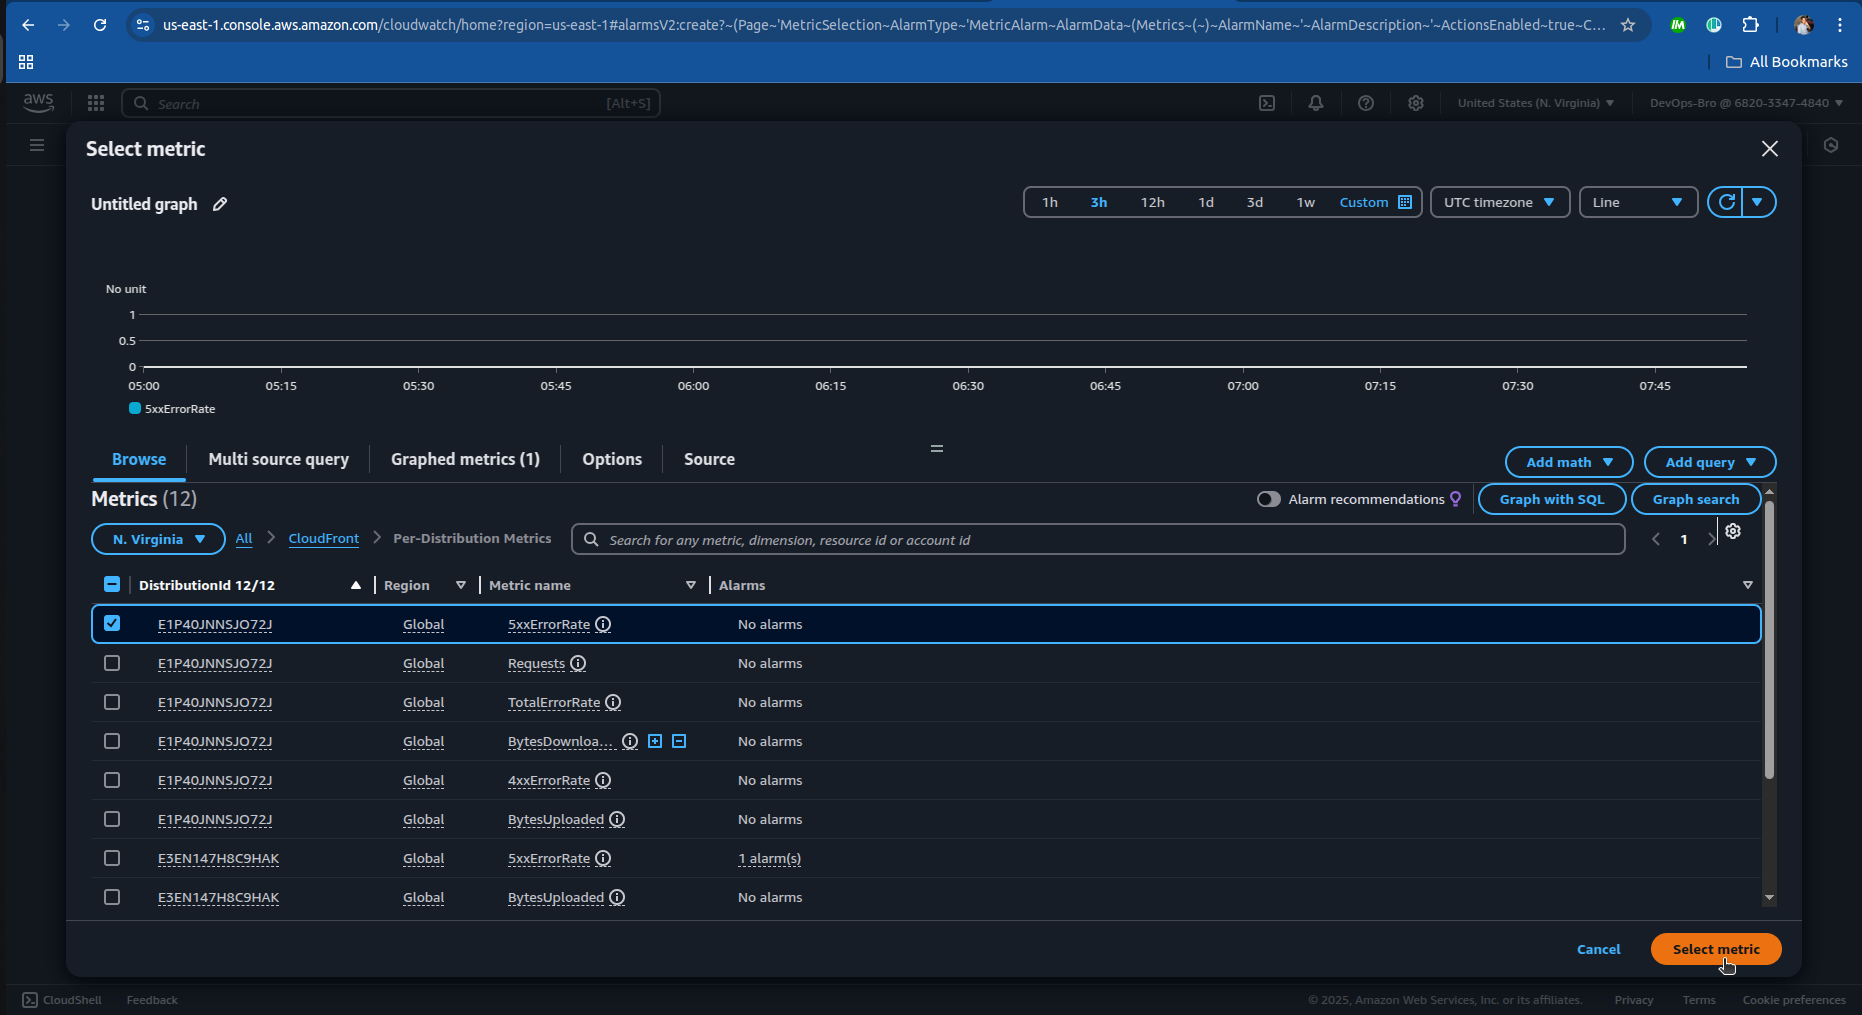
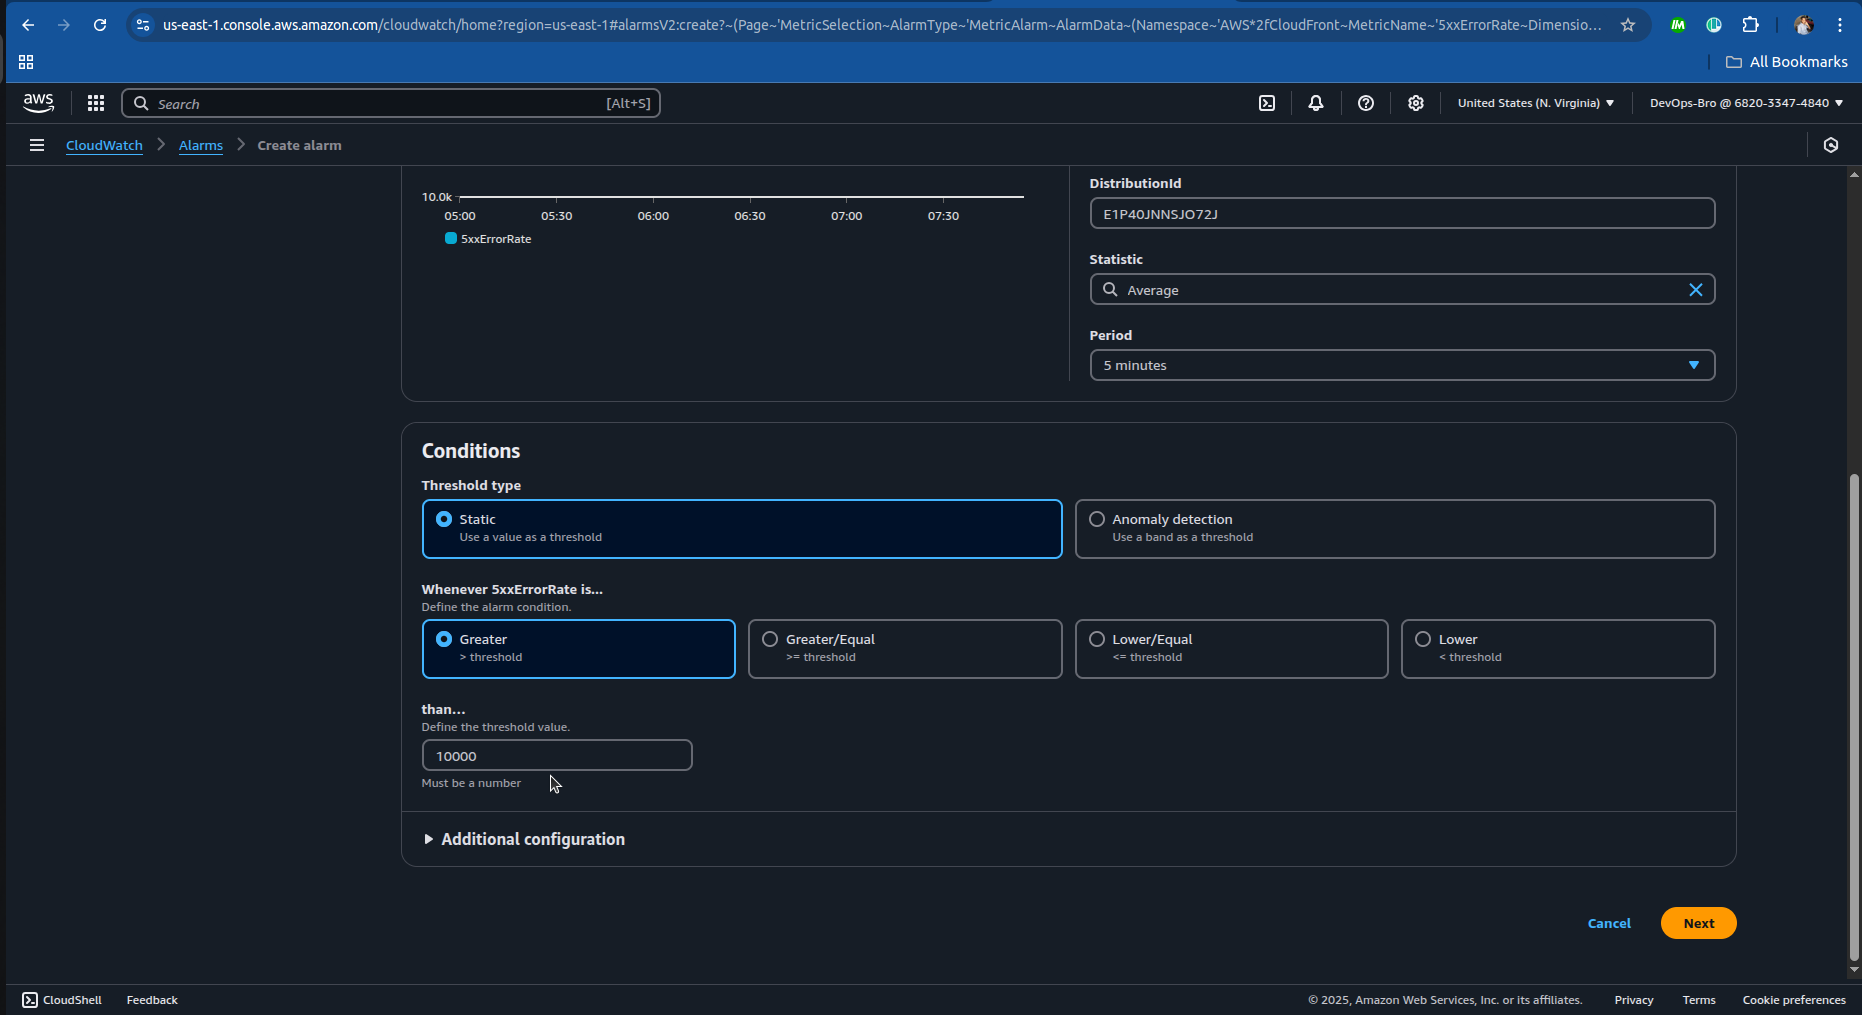
Select The SNS topic or create one:
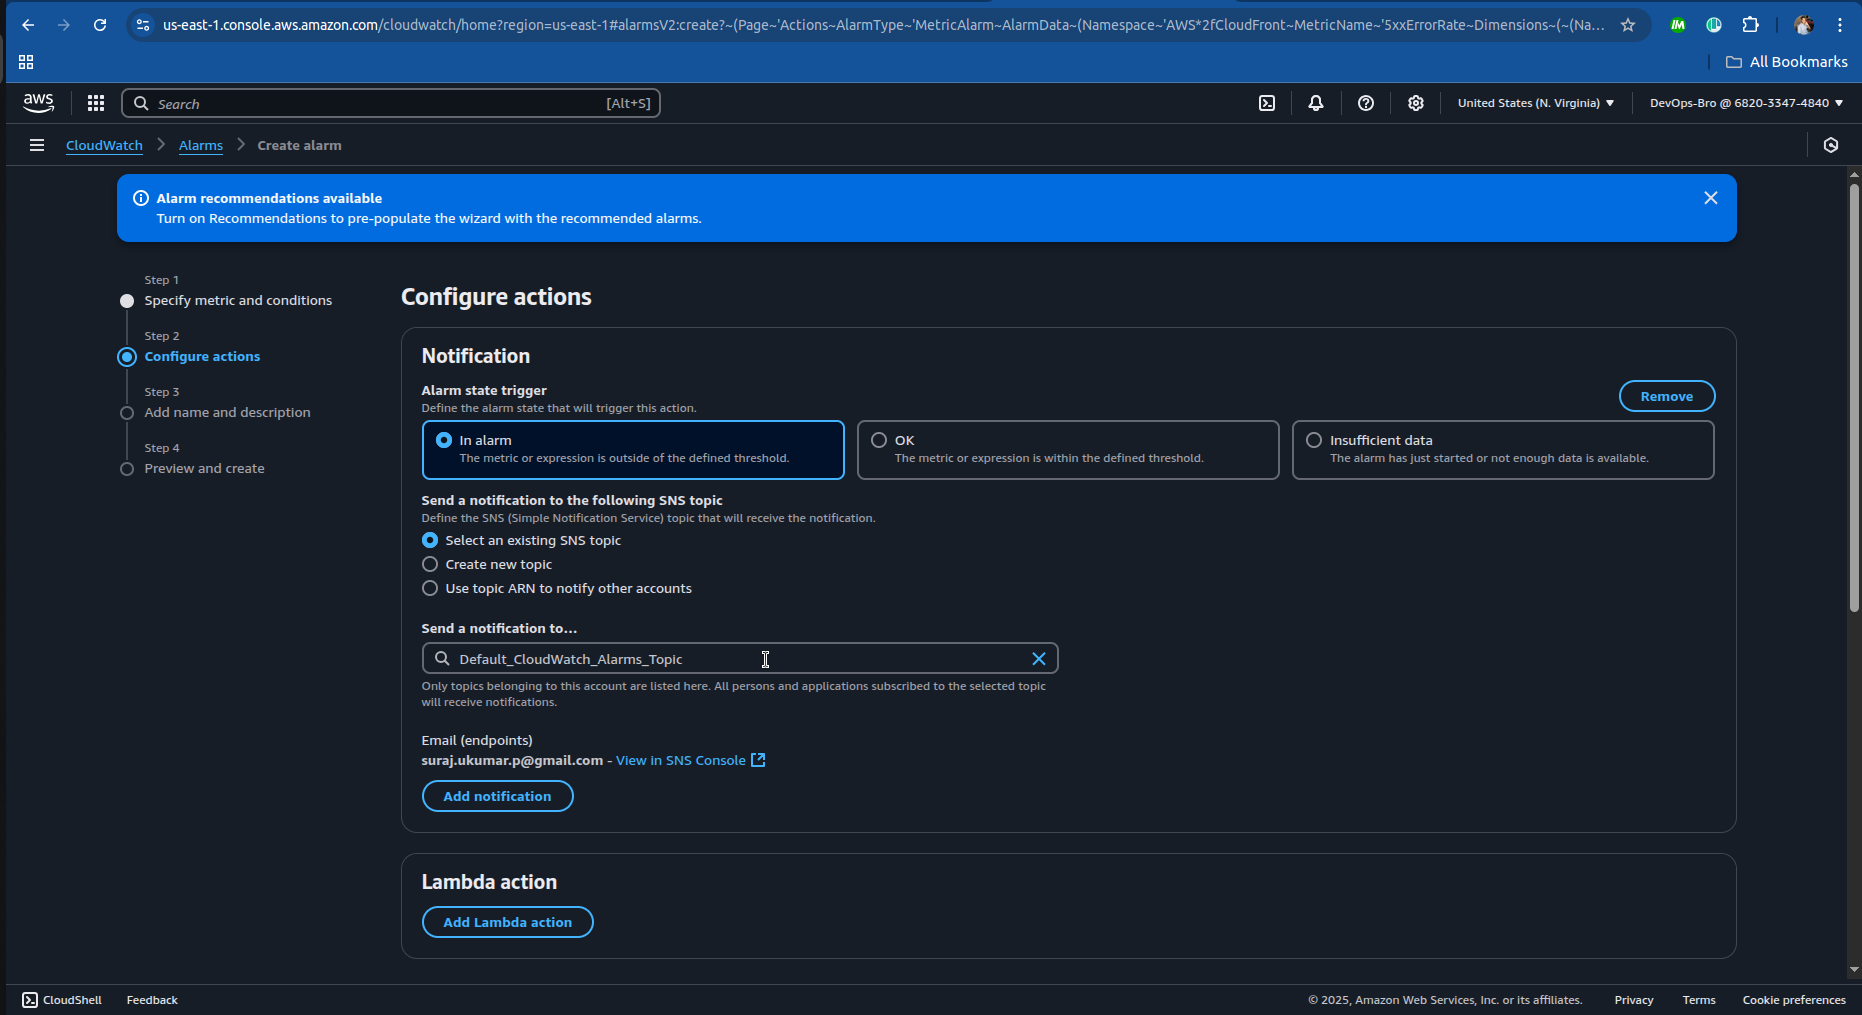
- And just complete the step 3 and step 4 in creating the alarm and you’re good go.
Step 8: Implementing Reliability & Disaster Recovery
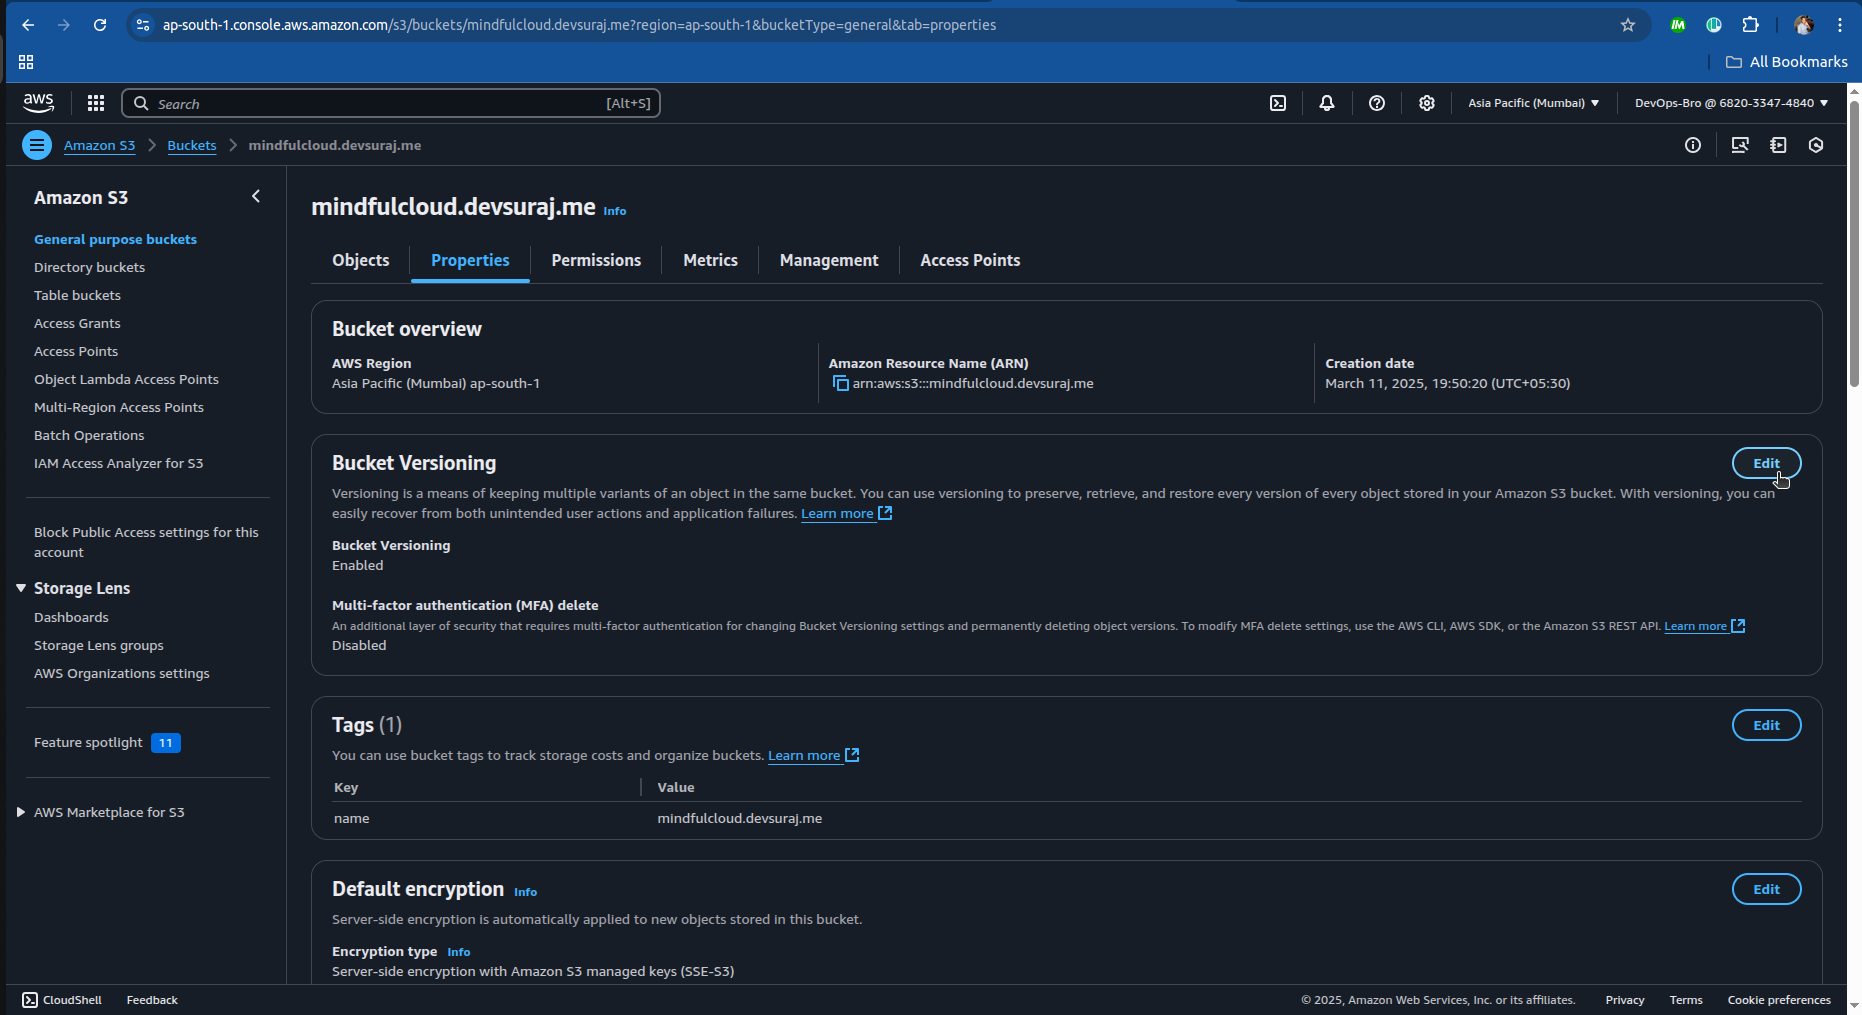
Enable S3 Versioning:
Go to S3 → Properties → Enable Versioning.
This helps rollback in case of accidental file deletion.
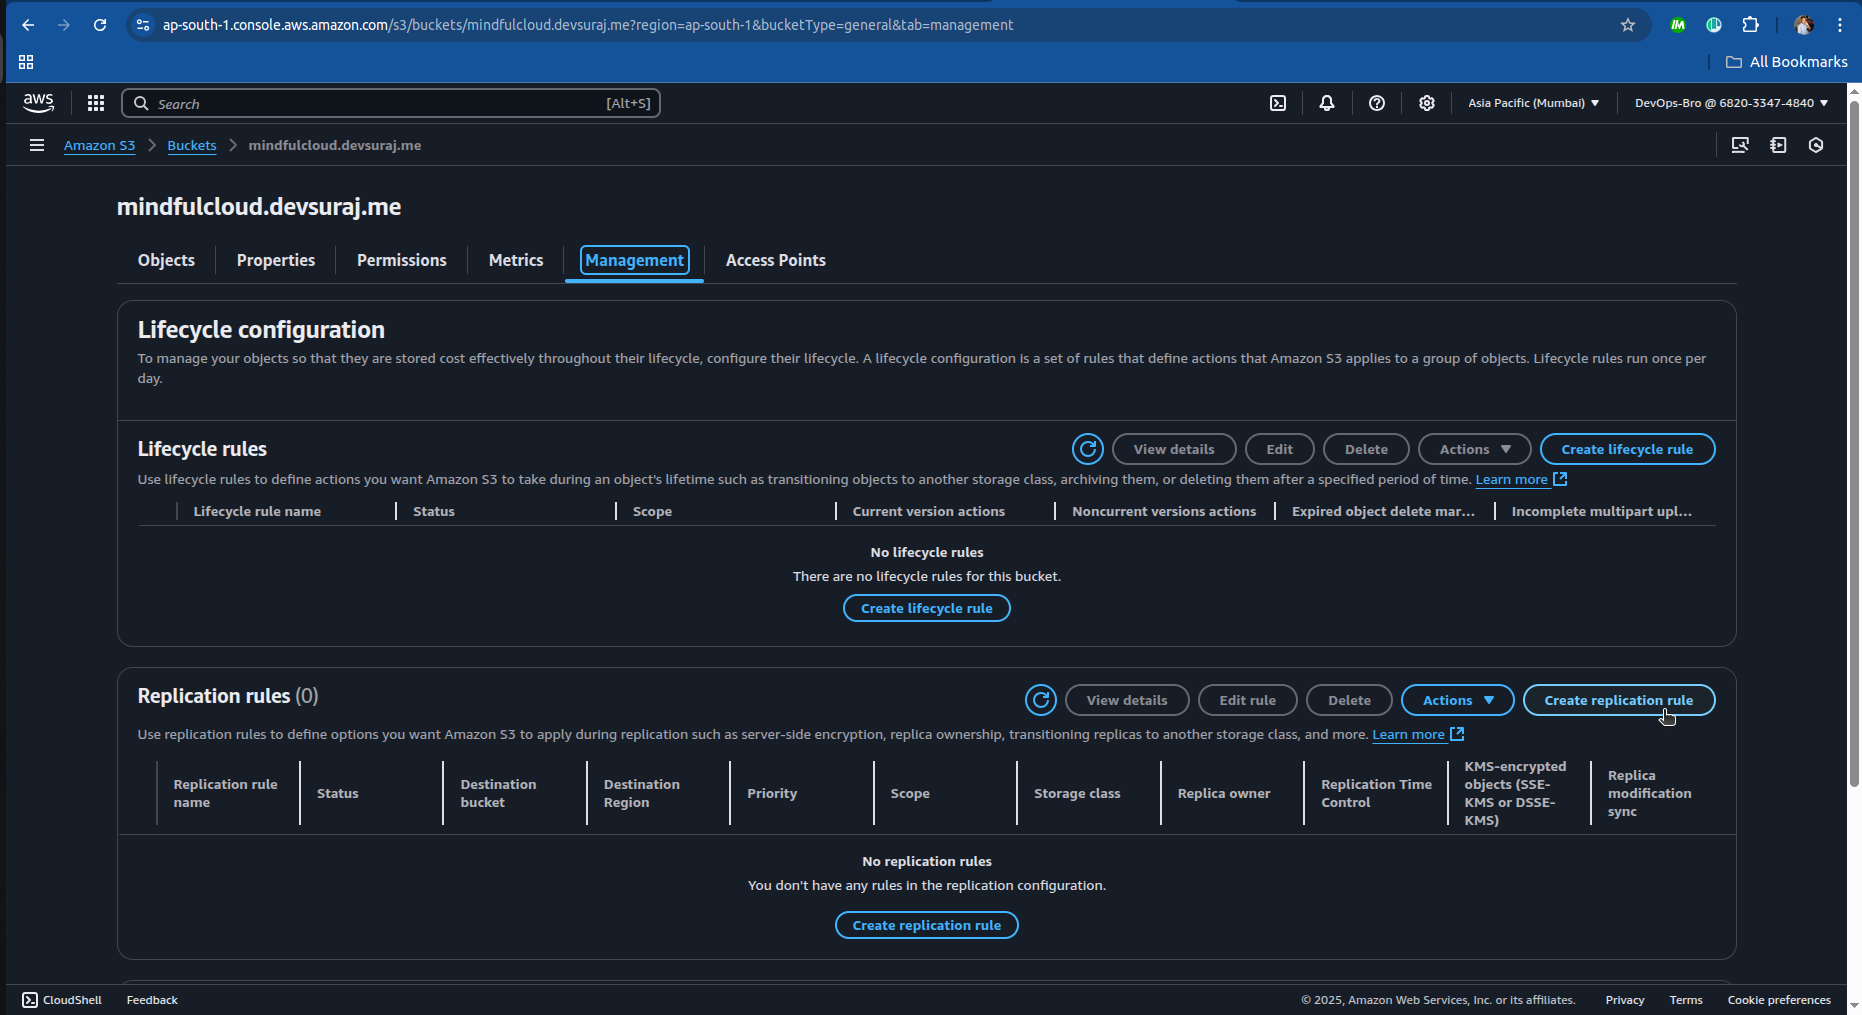
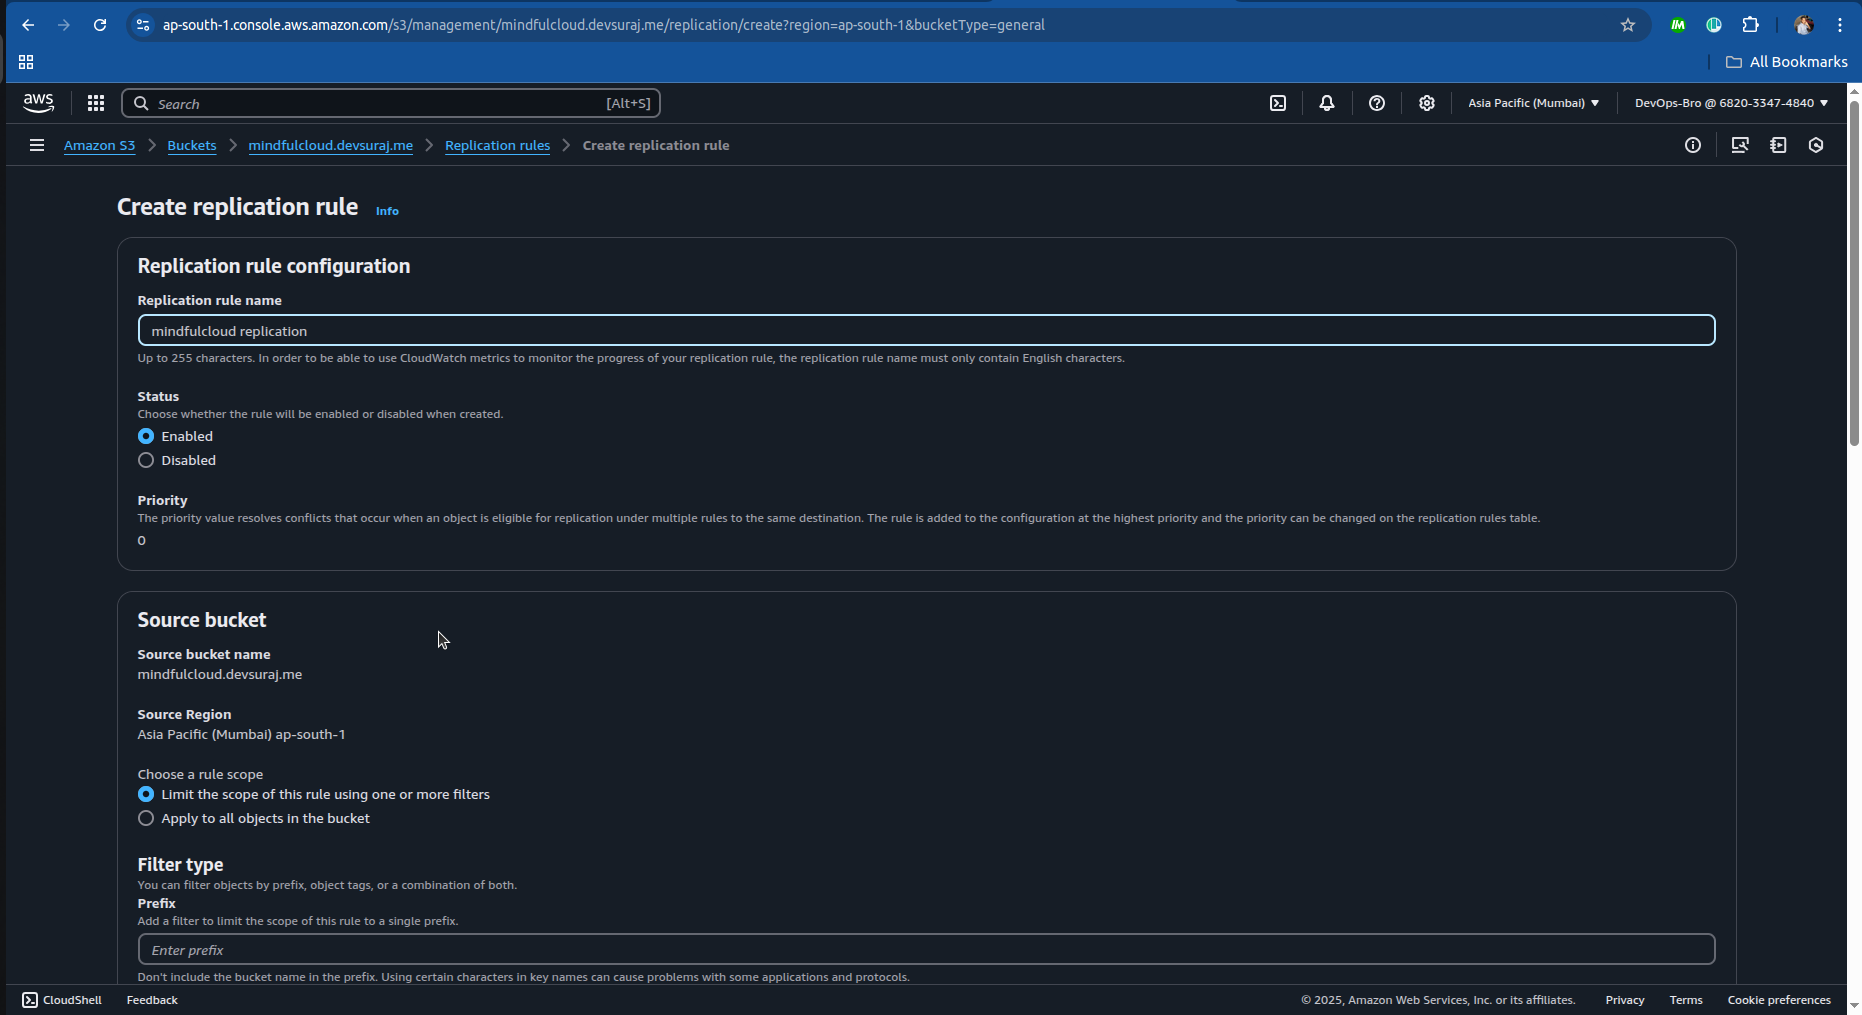
Enable Cross-Region Replication:
Go to S3 → Replication Rules → Set up a backup region.
Choose a different AWS region for redundancy.
Send the requests to your website to check the performance, WAF security and other metrics.
#!/bin/bash

URL="your website url"
REQUESTS='' # include the number of requrests you want to send

echo "Starting load test on $URL with $REQUESTS requests..."

for ((i=1; i<=REQUESTS; i++))
do
  curl -s -o /dev/null -w "Request $i: HTTP %{http_code}\n" $URL &
done

echo "Load test initiated!"
How to Run
Save this script as
simple_load_test.sh.Give it execution permission:
chmod +x simple_load_test.sh
- Run it:
./simple_load_test.sh
The end!!!
Thanks for the reading guys, see you in the next one…
Subscribe to my newsletter
Read articles from Suraj directly inside your inbox. Subscribe to the newsletter, and don't miss out.
Written by

Suraj
Suraj
I'm a Developer from India with a passion for DevOps ♾️ and open-source 🧑🏻💻. I'm always striving for the best code quality and seamless workflows. Currently, I'm exploring AI/ML and blockchain technologies. Alongside coding, I write Technical blogs at Hashnode, Dev.to & Medium 📝. In my free time, I love traveling, reading books