Traversing Complex and Deeply Nested API Responses with Python
 Evan
Evan
Deeply nested JSON data can be difficult to view and analyze, making it challenging to understand and work with. Recently, I wrote about automating data collection using AWS Lambda. Check out “Automating Data Collection from Dynamic Websites: My Journey with Puppeteer, API Fetching, and AWS Lambda”.
To sum up, the Lambda function triggers logic that queries the jawa.gg API for its current GPU listings and collects the API response as a JSON file, which is then uploaded to an S3 bucket. I chose jawa.gg for this project because it intersects with a couple of my hobbies. jawa.gg is a marketplace for second-hand PC components. I enjoy playing games in my spare time, and I also like learning about and collecting PC hardware. Over the years, I've built several gaming rigs and servers.
This project was undertaken solely for educational purposes.
The problem
The lambda function is running fine but I’ve decided it time to learn about how I could use this data, after all, what’s the point of collecting this kind of data without the ability analyze it? This is what the raw response looks like:

Yuck.
In this post, I will show how I wrote python code that will upload this data to an SQL database where it can be queried and more easily read.
I am using Jupyter Notebook to work with the data. Jupyter Notebook is an interactive web-based tool designed for data science and programming. It offers a versatile environment where a user can write and execute python code in cells. This approach really helps with exploring of the data, and is essentially allowing me to write my code in very small stages while being able to refer to previous cell output.
Understanding the data structure
Let’s get started. In my notebook, I load the file contents and print it so that I can analyze it:

Here is a snippet of the file contents (which is now in variable datafile ).
[[{'blocked_at': '', 'buyer_protection_policy': None, 'category': {'id': 6, 'name': 'GPUs'}, 'condition': 'used', 'created_at': '2024-10-17T00:44:00.193Z', 'description': 'Card has been kept in near perfect condition, with no scratches or signs of wear and tear.\nBox is included, along with the anti-static bag, PCIE pin cover and heavy duty memory foam for protection. Power cables not included.\n\nPurchased from EVGA in March 2022, recently upgraded in May 2024.\n\nRecommended for up to 1440p gaming, where most games achieved around 120fps on max settings for me. Easily overclockable with MSI Afterburner or EVGA software.\n\nAny questions at all, feel free to message me here or at null\n\nThanks!', 'expired_at': '', 'featured_at': '2024-10-17T00:46:29.640Z', 'height': 9.5, 'id': 46535, 'images': {'ids': ['production/listings/nxyjg6c3lrausbvjejcx', 'production/listings/ankxxvb2xrrsjrw4071q', 'production/listings/rnqo4zpslnqpi9osc2nt', 'production/listings/xgehov2xcqosfrz1x01r', 'production/listings/yhbvlhftz4zt058q3zjz', 'production/listings/jmeqfhhy2uzgloh2h0kg', 'production/listings/kxlg1l2jzuubruetc7rz', 'production/listings/glo3rnzp78liniqhmofo'], 'source': 'cloudinary'}, 'is_insured': True, 'is_on_sale': False, 'is_private_listing': False, 'is_published': True, 'is_sold_out': False, 'labels': [], 'last_featured_at': '', 'last_published_at': '2024-10-17T00:44:00.189Z', 'last_sold_at': '', 'length': 15.5, 'listing_code': '', 'listing_expires_at': '2024-11-16T00:00:00.000Z', 'minimum_offer_amount': None, 'name': 'EVGA GeForce RTX 3070 Ti FTW3 ULTRA GAMING, 8GB GDDR6X, ARGB LED, Metal Backplate', 'number_sold': 0, 'original_price': 45000, 'price': 45000, 'price_last_changed_at': '2024-10-17T00:44:00.193Z', 'published_at': '2024-10-17T00:44:00.189Z', 'quantity': 1, 'quantity_available': 1, 'return_policy': None, 'shipping_jawa_manual_price': 0, 'shipping_option': 'jawa_fulfilled', 'shipping_seller_manual_price': 0, 'sku': '', 'specs': {'Chipset': 'Nvidia', 'Brand': 'EVGA', 'Series': 'GeForce RTX 3070 Ti', 'Memory': '8GB'}, 'status': 'available', 'url': '/product/46535/evga-geforce-rtx-3070-ti-ftw3-ultra-gaming-8gb-gddr6x-argb-led-metal-backplate', 'usage': 'TWO_Y', 'user': {'badges': [], 'displayed_name': 'Impassioned-Jawa#4838', 'facebook_ids': ['facd13fa-48f5-4816-98a2-68382f3cf9df'], 'id': 293620, 'images': {'avatar': 'production/avatars/e0d2yifarjwoggcd4x70', 'source': 'cloudinary'}, 'is_business': False, 'is_guest': False, 'is_on_vacation': False, 'is_verified': False, 'store_name': '', 'tag_line': '', 'username': 'Impassioned-Jawa#4838', 'website': ''}, 'user_id': 293620, 'video_url': '', 'watch_count': 0, 'weight': 2, 'width': 4.5},
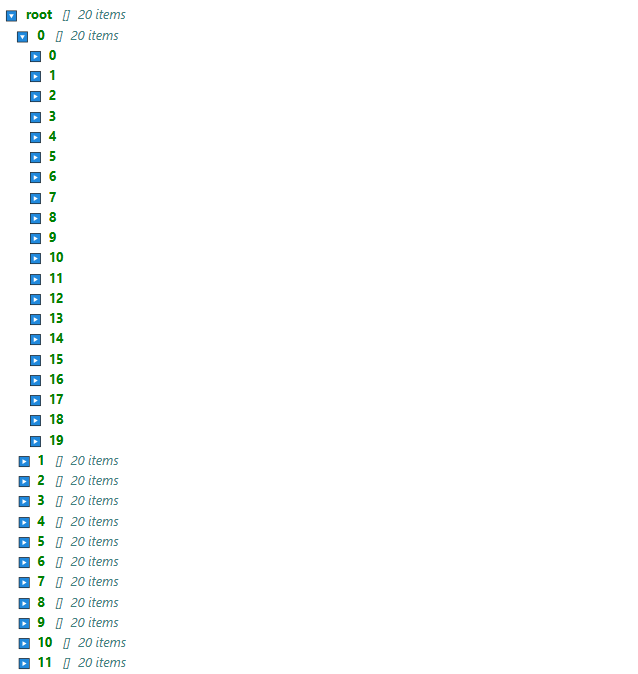
If we use type , we can further confirm that the very top level of this data is one big list. The first index, datafile[0], is also list. However, datafile[0][0] is a dictionary. So the first realization here is that the data that I am interested in extracting is two levels down. Each dictionary represents one product listing.

Here is another look at the file’s structure from Jupyter Notebook. Here, datafile = root.
Here are the dictionary keys:
datafile[0][0].keys()

So, I need to extract the data from these keys and upload it to the database. The dictionary keys will become the database columns, and each row will represent one GPU listing.
Pandas library
This is where I learned about the pandas utility! I want to shout out YouTuber Panda's Data Diaries. While researching, I found his video and realized that Pandas would be very useful here. Pandas is a python library that can flatten .JSON and turn it into a Pandas “data frame”. The data frame is a relational representation of the data structure. This is very similar to how data shows up in an SQL database. What’s more, Pandas can connect to an SQL database and push the data frame to the database. Perfect! This library is exactly what I’m looking for.
Using the json_normalize method I am able to print out the structure in columns.
#datafile[0] is a list of 20 dictionaries which are individual products
import pandas as pd
df = pd.json_normalize(datafile[0])

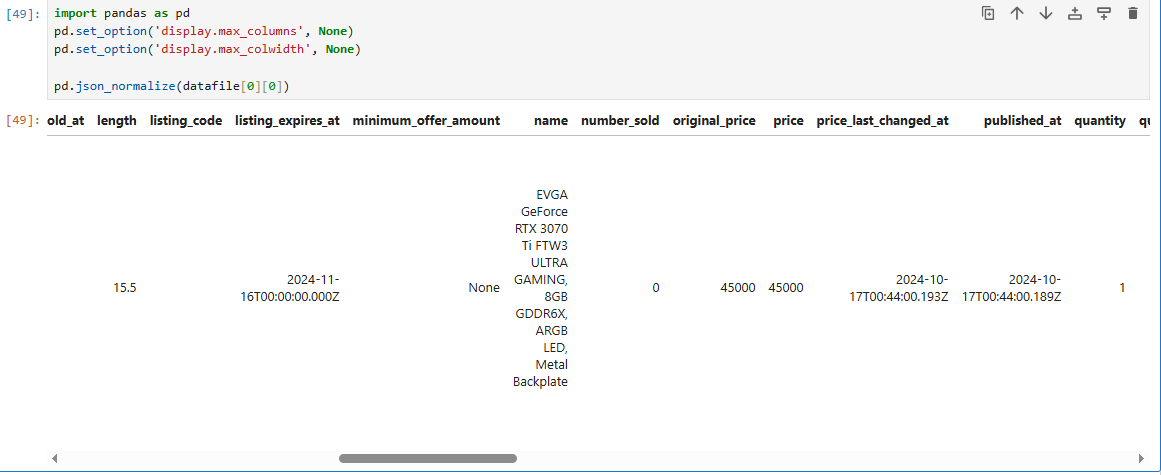
I noticed that some columns are still being obscured by an ellipses.

Adding the options pd.set_option('display.max_columns', None) and pd.set_option('display.max_colwidth', None) fix this issue. Now I can see important columns, i.e. the “price” column.
I can use Pandas to connect to my SQL database and directly copy the data to a table, or even create a new table if it does not exist yet.
Transforming the data
Before doing that, I need to transform the data. I don't need certain columns from the data frame, so I will exclude those. Secondly, I need to perform a numerical operation on the numbers in the "price" column so that they appear as float values or the actual price in USD.
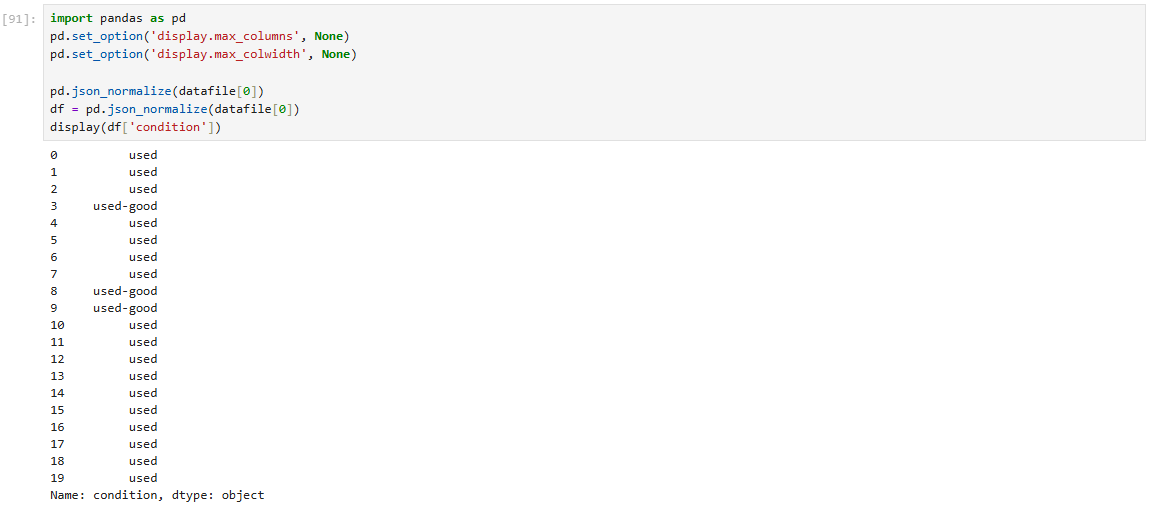
I can select a single column by using display and putting the name of the column as a string in-between a set of brackets.
df = pd.json_normalize(datafile[0])
display(df['condition'])
Here is the data frame again with only the columns that I want to keep (some do not appear on screen):
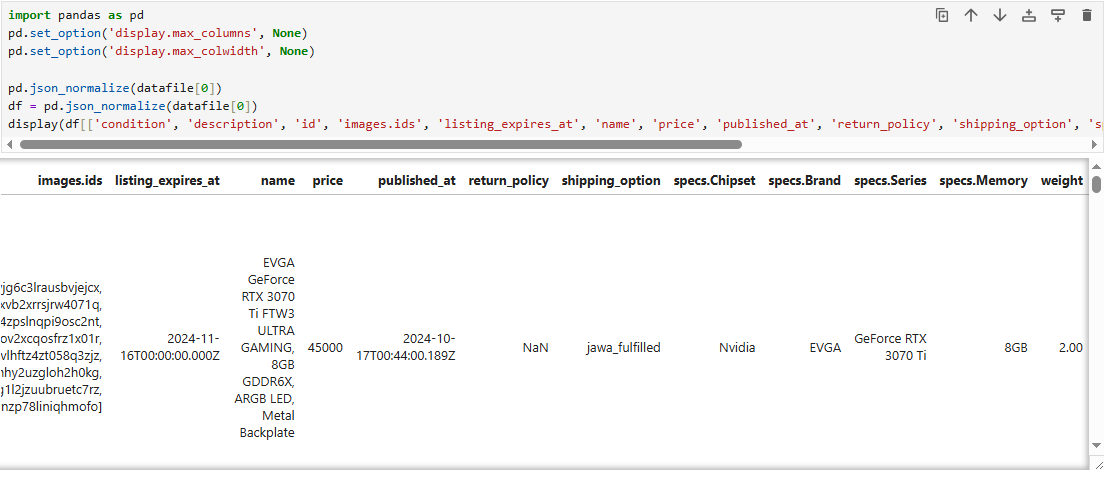
To clean this up further, I later define a list called “selected_columns”. Then, calling display(df[selected_columns]) can produce the same result.
Now that is done, I need to deal with that issue with the “price” column. The “price” column is a string type and it shows as a factor of 100 above the actual price value. So, for example, where the price may show up as “45000” as a string, the actual price is “450.00” as a float.
Here is how I fixed that:
import pandas as pd
pd.set_option('display.max_columns', None)
pd.set_option('display.max_colwidth', None)

#flatten JSON
df = pd.json_normalize(datafile[0])

# Select specific columns
selected_columns = [
    'condition', 'description', 'id', 'images.ids', 'listing_expires_at',
    'name', 'price', 'published_at', 'return_policy', 'shipping_option',
    'specs.Chipset', 'specs.Brand', 'specs.Series', 'specs.Memory', 'weight'
]

# Convert 'price' to numeric and handle any non-numeric values just in case
df['price'] = pd.to_numeric(df['price'], errors='coerce')

#divide 'price' by 100 so that a float value appears for the price
df['price'] = df['price'] / 100

df['price']
Result!

This completes the data transformation. Now I can work on inserting the data into the SQL database.
Connecting to MariaDB
For my initial testing, I set up a MariaDB server on a raspberry pi in a Docker container. When I'm ready to scale up, this will become an AWS RDS instance in the cloud, but for now, I wanted to experiment in a local environment. The database container uses port 3306 on the host network. I deployed the container using the docker compose template available on the official Docker Hub, which also deploys the Adminer container. Adminer is a tool for managing content in SQL databases and features a user-friendly Apache-based GUI, similar to phpMyAdmin.
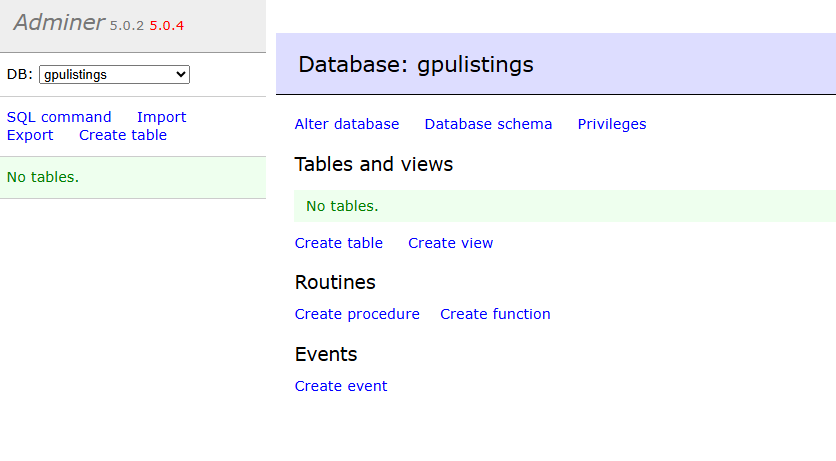
I am using standard password authentication and everything is set up and ready to go. The database name is ‘gpulistings’, it’s empty with no tables created.
I am following along with the steps in this article showing how we can use sqlalchemy to connect Pandas to an SQL database. I should mention that this article uses a postgres database but I am using MariaDB (MySQL). And so I needed to ensure that I installed pymysql and changed the connection string in the code to use the correct pymysql connector.
The tutorial suggests to write out the db username and password in the command you will use to initiate the db connection. However, this is a bad security practice and I would absolutely avoid this if I was running this in production. So, I will create python environment variables instead so that I can hide these sensitive credentials.
I’ve created a “.env” file in my Python virtual environment and wrote out the variables in that file.

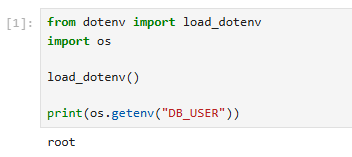
Then after installing python-dotenv, I can import the necessary modules into my code and I’ll do a quick test to check if the variables are available. This is working:

Now I’ll write the code that will create the db connection and insert the data. sqlalchemy really makes this simple.
from sqlalchemy import create_engine
from dotenv import load_dotenv
import psycopg2
import os


load_dotenv()
db_user = os.getenv("DB_USER")
db_pw = os.getenv("DB_PASSWORD")
db_host = os.getenv("DB_HOST")


#create a new data frame from the selected data so that I can use the ".to_sql" method
newdf = pd.DataFrame(df[selected_columns])

load_dotenv()

#define env variables
db_user = os.getenv("DB_USER")
db_pw = os.getenv("DB_PASSWORD")
db_host = os.getenv("DB_HOST")


# establish connection with the database
engine = create_engine(
    f"mysql+pymysql://{db_user}:{db_pw}@{db_host}:3306/gpulistings")

#create a table named products and use 'APPEND’ to add data to the existing table.
newdf.to_sql('products', engine, if_exists='append')
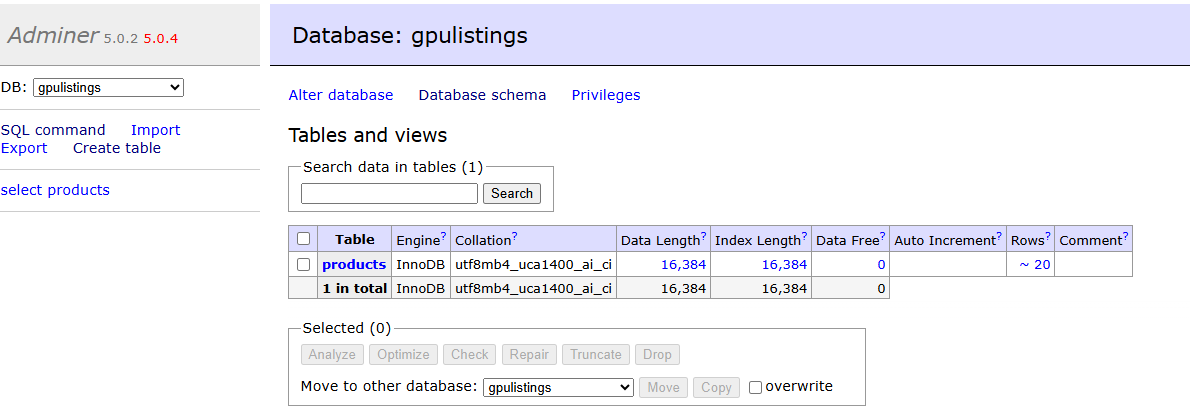
Result!
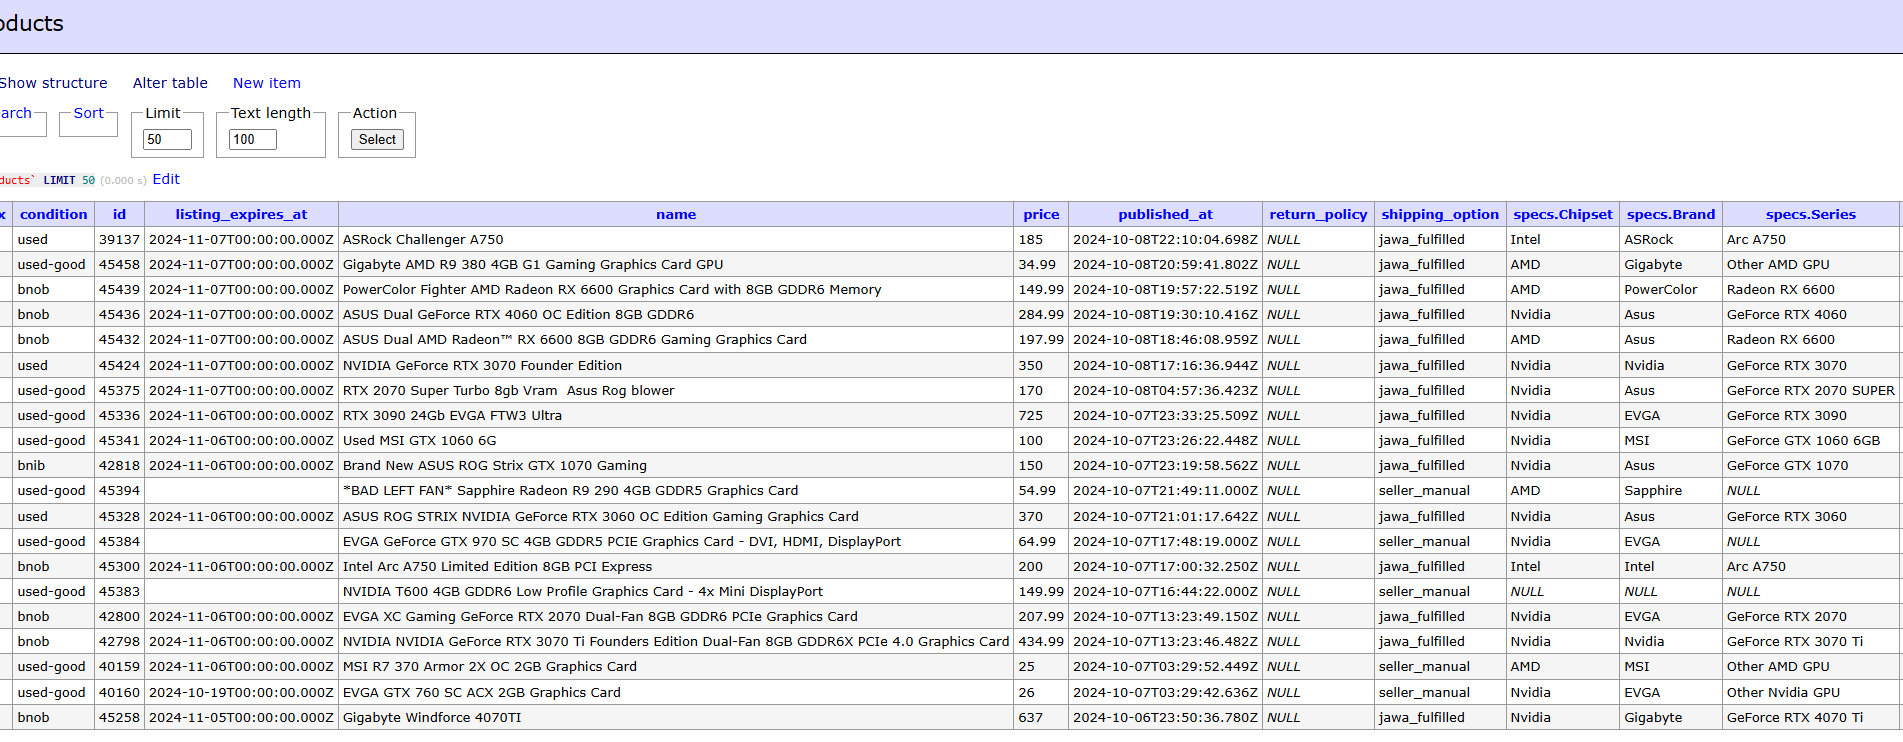
Putting it all together
This is working brilliantly. However, it's only a small part of our data, just 20 product listings. There are over 300 in this file. To finish this, I will write this code as a couple of functions that will go through each list index in the JSON data, create a data frame from the keys in the dictionaries, and then insert that data into the database.
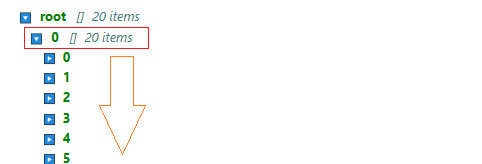
All together this is what it looks like:
from sqlalchemy import create_engine
from dotenv import load_dotenv
import json
import pandas as pd
import os

#fetchedarray.json is my testing file
with open("fetchedarray.json", "r") as f:
    datafile = json.load(f)

load_dotenv()

#define env variables
db_user = os.getenv("DB_USER")
db_pw = os.getenv("DB_PASSWORD")
db_host = os.getenv("DB_HOST")

def get_dataframe(index):
    pd.set_option('display.max_columns', None)
    pd.set_option('display.max_colwidth', None)

    #flatten JSON
    df = pd.json_normalize(datafile[index])

    # Select specific columns
    selected_columns = [
        'condition', 'id','listing_expires_at',
        'name', 'price', 'published_at', 'shipping_option',
        'specs.Chipset', 'specs.Brand', 'specs.Series', 'specs.Memory'
    ]

    # Convert 'price' to numeric and handle any non-numeric values
    df['price'] = pd.to_numeric(df['price'], errors='coerce')

    #divide 'price' by 100 so that a float value appears for the price
    df['price'] = df['price'] / 100

    newdf = pd.DataFrame(df[selected_columns])

    return newdf


def insertdb():

    # establish connection with the database
    engine = create_engine(
        f"mysql+pymysql://{db_user}:{db_pw}@{db_host}:3306/gpulistings")

    #I found that each API response .json has one empty list at the end. So, length needs to be " -1"
    #to avoid errors caused by the empty list. it just works :)
    for i in range(len(datafile) - 1):
        get_dataframe(i).to_sql('products', engine, if_exists='append')

#call main insertdb() function
insertdb()
Result!
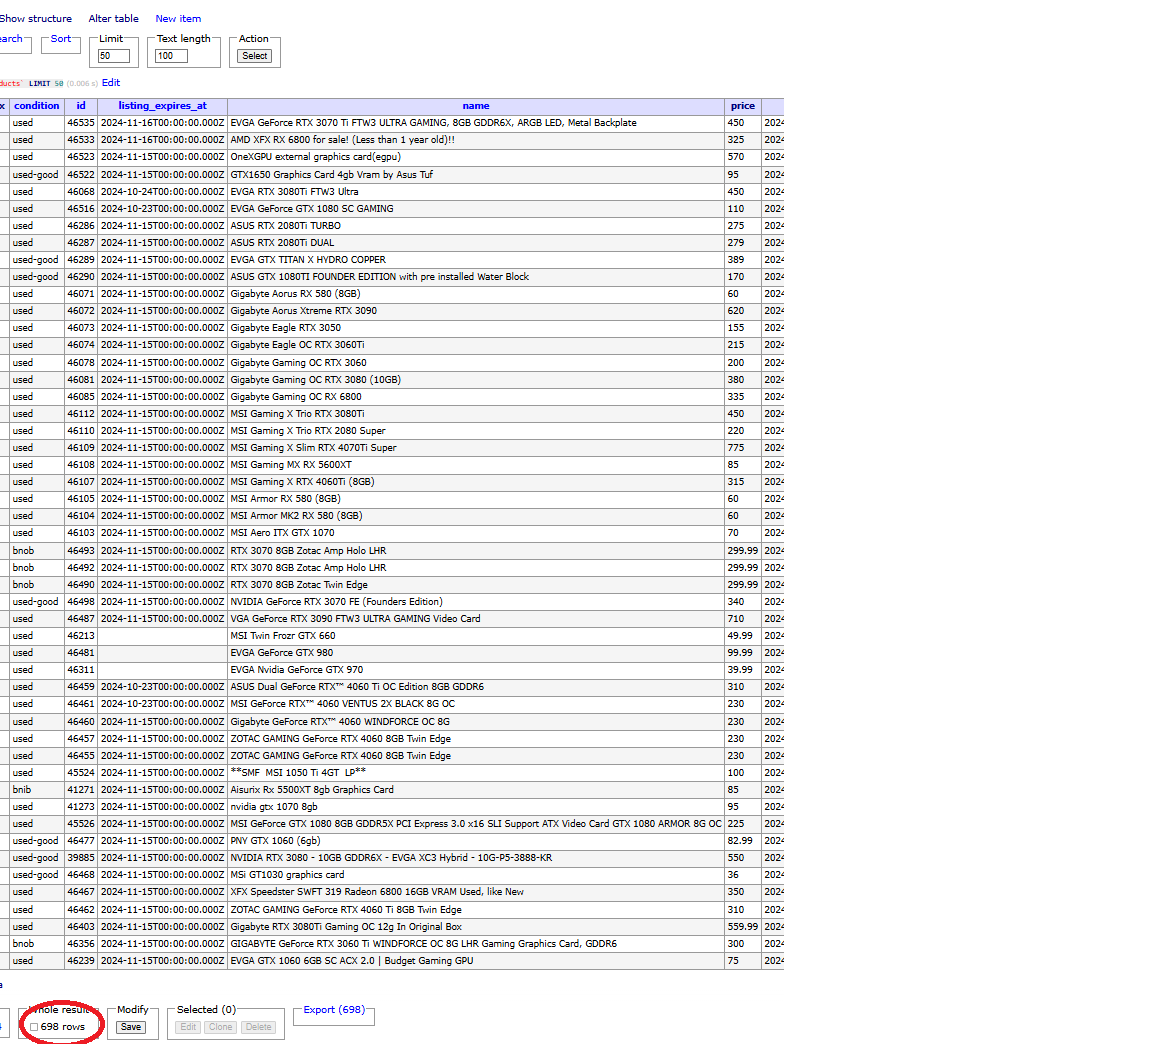
Now I have a populated SQL database with the product’s name, price, shipping details, listing date, and more. The picture above is after I changed out the .JSON file and ran it again, resulting in 698 rows.
Conclusion
With this proof of concept completed, I plan to make some tweaks to the code to accommodate AWS Lambda and RDS so that this can be truly automated. Thanks for checking out and check back for me soon!
Subscribe to my newsletter
Read articles from Evan directly inside your inbox. Subscribe to the newsletter, and don't miss out.
Written by

Evan
Evan
Hi, I’m Evan — an engineer with a passion for automation, security, and building resilient cloud infrastructure. I spend a lot of time in the weeds solving real-world problems, whether that’s through client work or experiments in my homelab. This blog is where I document those lessons, not just to keep track of what I’ve learned, but to share practical insights that others in the field can apply too. My focus is on bridging the gap between security best practices and operational efficiency, using tools like Ansible, Docker, and AWS to make systems both secure and manageable. Whether you’re planning your infrastructure, hardening environments, or just learning the ropes, I hope these posts give you something useful to take with you. I’m always learning too, and this blog is as much about sharing the process as it is the results. Thanks for stopping by — let’s keep learning and building together.