Learn to Deploy Your Application on a Docker Swarm Cluster: Step by step guide (with code)
 Piush Bose
Table of contents
- What we are going to build today ?
- Build the web server
- Quick recap for what we have done so far !
- Okay so what’s next ?
- Breakdown for all of the terraform files
- What we have created so far !
- What’s next ?
- Let’s try this out
- So officially we did it, but what about the next time we do some change to the code repository, let’s say i want to make the deployment from v3 to v4 ?
- Now we are good to go.
- So with this we have officially built the whole DevOps Projec in just under an hour
- Stay tuned for next articles on different types of deployment models and DevOps projects.
~ Pre-requisites:
There should be some tools installed on your machine before hand to follow along
1. Terraform - For provisioning infrastructure on GCP (Google Cloud Platform)
2. Ansible - For configuration management (Manually update the swarm service from your local machine without needing to ssh into the remote server)
3. Docker
4. You must have a Linux machine whether it is a VM or your own Machine
5. And an free account on GCP (Google Cloud Platform)
6. GCloud CLI Tool~ Clone the Github repo to gain access to the code - Credit goes to Cloud Champ for providing the base code for web server
If you don’t know what a cluster is and what is clustering, why do we need that, I highly recommend going through my this article, it will be good for you to follow along
TL;DR - We are not just going to deploy it for once, we are going to deploy it as a senior devops engineer who is more focused on efficiency and sustainability such as after the initial deployment whenever someone makes some changes in the code base our CI server will automatically redeploy the latest change to the server
What we are going to build today ?
Basic web server to show the system metrics and store last 5 metrics on Redis cluster as cache (Python, flask)
Redis Cluster with 2 nodes (Leader, follower architecture)
Deploy on a 2 node Docker Swarm Cluster which is deployed on different availability zones for high availibility and Zero Down time (asia-south1-a, asia-south1-b)
Will be able to make a CI CD Pipeline to automatically deploy the latest changes to the remote servers
Automated infrastructure deployment with Terraform
Automated configuration Management with Ansible
Build the web server
So, what are we deploying ?
Umm, let’s do a python based flask backend which will be able to show some metrics about the server health on which that is running on and also store the last 5 logs into a redis cluster (One node will be the leader another will be the follower) as a cache (Well, because in this overhyped age of AI everyone more or less know python, so it’s easy to follow along with)
Let’s start by initialising the project and add all the necessary folders and files
mkdir redis-devops
python3 -m venv venv
source ./venv/bin/activate
touch .env
touch .gitignore
mkdir infra # for terraform files
mkdir ansible # for automating the configuration management
mkdir nginx # for proxy config
mkdir templates # for the web app templates
mkdir -p .github/workflows # for CI (Continuous intgration) setup to automate the deployment
# the outline for our project
.
├── .env.example
├── .github
│ └── workflows
│ └── docker-build.yml
├── .gitignore
├── .vscode
│ └── settings.json
├── ansible
│ ├── ansible.cfg
│ ├── hosts
│ └── update-deployment.yml
├── app.py
├── docker-compose.yml
├── docker-stack.yml
├── Dockerfile
├── infra
│ ├── .terraform.lock.hcl
│ ├── keys
│ ├── main.tf
│ ├── outputs.tf
│ ├── plan
│ │ ├── main.dot
│ │ ├── main.tfplan
│ │ └── main_plan.png
│ ├── provider.tf
│ ├── scripts
│ │ ├── startup.sh
│ │ └── startup_with_nginx.sh
│ └── variables.tf
├── Makefile
├── nginx
│ └── nginx.conf
├── README.md
├── requirements.txt
└── templates
└── index.html
I think we are good to go to build the web server right now
File - app.py
It is the main entrypoint for the web server, it has 3 endpoints rightnow
/- get the main page/metrics- get the metrics in a json formatted way/health- for healthcheck
But this is meaningless without the HTML template for the main page
File - templates/index.html
Now it is time to run the server to test whether it is running or not
python app.py
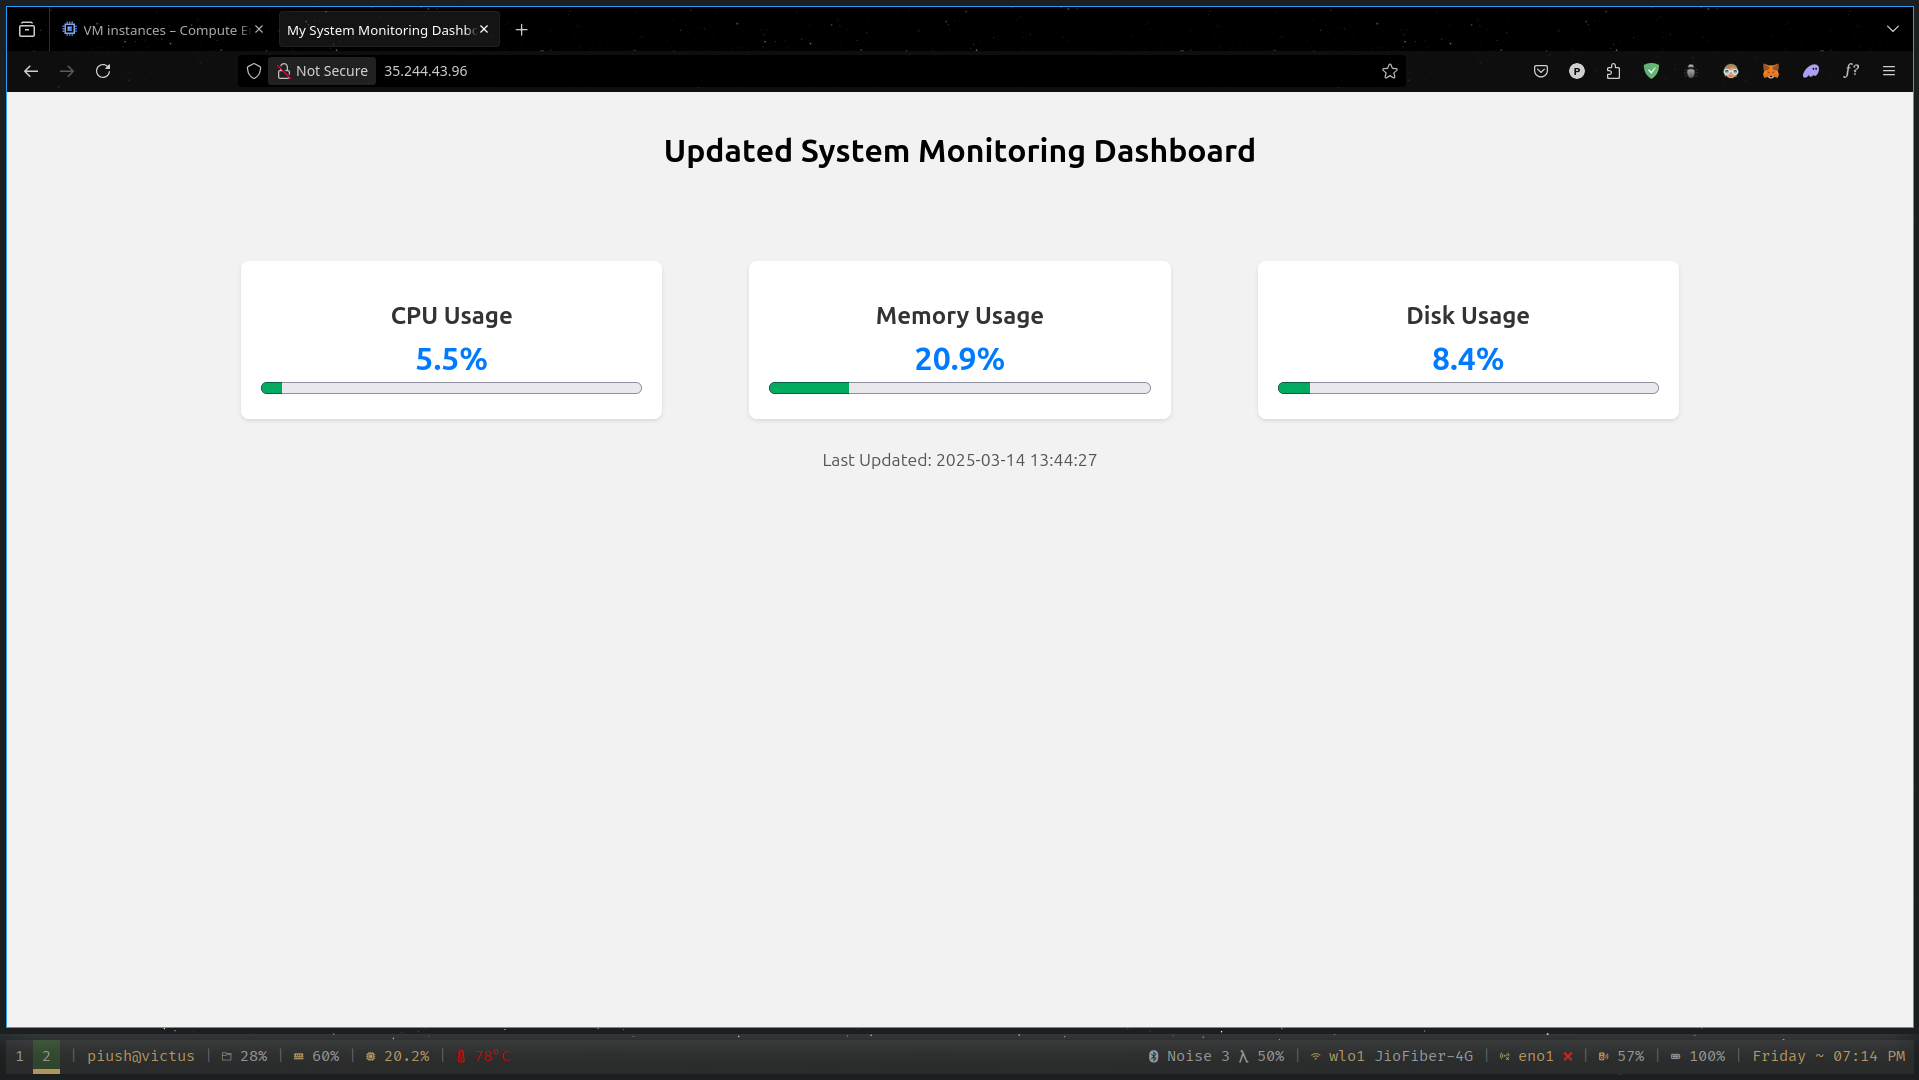
Now the output will look something like this
Example .env file
# Example environment file - copy to .env and fill in your values
REDIS_PASS=your_secure_password_here
DOCKER_HOST=your_remote_machine_ip
Now that we are good here, let’s ignore some credentials from git to monitor, File - .gitignore
# ---------------
# Environment
# ---------------
.env
**/vars/**
**credentials.json
/venv/

# ---------------
# Terraform
# ---------------
**.tfvars
**.tfstate**
**.terraform
**.tfplan


# ---------------
# SSH
# ---------------
id_rsa**
Now let’s conainerize the app,
File - Dockerfile
This file is the base for our deployment strategy, because we are going to deploy a containerized application so it’s a must to containerize the app
To actually build the image we can run
# build the image
docker build -t py_system_monitoring_app:latest .

# run the docker image as a conatiner
docker run \
    -p 5001:5001 # port to open \
    -e REDIS_PASS=your_password \
    -e REDIS_HOST=local_redis_host \
    -e REDIS_PORT=6379 # defualt redis port \
    --rm # to remove the container after stopping it \
    -d # to run in detached mode \
    py_system_monitoring_app:latest

# to get the json output from terminal
curl localhost:5001/health
curl localhost:5001/metrics
But what if i want to run the whole cluster locally and test it ?
Yes, exactly for this reason there is another file named docker-compose.yml, basically it’s almost the same solution we are going to have at the end of this article but there are some differences between compose and stack.
docker compose up
docker compose up -d # to run the stack in detached mode
Compose is meant for development purpose, where on the other hand docker stack is built for production ready applications.
Now let’s look at the production ready script
Take a look at File - docker-stack.yml
I know it is a lot, but trust me it is the most avg production deployment code. We are almost done at this point with the actual deployment stuff and coding stuff for the app. Now it’s time to change the genre for a little while right.
Yes, as simple as that, give it some time if you are running this for the first time.
Quick recap for what we have done so far !
First we have created the basic layout for the project
Then we have coded the whole web server
We created the dockerfile and docker compose for dev with docker stack file for production deployment
We ran the compose file to test at the local deployment
Okay so what’s next ?
Umm, now that we have done this much, there is nothing much for us to do unless we create the INFRASTRUCTURE for deploy the app on. I.e on GCP aka Google Cloud Platform. So i have chosen the most widely used IAC tool on the market which is used by a lot of tech giants and production firms all over the globe
Let’s configure the folder structure for our terraform code
infra
├── keys
├── main.tf
├── outputs.tf
├── plan
│ └── main.tfplan
├── provider.tf
├── scripts
│ ├── startup.sh
│ └── startup_with_nginx.sh
└── variables.tf
### There are some other hidden files which we have to create manuall
### Which i will tell you to do so.
For now it will be the structure we have to follow.
Let’s Define our provider at the very first so that we can initialise the terraform project
File - provider.tf - This file holds the information about the CSP we are using, in our case it’s Google, because we are going to use google’s free service on google cloud console.
Now we can initialise the project with
cd infra
terraform init
Don’t worry about the credentials.json file right now, i’ll come to it a little bit after, for now just know that it is the main private file you must protect and never share to anyone.
Let’s define our infrastructure, I am not gonna explain much of this, I may explain Terraform on another article after this.
File - main.tf
Now that’s a lot of code
Honestly it is but it has it’s benefits too, otherwise tech giants would be more dumb than me because they use this rather letting their engineers clicking and finding things on the cloud dashboard. Here is an article explaining why IAC is required
Breakdown for all of the terraform files
main.tf- Main entrypoint for out infrastructure codeprovider.tf- Provider details (Google, Amazon, Azure)variables.tf- This is the mapping of the secrets and the variables we are going to pass from*.tfvarsfileoutput.tf- This is the file where we put all of our outputs
~ Do we really need to write all of these in different files?
~ Obviously no, but this is the way for us to focus on little thing.
Now some secret files which we have to create
### This is like the .env file for us developers
### Secure way to pass sensitive data to our application
touch env.trvars
Now what about the credentials ?
Let’s have a tour from GCP - https://console.cloud.google.com/
- After creating your billing account and enabling the free trial you should land on this page
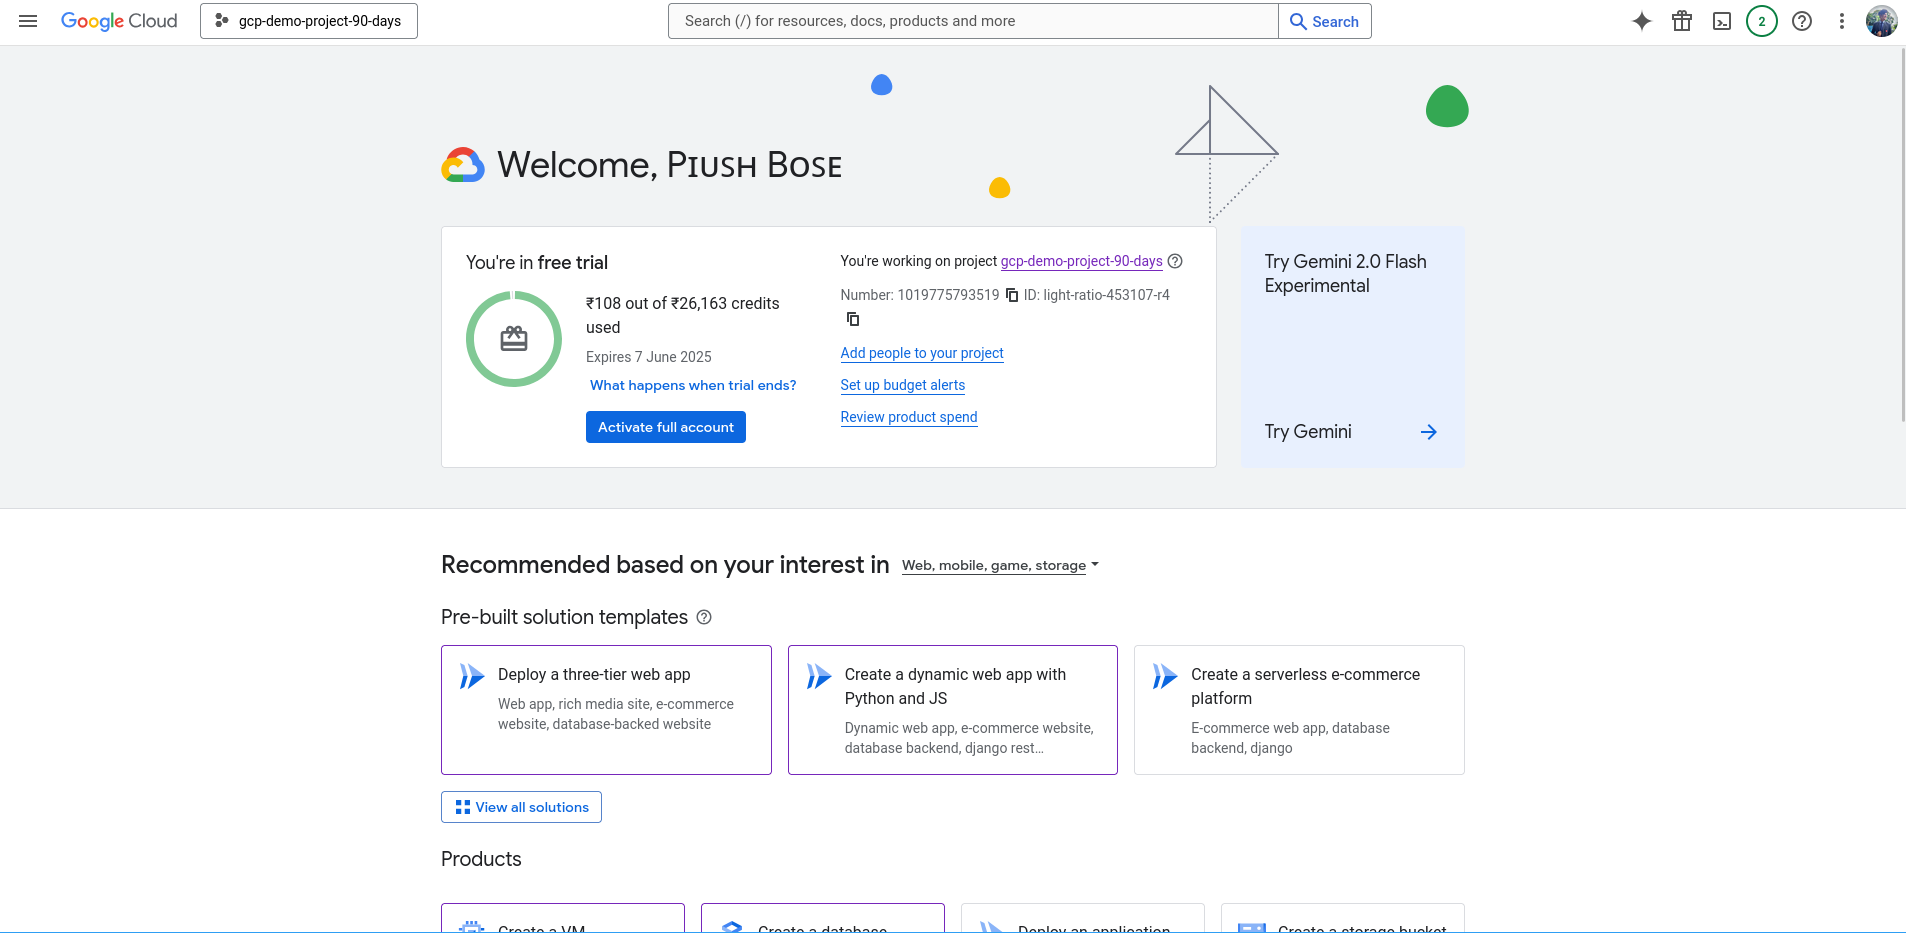
Now go to the sidebar and follow this route, IAM and admin > Service Accounts
Now click on create service account (For this project)

Now fill out the details as you like
Then click Create and Continue
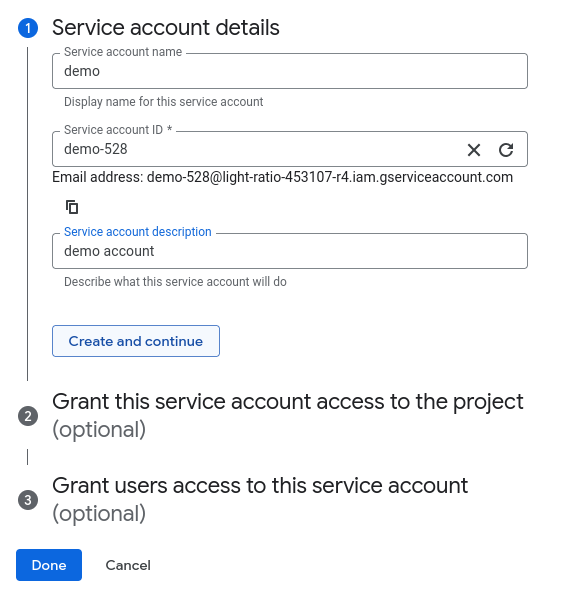
Now add the following permissions to the Service Account
Compute Network Admin (This is for VPC)
Compute Organisation Firewall Policy Admin (This is for firewall)
Service Account Admin (This is to manage and handle service account auth)
Compute Admin (To play with VM)
Then create Continue
Then Done
Now that you have gone to hom page again, click and open to newly created service account and go to Keys tab

Then click on Add Key, then choose Create new key, then choose JSON
After that one JSON file would be downloaded for you, keep it safe NEVER SHARE THAT TO ANYONE, and rename it to
credentials.jsonand place it into theinfrafolder inside the project
Now let’s add the secrets to the file env.tfvars
project_id       = "project-name-from-gcp-top-left-corner"
region           = "asia-south1" # let it be this if you are in india, else edit it
project_prefix   = "redis-swarm"
machine_type     = "e2-medium"
ssh_user         = "your_ssh_key_user_name"
ssh_pub_key_path = "./keys/id_rsa.pub"
redis_password   = "redis_123"
credentials_file = "./credentials.json"
Now we have to generate a new ssh key
ssh-keygen -t rsa
# then choose the current working directory to save the key
# don't share that to anyone ever if you don't know what you are doing
At this point you are pretty ready to deploy your first infrastructure with terraform
Let’s do this !!!
cd infra
terraform plan -var-file=env.tfvars -out=plan/main.tfplan
# it will generate a plan and will also point out if there is any error at all
# if everything is okay then you can apply the plan

terraform apply plan/main.tfplan
# it will take a lot time, almost 5 - 10 minutes
Boom !!!
Now a crucial part to be done
Now we have to copy and store the public ip addresses of both manager node and worker node in out ansible inventory file located at ./ansible/hosts
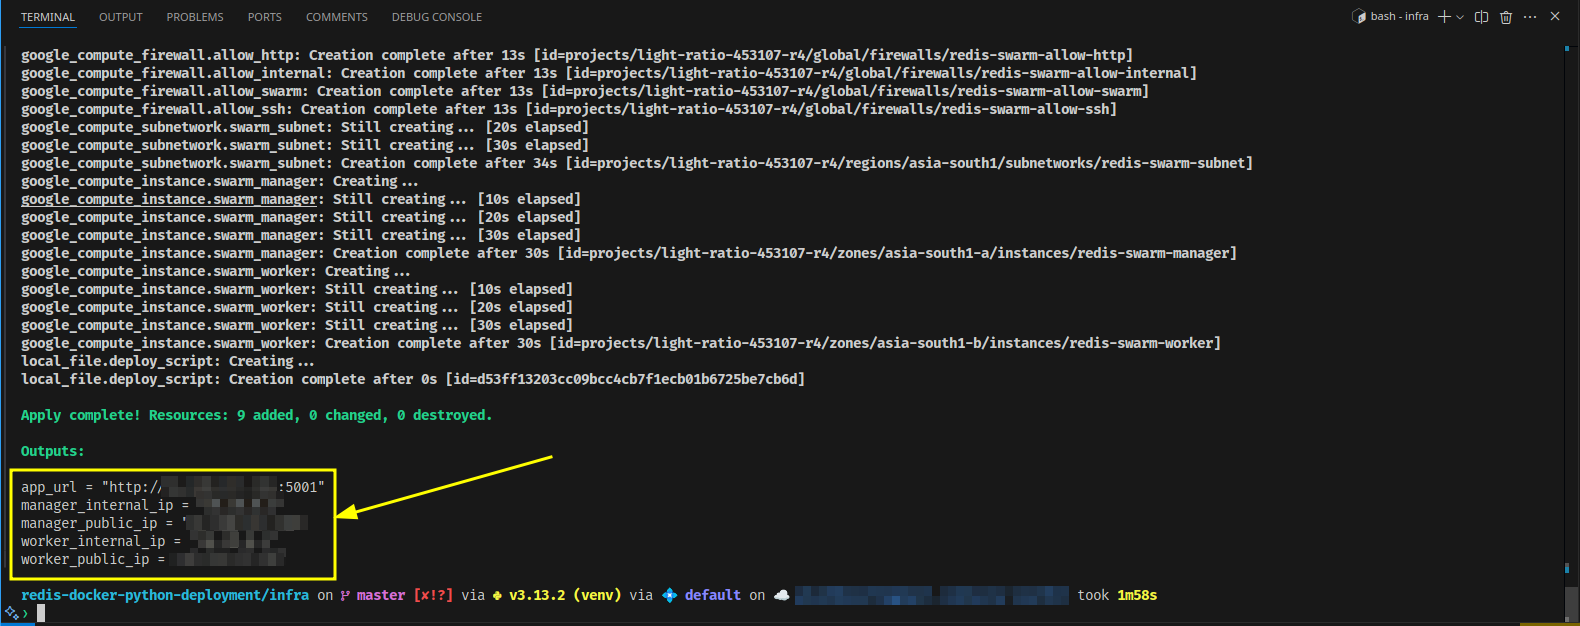
The file should look something like this
[servers]
35.244.43.96        # make sure these are the public ip
34.93.151.141

[managers]
34.93.151.141       # manager public ip

[workers]
35.244.43.96        # worker public ip

[swarm:children]
managers
workers
Let’s run the automation
cd ansible
ansible-playbook -i hosts tasks/install-docker.yaml
It will output something like this
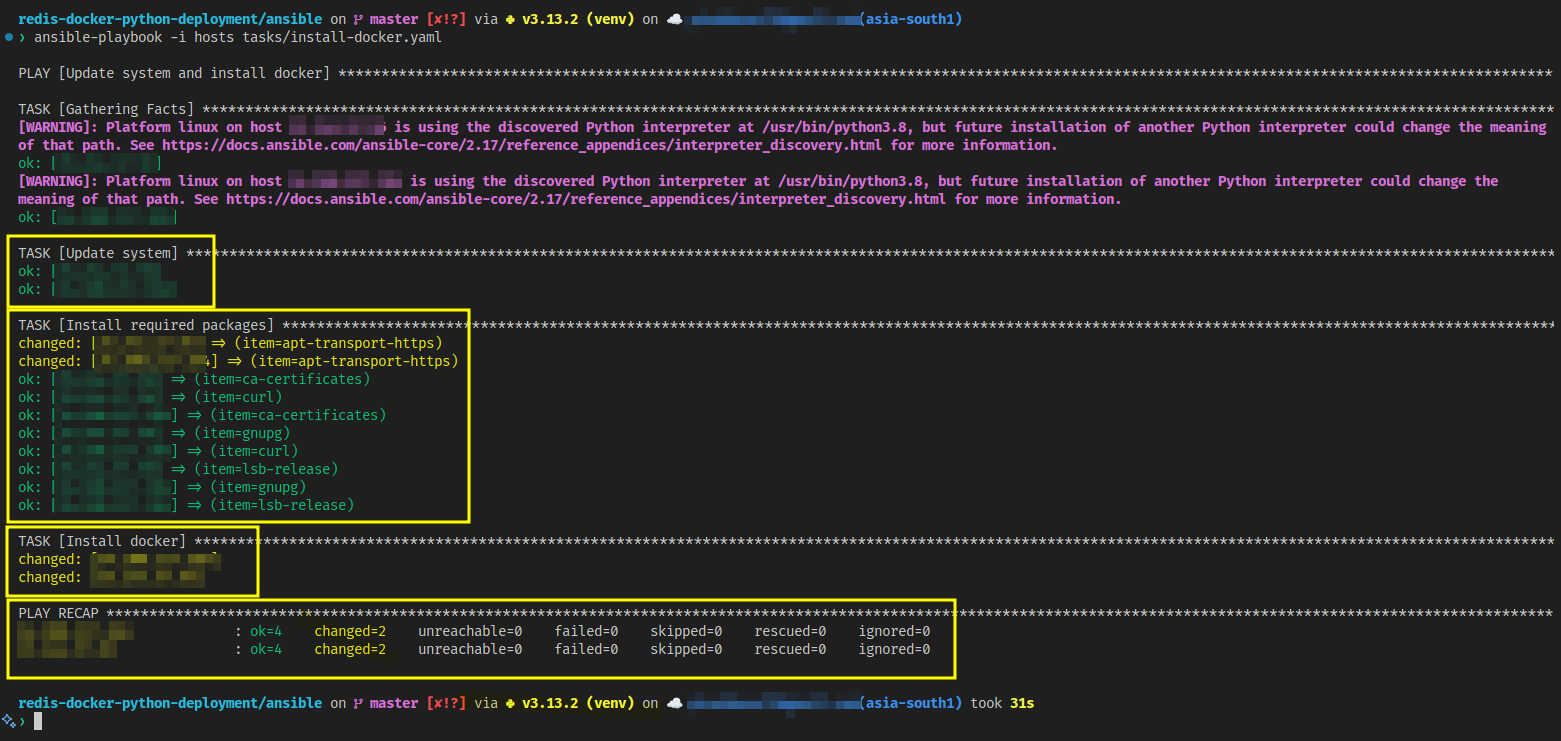
Now that we have installed docker on both manager and worker node, we have to install nginx as a reverse proxy on the worker node because we don’t want to expose our manager node to be exposed by http and https to the public internet.
ansible-playbook -i hosts tasks/install-nginx.yaml

Now we have to put our nginx configuration to act as a reverse proxy to be sent over to the remote server
ansible-playbook -i hosts tasks/setup-proxy.yaml

Wooh !! That was fun, isn’t it ??? Just running few commands and that’s all. If you want to take this to the next level then you also can write a shell script which will run all of these one by one, all you have to do is sit back and relax. (You can also run all of these on a CI server so that whenever you do some changes in the code then the changes appear on the main infrastructure)
Now, the main part, without which the cluster is not a cluster, Let’s install and configure swarm on both servers
ansible-playbook -i hosts tasks/setup-swarm.yaml
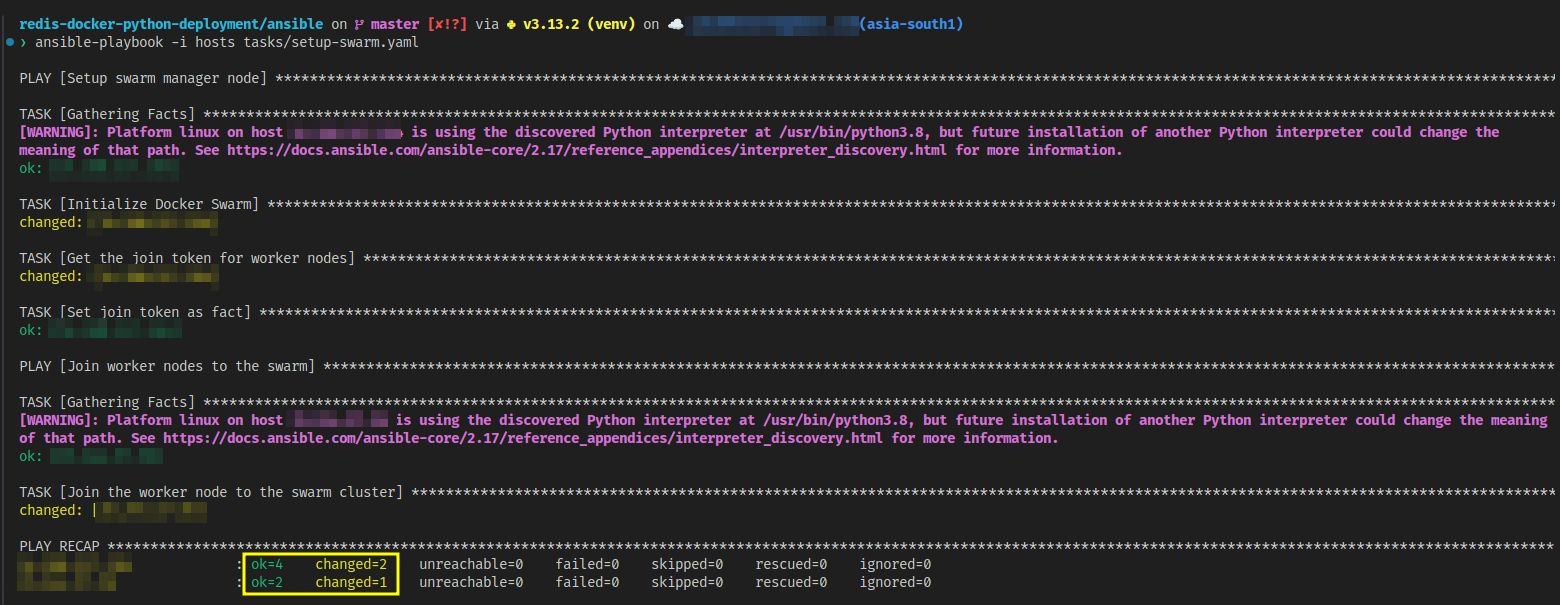
What we have created so far !
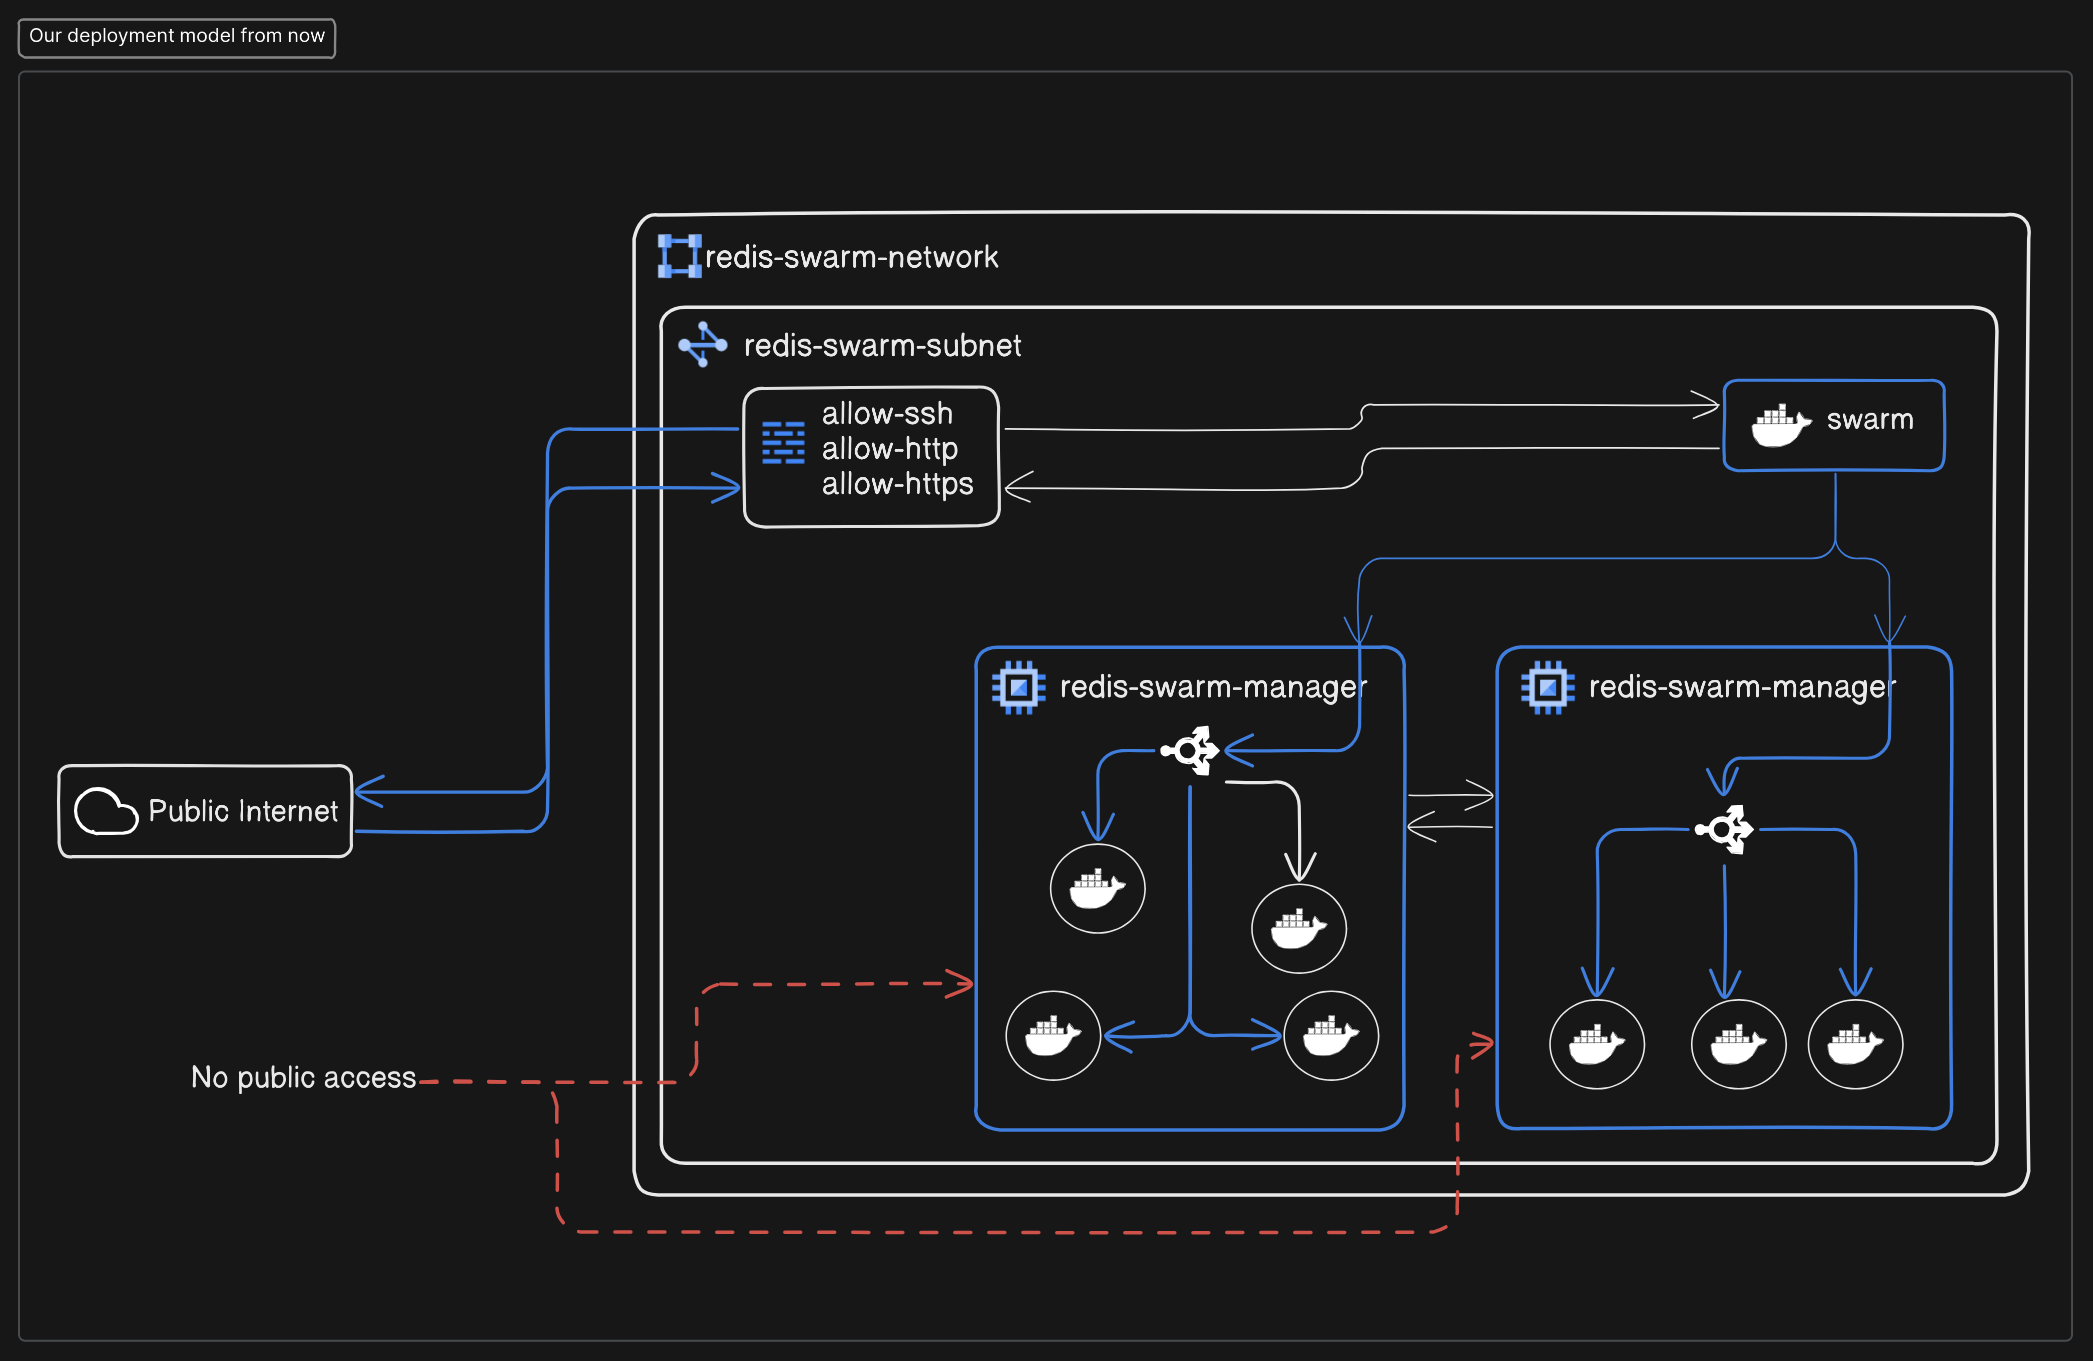
That’s a lot of things we have done so far guys, at-least be proud of yourself for this, ik there is no one appreciating you right now, but i’m here, i do. Let’s celebrate, yayy!!!
What’s next ?
Let’s deploy the app for the first time.
export REDIS_PASS=password_for_redis_cache
ansible-playbook -i hosts tasks/create-deployment.yaml
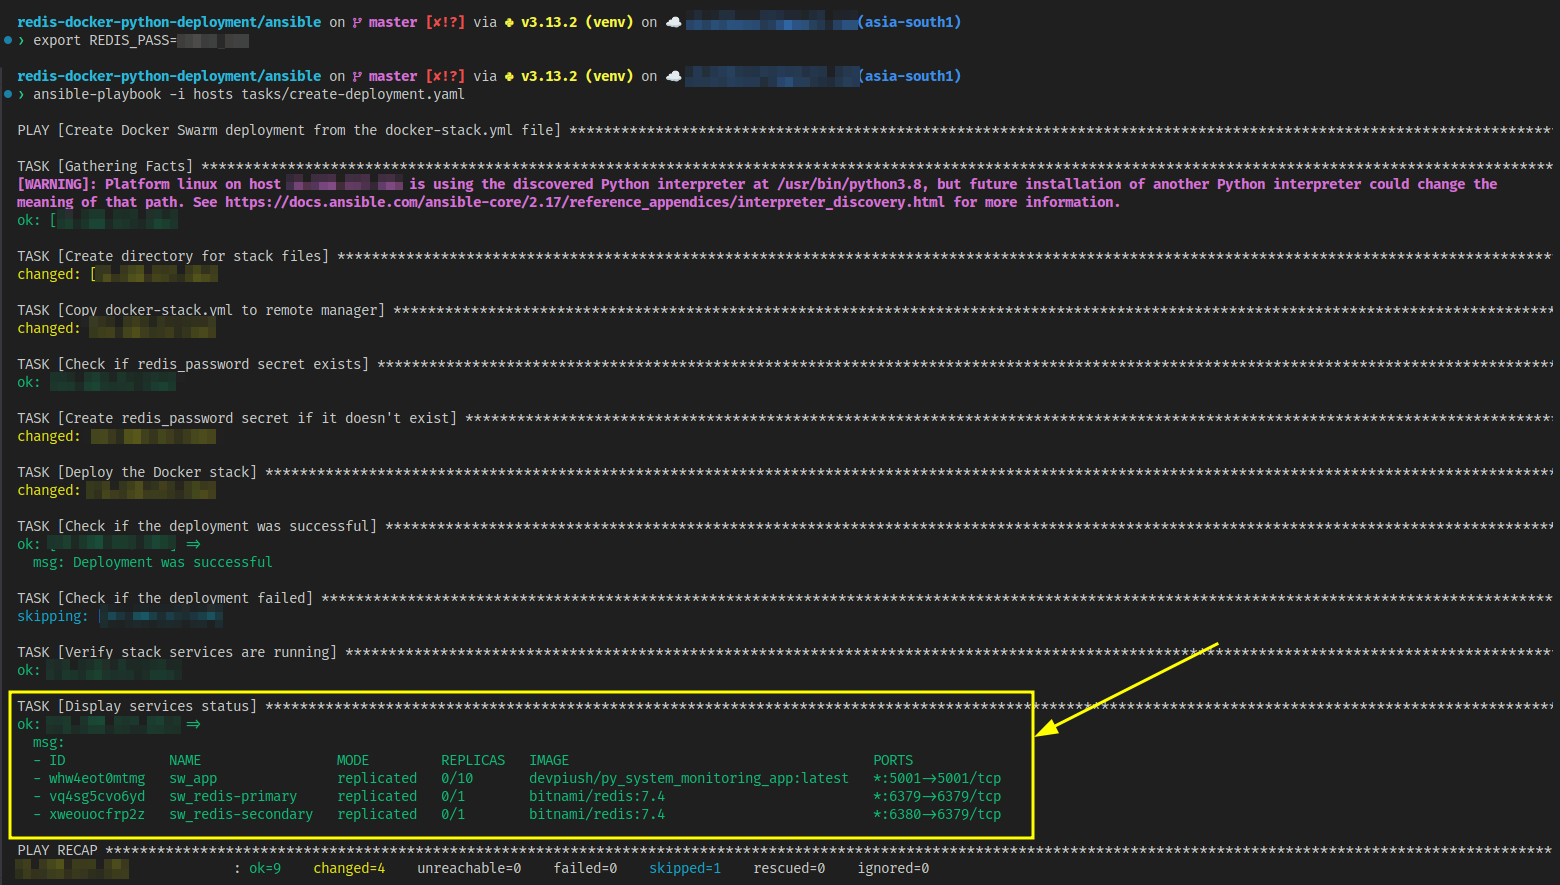
Yesssssss……We did it.
Let’s try this out
Go to GCP and then go to Compute Engine > VM Instances
Copy the External IP of the worker node (Remember we did not open the manager node for public use)

- Go to any browser you like and then paste that in there
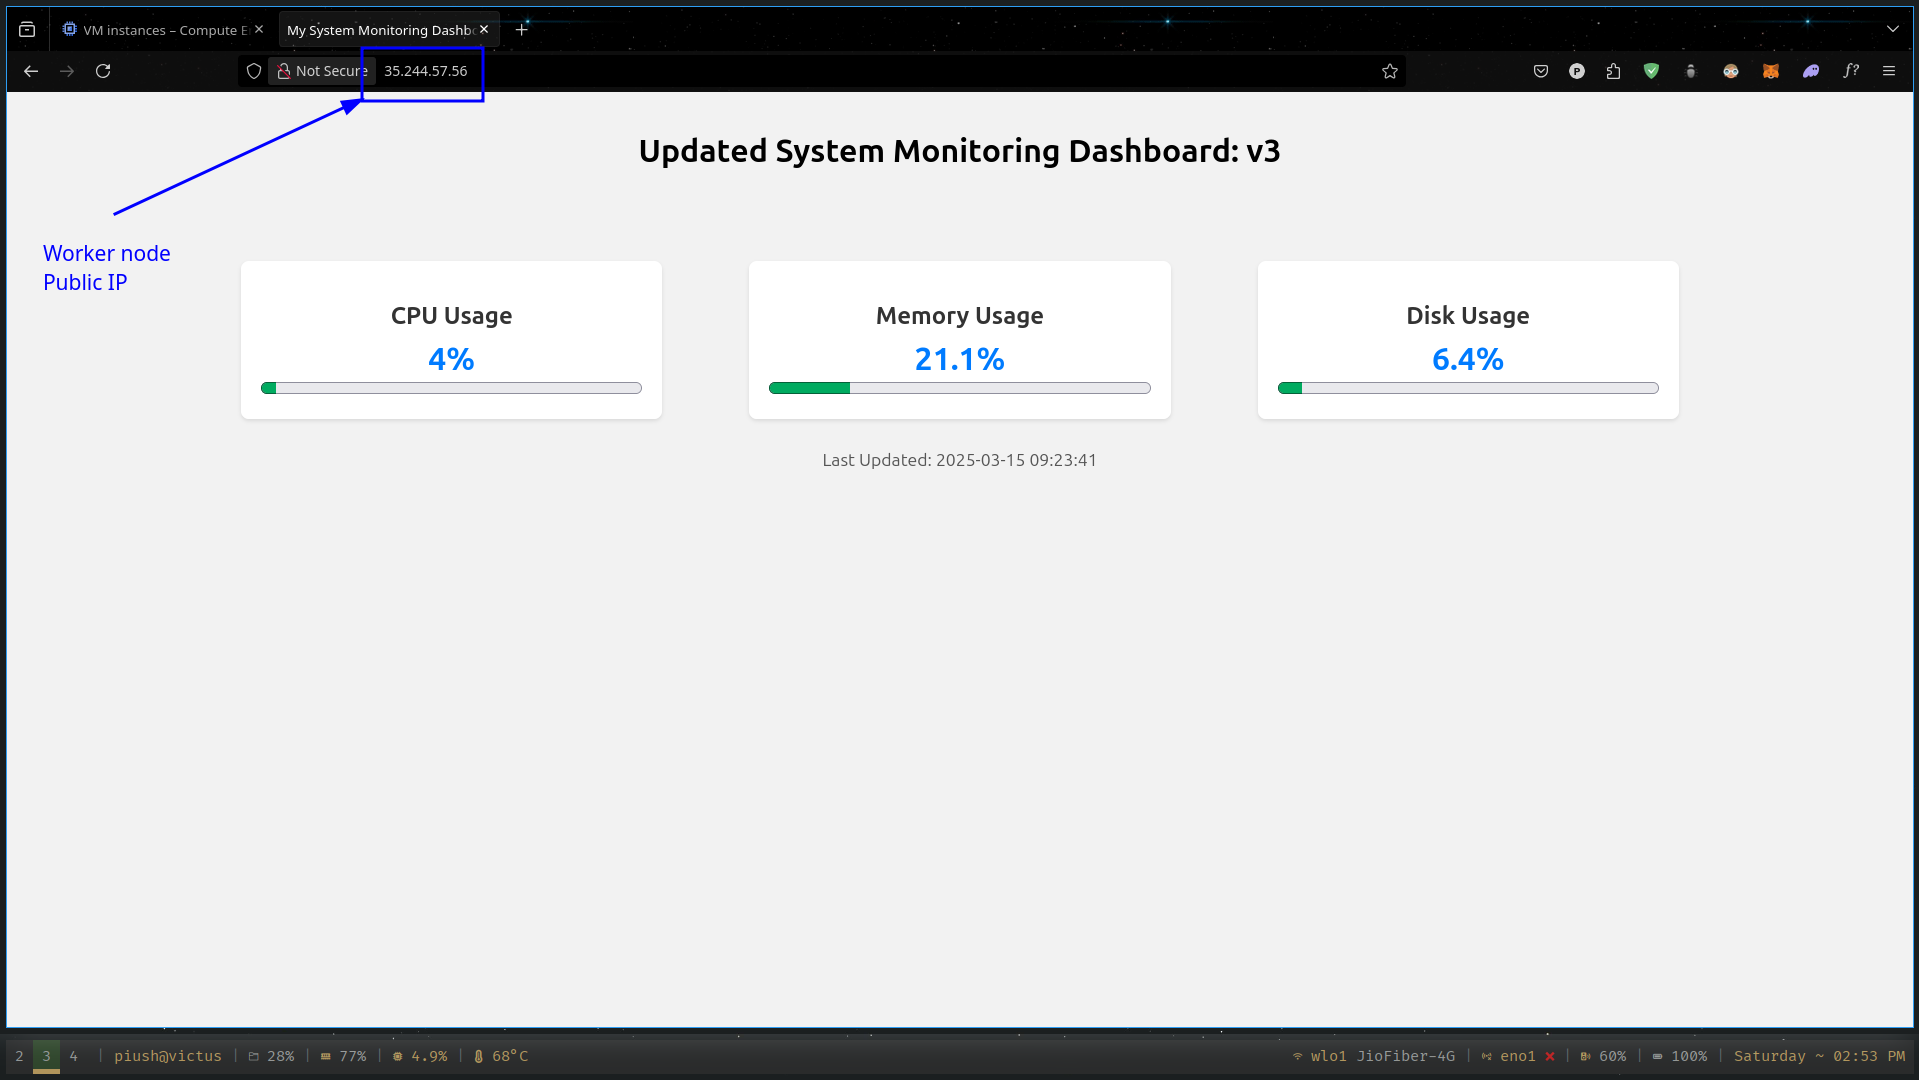
So officially we did it, but what about the next time we do some change to the code repository, let’s say i want to make the deployment from v3 to v4 ?
That’s the reason we need CI CD Pipelines in our code bases and on our source controls like Git, Gitlab, Bitbucket
There are multiple options to pick from
Github Actions (Easy to start working with)
Gitlab CI
Travis CI
Jenkins (By far the most used Open source ci server in terms of production)
Circle CI
……etc
For this project I chose to work with Github Actions because it is easy to use and also we have done a lot of work with the infrastructure previously so i don’t wanna create and setup another server for our CI tool.
Let’s do this !!!
You will find a folder named .github/workflows at the root of our project, there is a YAML file named docker-build.yml. This is the file you push this repo to your github account then you can find a button called Actions on your dashboard like below

So all the file does it whenever someone pushes change to the master branch or opens a pull request on the master branch it will simply build the docker image out of the Dockerfile at our root of the project and pushes that to the docker hub account of yours (Which we have to setup) and then update the deployment at our remote manager node on the docker swarm to use the lates image. And swarm will start a rolling update based on the configuration
....
....
deploy:
      replicas: 10 # total number of replicas
      ....
      ....
      update_config:
        parallelism: 2 # it means it will update 2 containers at the same time
        delay: 10s # it will wait for 10 seconds before going to the next 2 containers
        order: start-first # it will start the containers first then remove the older ones so that there will be no down time
        failure_action: rollback # if any one of the containers fail then it will rollback them to the older image as a fail safe machanism until there is more directions from the manager node
....
....
Now we have to setup our credentials to Github so that it can do the work on our behalf
Create docker hub token
Go to - https://hub.docker.com/ and Signin to your account
Go to account settings and then go to personal access tokens
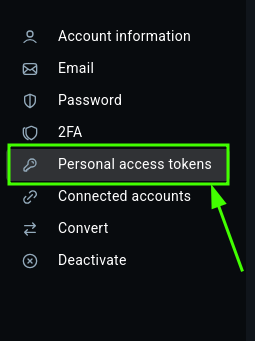
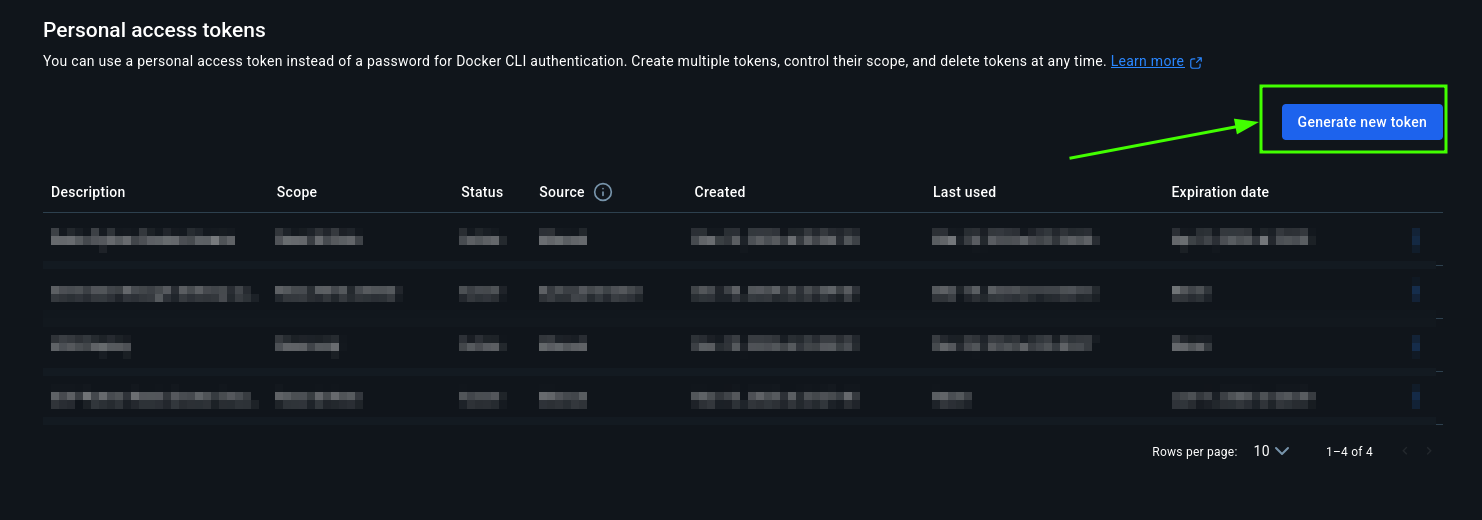
Store the token somewhere safe and don’t share to anyone (Make sure that has Read and write permission to it)
Copy the token over to github

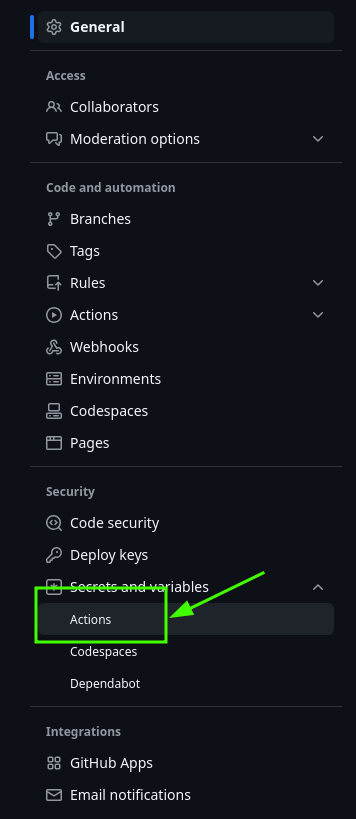
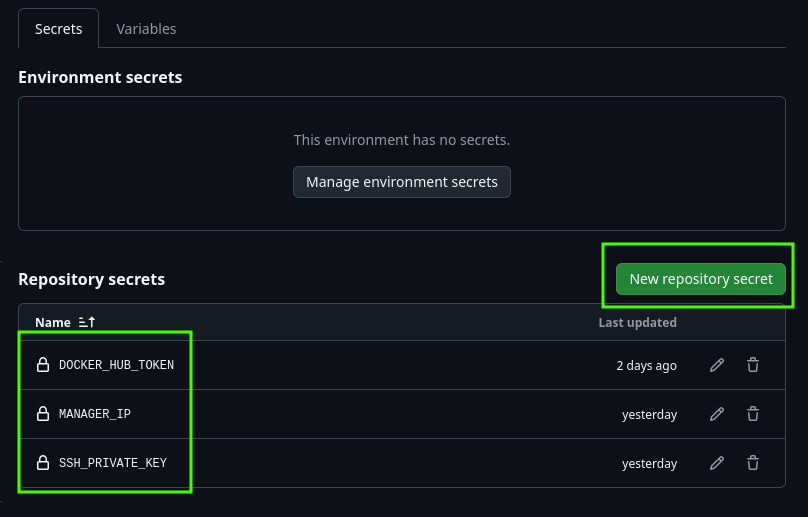
Fill out these necessary things
DOCKER_HUB_TOKEN - Already got it
MANAGER_IP - also got it
SSH_PRIVATE_KEY - run this command at the root of the project
cat infra/keys/id_rsaand then copy and paste the content over there
Also add your docker hub user name there.
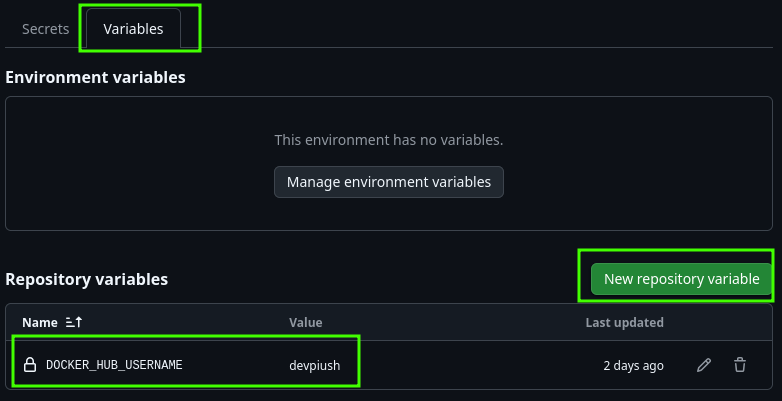
Now we are good to go.
Test that by making some change to the code, the actions tab should look something like this (Ignore the commit messages, fraustration on another level)
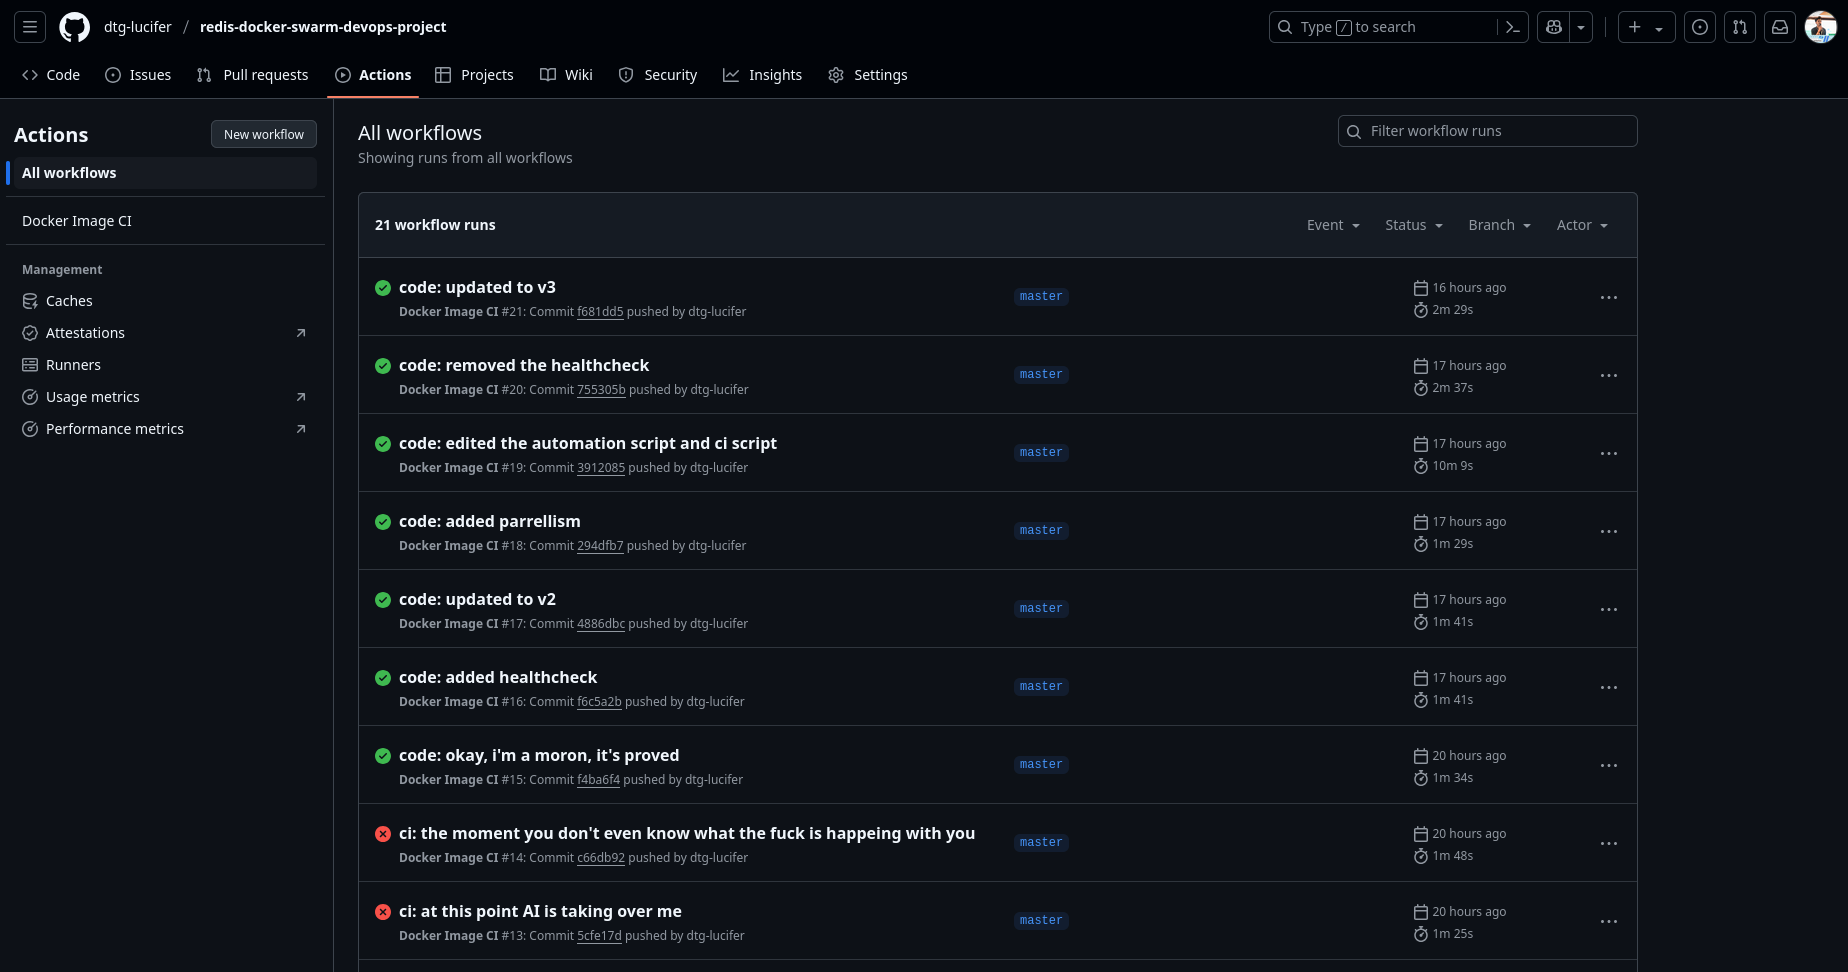
So with this we have officially built the whole DevOps Projec in just under an hour
And the final outcome looks something like this
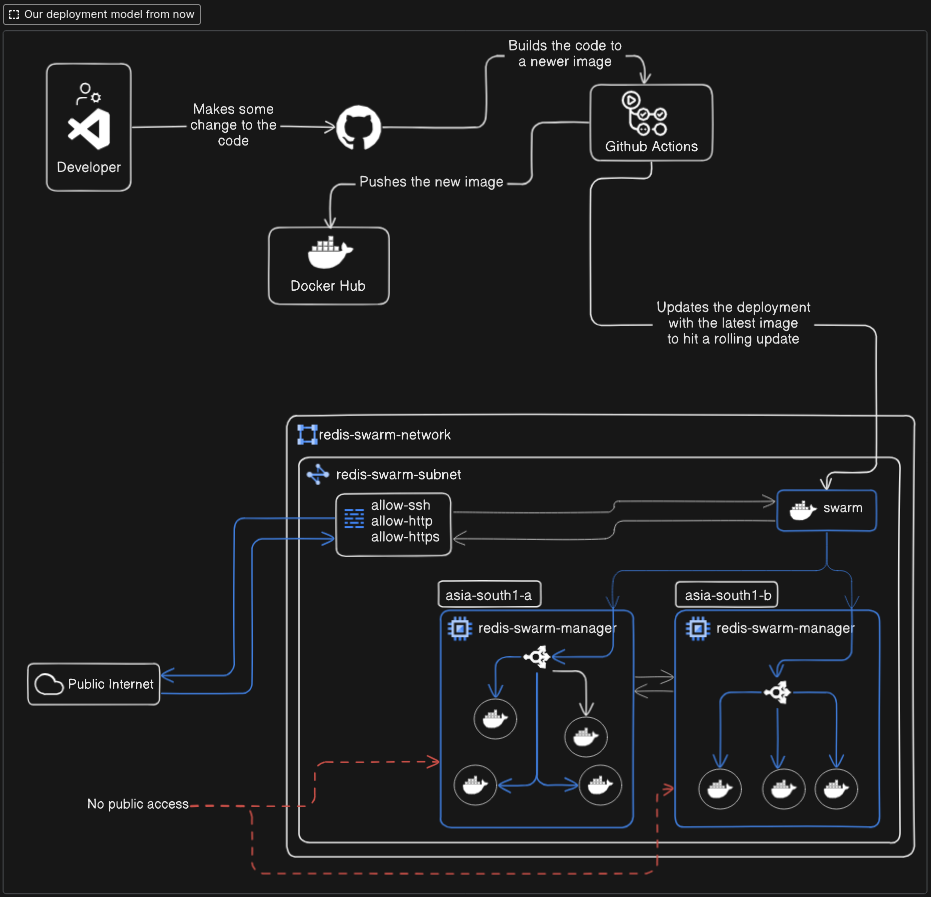
Stay tuned for next articles on different types of deployment models and DevOps projects.
~ Piush Bose <dev.bosepiush@gmail.com>, Signing off
Deployment series (Upcoming articles and knowledge)
Serverless Series
deployment - sl1a, Deploy on cloud run (Pending)
deployment - sl1b, Deploy on app engine (Pending)
deployment - sl1c, Deploy on Google Cloud Functions (FaaS) (Pending)
Server wide
Containerised
deployment - ws1a (Already done on gdg first session)deployment - ws1b, Containerized and then deployed on Docker Swarm cluster with multiple nodes (This article itself)deployment - ws1c, Containerized and deployed on kubernetes cluster (Pending)
Bare metal
deployment - ws2a, Deployed directly on a vm and served with nginx (Easiest one) (Pending)
deployment - ws2b, Deployed on multiple vm and added them to a auto scaling group and load balance between them (Pending)
deployment - ws2c, Shipt the frontend code to Cloud Store bucket and distribute it with Cloud CDN and deploy the backend on any of the solution from before.
Subscribe to my newsletter
Read articles from Piush Bose directly inside your inbox. Subscribe to the newsletter, and don't miss out.
Written by

Piush Bose
Piush Bose
As Domain Lead for Cloud & DevOps at Techno India University, I bridge academic theory with industry standards, driving initiatives that turn classroom concepts into scalable solutions. Previously, as a Full Stack Developer at The Entrepreneurship Network, I delivered robust web solutions, showcasing my Kubernetes and DevOps expertise to meet and exceed business objectives.