Deploying and Interacting with EVM Contracts
 Ukeje Chukwemeriwo Goodness
Writing smart contract code is only the beginning if you’re trying to build anything onchain. You’ll need to deploy the contract onchain where you can interact with it and build further.
Deploying smart contracts on EVM (Ethereum Virtual Machine) chains is easy, and with the right tools, it gets easier. This article will walk you through deploying Solidity smart contracts on any EVM chain with Foundry and interacting with them with a client library.
Getting Started with Deploying Smart Contracts
You’ll learn how to deploy smart contracts by deploying a batch transfer smart contract. You’ll find this useful for airdropping tokens to multiple addresses. You’ll deploy the contract on the Base network and interact with it via the Geth (the Go Ethereum implementation) framework.
First, let’s set you up with the tools you’ll need to deploy smart contracts. There are many tools on the market, but after some research, I found Foundry attractive.
Foundry is a suite of tools for Ethereum development written in Rust, and you can run it anywhere. Install it with this command:
curl -L <https://foundry.paradigm.xyz> | bash
Once the installation is complete, execute the foundryup command to complete the installation.
foundryup
The foundryup command will set up forge (the smart contract development tool) and cast (a CLI tool for interacting with Ethereum).
Now, create a new directory for your project on your computer and initialize a new project with Foundry with this command:
forge init airdroped
Now, open up the airdroped project in your code editor of choice. You should have this setup with a README.md that provides rudimentary Foundry documentation.
Publishing Smart Contracts to EVM Networks
Create a Solidity file in the src directory for your smart contract and paste this program.
// SPDX-License-Identifier: MIT
pragma solidity ^0.8.0;

interface IERC20 {
    function transferFrom(address sender, address recipient, uint256 amount) external returns (bool);
}

contract BatchTransfer {
    function batchTransfer(
        address token,
        address[] calldata recipients,
        uint256[] calldata amounts
    ) external {
        require(recipients.length == amounts.length, "Array lengths do not match");

        for (uint256 i = 0; i < recipients.length; i++) {
            require(
                IERC20(token).transferFrom(msg.sender, recipients[i], amounts[i]),
                "Transfer failed"
            );
        }
    }
}
The IERC20 interface defines the signature for the transferFrom function, which lets the contract transfer tokens on behalf of users after they approve it.
The BatchTransfer contract handles ERC20 token transfers to multiple recipients in one transaction. The batch transfer function in the contract takes in the user’s address, the list of recipients, and the corresponding amounts they should receive. If the arrays have corresponding lengths, the contract transfers the specified amounts to the transferFrom function.
In the client implementation, the sender address must approve the token transfer for the contract to spend the tokens; that’s the only overhead, but the same amount in gas will be paid for any transfer amount.
Execute this command to deploy the contract on your EVM-compatible network of choice over the forge command.
forge create --rpc-url <RPC_URL> --private-key <PRIVATE_KEY> <CONTRACT_PATH>:<CONTRACT_NAME>
The command compiles the specified smart contract, signs the deployment transaction with the private key for authentication, and sends it to the blockchain via the RPC URL, registering the contract at a unique address where you can interact.
Add a --broadcast flag to the command to broadcast it to the network and deploy the contract onchain.
forge create --rpc-url <RPC_URL> --private-key <PRIVATE_KEY> <CONTRACT_PATH>:<CONTRACT_NAME> --broadcast
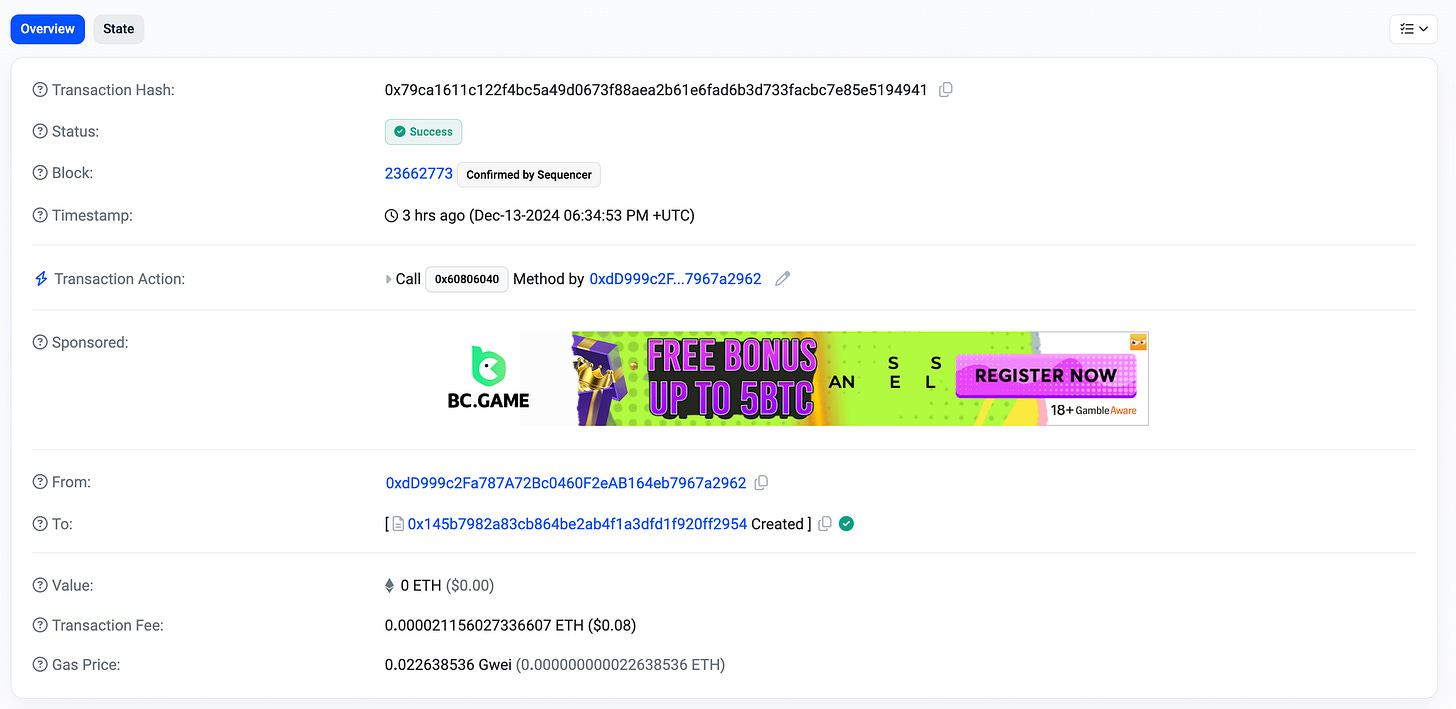
The command should return the transaction hash, deployment address, and other details when executing it. Head to a block explorer on the chain where you’ve deployed the contract to verify the deployment.
Congratulations! You’ve successfully deployed/published a smart contract. Now, you’ll need to interact with the contract using a client library.
Interacting with Smart Contracts
You can use Ethereum-supported client libraries to interact with smart contracts deployed on any EVM chain. In this tutorial, you’ll learn with Geth (Go-Ethereum) the official client implementation of Ethereum.
First, execute these commands in a new Go project to add go-ethereum as a dependency and install abigen, a command line tool for transpiling smart contract ABIs into Go interactive methods.
go get github.com/ethereum/go-ethereum
go install github.com/ethereum/go-ethereum/cmd/abigen@latest
You may also need to install the Solidity compiler if you don’t have the ABI and you need to generate it from the Solidity program
Execute this command to generate the ABI from the Solidity program after installing the Solidity compiler.
// code to transpile to Go
solc --abi --bin --optimize --overwrite -o build/ <filename>.sol
Here’s the ABI of the BatchTransfer smart contract.
[
  {
    "inputs": [
      {
        "internalType": "address",
        "name": "token",
        "type": "address"
      },
      {
        "internalType": "address[]",
        "name": "recipients",
        "type": "address[]"
      },
      {
        "internalType": "uint256[]",
        "name": "amounts",
        "type": "uint256[]"
      }
    ],
    "name": "batchTransfer",
    "outputs": [],
    "stateMutability": "nonpayable",
    "type": "function"
  }
]
Now, execute this command to generate the Go bindings for the smart contract’s functions.
abigen --abi <path-to-abi> --bin <path-to-bytecode> --pkg <package-name> --out <output-file.go>
You can view the Go code generated by executing the command in the same directory as your ABI. Do not edit the file; if you do, all changes will be lost.
Here’s a function that interacts with the batch transfer smart contact.
// BatchTransferAssets performs a batch transfer of assets on Ethereum.
func BatchTransferAssets(privateKeyHex, tokenAddress, contractAddress string, recipients []string, amounts []*big.Int, chainID *big.Int, rpcURL string) error {
    // Connect to the Ethereum client
    client, err := ethclient.Dial(rpcURL)
    if err != nil {
        return fmt.Errorf("failed to connect to Ethereum client: %w", err)
    }

    privateKey, err := crypto.HexToECDSA(privateKeyHex)
    if err != nil {
        return fmt.Errorf("failed to parse private key: %w", err)
    }

    publicKey := privateKey.Public()
    publicKeyECDSA, ok := publicKey.(*ecdsa.PublicKey)
    if !ok {
        return errors.New("error casting public key to ECDSA")
    }

    fromAddress := crypto.PubkeyToAddress(*publicKeyECDSA)
    nonce, err := client.PendingNonceAt(context.Background(), fromAddress)
    if err != nil {
        return fmt.Errorf("failed to get nonce: %w", err)
    }
    gasPrice, err := client.SuggestGasPrice(context.Background())
    if err != nil {
        return fmt.Errorf("failed to get gas price: %w", err)
    }

    auth, err := bind.NewKeyedTransactorWithChainID(privateKey, chainID)
    if err != nil {
        return fmt.Errorf("failed to create transaction signer: %w", err)
    }

    auth.Nonce = big.NewInt(int64(nonce))
    auth.Value = big.NewInt(0)      // Amount to send in wei (0 for token transfer)
    auth.GasLimit = uint64(3000000) // Gas limit
    auth.GasPrice = gasPrice

    batchContract, err := NewBatchtransfer(common.HexToAddress(contractAddress), client)
    if err != nil {
        return fmt.Errorf("failed to create contract instance: %w", err)
    }

    recipientAddresses := make([]common.Address, len(recipients))
    for i, addr := range recipients {
        recipientAddresses[i] = common.HexToAddress(addr)
    }

    tx, err := batchContract.BatchTransfer(auth, common.HexToAddress(tokenAddress), recipientAddresses, amounts)
    if err != nil {
        return fmt.Errorf("batch transfer failed: %w", err)
    }

    fmt.Printf("Batch transfer initiated. Transaction hash: %s\\n", tx.Hash().Hex())
    return nil
}
The function connects to Ethereum, signs a transaction, interacts with a batch transfer smart contract to send tokens to multiple recipients, and prints the transaction hash once it is successful.
The NewBatchtransfer creates a new instance of the smart contract, and the BatchTransfer method performs the batch transfer of tokens, taking the transaction signer (auth), the token contract address (tokenAddress), the list of recipient addresses (recipient addresses), and the list of amounts (amounts) to transfer.
Here’s a main function with the BatchTransferAssets function call and all variables instantiated properly
func main() {
    // Replace these values with your own configurations
    privateKeyHex := "YOUR_PRIVATE_KEY"                       // Replace with your private key
    tokenAddress := "0xTokenContractAddressHere"             // Replace with your token contract address
    contractAddress := "0xBatchTransferContractAddressHere"  // Replace with your batch transfer contract address
    rpcURL := "<https://mainnet.infura.io/v3/YOUR_INFURA_KEY>" // Replace with your Ethereum RPC endpoint
    chainID := big.NewInt(8453)                                // Mainnet ChainID

    // Define recipients and amounts
    recipients := []string{
        "0xRecipientAddress1",
        "0xRecipientAddress2",
        "0xRecipientAddress3",
    }

    amounts := []*big.Int{
        big.NewInt(1000000000000000000), // 1 token (assuming 18 decimals)
        big.NewInt(2000000000000000000), // 2 tokens
        big.NewInt(1500000000000000000), // 1.5 tokens
    }

    // Call the batch transfer function
    err := BatchTransferAssets(privateKeyHex, tokenAddress, contractAddress, recipients, amounts, chainID, rpcURL)
    if err != nil {
        log.Fatalf("Batch transfer failed: %v", err)
    }
}
On running the program, if everything is right, this is the output you should expect.
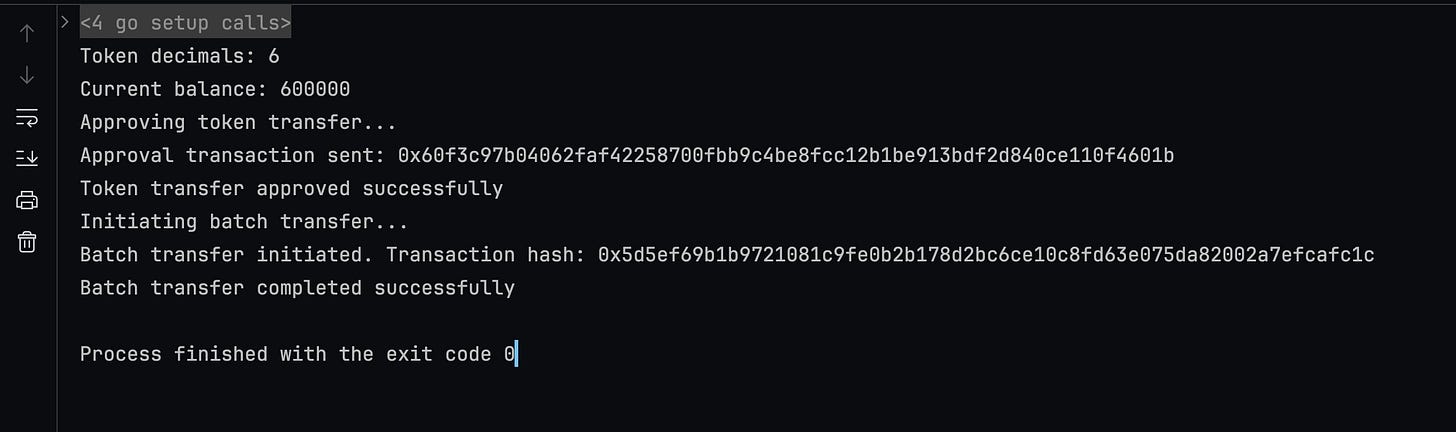
The code and processes in this article are excerpts from the airdroped project on GitHub. Feel free to play around with them and enjoy.
Conclusion
You’ve learned how to deploy smart contracts to the 60+ EVM L1 and L2 and how to interact with them from client implementations like Geth.
Your next steps could be anything from building more complex batch transfer mechanisms across other EVM and non-EVM compatible chains to building other smart contracts; whichever you choose, remember you can always lean back on the Web3Afrika community of devs if you get stuck.
Subscribe to my newsletter
Read articles from Ukeje Chukwemeriwo Goodness directly inside your inbox. Subscribe to the newsletter, and don't miss out.
Written by
Ukeje Chukwemeriwo Goodness
Ukeje Chukwemeriwo Goodness
Mechanical Engineering Student. Interested in Computational Sciences, Human Philosophy and Psychology.