Deploying an Application Behind a Firewall on Azure
 Sowmya Vallepu
In this guide, we will walk through deploying an application behind a firewall on Microsoft Azure. This step-by-step process ensures security by restricting access to only authorized users.
Step 1: Creating the Virtual Network (VNet)
Log in to your Azure portal.
Navigate to Virtual Networks and click Create.
Configure the VNet:
Choose a Resource Group.
Provide a Name for the VNet.
Select a Region.
Configure IP Address Space.
Click Review + Create, then Create.
Step 2: Setting Up Azure Bastion and Firewall
Inside your newly created VNet, go to Subnets.
Enable Azure Bastion for secure access:
Navigate to Bastion under the VNet.
Click Create Bastion and configure it.
Enable Azure Firewall:
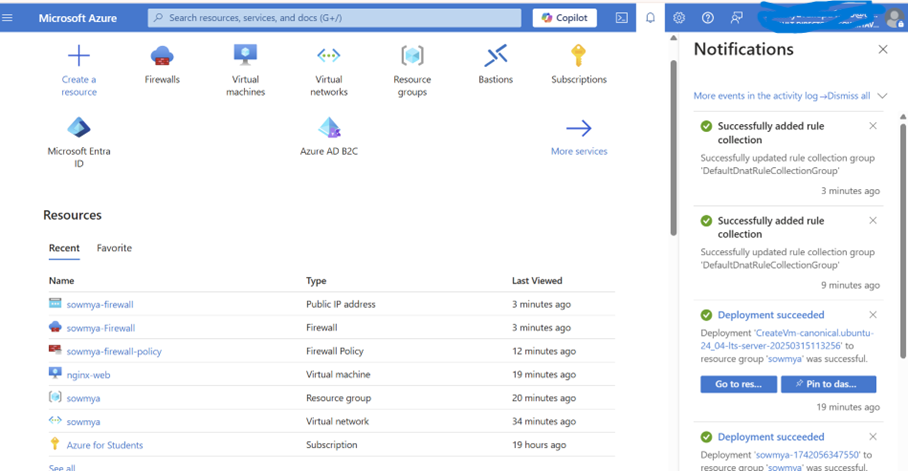
Deploy Azure Firewall in the VNet.
Azure will automatically create the required subnets (
AzureBastionSubnetandAzureFirewallSubnet).Assign a public IP to the firewall.
Step 3: Creating the Virtual Machine (VM)
Navigate to Virtual Machines in the Azure portal.
Click Create a new VM.
Configure the following:
Choose the same VNet created earlier.
Select an operating system (e.g., Ubuntu).
Configure Administrator credentials.
Choose a size based on requirements.
Click Review + Create, then Create.
Step 4: Connecting to the VM via SSH
Once the VM is running, copy the private IP address (since we are using Bastion).
Open Azure Bastion and enter the VM credentials to connect securely.

Step 5: Installing and Configuring Nginx on the VM
Update the system:
sudo apt-get updateInstall Nginx:
sudo apt-get install nginx -yNavigate to the HTML directory:
cd /var/www/htmlCreate and edit an HTML file:
sudo vim index.htmlAdd the following content and save:
<h1>I learned Azure Networking</h1>Restart Nginx to apply changes:
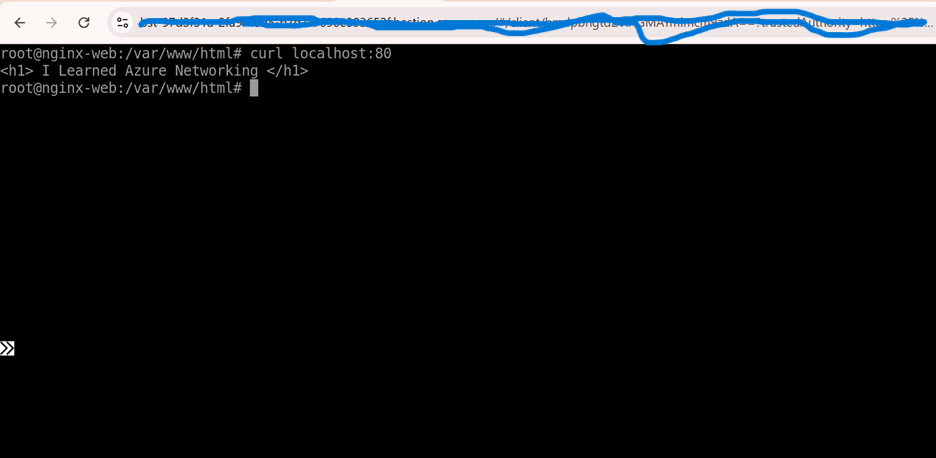
sudo systemctl restart nginxVerify the setup:
curl localhost:80- This should display your HTML content.

Step 6: Configuring Azure Firewall Rules
Go to Azure Firewall in the portal.
Under Rules, configure an Inbound Rule:
Source: Any or a specific IP range.
Destination: The VM’s private IP.
Protocol: TCP.
Port: 80 (for HTTP traffic).
Action: Allow.
Apply the rule to enforce network security.
Step 7: Accessing the Application
Copy the public IP address of the Azure Firewall.
Open a terminal and access the application using SSH tunneling:
<ipaddress:port>Open a web browser and enter:
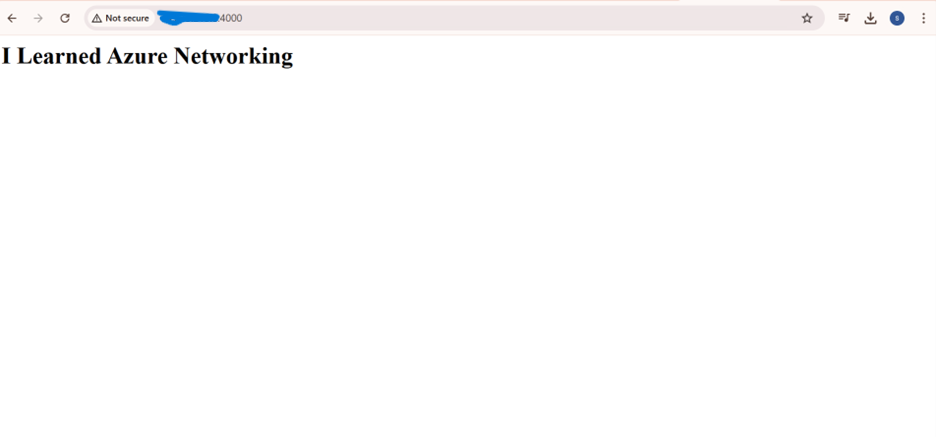
http://localhost:8080You should see the webpage displaying "I learned Azure Networking".
You should see the webpage displaying "I learned Azure Networking".

Conclusion
By following these steps, we successfully deployed an application behind a firewall on Azure. This setup ensures controlled access, improving security while maintaining availability.
Subscribe to my newsletter
Read articles from Sowmya Vallepu directly inside your inbox. Subscribe to the newsletter, and don't miss out.
Written by

Sowmya Vallepu
Sowmya Vallepu
I am currently pursuing my master's degree at Indiana Wesleyan University, with a focus on expanding my knowledge and expertise in the field of DevOps. Previously, I worked as an Azure DevOps Engineer at RSI SoftTech India Private Limited, where I gained 3 years of hands-on experience in managing Azure DevOps pipelines, cloud infrastructure, and automation processes. During my time in this role, I developed a deep understanding of CI/CD, version control, and deployment strategies. I am passionate about continuous learning and improving software development workflows to drive efficiency and scalability. My goal is to leverage my academic and professional experiences to contribute to innovative DevOps practices in the future.