Make Your First Computer Vision Project: A Step-by-Step Guide
 Abhishek Mukherjee
Have you ever wondered how computers can "see" and process images? Computer vision is the exciting field that gives machines the ability to interpret and understand visual information, just like humans do. In this beginner-friendly guide, I'll walk you through creating your very first computer vision project using Python.
What You'll Build
In this tutorial, we'll create a simple computer vision application that can:
Load and display images
Convert images to grayscale
Apply Gaussian blur for noise reduction
Detect edges in images
Detect faces in photographs
By the end, you'll have a working application that you can use to process your own images and even deploy online for others to use!
Prerequisites
Basic Python knowledge
A computer with Python installed
Enthusiasm to learn!
Setting Up Your Environment
Let's start by setting up our project environment. We'll create a folder for our project and set up a virtual environment to keep our dependencies organized.
Create a project folder and navigate to it:
 mkdir computer_vision_project
 cd computer_vision_project
Create and activate a virtual environment:
python -m venv venvOn Windows:
venv\Scripts\activateOn macOS/Linux:
source venv/bin/activateInstall required libraries:
pip install opencv-python numpy matplotlib
Building the Basic Image Processing Script
Now, let's create our first script that will handle basic image processing techniques.
Create a new file called
image_processing.py:Add the following code:
 import cv2
 import numpy as np
 import matplotlib.pyplot as plt

 # Load an image
 def load_image(image_path):
     img = cv2.imread(image_path)
     # Convert from BGR to RGB (OpenCV loads images in BGR format)
     img = cv2.cvtColor(img, cv2.COLOR_BGR2RGB)
     return img

 # Display the image
 def display_image(image, title="Image"):
     plt.figure(figsize=(10, 8))
     plt.imshow(image)
     plt.title(title)
     plt.axis('off')
     plt.show()

 # Apply grayscale conversion
 def convert_to_grayscale(image):
     return cv2.cvtColor(image, cv2.COLOR_RGB2GRAY)

 # Apply Gaussian blur
 def apply_gaussian_blur(image, kernel_size=(5, 5)):
     return cv2.GaussianBlur(image, kernel_size, 0)

 # Apply edge detection
 def detect_edges(image, threshold1=100, threshold2=200):
     return cv2.Canny(image, threshold1, threshold2)

 # Main function
 def main():
     # Path to your image
     image_path = "sample_image.jpg"

     # Load the image
     original_image = load_image(image_path)

     # Display original image
     display_image(original_image, "Original Image")

     # Convert to grayscale
     gray_image = convert_to_grayscale(original_image)
     display_image(gray_image, "Grayscale Image")

     # Apply Gaussian blur
     blurred_image = apply_gaussian_blur(gray_image)
     display_image(blurred_image, "Blurred Image")

     # Detect edges
     edges = detect_edges(blurred_image)
     display_image(edges, "Edge Detection")

 if __name__ == "__main__":
     main()
Download a sample image from the internet or use one of your own photos, and save it as
sample_image.jpgin your project folder.Run the script:
python image_processing.pyYou should see four images displayed one after another: the original image, grayscale version, blurred version, and edge detection result.
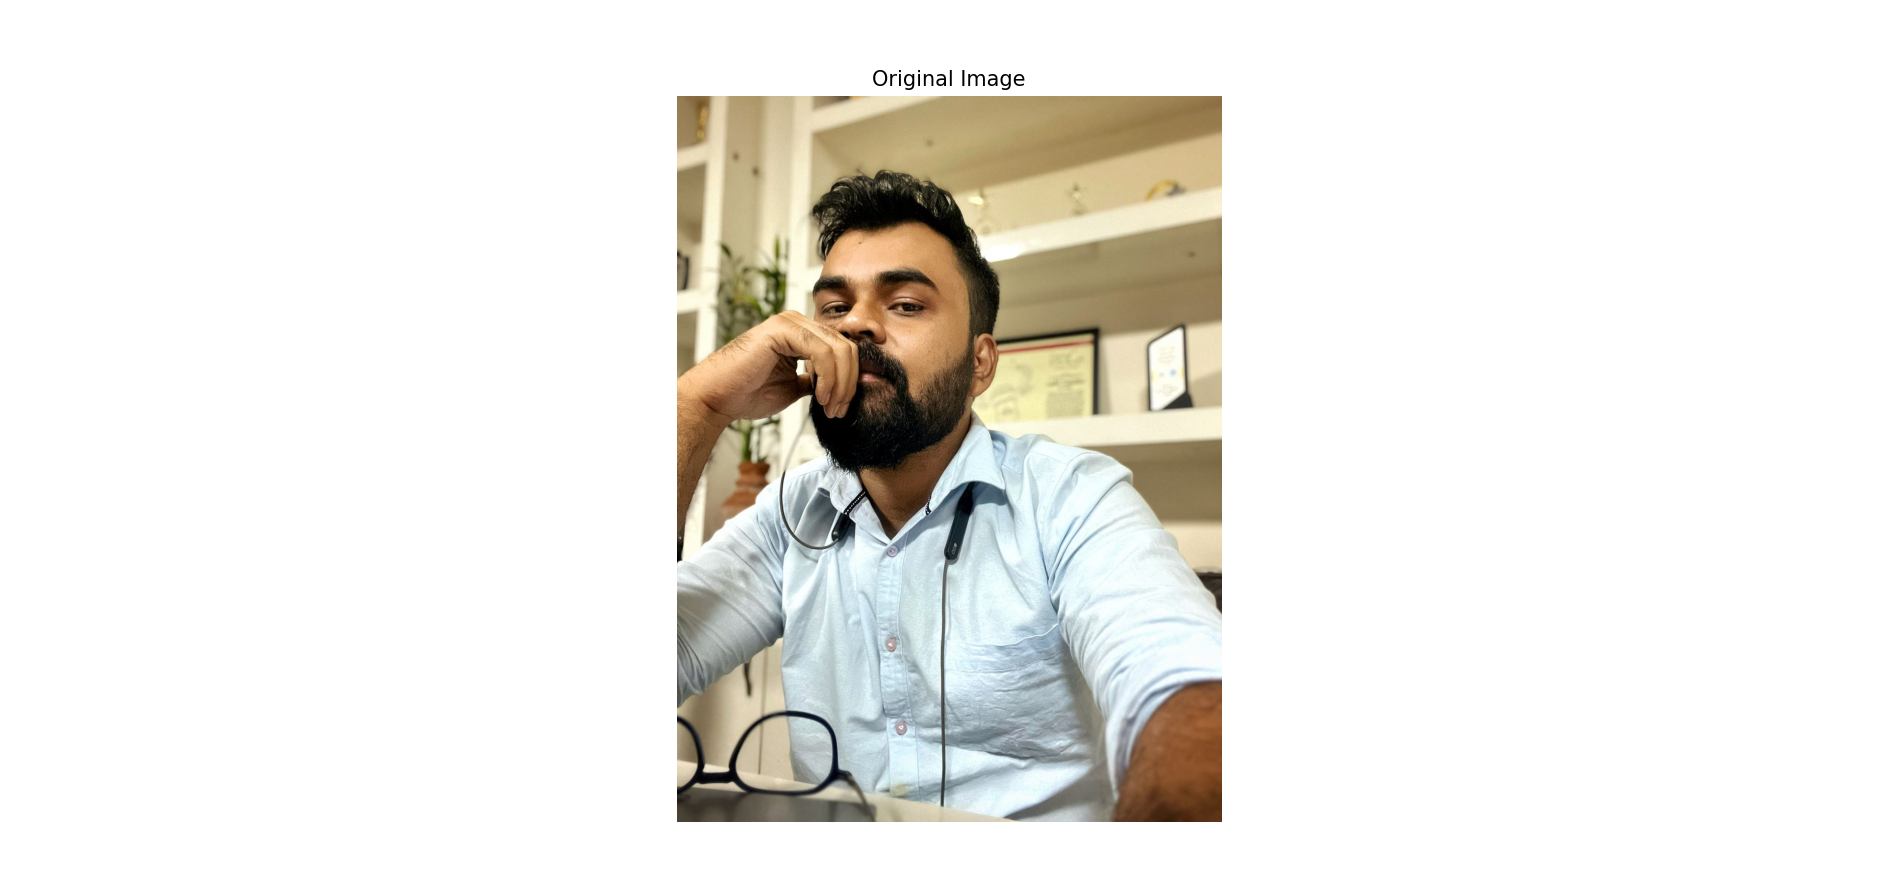
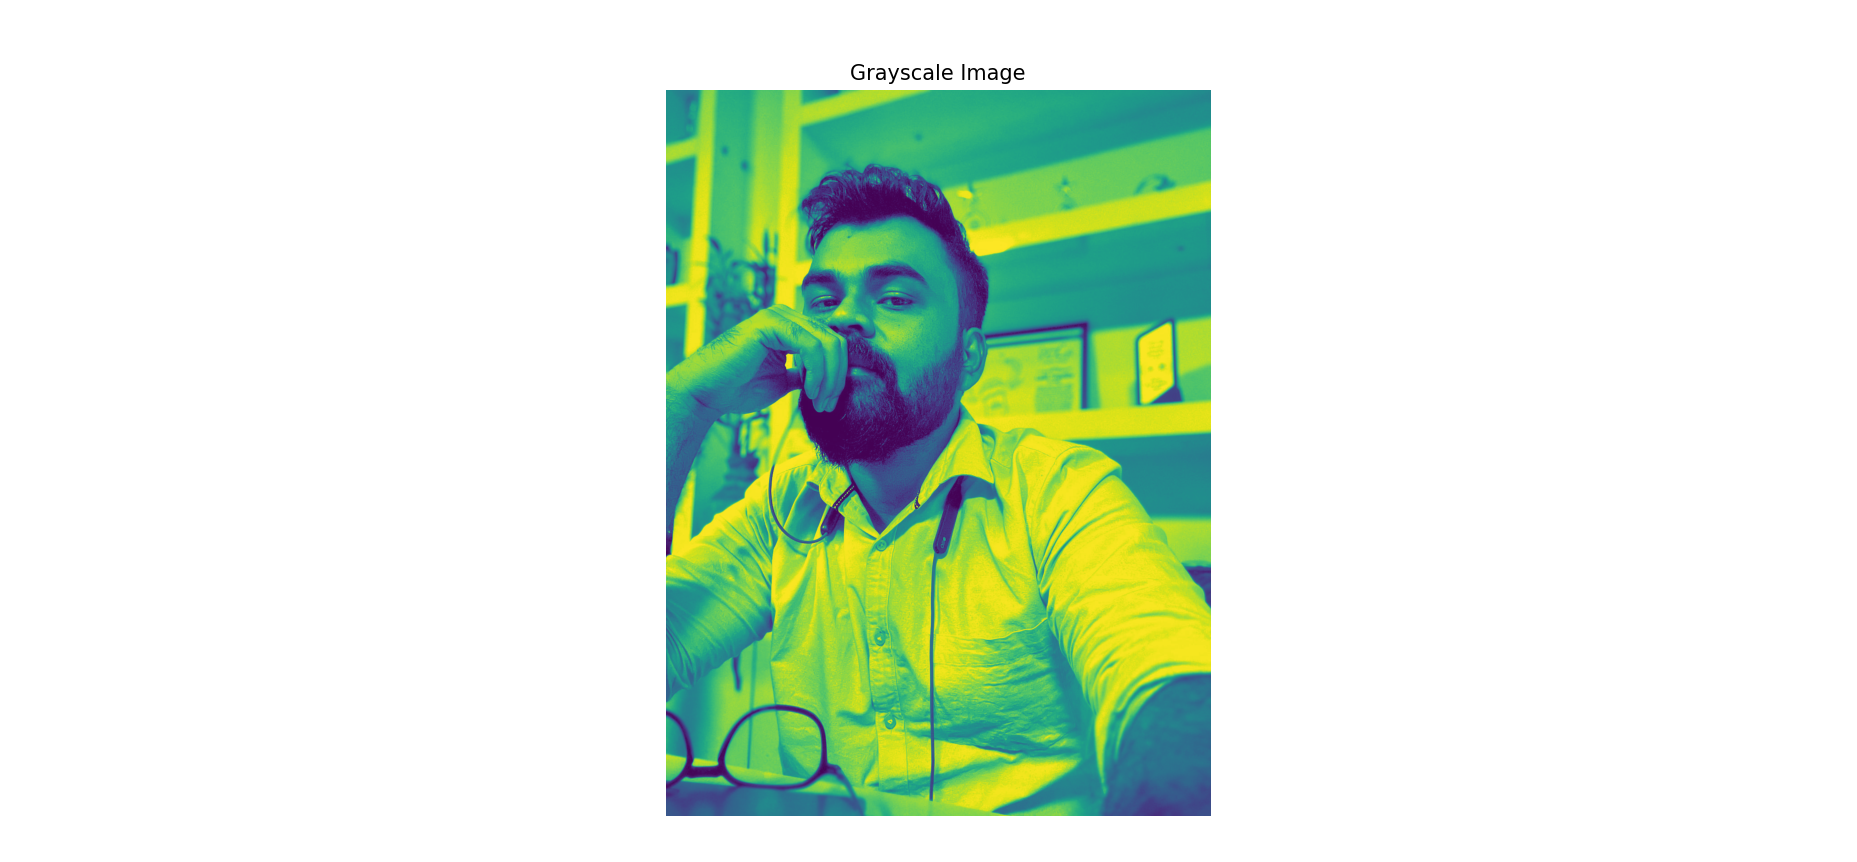
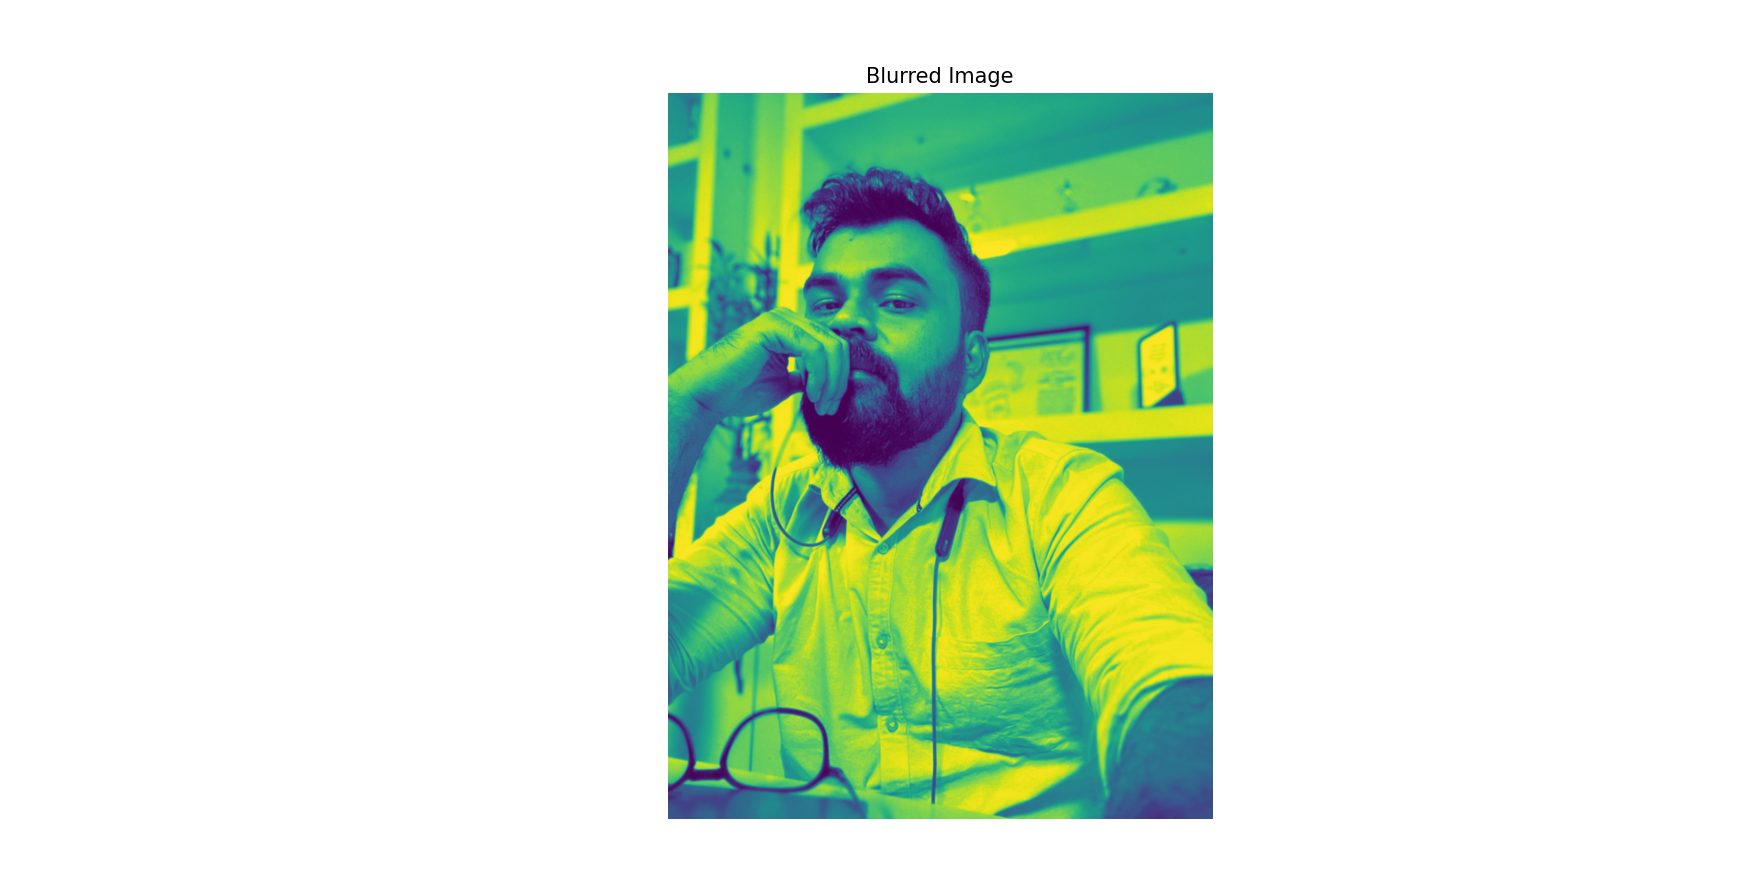
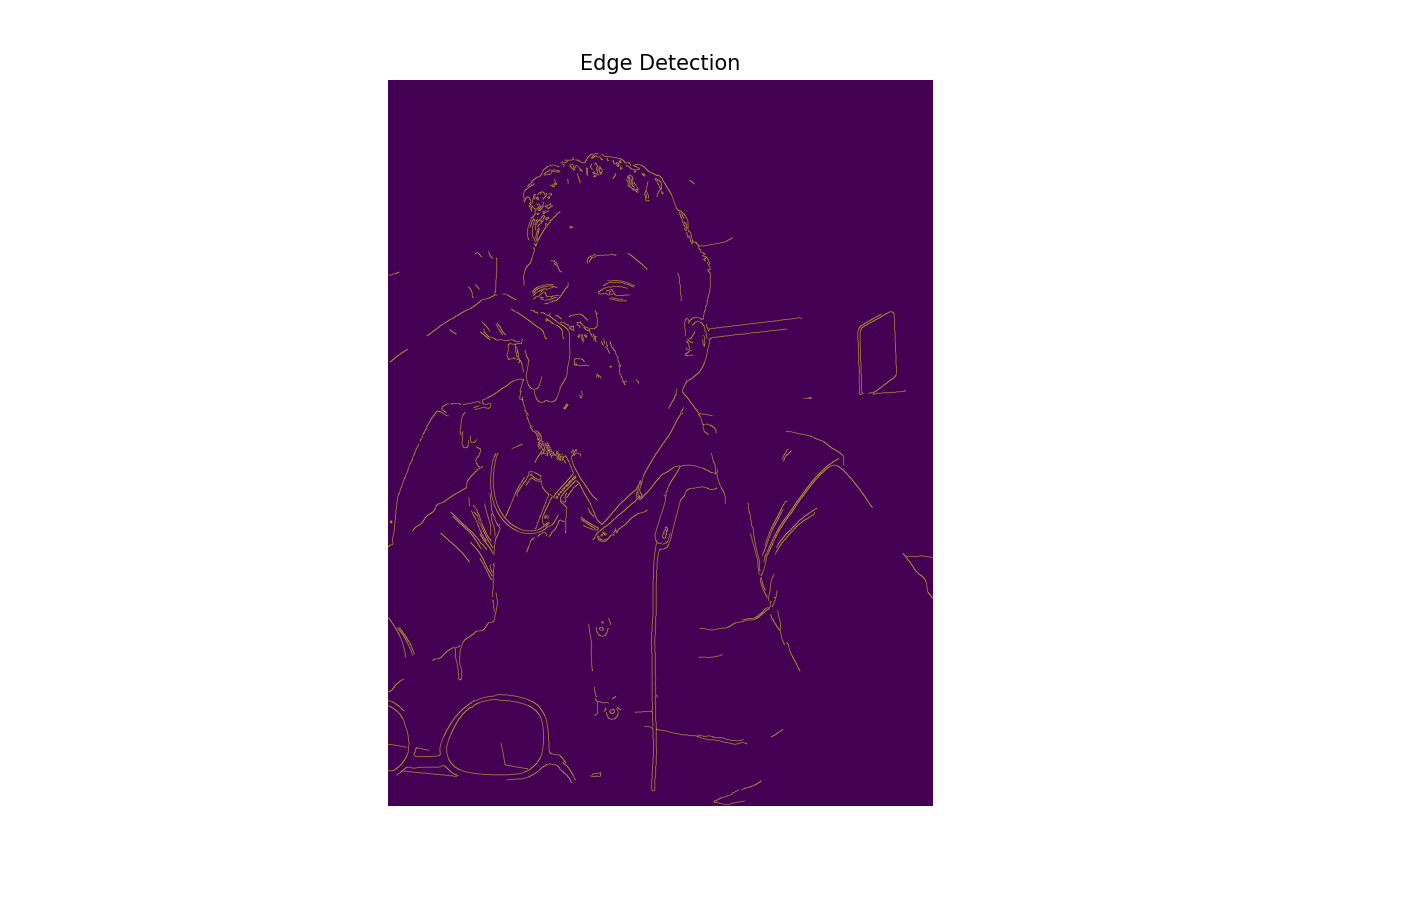
Adding Face Detection
Now, let's add face detection capabilities to our project:
Create a new file called
face_detection.py:Add the following code:
 import cv2
 import numpy as np
 import matplotlib.pyplot as plt

 def load_image(image_path):
     img = cv2.imread(image_path)
     img_rgb = cv2.cvtColor(img, cv2.COLOR_BGR2RGB)
     return img, img_rgb

 def detect_faces(image):
     # Load the pre-trained face detector
     face_cascade = cv2.CascadeClassifier(cv2.data.haarcascades + 'haarcascade_frontalface_default.xml')

     # Convert to grayscale for face detection
     gray = cv2.cvtColor(image, cv2.COLOR_RGB2GRAY)

     # Detect faces
     faces = face_cascade.detectMultiScale(gray, 1.1, 4)

     return faces

 def draw_faces(image, faces):
     # Create a copy of the image
     image_with_faces = image.copy()

     # Draw rectangles around detected faces
     for (x, y, w, h) in faces:
         cv2.rectangle(image_with_faces, (x, y), (x+w, y+h), (255, 0, 0), 2)

     return image_with_faces

 def display_image(image, title="Image"):
     plt.figure(figsize=(10, 8))
     plt.imshow(image)
     plt.title(title)
     plt.axis('off')
     plt.show()

 def main():
     # Path to your image with faces
     image_path = "people_image.jpg"

     # Load the image
     original_image, image_rgb = load_image(image_path)

     # Display original image
     display_image(image_rgb, "Original Image")

     # Detect faces
     faces = detect_faces(original_image)

     # Draw rectangles around faces
     image_with_faces = draw_faces(image_rgb, faces)

     # Display image with detected faces
     display_image(image_with_faces, "Detected Faces")

     print(f"Found {len(faces)} faces!")

 if __name__ == "__main__":
     main()
Download or find an image with faces and save it as
people_image.jpgin your project folder.Run the face detection script:
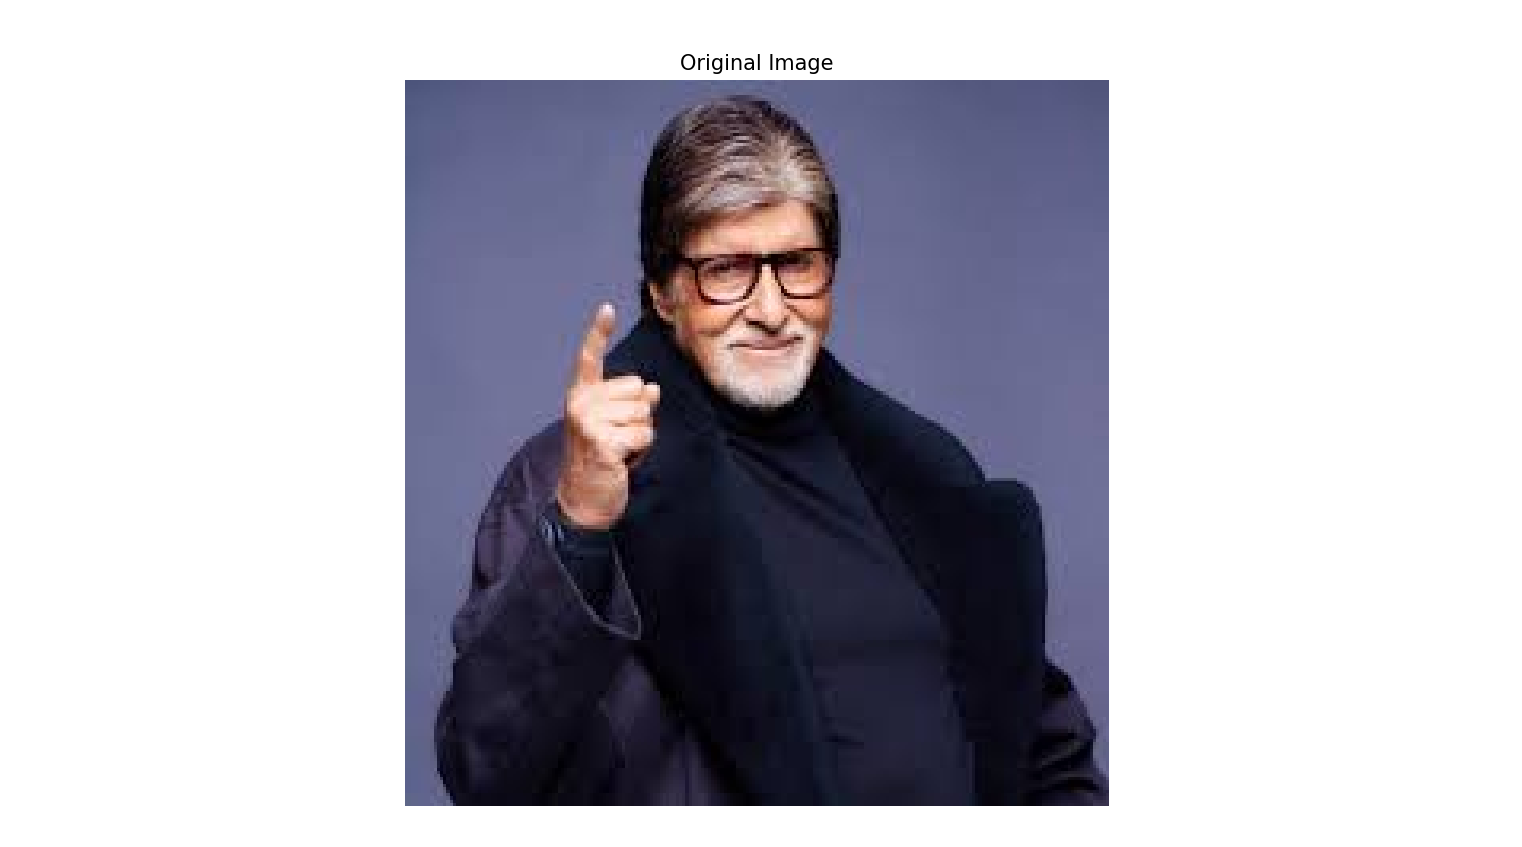
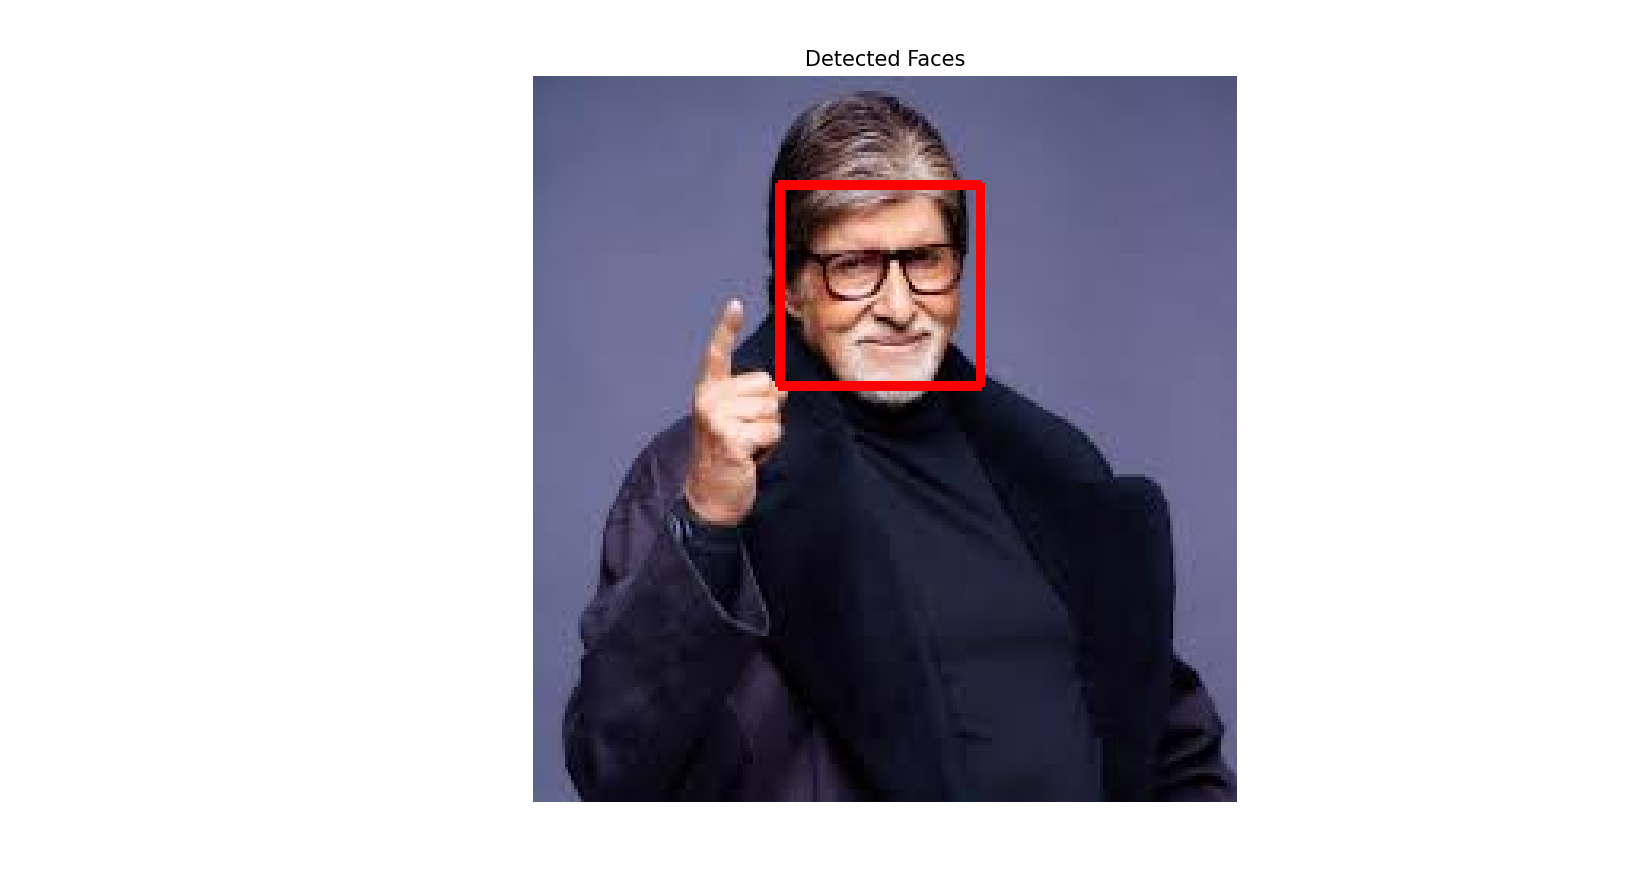
python face_detection.pyYou should see two images displayed: the original image and the same image with blue rectangles drawn around detected faces.
Deploying with Streamlit
Now that we have our basic functionality working, let's create a web application using Streamlit to make our project interactive and shareable.
Install Streamlit:
pip install streamlitCreate a new file called
app.py:Add the following code:
 import streamlit as st
 import cv2
 import numpy as np
 from PIL import Image
 import io

 def load_image(image_file):
     img = Image.open(image_file)
     return np.array(img)

 def convert_to_grayscale(image):
     return cv2.cvtColor(image, cv2.COLOR_RGB2GRAY)

 def apply_gaussian_blur(image, kernel_size=5):
     return cv2.GaussianBlur(image, (kernel_size, kernel_size), 0)

 def detect_edges(image, threshold1=100, threshold2=200):
     if len(image.shape) == 3:
         image = cv2.cvtColor(image, cv2.COLOR_RGB2GRAY)
     return cv2.Canny(image, threshold1, threshold2)

 def detect_faces(image):
     # Load the pre-trained face detector
     face_cascade = cv2.CascadeClassifier(cv2.data.haarcascades + 'haarcascade_frontalface_default.xml')

     # Convert to grayscale for face detection
     if len(image.shape) == 3:
         gray = cv2.cvtColor(image, cv2.COLOR_RGB2GRAY)
     else:
         gray = image

     # Detect faces
     faces = face_cascade.detectMultiScale(gray, 1.1, 4)

     return faces

 def draw_faces(image, faces):
     # Create a copy of the image
     image_with_faces = image.copy()

     # Draw rectangles around detected faces
     for (x, y, w, h) in faces:
         cv2.rectangle(image_with_faces, (x, y), (x+w, y+h), (255, 0, 0), 2)

     return image_with_faces

 # Set up the Streamlit app
 st.set_page_config(page_title="Computer Vision Explorer", layout="wide")

 st.title("Computer Vision Explorer")
 st.write("Upload an image to apply different computer vision techniques!")

 # File uploader
 uploaded_file = st.file_uploader("Choose an image...", type=["jpg", "jpeg", "png"])

 if uploaded_file is not None:
     # Load and display the original image
     image = load_image(uploaded_file)

     st.subheader("Original Image")
     st.image(image, caption="Uploaded Image", use_column_width=True)

     # Create a sidebar for options
     st.sidebar.title("Options")

     # Select image processing technique
     technique = st.sidebar.selectbox(
         "Select a technique",
         ["Grayscale", "Gaussian Blur", "Edge Detection", "Face Detection"]
     )

     # Parameters based on selected technique
     if technique == "Gaussian Blur":
         kernel_size = st.sidebar.slider("Kernel Size", 1, 15, 5, step=2)
     elif technique == "Edge Detection":
         threshold1 = st.sidebar.slider("Threshold 1", 0, 300, 100)
         threshold2 = st.sidebar.slider("Threshold 2", 0, 300, 200)

     # Apply the selected technique
     st.subheader(f"Result: {technique}")

     if technique == "Grayscale":
         result_image = convert_to_grayscale(image)
         st.image(result_image, caption="Grayscale Image", use_column_width=True)

     elif technique == "Gaussian Blur":
         result_image = apply_gaussian_blur(image, kernel_size)
         st.image(result_image, caption="Blurred Image", use_column_width=True)

     elif technique == "Edge Detection":
         result_image = detect_edges(image, threshold1, threshold2)
         st.image(result_image, caption="Edge Detection", use_column_width=True)

     elif technique == "Face Detection":
         faces = detect_faces(image)
         result_image = draw_faces(image, faces)
         st.image(result_image, caption=f"Detected {len(faces)} faces", use_column_width=True)
Run the Streamlit app:
streamlit run app.pyYour browser should open, showing your interactive computer vision application.
Deploying to Streamlit Cloud
Let's deploy our app to Streamlit Cloud so others can use it:
Create a requirements.txt file:
pip freeze > requirements.txtCreate a GitHub repository and push your code:
 git init
 git add .
 git commit -m "Initial commit"
 git branch -M main
 git remote add origin https://github.com/yourusername/computer-vision-project.git
 git push -u origin main
Sign up for Streamlit Cloud at https://streamlit.io/cloud and connect your GitHub account.
Deploy your app:
Click "New app"
Select your repository
Choose the main branch
Set the main file path to
app.pyClick "Deploy"
Share your app with the provided URL.
What's Happening Behind the Scenes?
Let's break down what's happening in our code:
Image Processing Basics
Grayscale Conversion: Converting a color image to grayscale reduces it to a single channel, which is often the first step in many computer vision algorithms.
Gaussian Blur: This technique reduces noise and detail in an image by applying a Gaussian filter.
Edge Detection: The Canny edge detector identifies edges in an image by looking for areas with rapid intensity changes.
Face Detection
We're using a pre-trained Haar Cascade classifier, which is a machine learning-based approach that has been trained to recognize facial features. The classifier looks for specific patterns in the image that correspond to faces.
Streamlit Web App
Streamlit turns our Python script into a web application with minimal code. It handles:
File uploads
User interface components (sliders, dropdowns)
Image display
Interactive parameter adjustment
Github Repo:
Conclusion
Congratulations! You've successfully built your first computer vision project that can process images in various ways and even detect faces. You've also deployed it as a web application that anyone can use.
This project provides a foundation for more advanced computer vision applications. You could extend it by:
Adding more image processing techniques
Implementing object detection
Creating a real-time webcam version
Training your own custom models
The field of computer vision is vast and growing rapidly. I hope this tutorial has given you a taste of what's possible and inspired you to explore further!
Resources for Further Learning
OpenCV Documentation: https://docs.opencv.org/
Streamlit Documentation: https://docs.streamlit.io/
Computer Vision Courses on platforms like Coursera, edX, and Udacity
Books like "Computer Vision: Algorithms and Applications" by Richard Szeliski
Happy coding!
Subscribe to my newsletter
Read articles from Abhishek Mukherjee directly inside your inbox. Subscribe to the newsletter, and don't miss out.
Written by

Abhishek Mukherjee
Abhishek Mukherjee
Myself Abhishek Mukherjee, a full-stack web developer who's passionate about exploring new technologies and learning new skills. With a solid foundation in HTML, CSS, JavaScript, Bootstrap, React.js, Node.js, and MongoDB, I've developed a wide range of web applications and have become proficient in both front-end and back-end development. Recently, I've been diving into the world of DevOps and automation, learning Python and Bash scripting and familiarizing myself with popular DevOps tools like Ansible, Jenkins, and Docker. As a strong believer in the power of open-source software, I'm always looking for opportunities to contribute to projects on GitHub and other platforms. In addition to my technical skills, I'm also a passionate writer and enjoy sharing my knowledge and experience with others through blog posts and tutorials. I find it incredibly rewarding to help others learn and grow in their own development journeys. When I'm not coding or writing, I can usually be found exploring new technologies, attending tech meetups, or practicing my photography skills. I believe that continuous learning and self-improvement are key to success in any field, and I'm excited to continue growing my skills and contributing to the world of web development and DevOps.