Uptime Kuma setup with OCI free tier with Cloudflared Phase - 1
 Kunal Yadavaa
Setup a Oracle Cloud Infrastructure (OCI) VM Setup
For setting up your OCI instance, follow this detailed guide:
Oracle Cloud Always Free Resources - Simple Guide
Oracle Cloud Always Free Resources give you cloud services you can use without paying. It’s a great way to start learning or testing cloud computing without worrying about surprise bills. You get free access to virtual machines (VMs), databases, and storage that are perfect for small projects or development.
In this guide, we’ll focus on virtual machines (VMs)—basically, free cloud computers you can use anytime.
What Free Compute Resources Do You Get?
AMD Micro Instances
1 OCPU (Oracle CPU) - this is the processing power.
1 GB RAM - this is your machine’s memory.
Ampere A1 (ARM Processor) Instances
4 OCPUs - stronger processing power.
24 GB RAM - lots more memory.
Flexible - you can split these into smaller VMs, making them very versatile.
You can choose between AMD and ARM VMs based on what you need!
How to Create an Oracle Cloud Account (Step-by-Step)
Before you can use anything, you need an account. Don’t worry—it’s free!
Go to Oracle Cloud Sign-Up
Fill in your account details.
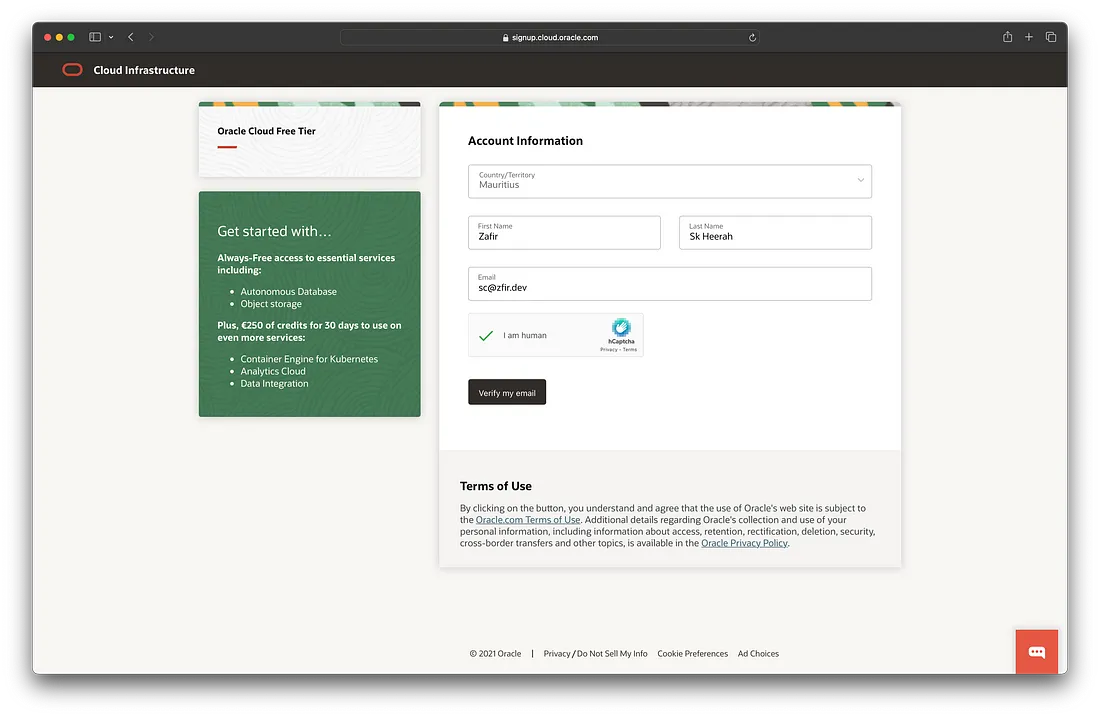
Verify your email (check your inbox and click “Verify Email”).
Create a password.
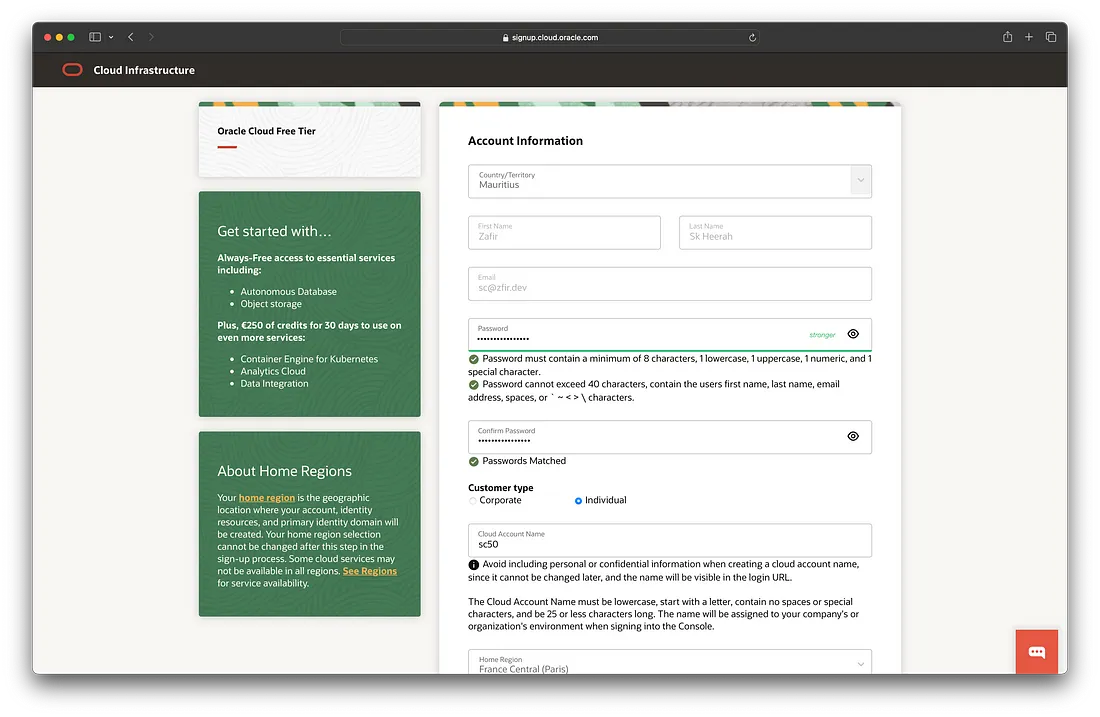
Select Customer Type as “Individual.”
Set your Cloud Account Name.
Pick your Home Region (I chose "France Central (Paris)" but you can pick one near you).
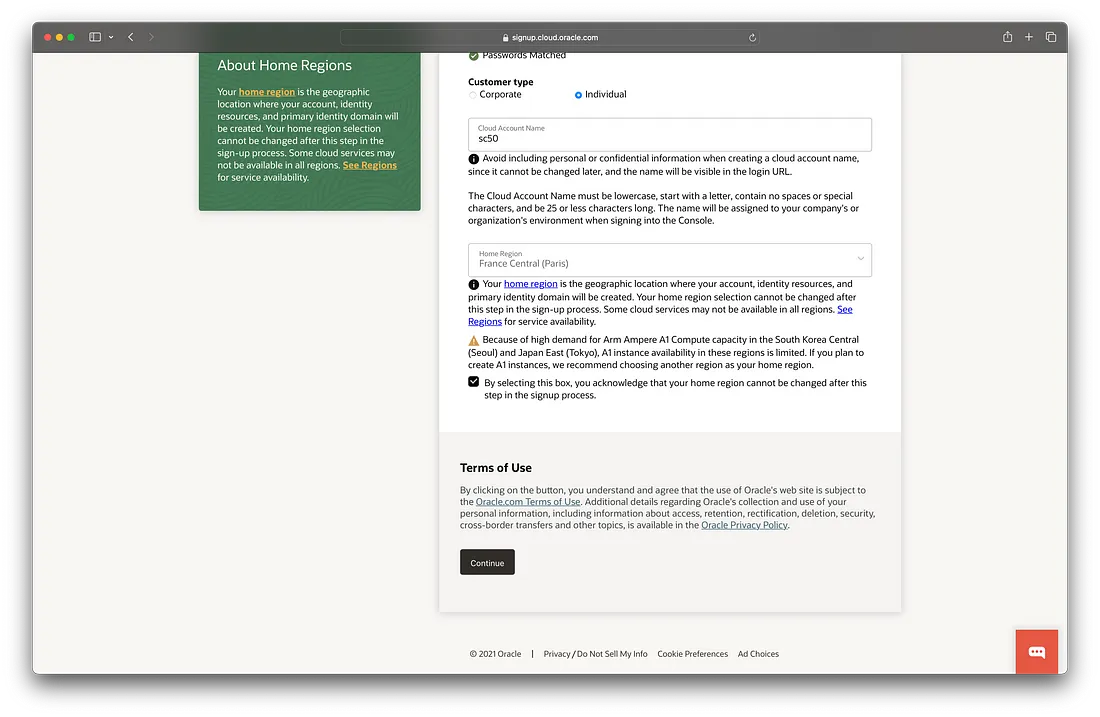
Enter your address and phone number.
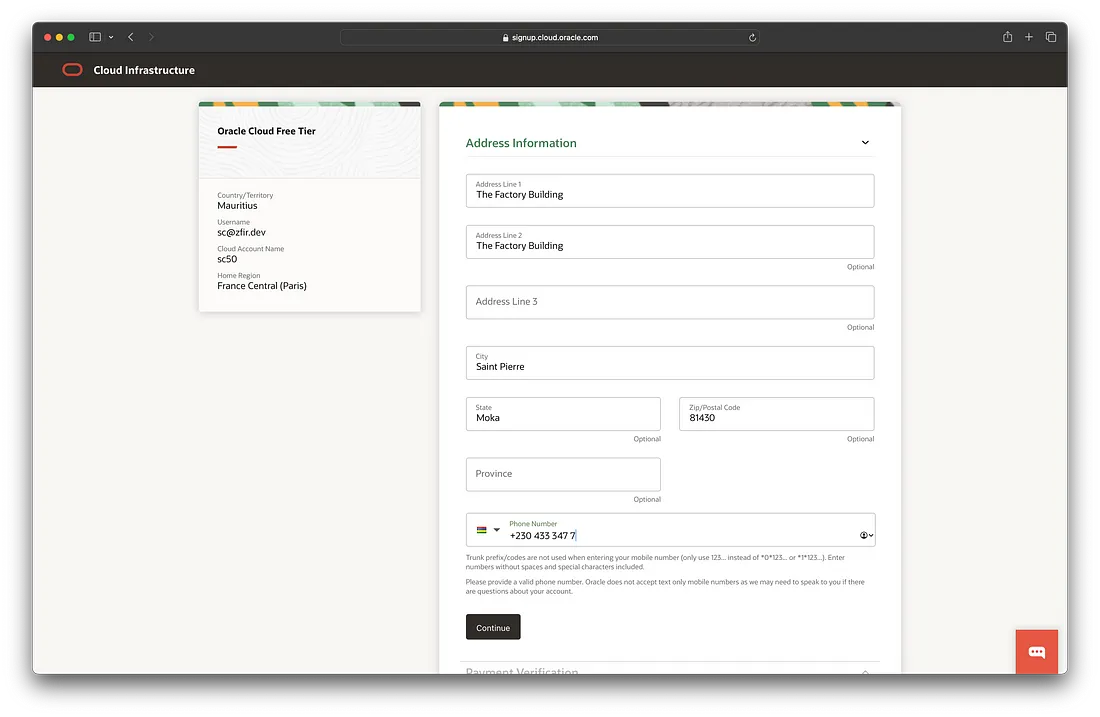
Enter your billing info (they’ll charge ~€0.93 to verify your card—this gets refunded soon).
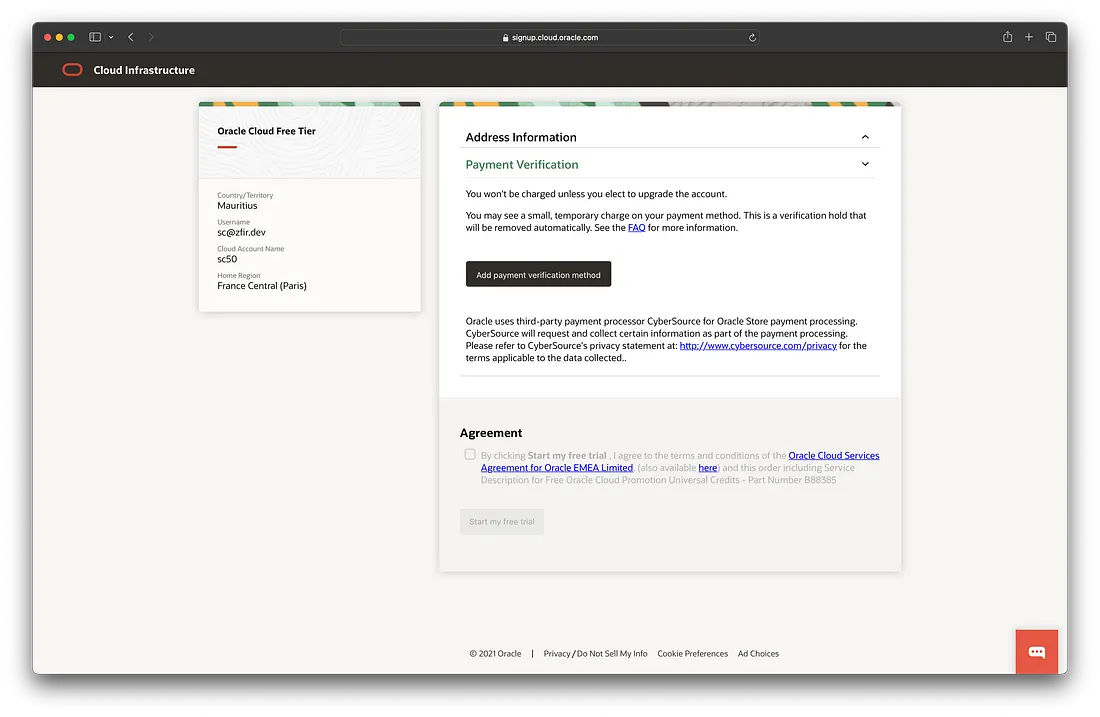
Accept the agreements.
Click Start My Free Trial (Don’t worry, the Always Free resources stay free even after the trial).
Credit Card Issues?
Don’t use prepaid cards.
Make sure your billing address matches your account address.
If you get stuck, contact Oracle Support for help.
How to Create a Virtual Machine (VM)
Now that you have an account, let’s create a free VM!
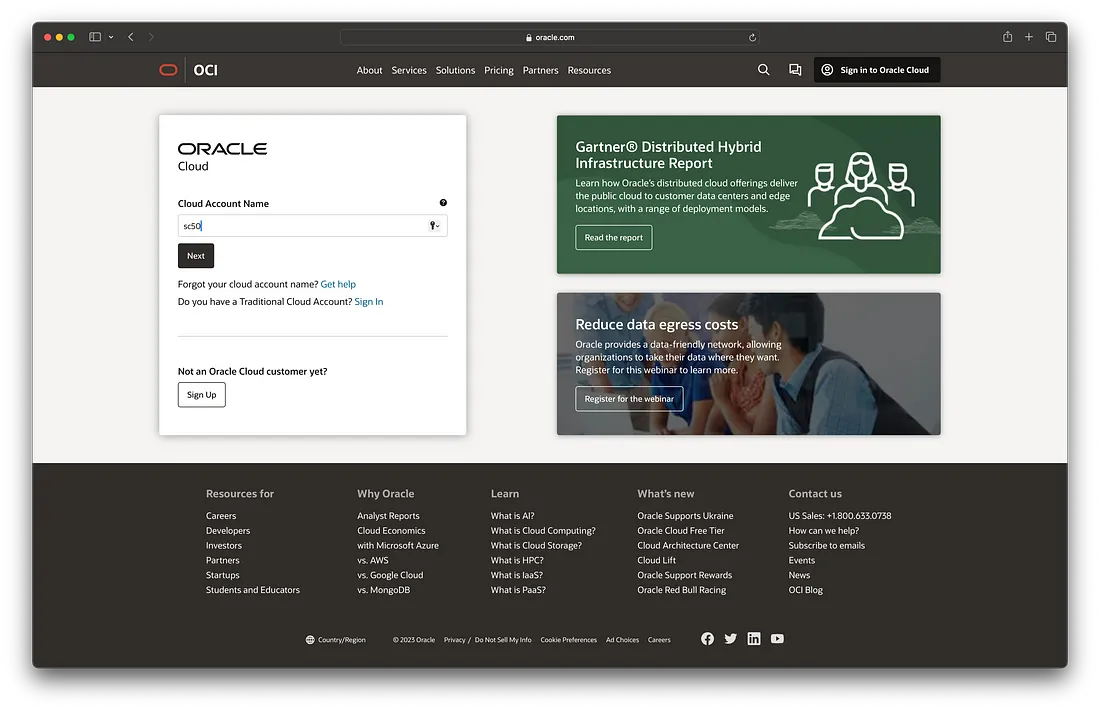
Go to the Oracle Cloud Sign-In
Enter your Cloud Account Name and click Next.
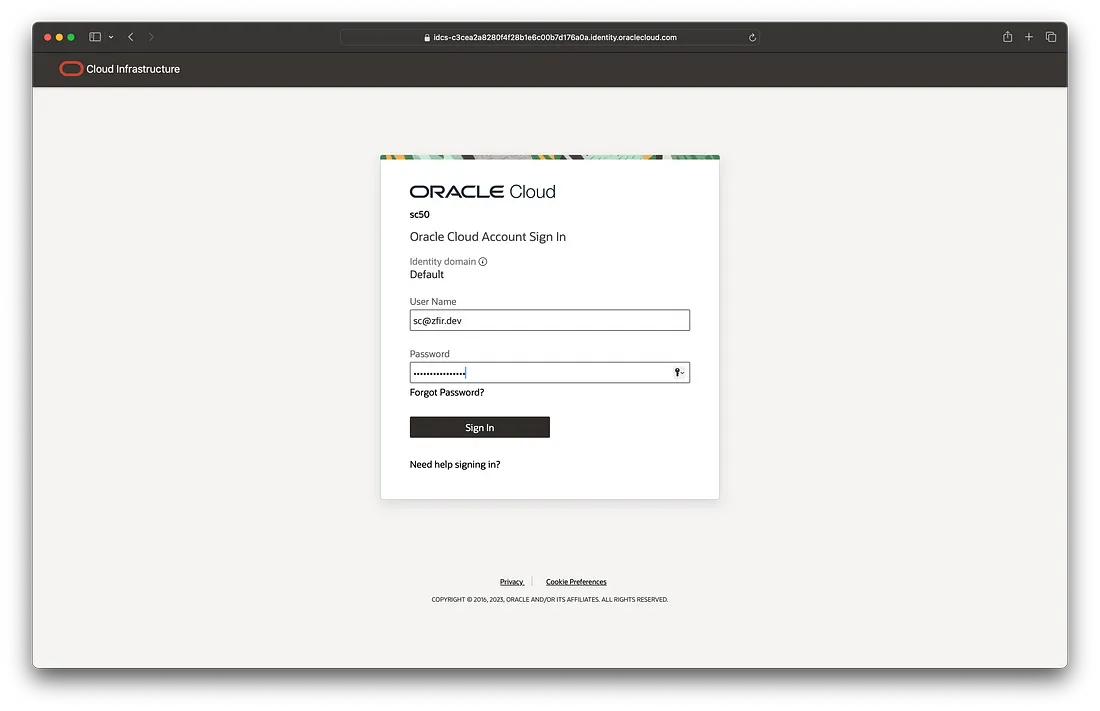
Enter your Username and Password, then click Sign In.
Enable Multi-Factor Authentication (MFA) if you haven’t already.
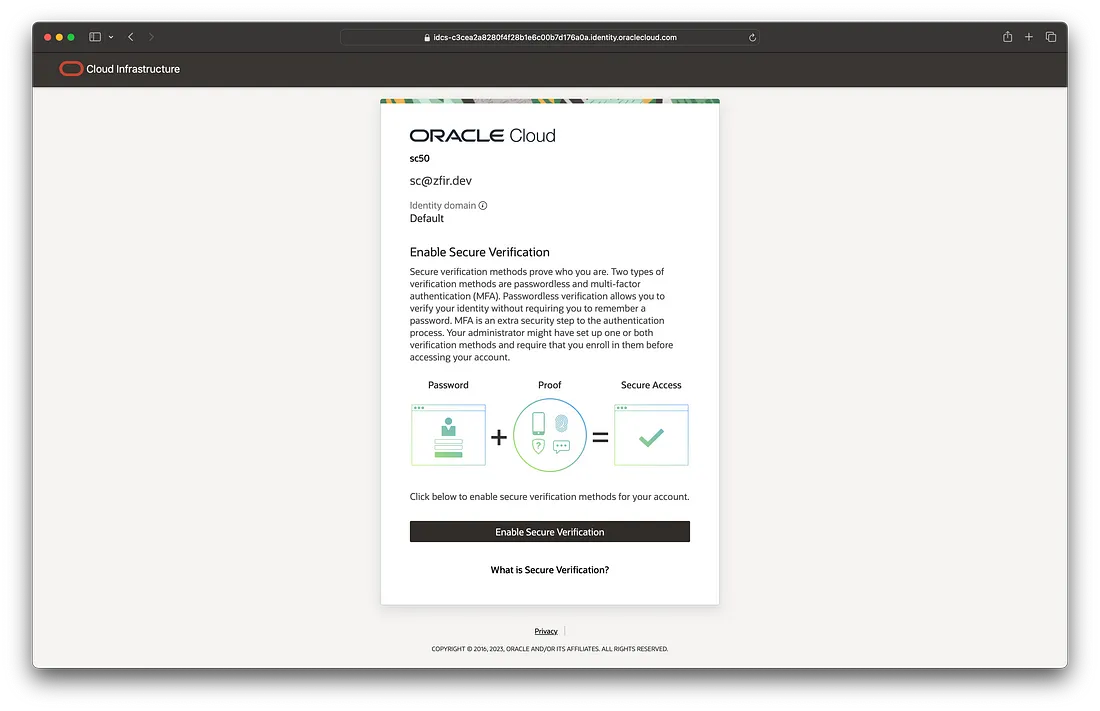
Once inside, click the navigation menu (hamburger menu).
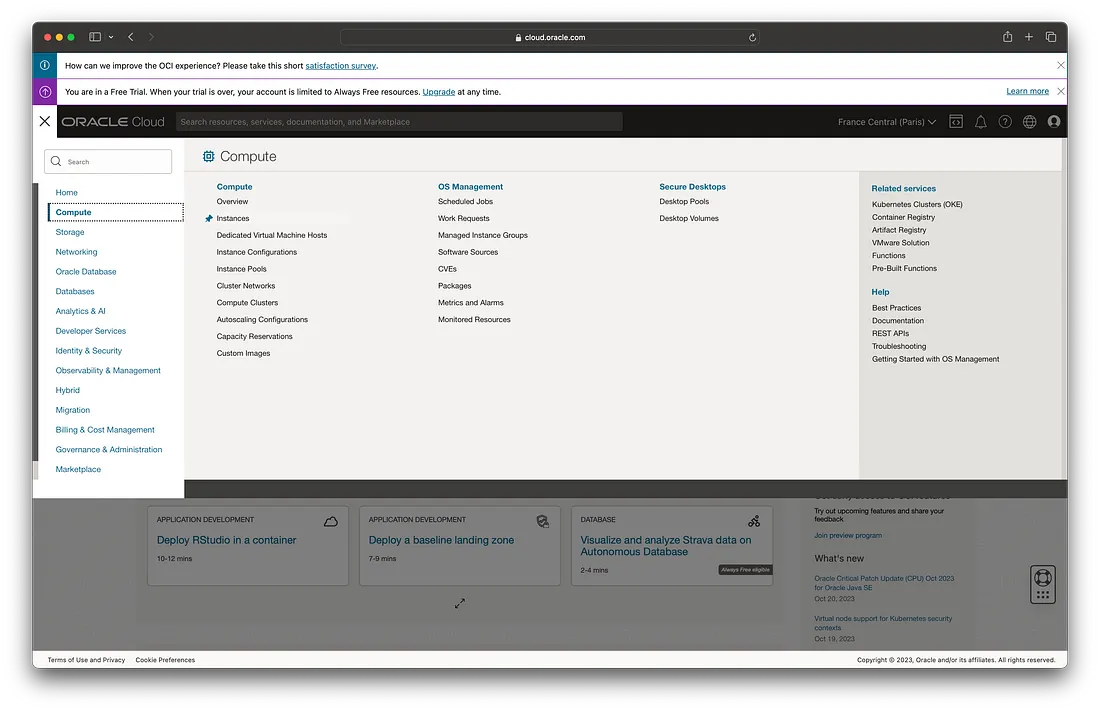
Go to Compute > Instances.
On the left, pick the Compartment (choose the default).
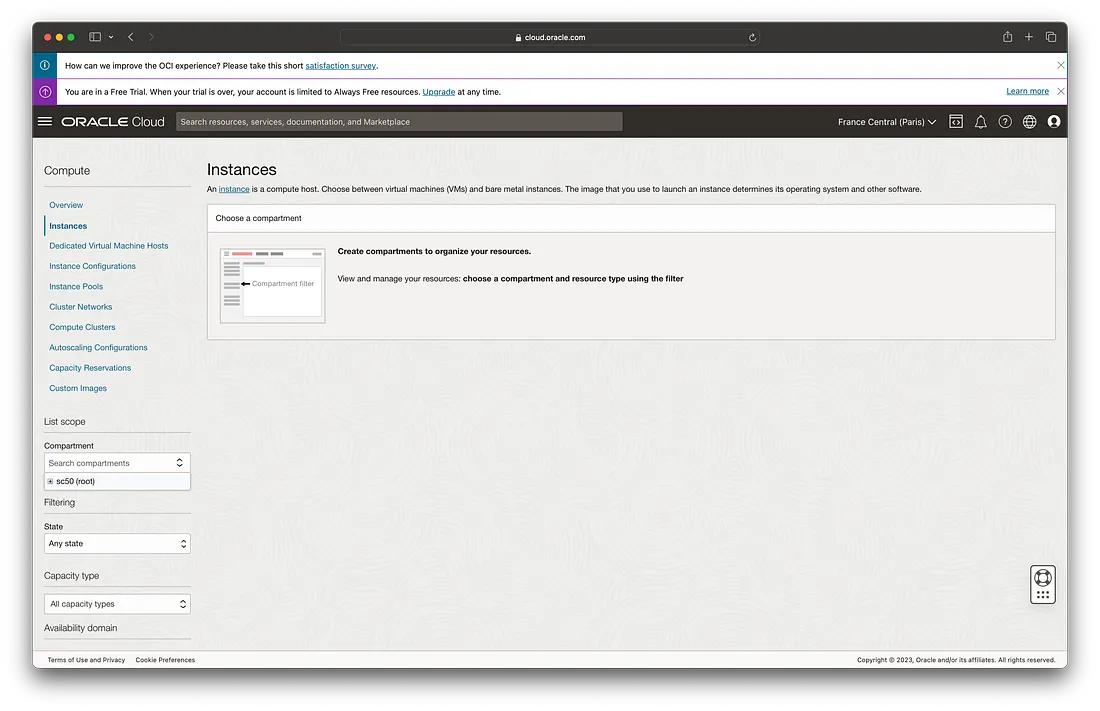
Click Create Instance.
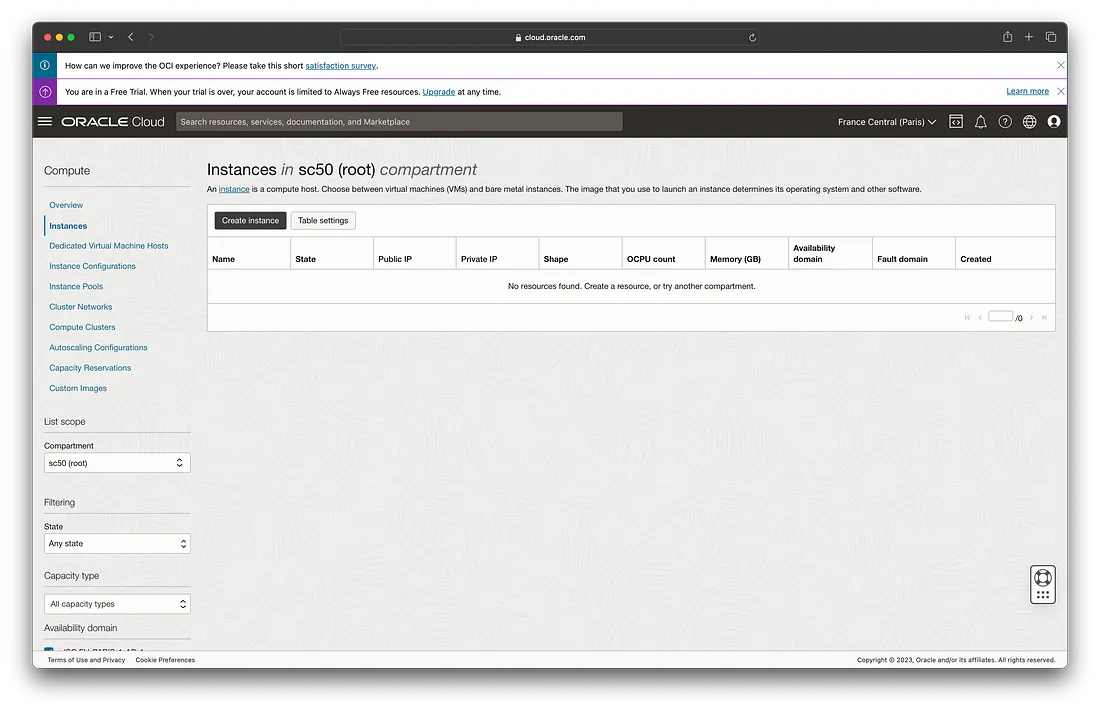
Enter a Name for your VM.
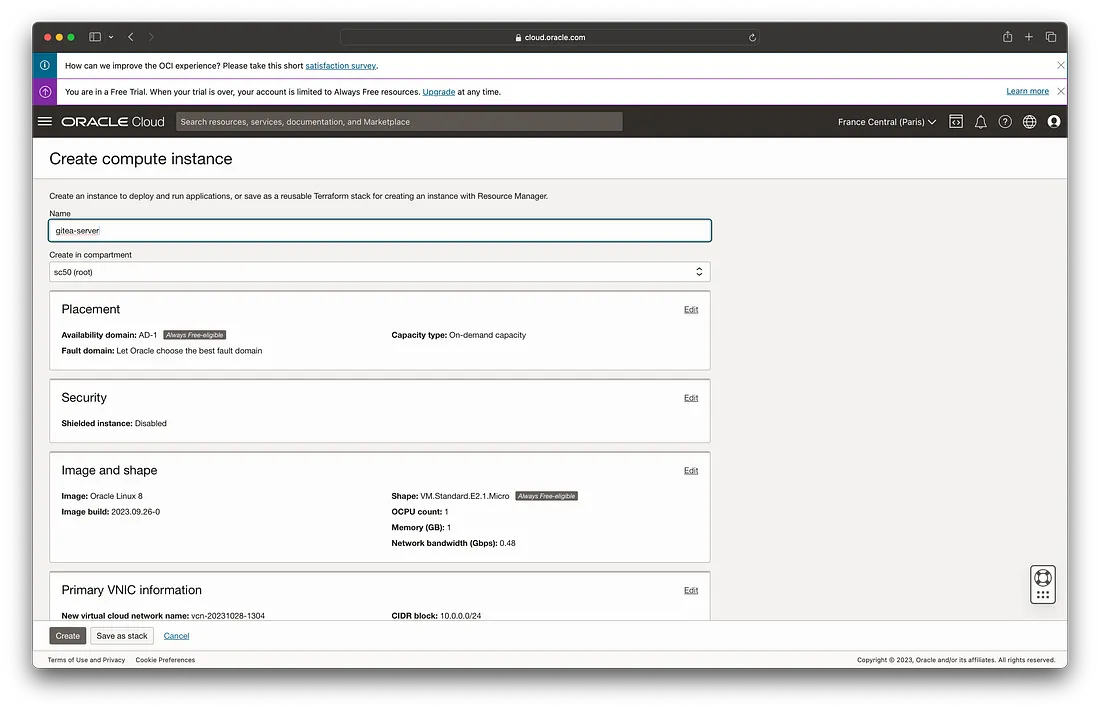
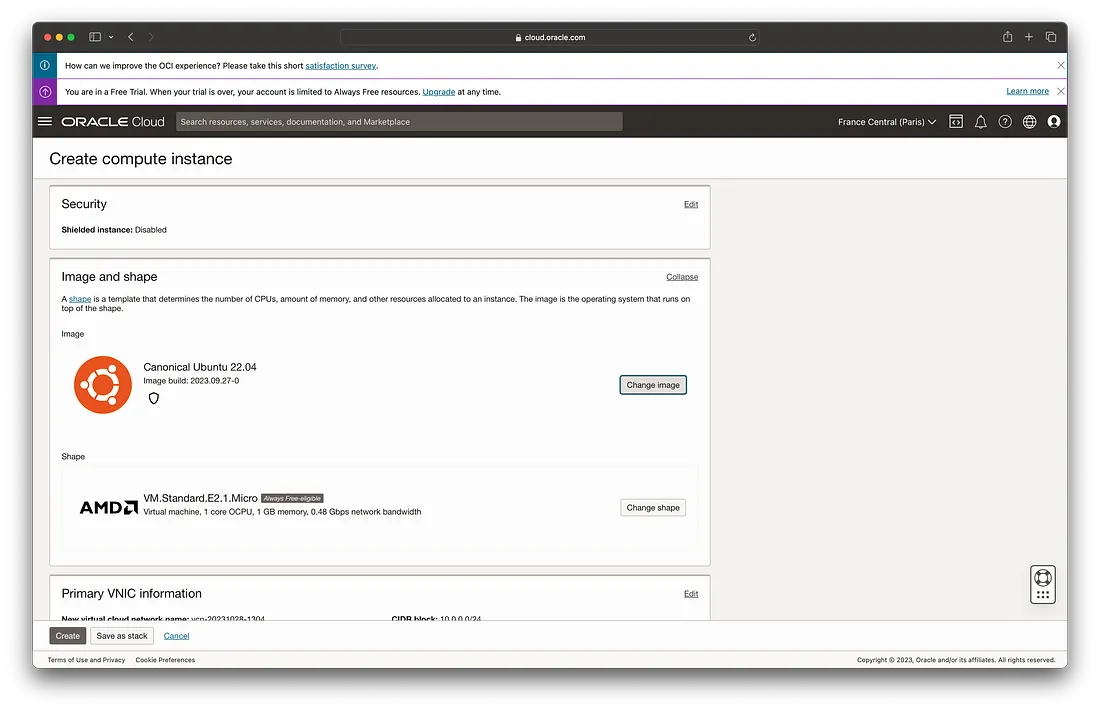
Click Edit next to Image and Shape.
Select Ubuntu as the operating system.
Leave the Shape as the default (VM.Standard.E2.1.Micro) for Always Free.
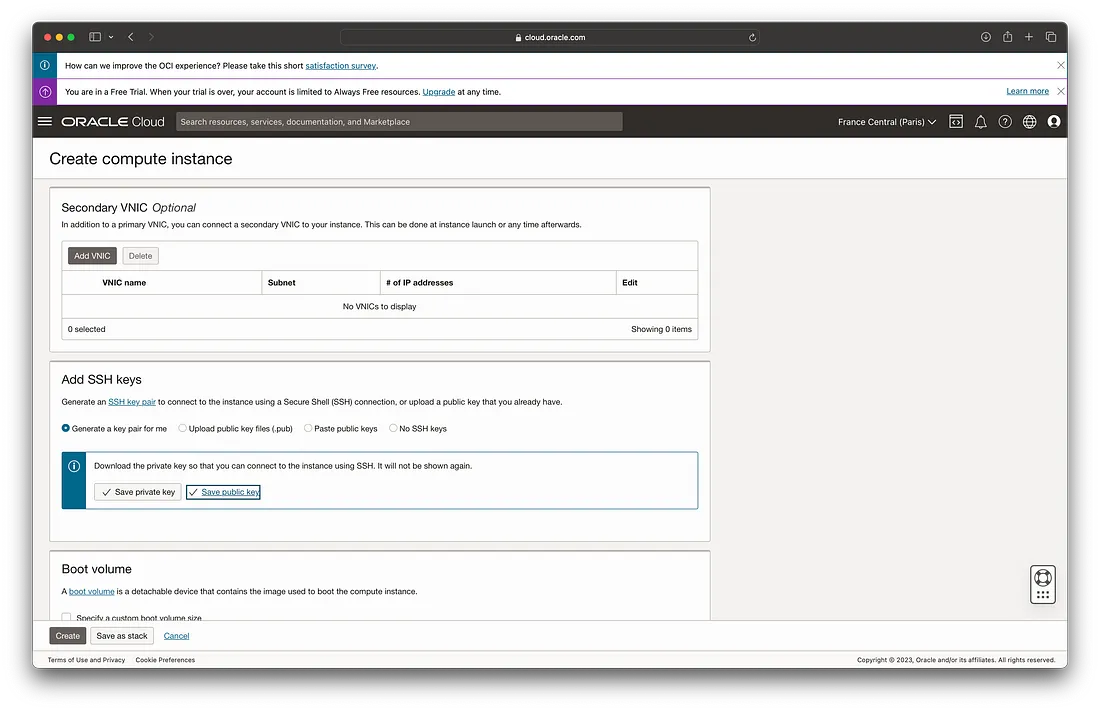
Add SSH Keys (Download and save both public and private keys).
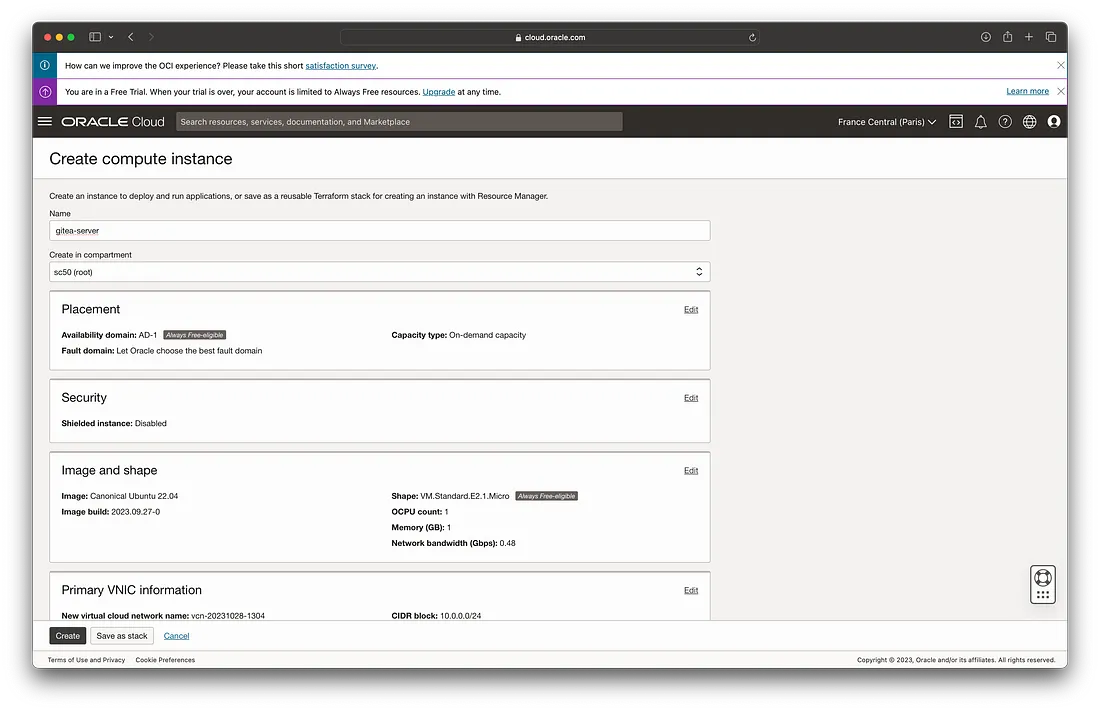
Click Create.
How to Connect to Your VM (SSH Access)
You’ll need the SSH key you just downloaded.
Go to the folder where you saved the key (mine was
$HOME/Downloads).Open a terminal and run:
cd $HOME/Downloads
ssh -i <your-private-key> ubuntu@<your-vm-ip-address>
For example:
ssh -i ssh-oracle-zfir.key ubuntu@1.1.1.1
Replace ssh-oracle-zfir.key with your file name, and 1.1.1.1 with your VM's IP address.
What Can You Do With Your VM?
Once your VM is ready, you can:
Host websites or apps (WordPress, personal sites, etc.).
Develop and test software.
Analyze data (run data tools and frameworks).
Host databases or backend services.
Learn and experiment with new technologies.
Backup important files or set up disaster recovery.
Run AI/ML workloads (if you need more power later).
Stay Tuned
I will be releasing another blog explaining how to use these VMs and create a Docker containerization environment . For Docker setup on Ubuntu 22.04, that is going to be totally free of charge.
Subscribe to my newsletter
Read articles from Kunal Yadavaa directly inside your inbox. Subscribe to the newsletter, and don't miss out.
Written by

Kunal Yadavaa
Kunal Yadavaa
"Sudo-ing my way through clouds and containers."