Building a Web App with Azure CLI: A Beginner-Friendly Guide
 Jesudetan Akinyemi
Azure CLI is a powerful tool that helps developers build, deploy, and manage web applications on Microsoft Azure—all from the comfort of your terminal. In this guide, I'll show you how to create a web app step by step, even if you're new to Azure!"
Step 1: Prerequisites
Before diving in, make sure you have the following ready:
Azure CLI Installed: Download and install Azure CLI on your desktop.
GitHub Repository: Create a repository for your web app files.
Index File: Prepare an index.html file for your web app (Here is my guide on creating and pushing files to GitHub).
Step 2: Log In to Your Azure Account
Open PowerShell or any terminal where Azure CLI is installed.
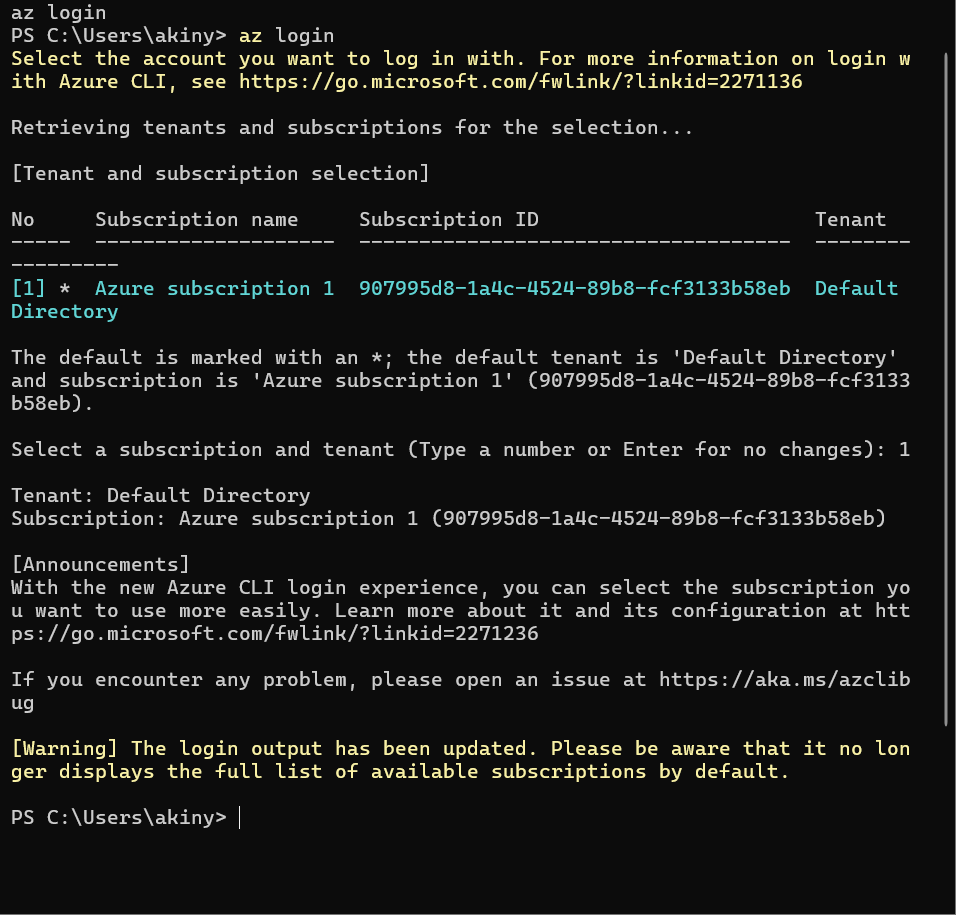
Type the command: az login to access your azure account and press Enter.
You'll be redirected to a browser to sign in with your Azure account credentials.
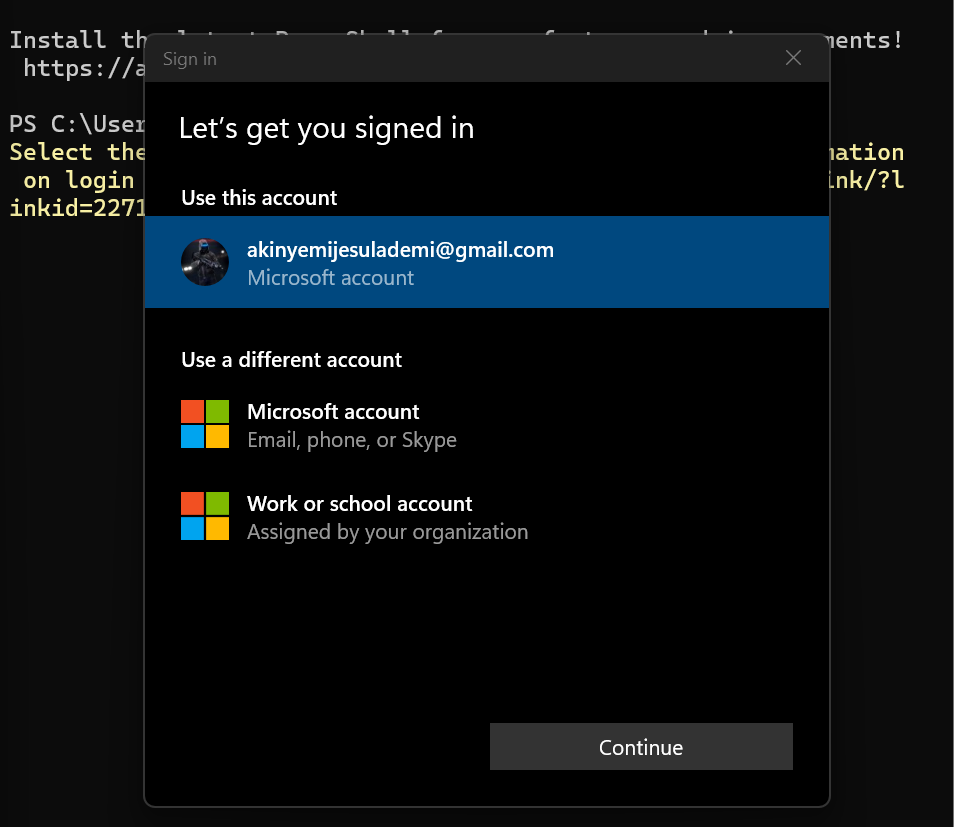
Once logged in, return to the terminal; it will confirm you're successfully logged in.
Step 3: Create a Resource Group
Resource groups are containers that hold related resources for your web app.
Use the command:
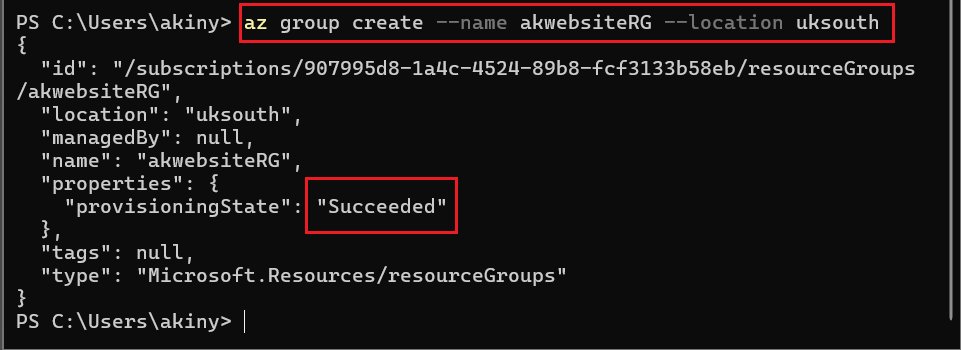
az group create --name <YourResourceGroupName> --location <YourPreferredLocation>Example:
az group create --name akwebsiteRG --location uksouthPress Enter, and your resource group will be created.
Step 4: Create an App Service Plan
The App Service Plan provides the infrastructure for hosting your web app.
Use the command:
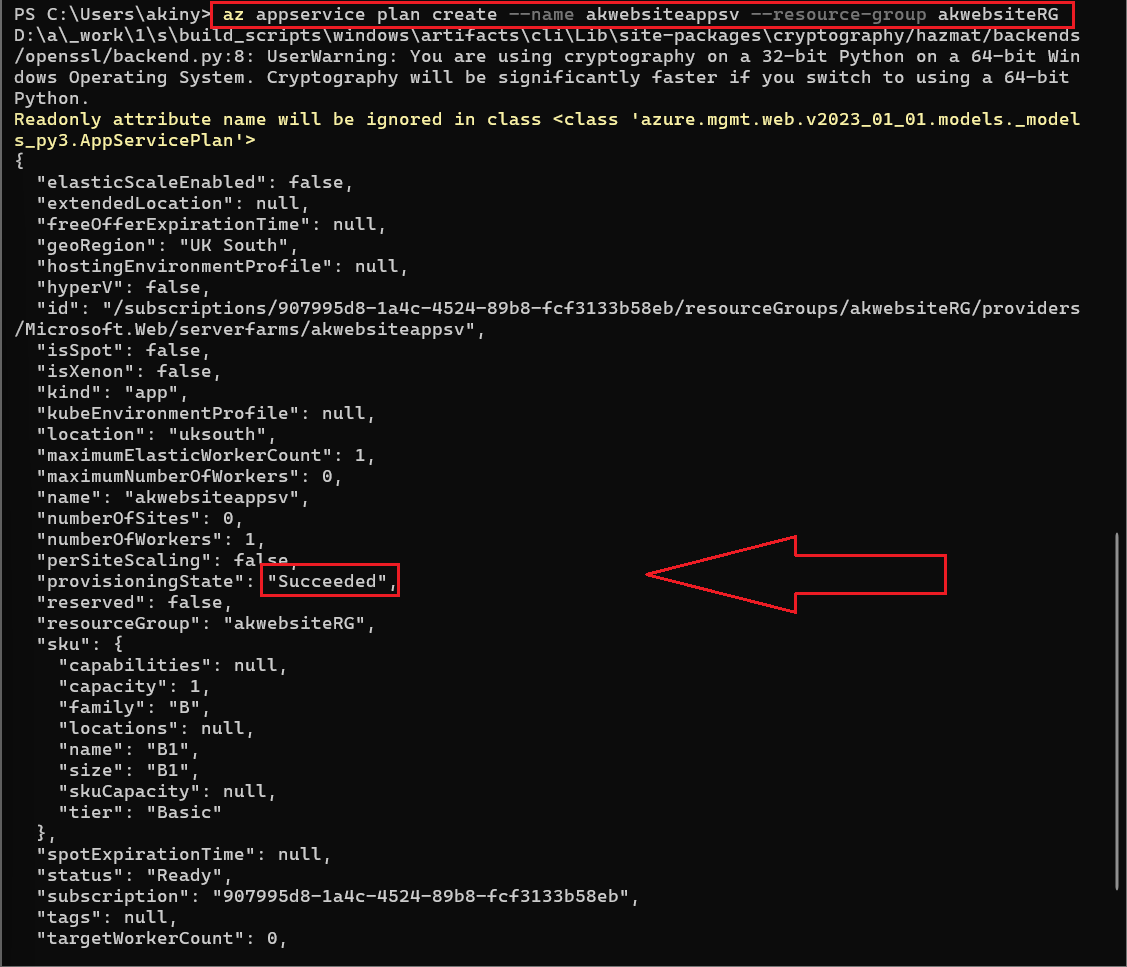
az appservice plan create --name <YourPlanName> --resource-group <YourResourceGroupName>Example:
az appservice plan create --name akwebsiteappsv --resource-group akwebsiteRGPress Enter to create the plan.
Step 5: Create Your Web Application
Now, it's time to create the actual web app!
Use the command:
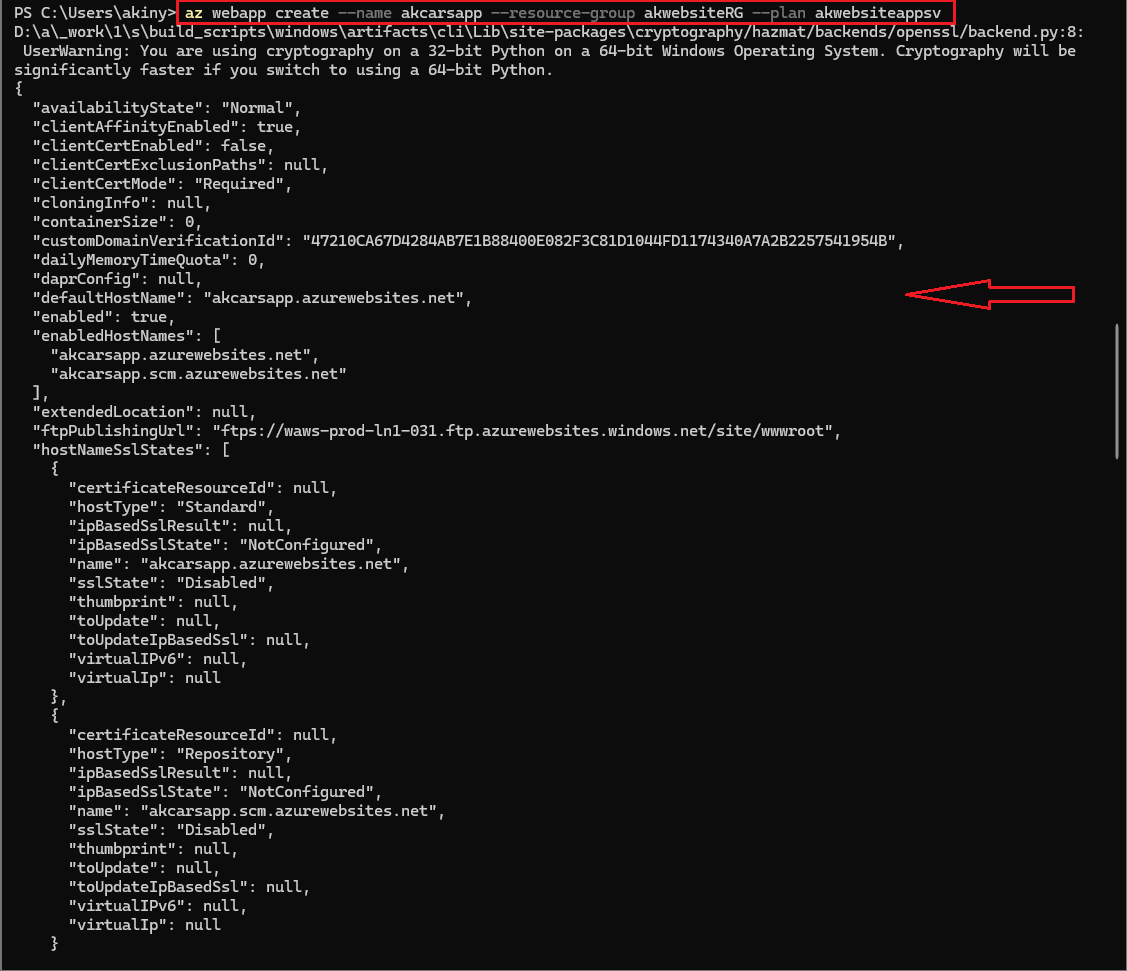
az webapp create --name <YourWebAppName> --resource-group <YourResourceGroupName> --plan <YourPlanName>Example:
az webapp create --name akcarsapp --resource-group akwebsiteRG --plan akwebsiteappsvPress Enter, and your web app will be created.
Step 6: Configure Deployment Source
Link your GitHub repository containing the index.html file to your web app.
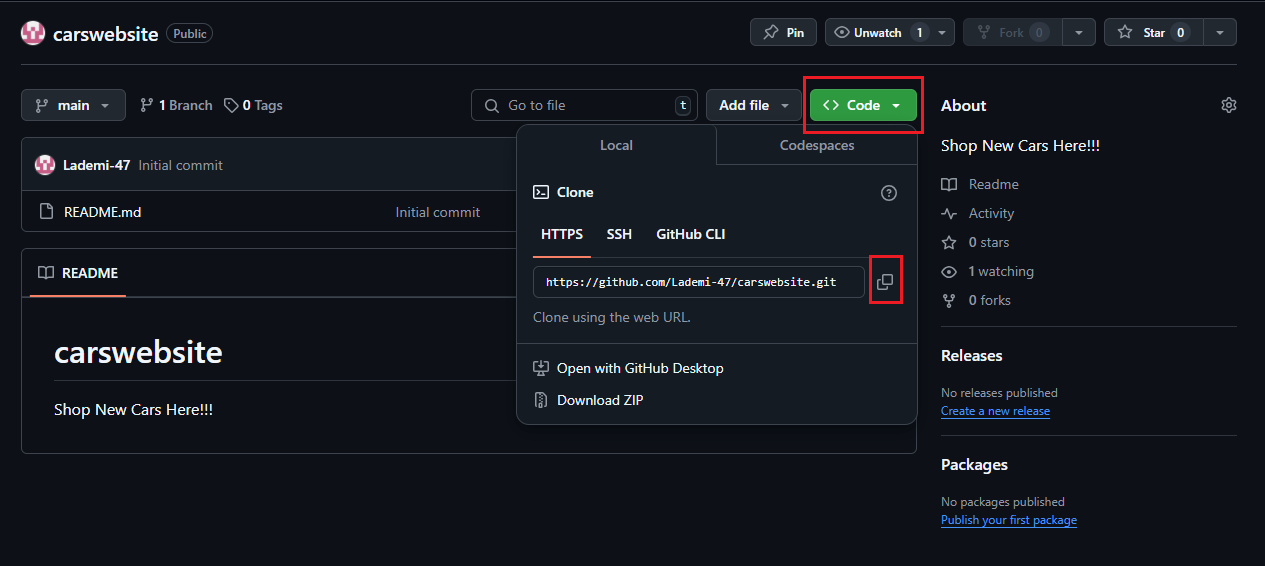
Copy the HTTPS URL of your GitHub repository (e.g., from the green "Code" button on GitHub).
Use the following command:
az webapp deployment source config --name <YourWebAppName> --resource-group <YourResourceGroupName> --repo-url <YourRepoURL> --branch master --manual-integrationExample:
az webapp deployment source config --name akcarsapp --resource-group akwebsiteRG --repo-urlhttps://github.com/Lademi-47/carswebsite.git--branch master —manual-integration. The output is shown below: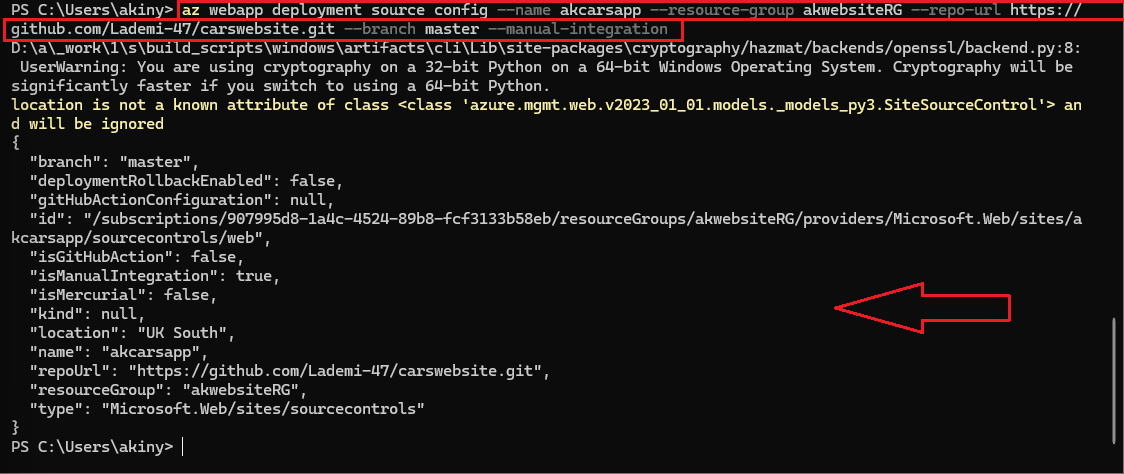
Step 7: Verify Your Web App
Go to the Azure Portal and navigate to "App Services." Locate your web app in the list.
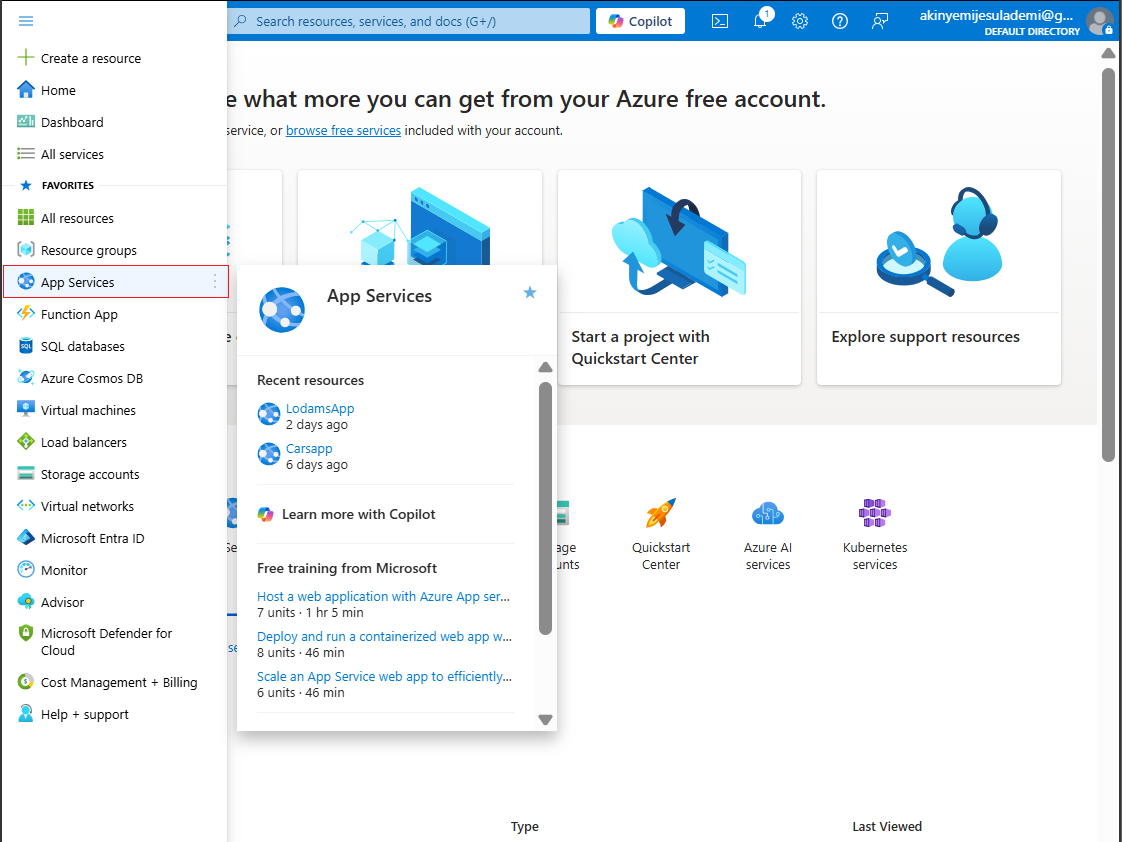
Click on your web app's name to view its overview.

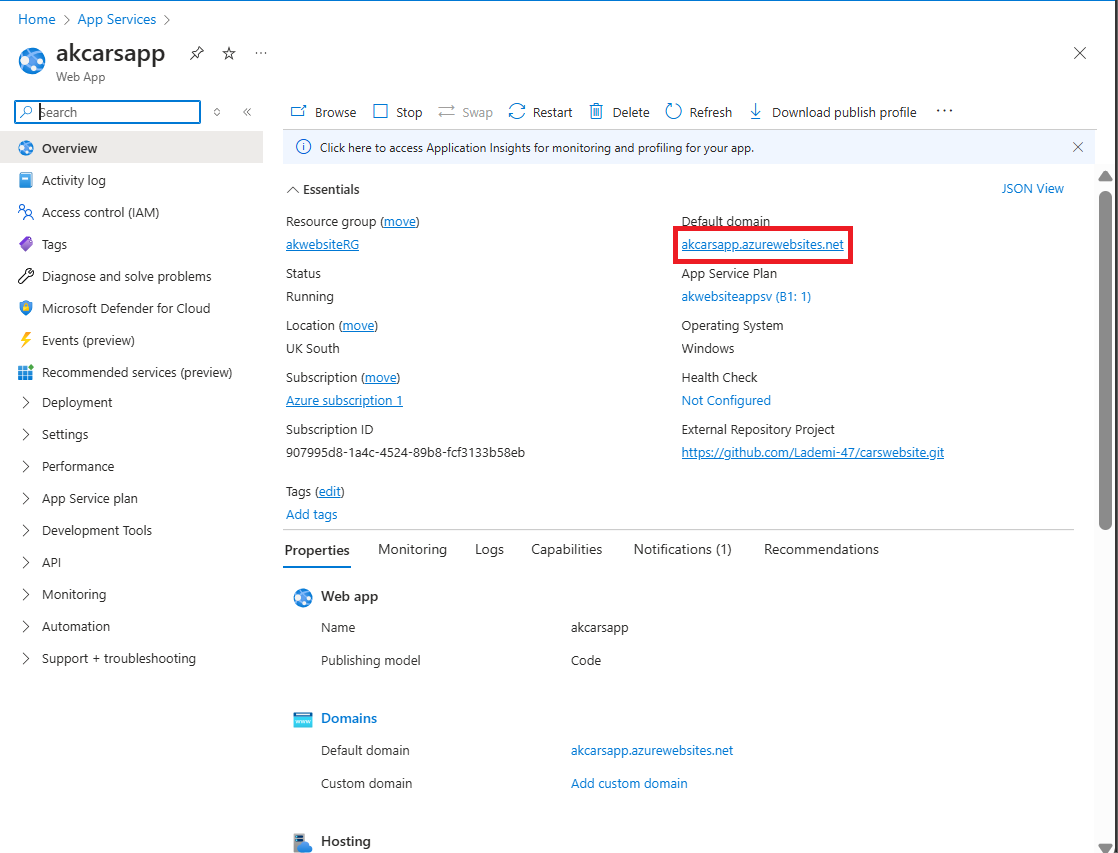
Find and click on the "Default Domain" link to see your live web app displaying the index.html file.

Step 8: Create Deployment Slots (Optional)
Deployment slots allow you to test updates before deploying them to production.
Navigate to your Web App page in Azure Portal.
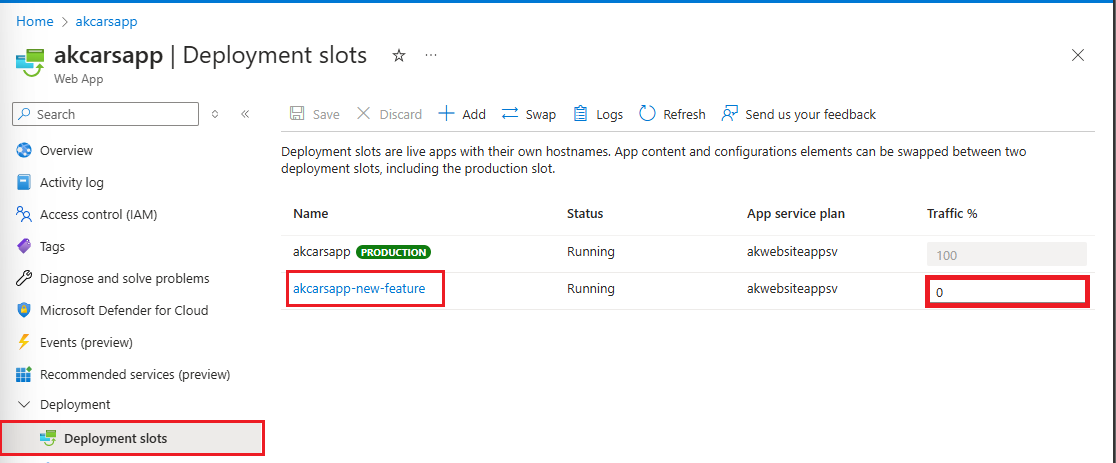
Scroll down and click "Deployment Slots." Click "+Add Slot."
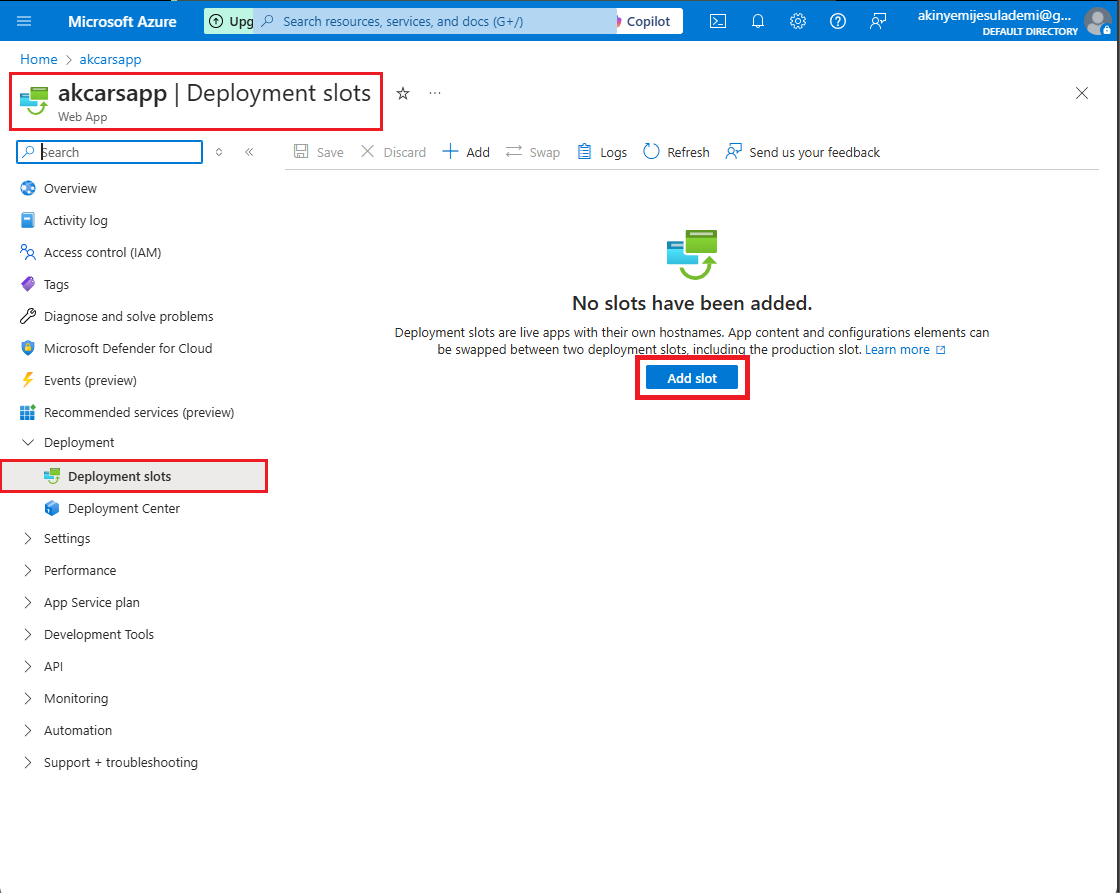
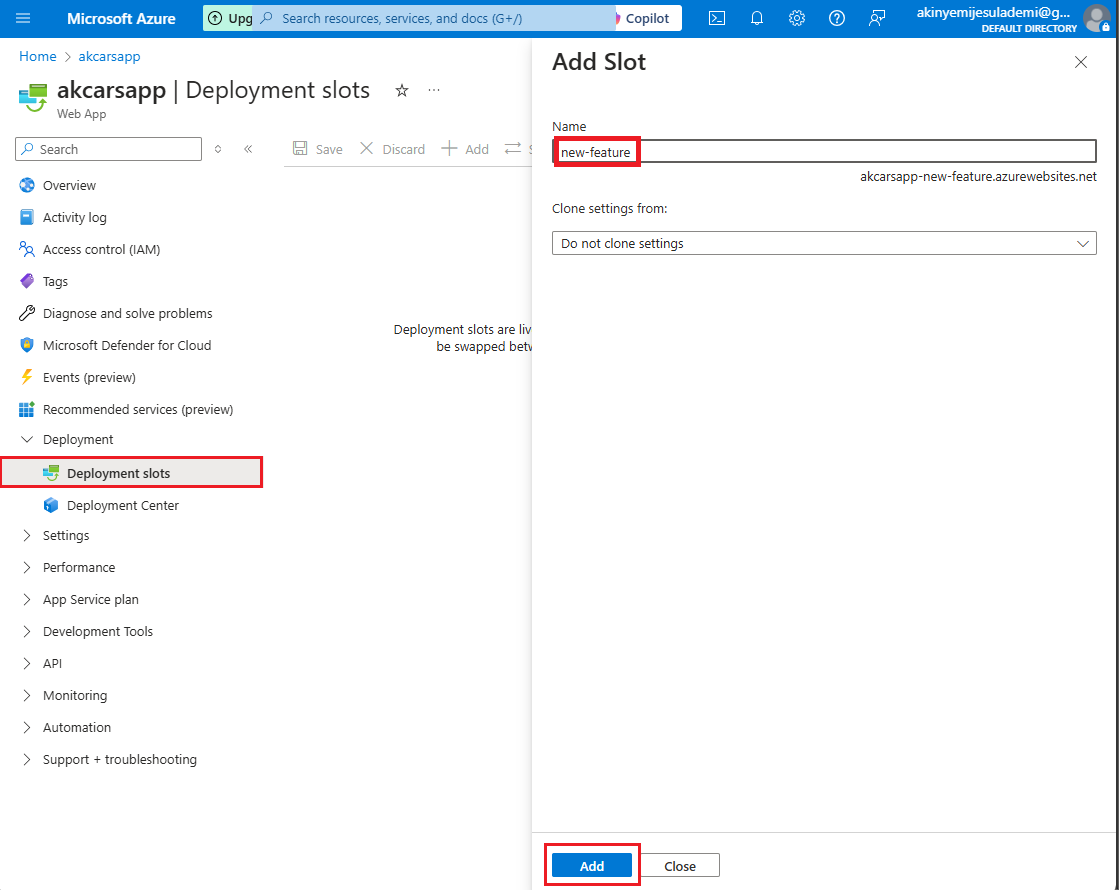
Name your slot (e.g., "newfeature") and click "Add."
Assign traffic percentages you want to give your slot and save it by clicking on “save“ at the top left
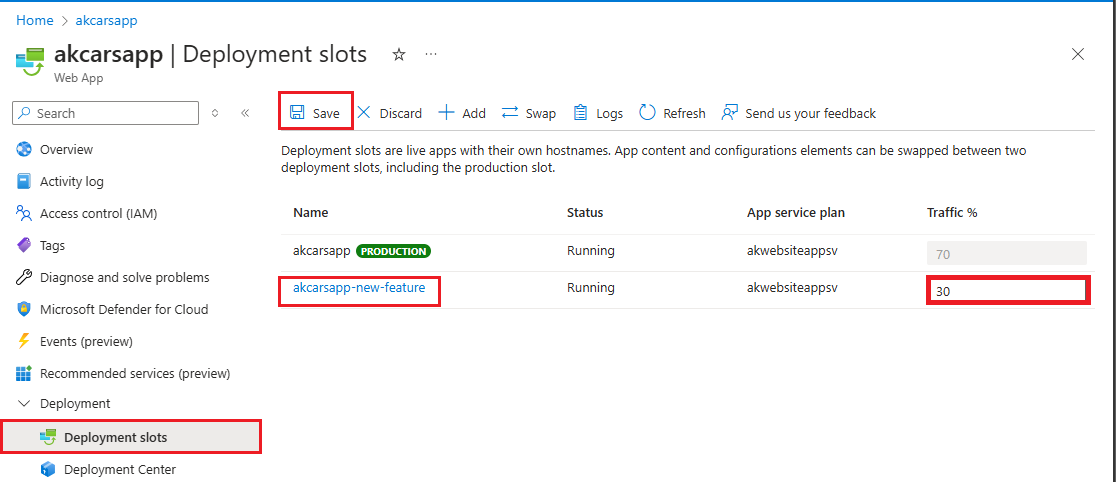
To have an overview of your deployment slot, click on it. Use this slot for testing updates without affecting the live environment,
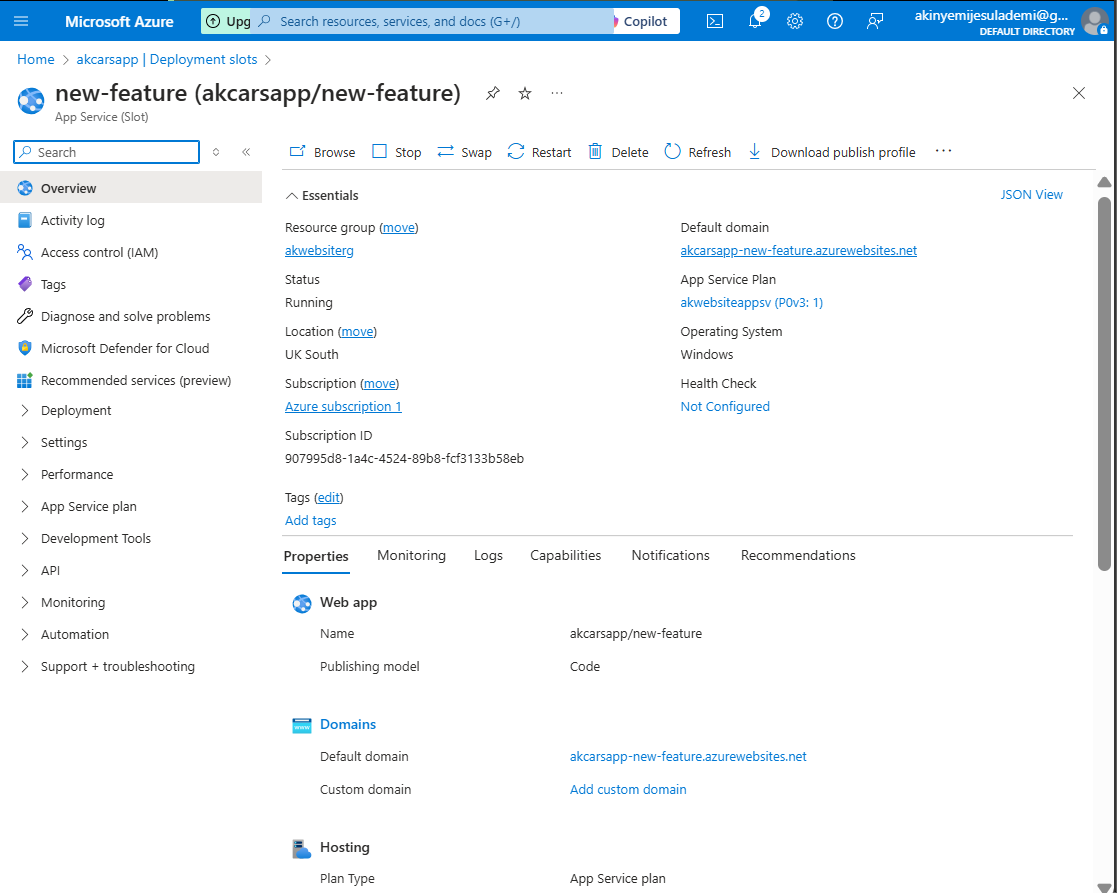
After testing, click "Swap" to move updates from staging to production.
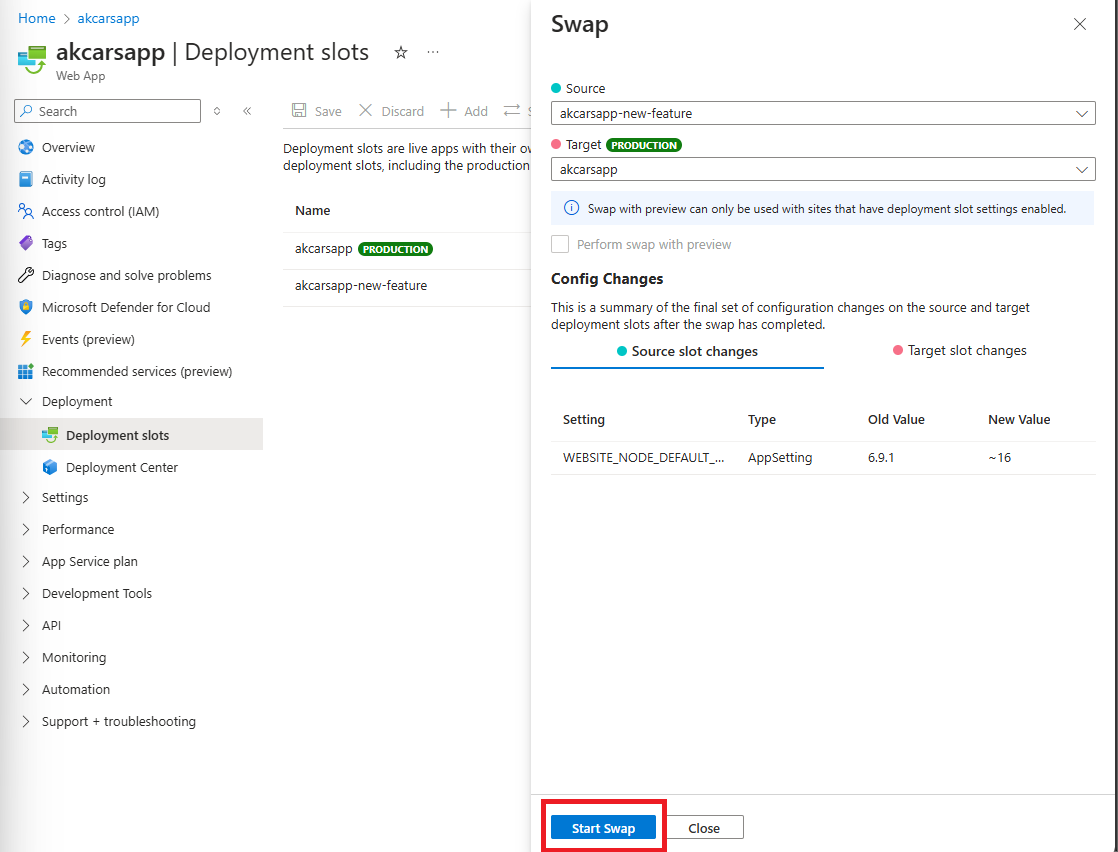
After swapping, you can see that our web app has been updated without tampering with the live environment.
**
And that's it! You've just built and deployed a fully functional web application using Azure CLI! Whether you're testing deployment slots or scaling resources, Azure makes it easy for developers at all levels.**
Subscribe to my newsletter
Read articles from Jesudetan Akinyemi directly inside your inbox. Subscribe to the newsletter, and don't miss out.
Written by
