Learn the Basics: How to Get Started with the APEX Animal Shelter App
 Santosh Panigrahi
This is a beginner's app designed to help understand how an app works, not a fully developed Apex app for production, with non-normalized tables, sample data, and suboptimal relationships, intended solely for learning purposes on what, when, and how to do basic things in Apex.This blog is a continuation of my previous blog: "APEX, ORDS, and TOMCAT INSTALLATION." If you haven’t checked that out, I recommend reviewing it also first for a smoother setup experience.
Disclaimer: This blog is inspired by the J Kreie Database YouTube channel (www.youtube.com/@databasetopics) video playlist. It is created solely for informational and personal reference purposes. I highly suggest going through this playlist before reading this blog, where Kreie has explained everything in a crystal clear manner. The content has been adapted for my own learning and documentation. If you find it helpful, that's great—but please note that this is not an official guide. Always refer to the original source for authoritative information.
Create ANIMAL_SHELTER schema and required DB objects in DEMO PDB
Download resources: Google Drive Link
Create tablespace named APEX (skip if already exists): SQL
create tablespace apex datafile 'E:\app\oradata\ORCL\demo\apex.dbf' size 300m autoextend on next 10m;Update
create_schema.sqlwith your prefered password and tablespace name toAPEXConnect to
SYS@DEMOand run@create_schema.sql(DEMO is PDB here).Verify user ANIMAL_SHELTER created from dba_users.
Modify
@create_animal_shelter_tables.sqlby changing tablespace name toAPEXfor all create table statement.Verify all require tables are created and empty:
  SELECT * FROM ZIPS;
  SELECT * FROM PERSONS;
  SELECT * FROM EMPLOYEES;
  SELECT * FROM ANIMALS;
  SELECT * FROM TRANSACTIONS;
  SELECT * FROM ACTIVITIES;
Create ANIMAL SHELTER workspace and require user accounts for application
Login to ADMIN@INTERNAL workspace at localhost:8080/ords.
Create a workspace called "Animal Shelter" by clicking "Create Workspace" or managing workspaces → create workspace. For "Reuse existing schema," select Yes, and for "Schema Name," choose ANIMAL_SHELTER. On the next page, enter the admin name as AS_ADMIN and fill the necessary details to create the workspace.
Note: INTERNAL is the main workspace, and you should use ADMIN@INTERNAL for overall administration of APEX, such as creating and managing other workspaces. Typically, for development or admin tasks, we log in to a specific workspace. workspace contains all the design elements for the web application in this project. It's always a good idea to add a description for the workspace.
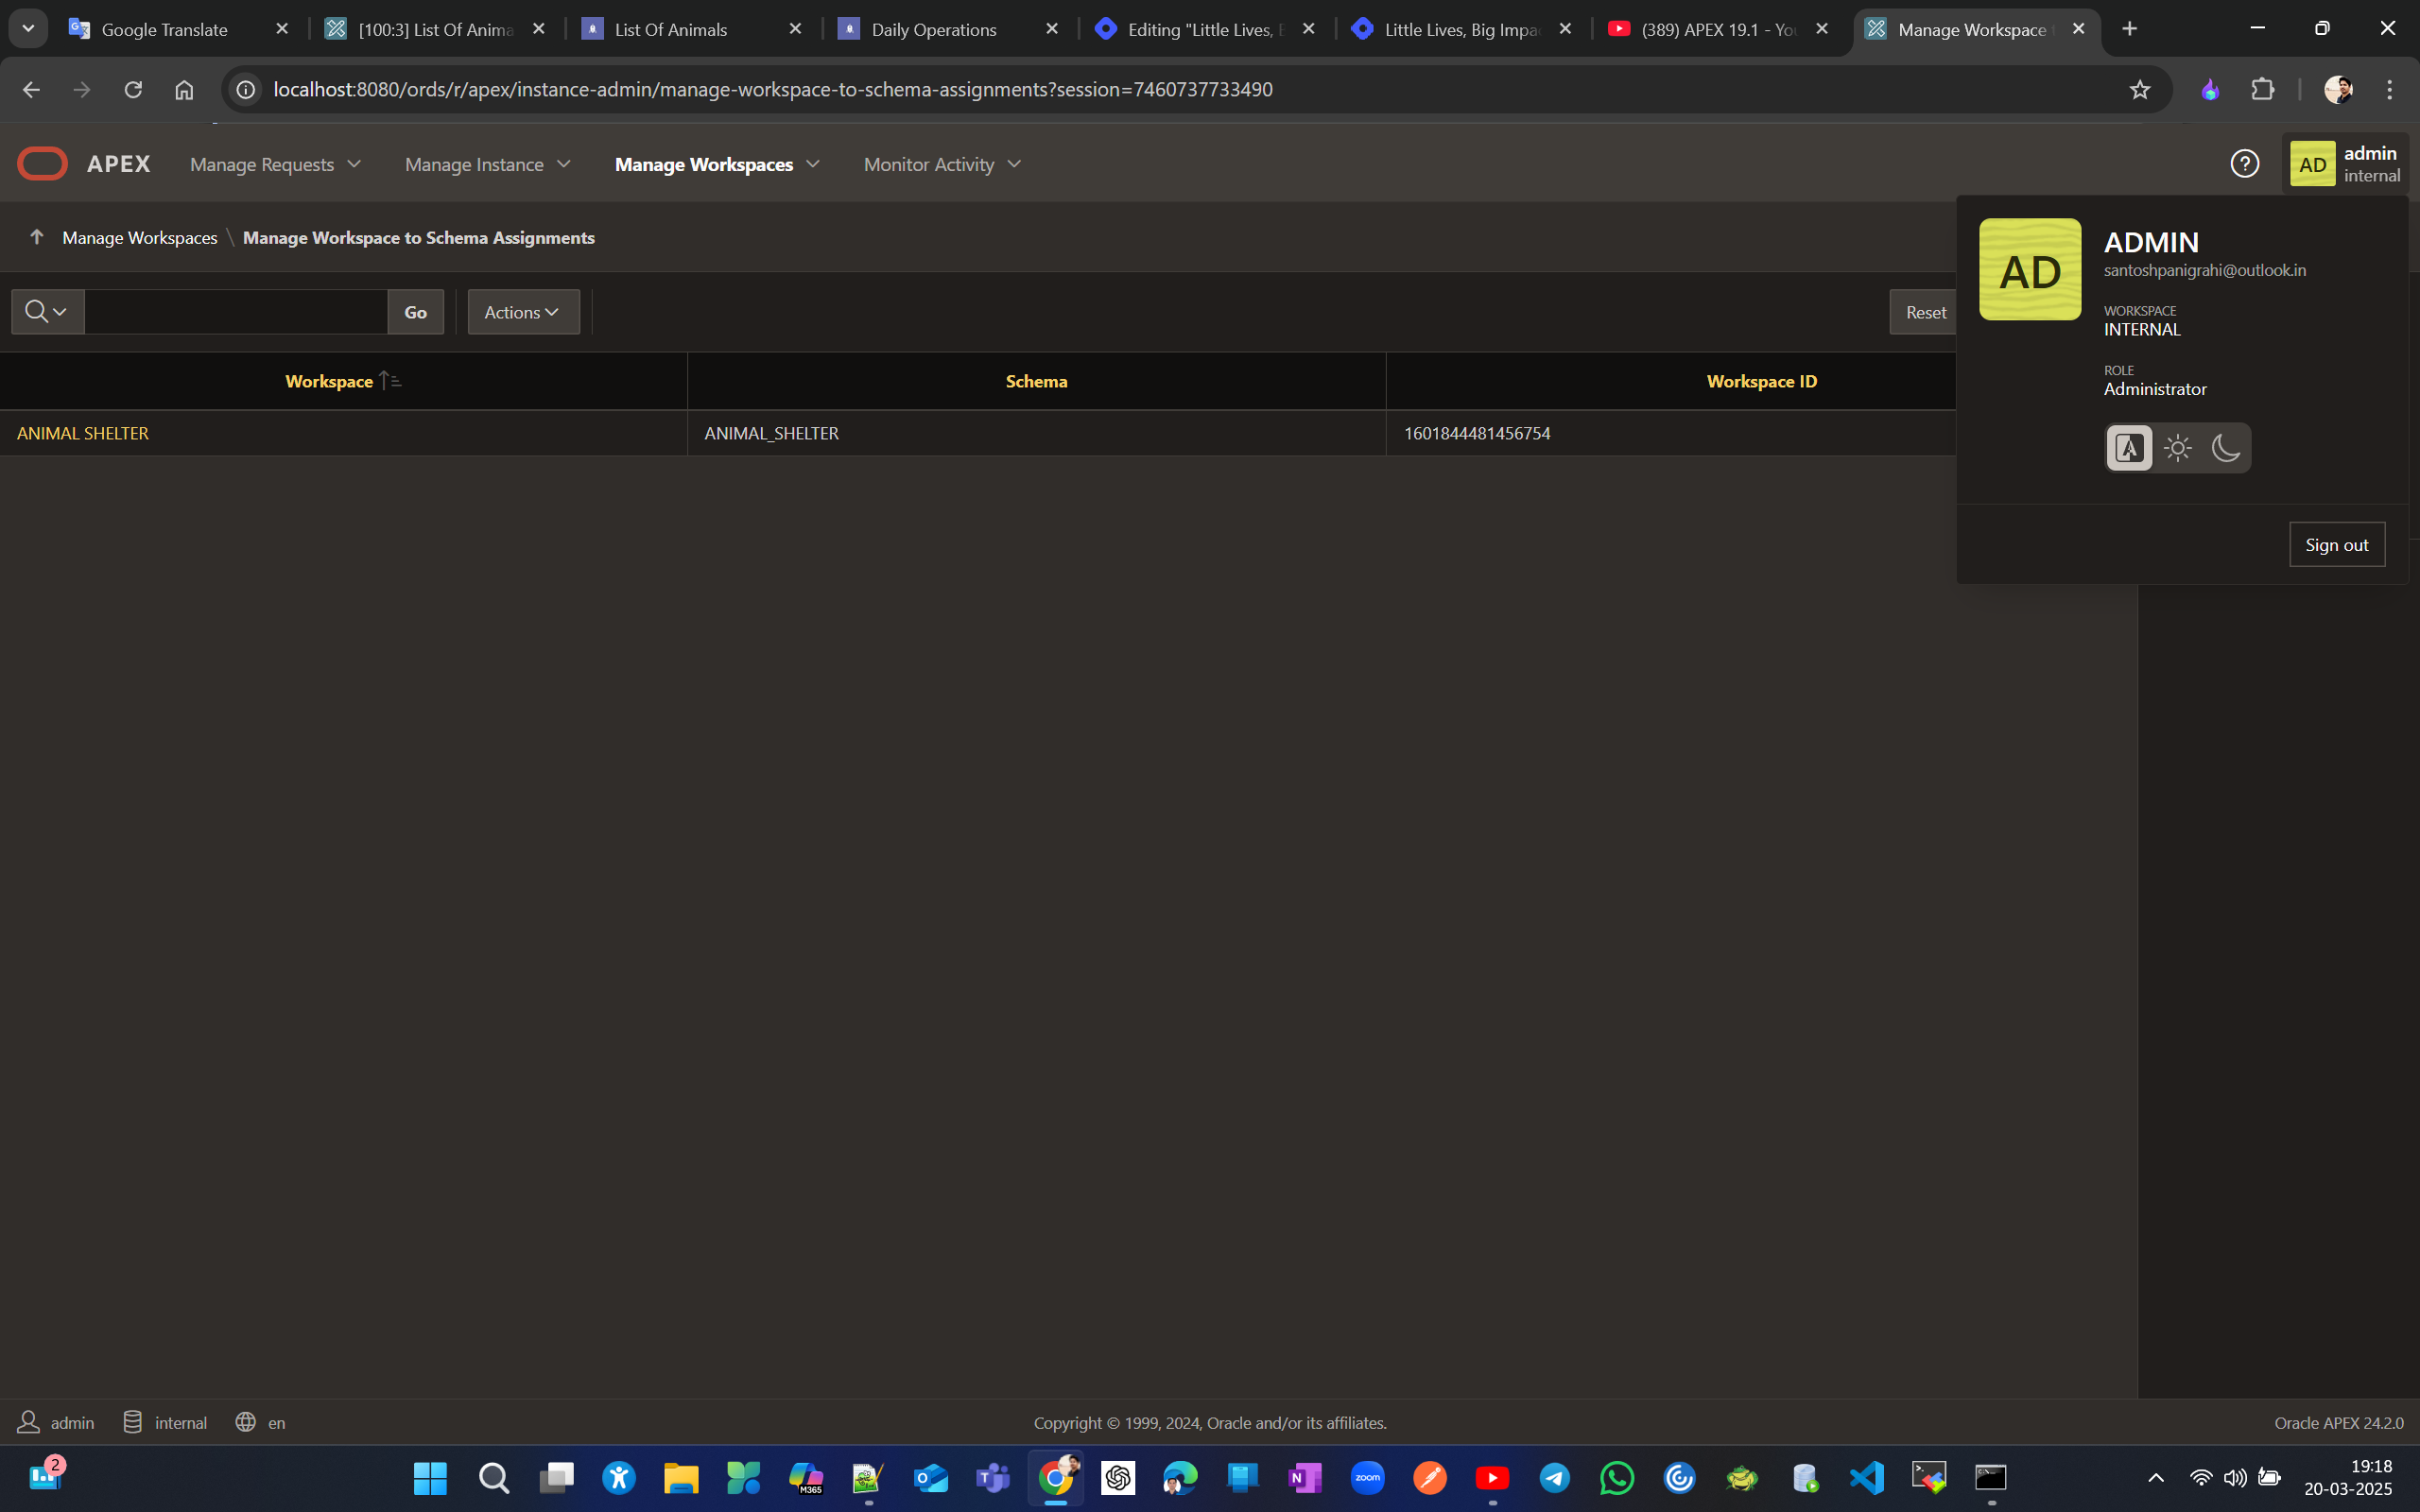
Click on Manage Workspaces -> Manage Workspace to Schema Assignments to check if the new workspace appears.
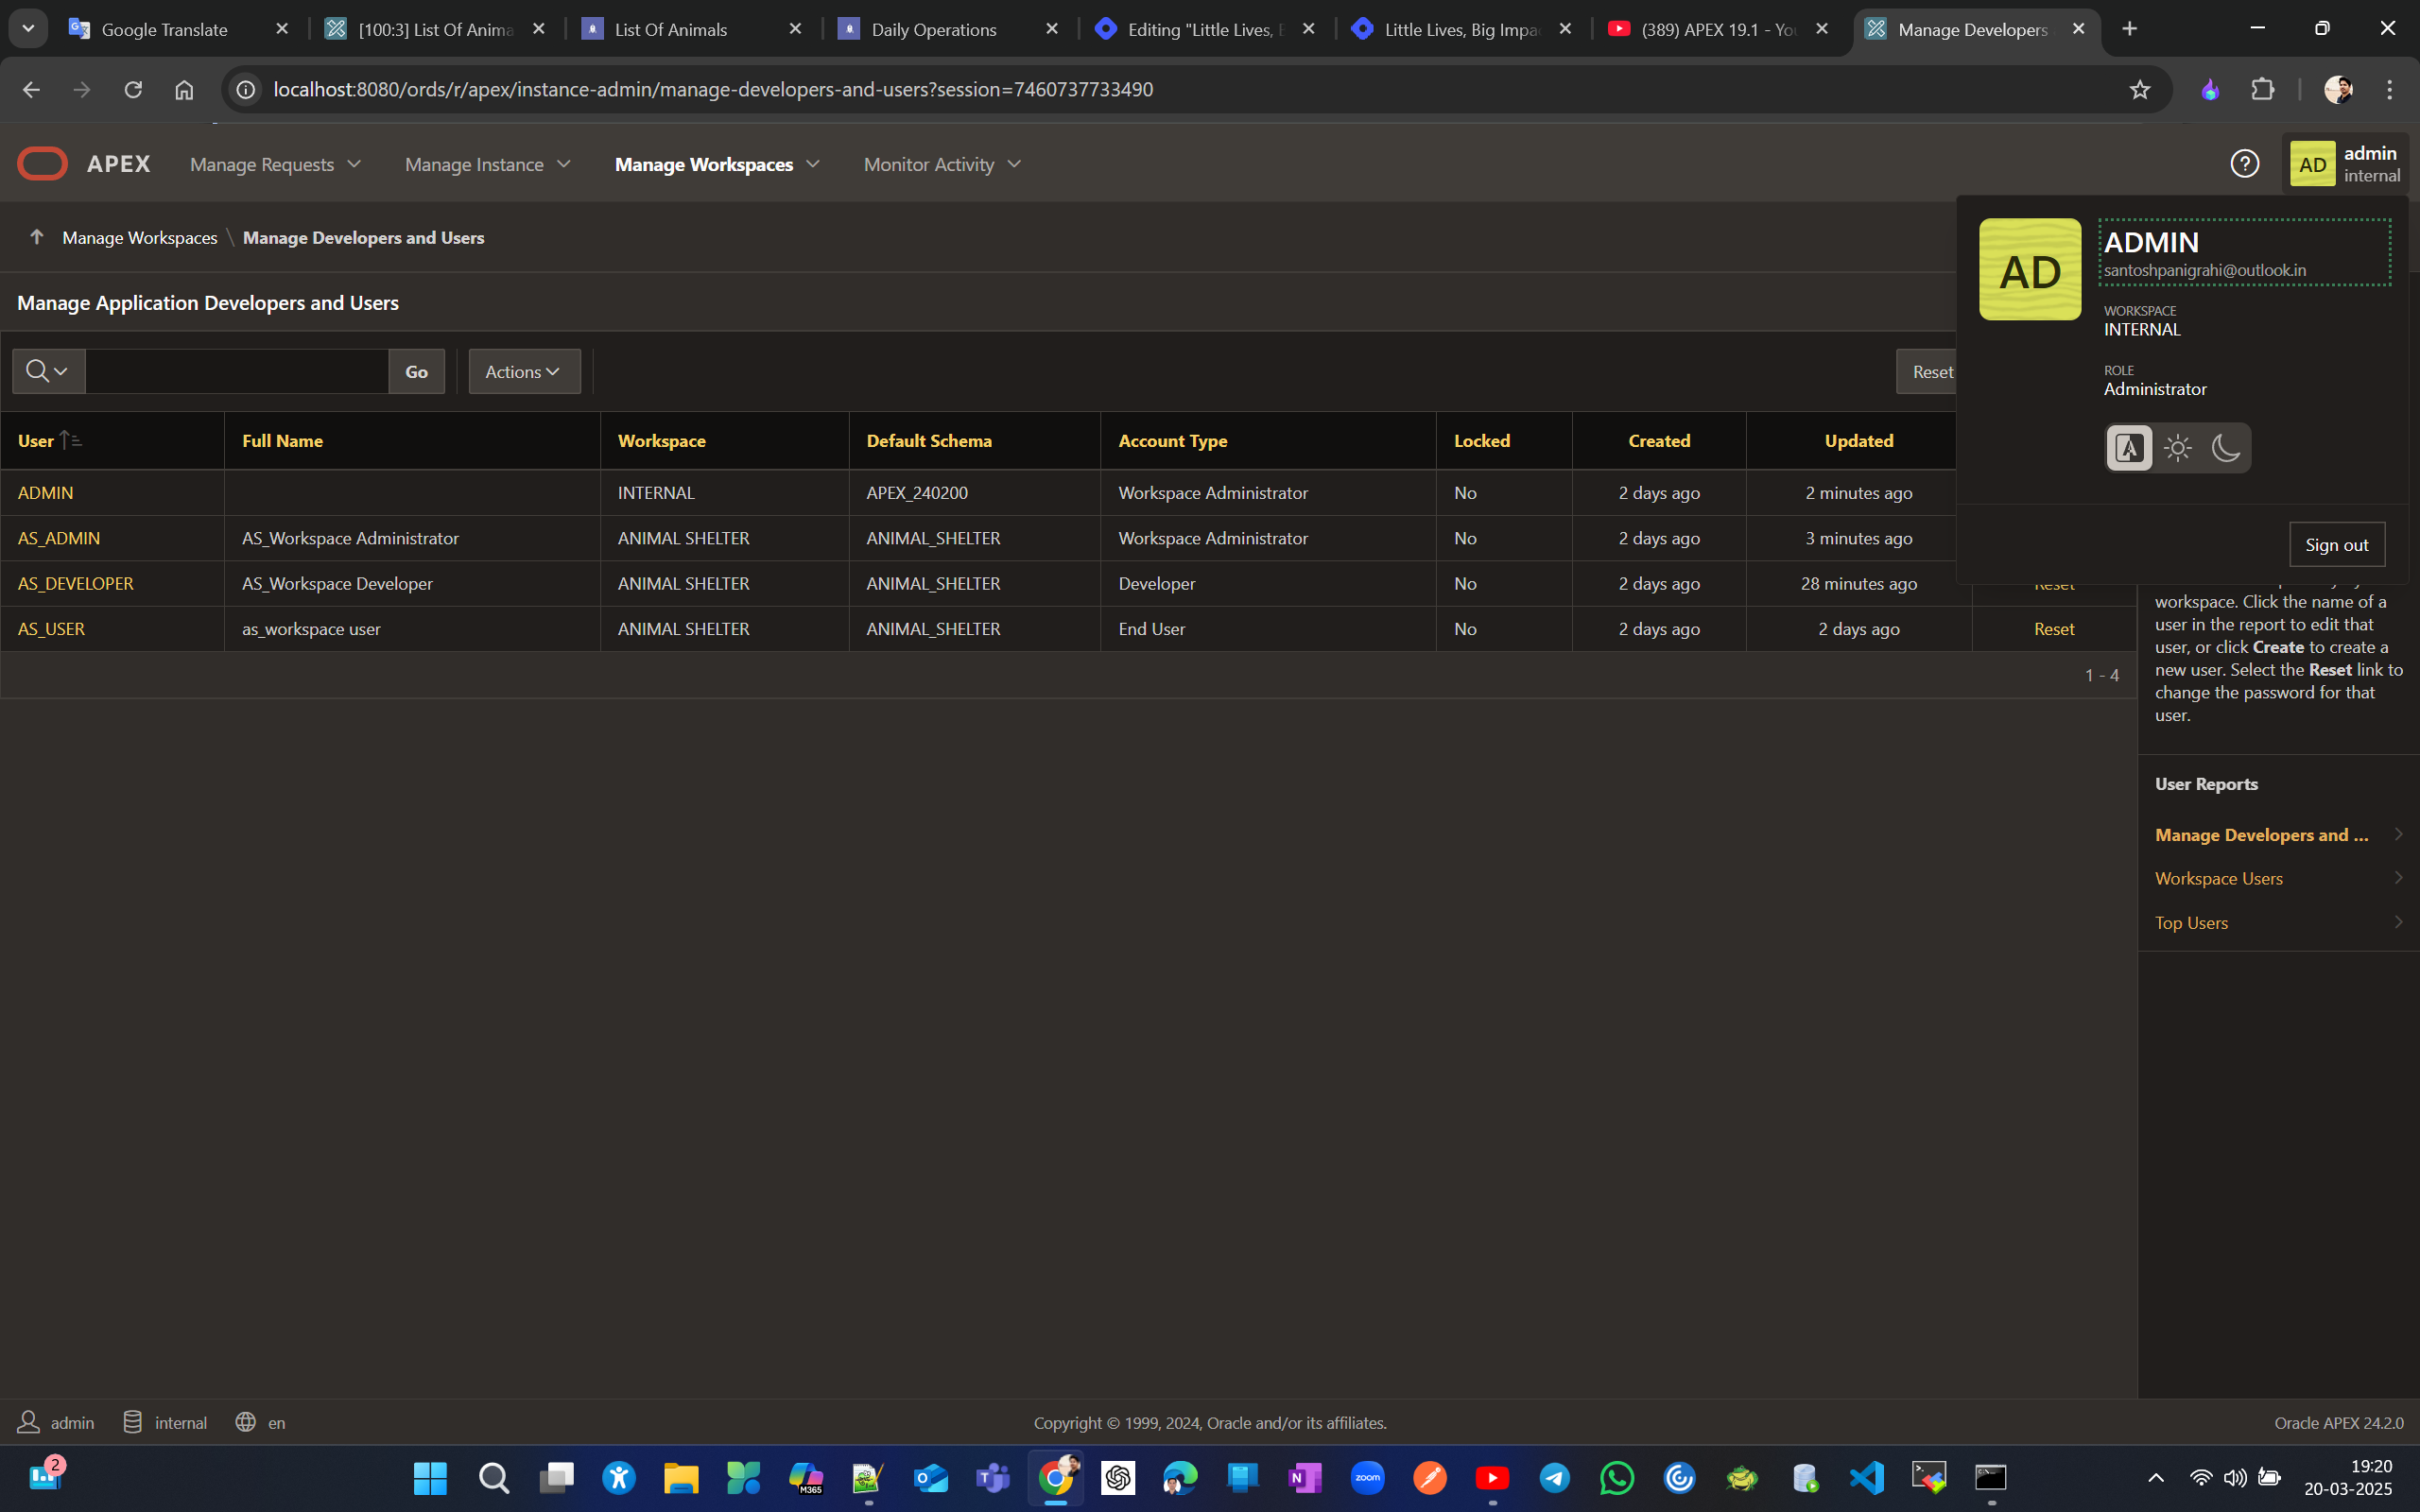
Similarly, click on Manage Developers and Users to confirm the admin user AS_ADMIN is created.
Now, log in to the new Animal Shelter workspace as the workspace administrator AS_ADMIN to create two types of accounts: i. Developer and ii. Regular User.
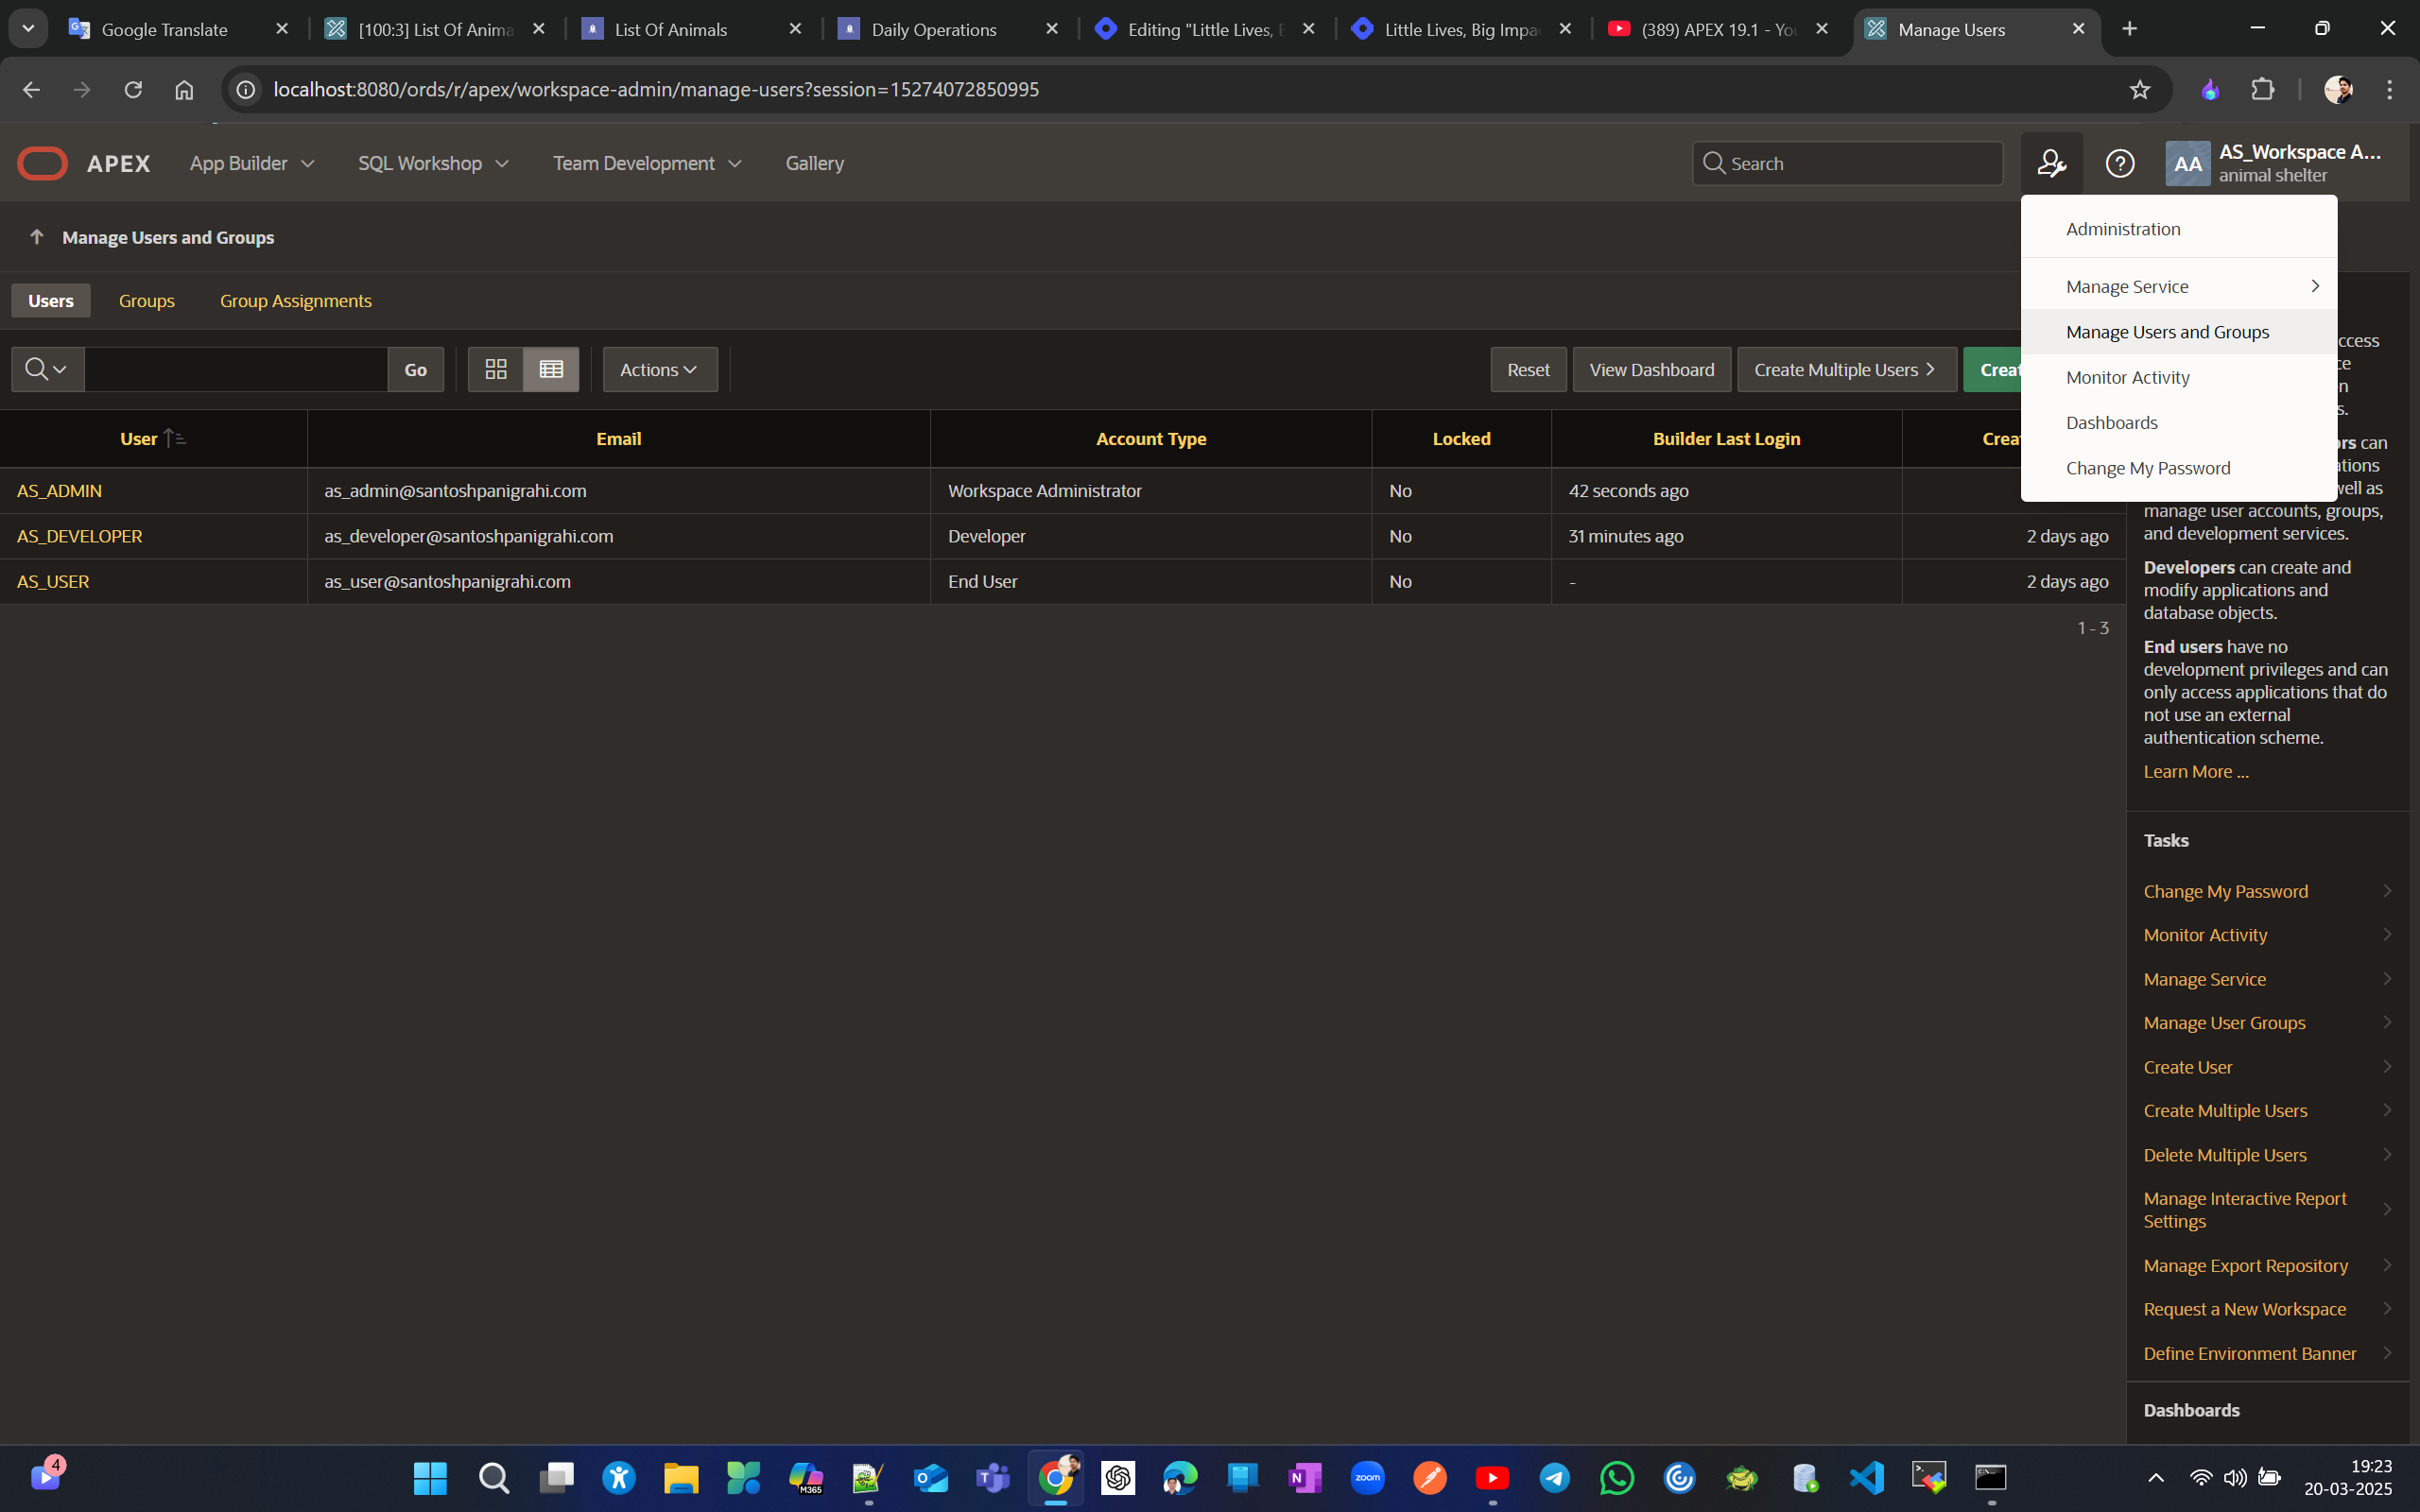
To create an account, select Manage Users and Groups from the dropdown → Create User → Fill in all details. For the name, use AS_DEVELOPER (make sure the schema is ANIMAL_SHELTER). Select No for "User is Workspace Administrator" and Yes for "User is a Developer." For this exercise, set "Require change of password" to No, though typically it is set to Yes. → Click on Create and Create Another → Create user AS_USER (make sure to select No for both "Is admin" and "Is dev"). (Note: The email doesn't need to be valid, but it is mandatory.)
Verify all these 3 users created (manage users and groups → Users).
Use SQL Workshop in APEX to run scripts that insert data into tables
Now log in to the Animal Shelter workspace with the developer account to view an overview of the Animal Shelter APEX WS, including the App Builder, SQL Workshop, Team Development, and Gallery. Run scripts to populate tables and perform other necessary tasks. Verify the created or modified objects from the object browser.
Log in as_developer to Workspace -> SQL Workshop -> SQL Scripts -> upload -> choose file -> upload. Select all files that start with insert_data (Warning: don't run them yet; they need to be run in order).
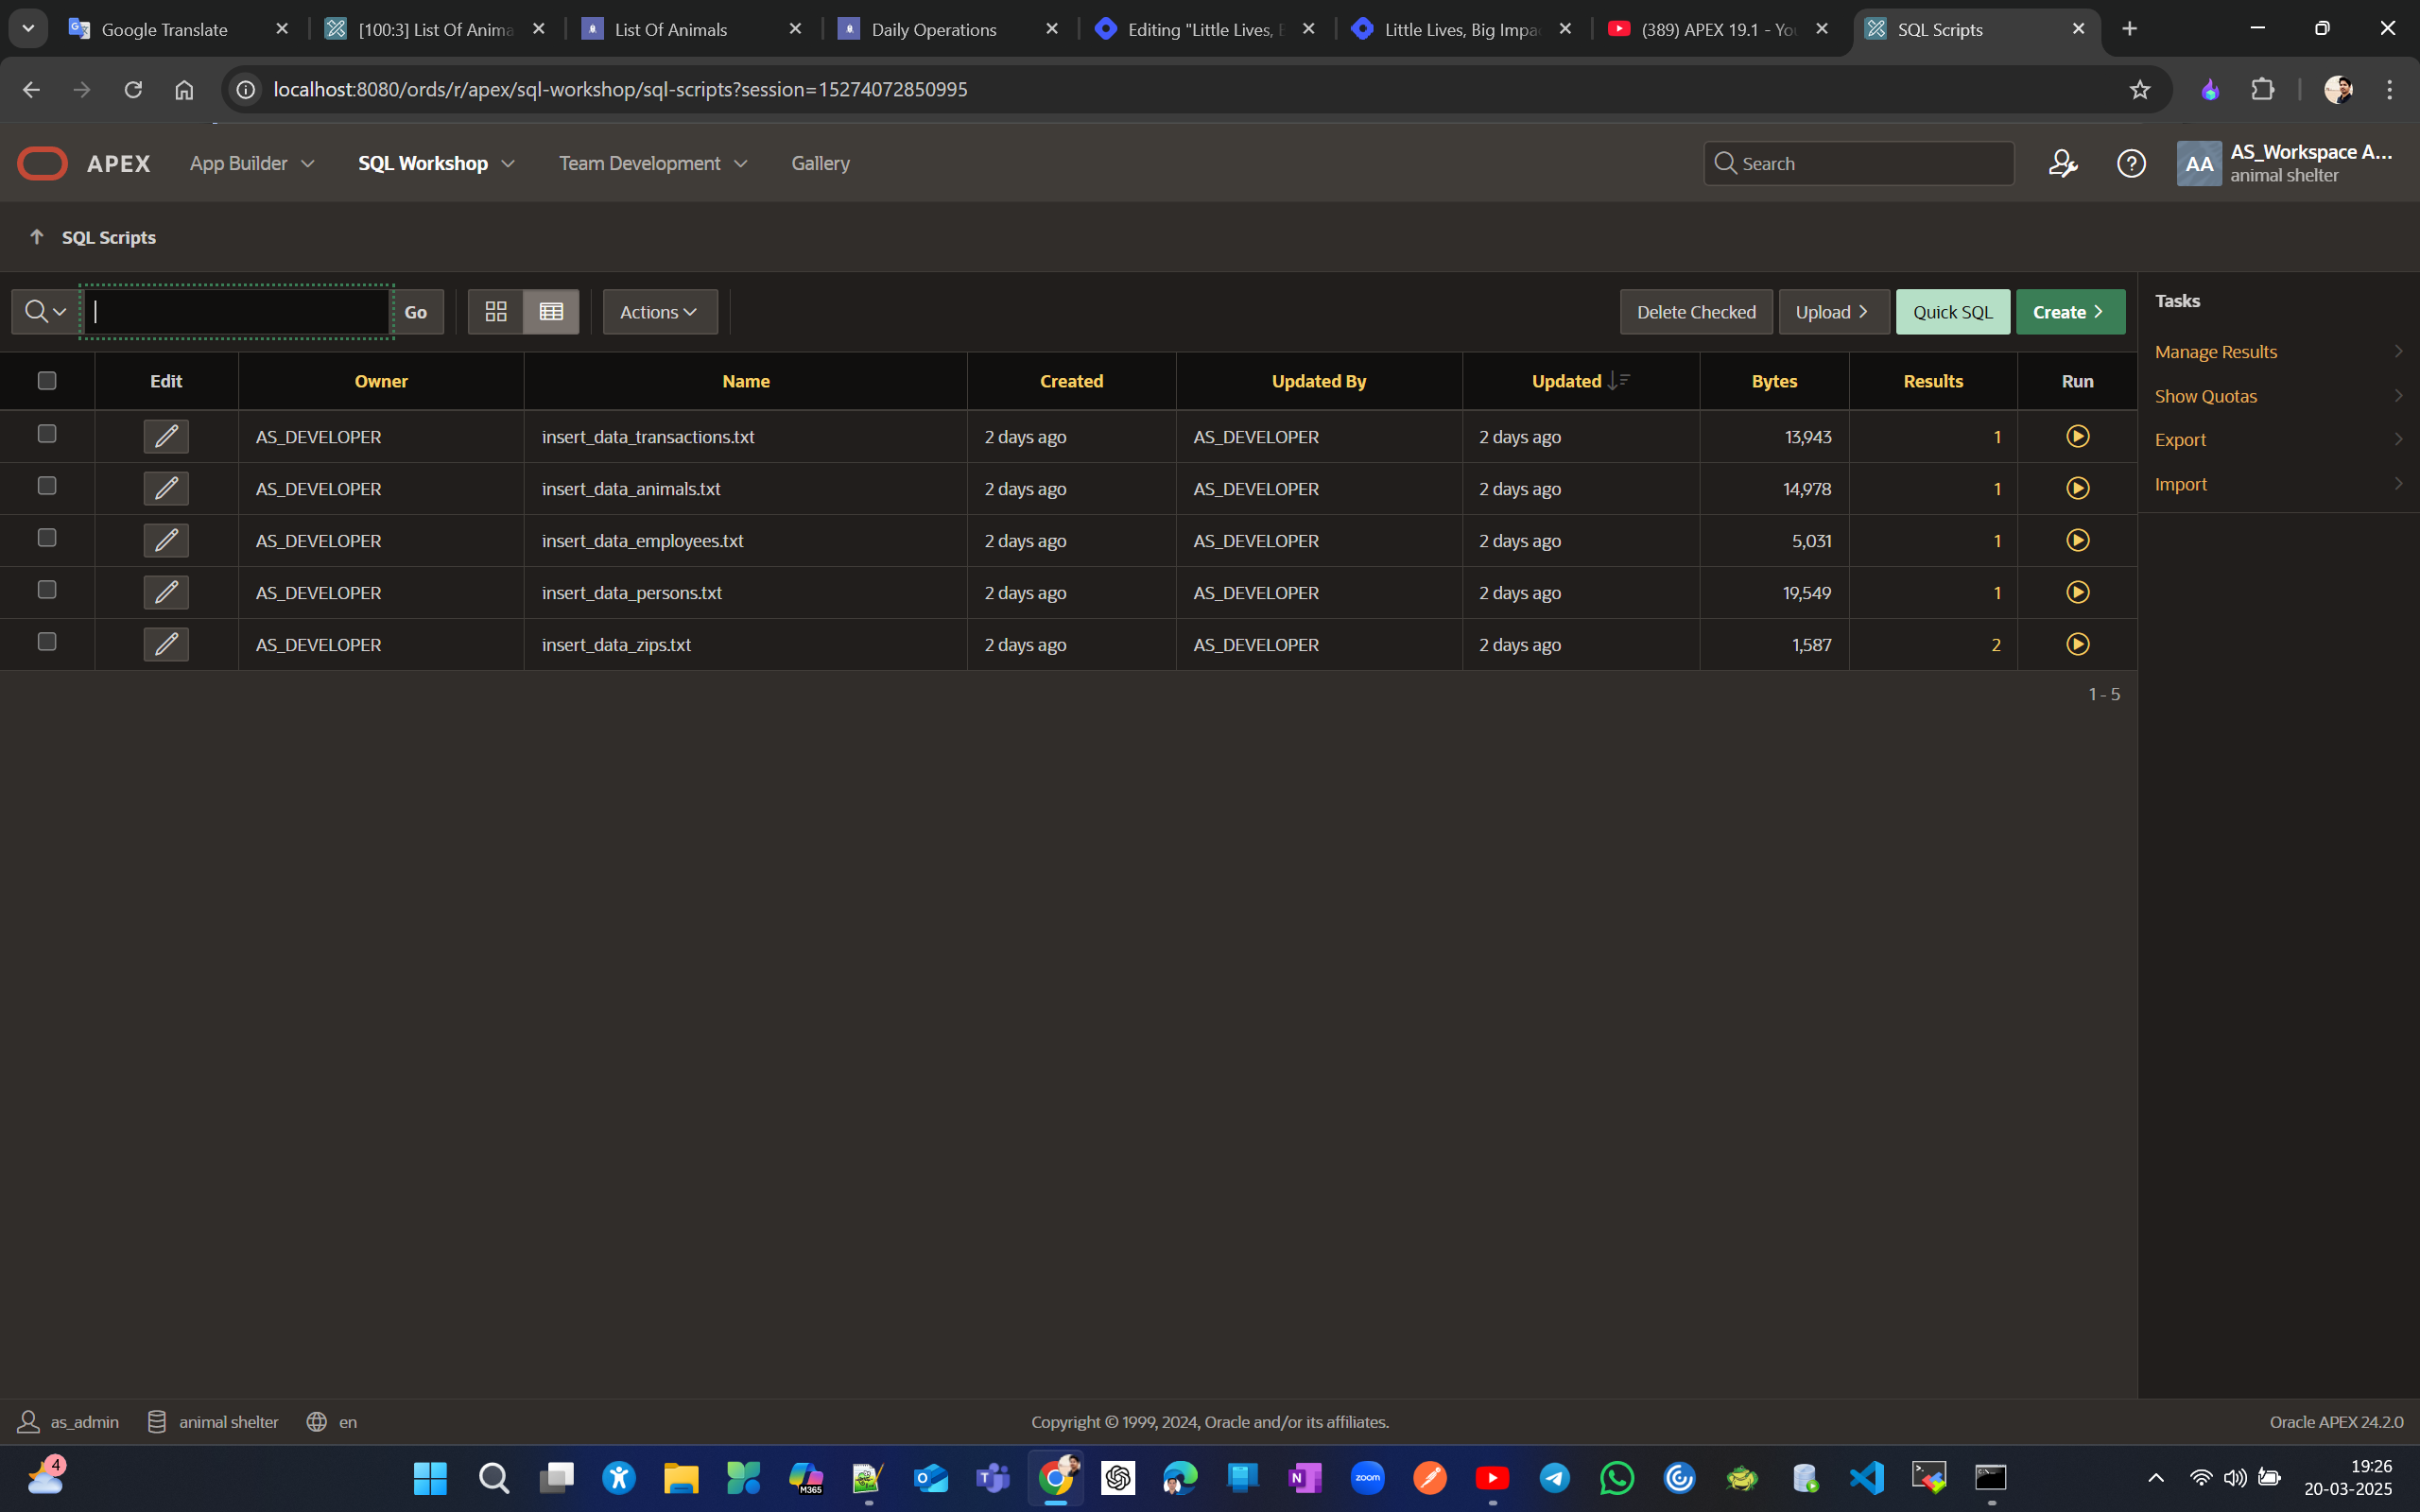
Before choosing the order for inserts, check the ERD to find tables that are on the "one" side of a relationship. In this case, the ZIPS table is populated first, followed by the others in this order: zip -> persons -> employees -> animals -> transactions -> activities. For activities, import from the ACTIVITIES_DATA.csv file using SQL Workshop -> Utilities -> Data Workshop -> Load data.
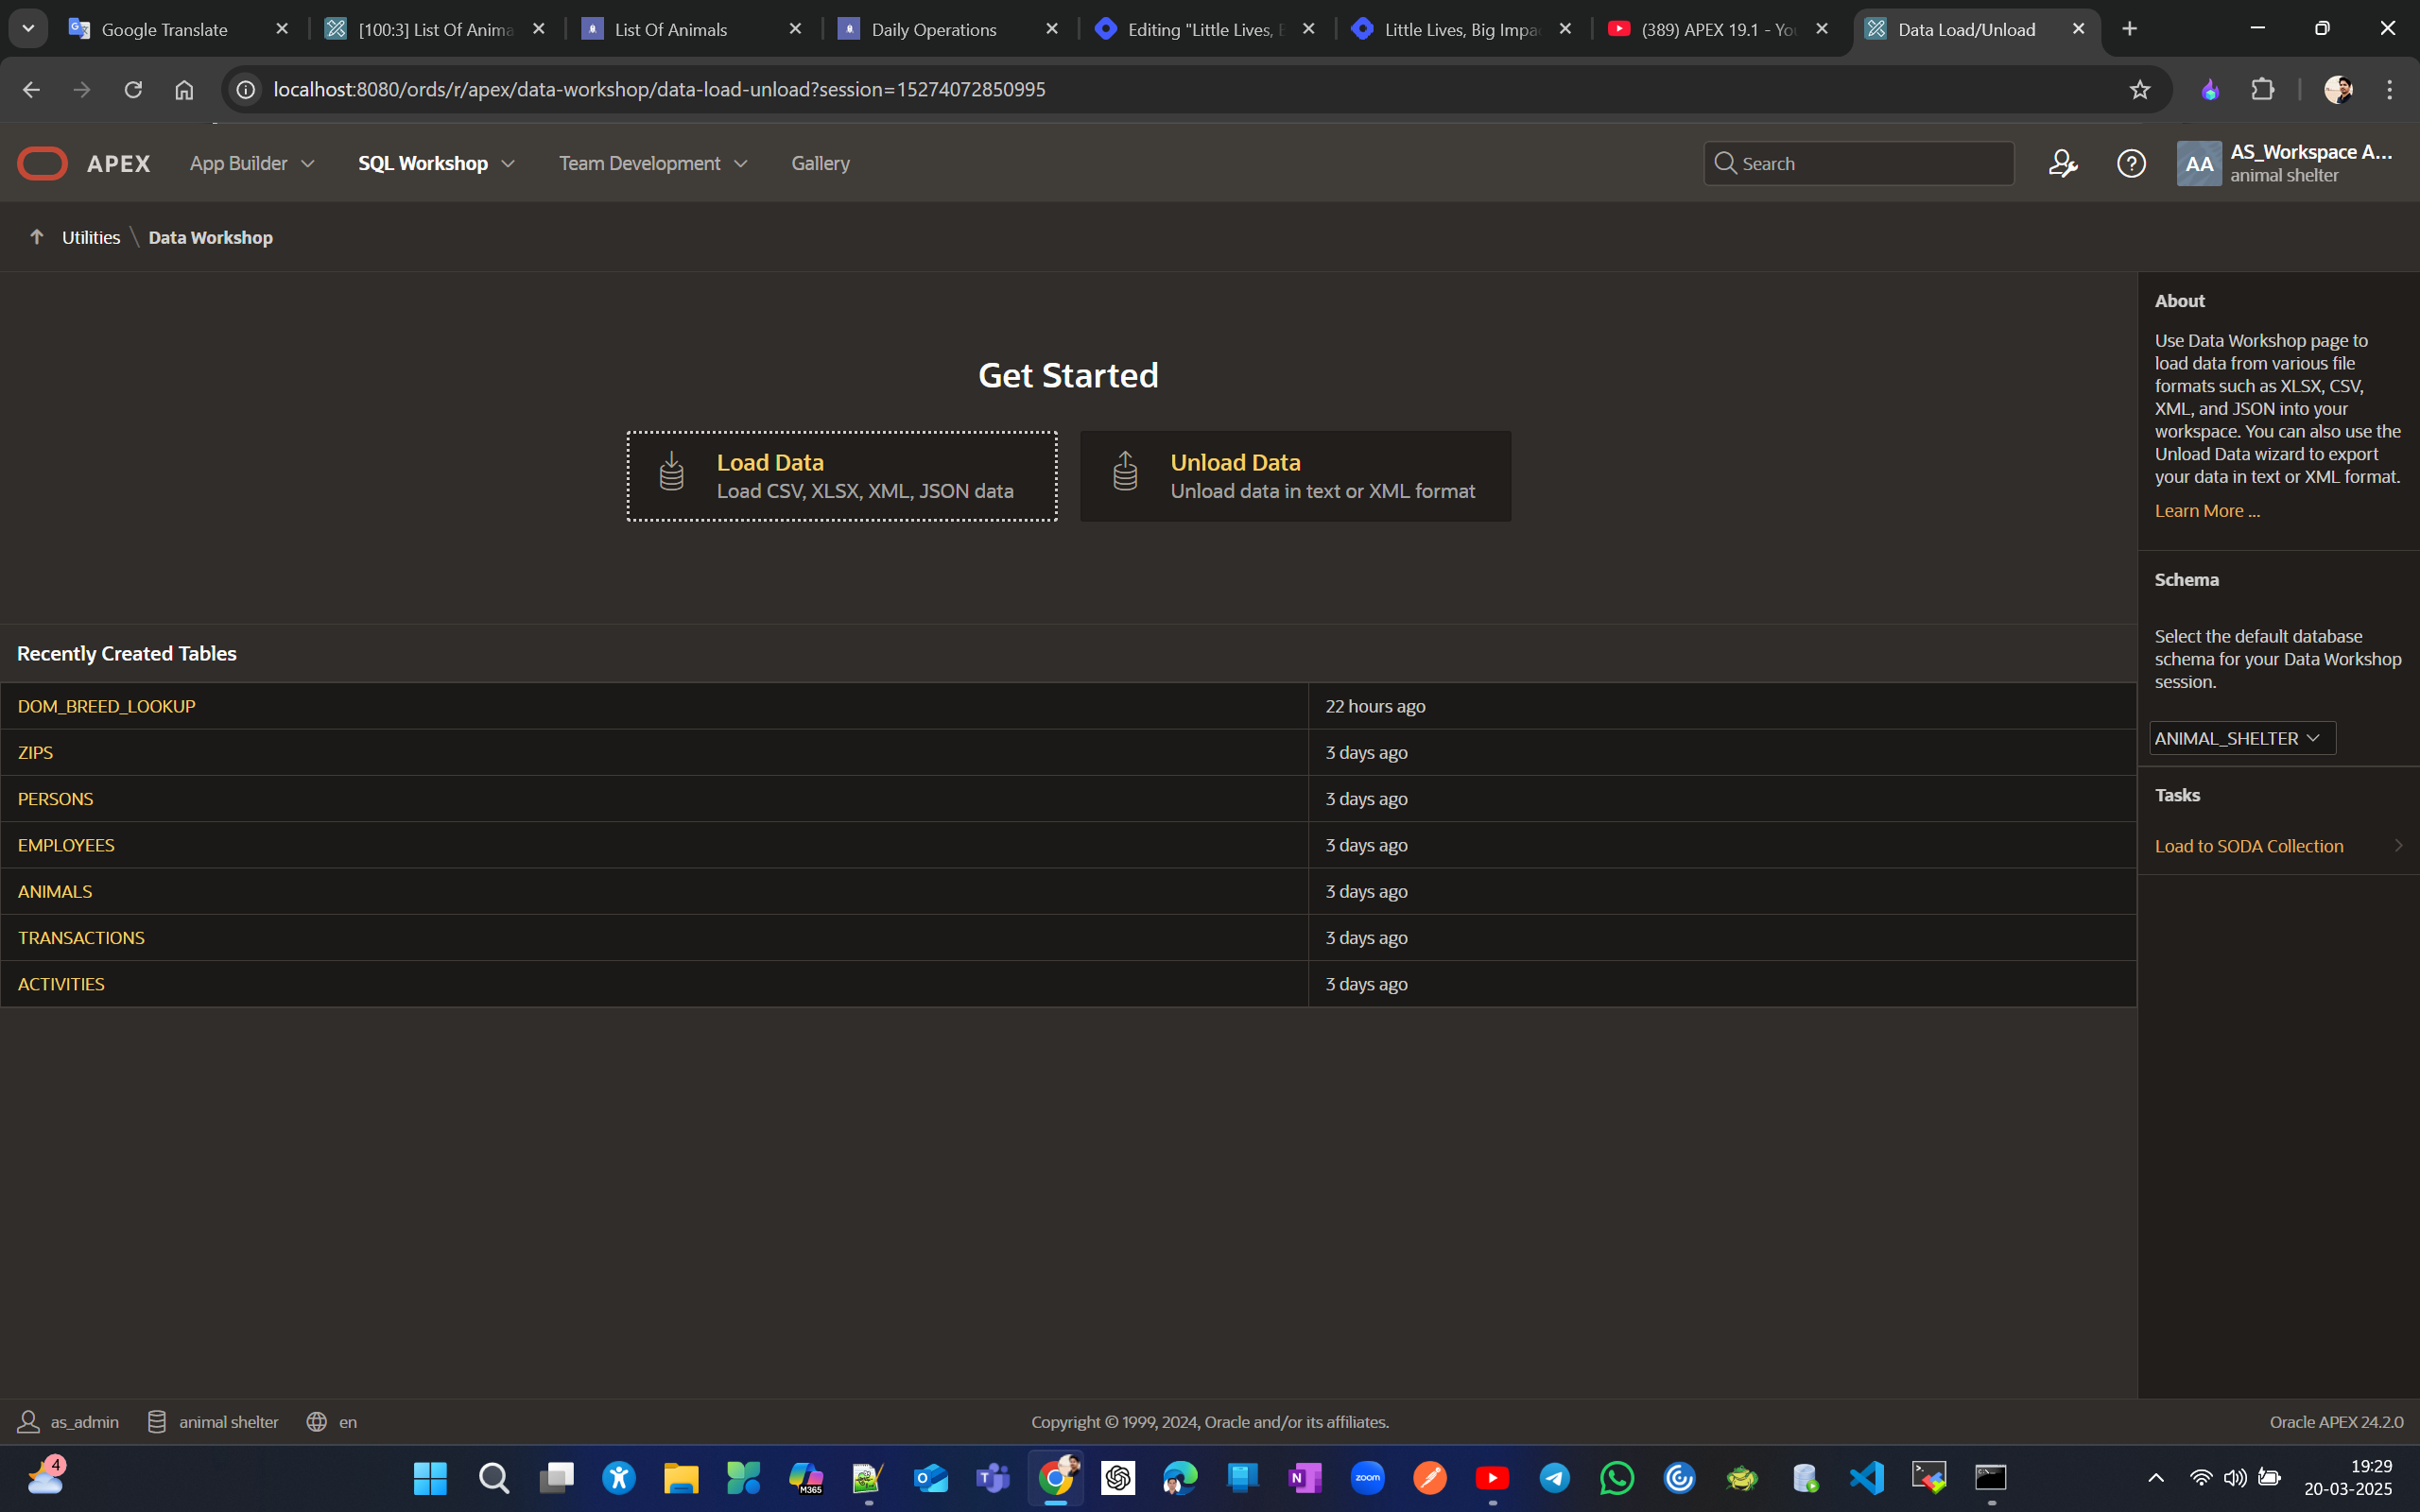
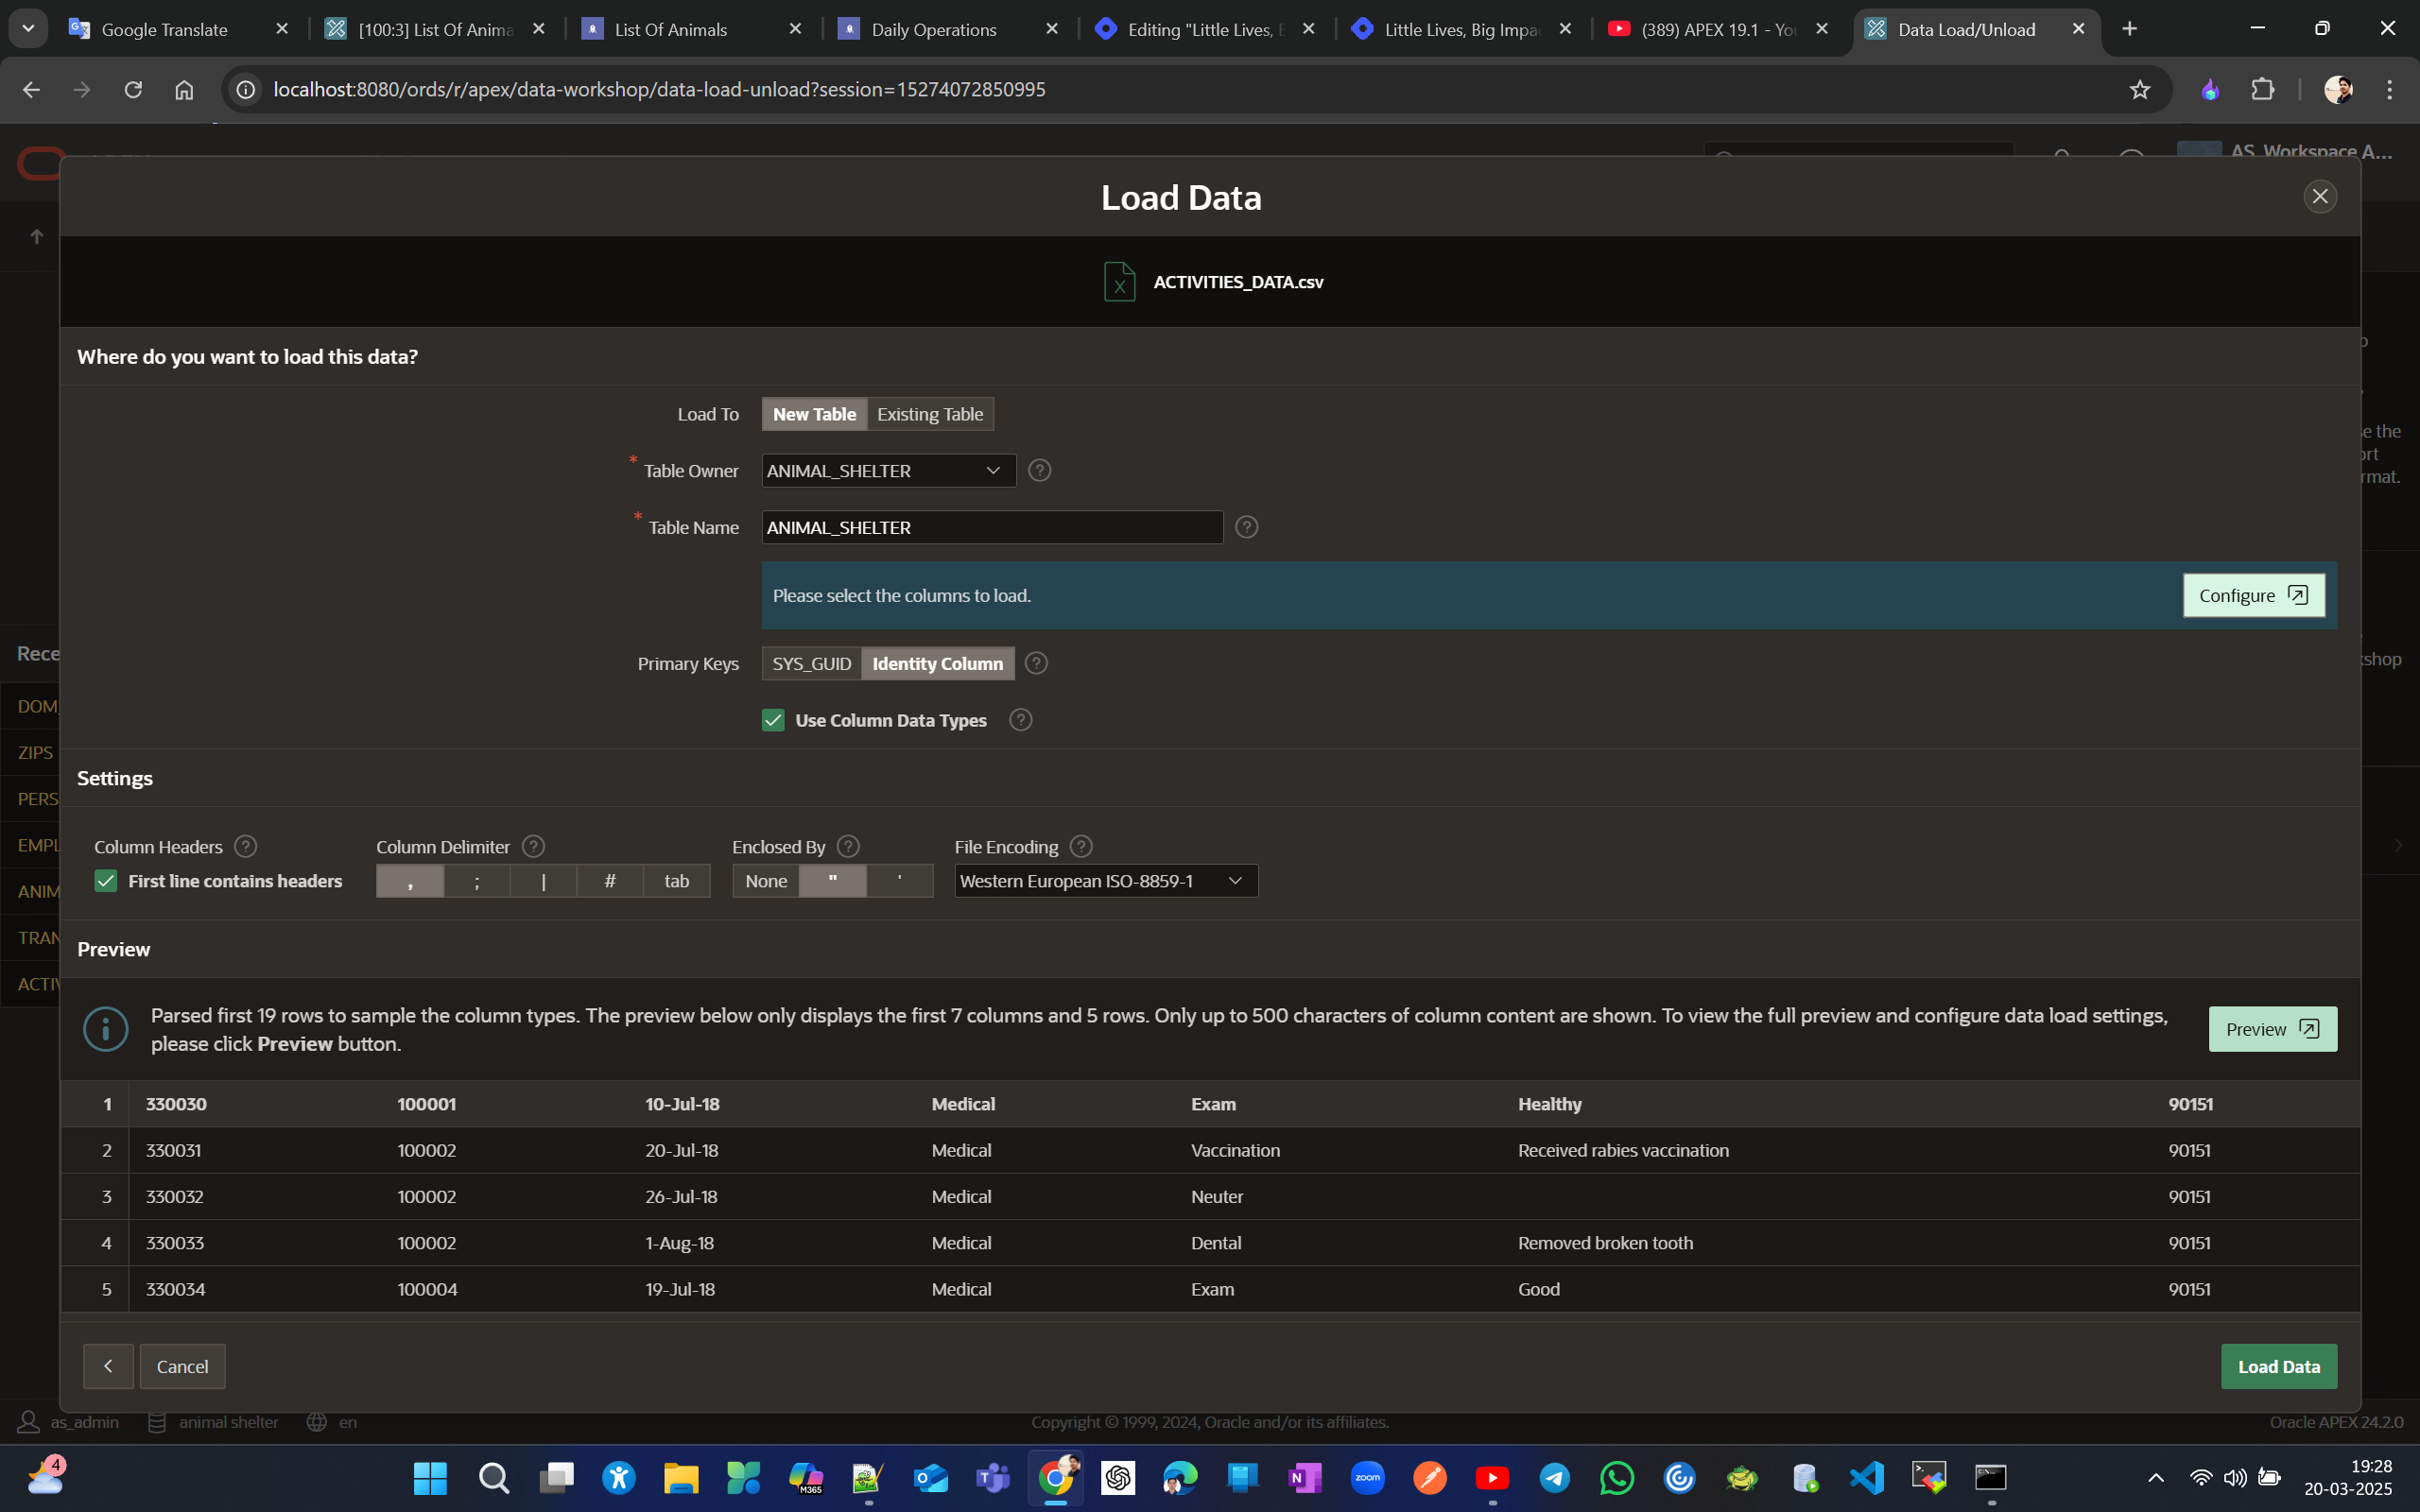
While running, we expect 2 errors for
insert_data_transaction. You can find this order at the end ofdrop_animal_shelter_db.sql(it's reversed in this file since they are delete statements). You can refer toANIMAL_SHELTER@DEMO.pdffor the ERD, or alternatively, you can get it from SQL Developer by going to File -> Data Modeler -> Import -> Data Dictionary, and so on.Create an application with Application Builder. Add a logo & Create a simple form. .
Log in again as AS_DEVELOPER and create an application called Daily Operations from the App Builder. Go to App Builder -> Create Application -> Choose required details (let's keep everything as default for this app, like Theme as Standard Vita, Navigation side menu, Authentication as Application Express Accounts, etc.). Now run the application with the required credentials.
Note: When APEX creates an application, it generates a Global Page, home page, login page, and others in recent versions.
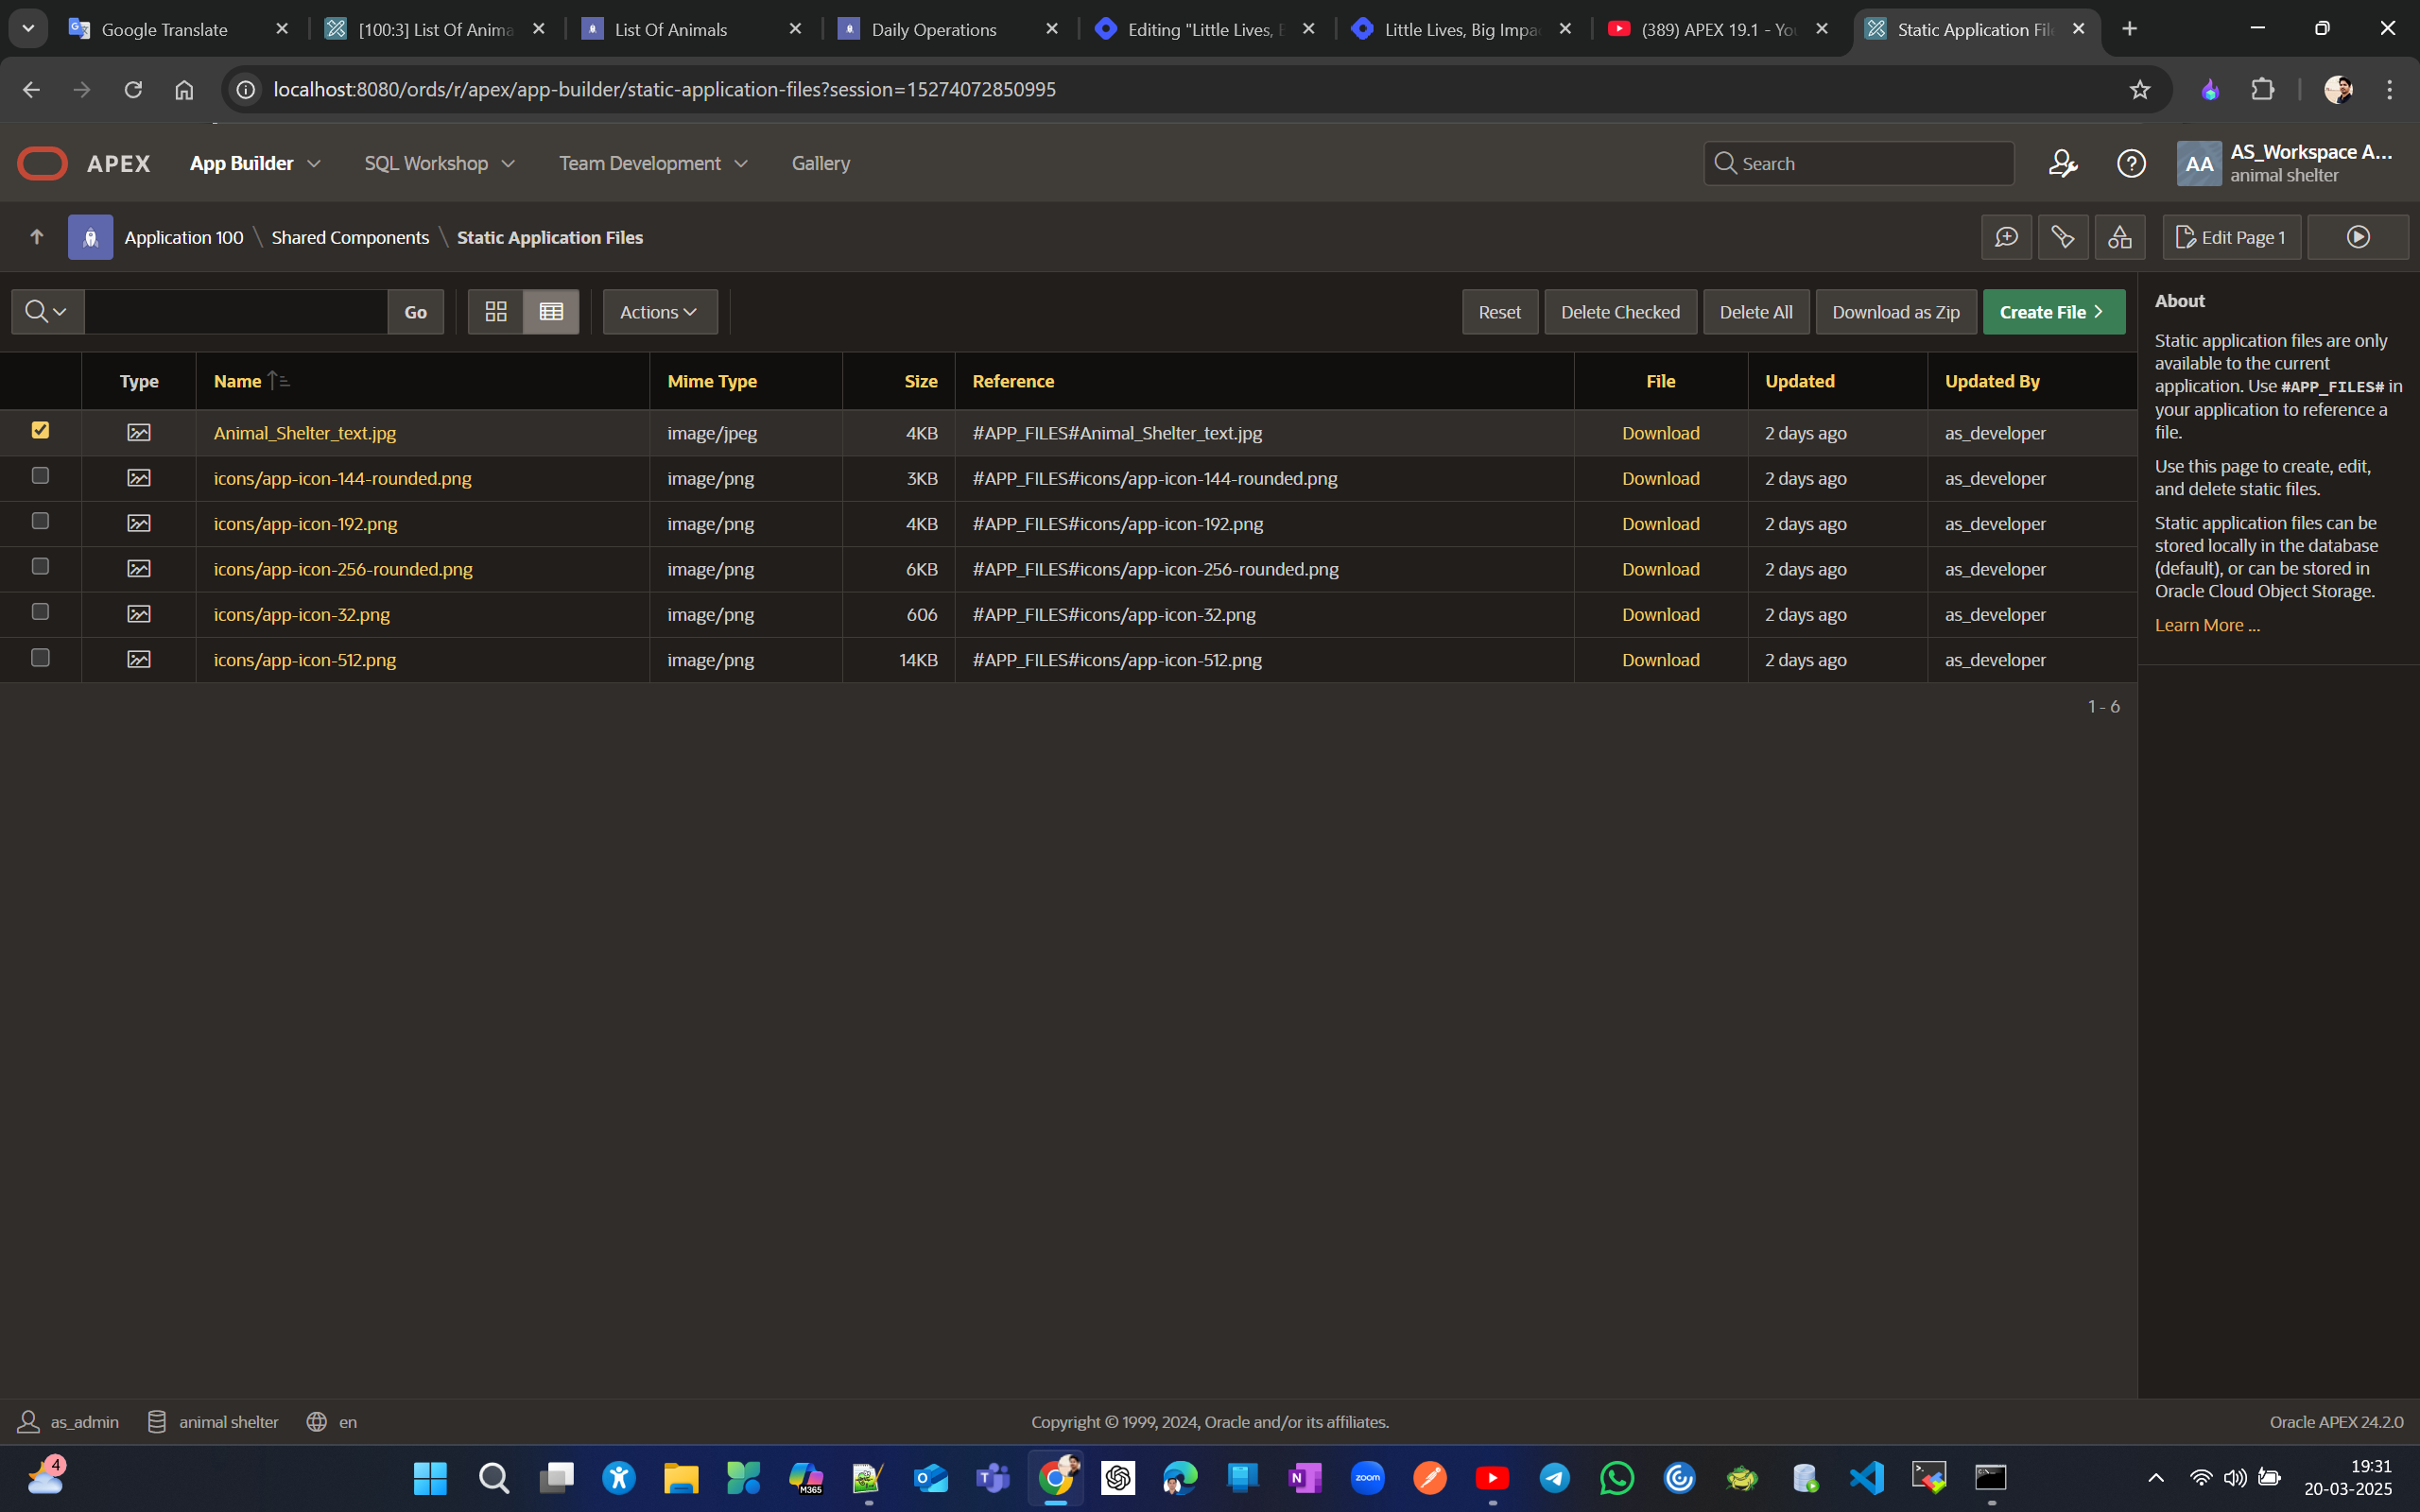
Now, try to change the title bar image . From the developer toolbar, click on Application -> Shared Components -> under the Files and Reports section, click Static Application Files -> Create File -> drag and drop the file Animal_Shelter_text.jpg for the title logo. Once uploaded, copy the reference for the uploaded image file, which is usually like #APP_FILES#Animal_Shelter_text.jpg.
Now go back to Shared Components -> From User Interface, select User Interface Attributes -> check for the menu Logo and select the Image tab -> replace the text for the label Logo with the one you just copied #APP_FILES#Animal_Shelter_text.jpg -> Apply Changes -> Run Application.
#APP_FILES# indicates where to find the image within the workspace itself.
Now we can add components like a form, IR, CR, or IG to the page. To create a form, find a table that shows a lot of relevant information on its own, such as "persons" or "animals," rather than "transactions" or "activities."
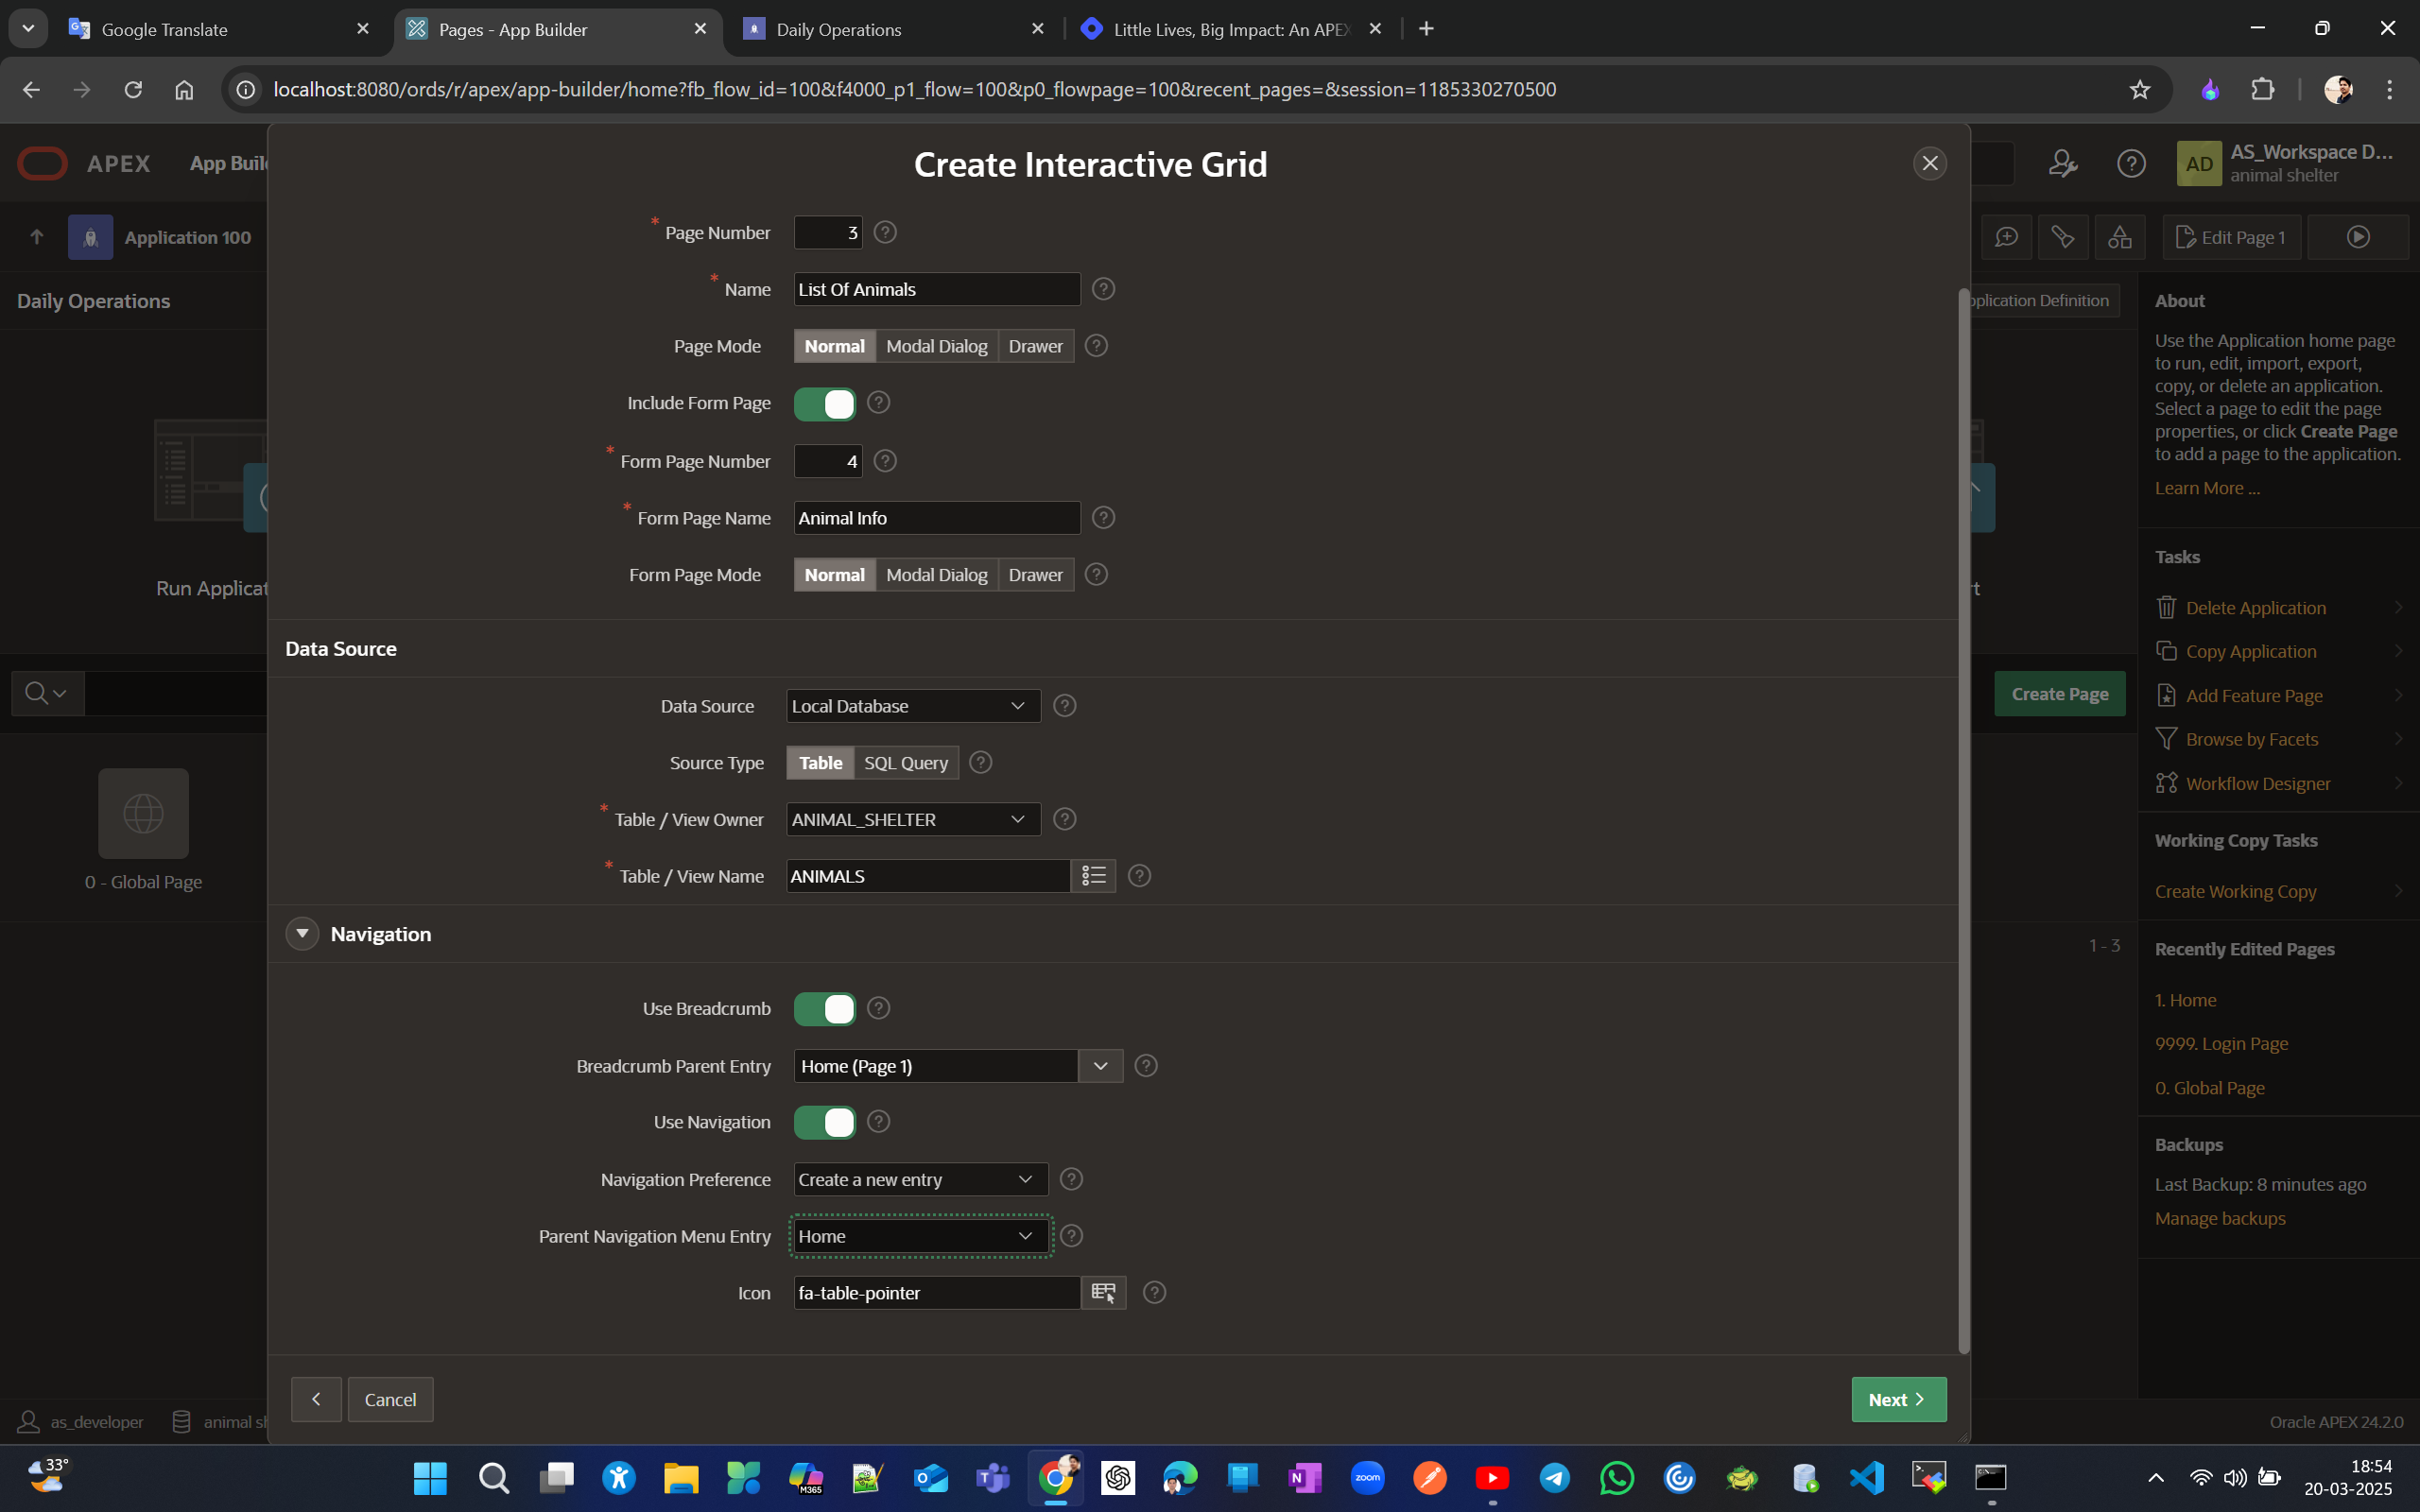
To create a page and add a component to it, go to the Dev toolbar and select Application -> Create Page -> choose the Interactive Grid component -> enable form -> fill in the required details -> next, select PK -> Create Page.
Below is a screenshot showing the application page with a form and a classic report. The Interactive Grid is named List of Animals and the form is named Animal Info. Now, we'll use the form to add a new record for Rocky and see it in the report as Animal ID 10075.
Note: A report displays, filters, and sorts data, while a form creates and modifies data, and in IG you can edit records inline without a form if it's not enabled, but in IR you must use a form to edit records.
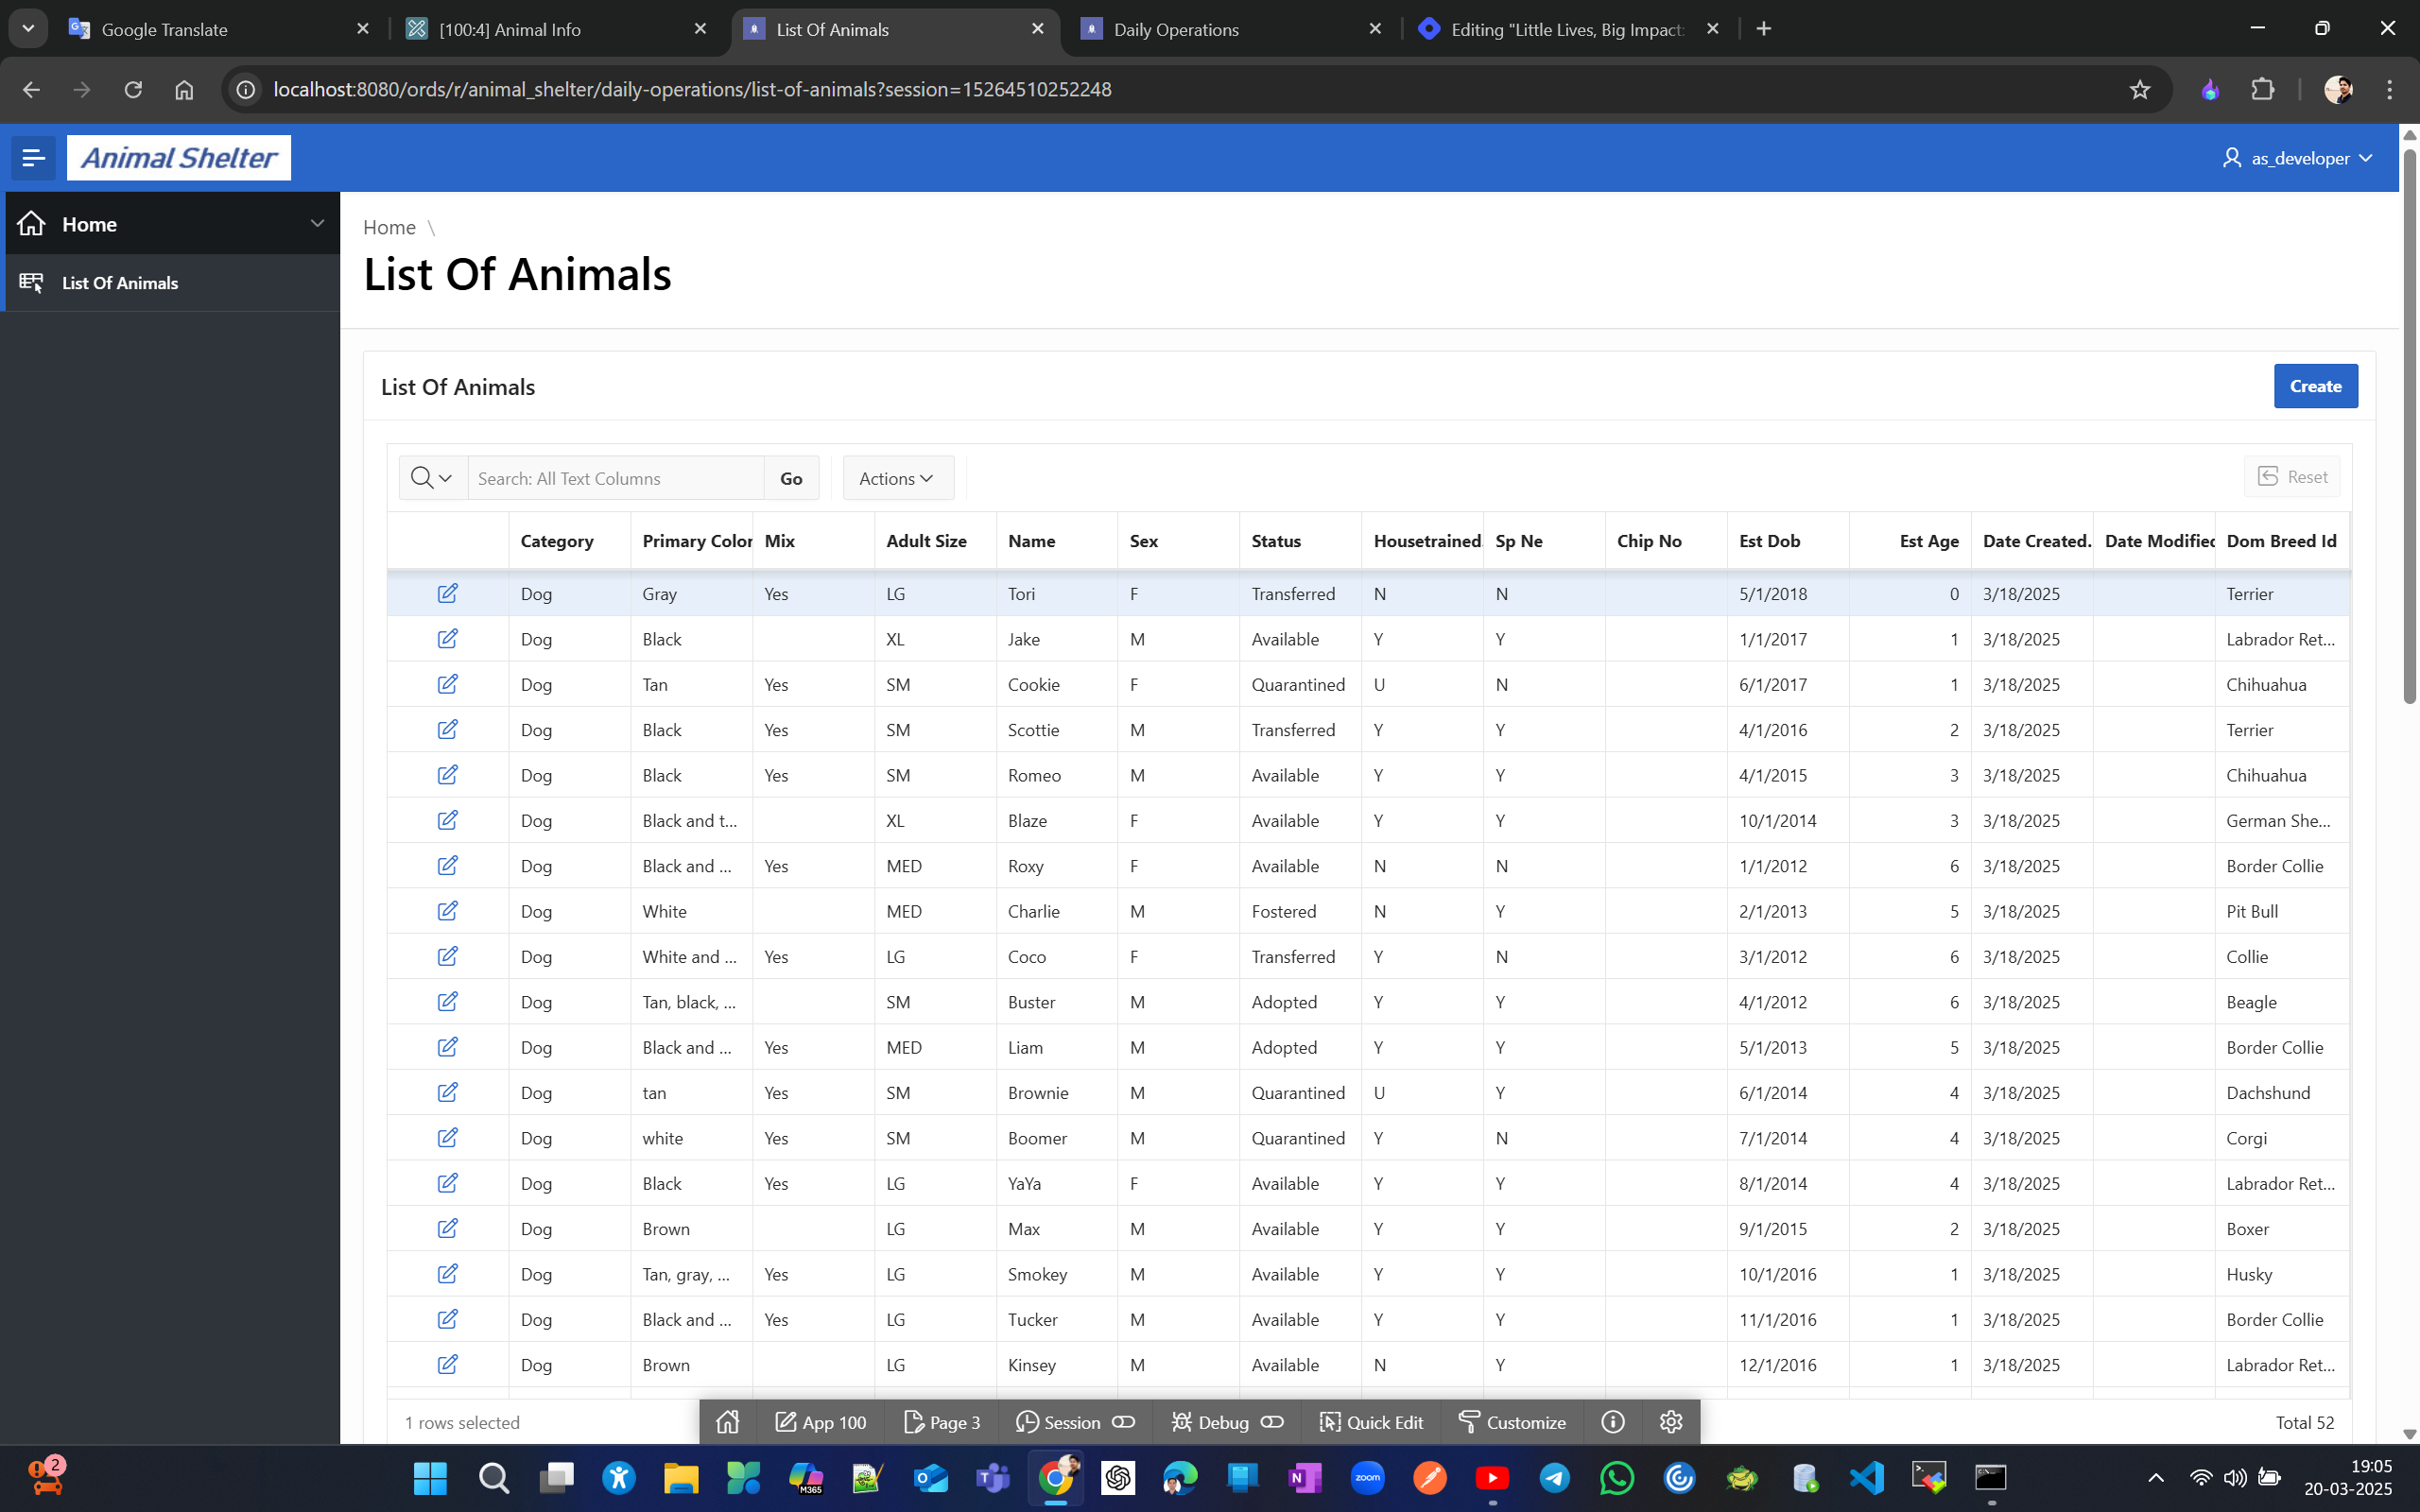
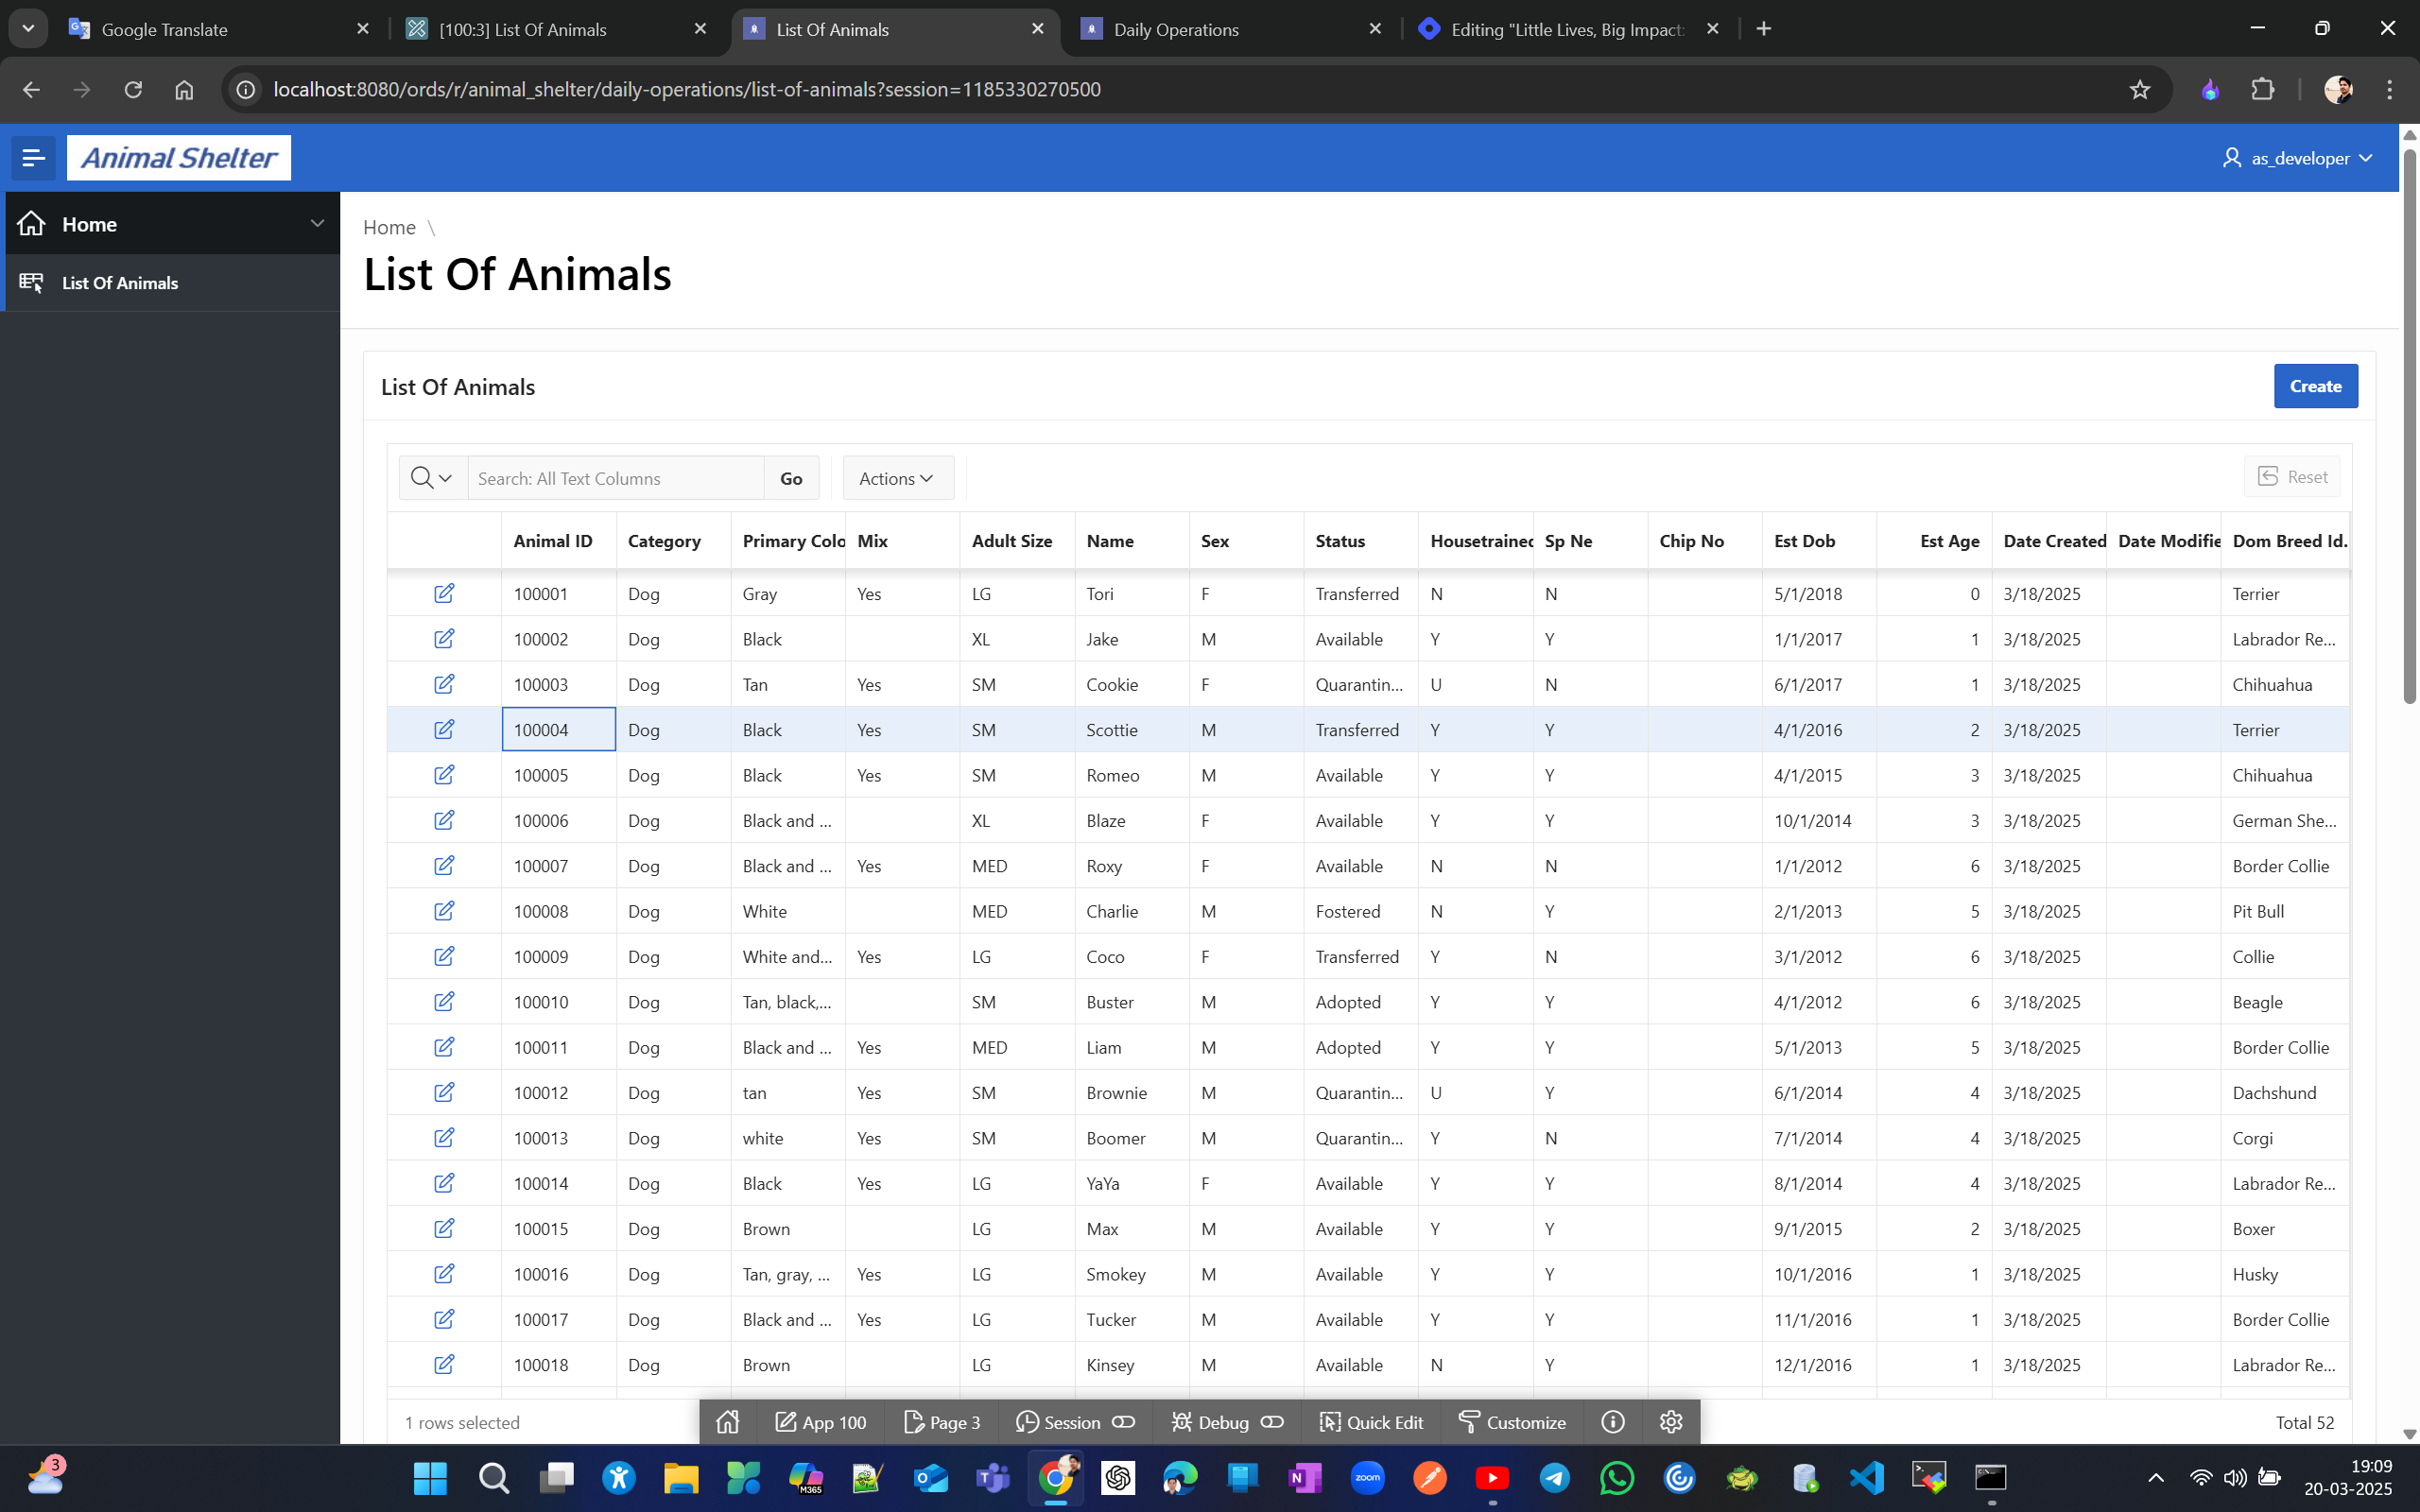
To see Animal ID column in report we have to below change
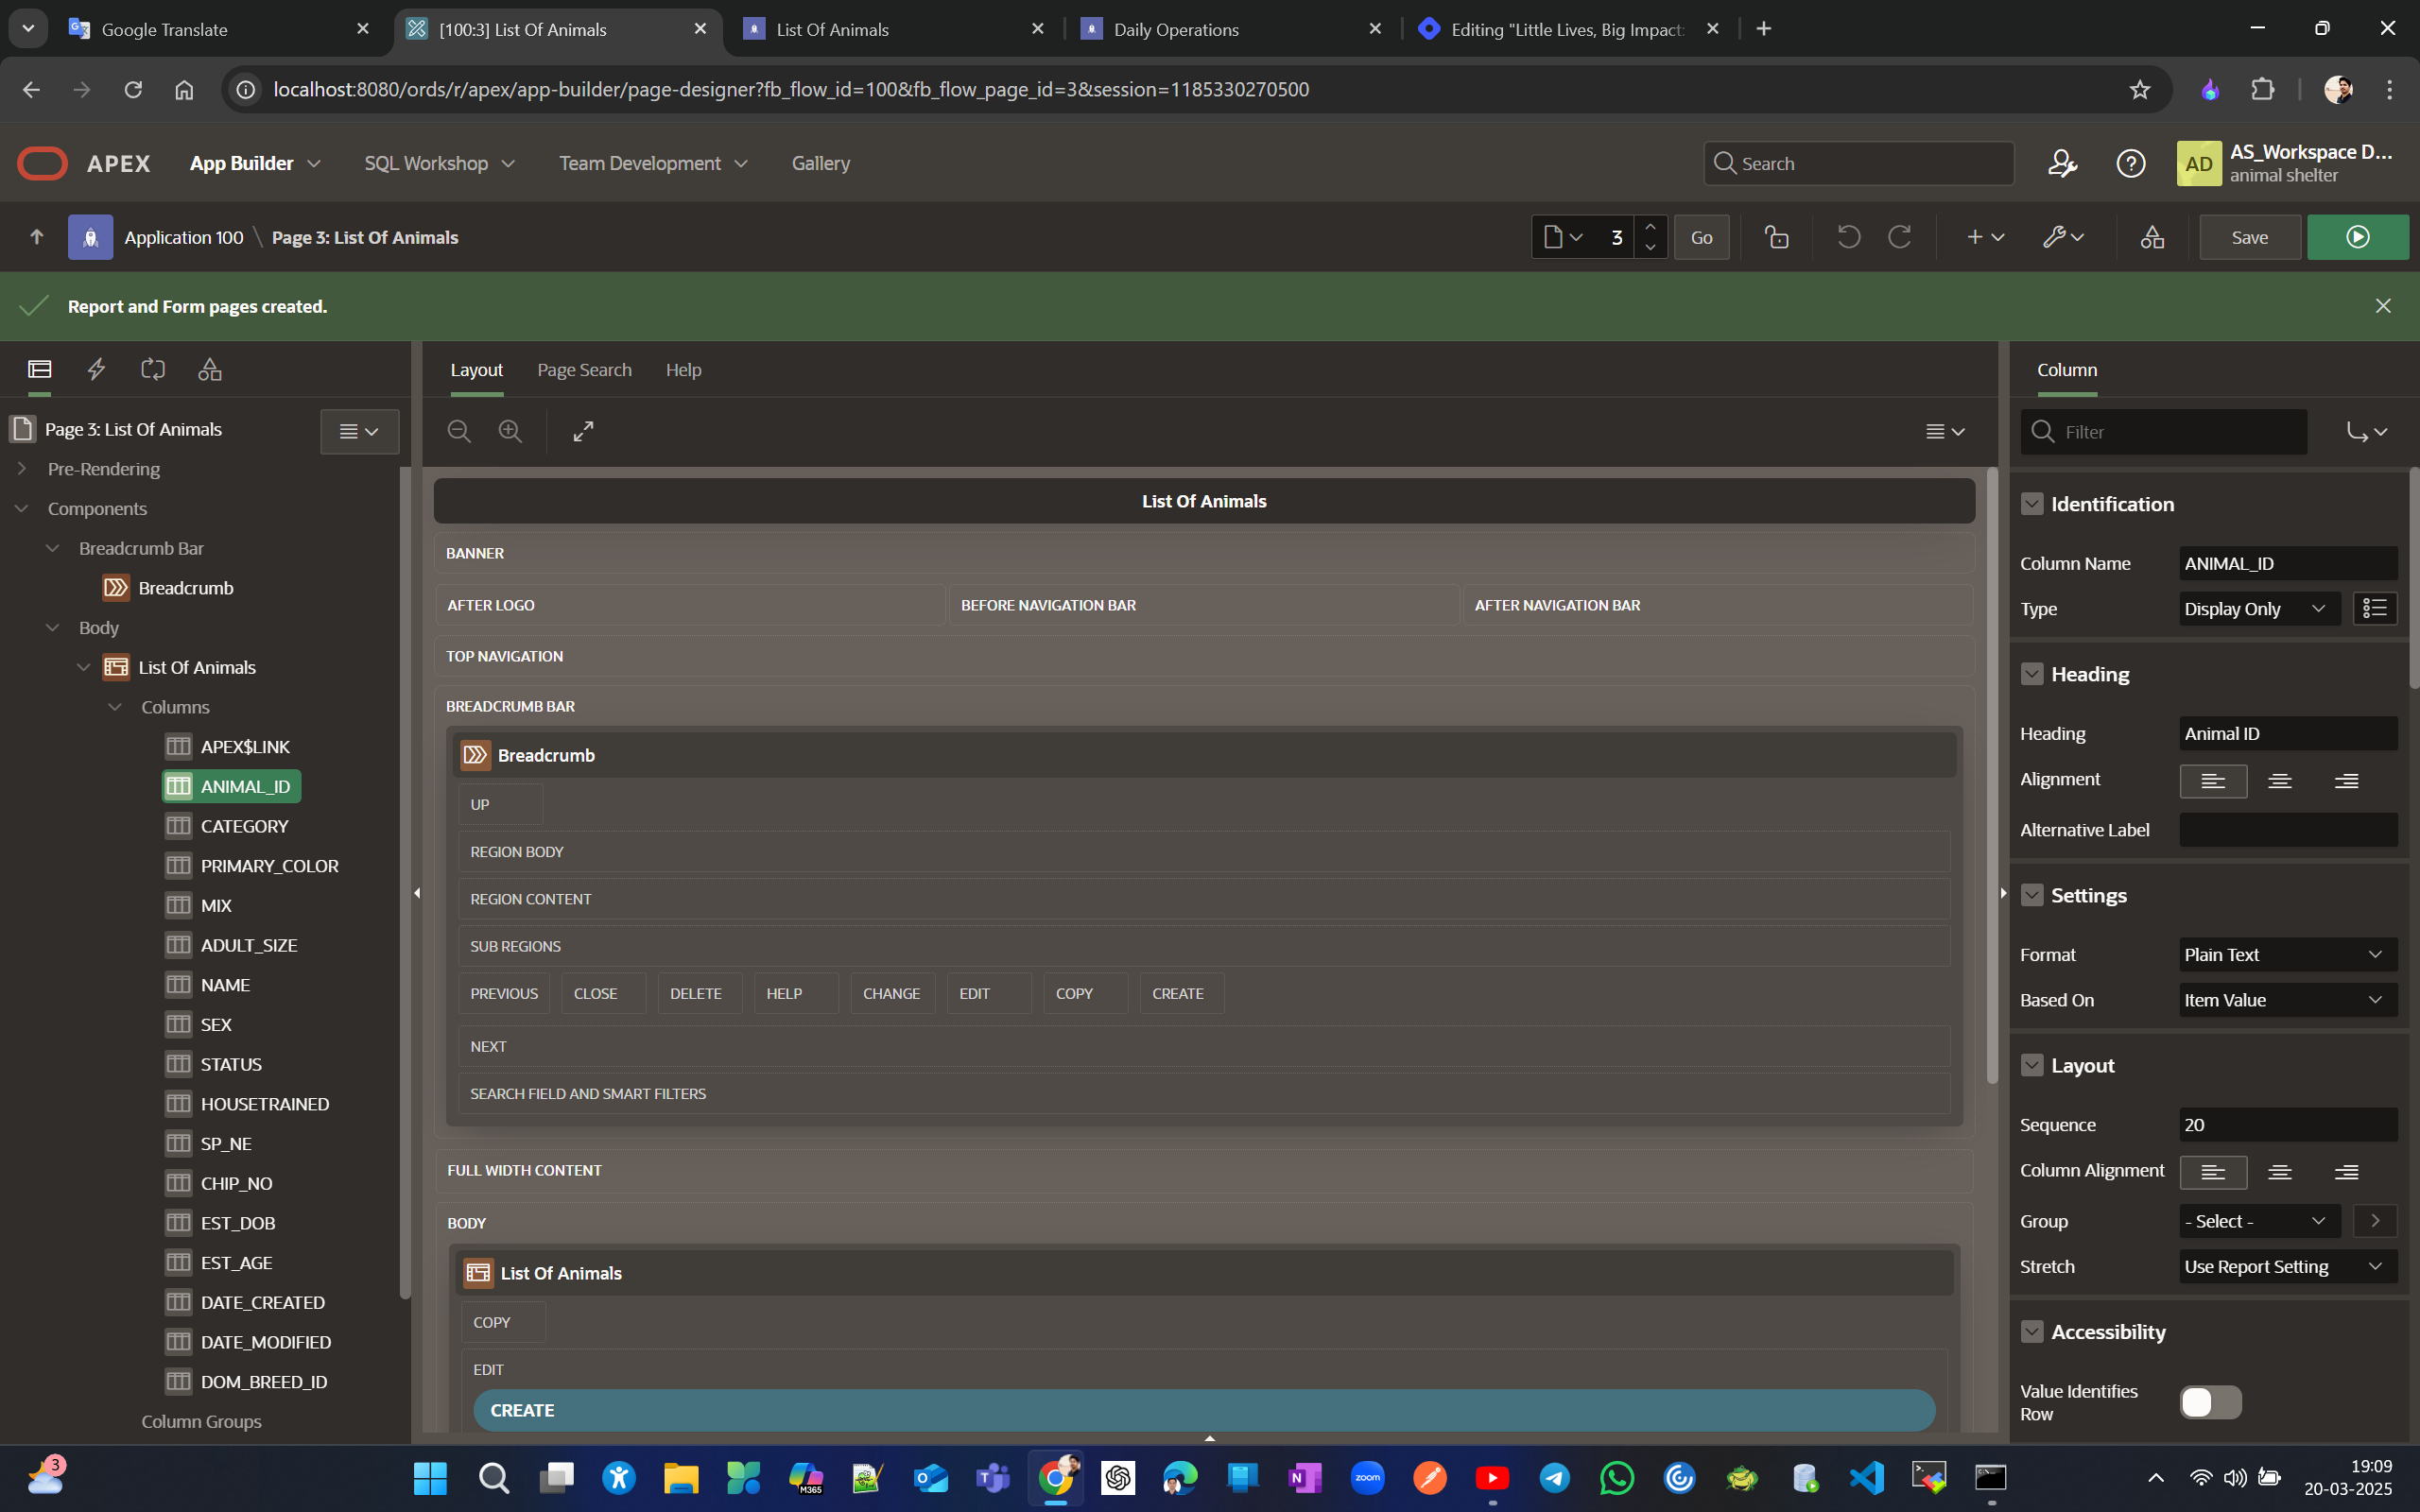
Page Designer. Show PK in a form. See source of a Item. Create lookup table
In the page designer, there are three sections: Rendering, Layout, and Properties, with the Layout section, known as the canvas, being where we actually work. When you select a component in rendering, you can view its corresponding item properties in the item section and the page layout in the layout or canvas section.
[Page designer from APEX 19.1]
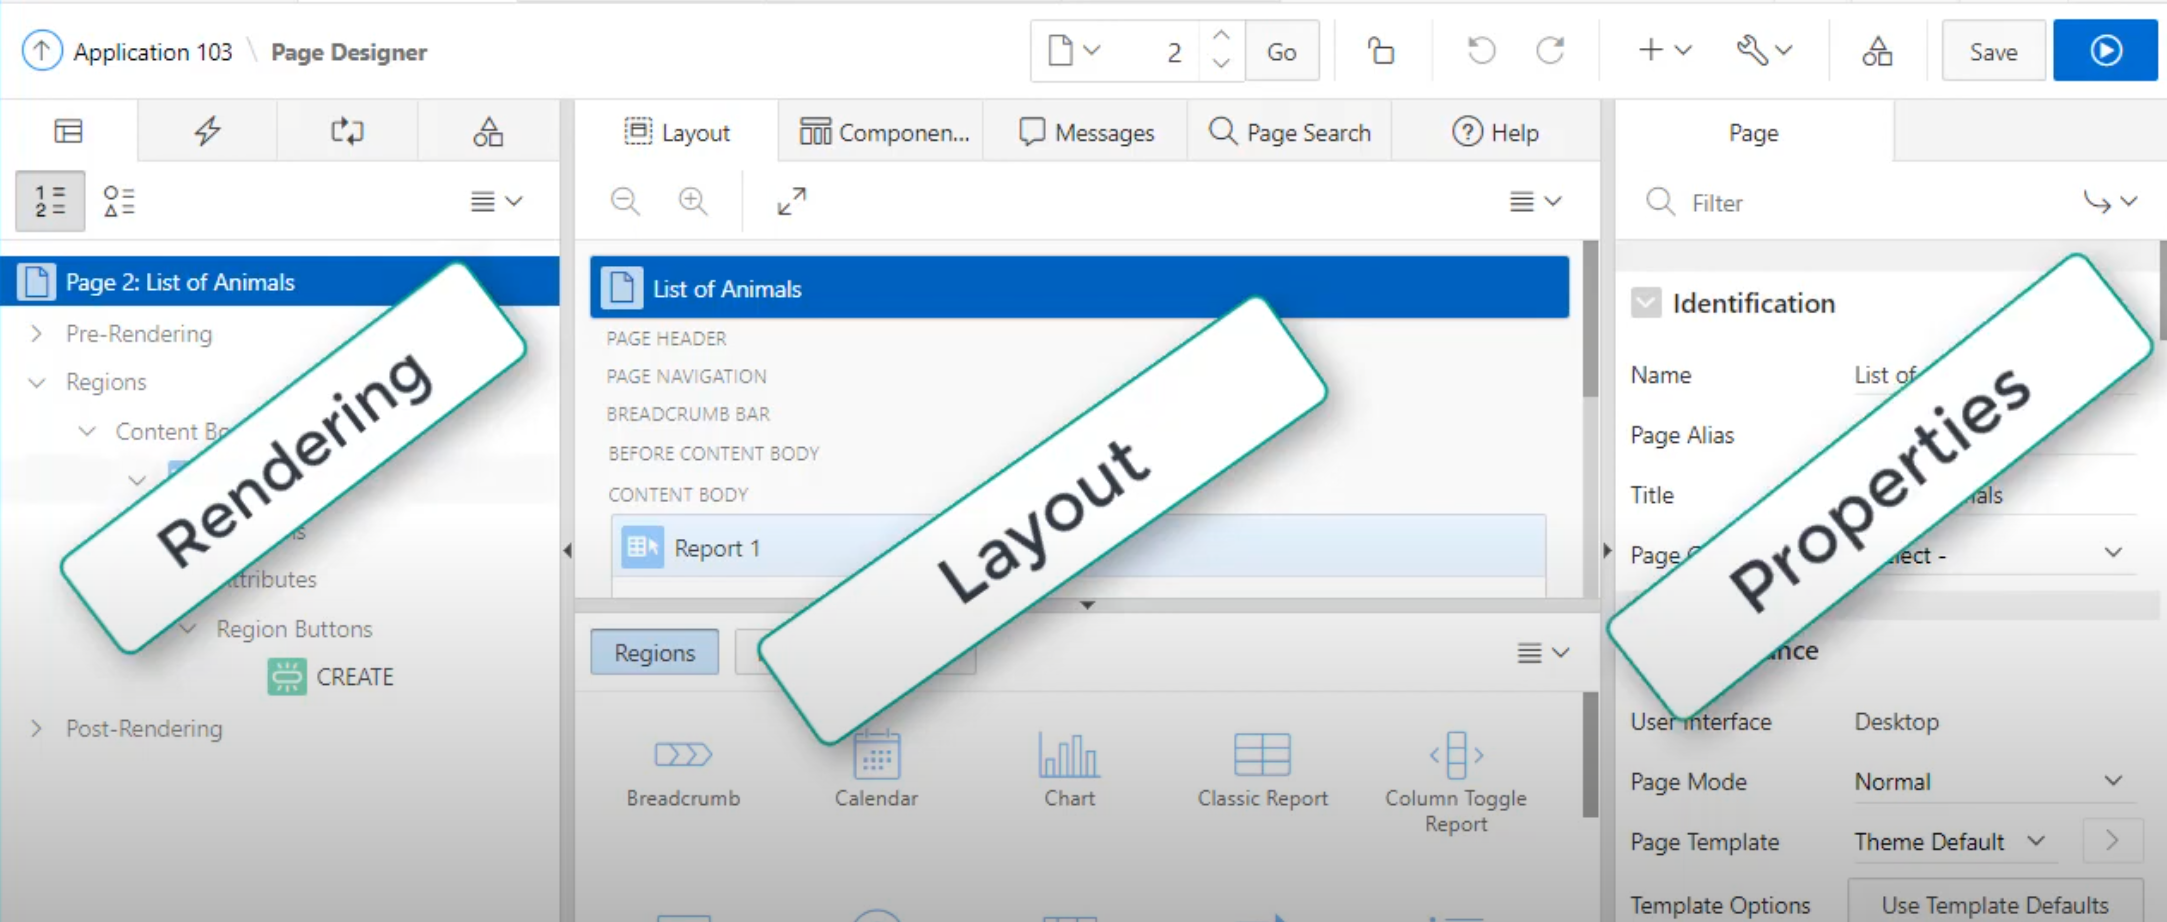
[Page designer from APEX 24.2]
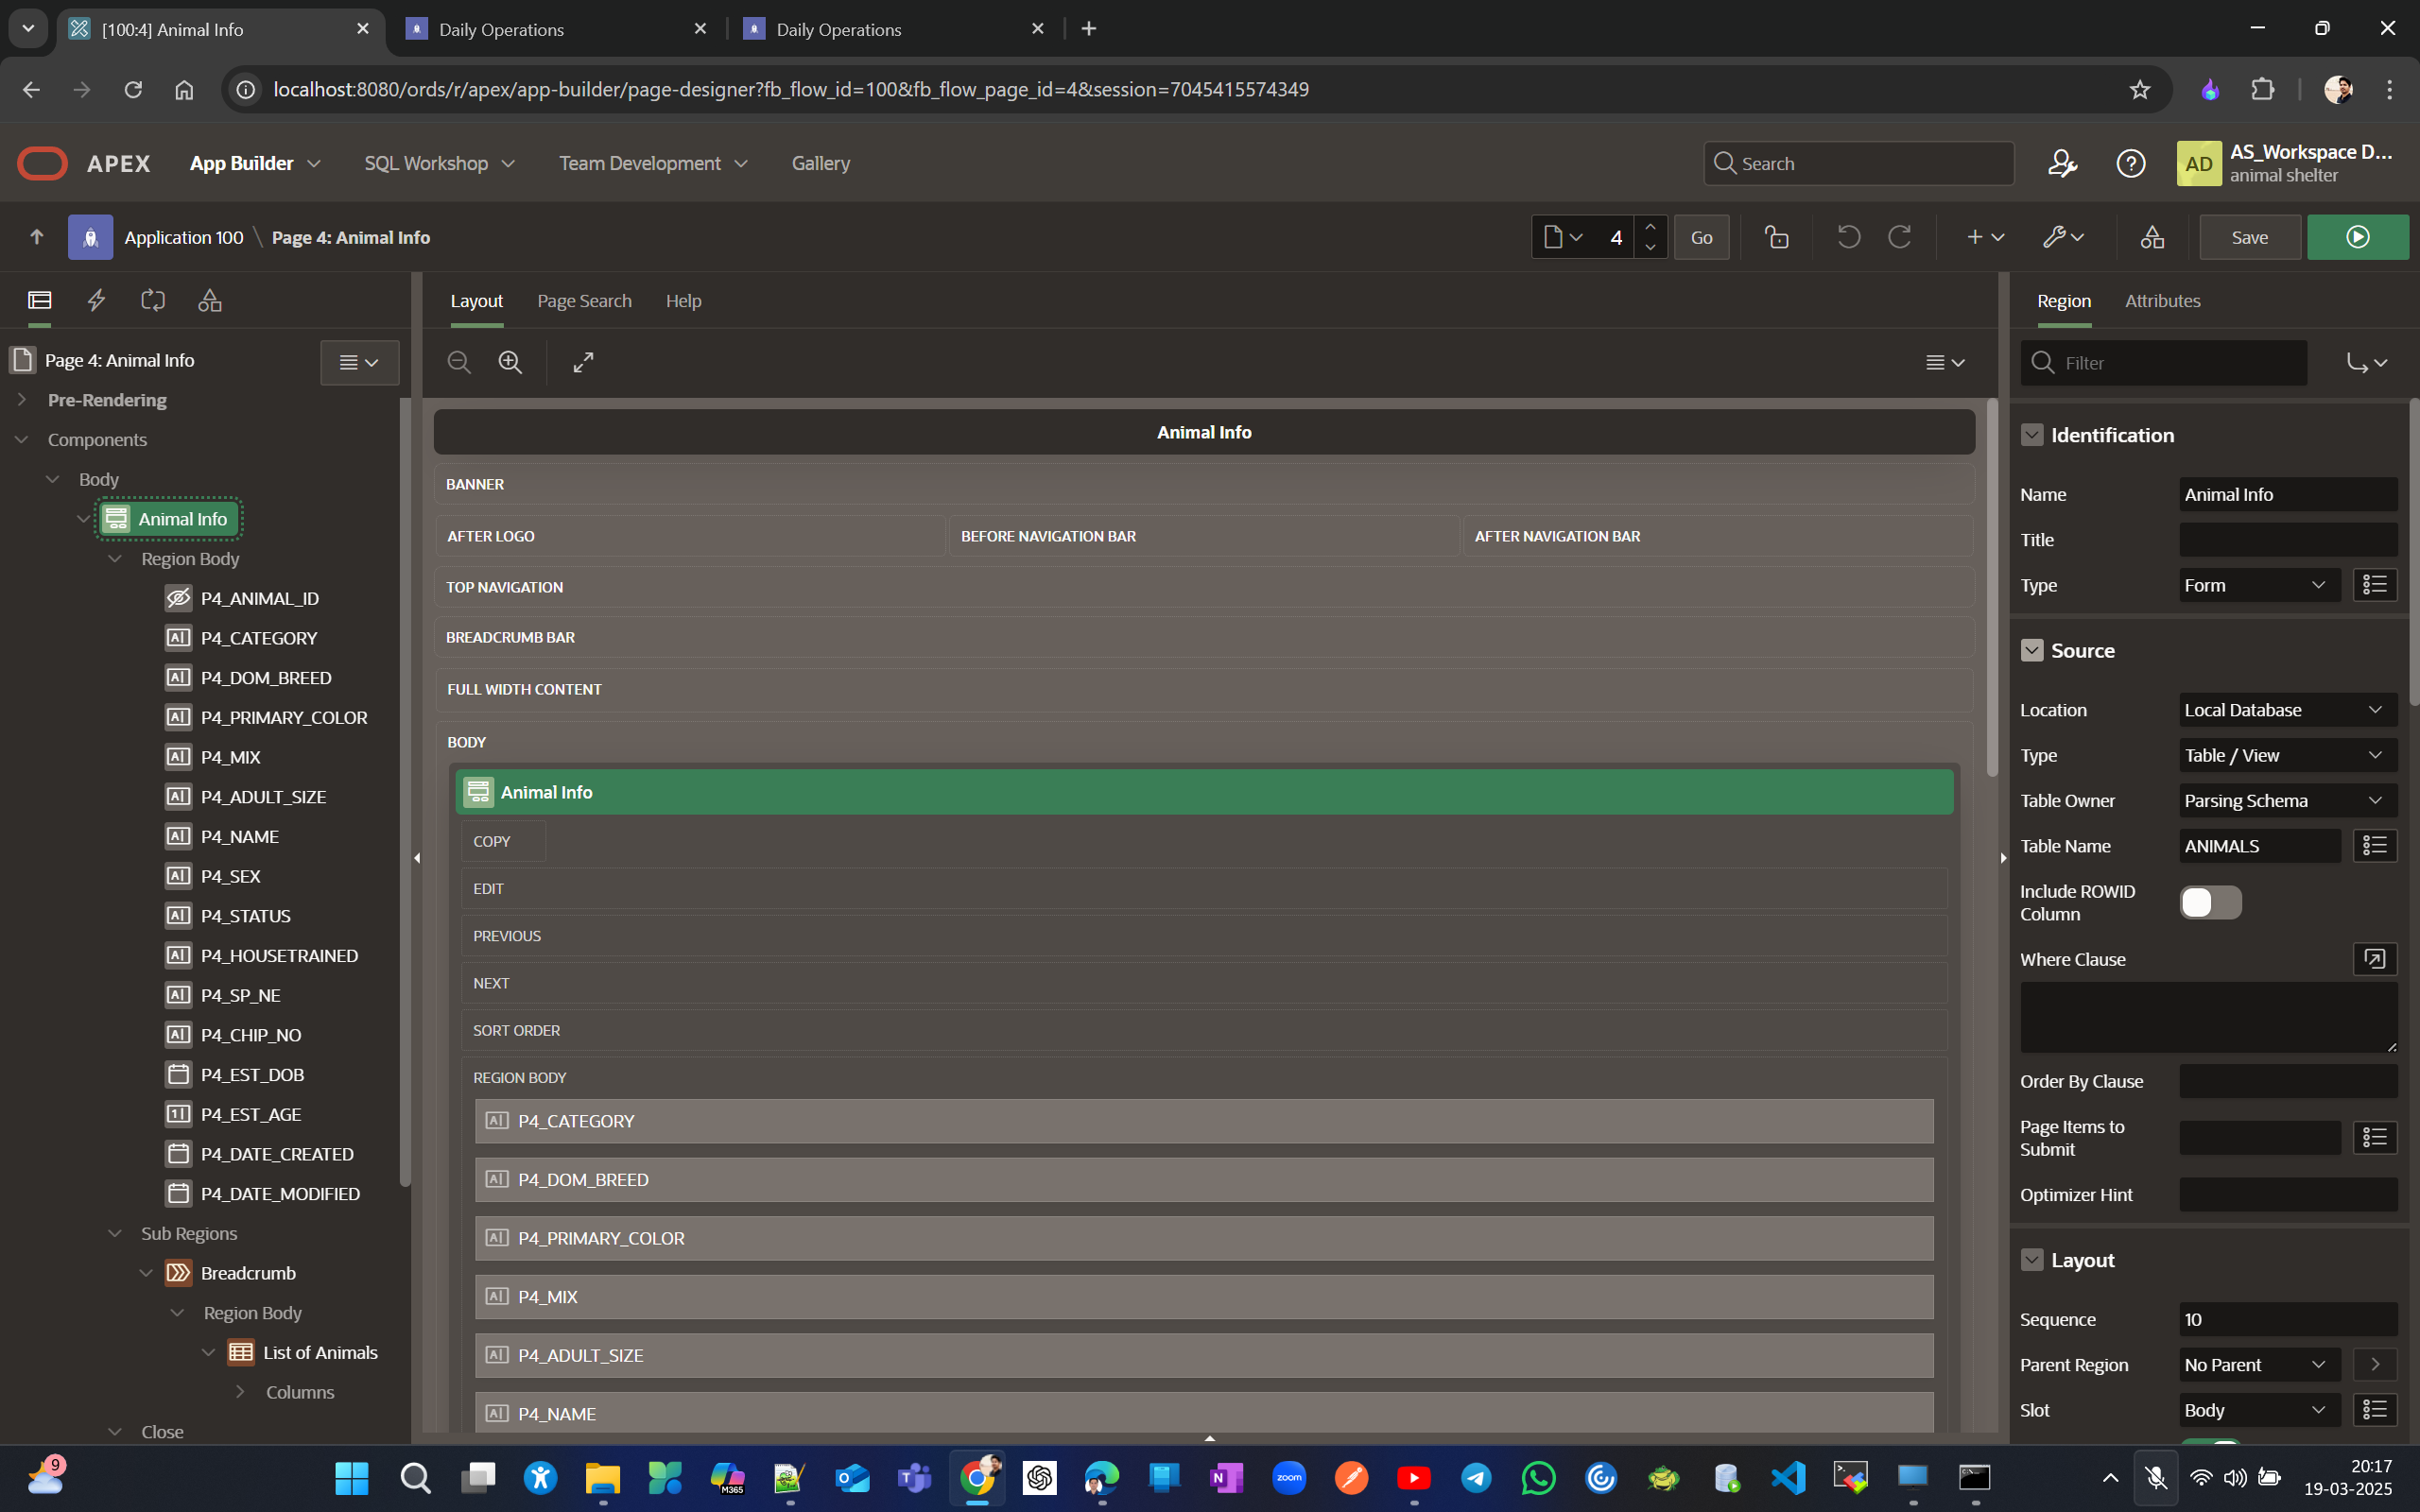
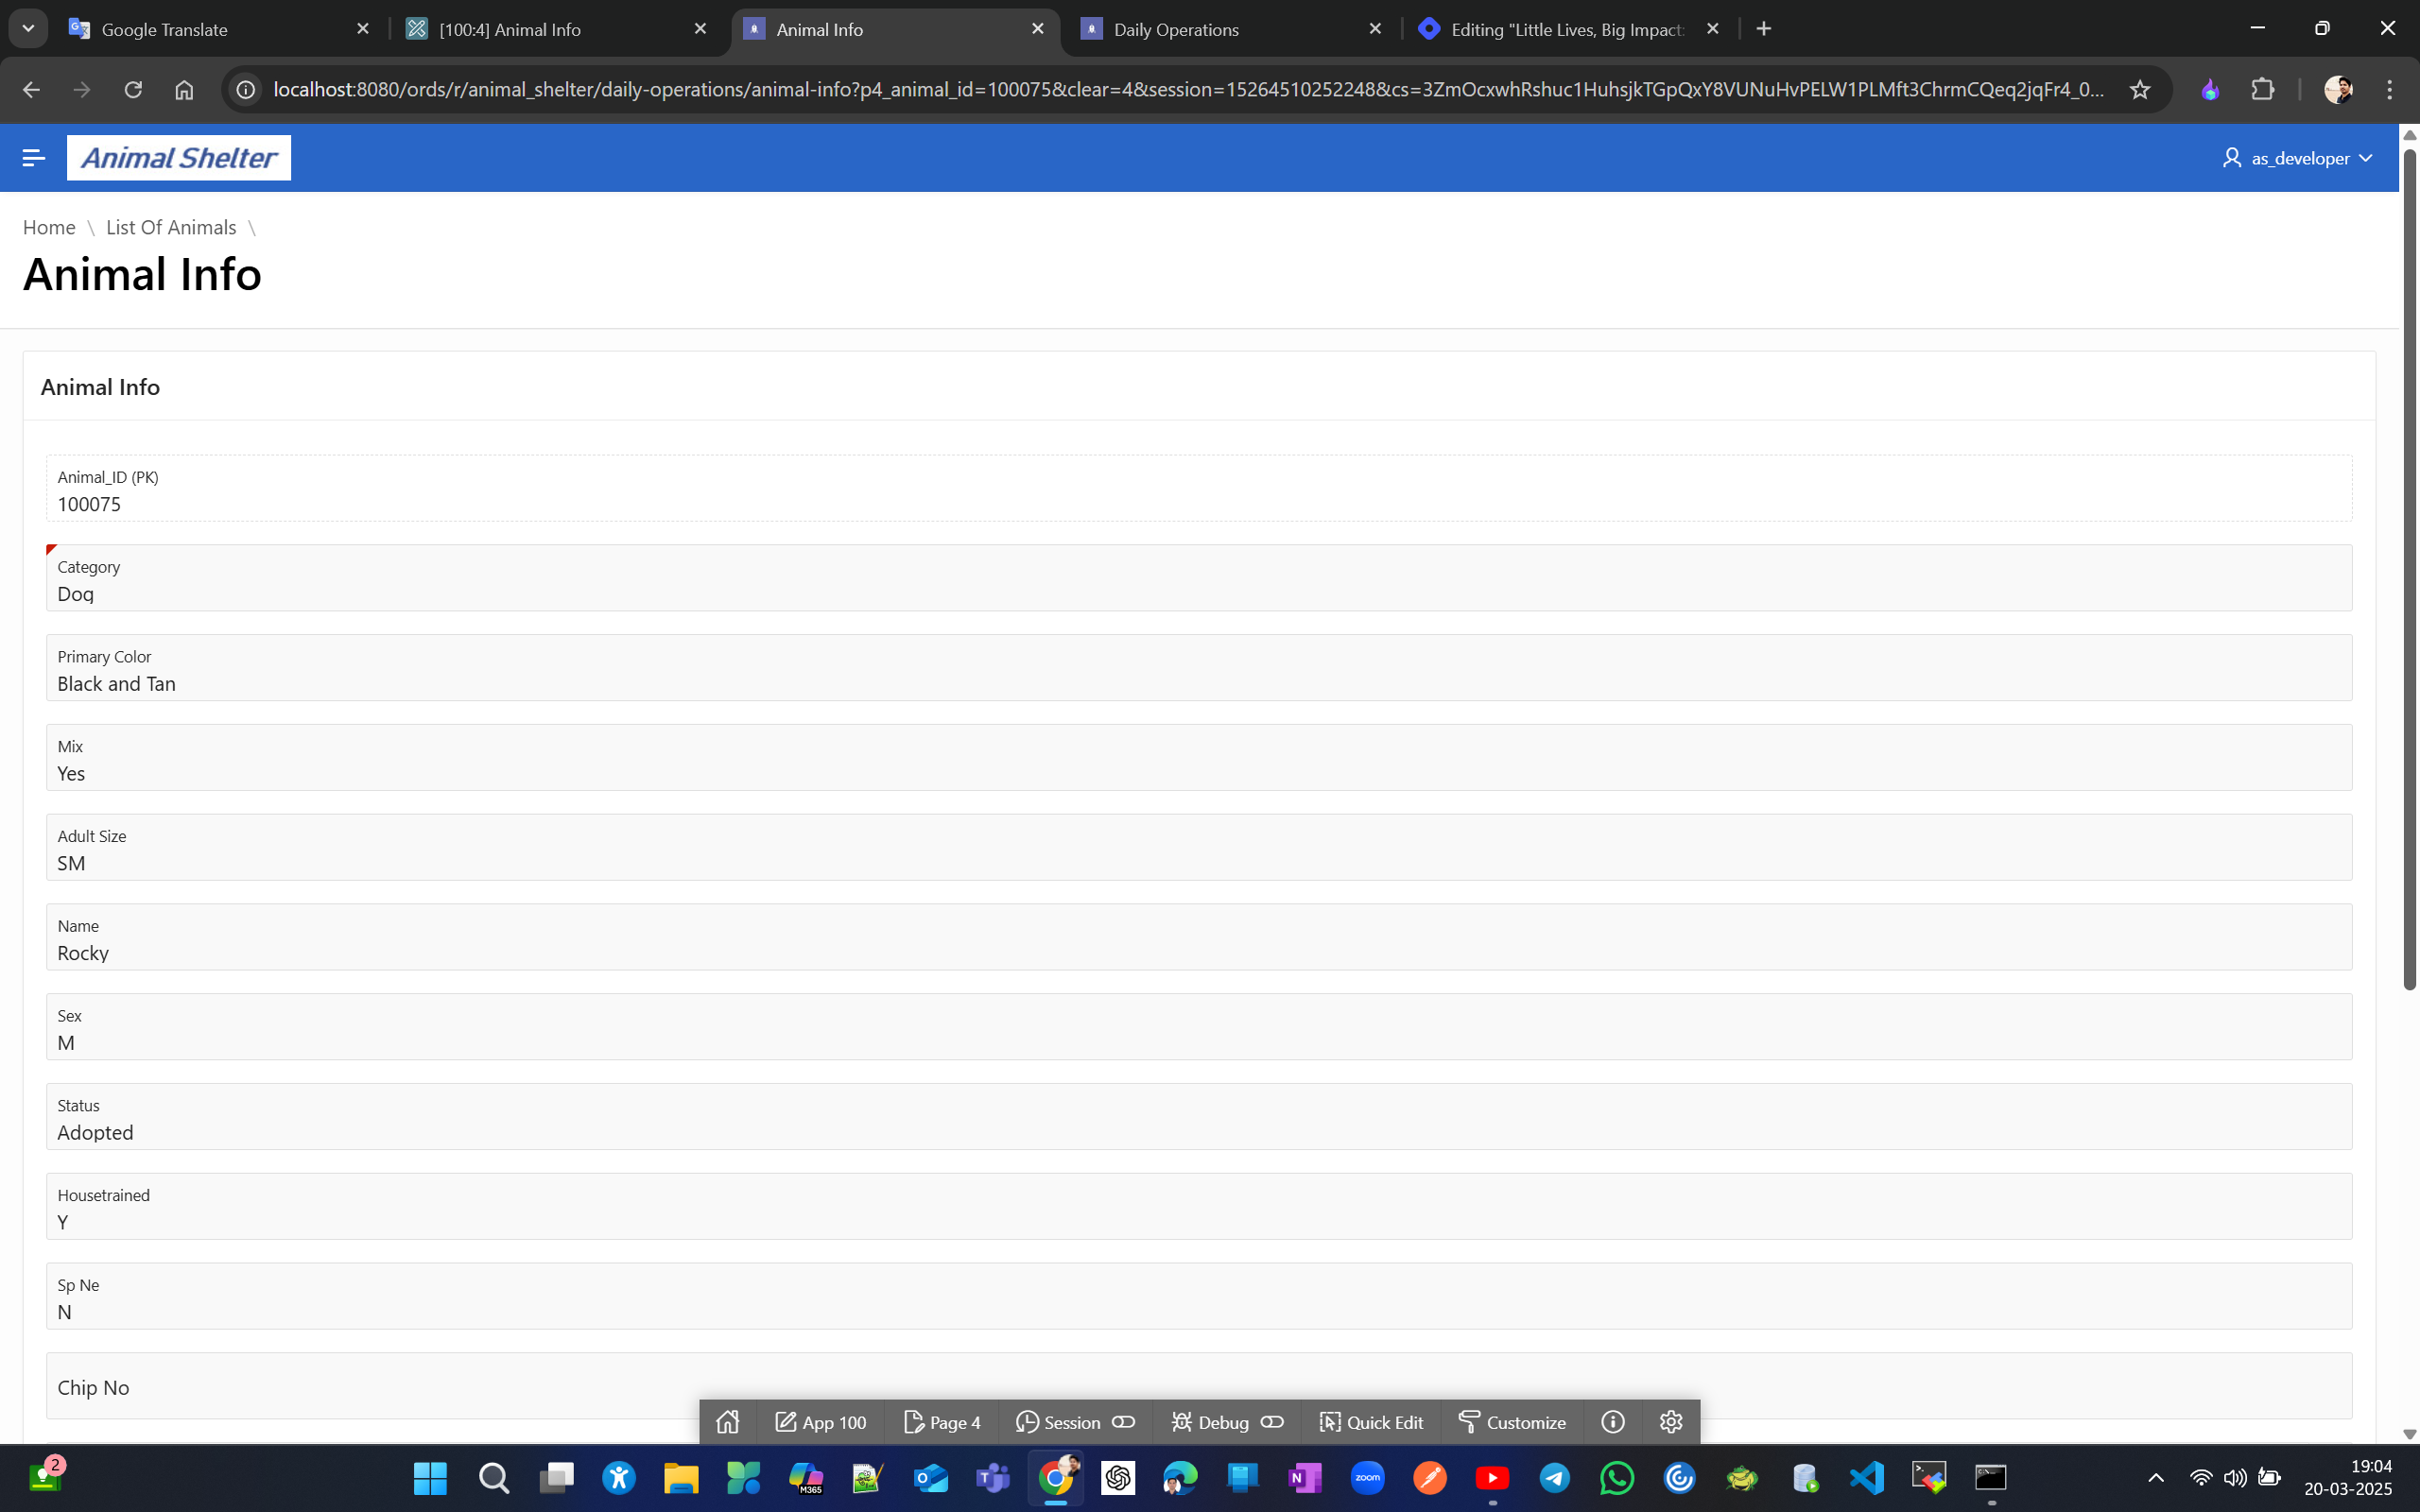
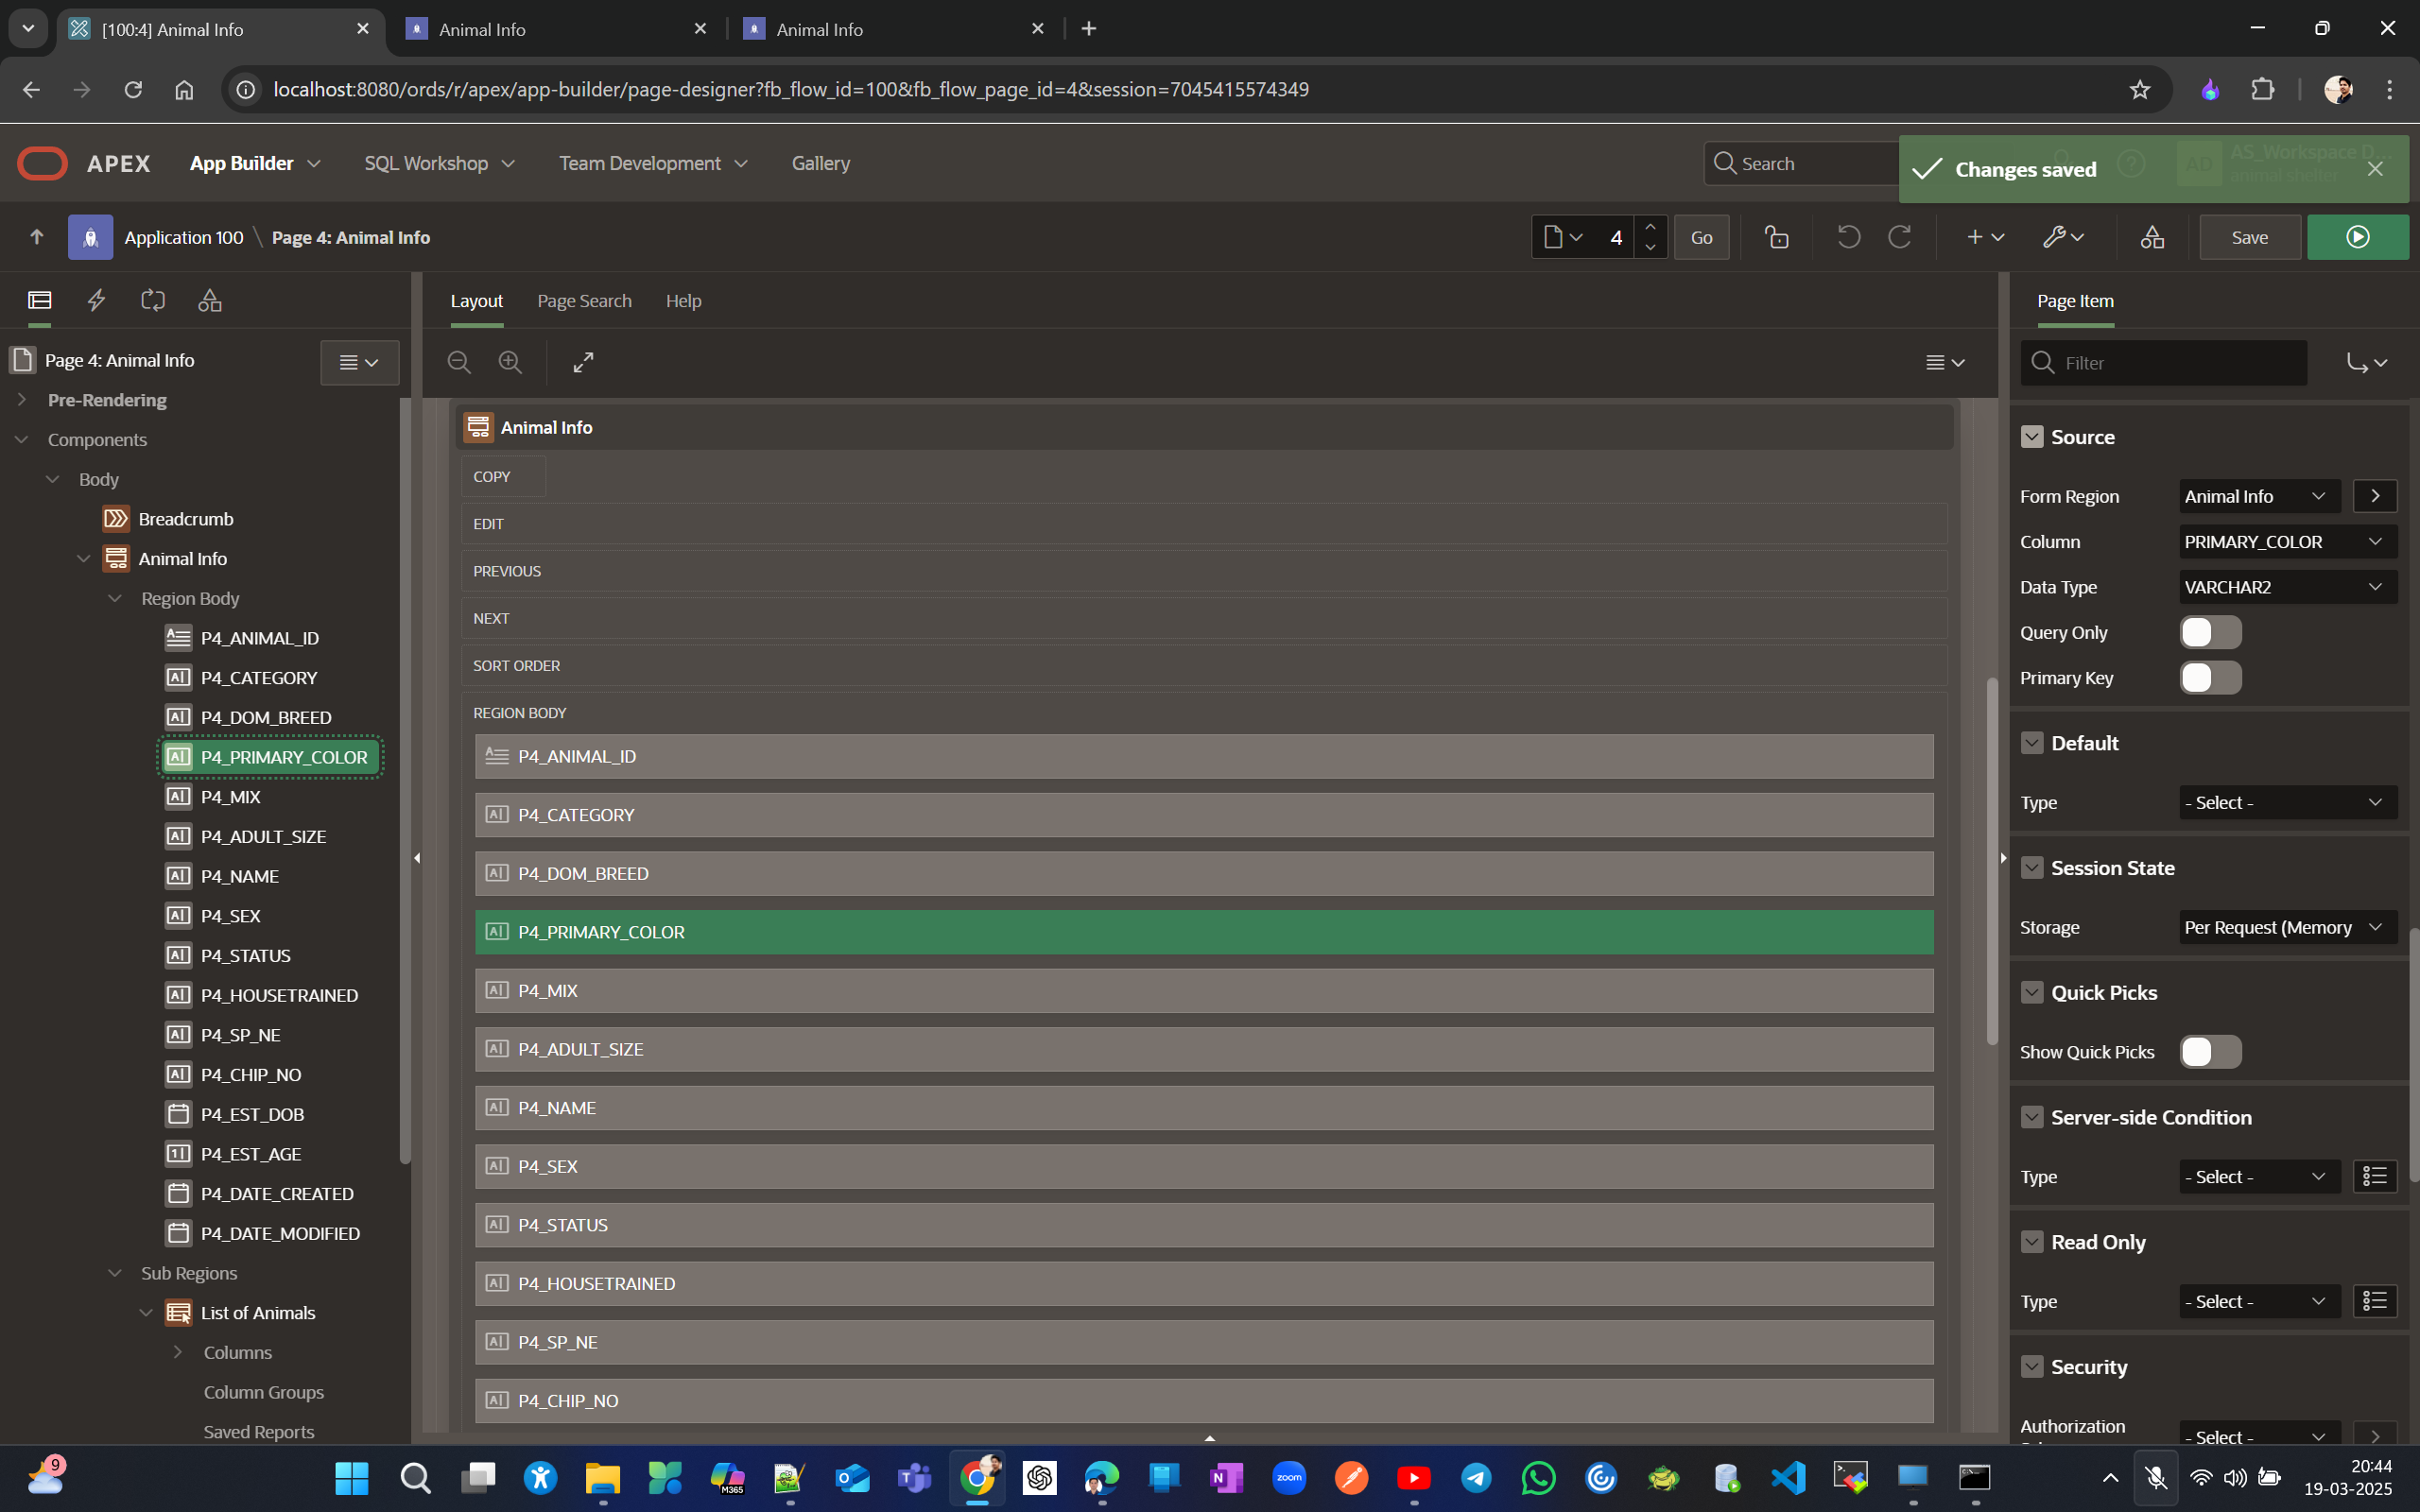
Normally, you don't see the PK in a form because the PK attribute item property is set to hidden, but you can make it visible by selecting Display Only. It's also recommended to change the label name from "New" to something more appropriate and meaningful, like "Animal ID (PK)," otherwise the disabled PK field will display with the label "New" inside, as shown in the third screenshot.
[After label change]
[See source of selected Item]
Sometimes we need to provide an input list to ensure that people don't add animals incorrectly or modify their classification over time. Mistakes can happen, such as entering the wrong value, using incorrect casing, or omitting spaces, which makes list and column values inconsistent. We want data entry to be uniform and efficient wherever possible. To achieve this, we should use a lookup table to provide a dropdown list when someone wants to enter a new animal. Let's create a lookup table for this purpose.
To create a lookup table, go to the object browser, select the Animal table, click "Create Lookup Table" under the column section's more dropdown, select the column DOM_BREED and create on lookup table, and a new lookup table named DOM_BREED_LOOKUP will be automatically created to store a unique list of values from the selected column. You can also make the change by modifying the displayed script.
A lookup table serves as a "master list" to find a business key value, like "DOM_BREED," in exchange for its identifier, such as the id column, for use in another table's foreign key column.
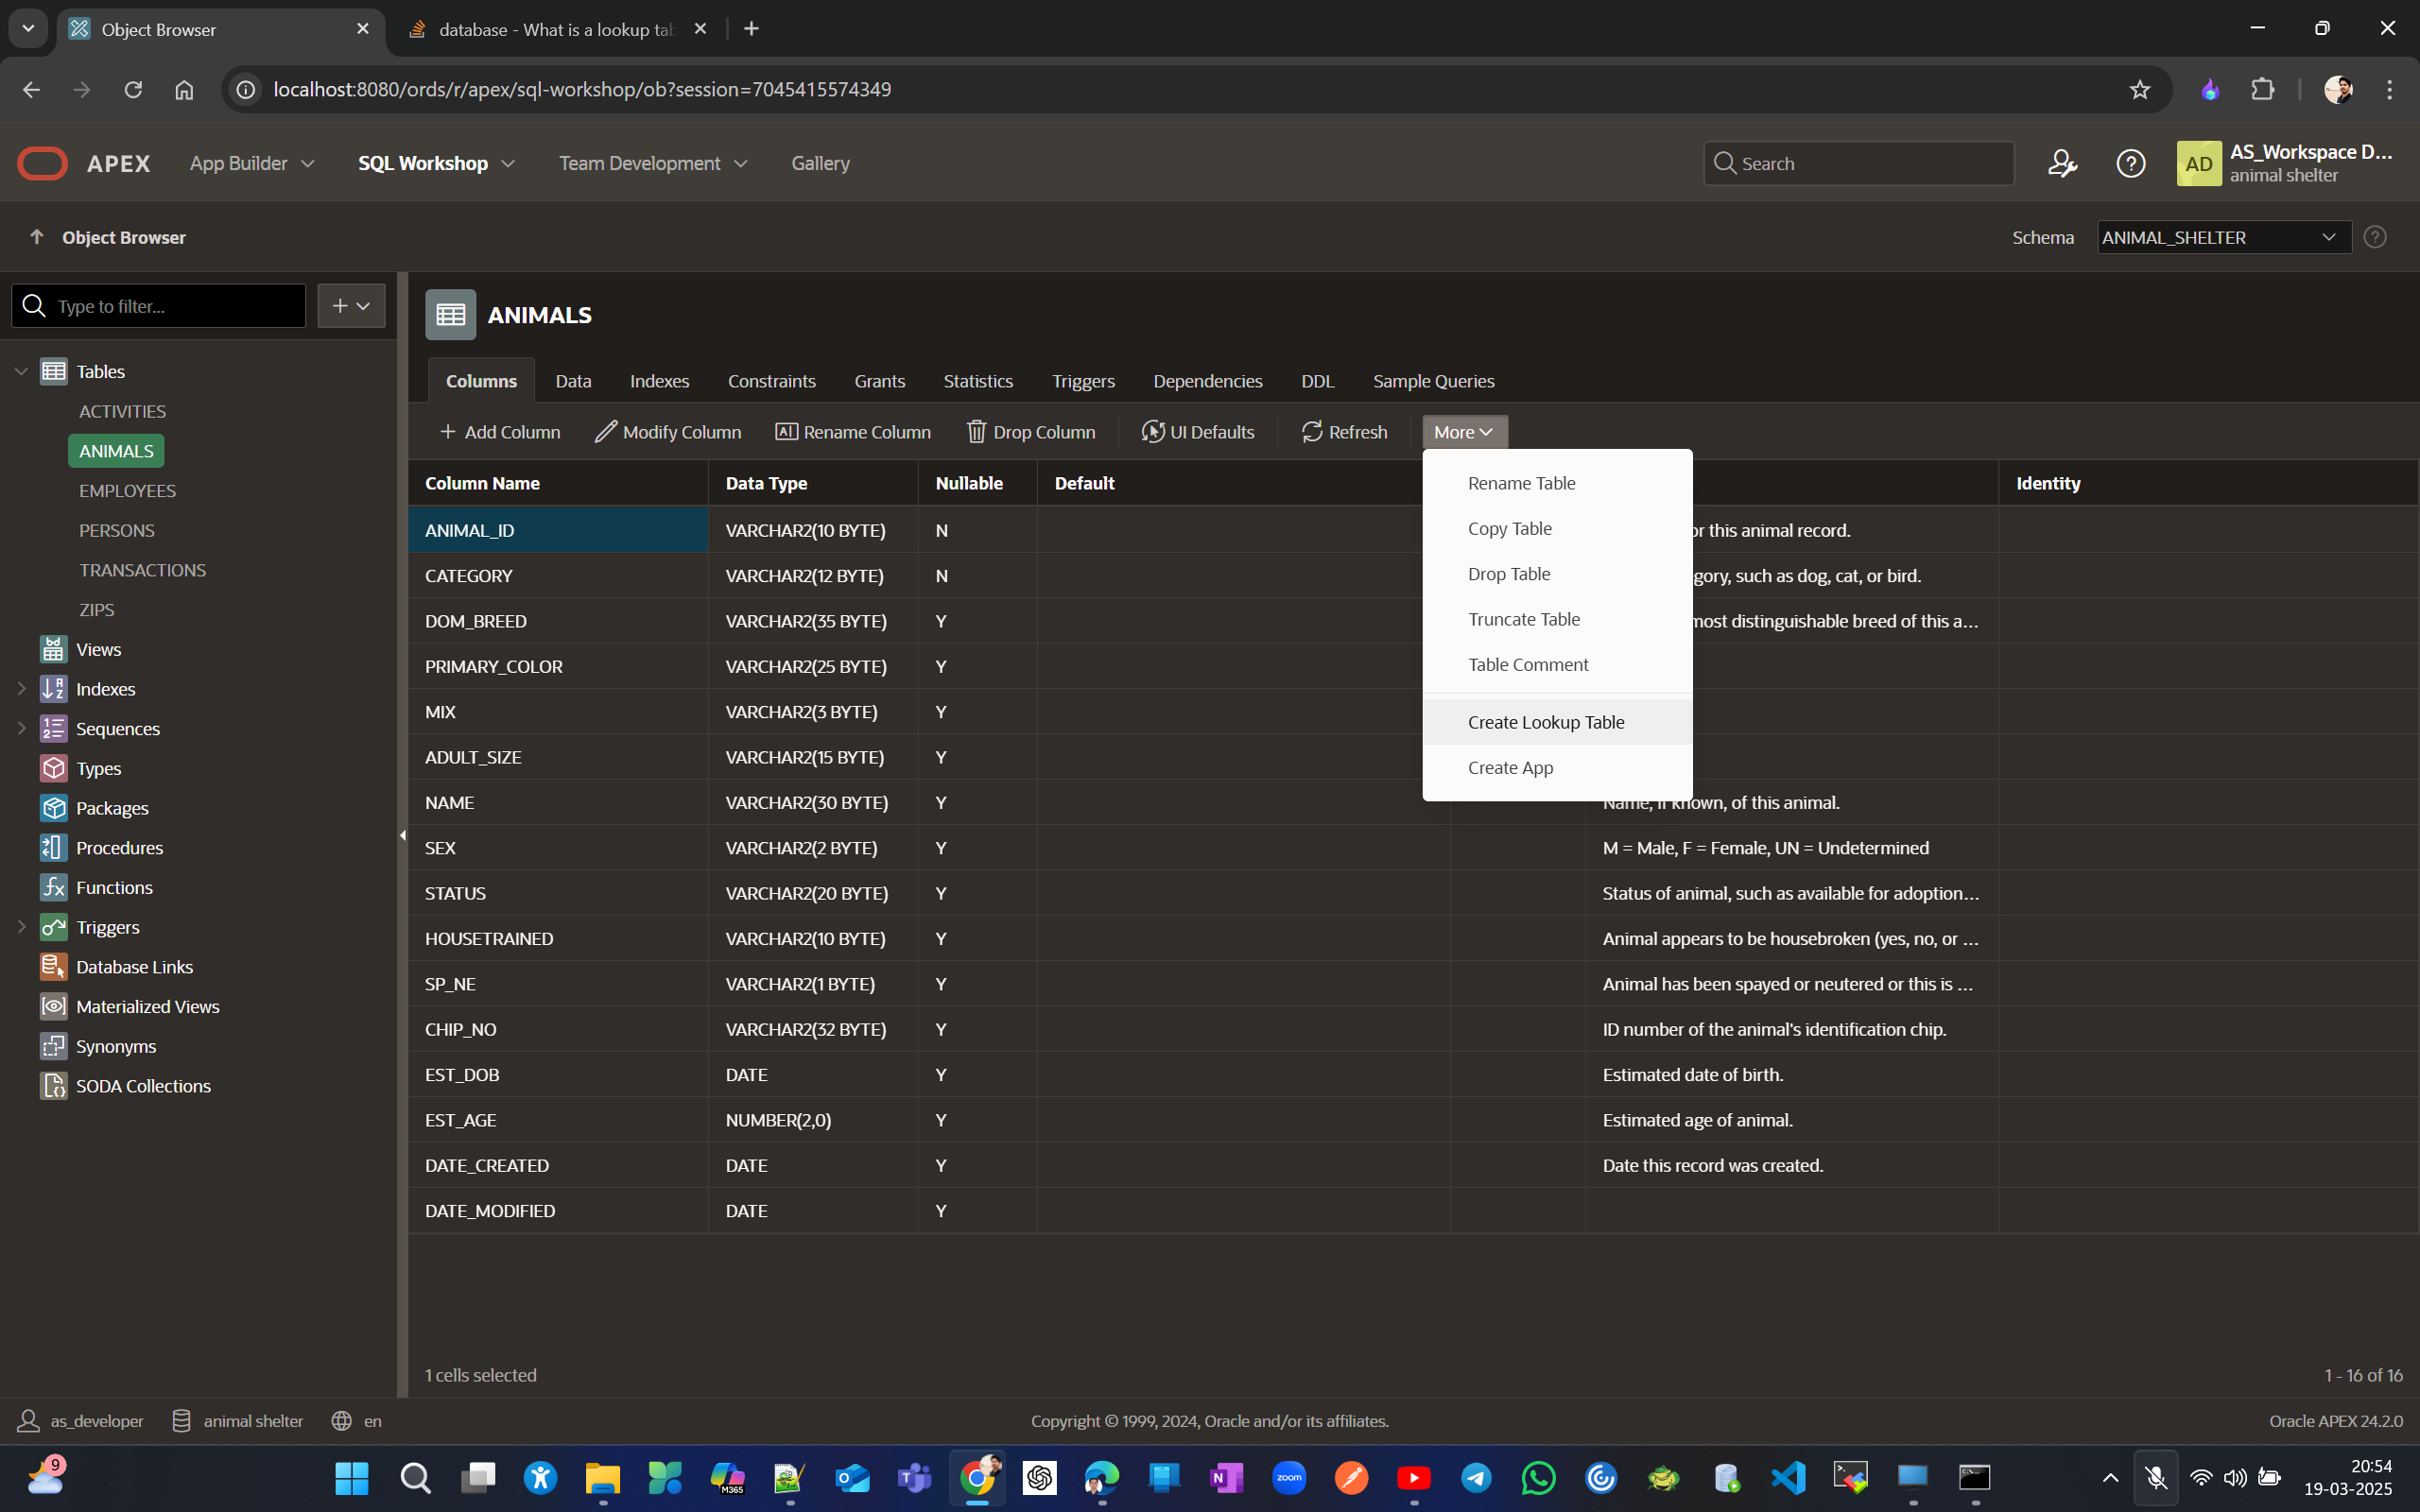
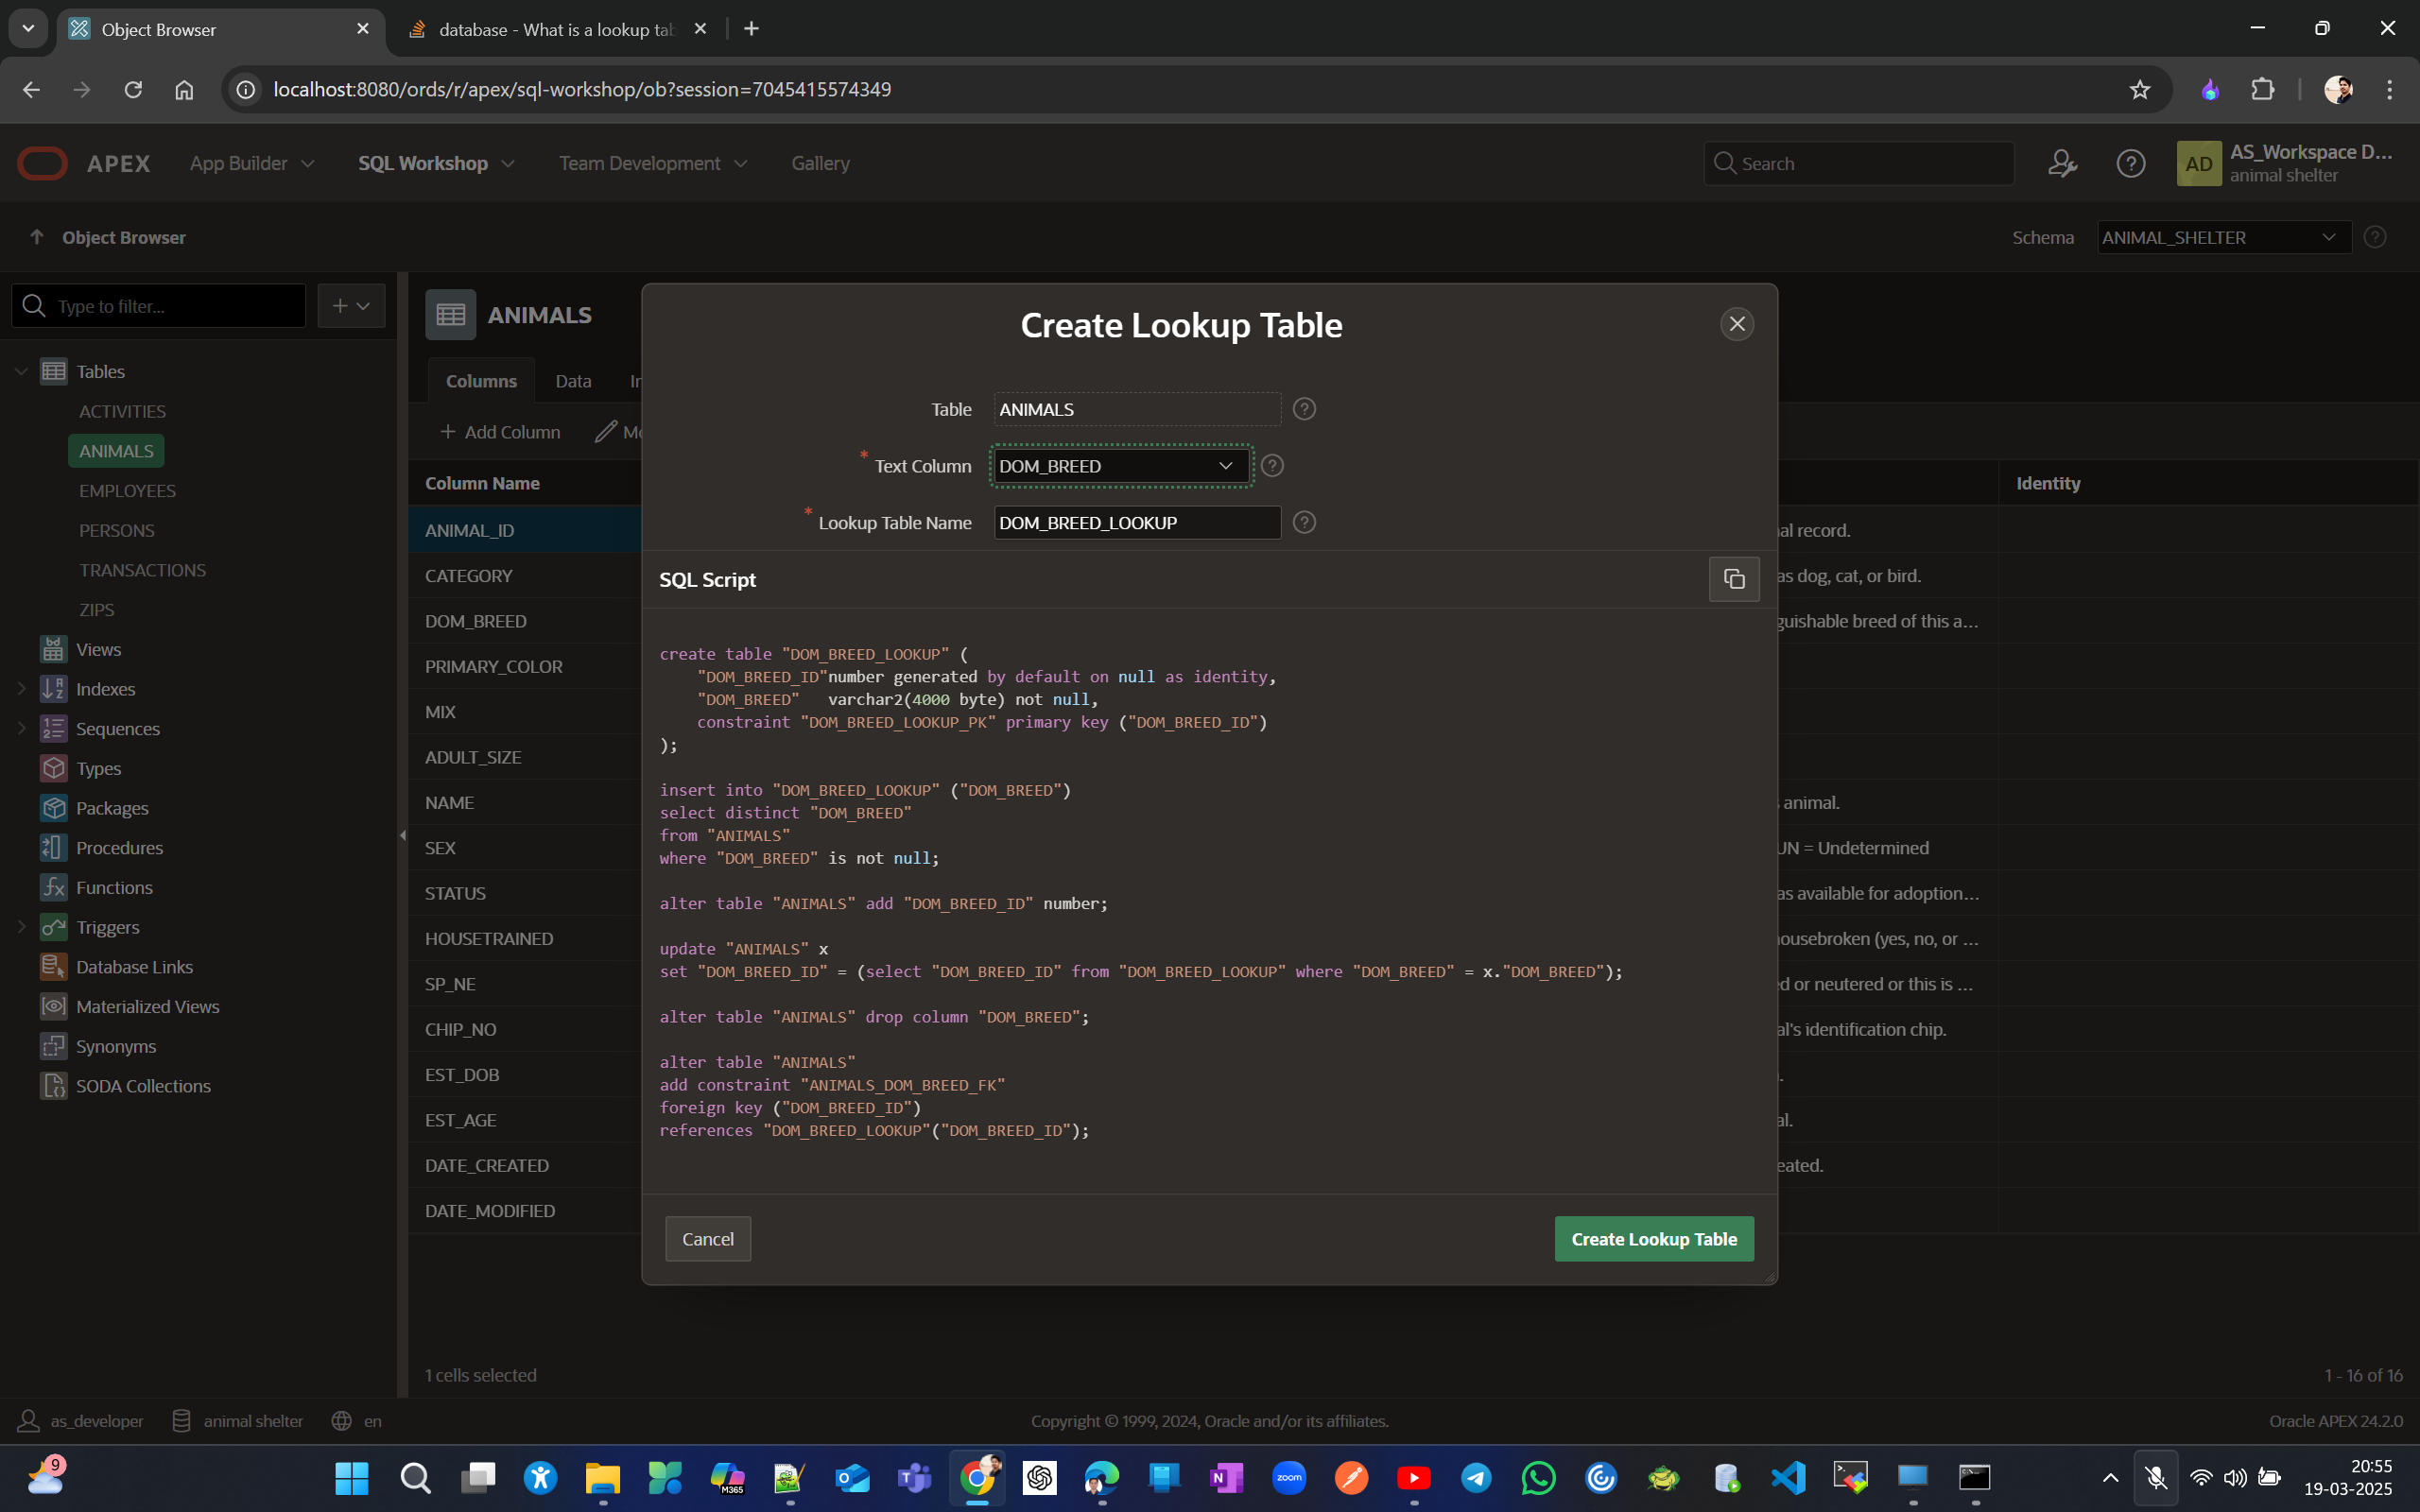
The following SQL commands were executed behind the scenes to create the lookup table.
create table "DOM_BREED_LOOKUP" (
    "DOM_BREED_ID"number generated by default on null as identity,
    "DOM_BREED"   varchar2(4000 byte) not null,
    constraint "DOM_BREED_LOOKUP_PK" primary key ("DOM_BREED_ID")
);

insert into "DOM_BREED_LOOKUP" ("DOM_BREED")
select distinct "DOM_BREED"
from "ANIMALS"
where "DOM_BREED" is not null;

alter table "ANIMALS" add "DOM_BREED_ID" number;

update "ANIMALS" x
set "DOM_BREED_ID" = (select "DOM_BREED_ID" from "DOM_BREED_LOOKUP" where "DOM_BREED" = x."DOM_BREED");

alter table "ANIMALS" drop column "DOM_BREED";

alter table "ANIMALS"
add constraint "ANIMALS_DOM_BREED_FK"
foreign key ("DOM_BREED_ID")
references "DOM_BREED_LOOKUP"("DOM_BREED_ID");
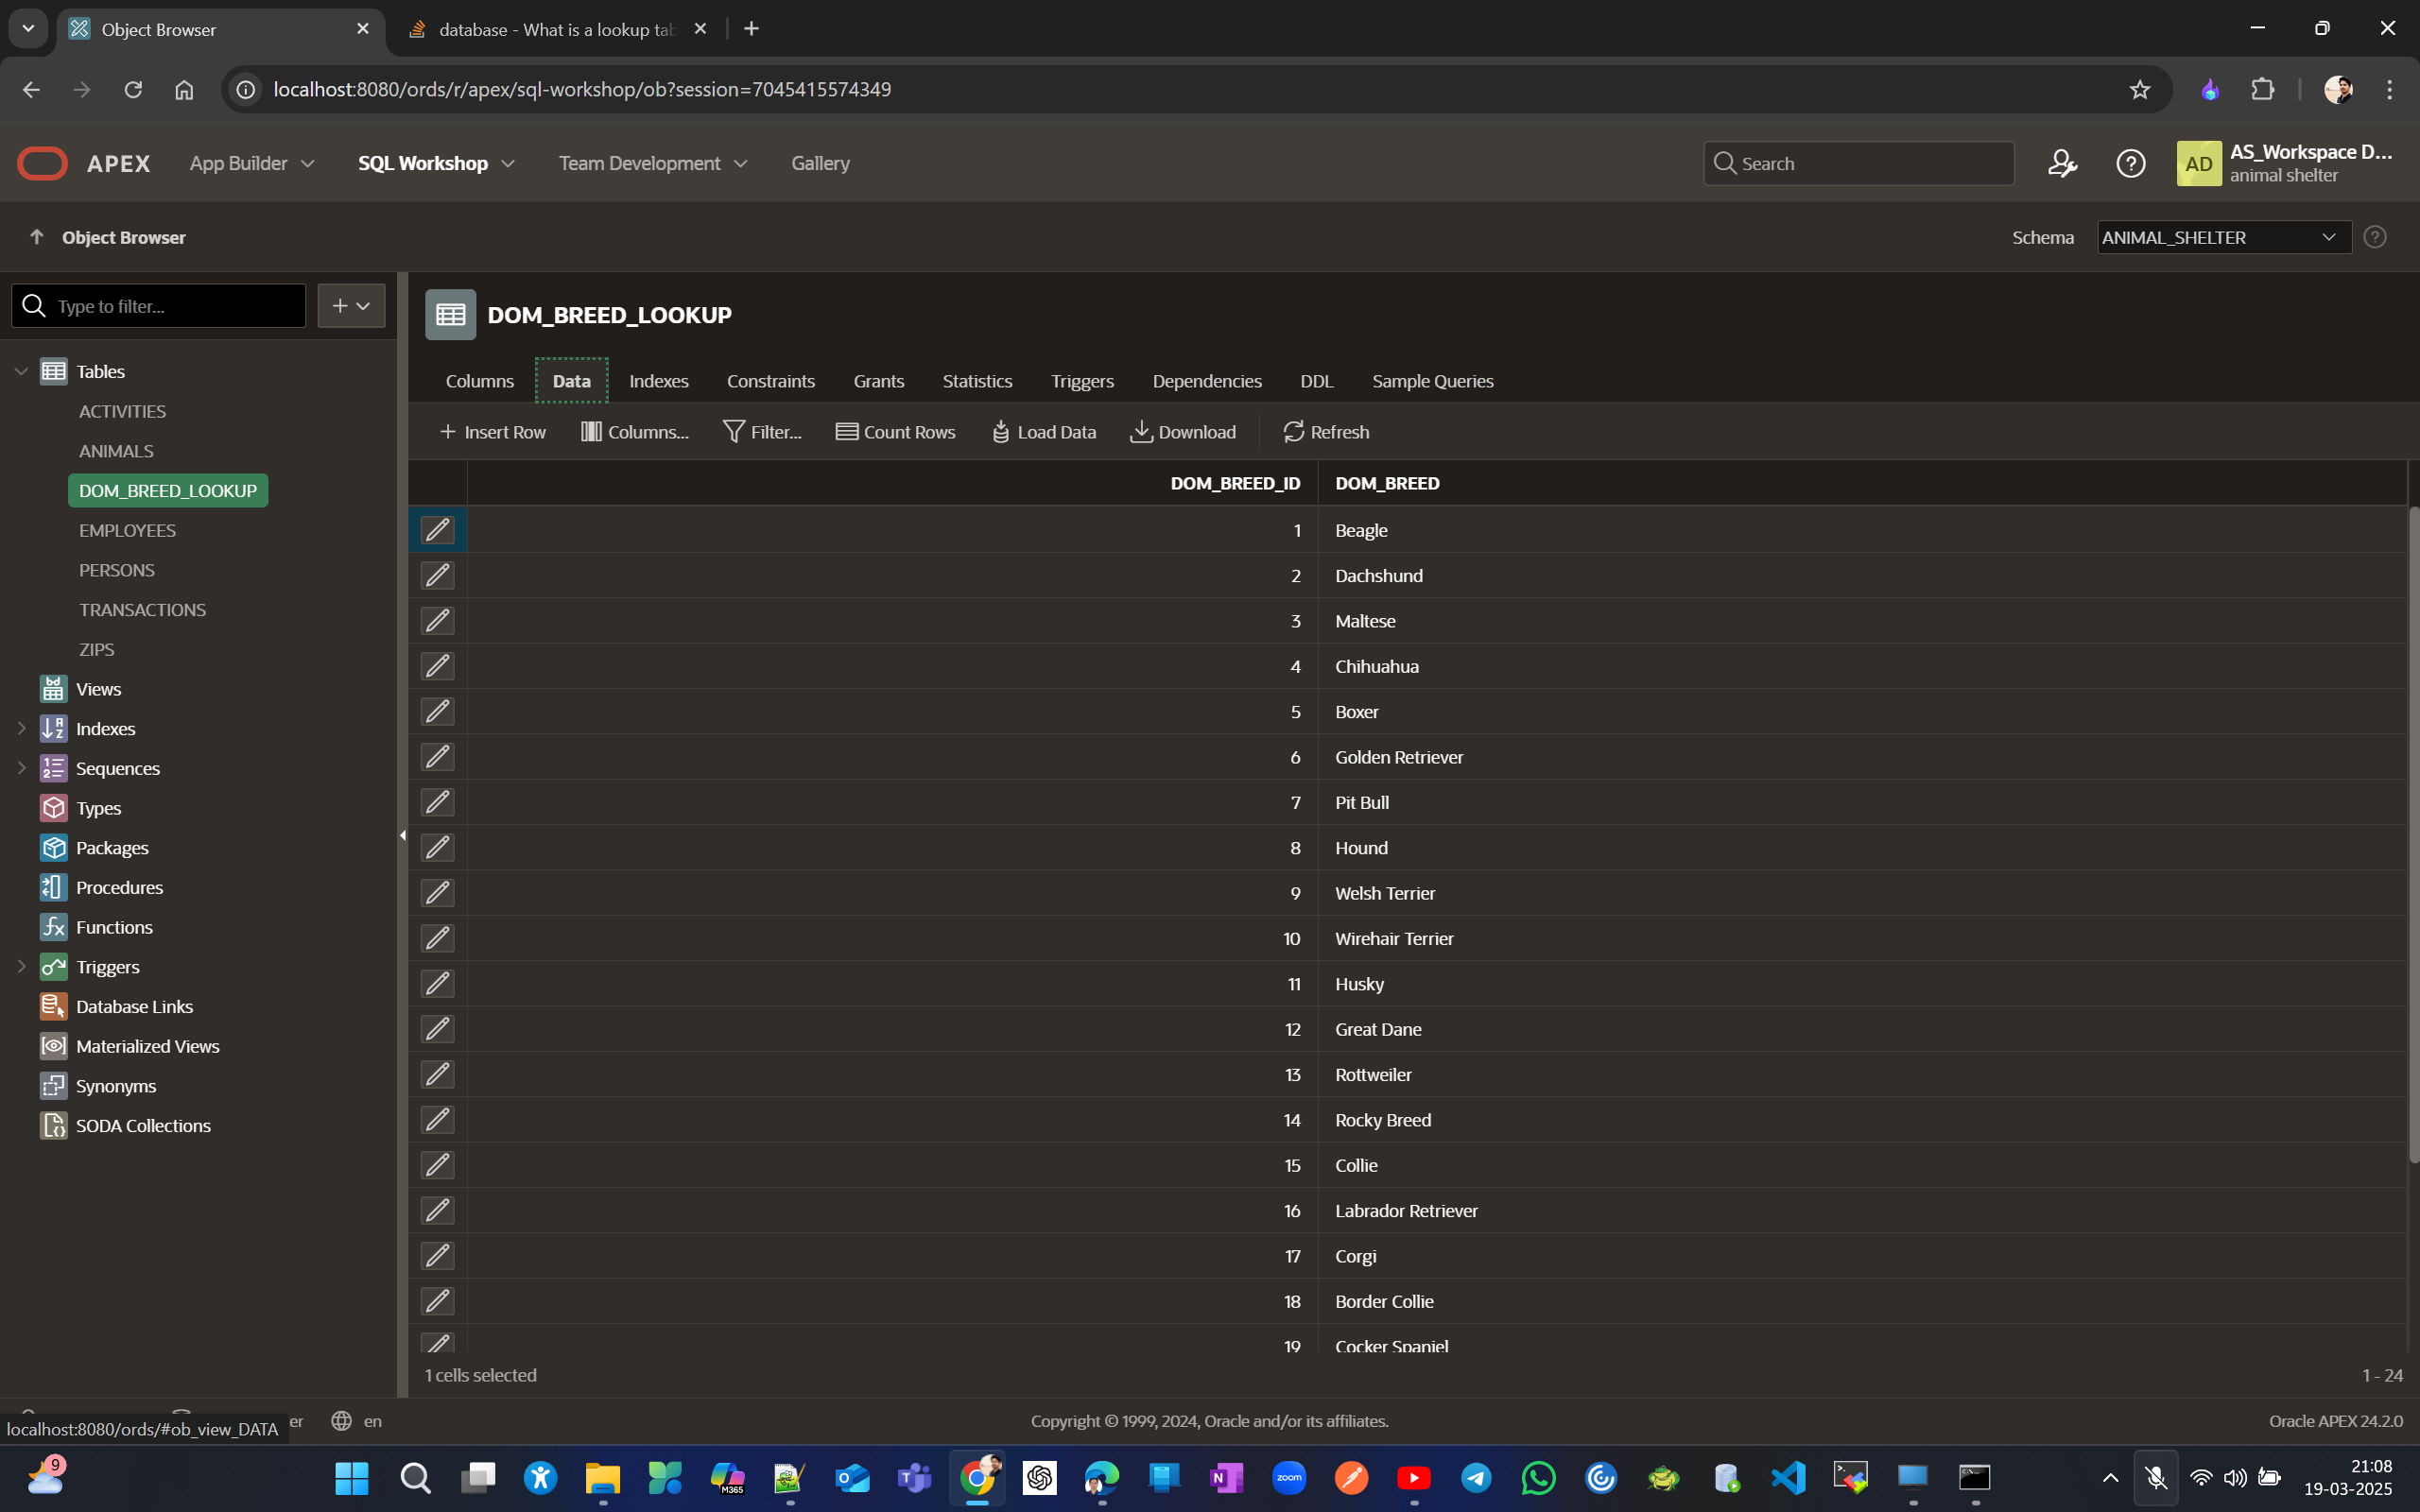
You can now verify that the new table DOM_BREED_LOOKUP has been created, the column DOM_BREED has been dropped from the ANIMALS table, and a new foreign key column DOM_BREED_ID has replaced it with values from the new lookup table's ID.
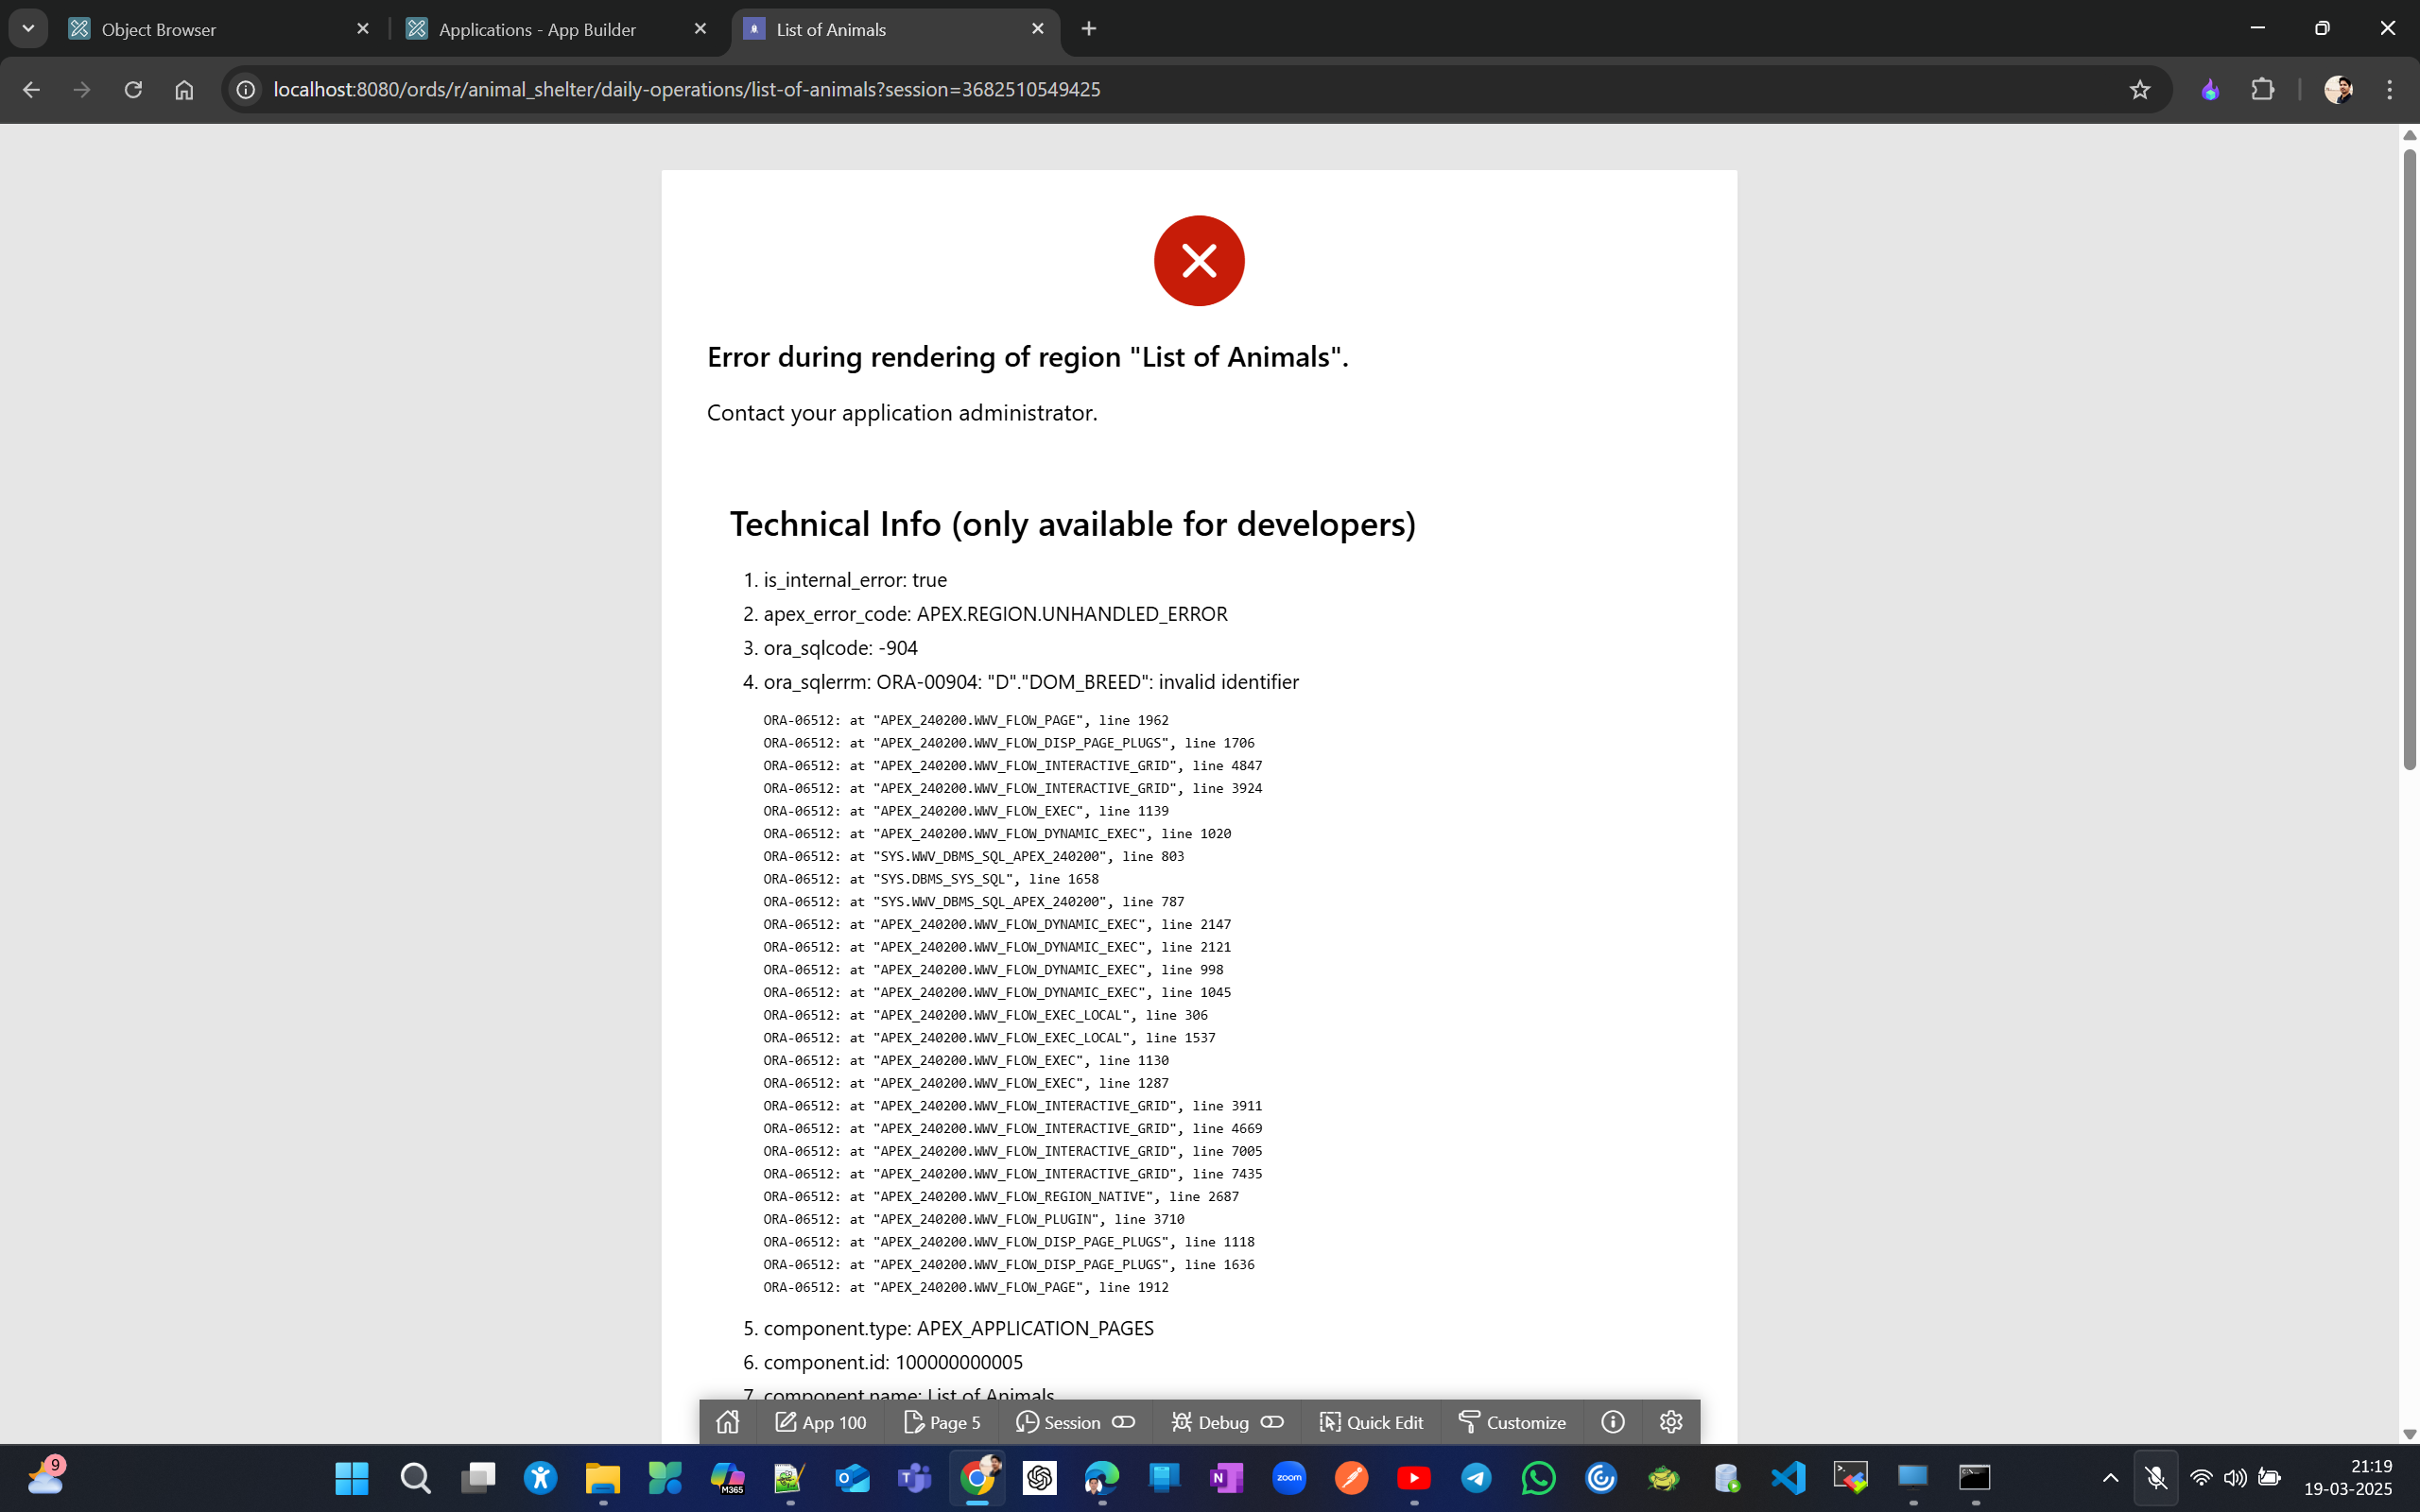
However, after creating the lookup table, the application may start to break. To fix this, quickly edit from the dev toolbar, then in the report page designer, go to the report element properties. In the source, select the source and add the dom_breed_id column in the SQL query, which was added to the table, and remove any reference to the dom_breed column. Alternatively, you can select the source as a table again and choose the Animal table to resolve this error.
Display a picture in a form. Edit link between report and form.
Add a BLOB animal_pic column to the Animals table by selecting the Animal table in the object browser and clicking on Add column in the right pane.
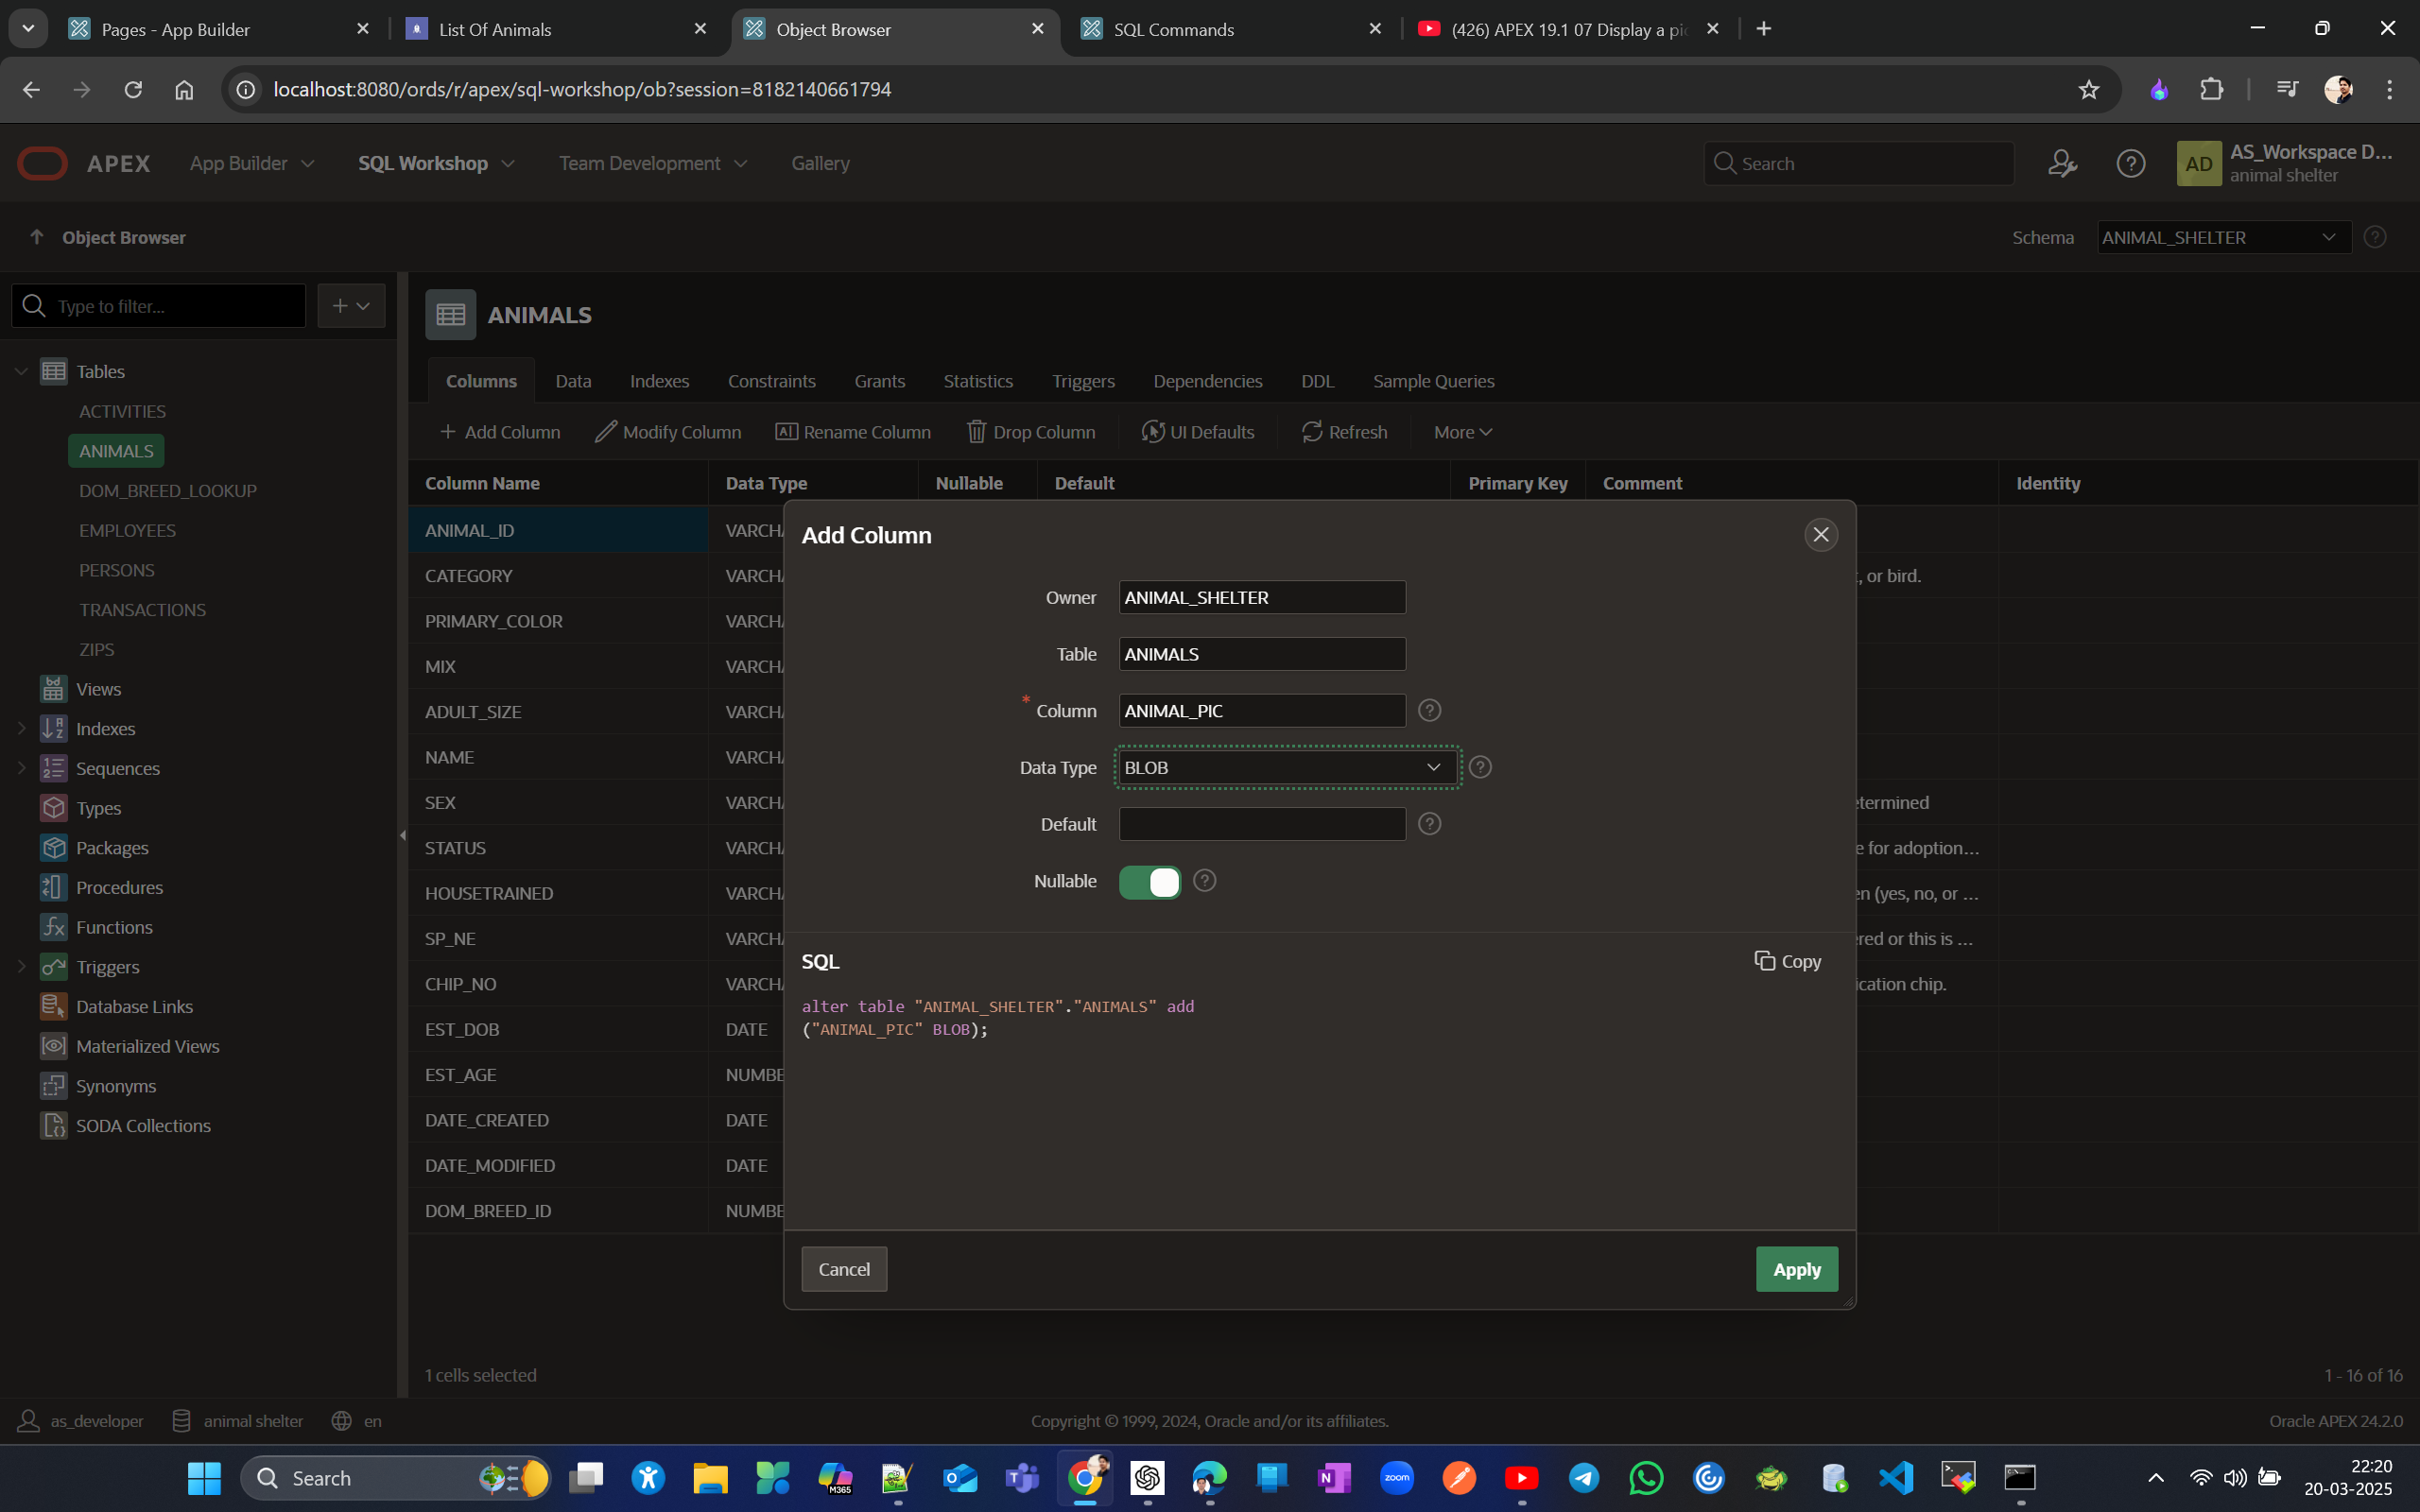
But you see adding this column doesn’t change anything in report but in form it is there.
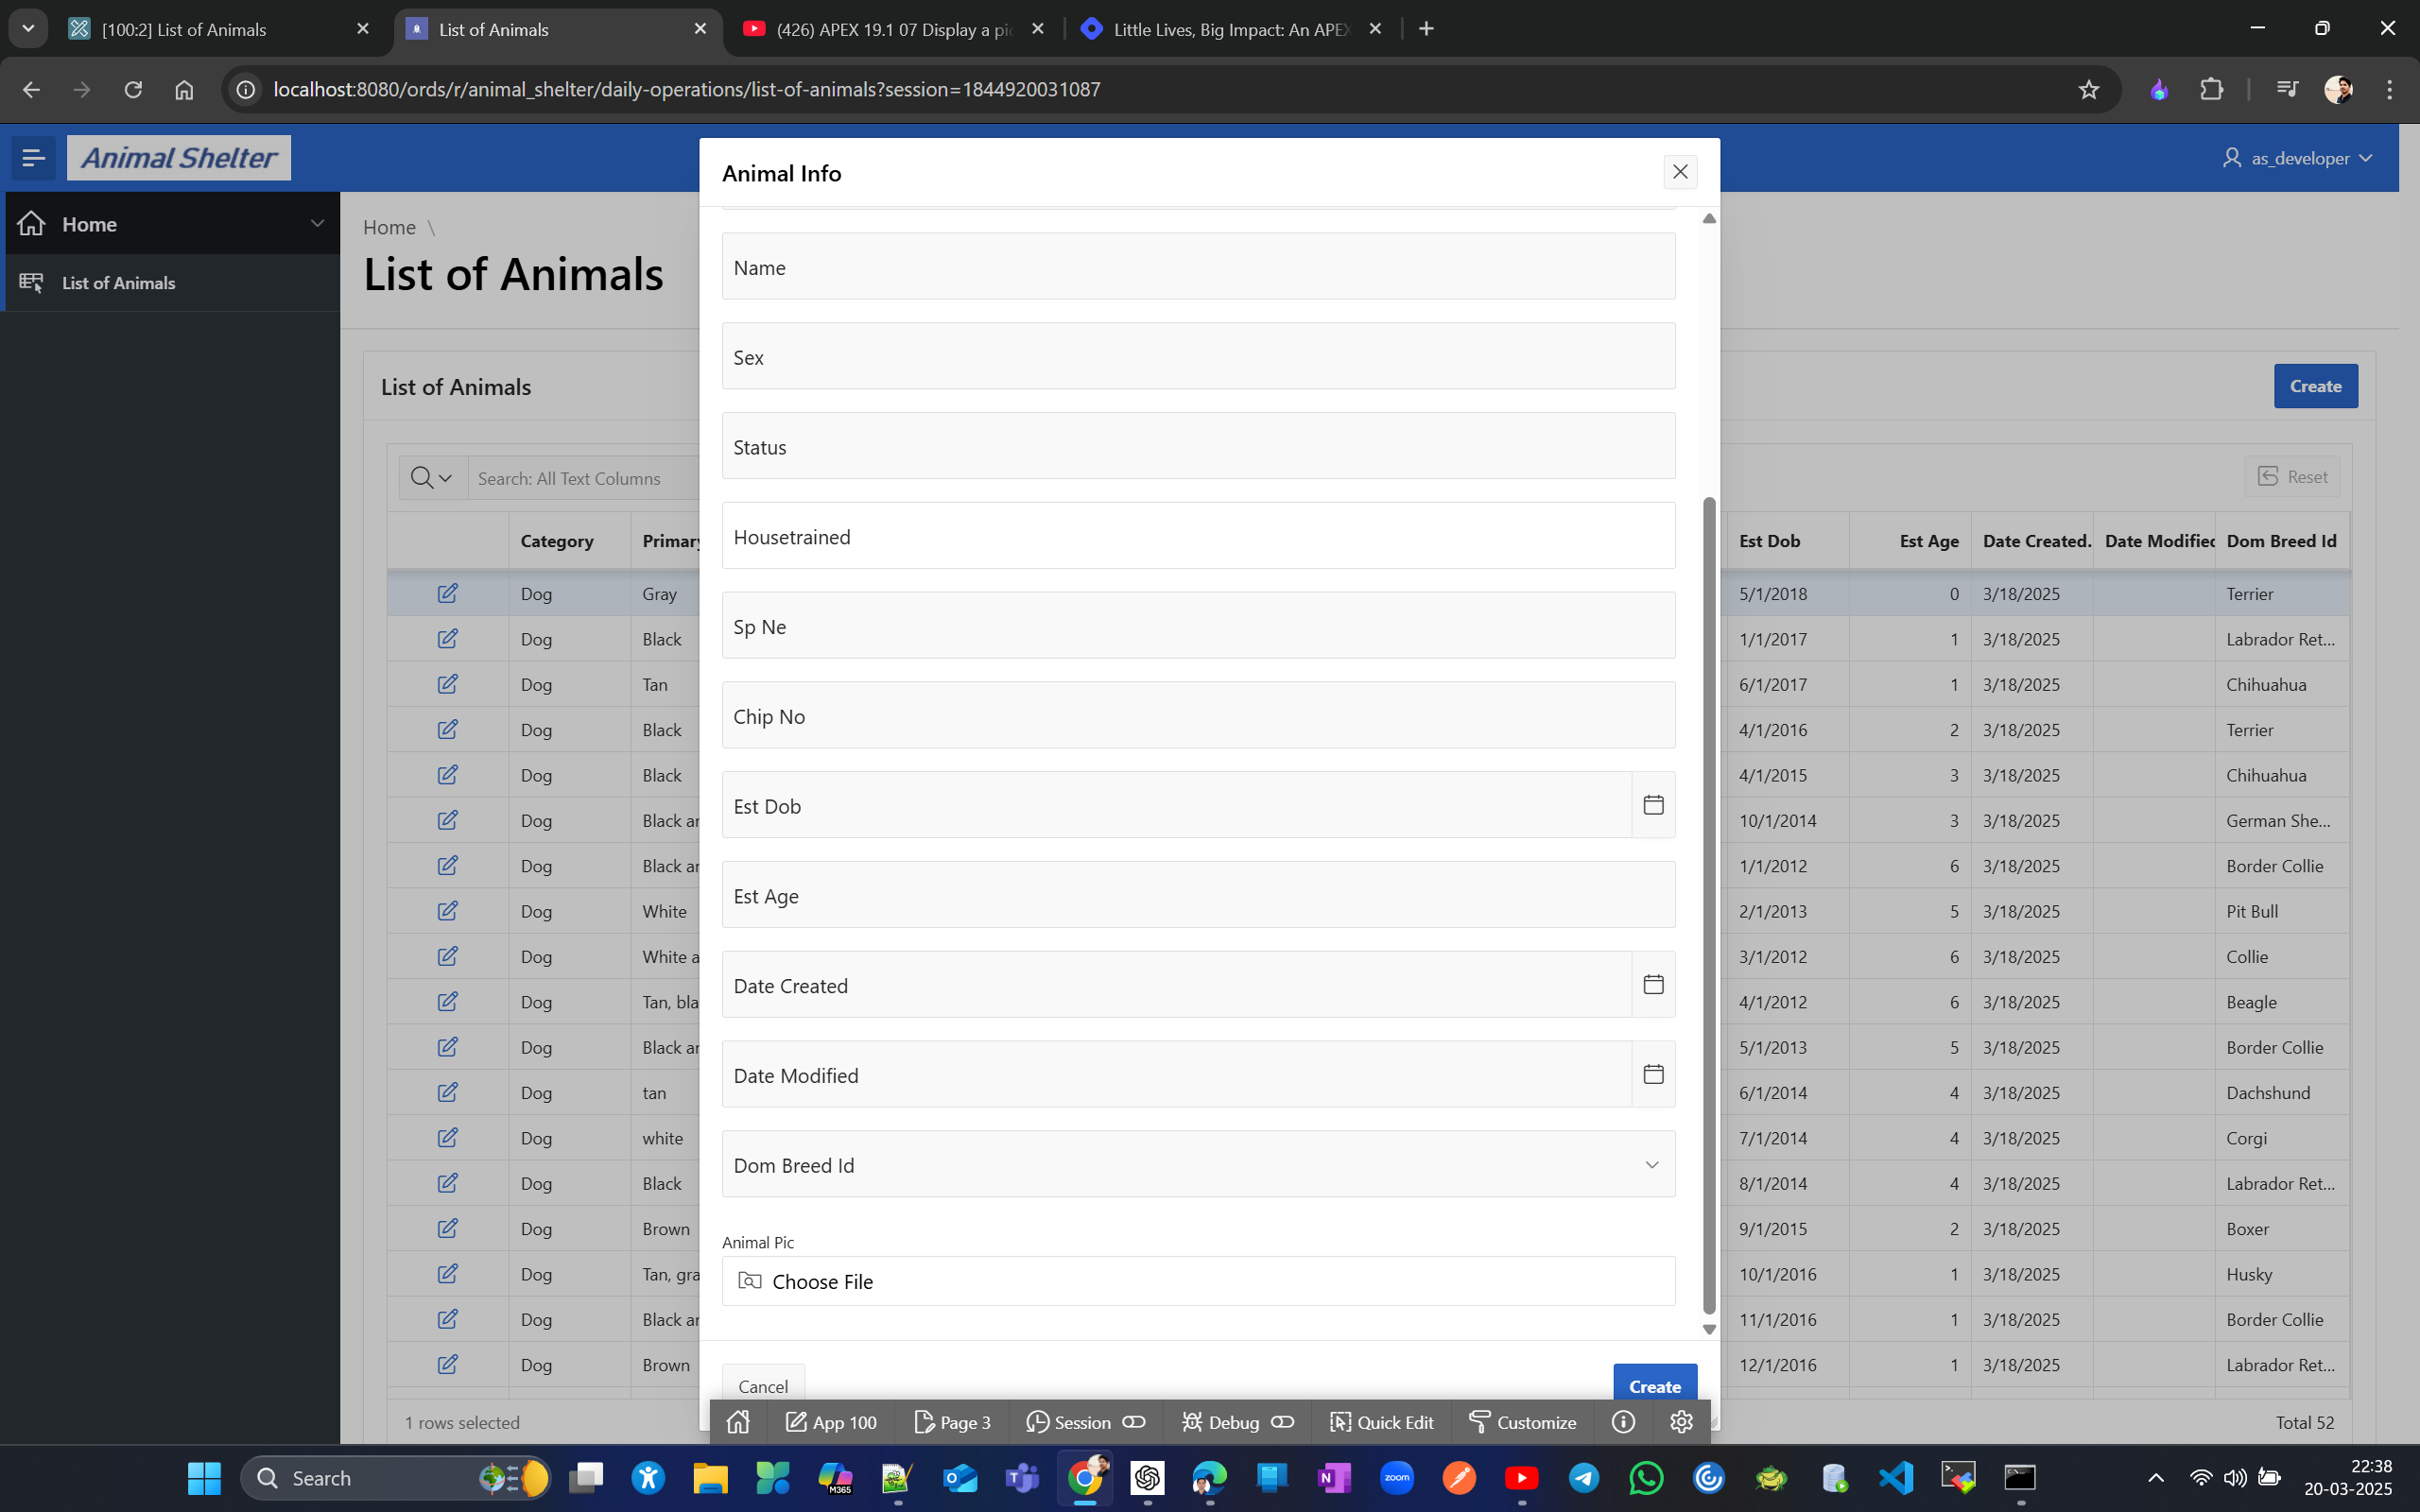
Now let's delete the form that we originally had (Animal Info form page #3).
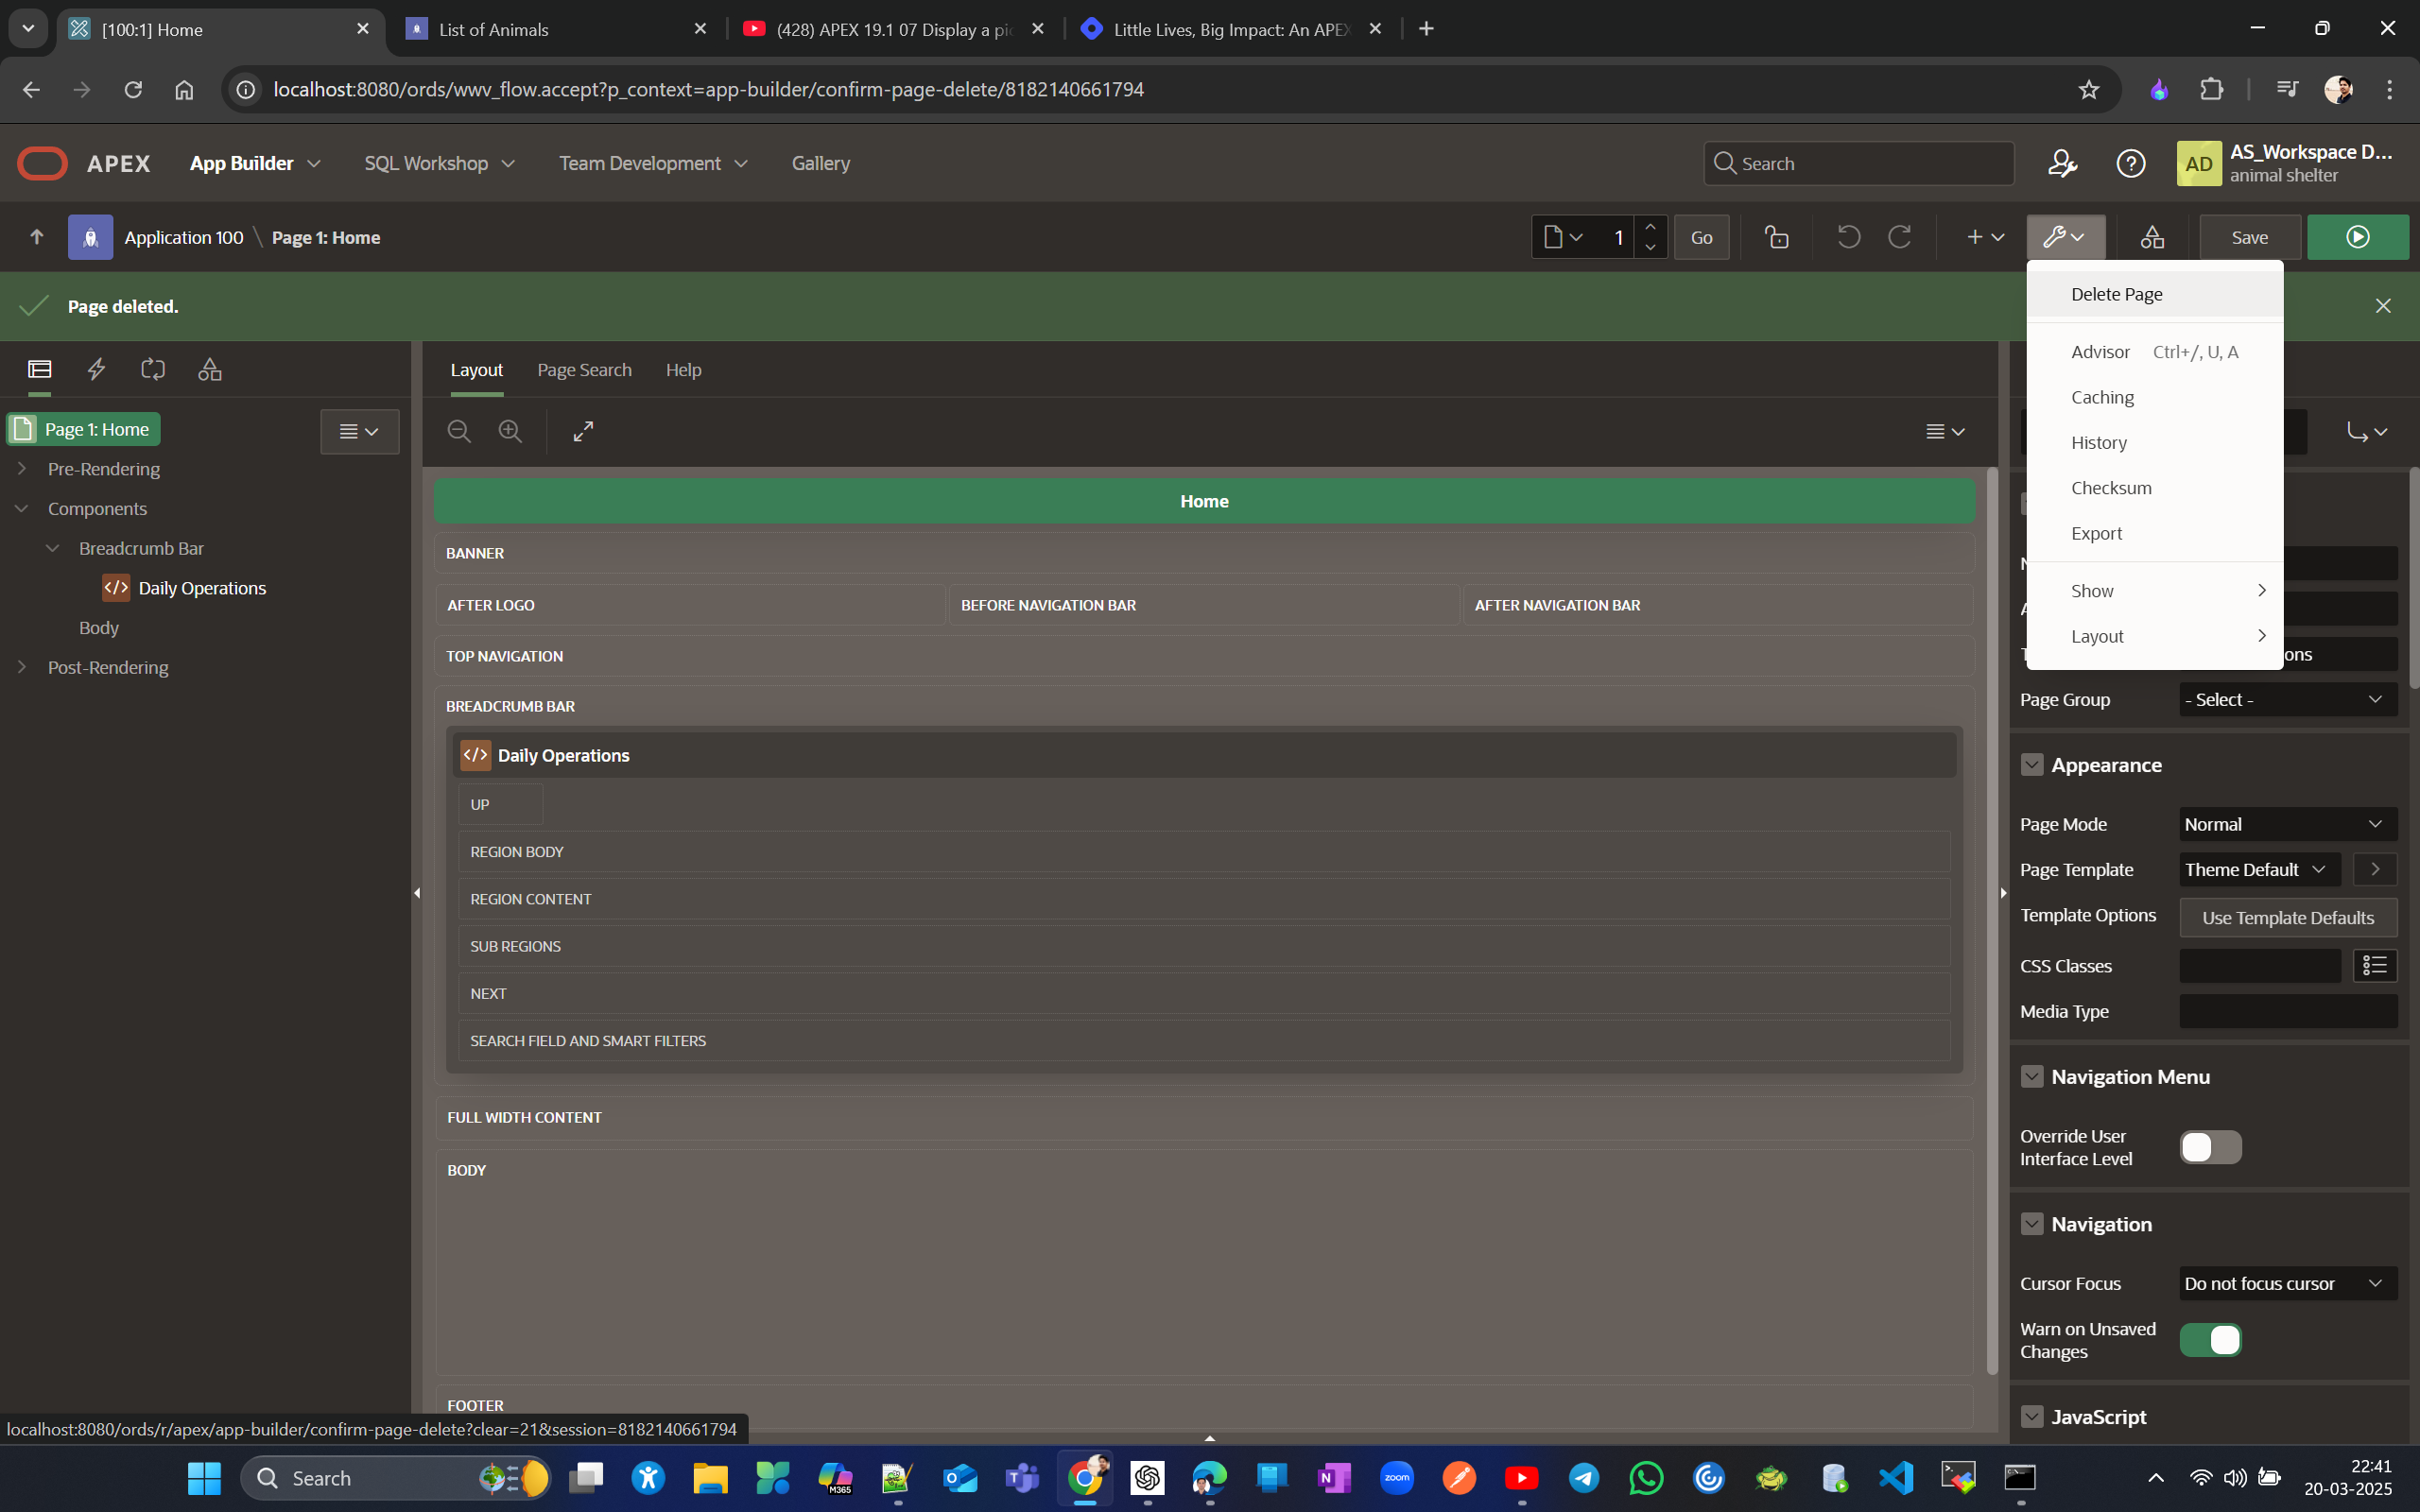
confirm
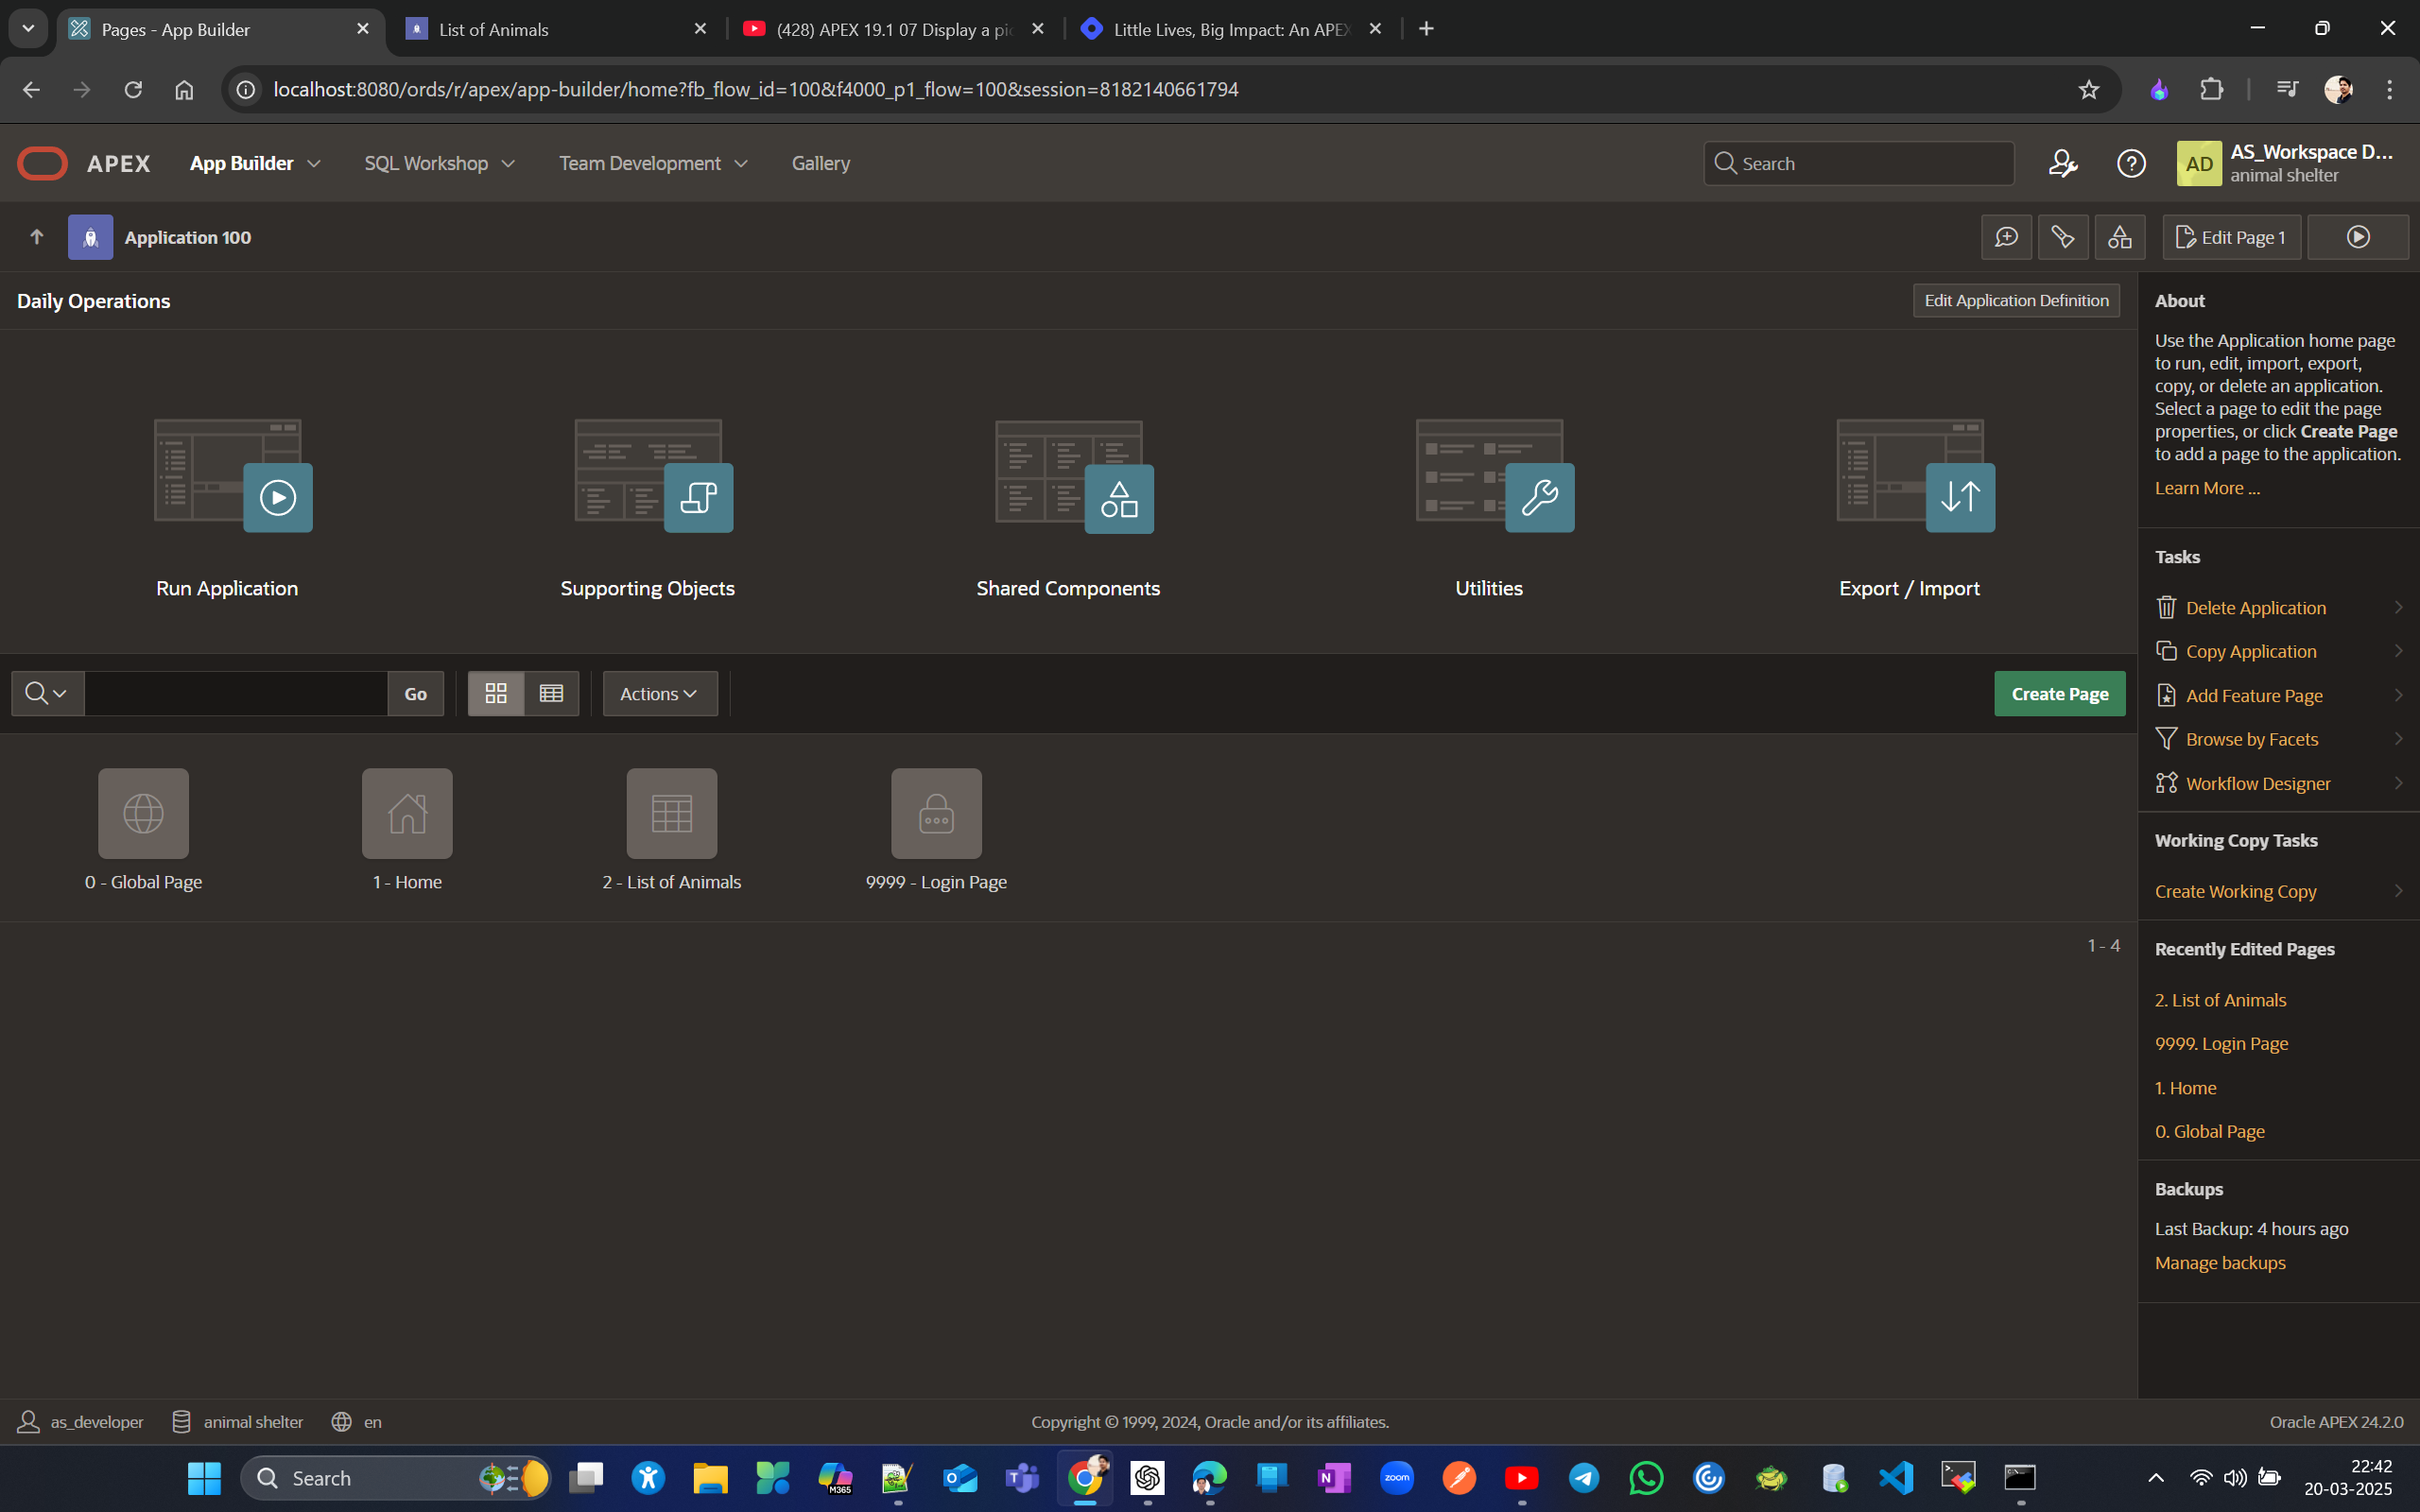
create a new page again
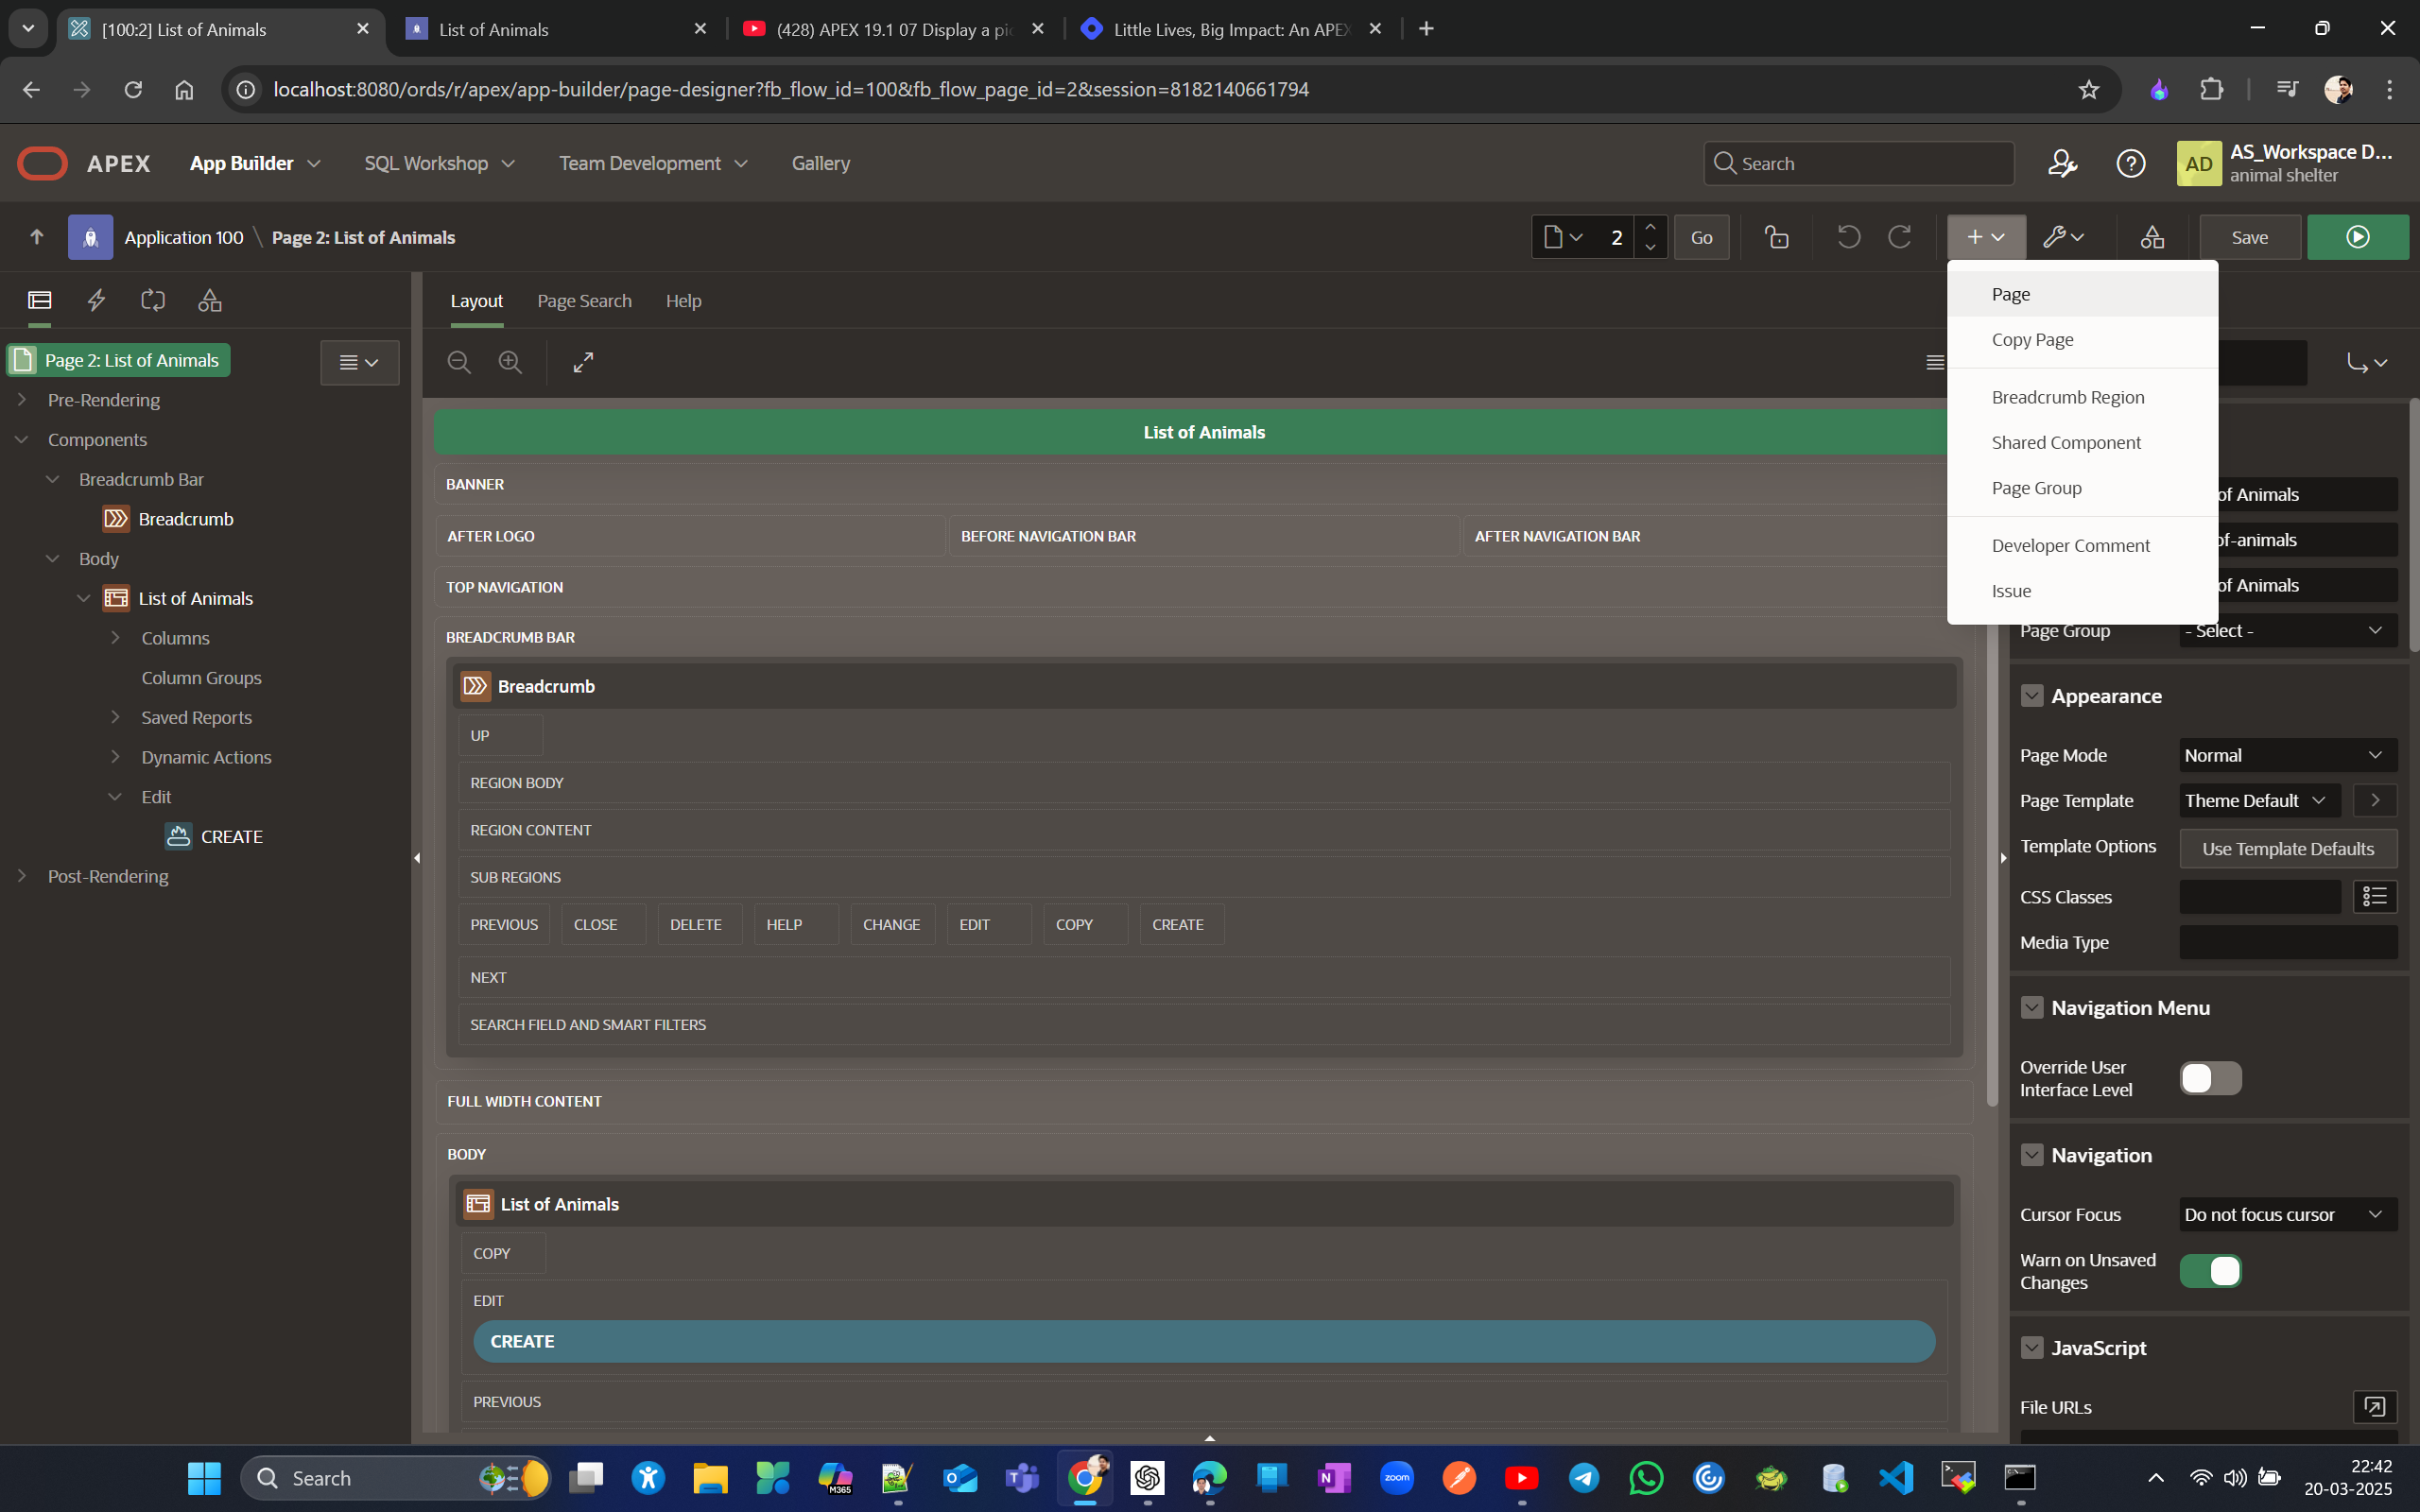
Deliberately give page#4 to break the functionality as page 4 is not available
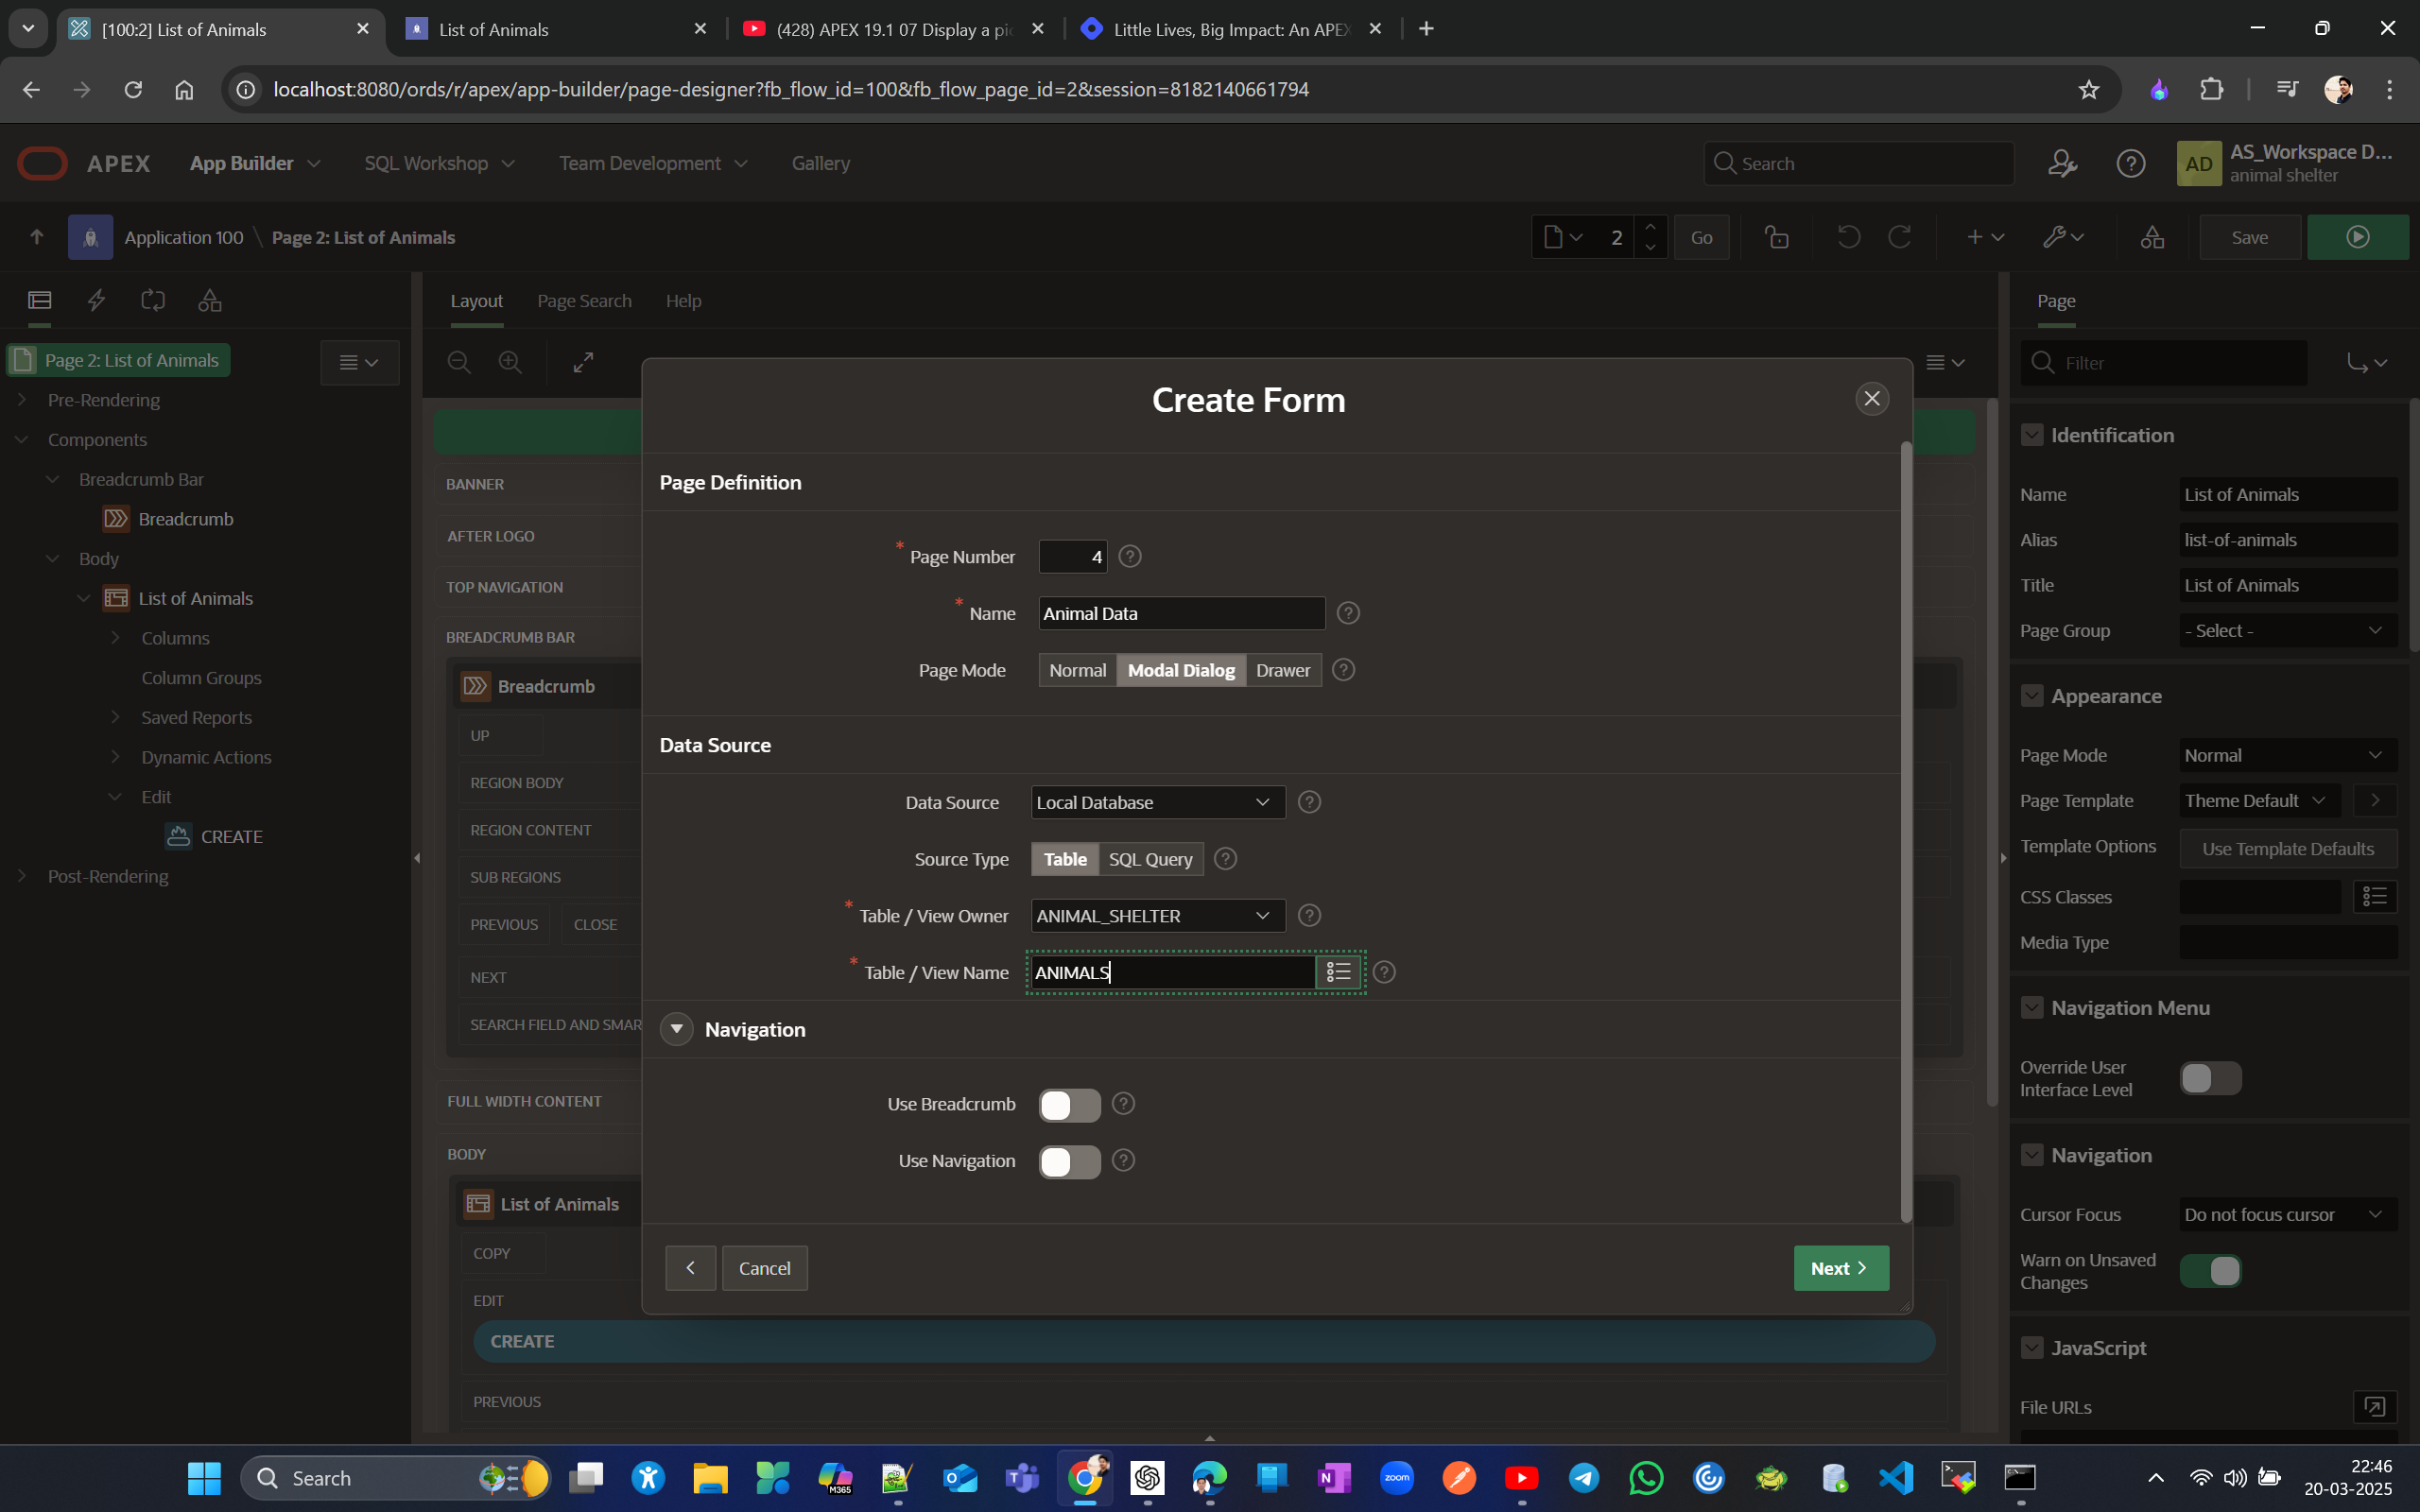
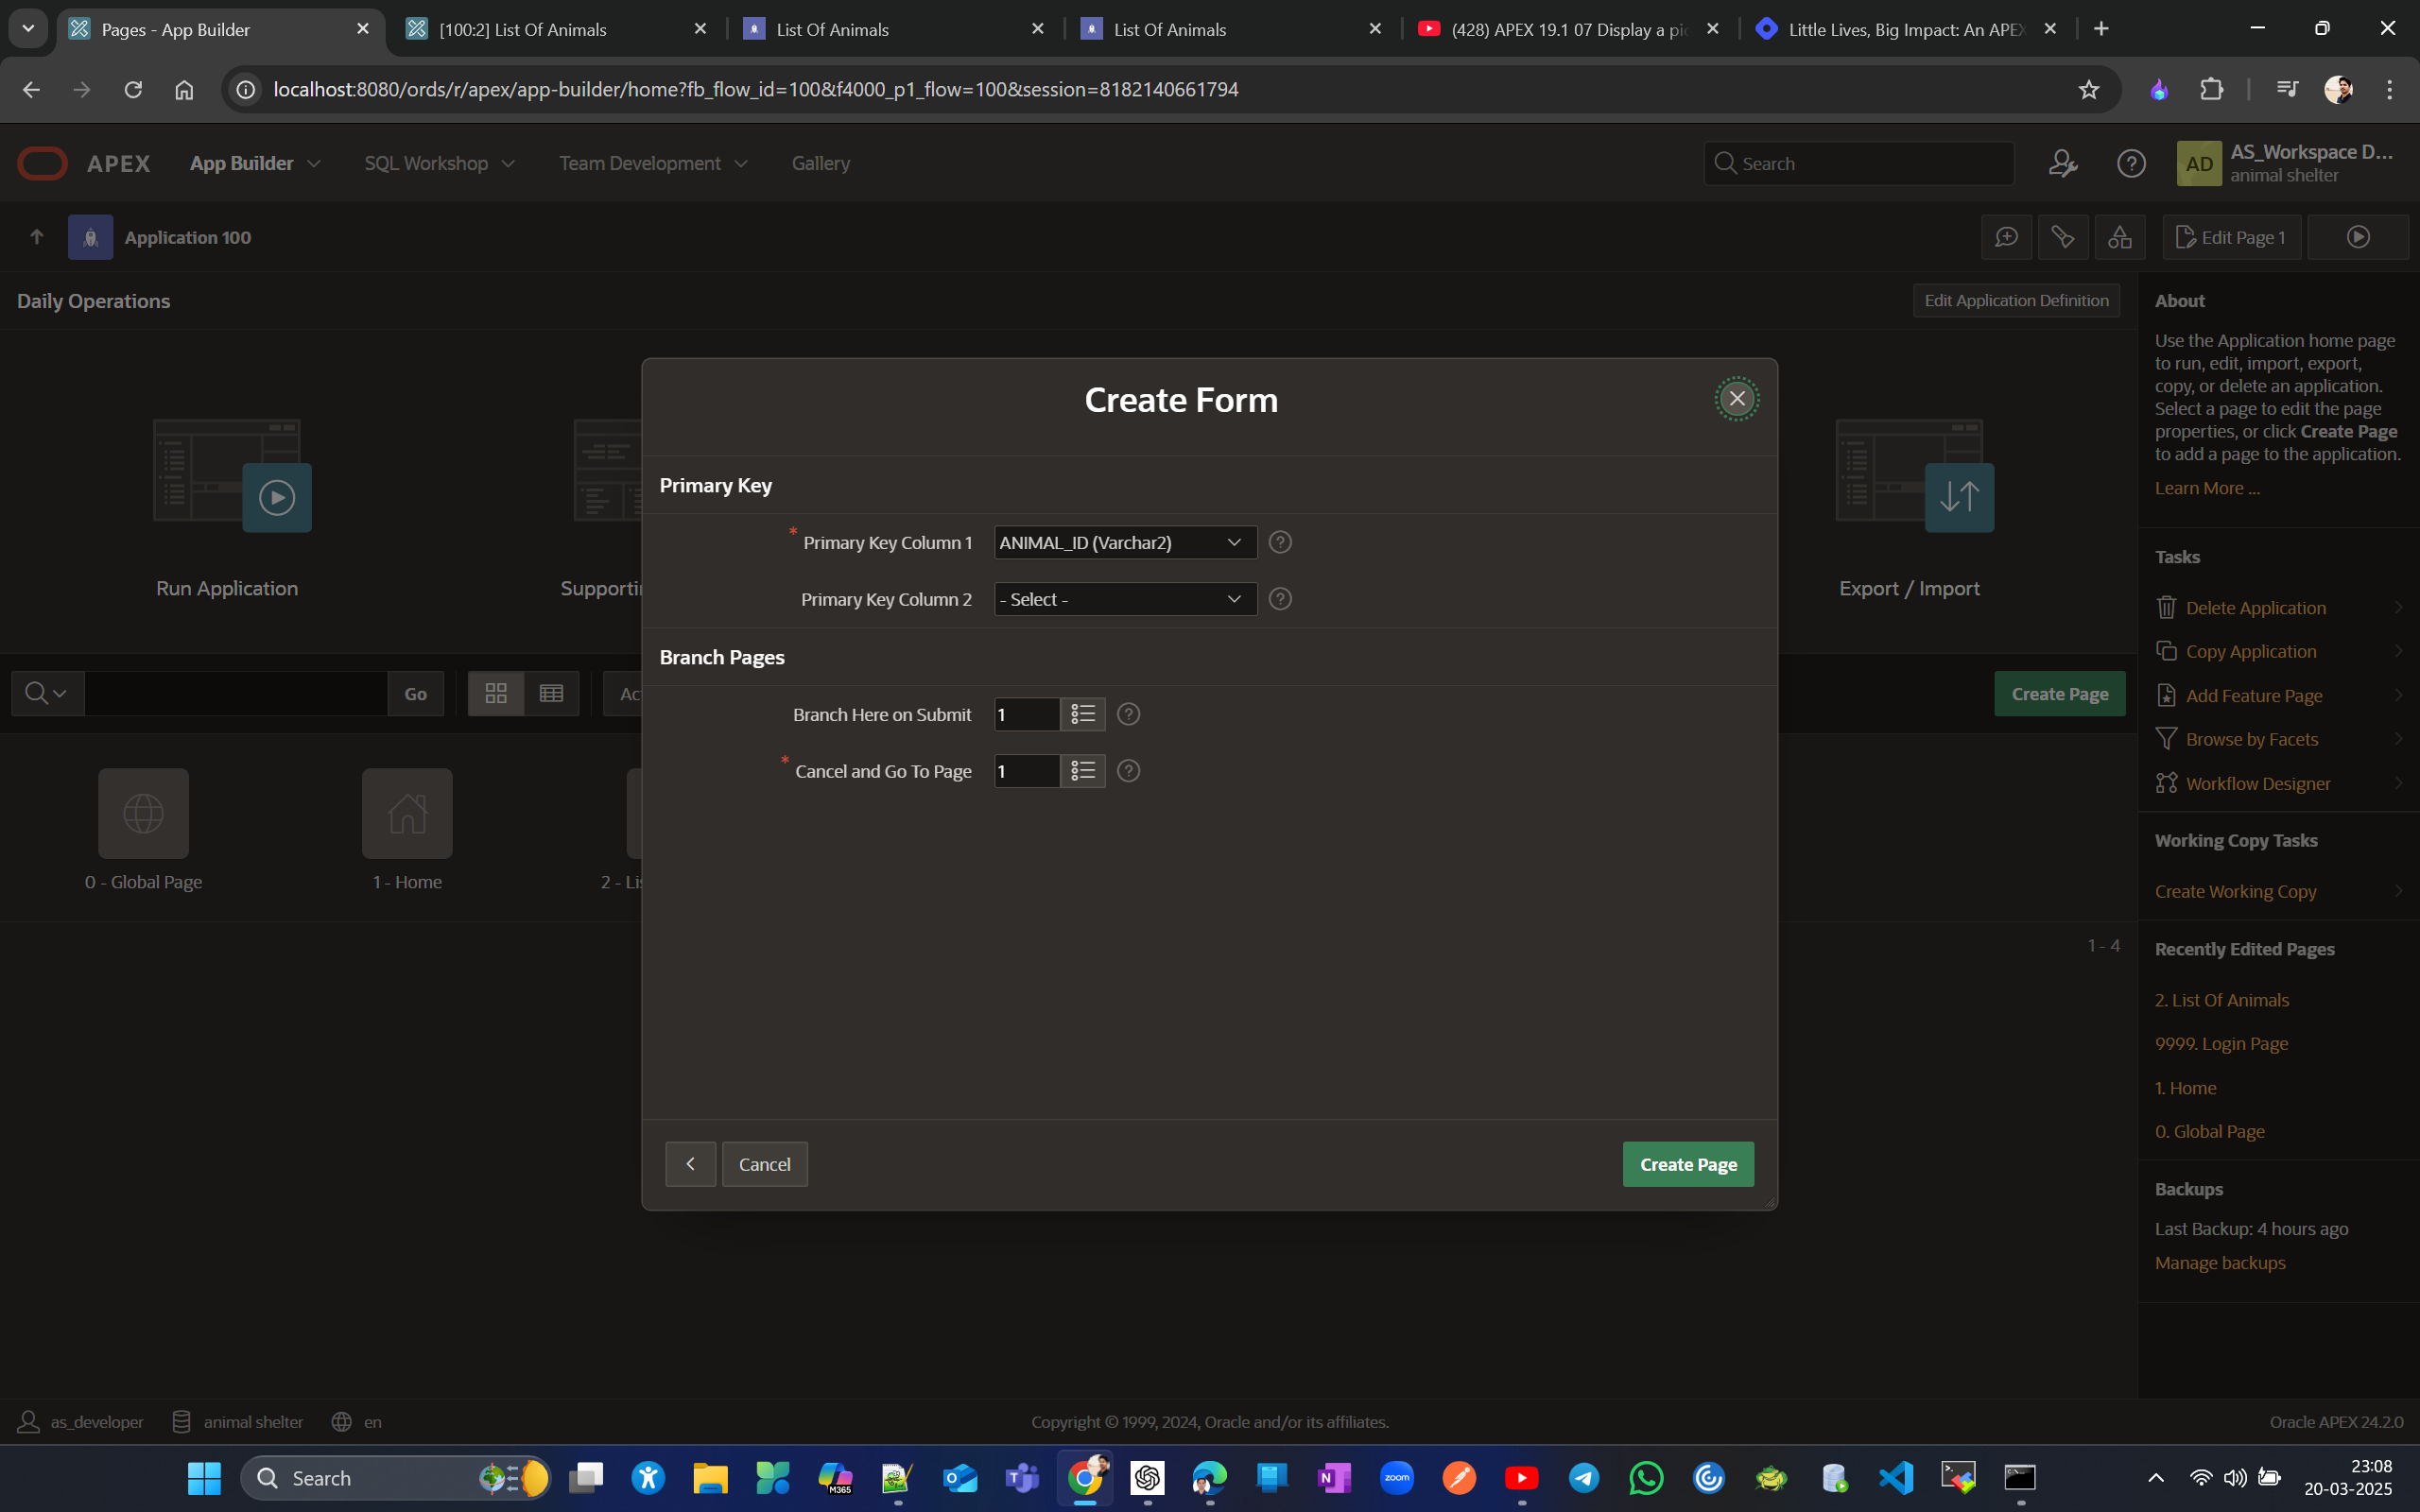
now run application directly as modal dialog can’t be run directly
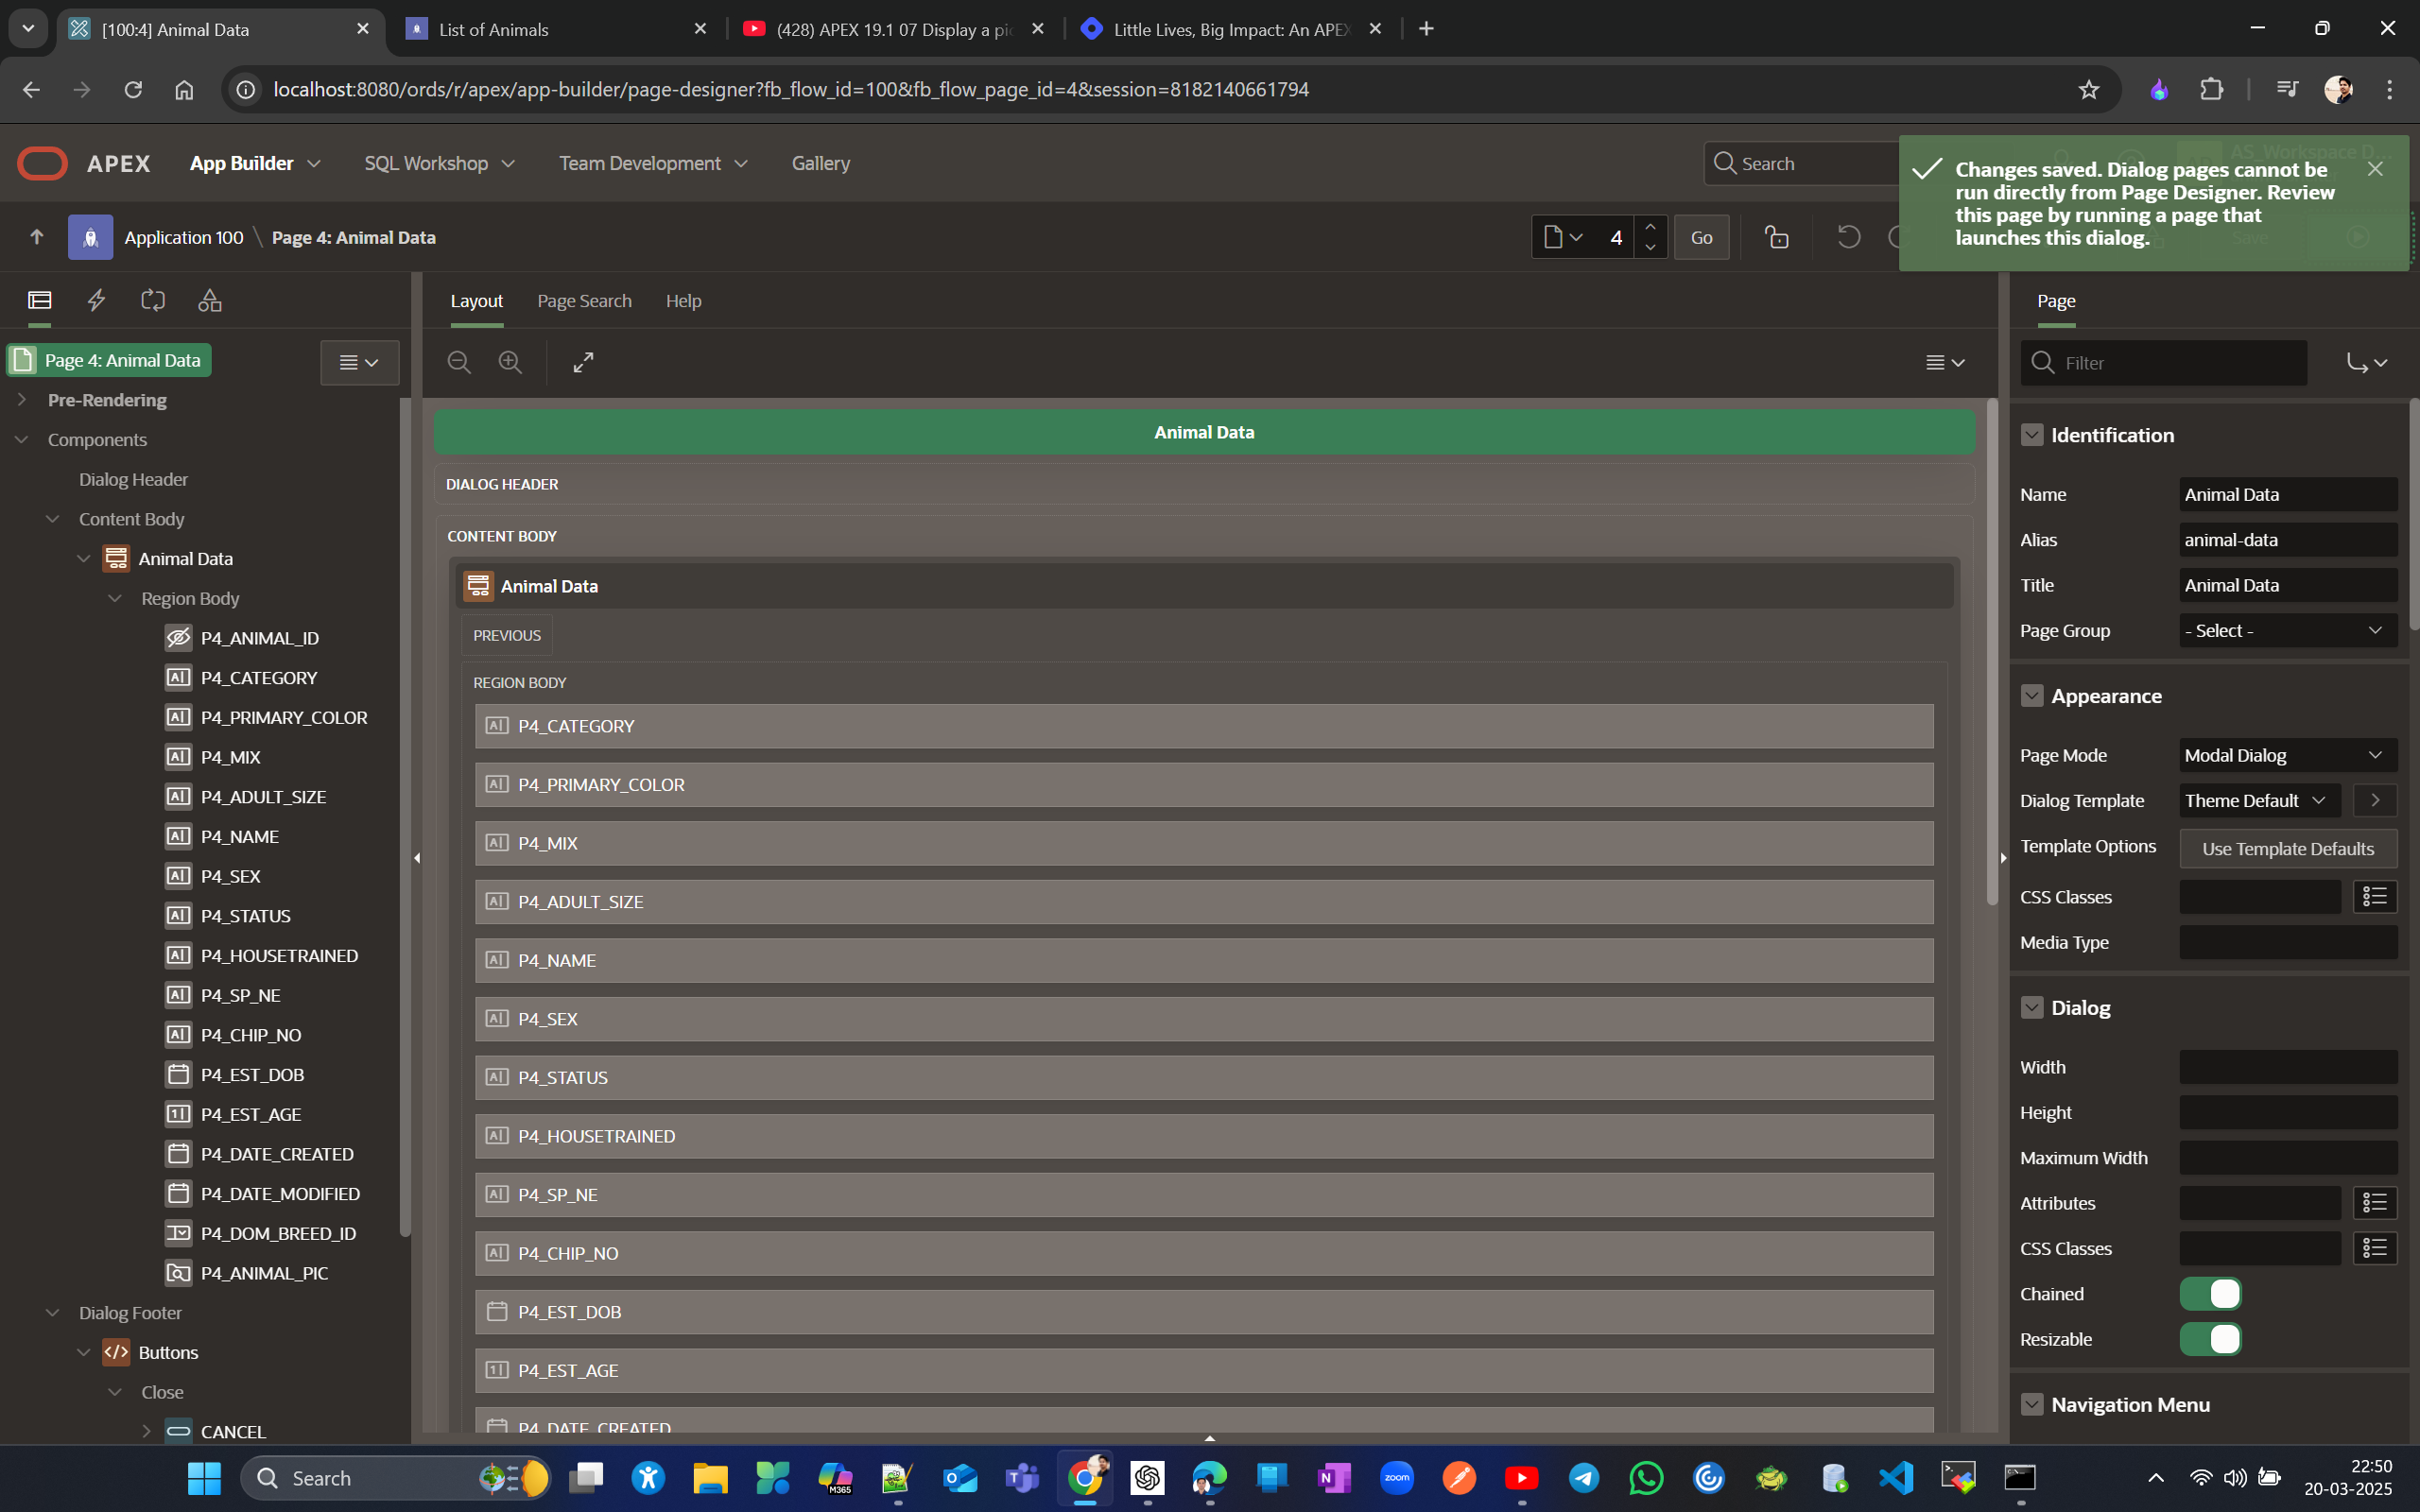
Now, if I run the application and try to click on create form or edit any record in the report, I get a page not available error.
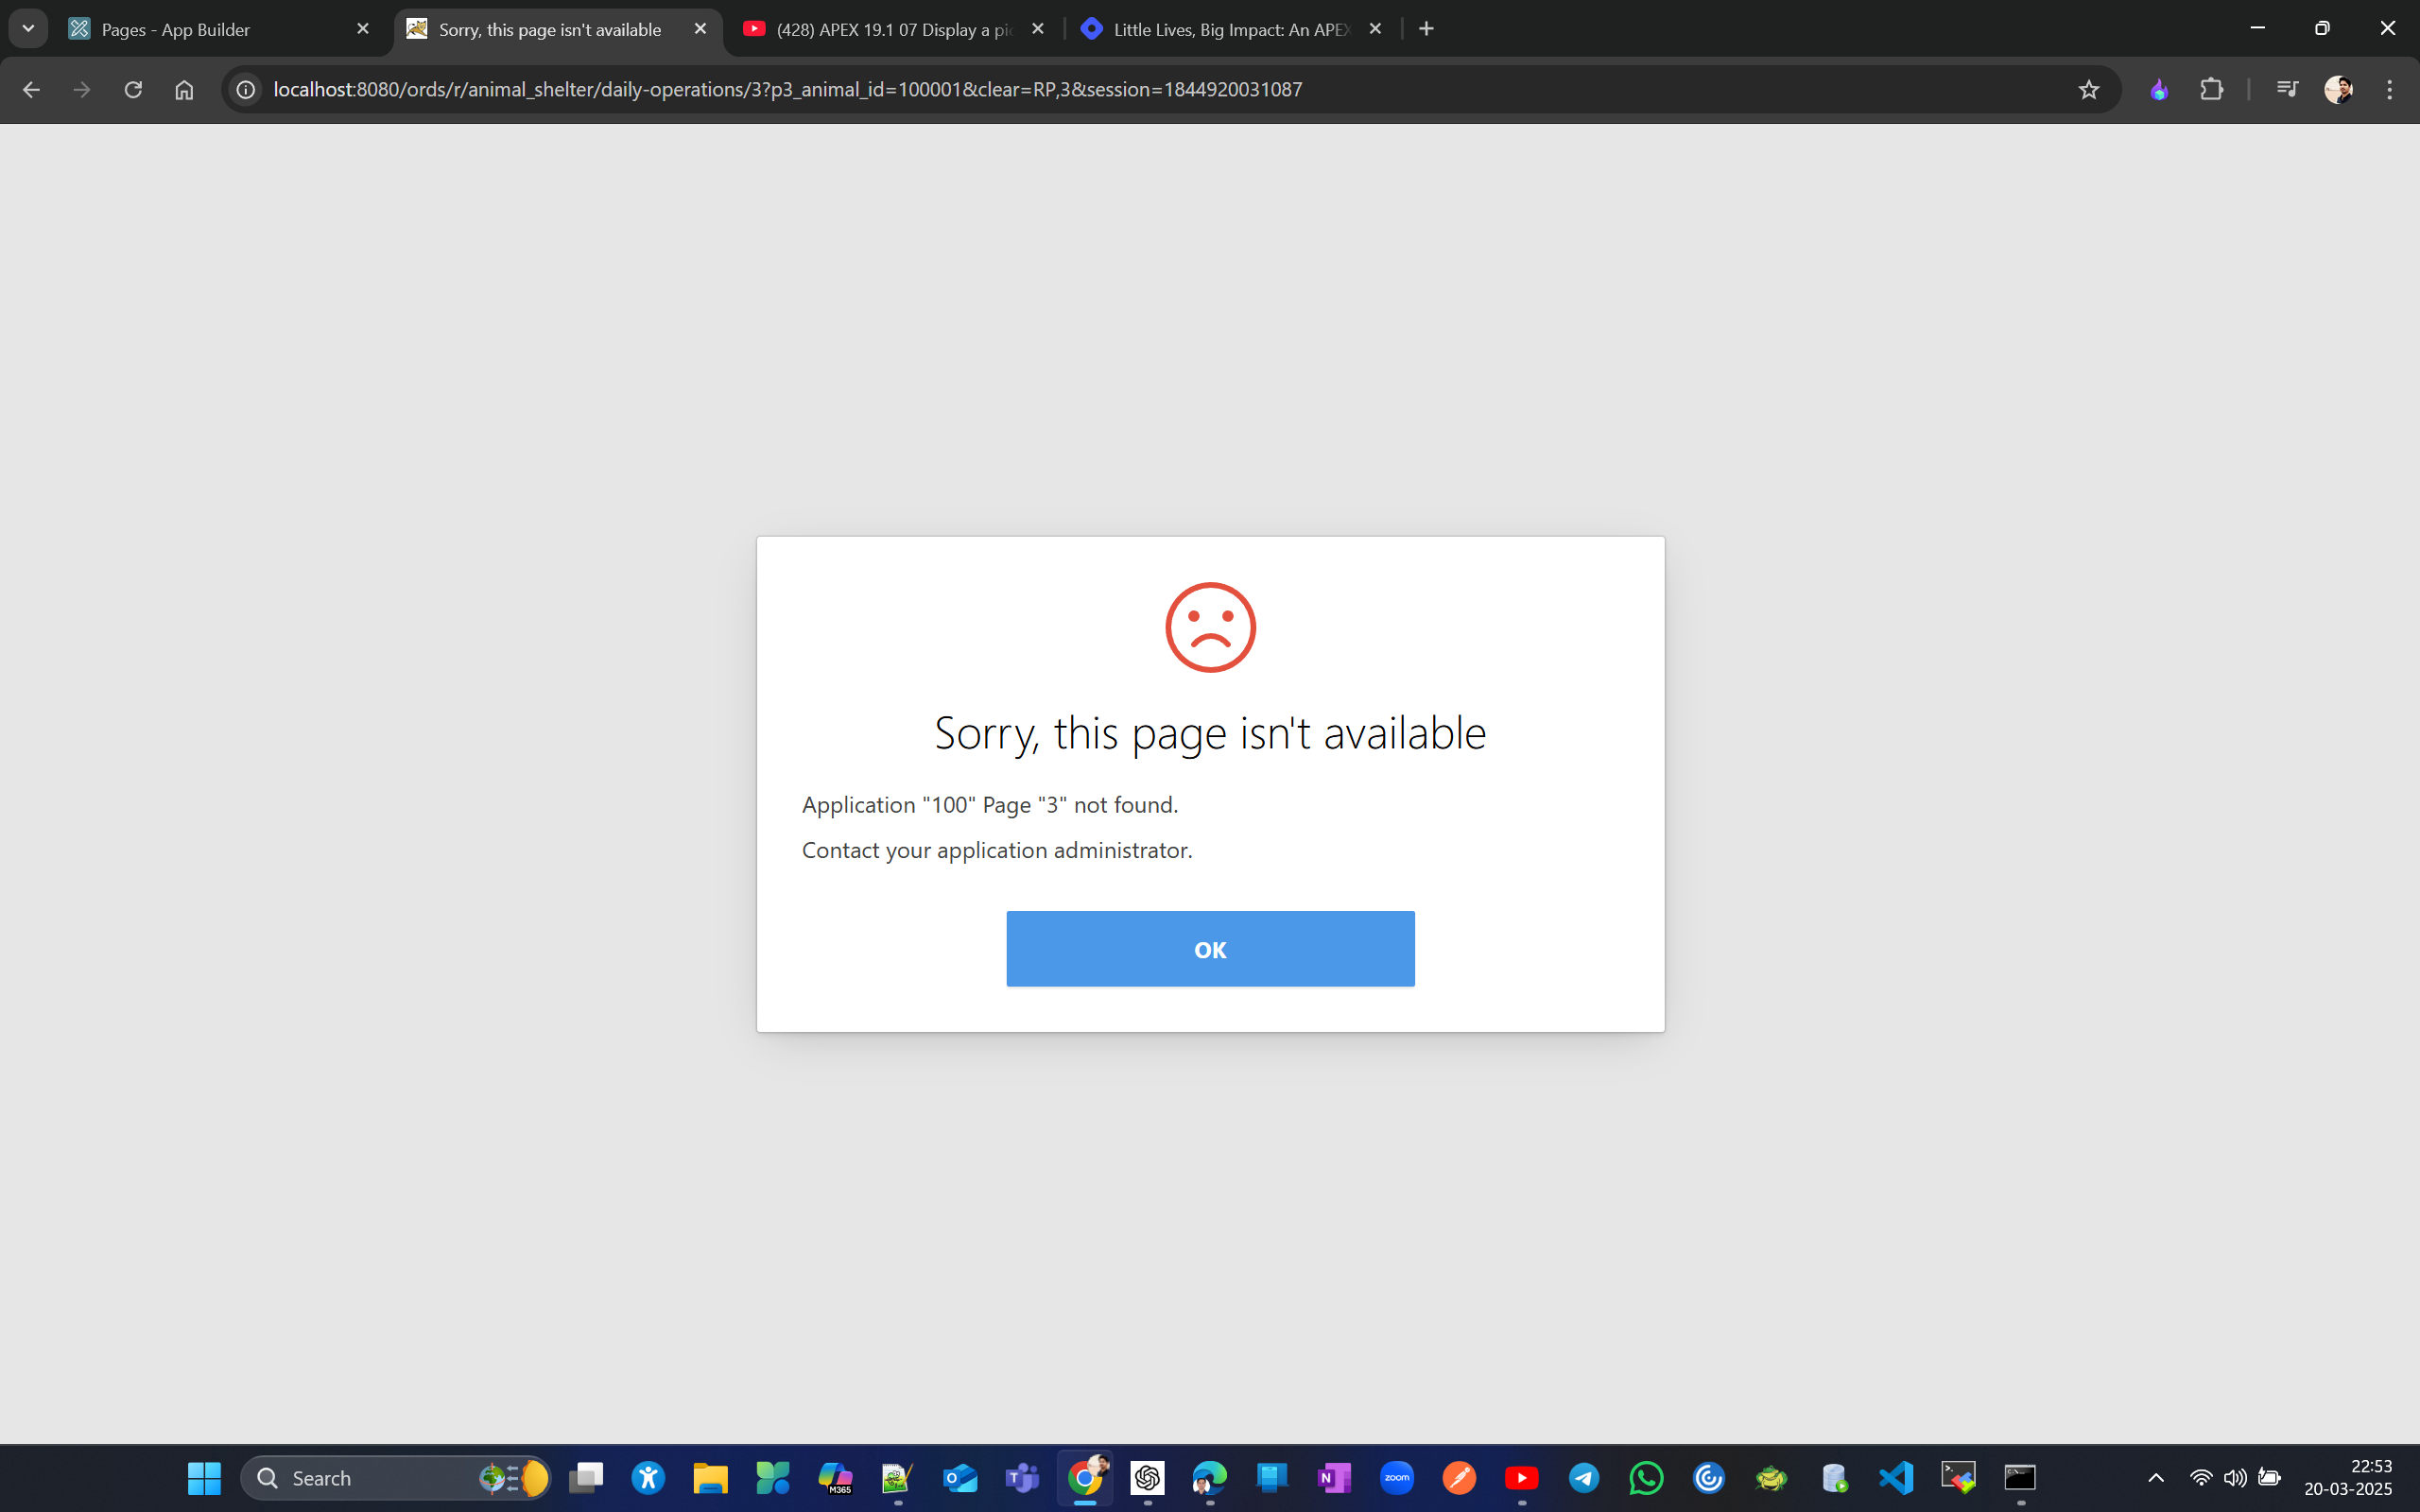
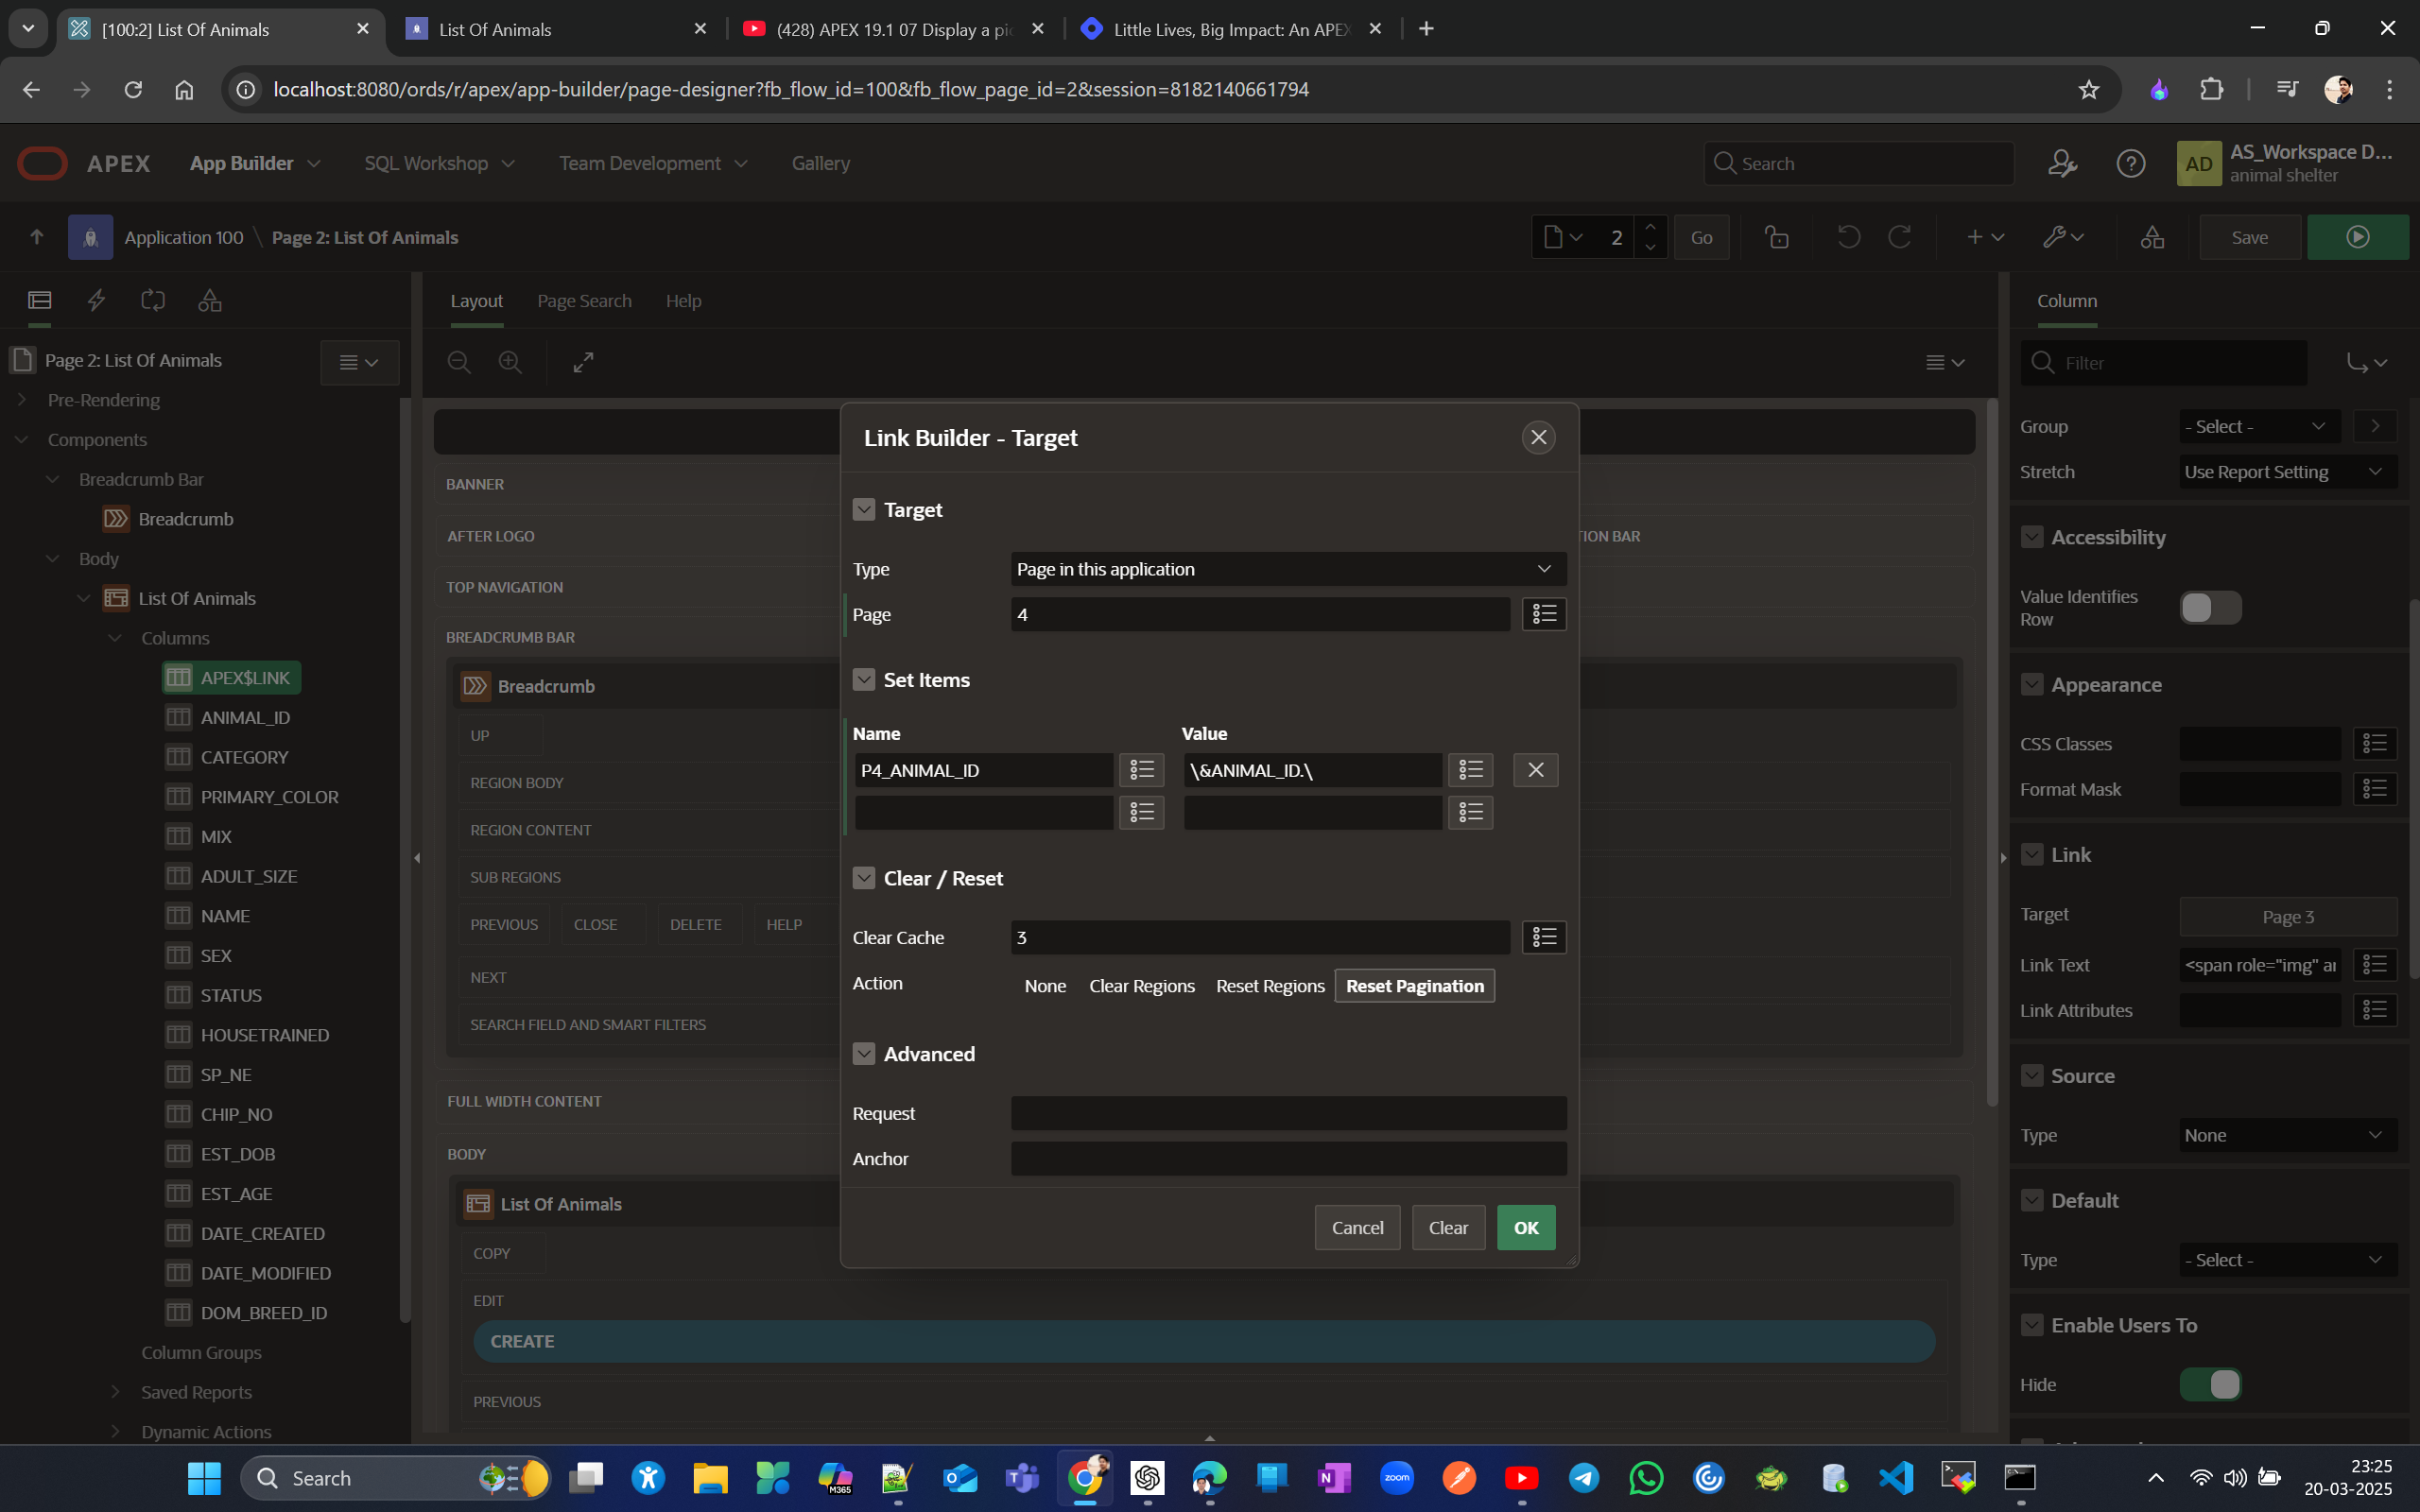
To fix this, go back to the report page, do a quick edit, and set the target to the correct newly created page #4, and also change the name in set items to P4_ANIMAL_ID and click ok and you see application works well but in report when you click create you still get same error as previous page 103 is already deleted.
Now lets try to upload a image to newly create blob column


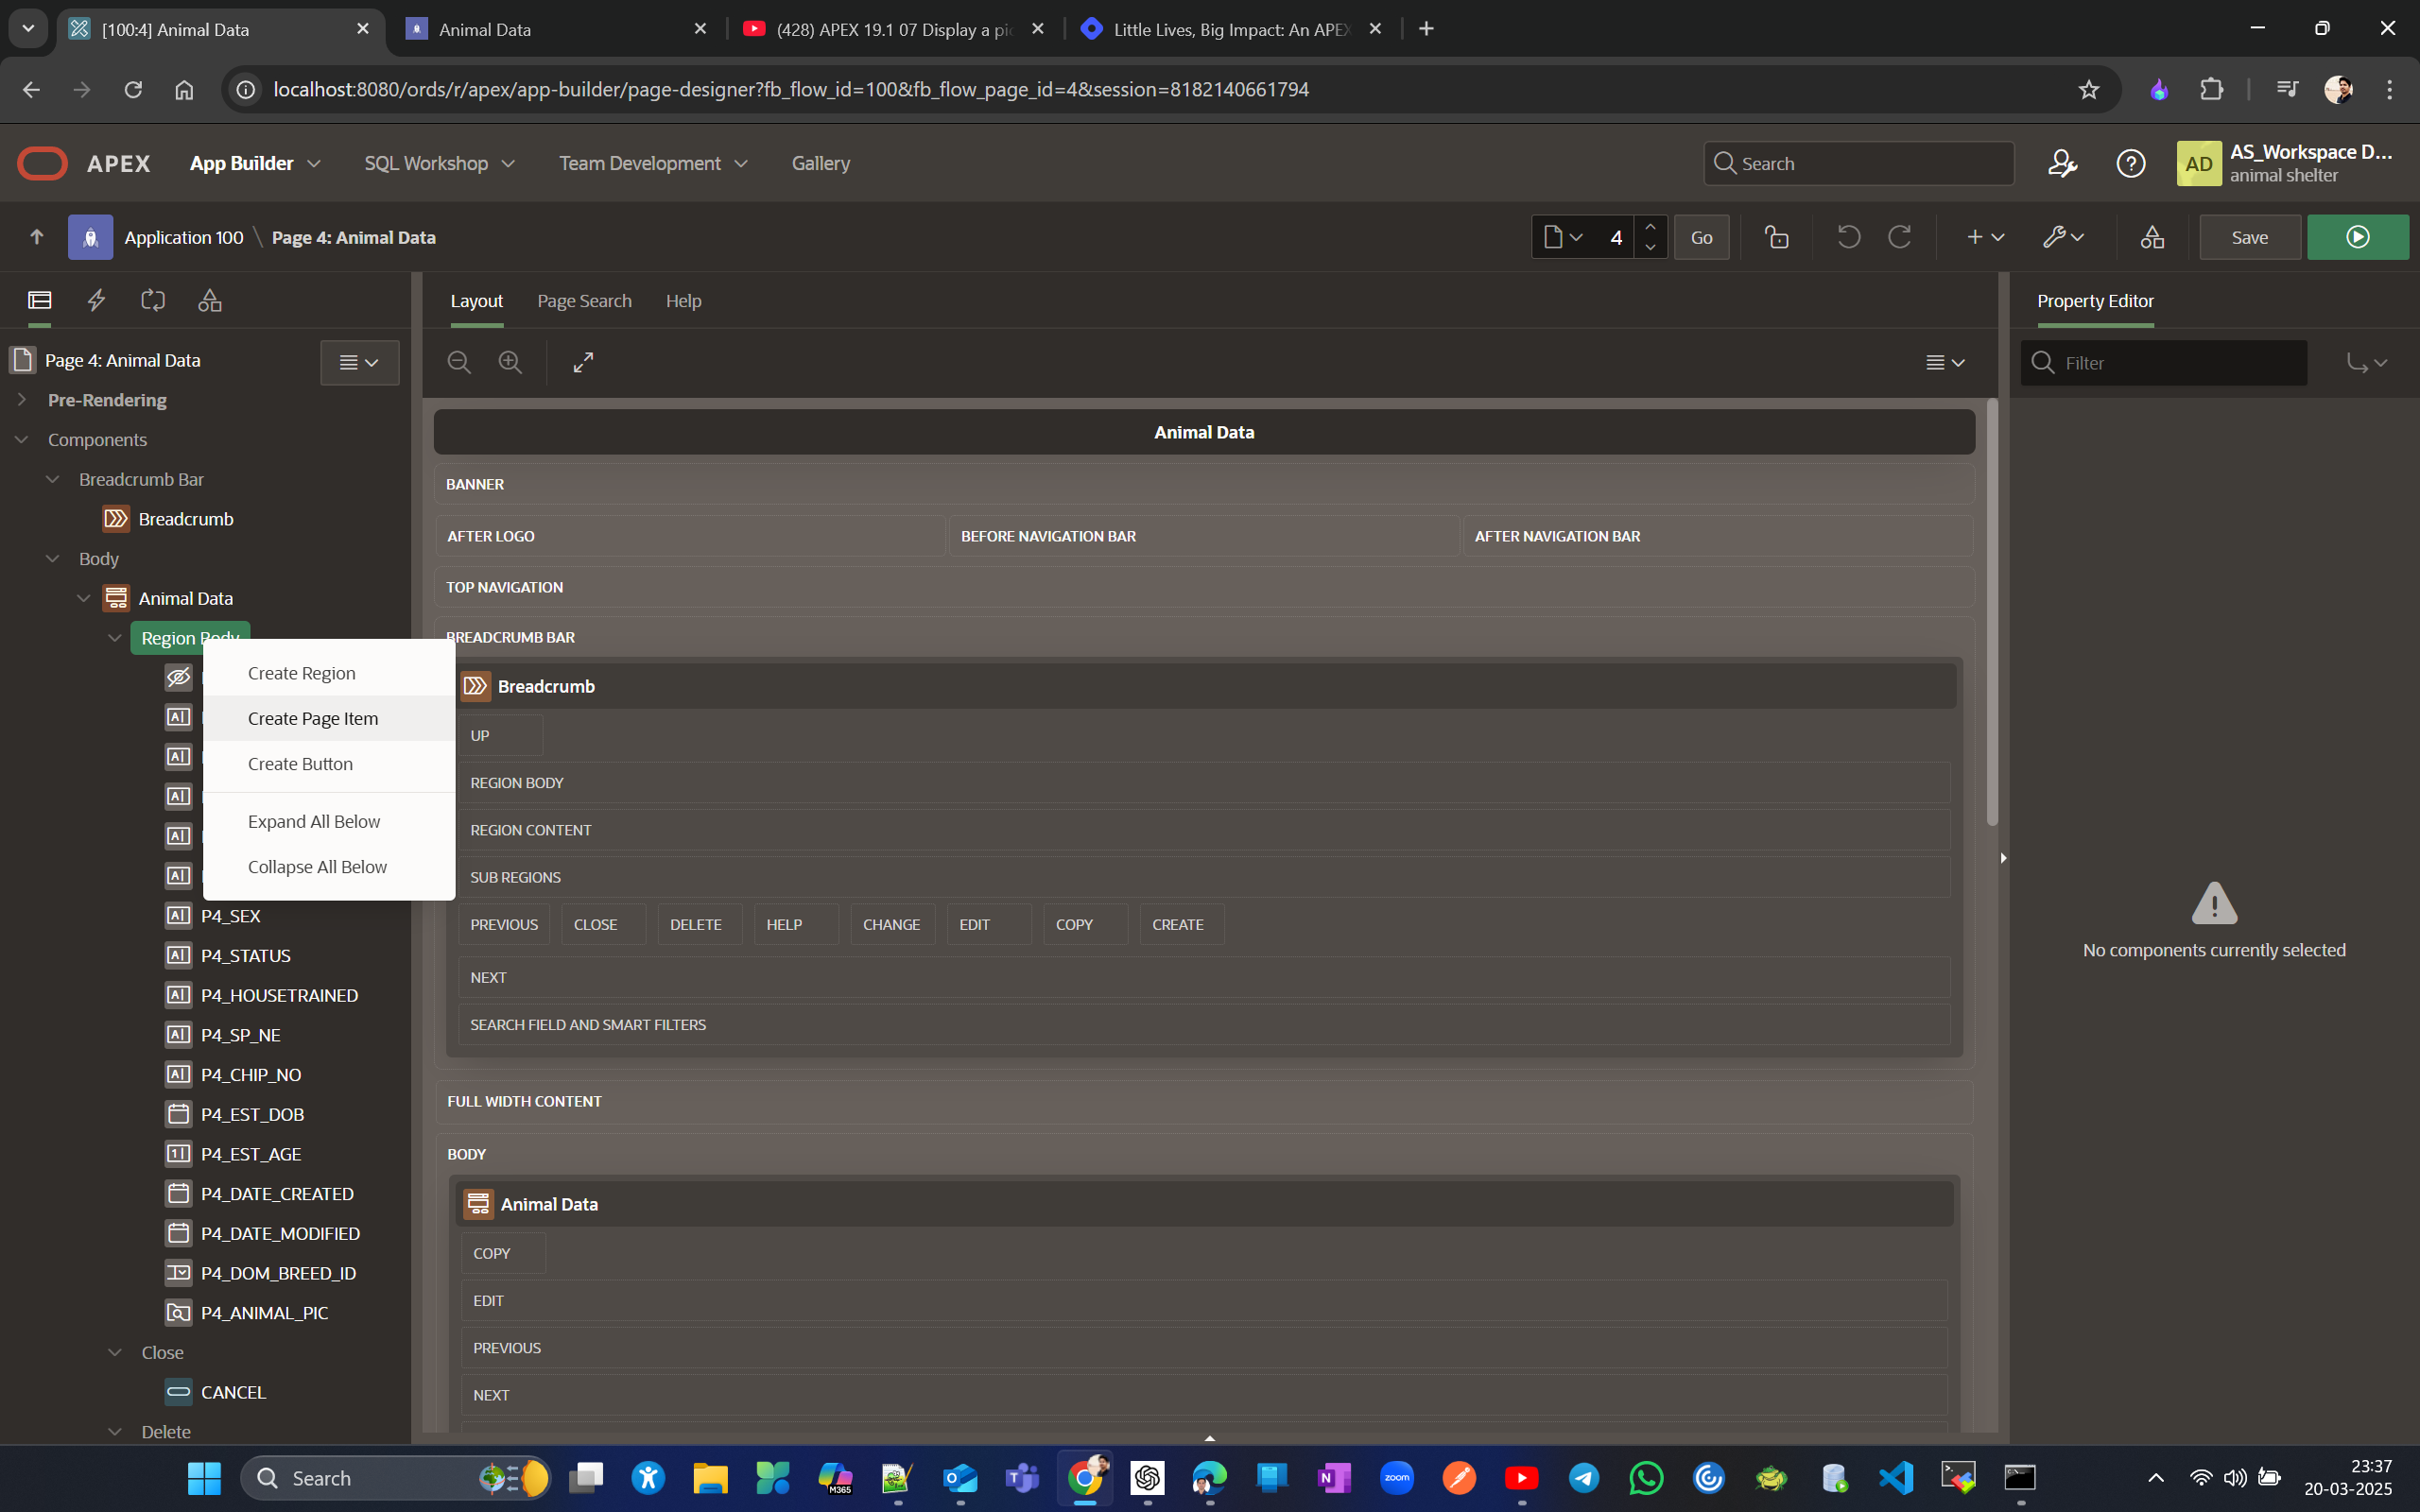
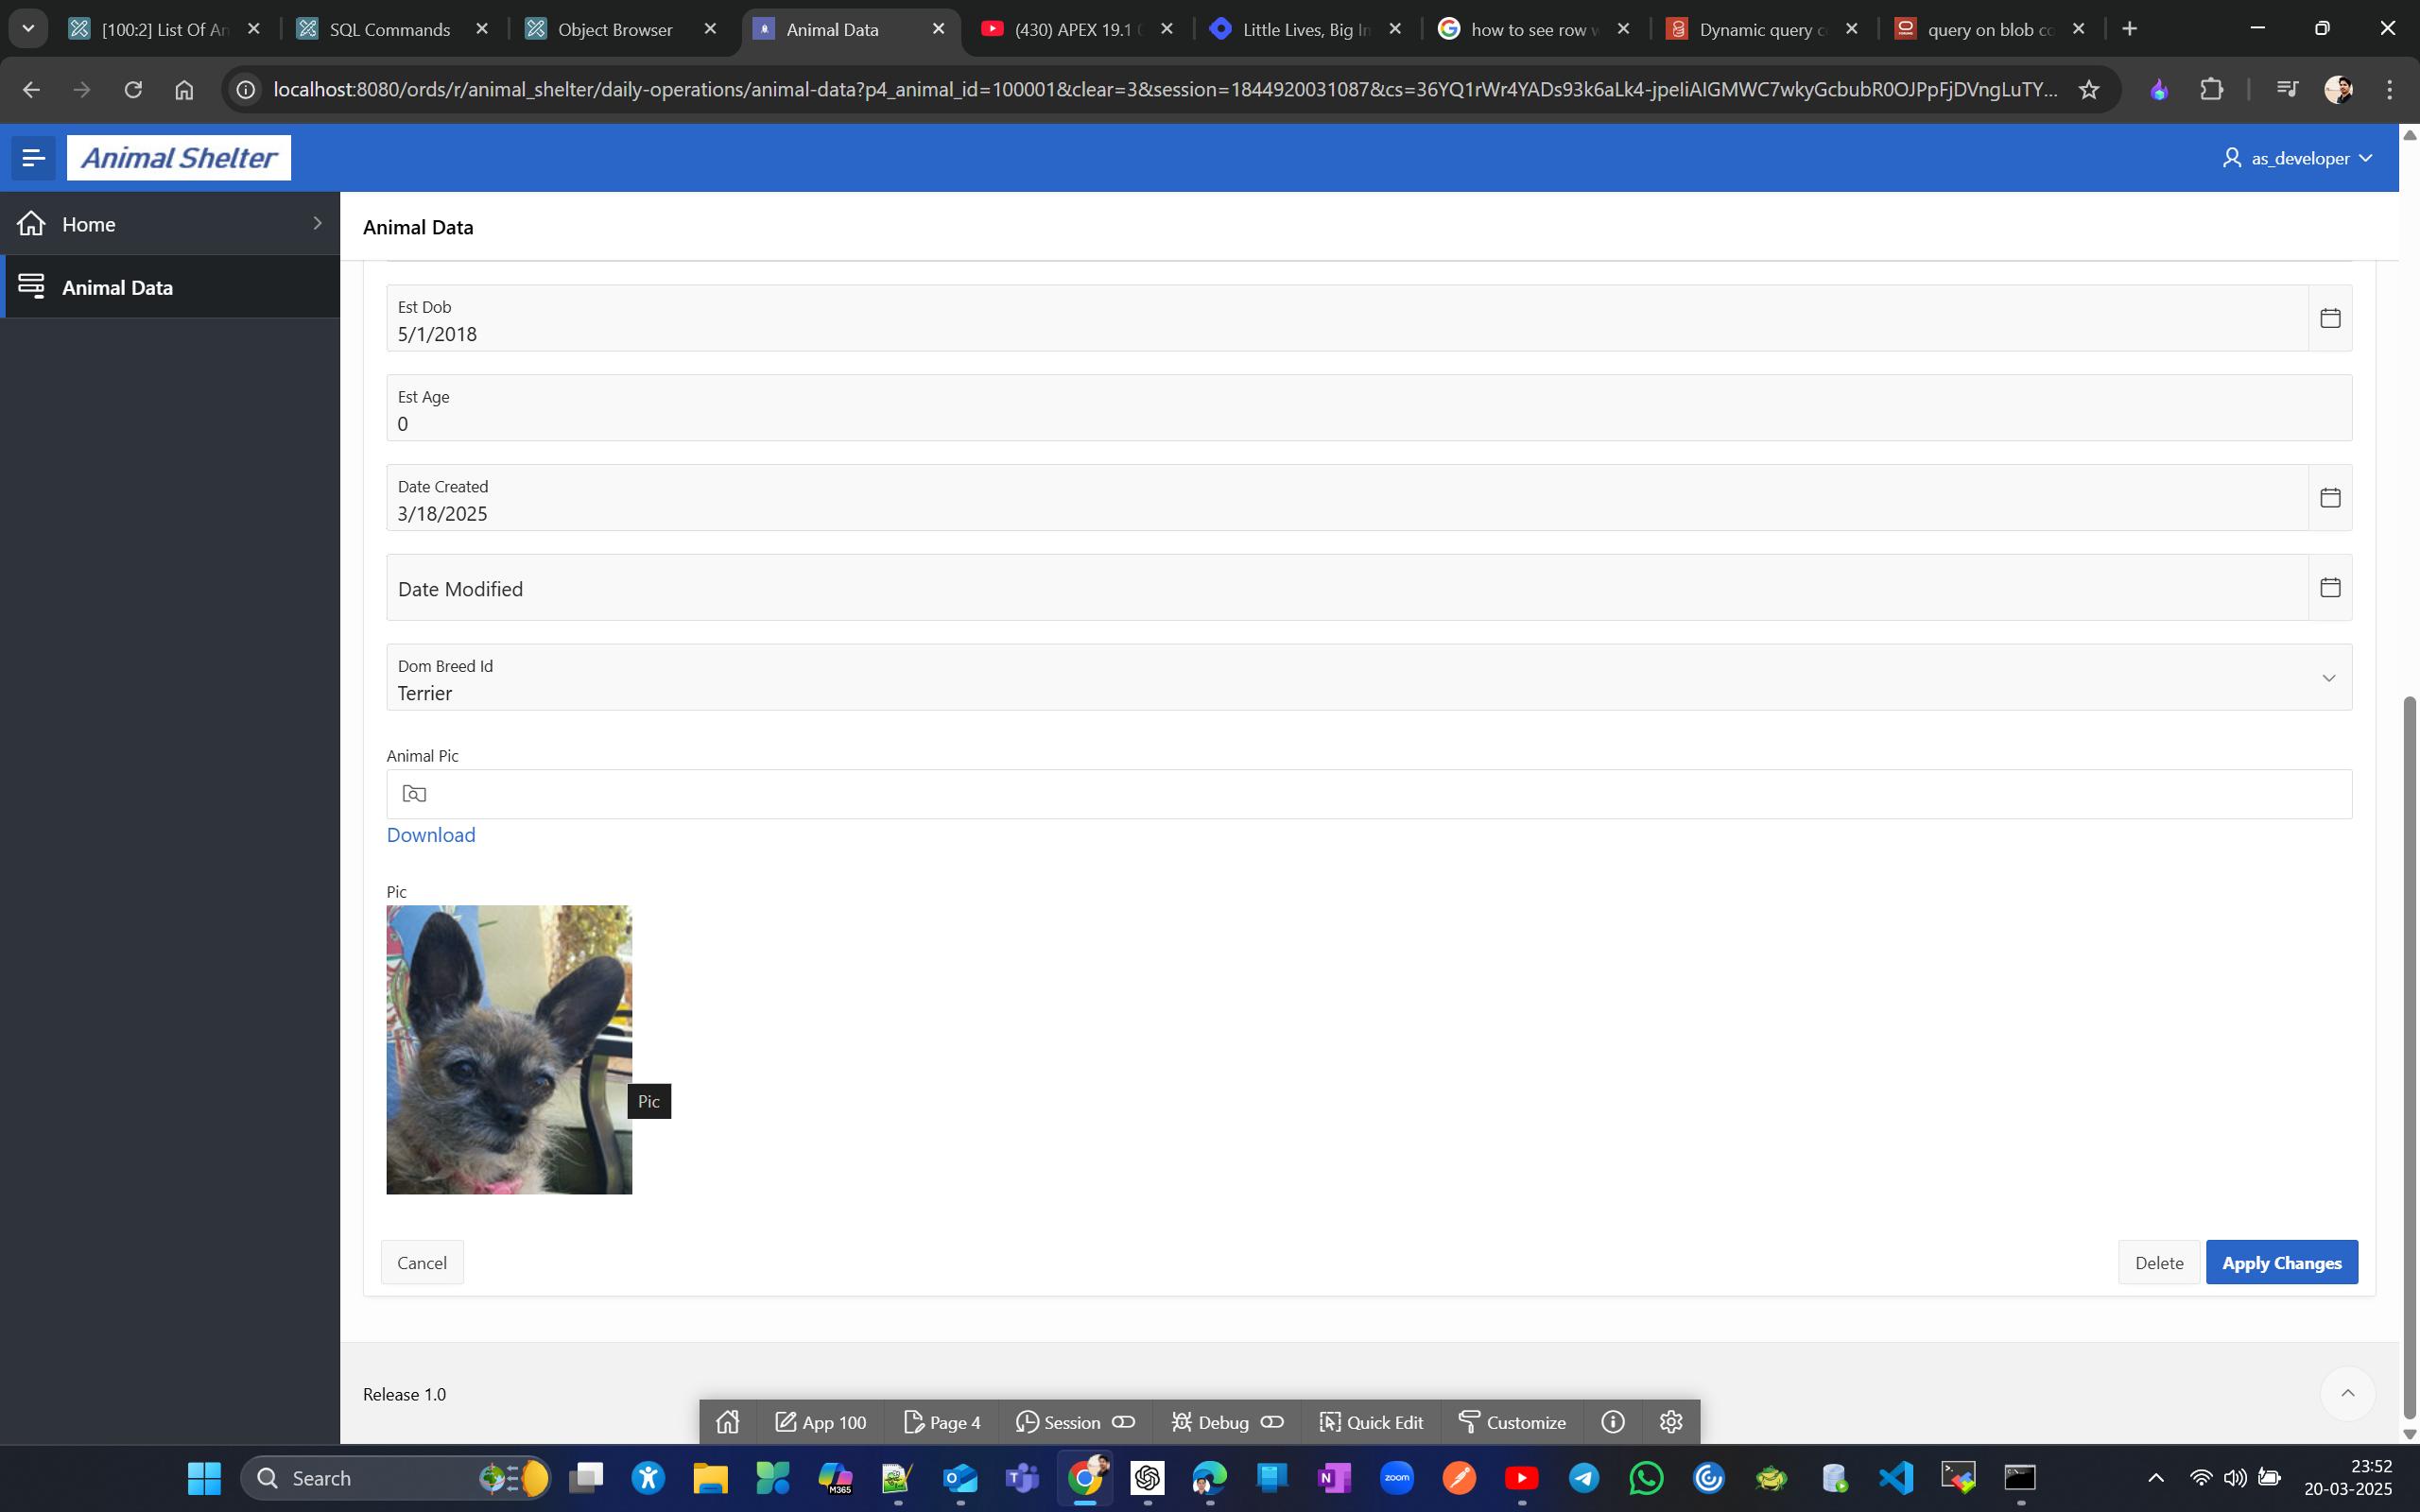
After uploading, you can see the image, but to view the blob content, add a page item in page #4 for the Animal Data form, and we won't use the existing ANIMAL_PIC column to display animal photos since it only allows browsing and uploading.
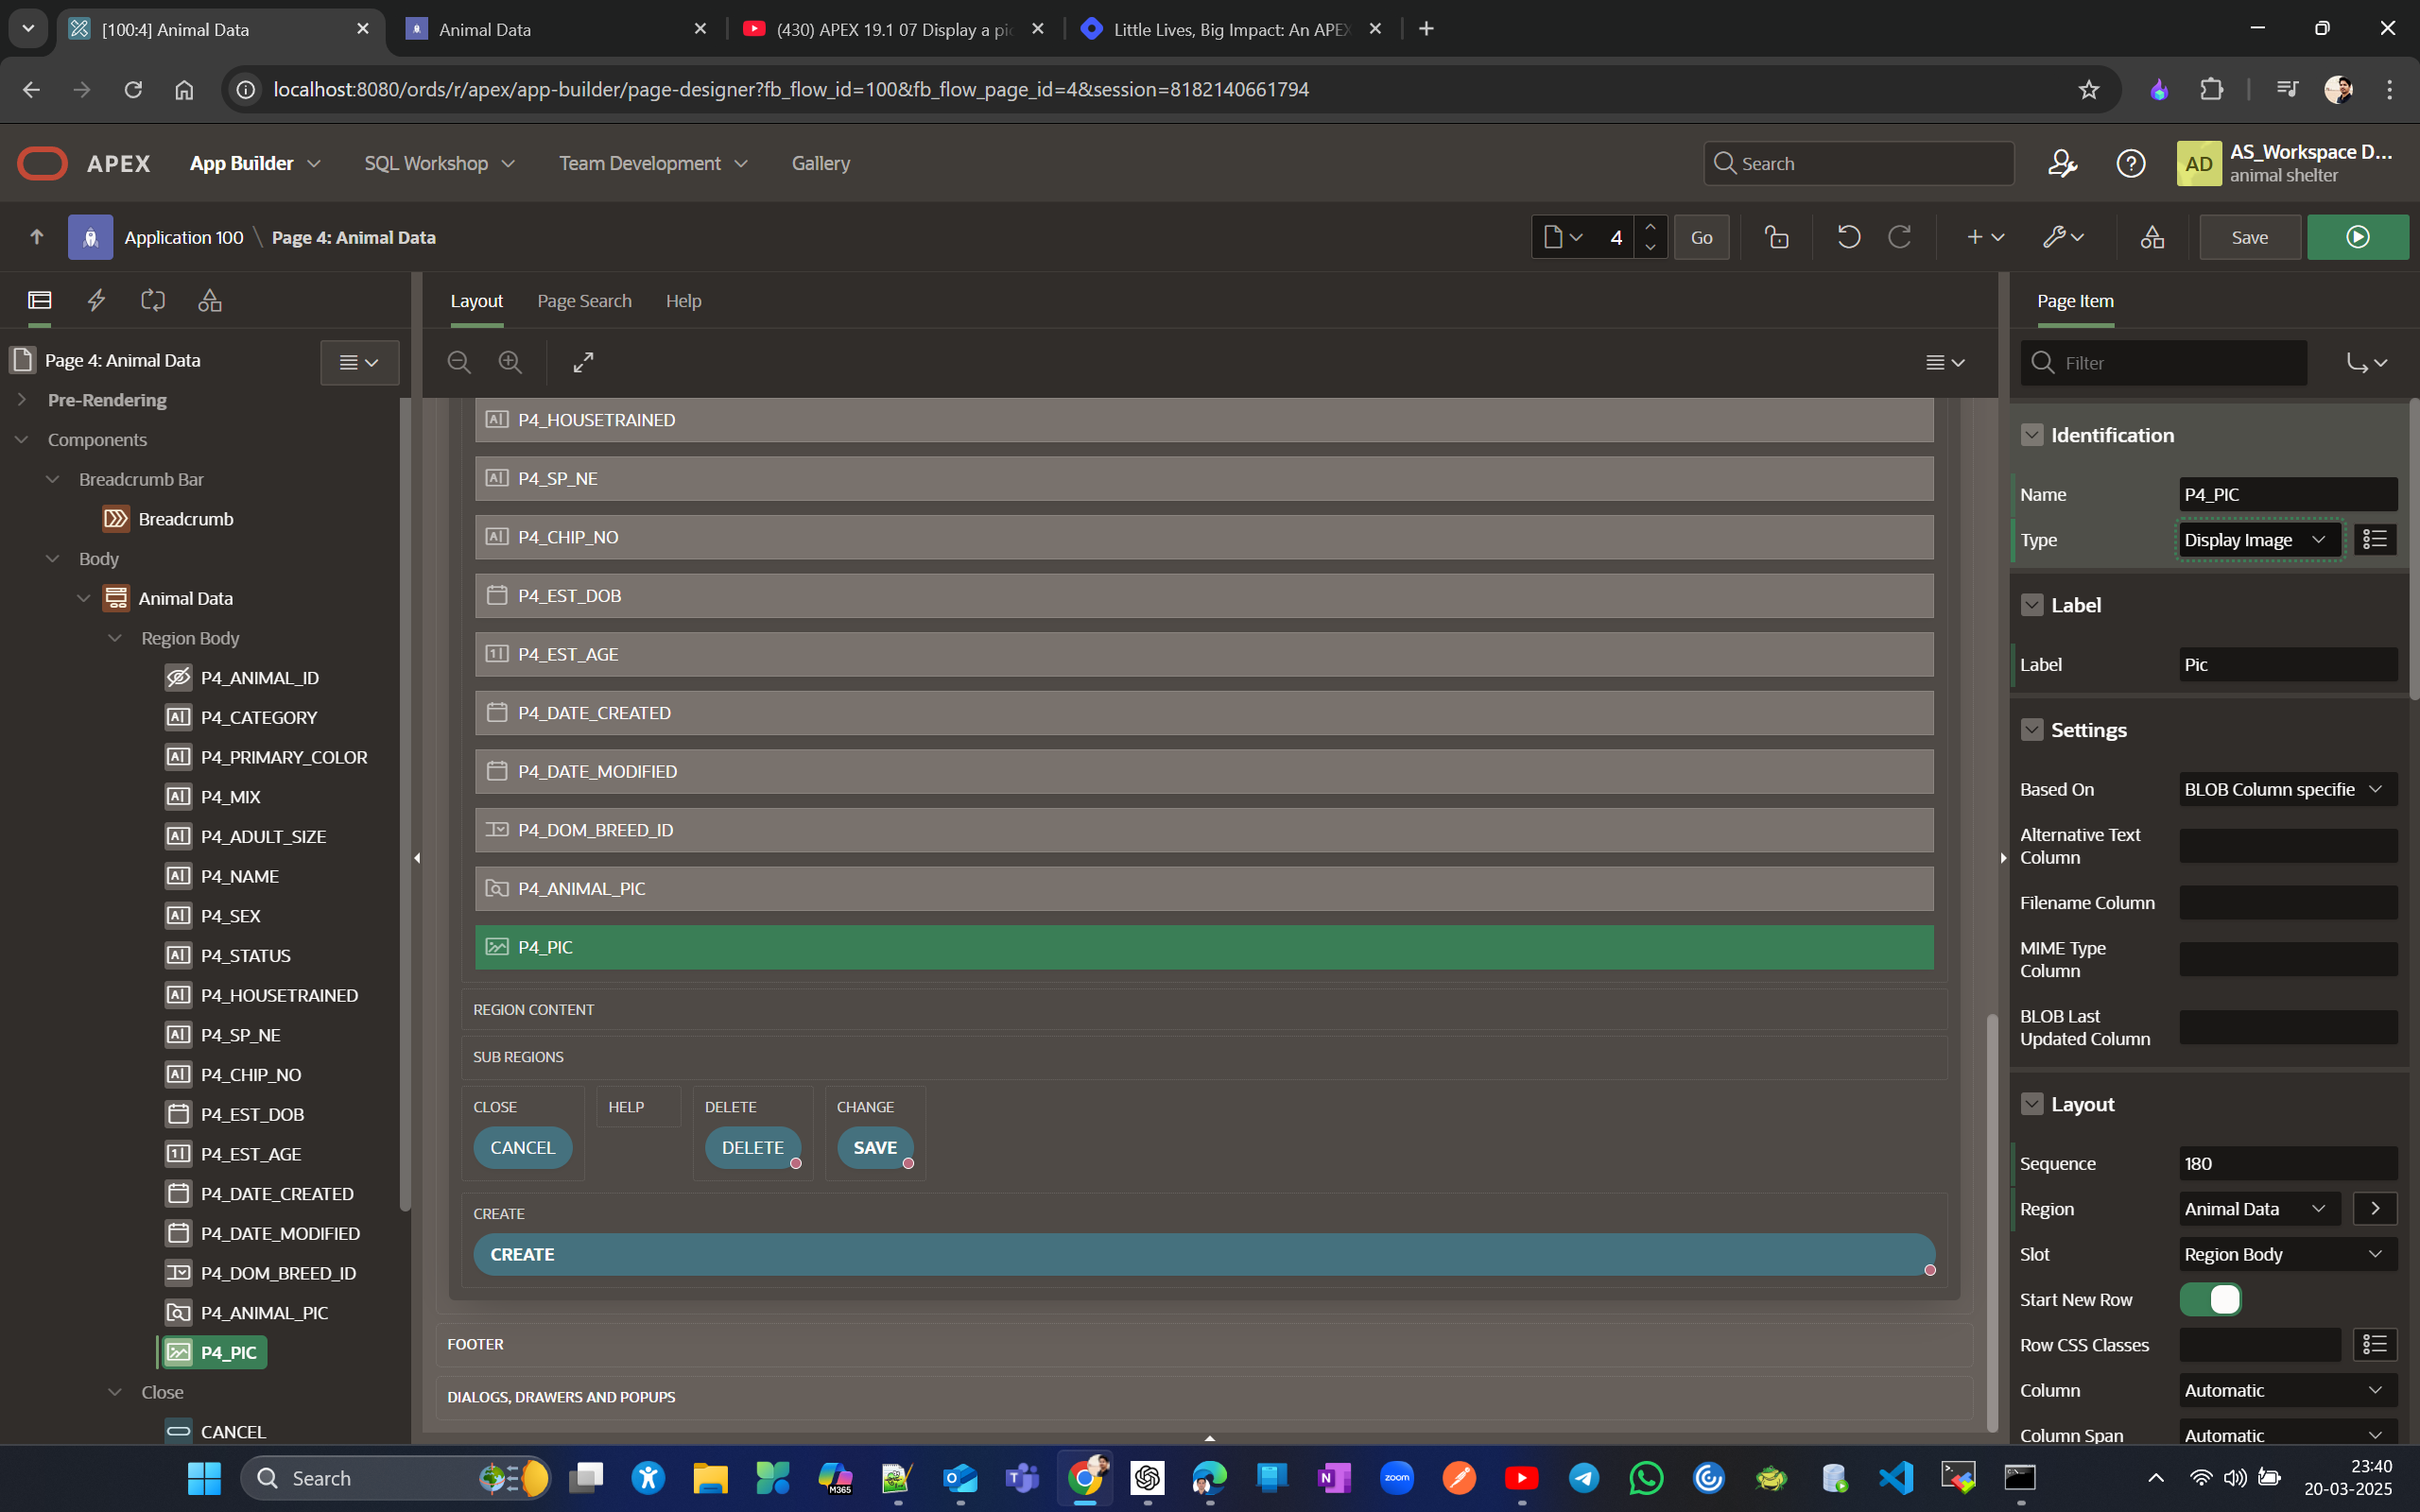
rename new page item to P4_PIC and select type as Display image
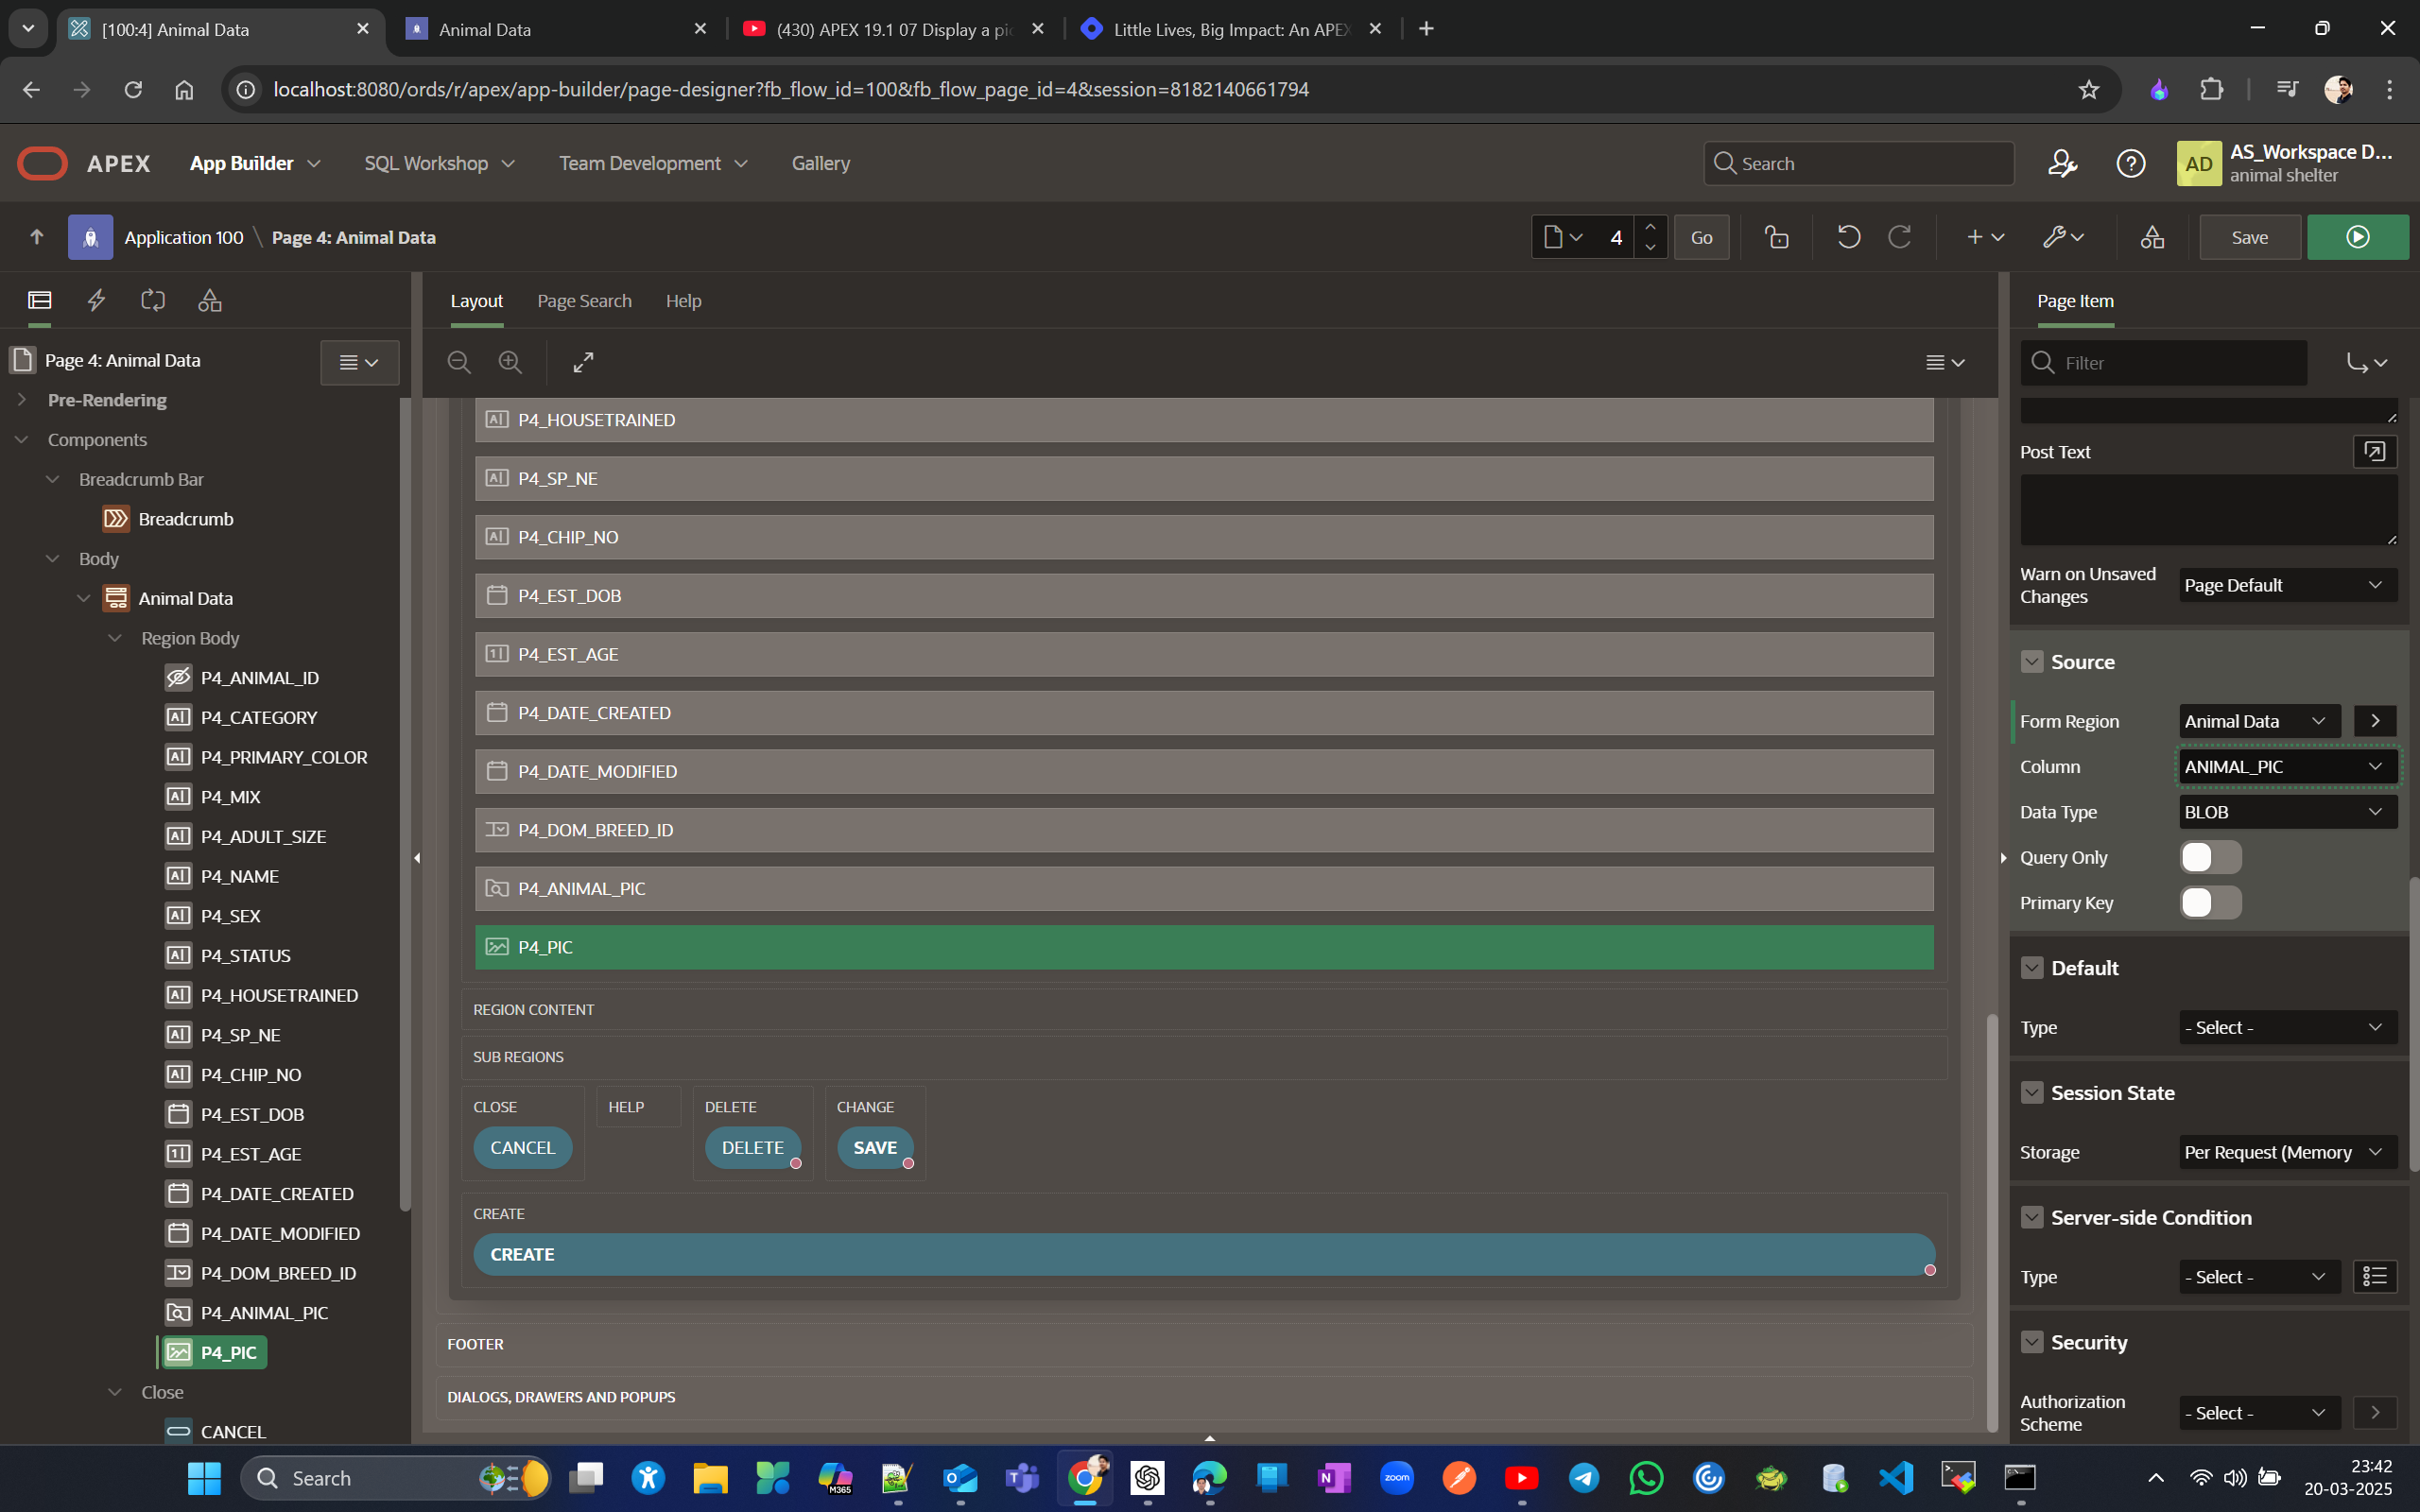
Now scroll to source section and select the form for source and select column which you want to display
Now when you will edit a form for a row you can see pic you had added already added.
Create static and dynamic LOVs in Shared Components. Use them in a form.
Copy the Animal Data form page (Page #4) to create a new form page called Animal Data LOVs (Page #5), where users can input data using a dropdown select list or Popup LOV. DOn’t associate this page with navigation entry yet.
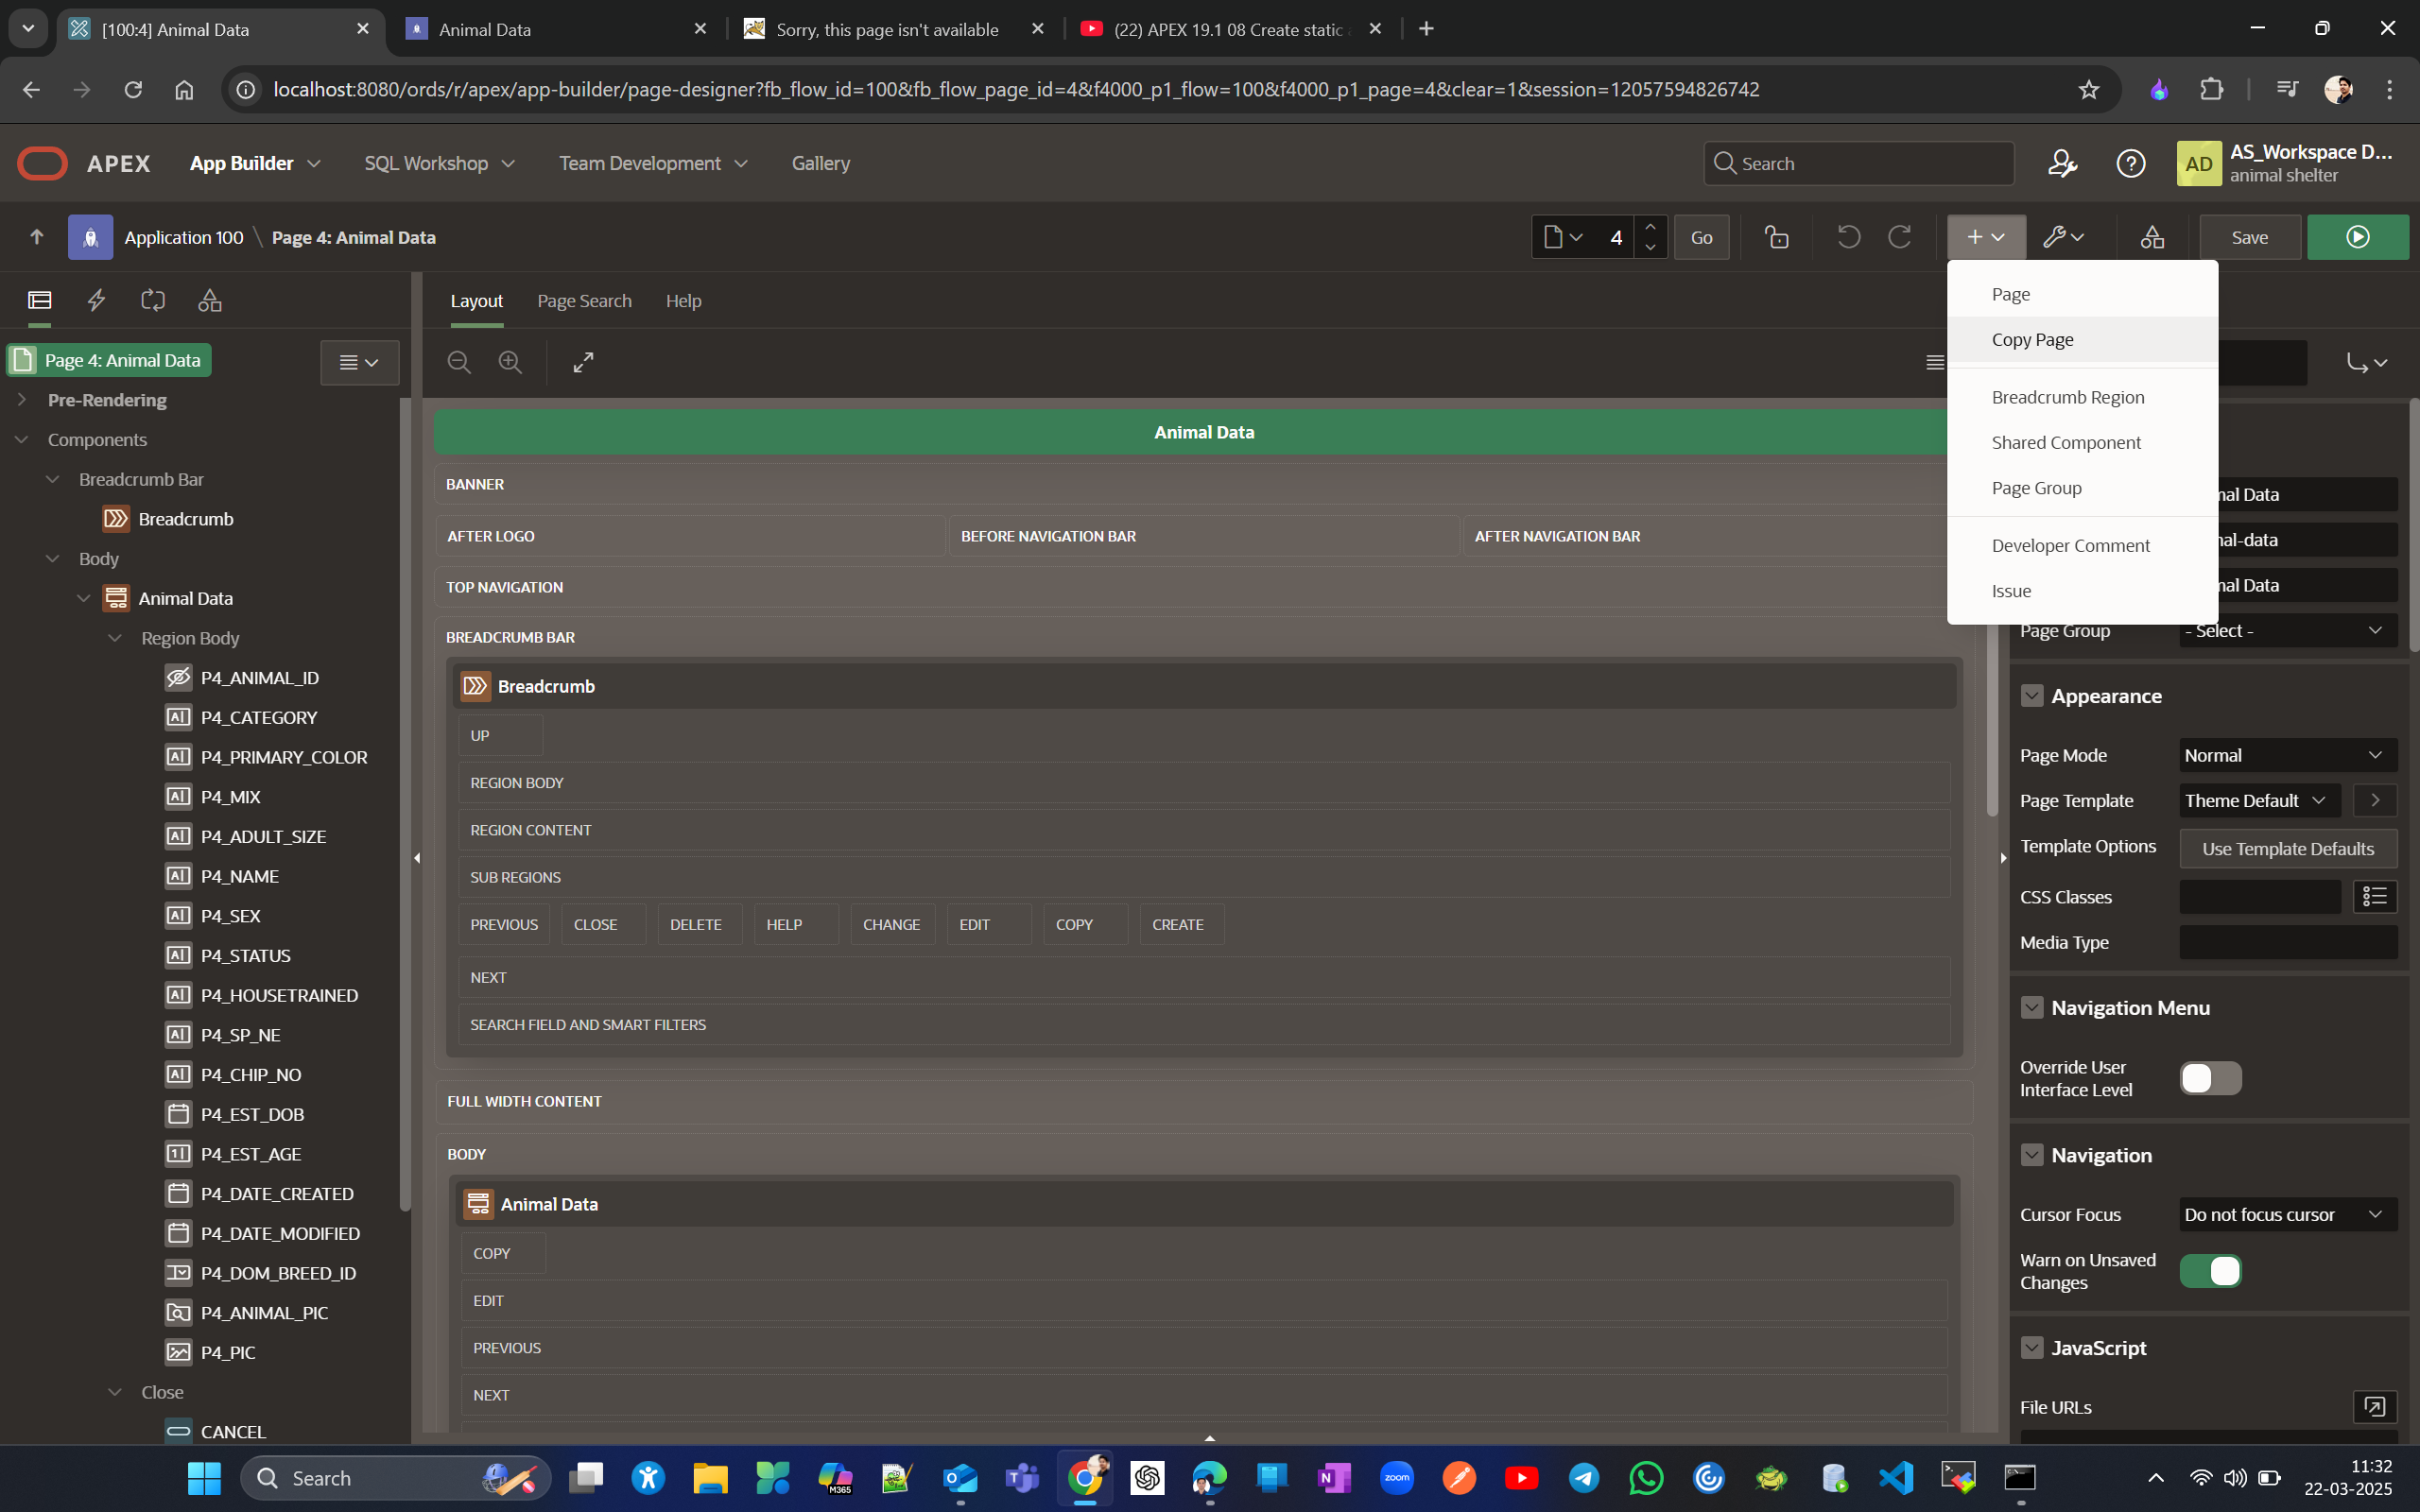
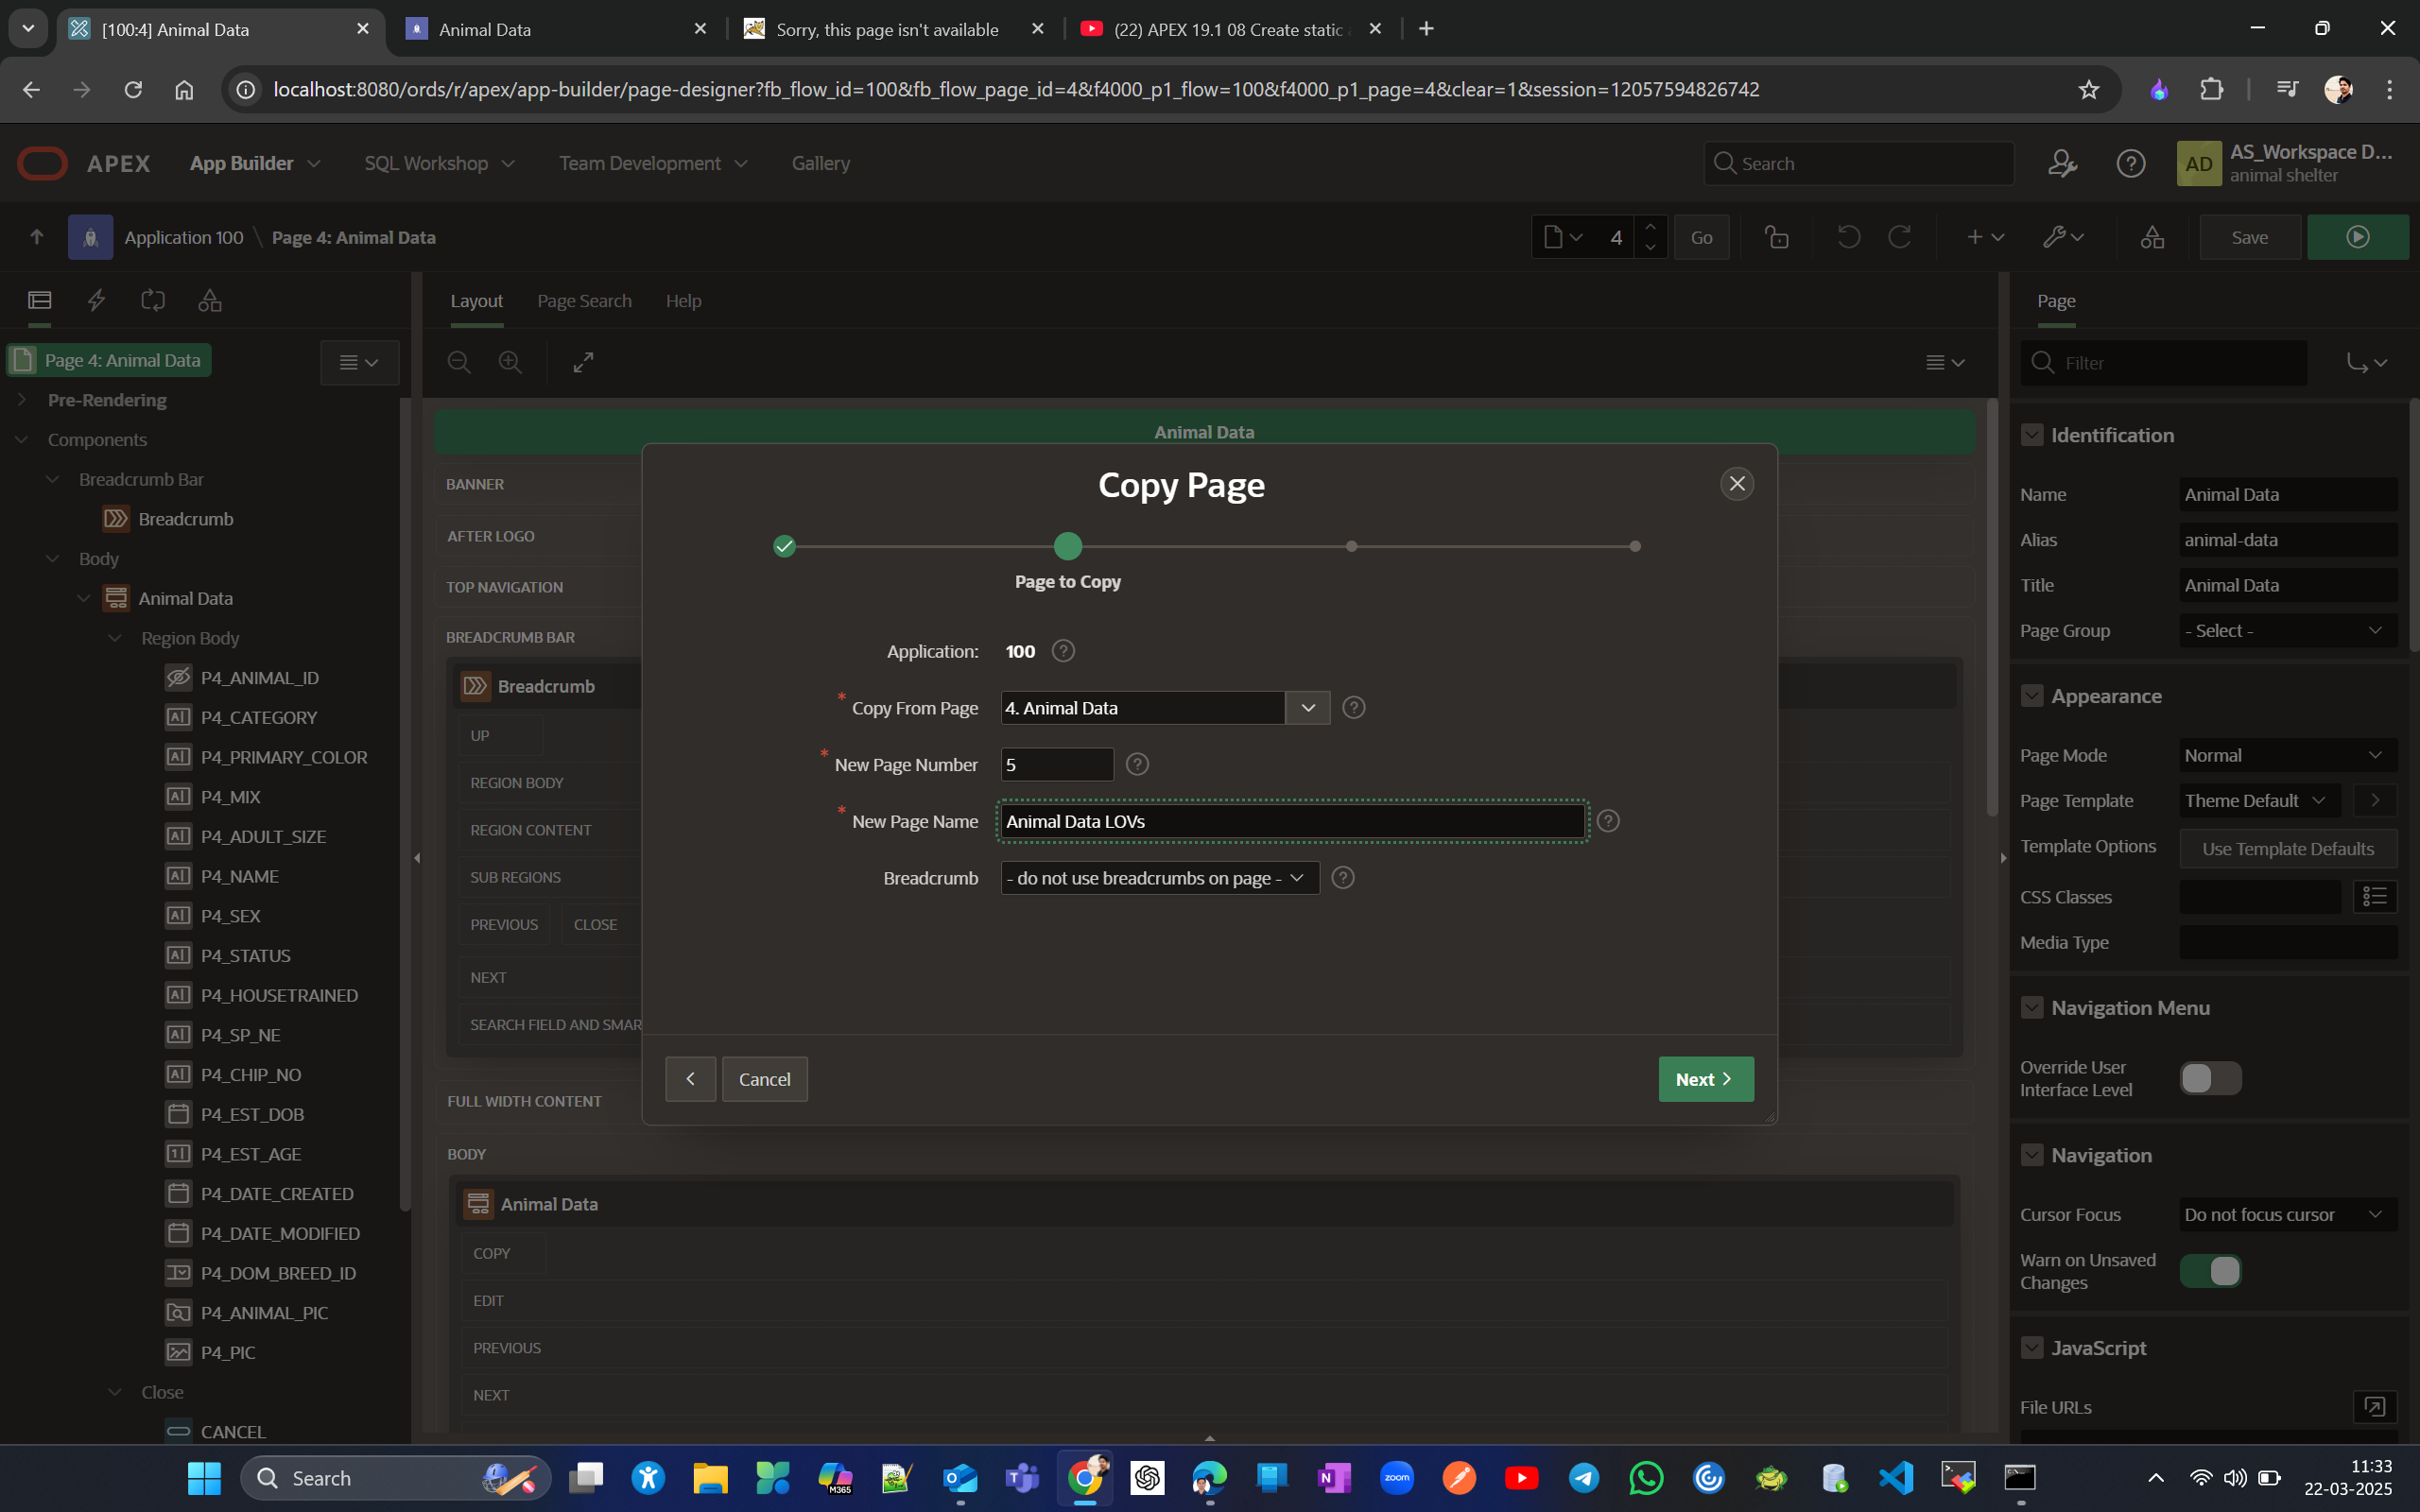
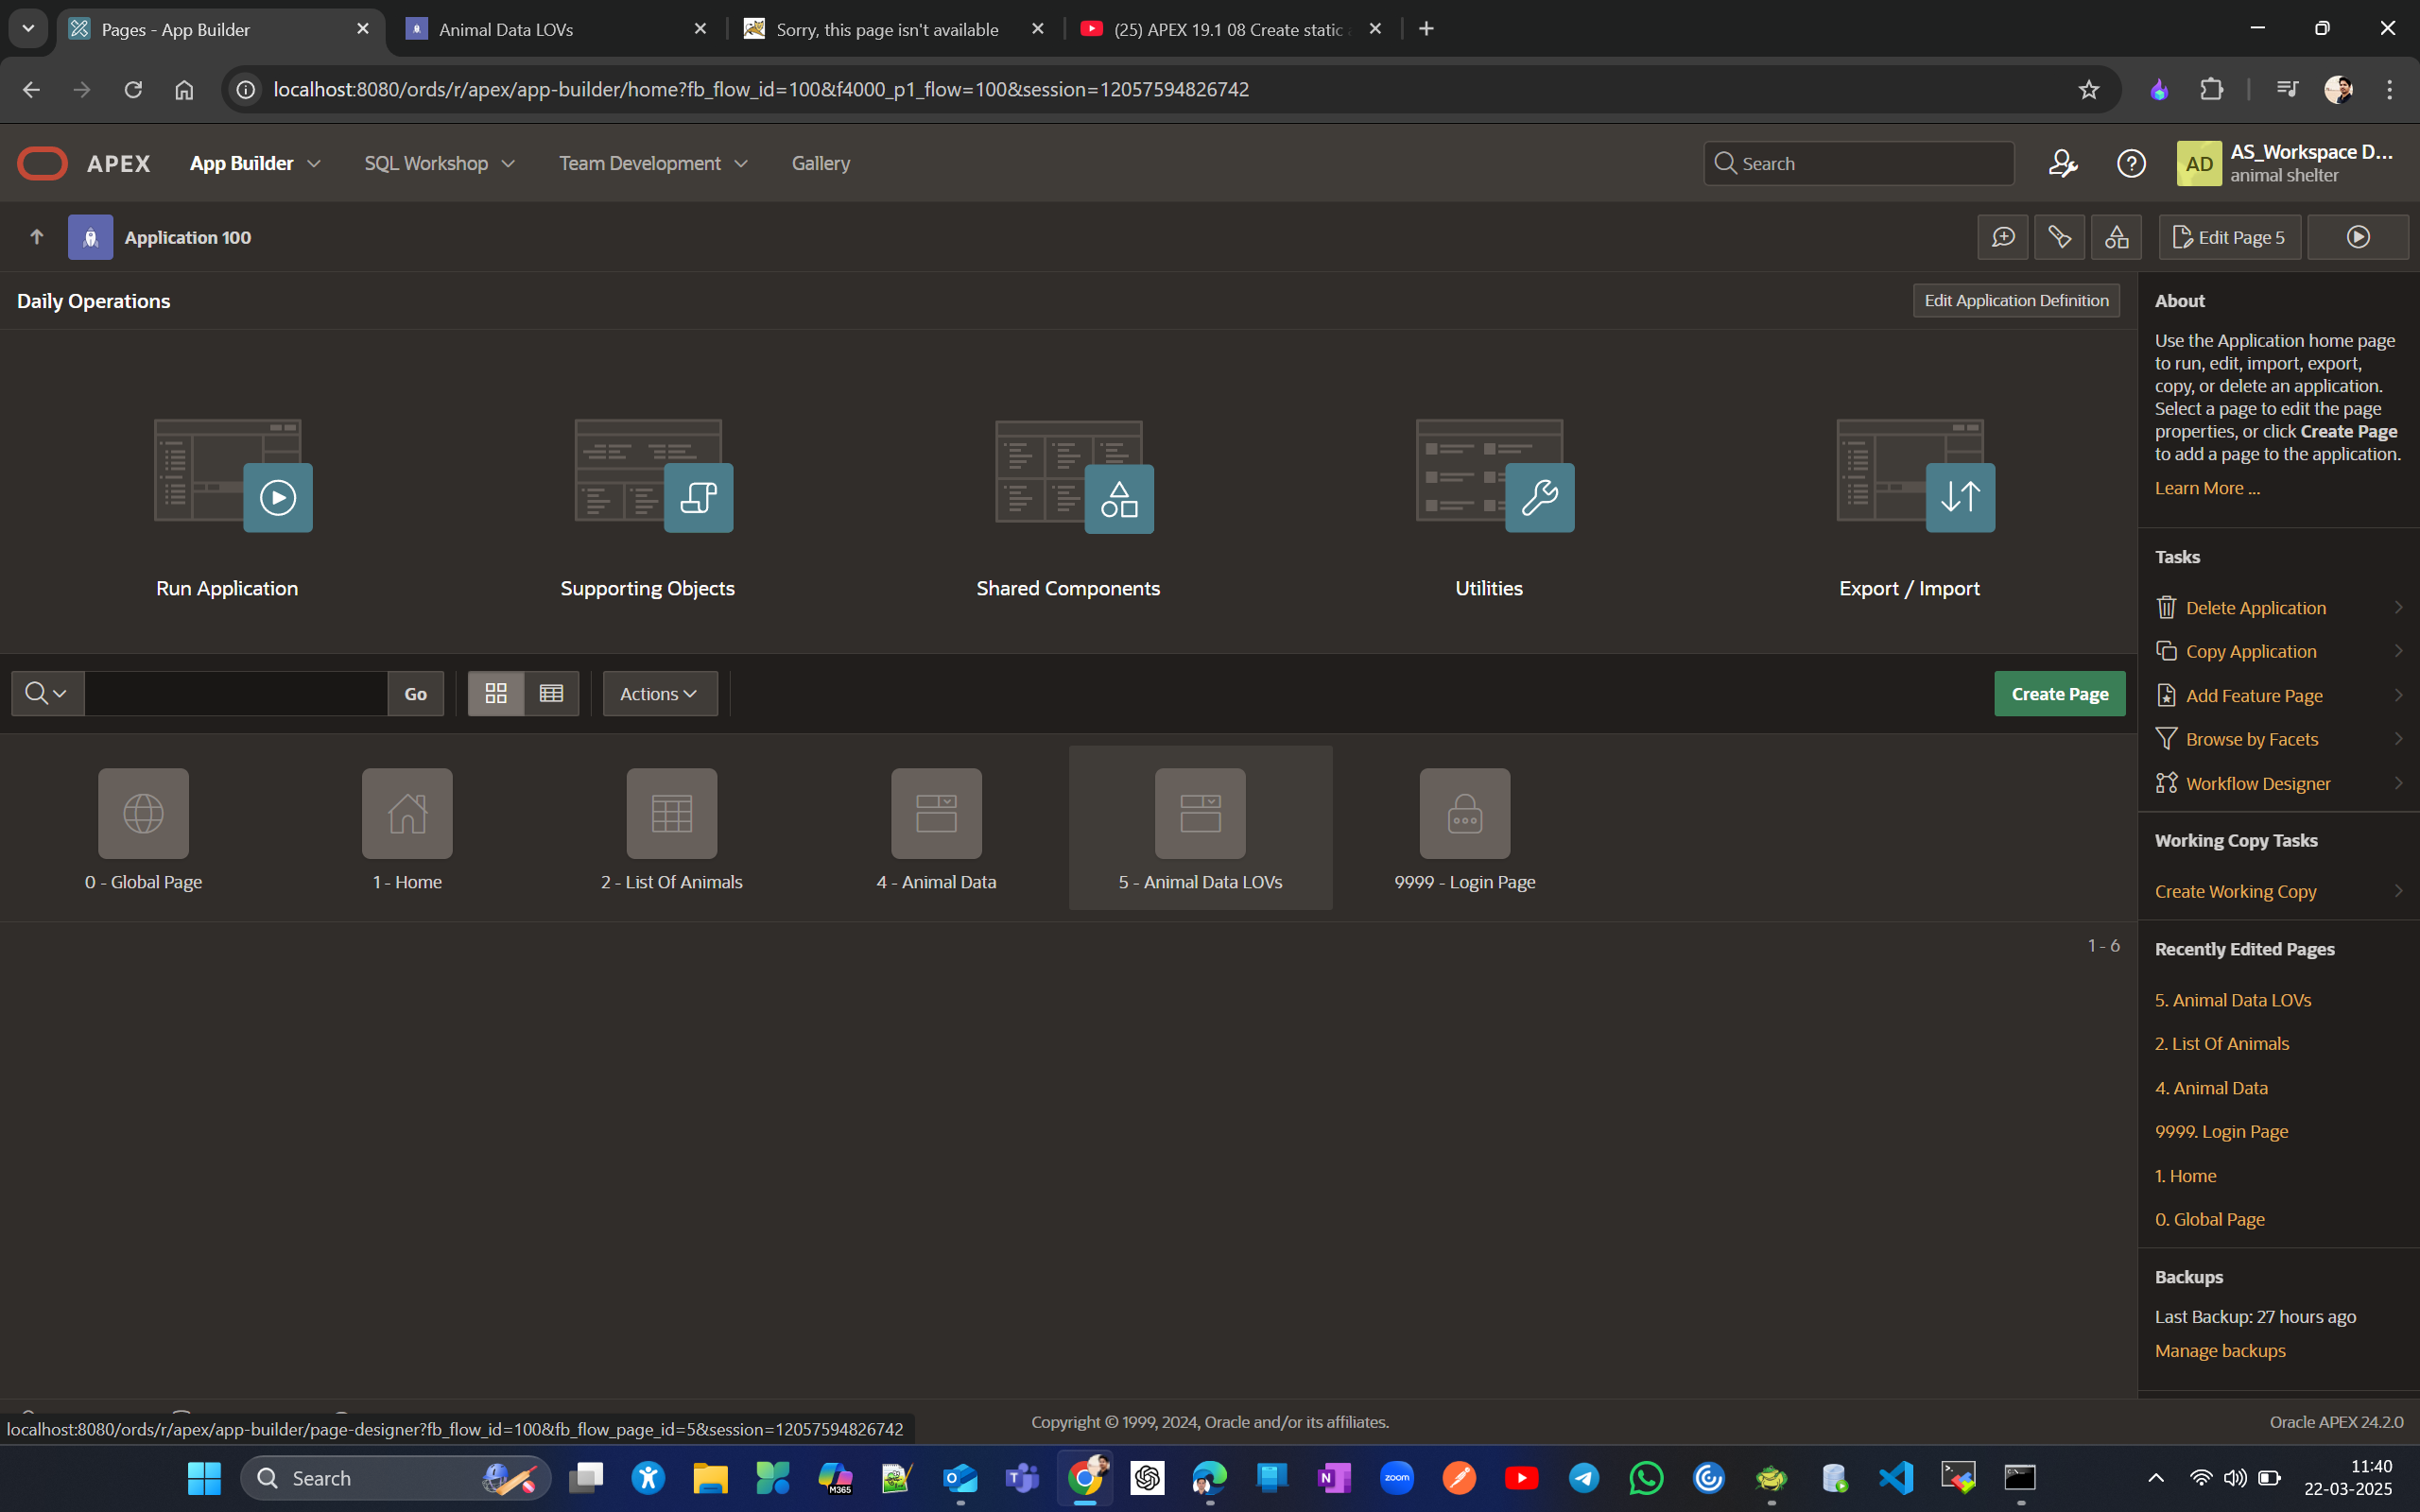
Now are next idea is to create static/dynamic lovs for each column based on the requirement. LOVs help prevent errors in data entry. There are two types of LOVs: Static and Dynamic. Static LOVs do not change over time and only developers can modify them. Dynamic LOVs, on the other hand, come from distinct column values and can change as users update them since these dynamic values are auto-populated. Static values will appear in shared component LOV lists, whereas dynamic values will not.
here is Animal table column for which we will be creating LOVs
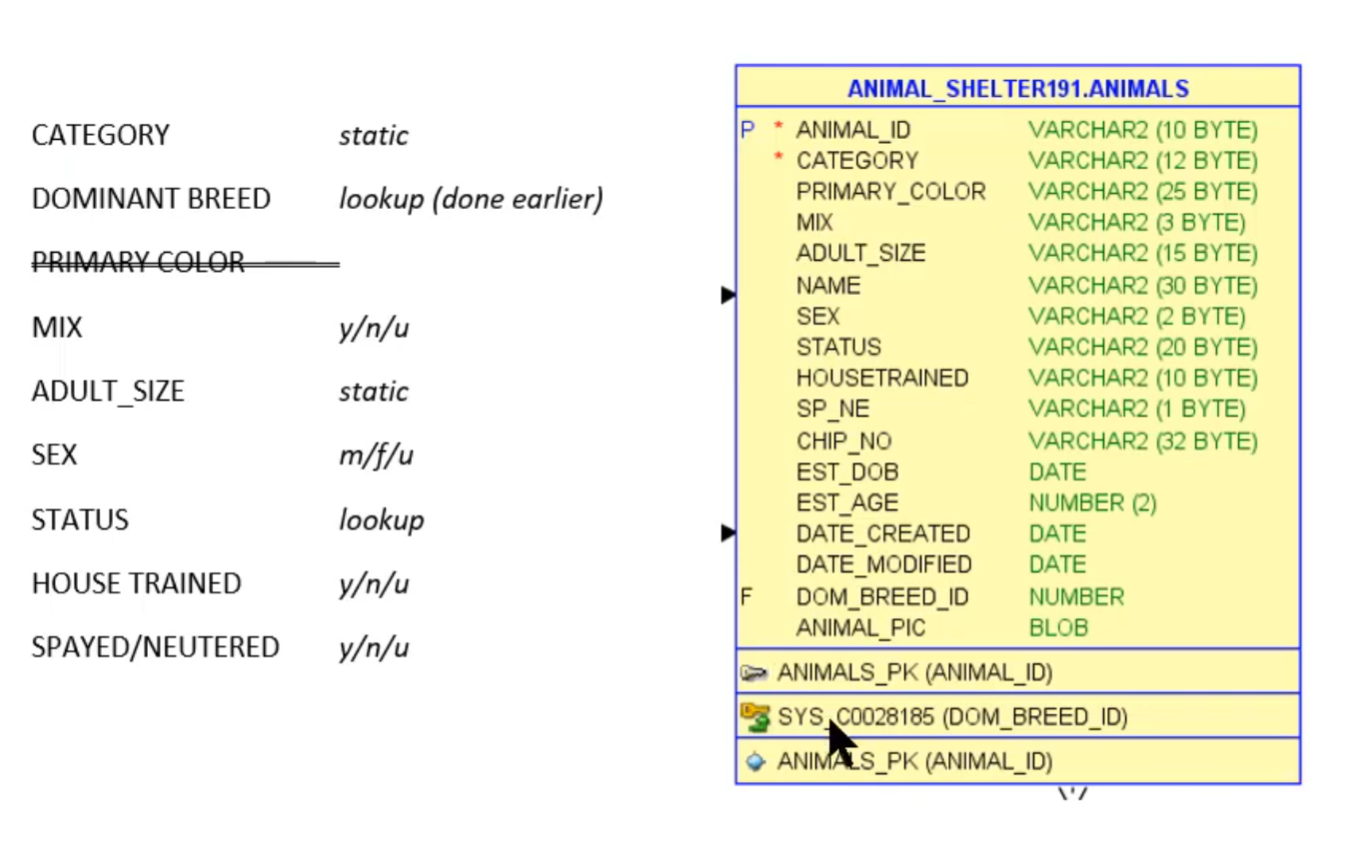
To create LOV go to Shared Component → Under Other Components select List of Values → Create →
Note - You have already DOM_BREED_LOOKUP.DOM_BREED local lov already created as part of lookup table creation from Animals.DOM_BREED column
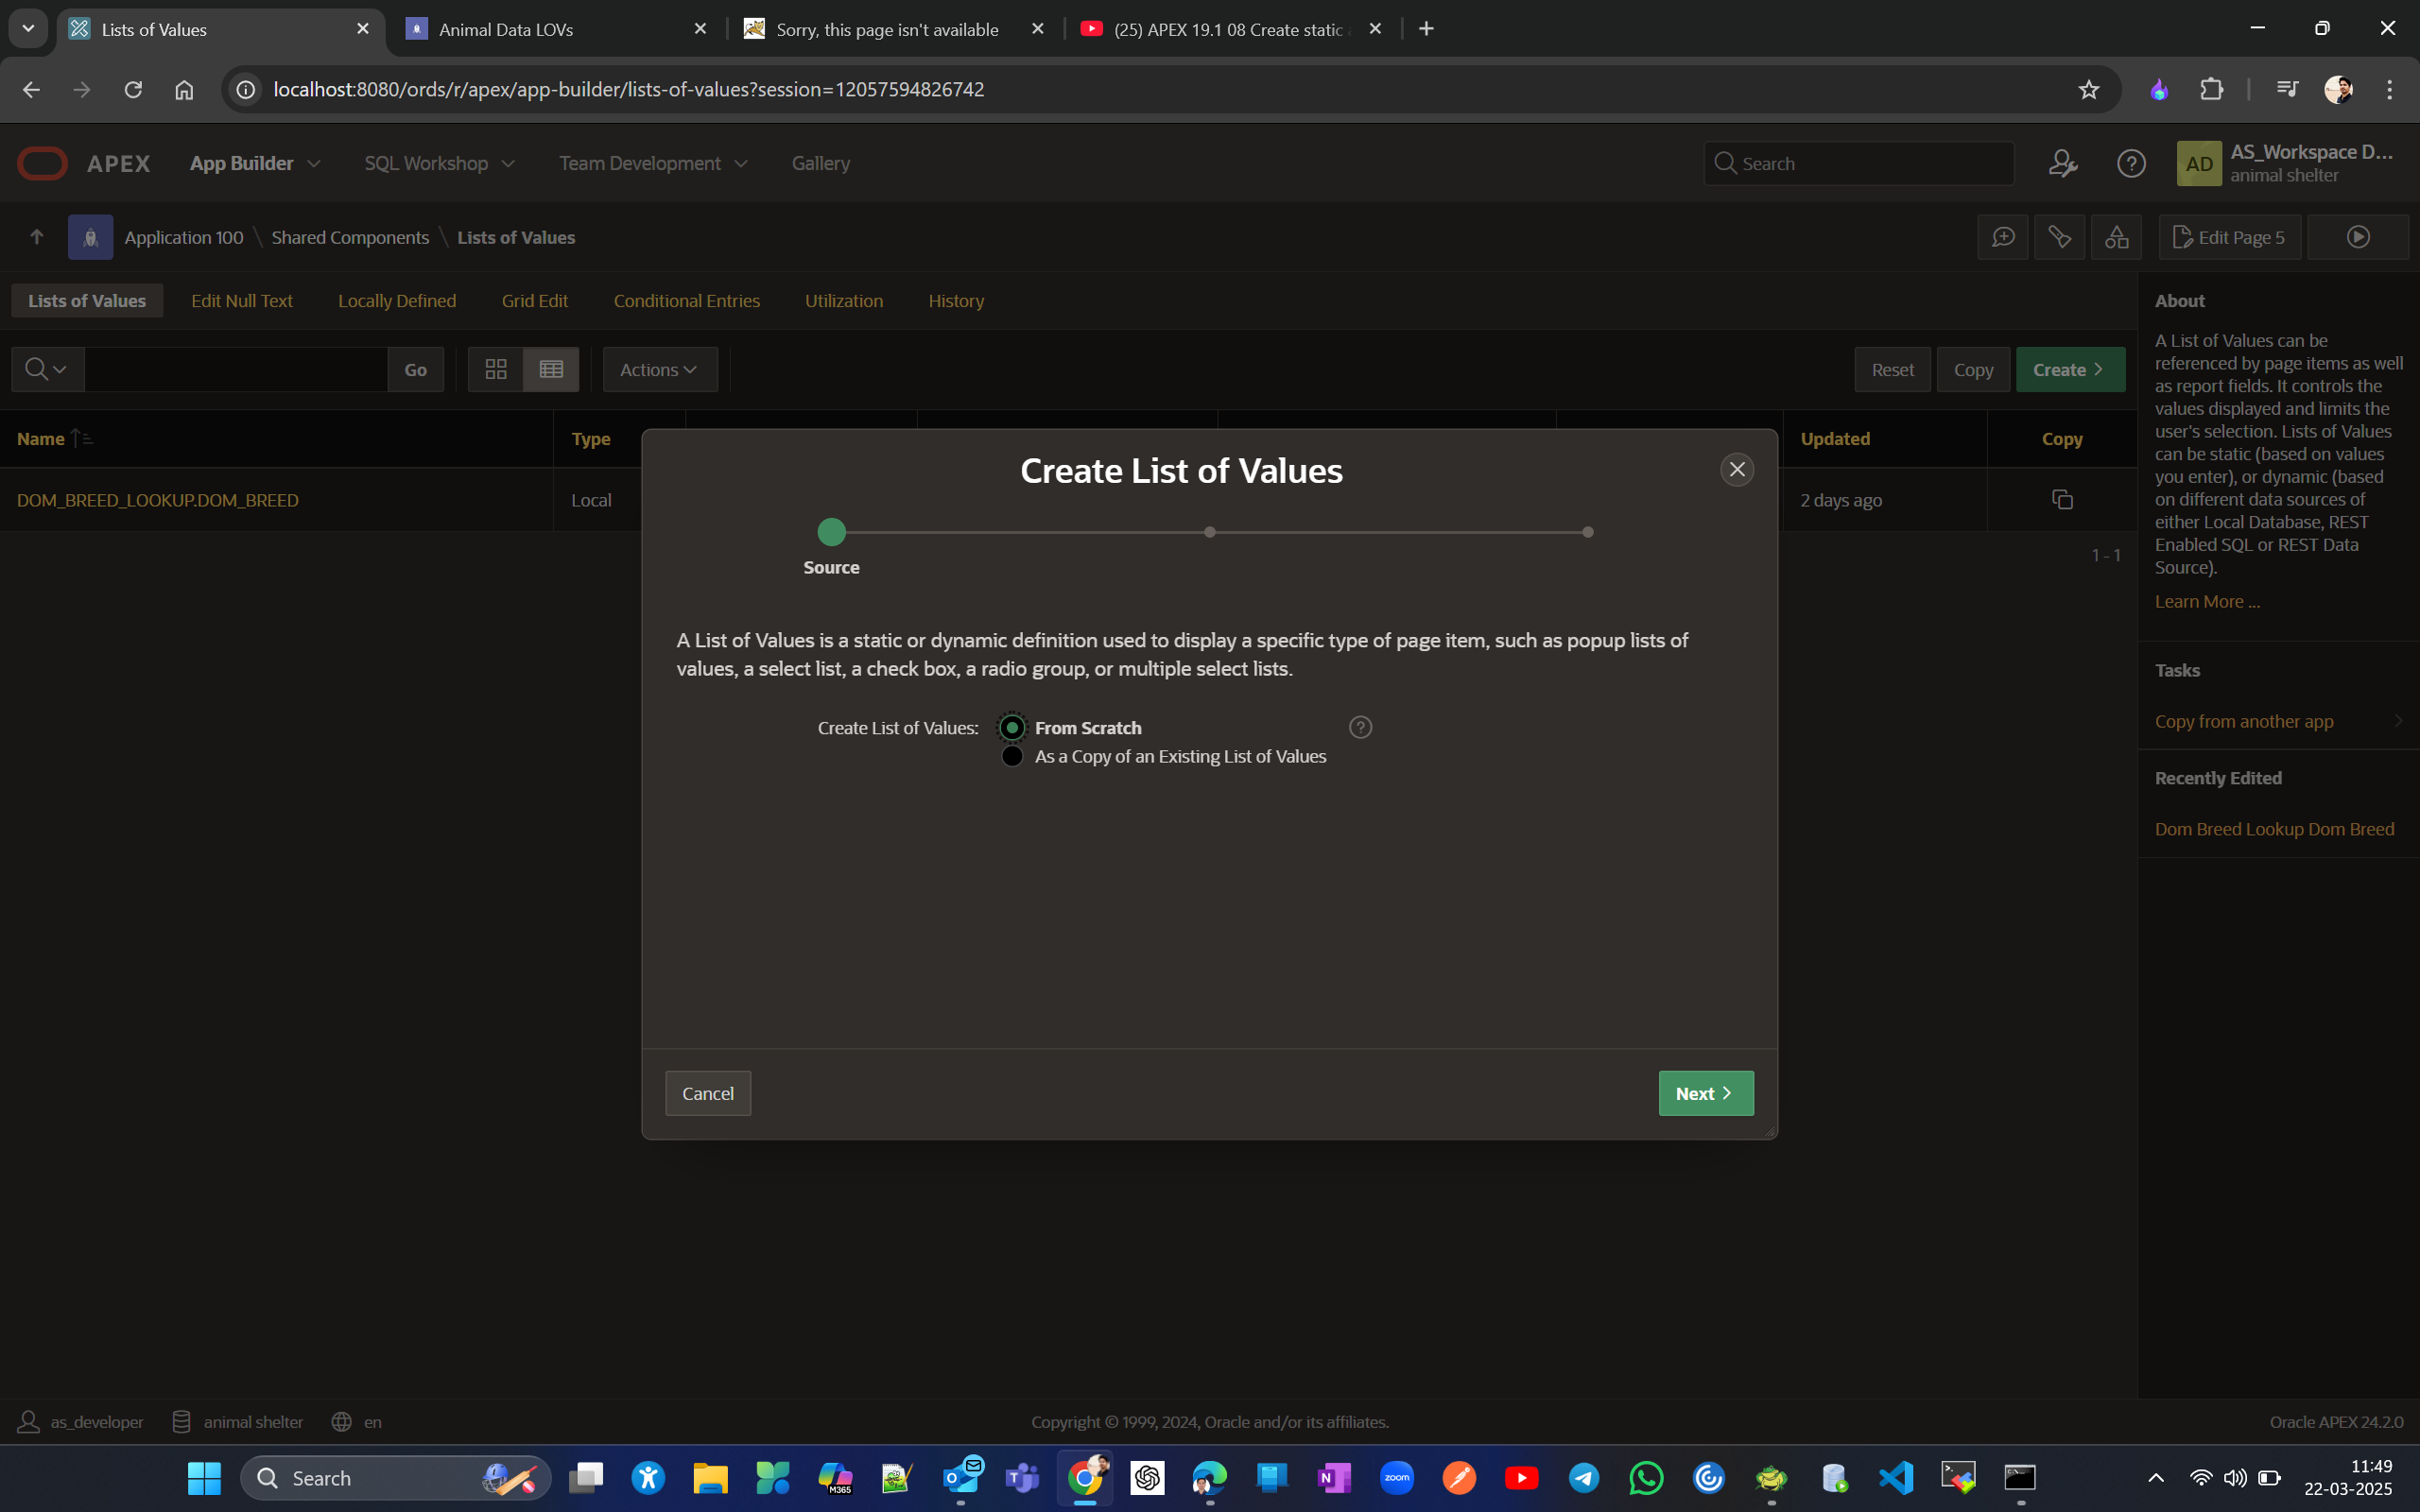
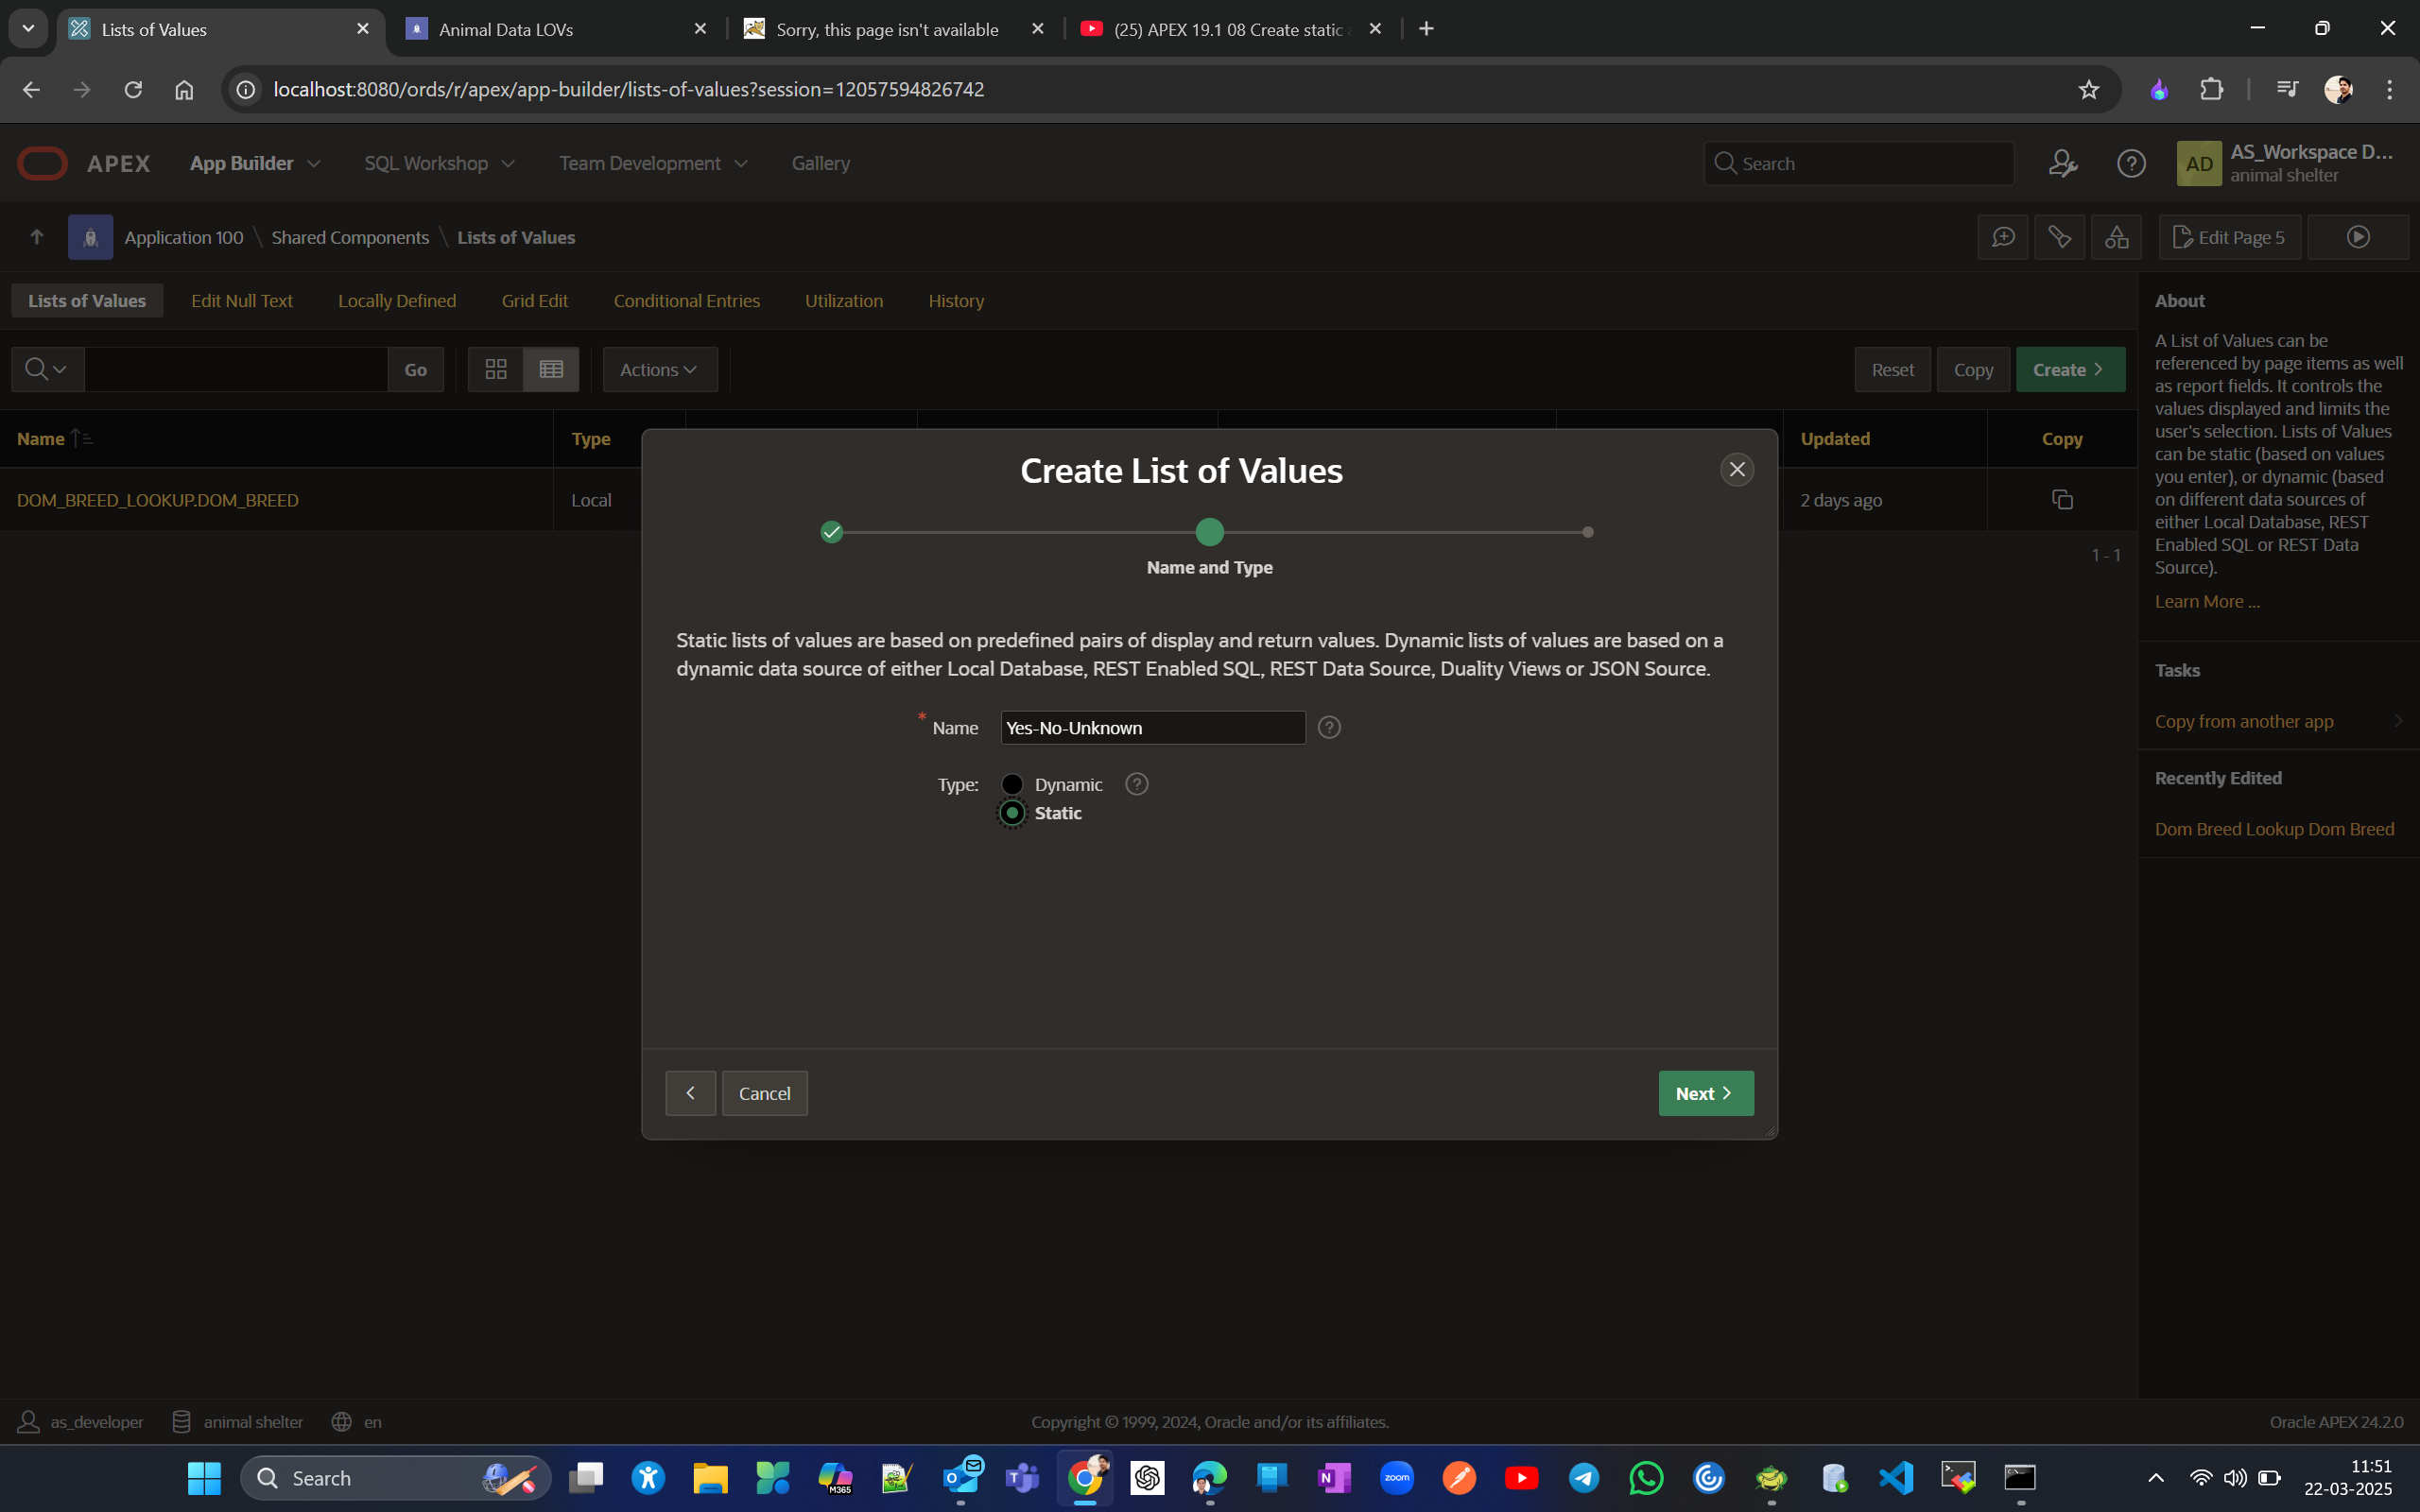
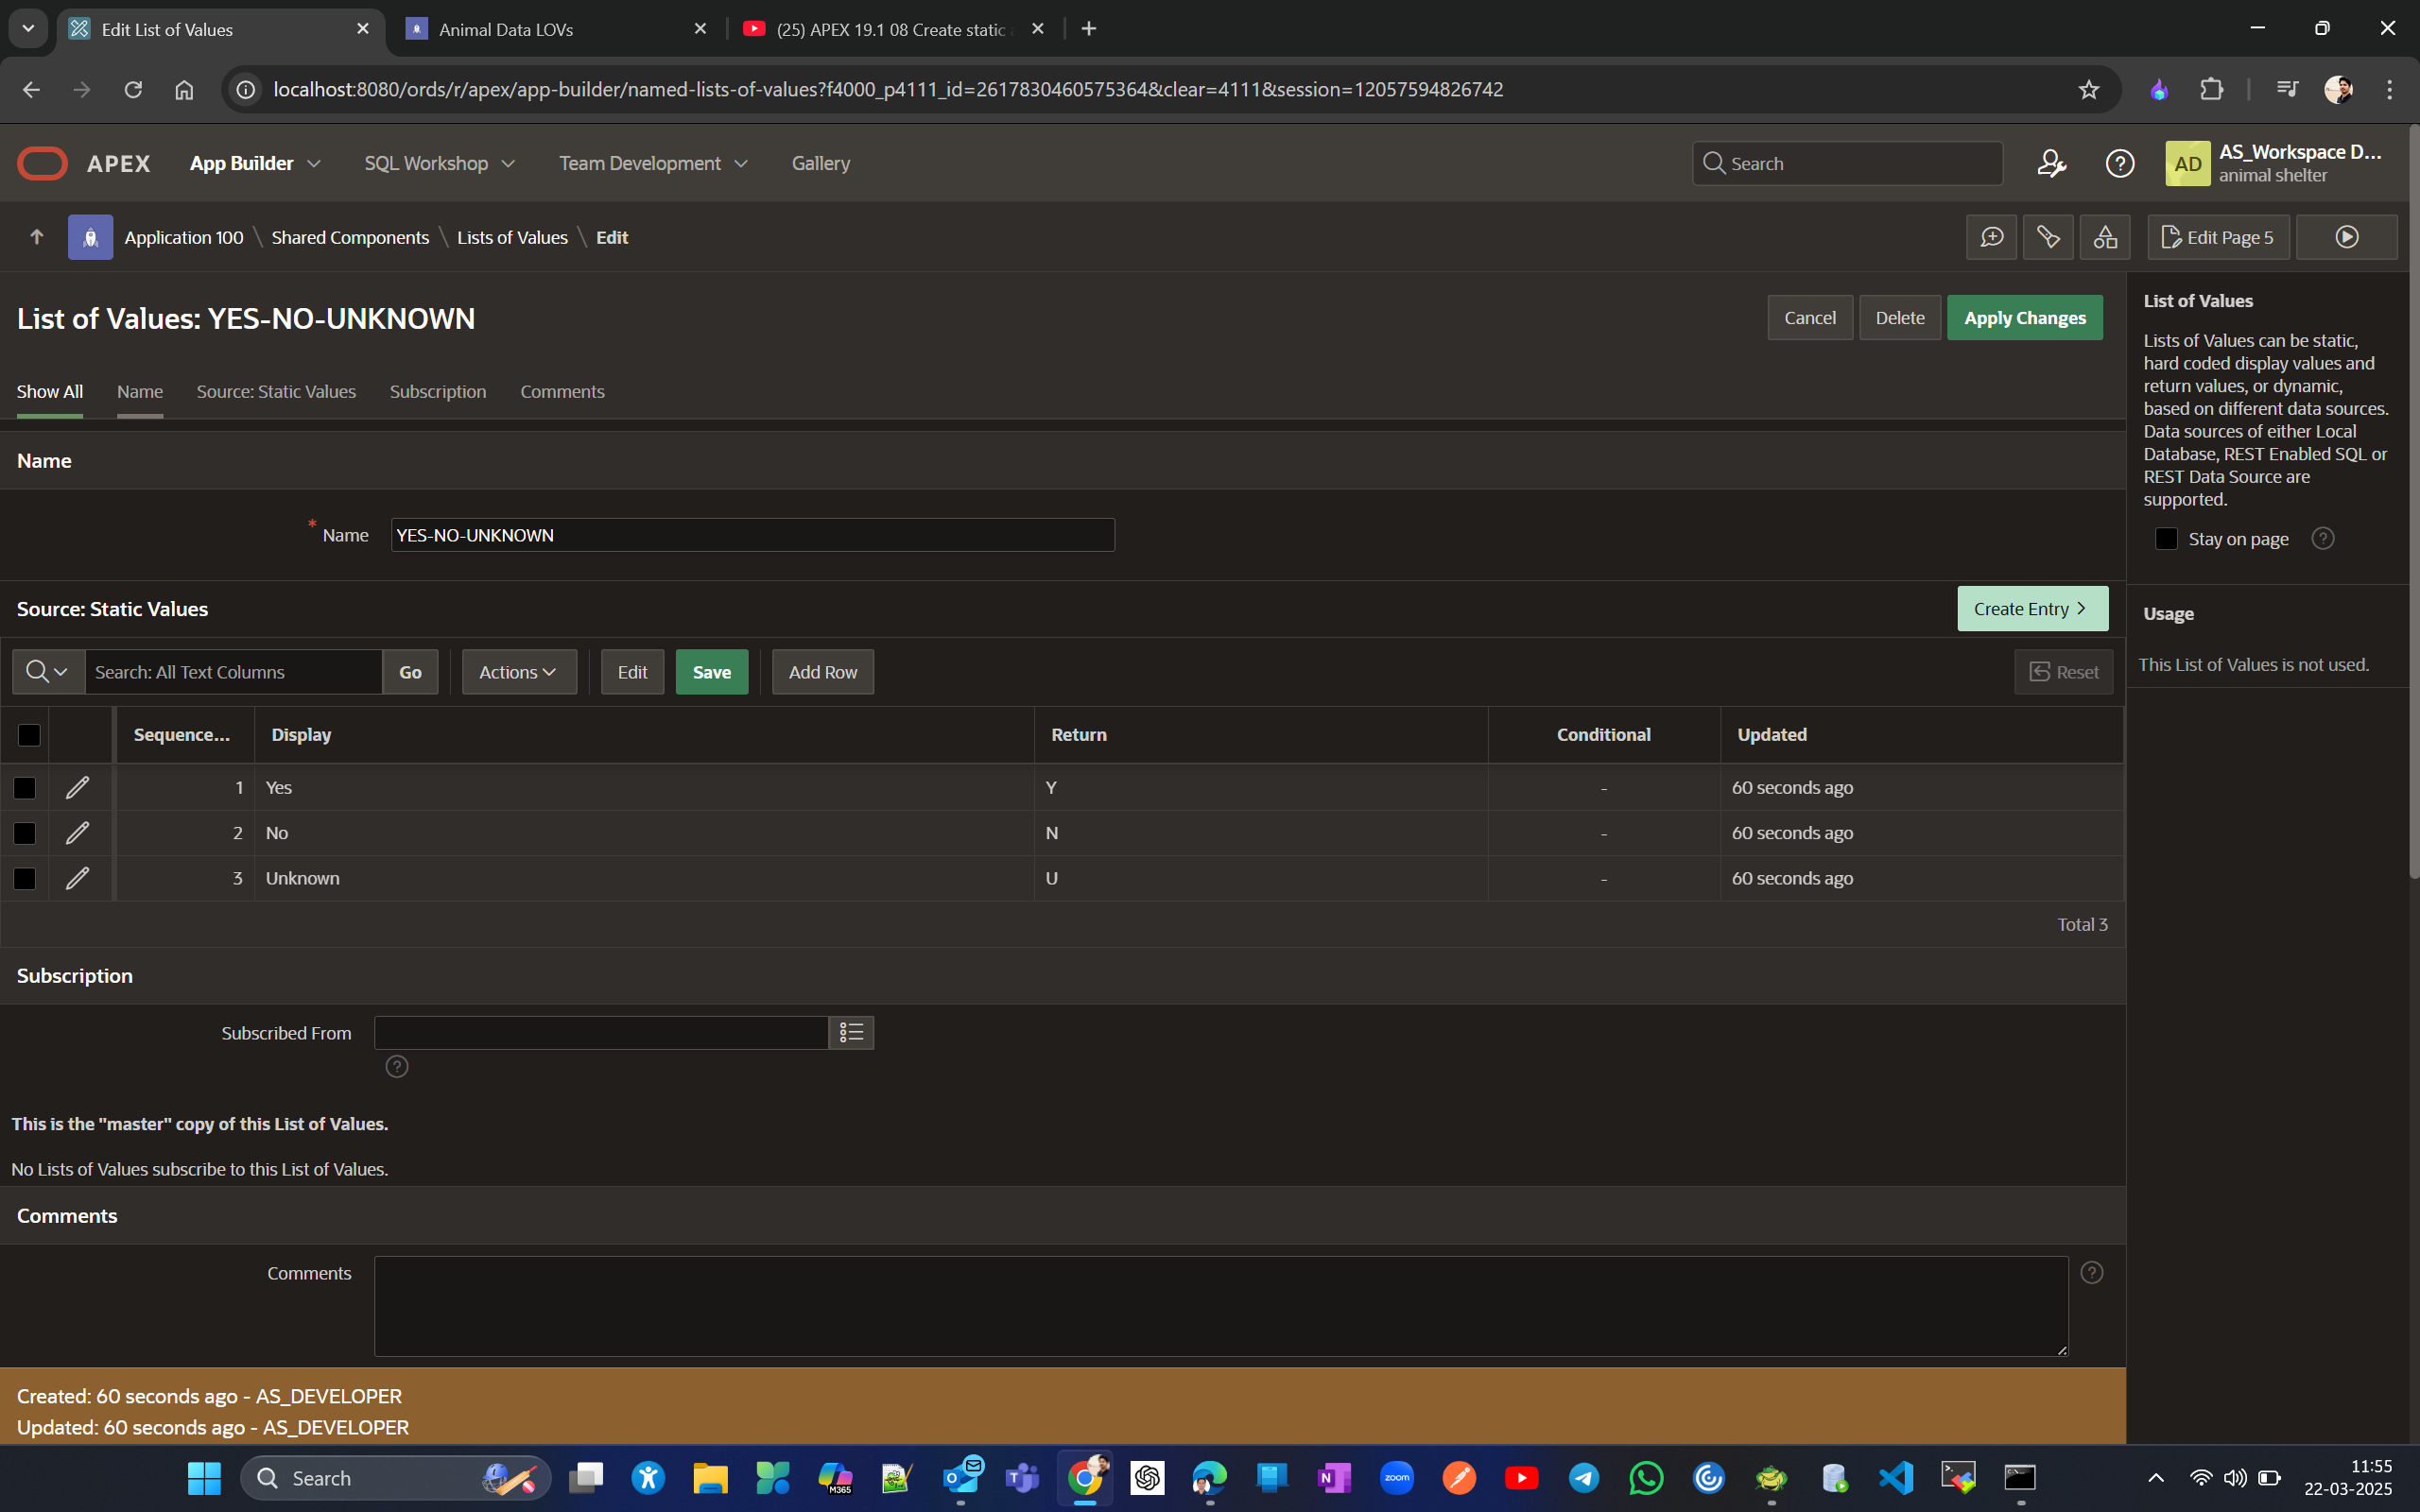
The Display Value is what you see in the application dropdown, and the Return Value is the corresponding value that will be saved in the database table column. Now lets LOVs for other column as well.
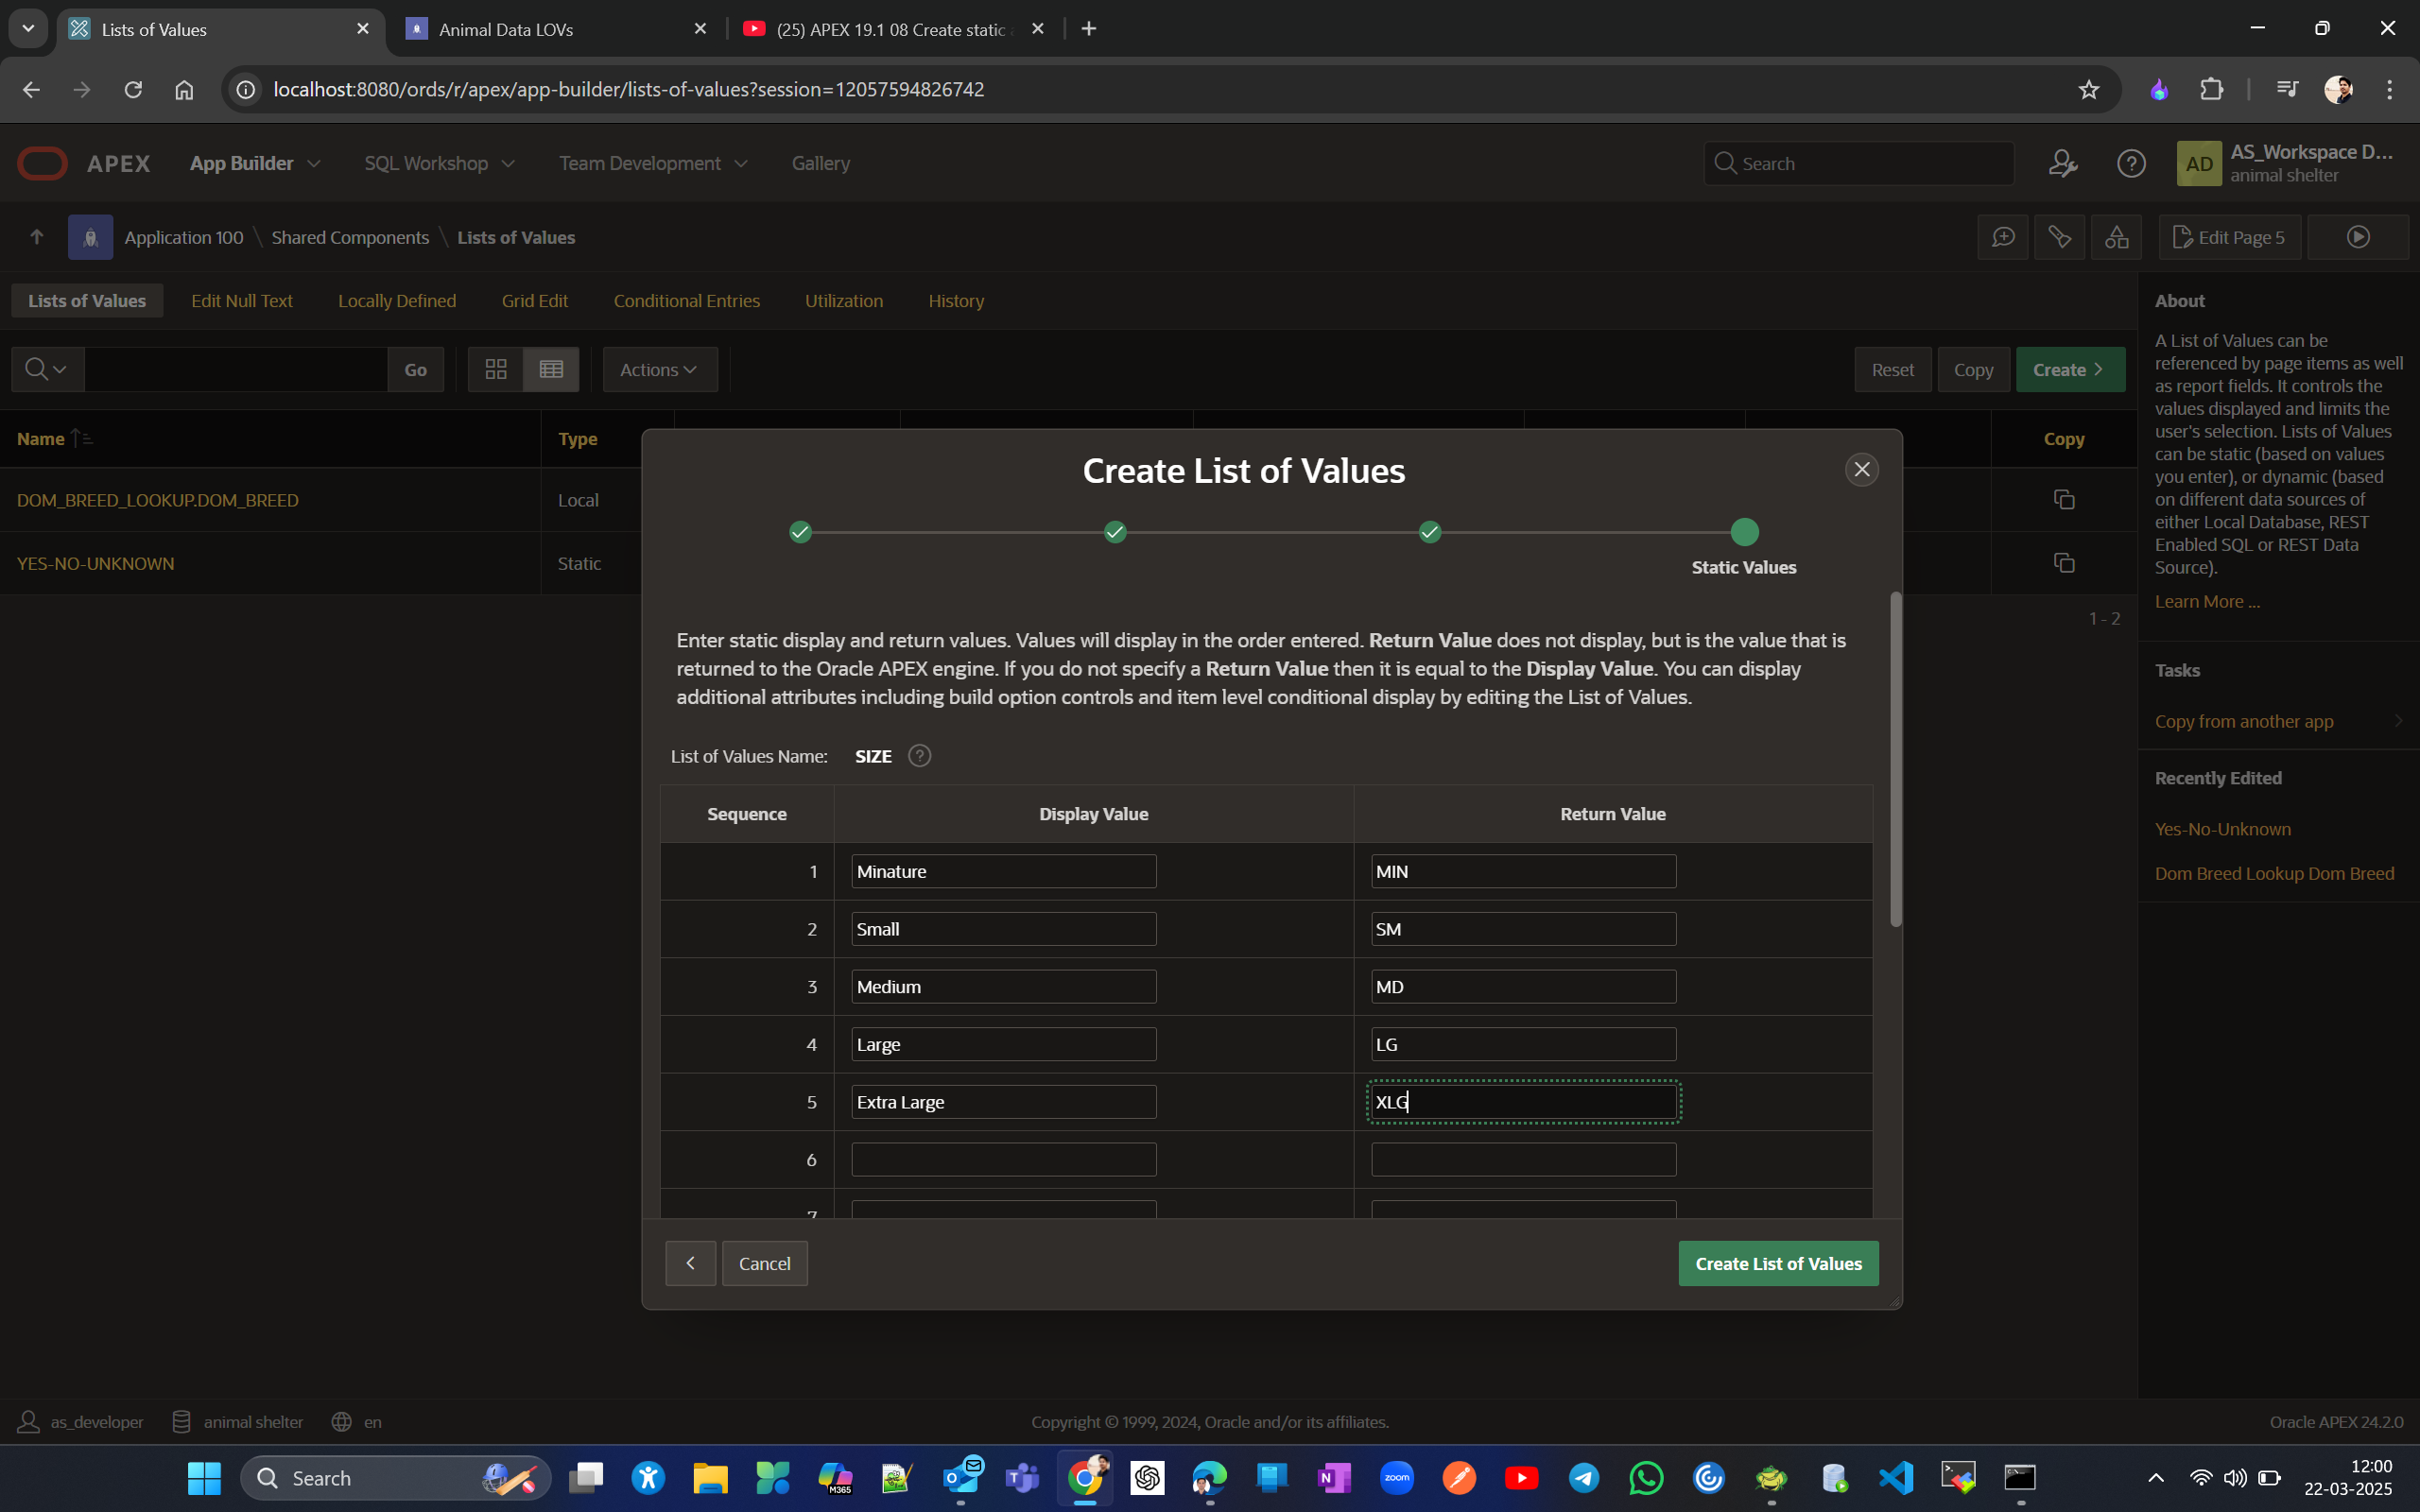
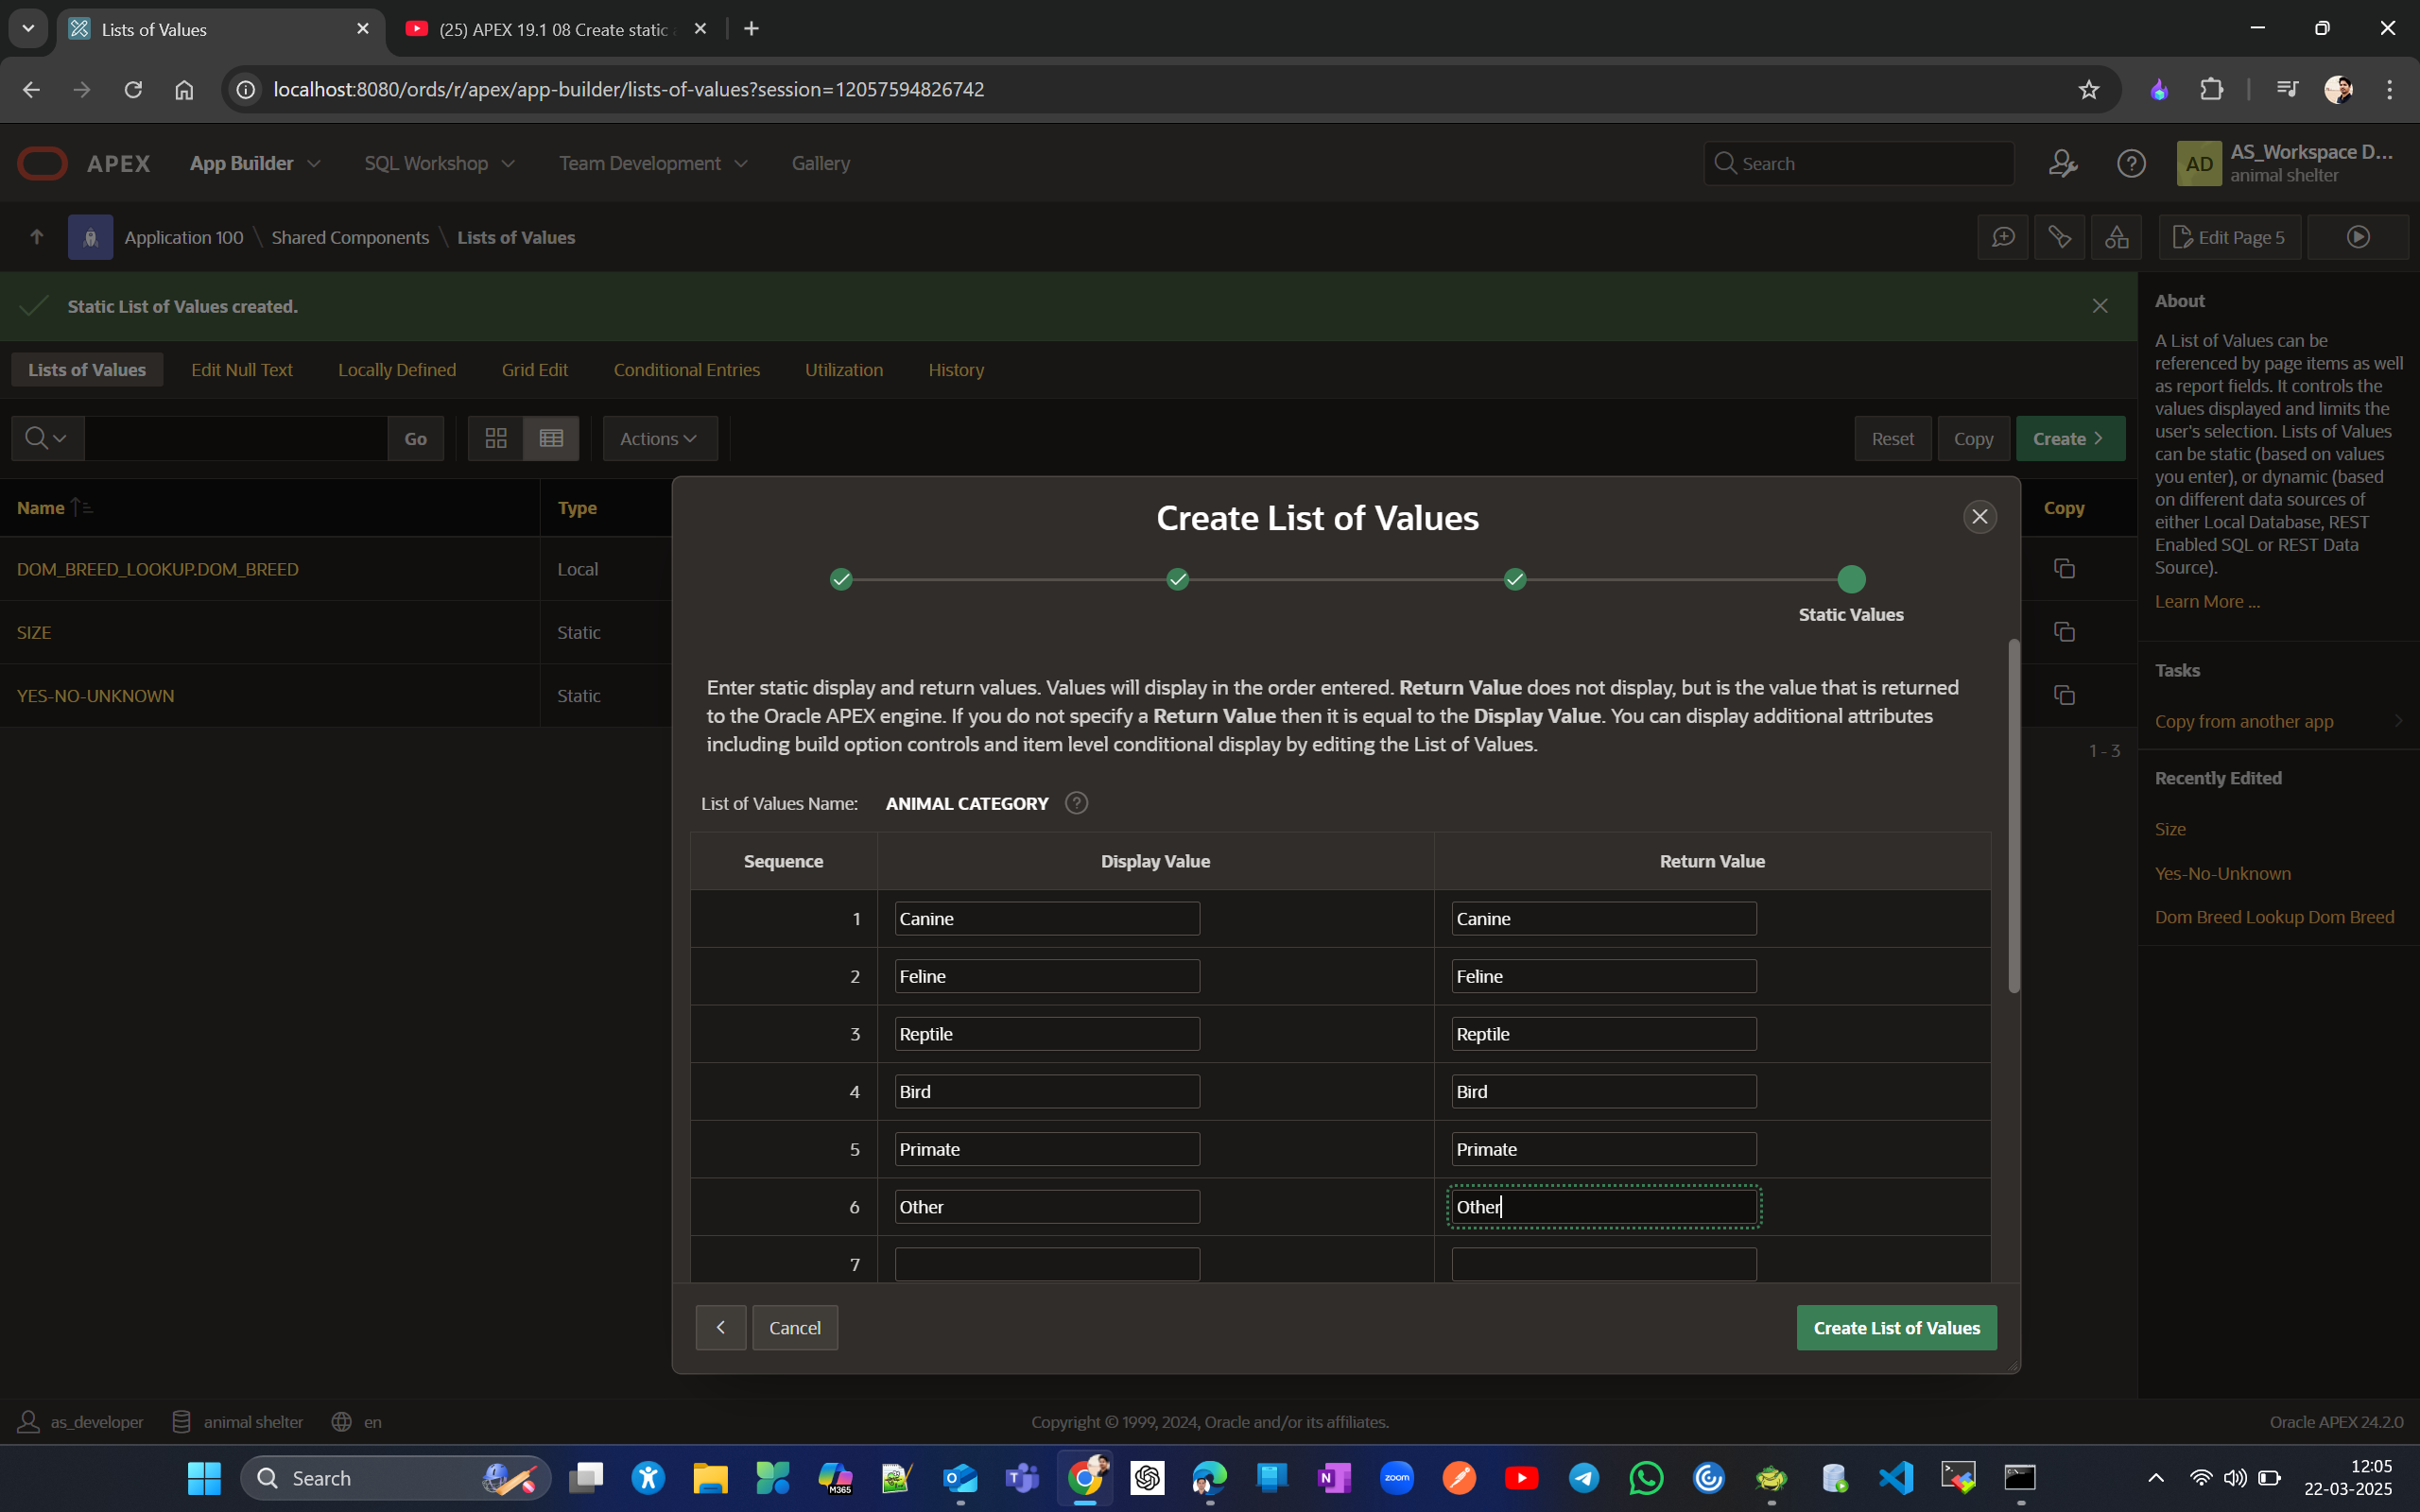
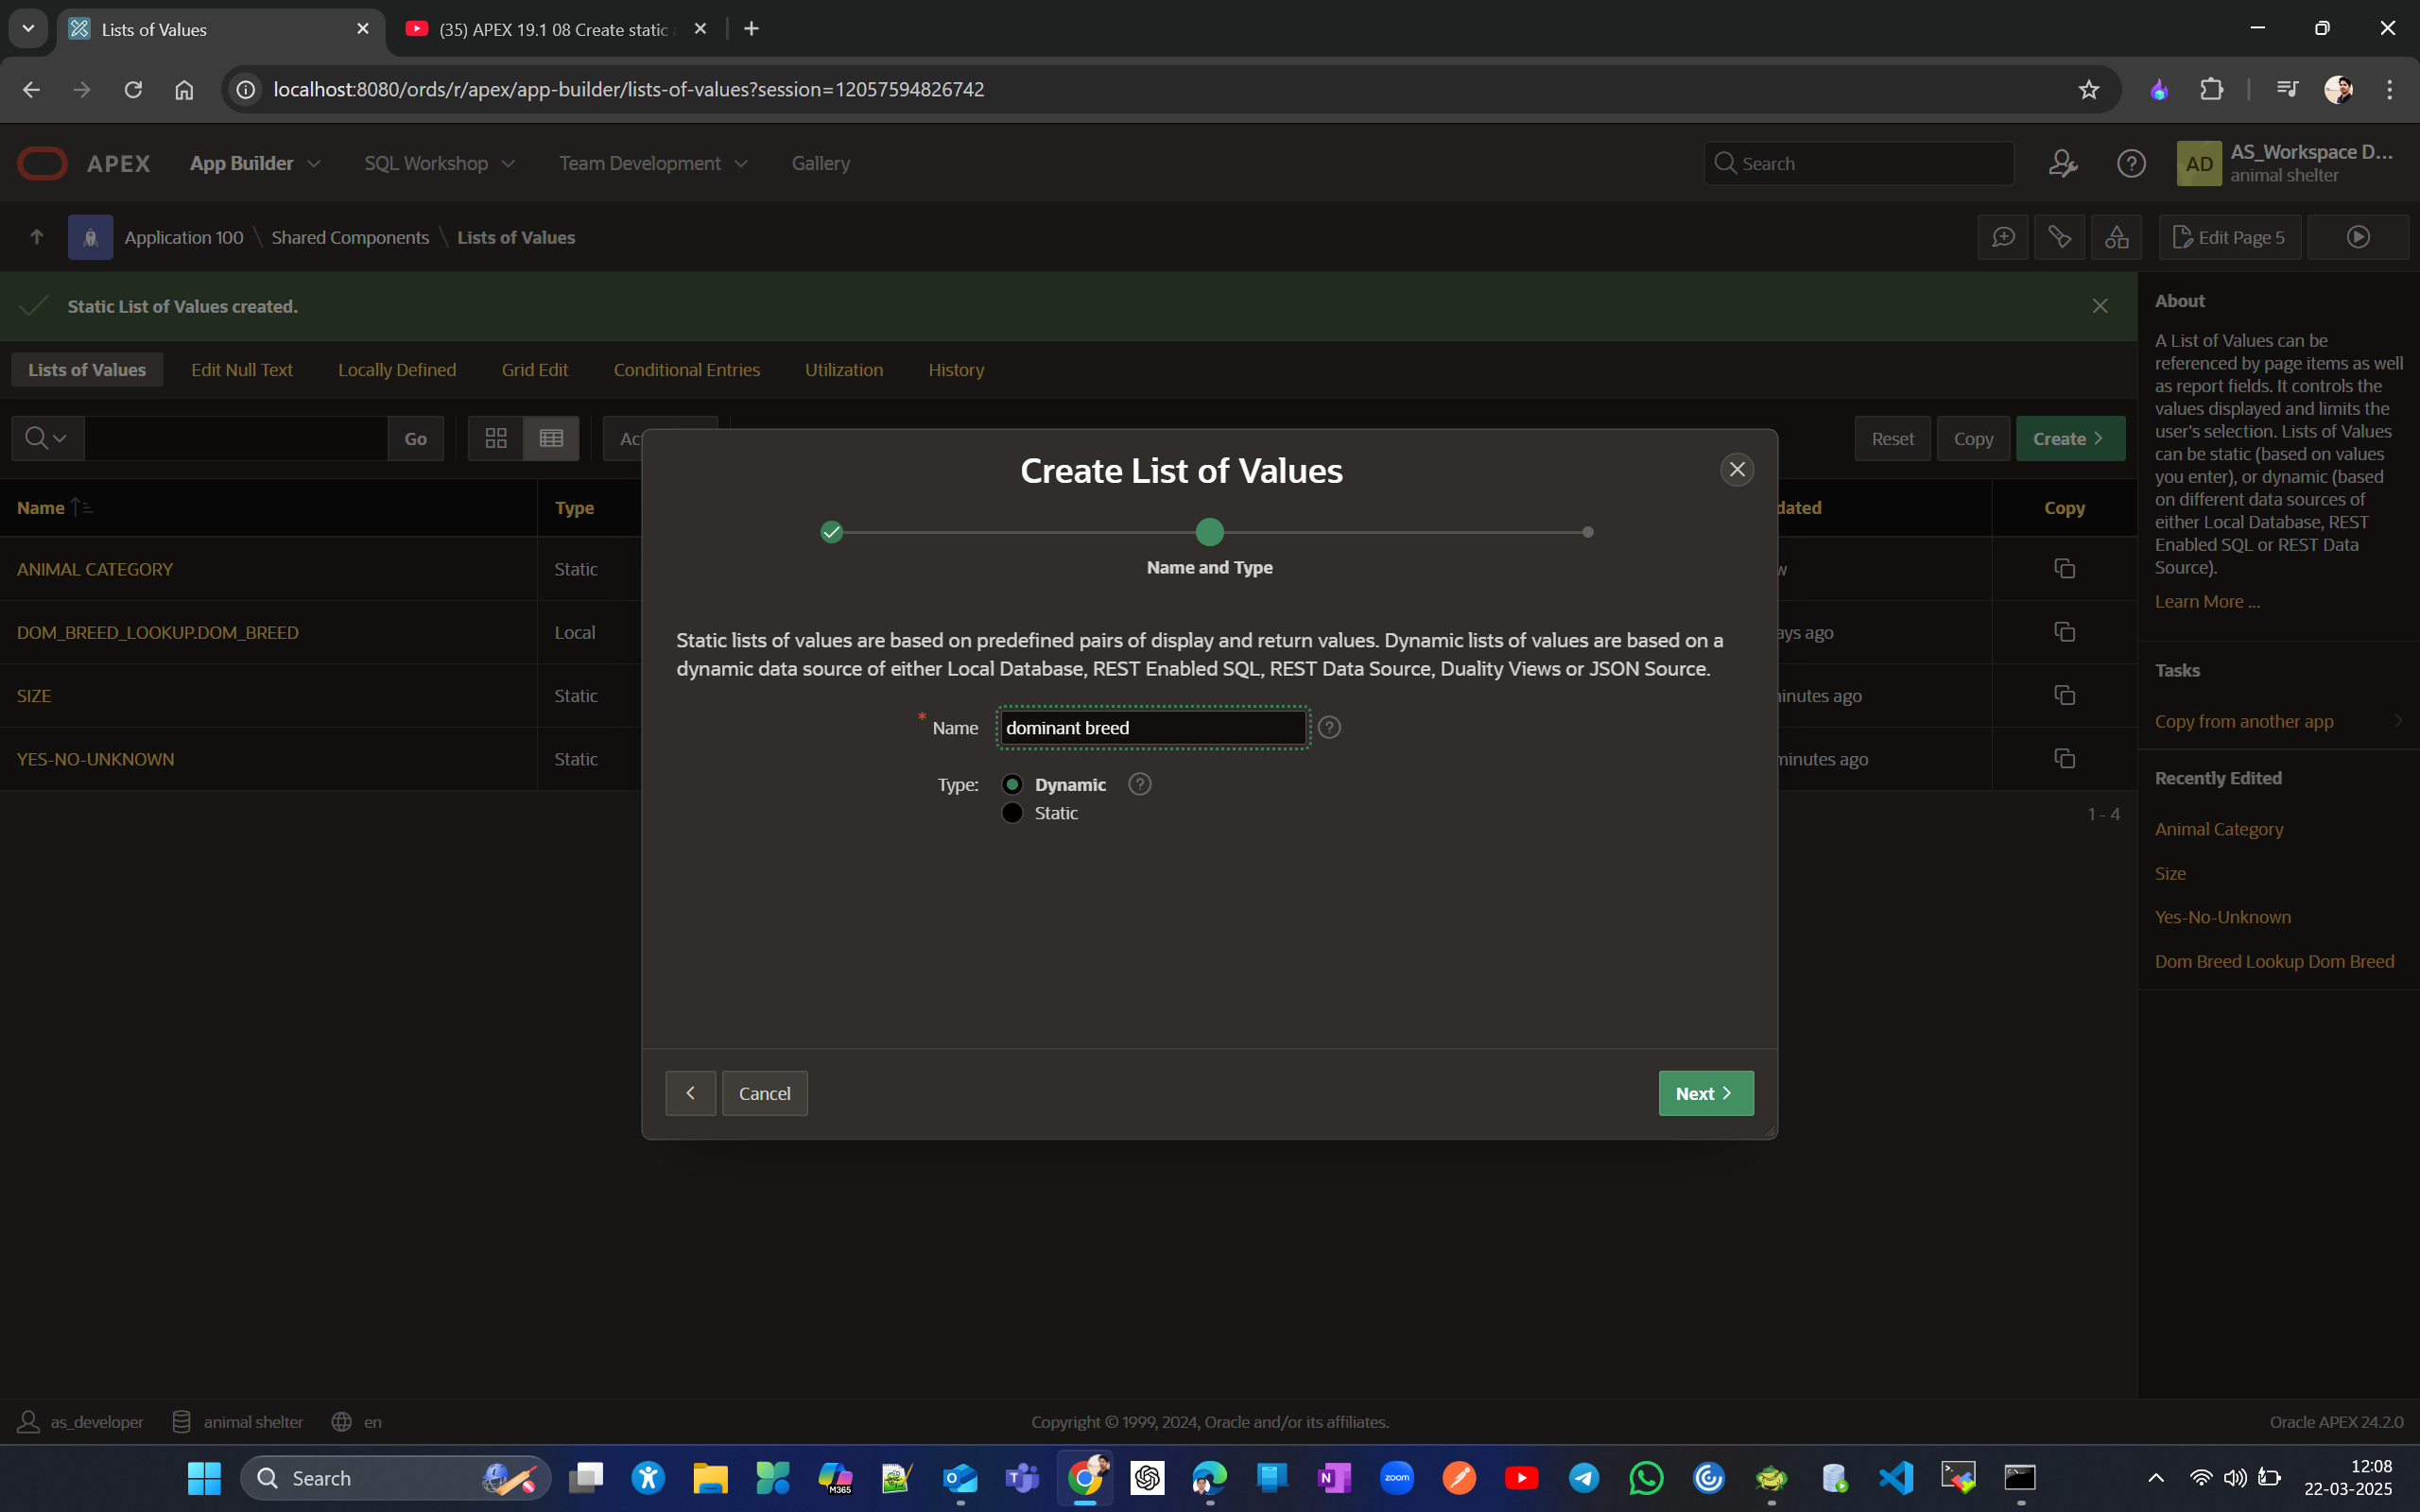
Now let's create DOMINANT BREED dynamic LOVs like the one automatically created by APEX during the lookup table creation from dom-Breed.
Either make source type as SQL Query or Table like below
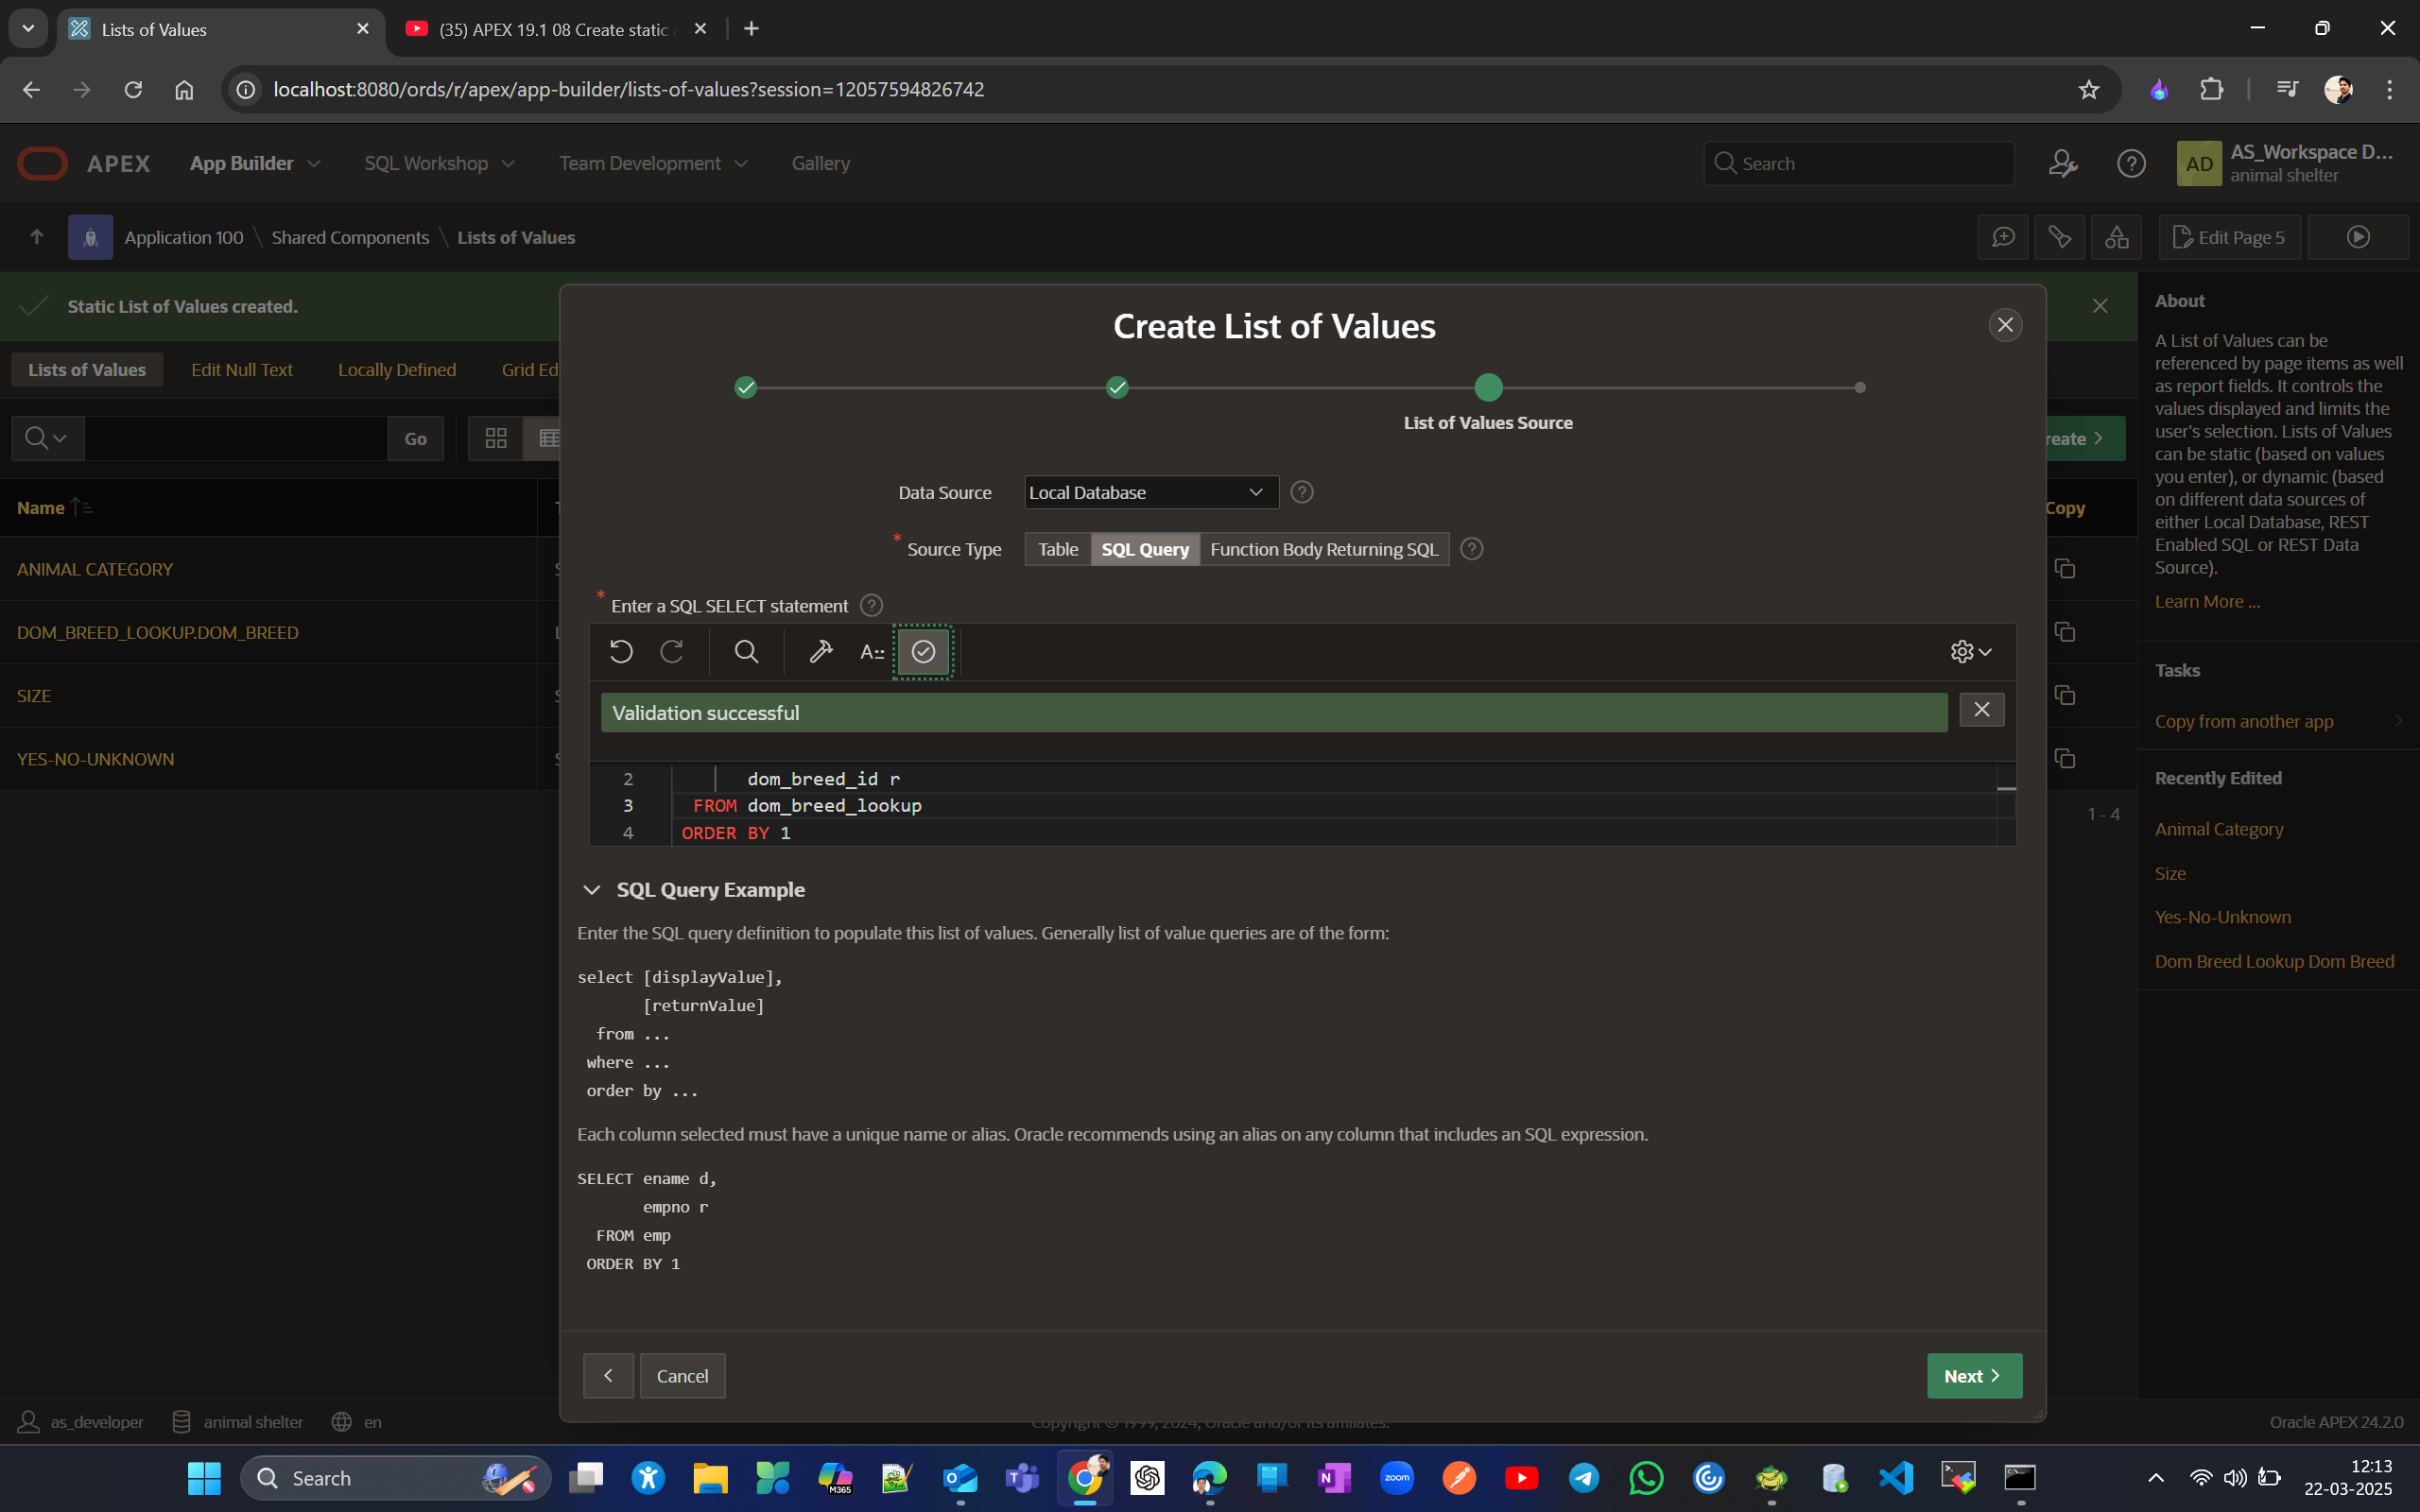
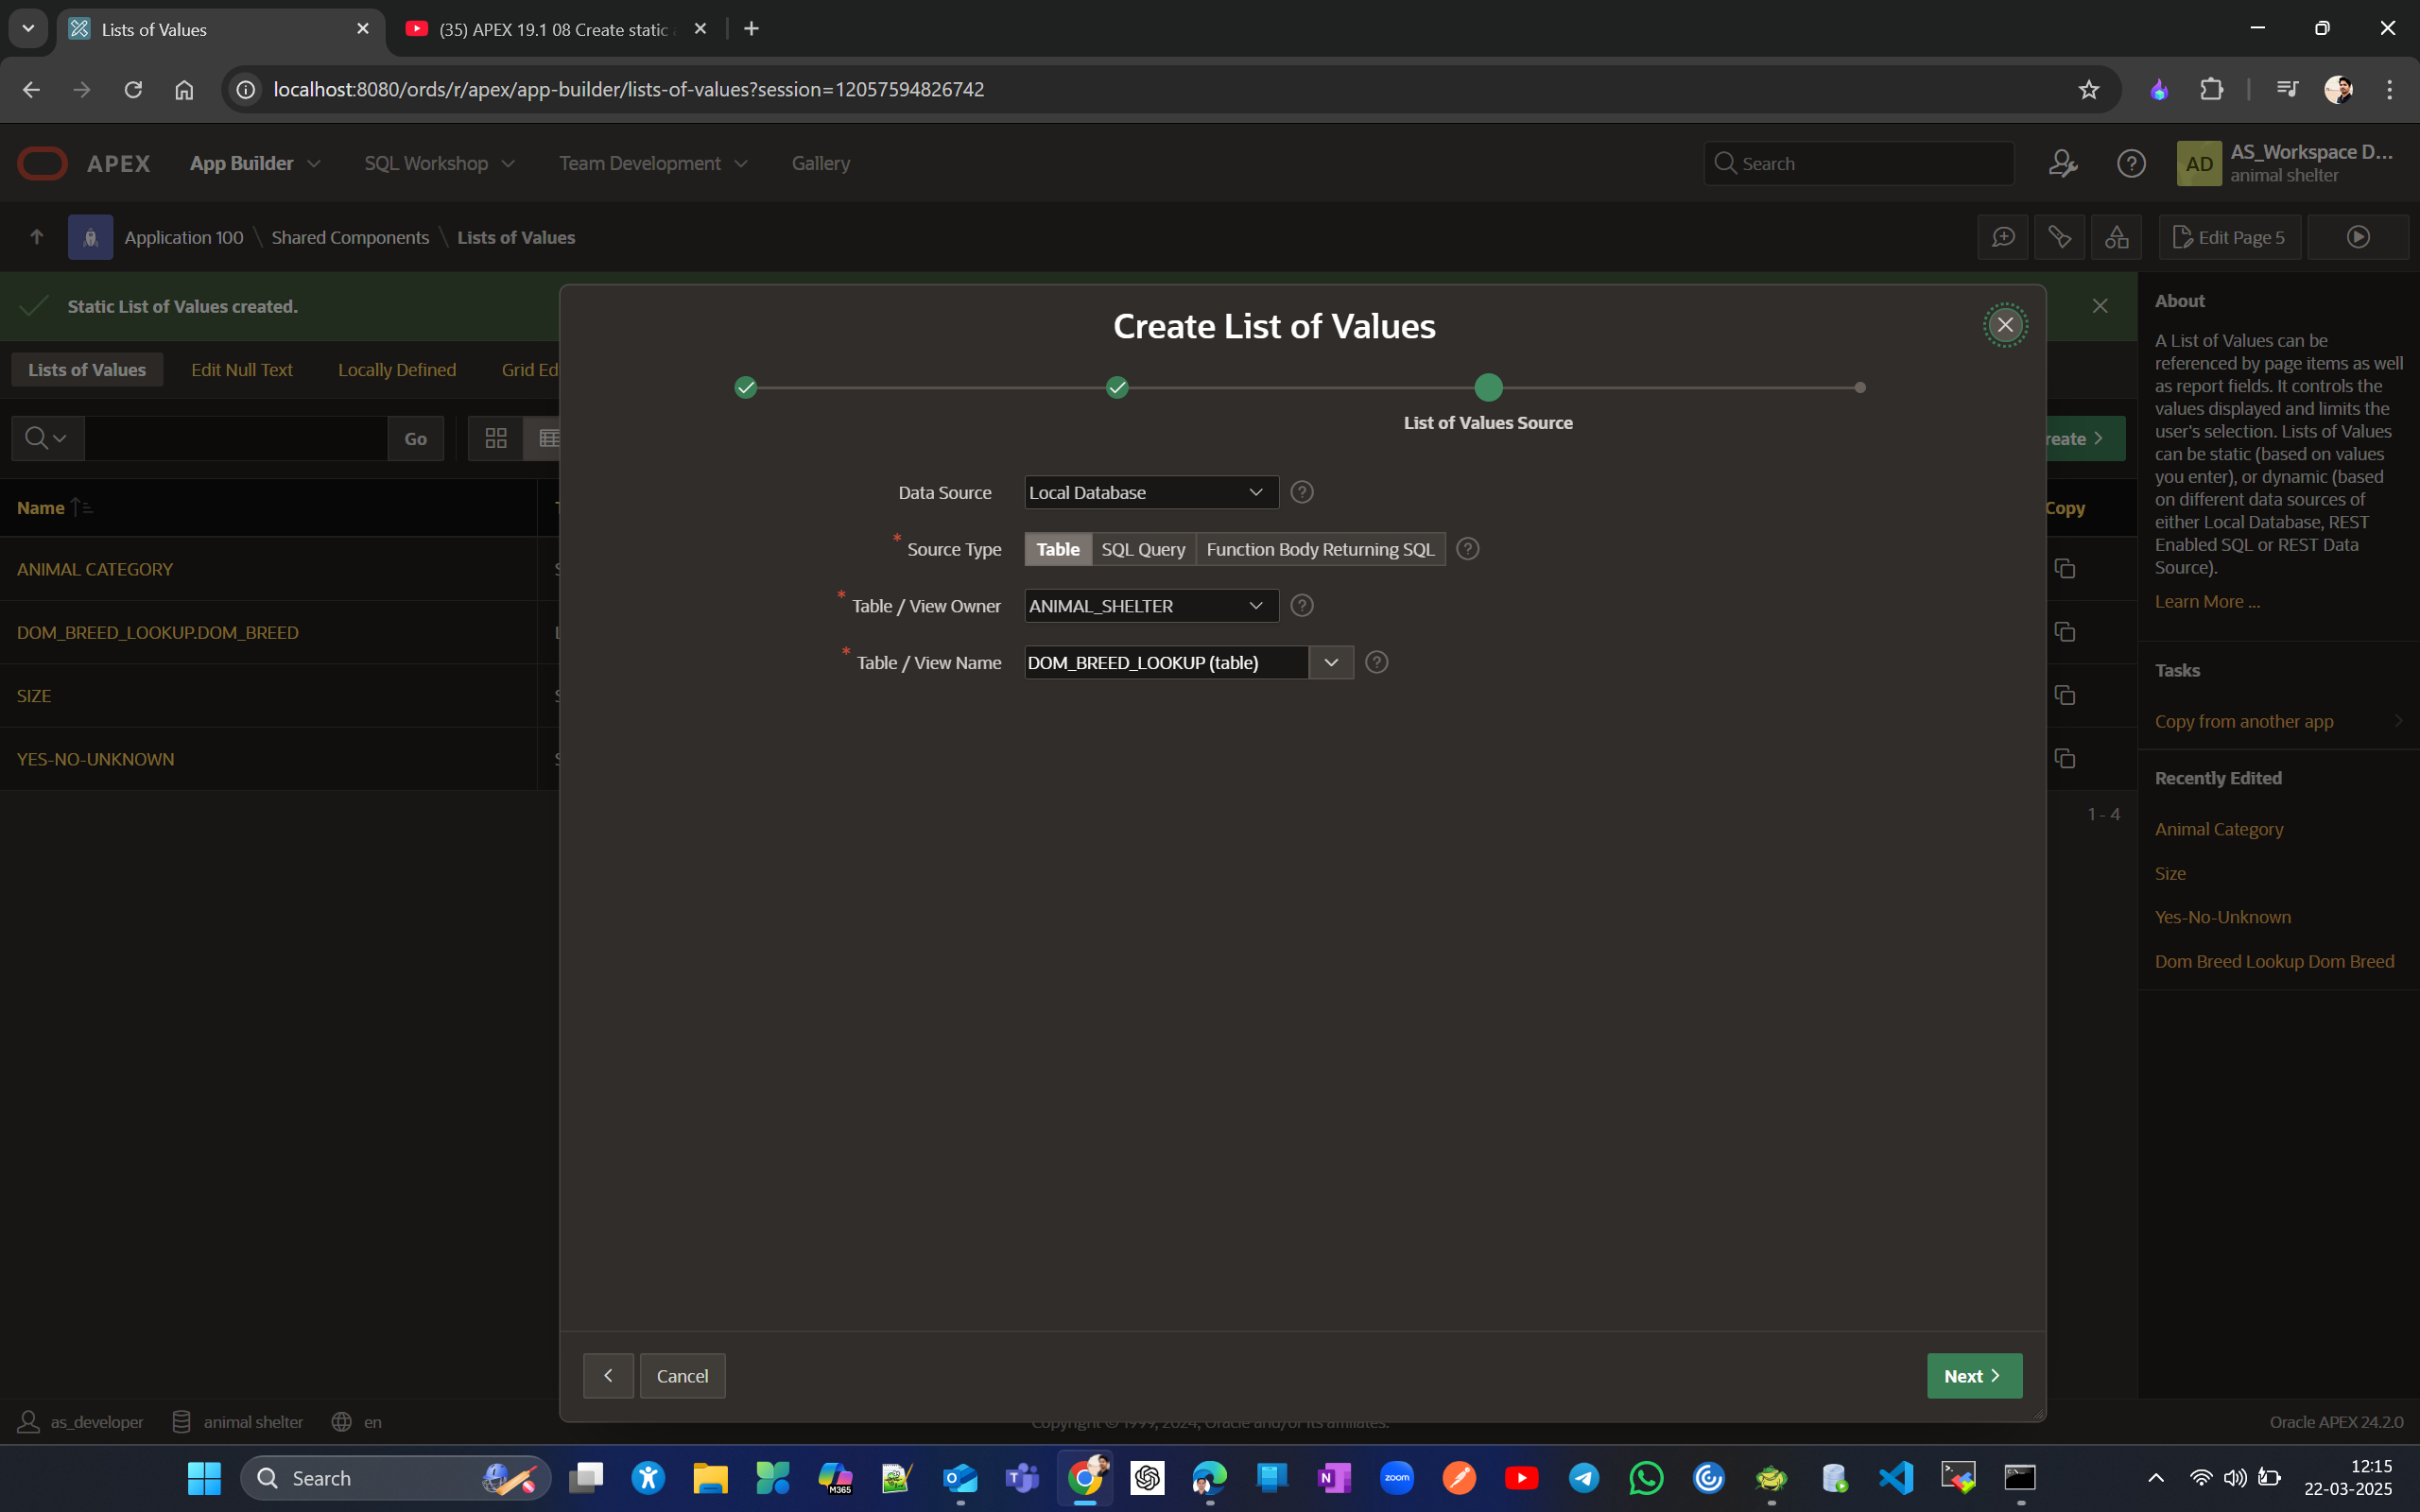
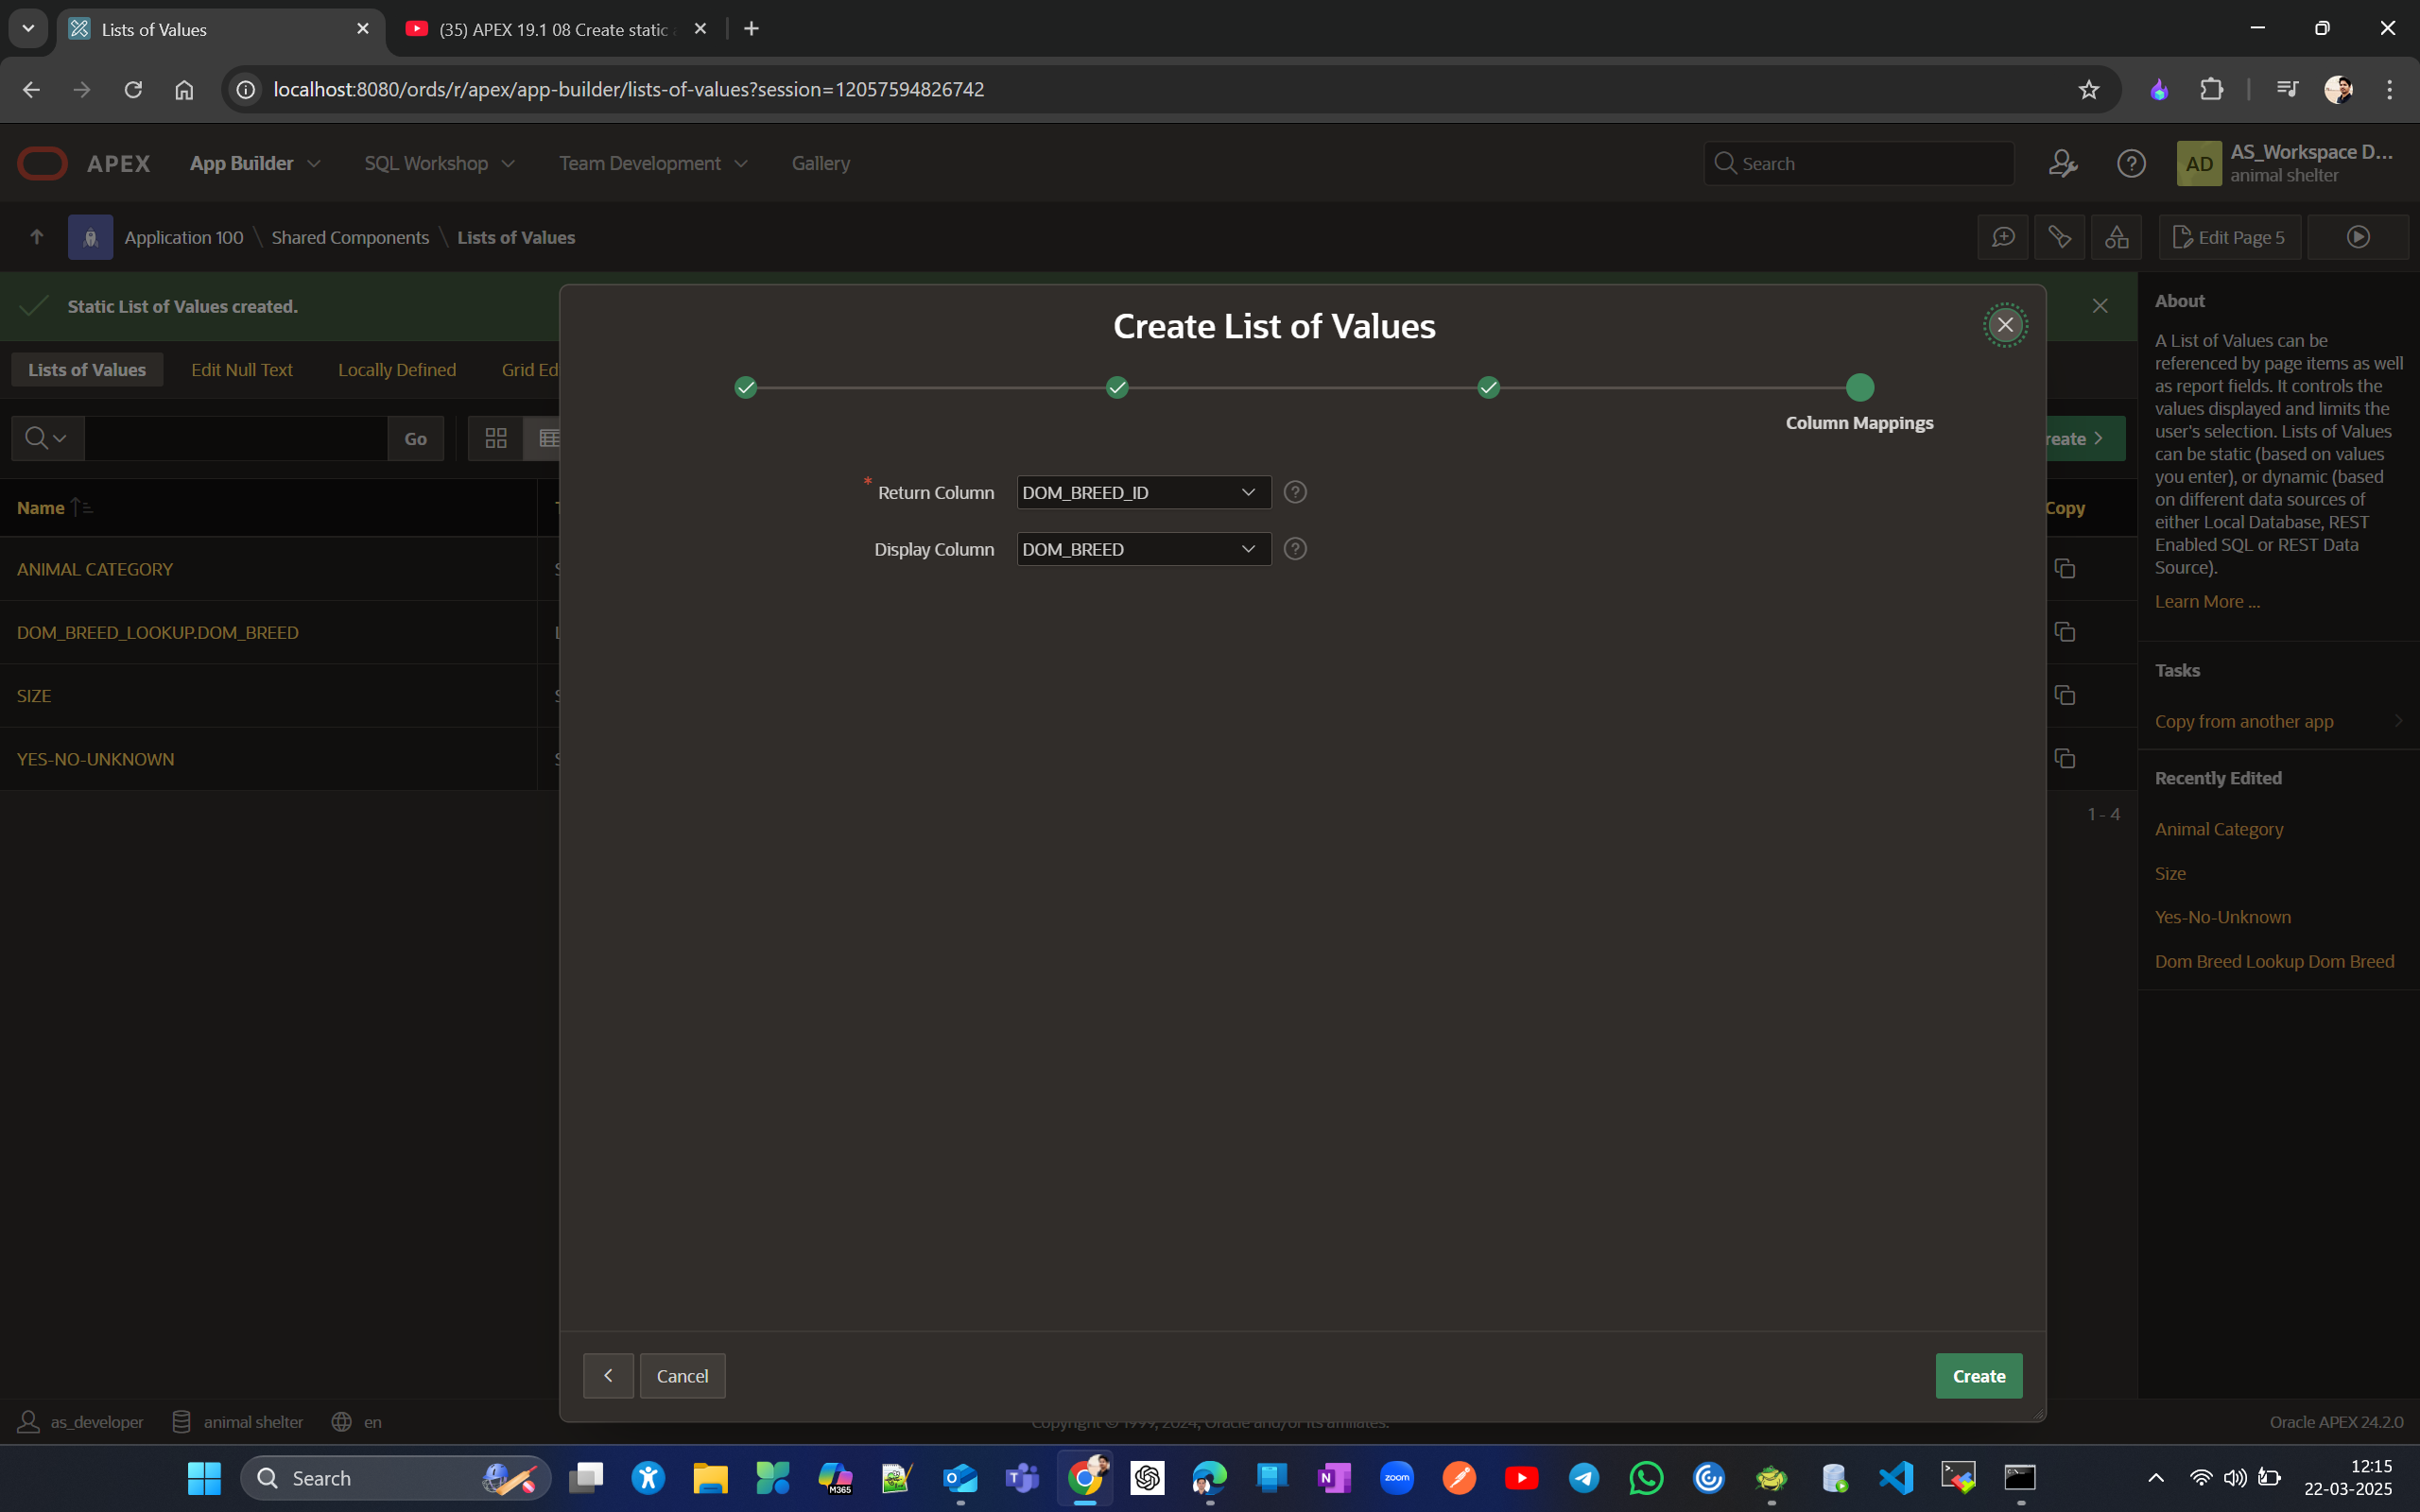
This will create local LOV.
Return to the page designer and change the column items' identification type attributes to either a select list or Popup LOV and change List of Value attribute for same selected column item.
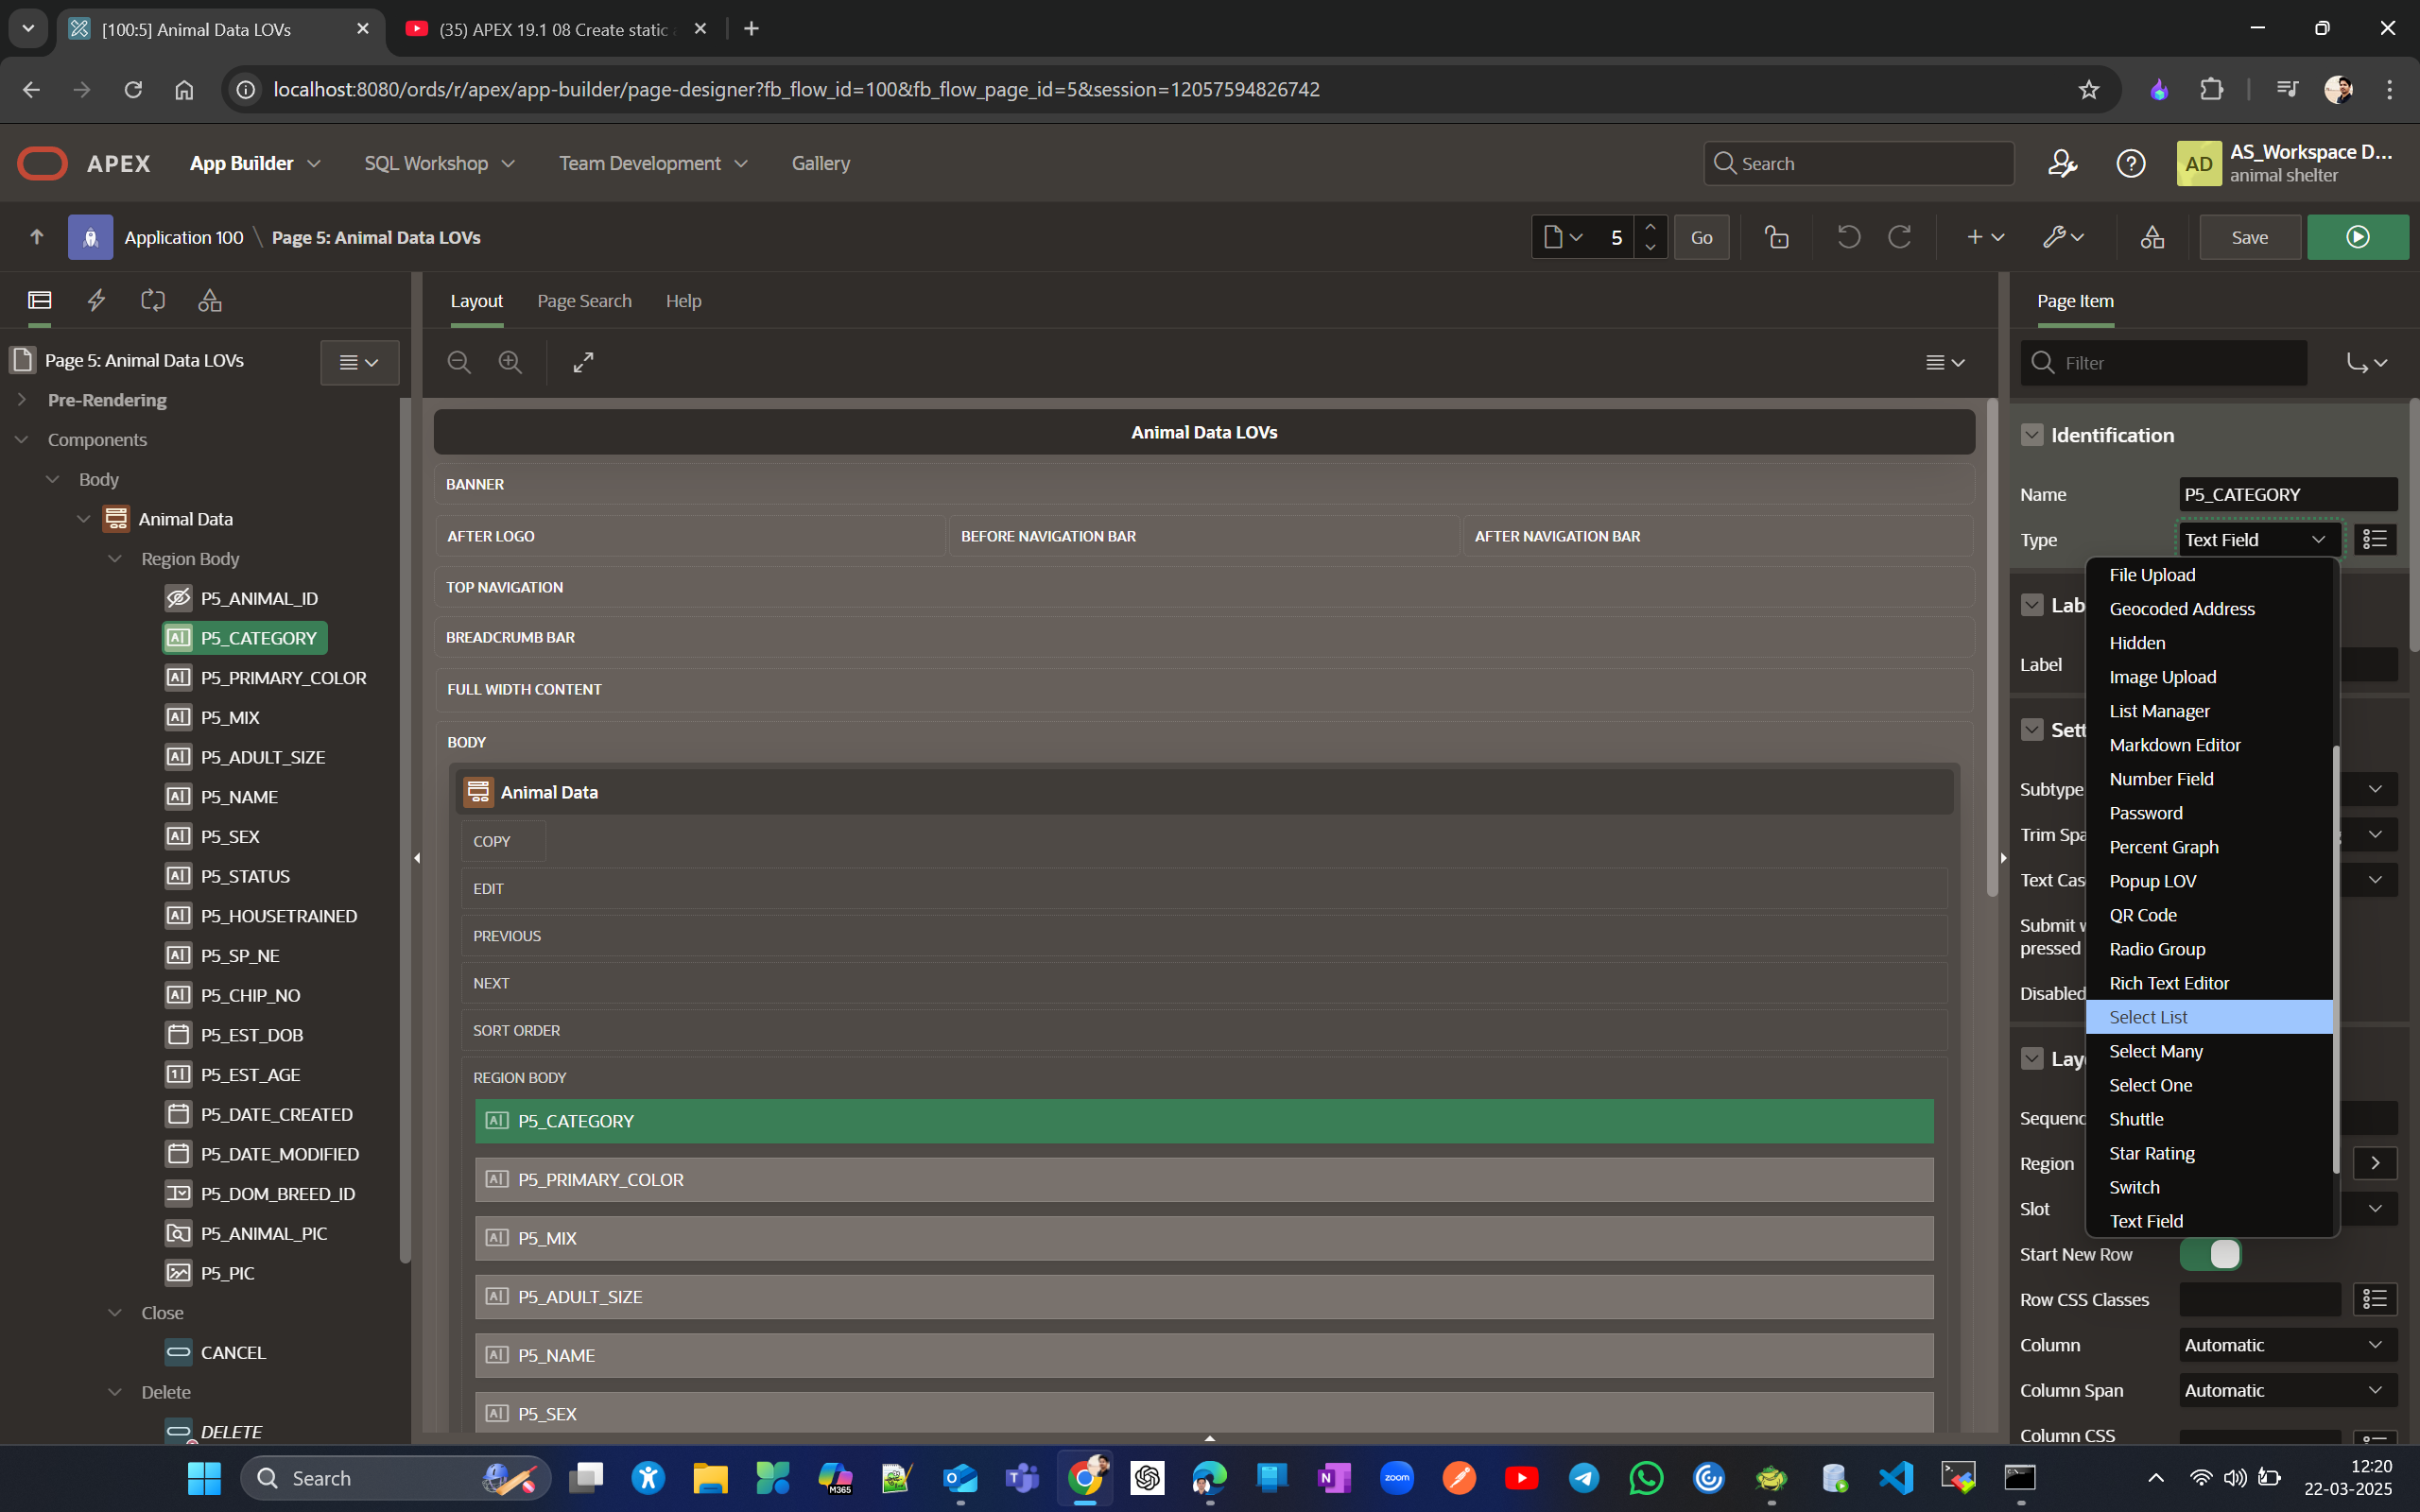
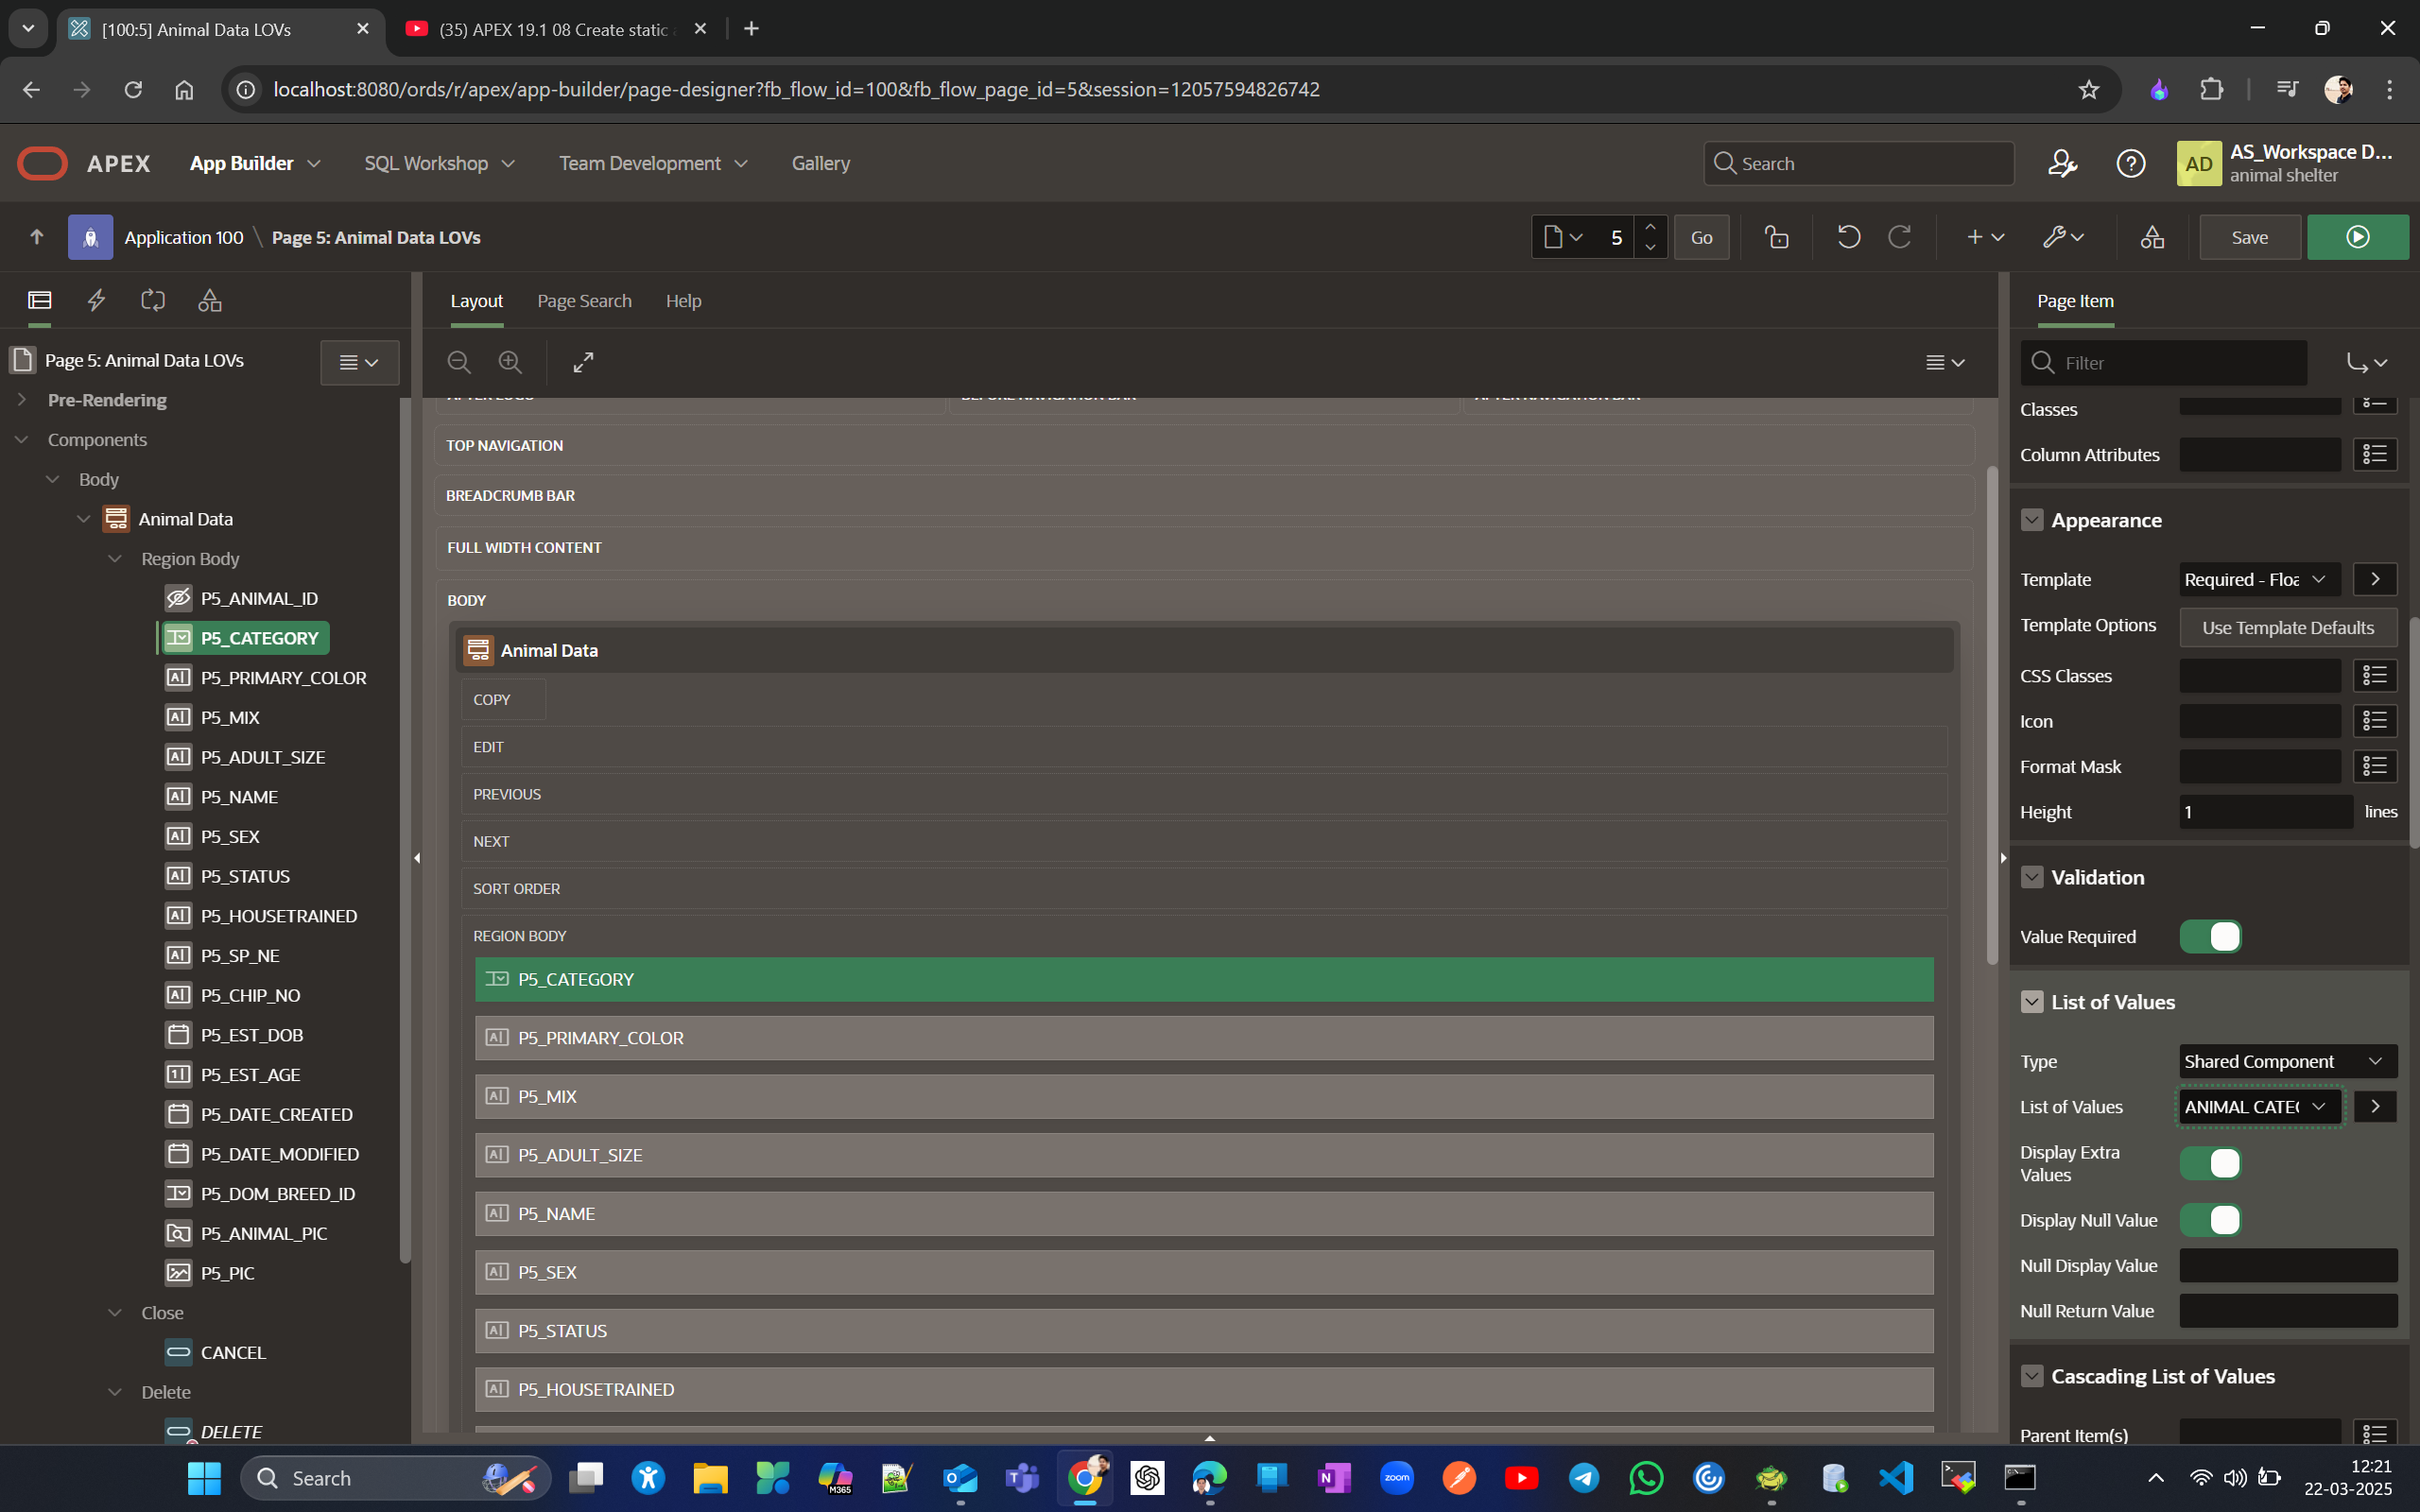
Now if we run application we see for the newly created almost all filed is either select list or popup LOV. now lets create a lookup for status field.
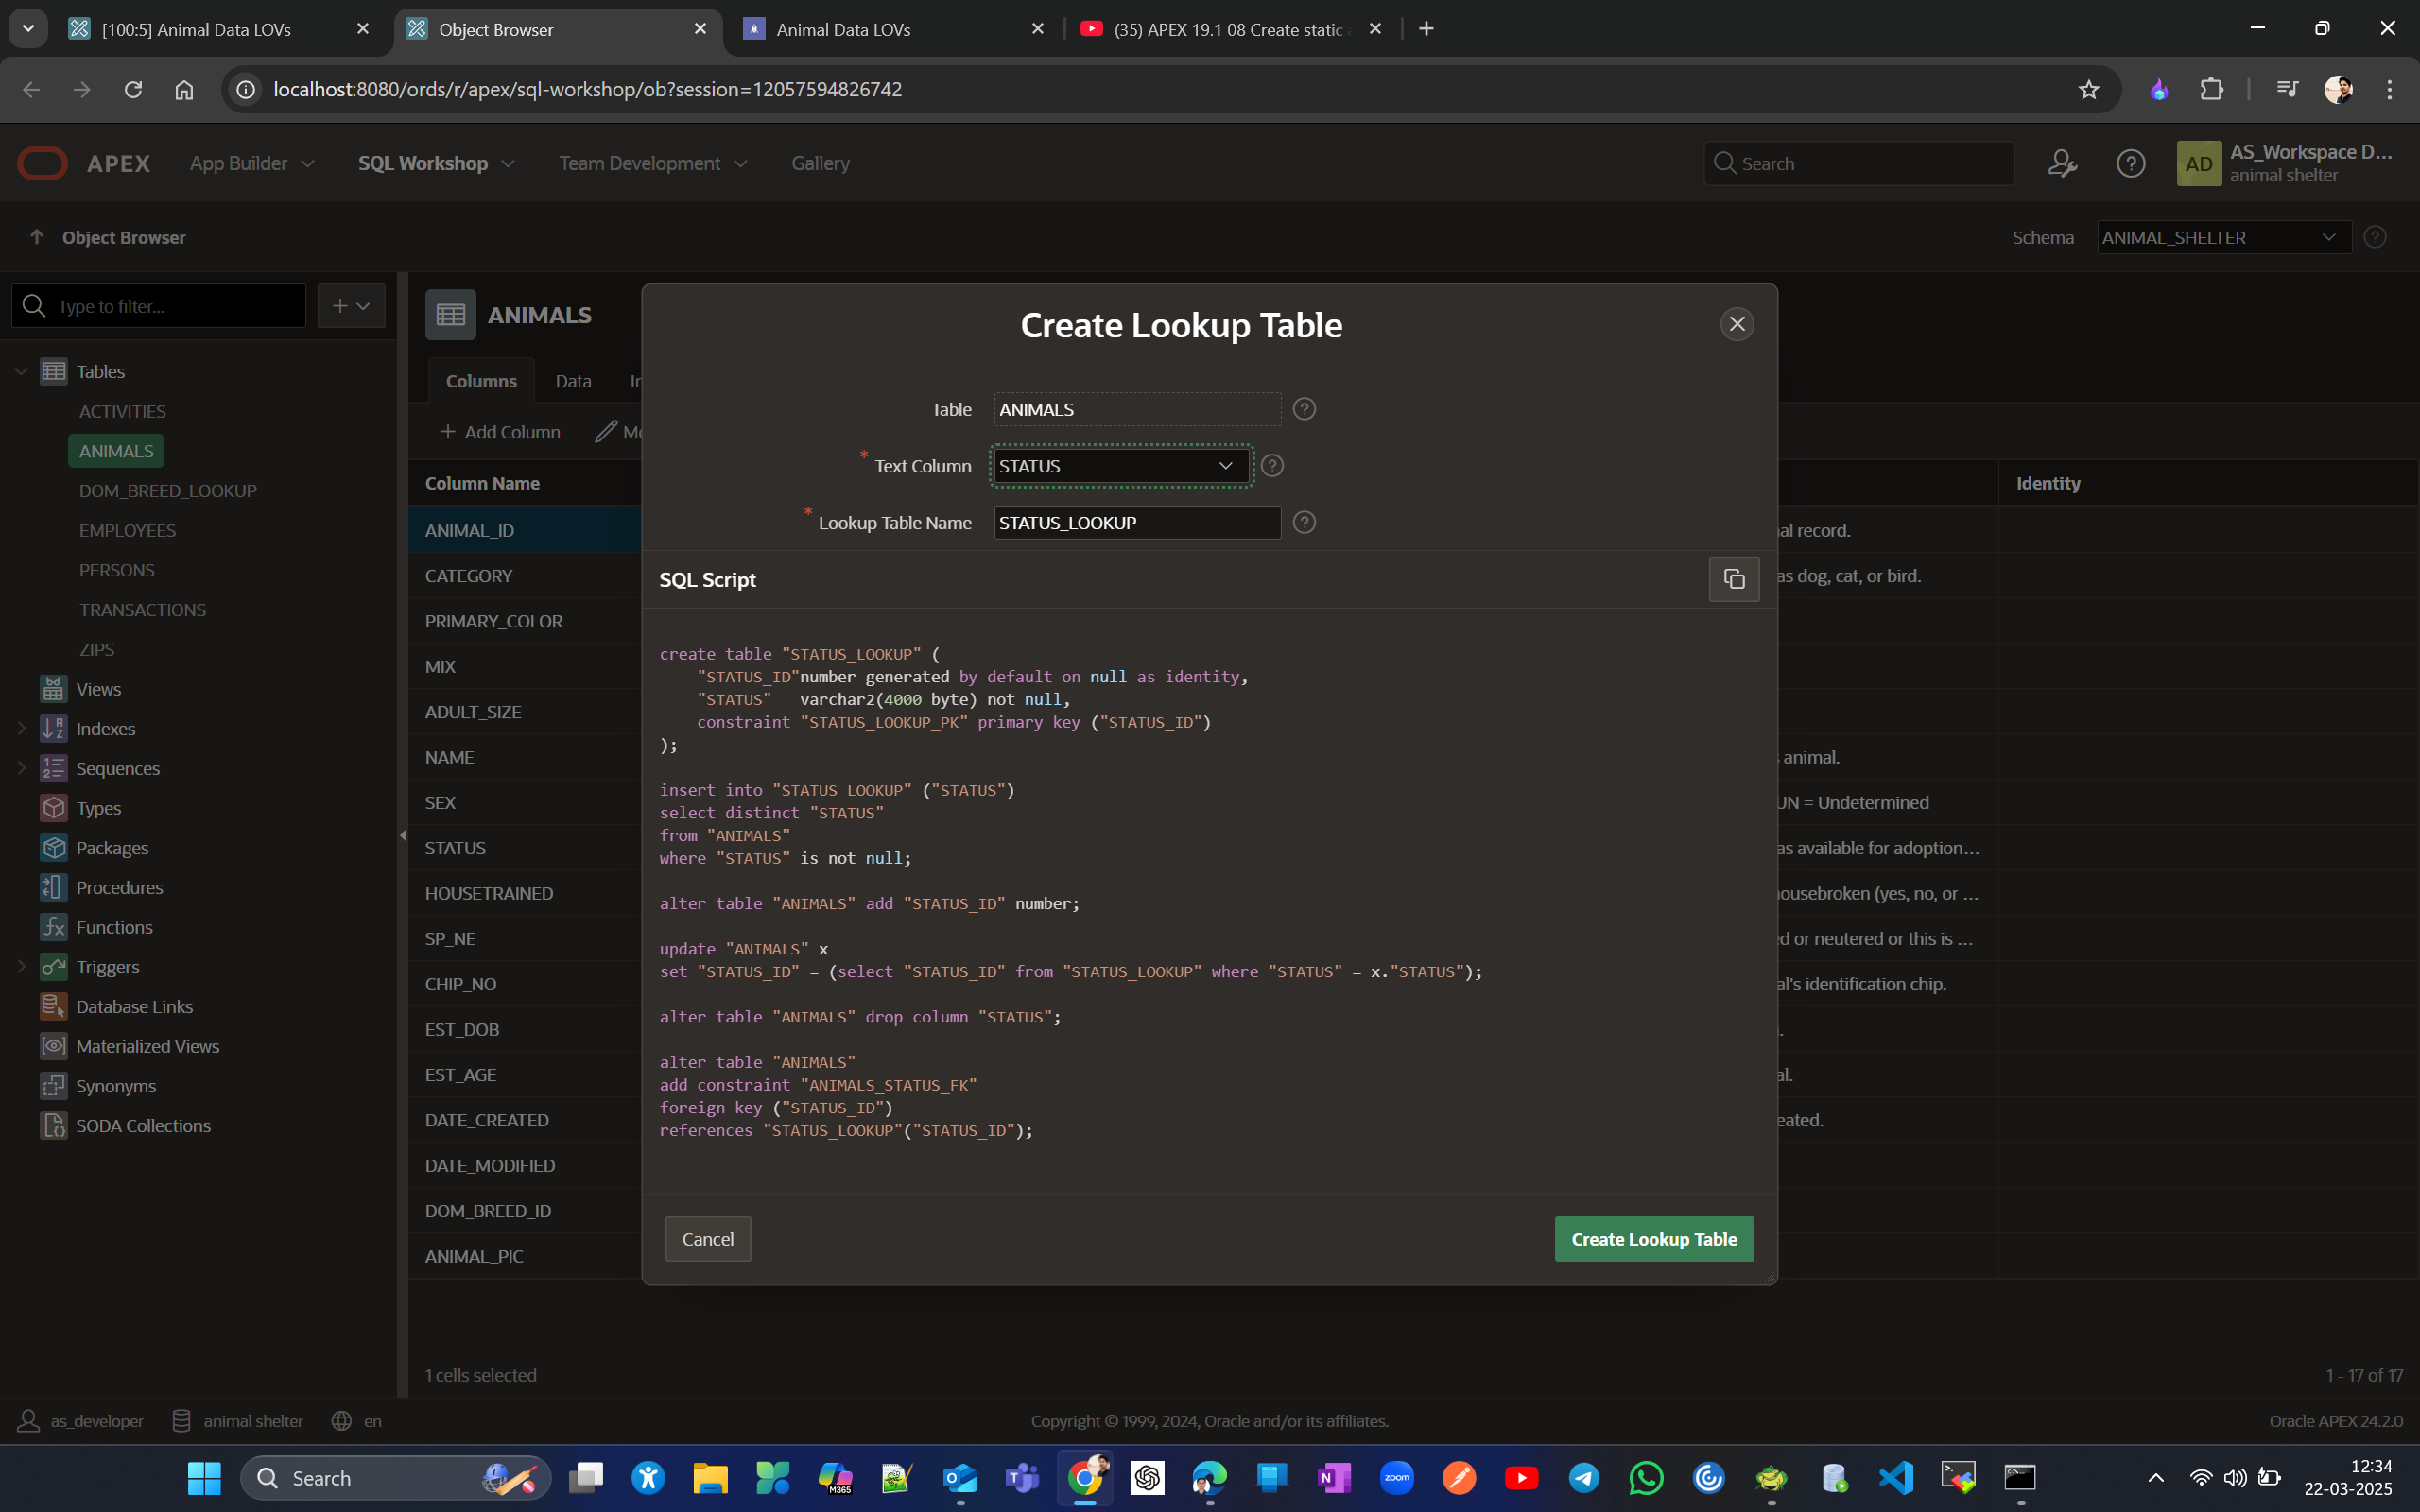
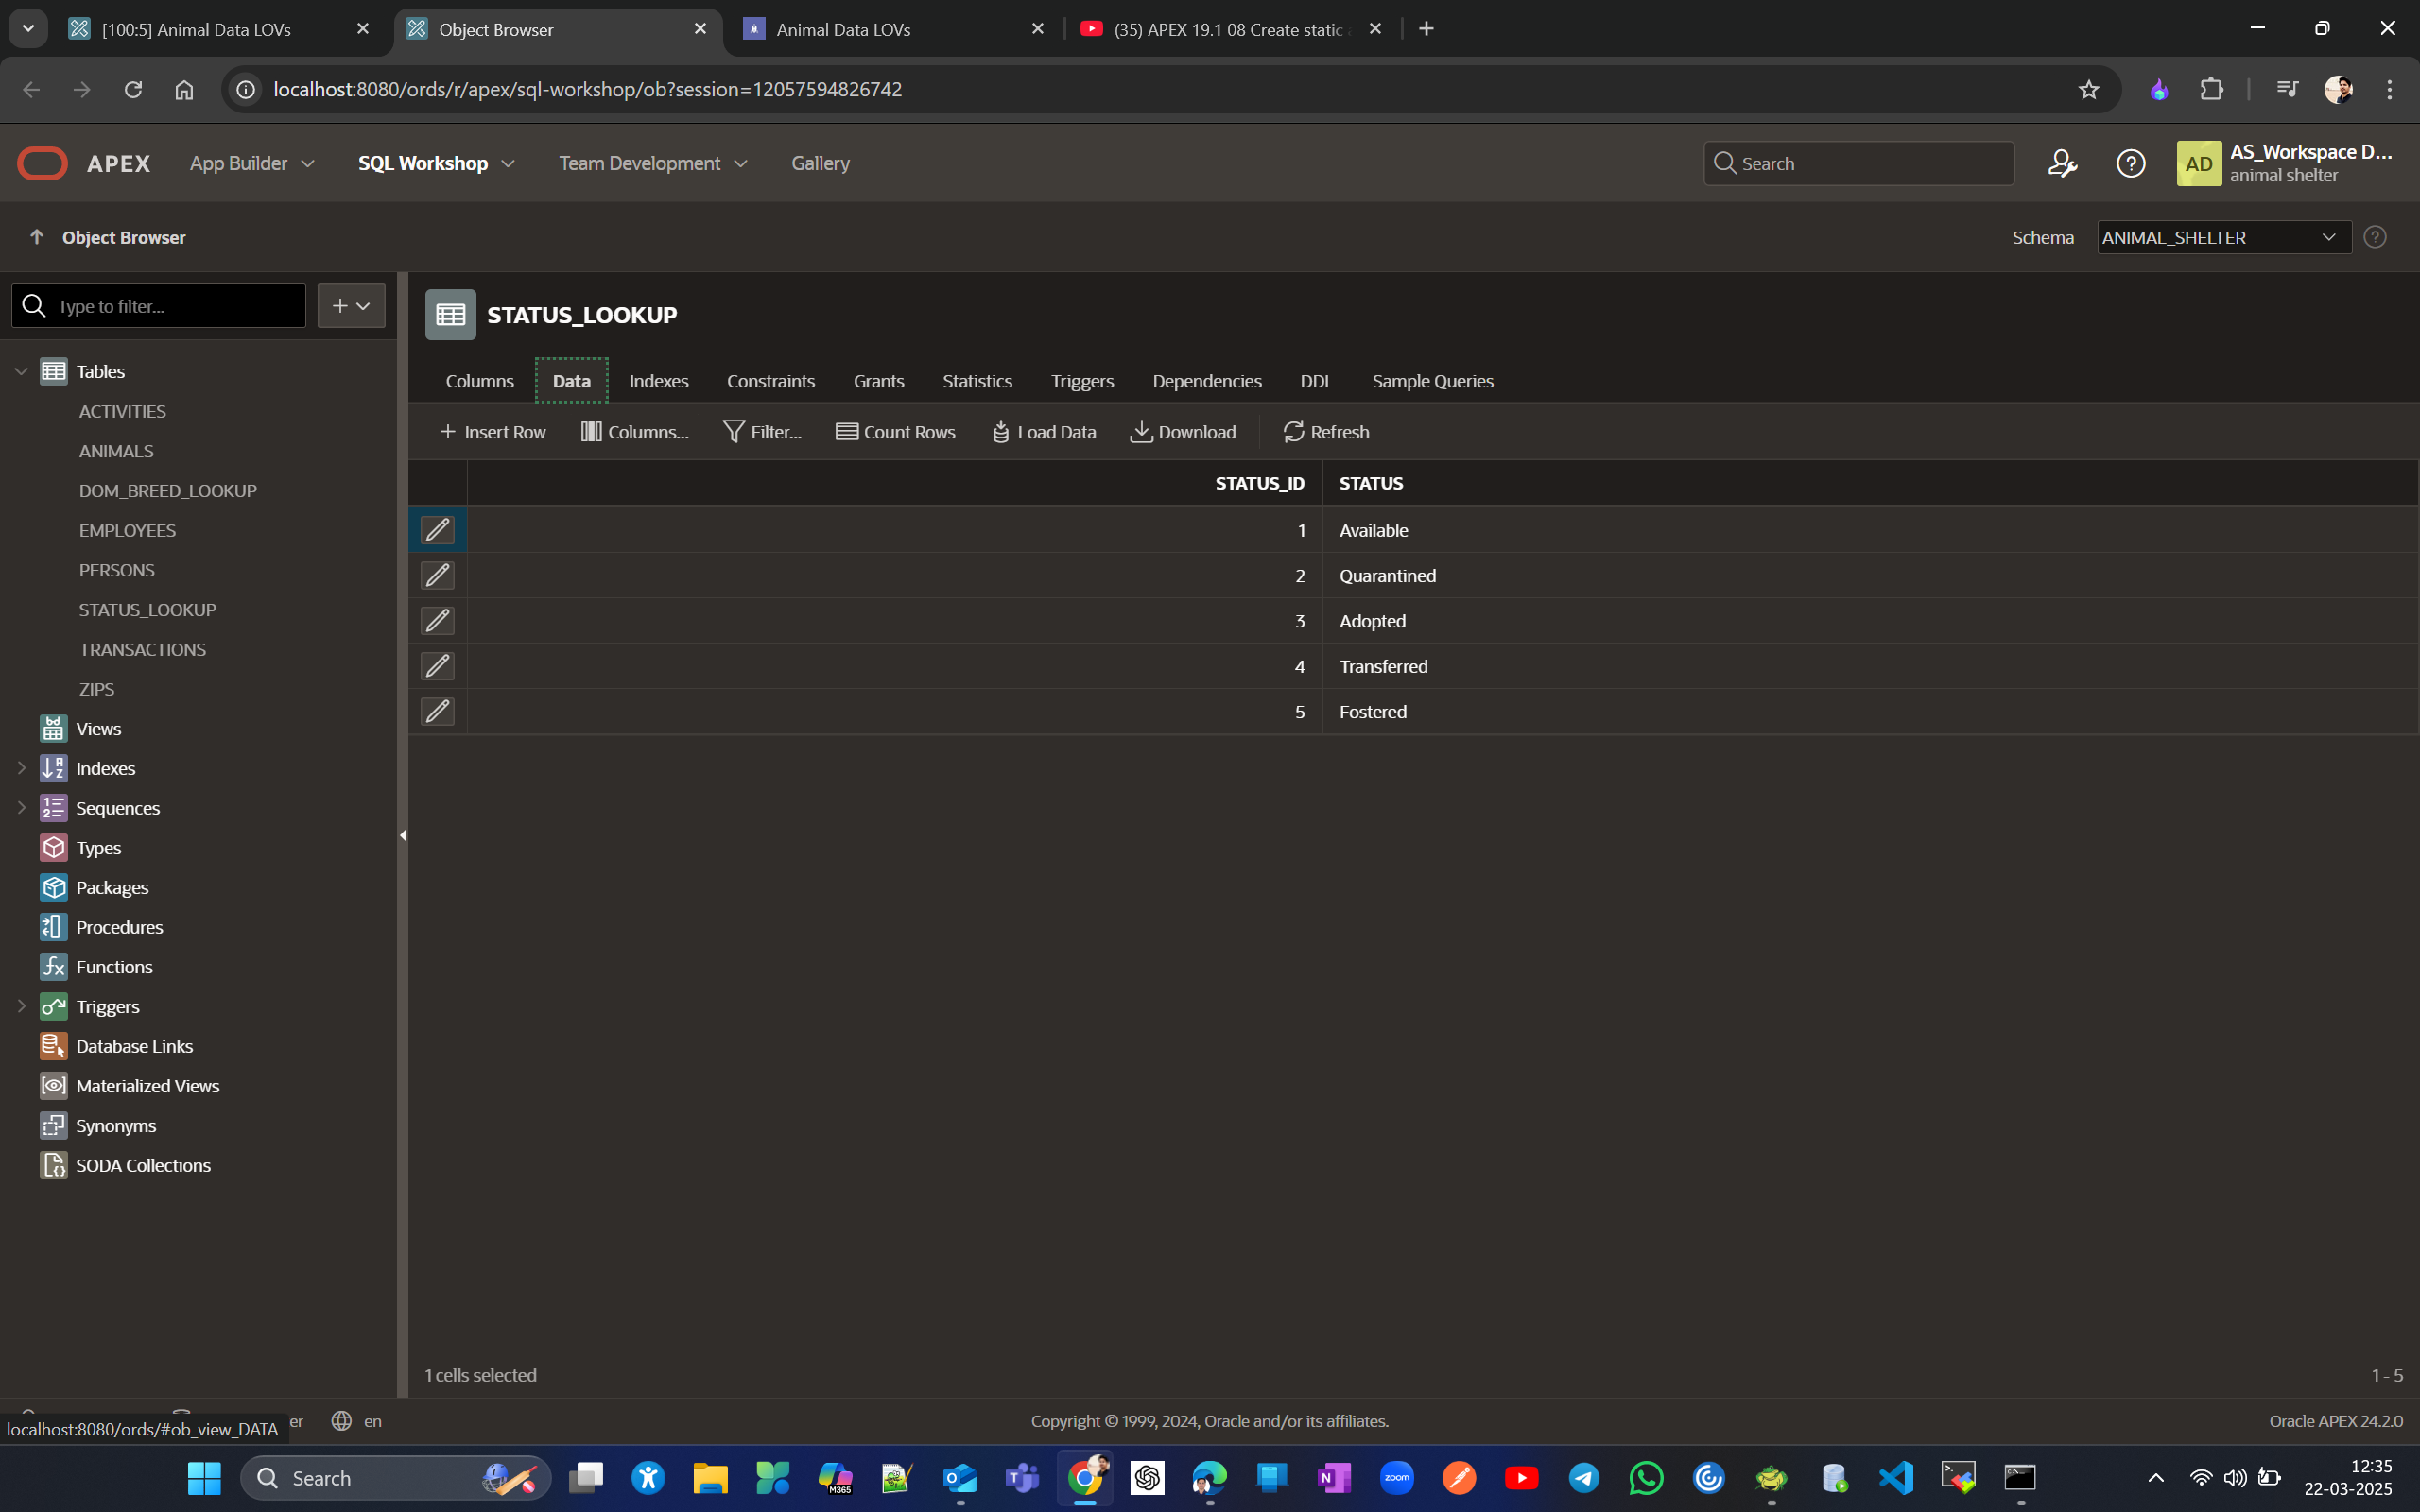
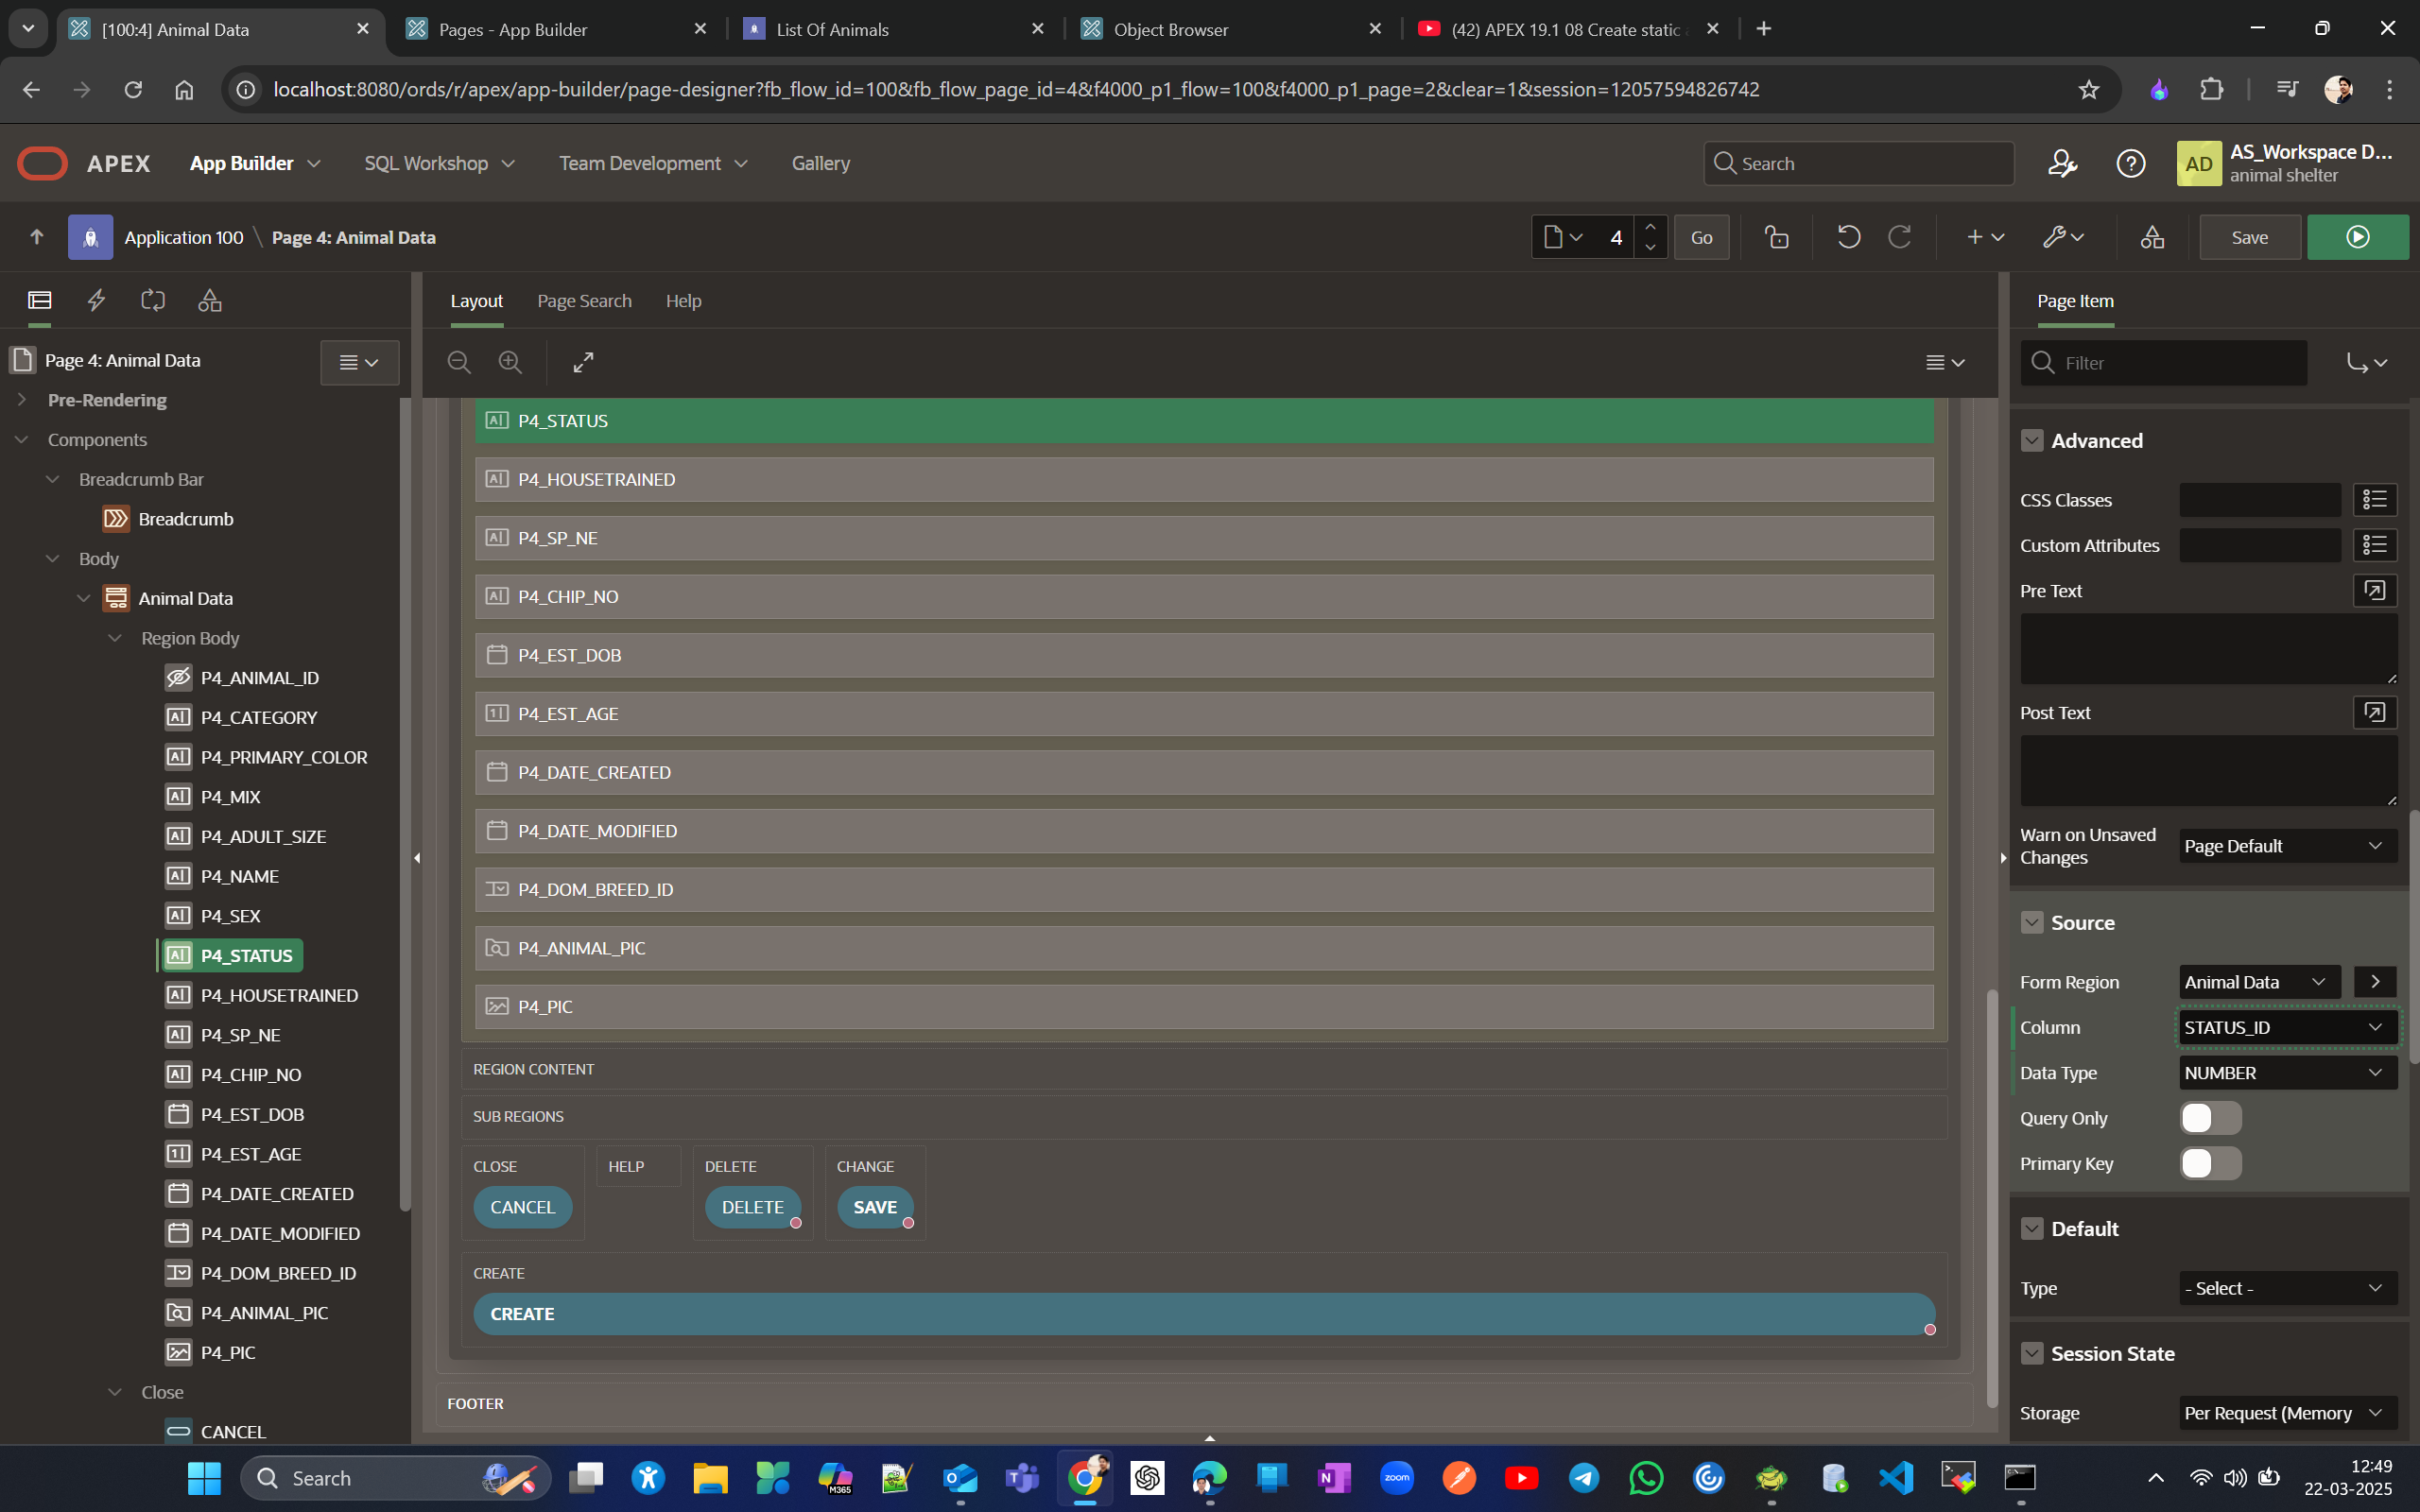
Once done, you may see a "page not available" and "status invalid identifier" error. To fix this, change the source to status_id instead of status. Then, change the column type to a select list and set the source to the newly created animal status LOV.
Keep in mind that when you run the application and click the edit icon for a row in the list of animals report page, it will open the original form without LOVs. To fix that go to report page designer #2 and change target attribute to page #5 from page #4 to map to newly created form with LOVs .
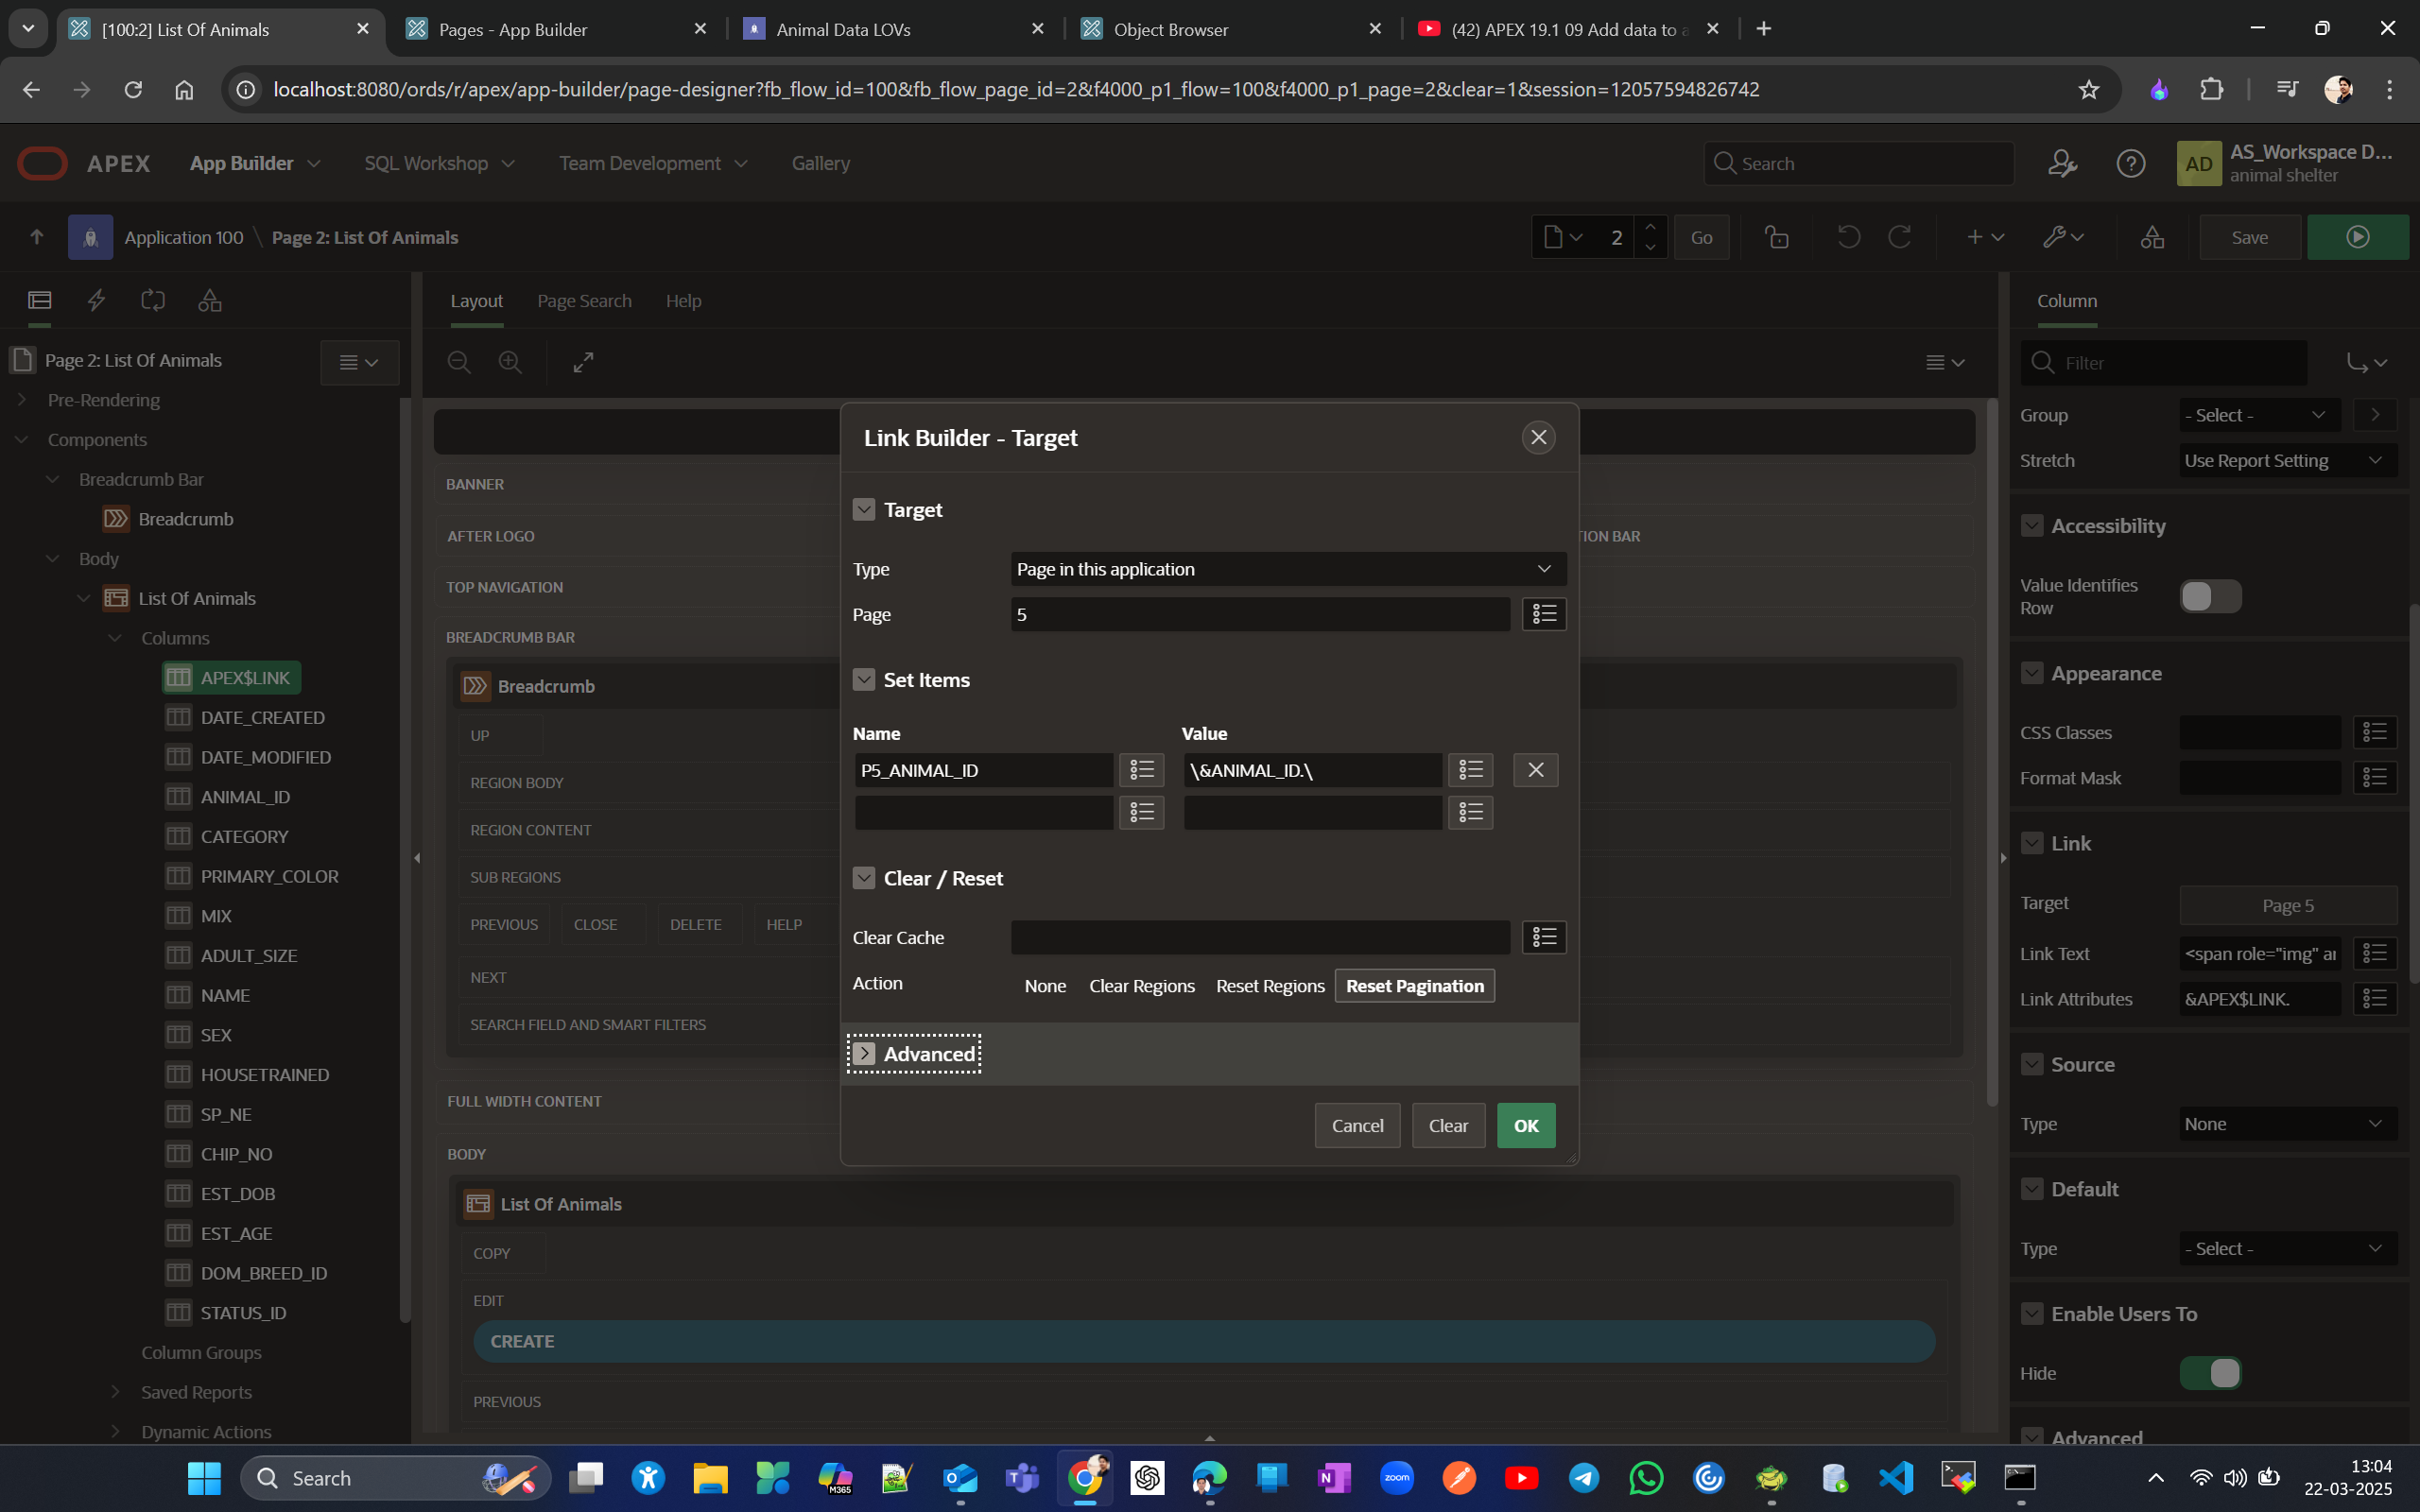
Now, run the application and try to edit a row in the report using the newly created form page with LOVs; if you see an error for status invalid identifier, change the source for status to STATUS_ID for page #5, just as you did for page #4 previously. Now all should be good.
Below are the pages and LOVs we have created so far.
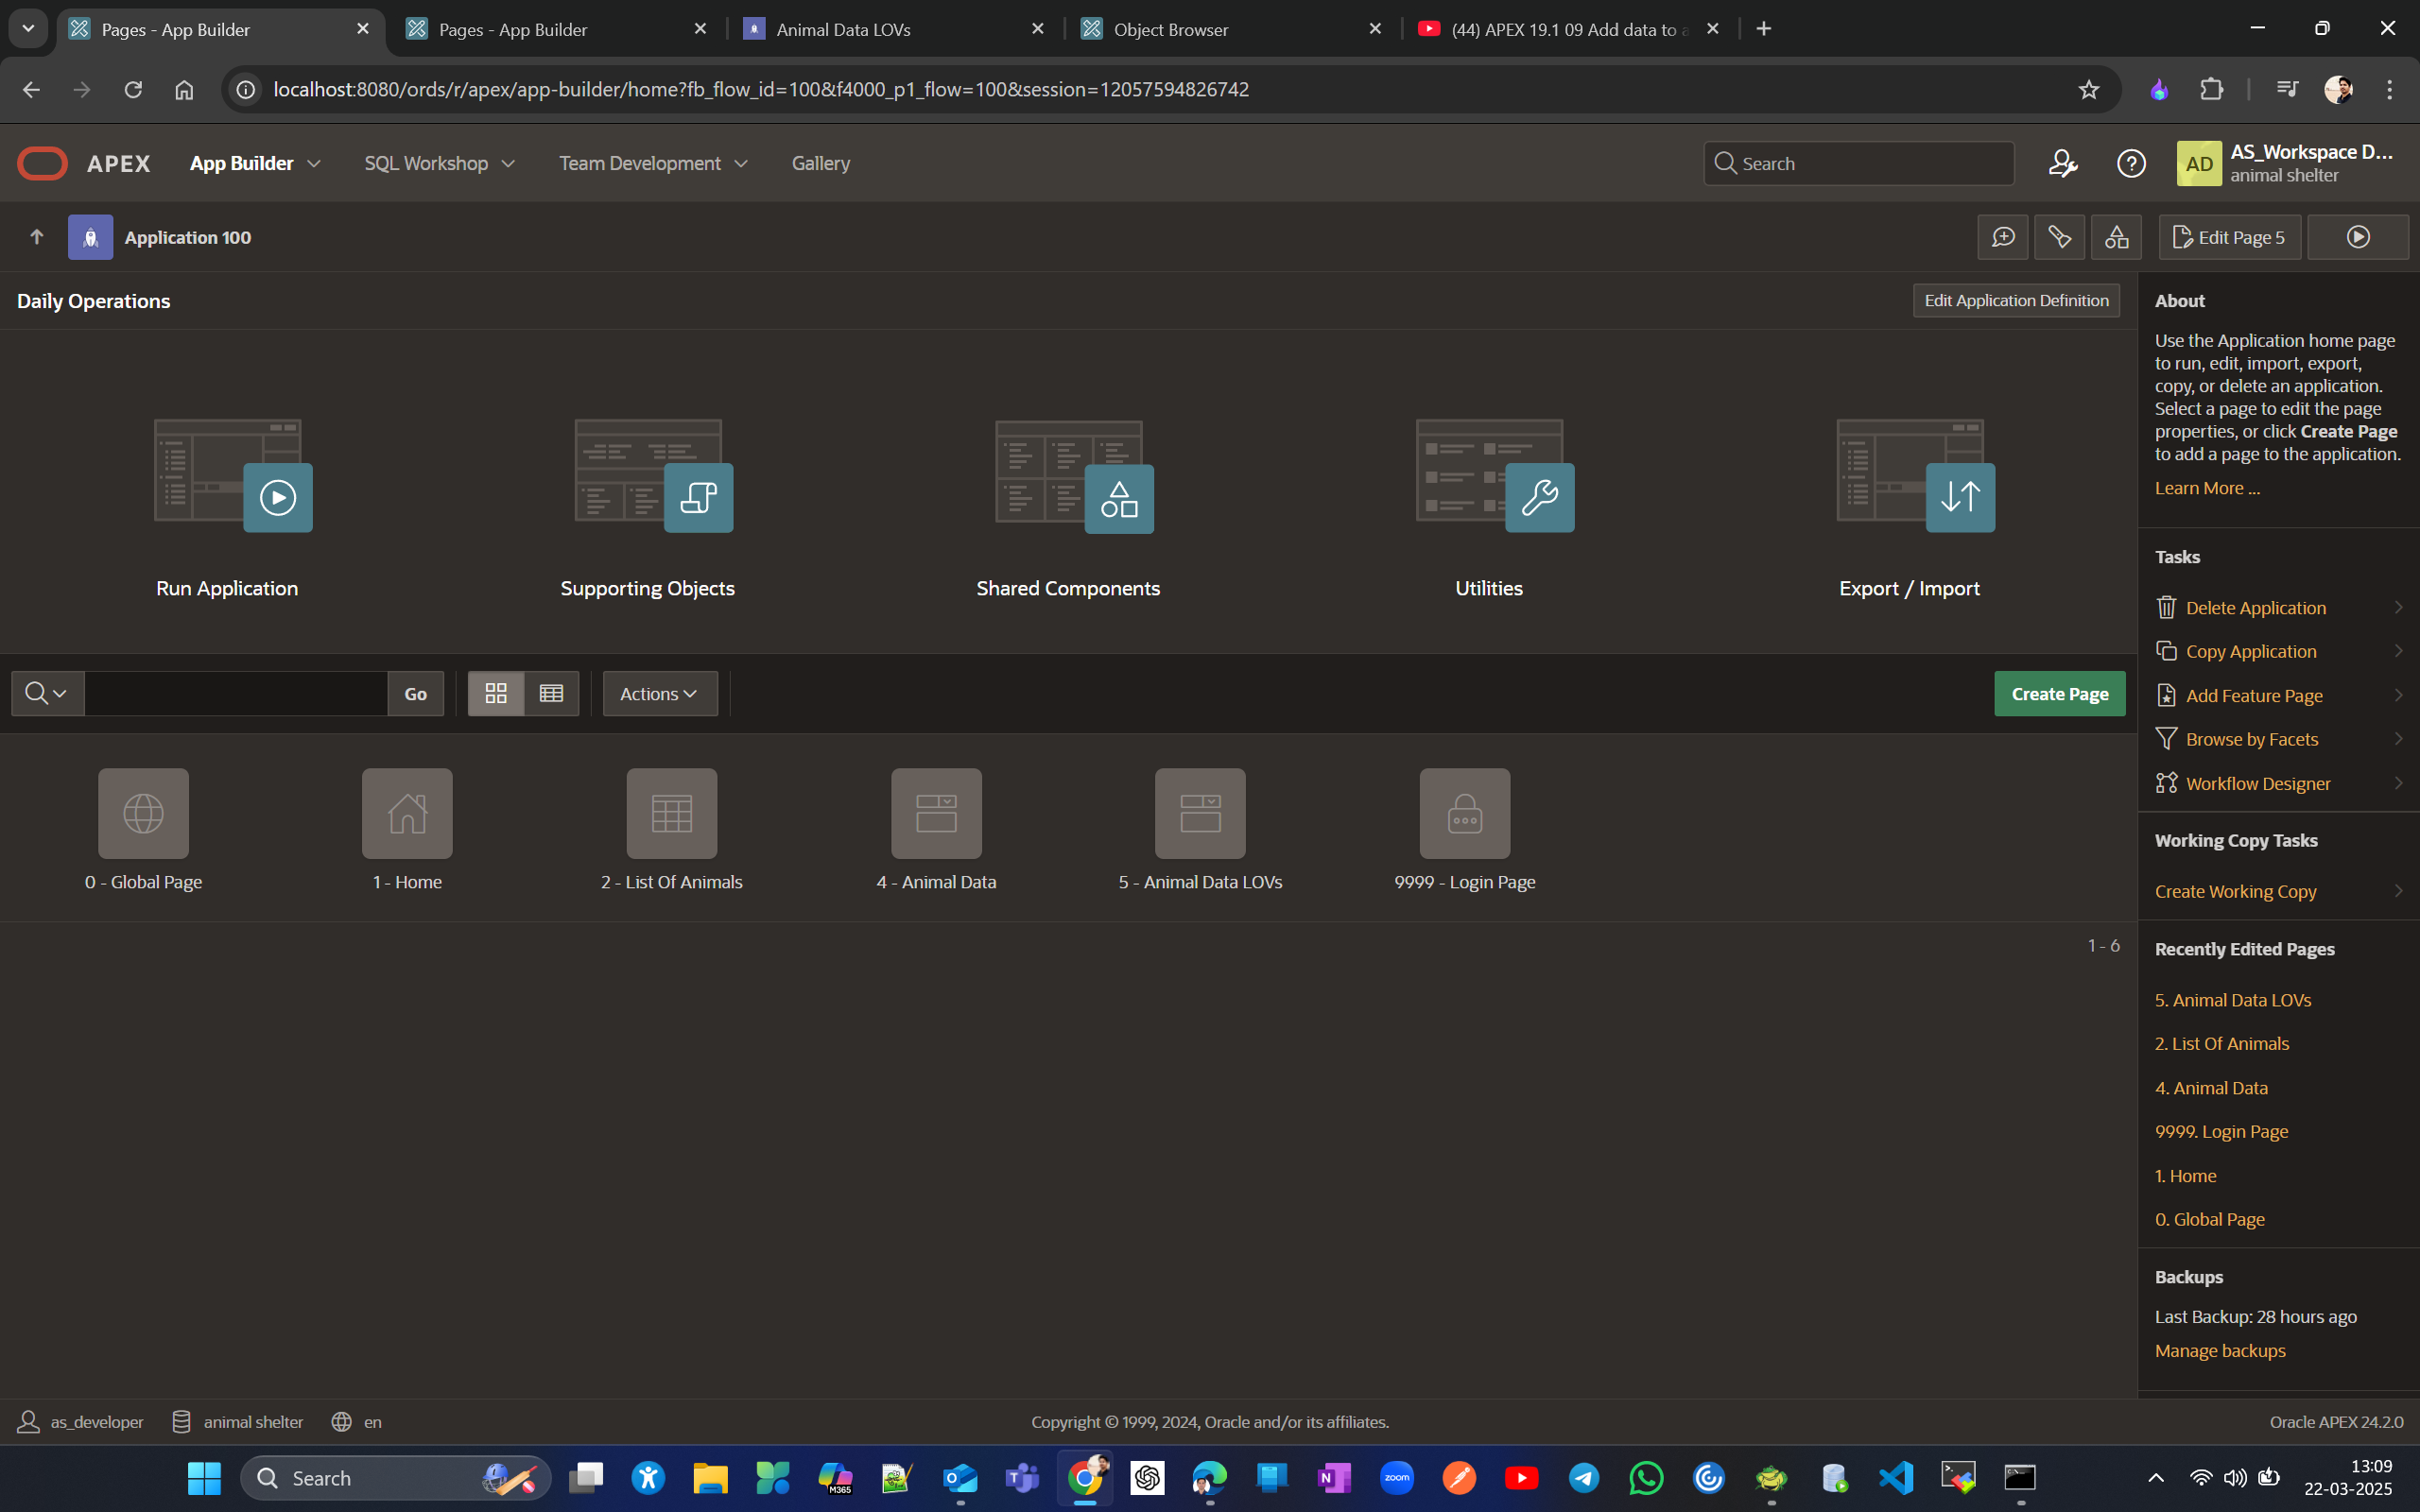
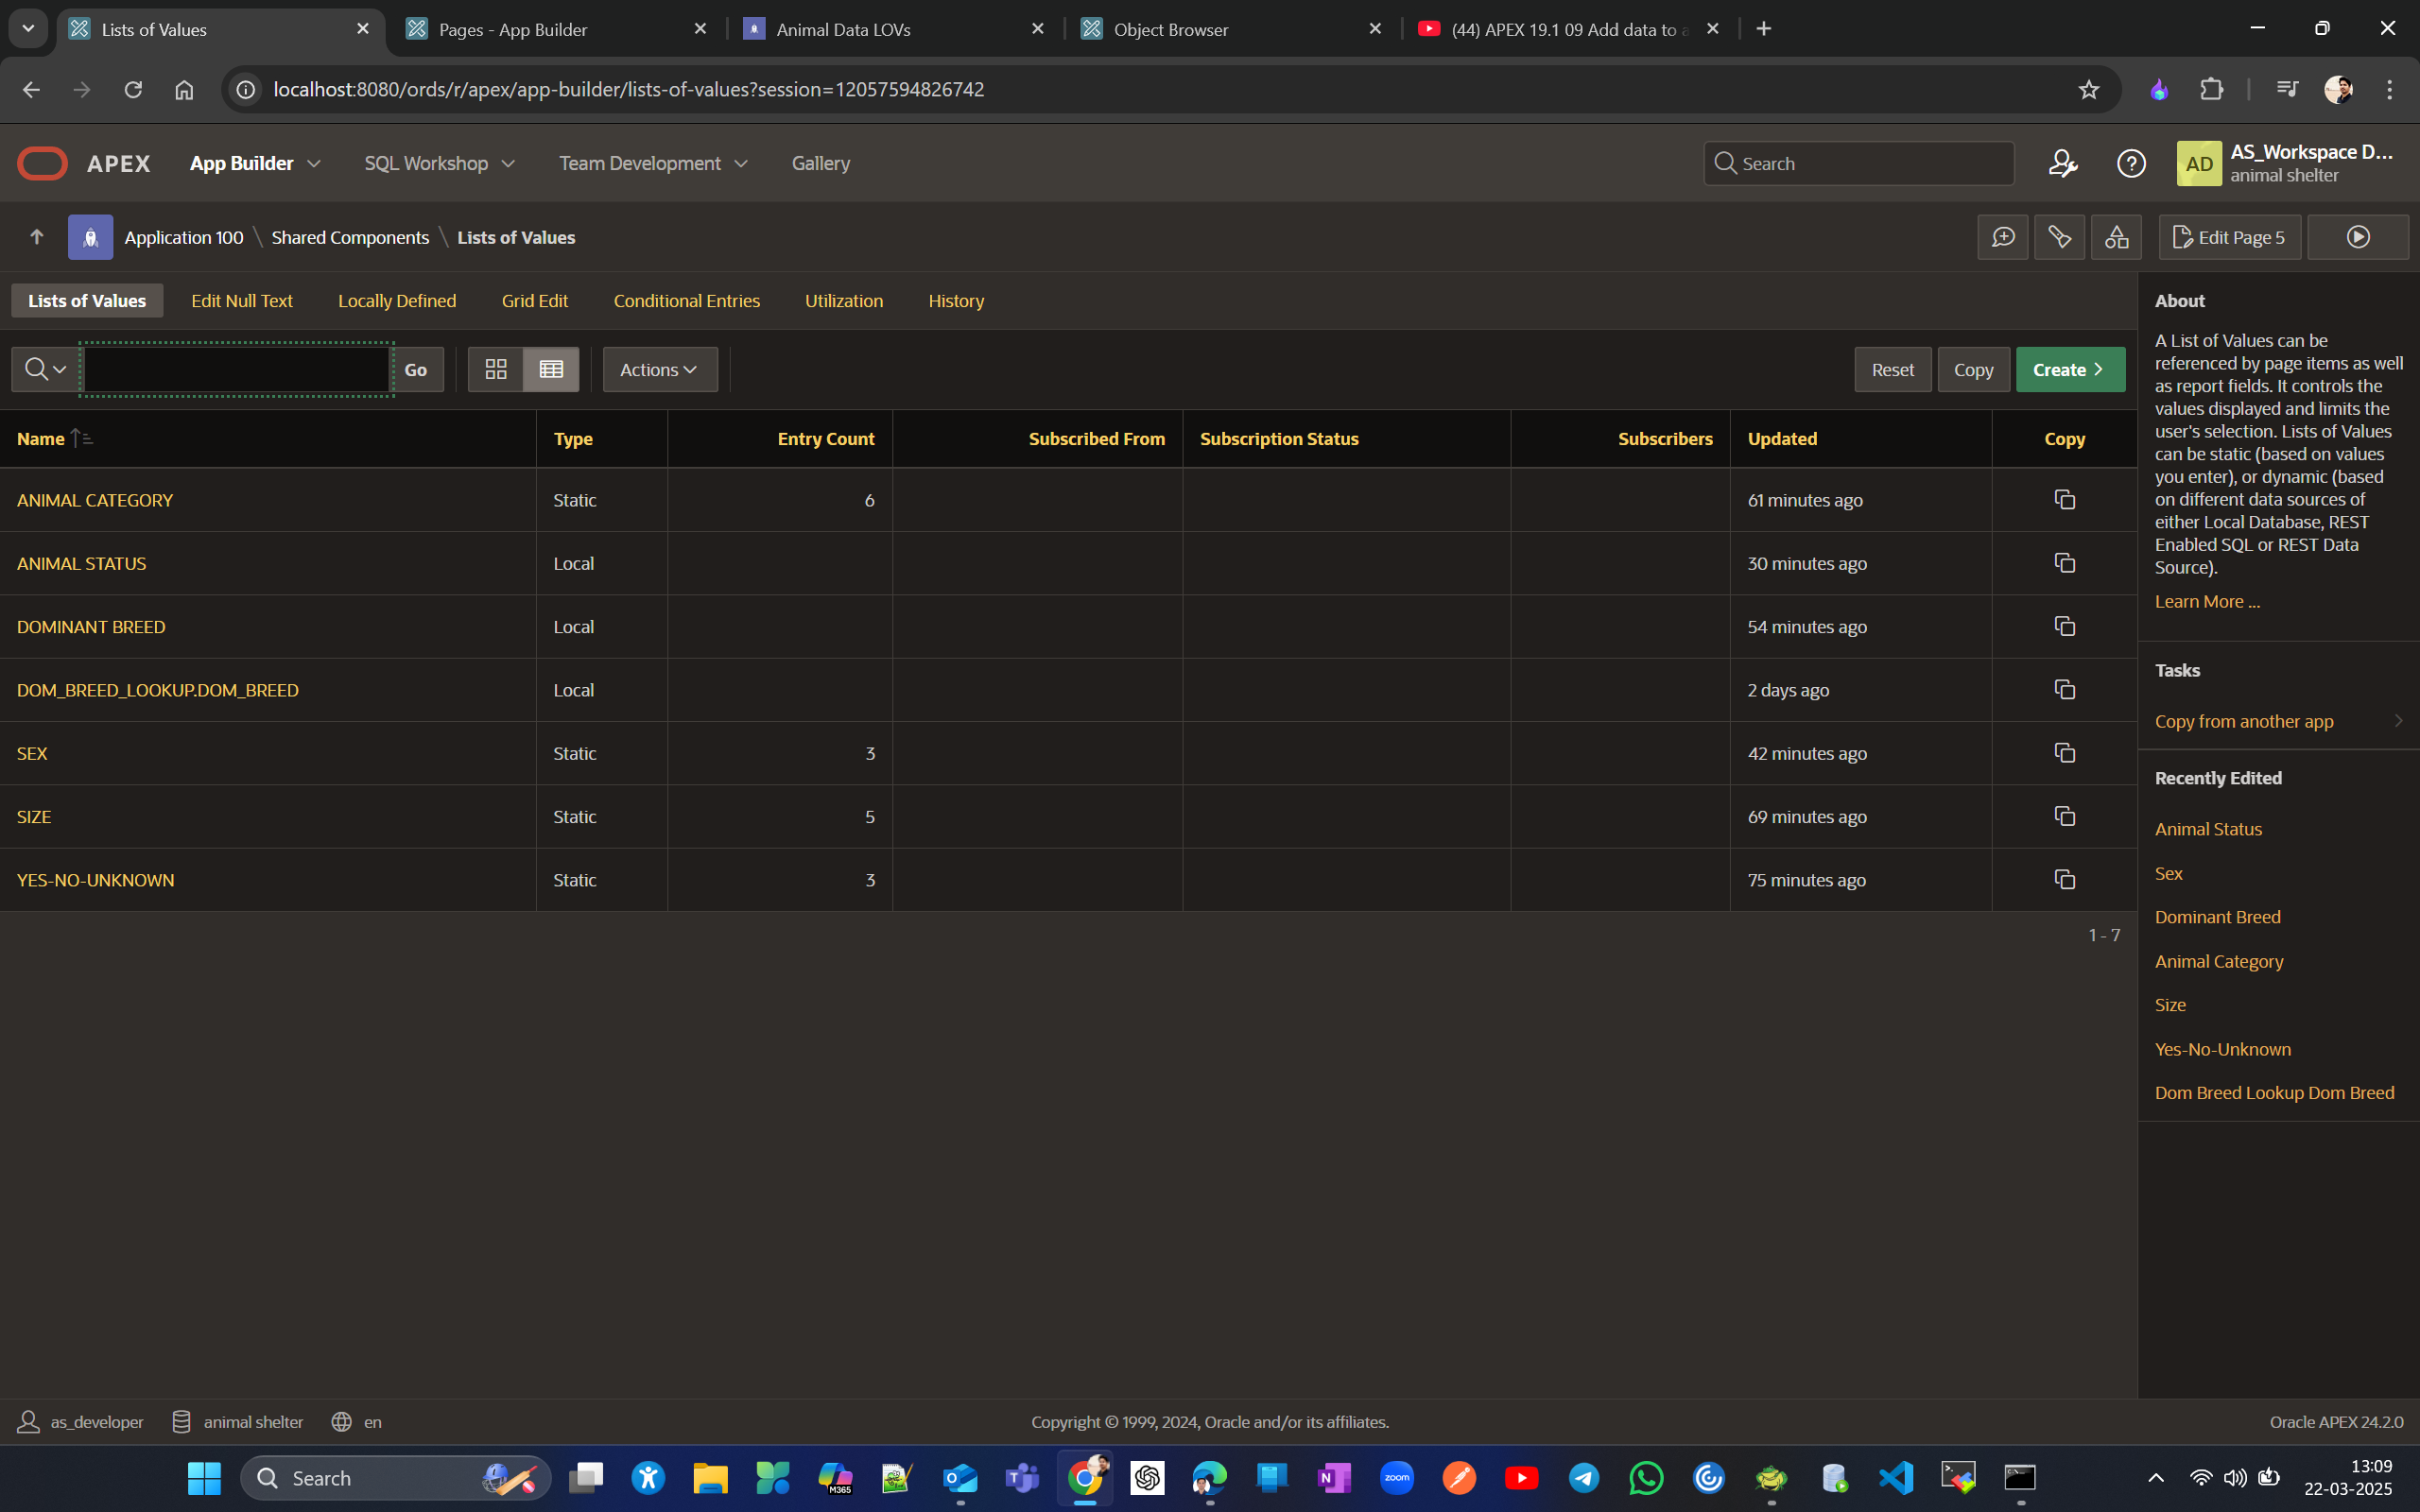
Add data to a static or dynamic LOV, clean the data, and prevent inconsistent entries in the future by enforcing lowercase in a form.
To add or modify LOV -
Developer can go to shared component → select LOV → either Add Row or Edit
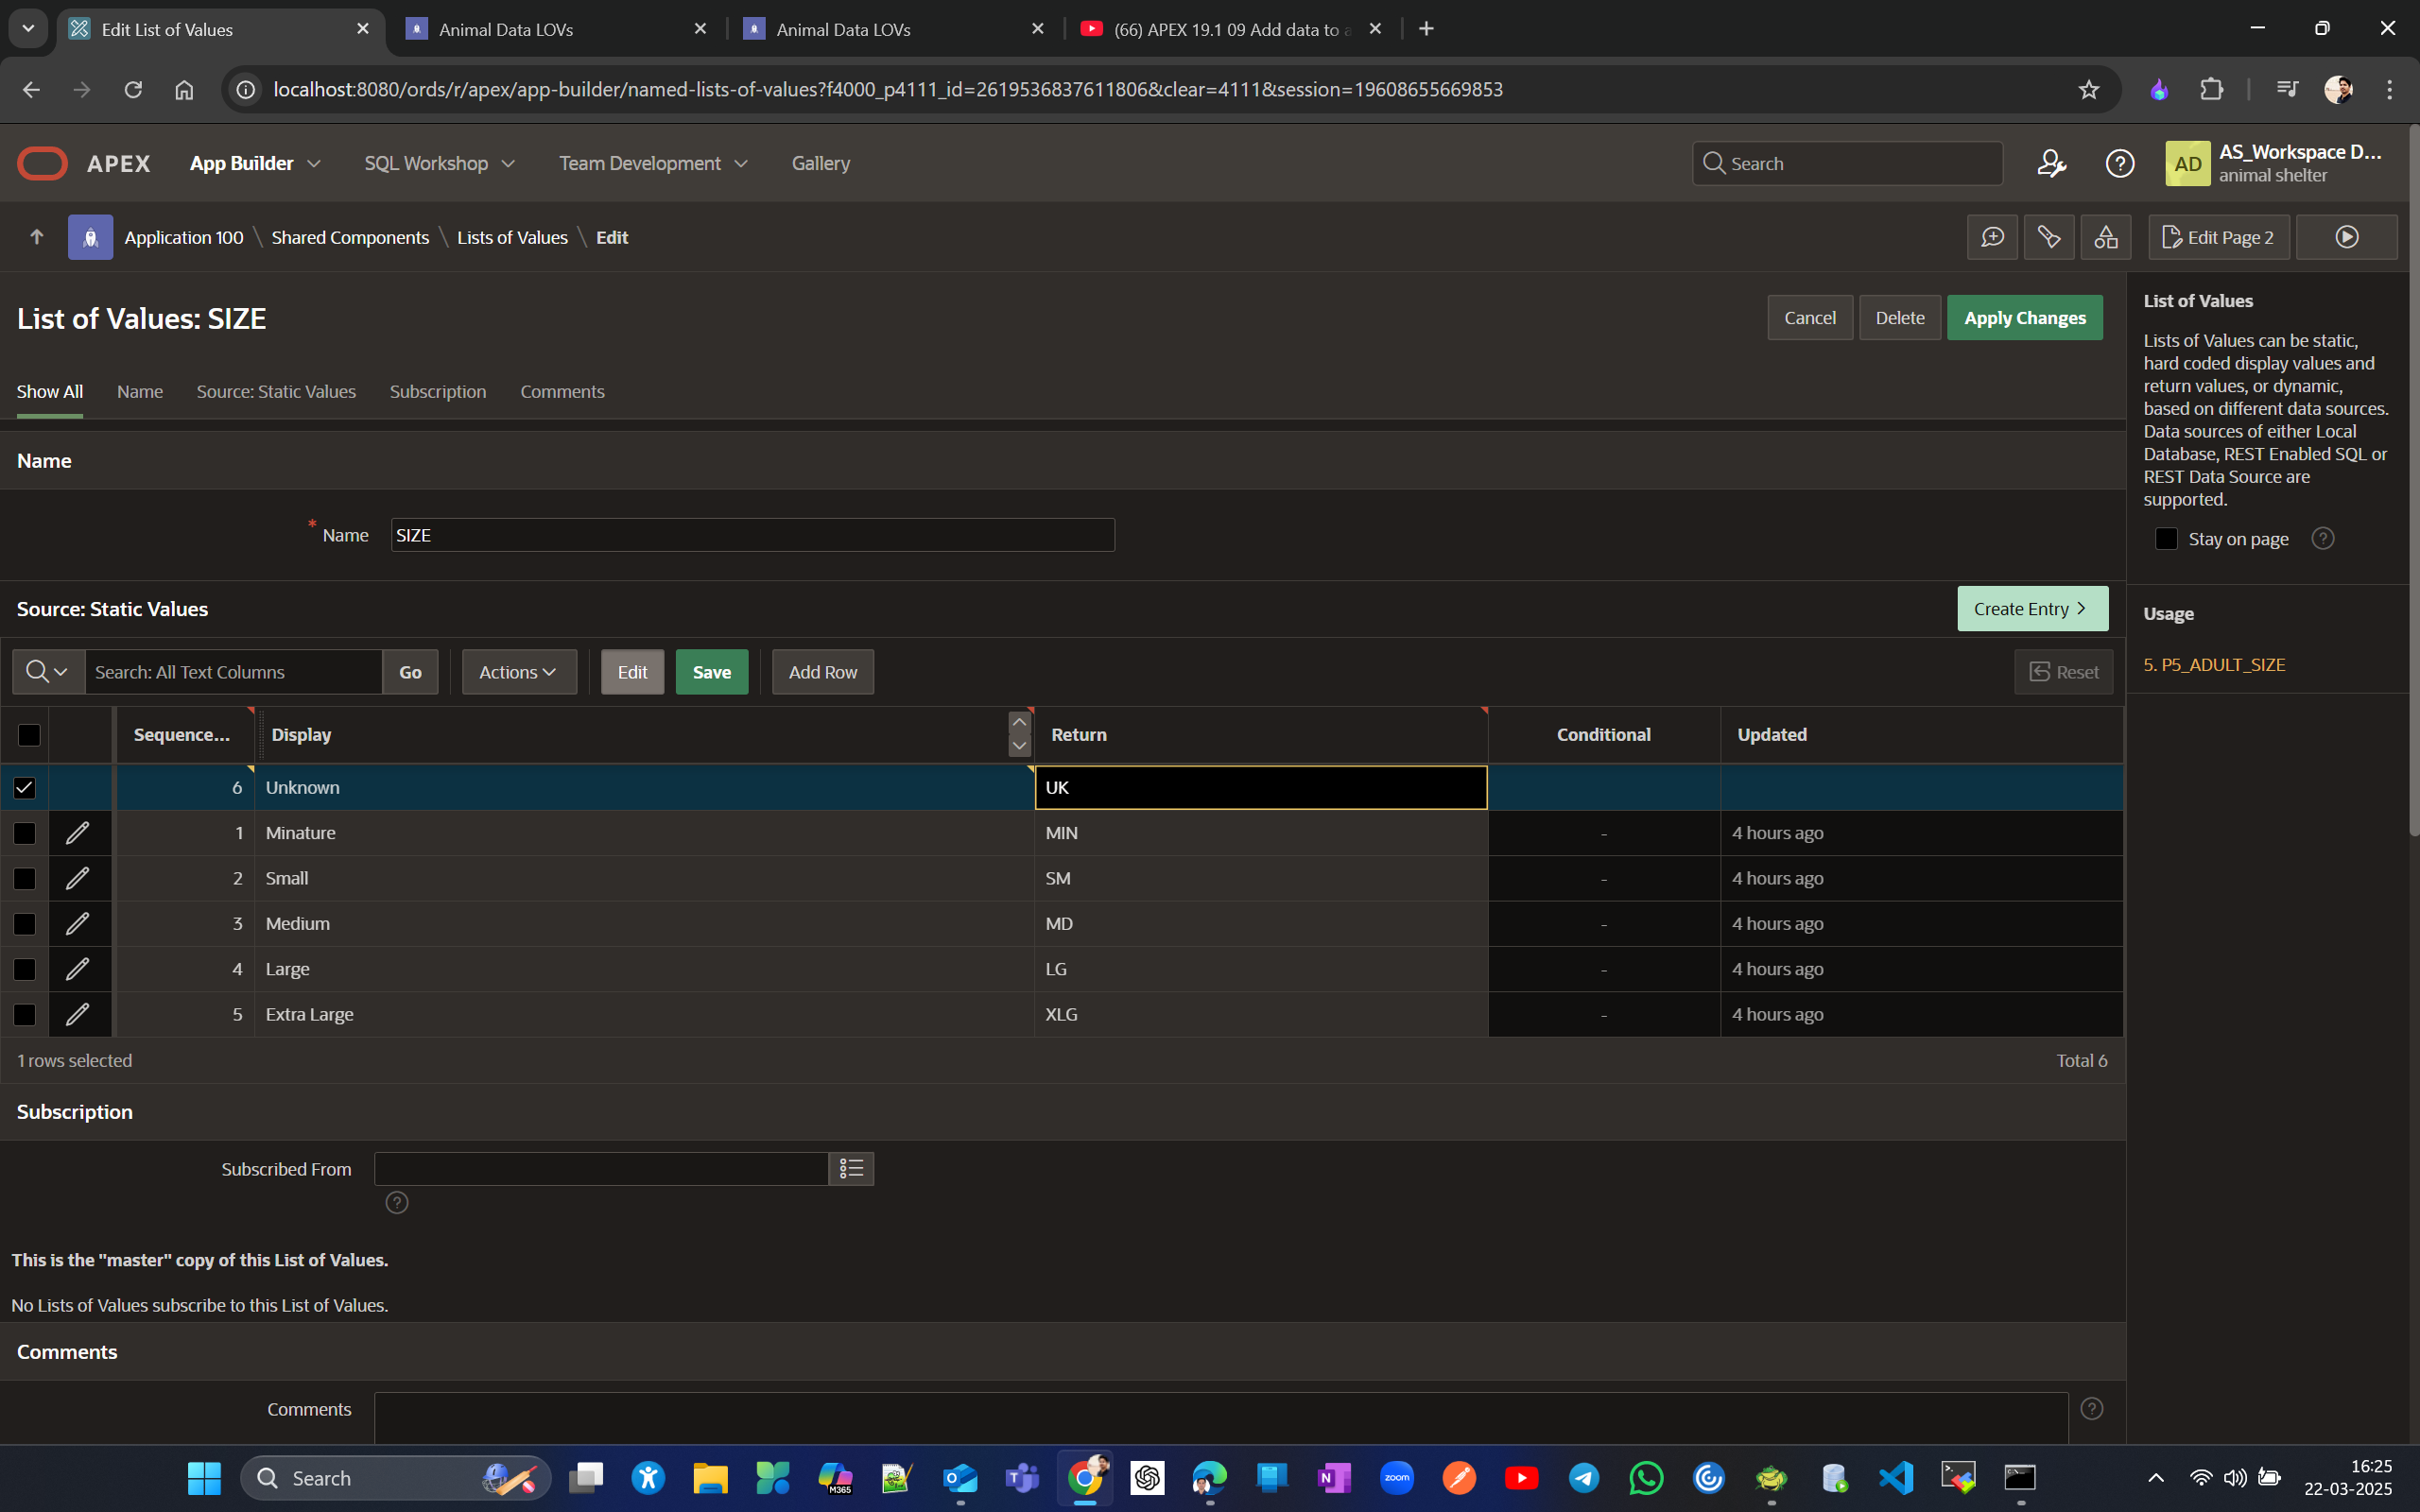
For Dynamic LOV, we can create a form for each lookup table. Users can add to the list by using the form
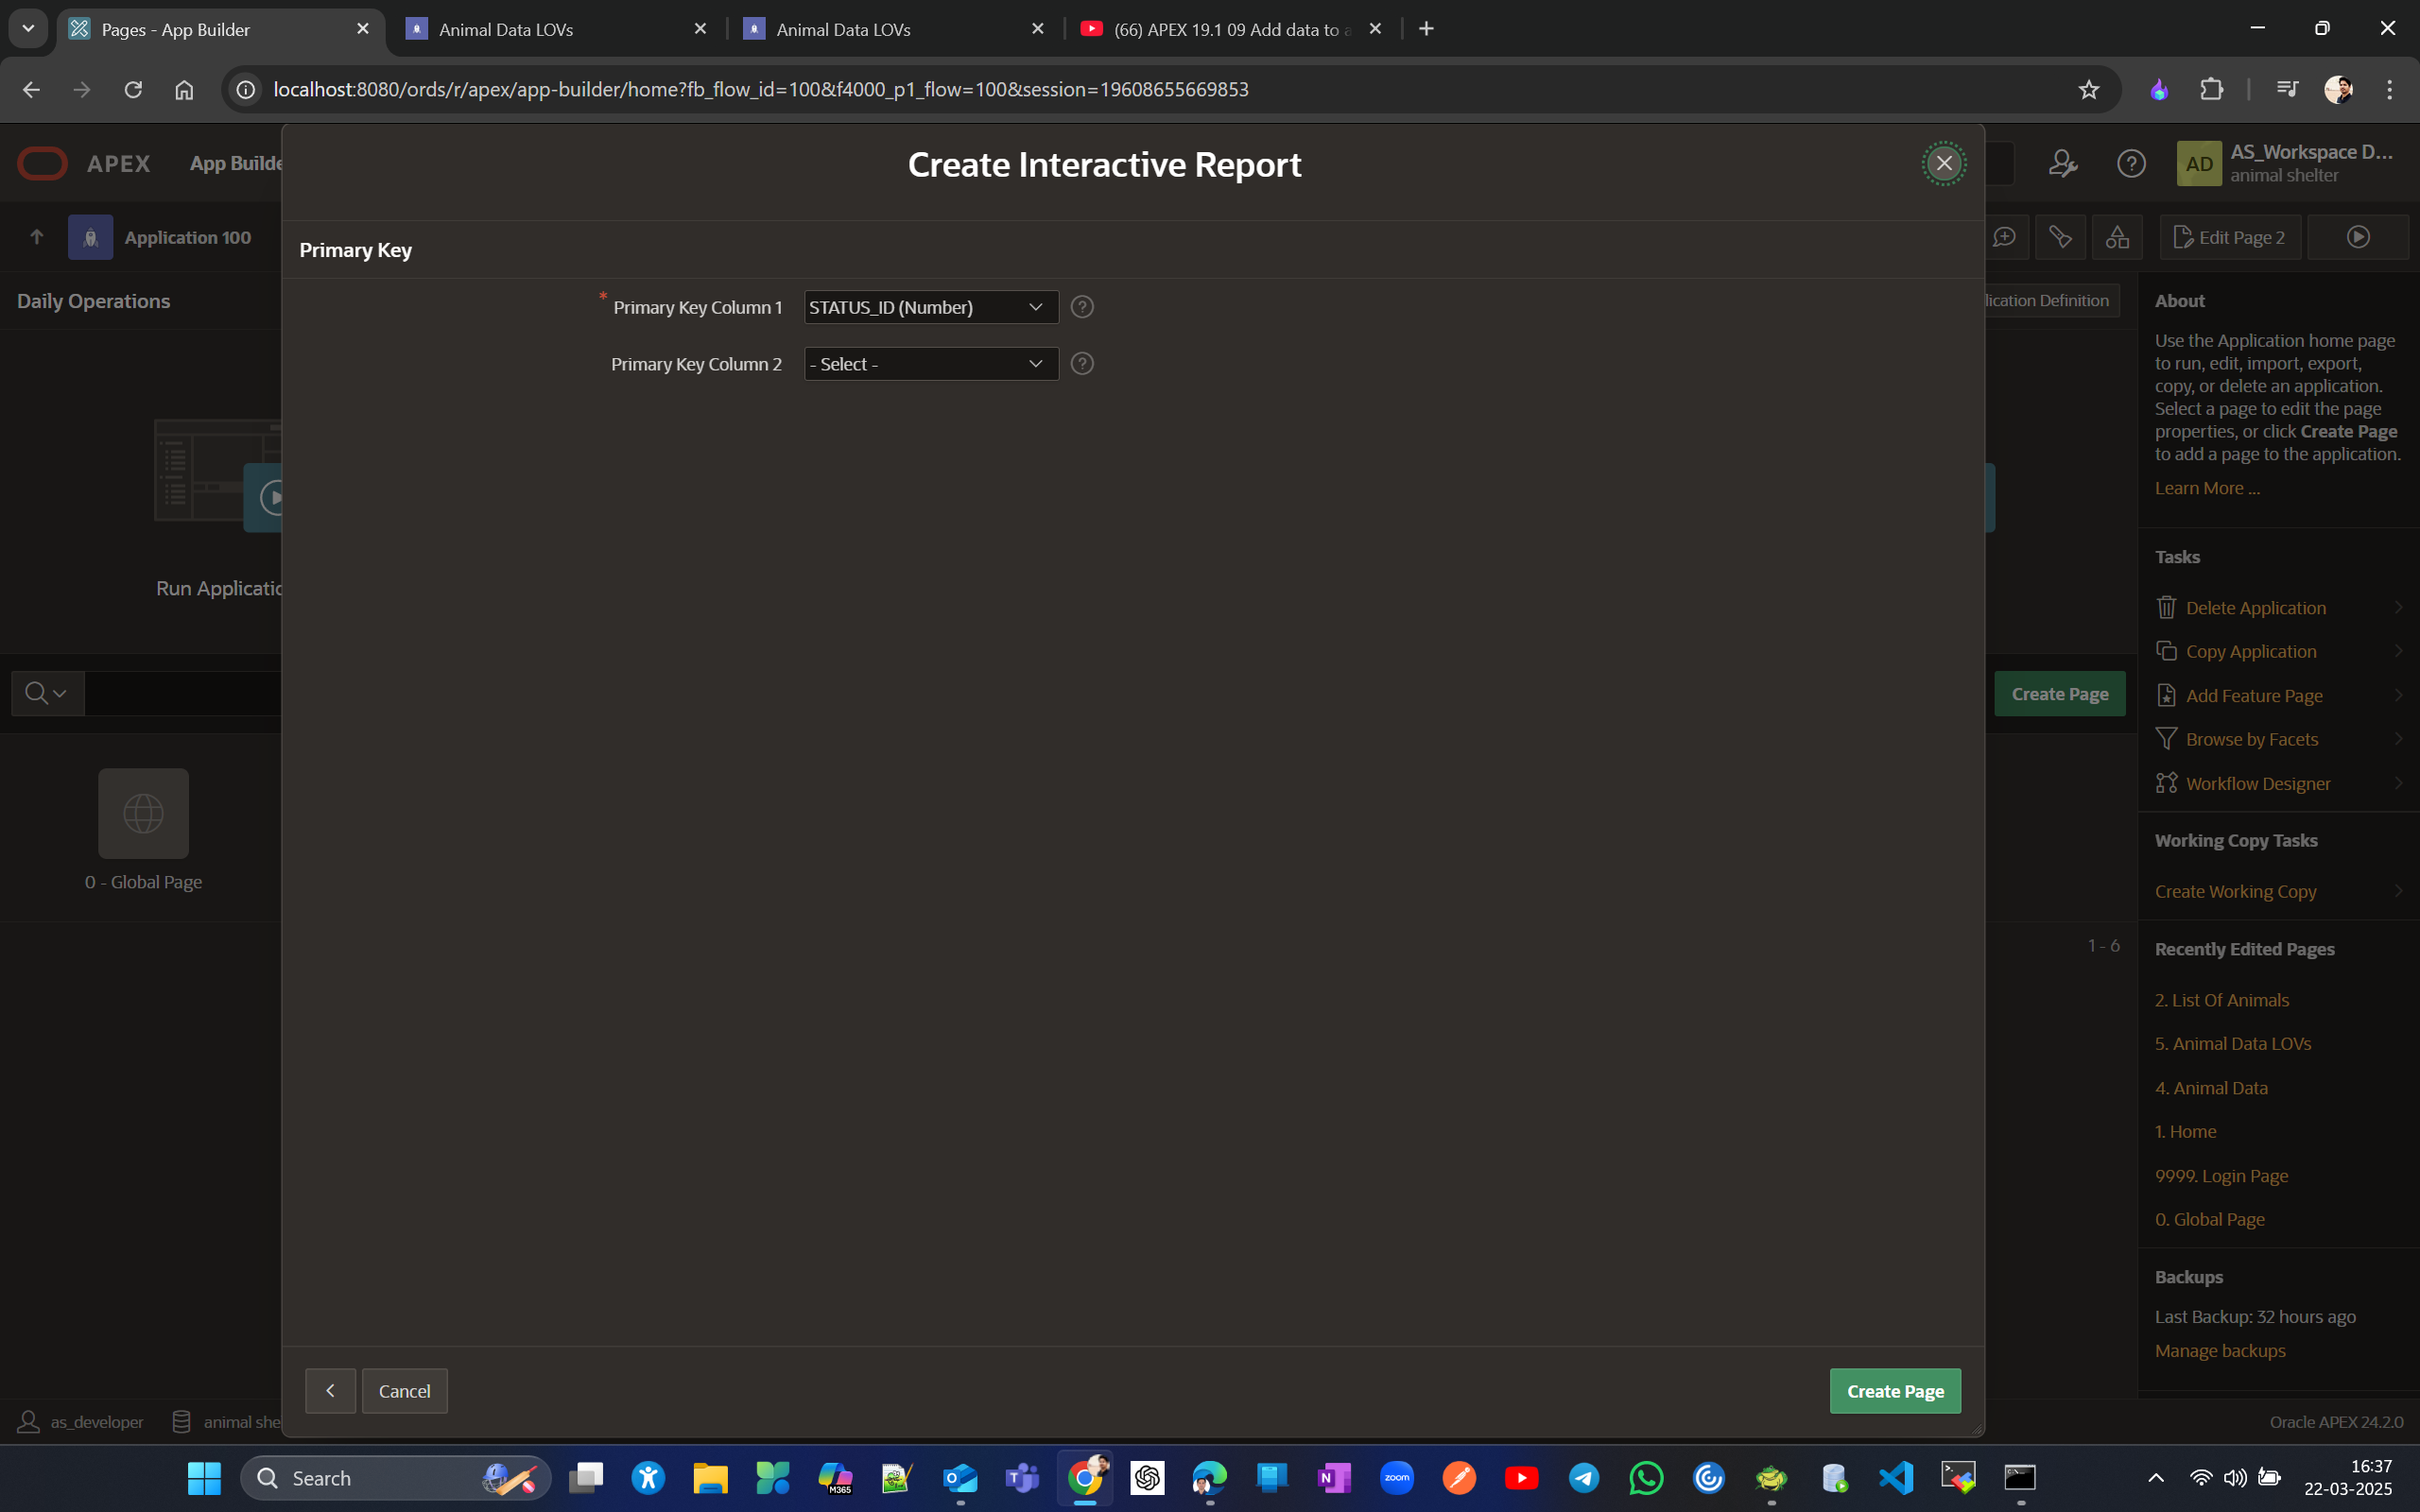
Lets create a interactive report and enable form there like this
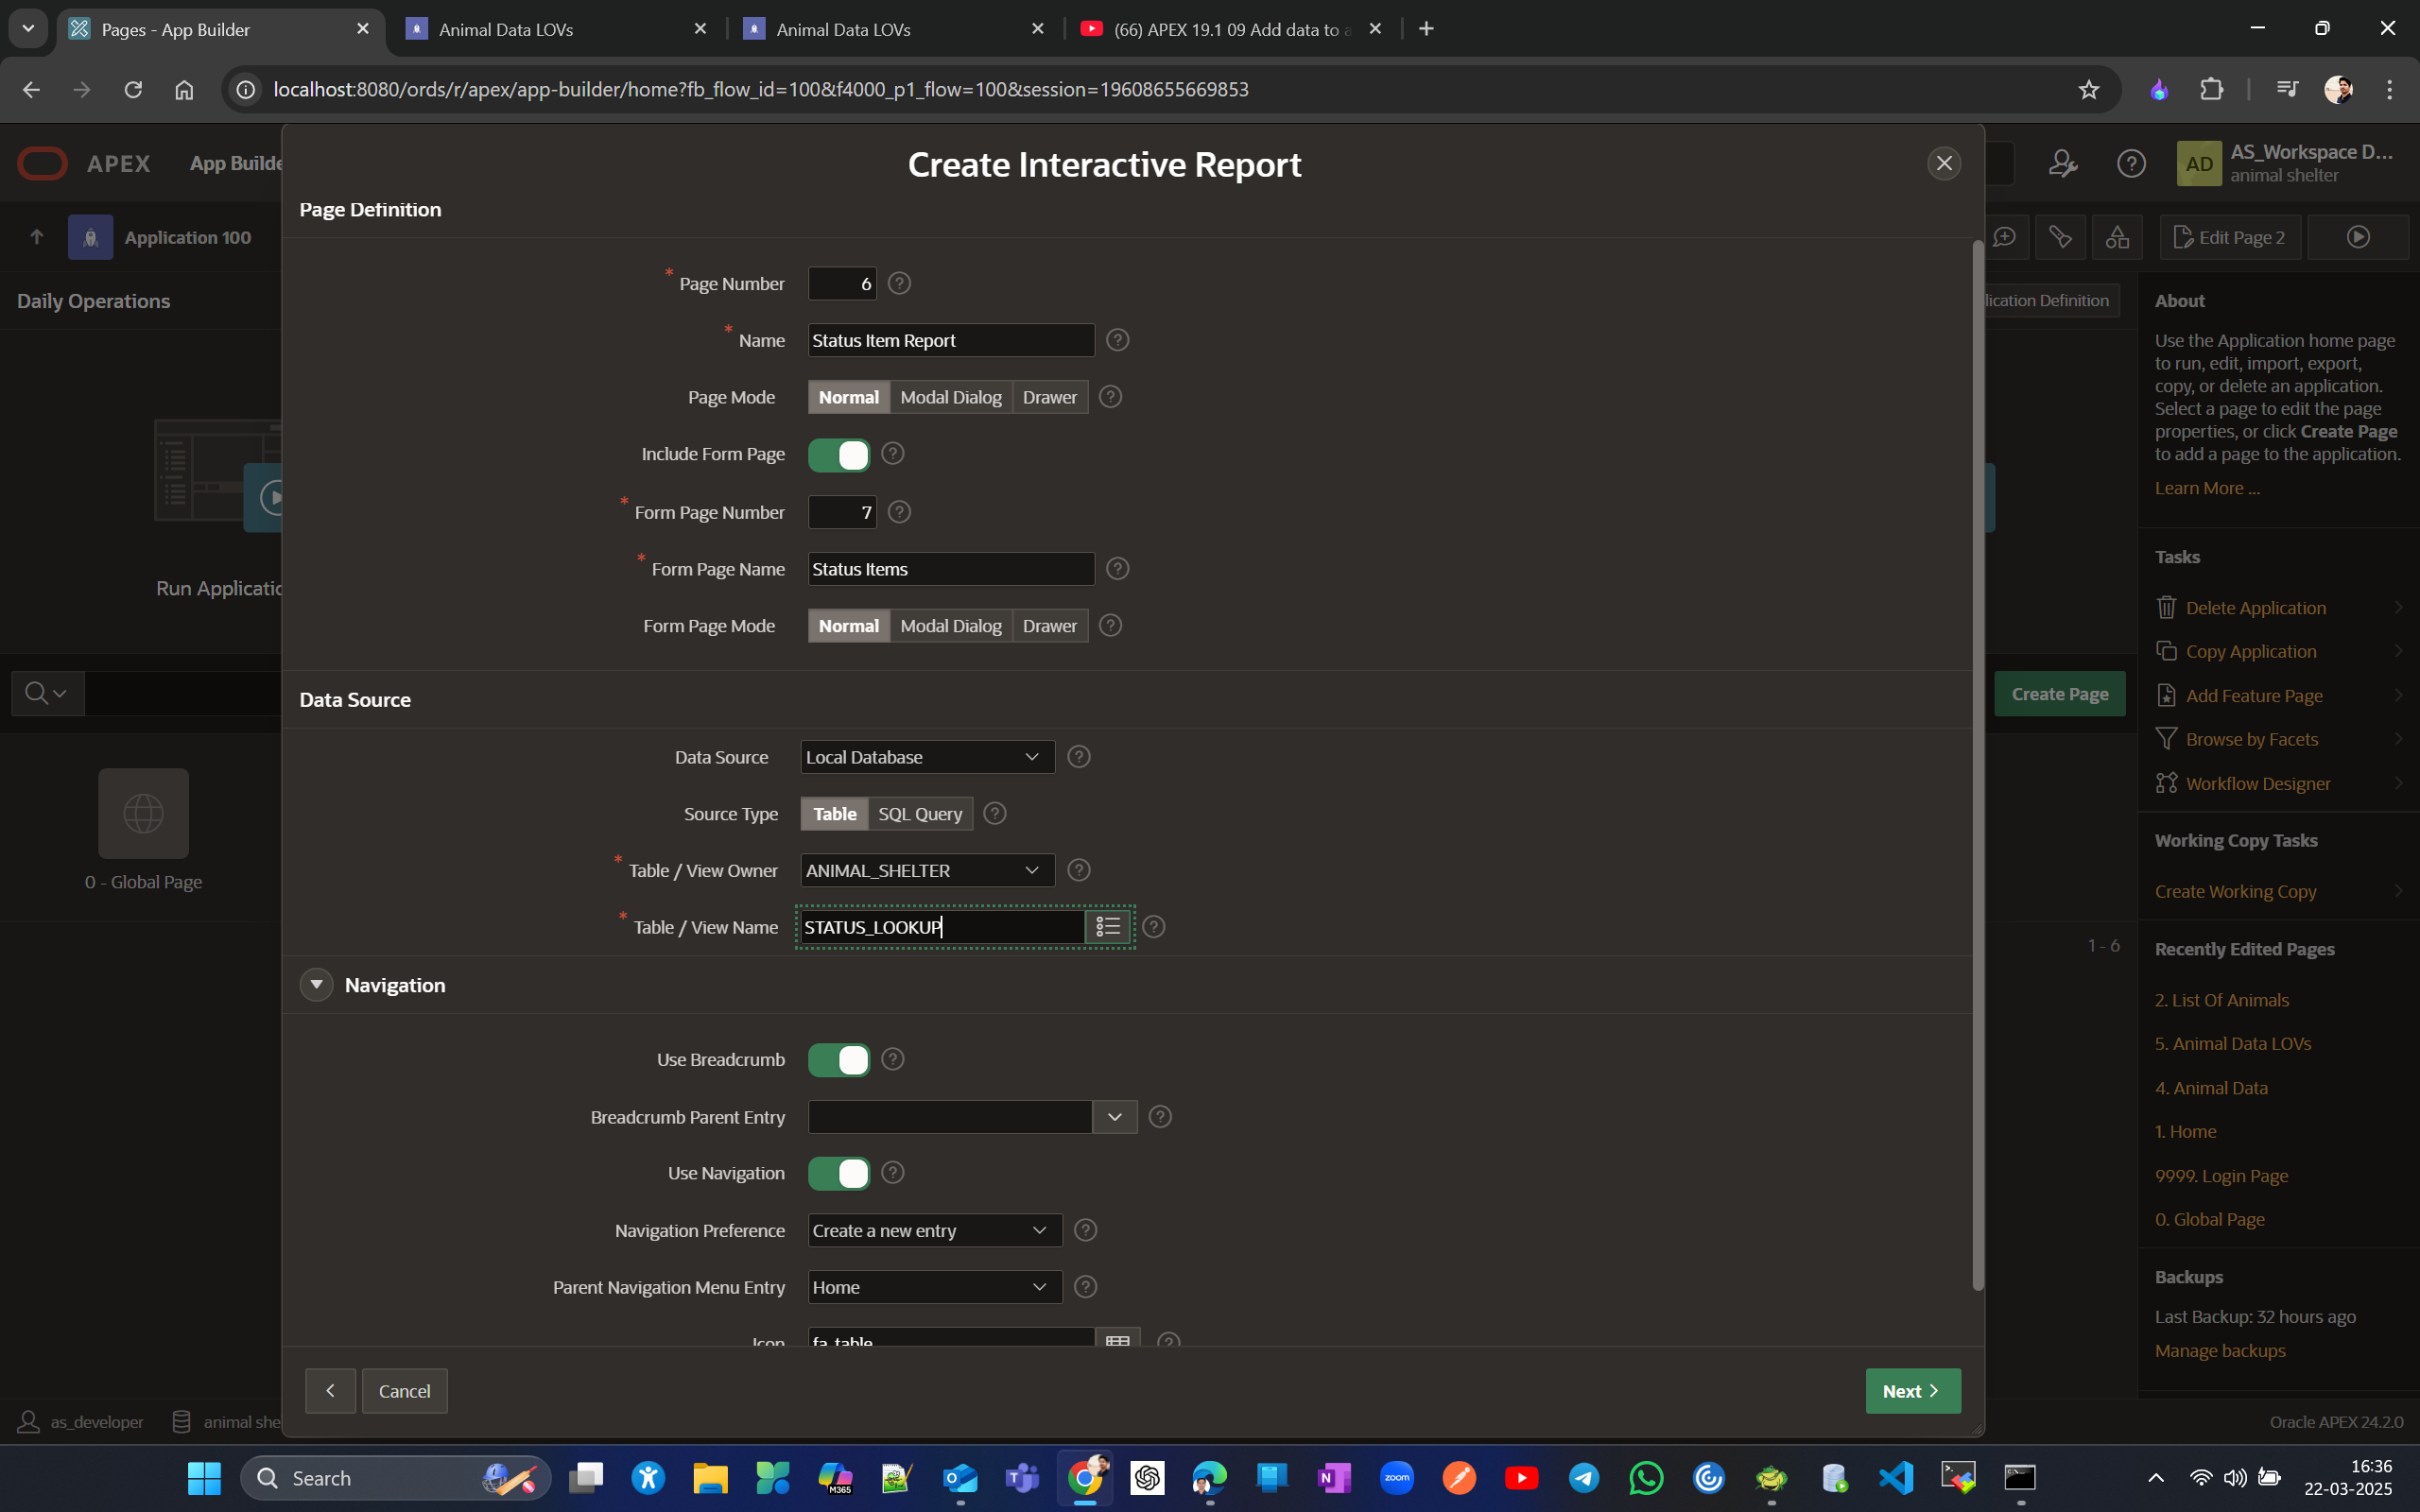
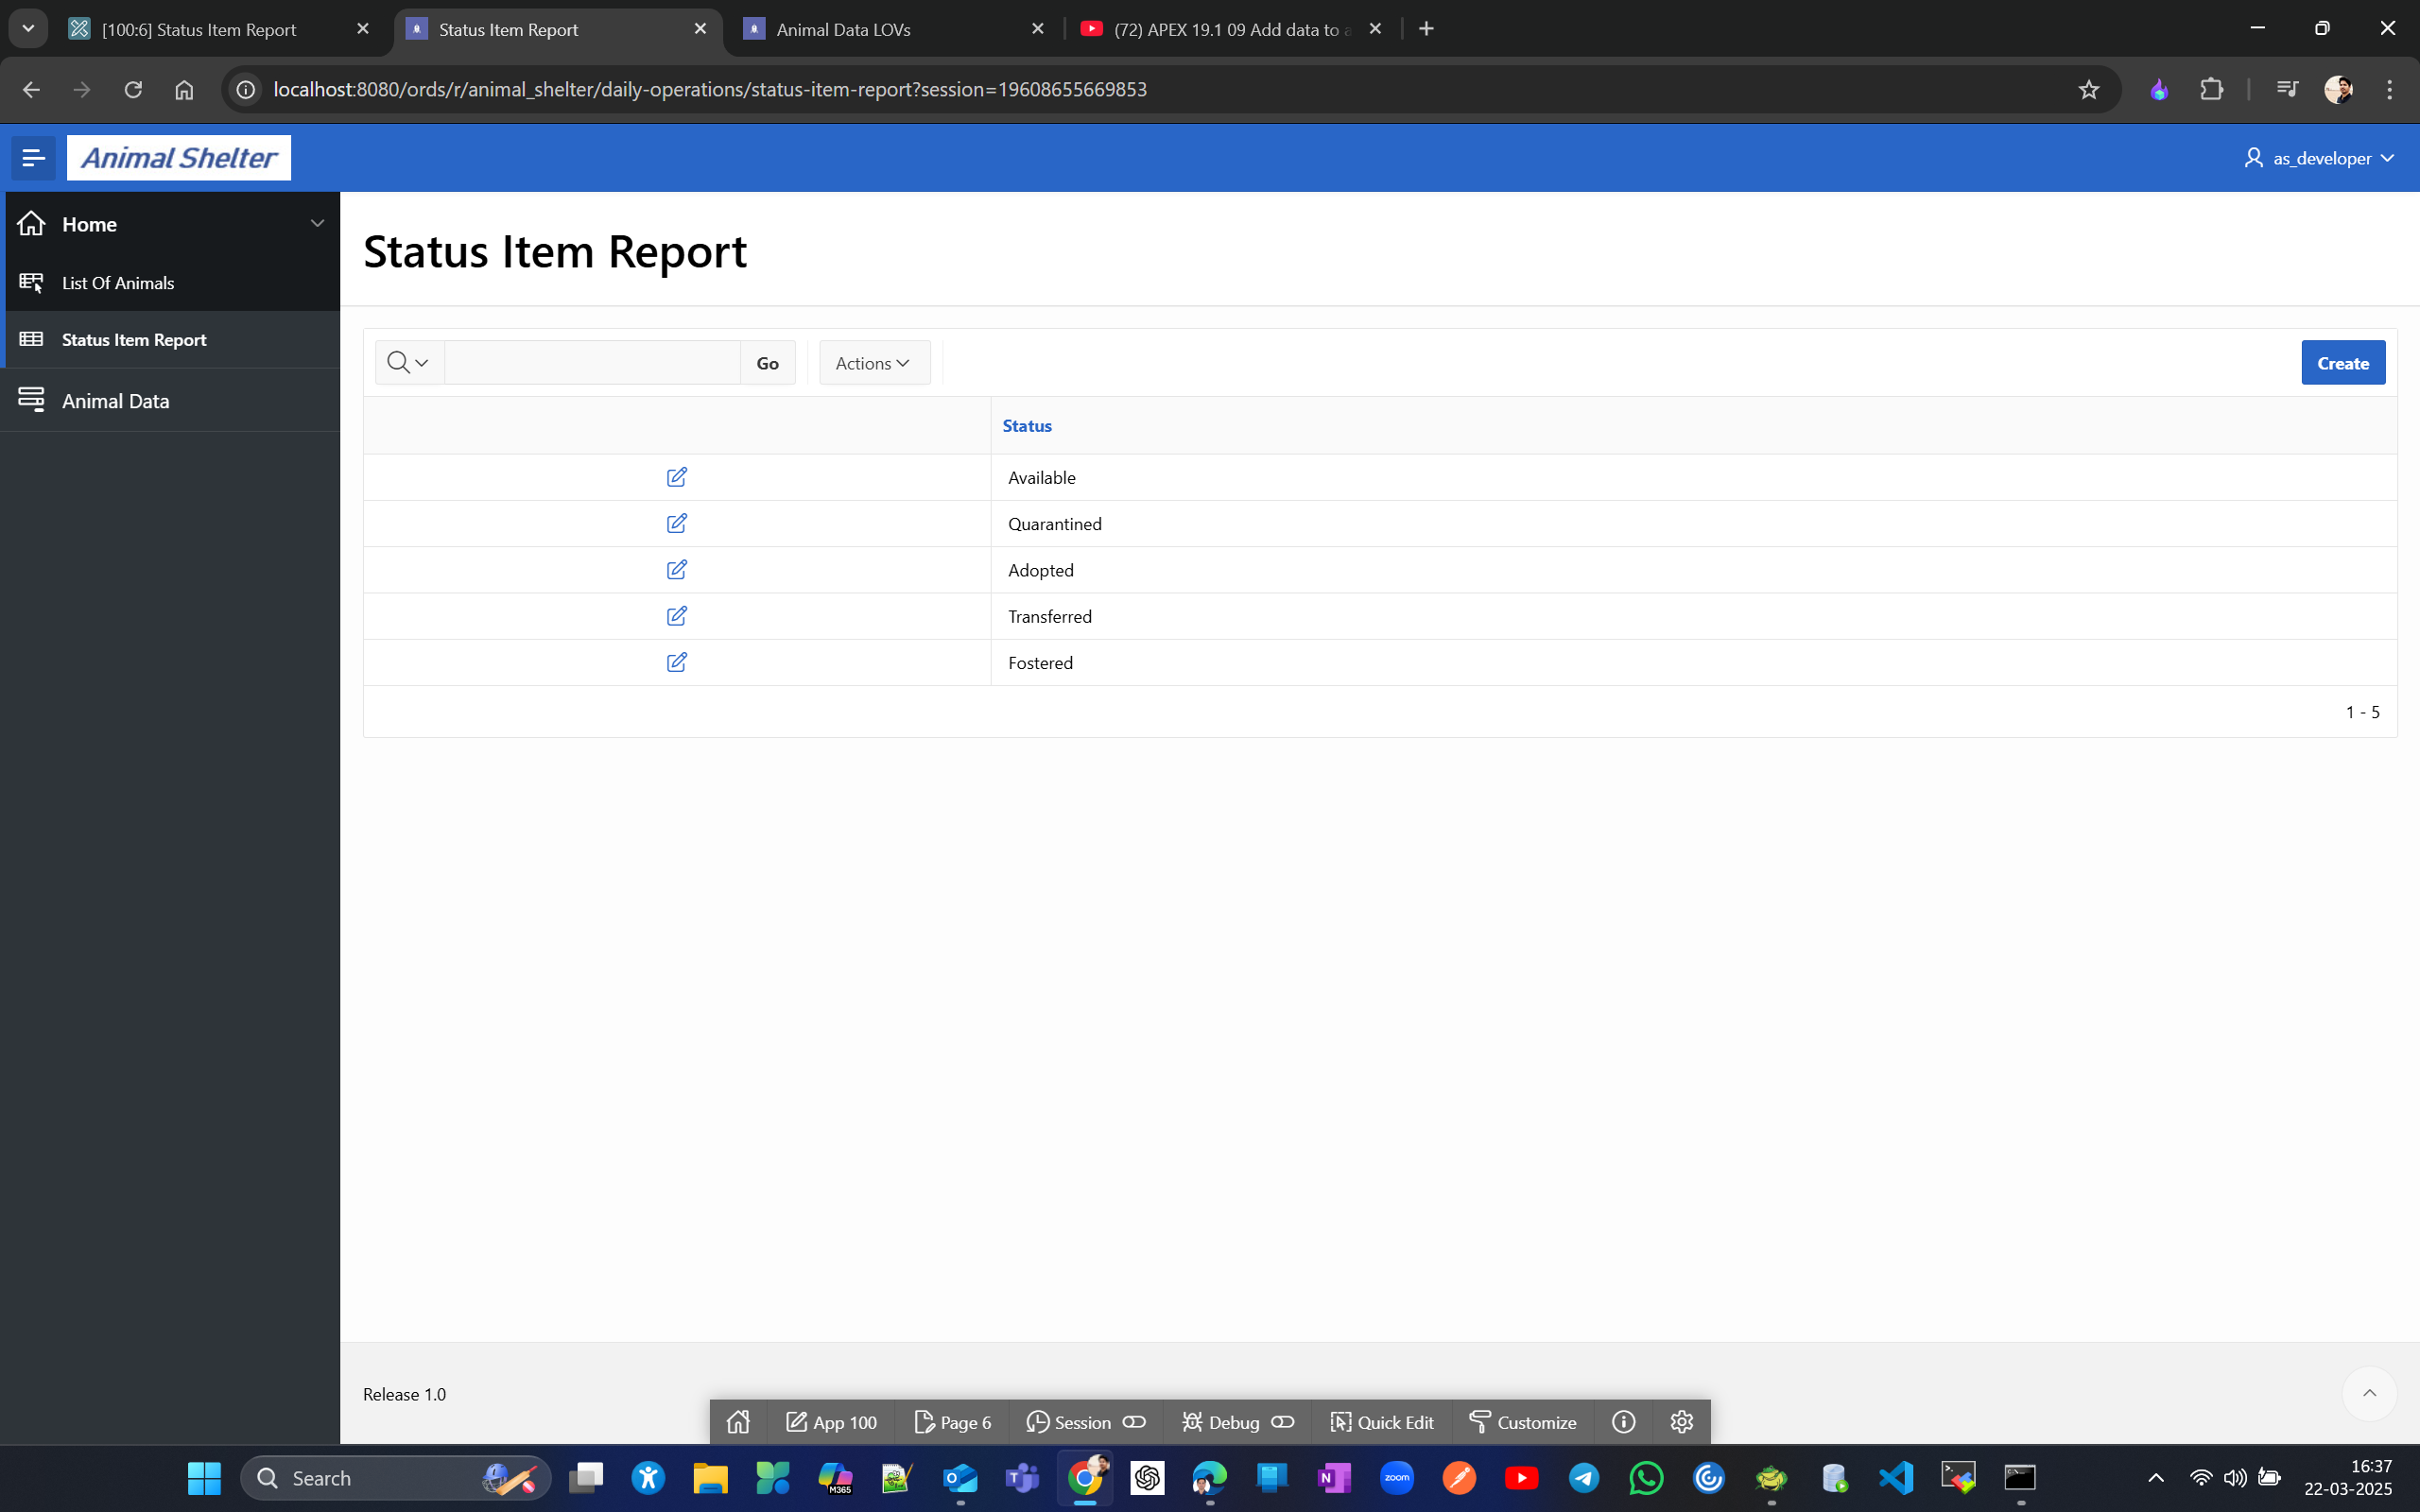
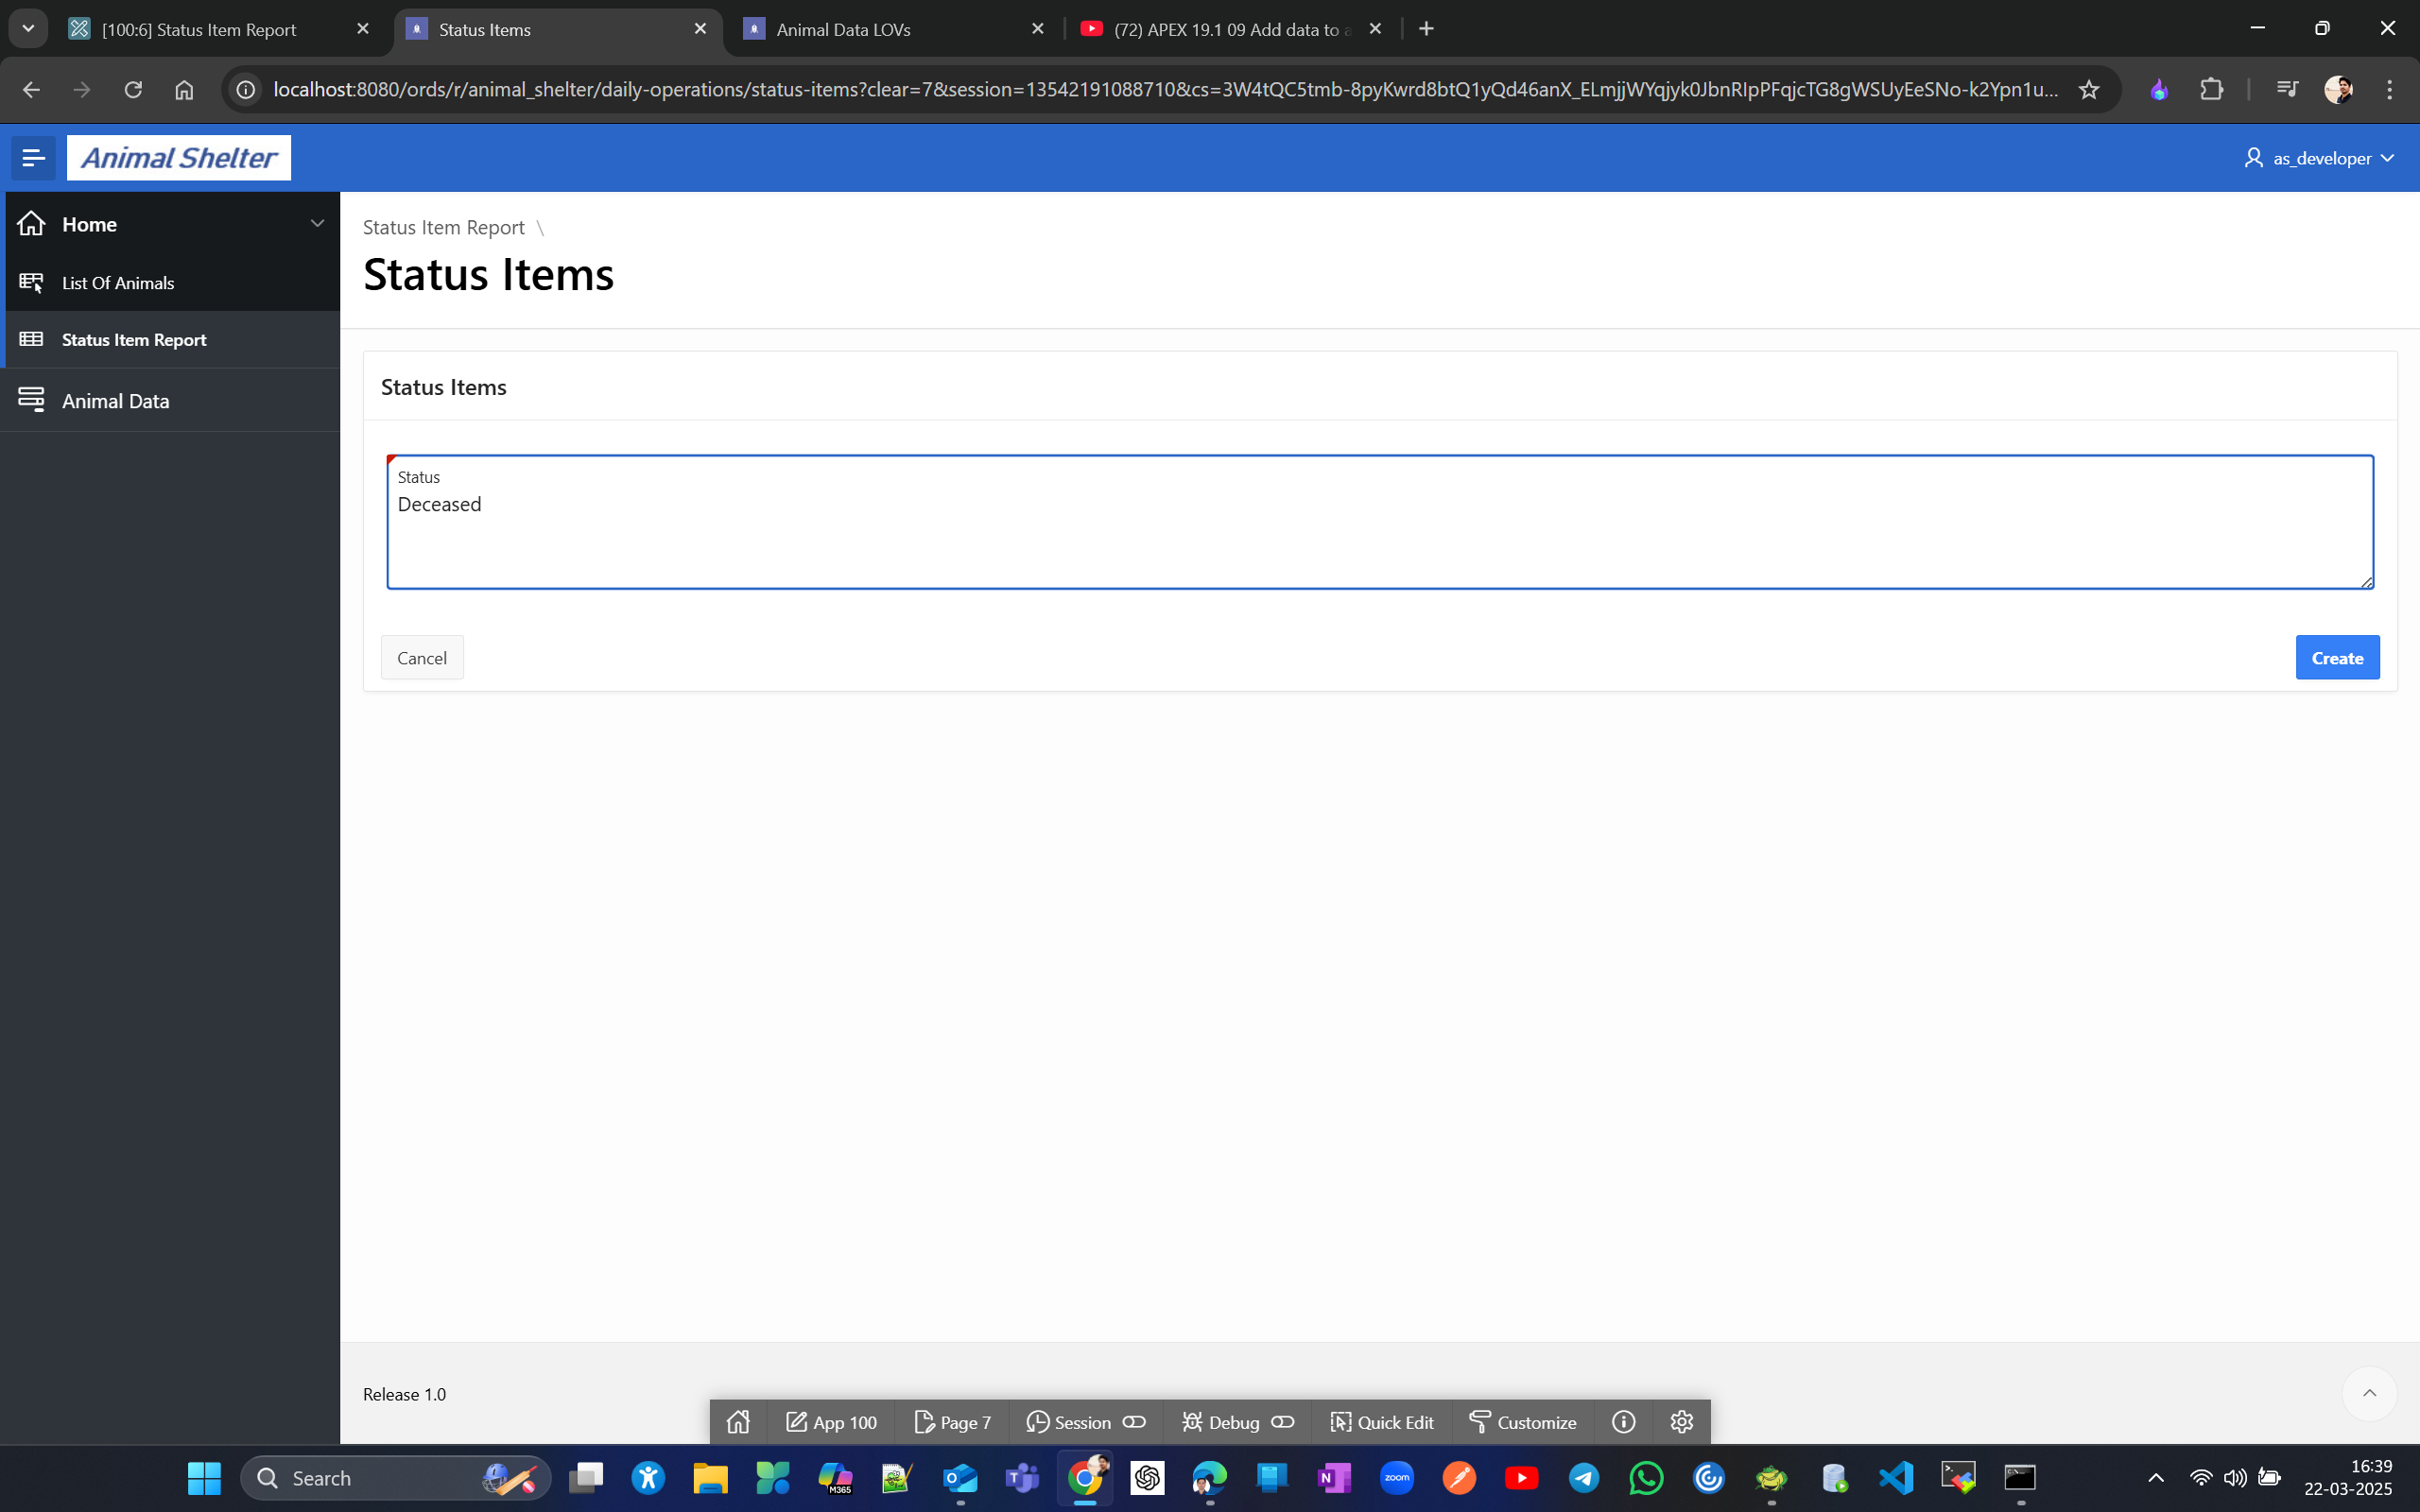
From this Status Item Report we will try to insert a new status deceased
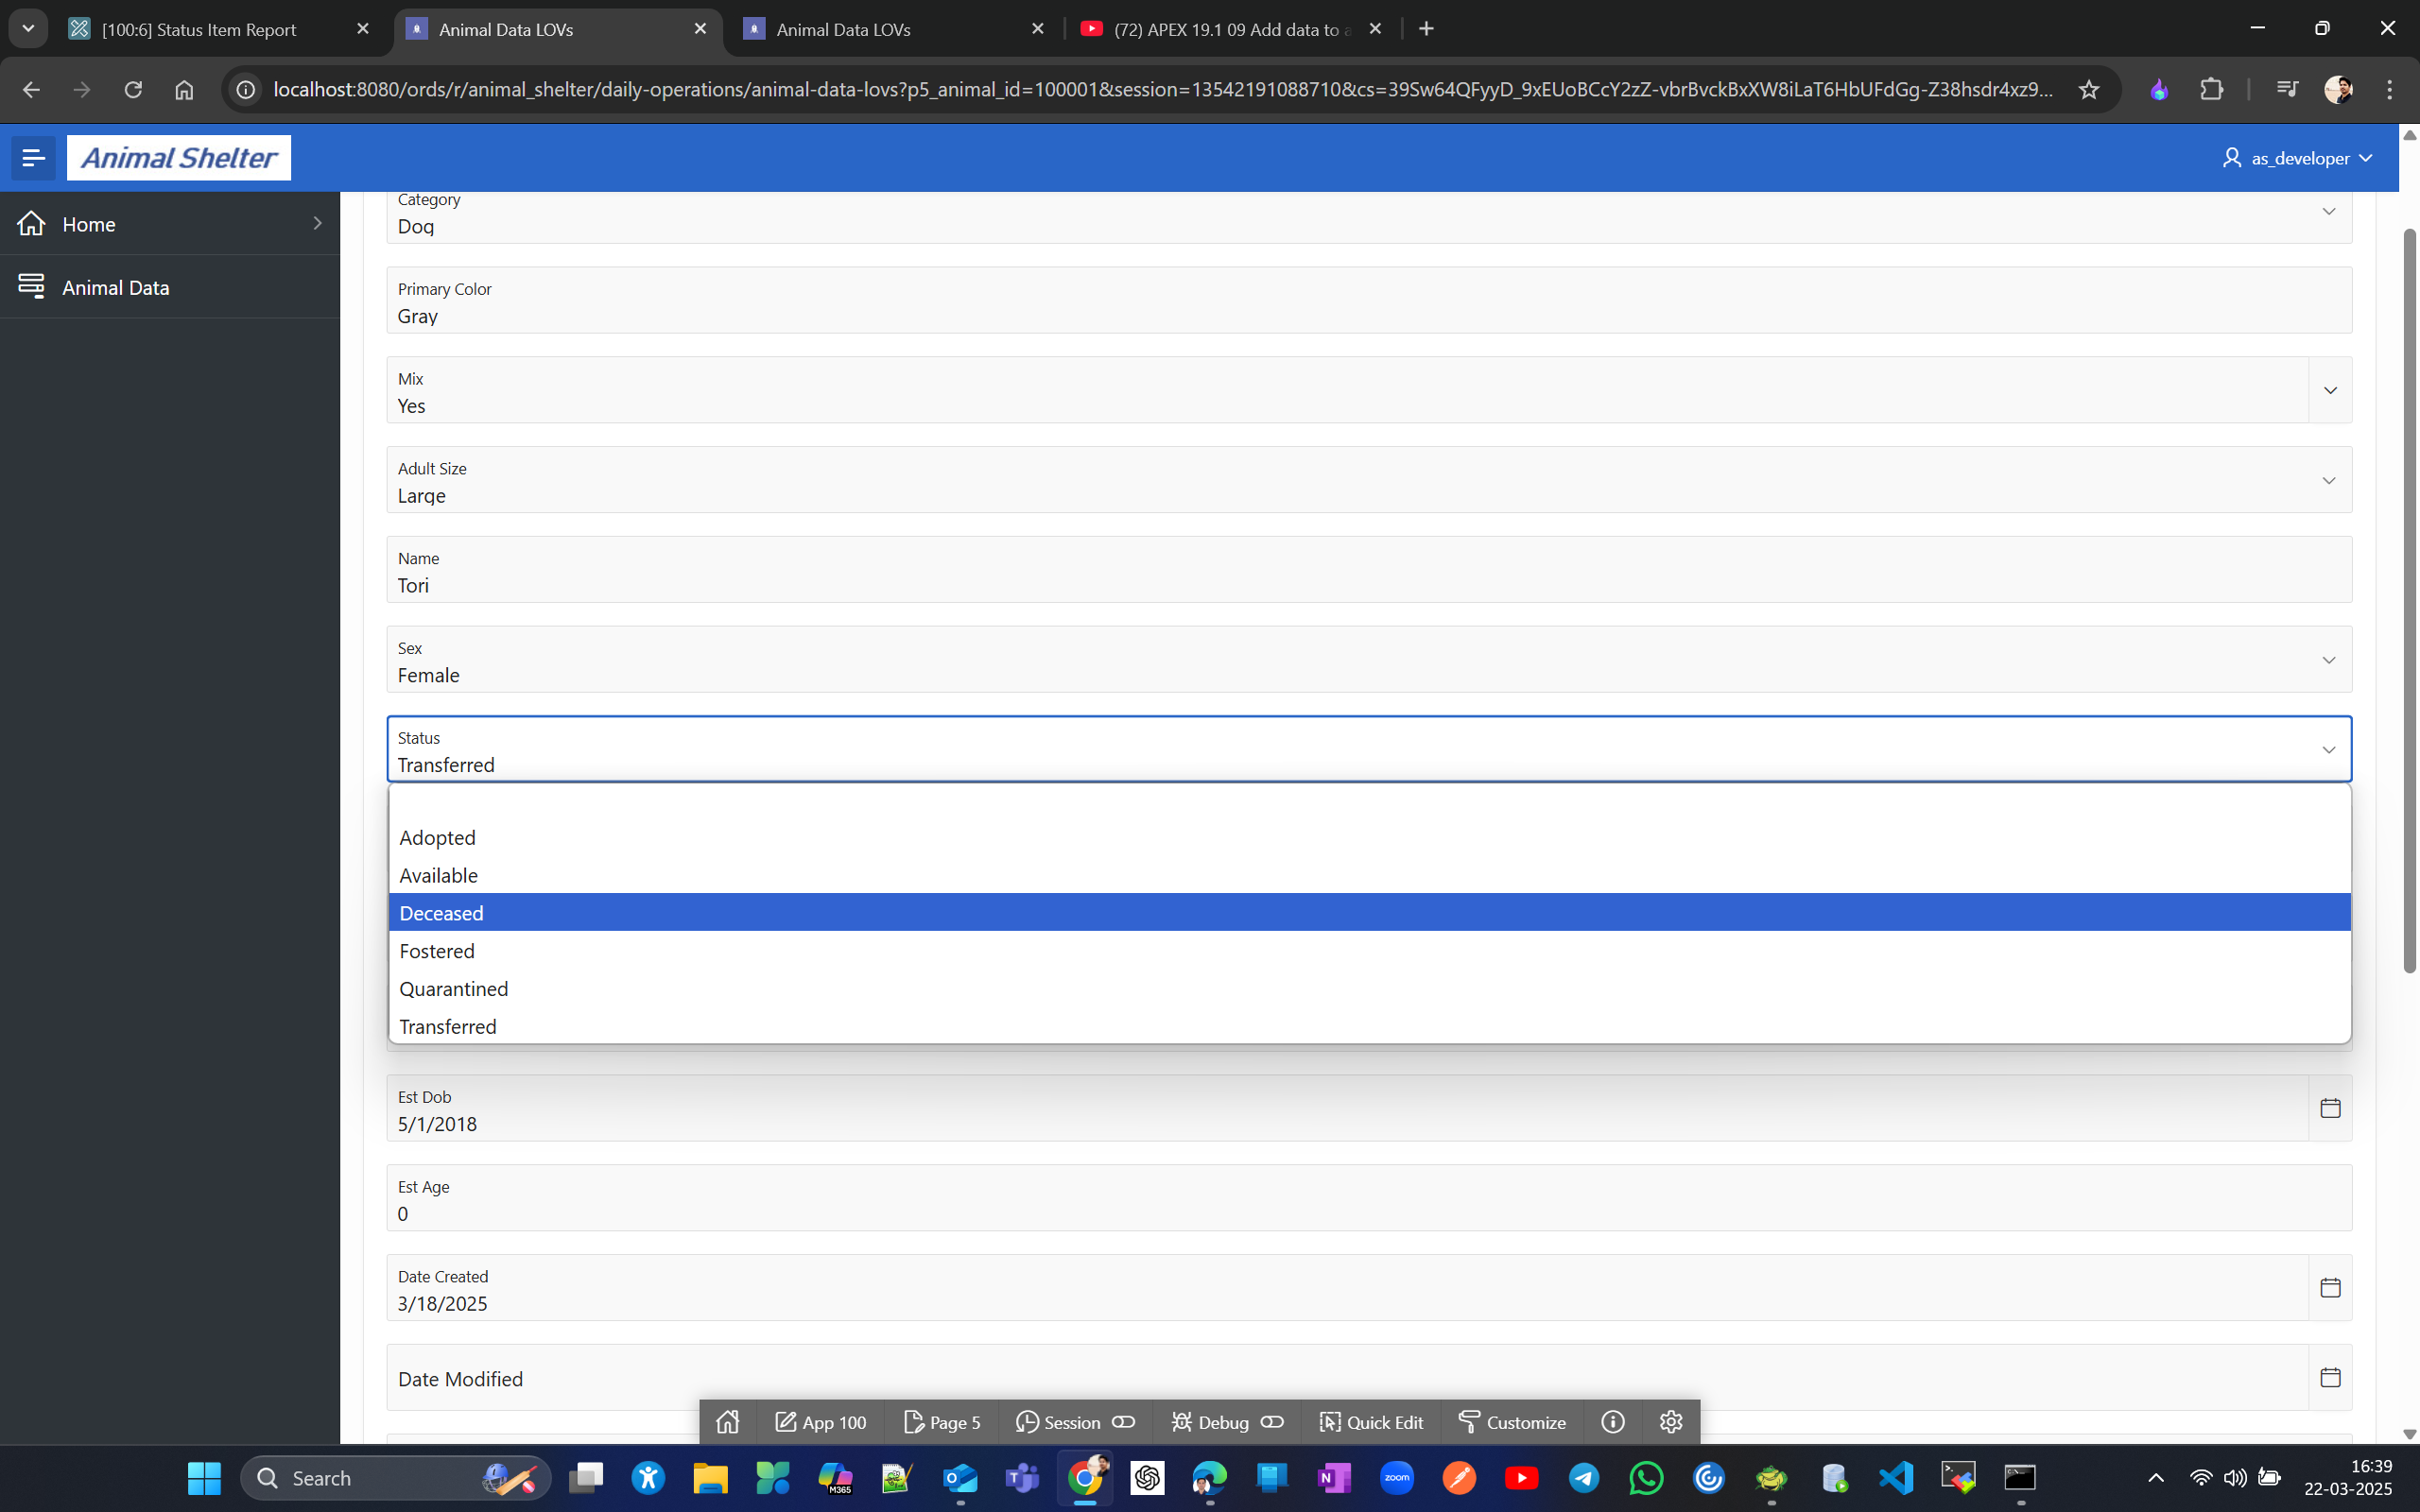
You can check the new addition from the forms you had created earlier or from List of Animals page
Just as side Note if you want to bring Animal Data form page to Home in navigation menu. then go to shared component →
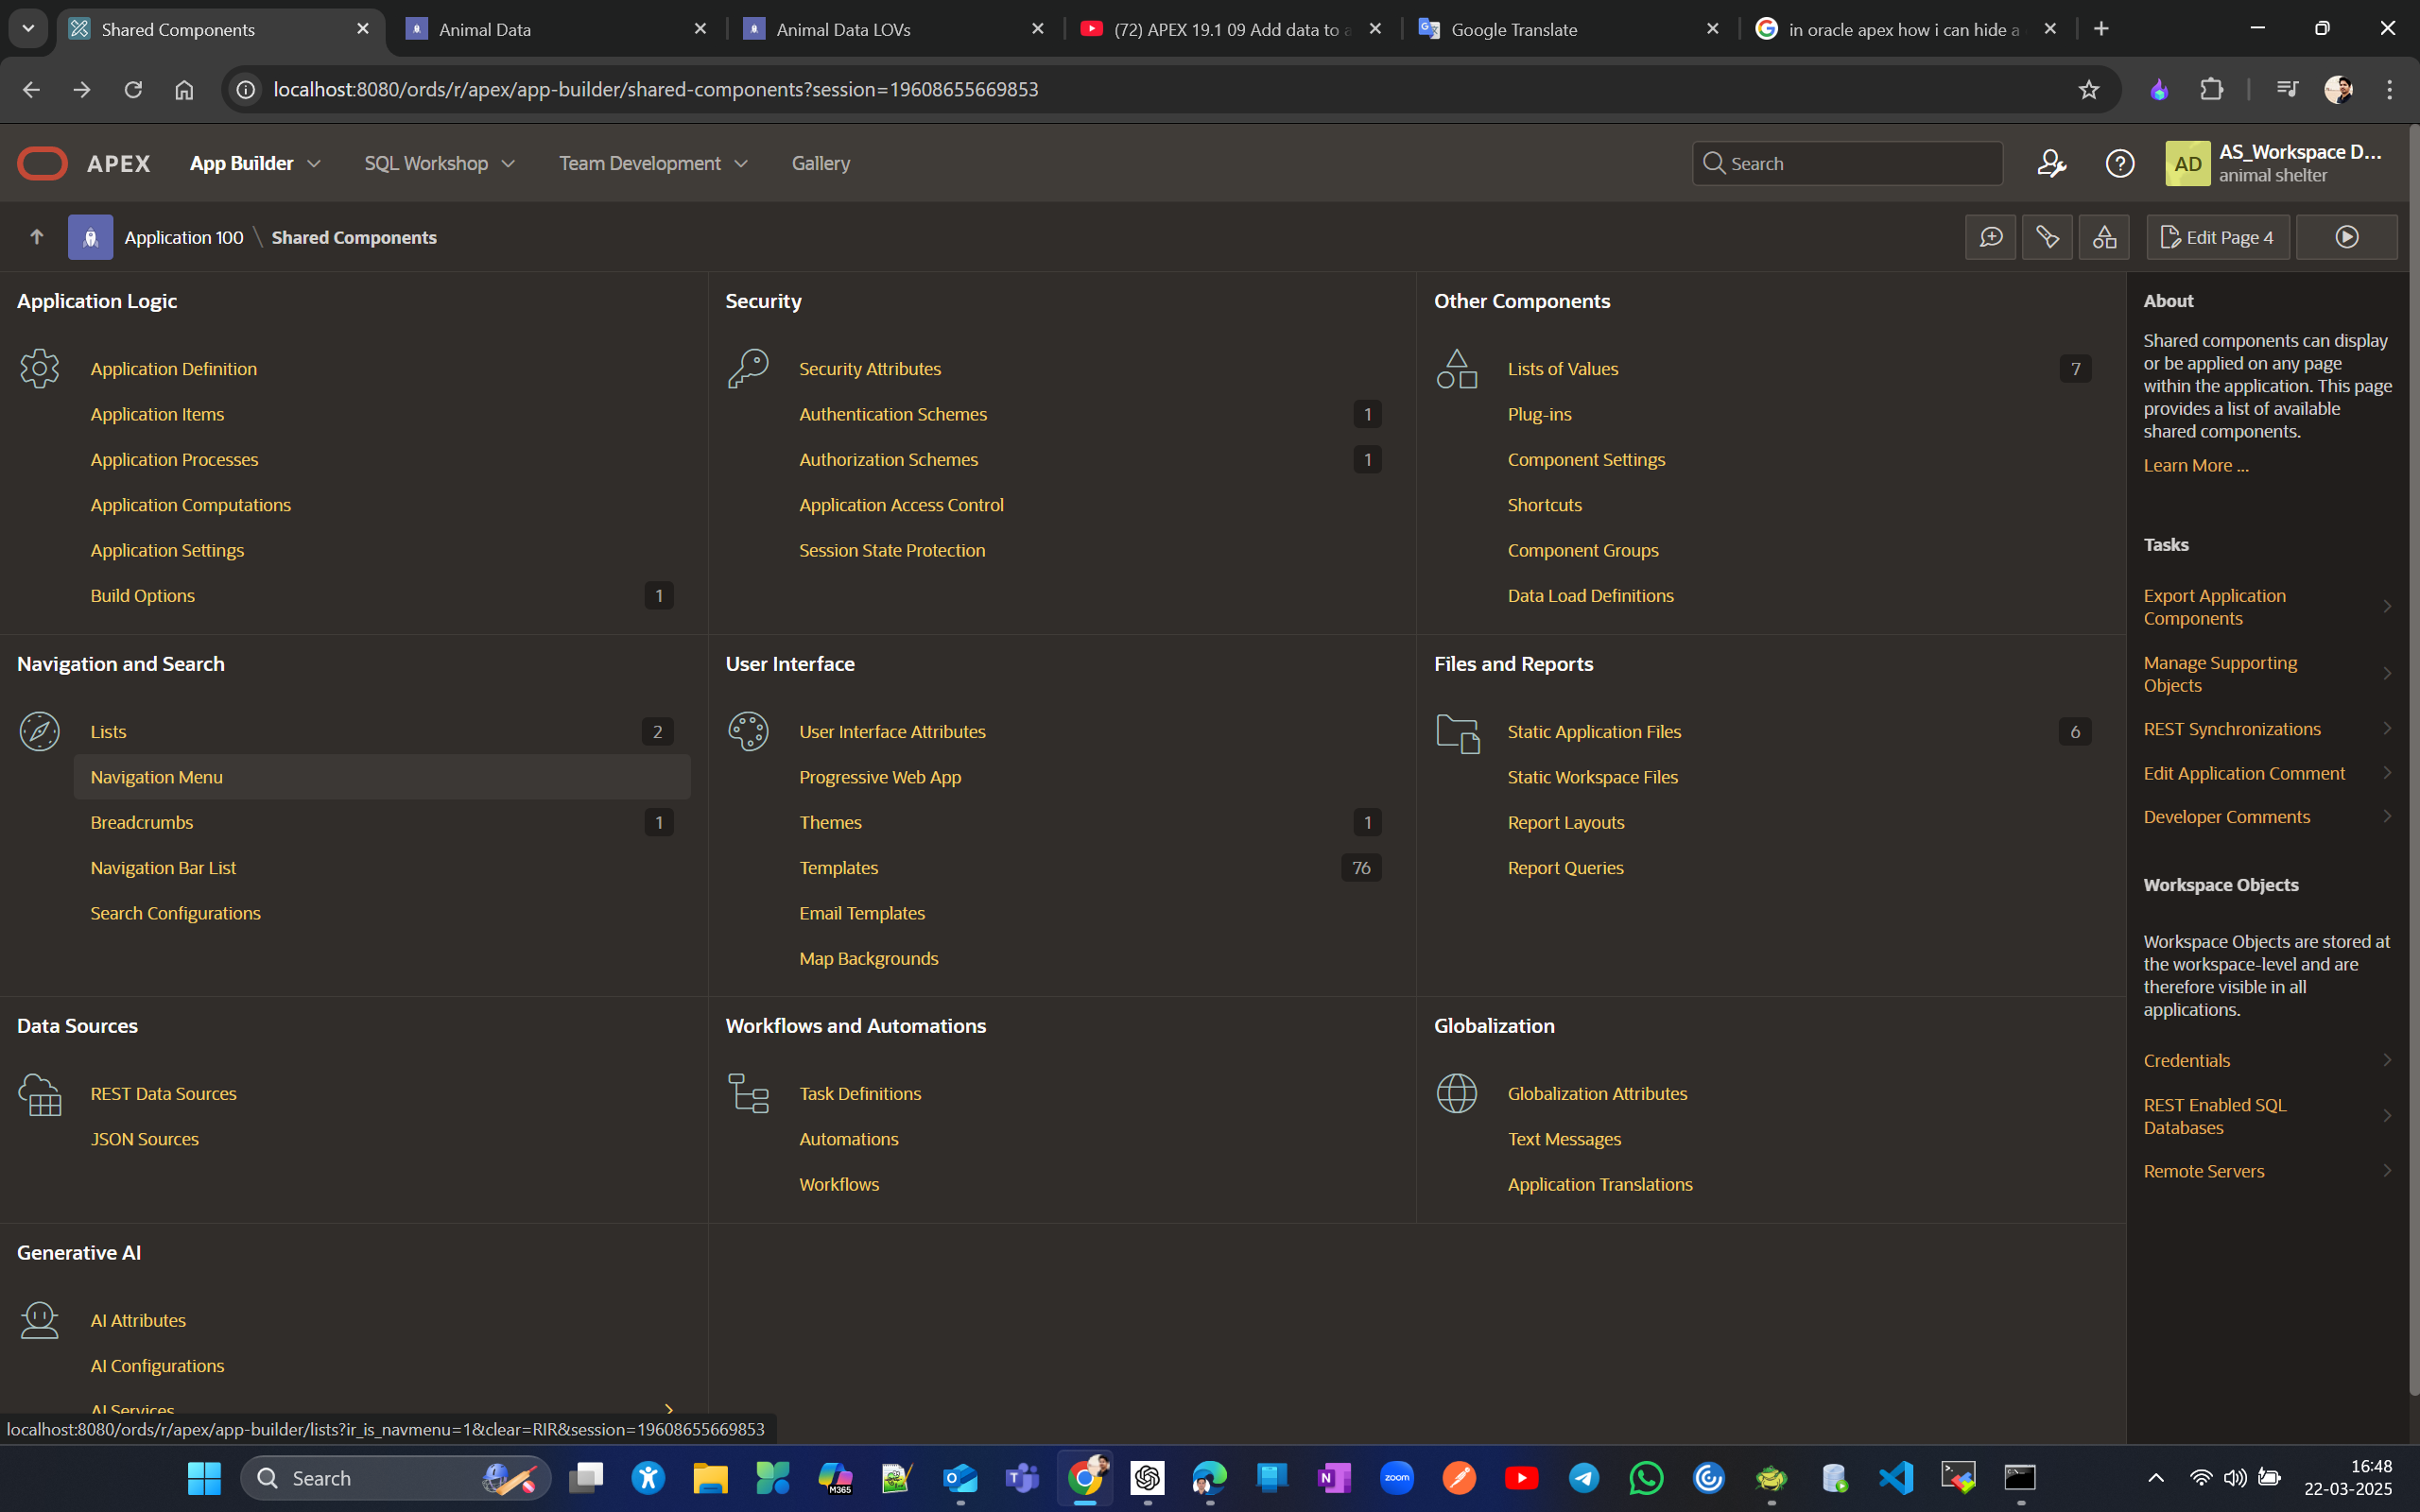
Now see Animal Data is not in Home
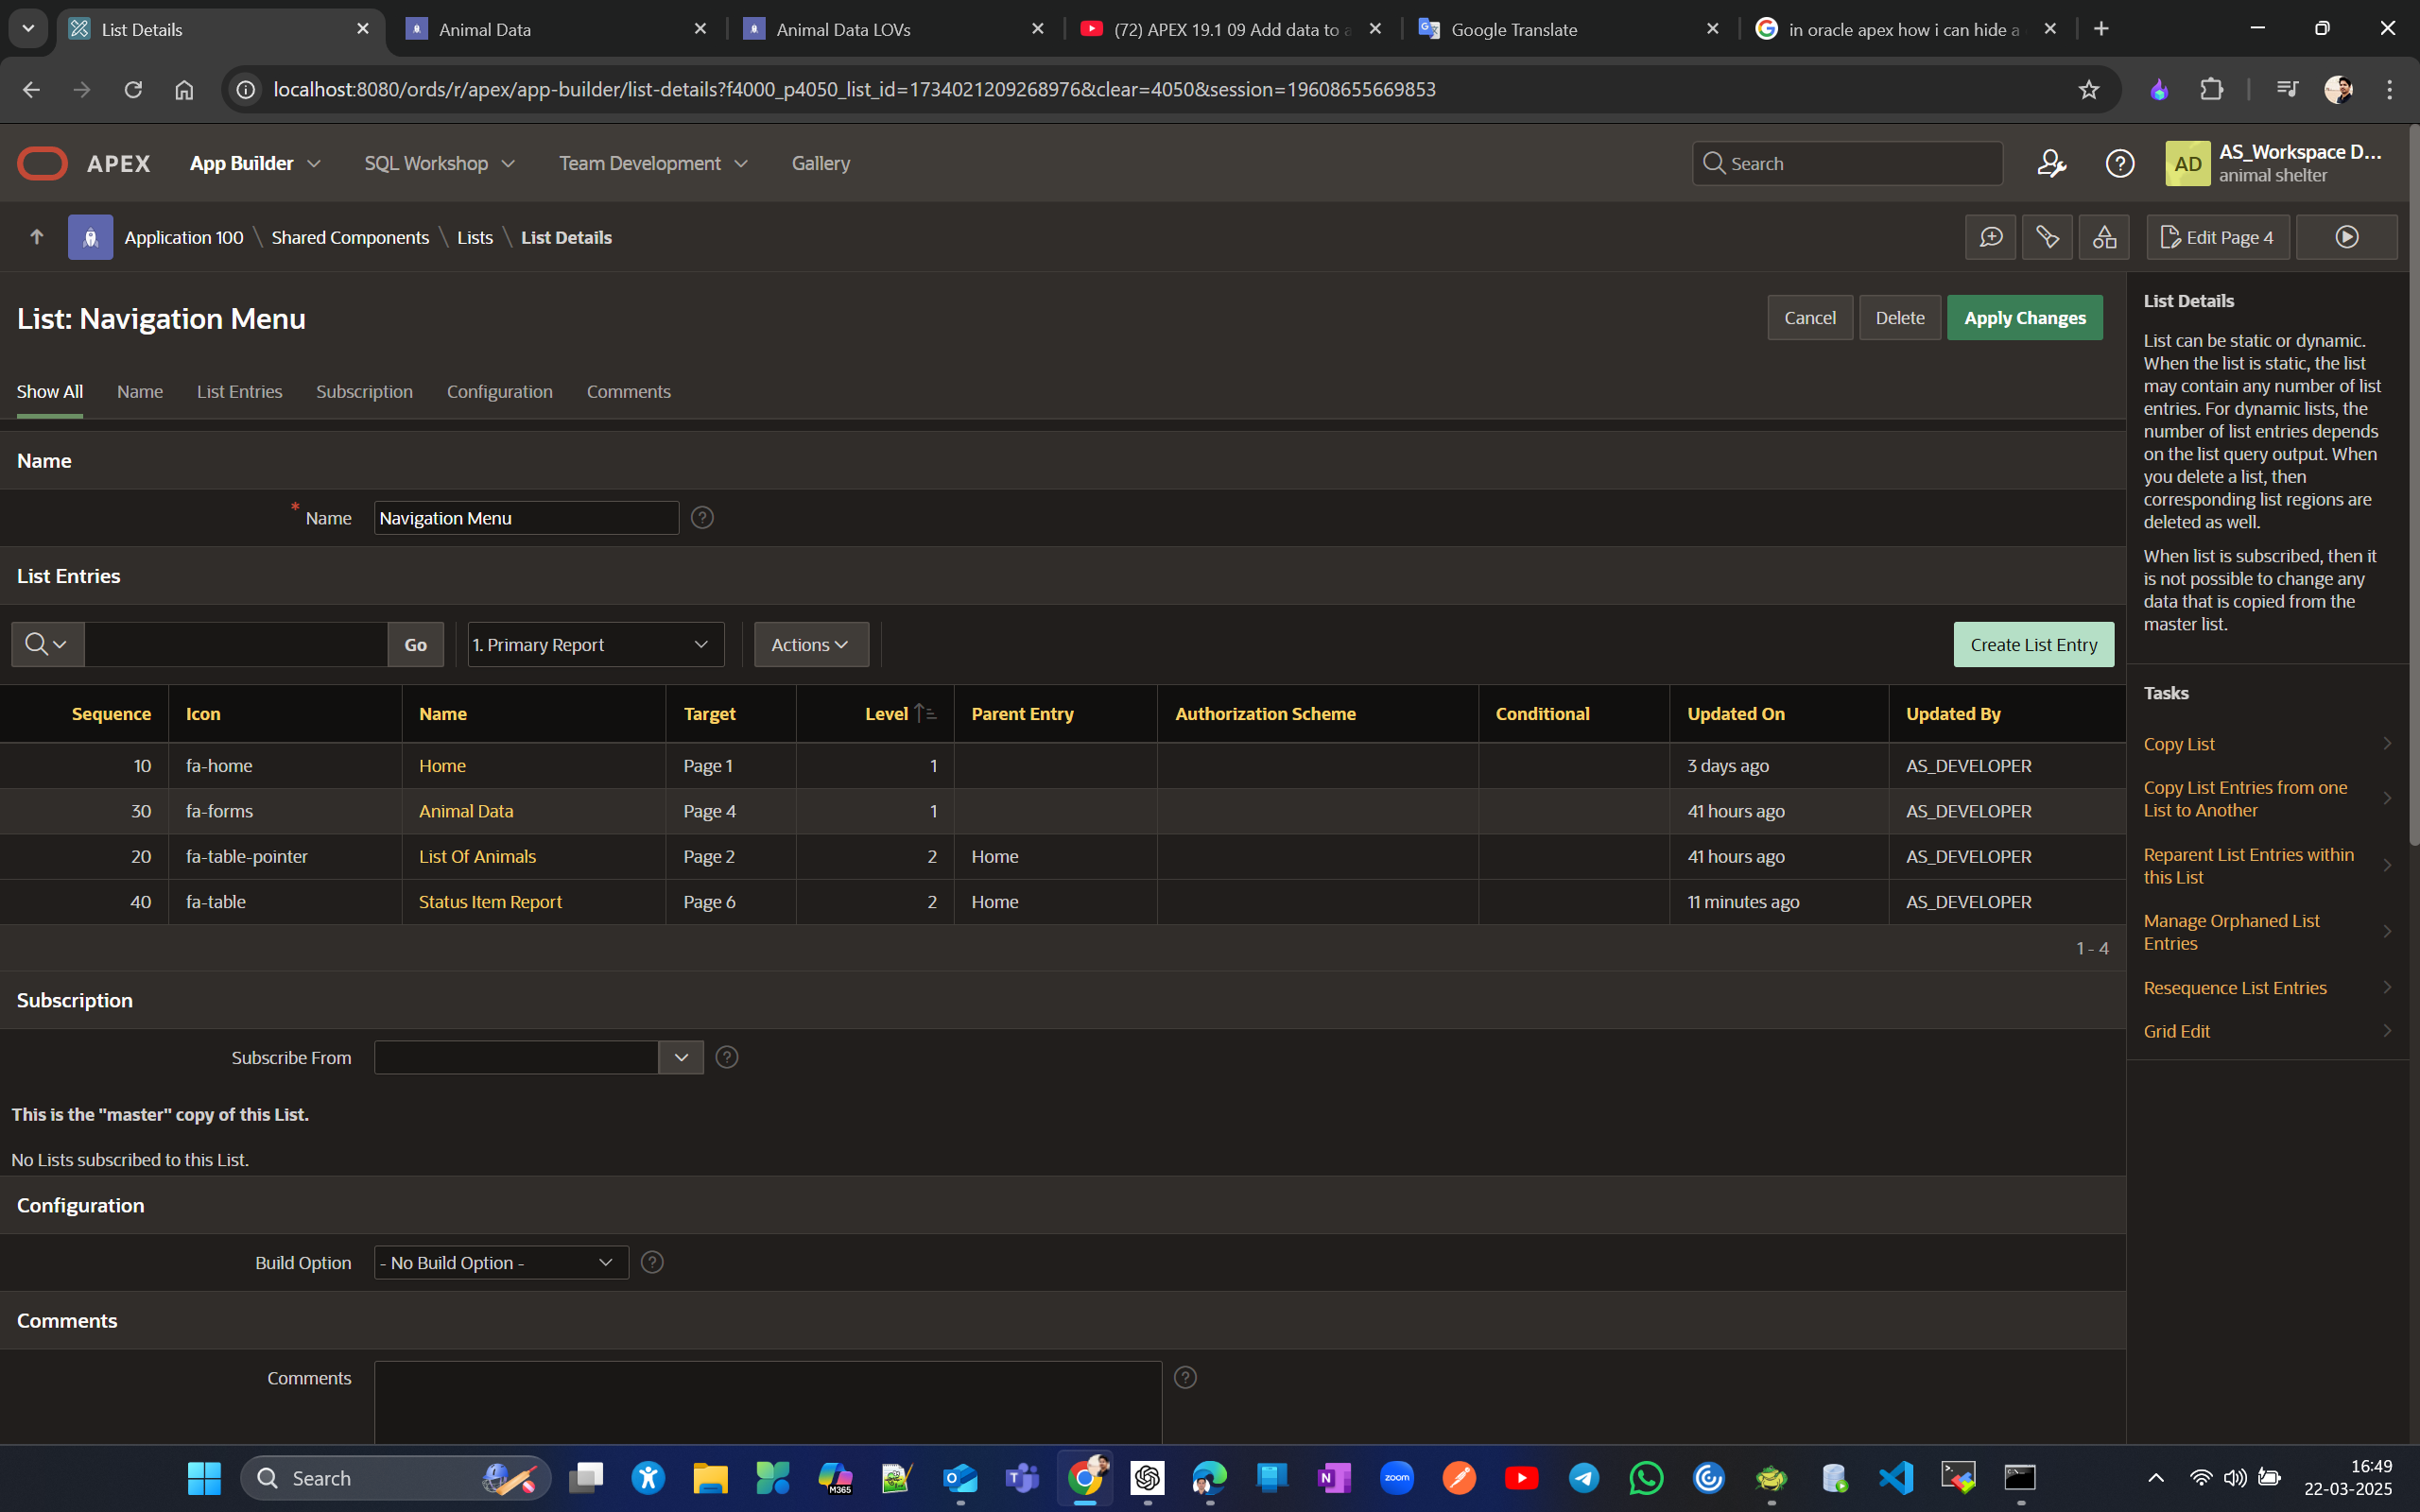
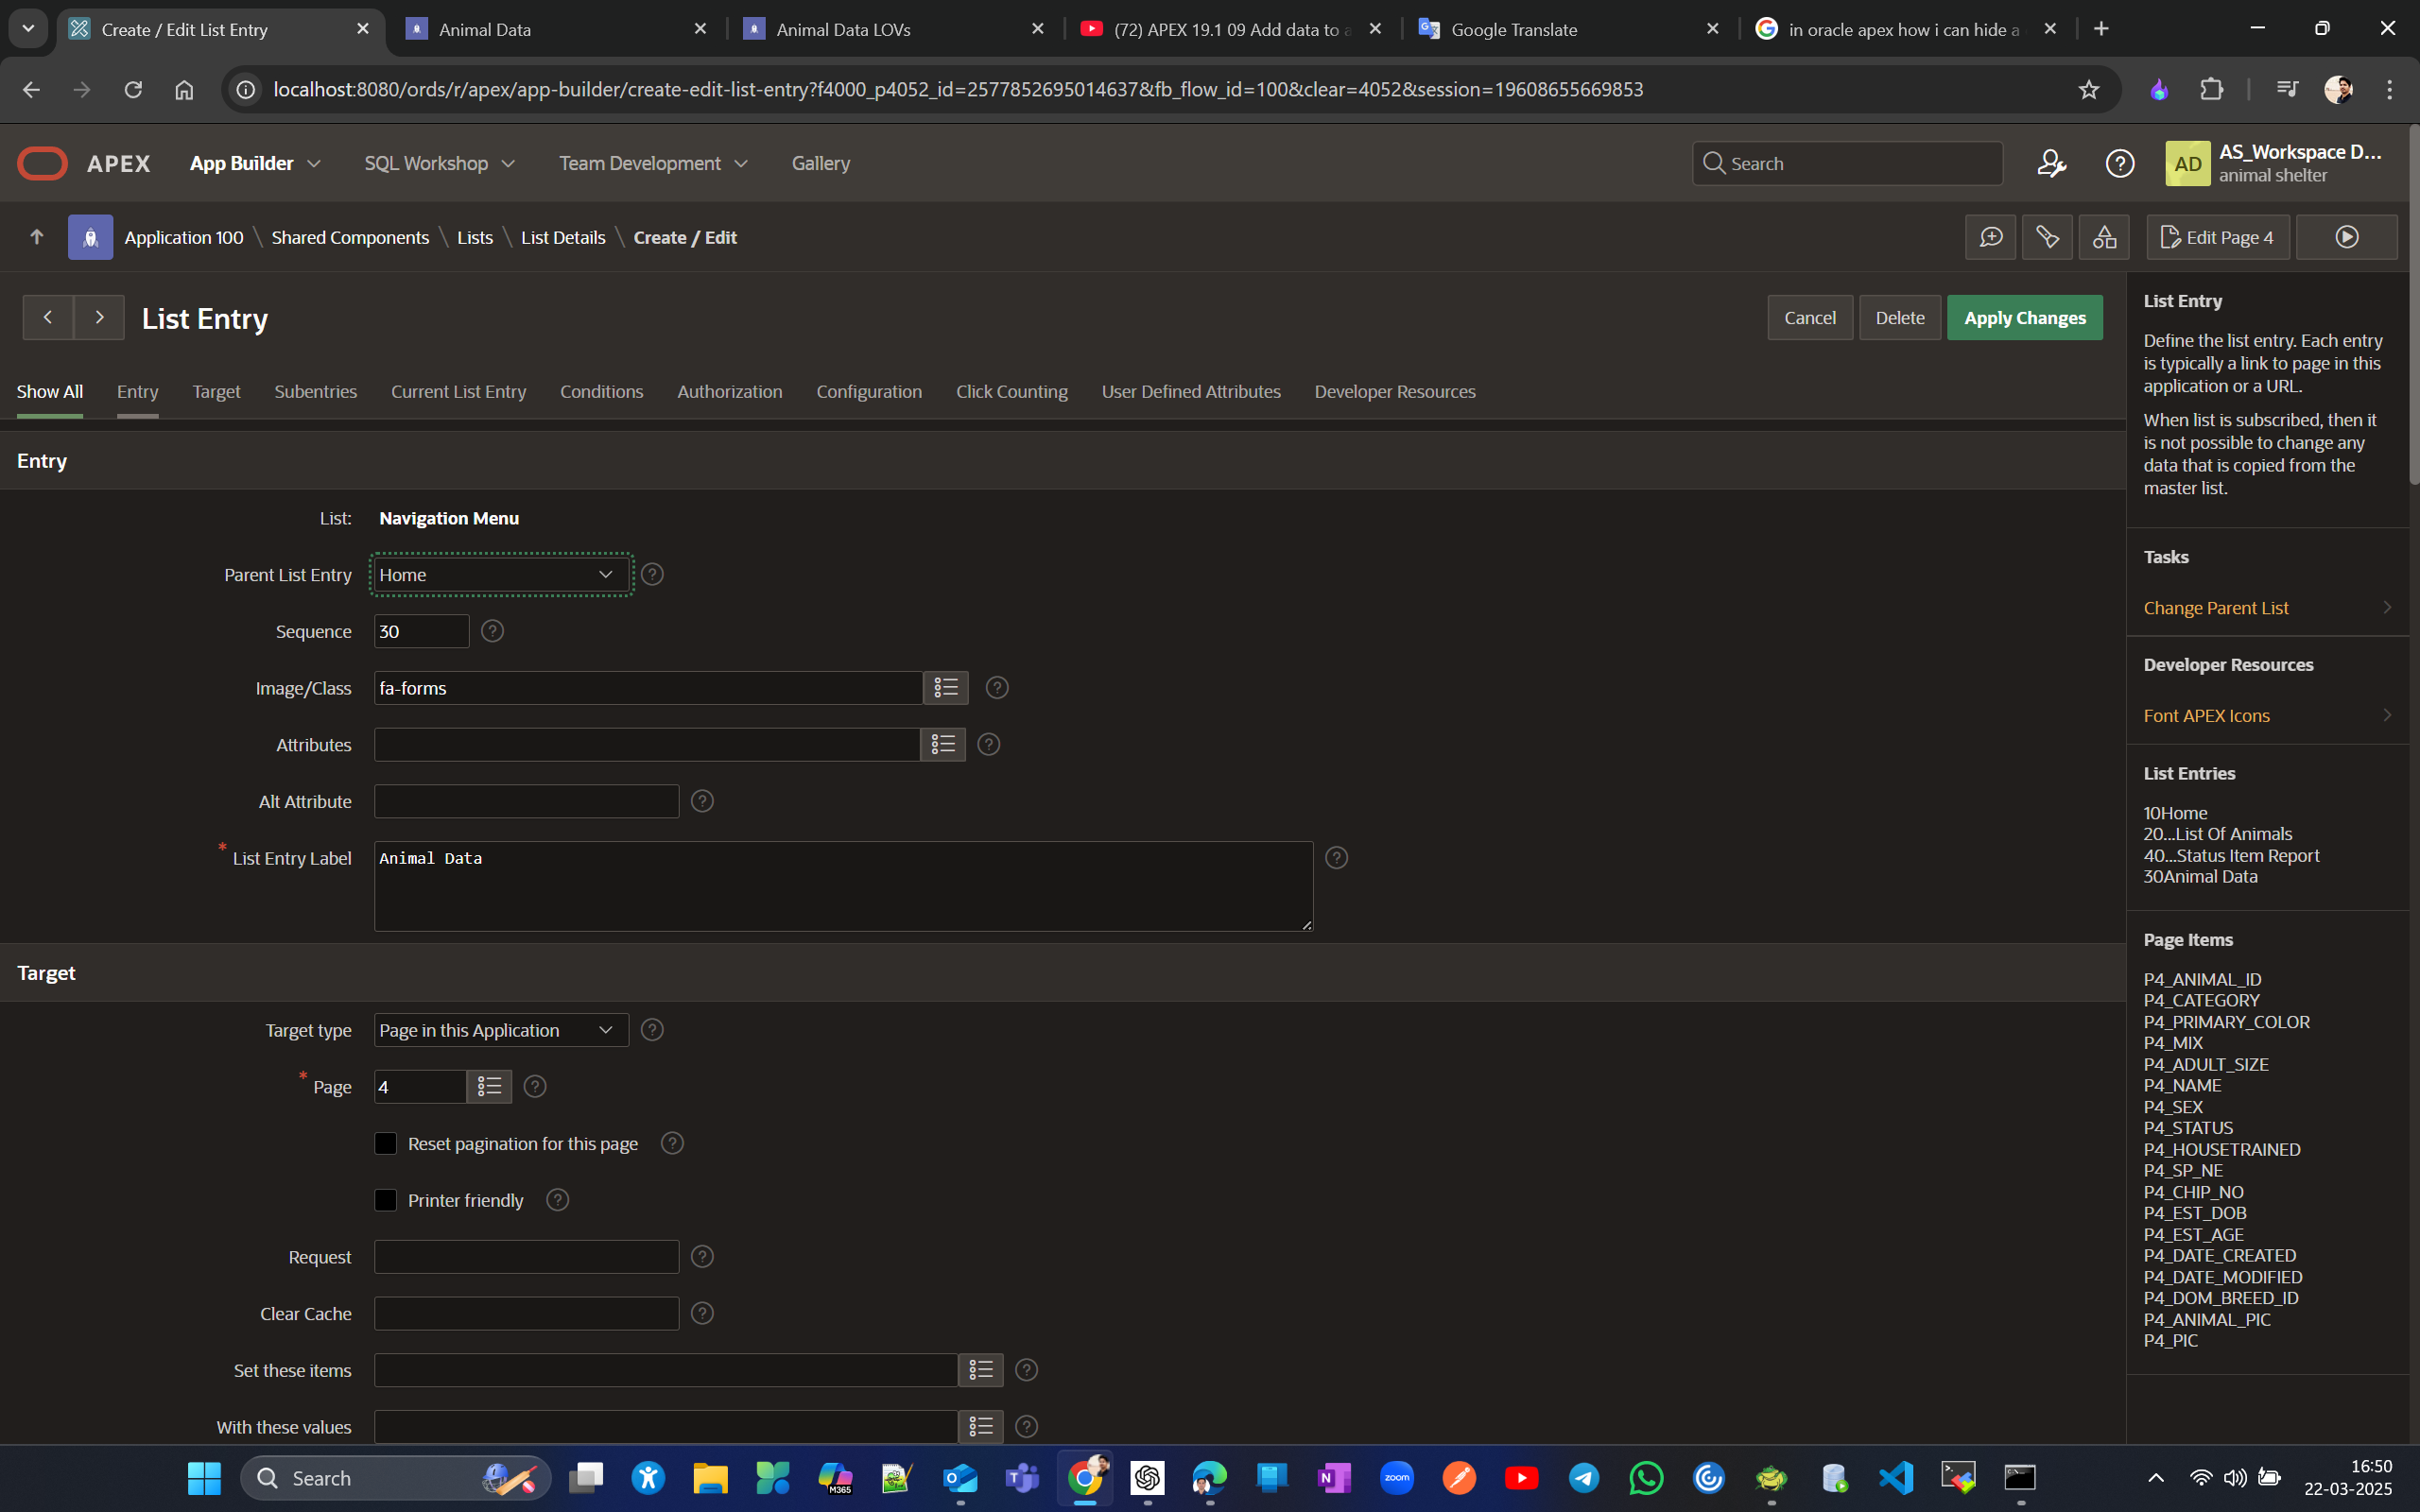
Chnage parent List entry to Home and Apply Changes
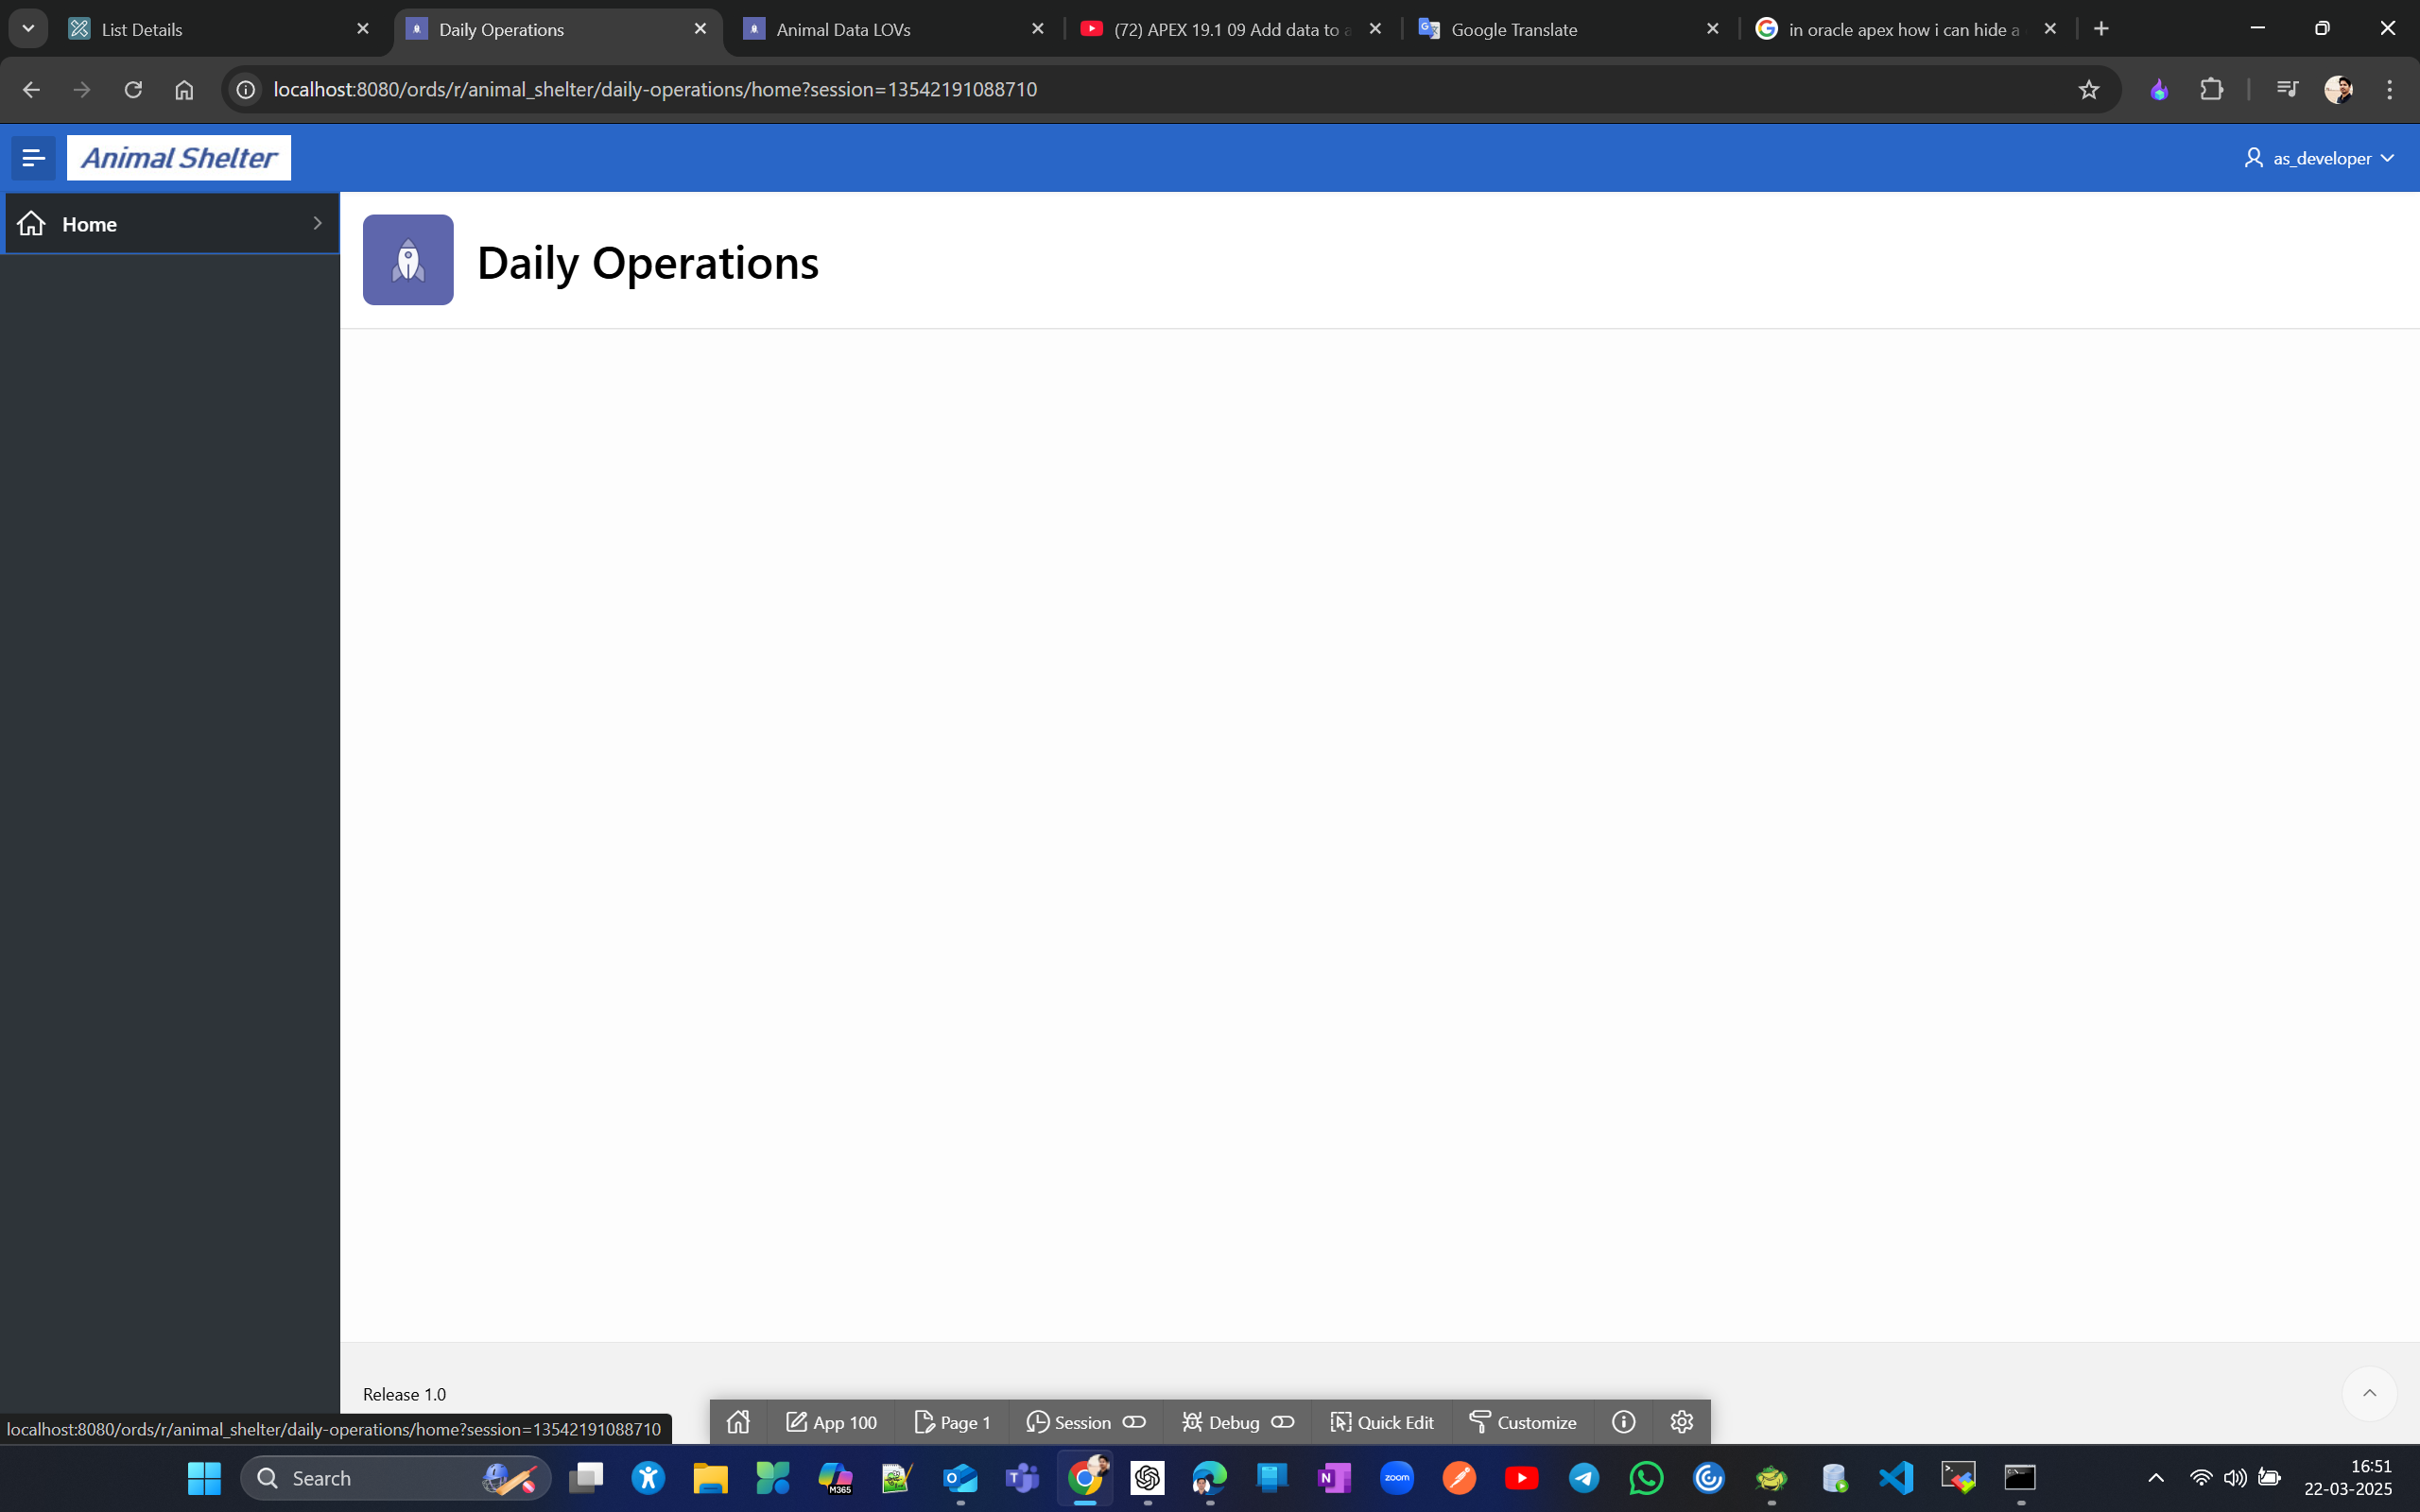
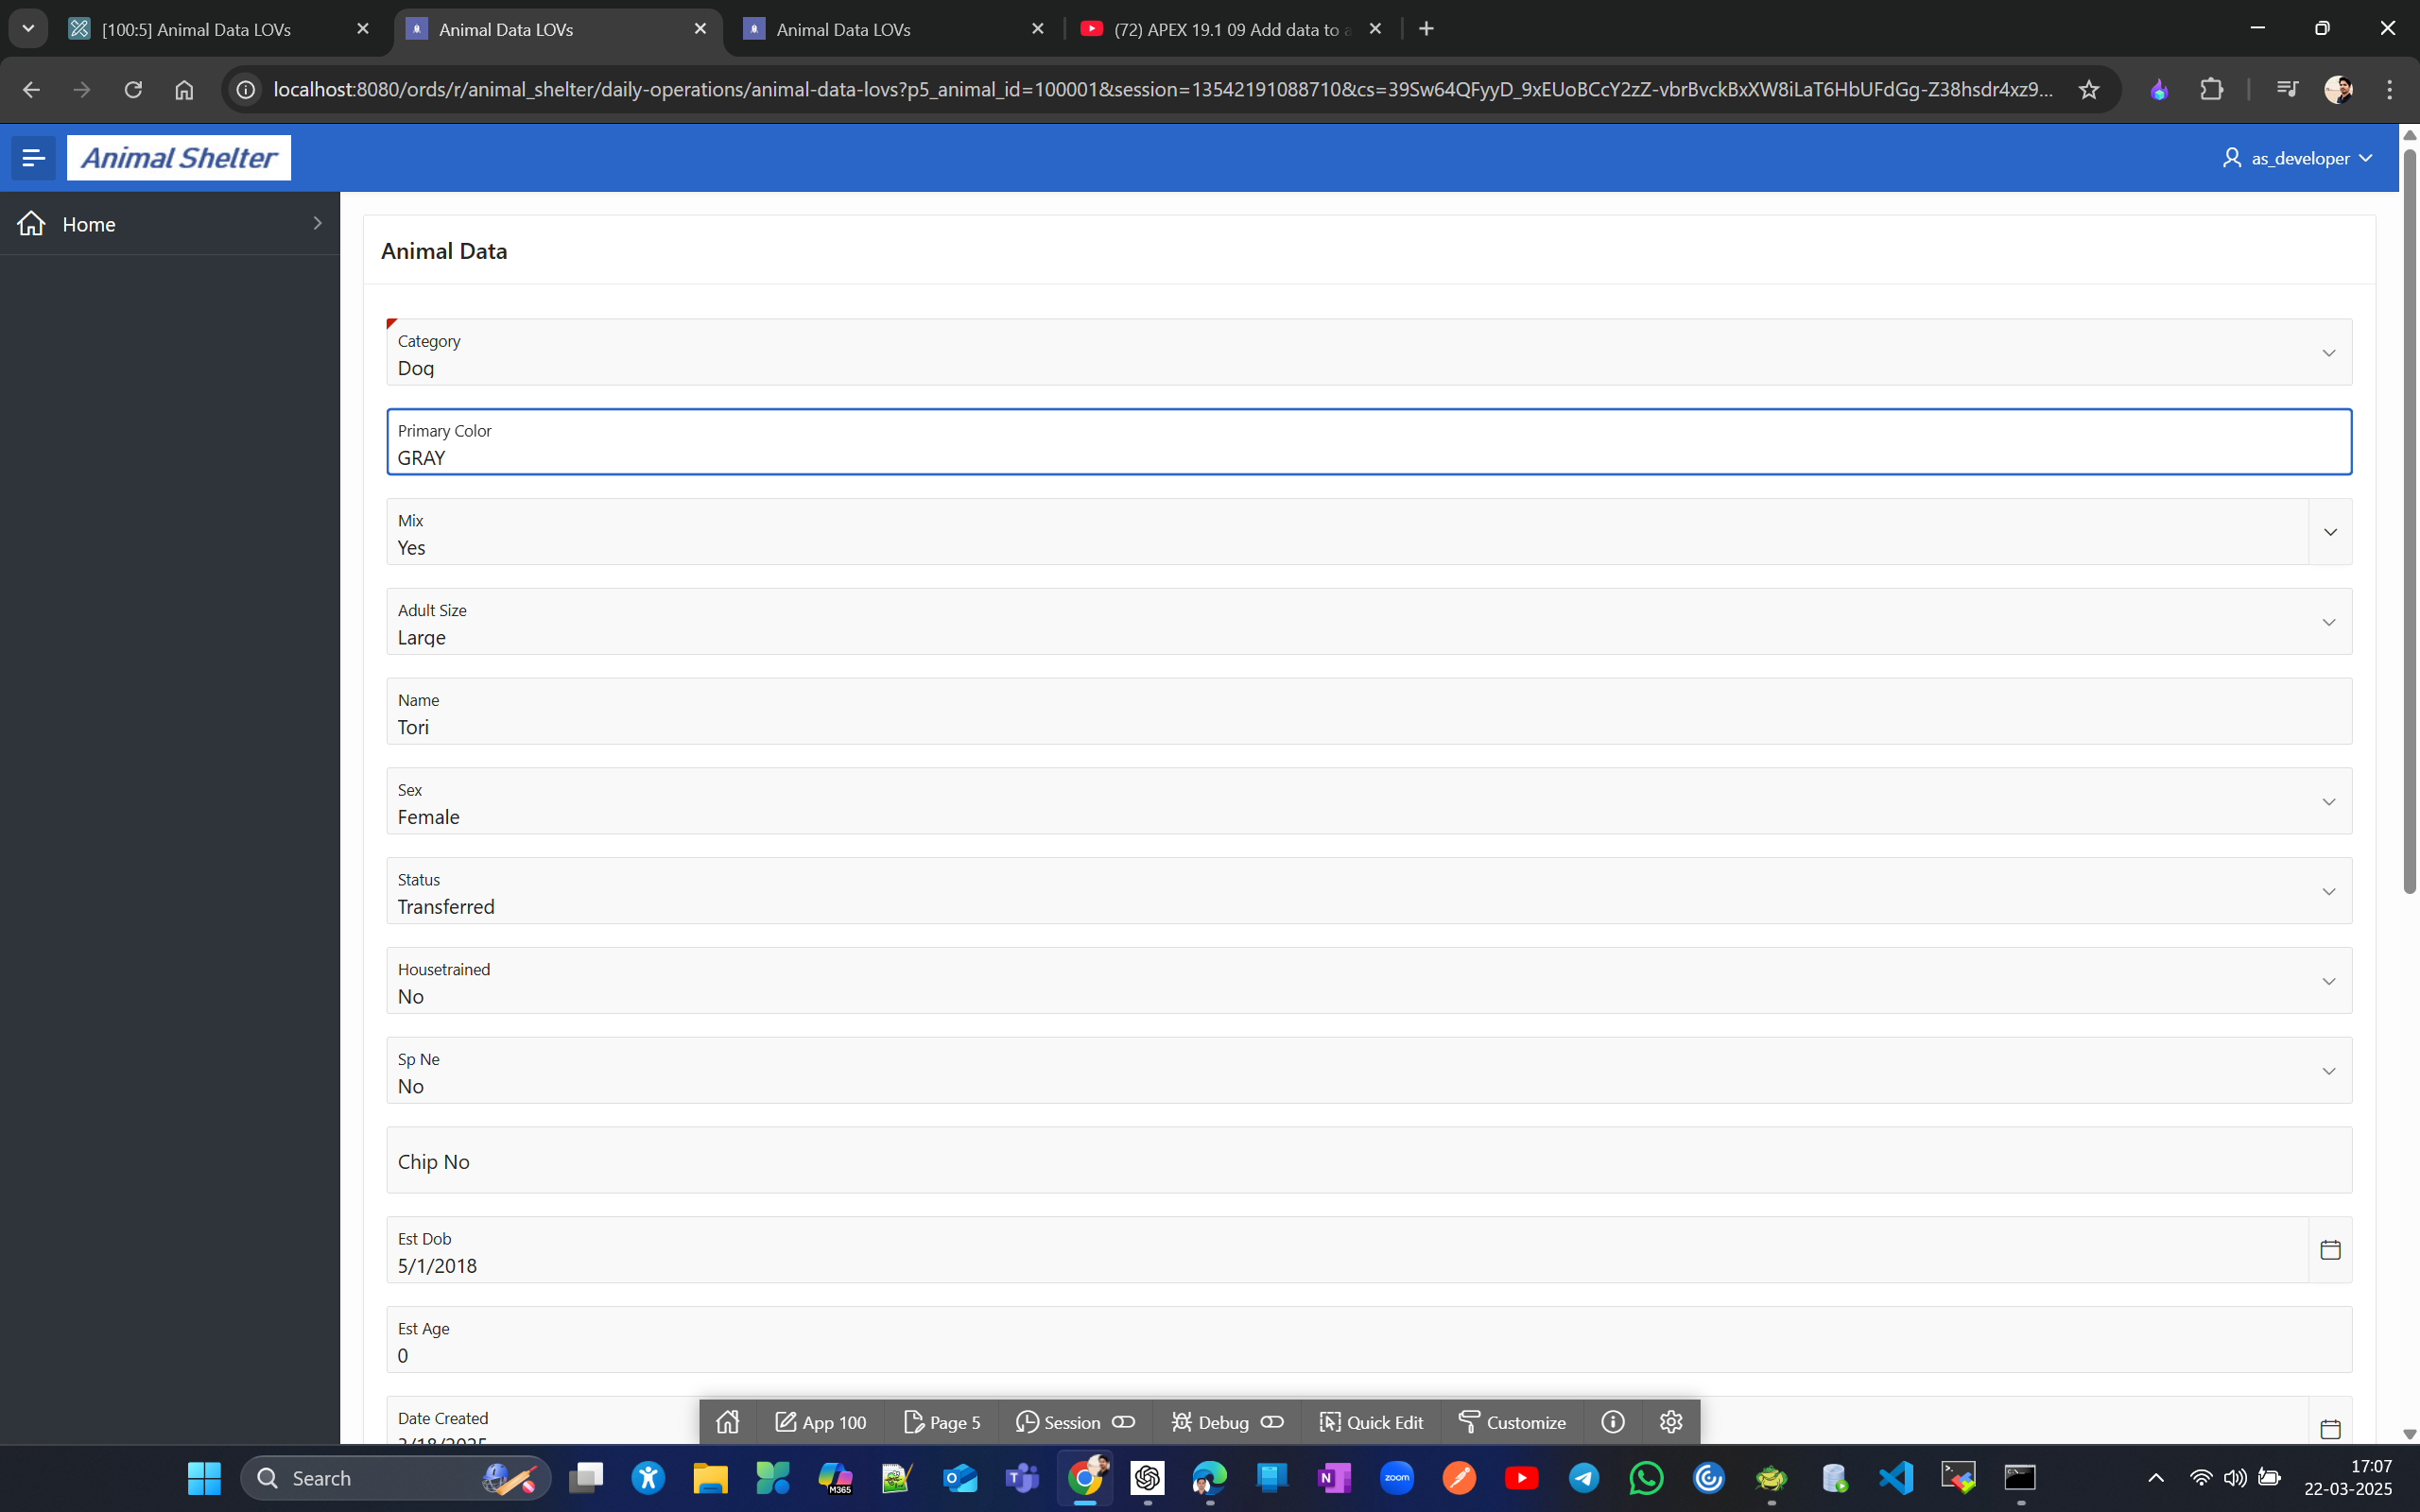
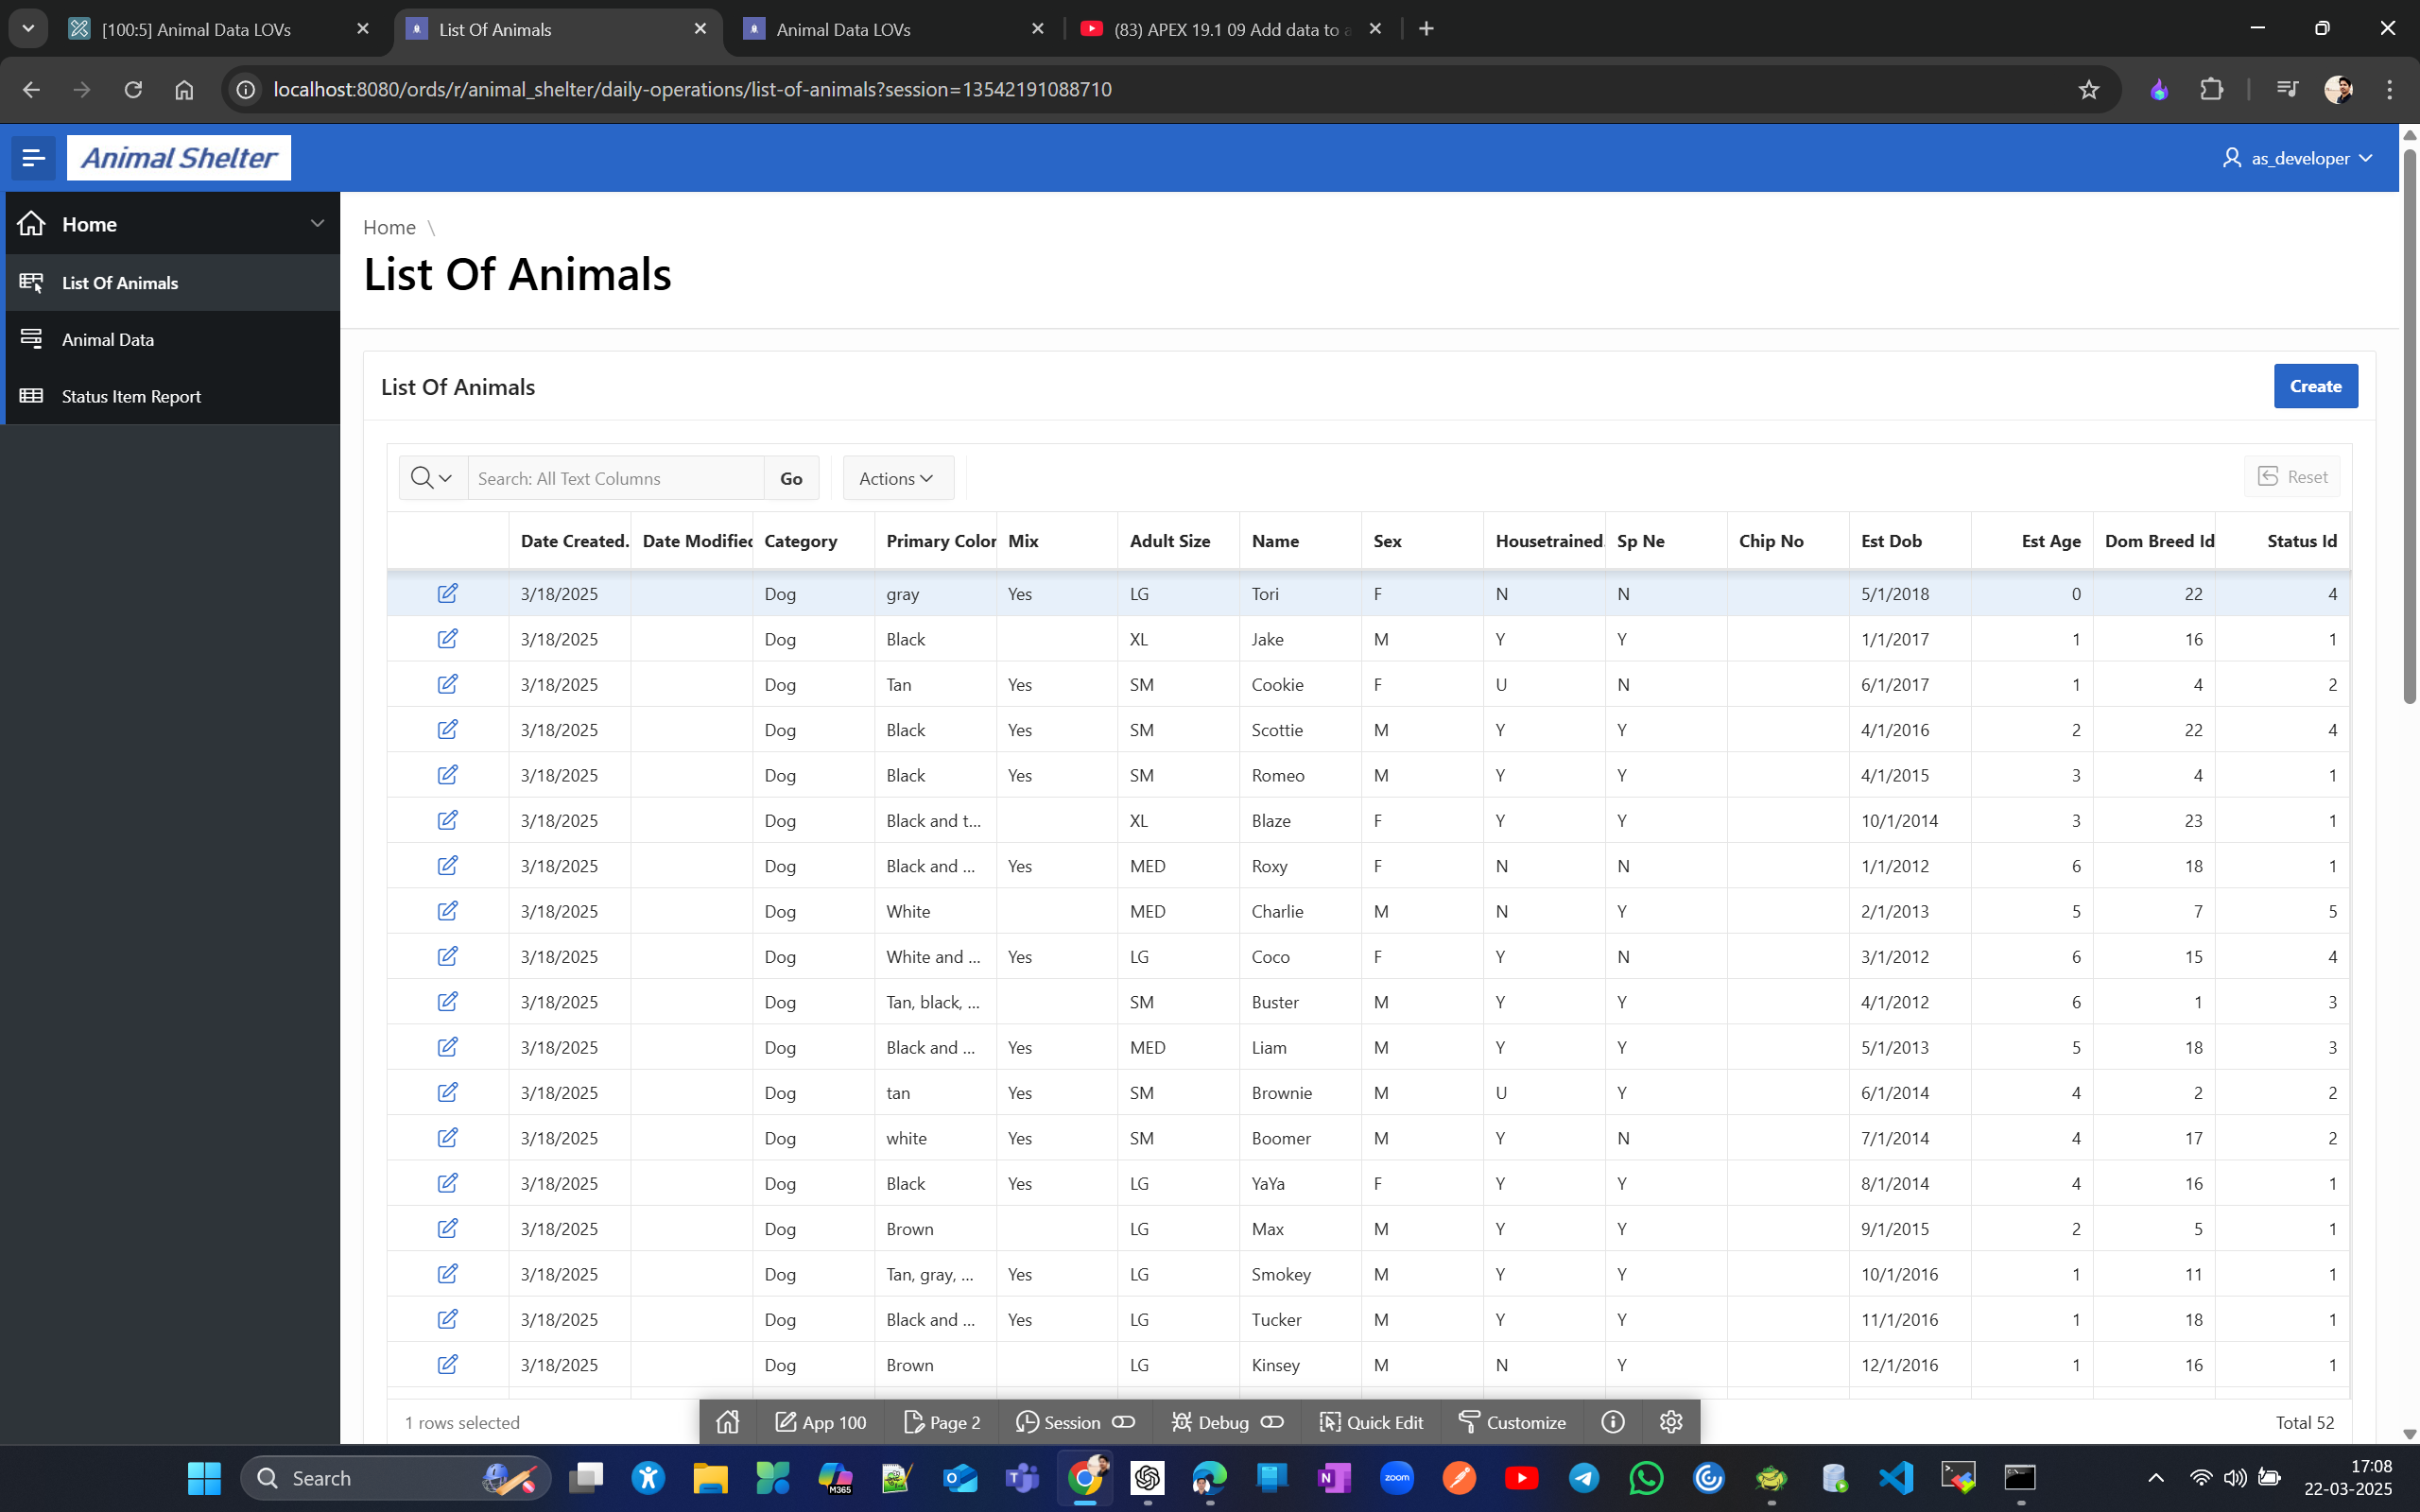
Returning to the project, you may notice that the color values of Animals are inconsistent, appearing in all lowercase, uppercase, and camel case in different places.
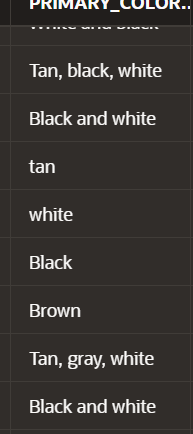
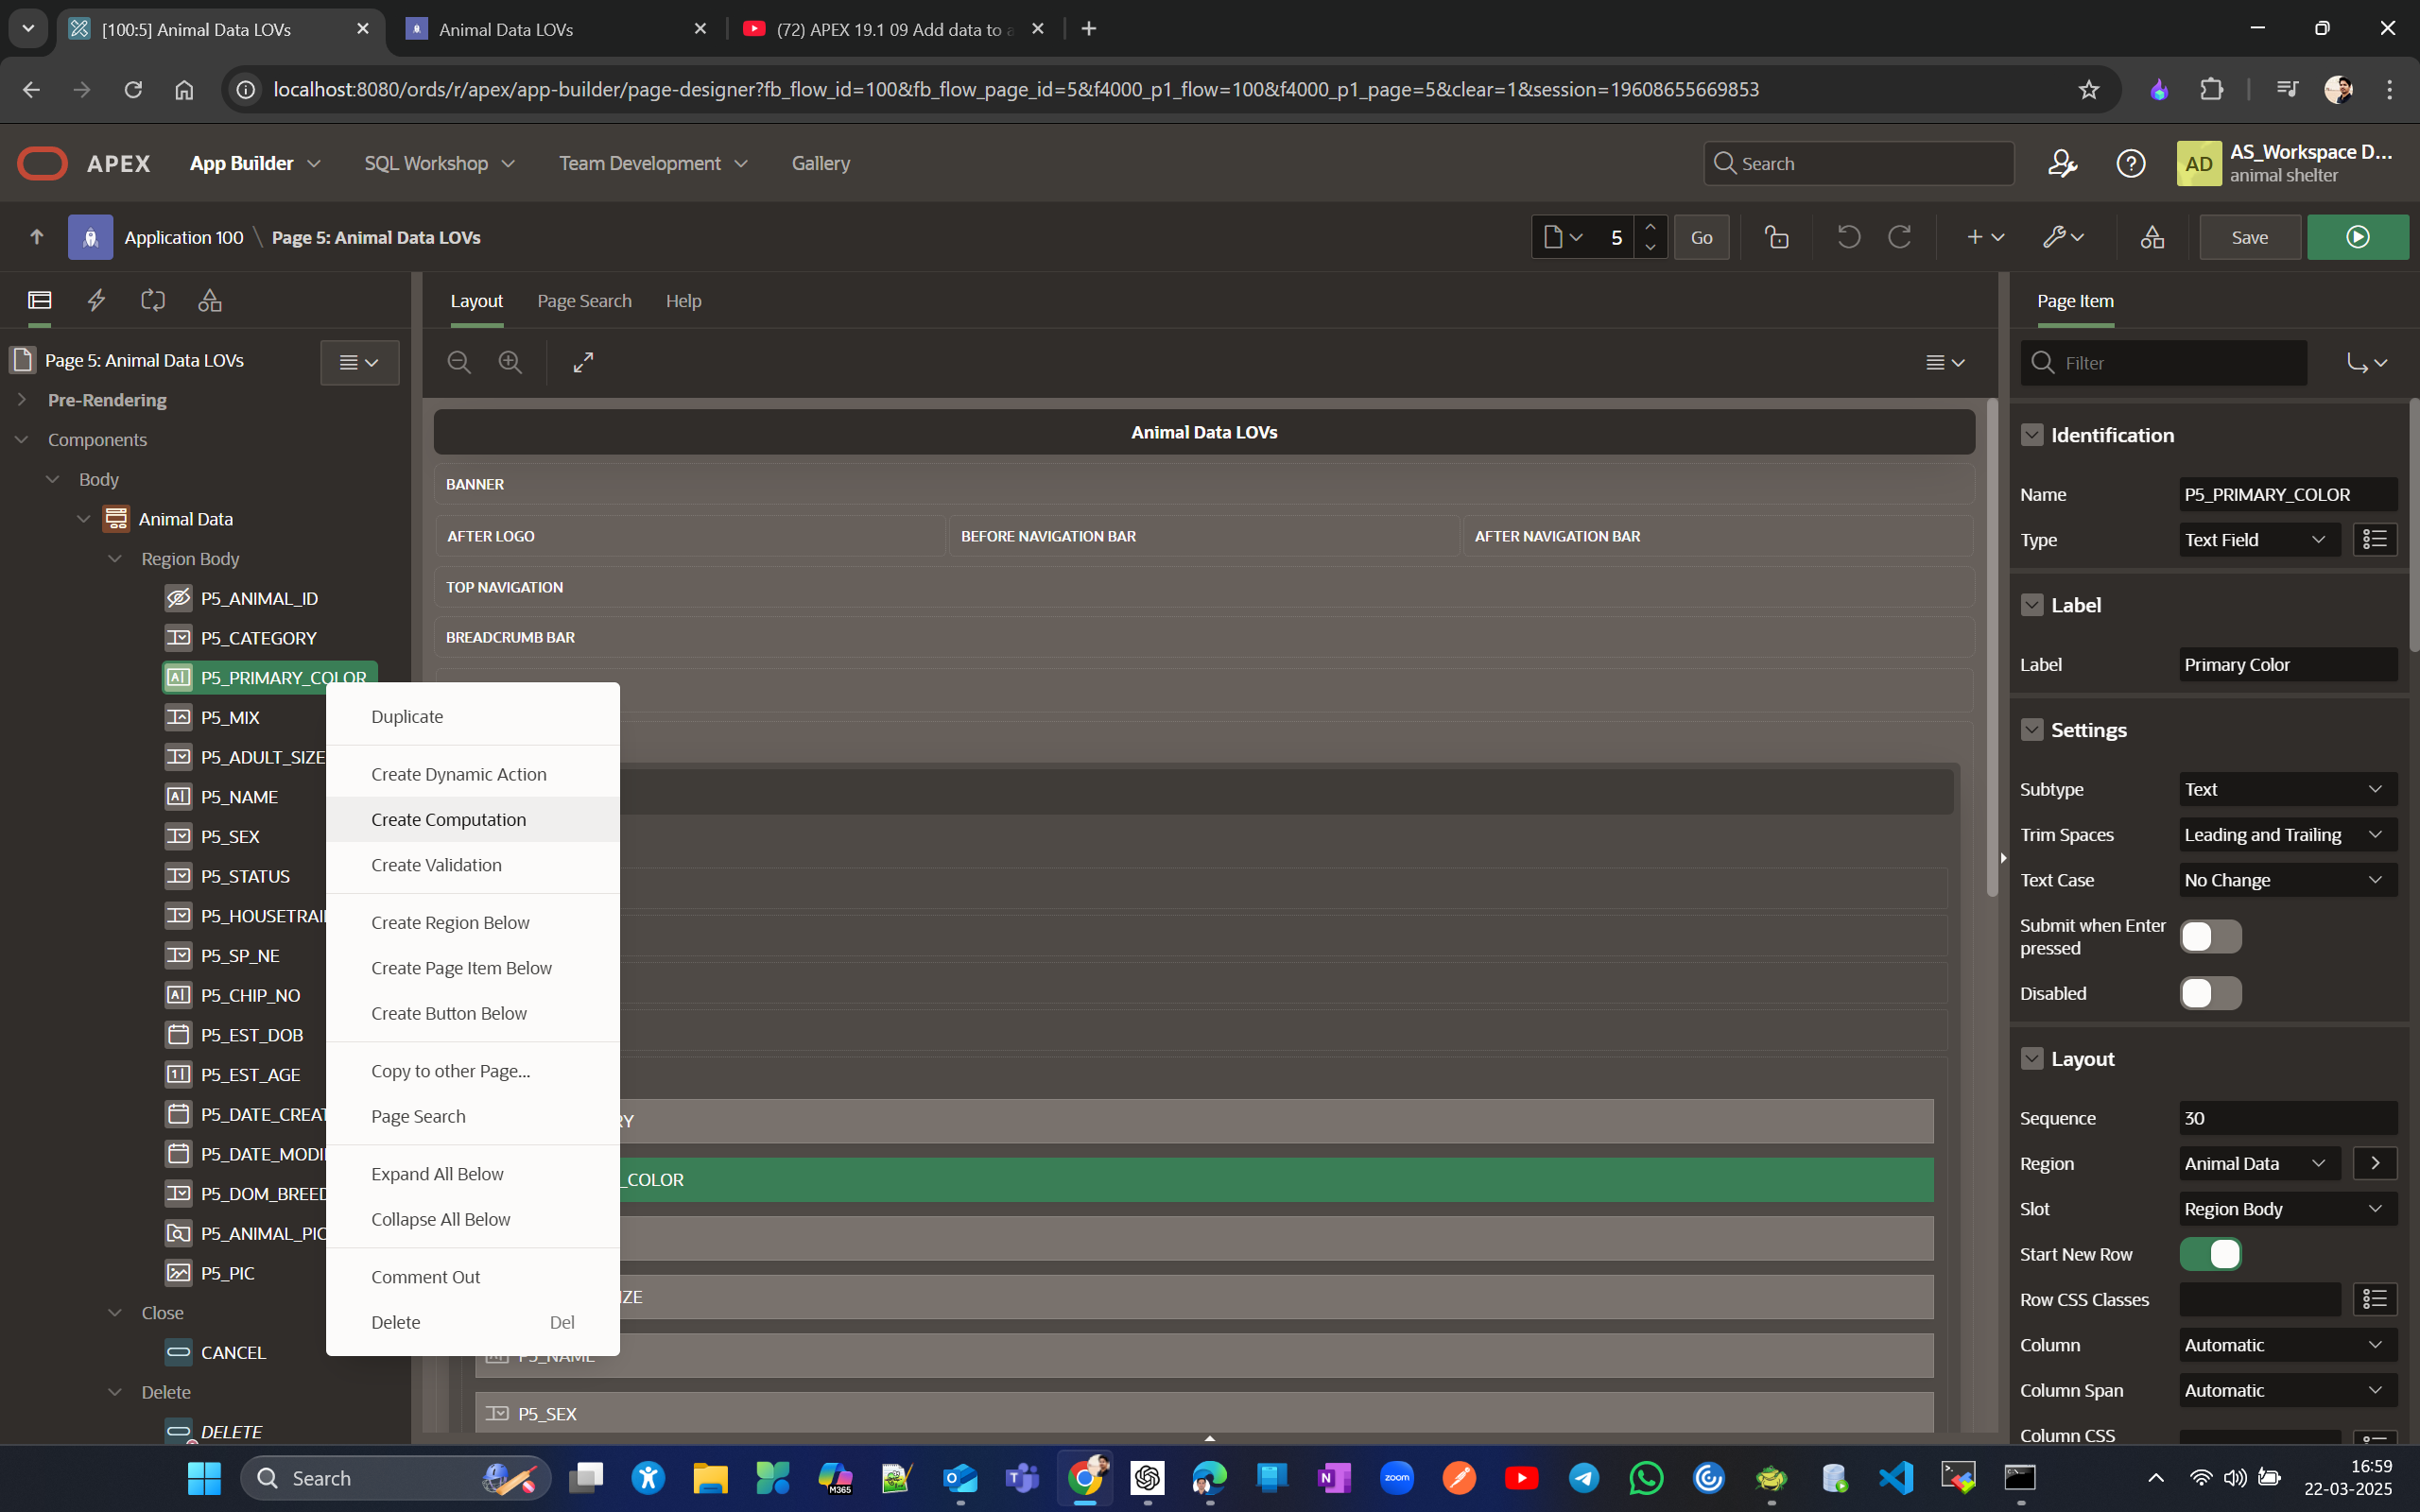
Now to ensure data is consistent irrespective of the case it was entered. go to for page (page#5 in our case), right click on column for which you want to make thinks consitent(in our case primary_colour would be in small case)
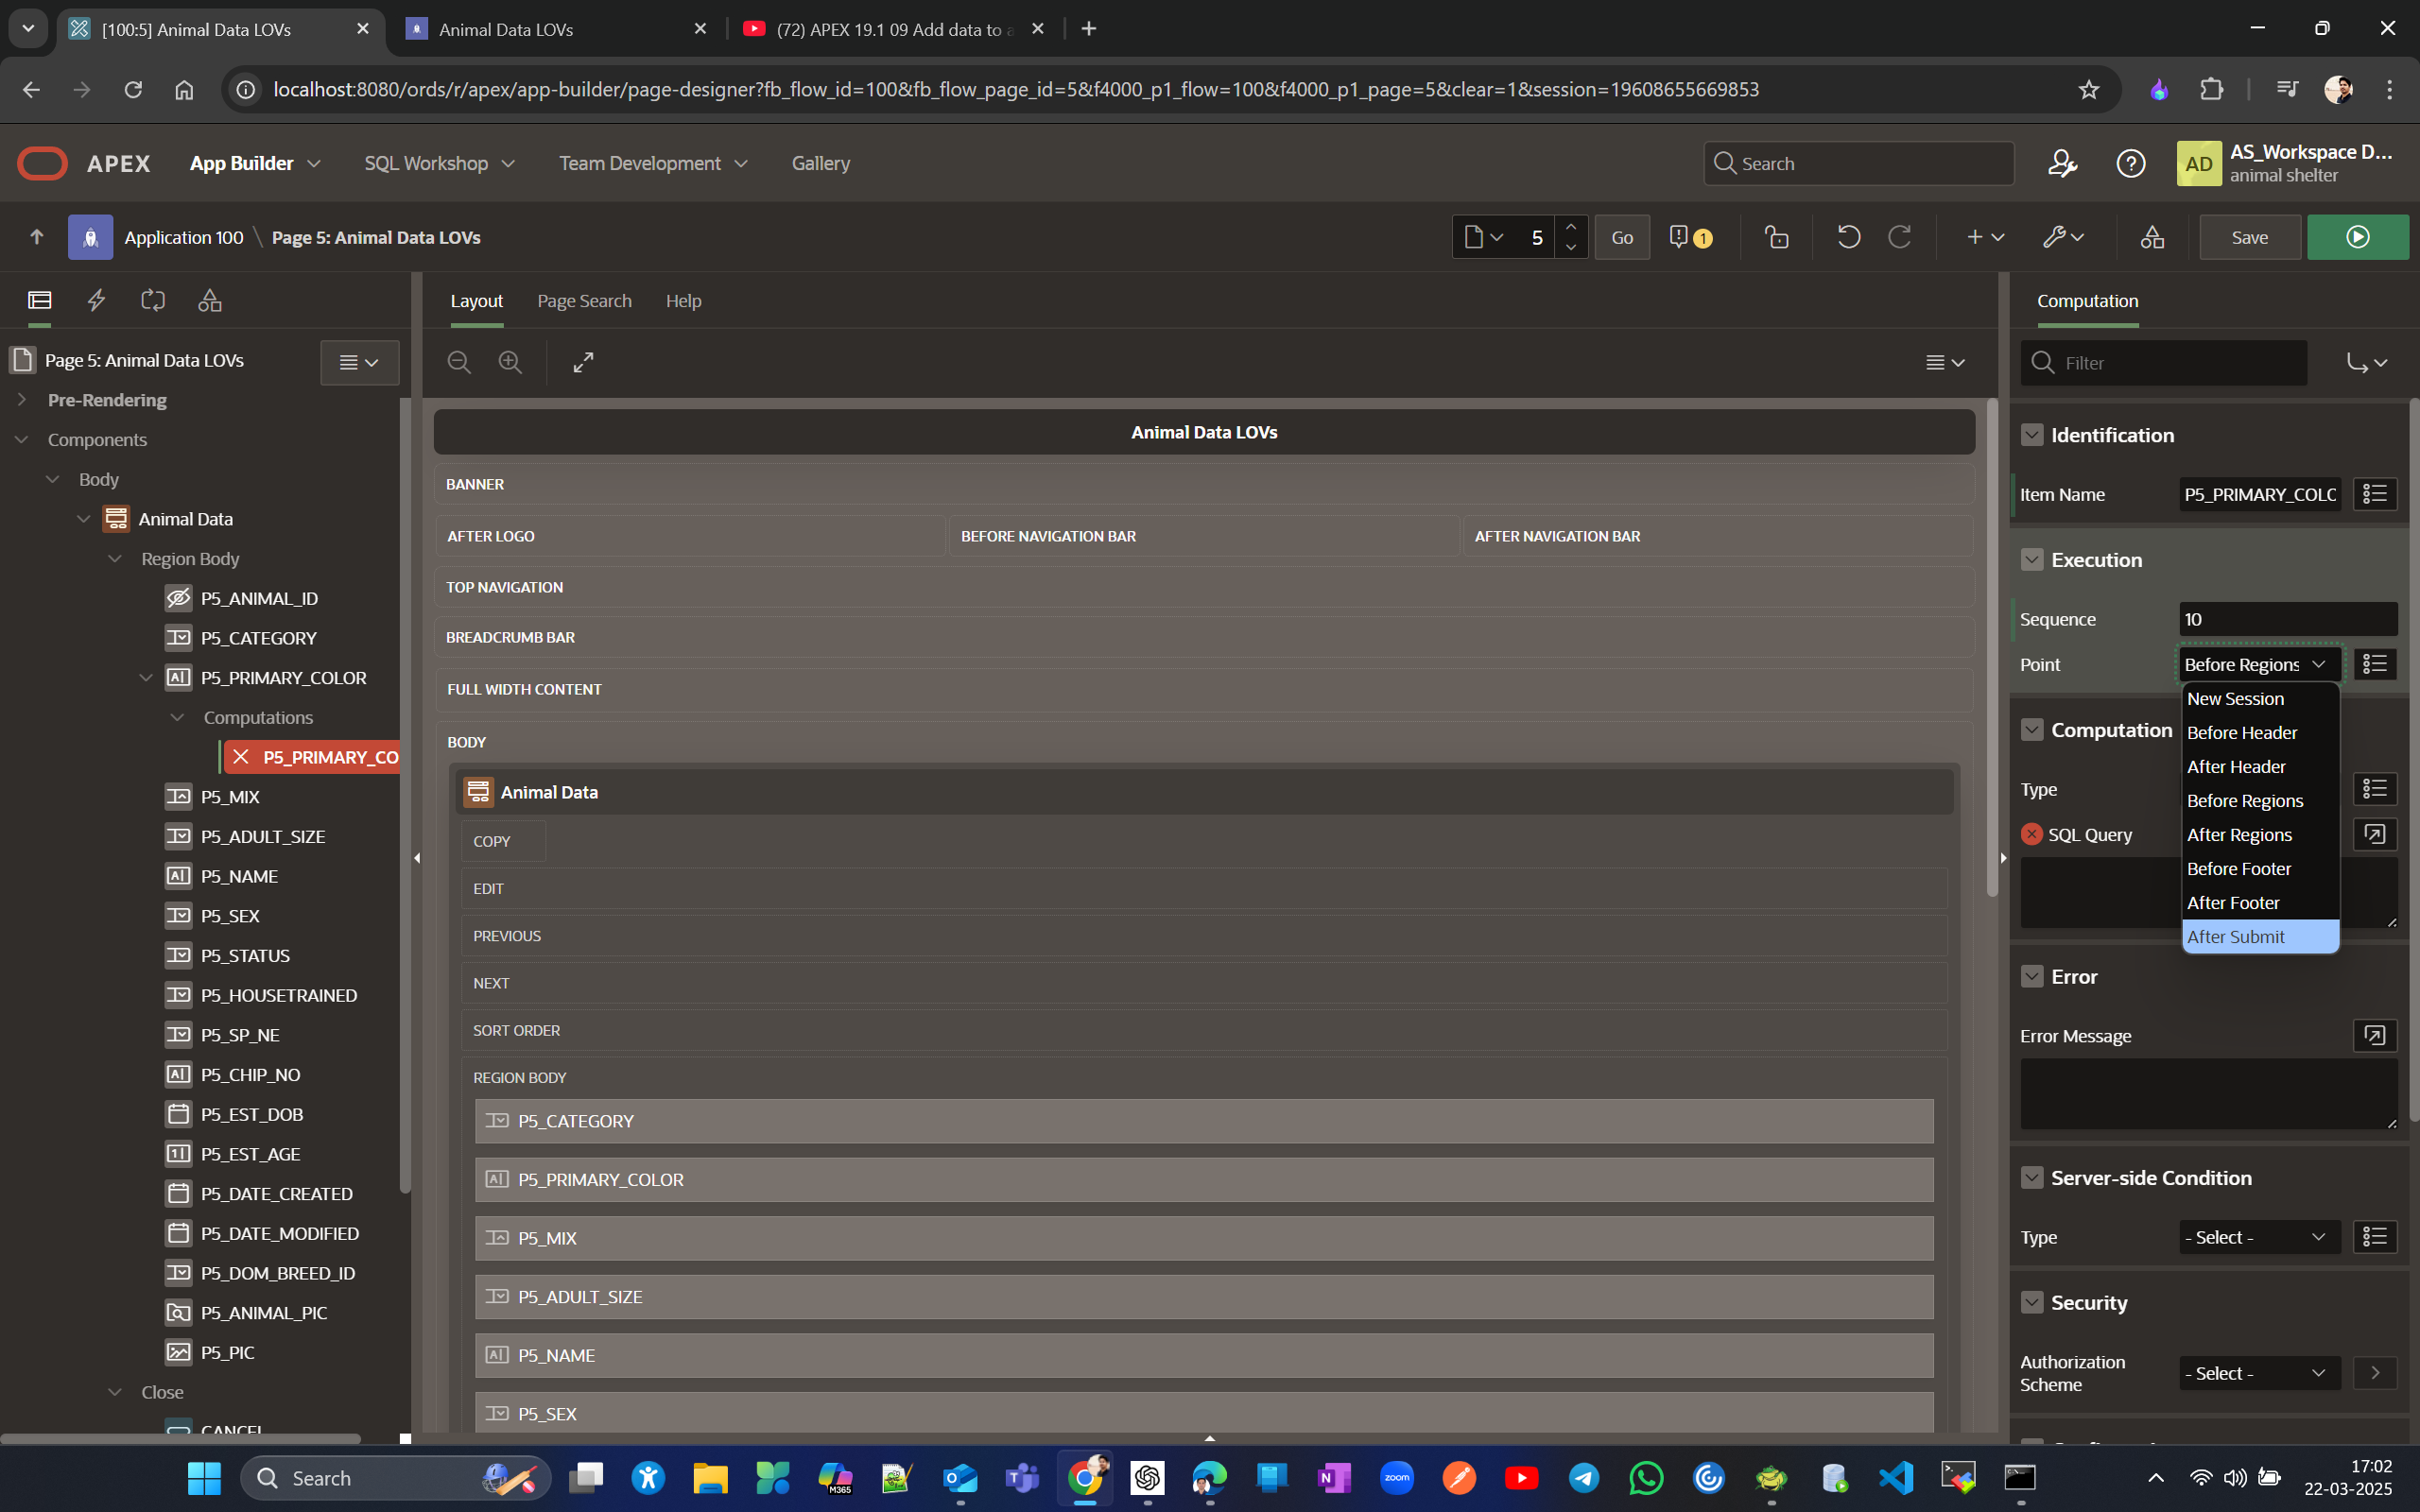
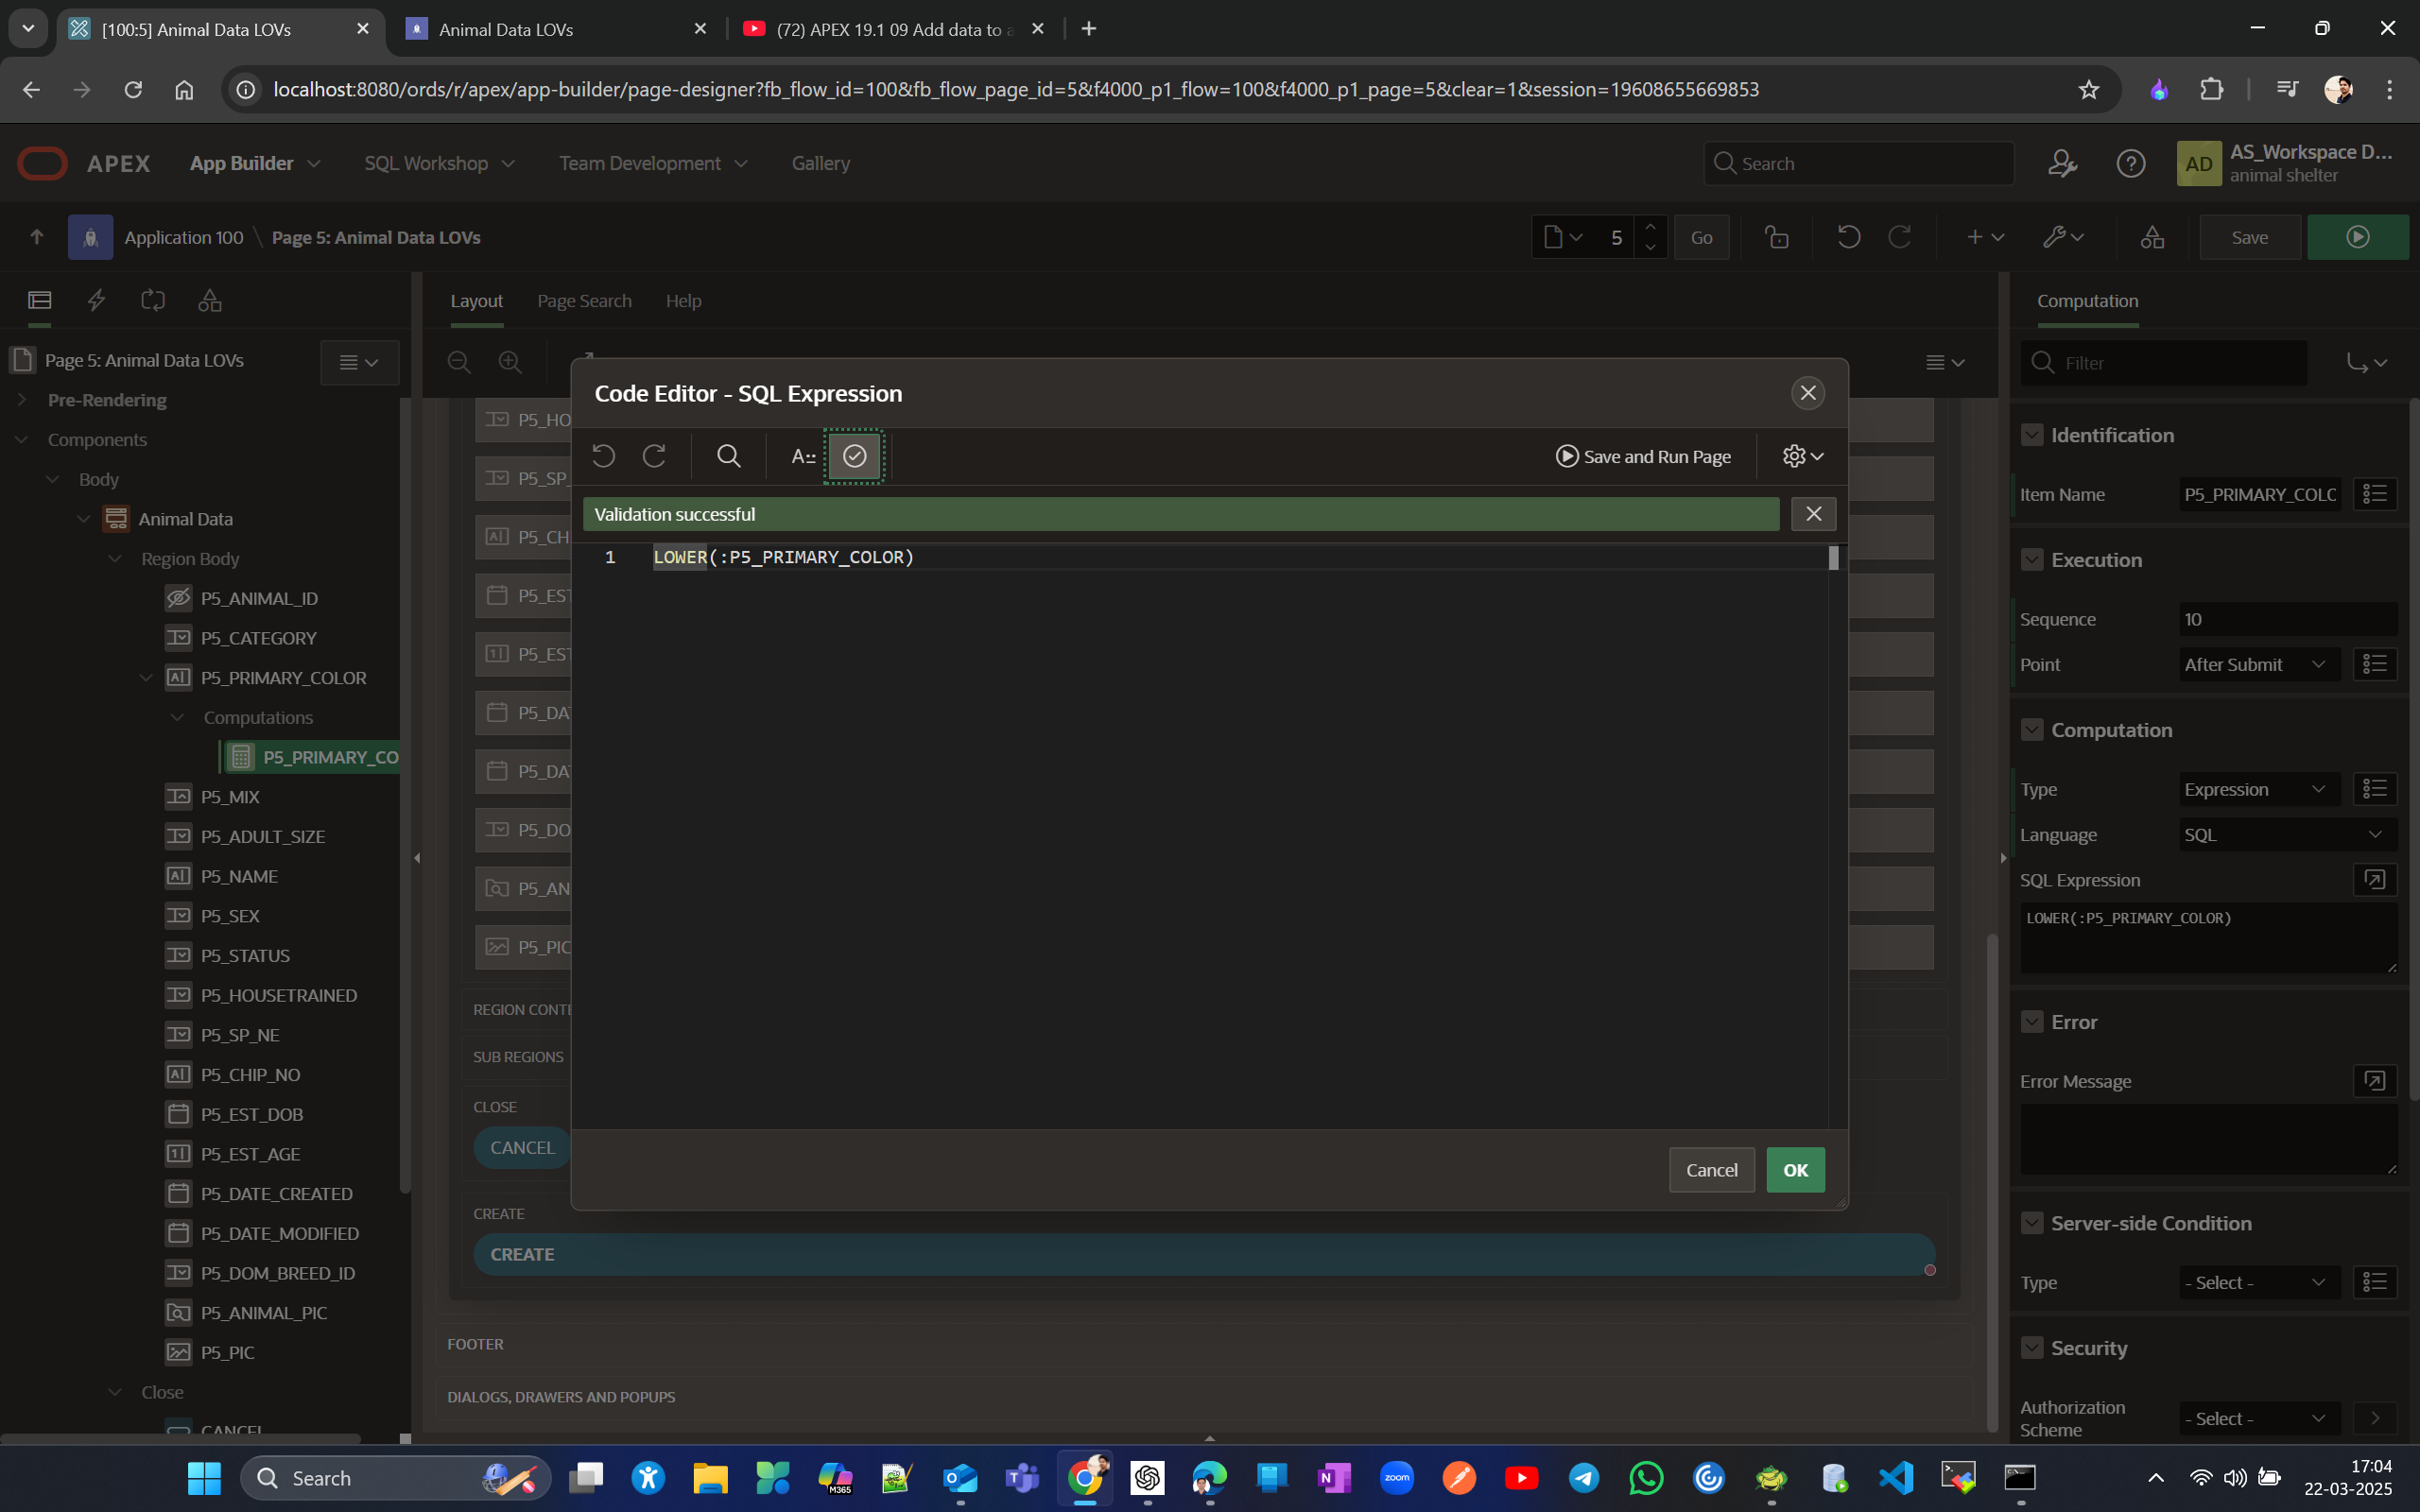
Returning to the project, you might see that the color values of Animals are inconsistent, showing up in lowercase, uppercase, and camel case in various places.
Correct a target page. Change the layout of page items in a form
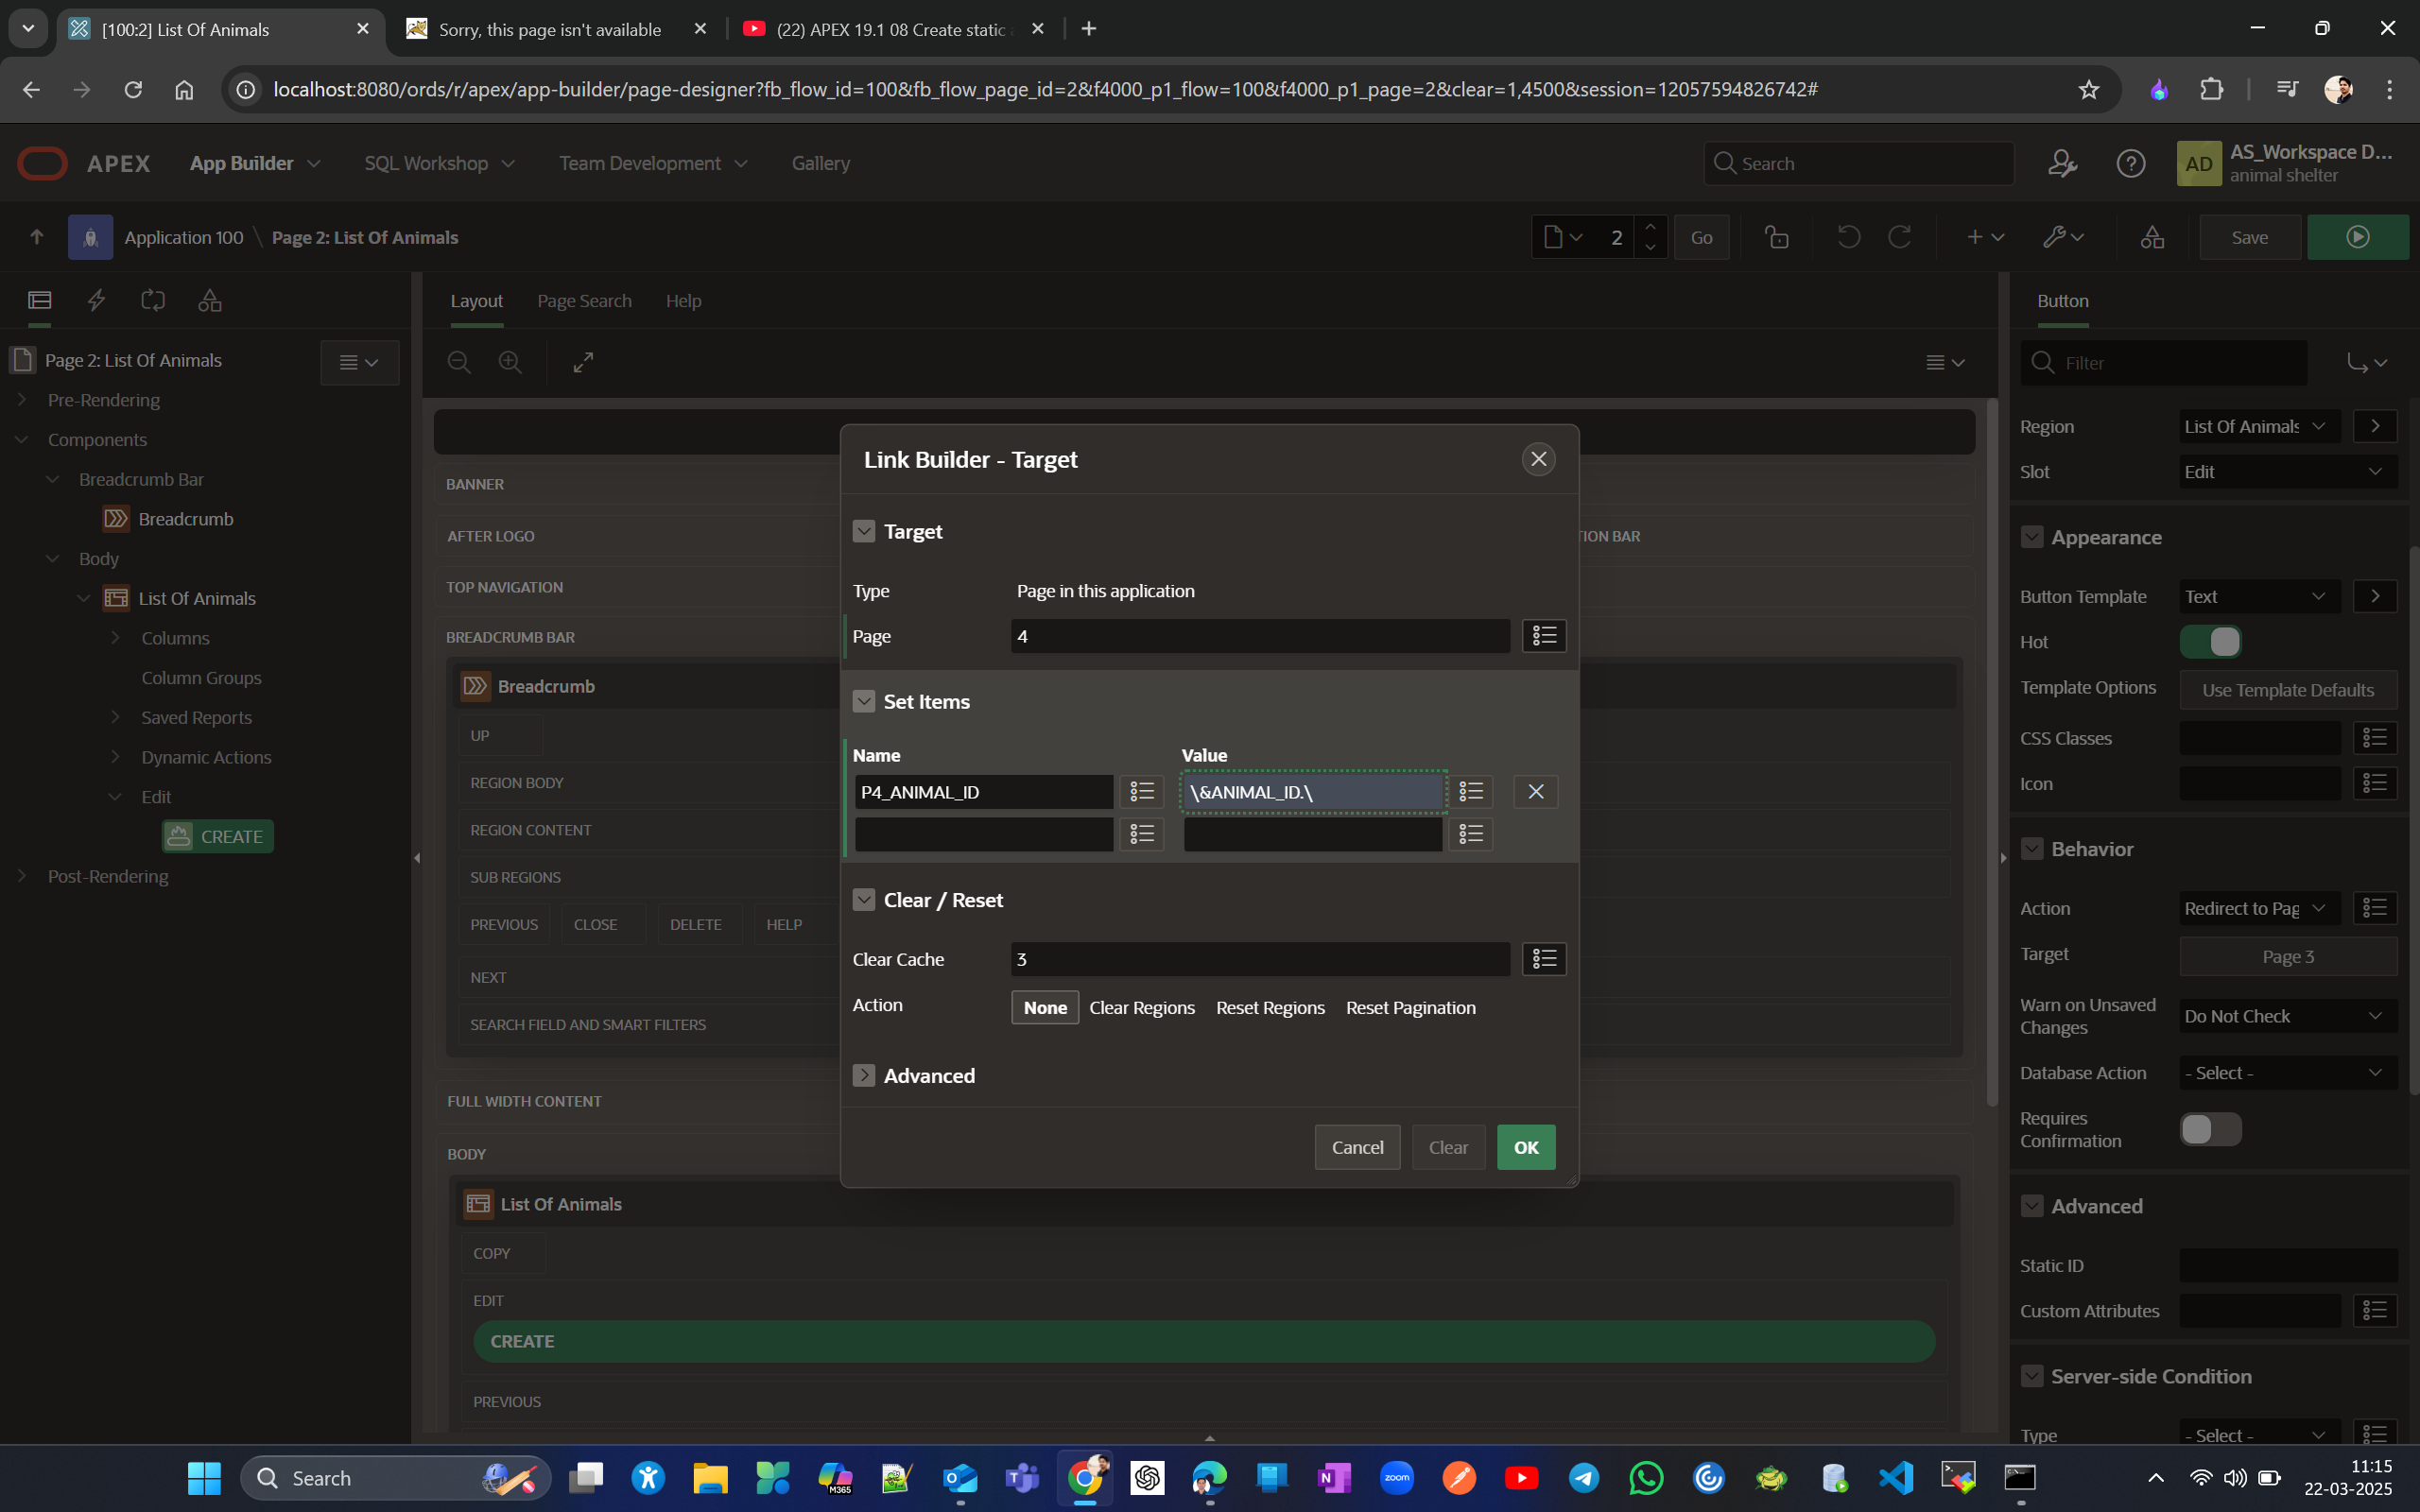
If you see a "Page isn’t available" error when clicking the create button on the interactive grid list of animals, go to the page designer, click on the CREATE button in the rendering section, and change the target properties on the right to page #4 as shown below; this will solve the page not available problem.
To Create a form lookup table for Dominant Breed - Lets create a interactive report for this
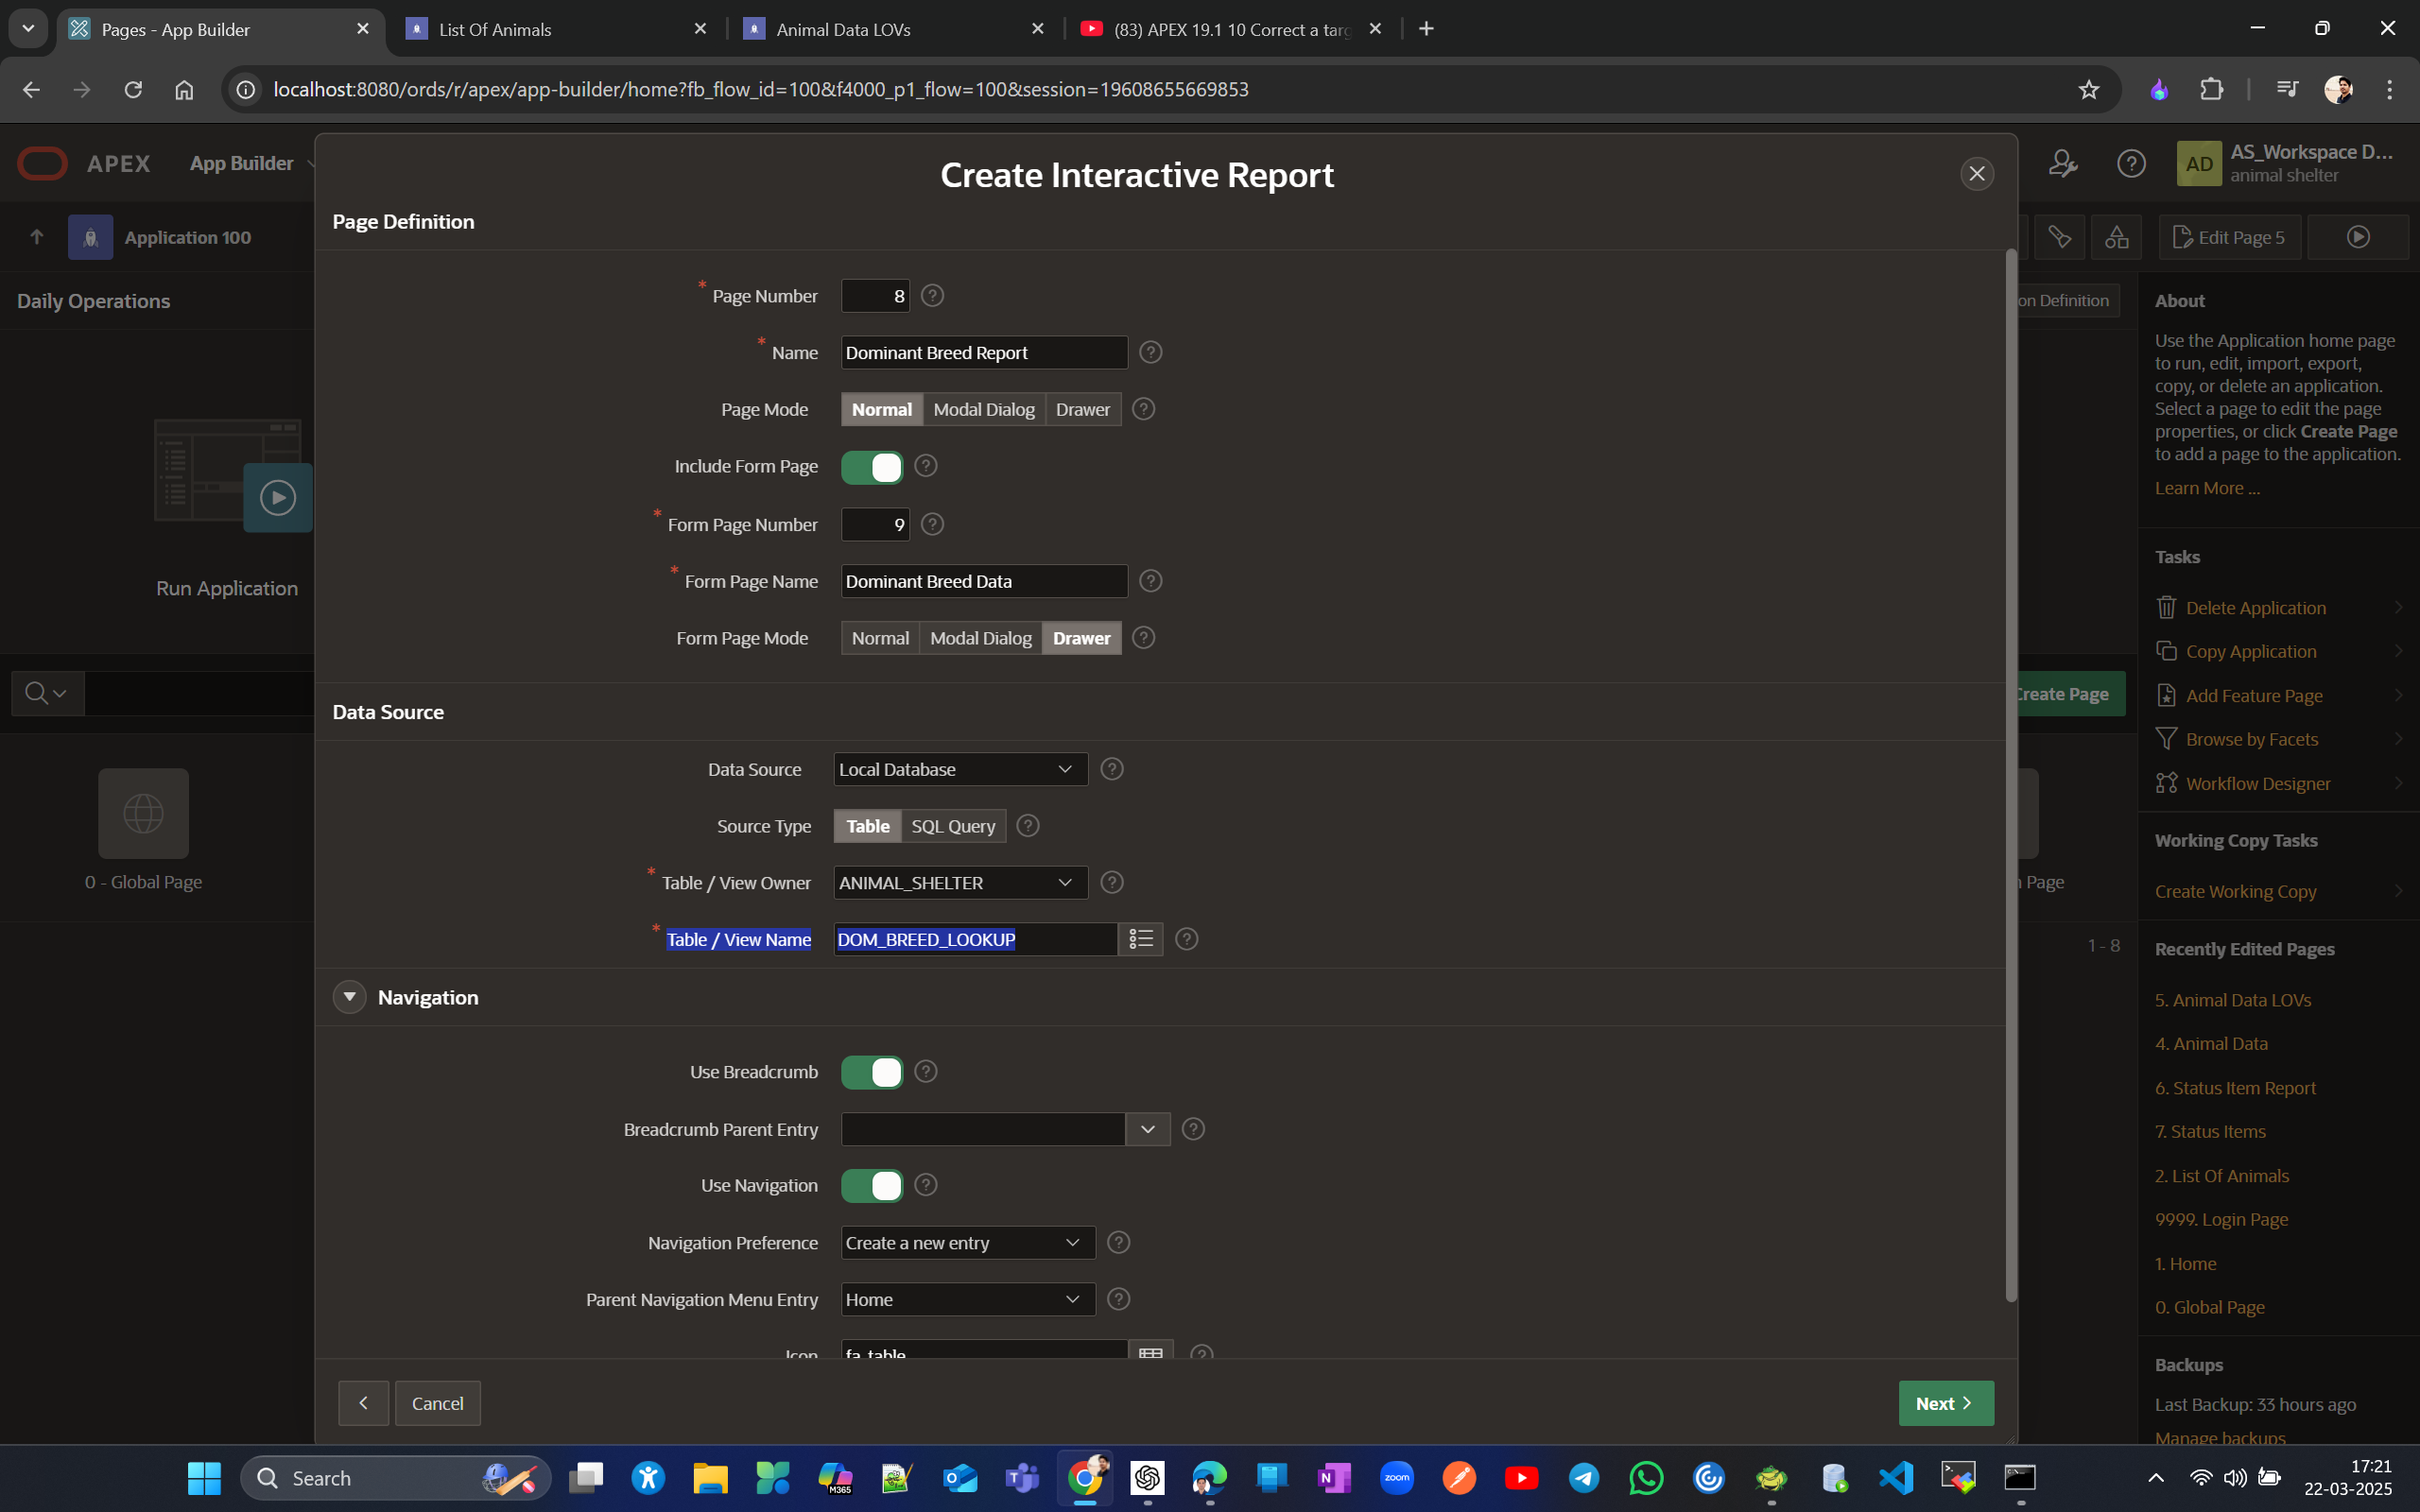
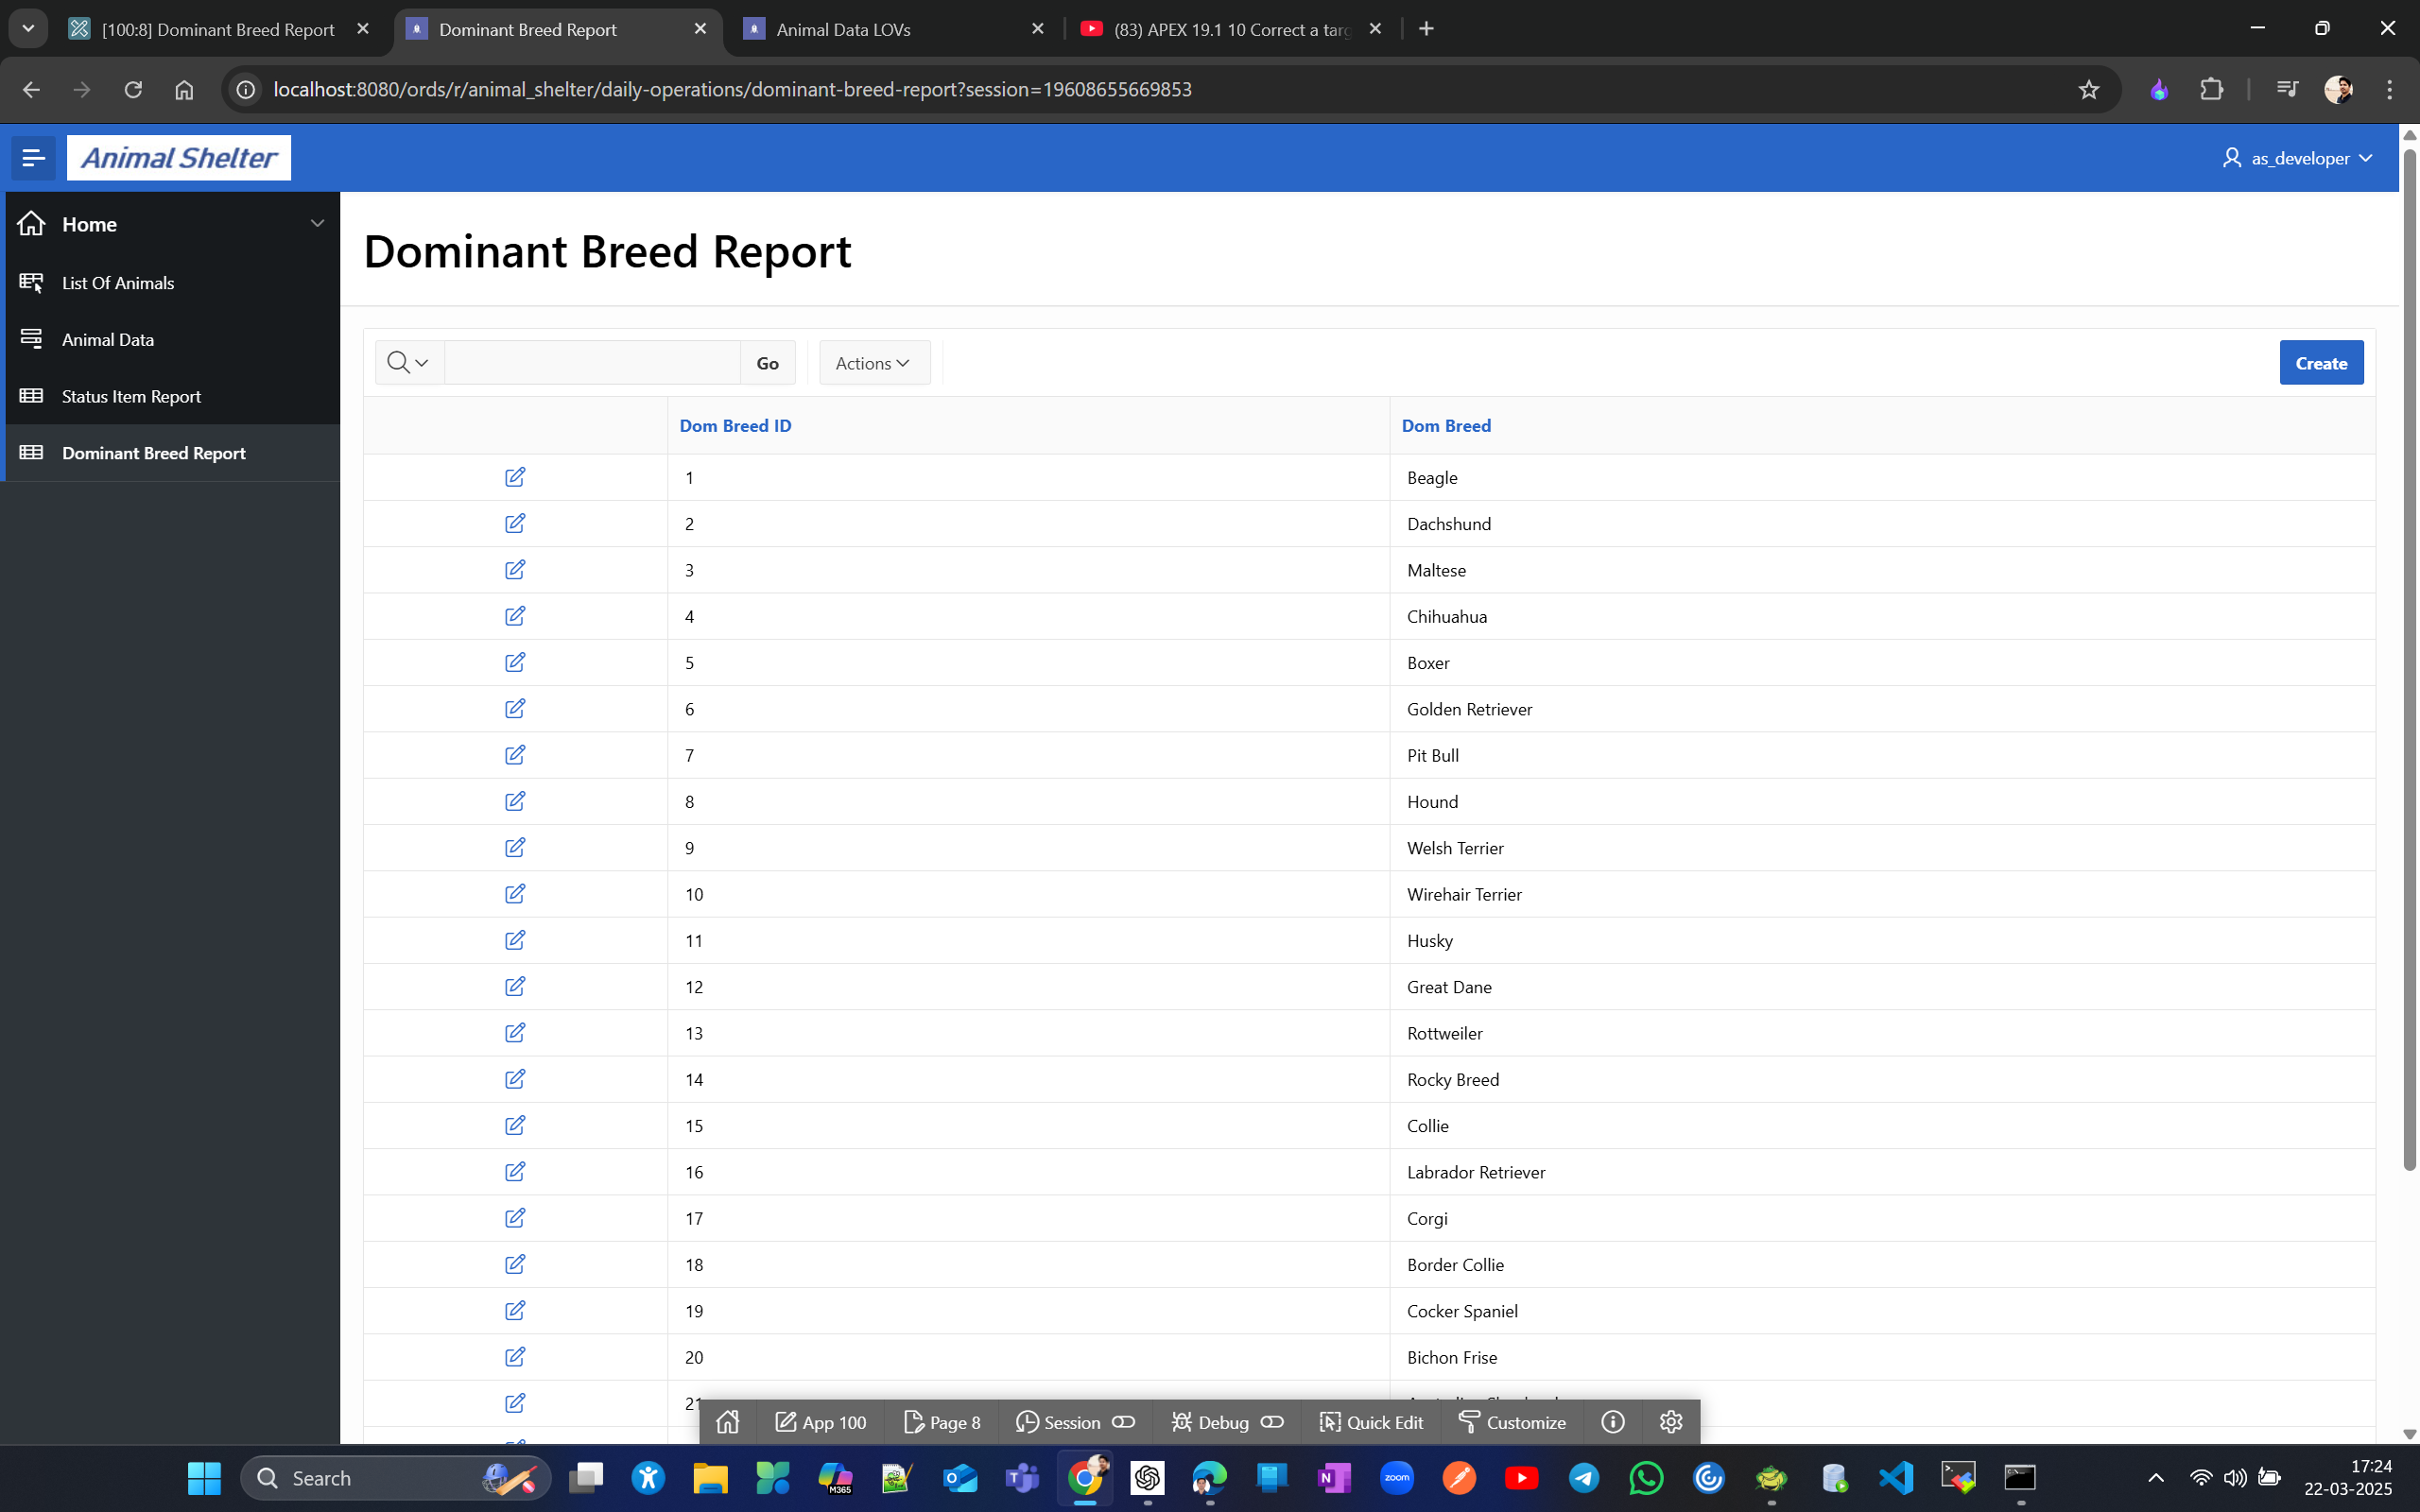
(Change column Dom Breed ID from hidden to plain text or display if not appear default in form)
Now lets go and add “American Blue Heeler “
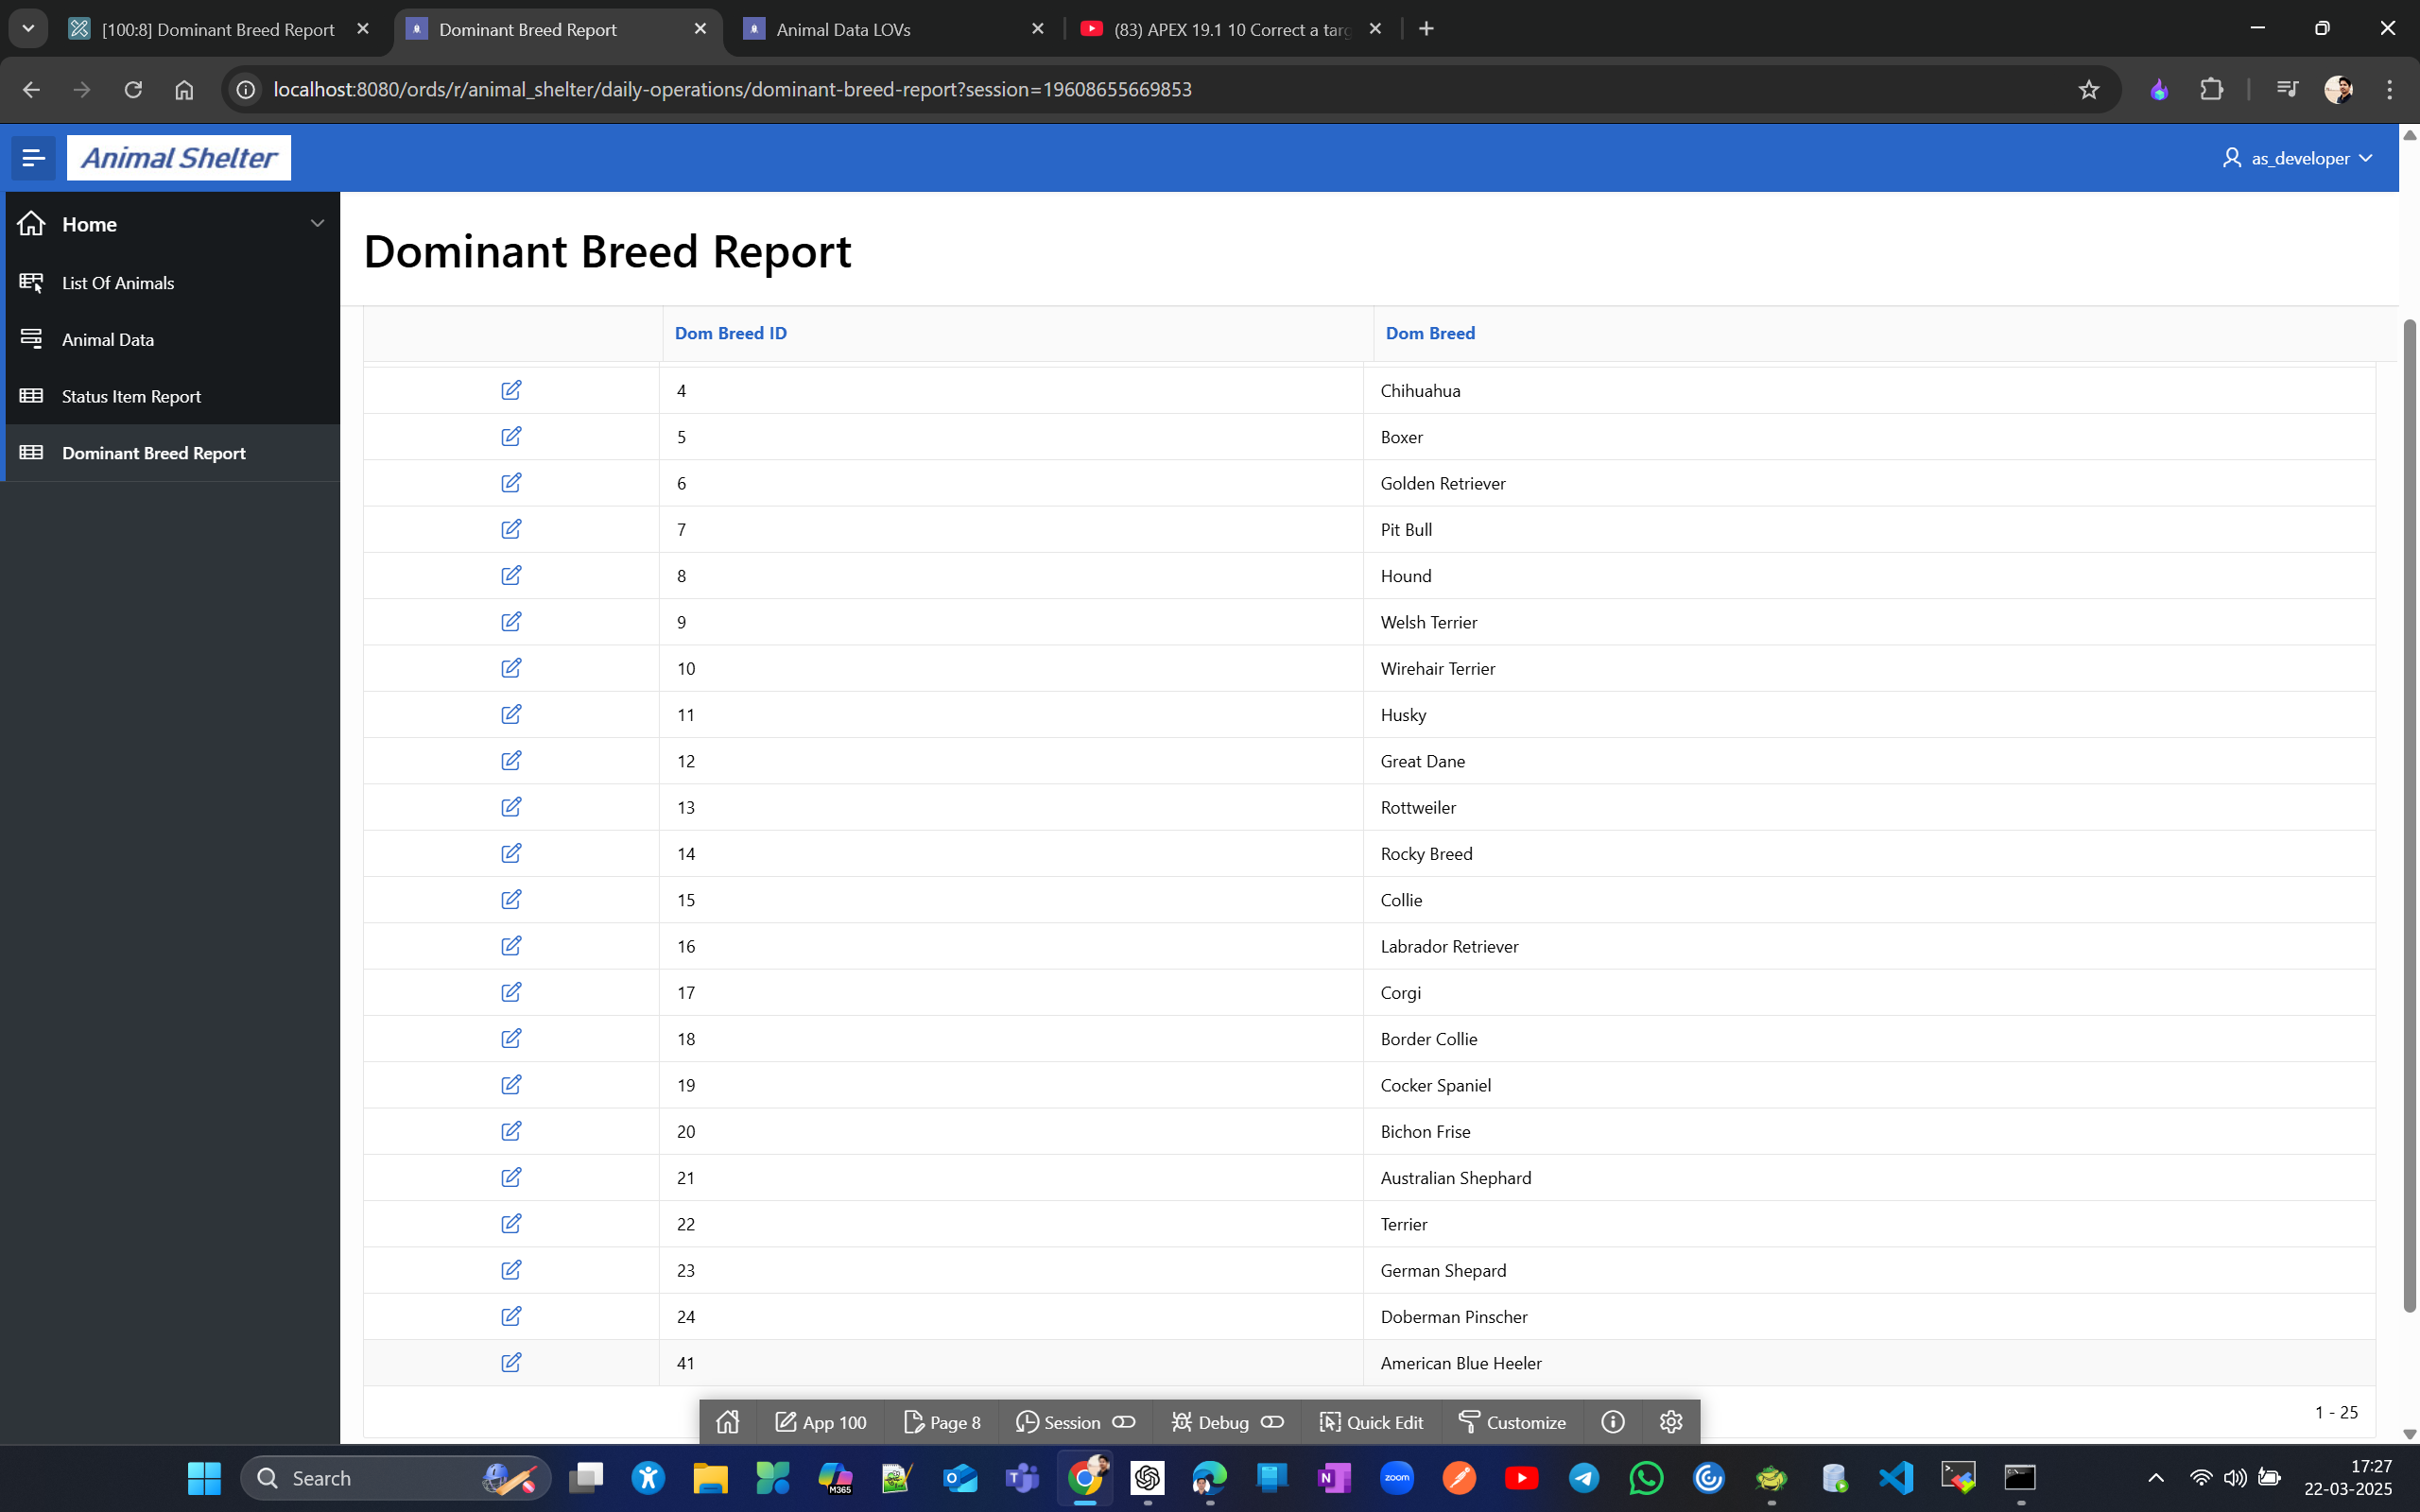
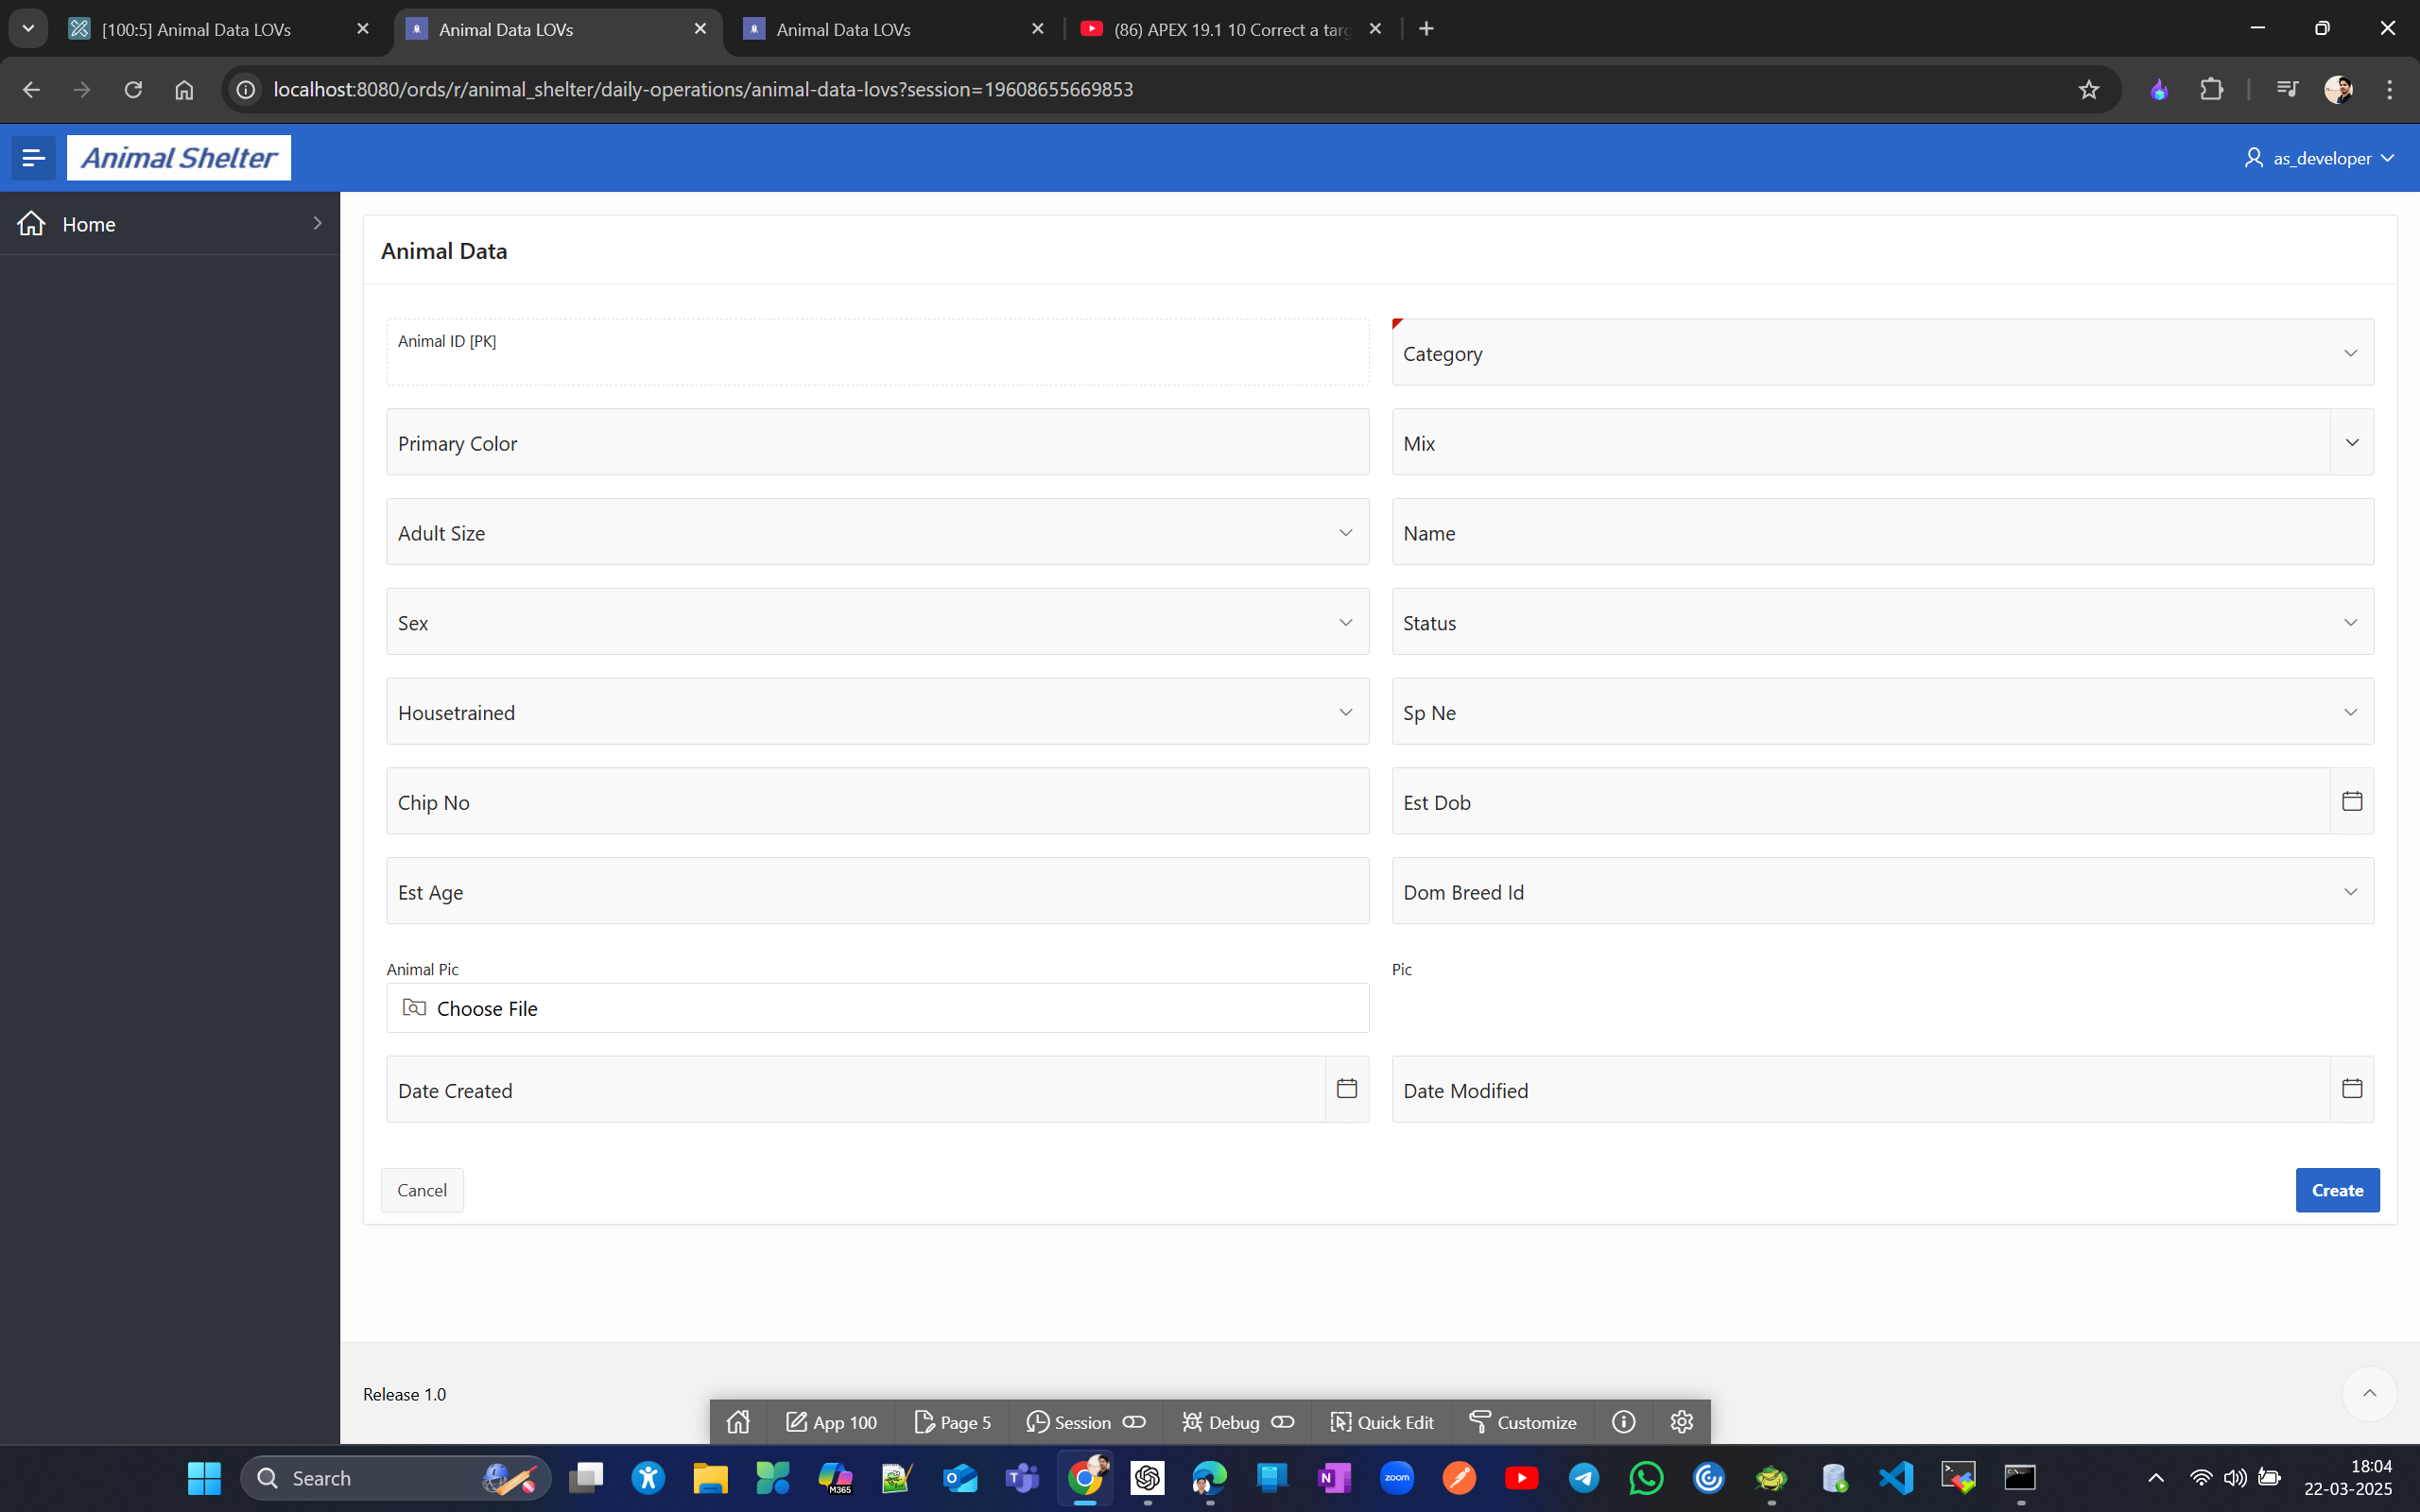
We know APEX is a responsive design tool, so pages in the application will adjust their display based on the device being used. Now, go back to the List of Animals Report and change the layout of the form. Instead of having a wide column field for each column, change the layout to a two-column page so that two fields will appear in a single row, except for the last two audit columns.
Before Layout change
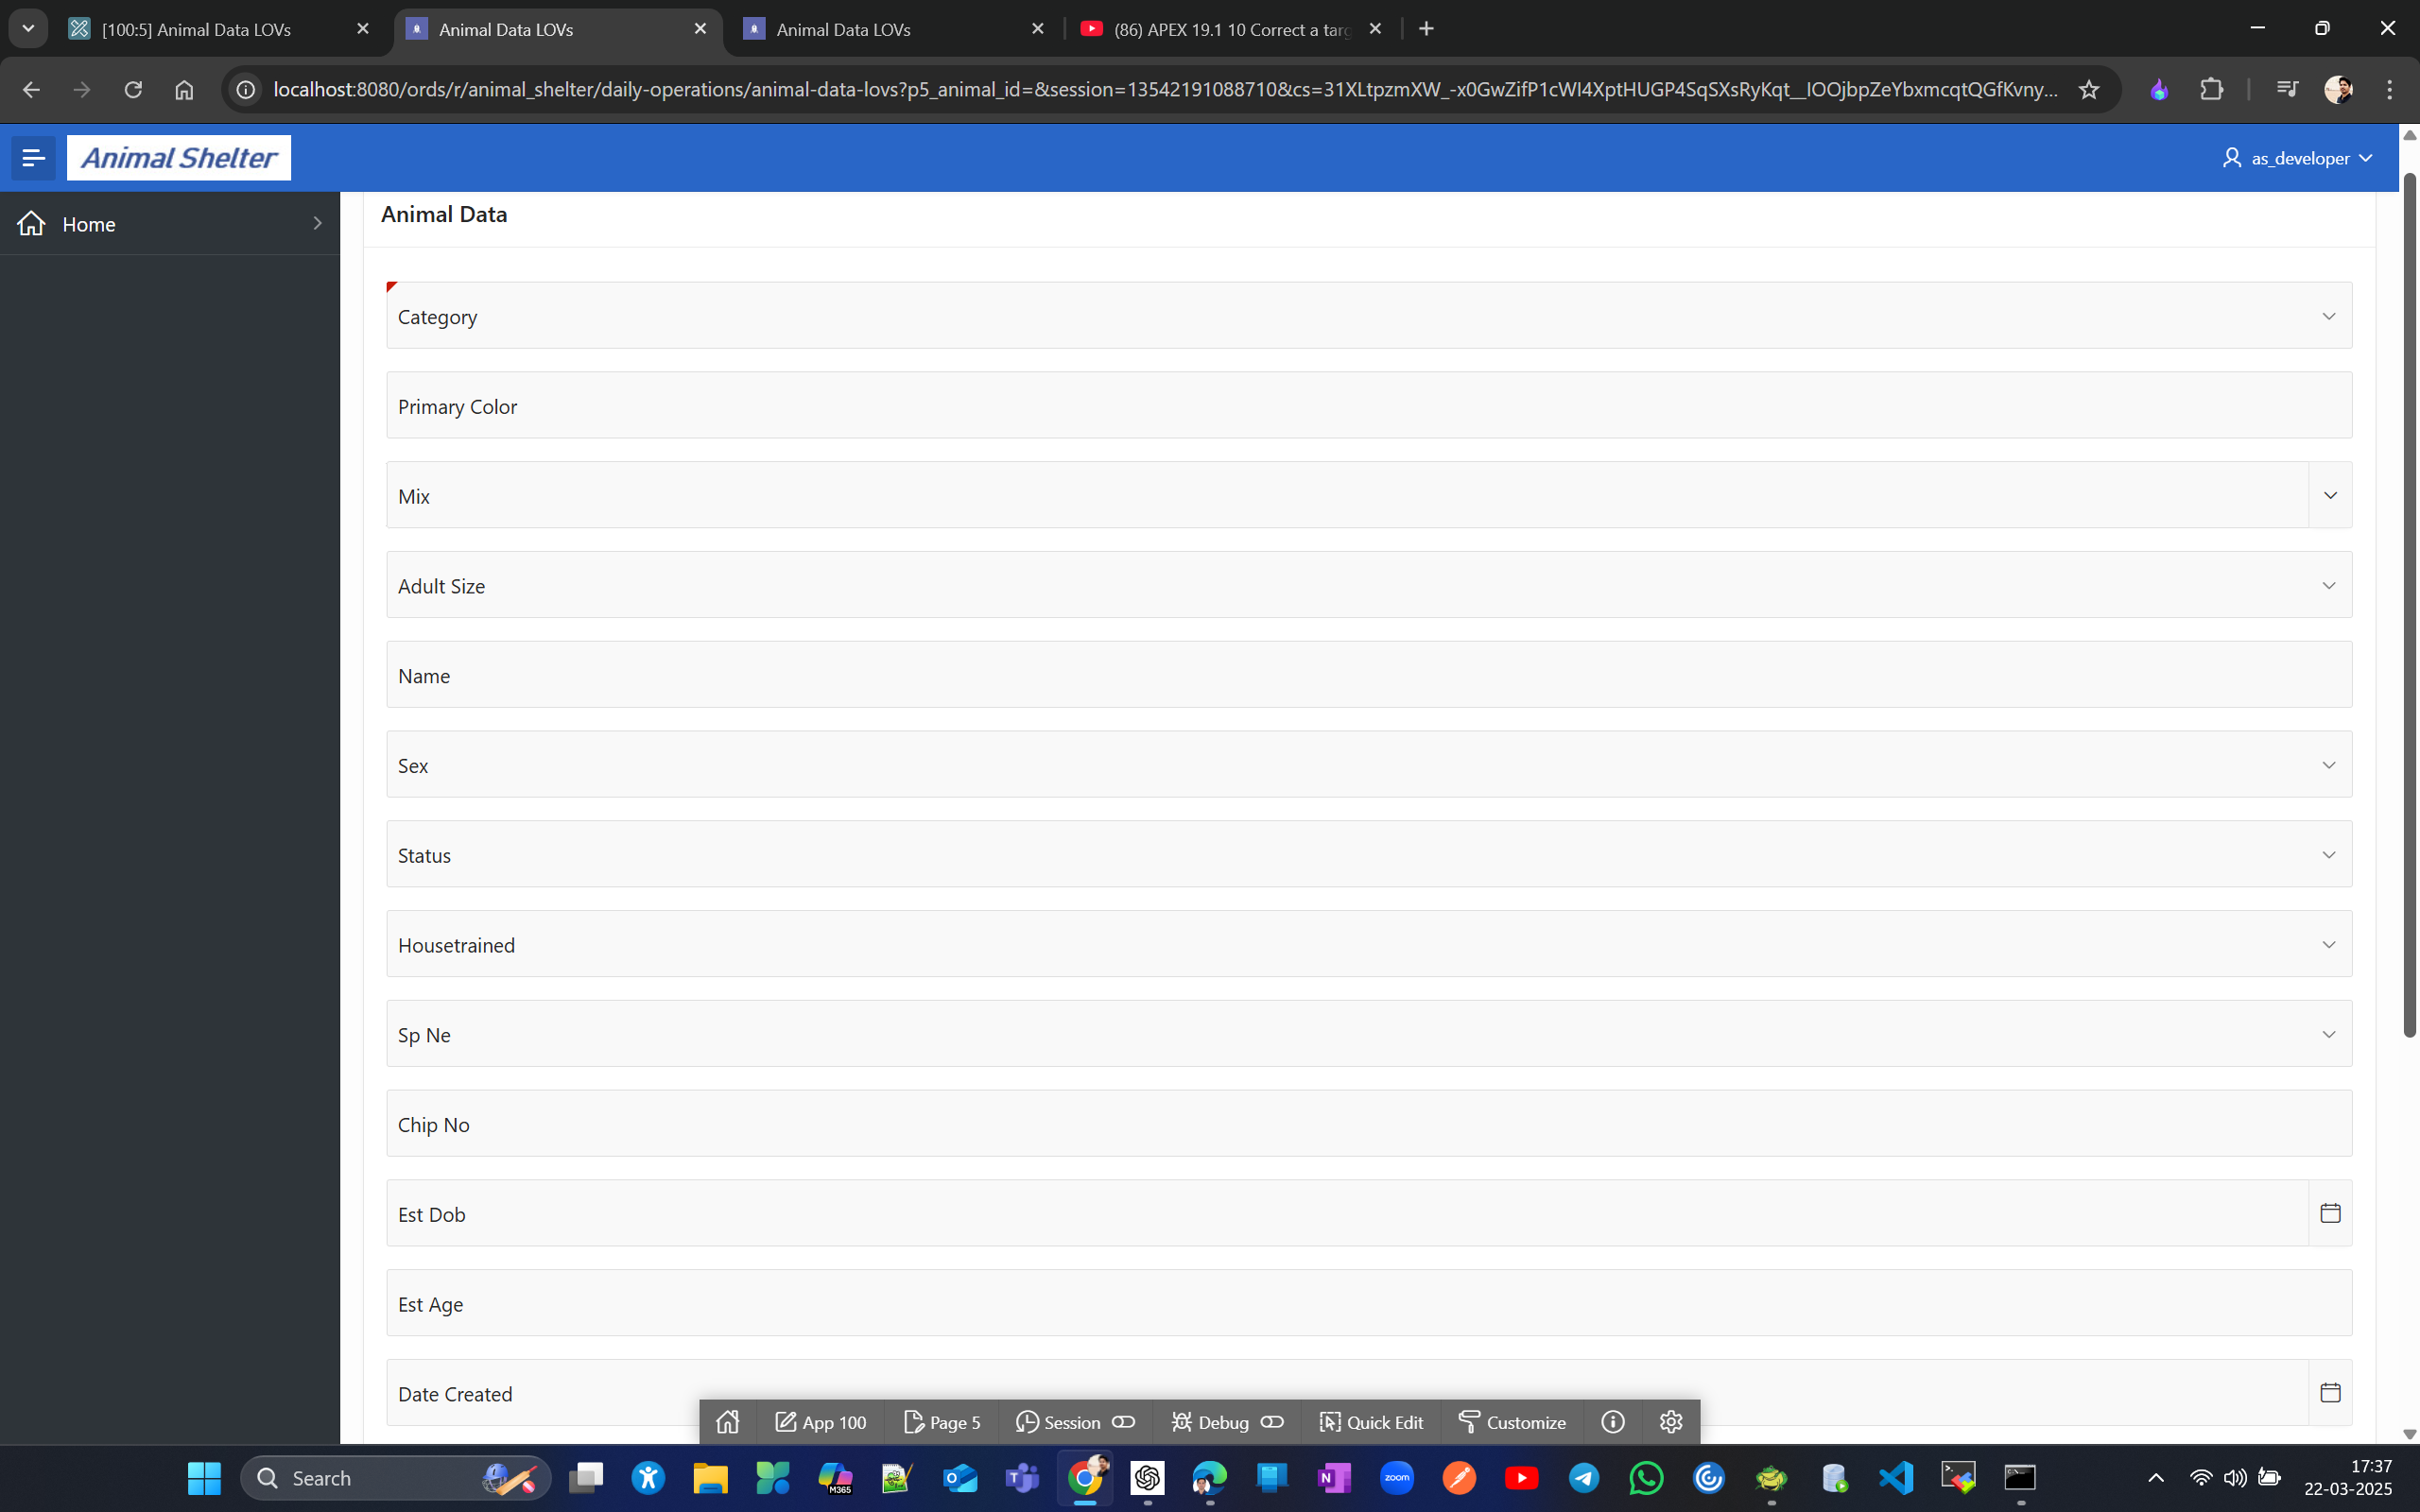
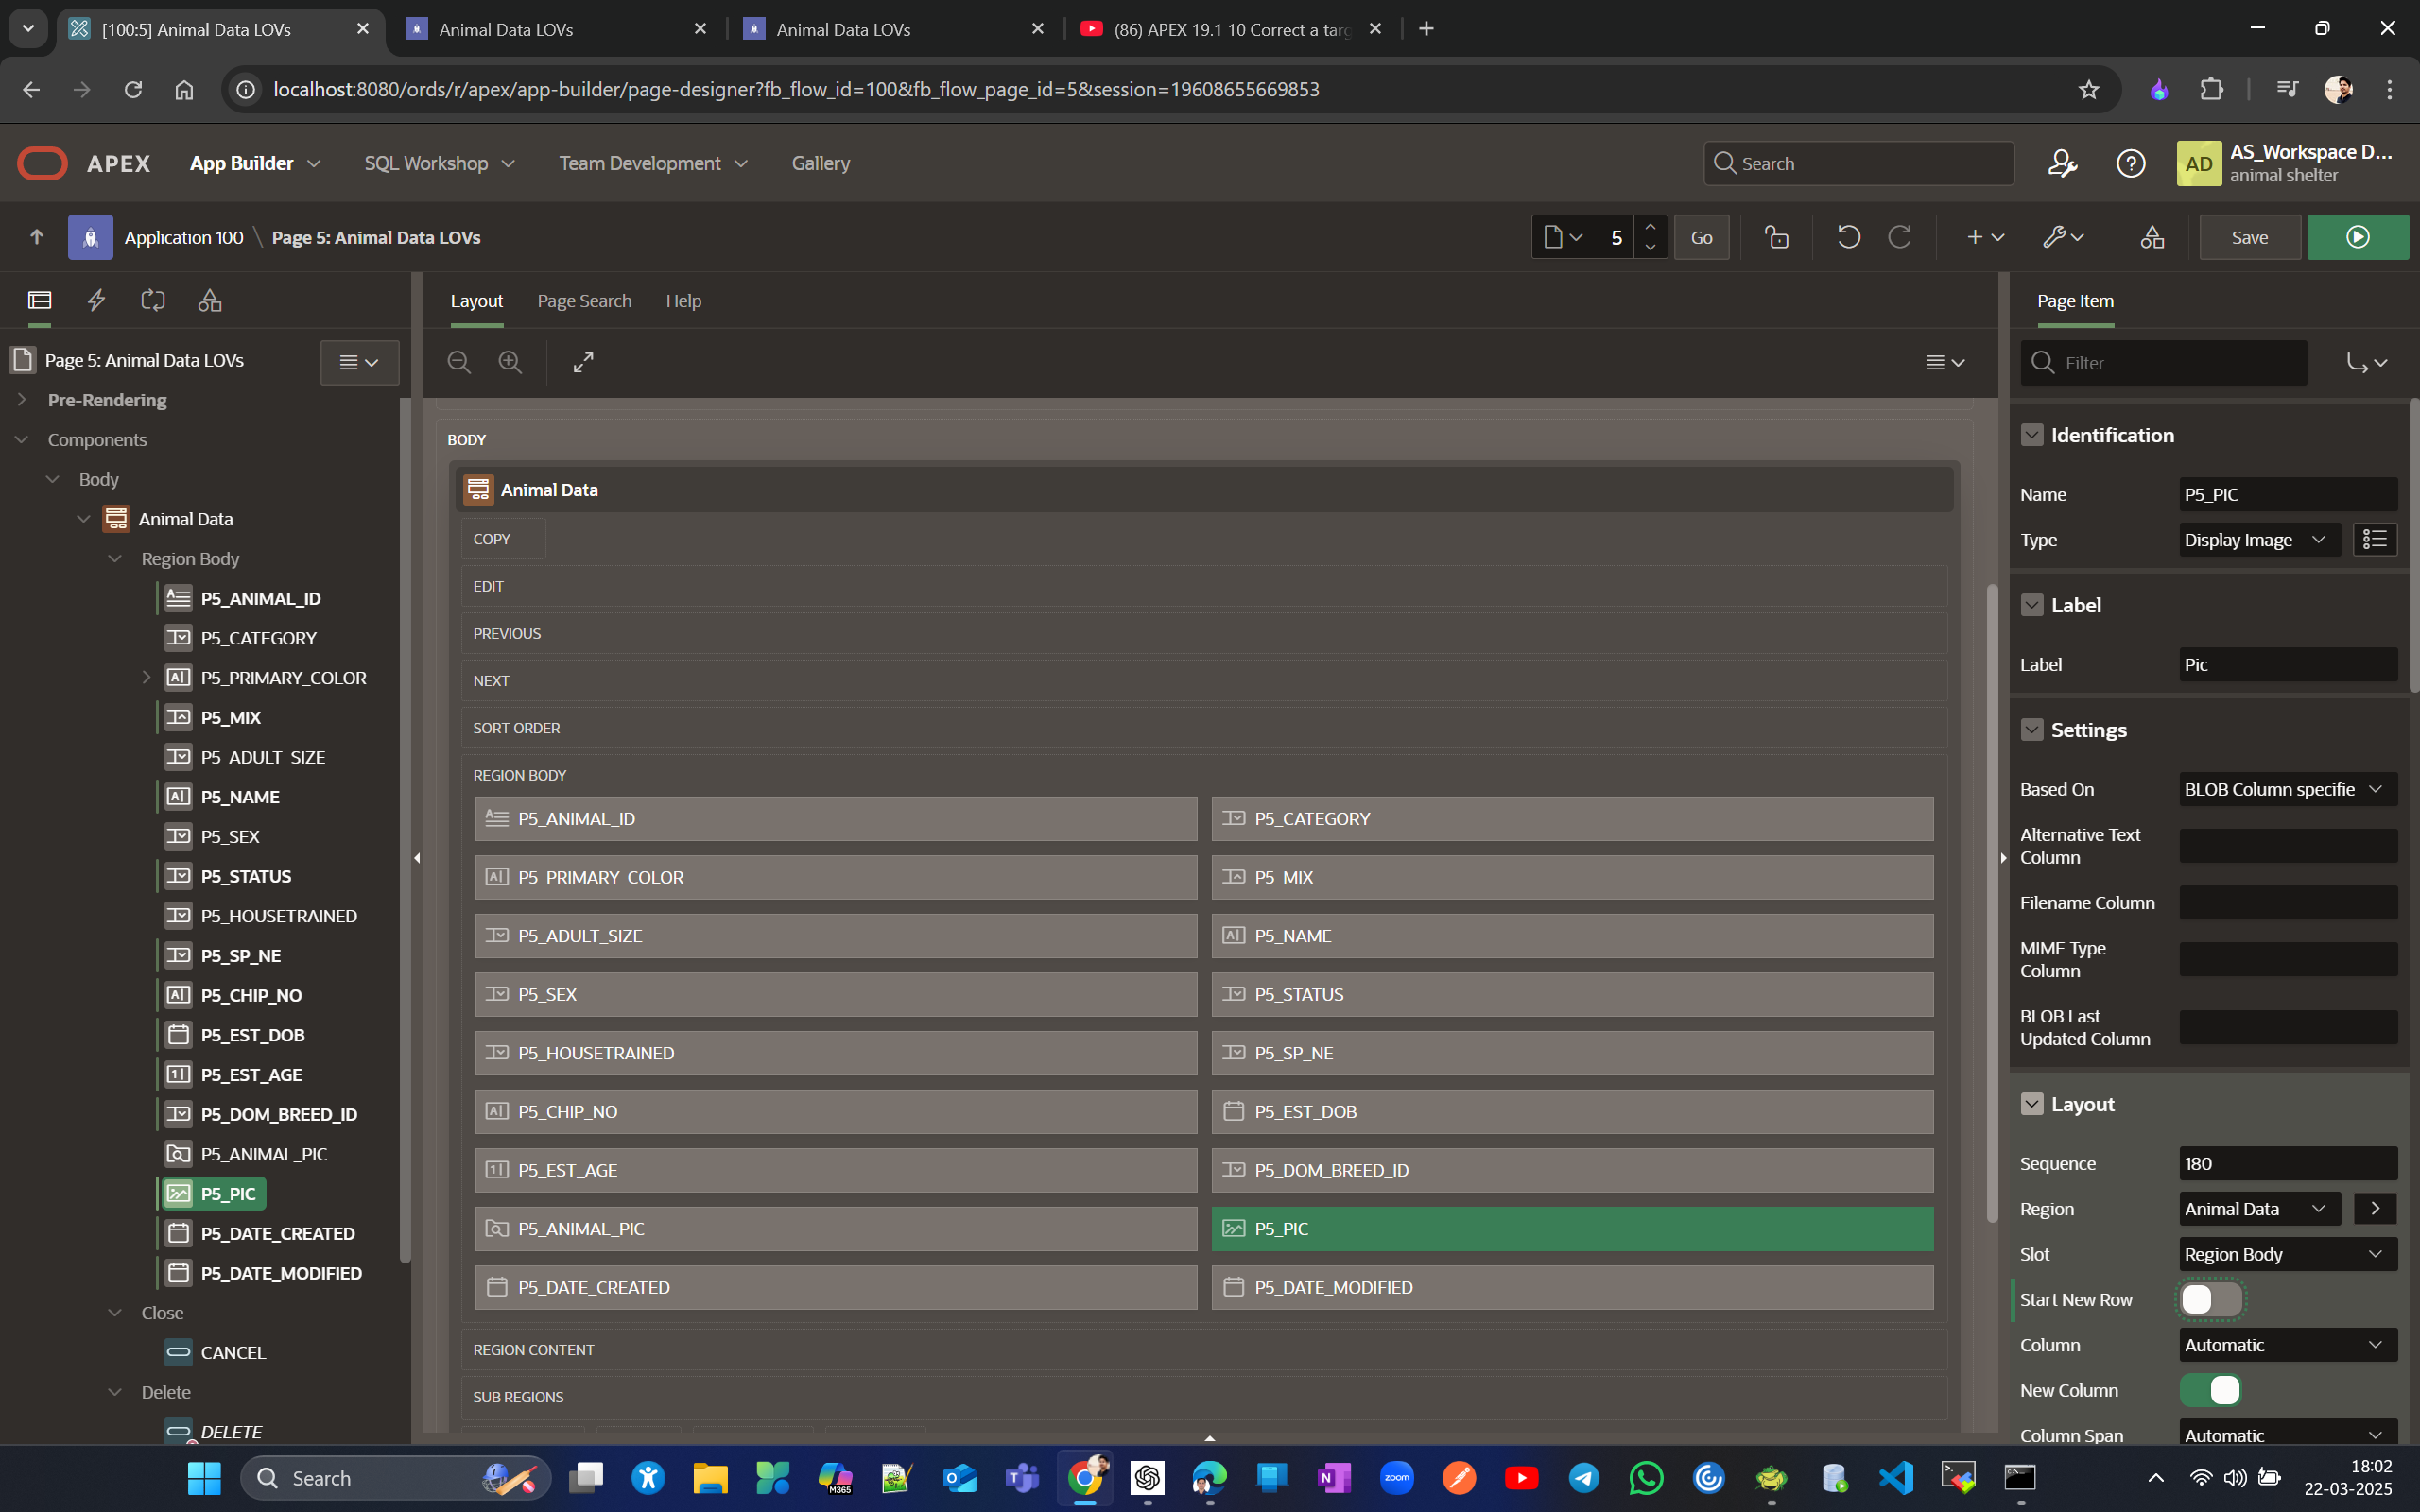
Now to change layout select column in page designer (page #5) → go to layout section
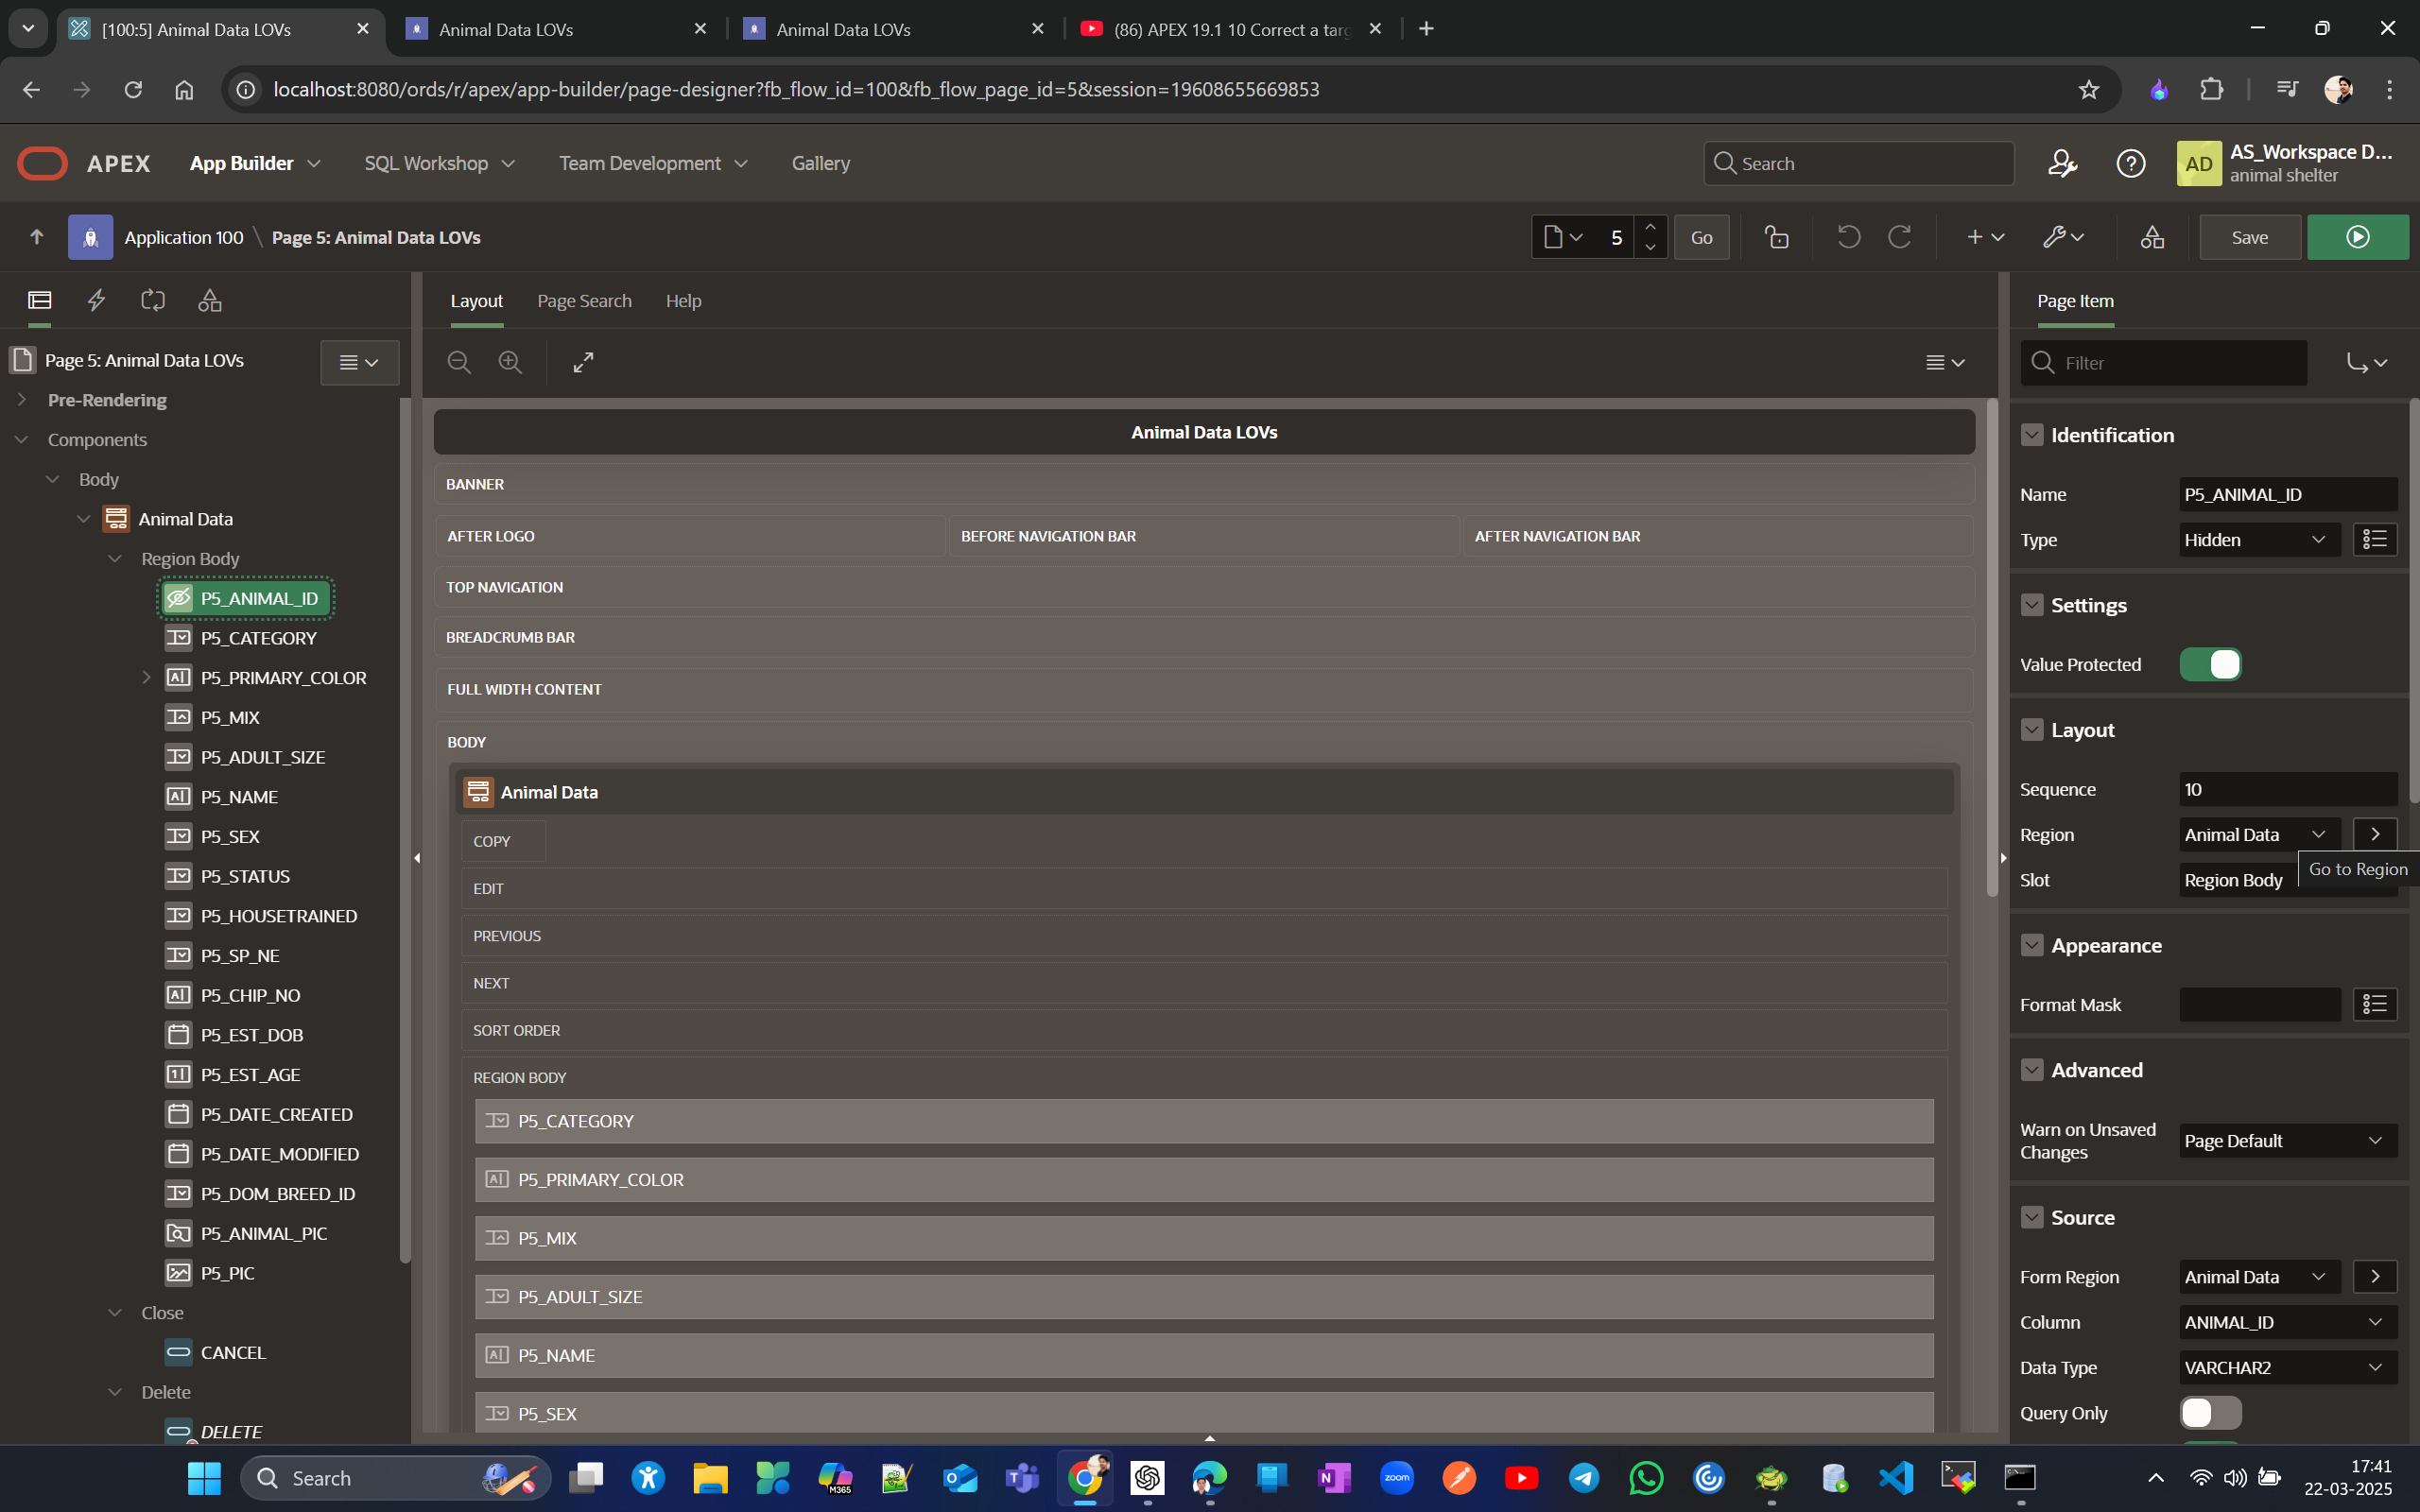
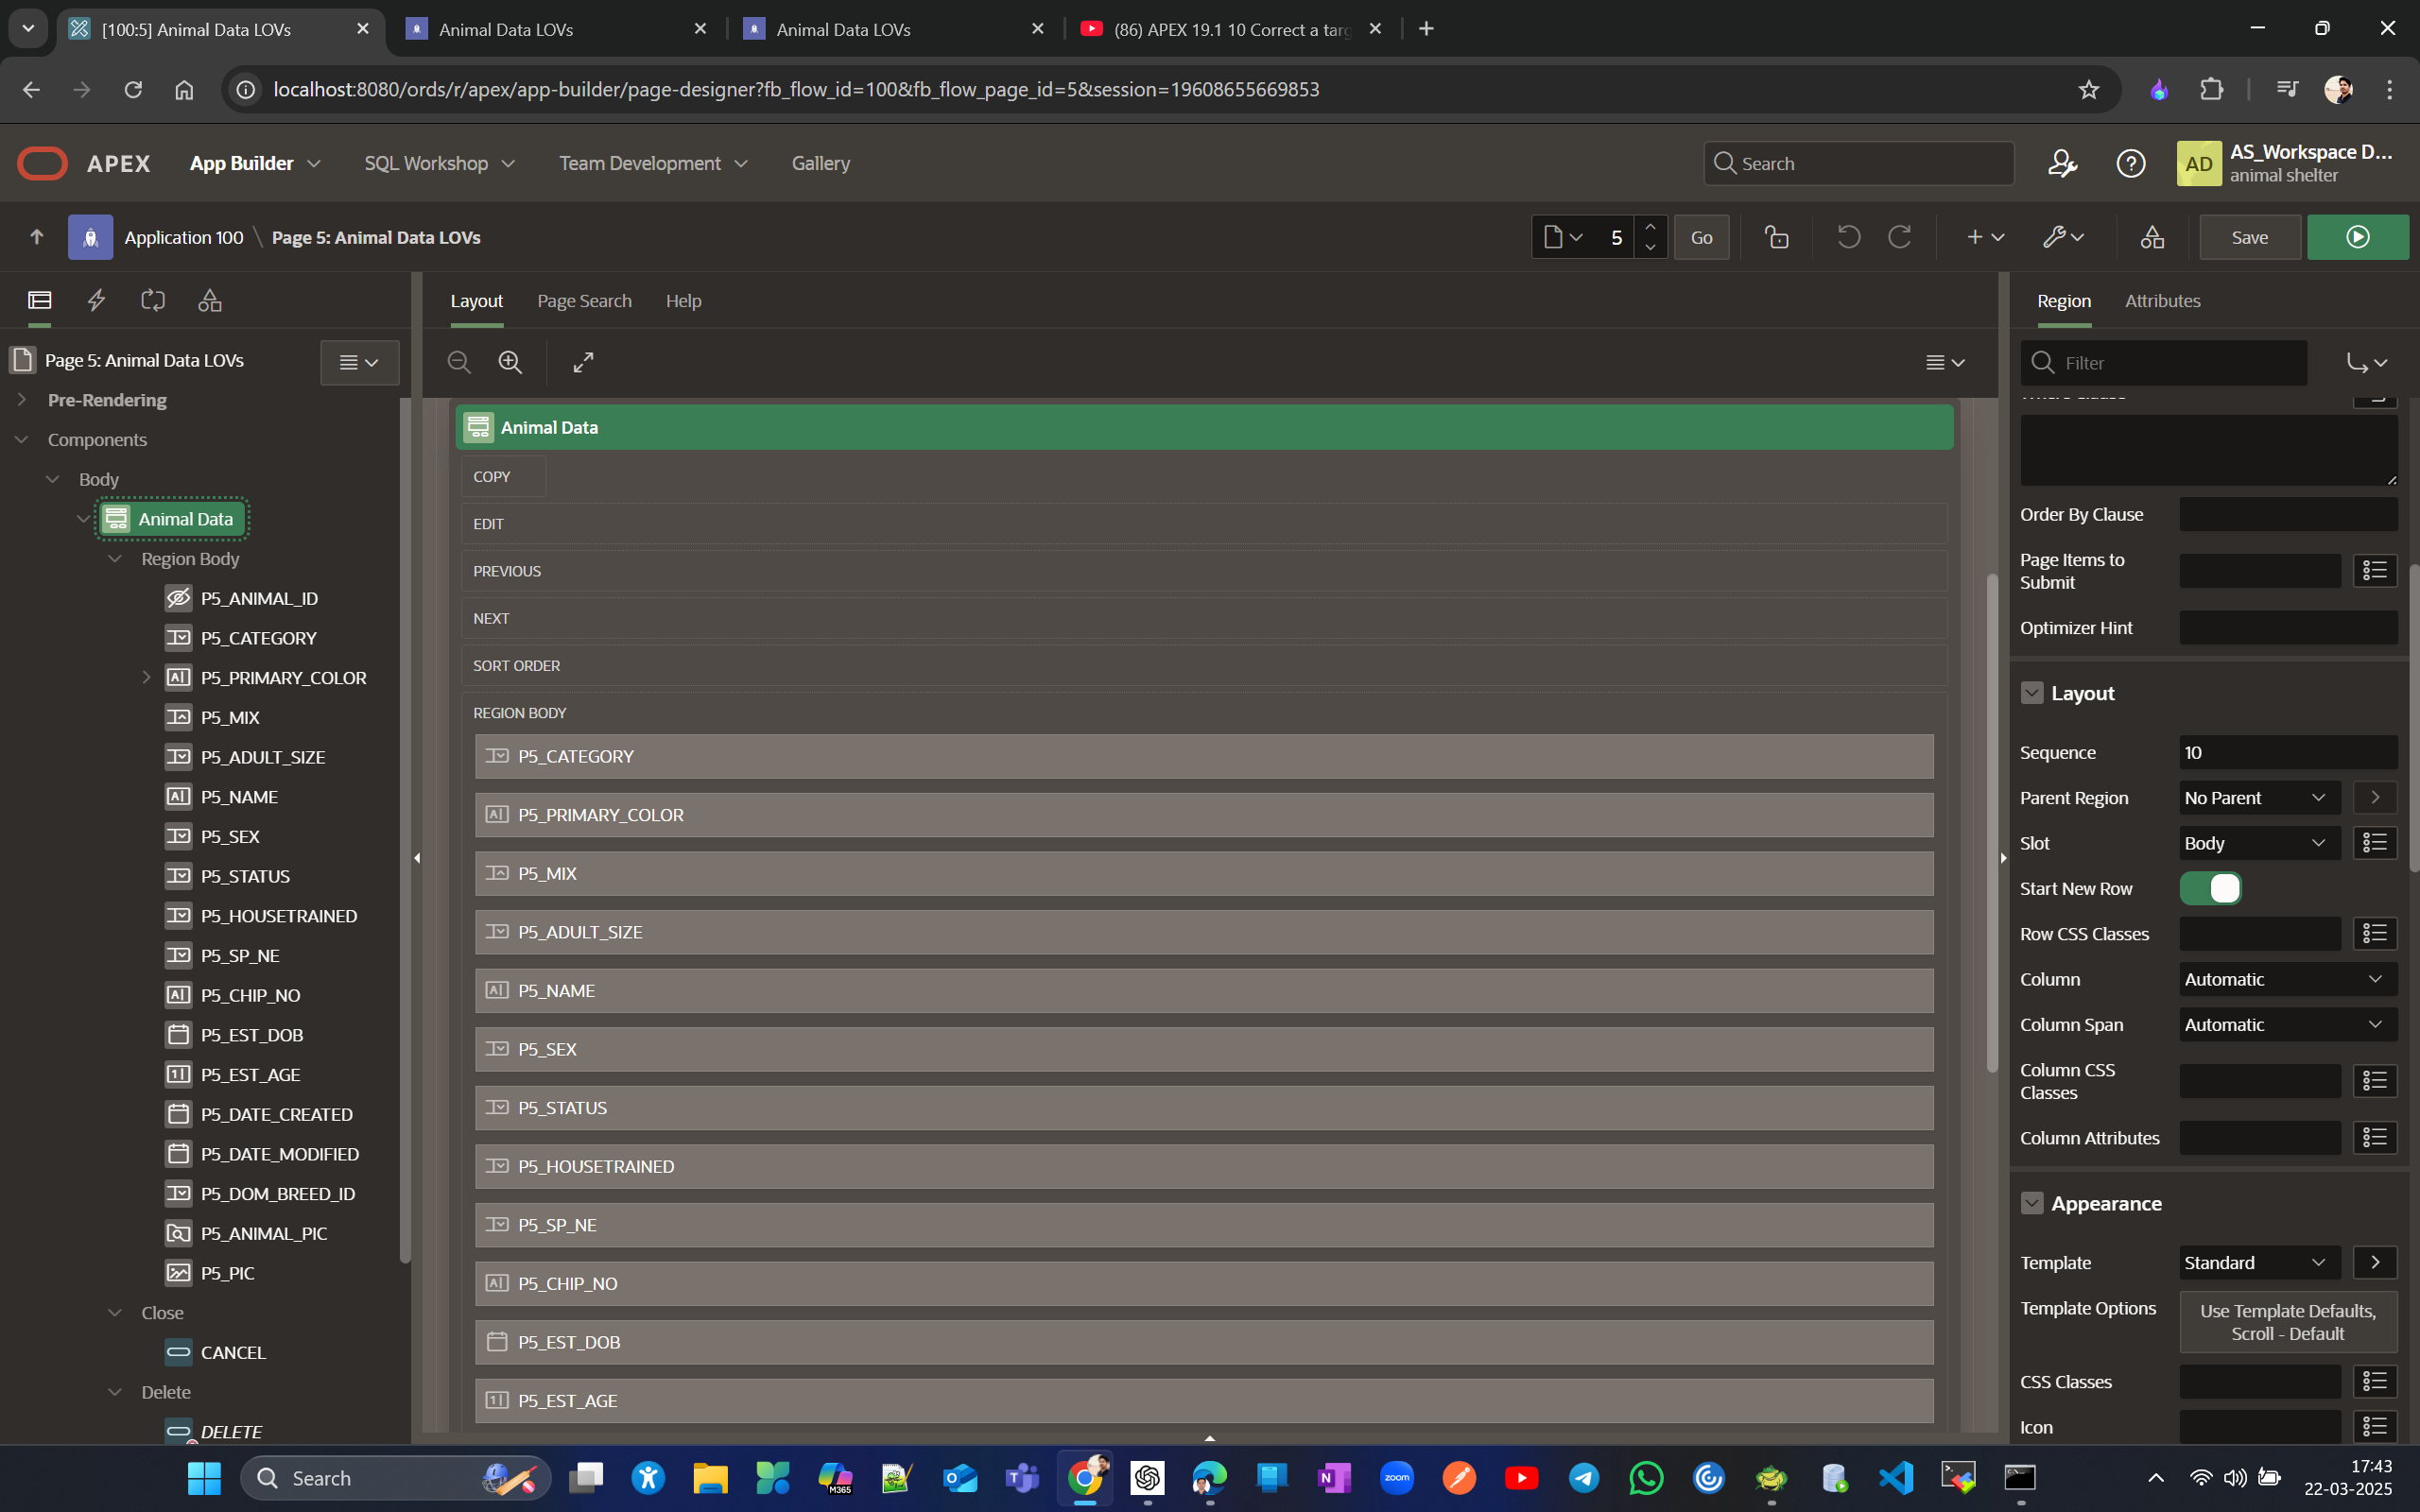
Let Start new Row enable for P5_ANIMAL_ID. and observe how layout chnage when you make start new row to NO for P5_CATEGORY.
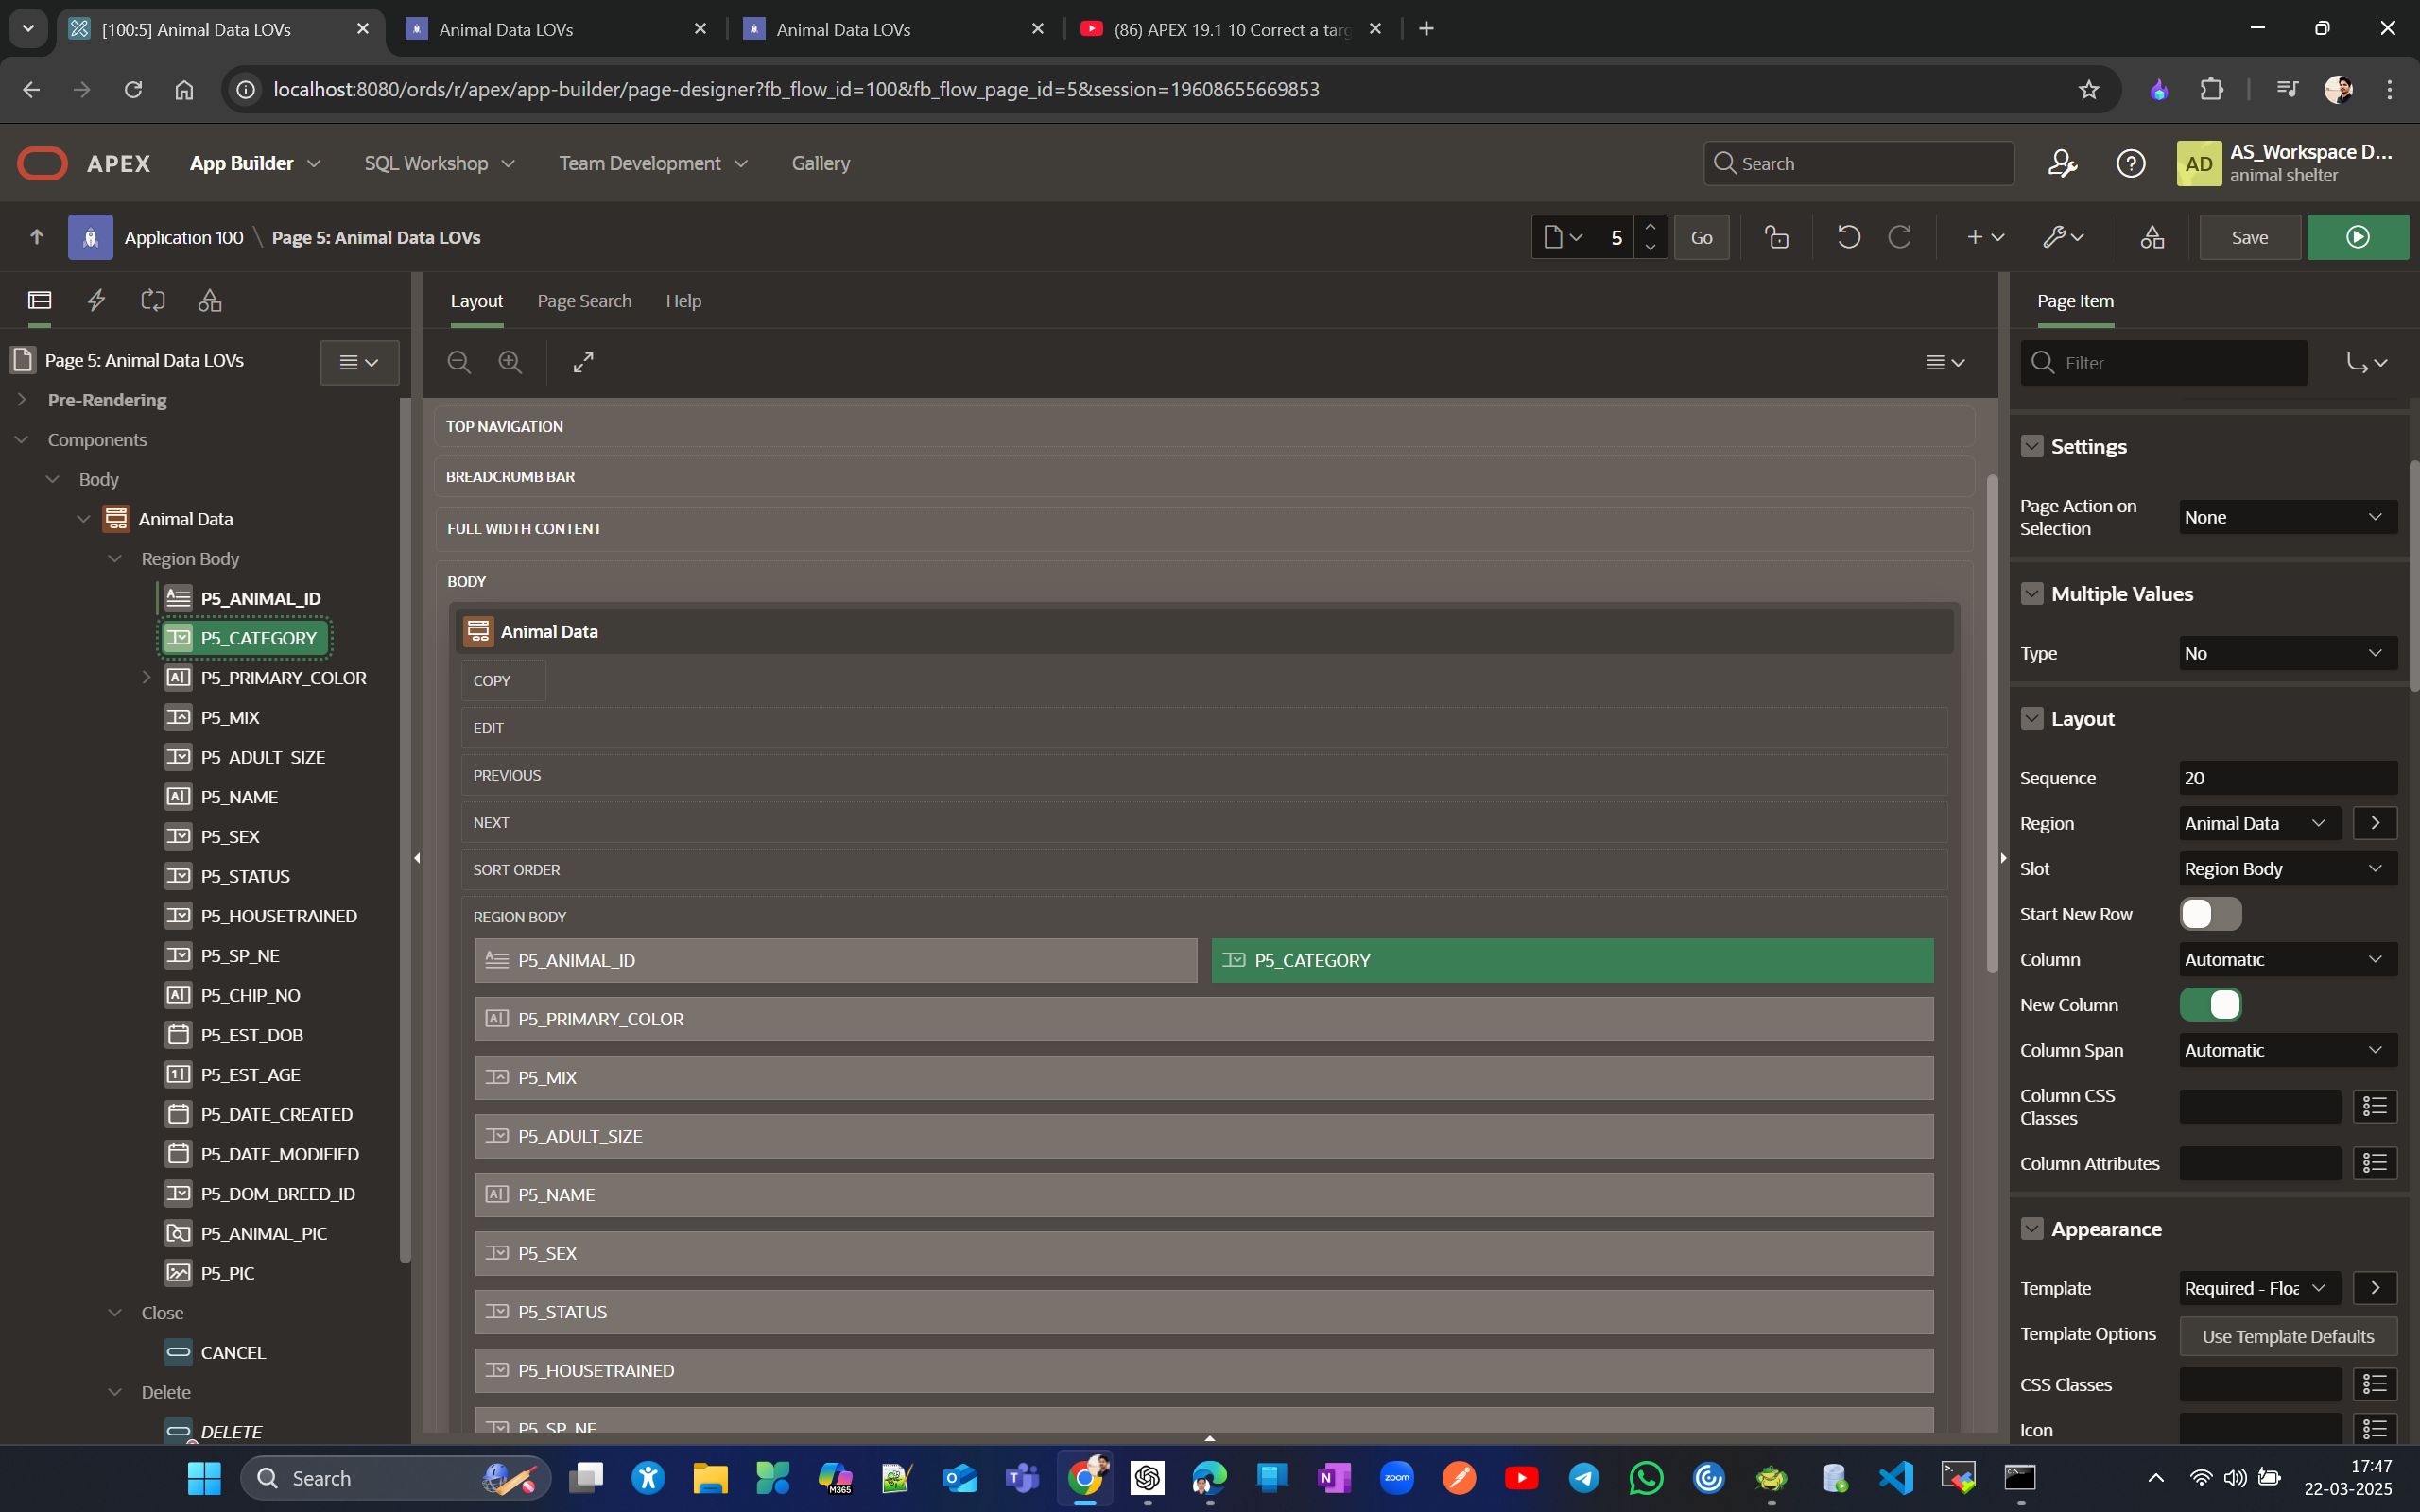
You can also see the column span set to Automatic below the enabled New column in Layout. To explain what column span is, APEX views any display screen in 12 units, so if you want to change the width of some fields relative to others, you can adjust this column span value. For example, if you set it to 6, then both columns in a single row will have equal width in a form, and if you set one to 8 and the other to 4, the one set to 8 will be larger, and the one set to 4 will be smaller.
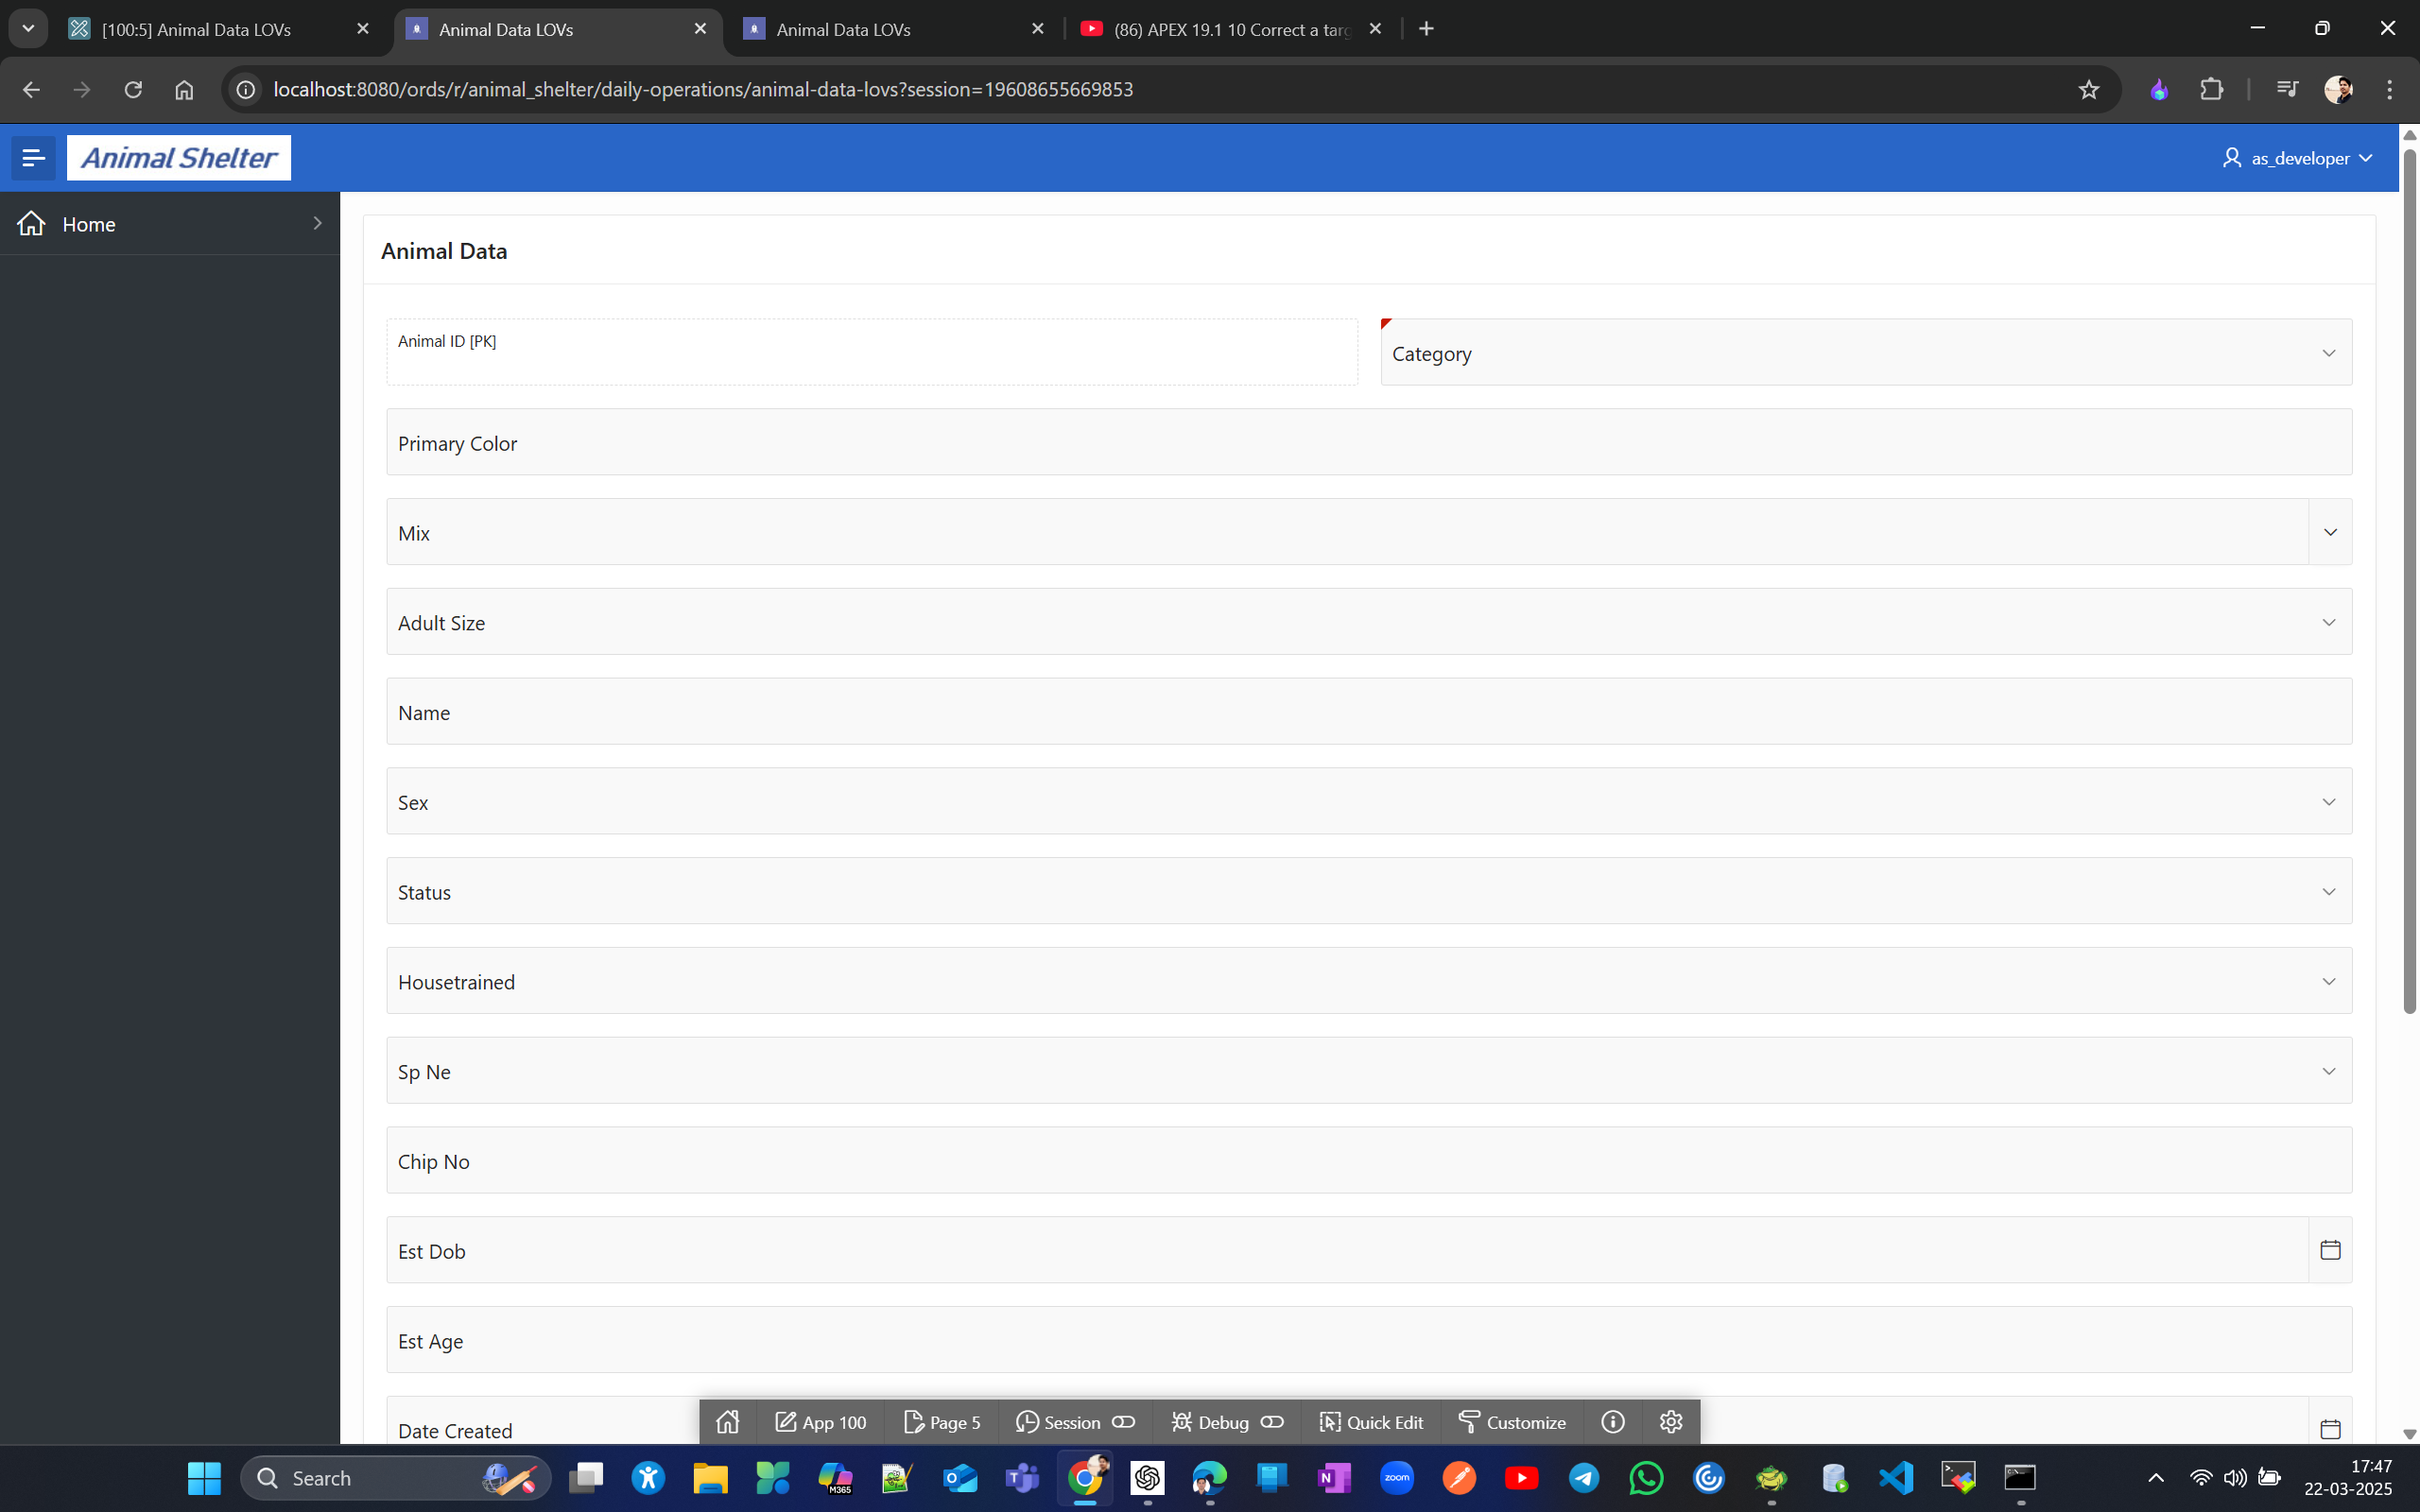
Now if i set Animal Id column span as 4 in form it willl apear something like this
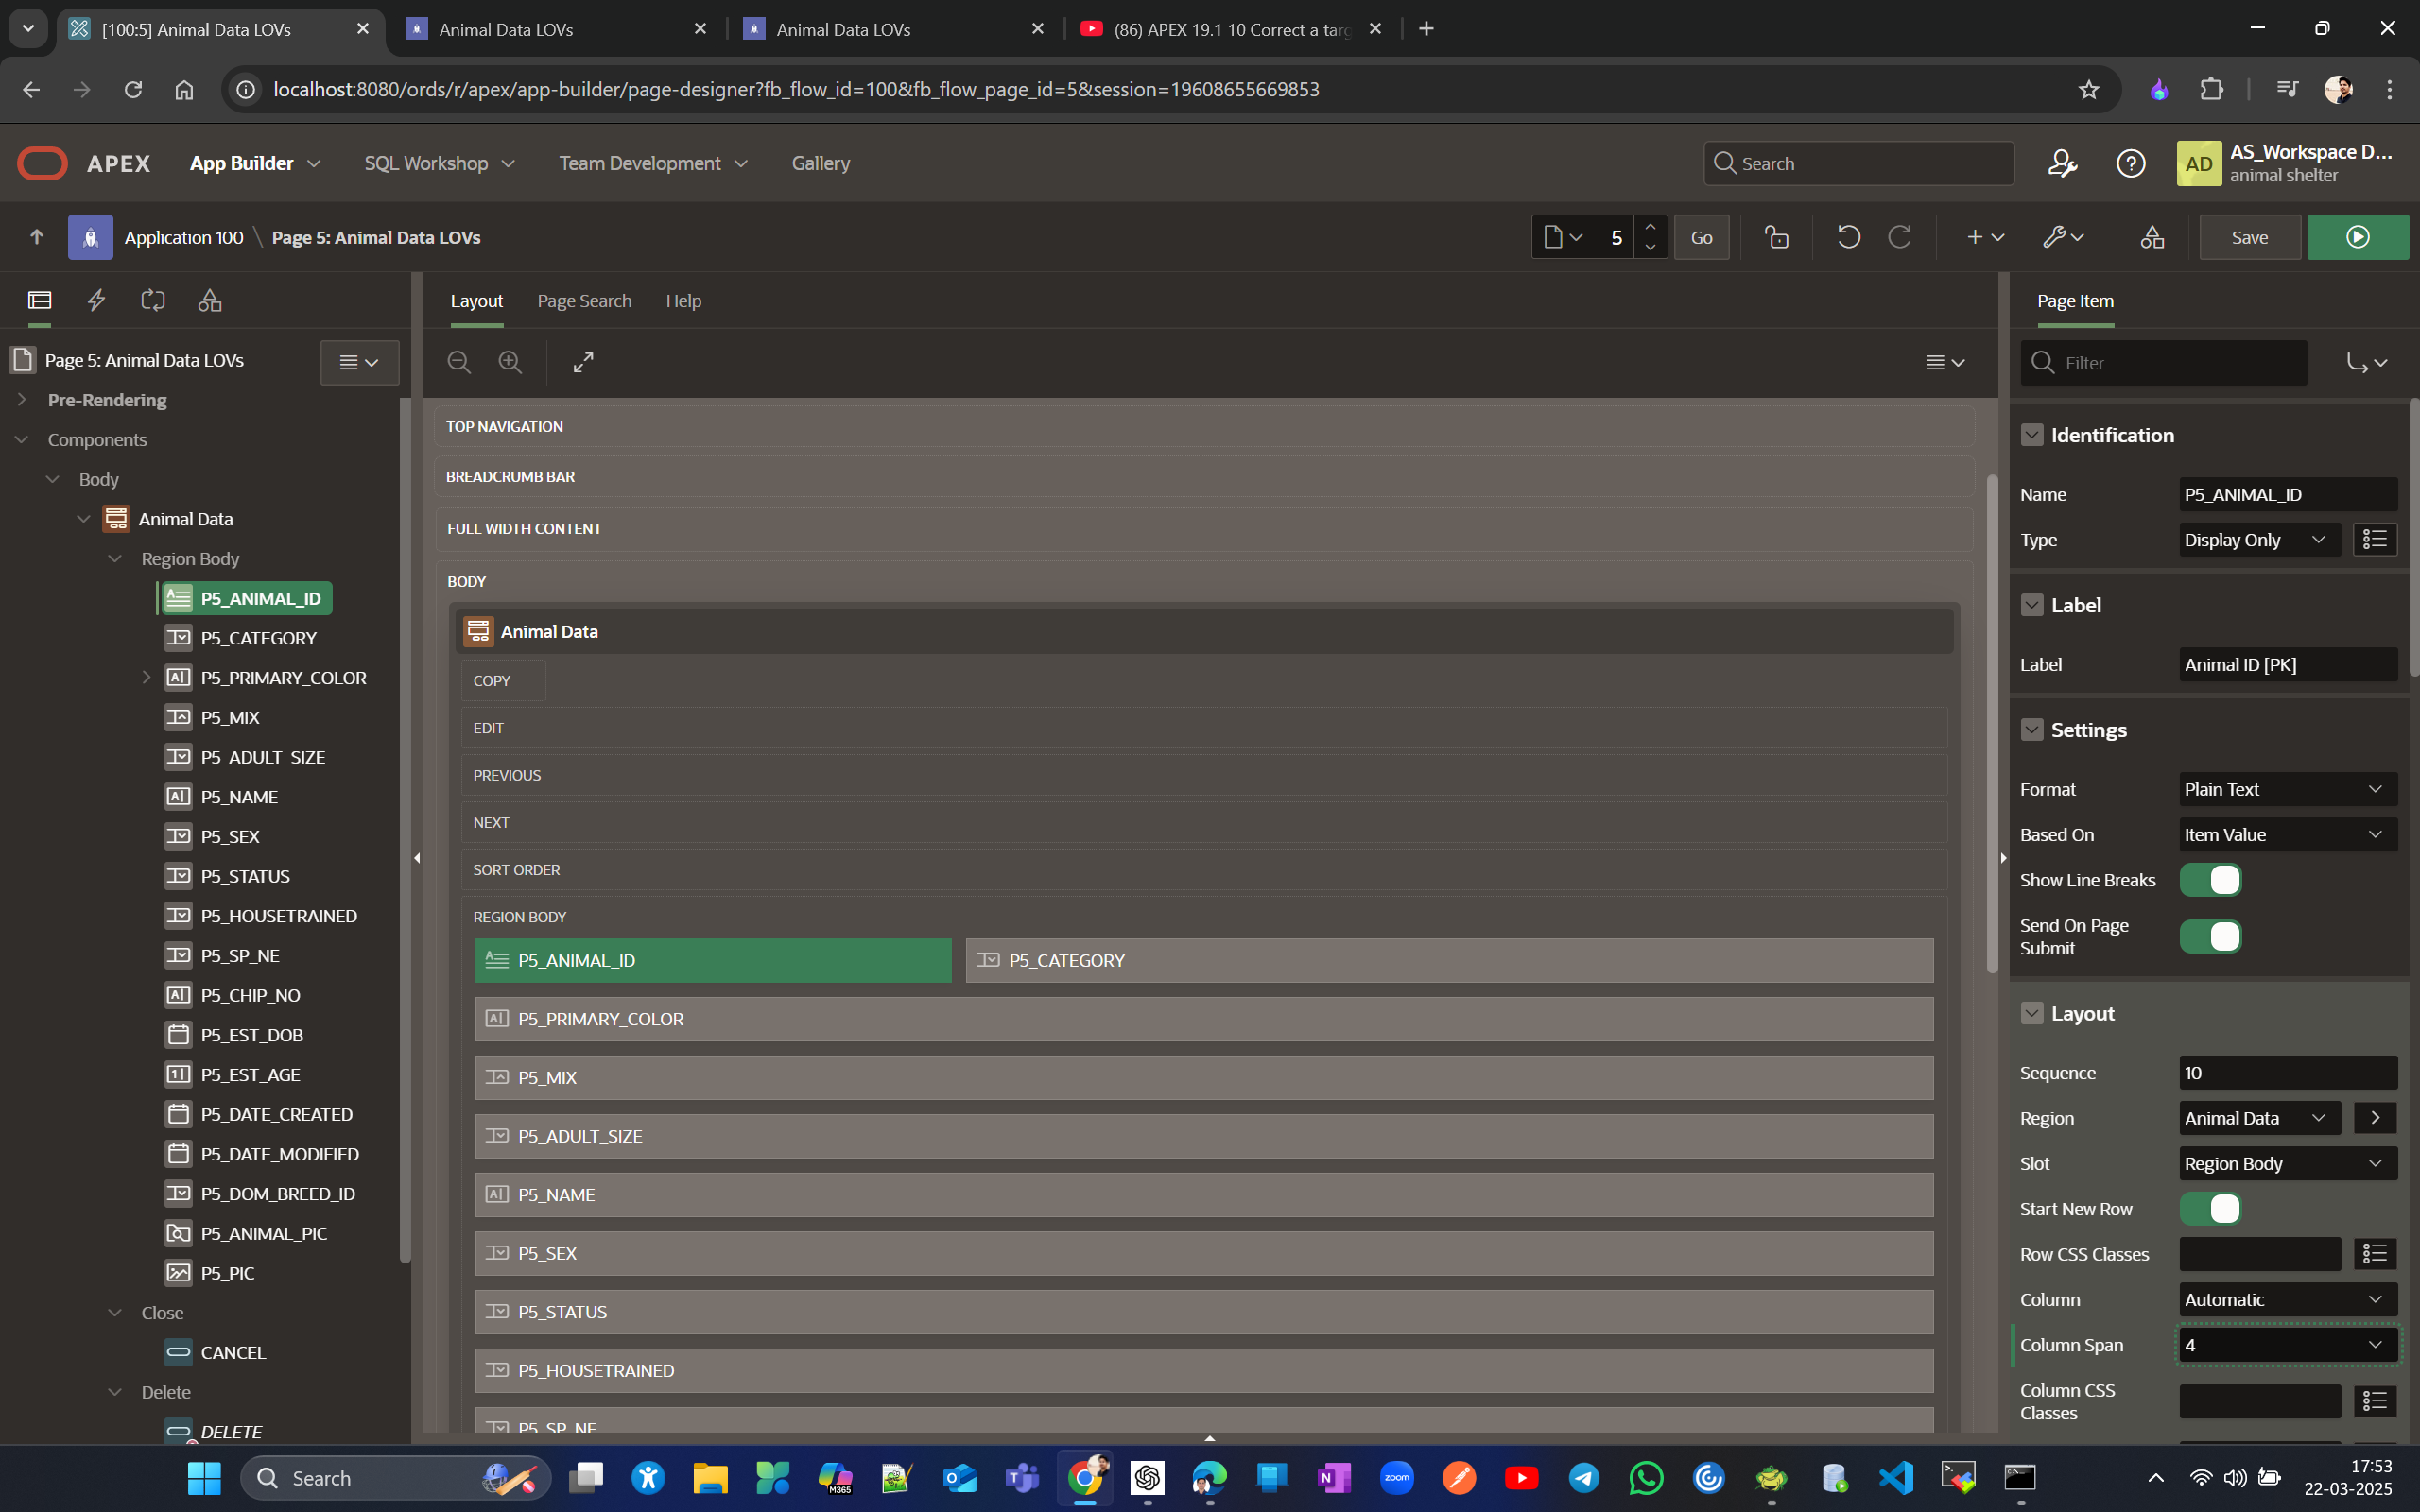
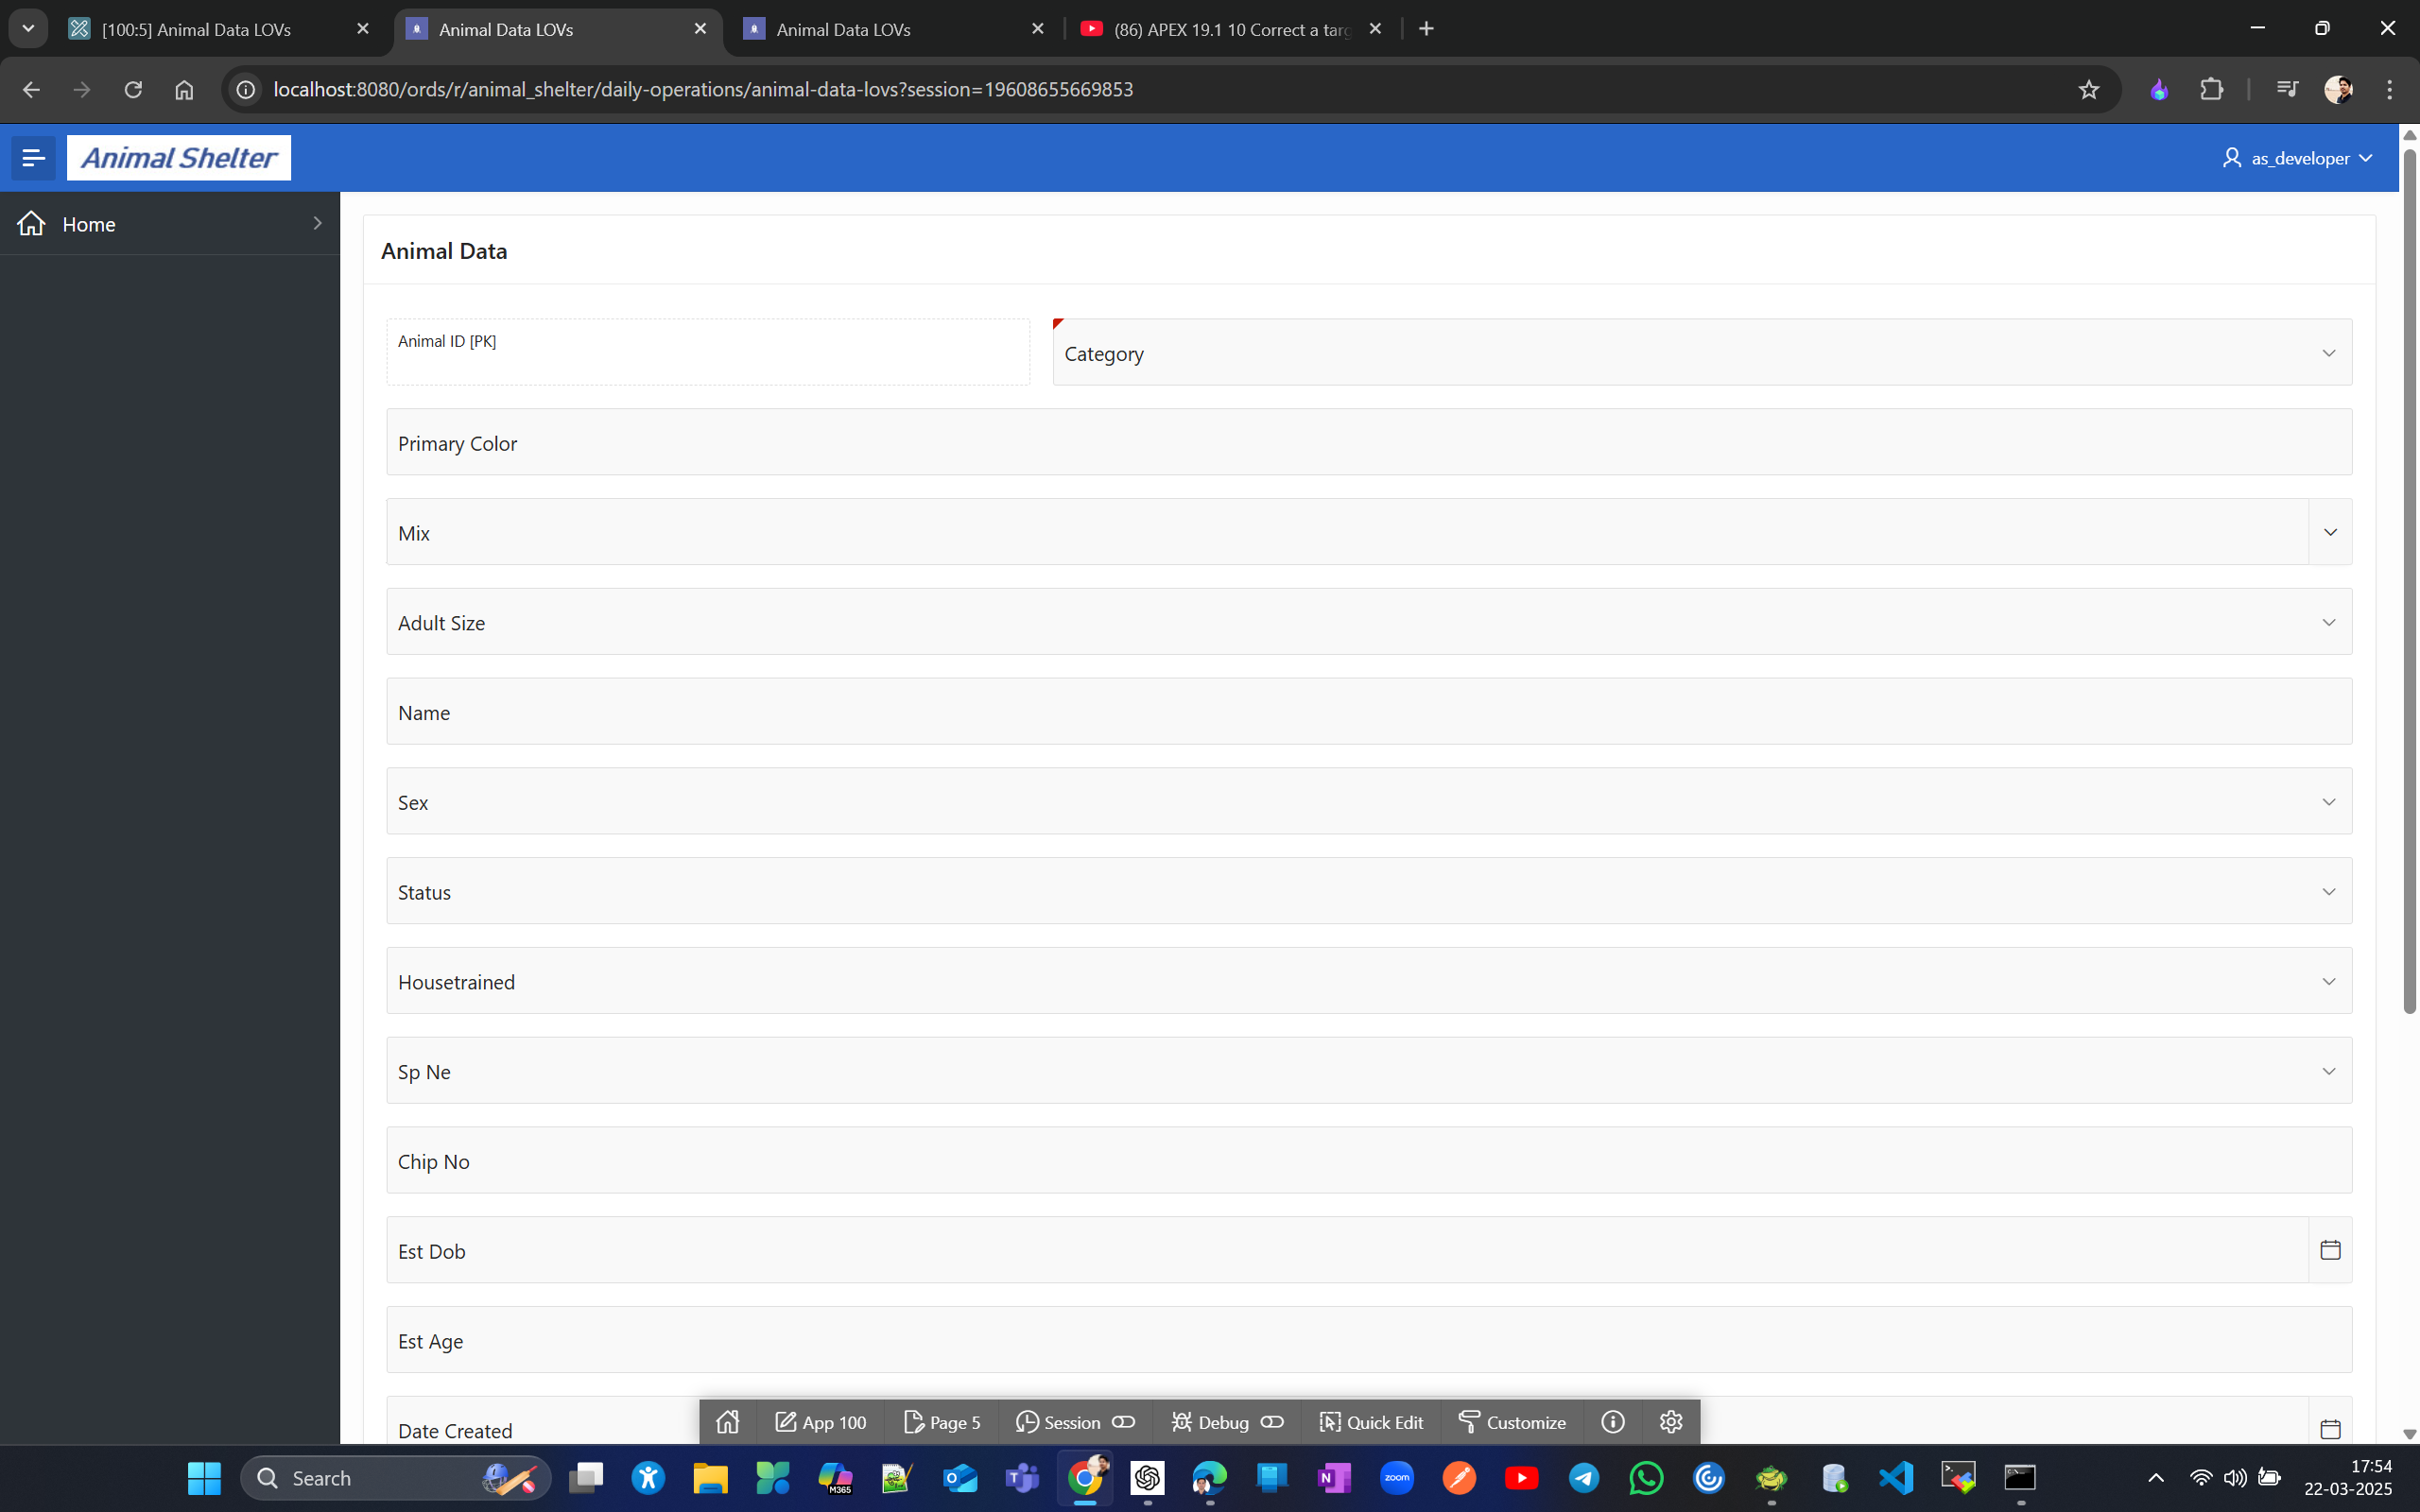
Let's disable "start a new row" for every alternate item so 2 fields appear in a single row in the UI form, and ensure audit columns appear last by assigning them a sequence value greater than the last column, in this case, P5_PIC.

To display 2 fields in a single row when 3 or 4 fields appear, set the column span value to 6, resulting in the final layout after the change.
Change navigation menu. Add a hierarchy. Create 2nd application. Copy a page
Reorganize and group navigation items. Before this create 3 more landing pages (like page #1), all will be blank pages.
Lets create Animal Page #10 and keepp that at the same level of Home(No parent selected in Parent navigation menu entry)
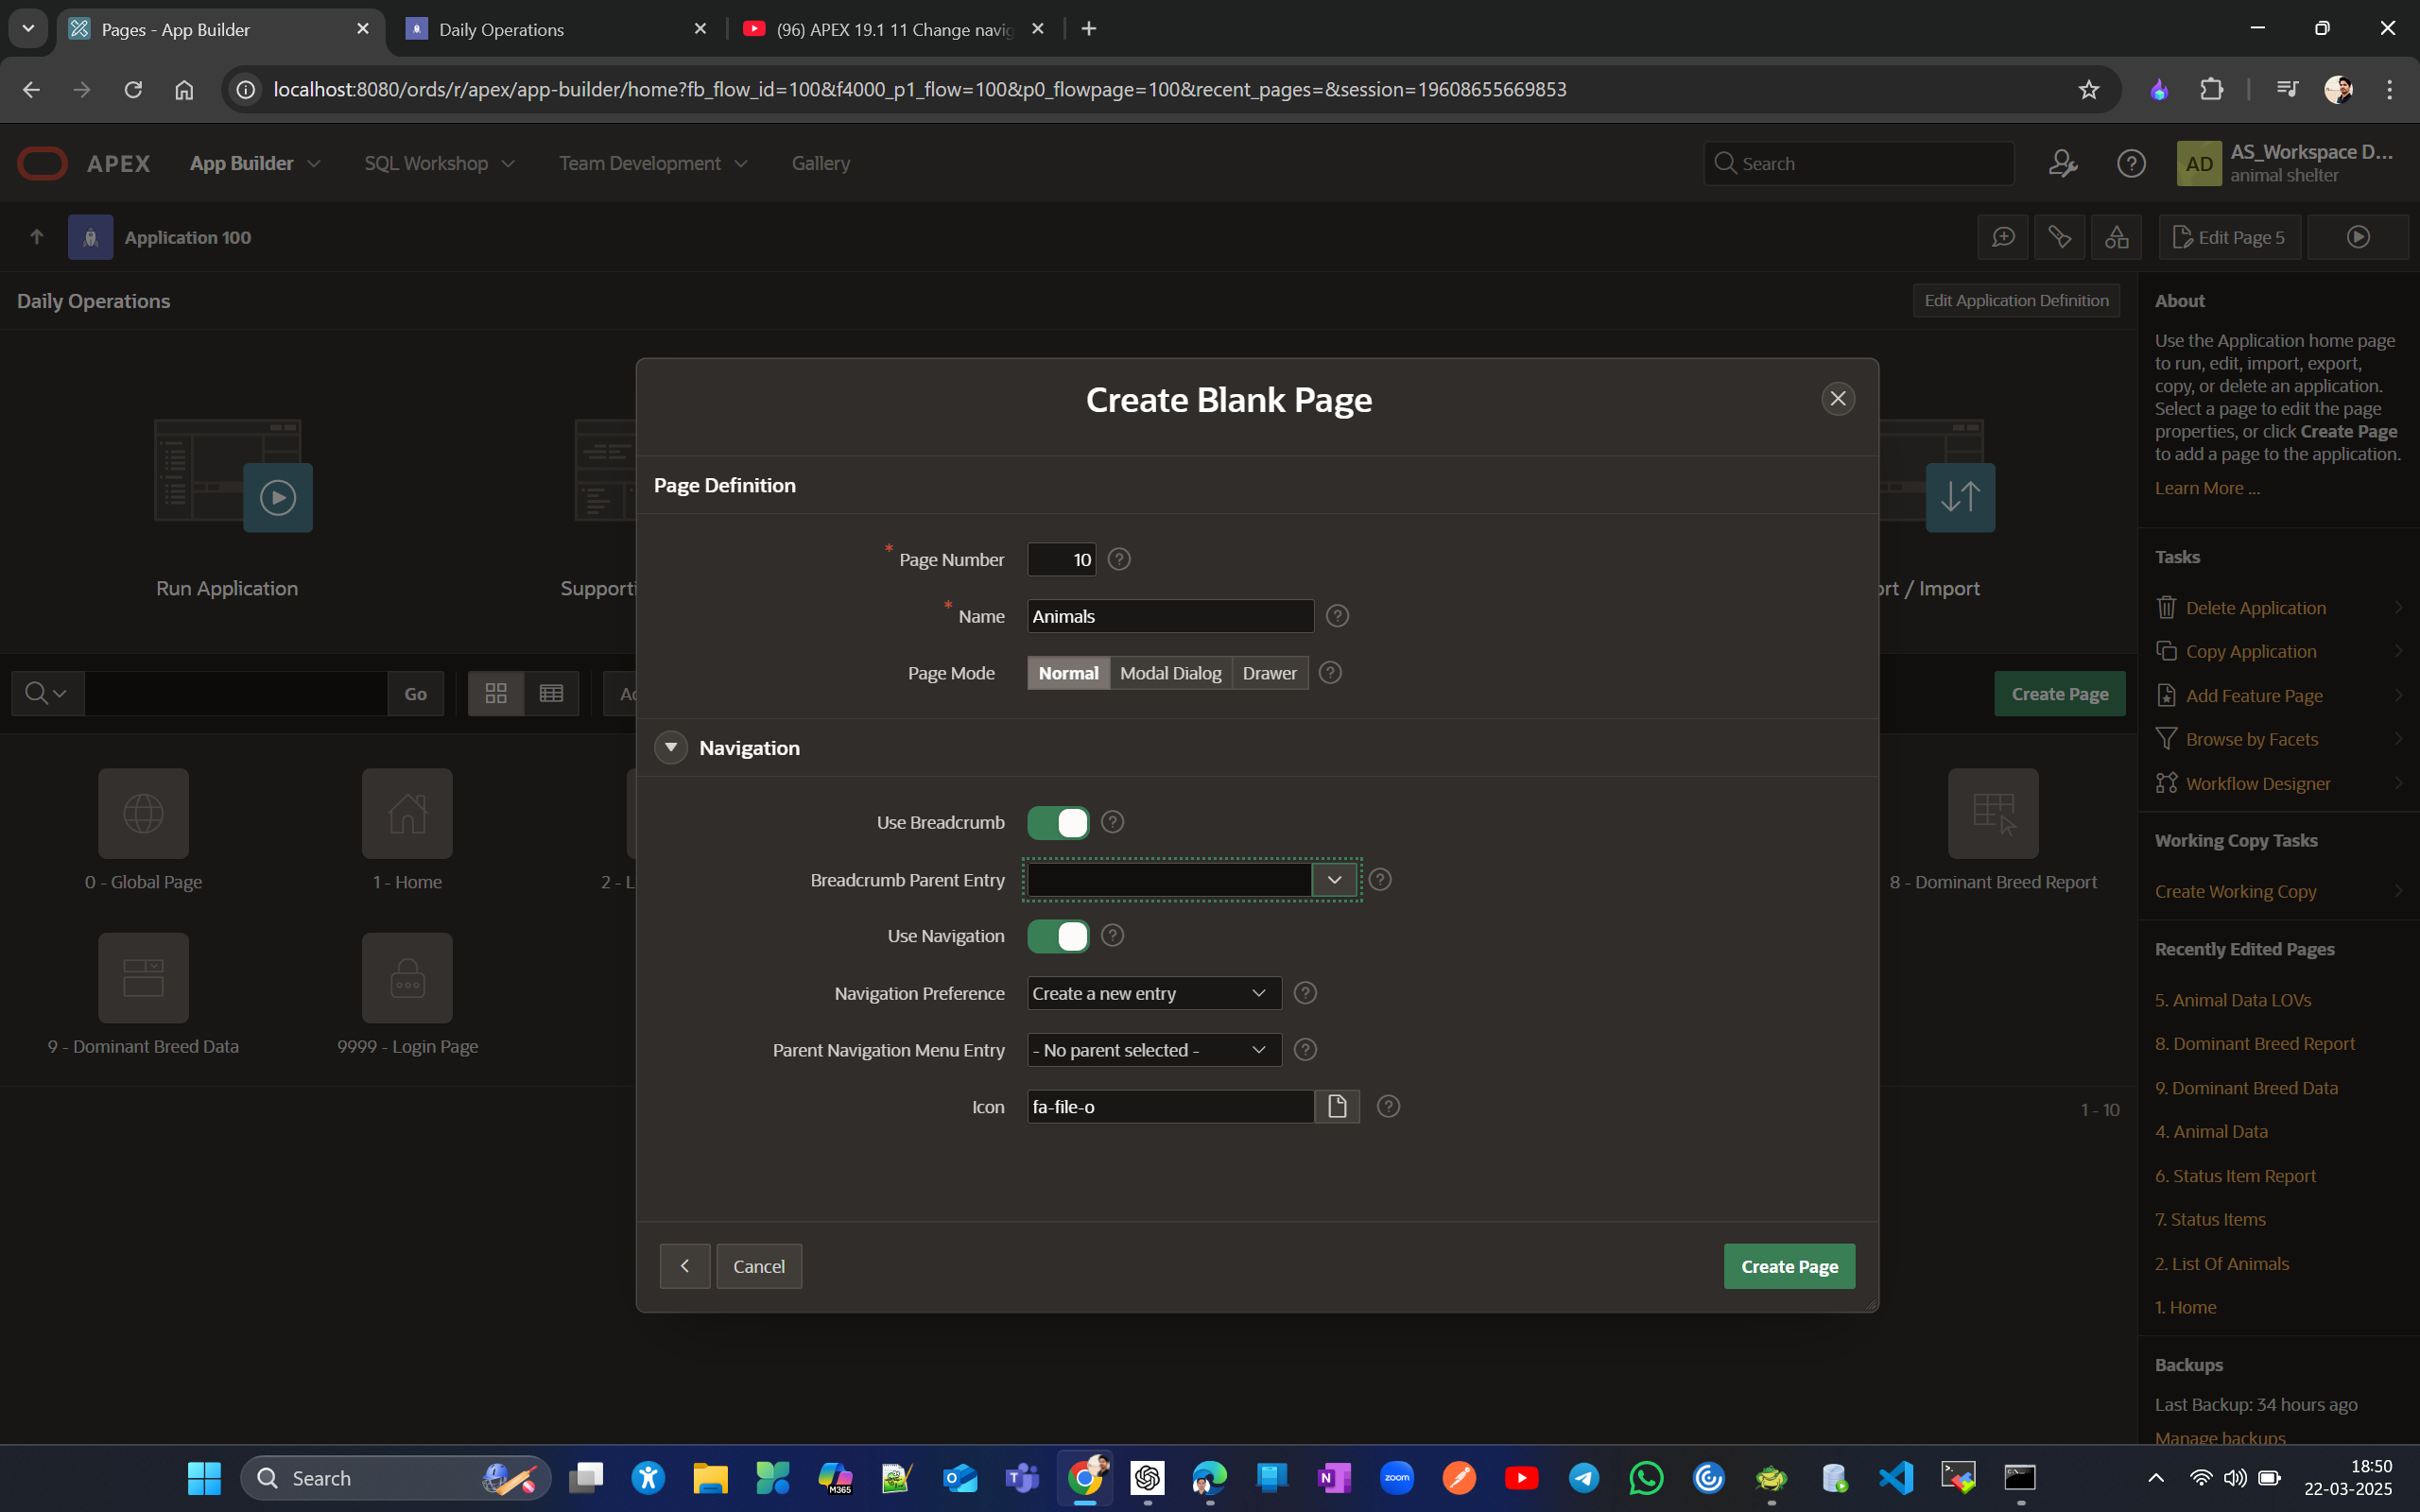
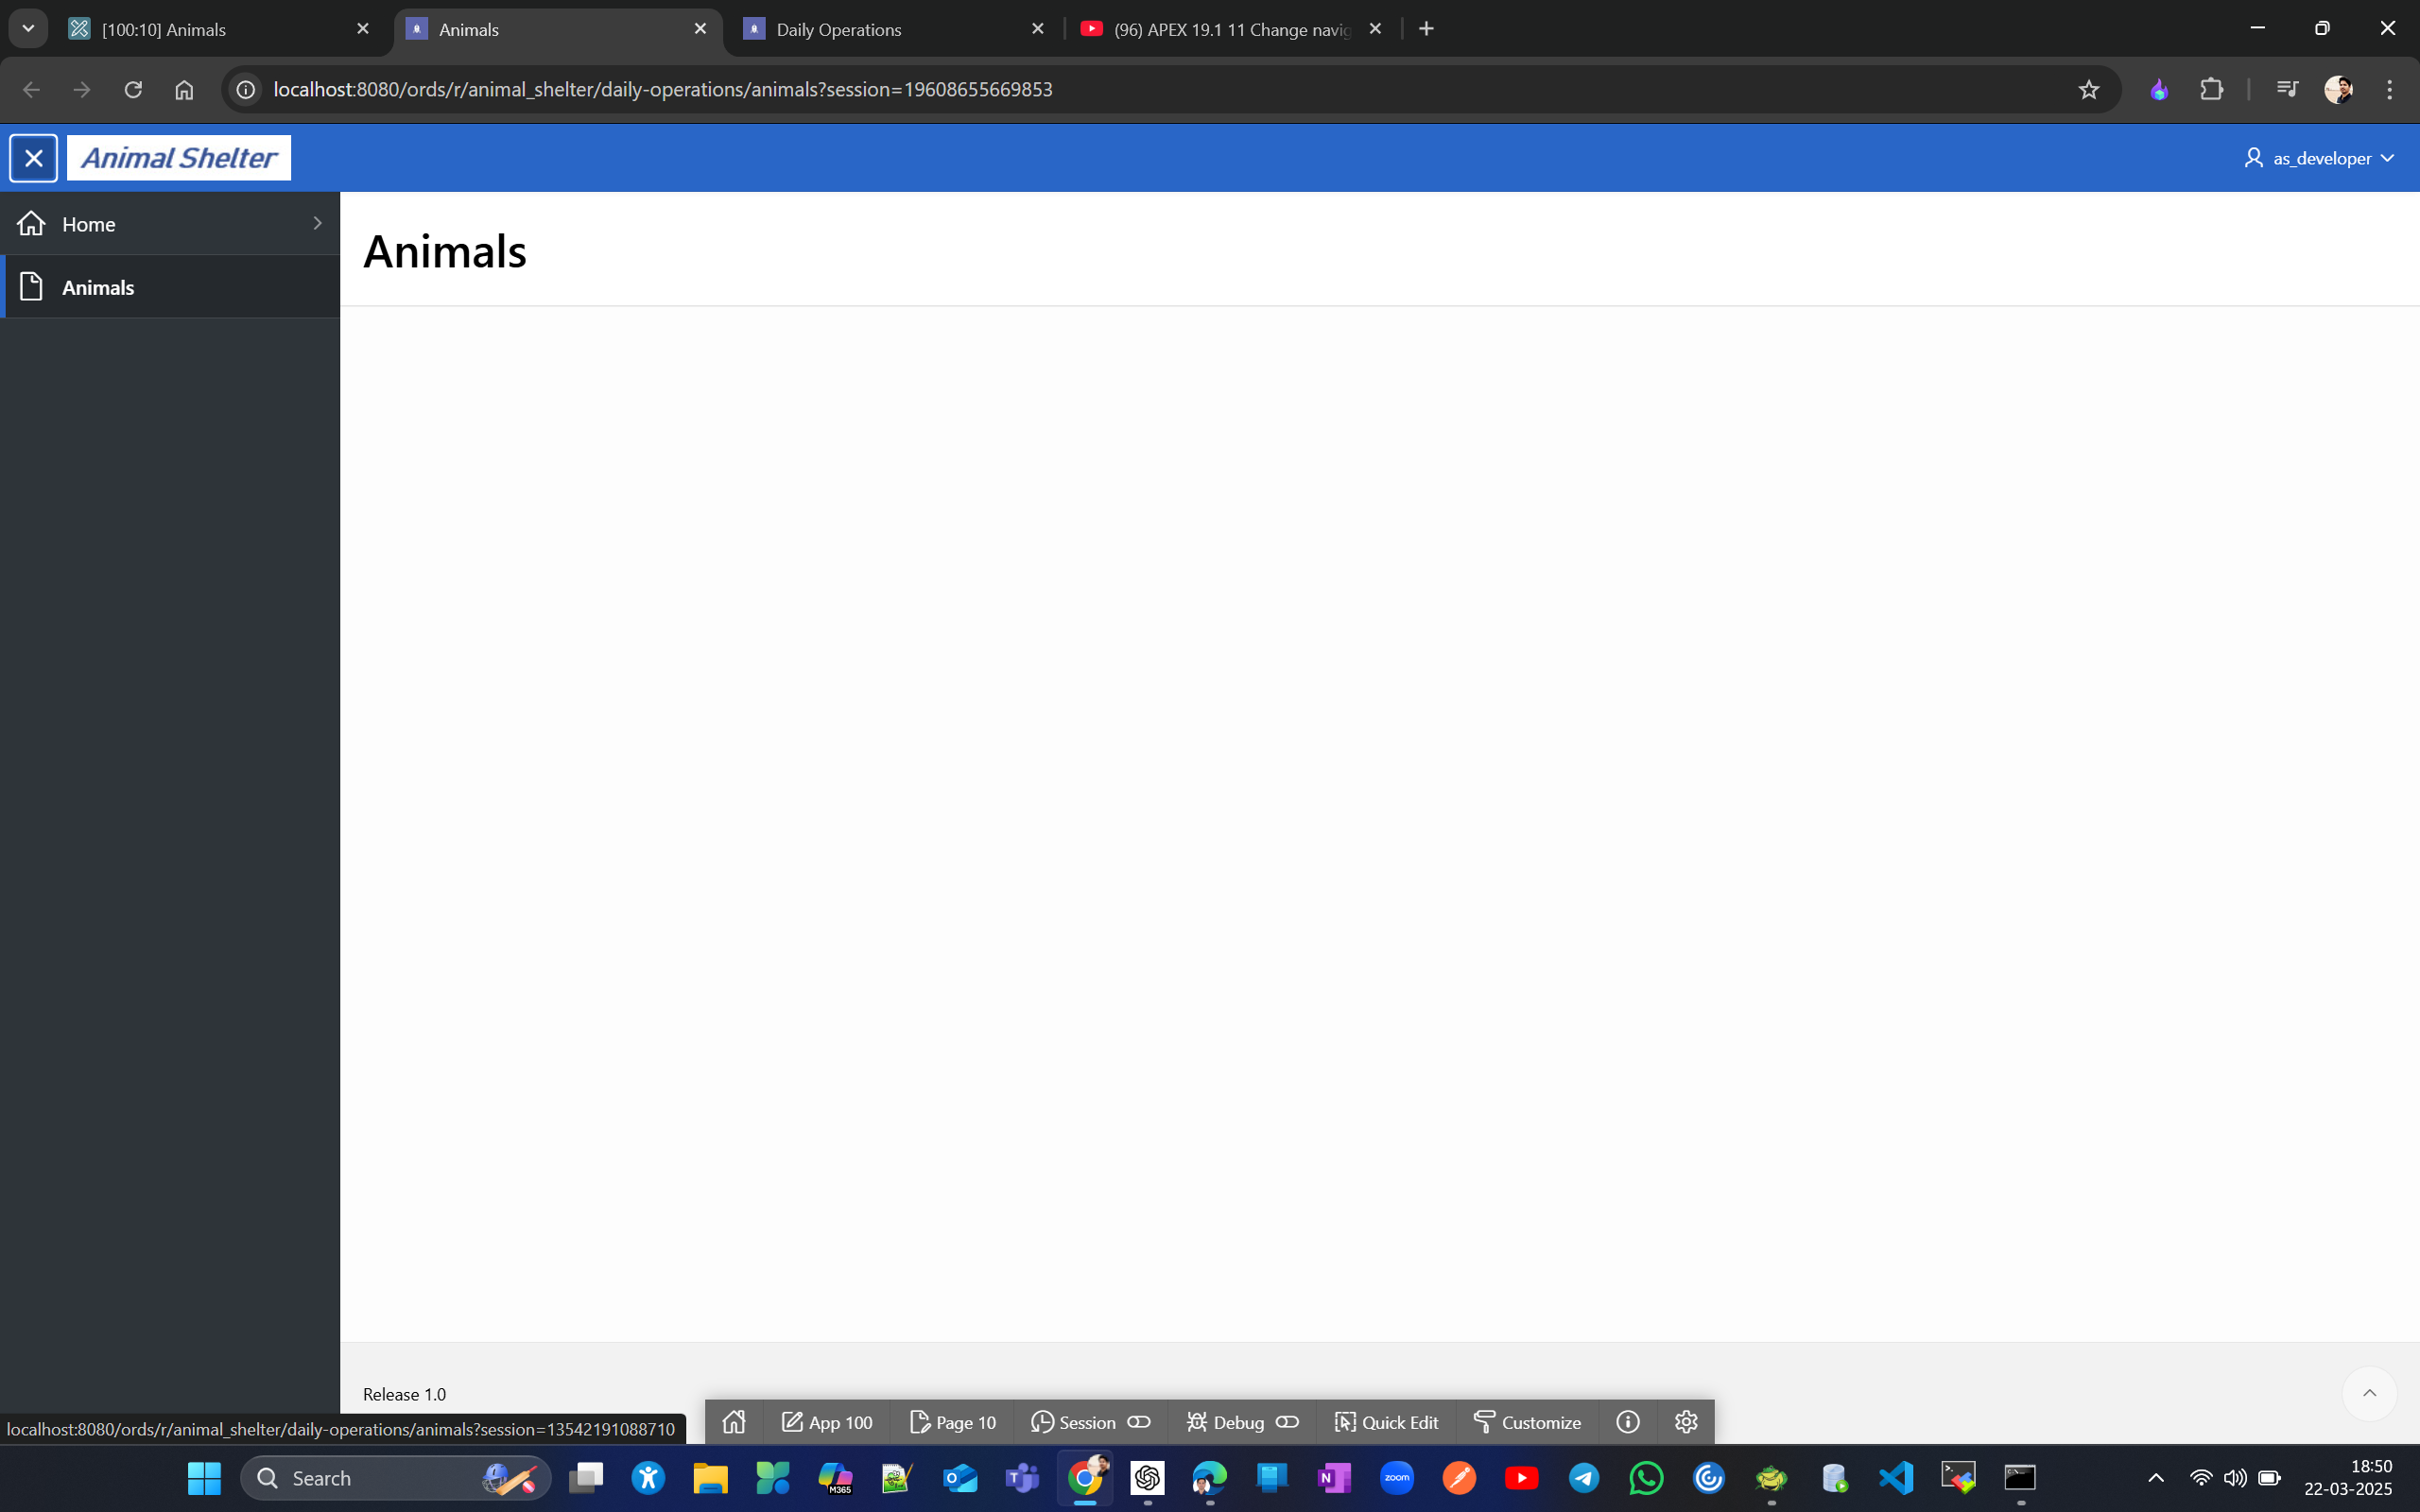
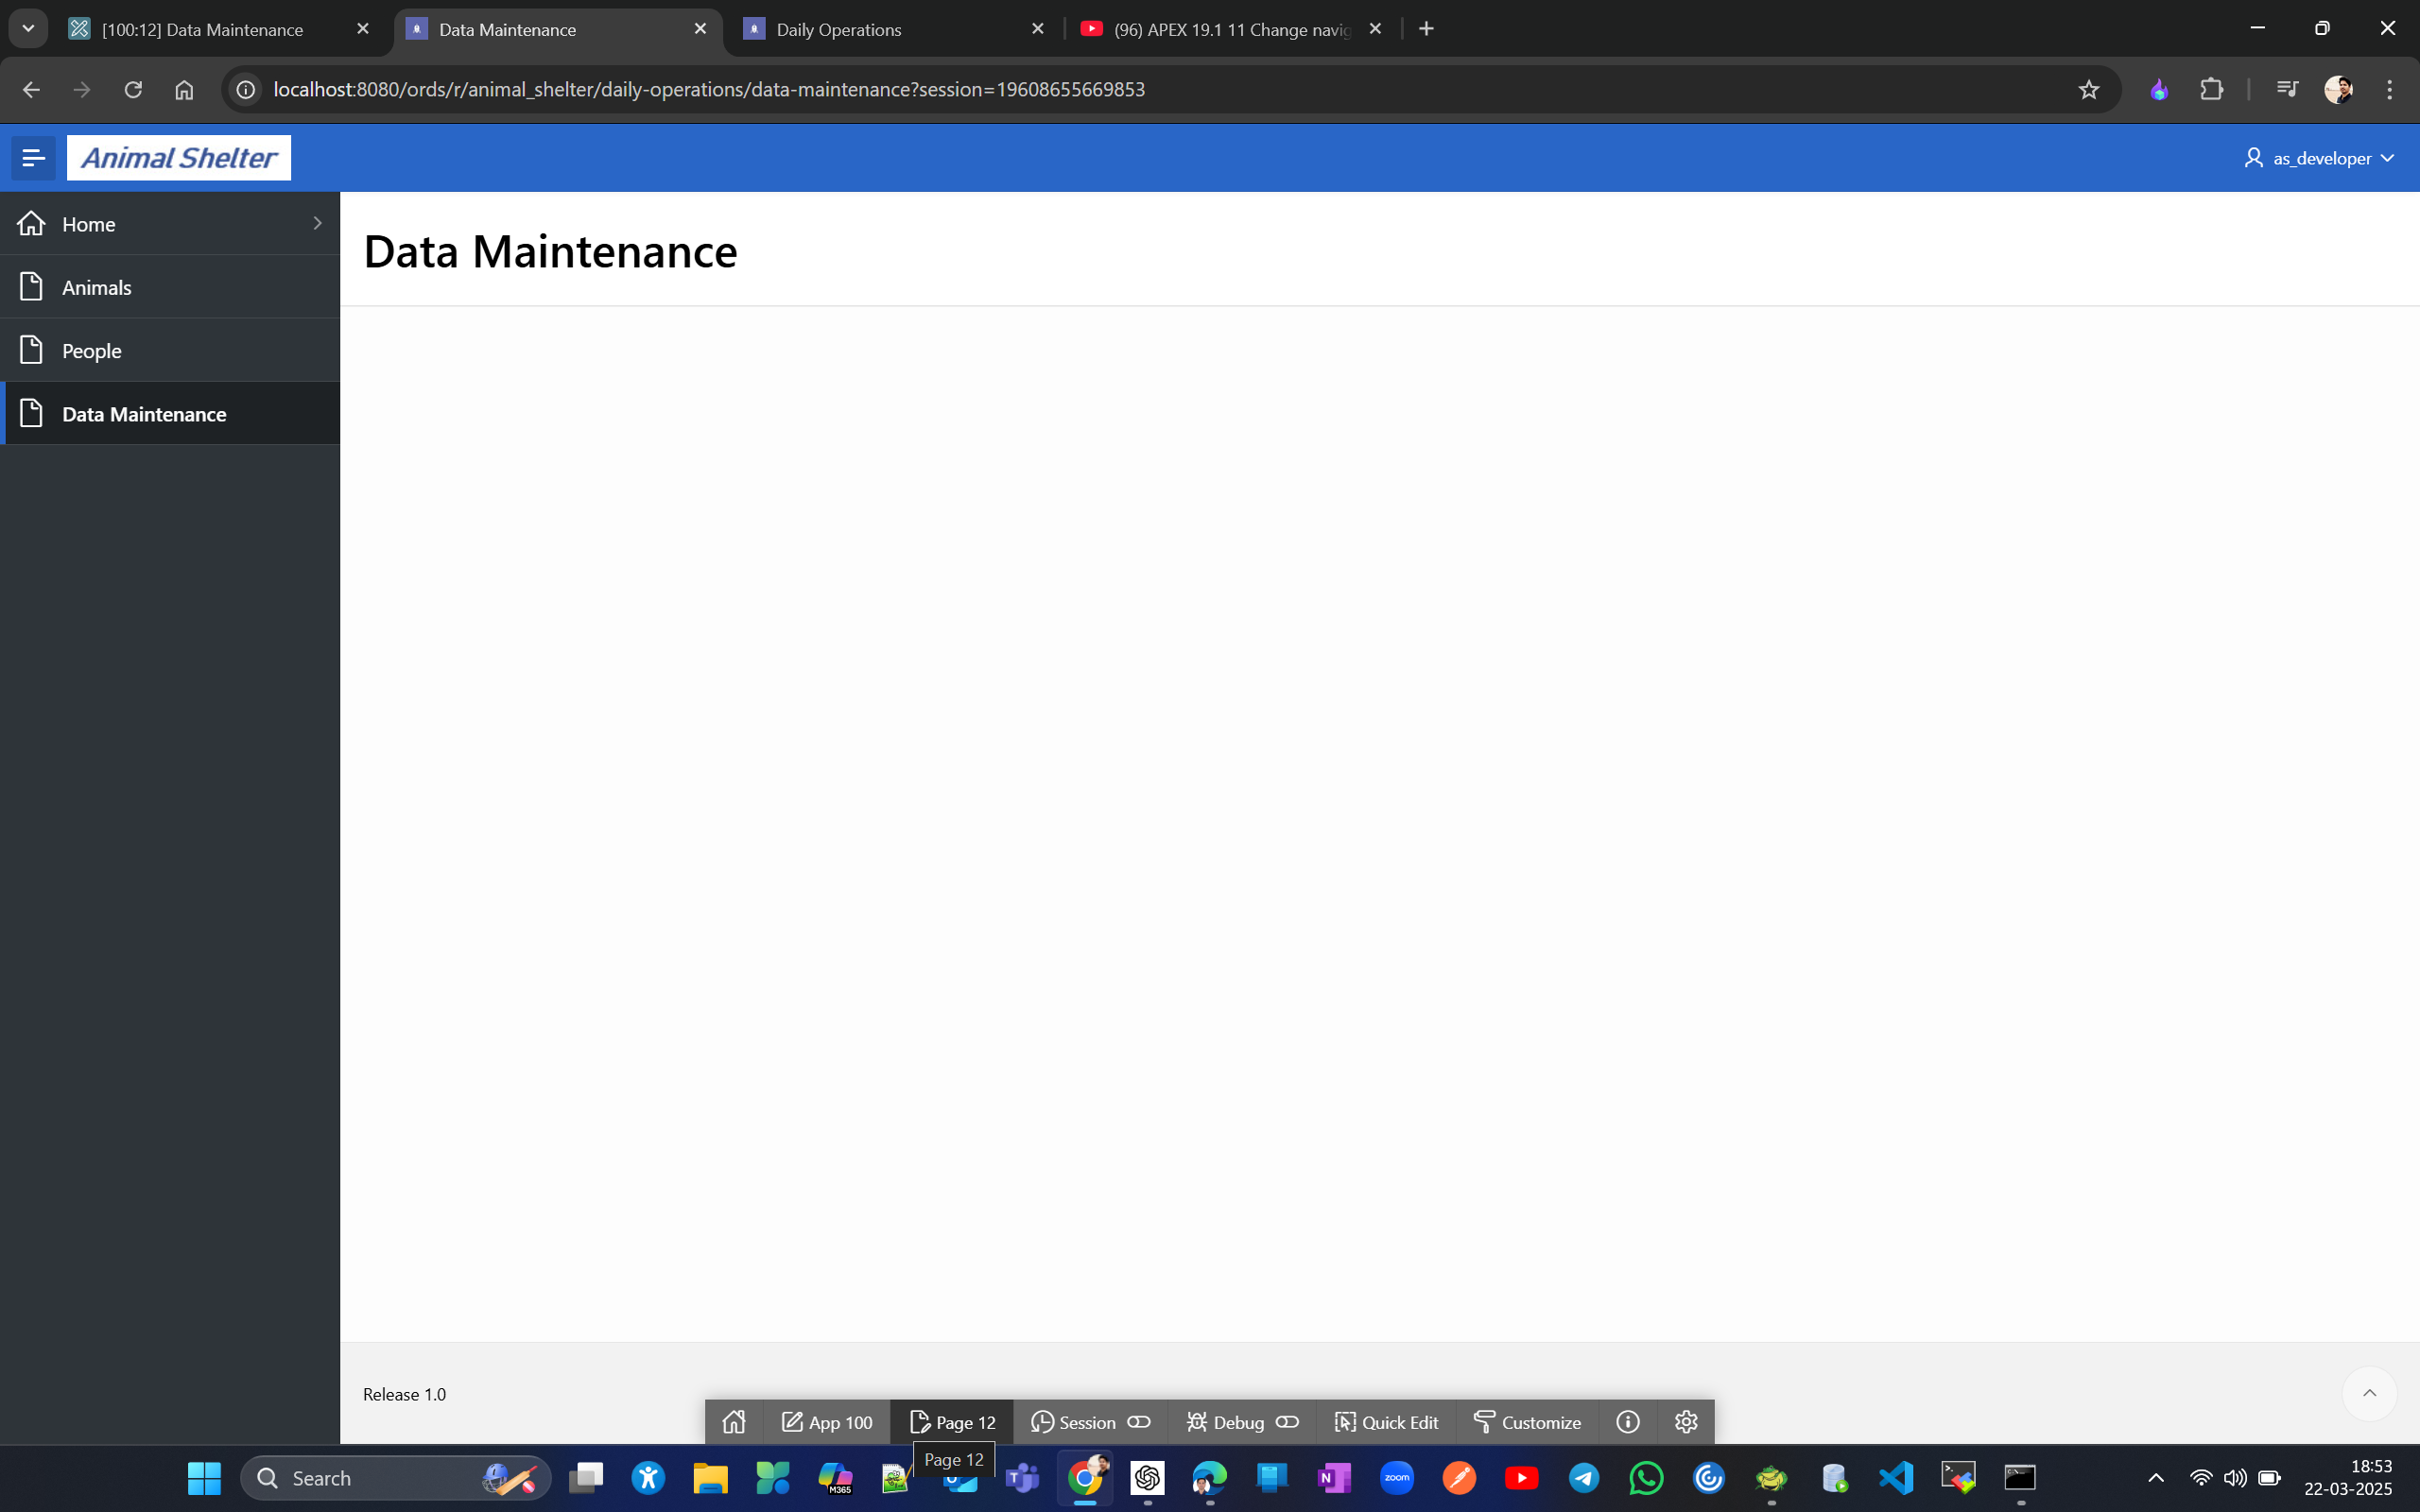
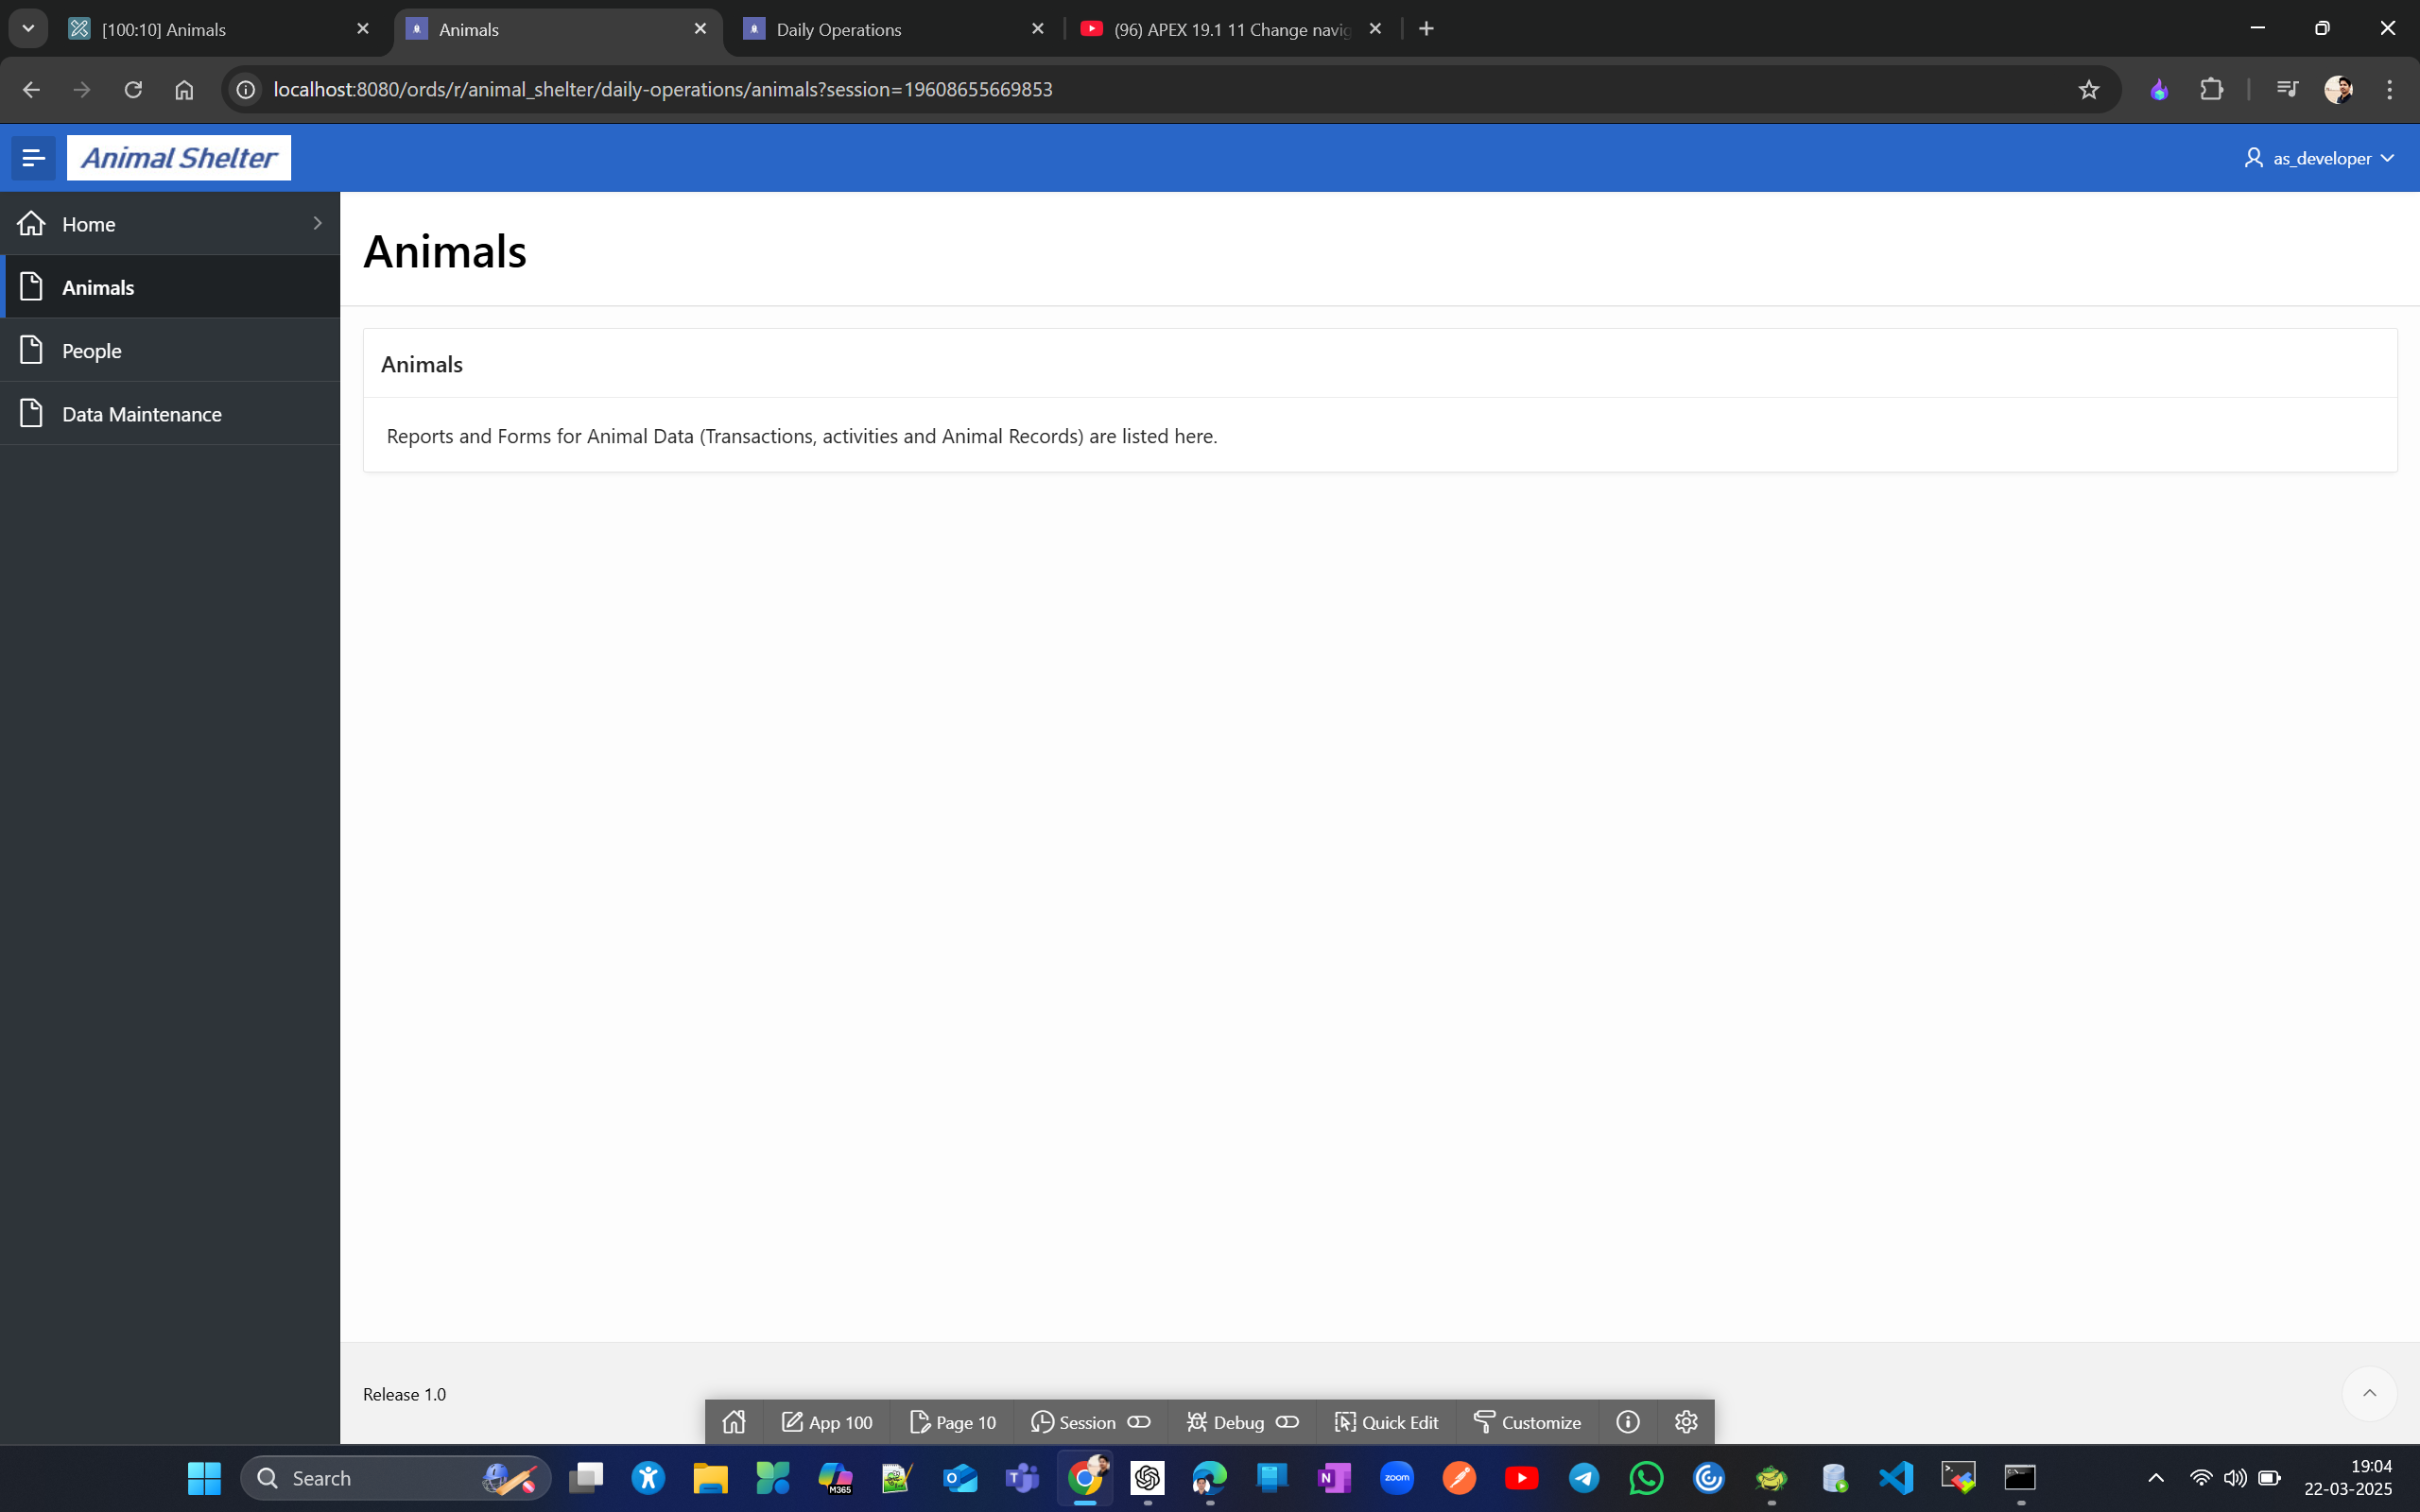
Now similarly Create 2 more blank pages People and Data Maintenance. and the purpose of these blank pages to provide that top level groupings where other navigation items can be put together like in Home.
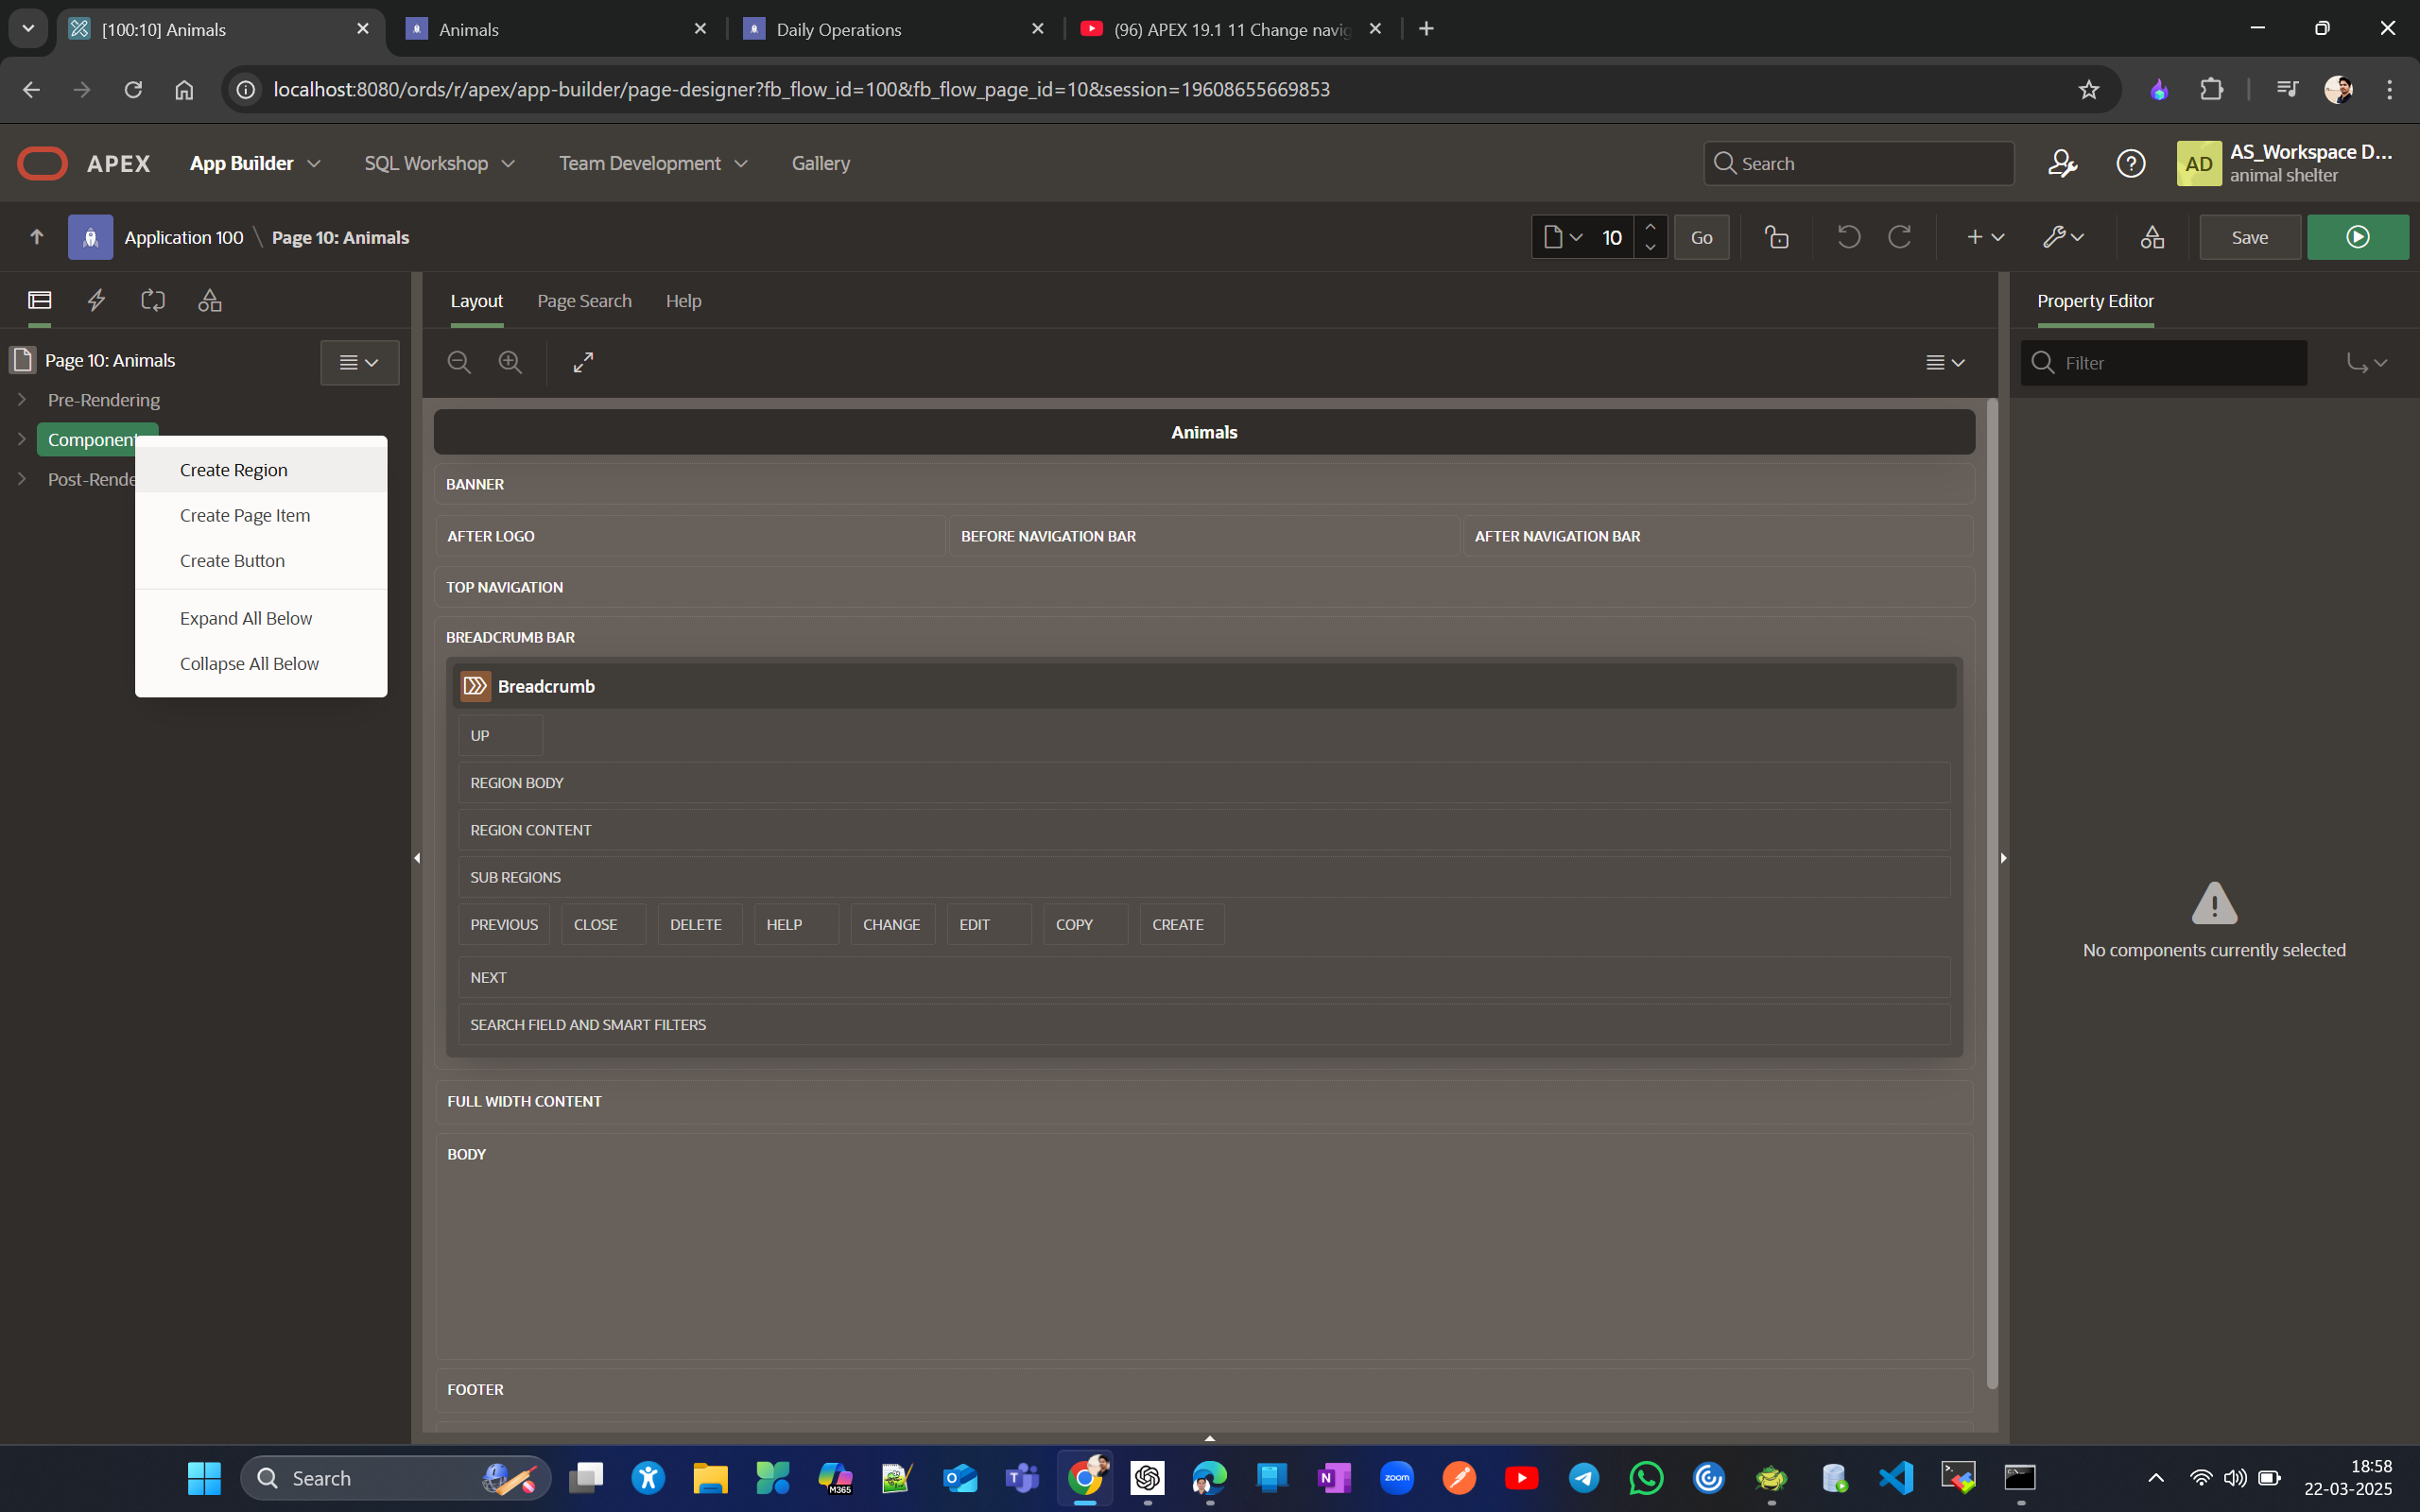
Now in Animal Page we’ll create new component and/or region
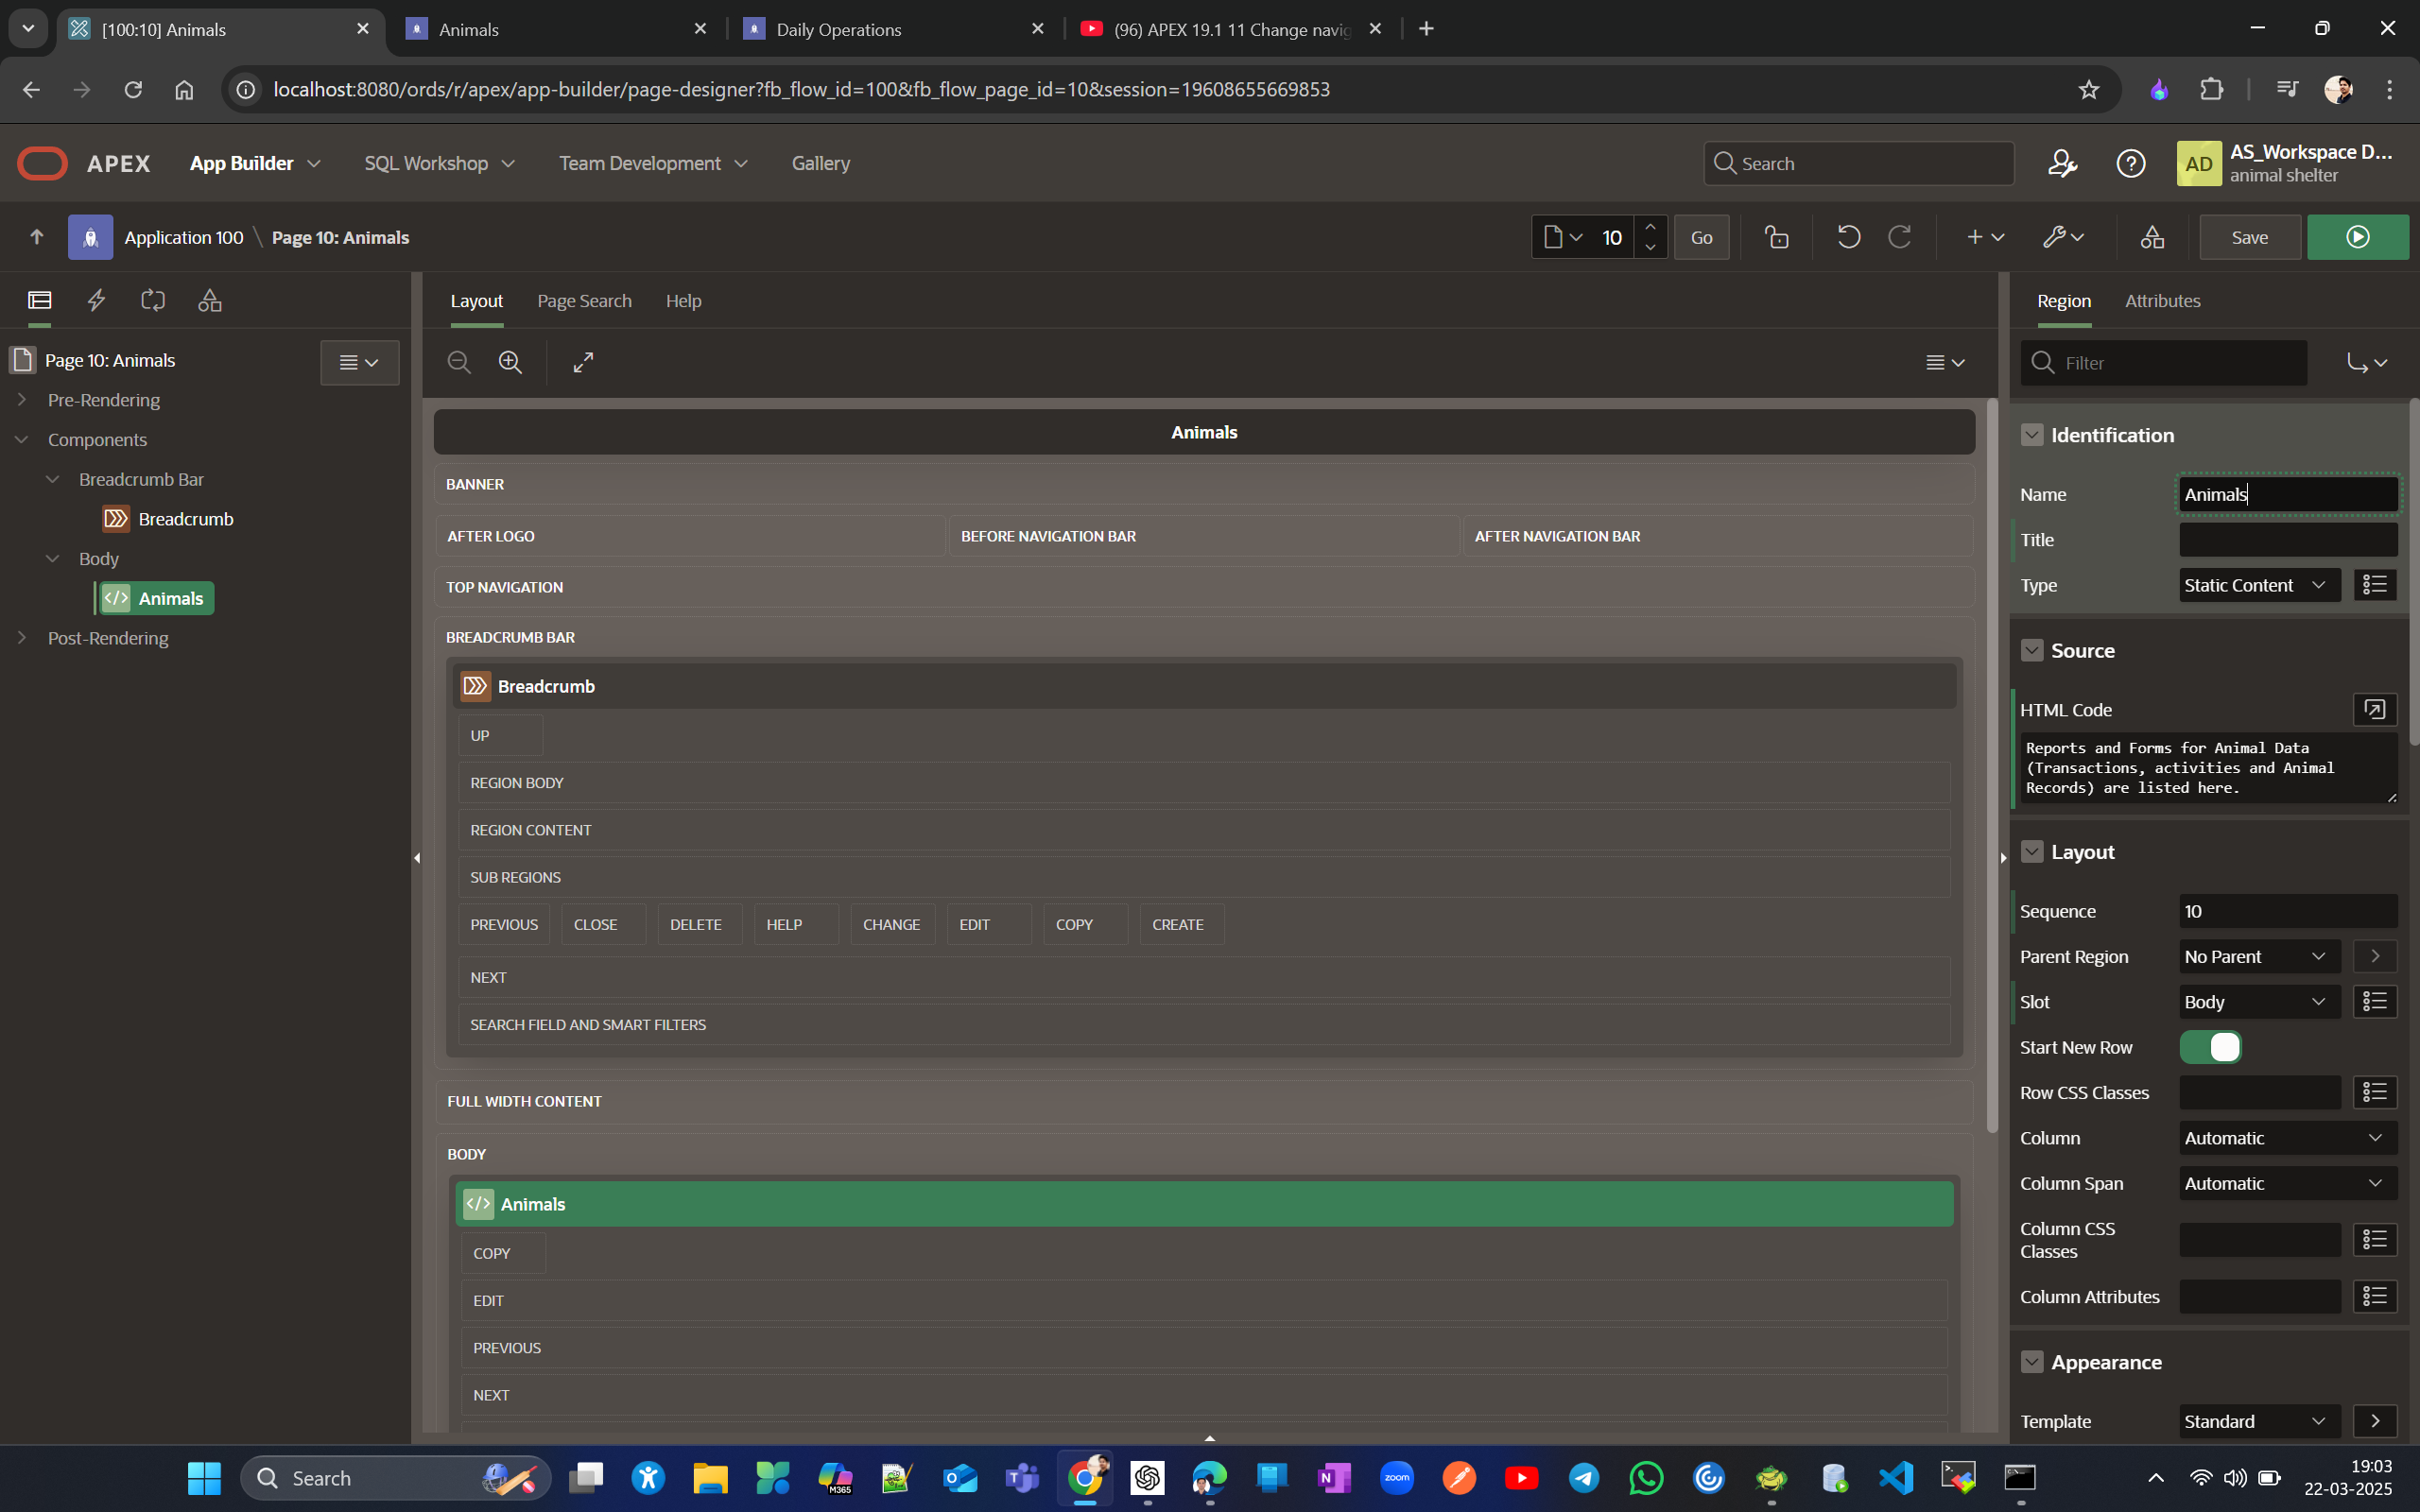
Change Name to Animals and add details to Source
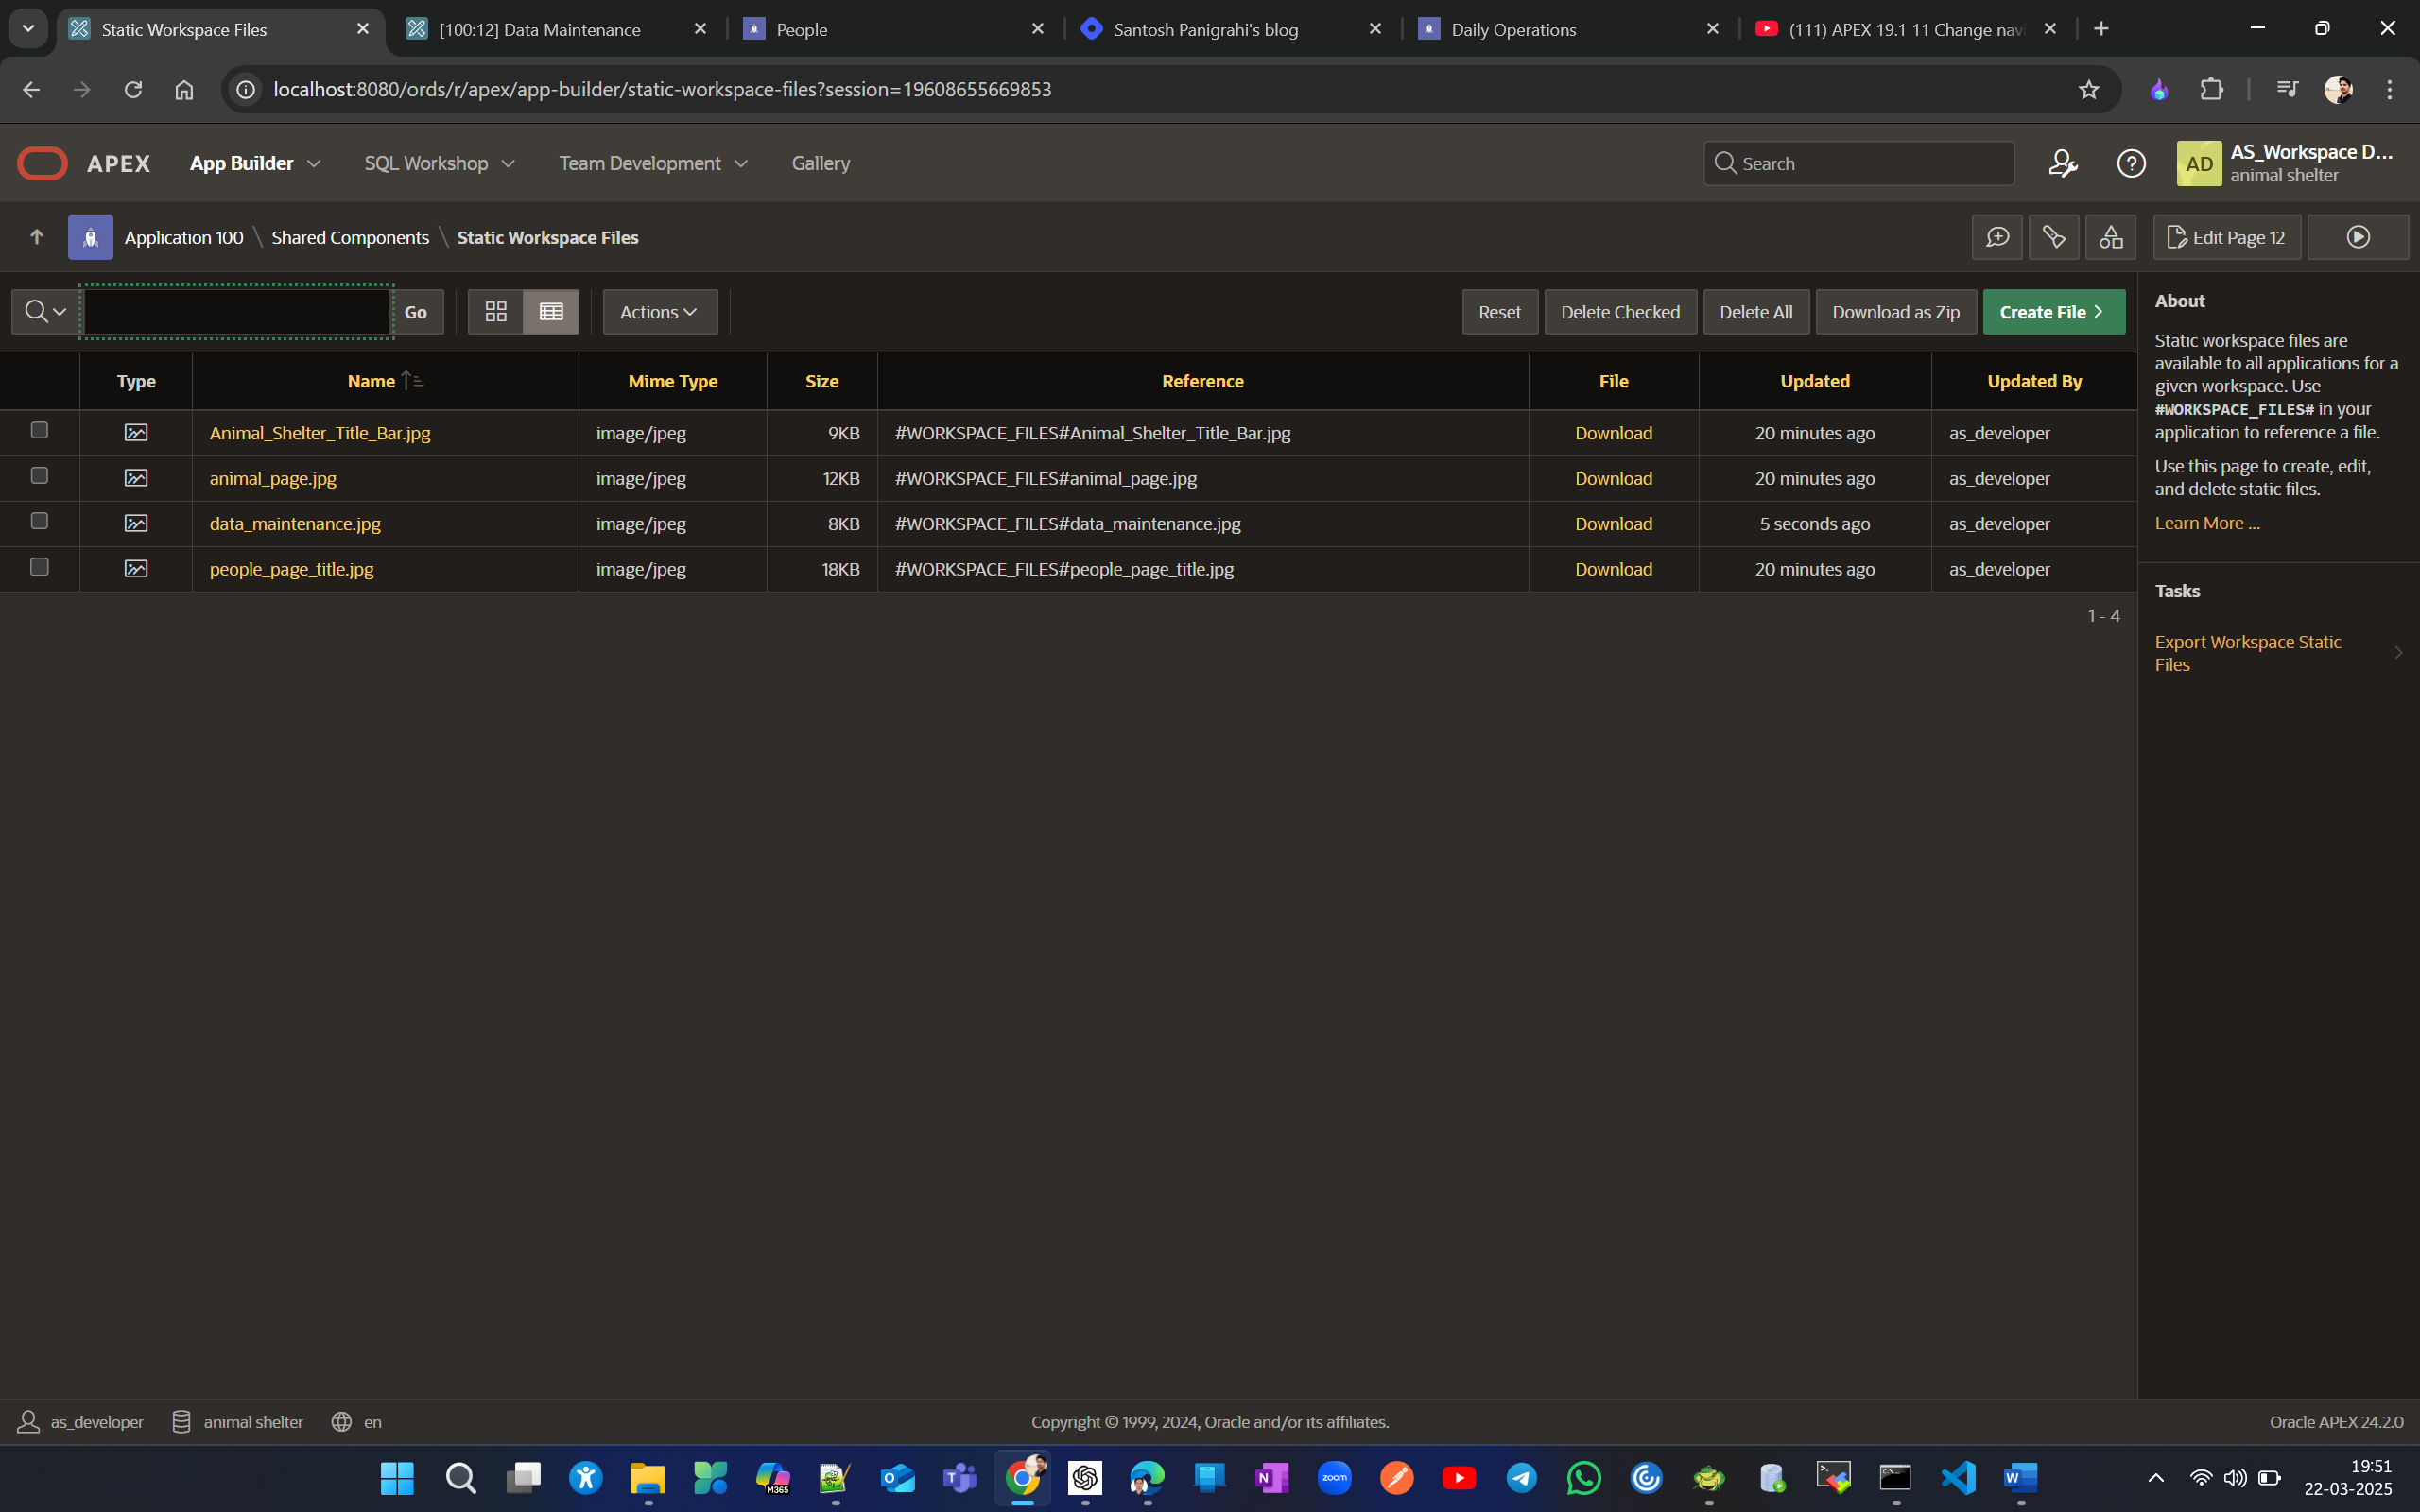
Now add 4 new pics to shared components → Files → Static Workspace Files (As we might need to add those files in some other applications in single workspace as well)
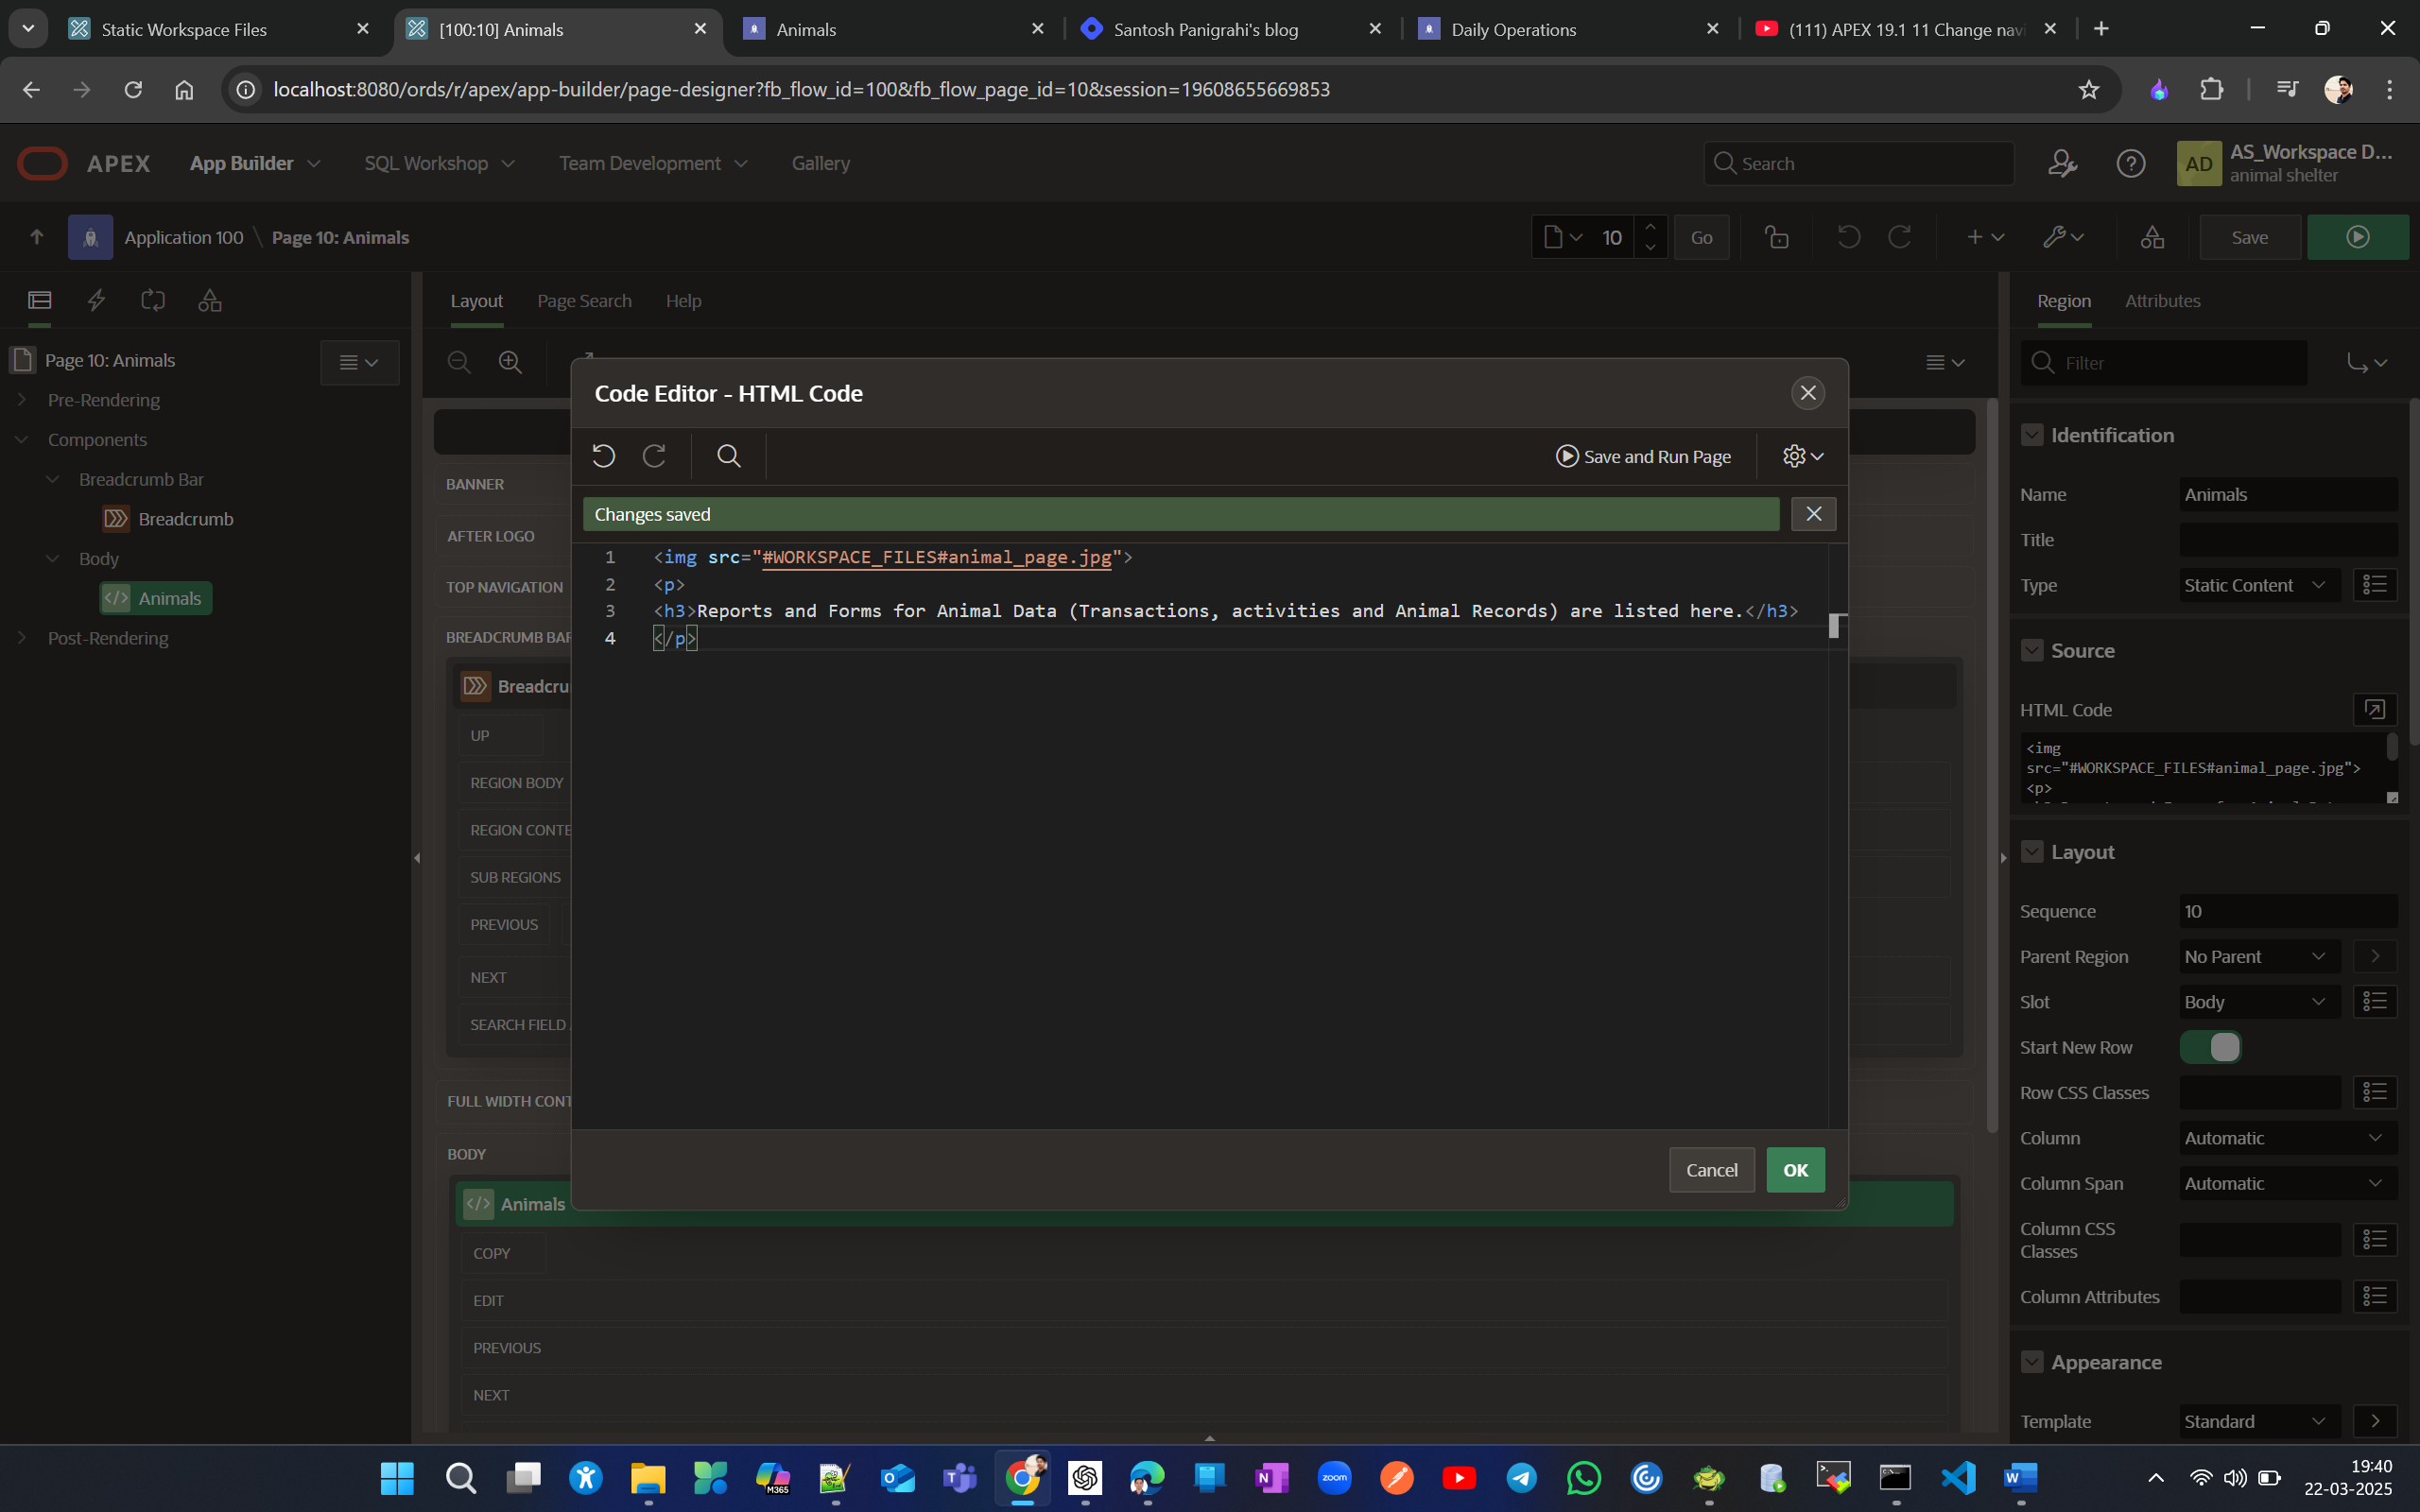
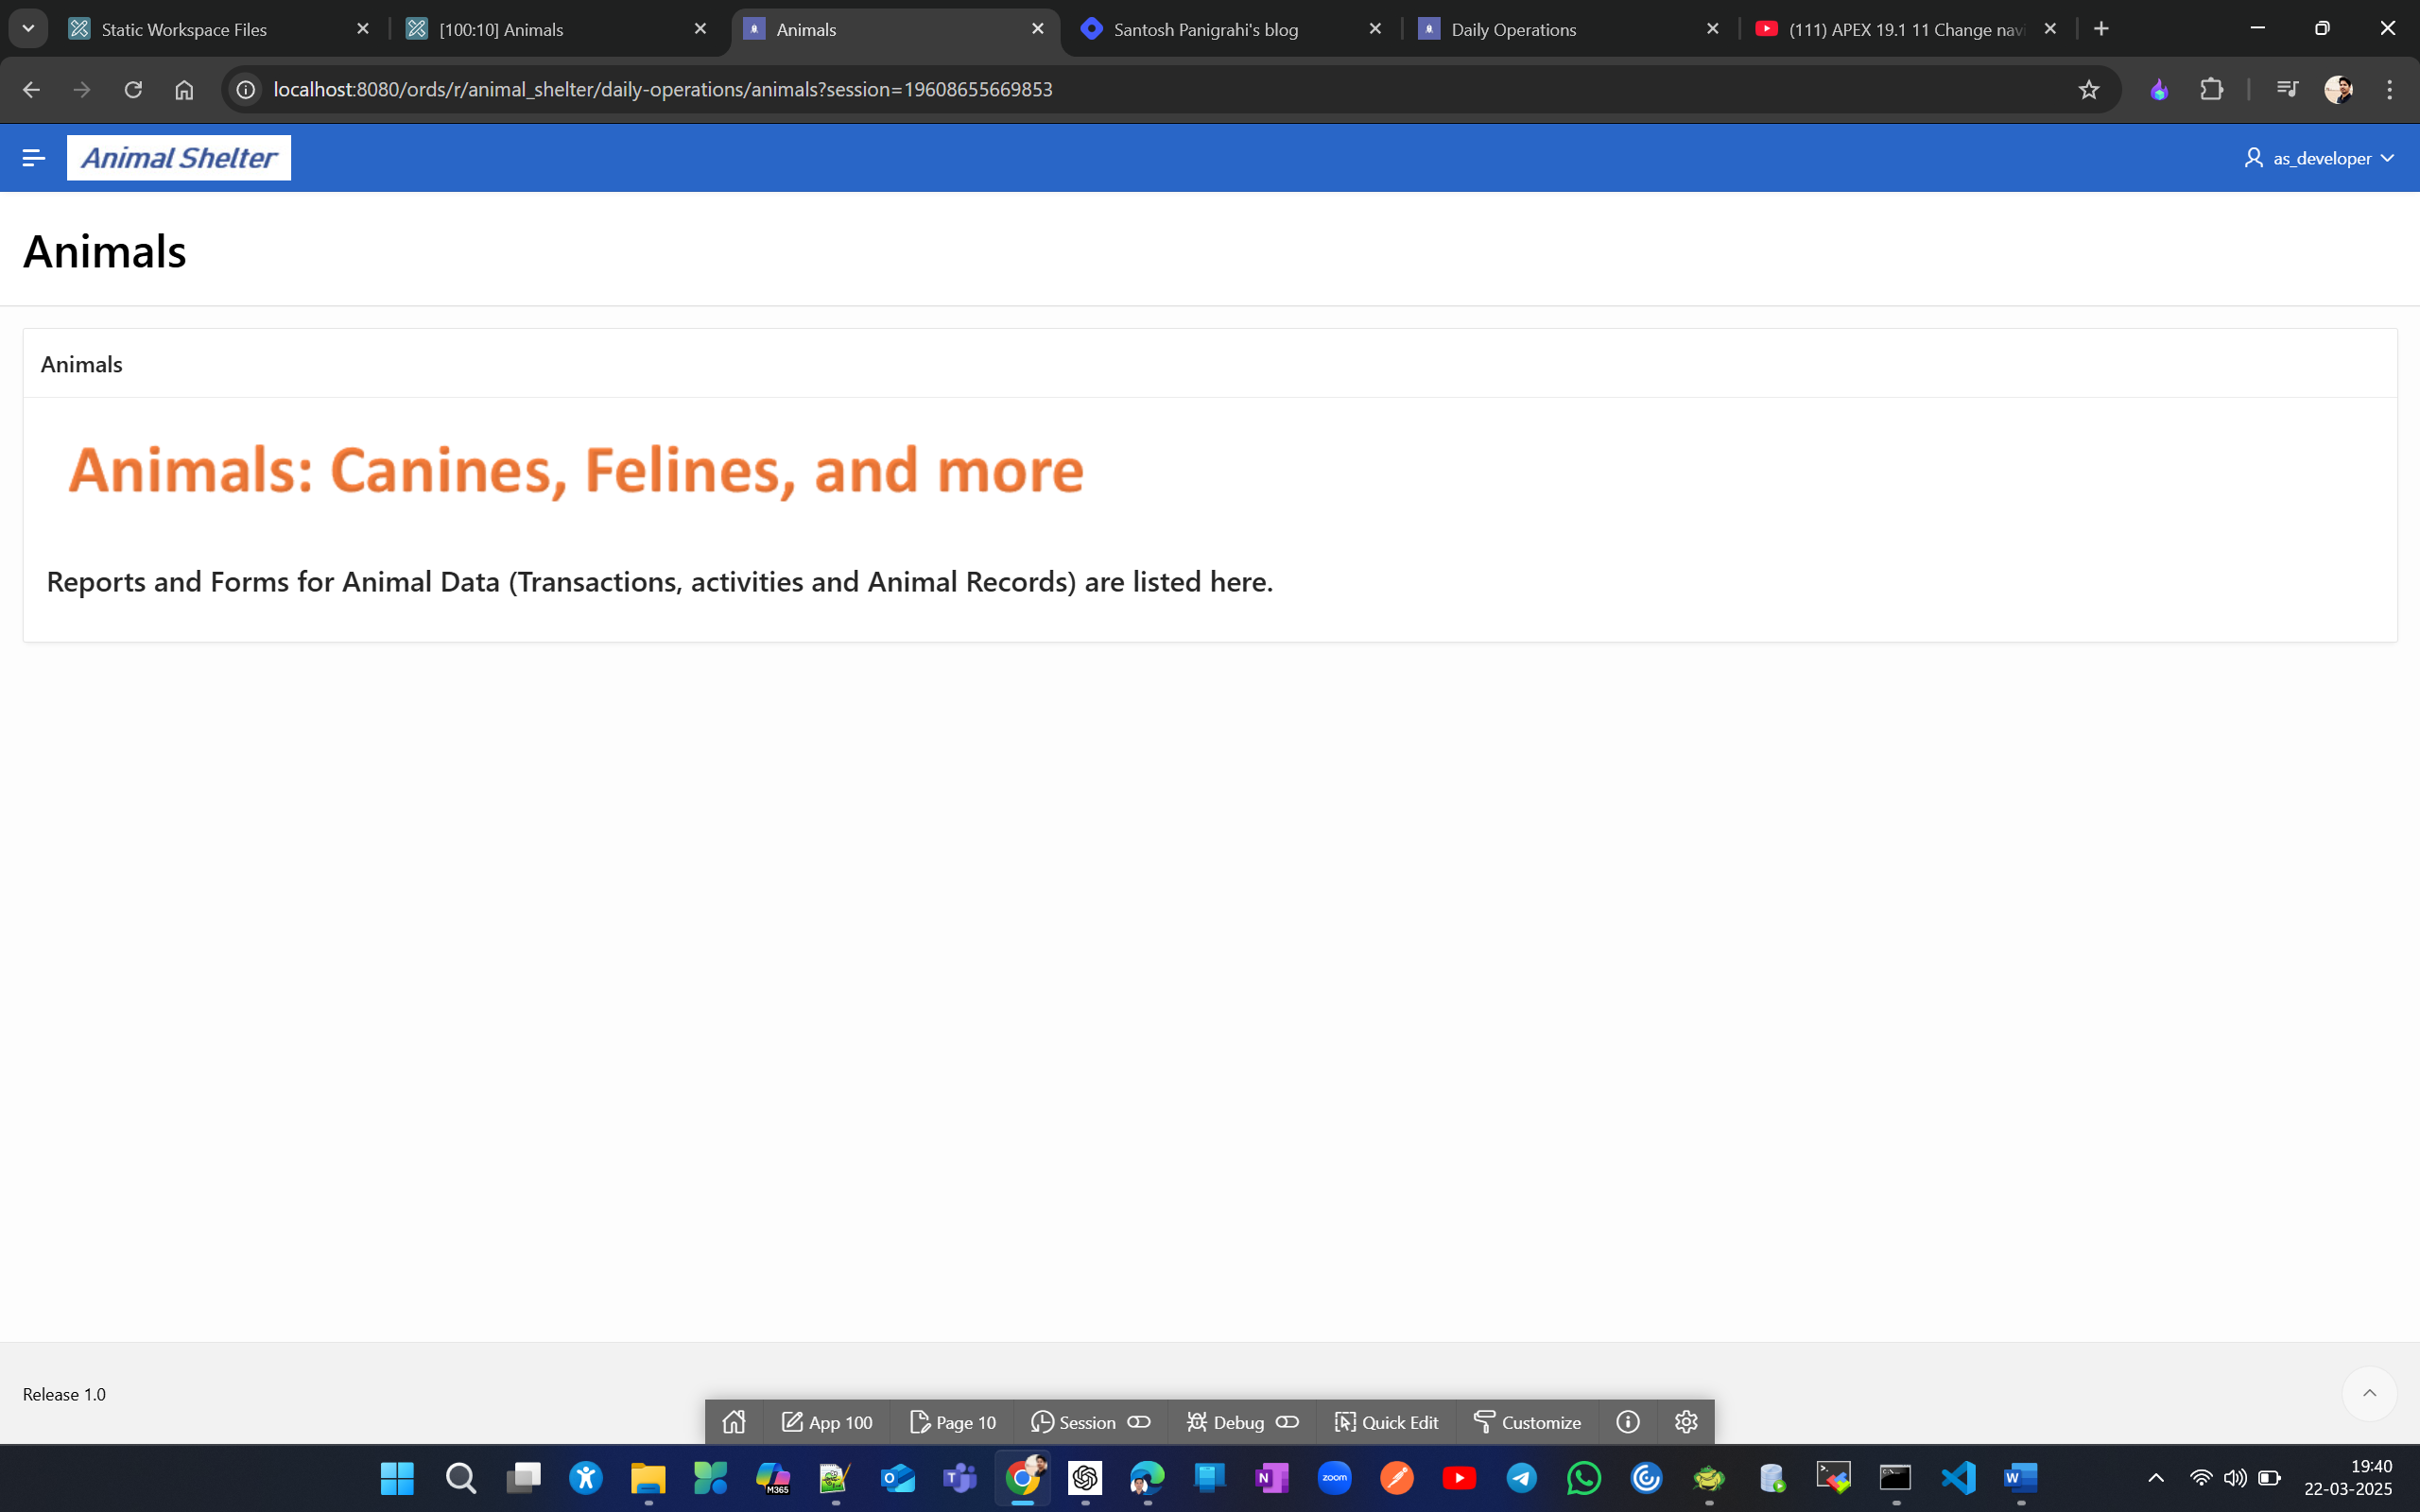
Copy animal page reference and paste in source section along with existing text as HTML
<img src="#WORKSPACE_FILES#animal_page.jpg">
<p>
<h3>Reports and Forms for Animal Data (Transactions, activities and Animal Records) are listed here.</h3>
</p>
do same for people and Data Maintenance page
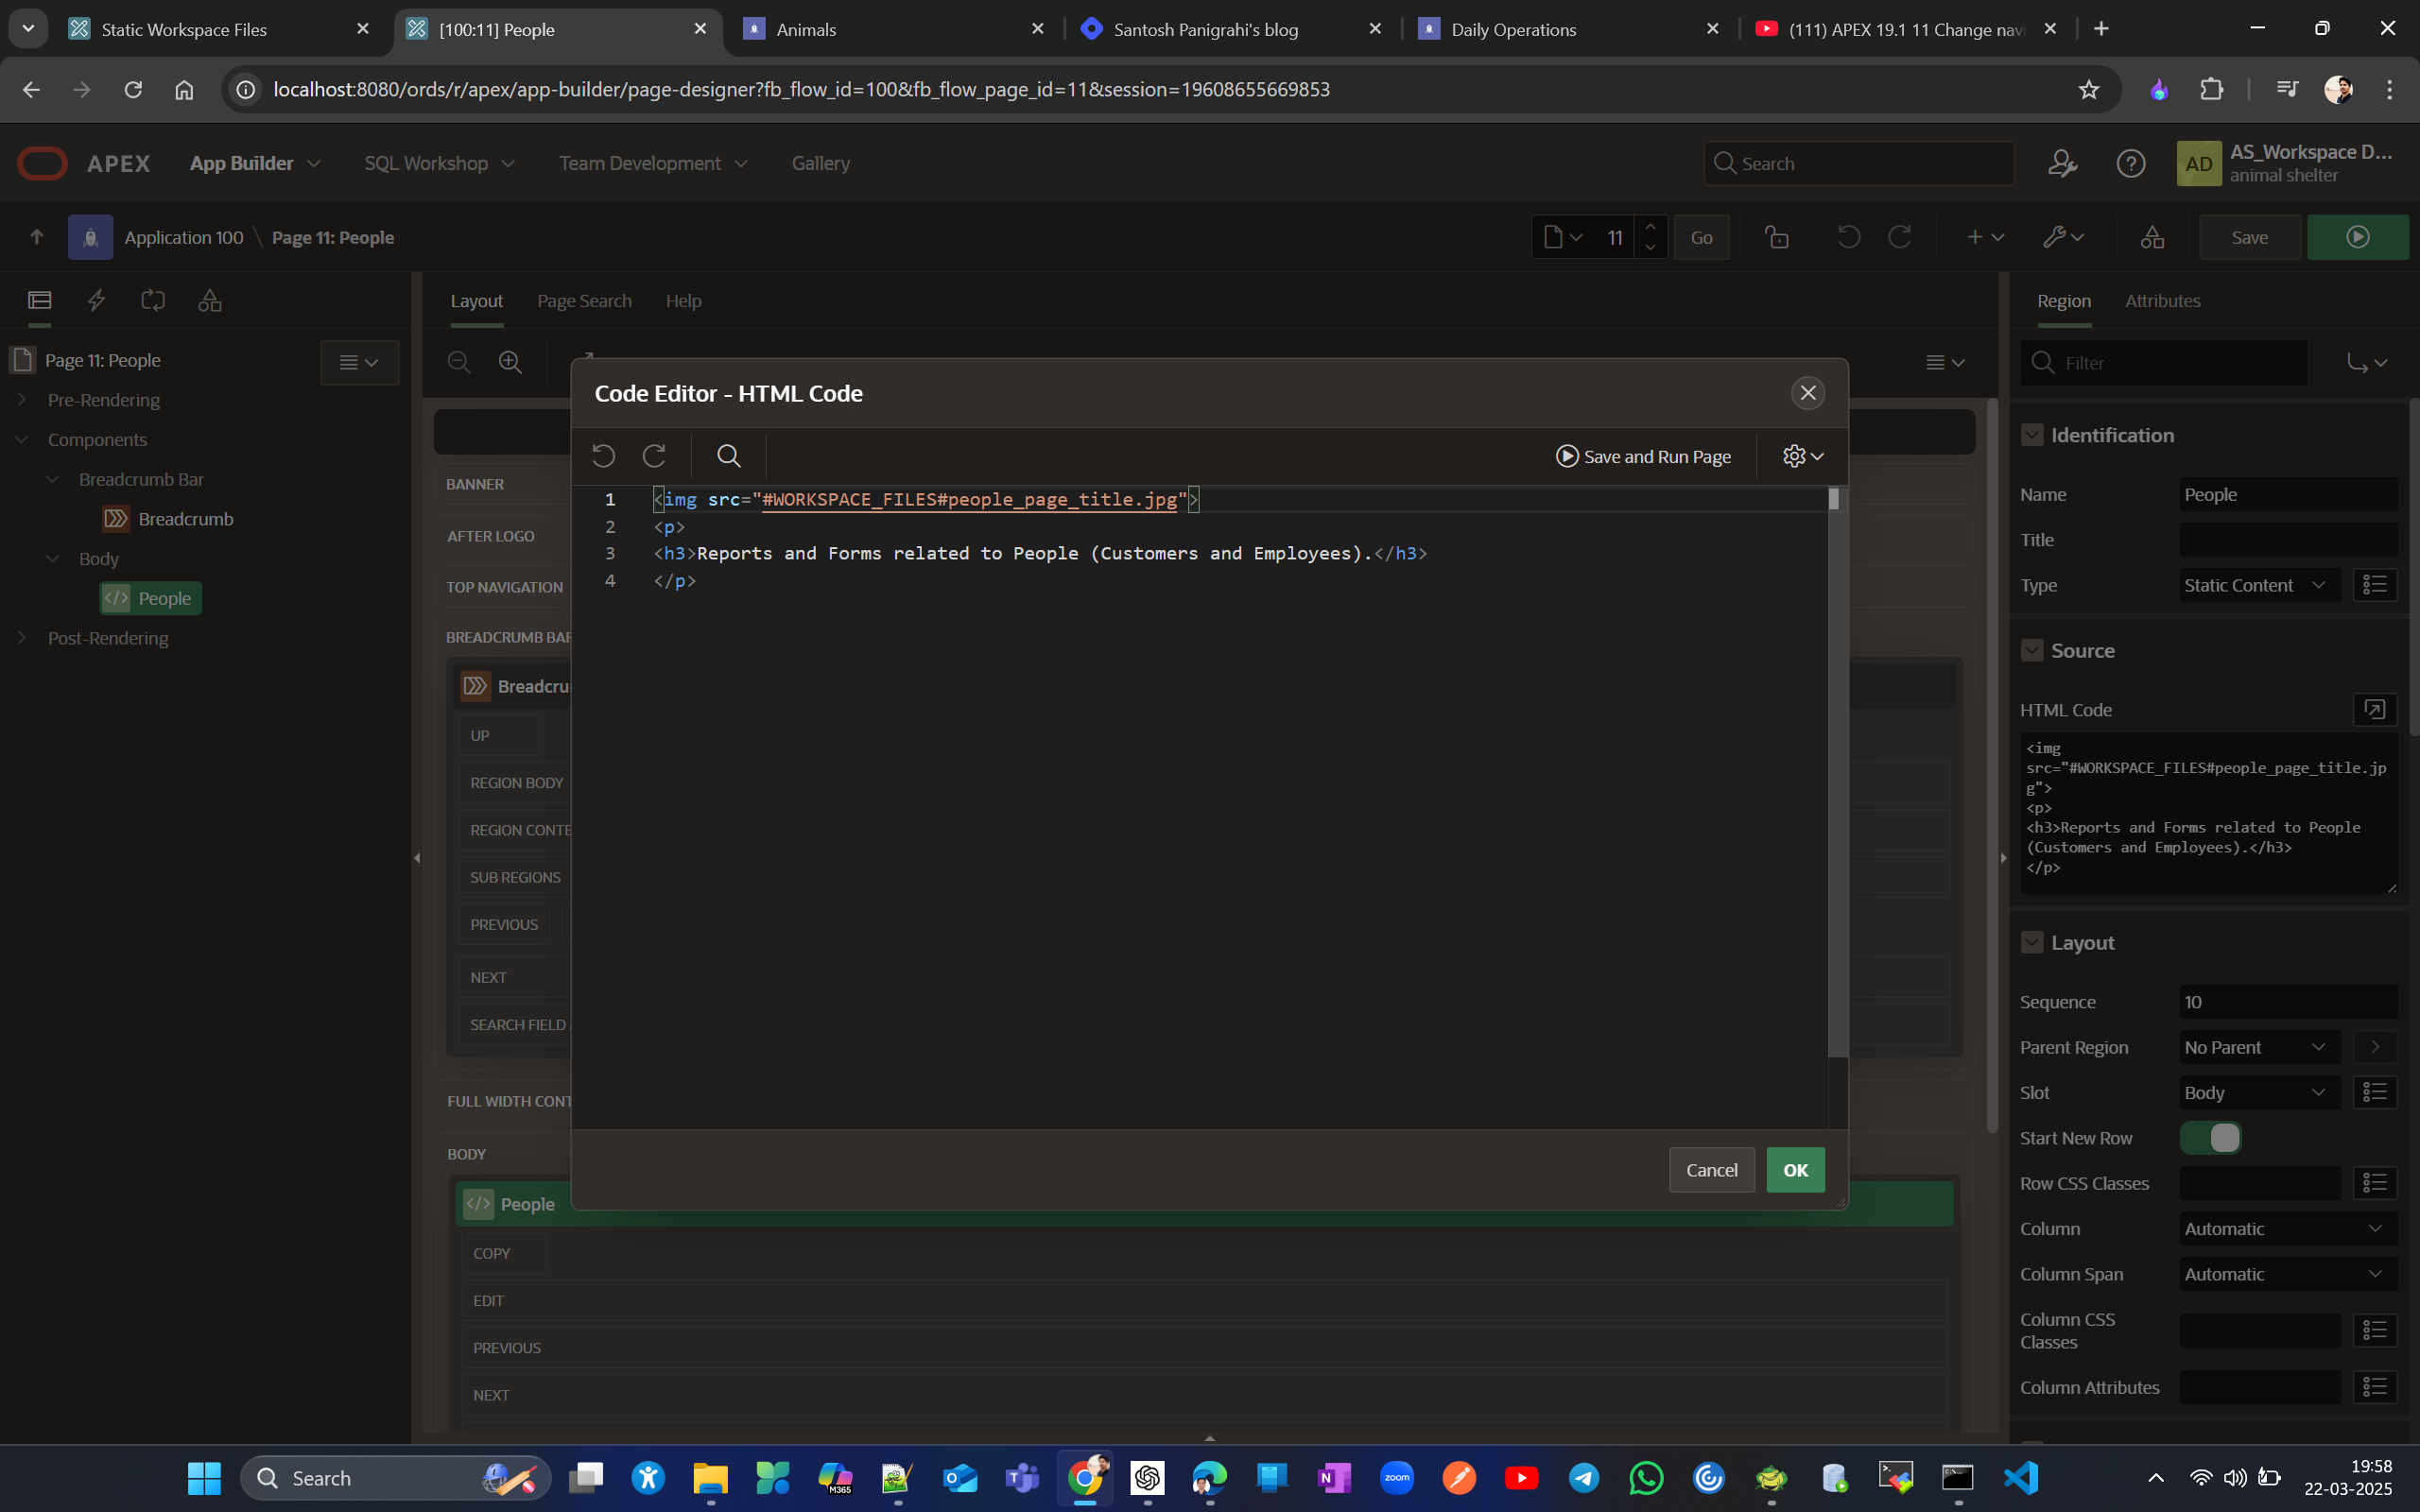
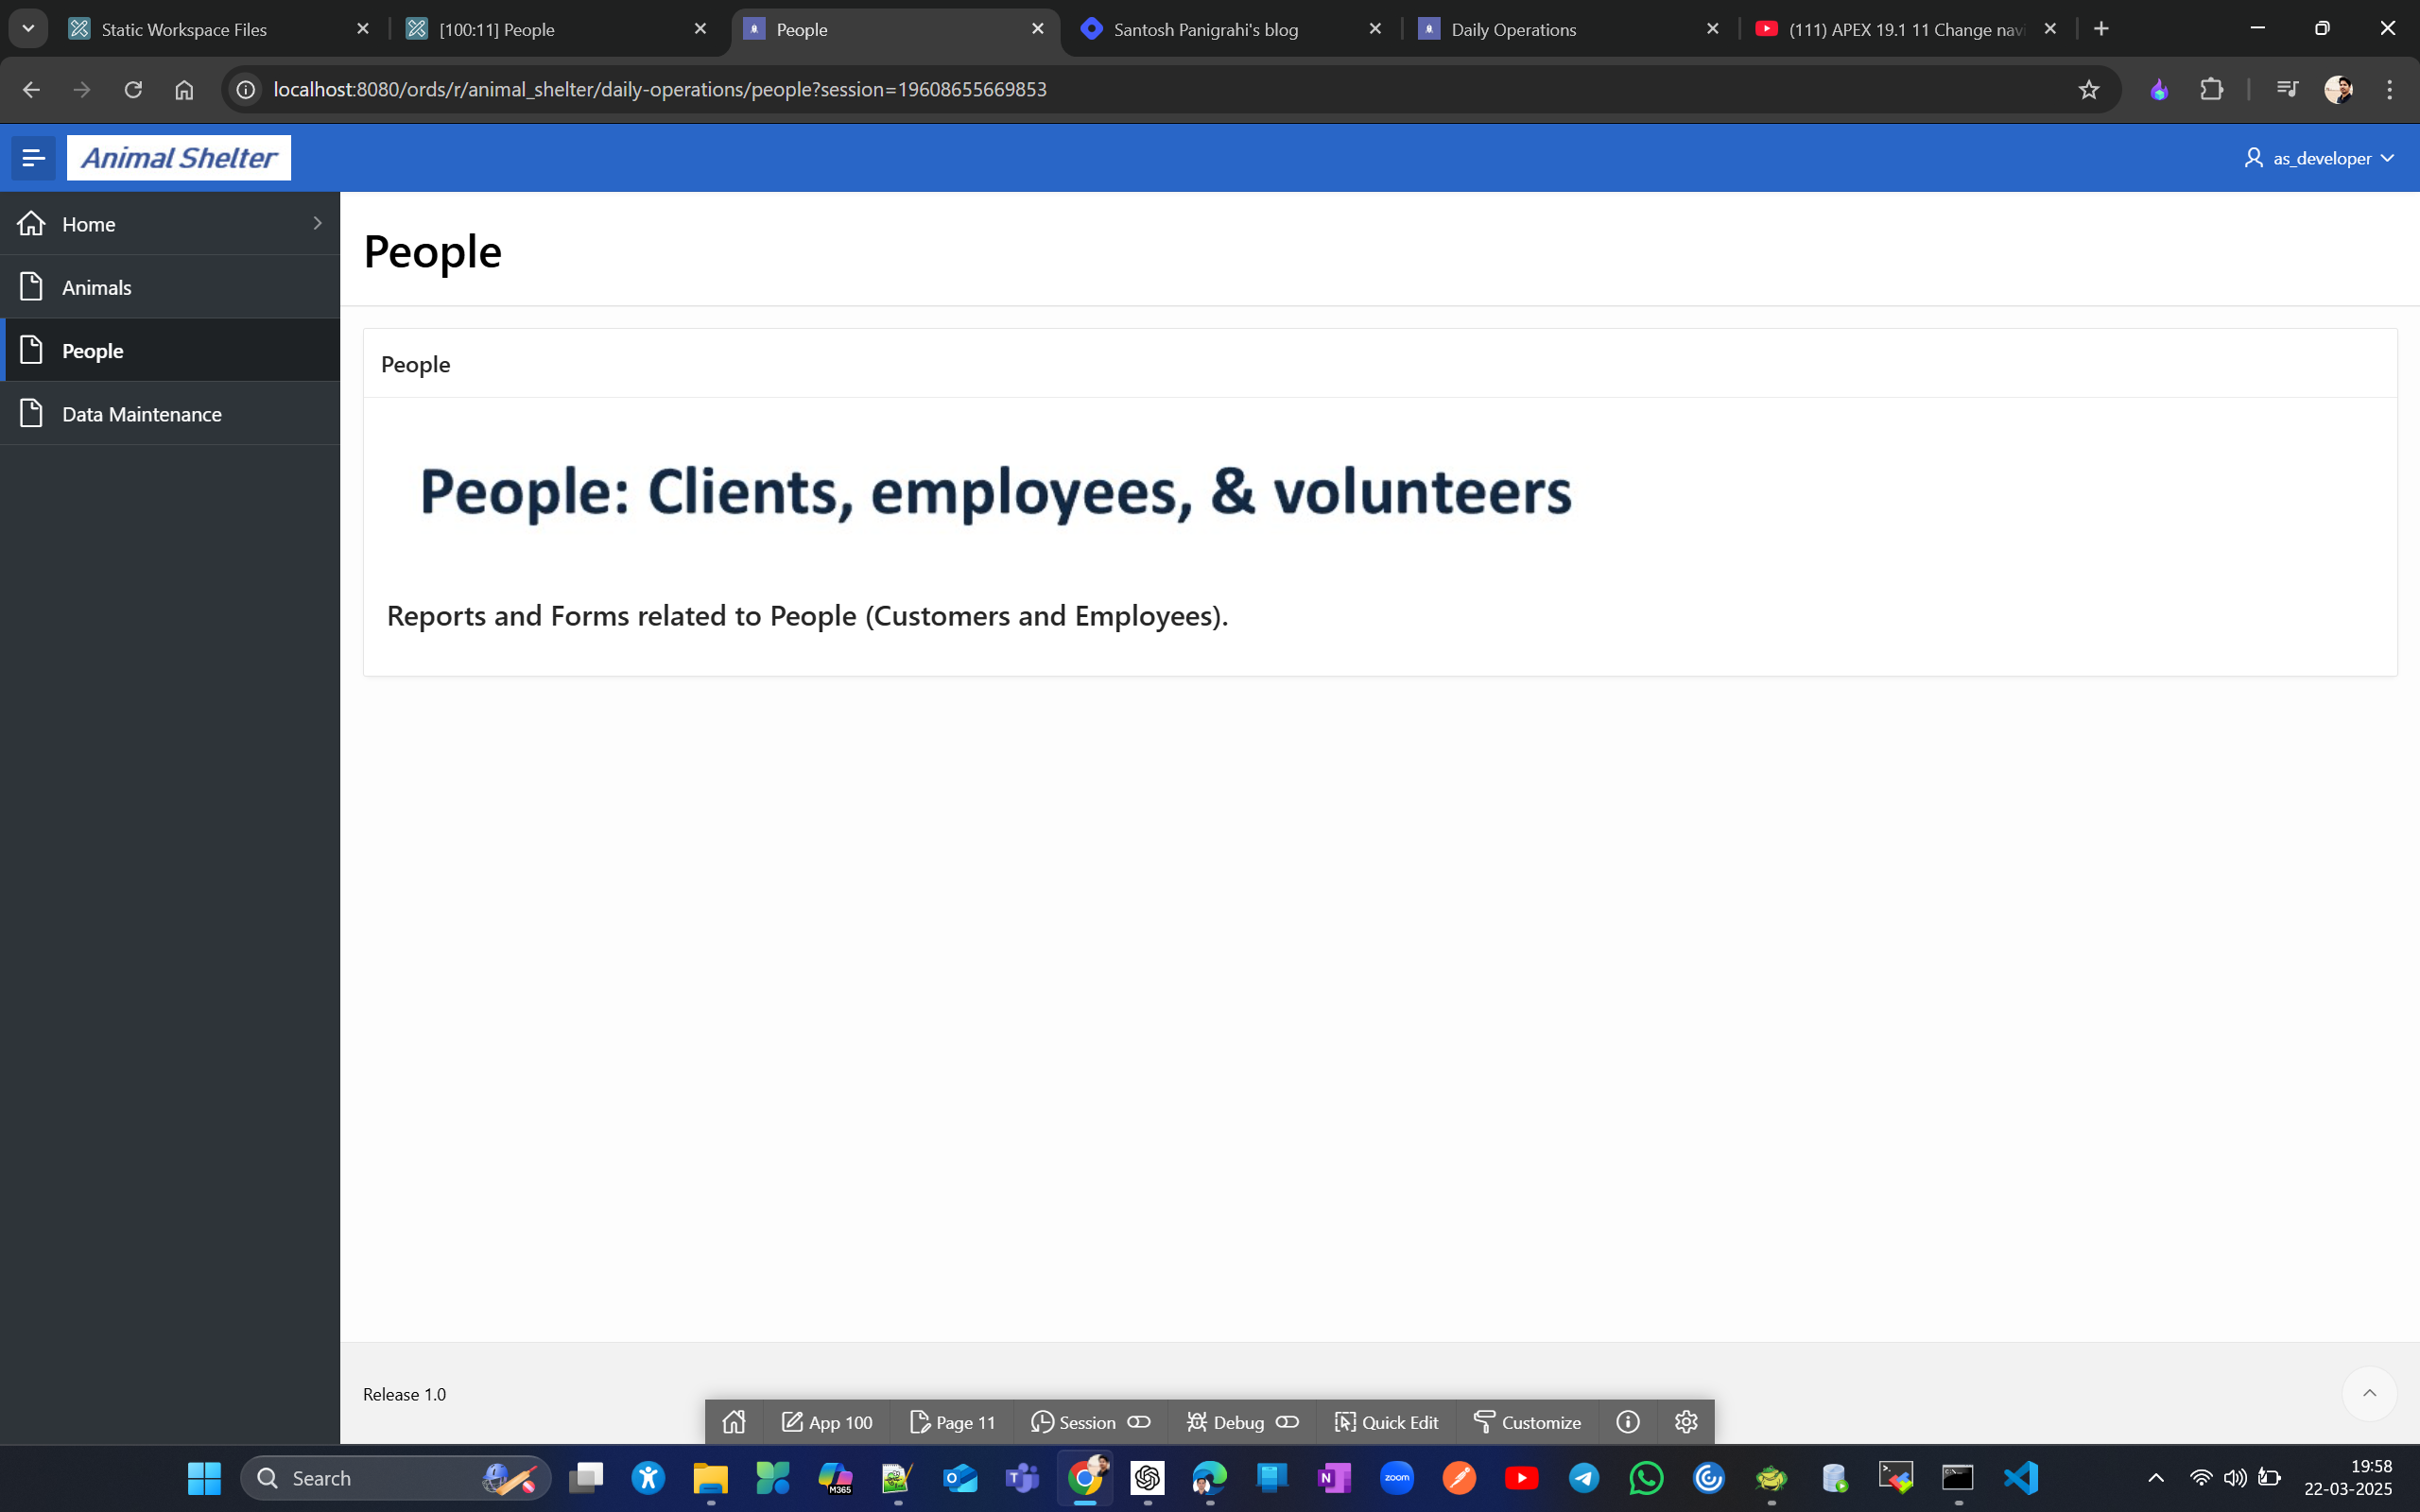
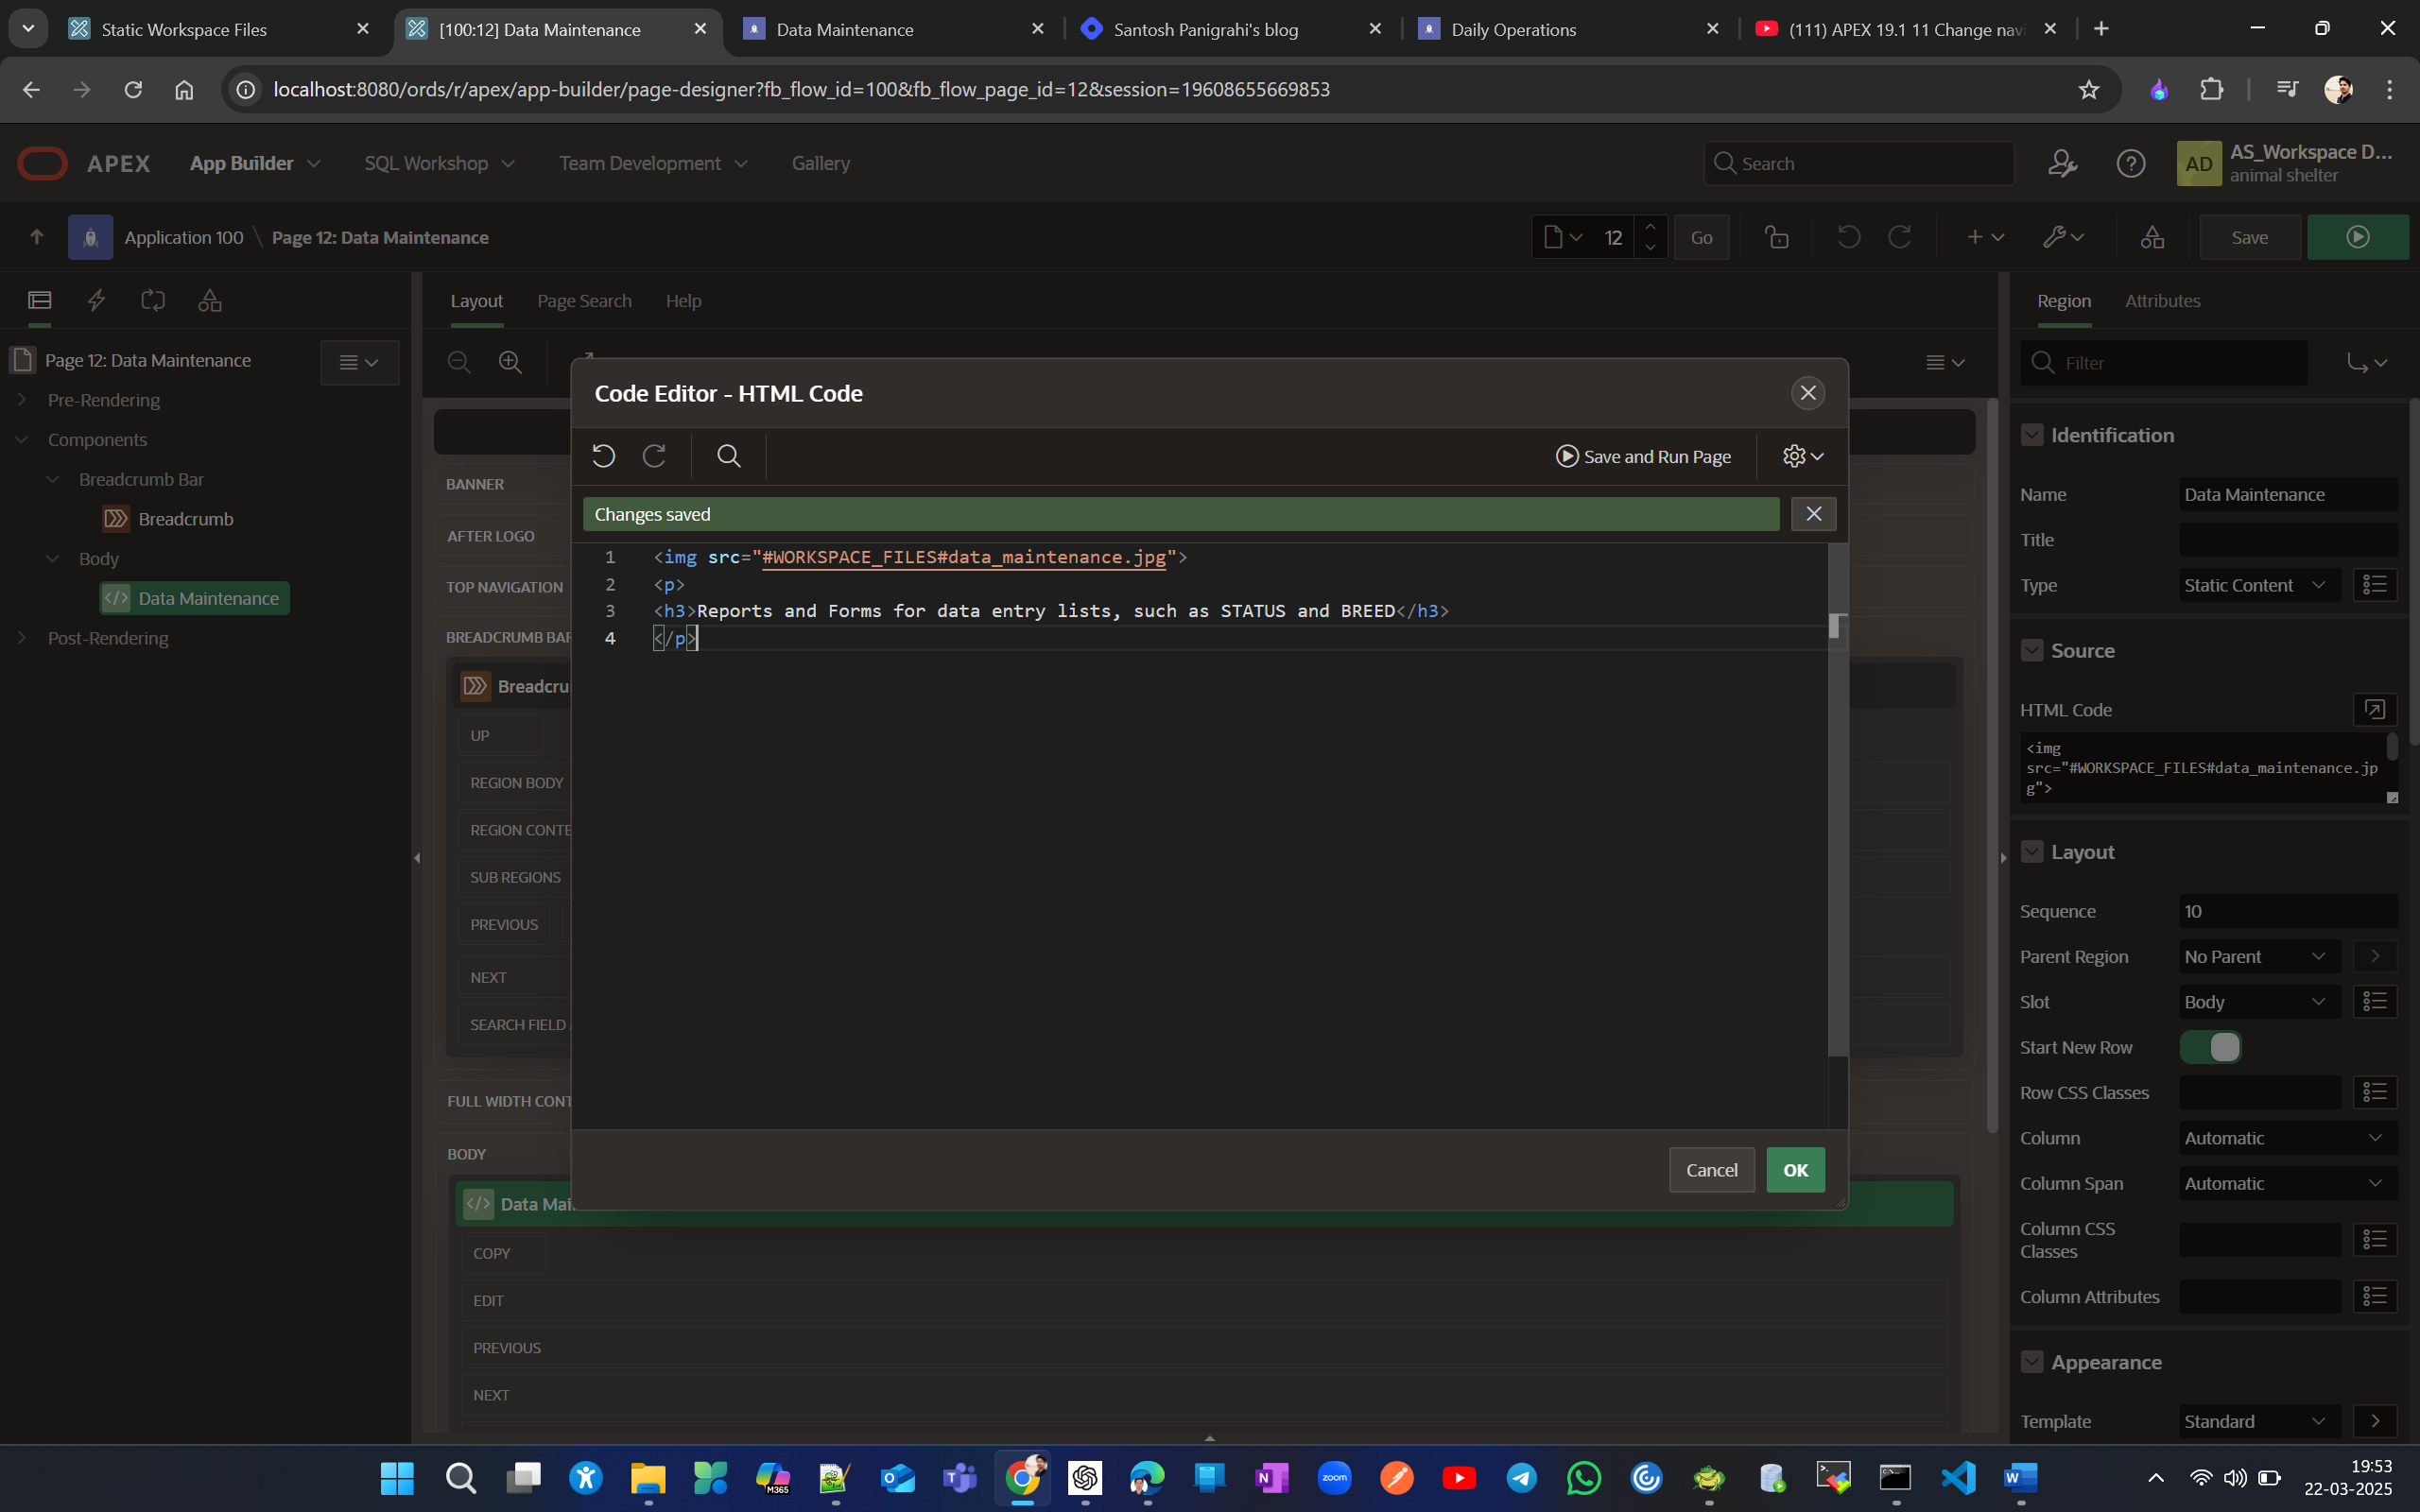
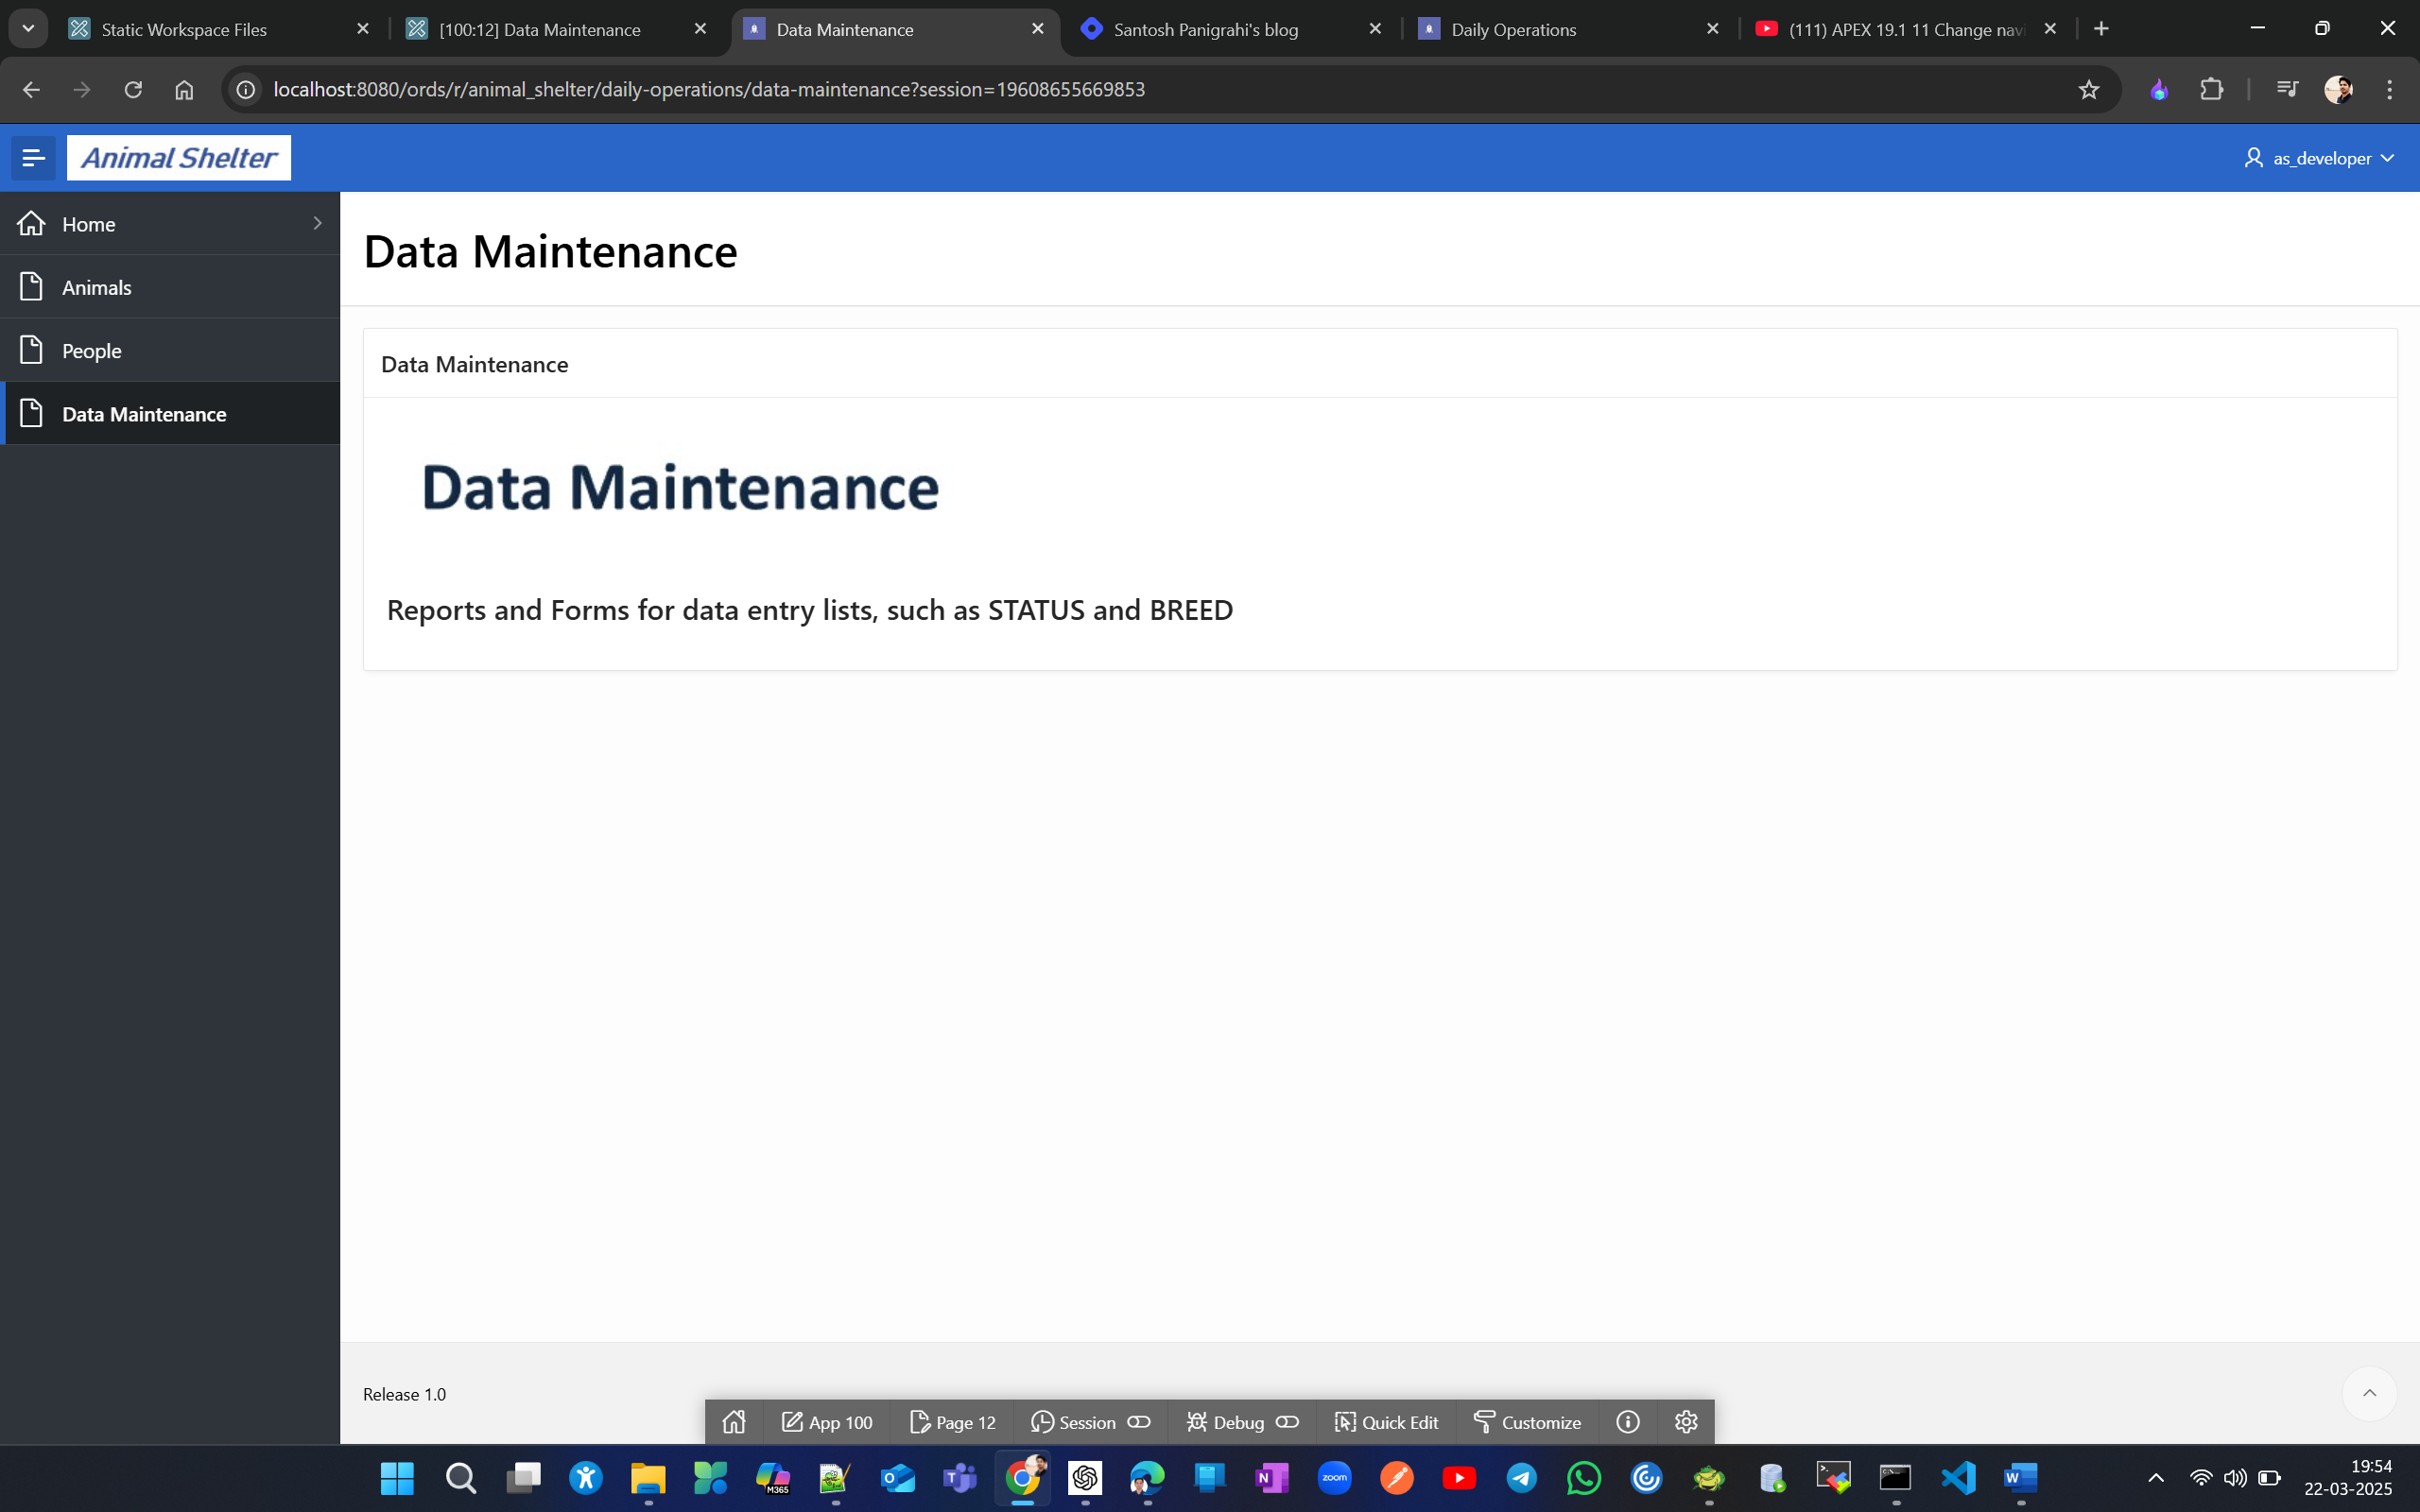
Once done with these goto shared components → navigation and Search → navigation menu → click on the name Navigation Menu.
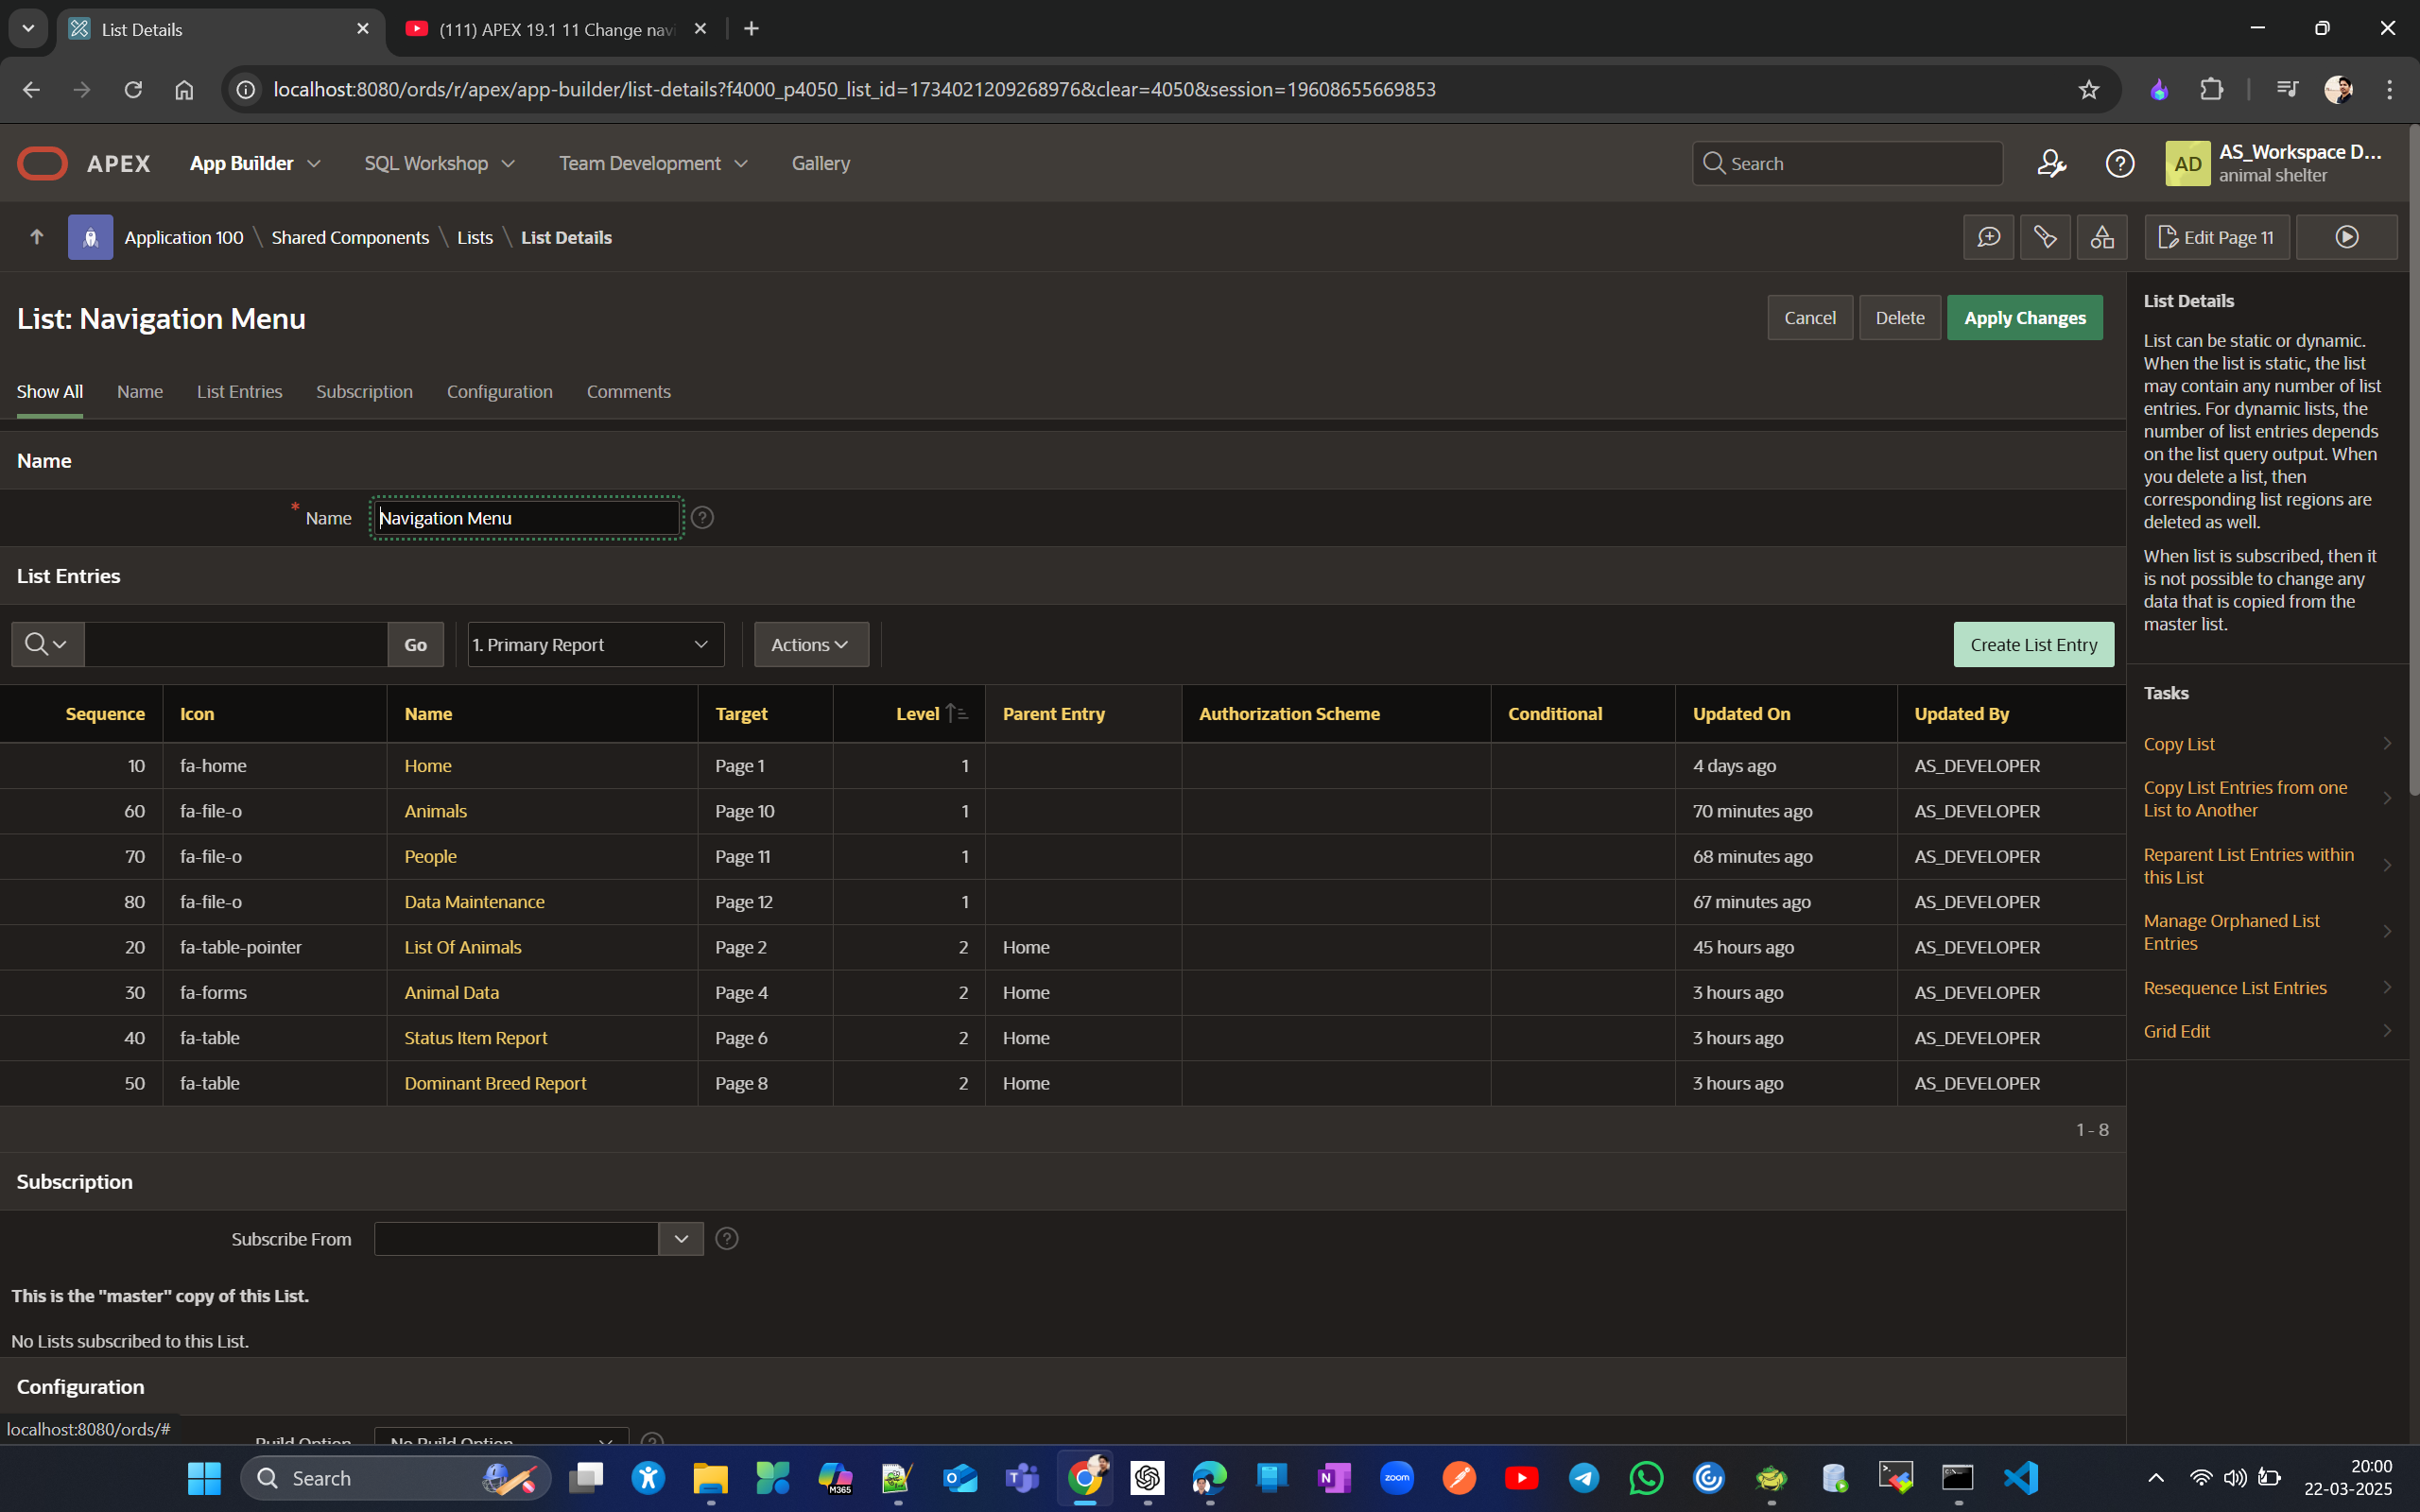
here notice column parent entry the entry for which parent entry are Home they are listed under Homem menu. We’ll now move status item report and dominant breed report under data maintenance by assigning Data Maintenance as parent
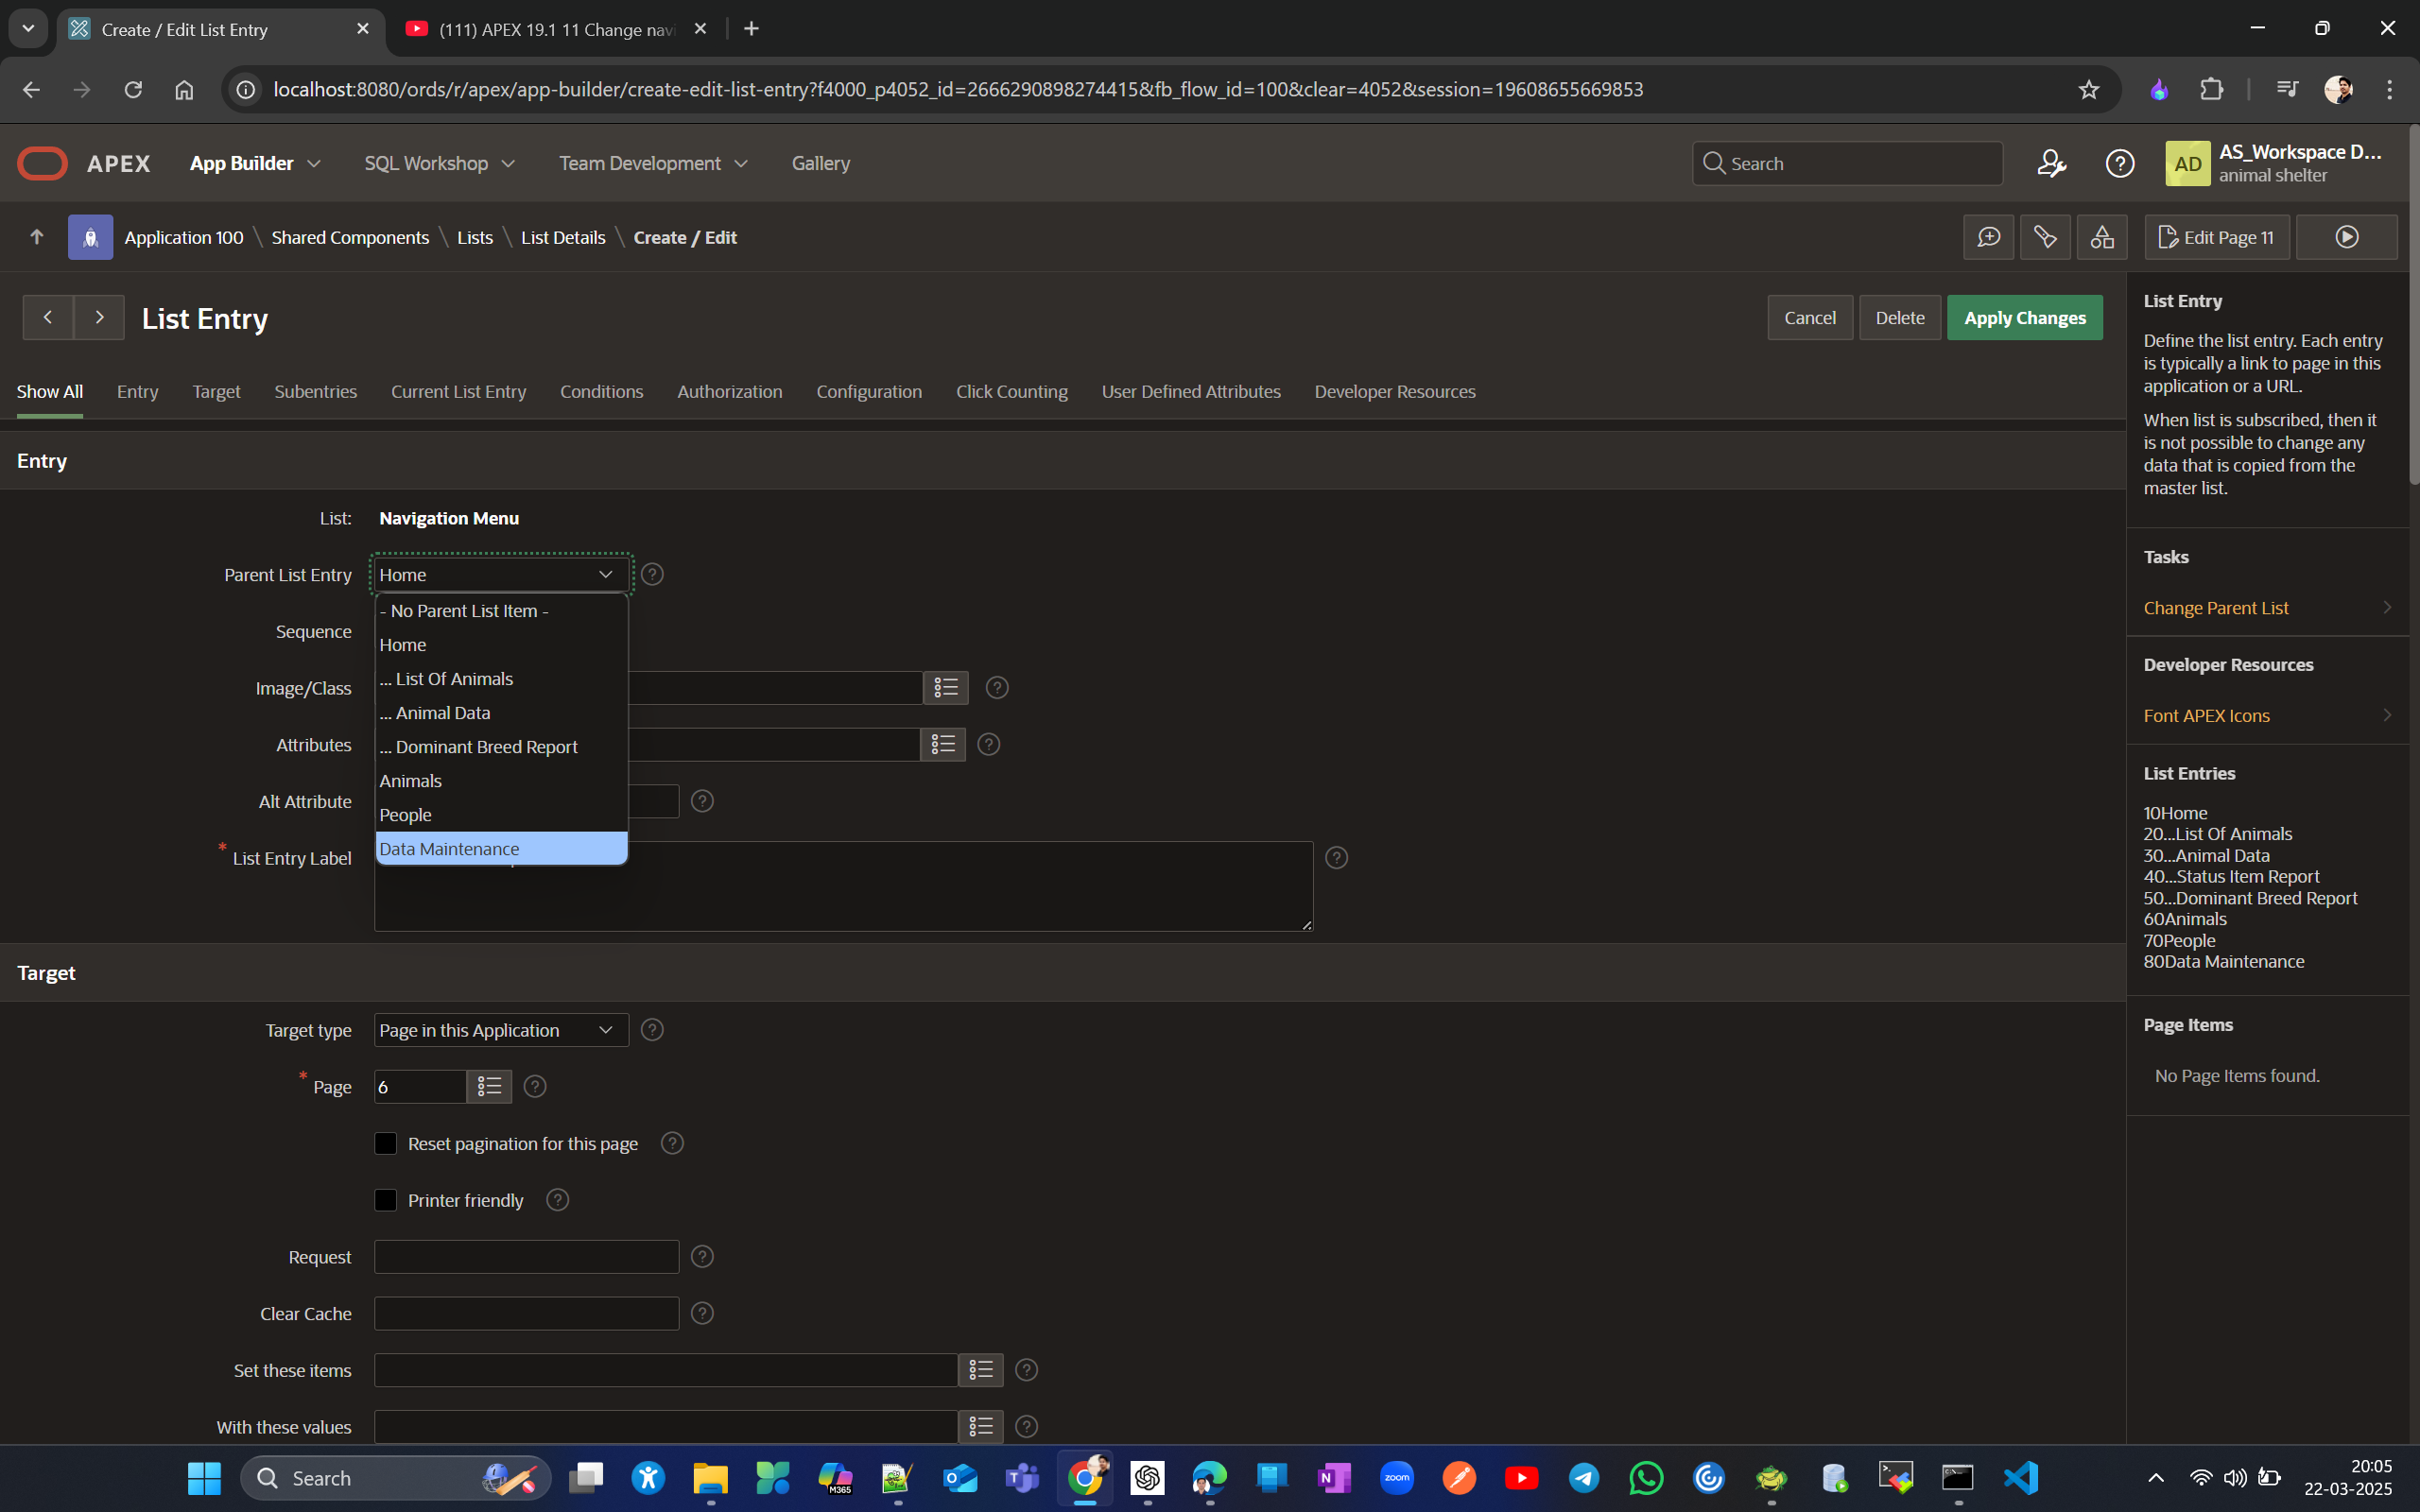
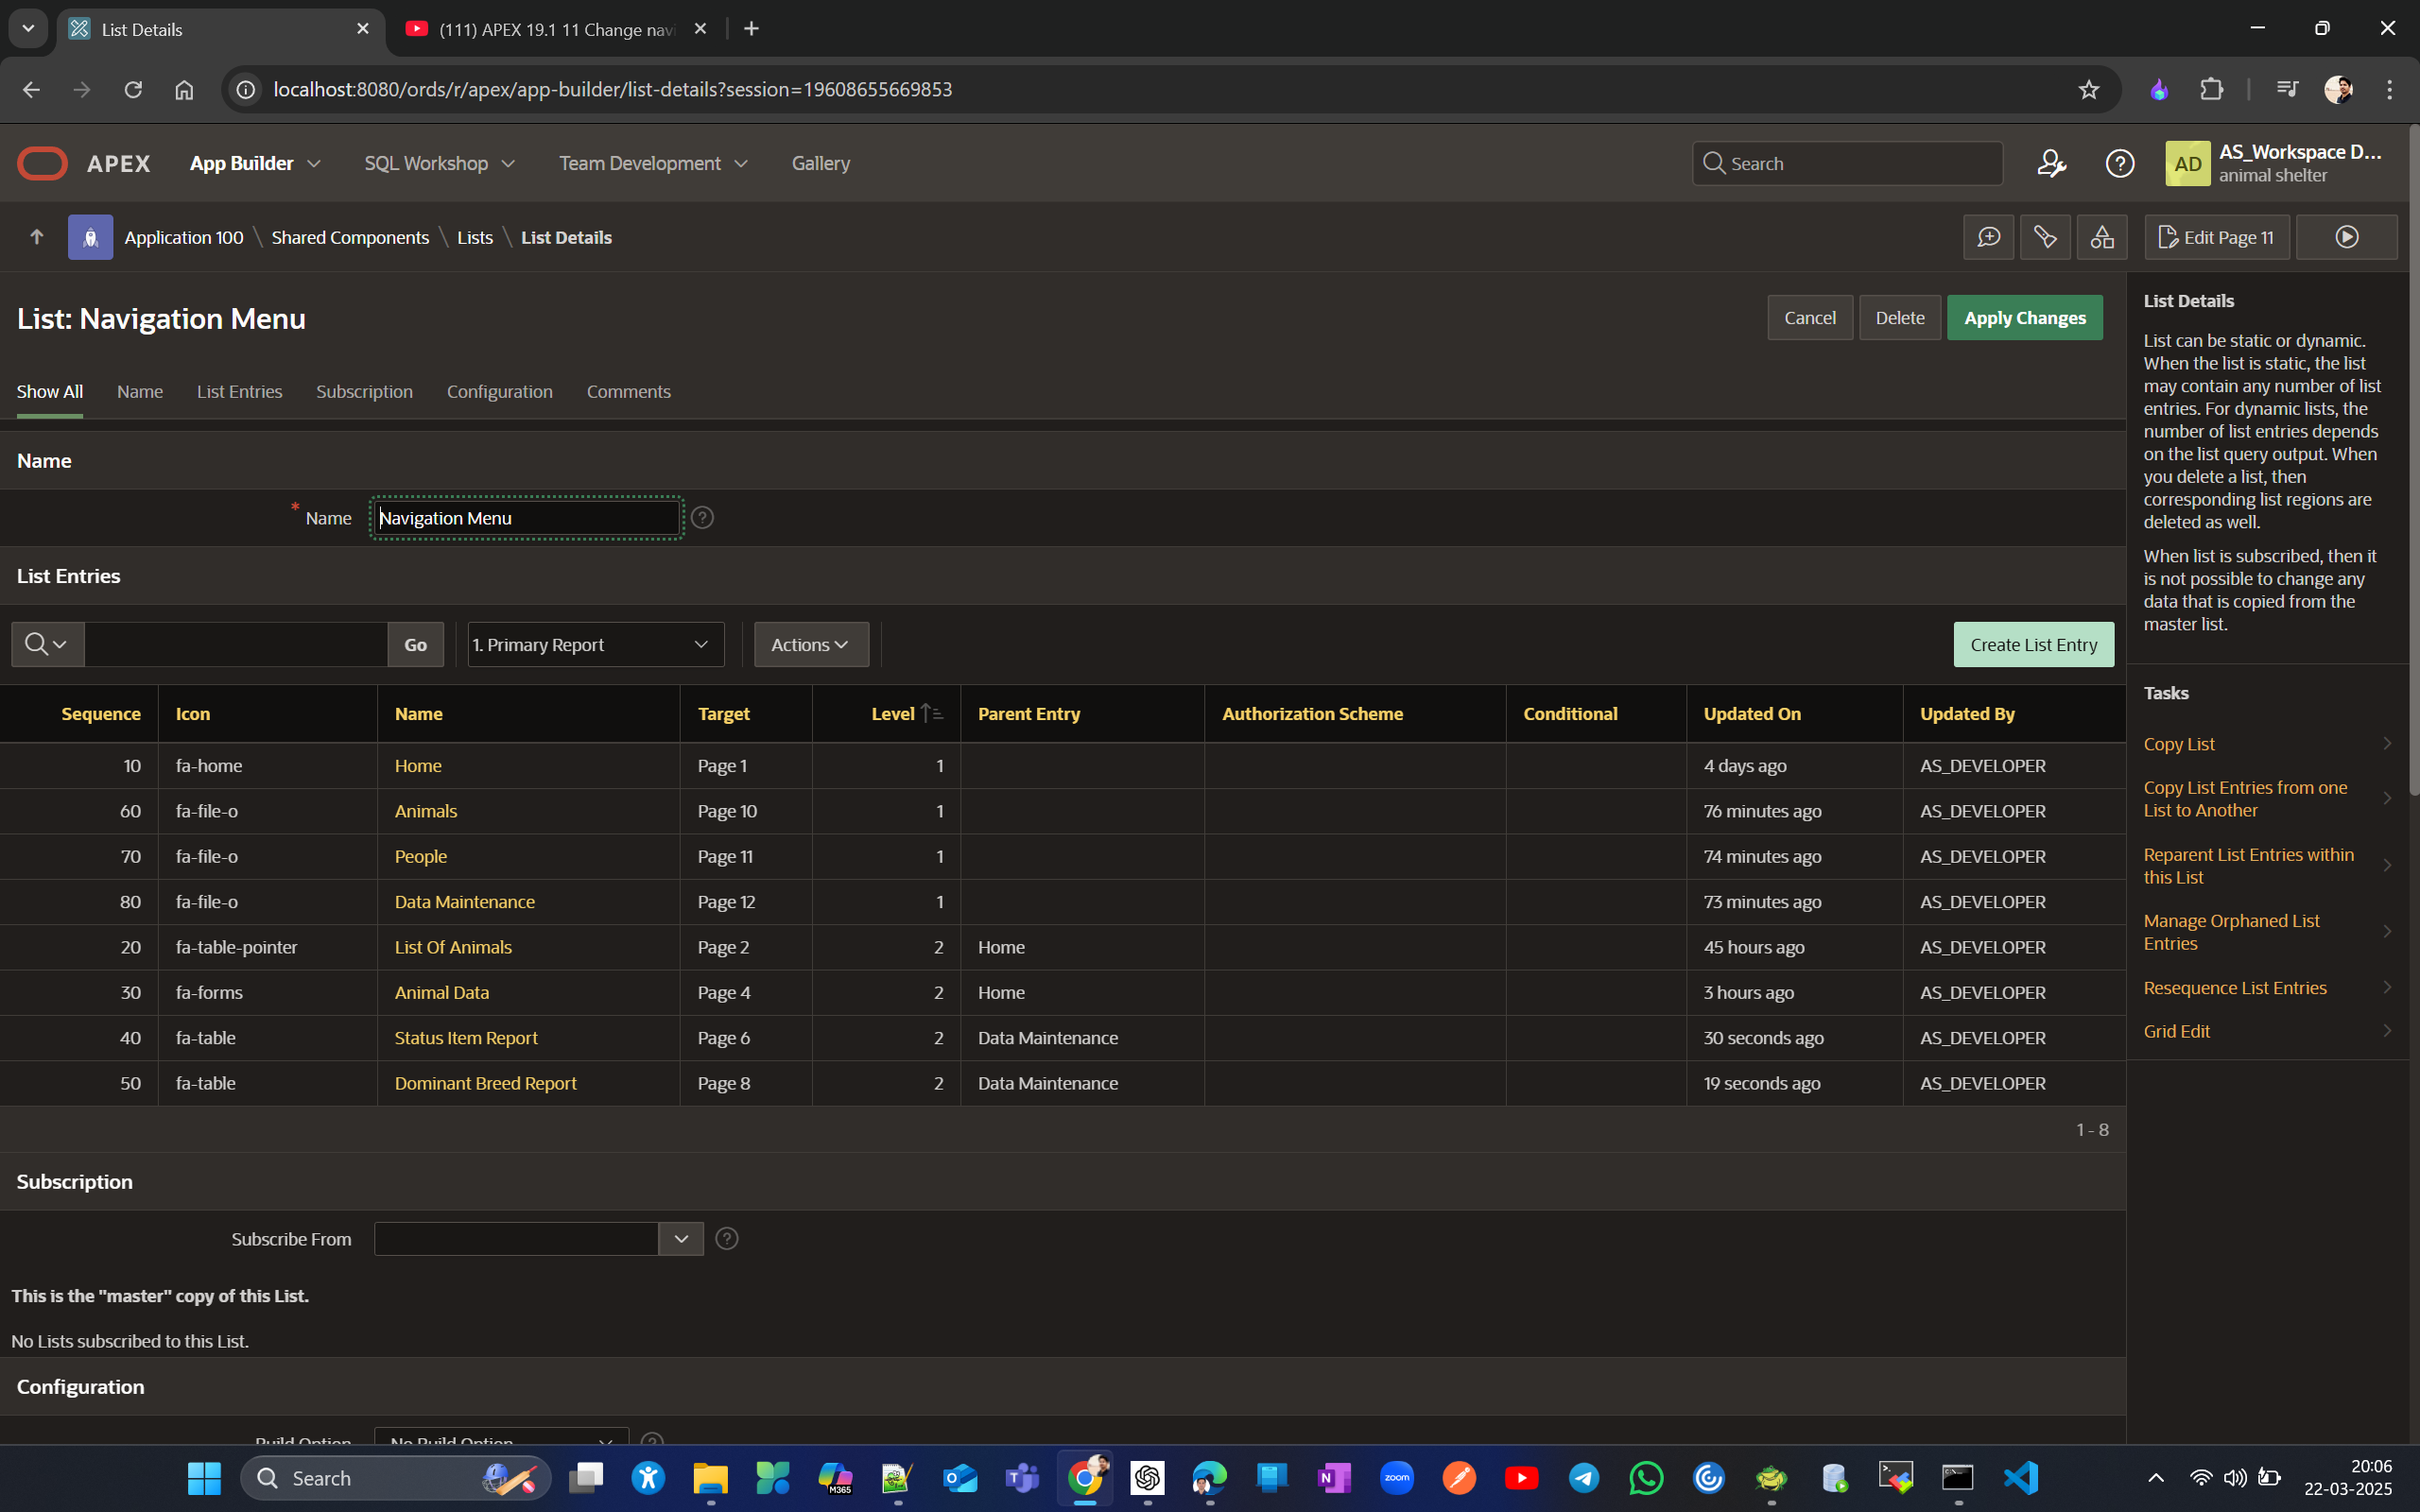
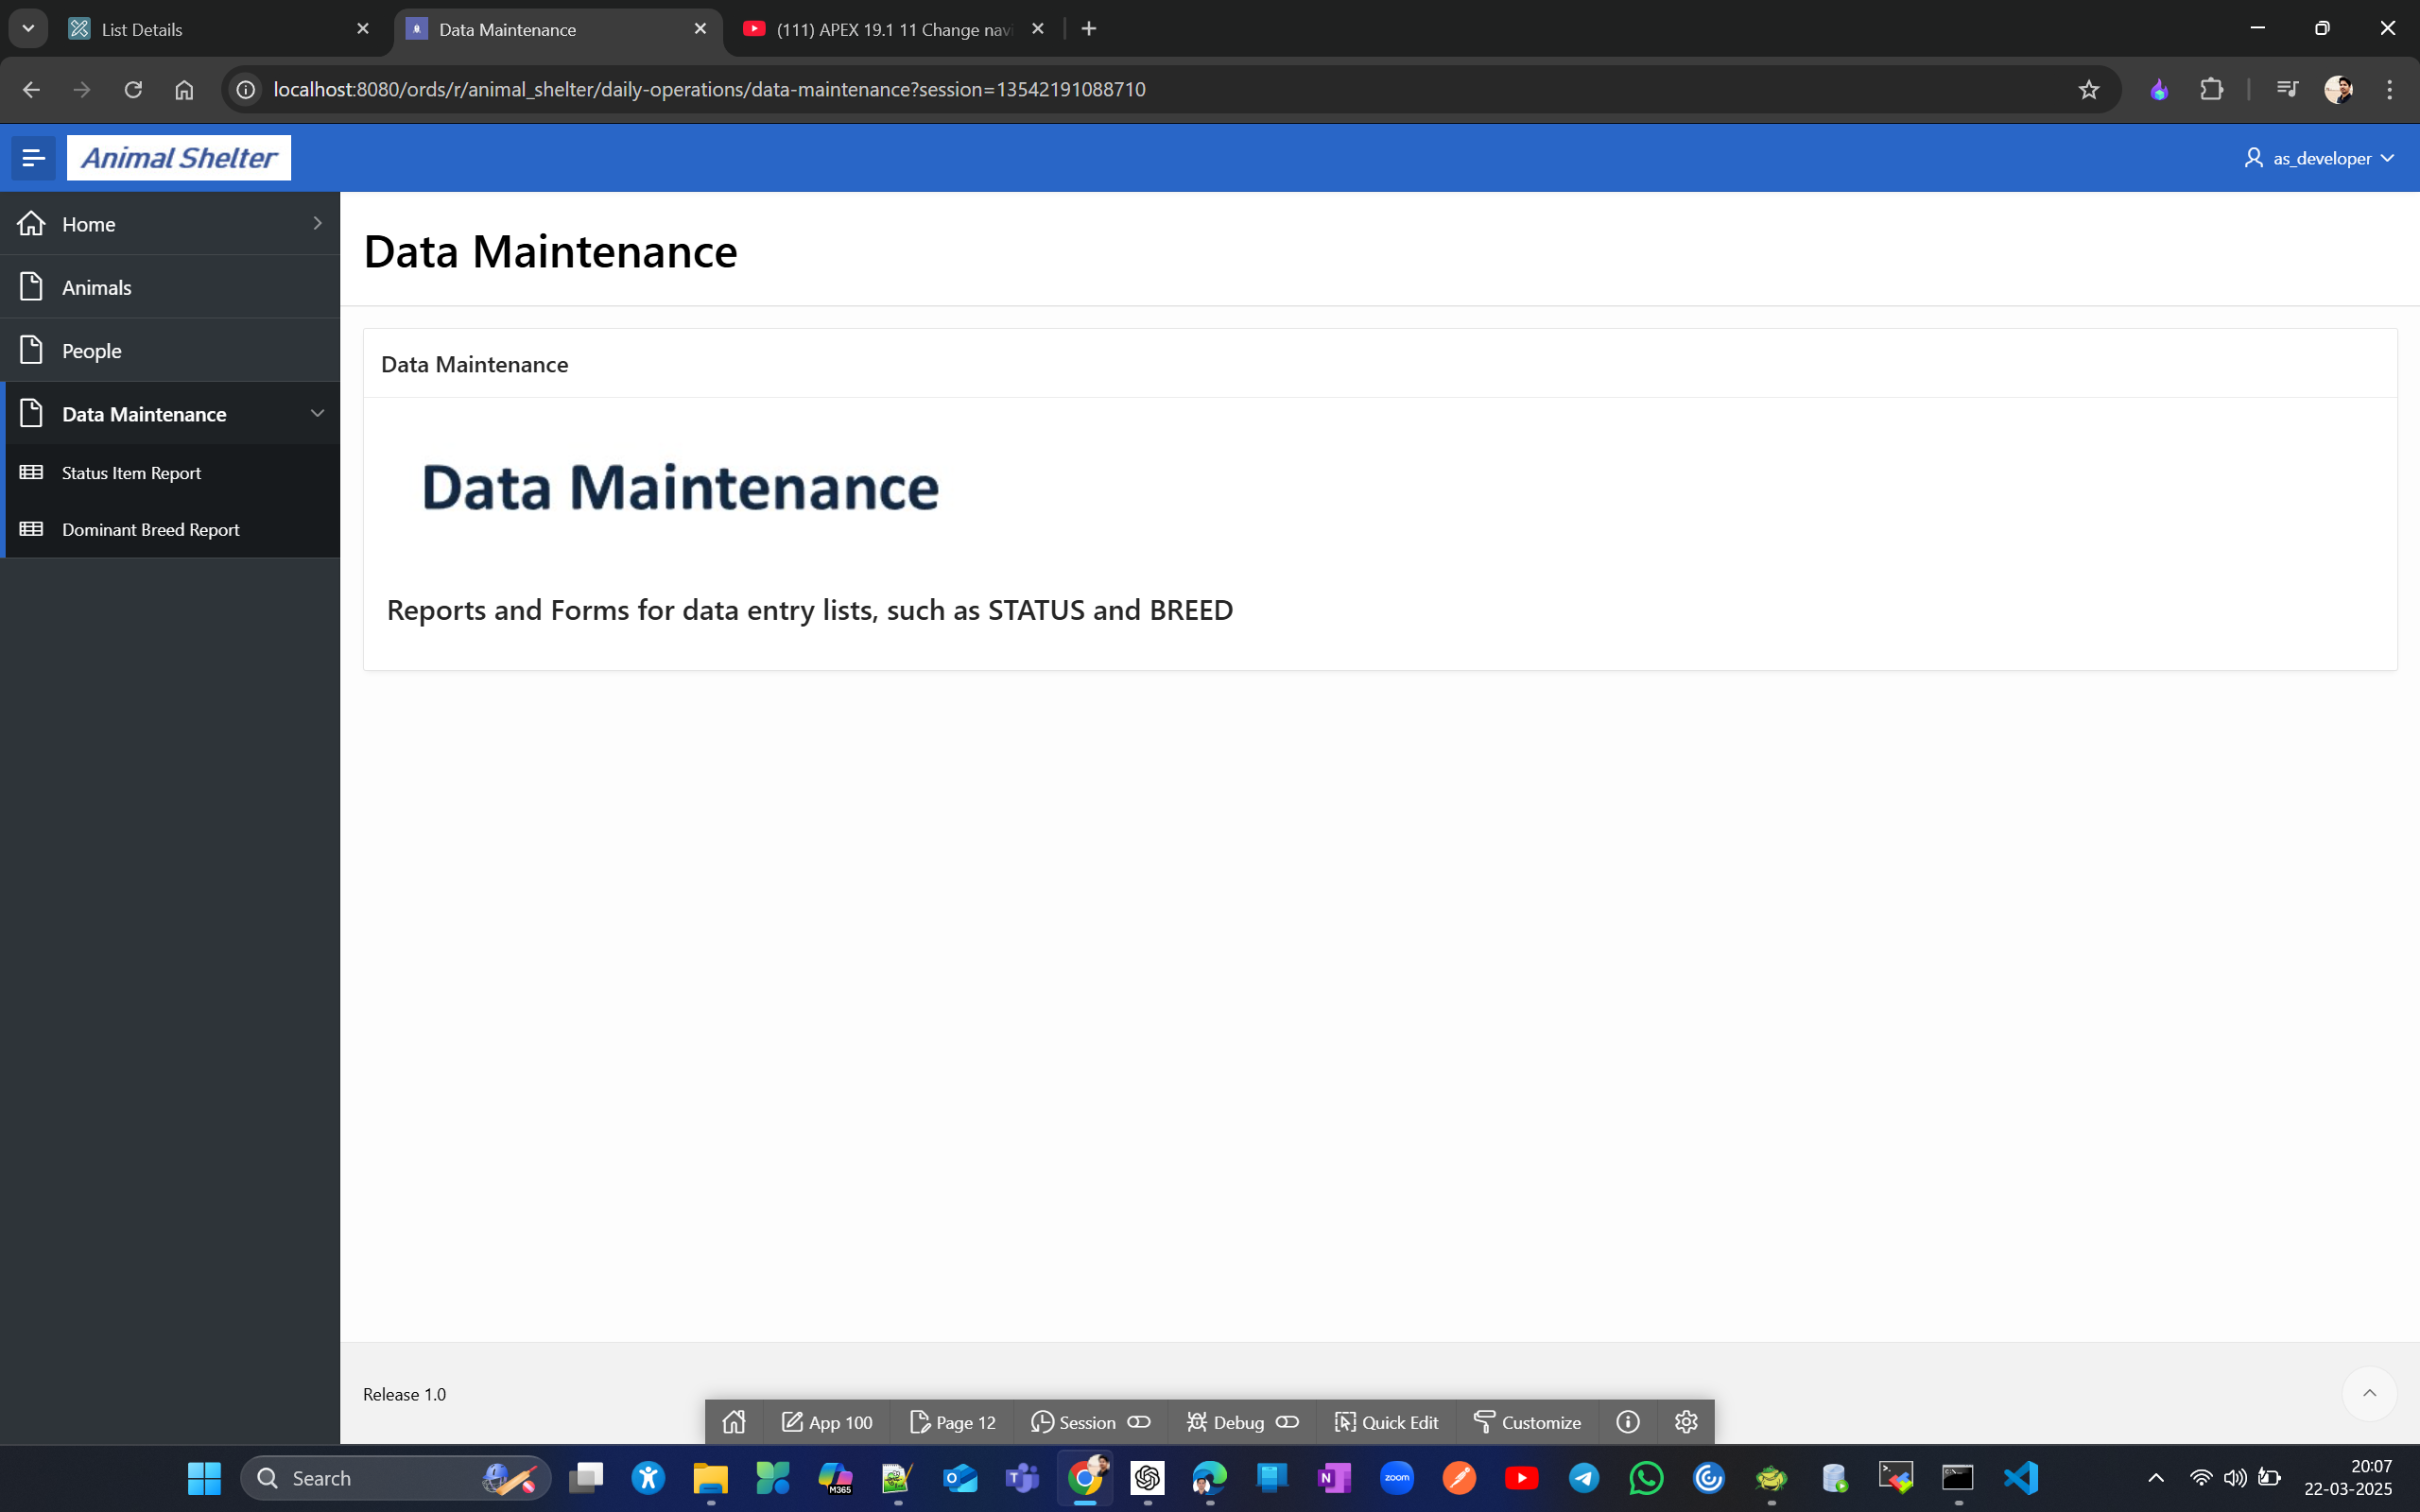
Now switch List Of Animalsand Animal Data to Animals Menu
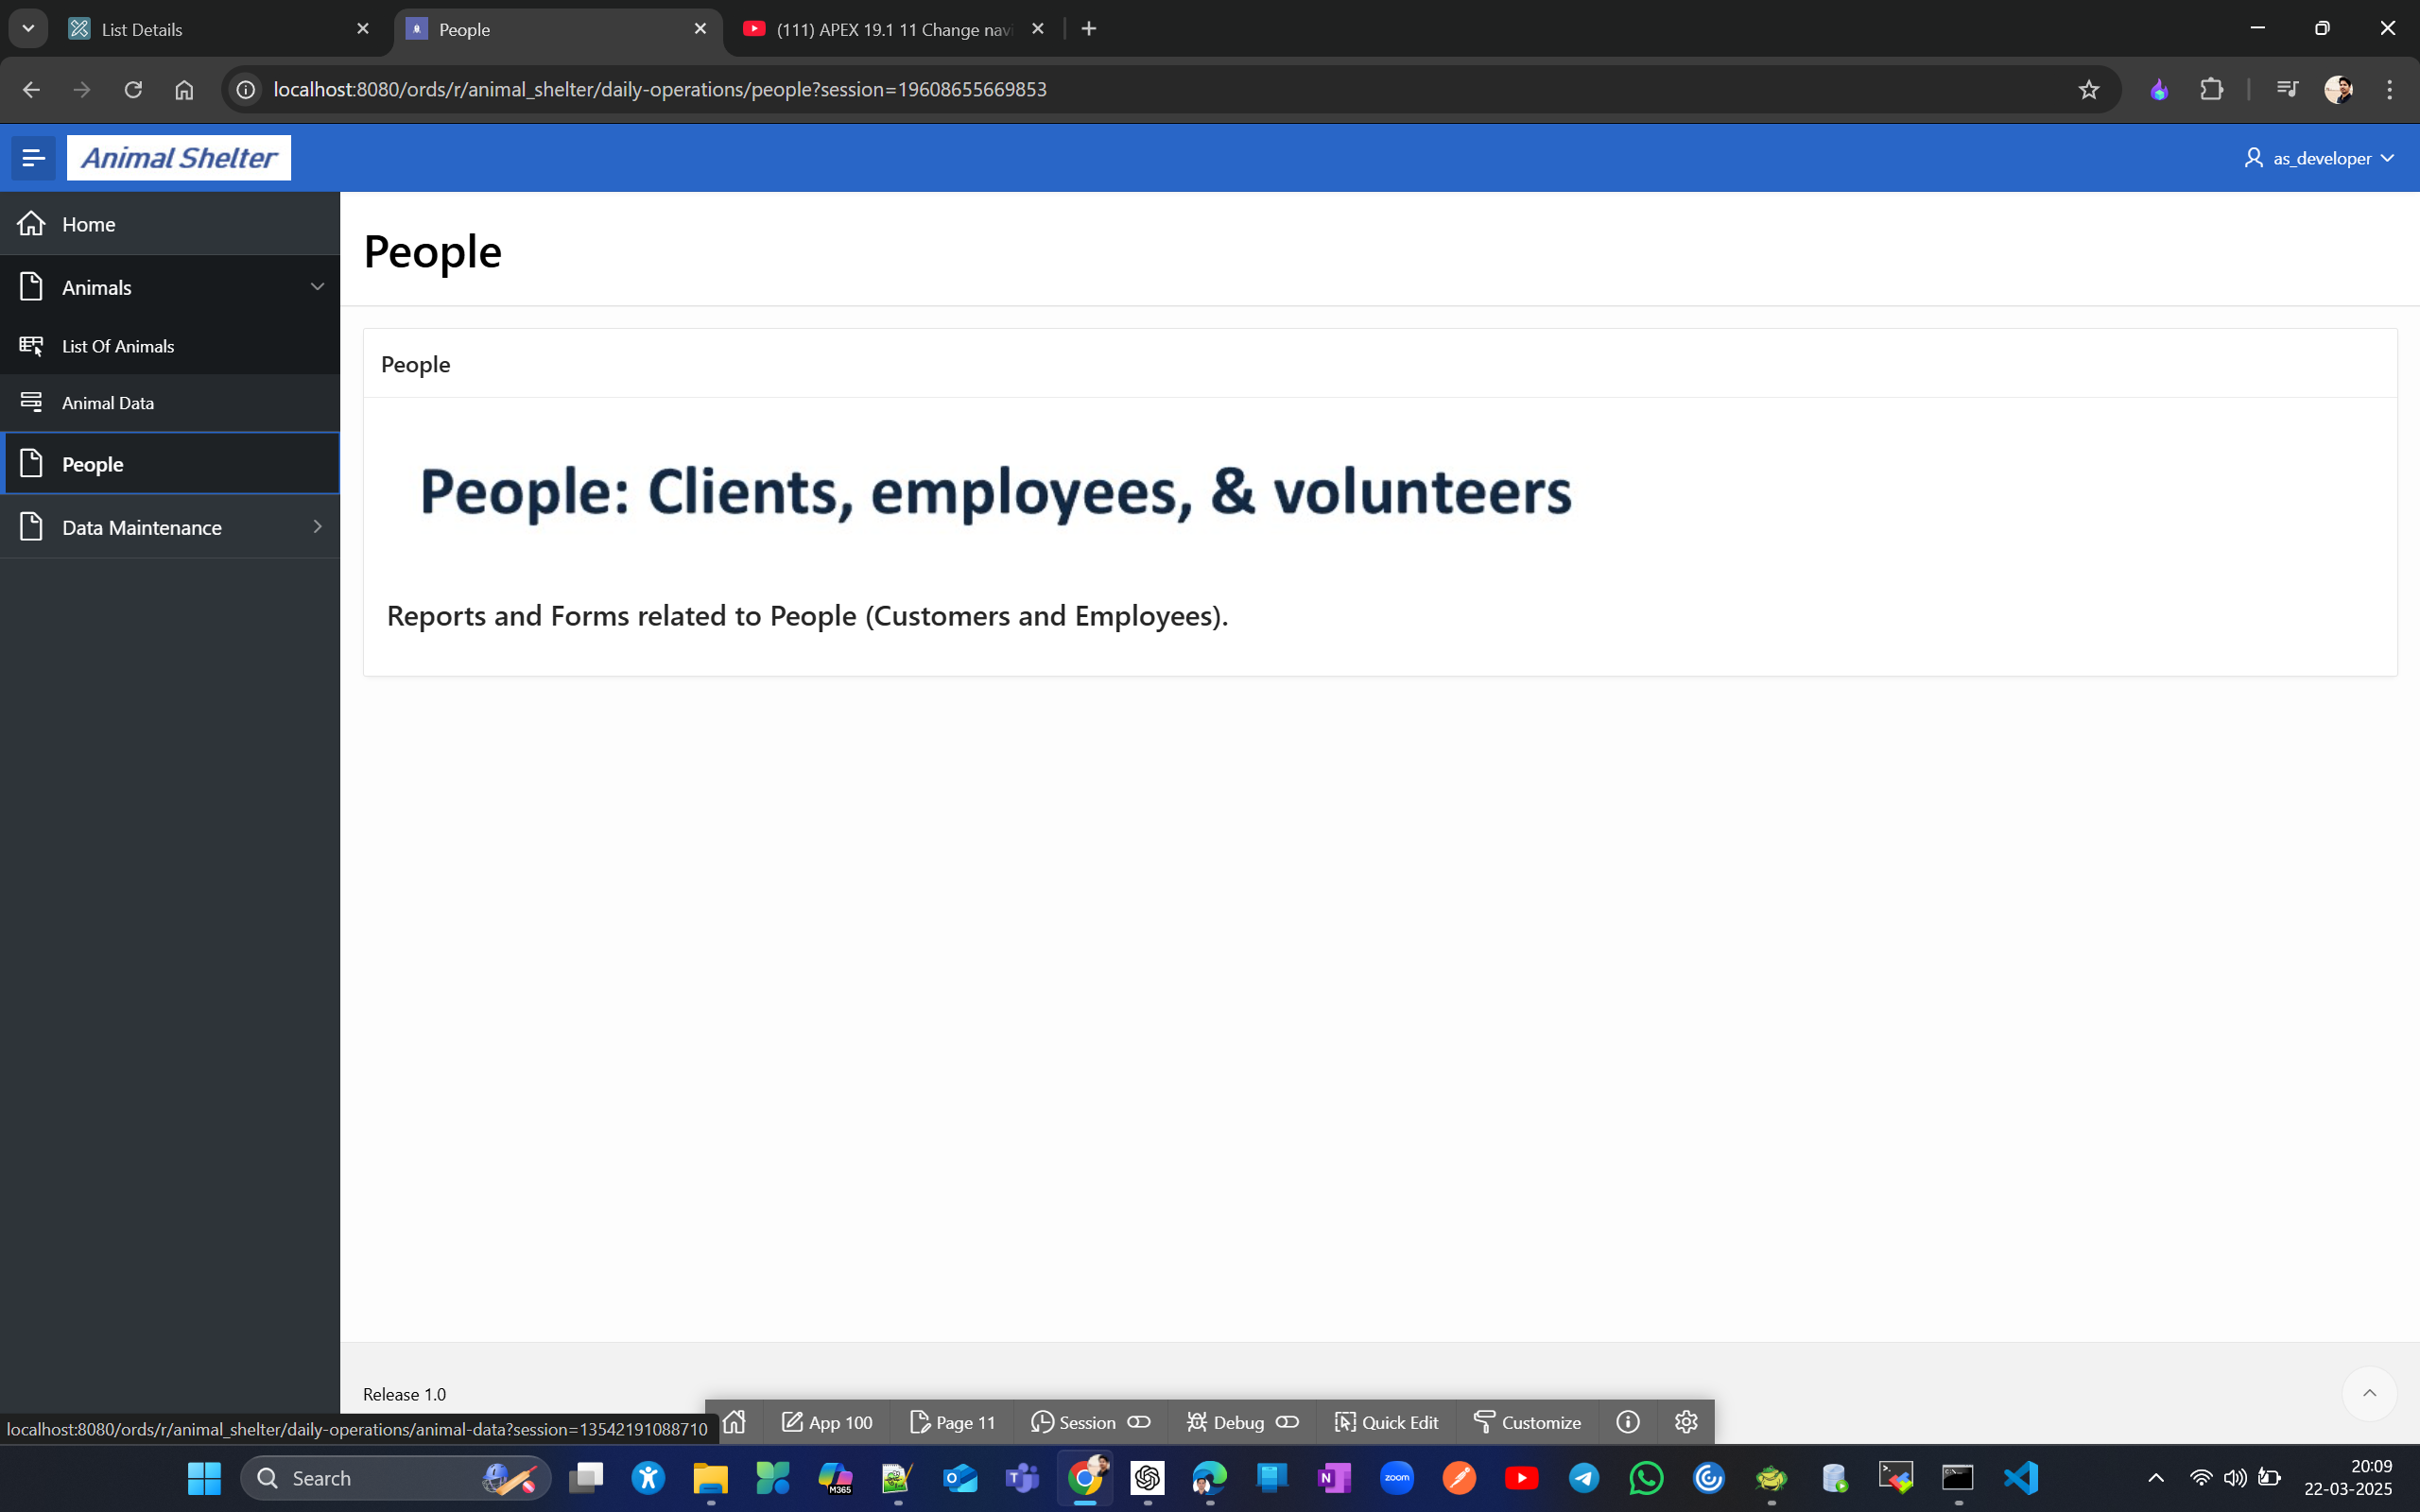
Animal Data id old form which we created to enter animals’ data w/o any select list or popup LOV.
Now lets create other application .
Click on Home icon on designer de tool bar and create Application from app builder
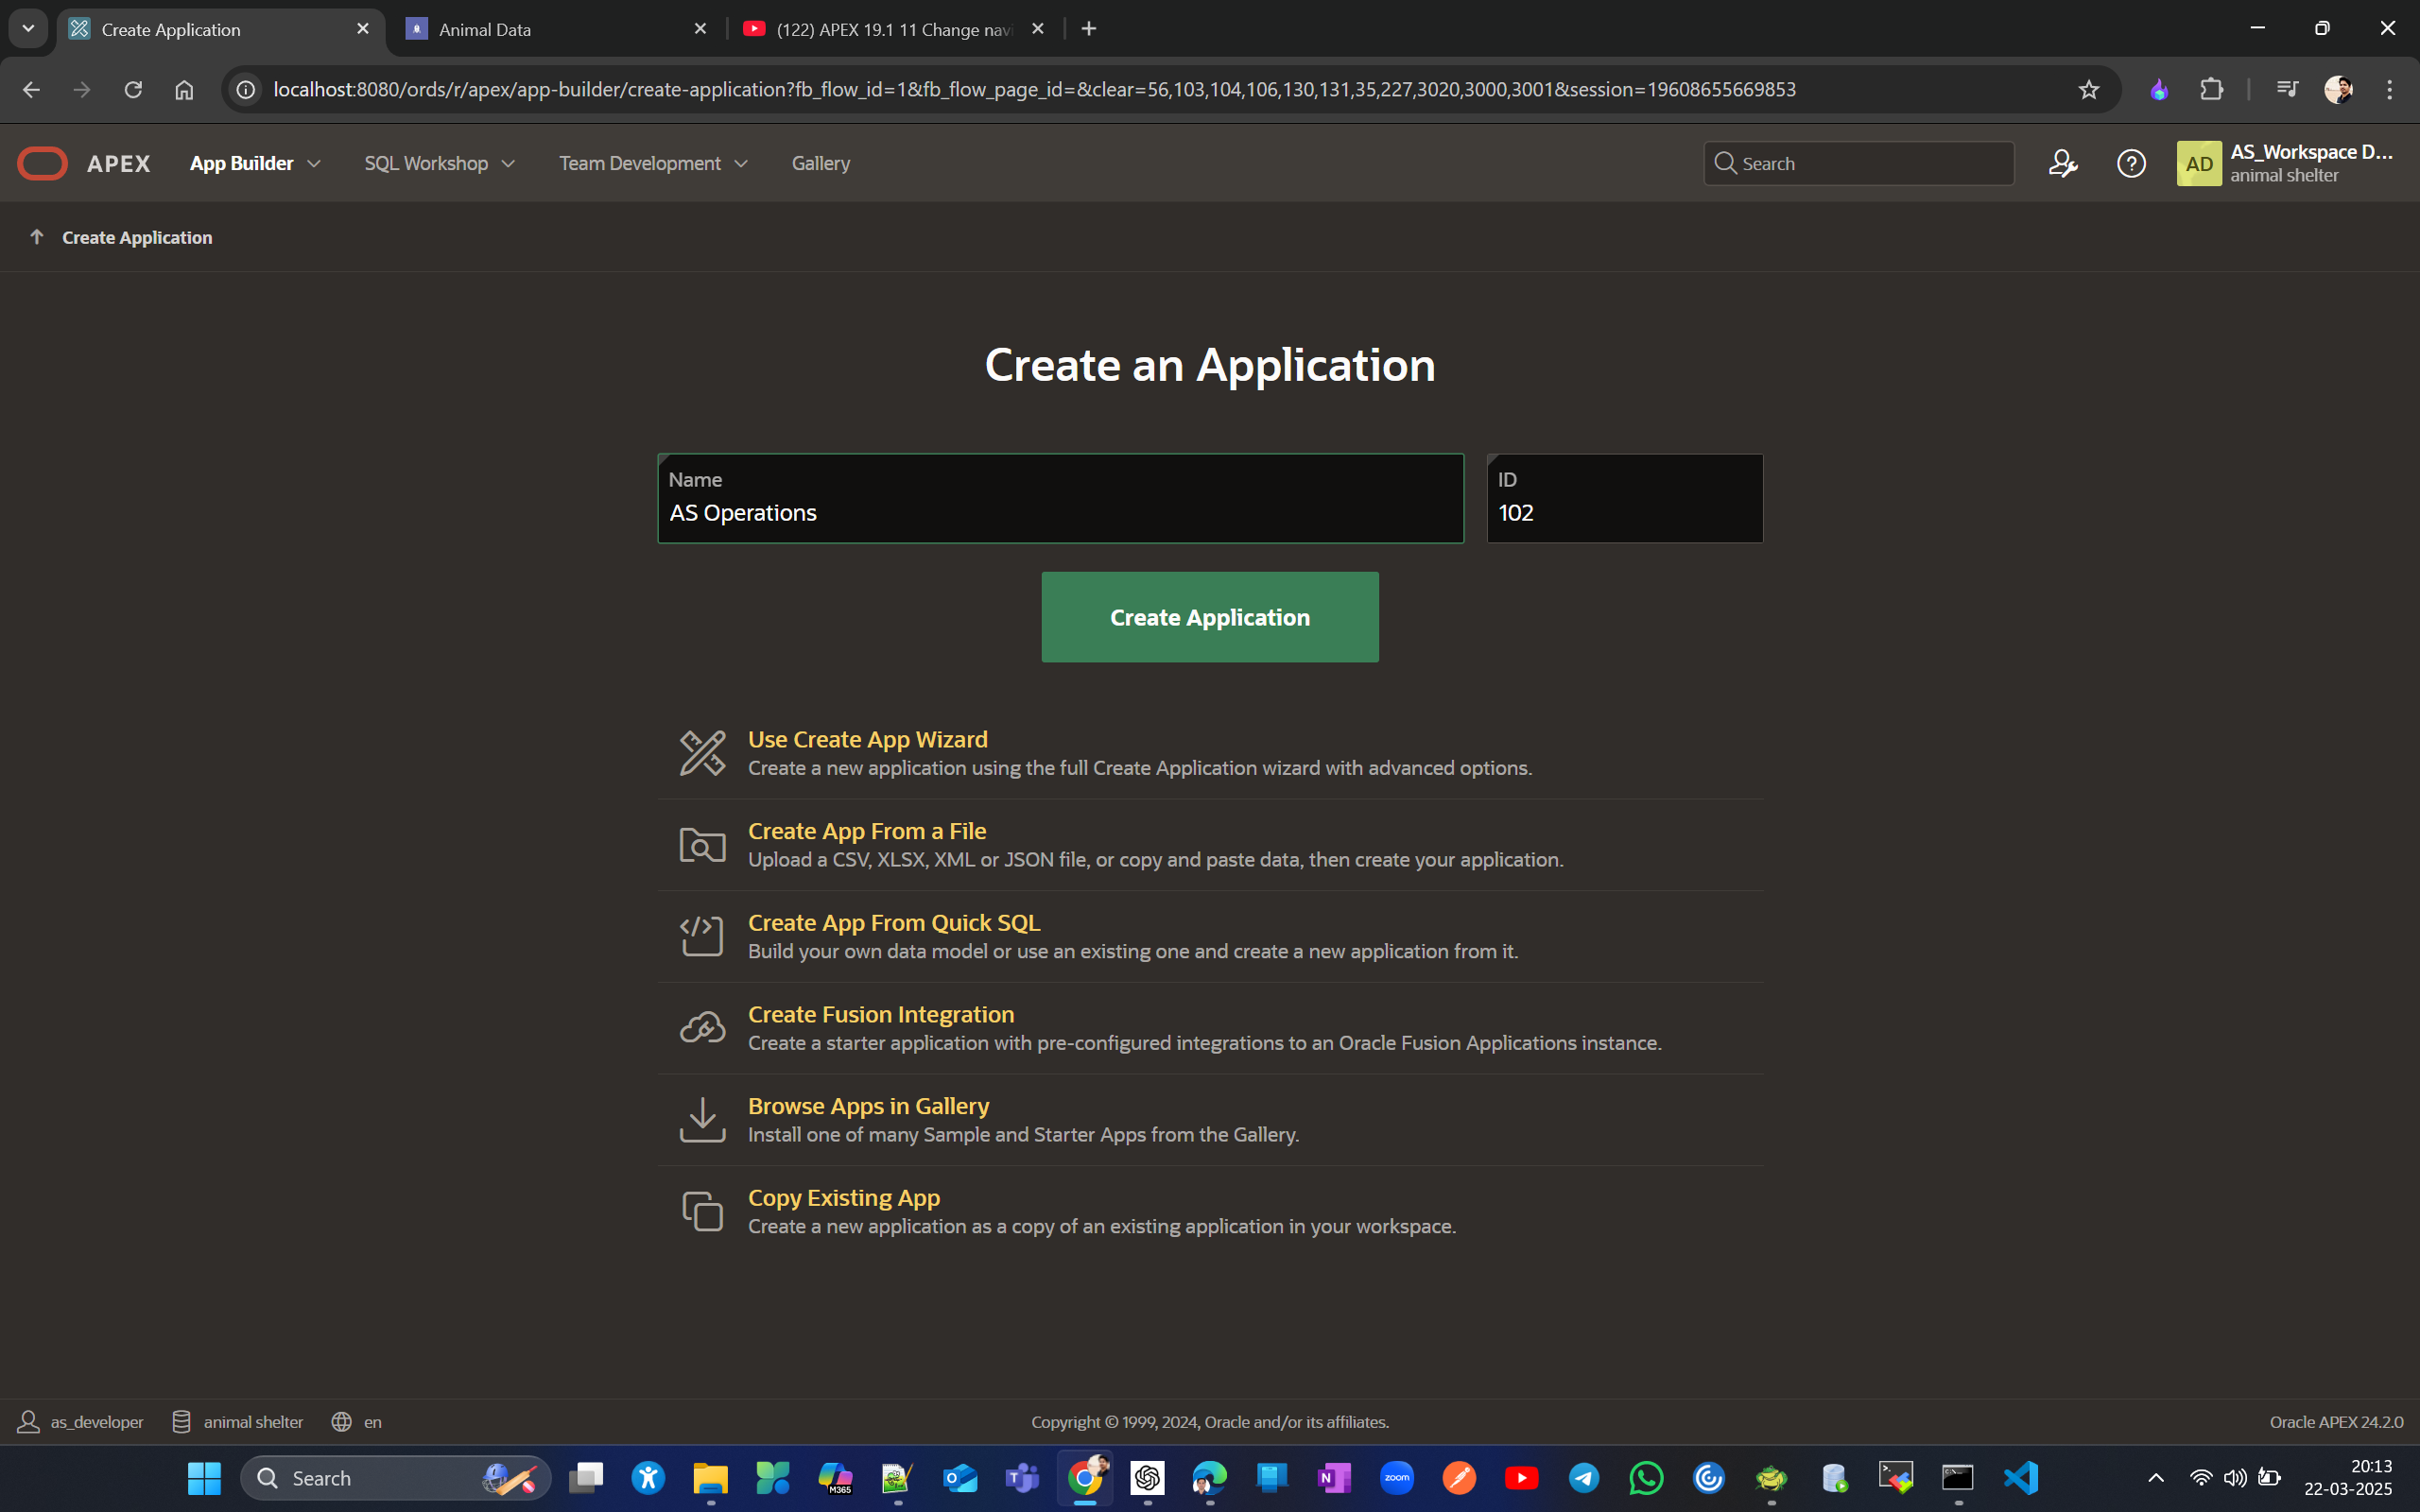
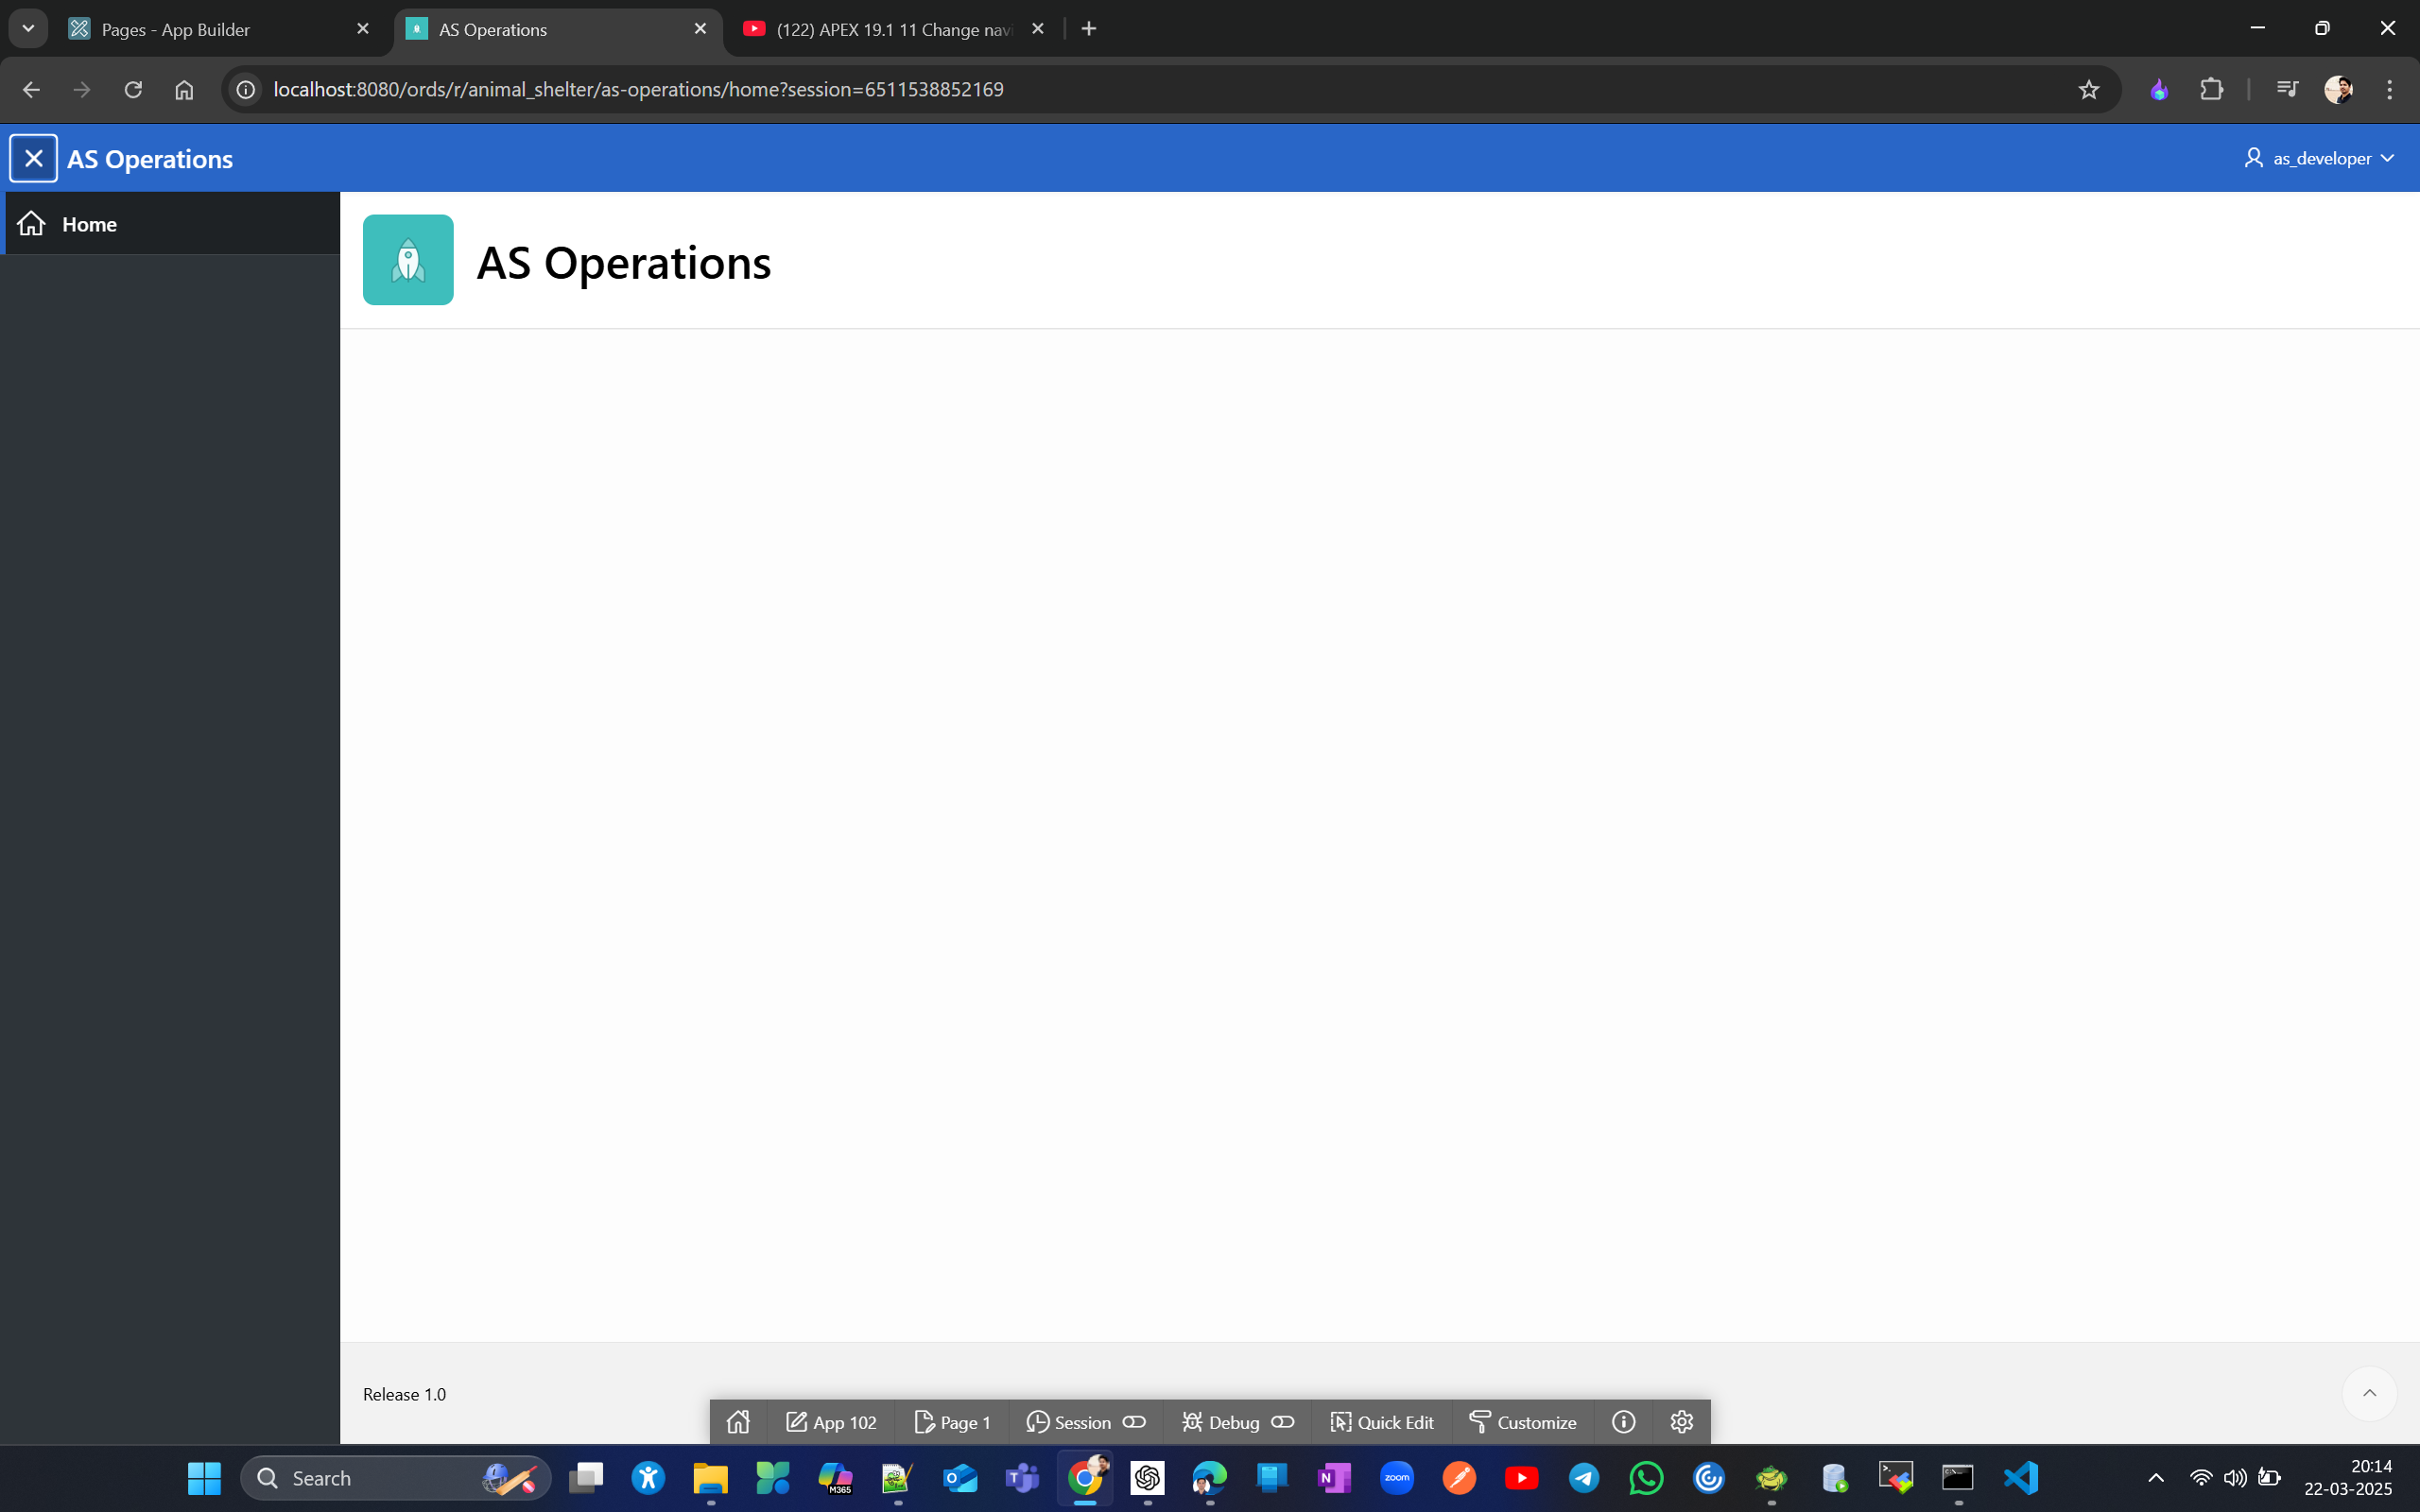
No copy Animal Shelter pic reference you had uploaded to workspace files and go to application (App 102) → shared component → Application definition under Application Logic → under user interface and paste image reference in logo URL
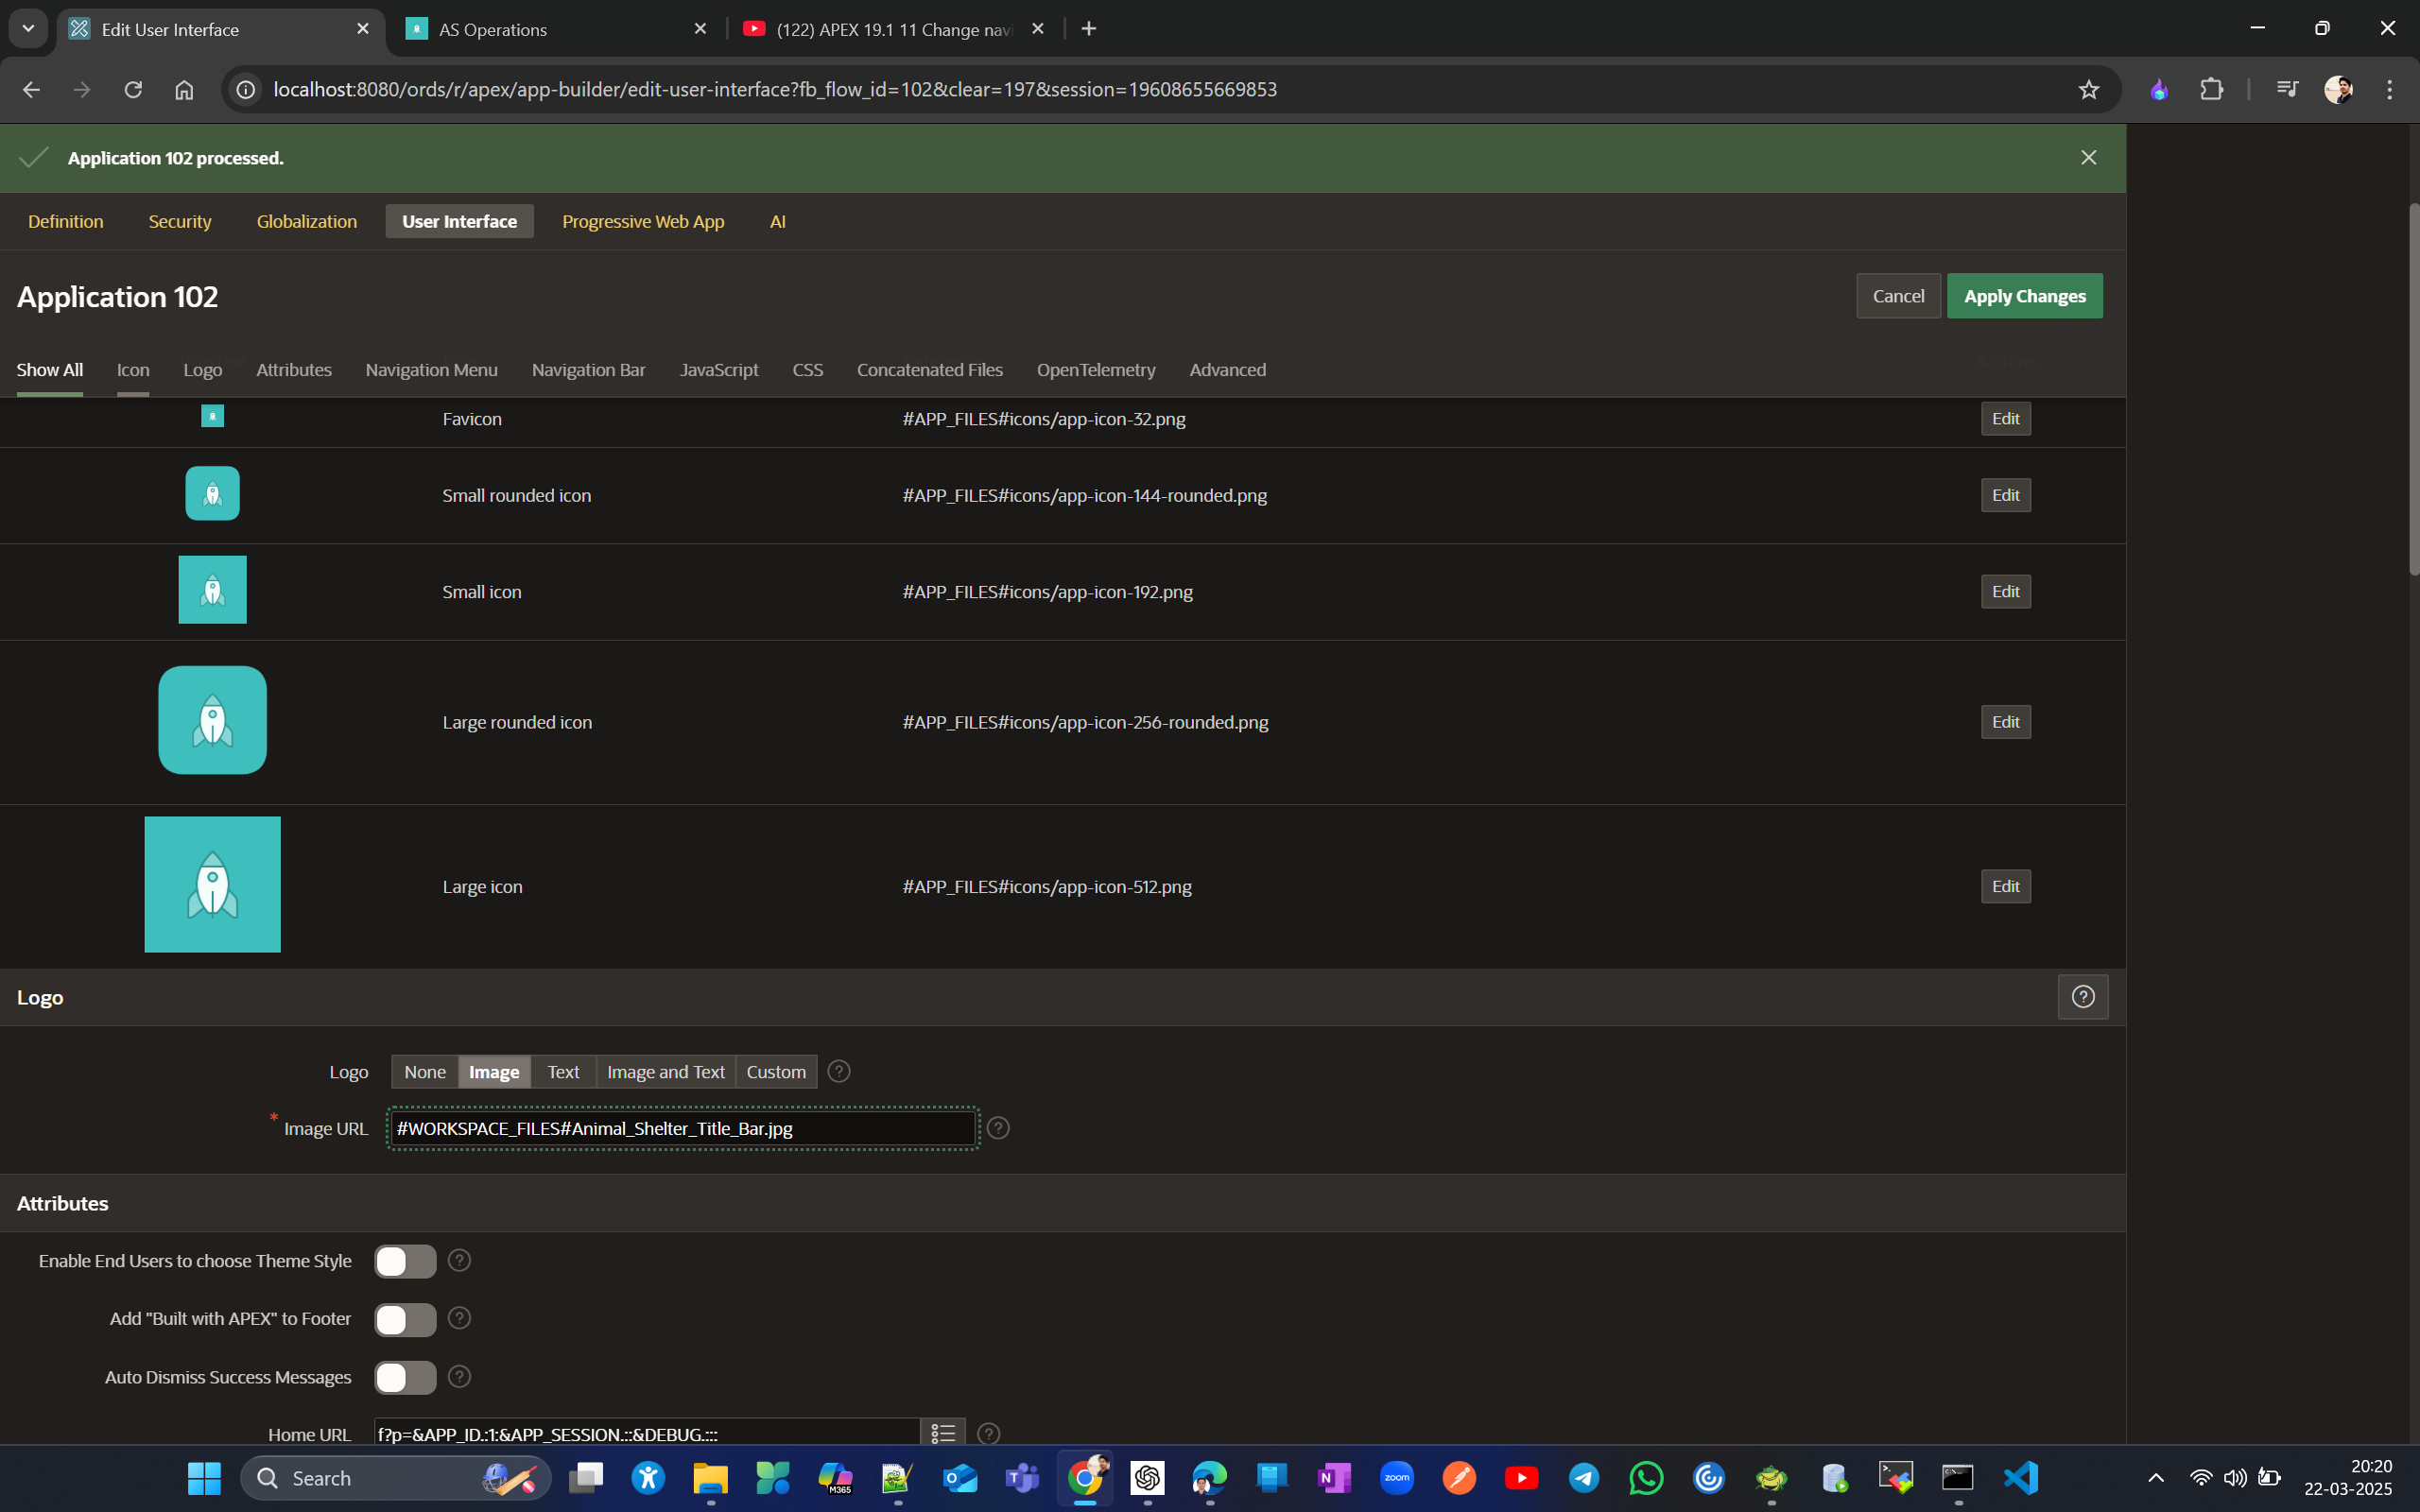
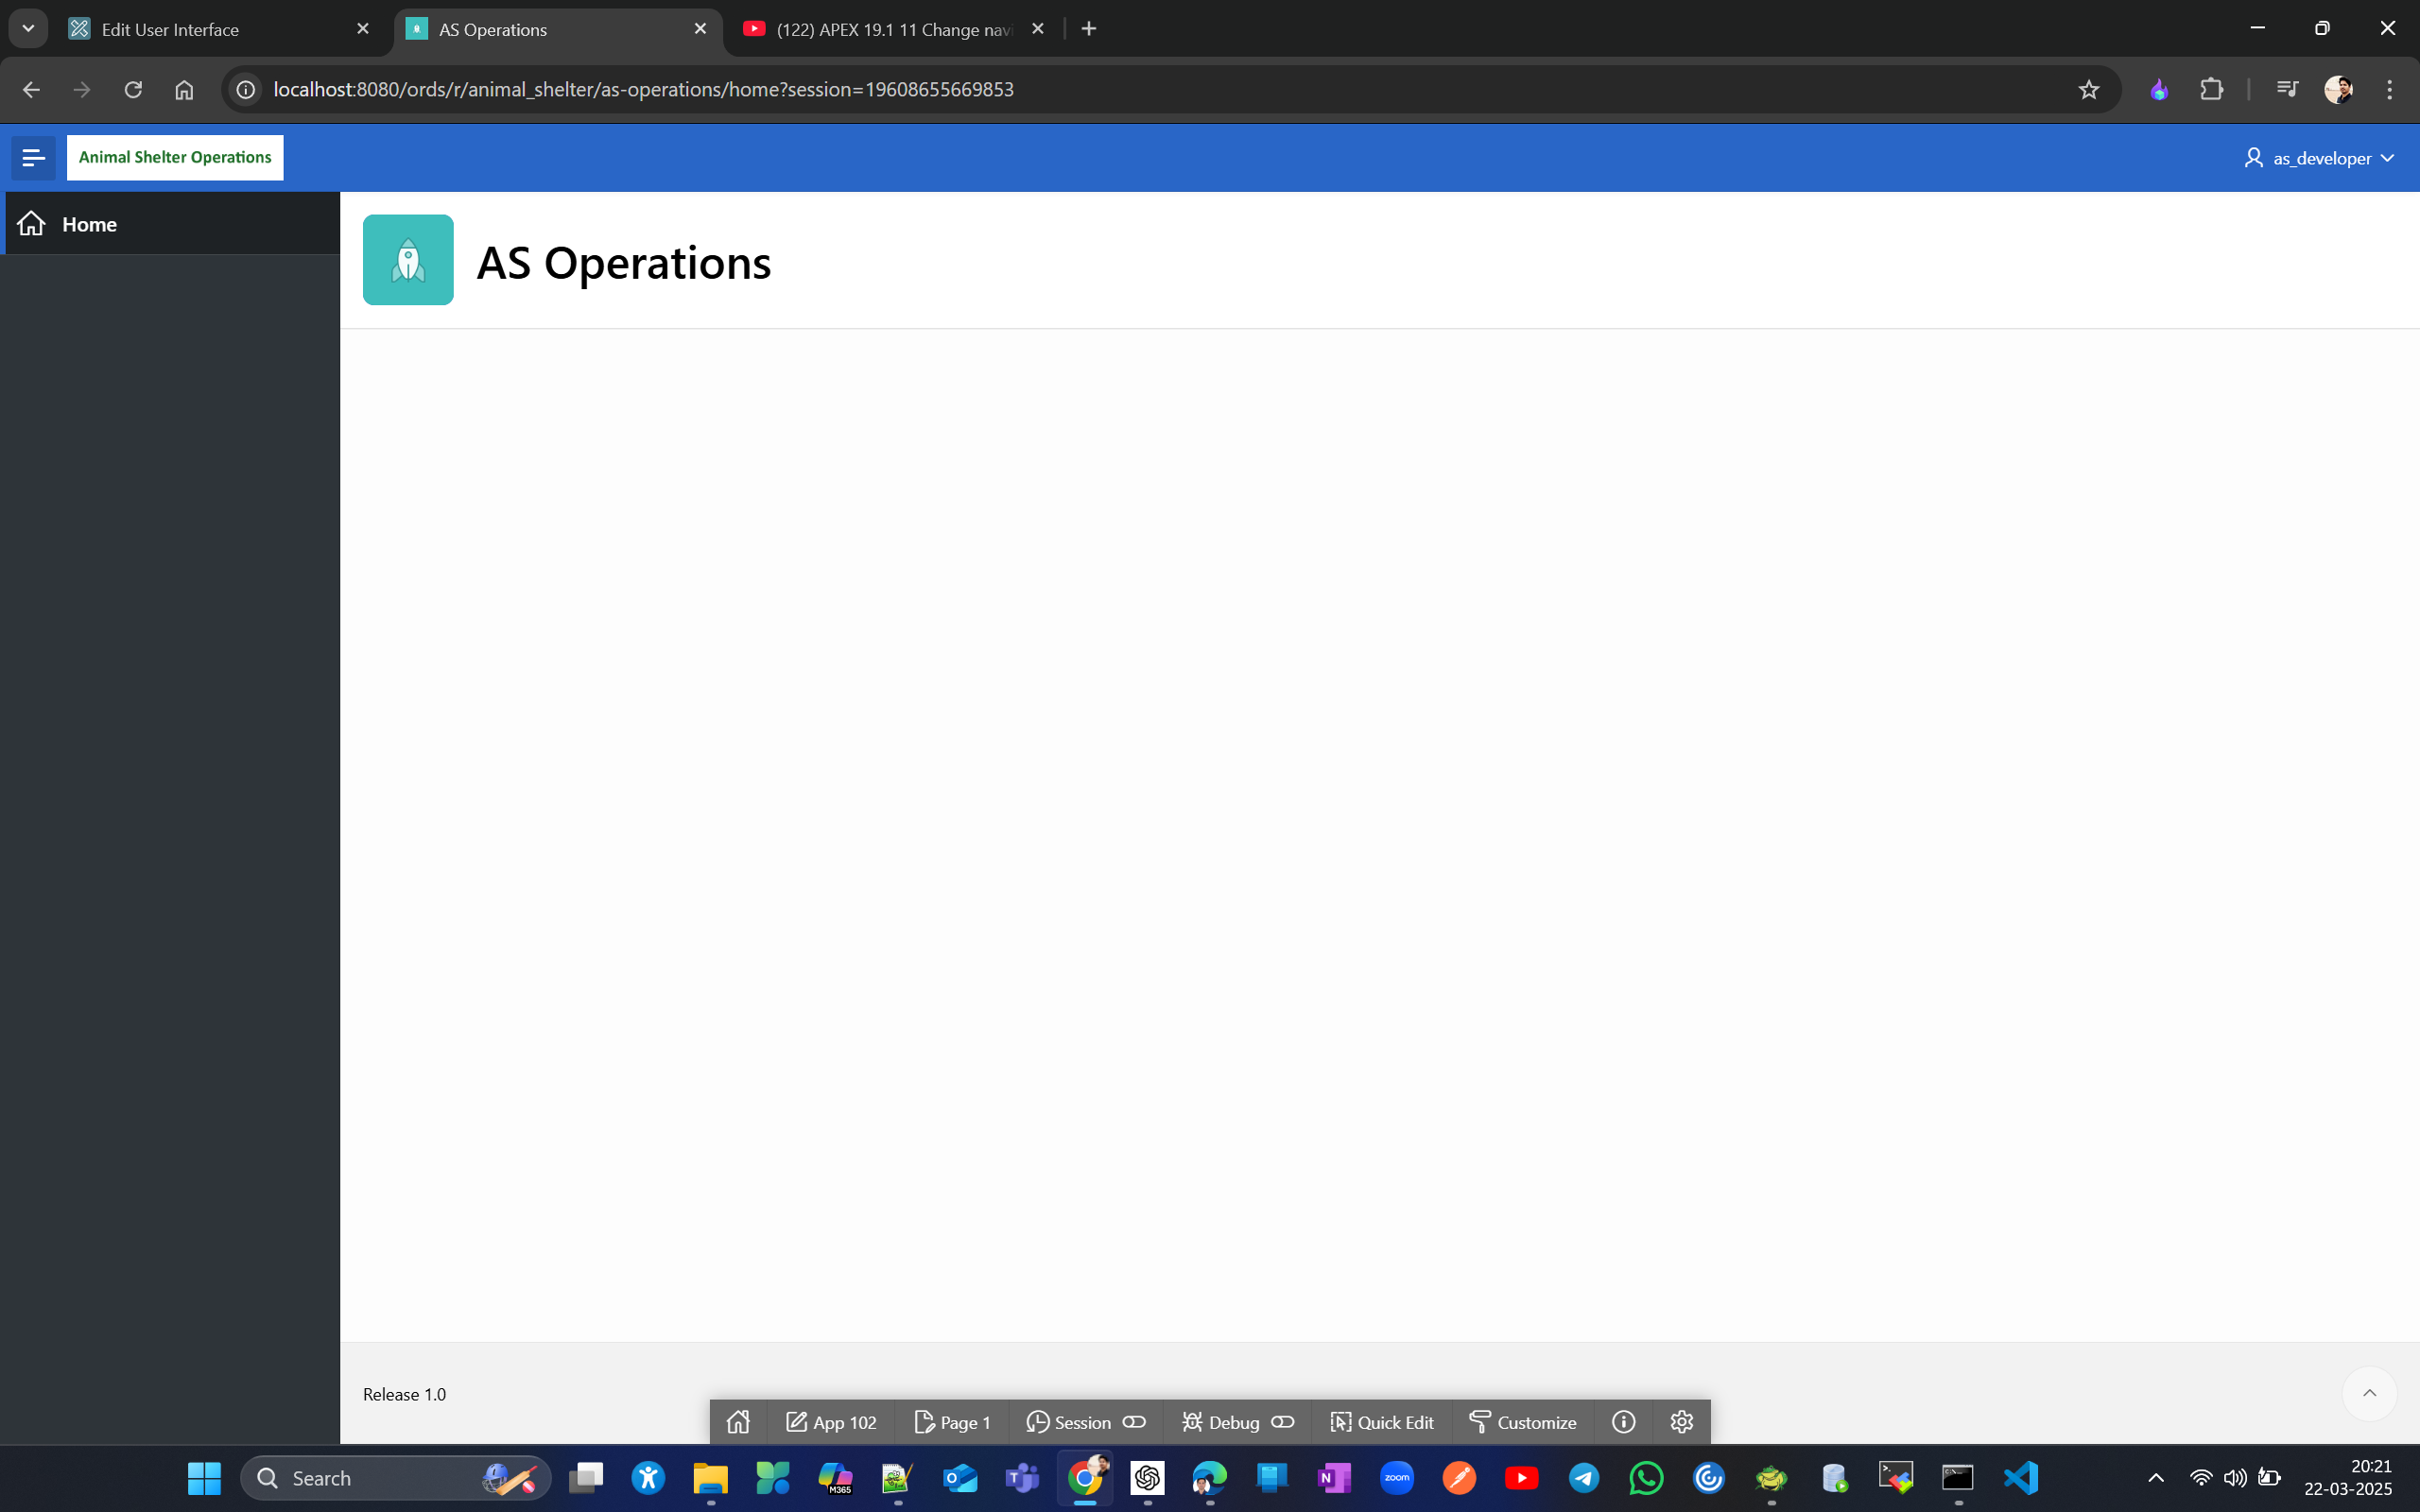
Now lets copy few pages from other application to this new one.
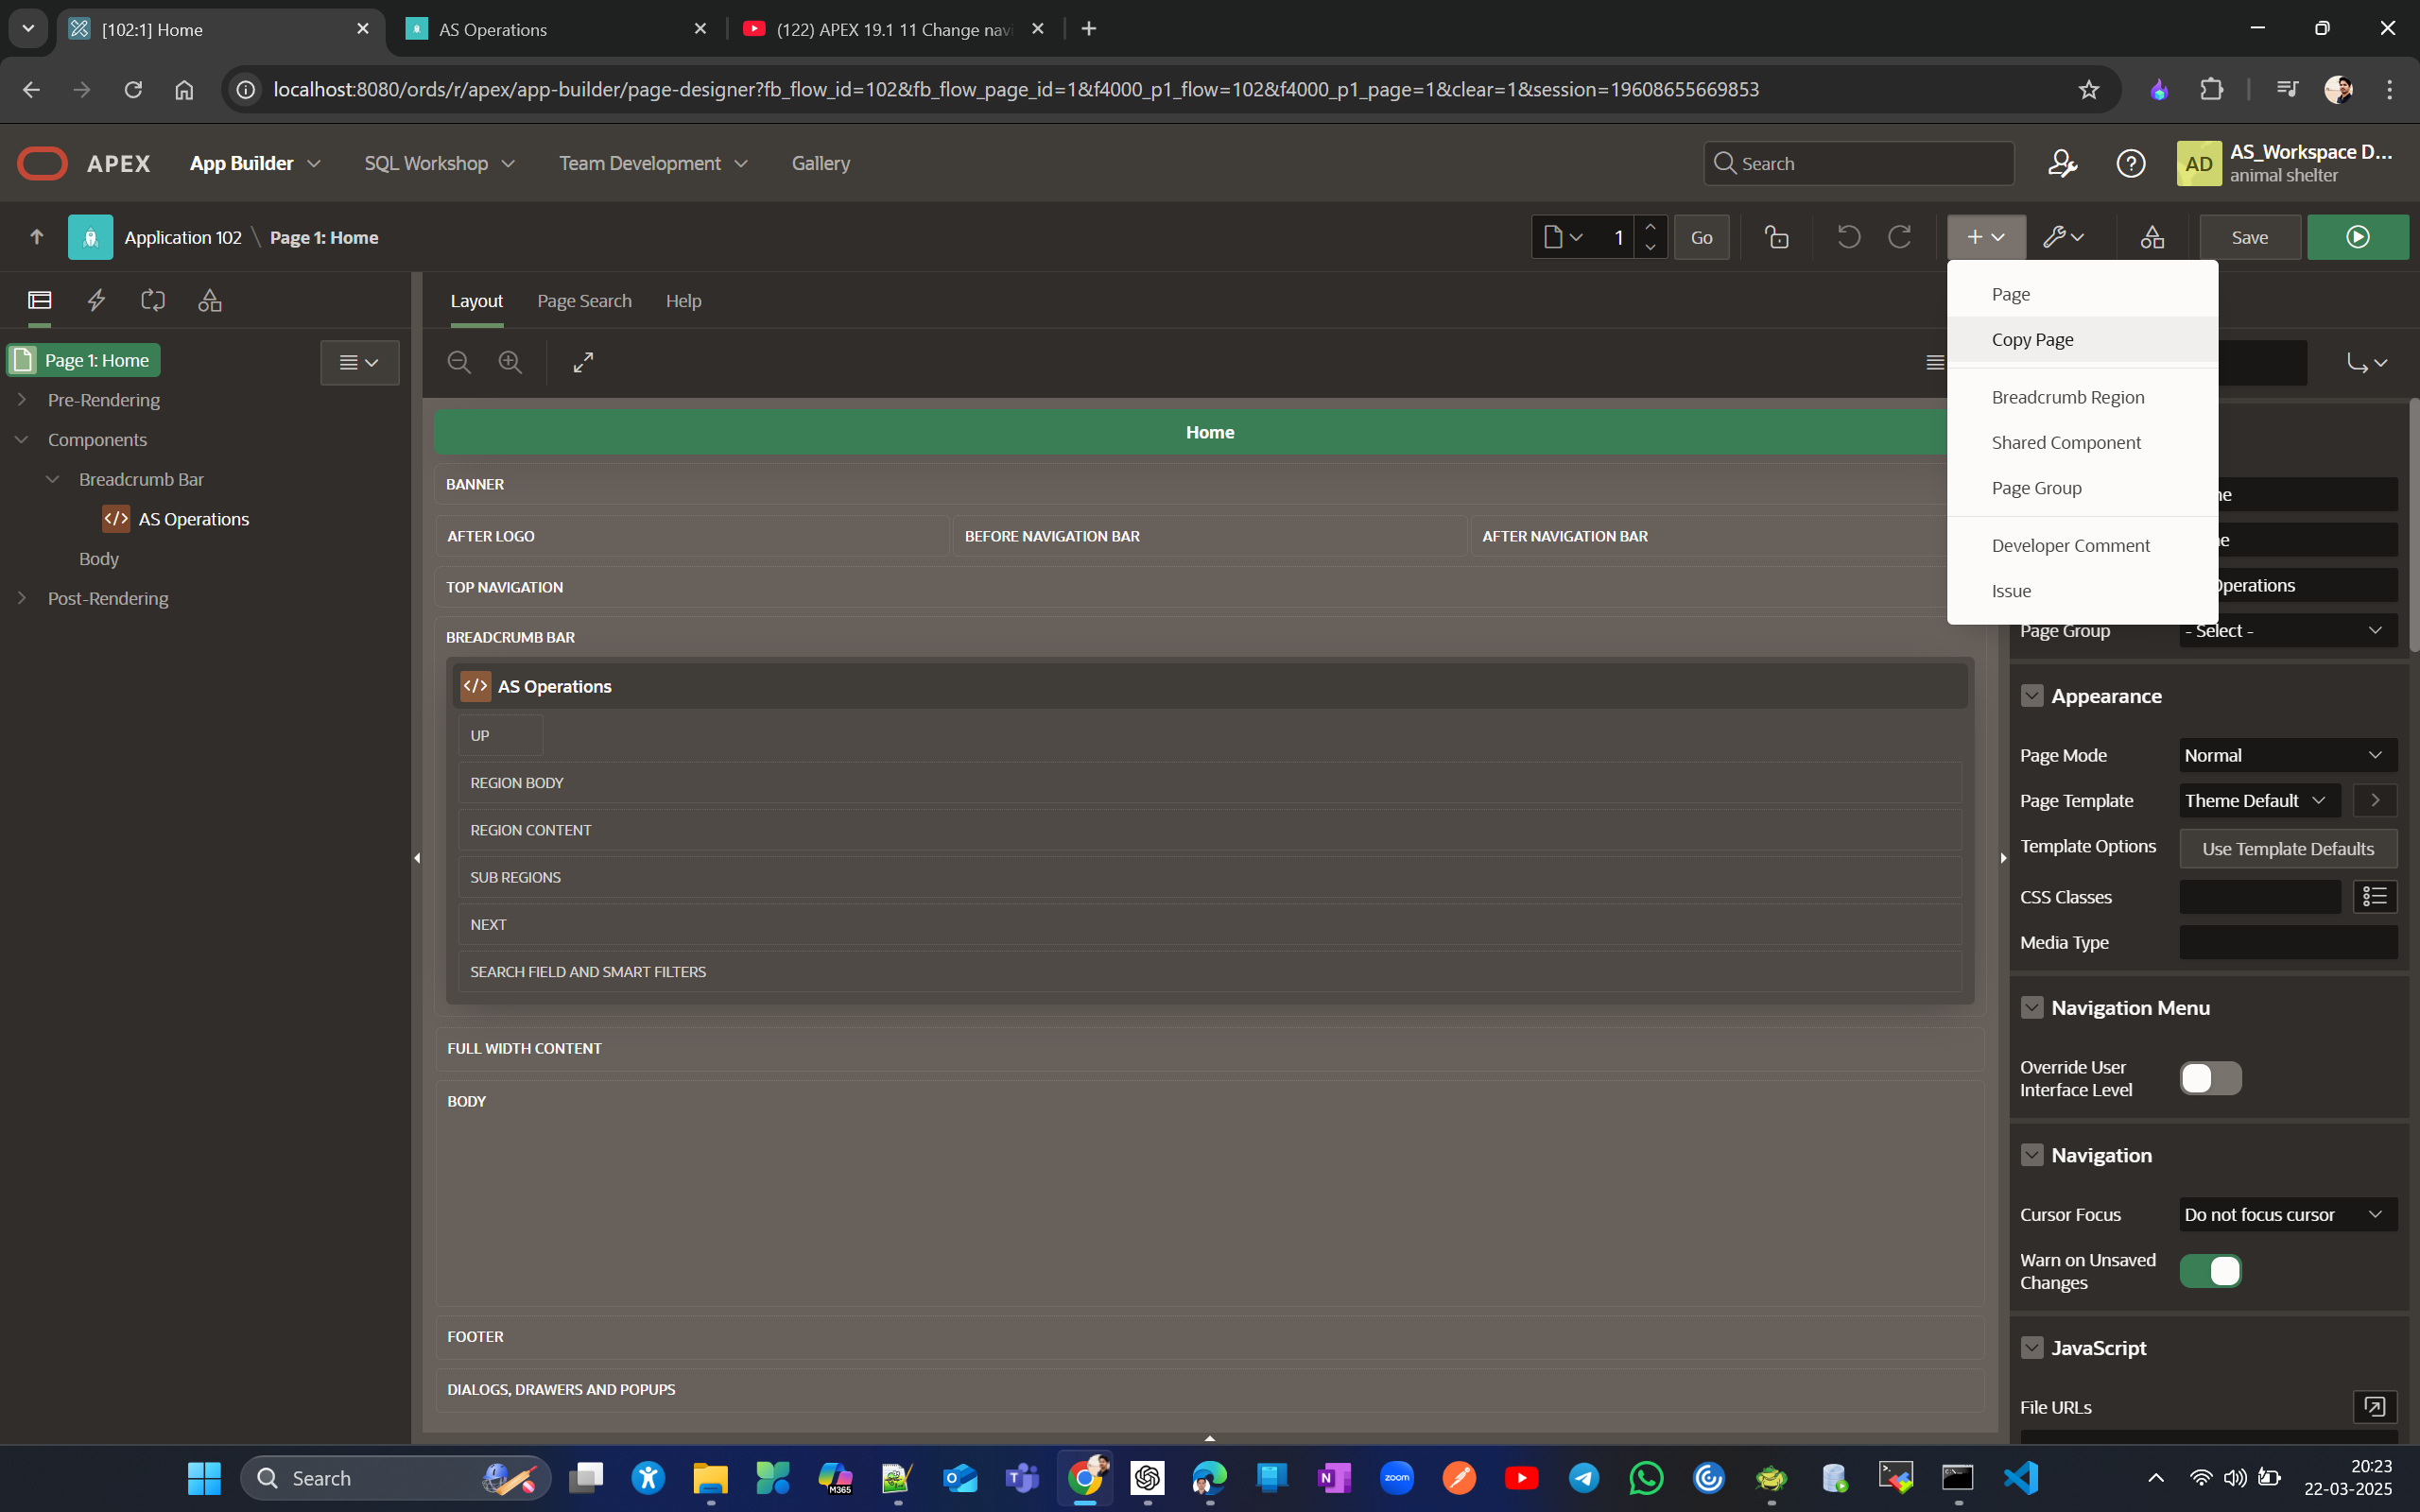
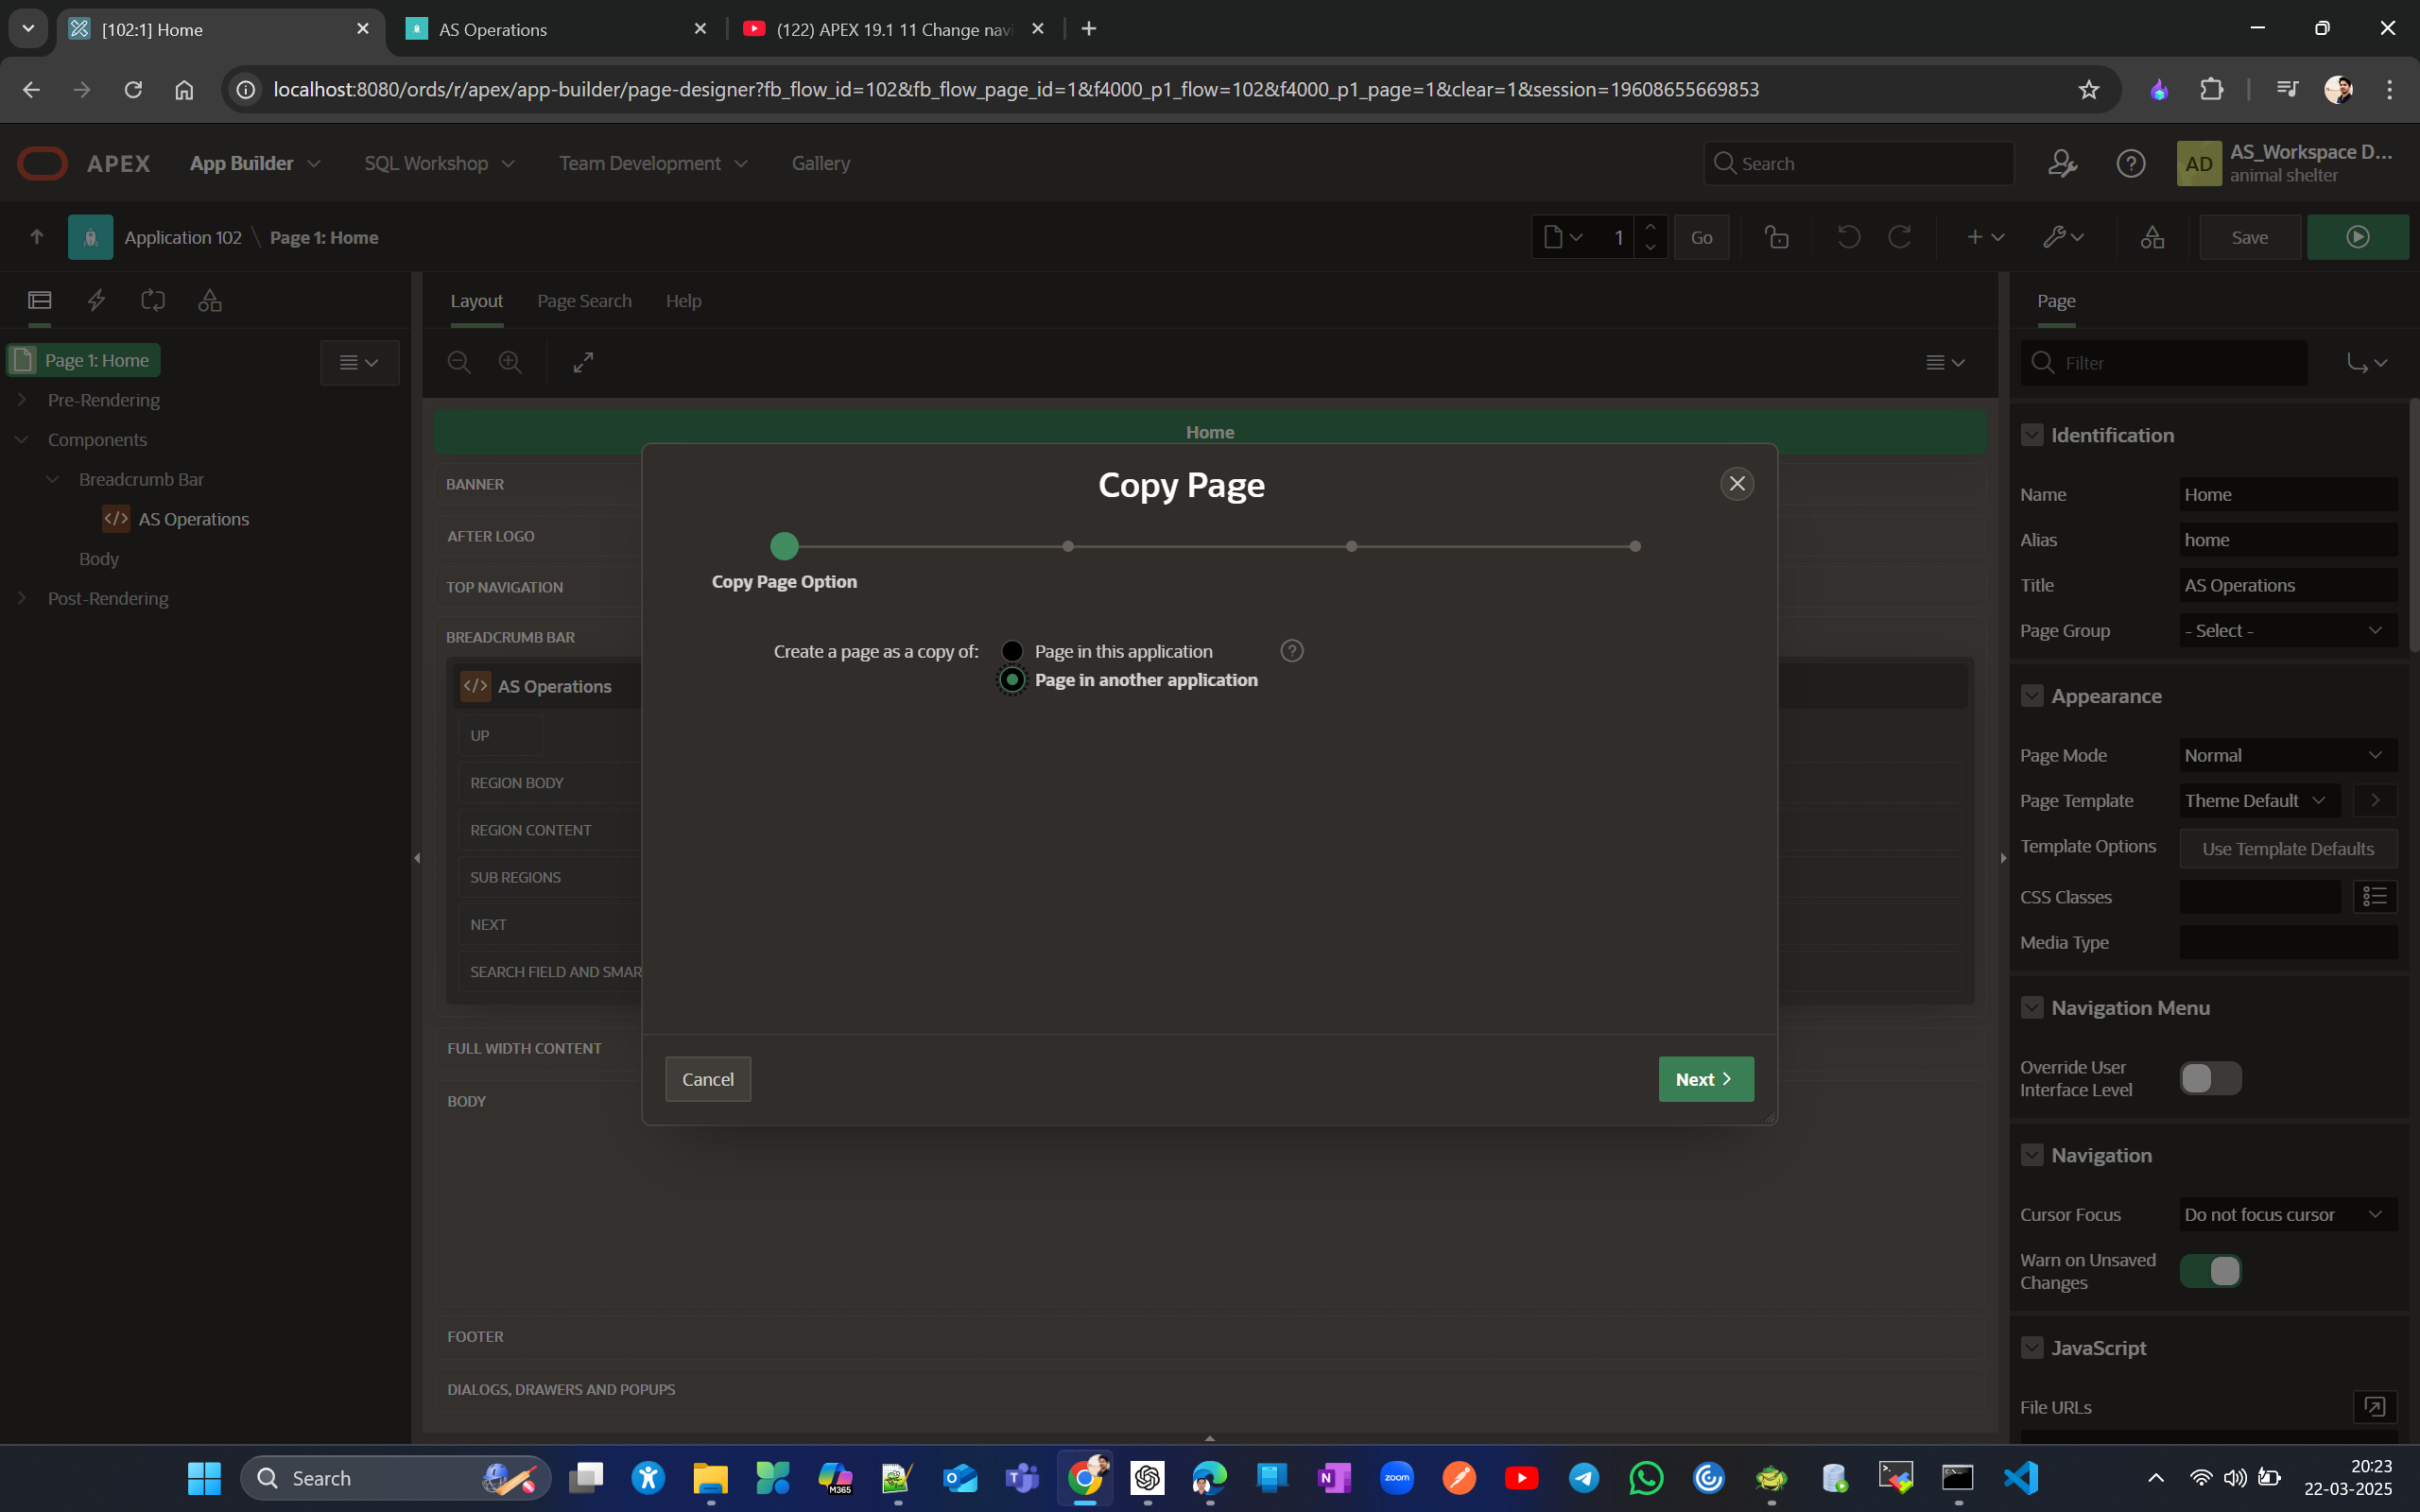

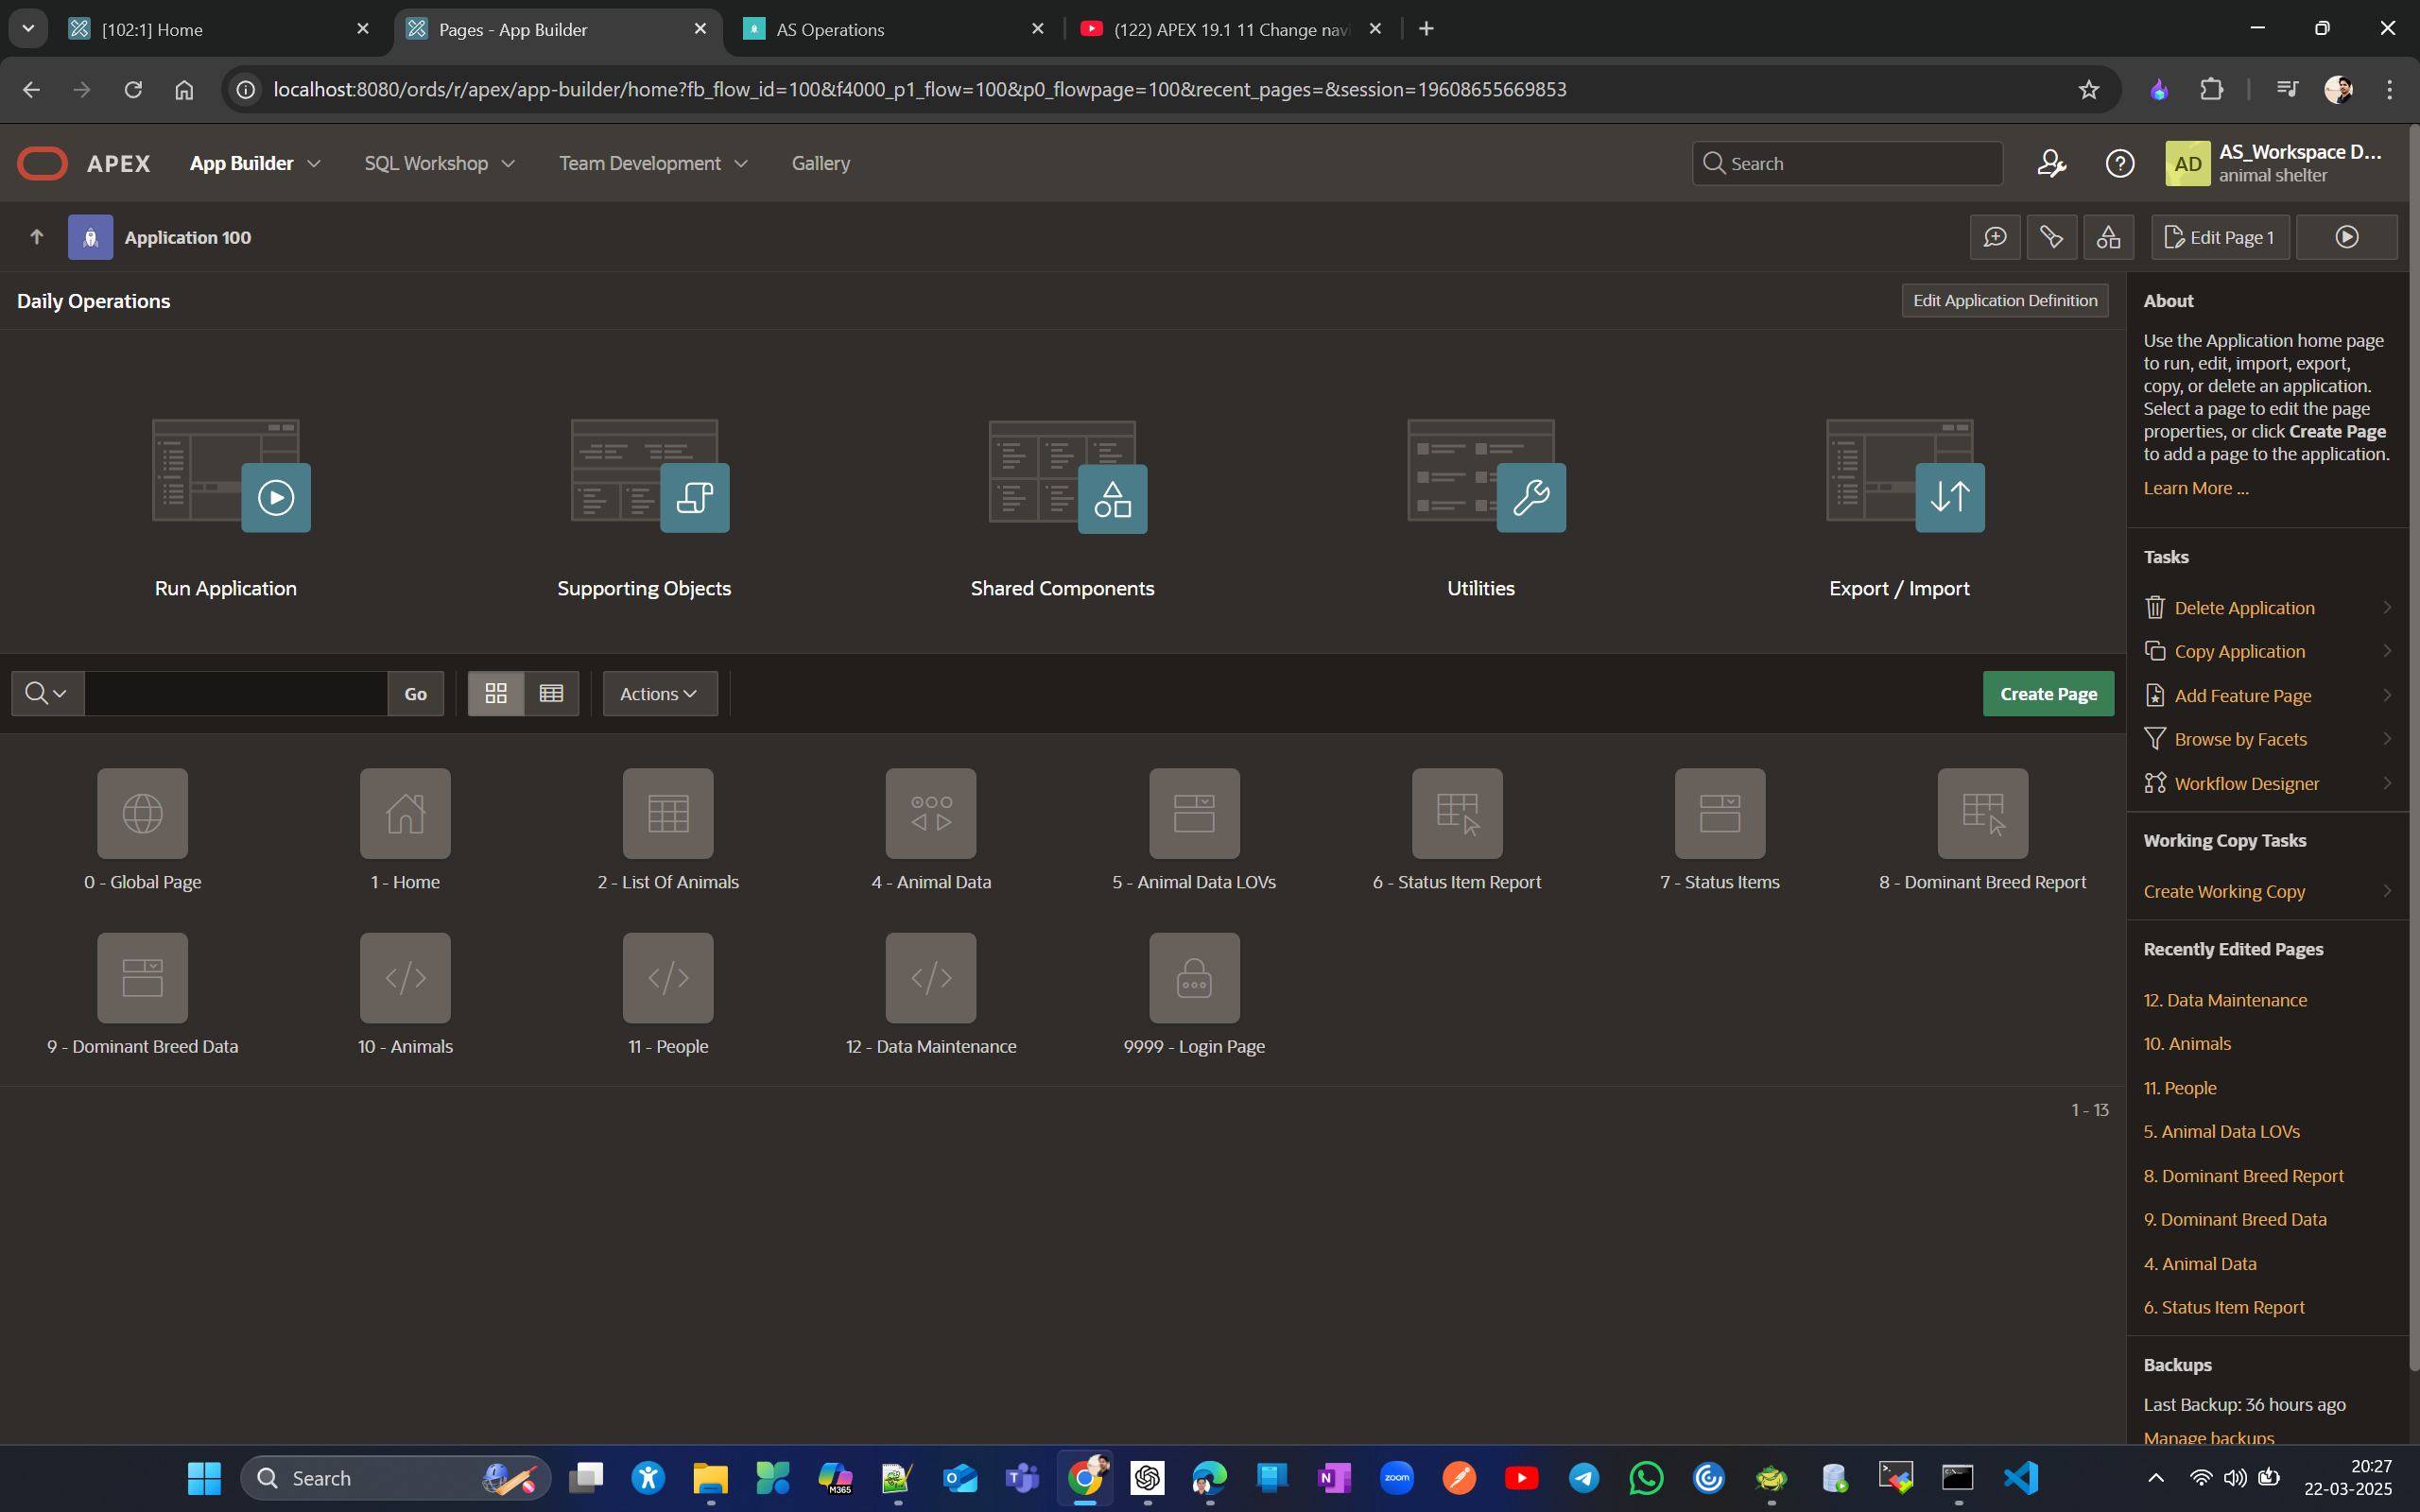
Now the first thing we’lll copy are all 3 parent pages for navigation menu we created newly )Animals, People and Data Maintenance).
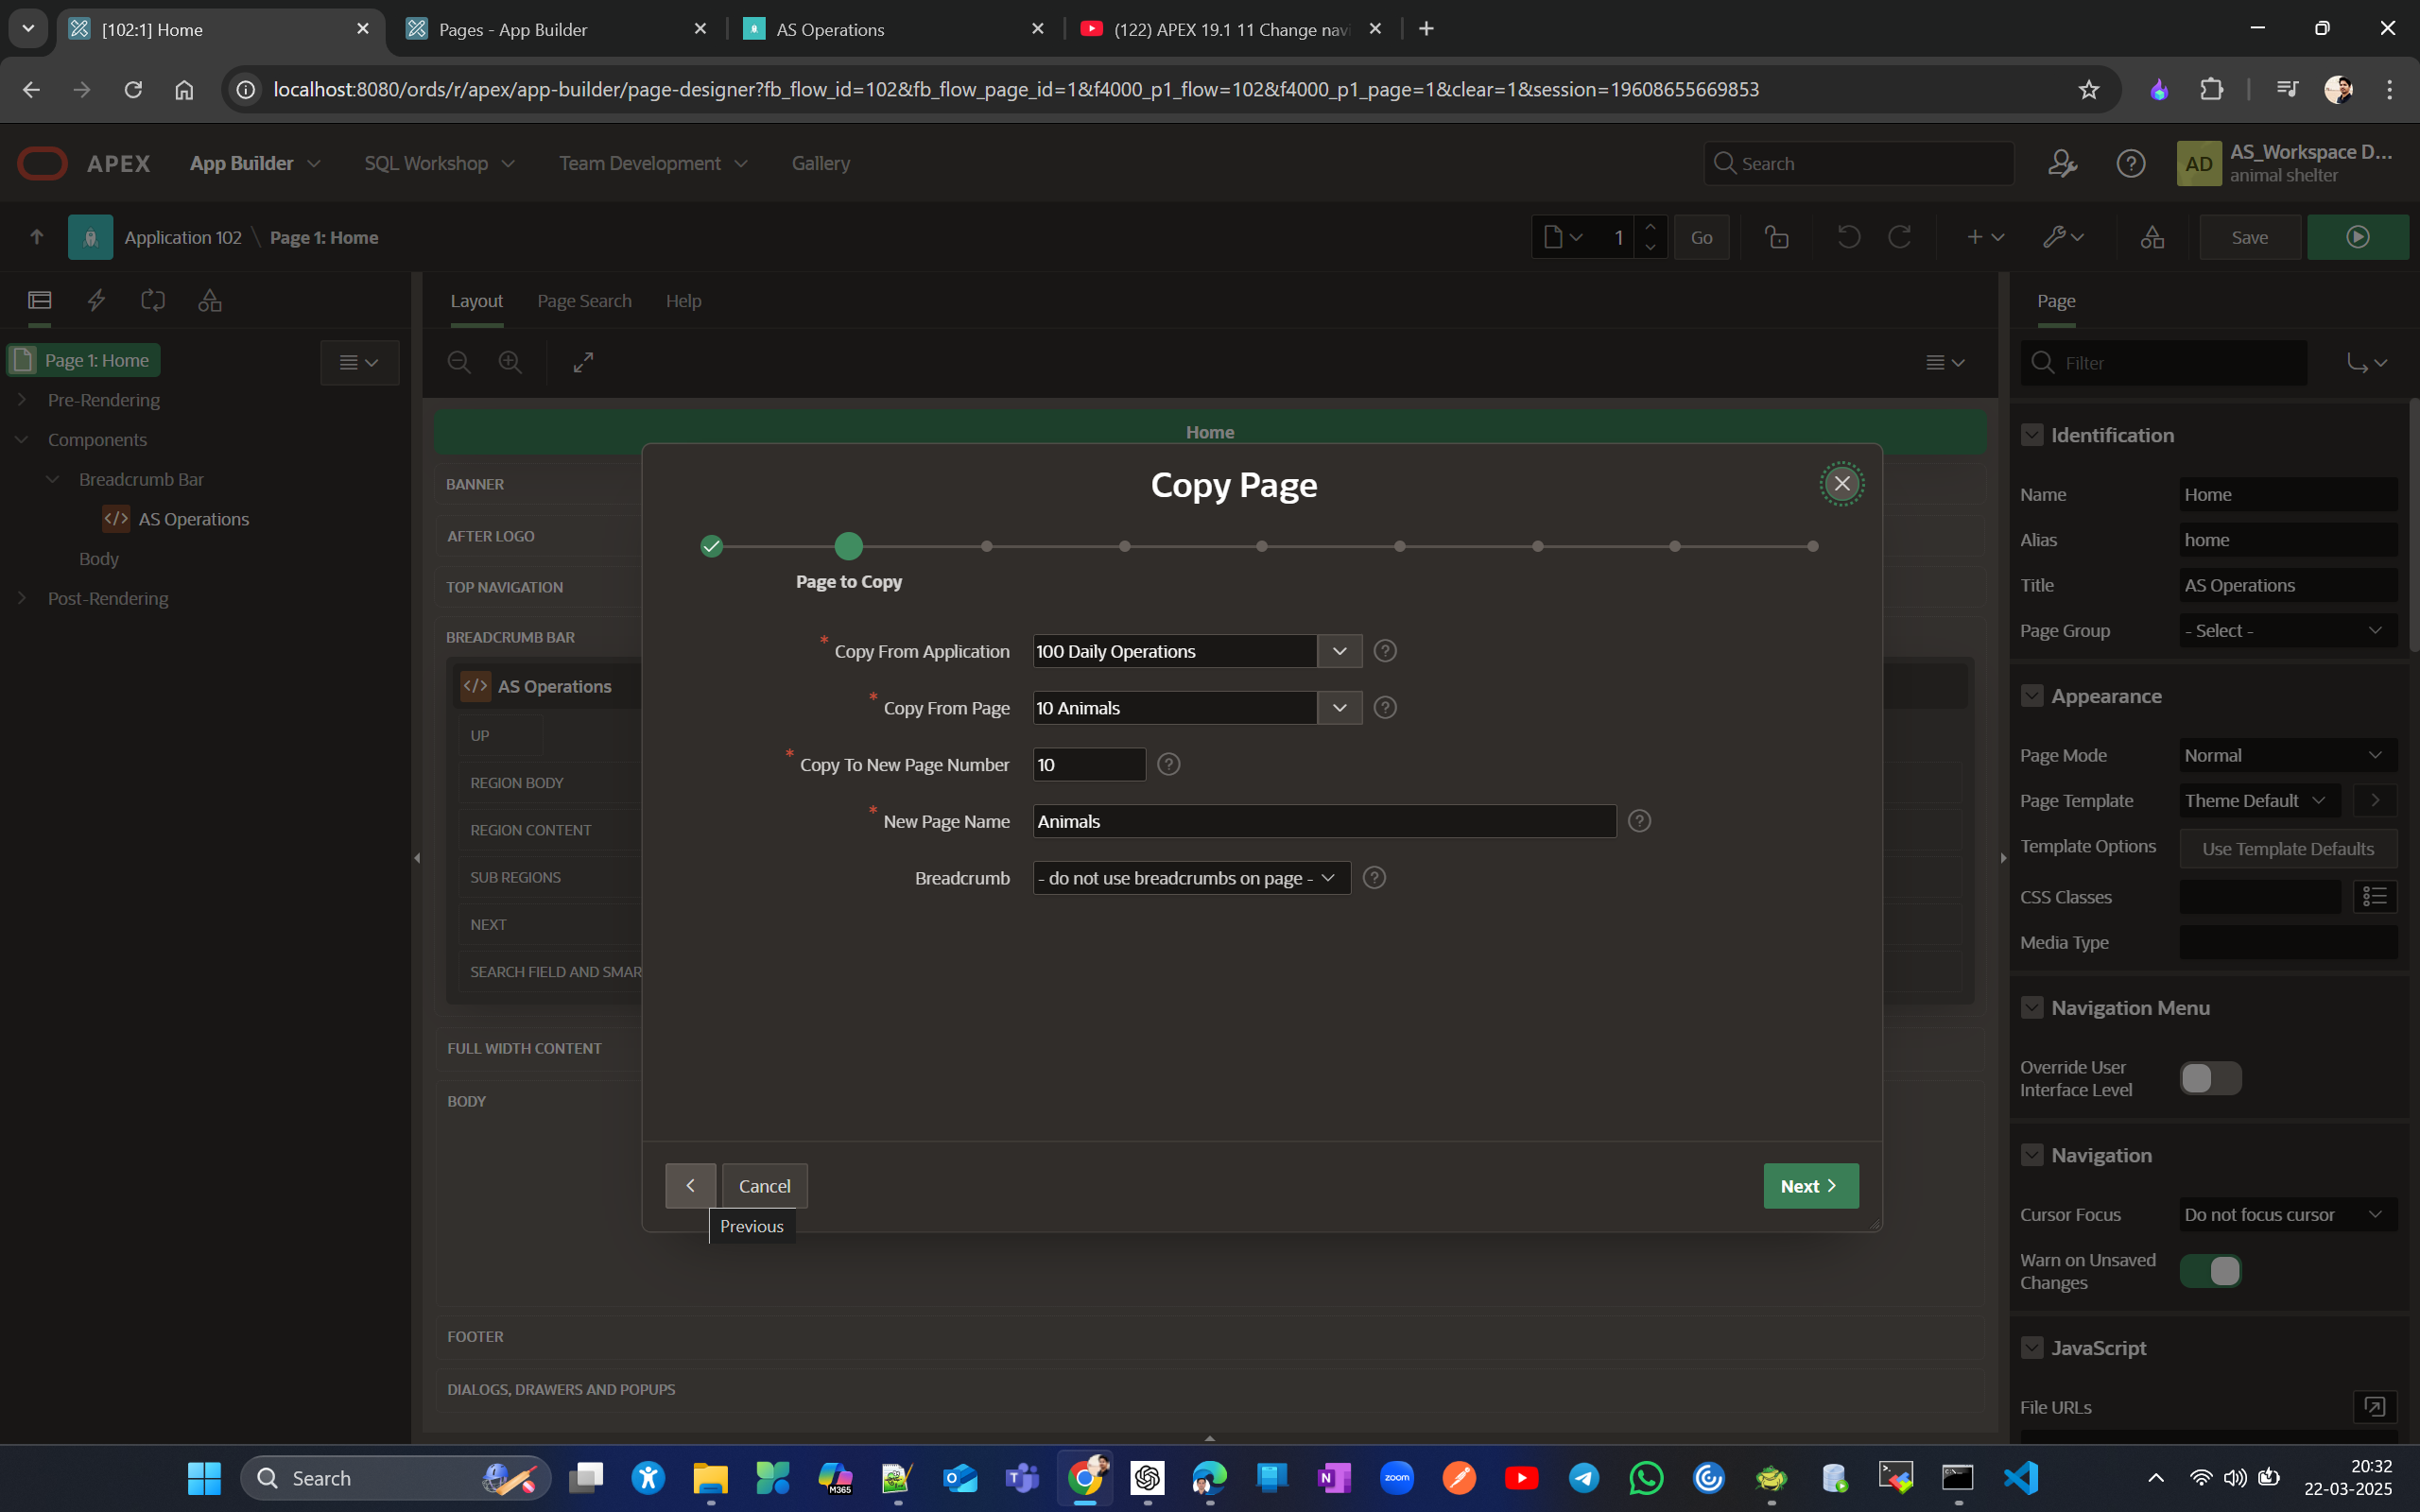
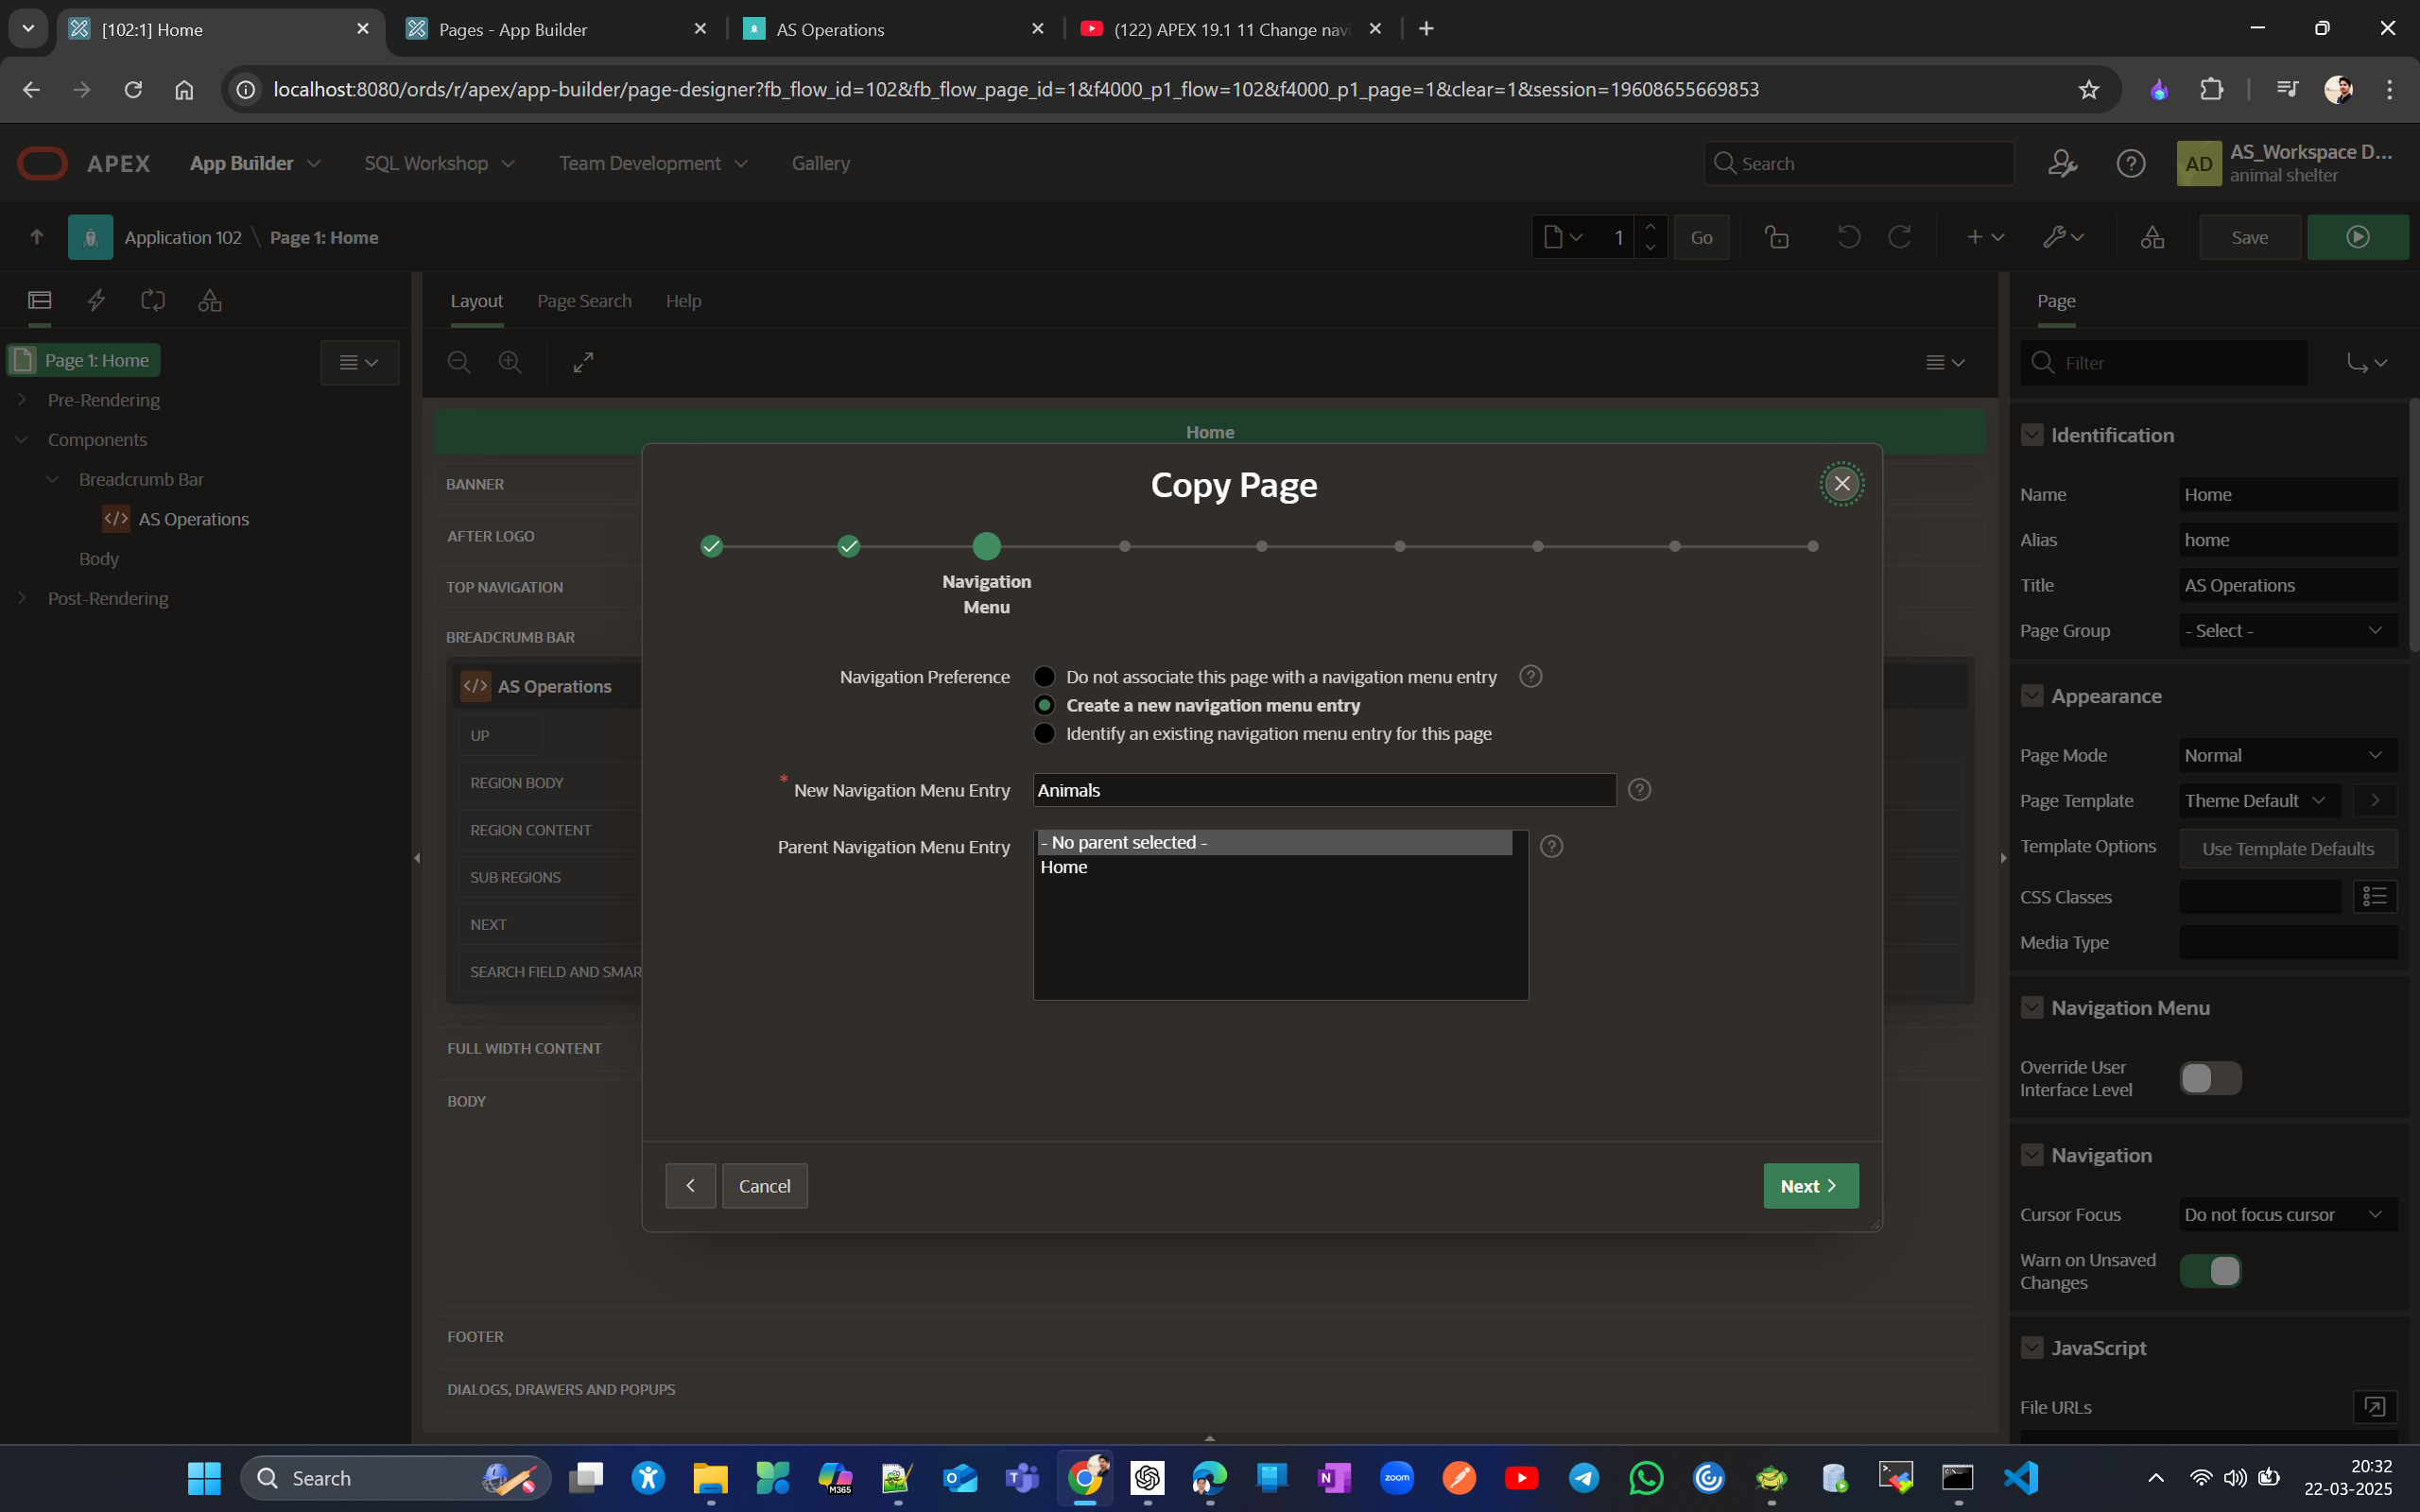
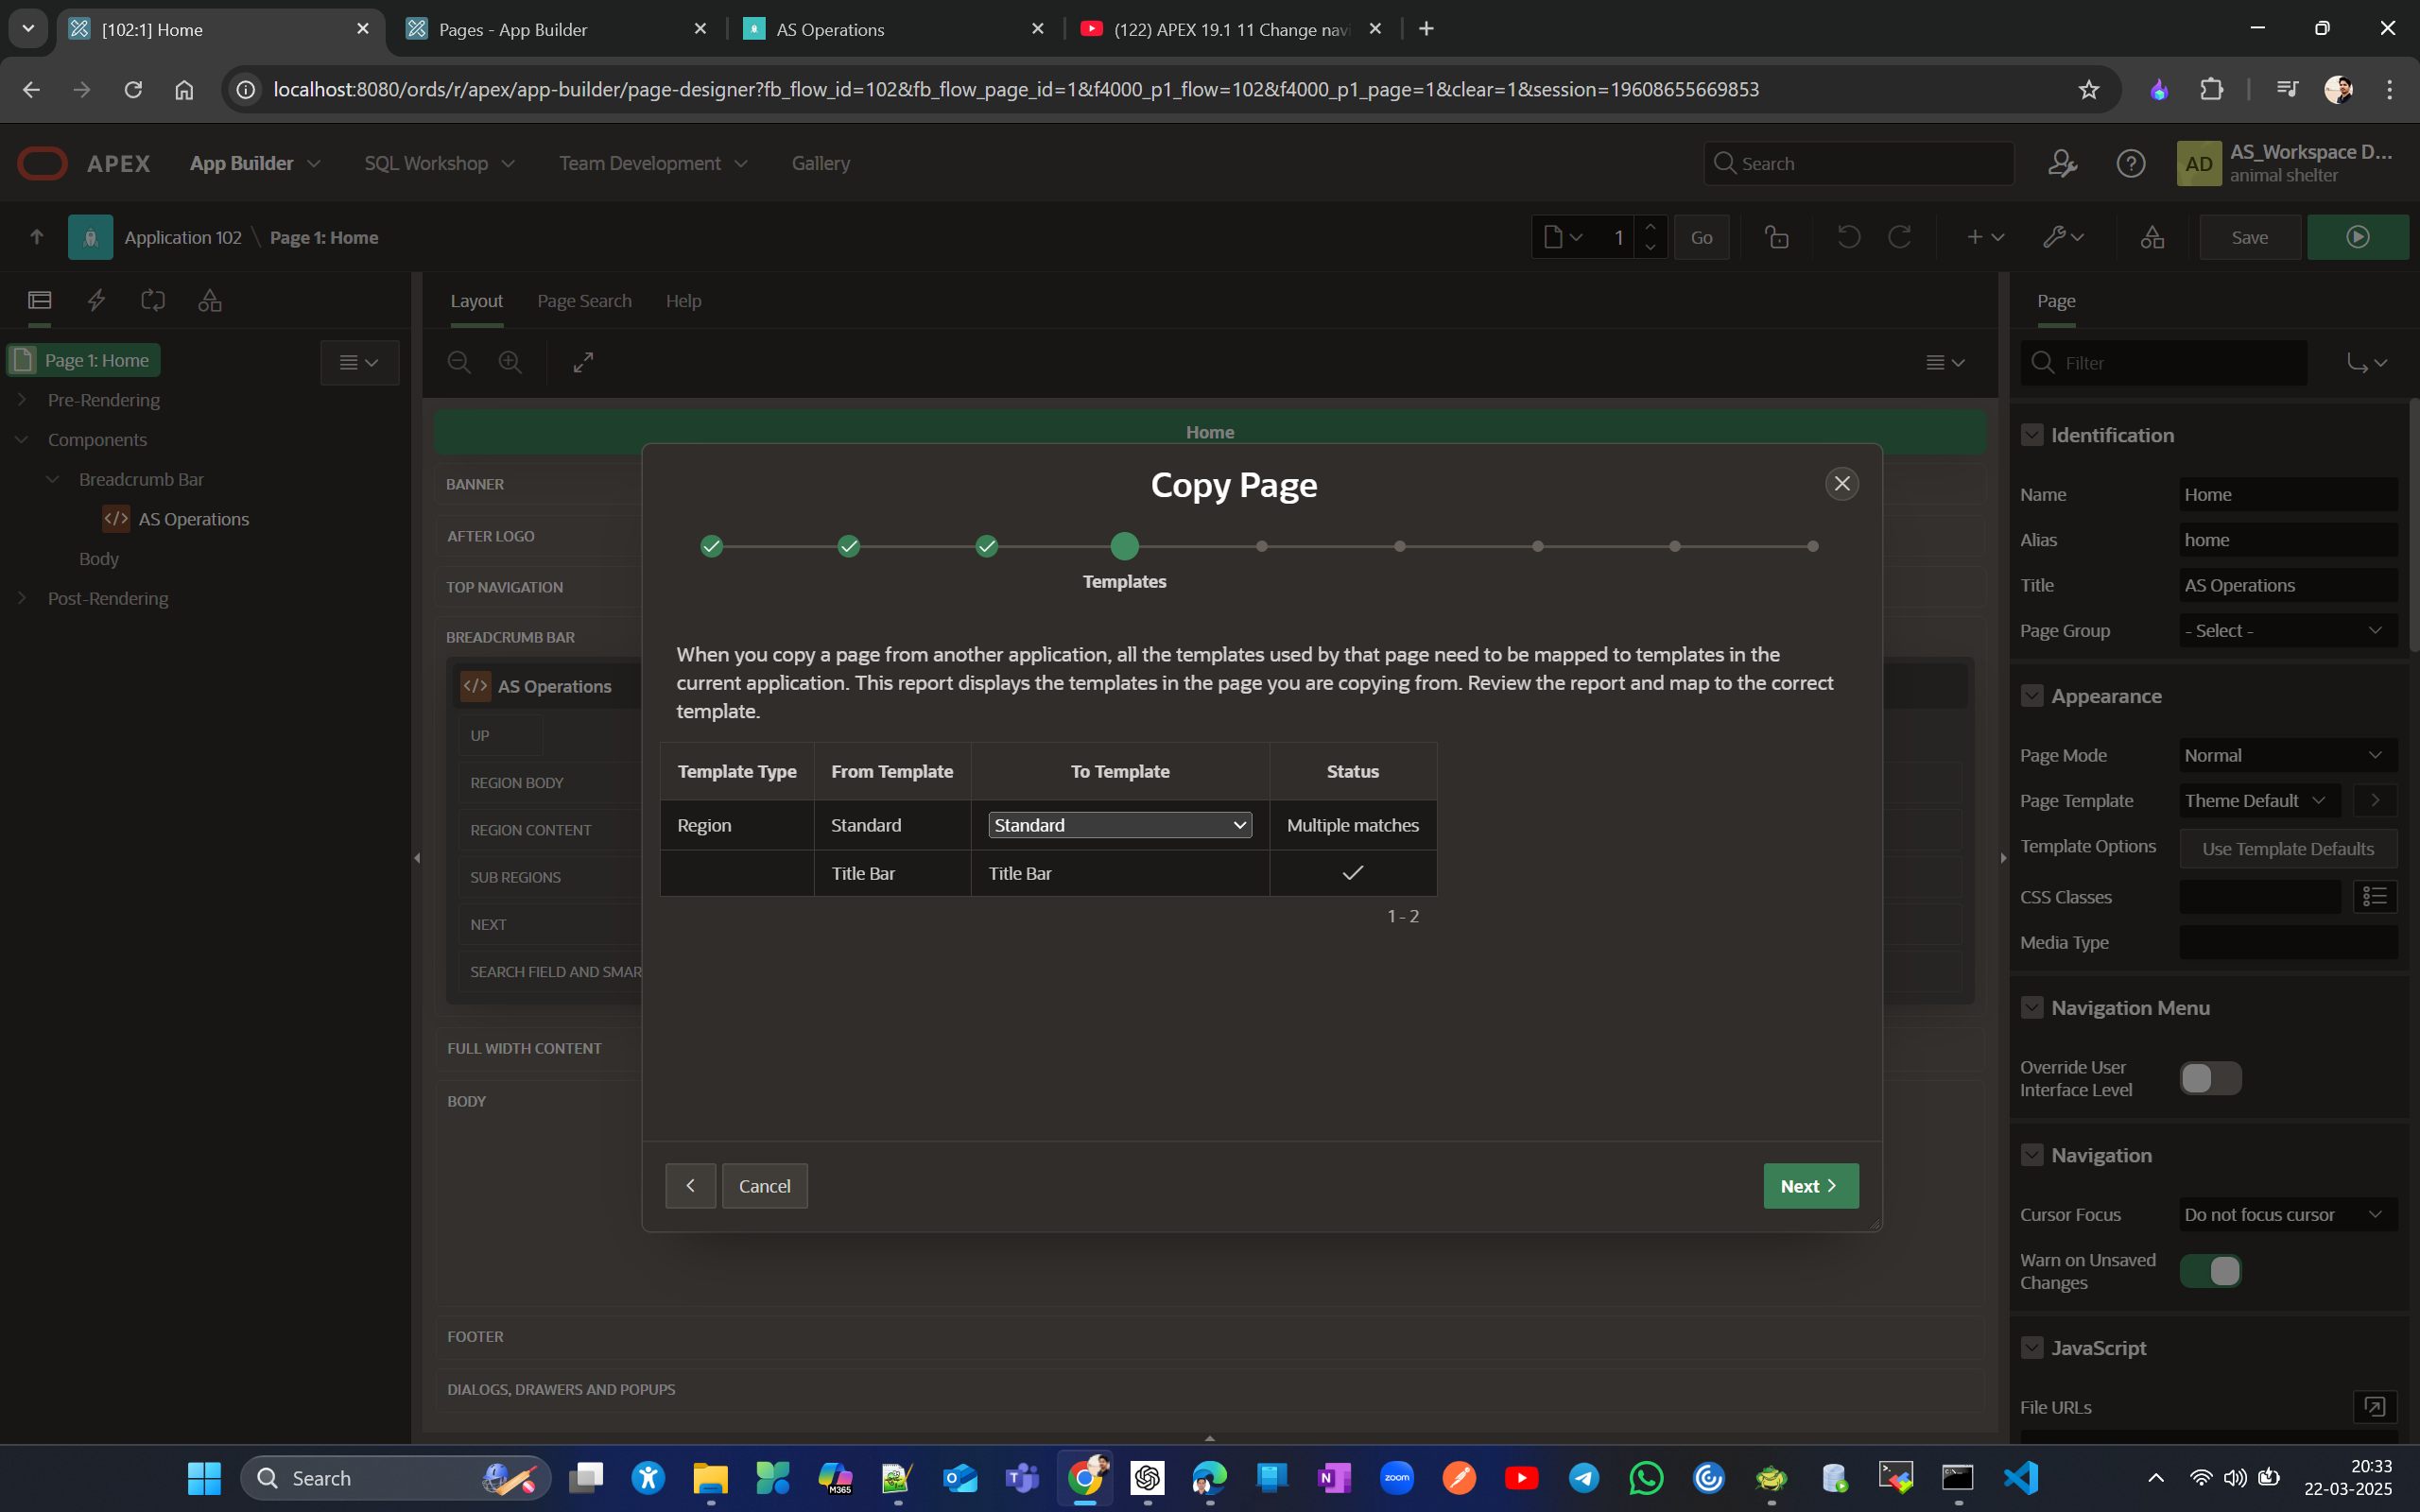
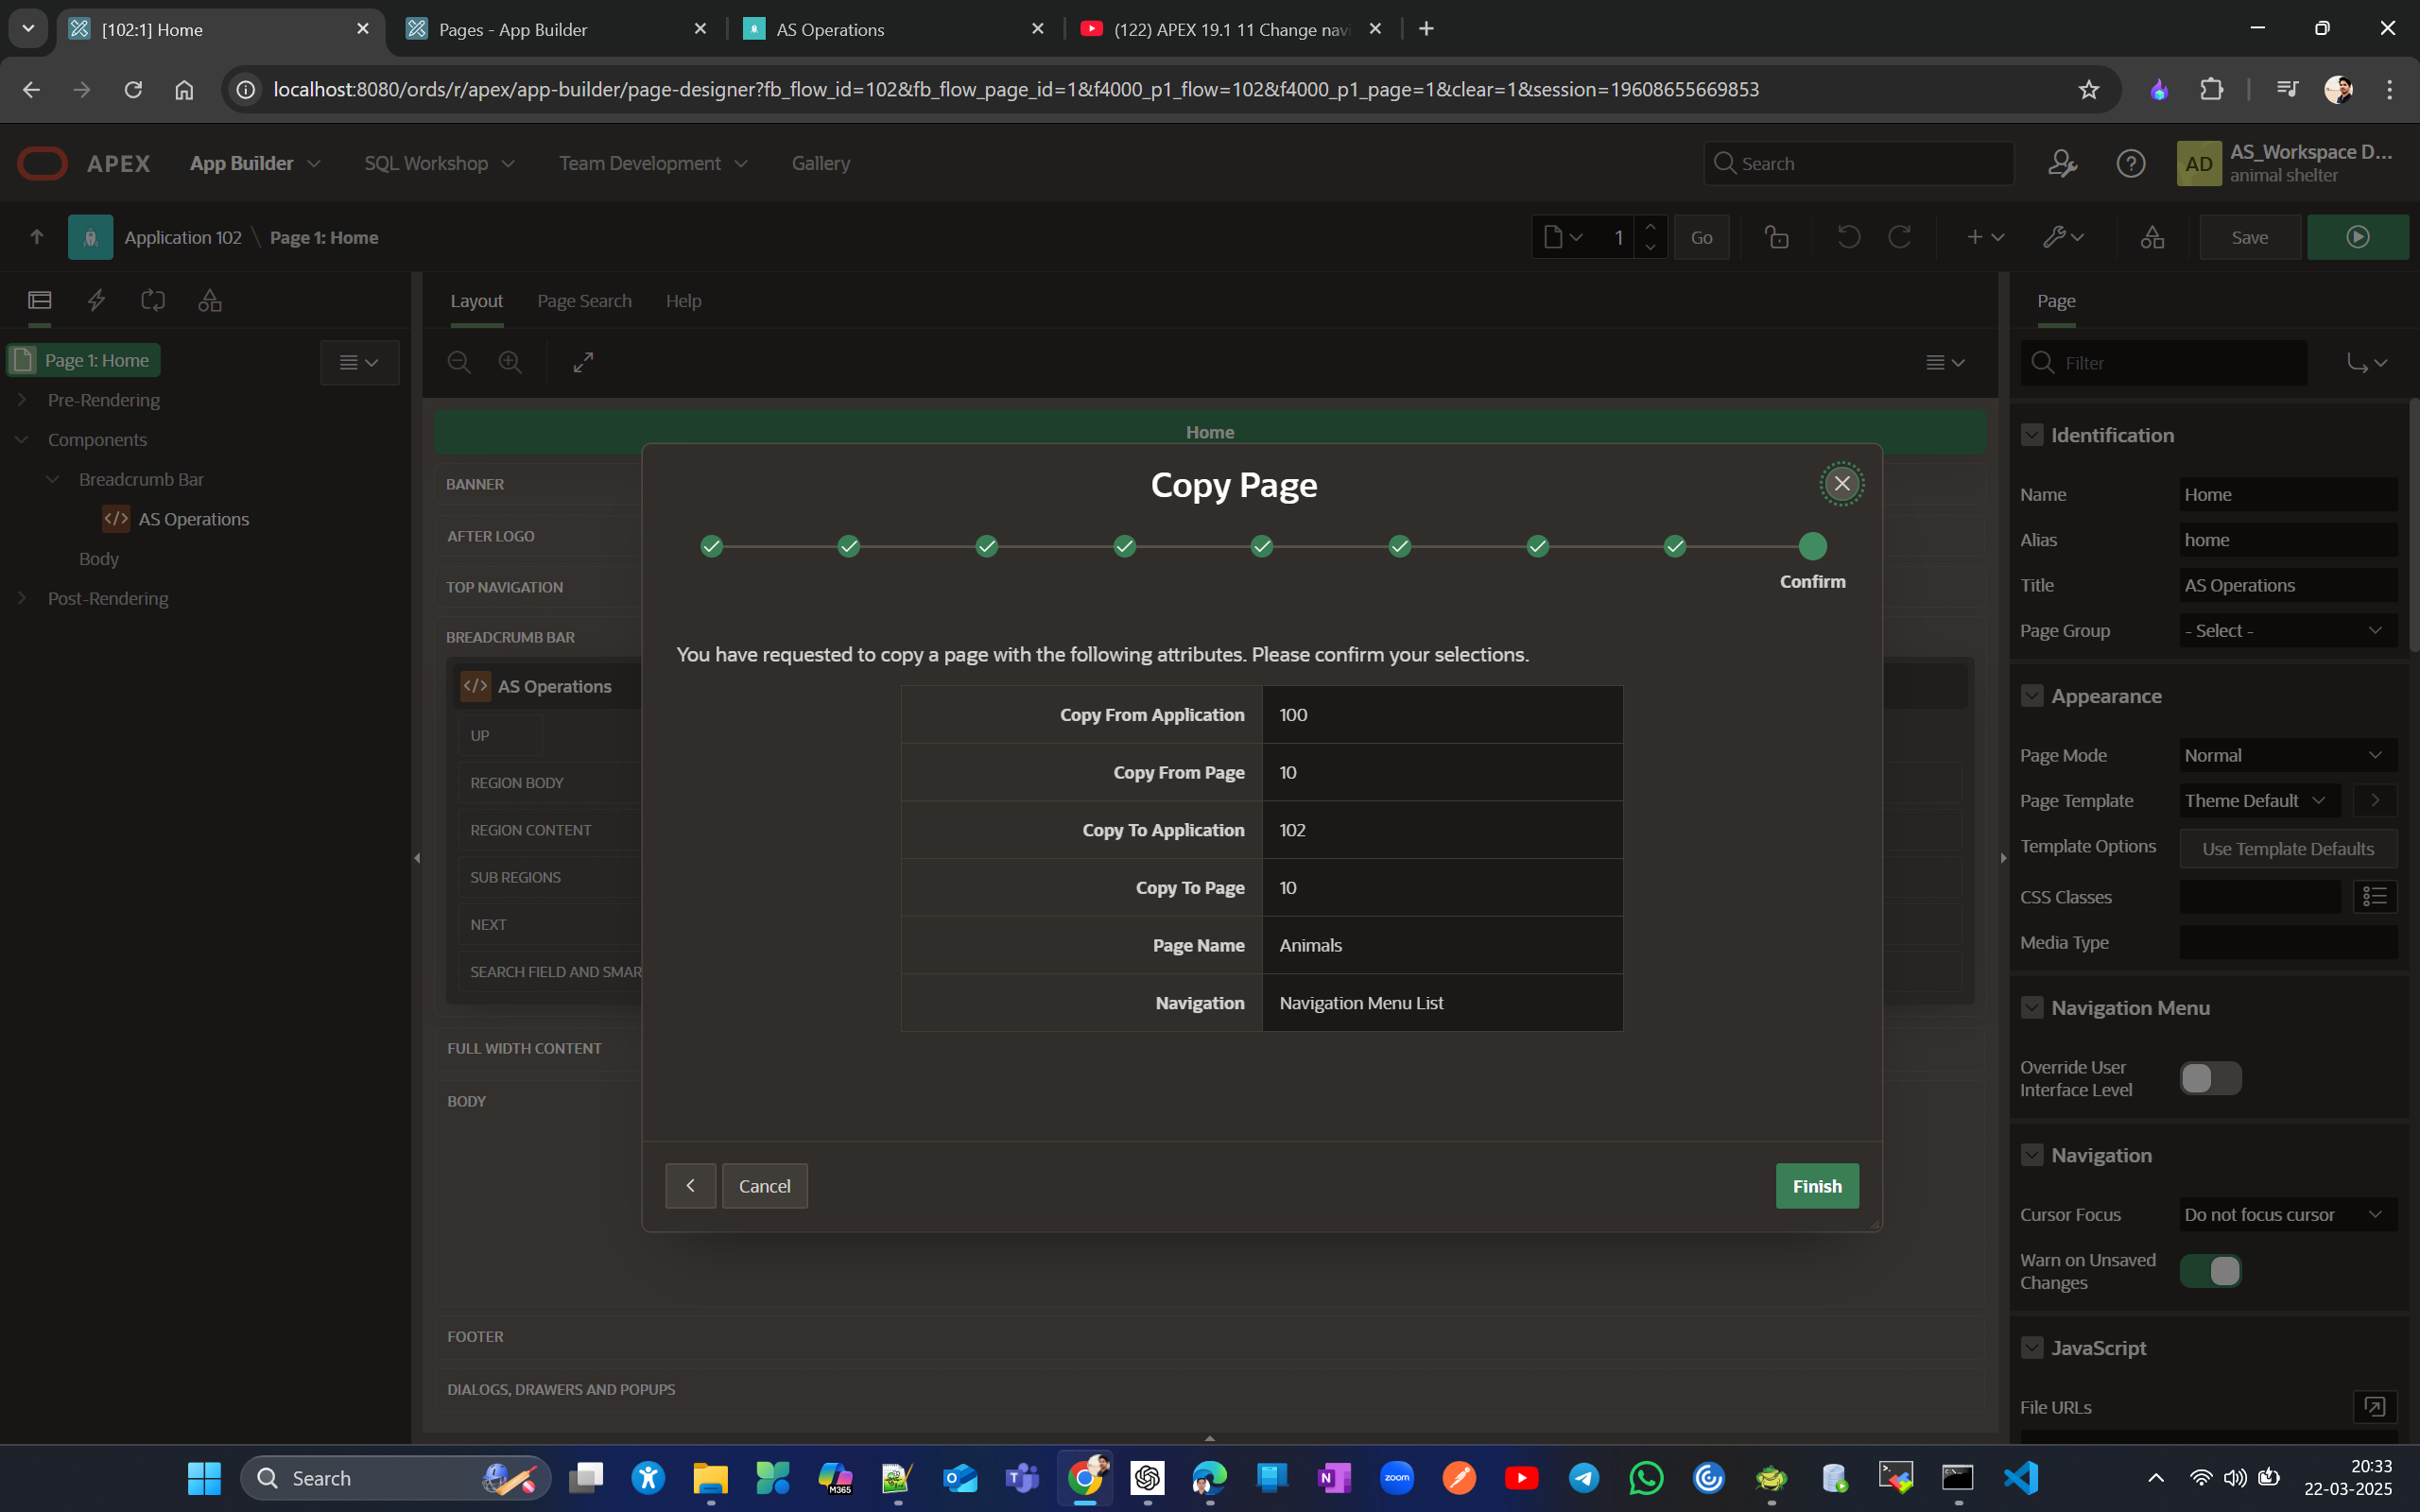
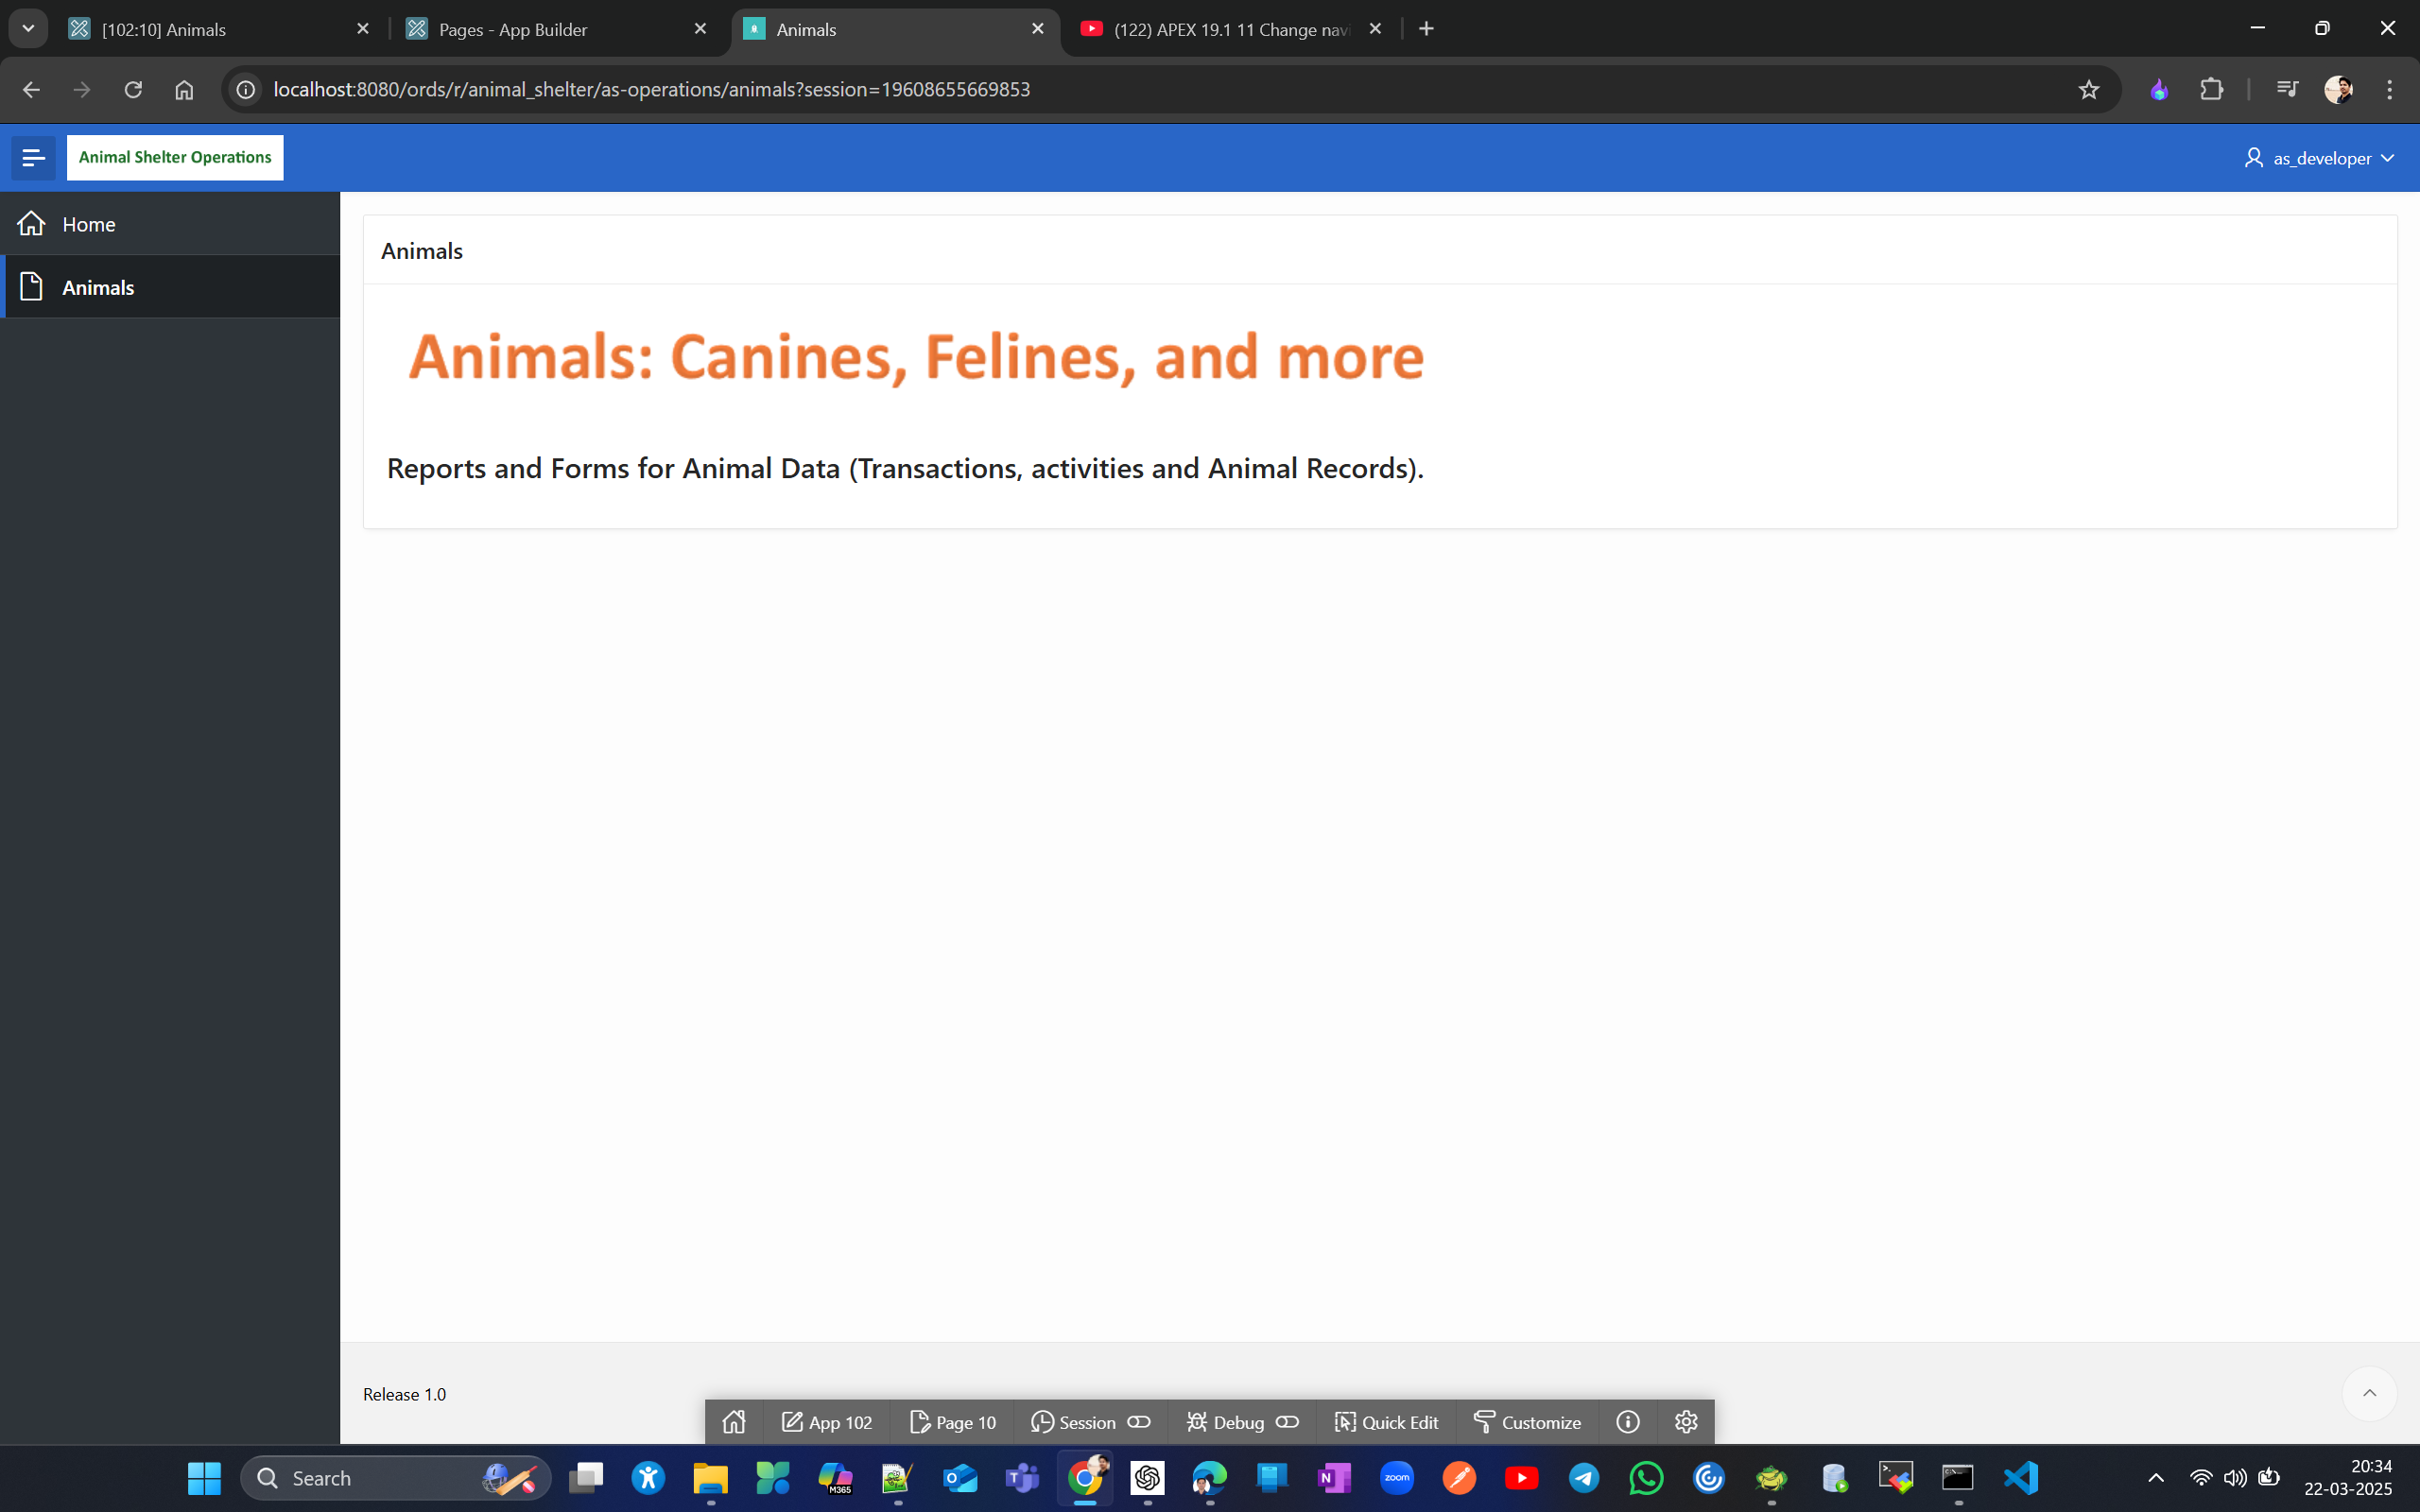
Similarly copy the remaining 2 pages People and Data Maintenance (ensure page numers are same)
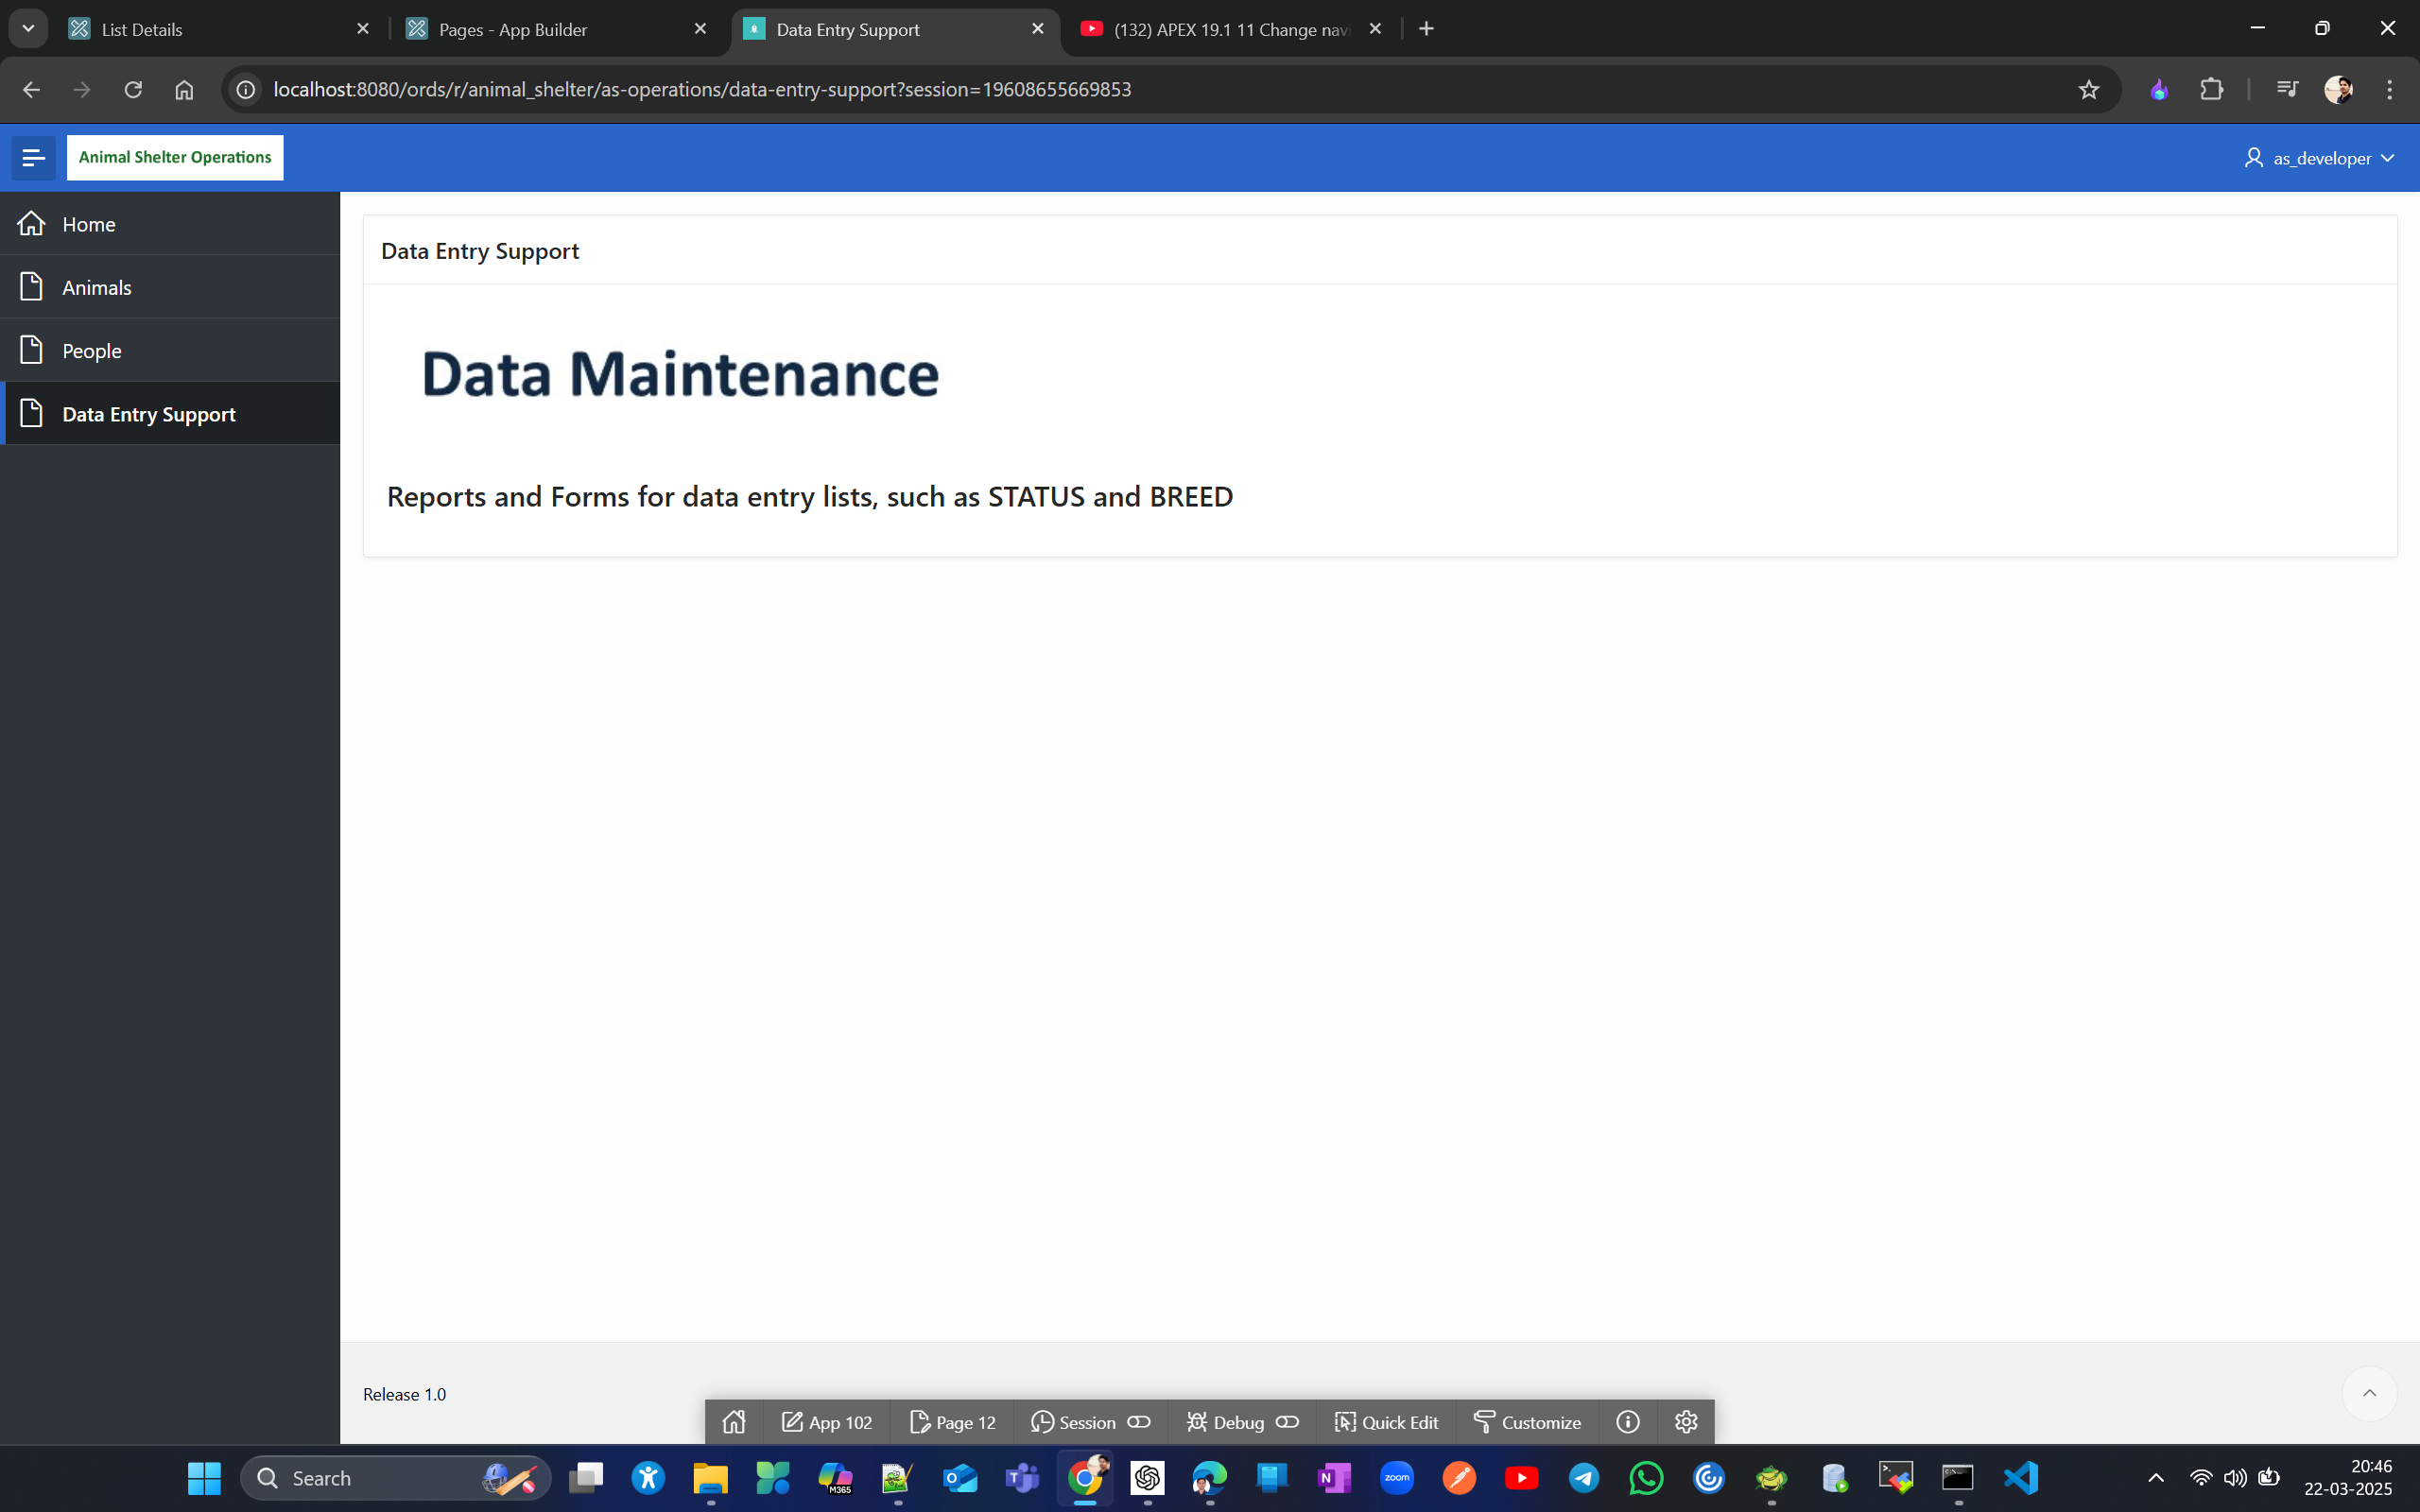
Observe I have copied as Data Entry Support Not Data Maintenance just to show they don’t have to same when copy. If you have already copied, you can rename it from shared component navigation menu.
Now lets copy in status report and form to Data Data Entry Support
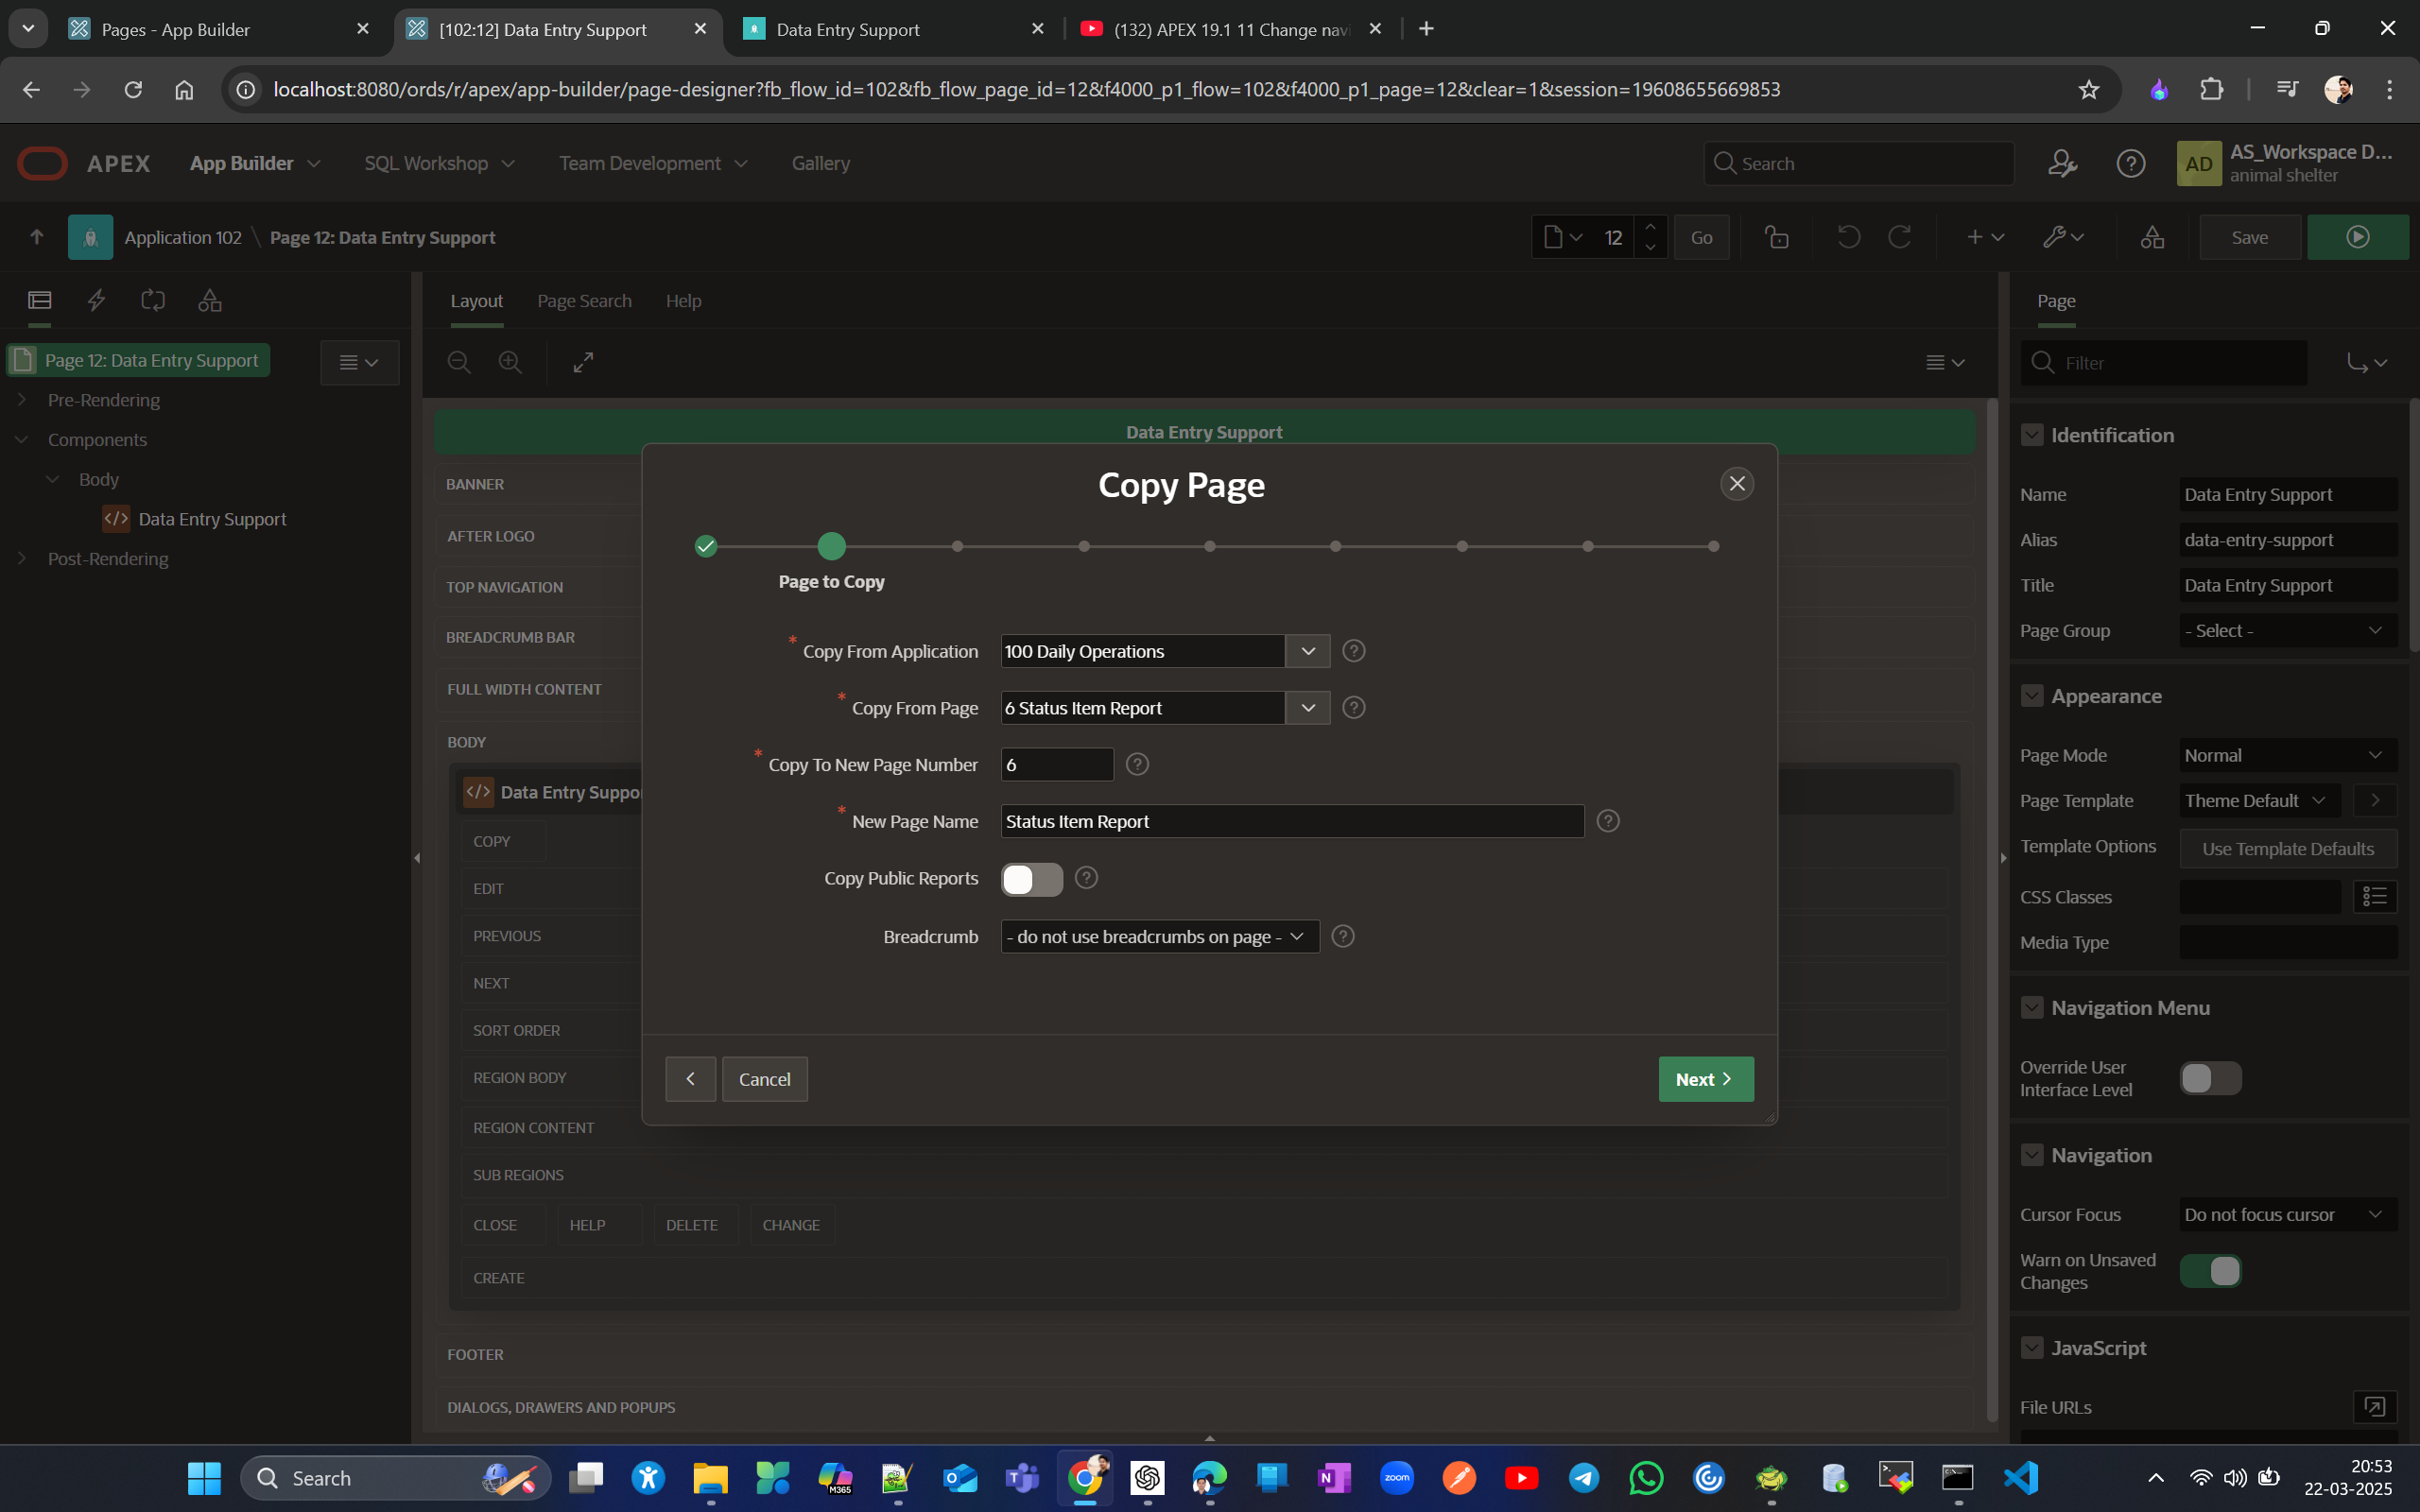

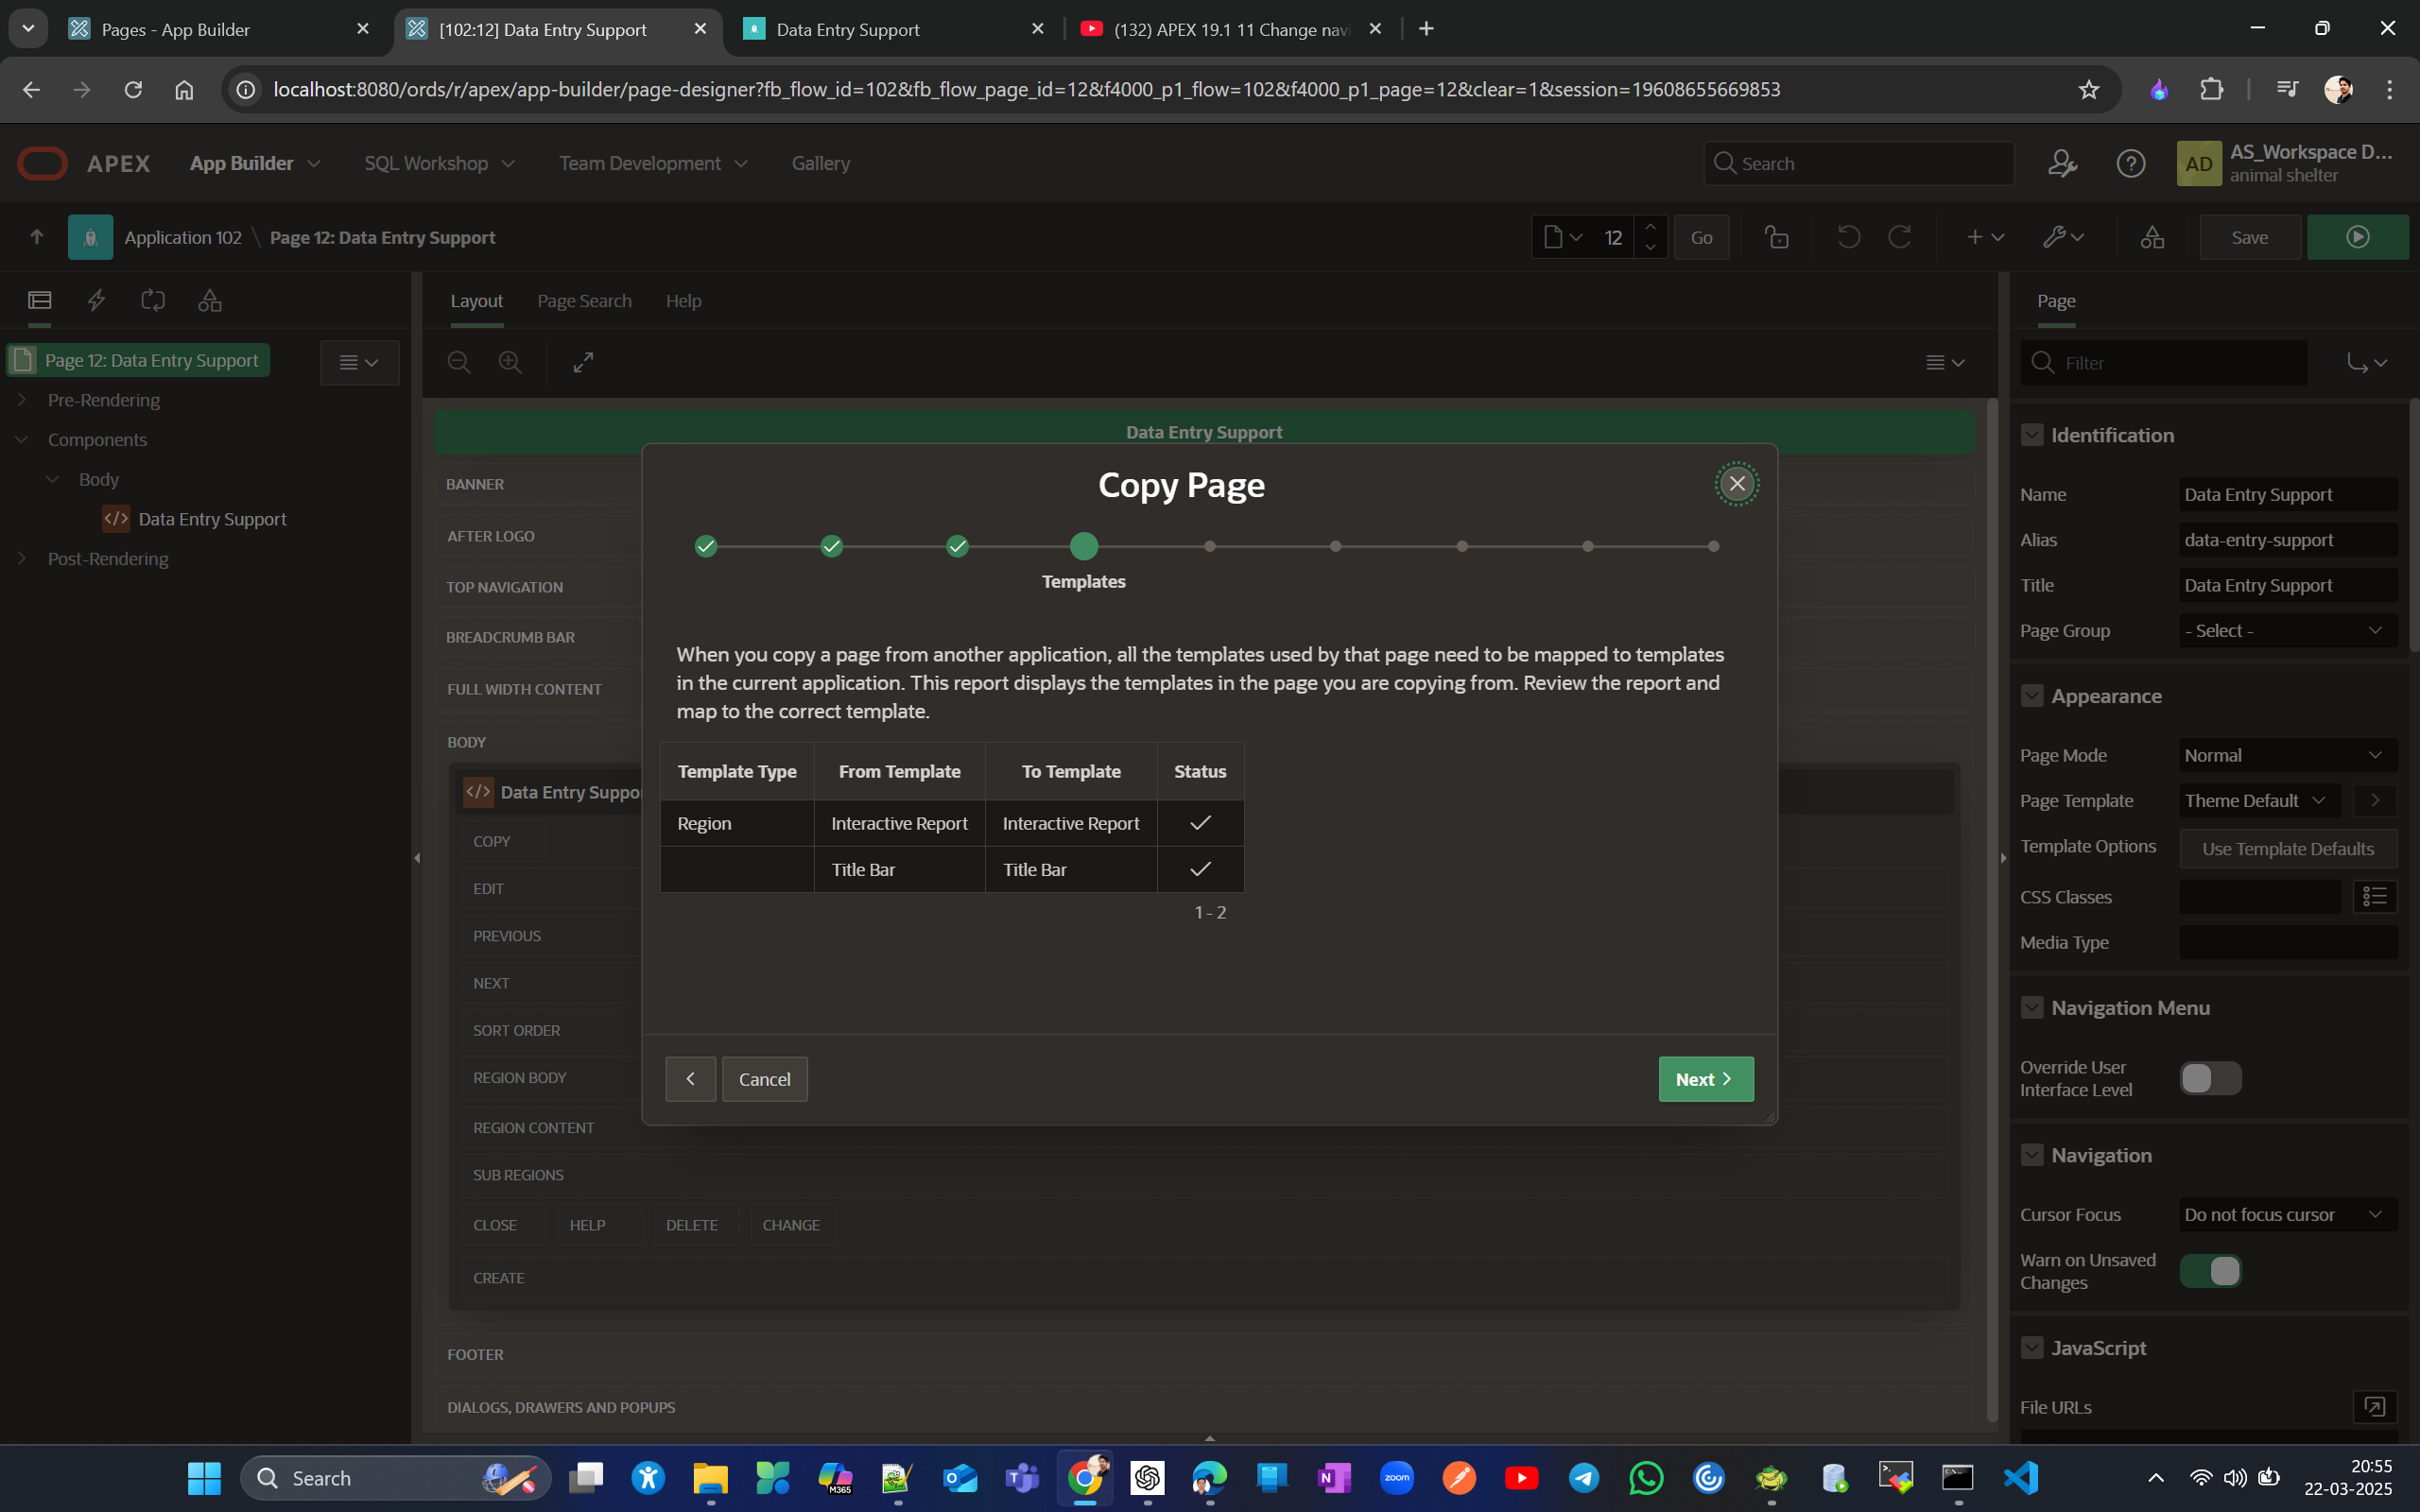
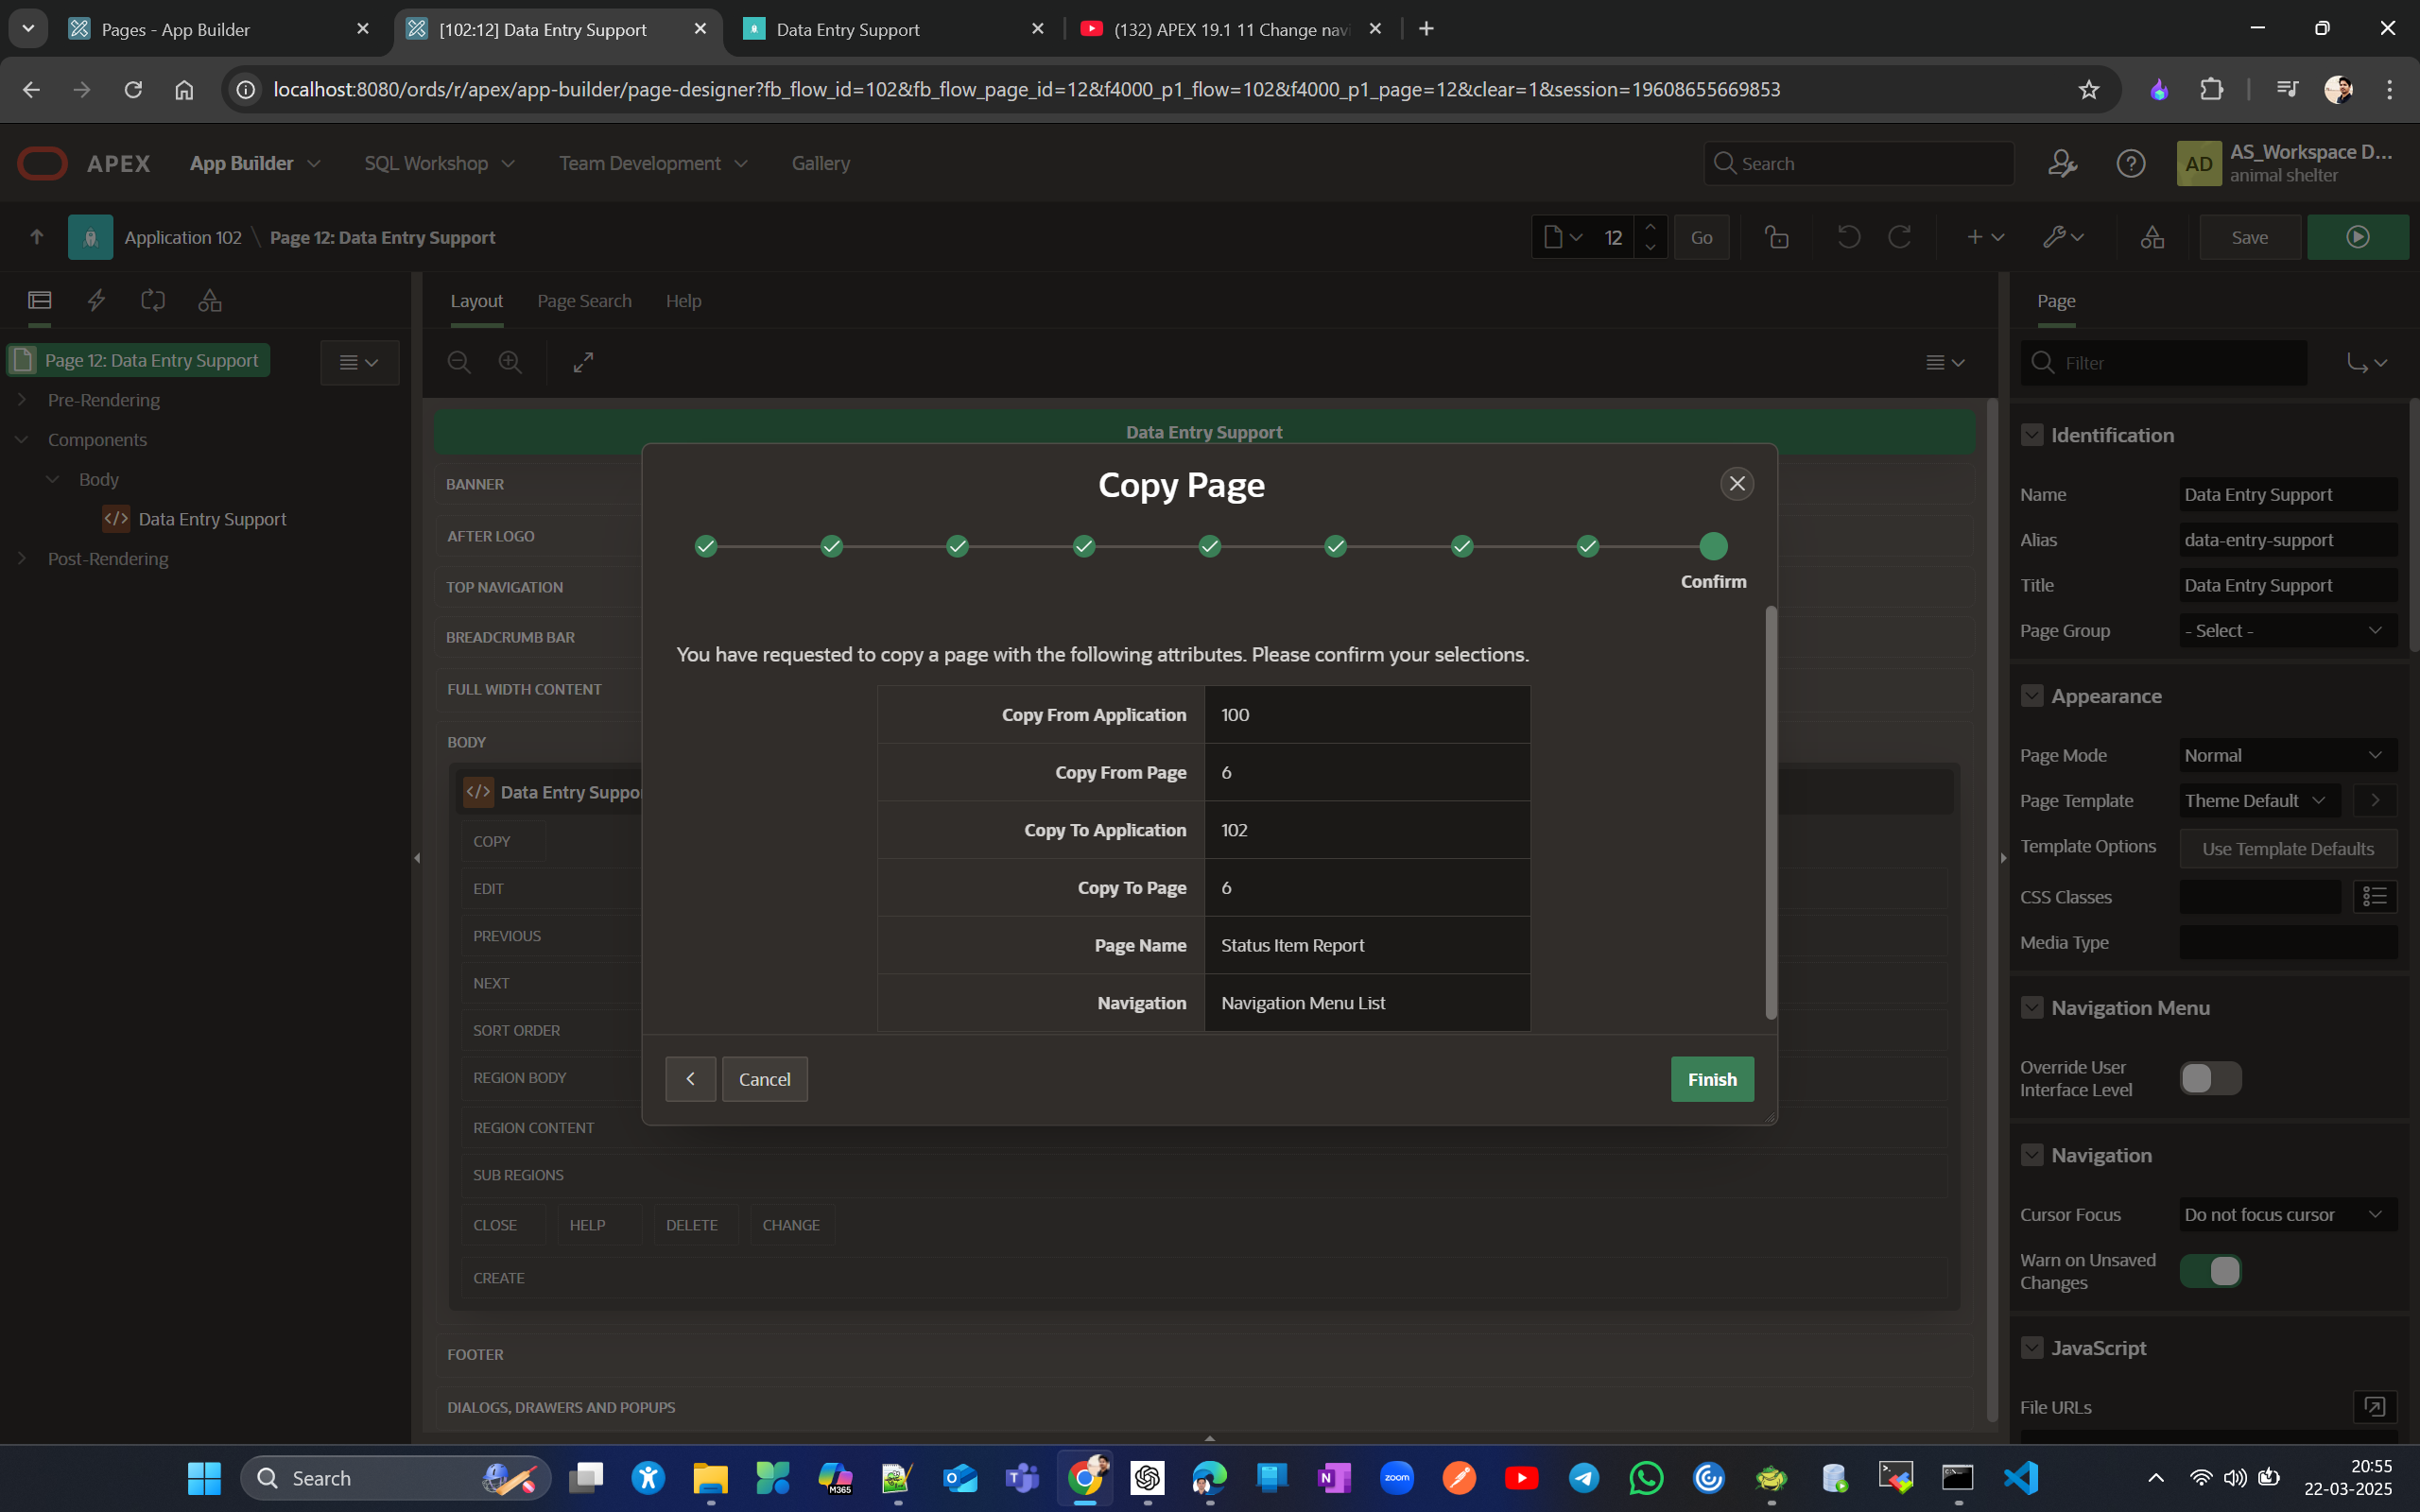
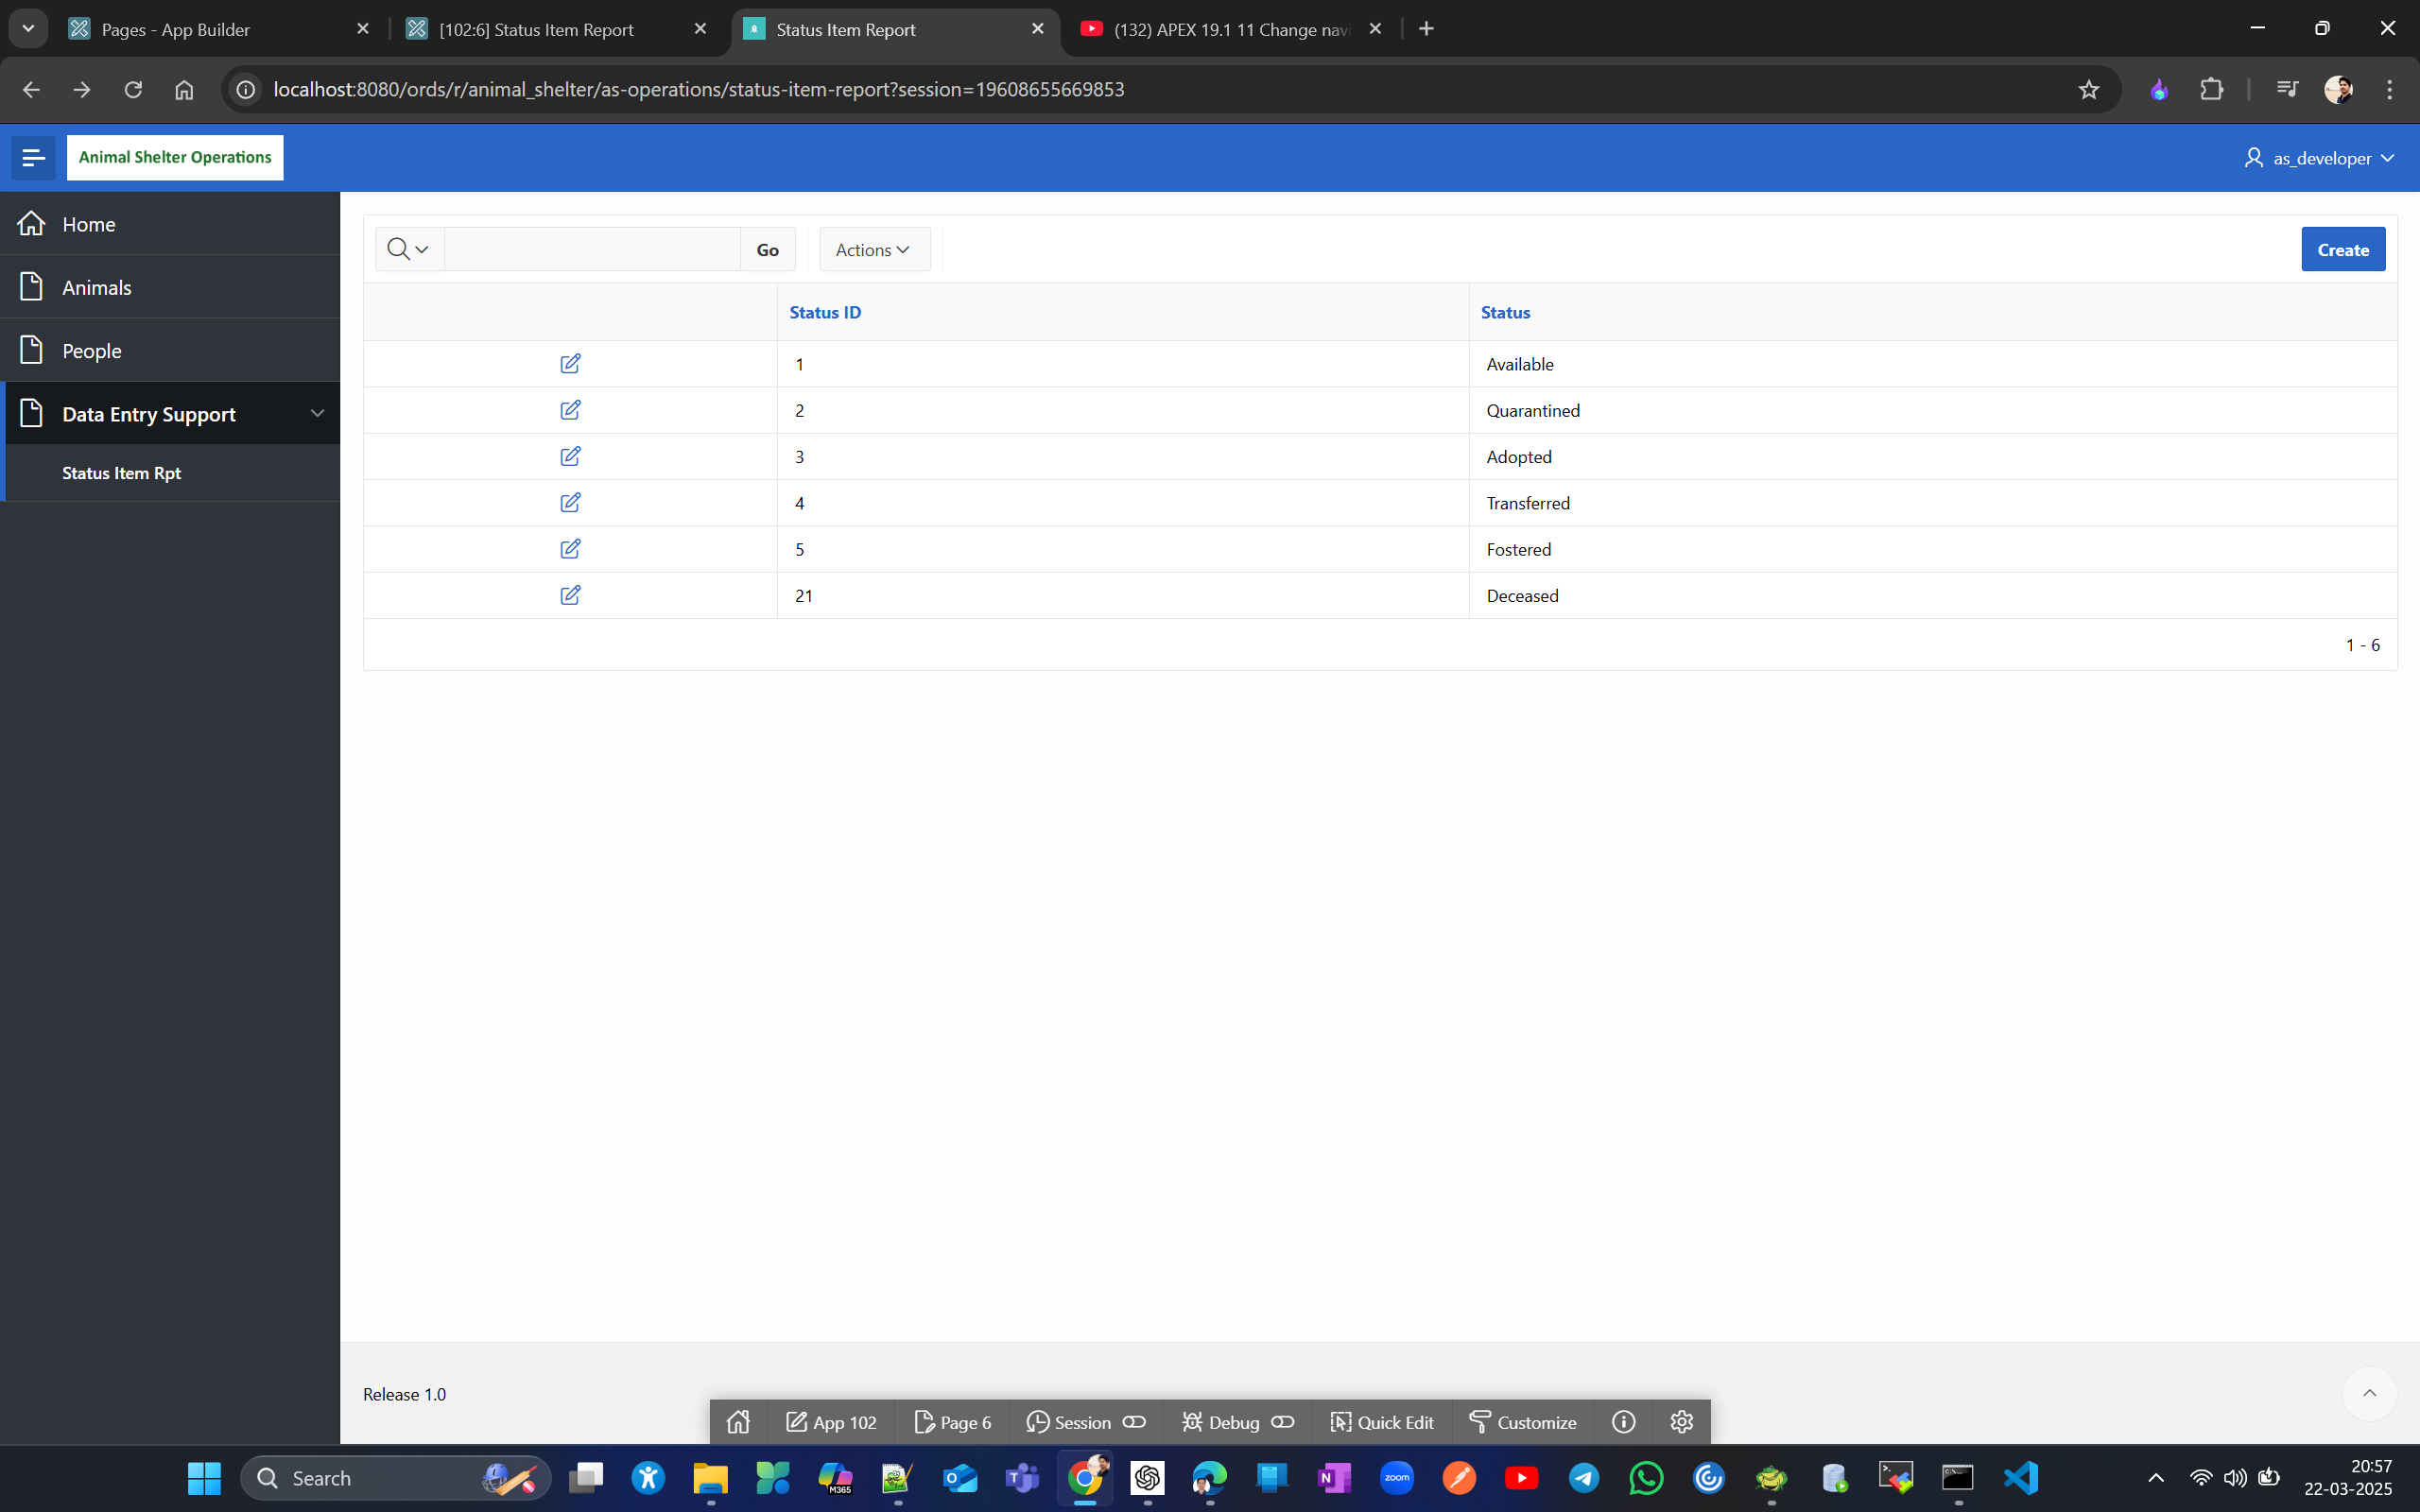
But if you click on edit icon here you get page not available error message. To fix that we to copy the corresponding for as well. also ensure page numbers are same else you have to fix the target properties.
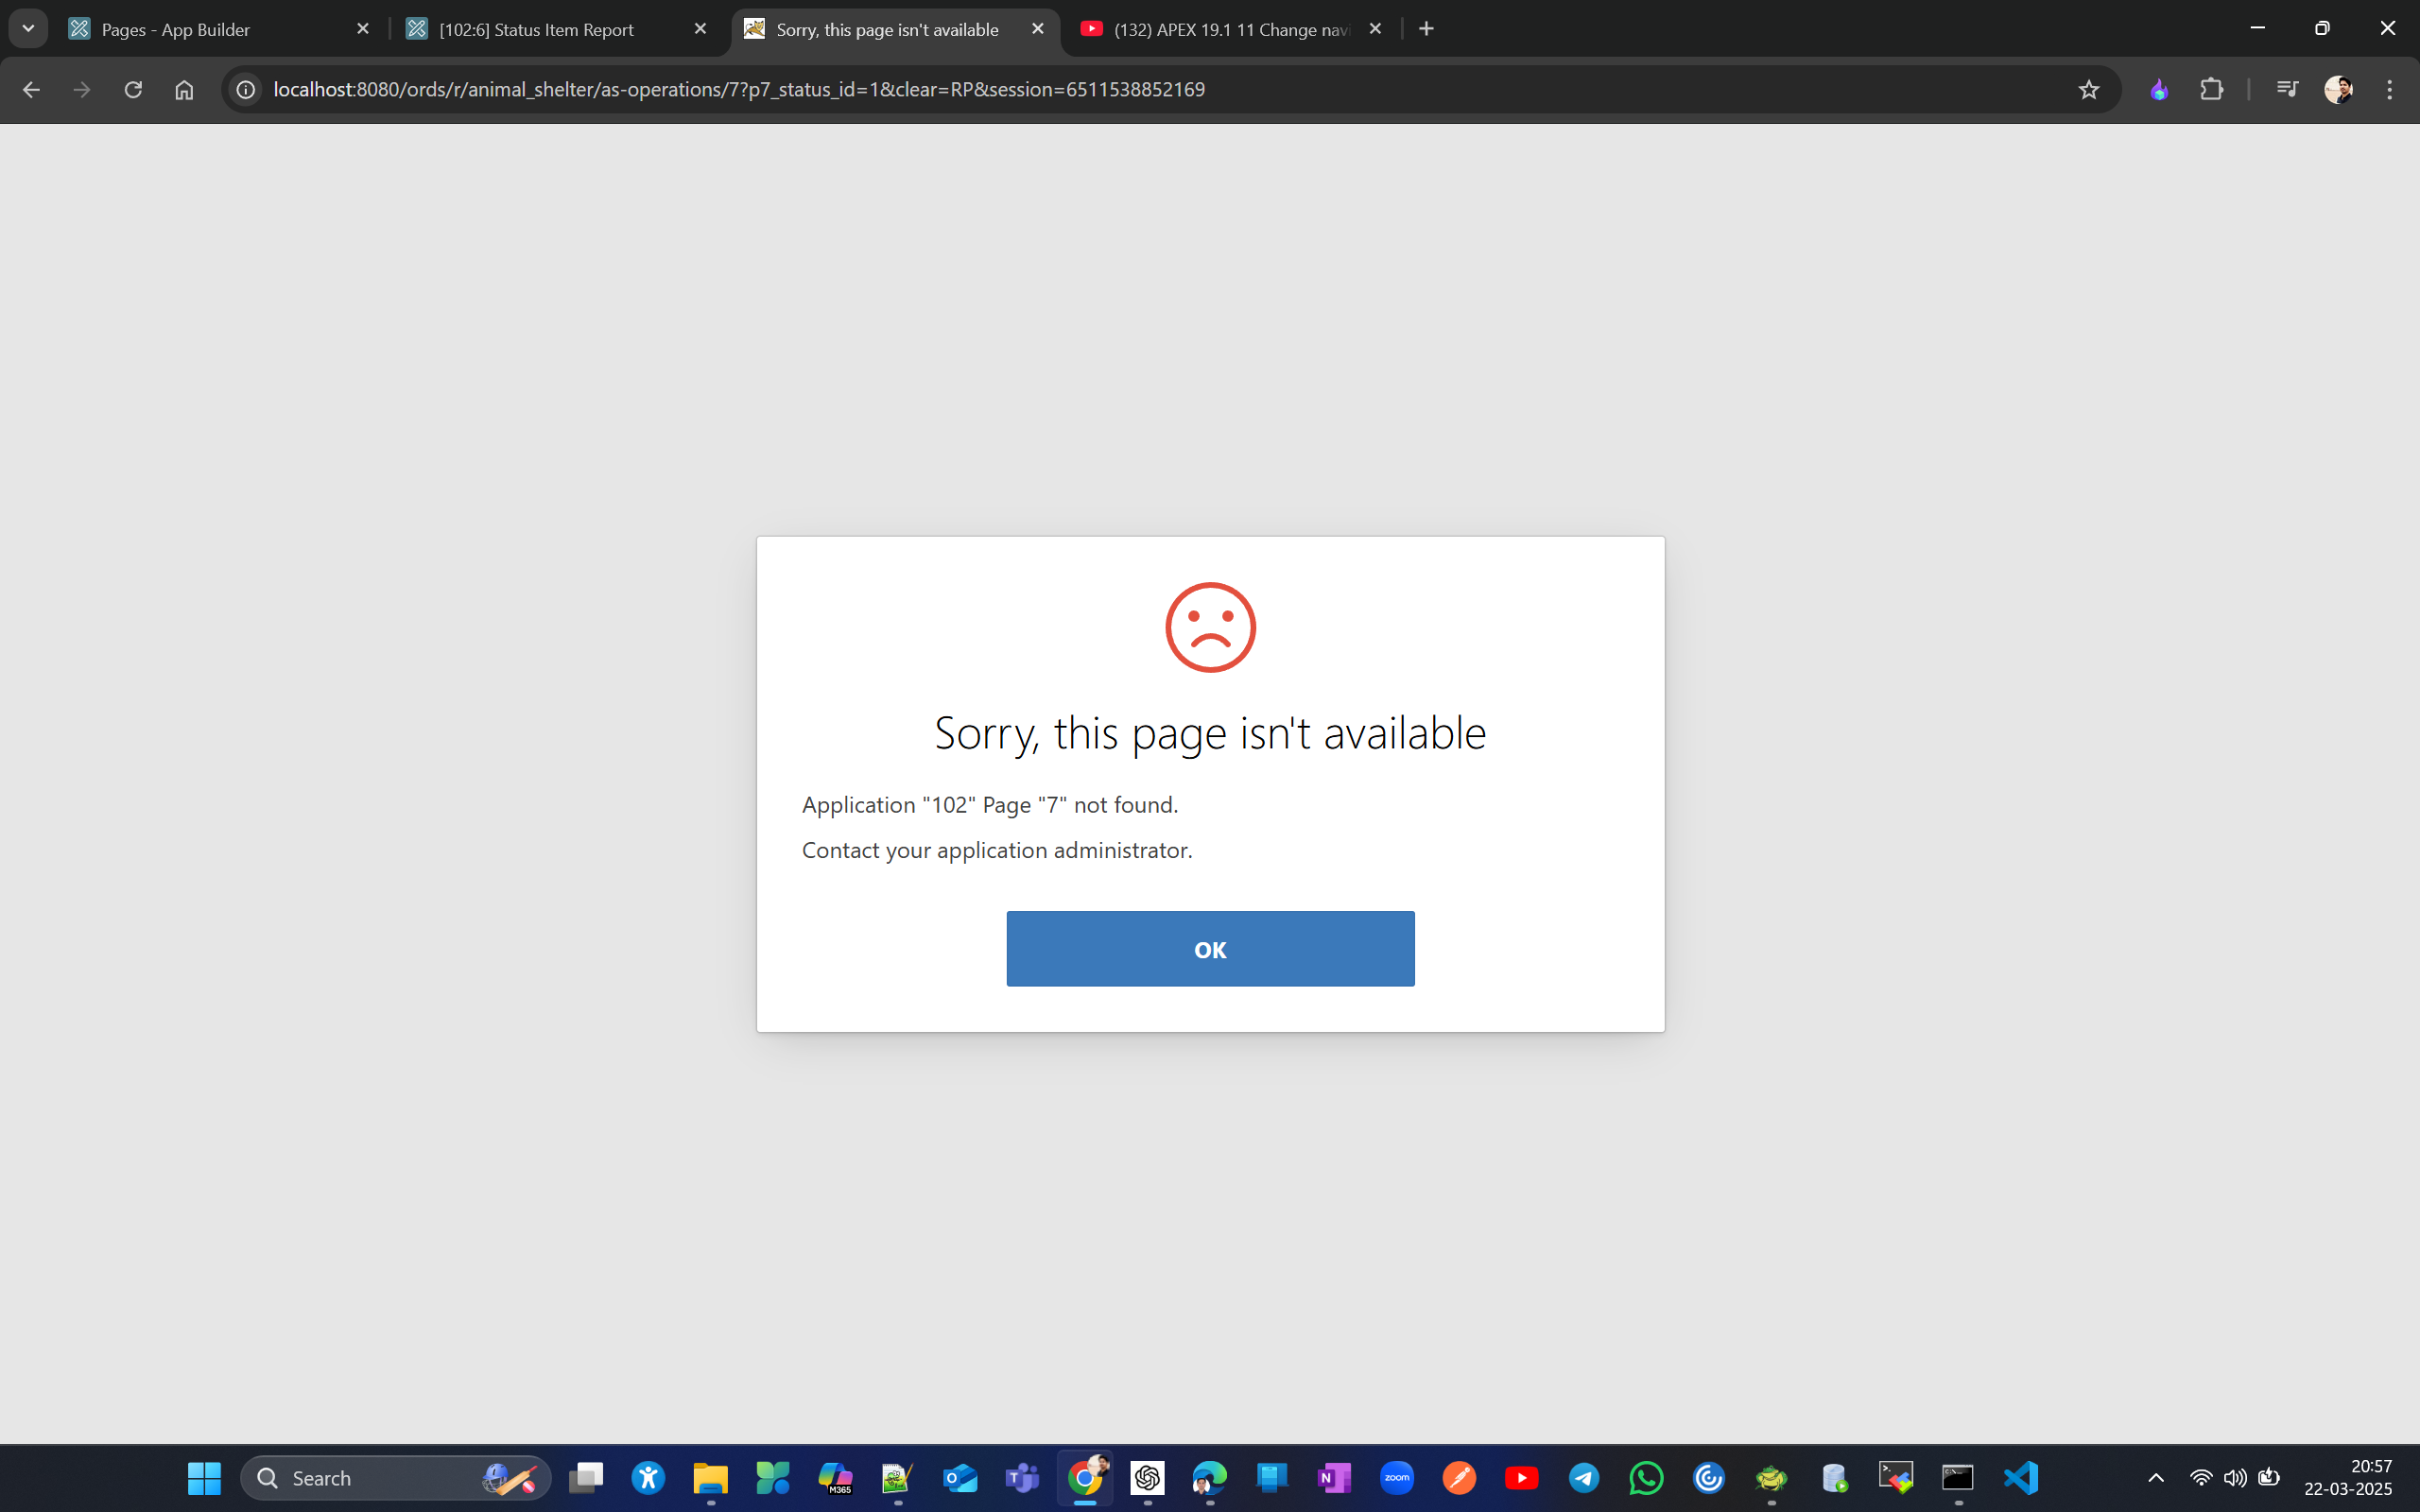
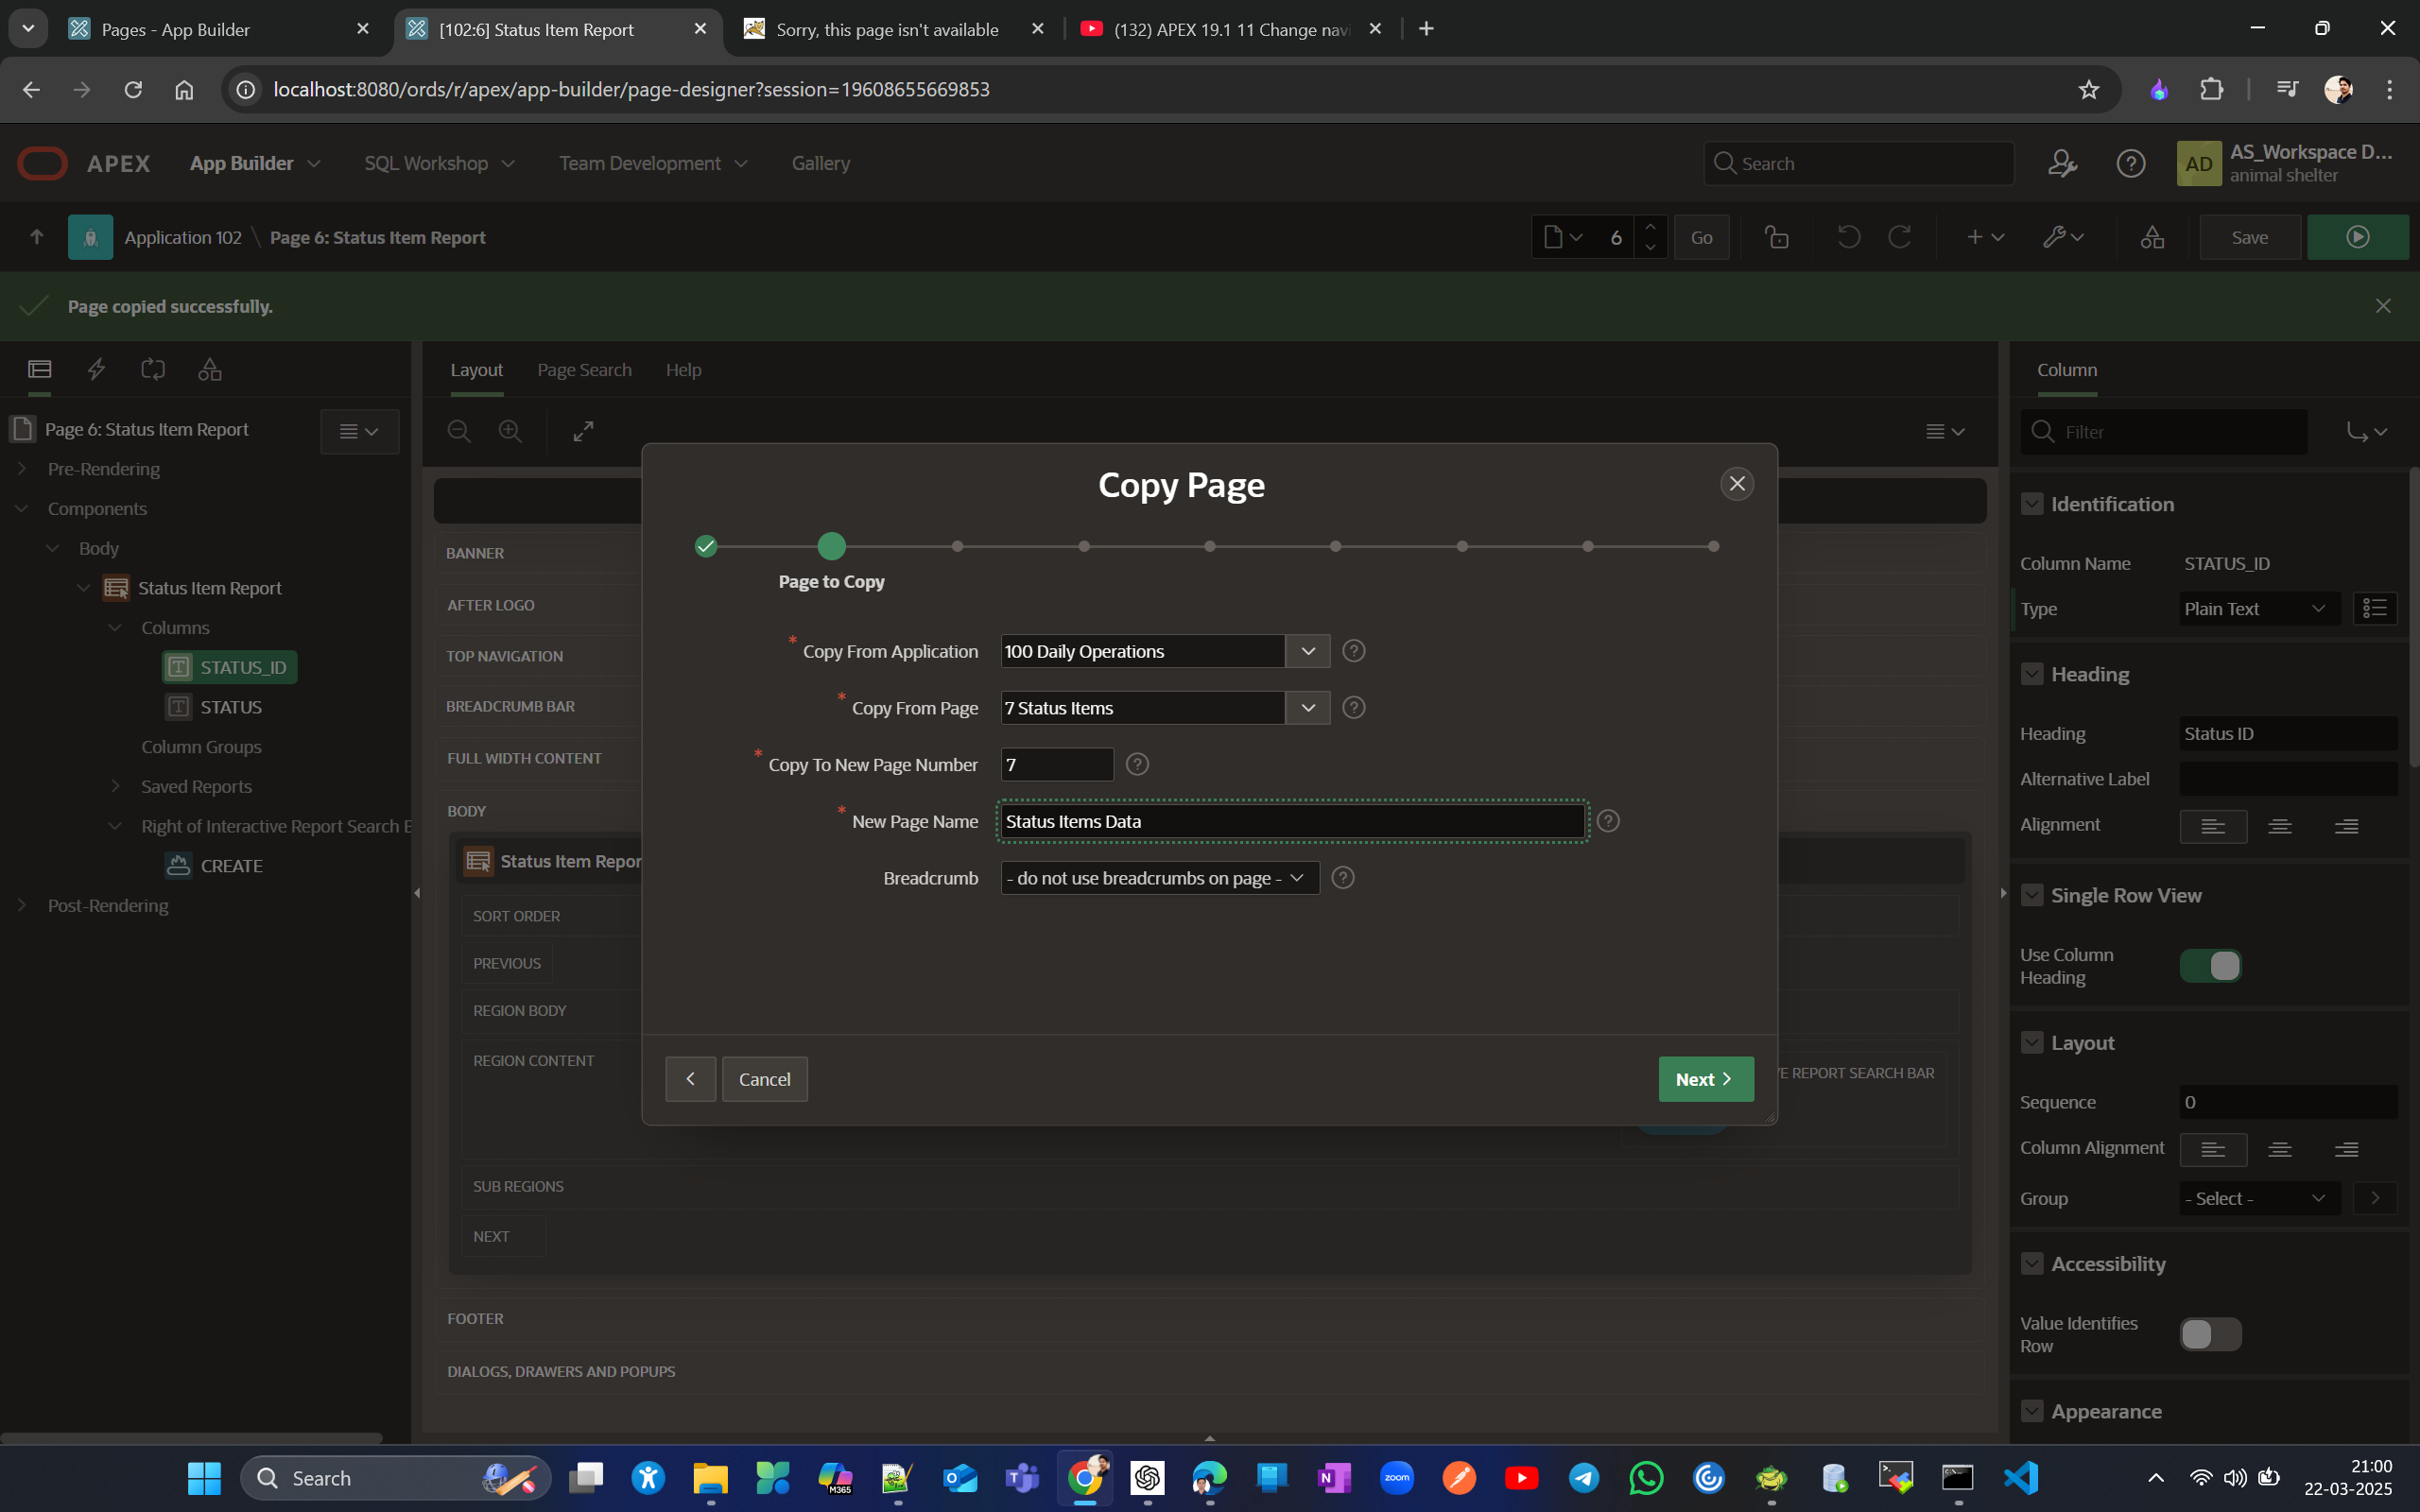
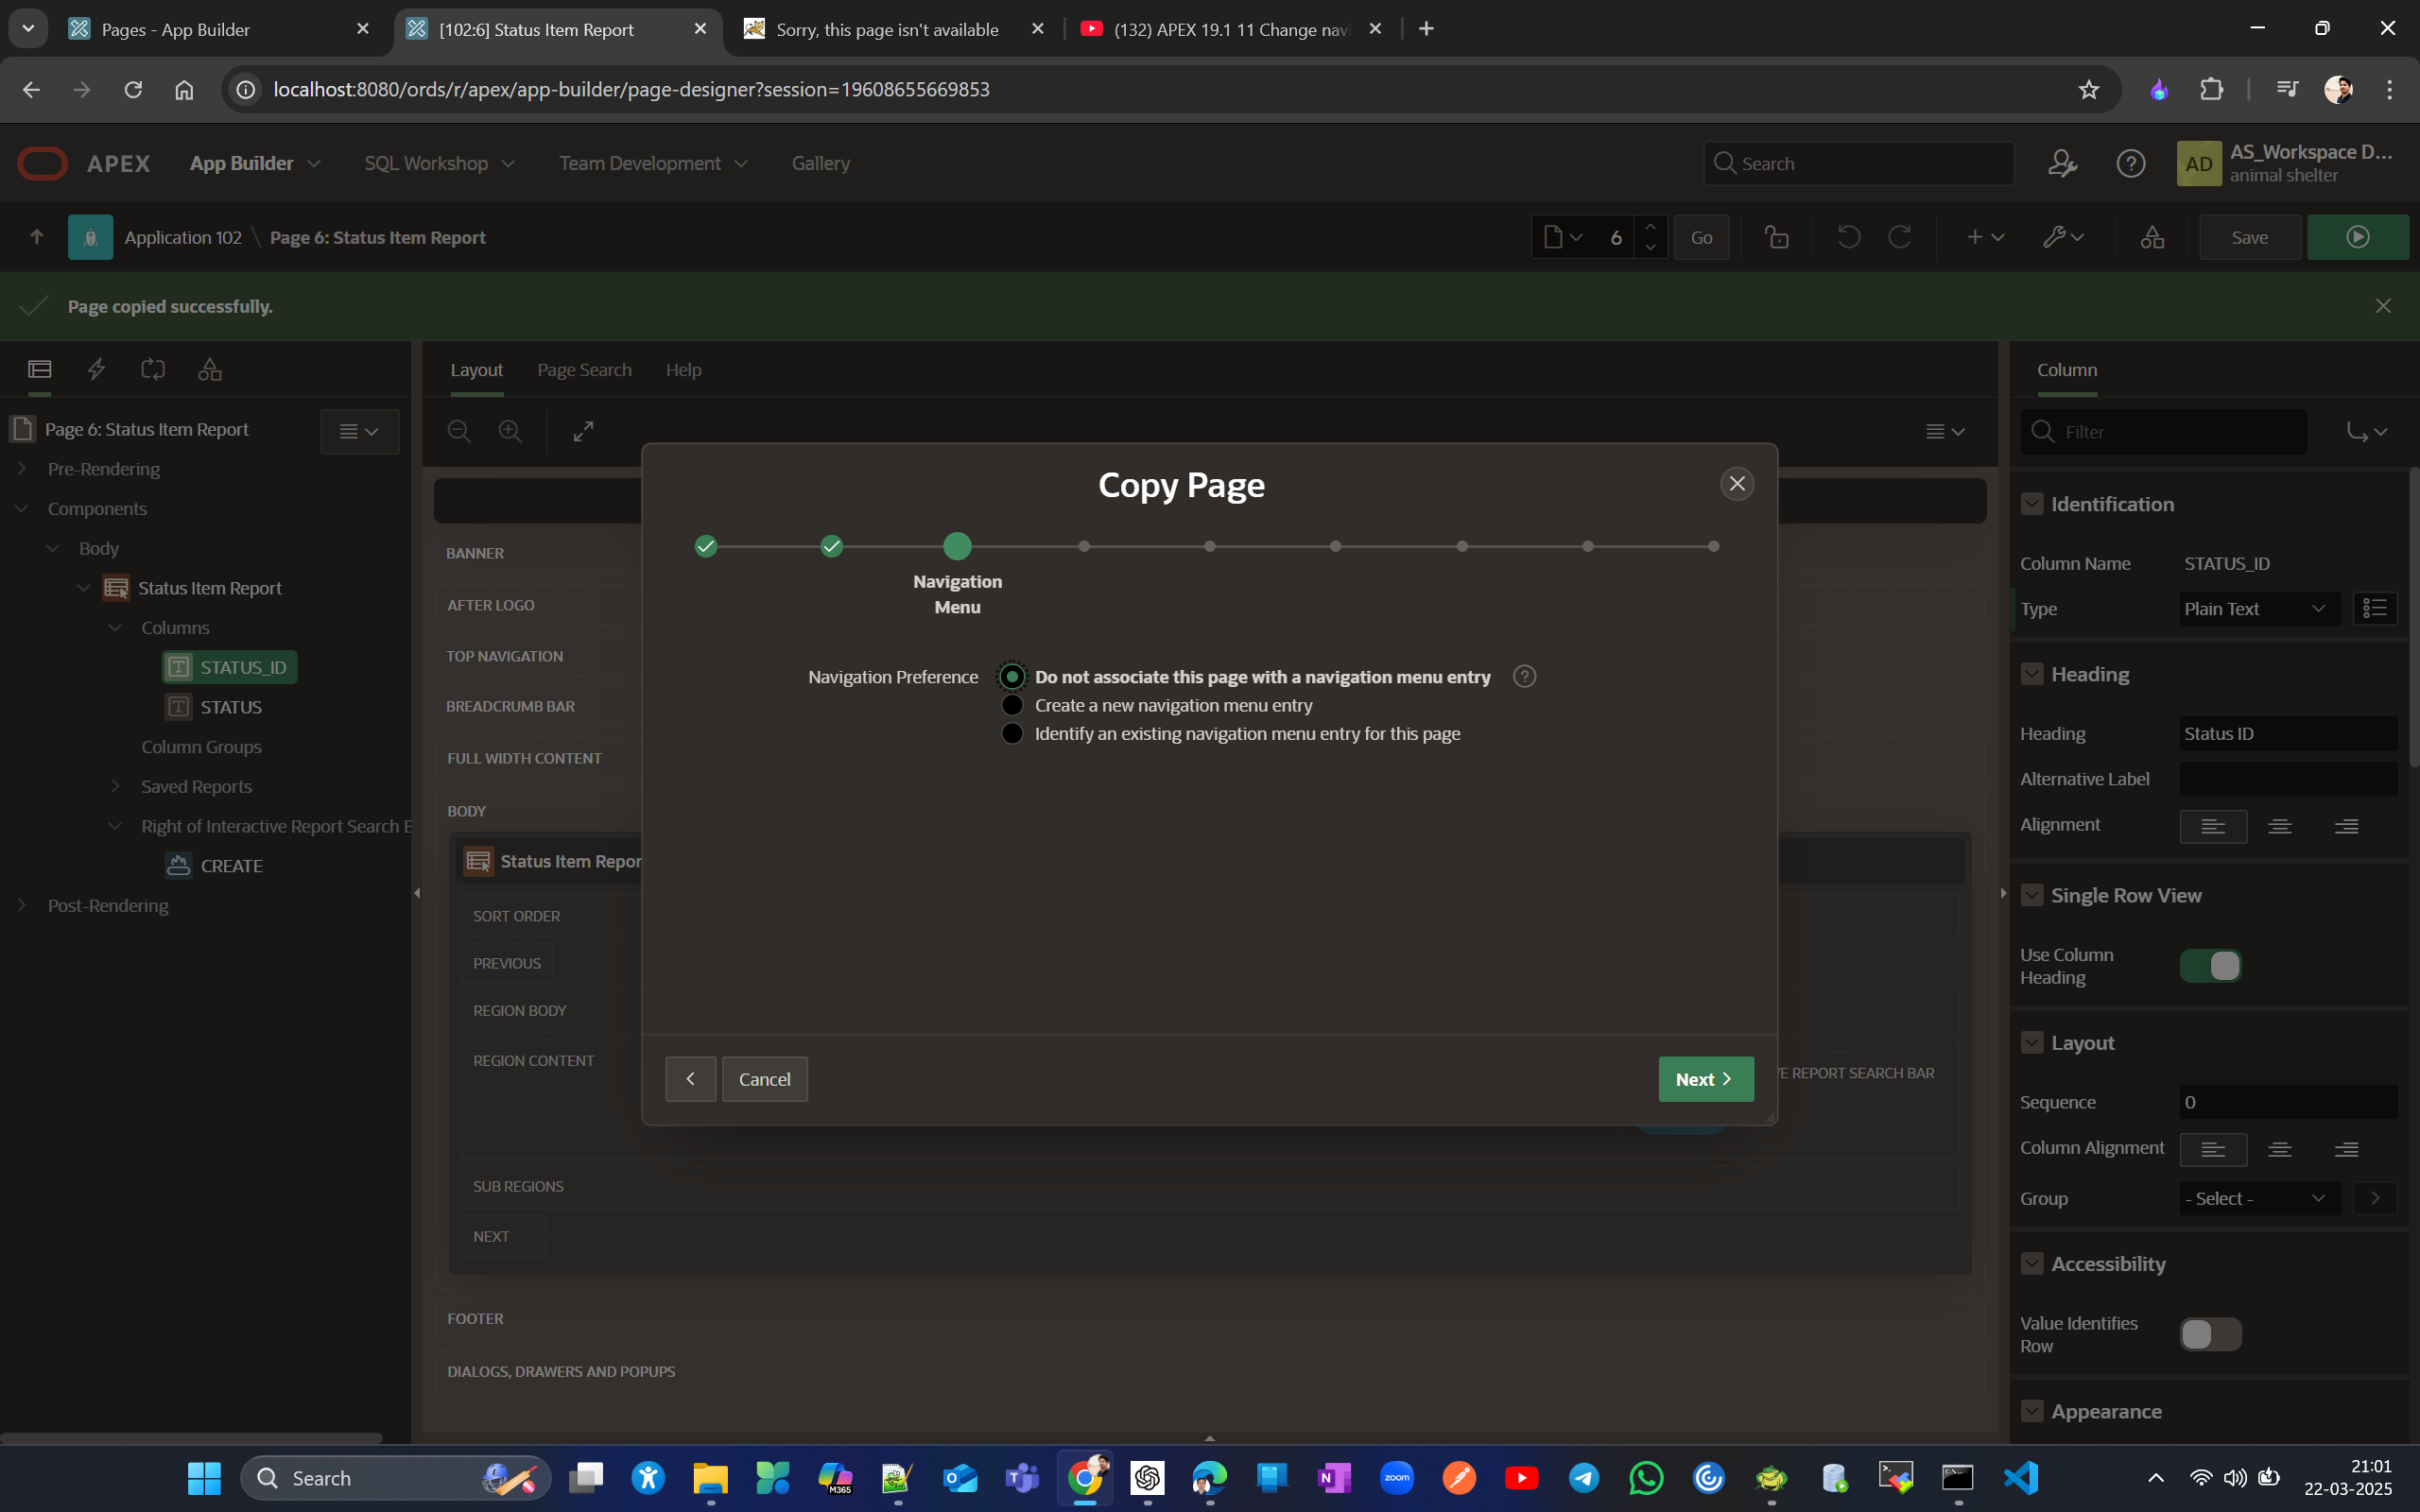
click next next Finish
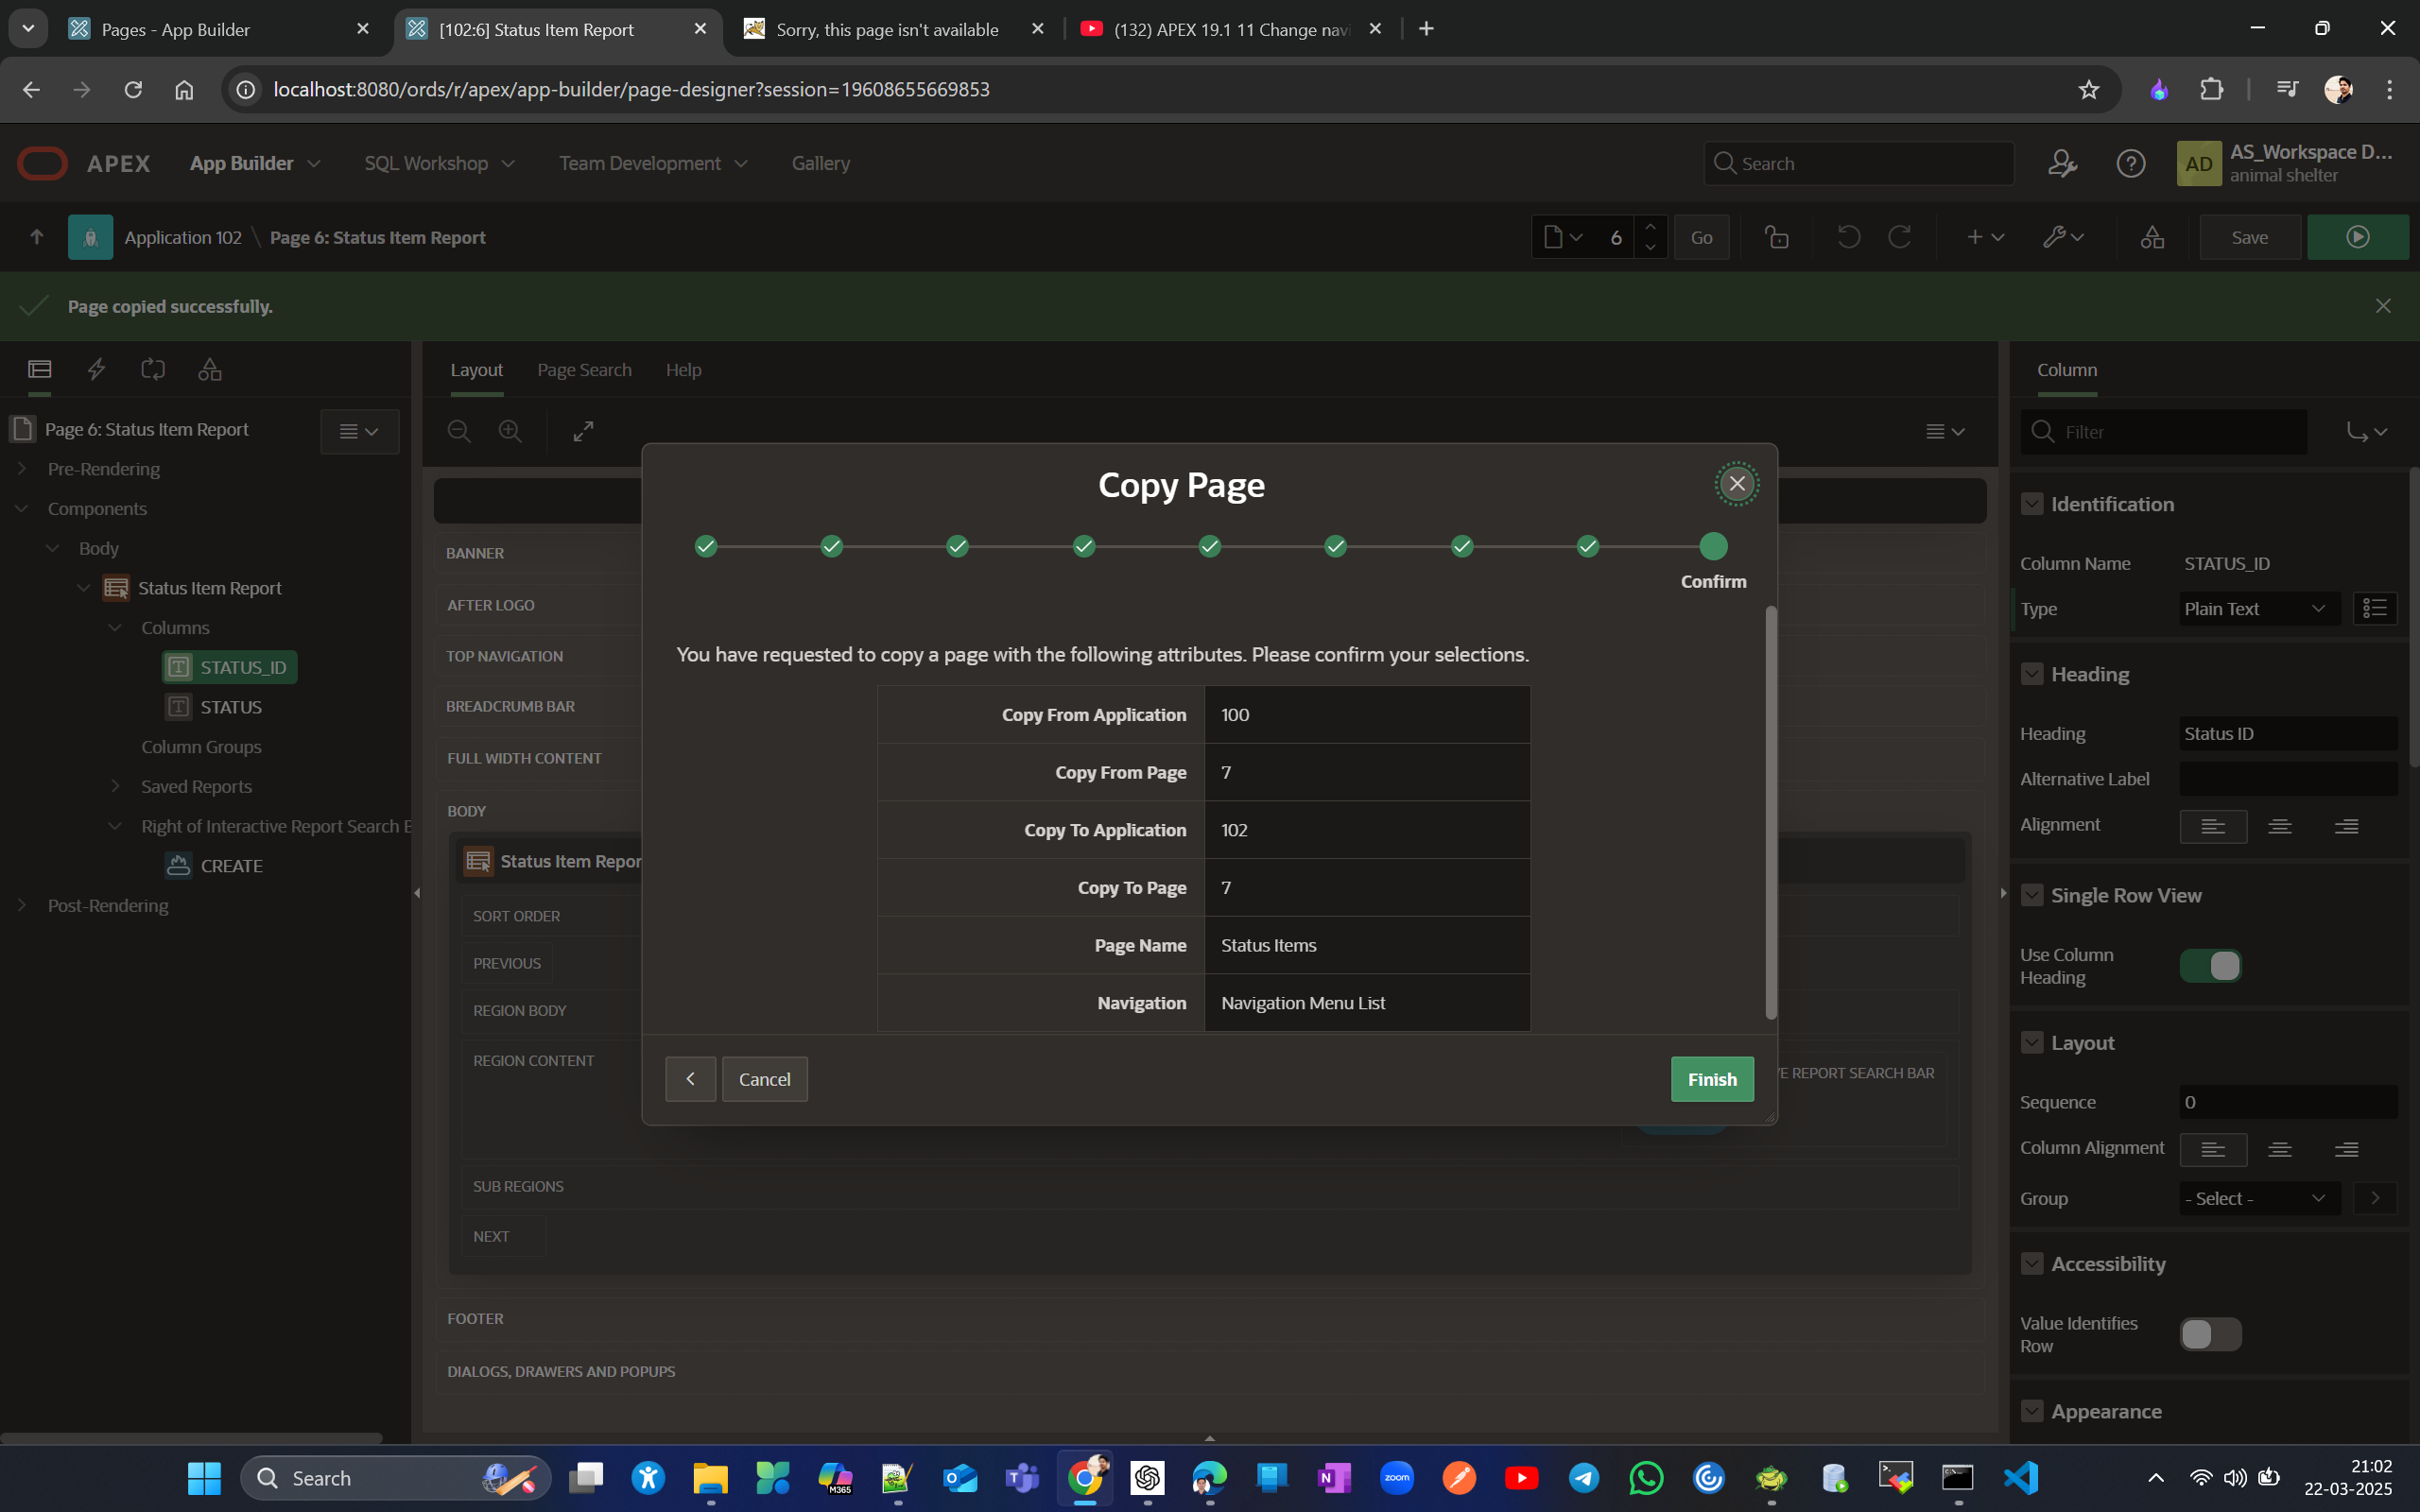
Now we can see form opening on clicking edit icon in Page #7
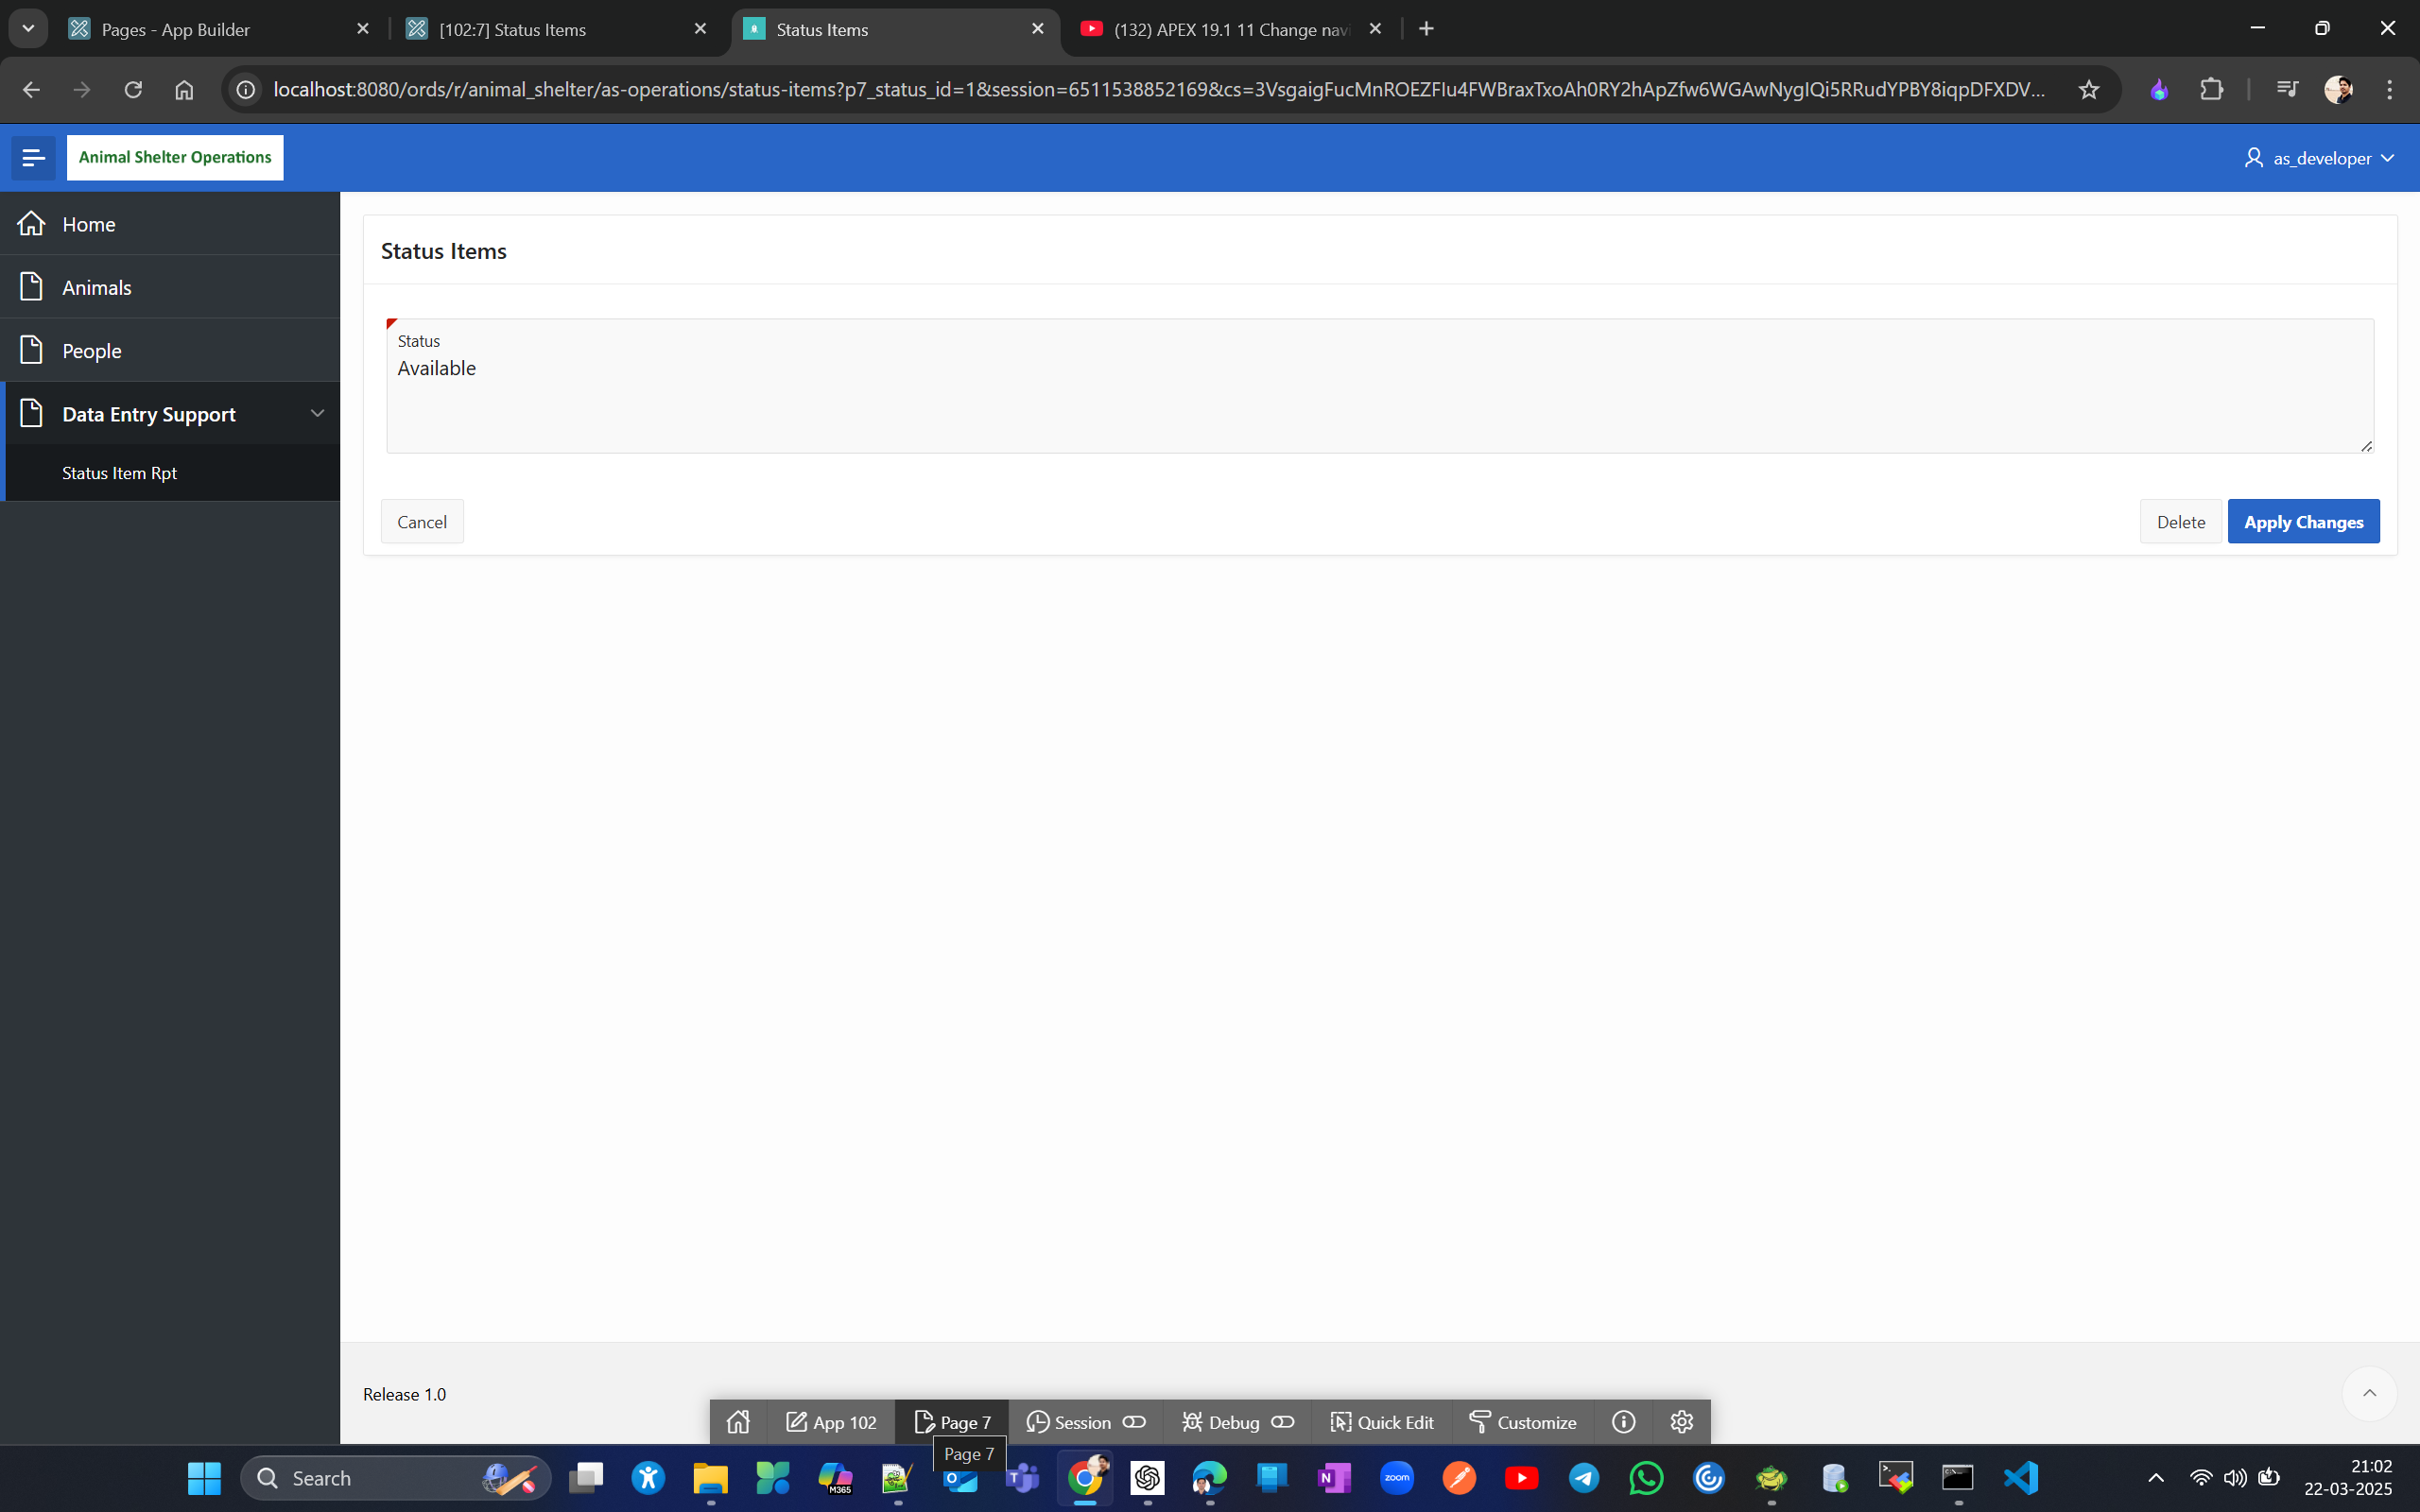
Now Lets do the same thing for Dominant Breed Report and put under Data Entry Support
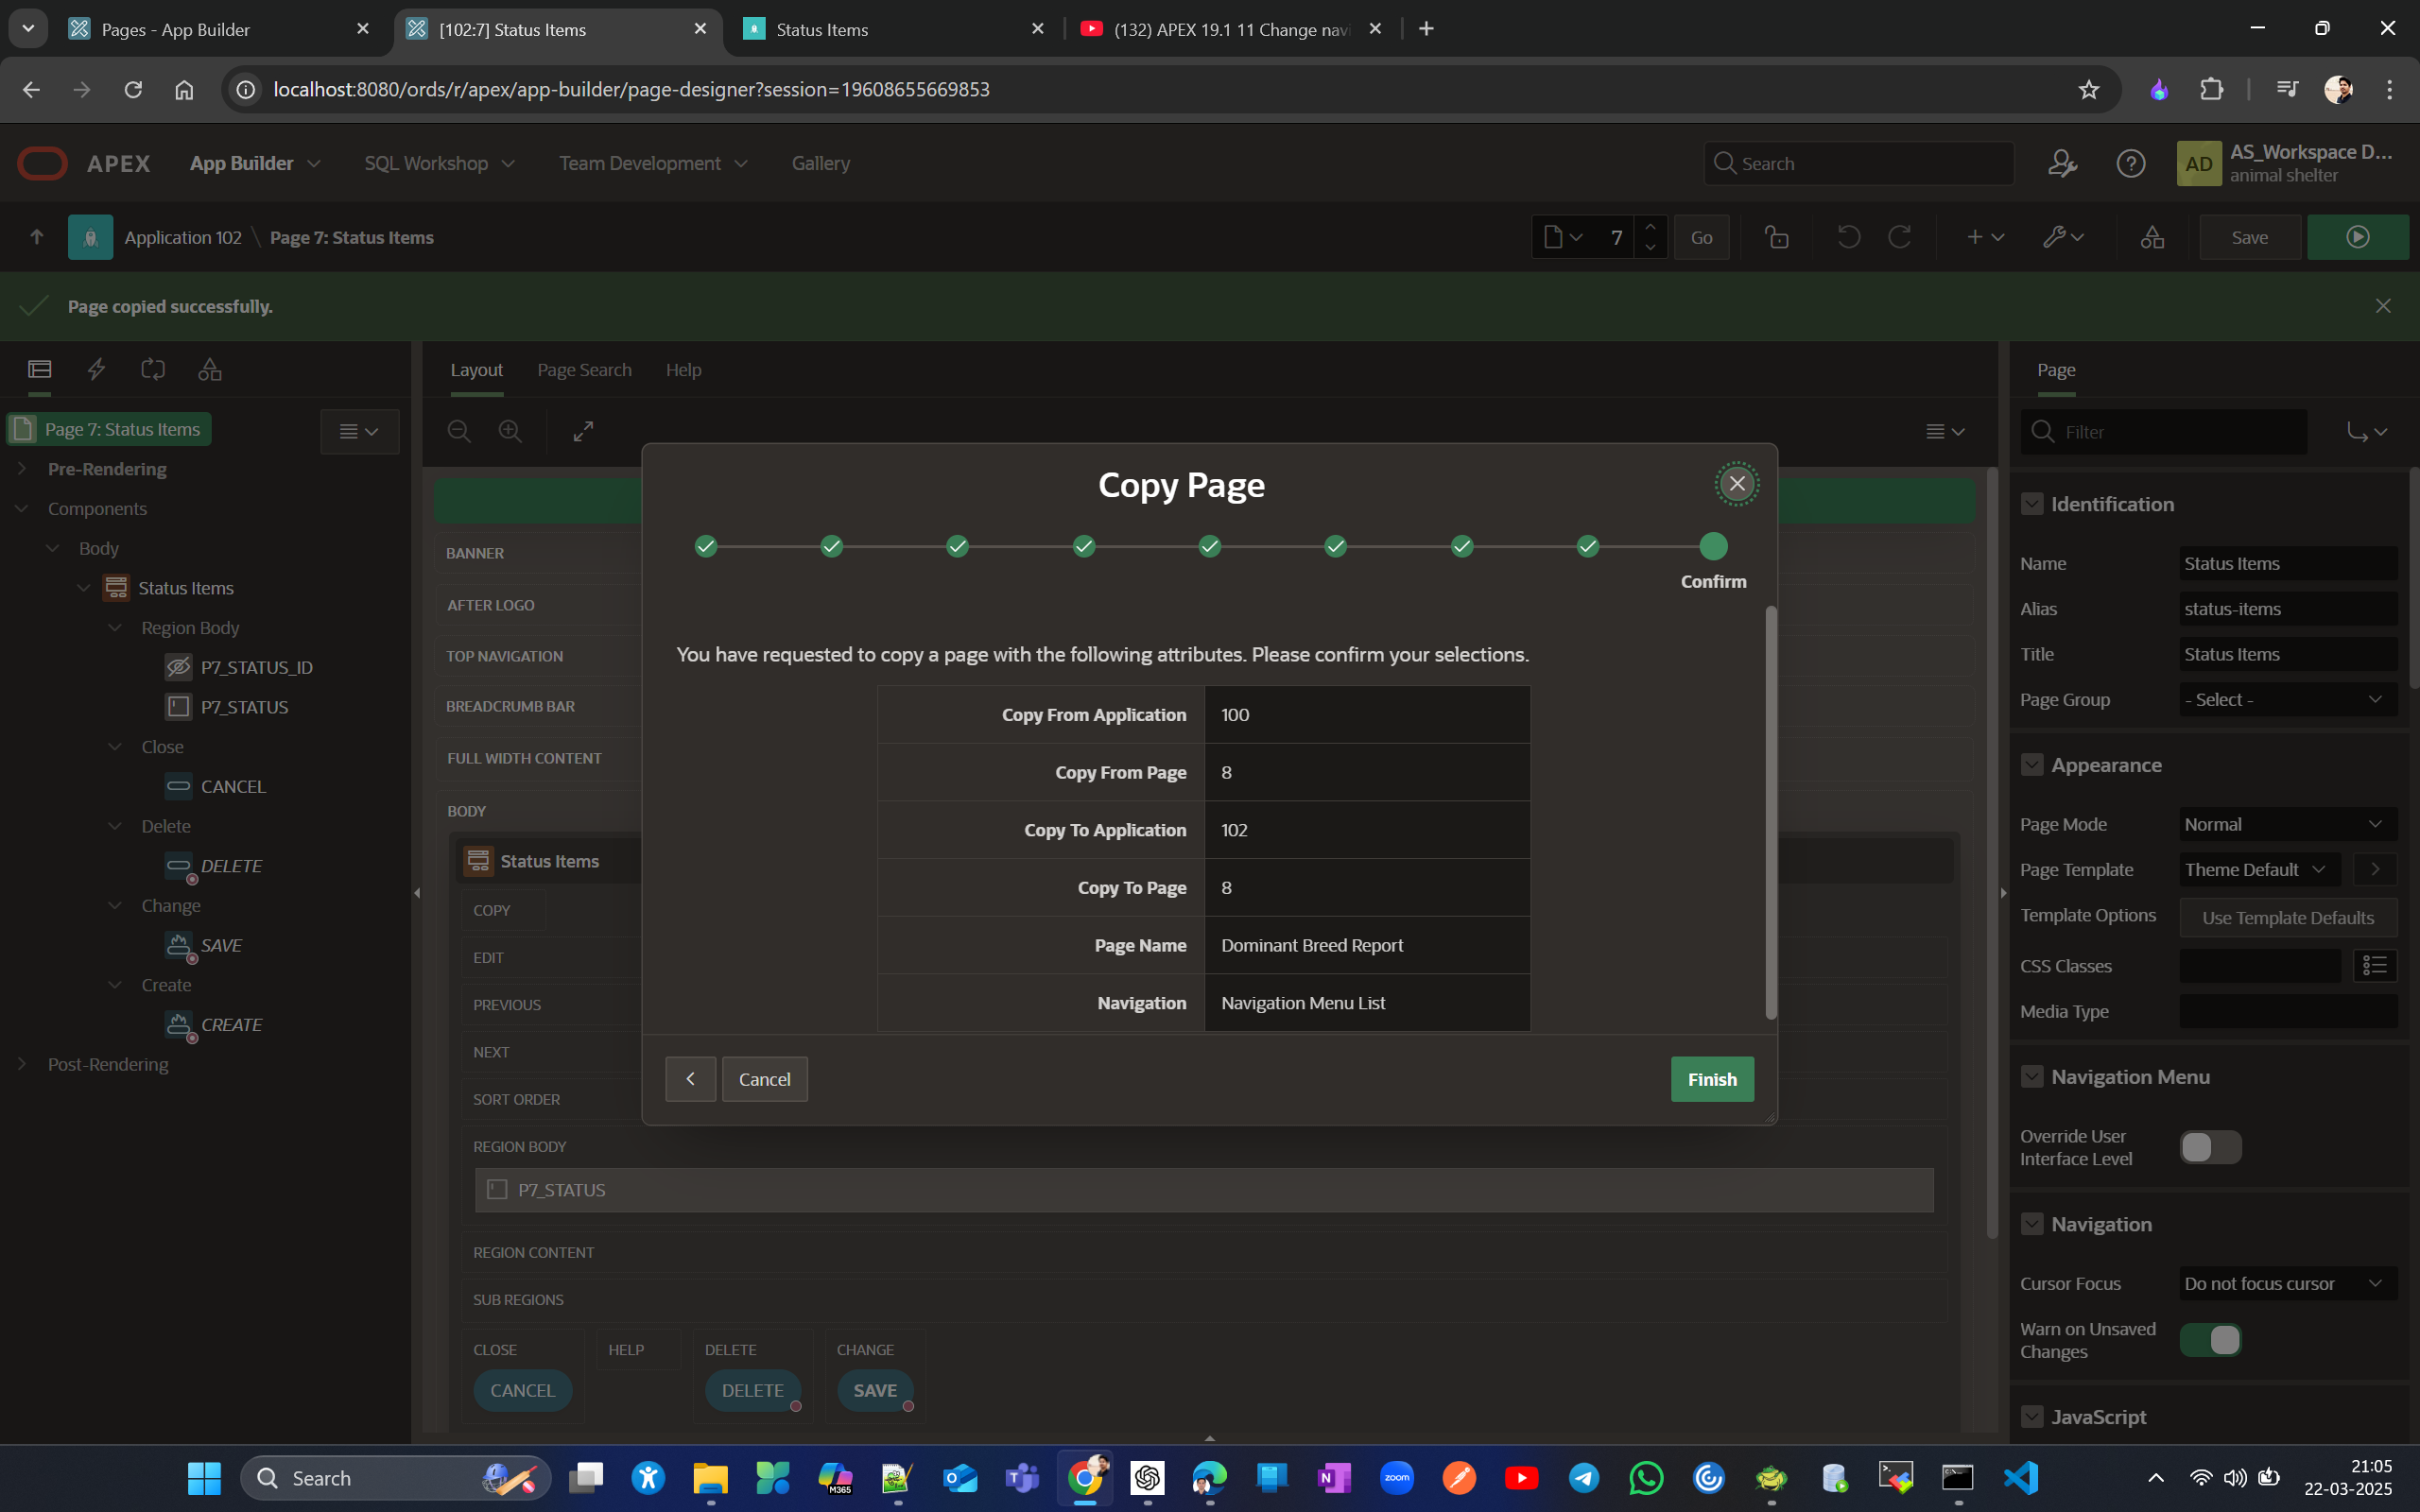
Now copy corresponding form also to avoid page not available error. don’t create navigation entry for this form page you are copying for dominant breed.
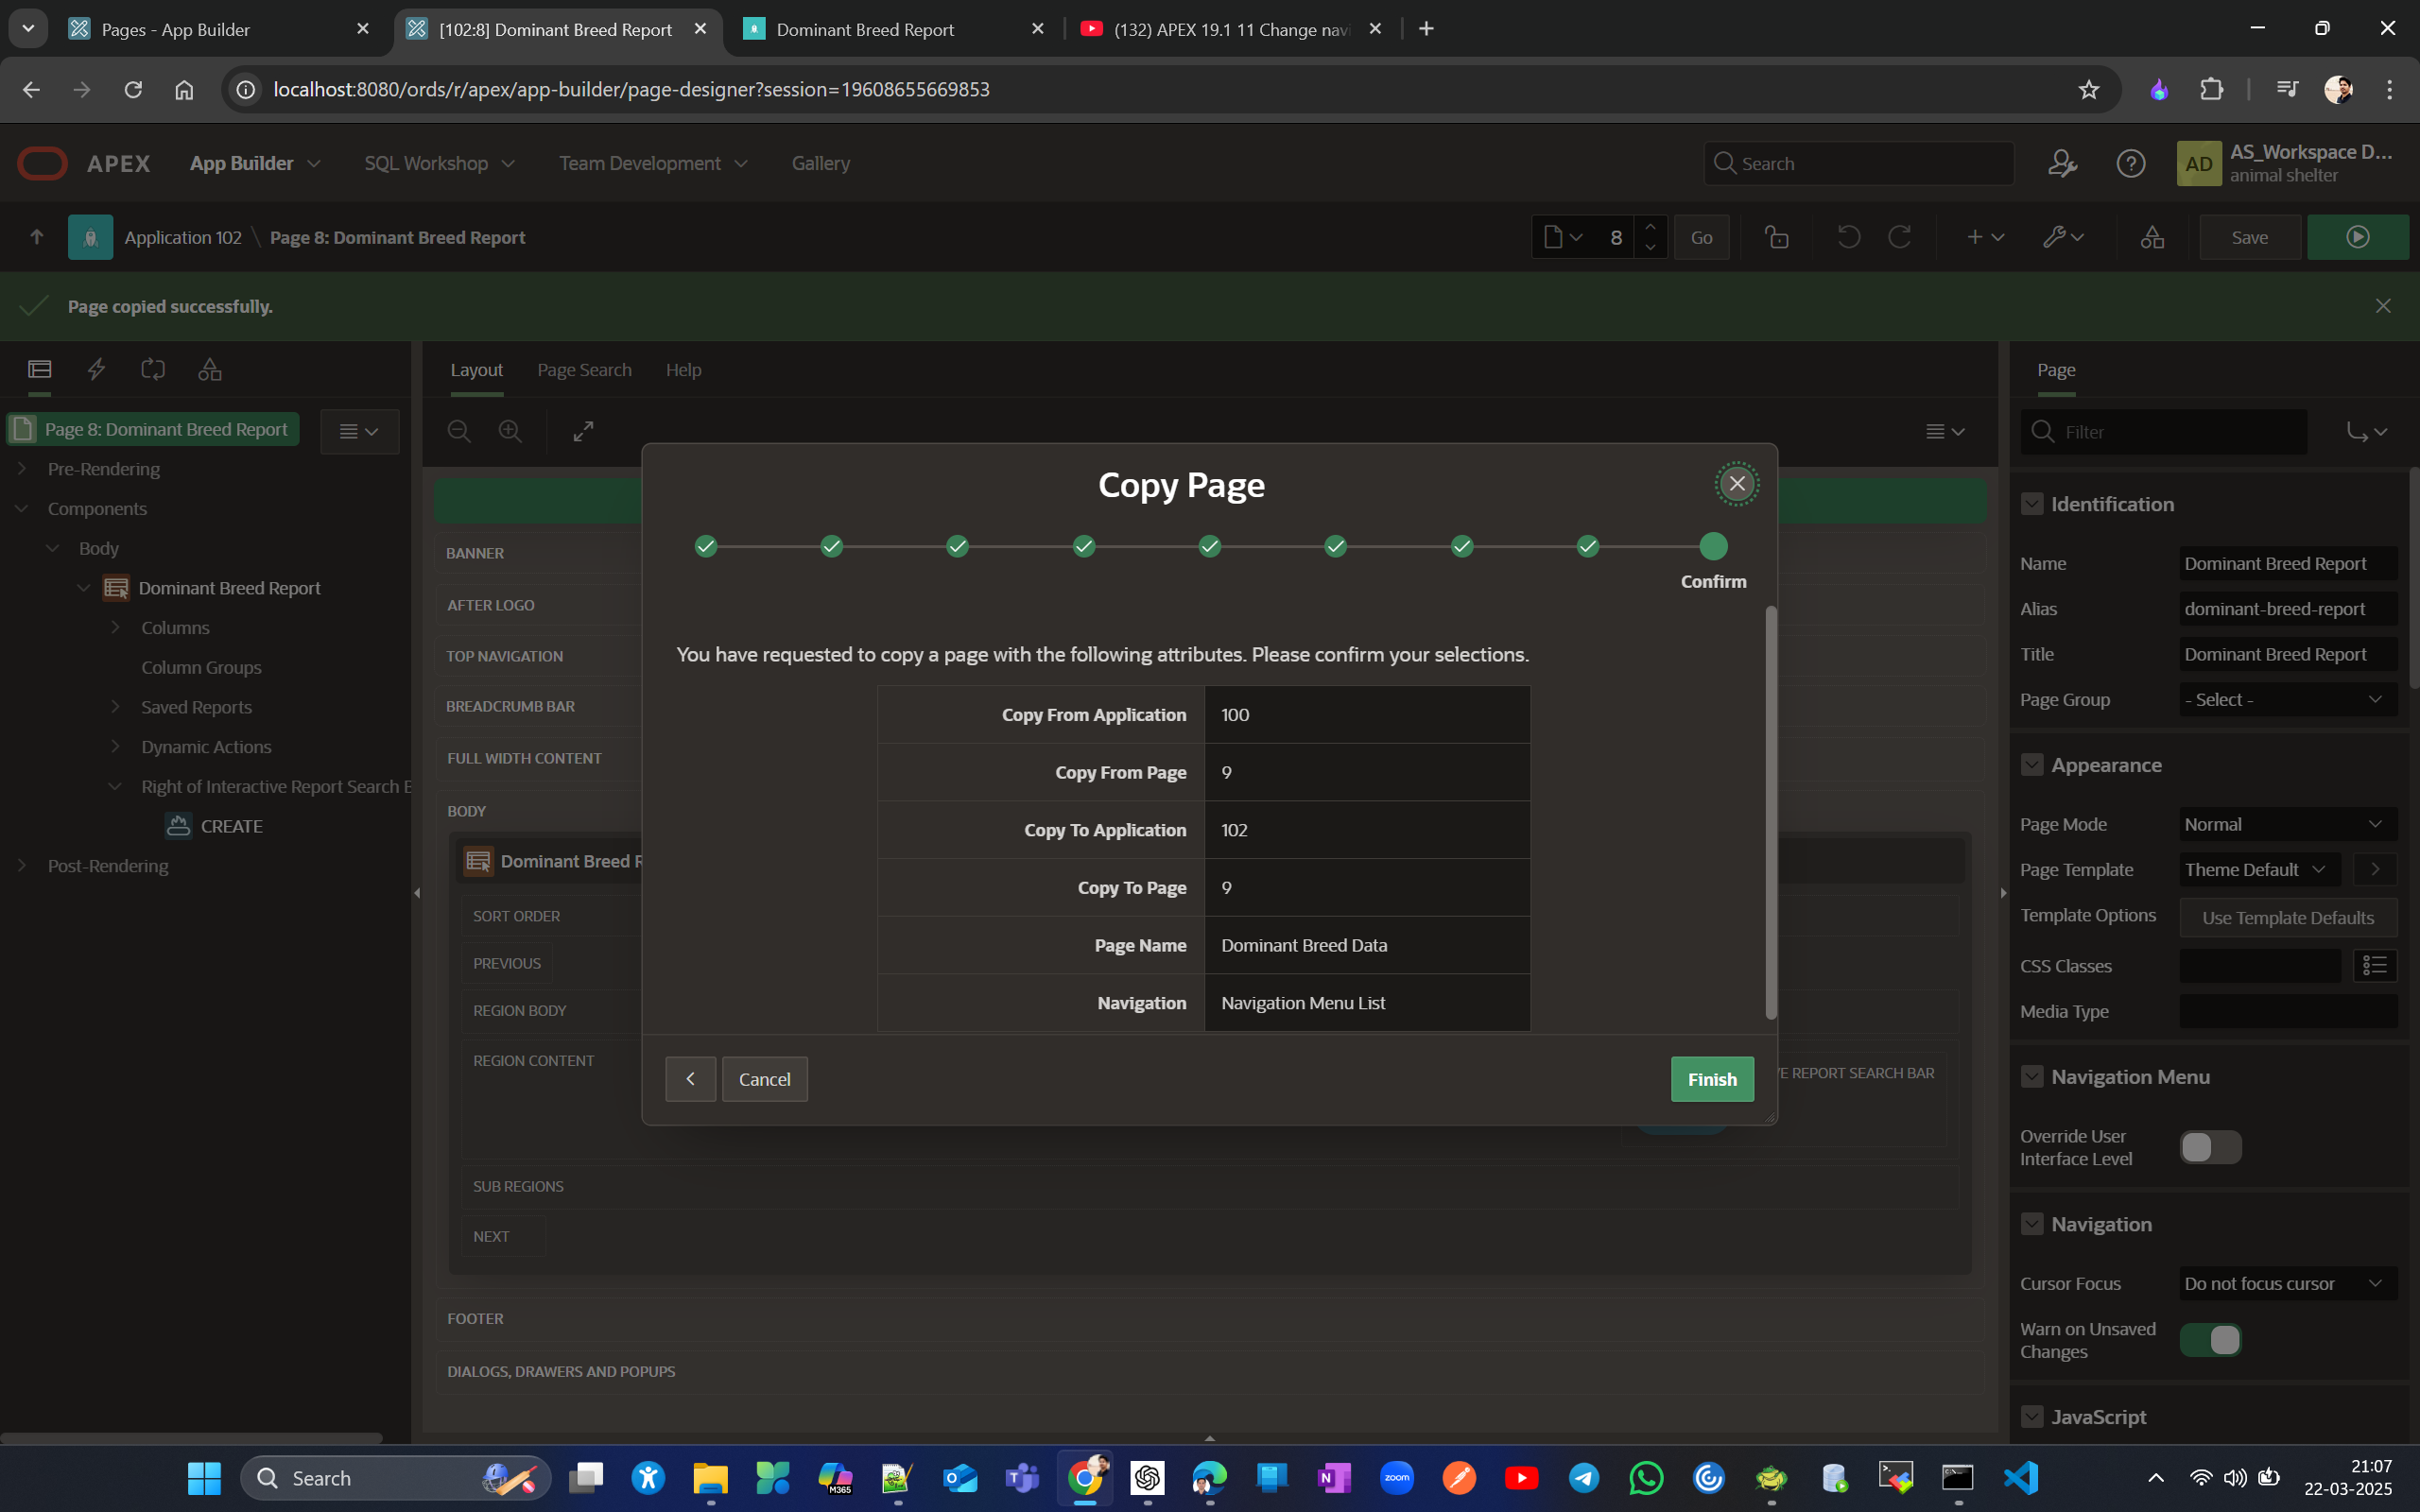
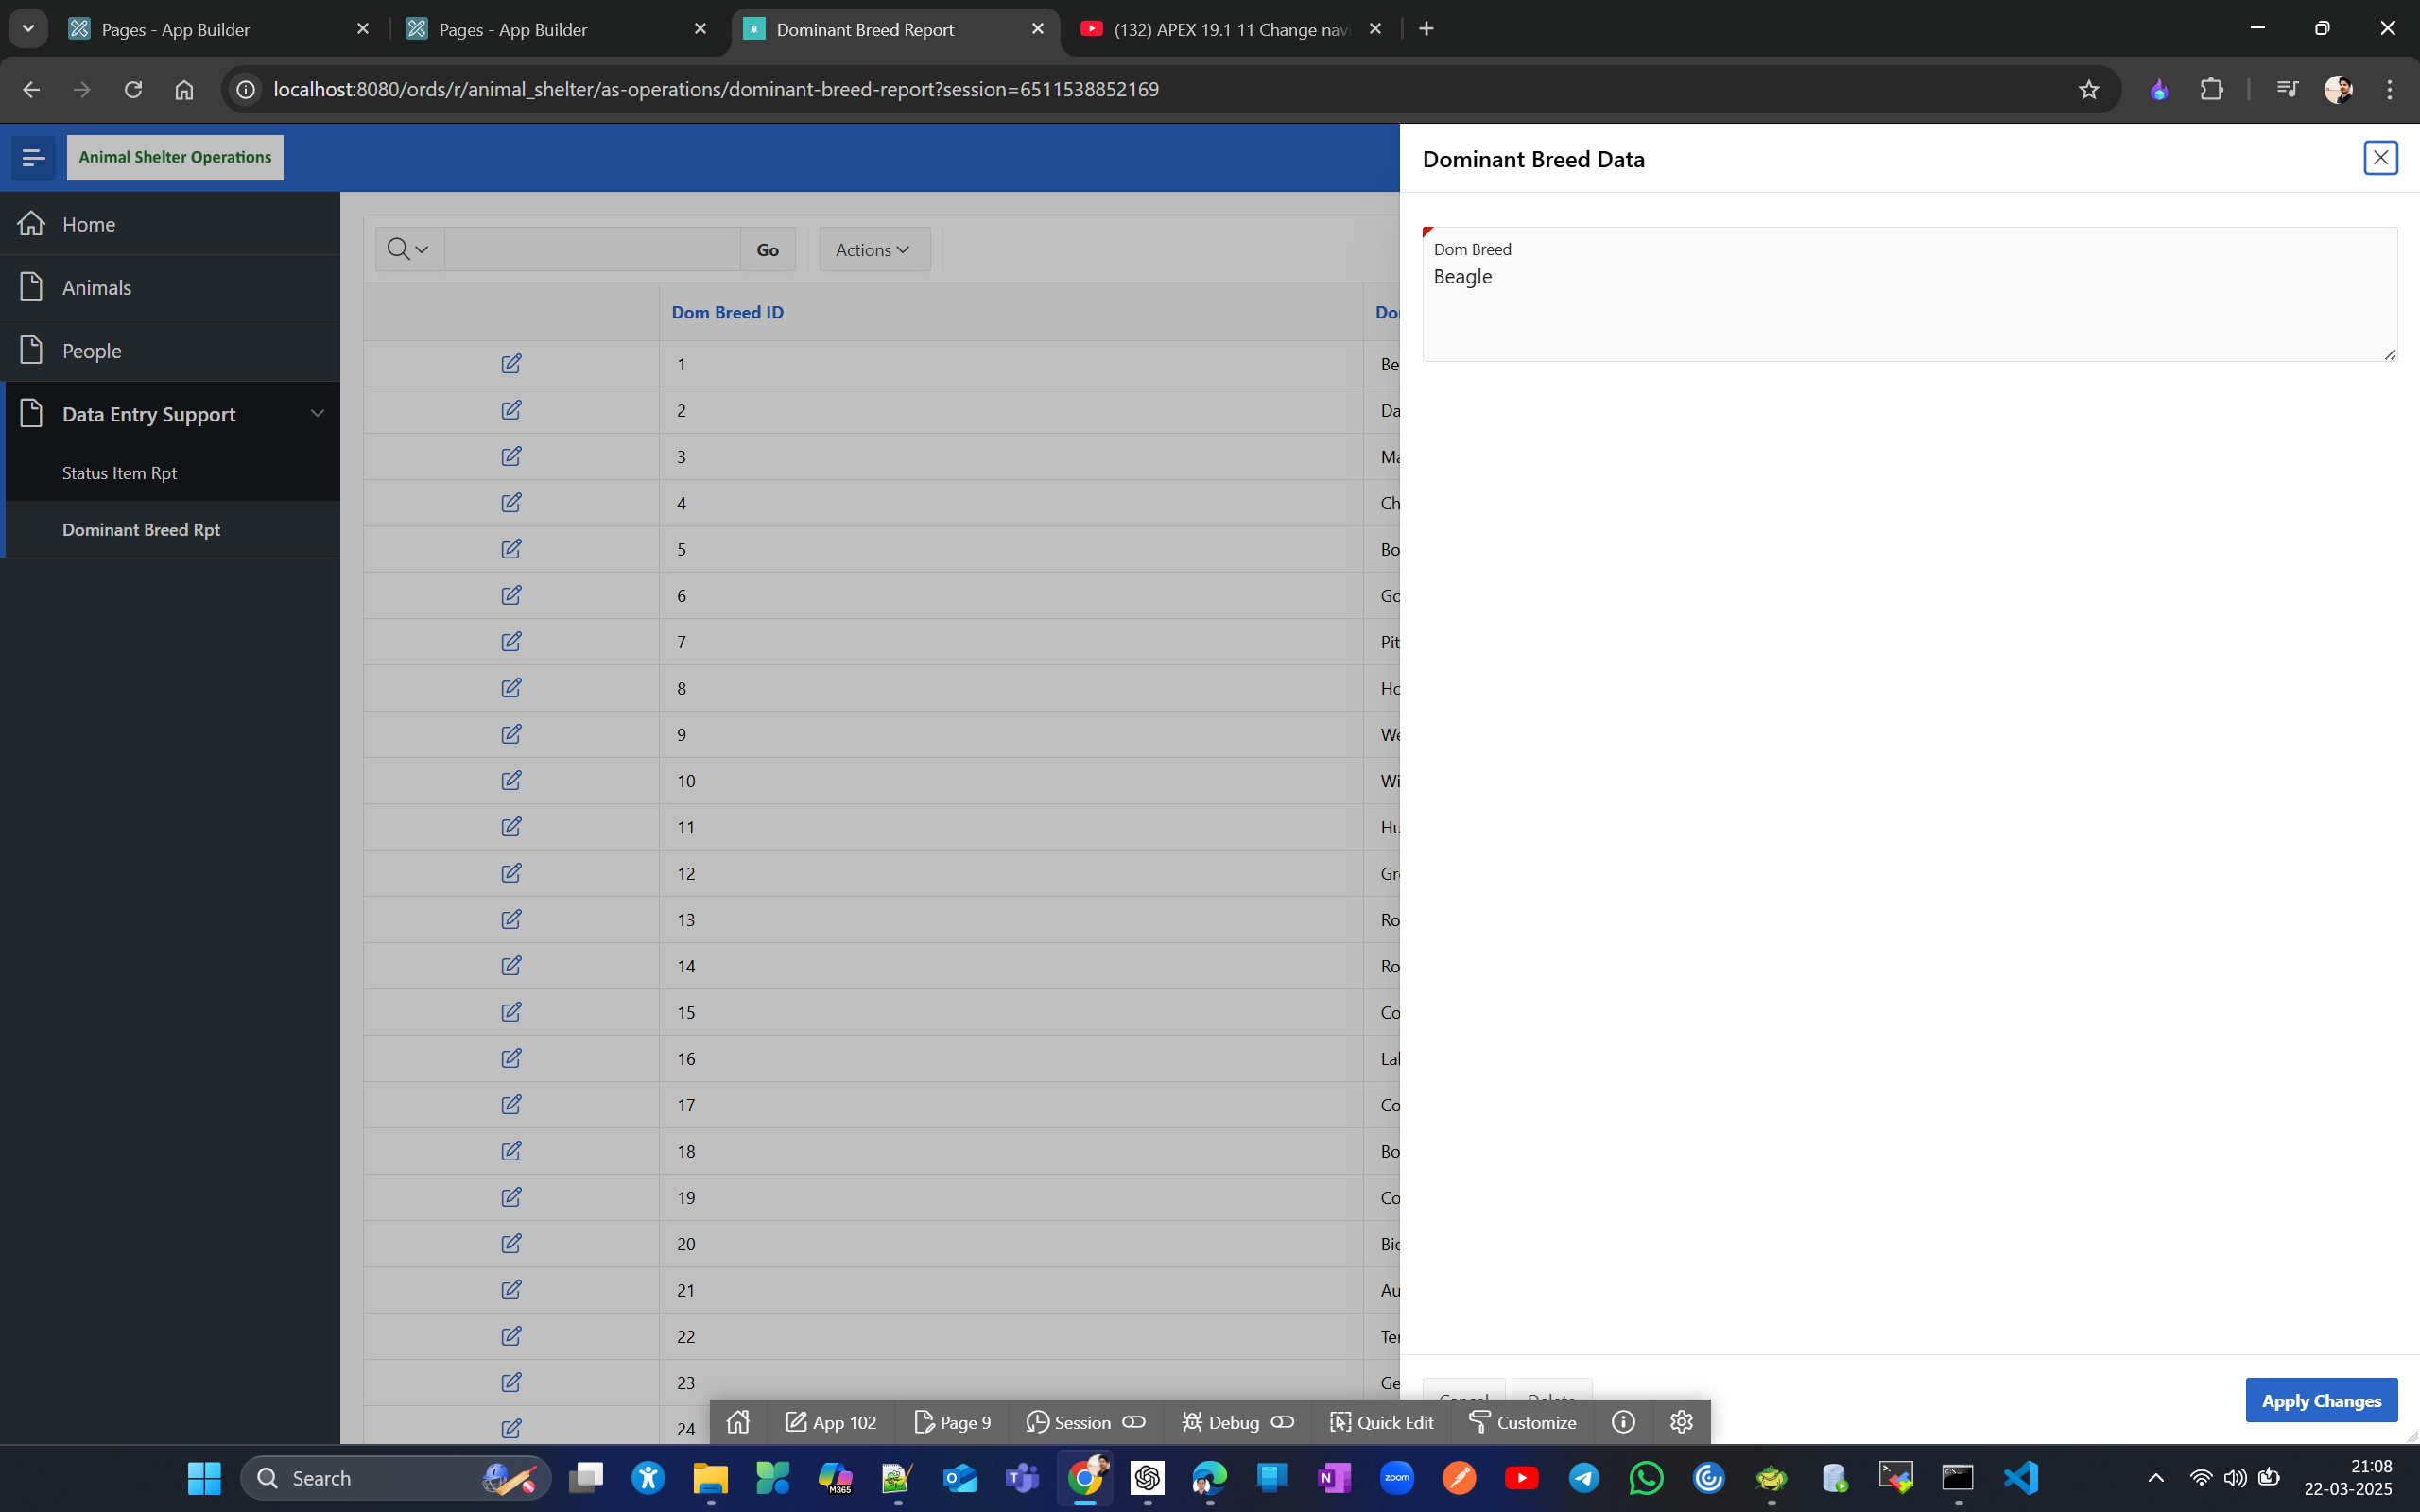
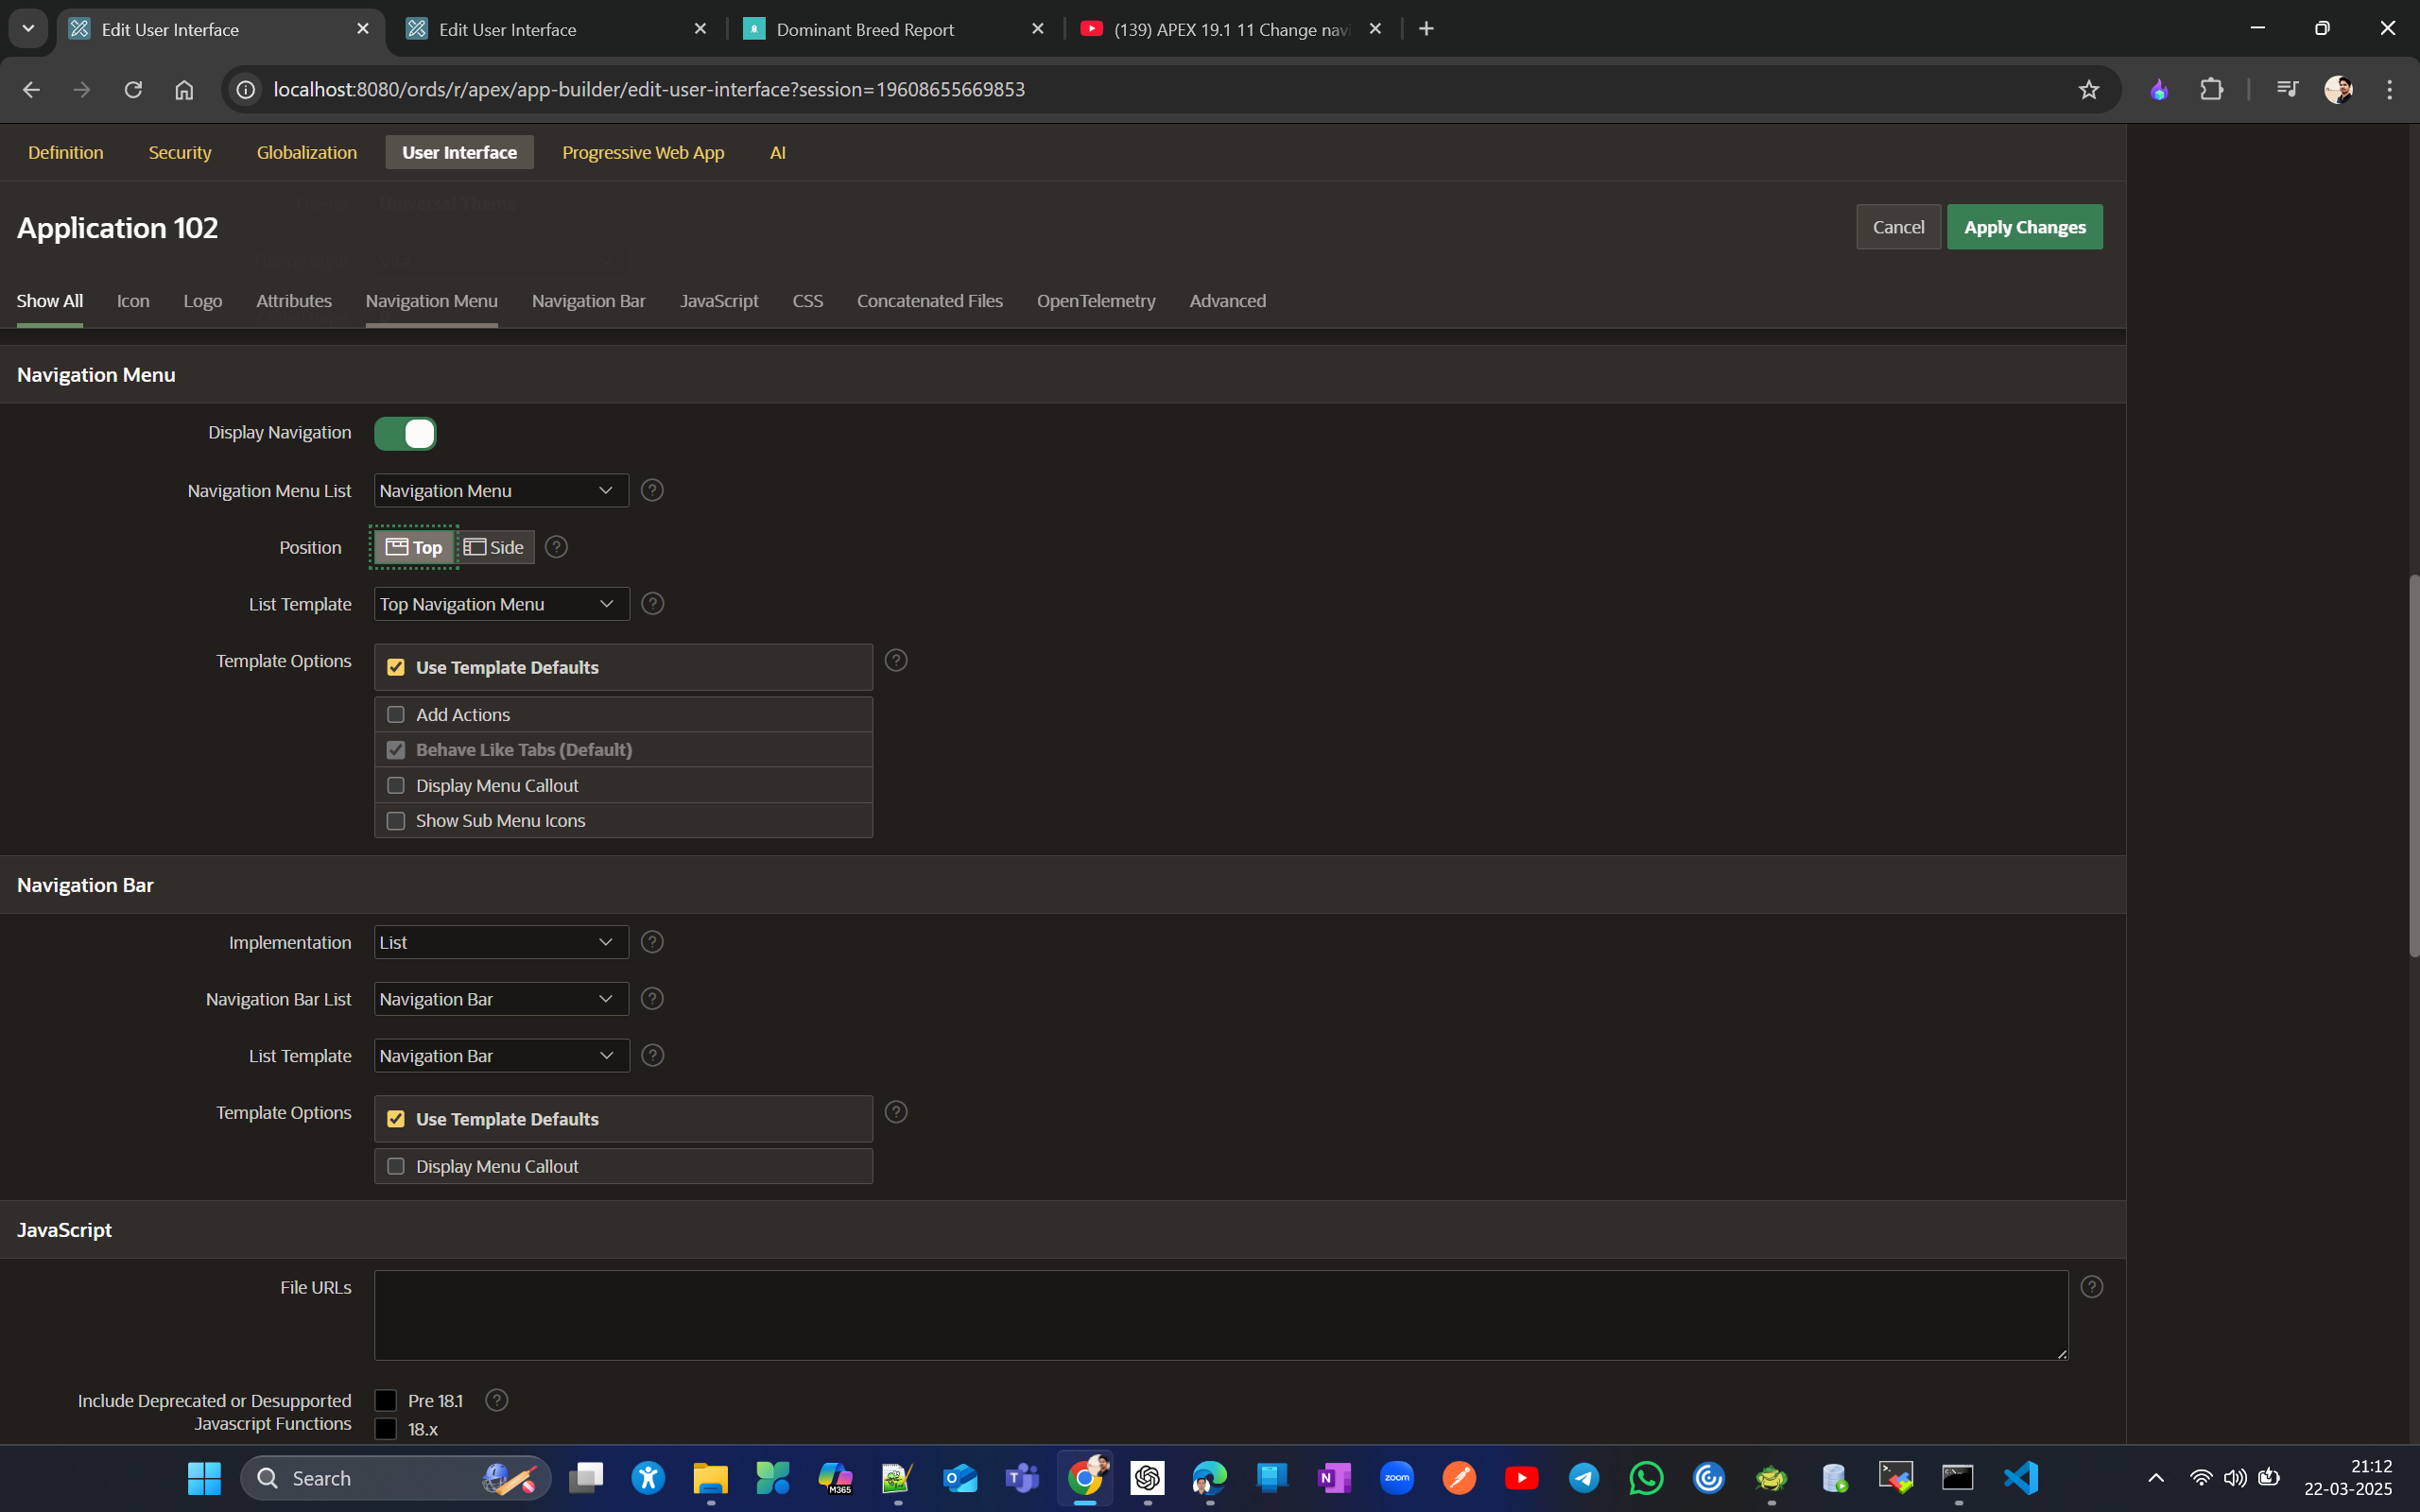
Now Lets move the navigation pane from the side to the top. Go to shared componenets → User Interface Attributes → Either Under Show All or from direct Navigation Menu tab change Position to Top from Side.
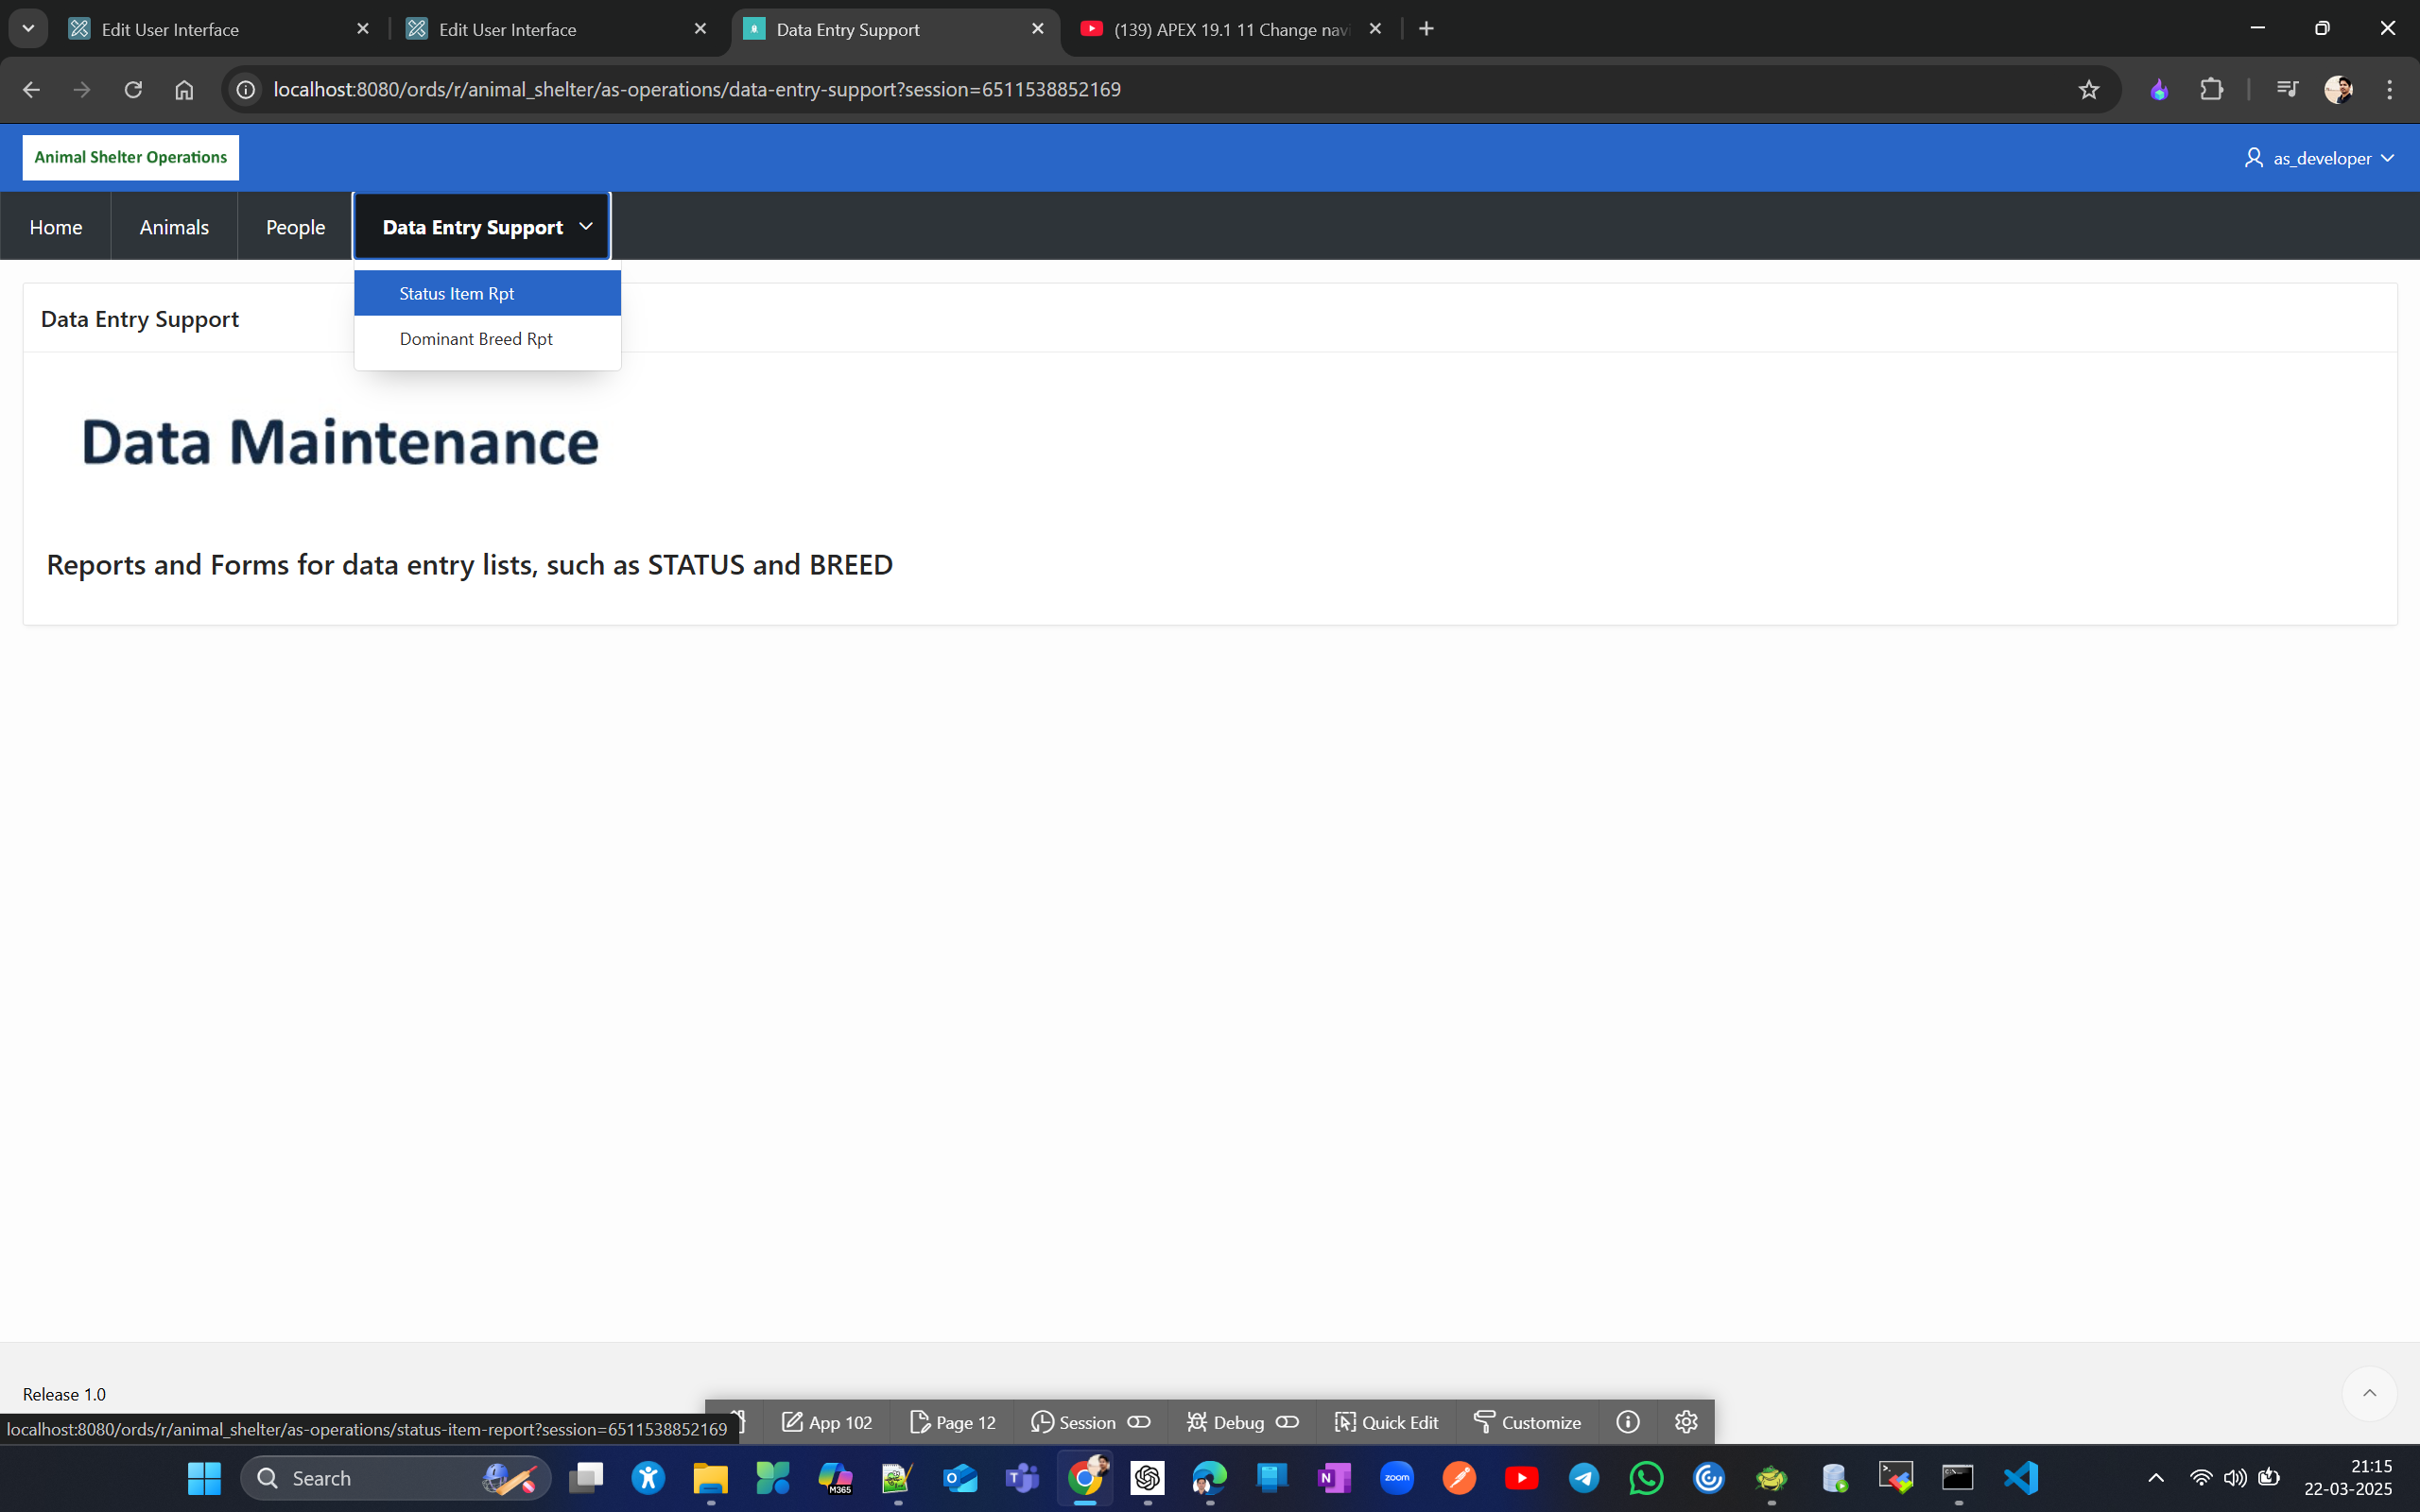
Observe images are also coming fine as they were uploaded at workspace levell not application level.
Note We could use one application for development/ testing and move pages to the second application once they have been approved.
SQL code concatenates columns in a dynamic LOV. APEX writes LOV SQL code
Before continuing, let's review our progress so far. We’ll treat Daily Operations as our DEV environment and AS Operations as our PROD environment
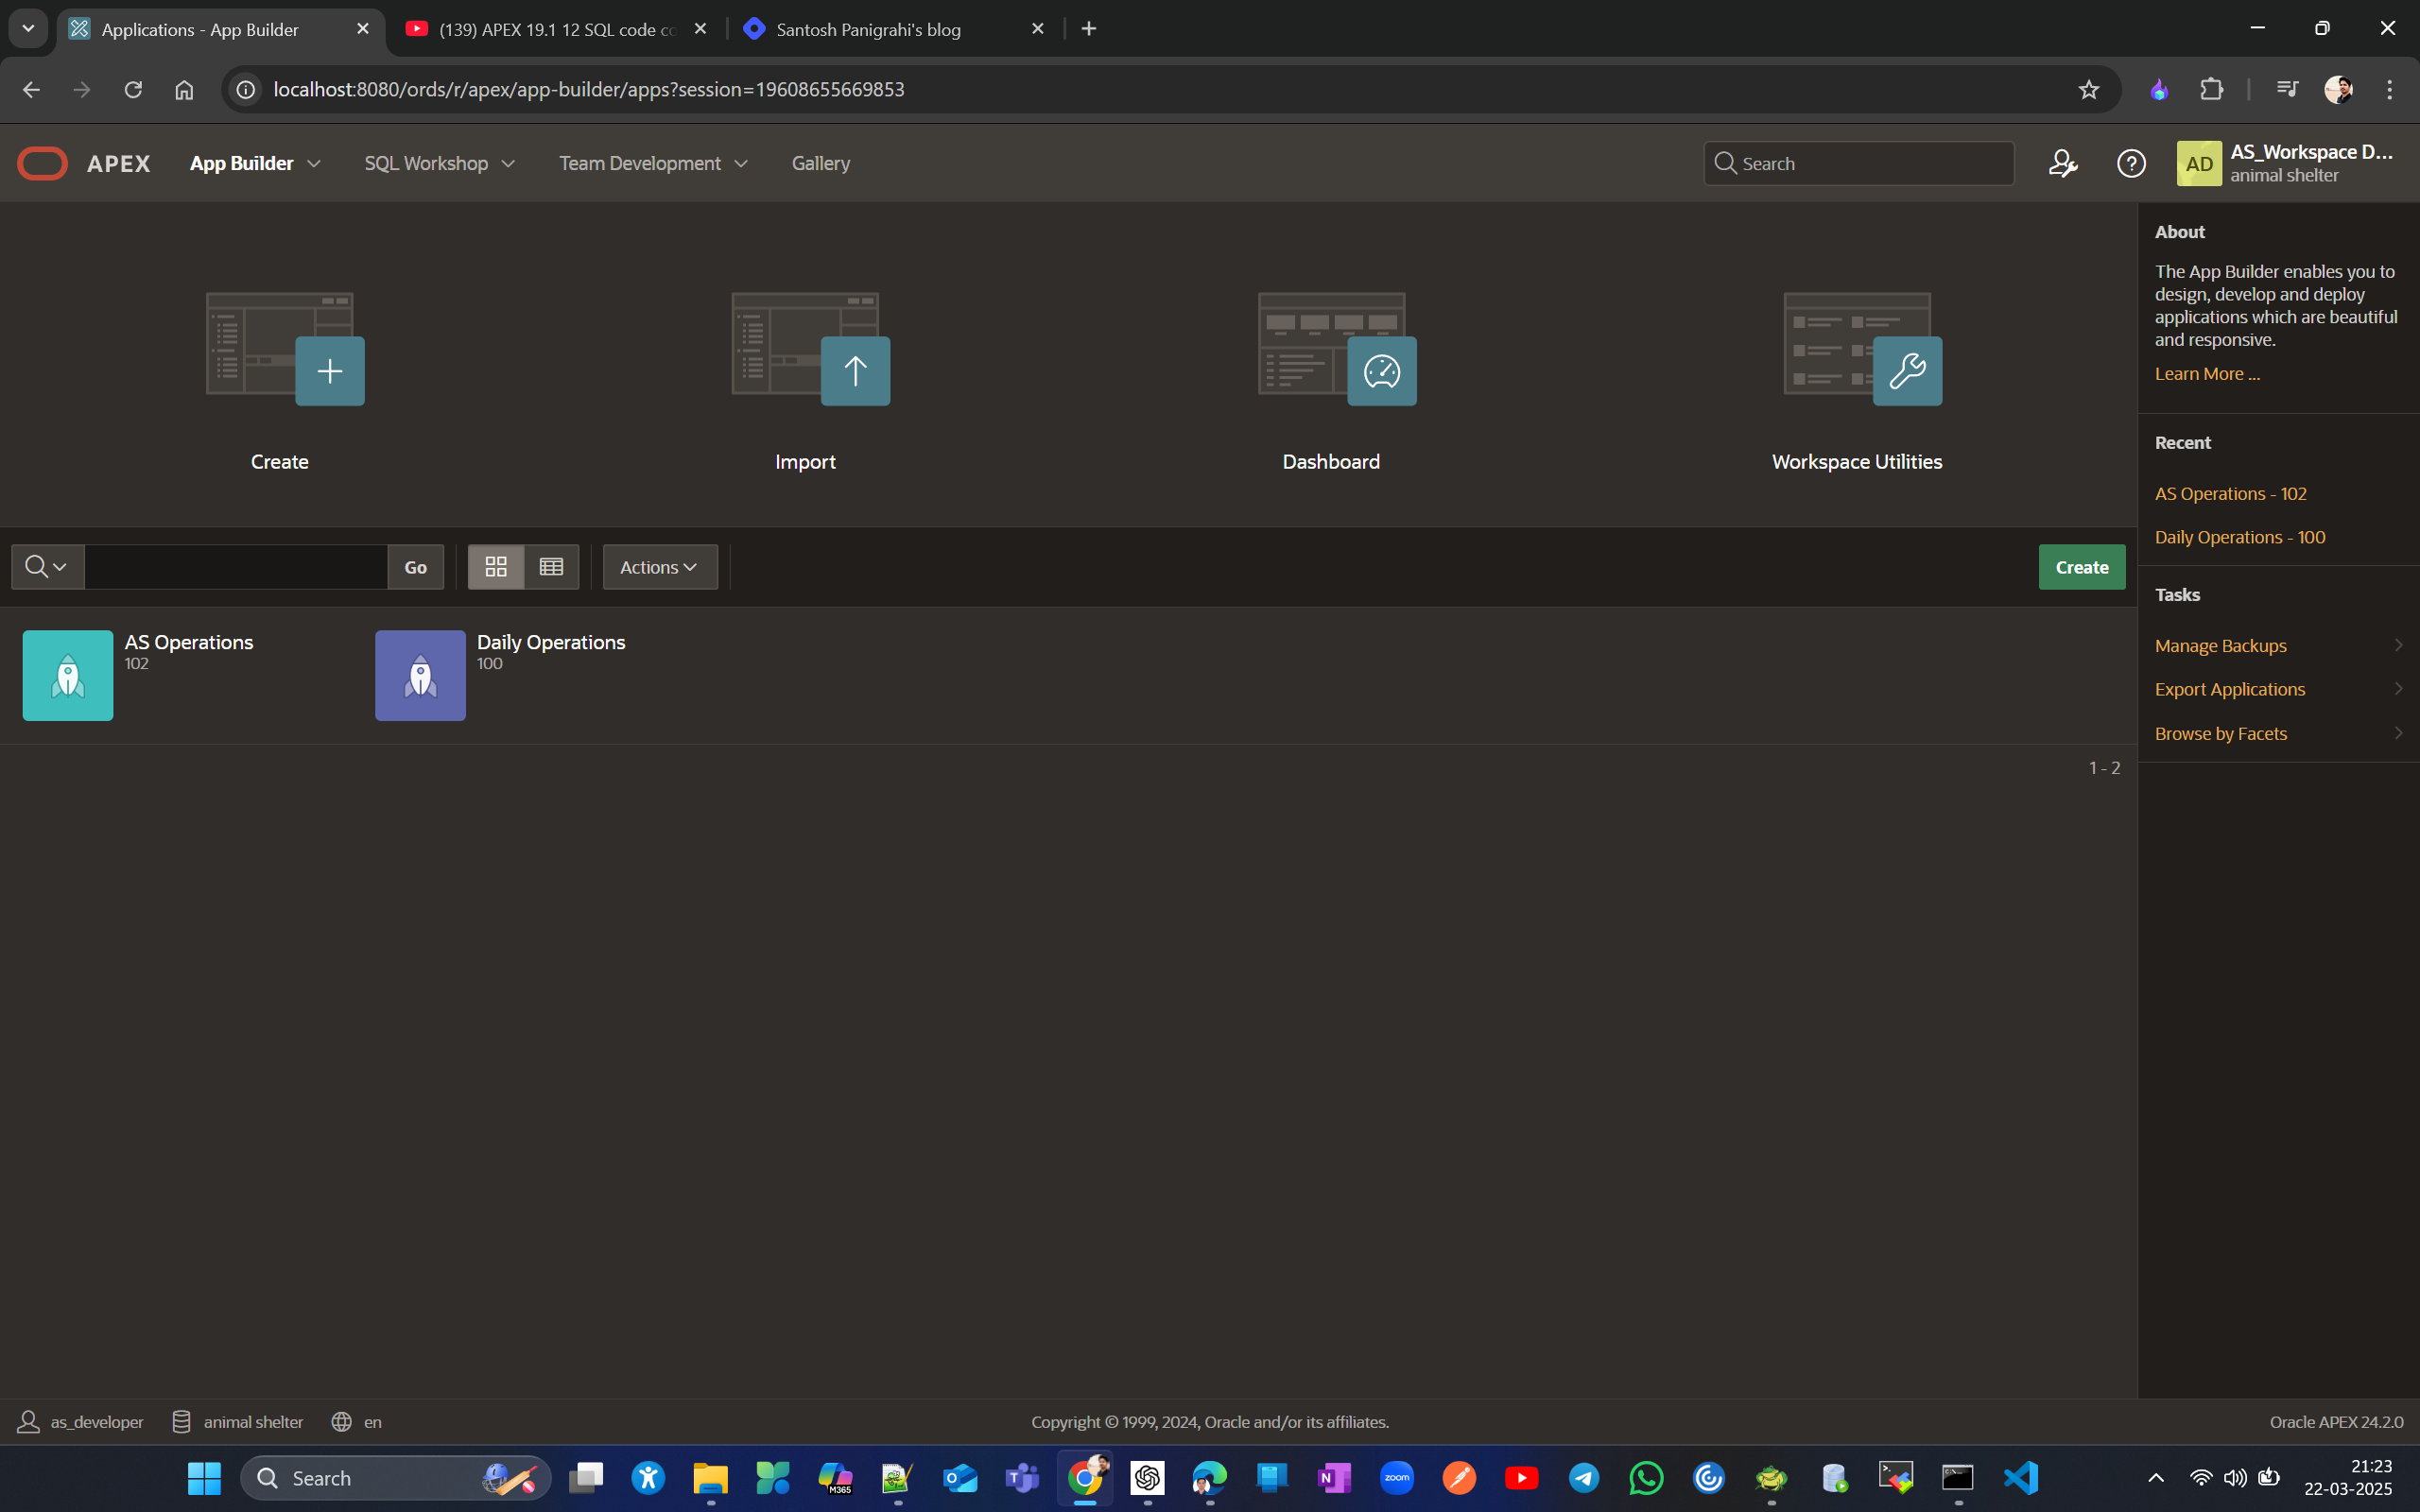
So far, we have created lookup tables only for the Animals tables; let's create more lookup tables for the remaining ones using the object browser and add unique constraints where needed.
For Activities, we need to create two dynamic LOVs: one for categories and another for sub-categories. For transactions, we need to create dynamic LOVs for transaction type, Client ID, Pers ID, and Animal ID. Except for transaction type, we don't need any lookup tables for the remaining three attributes as they are derived from existing tables. For the persons table, we need a dynamic LOV for ZIP code, which doesn't require a lookup table as it is already referenced in the ZIP table. For the Employees table, we need two static LOVs for STATUS and ROLE, and one dynamic LOV for Supervisor ID. No new lookup table is required for the Employees table lookup tables.
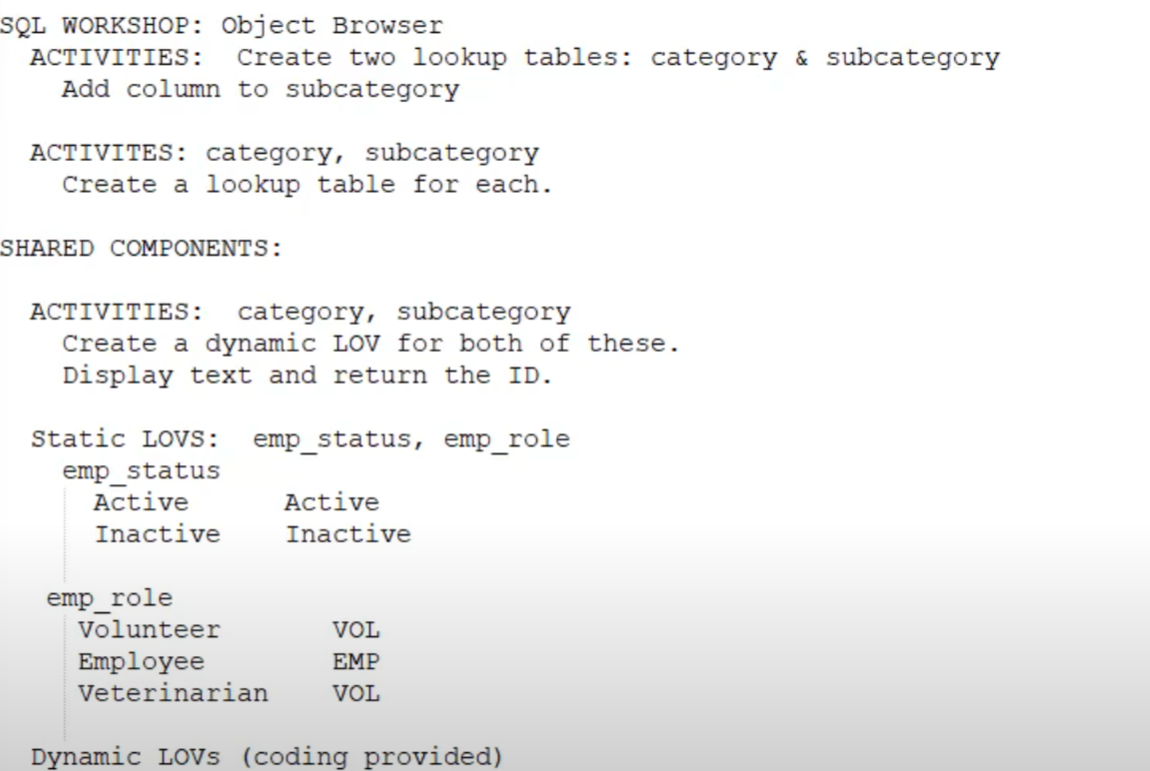
For Veterinarian return value should be VET not VOL (typo)
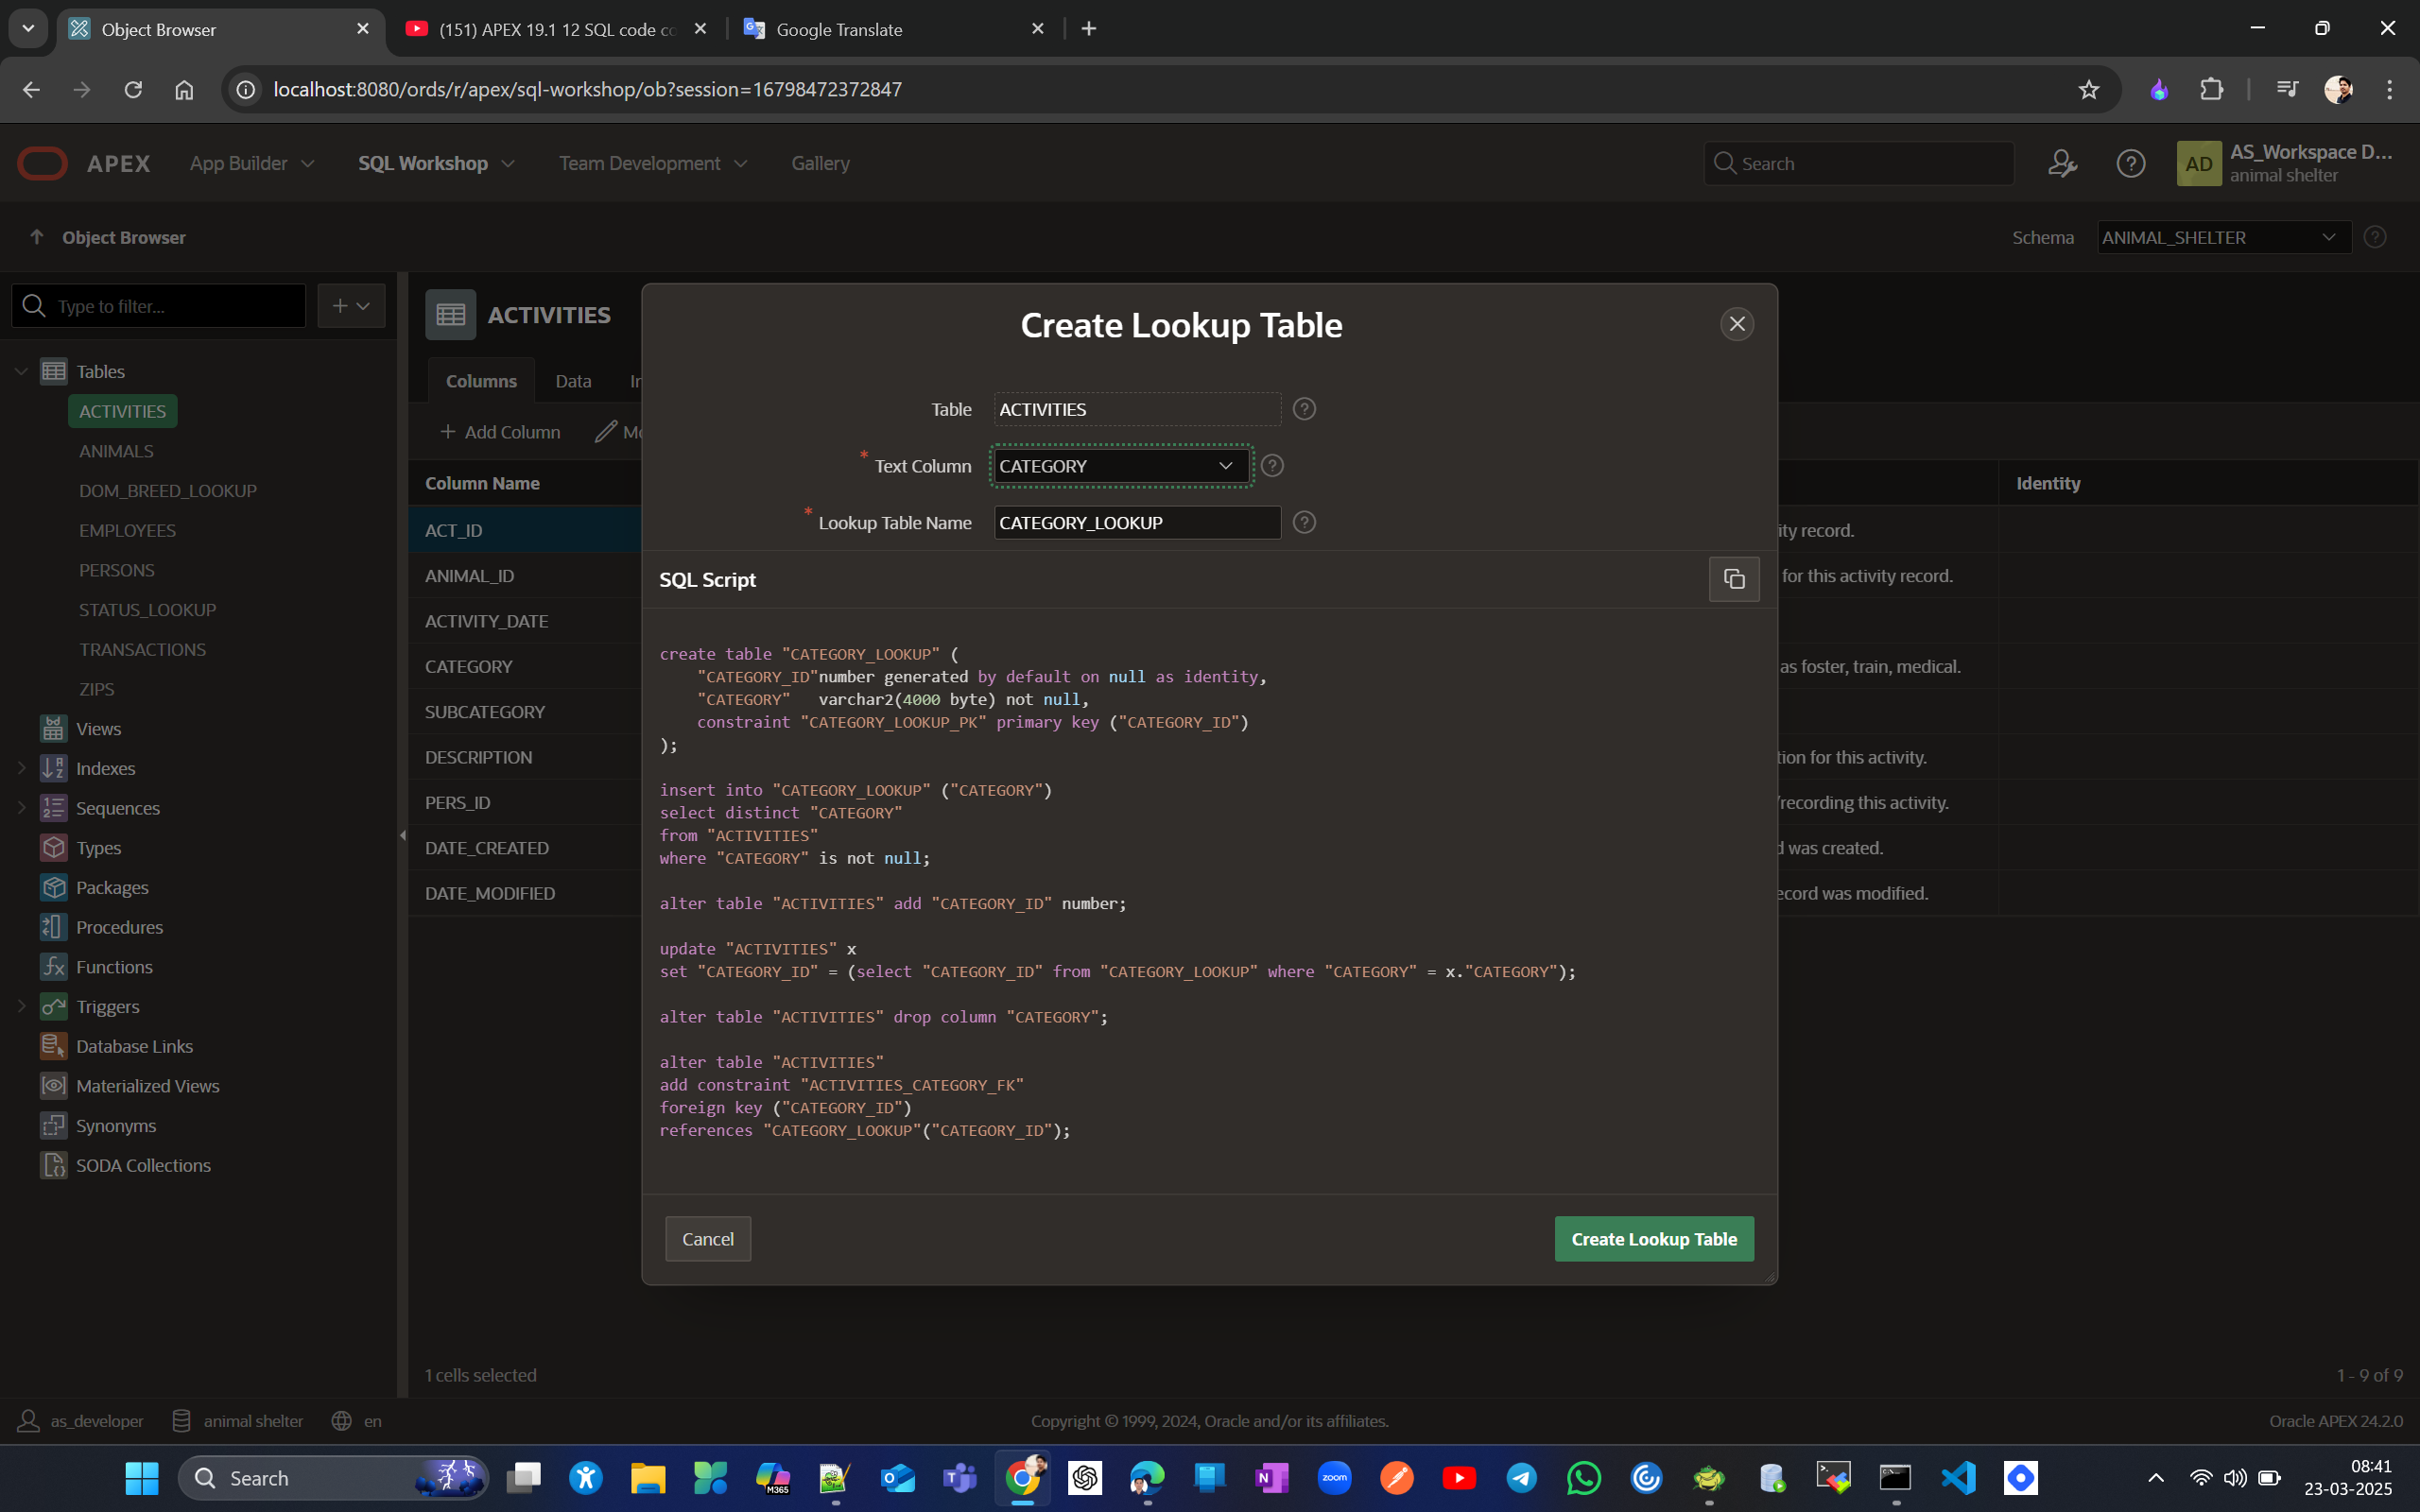
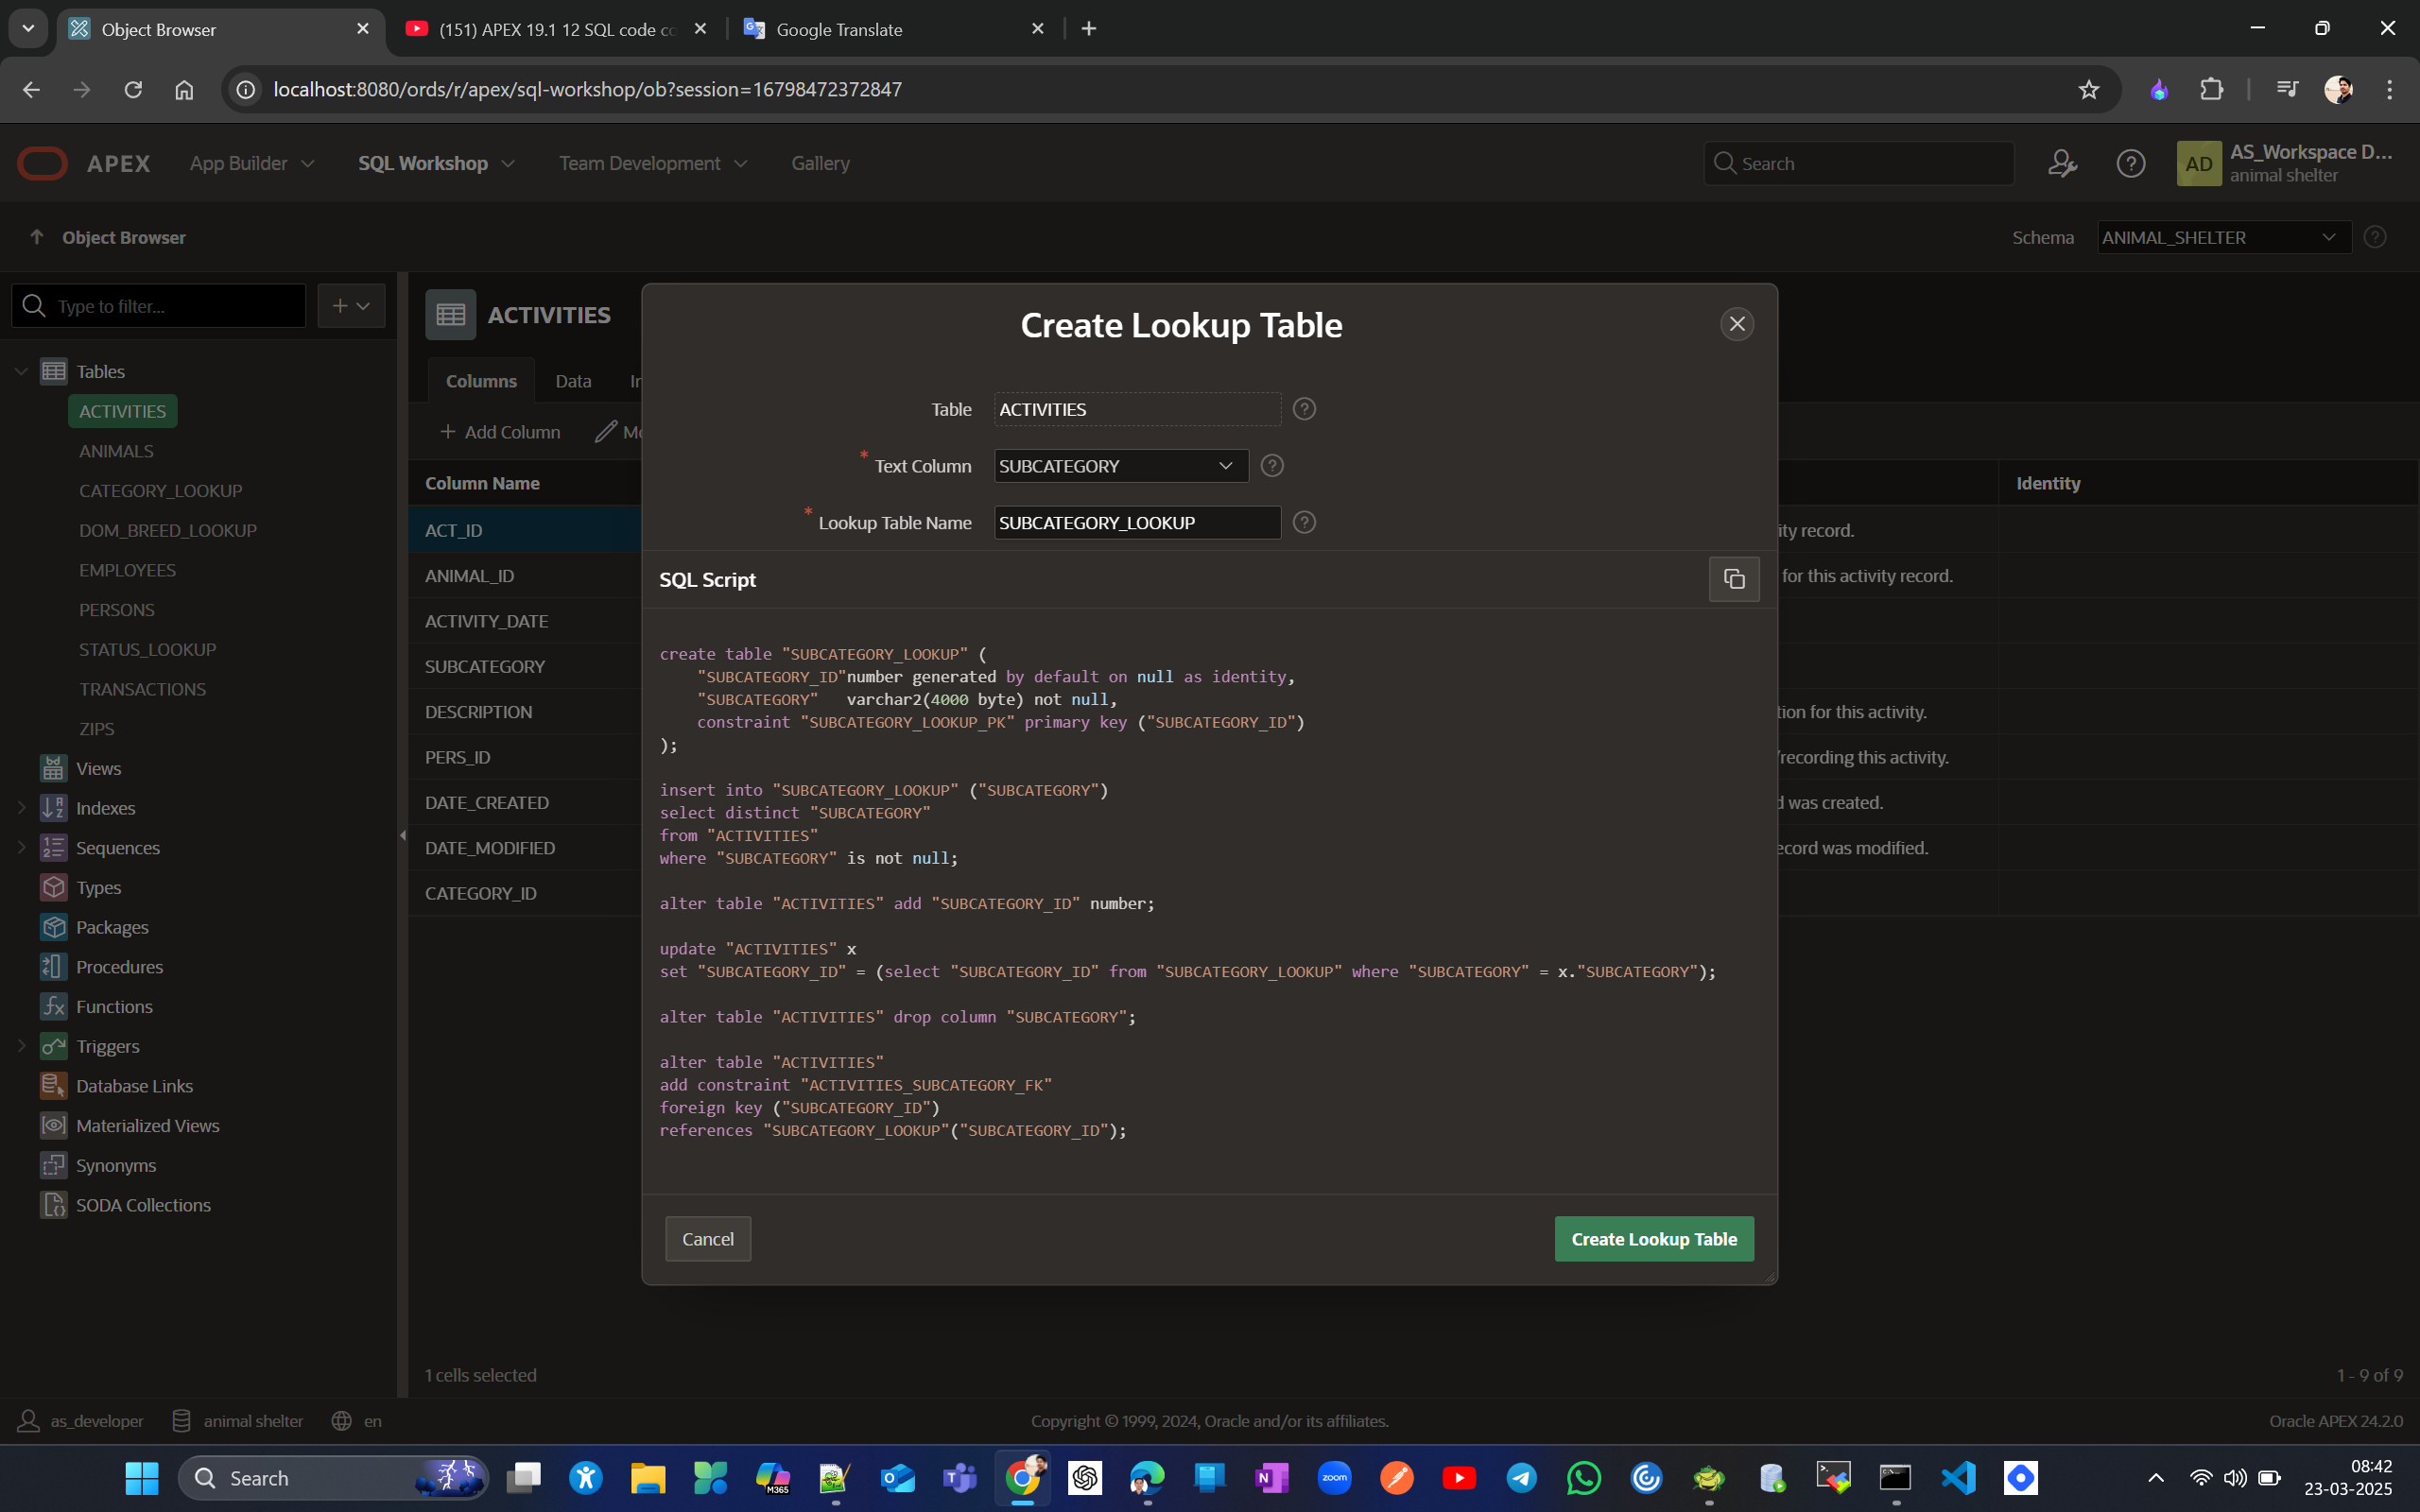
After creating the sub-category lookup table, we'll add one column for the category to it, as we'll use this later to create a hierarchy of choices in an LOV.
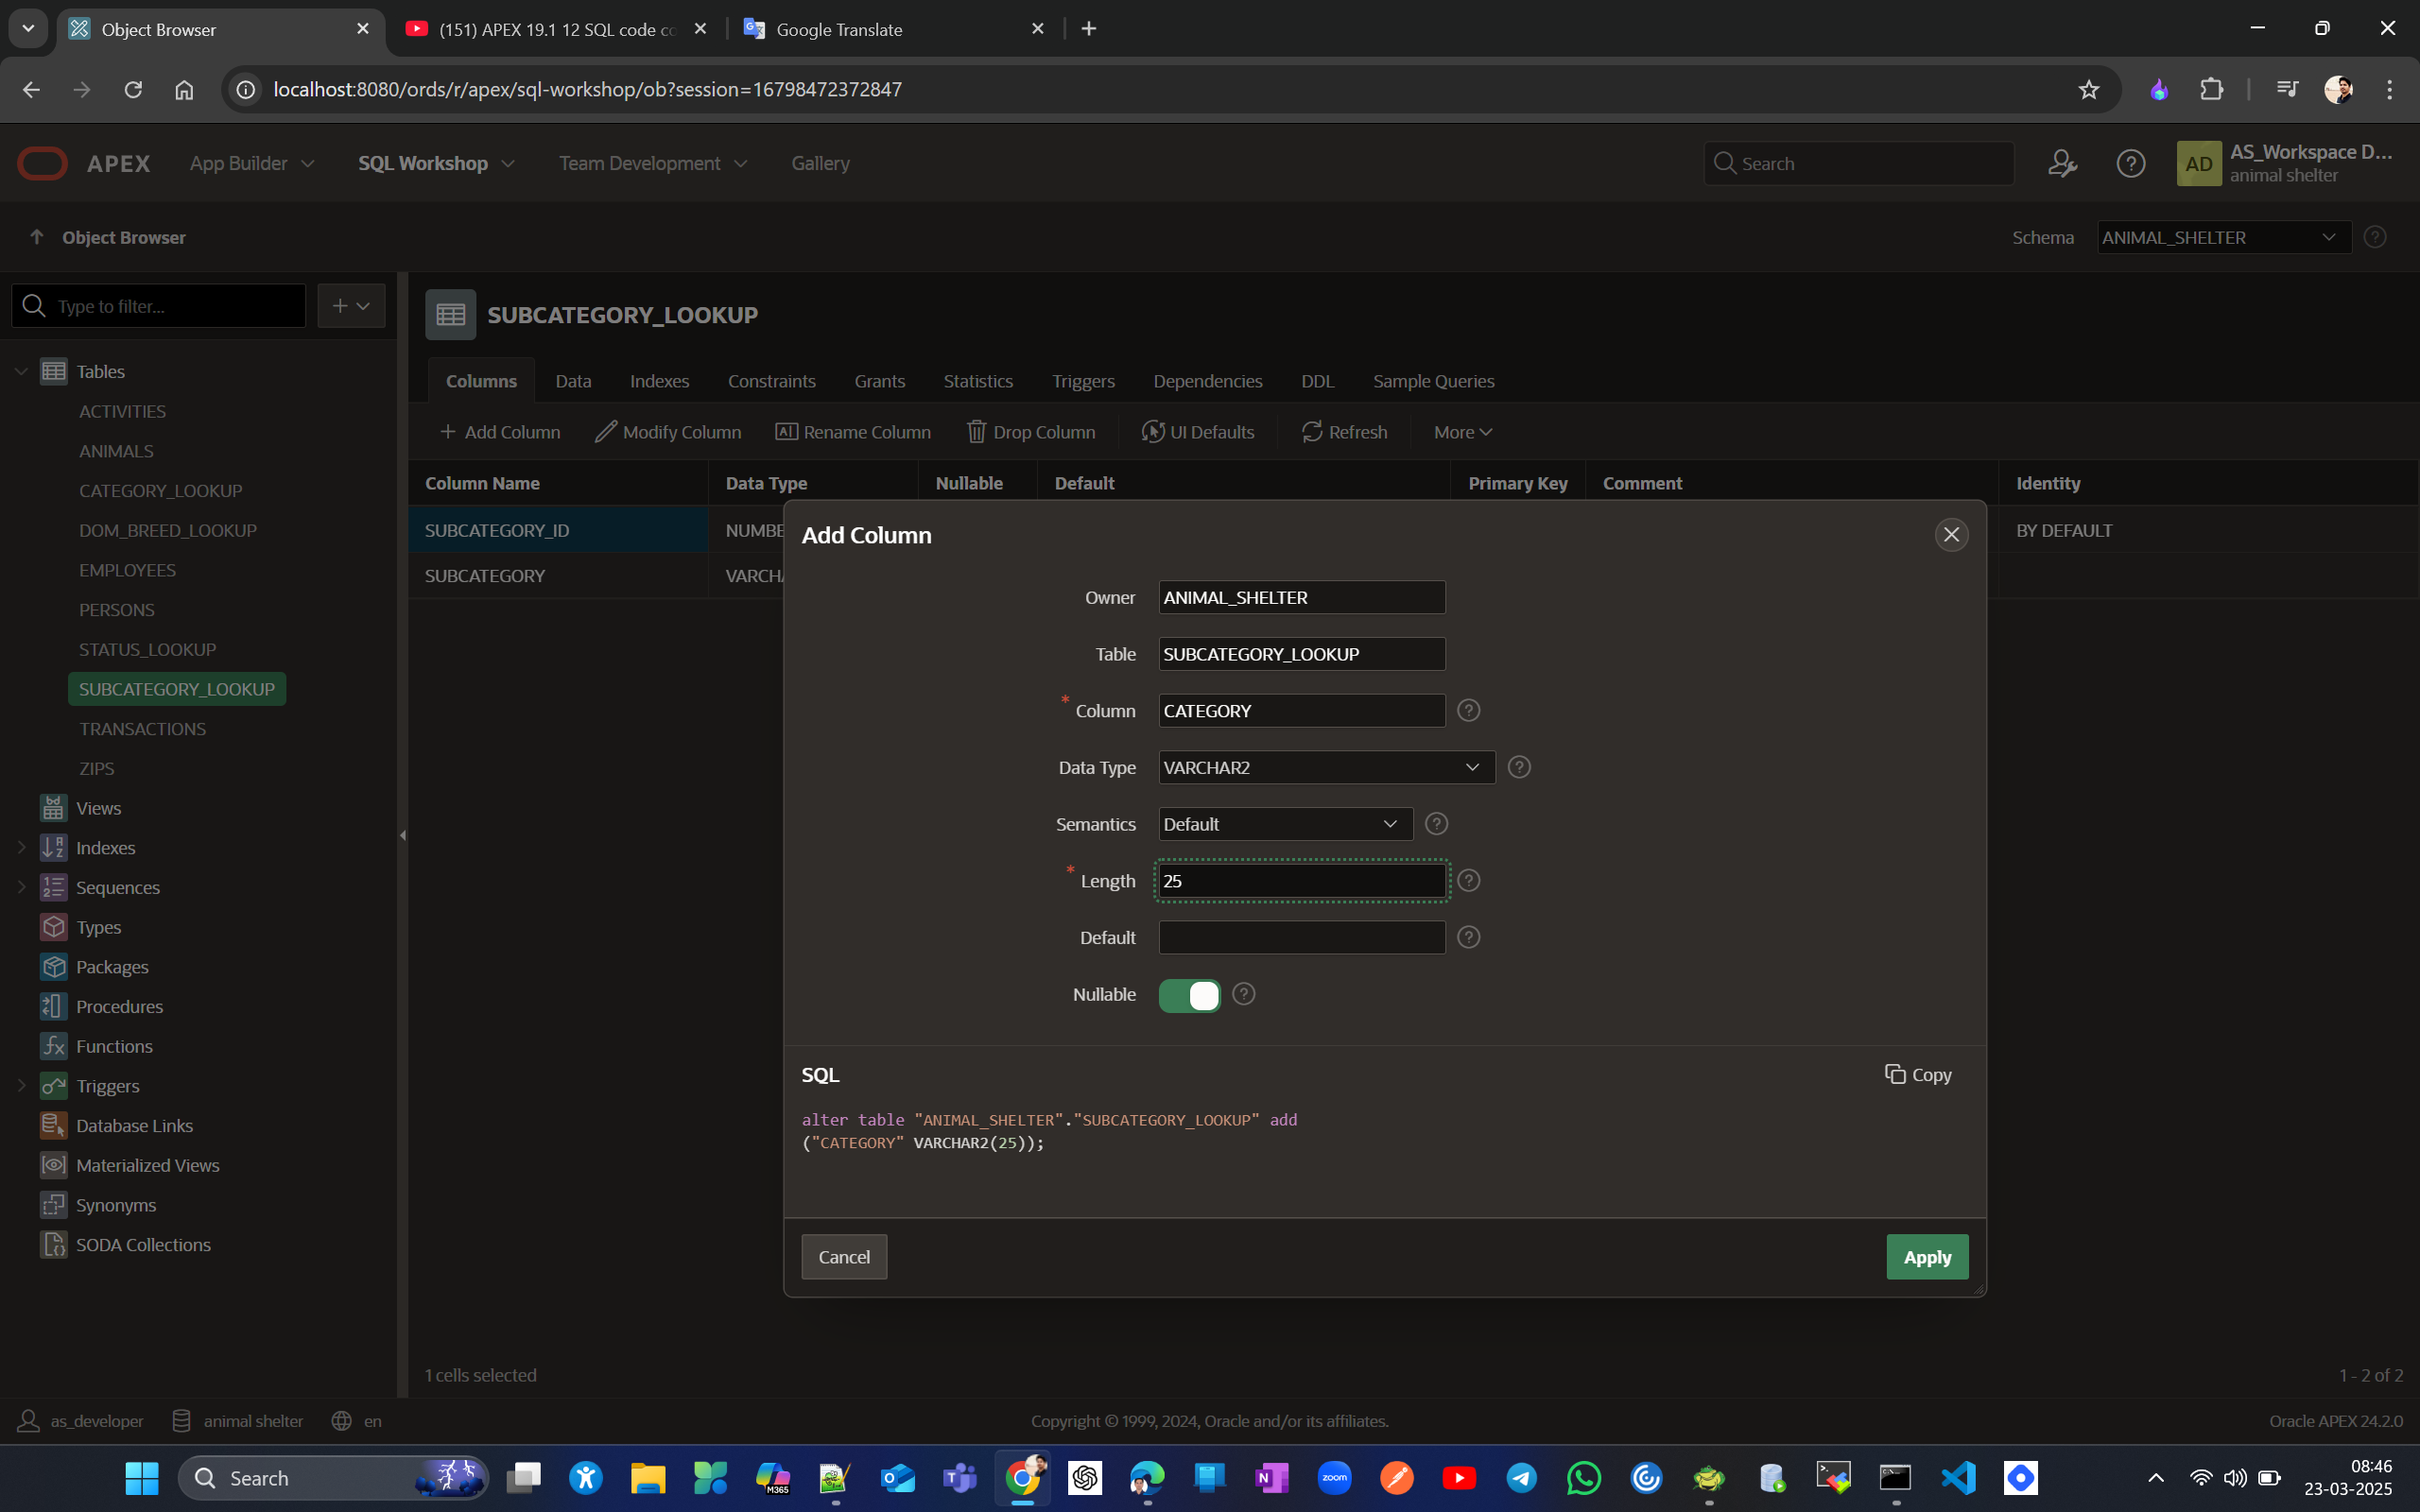
We have 2 category present in our DB

So let's manually map each subcategory to these 2 categories.
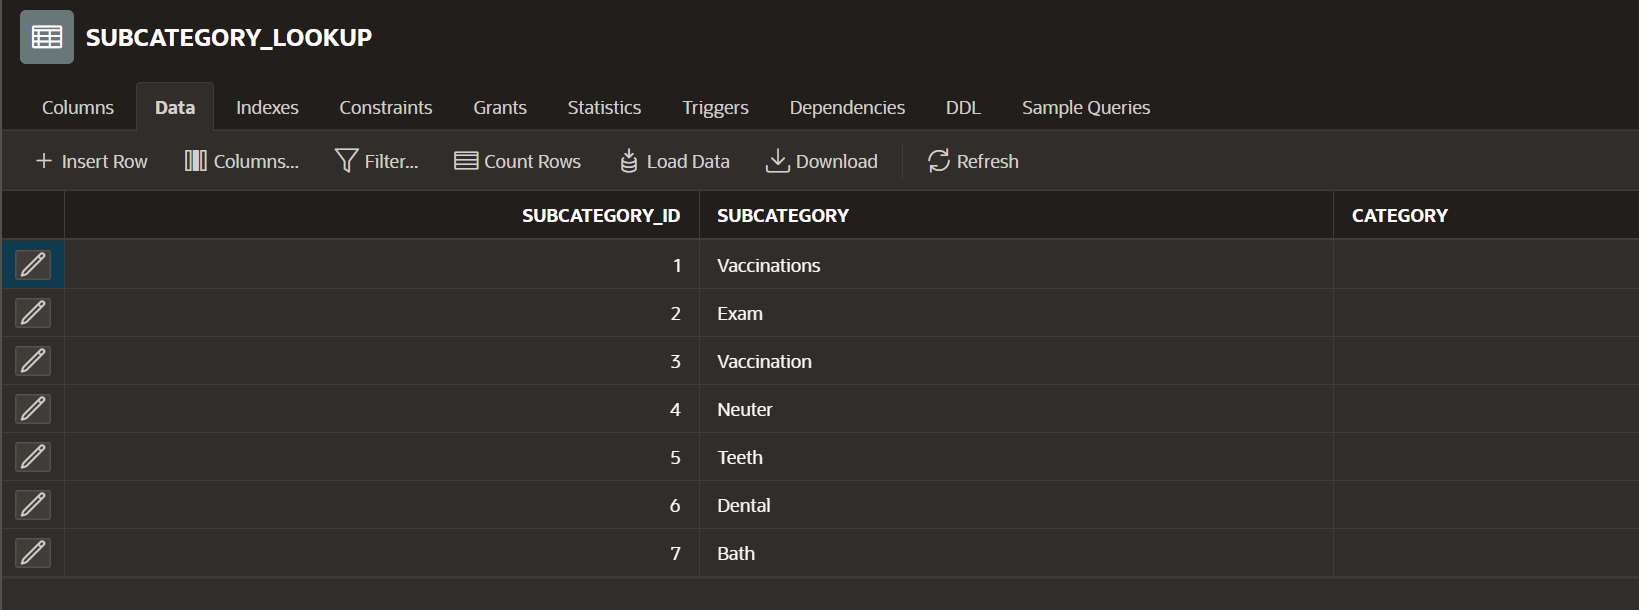
Now update manually the correpending categorory
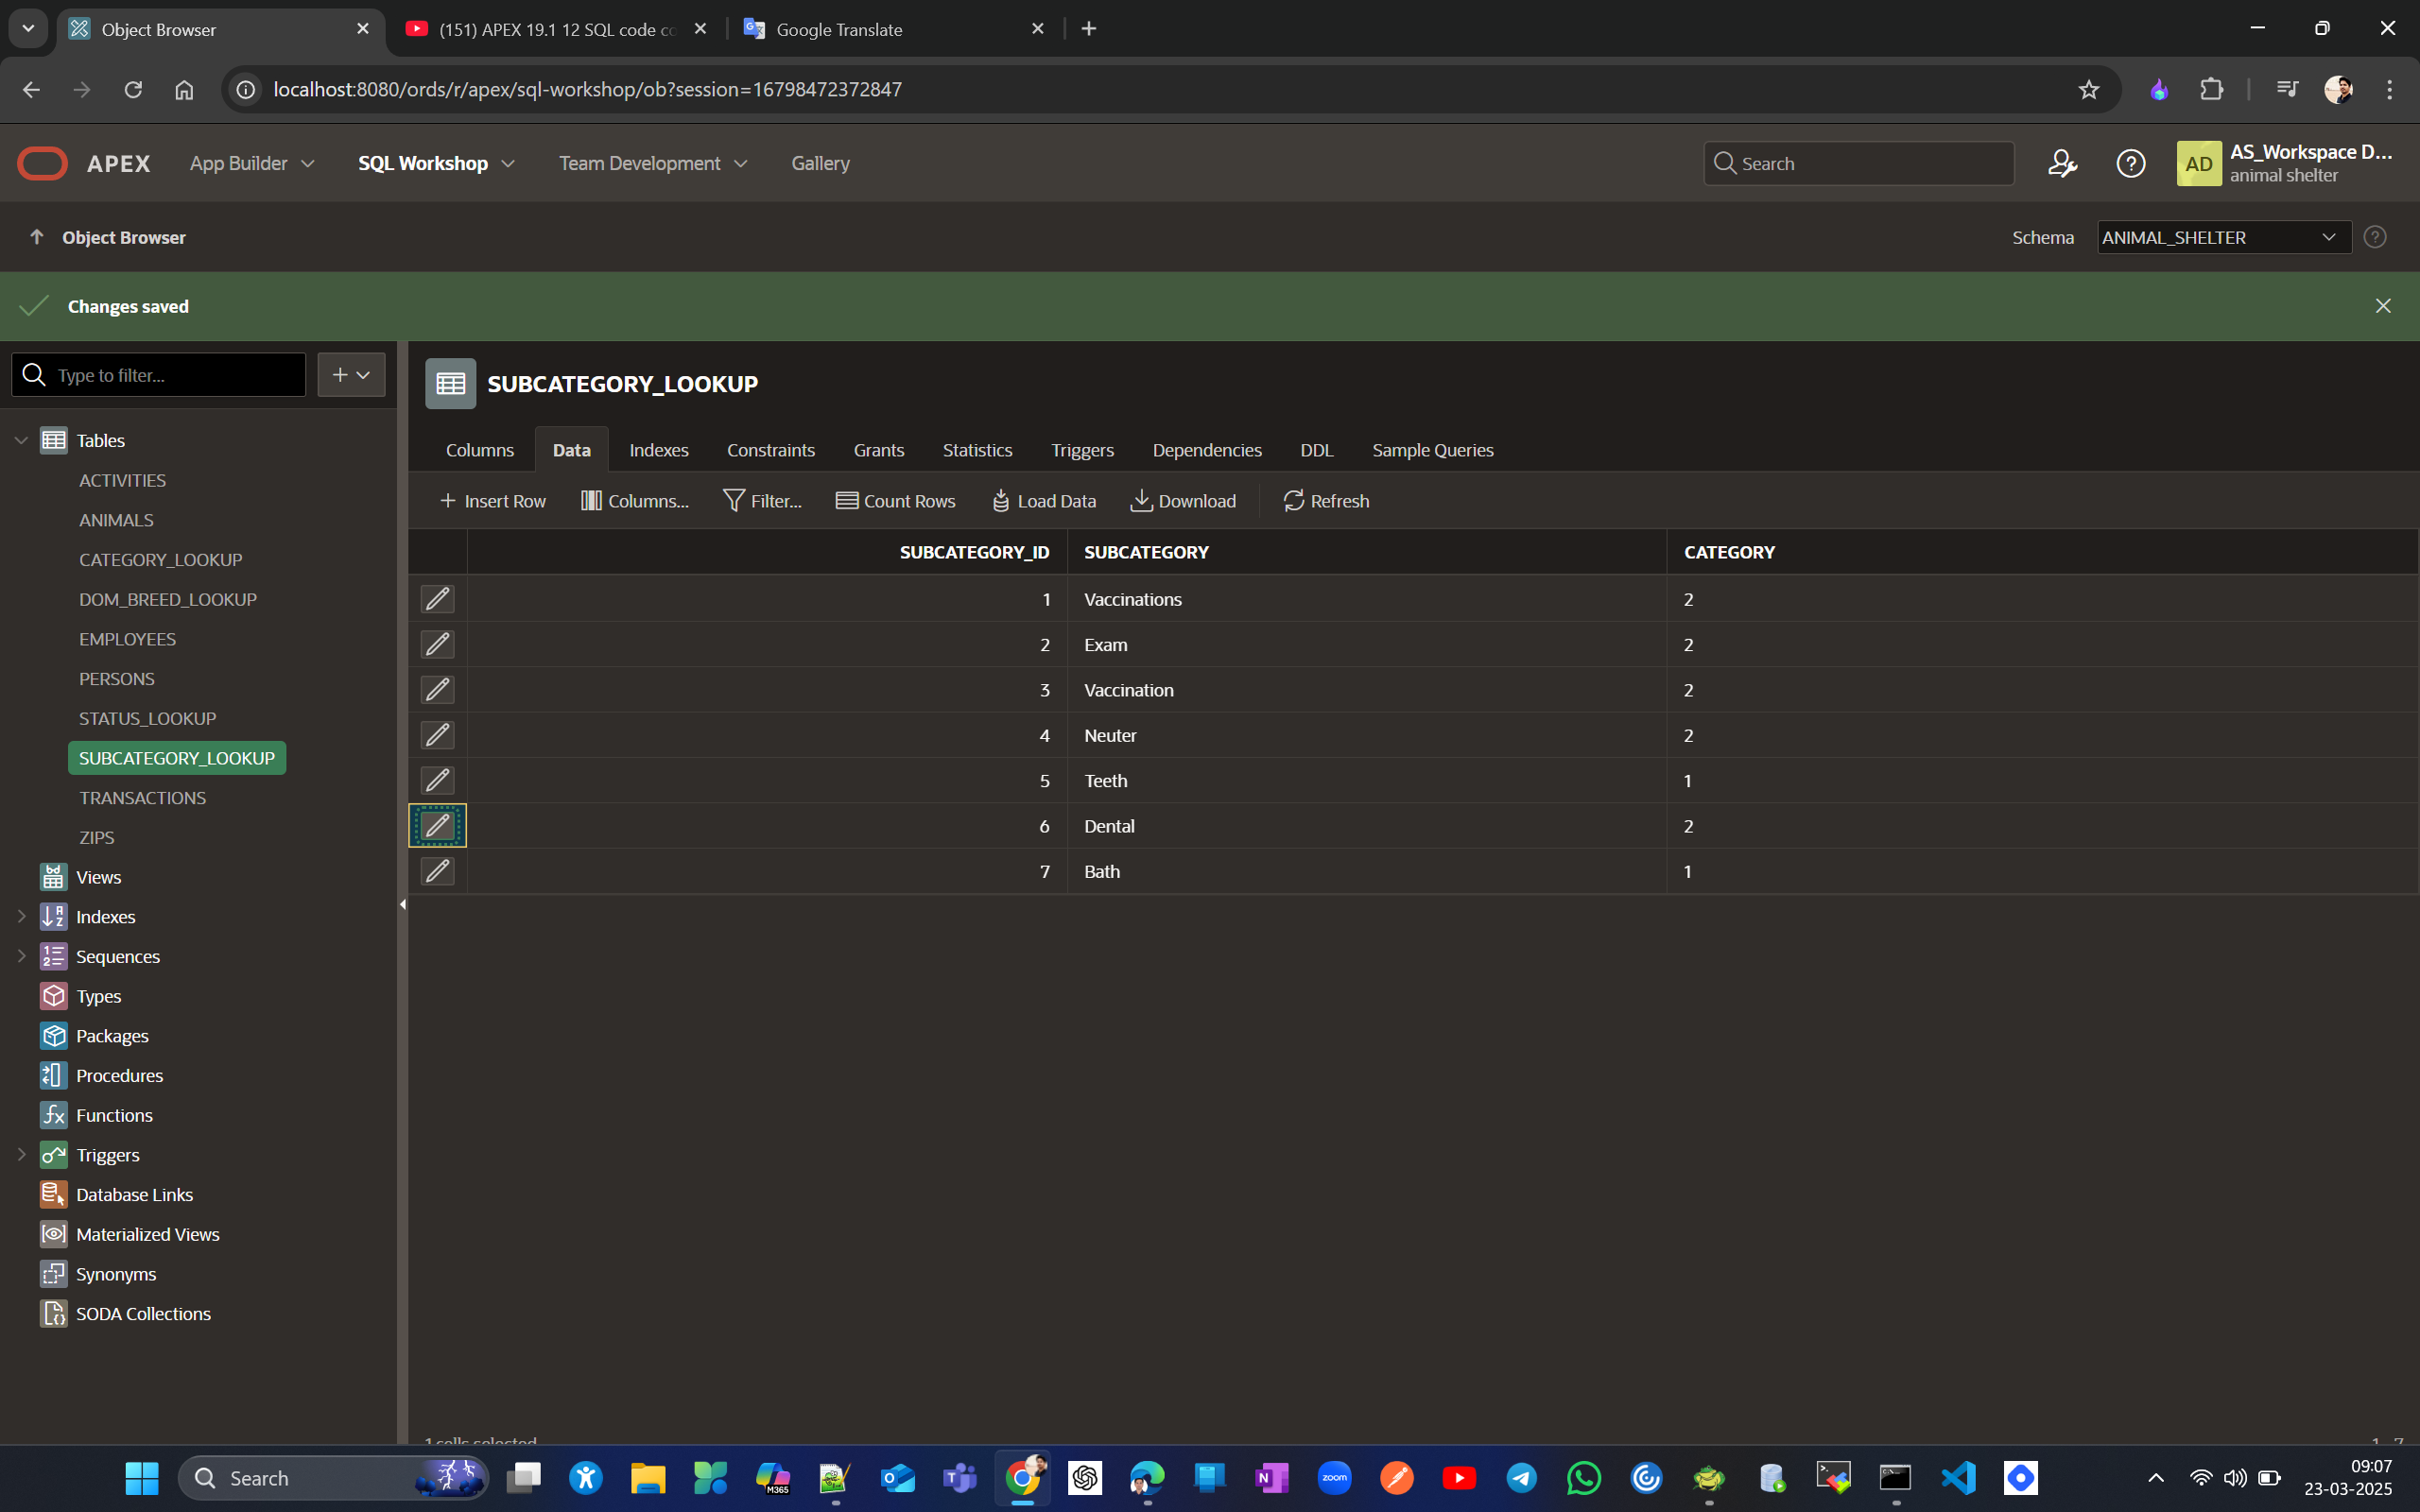
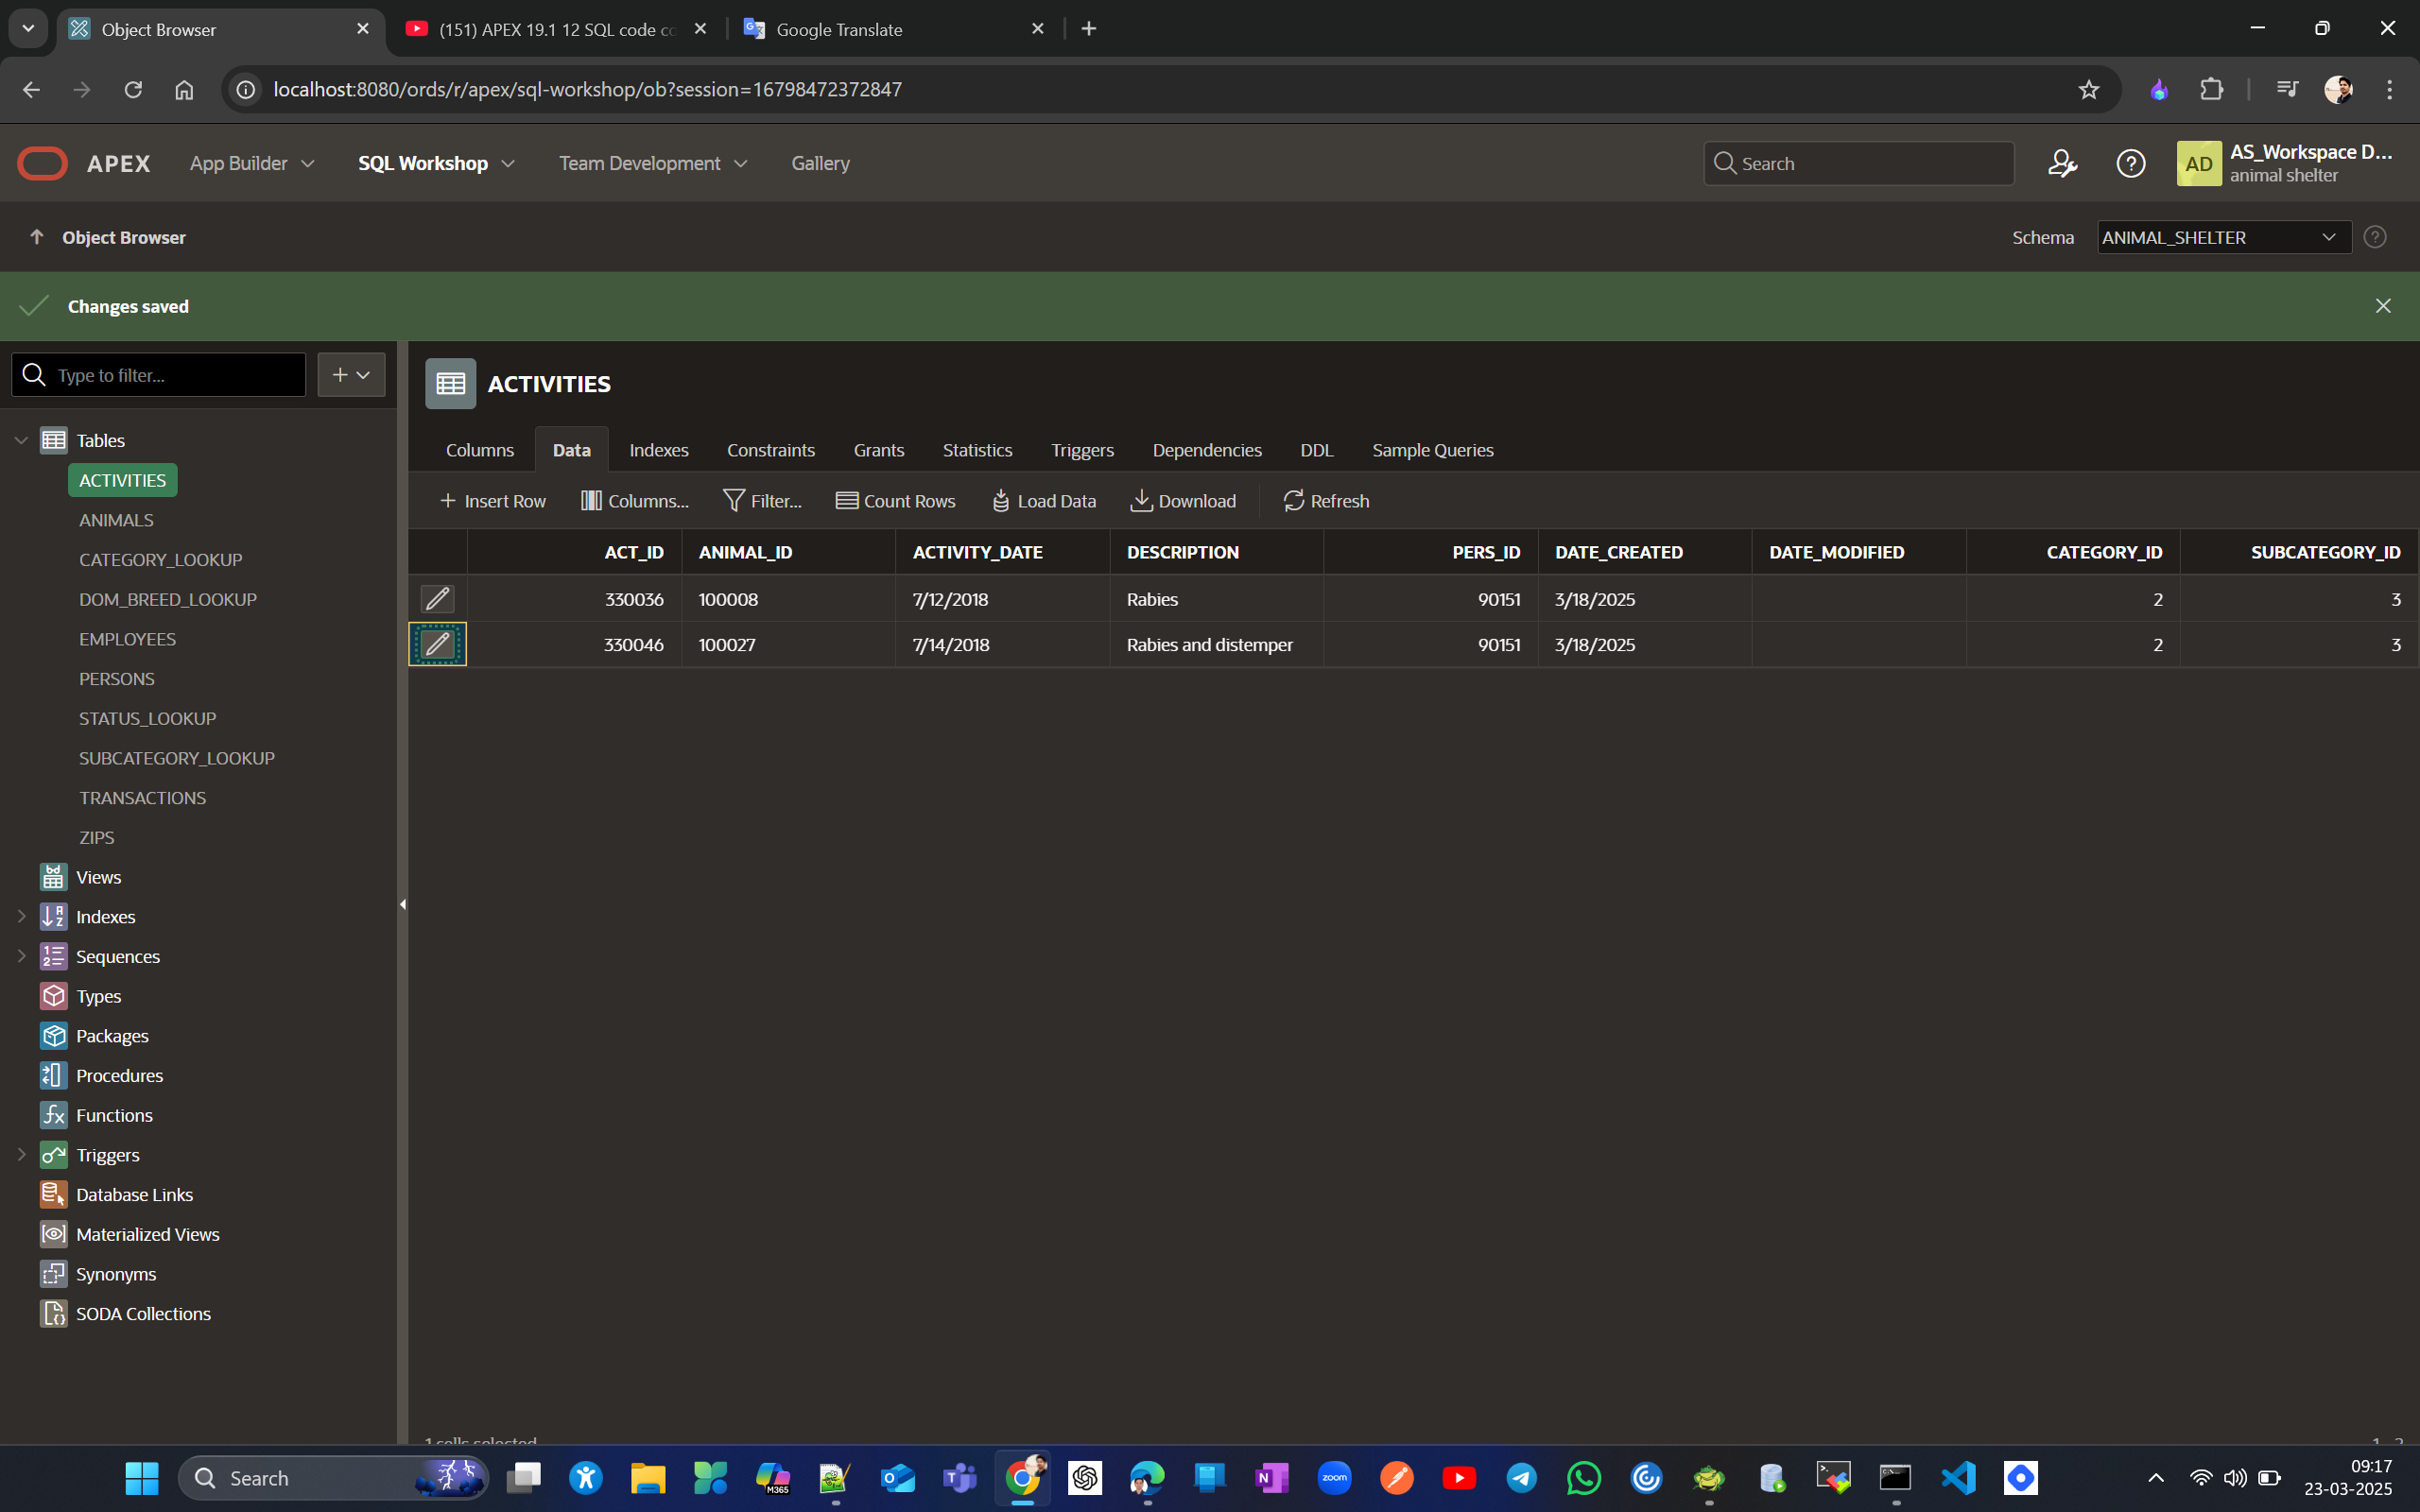
Let's delete the row for vaccinations because we already have a similar subcategory called vaccination.
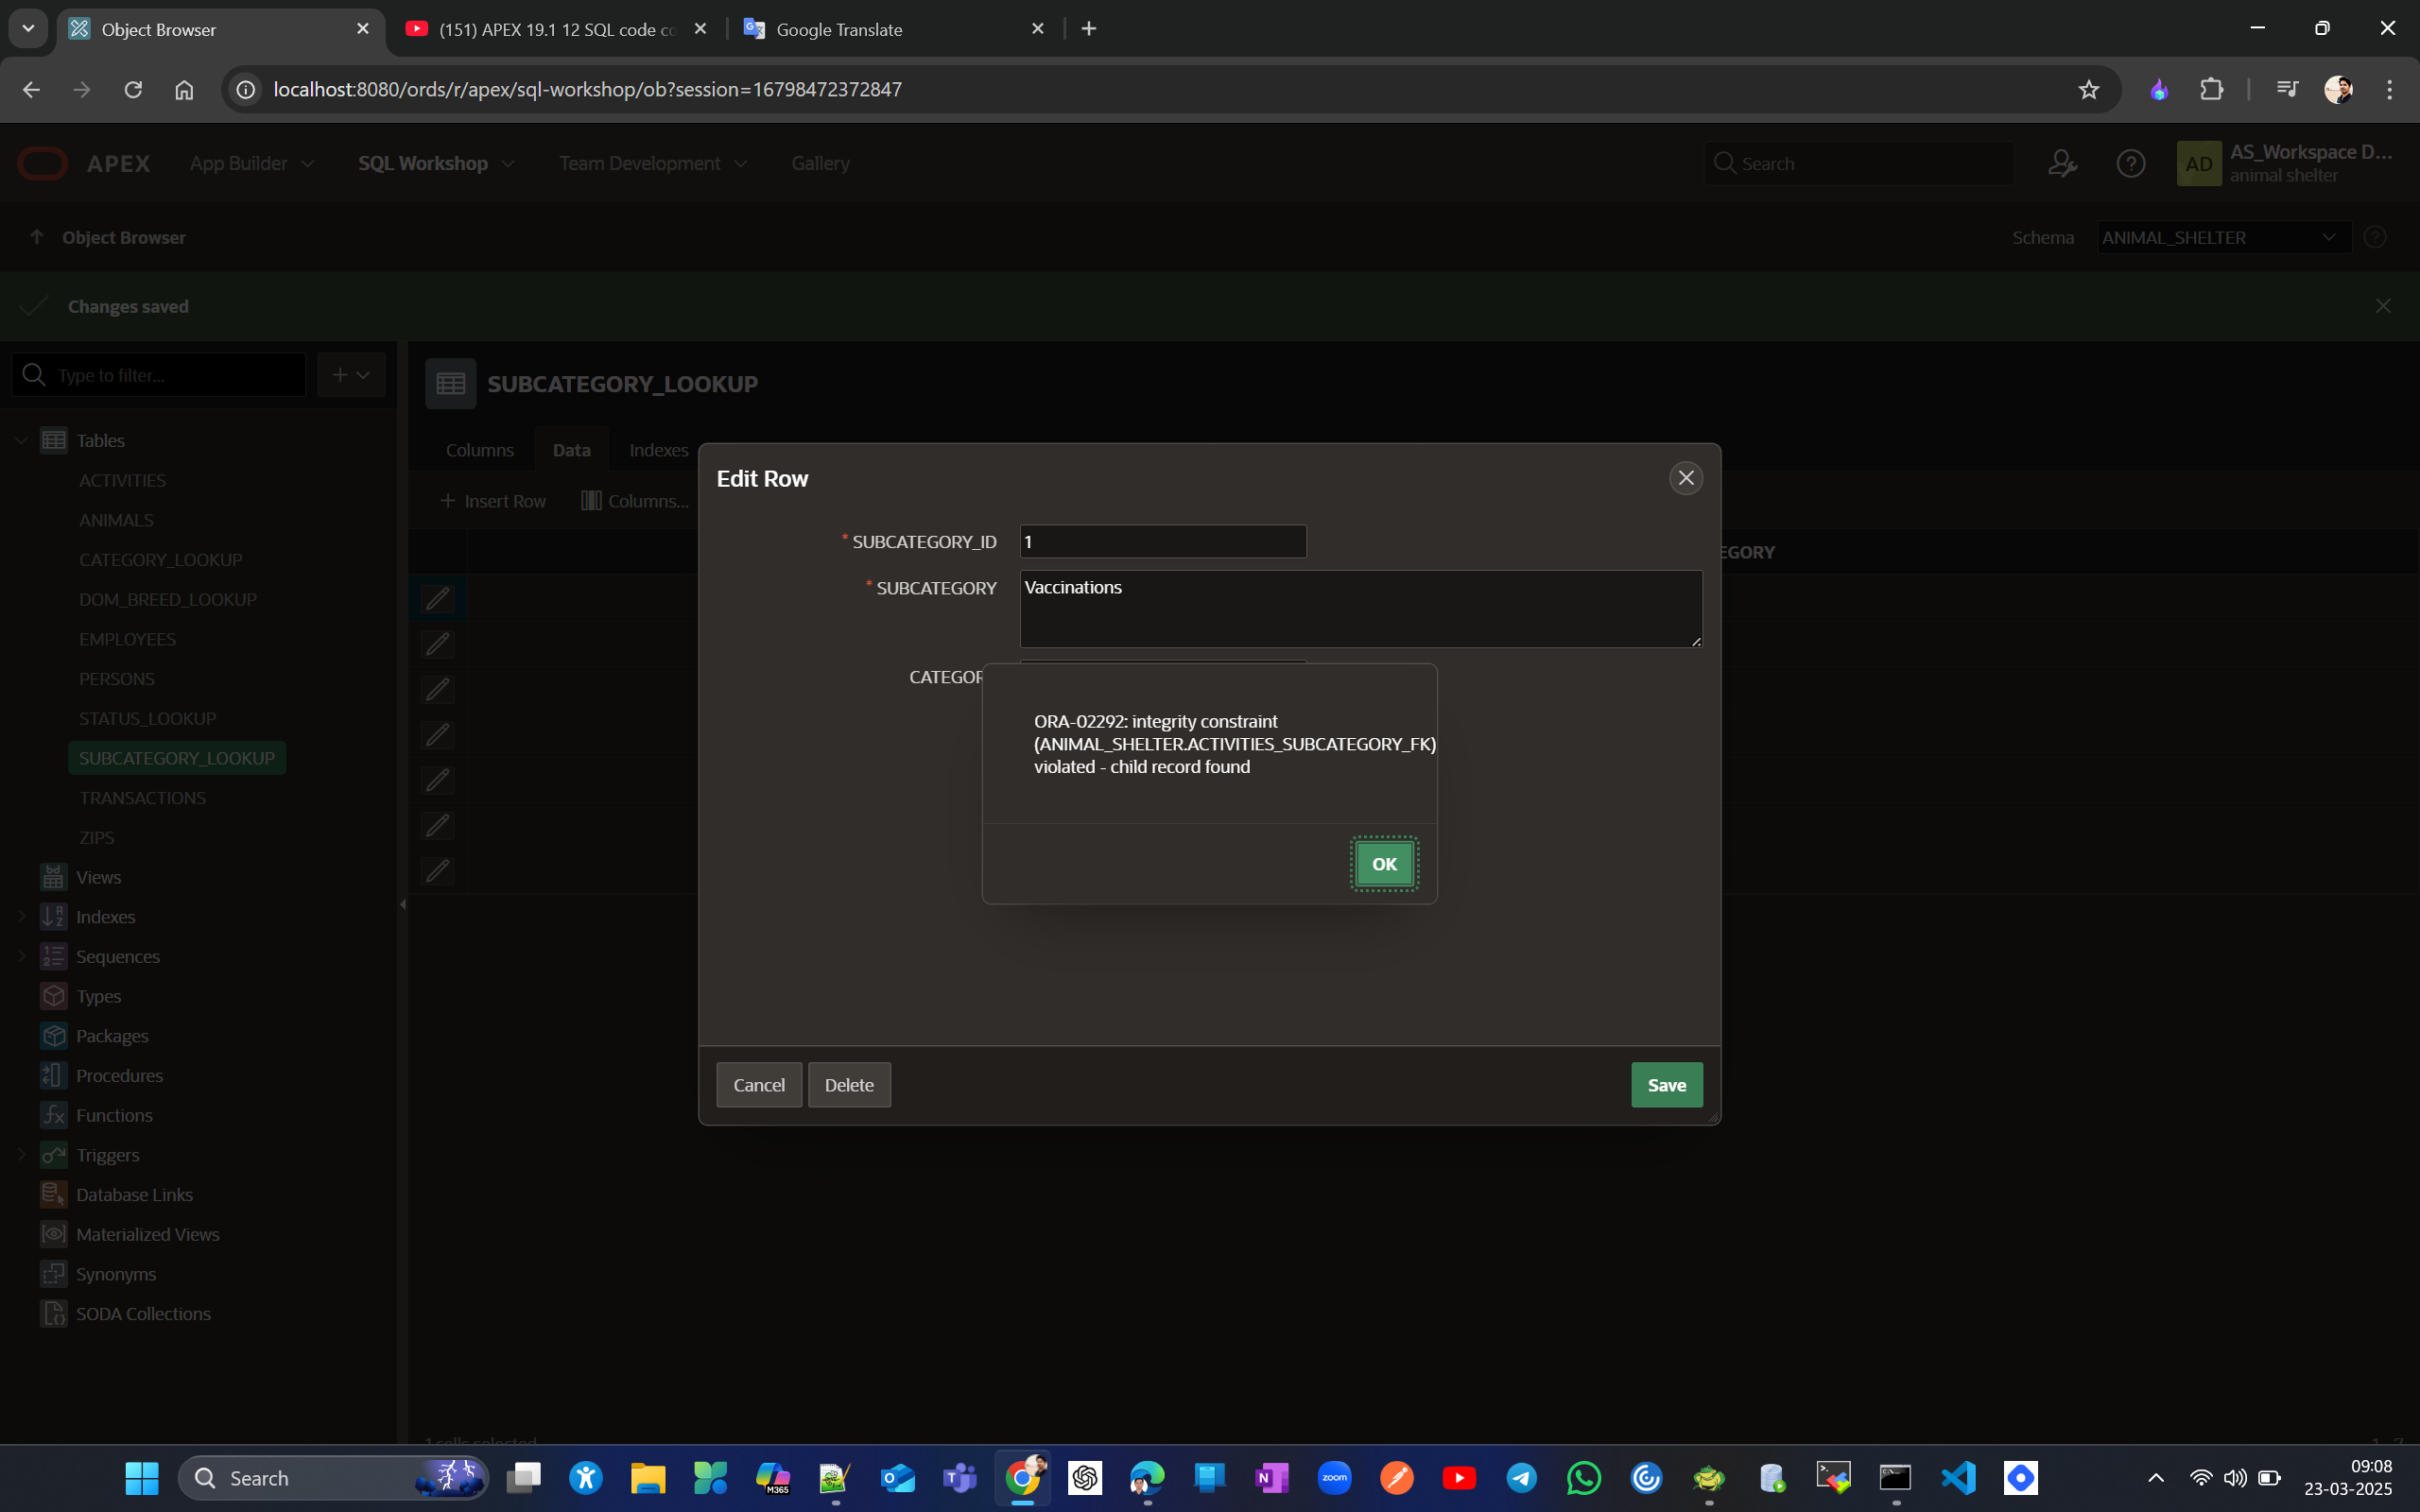
Update subcategory id to 3 where it was 1

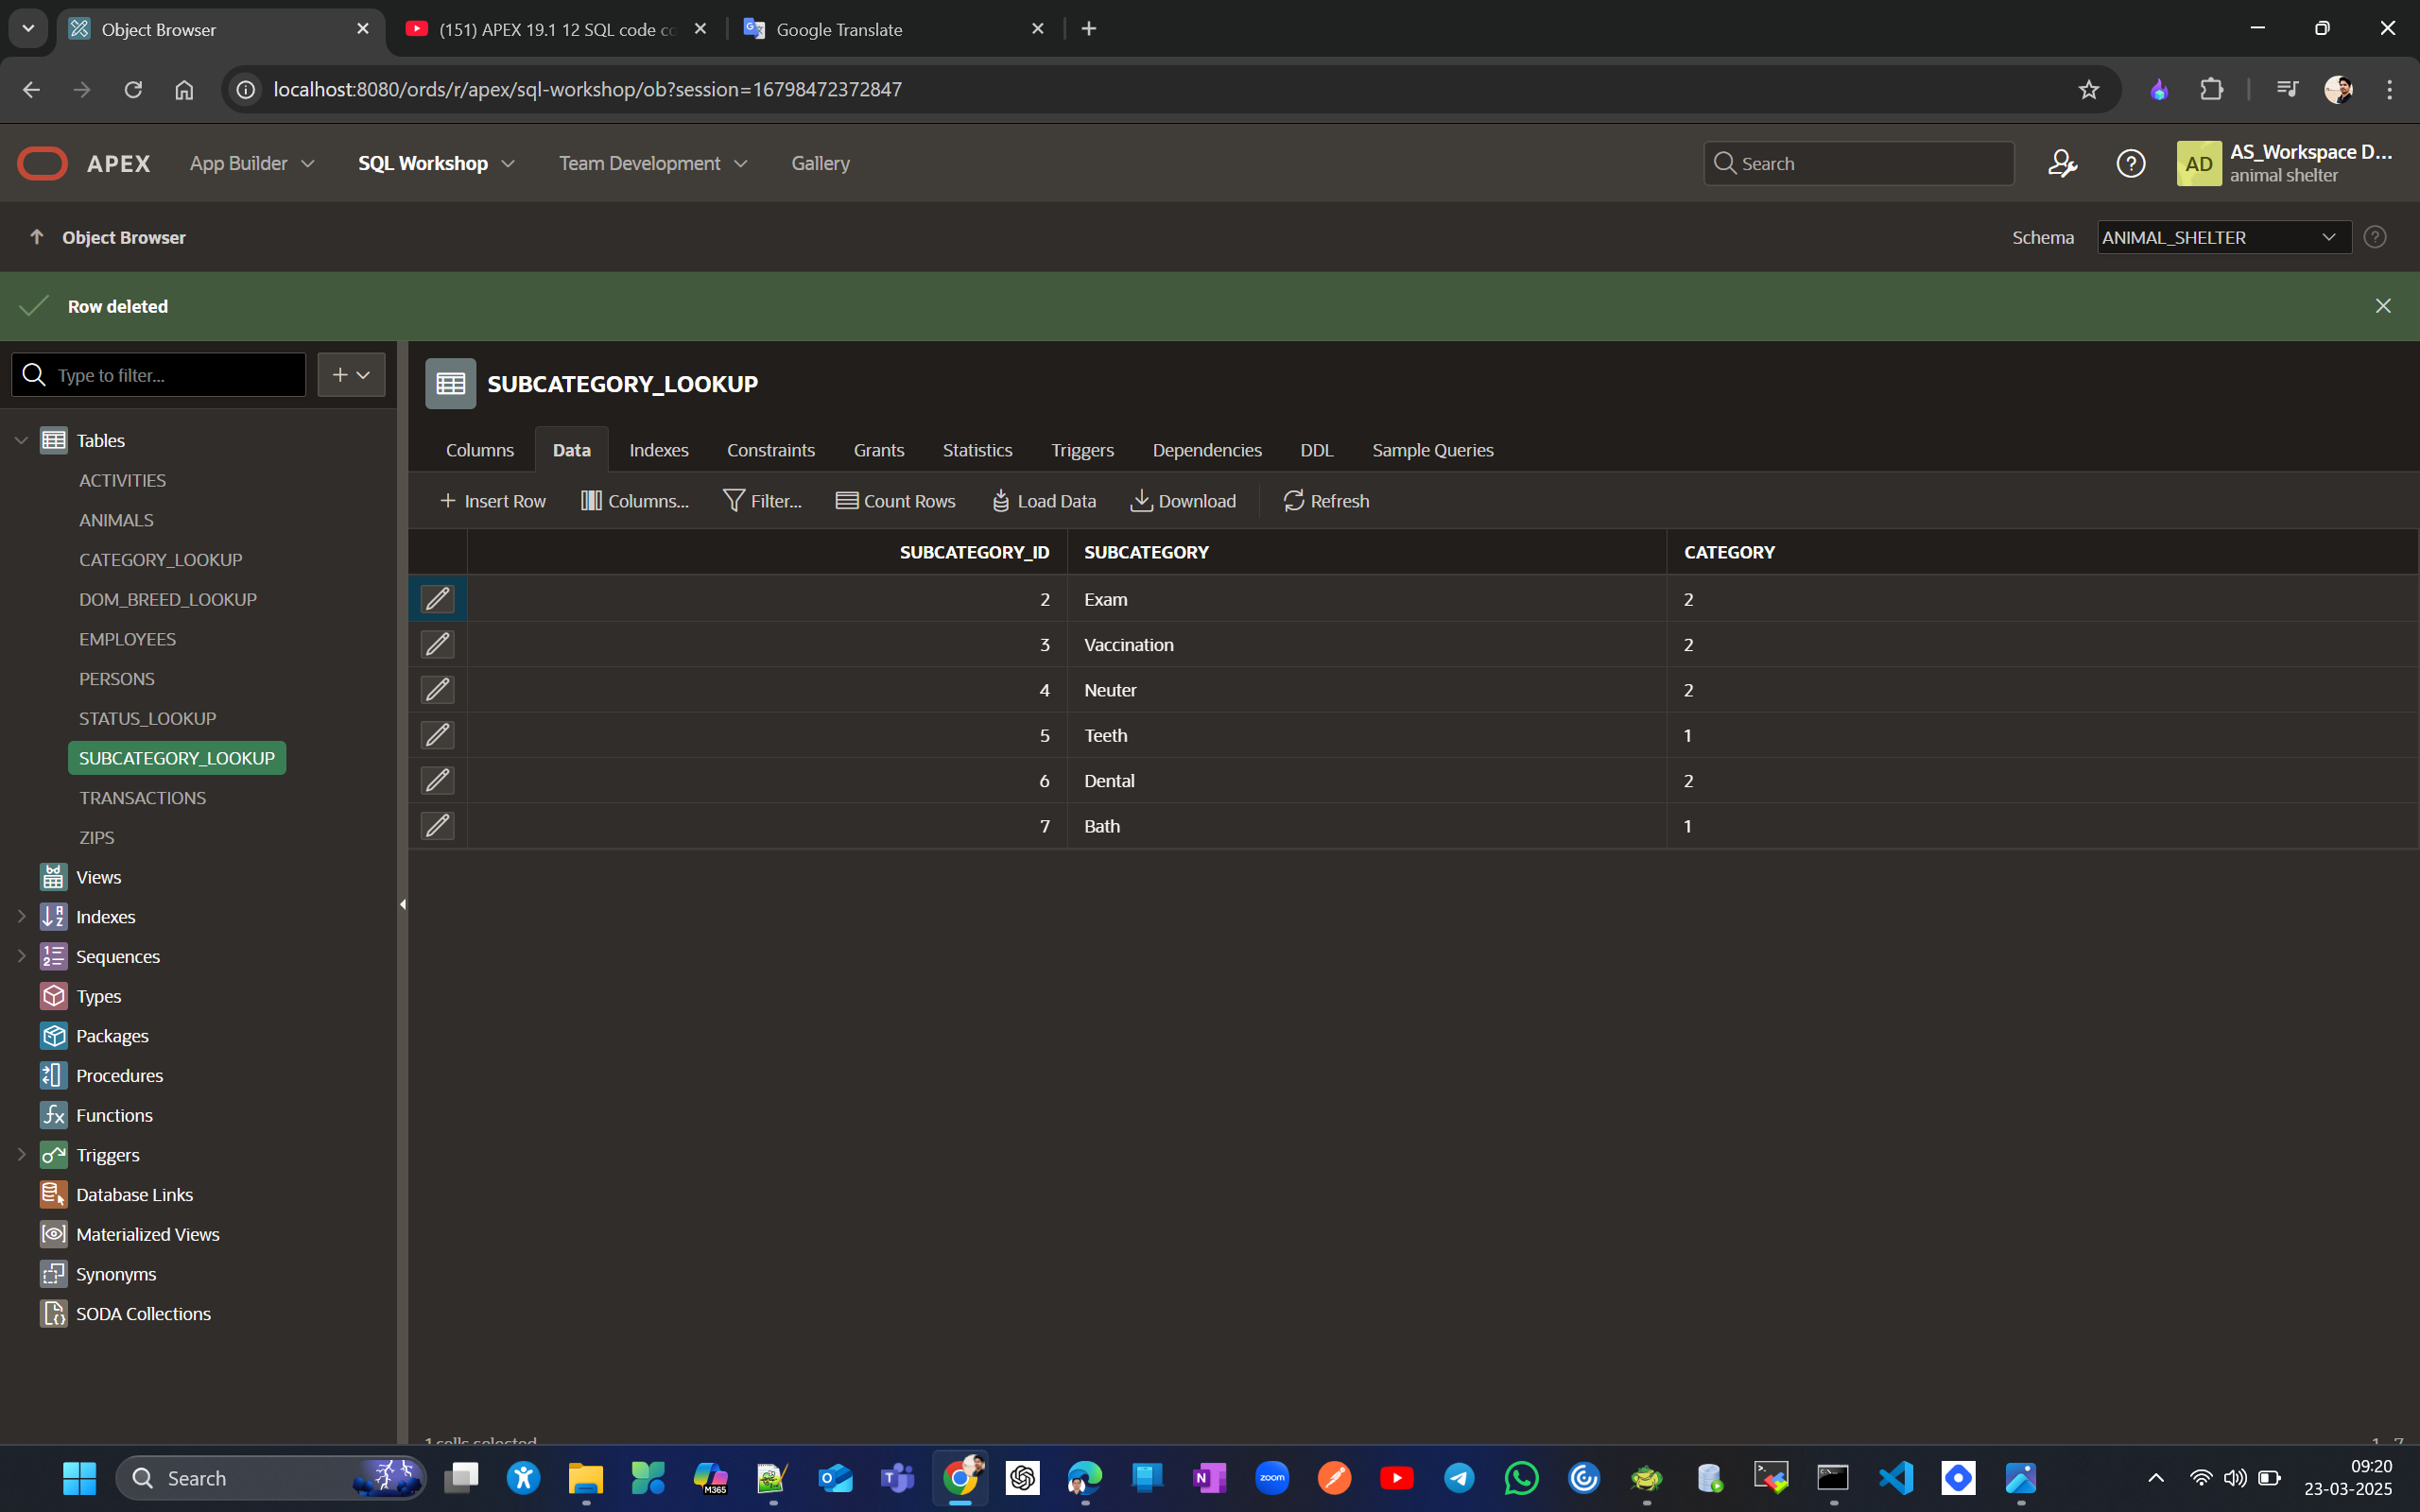
Now add 1 unique constraint to Subcategory field to avoid duplicate entry
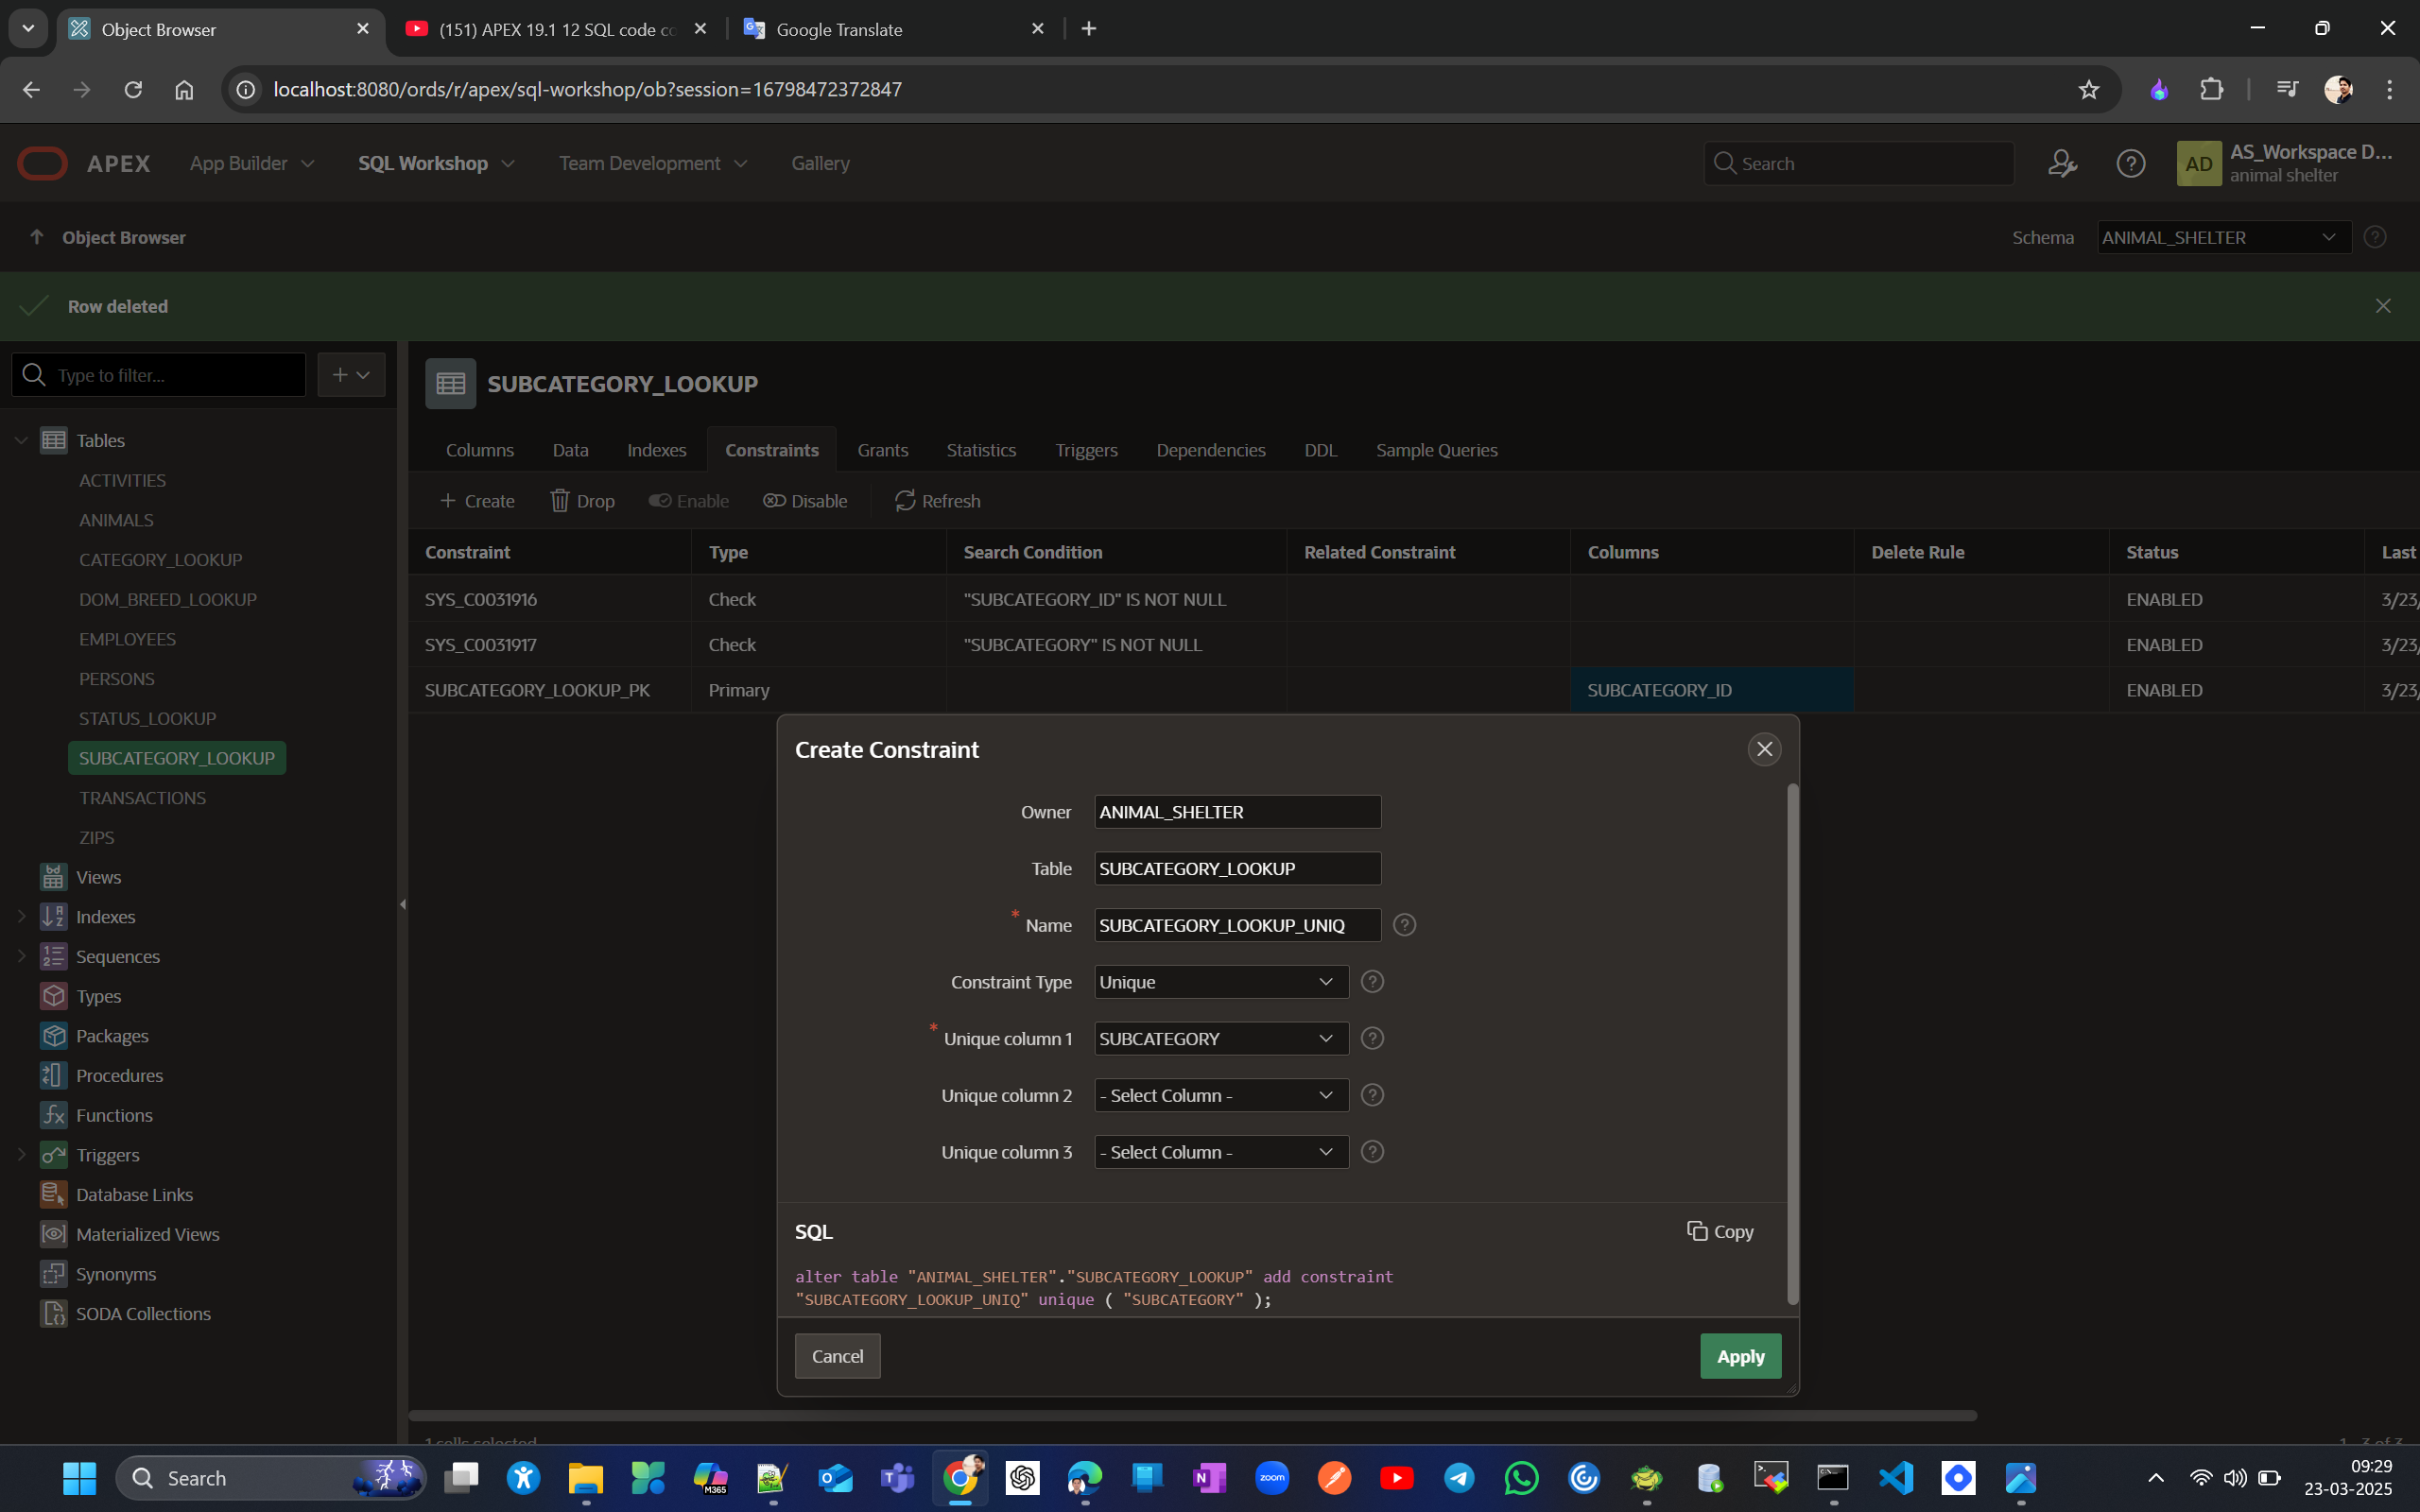
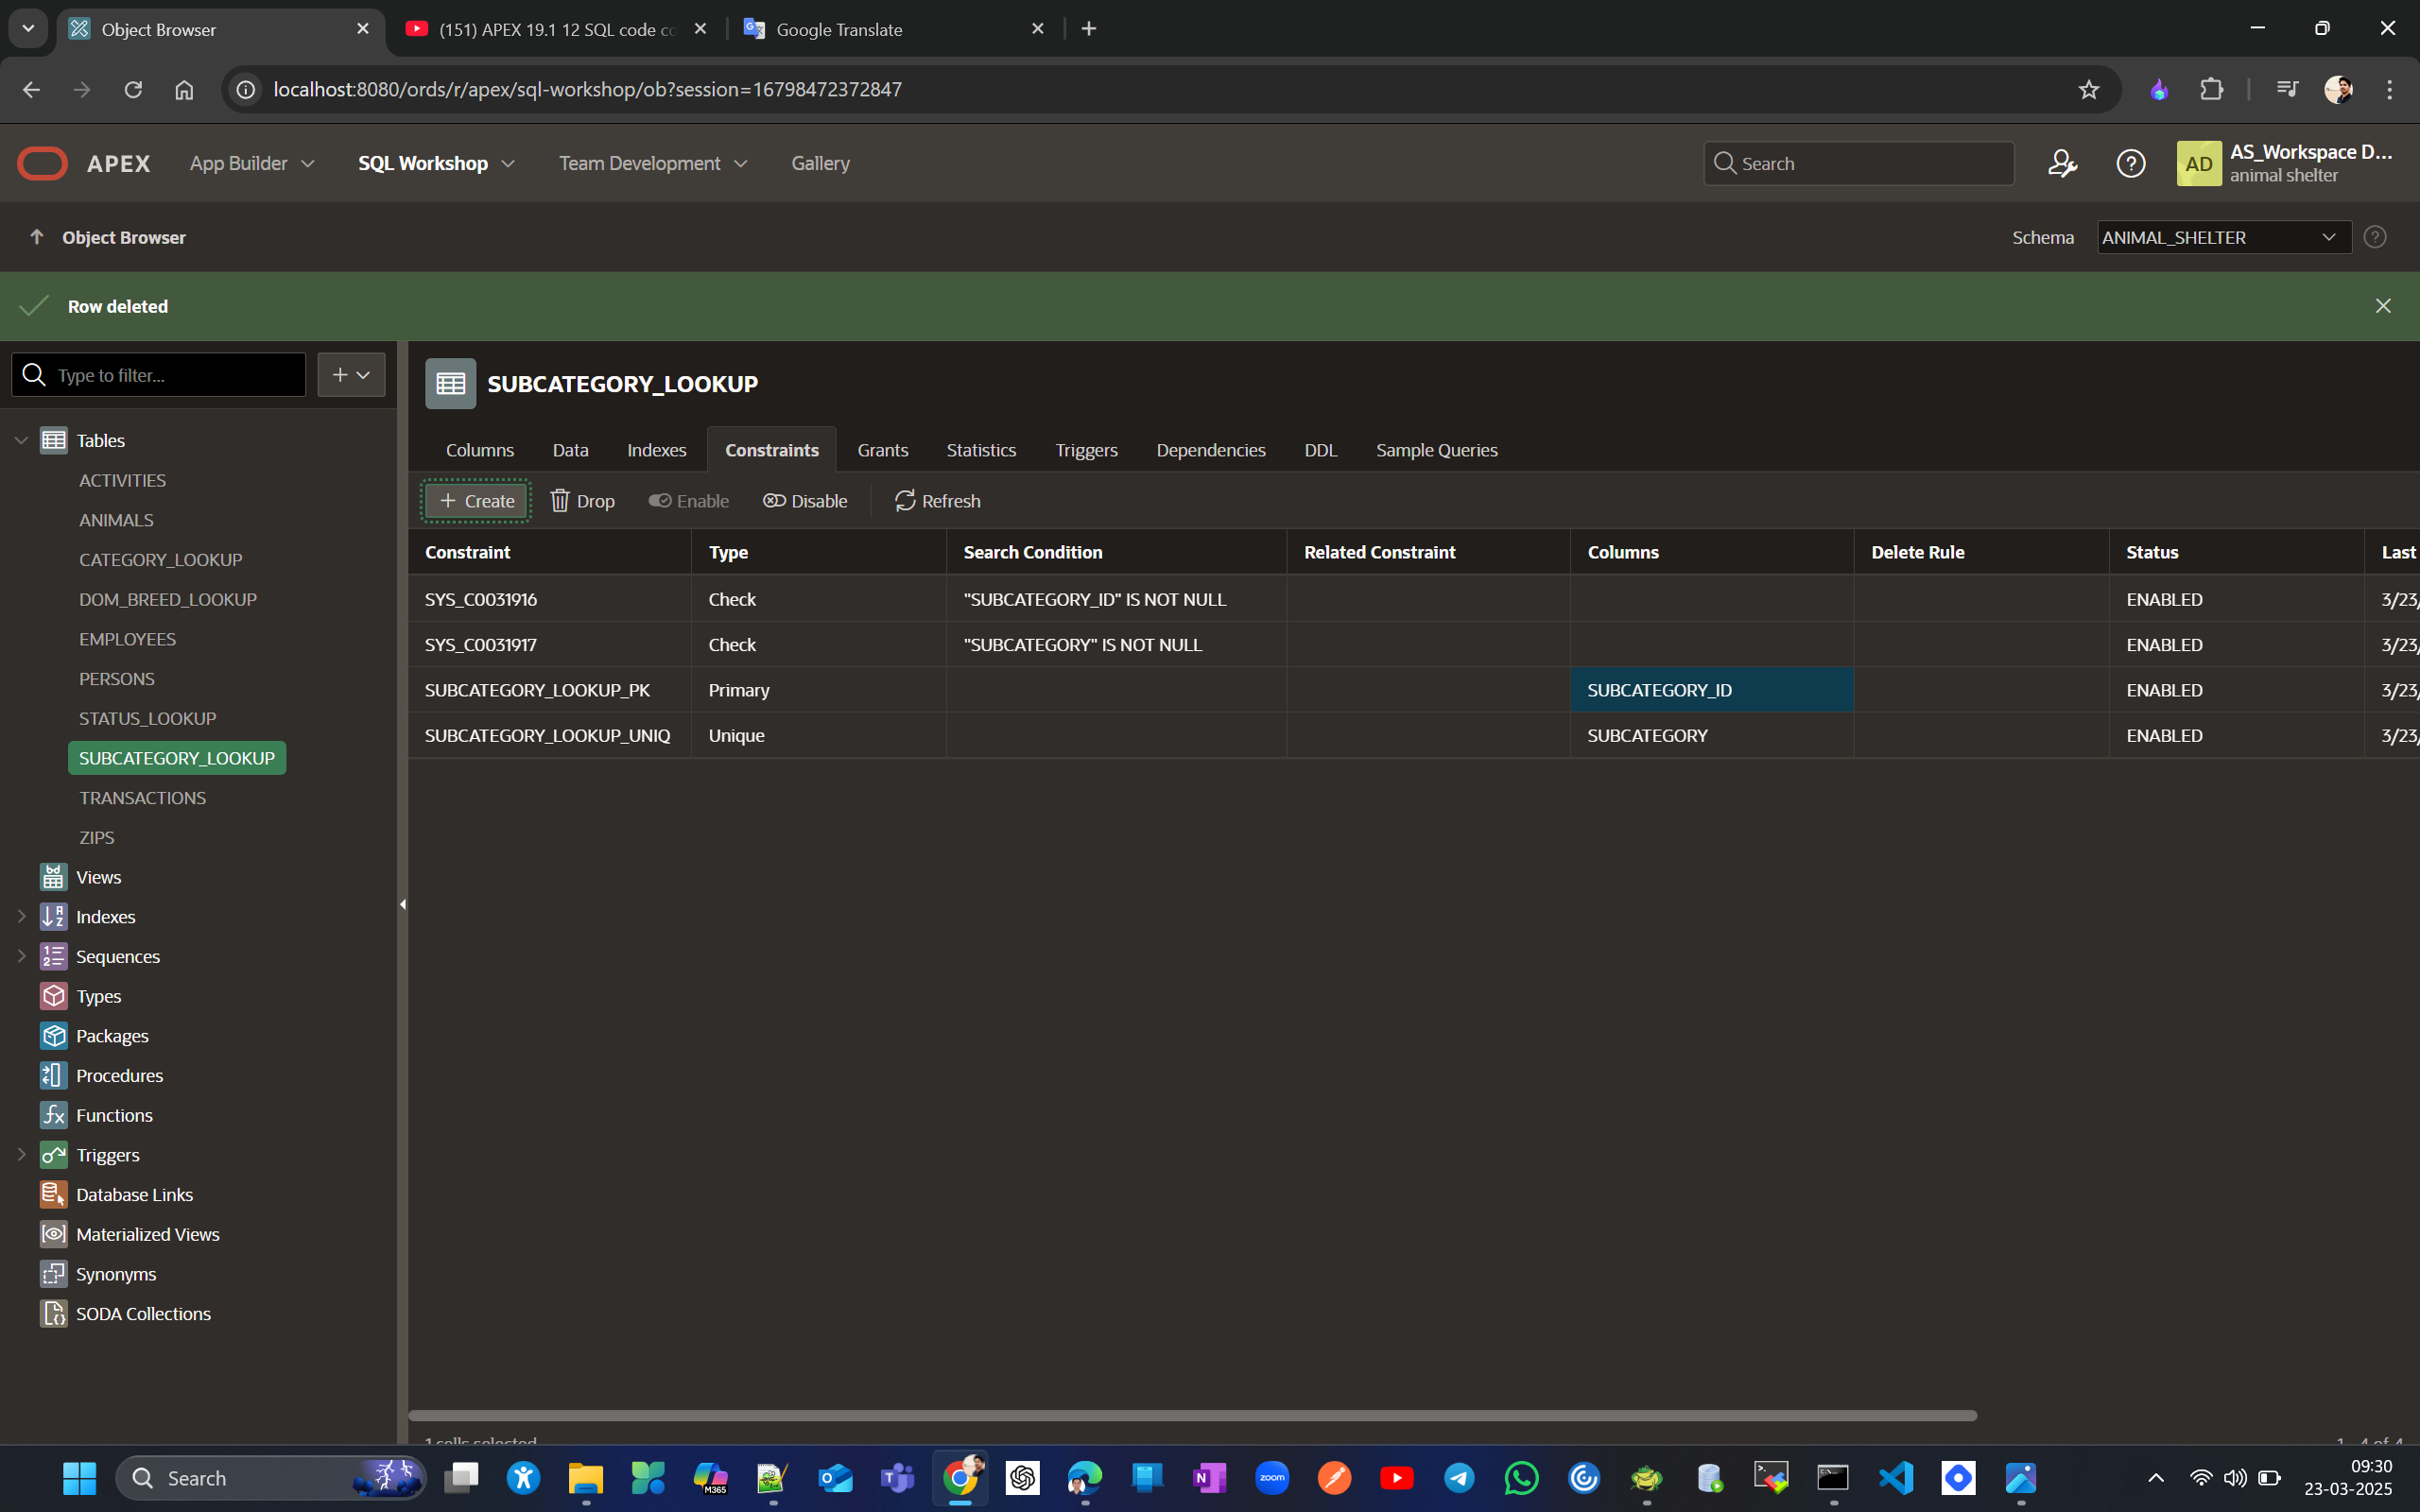
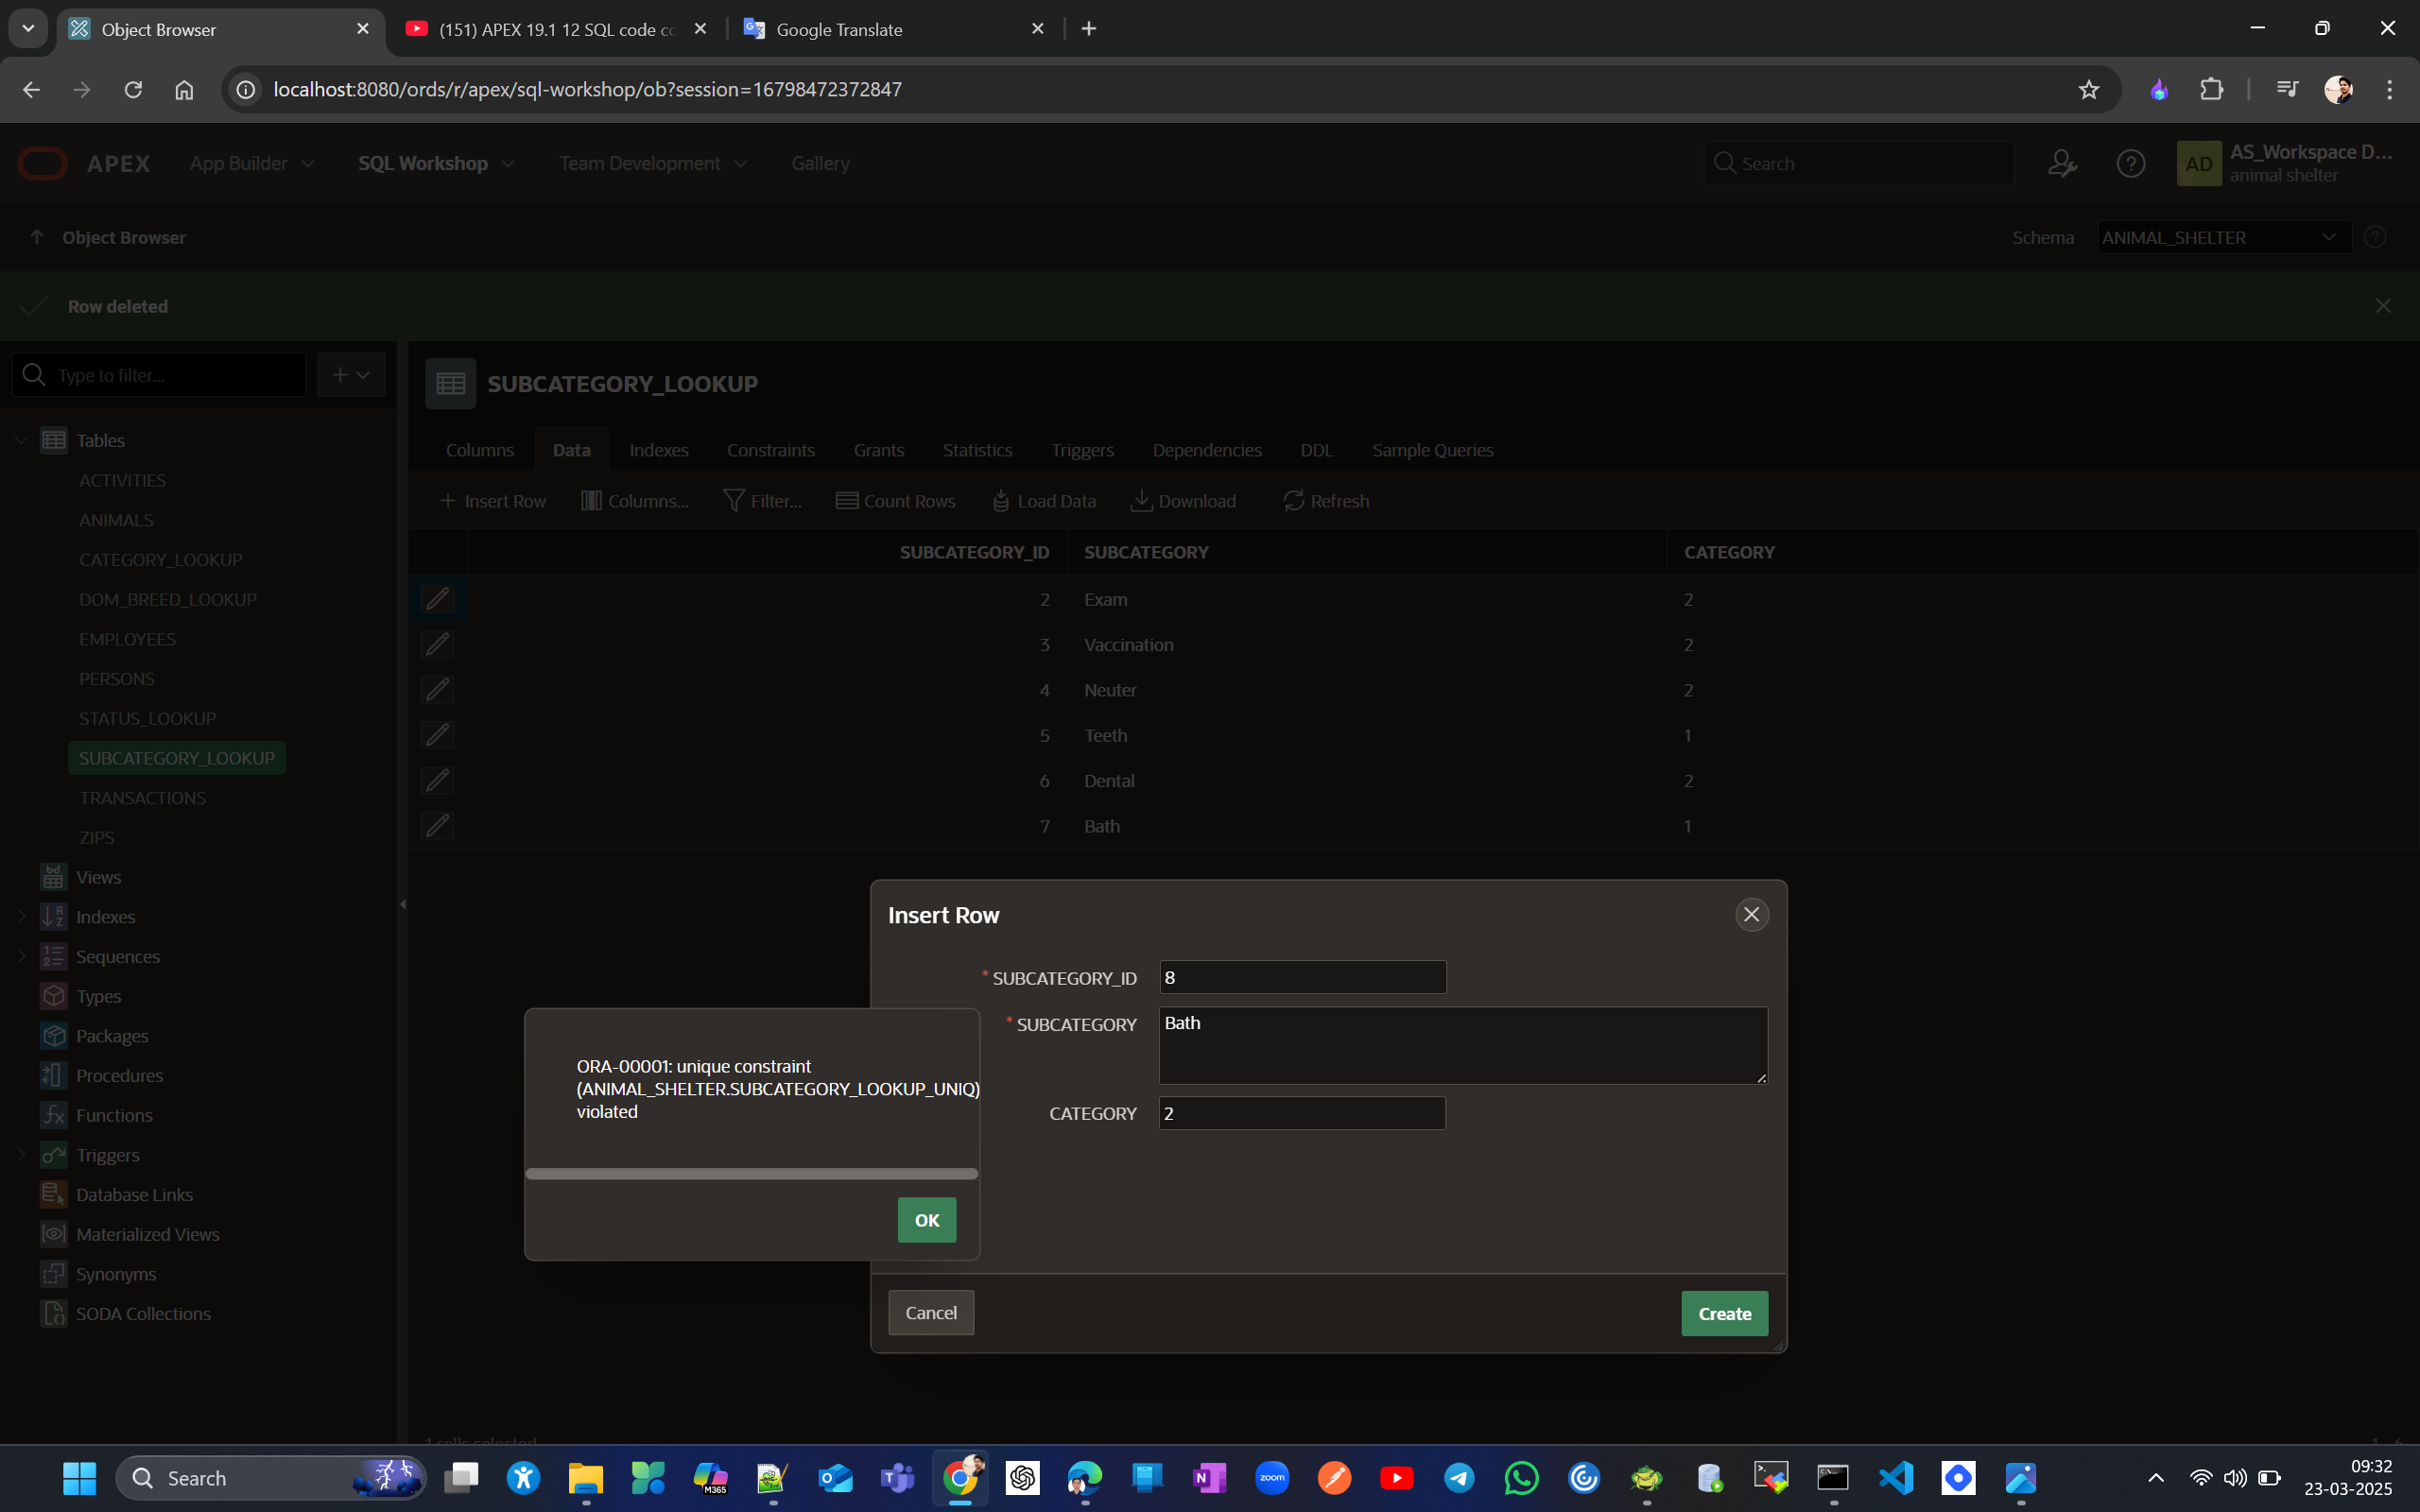
Now similarly create unique constraint to remaining lookup tables created
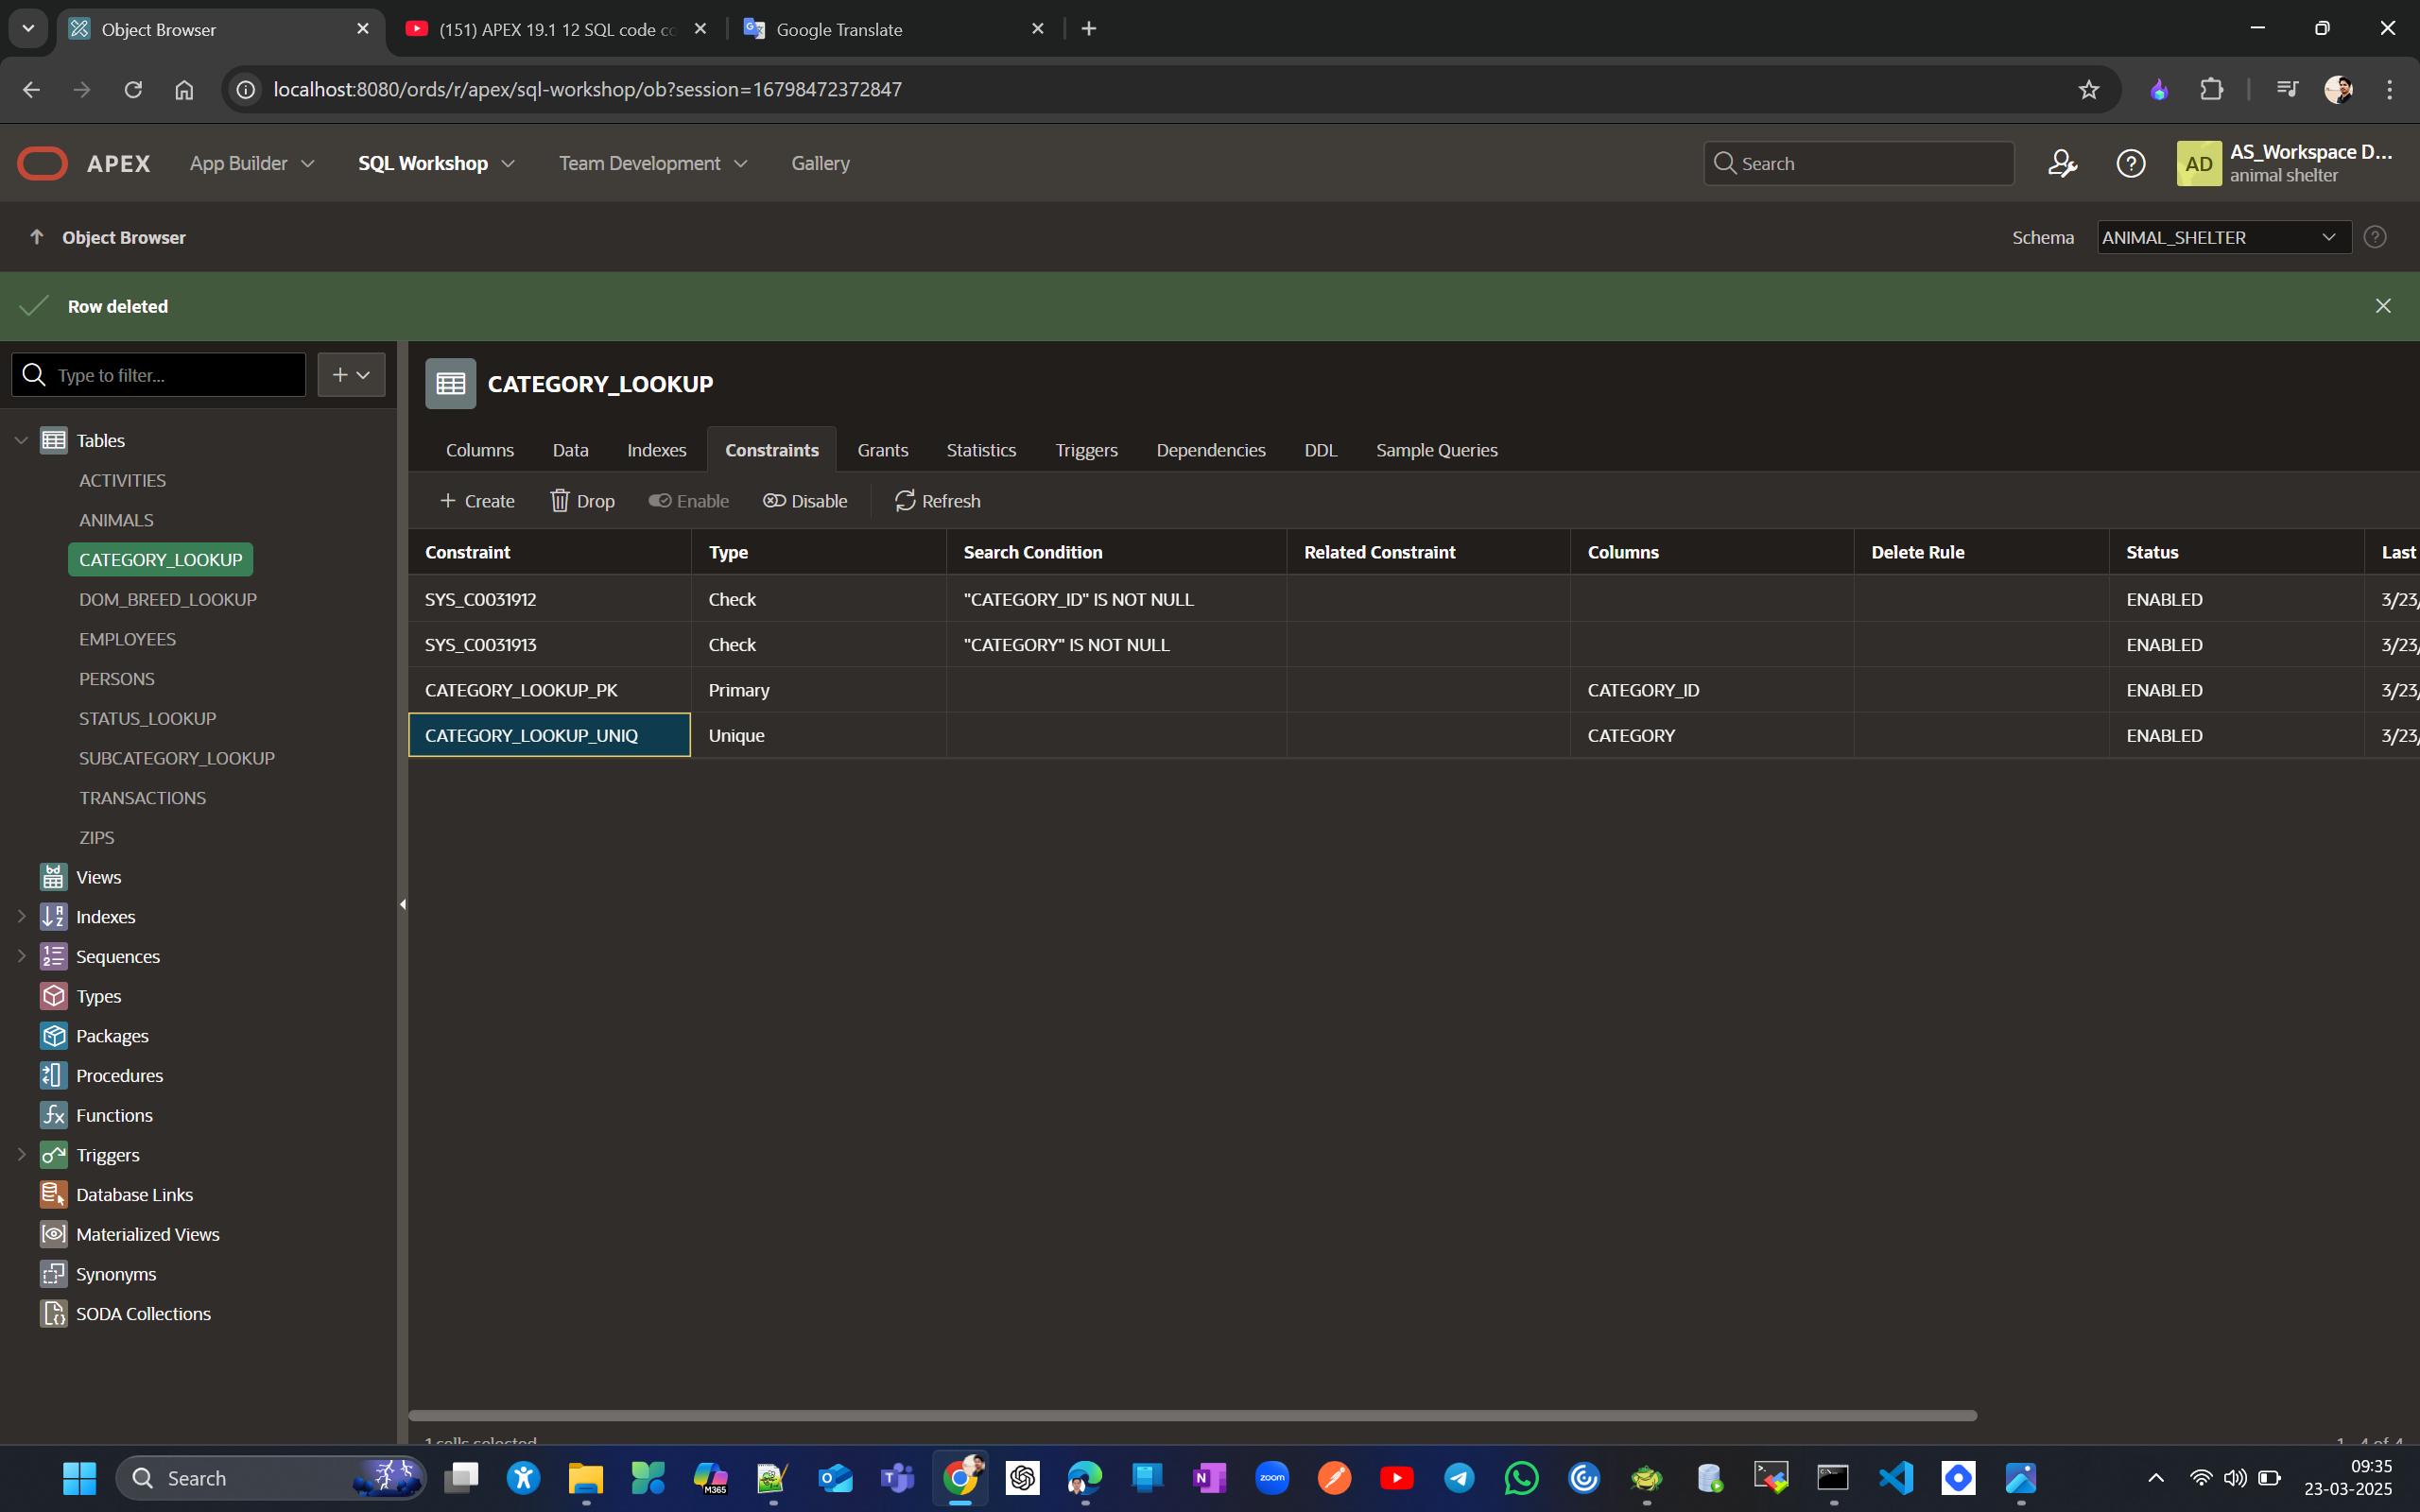
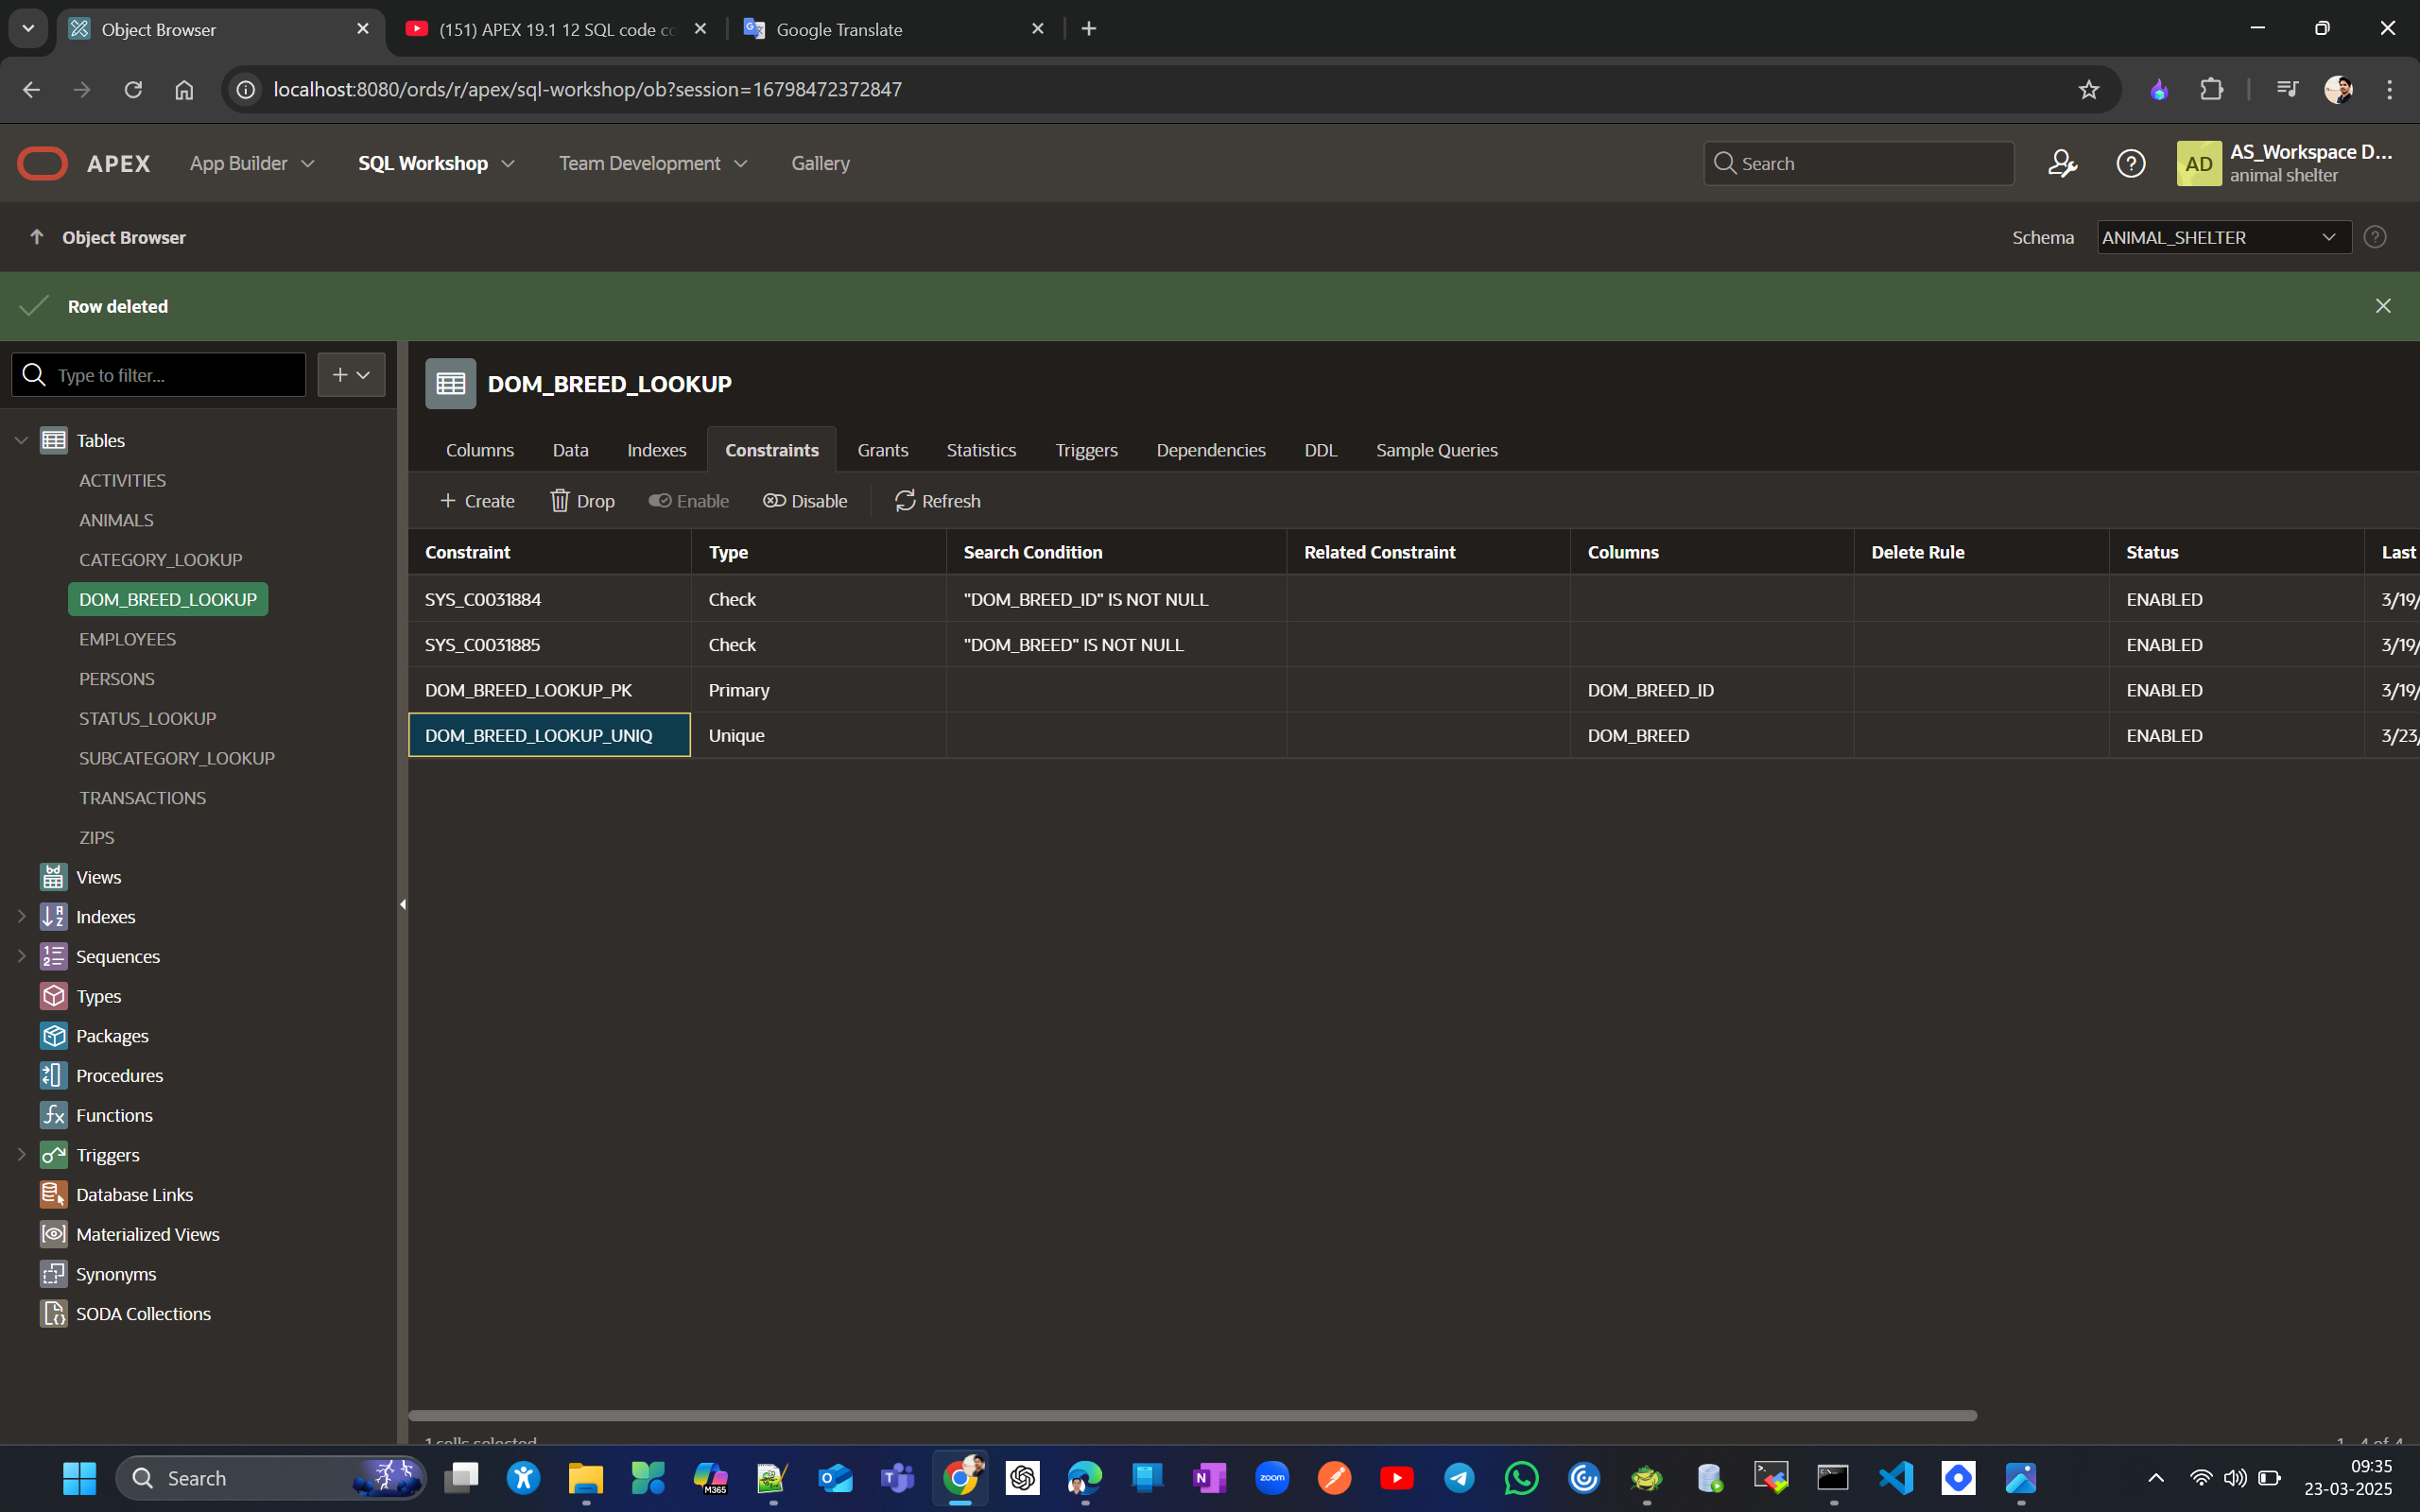
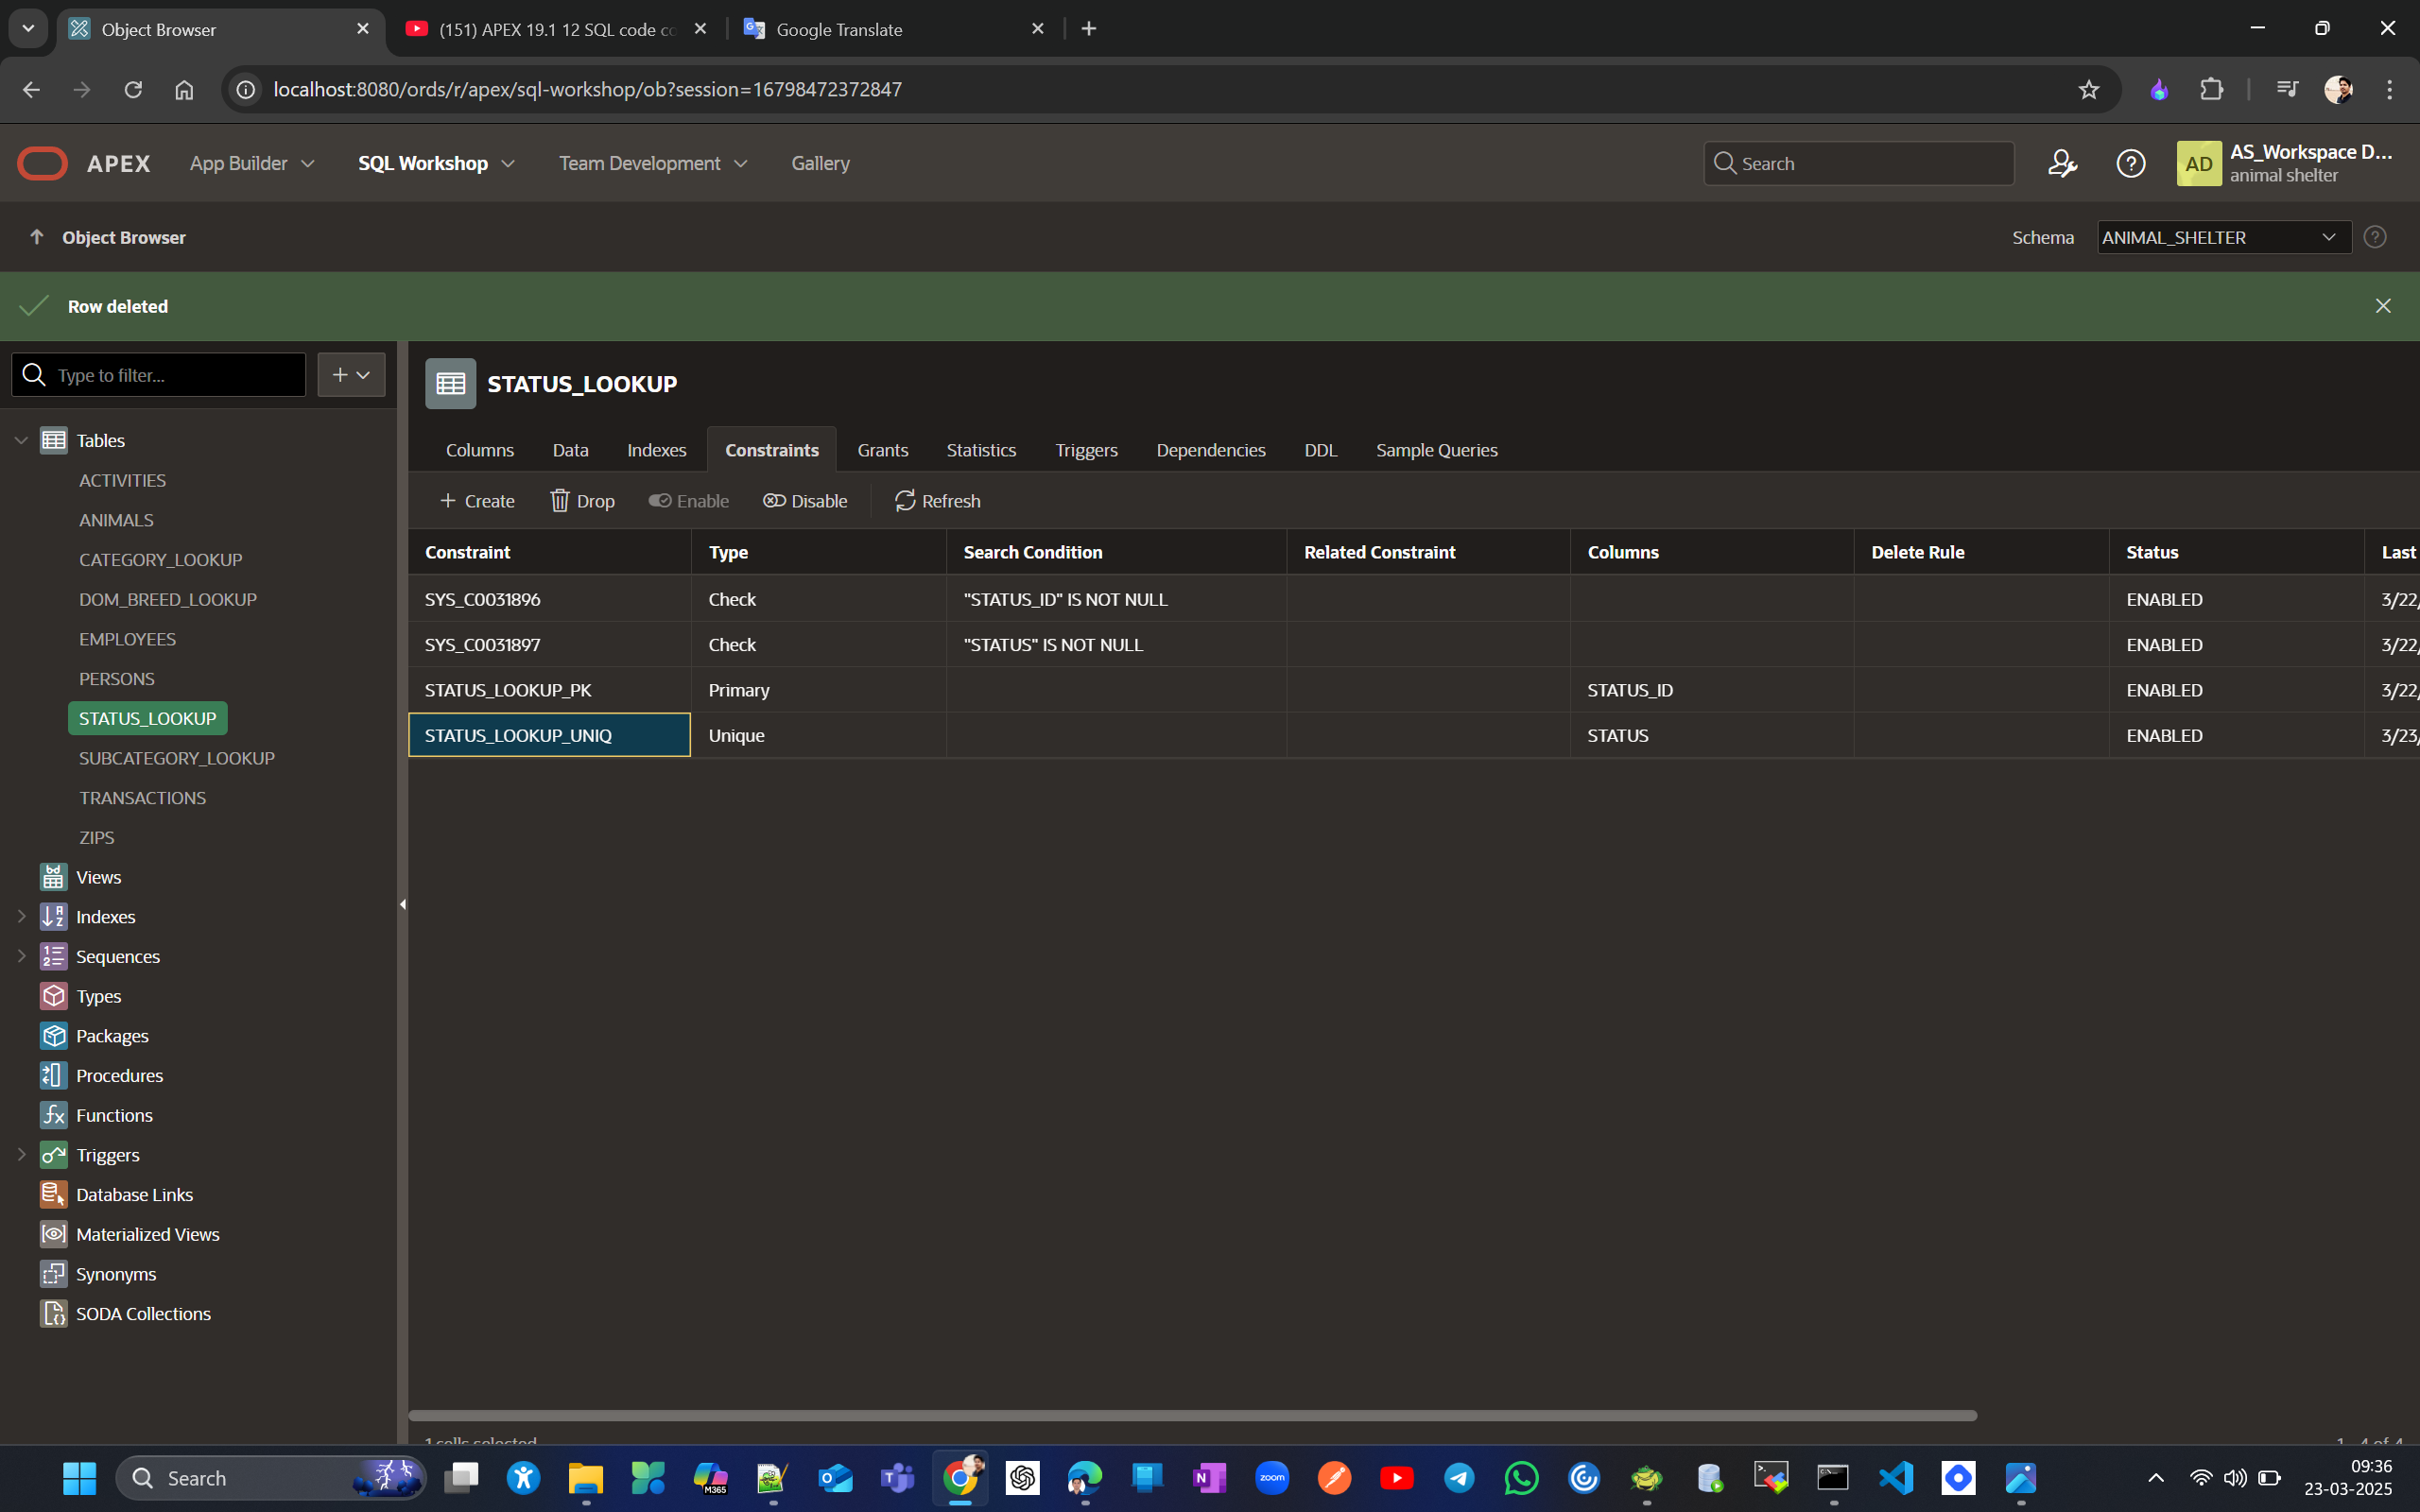
Let's go to the Daily Operations application to create some LOVs from shared components, and copy-paste these codes wherever needed to create dynamic LOVs.
--category_list
instead of SQL query select source as CATEGORY_LOOKUP -> display:CATEGORY and -> RETURN: CATEGORY_ID

--subcategory_list
instead of SQL query select source as SUBCATEGORY_LOOKUP -> display:SUBCATEGORY and -> RETURN: SUBCATEGORY_ID

--client_list
select lname || ', ' || fname || ': ' || pers_ID as display,
   pers_id as return from persons order by 1;

--emp_list
select lname || ', ' || fname || ': ' || persons.pers_ID as display,
   persons.pers_id as return from persons inner join employees
  on persons.pers_id = employees.pers_id order by 1;

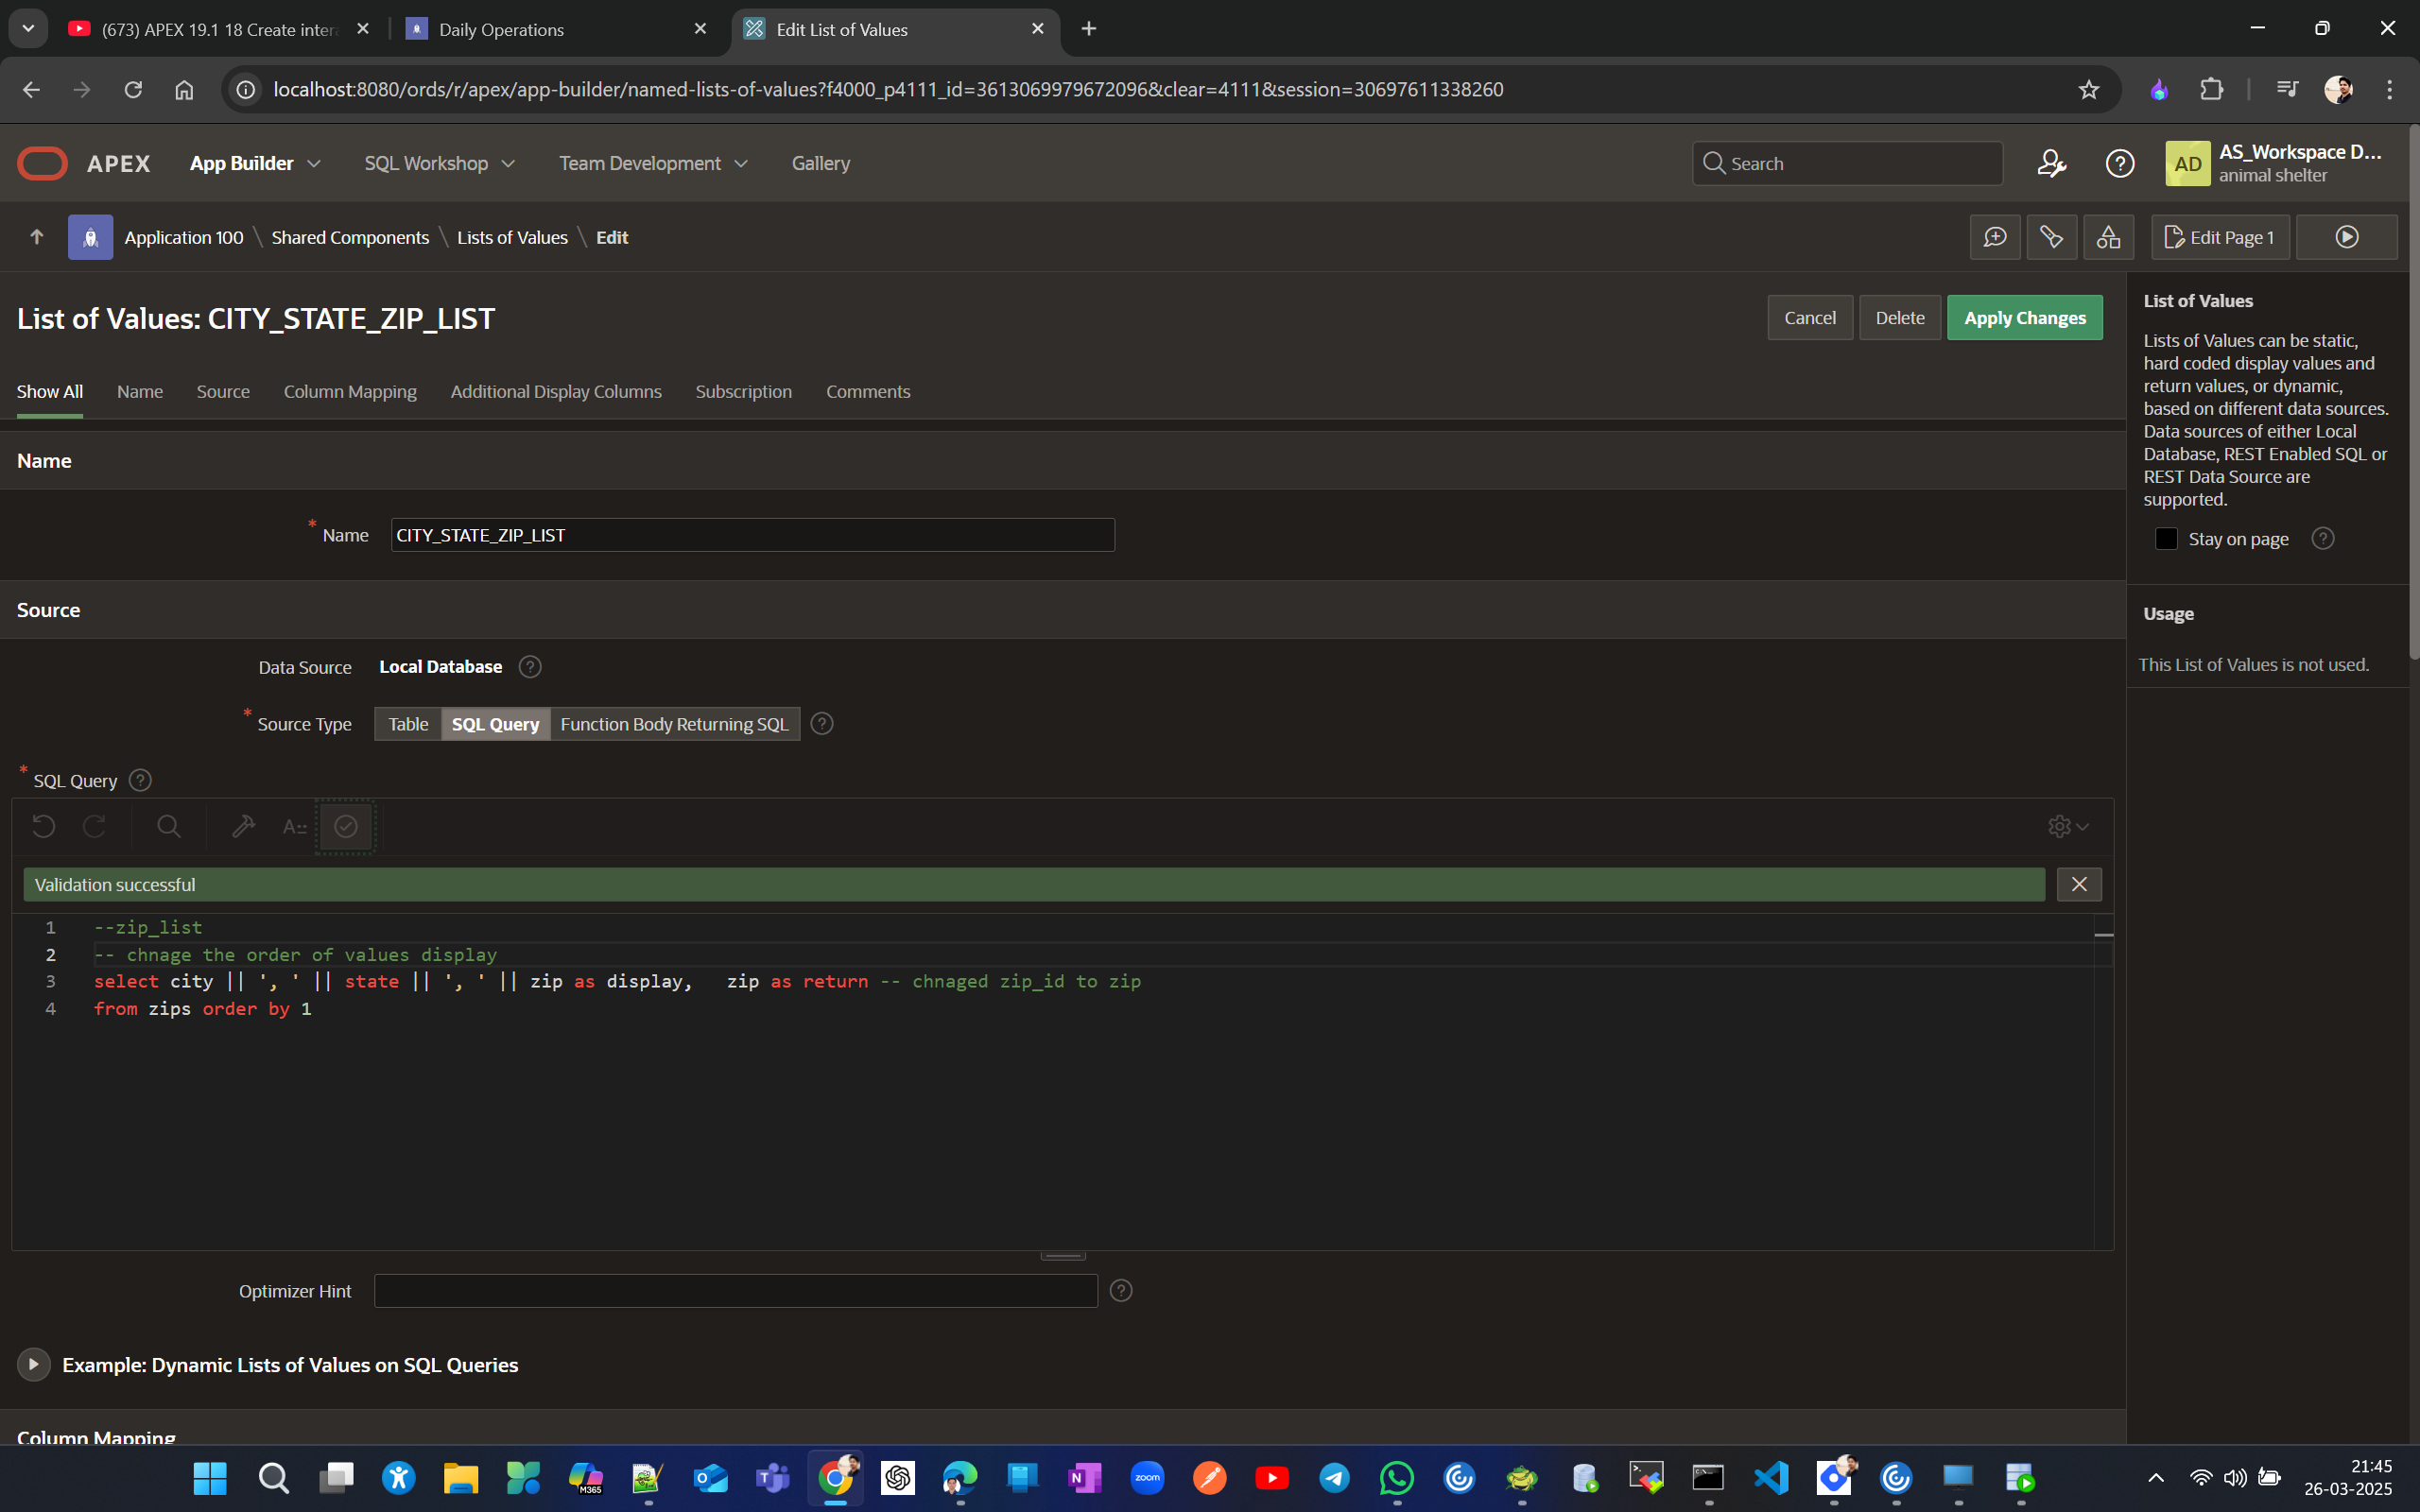
--zip_list
select zip || ', ' || city || ', ' || state as display,    zip_id as return
from zips order by 1;

--animal_list
select name || ', ' || dom_breed || ': ' || animal_id as display,
  animal_id as return from animals inner join dom_breed_lookup
  on animals.dom_breed_id = dom_breed_lookup.dom_breed_id
order by name;
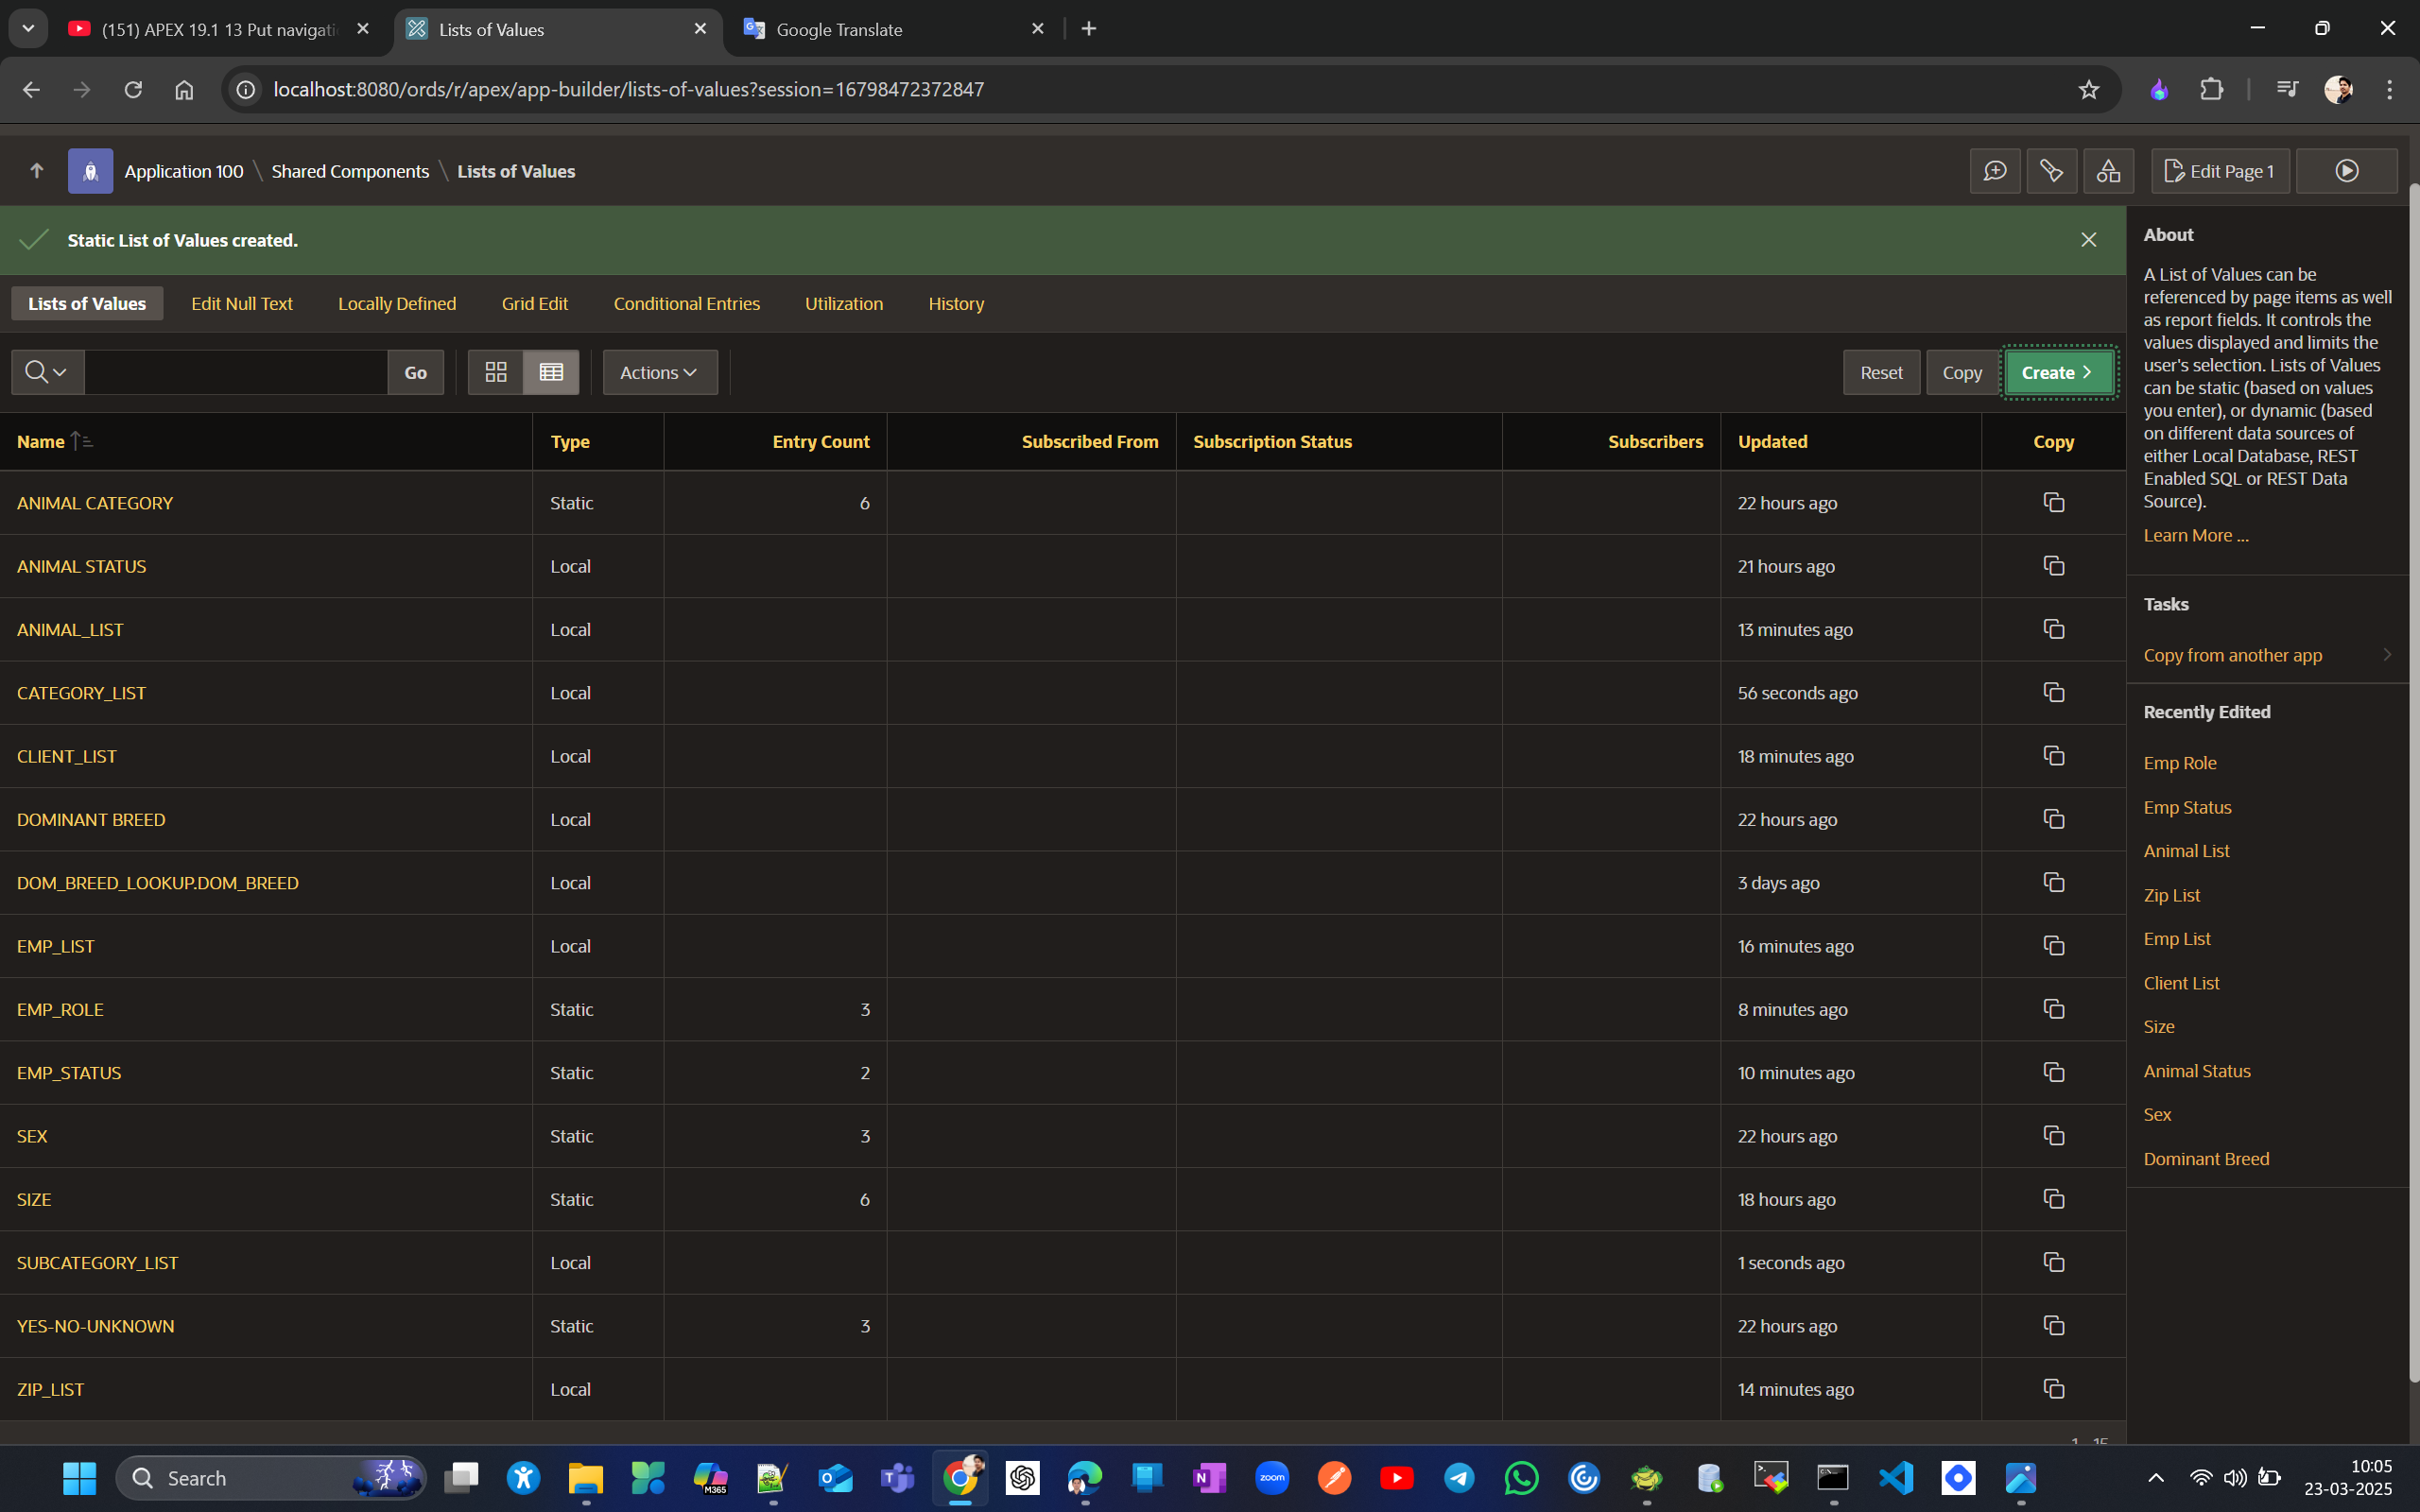
Below are the LOVs that we have created so far which we will use in future activities
Put navigation buttons at the top & bottom of a report. Change an LOV to radio group.
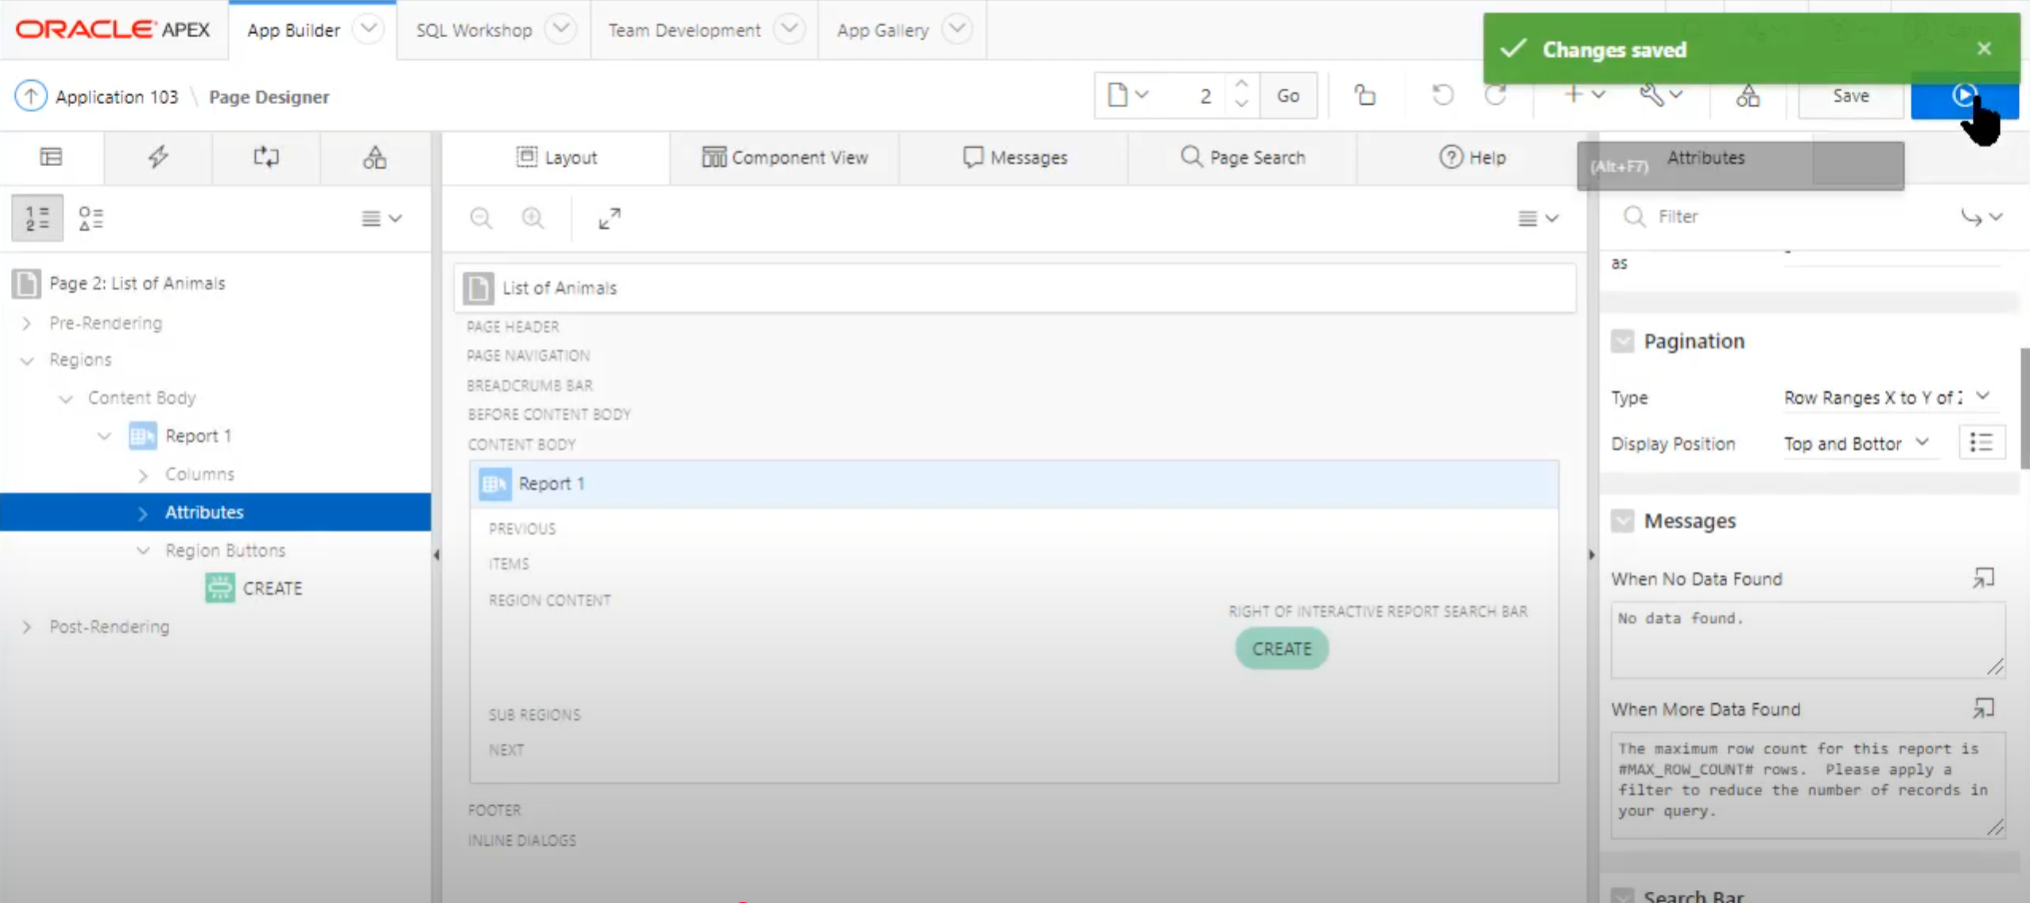
Let's modify the report and form for ANIMALS by adding the record navigation feature to the top of the page, so we don't have to scroll down to access additional records.
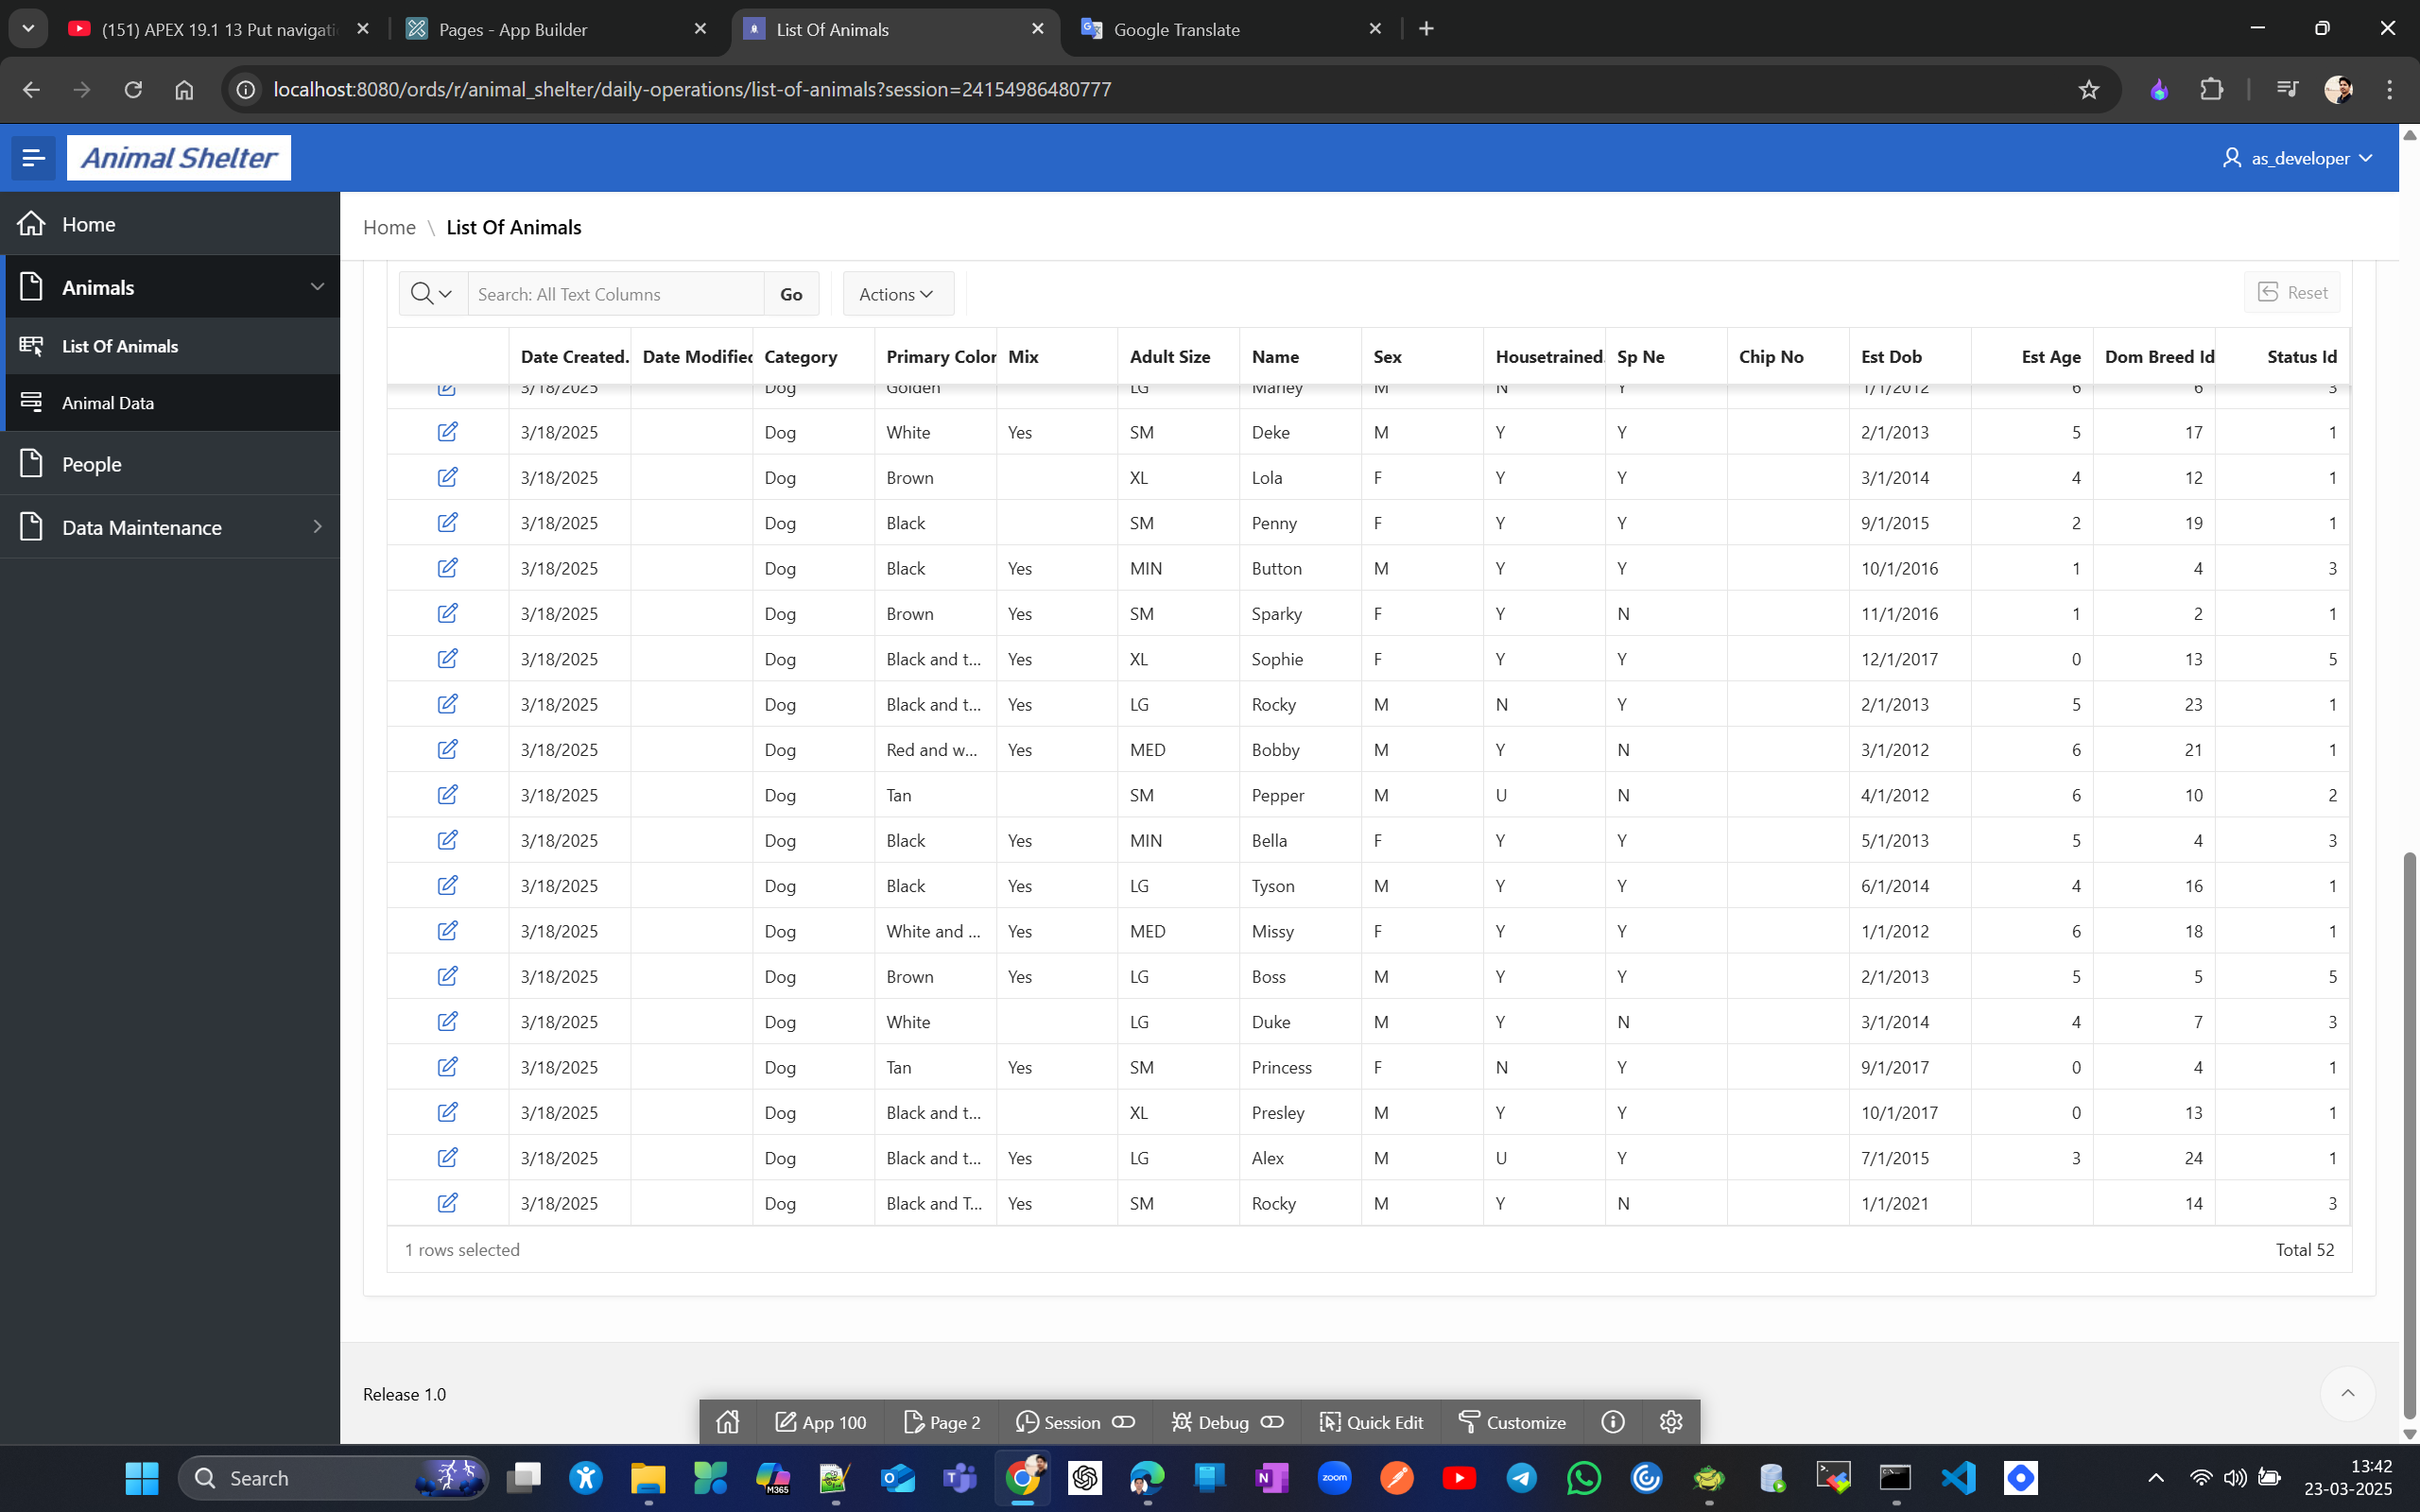
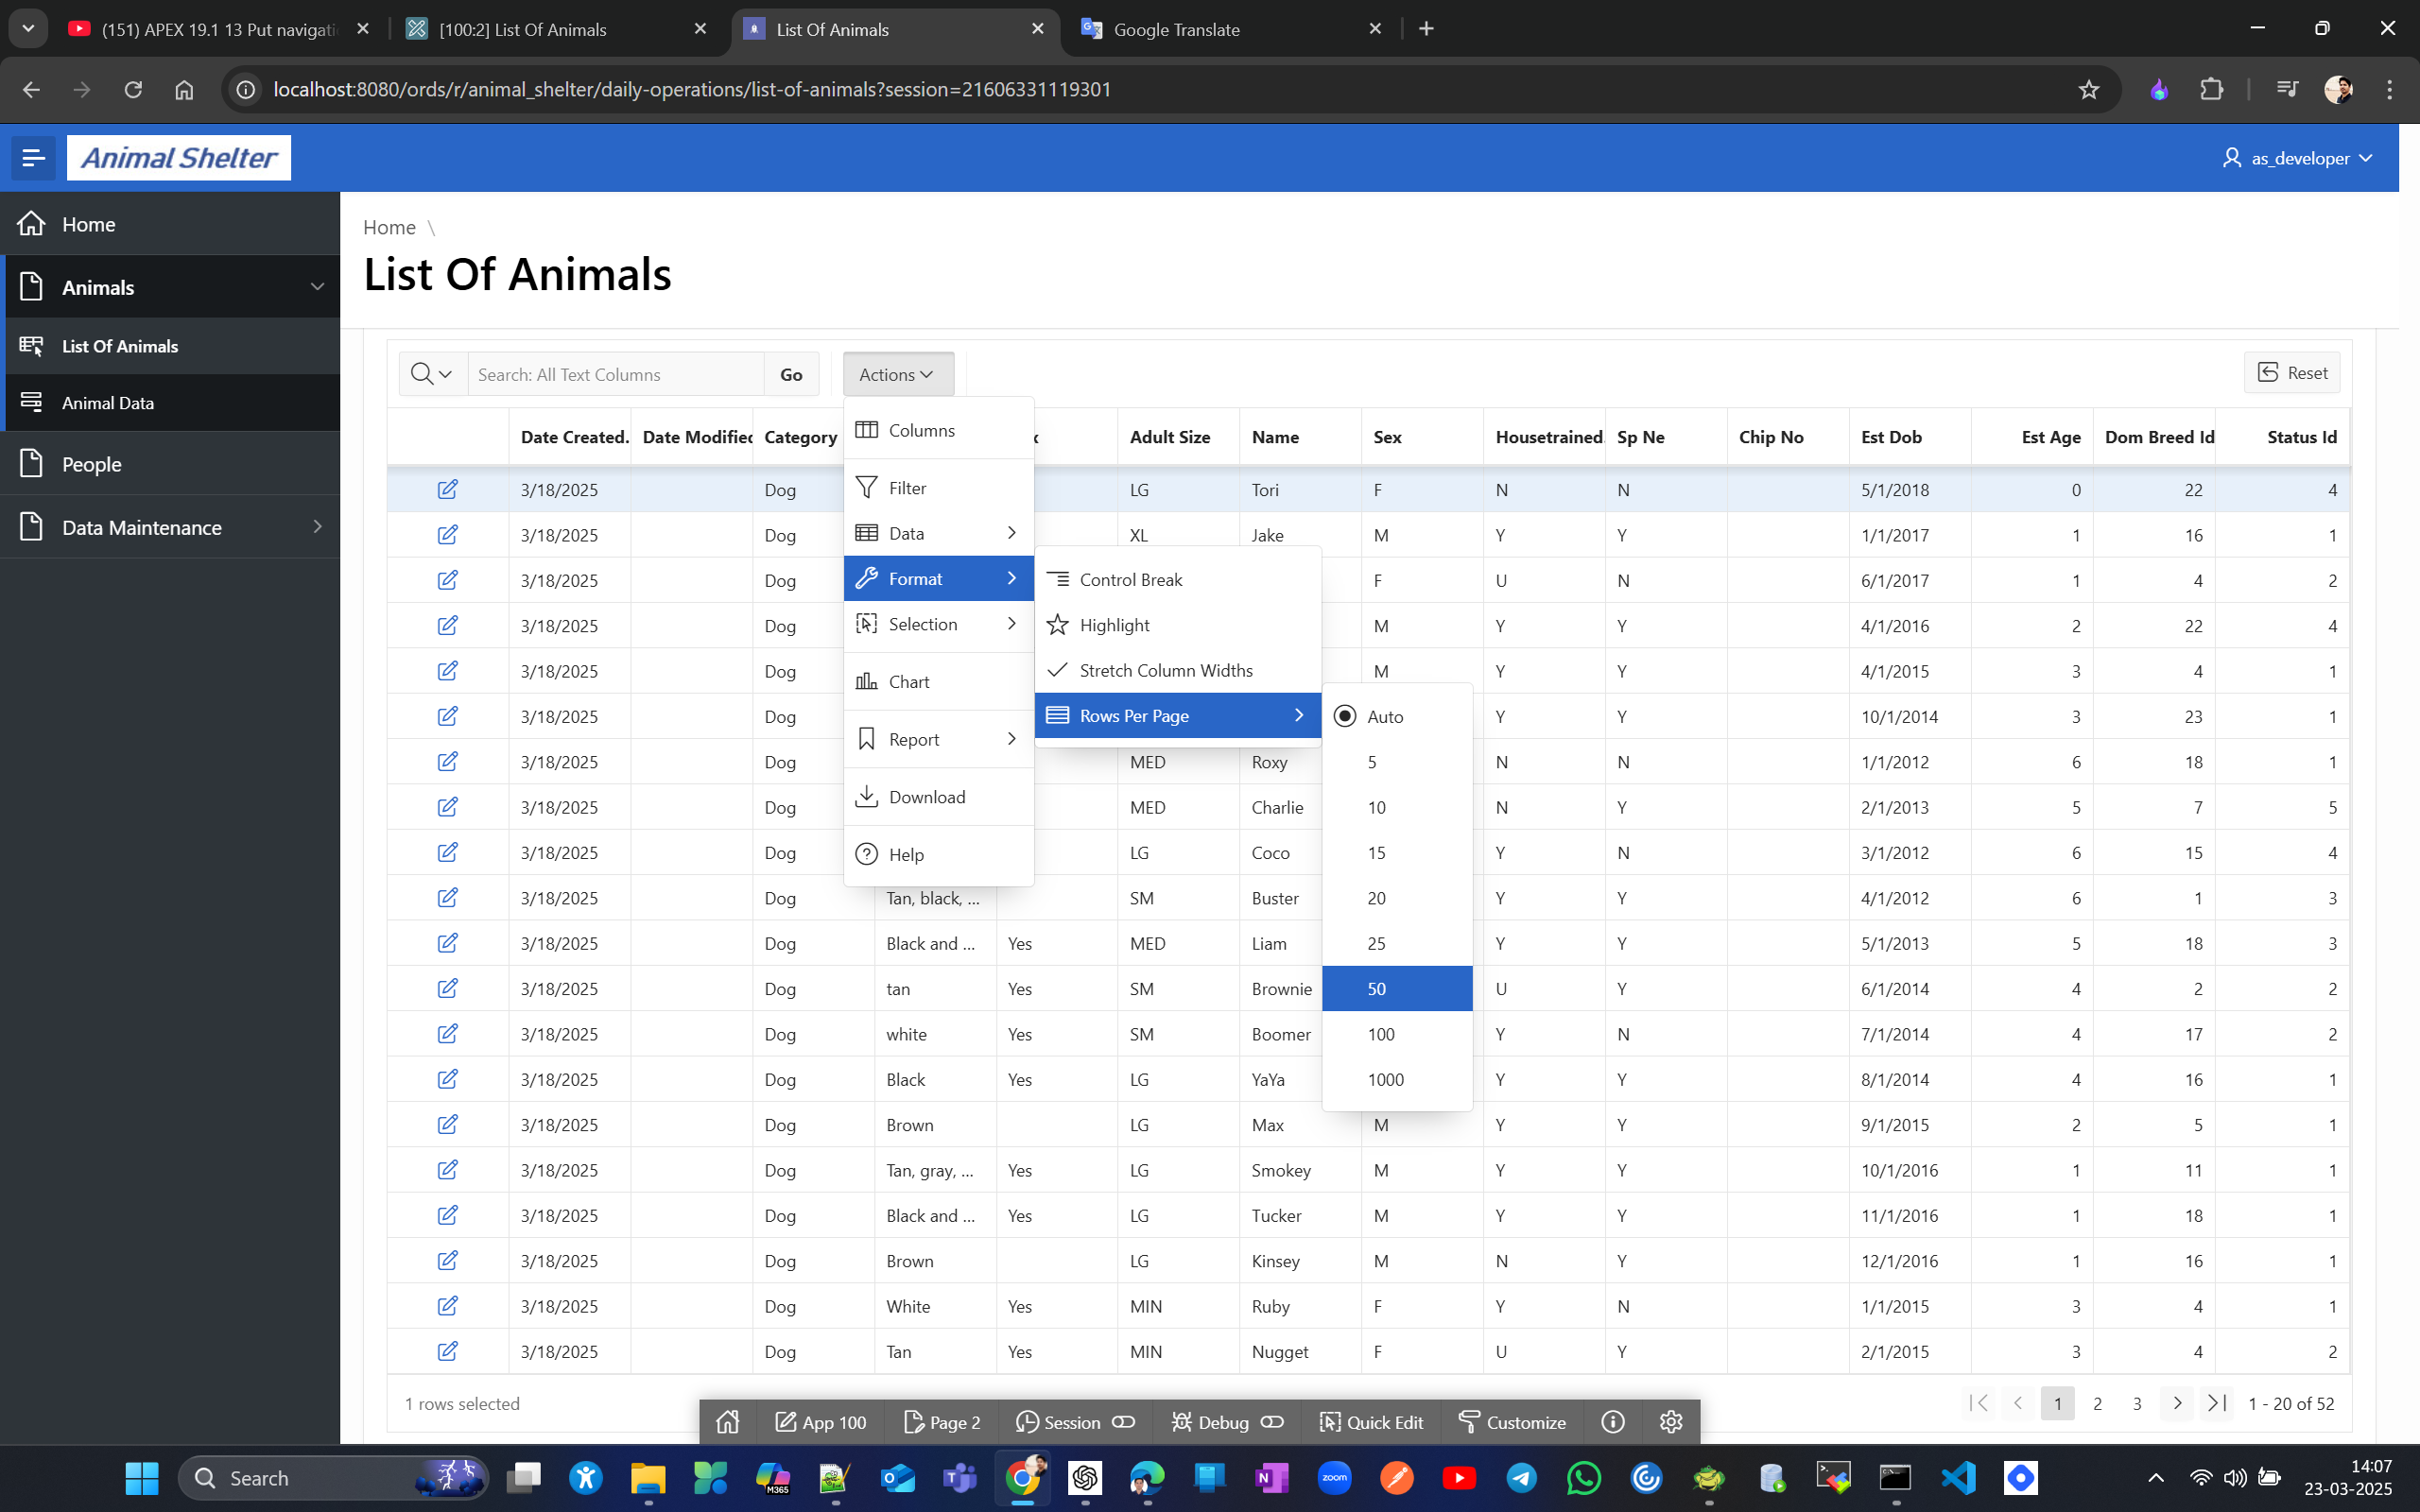
If you don't see navigation arrows, you can enable them by going to actions → Format → Rows per page → 50.
if you don’t see Rows per page option under Format then you can go to page designer and chnage Pagination type attribute to Page and enable Show total count to see total no records in the report
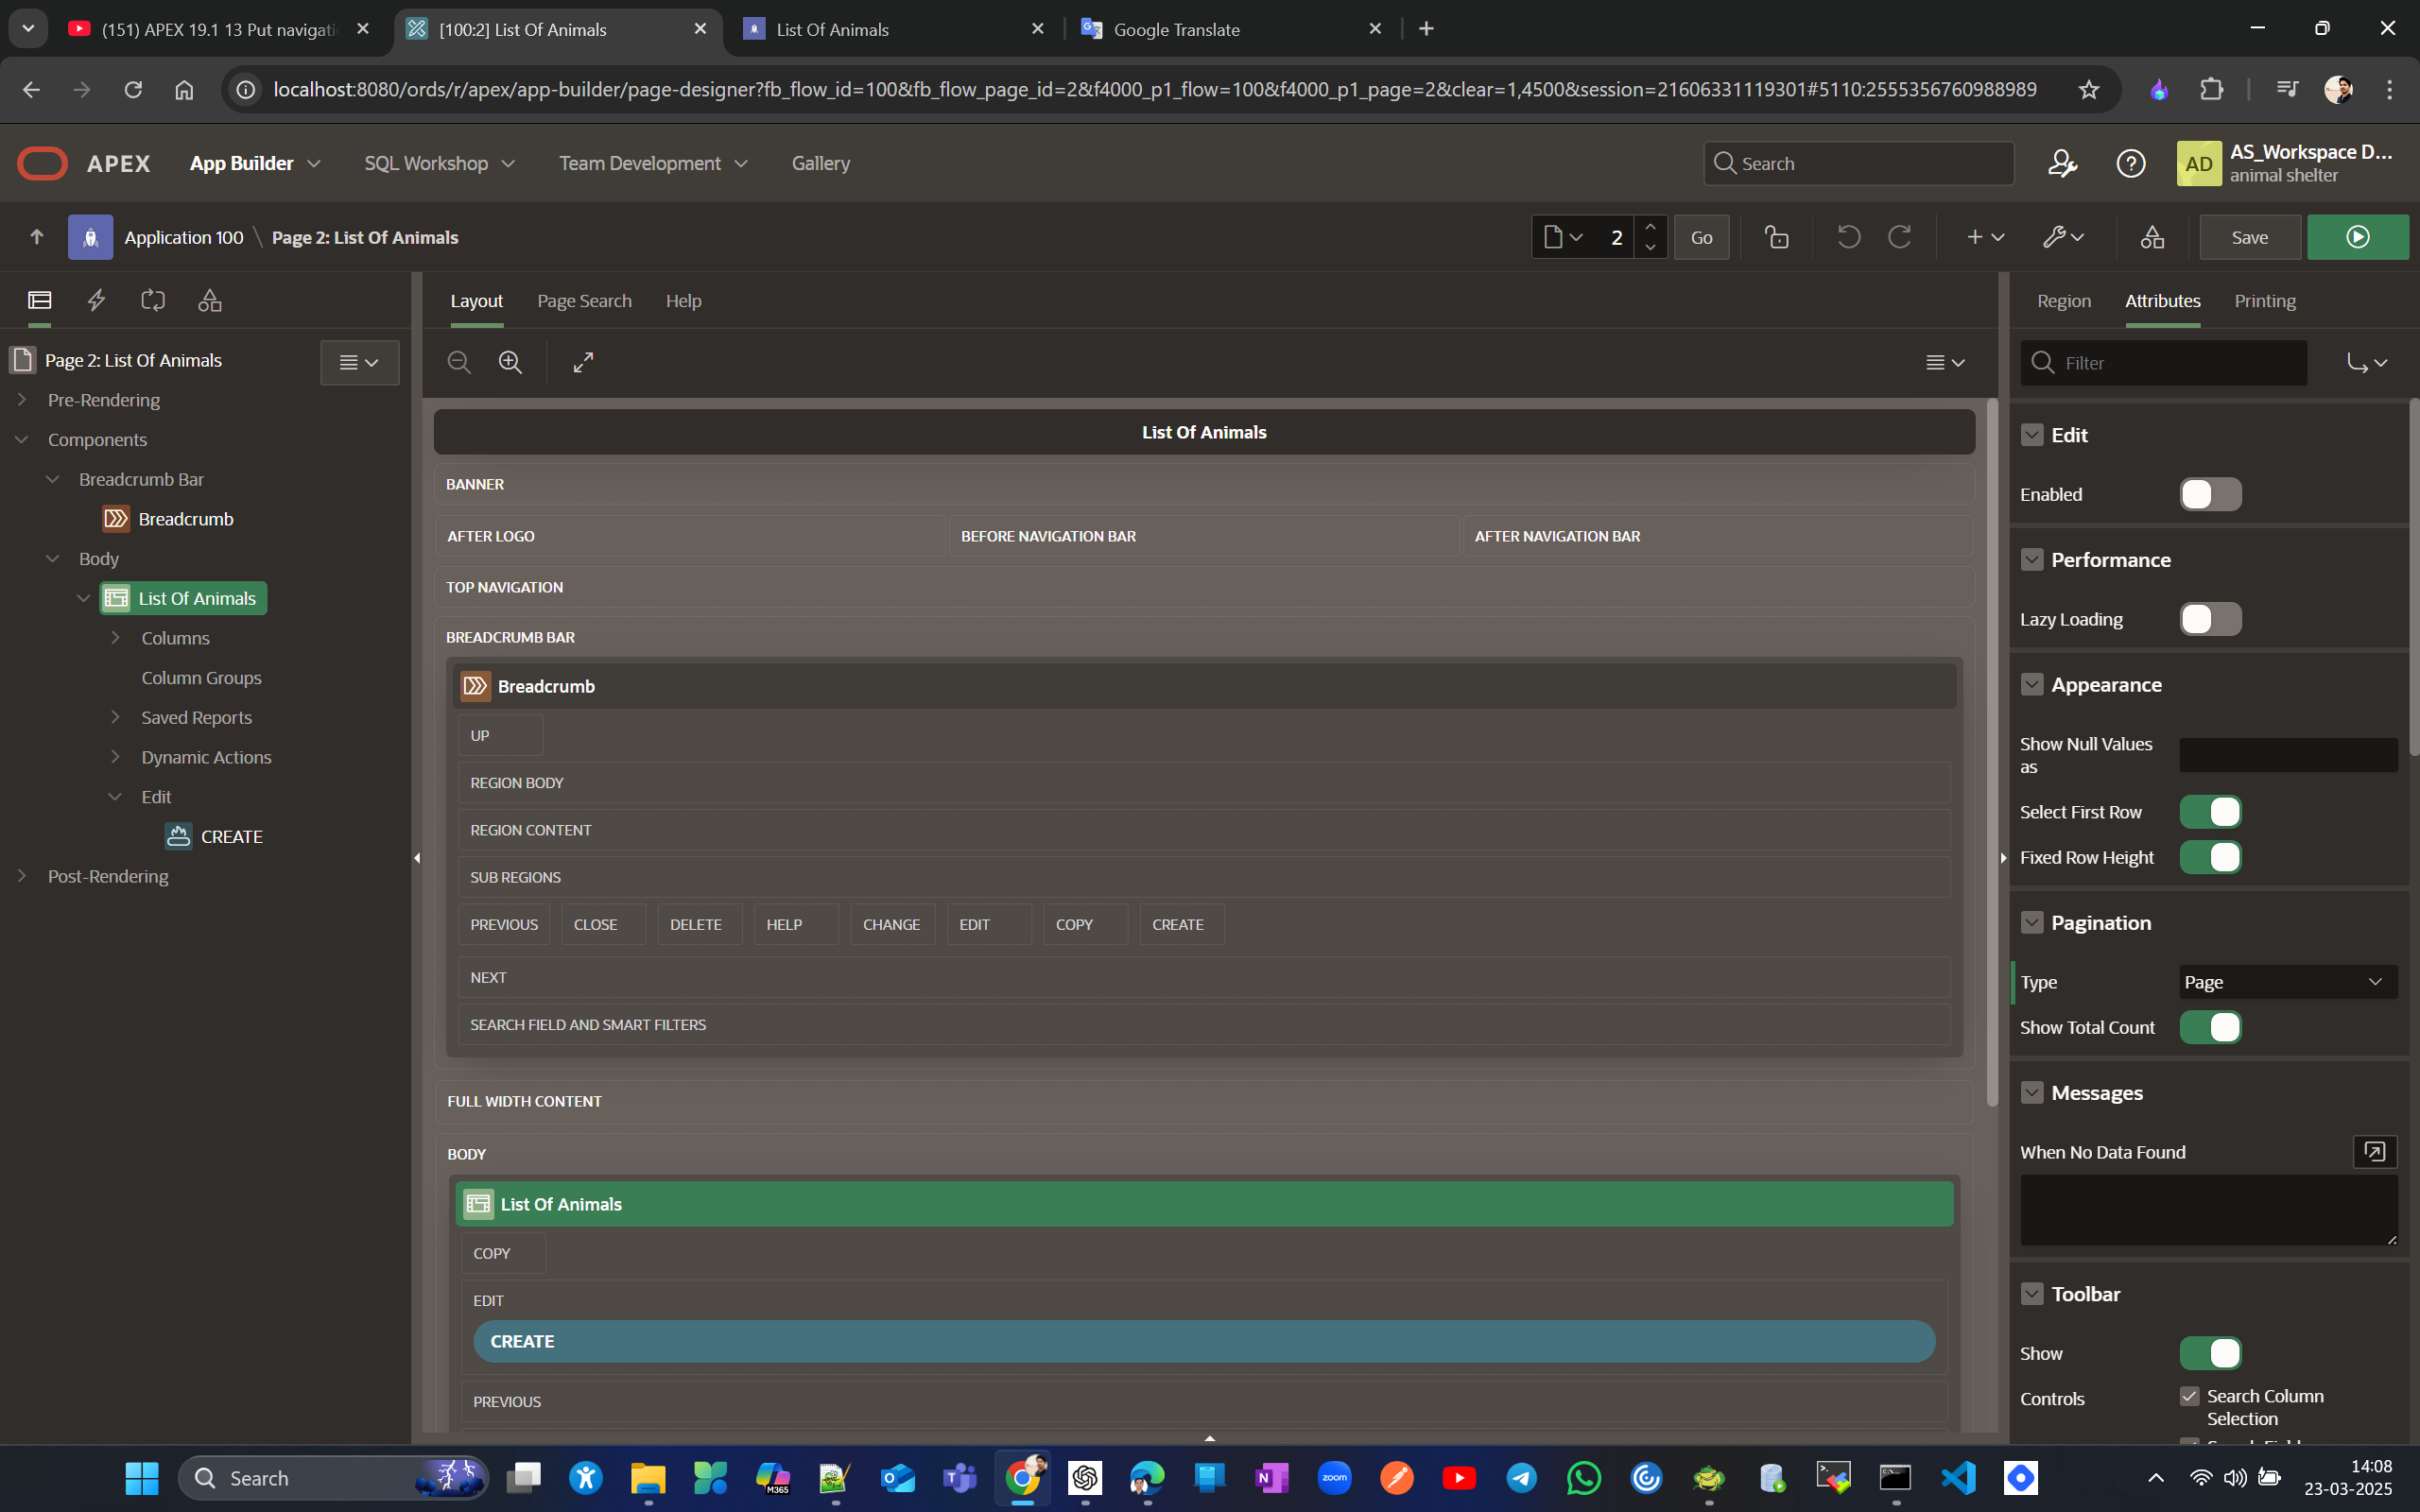
Now to get this navigation in the top of page along with bottom you can do like this in APEX version older than 20. but for 20+ version I don’t see this option. still searching :)
Modify the display of few LOVs to radio group from select list. Go to Page #5 form LOVs designer → change type to Radio Group.
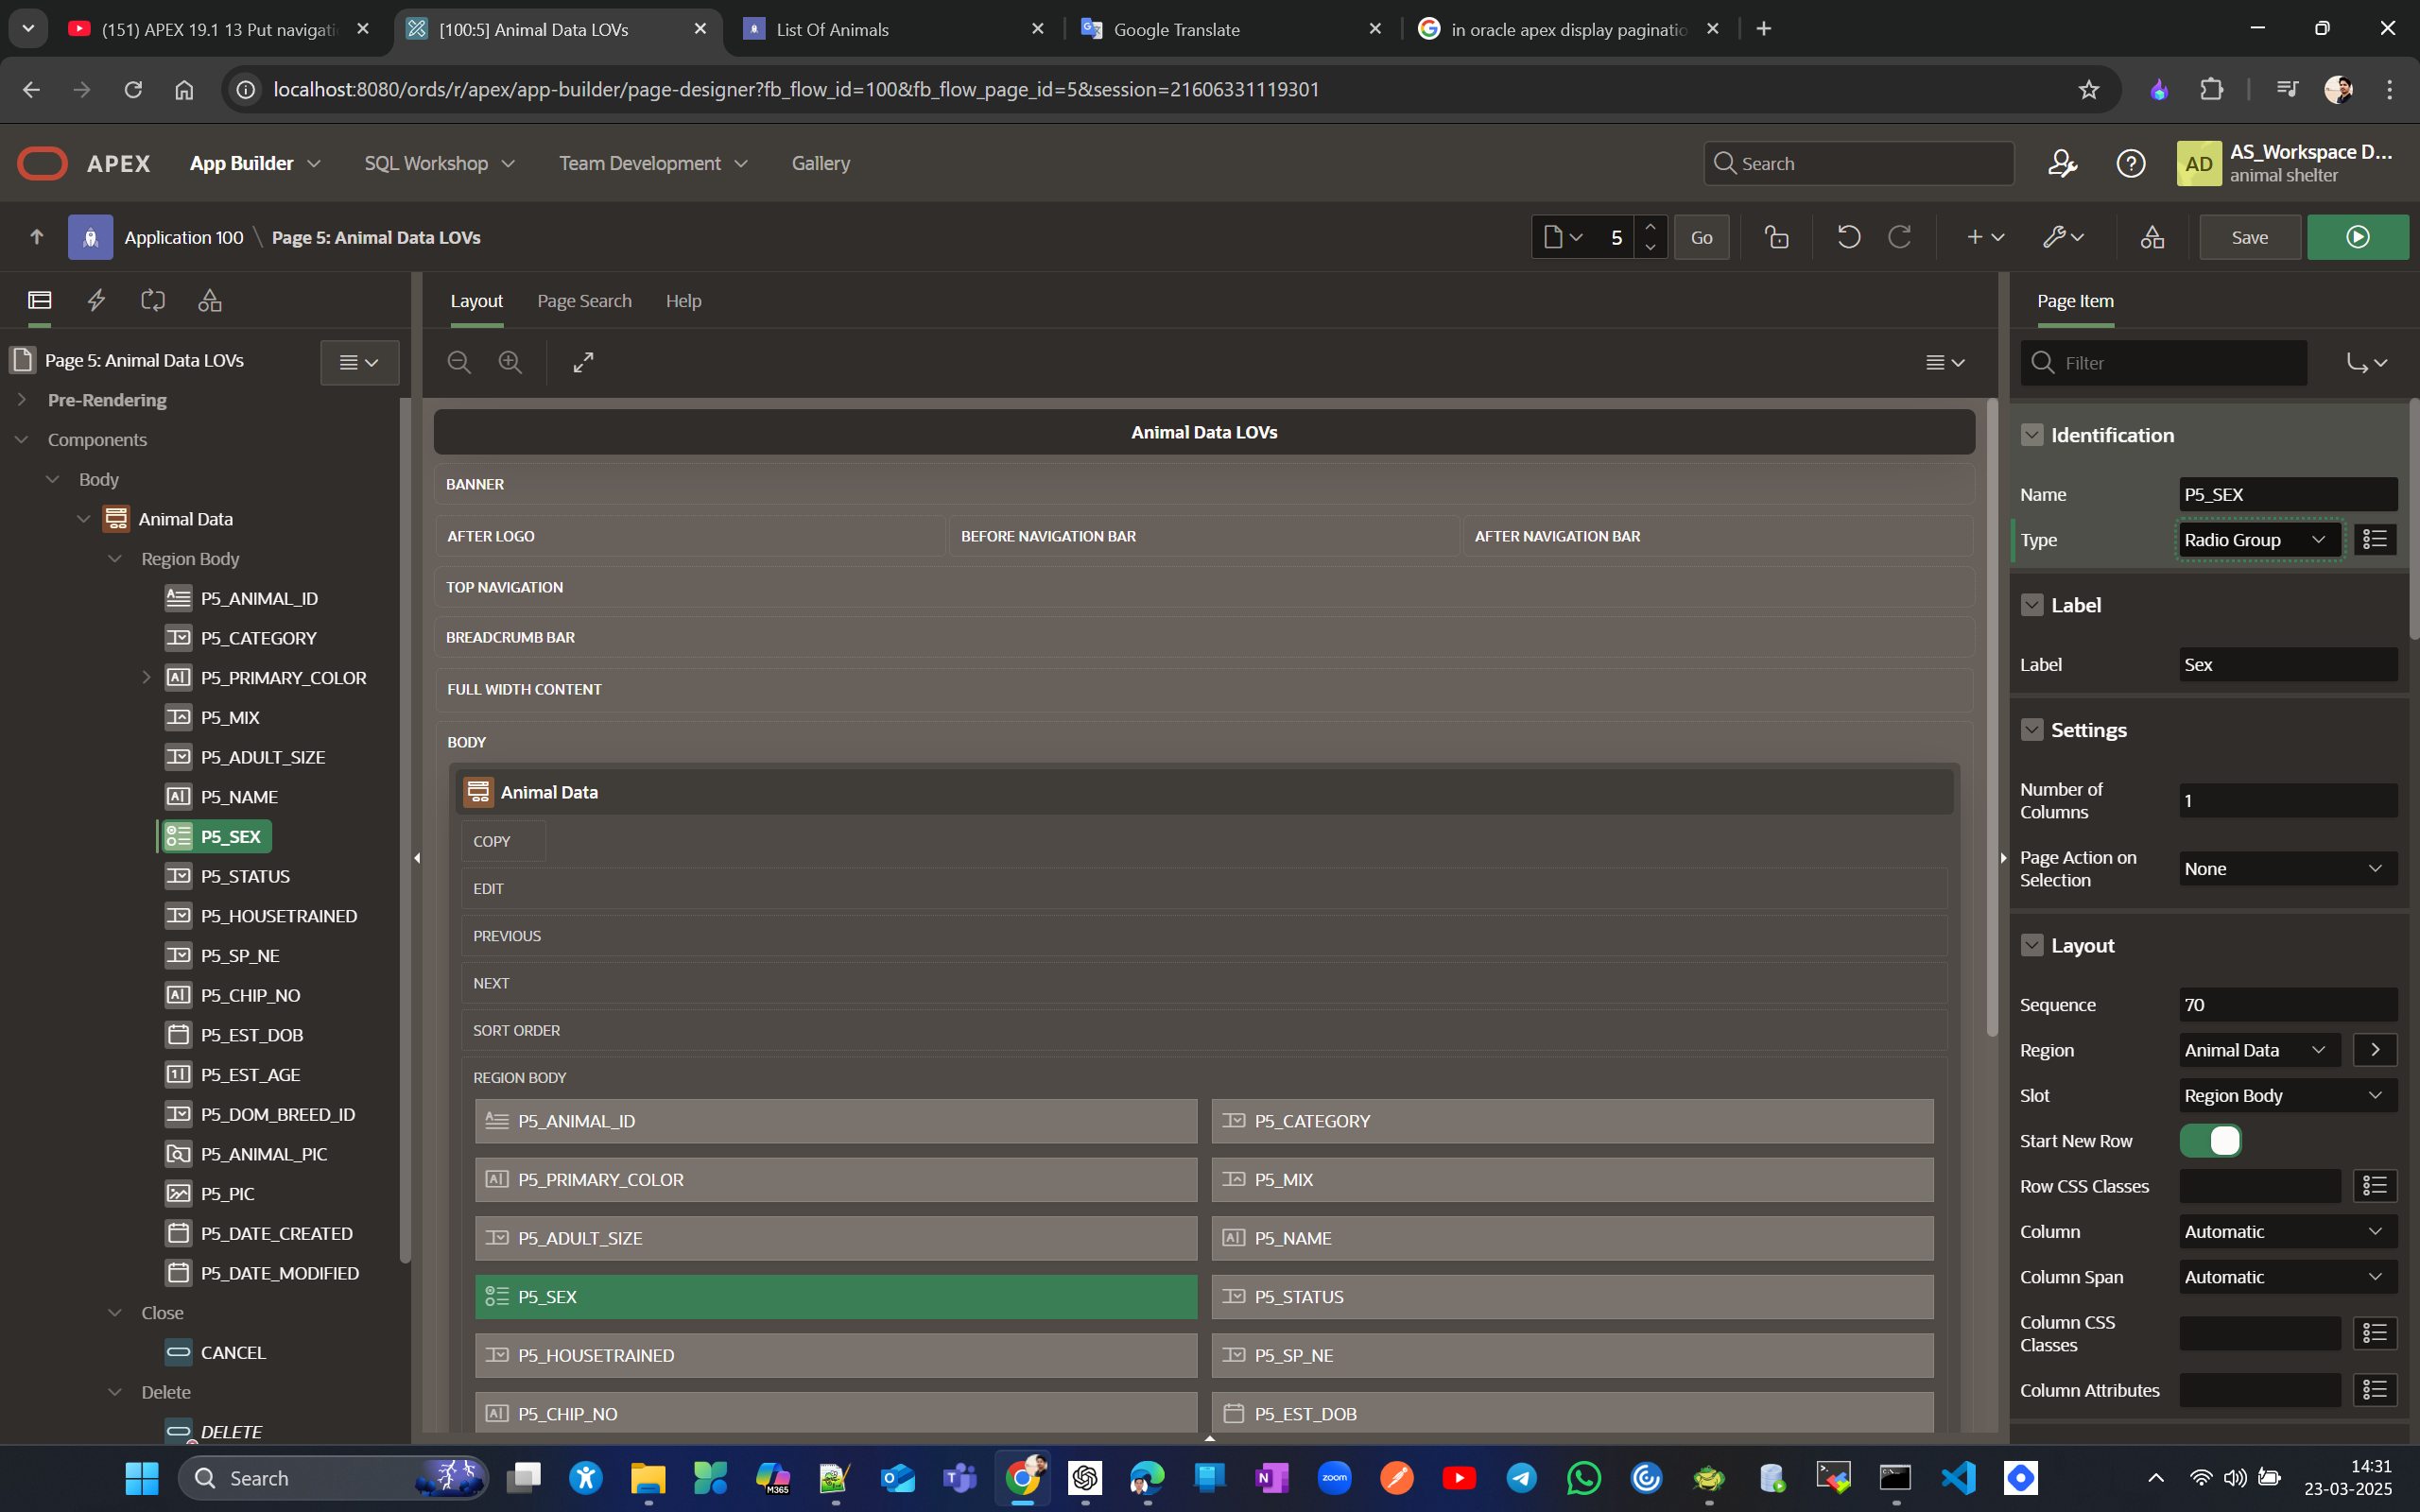
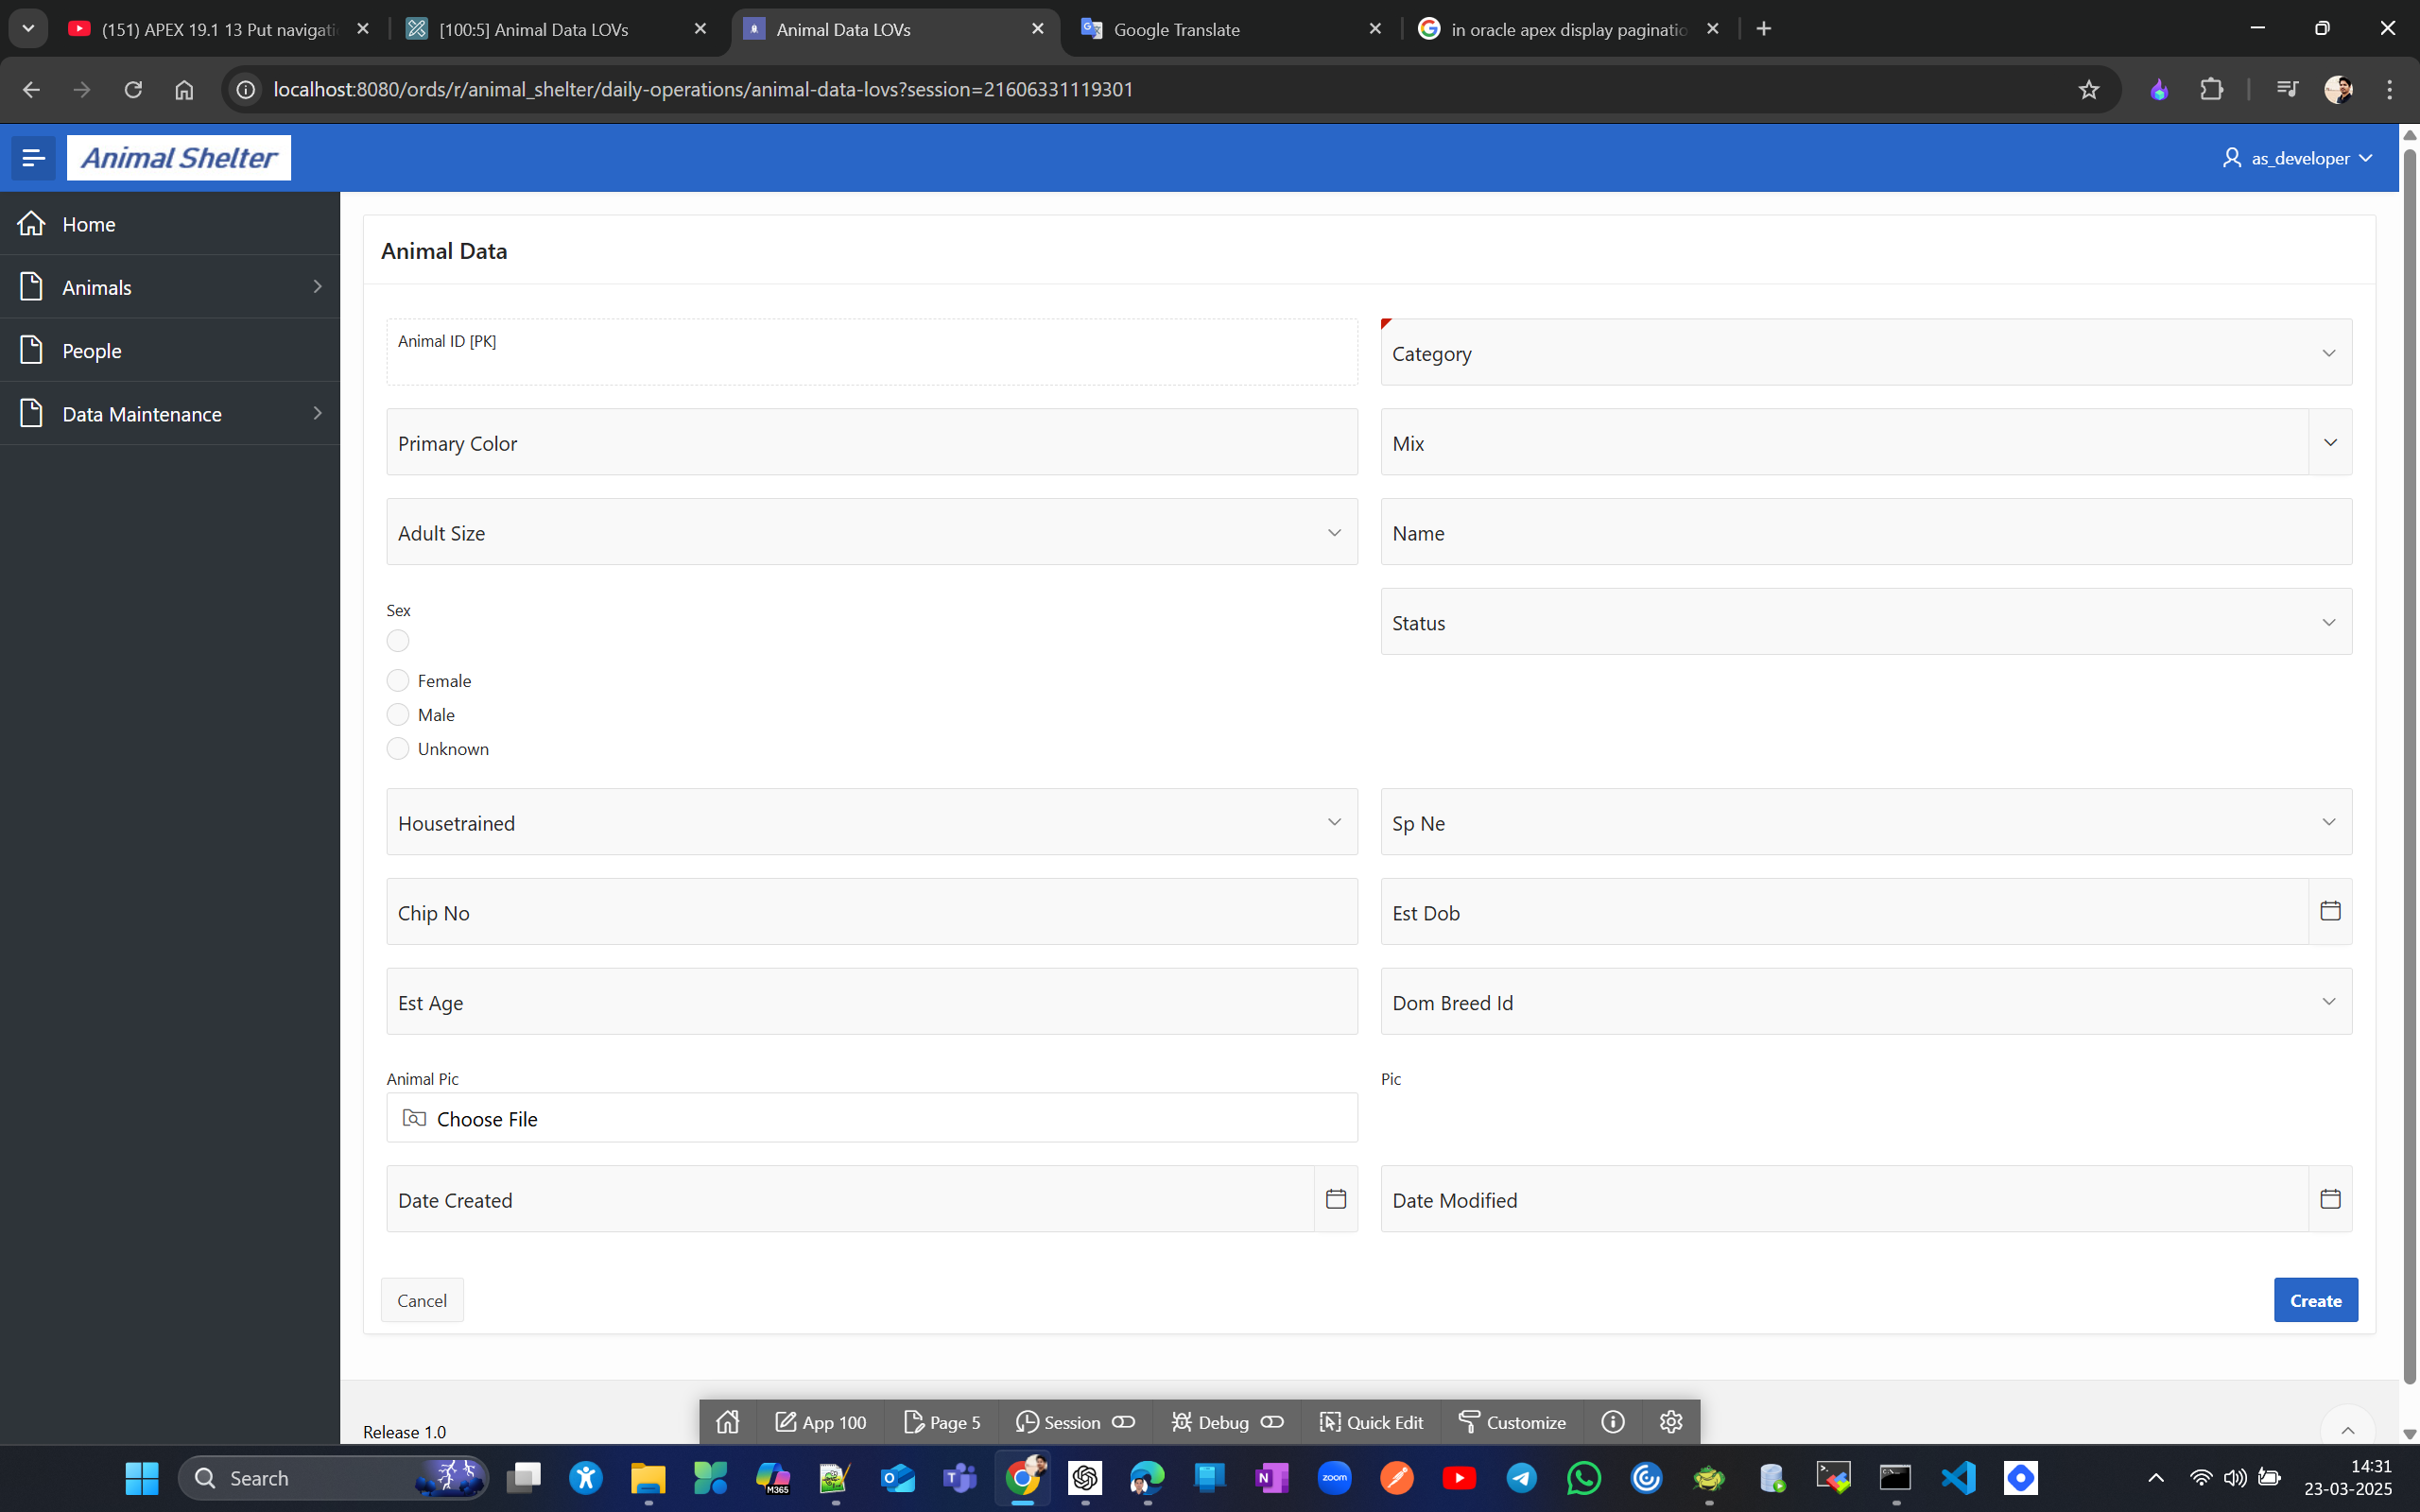
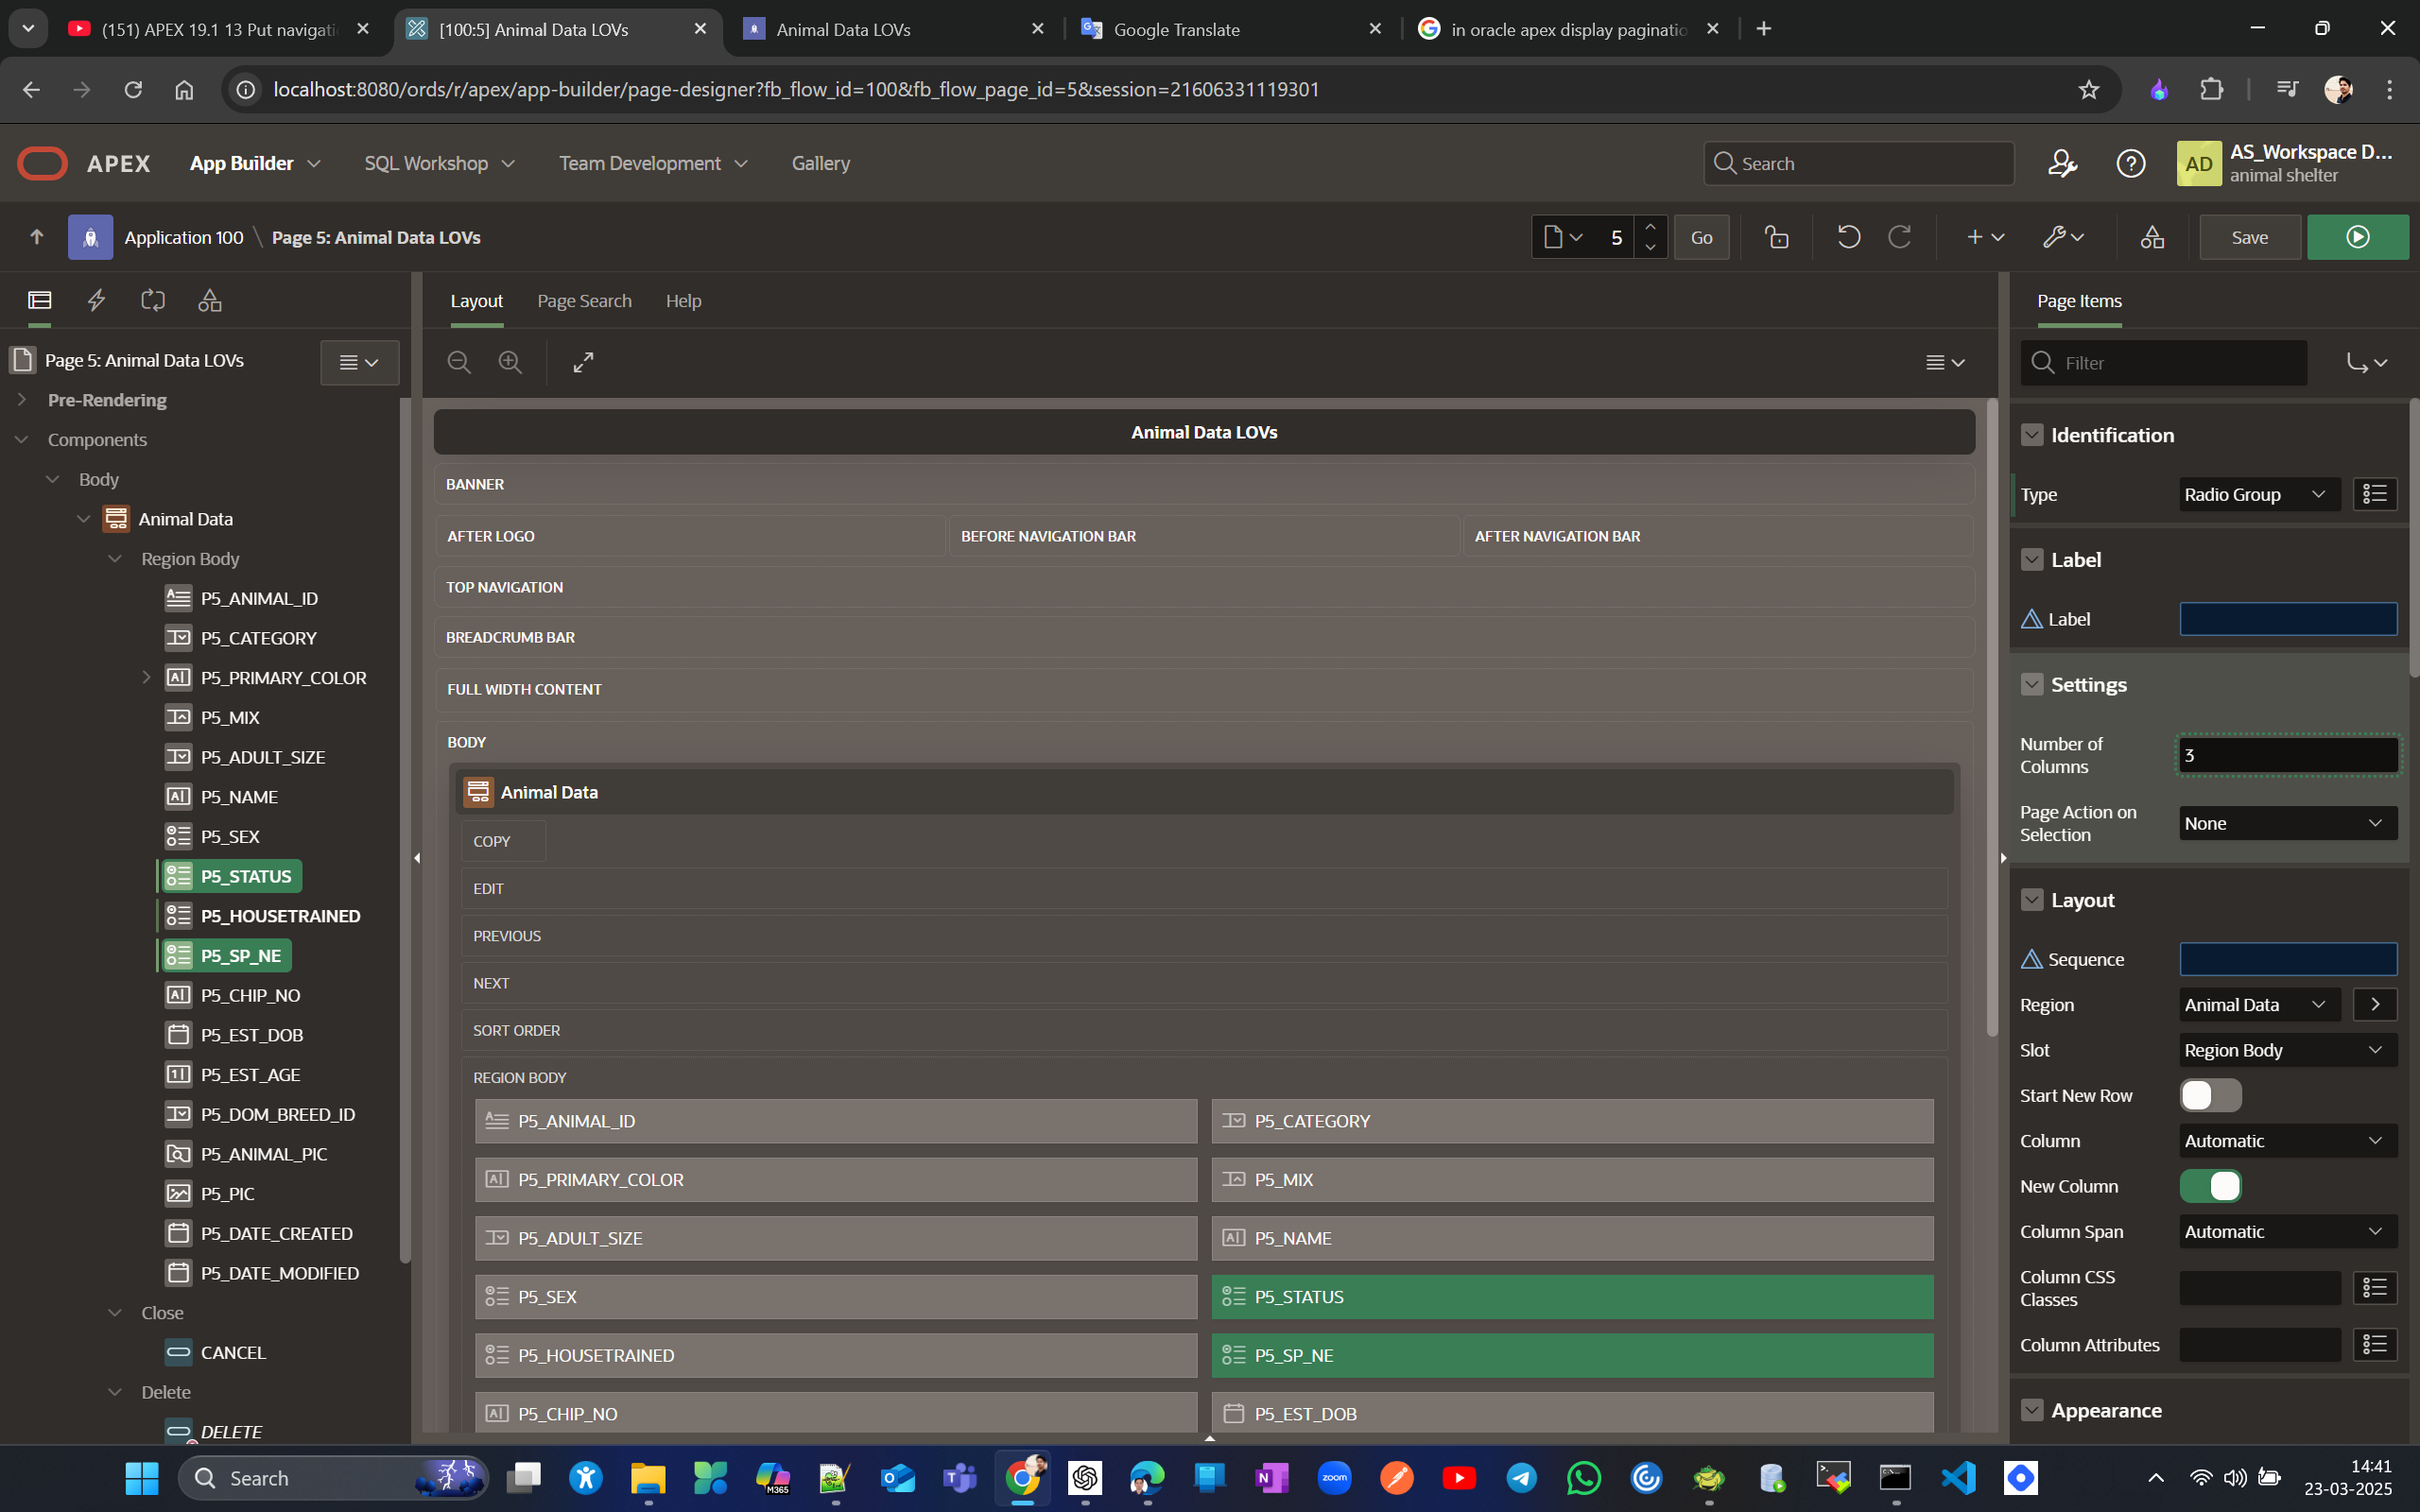
Change the Number of Columns under settings to 3 to prevent options from appearing vertically, and disable Display Null Value to avoid showing null values as radio button.
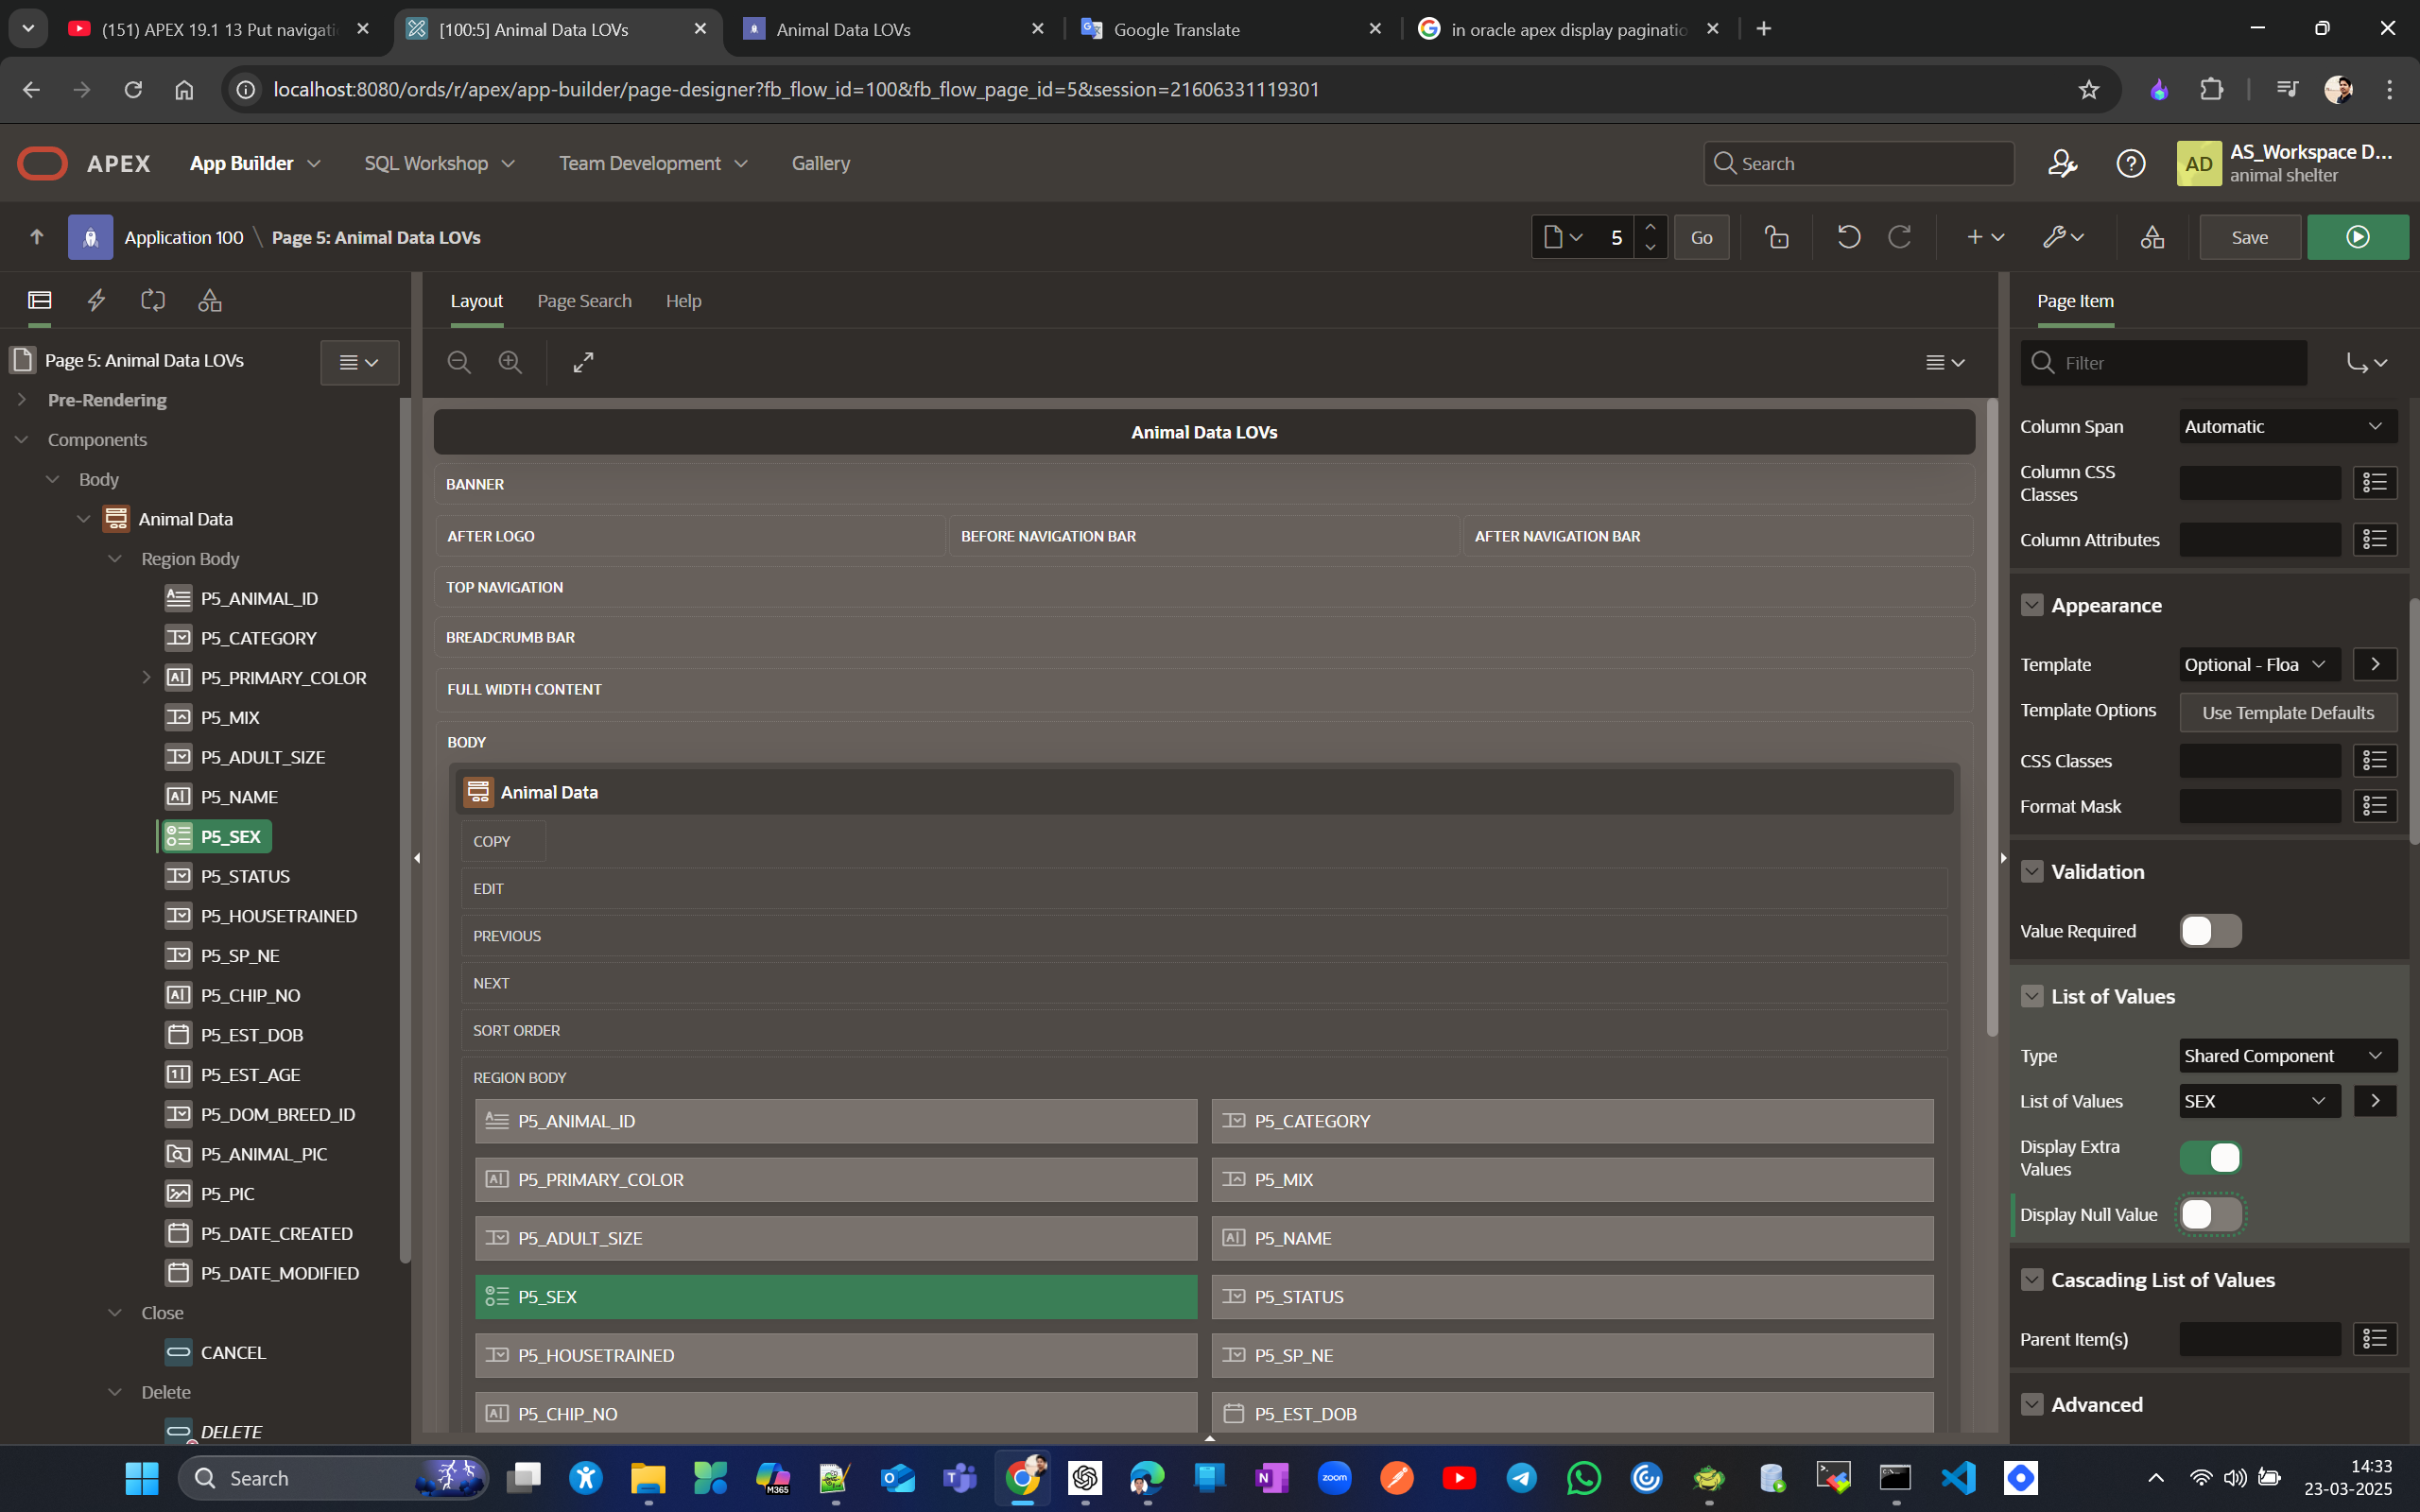
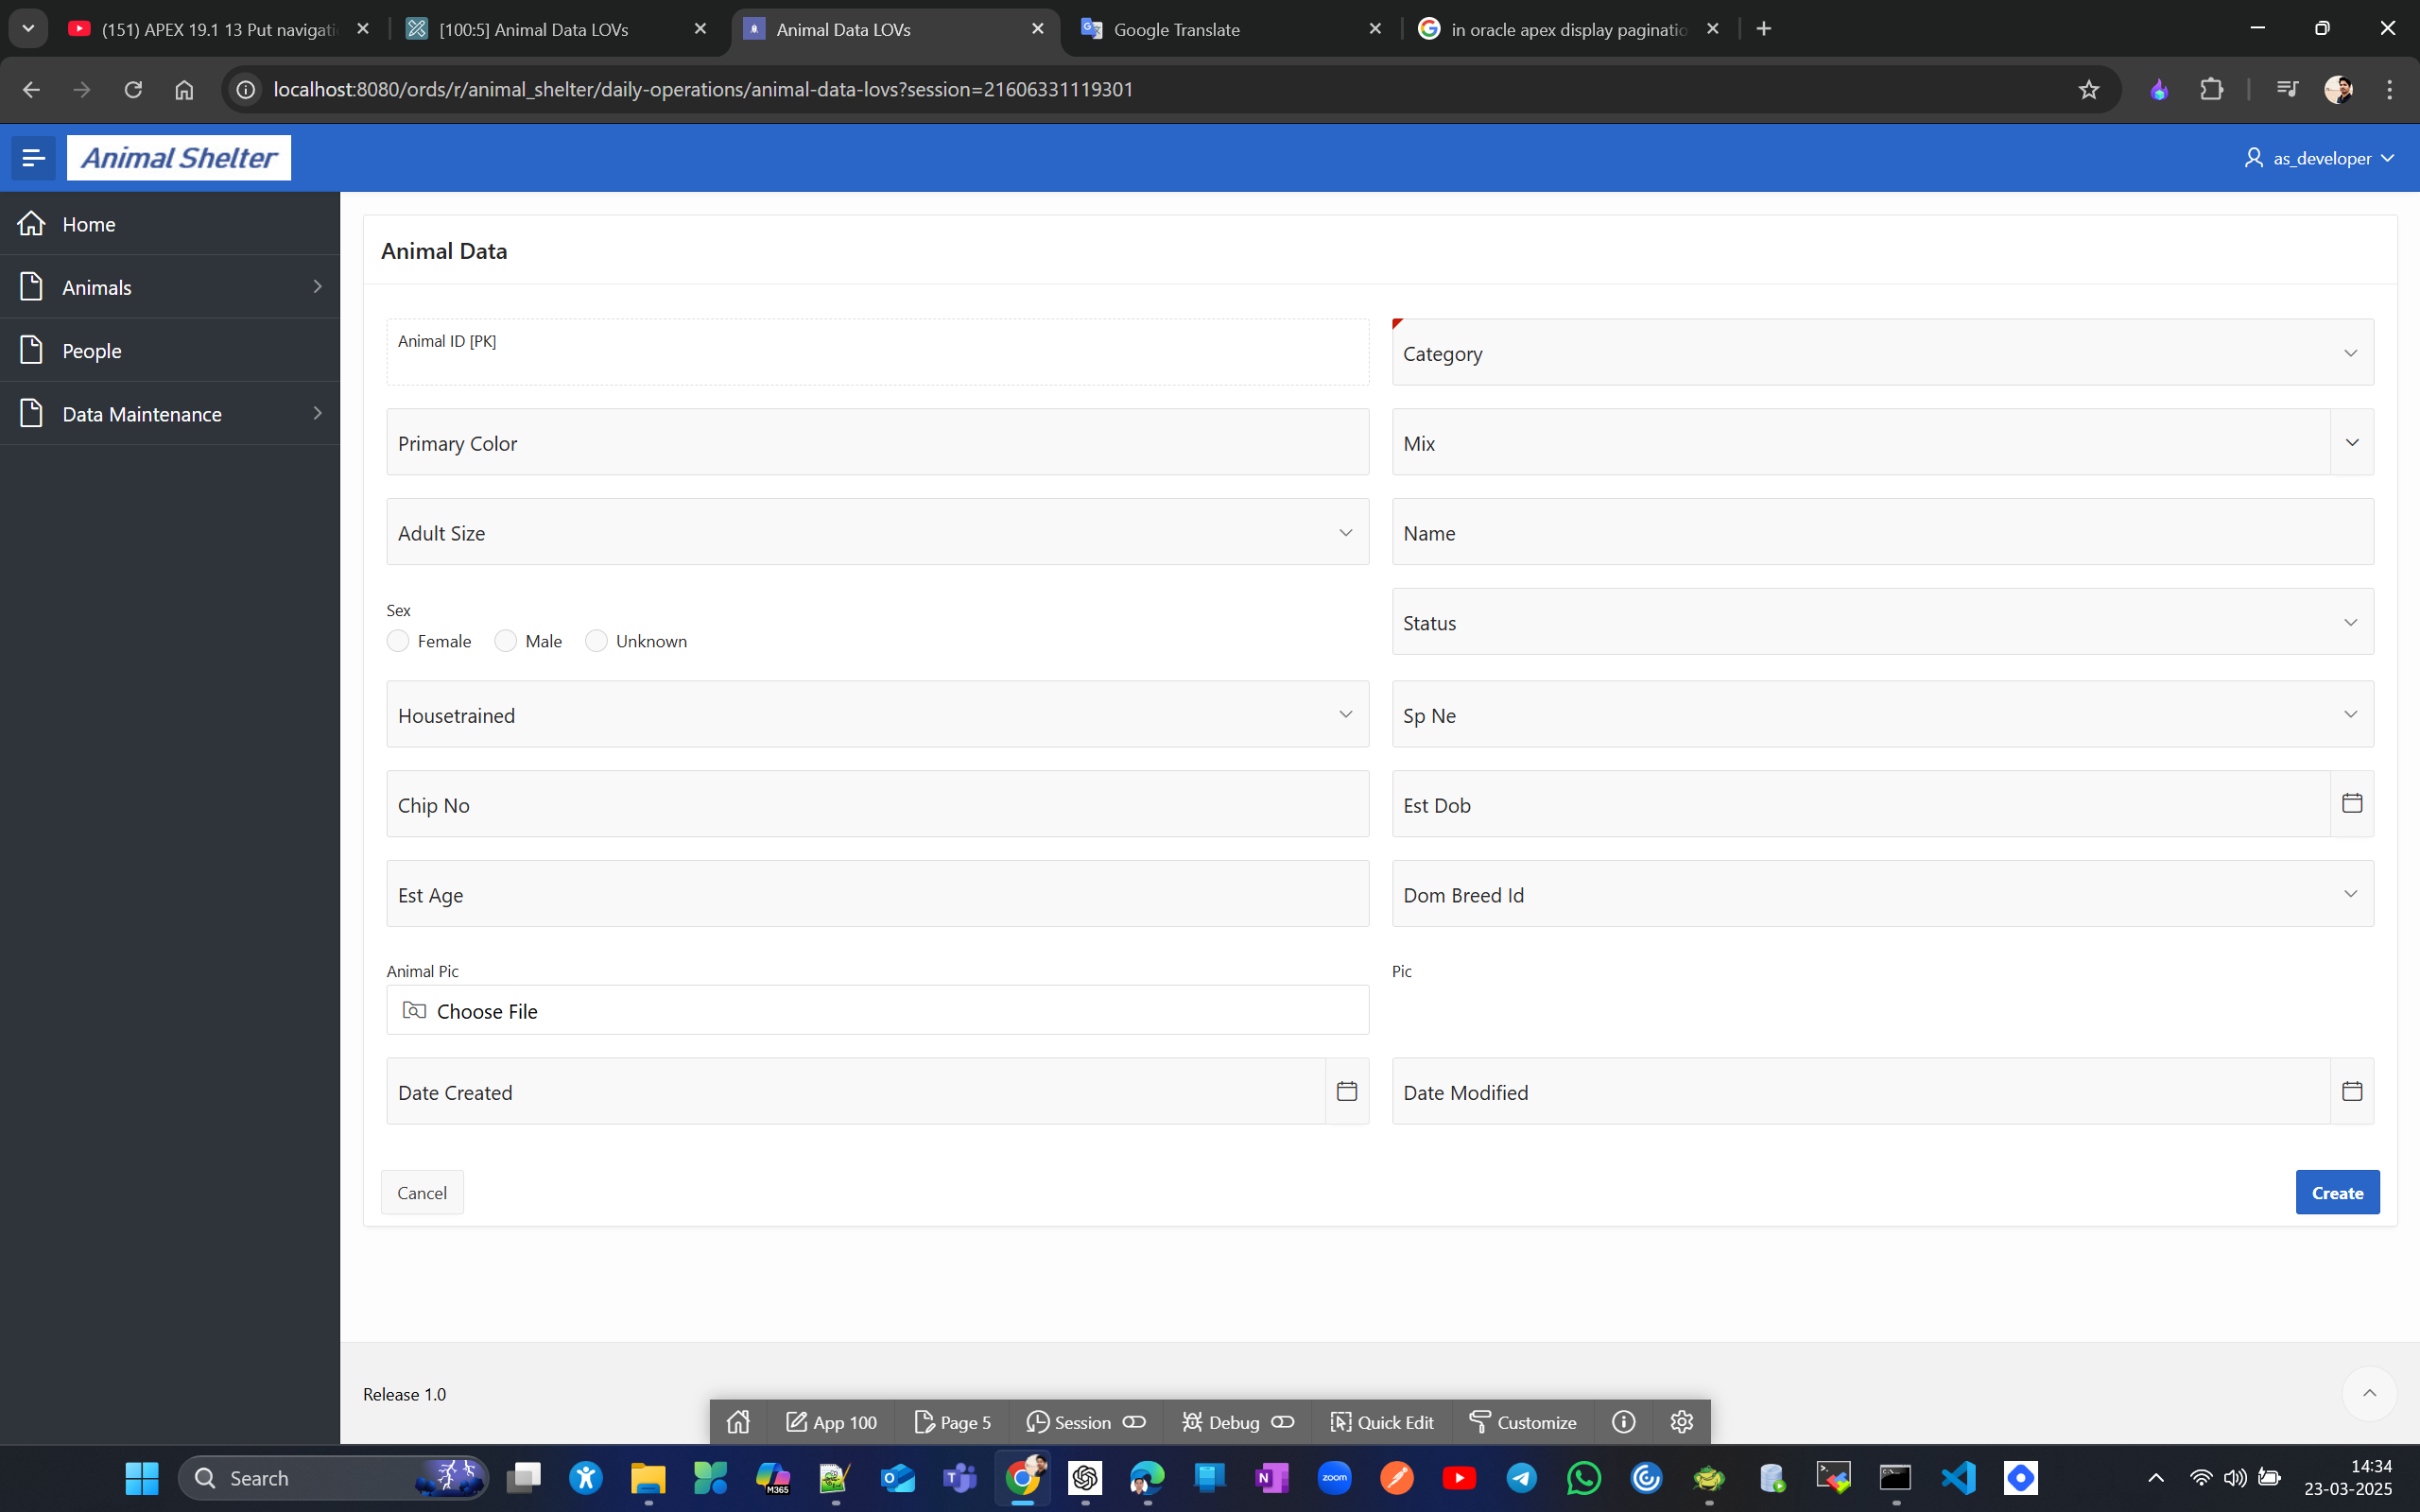
Note : To select multiple values. insted of radio group you can choose check list or shuttle.
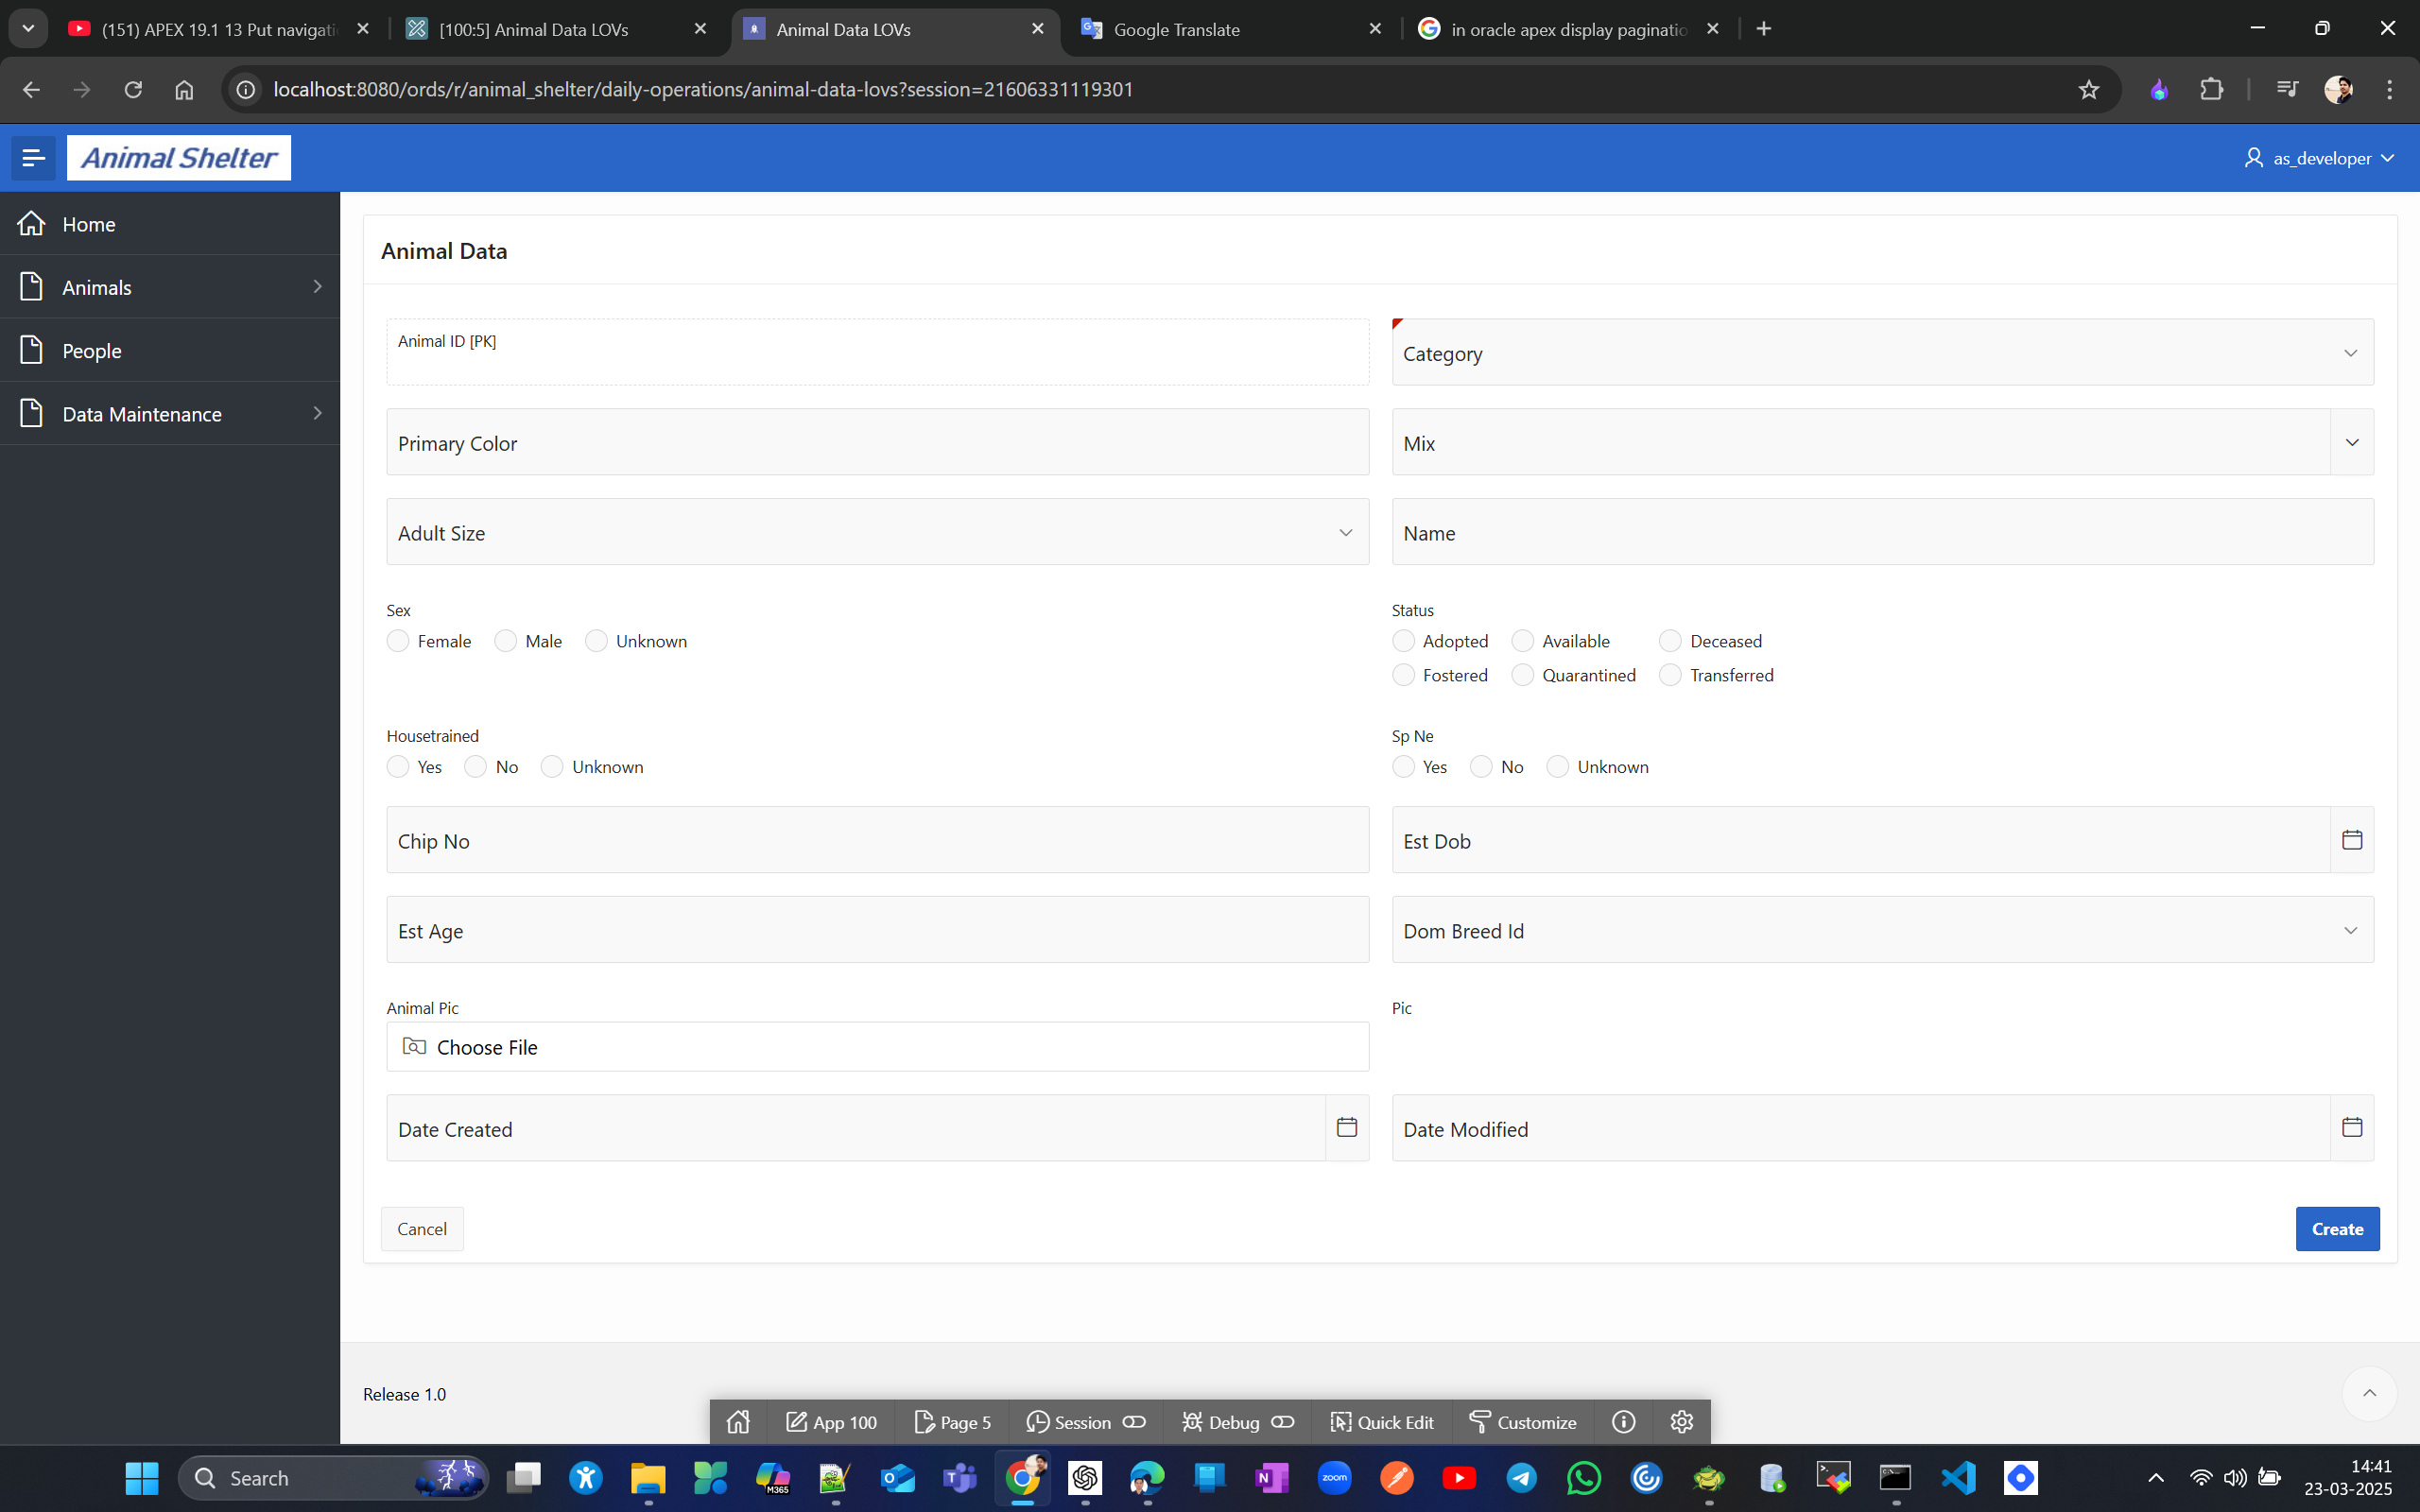
Now Similary you cange Housetrained from select list to radio grup.You can chnage for status and SP_NE by holding ctrl button and change type to radio group. they both share common lov properties.
Now lets copy List of Animals report (Page #2) and corresponding form with LOVs(page #5) to PROD (AS Operations). Click on any page then copy page#2 and #5 from DEV Daily Operations.
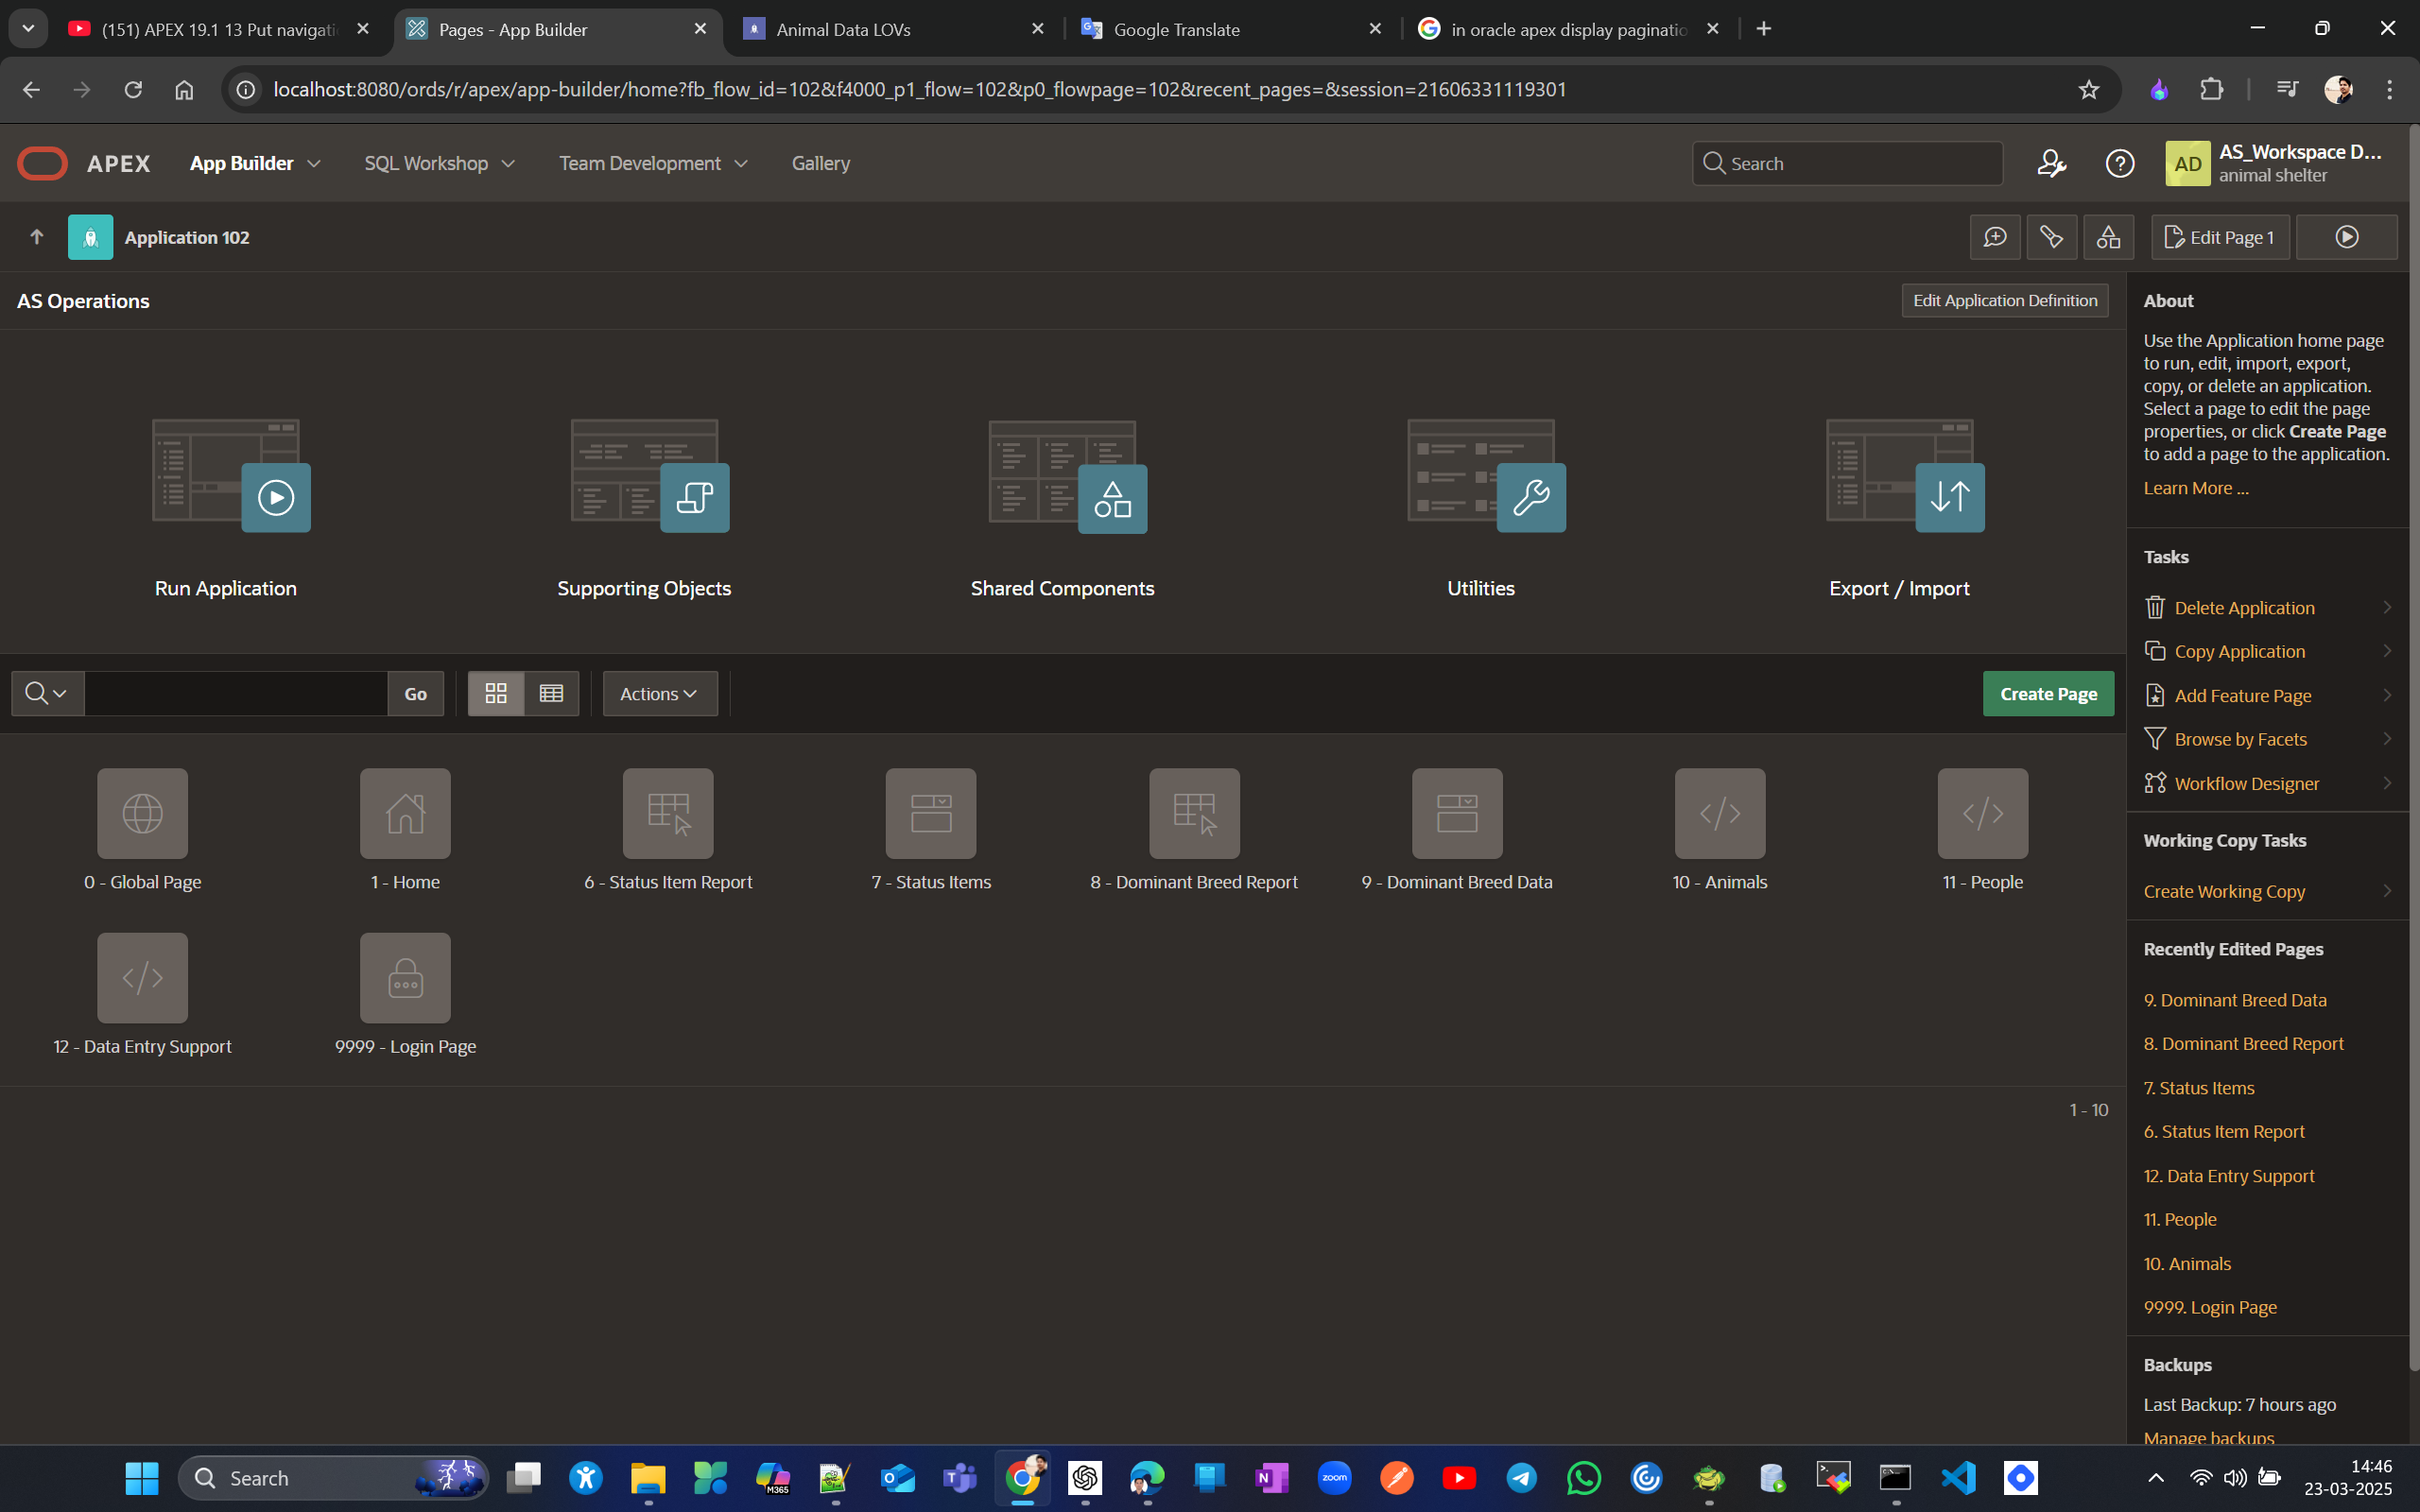
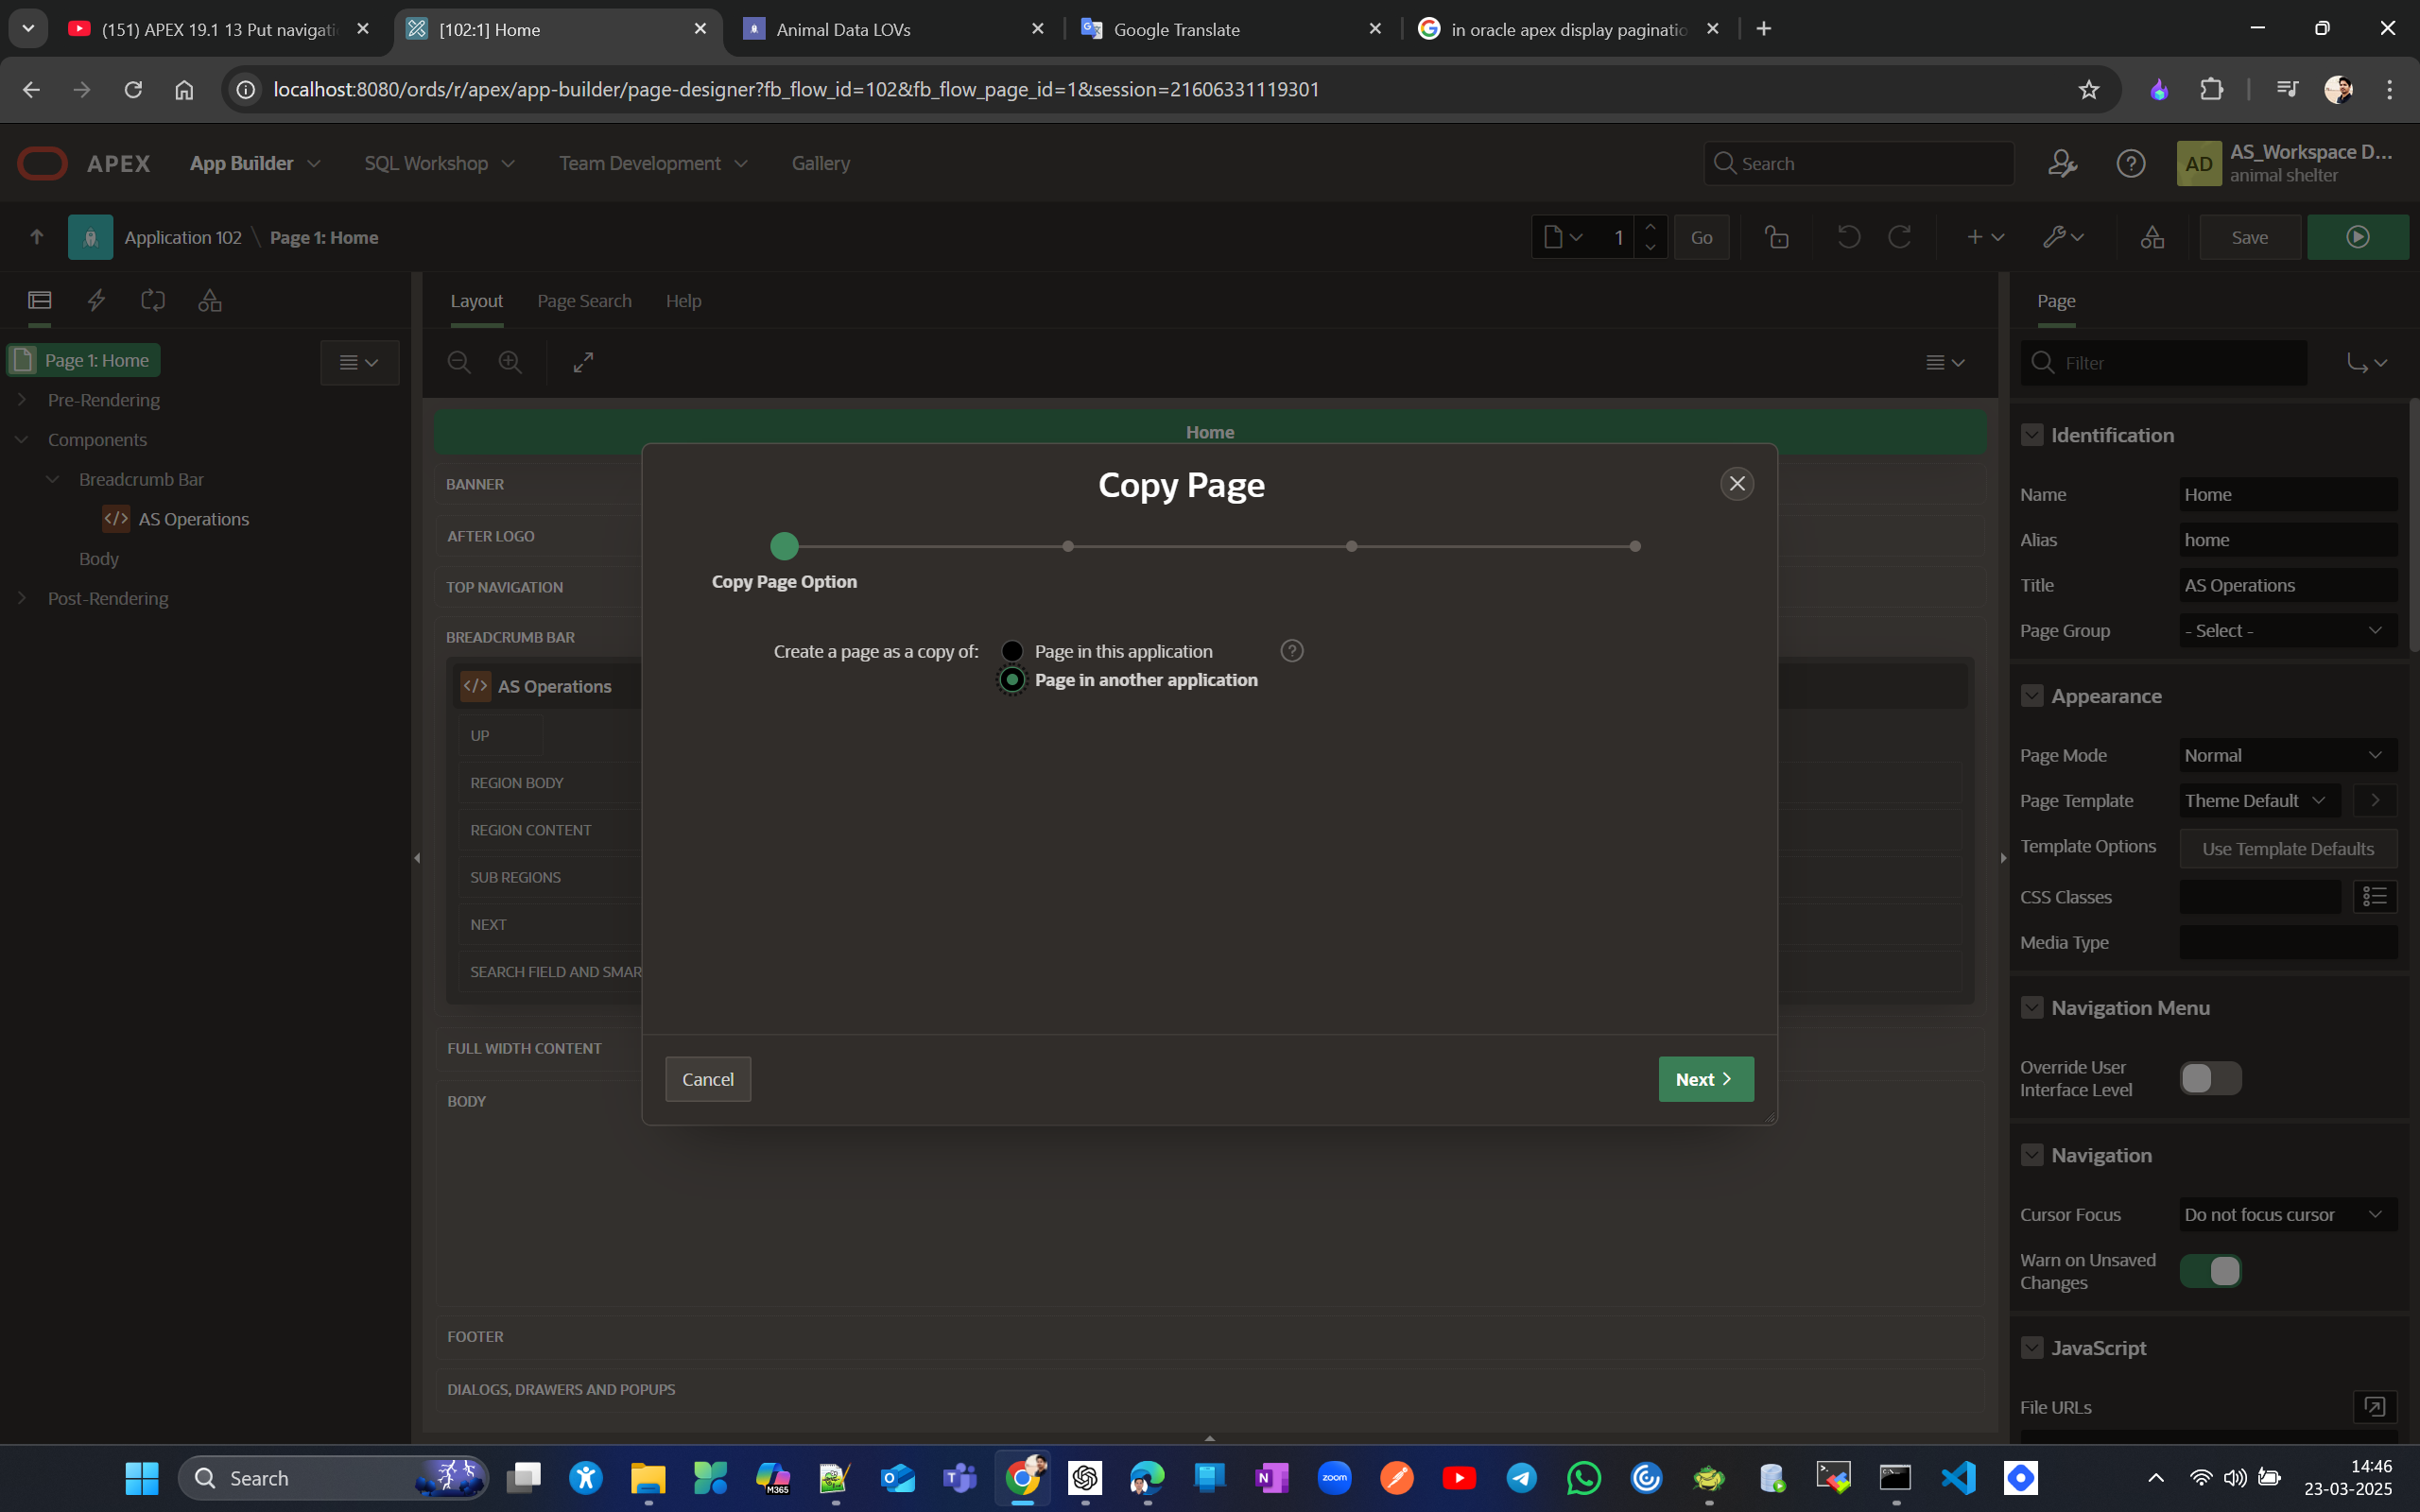
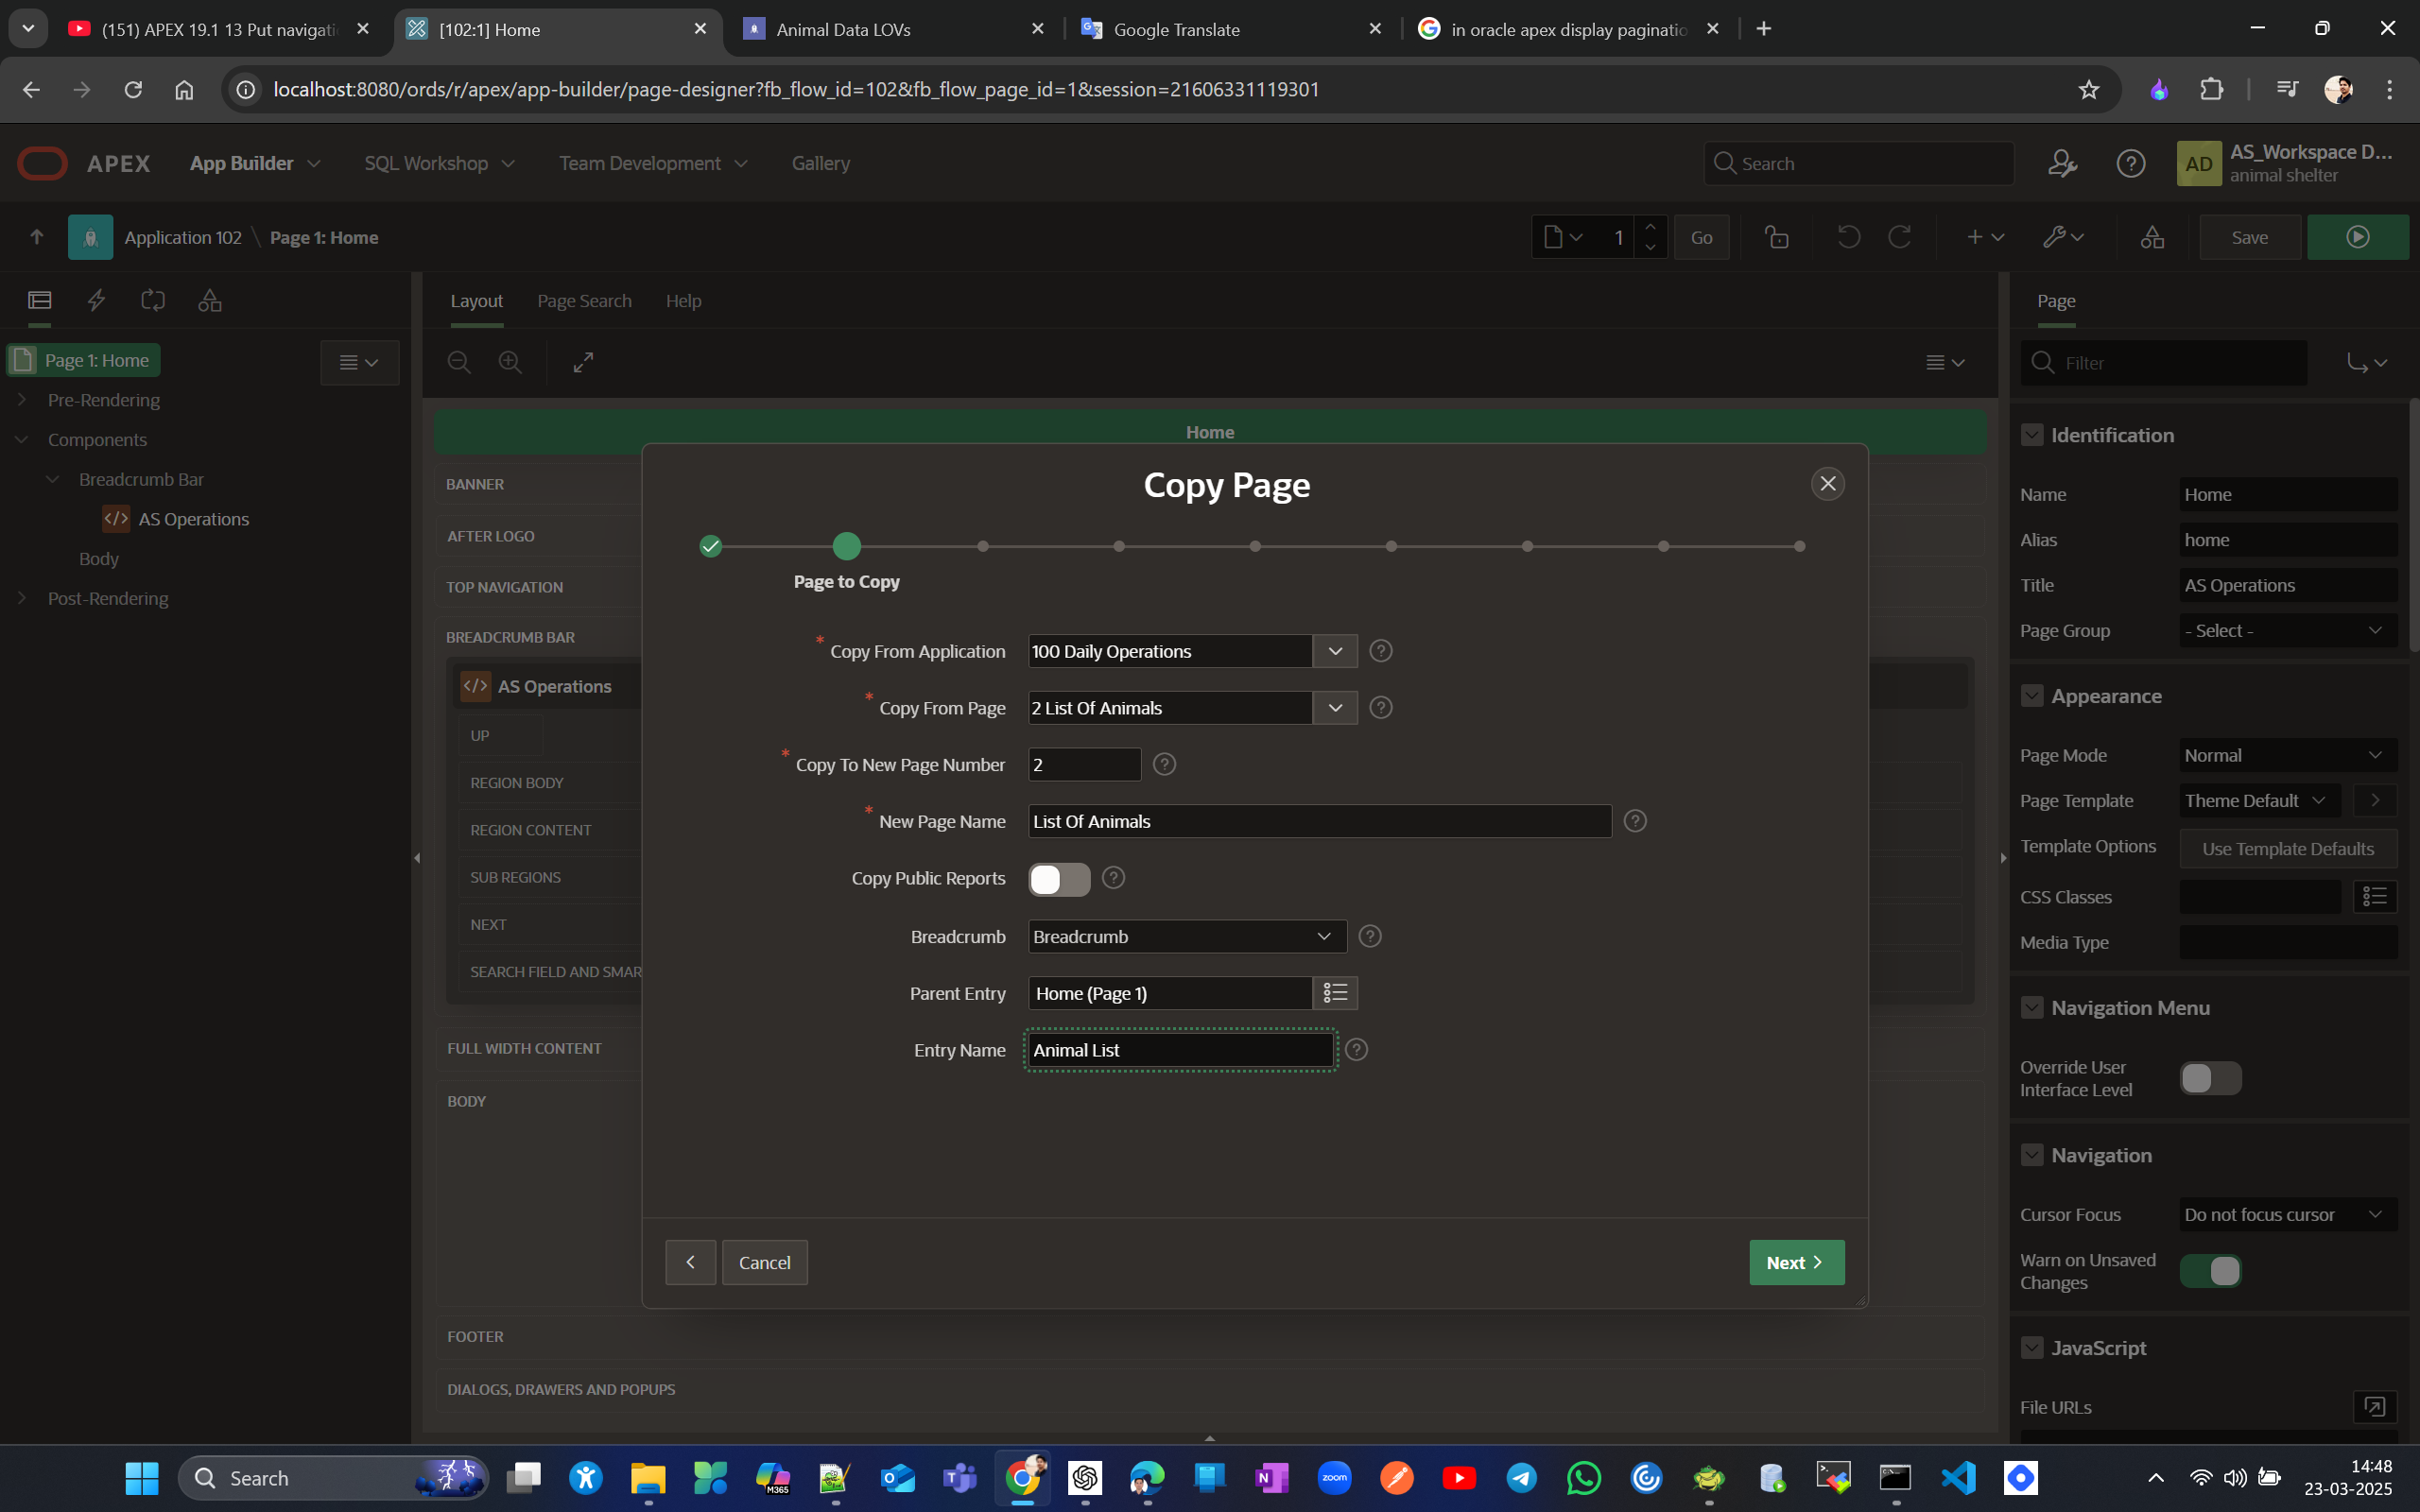
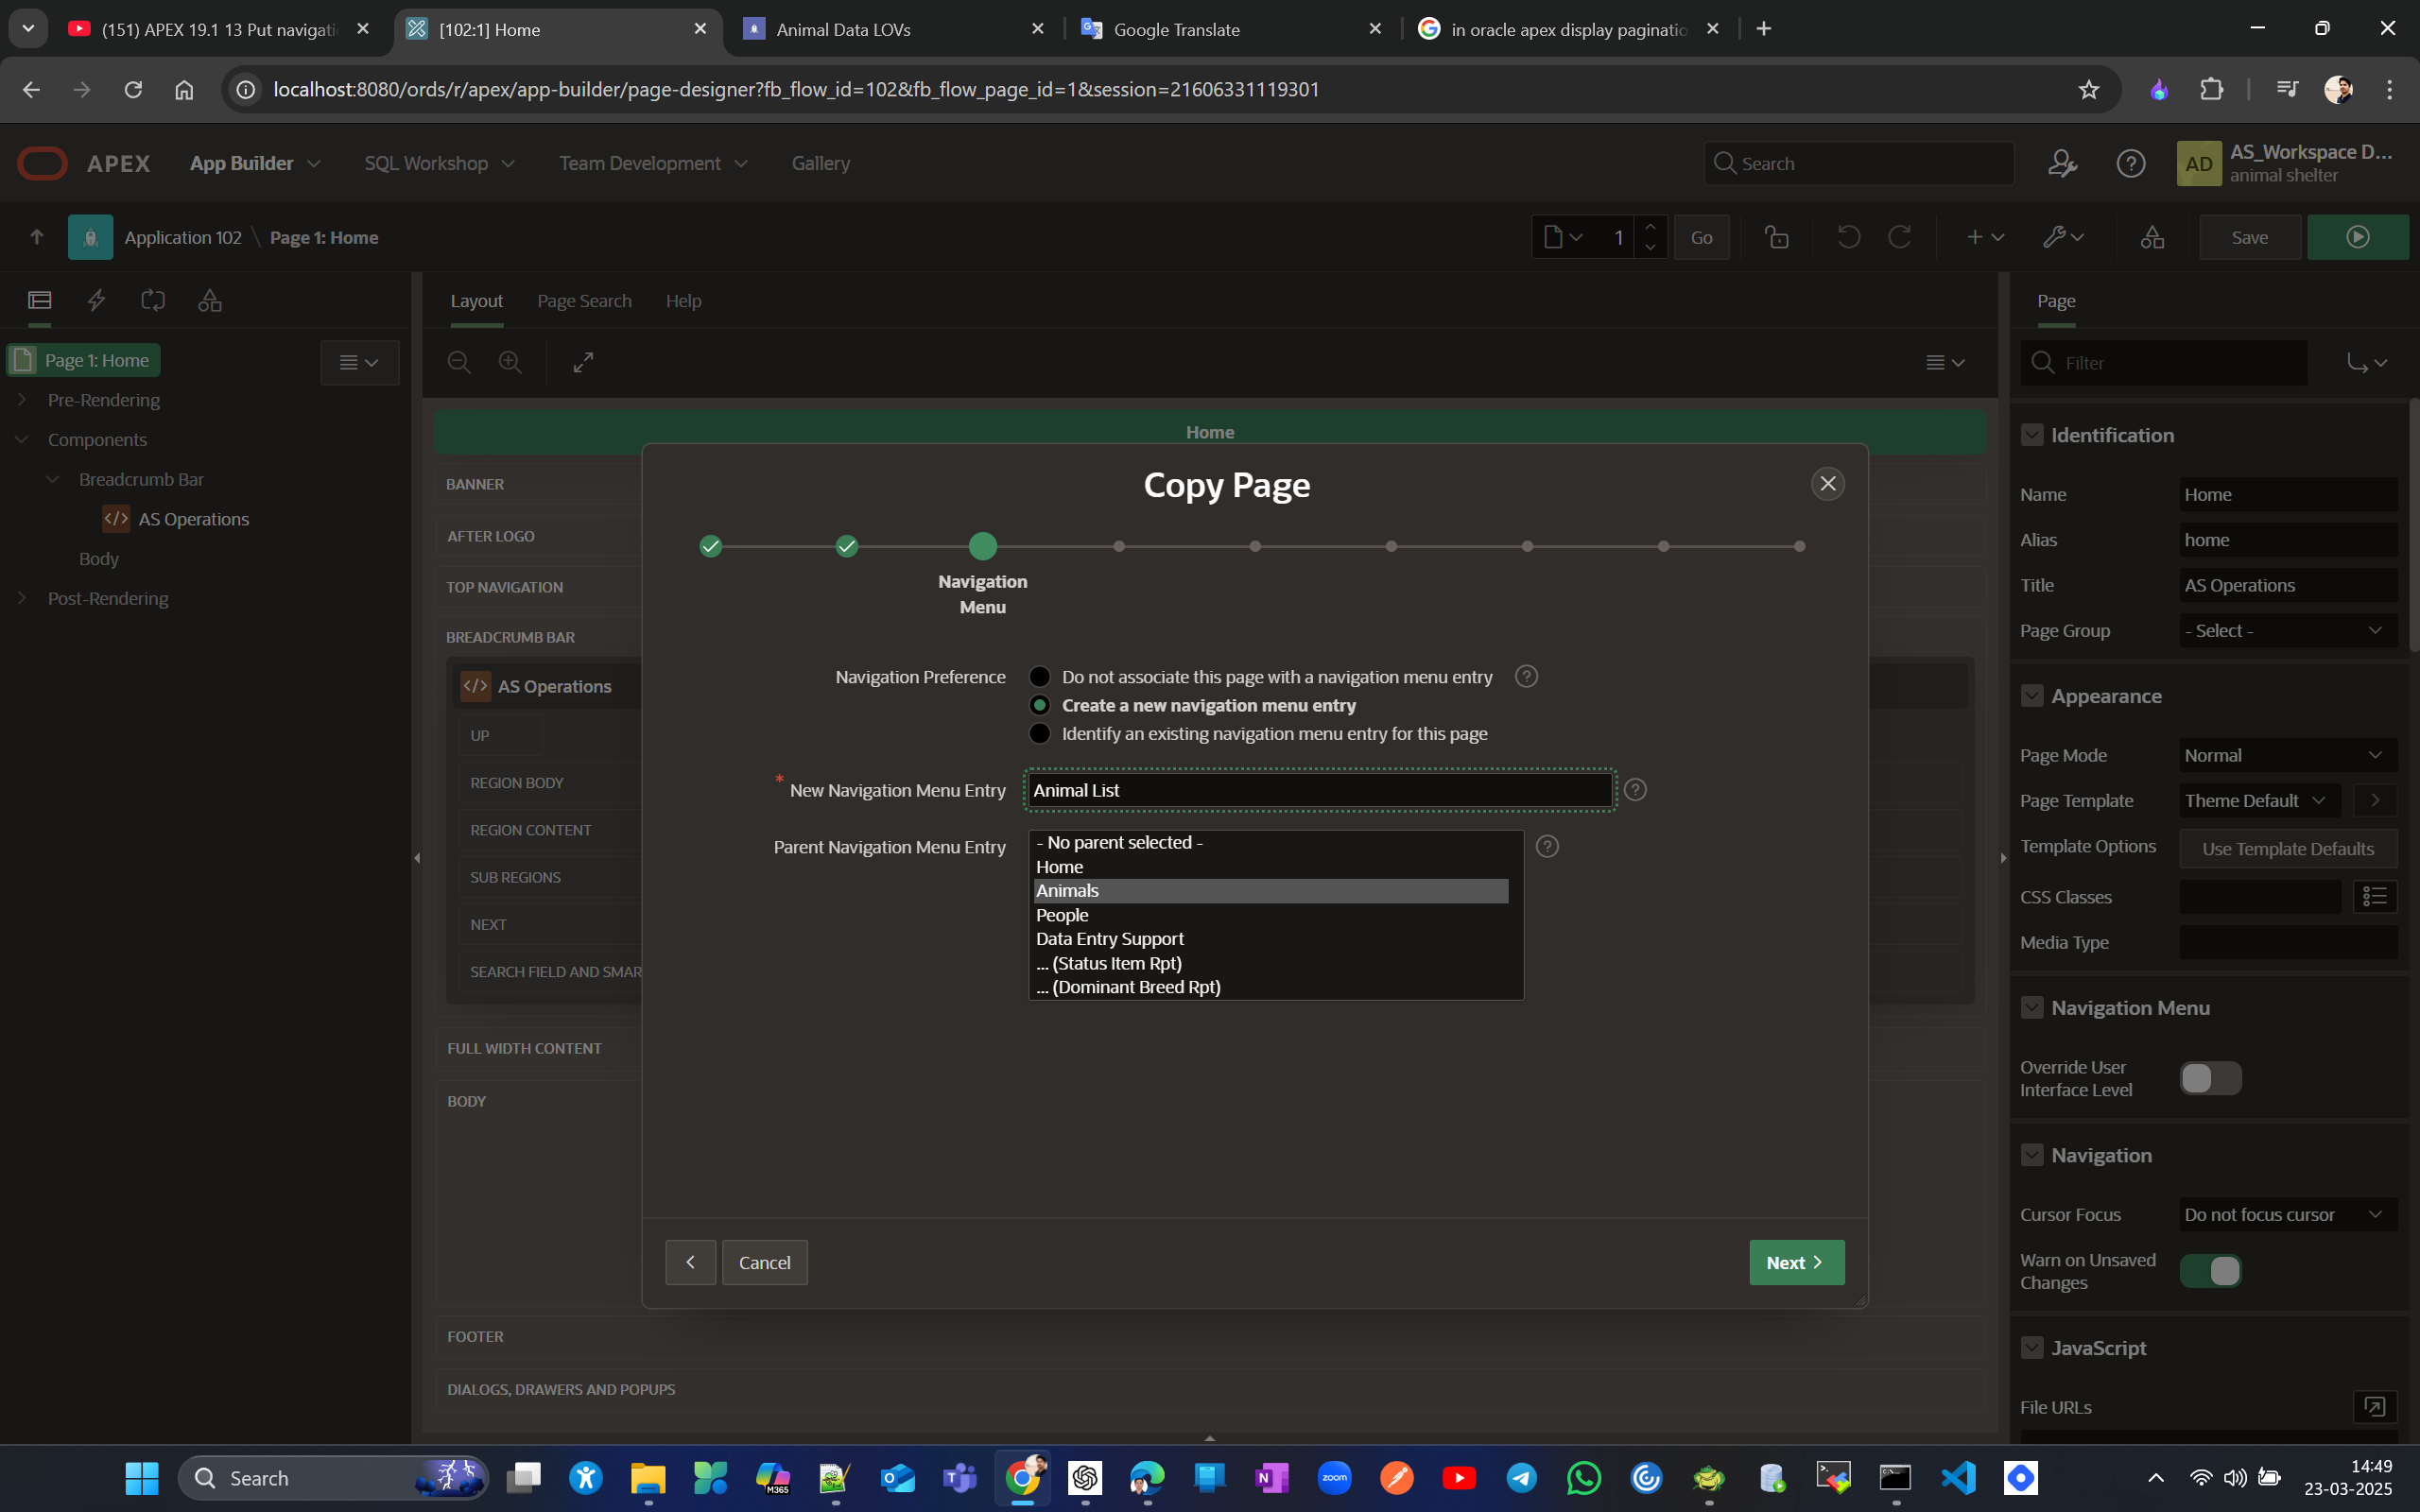
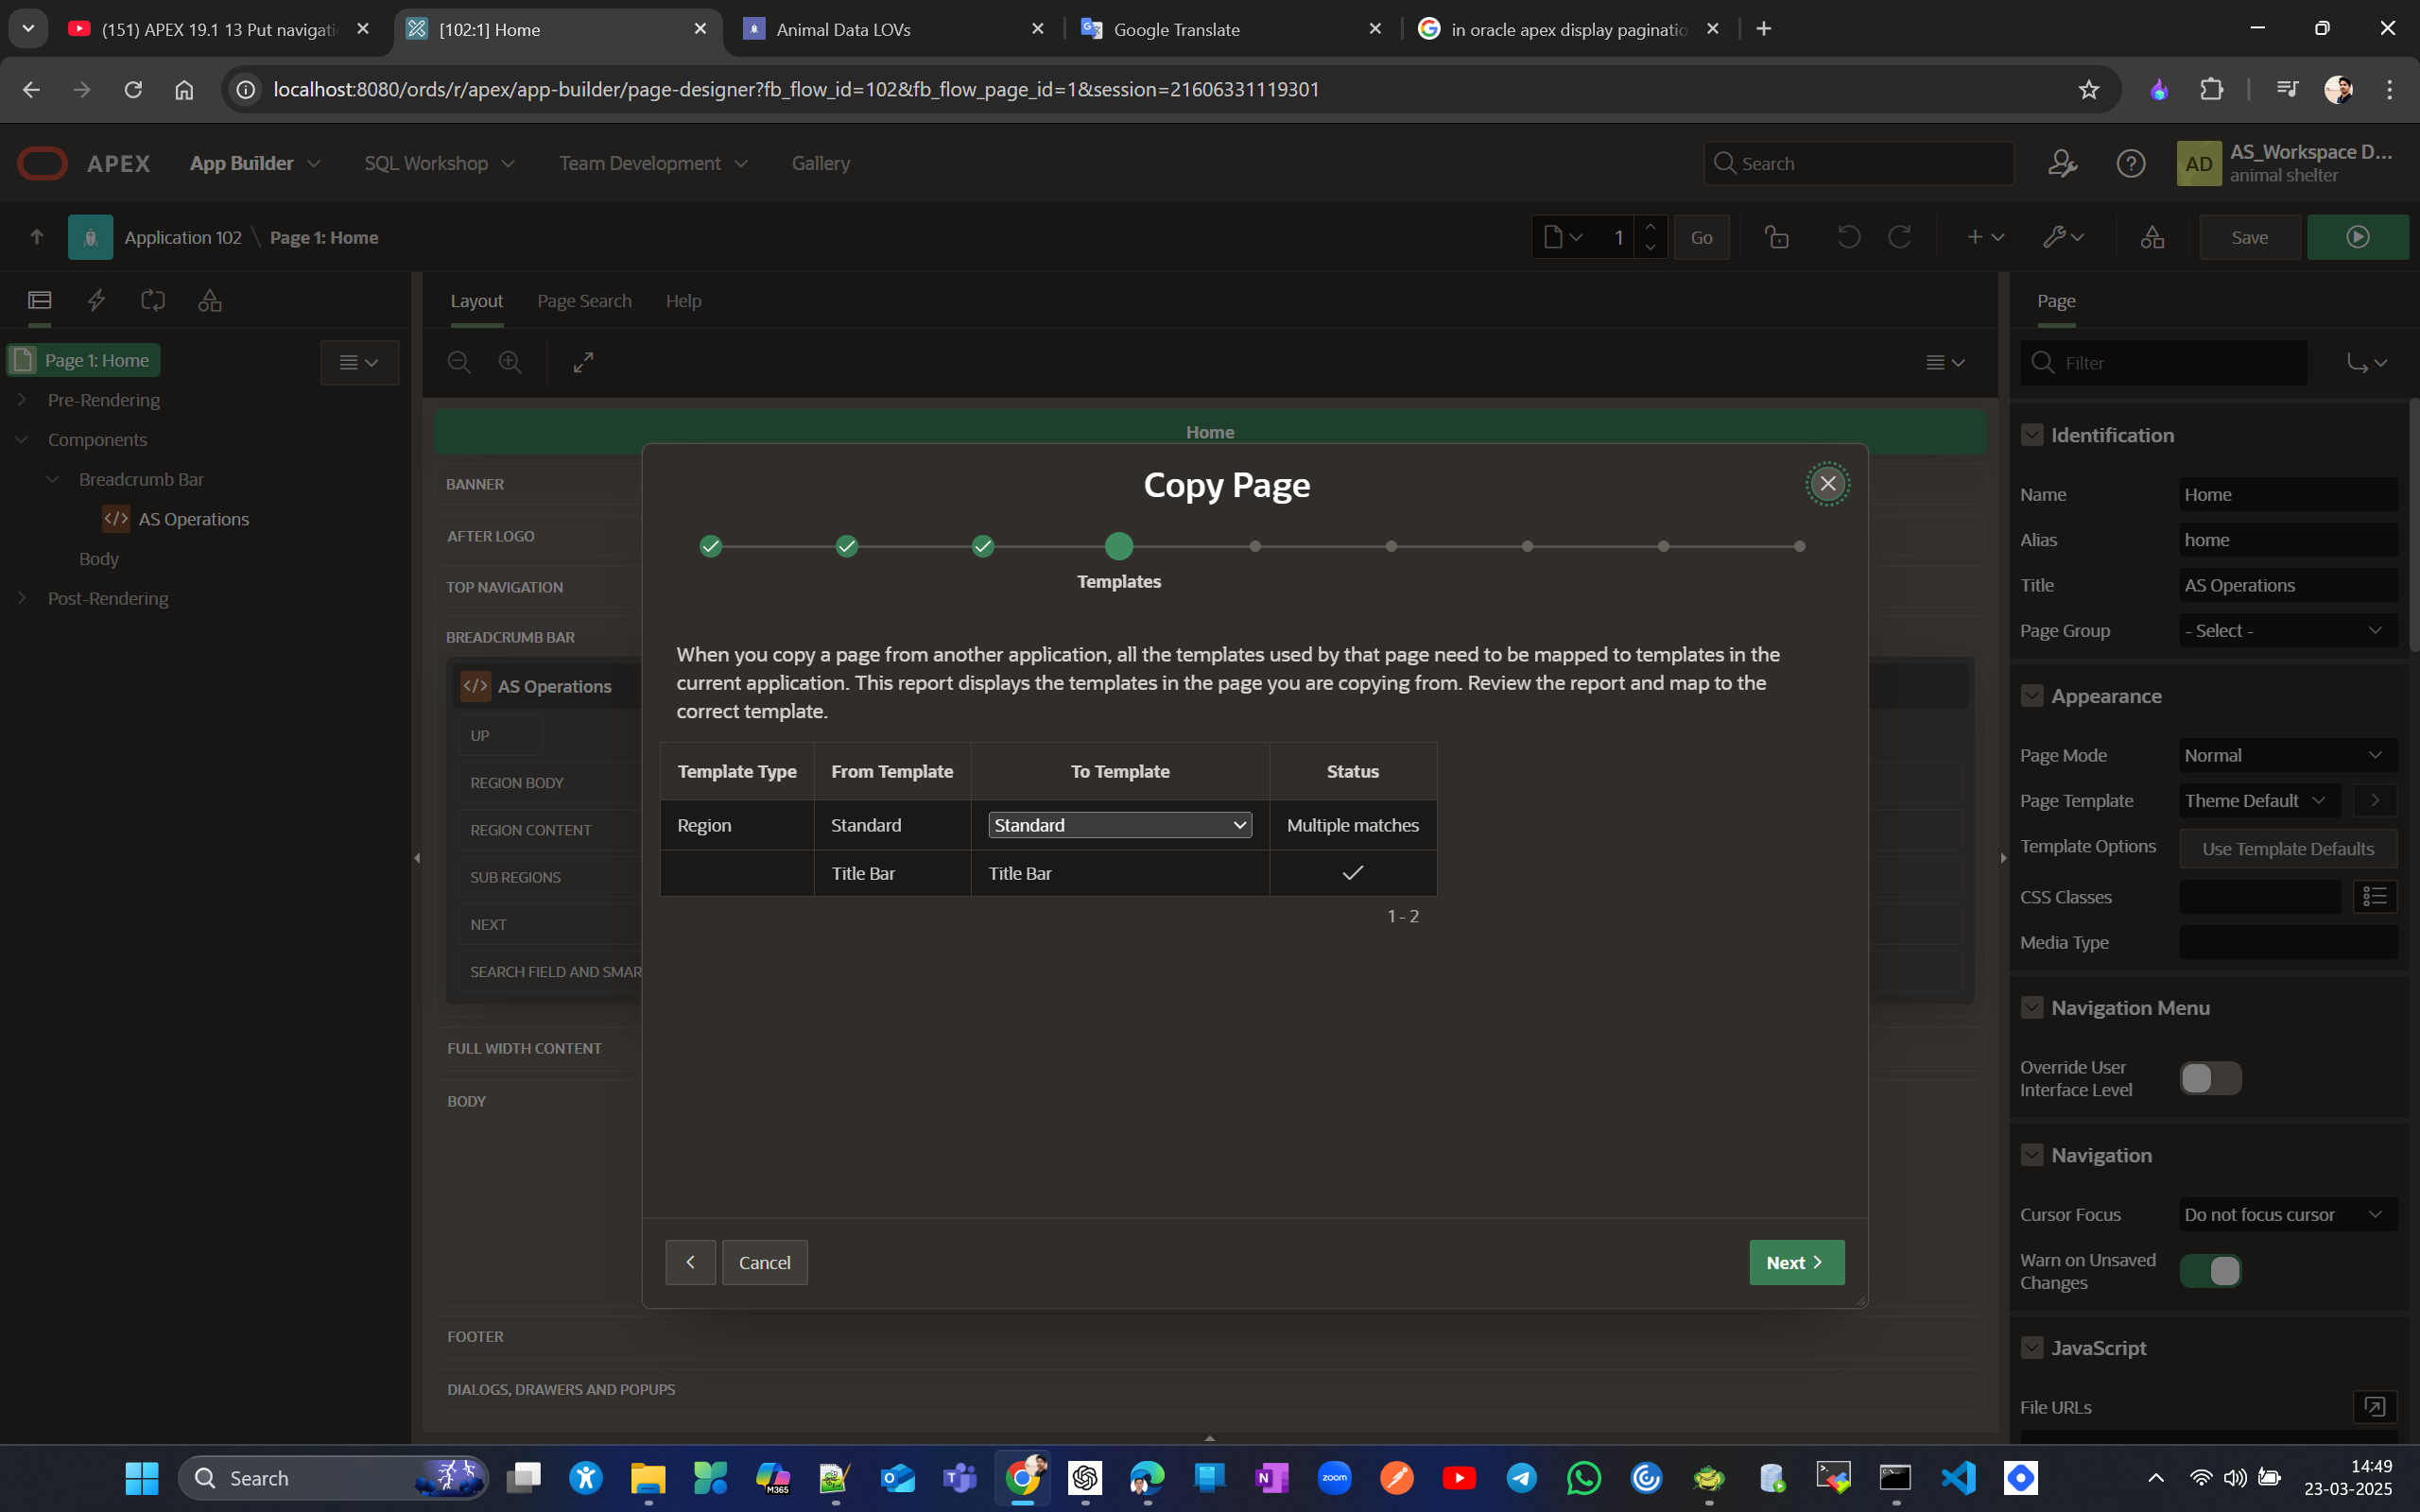
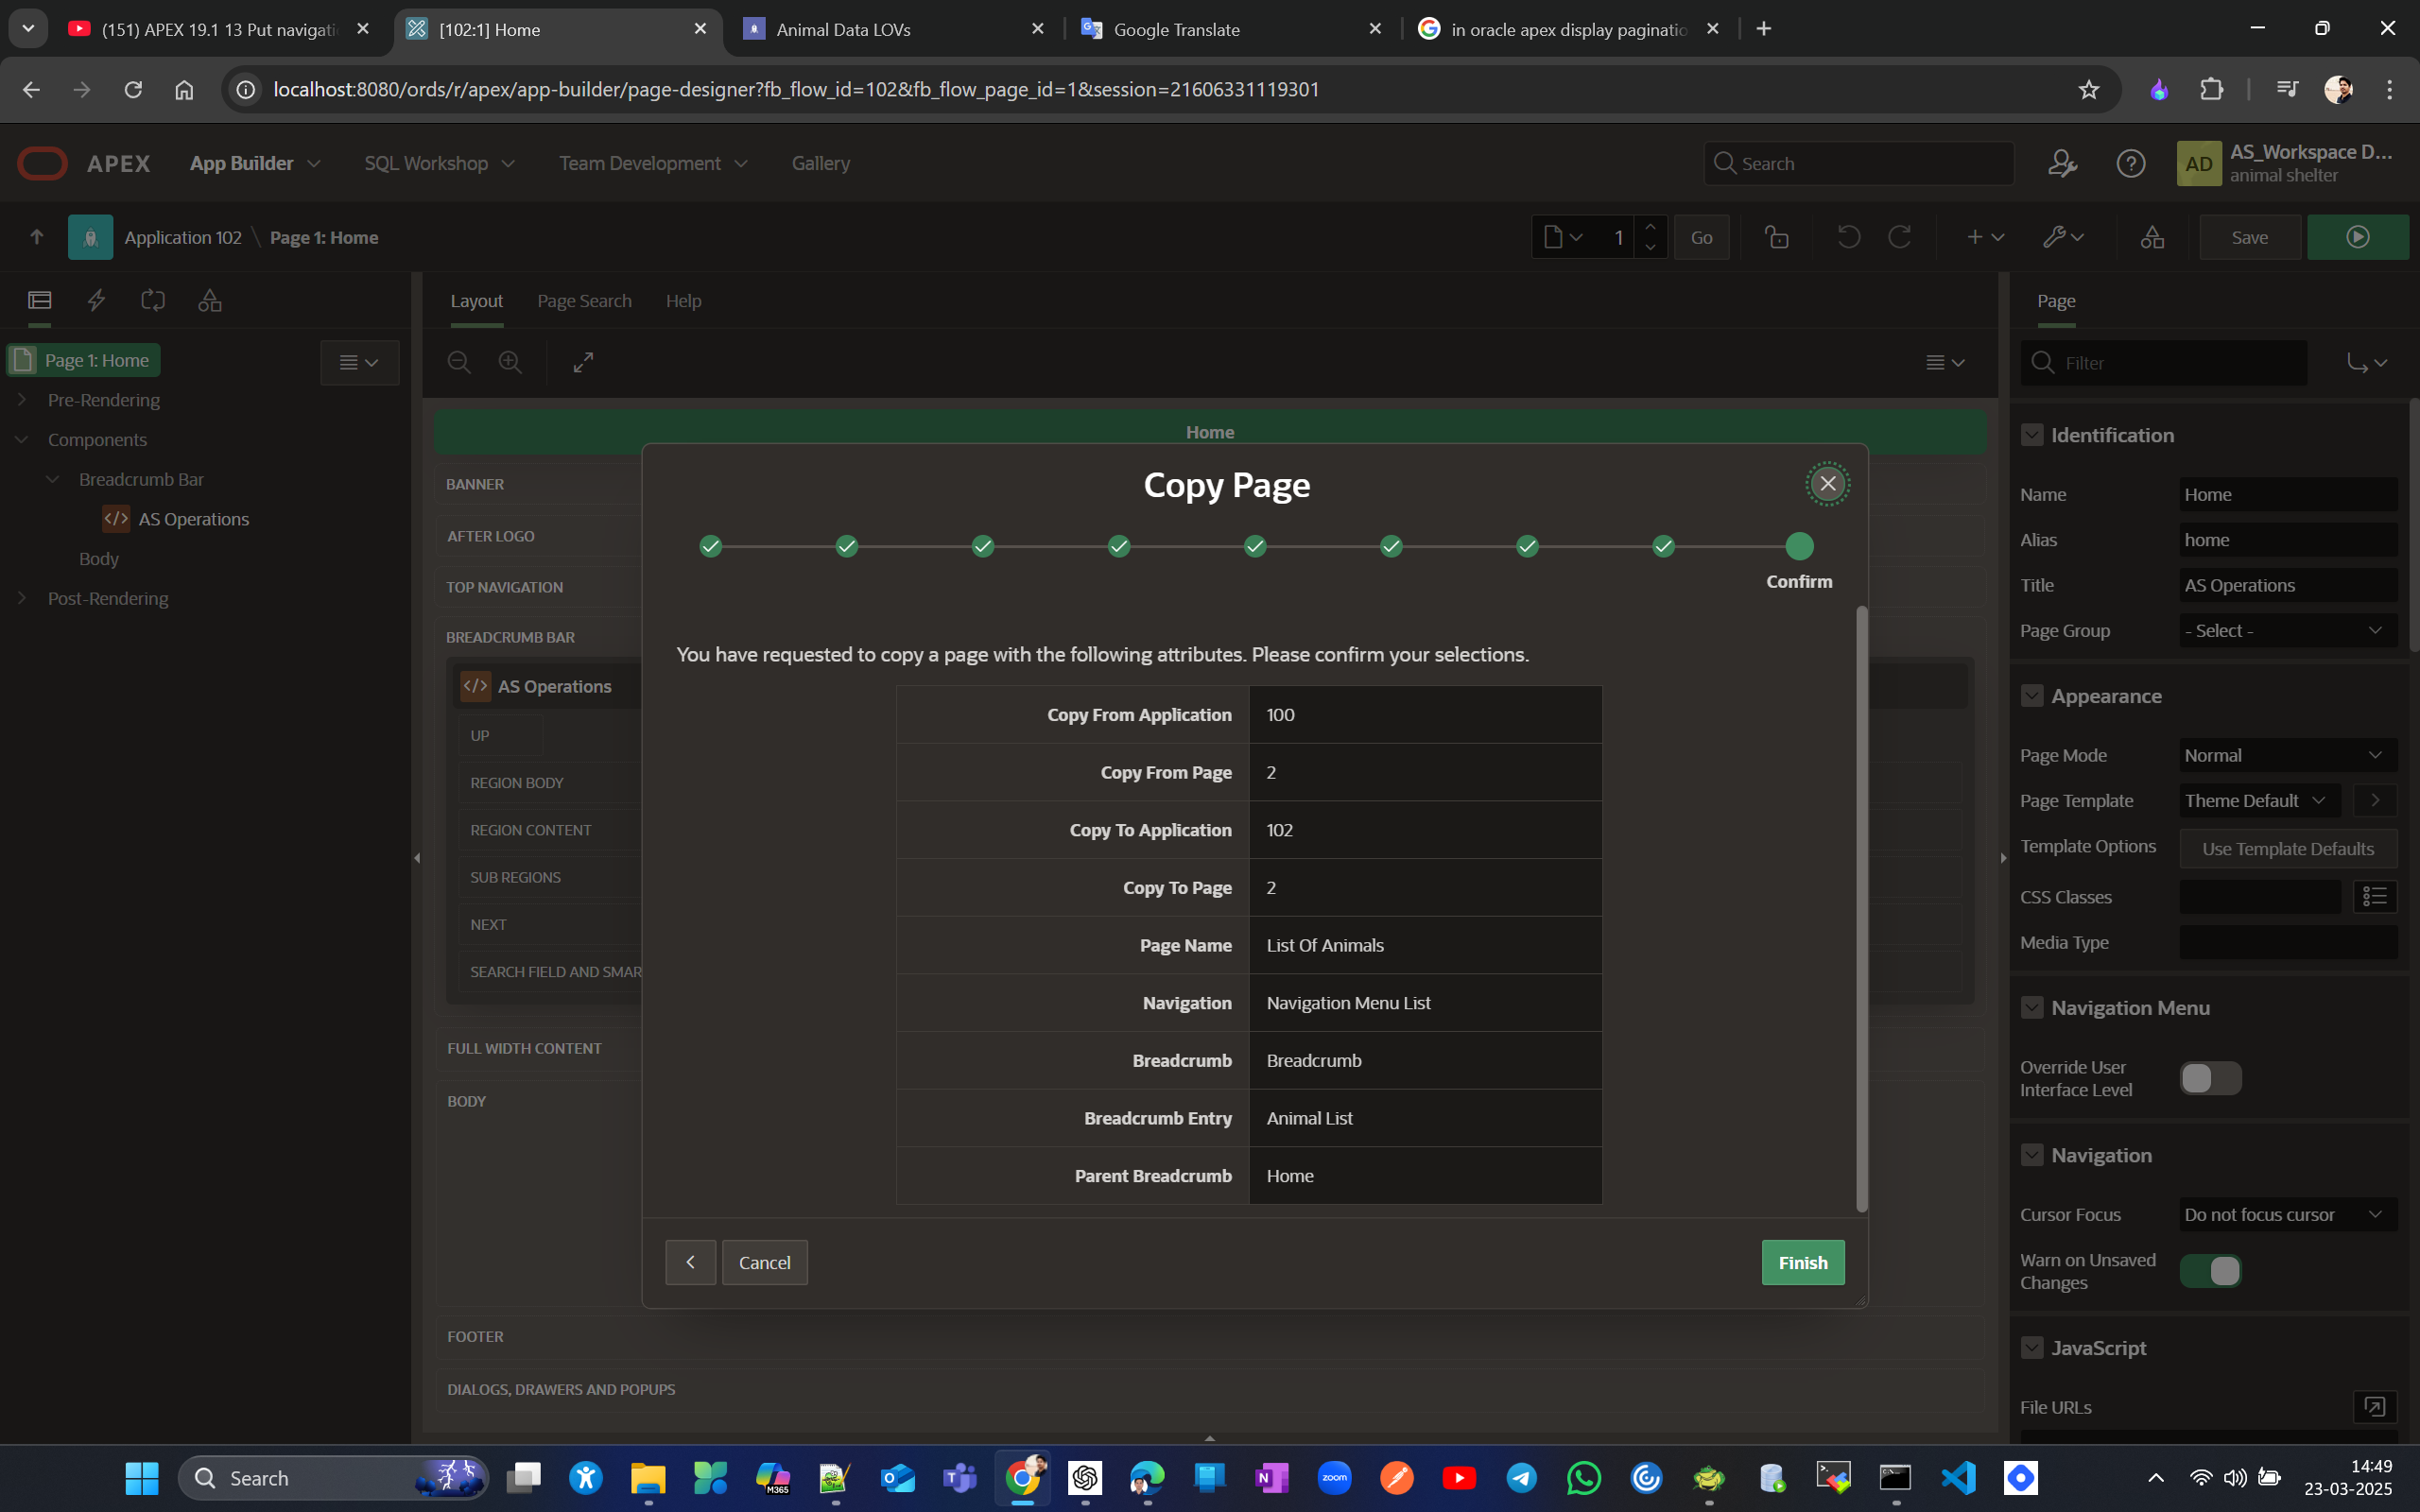
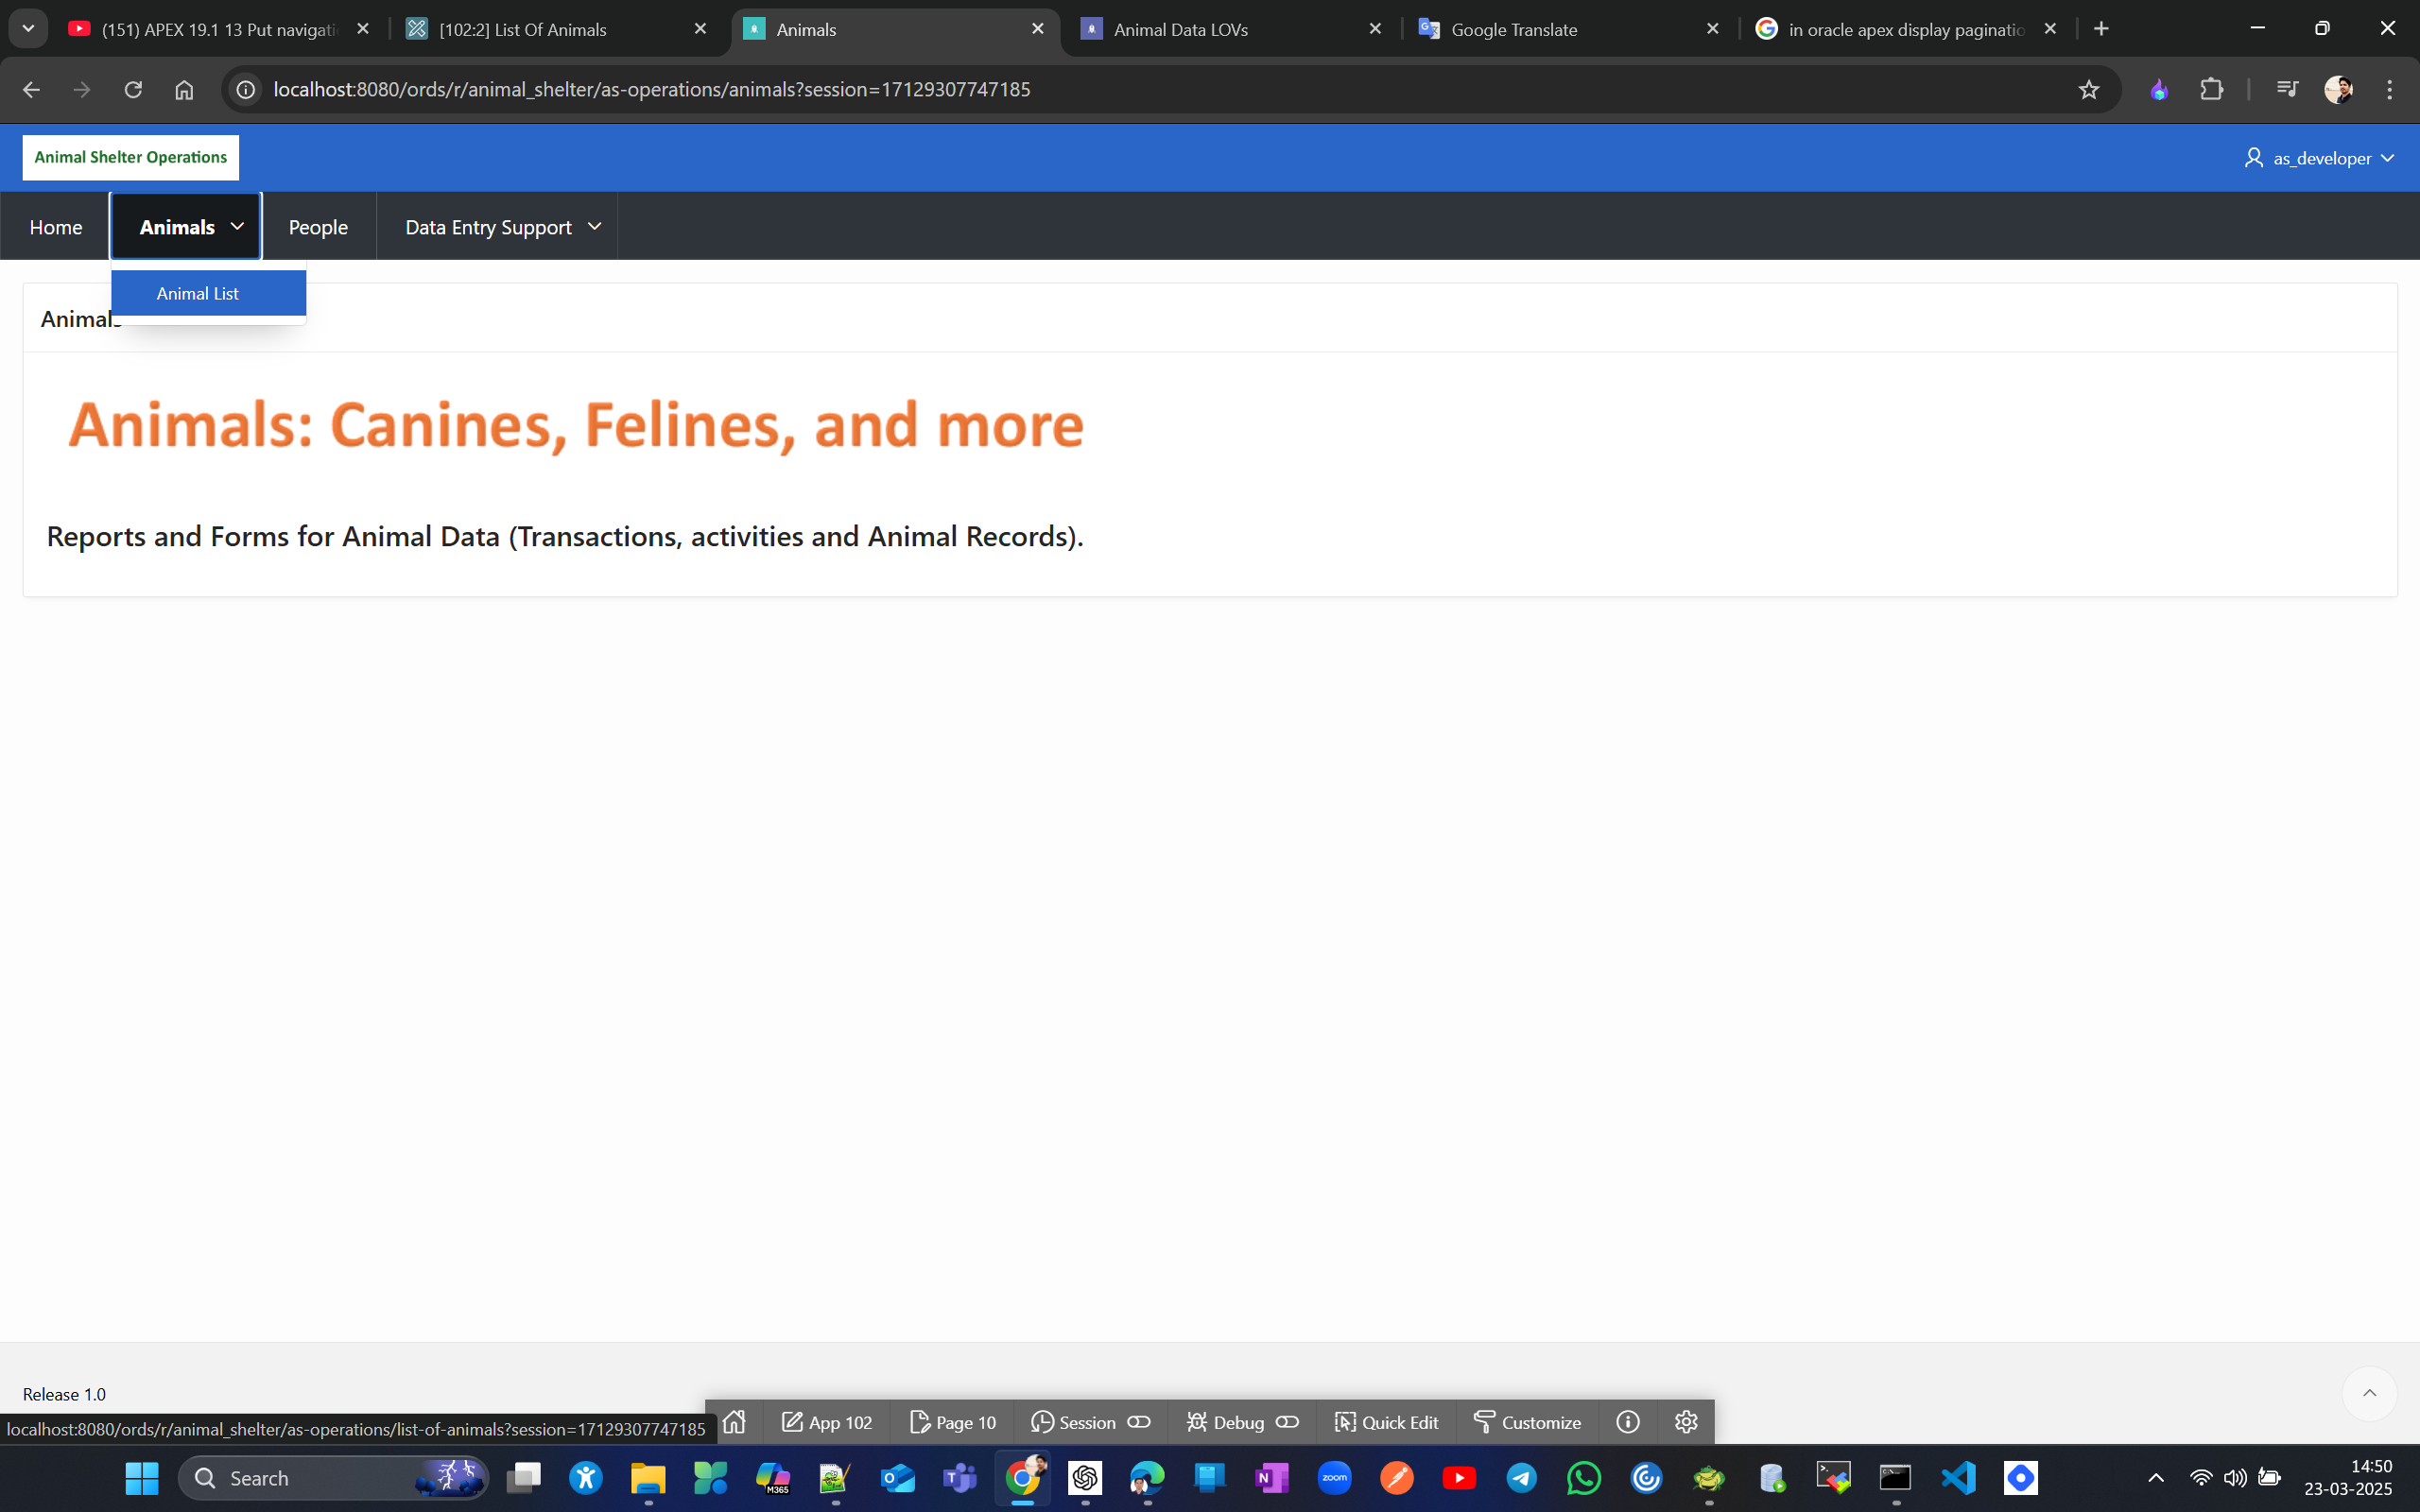
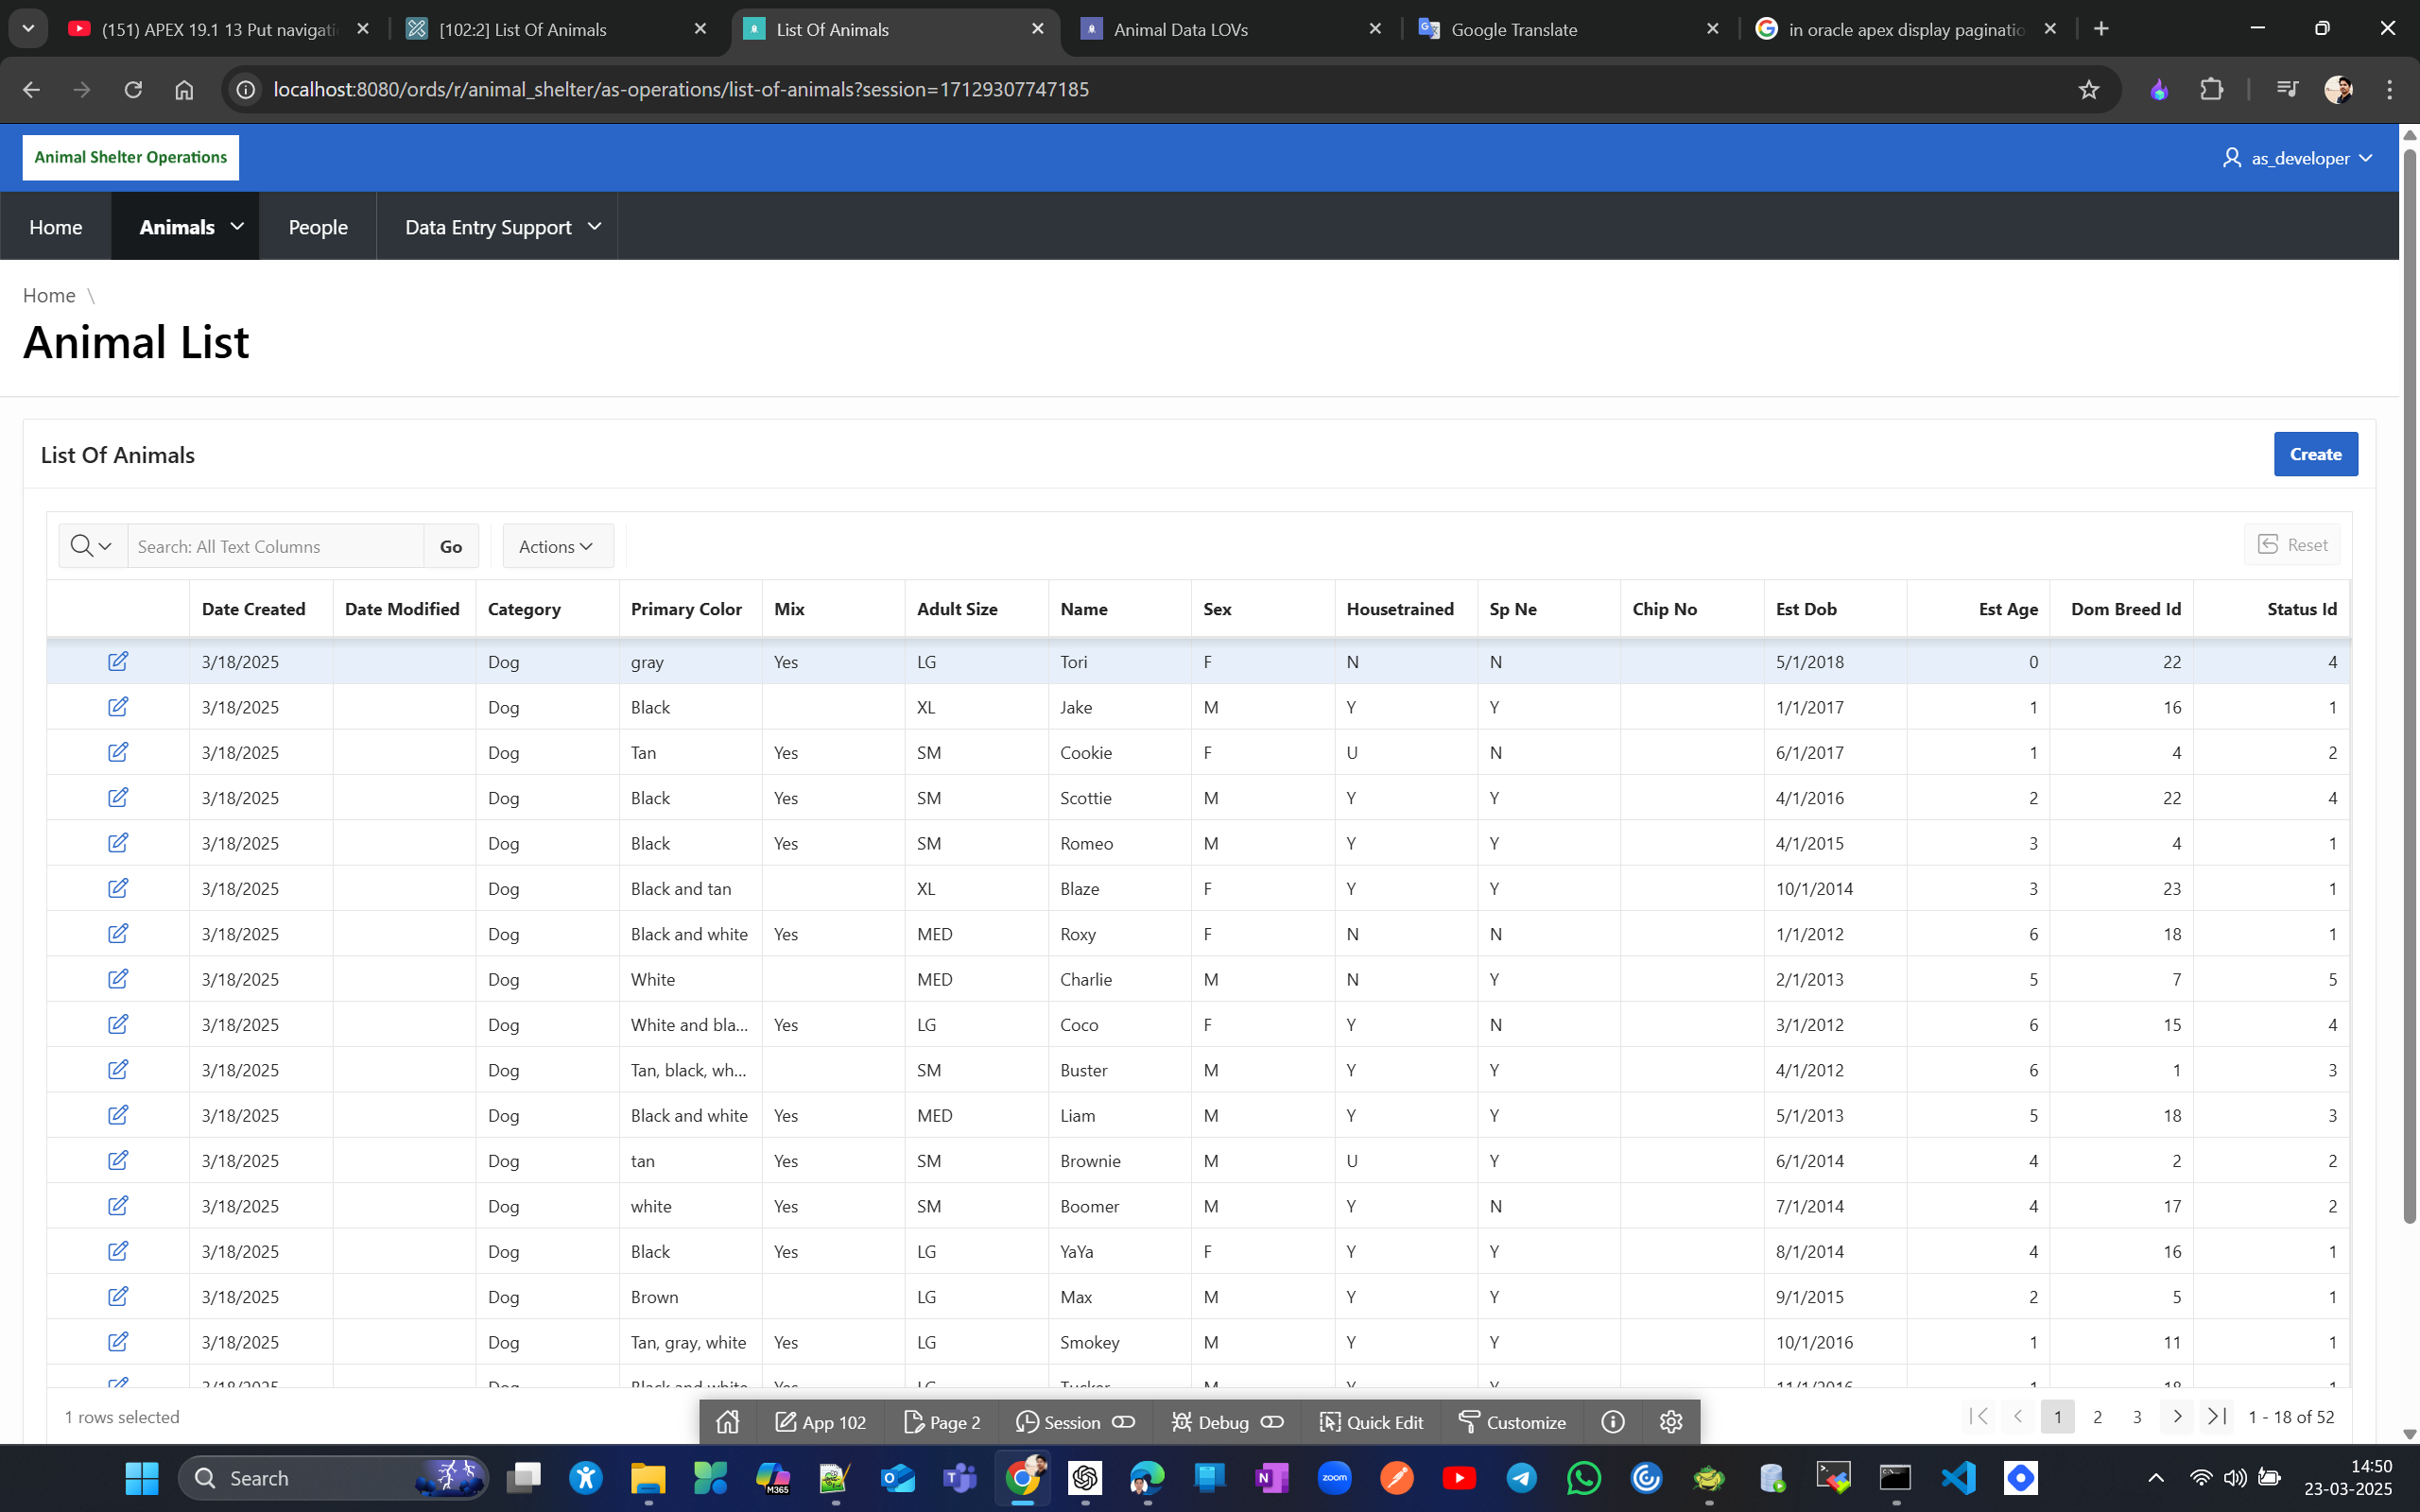
But if you click on edit option of any record you will get page not available error. To fix that we need to copy the form page as well from DEV application.
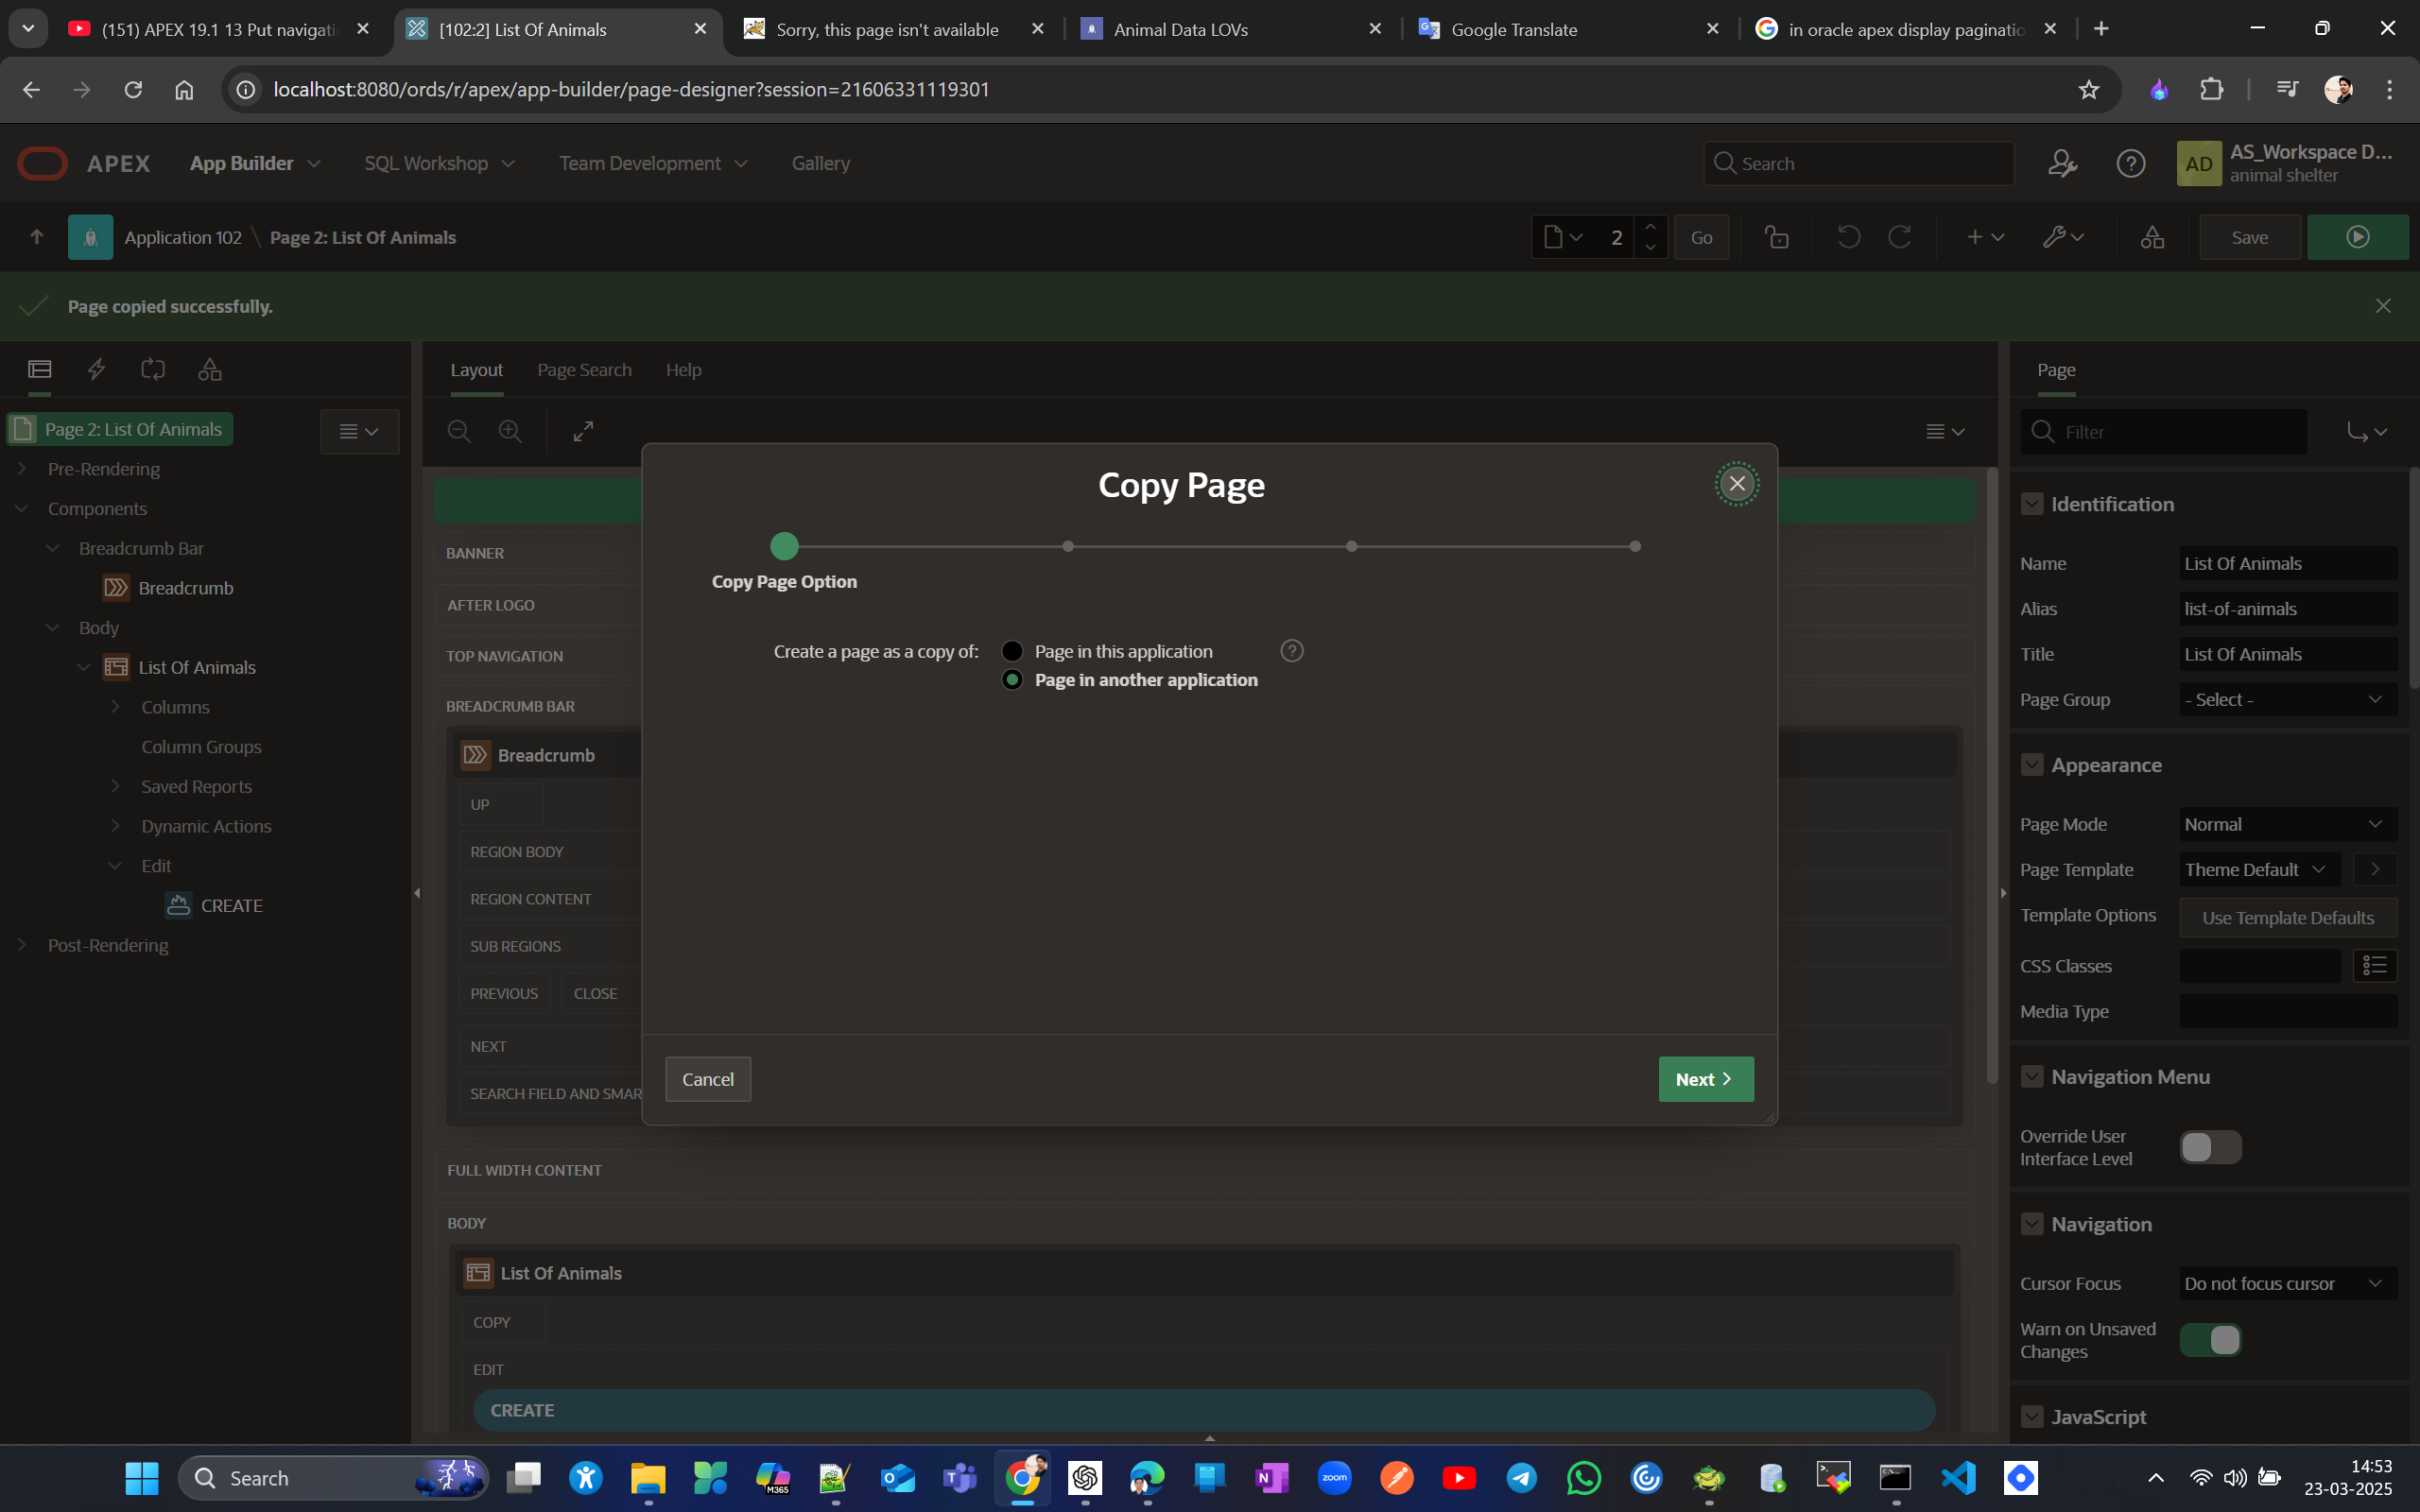
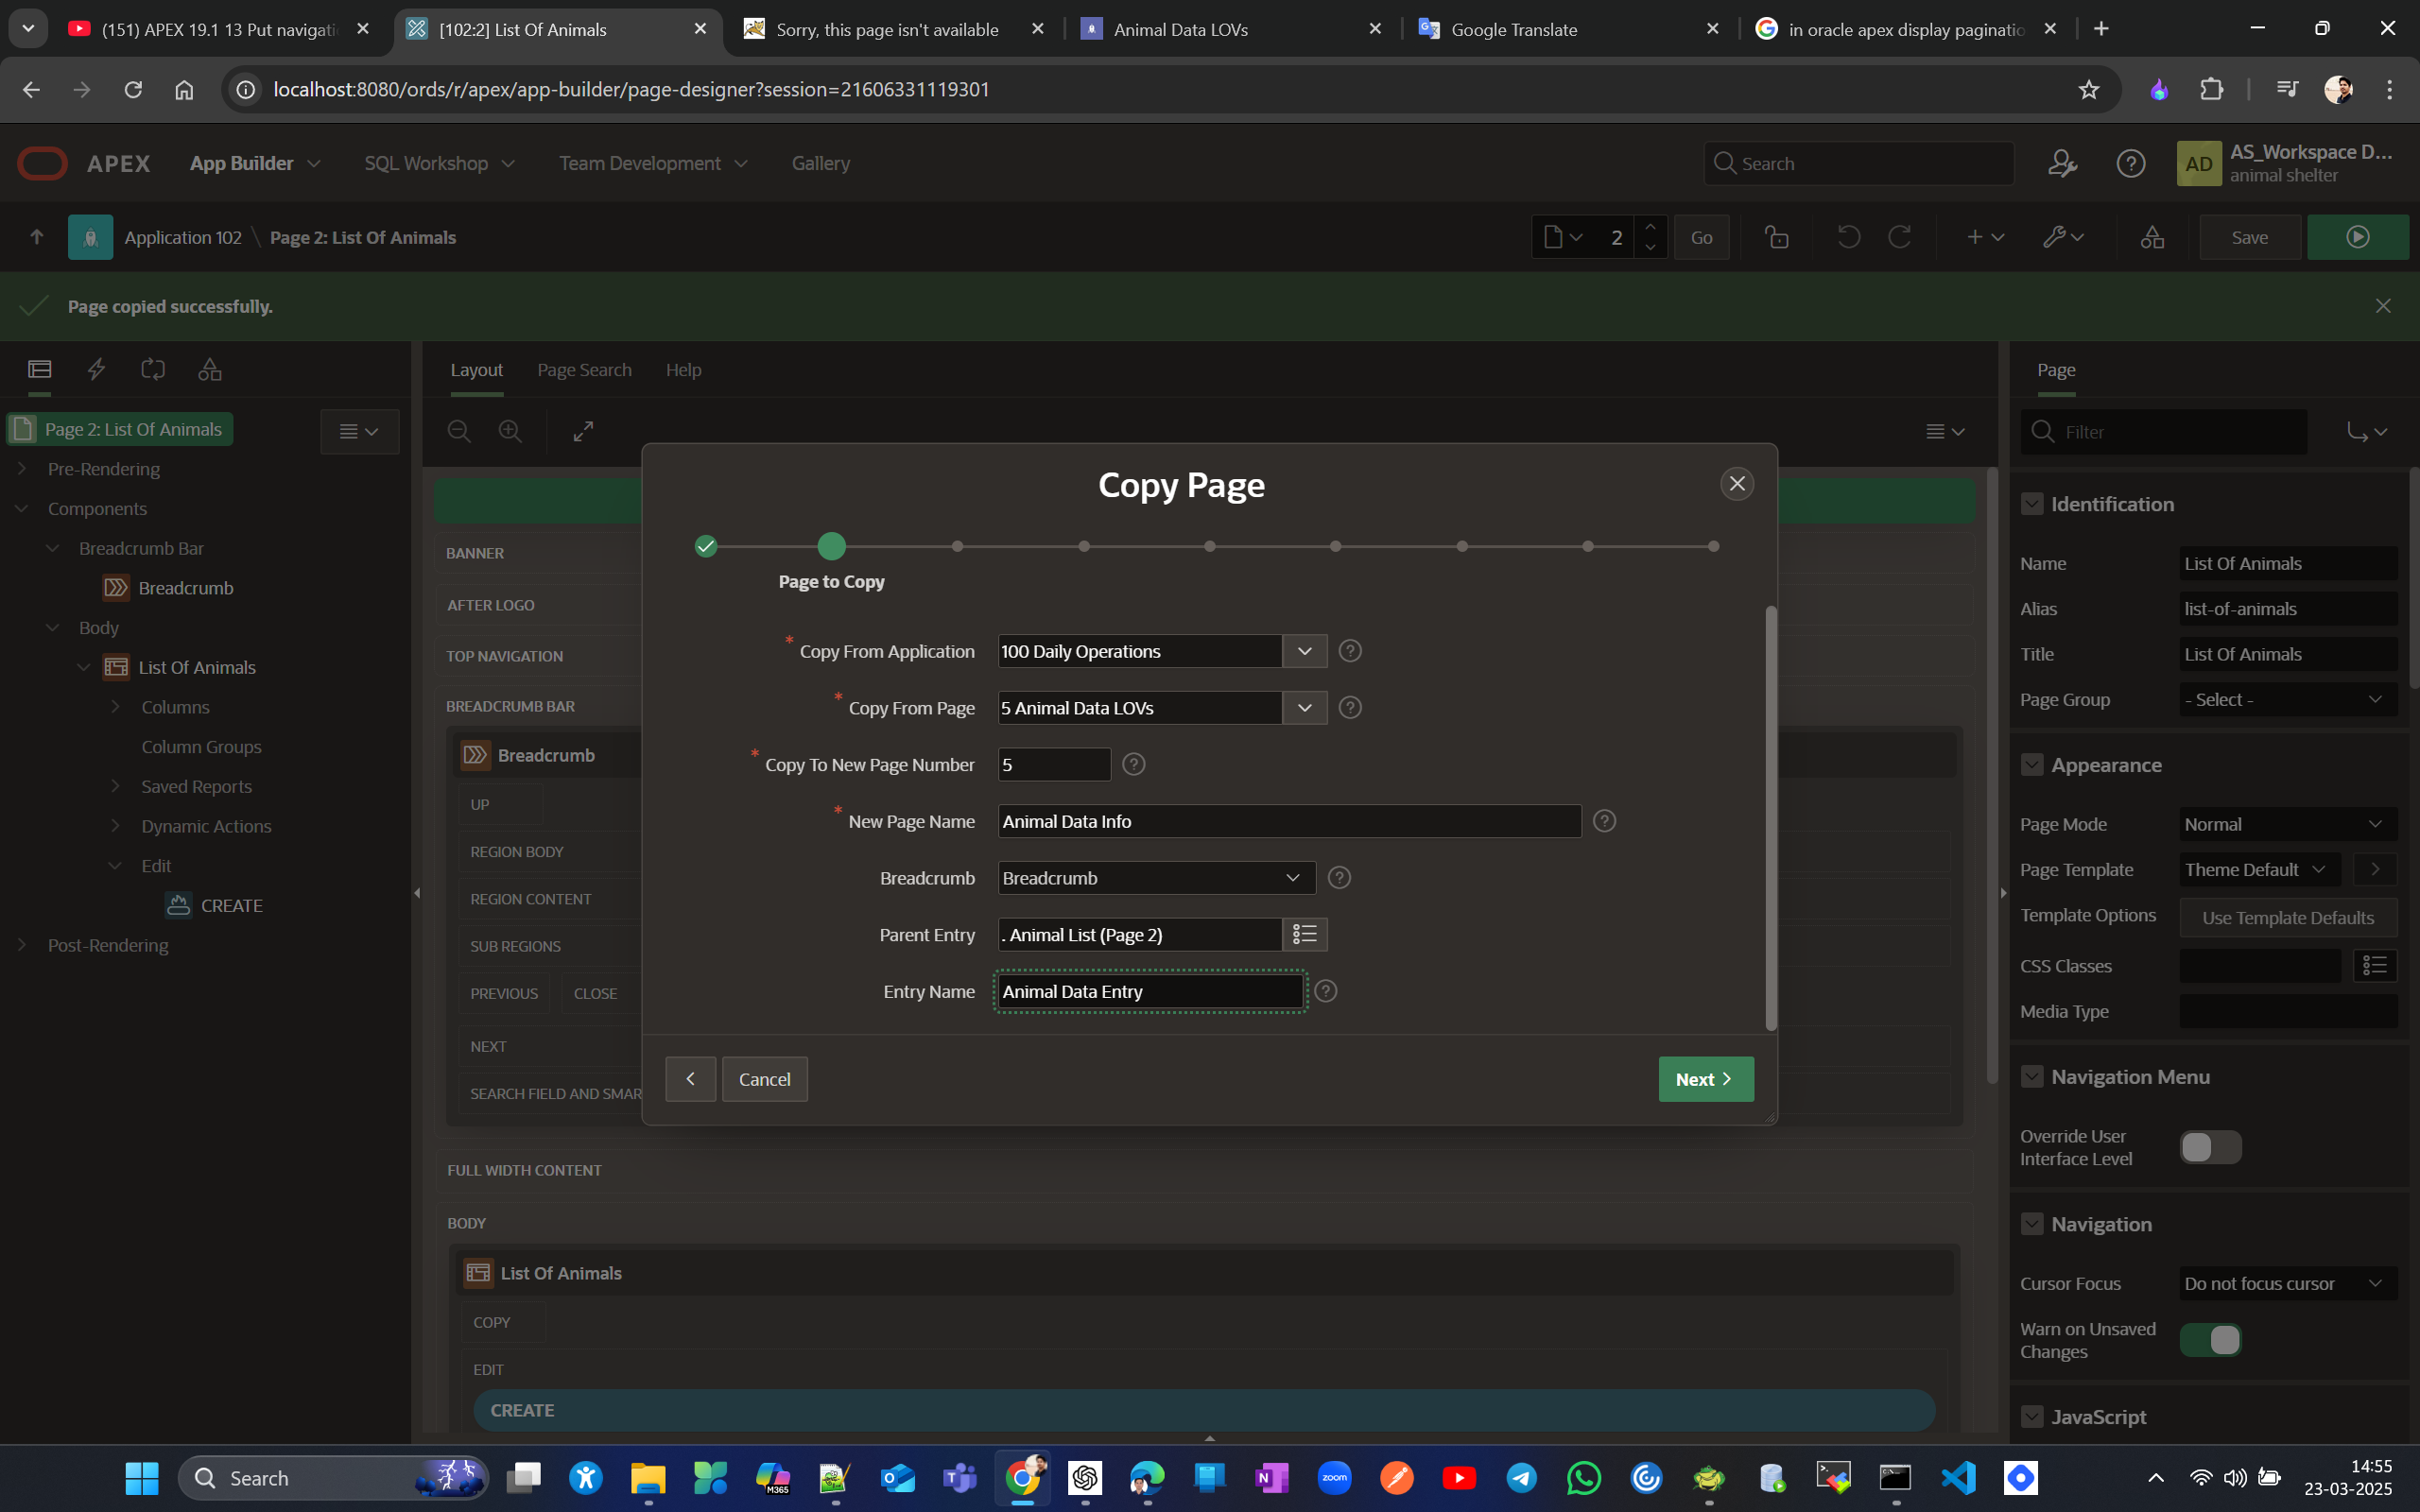
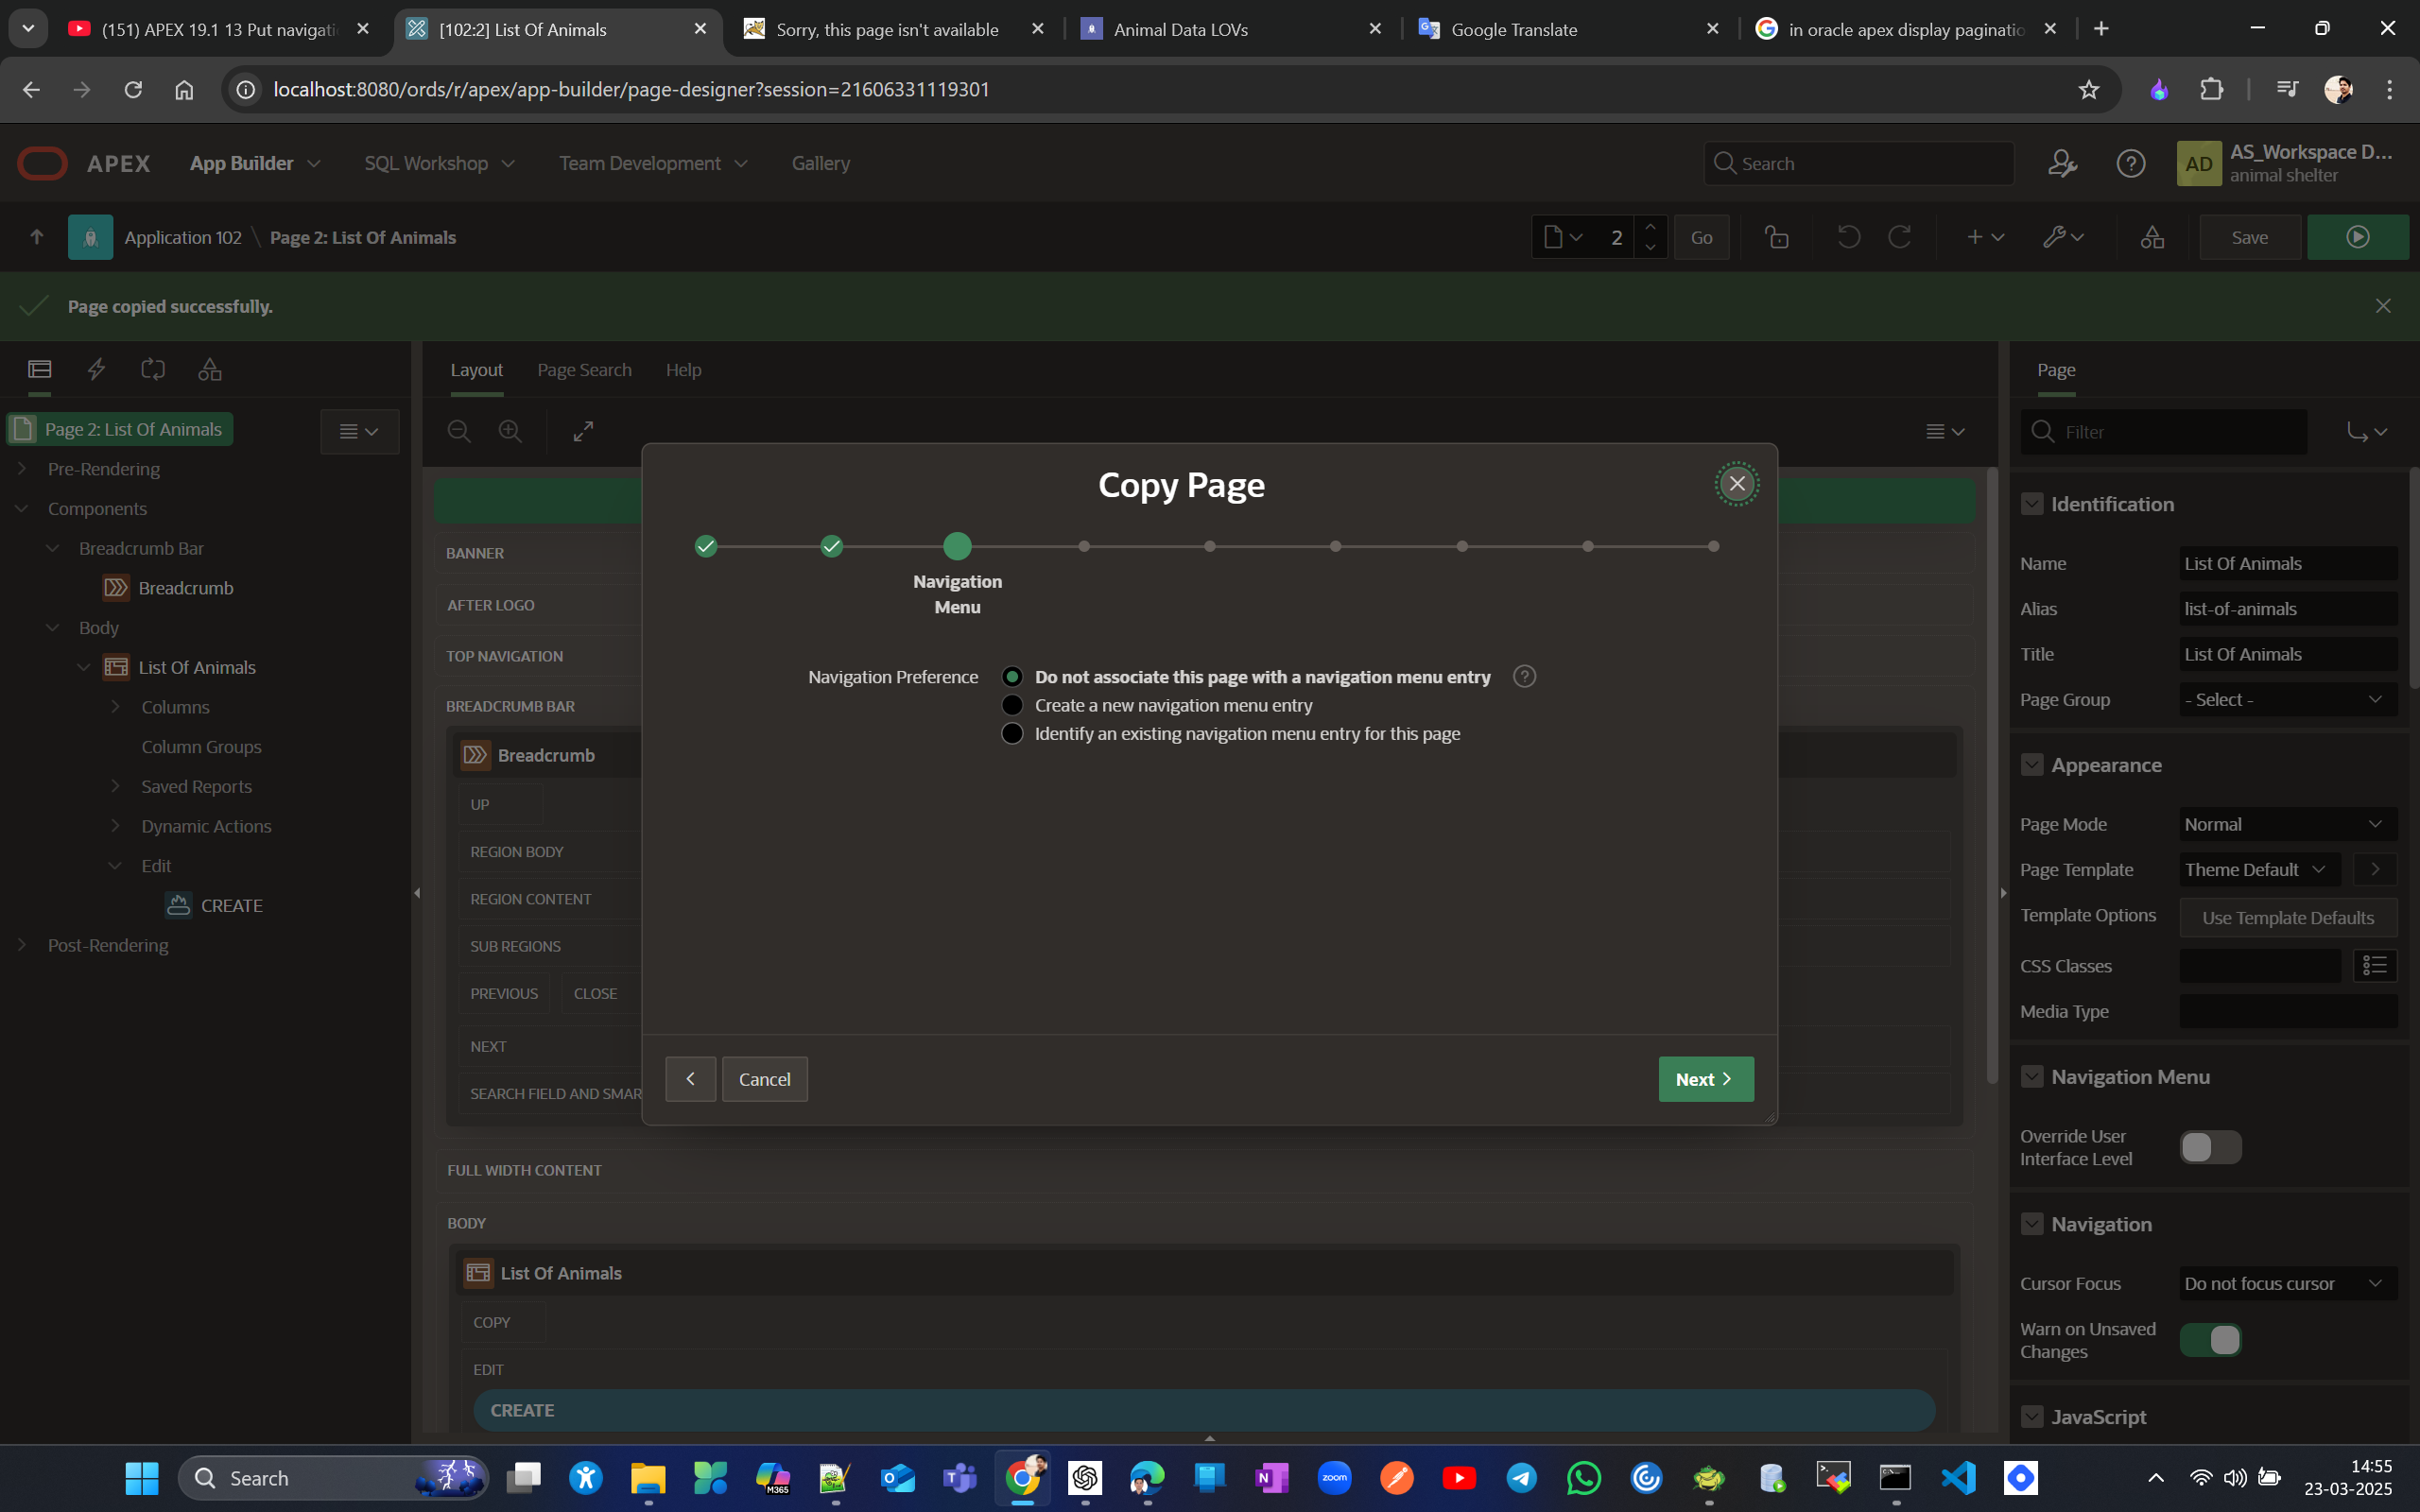
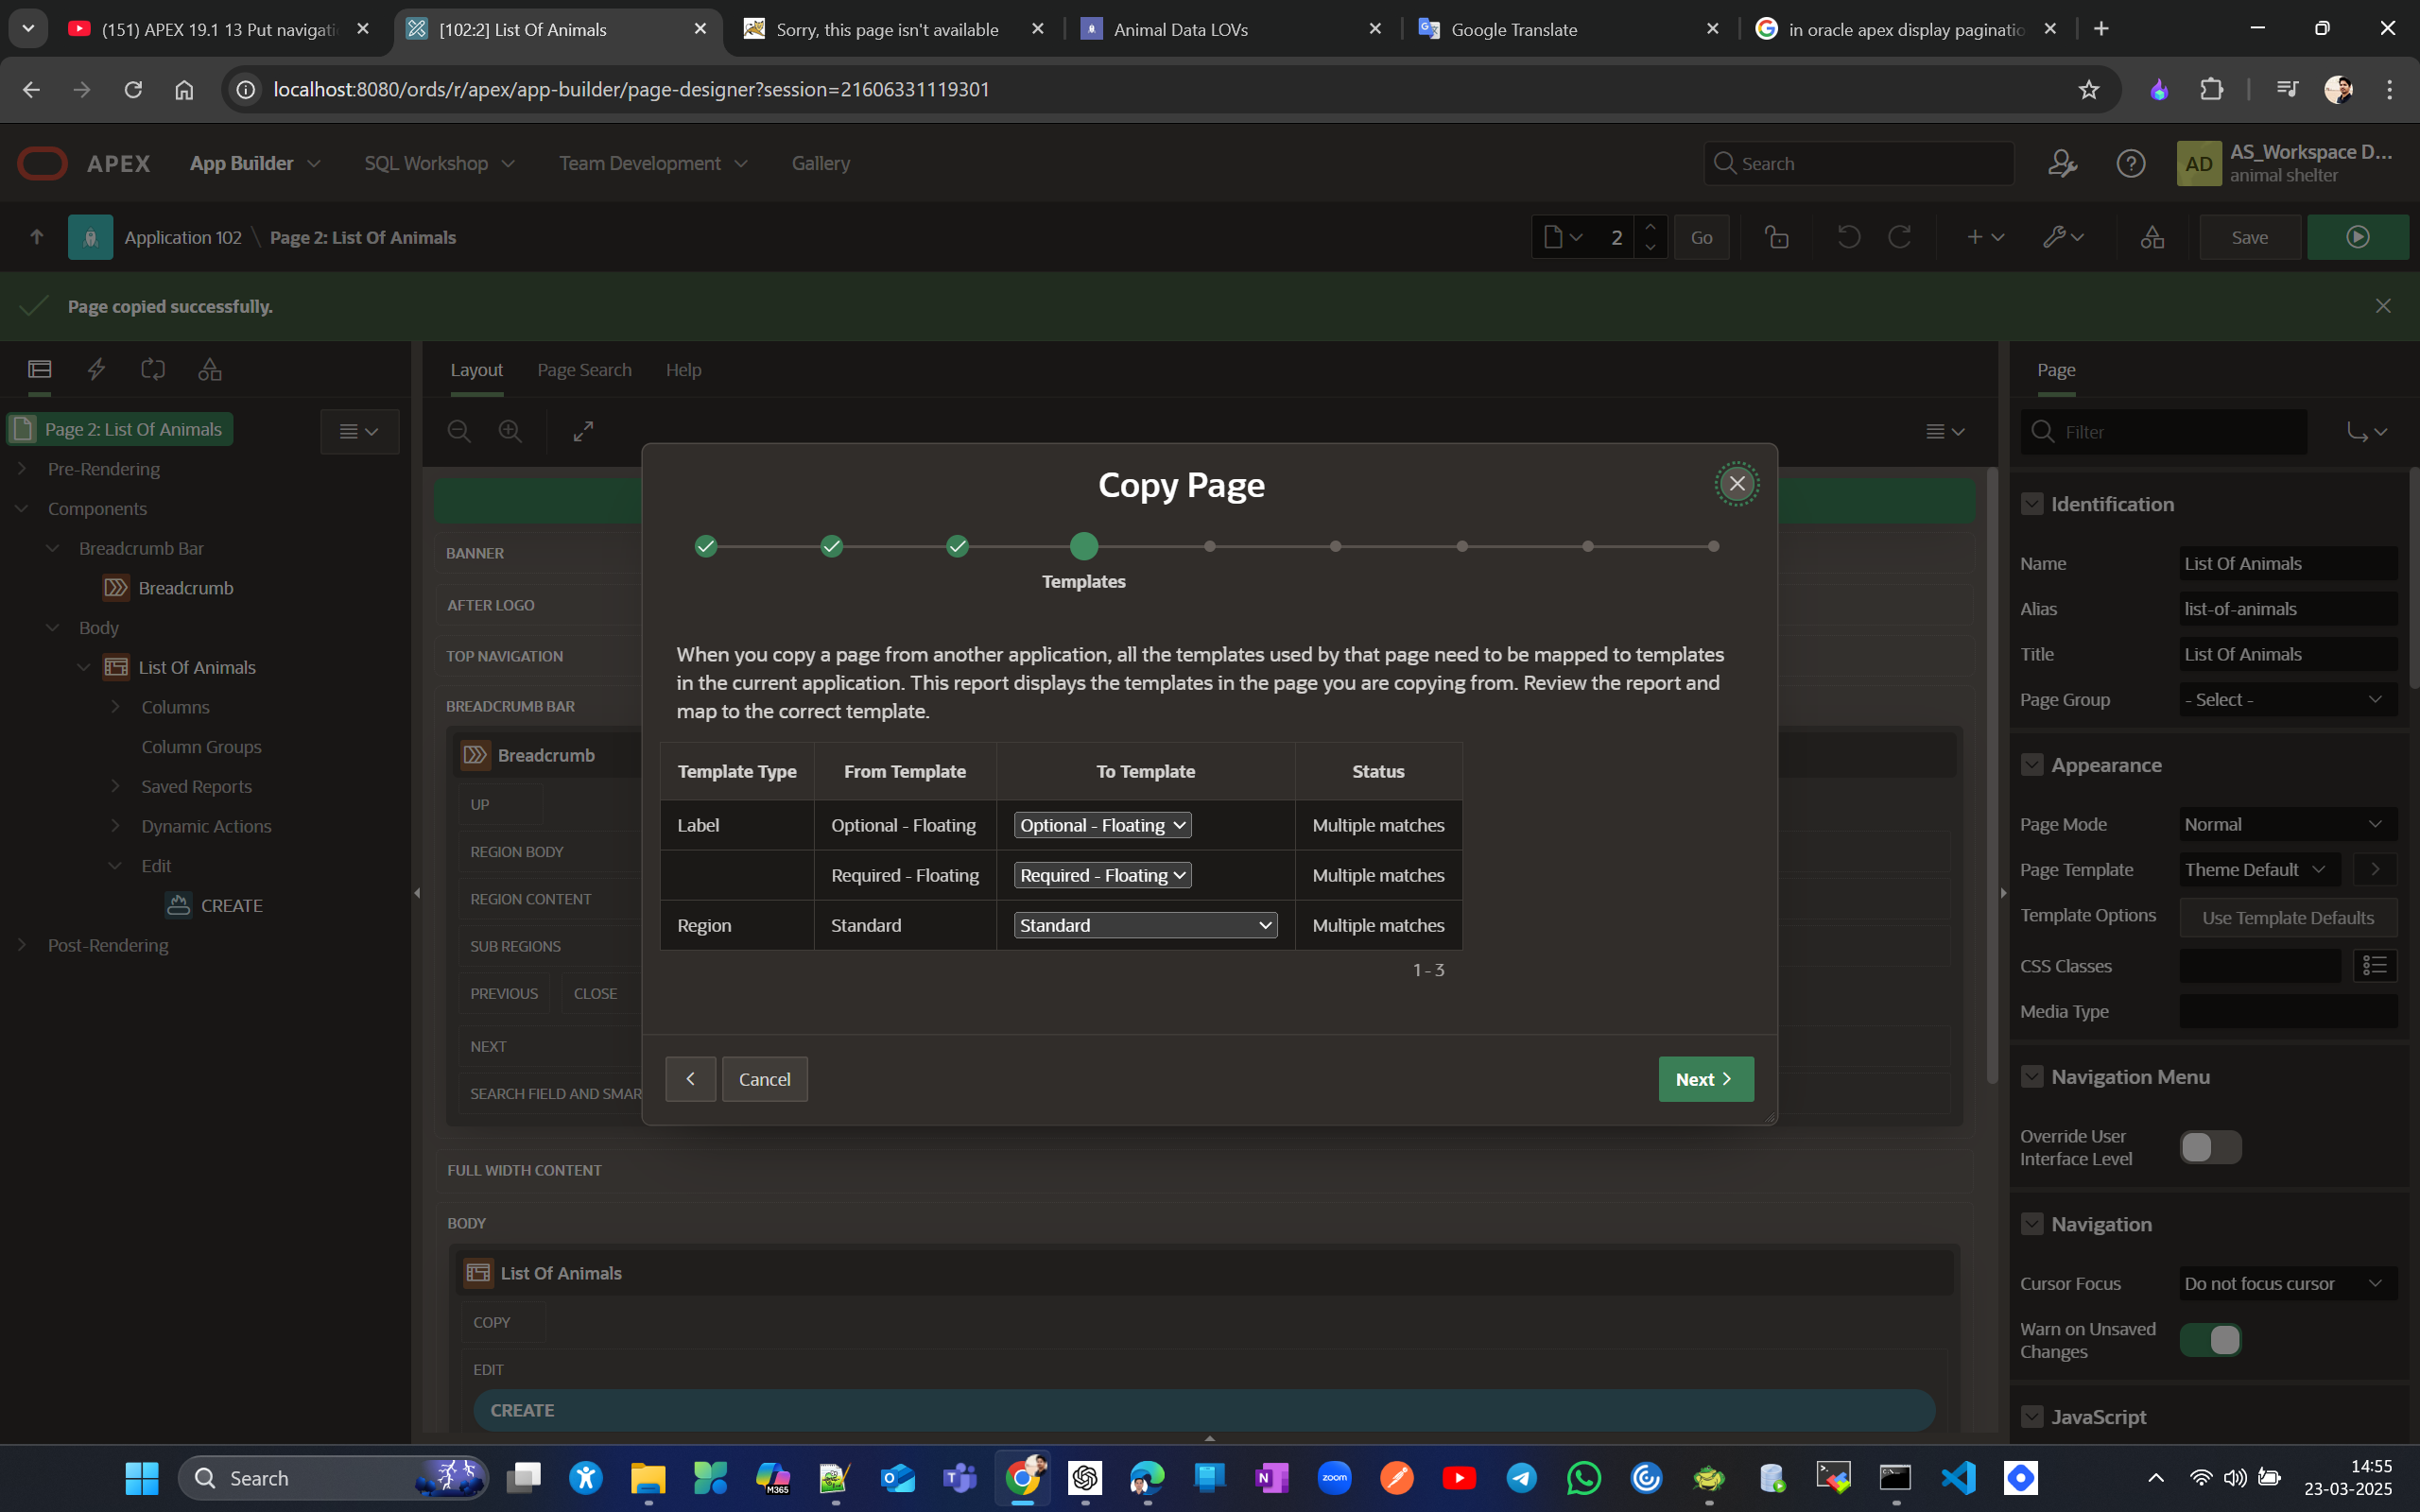
Copy all LOVs for this page to PROD. select Copy drop down.

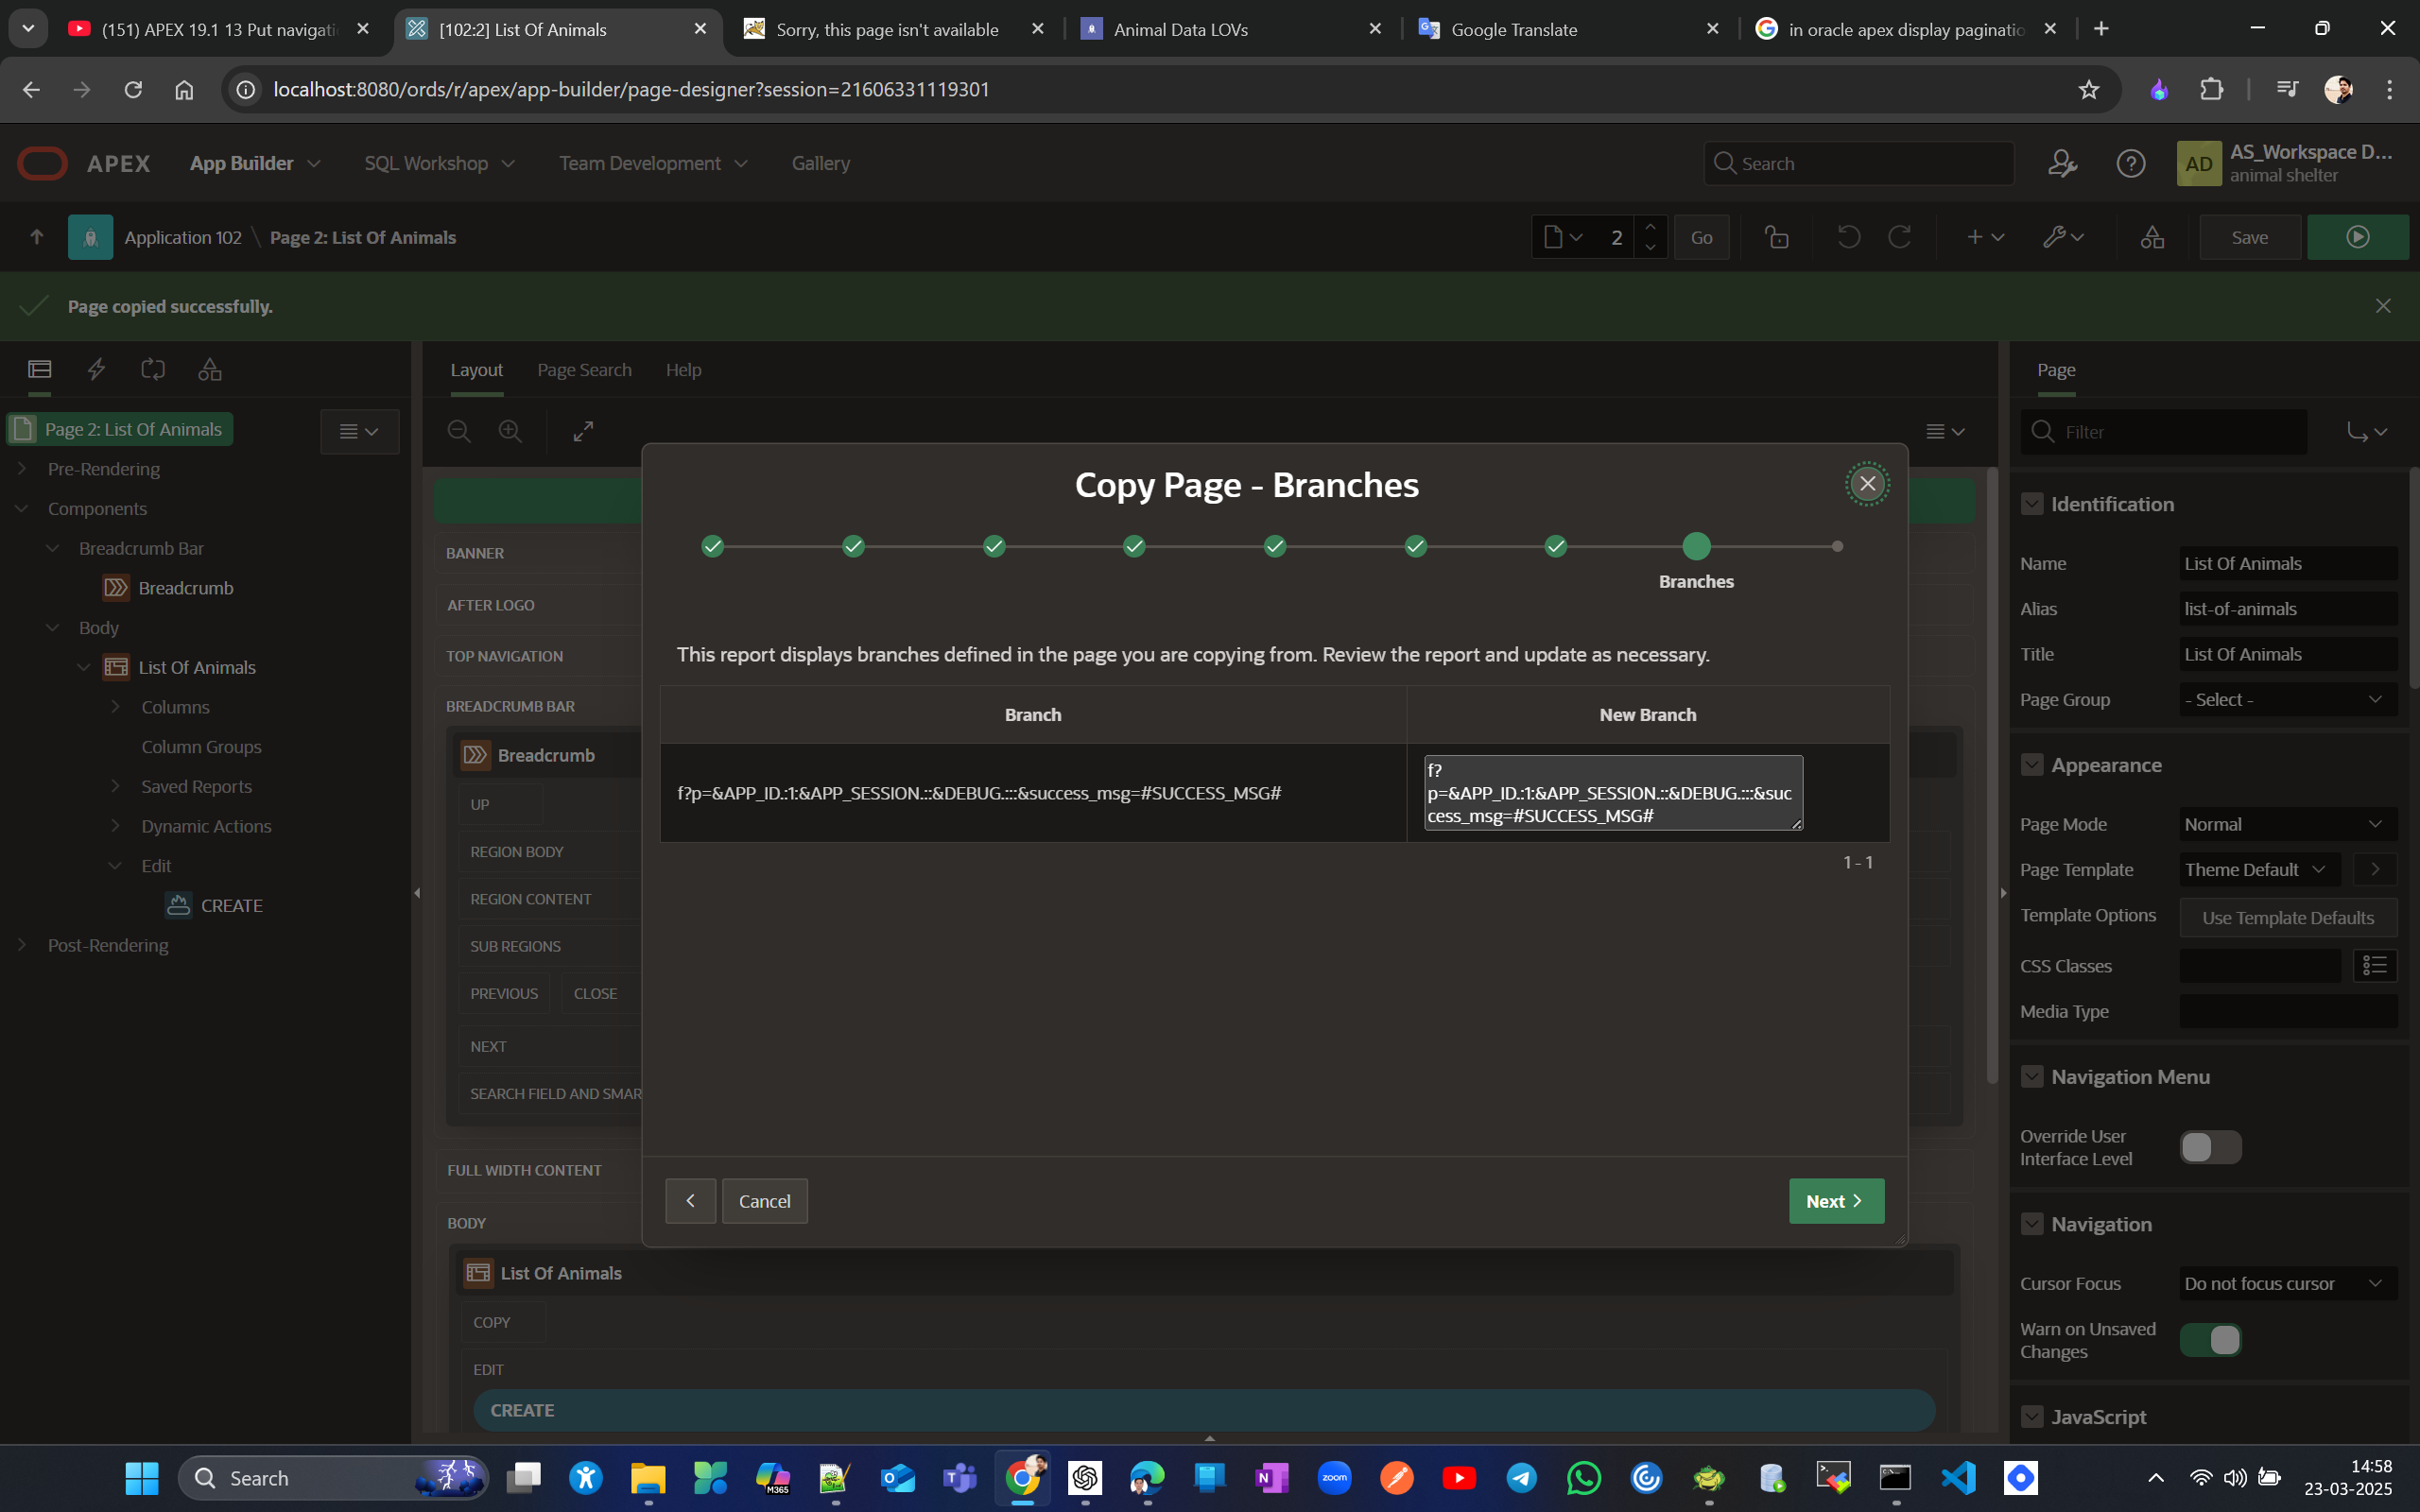
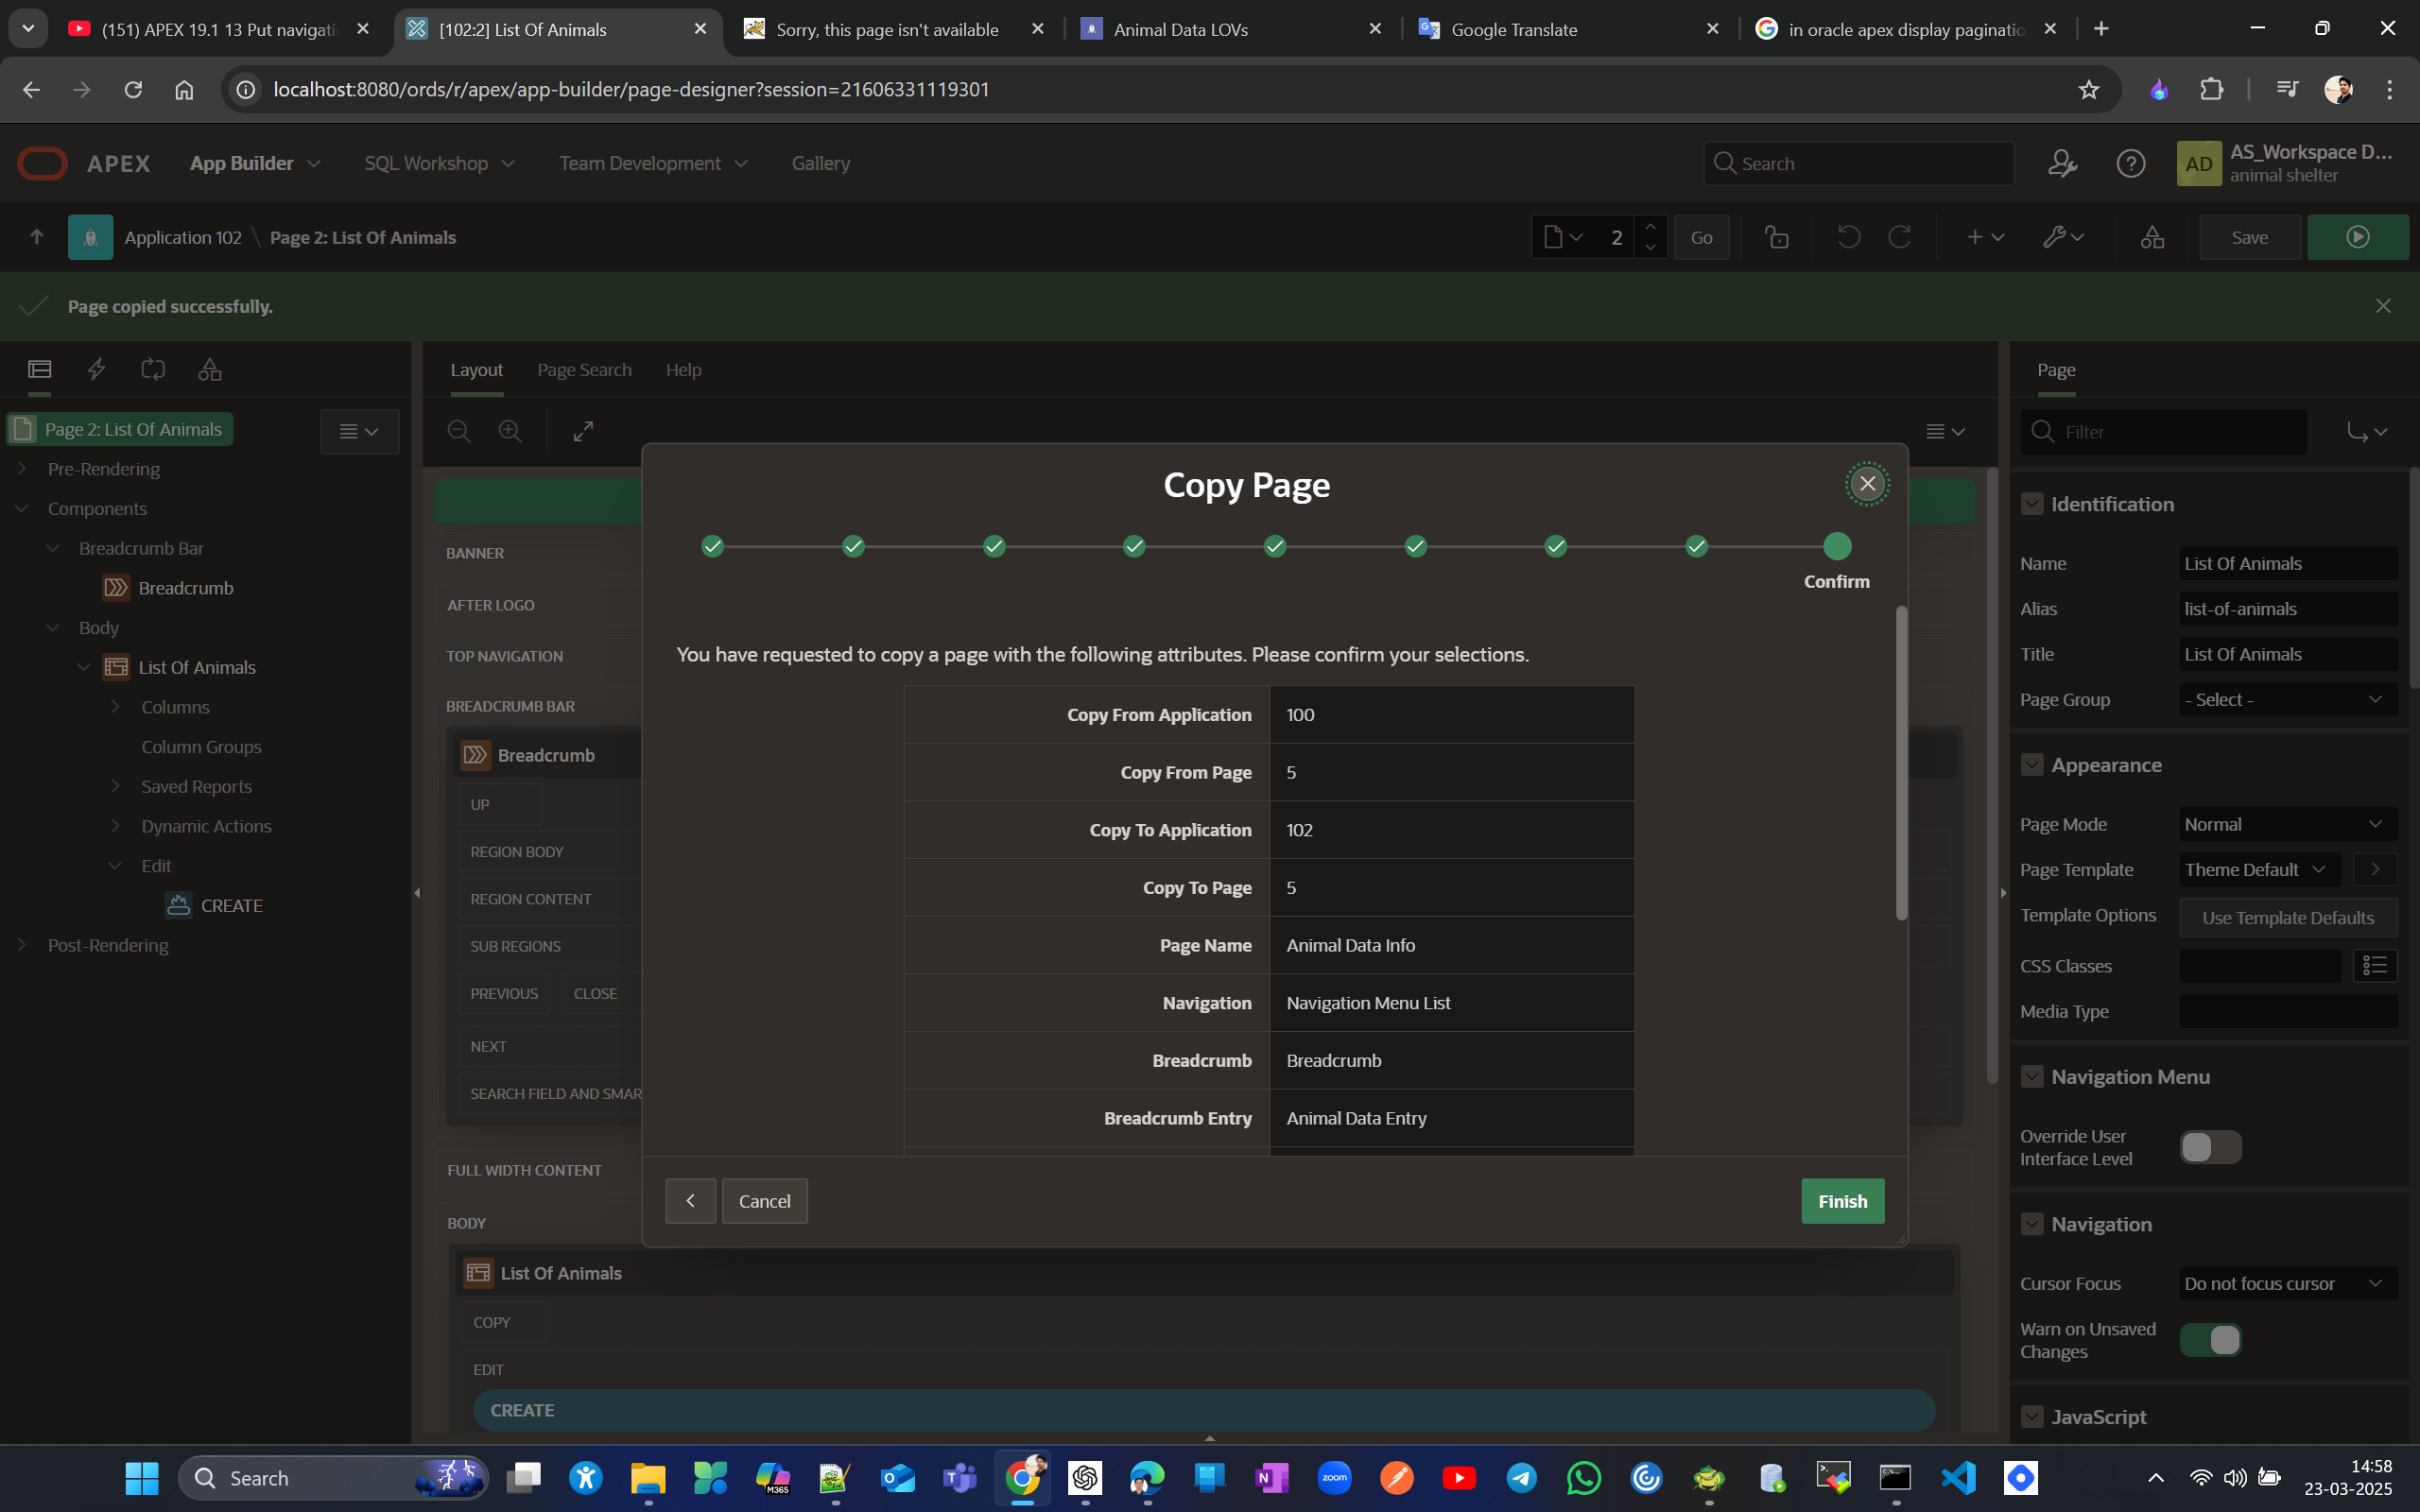
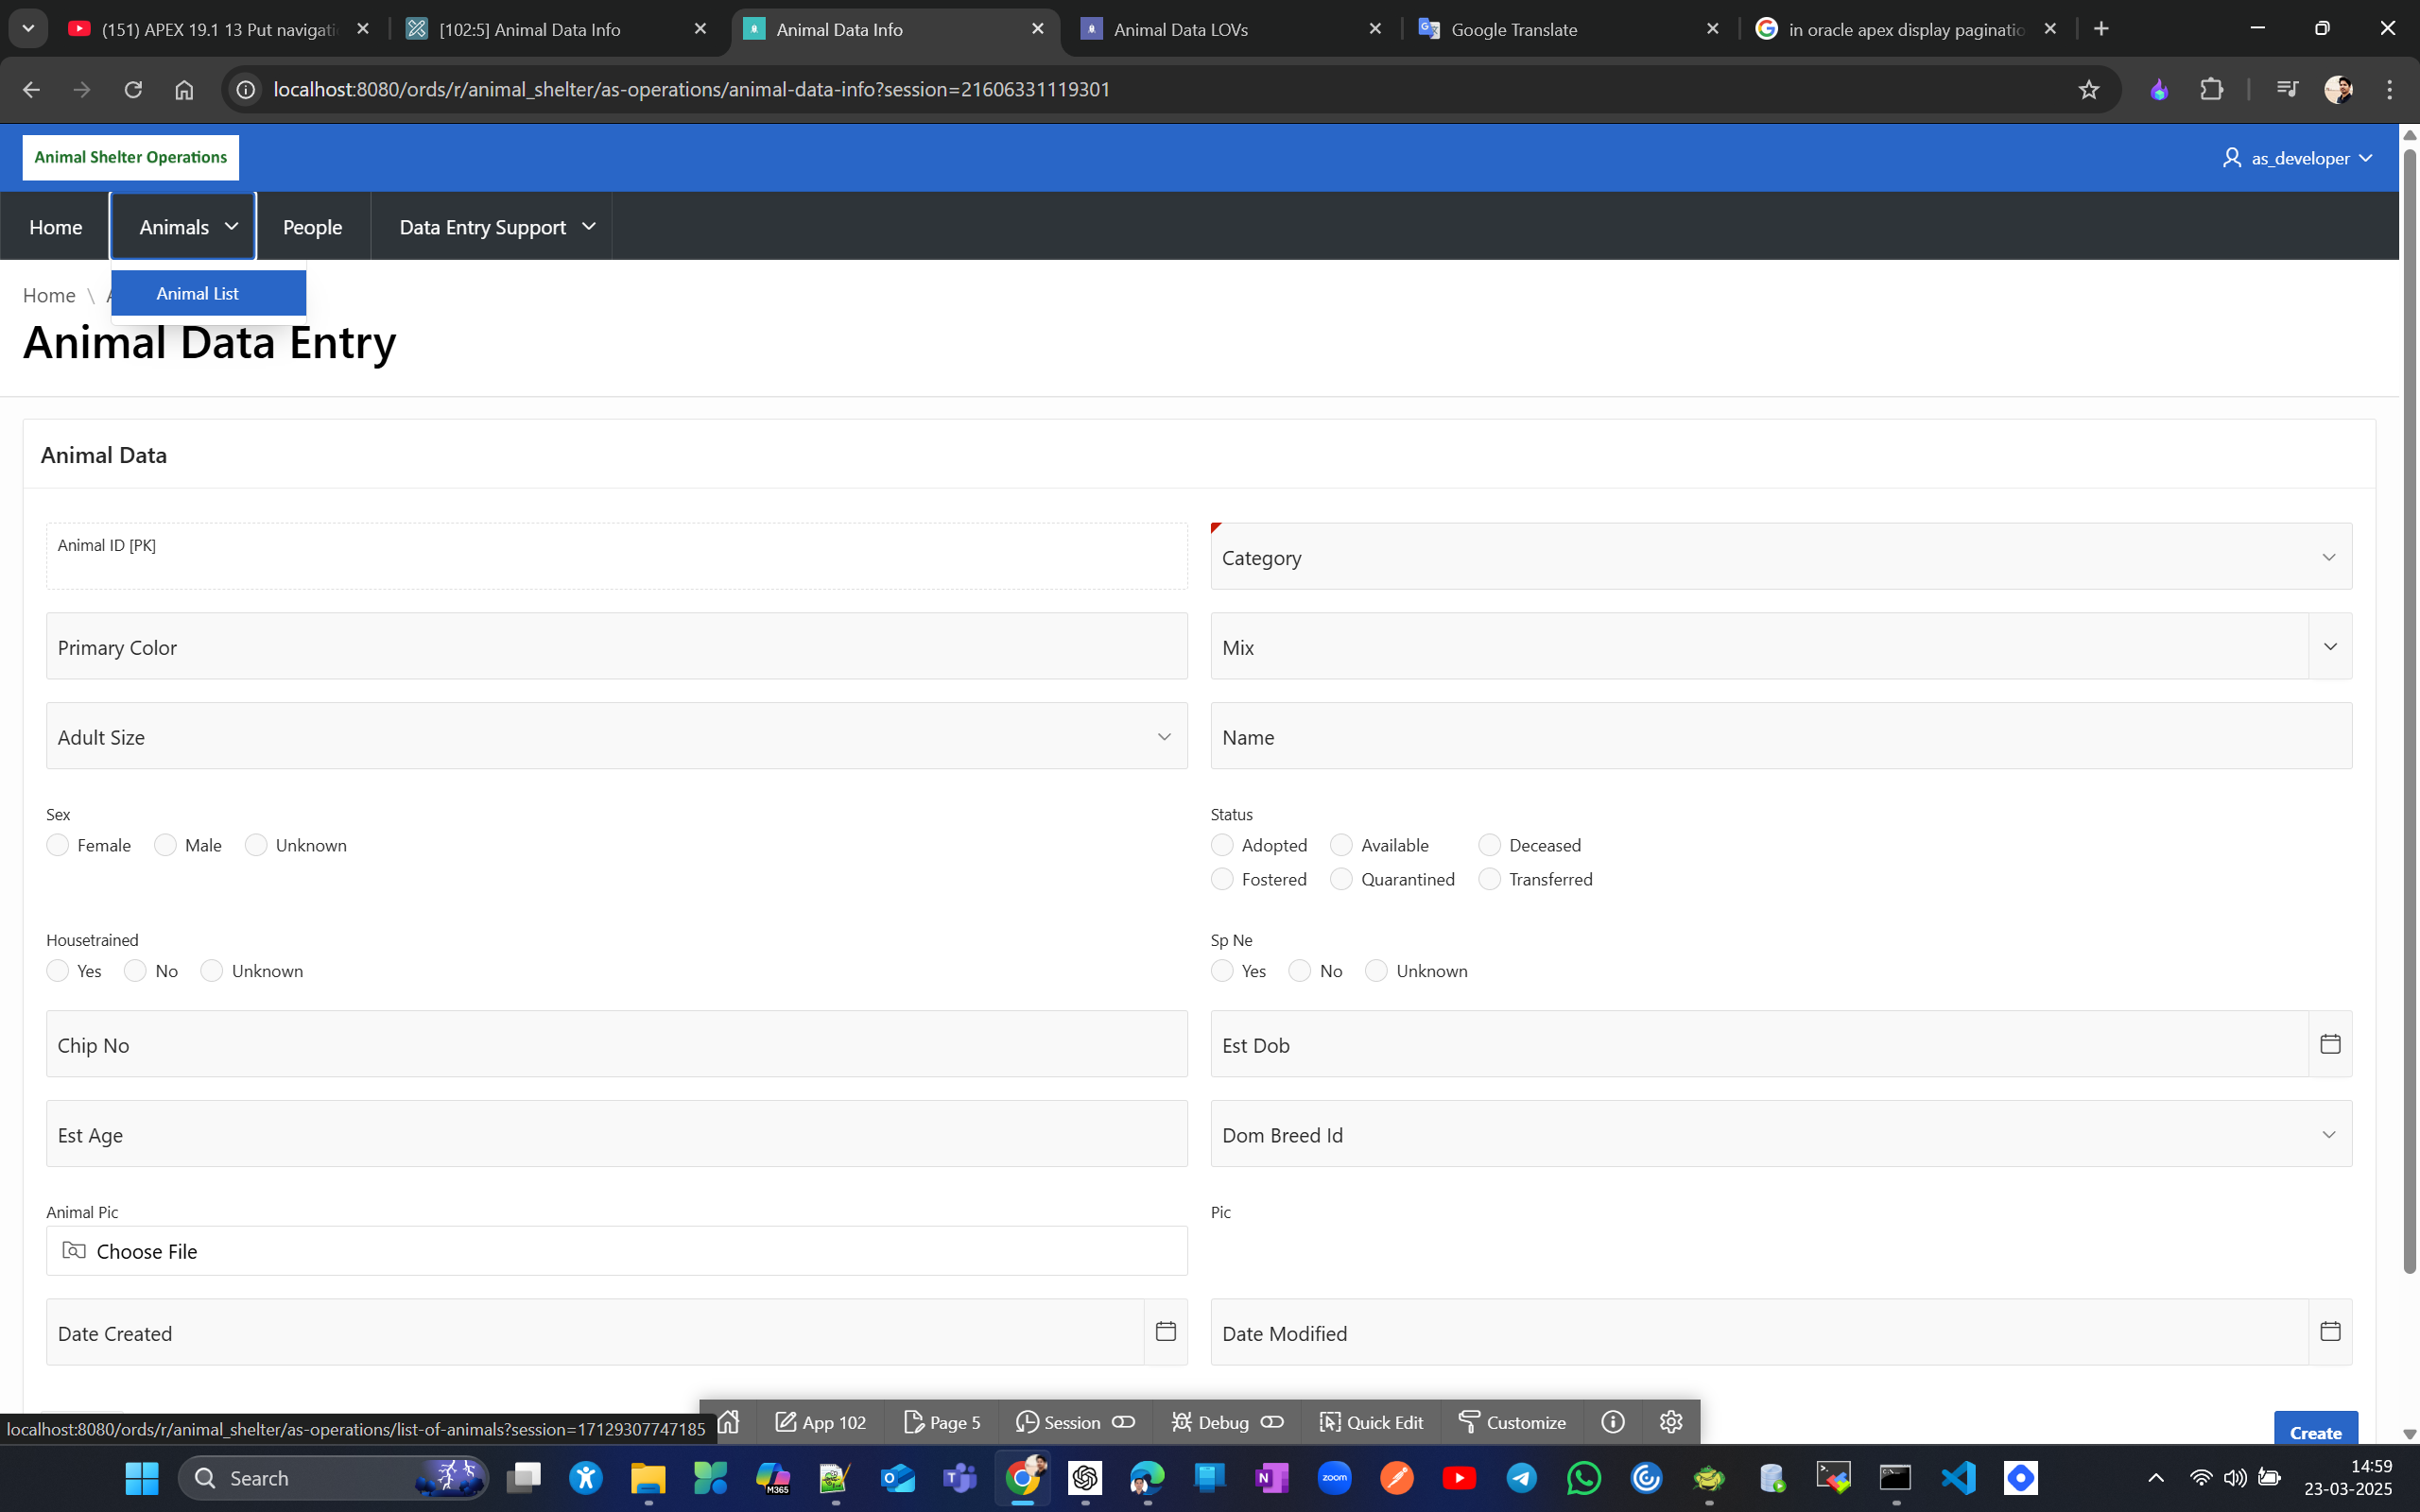
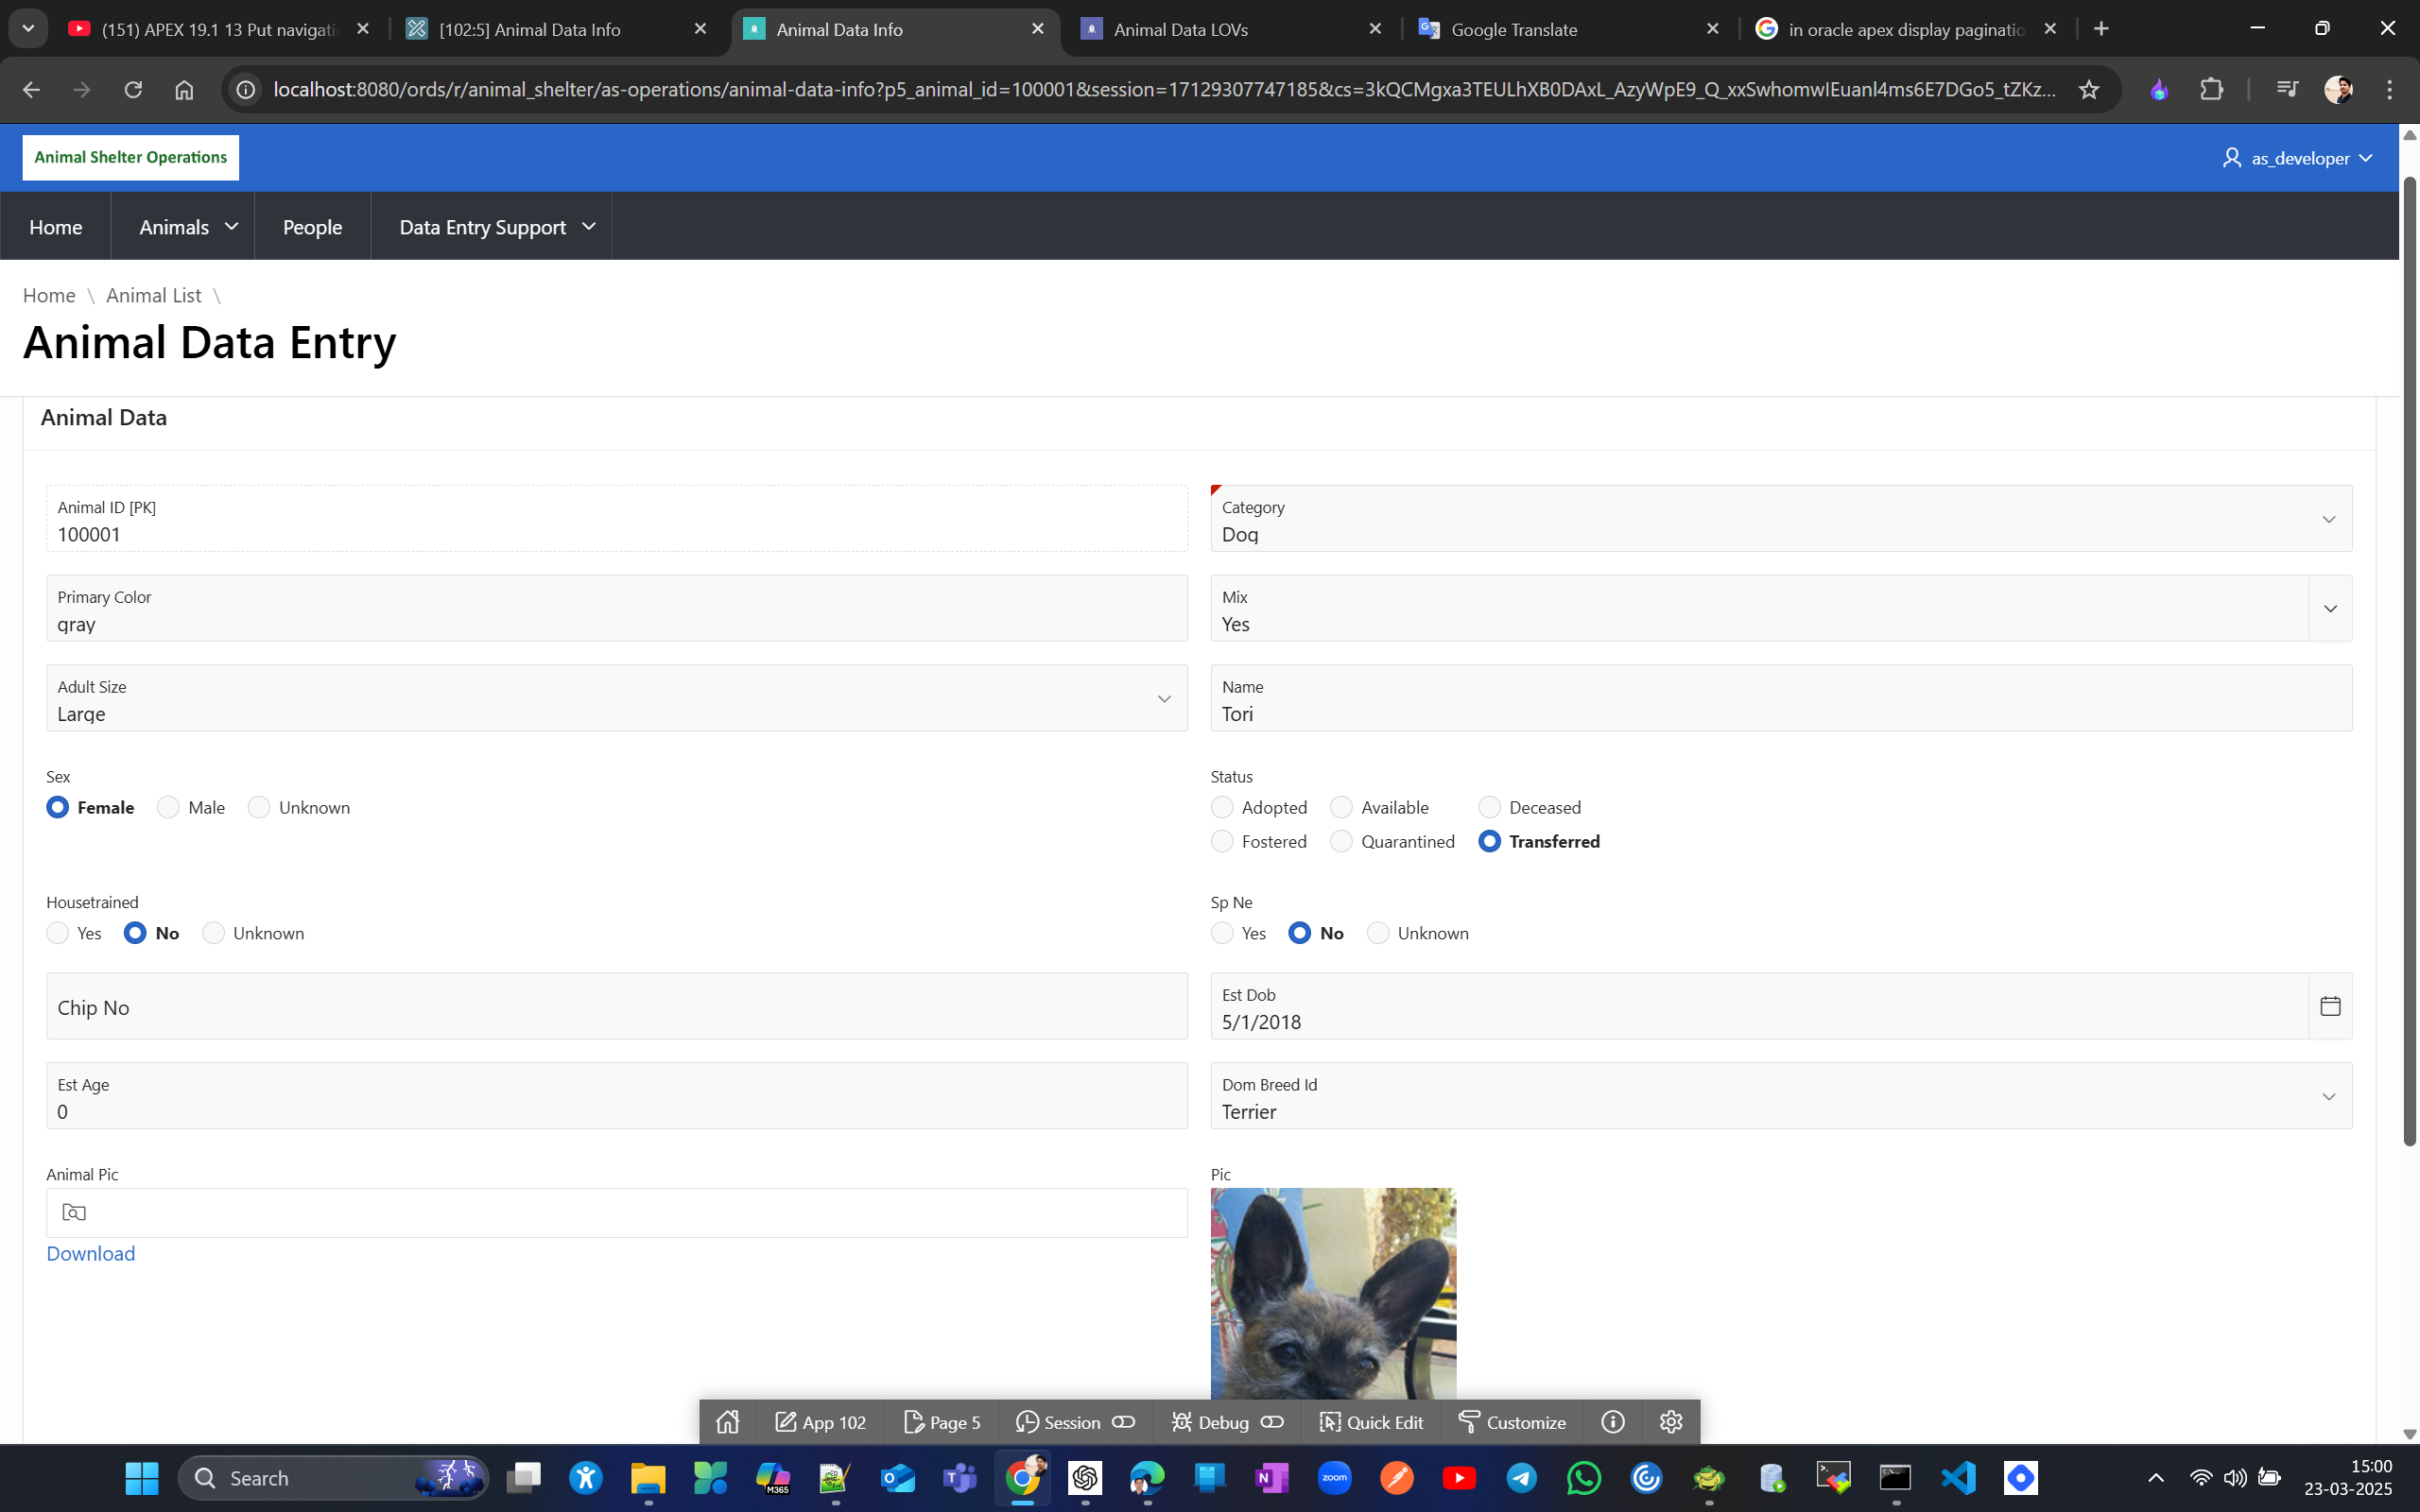
You can verify the copied LOVs as well.
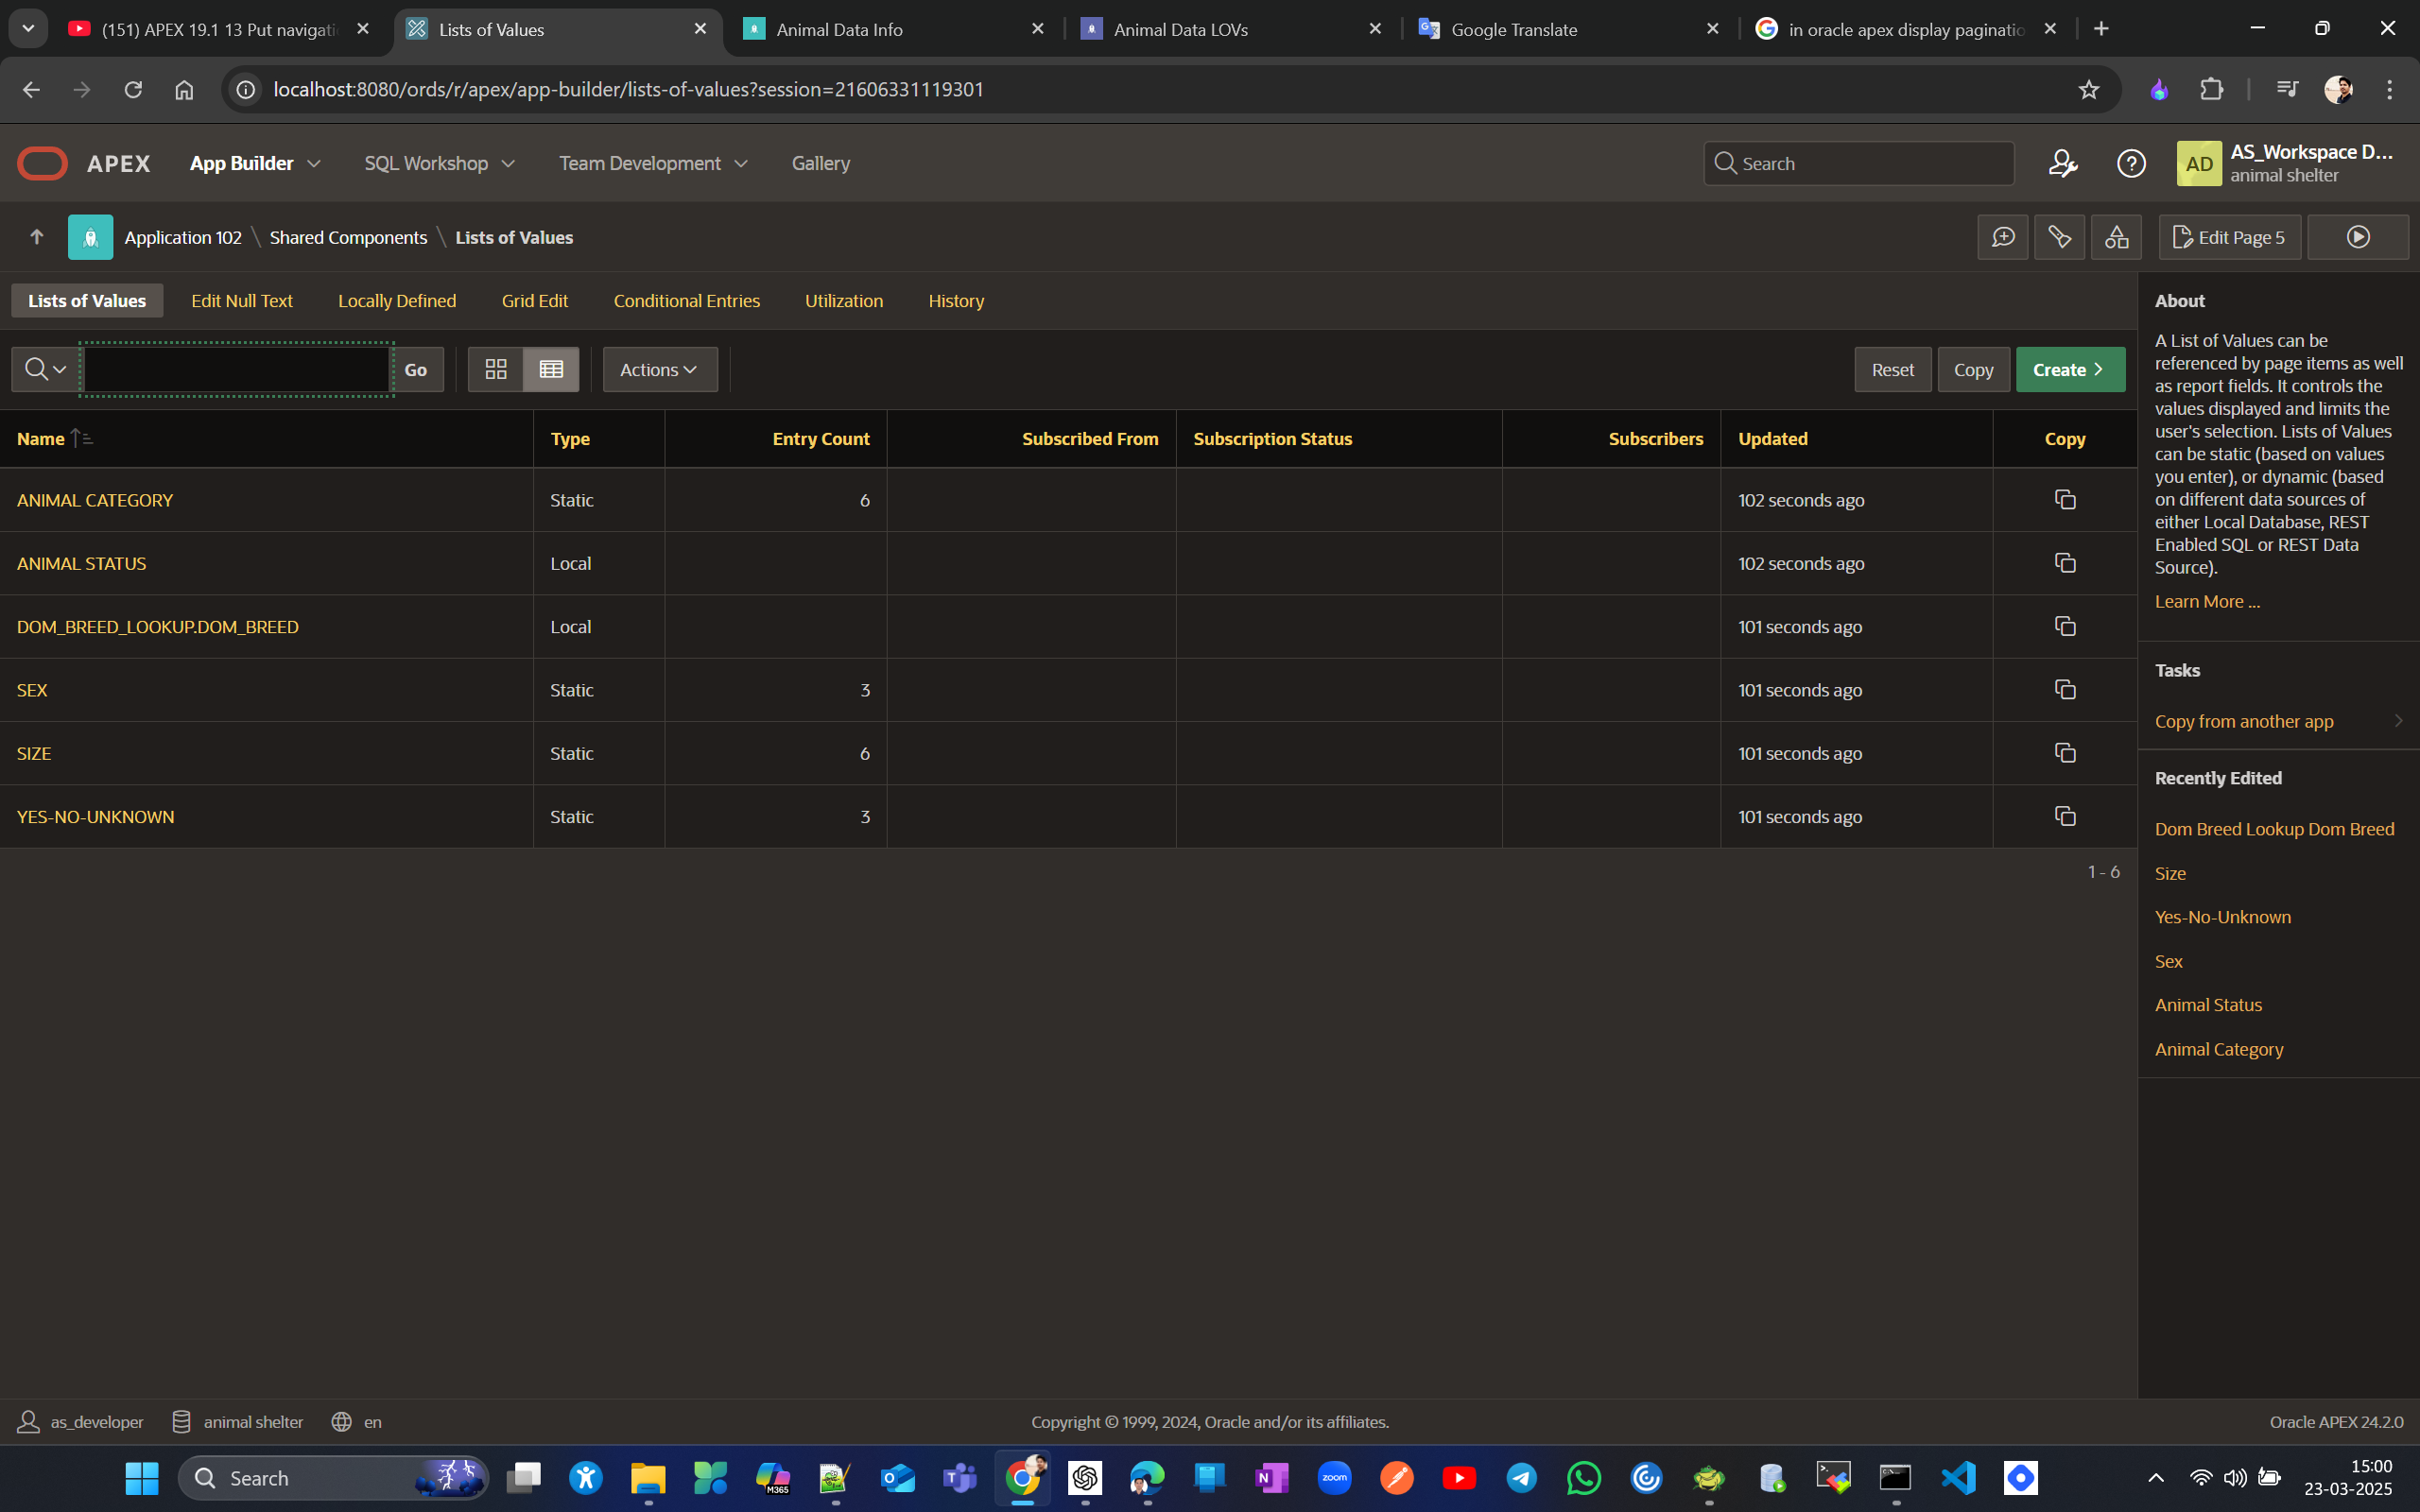
After copying the report and form from DEV (Daily Operations) to PROD (AS Operations), all LOVs, which didn't exist in the PROD app before, are copied along with the form and report pages.
[Before Copy of Report and Form page from daily Operations to AS Operations]
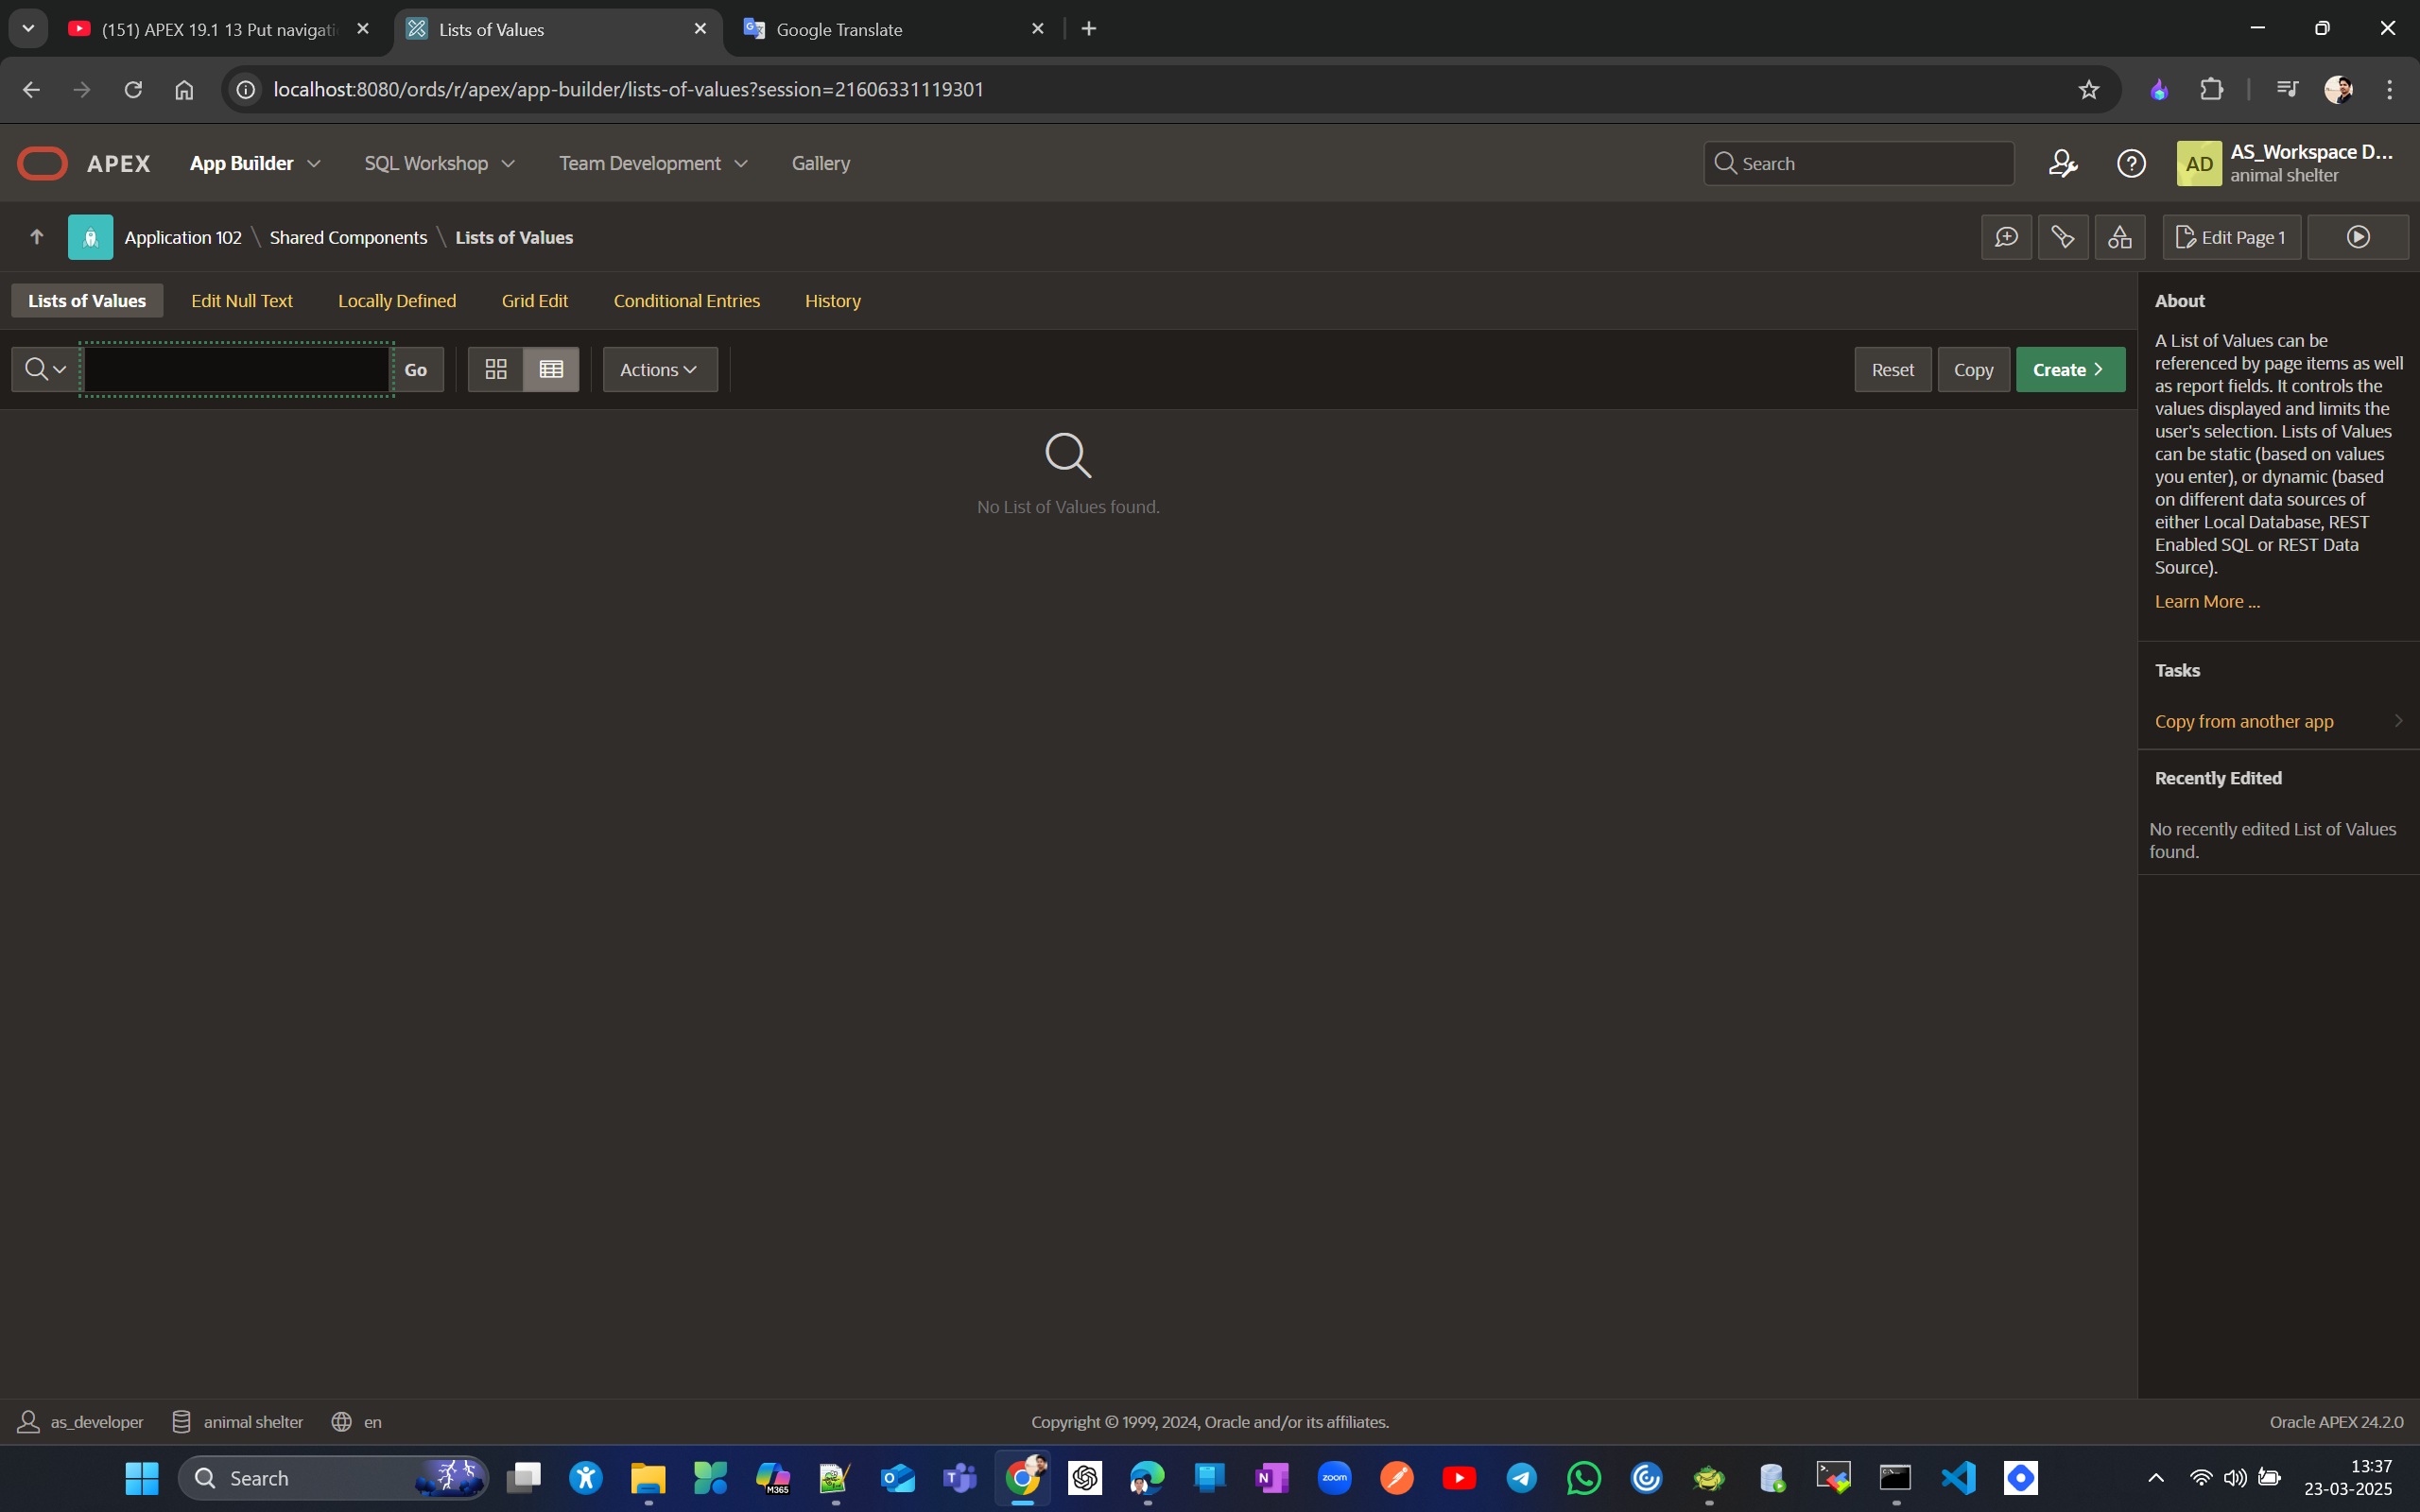
Log in as an end user to see how the application looks, because if you try to log in as a developer or admin, you won't be able to access the page and will see a message instead saying only allowed to change password, so make sure to use the correct URL. http://localhost:8080/ords/r/animal_shelter/as-operations/. In older versions you had to copy url till page number like this.

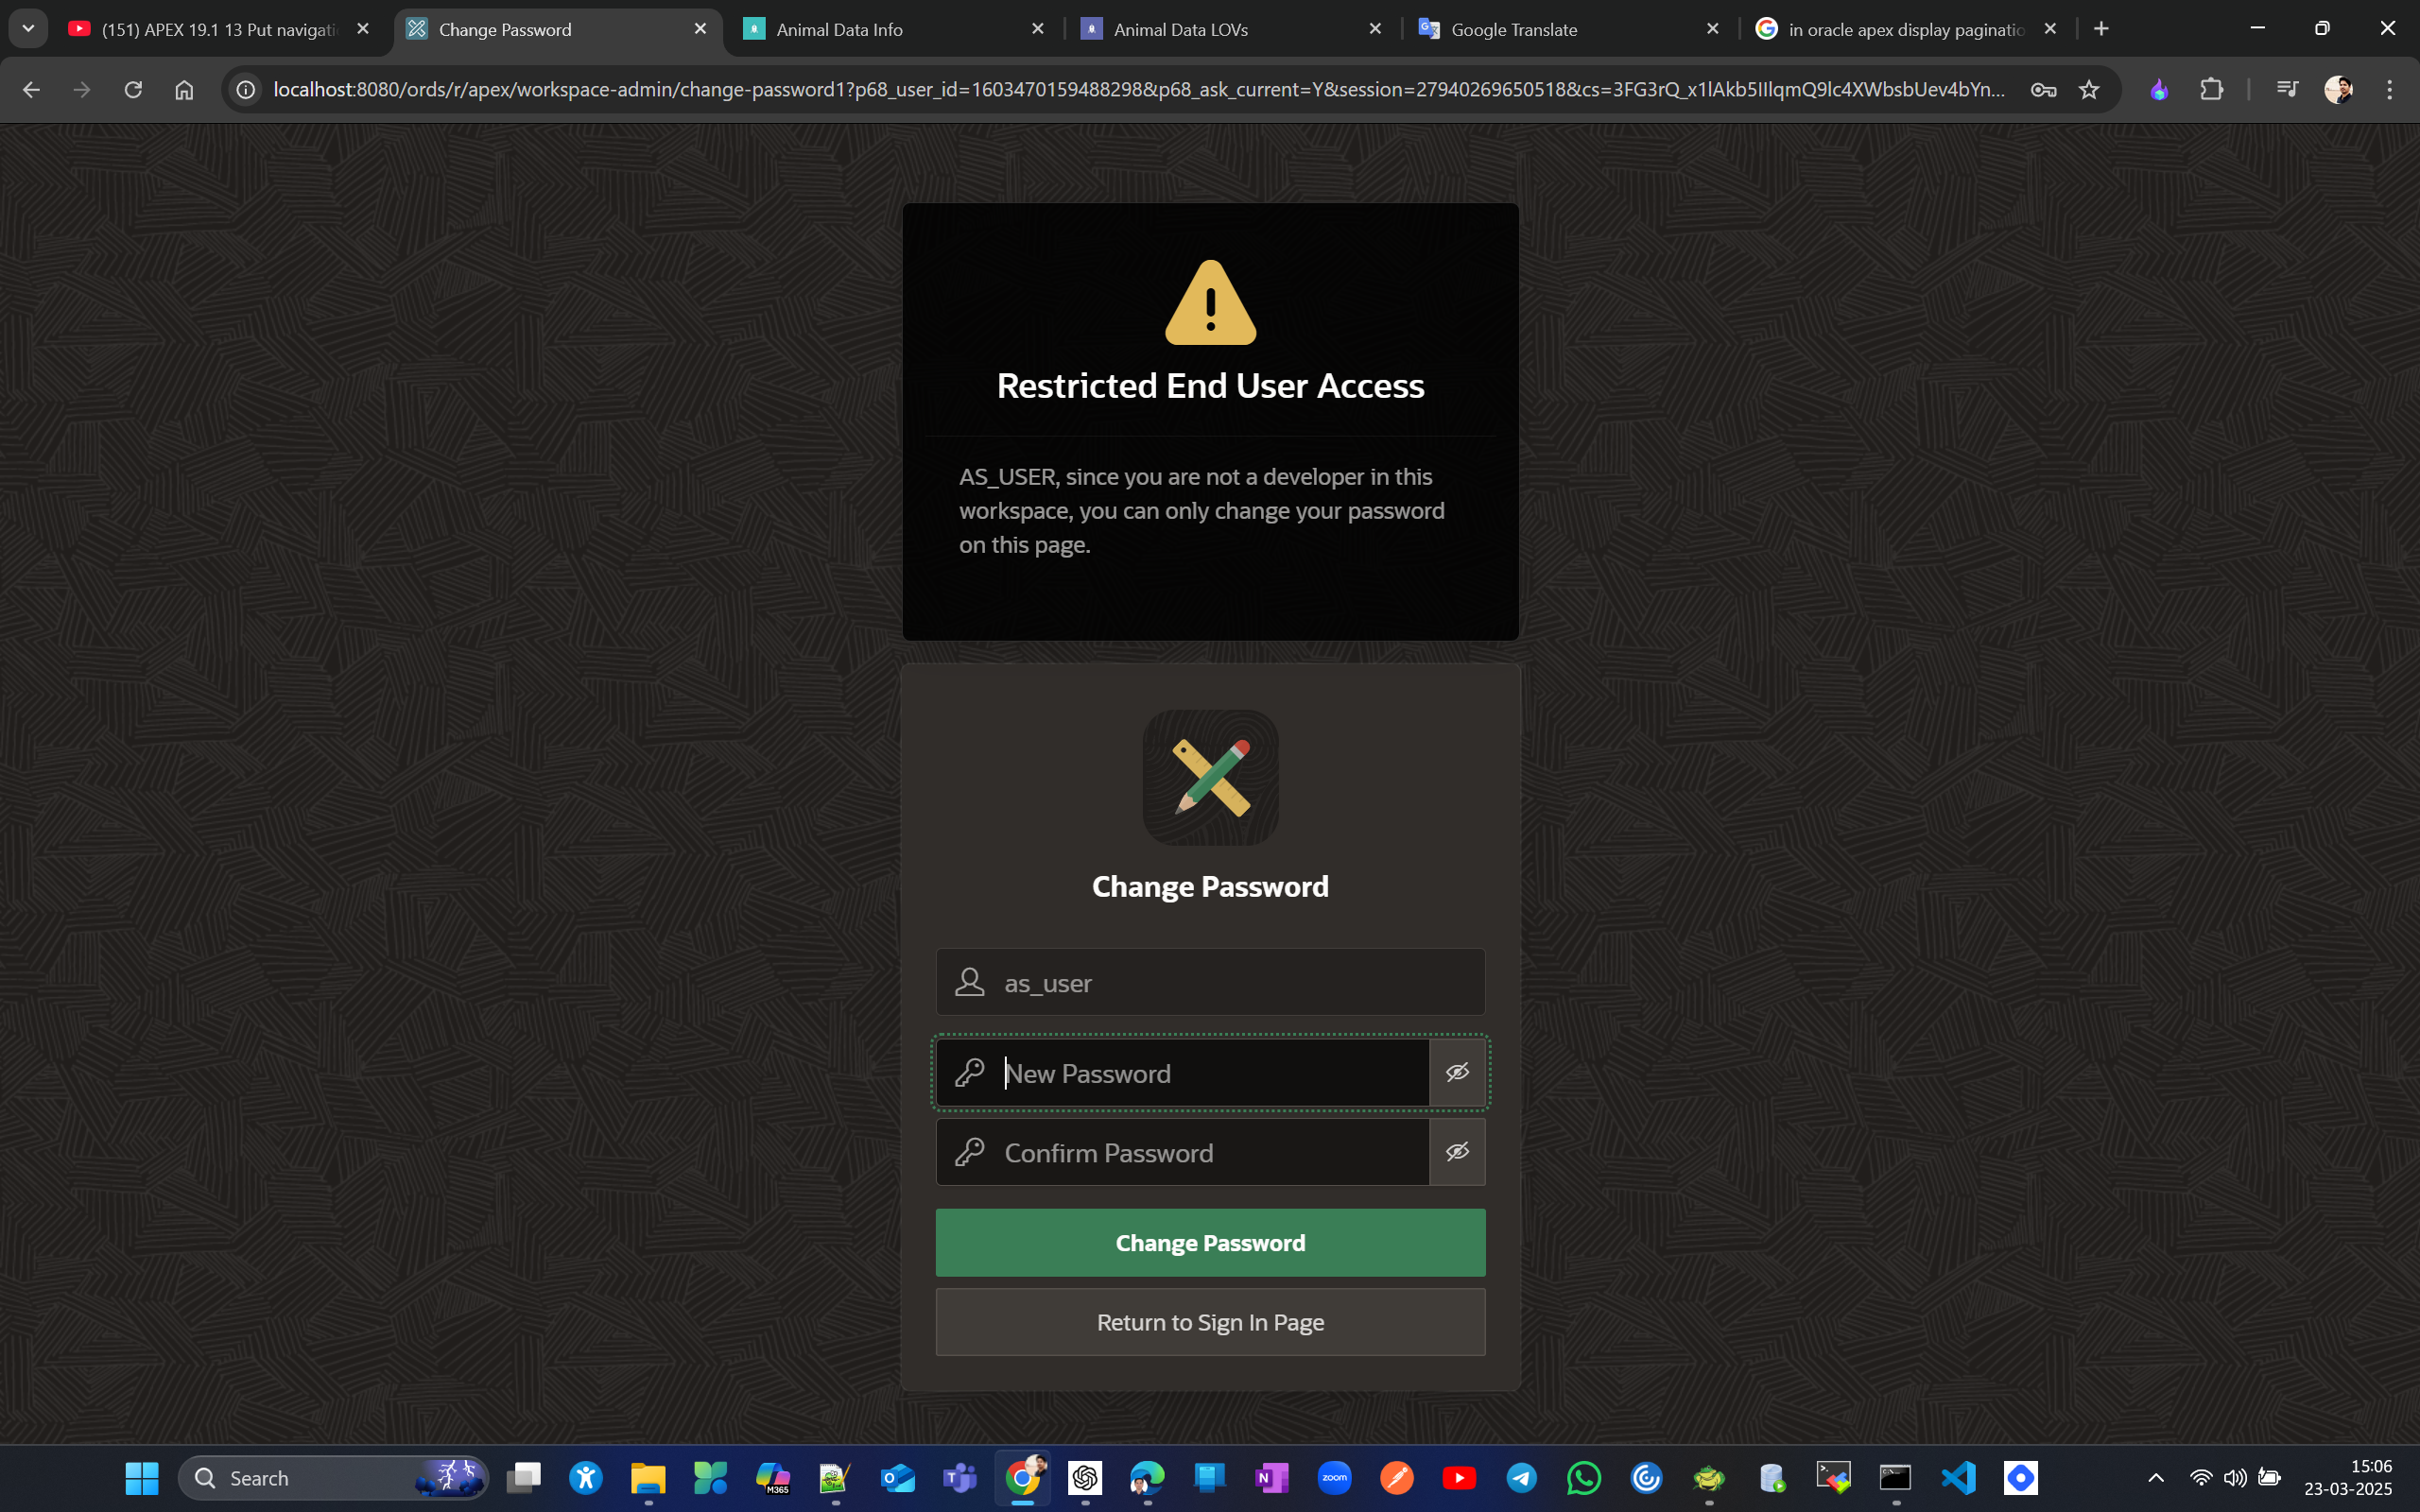
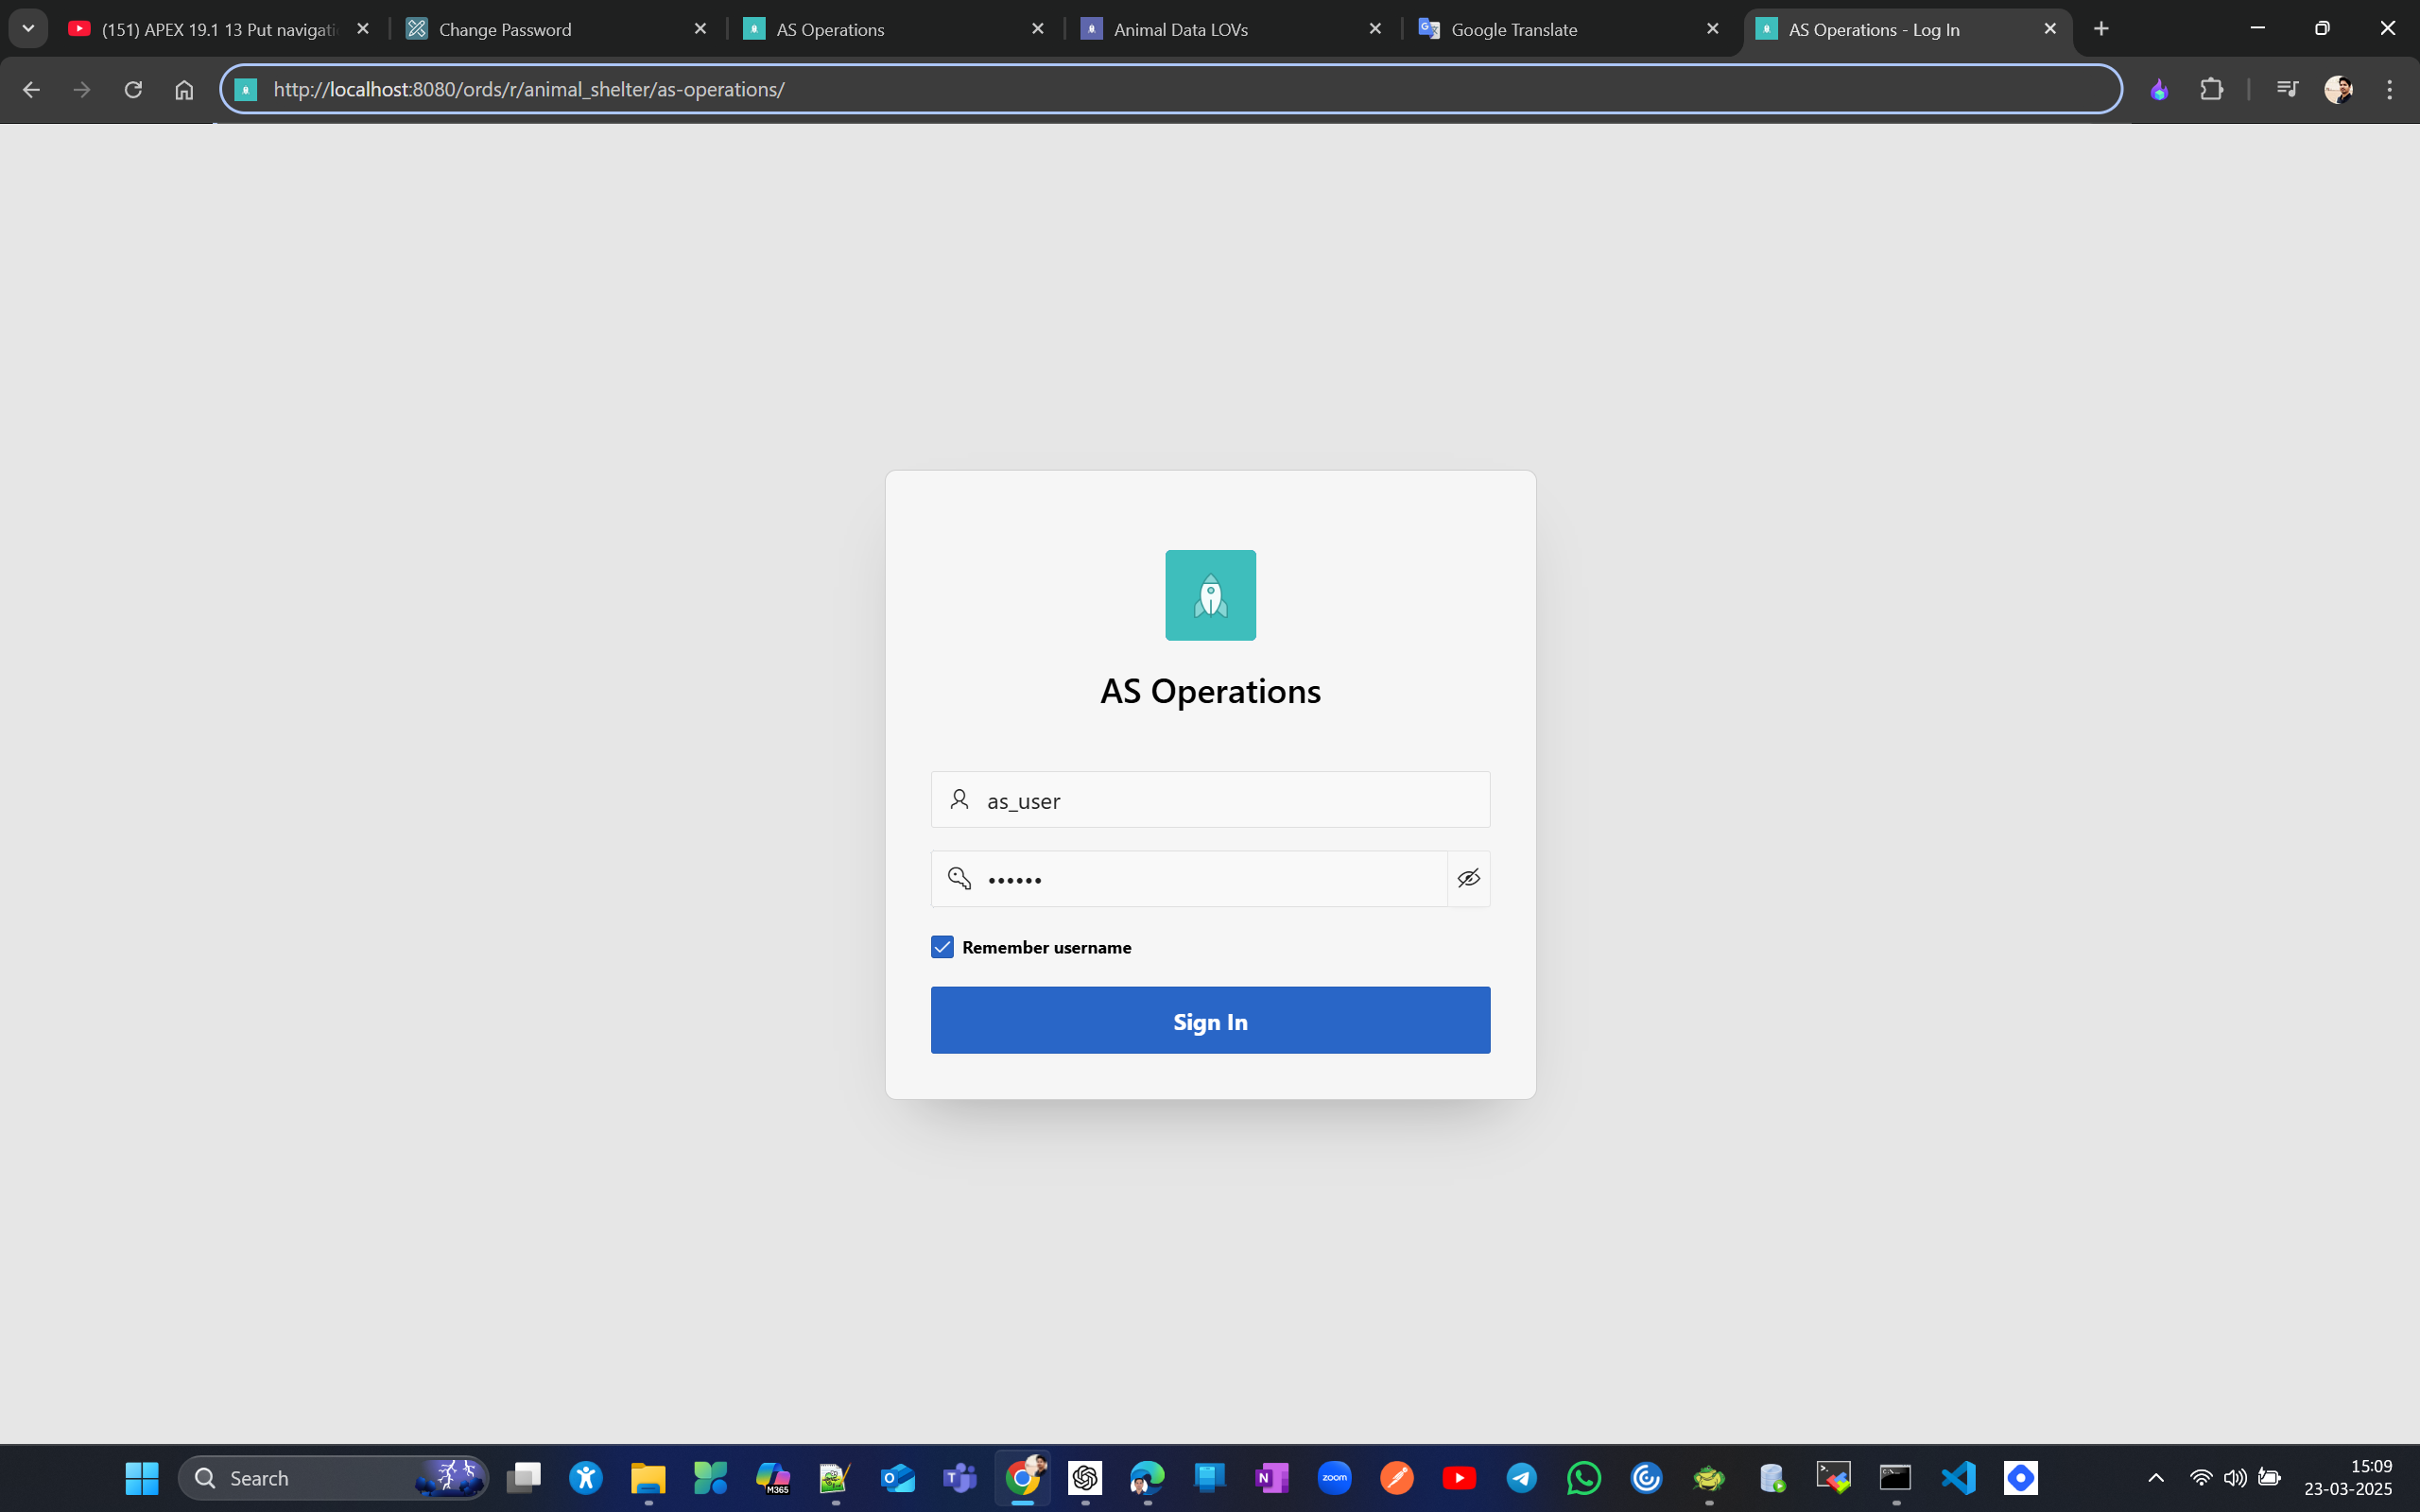
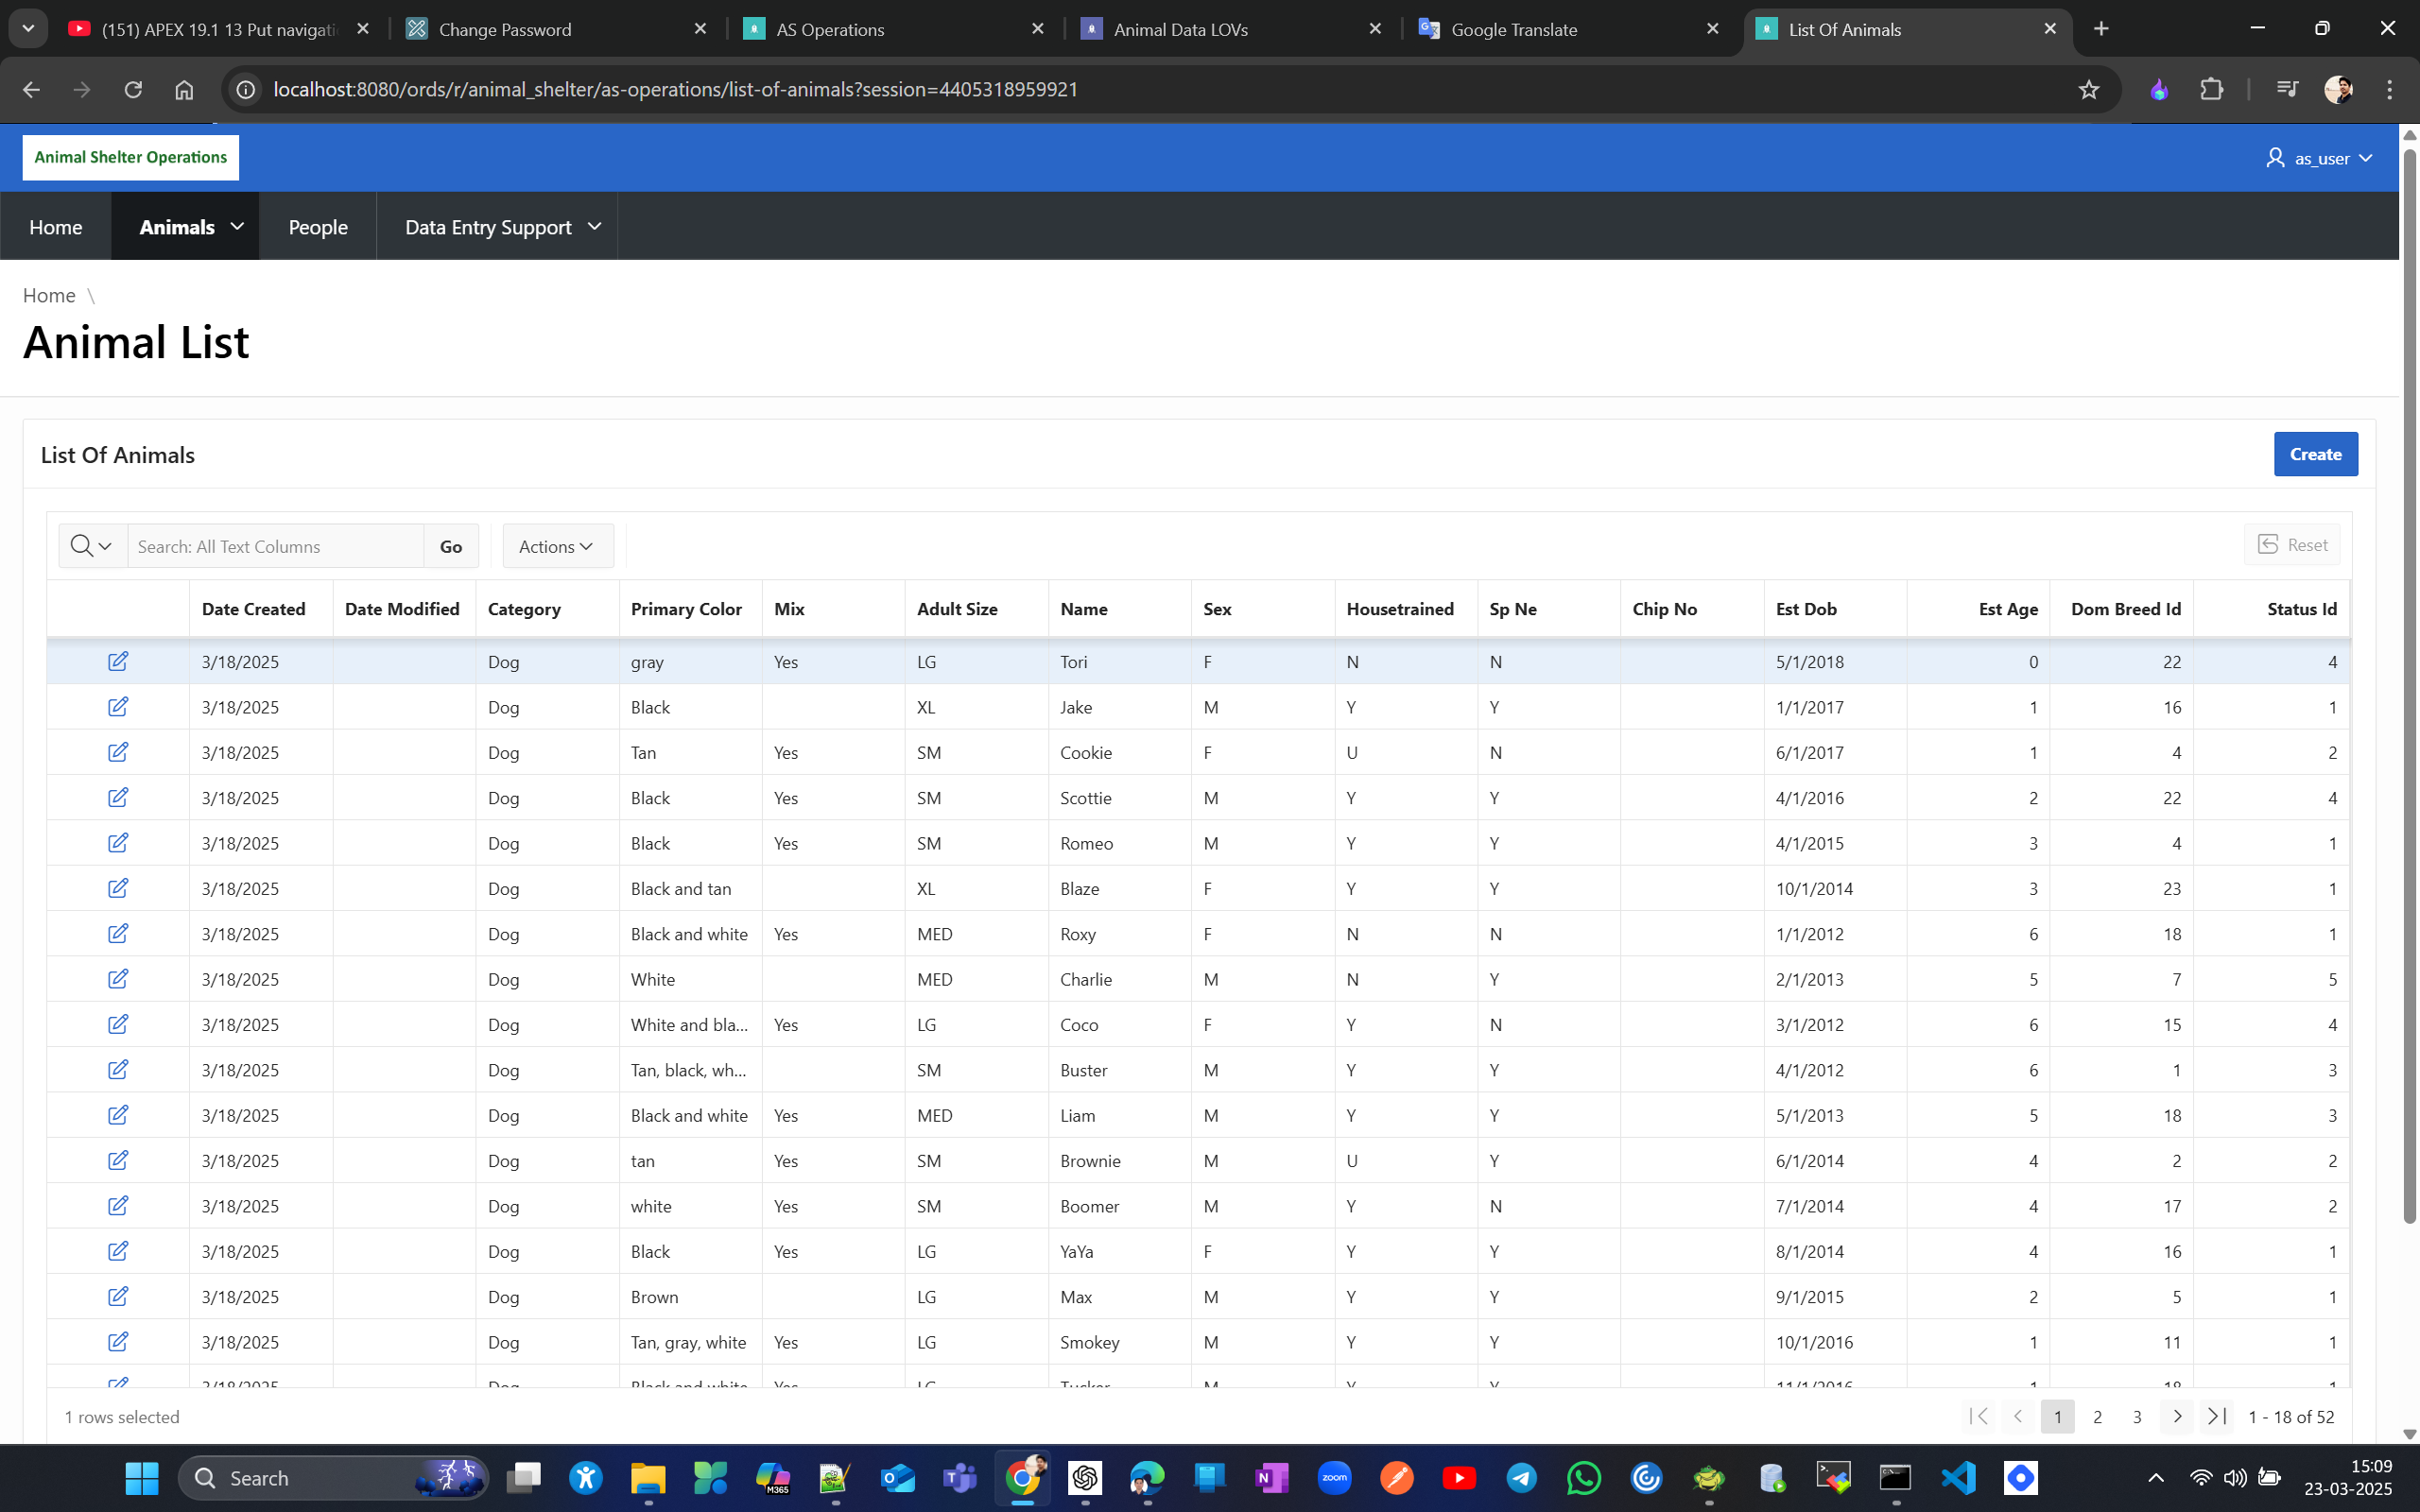
As a normal end user, you won't see the dev designer toolbar.
Create a master-detail form (2 tables) and simple form (1 table)
Before starting on master details, create a model excluding lookup tables, as they are only meant for data entry consistency and will clutter the model, making it less succinct. For reference during model import, in SQL Developer's data dictionary, you can check and drop lookup tables, then click on merge and rearrange tables so they look better in the data model.
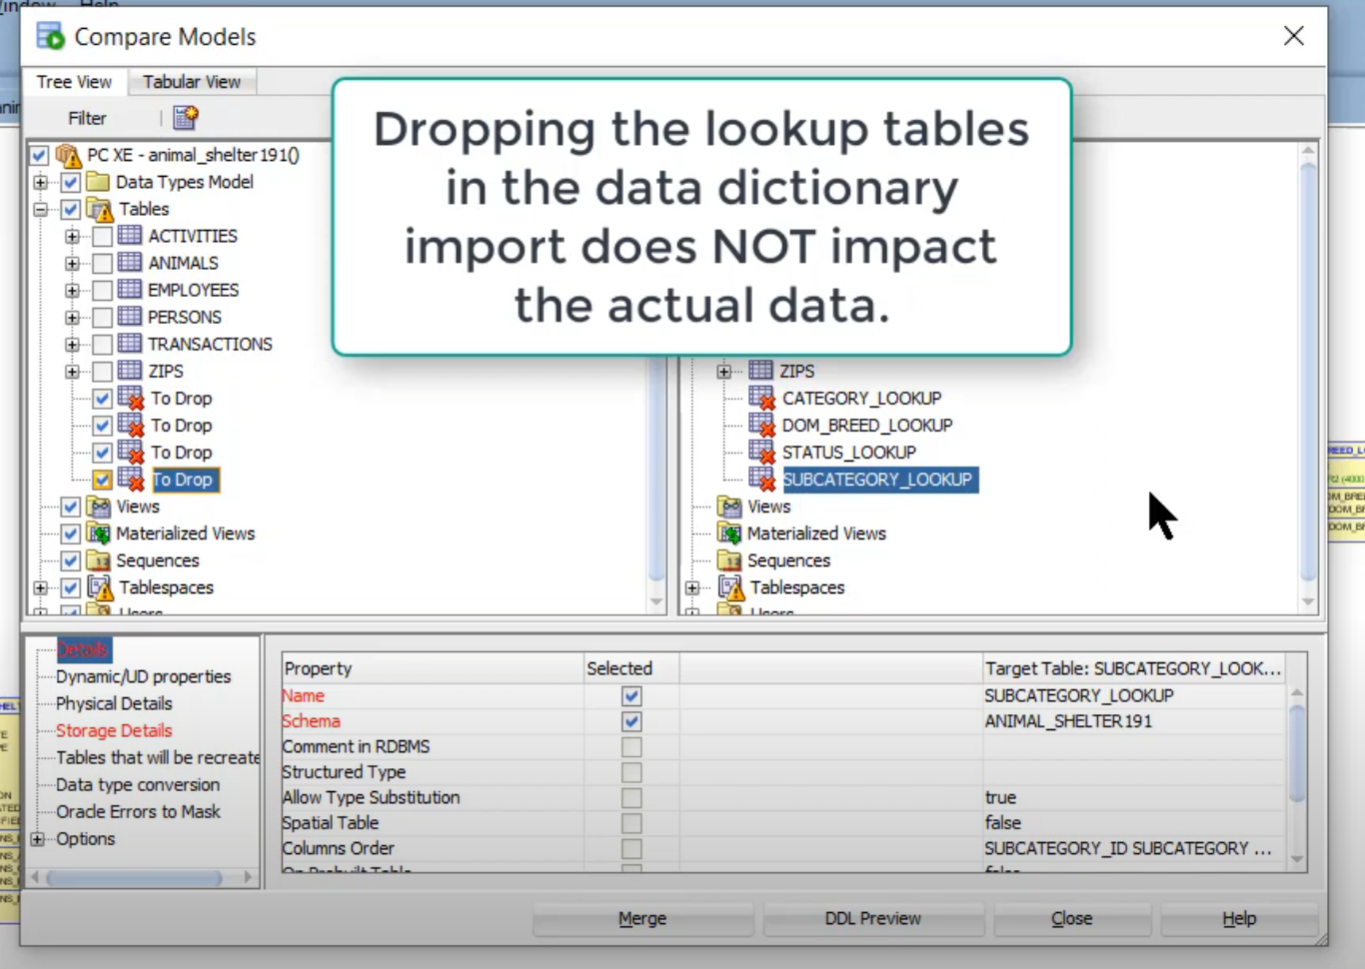
Normally, a single table has a simple form, but there can be situations where two tables are linked, with one as the master and the other as the detail, or main and subform. Let's look at the data model to discuss when to create a simple form and when to create a master-detail or main-subform. This decision depends on whether the tables are dependent or independent. Sometimes, data in one table depends on another table, like in a strong entity 1-1 relation where a foreign key is usually a unique key constraint. We’ll create a simple form for "PERSON" and a master-detail form for "PERSON_EMPLOYEES." Tables like "Animals" and "Persons" are candidates for simple forms as they are independent and not linked to transactions or activities. Remember, you are not limited to one form per table; you might create two or more forms for a table. For dependent tables (weak entities), consider using a master-detail form, such as for "Animal-Transactions" and "Animal-Activities."
Login to Animal Shelter workspace AS_DEVELOPER → Daily Operation App(DEV APP)
Lets create a simple interactive report form on persons.
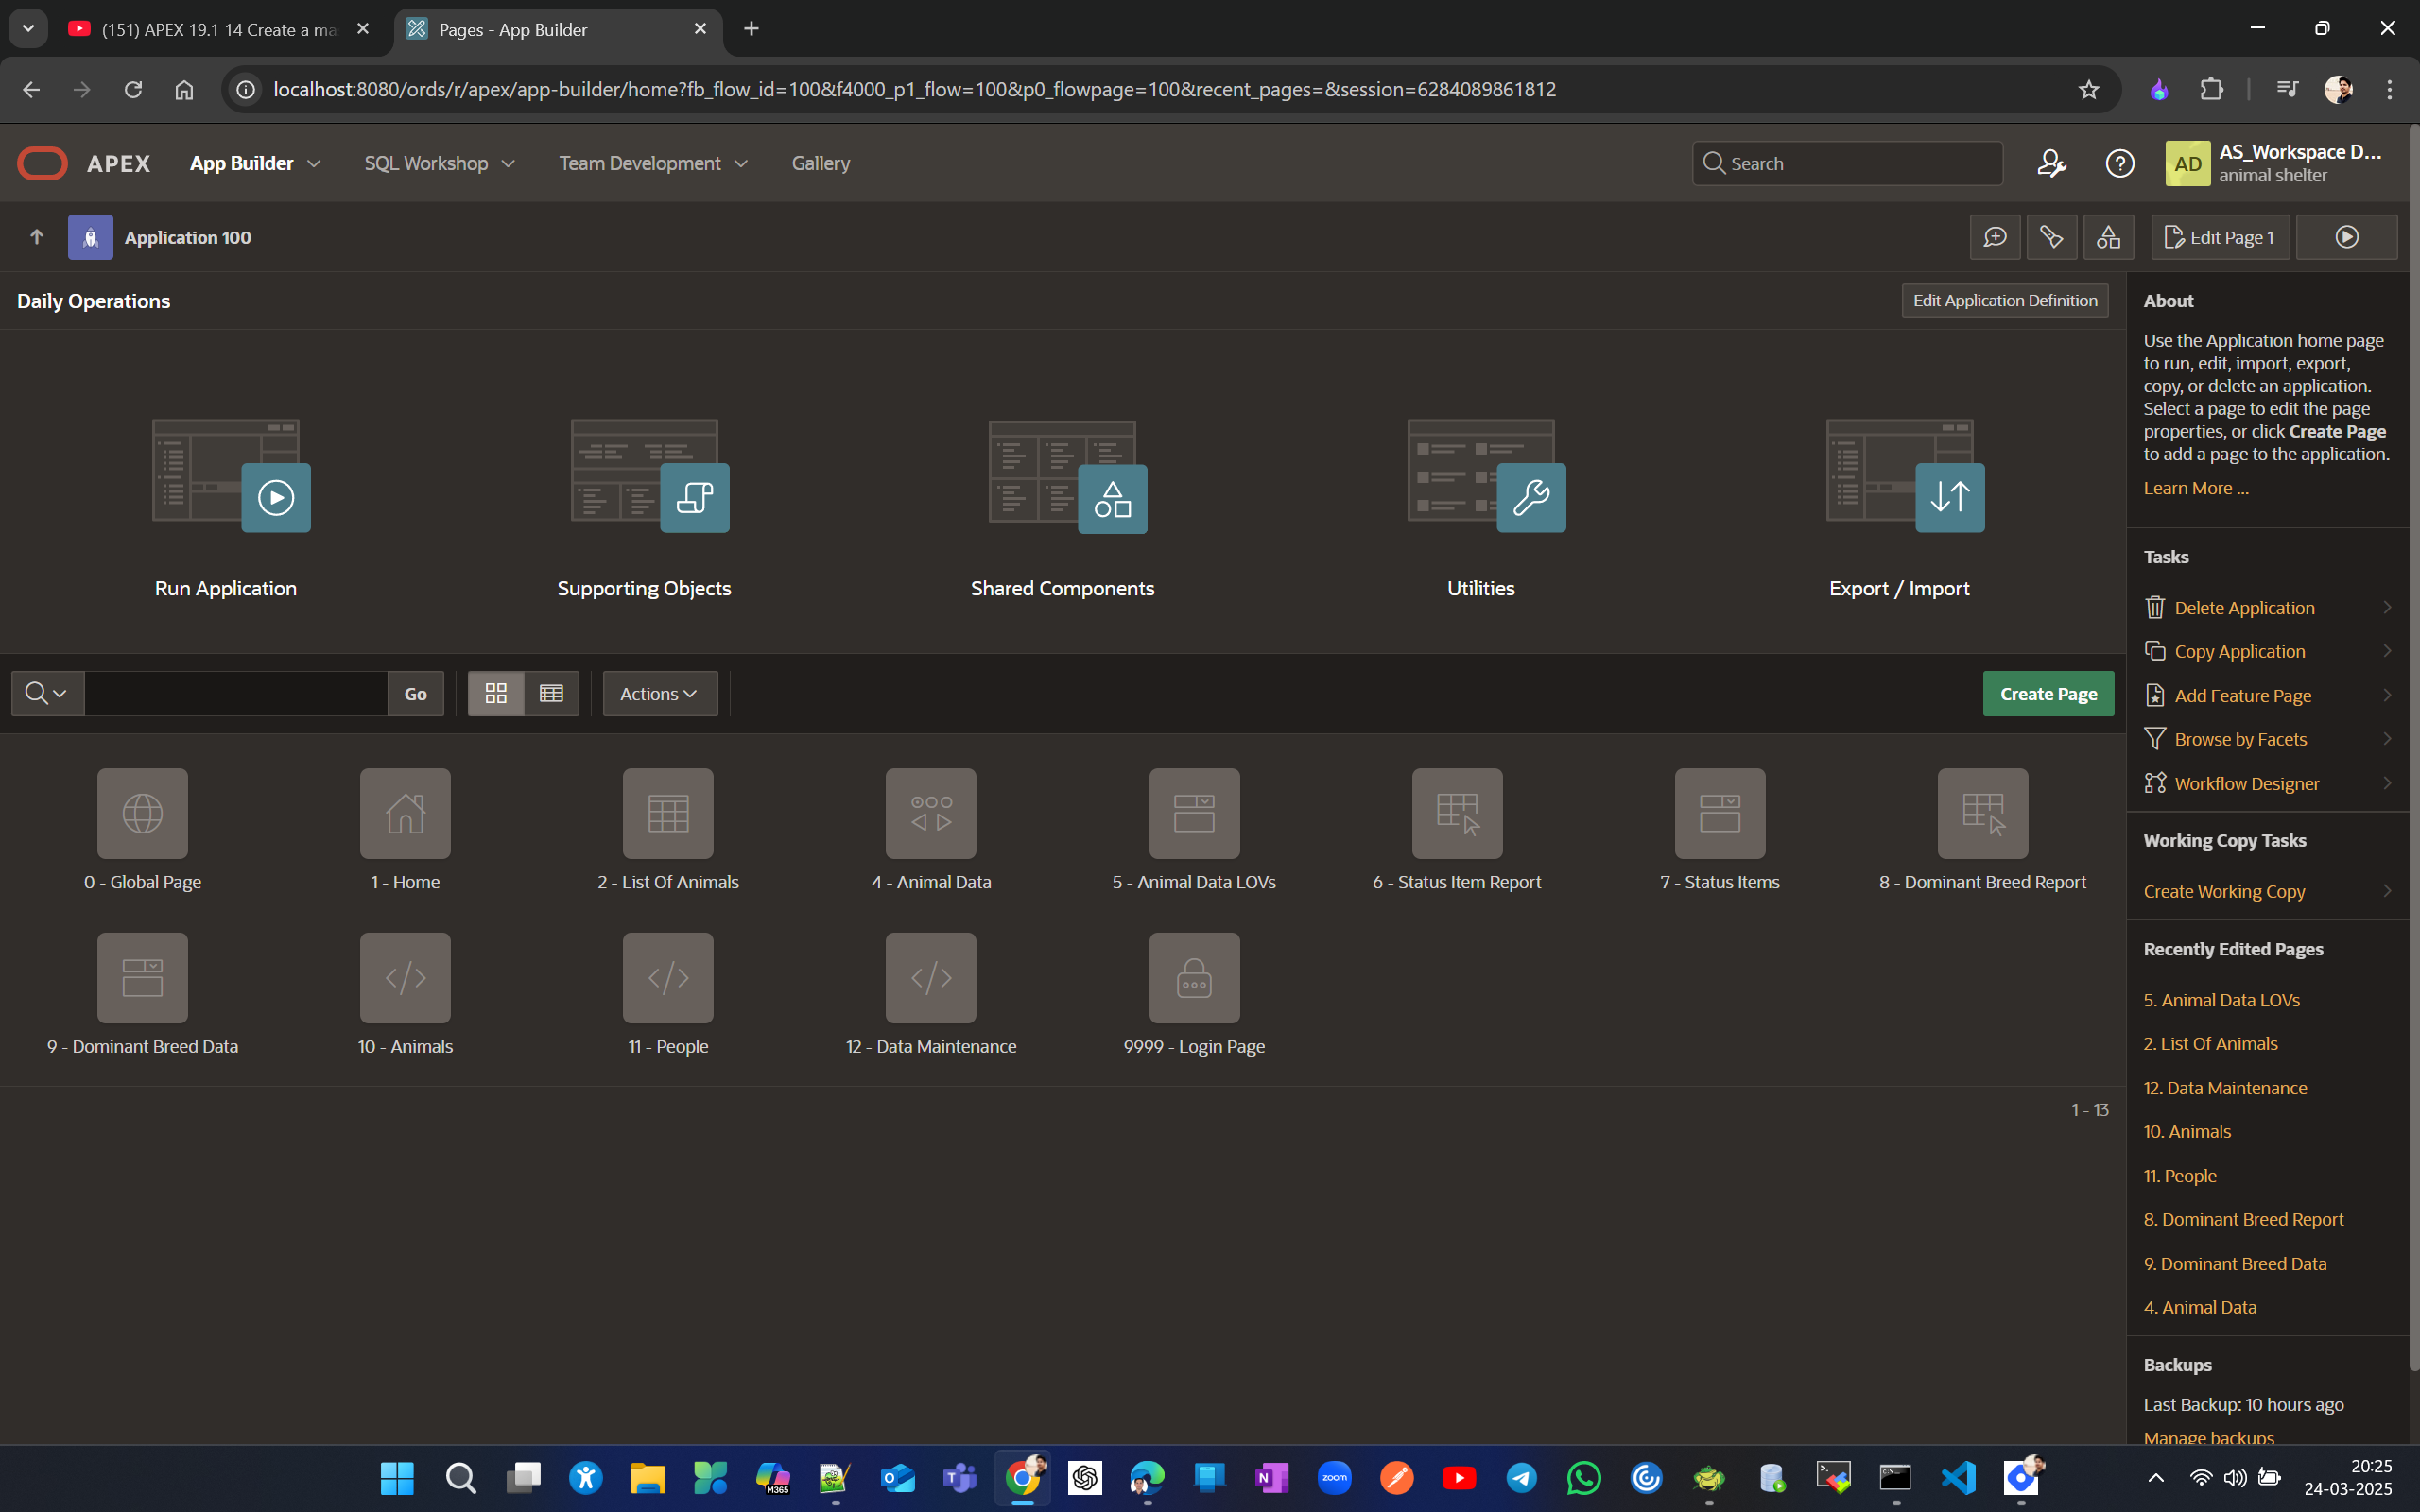
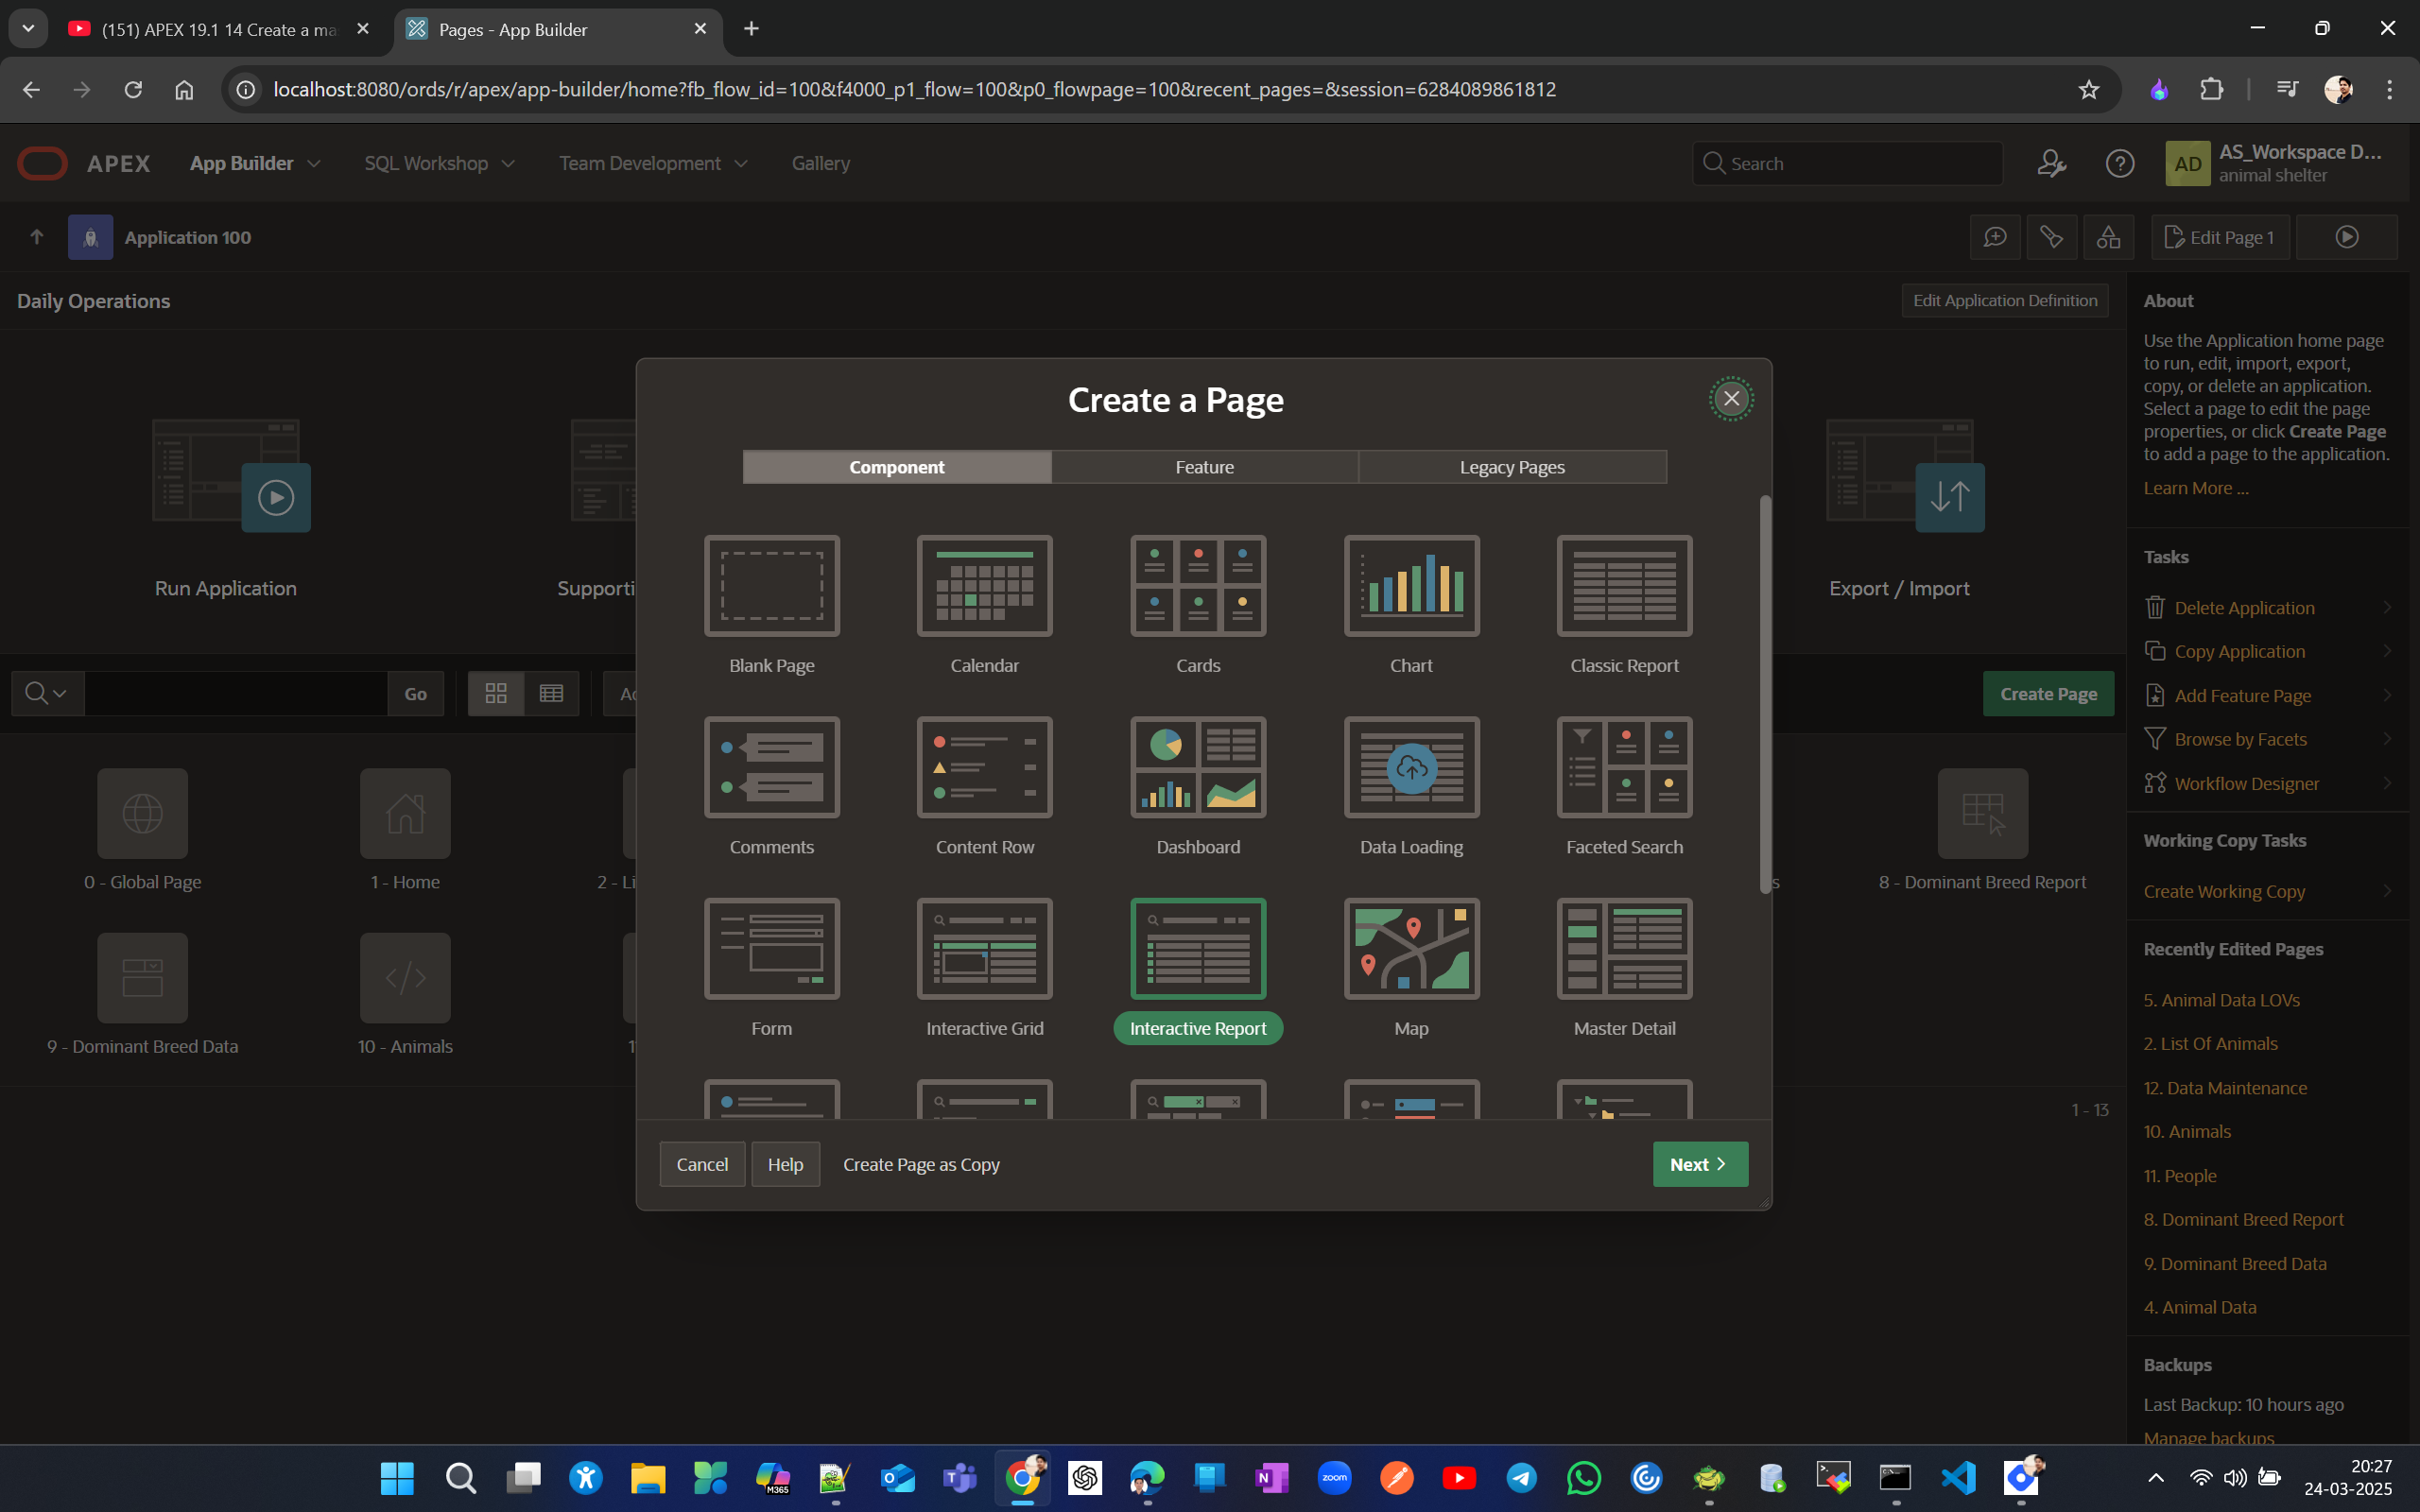
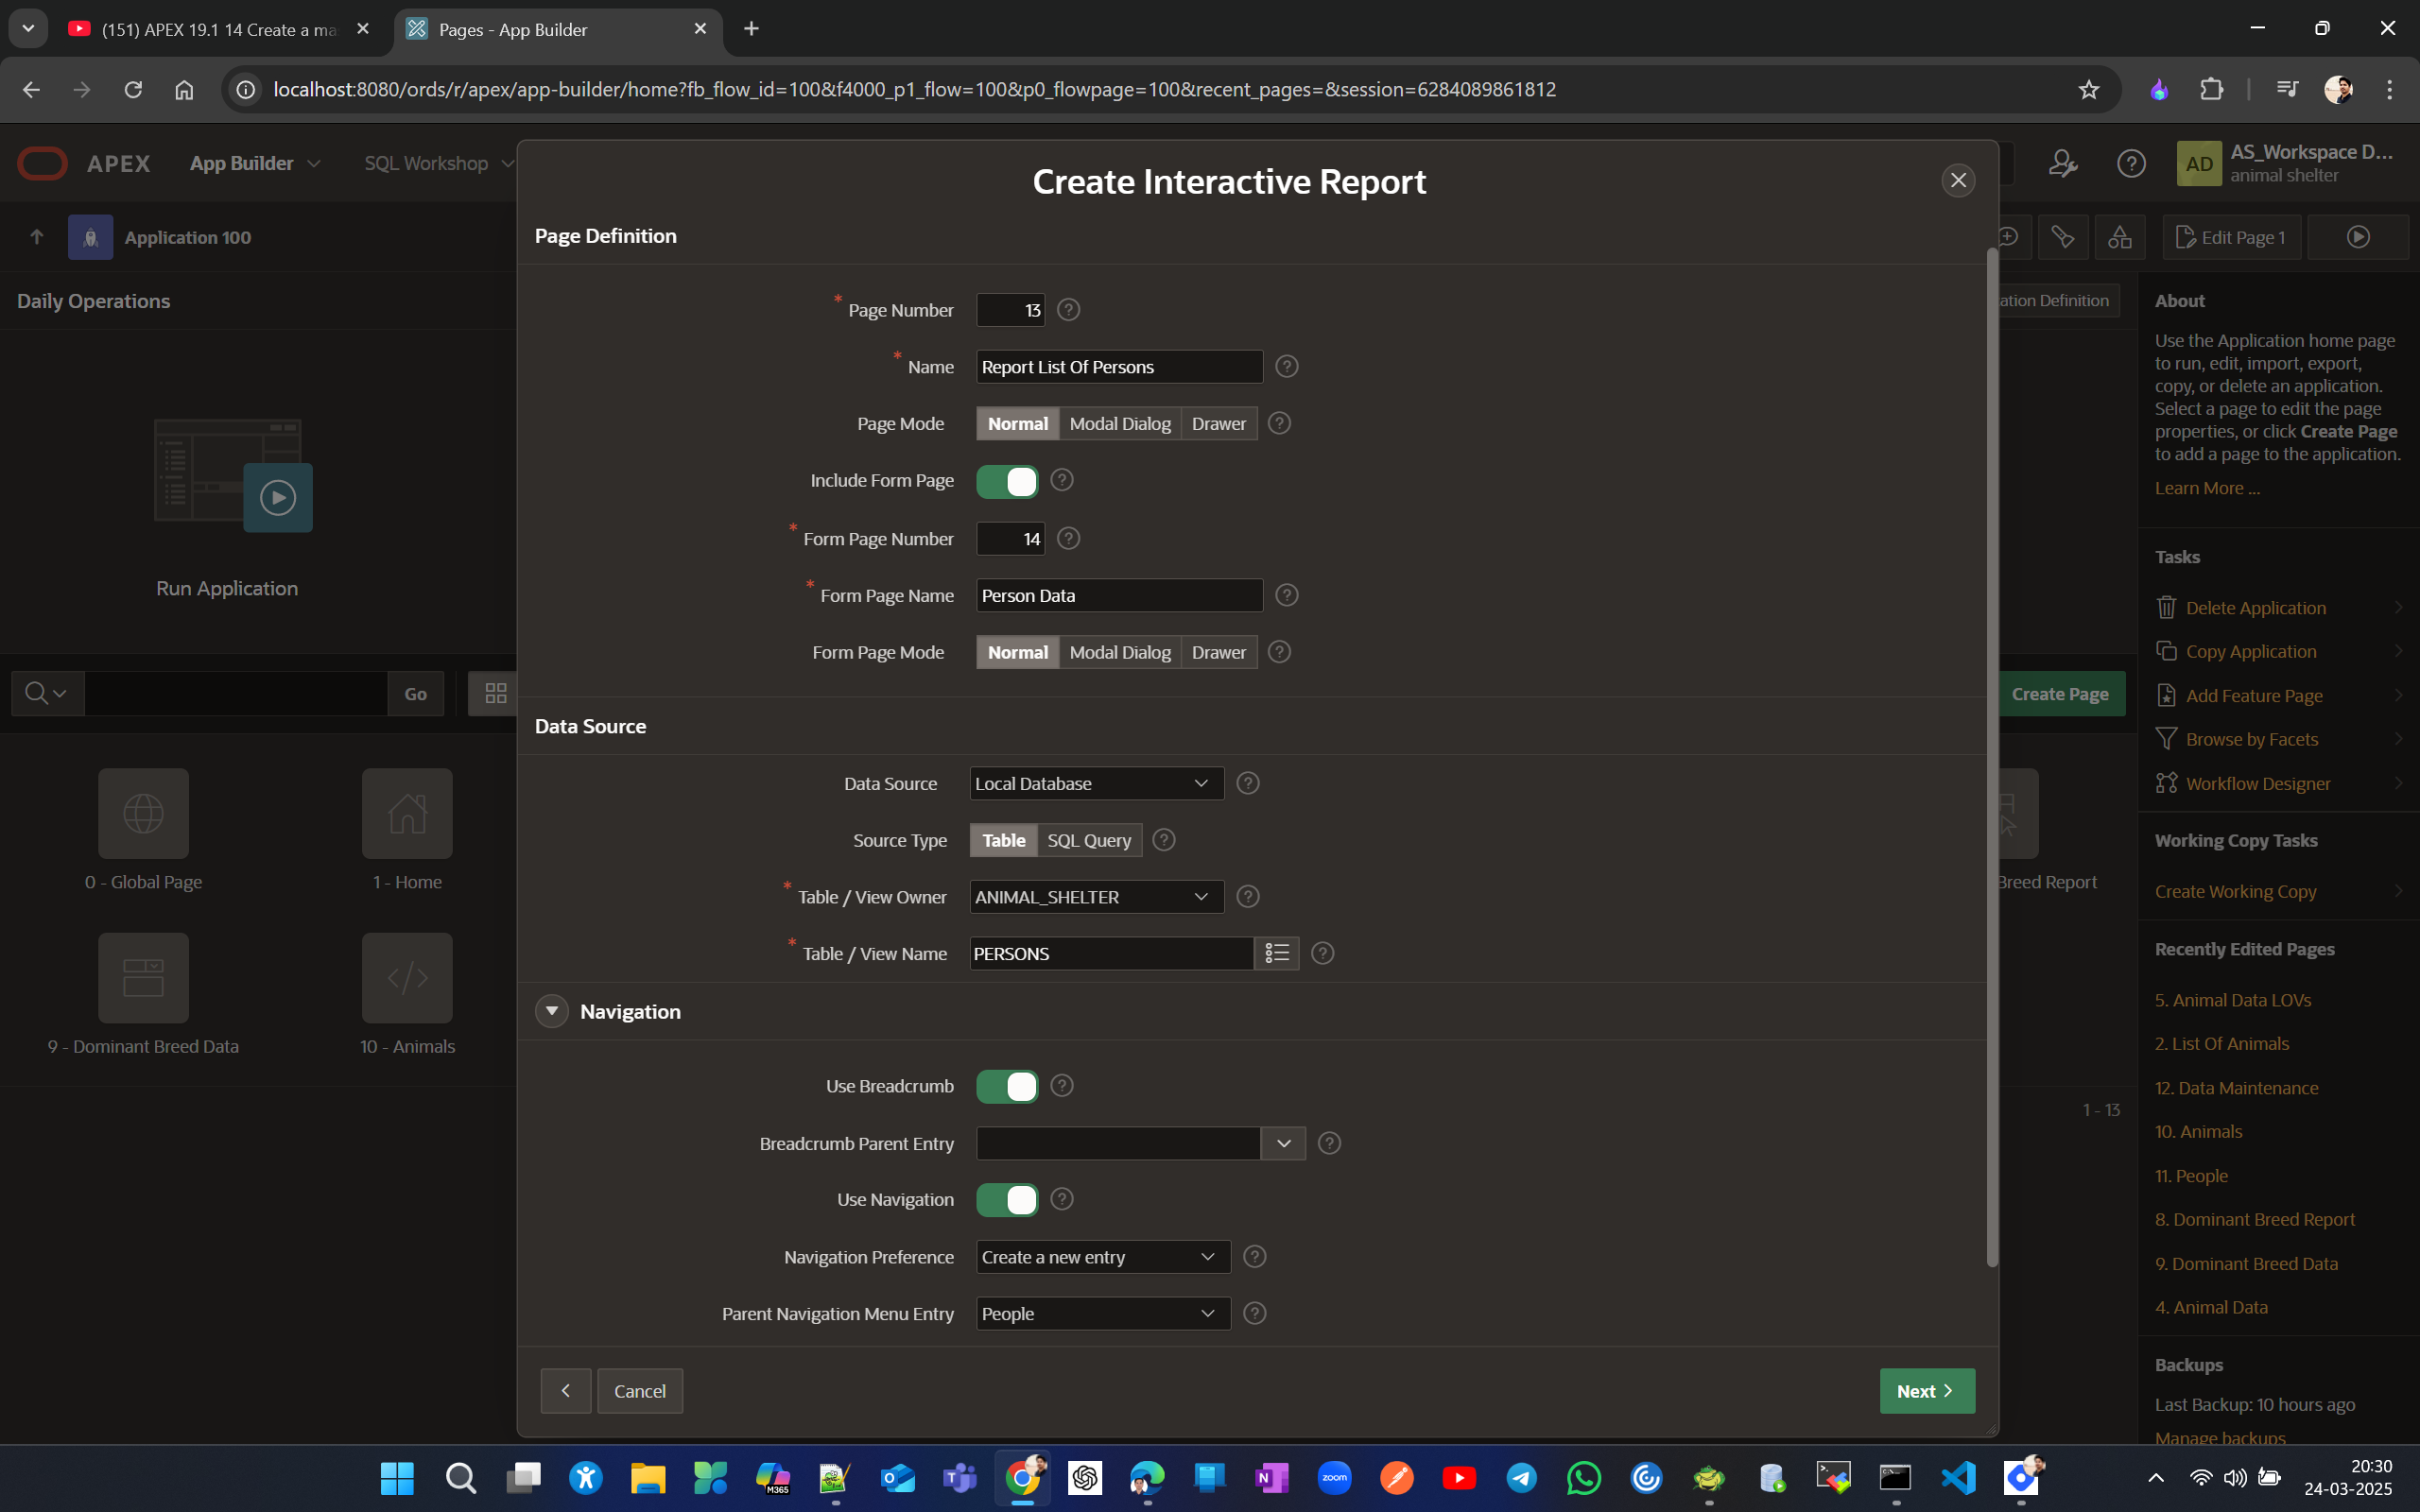
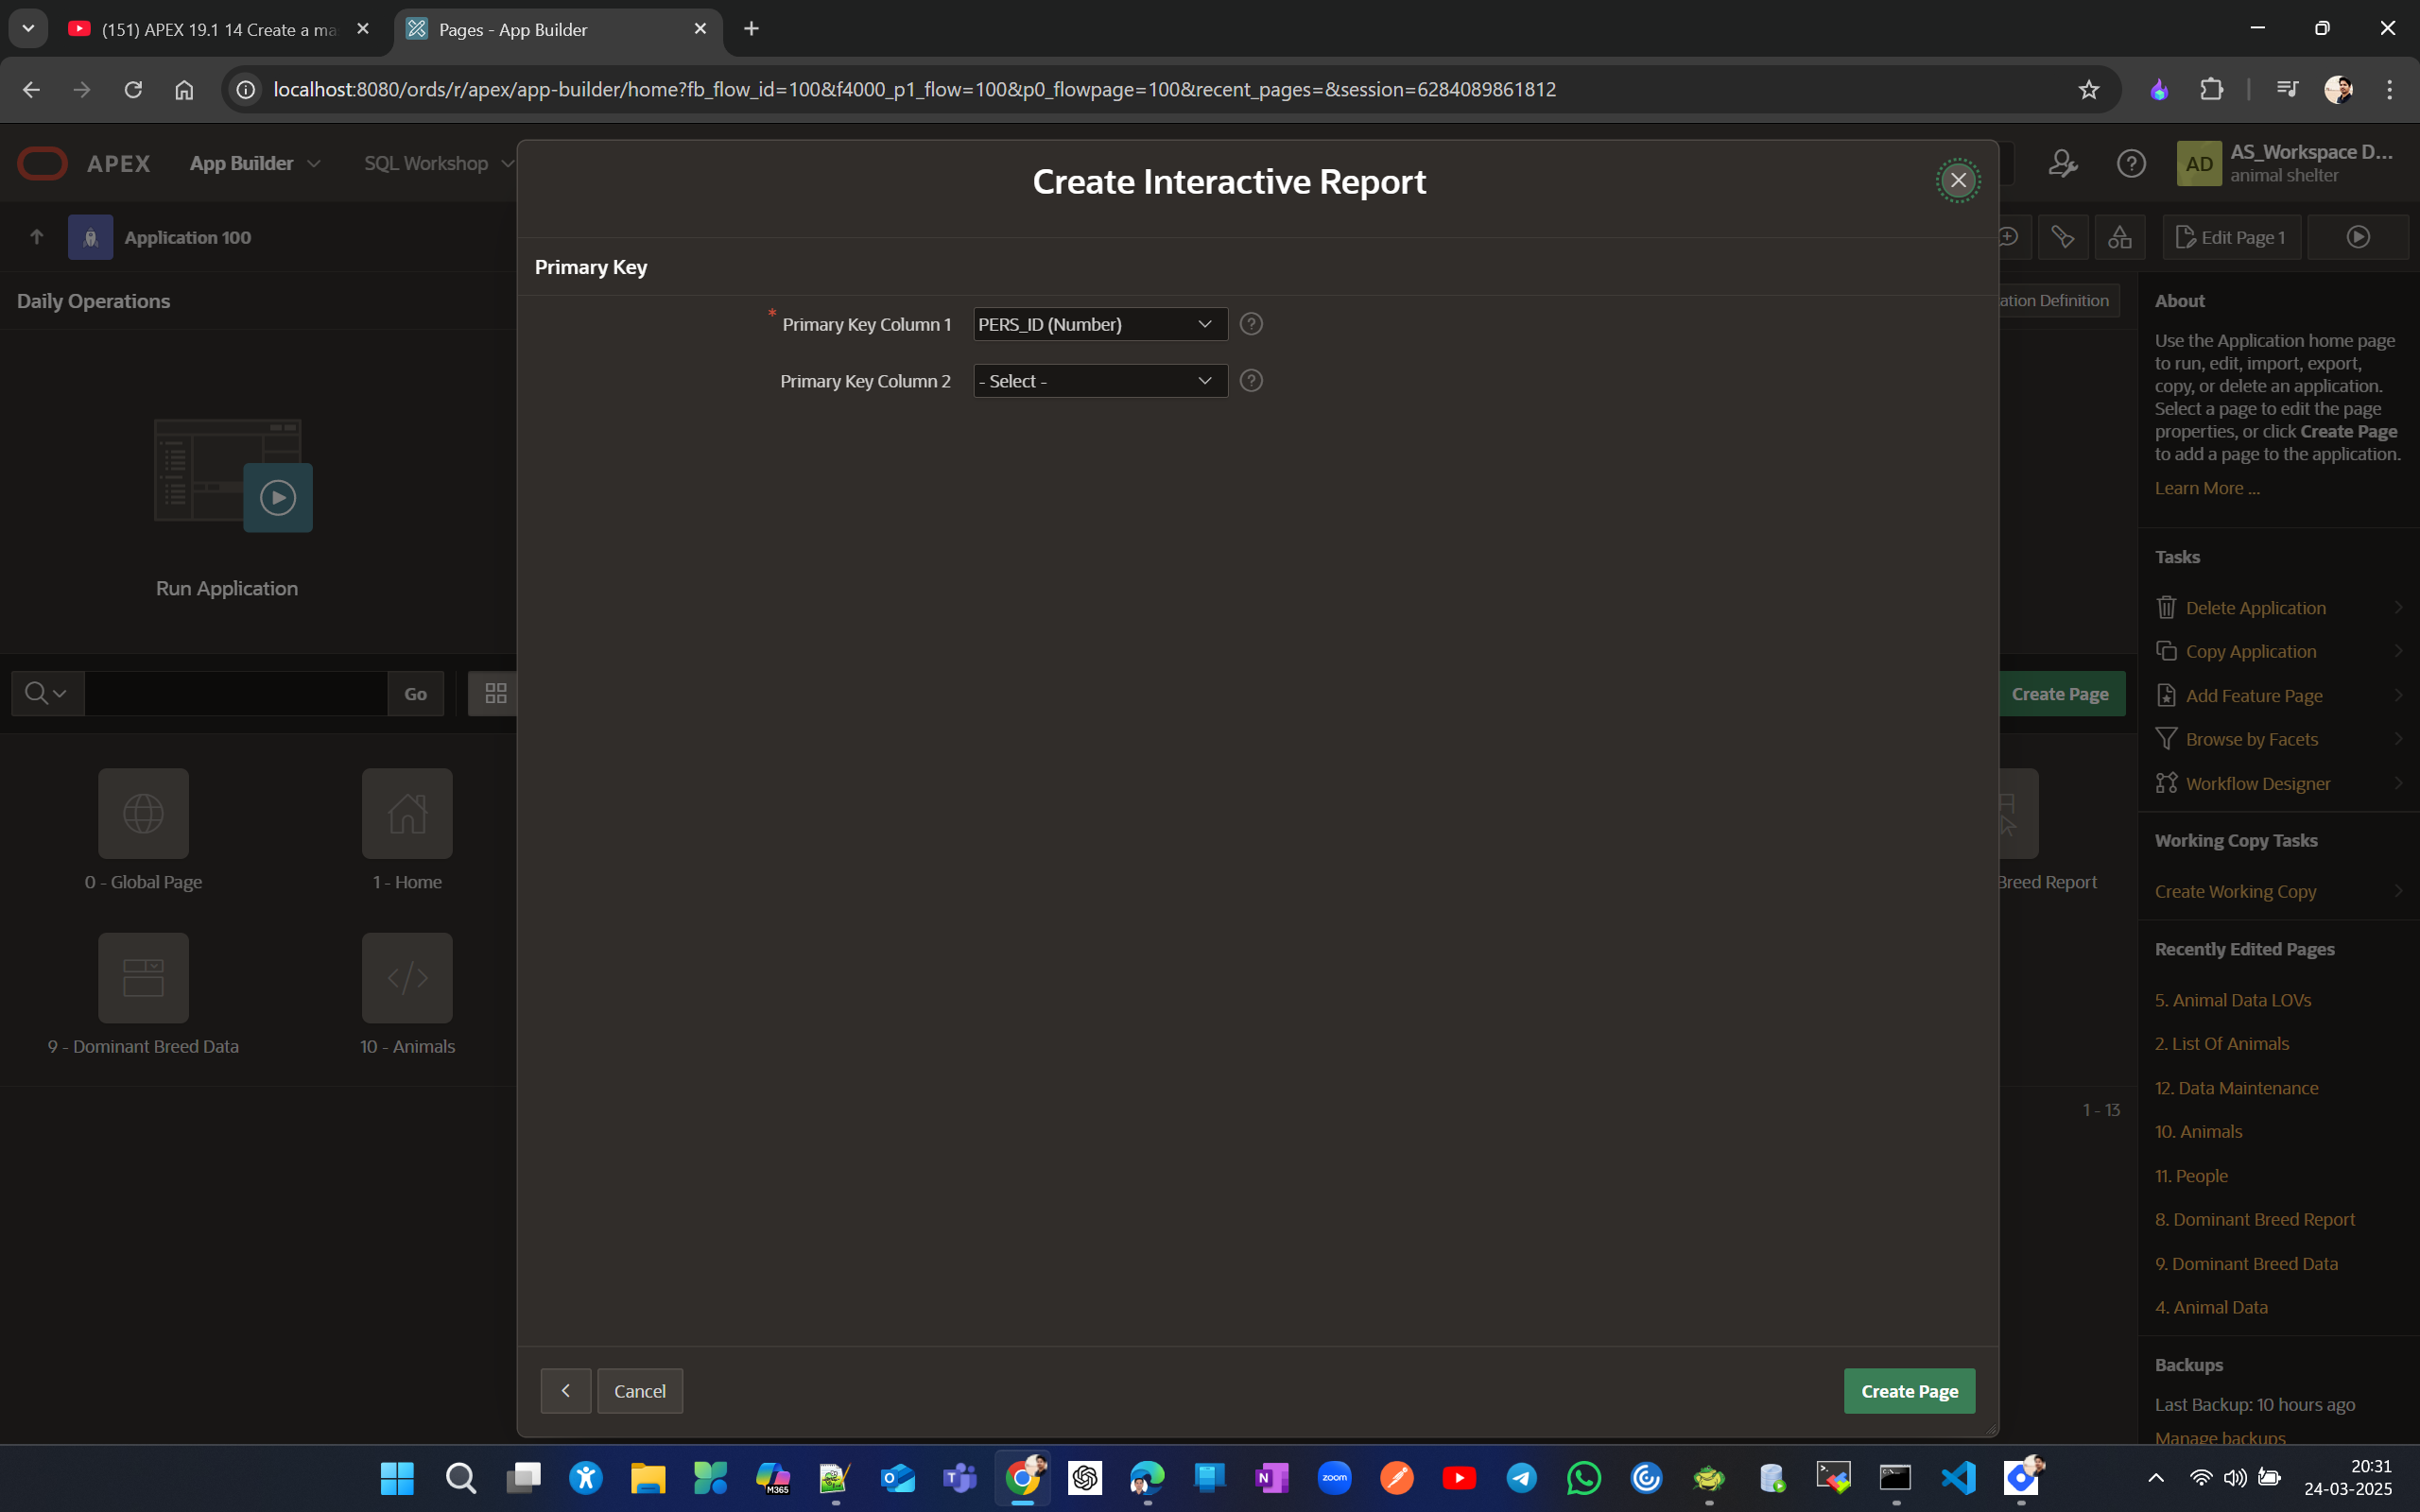
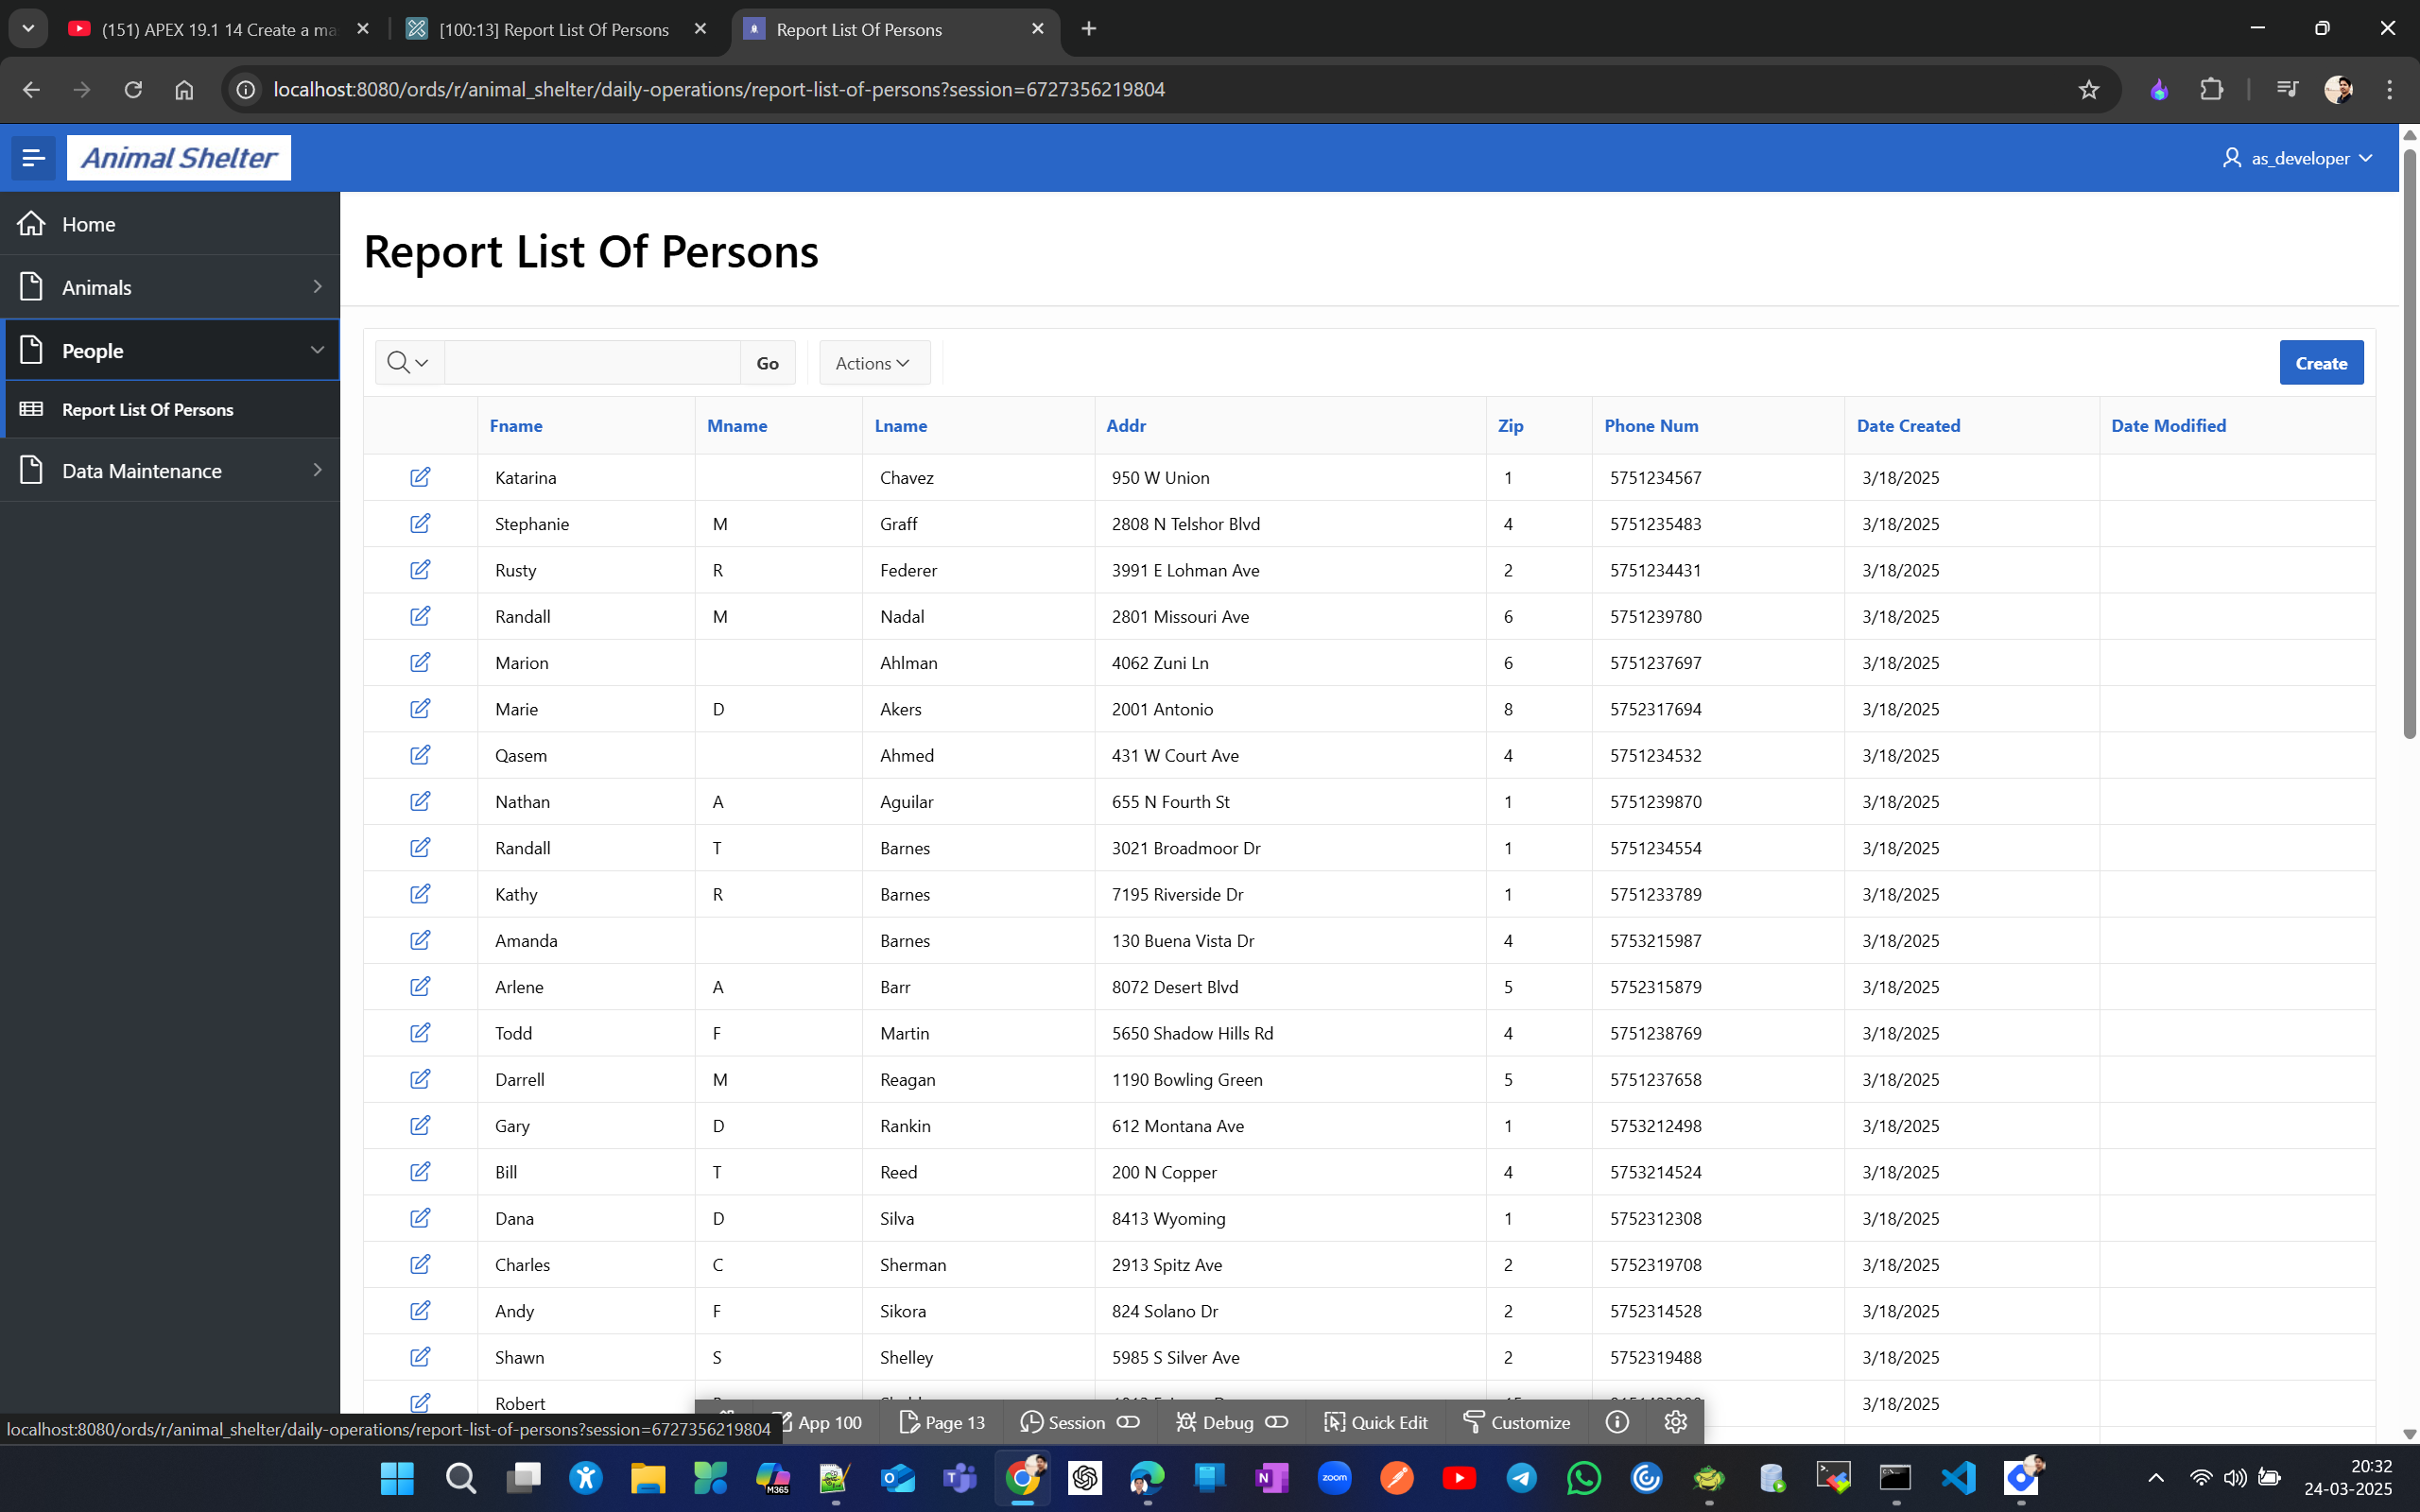
Click on any edit icon you’ll see form Person Data
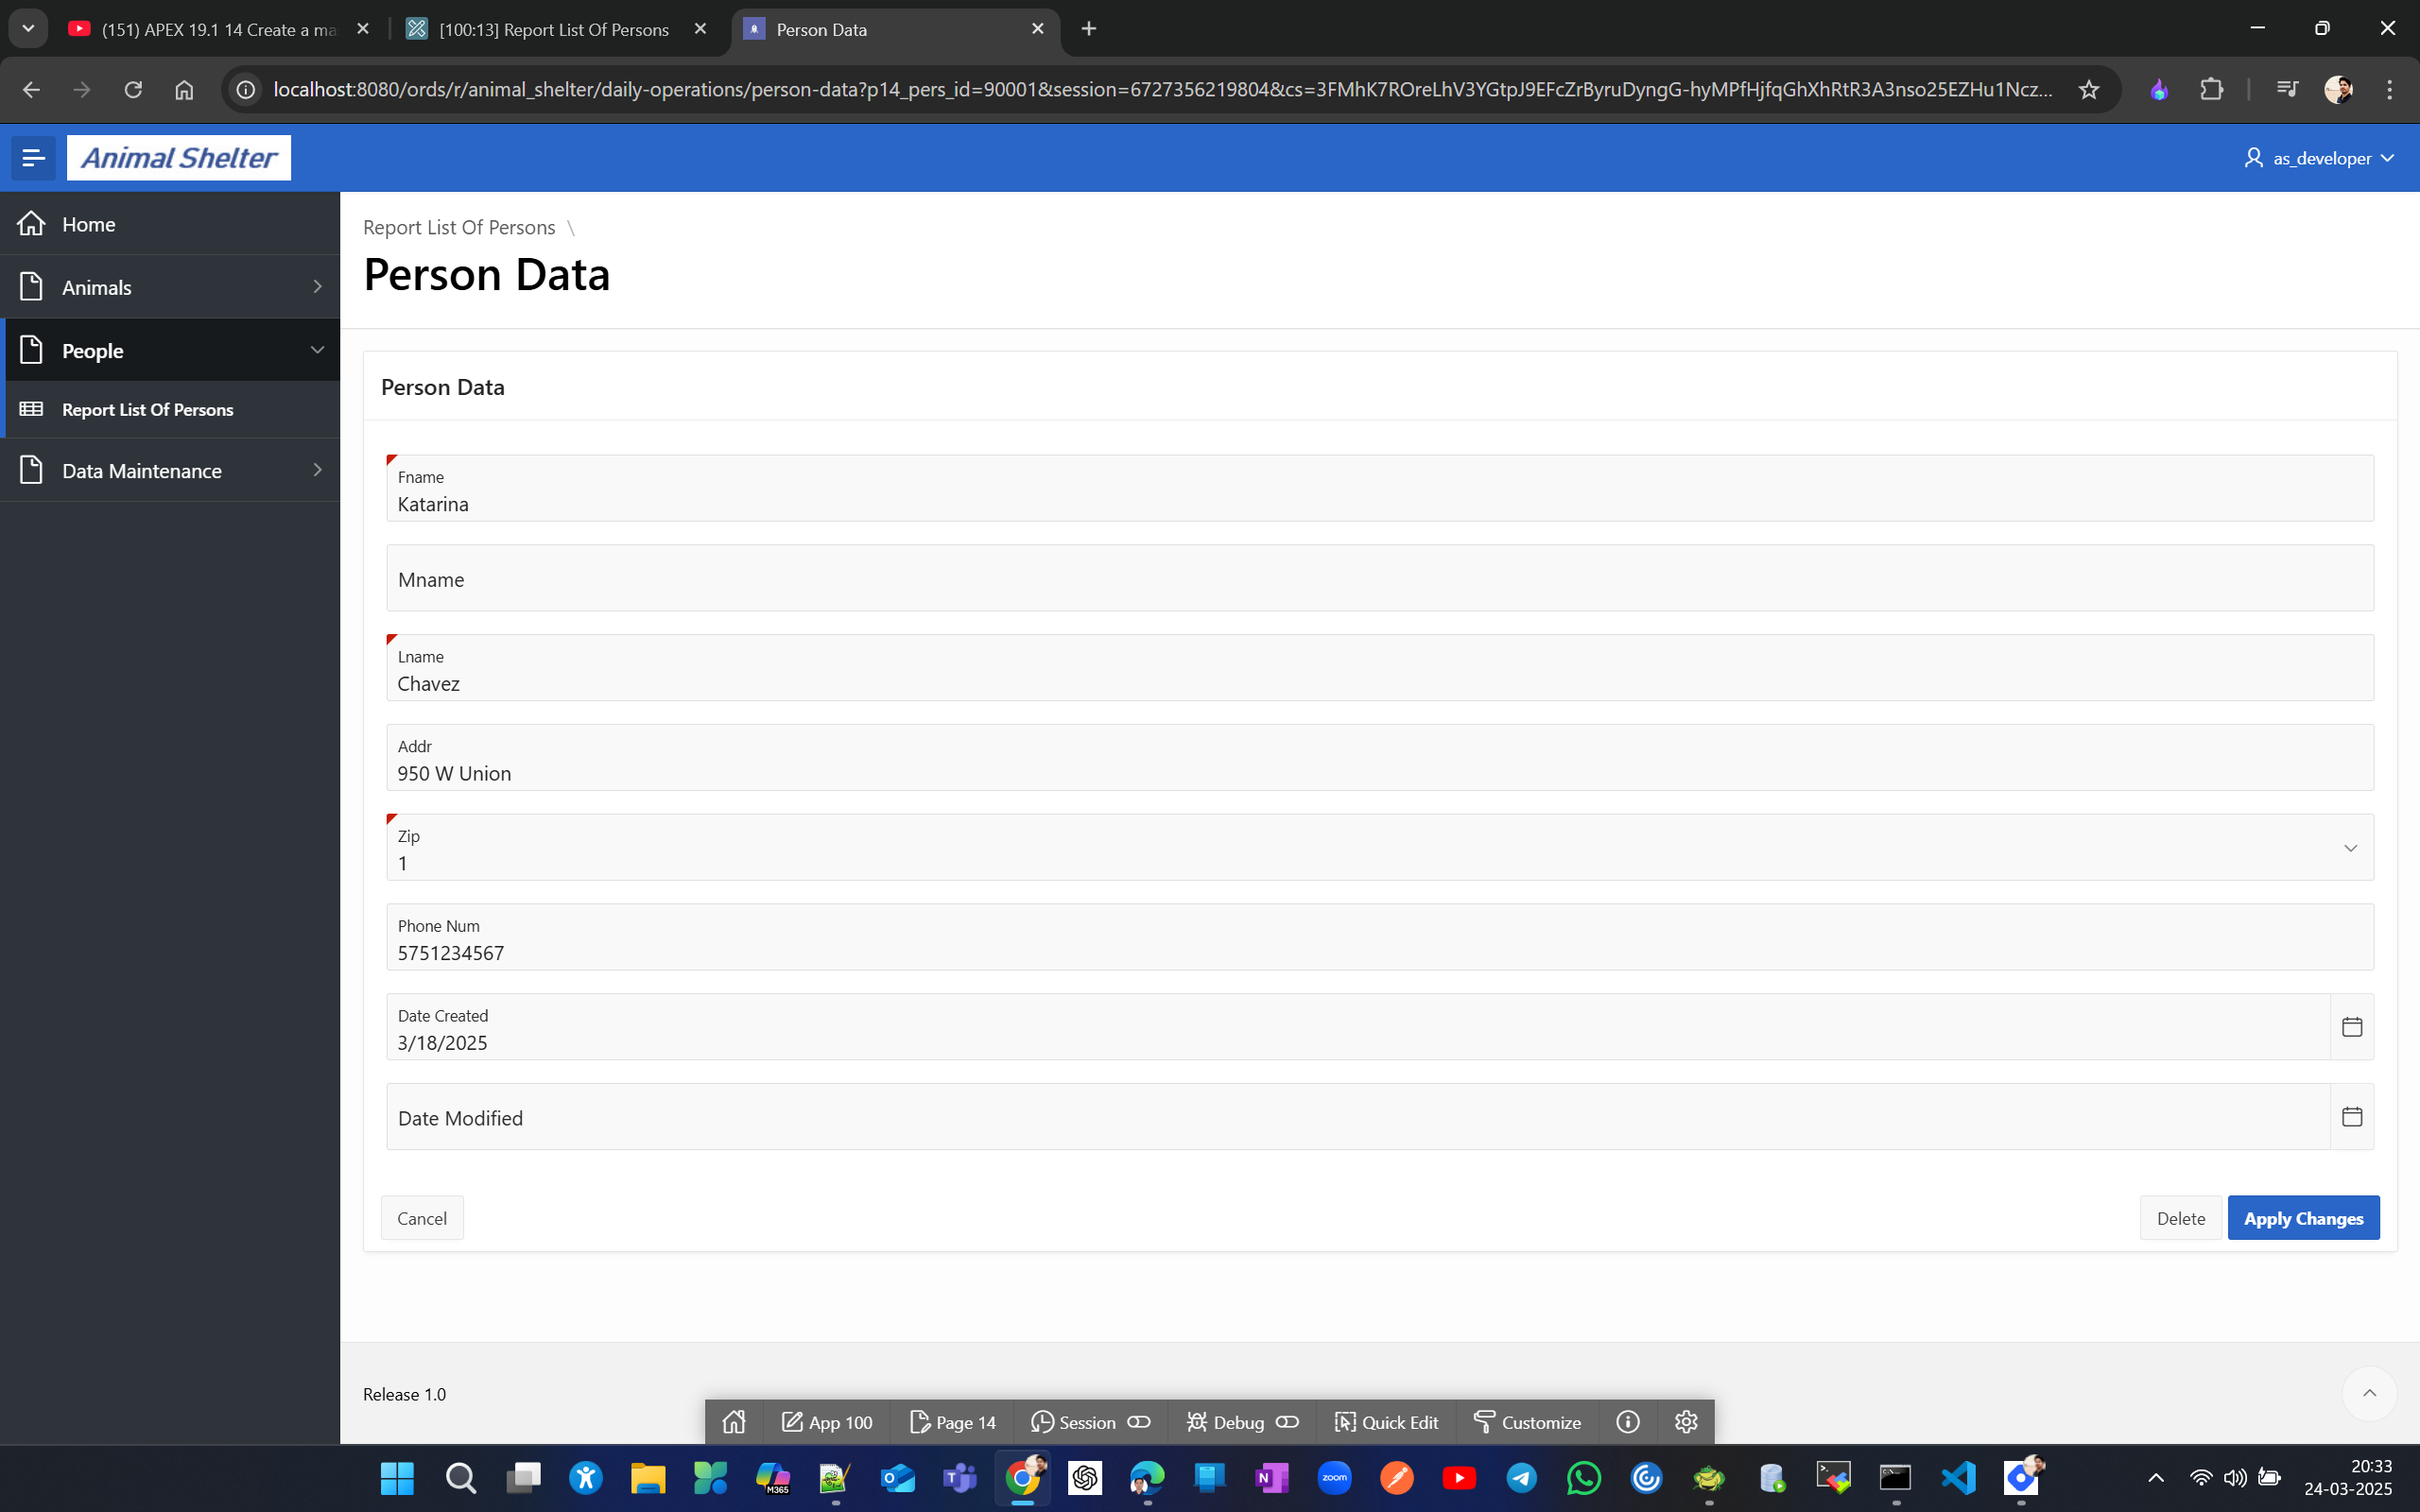
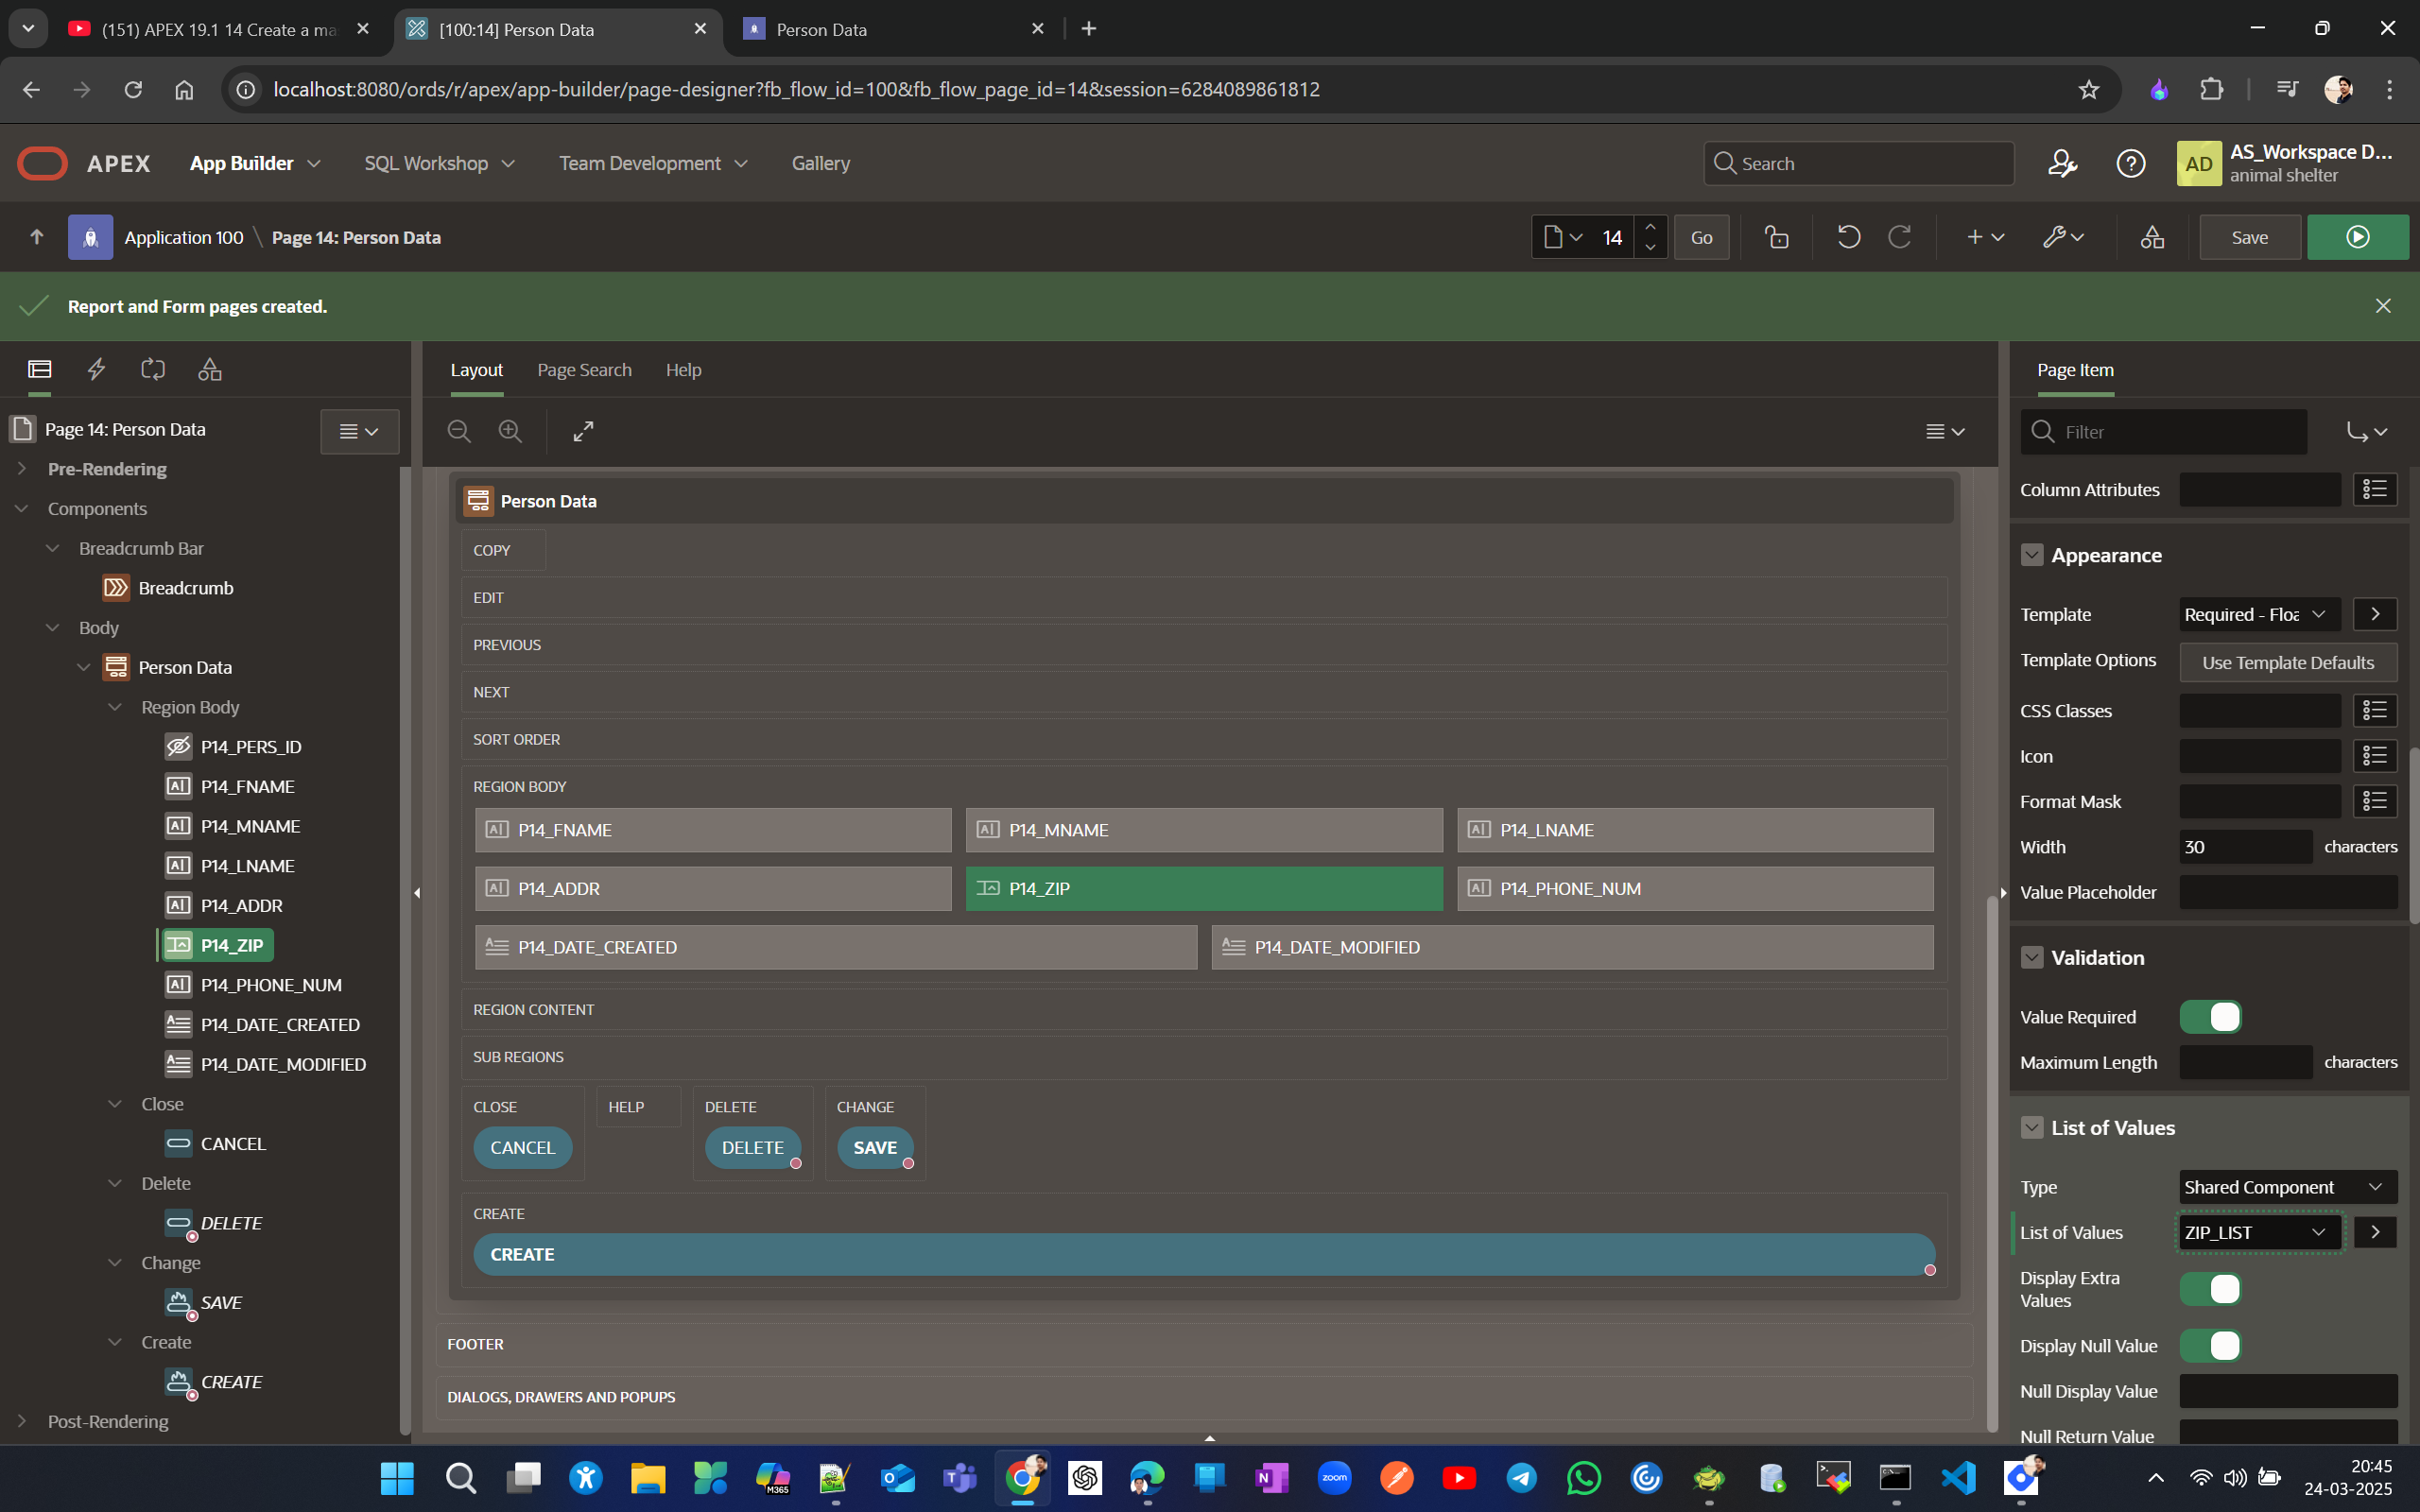
Modify the form to adjust multiple fields in 1 row. For audit keys Data created and modified make the type to Display only as they’ll be populated through triggers.
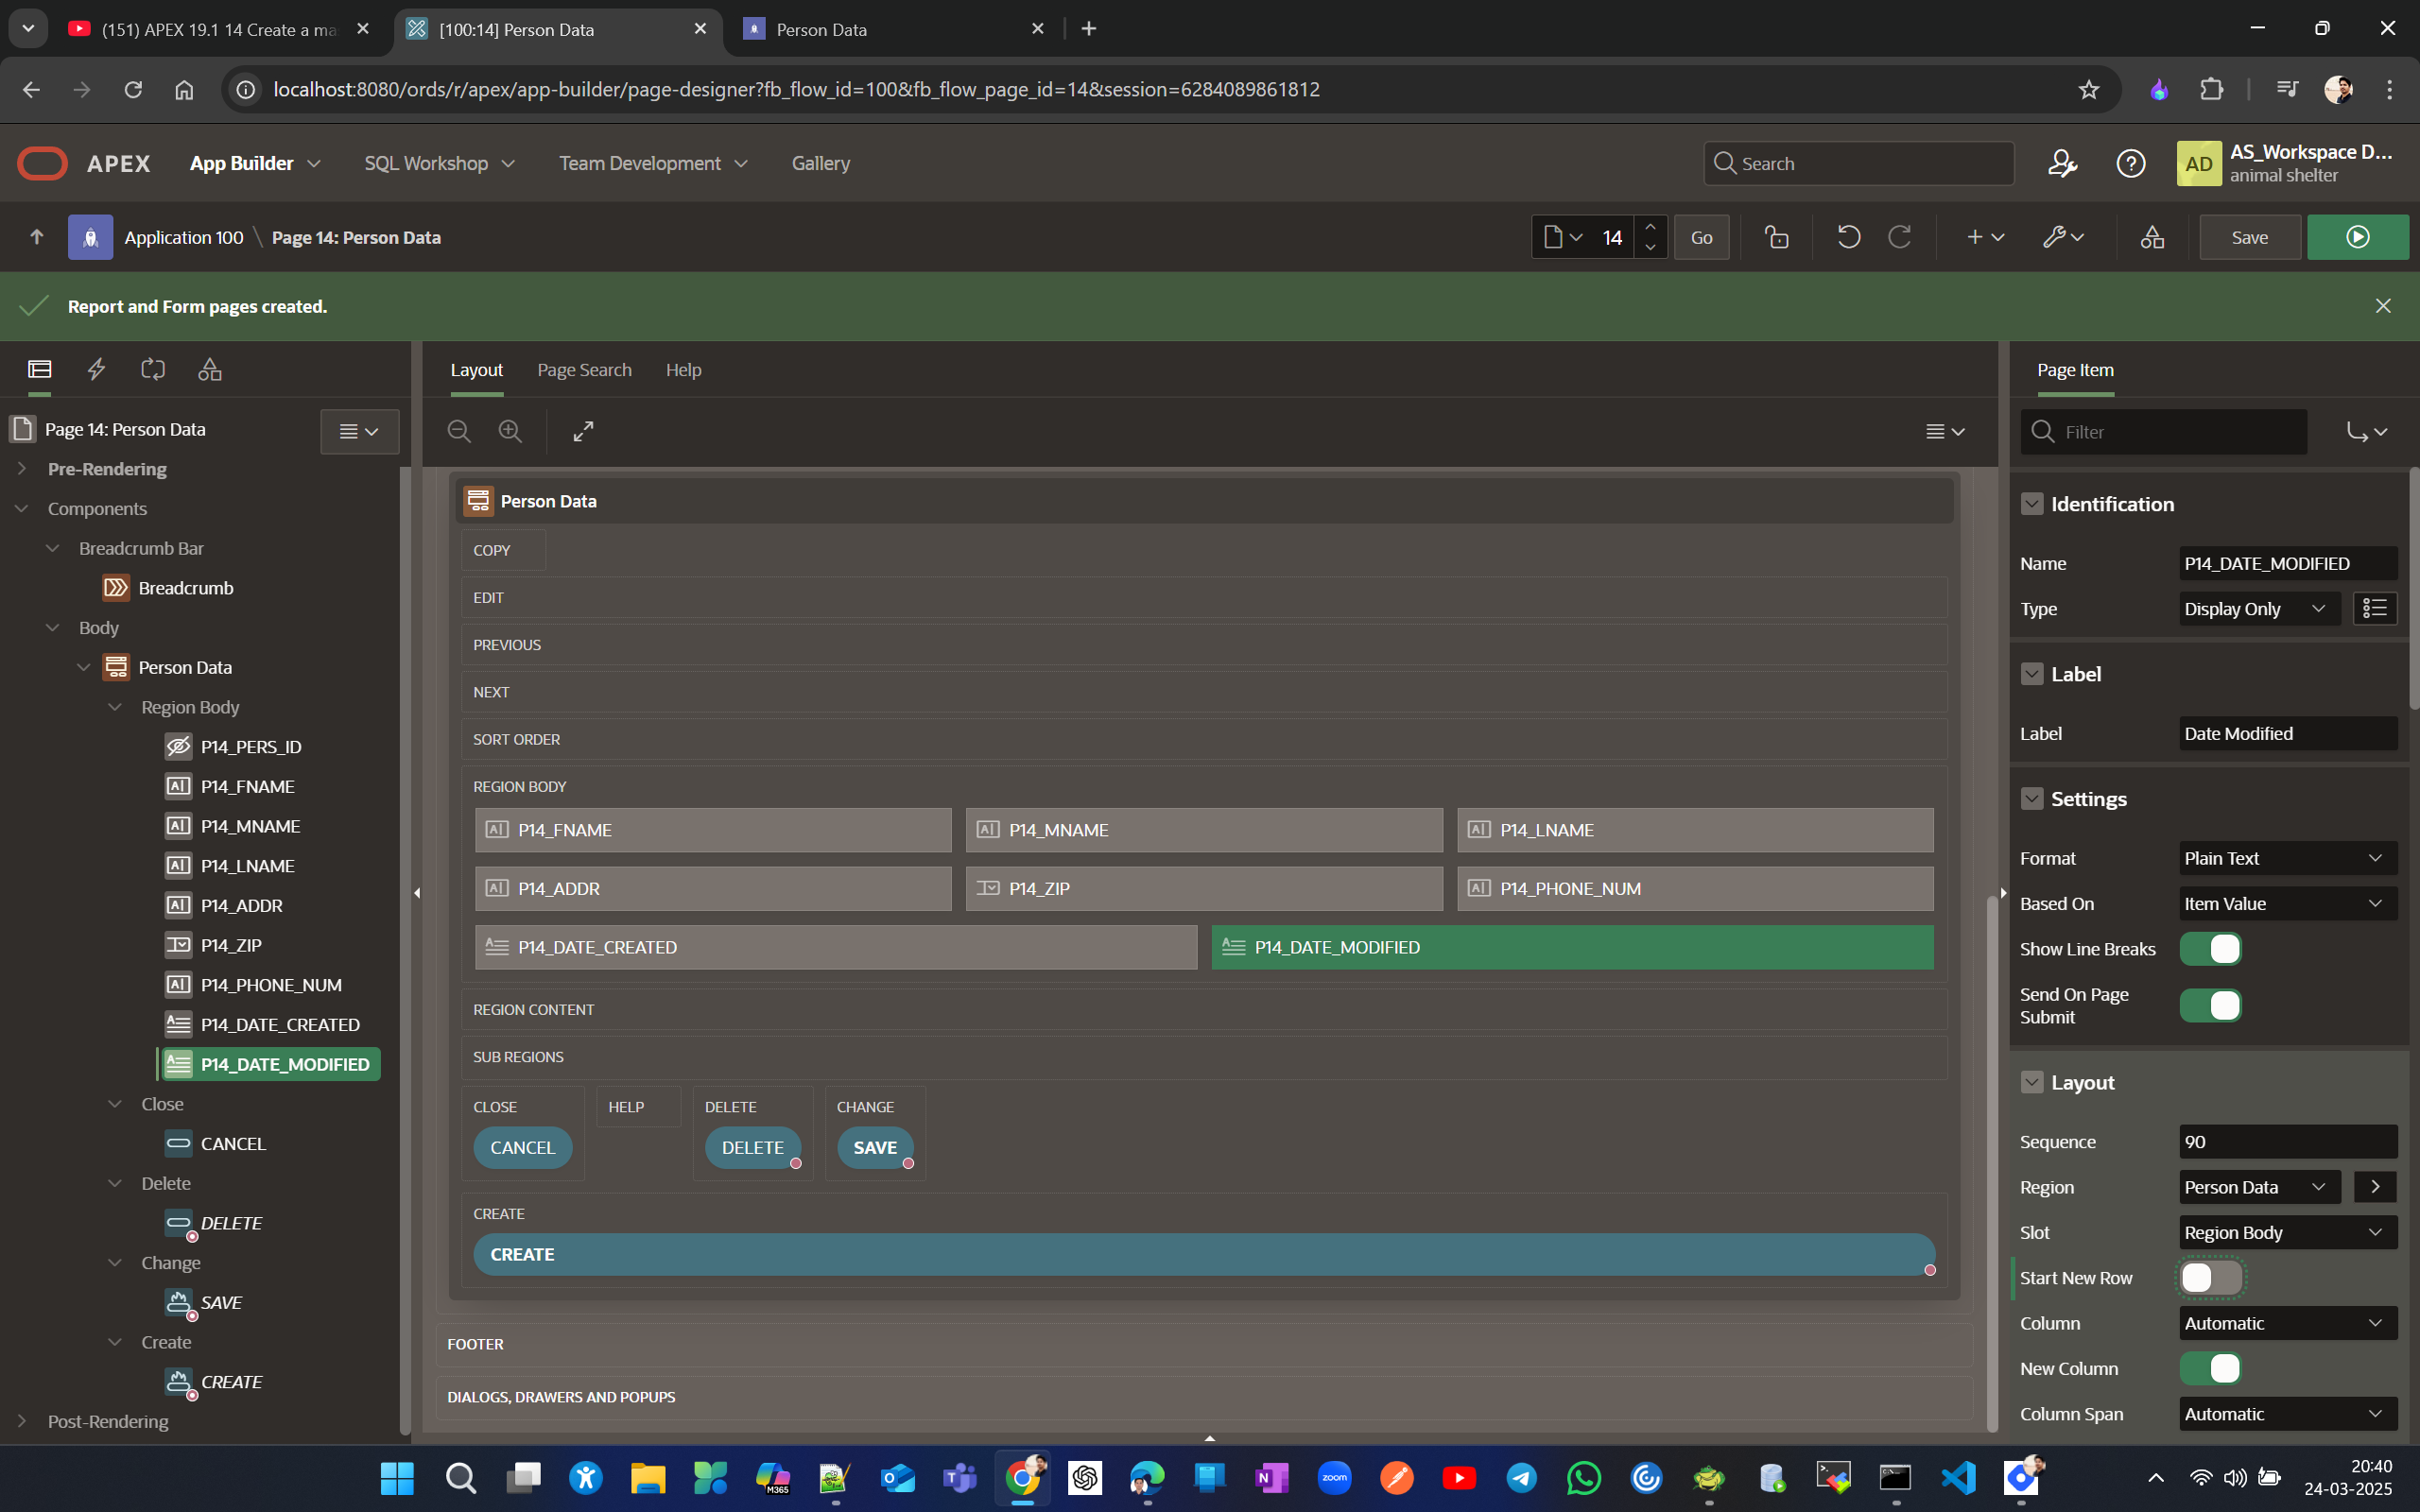
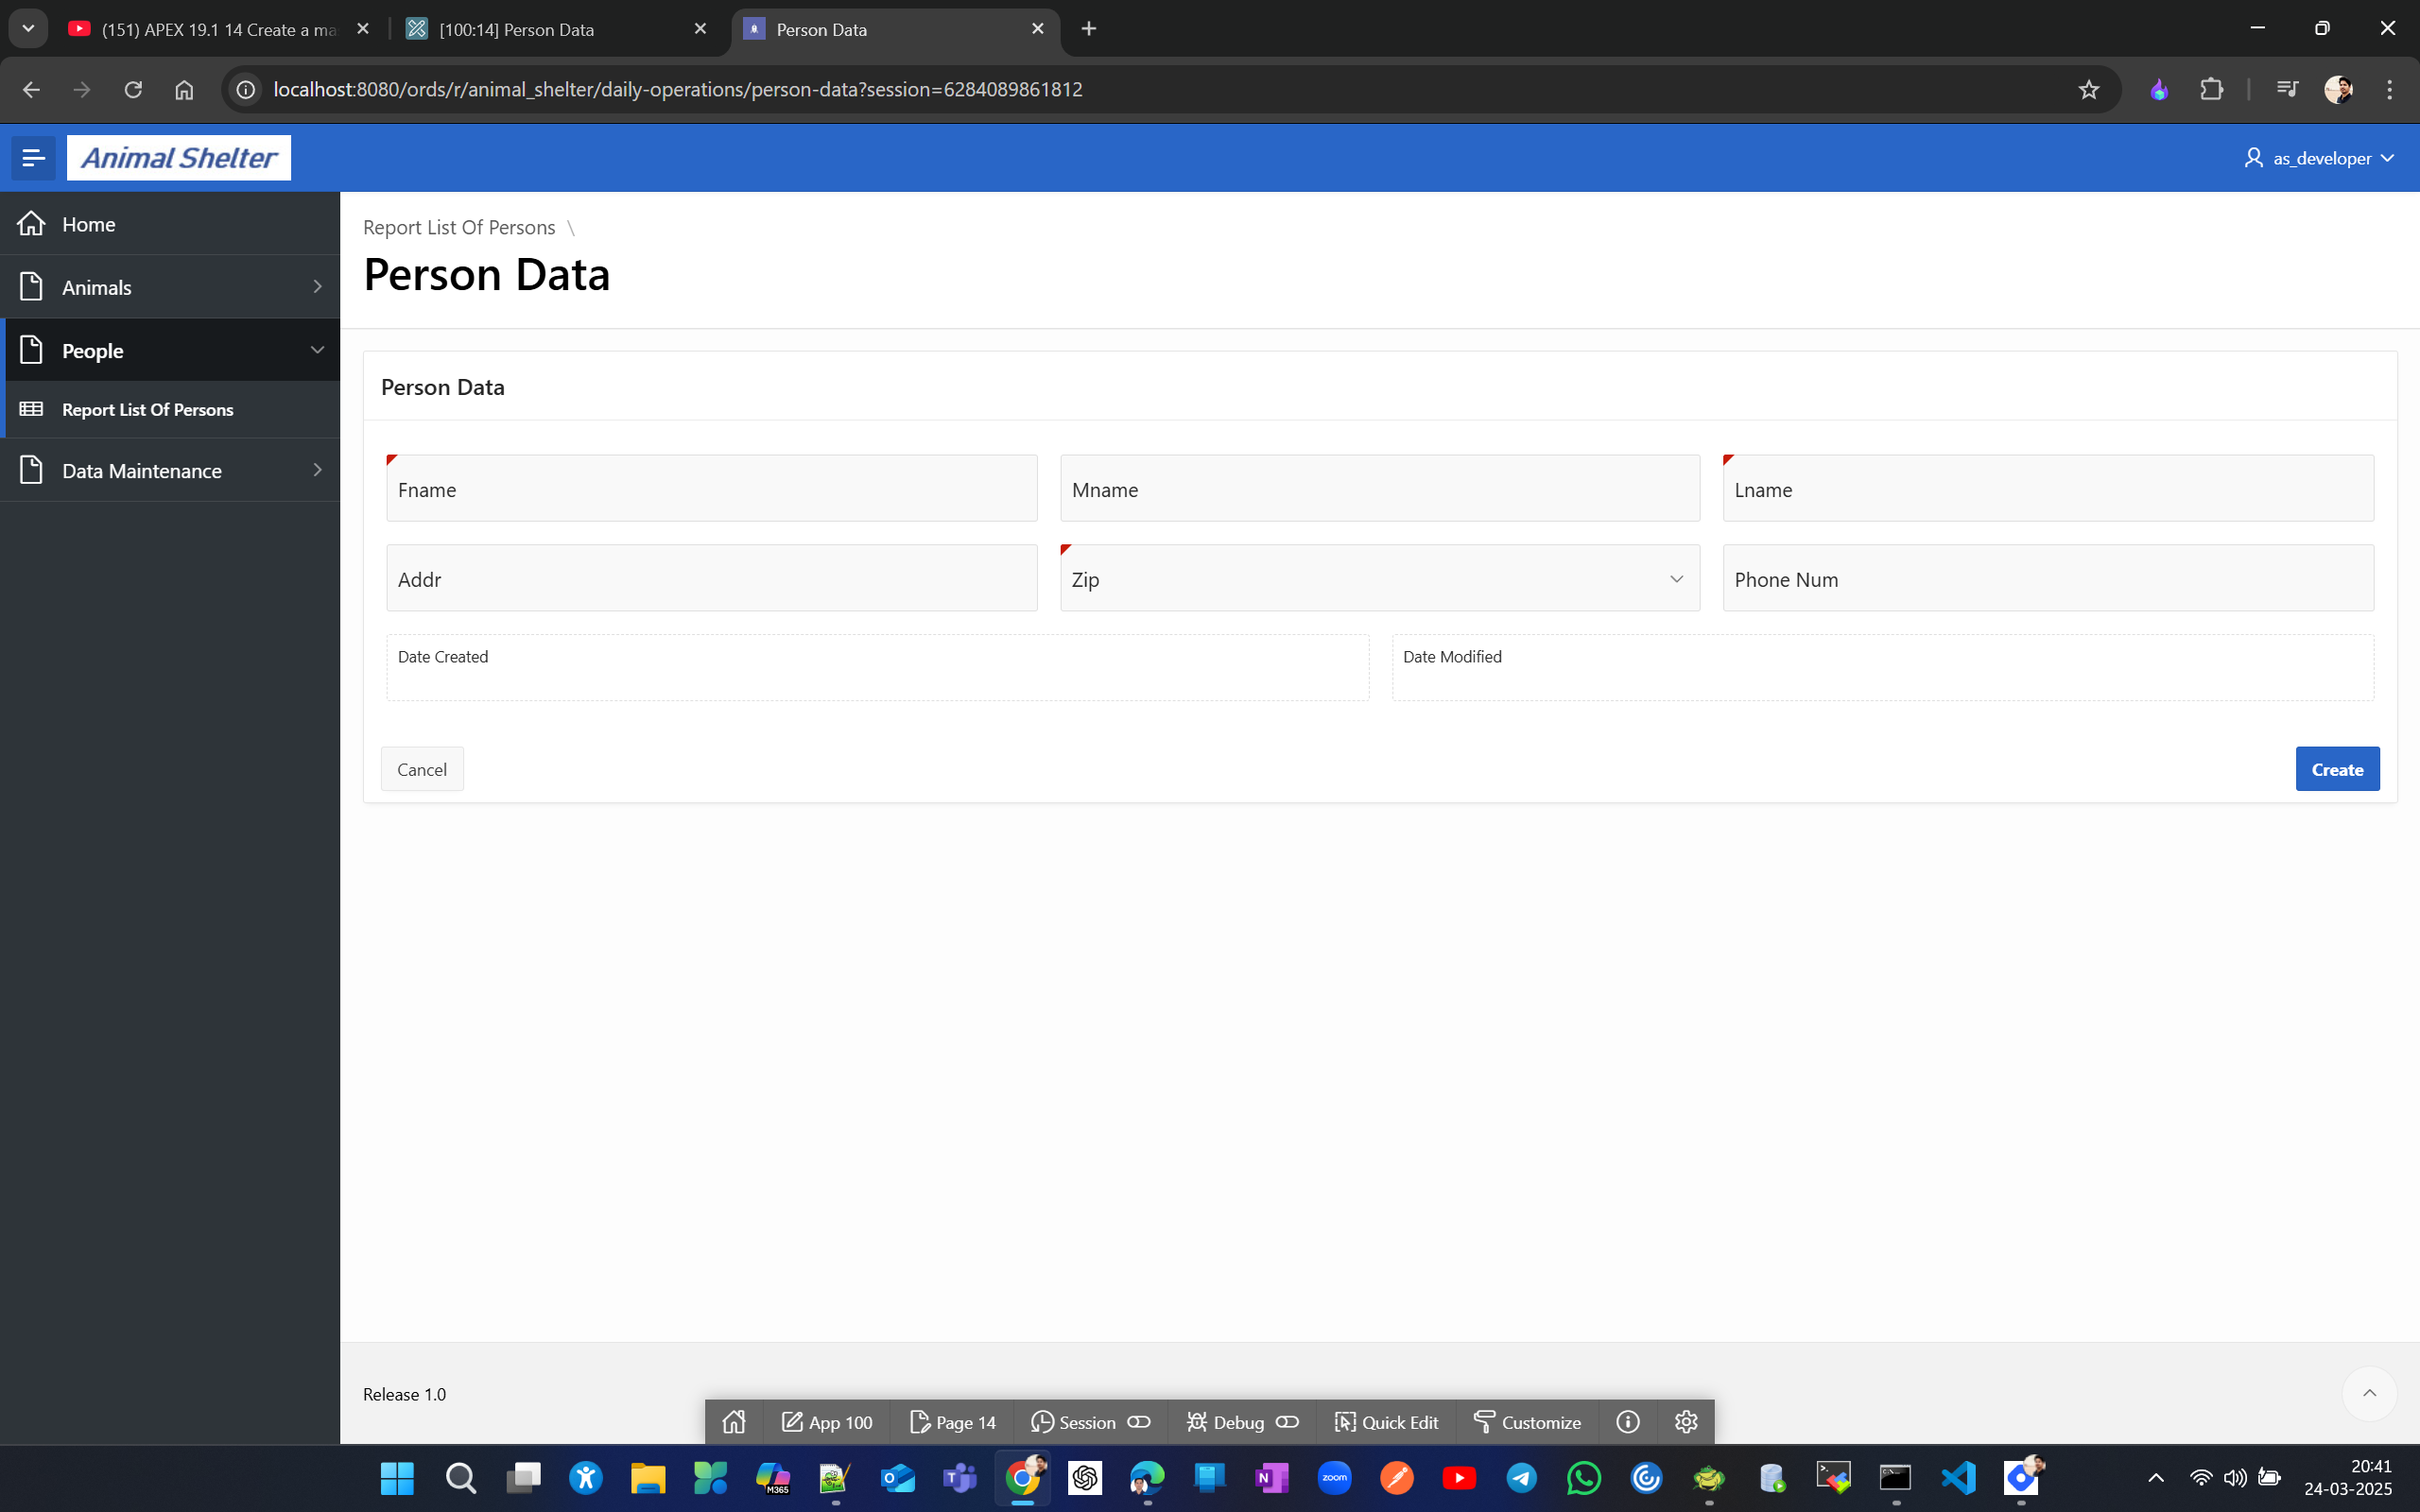
For ZIP use POPUP LOV
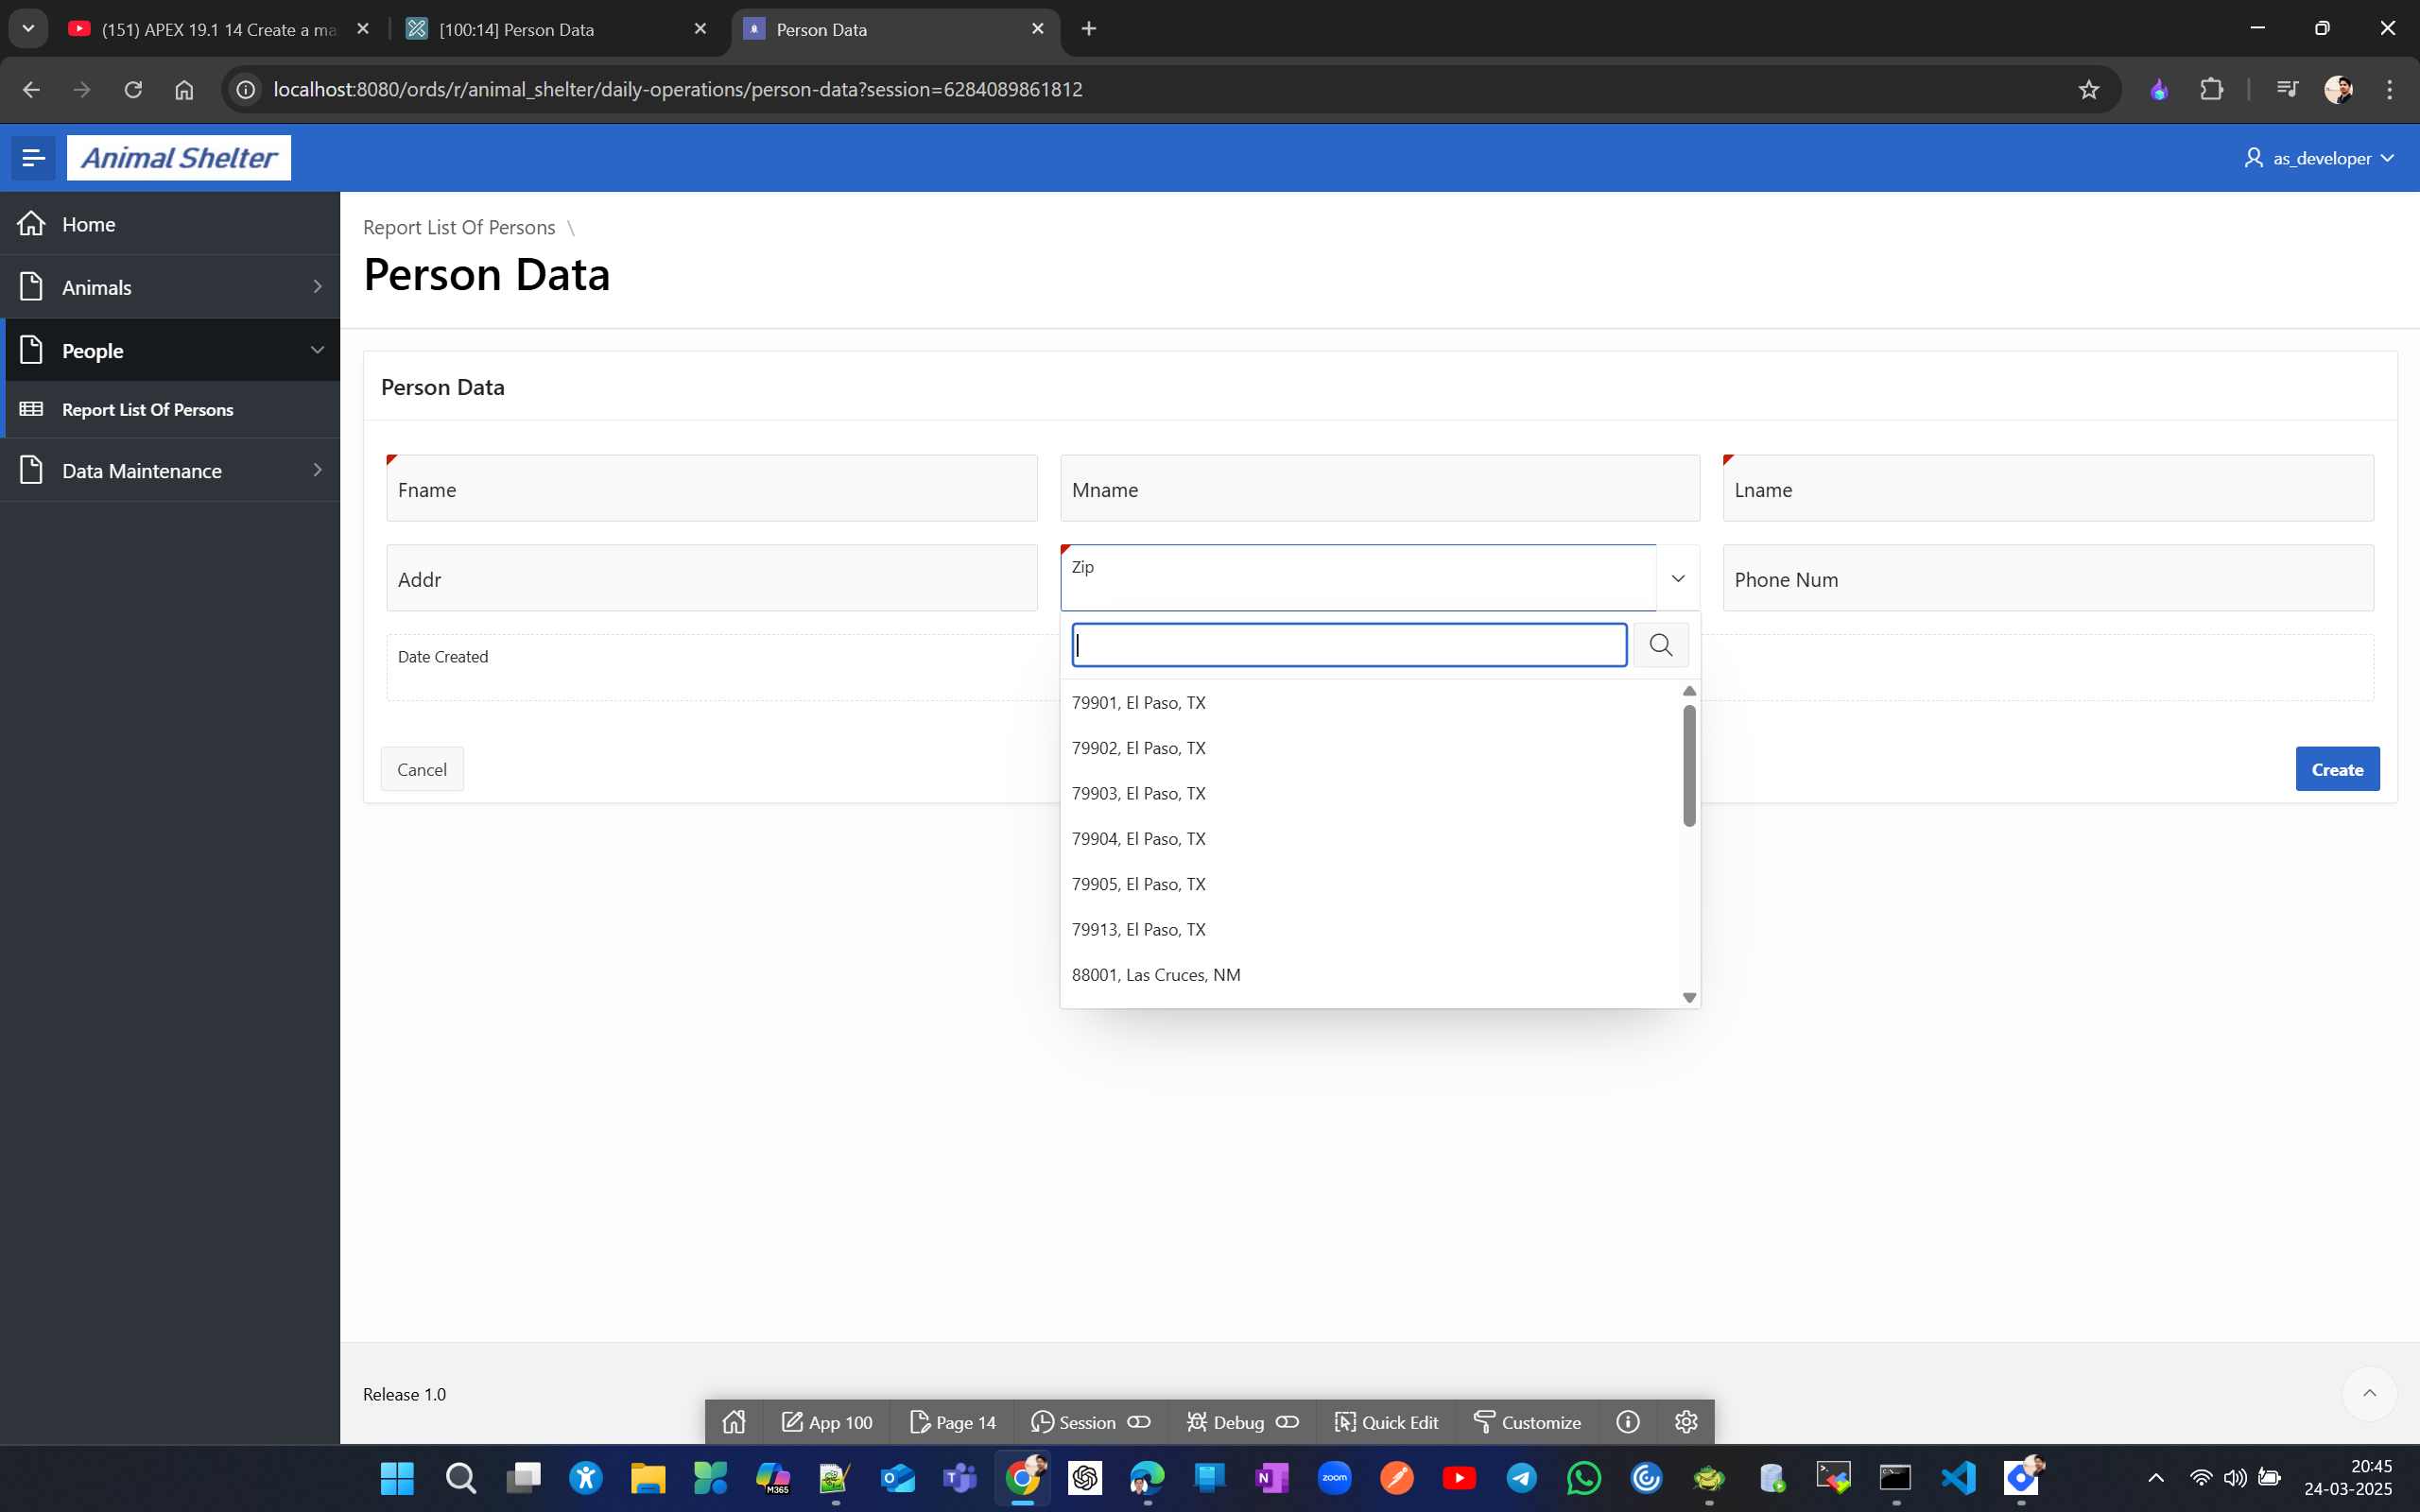
Now, Person Data is a simple form, a single page that interacts with one table for adding and maintaining data; let's look at the master-detail form.

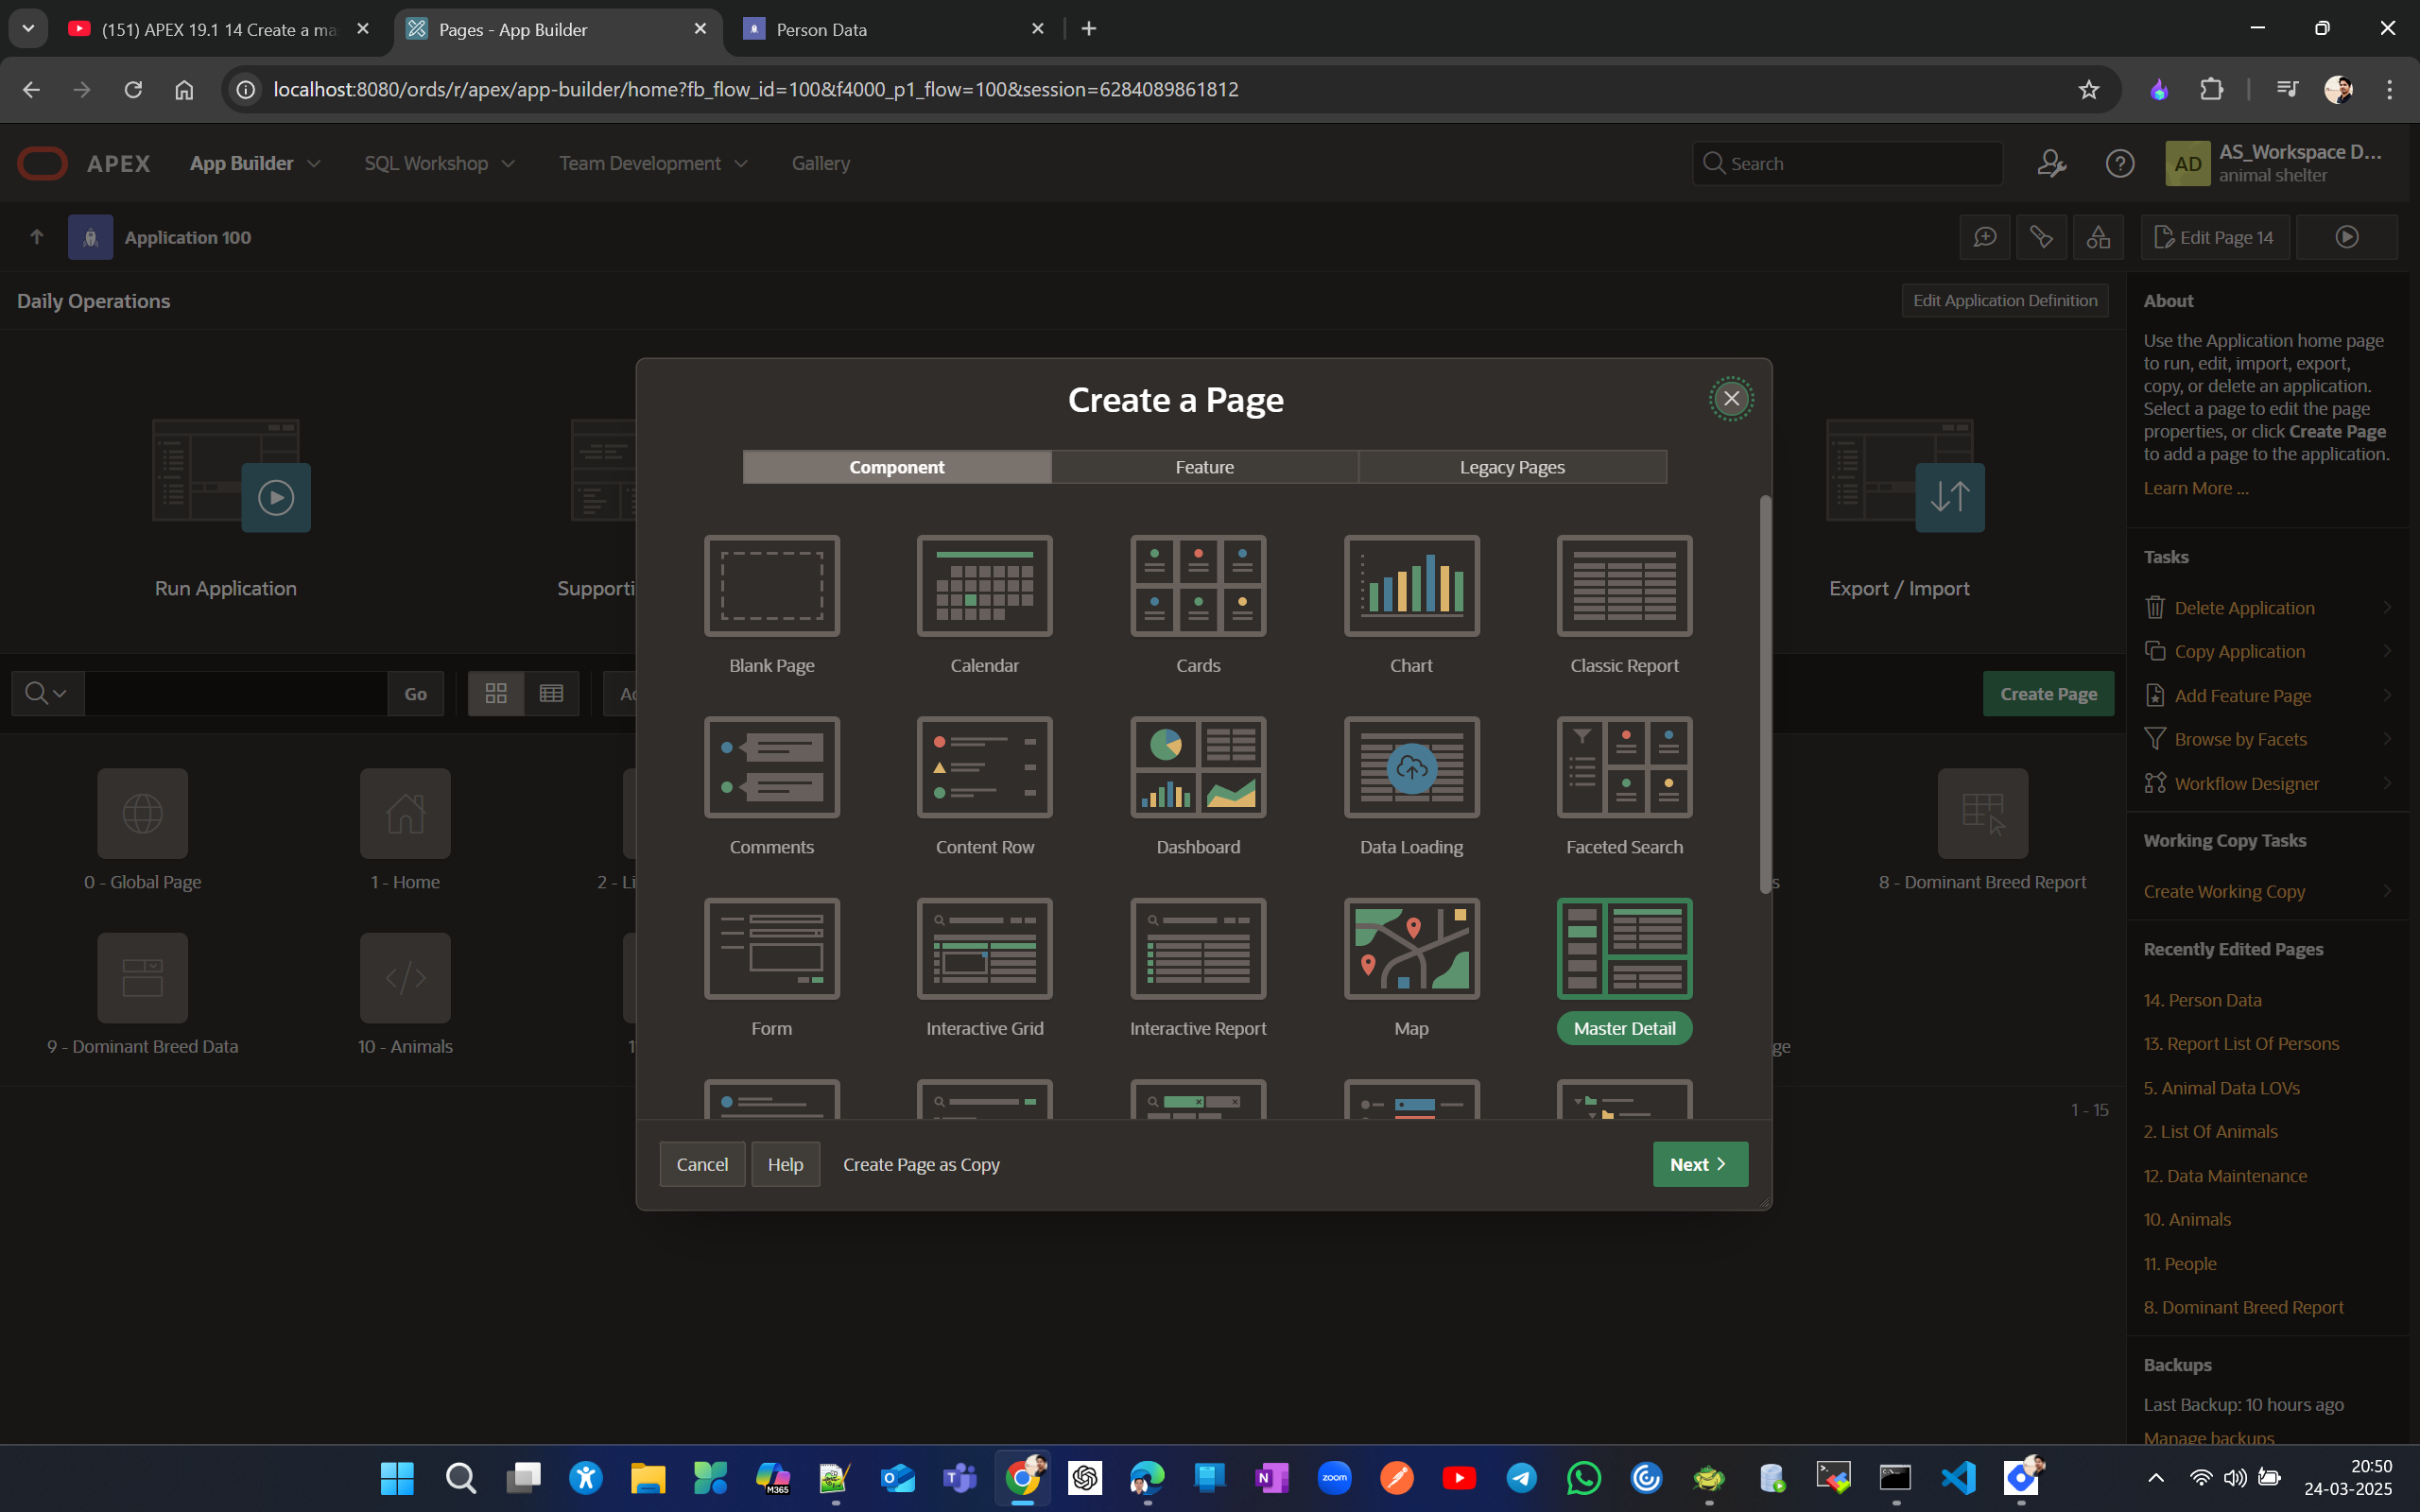
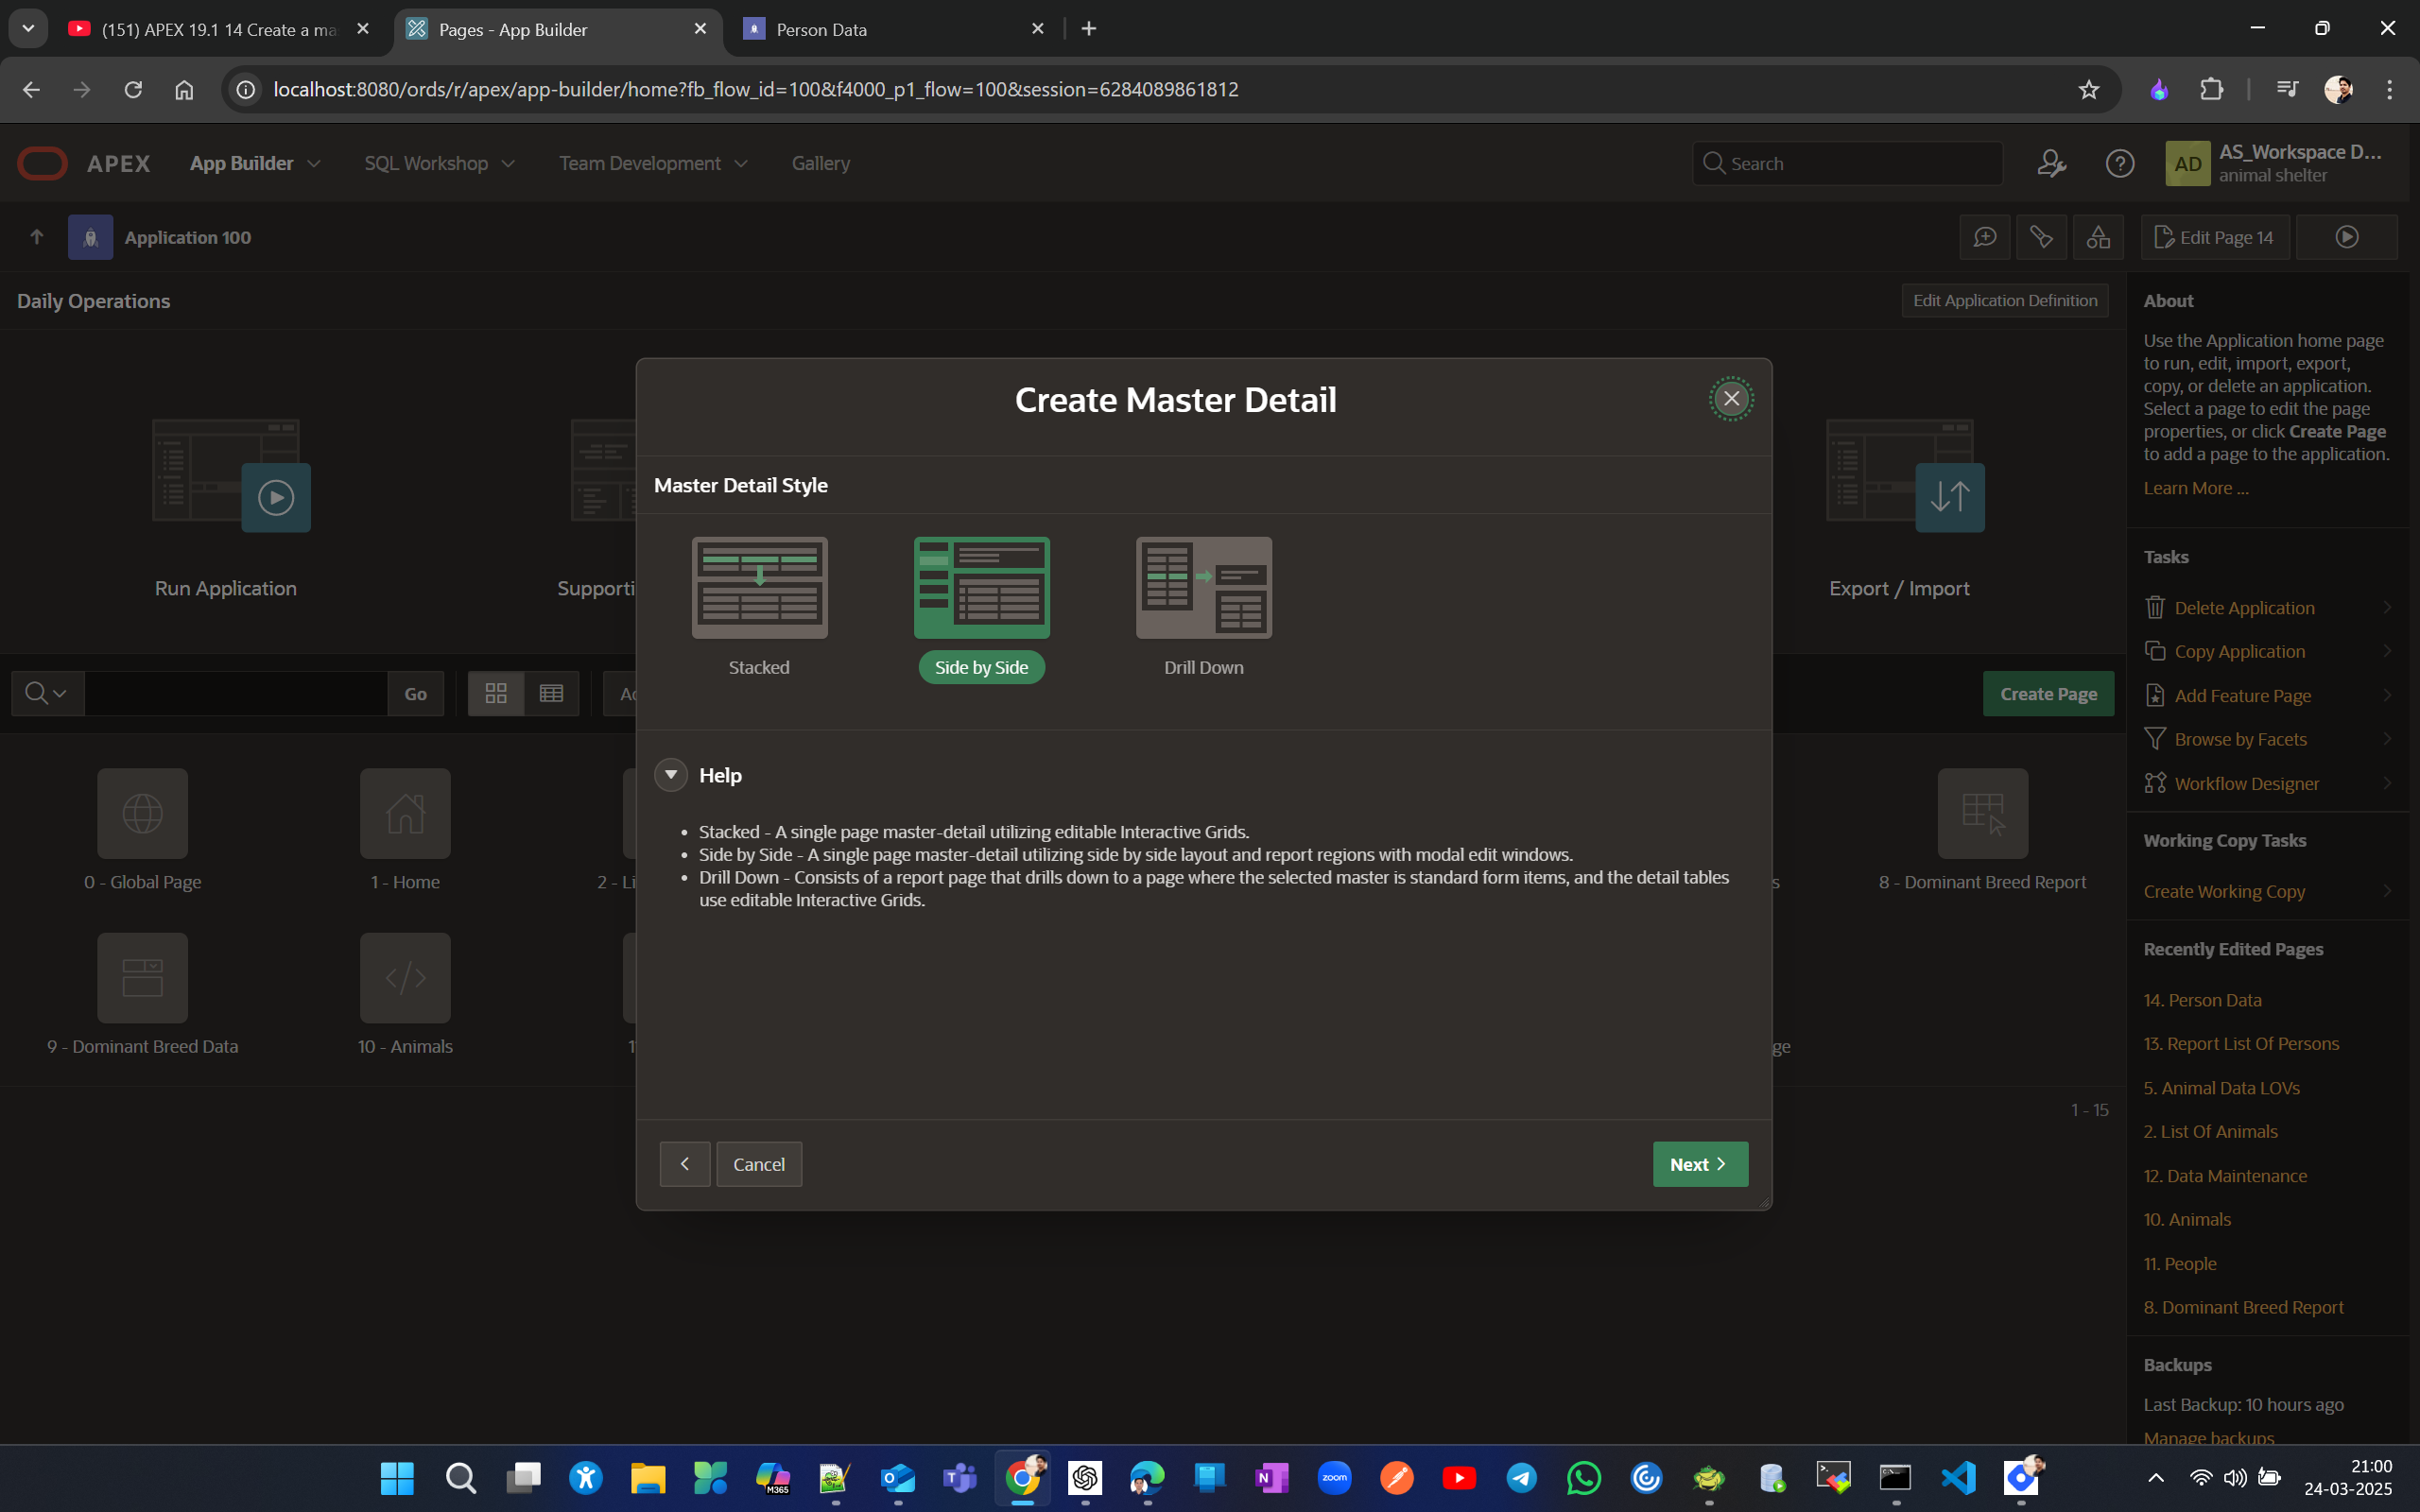
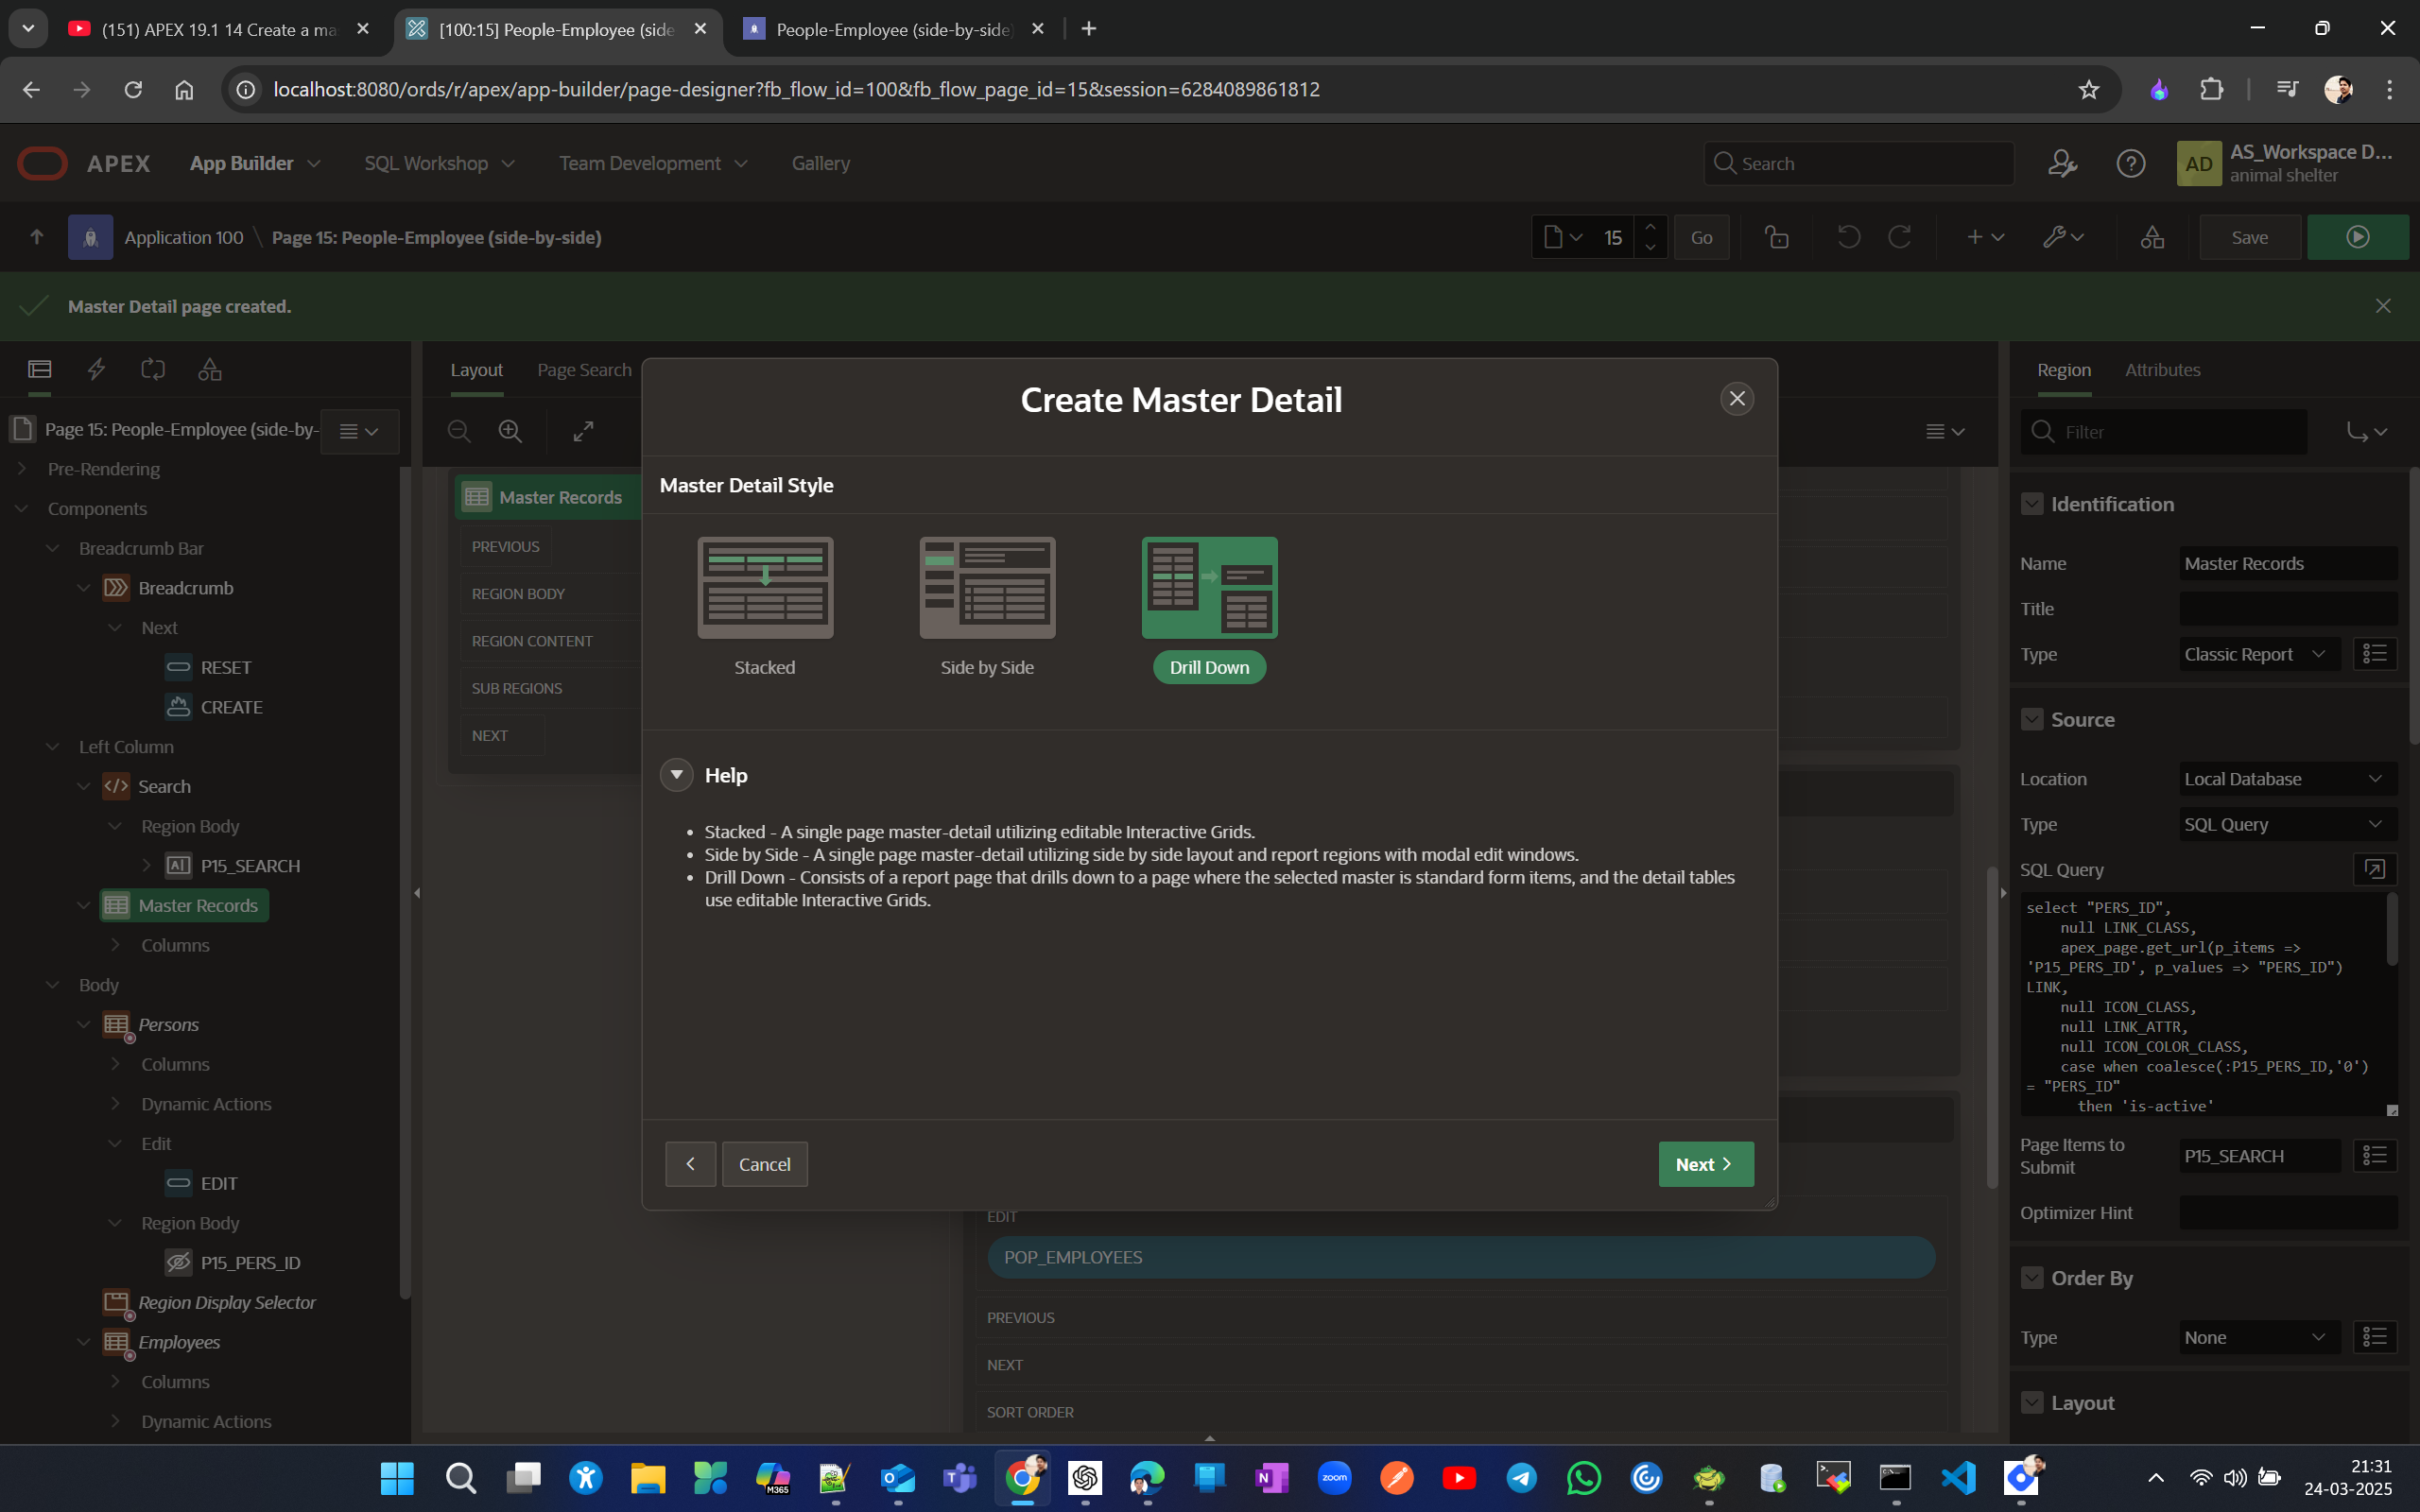
you will get 3 types of master detail style (Stacked, Side by Side and Drill Down). We’ll not be using Stacked that is we can do , but here we’ll see and create Side by side and Drill Down example
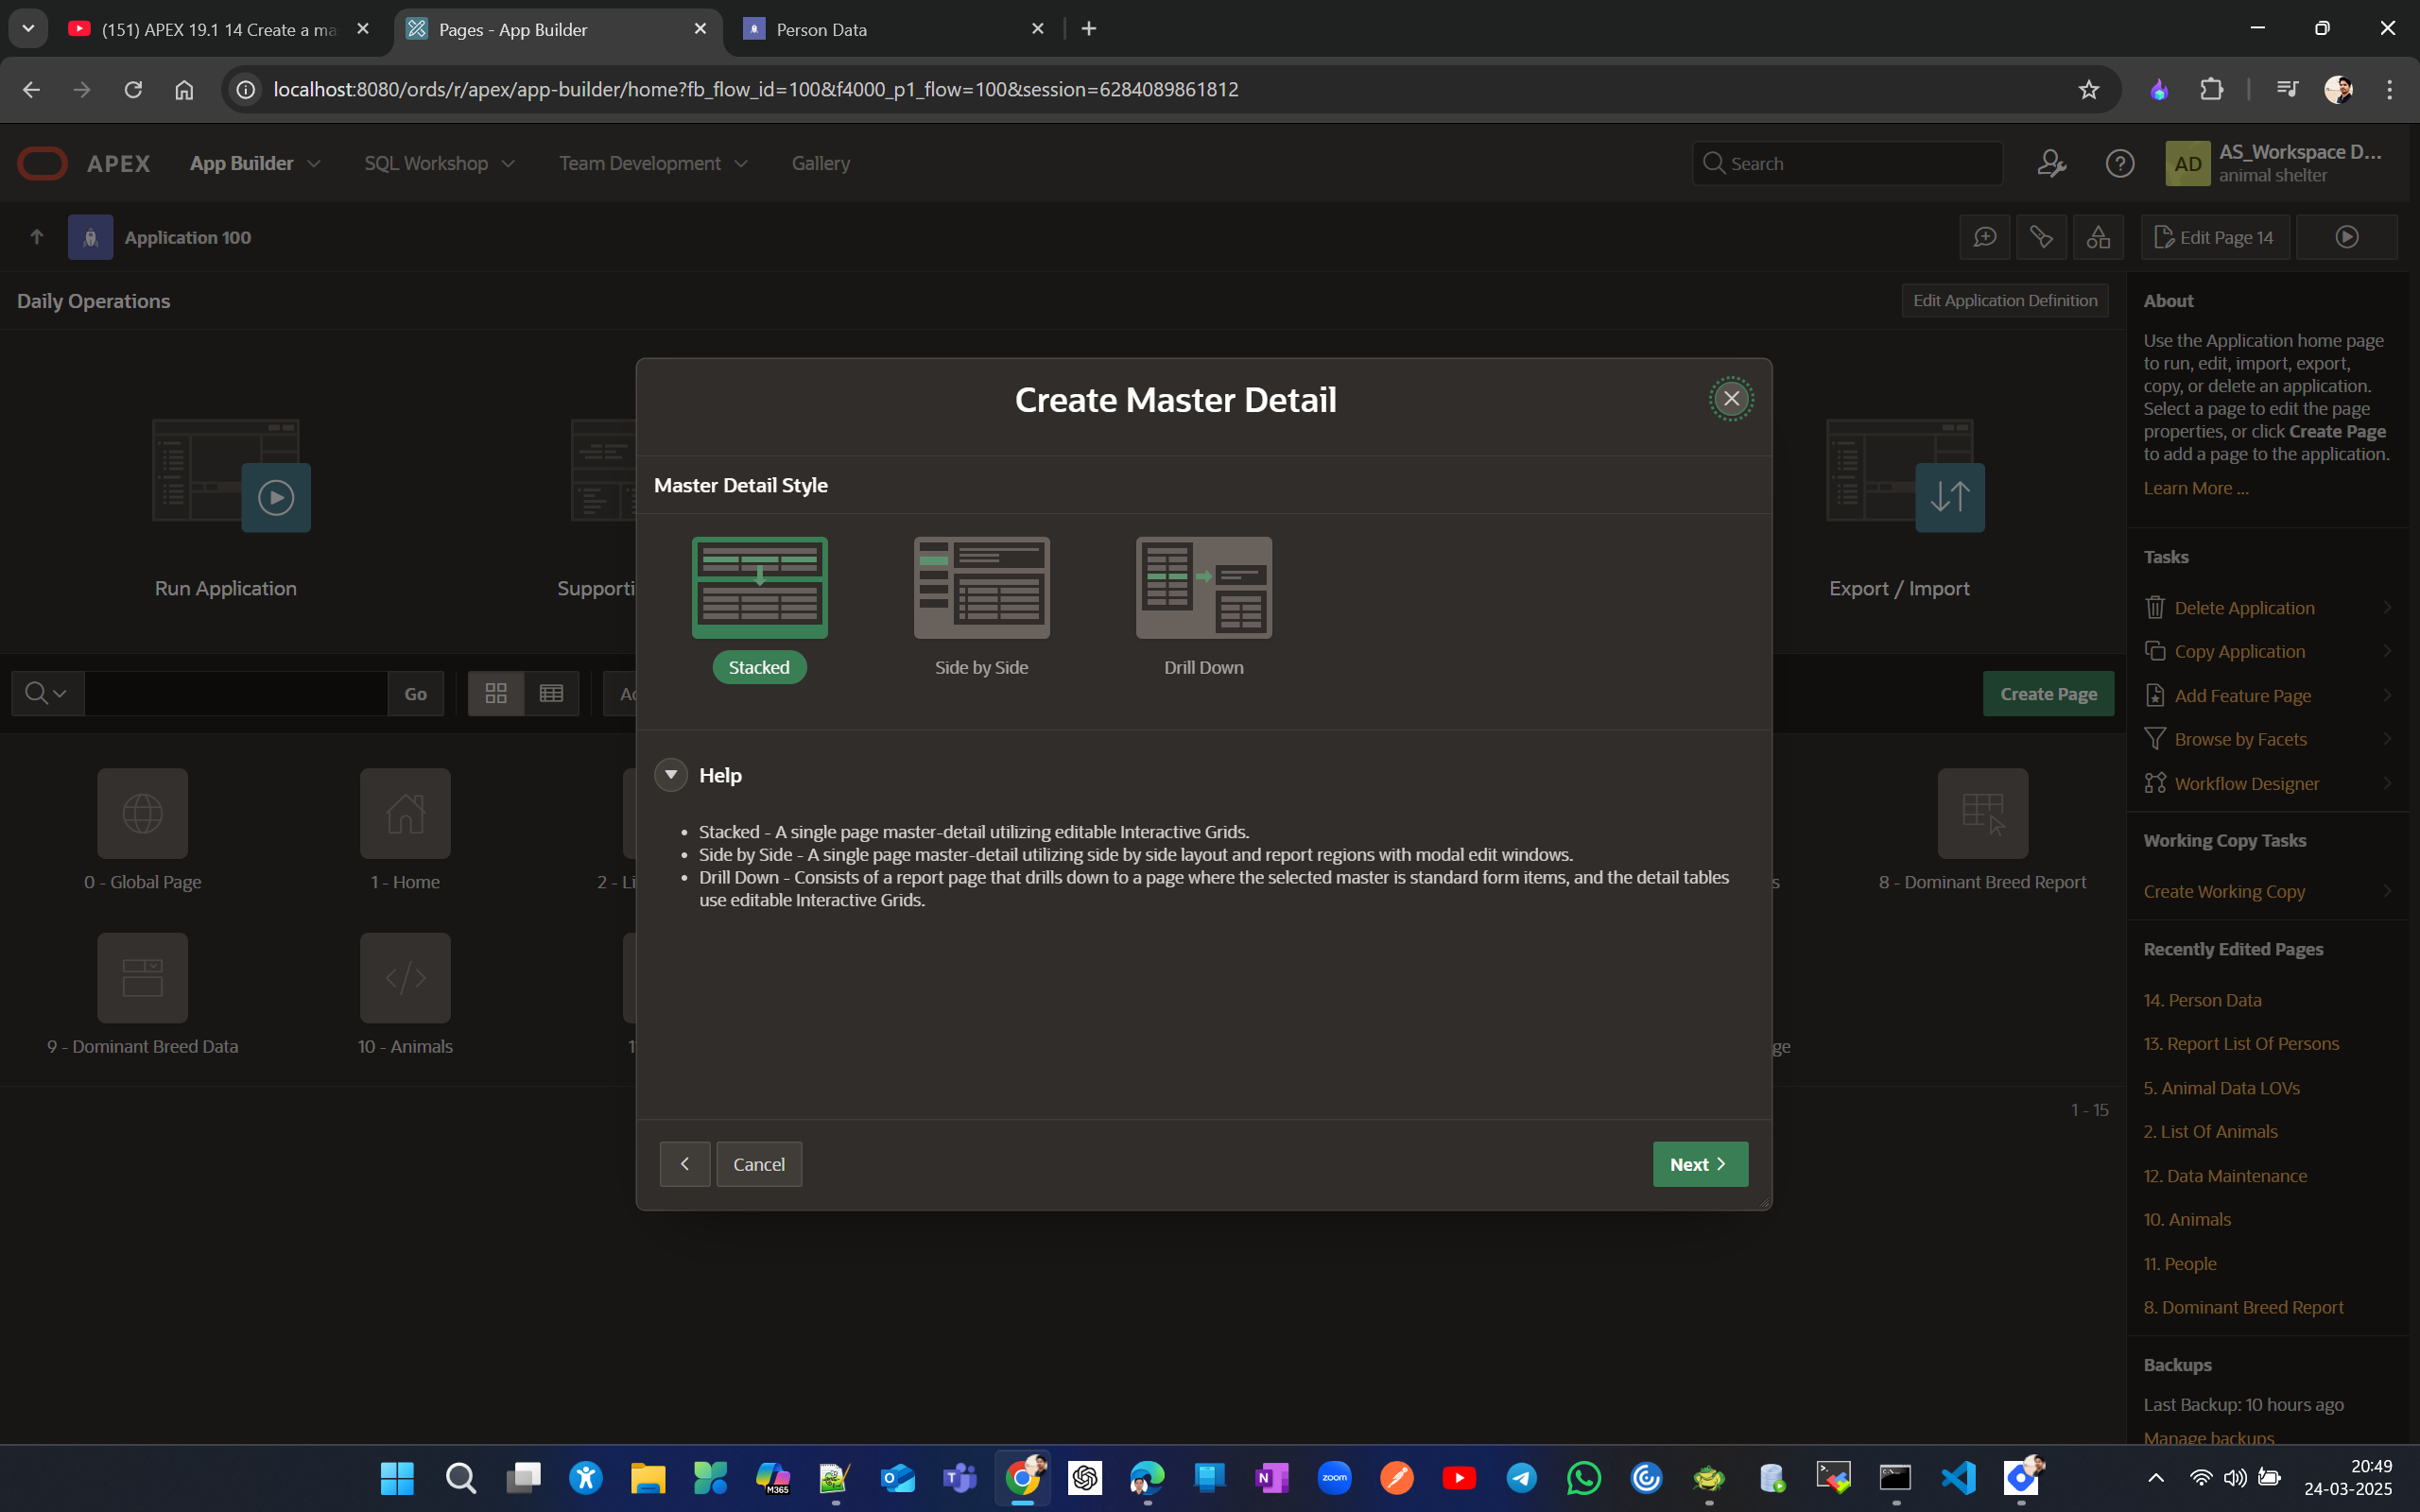
Lets create side by side master detail page. Create anavigation mentry for that as we’re going to do this more than once.
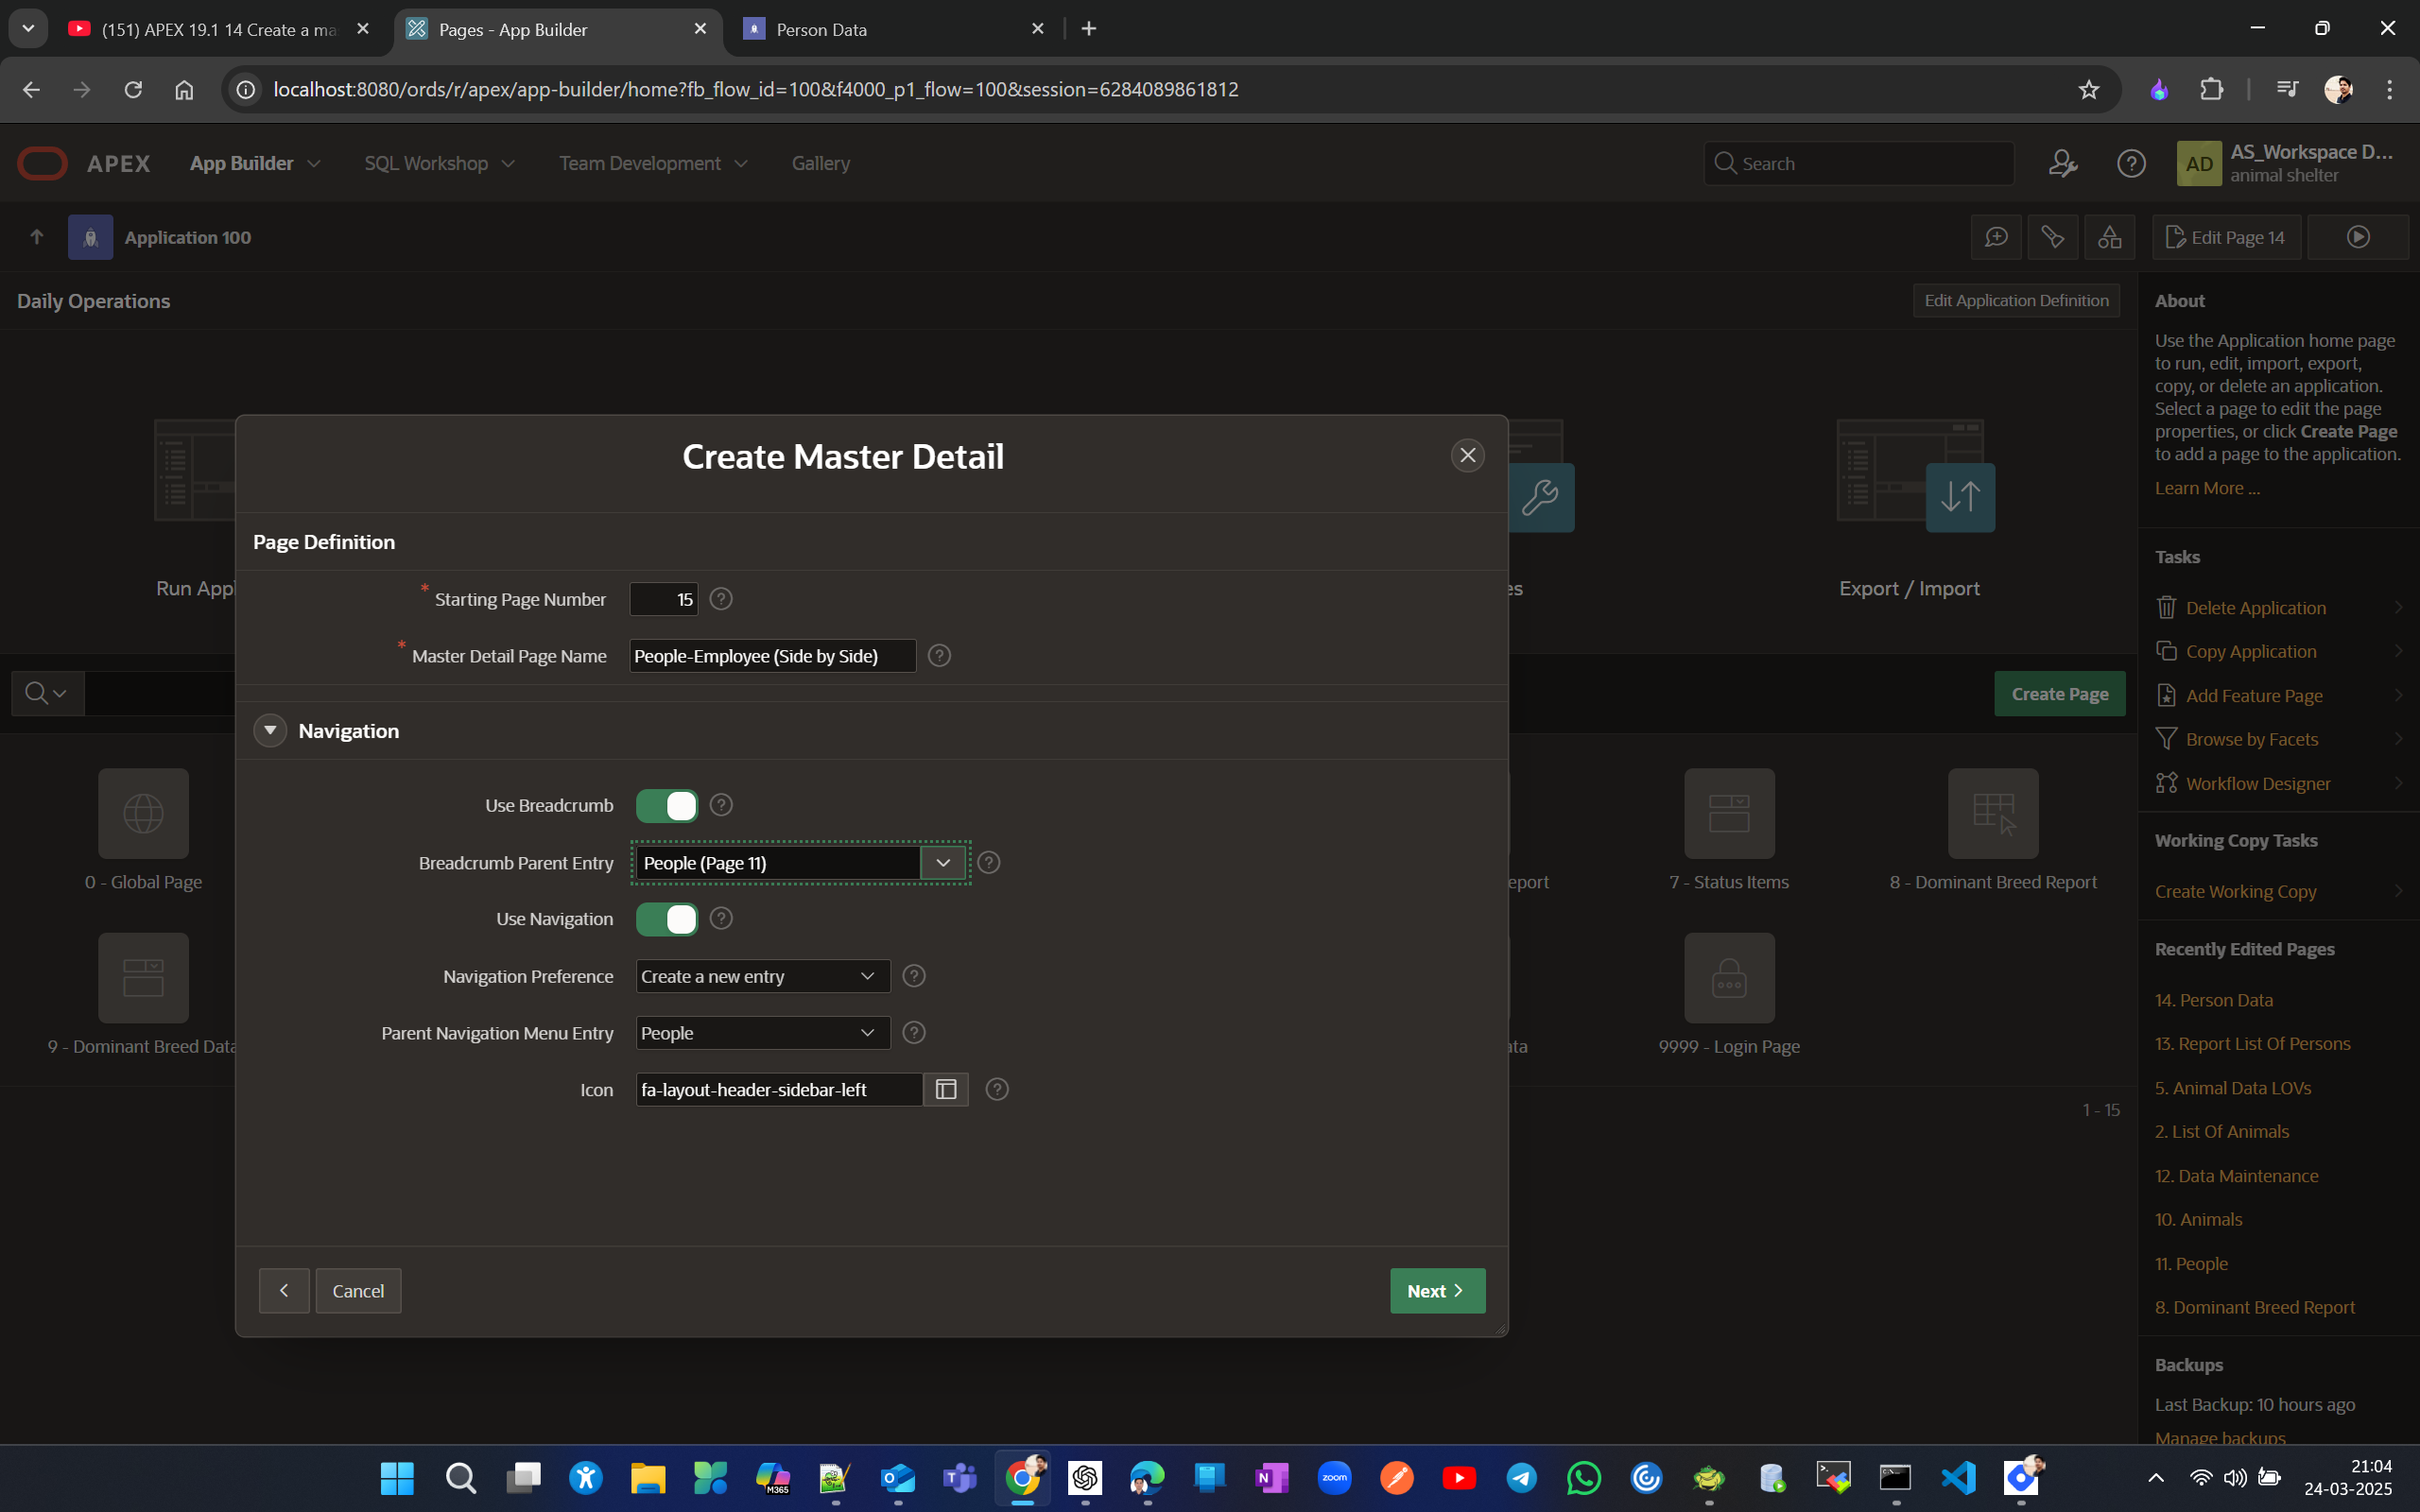
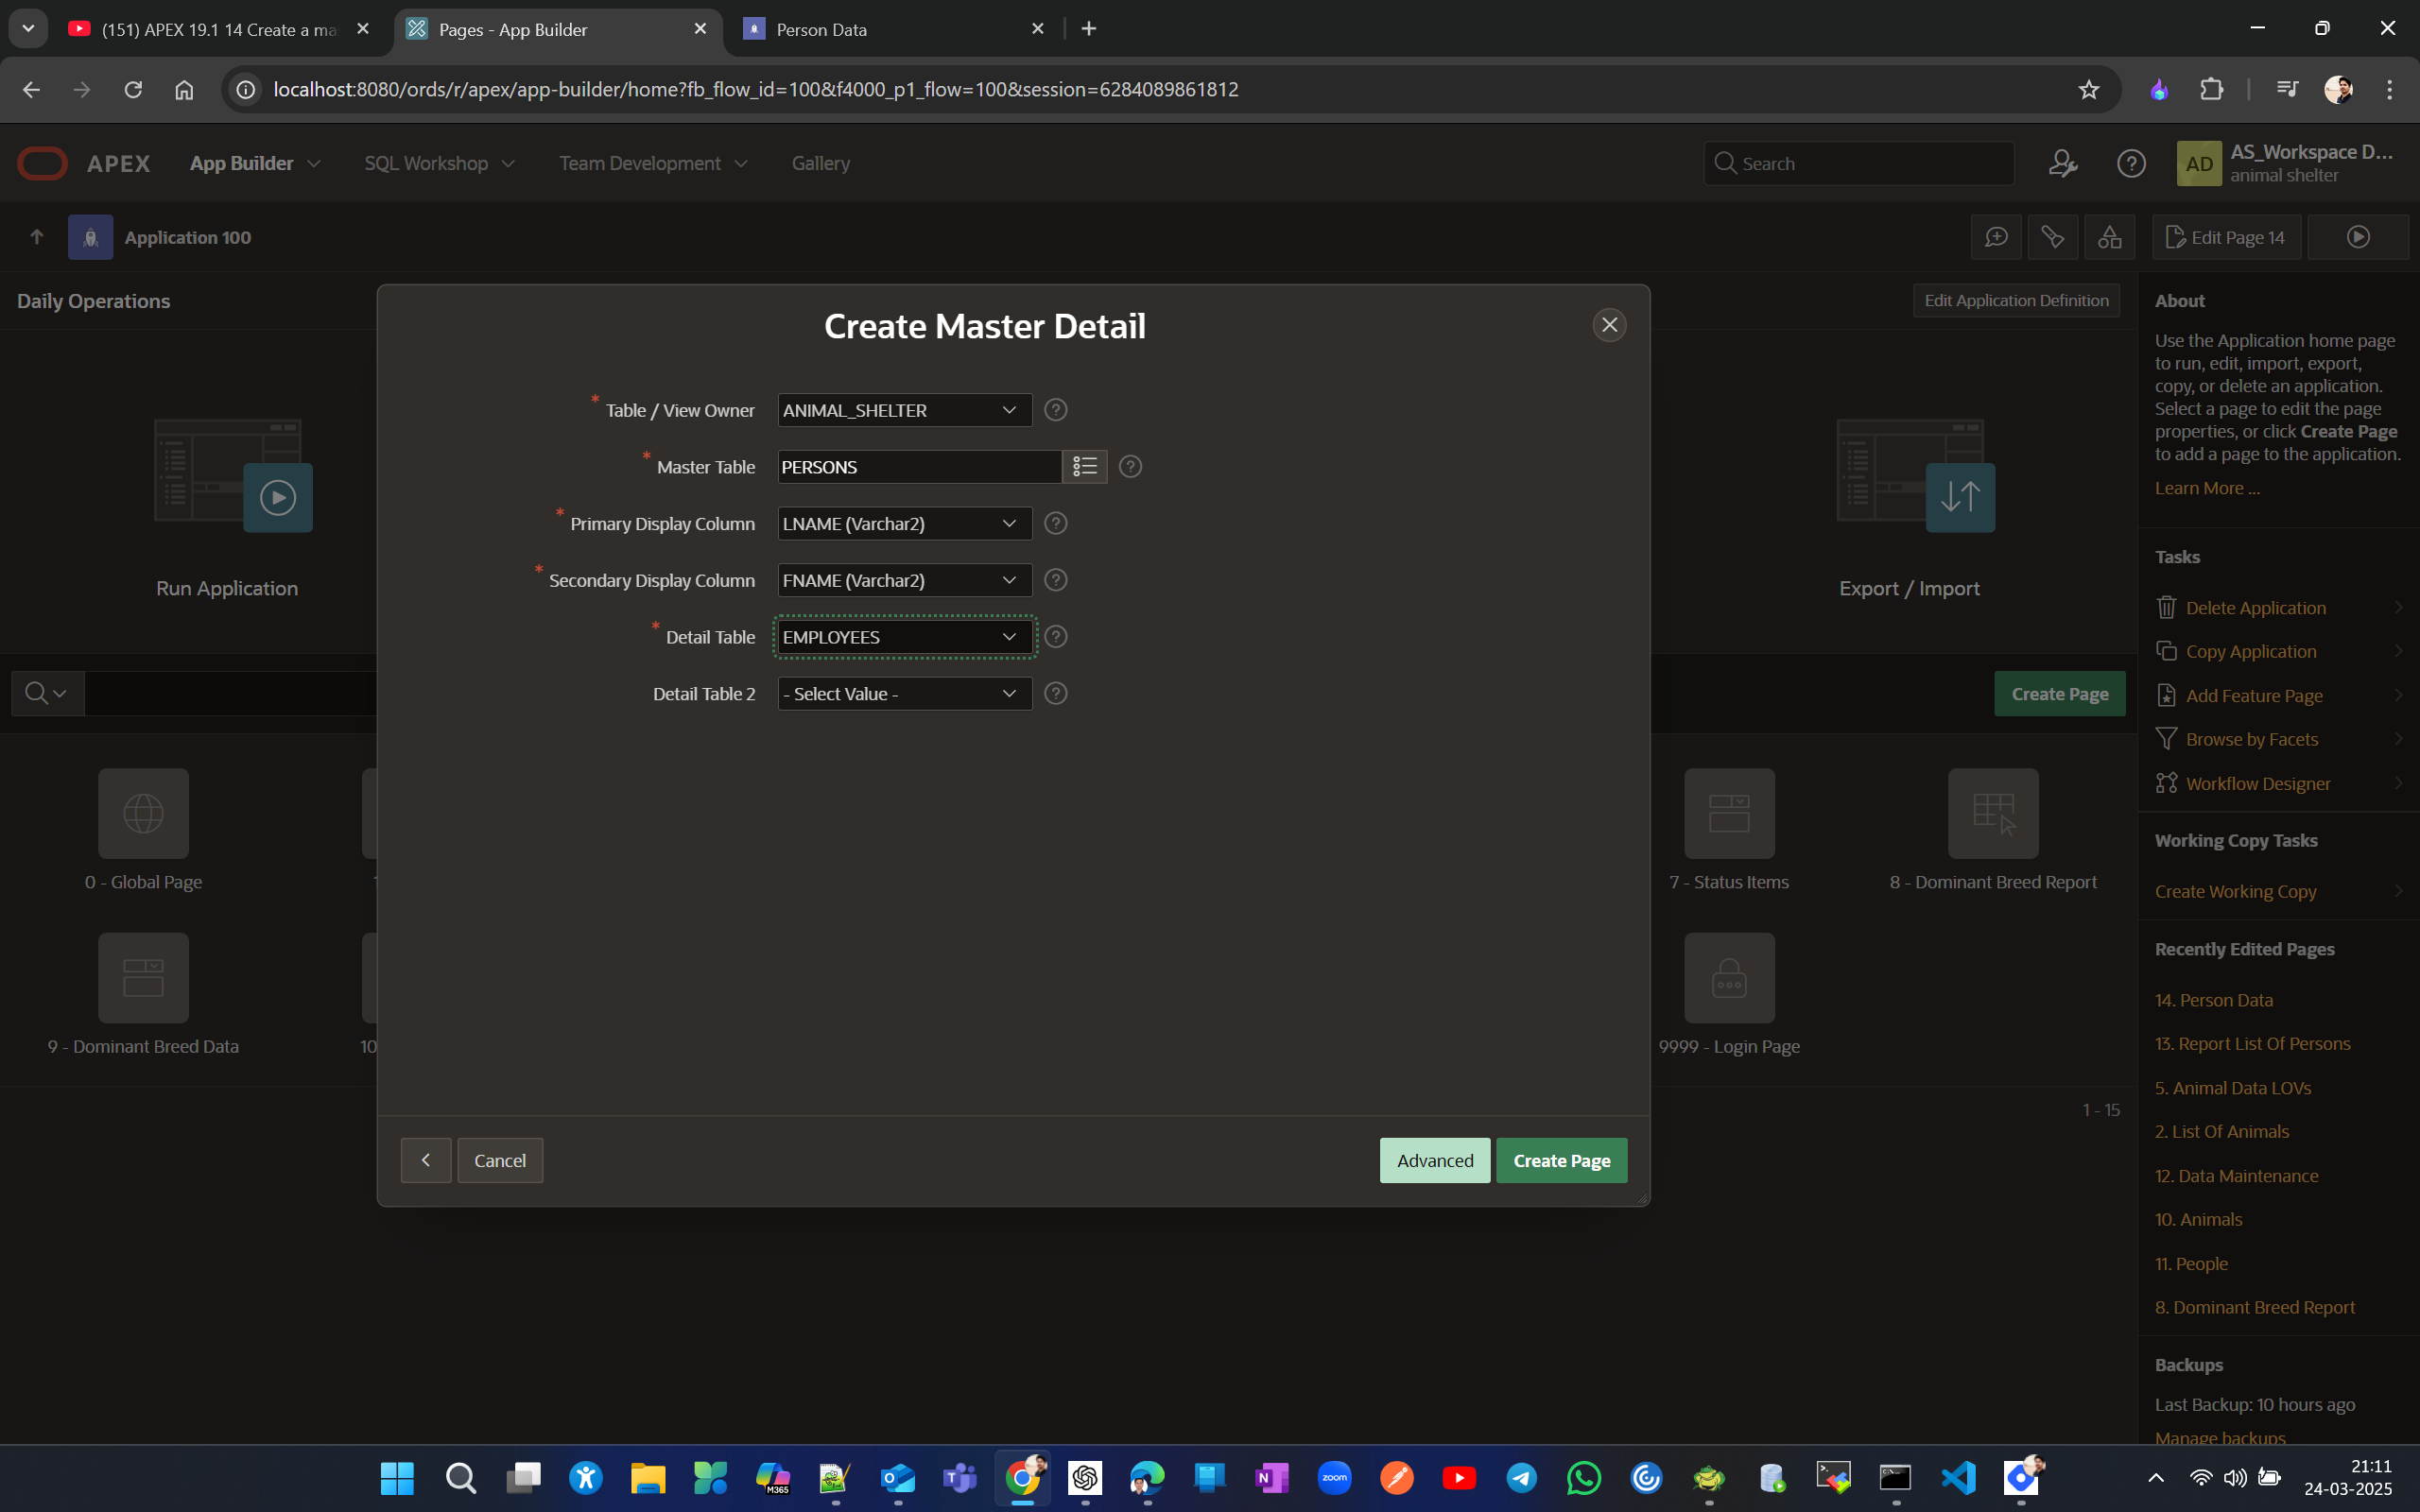
Run to see if a person is employee and if not a employee.
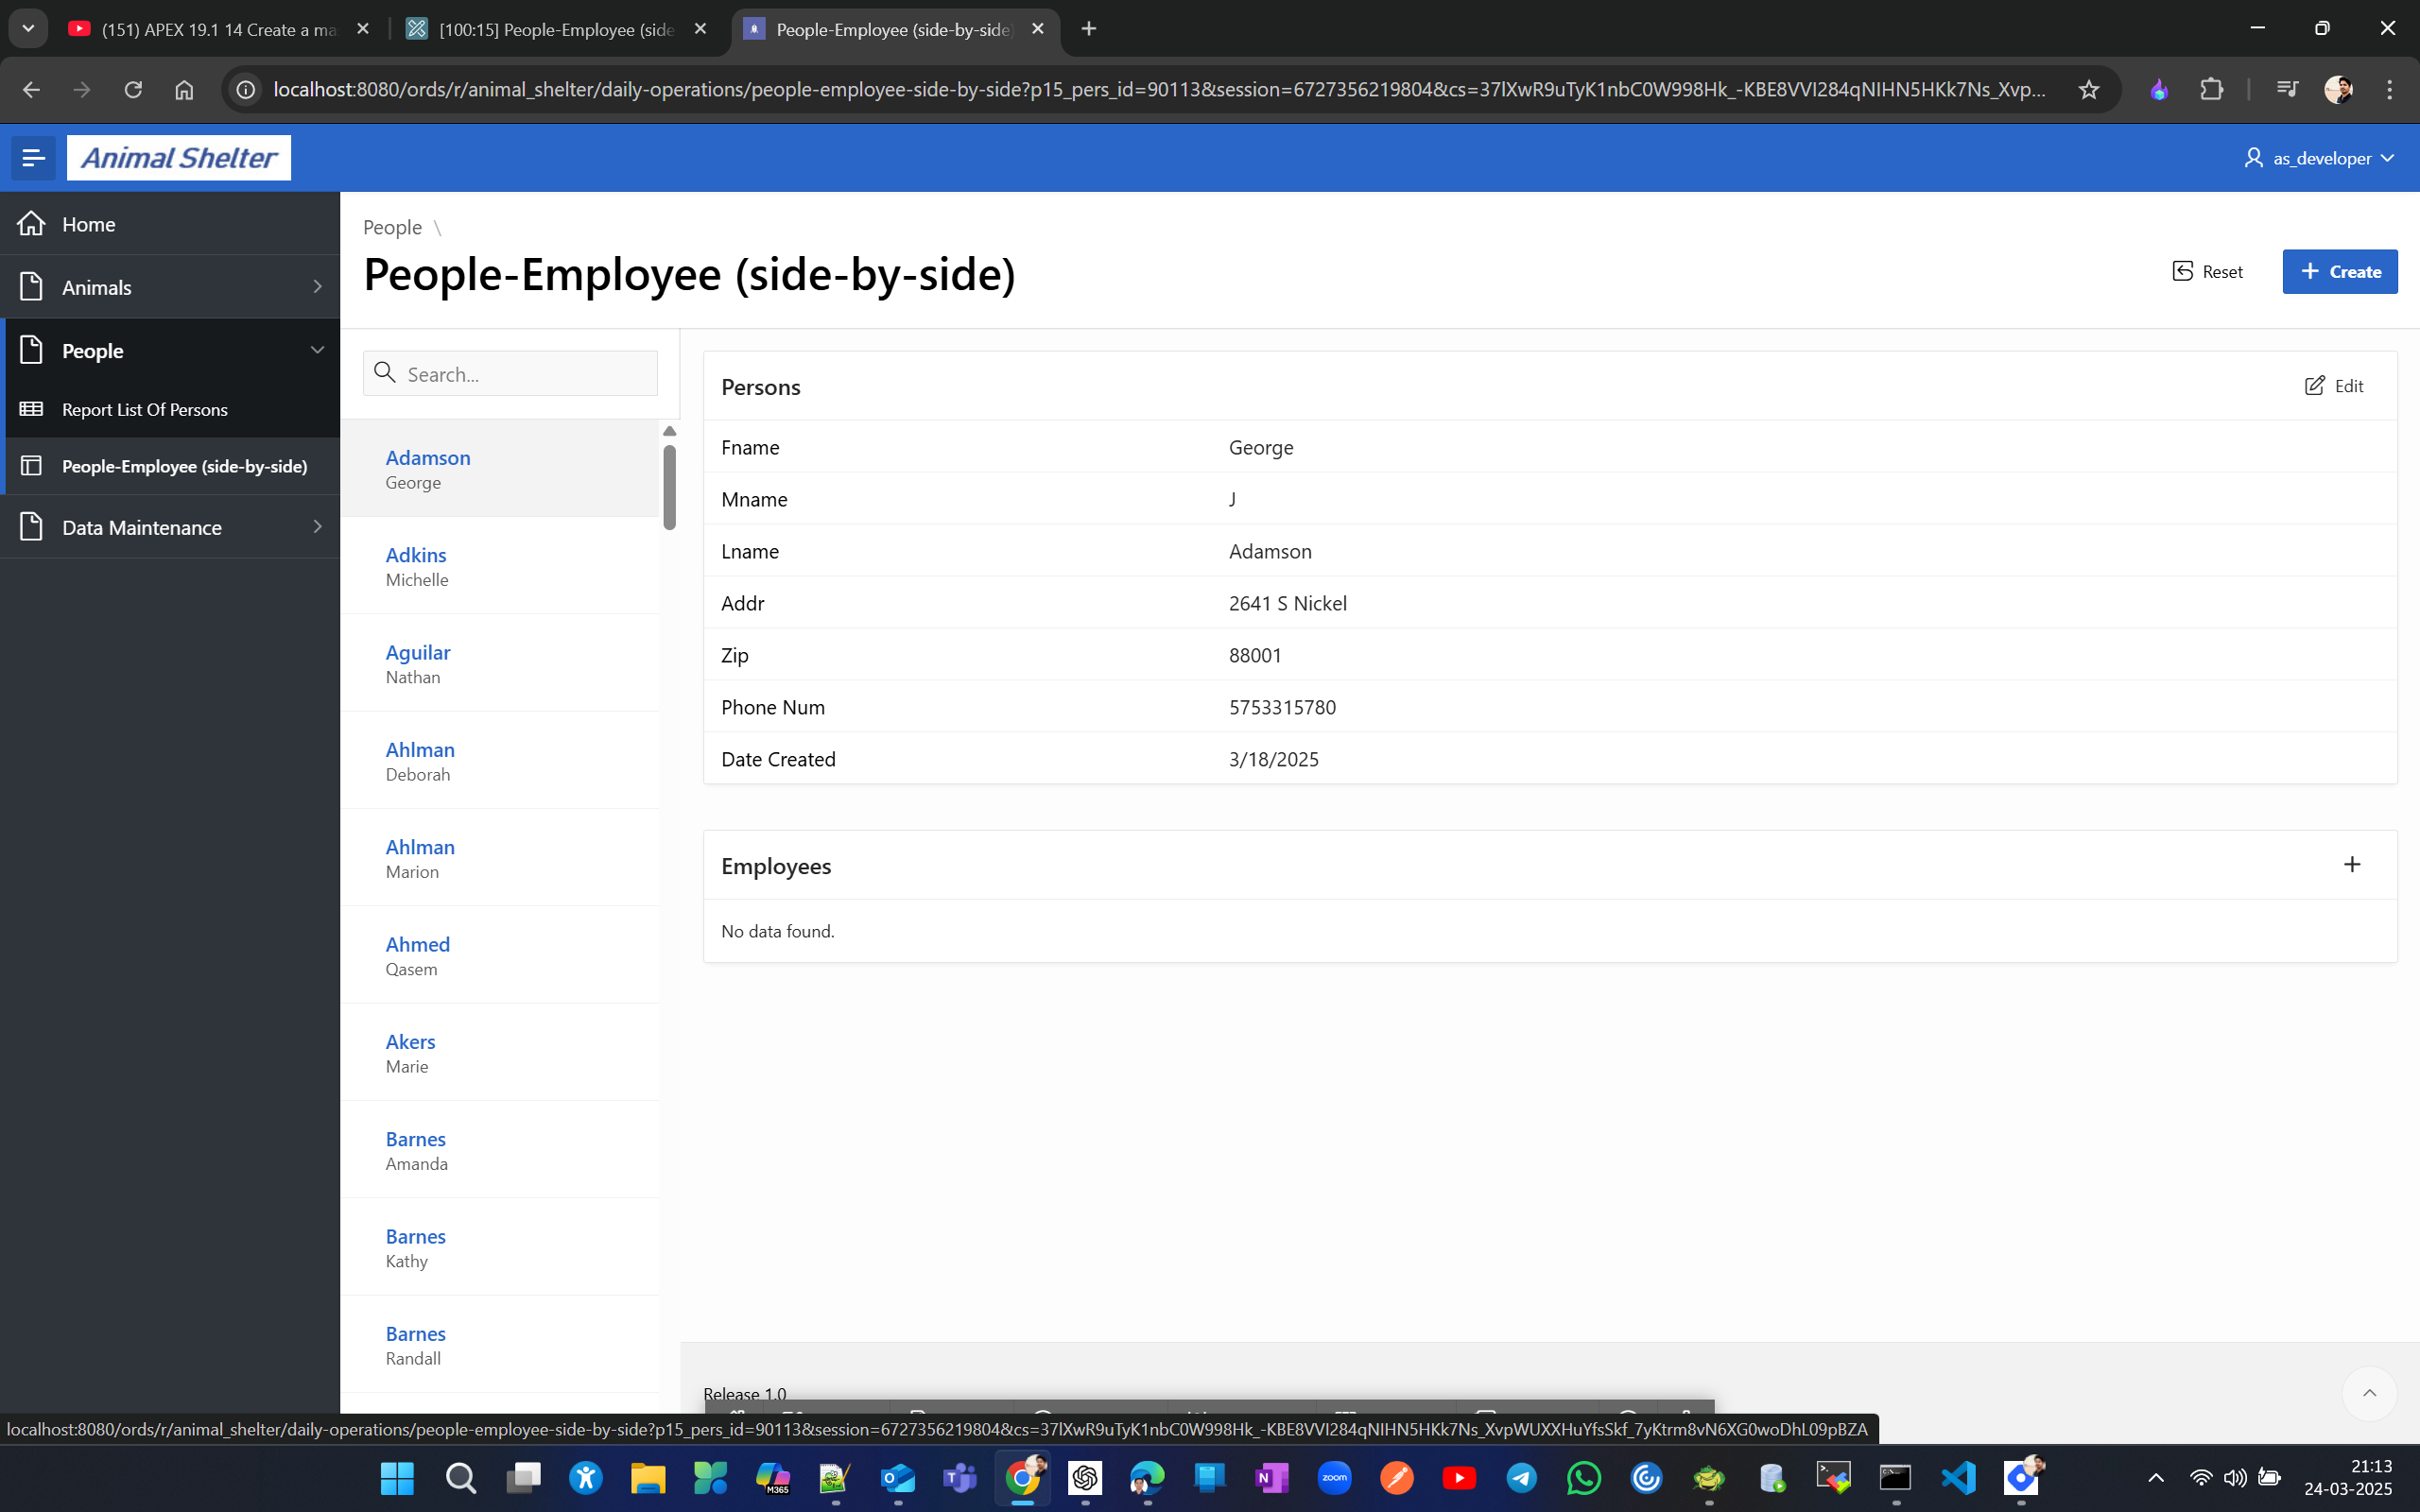
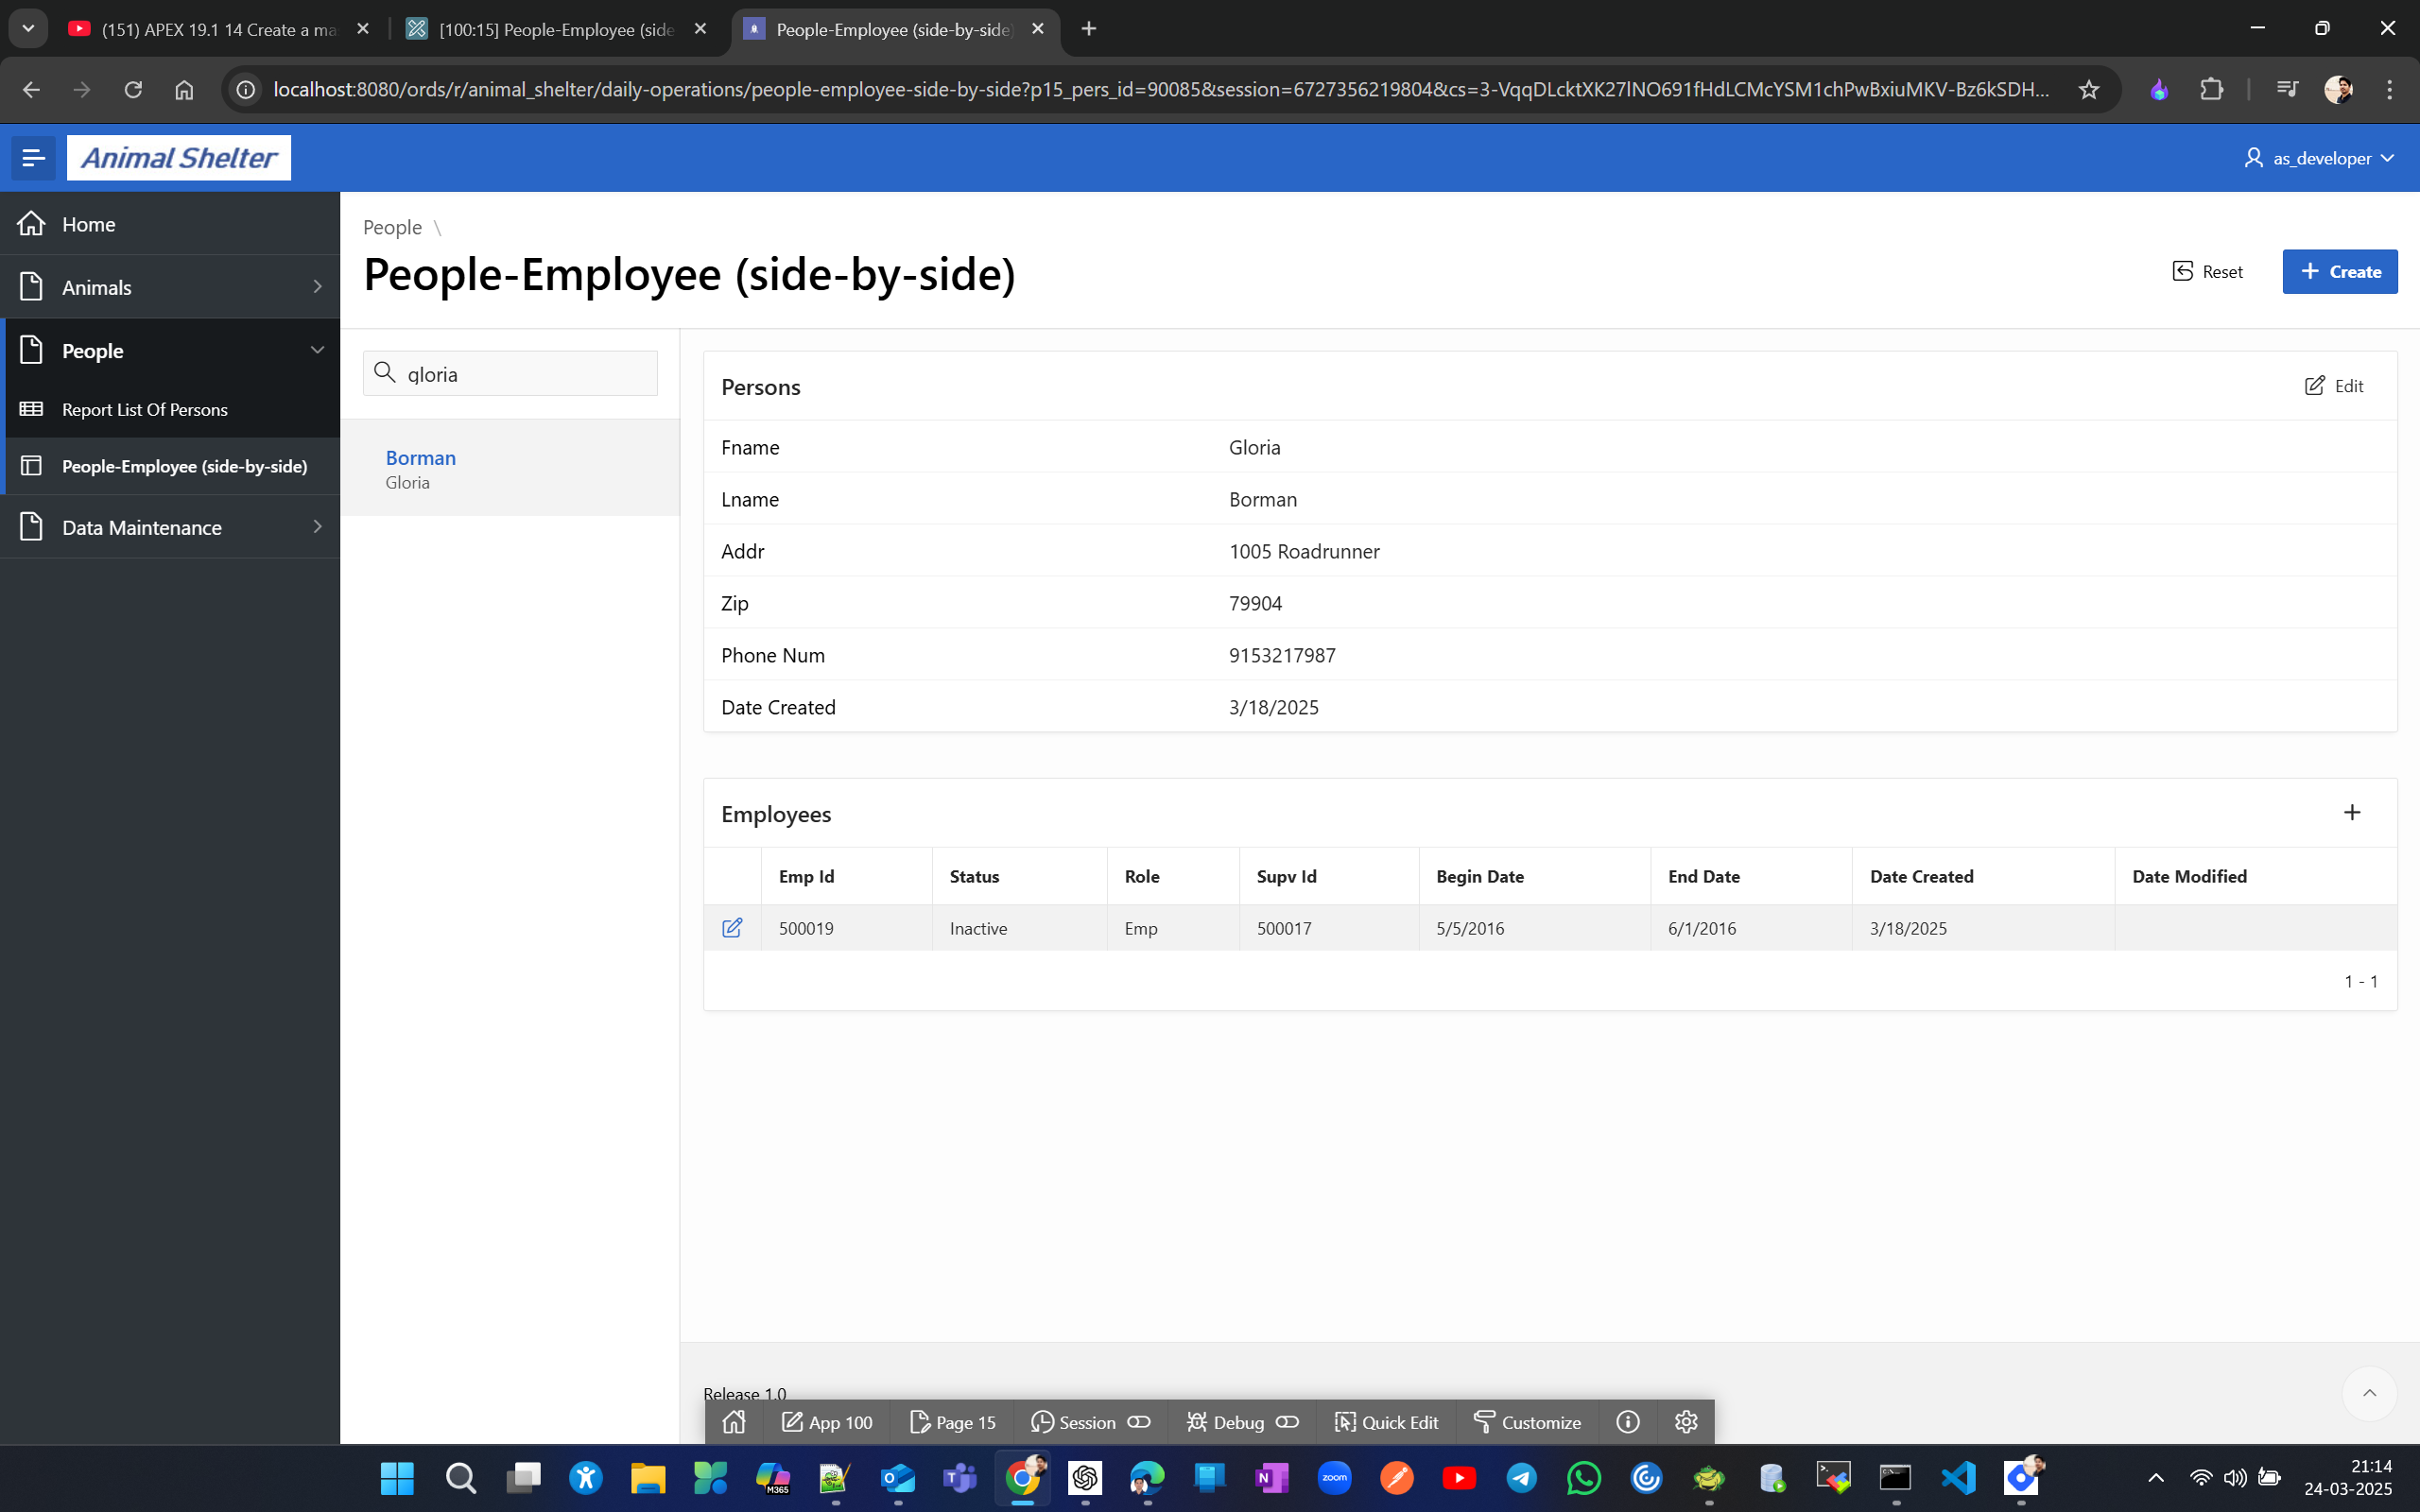
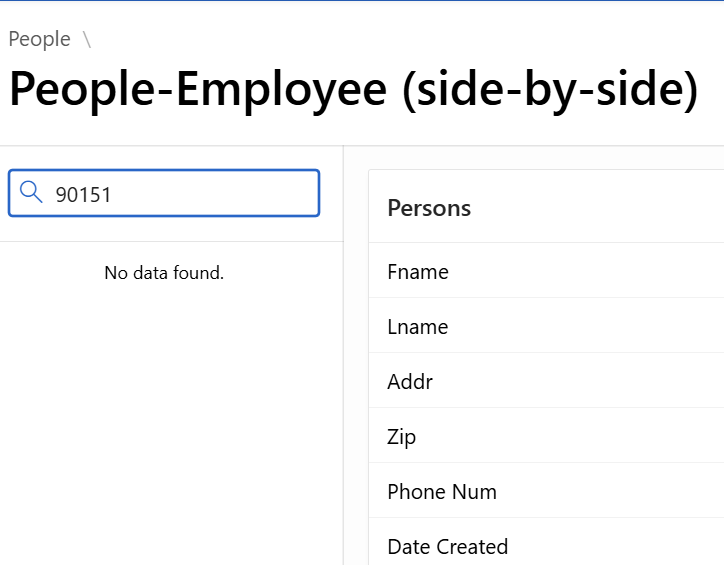
Lets modify the master-detail page to have the ability to serch by id along with name. for example if you wil search 90117 or 90151 you’ll not see any record.

Lets modify the page to incorporate this modification sech by id. From page select Master record and modify SQL Query under source.
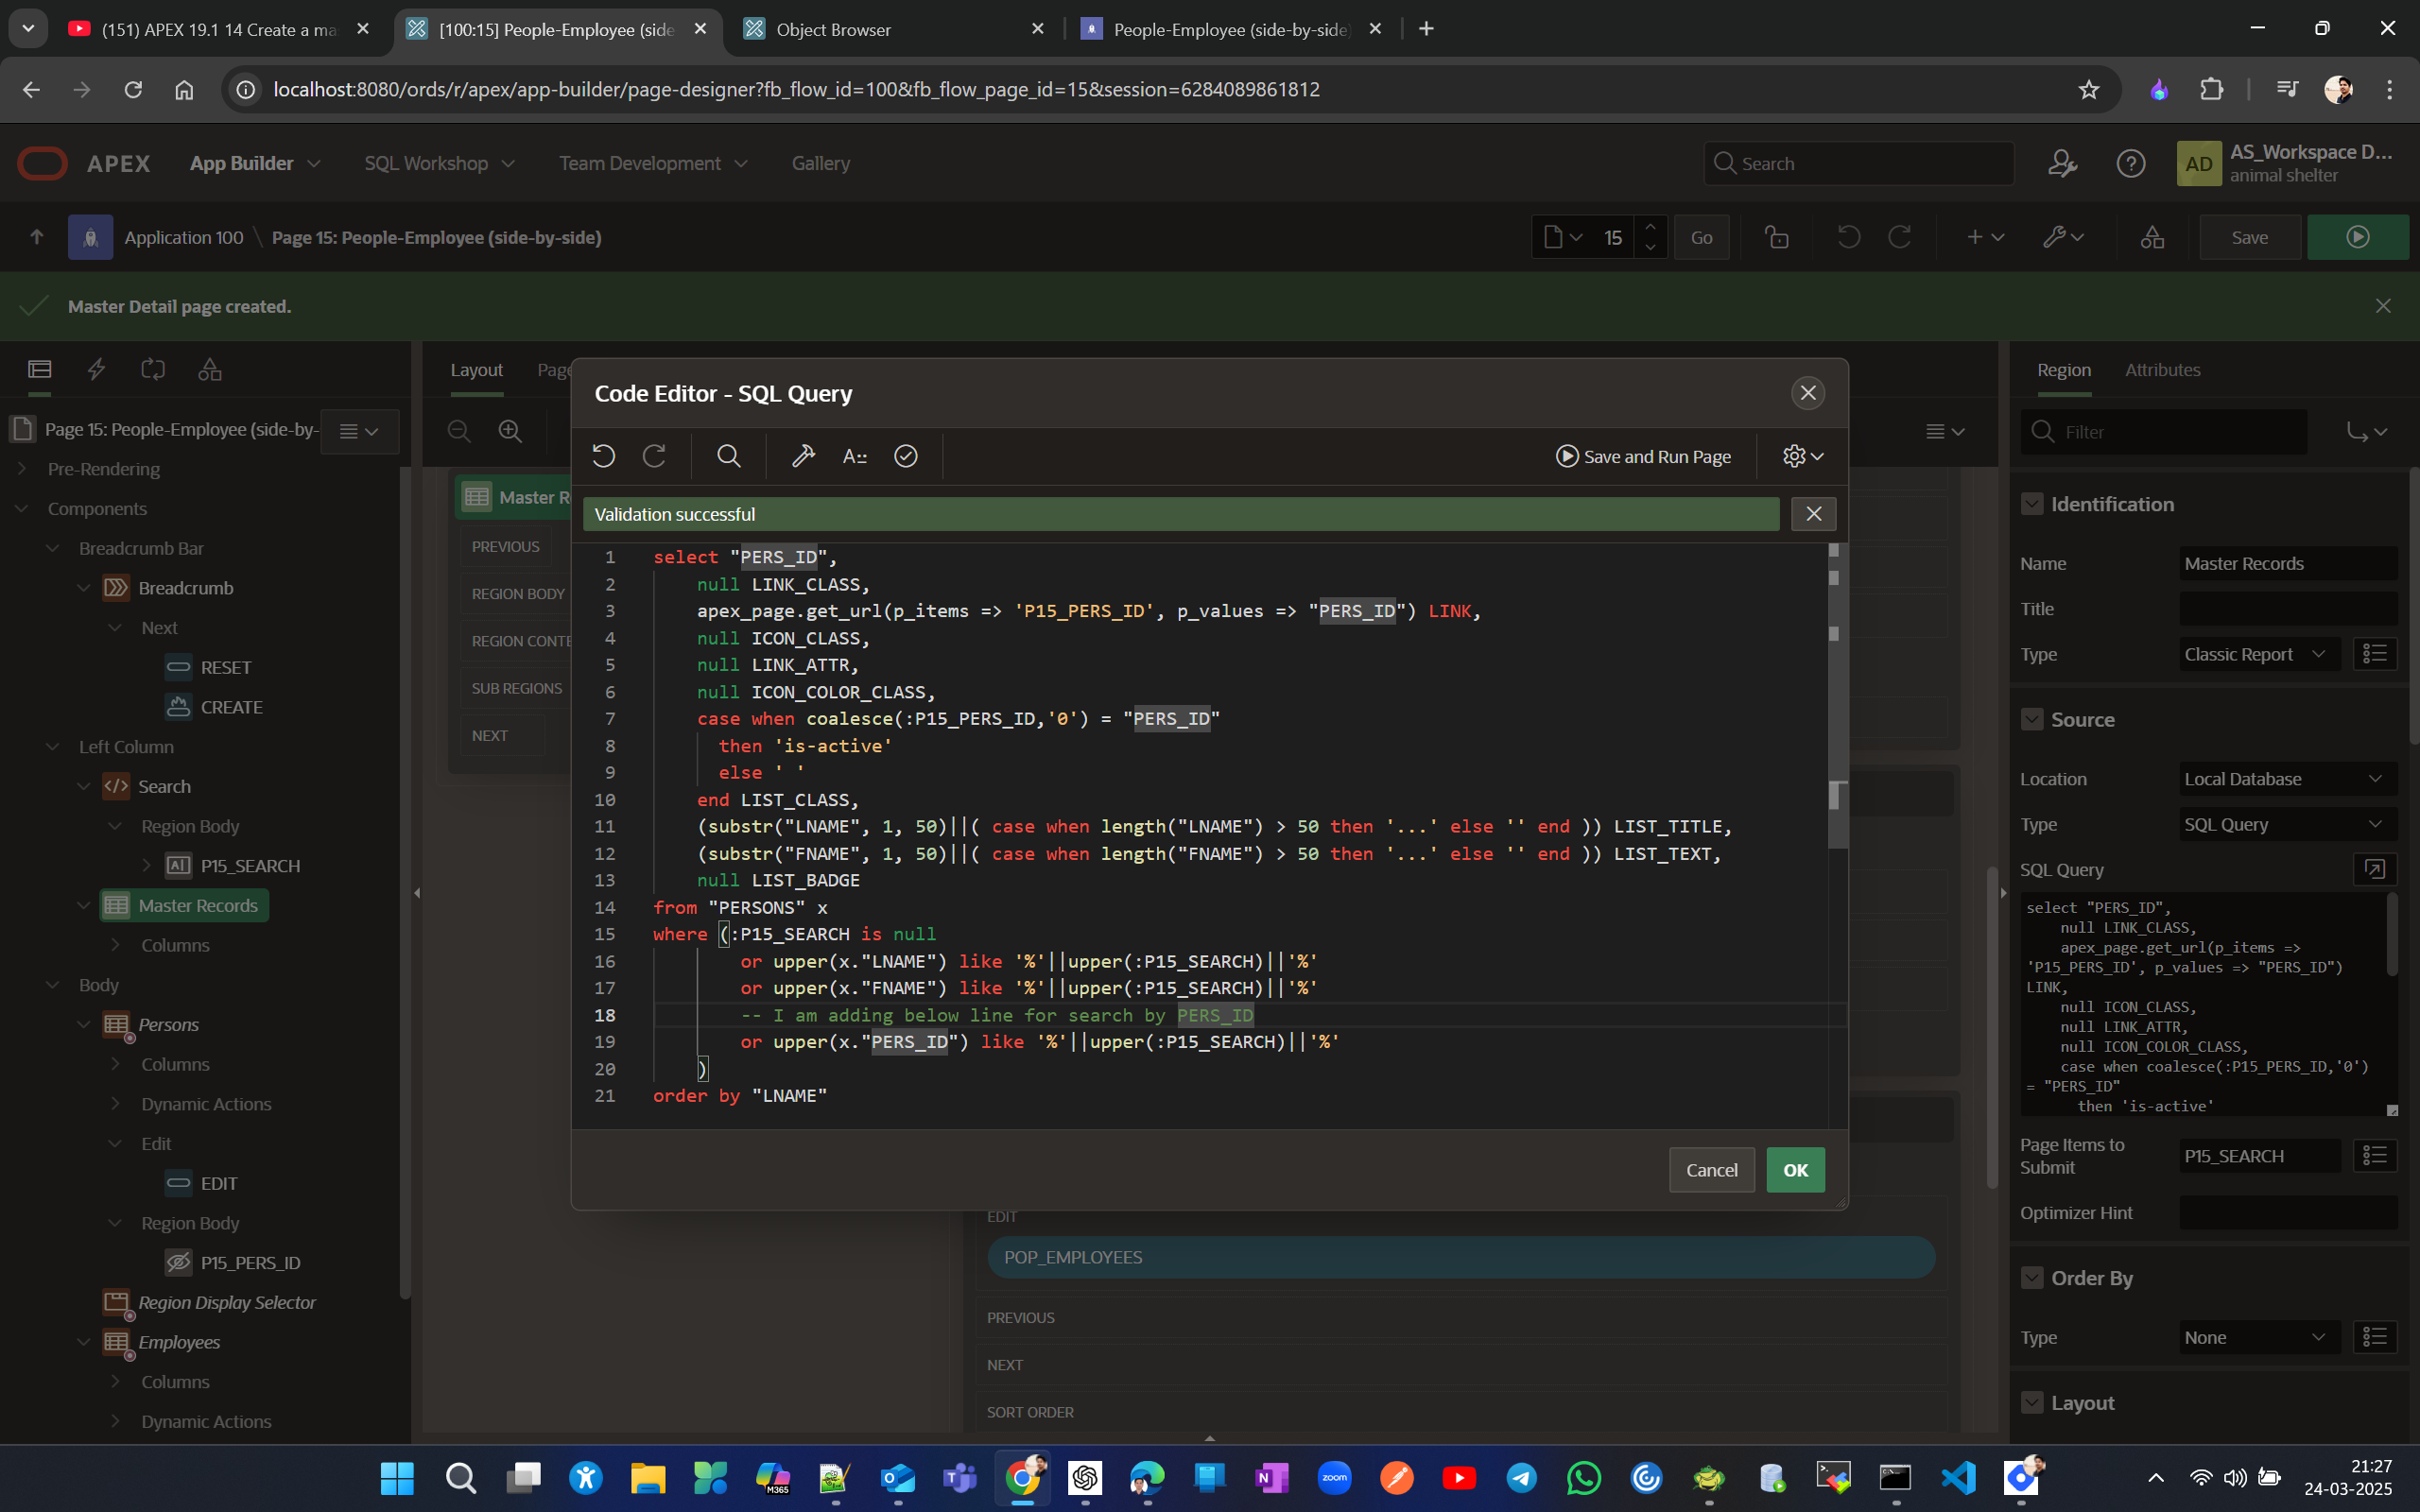
post change
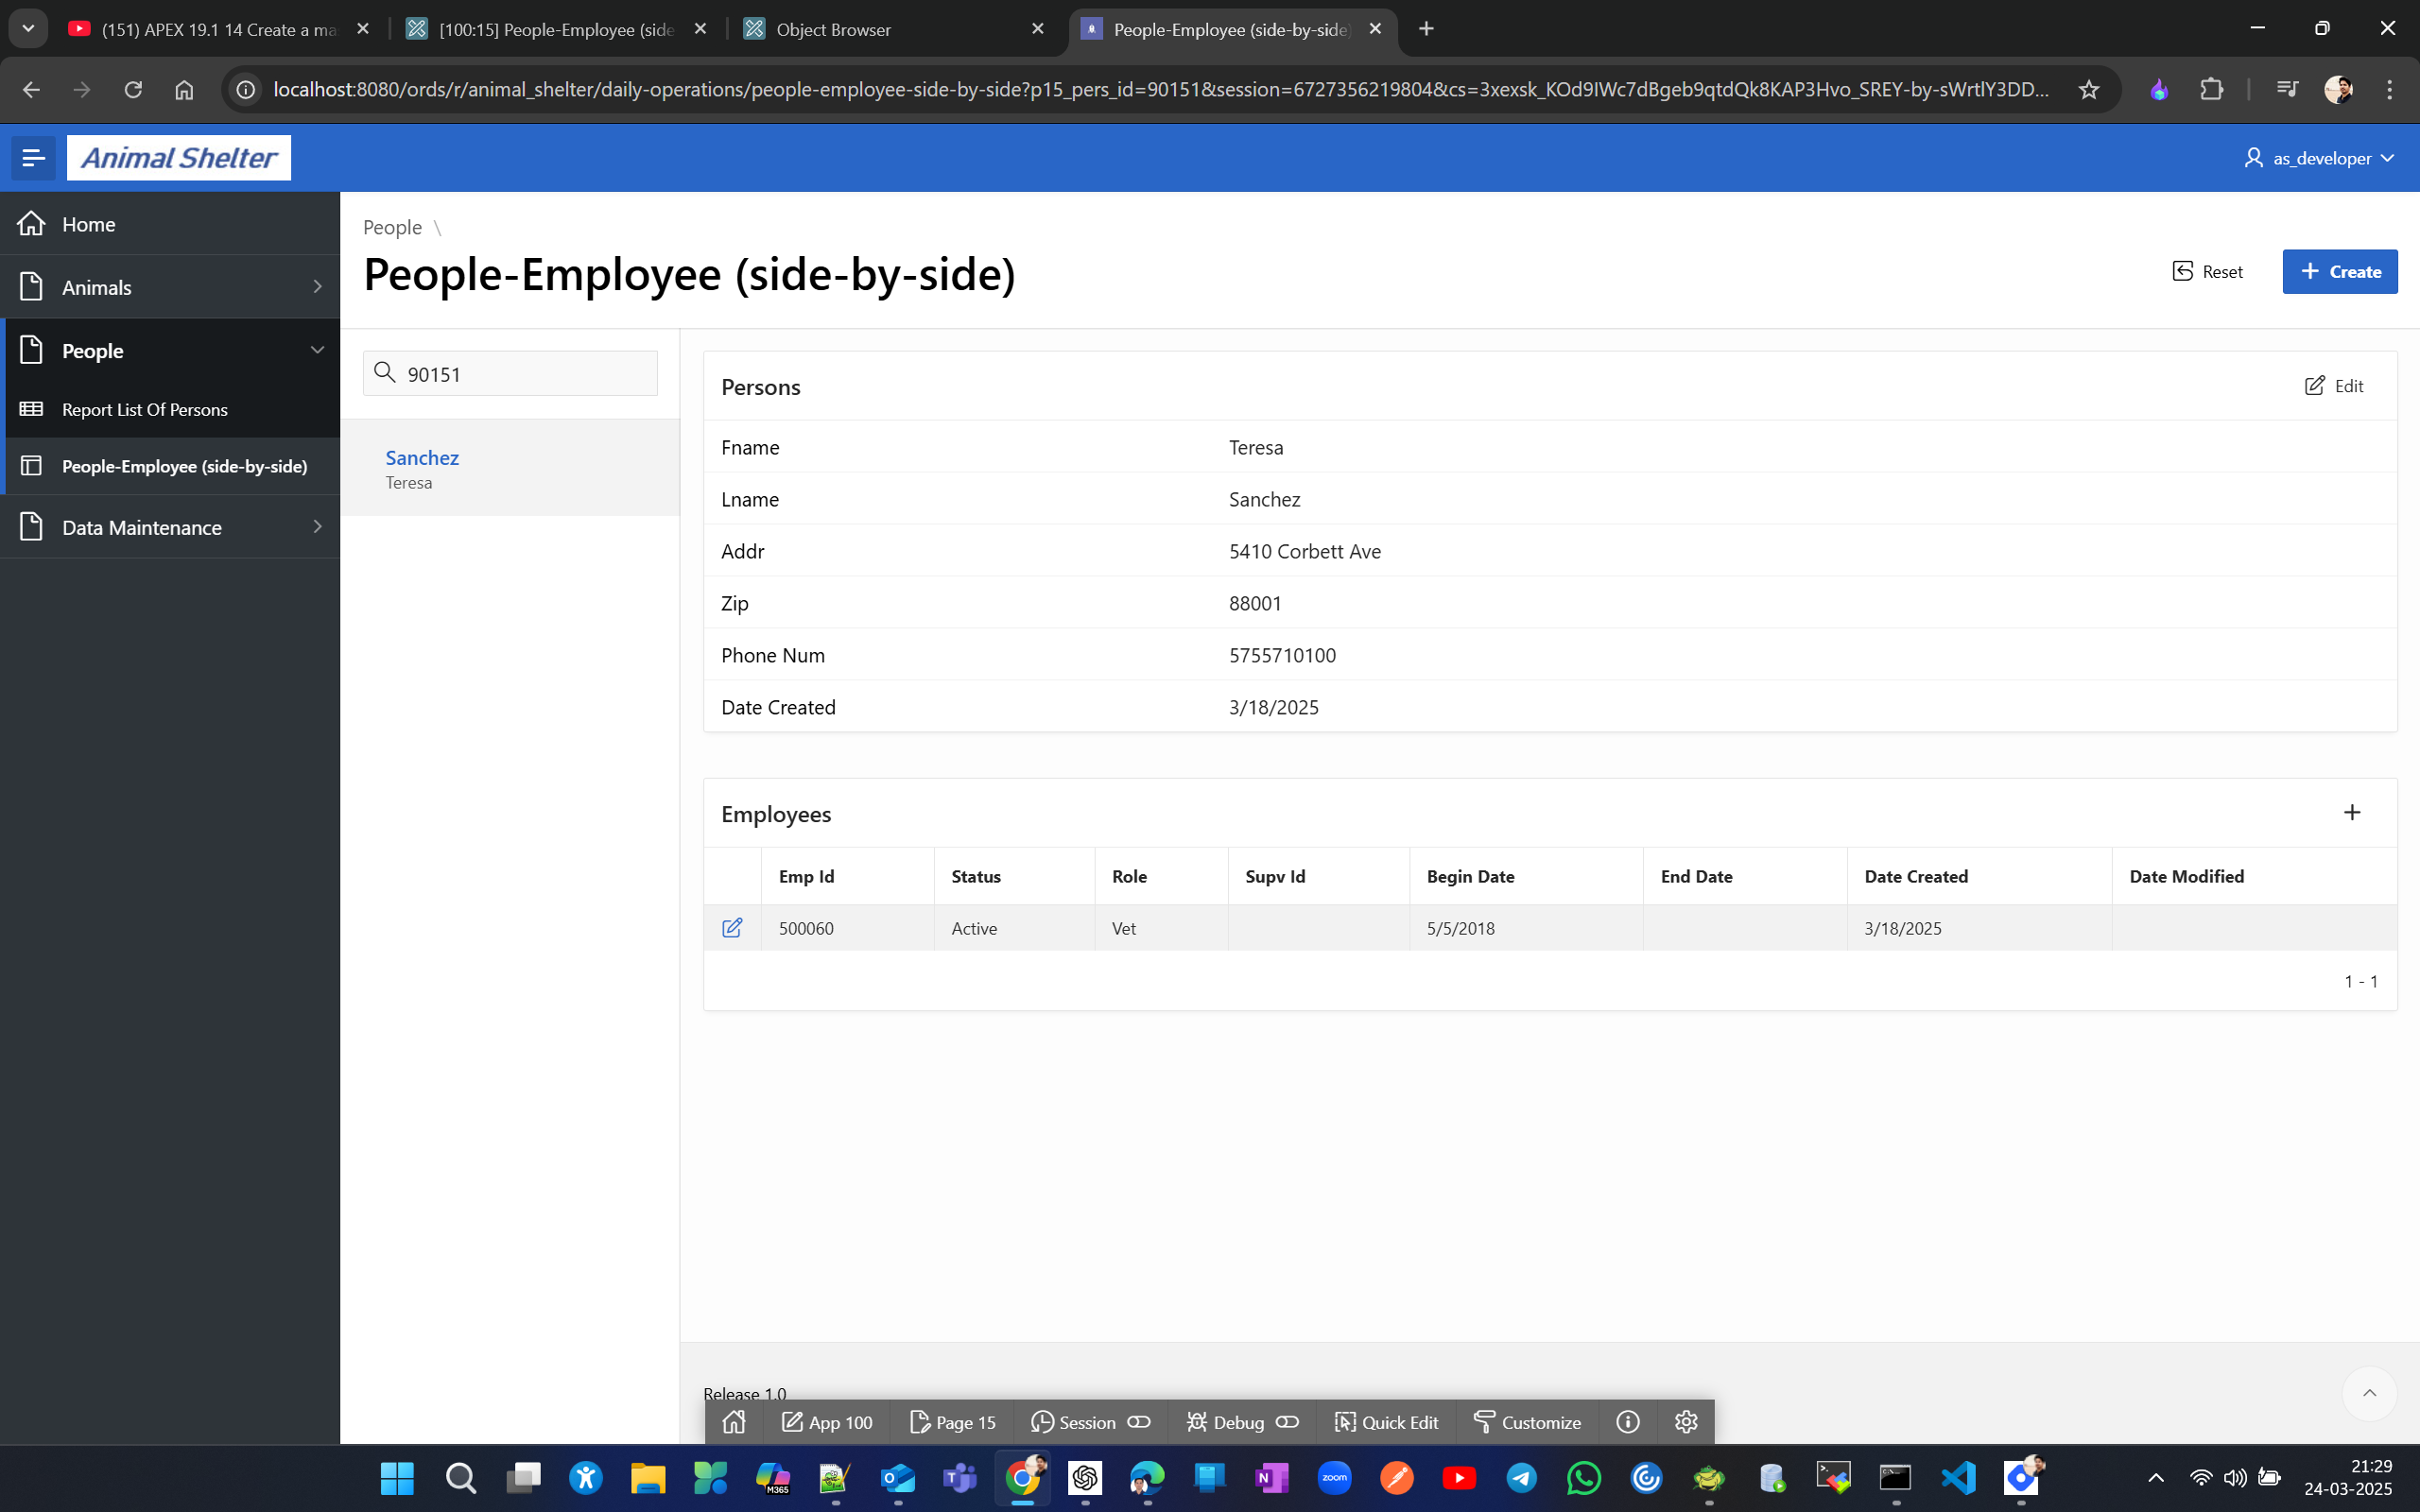
You can see 3 pages created beacuse of 1 master details page. we created page#15 but page #25 and #26 created automatically 1 for master and other for detail. Here the report page is of type classic report.
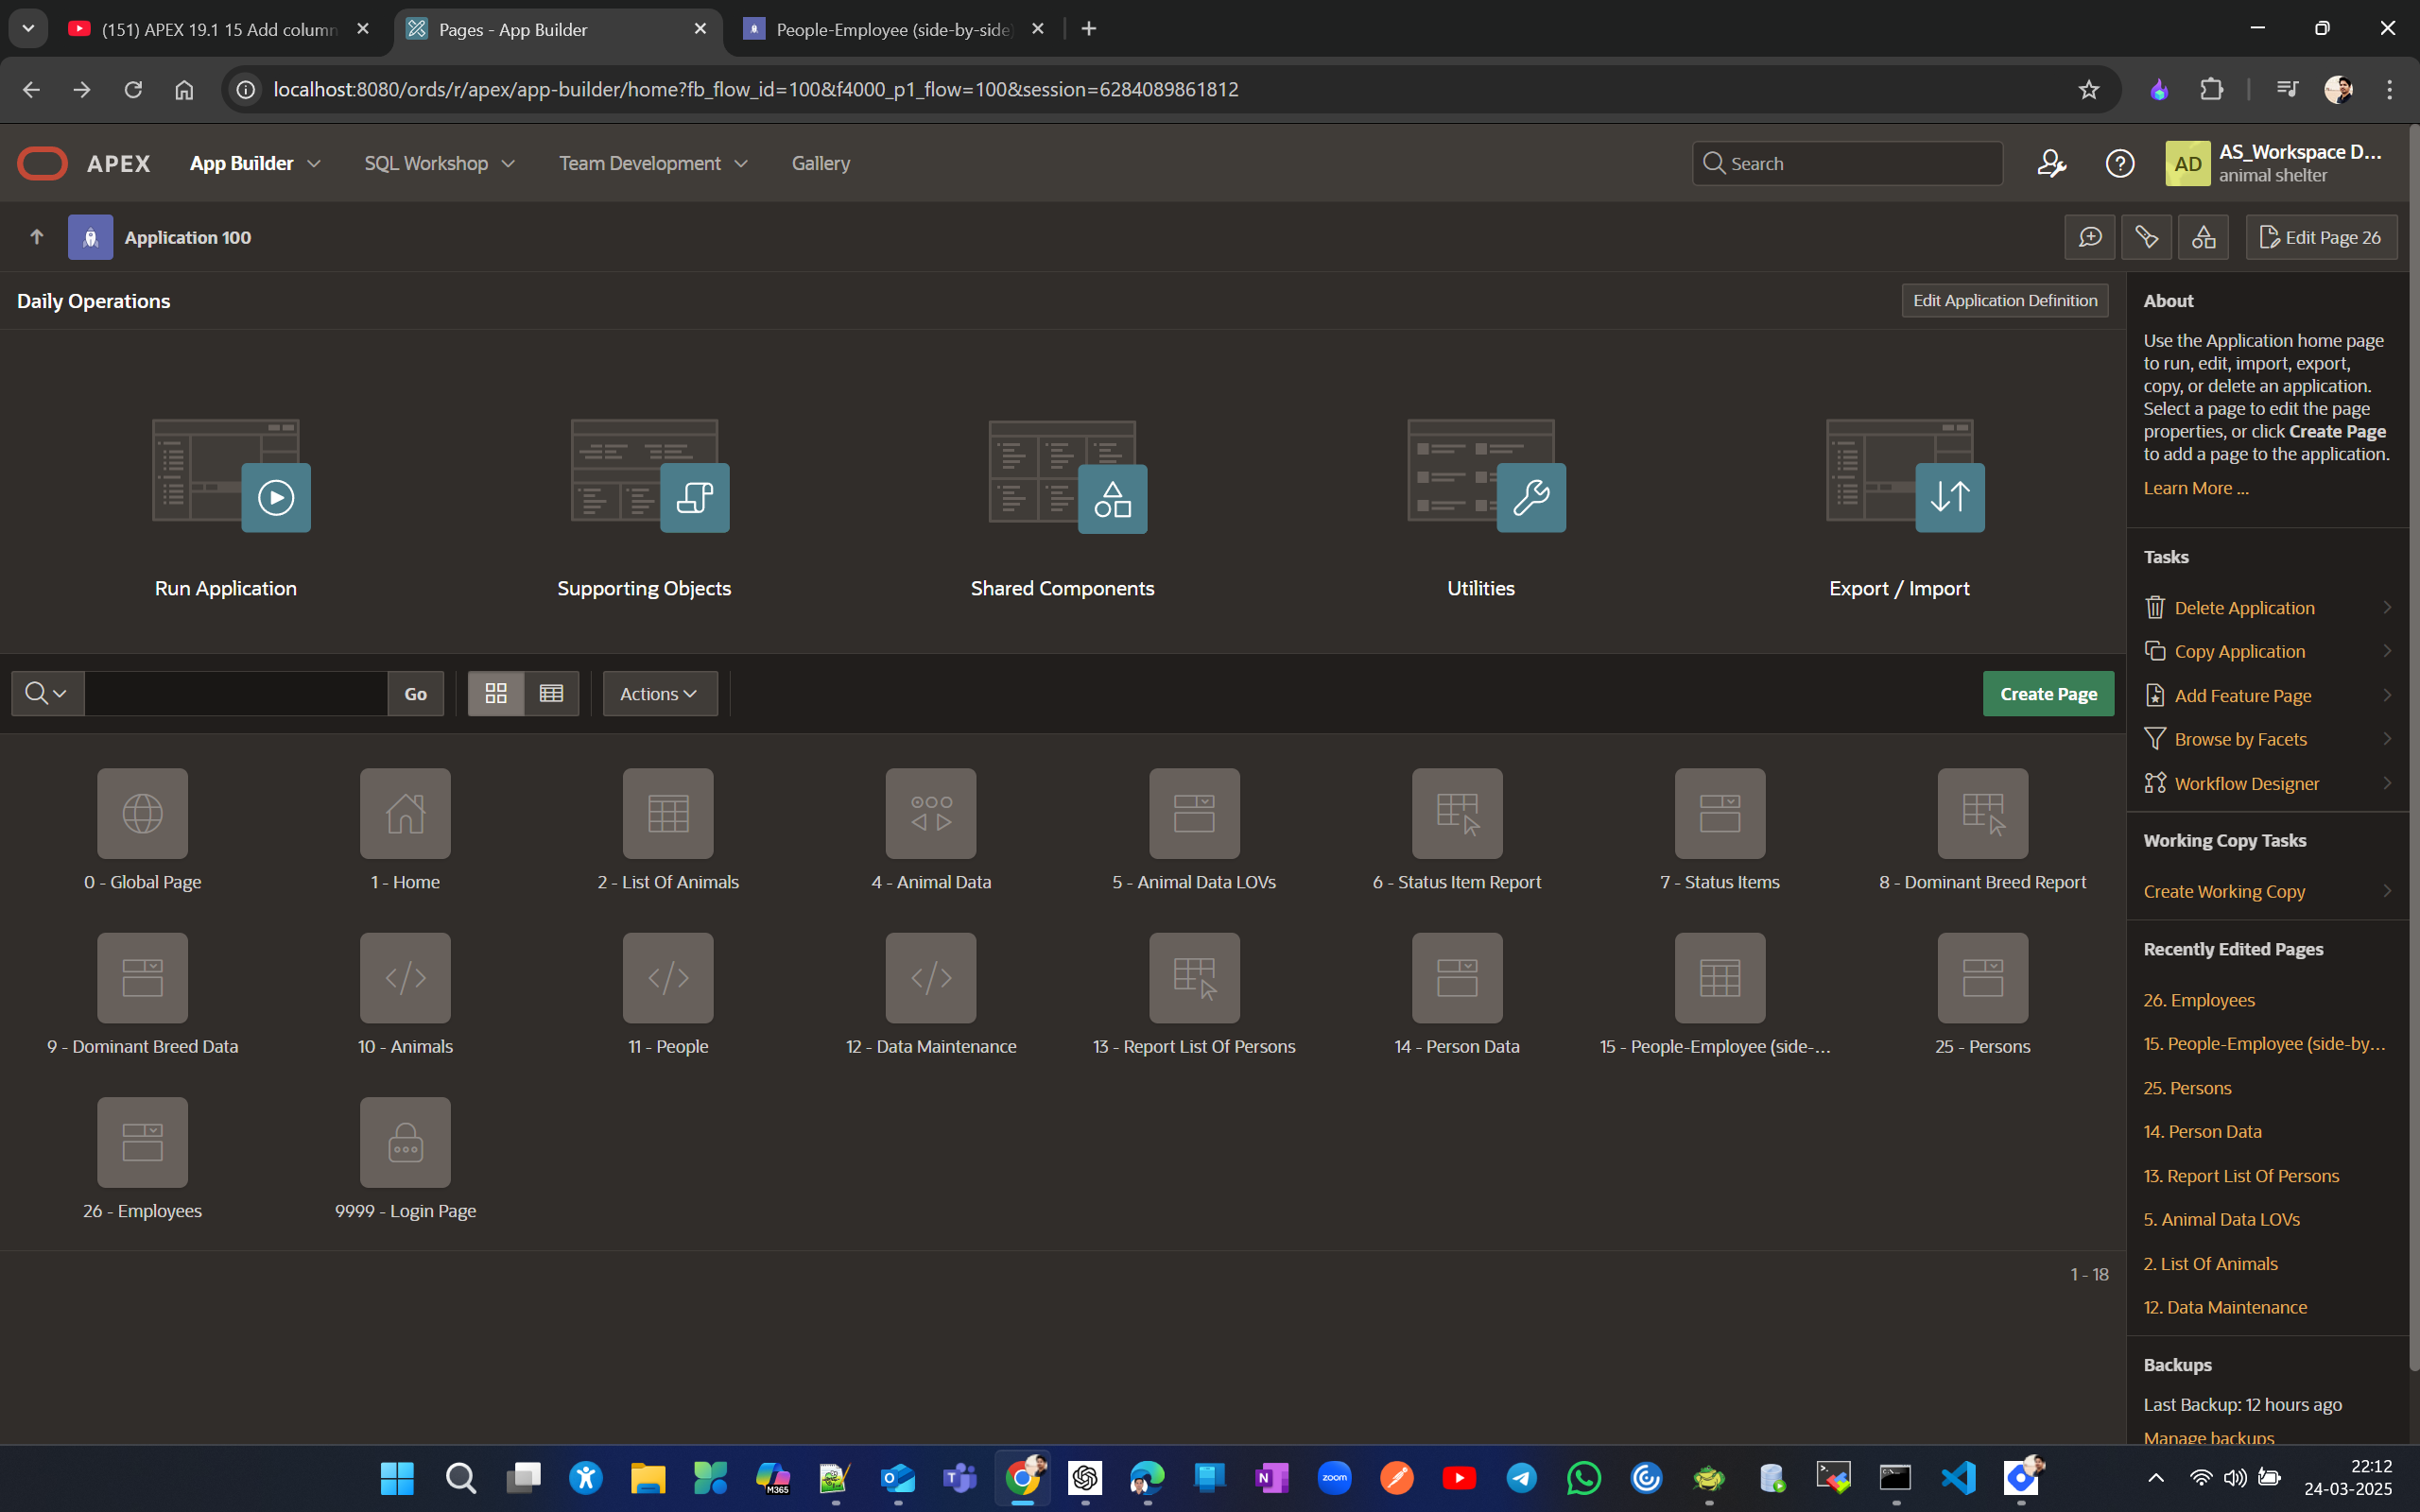
Now create 1 more master detail form type drill down. lets number it 16.
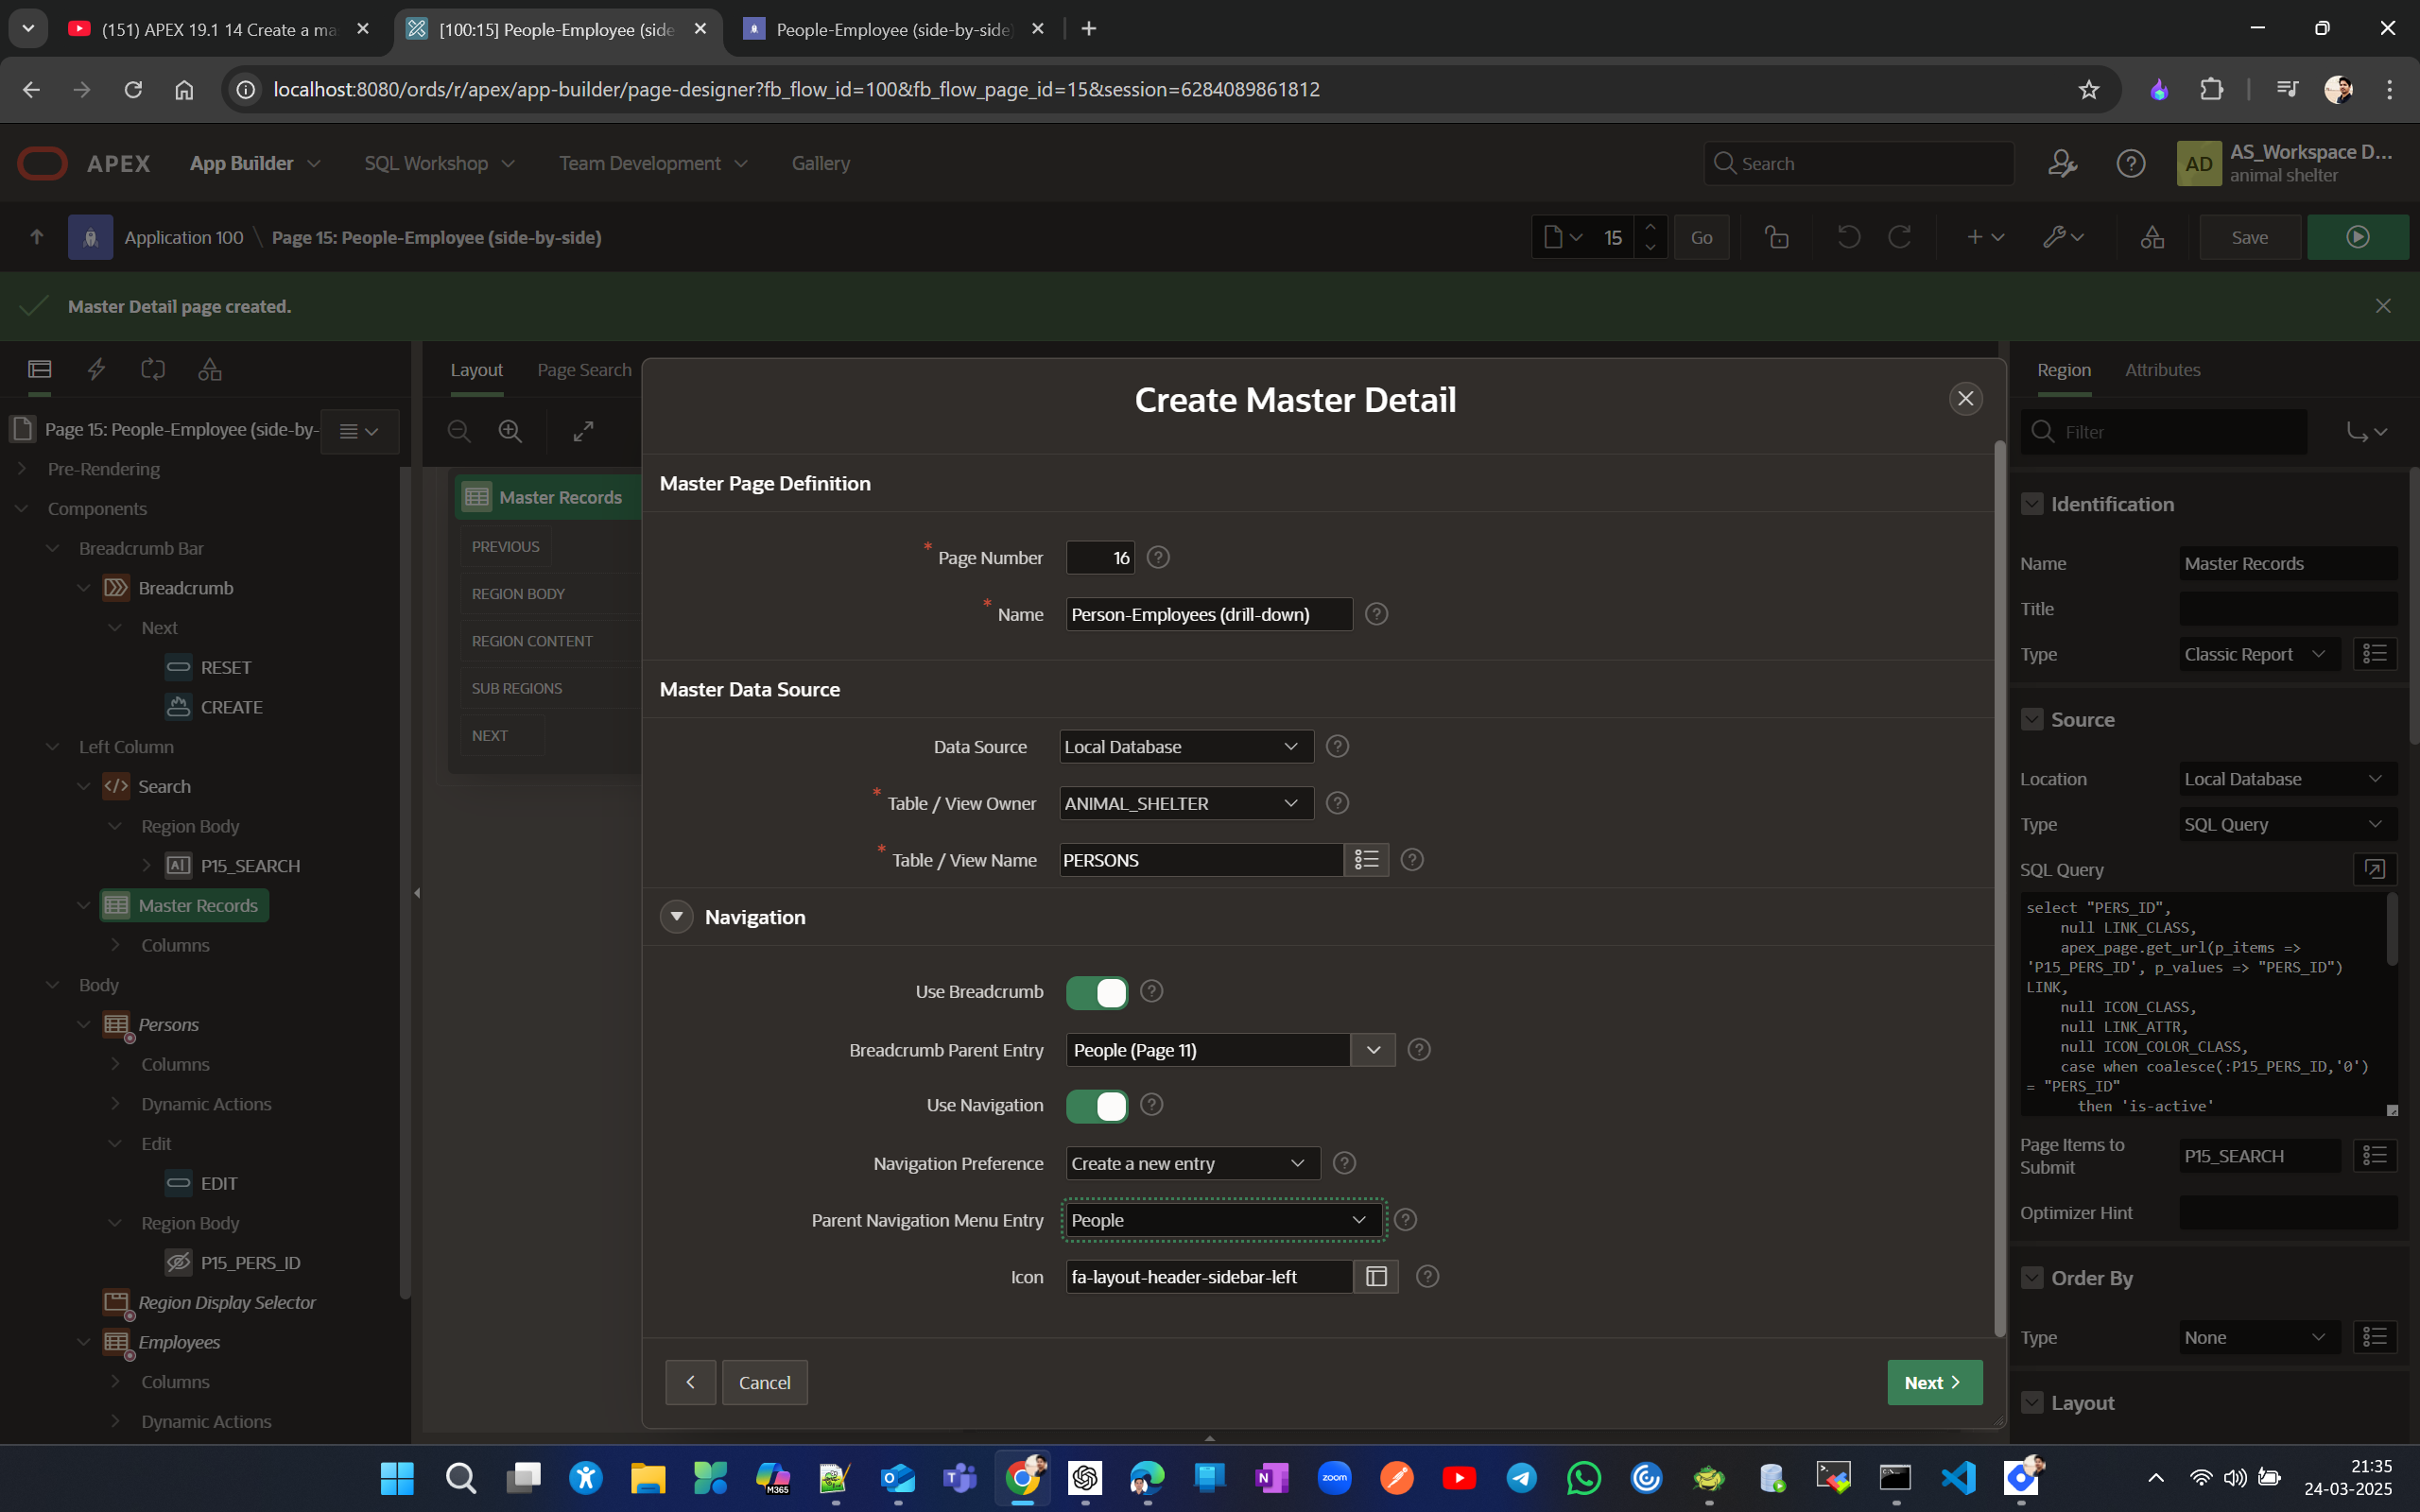
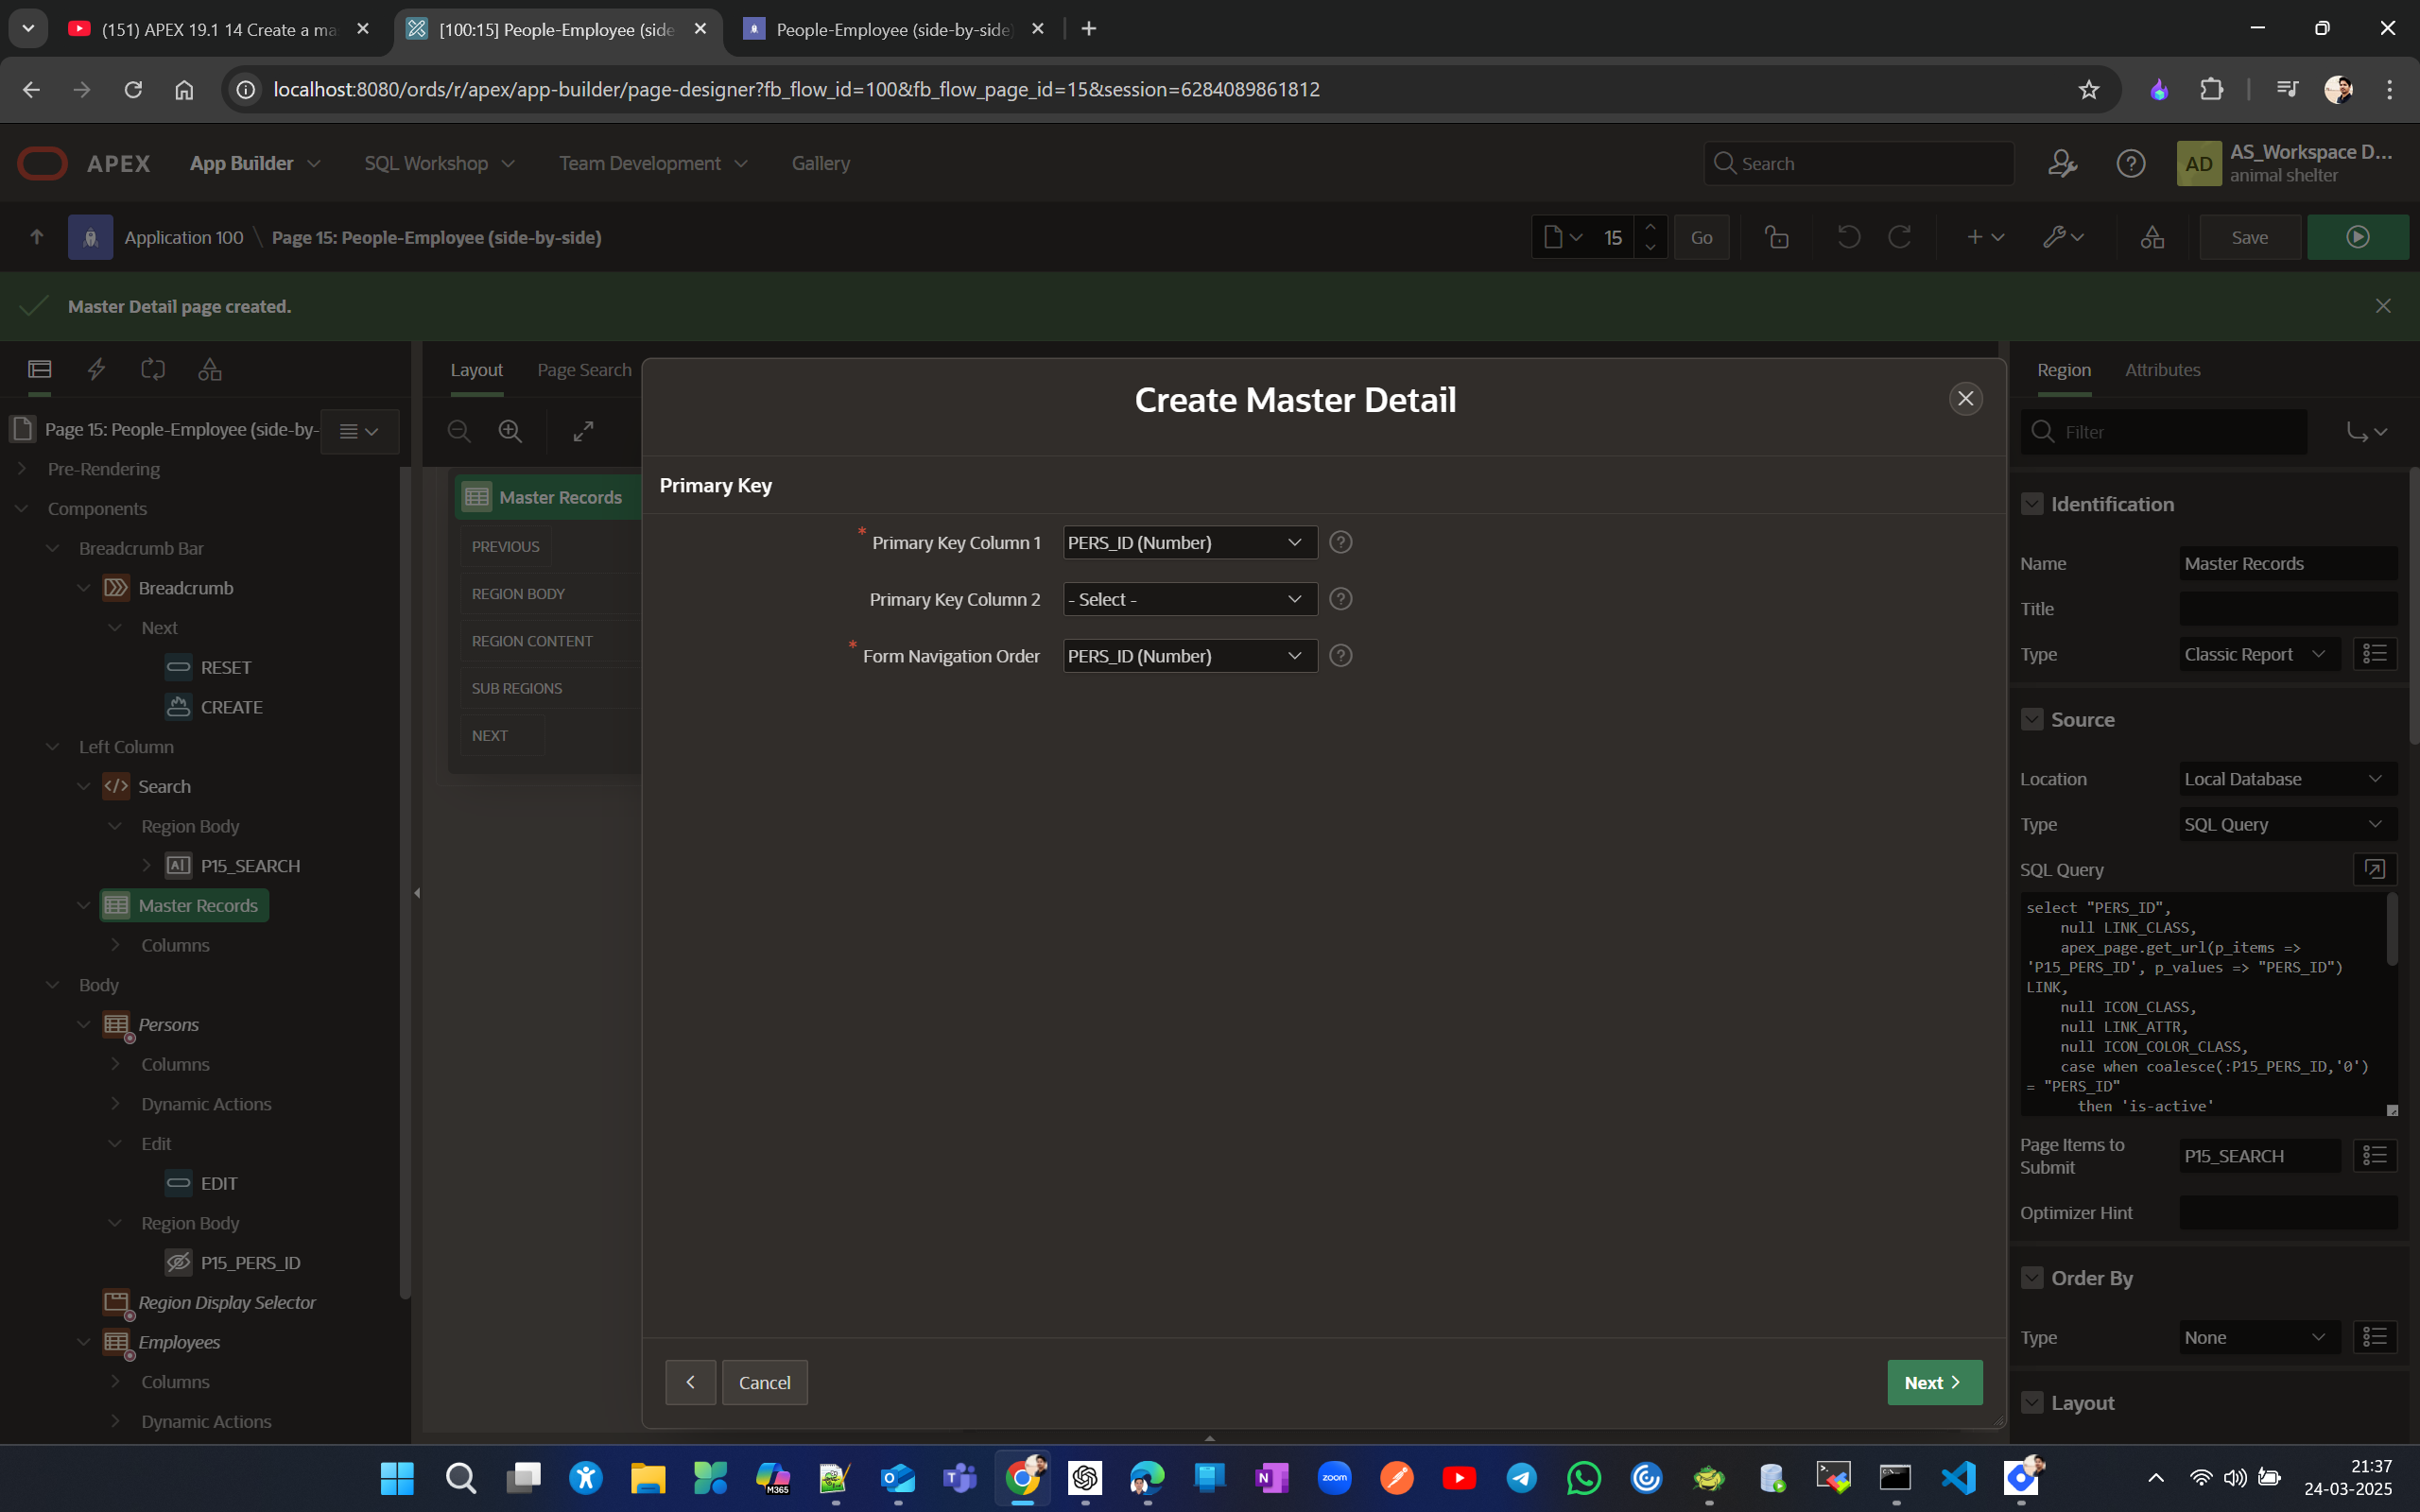
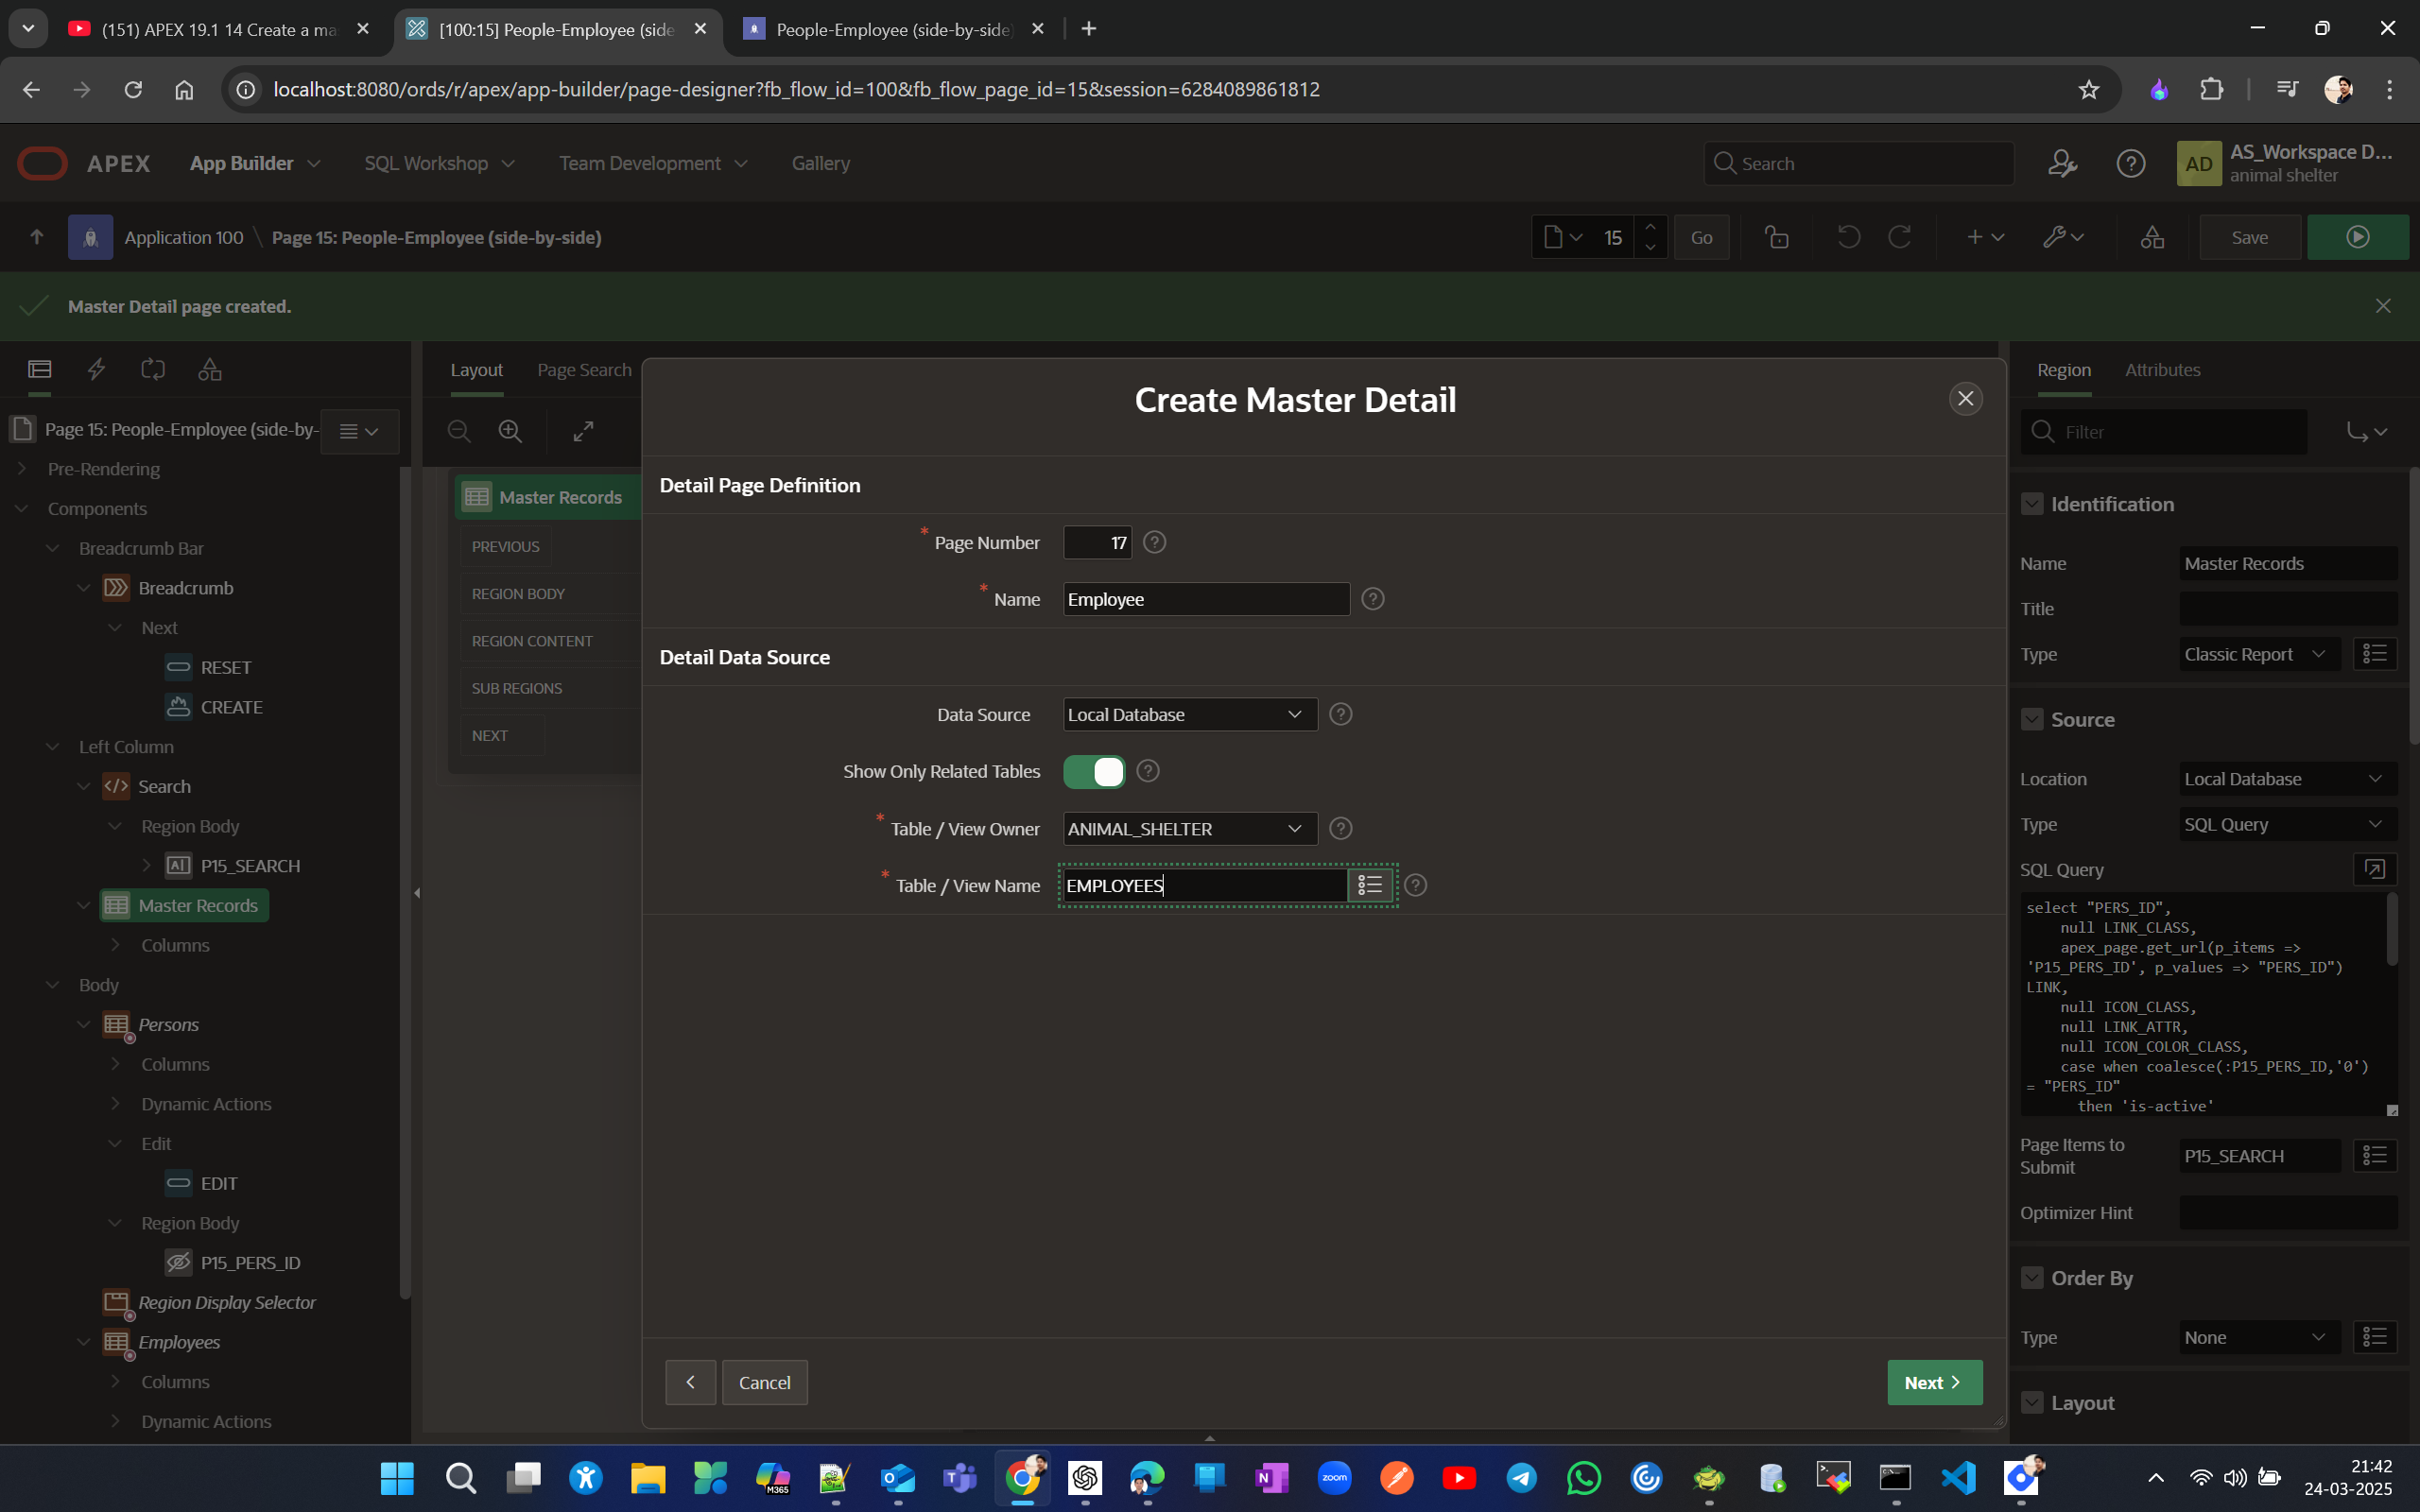
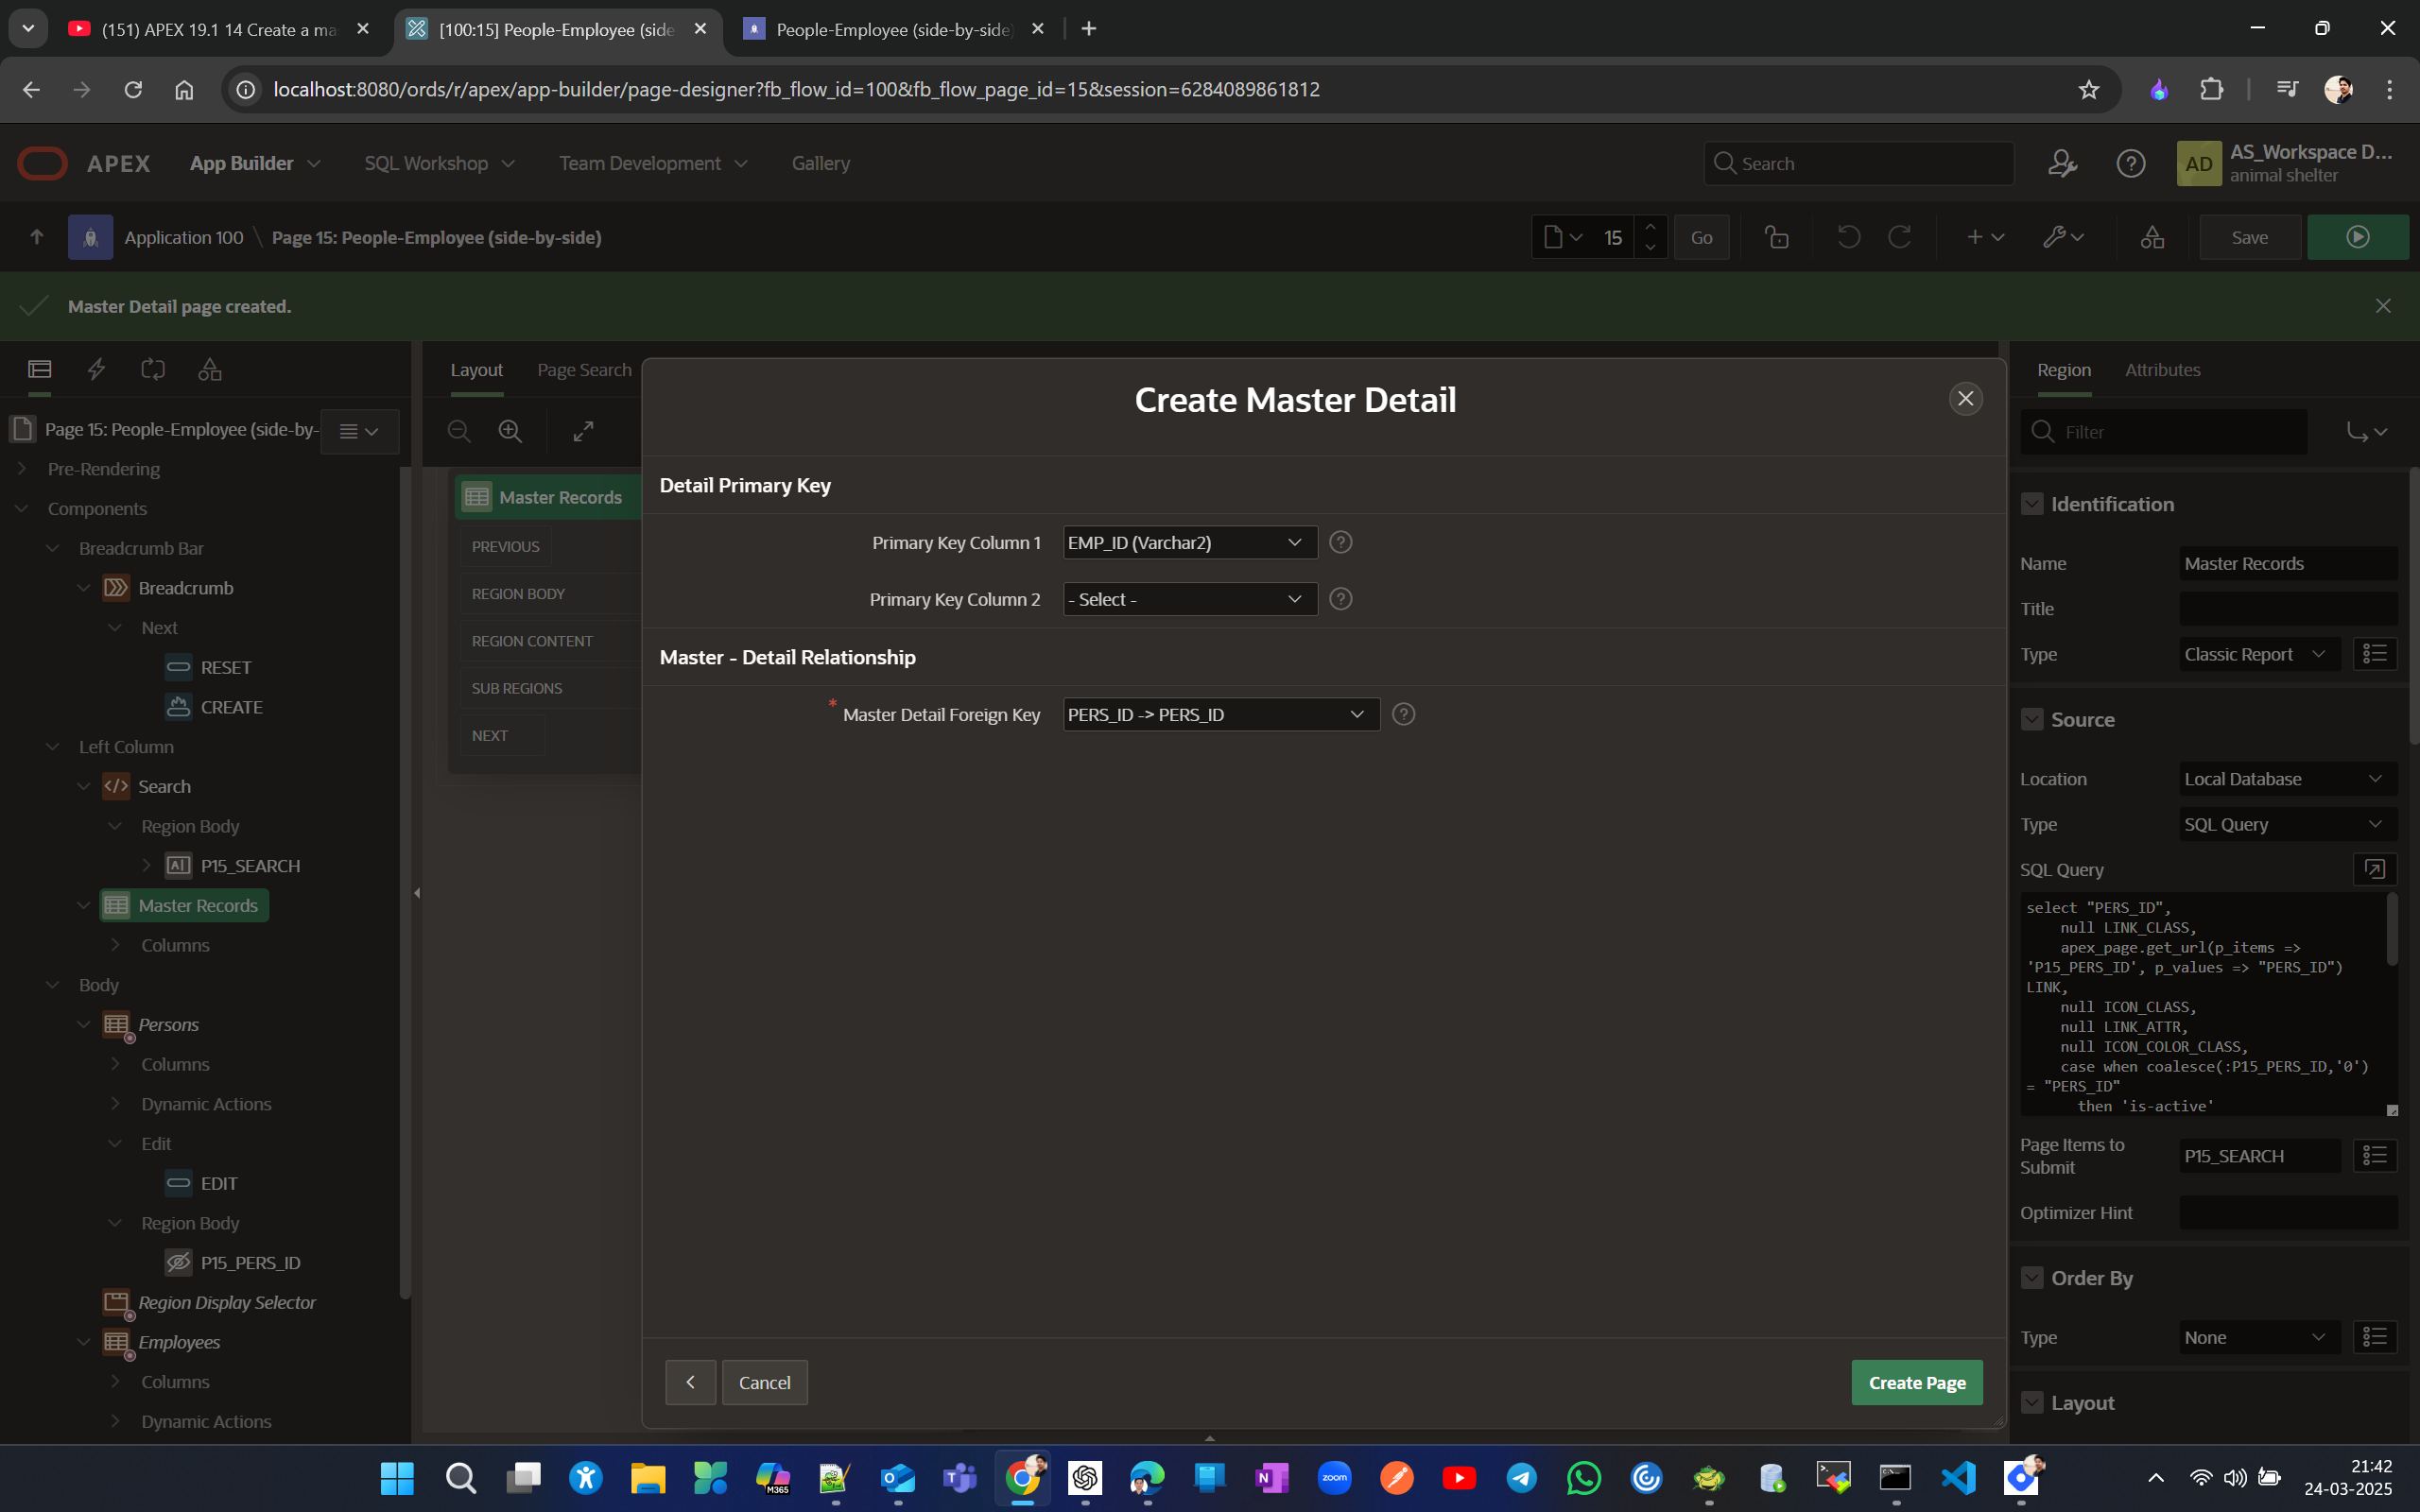
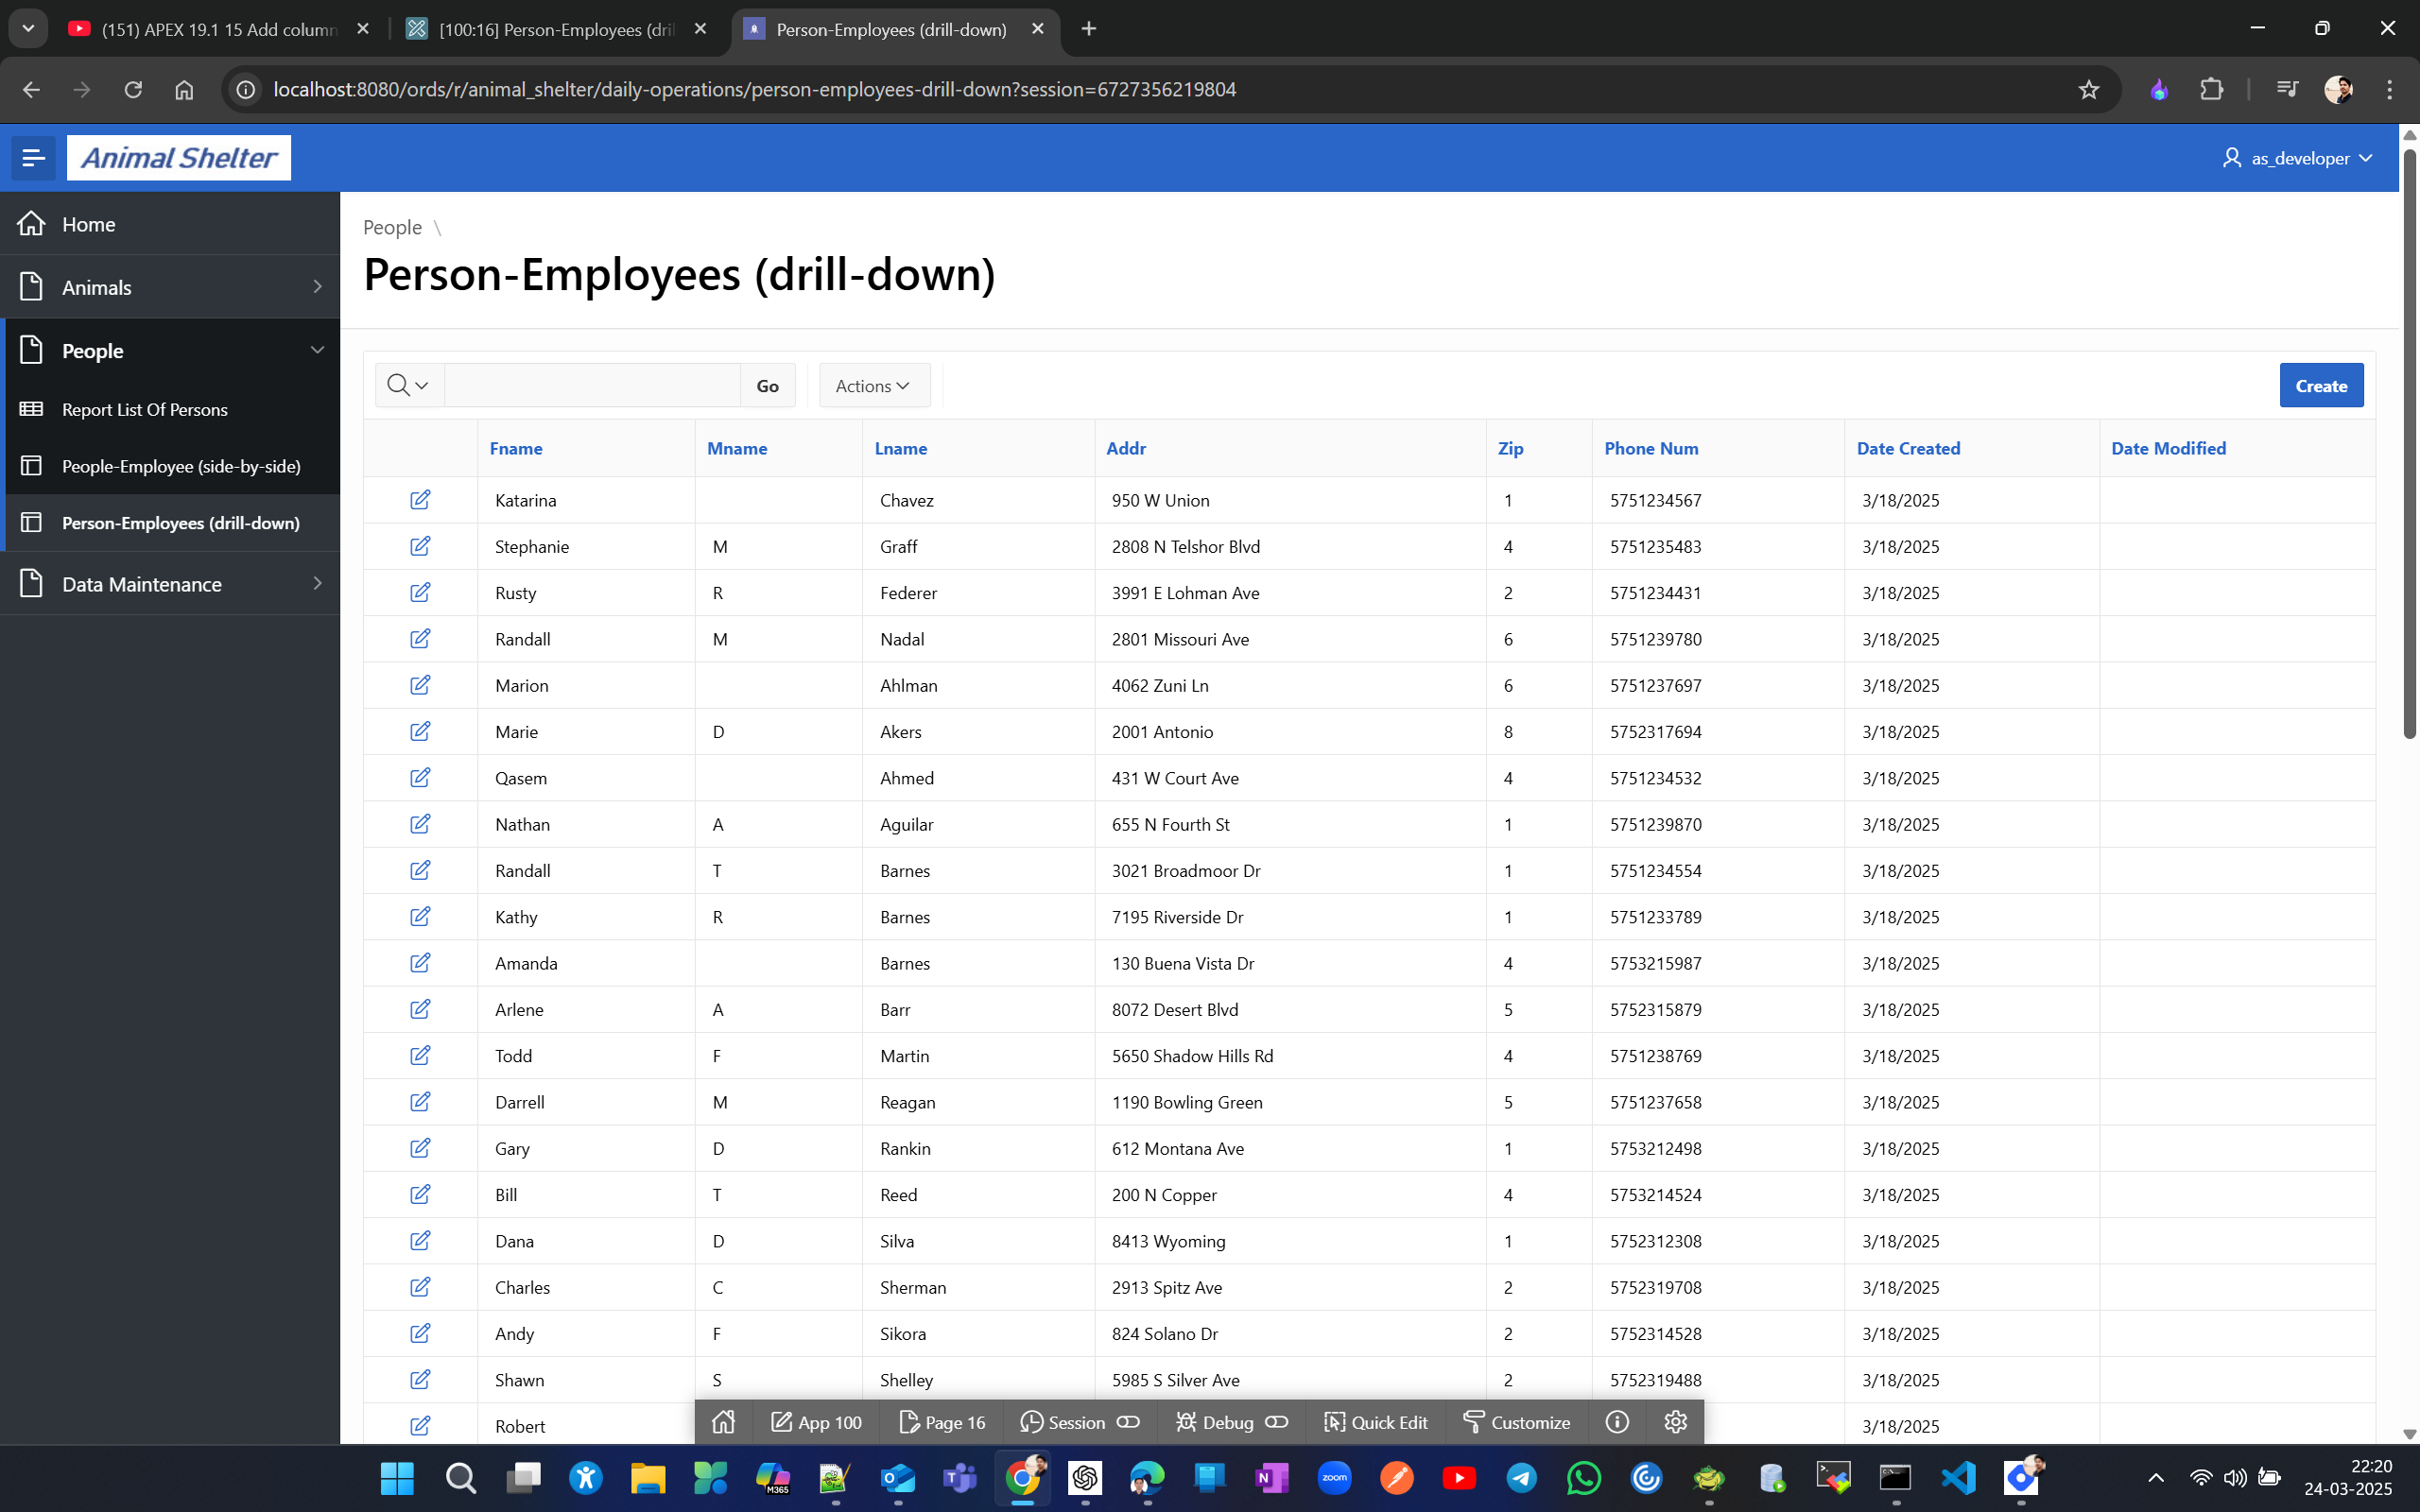
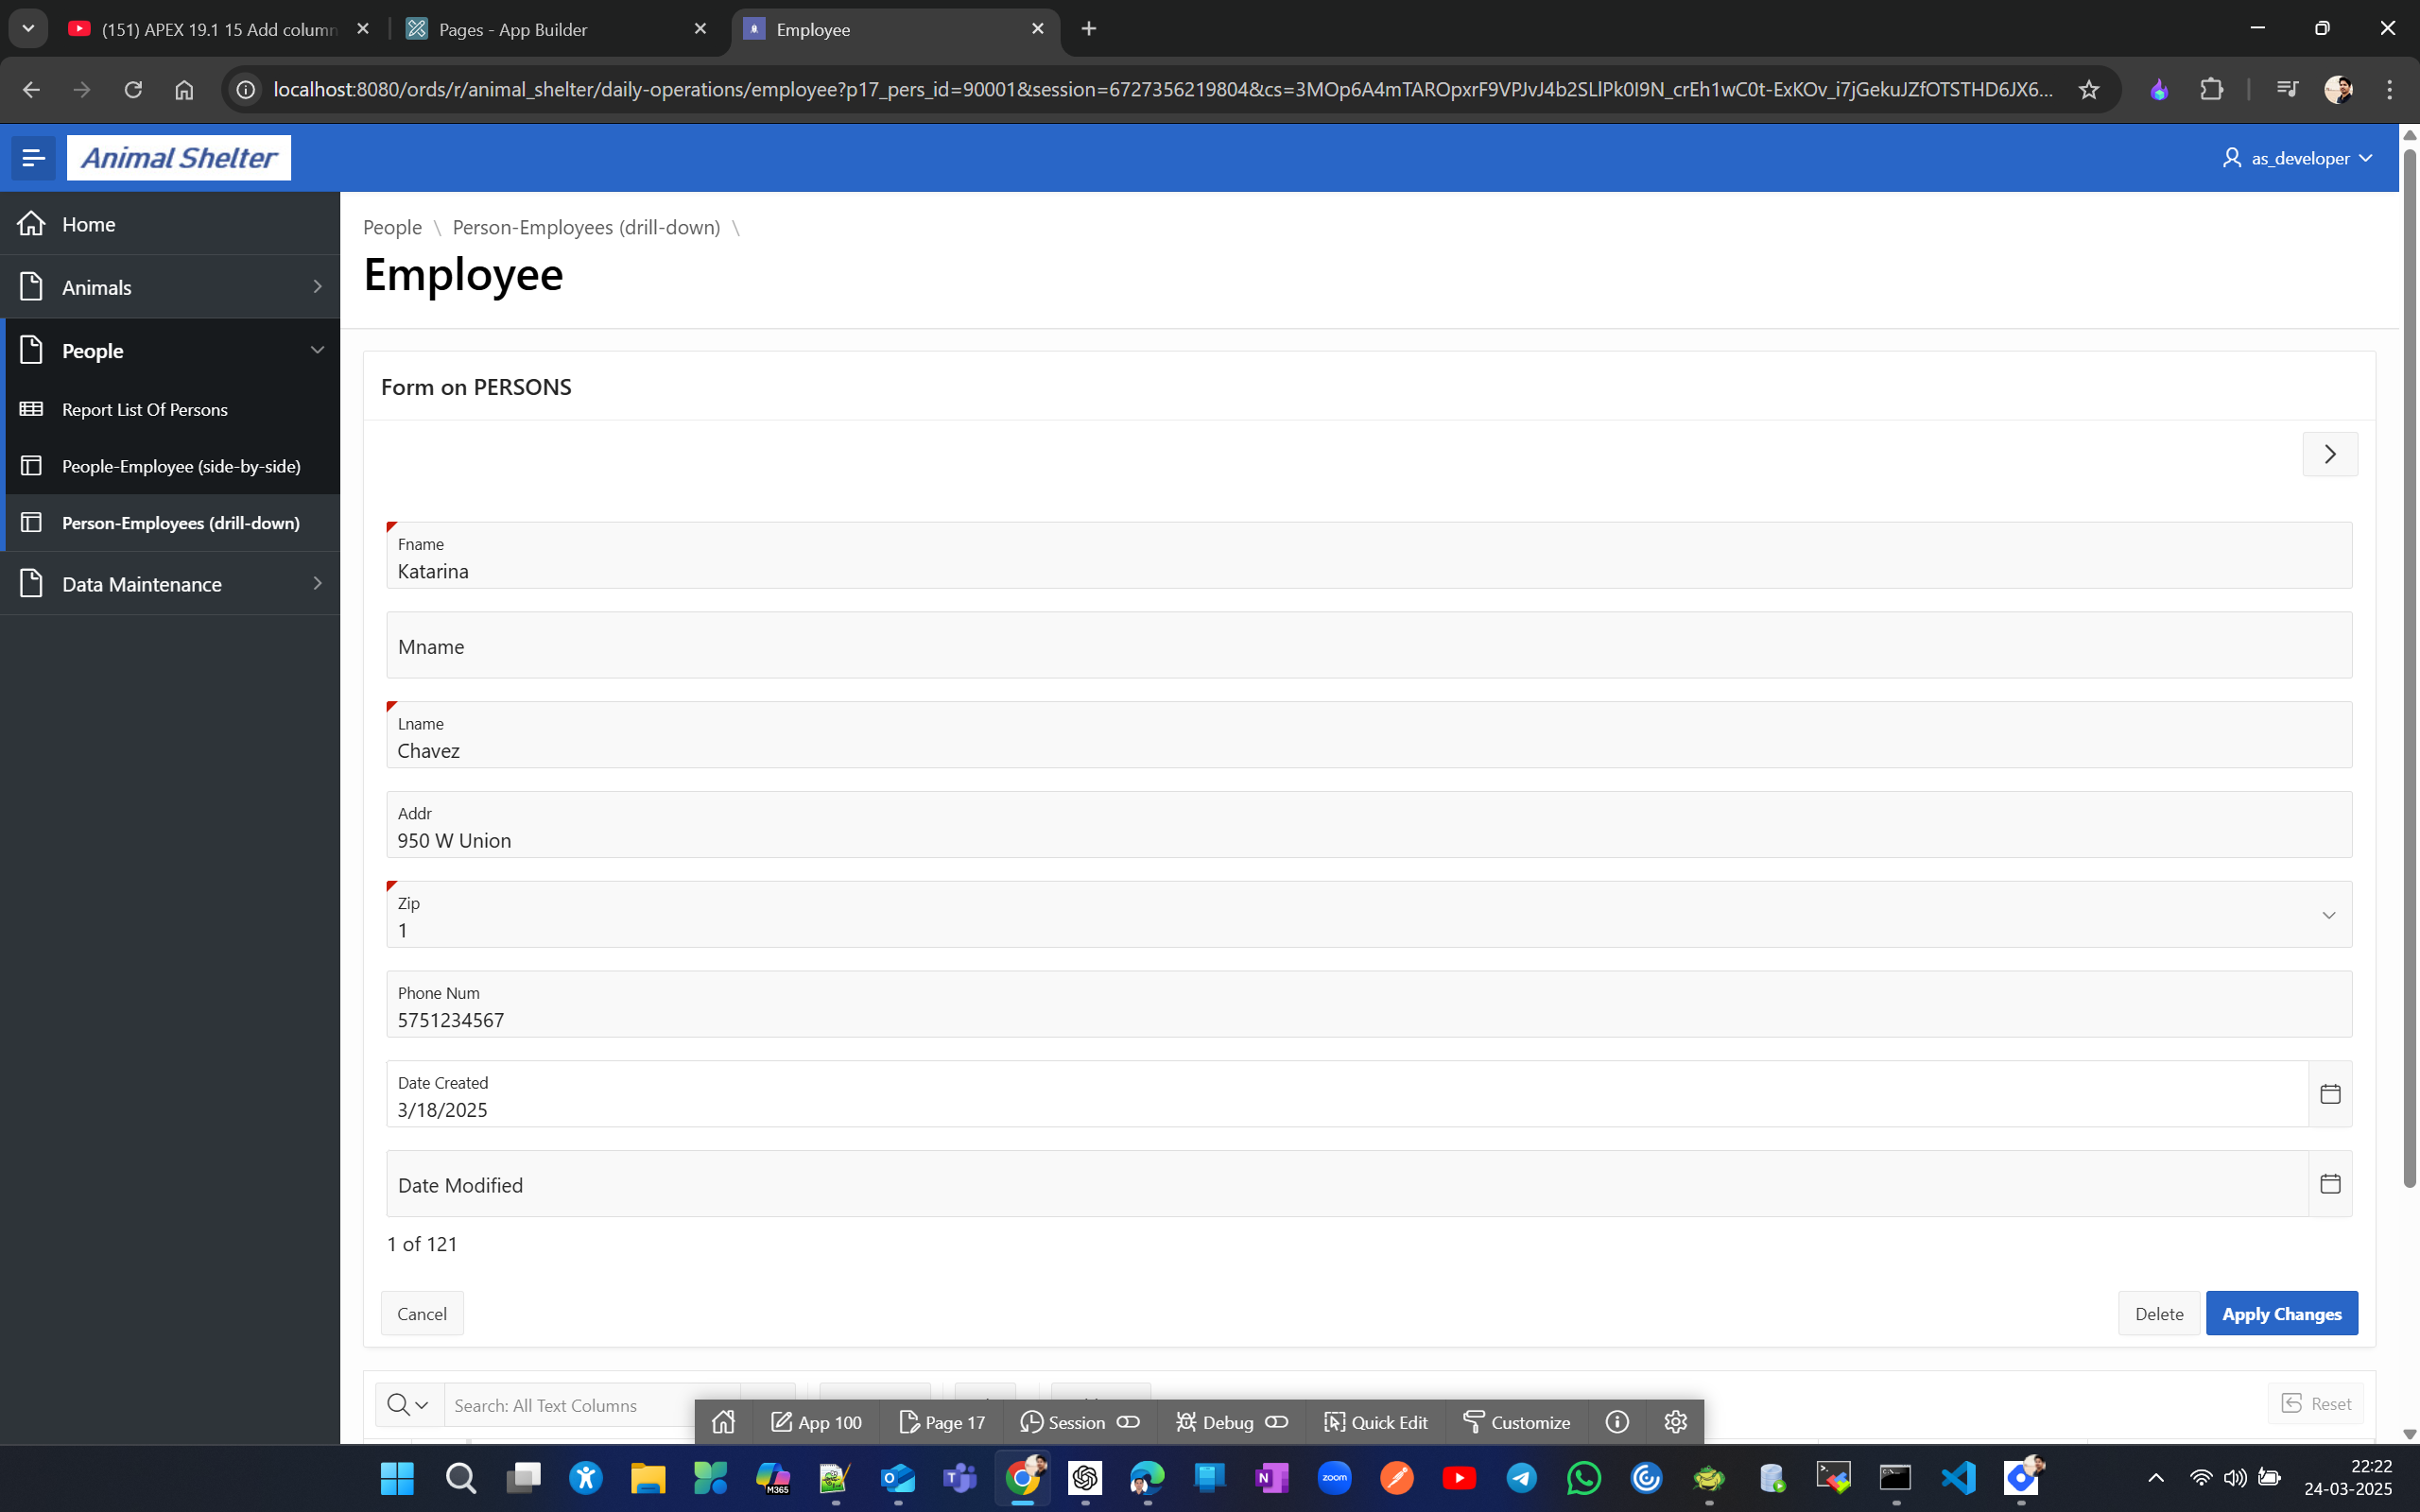
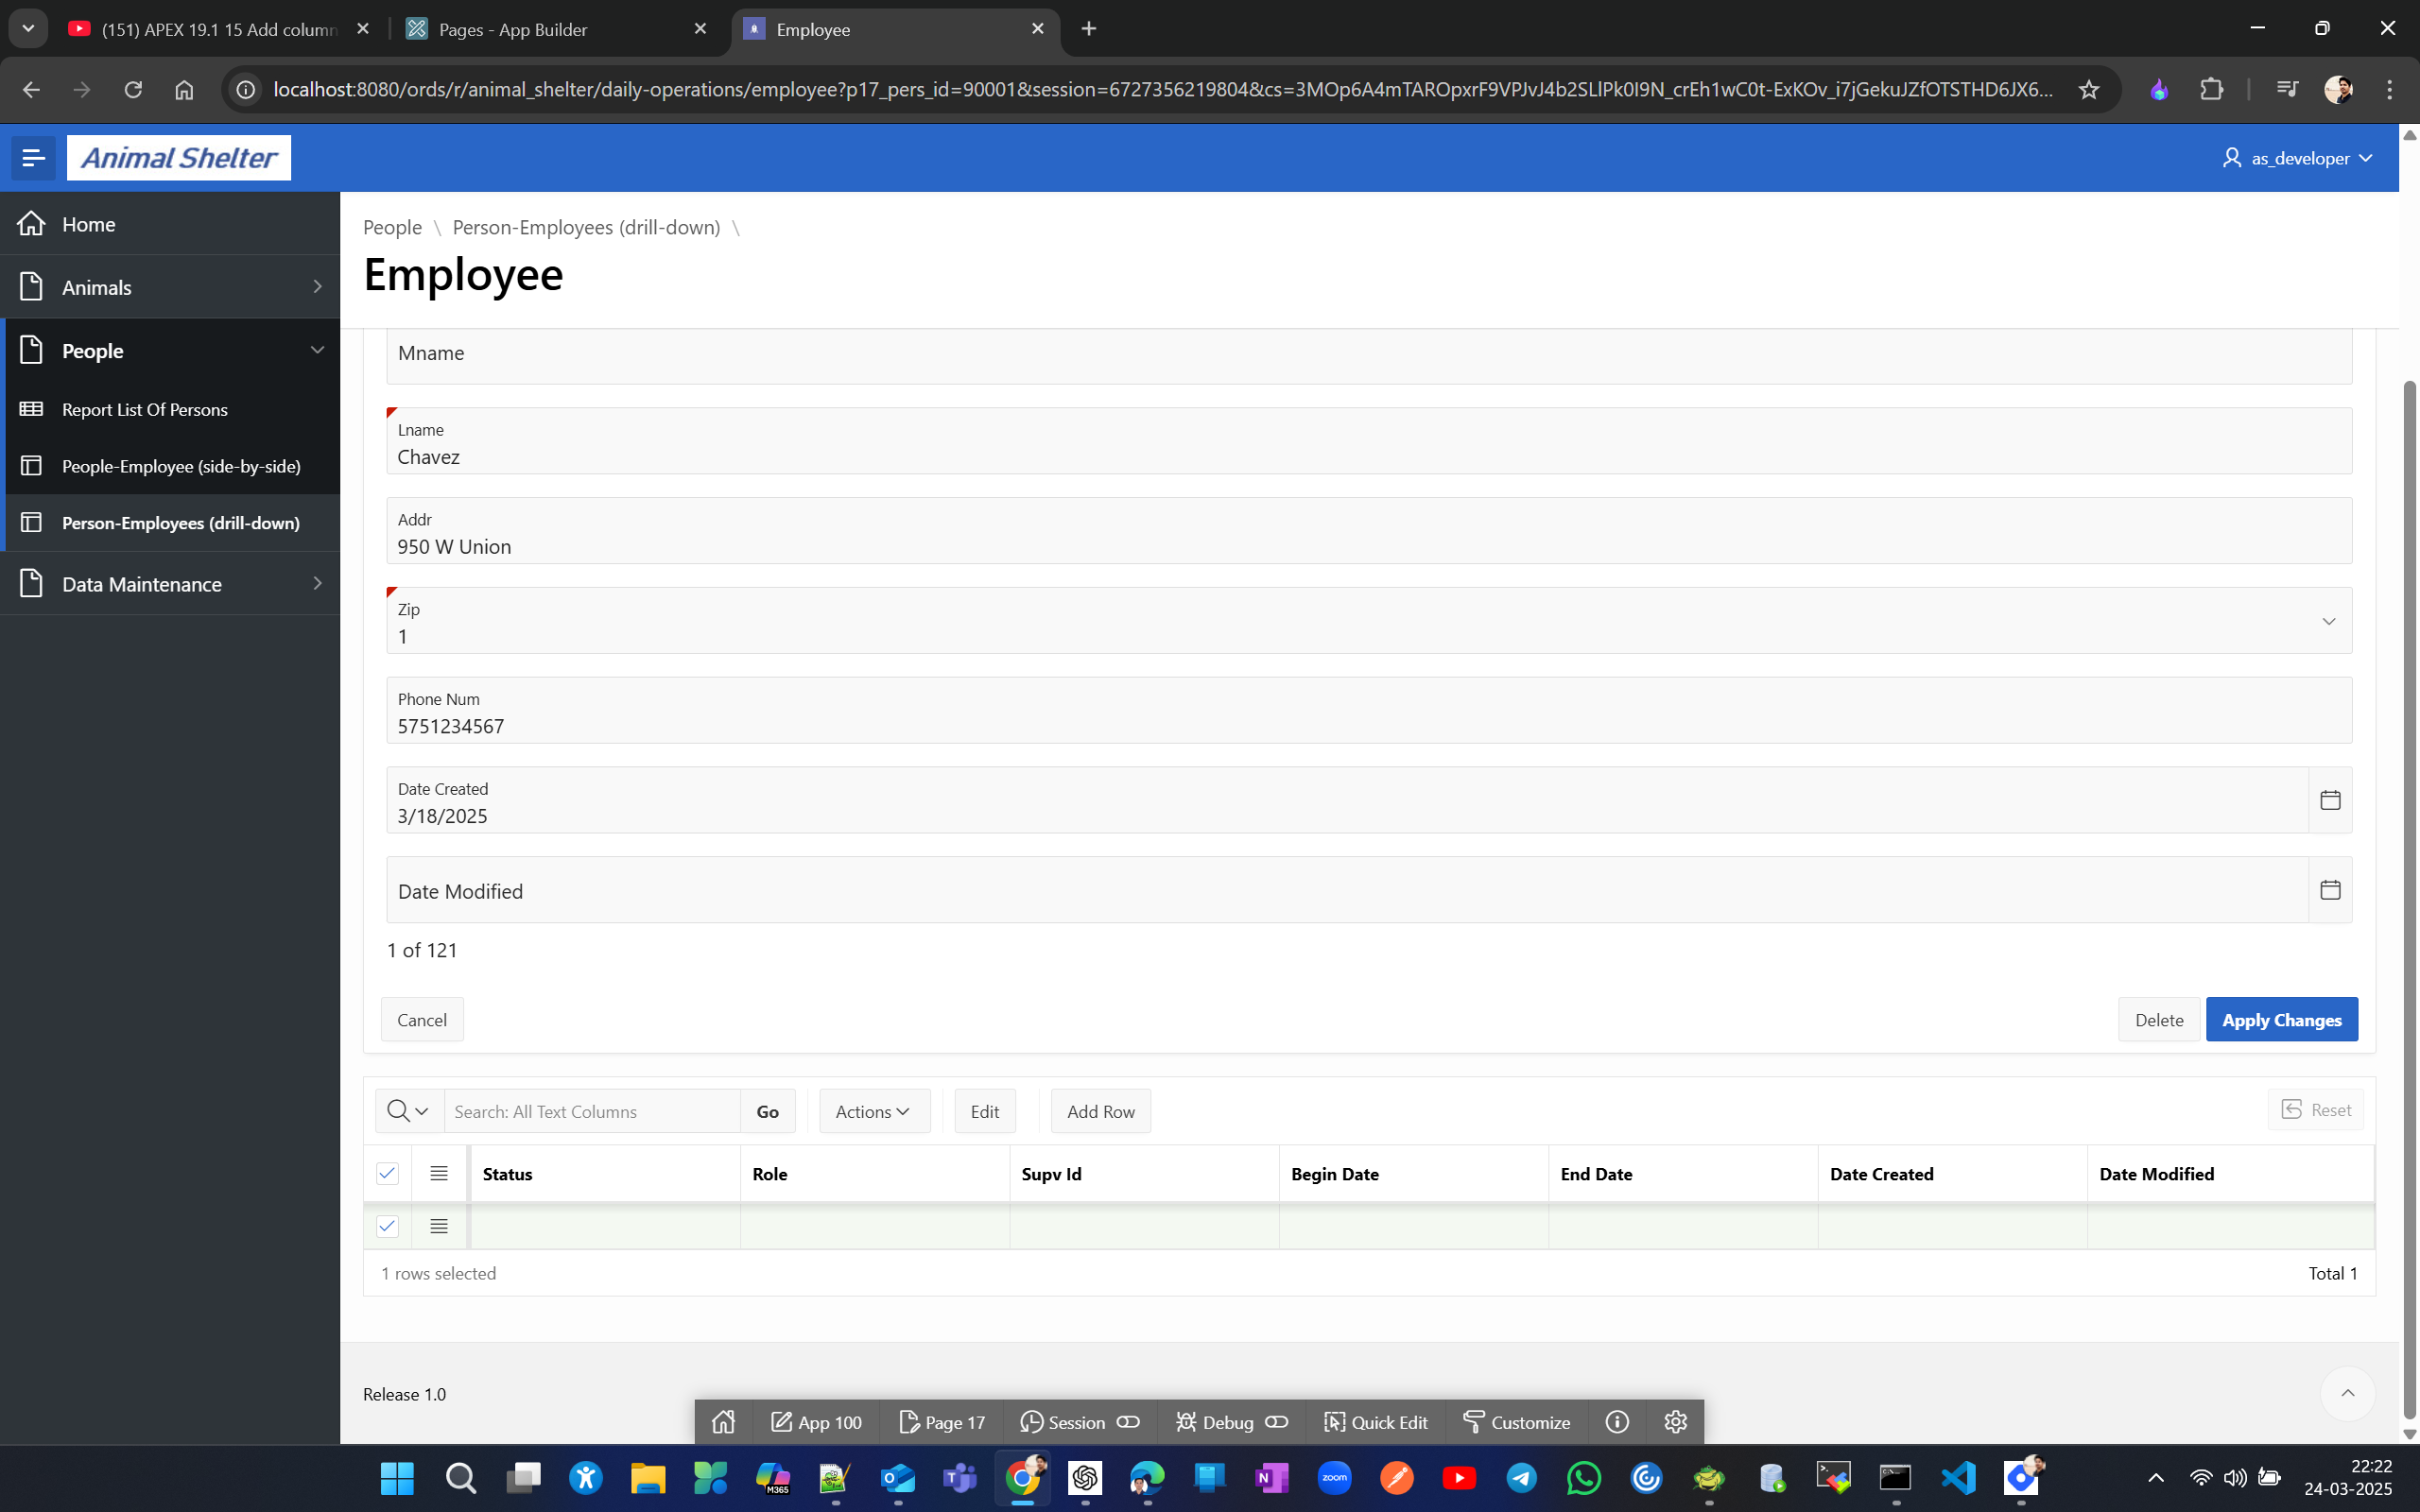
Lets make ID columns visible in the master-detail as well.
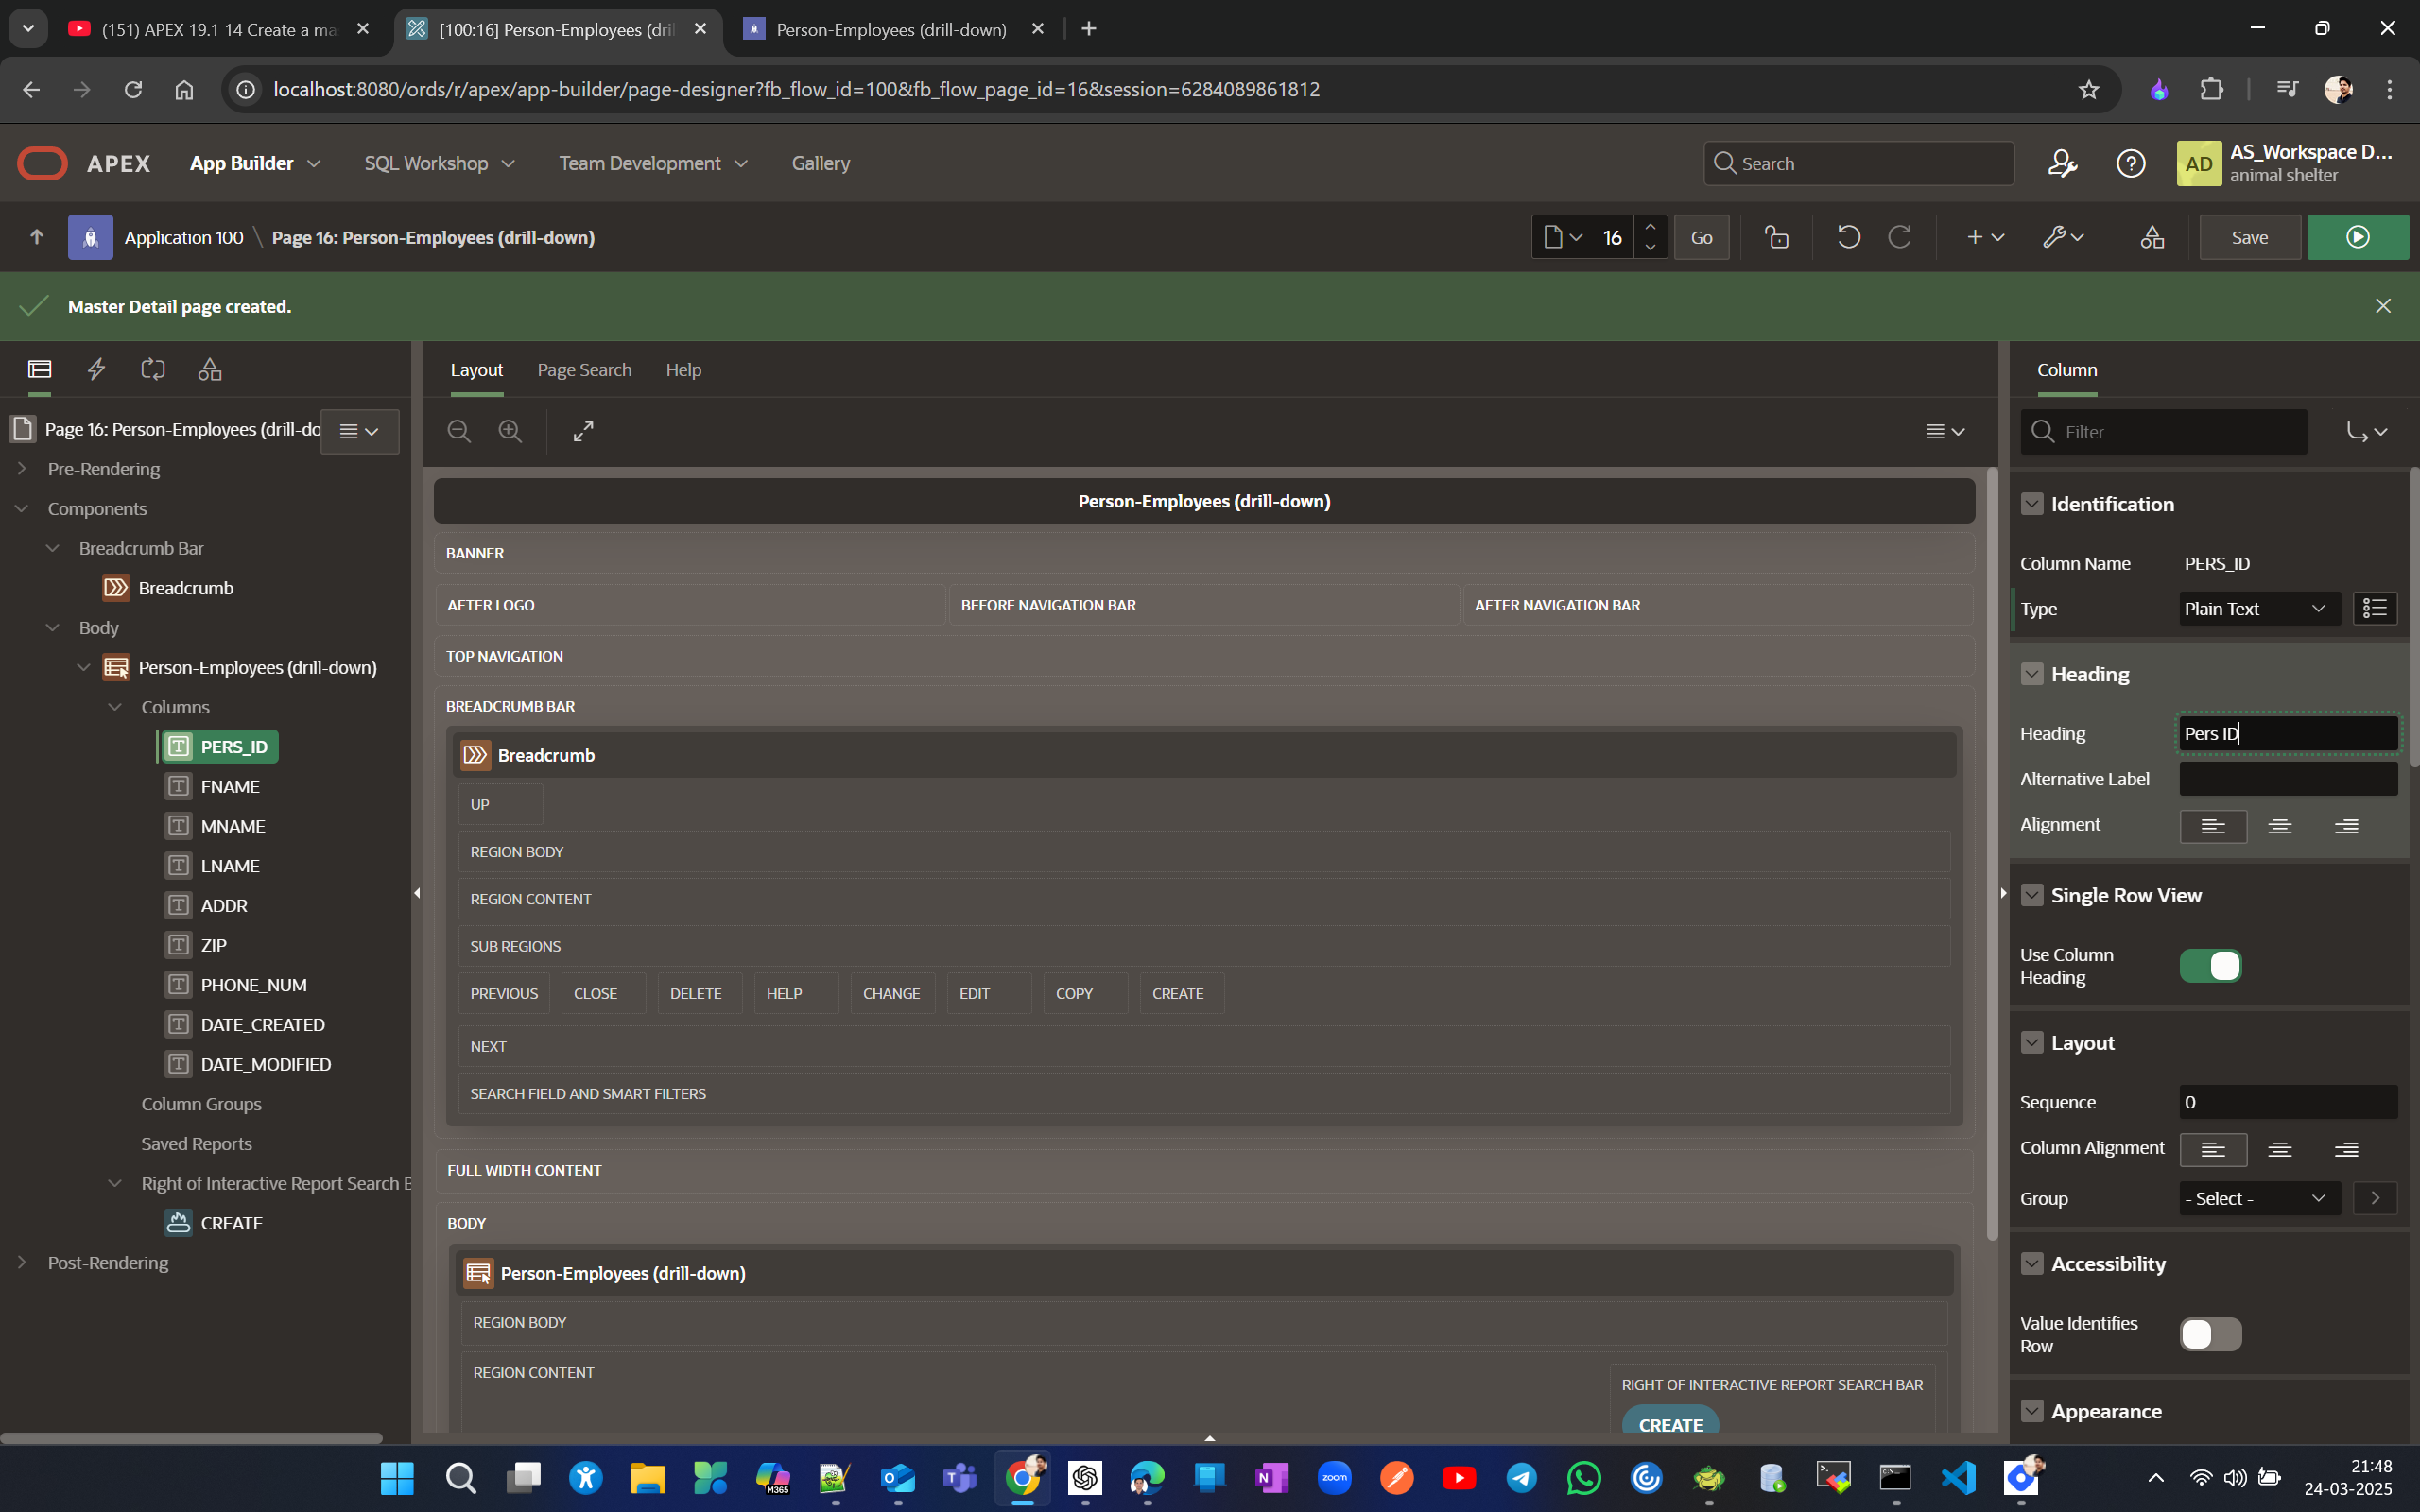
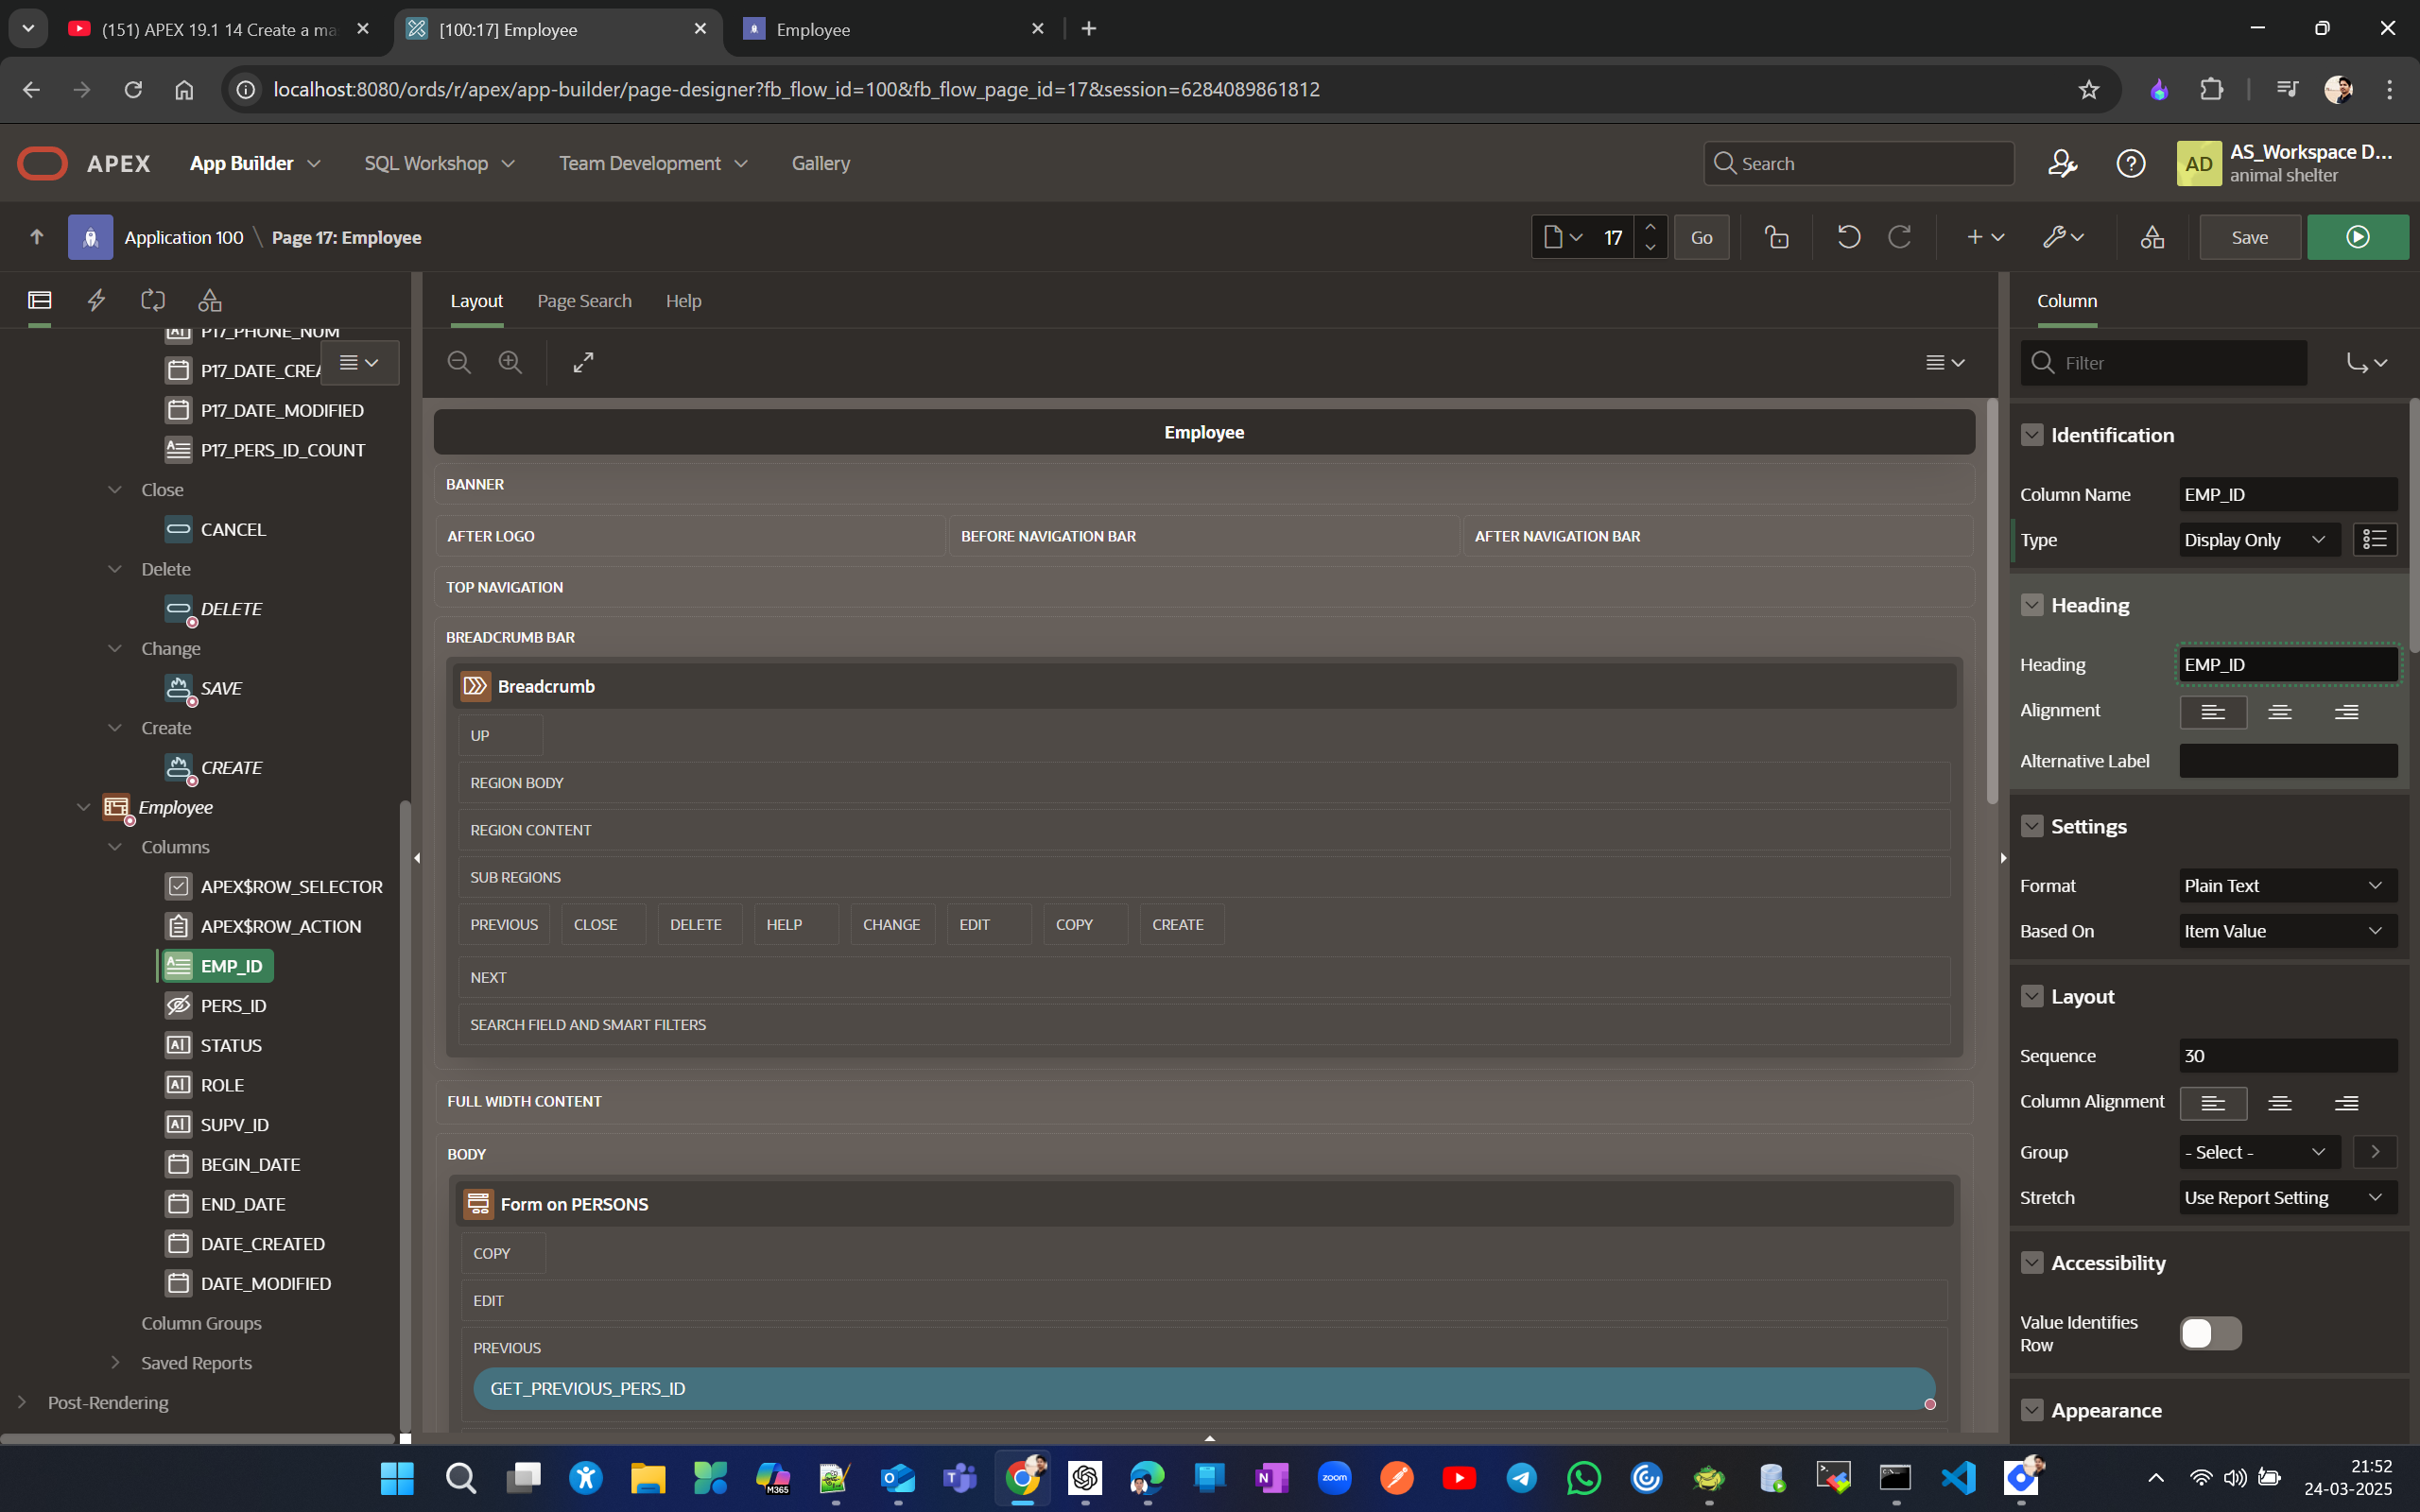

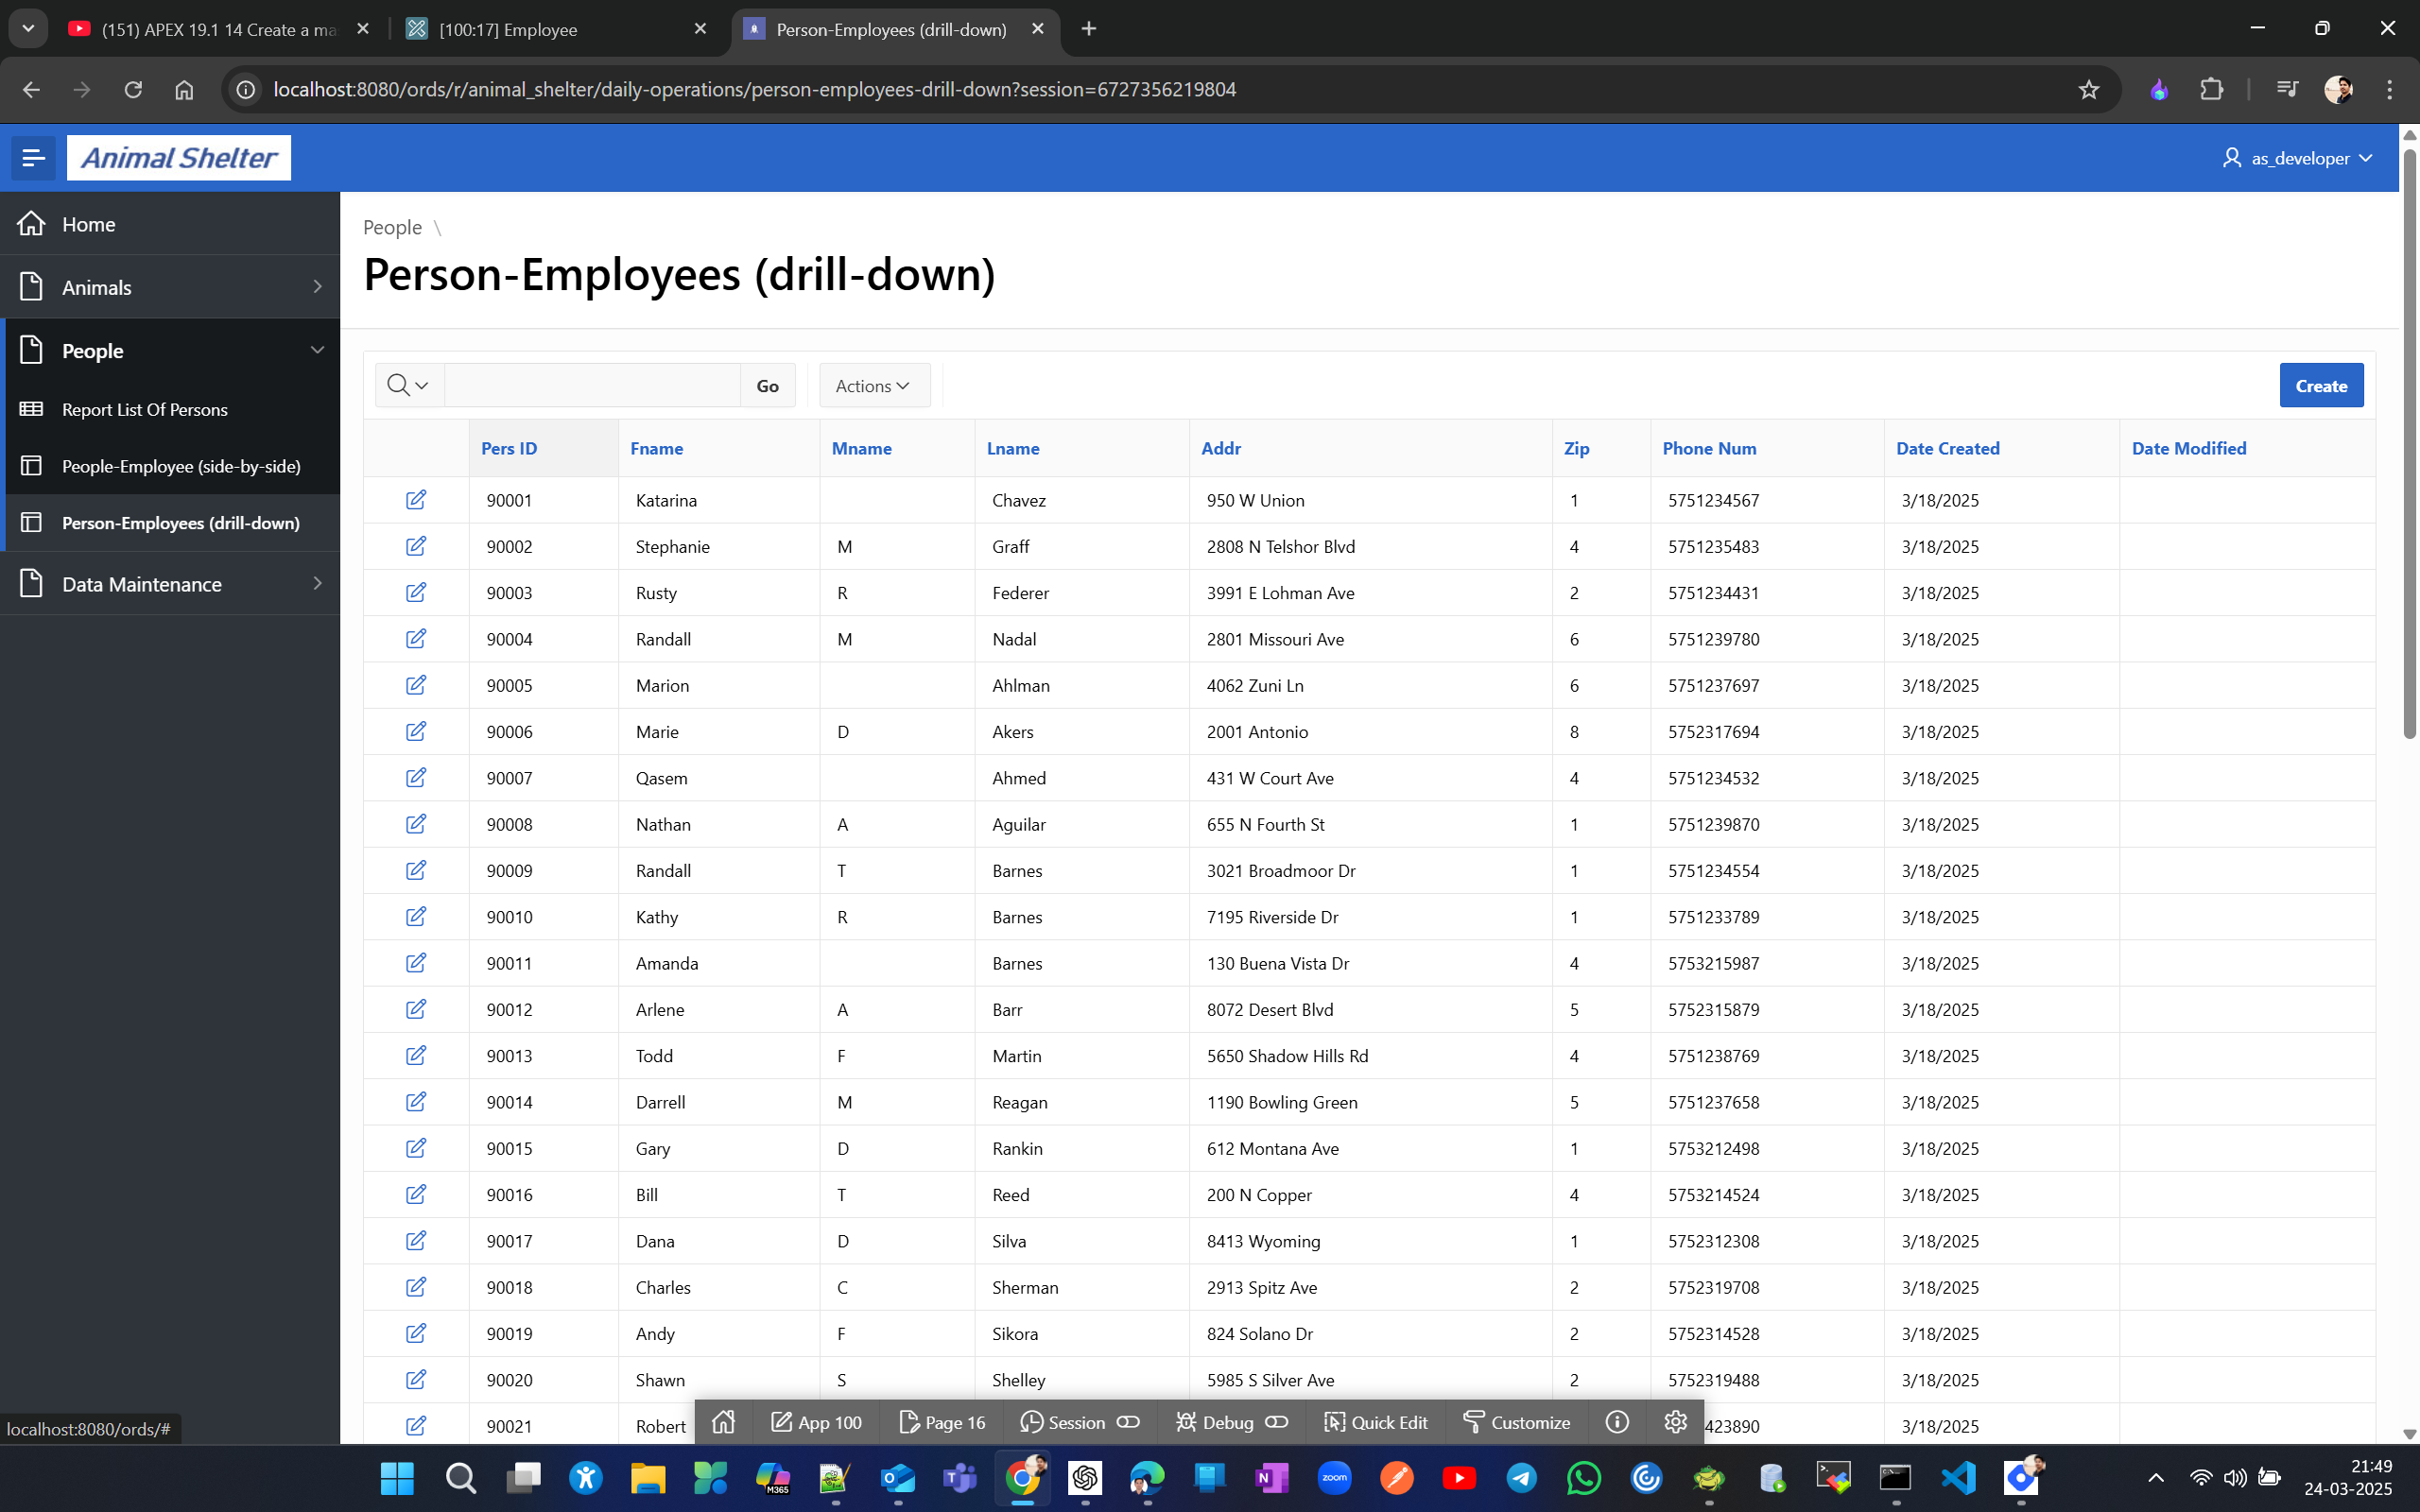
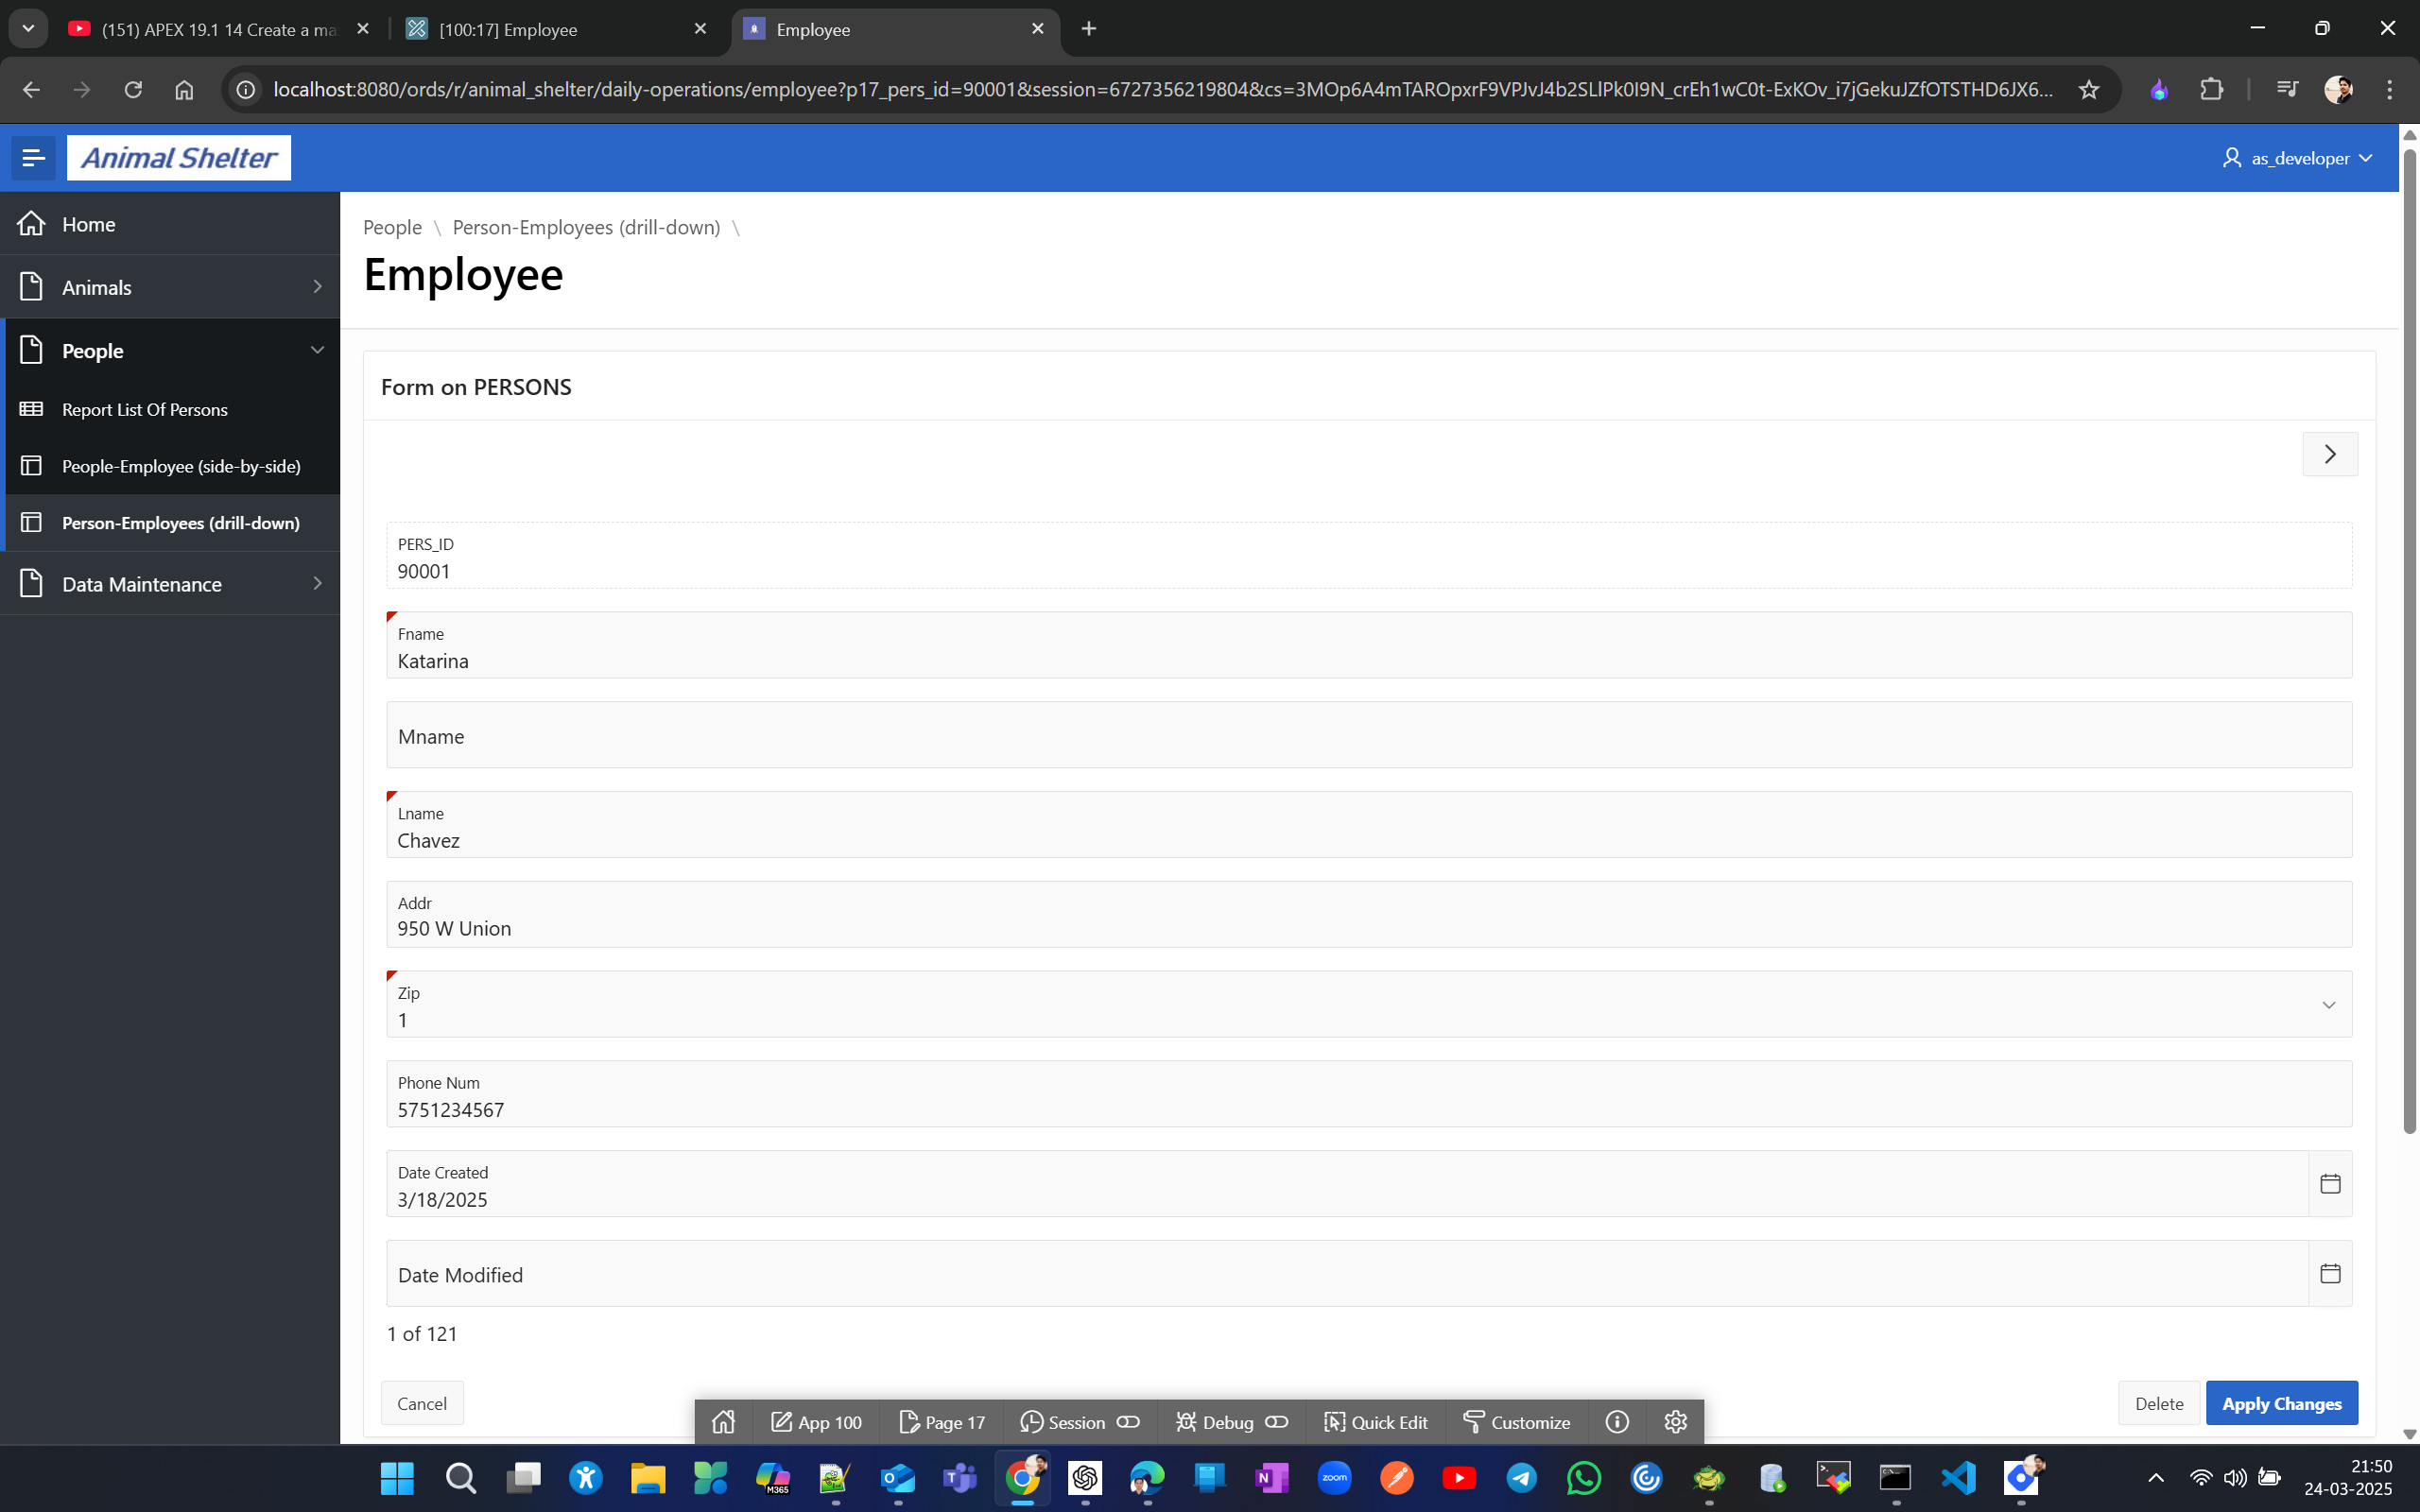
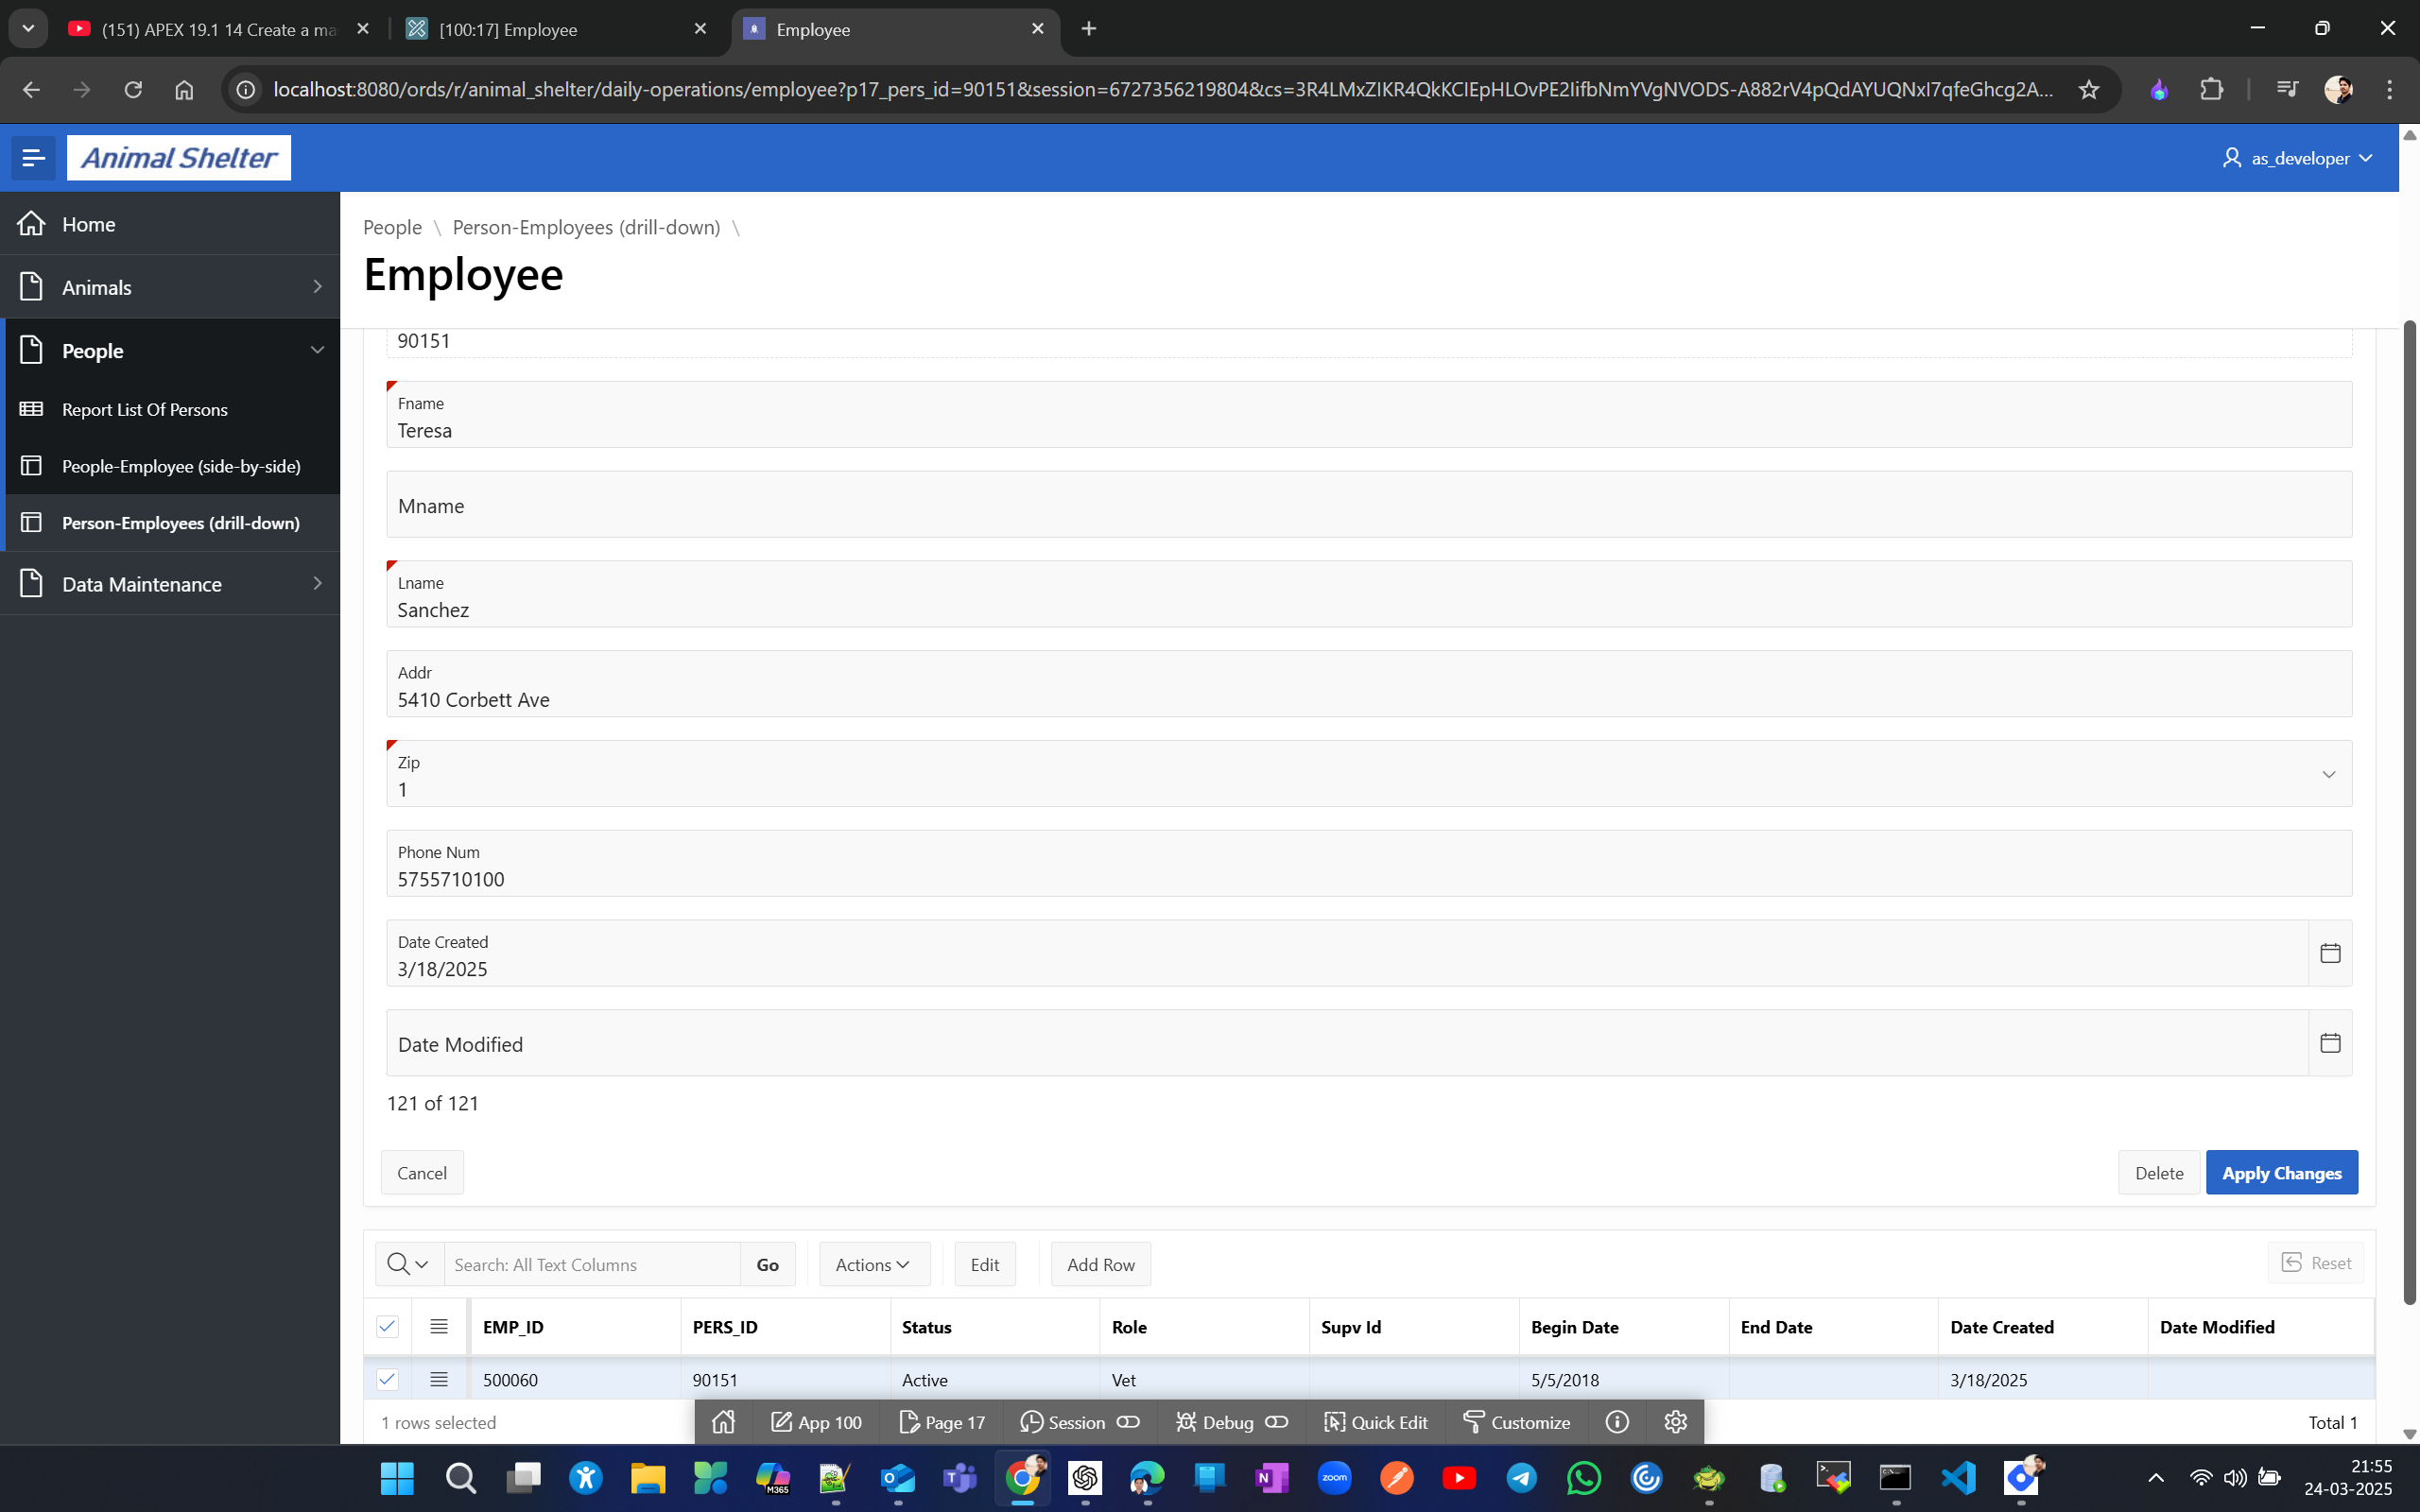
For the drill-down report page, which is an interactive report, we don't need to add search by ID like we did for the side-by-side master-detail type, where the report page was a classic report requiring the search by ID feature.
Add column to table & page item to form. Edit SQL to filter rows shown in a form.
Pages created so far for Daily Operations (DEV APP) include the drill-down type page #16 IR and page #17 form.
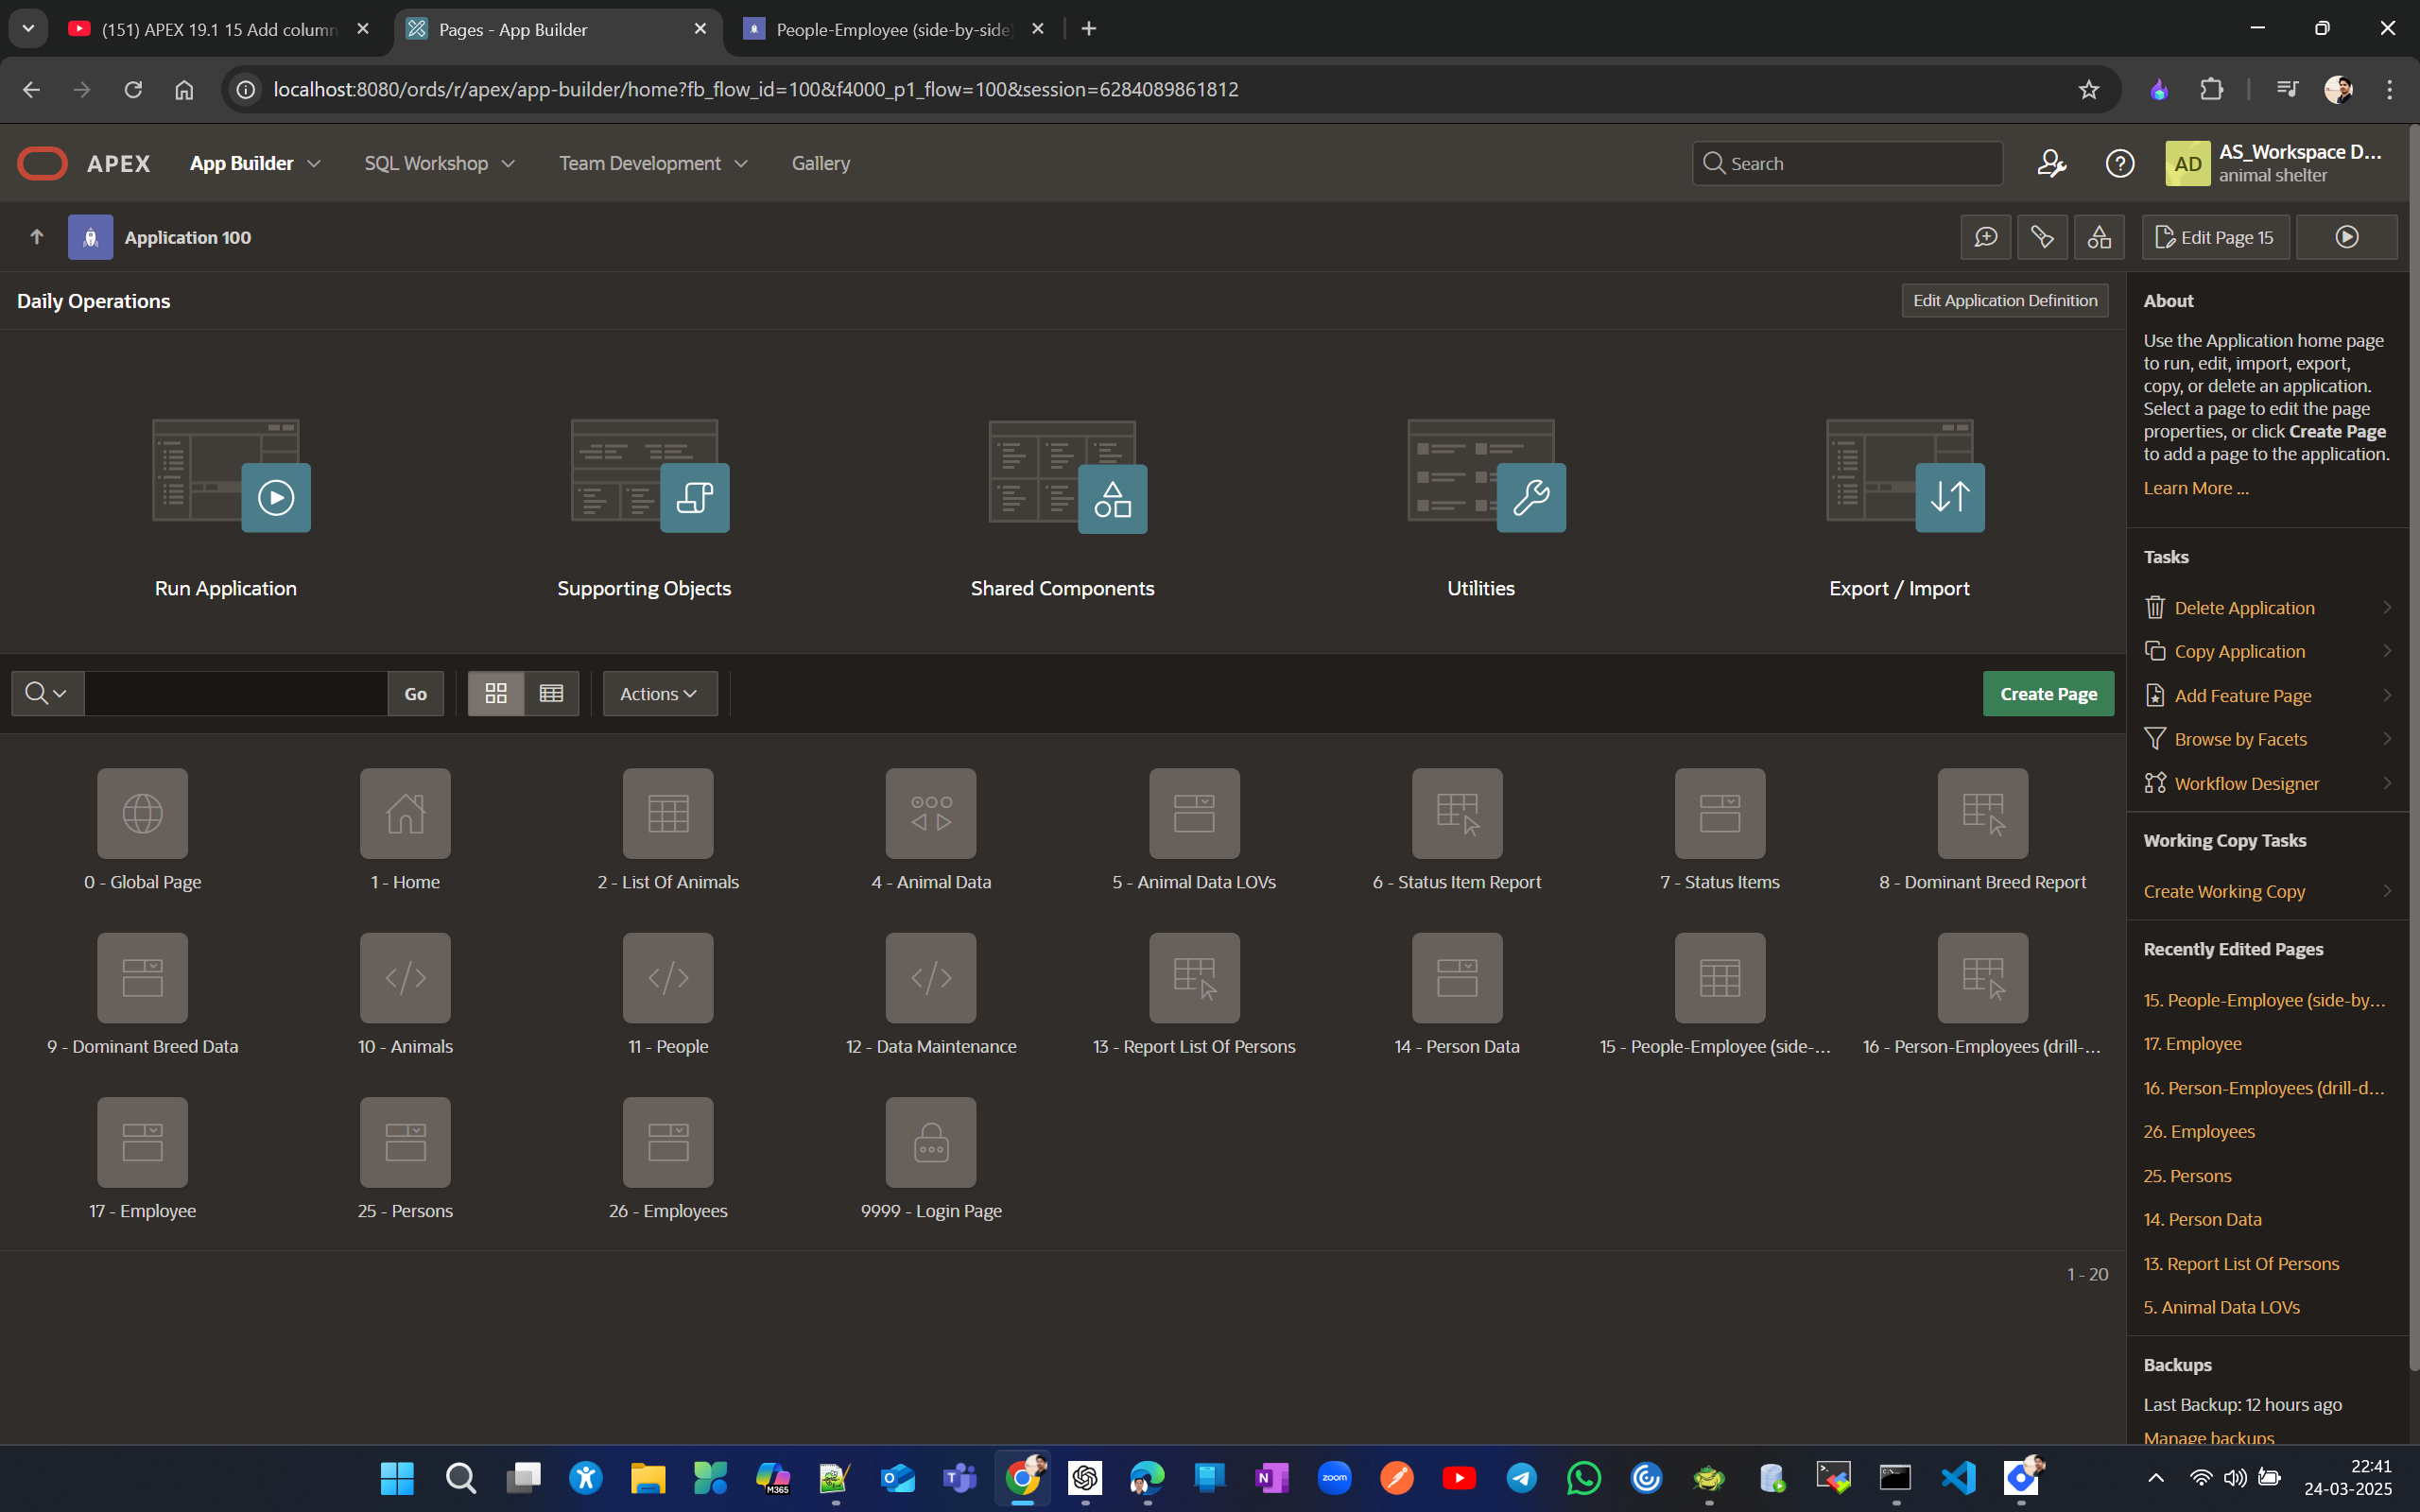
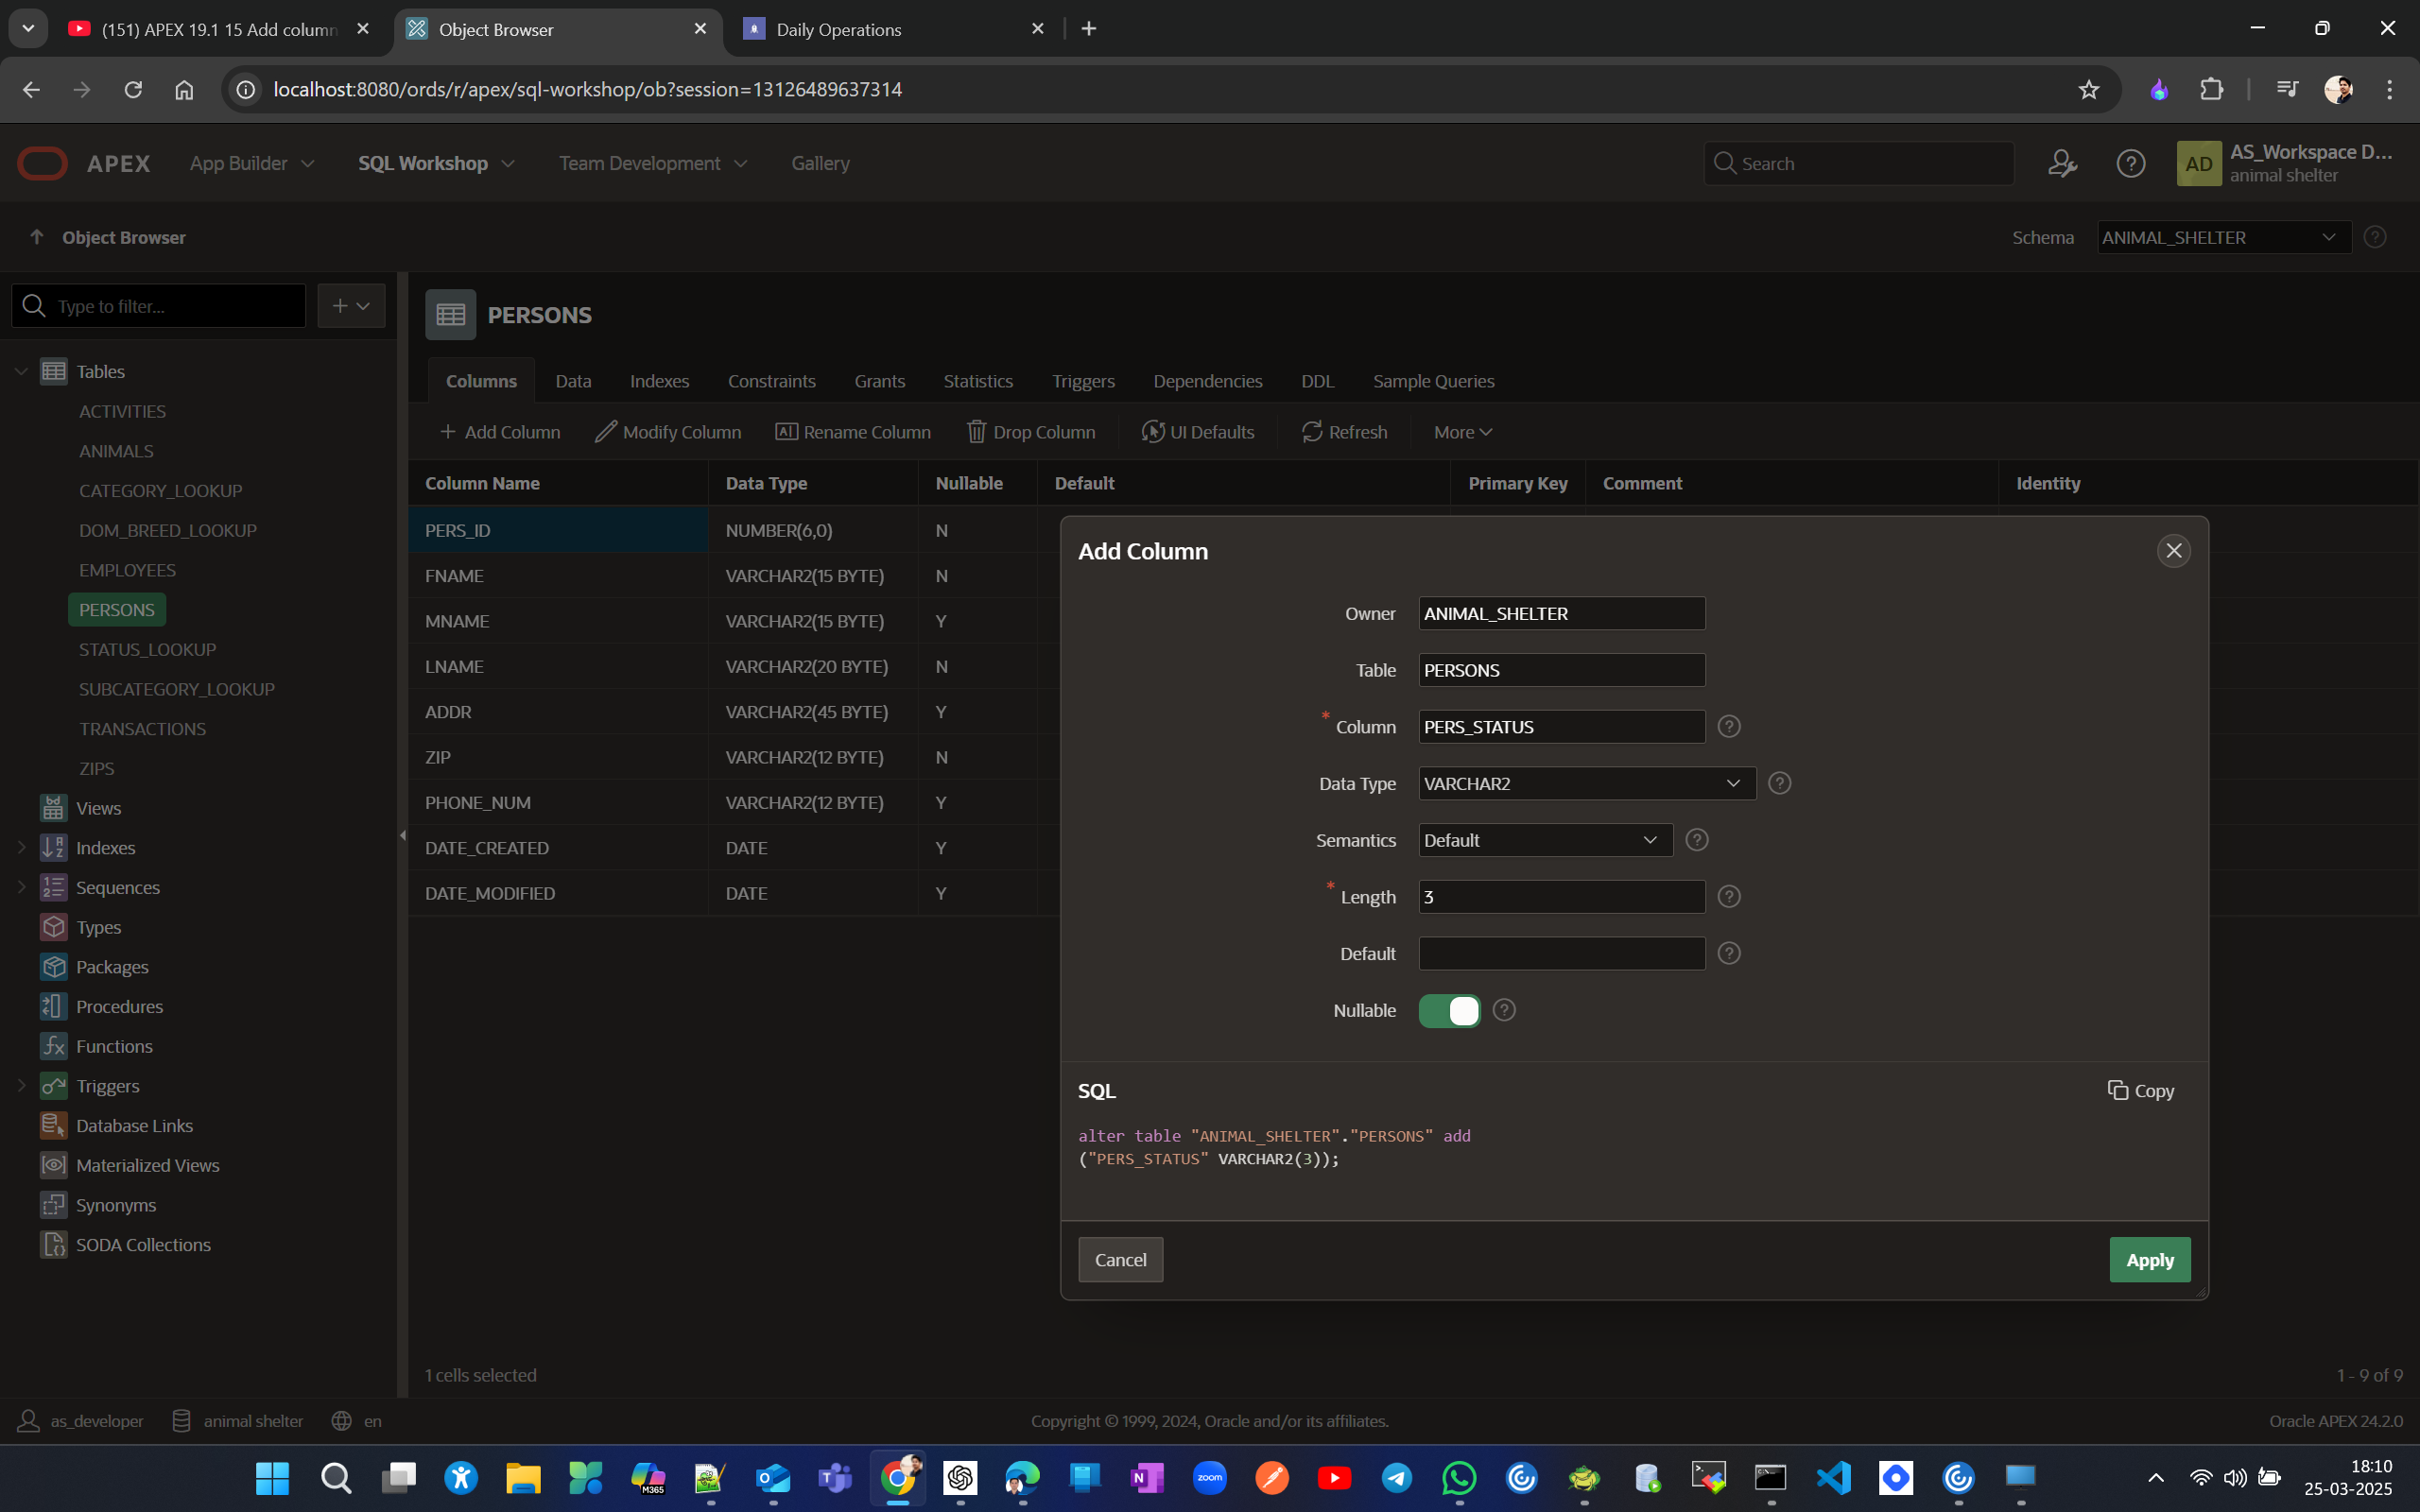
Now let's add and update the column in APEX object browser, then include it as a page item in the APEX form. For that from the previous master-details page we created, if we don't want to show information about people who have left or passed away, we don't delete them from the database; instead, we flag those records as inactive. Let's add a status column in the Persons table where the values can be Active(A) or Inactive(I), similar to the status column in the Employees table.
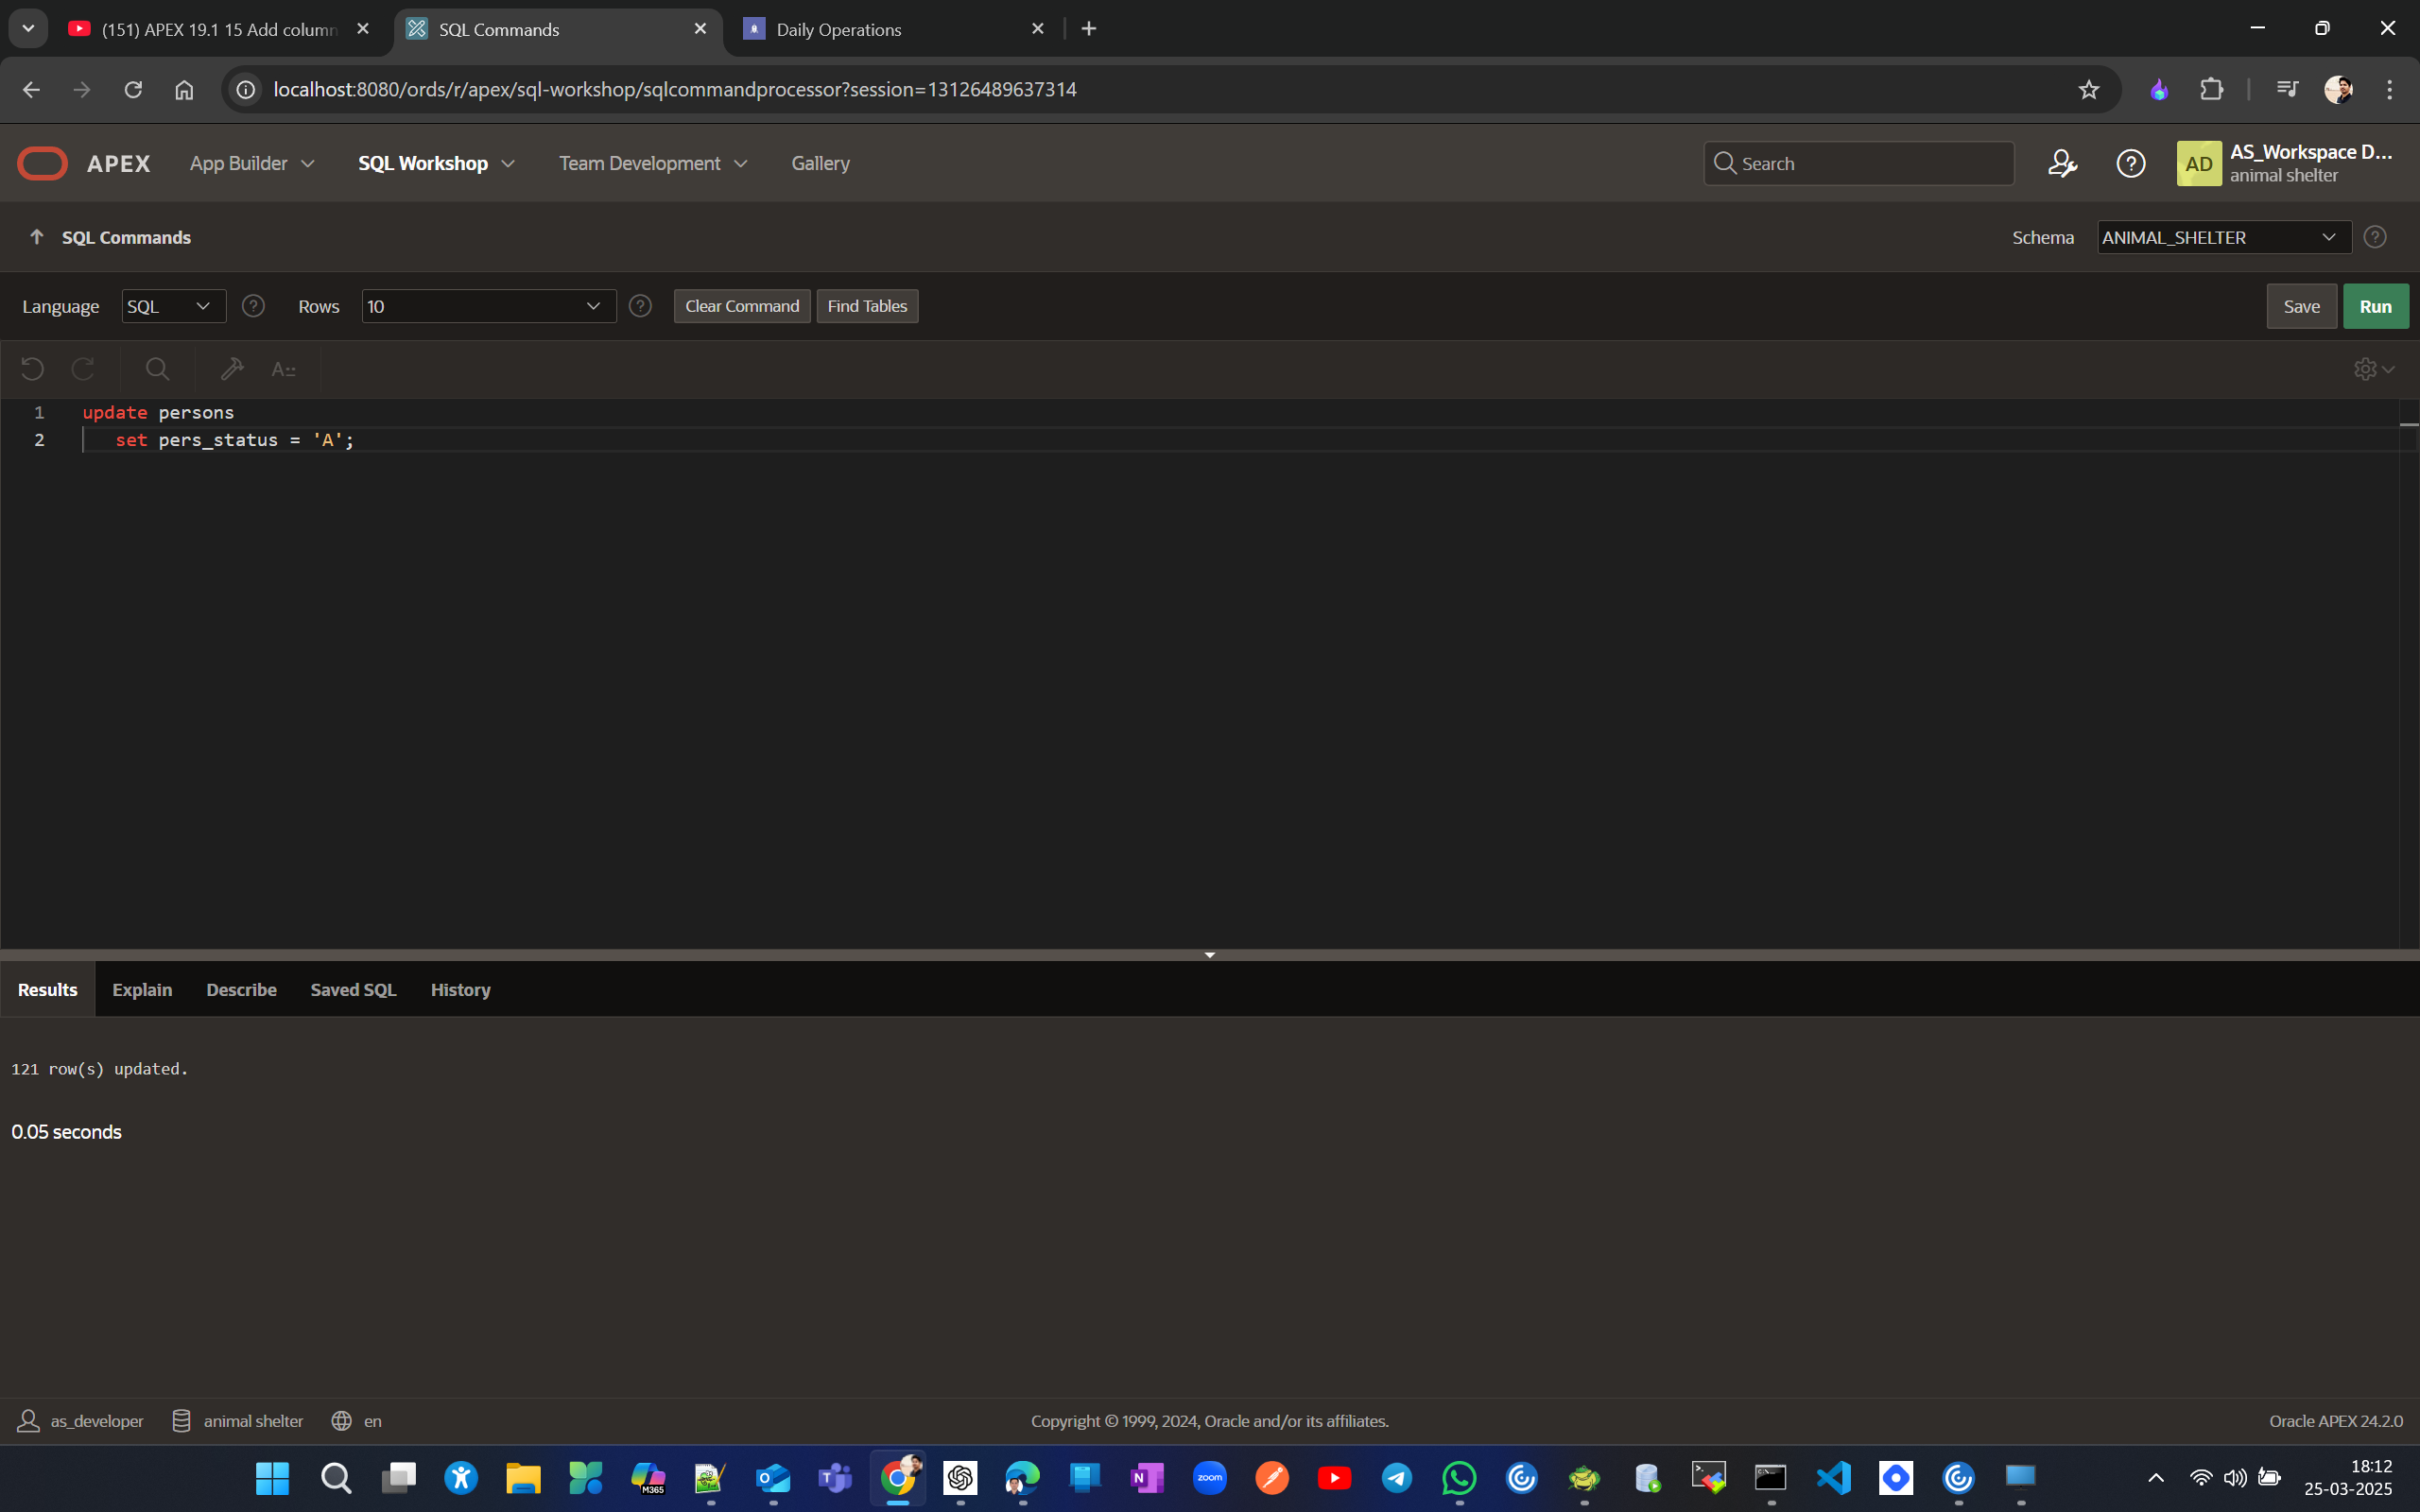
update all perosns to Active (A). Lets now update PERS_ID 90001 PERS_STATUS to Inactive(I)
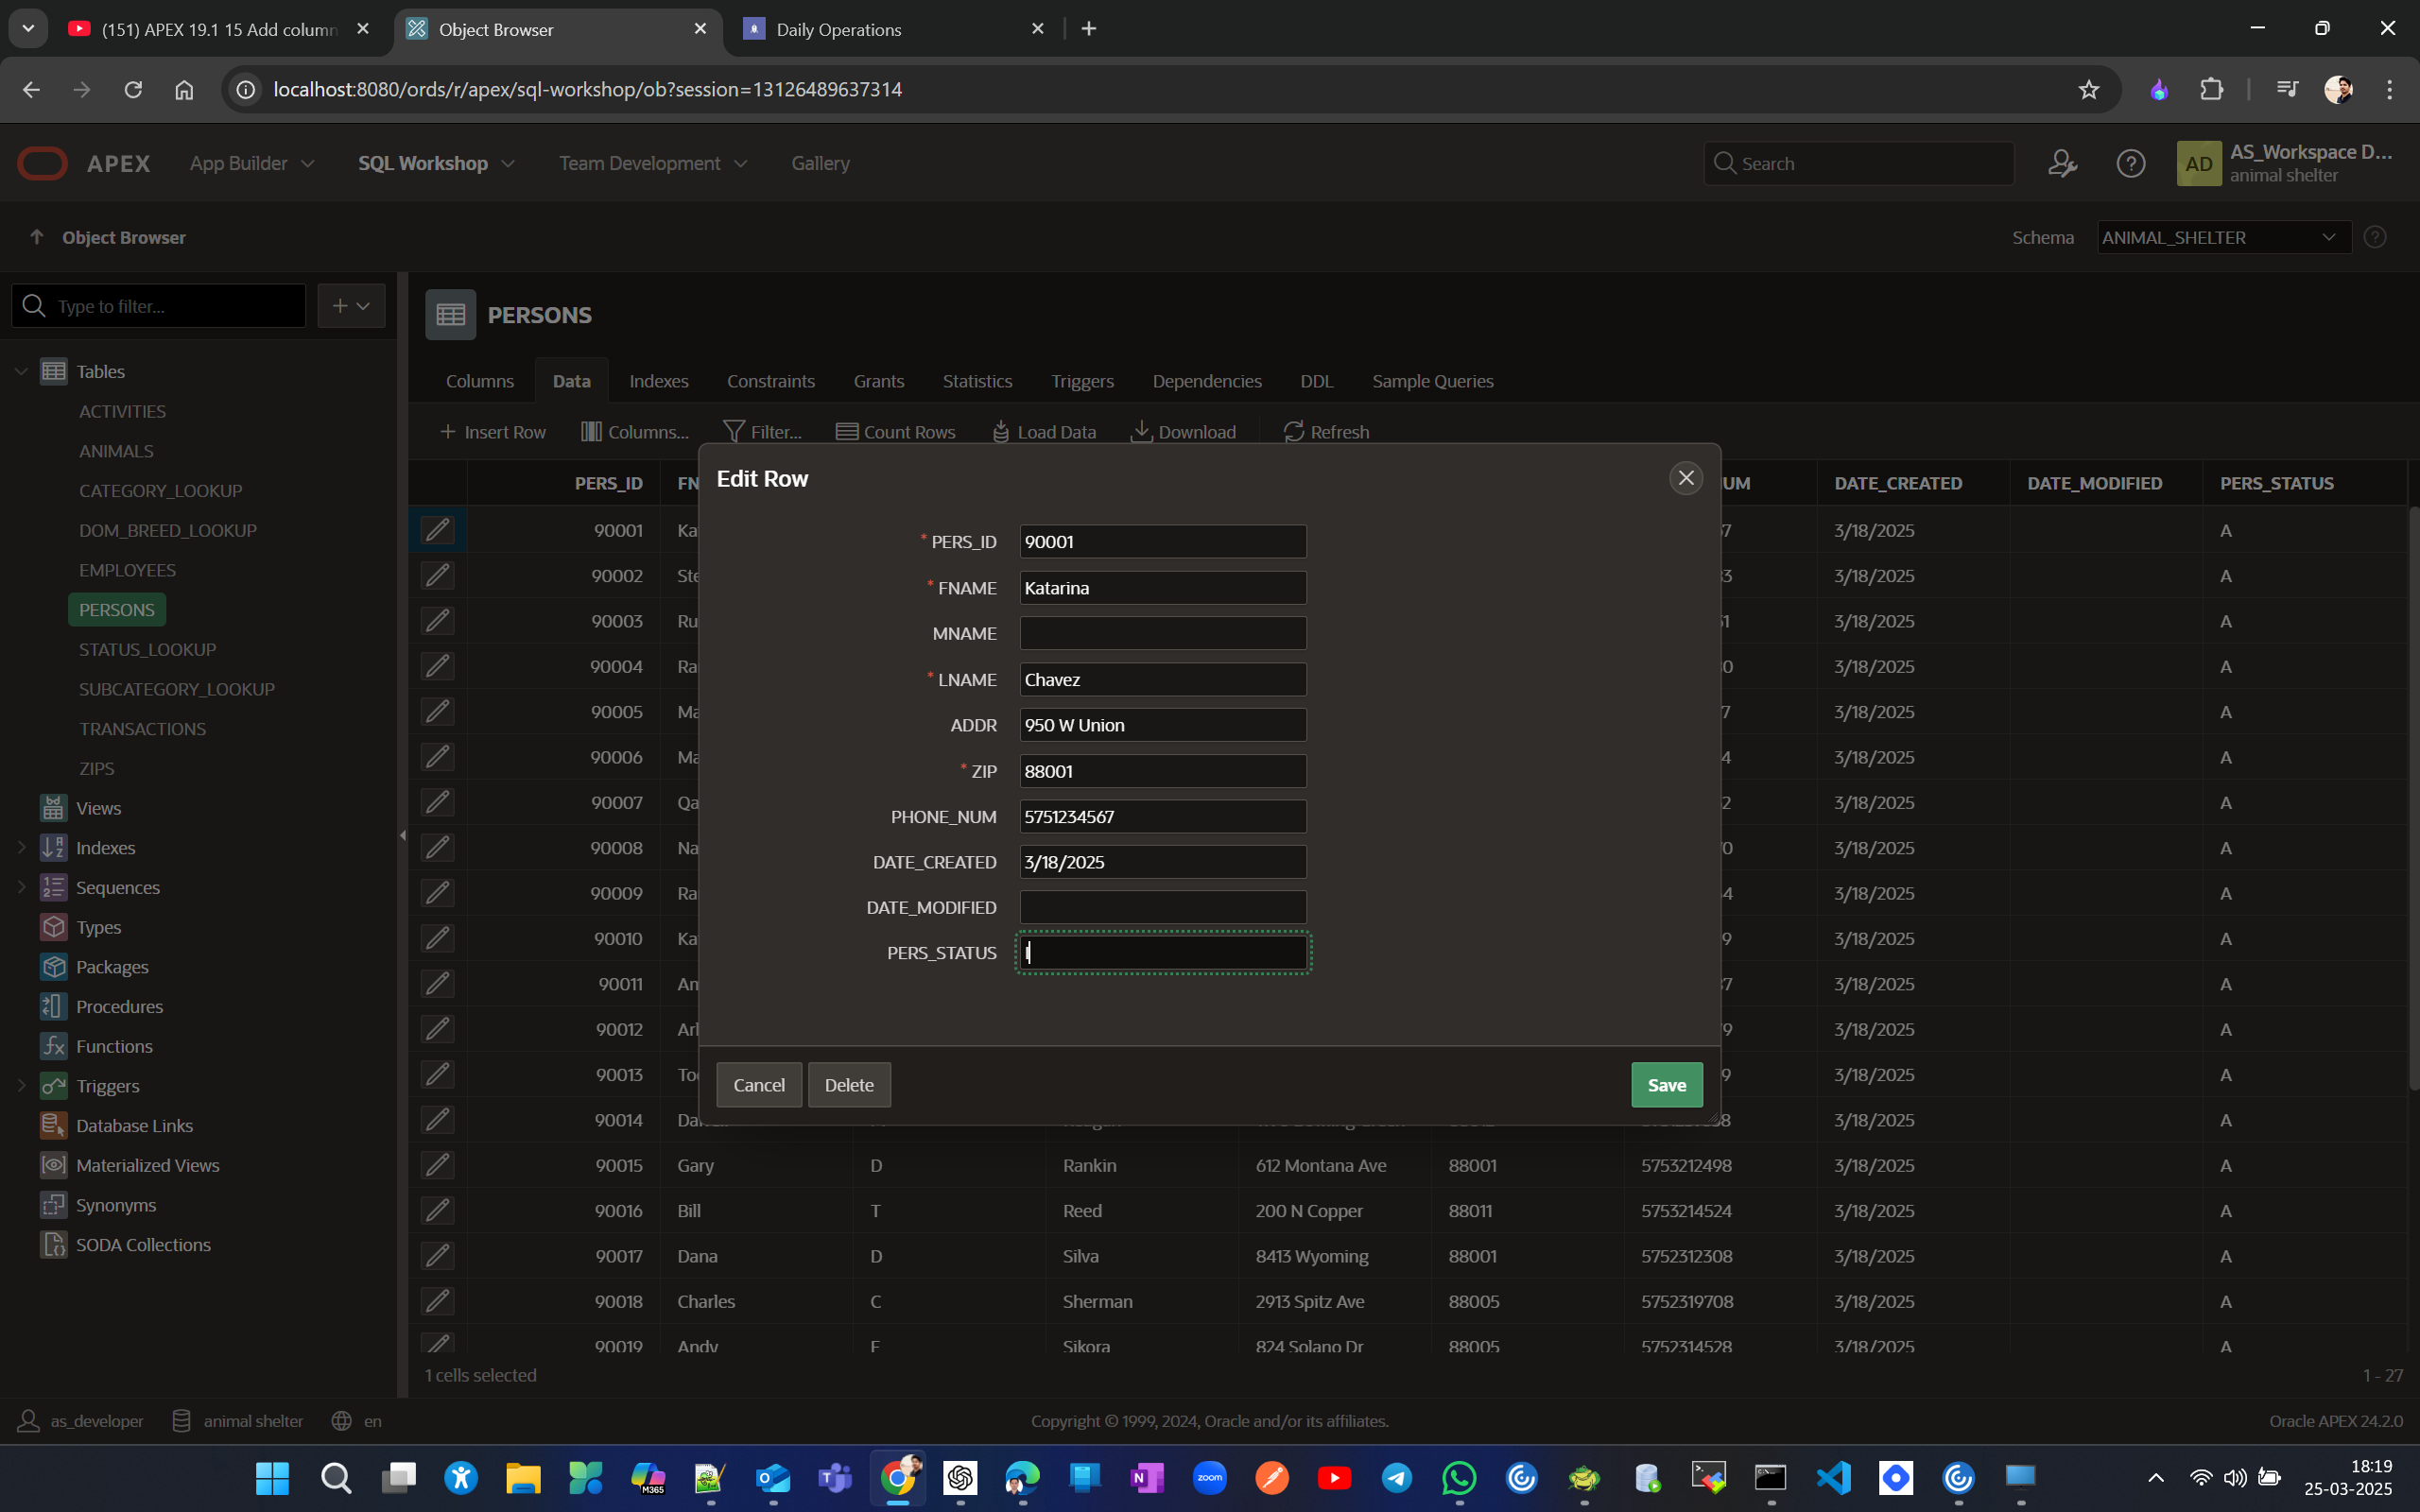
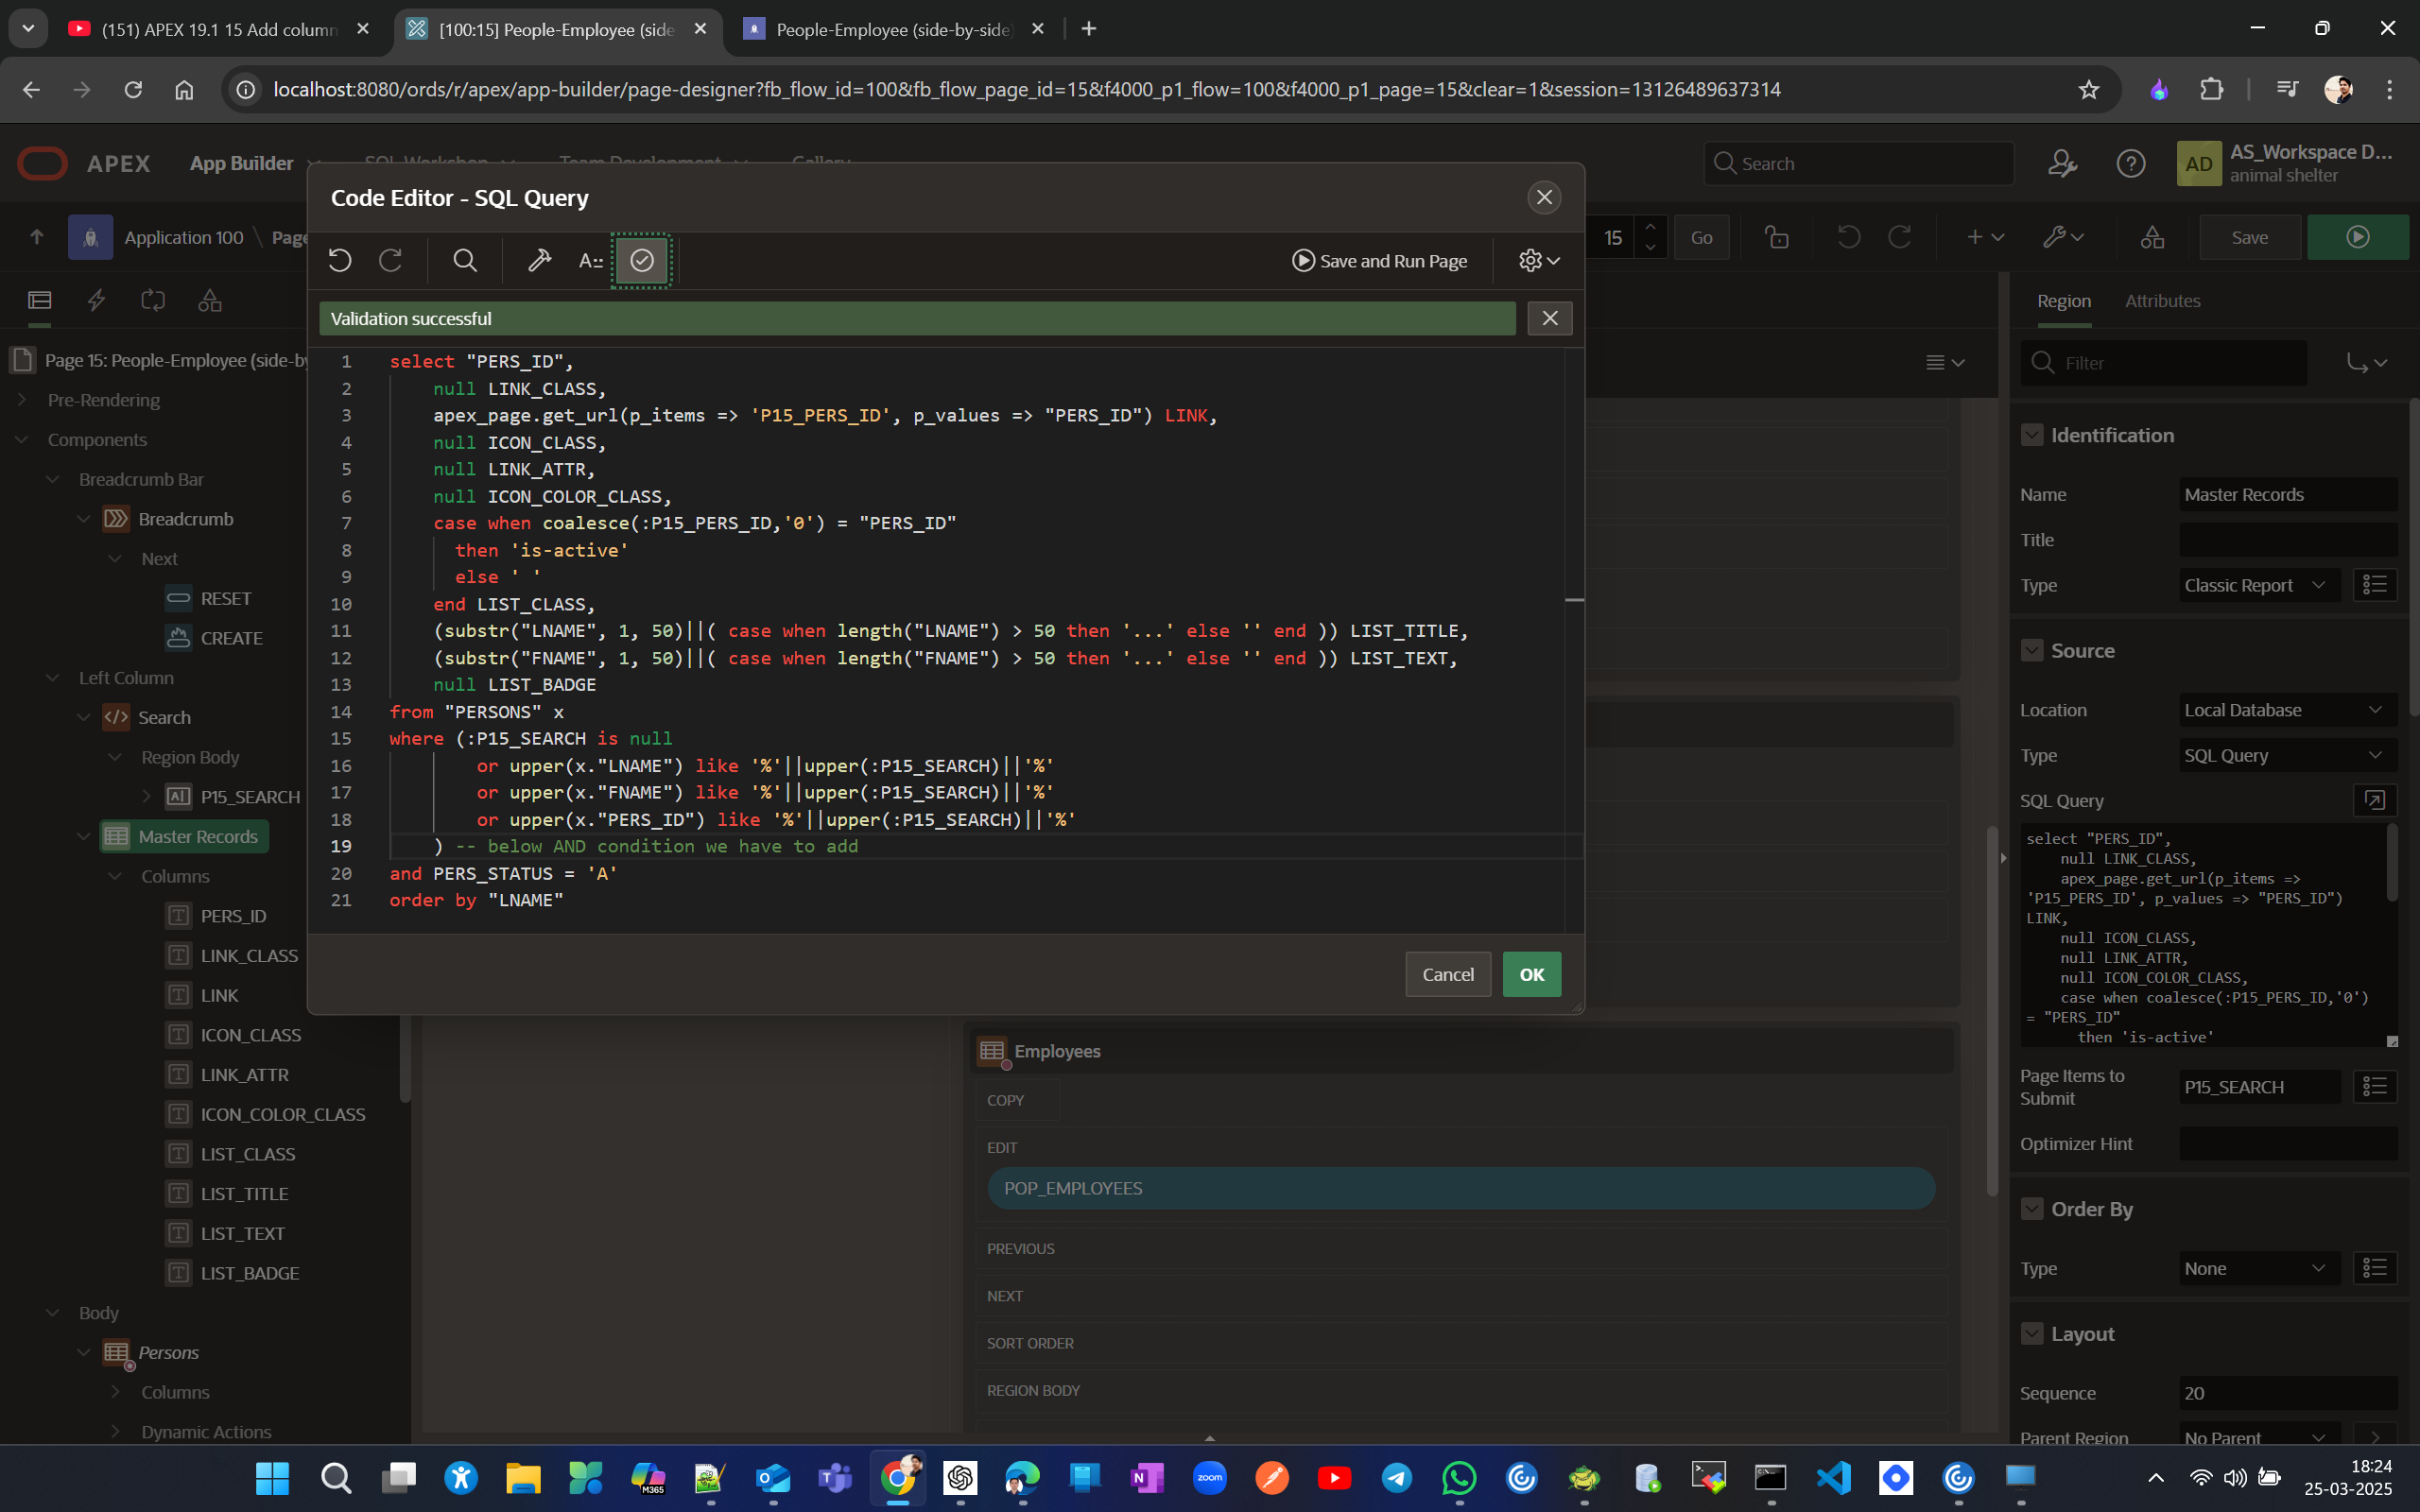
Now idea is to show 120 records in form not the 1 which status we made Inactive(I). so edit the sql from page designer and add require filter condition
verify from UI
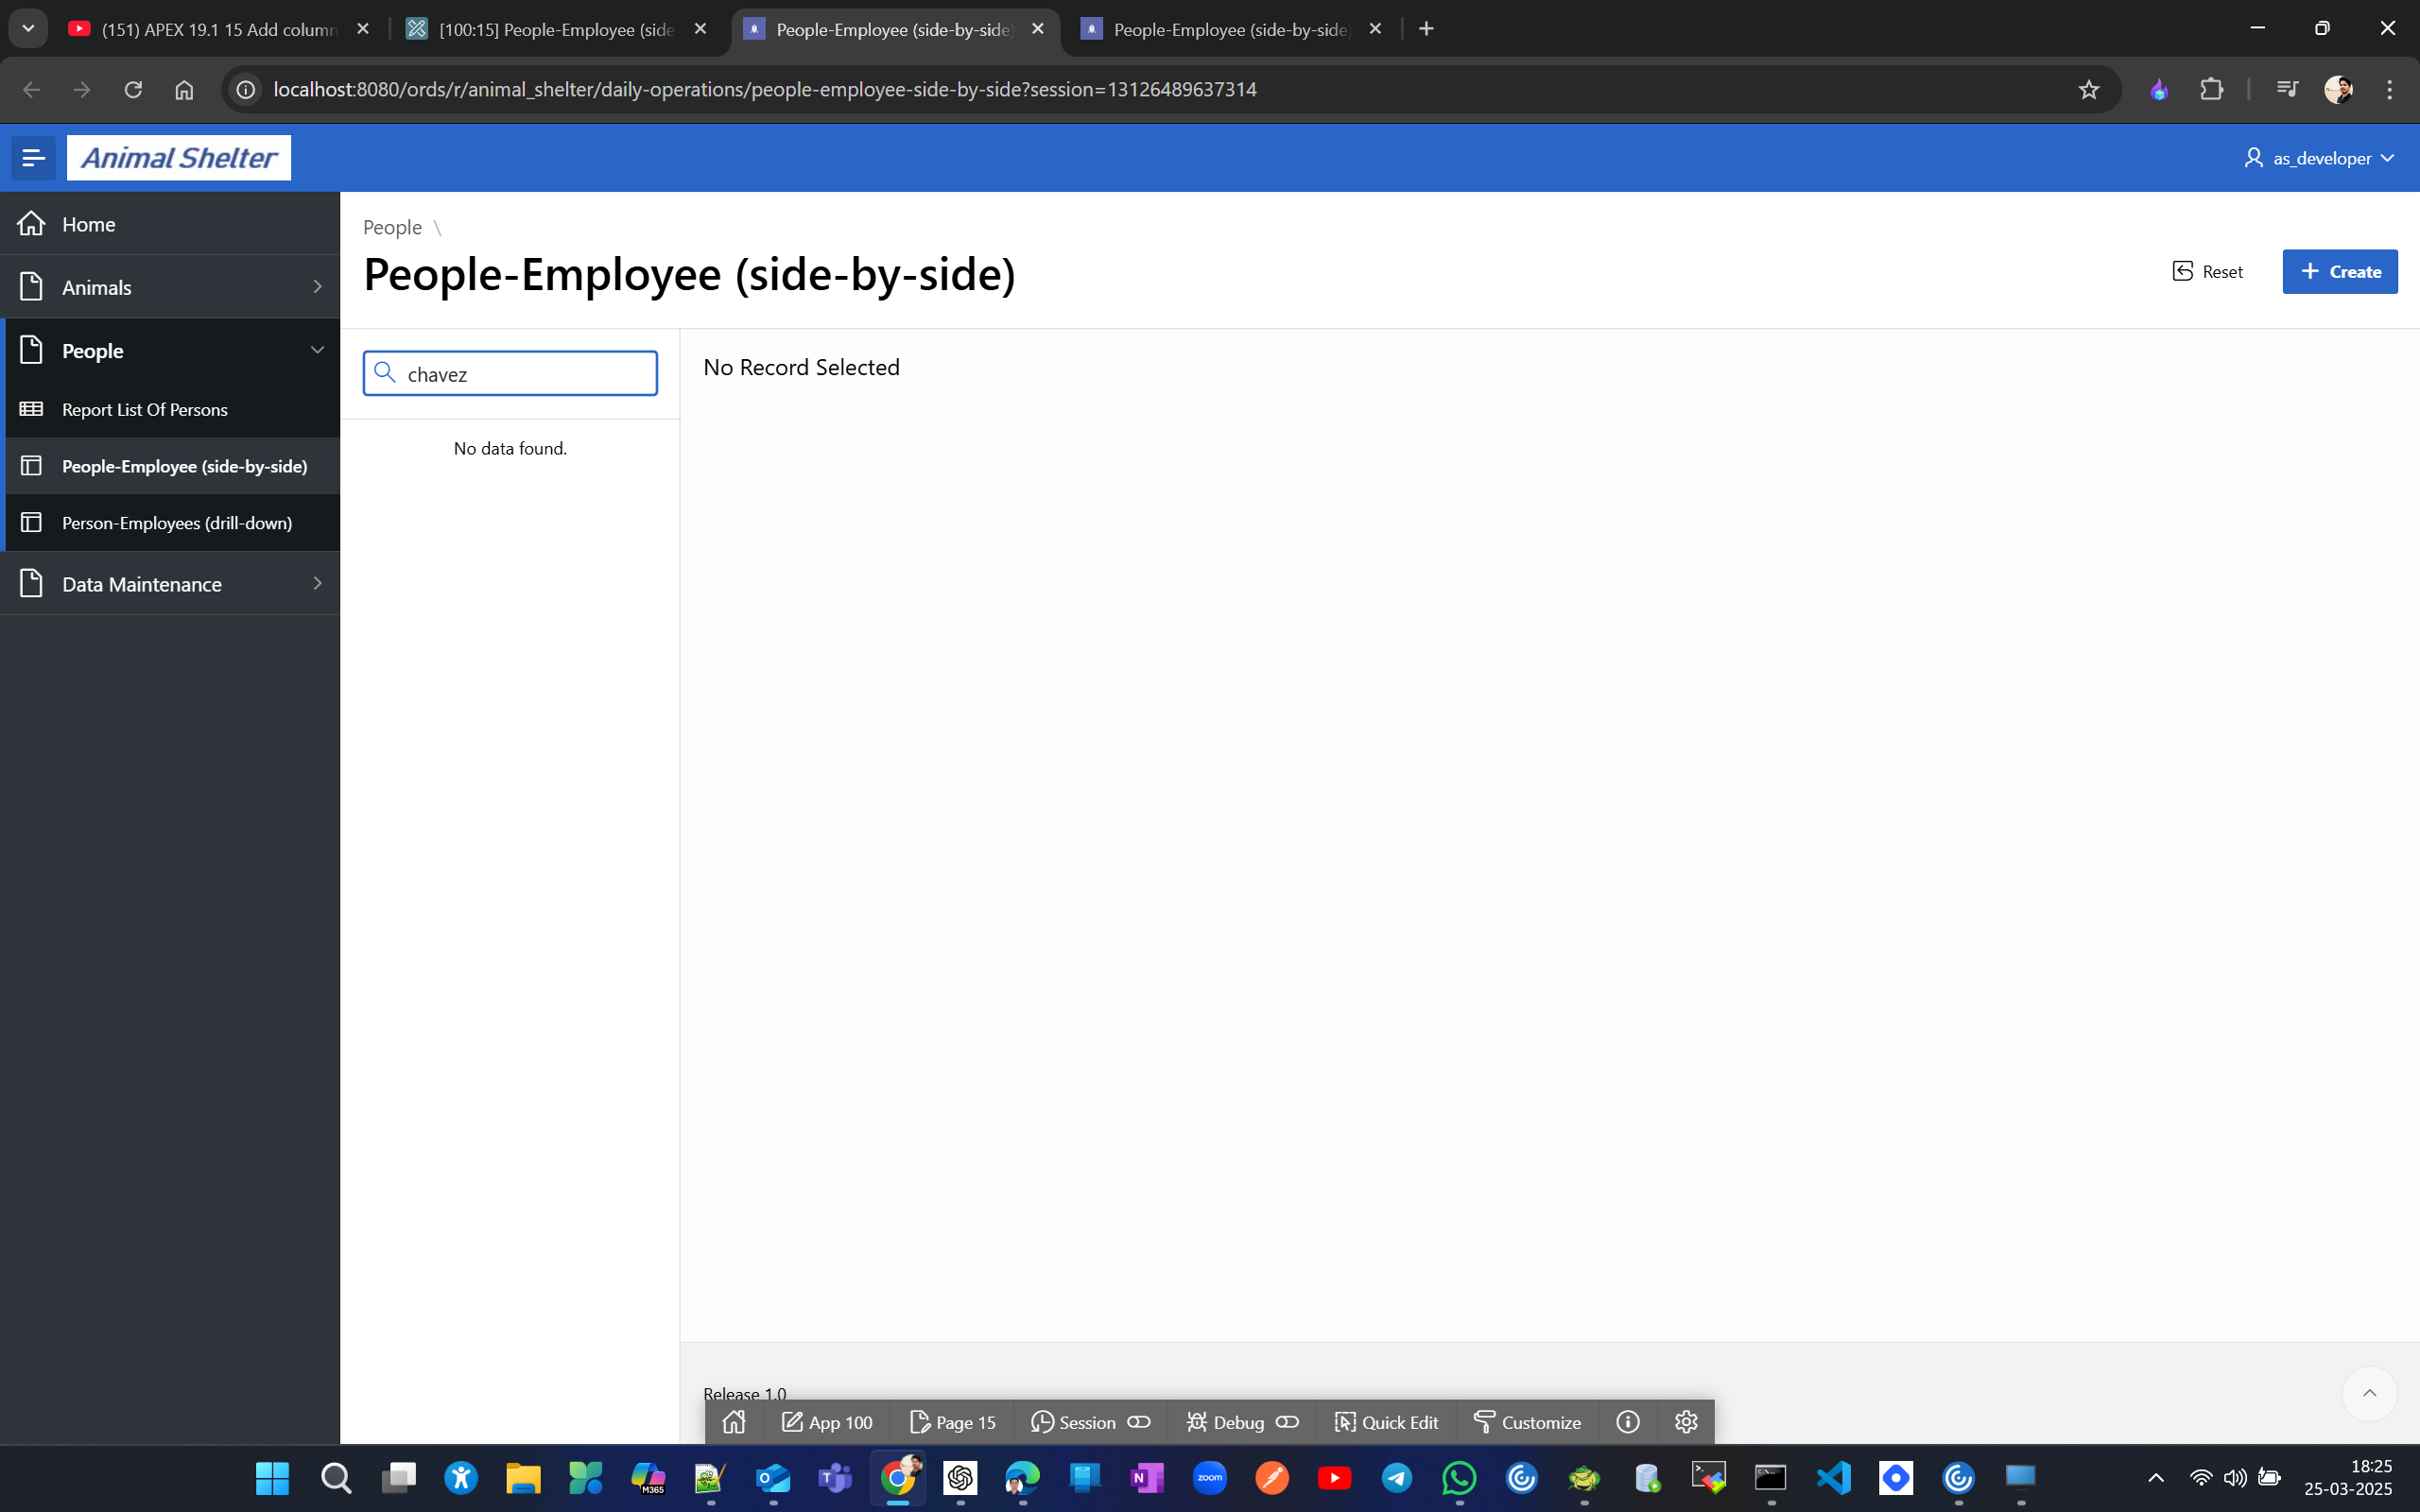
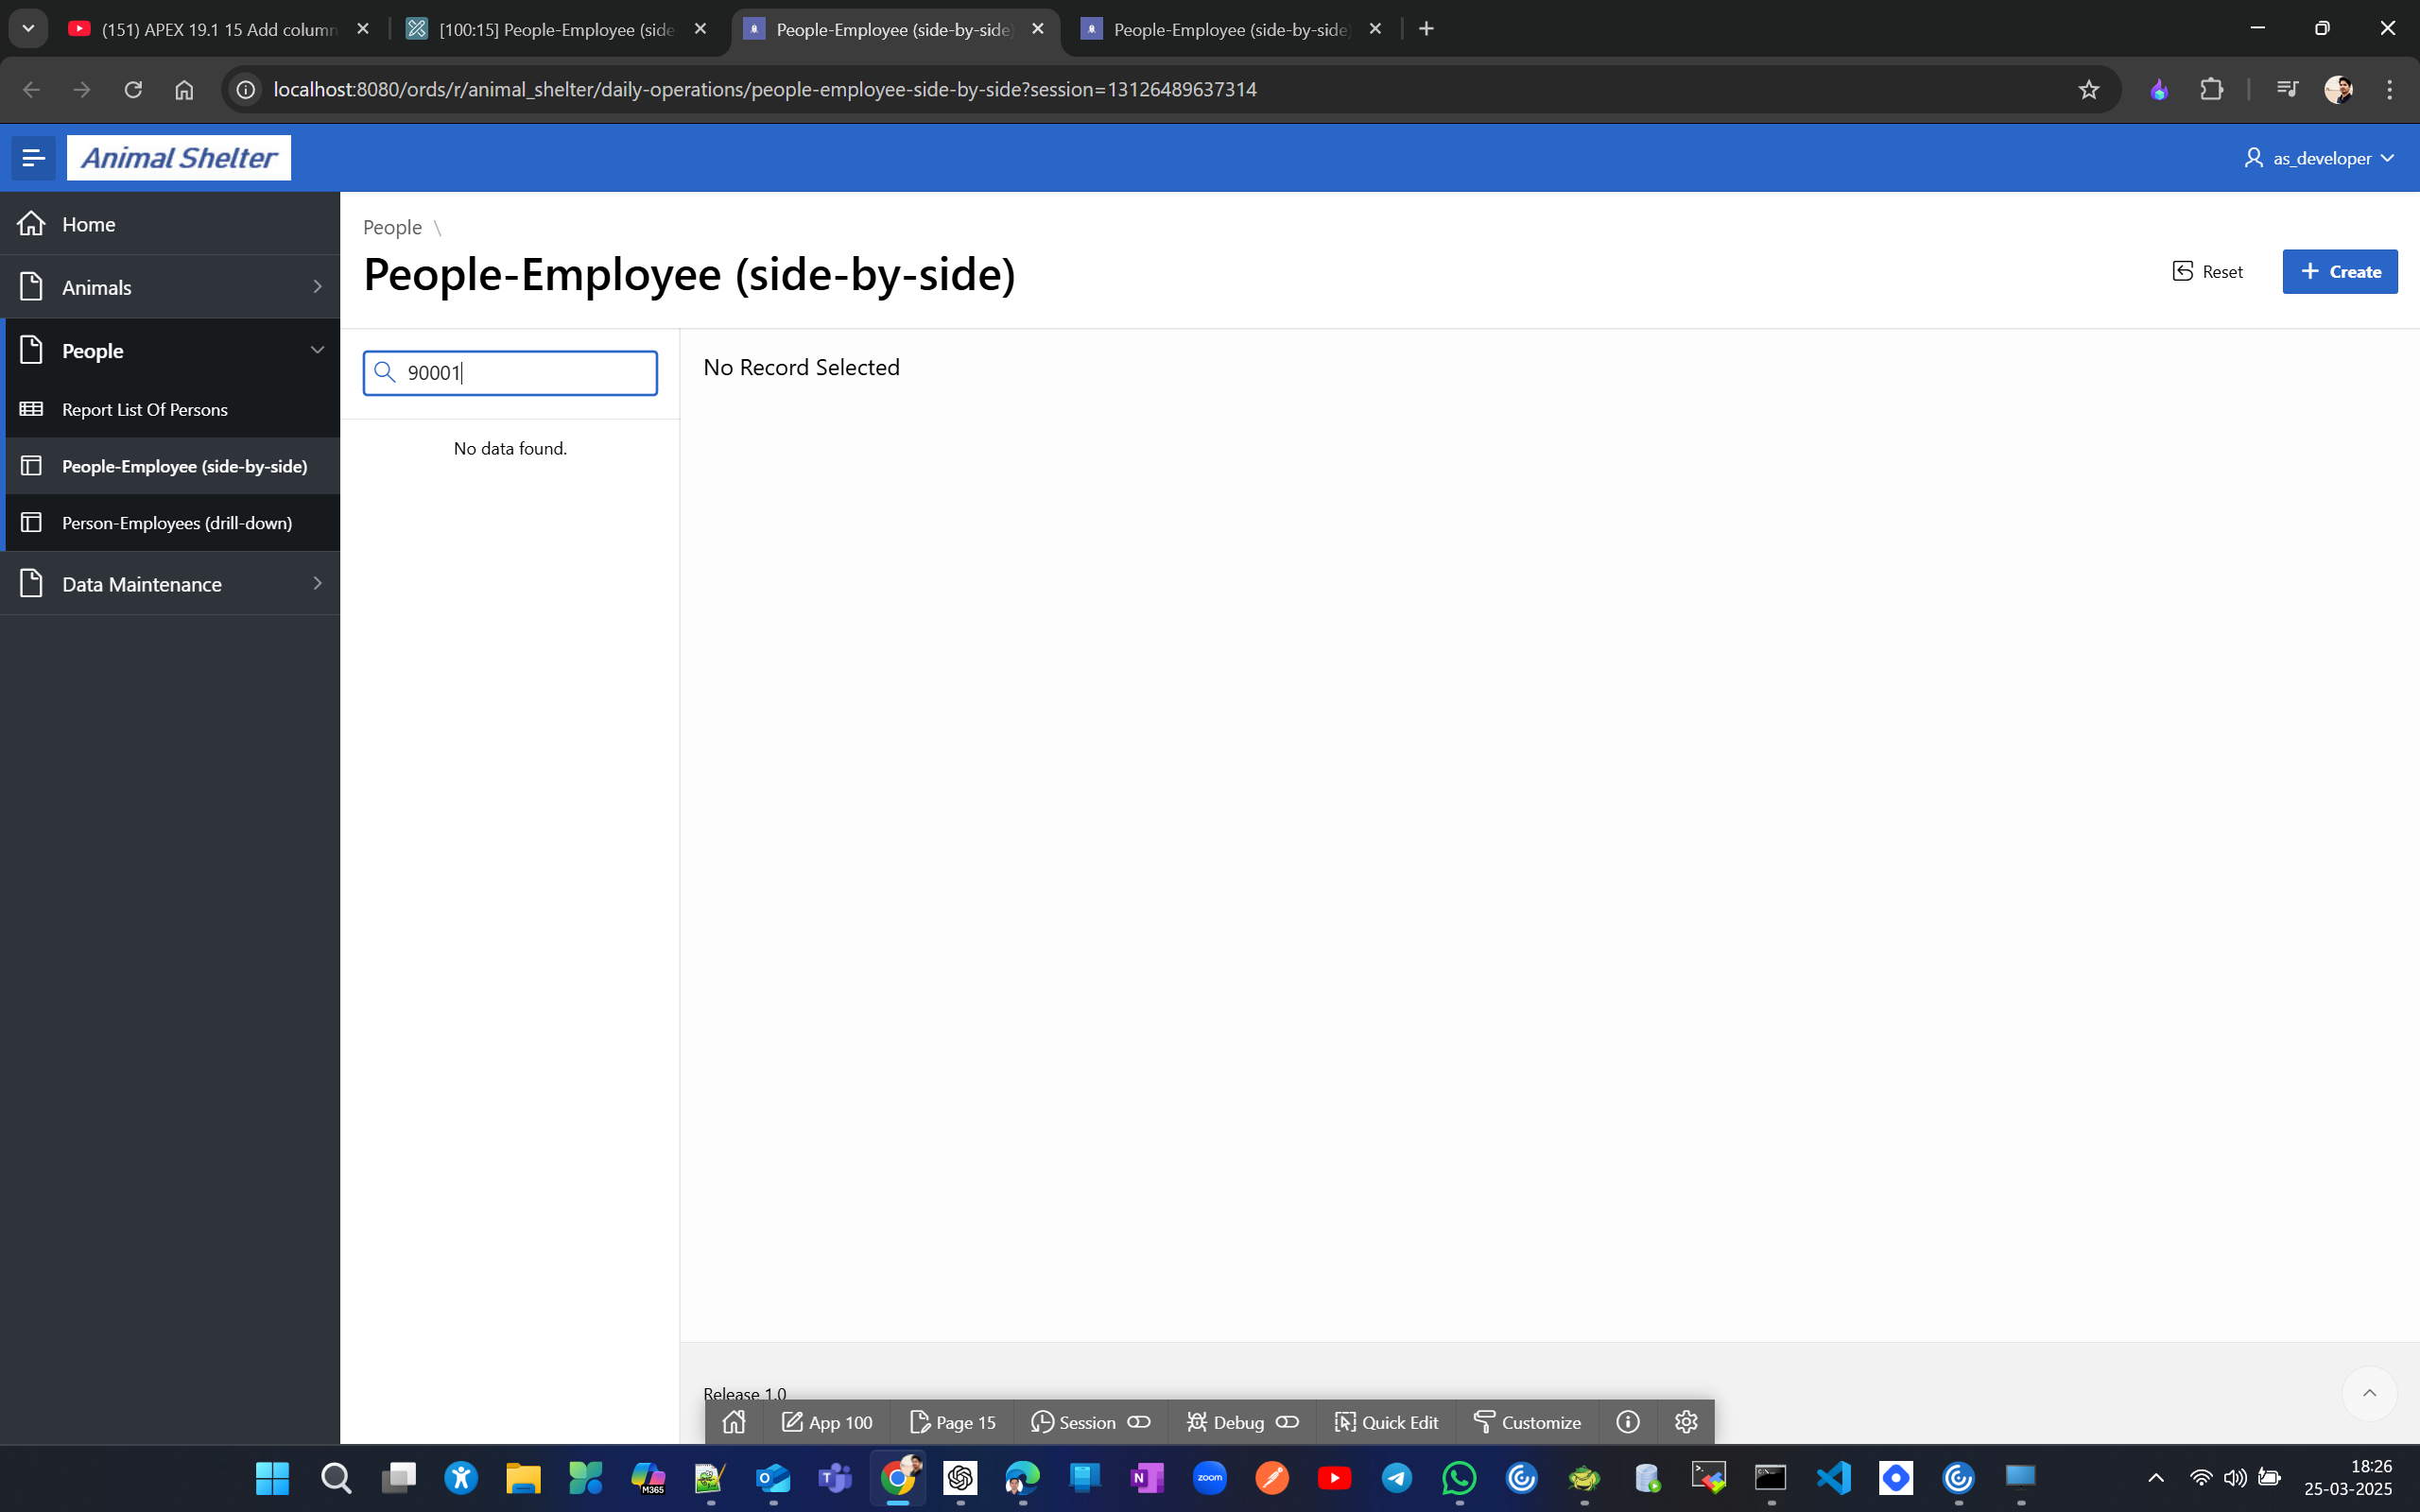
Now lets come back to People → Report List of Persons. In the form you don’t get field/label to chnage newly added column. so to add that to the form create a page item for pers_status.
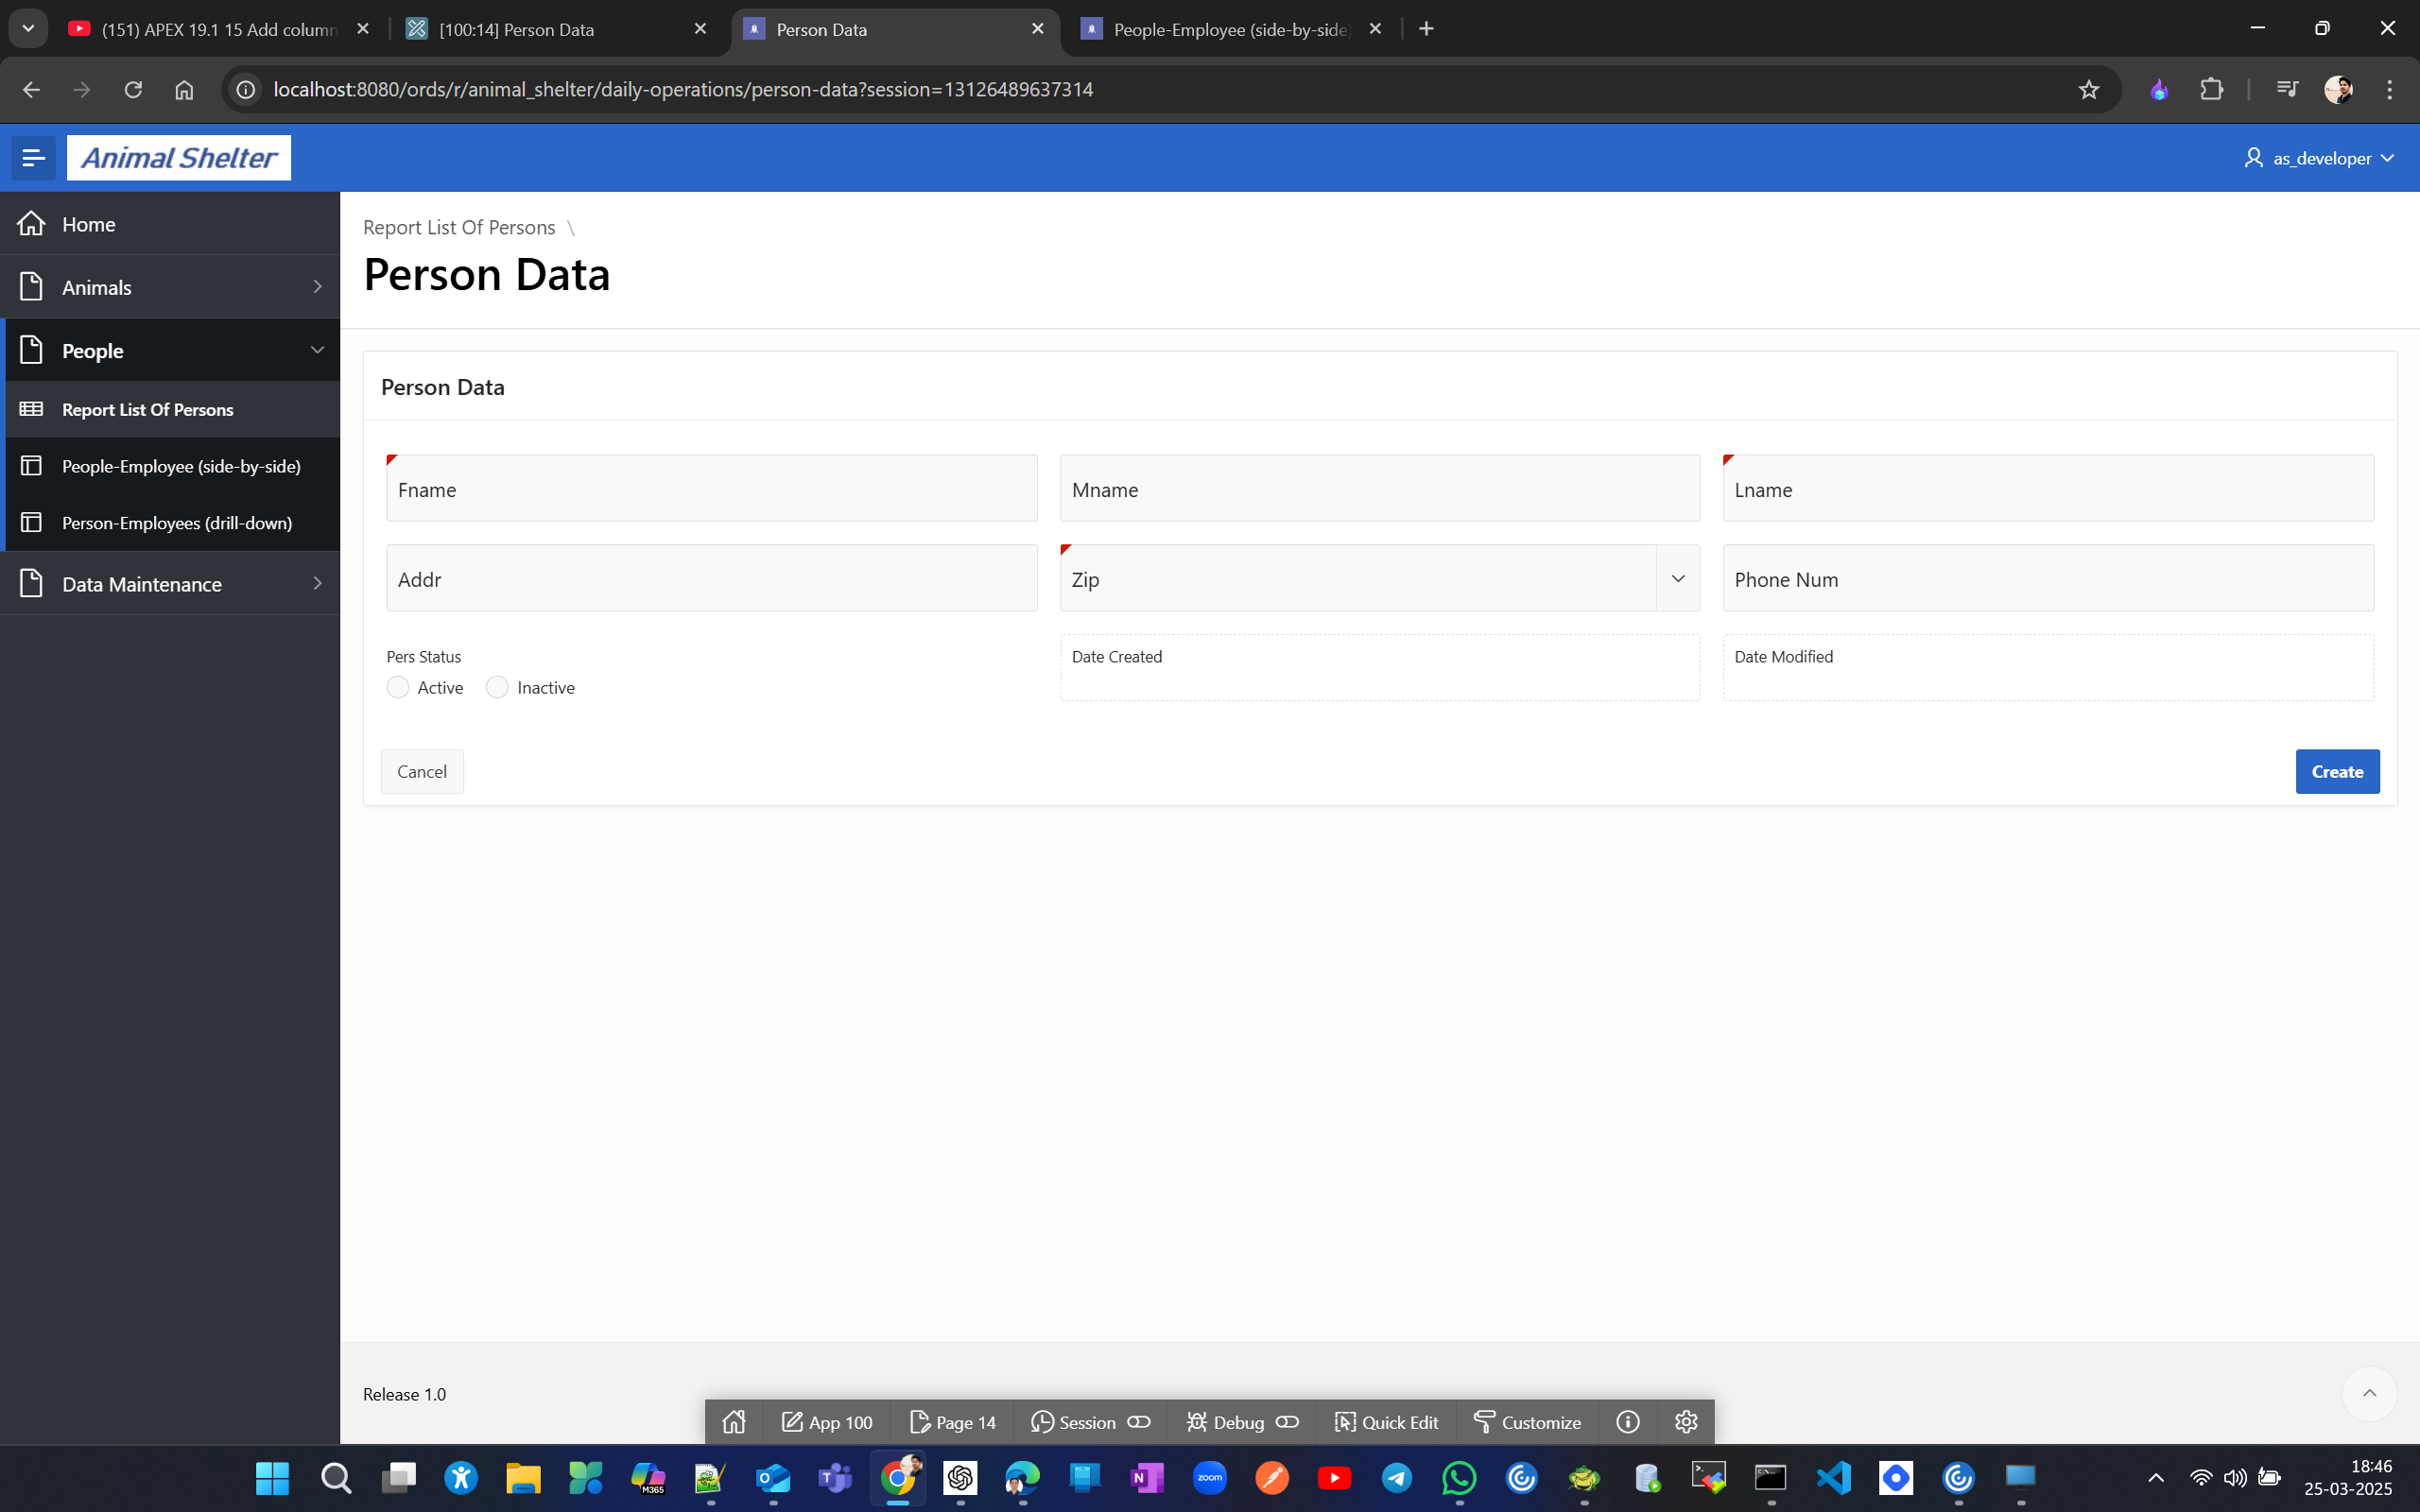
Before change
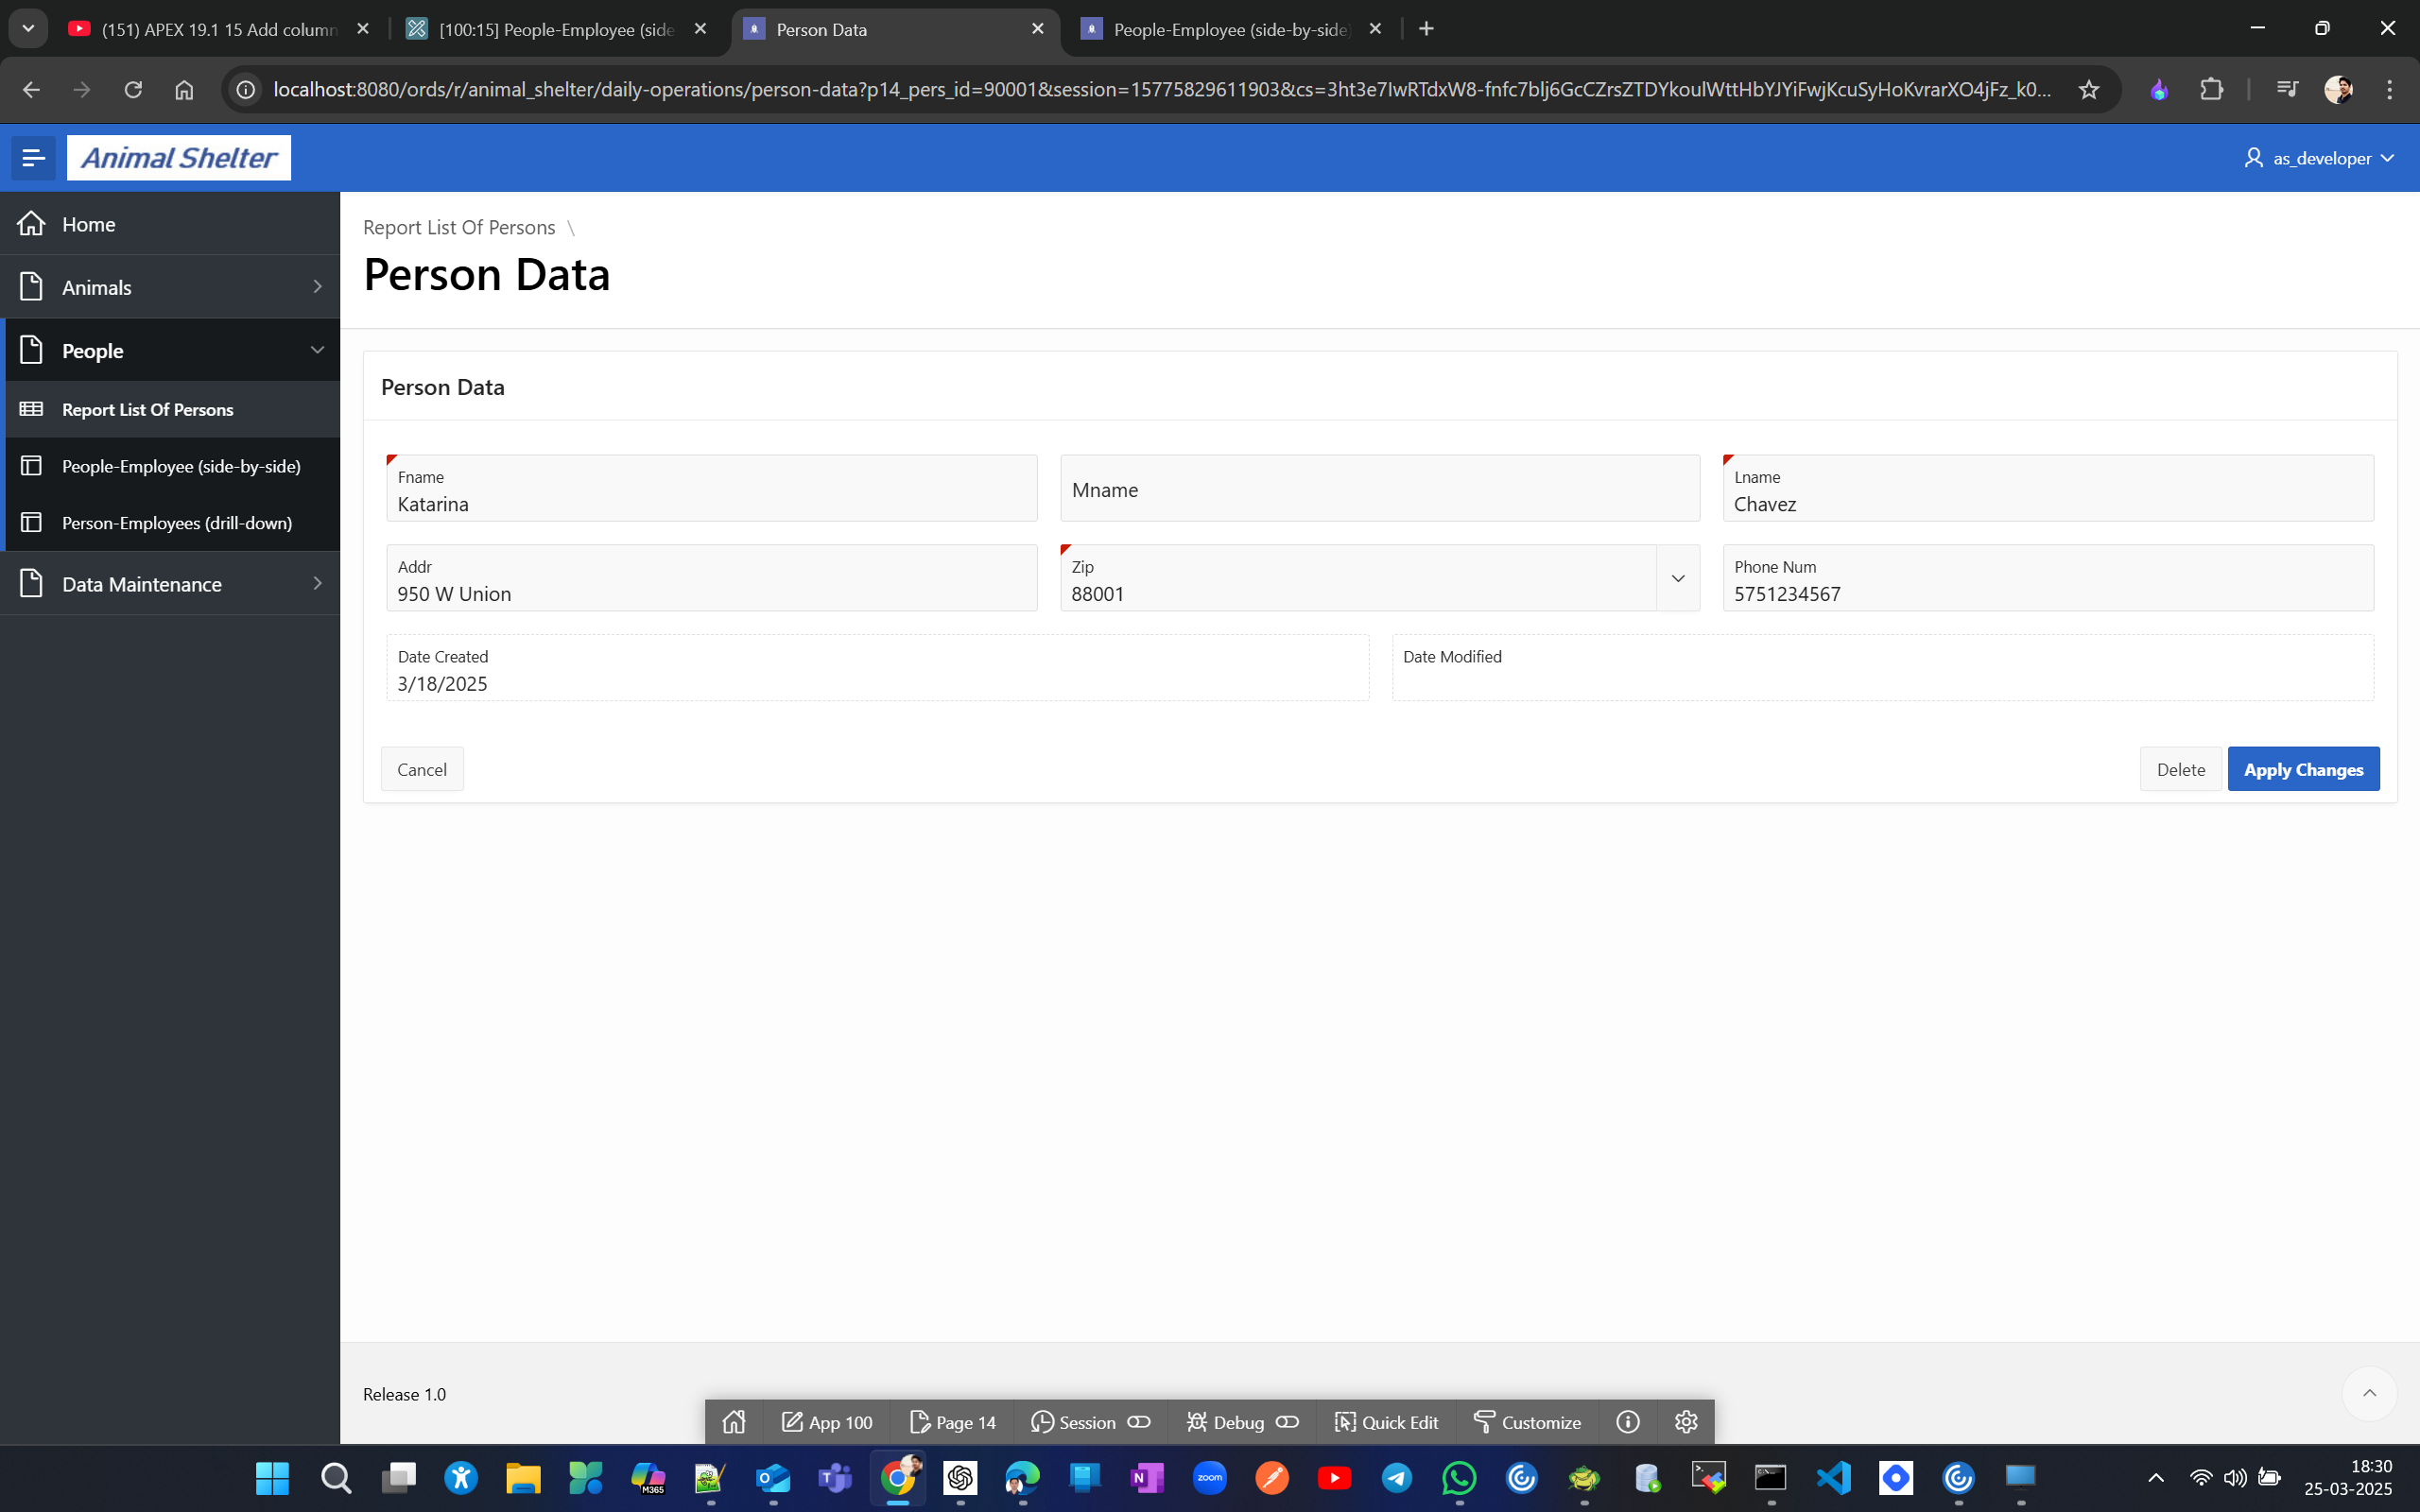
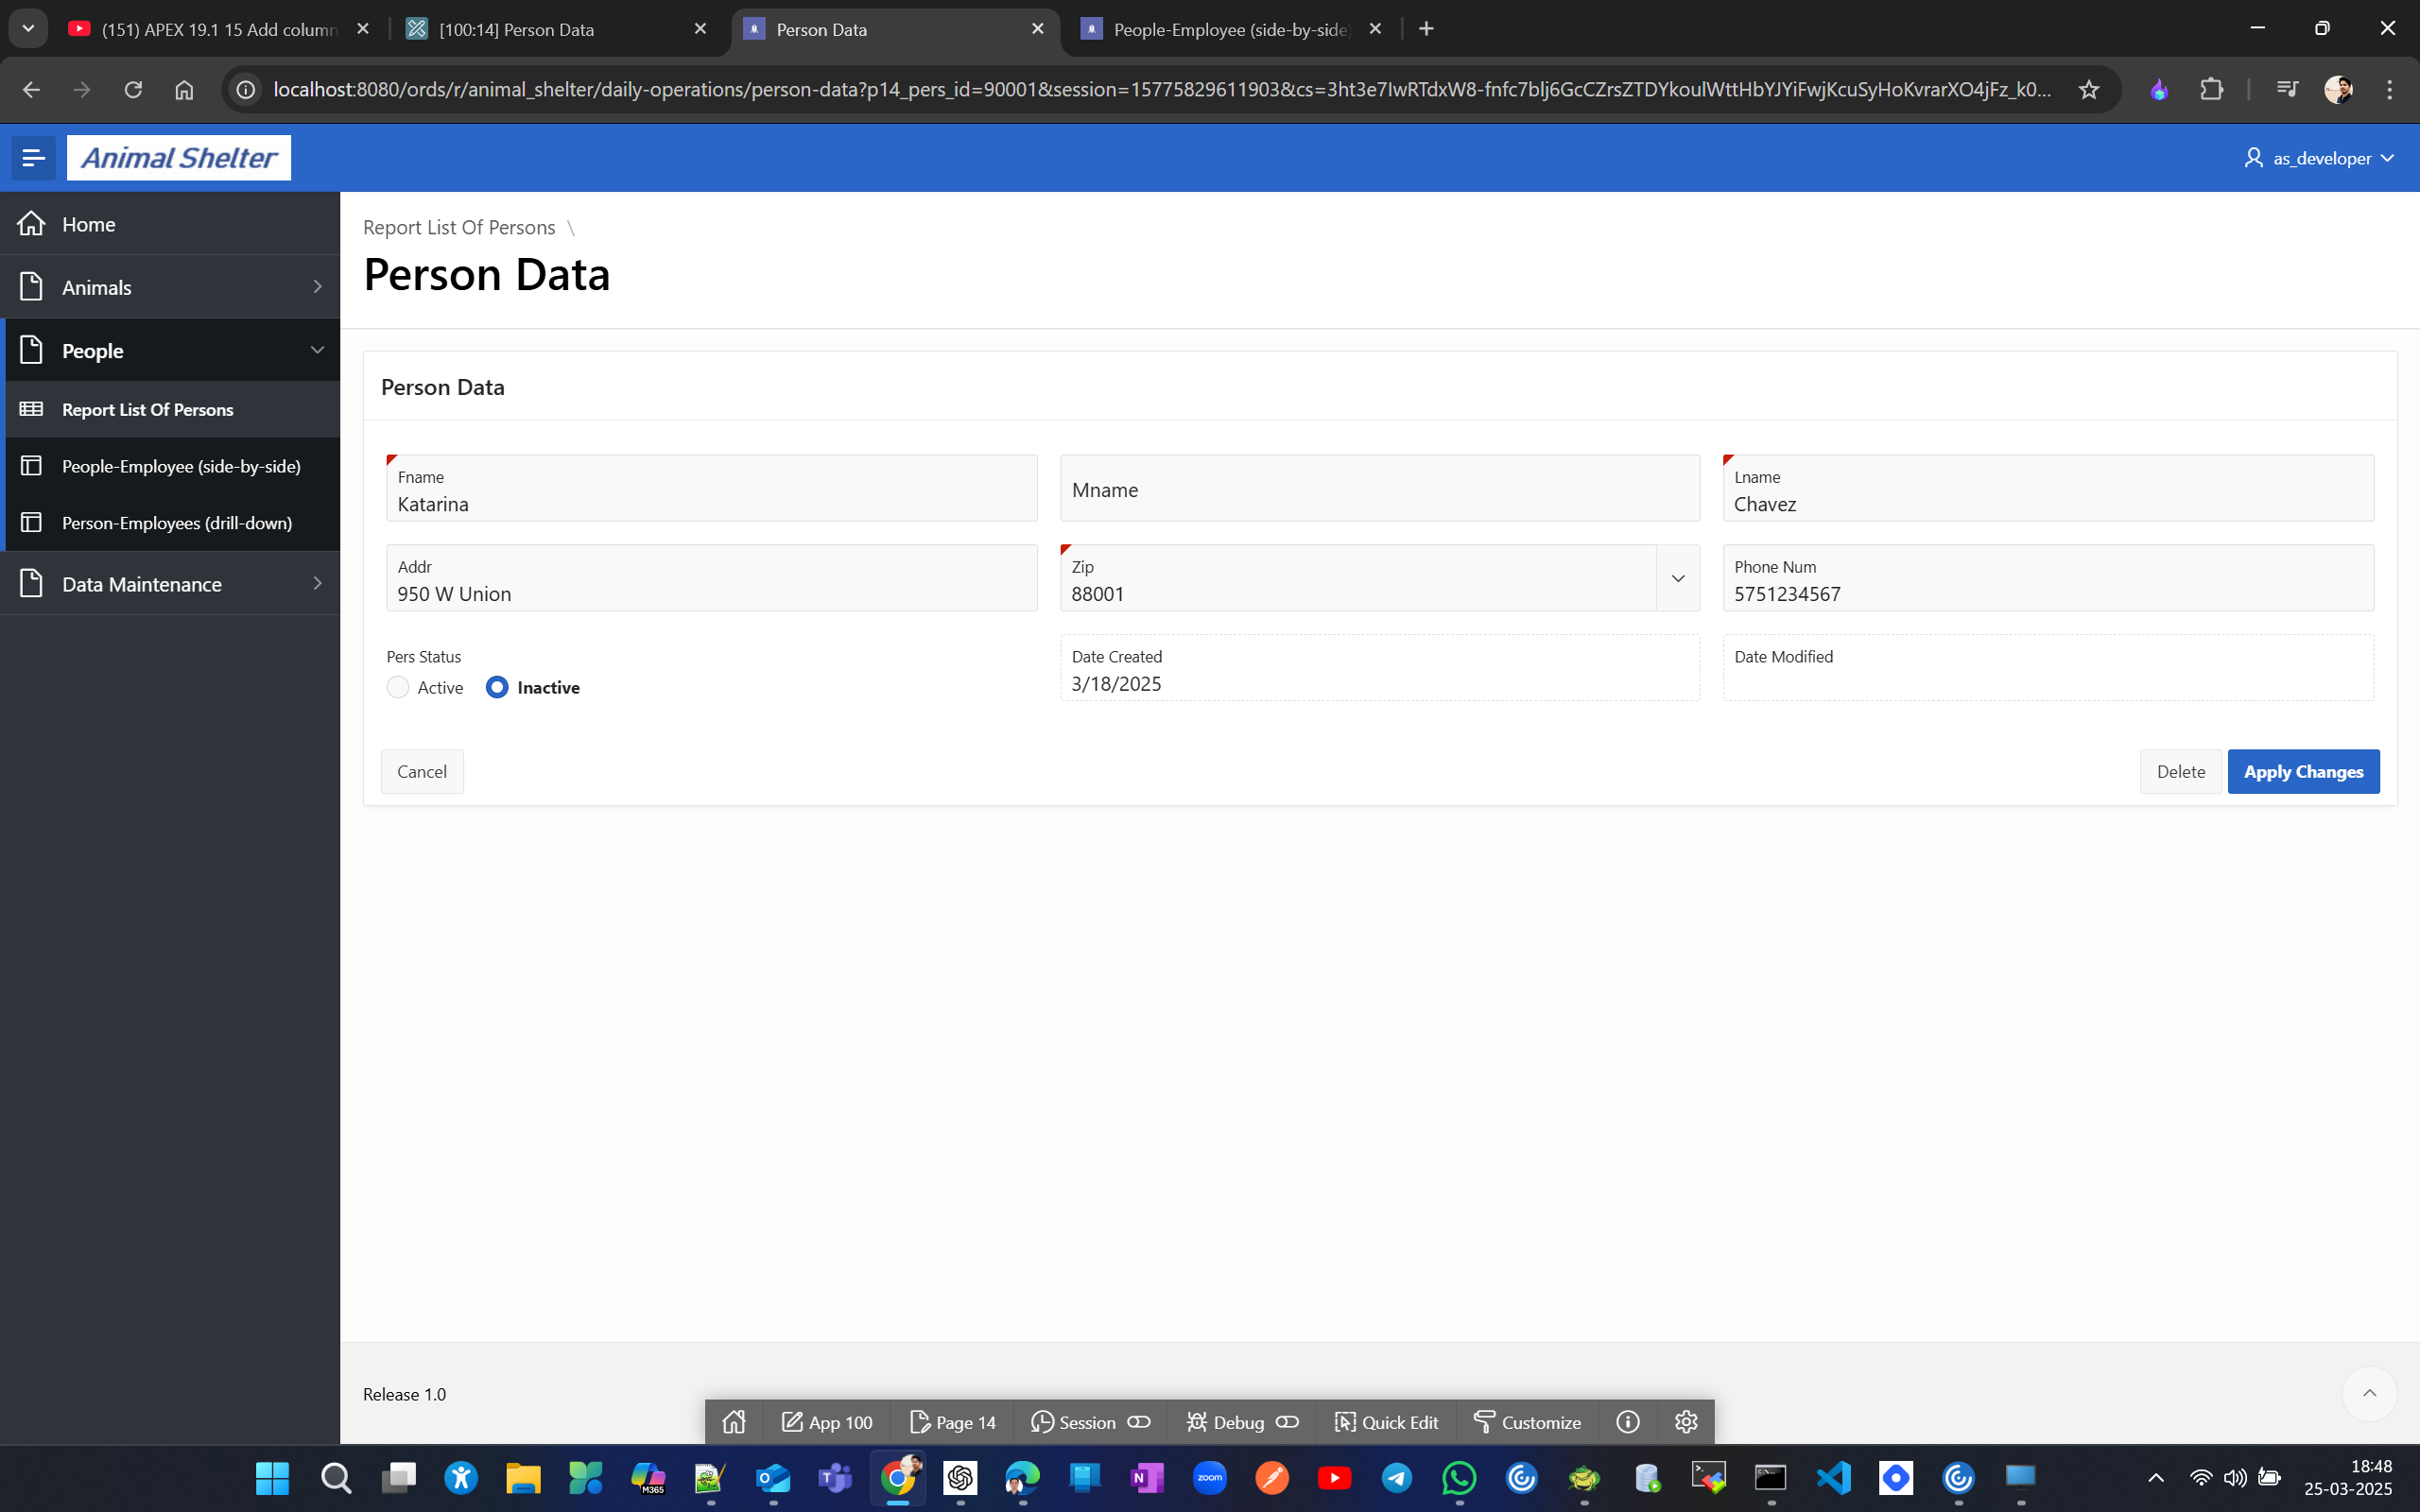
After change
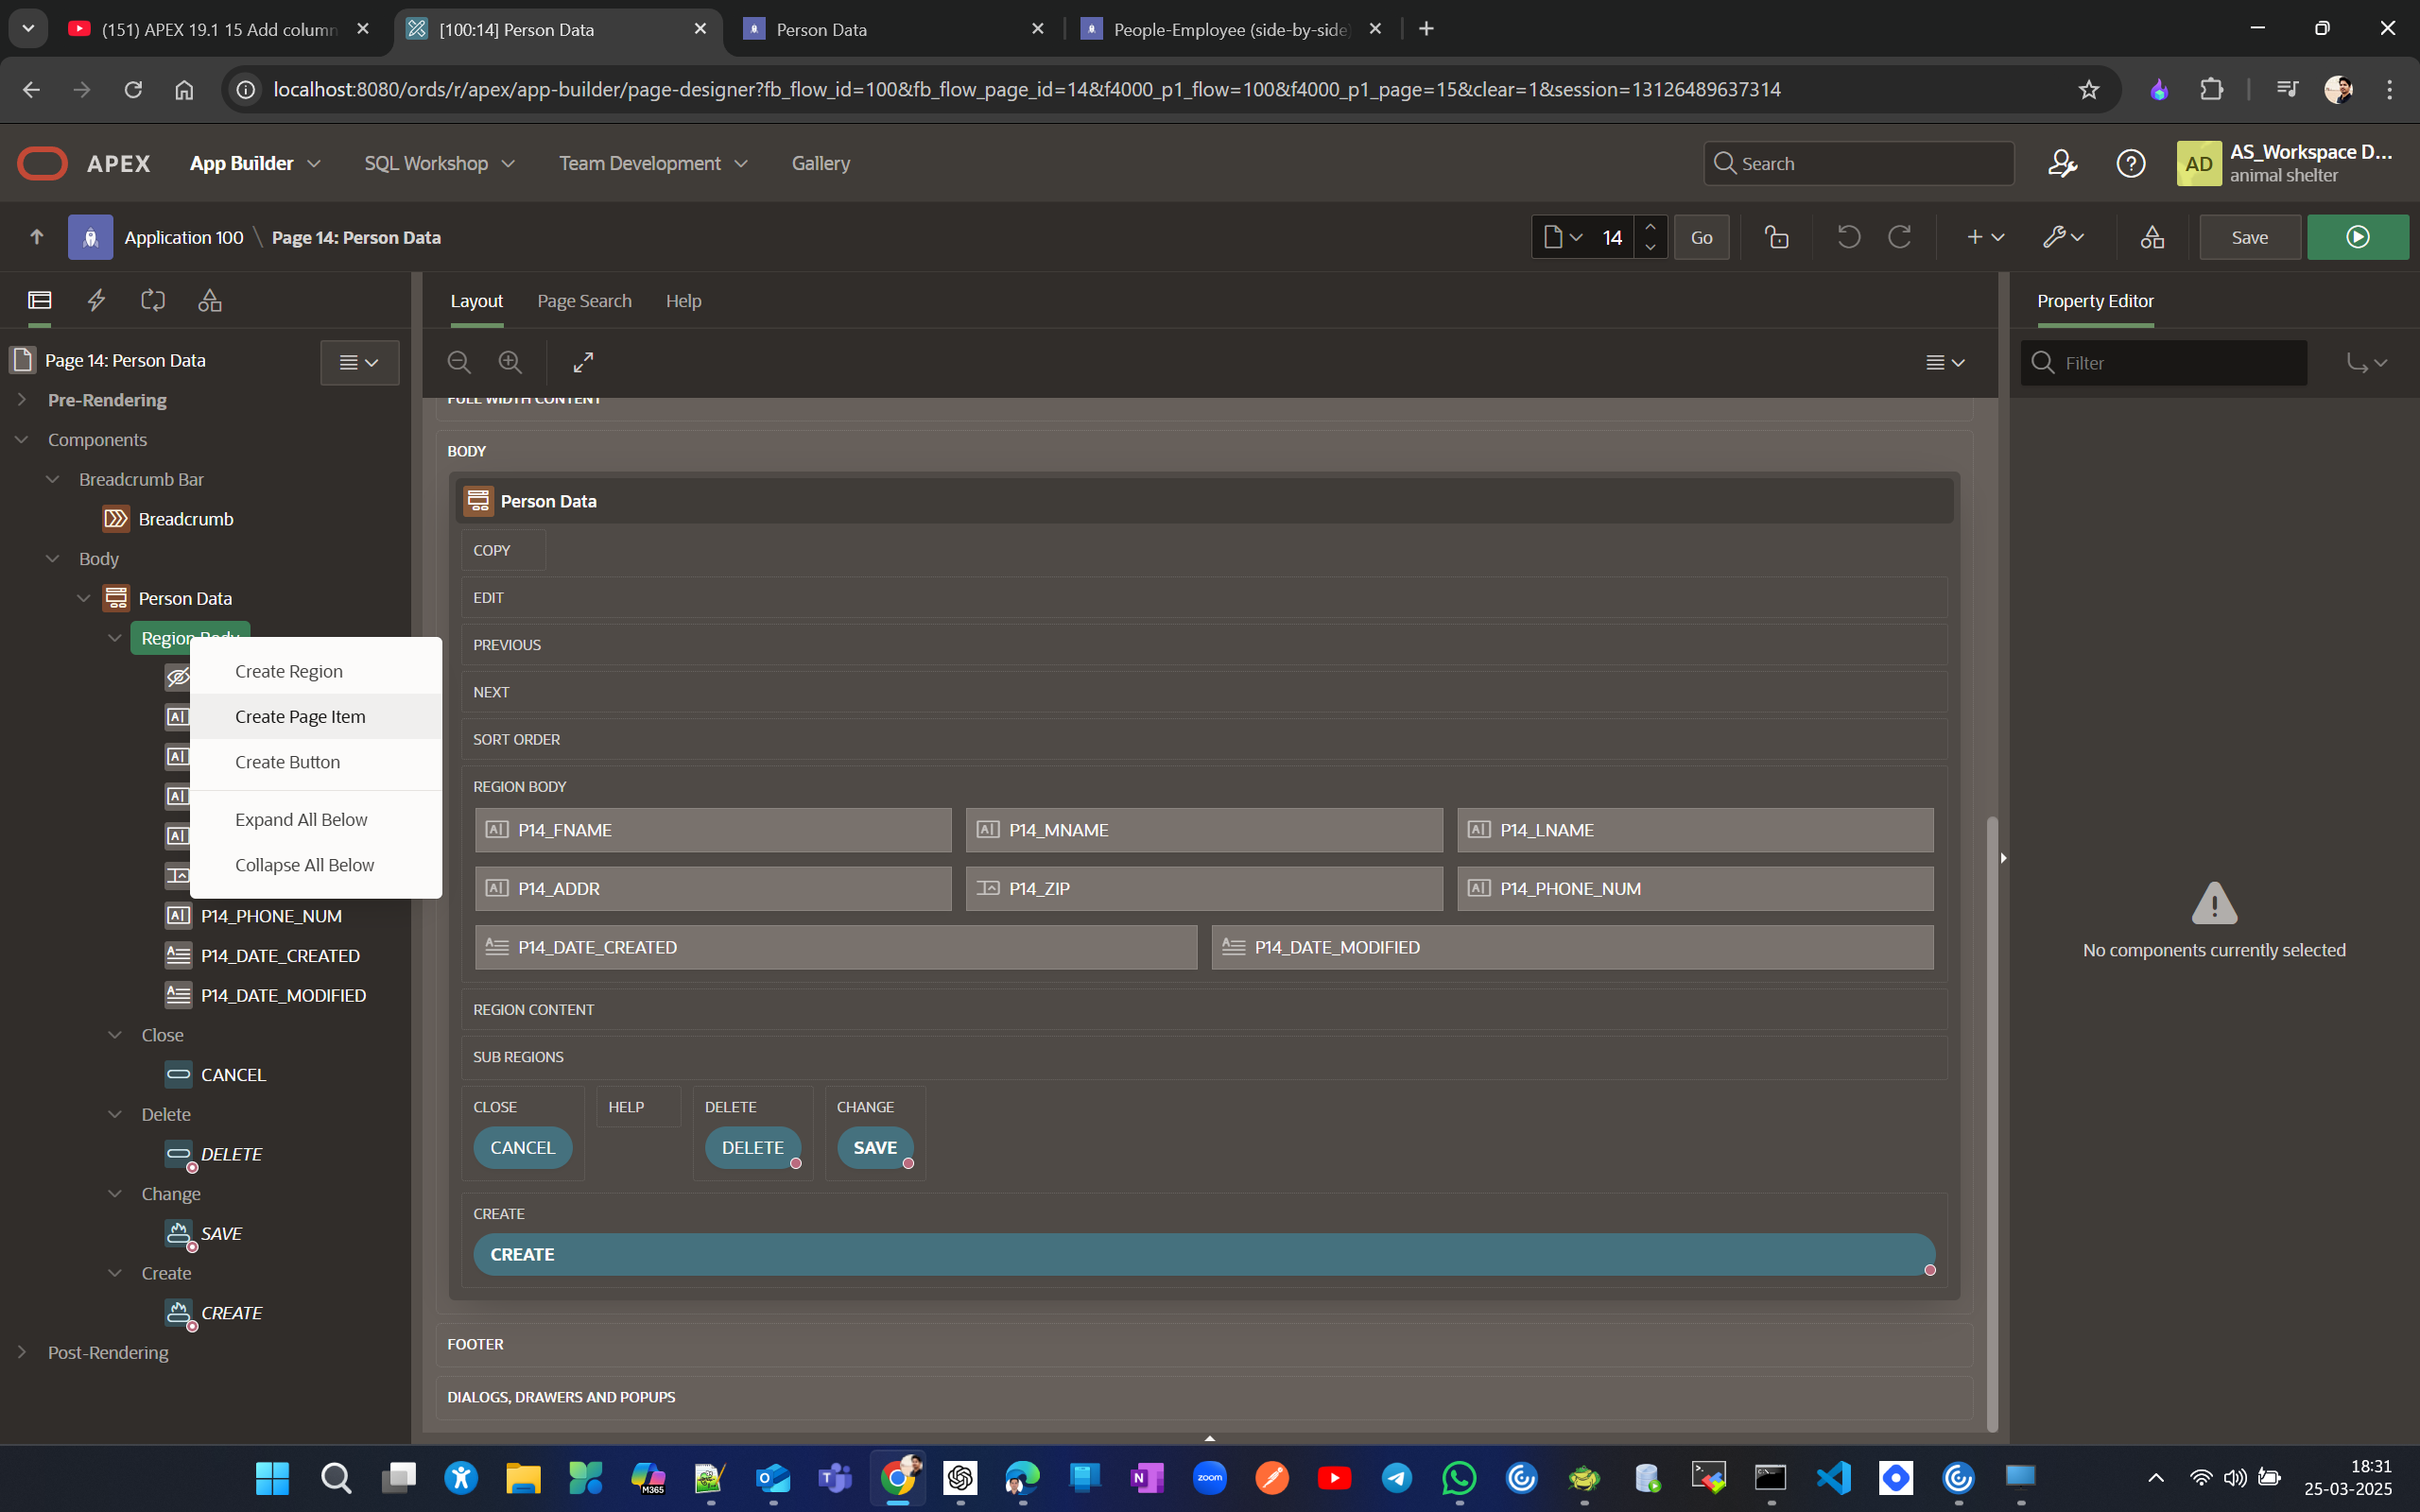
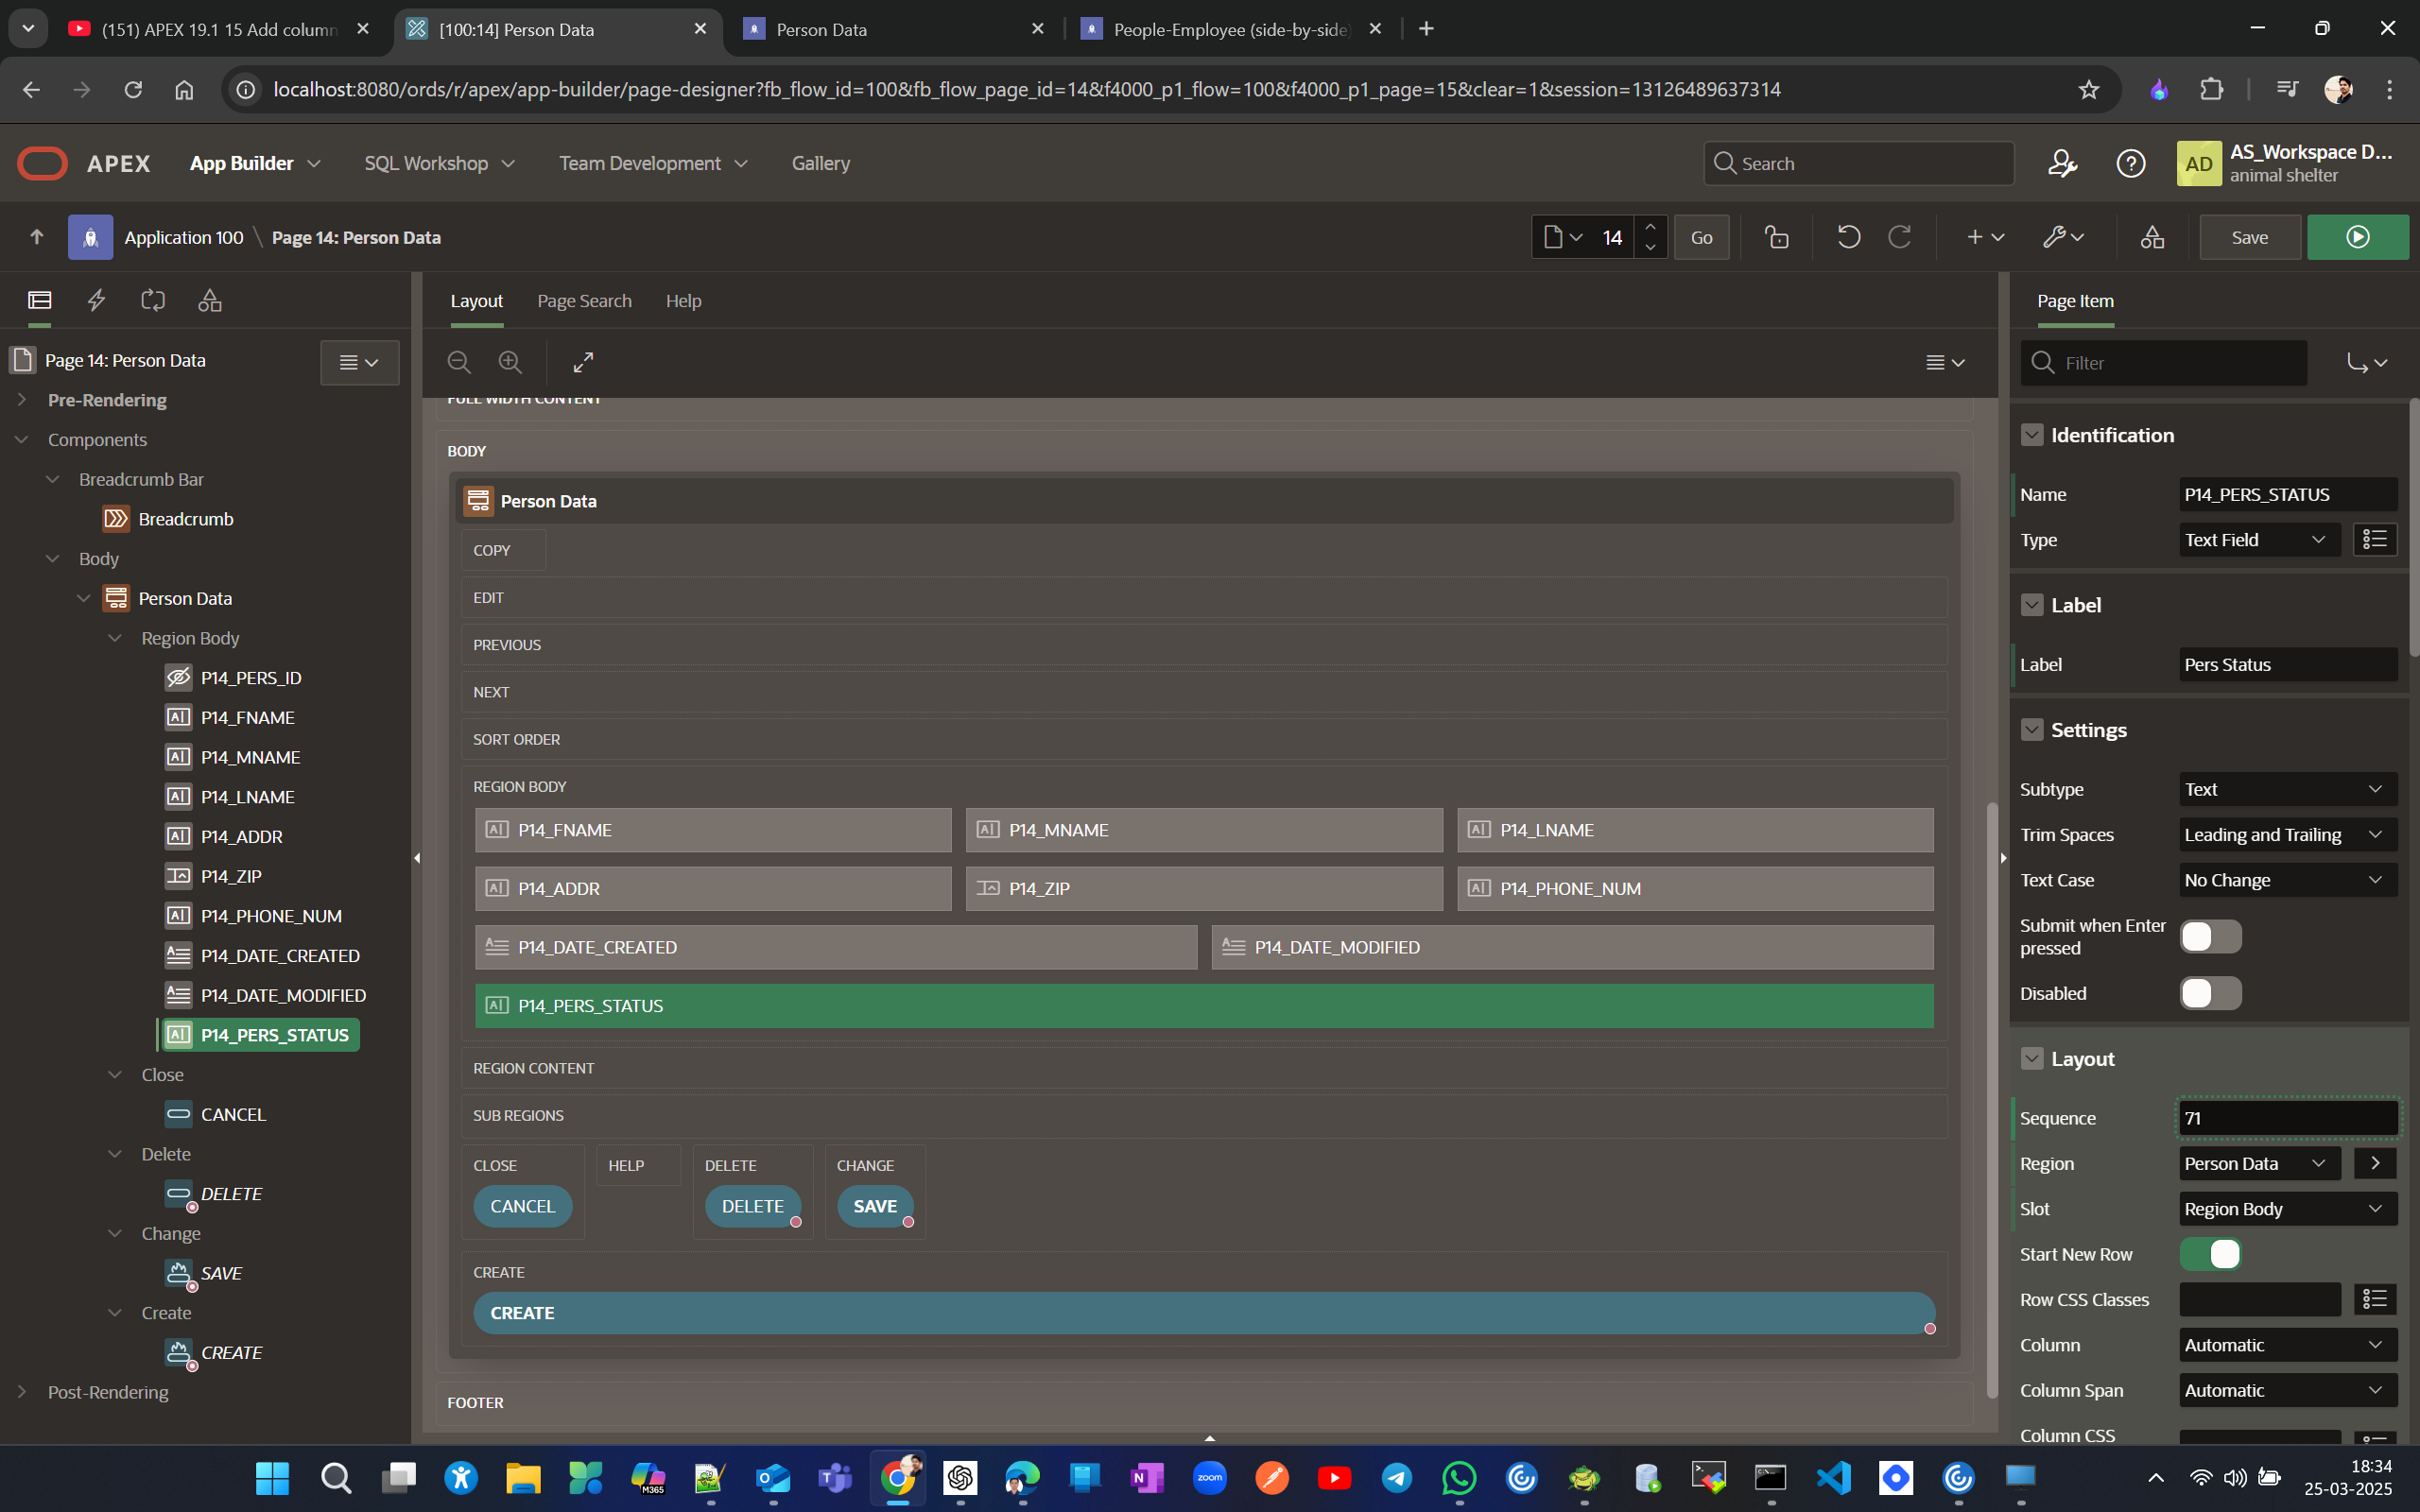
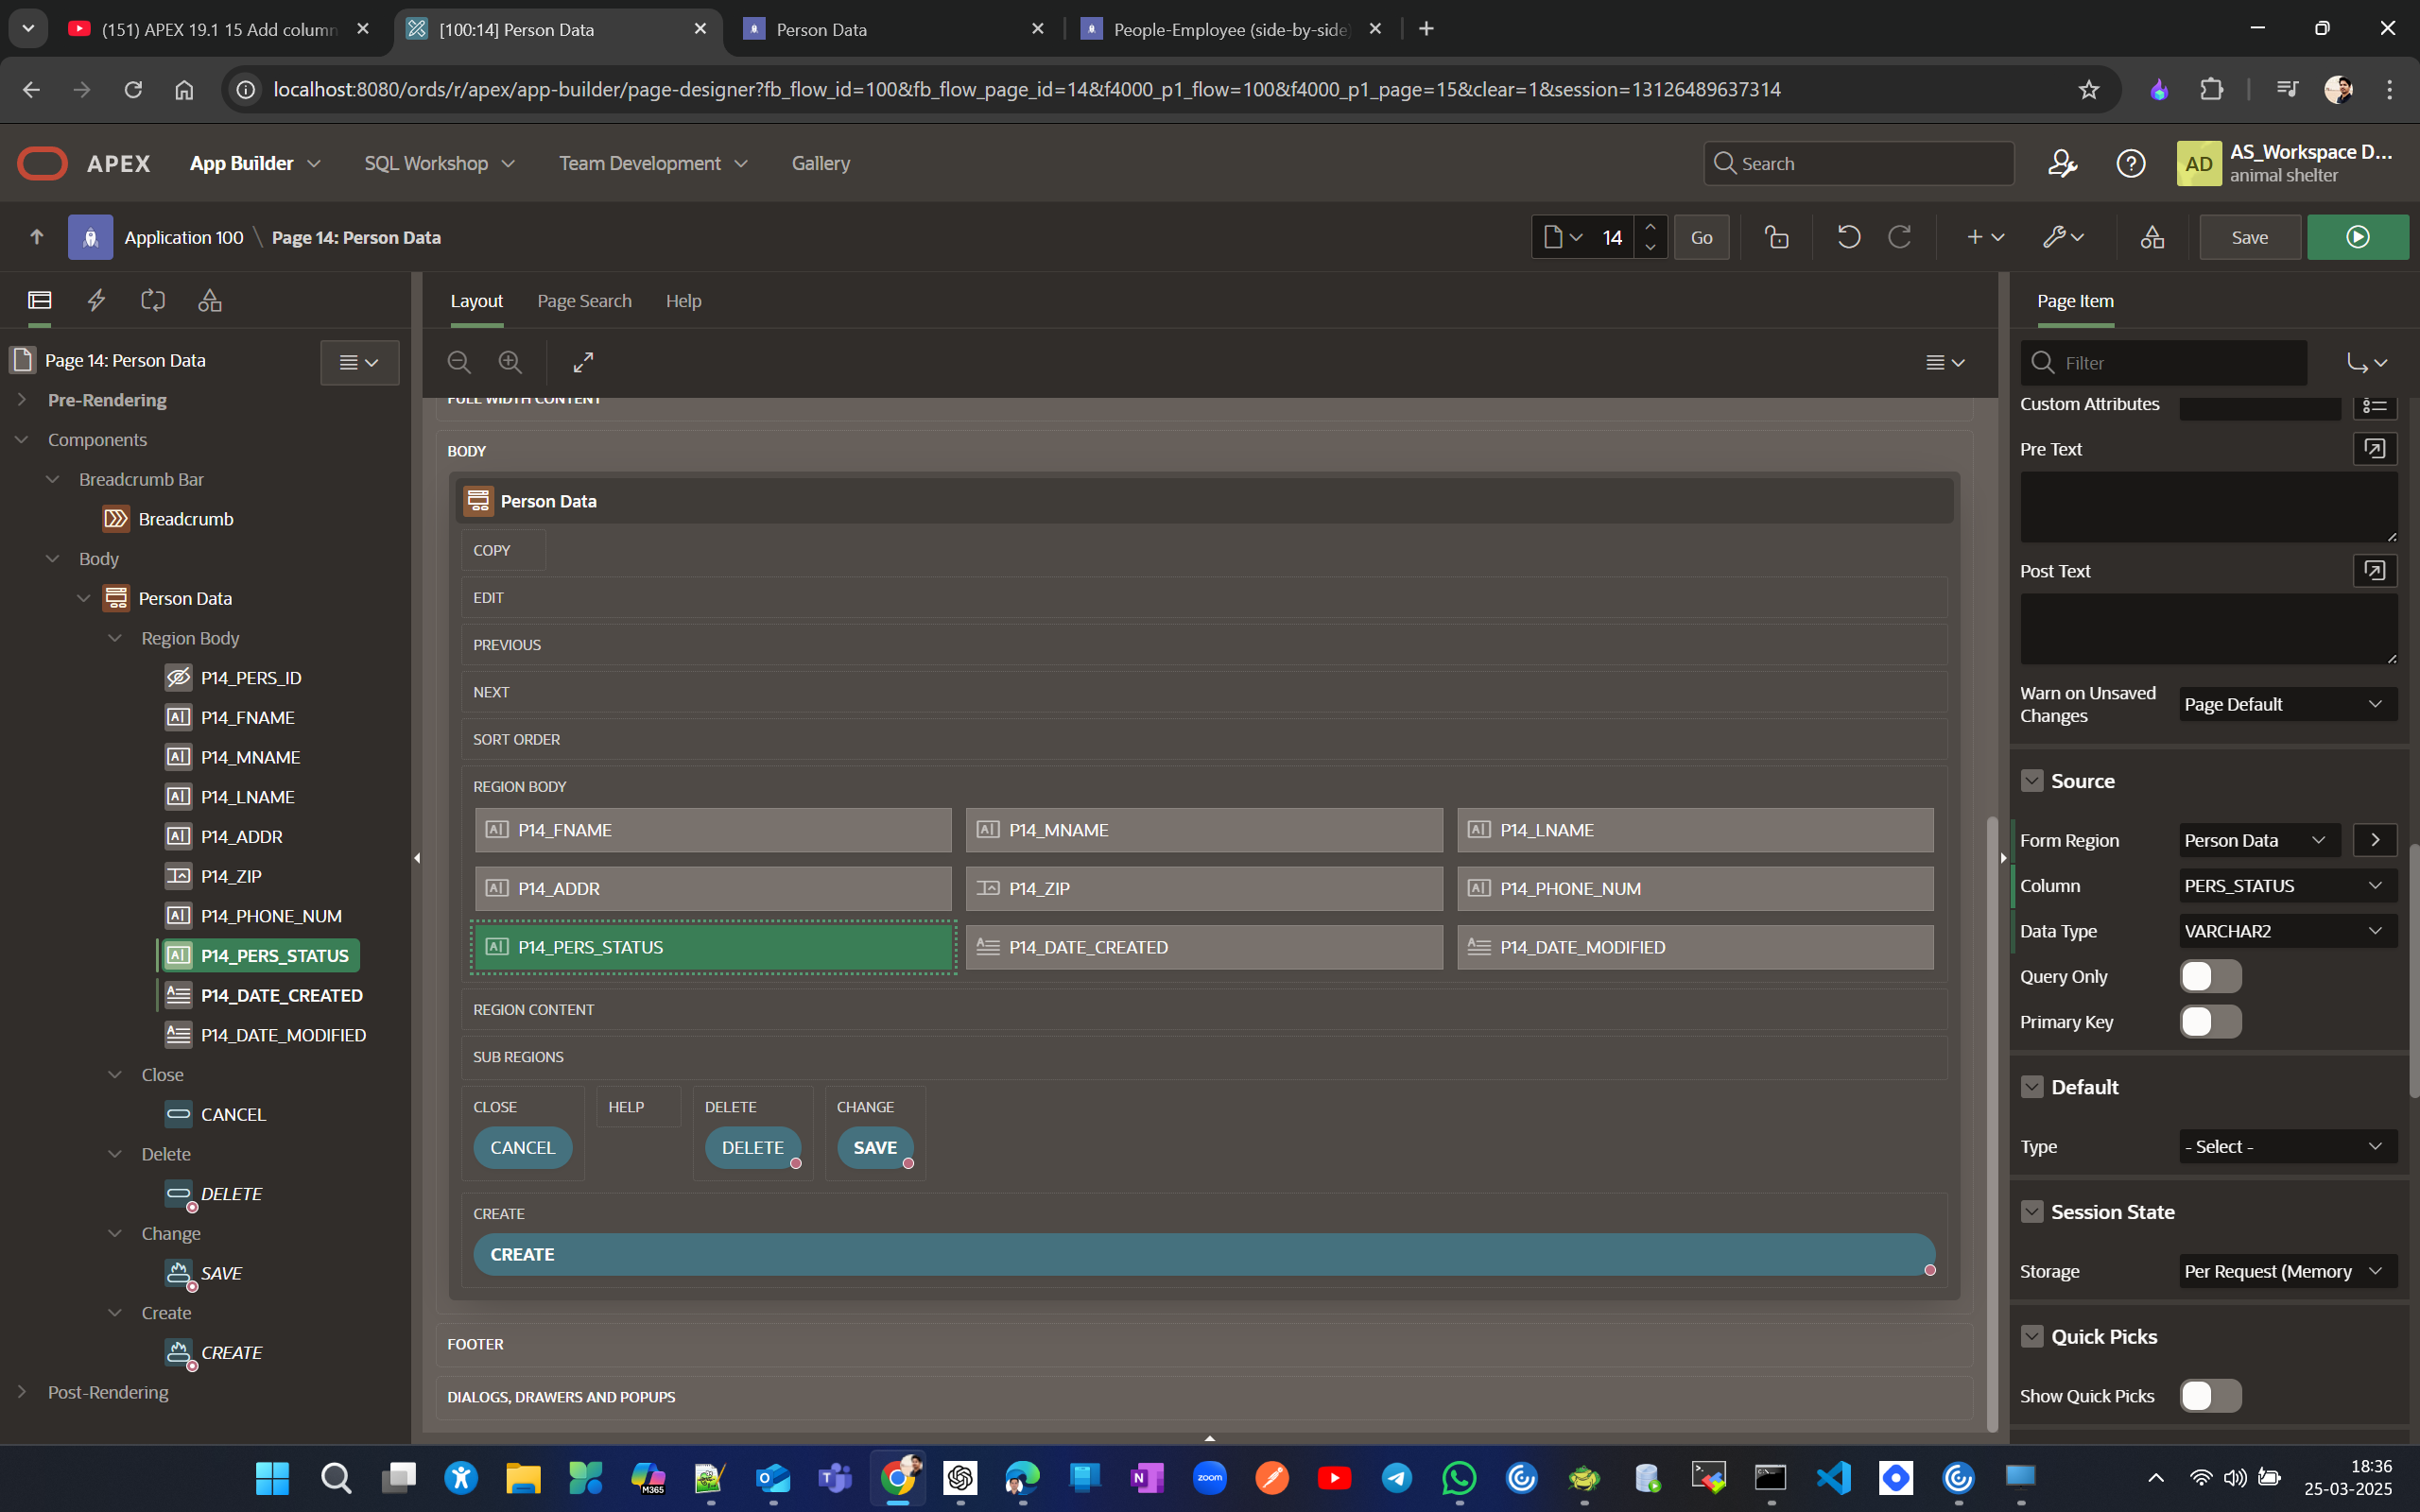
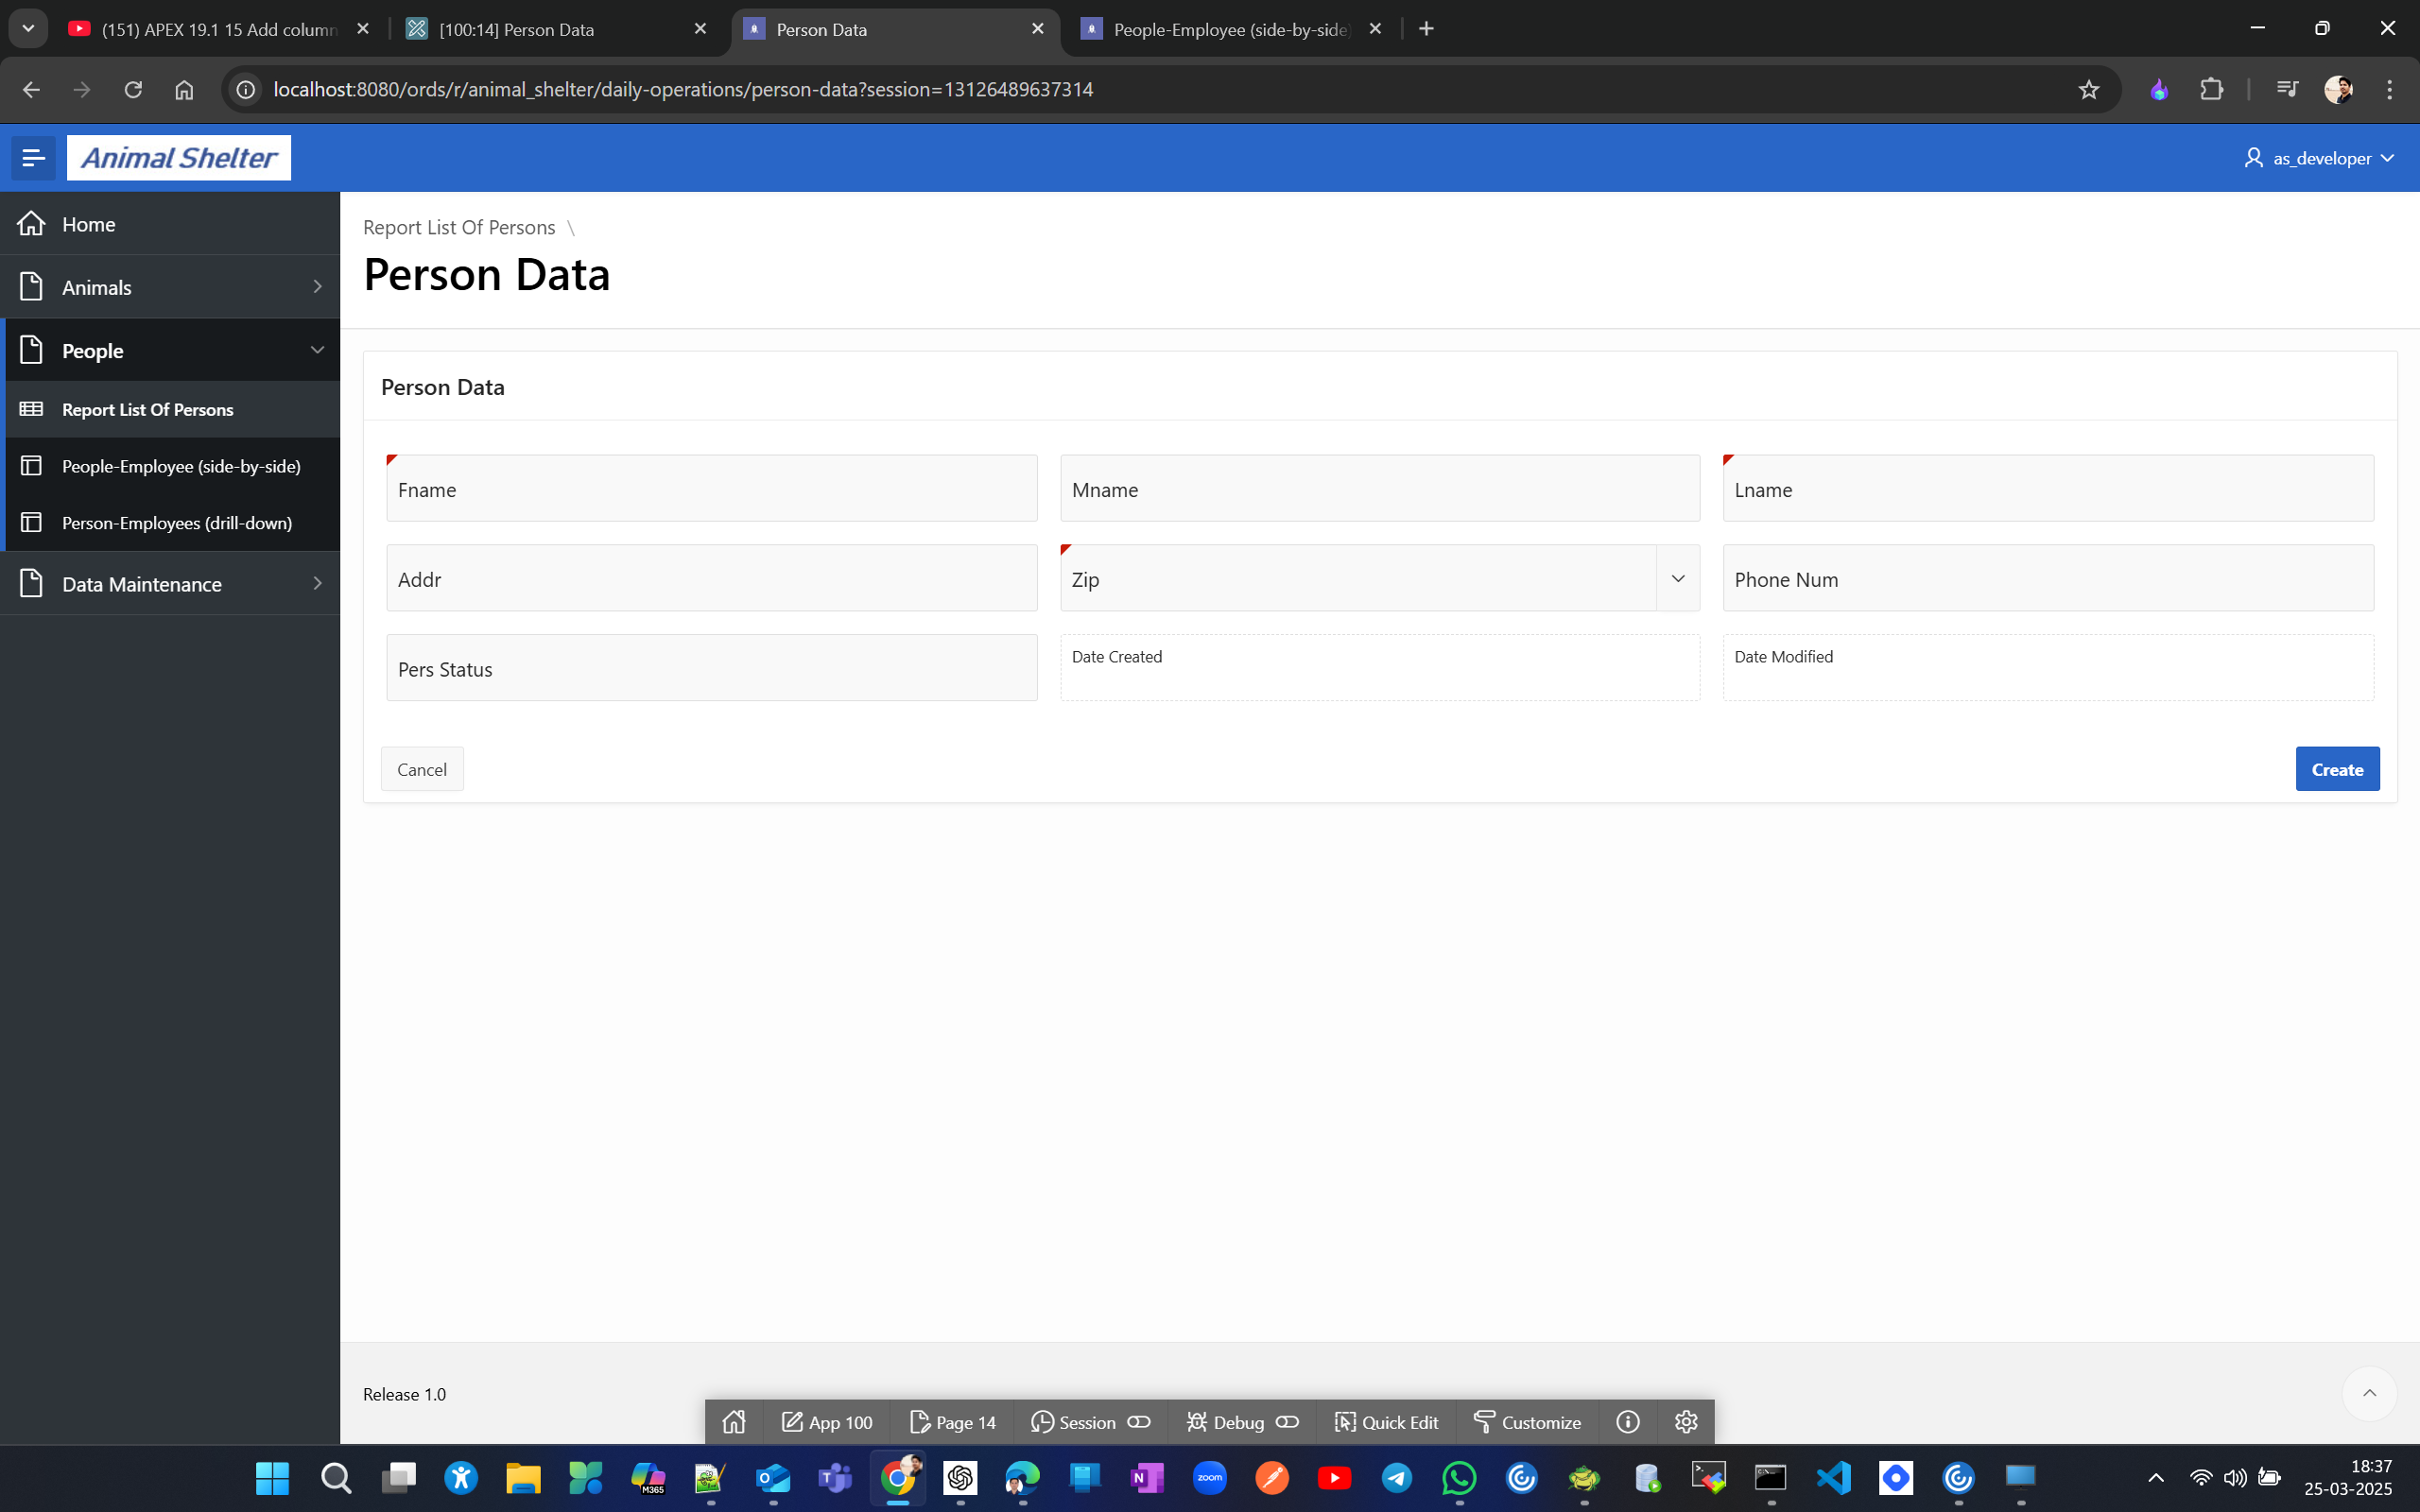
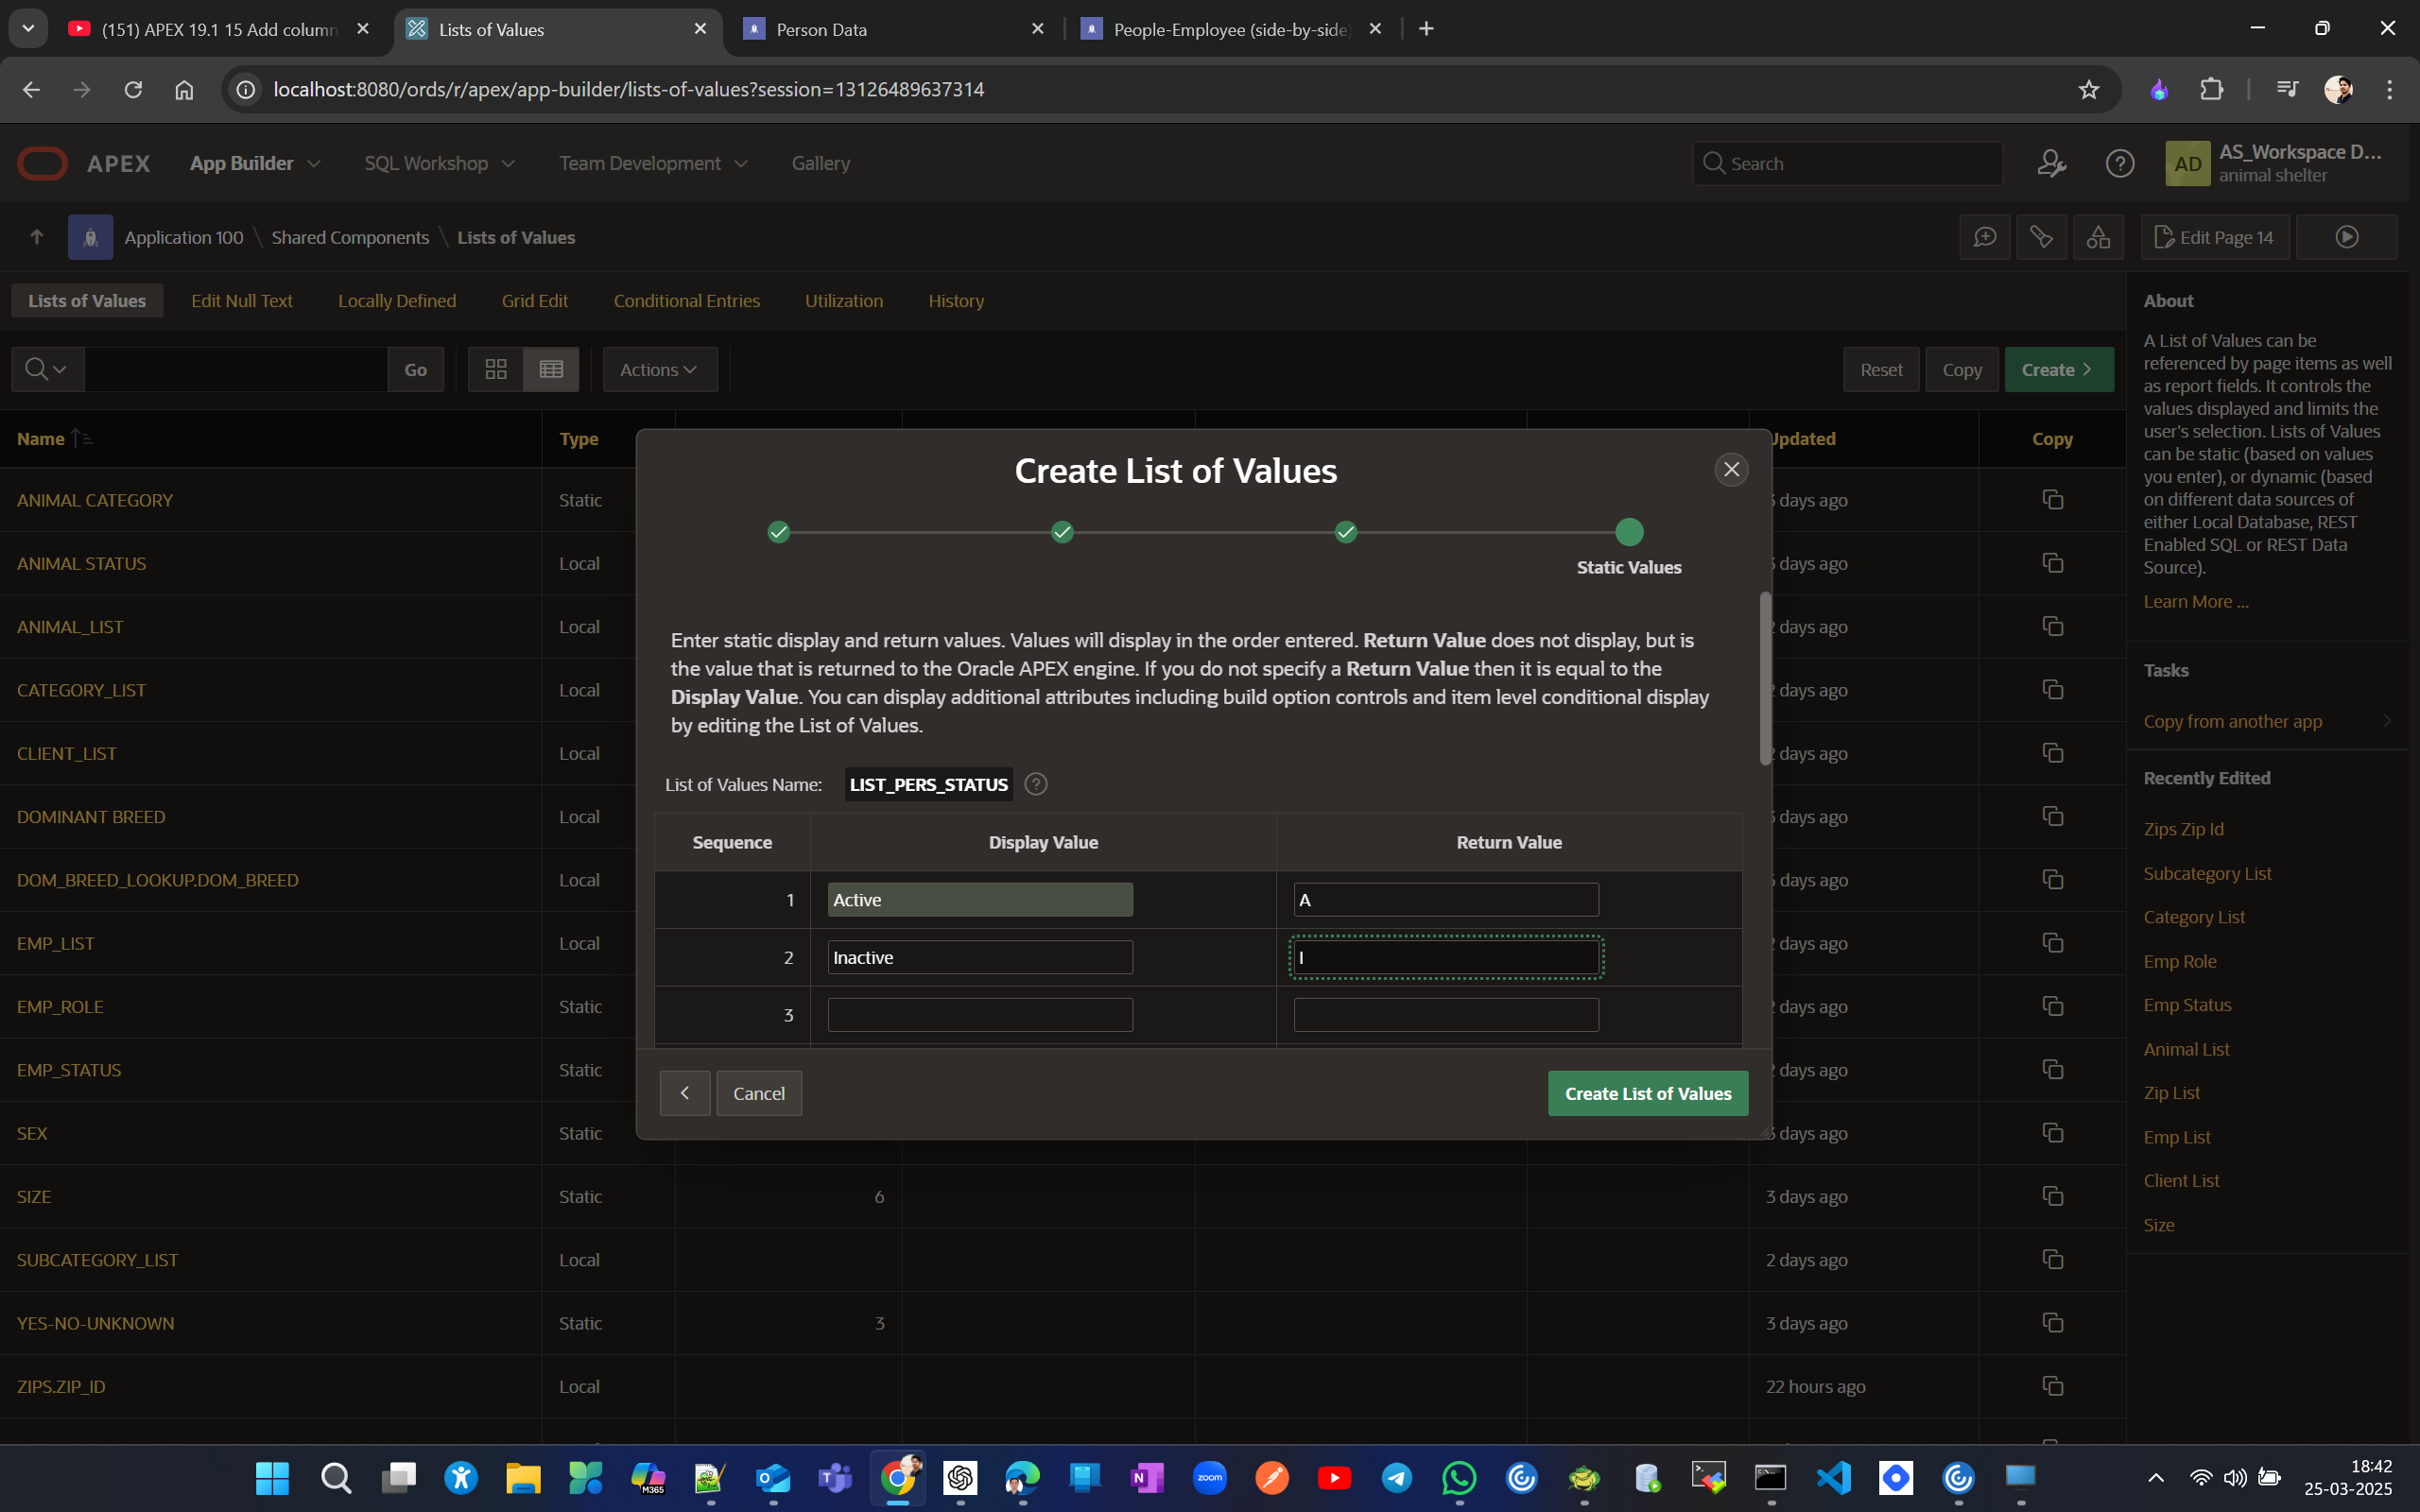
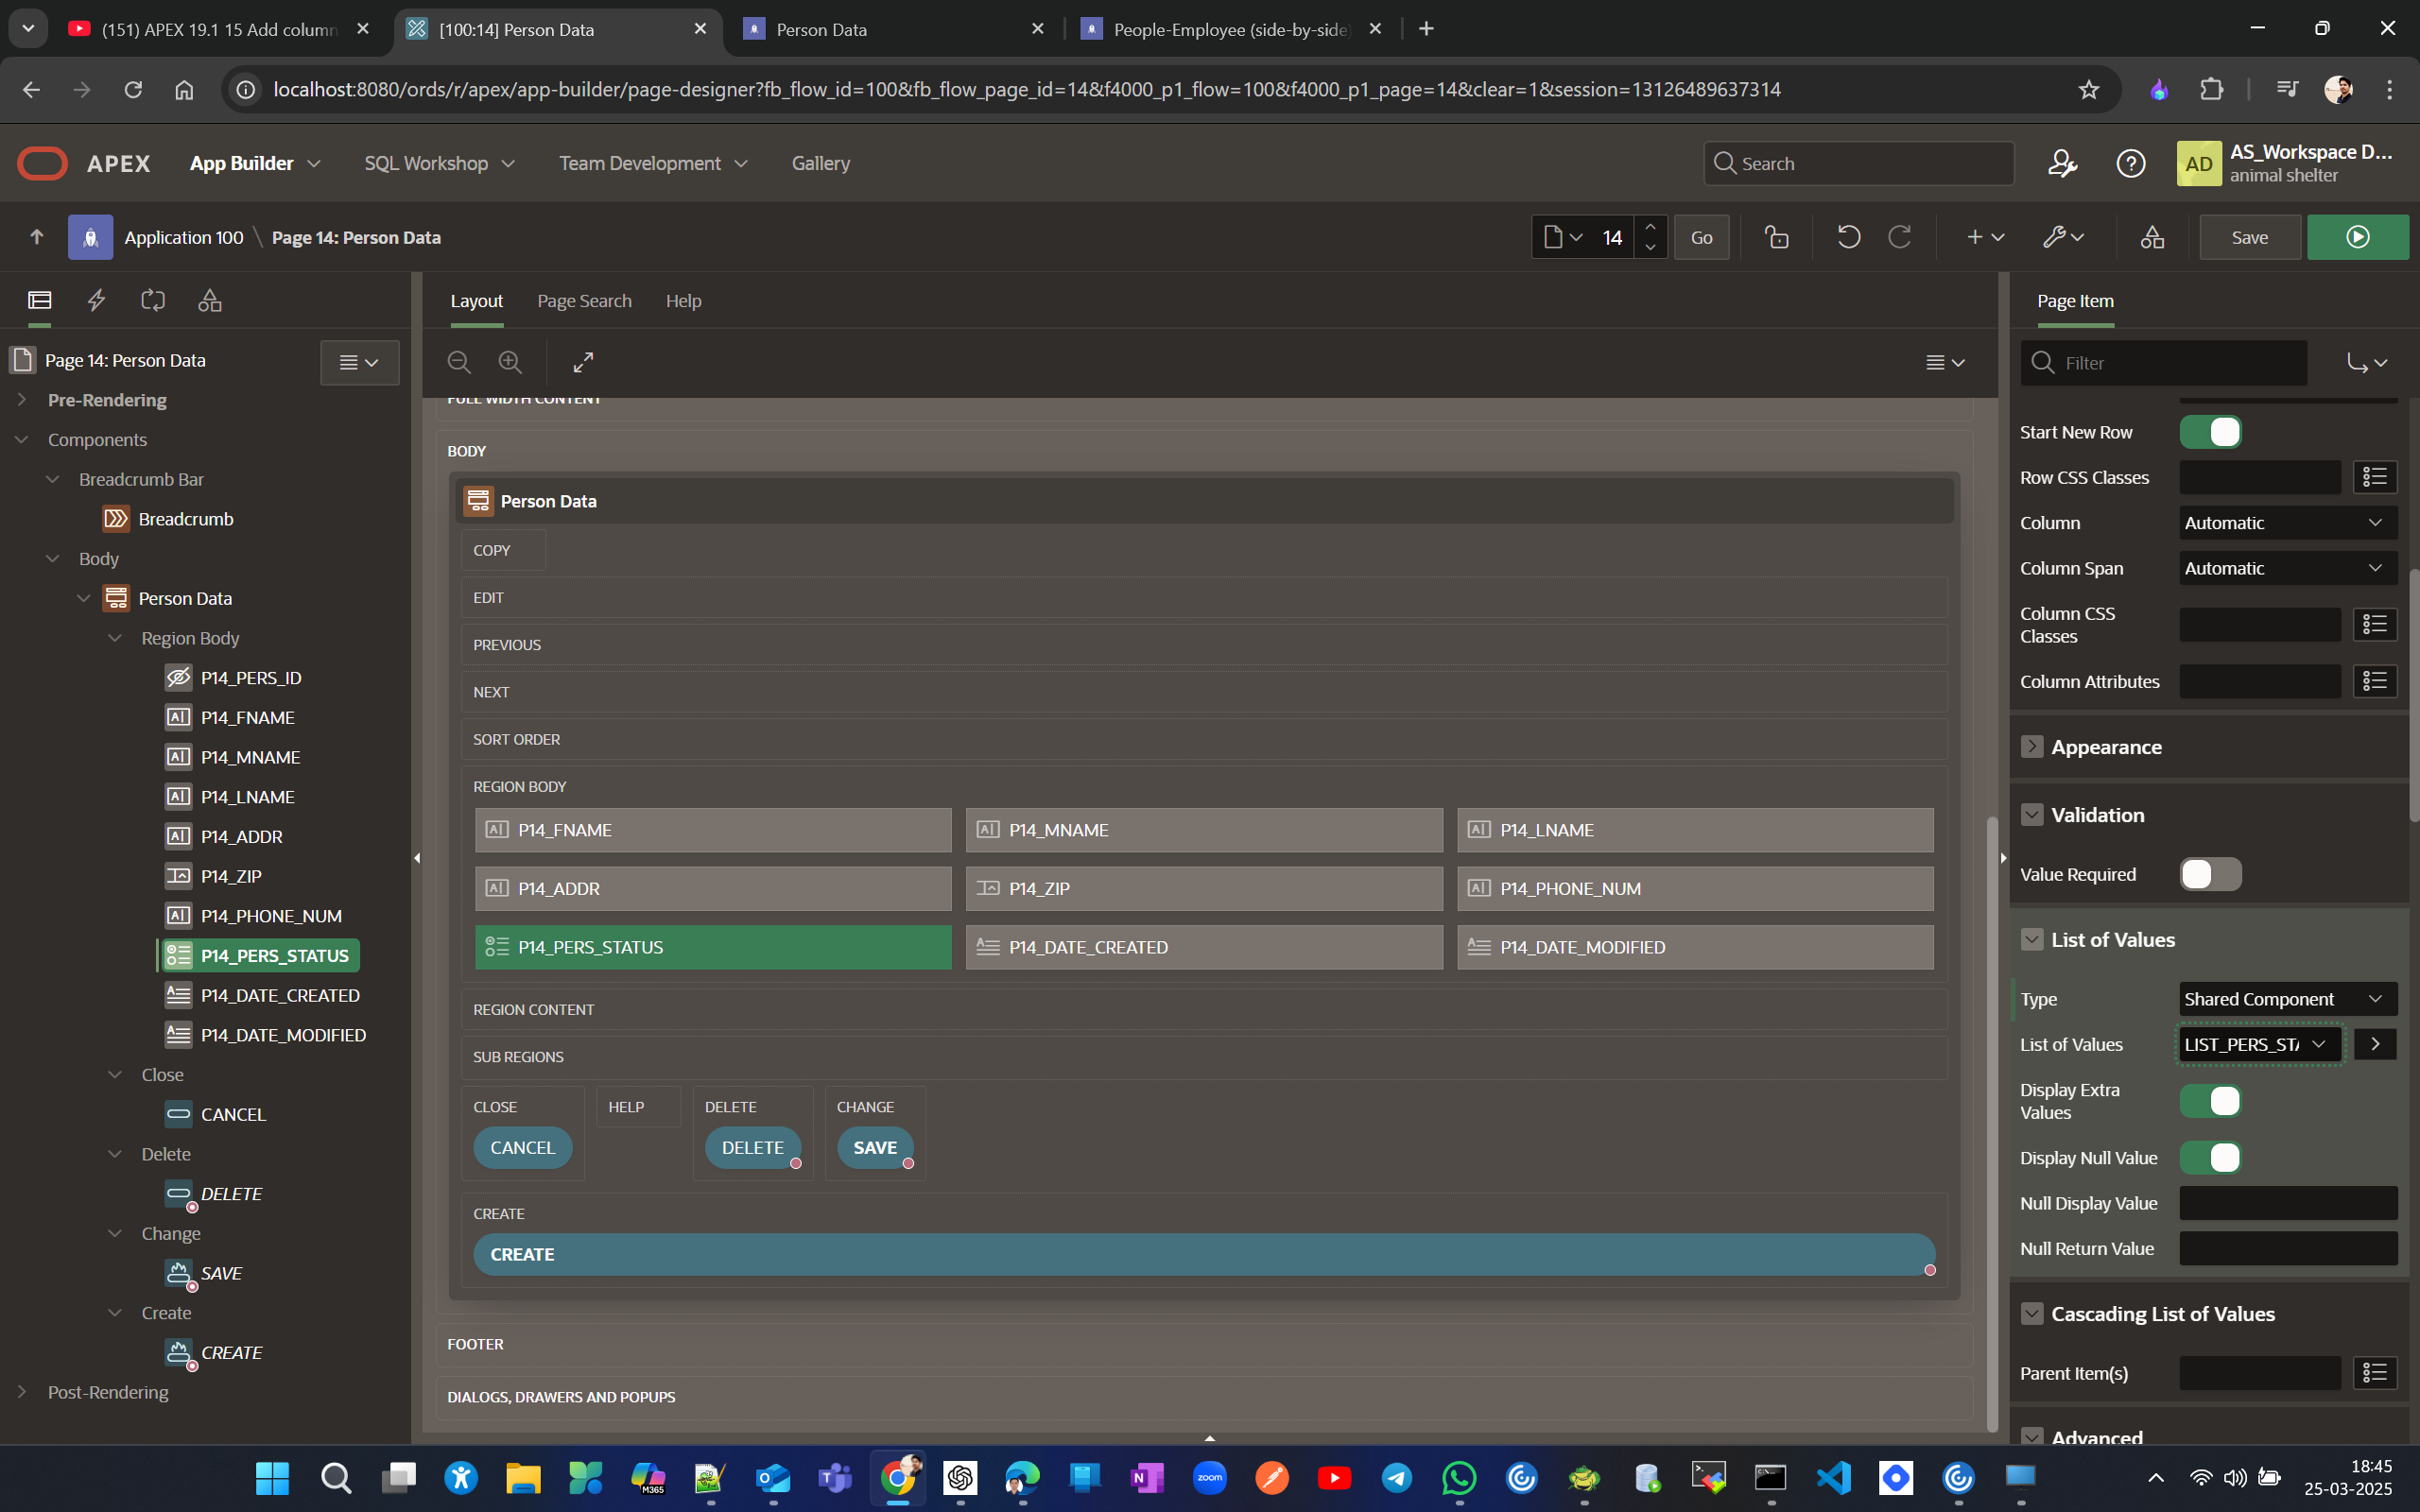
Now lets have a LOV for Pers Status. Create
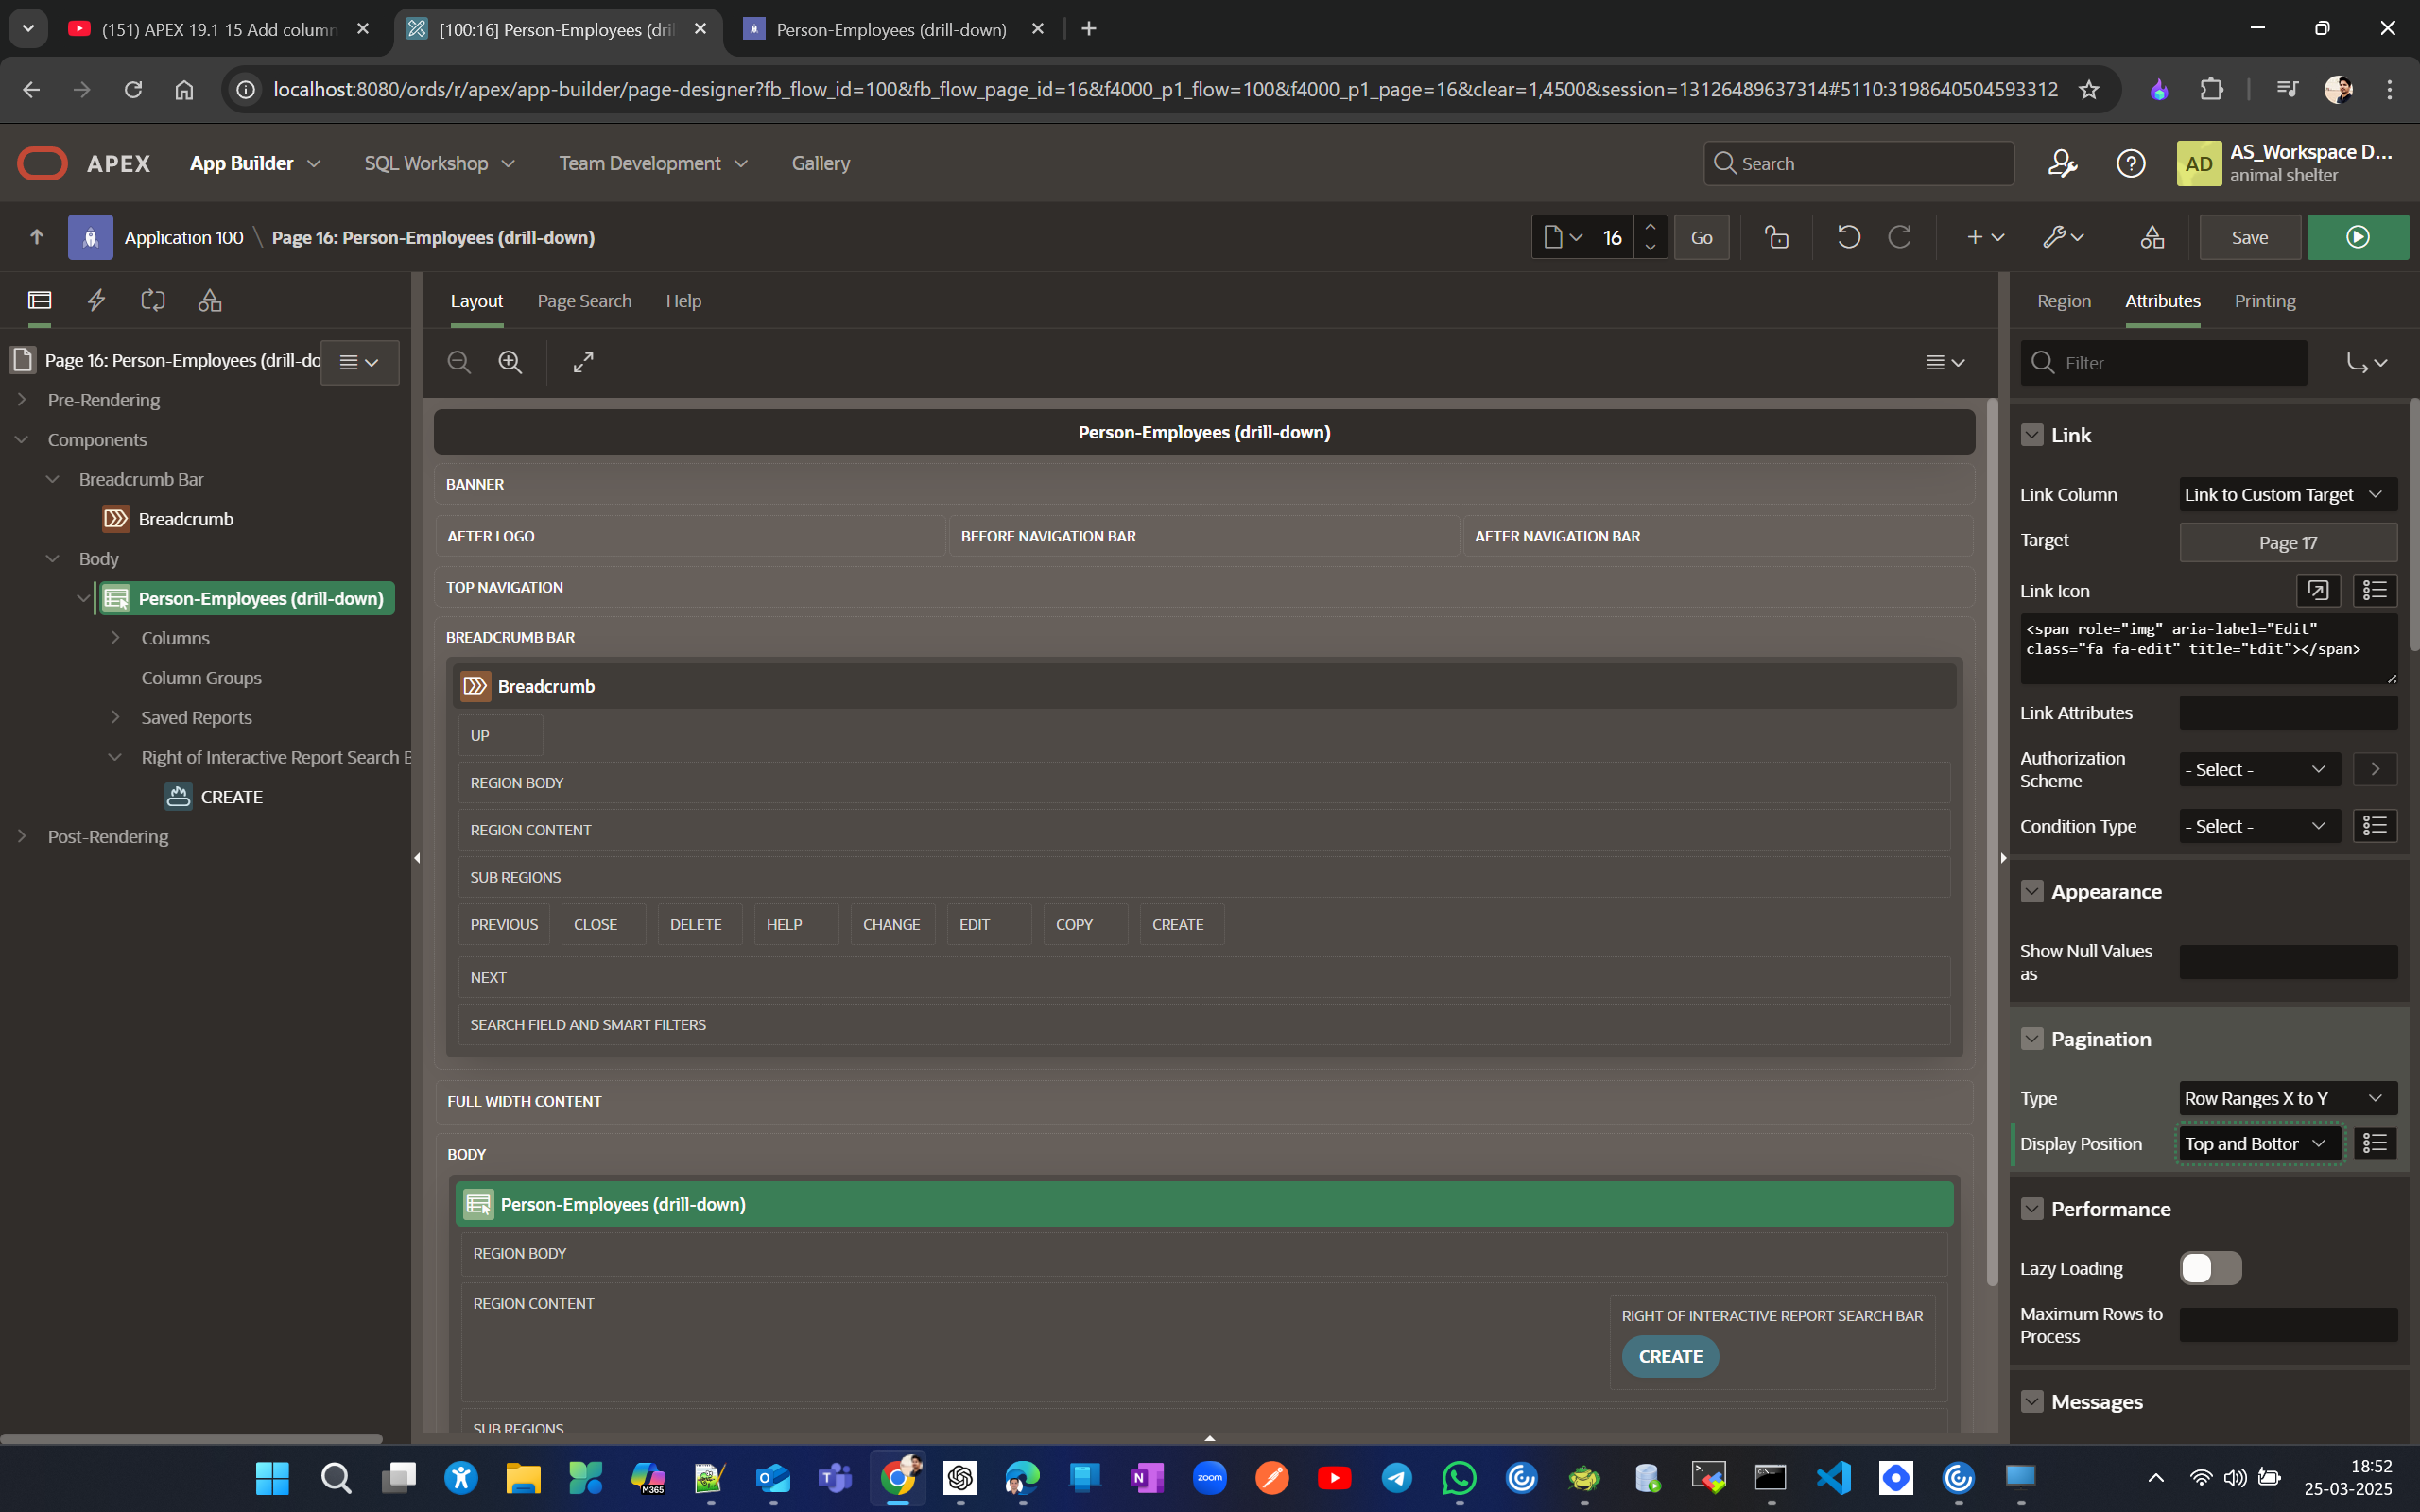
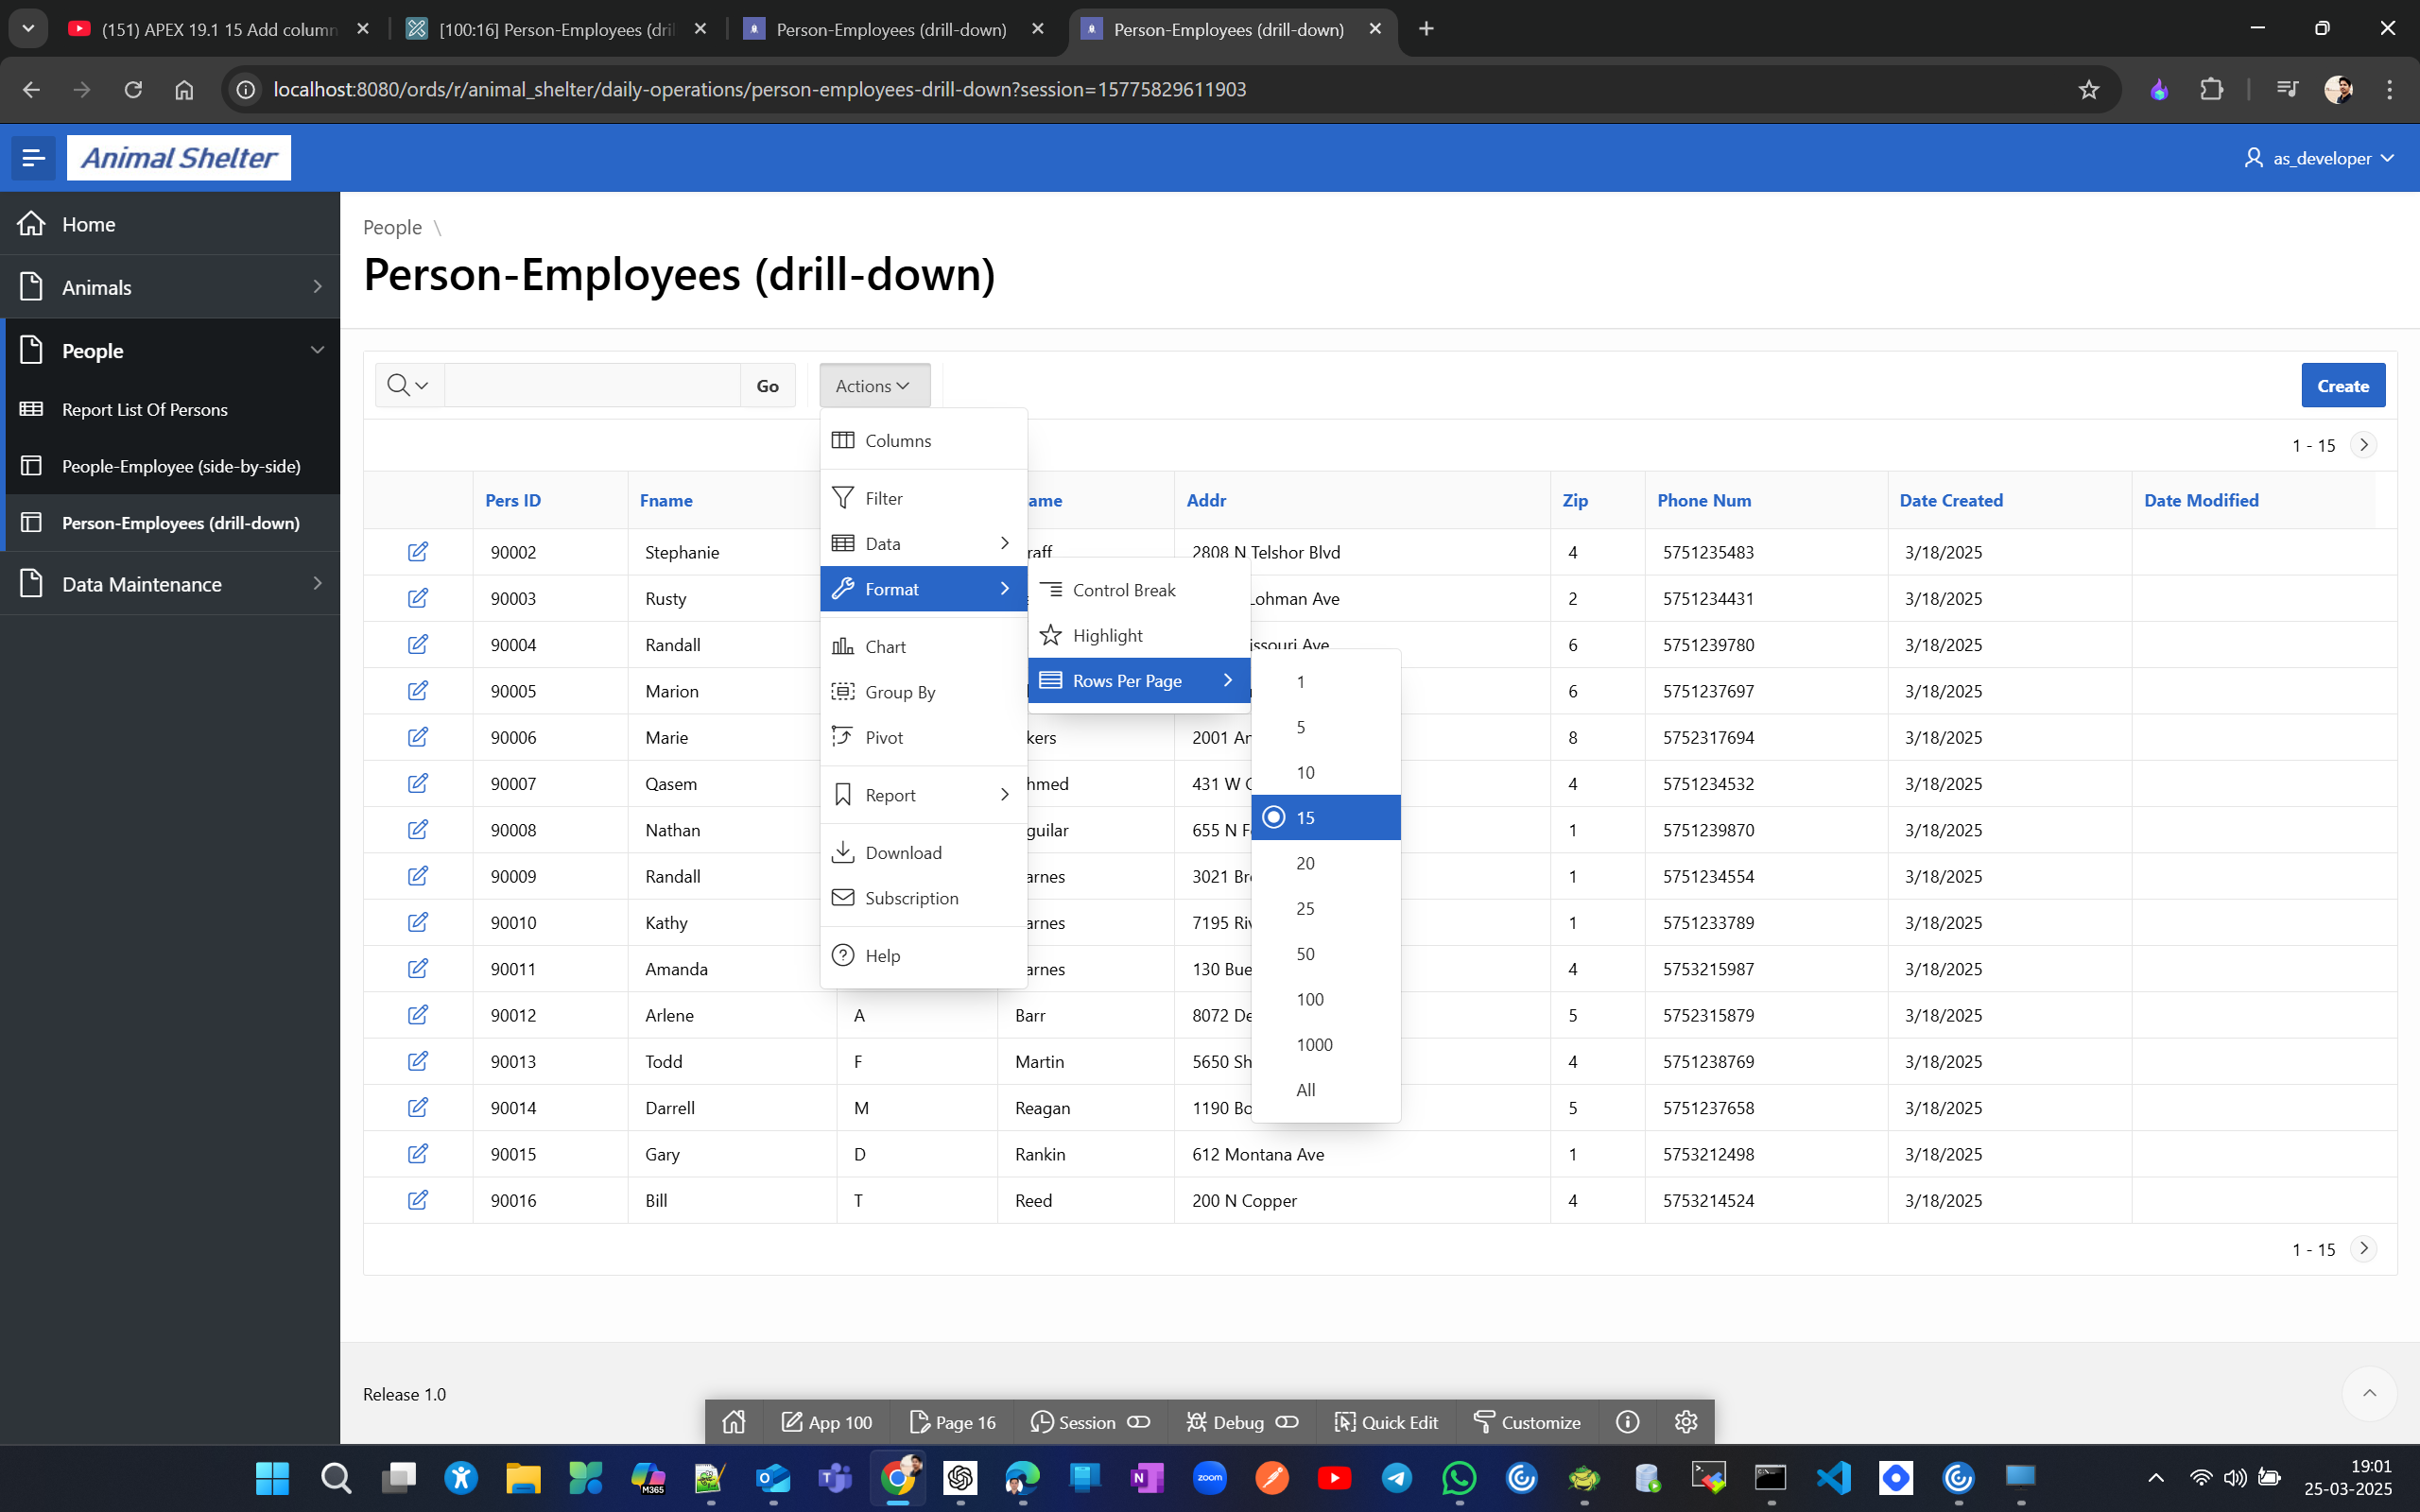
Now Select the drill-down report under home and change pagination attributes in the page designer to display page navigation above the report page too.

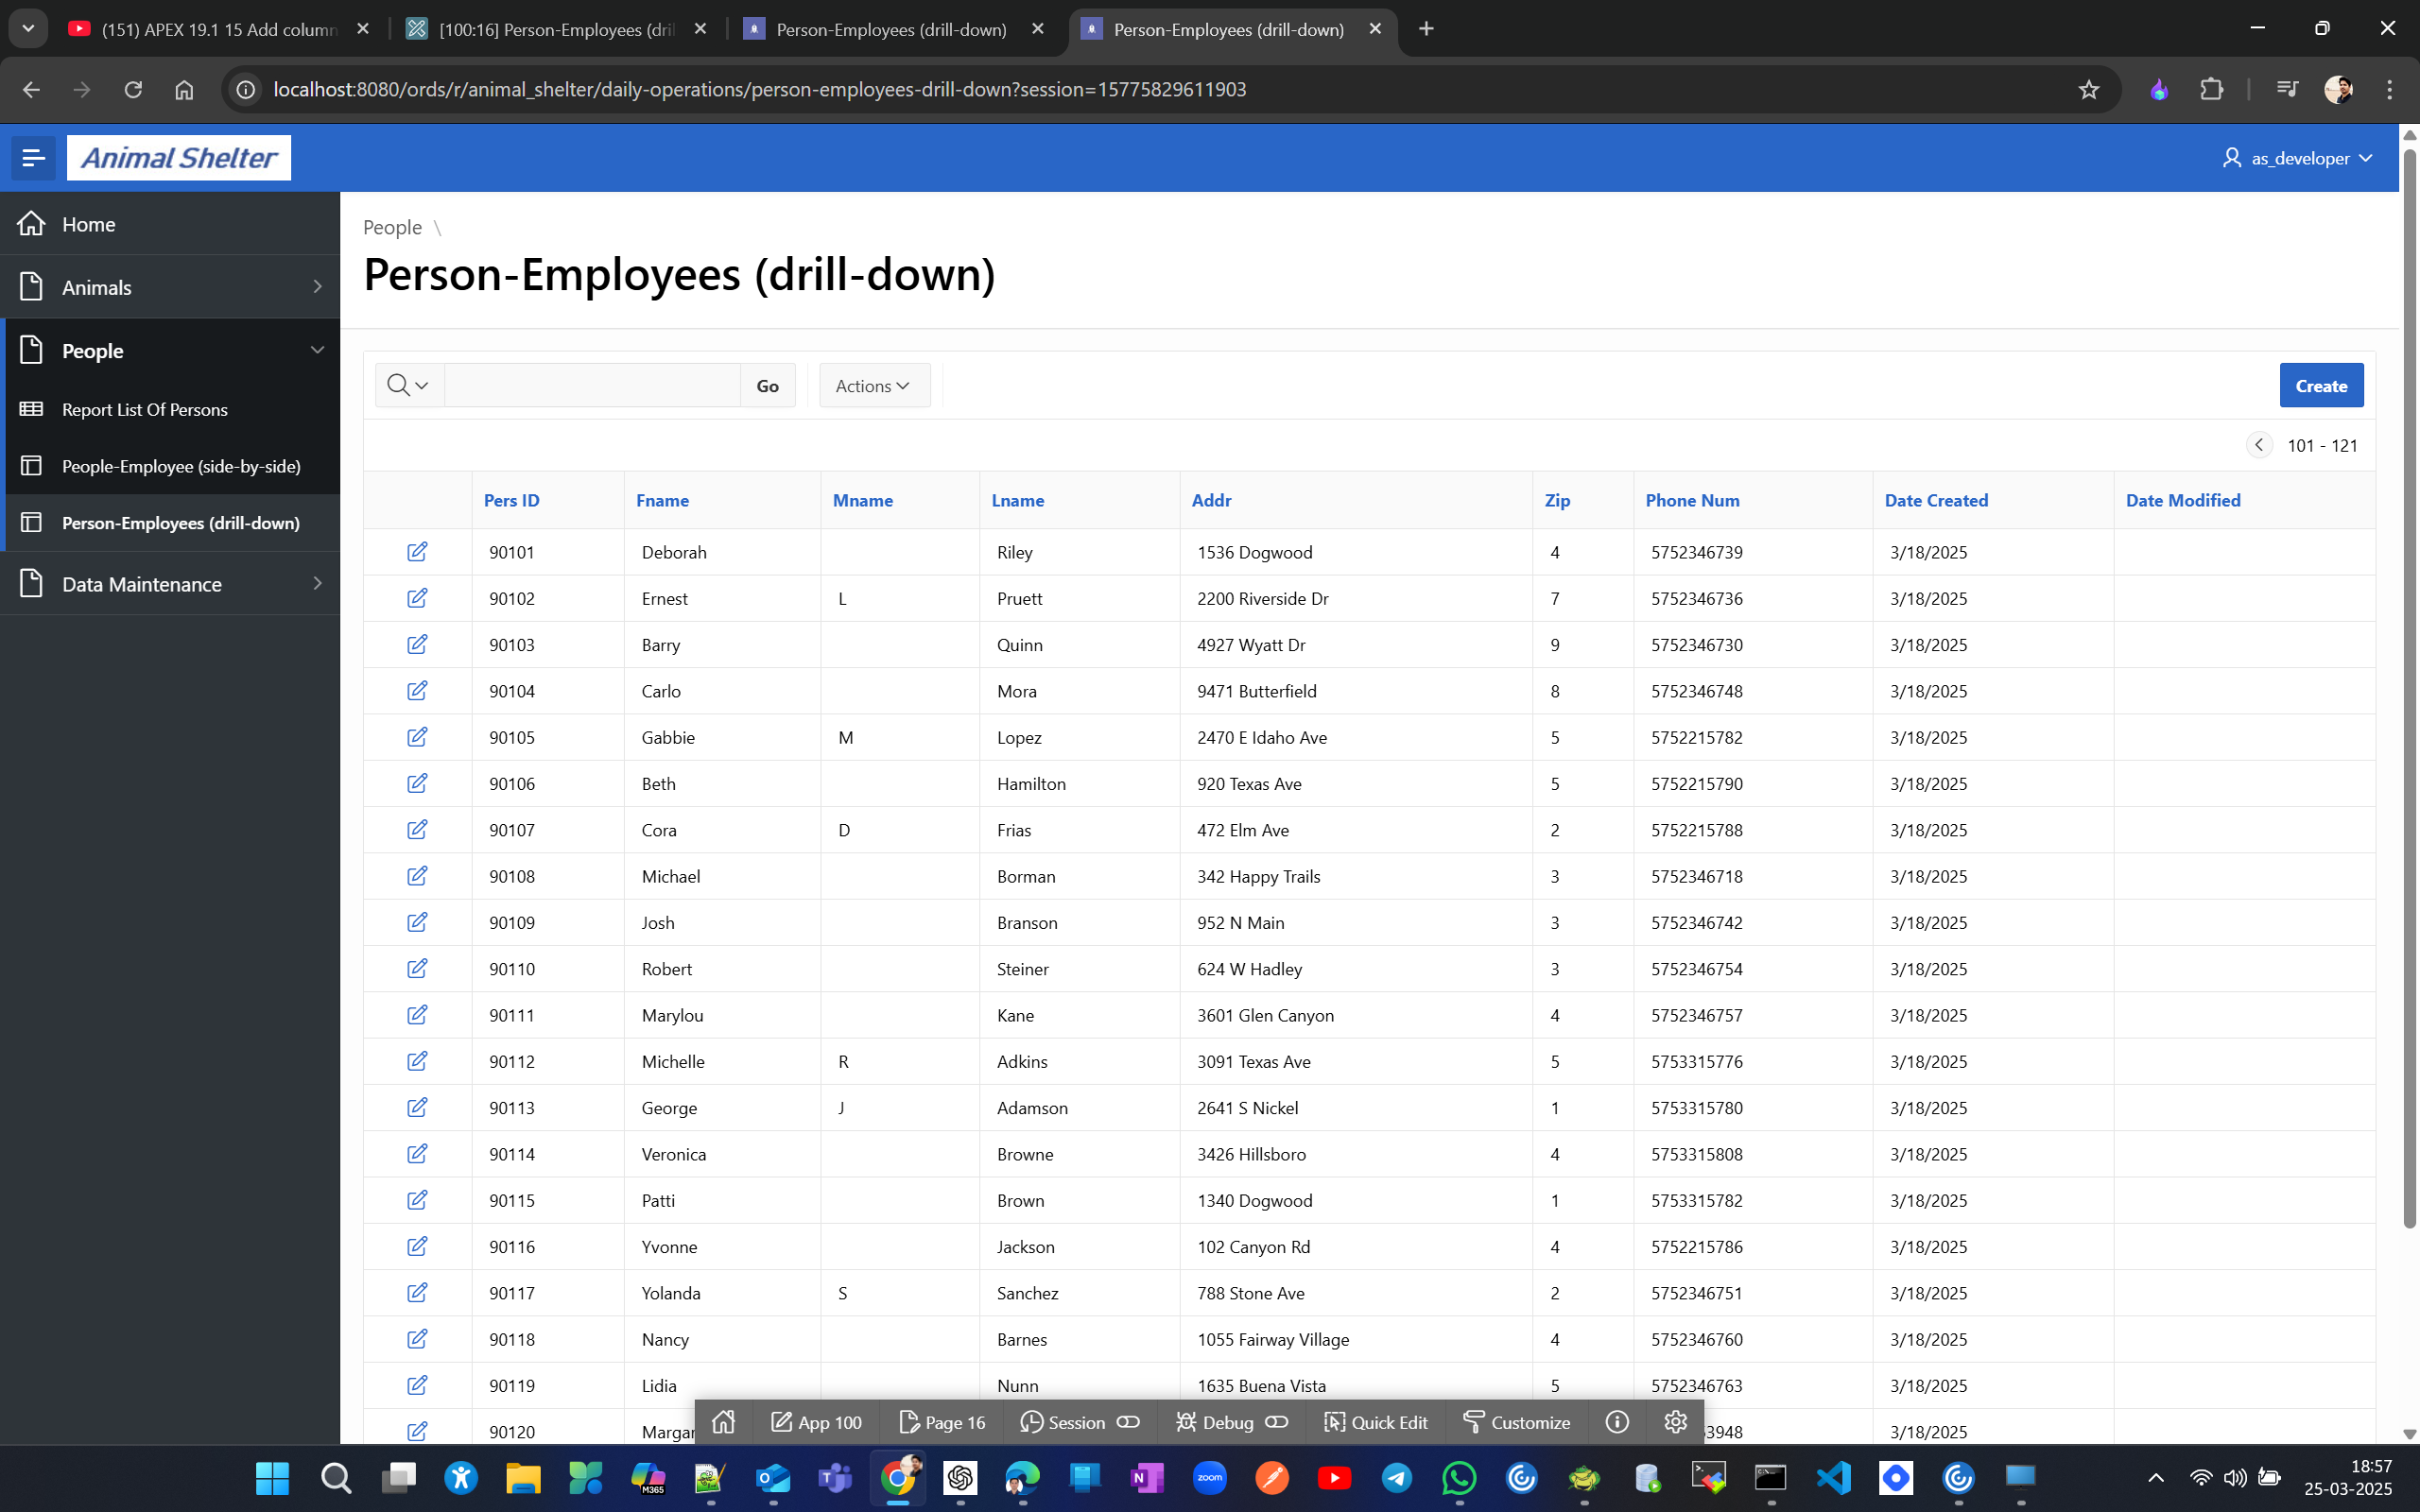
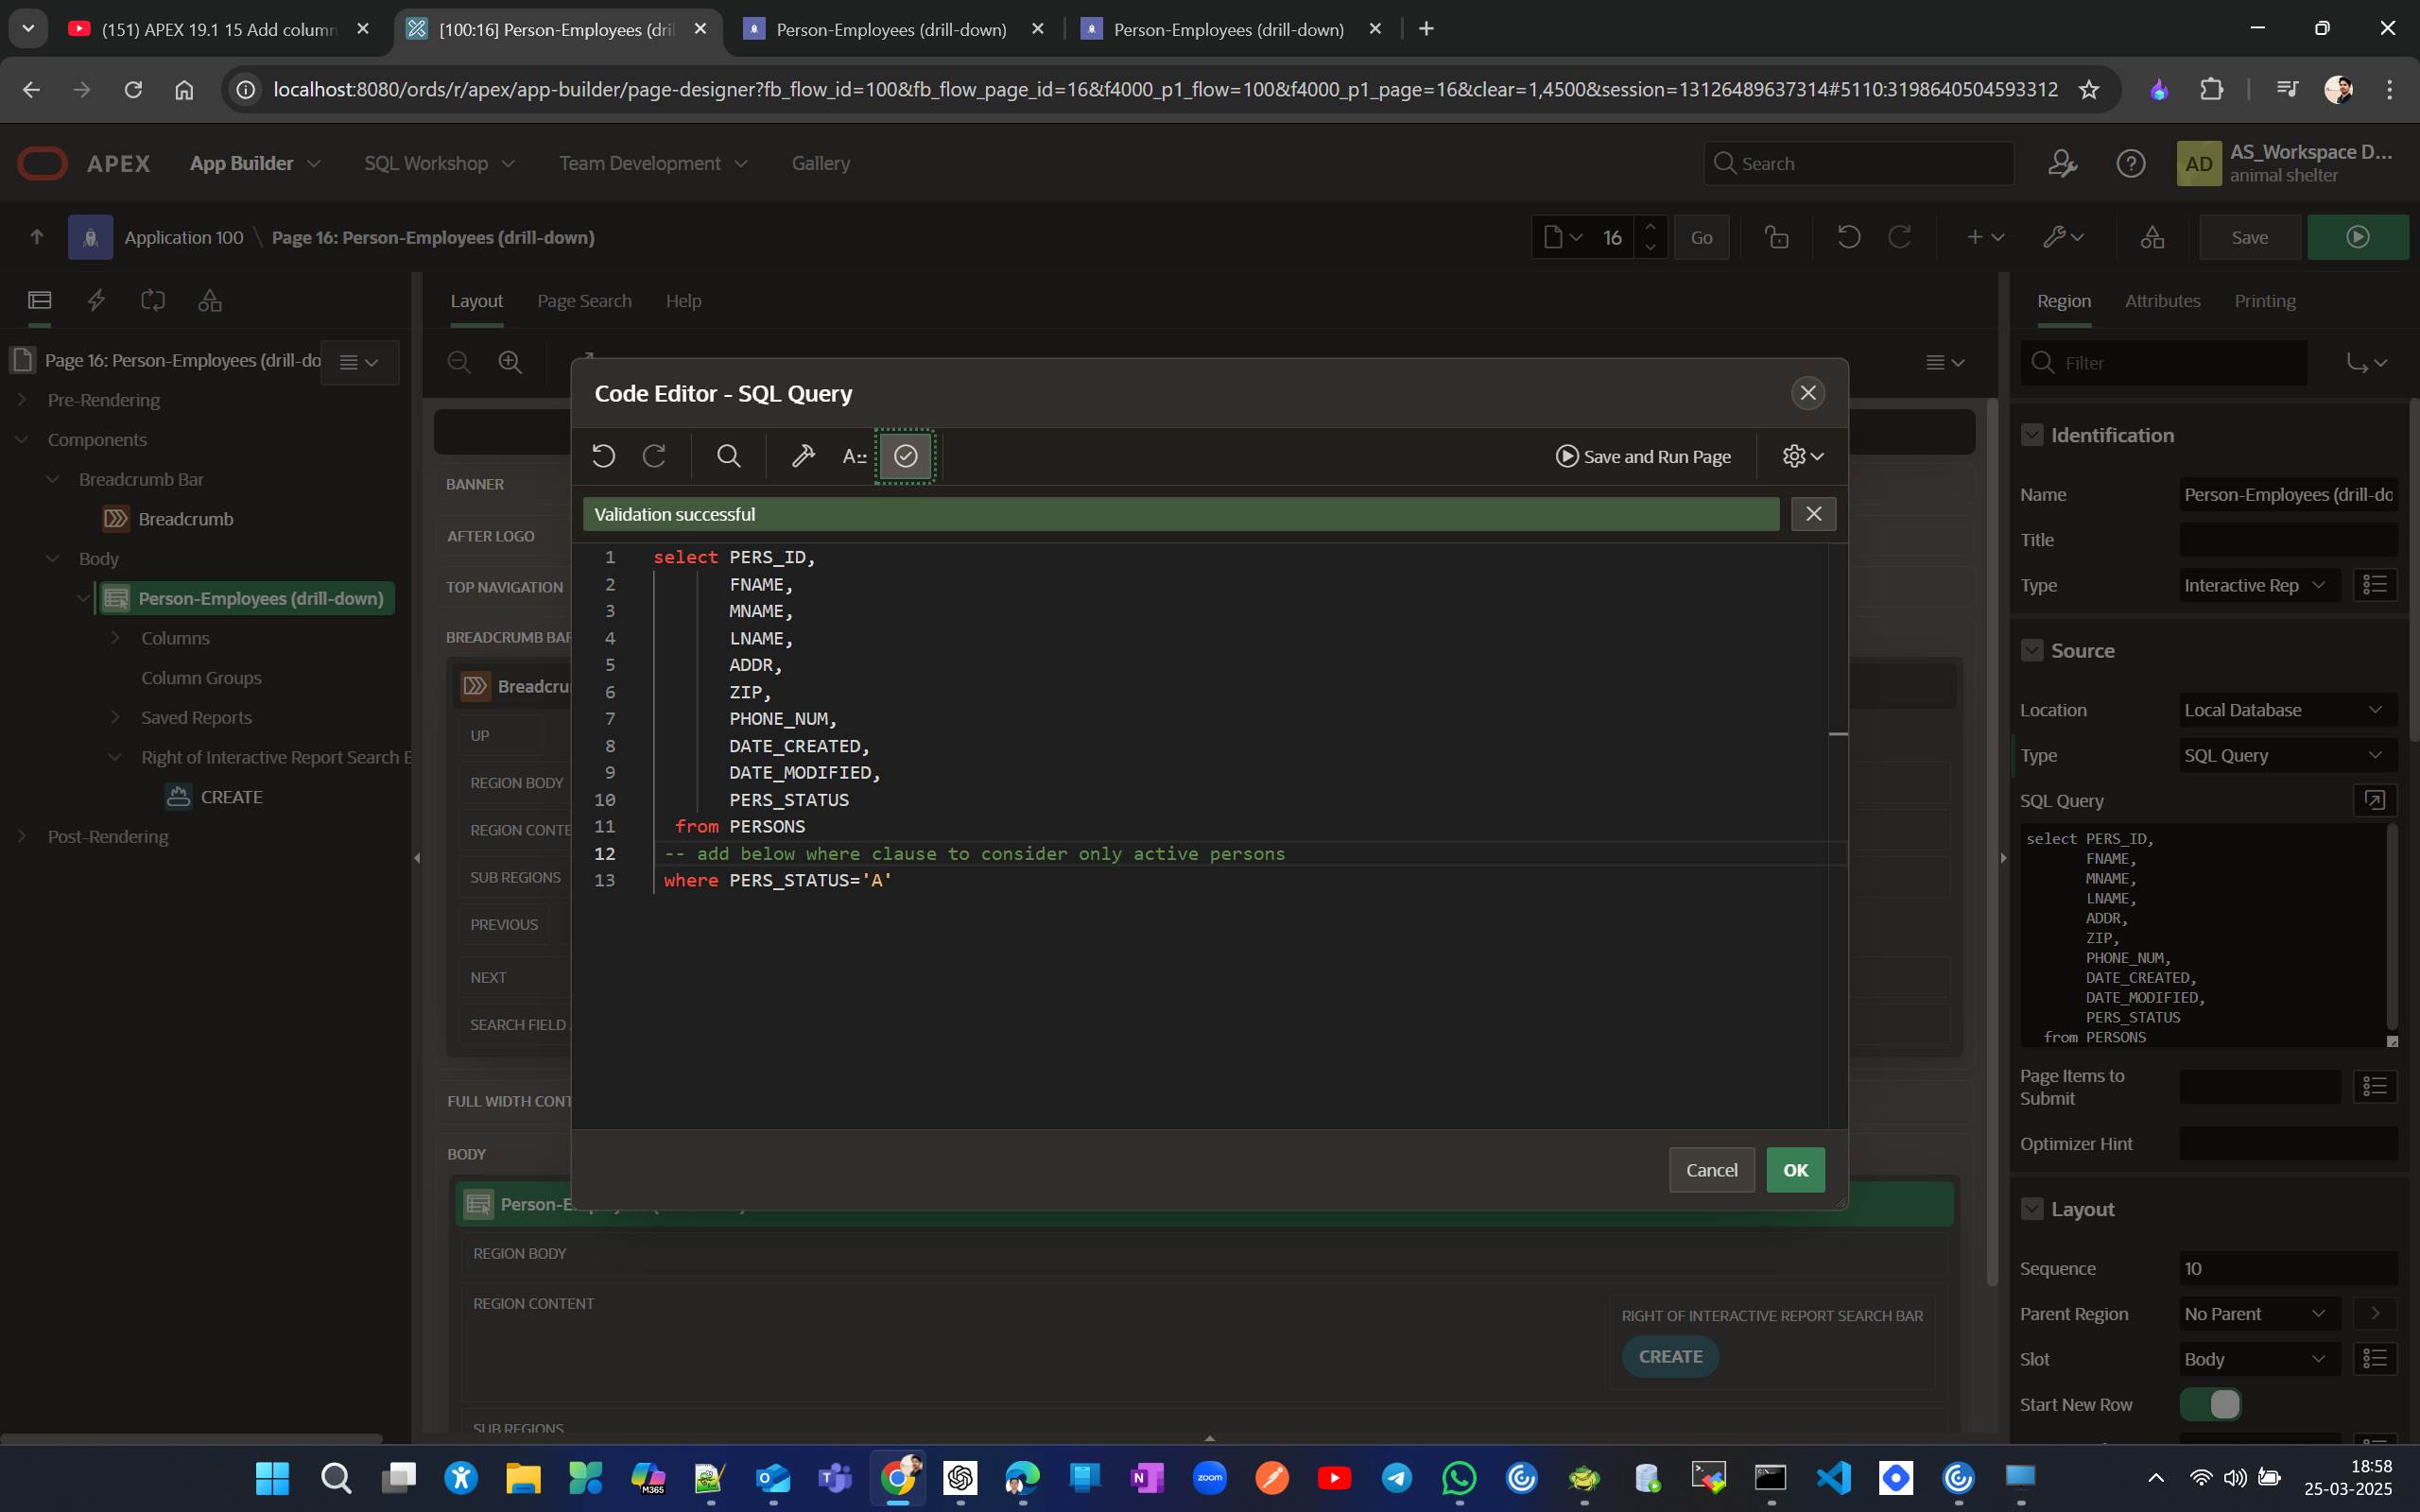
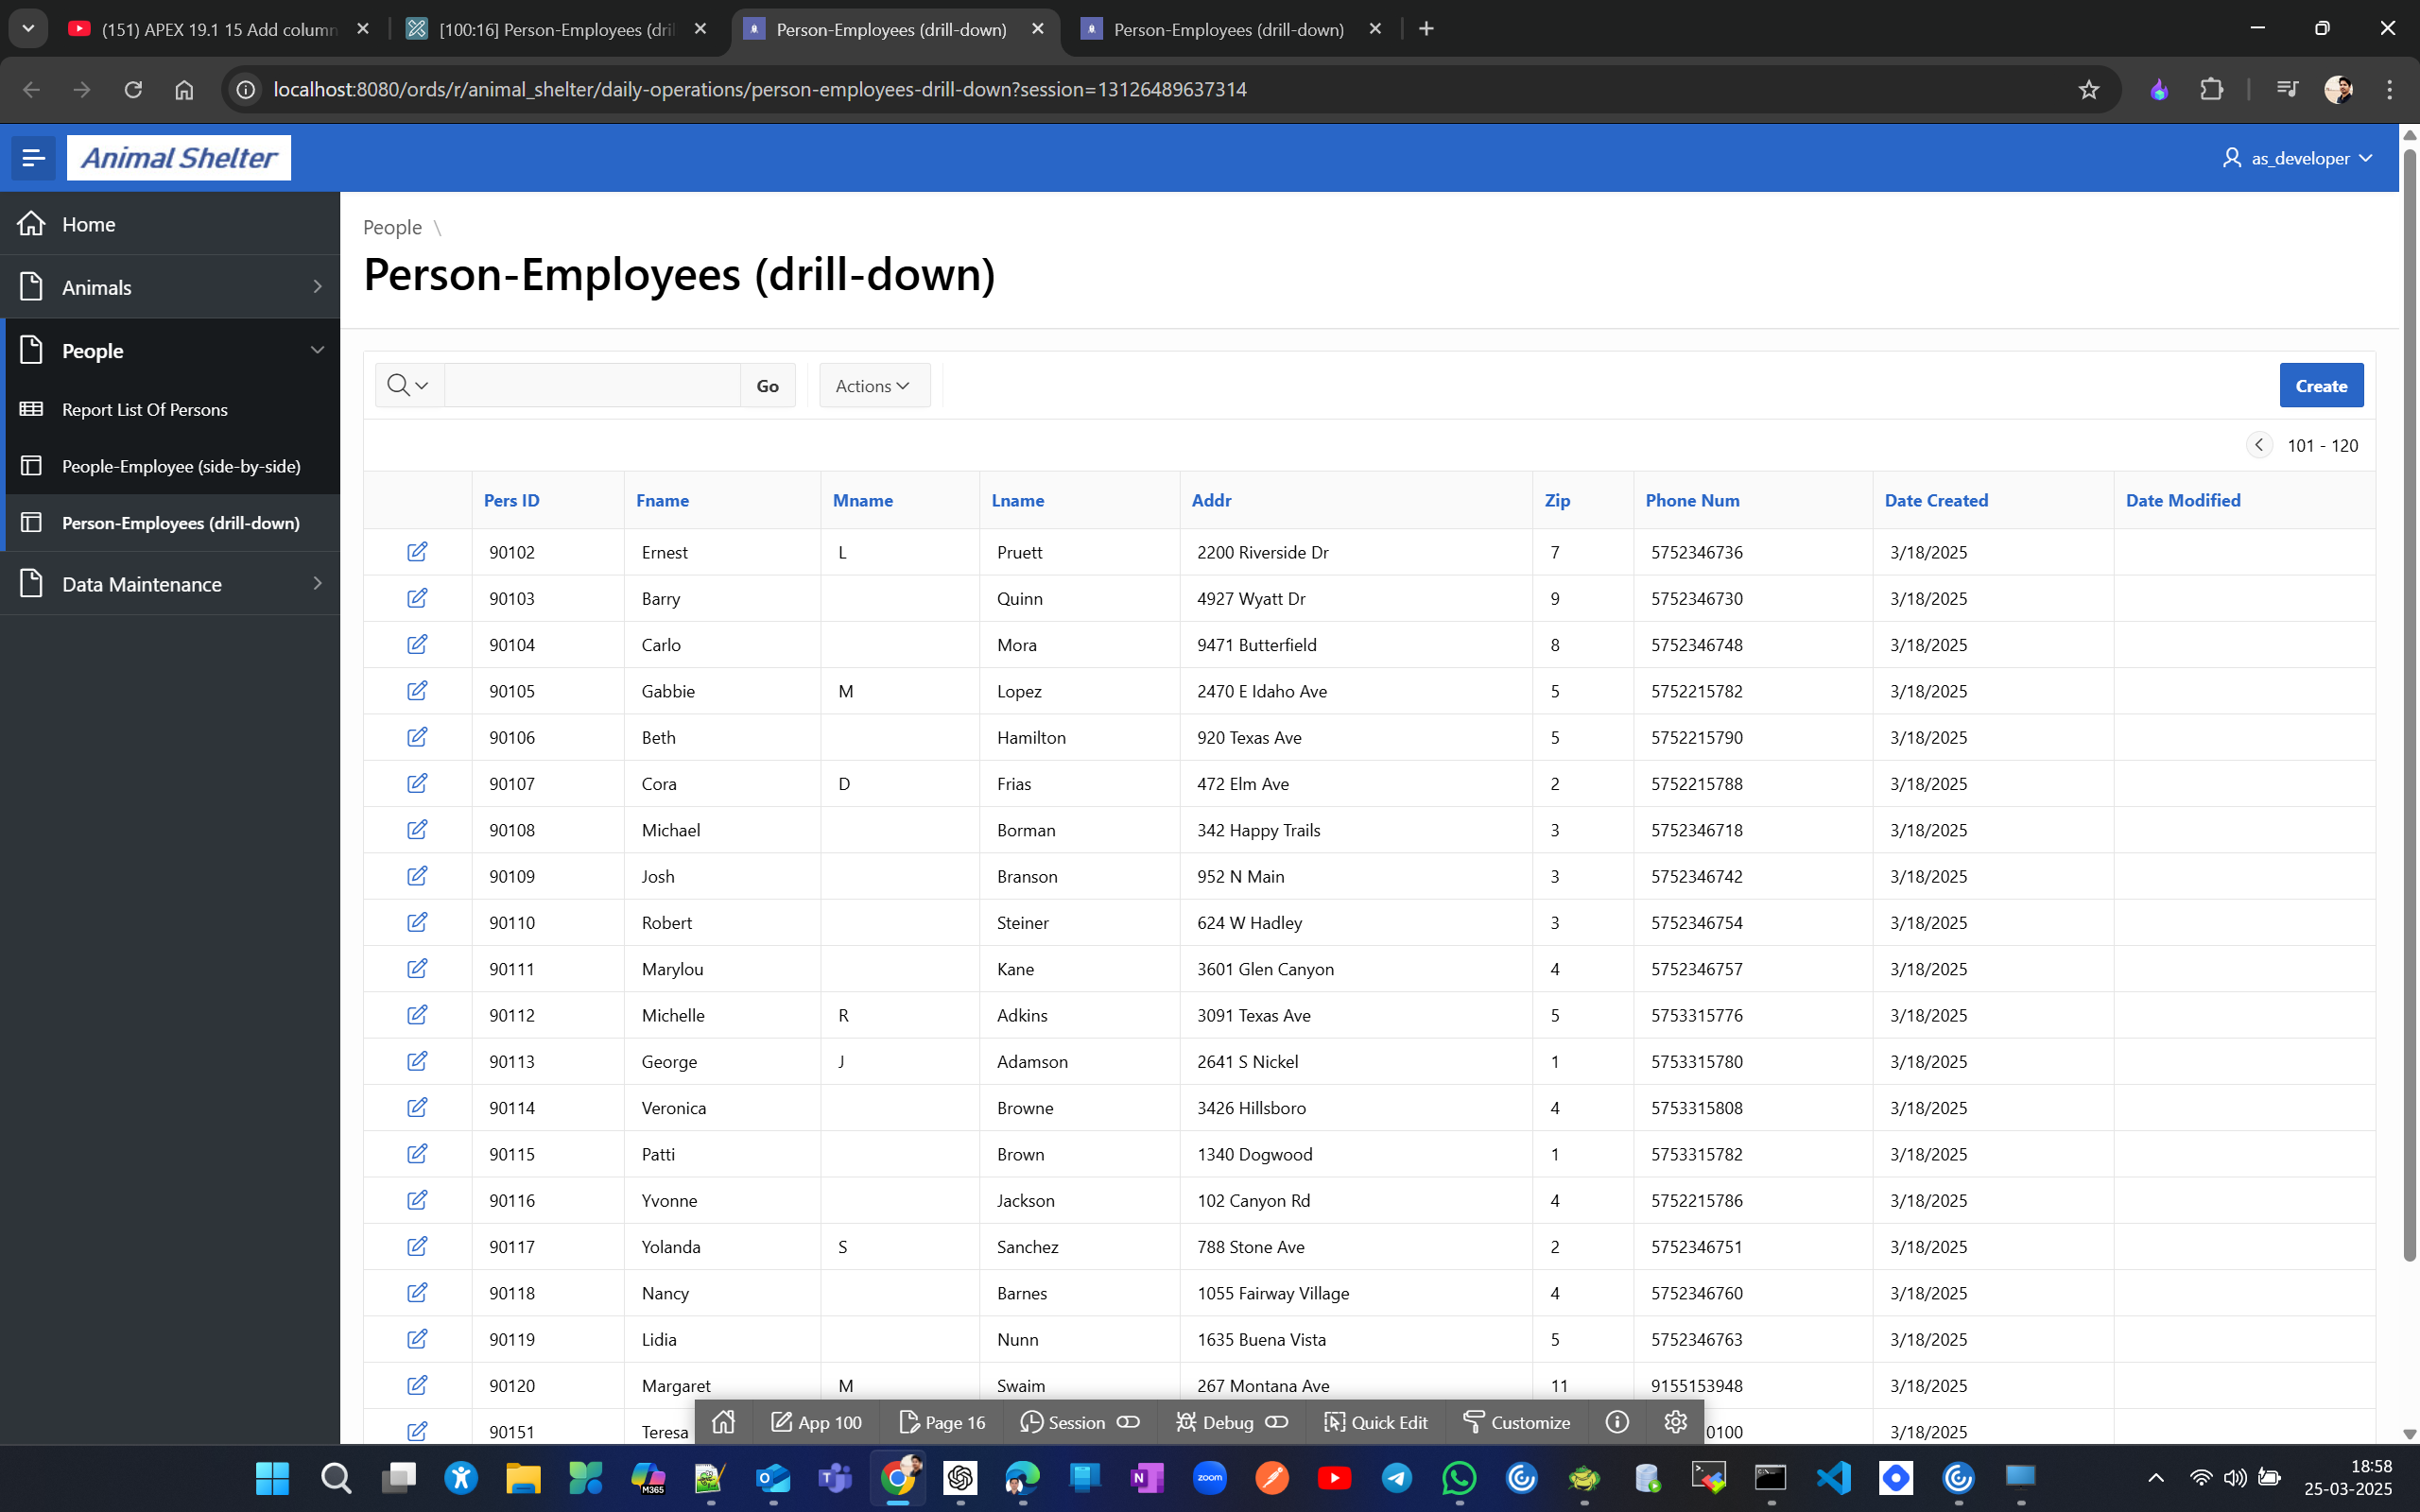
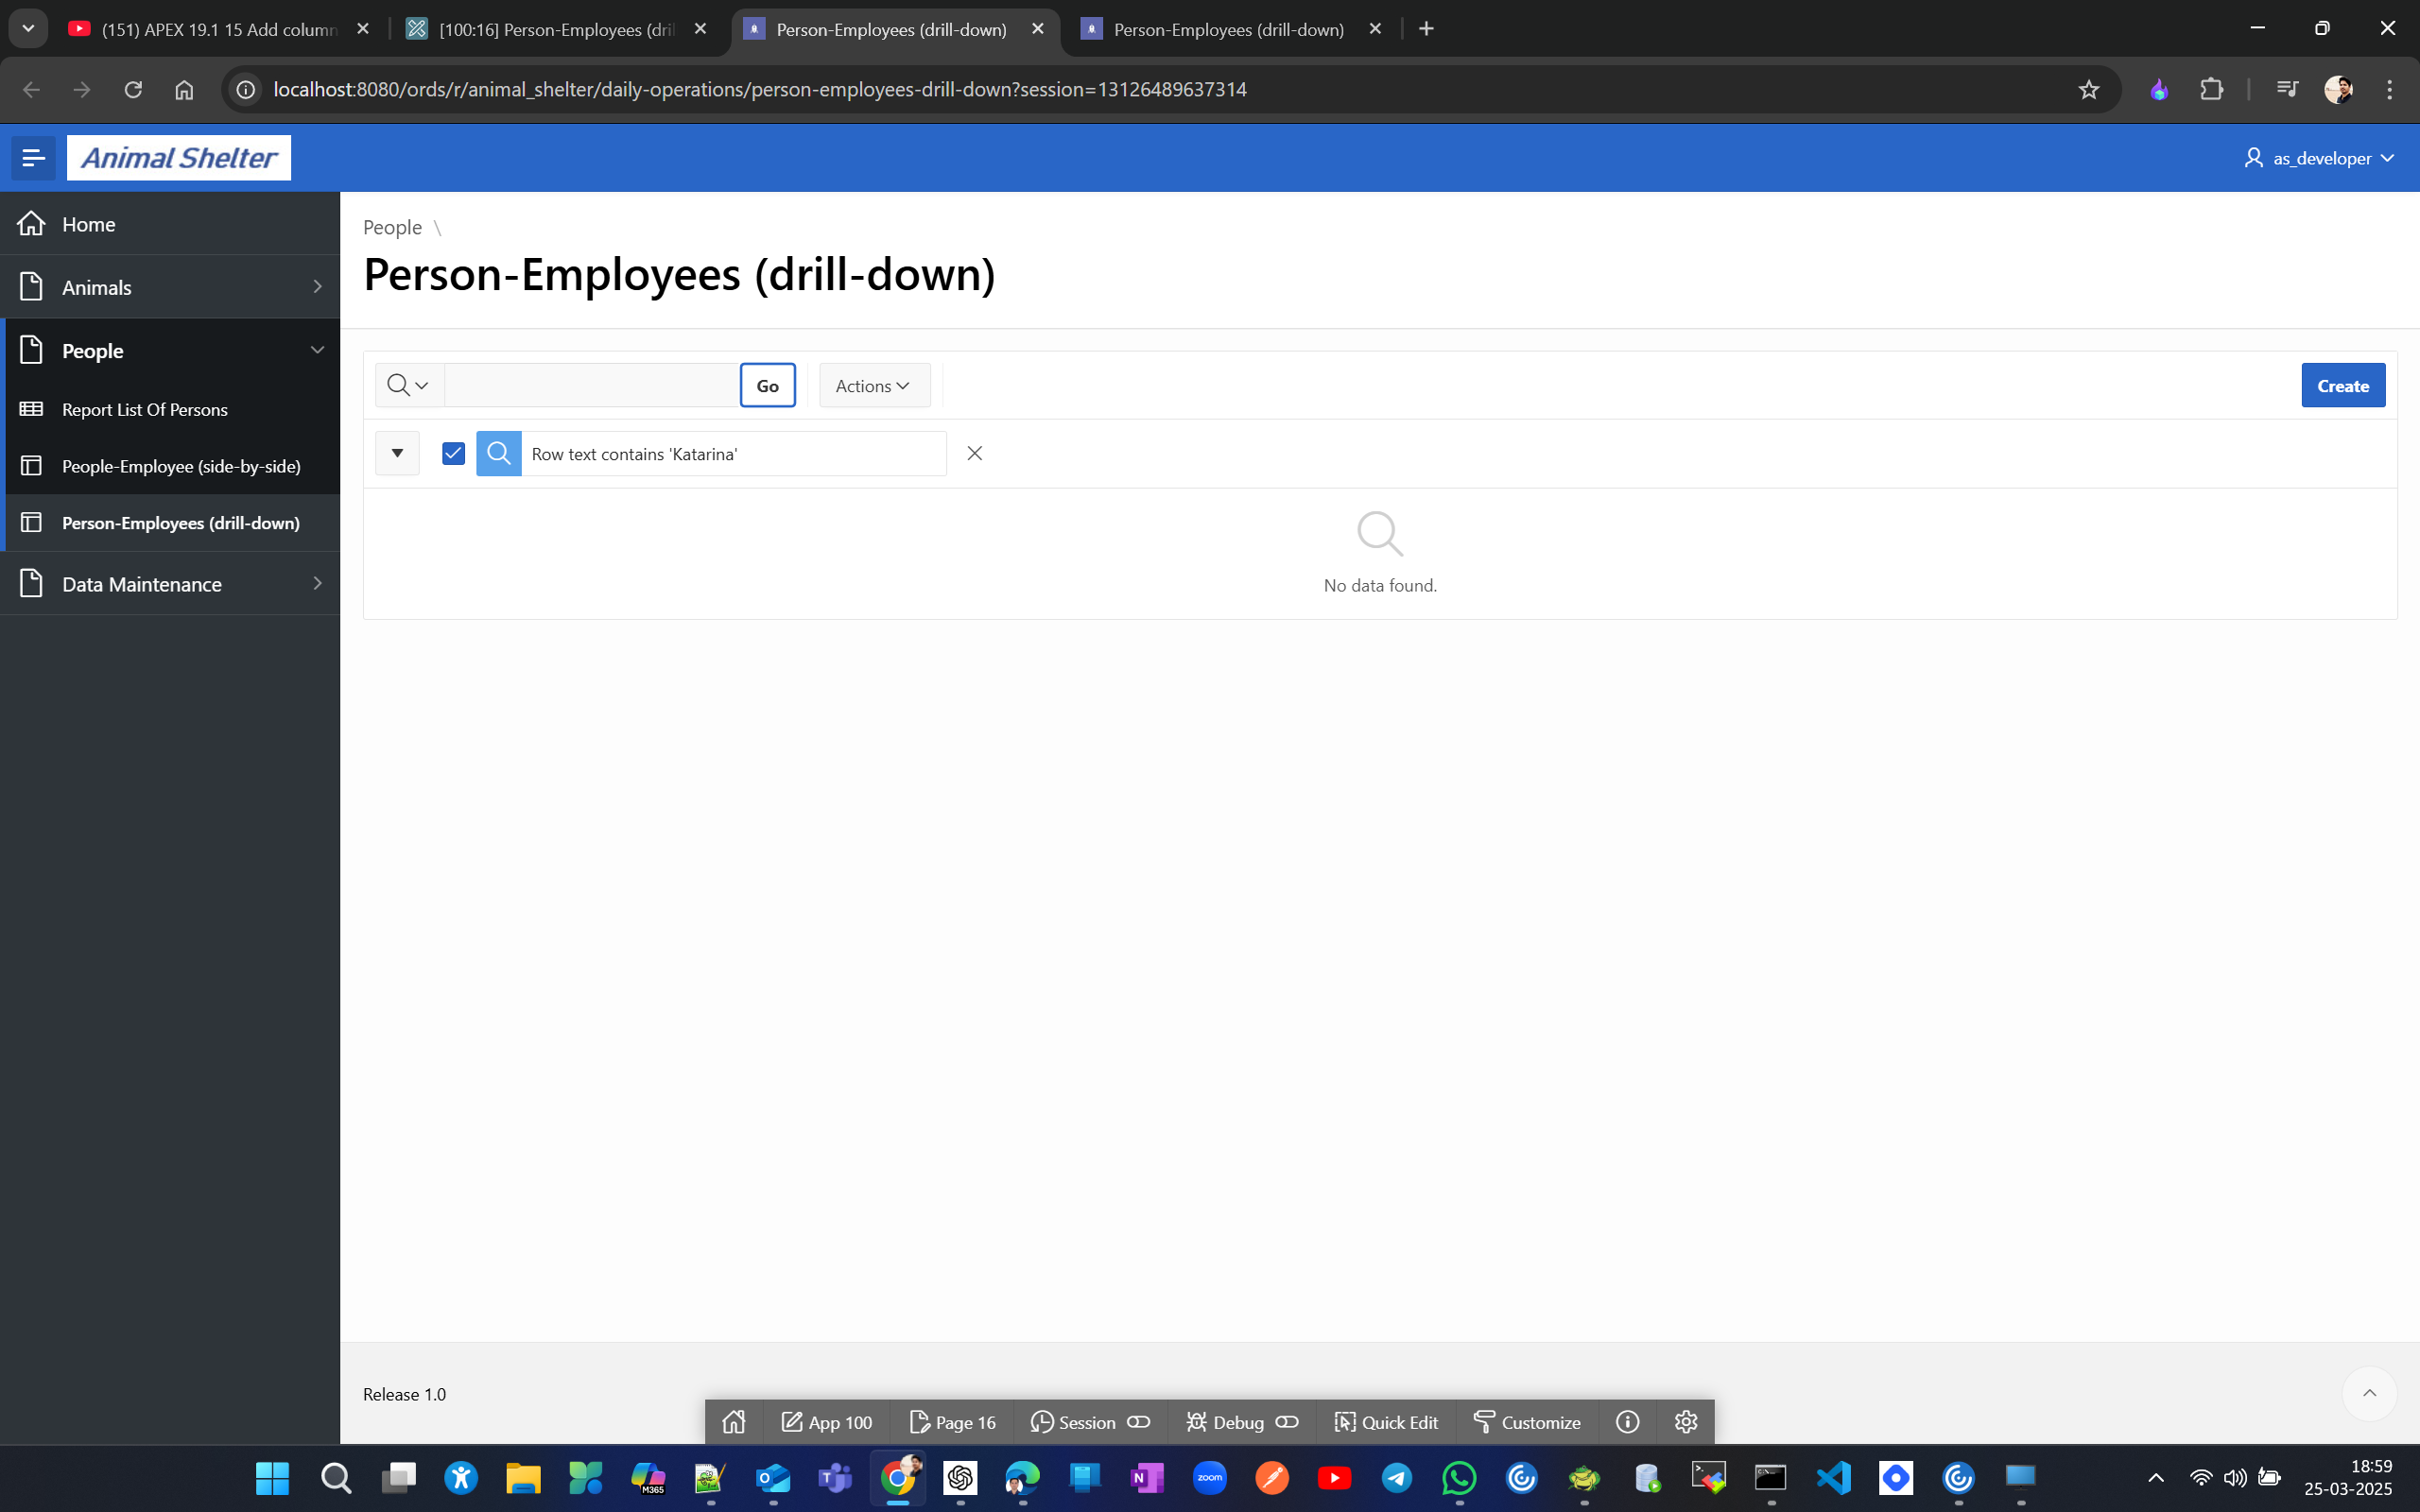
Now lets display 15 rows per page.
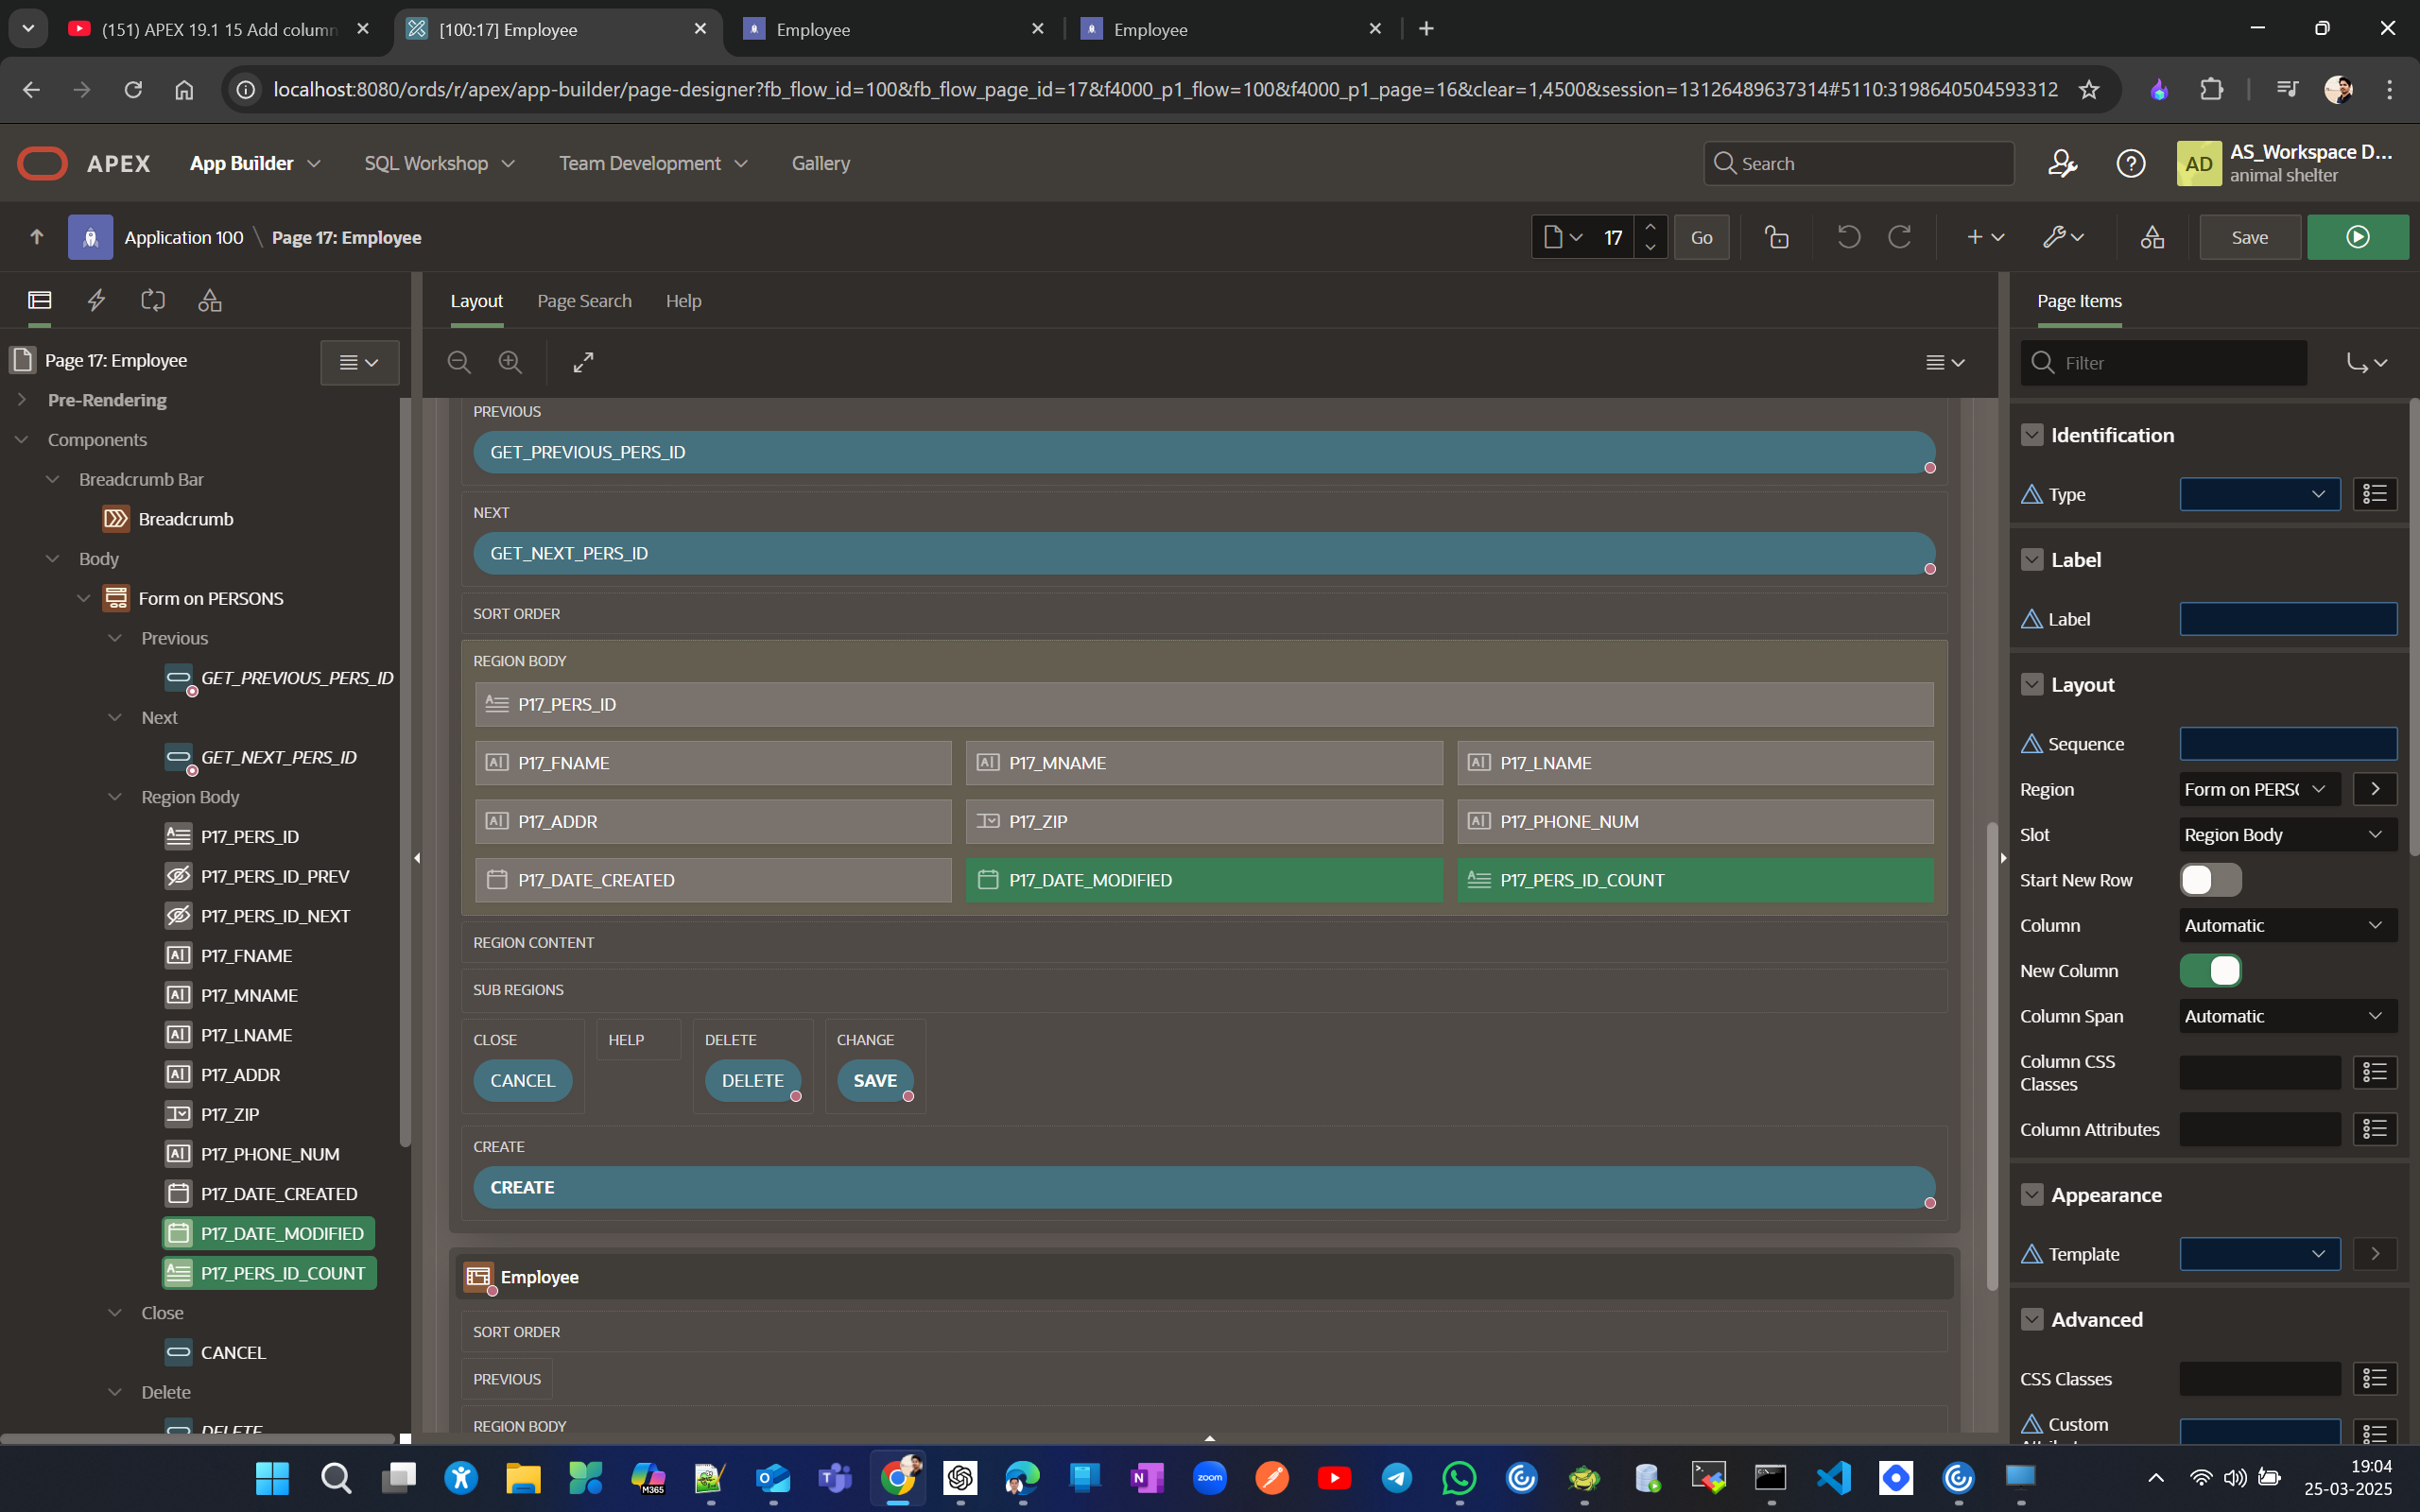
Now edit the form page desiner to display 3 fields in 1 line
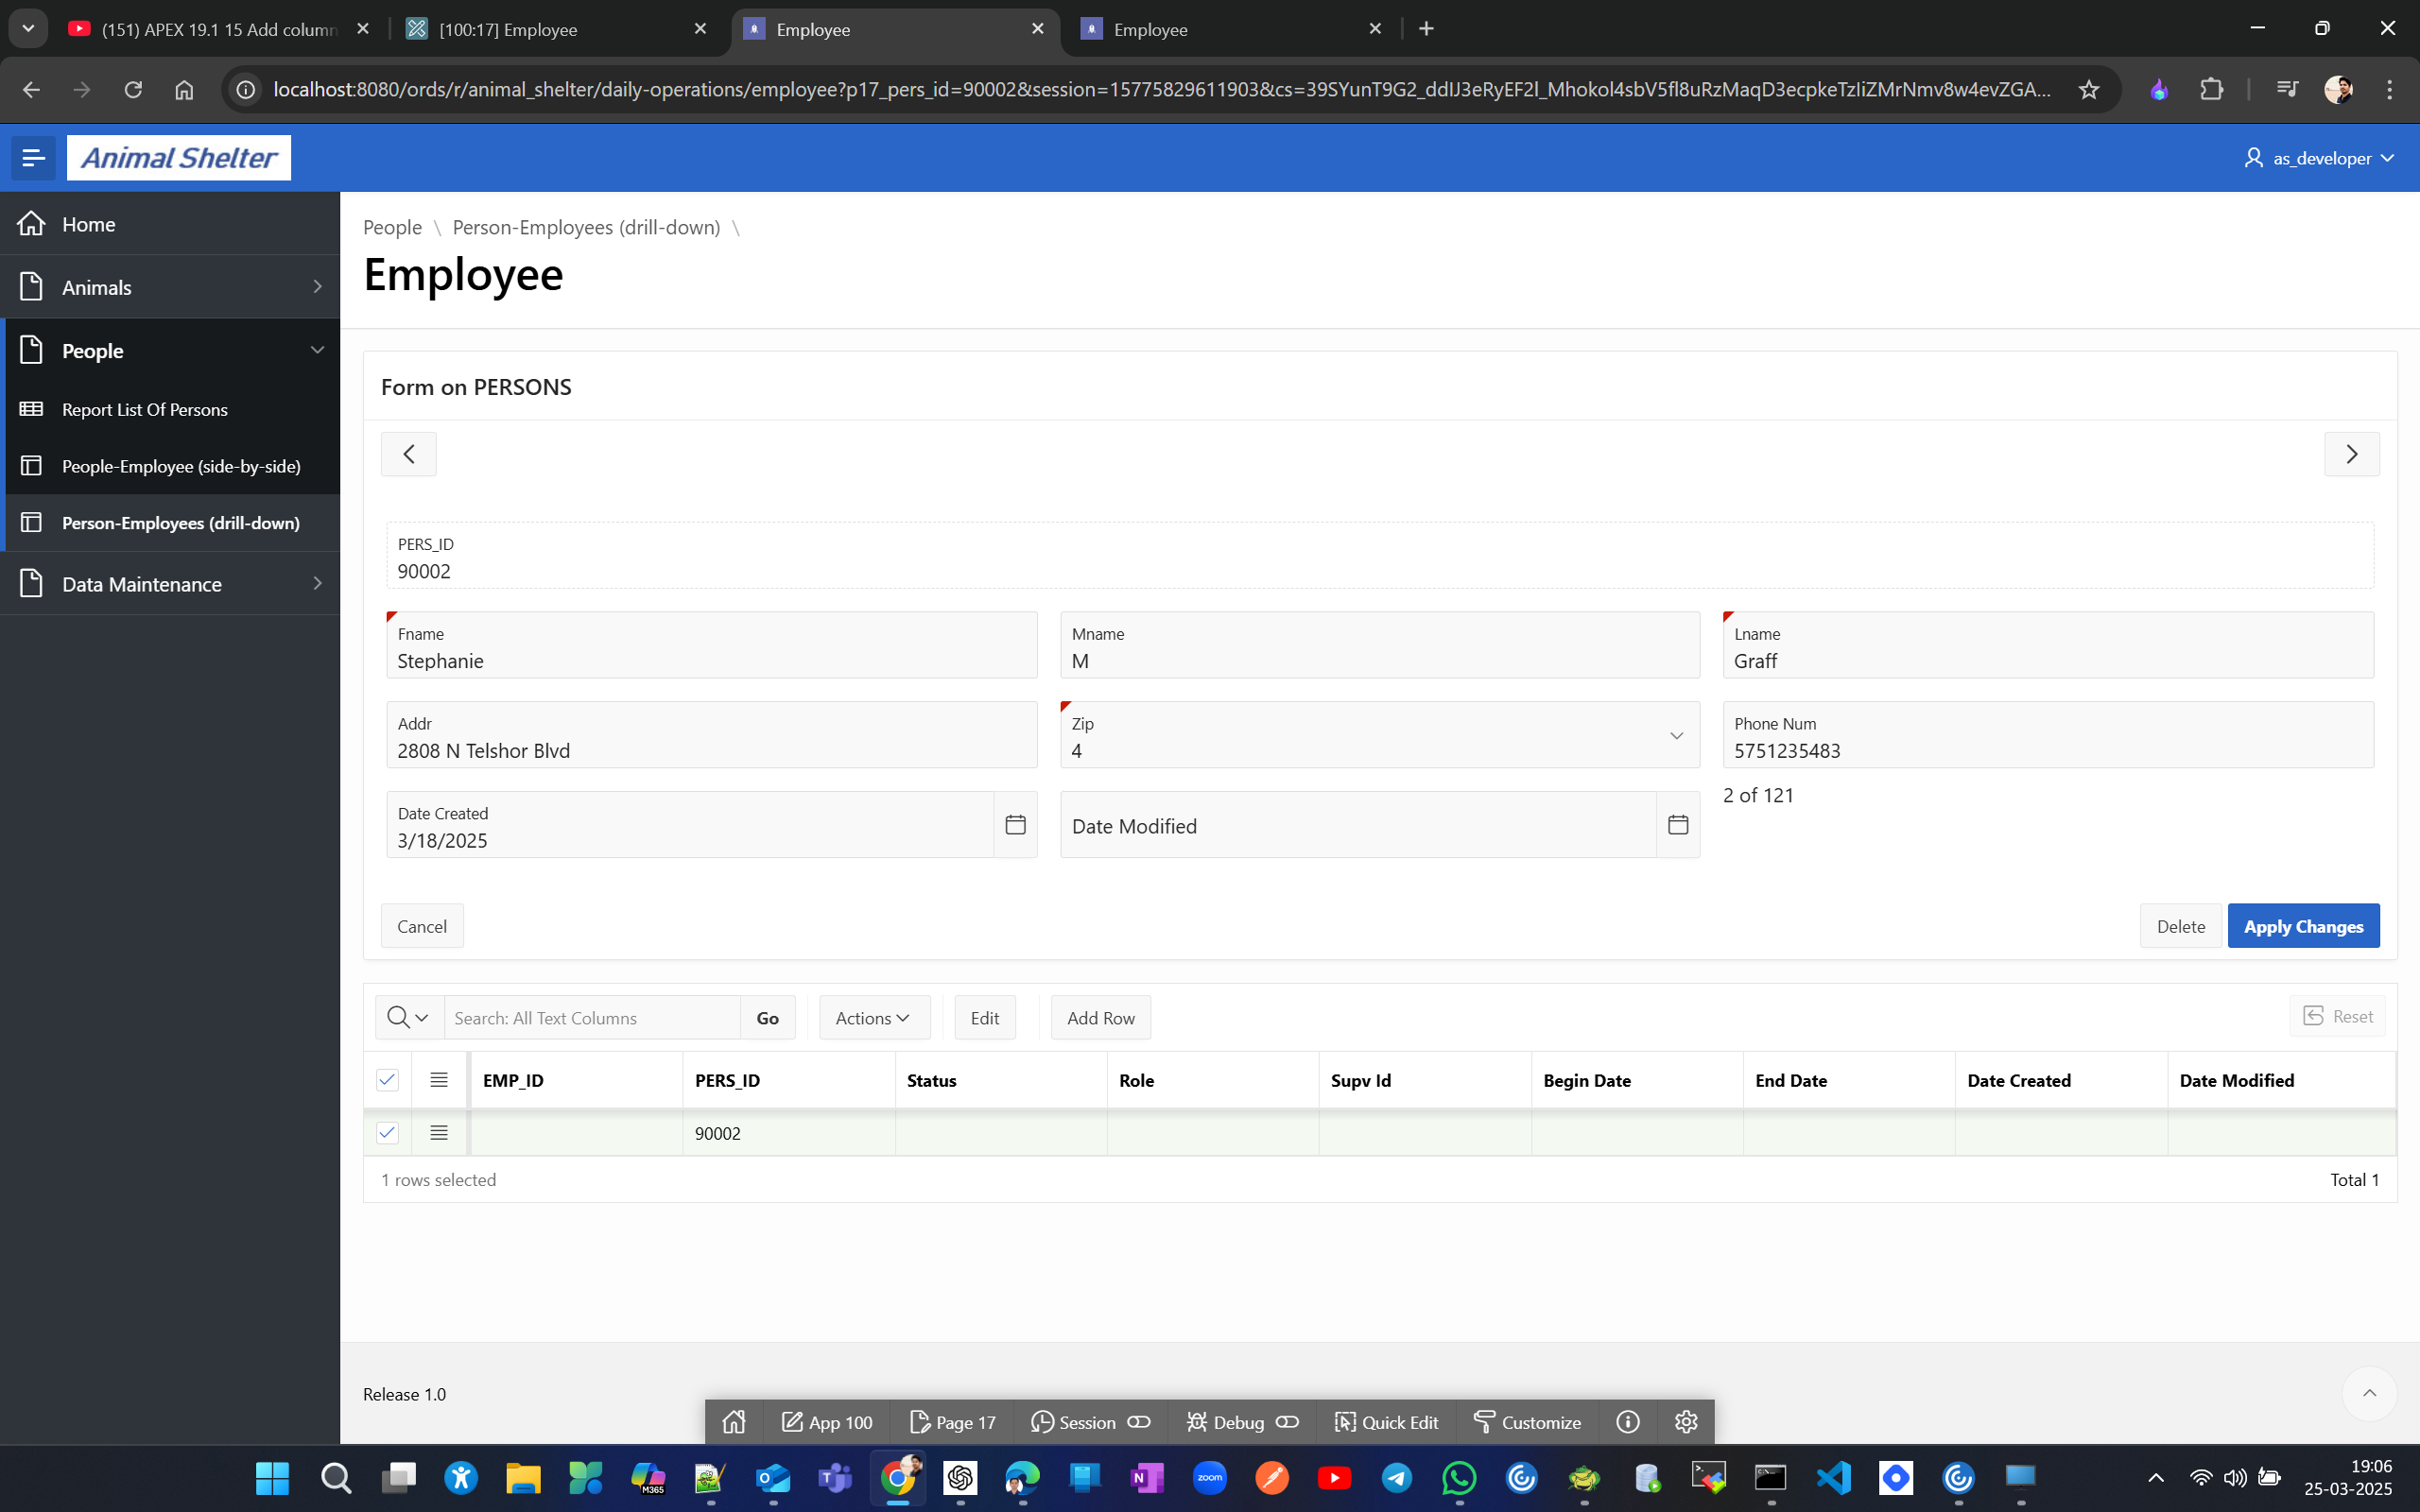
Finally we can edit the details directly in the report as it is a interactive grid, unlike a classic report in a side-by-side master-details page.
Correct code for an LOV. Add LOVs to master-detail. Add data to form.
Back to Animal Shelter data model we see zip table has PK on ZIP column rather ZIP_ID like all other tables inthe schema. Now we will chnage zip_id to zipp in zip_list lov
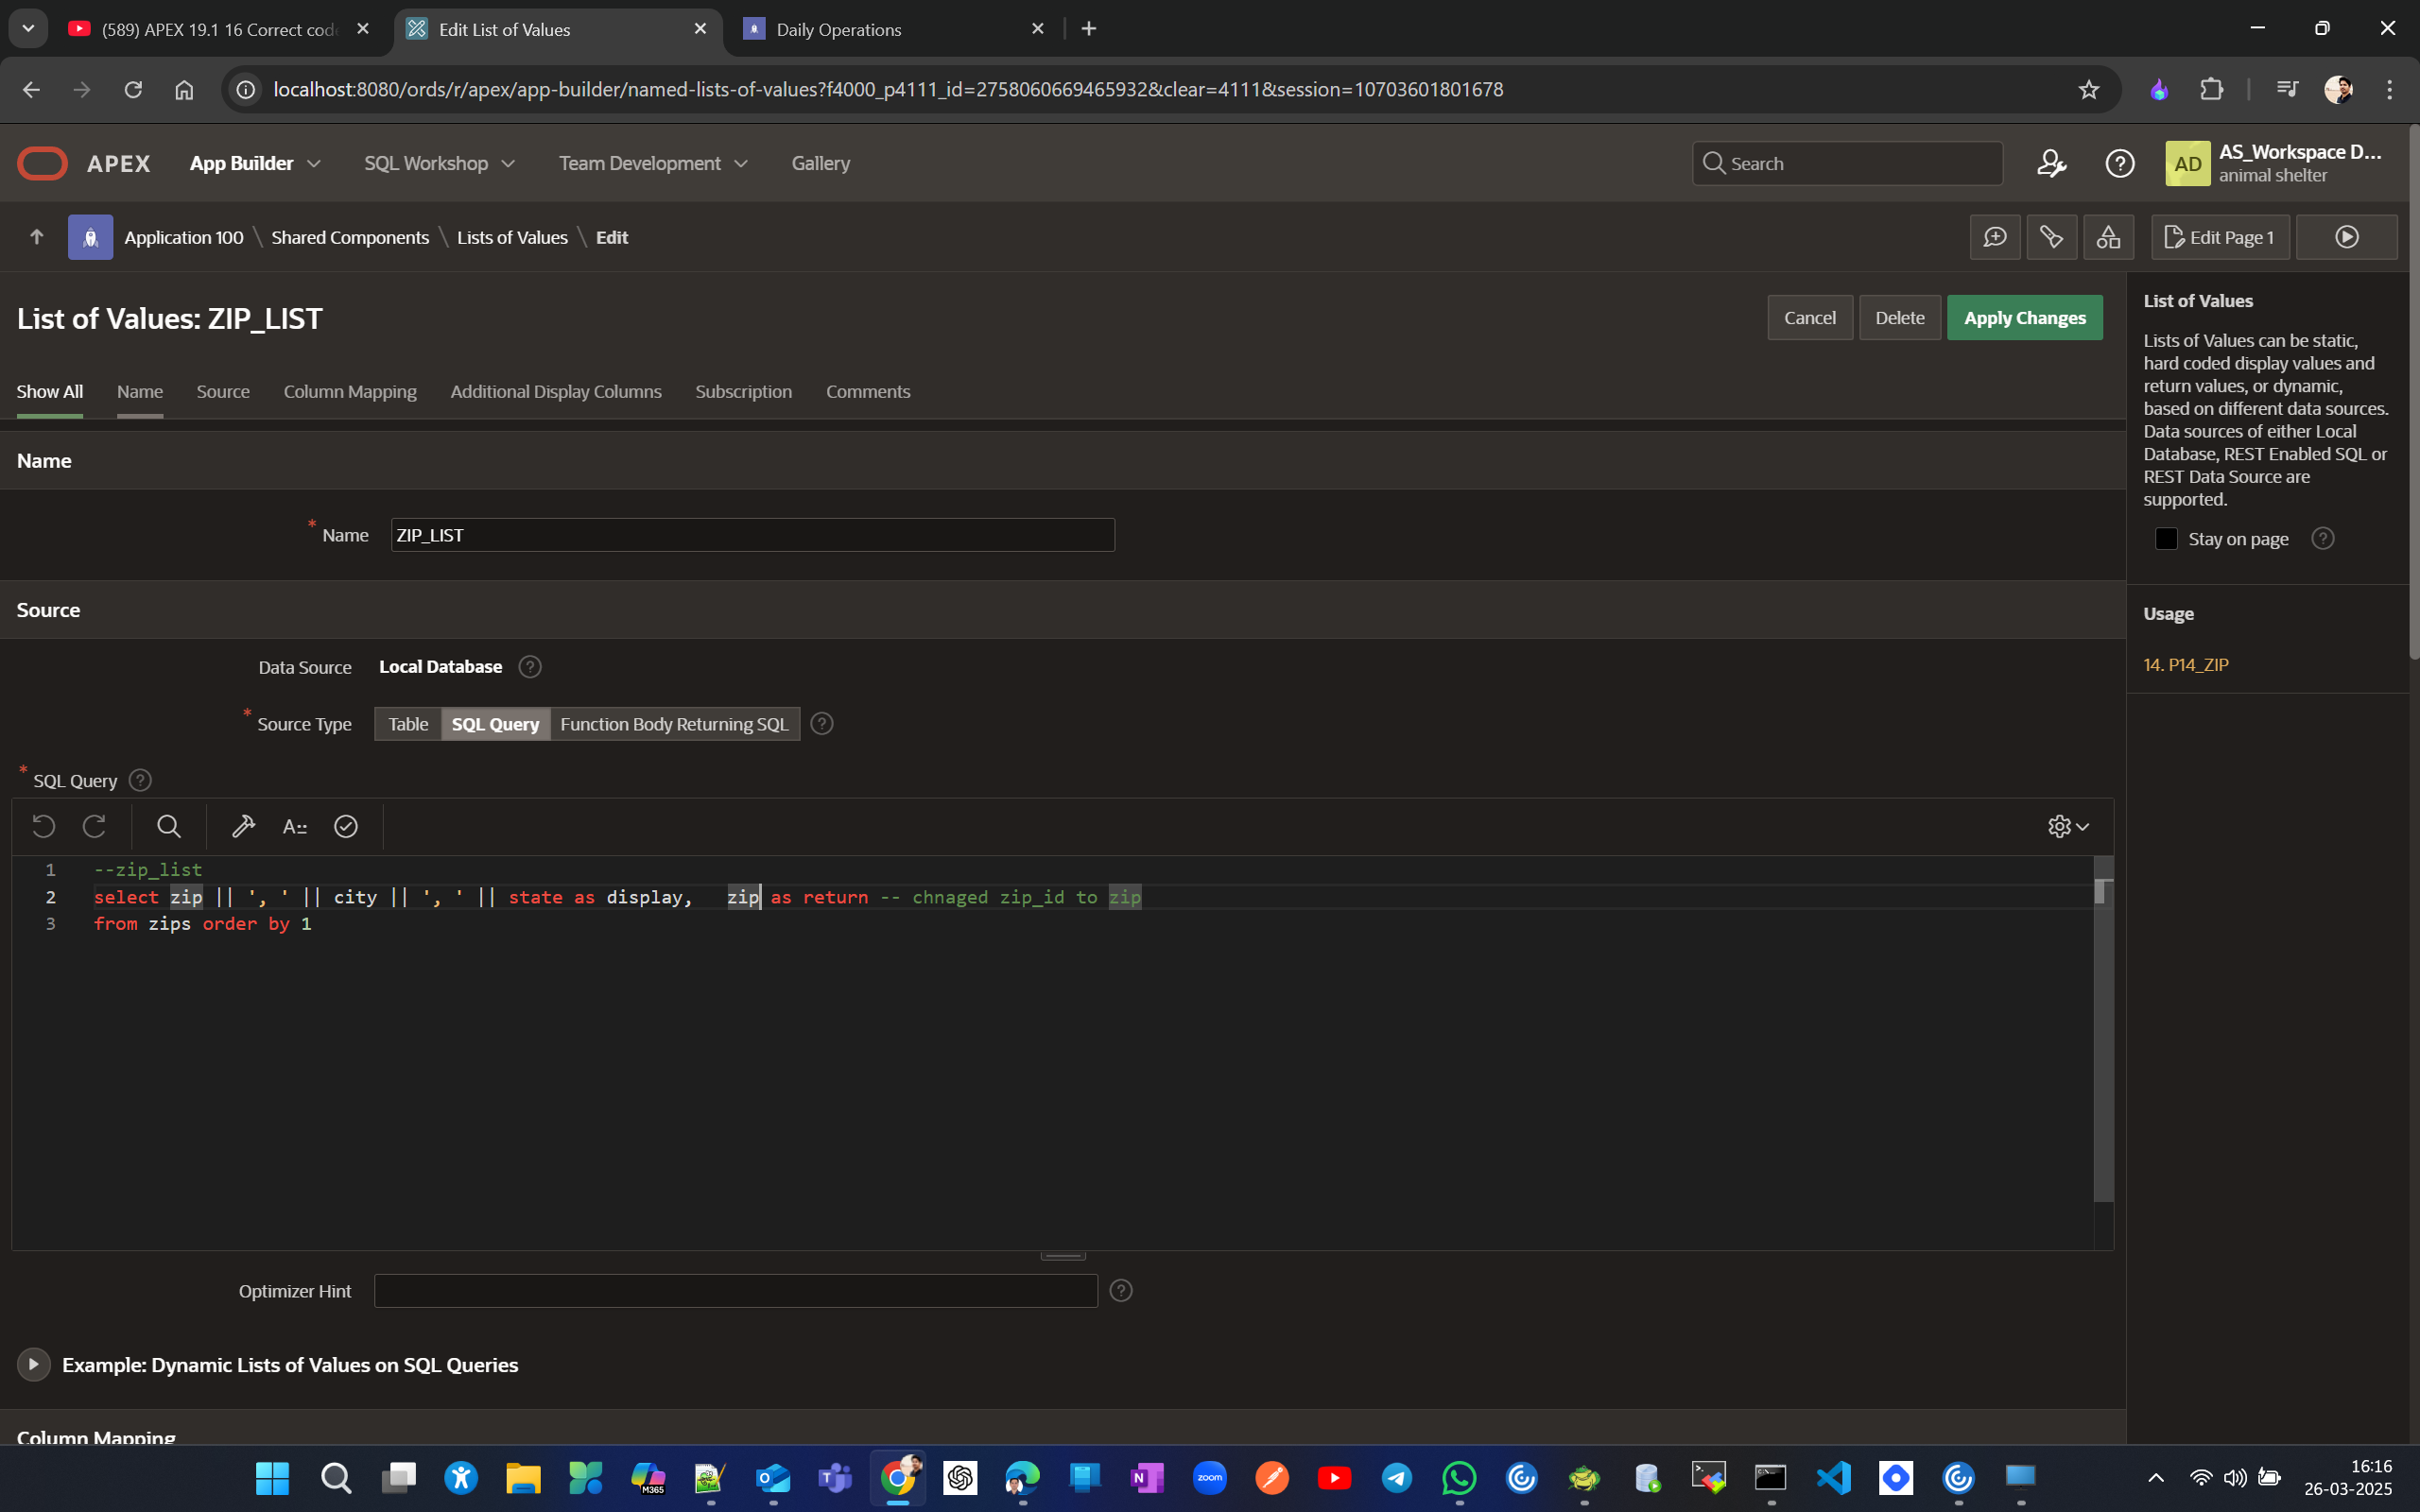
Now from application of you see zip is souced from zip_id. so lets chnage that to zip_list lov.
Before
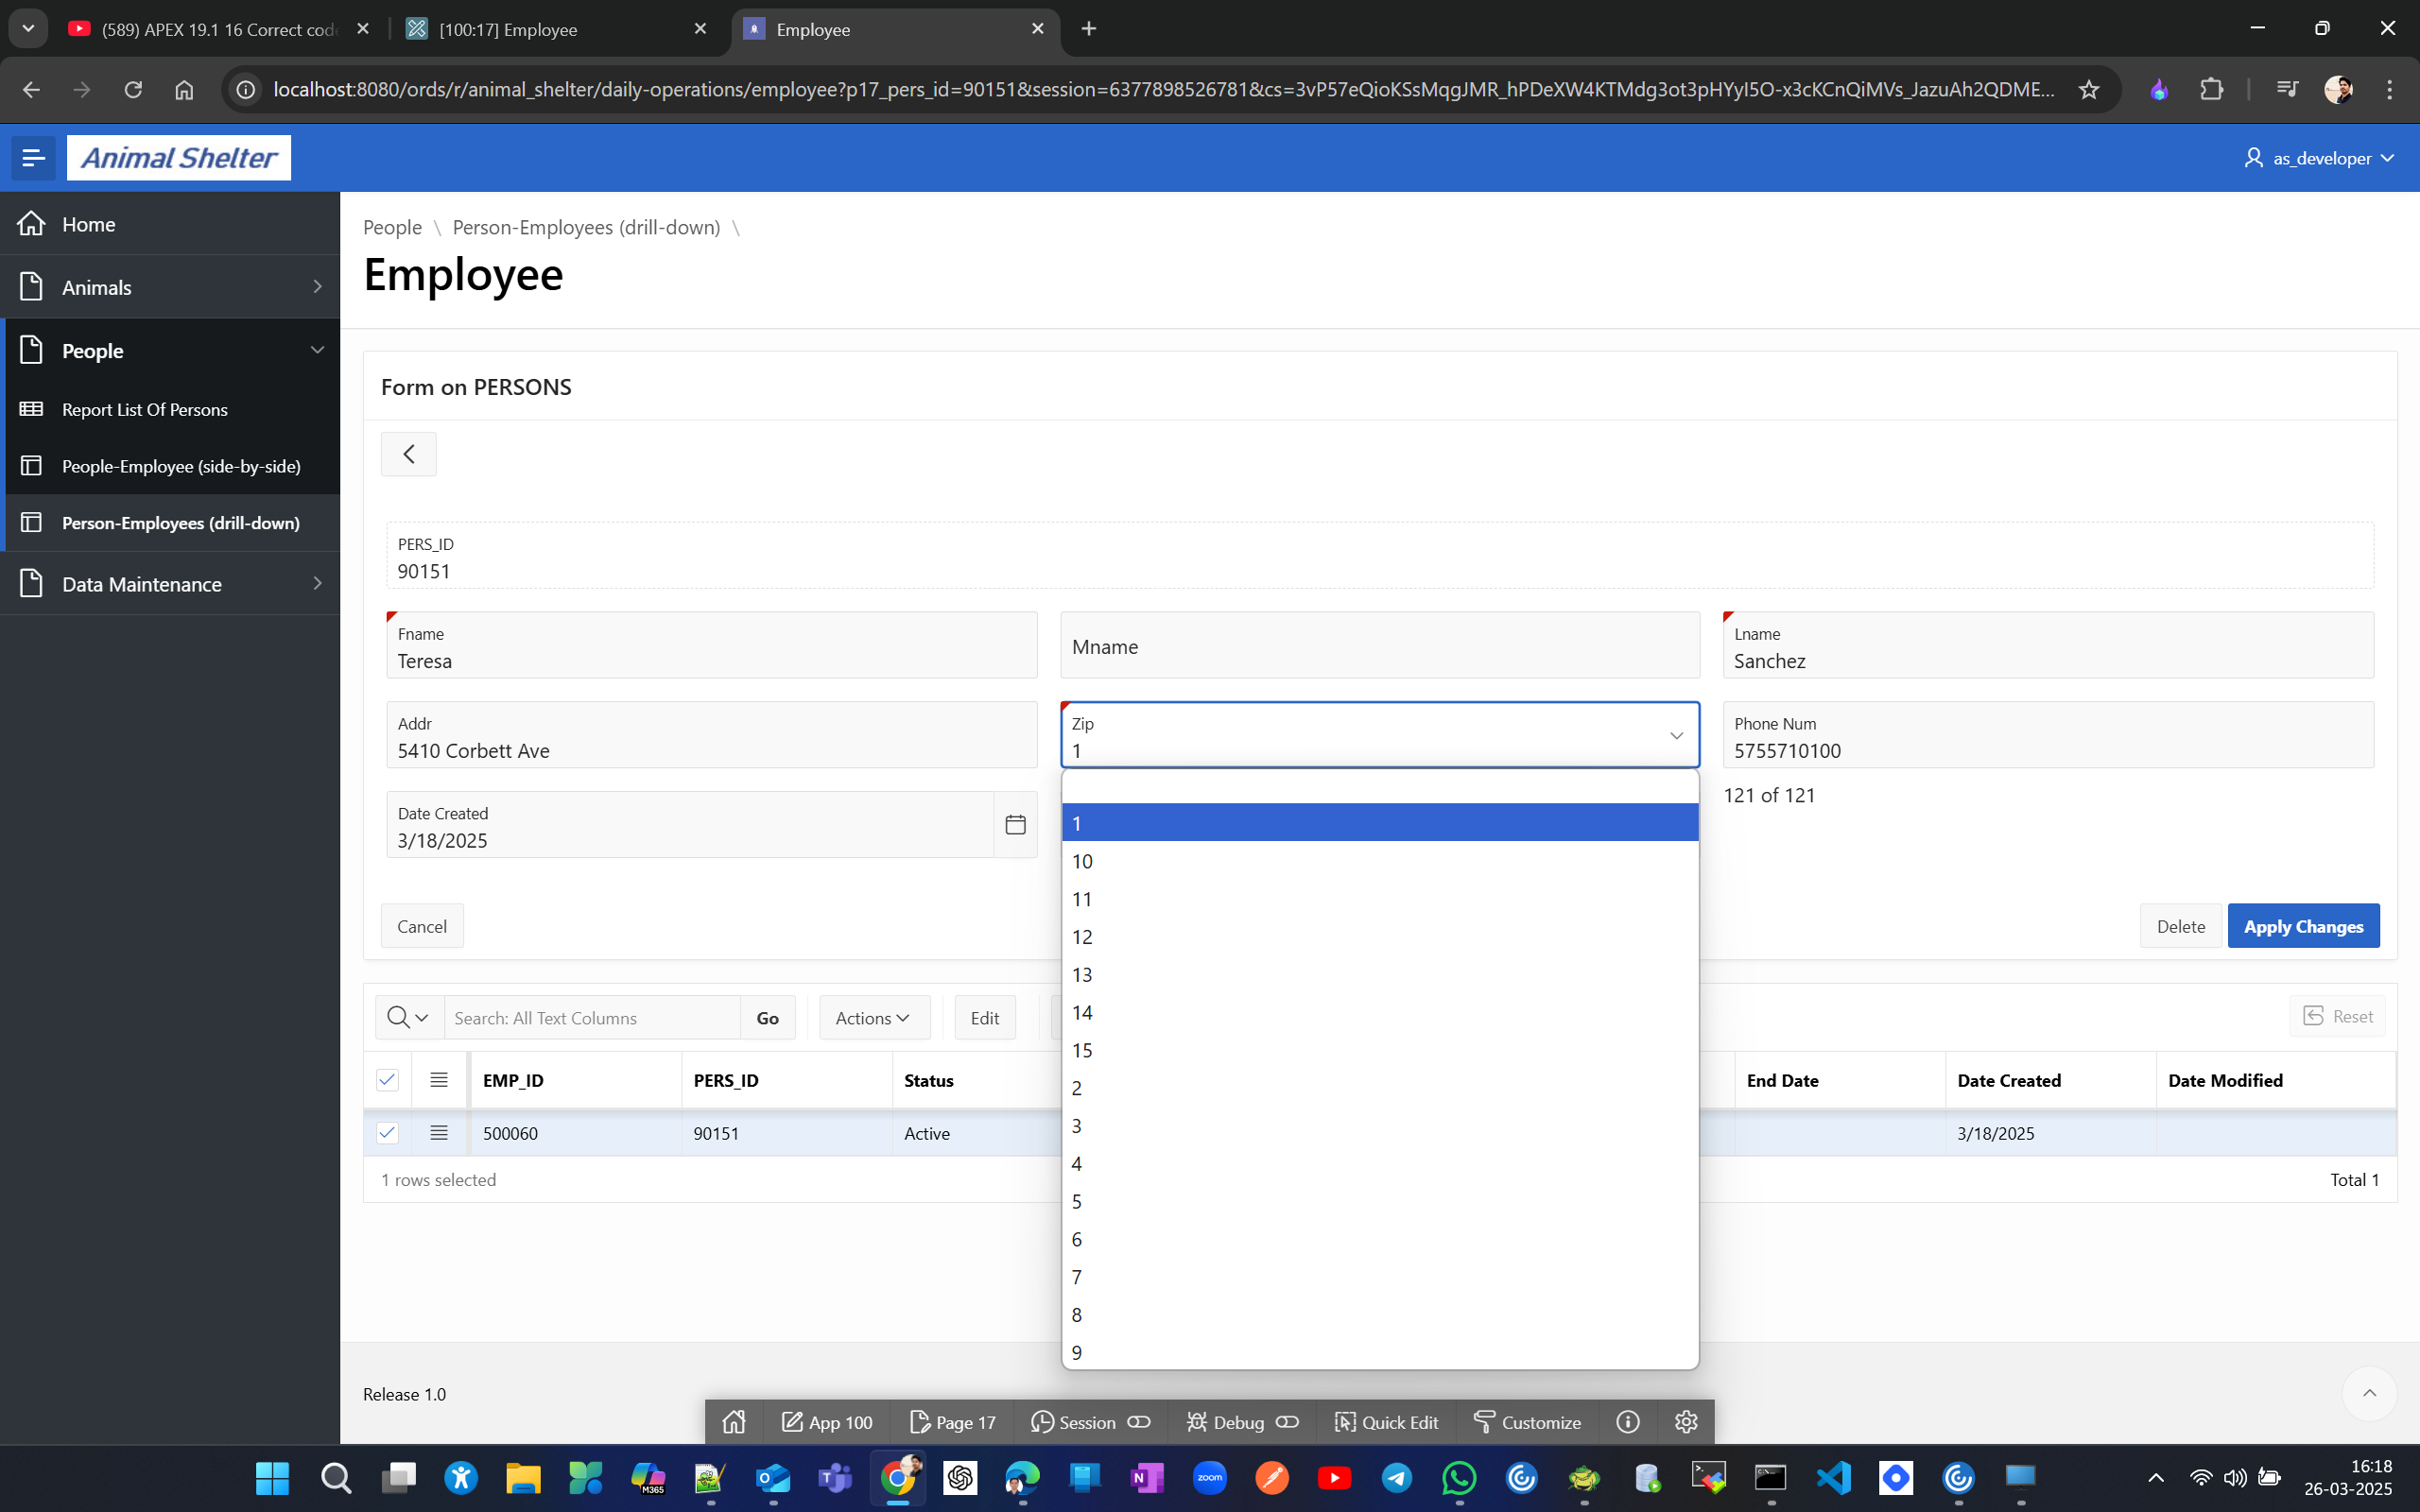
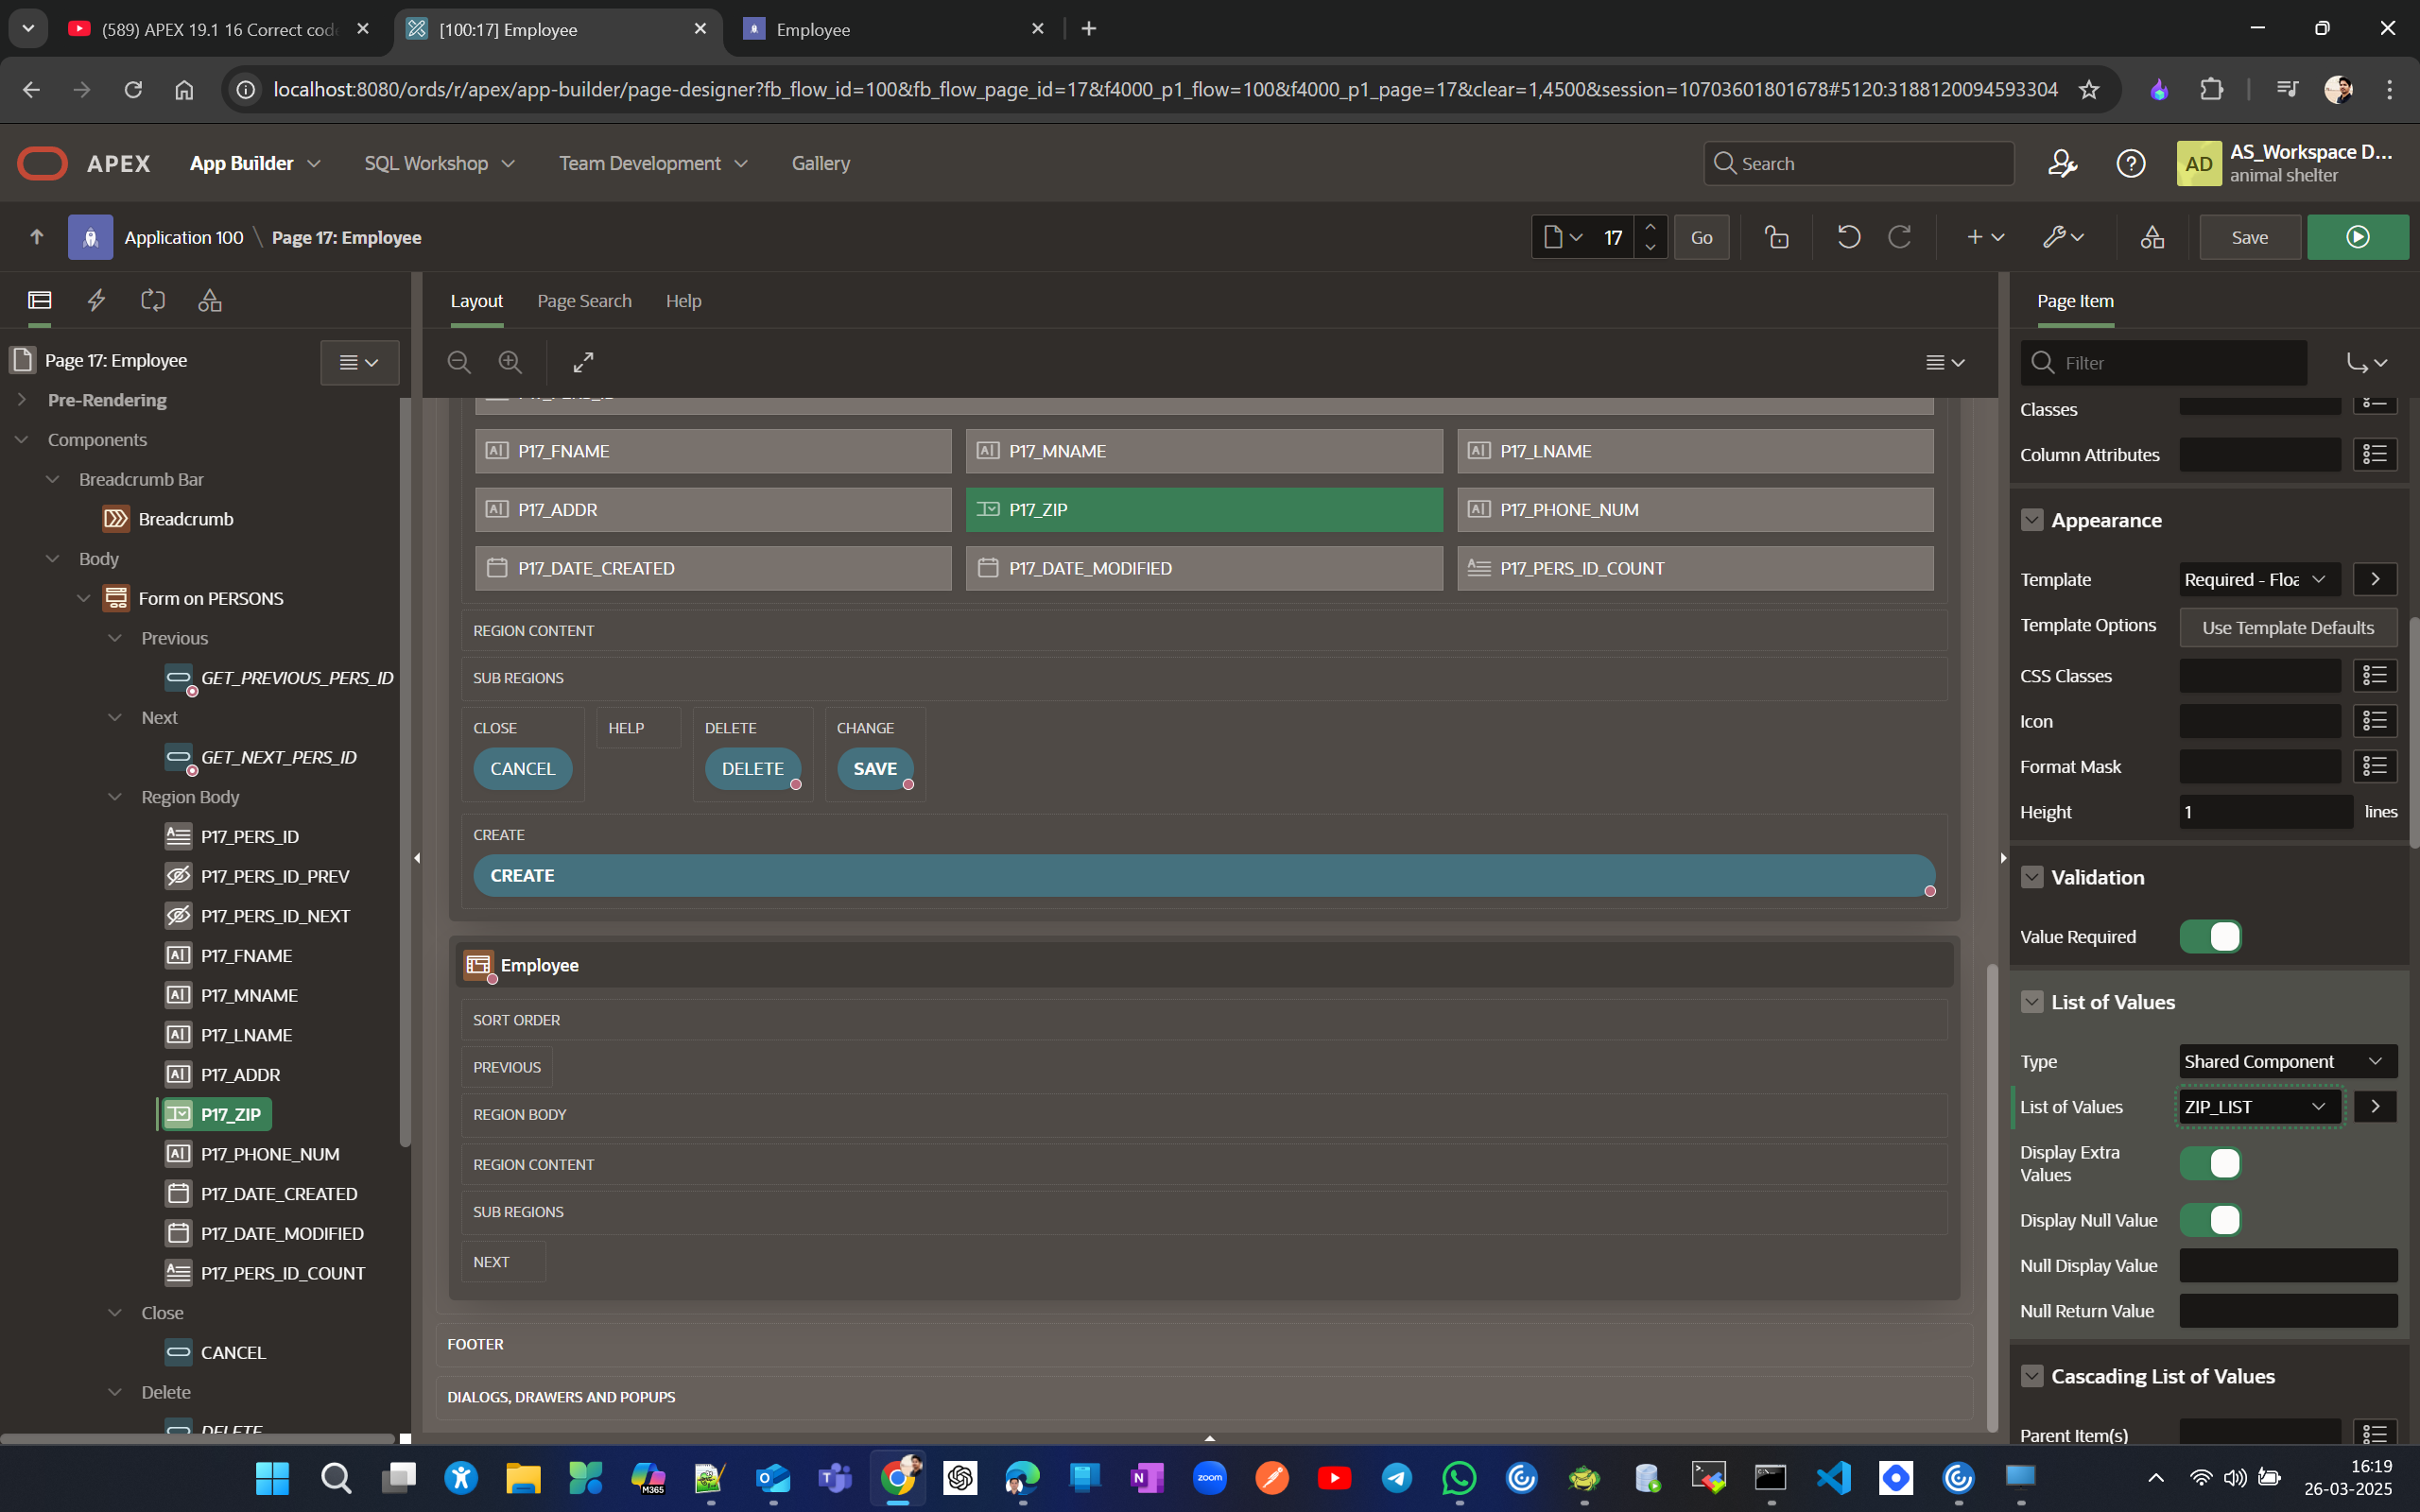

Now lets display/add Pers_Status column to the master form.
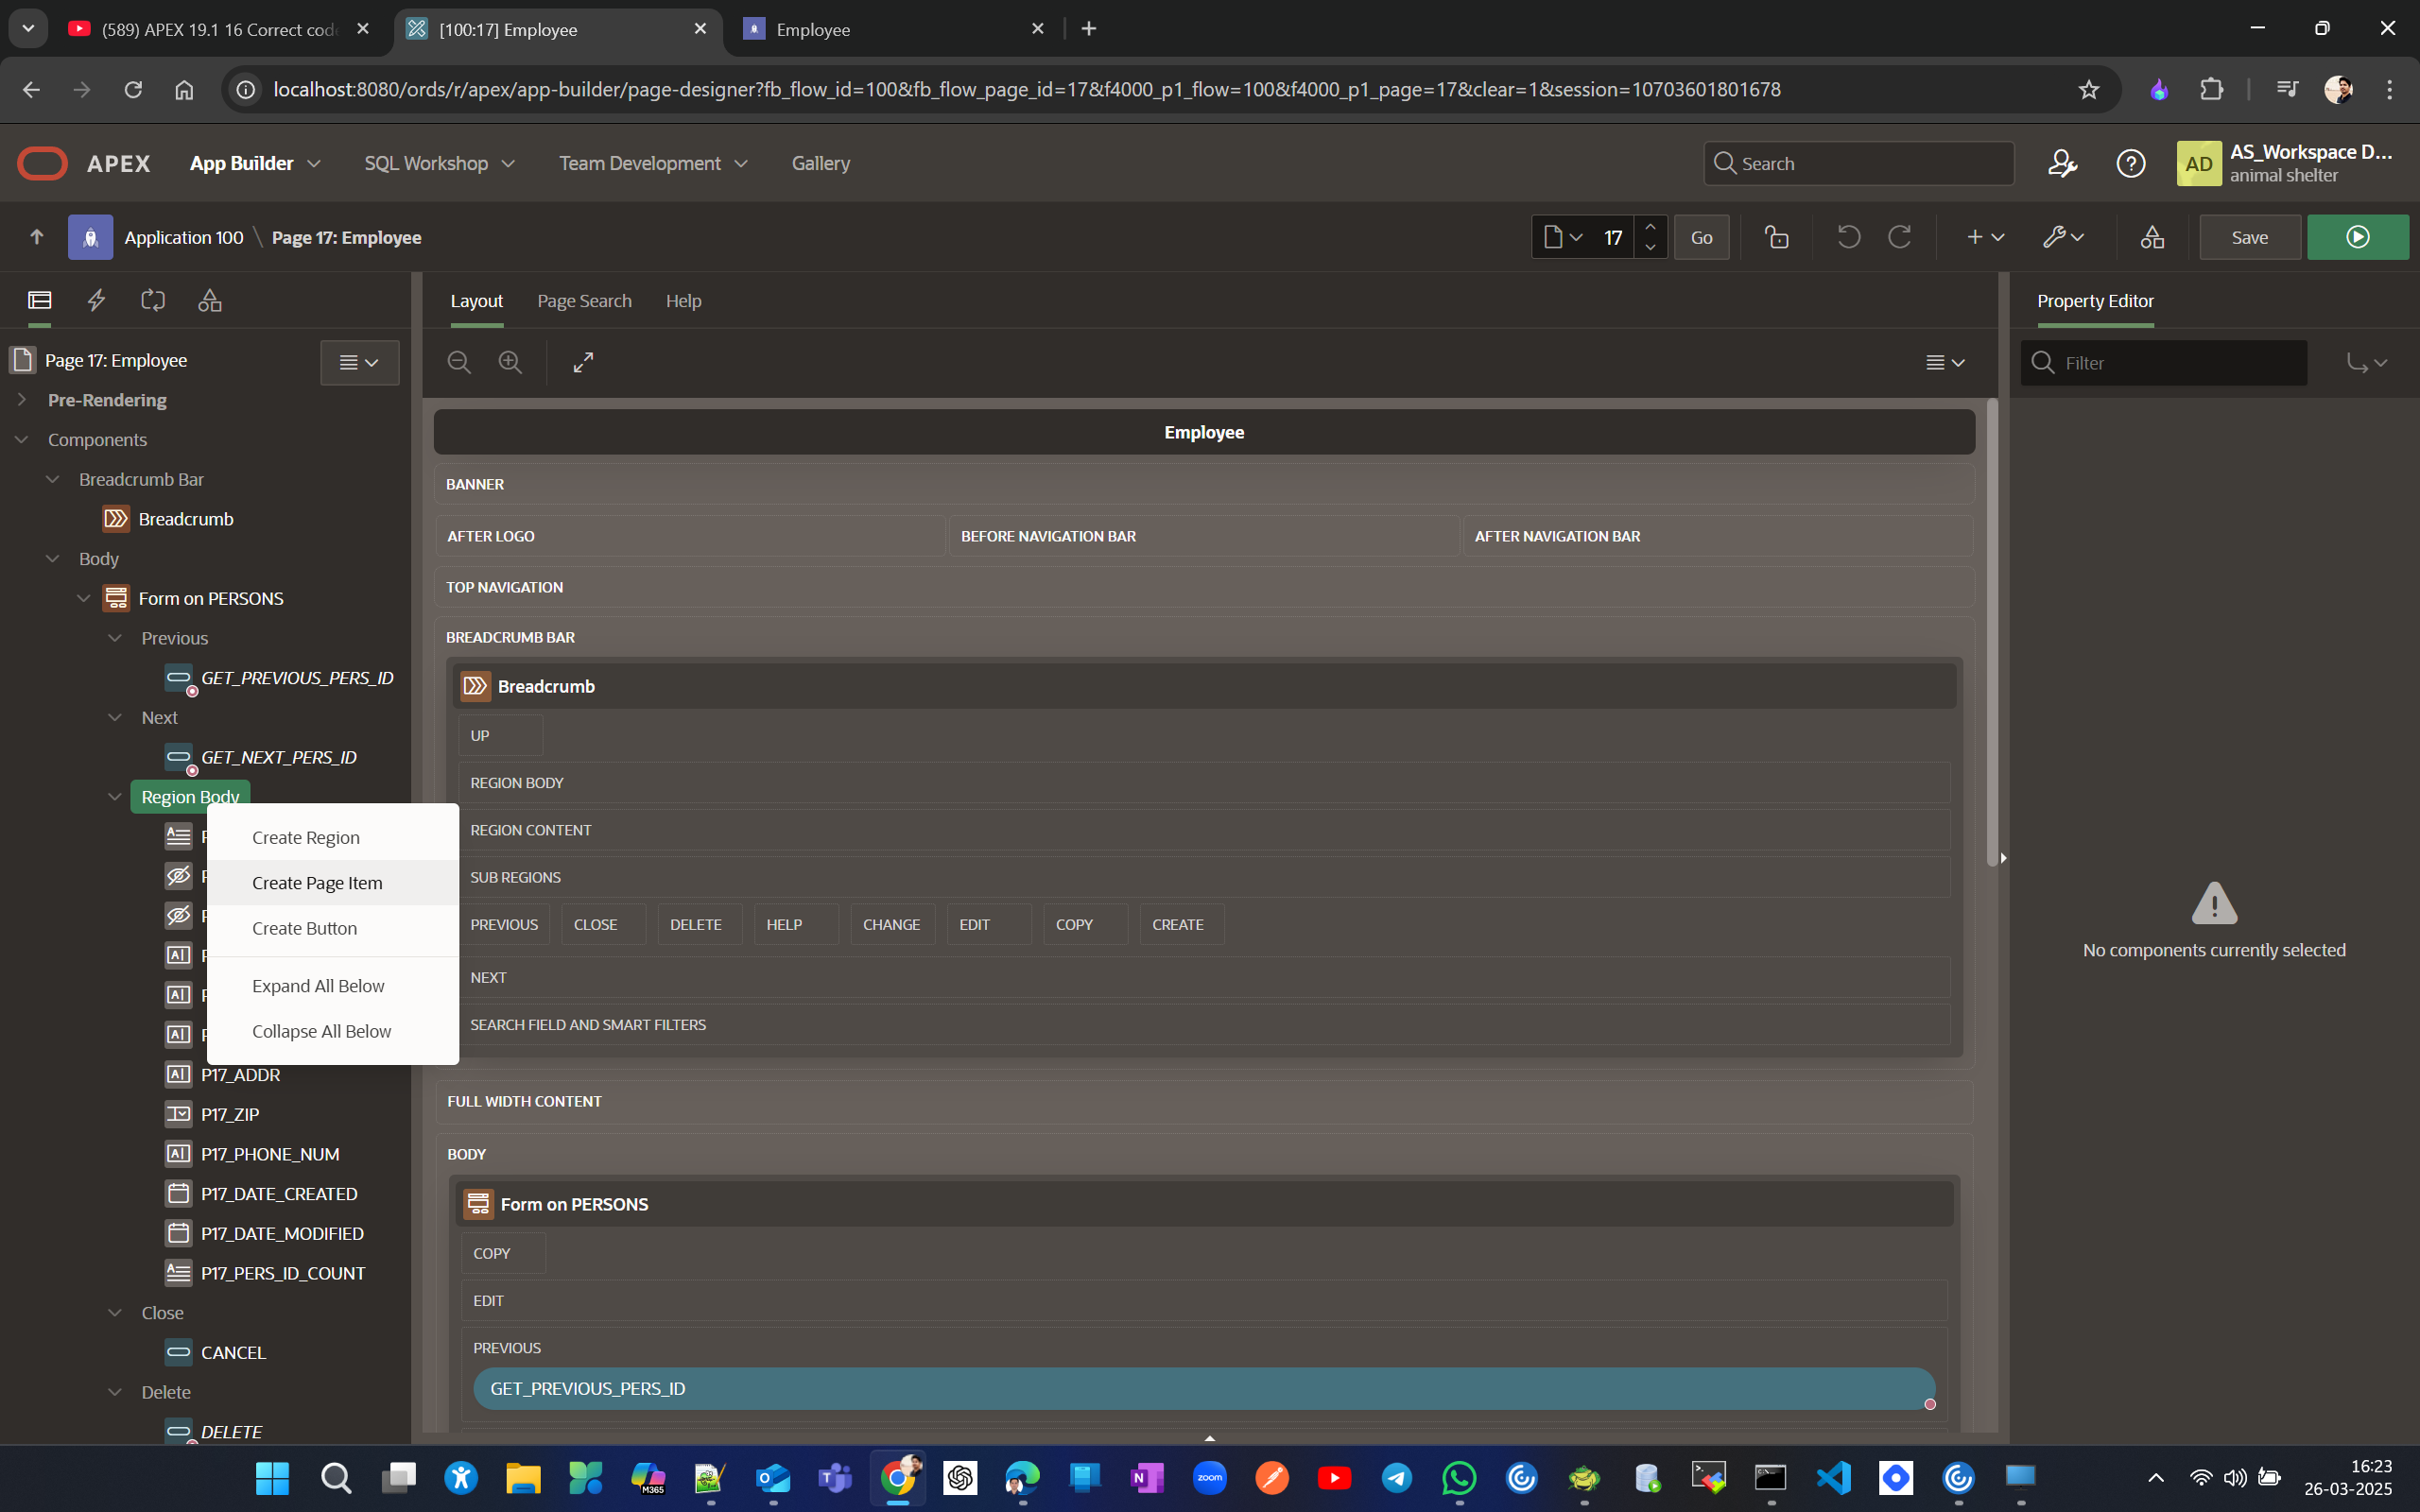
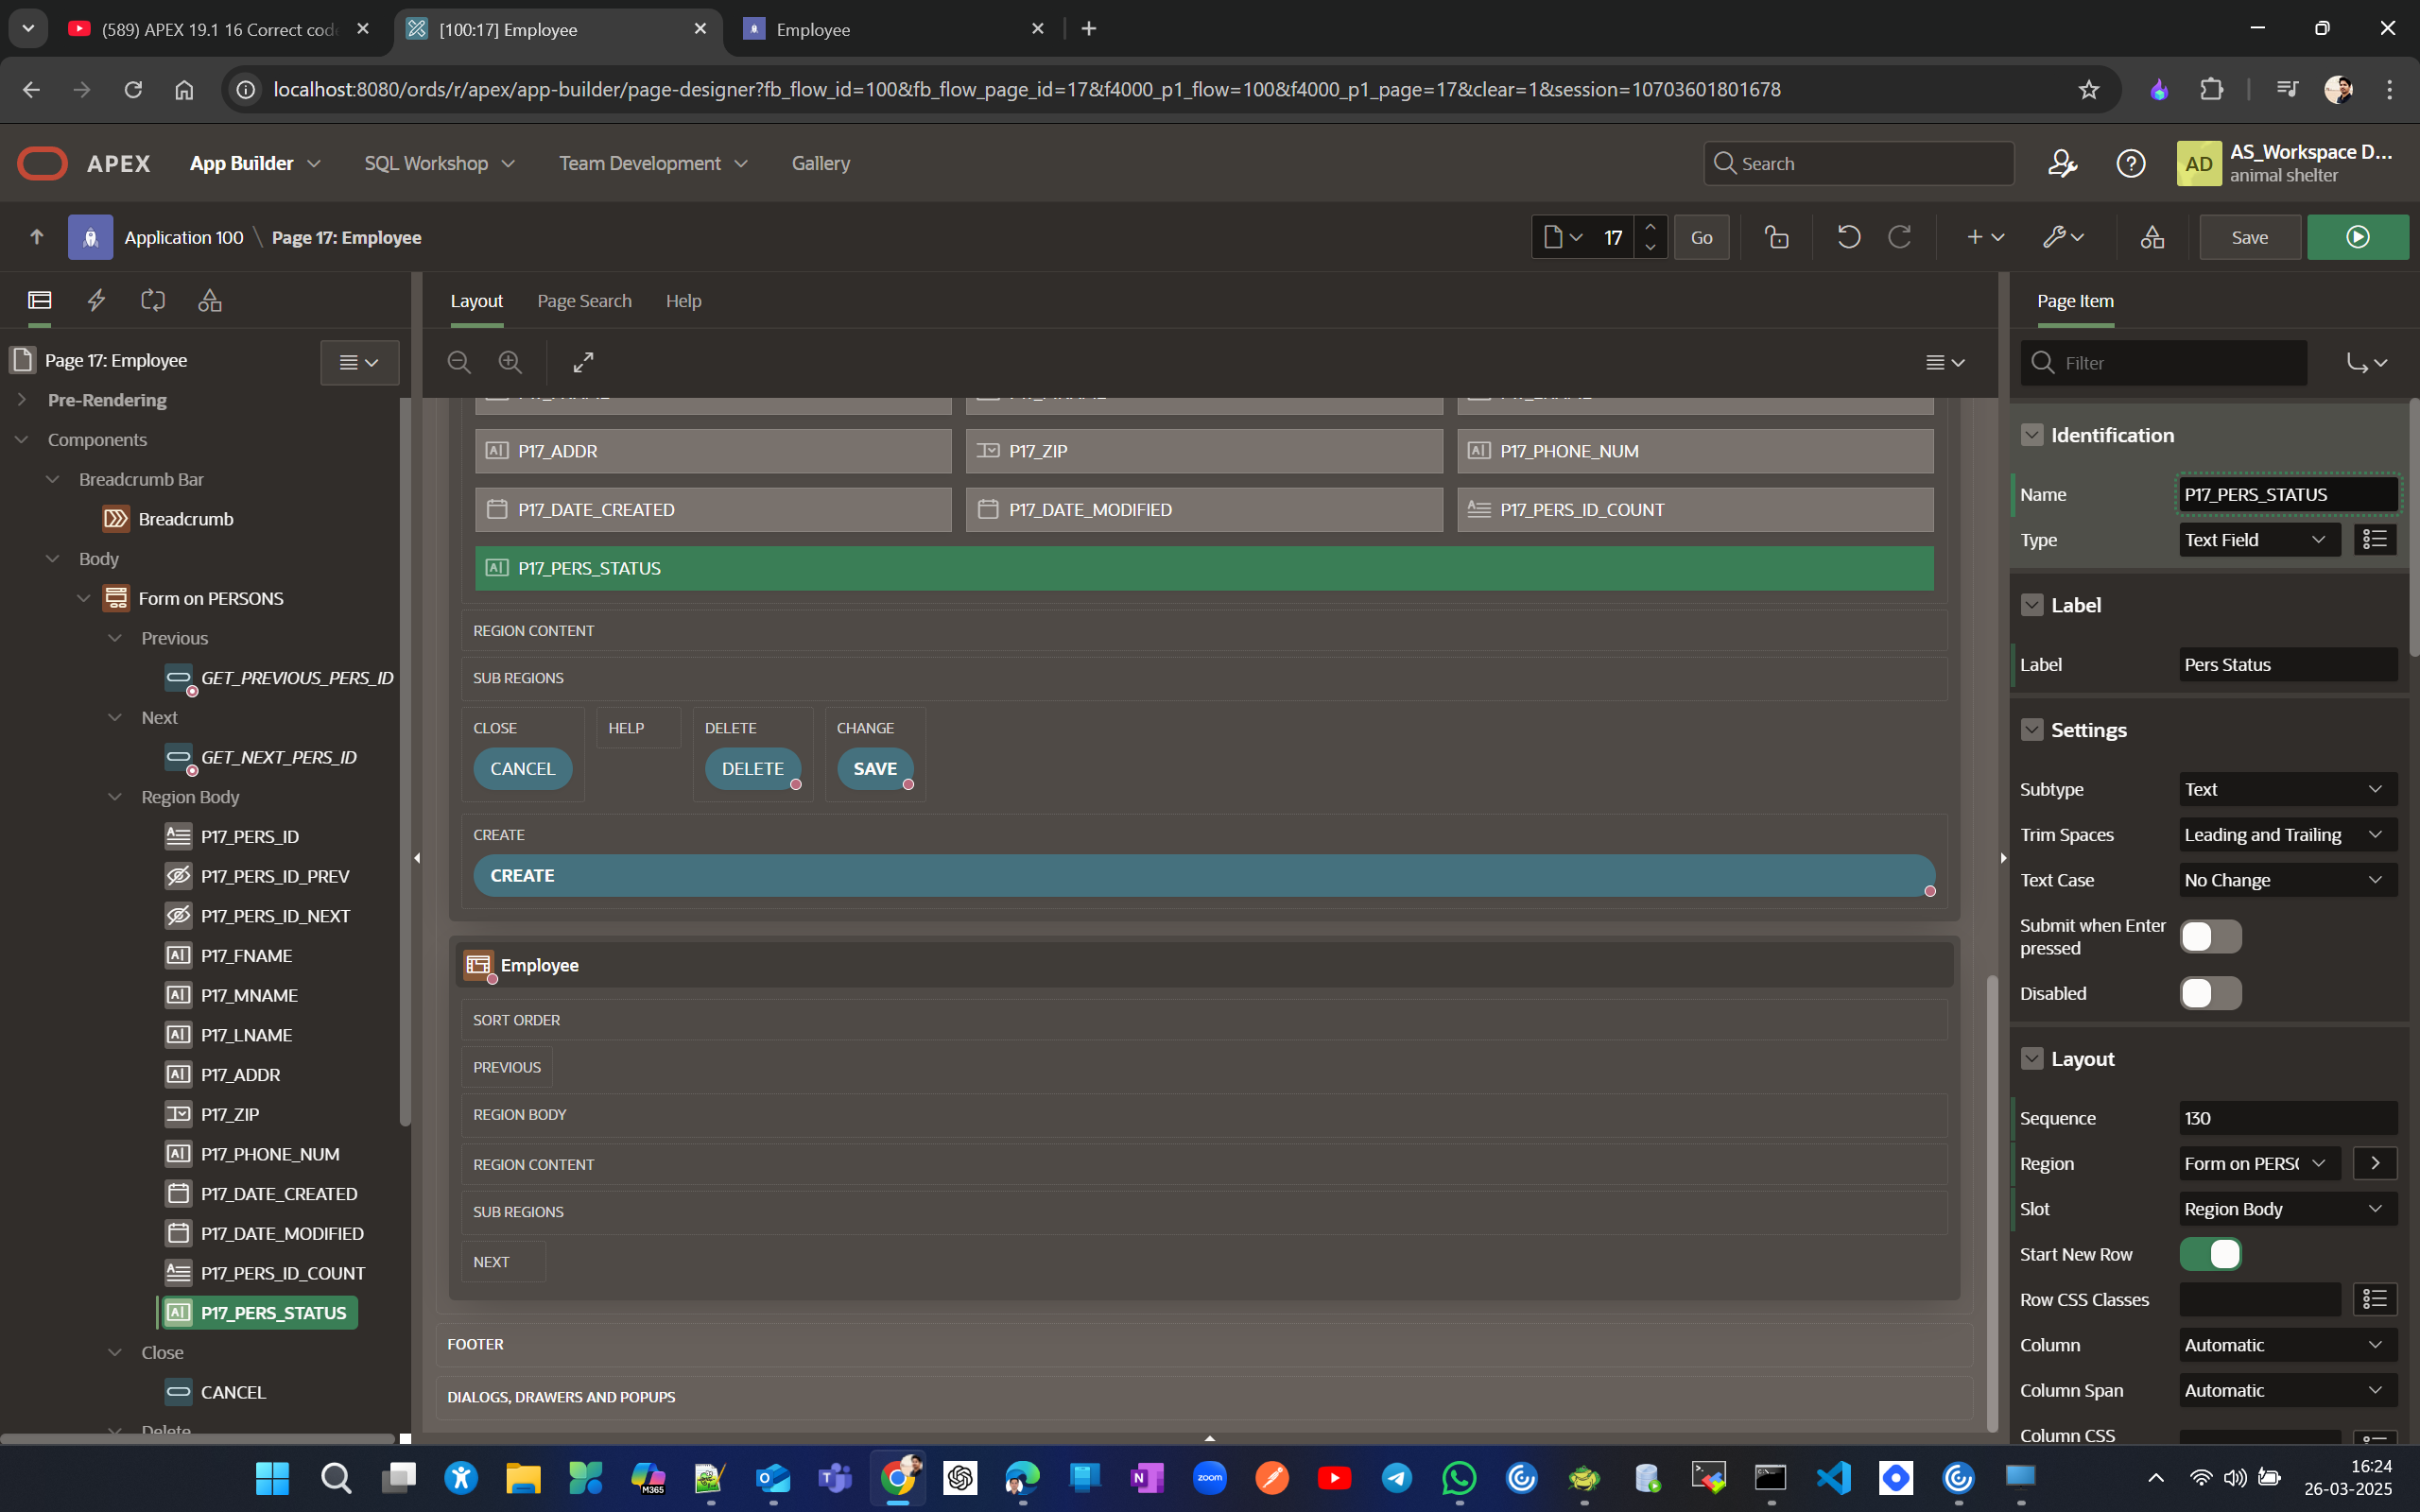
Chnage source and sequence so that it appear next to phone no
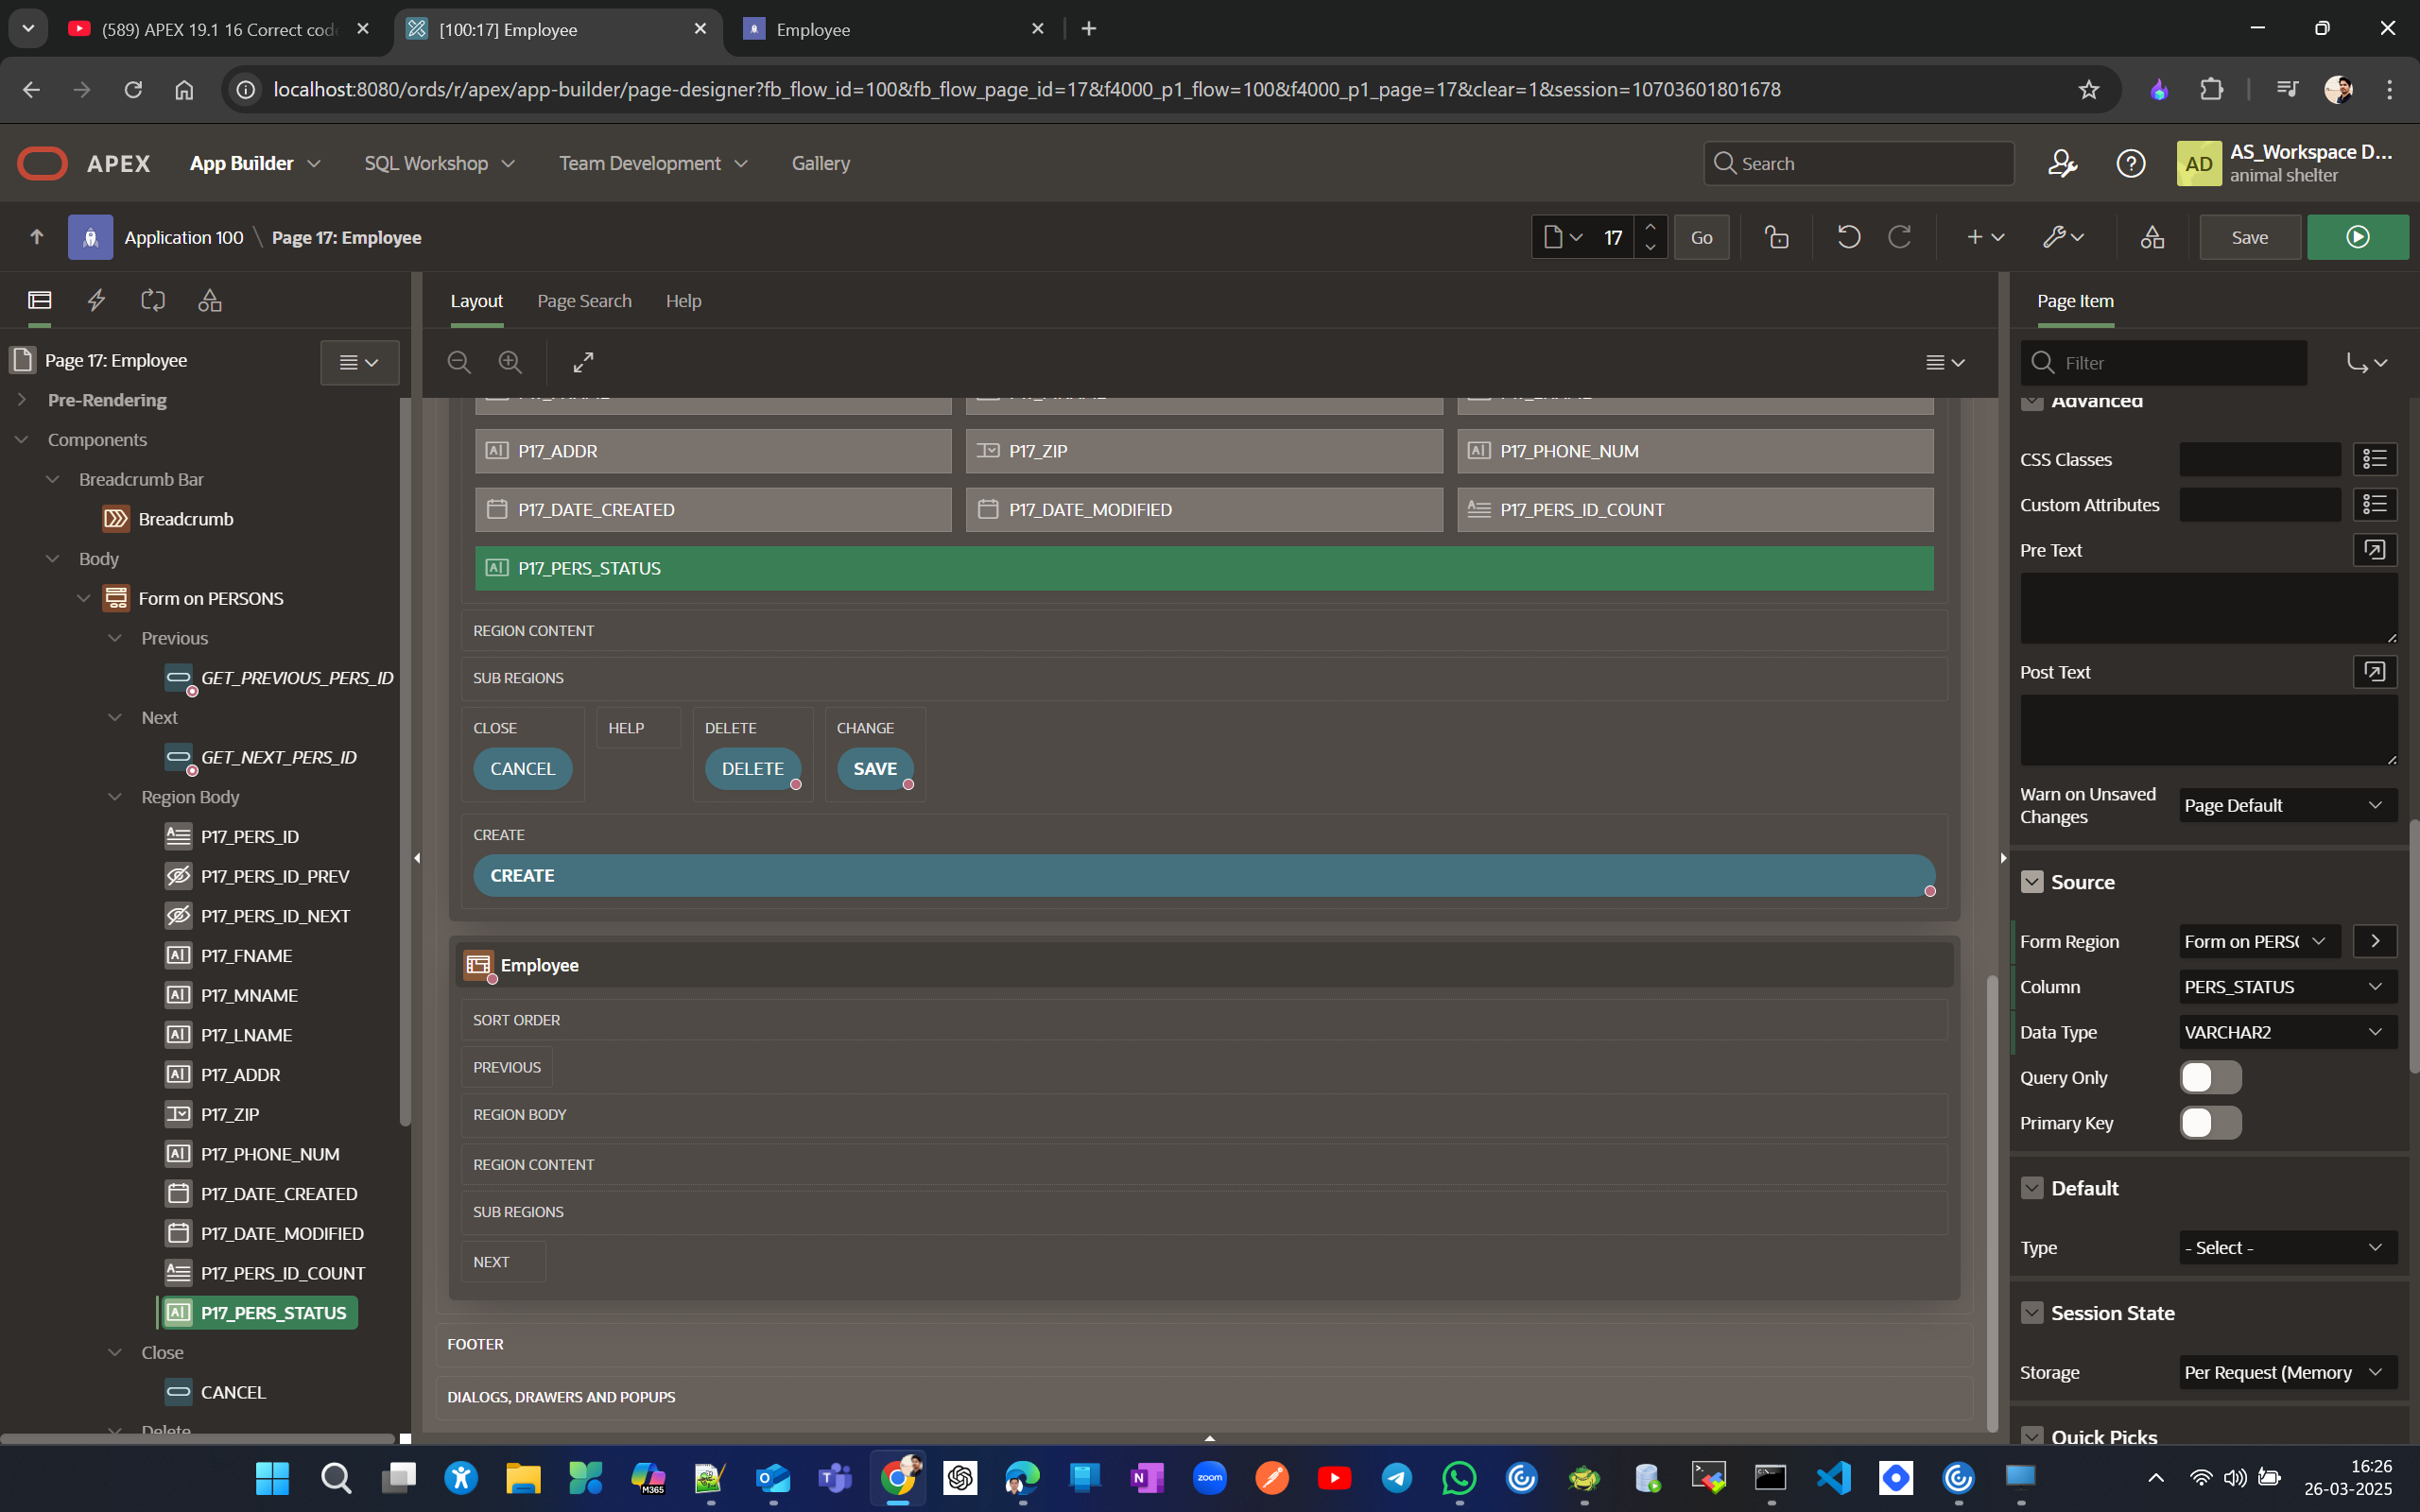
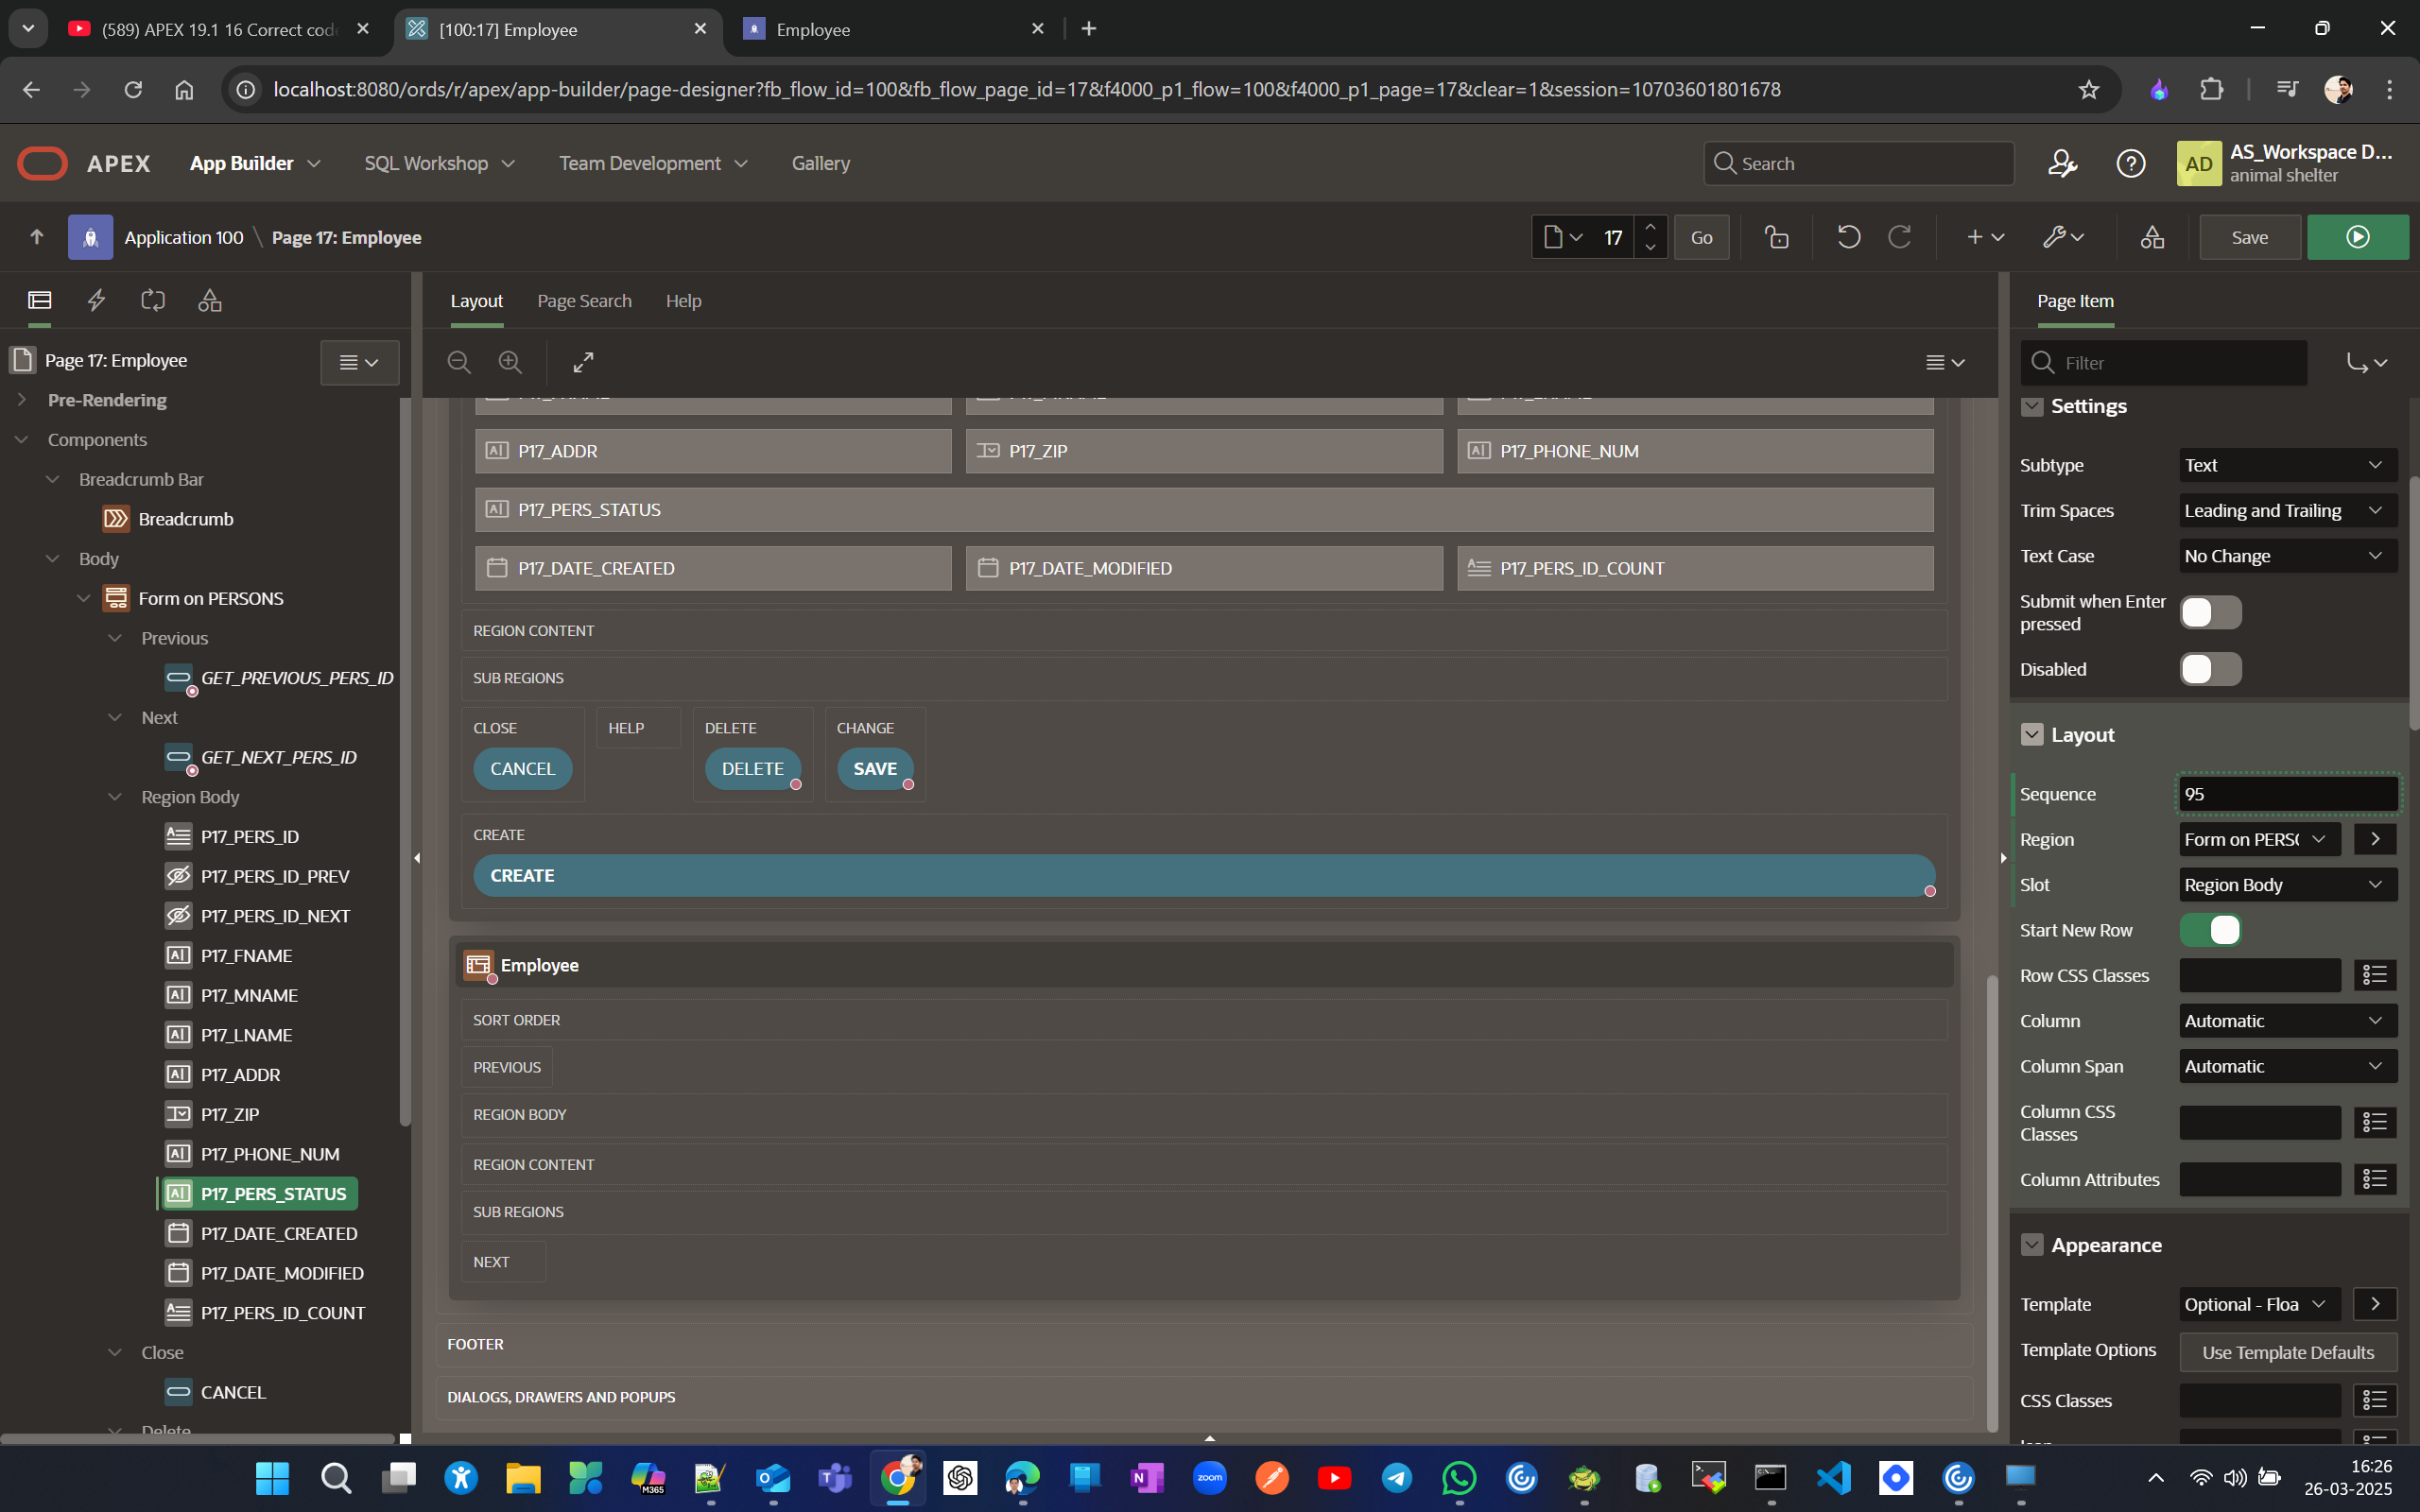
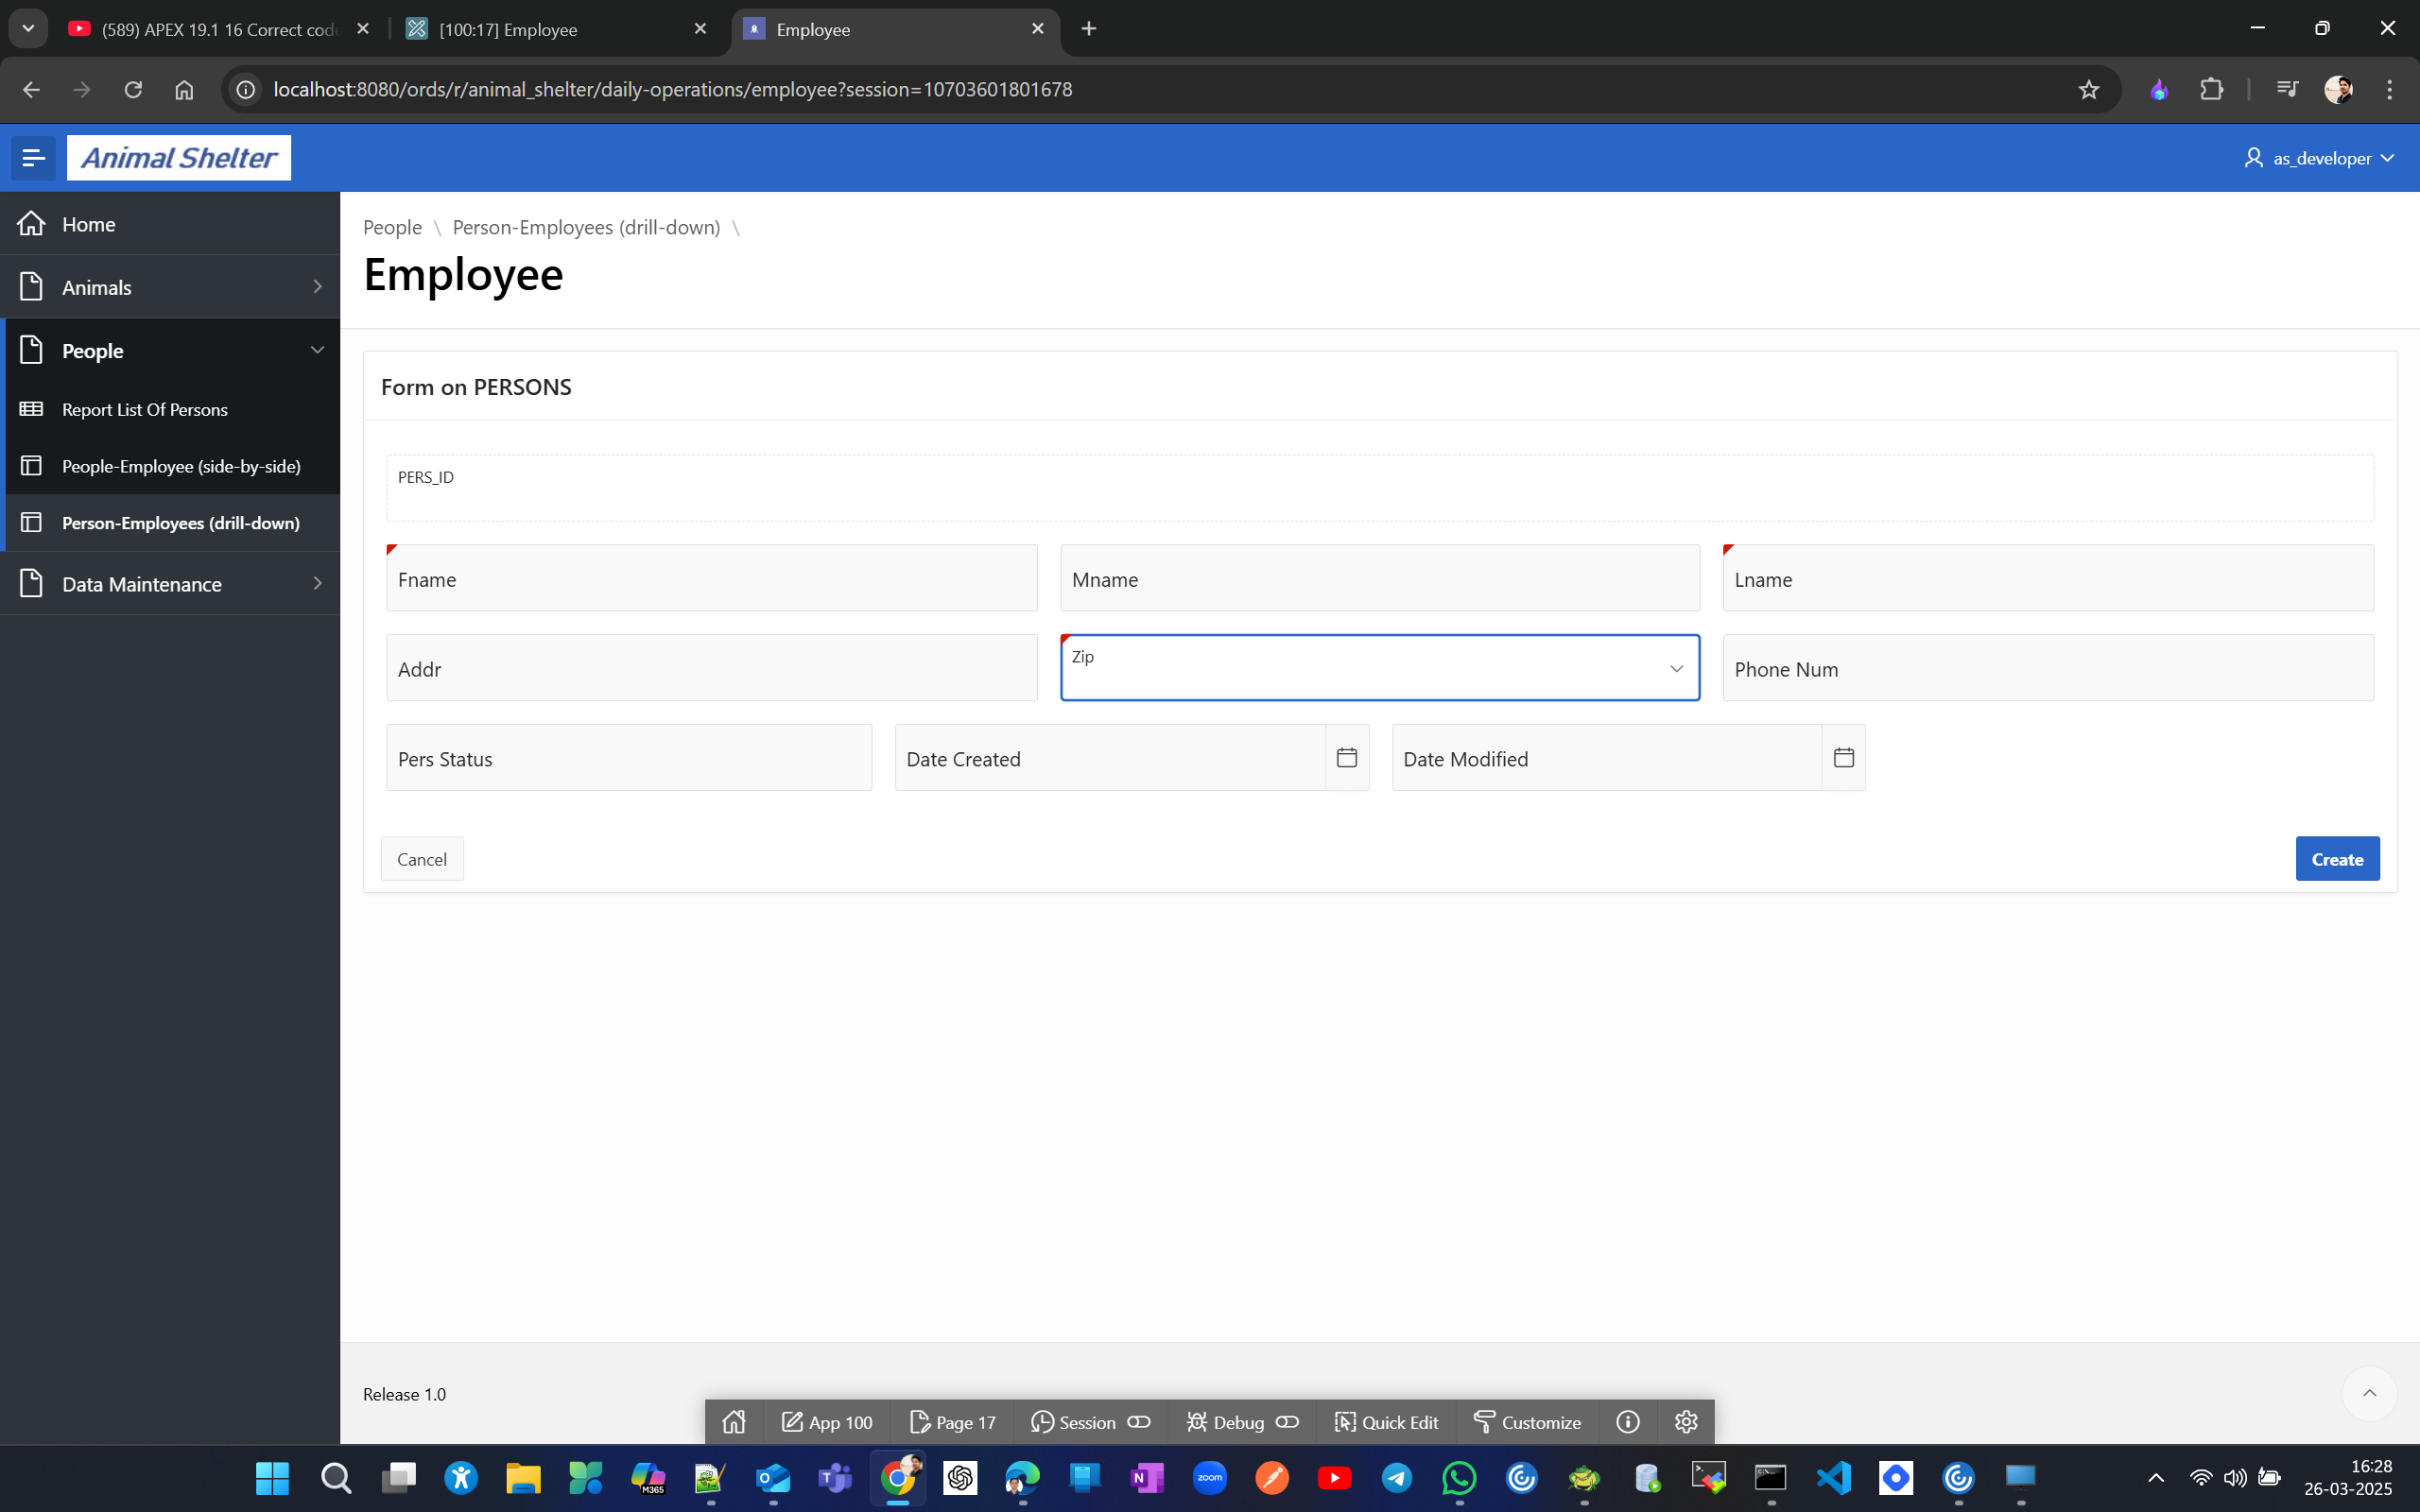
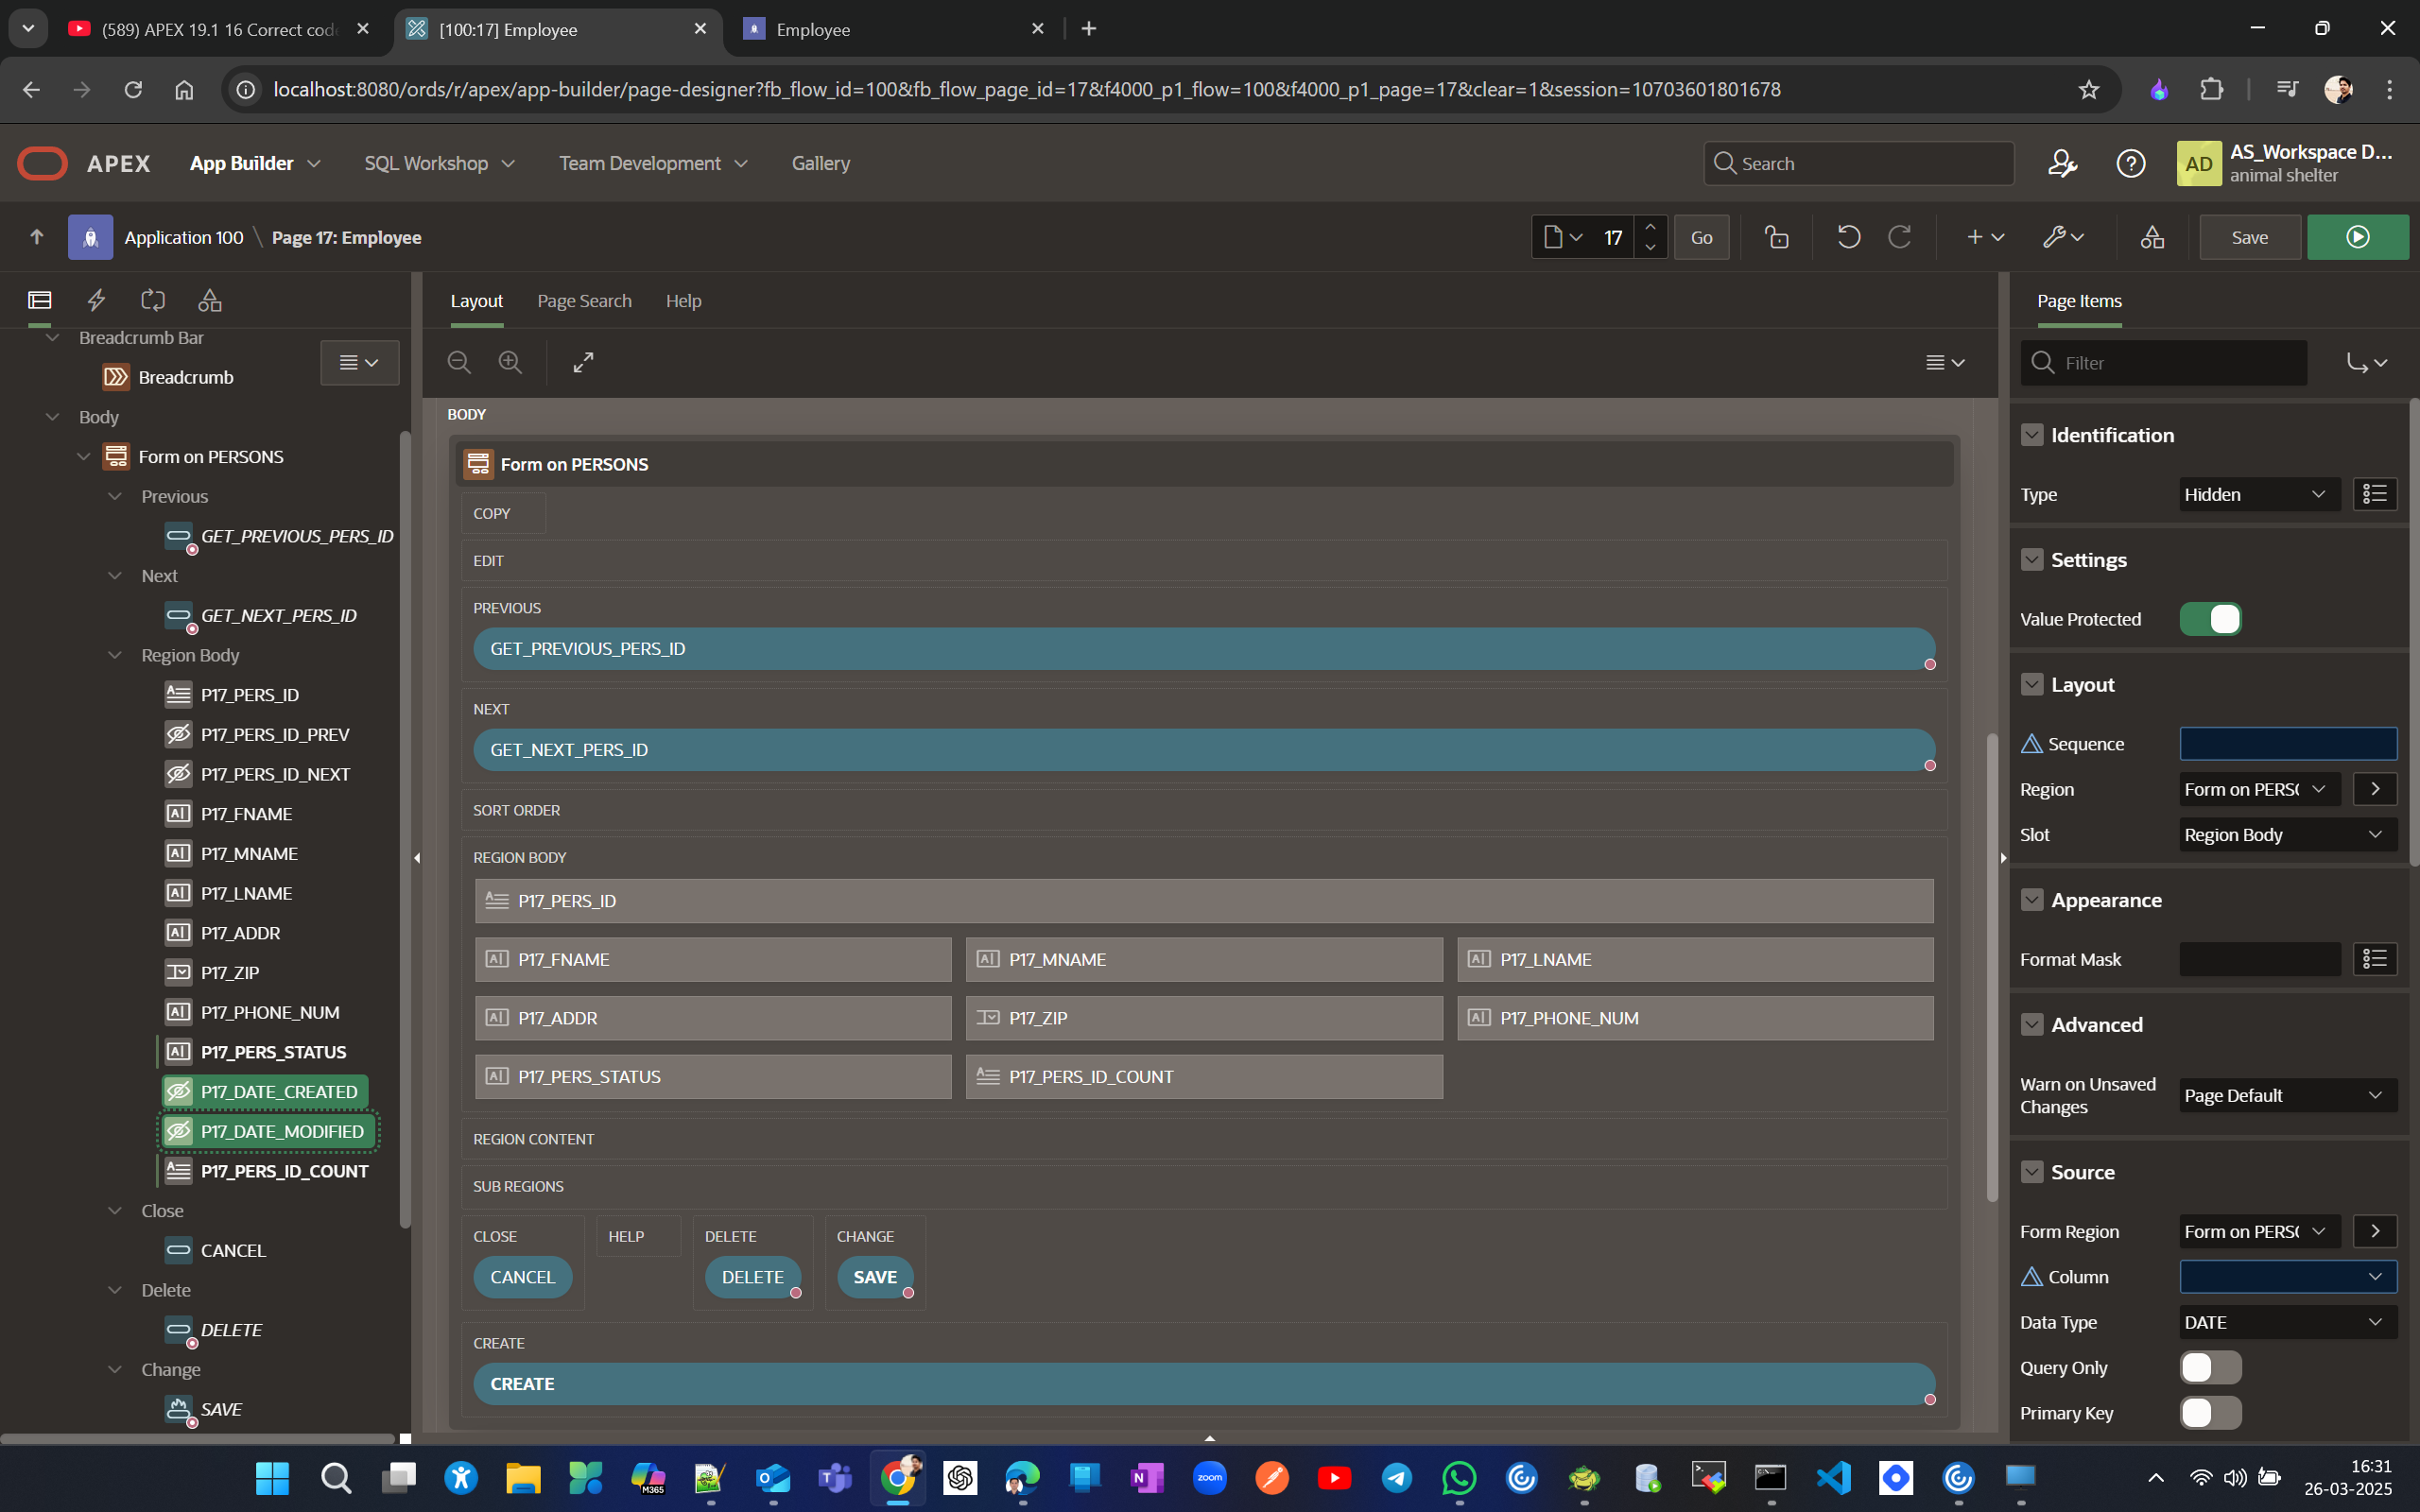
Lets hide those audit columns as they are auto populated through triggers.
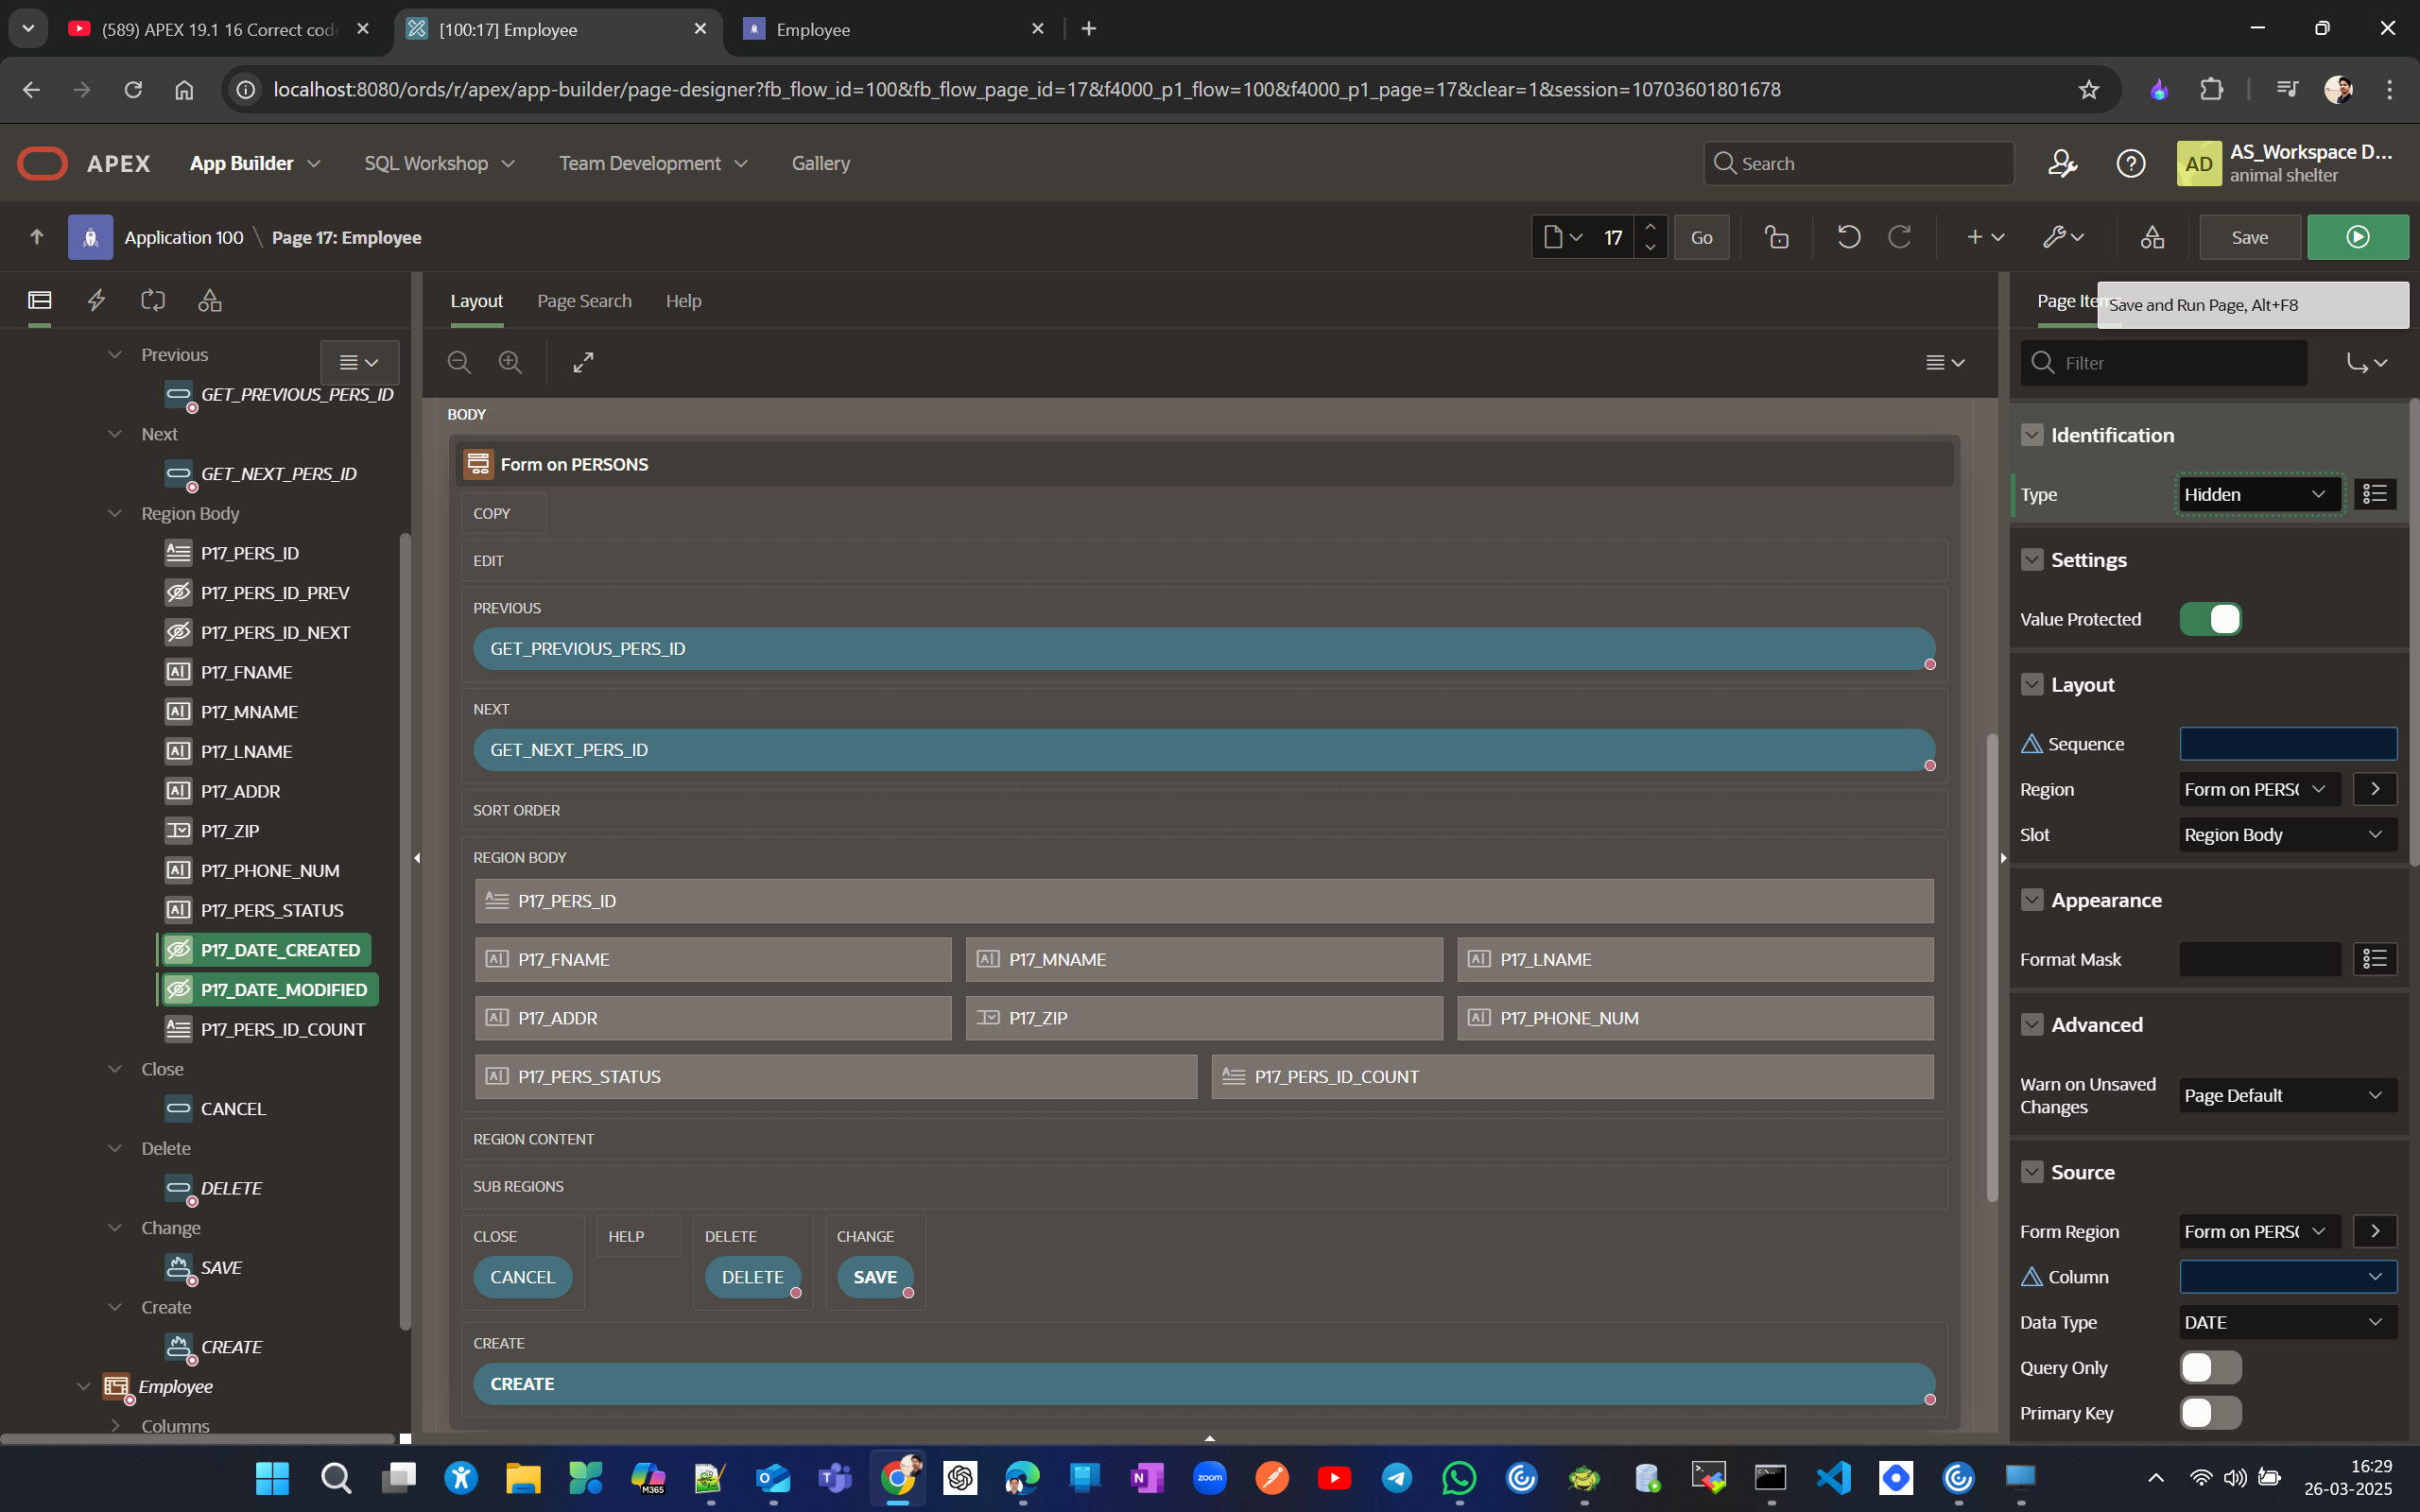
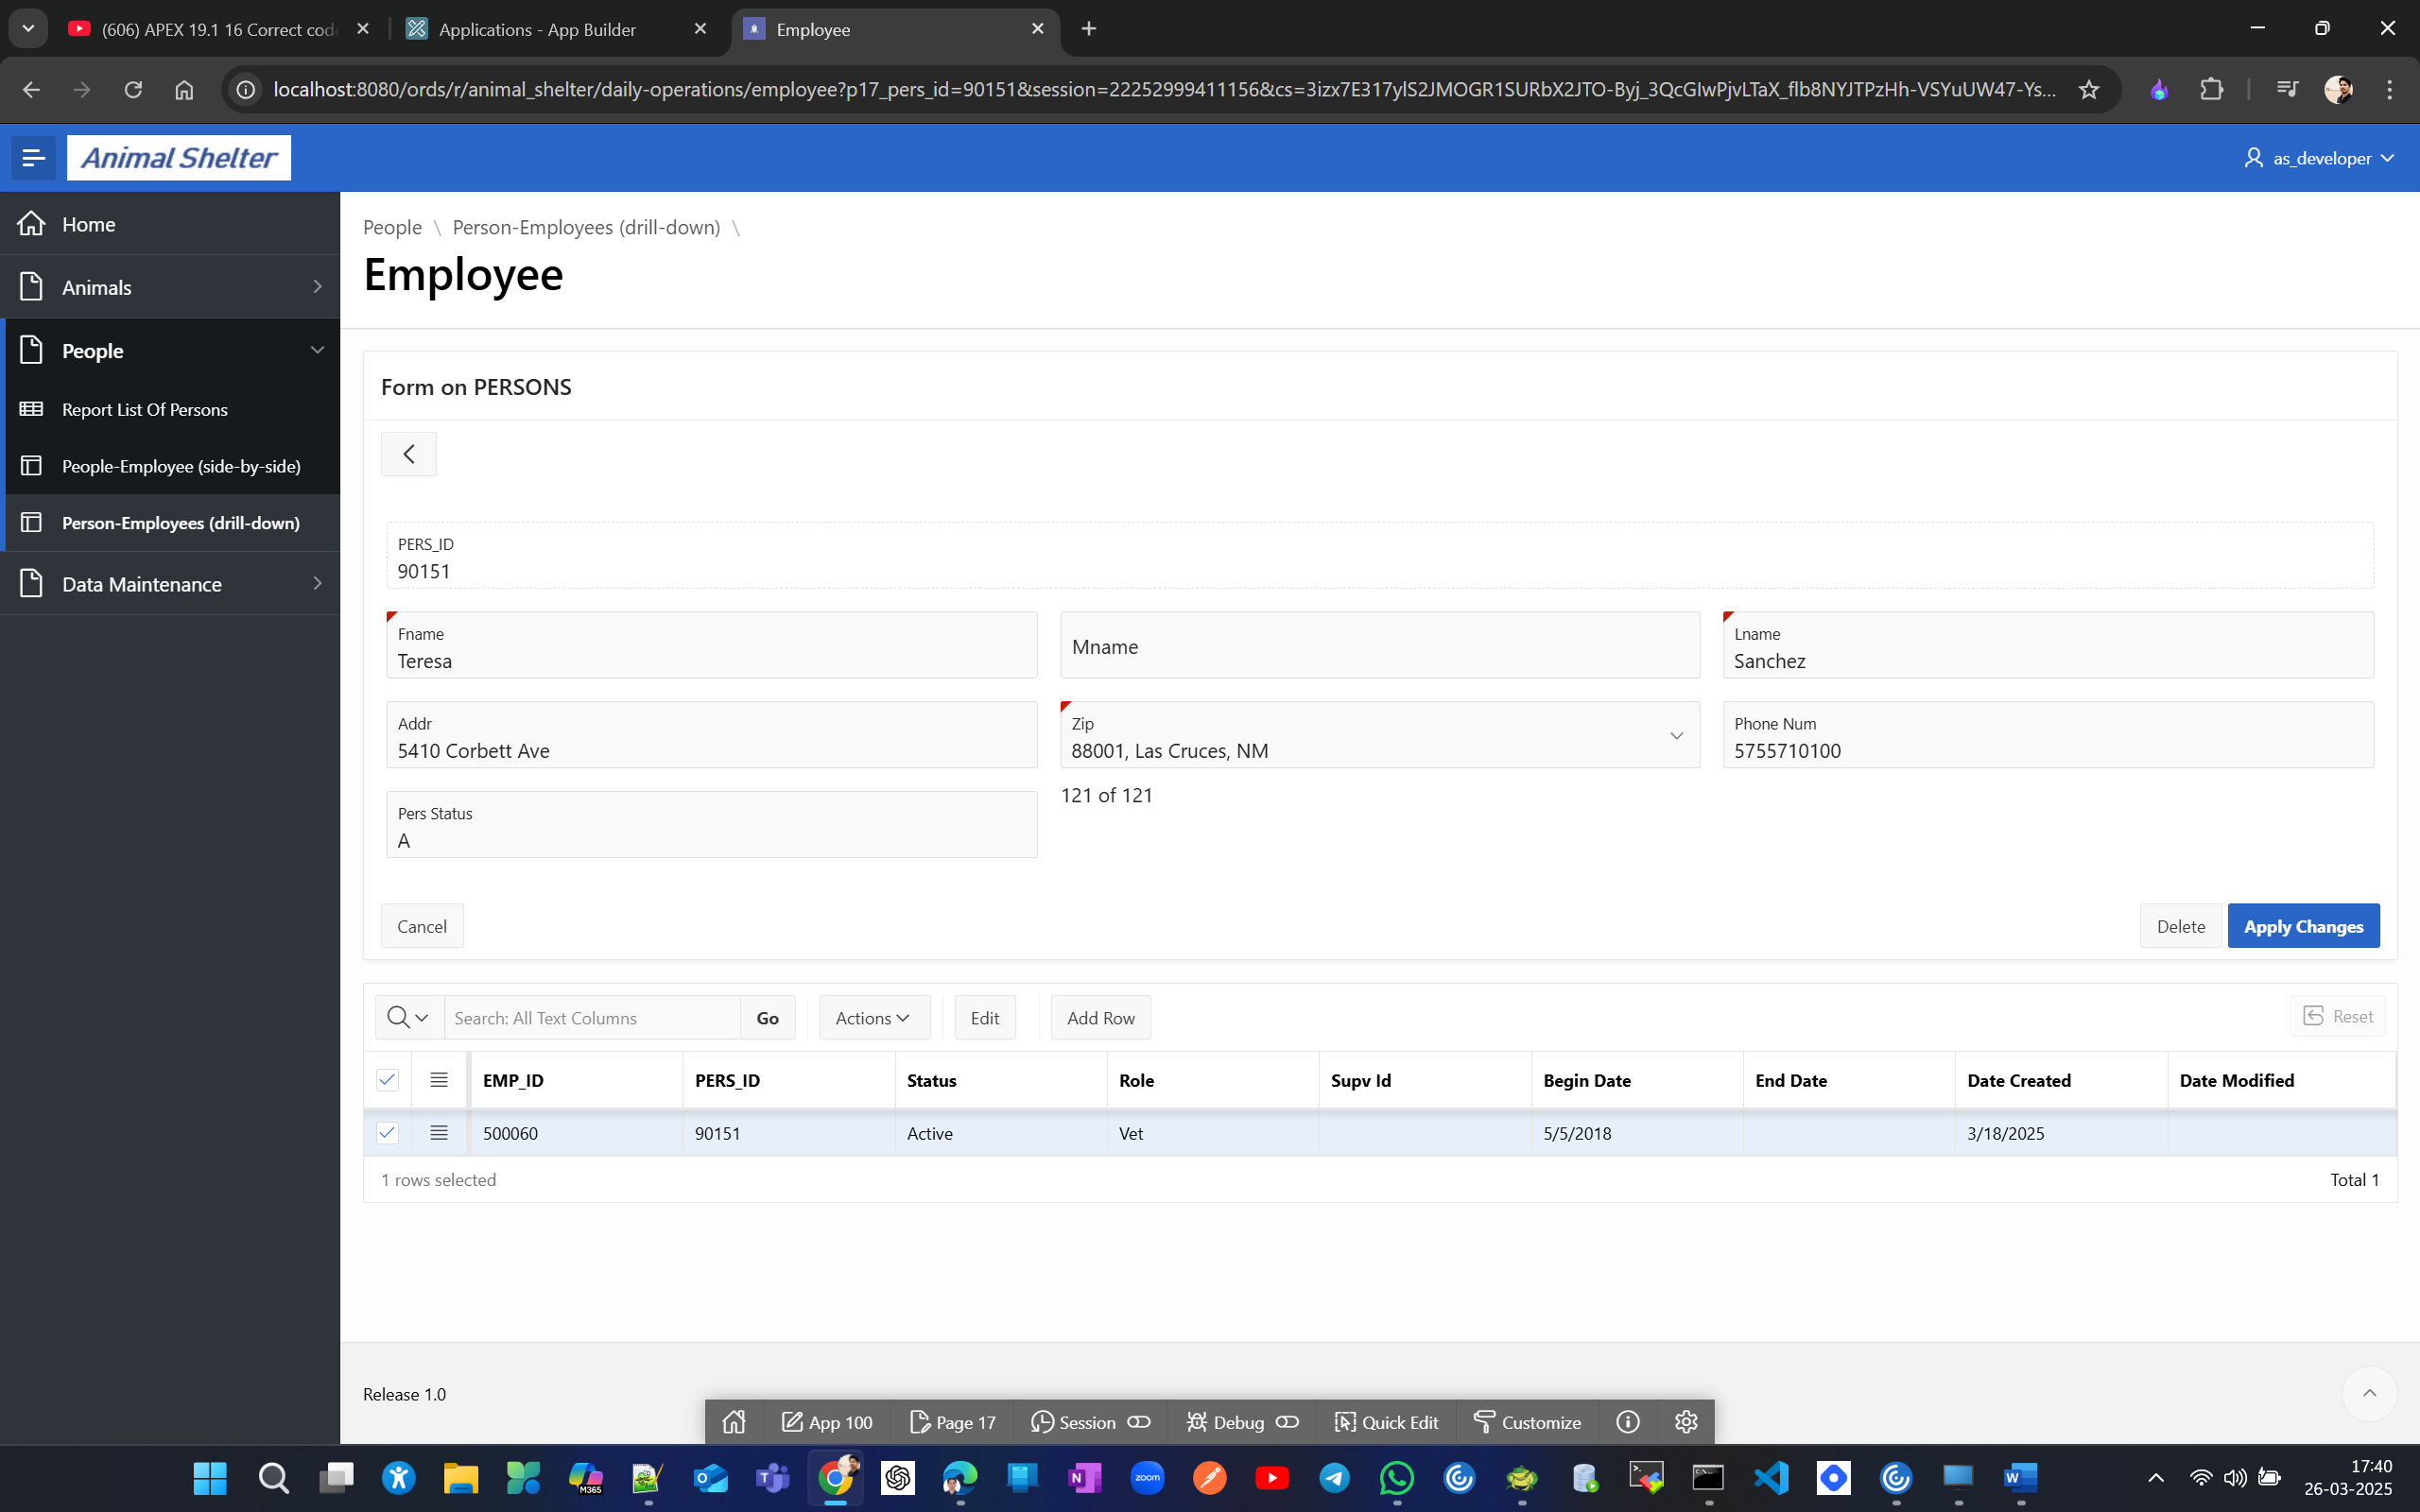
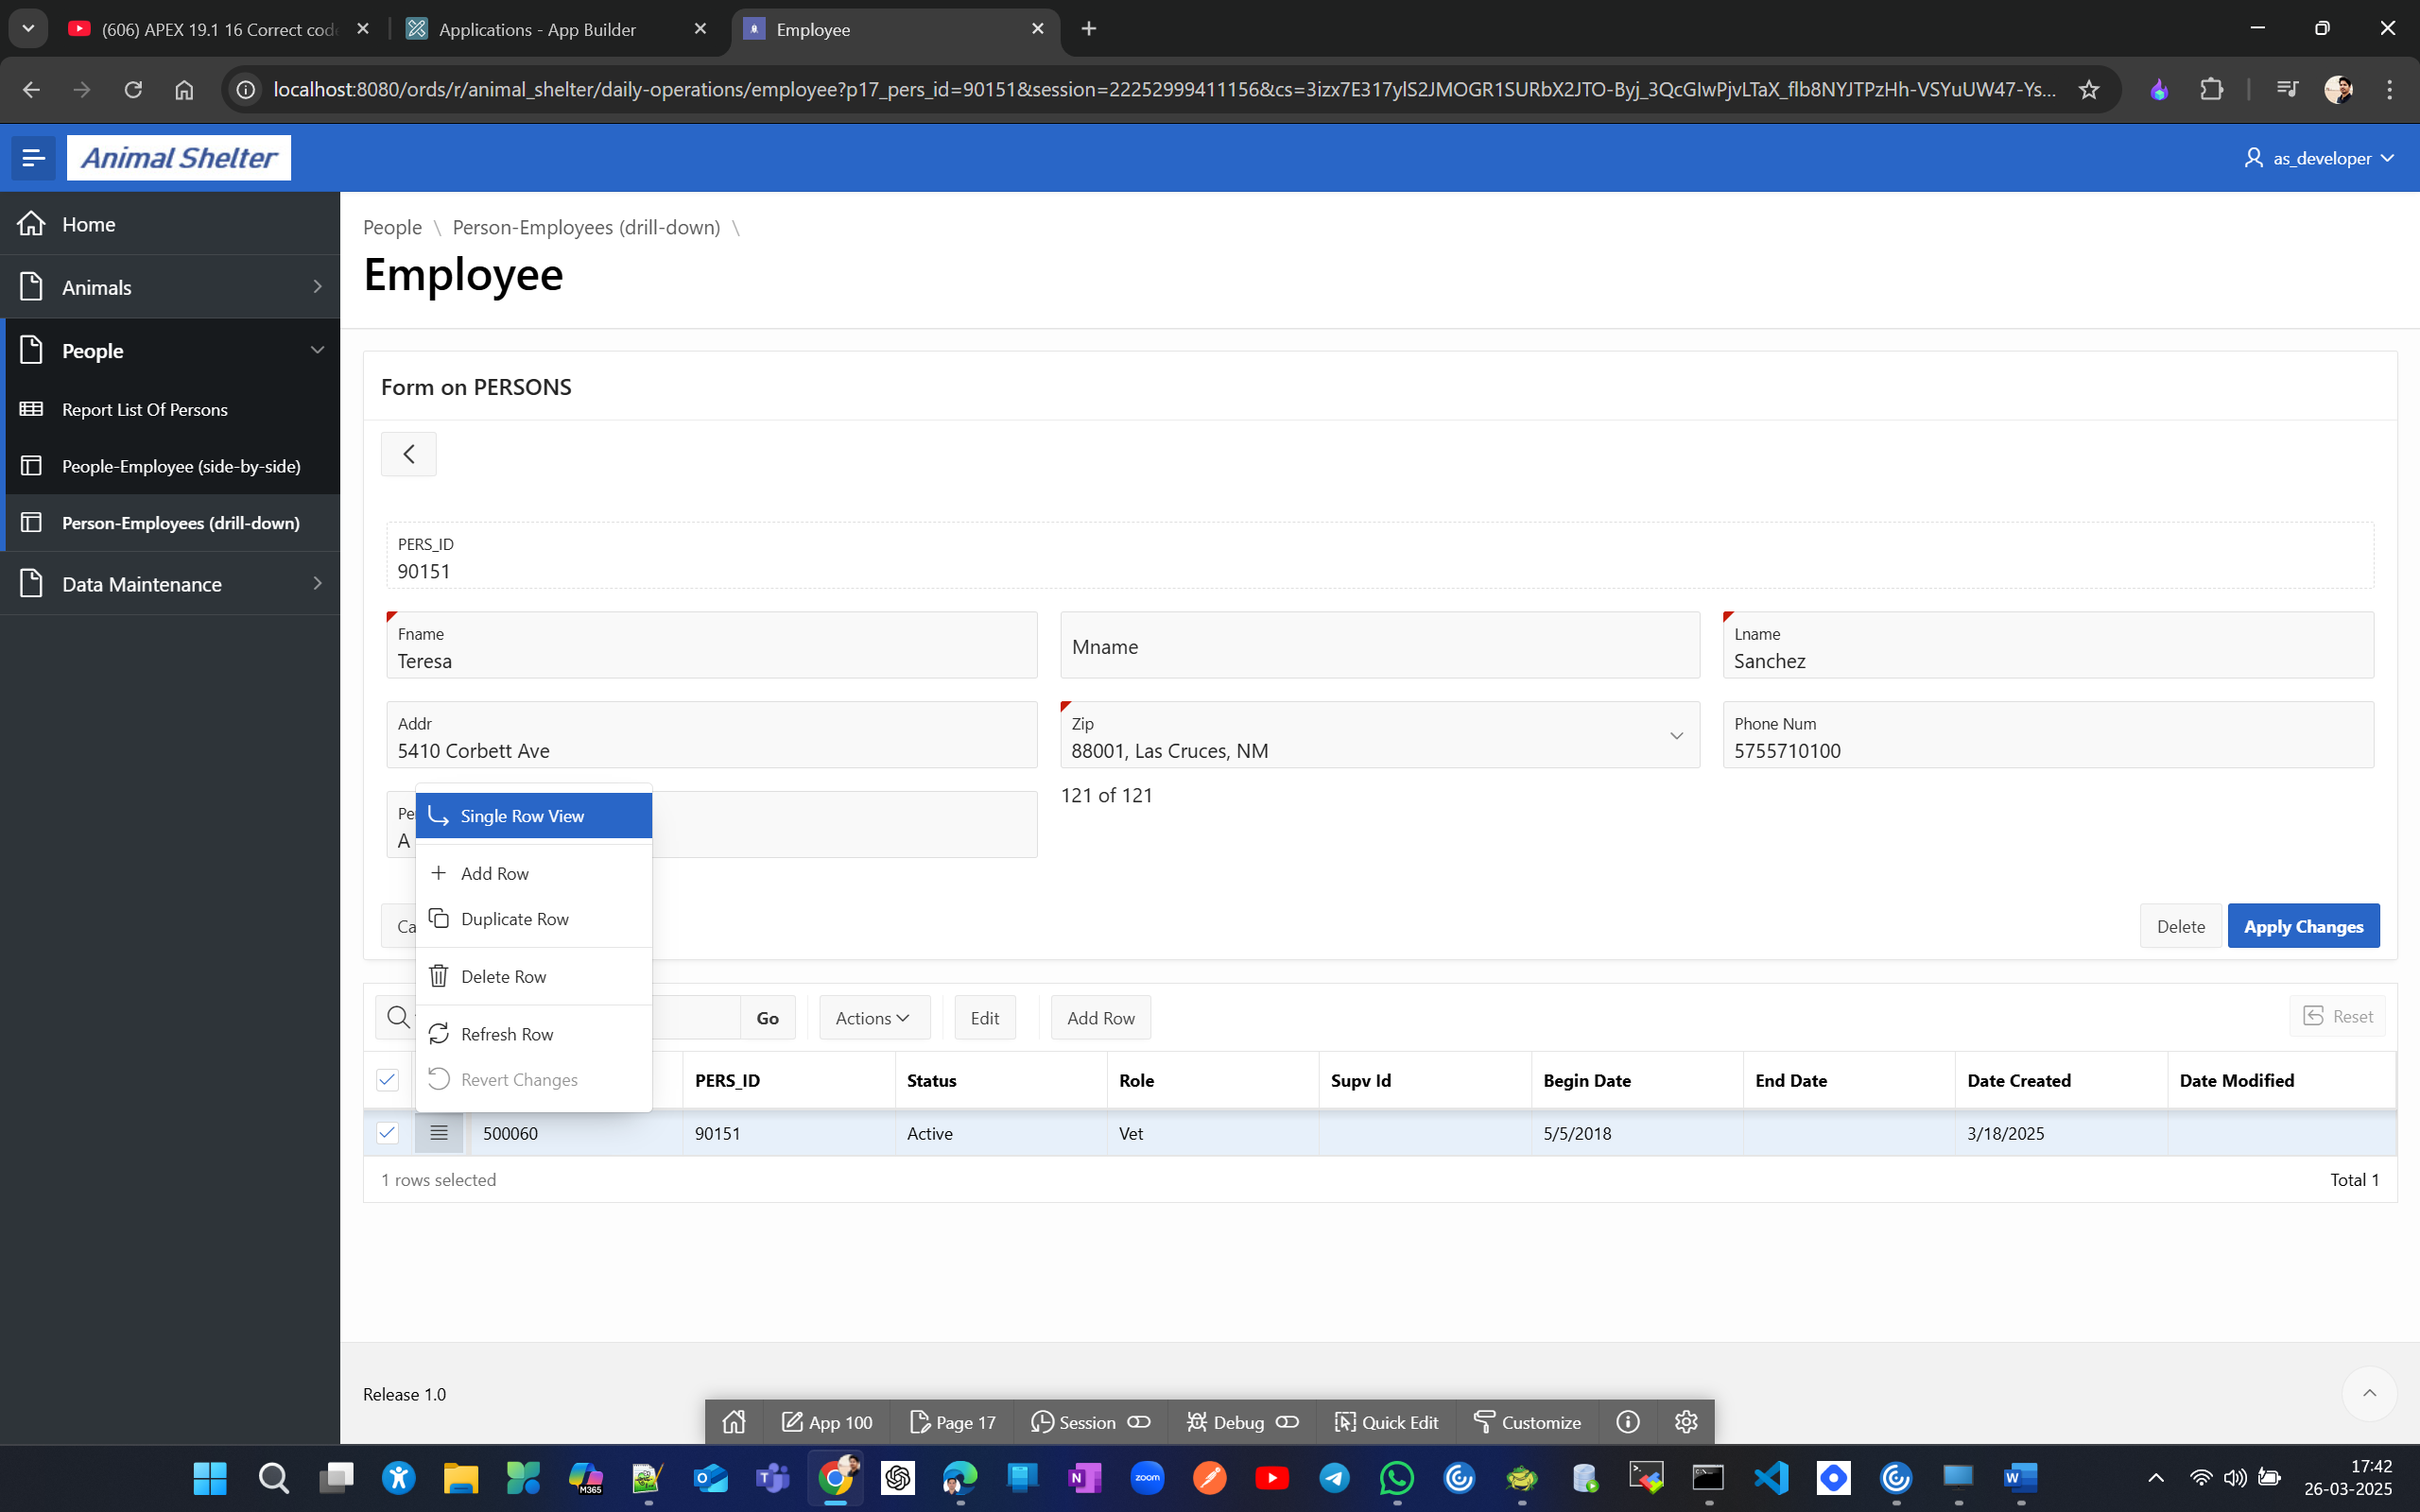
To see single row view
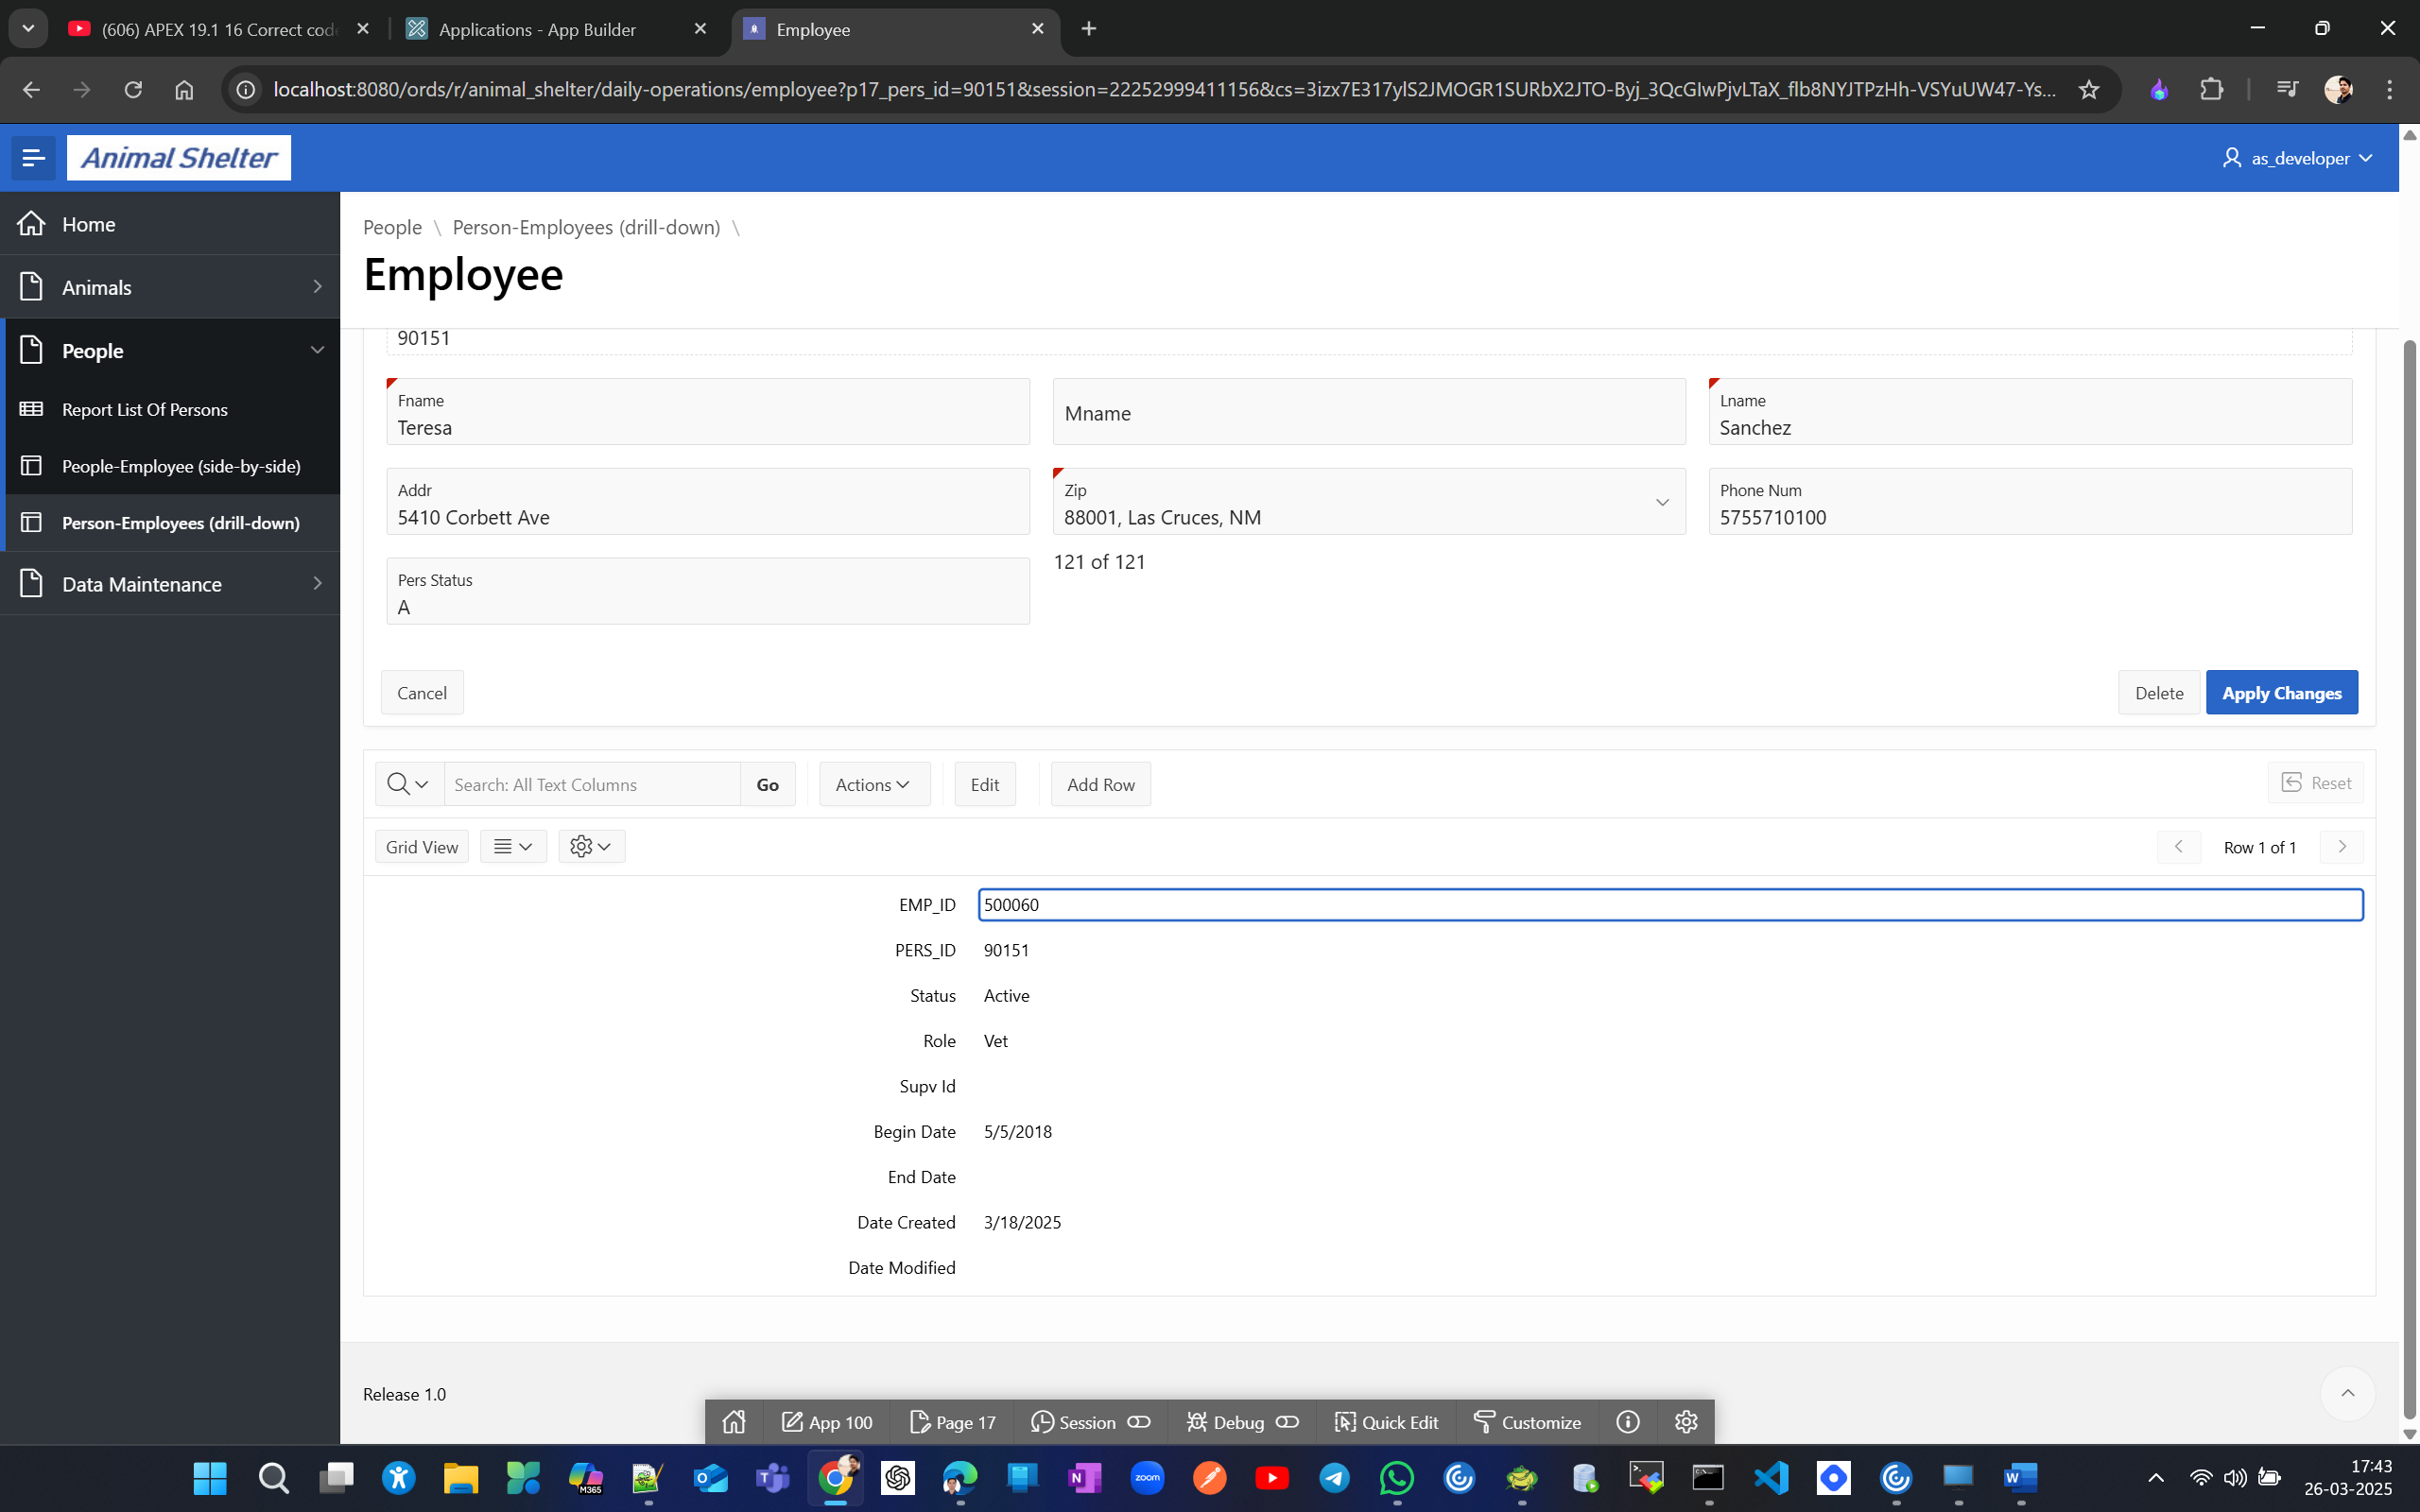
you can click on edit and edit the fields inline
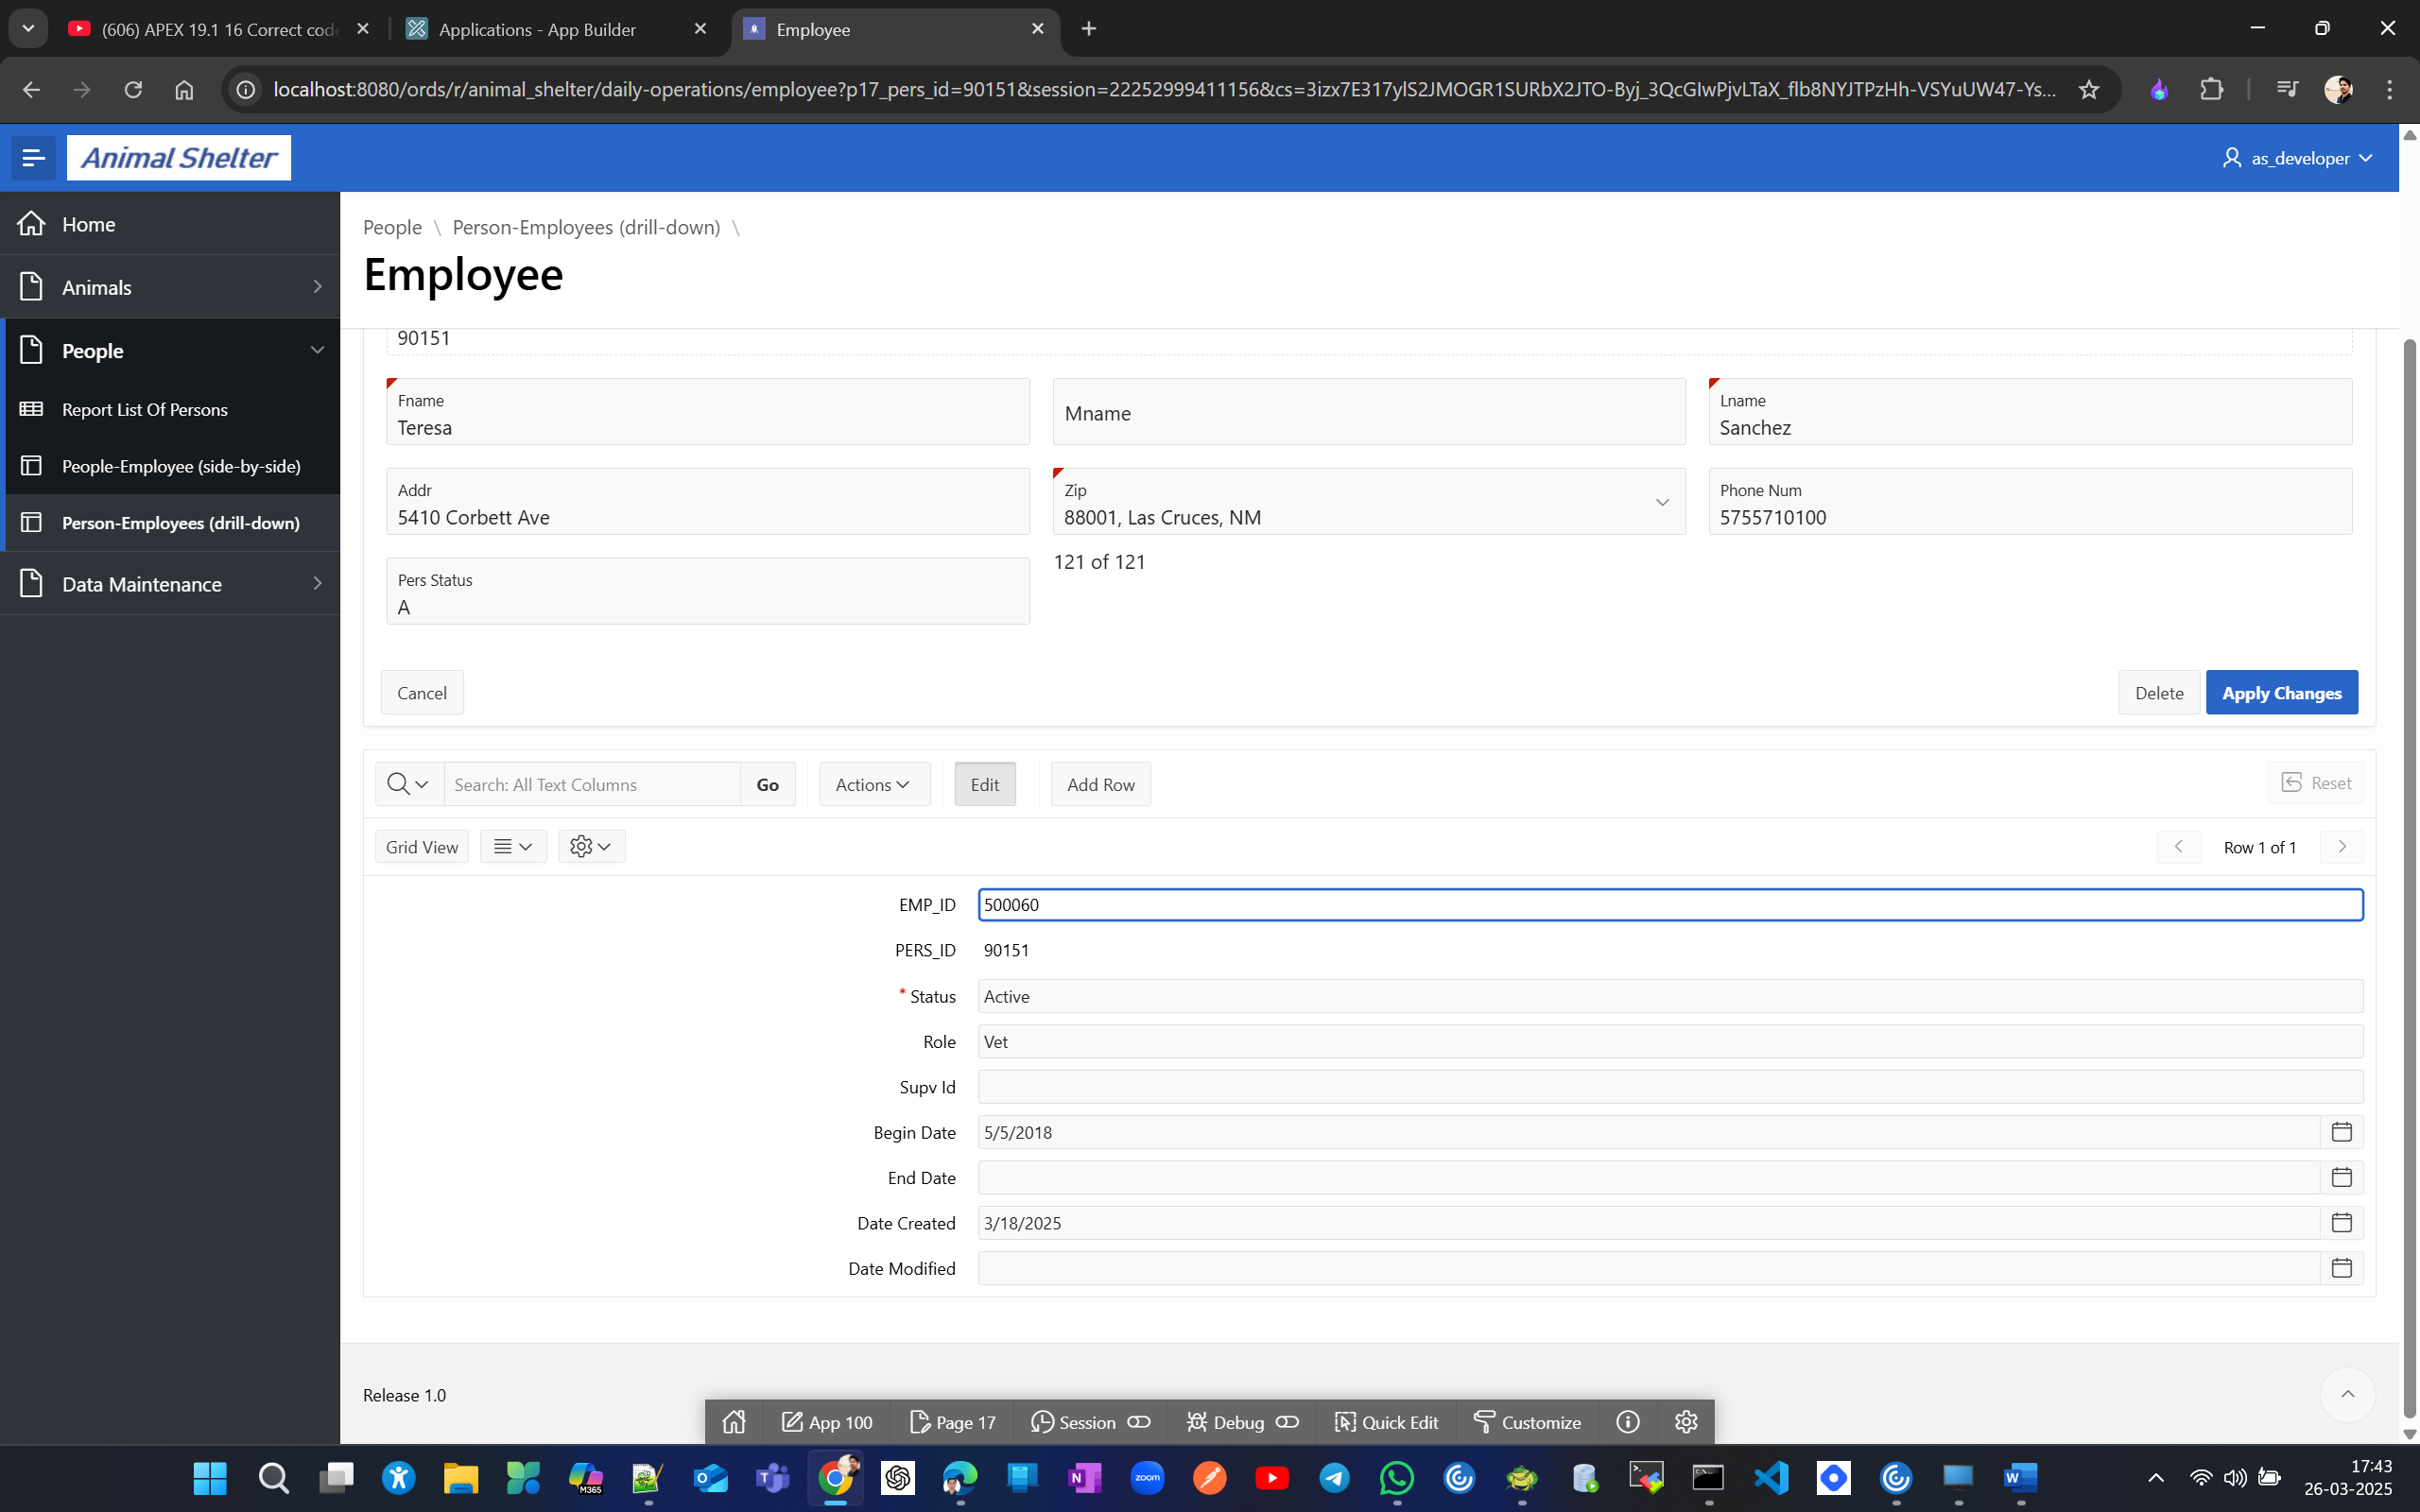
Now lets hide audit columns here and add lovs for status, role and supv id
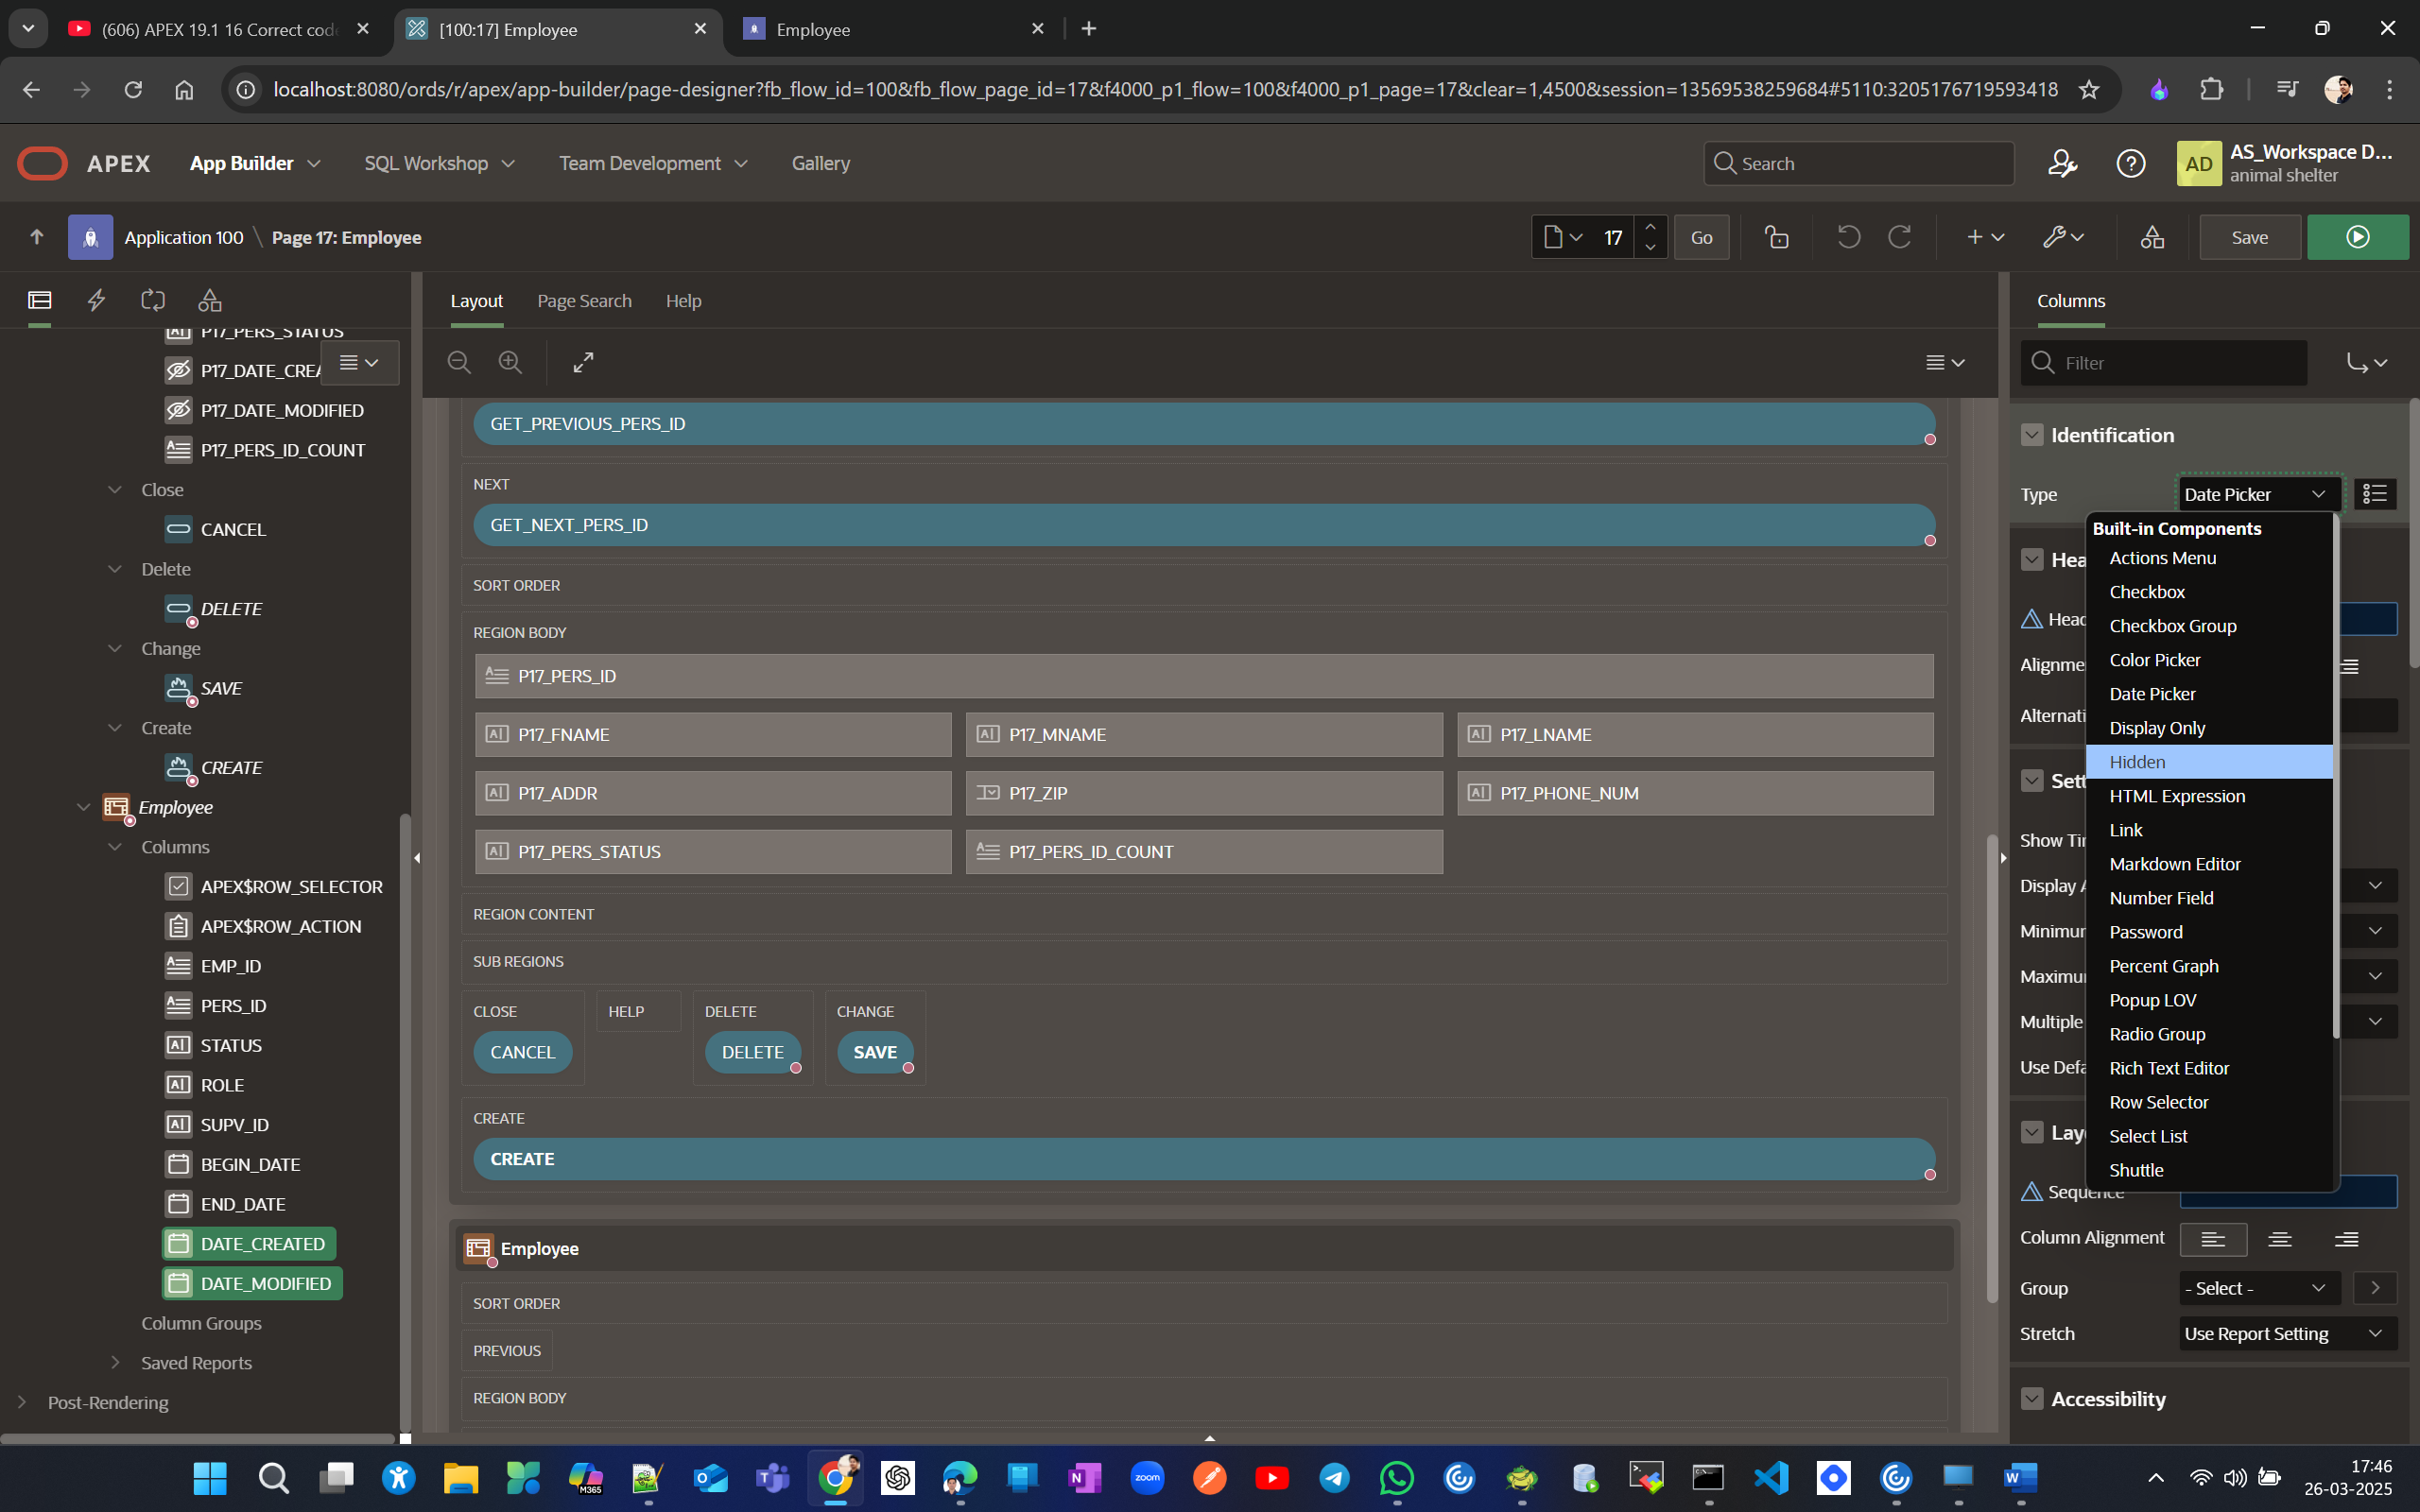
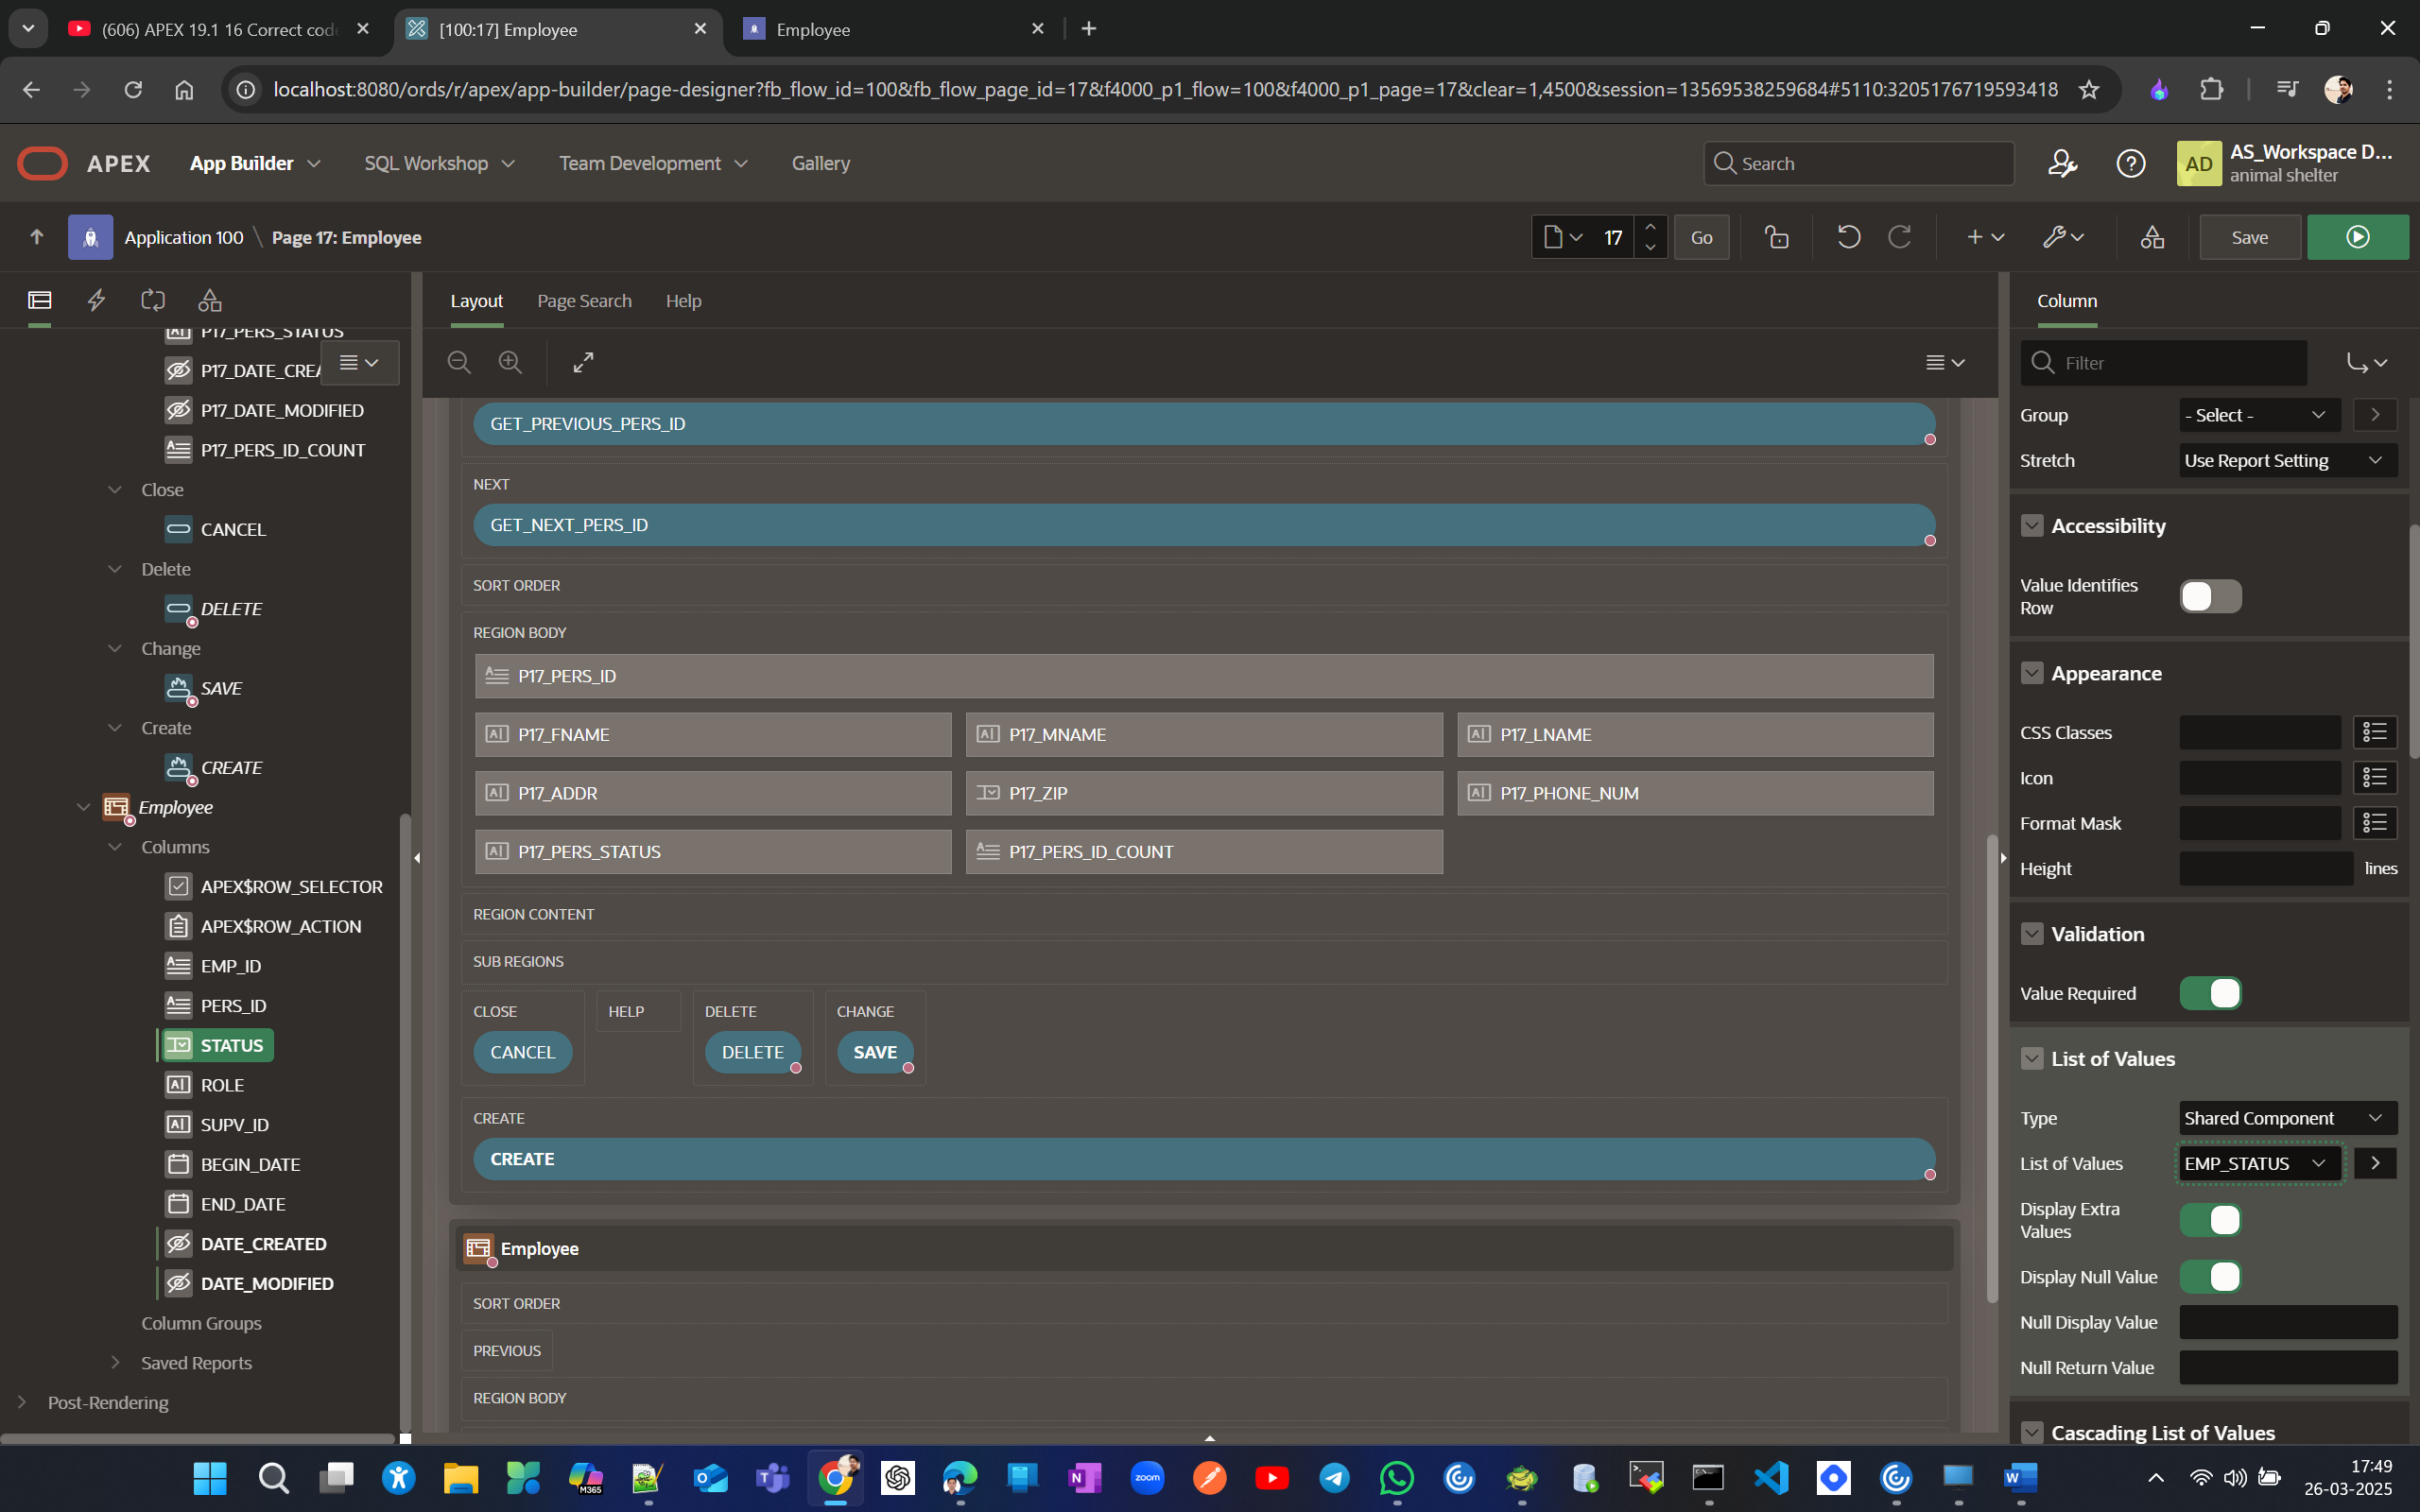
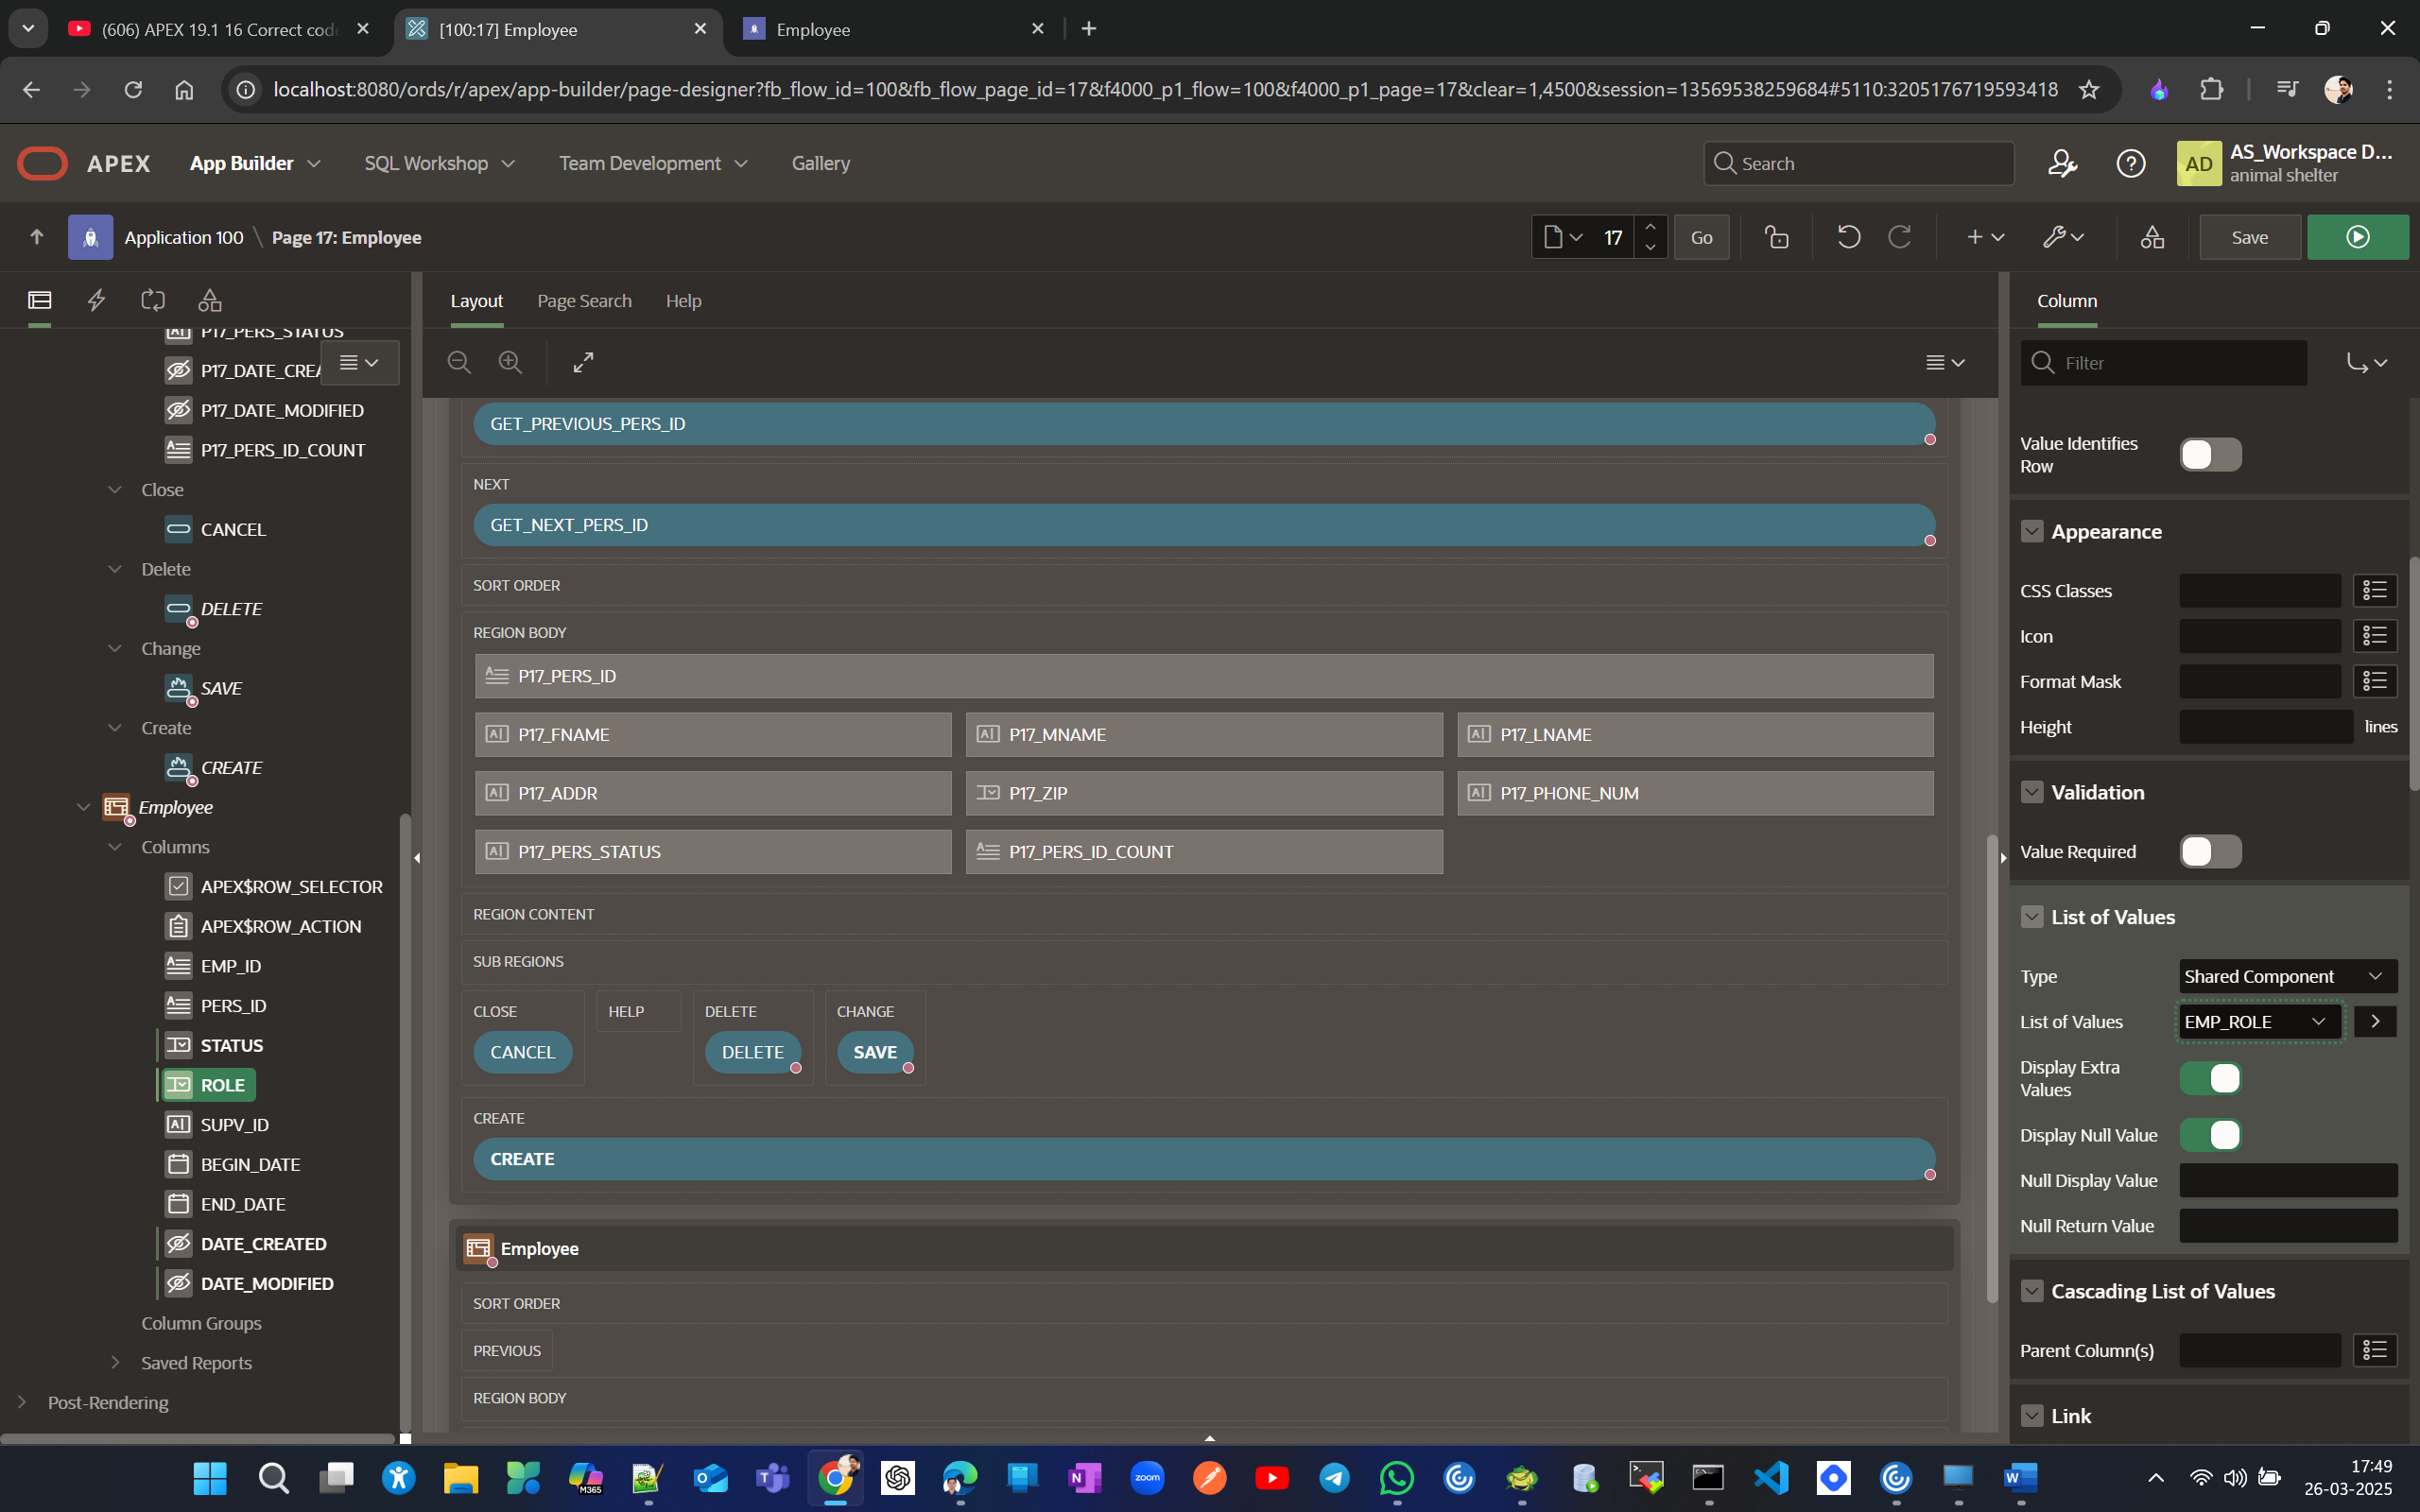
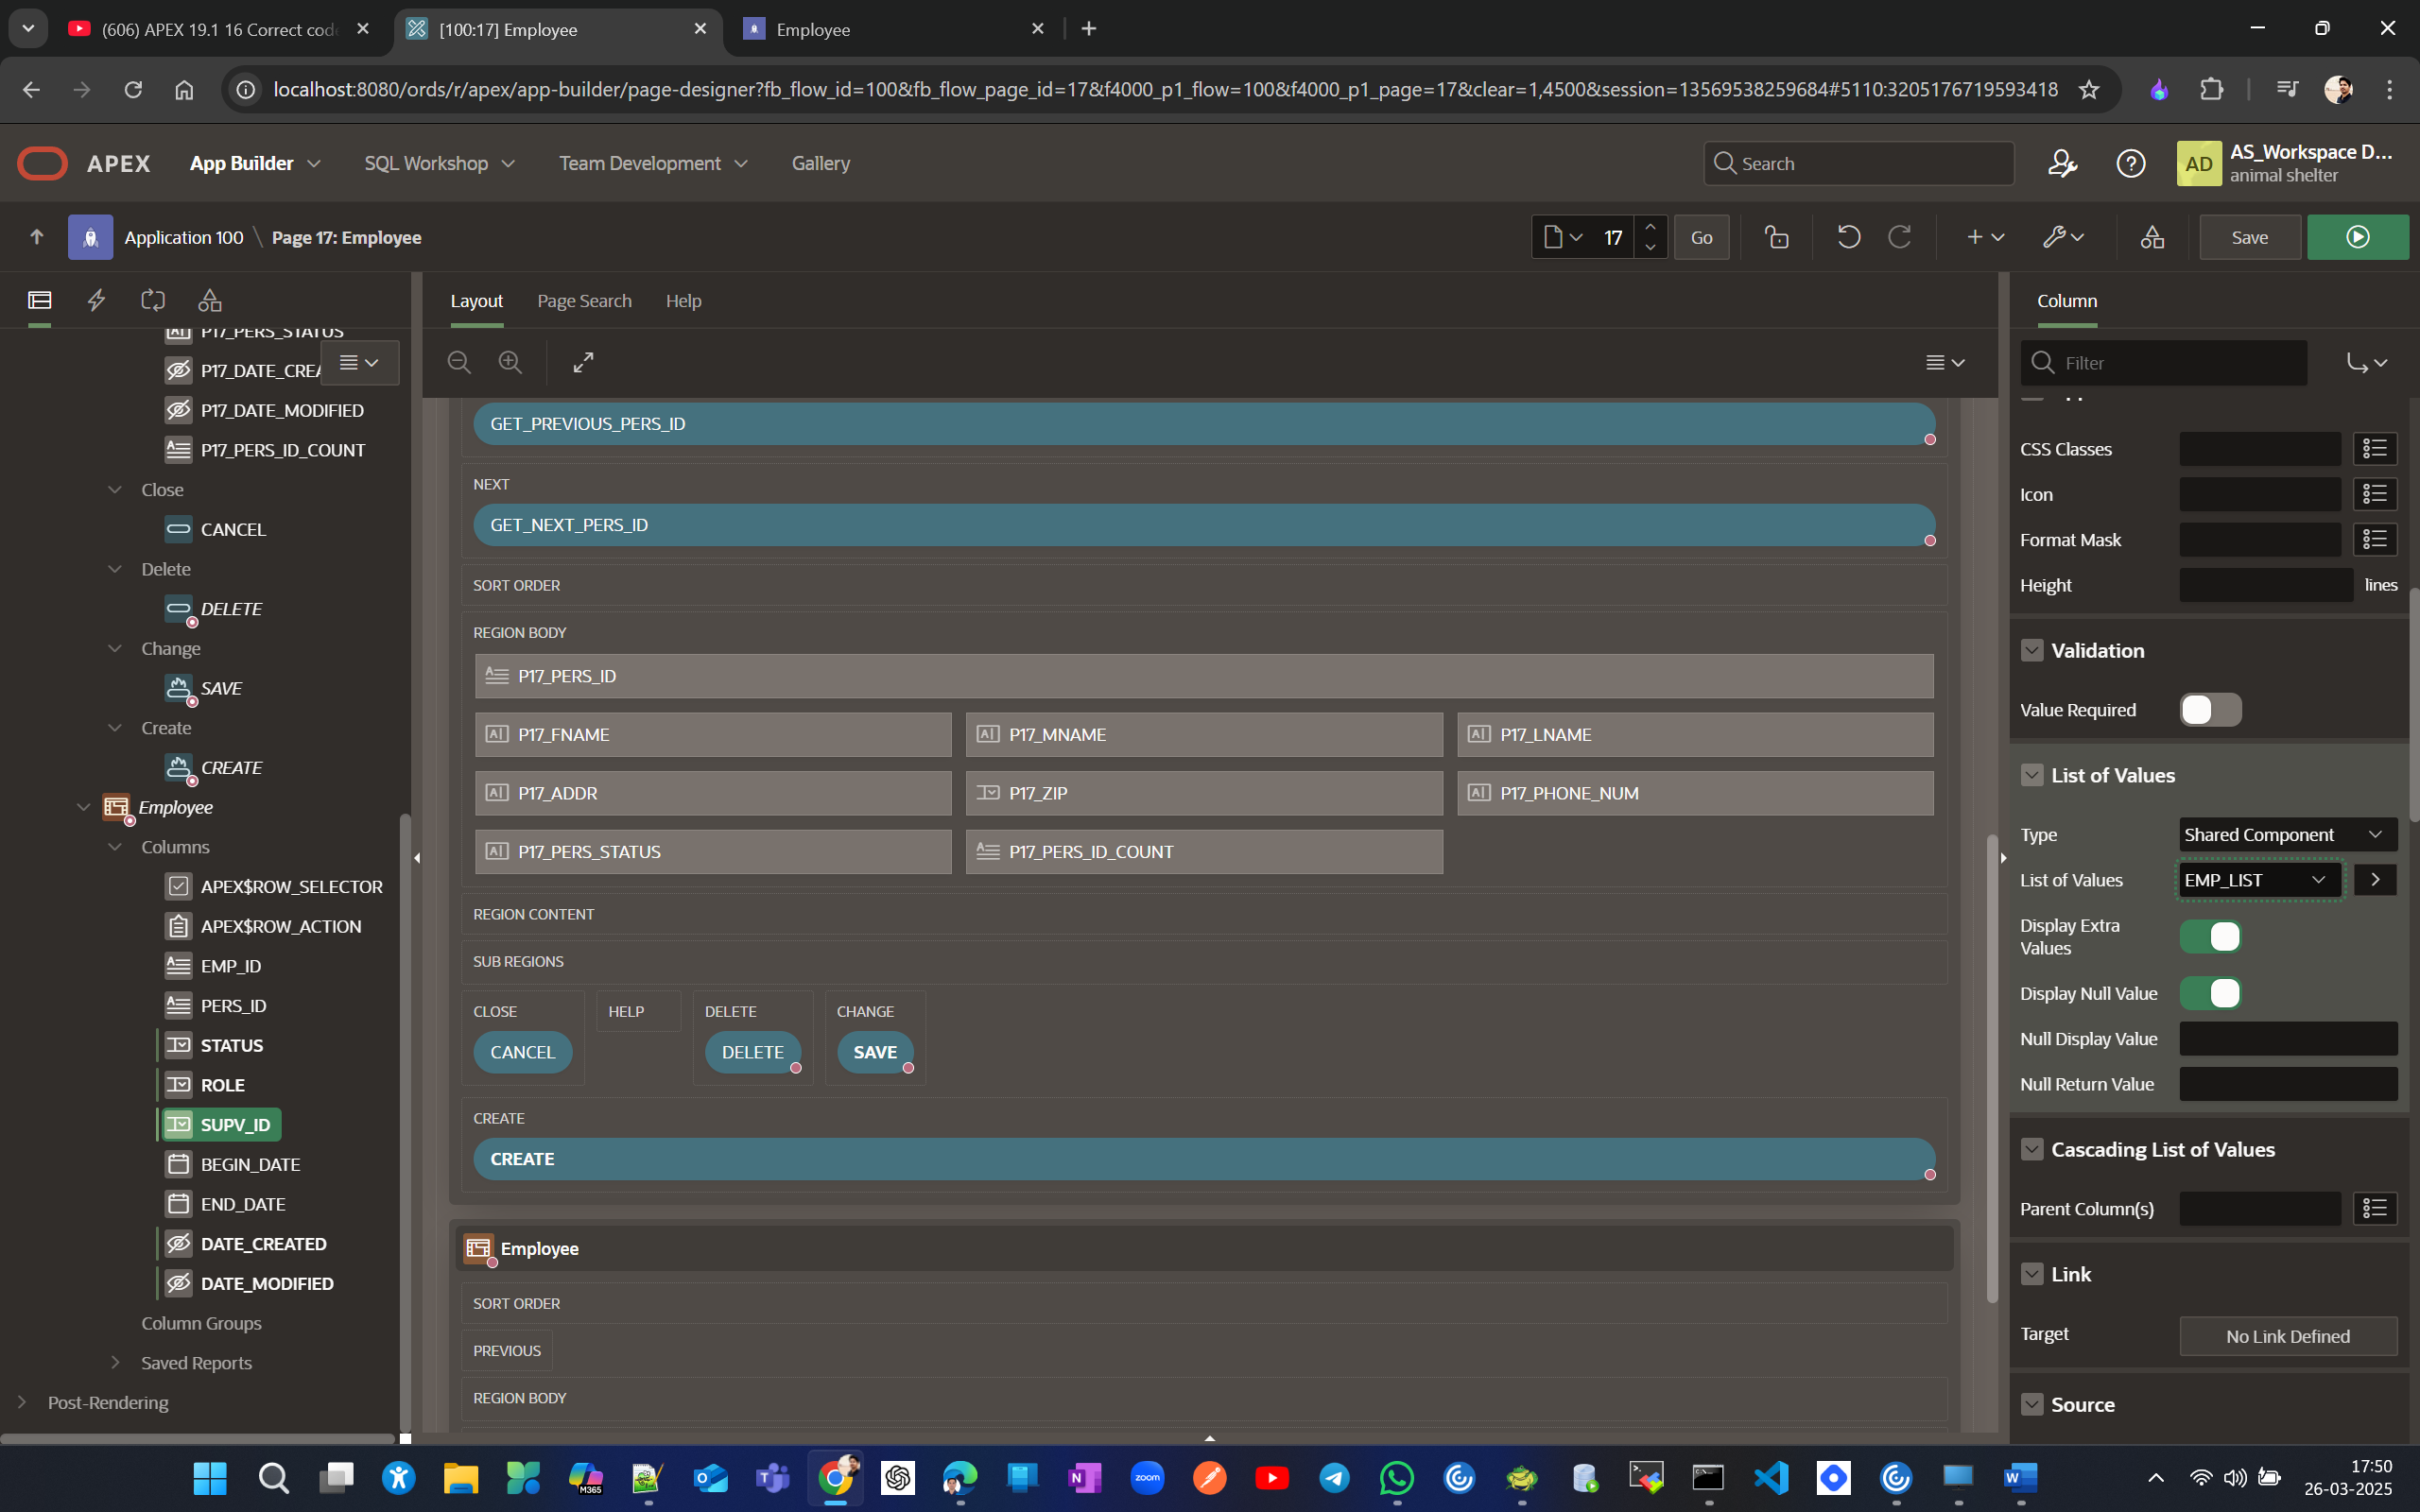
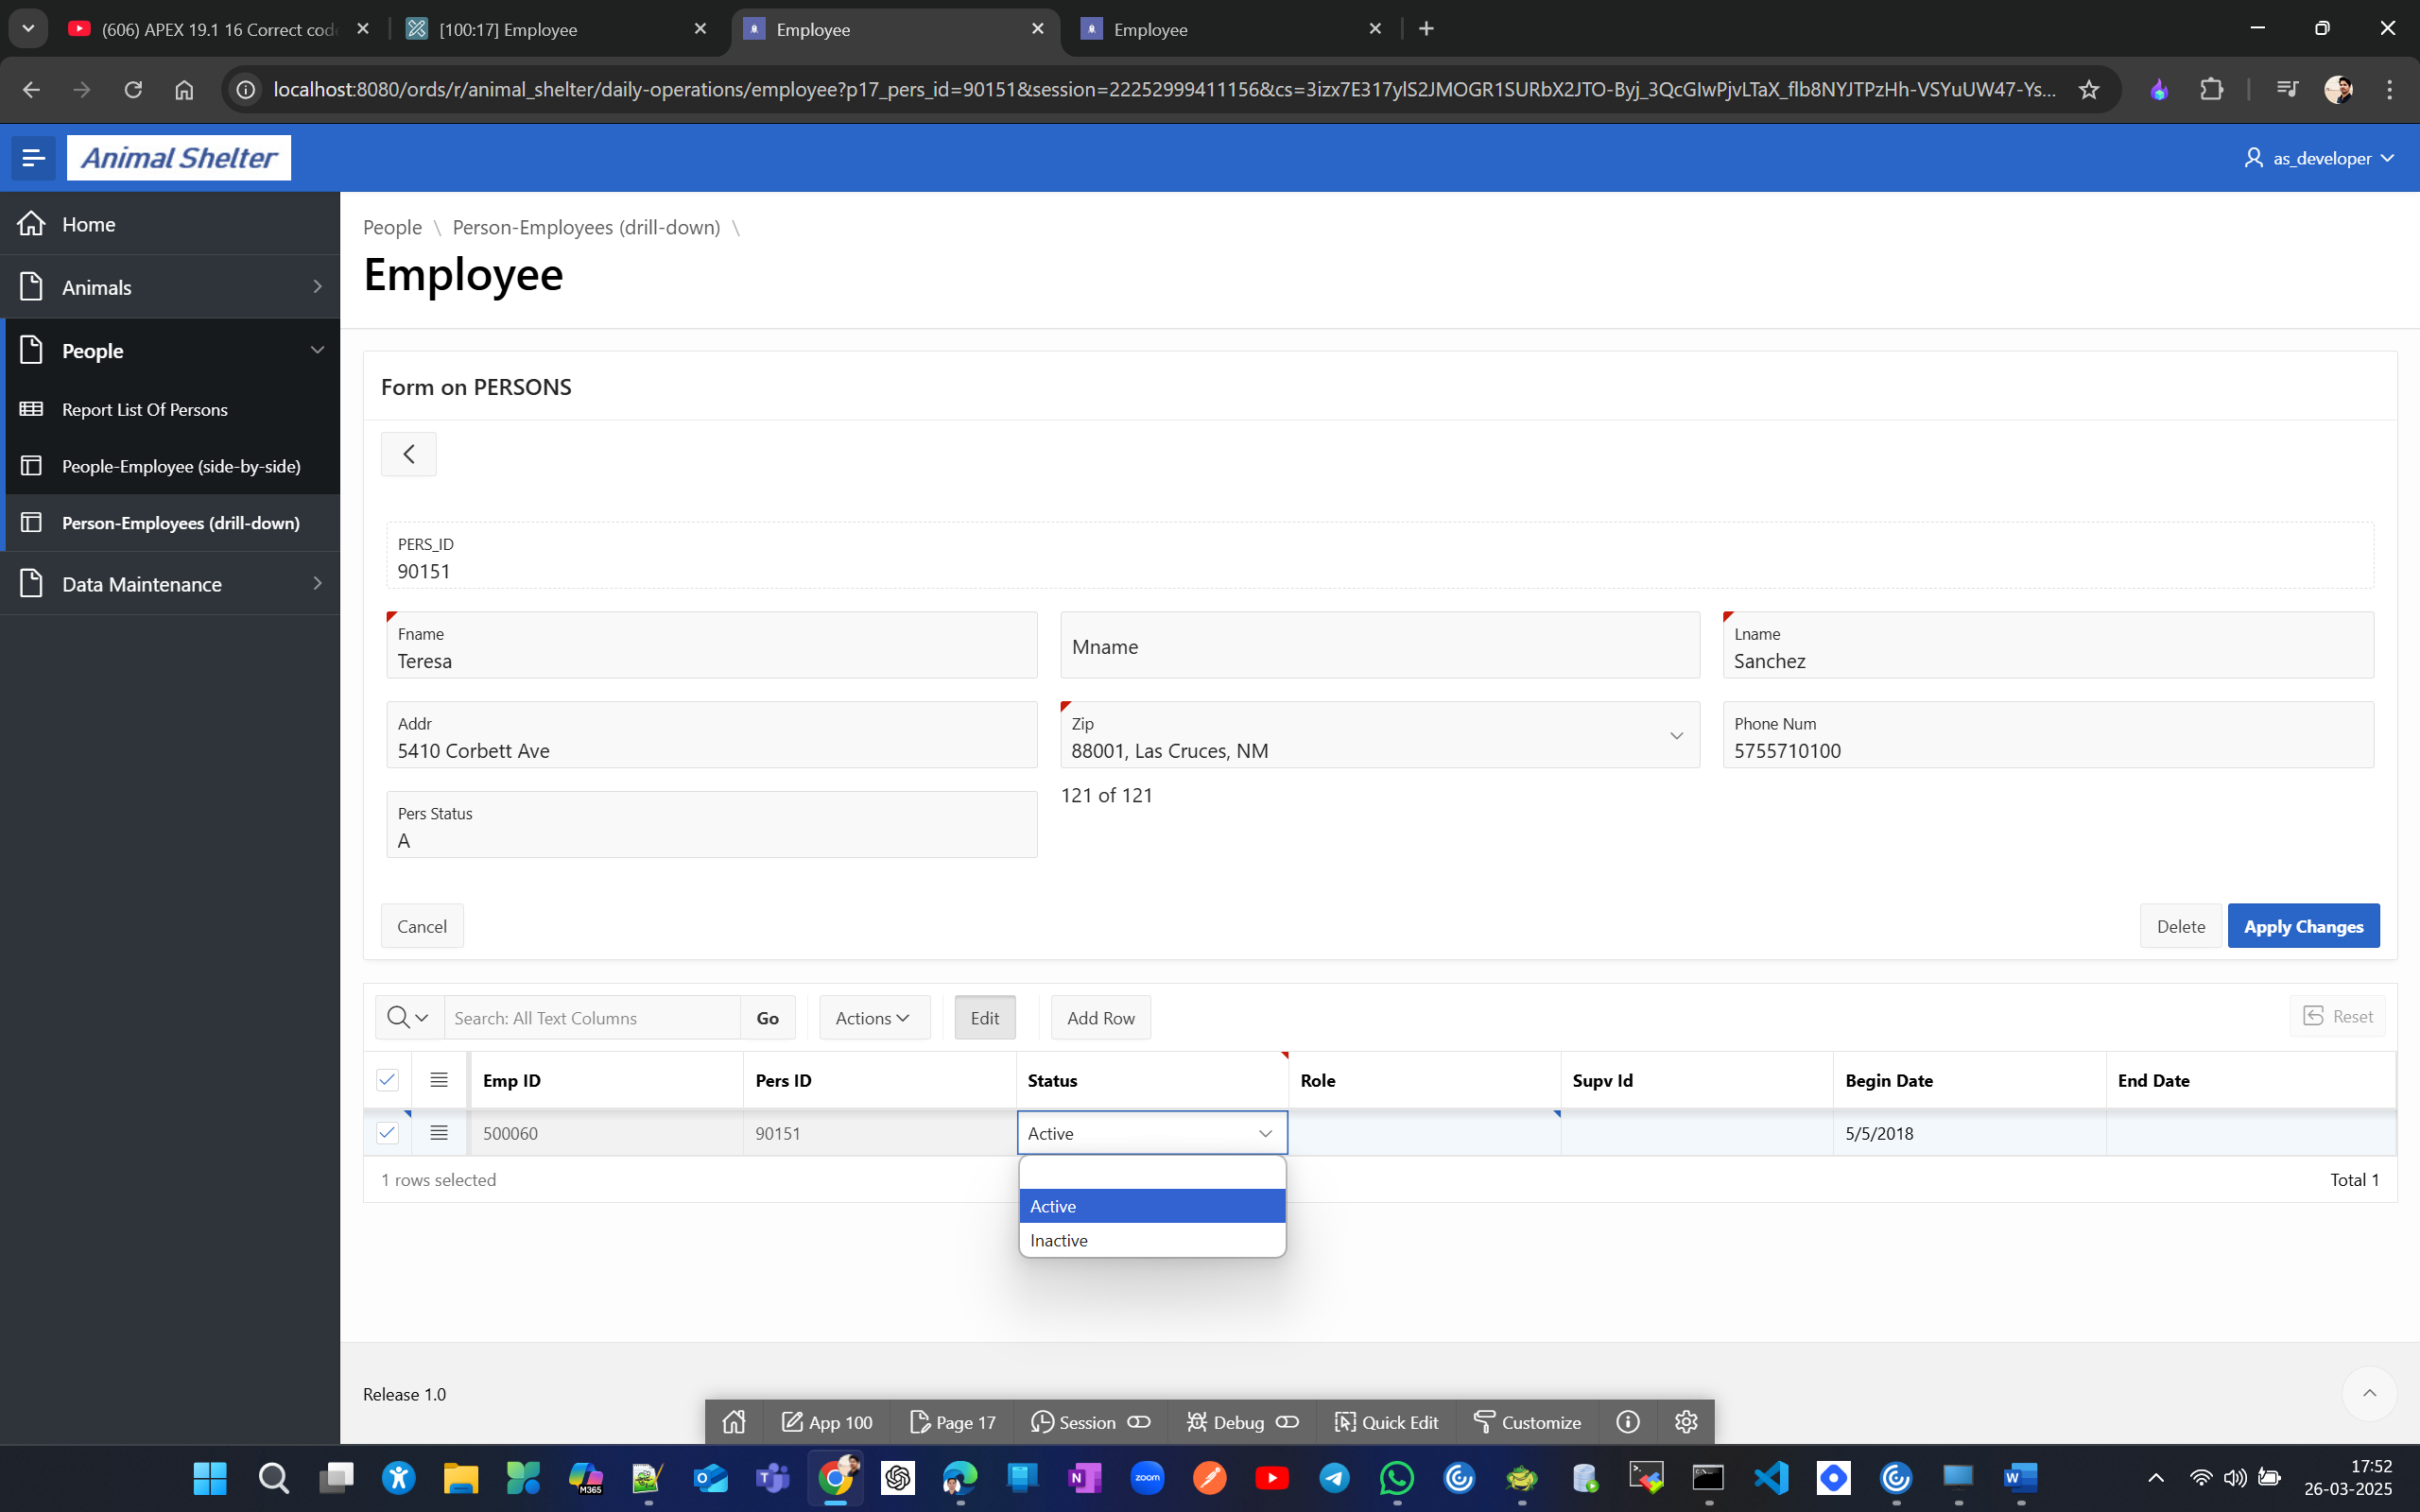
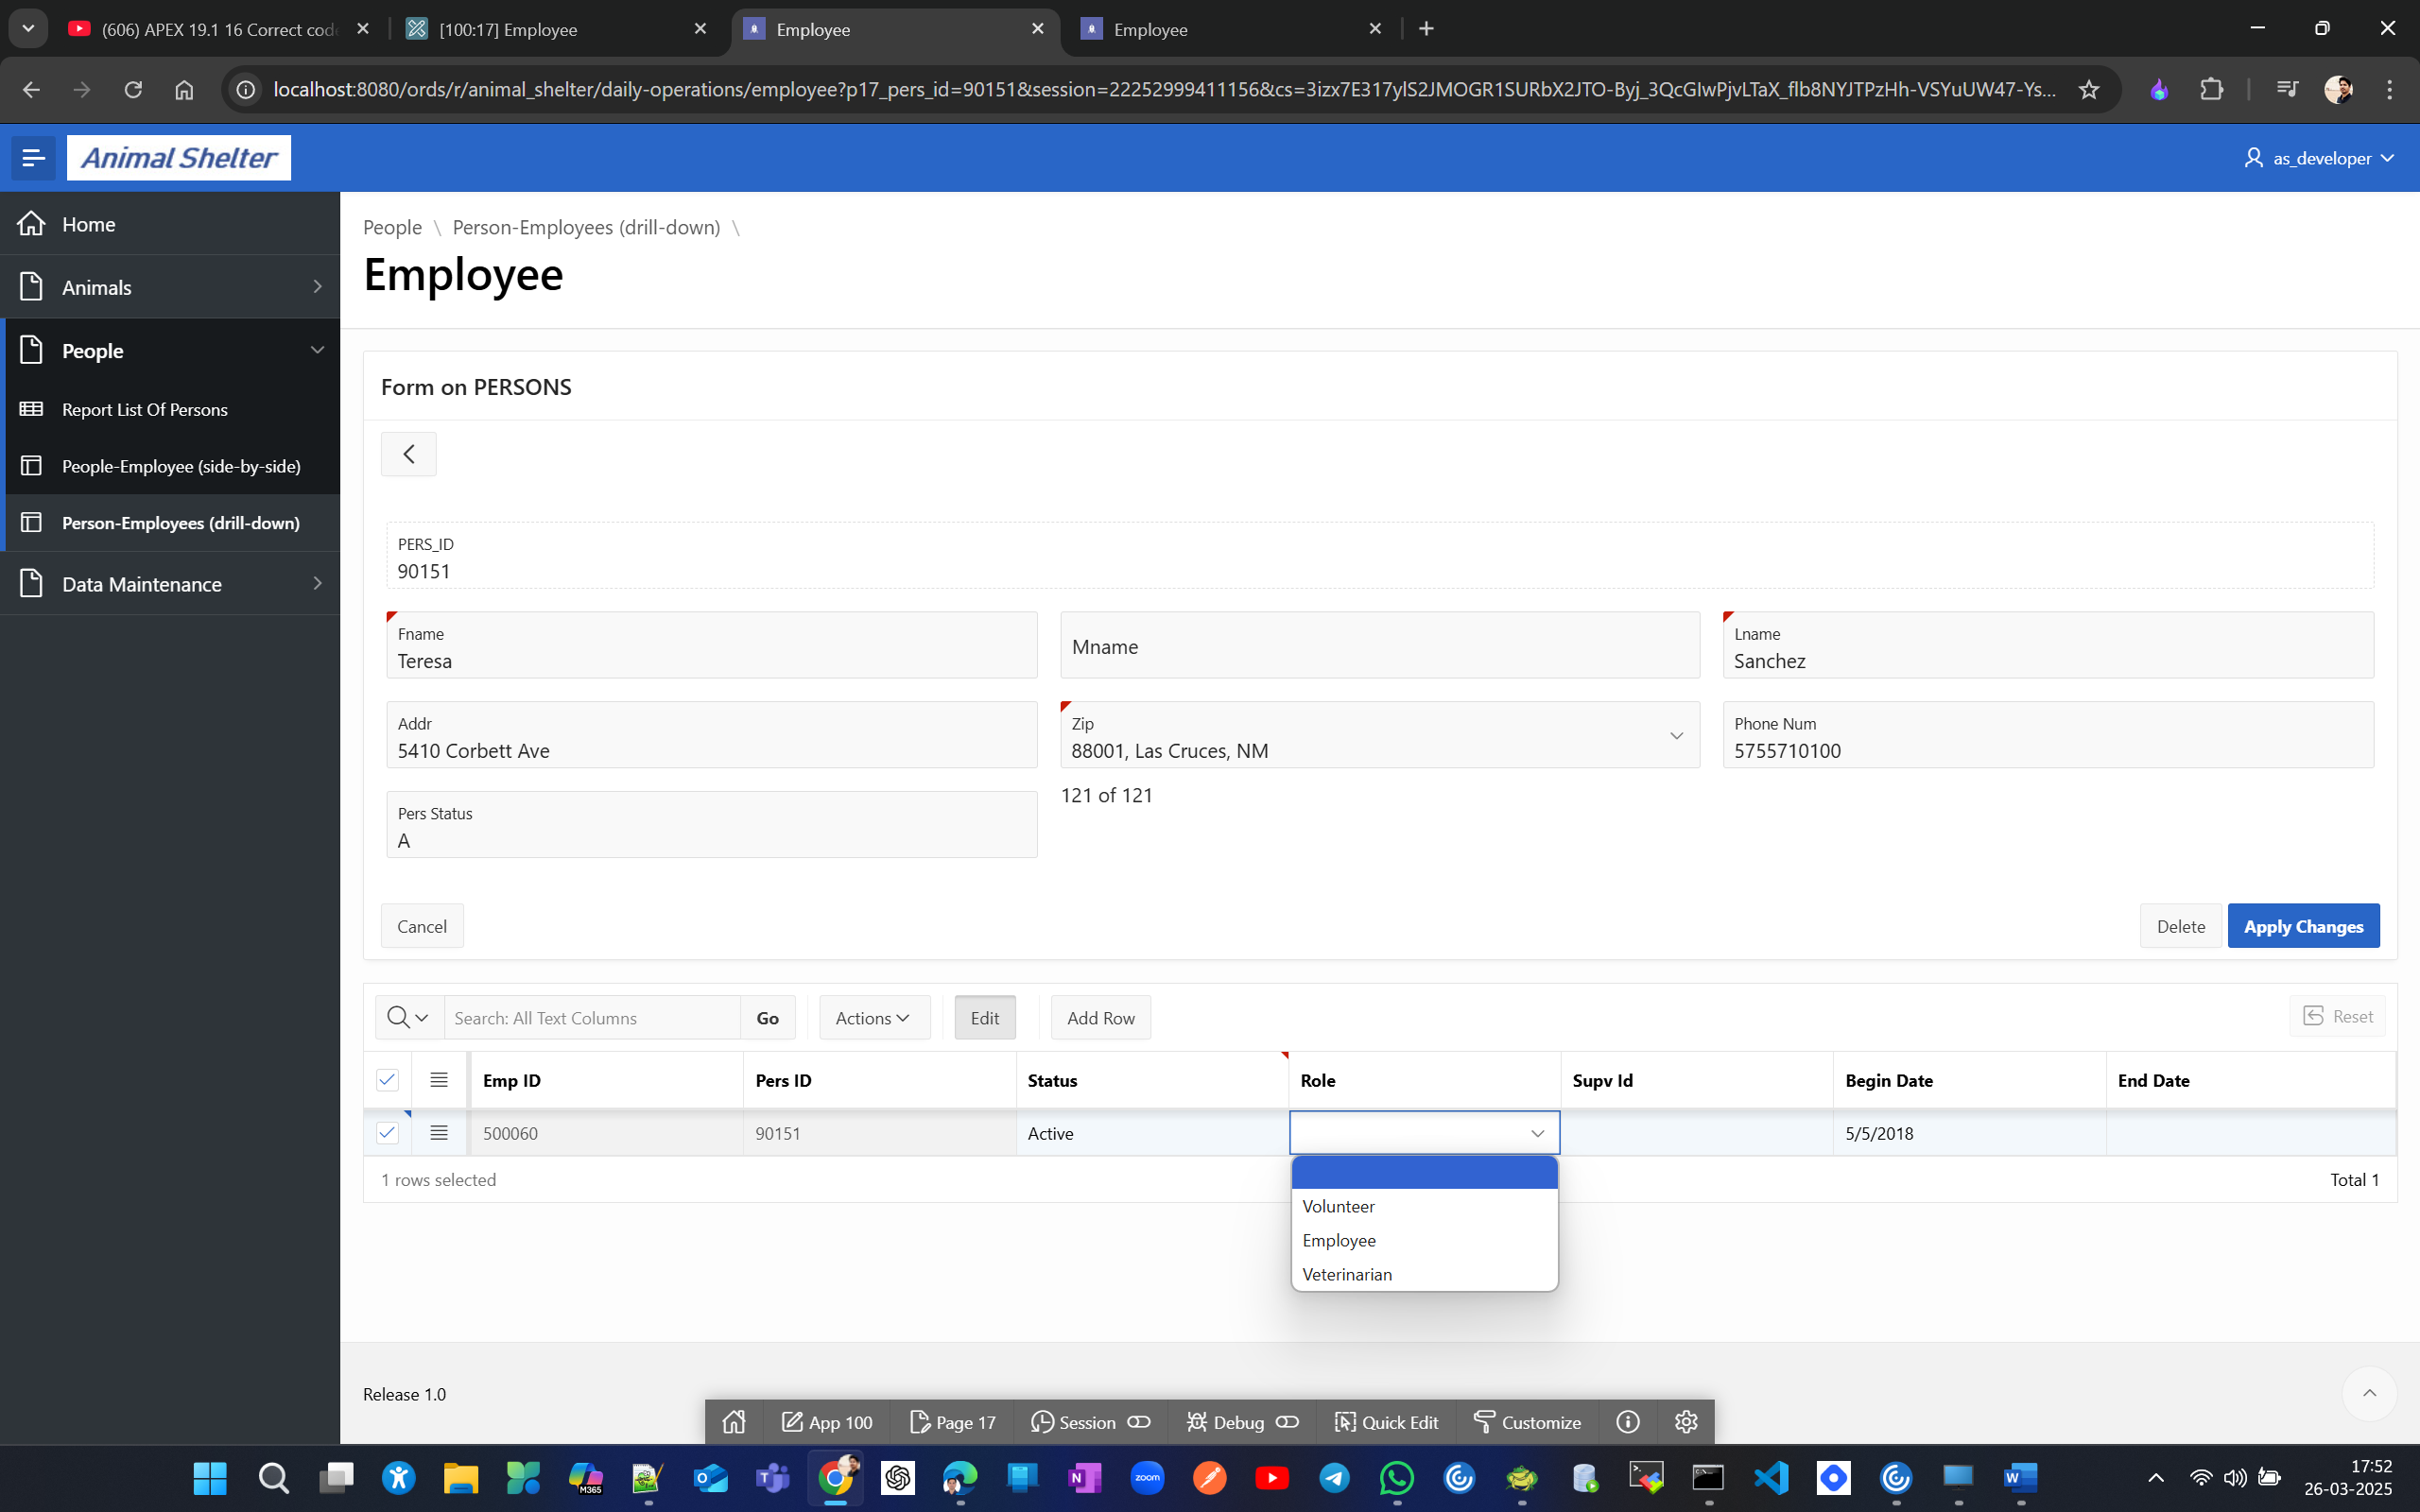
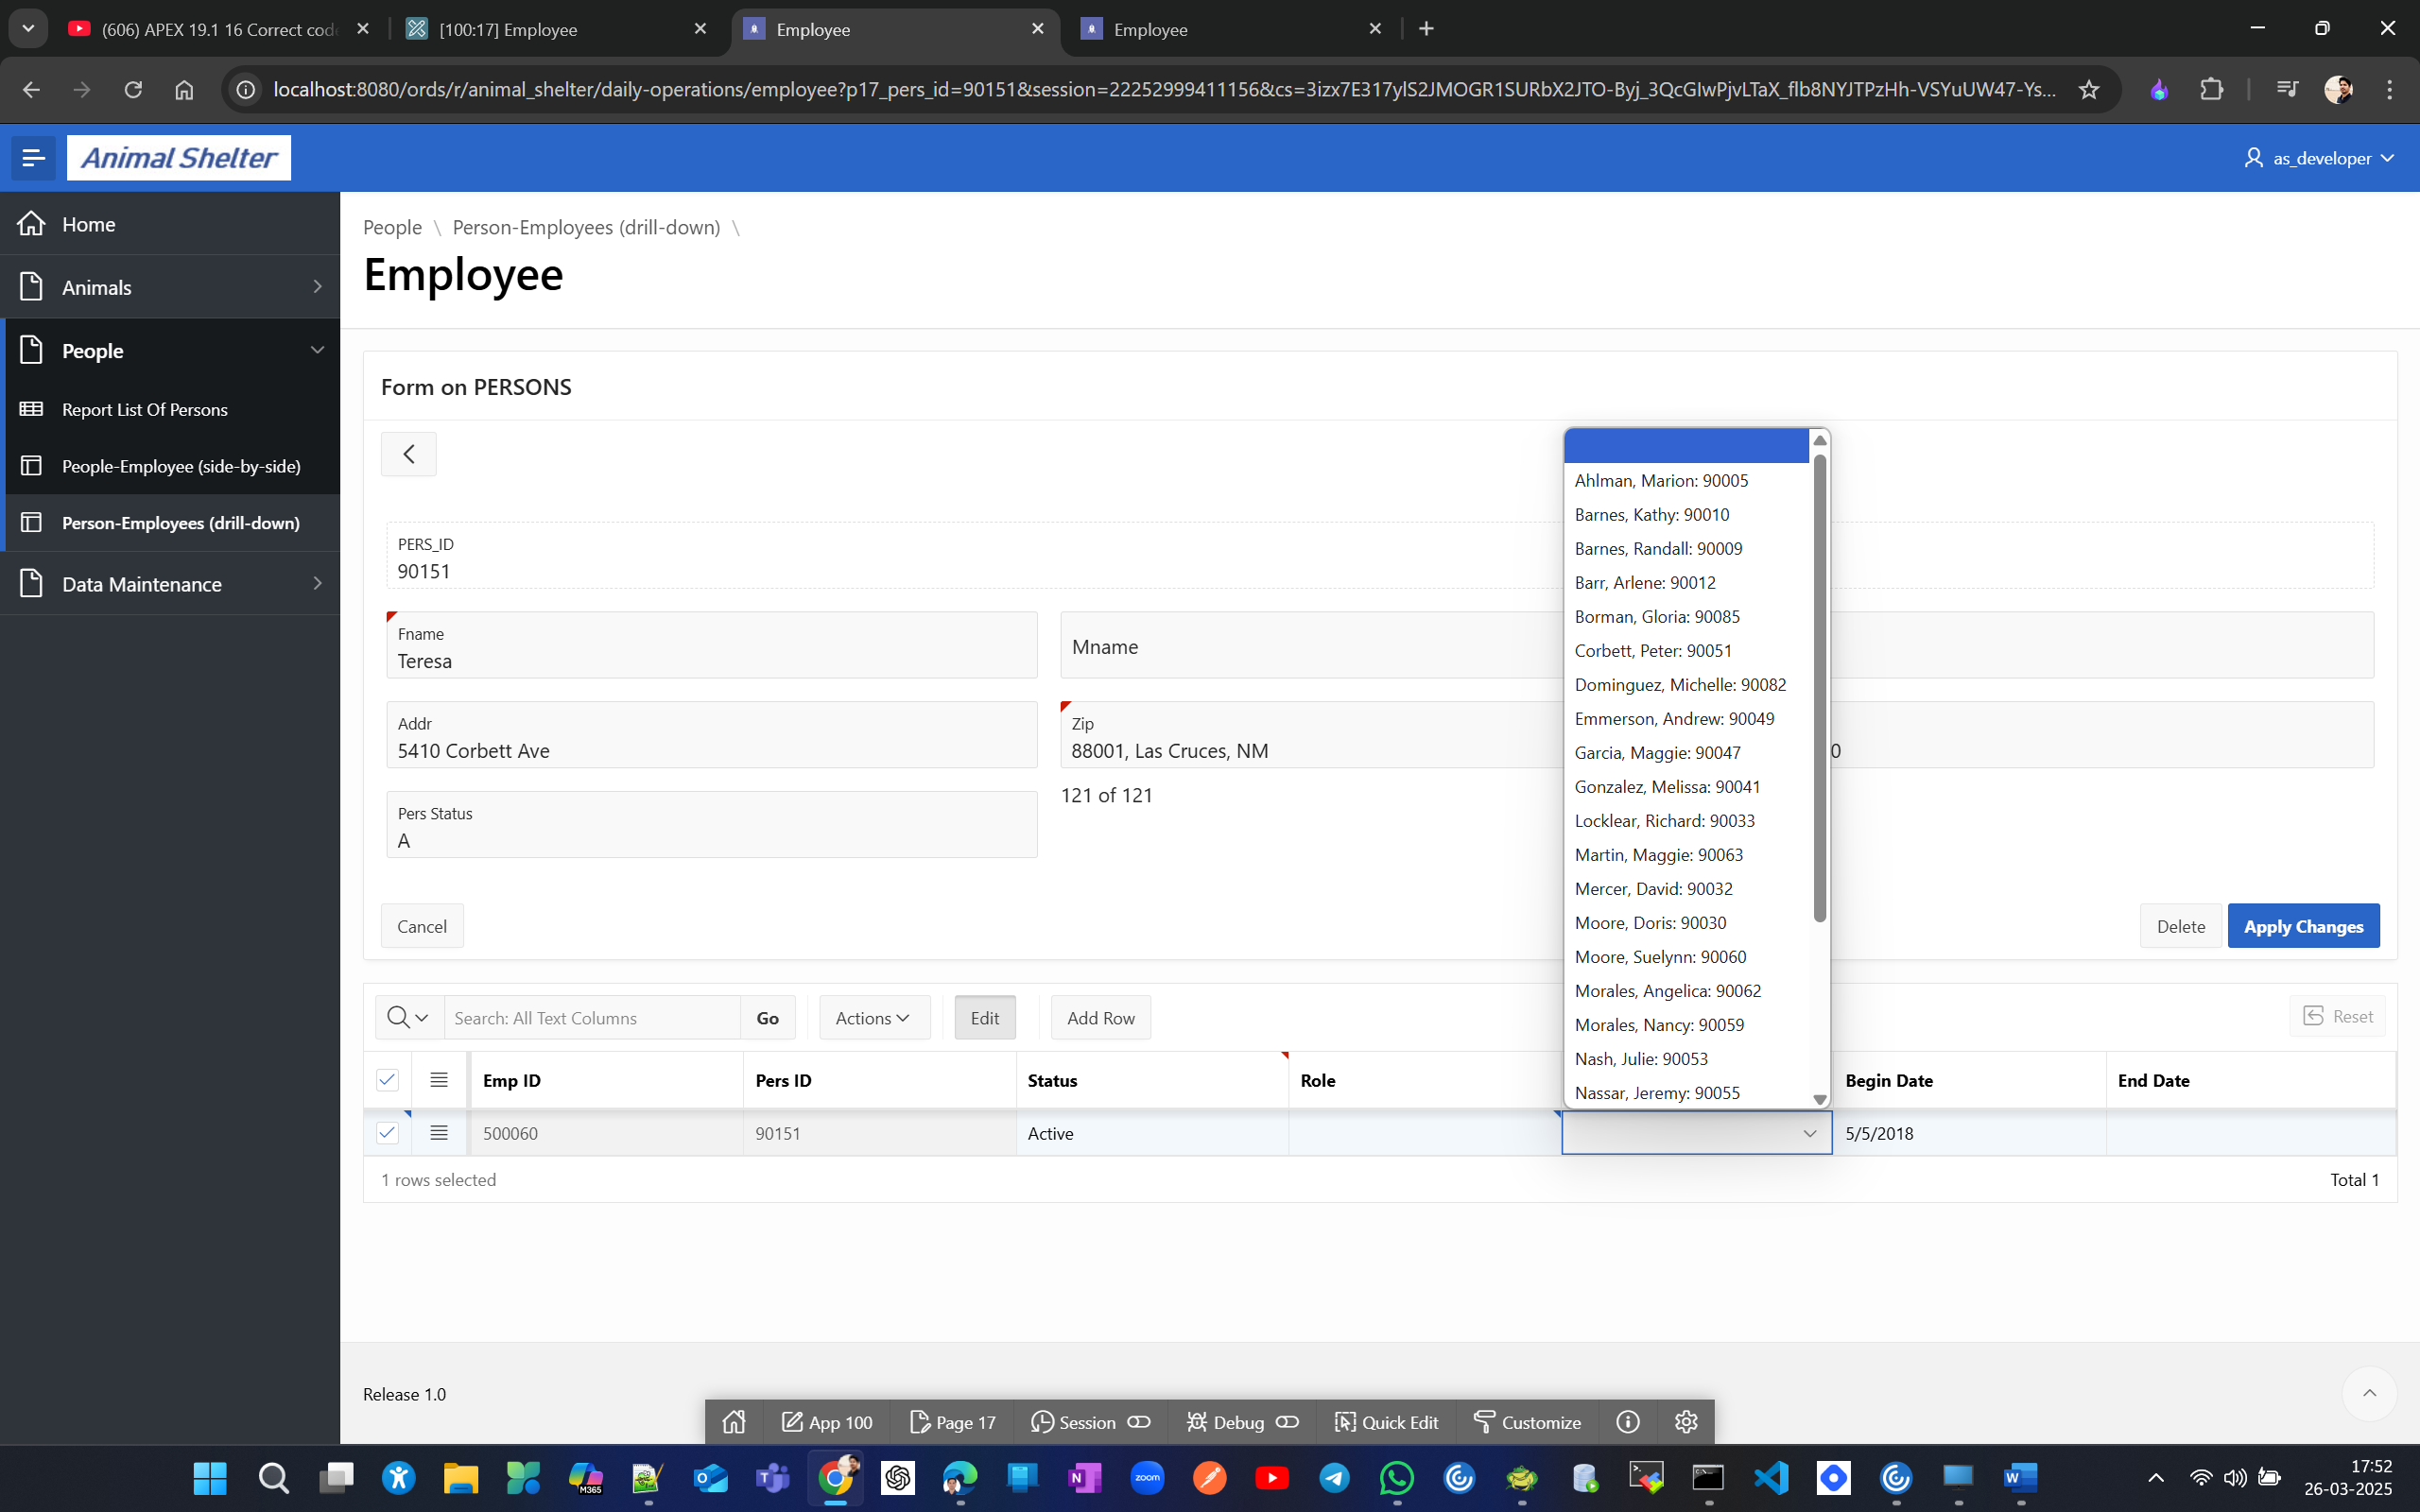
You can disbale null value in page designer under column → List of Values to hide null values for selected list. now chnage to single row view and verify if good to edit
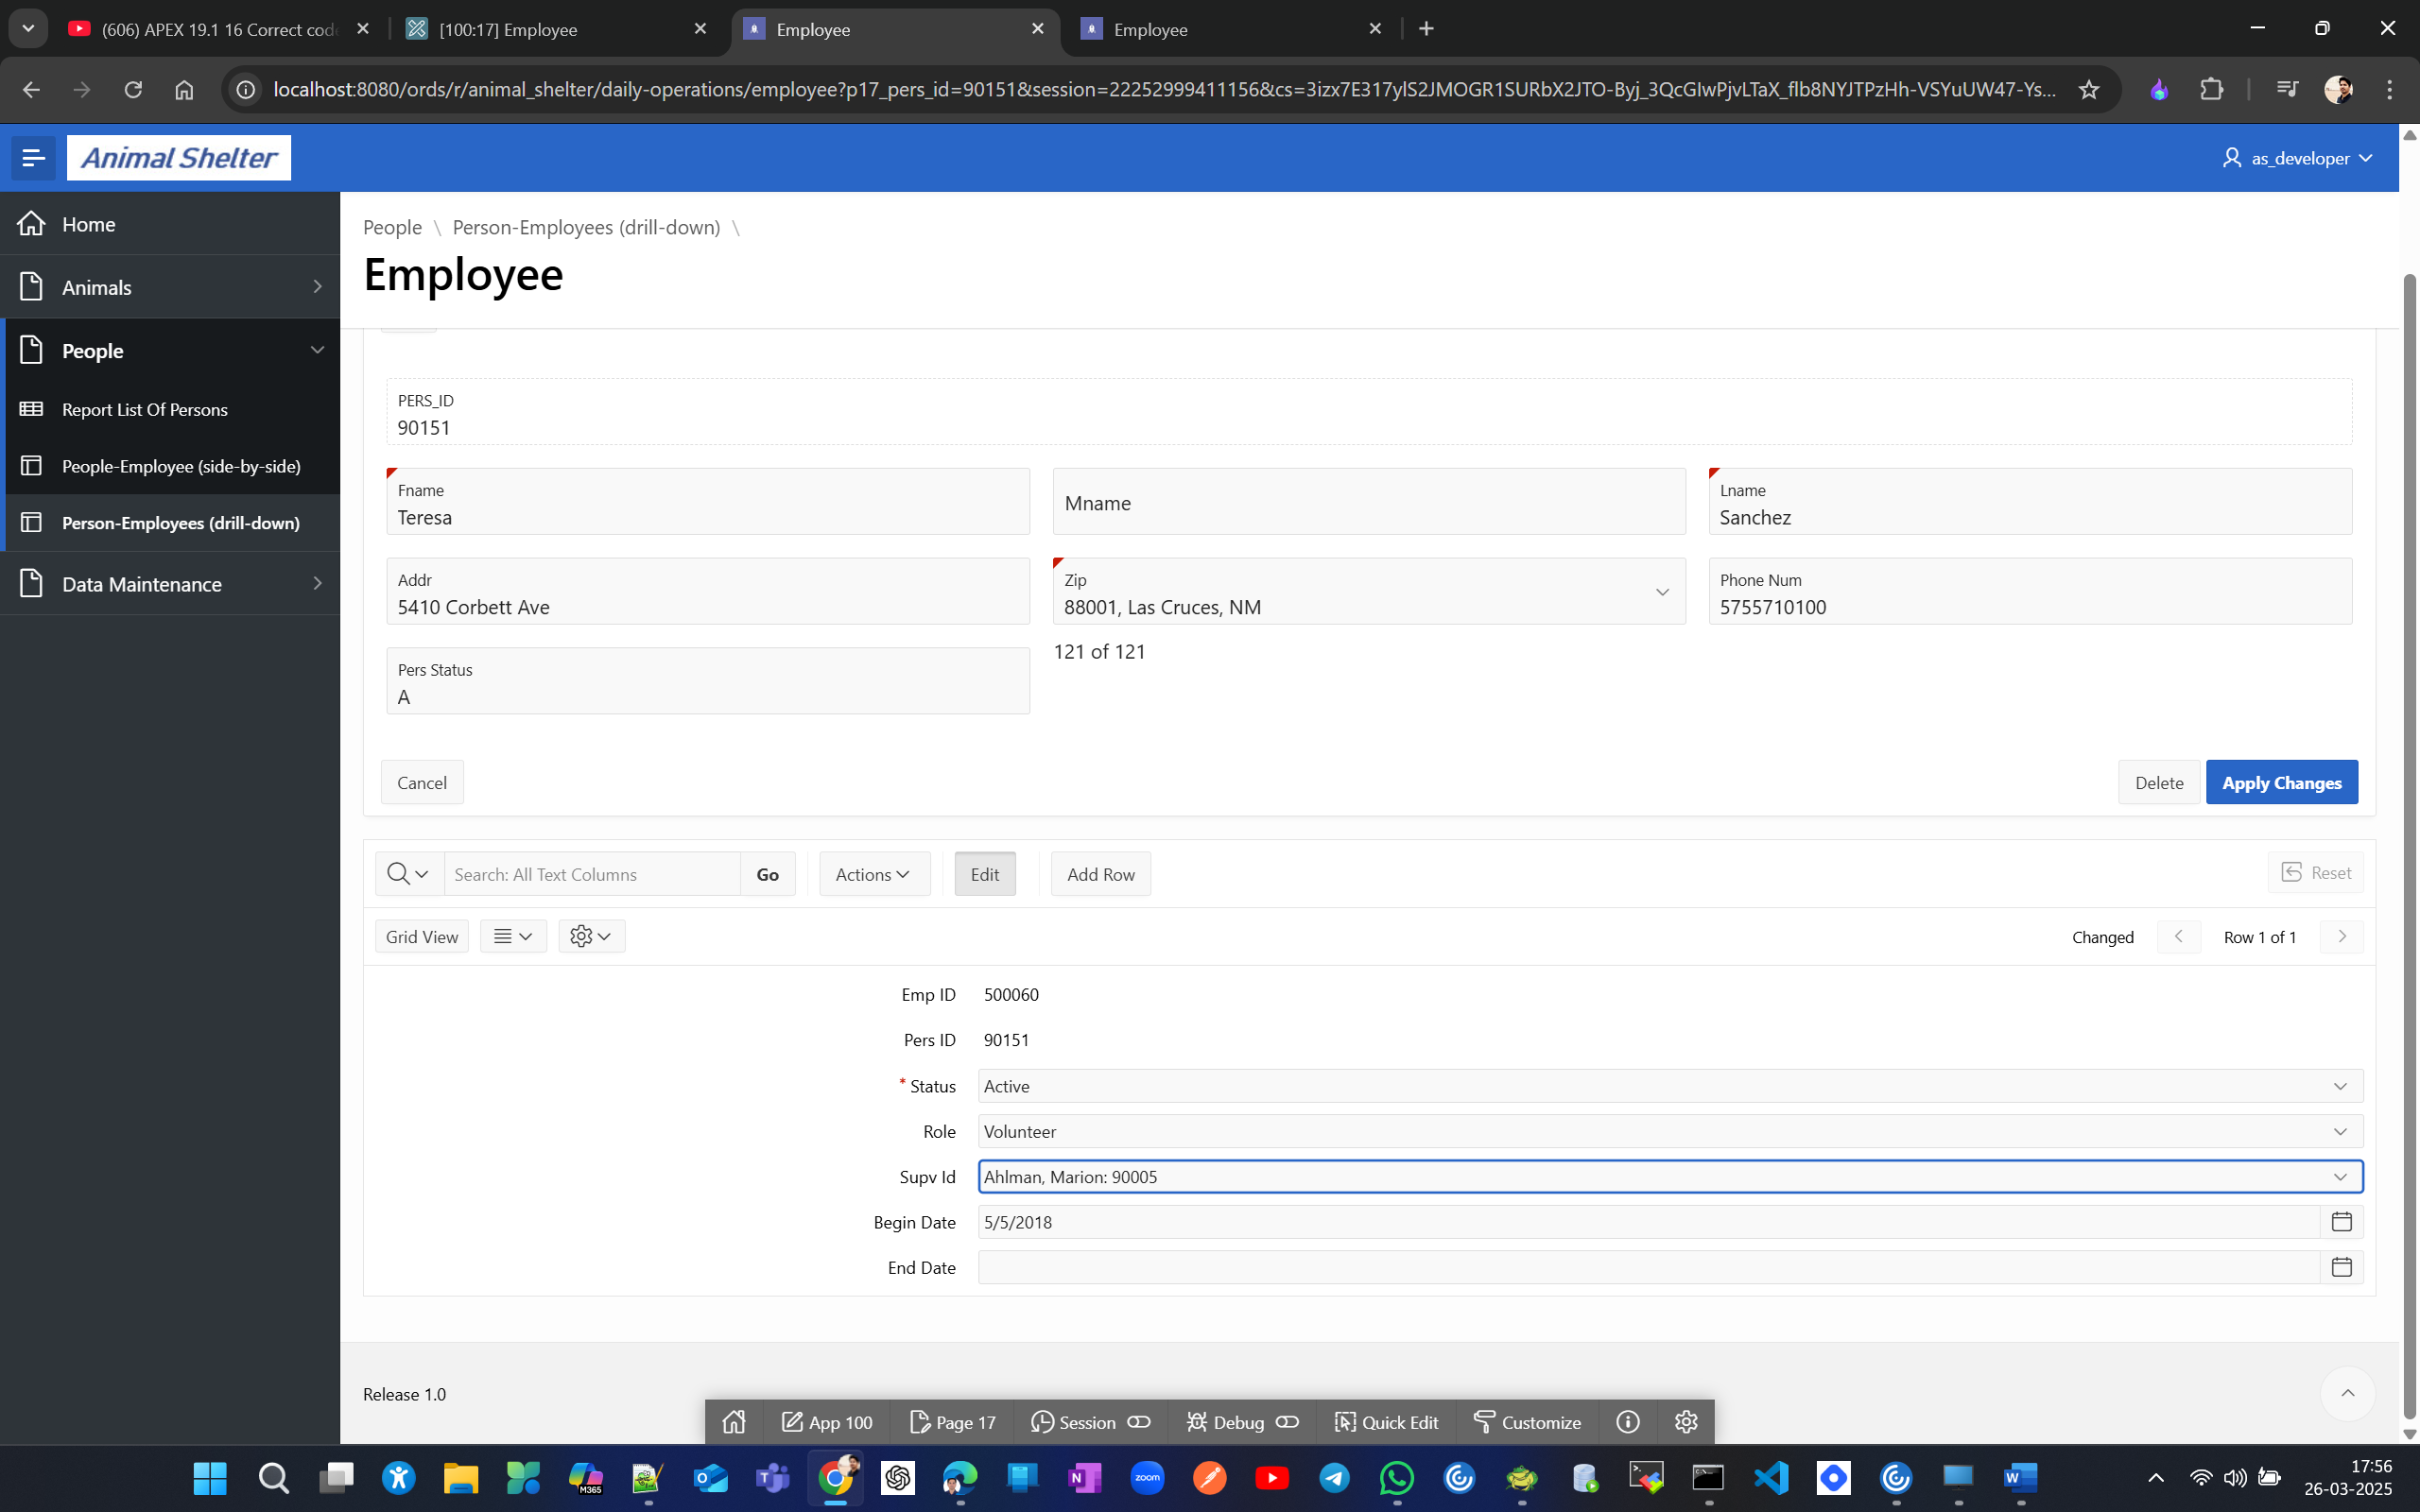
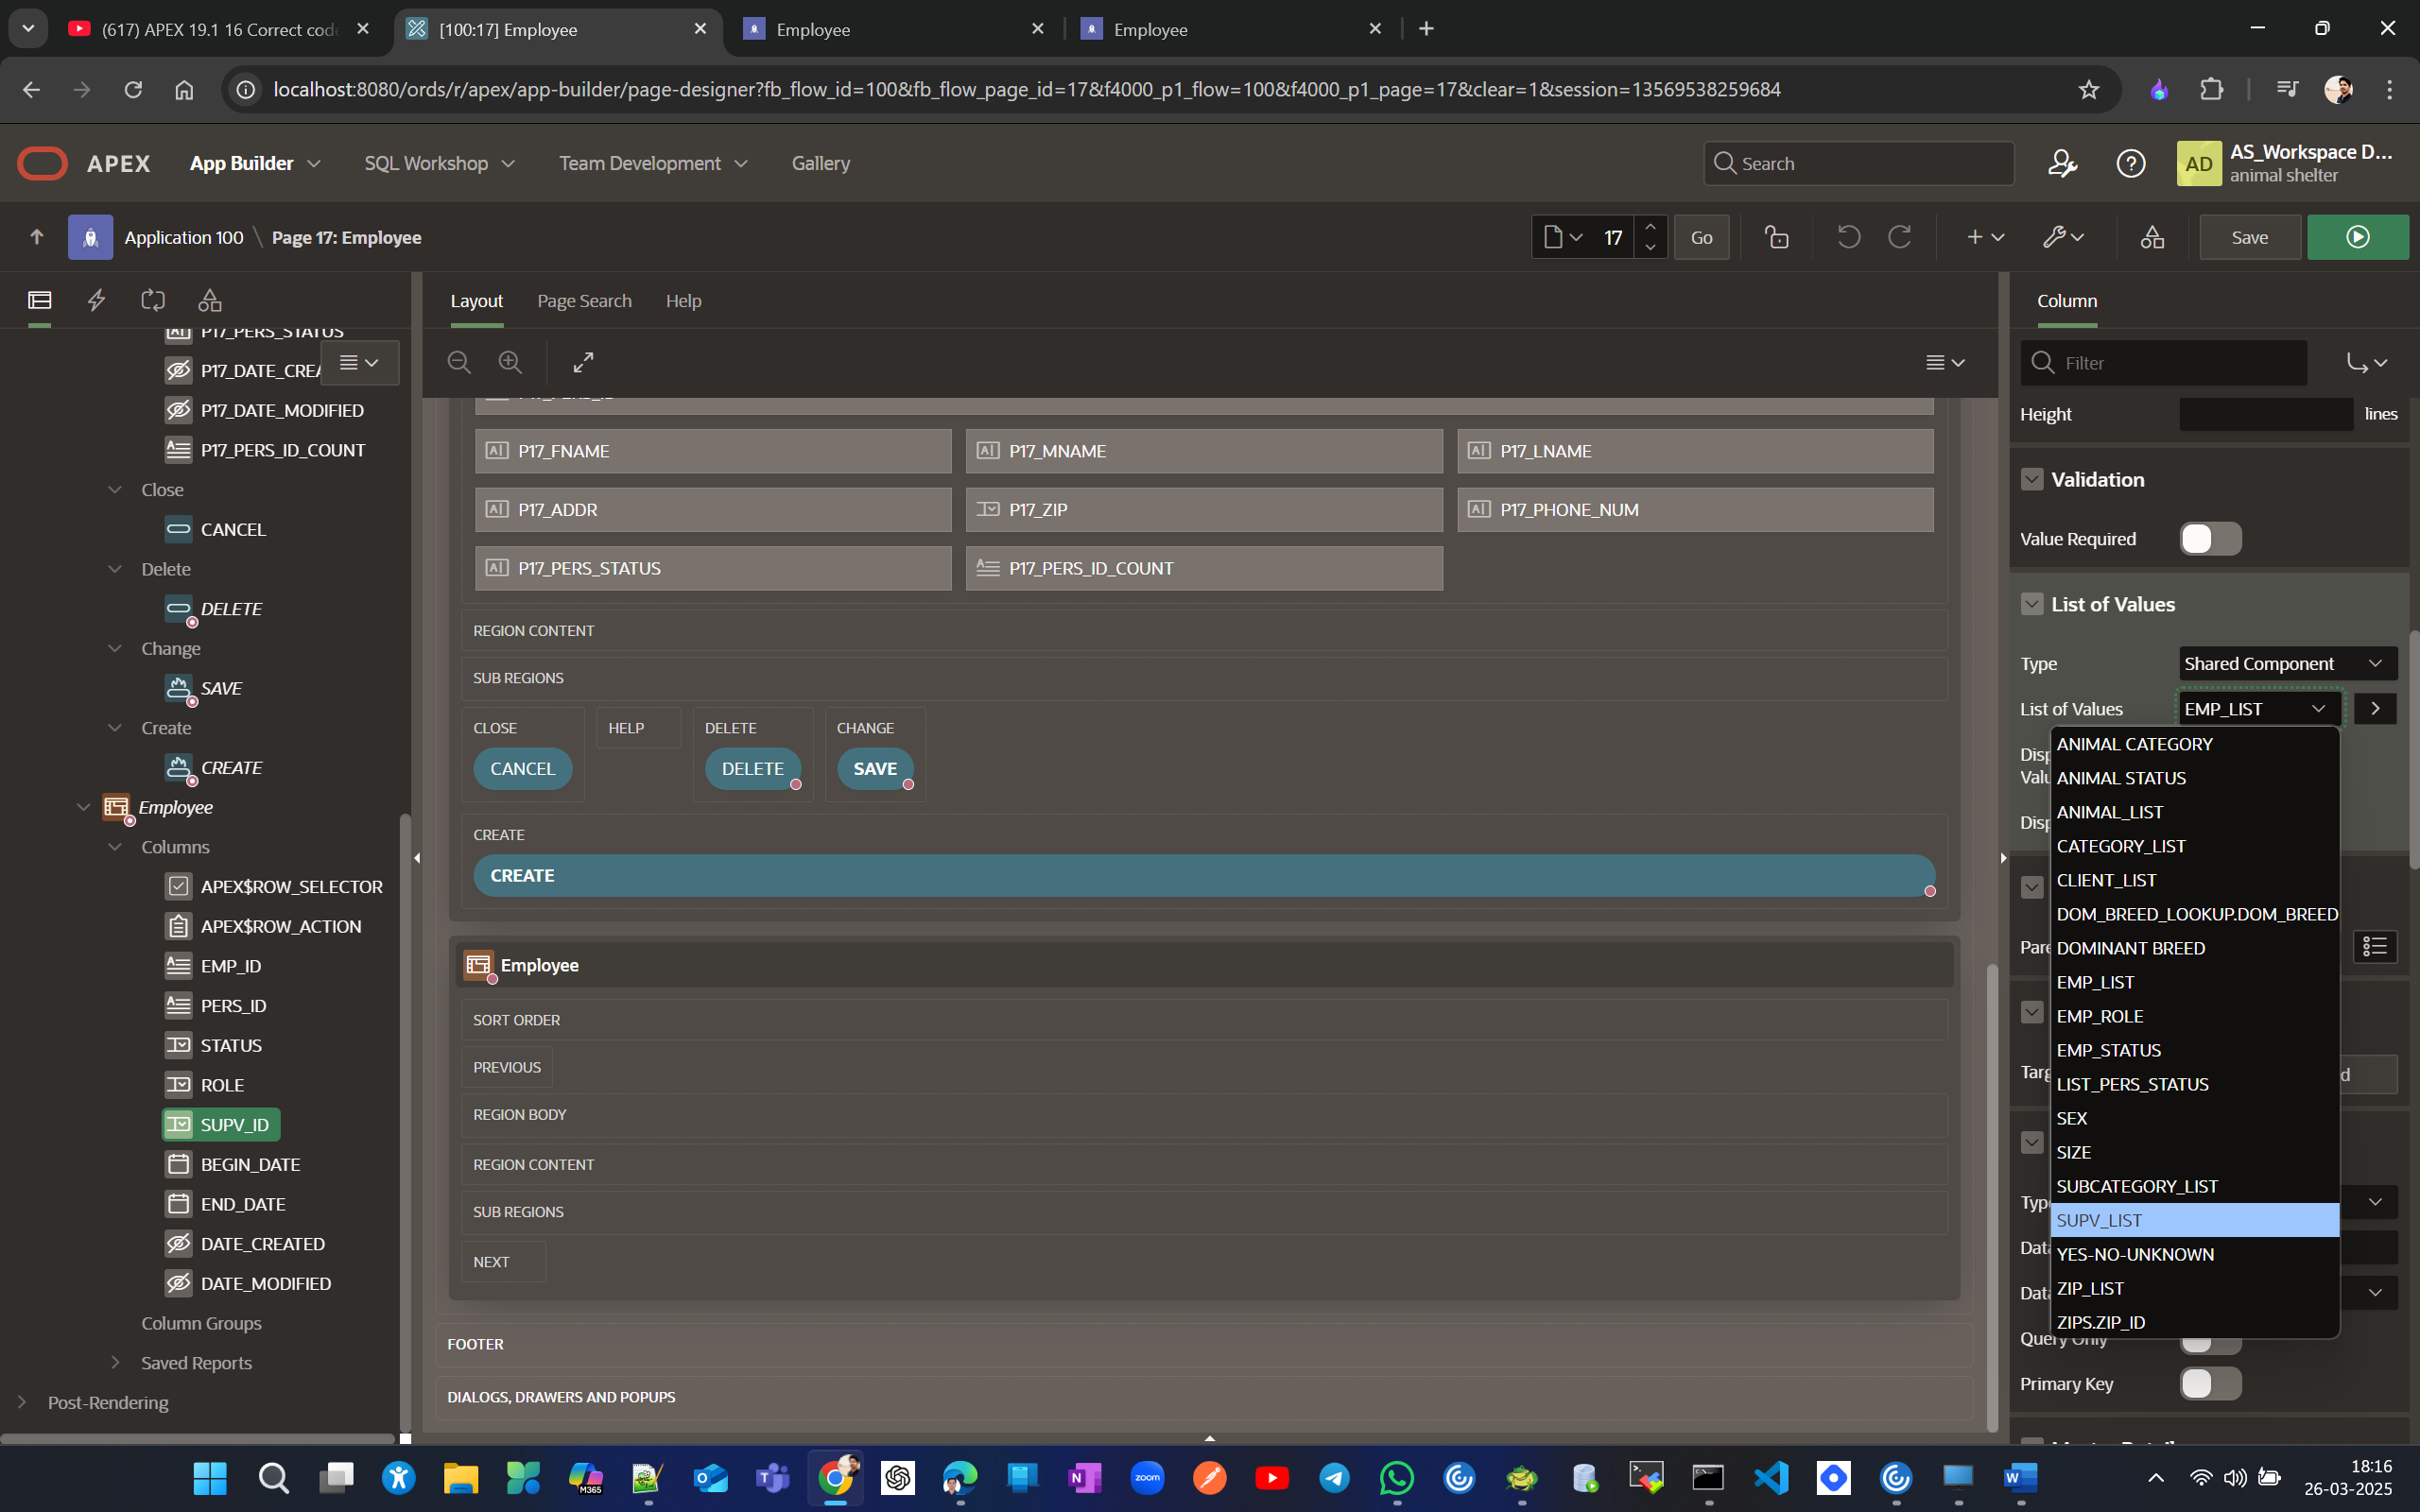
But here the issue is that the supervisor list includes all Veterinarians and Volunteers and also possibly inactive, so we need to automatically exclude them from the select list. For that we need to update the LOV for this.
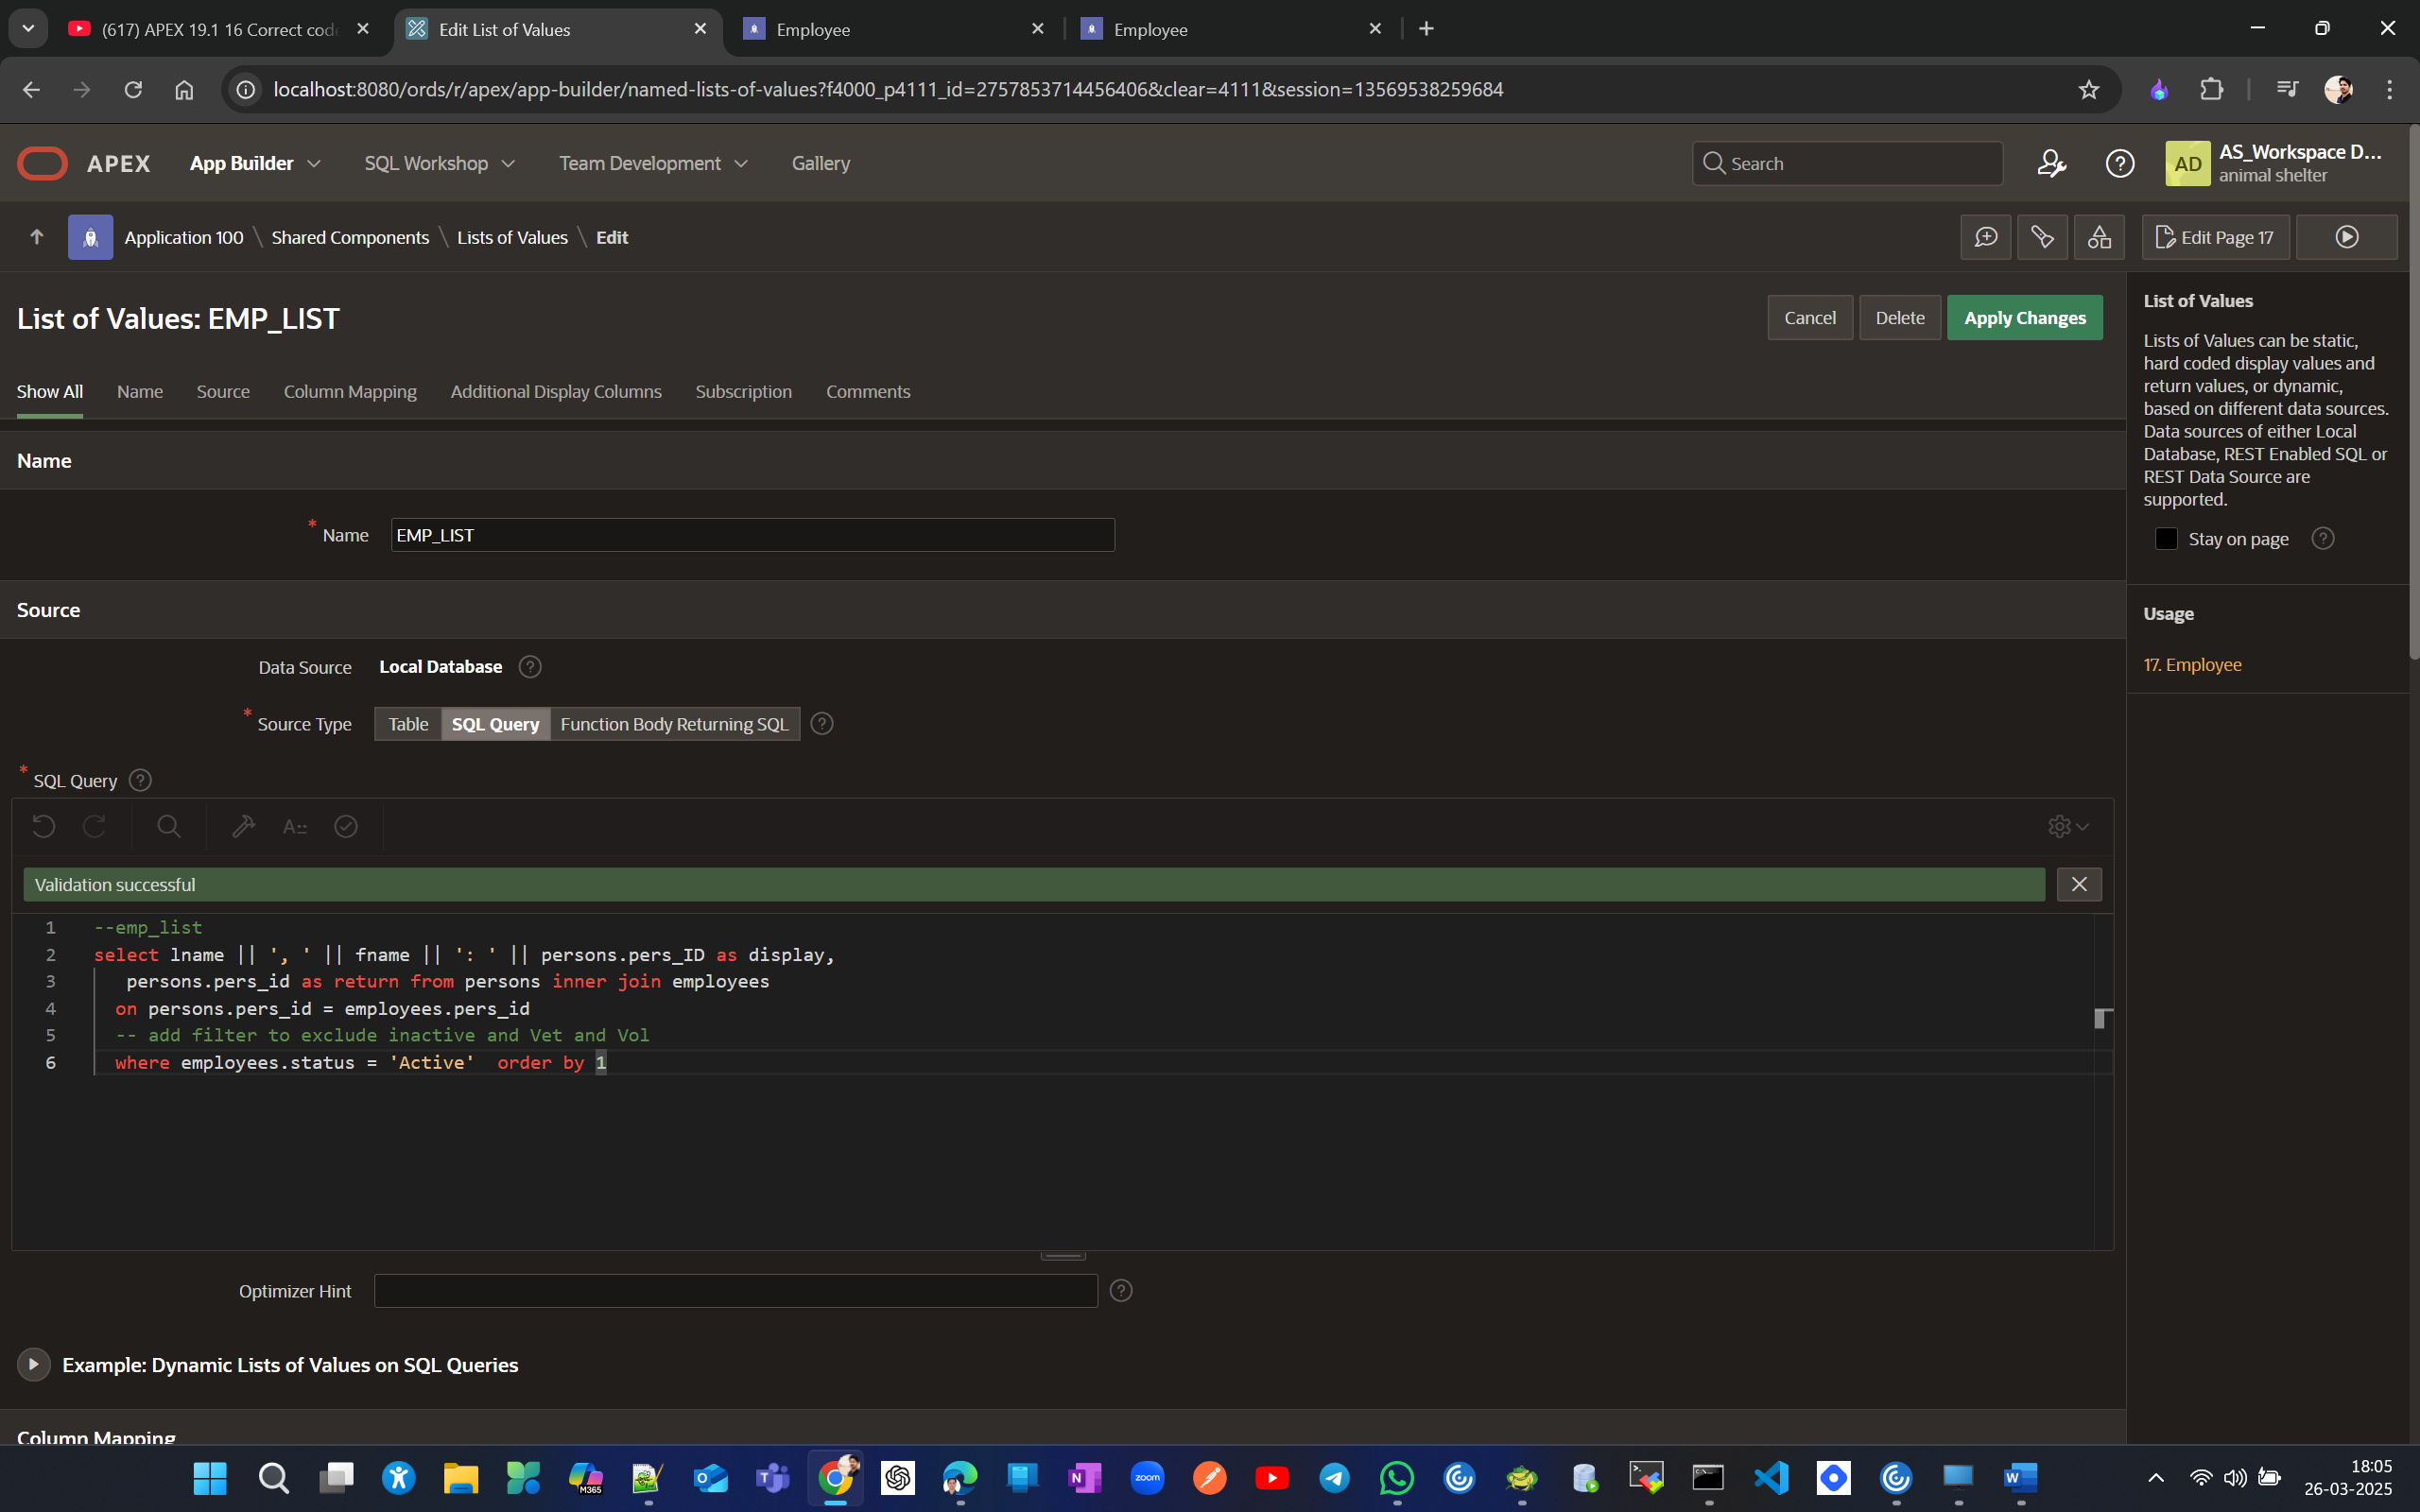
here this extra filter willl only include active one but don’t exclude vol and vets. so as a best practice no need to edit existing emp_list lov and copy emp_list LOV to create a new SUPV_LIST and edit to add extra filter condition.
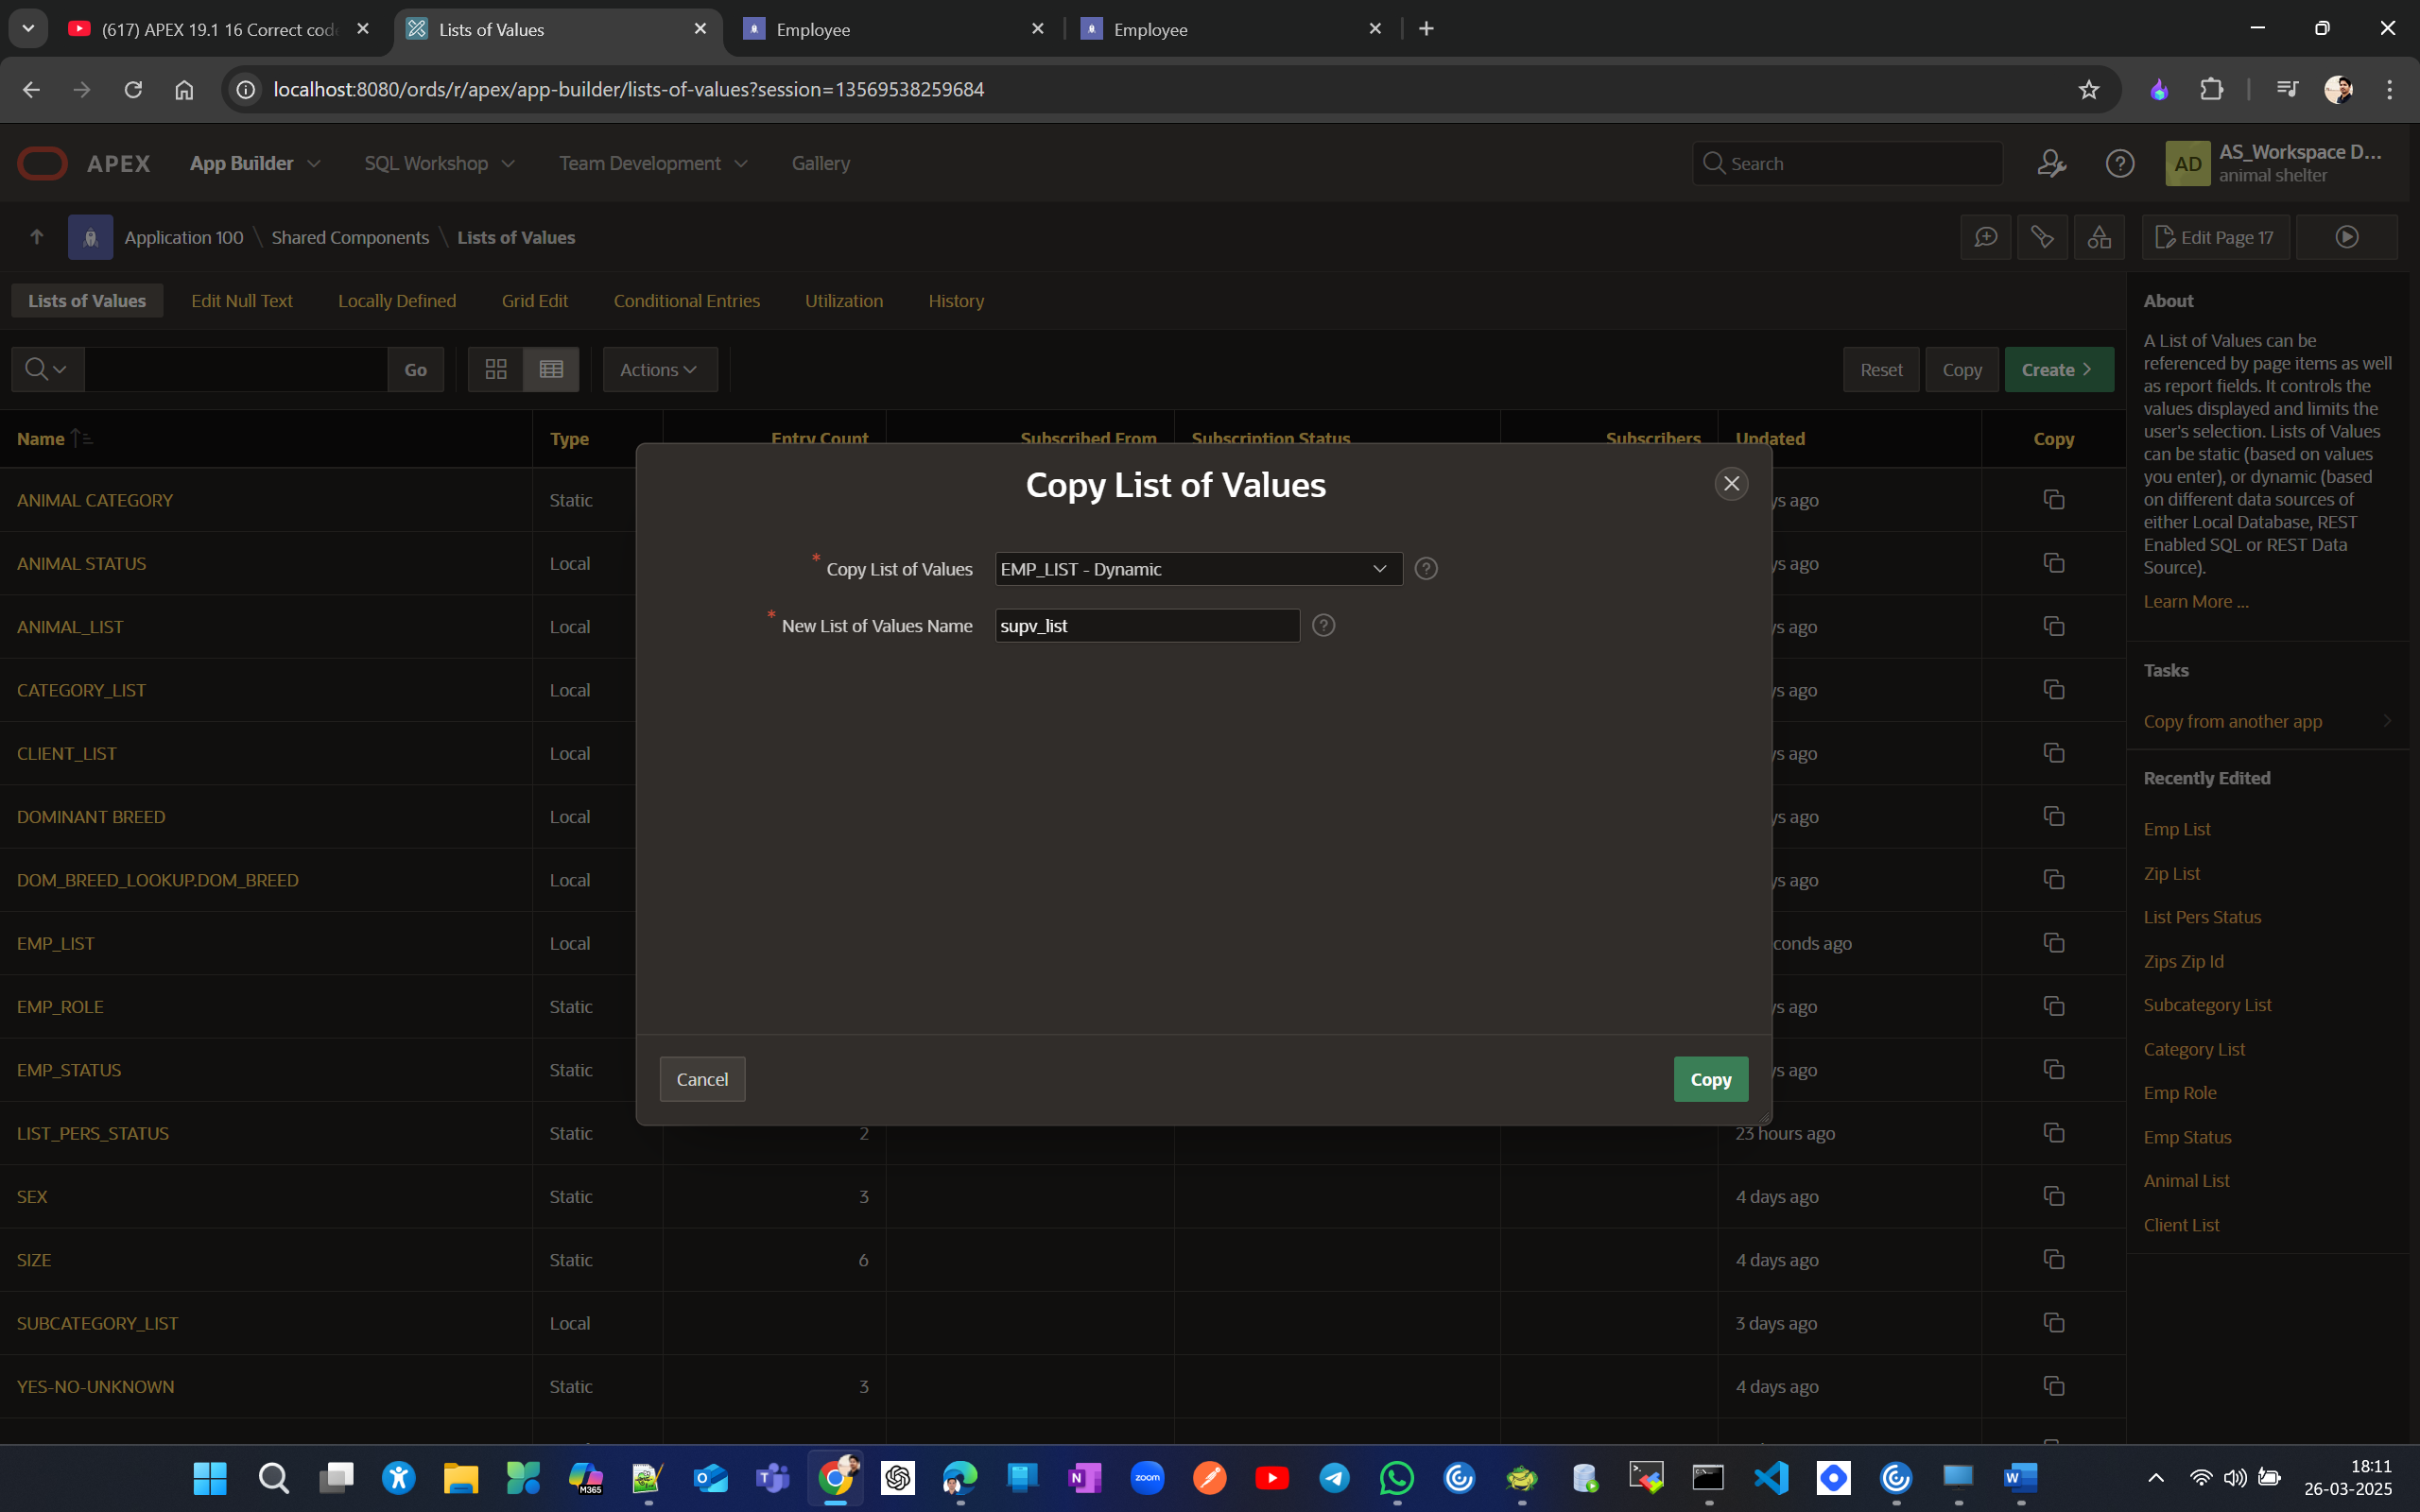
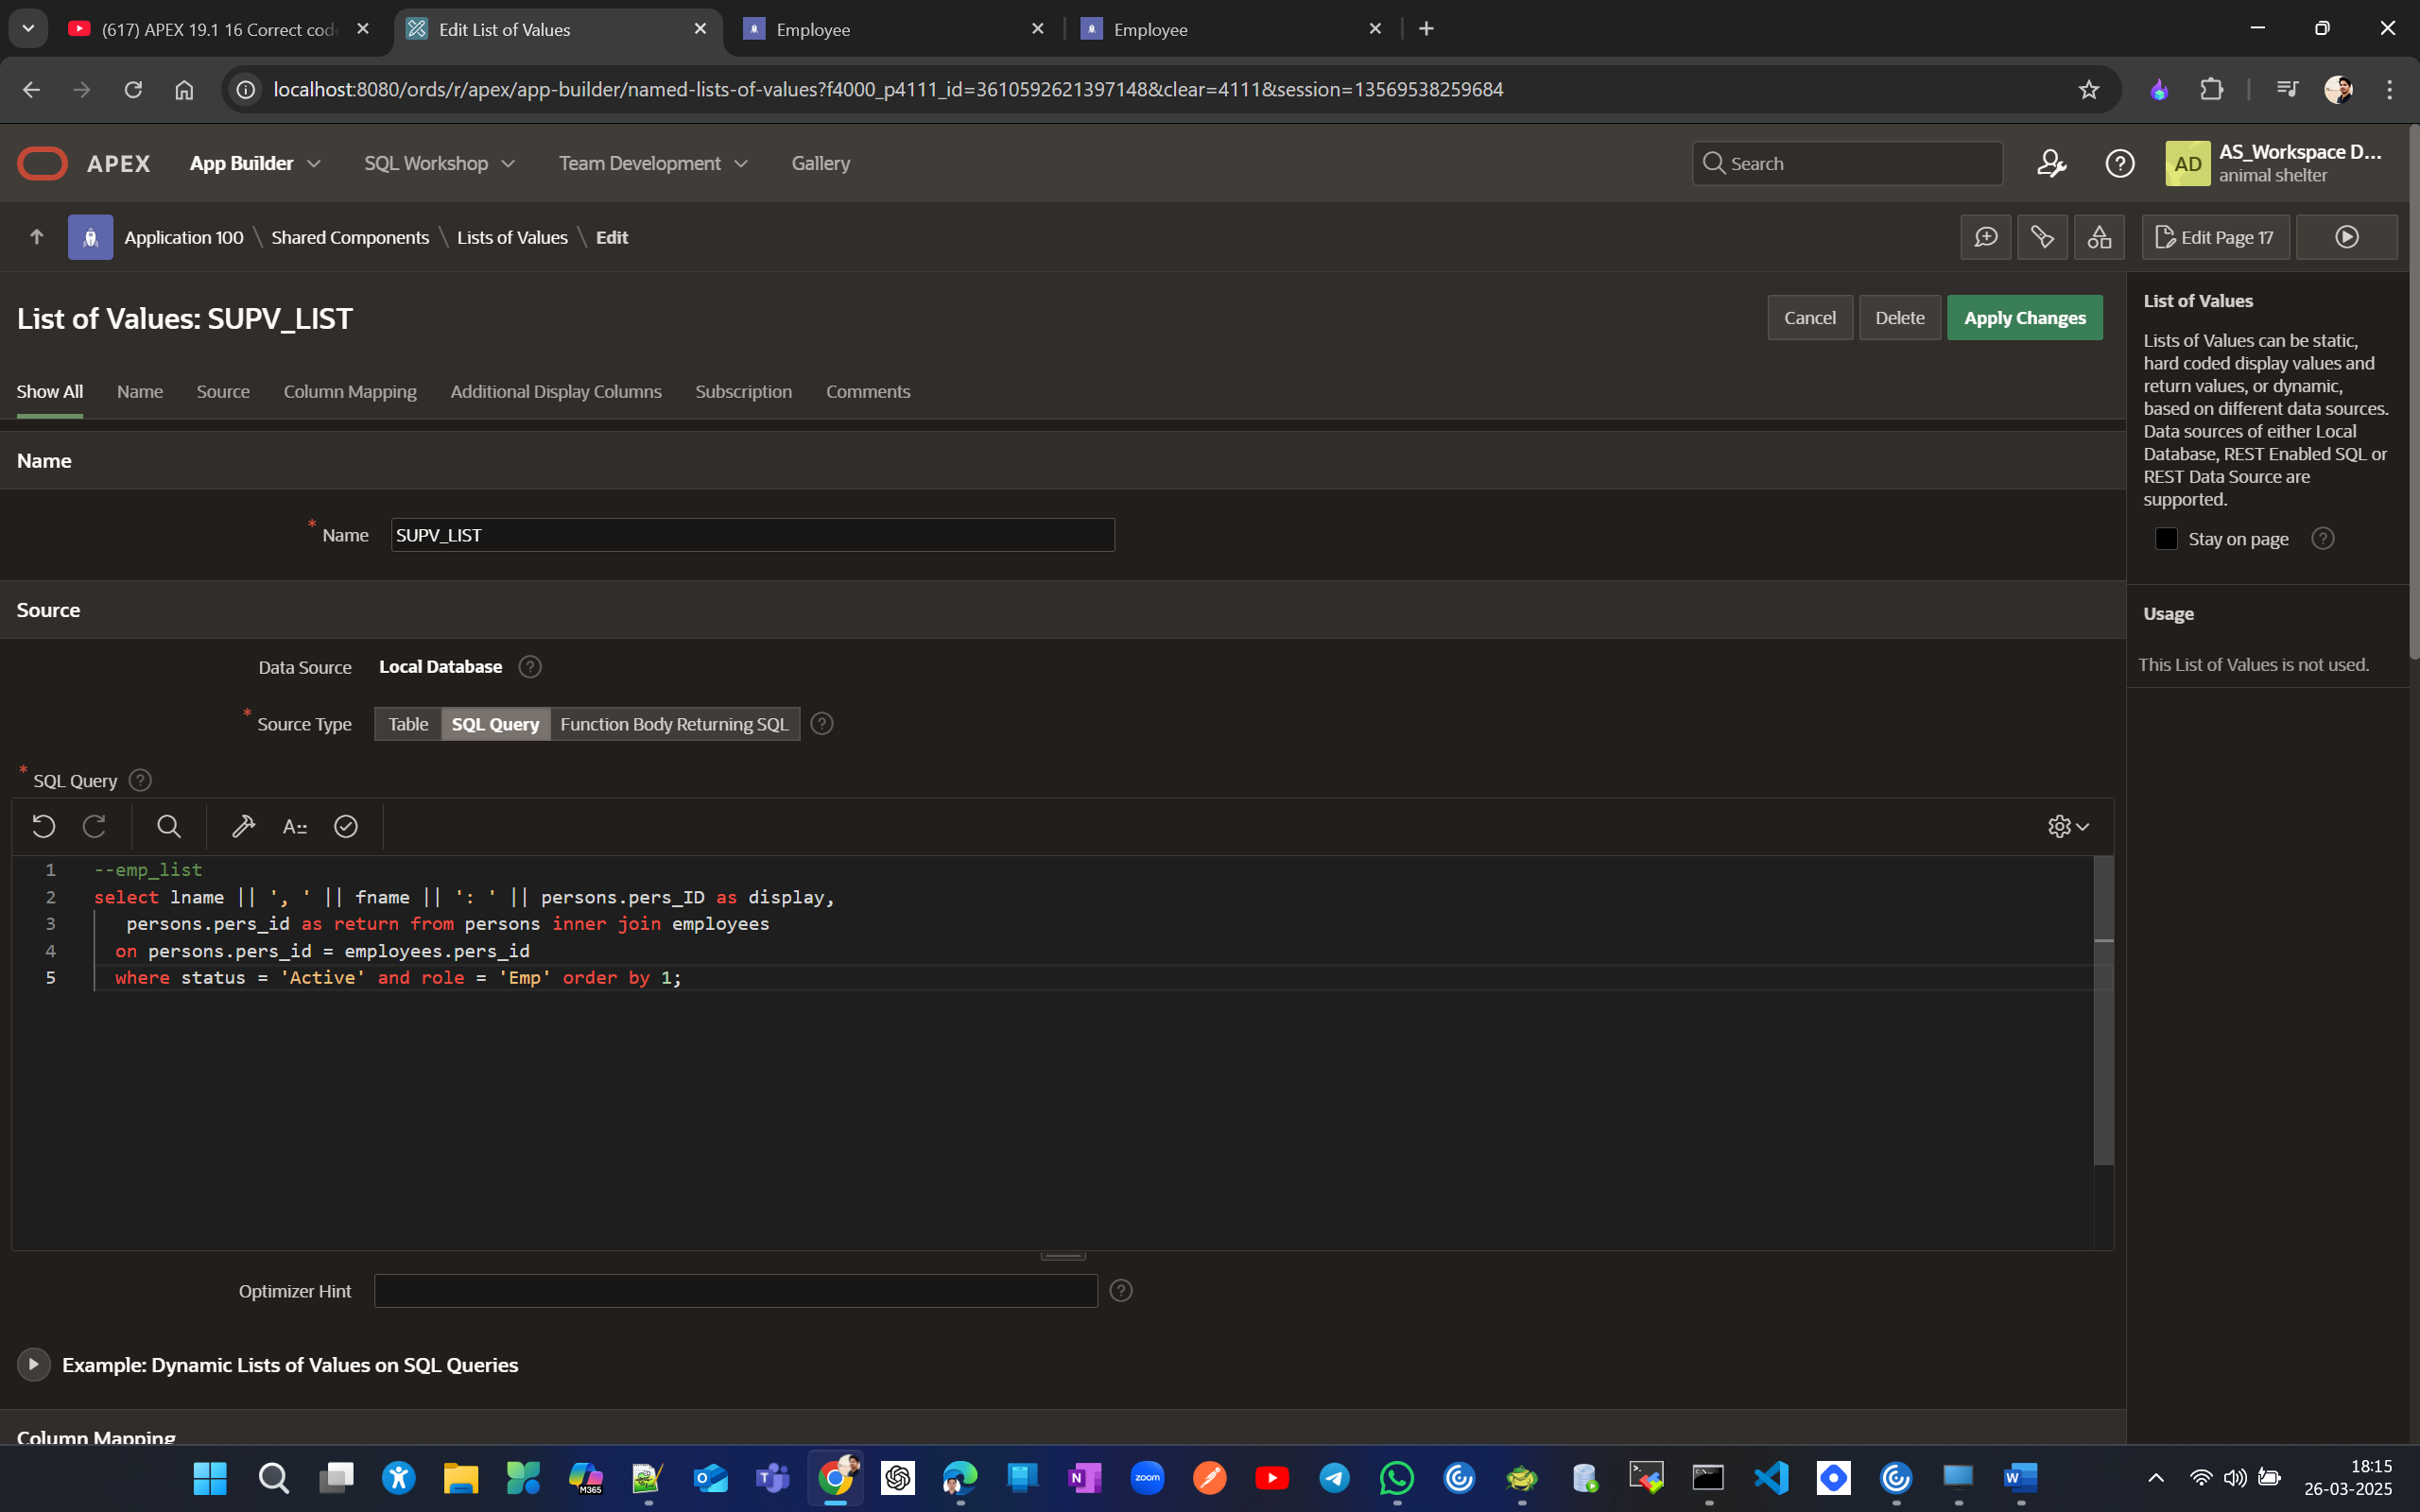
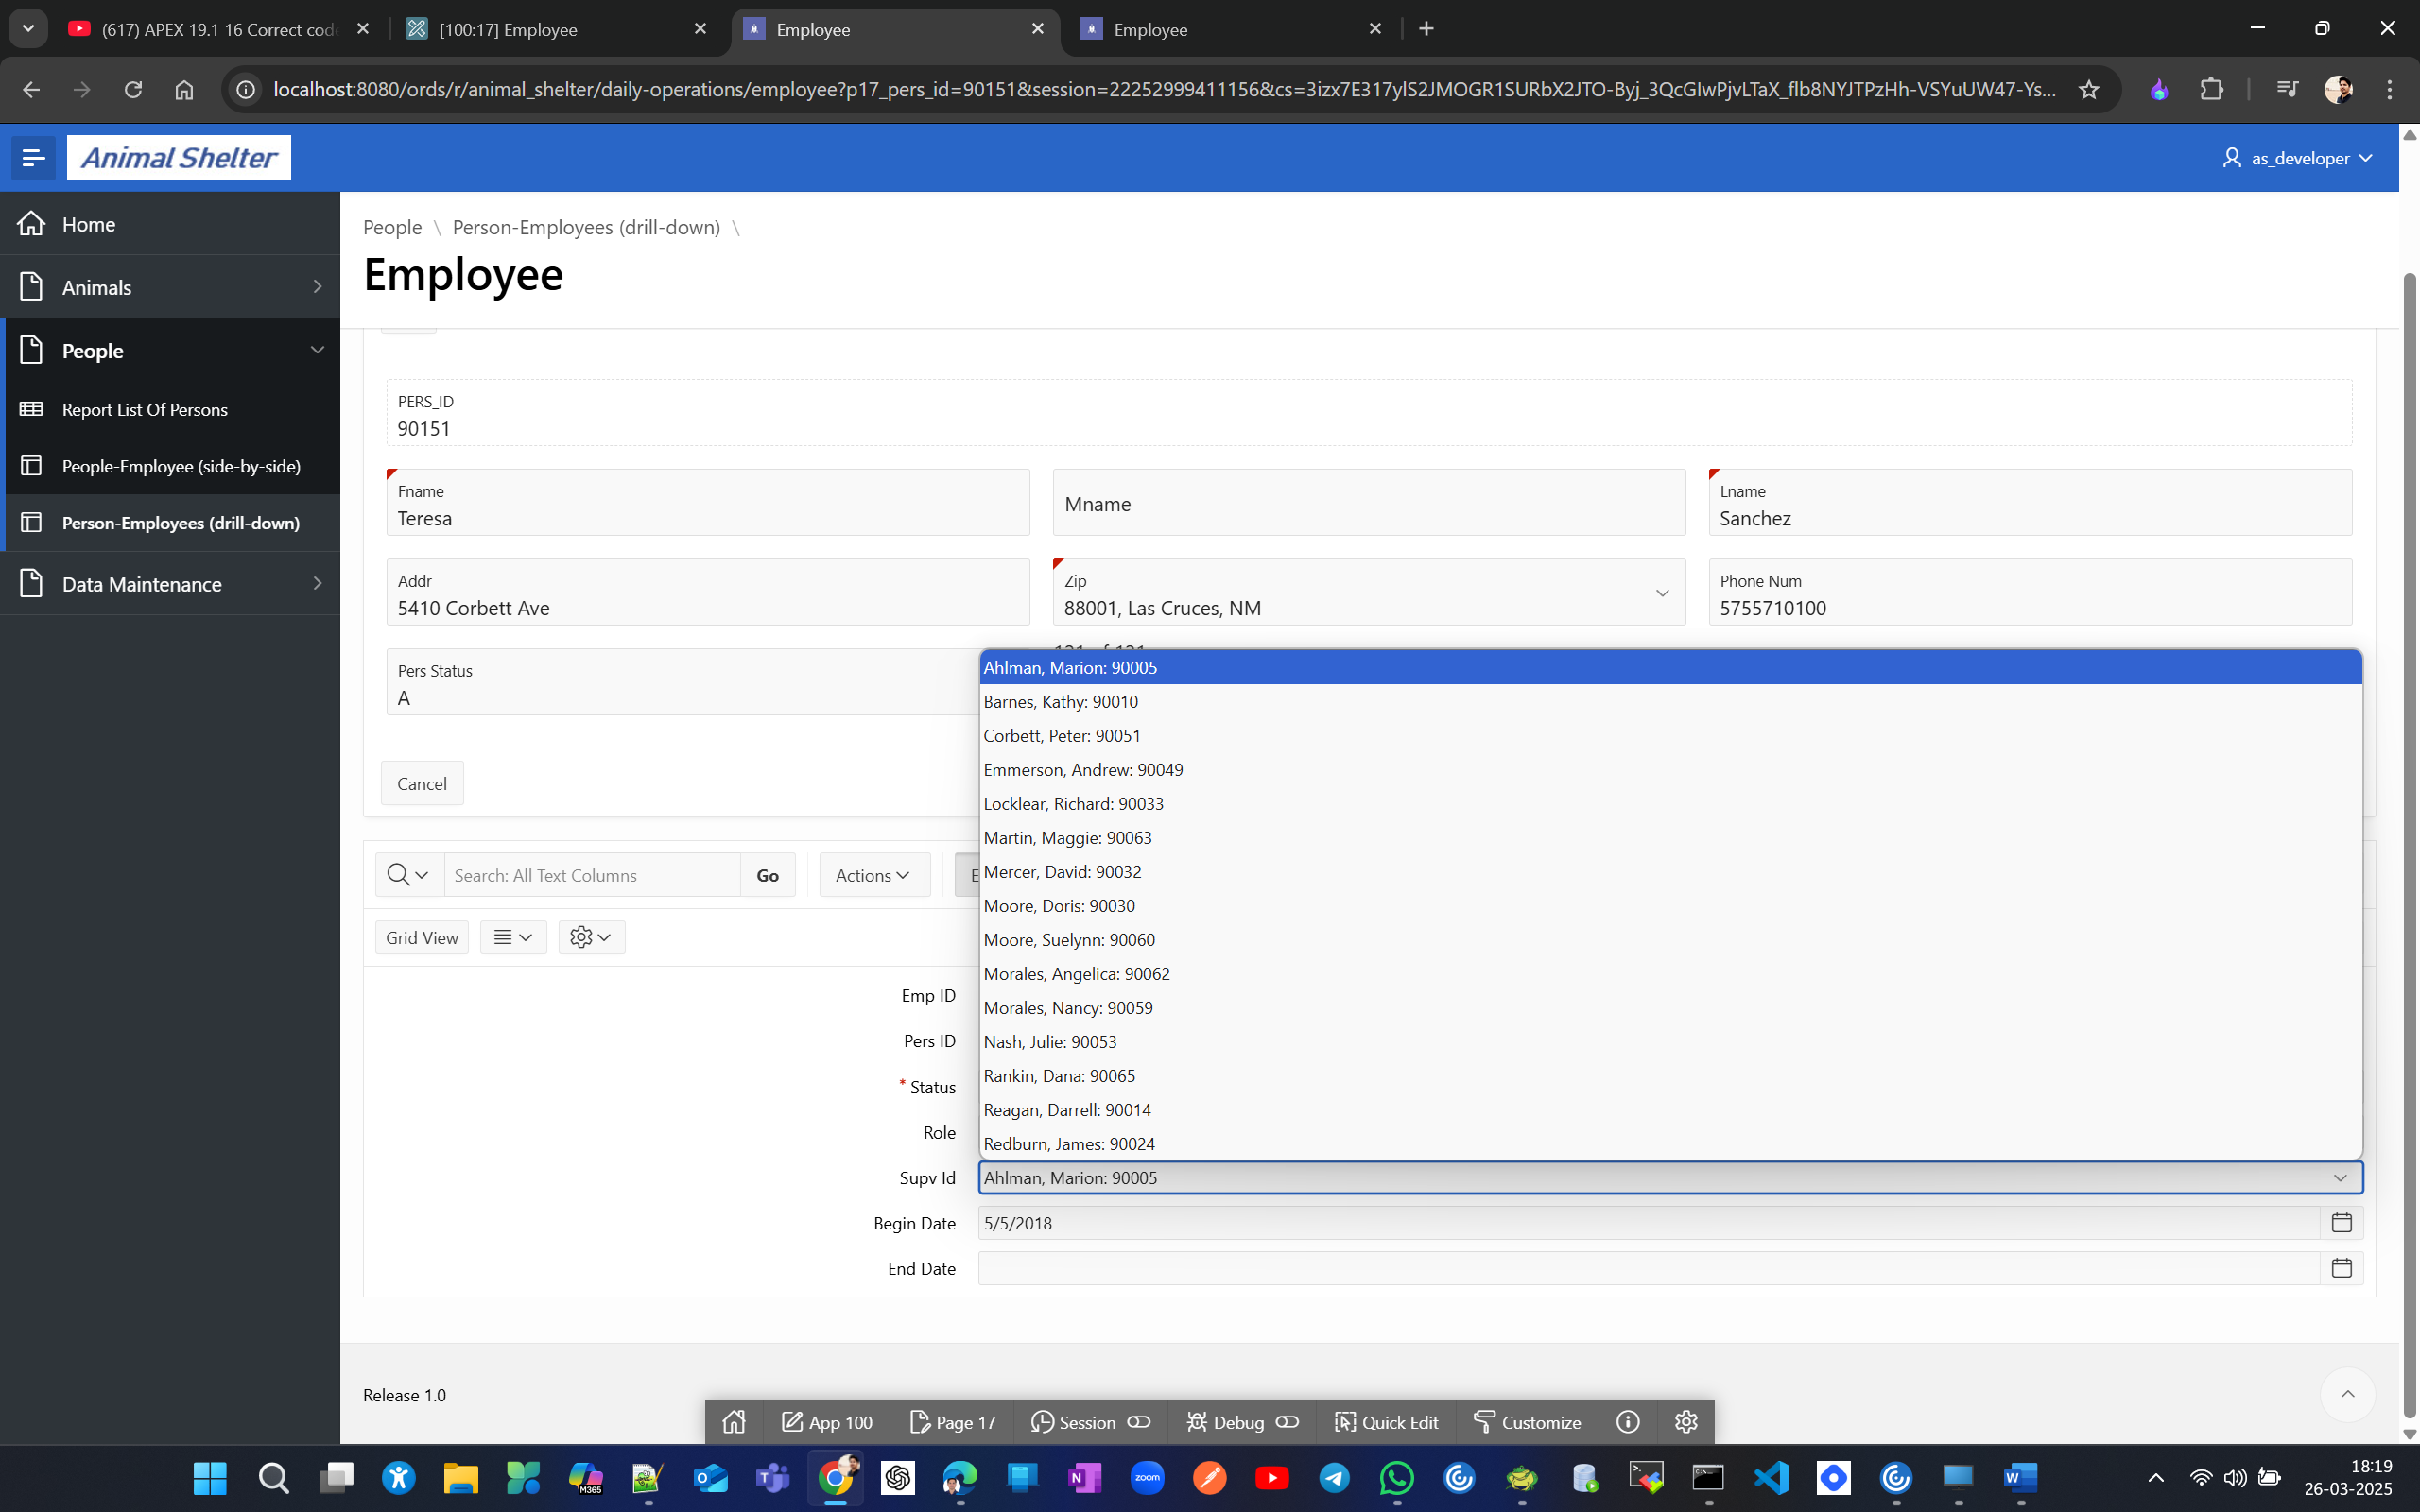
Now change SUPV_ID LOV value to SUPV_LIST from EMP_LIST
now you will only see active supervisors
Now lets create data(person).
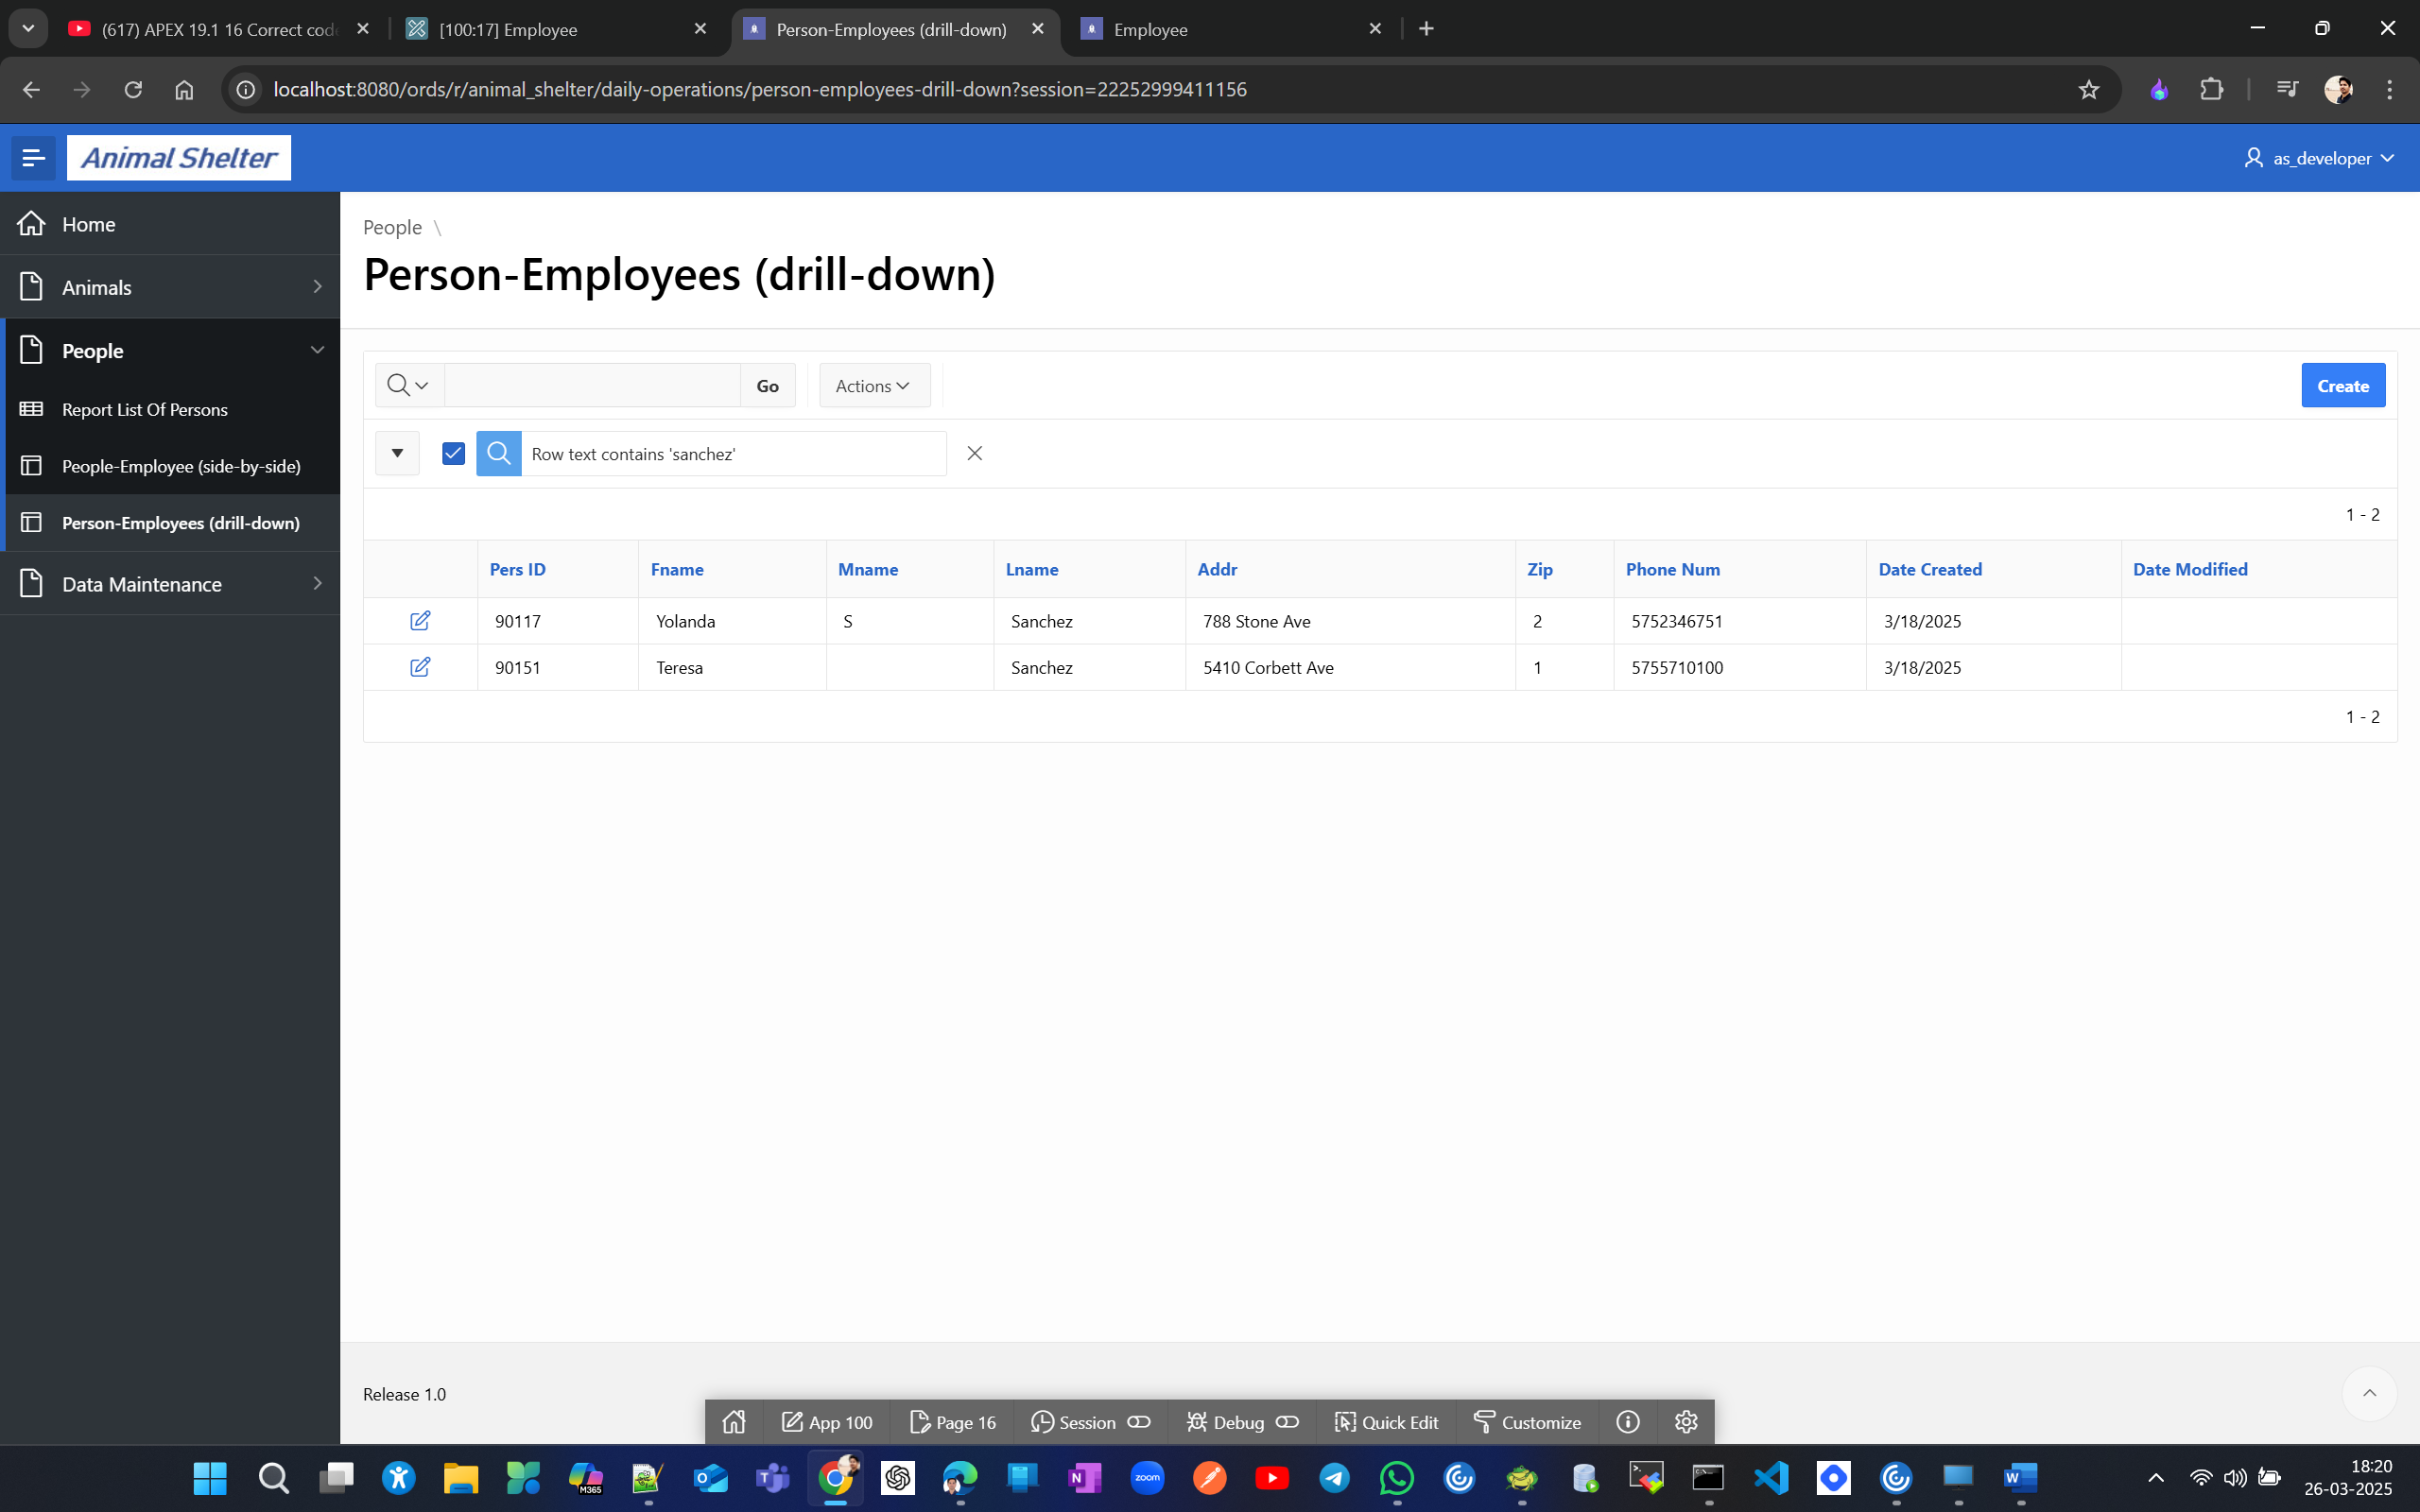
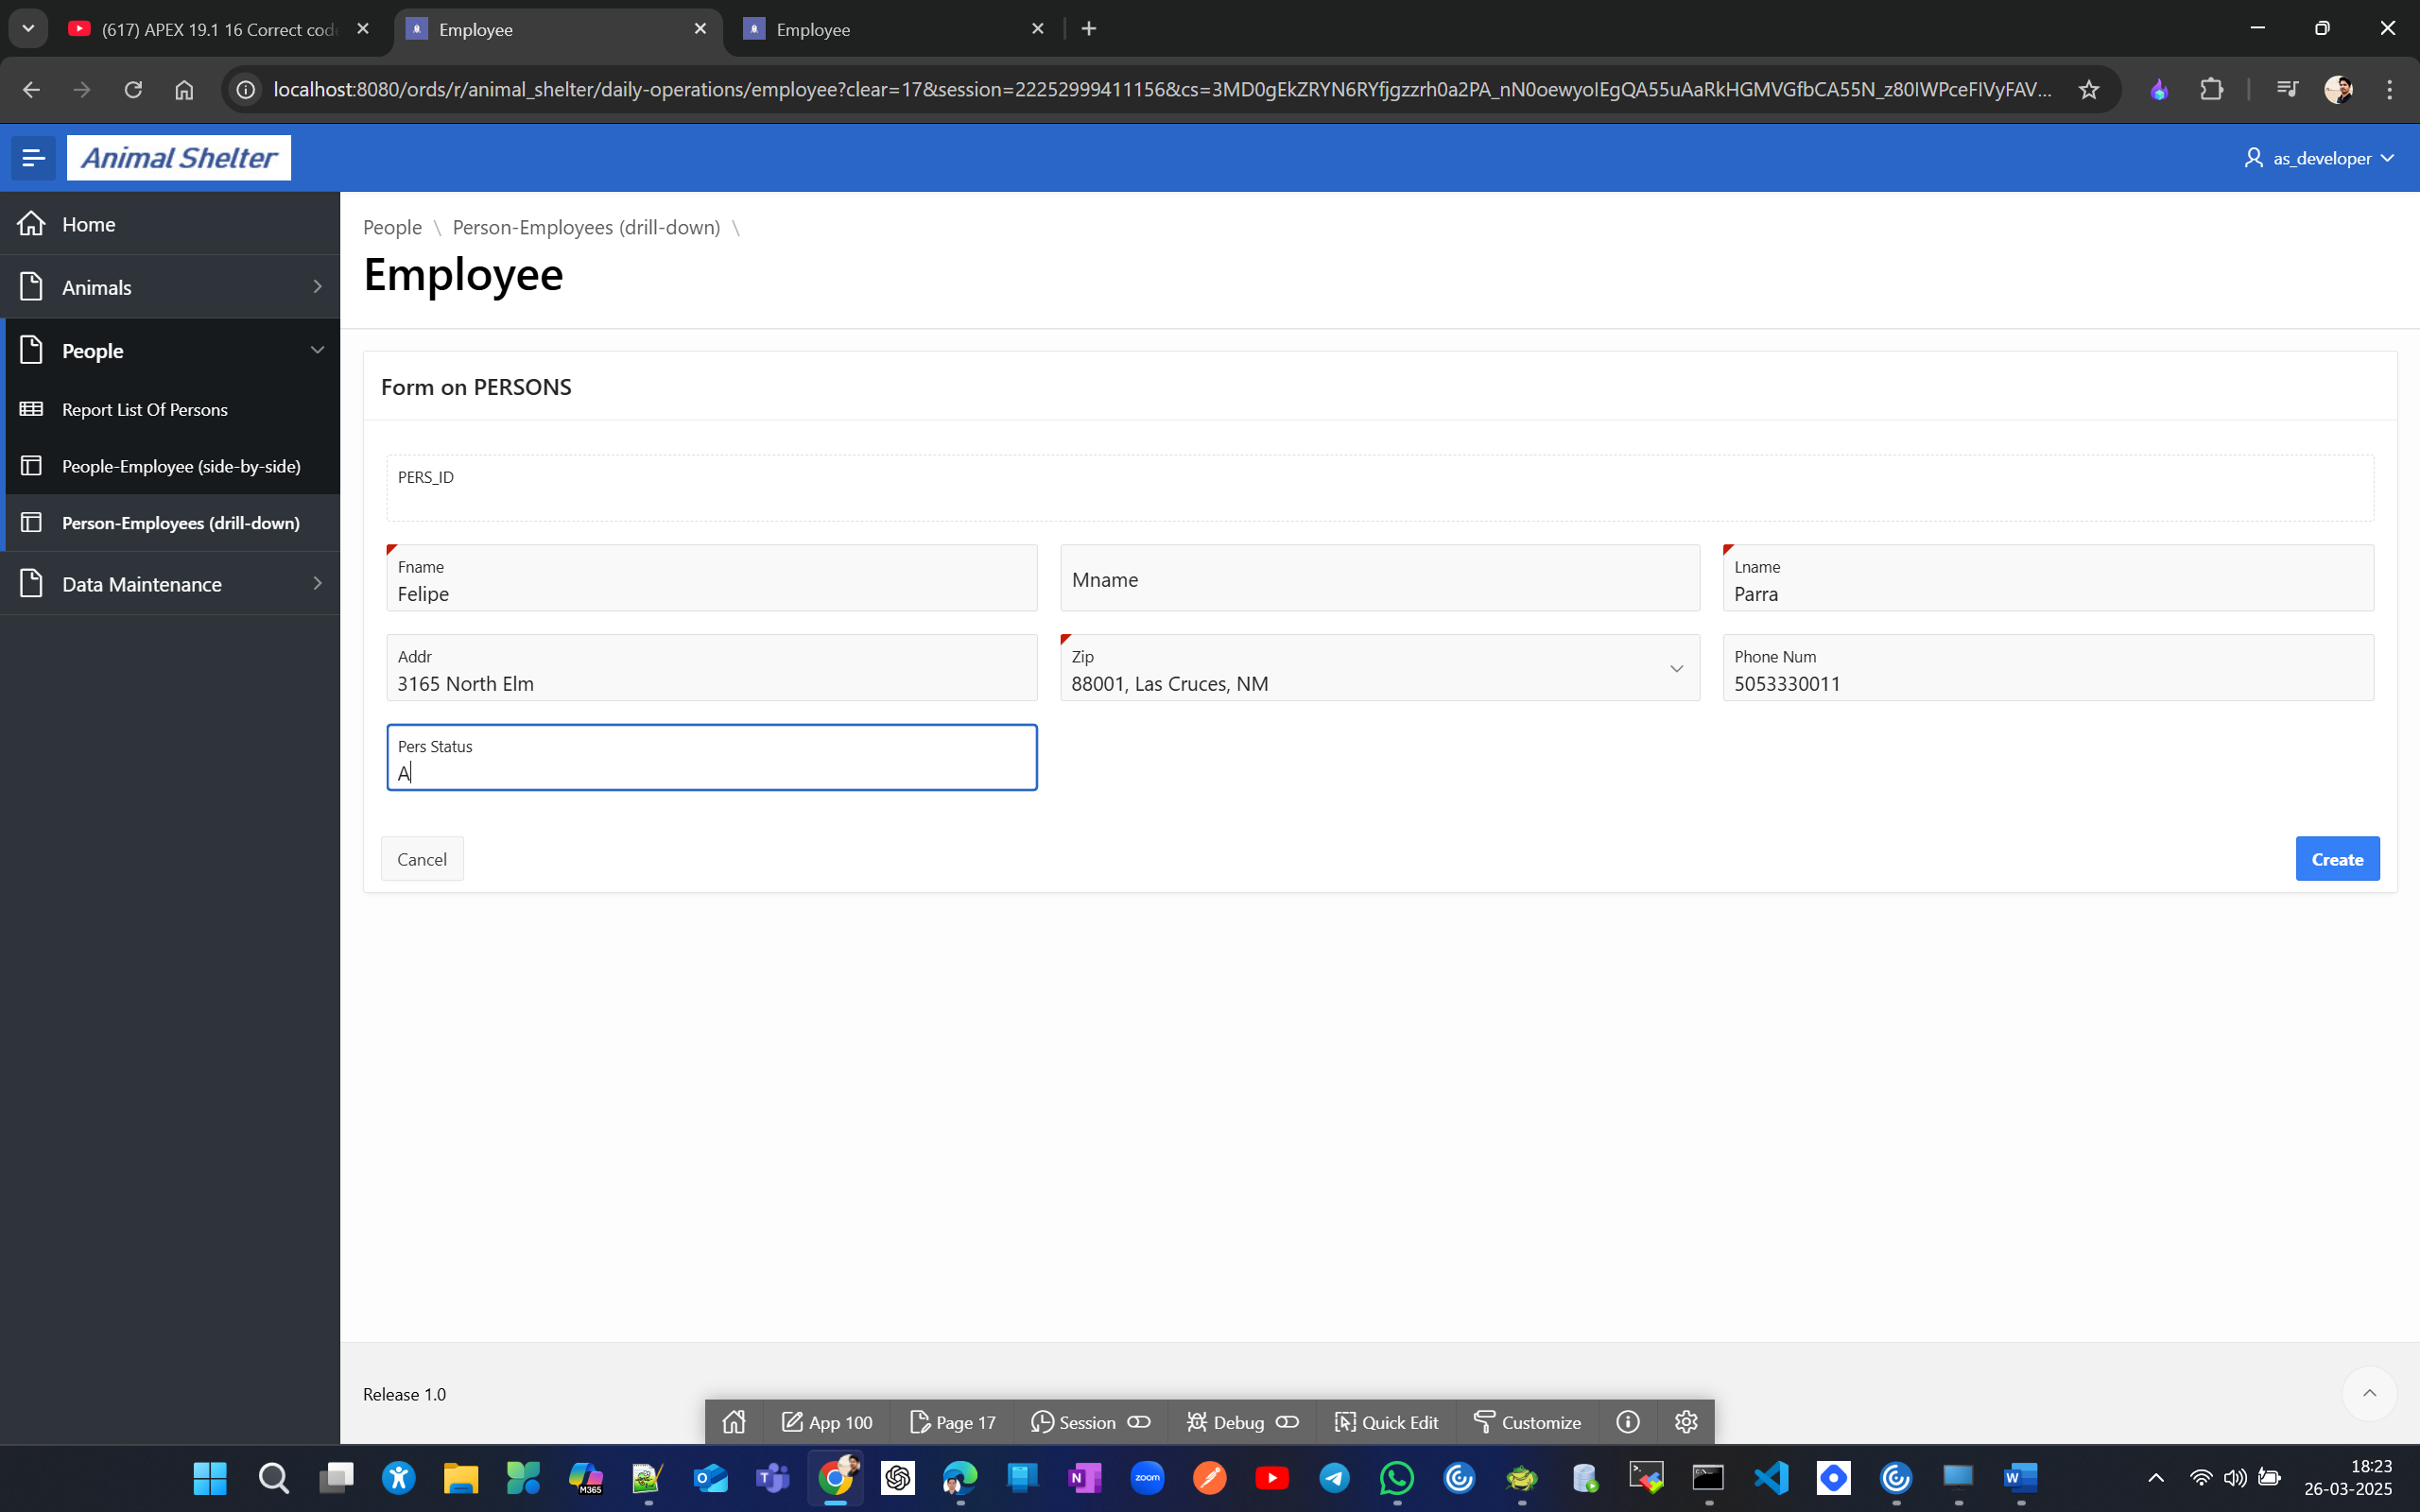
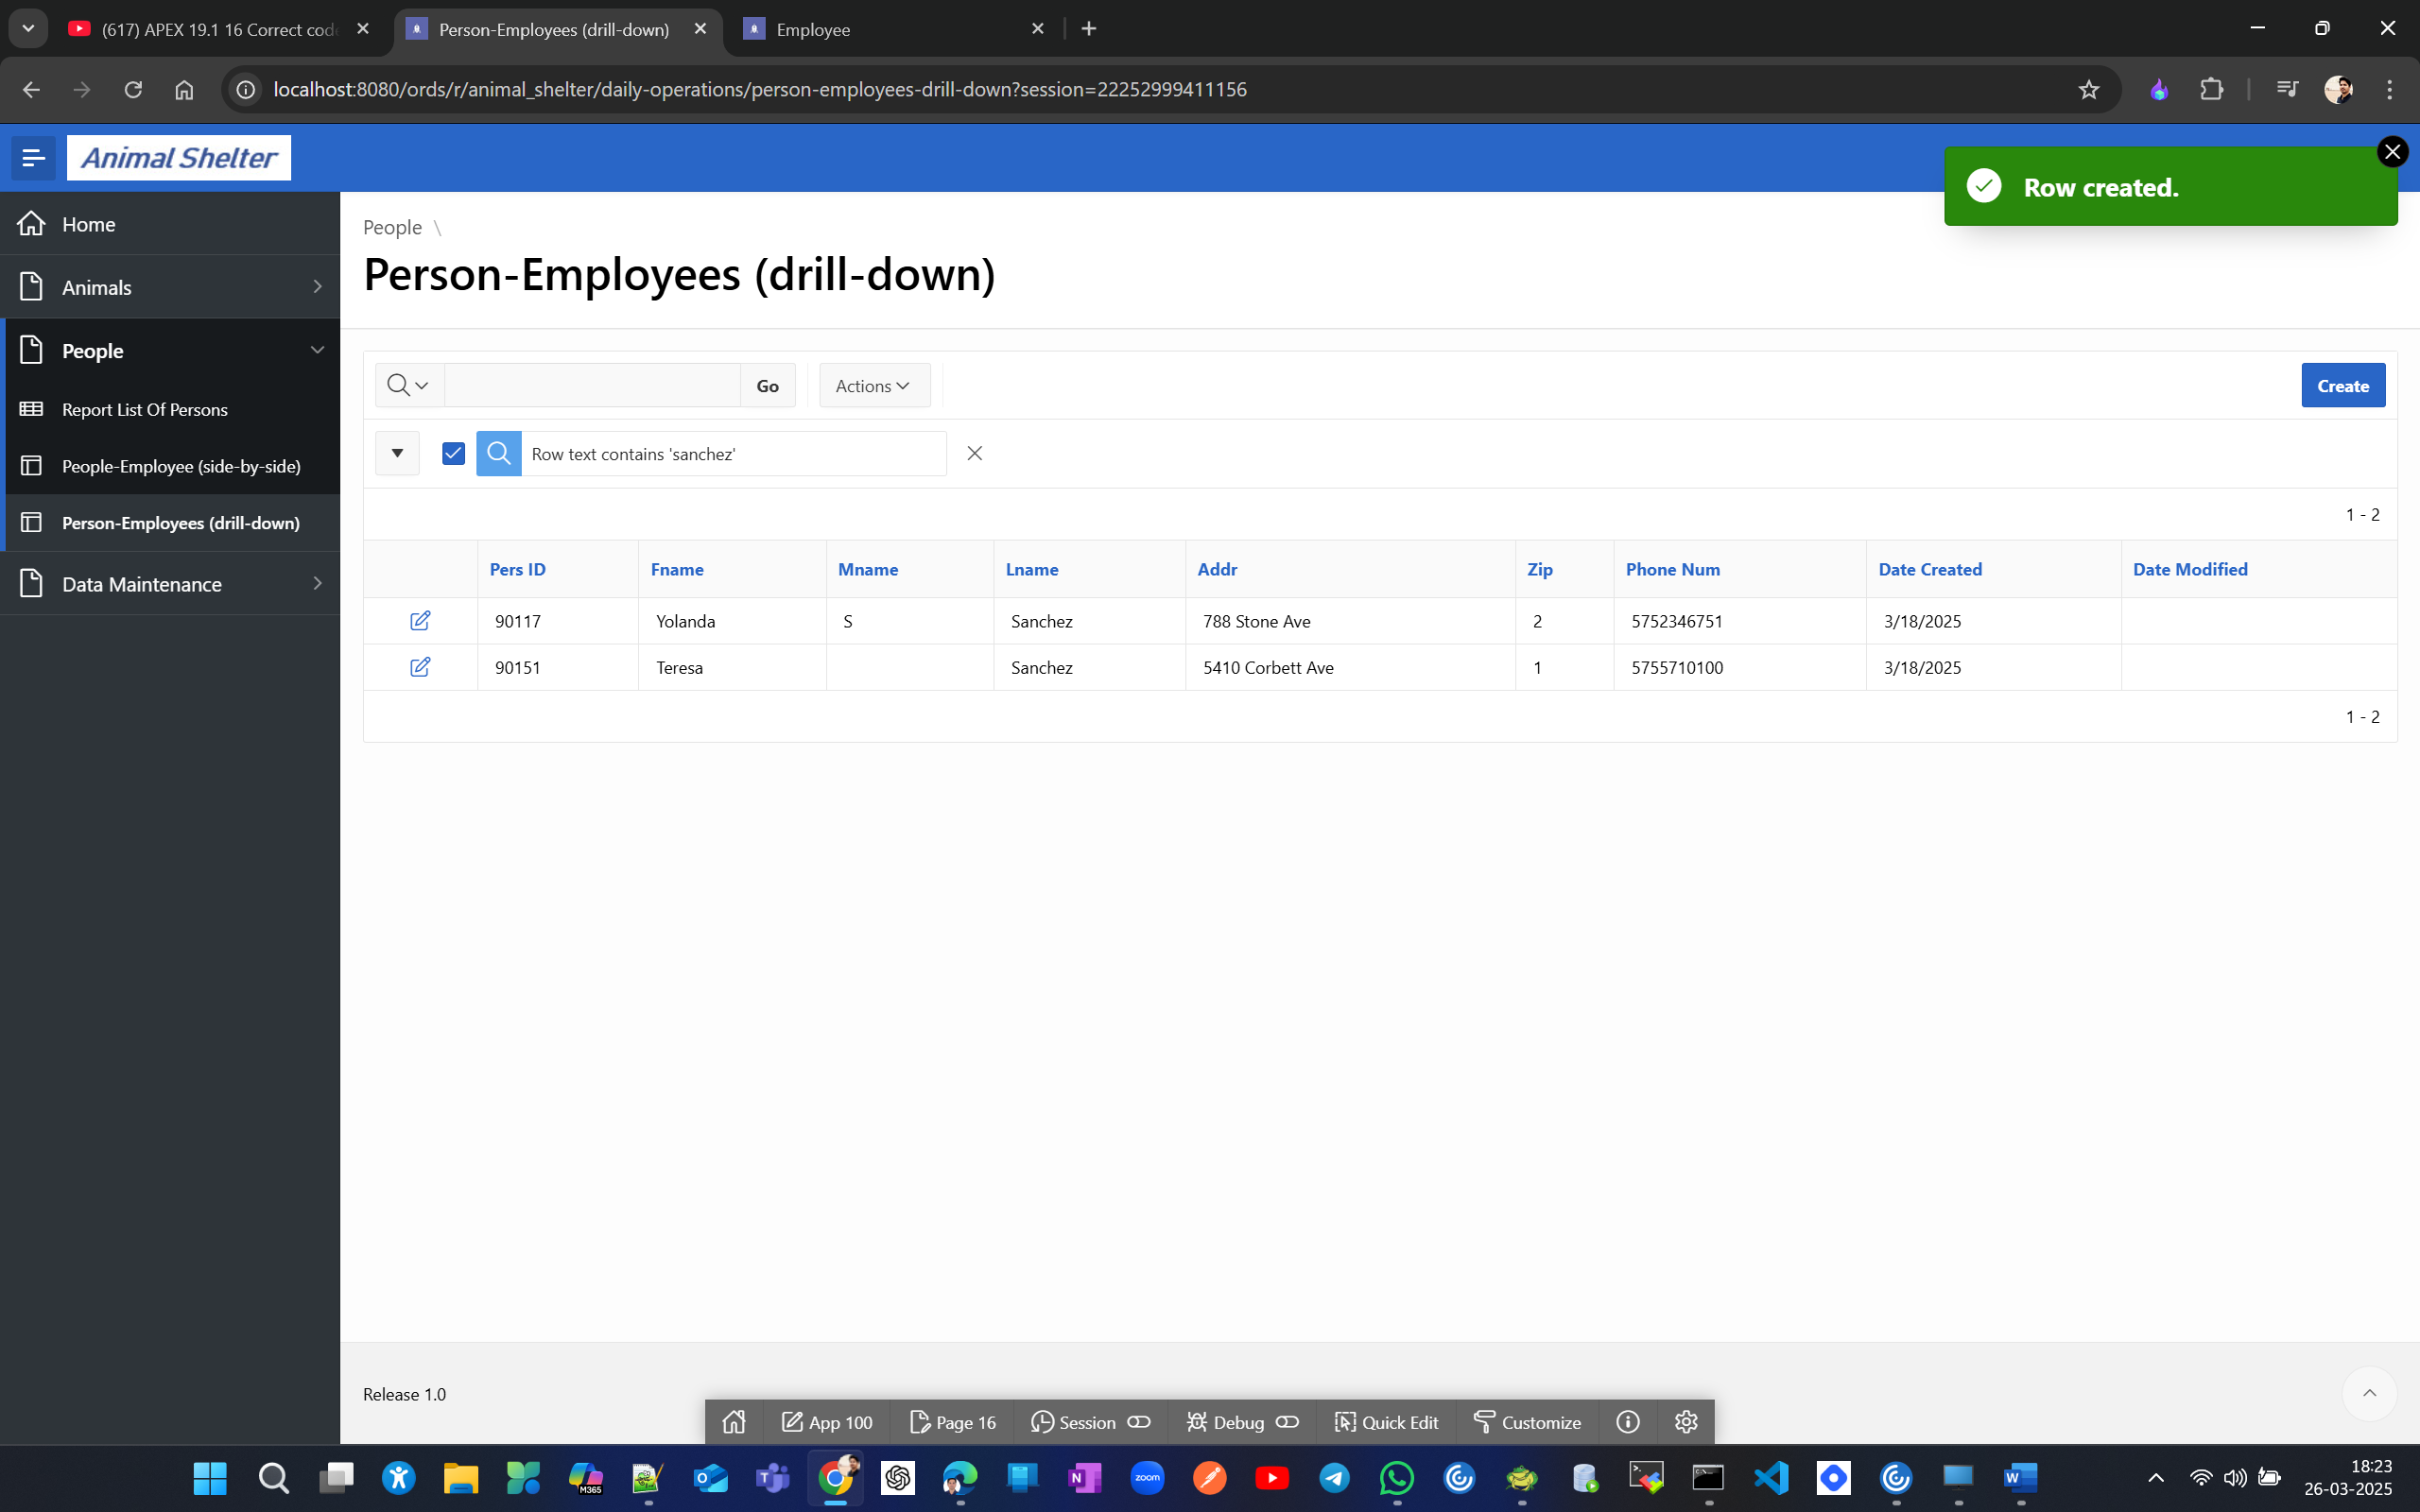
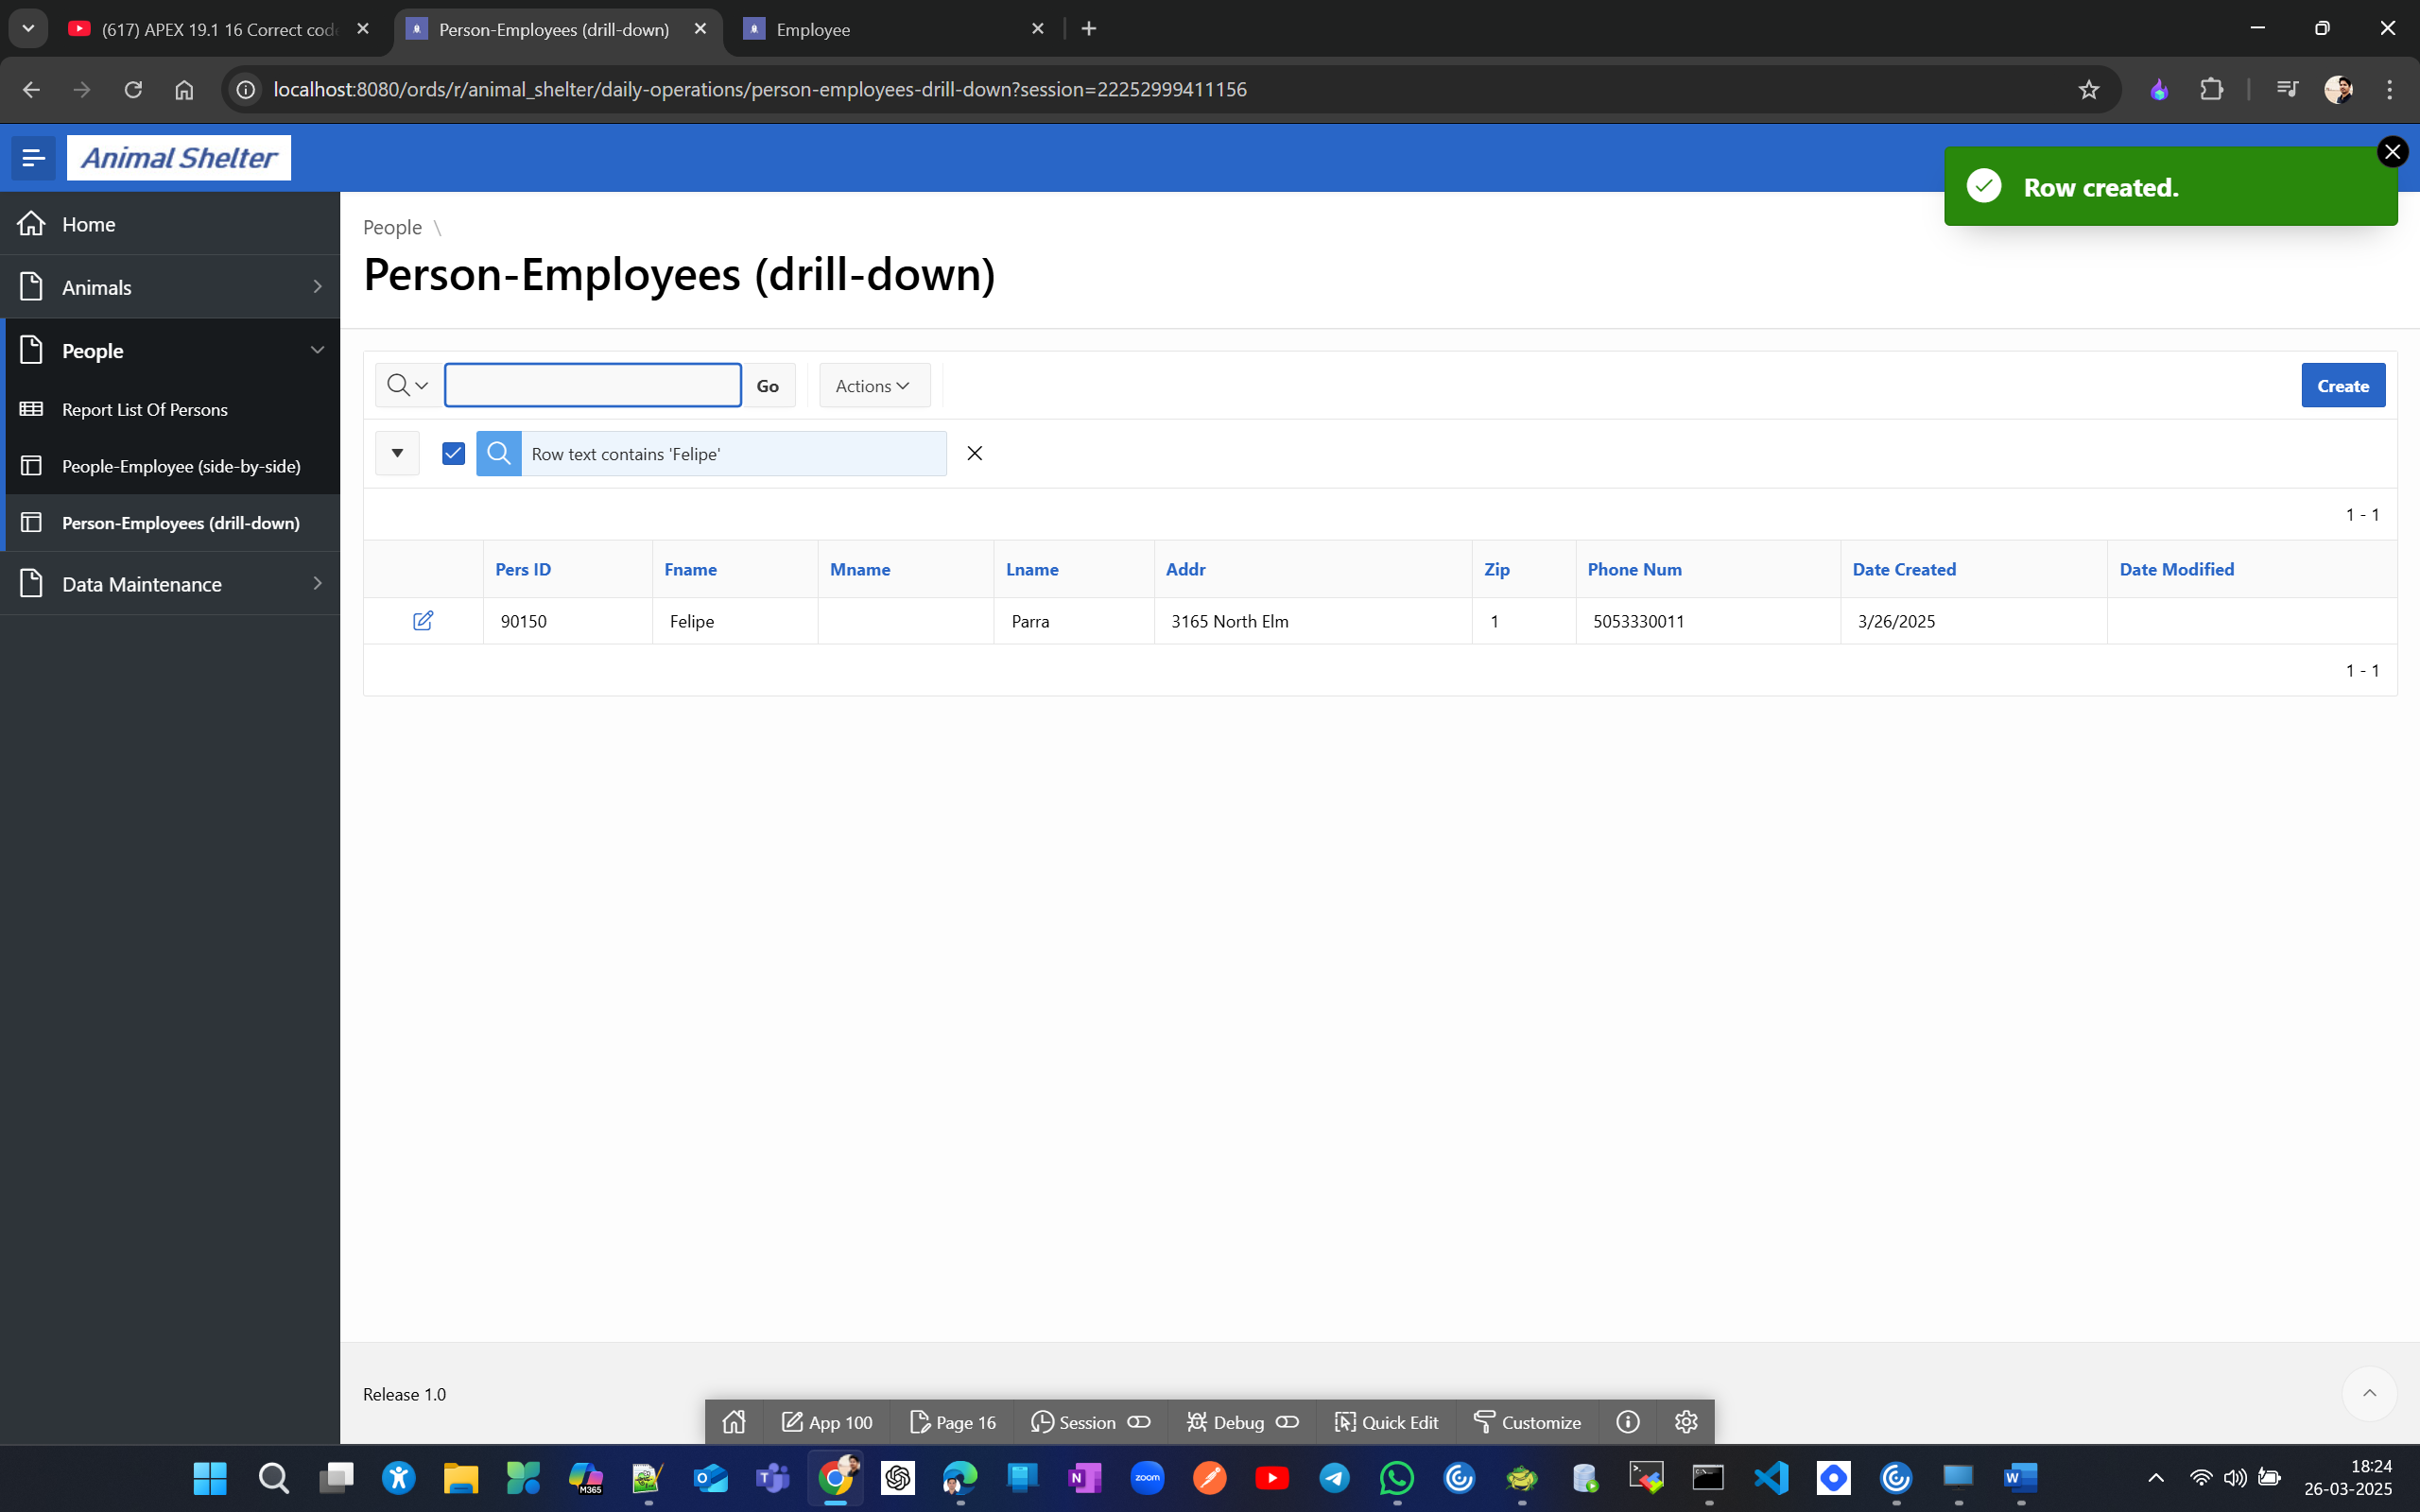
Now lets add a row for Felipe in Employees table
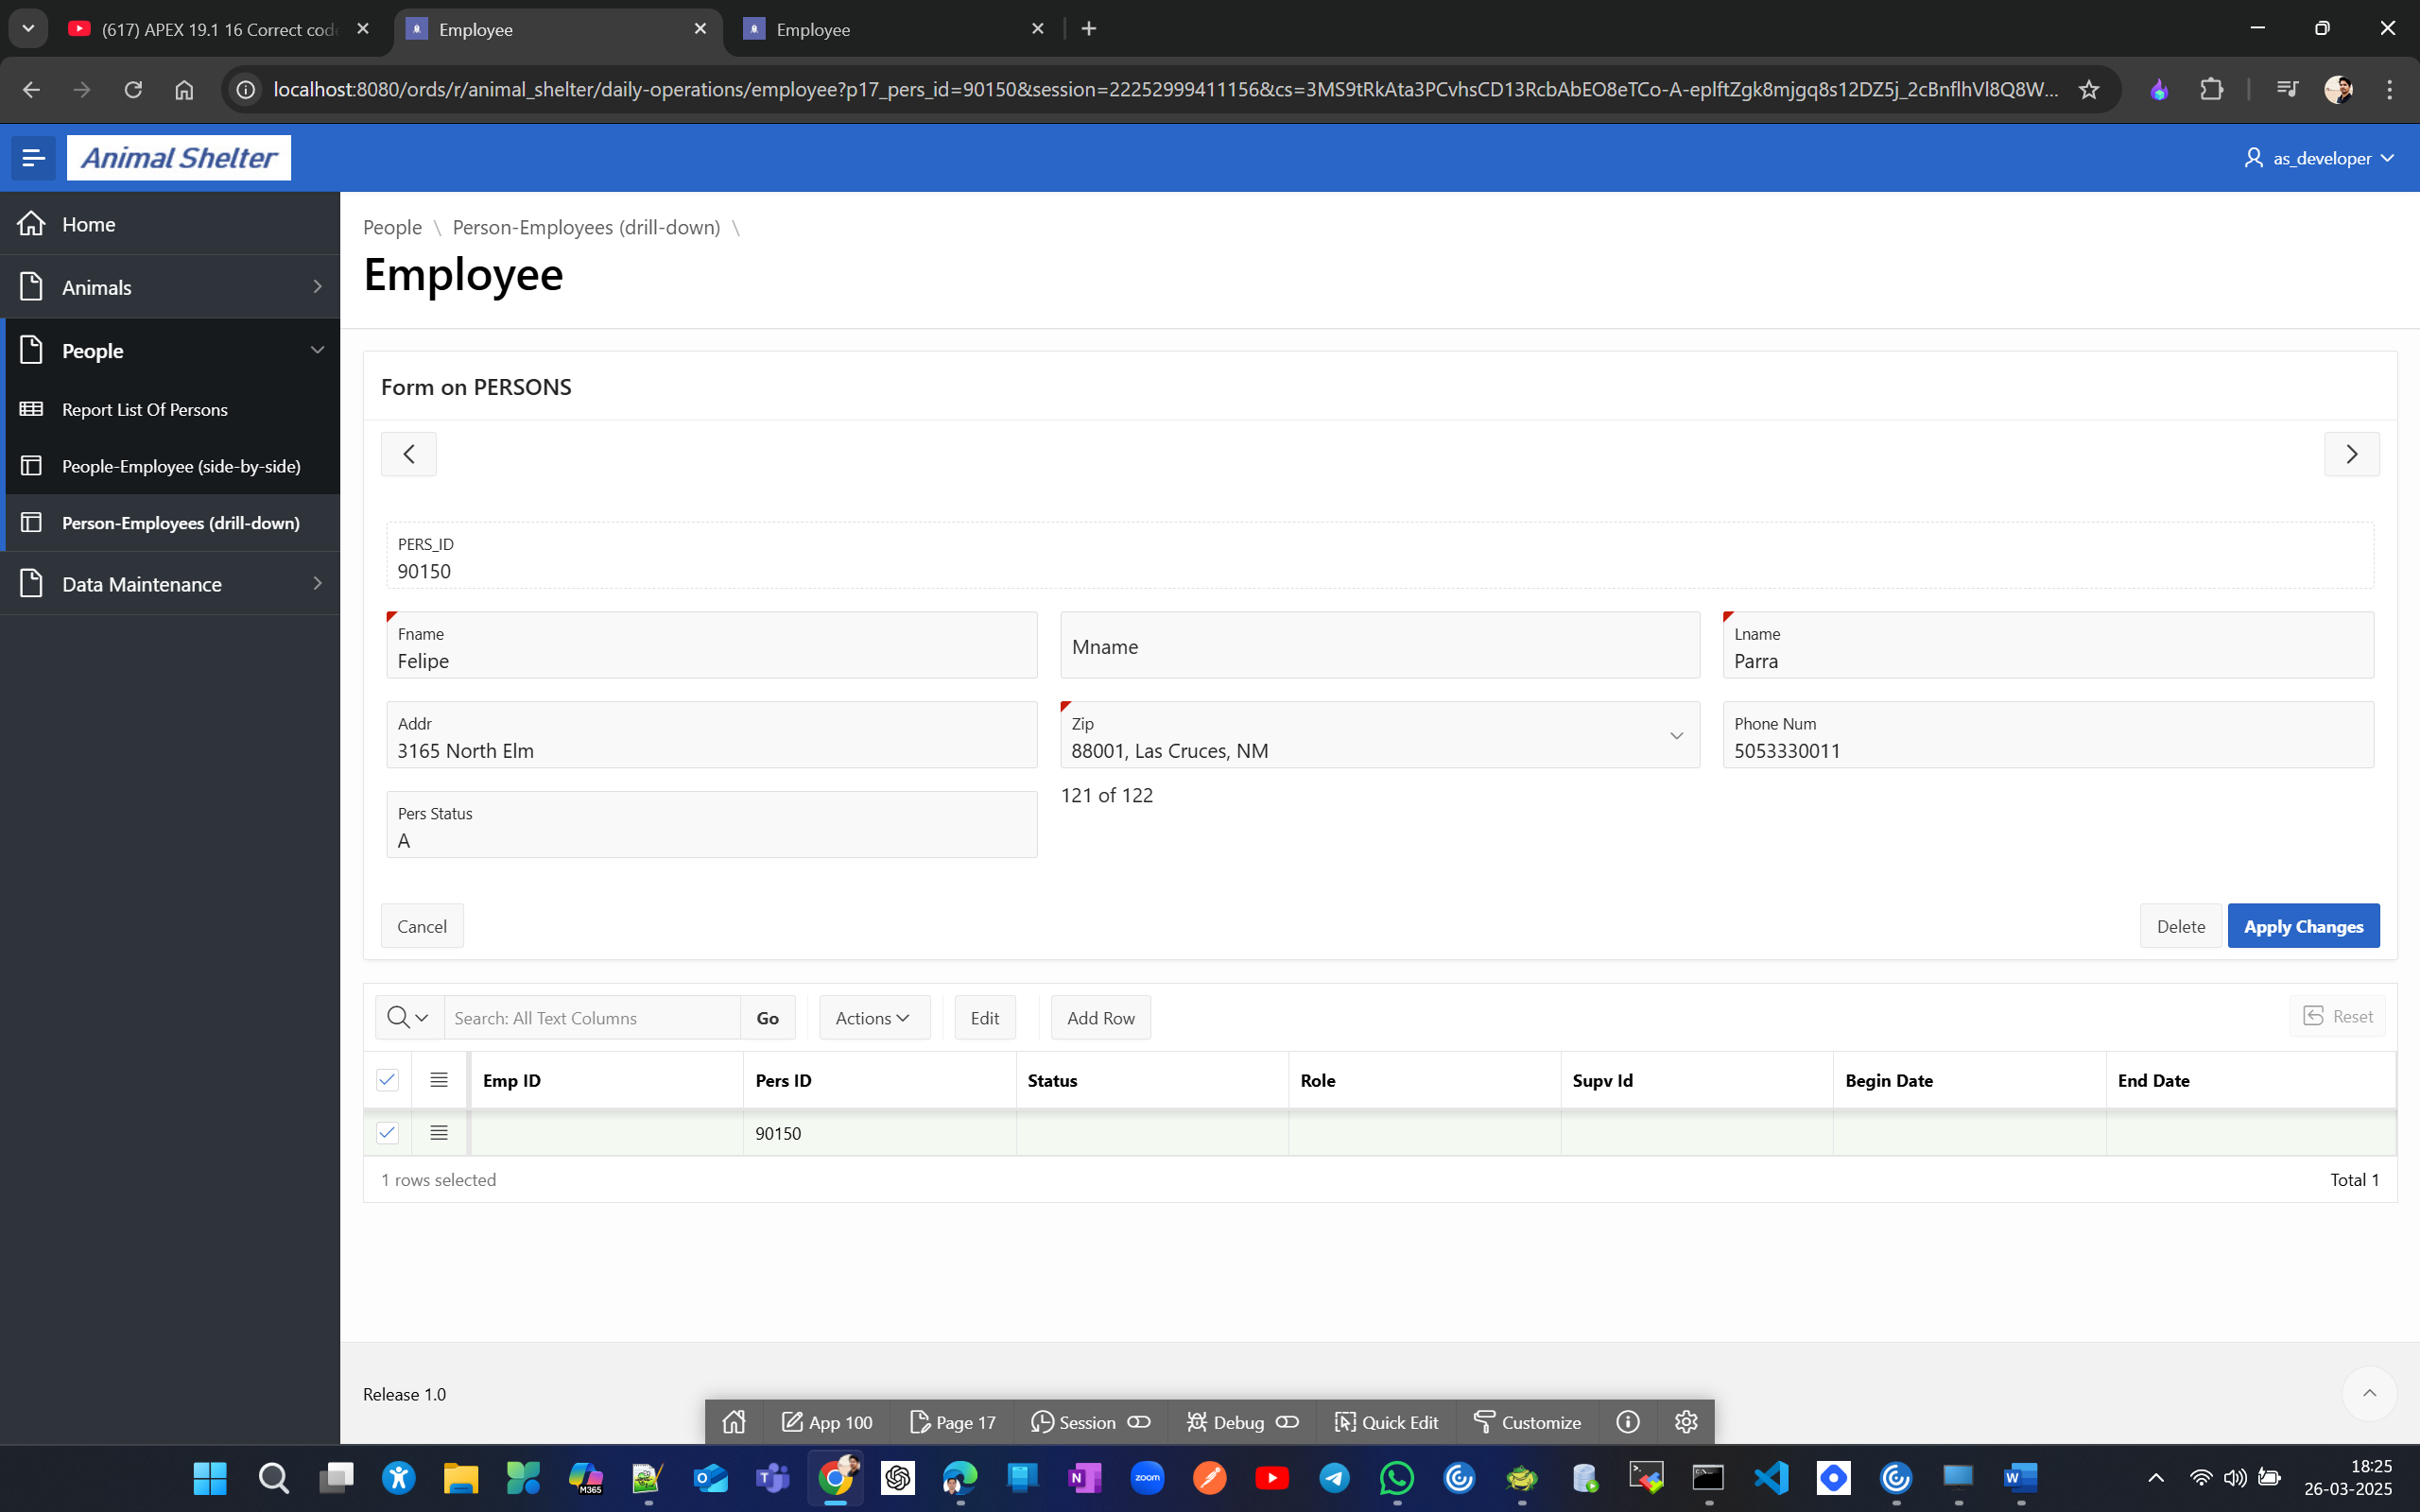
click on Add Row
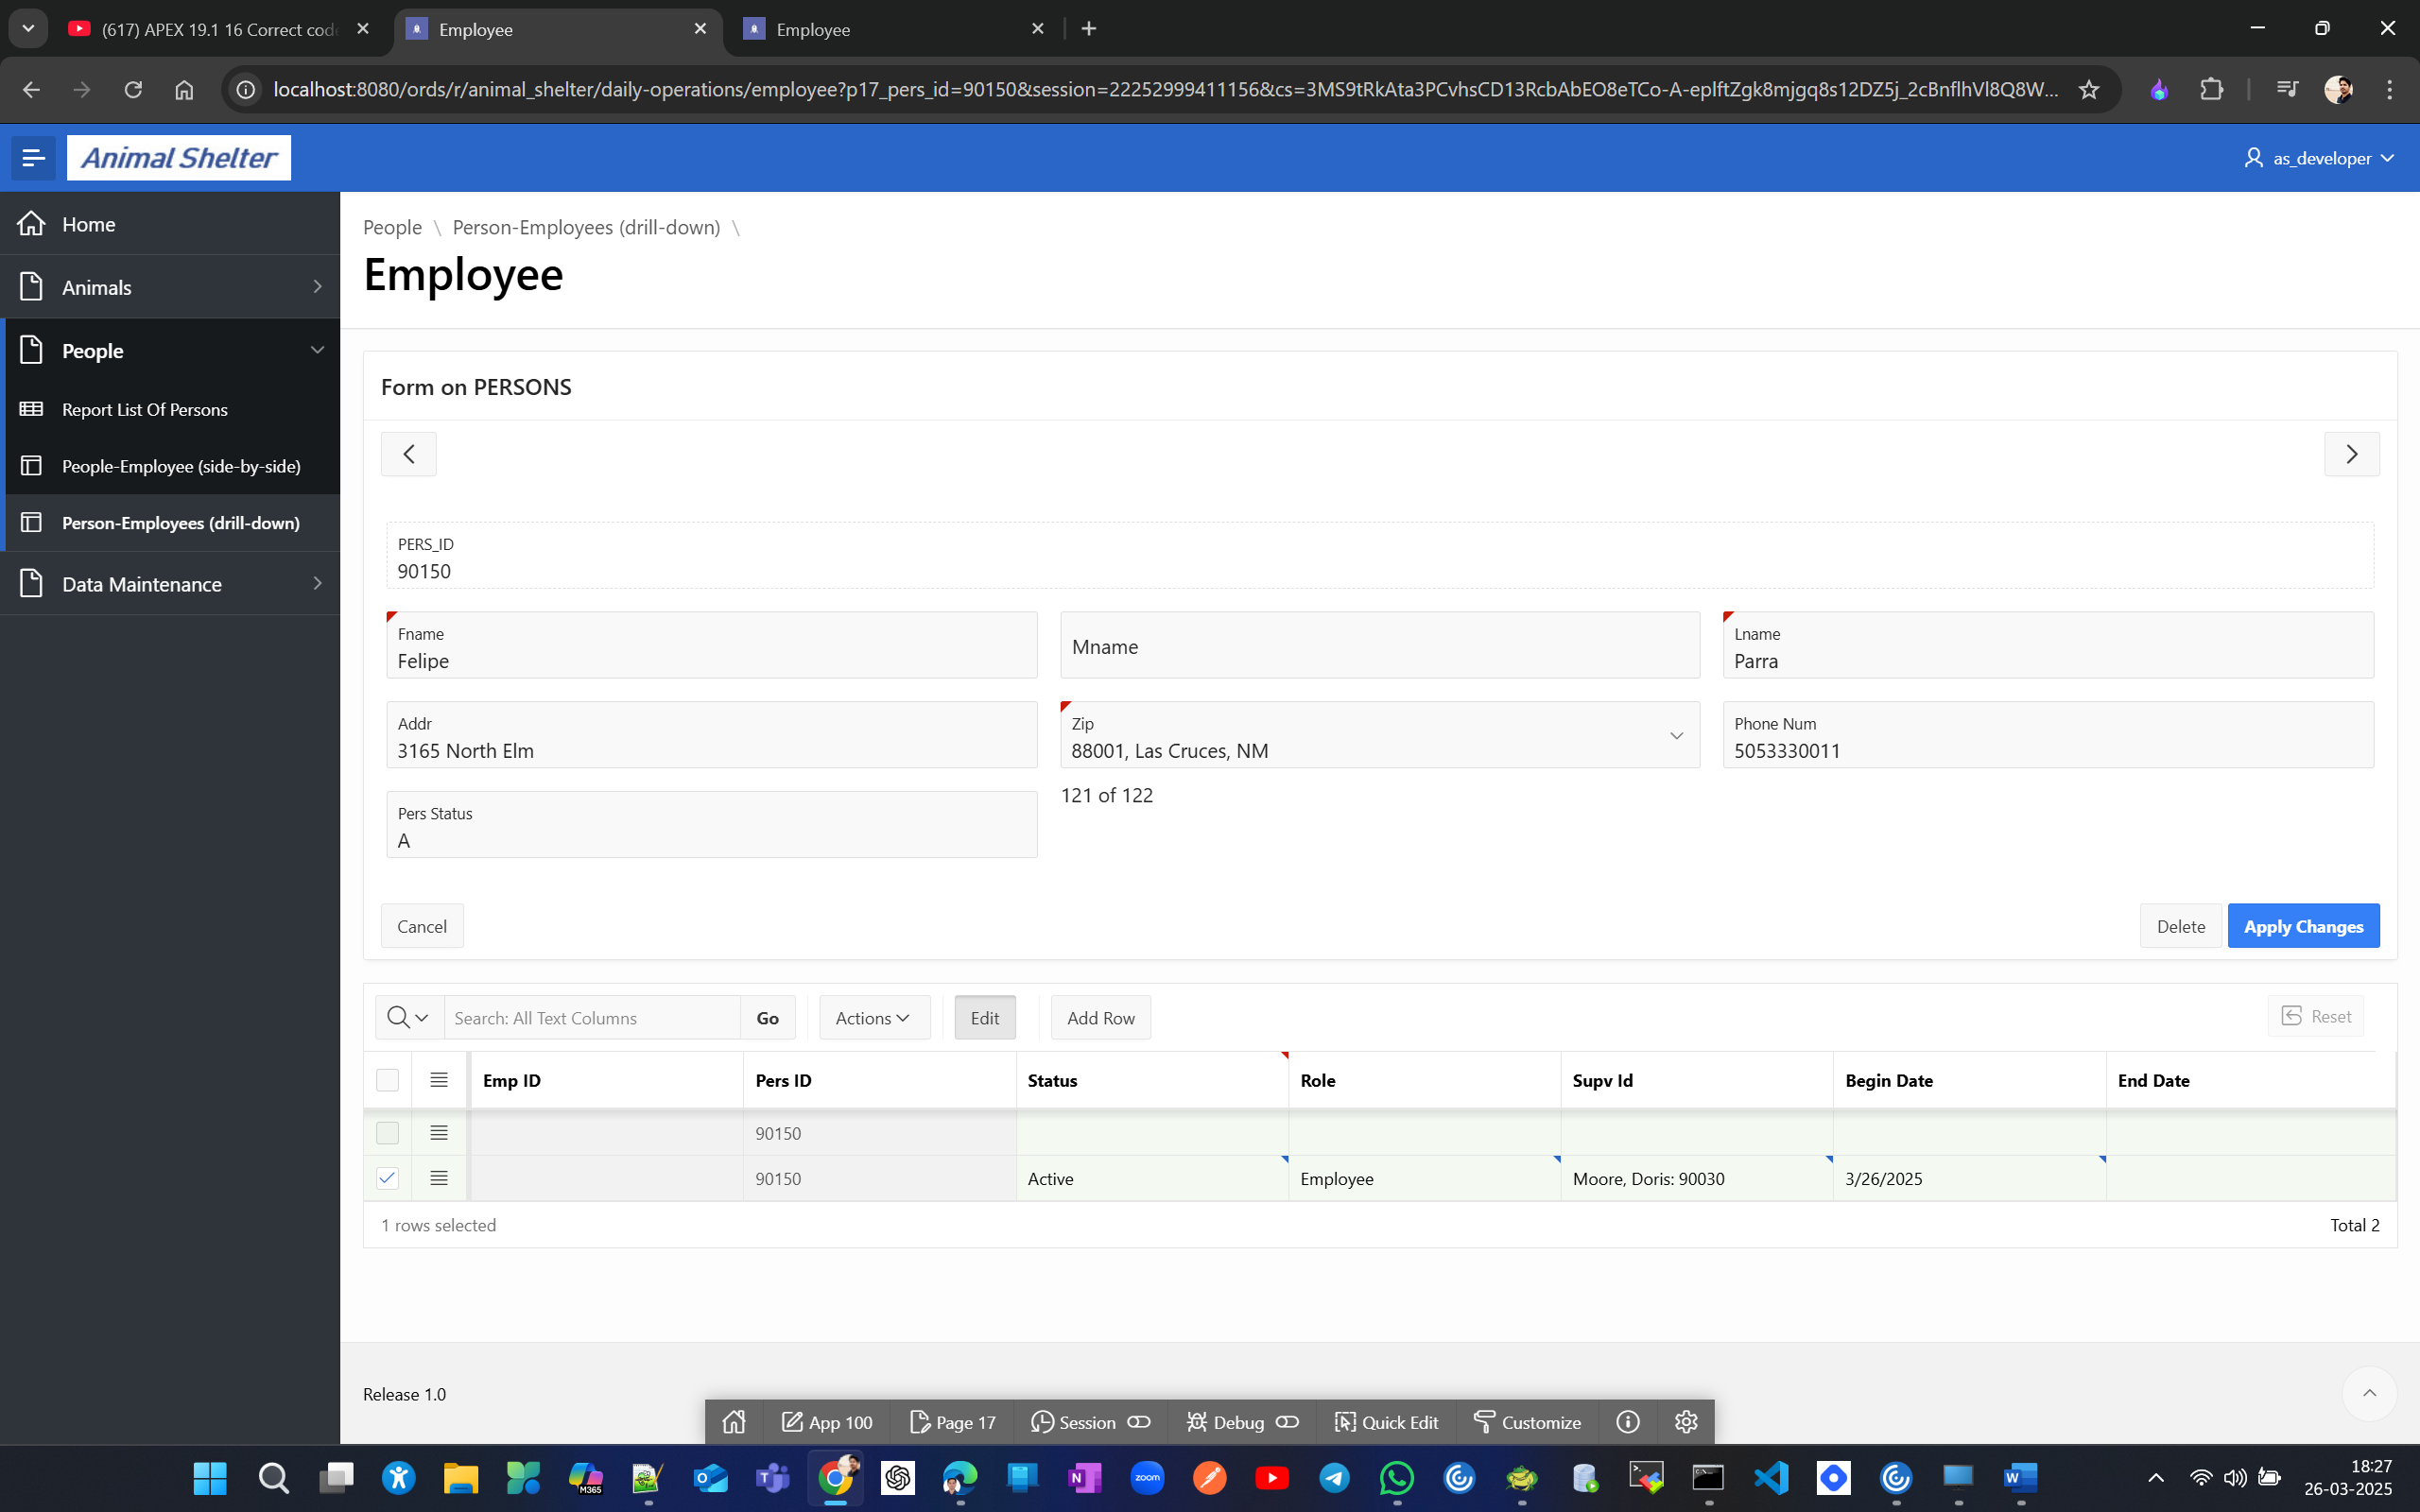
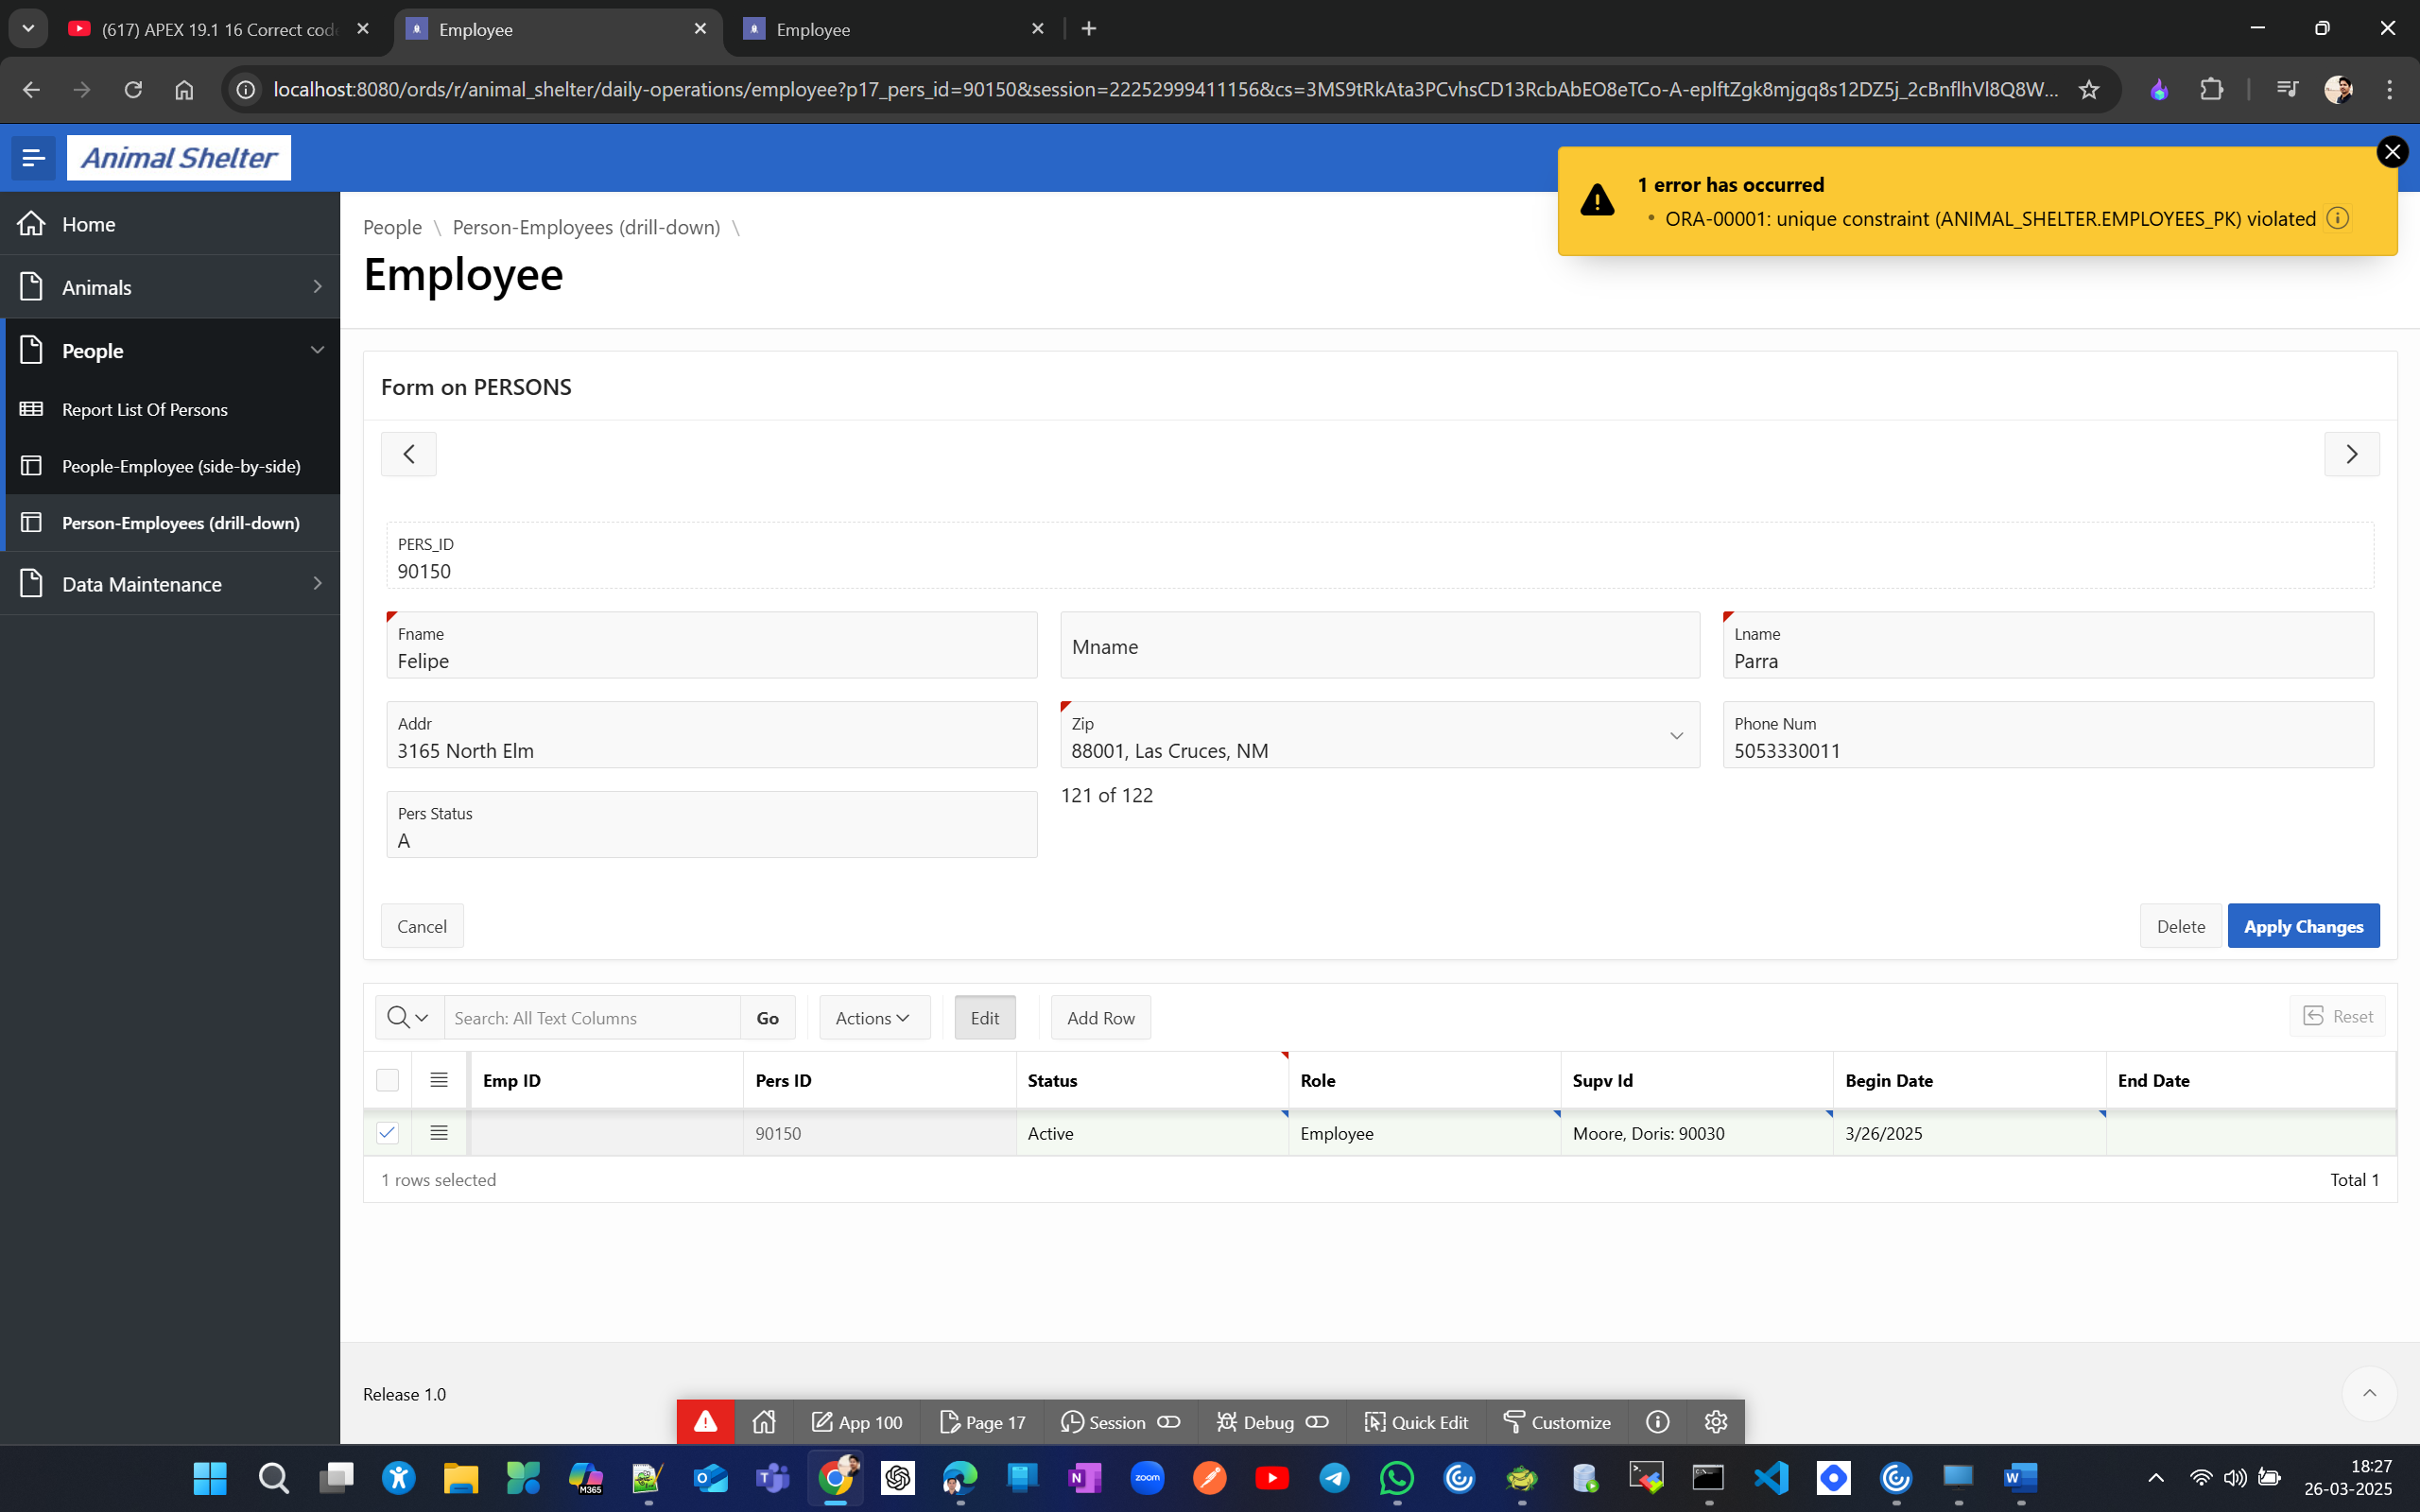
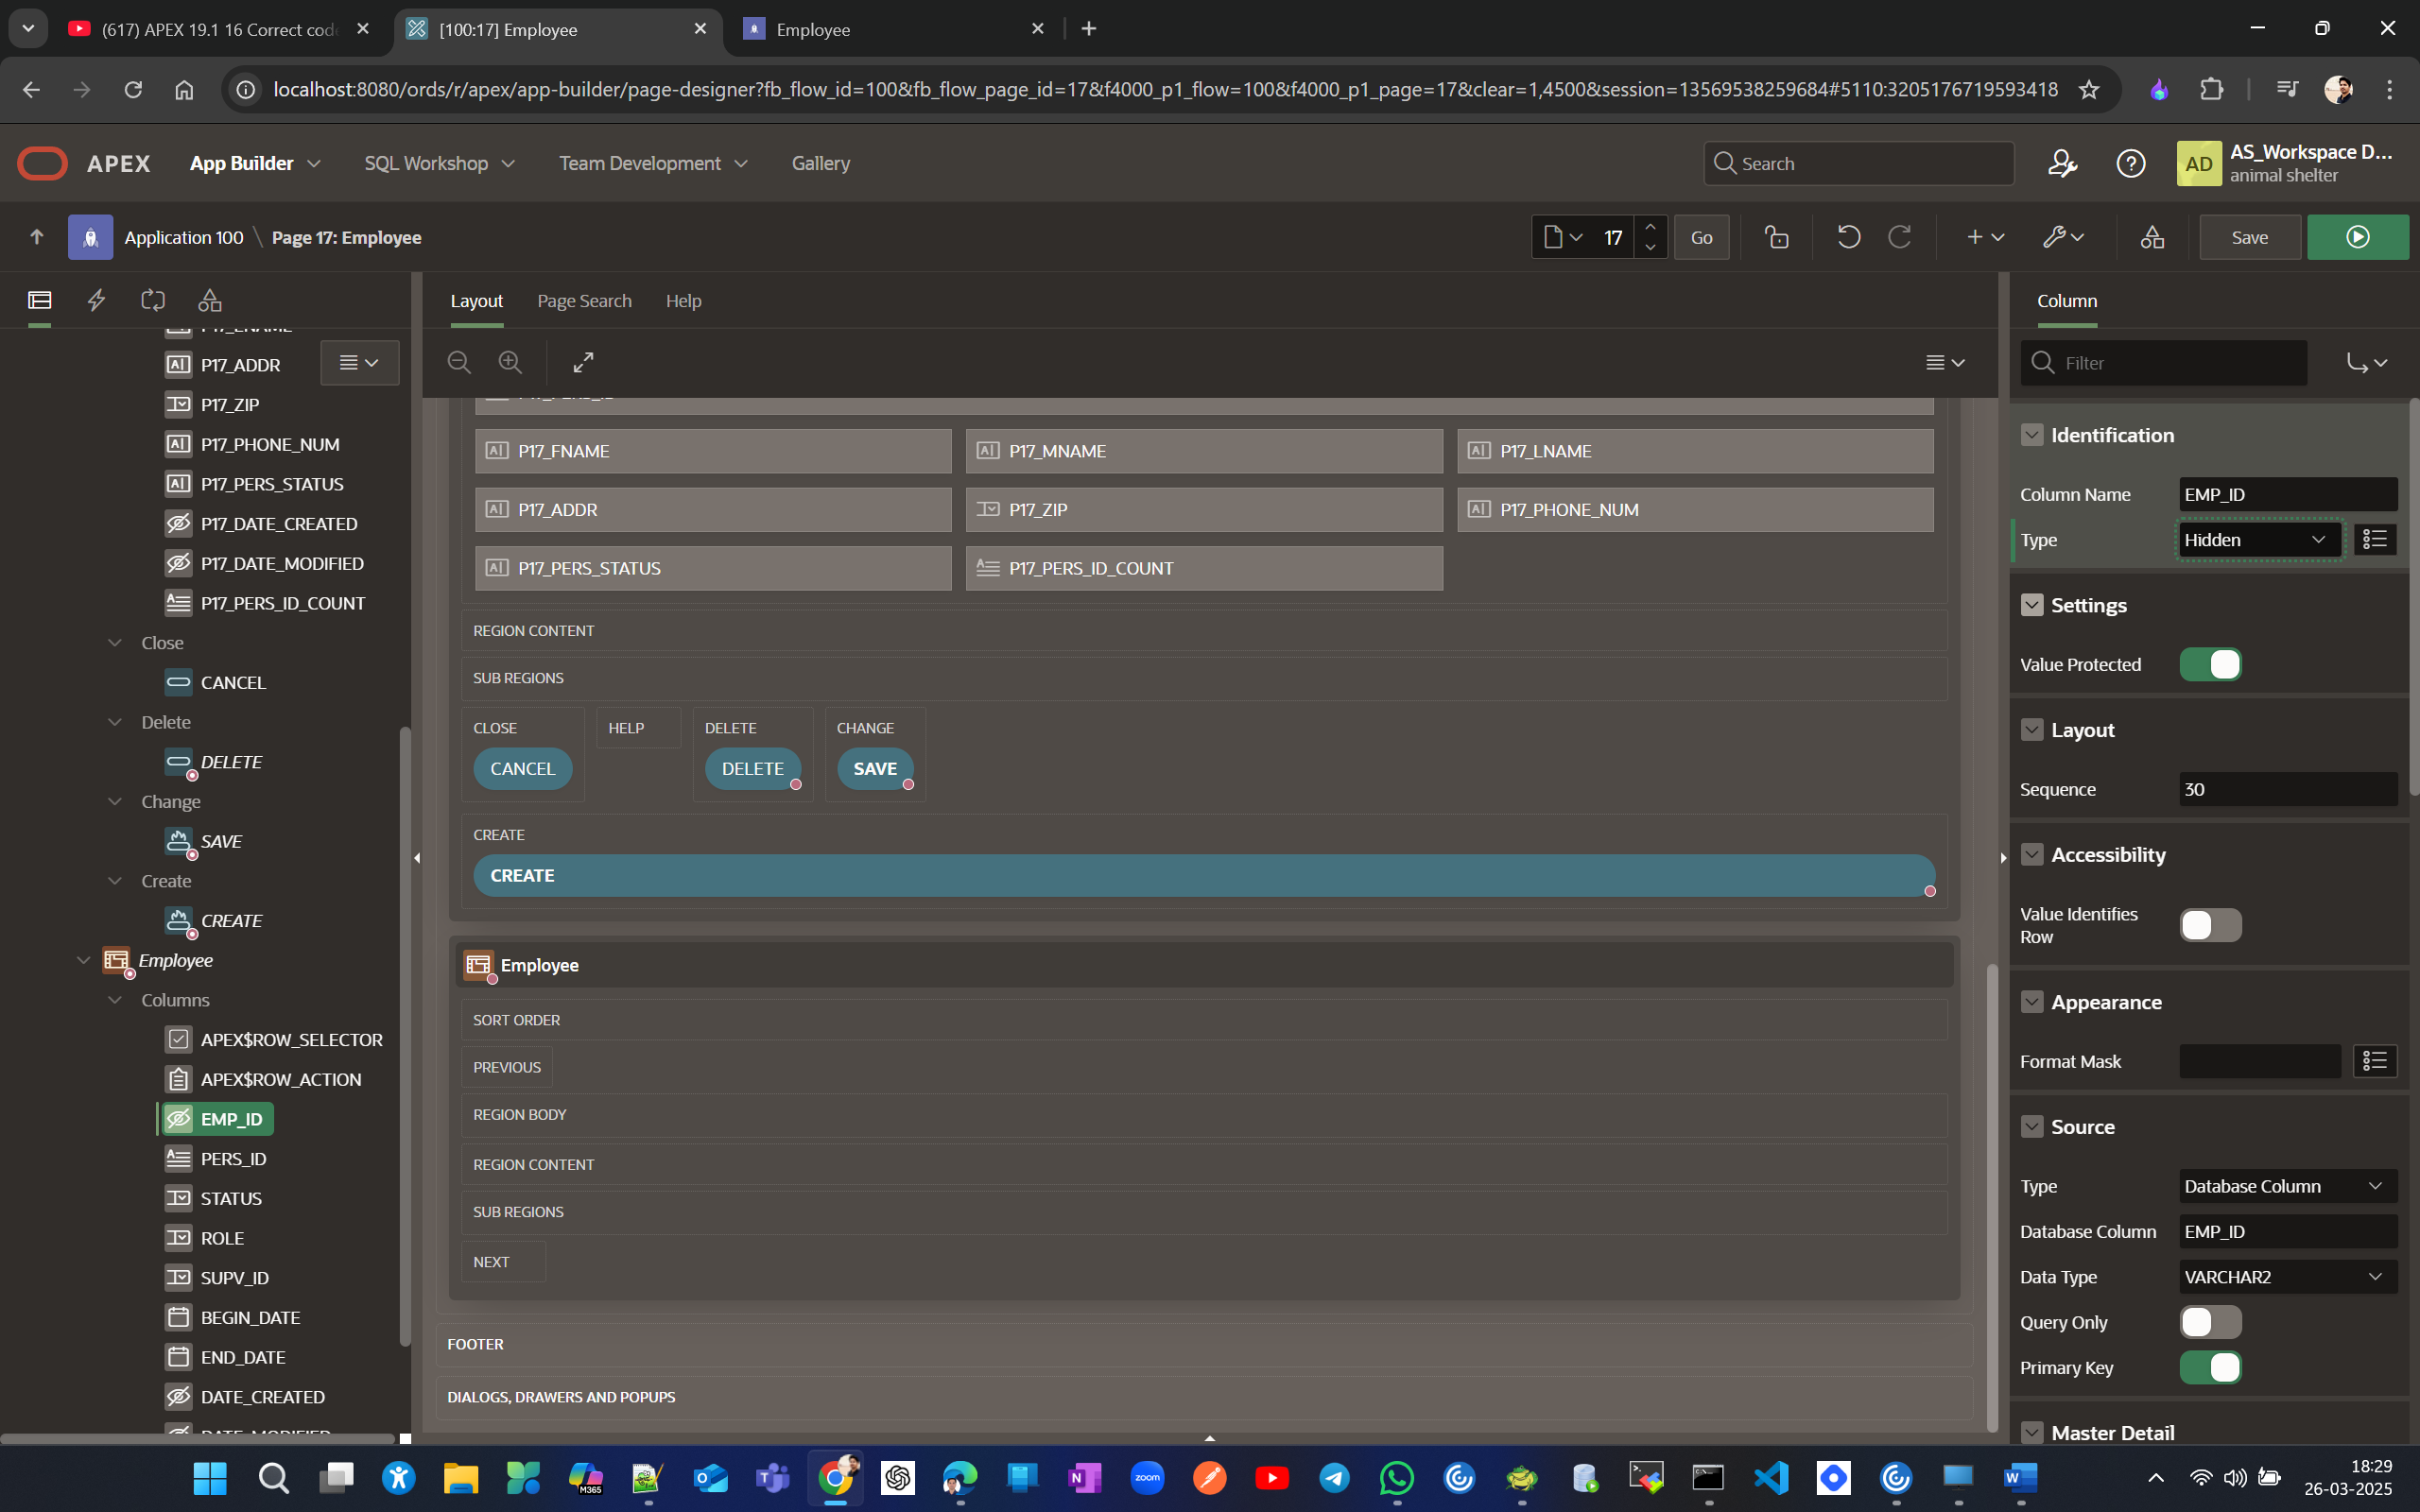
Hide Emp ID
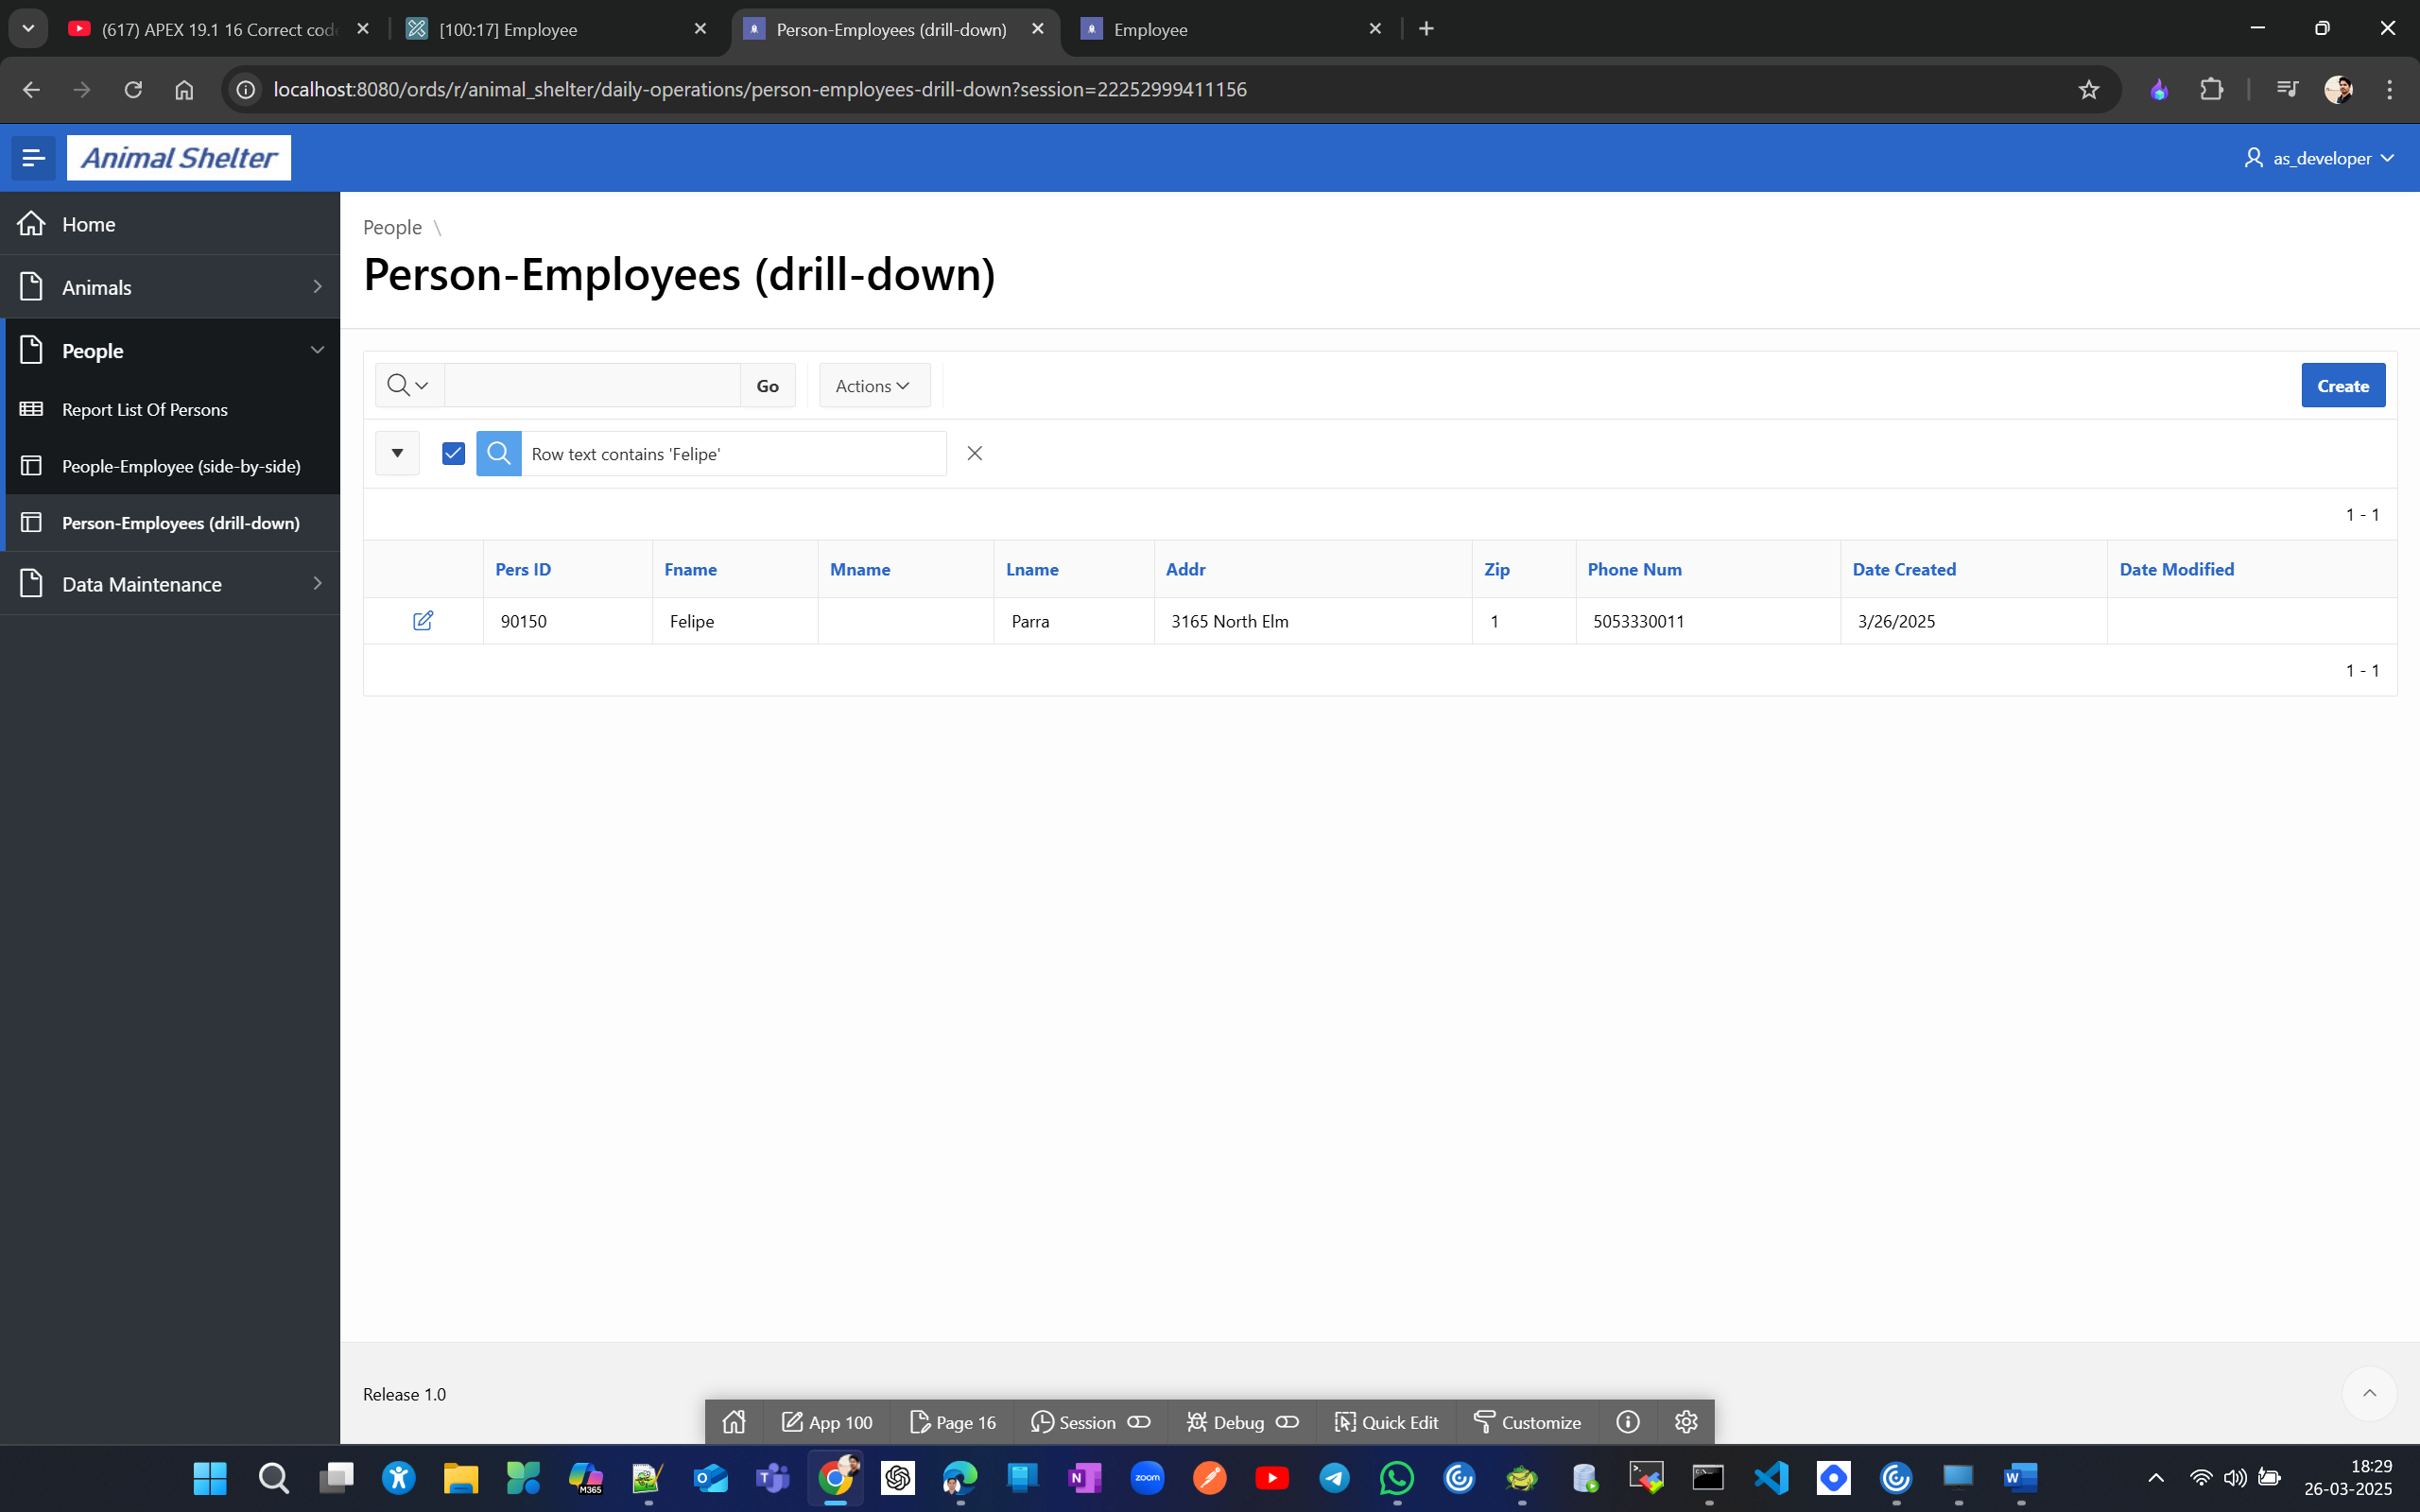
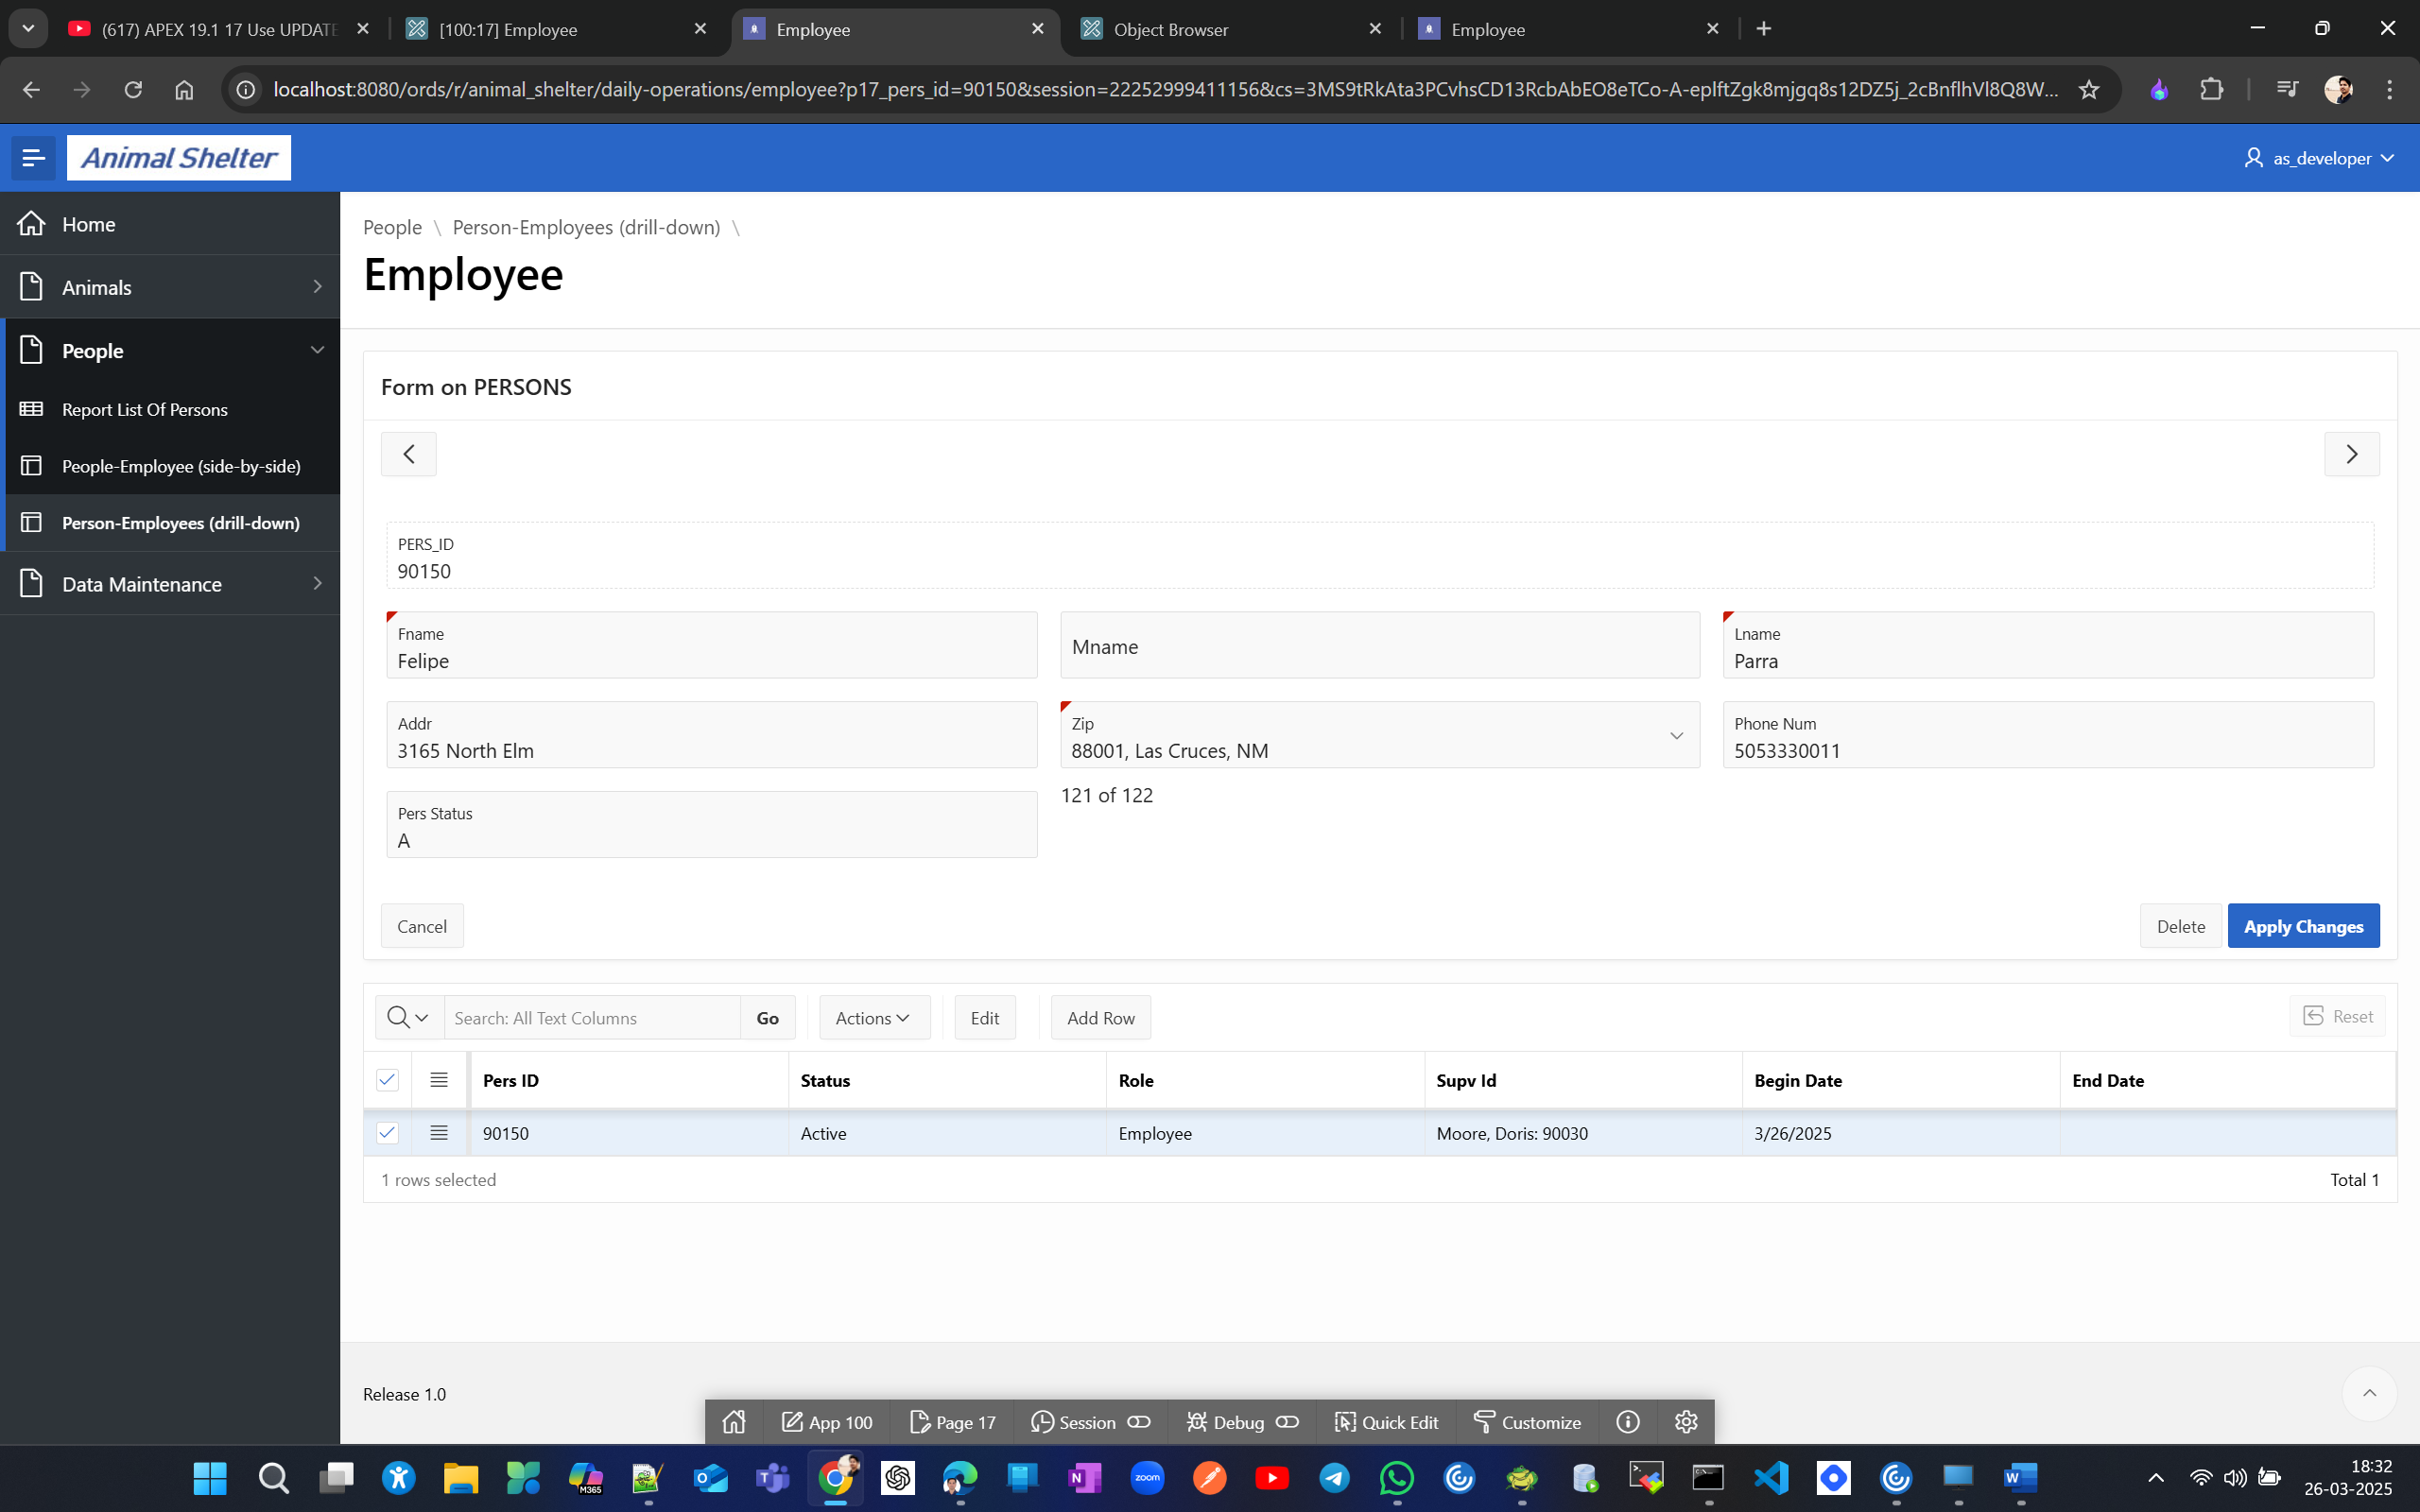
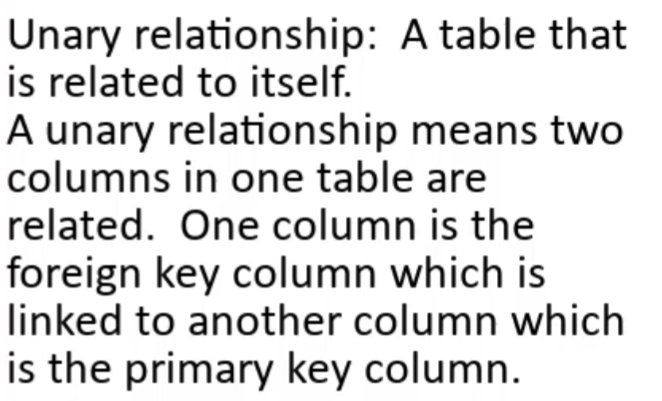
Use UPDATE to clean data. Add a unary relationship to a table. Remove a column.
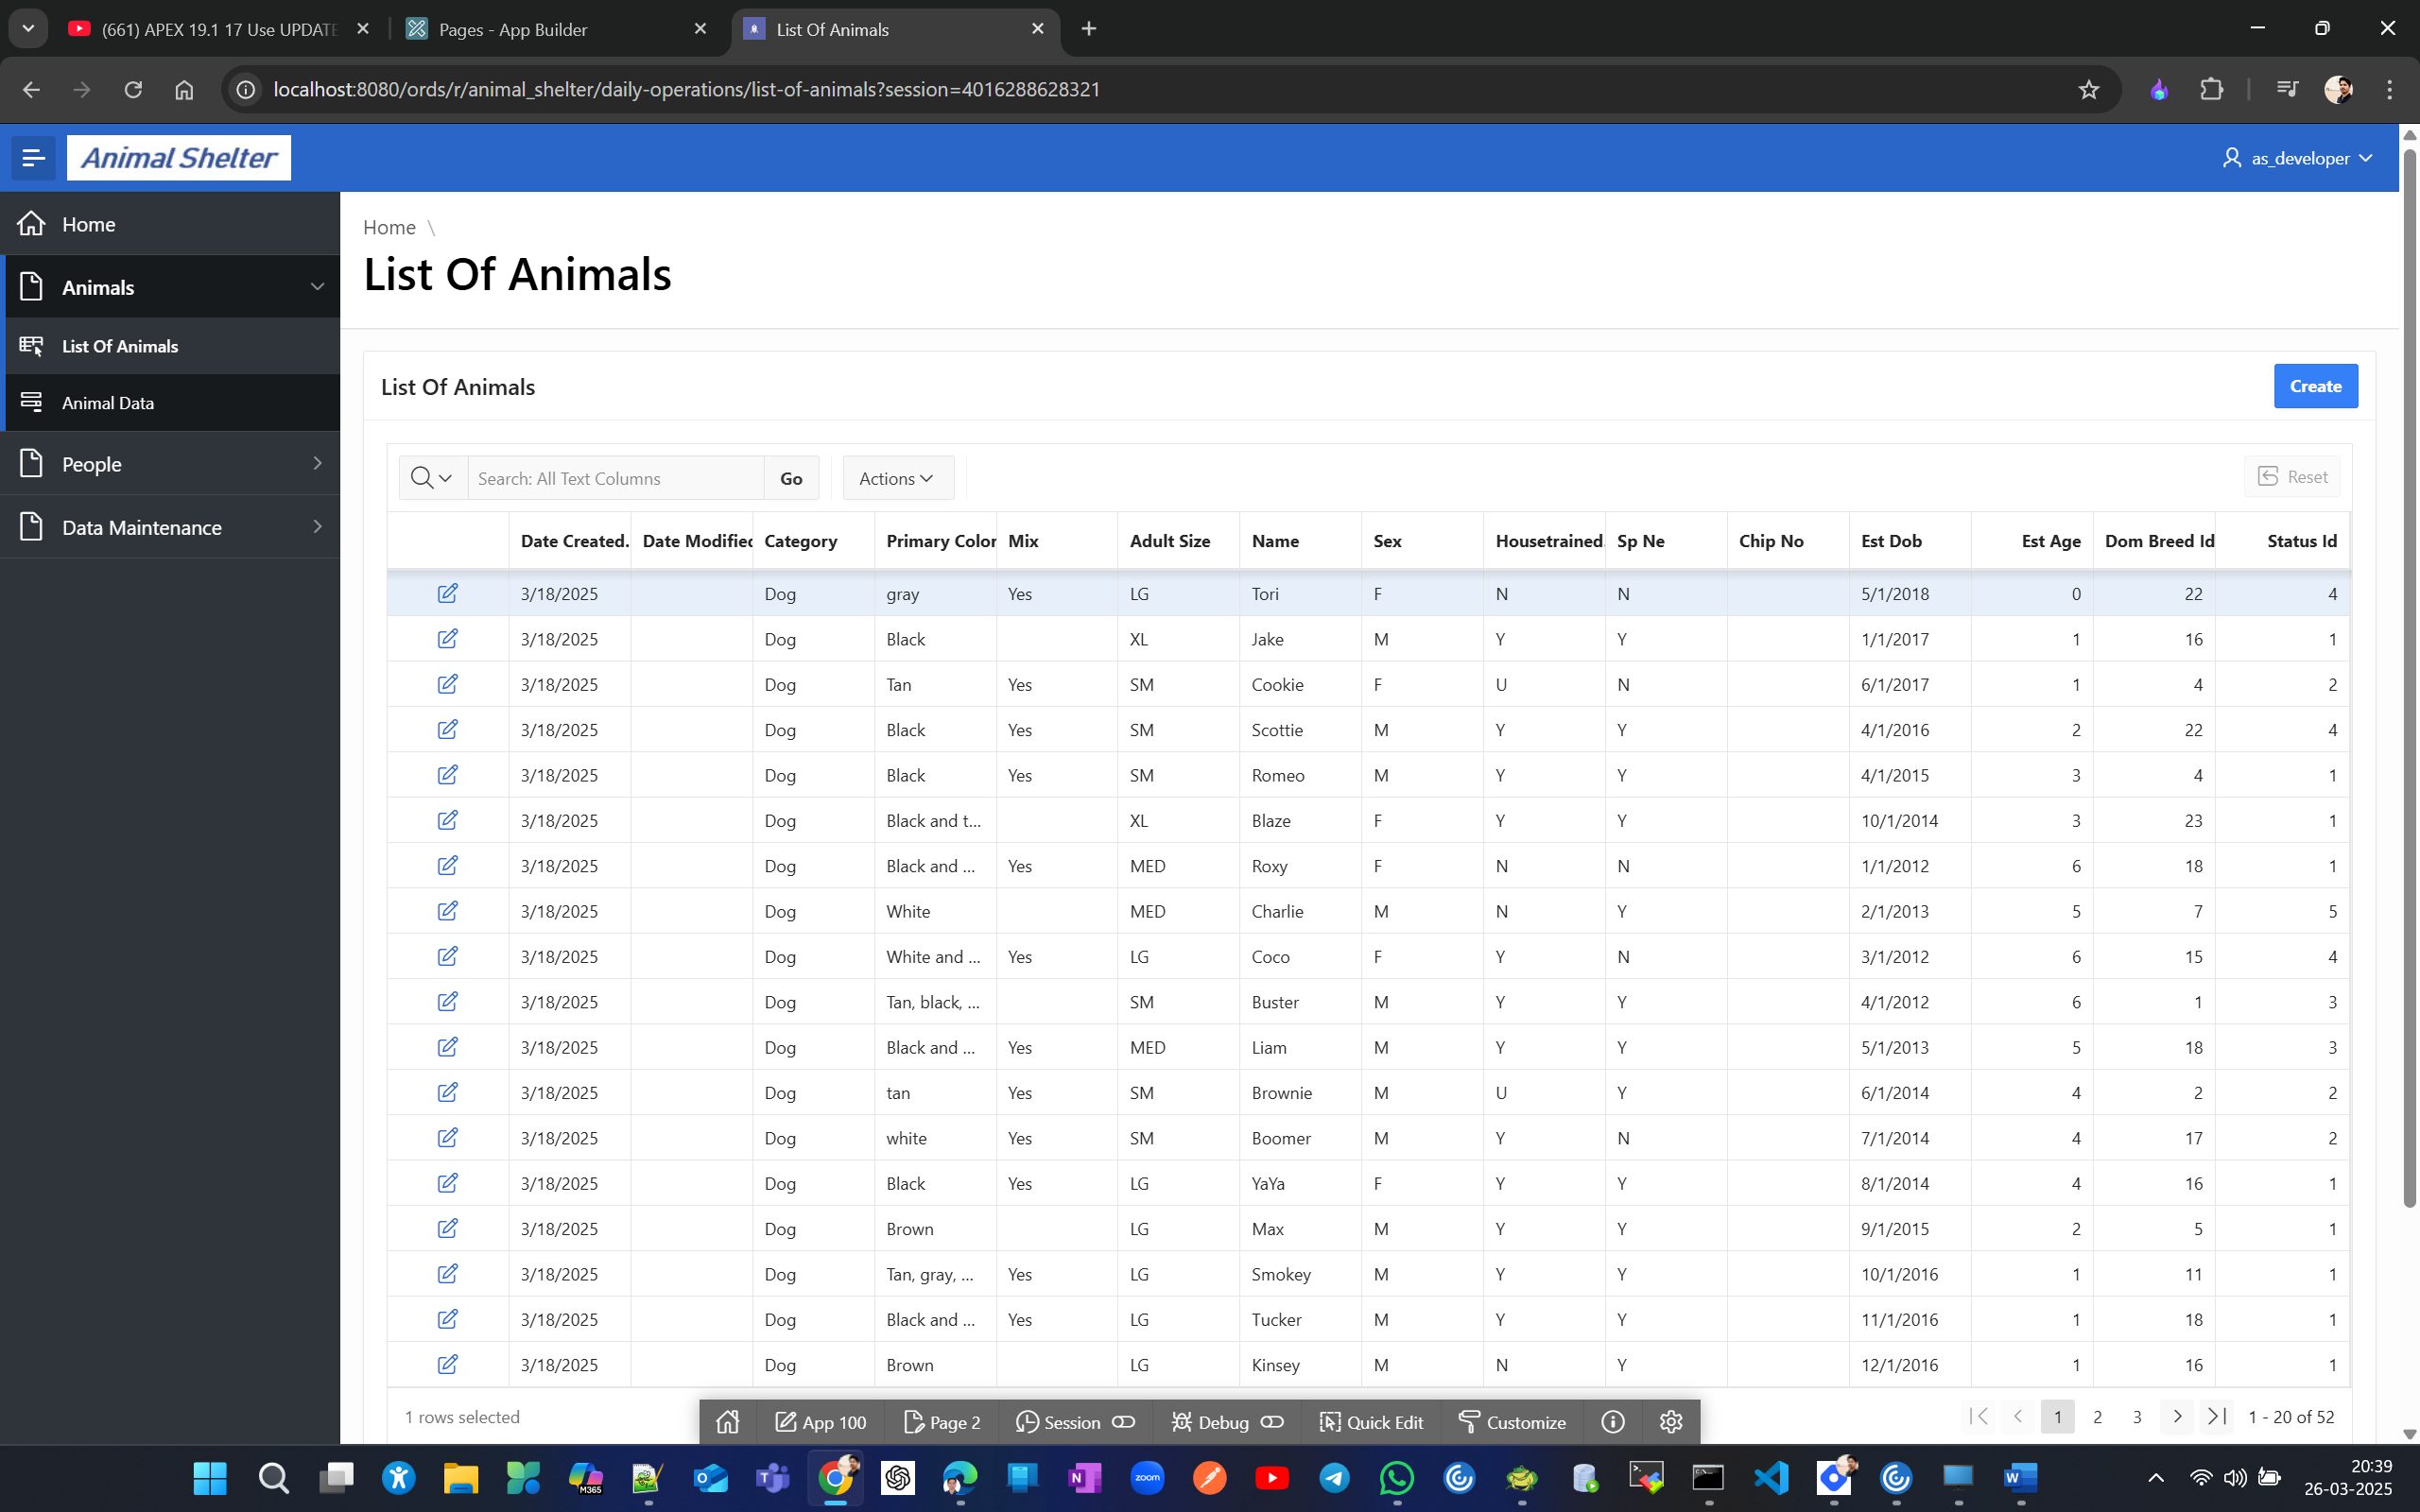
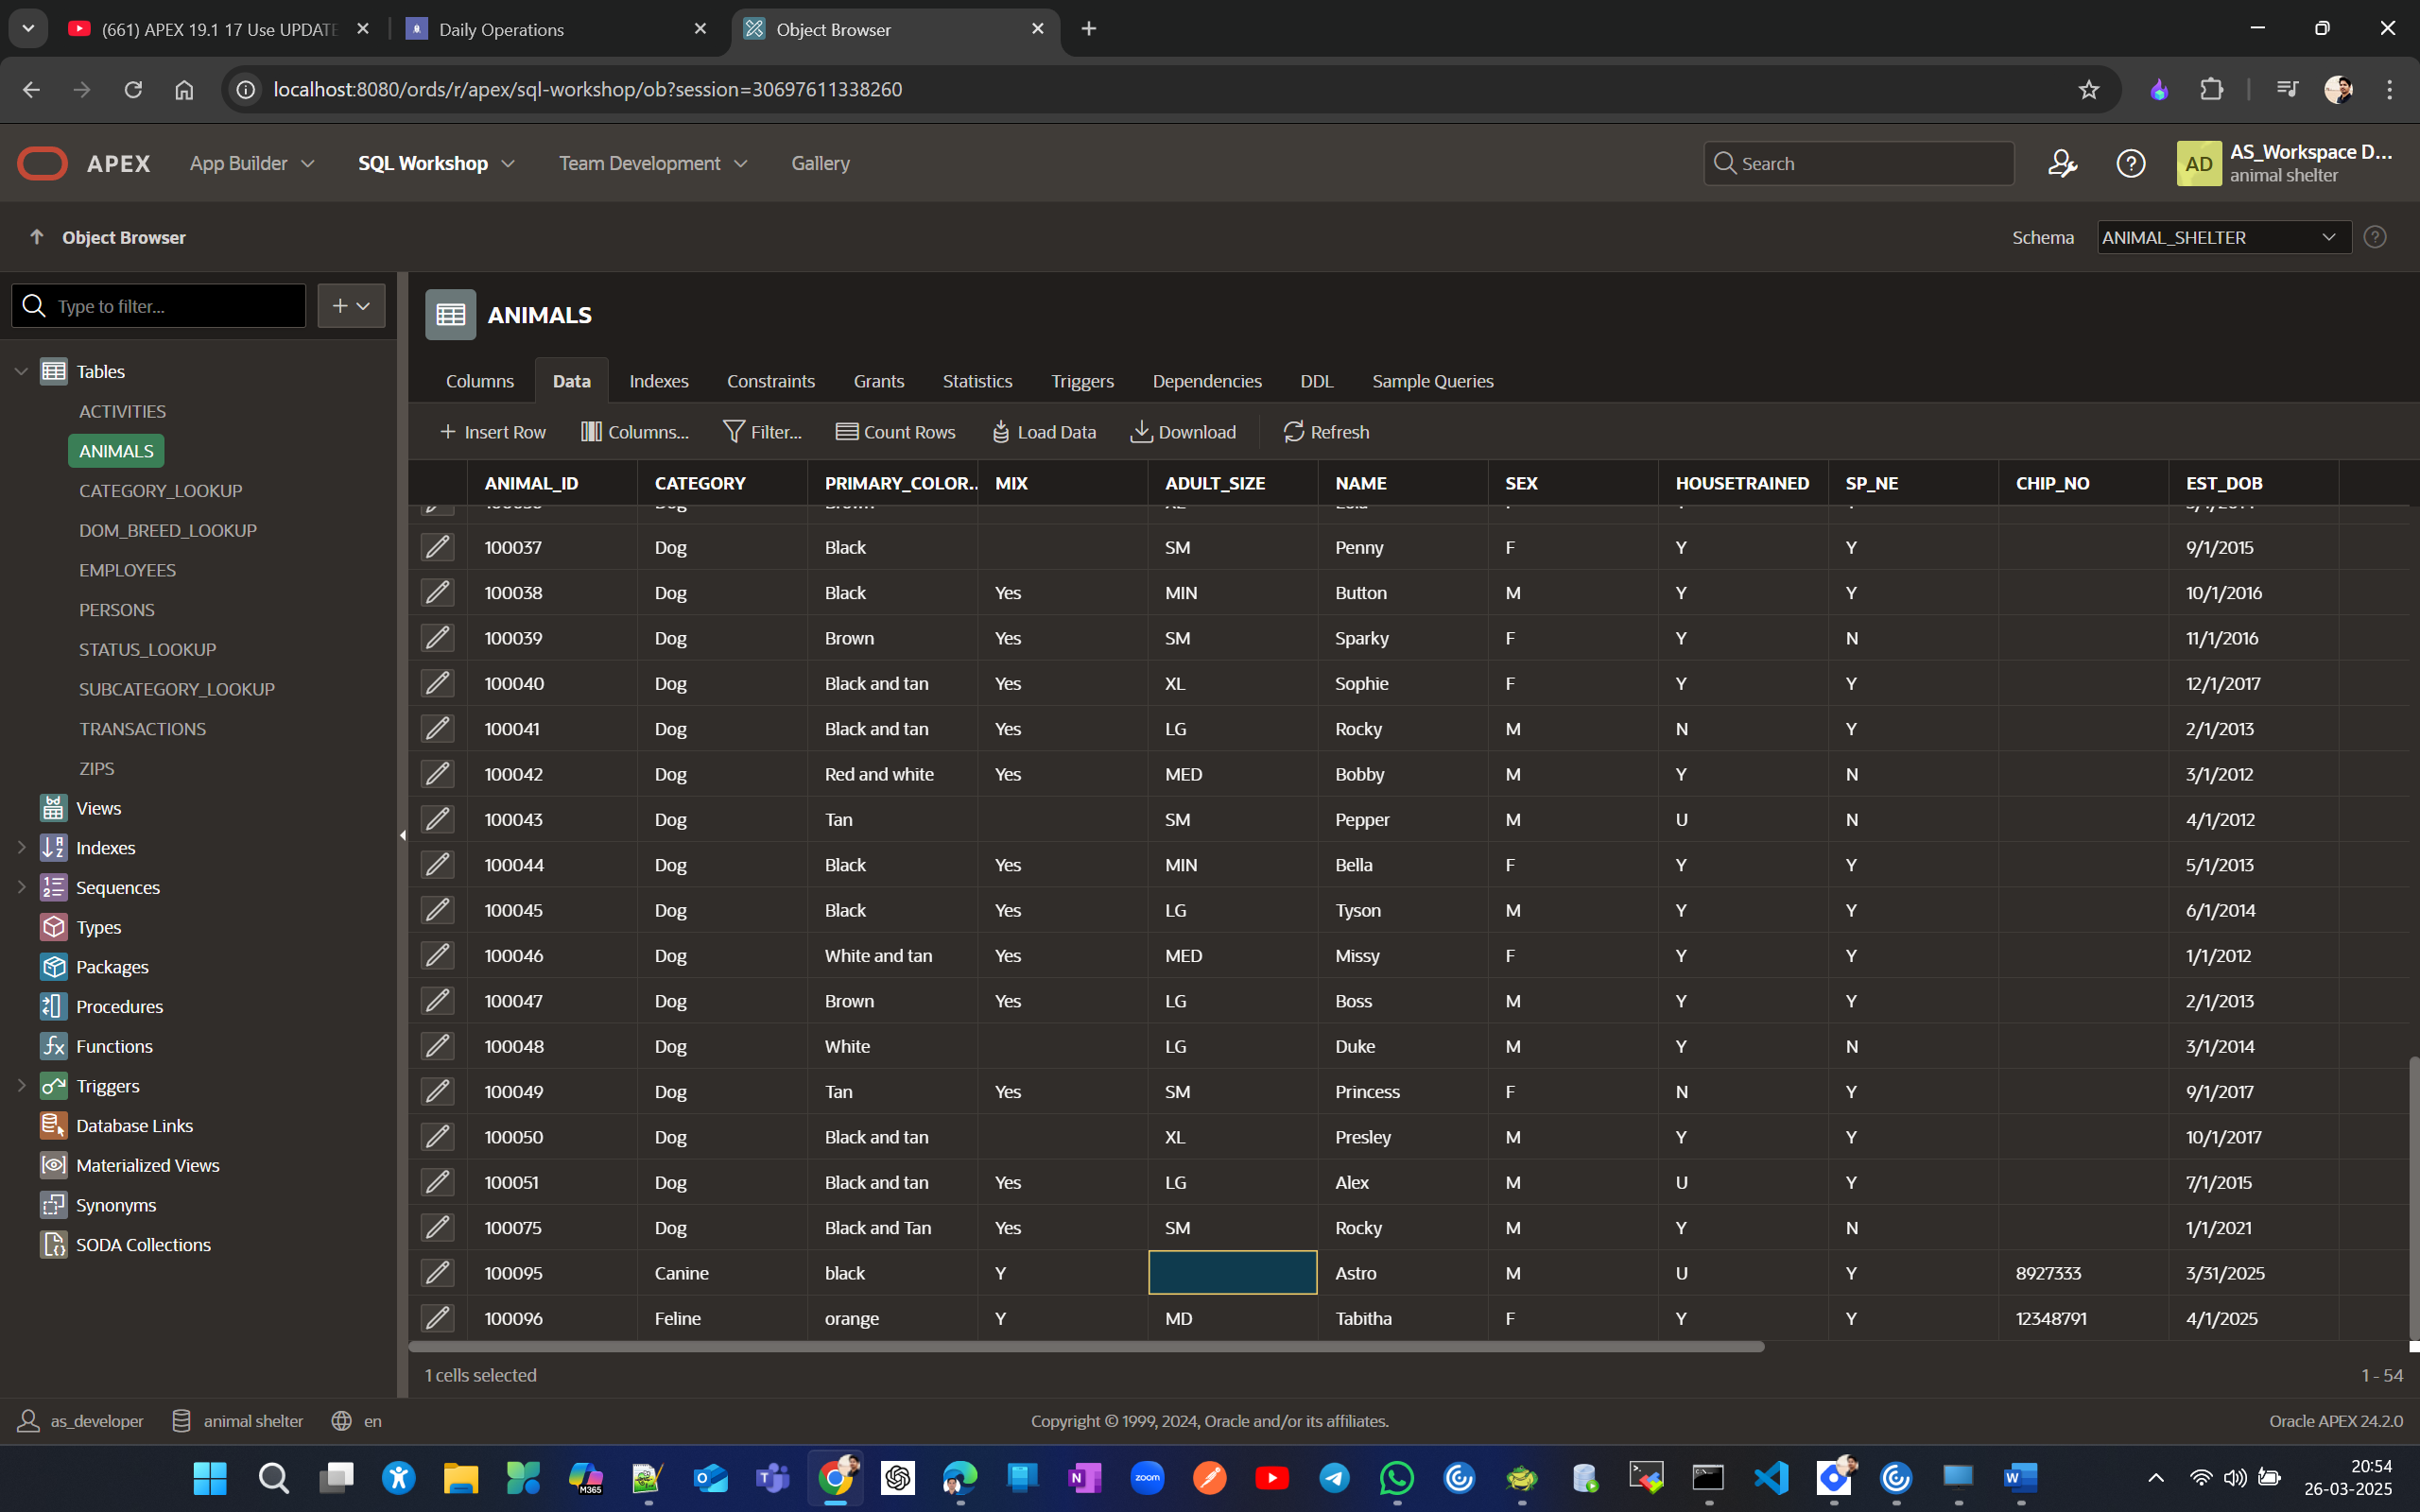
Lets add couple of Animals to List of Animals
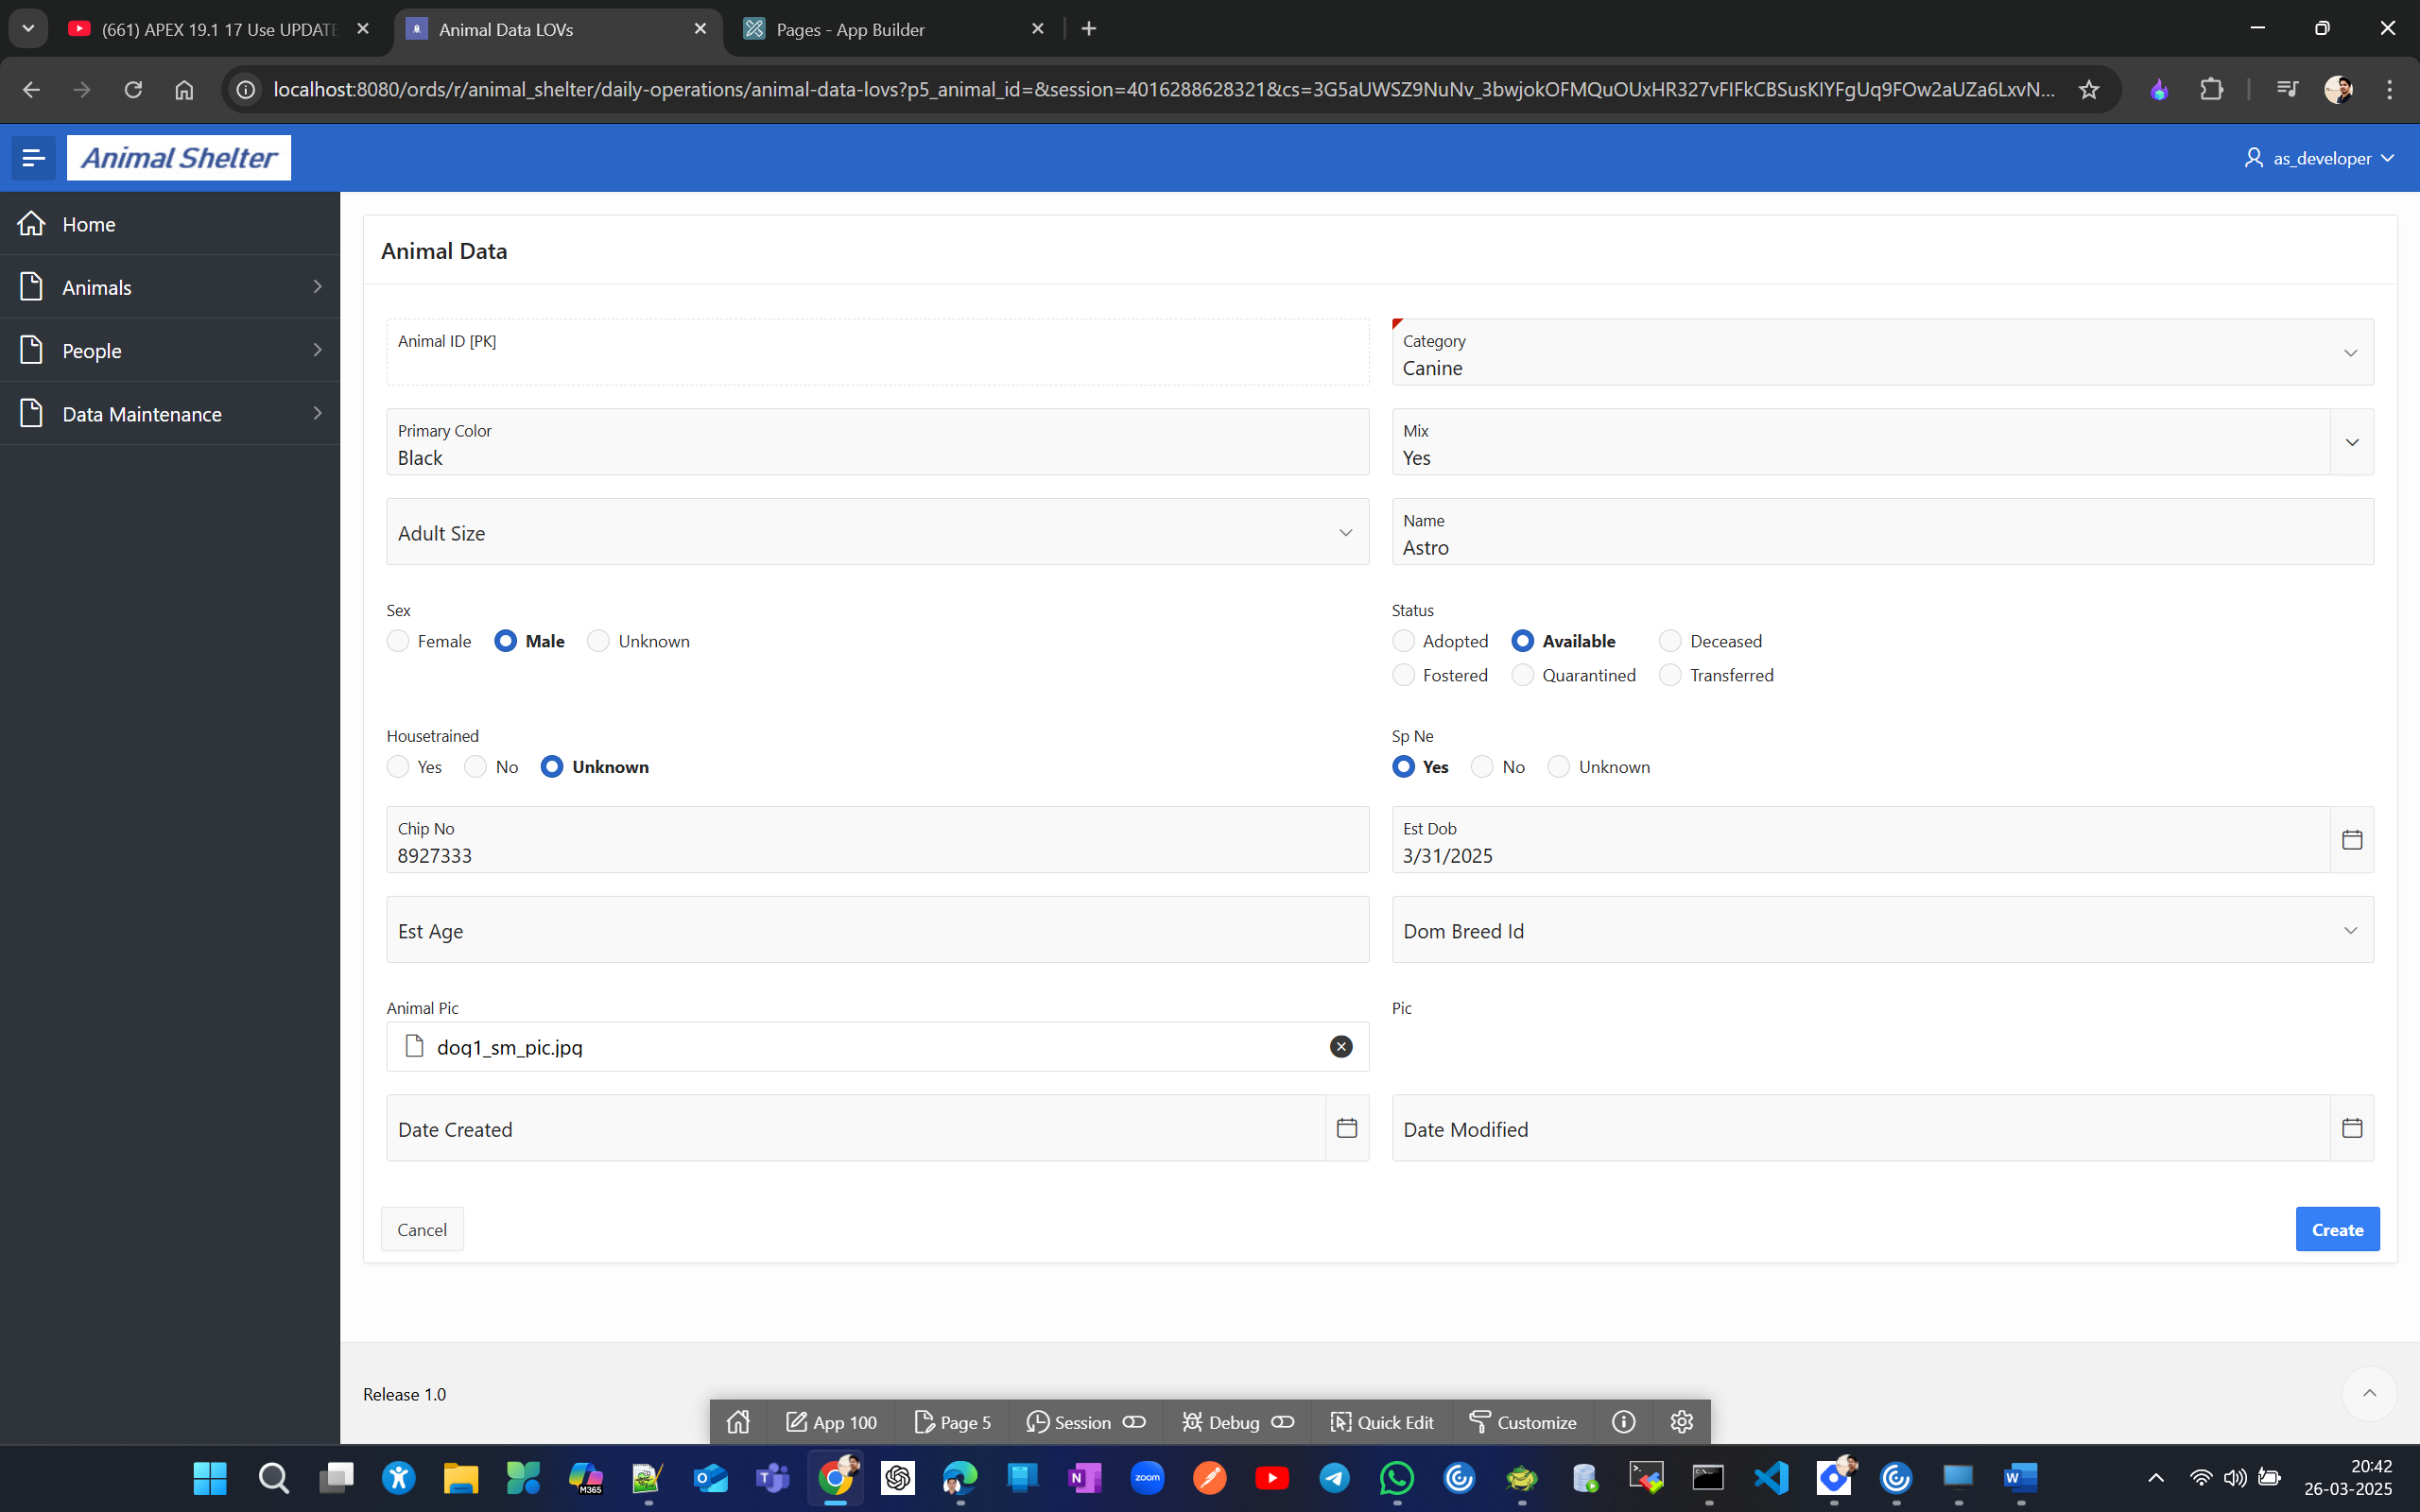
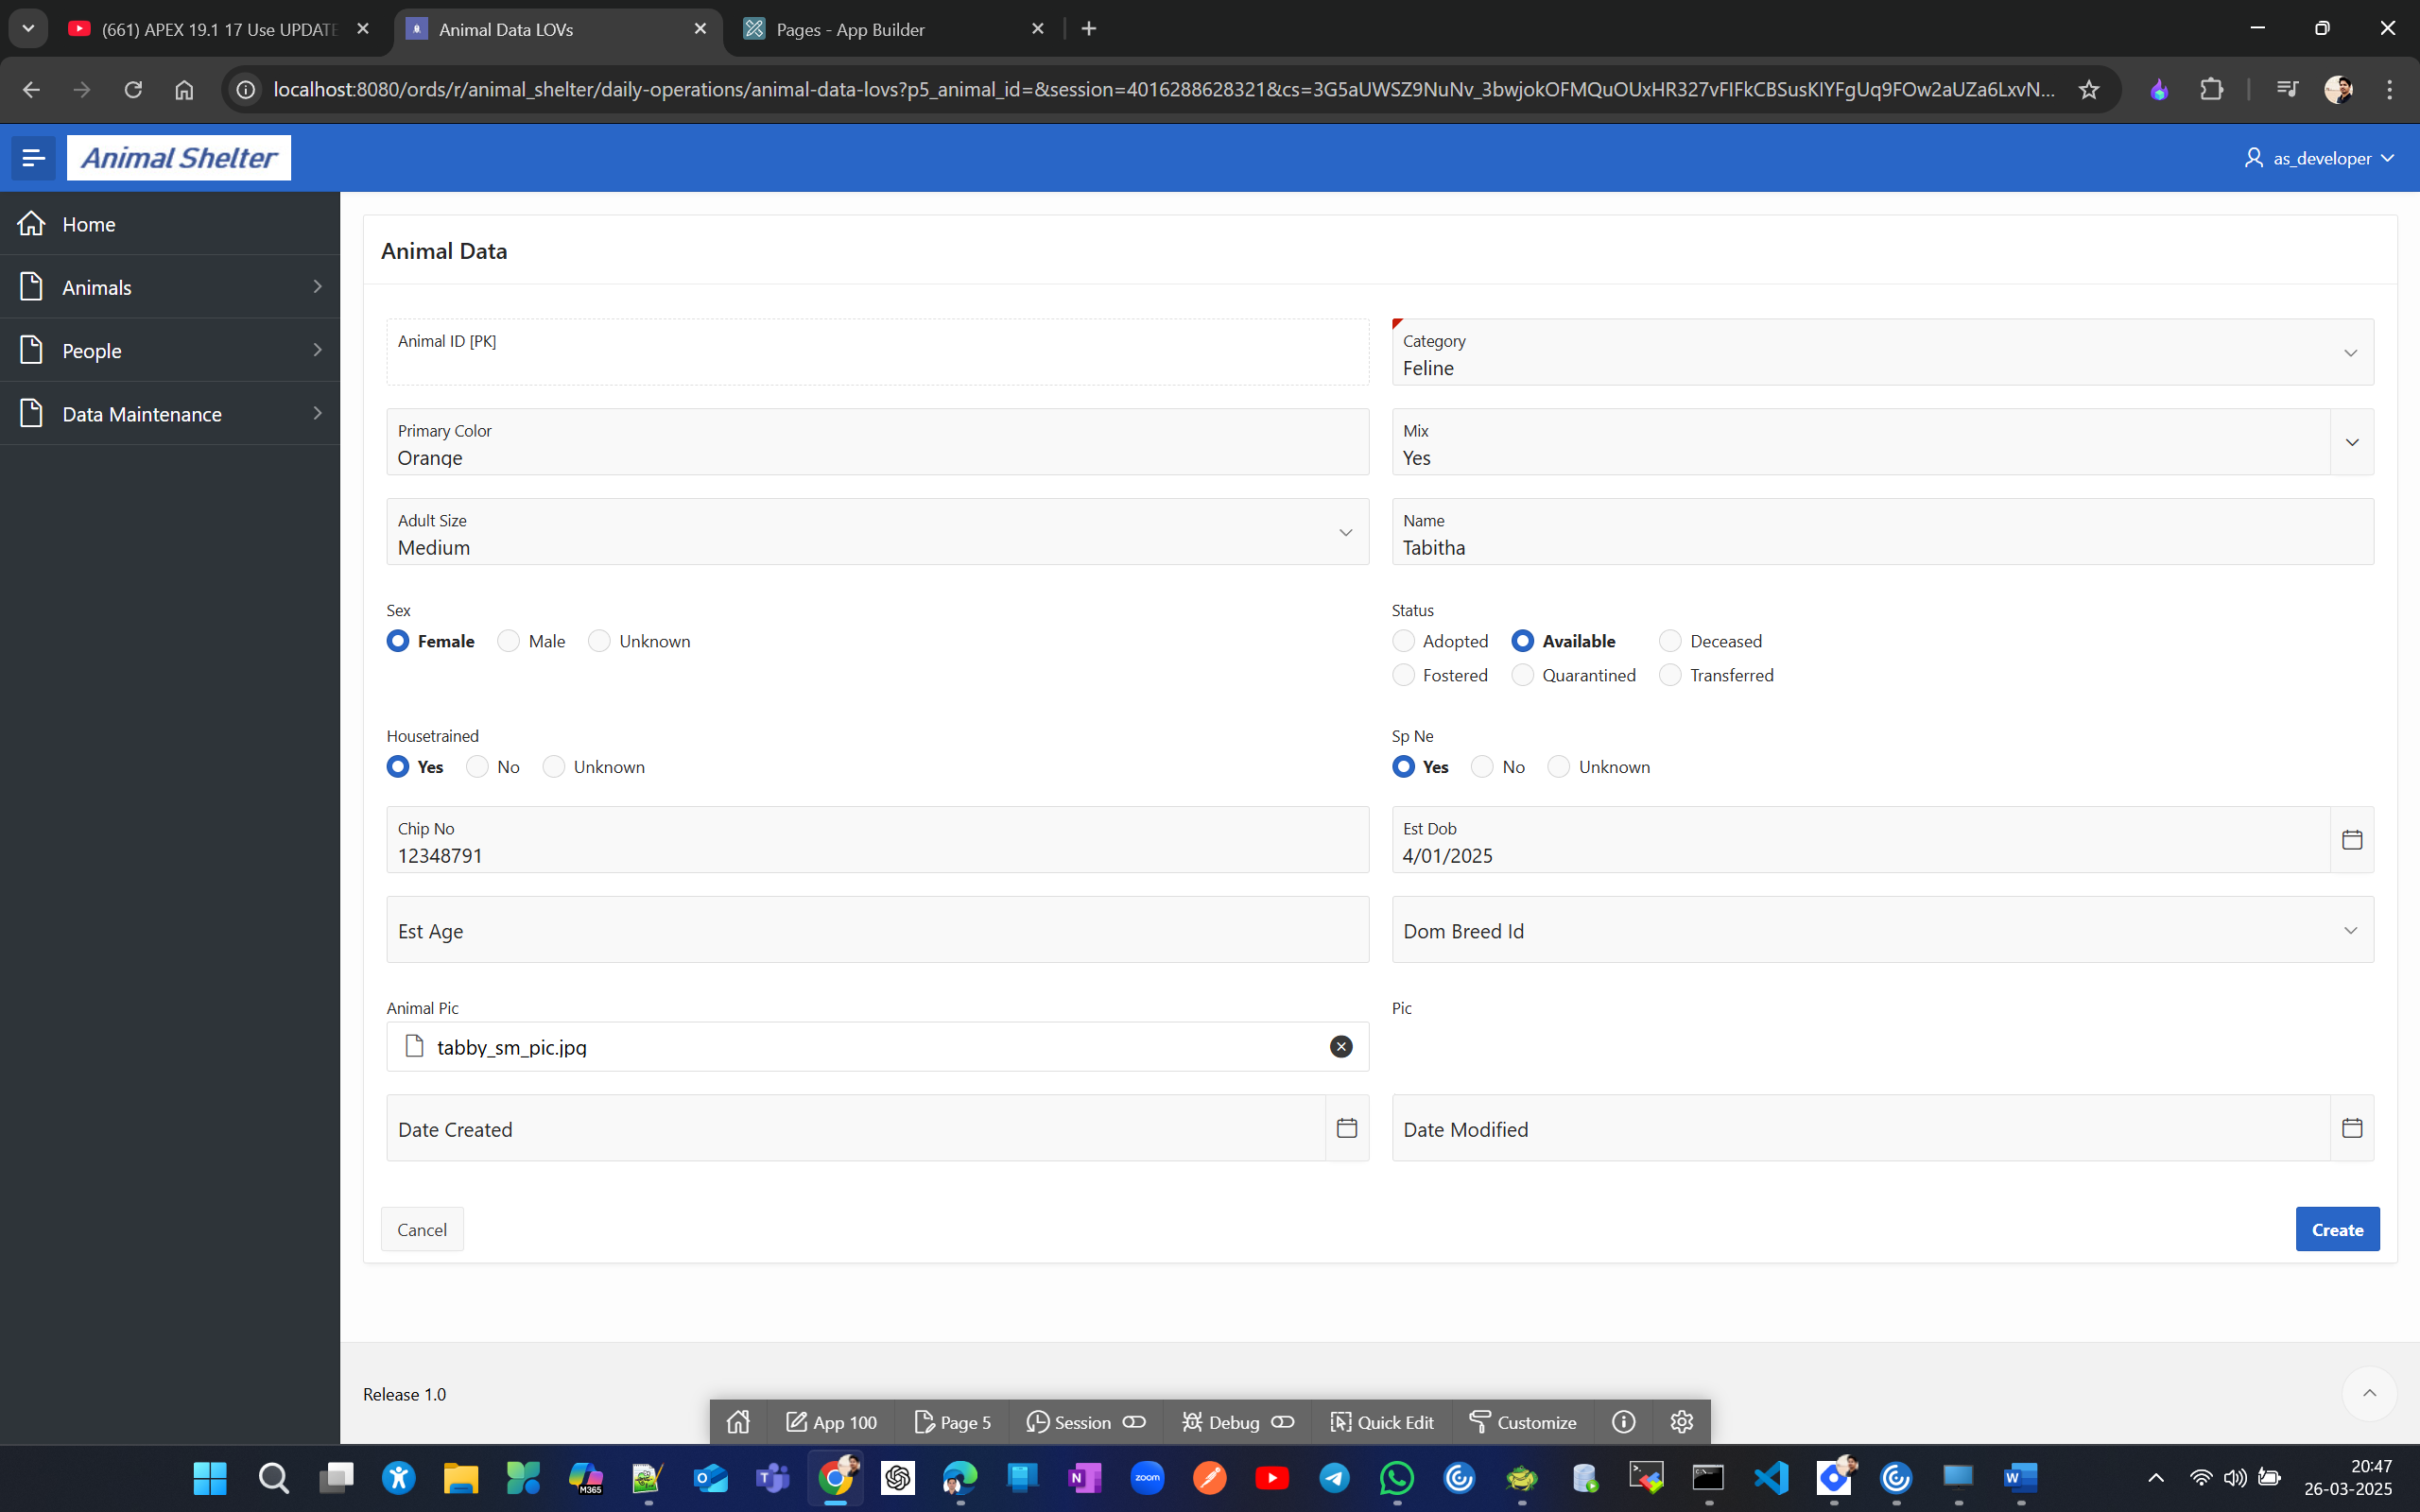
Lets update all Dog to Canine. update animals set category = ‘Canine’ where category = ‘Dog‘; —52 rows updated
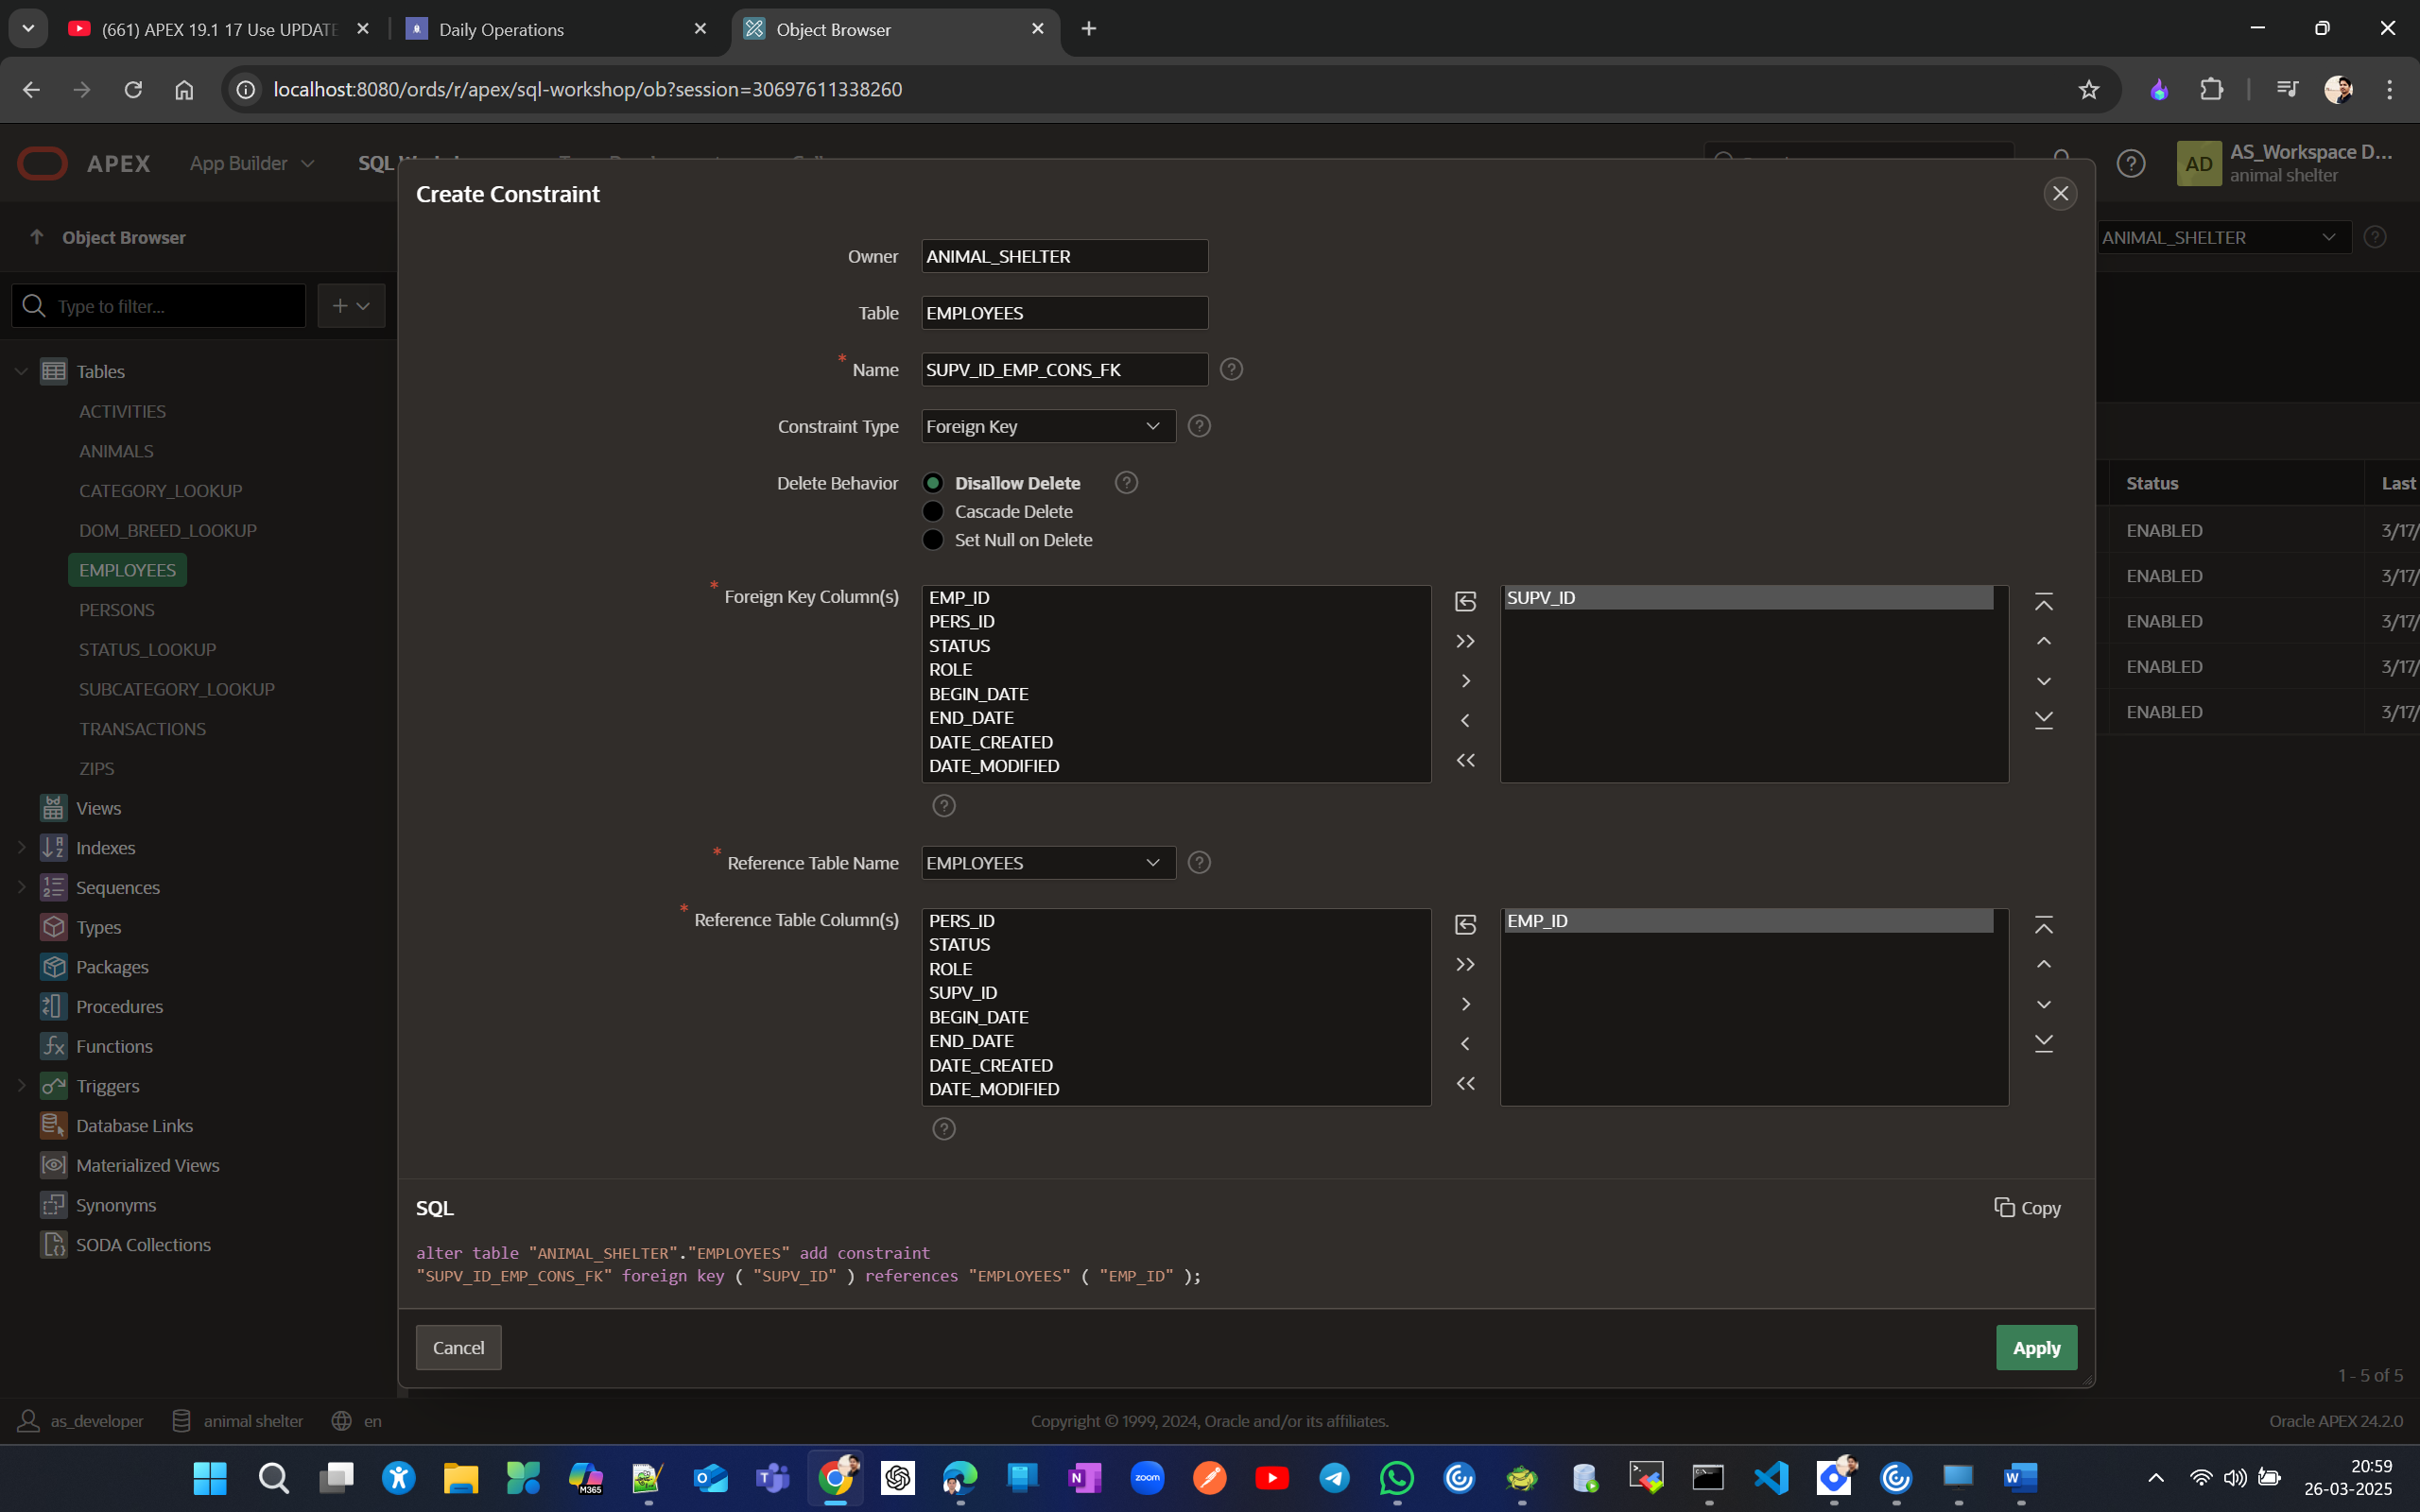
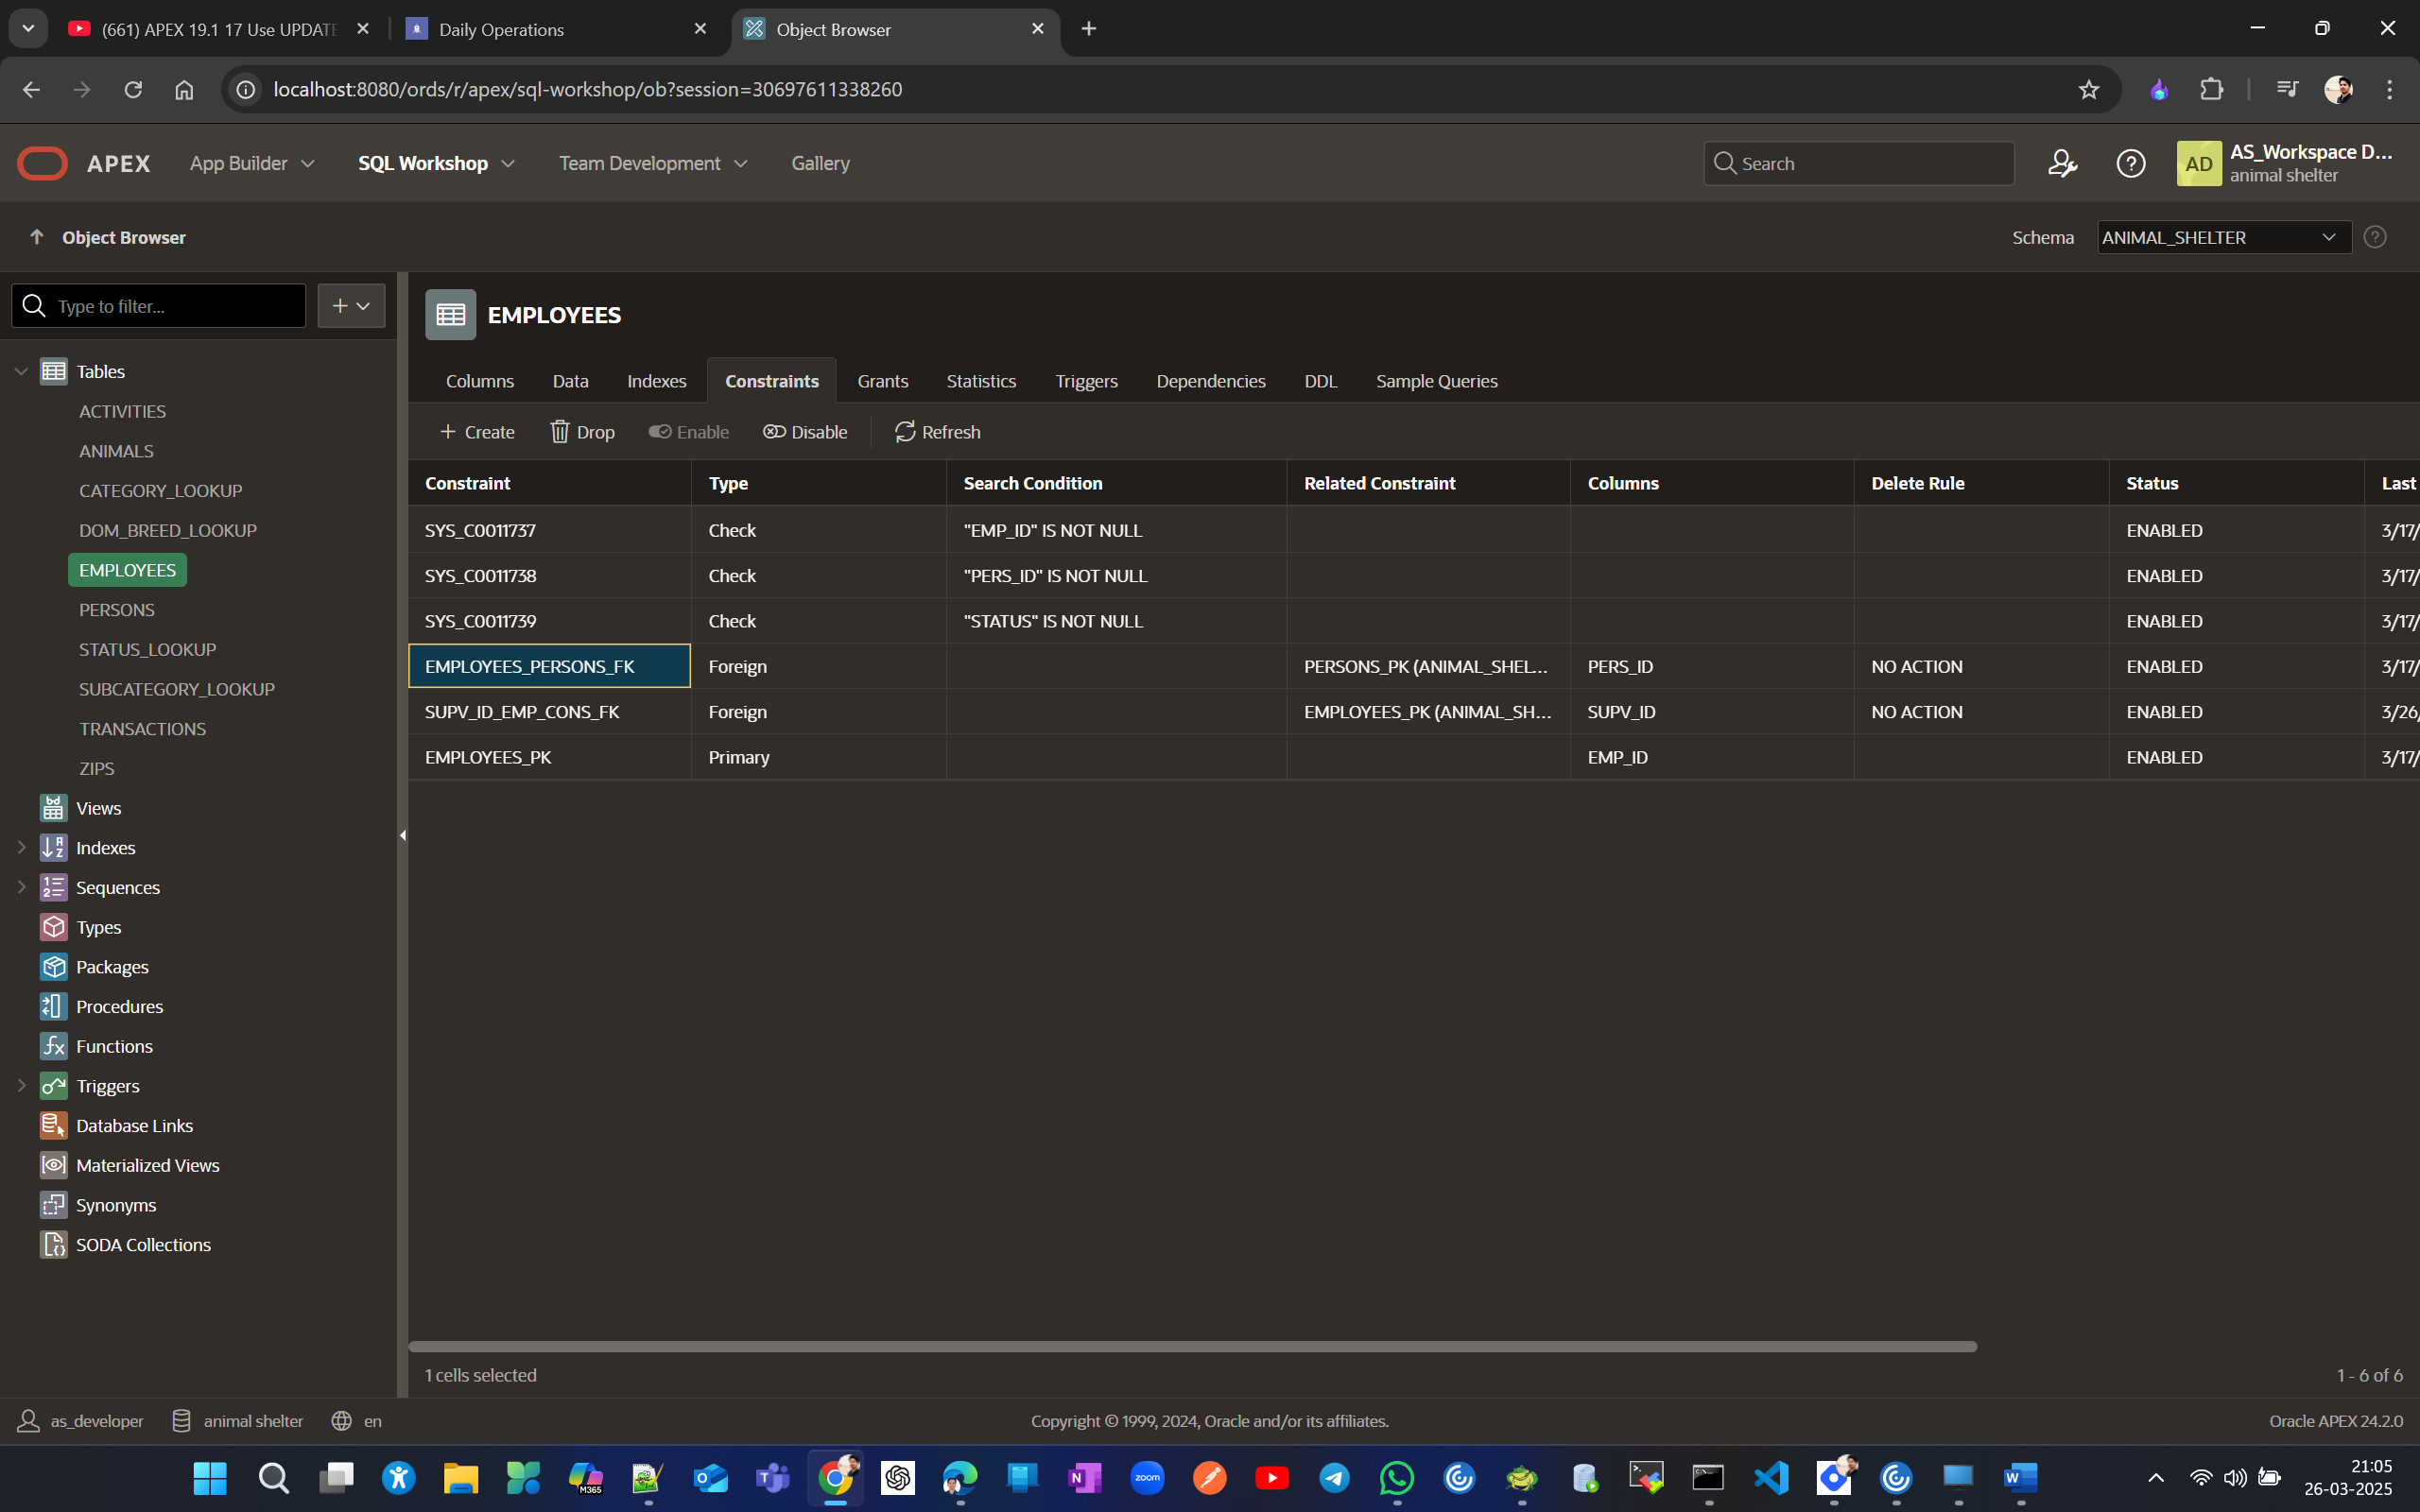
Now lets create fk(SUPV_ID_EMP_CONS_FK) on supv_id to reference emp_id in same employees table
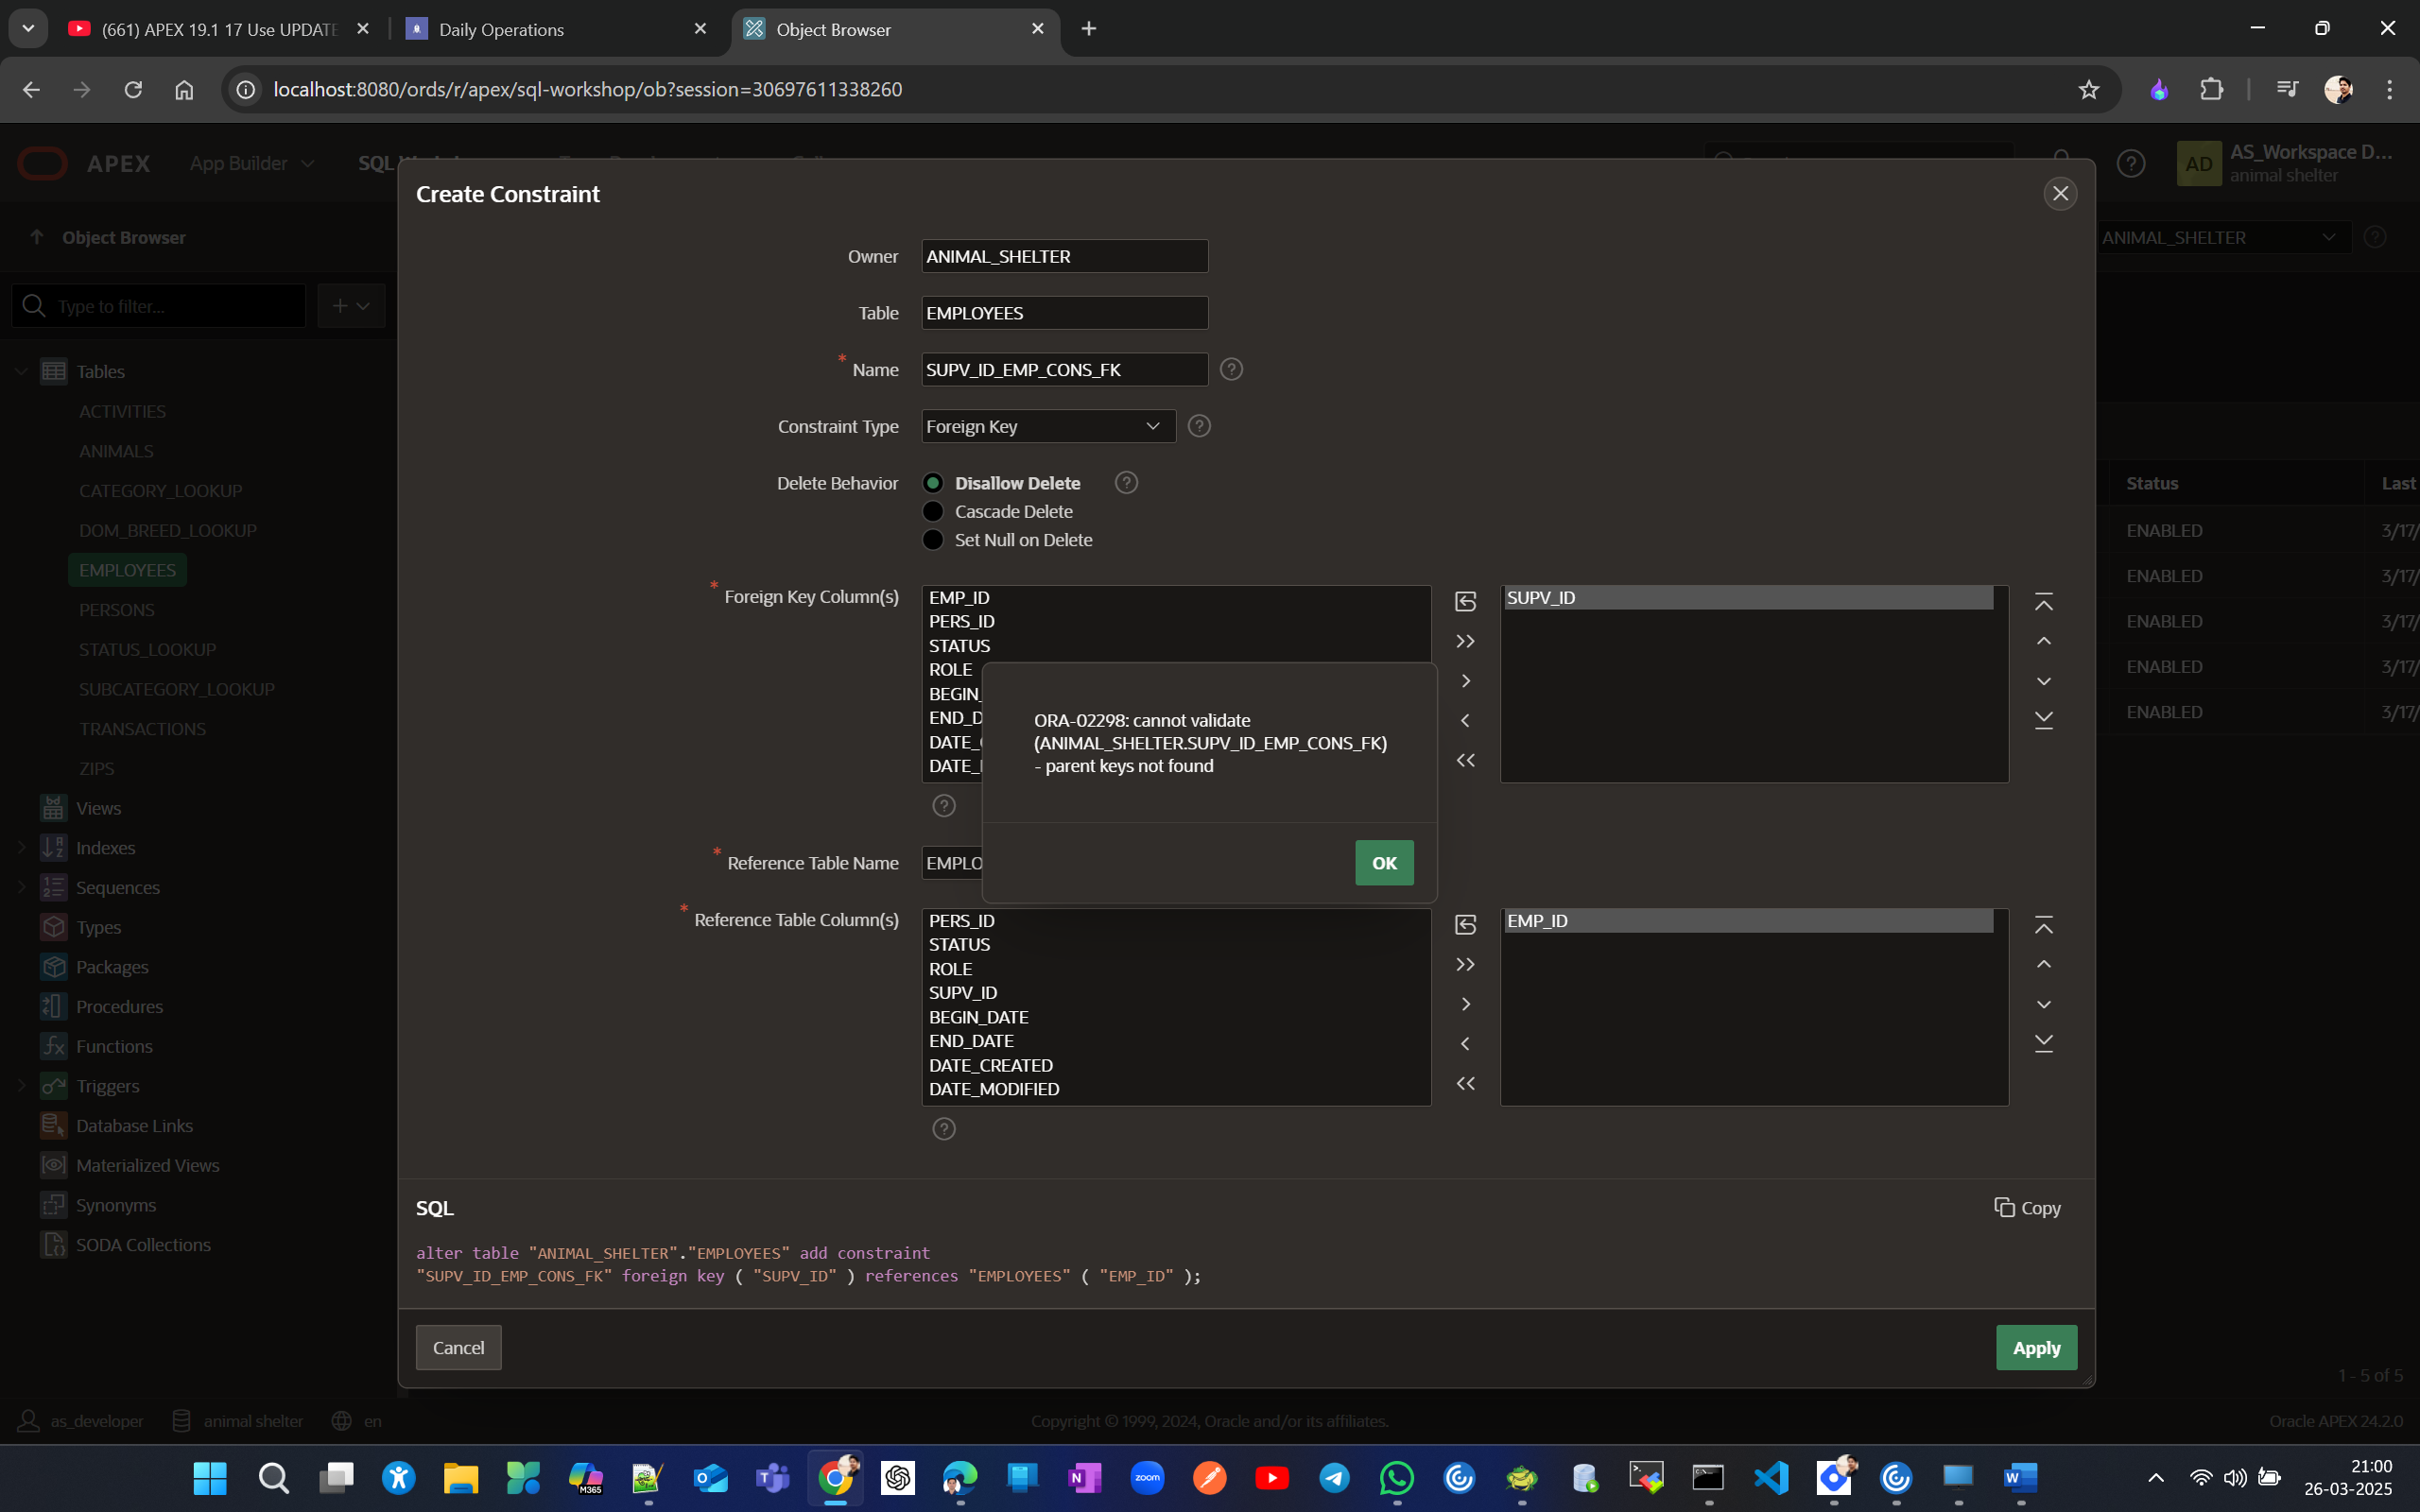
Just for sake of this constraint creation sucessful we can delete supv_id of the person we created Felipe.
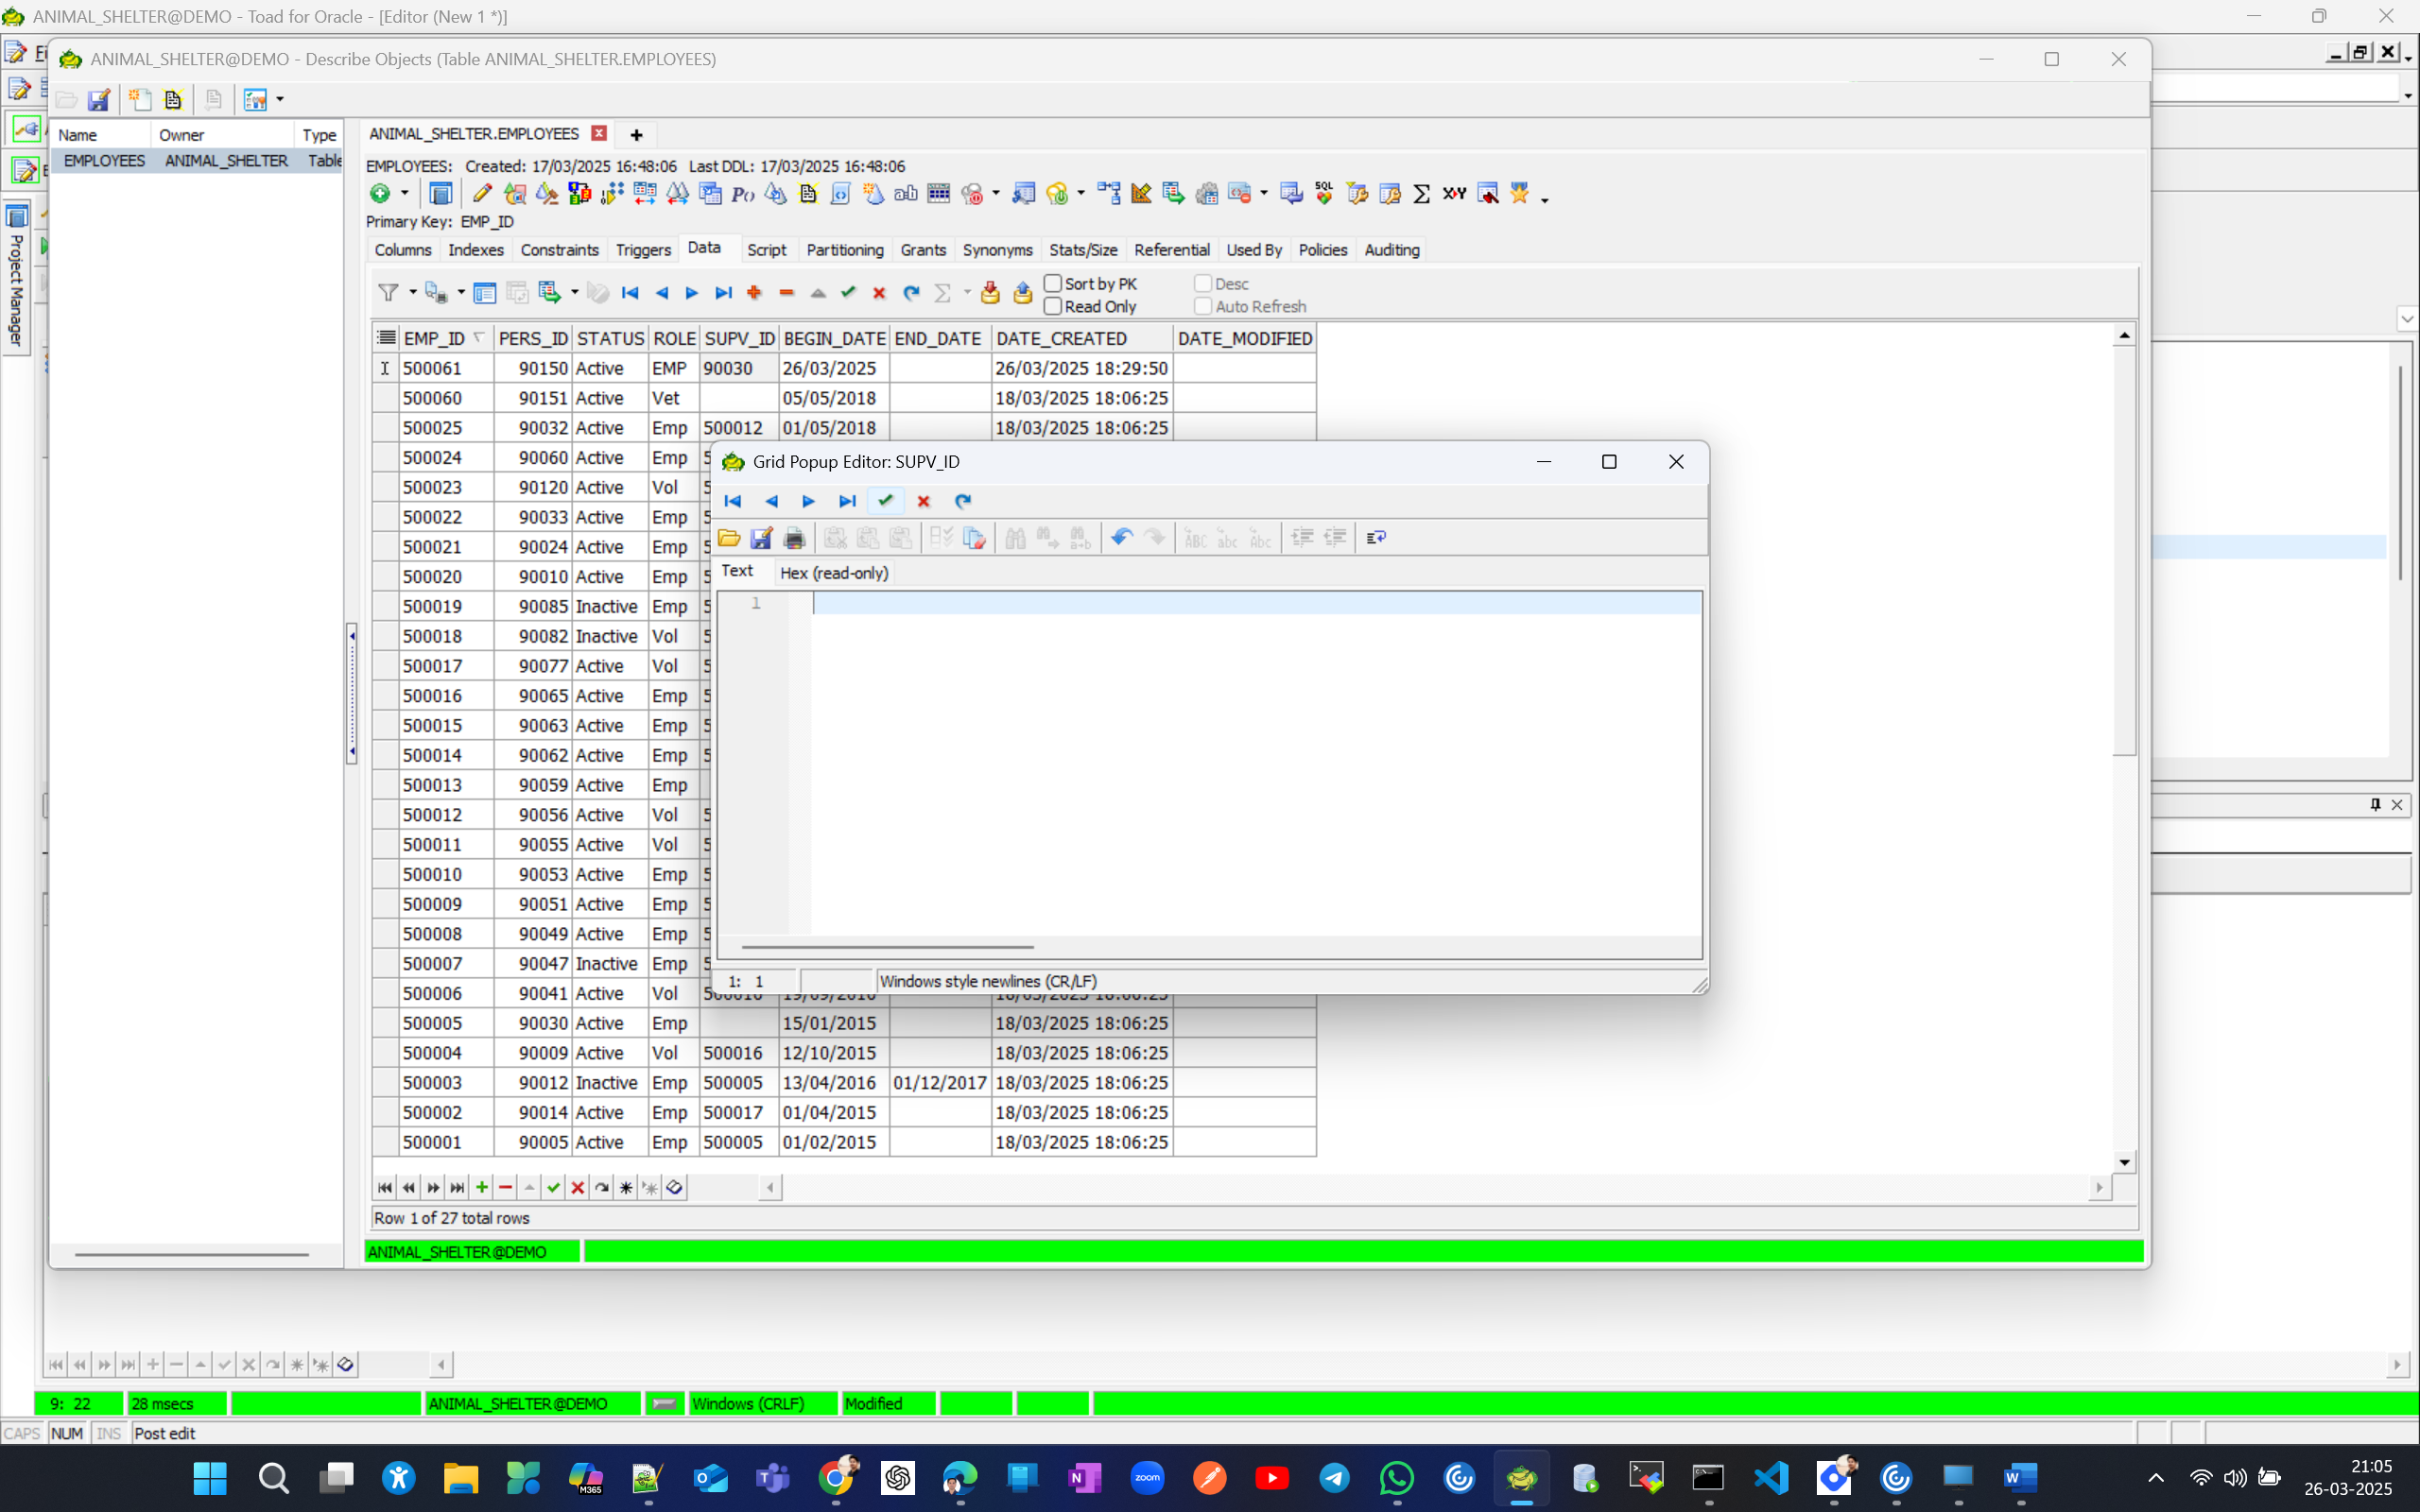
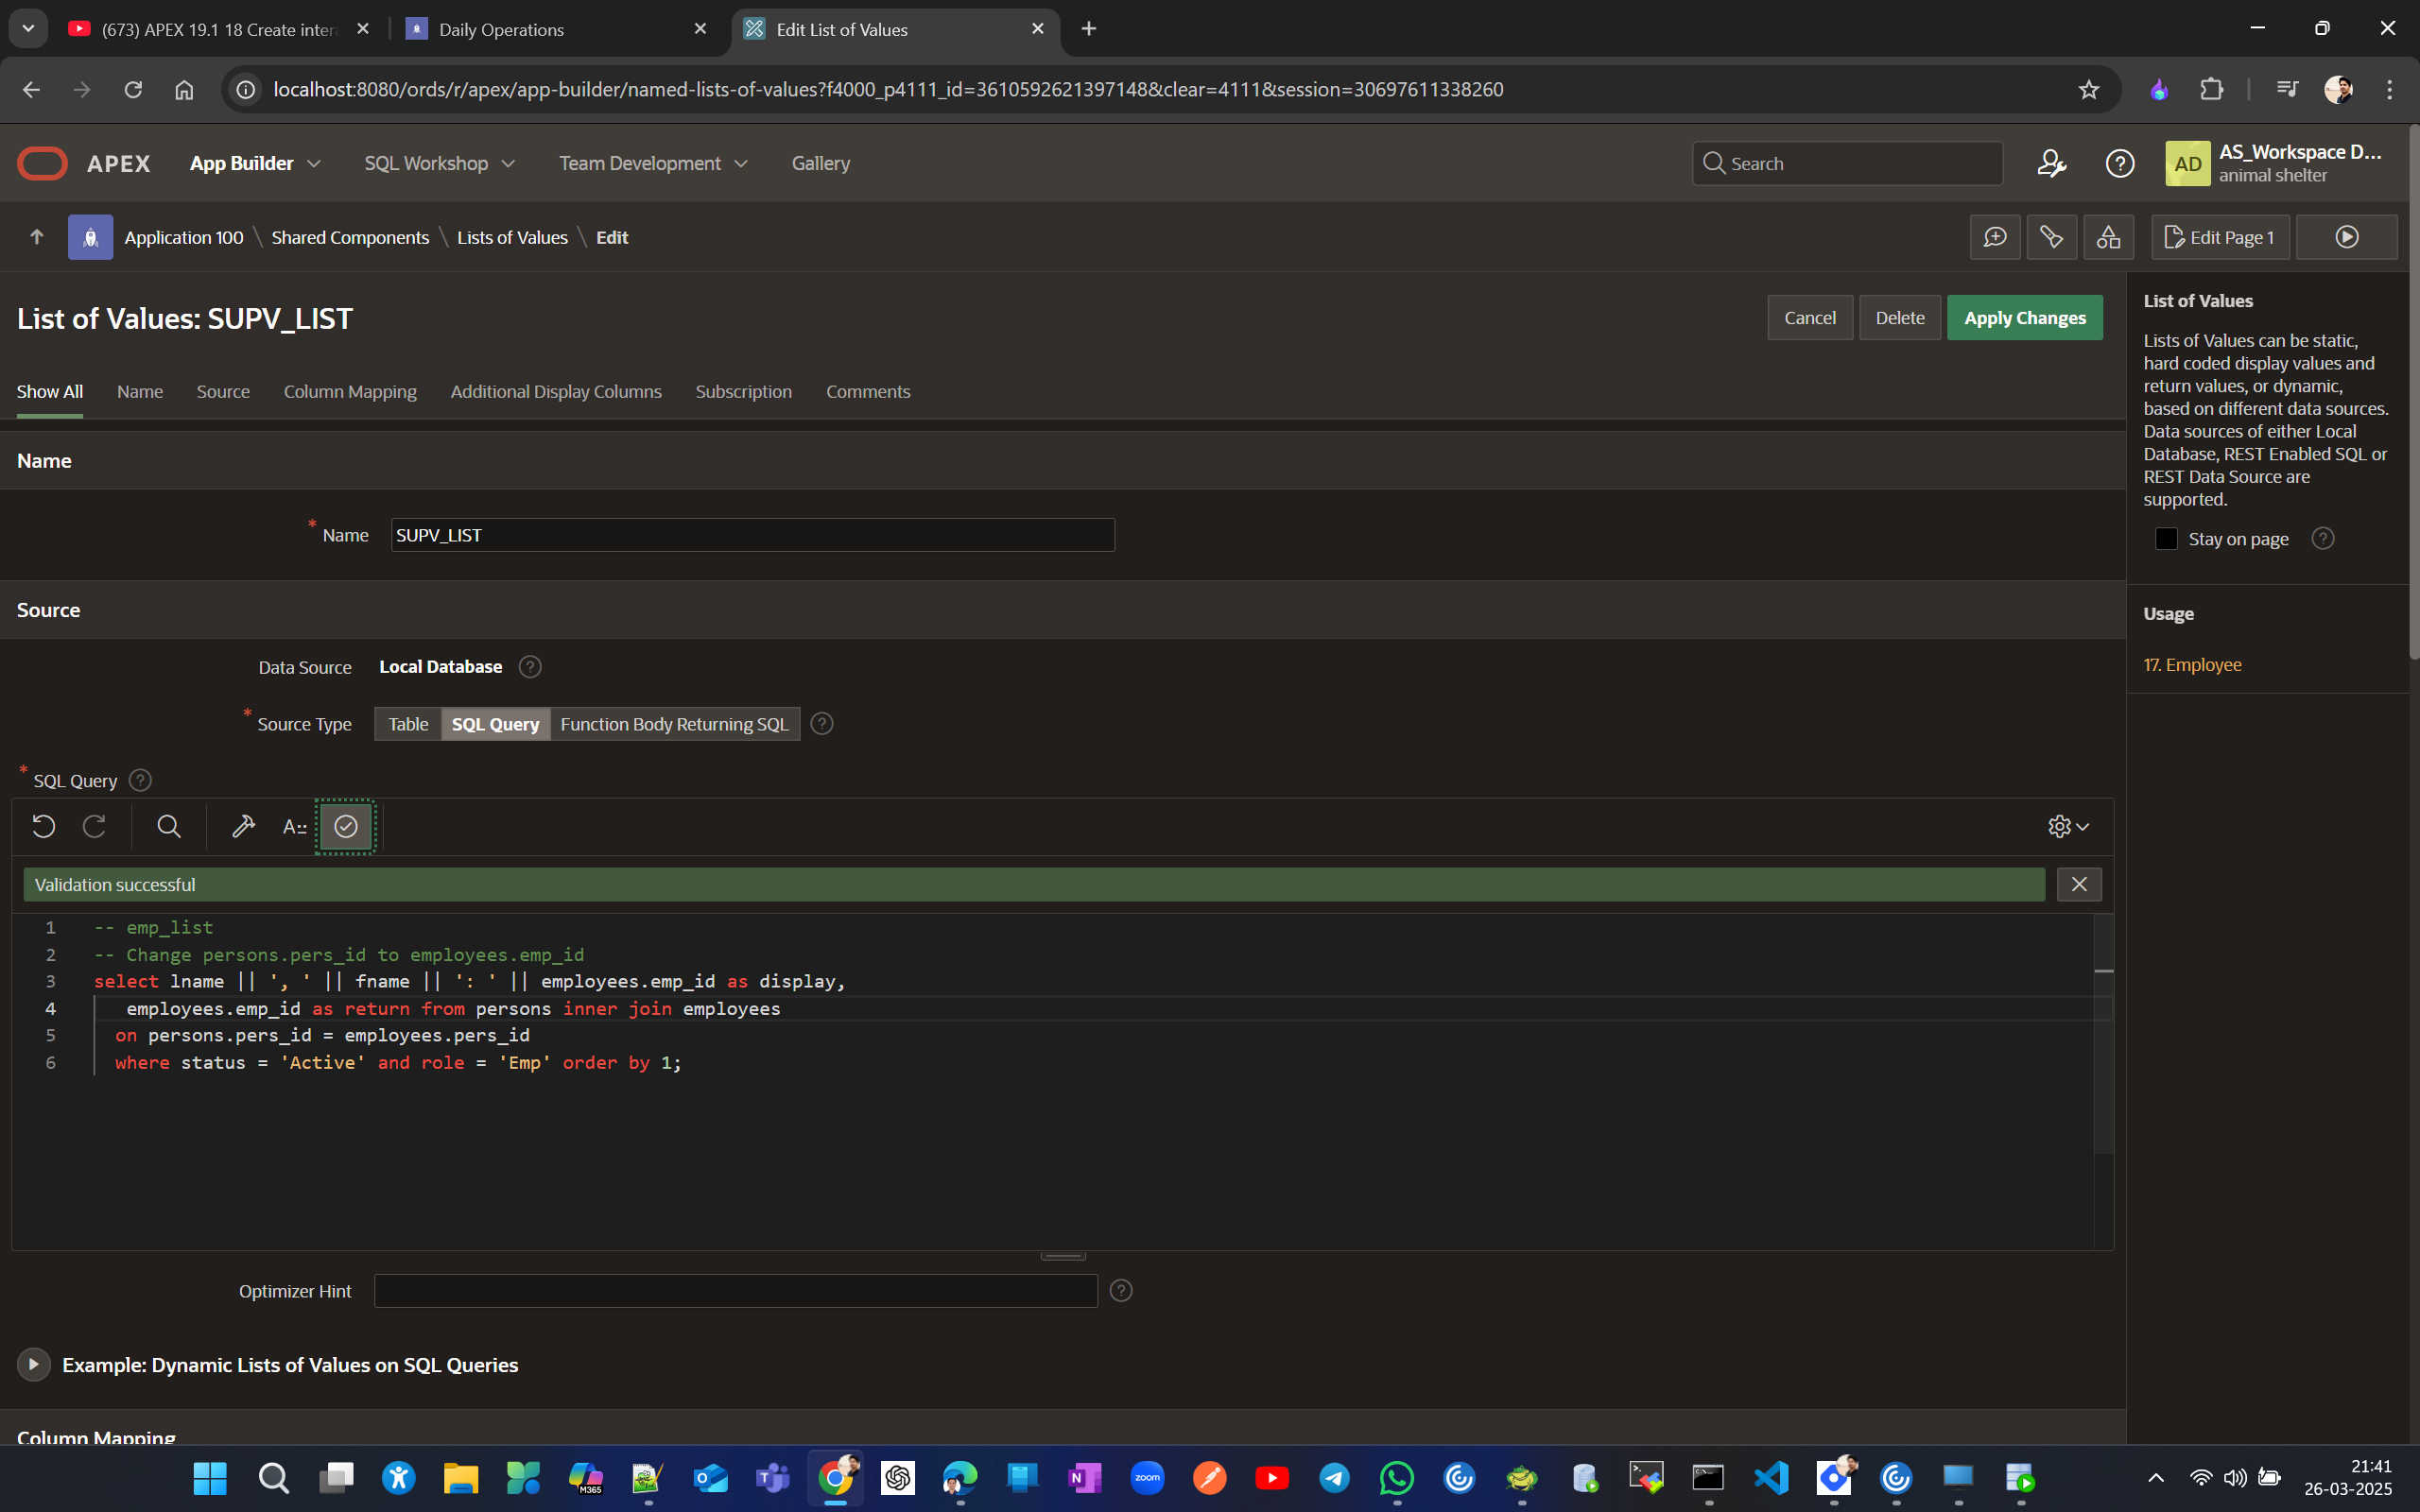
Now go to SUPV_LIST and modify query to get return value, so that going forards correct value get stored on selecting values from select list LOVs.
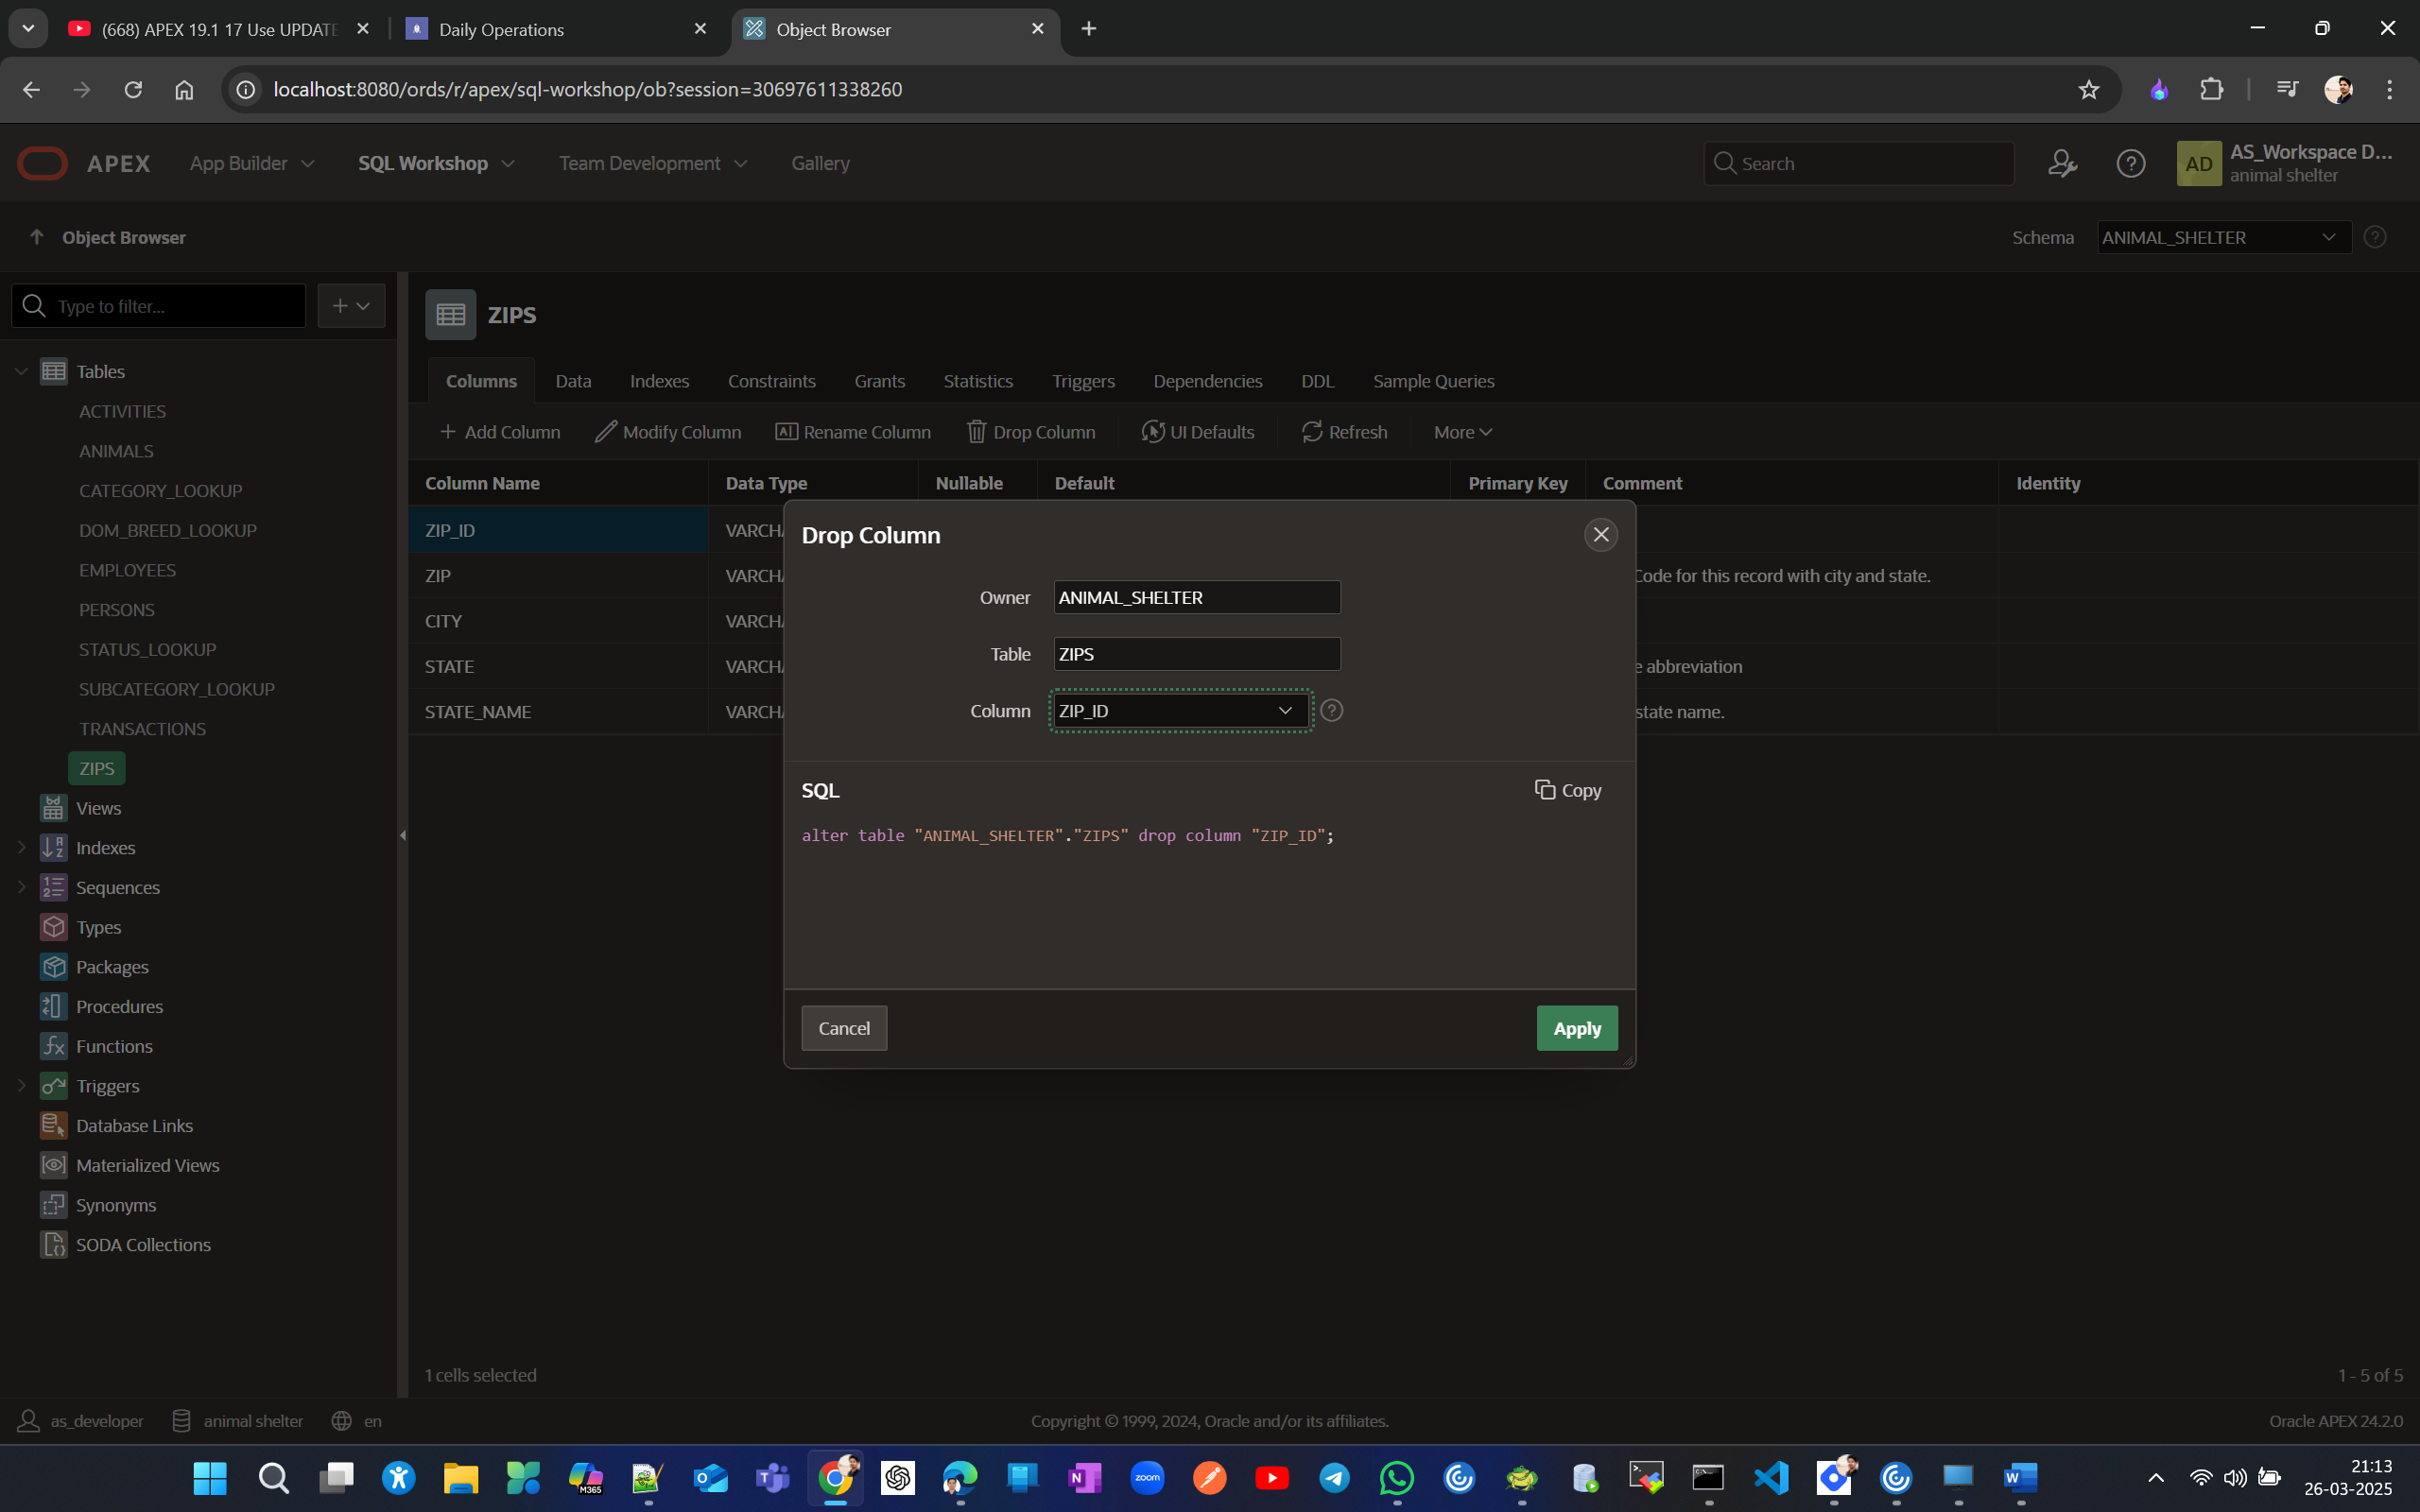
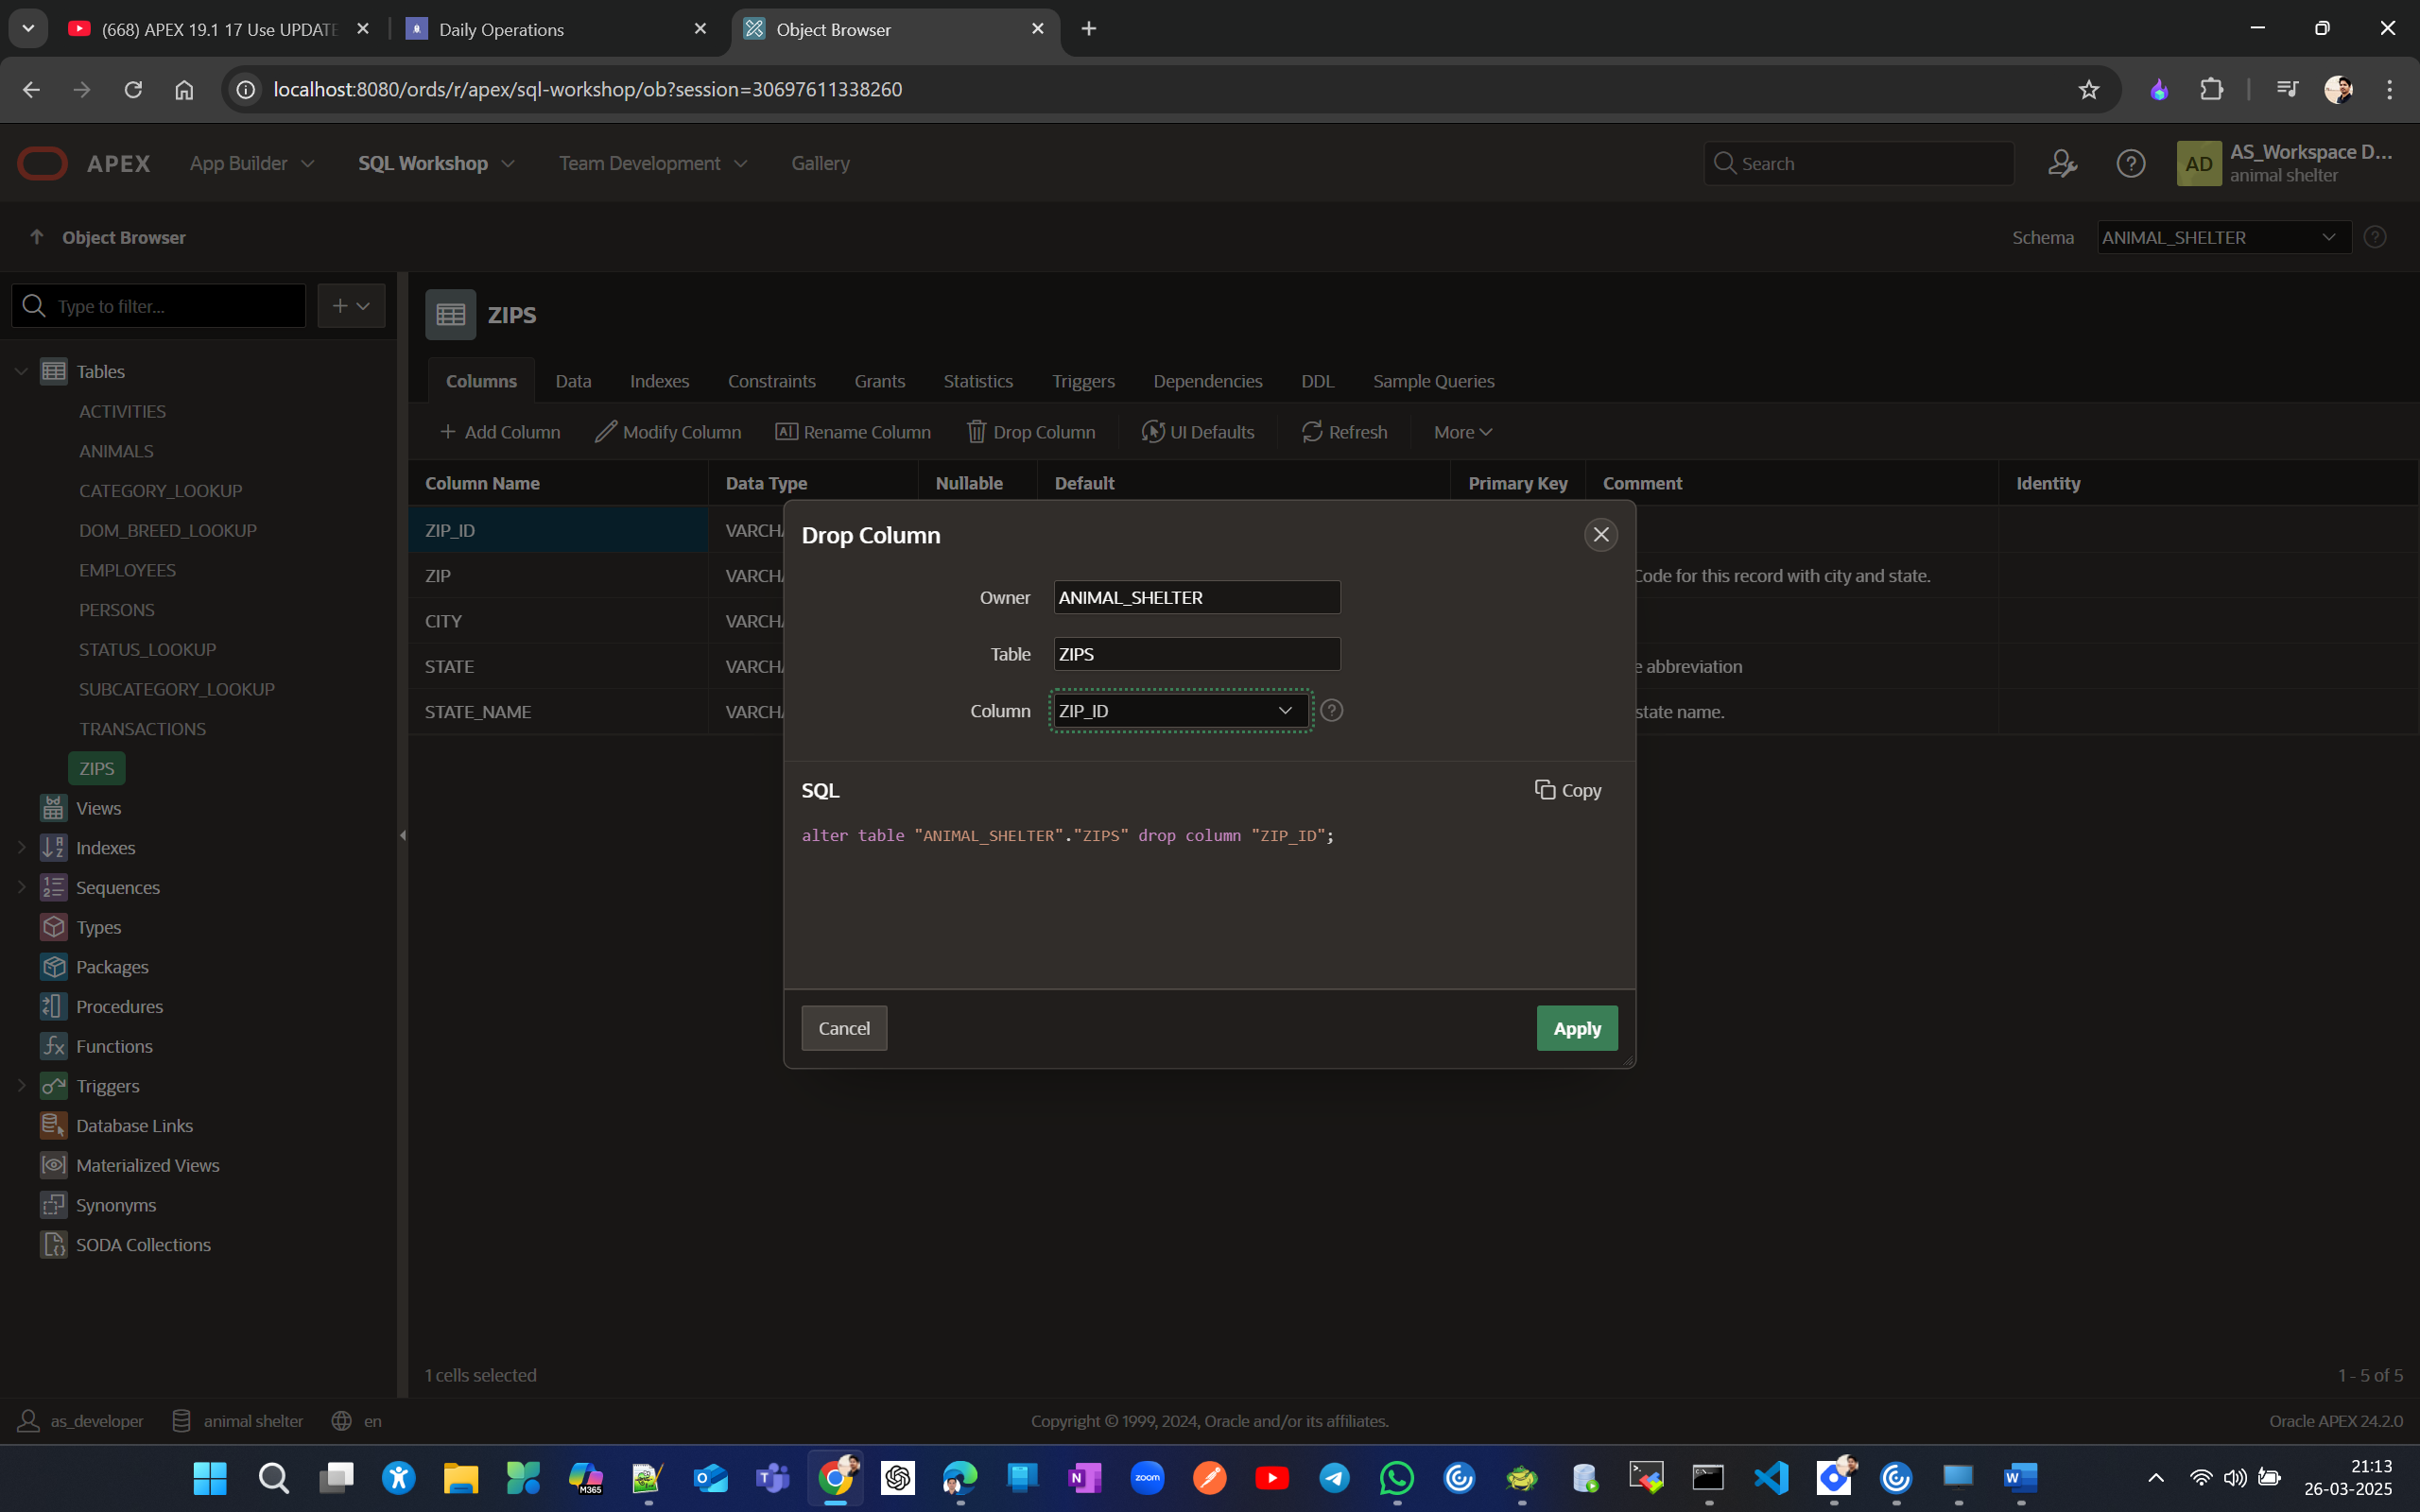
Now let's drop the ZIP_ID column from the ZIP table since we already have a meaningful unique ZIP column.
Finally, after completing all these steps, reimport the data model to see the removal of the zip_id column and the new hierarchical/unary relationship.
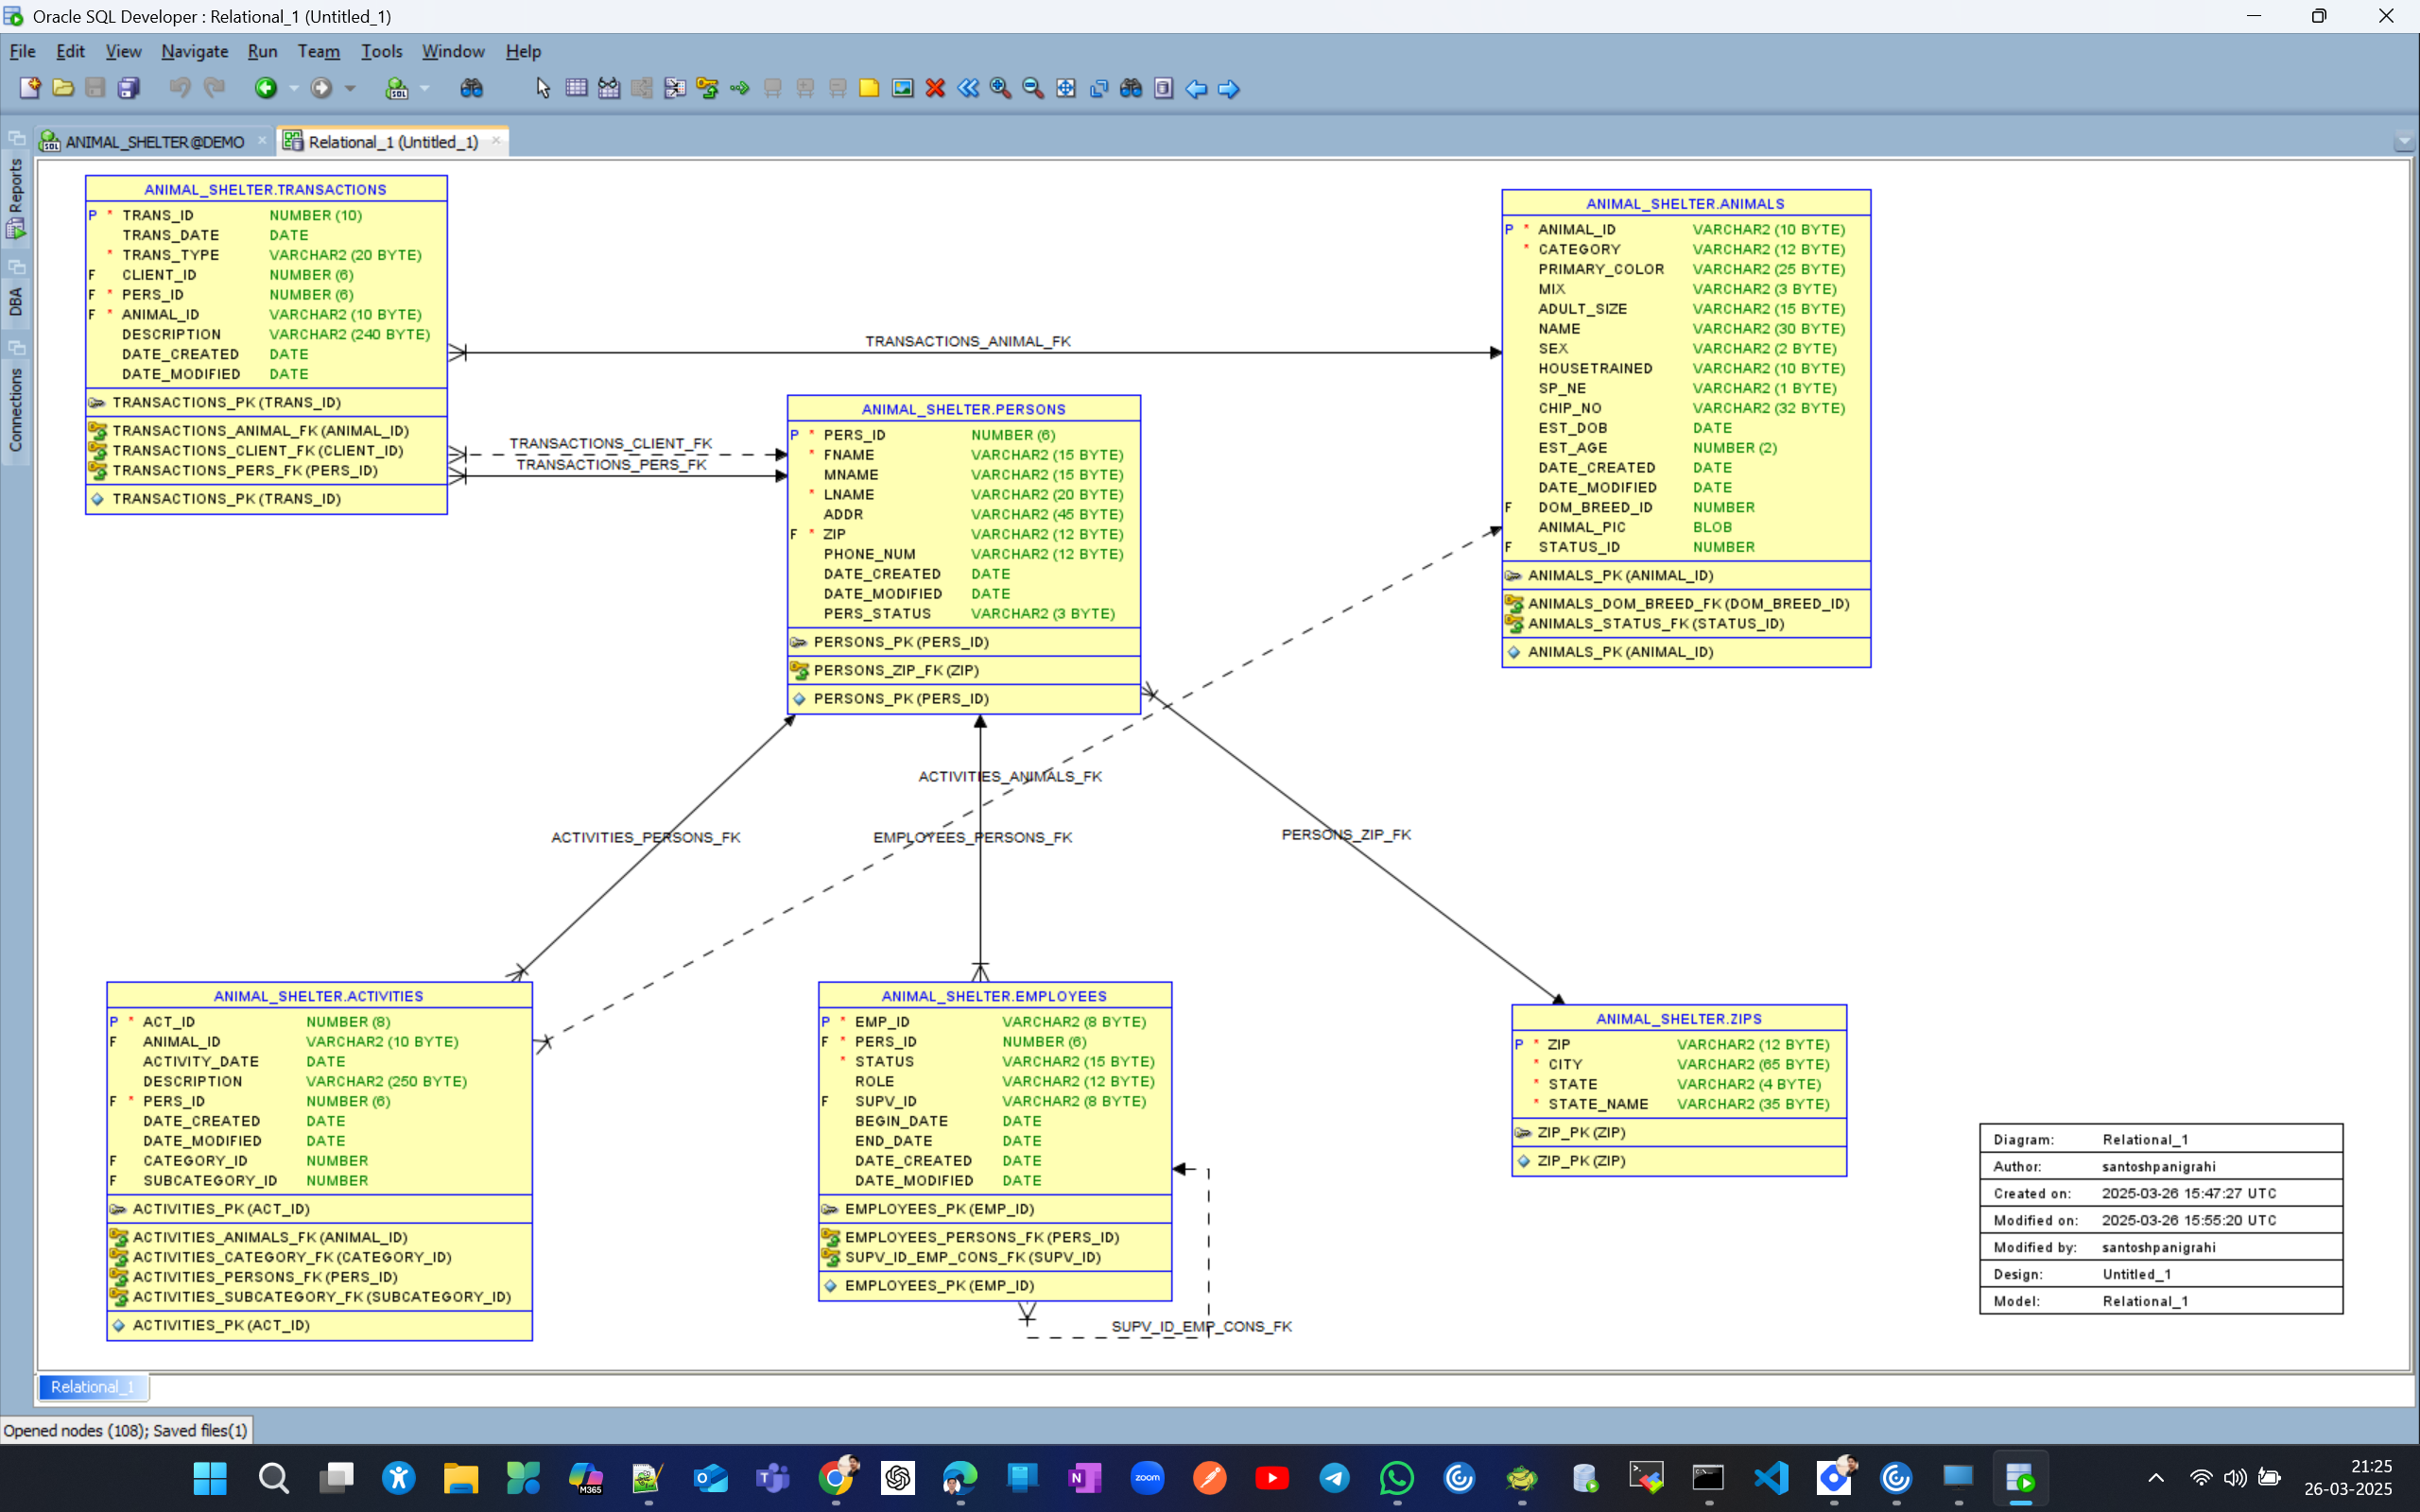
Create interactive report and GRID. Format phone display with LOV.
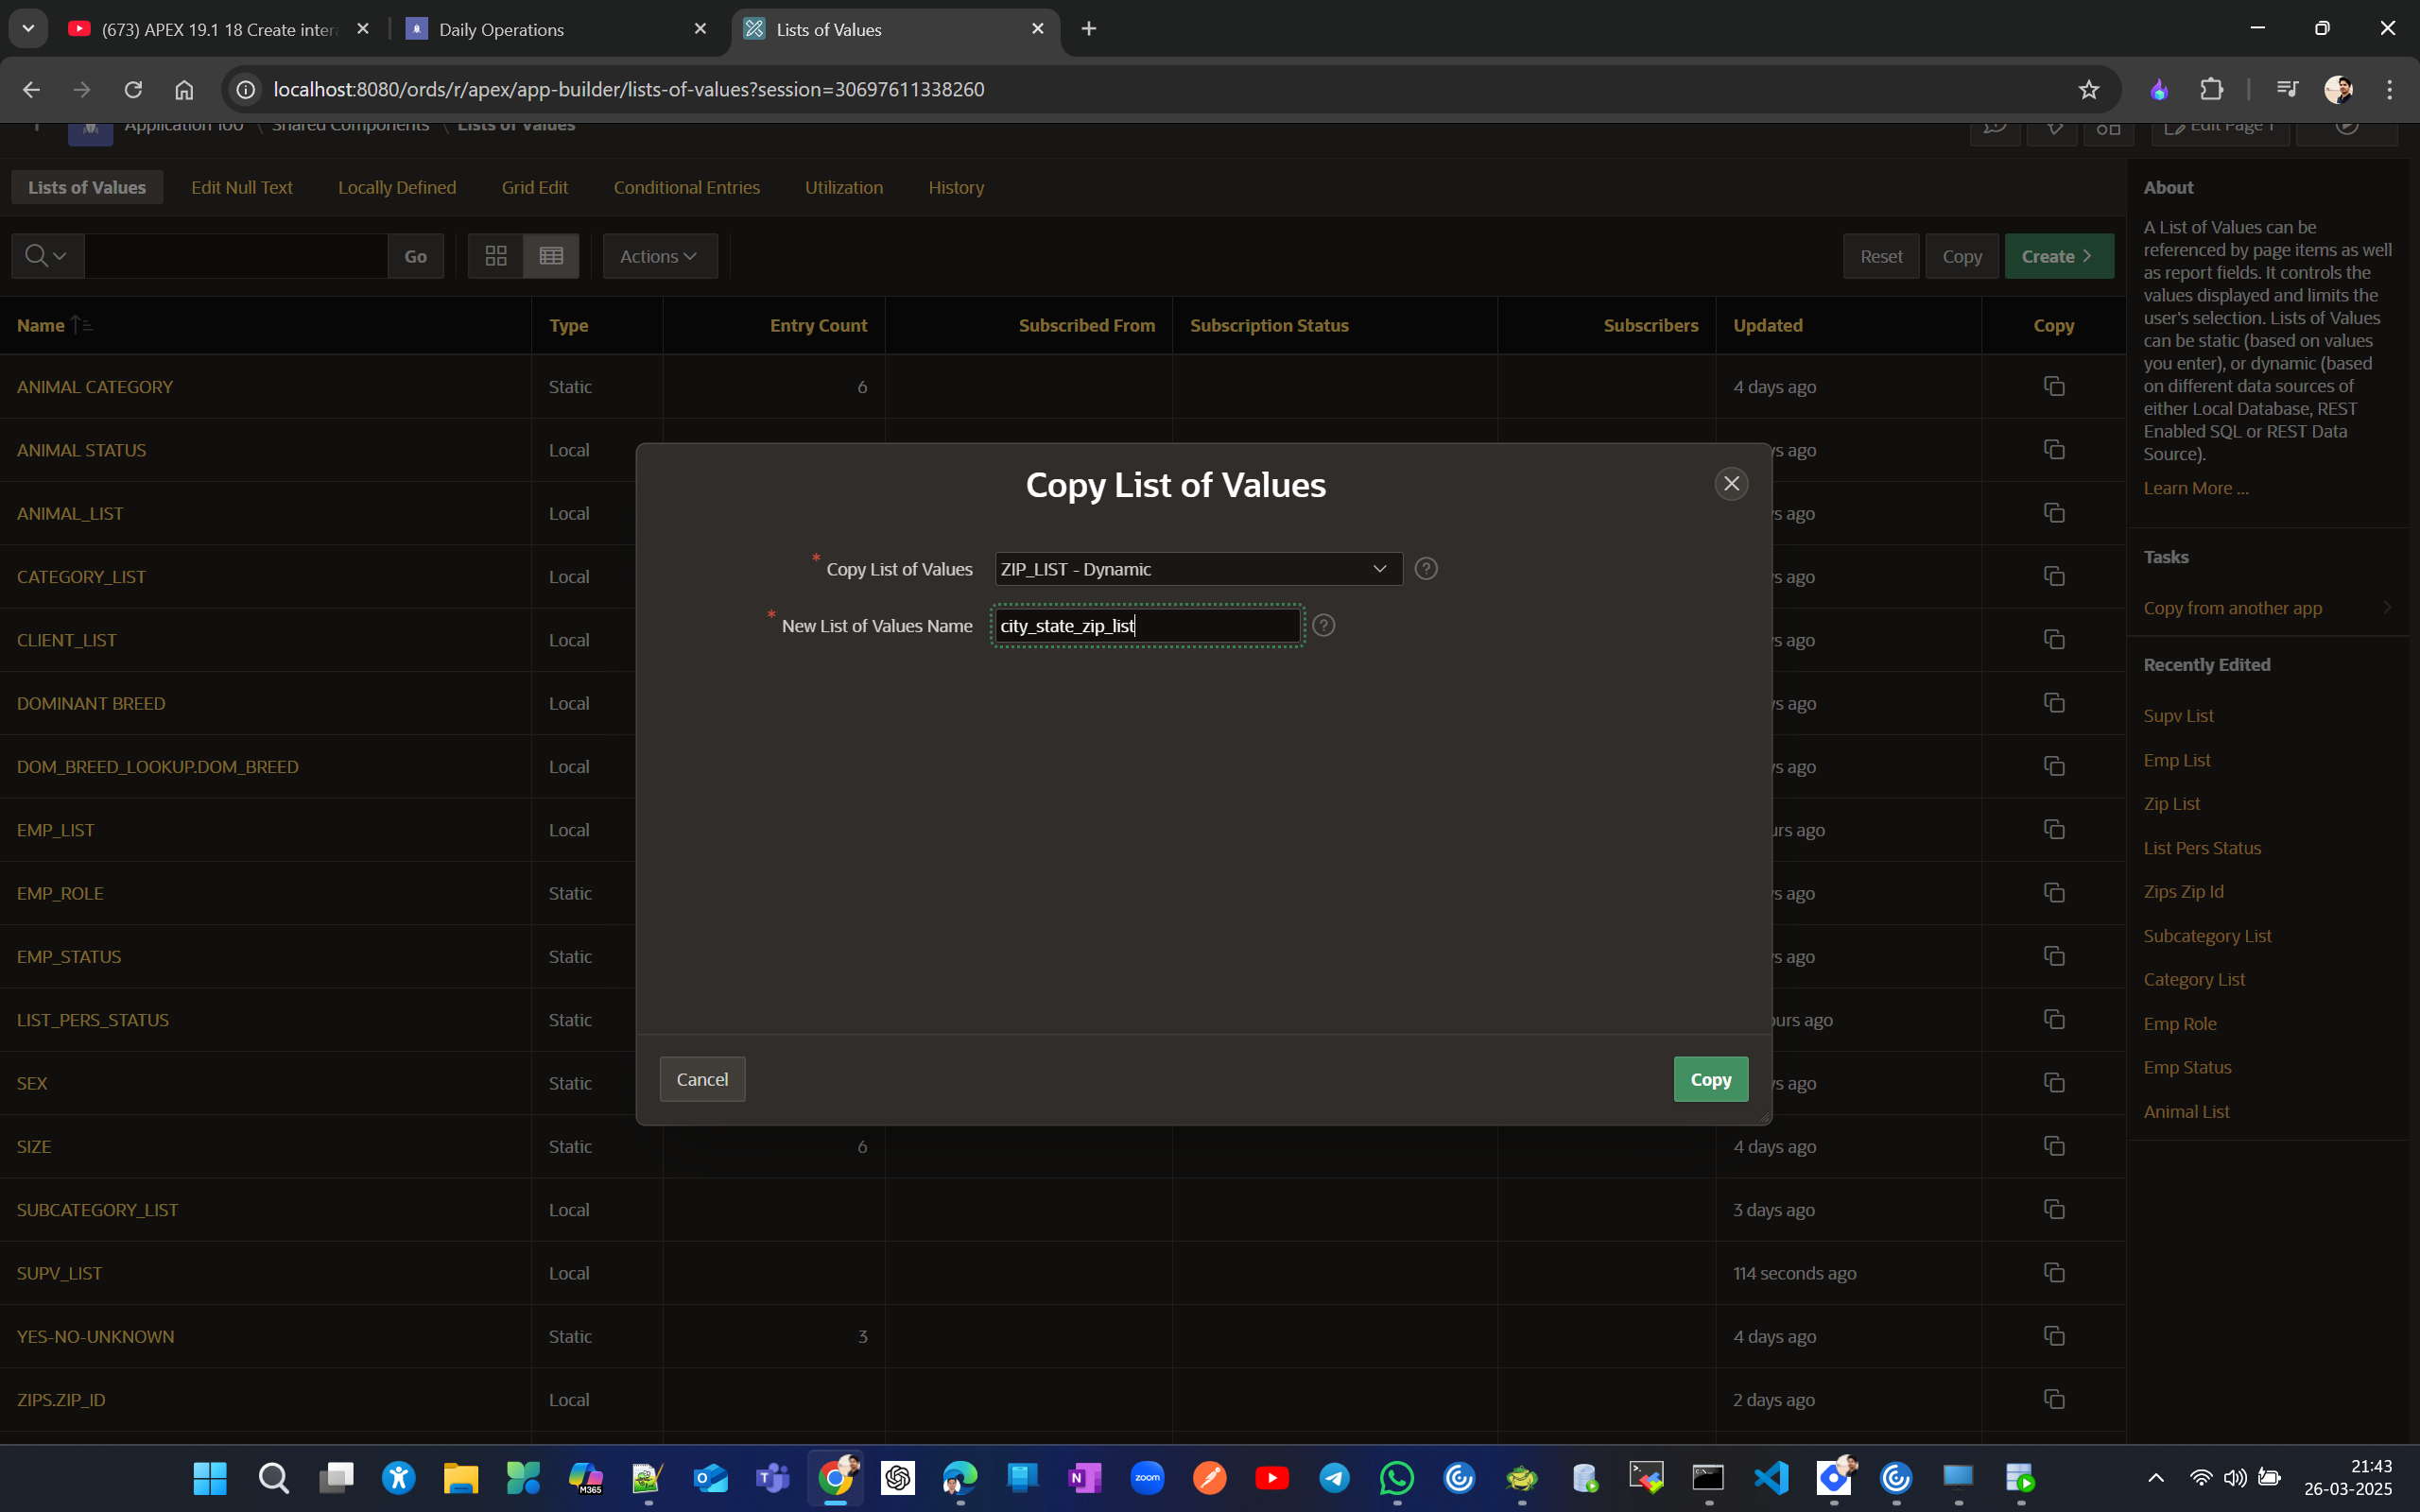
Copy ZIP_LIST lov to create a new city_state_zip_list
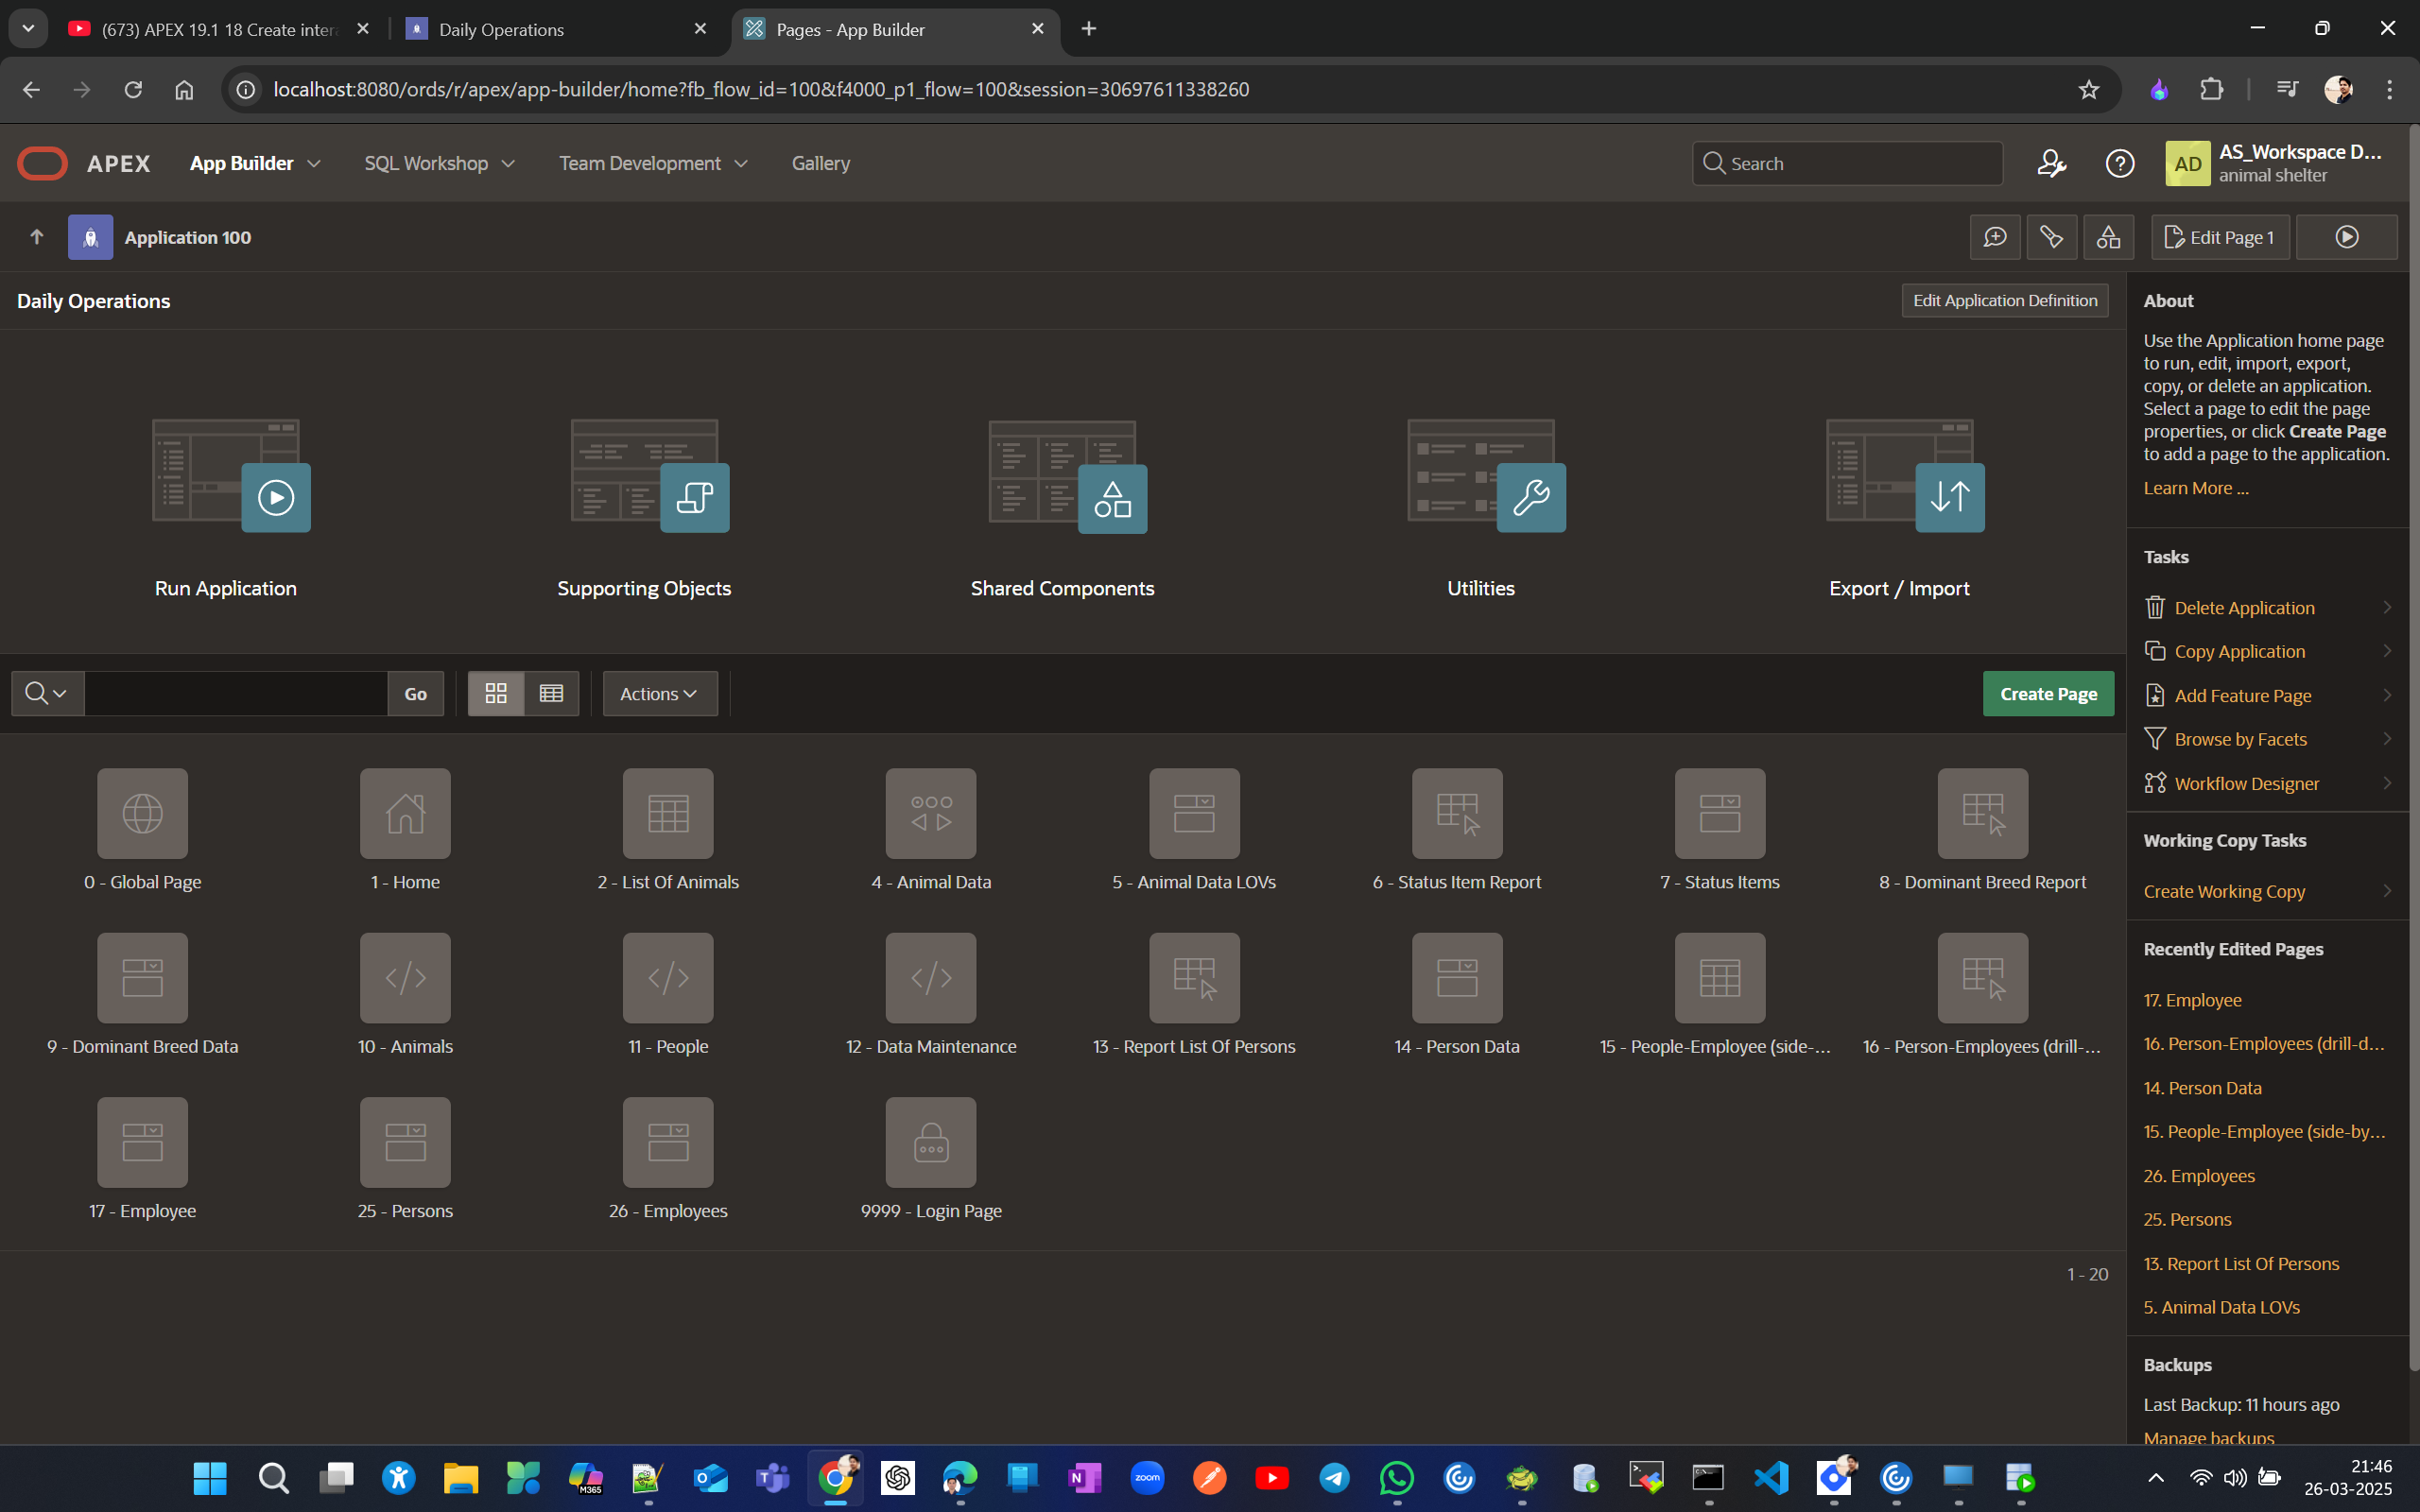
Pages till now
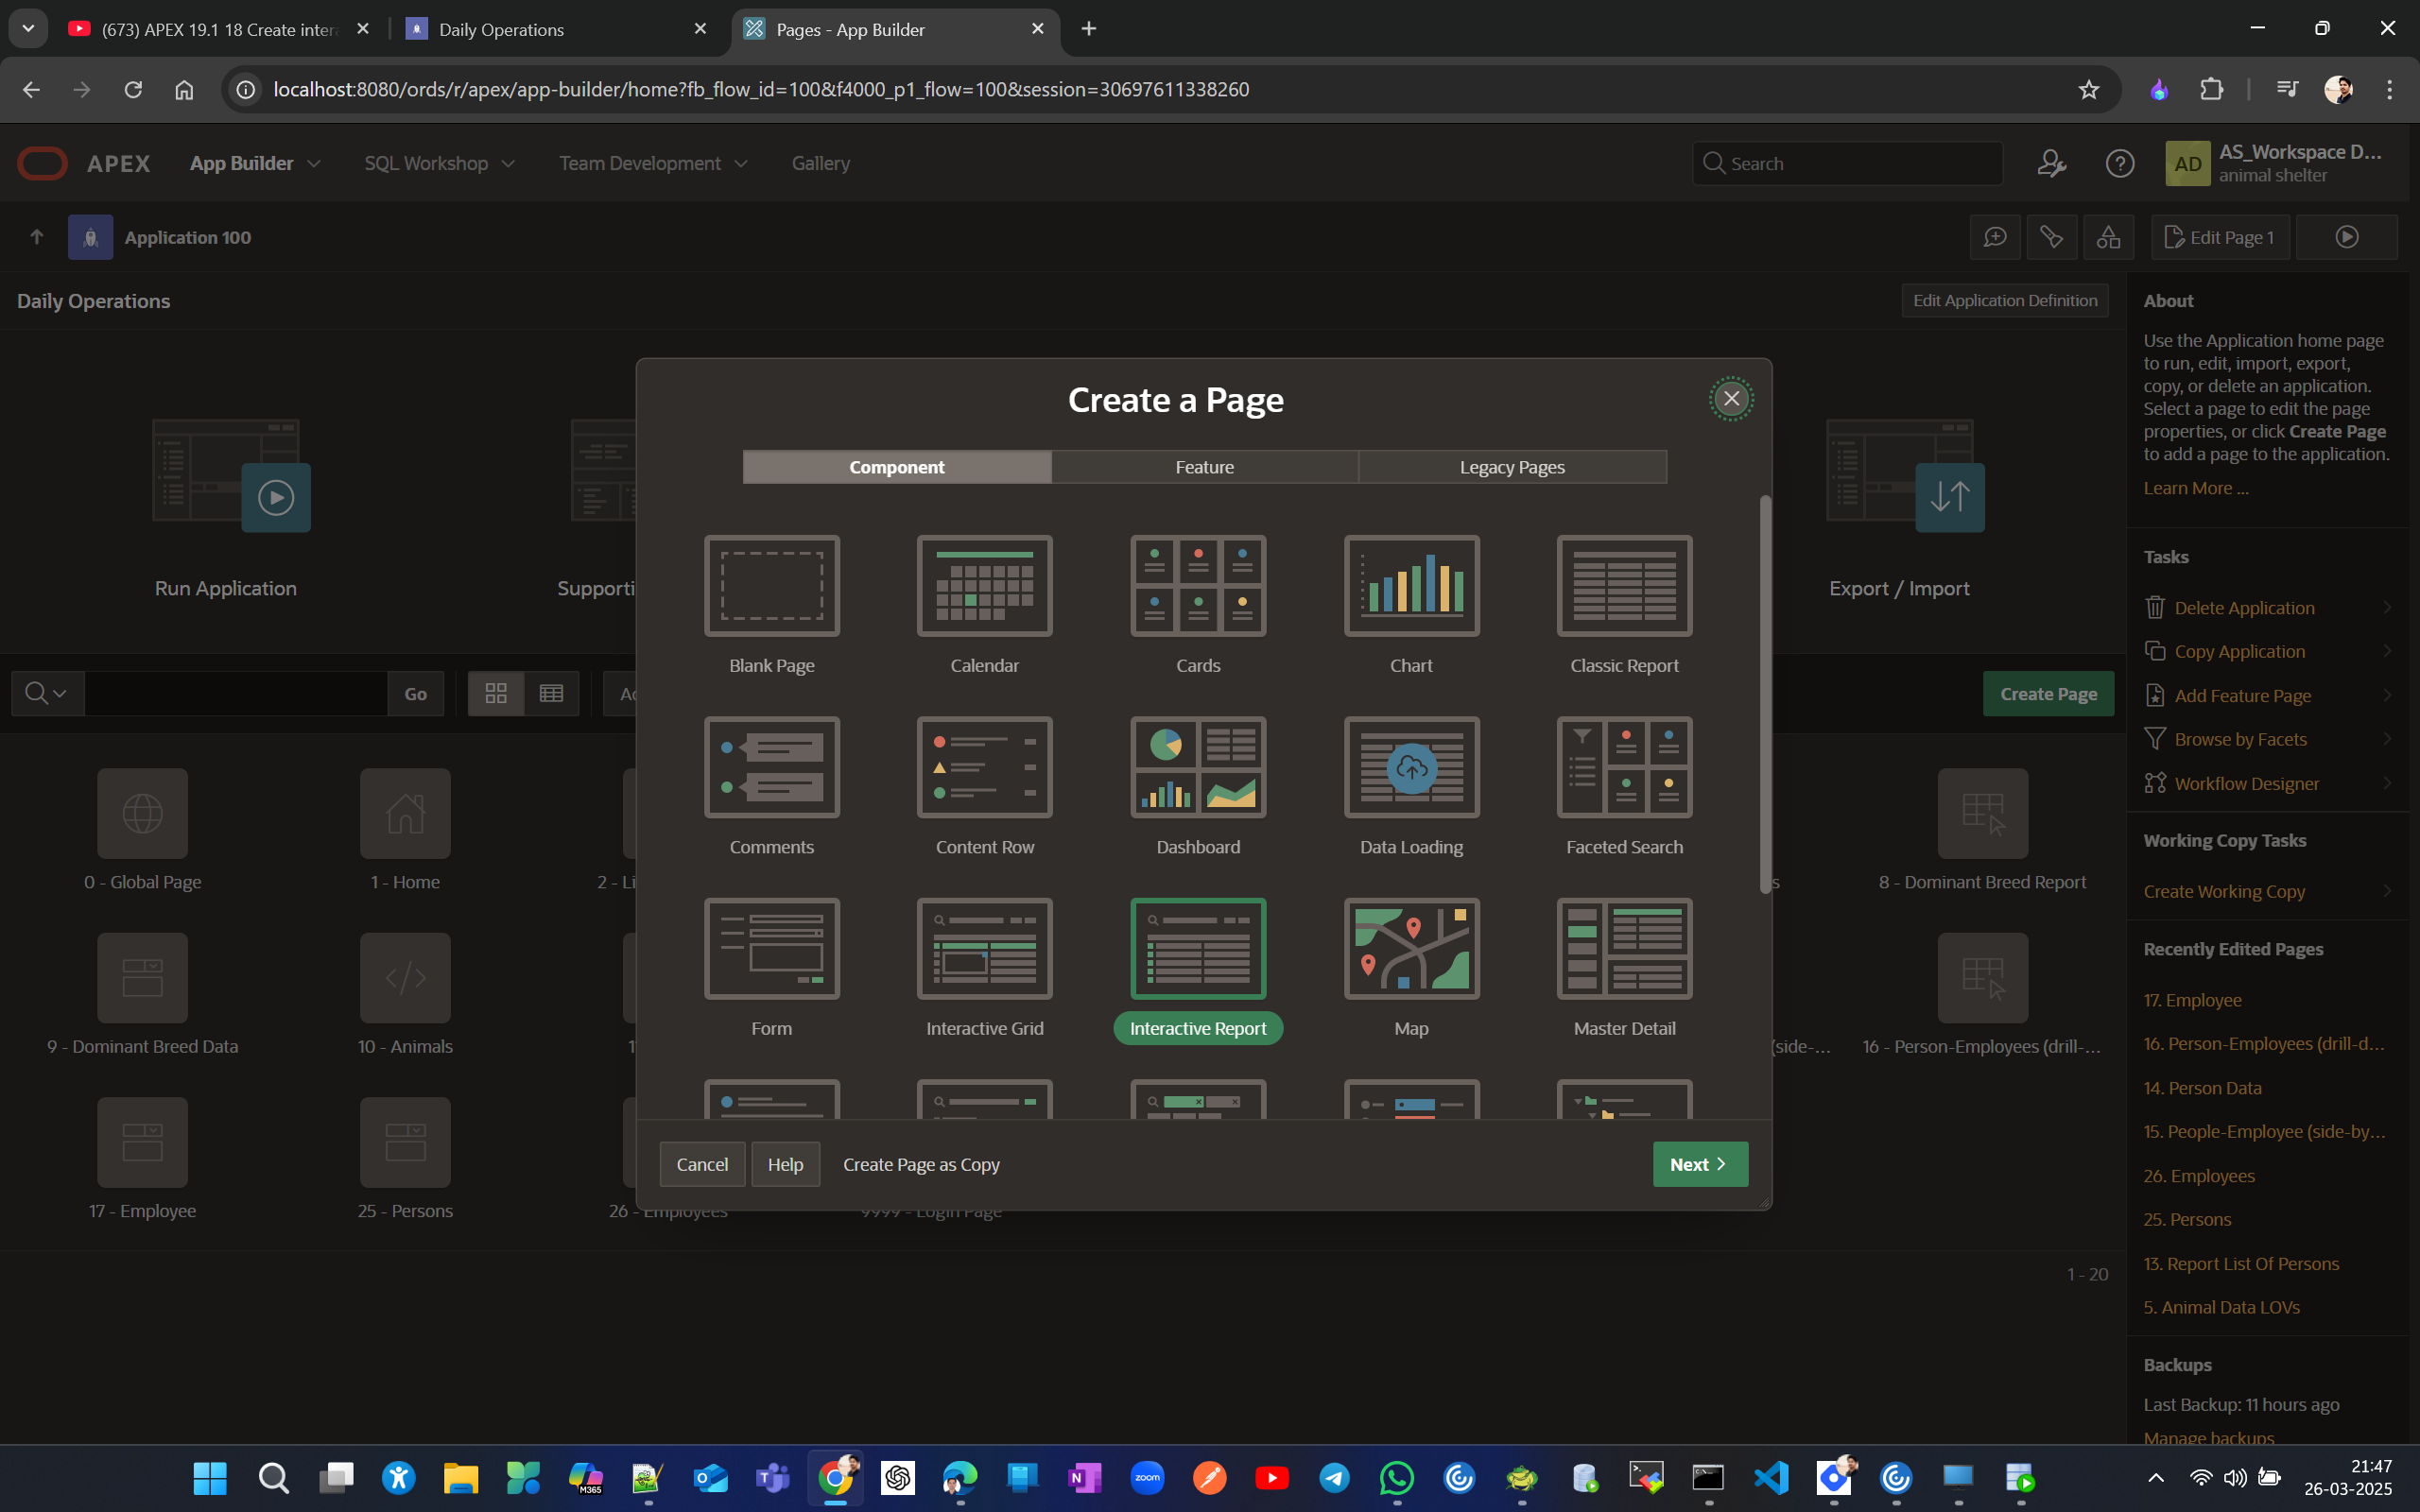
Now lets create a interactive report page
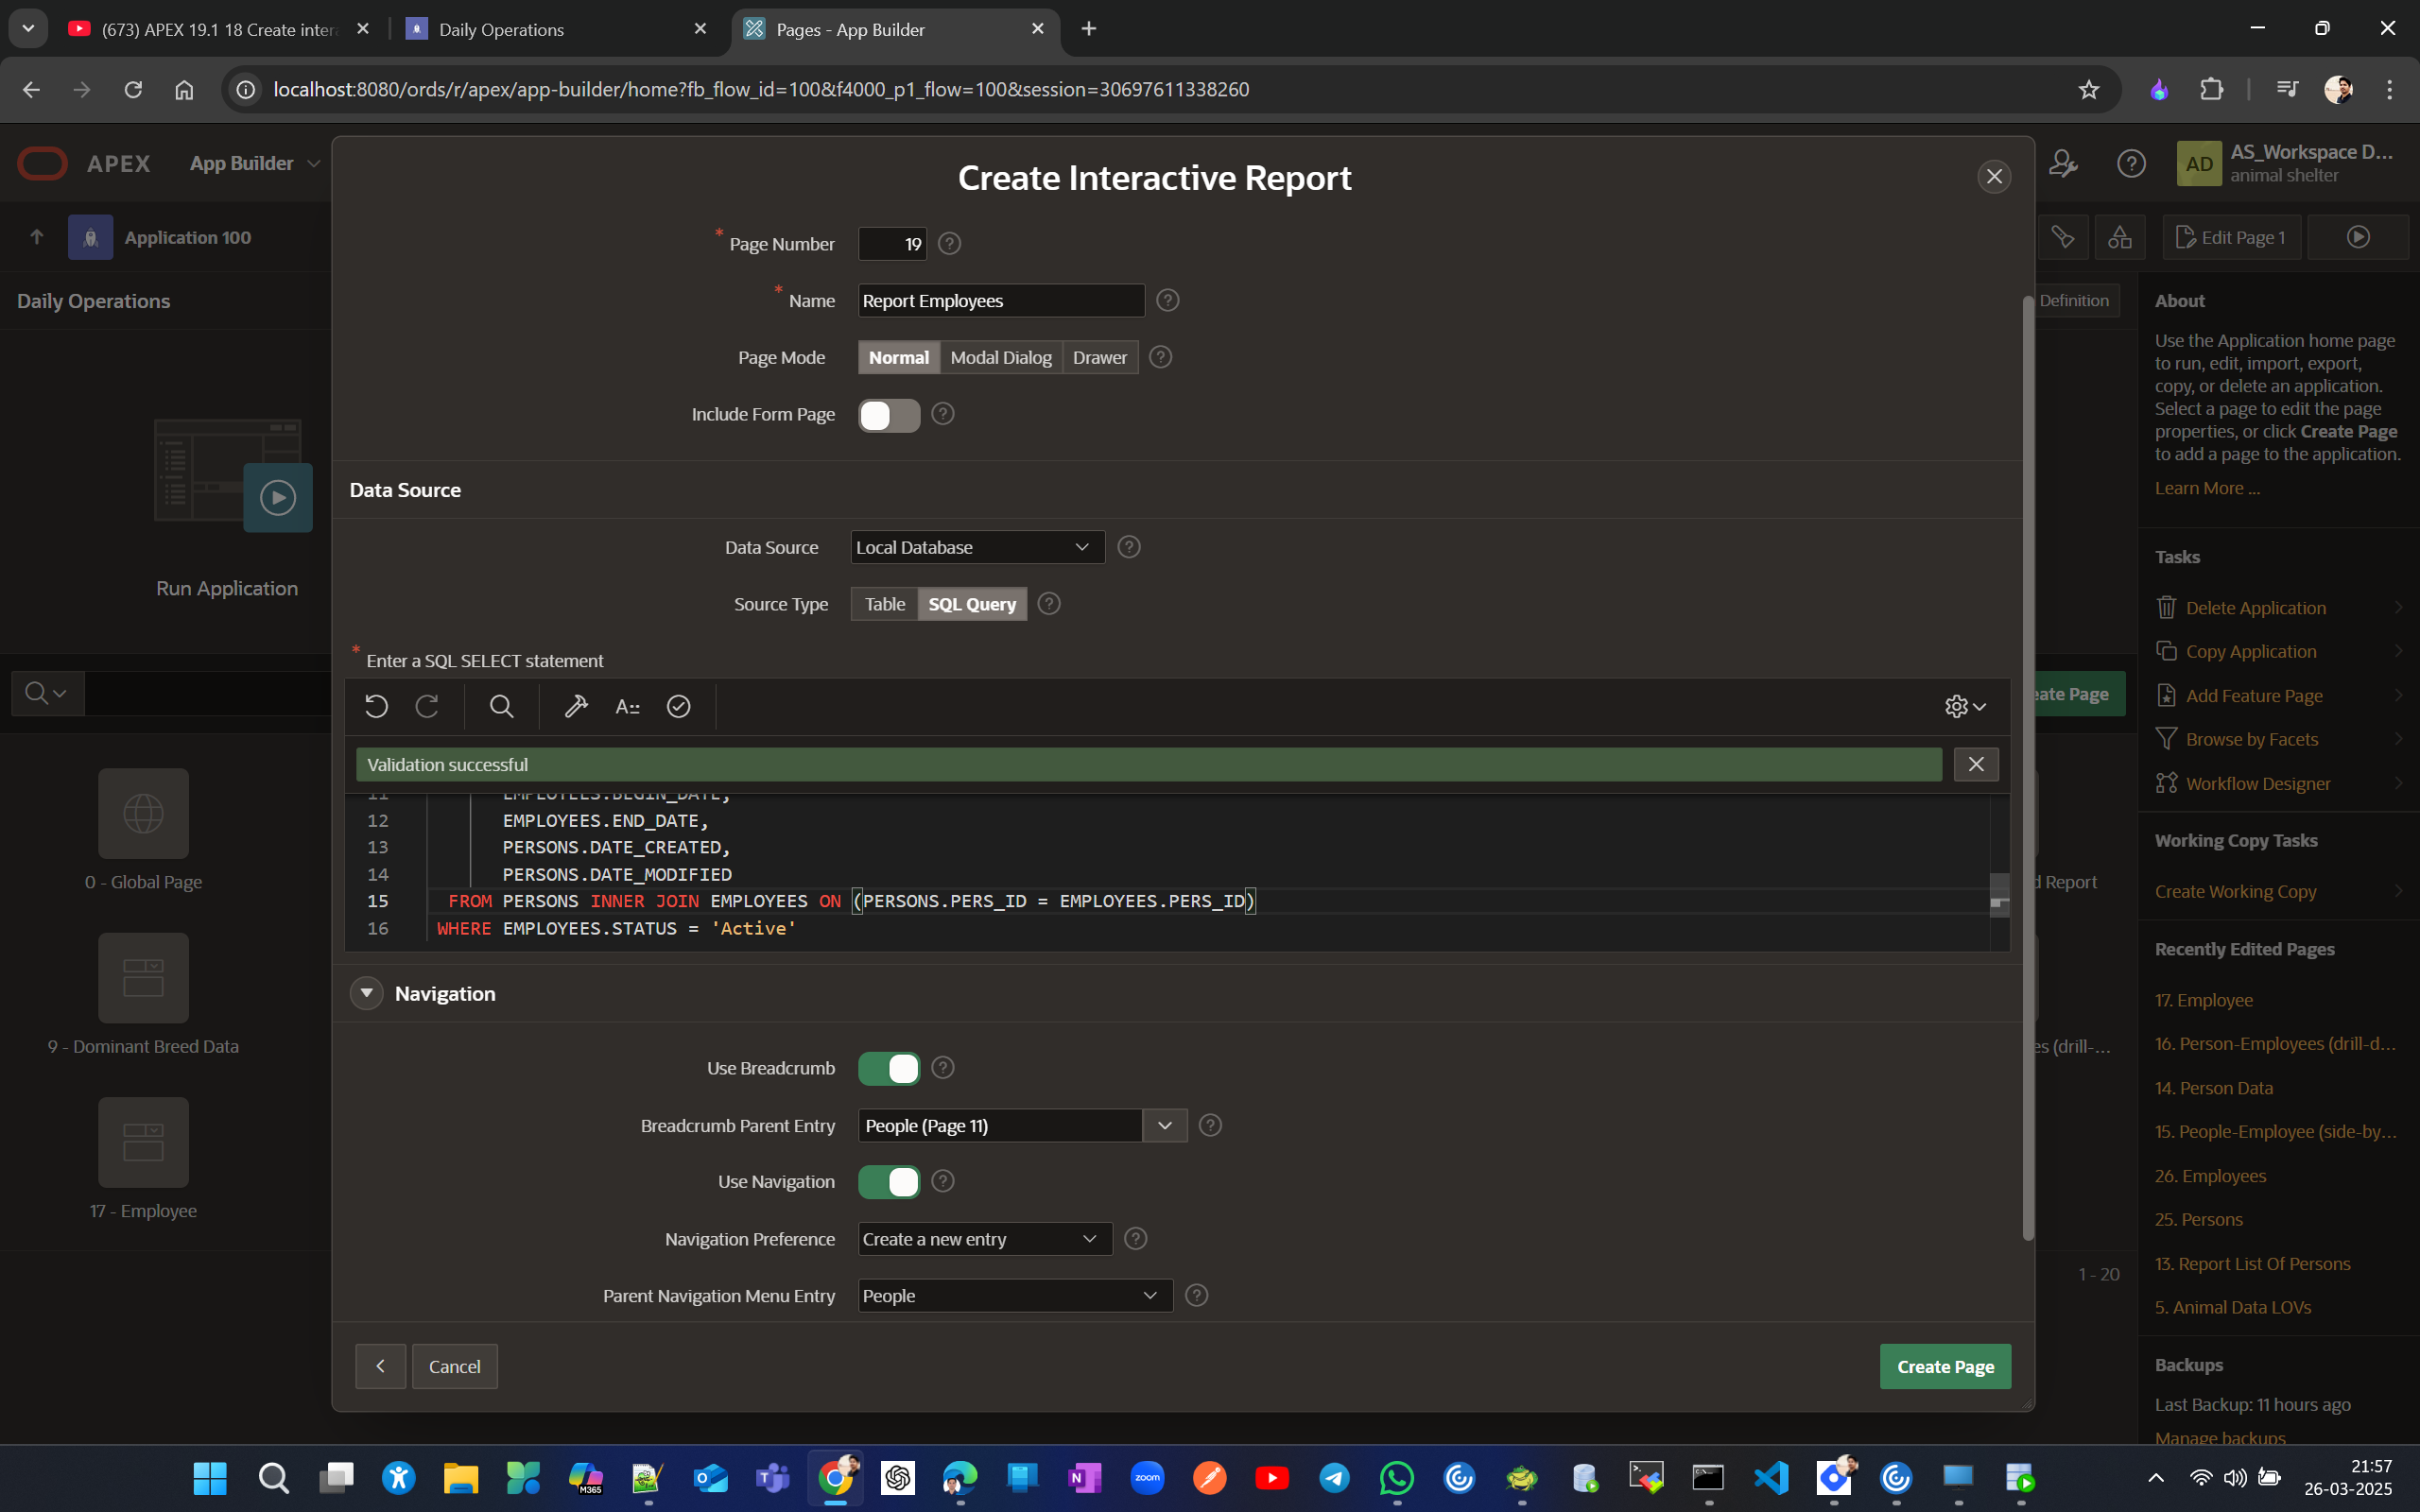
SELECT PERSONS.PERS_ID,
       PERSONS.FNAME,
       PERSONS.MNAME,
       PERSONS.LNAME,
       PERSONS.ADDR,
       PERSONS.ZIP,
       PERSONS.PHONE_NUM,
       EMPLOYEES.STATUS,
       EMPLOYEES.ROLE,
       EMPLOYEES.SUPV_ID,
       EMPLOYEES.BEGIN_DATE,
       EMPLOYEES.END_DATE,
       PERSONS.DATE_CREATED,
       PERSONS.DATE_MODIFIED
  FROM PERSONS INNER JOIN EMPLOYEES ON (PERSONS.PERS_ID = EMPLOYEES.PERS_ID)
 WHERE EMPLOYEES.STATUS = 'Active'
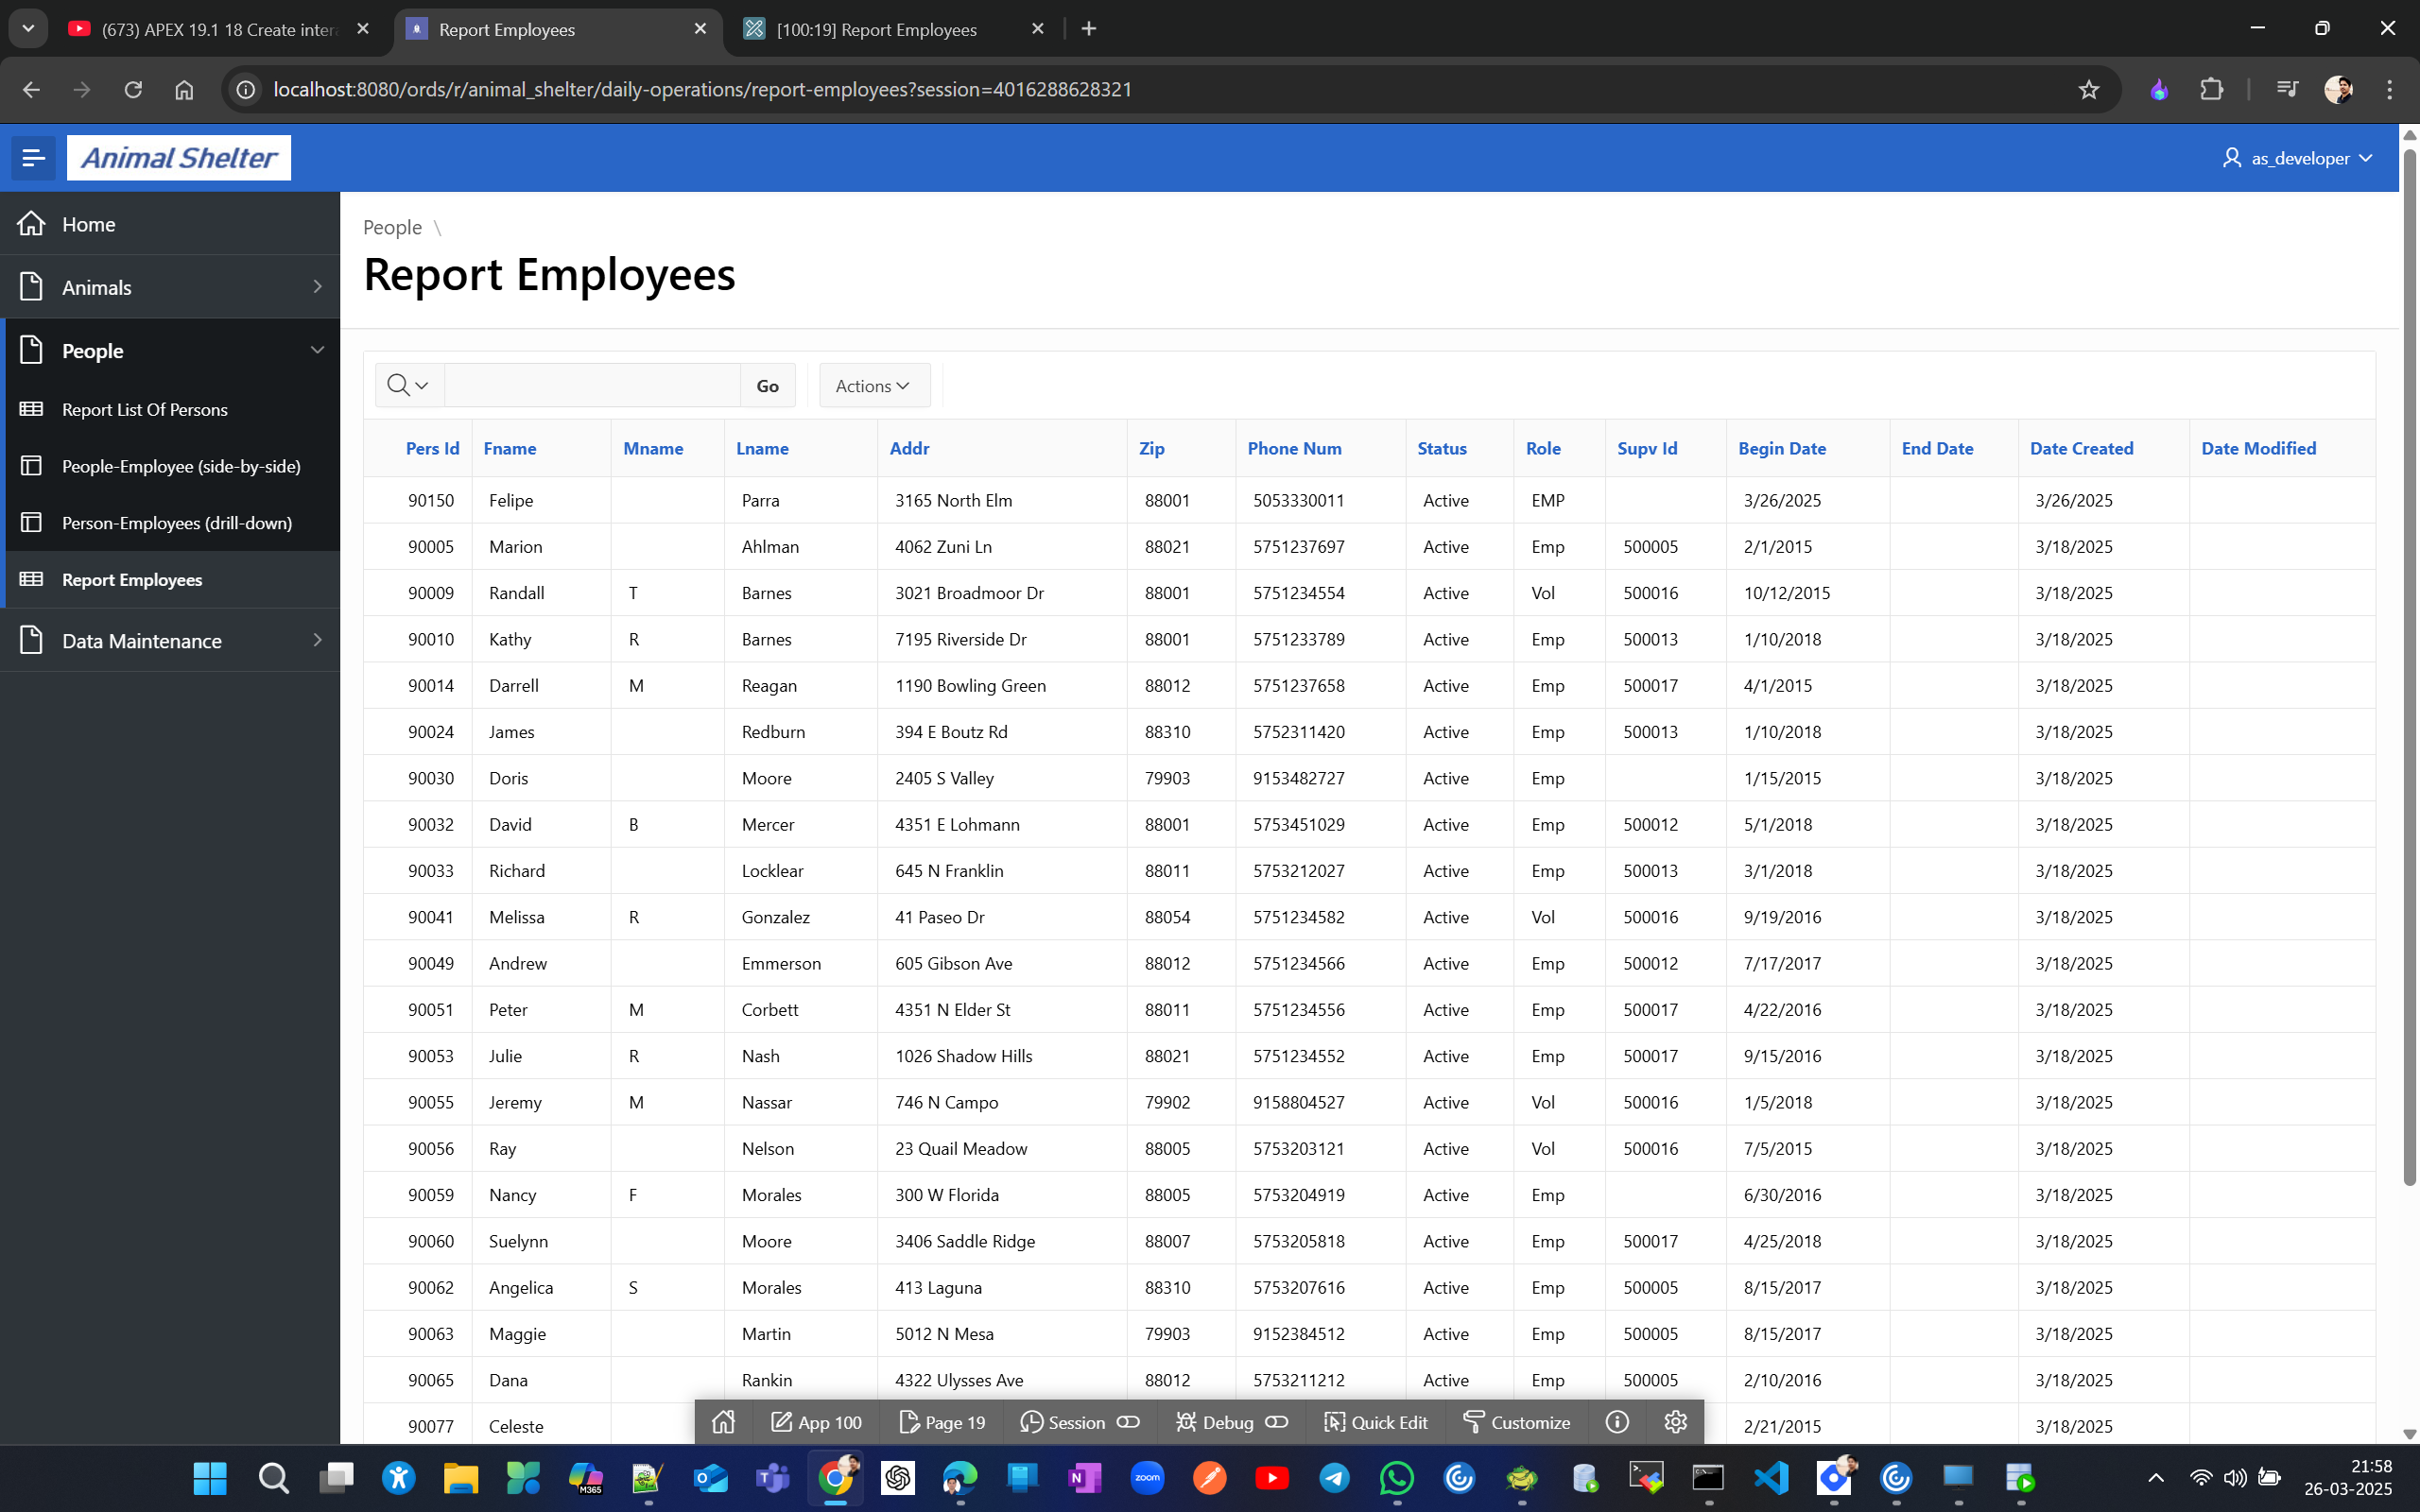
Now let's display the city_state_zip LOV instead of only the zip on the newly created UI interactive report.
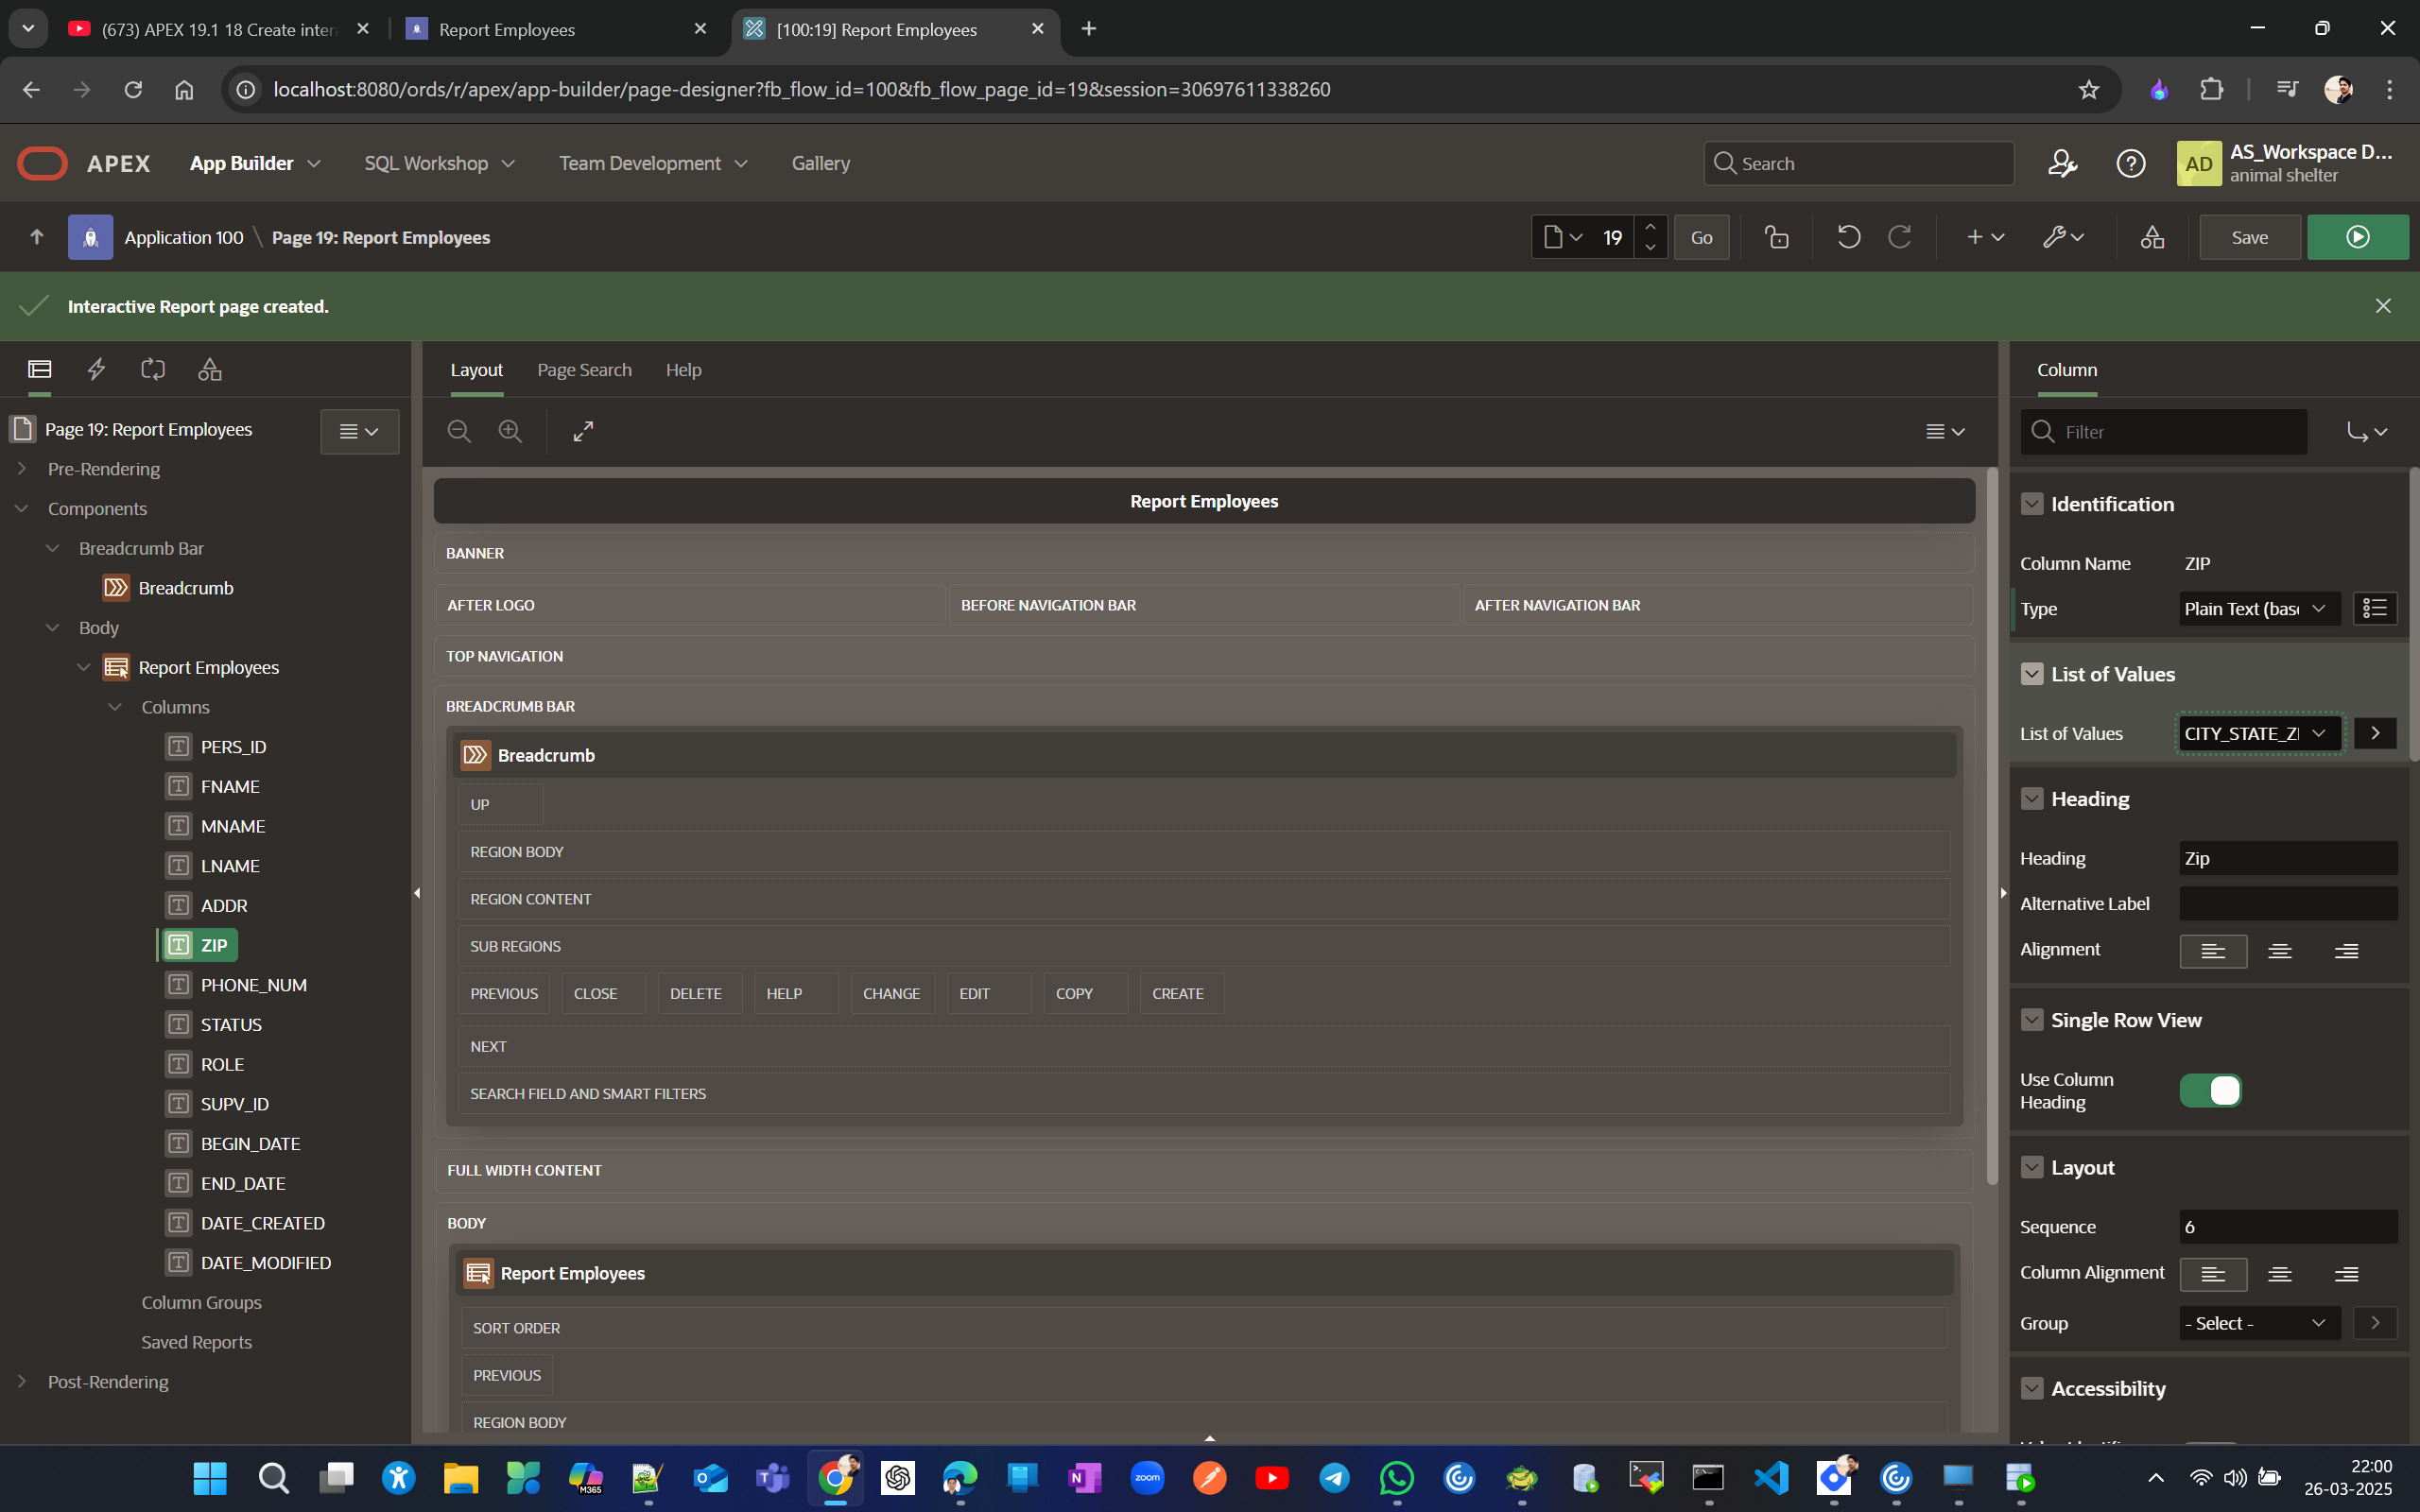
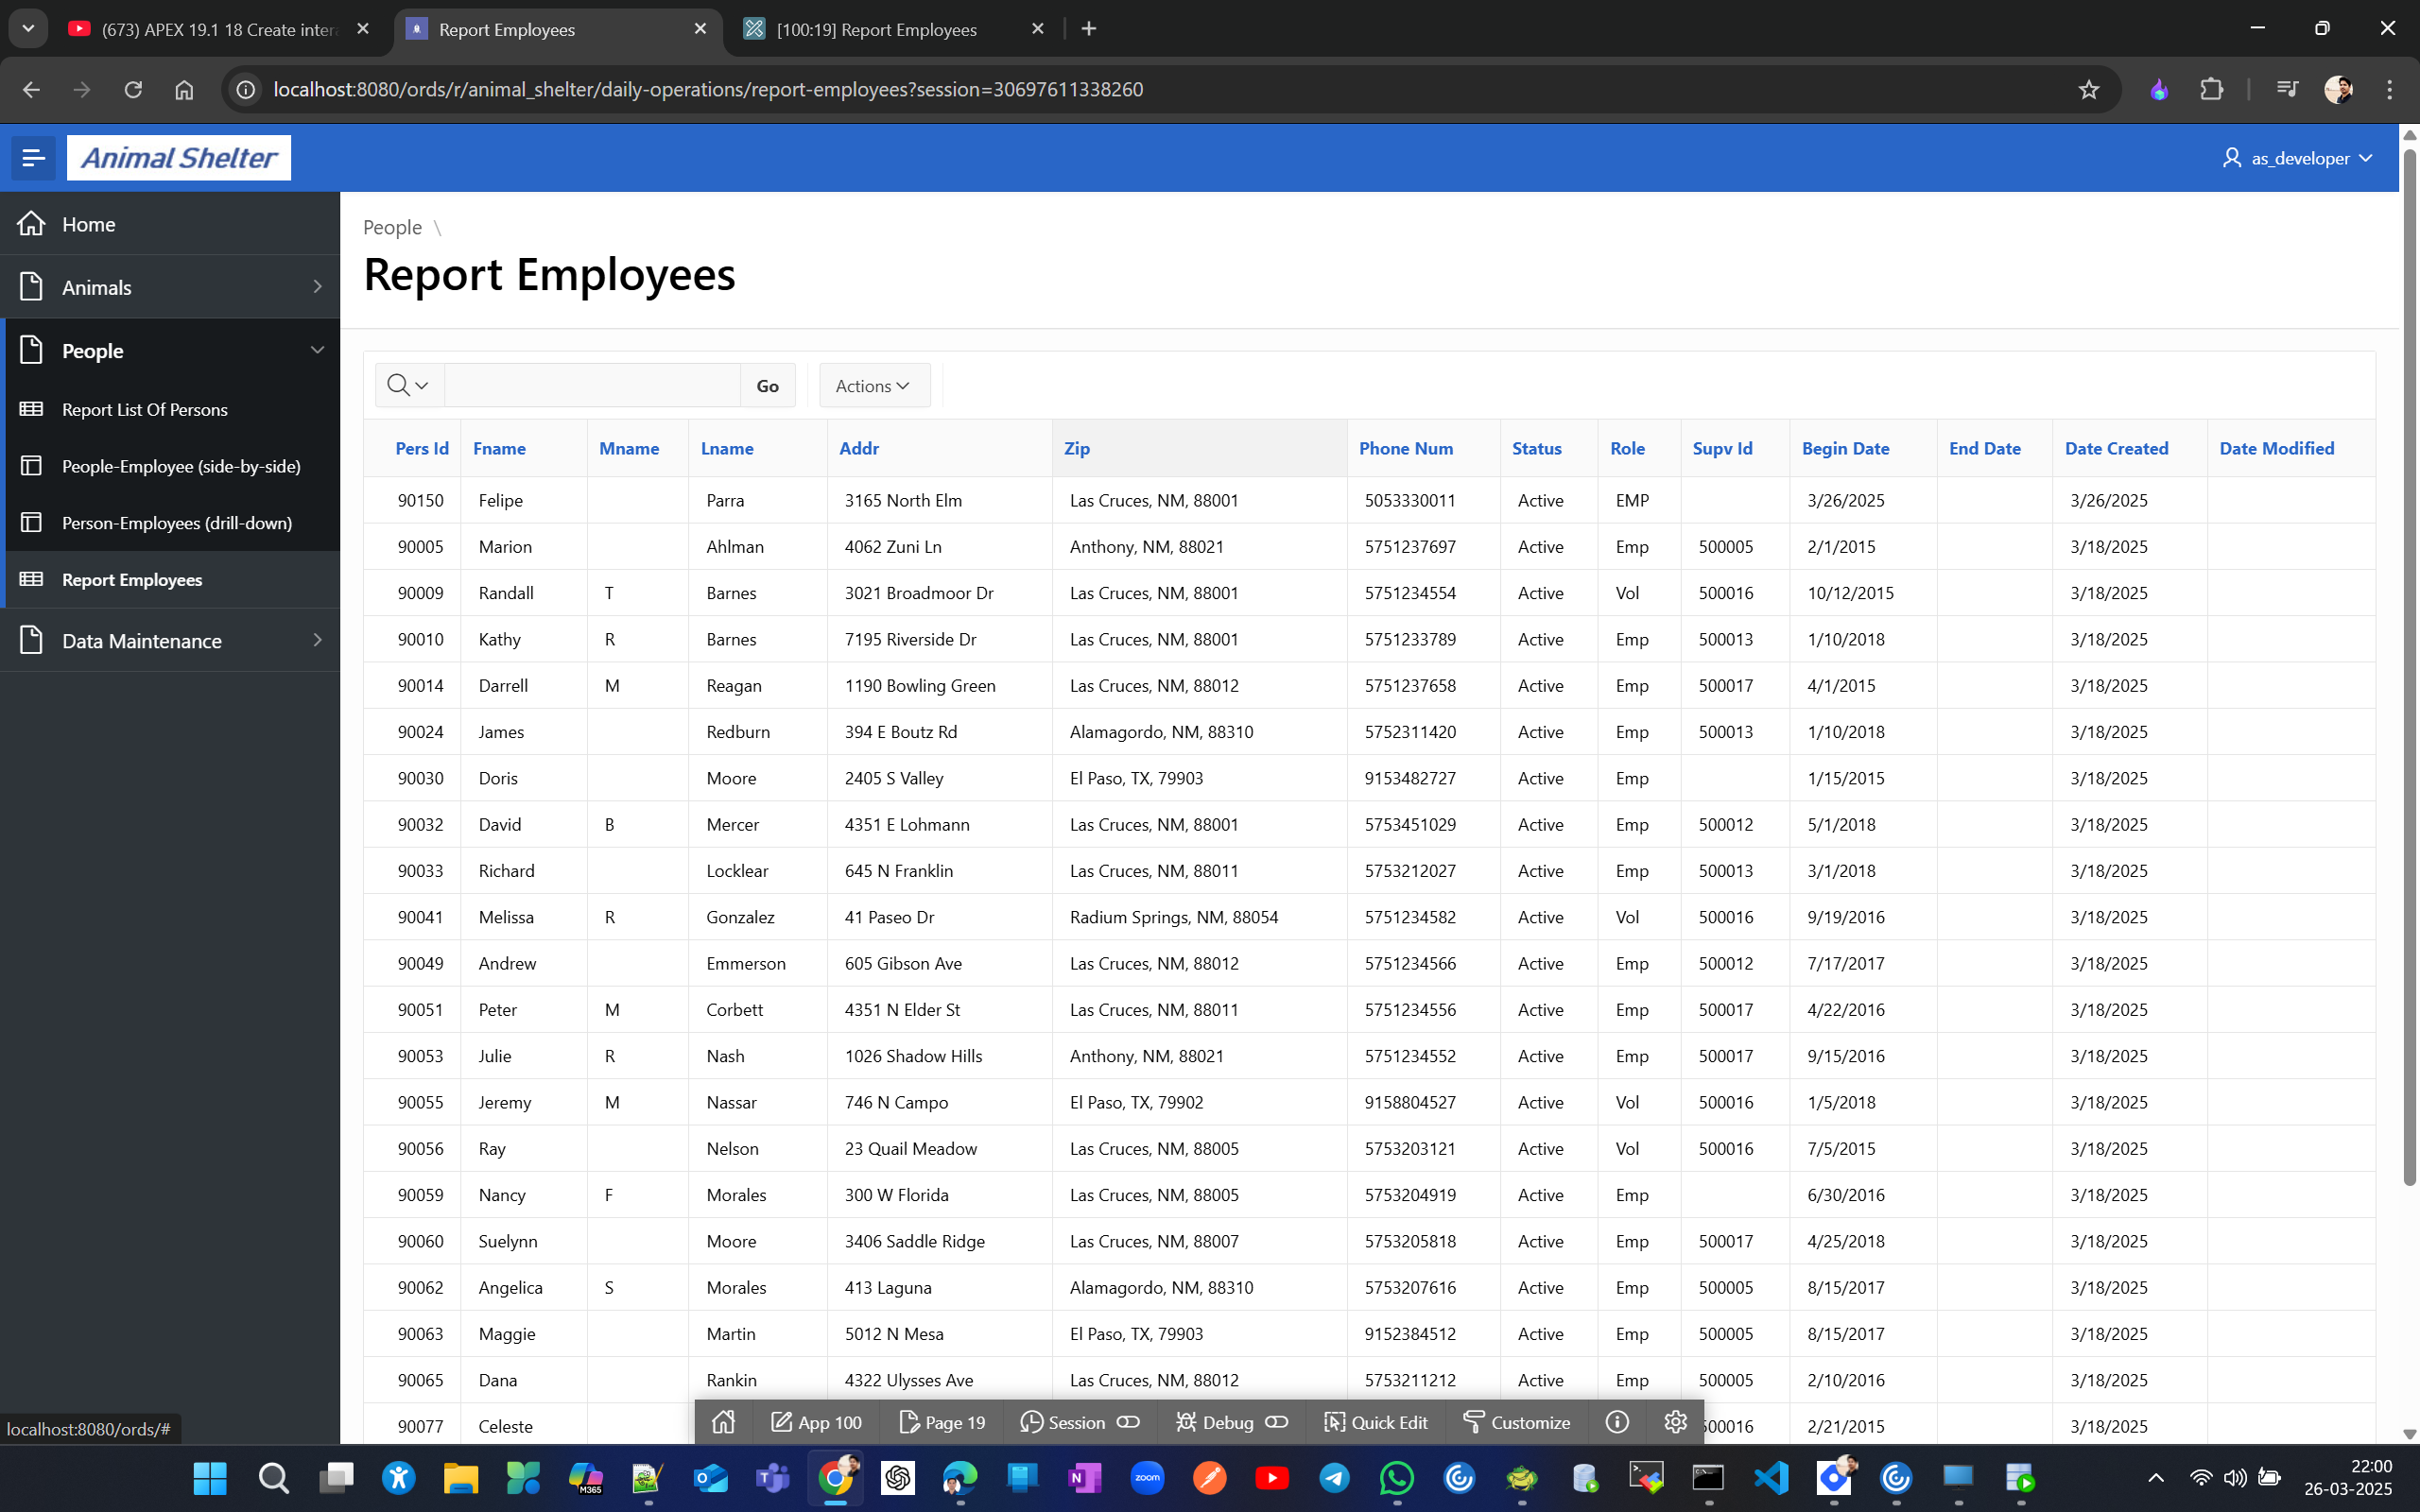
Now we’ll display a formatted phone number. for that we will create a dynamic LOV from scratch.
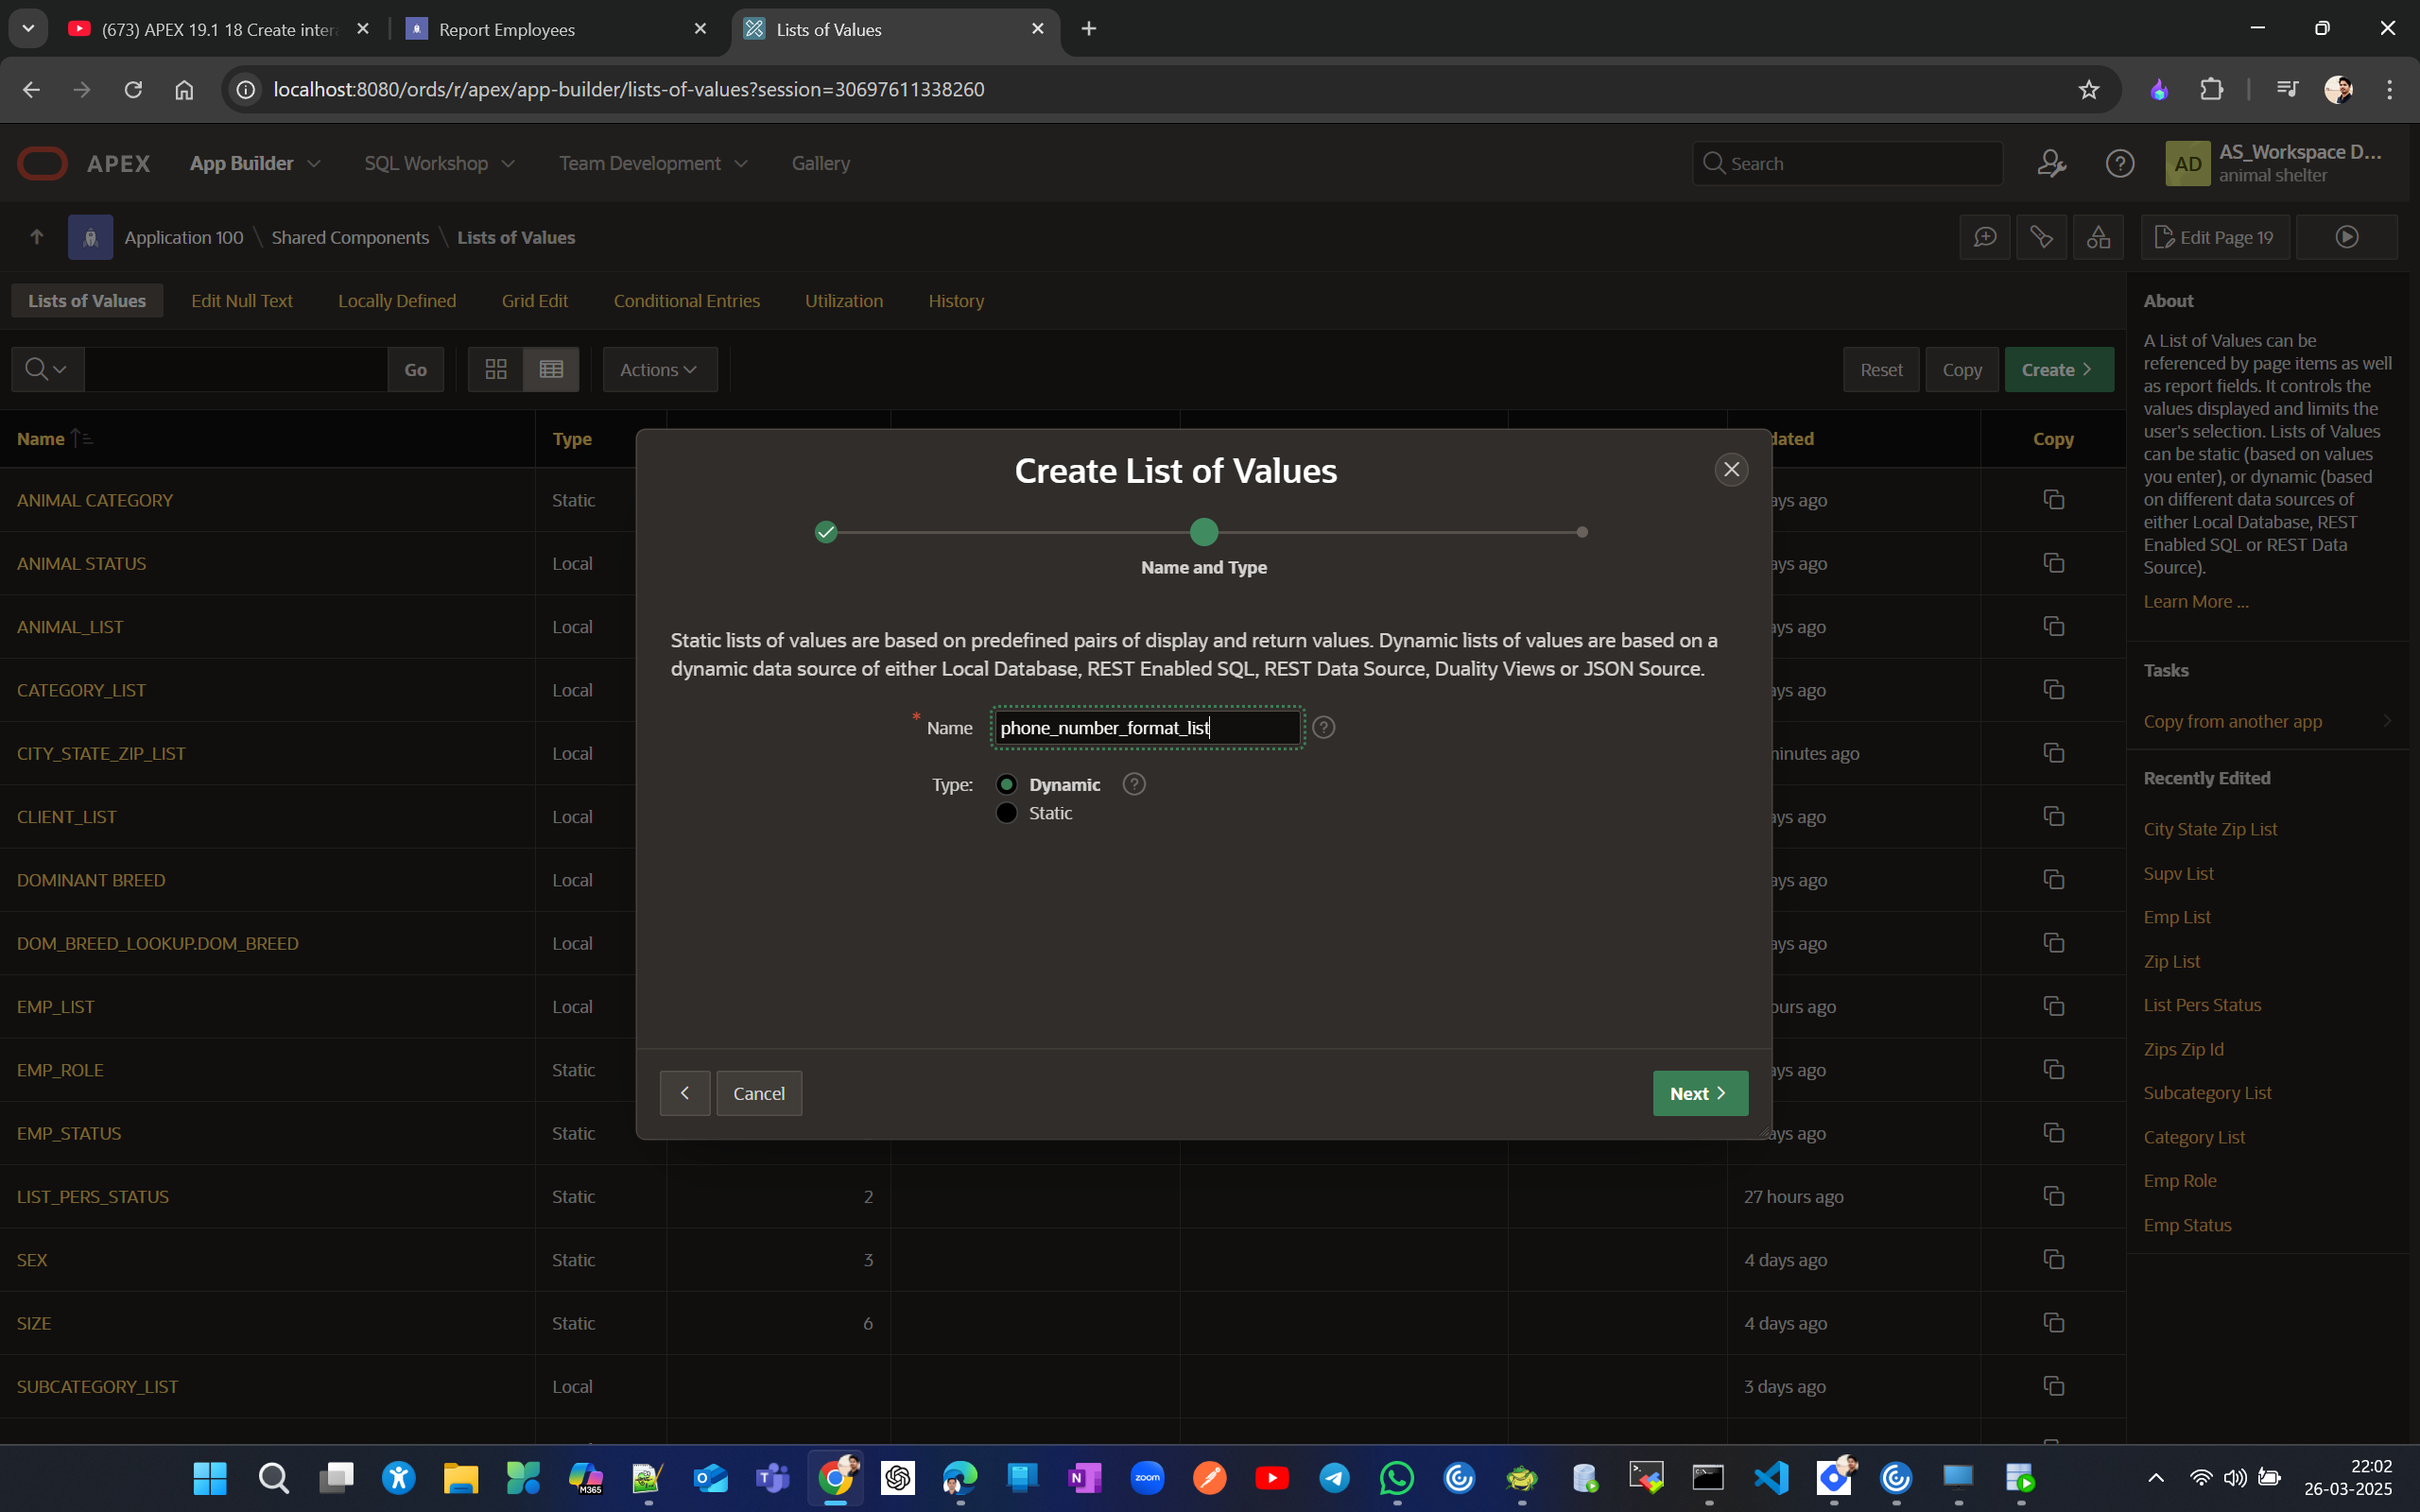
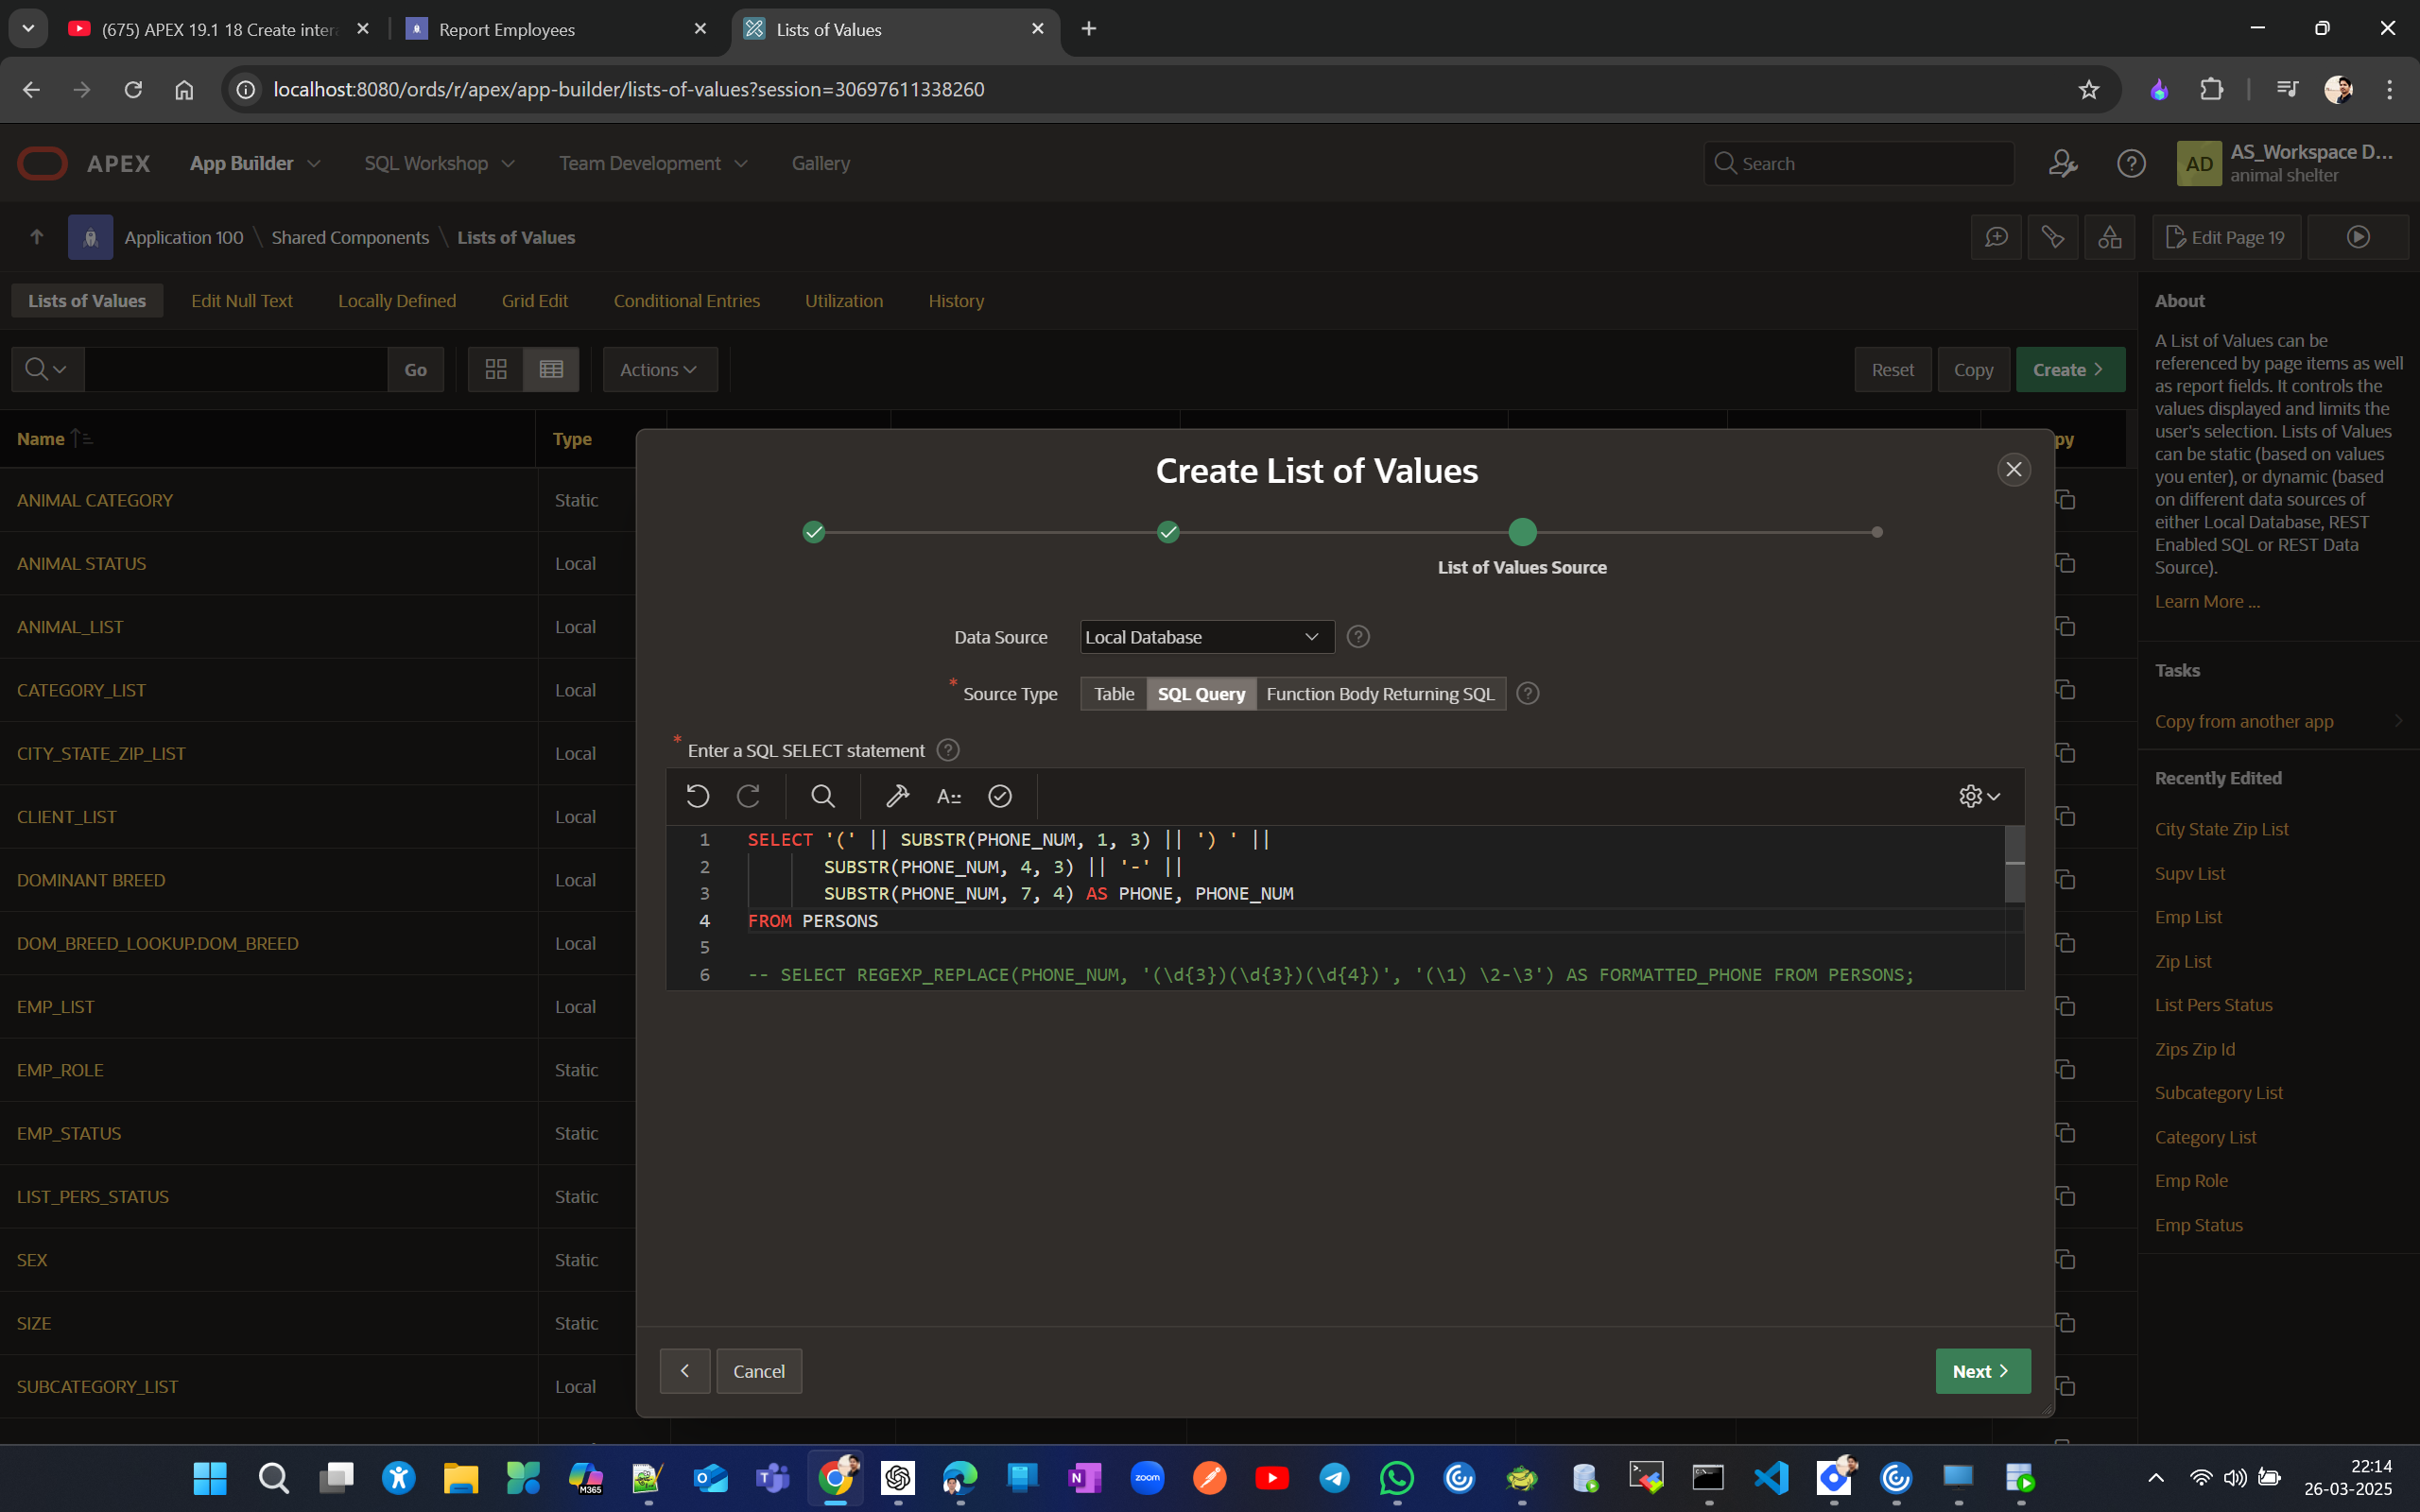
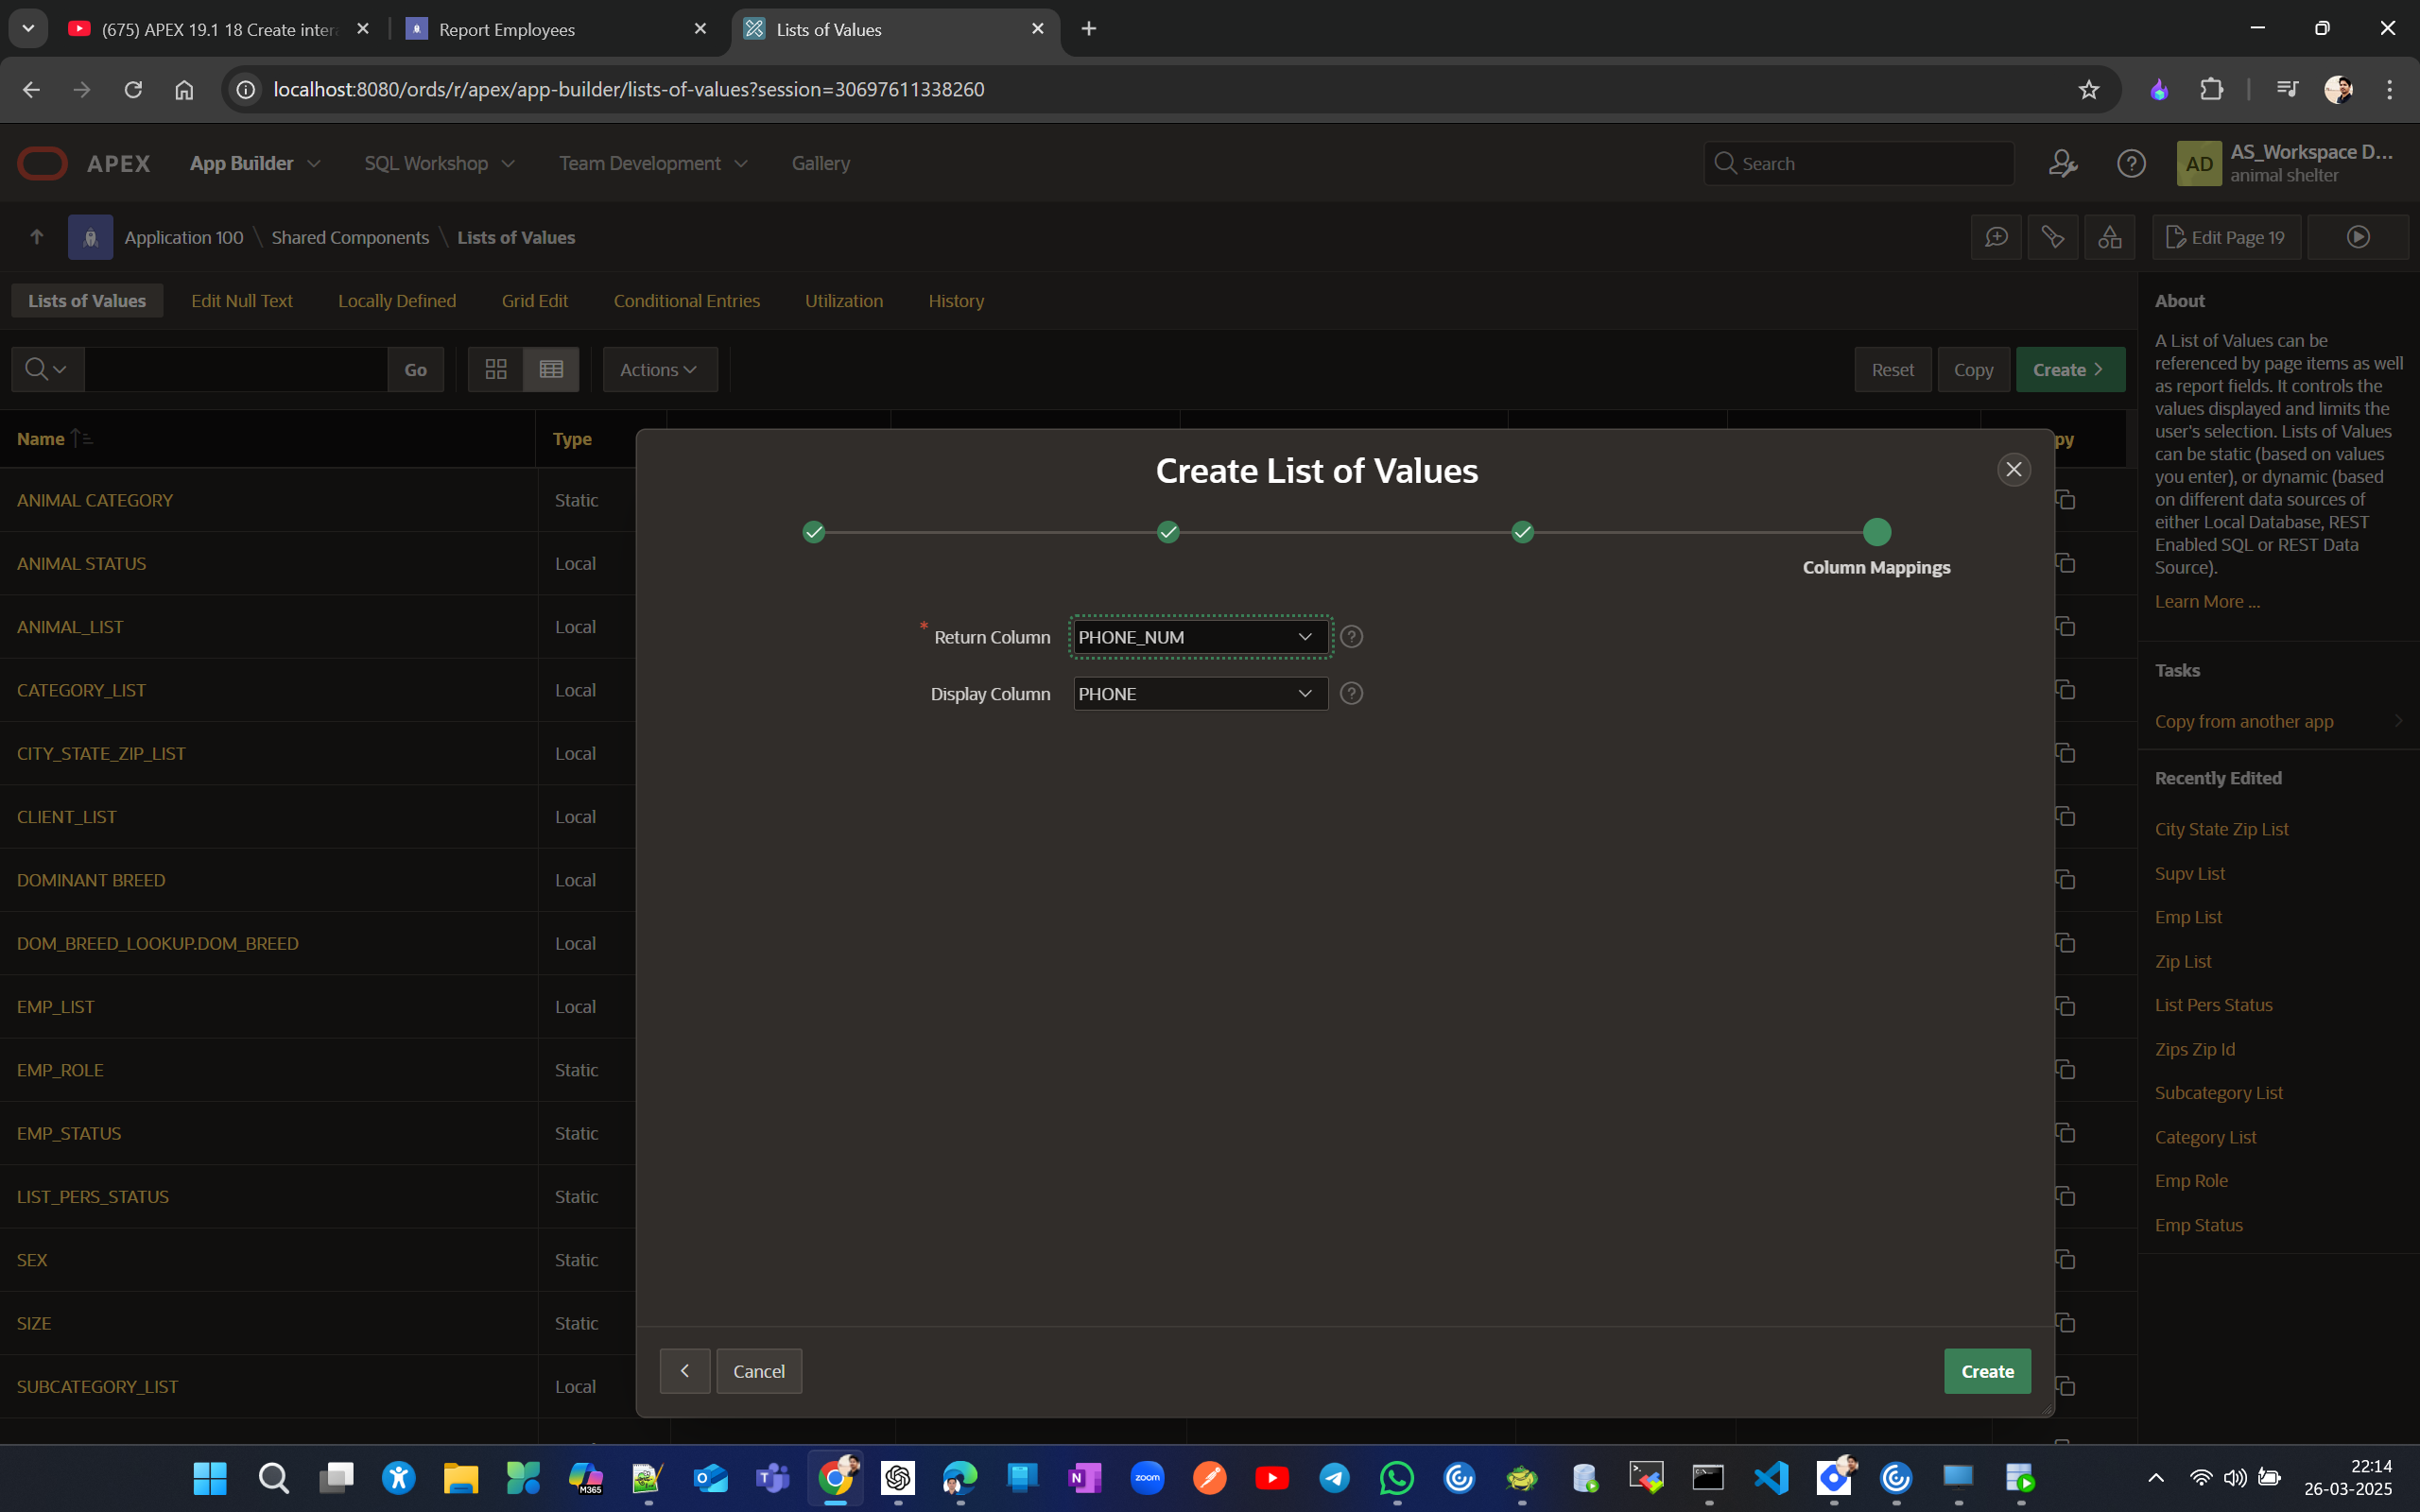
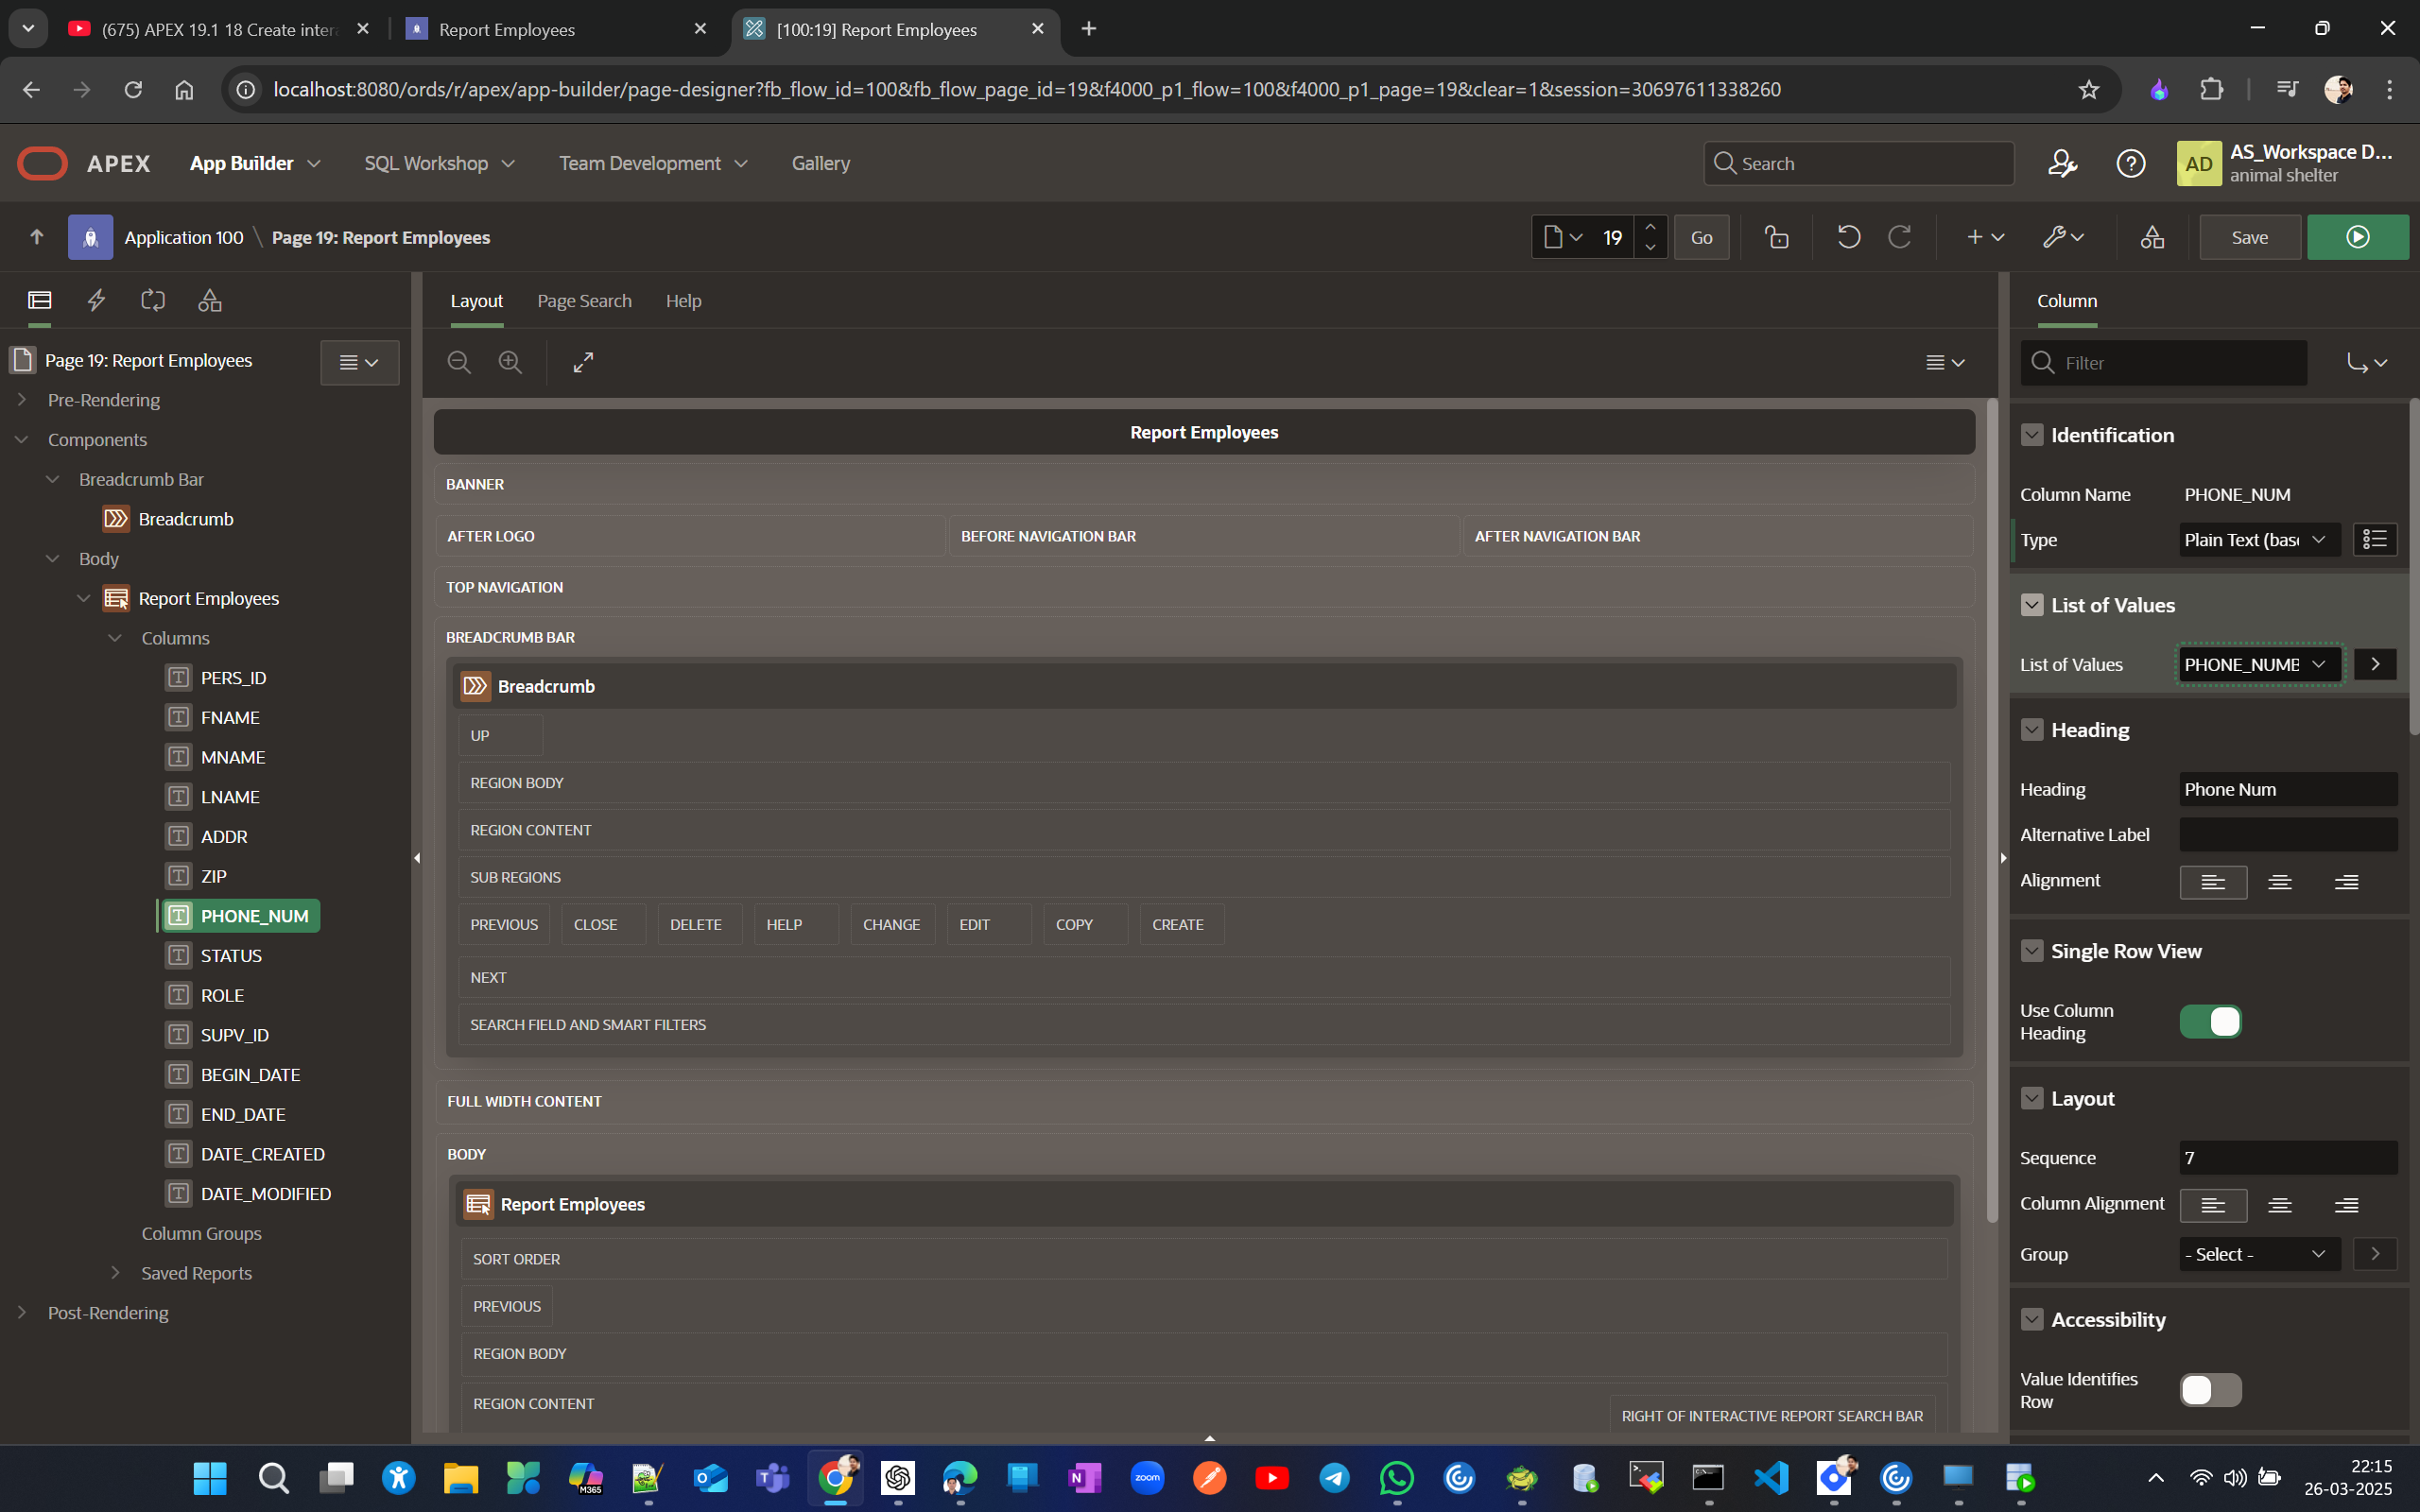
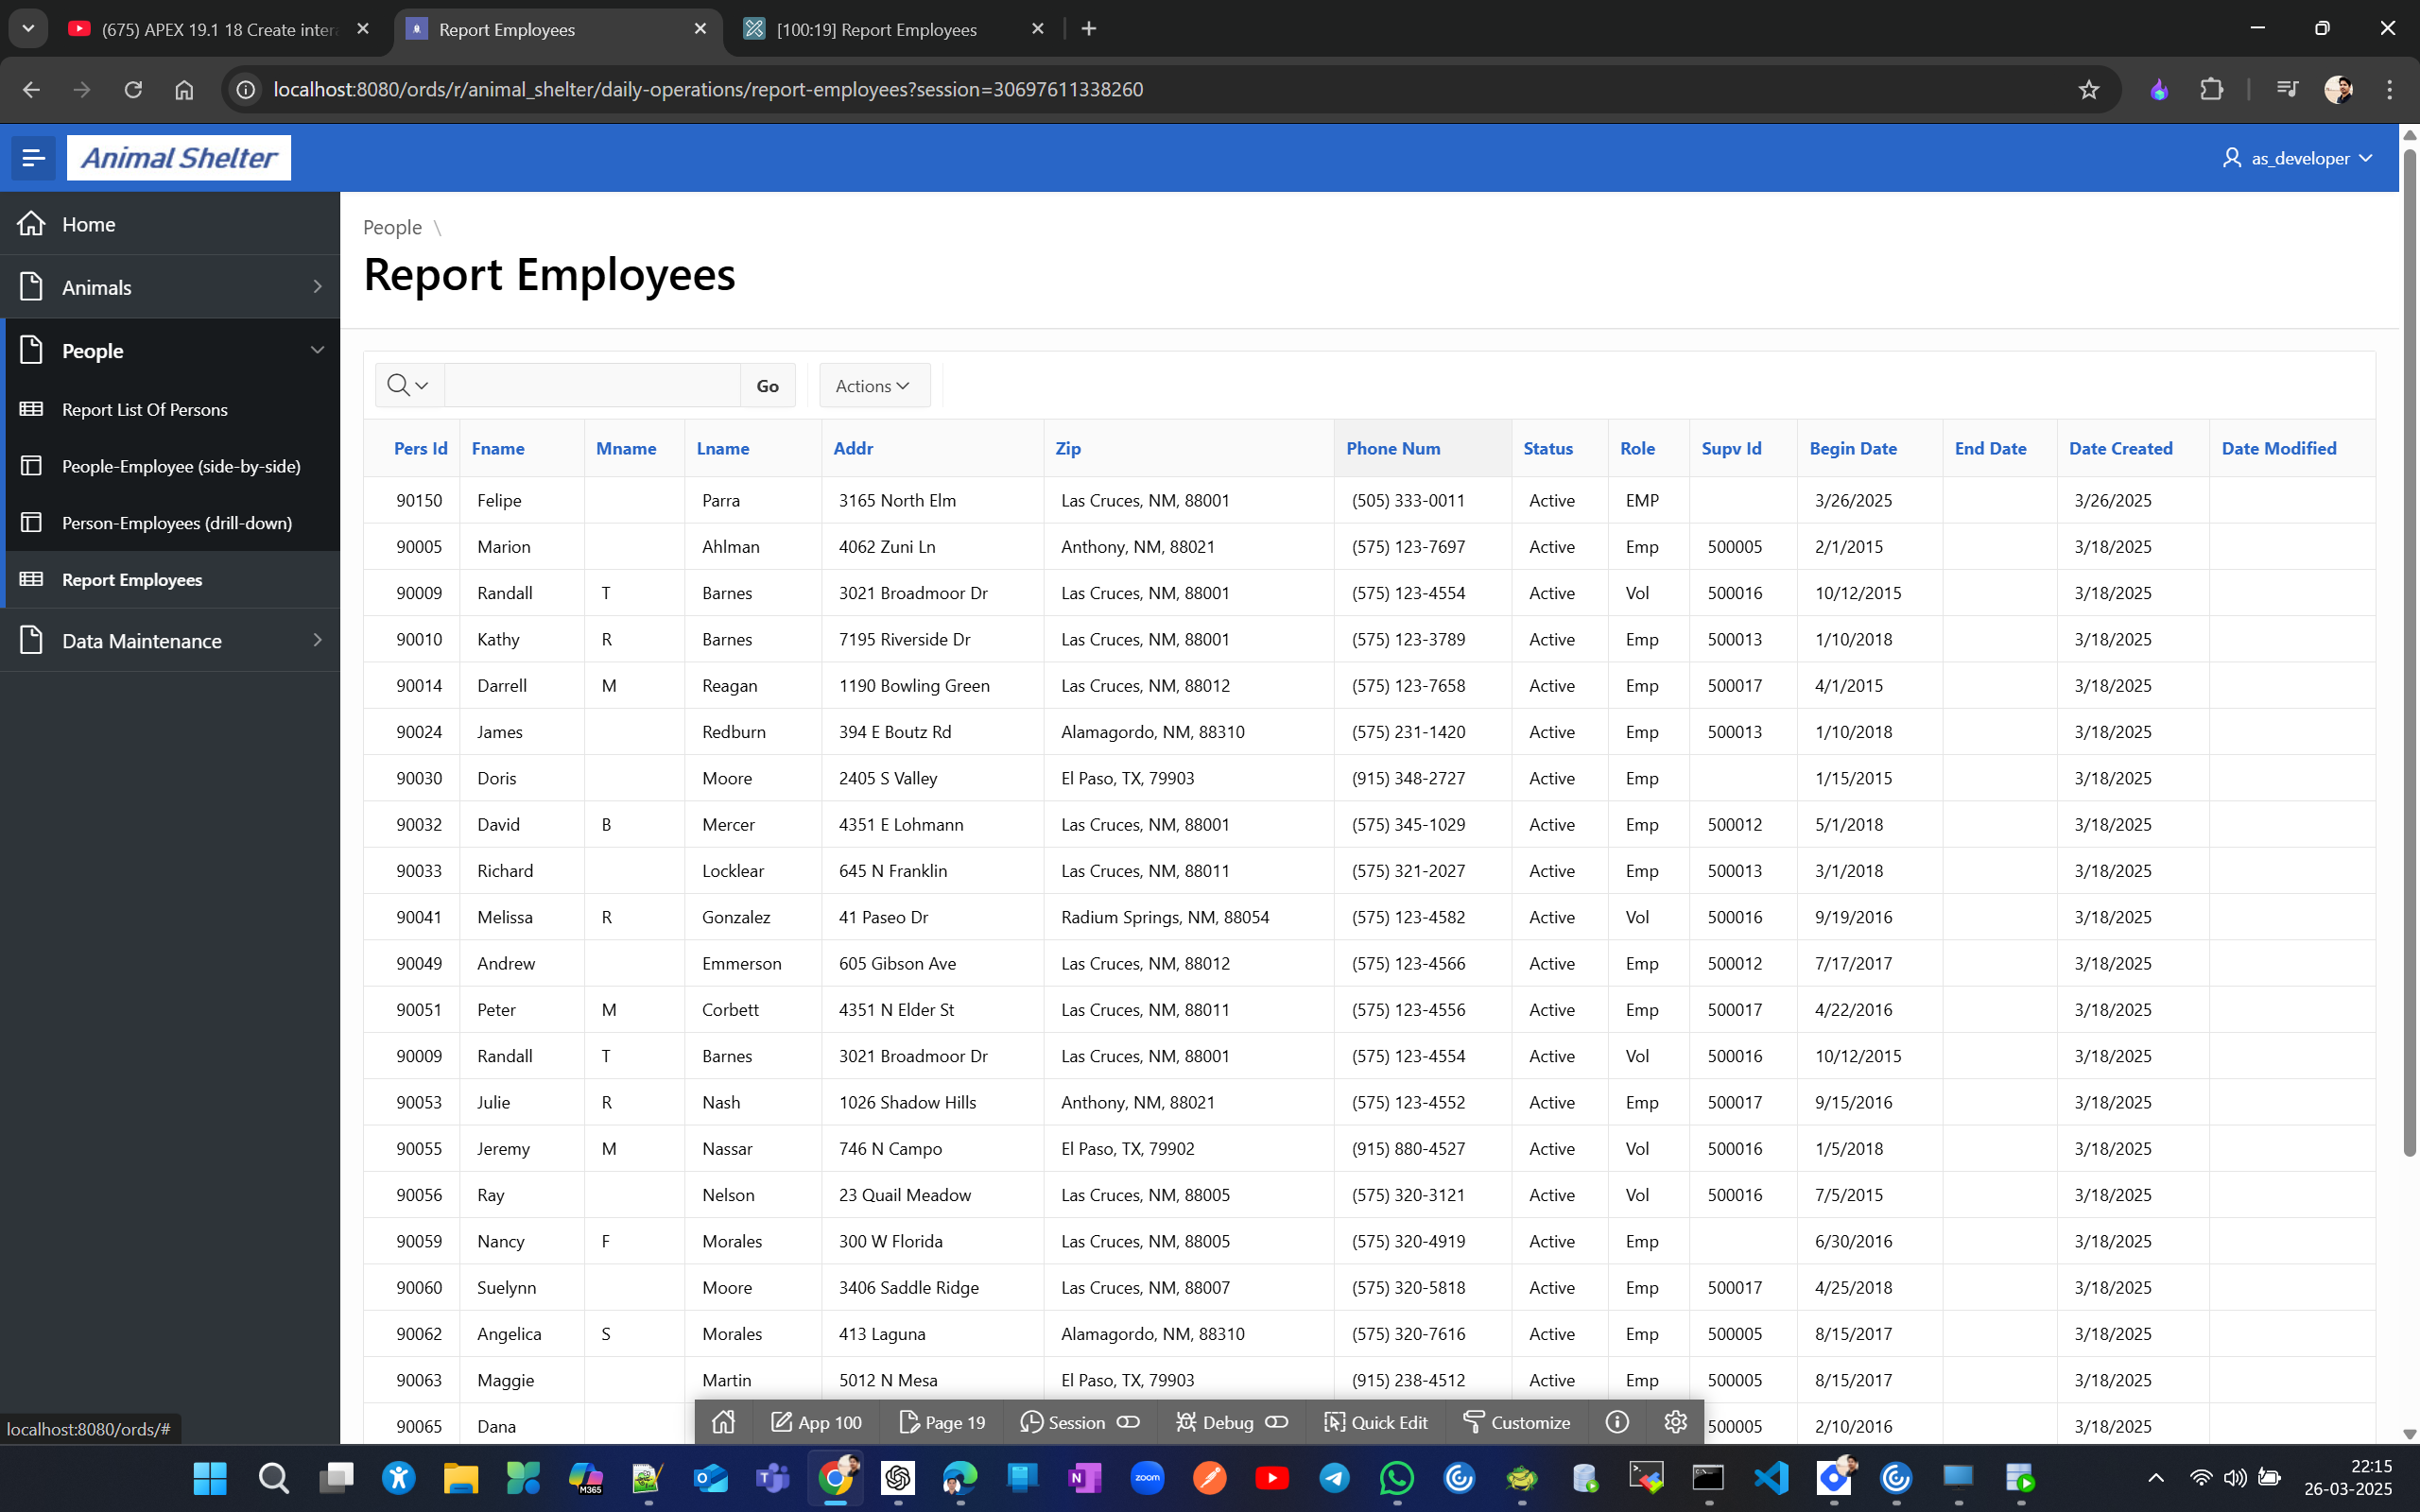
We can filter in IR also. We see 2 emp and 2 vol
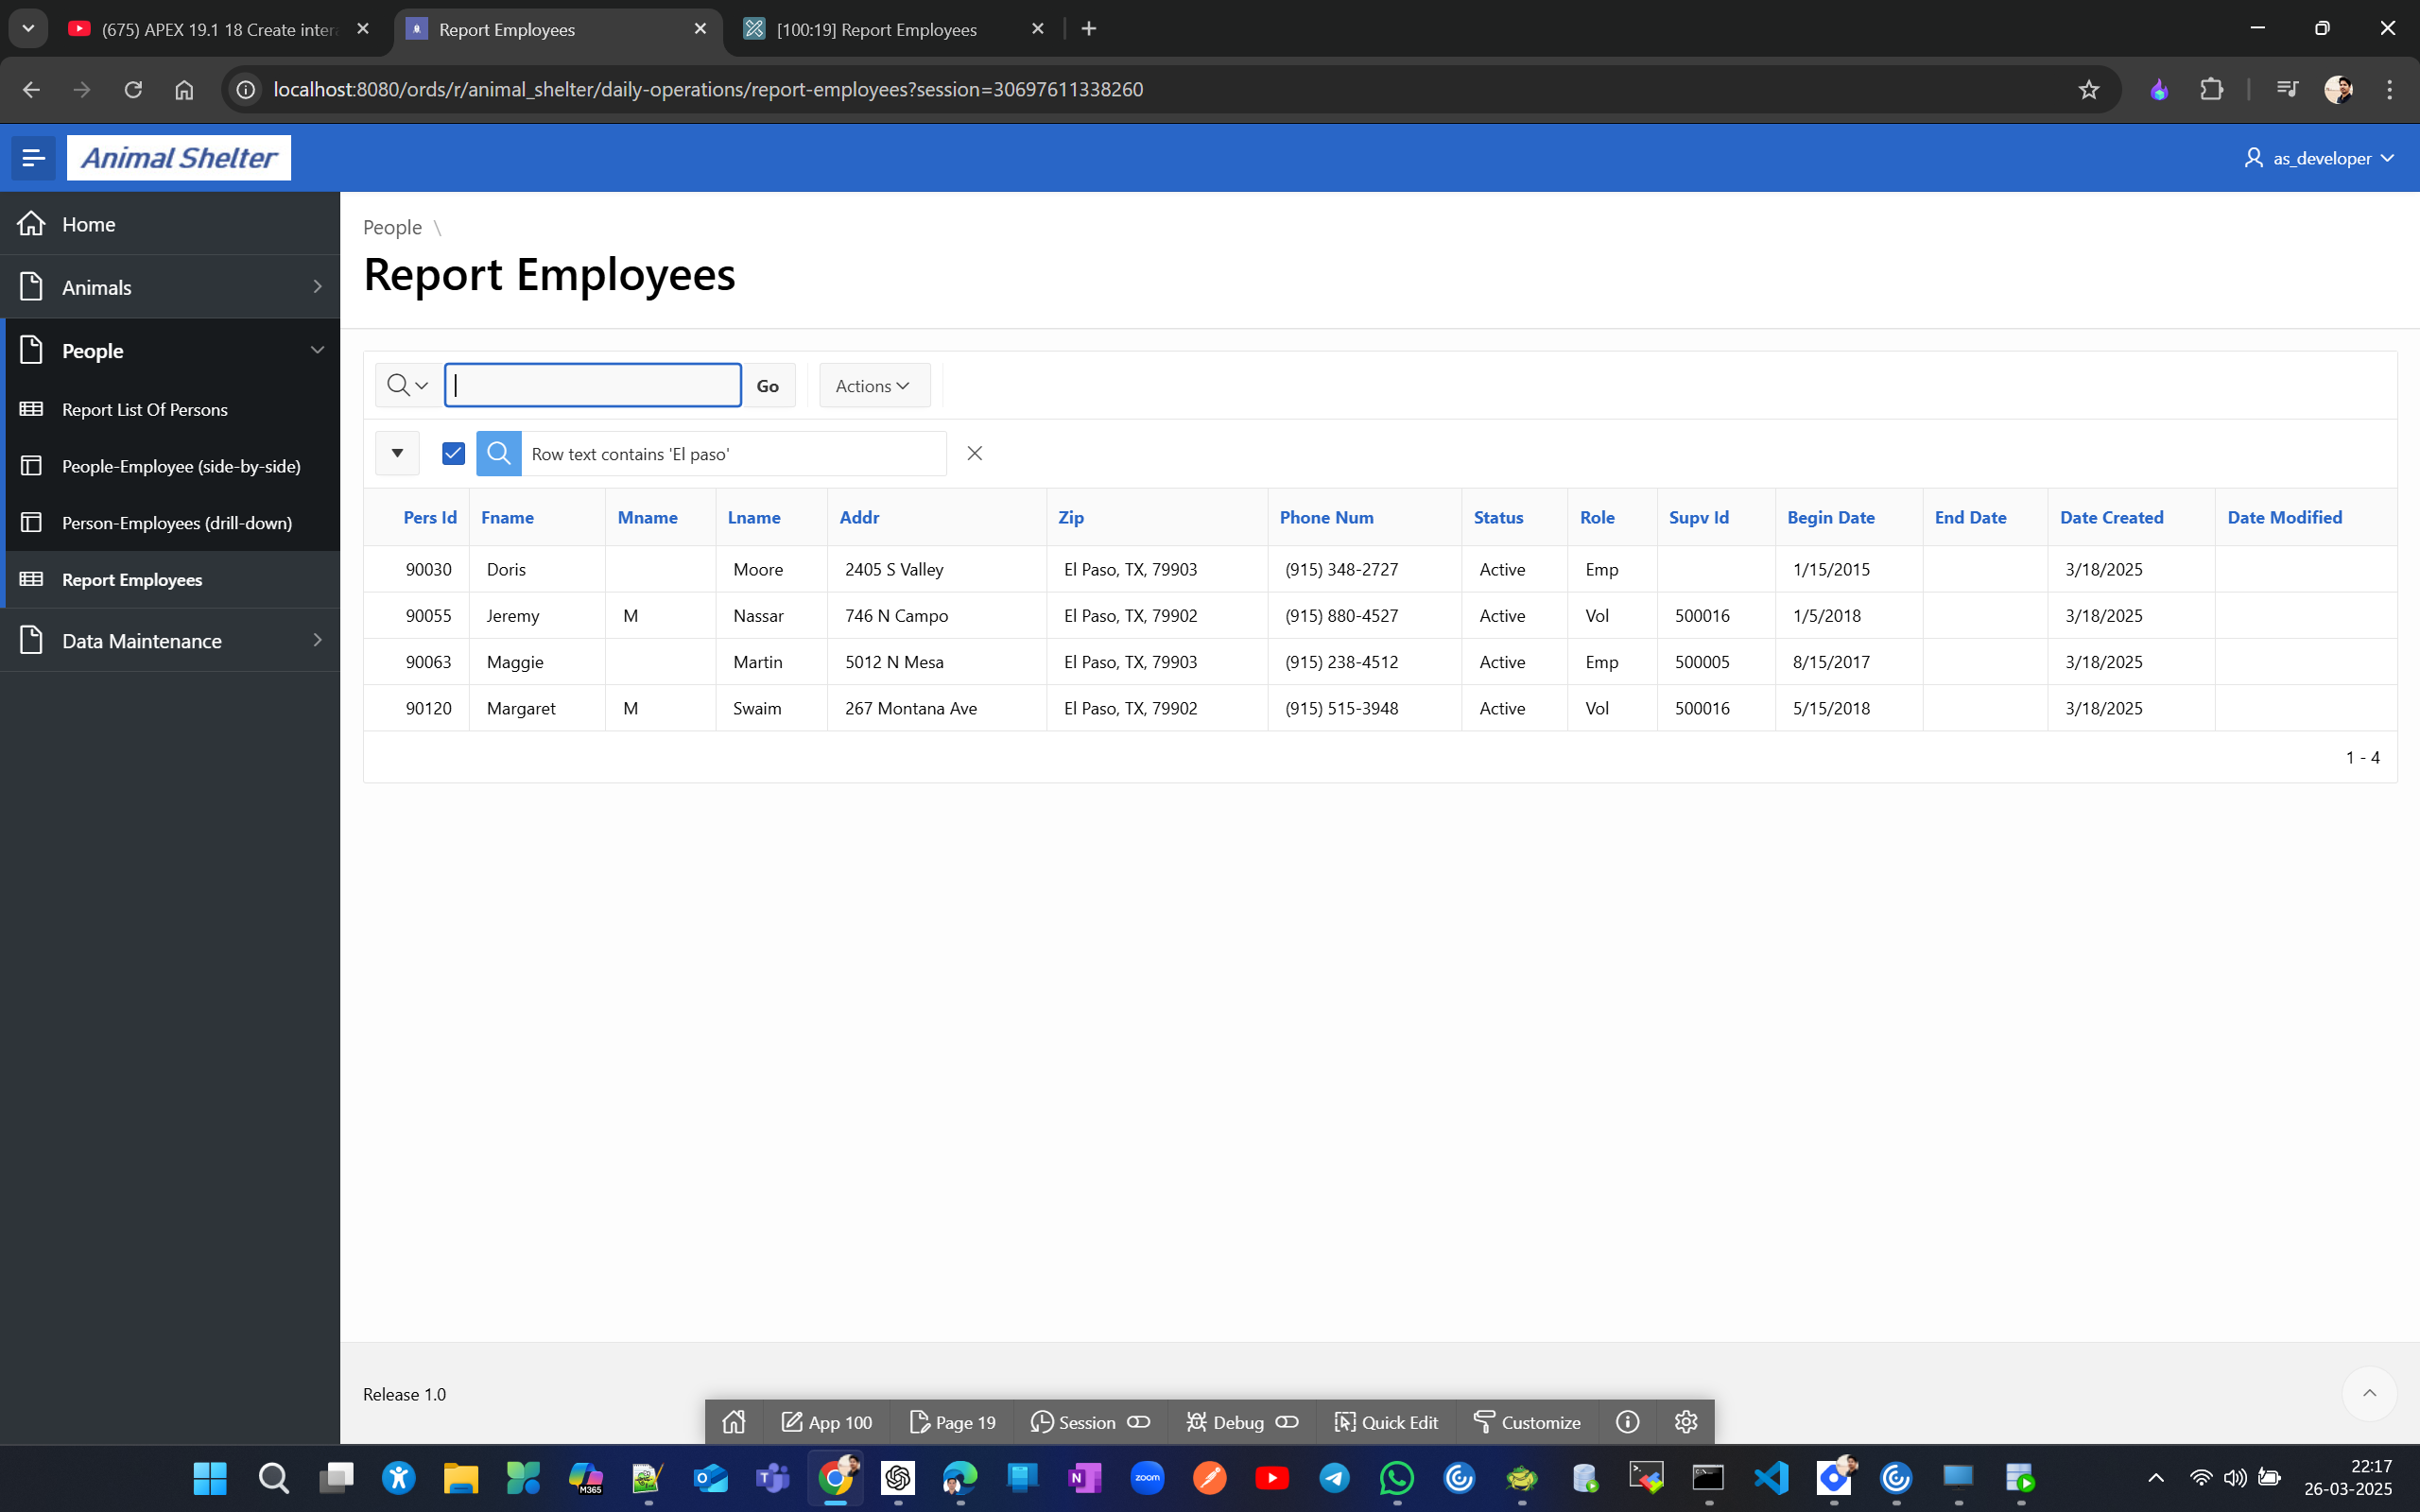
We can download this report with the formatting intact and only the selected records displayed.
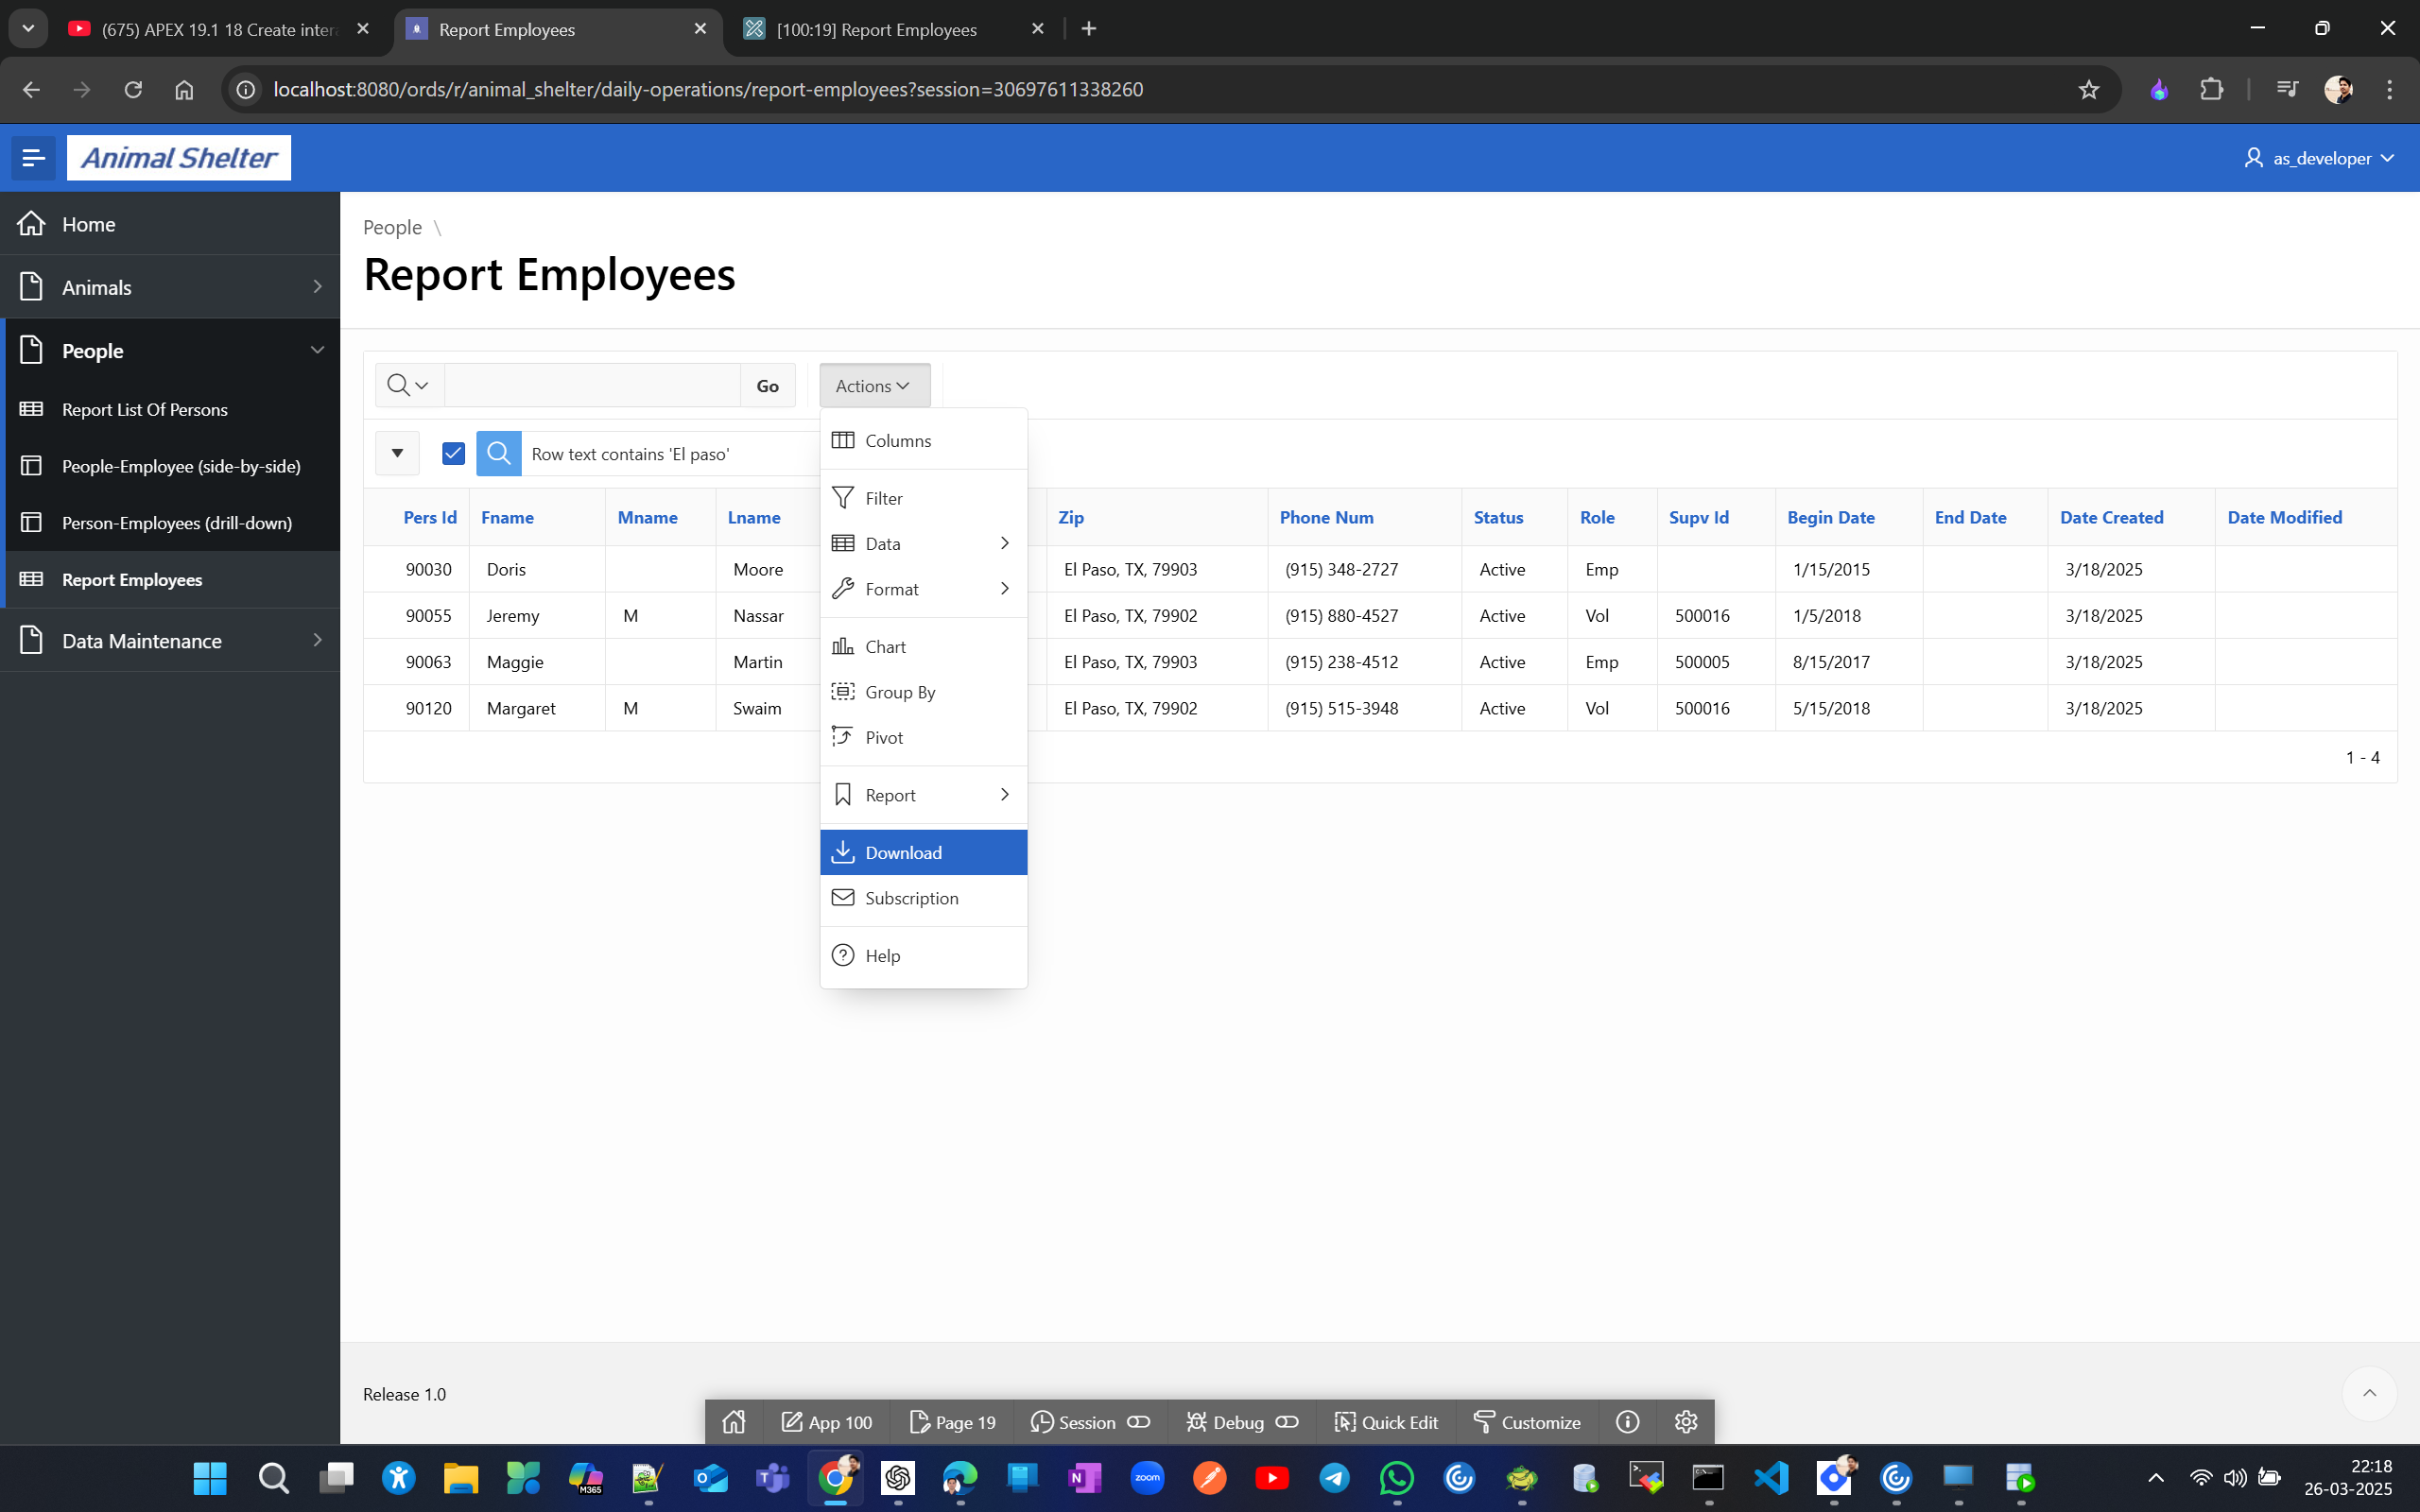
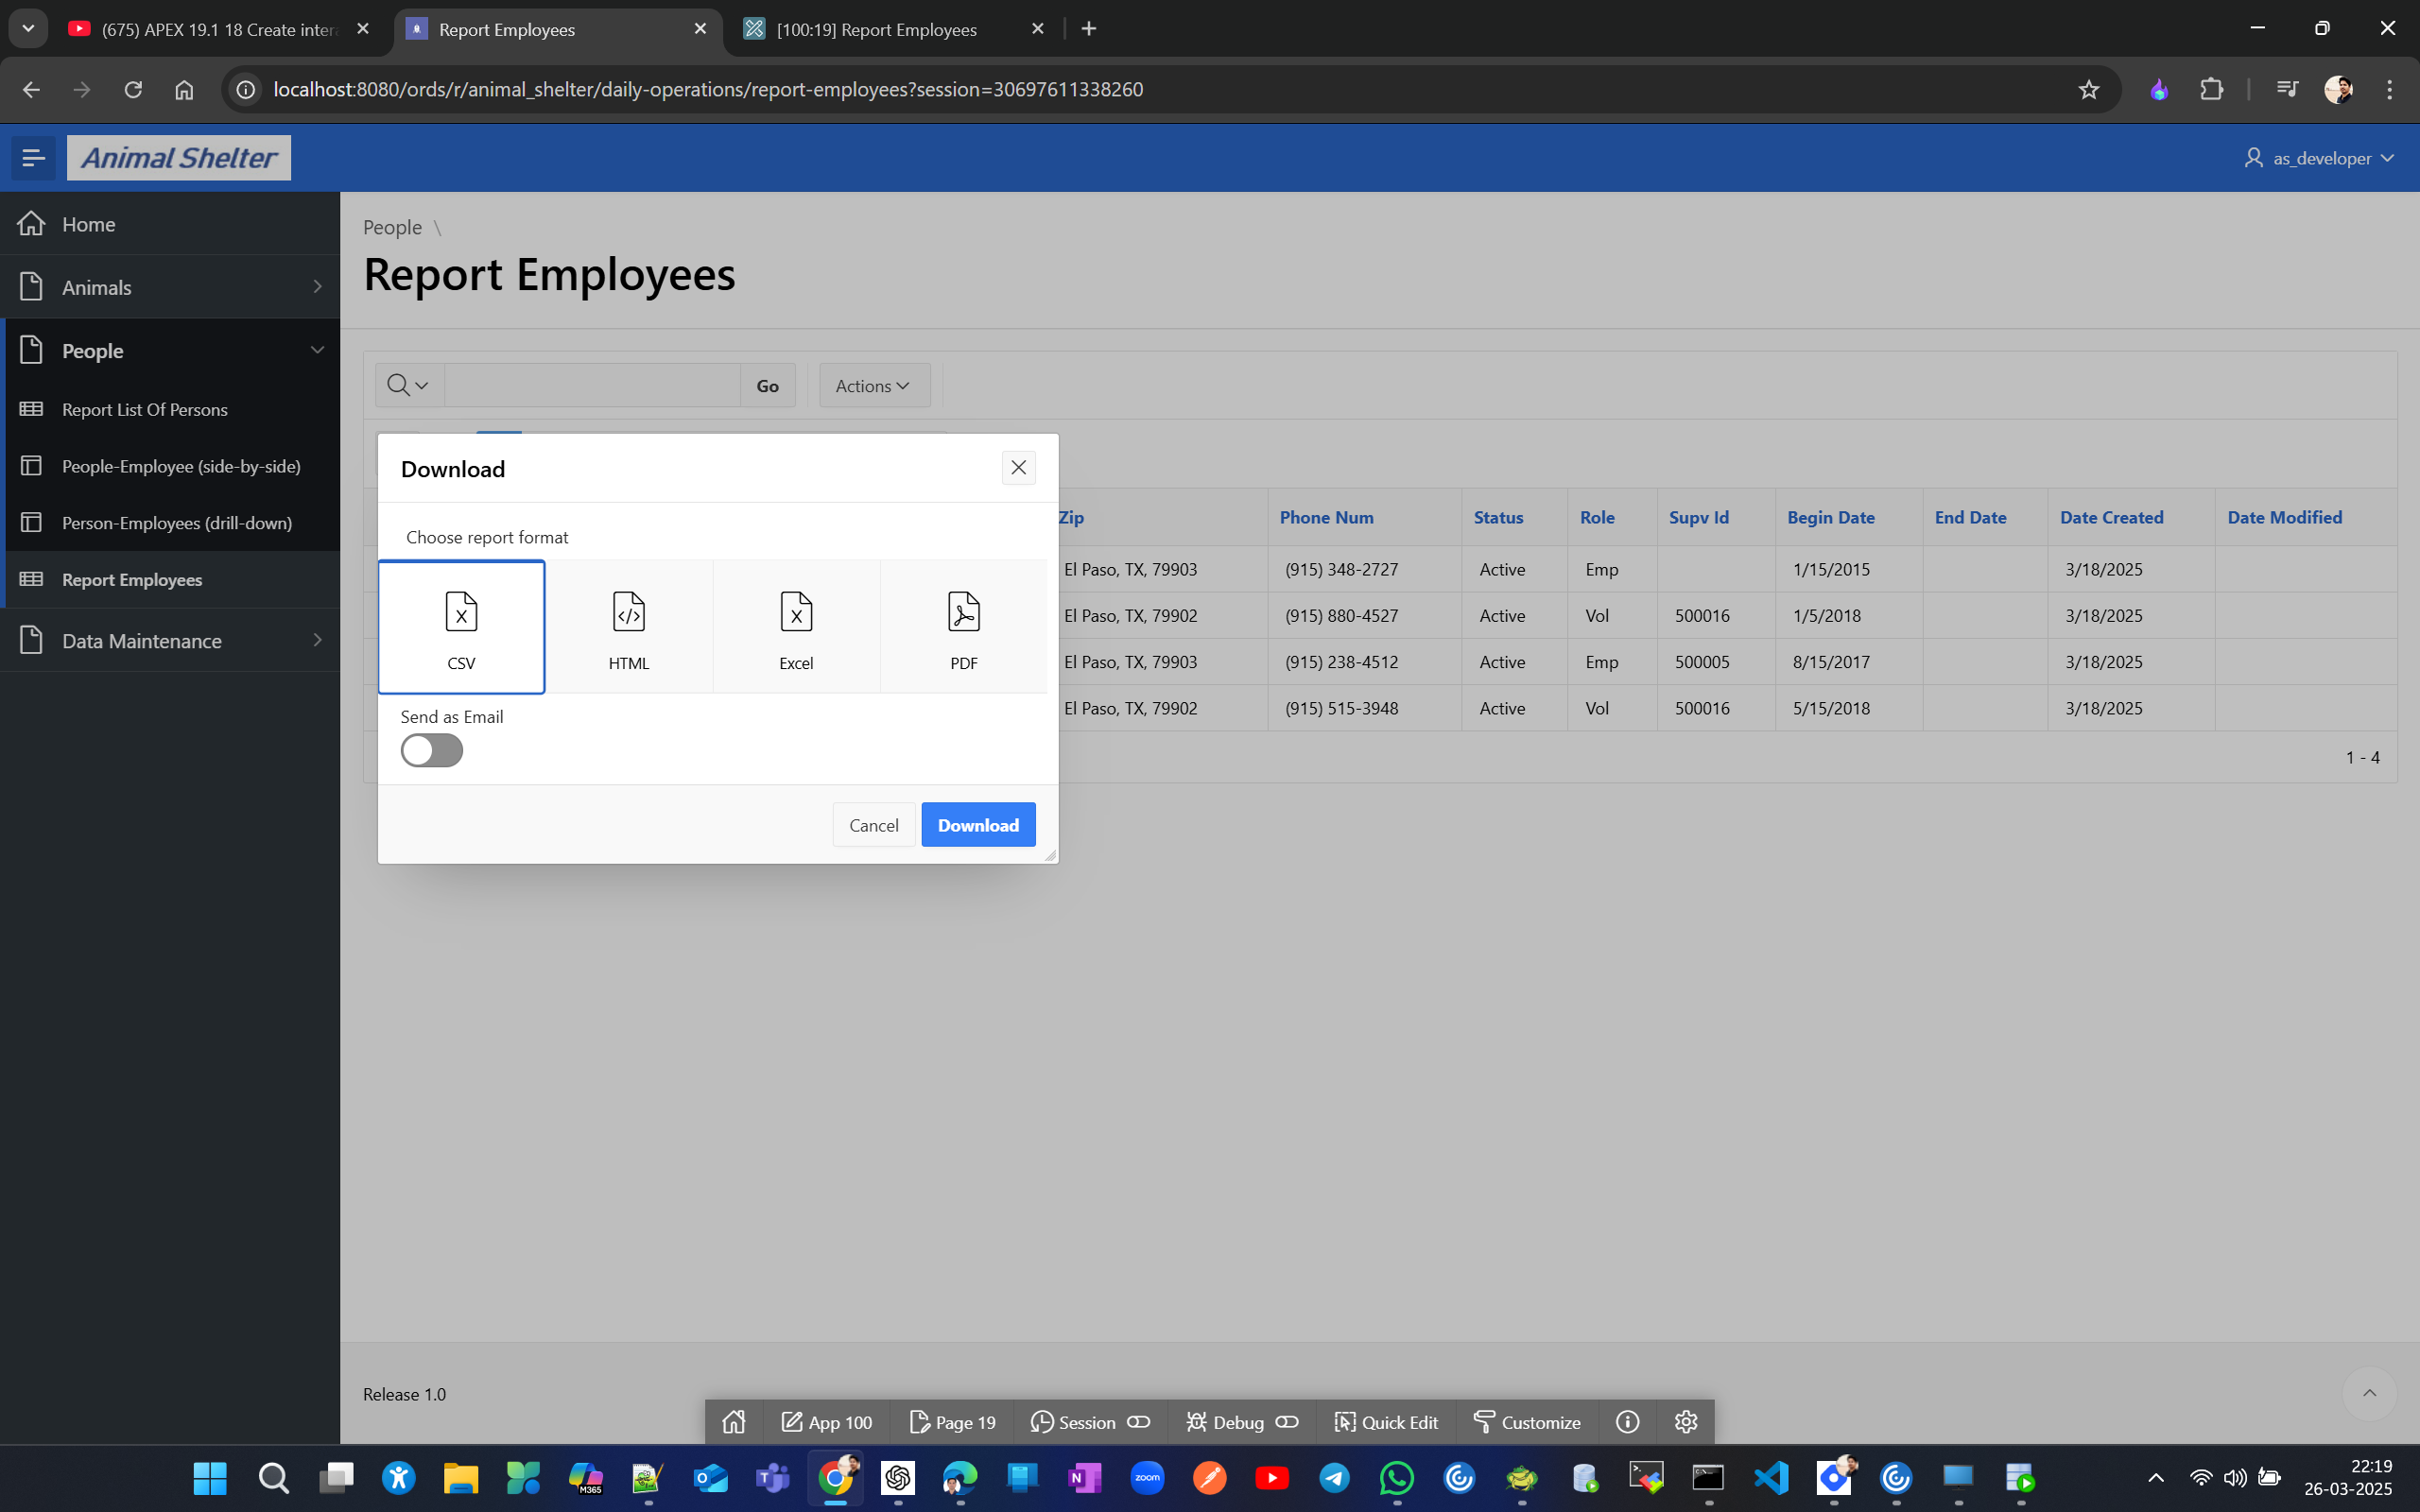
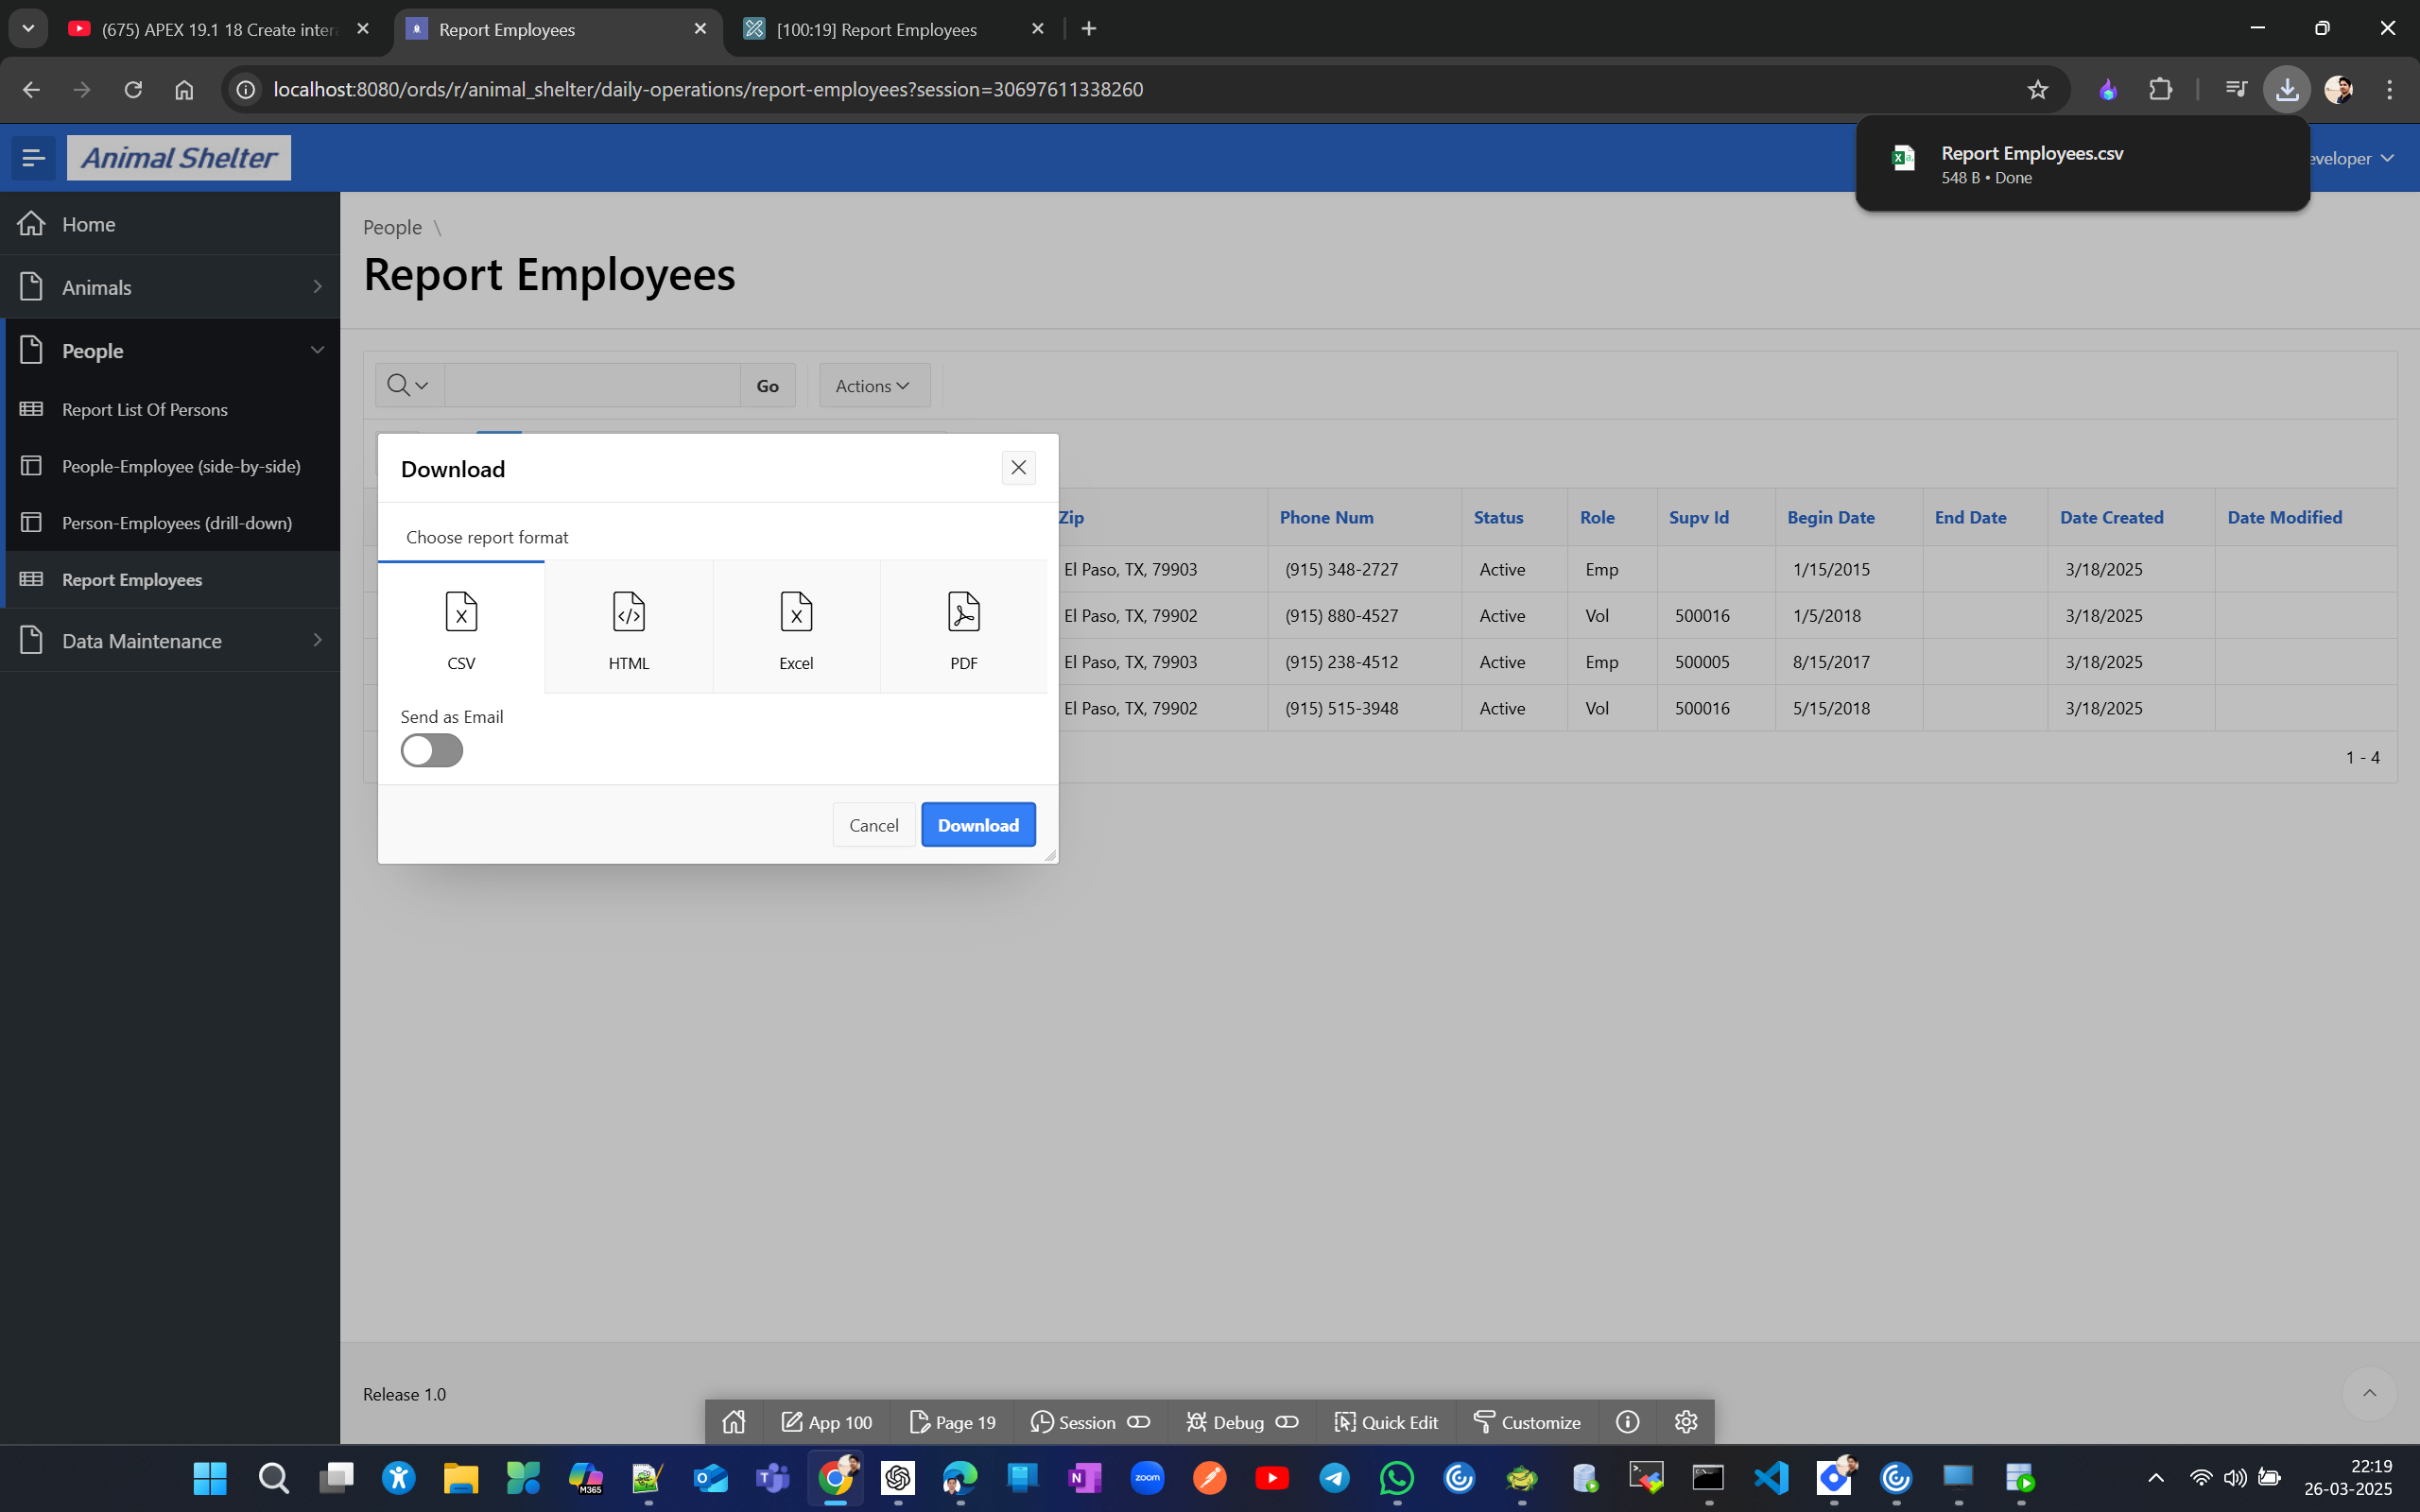
In the downloaded report, the ZIP and PHONE_NUM are formatted even if the database values are not, making the download feature very sophisticated and useful.

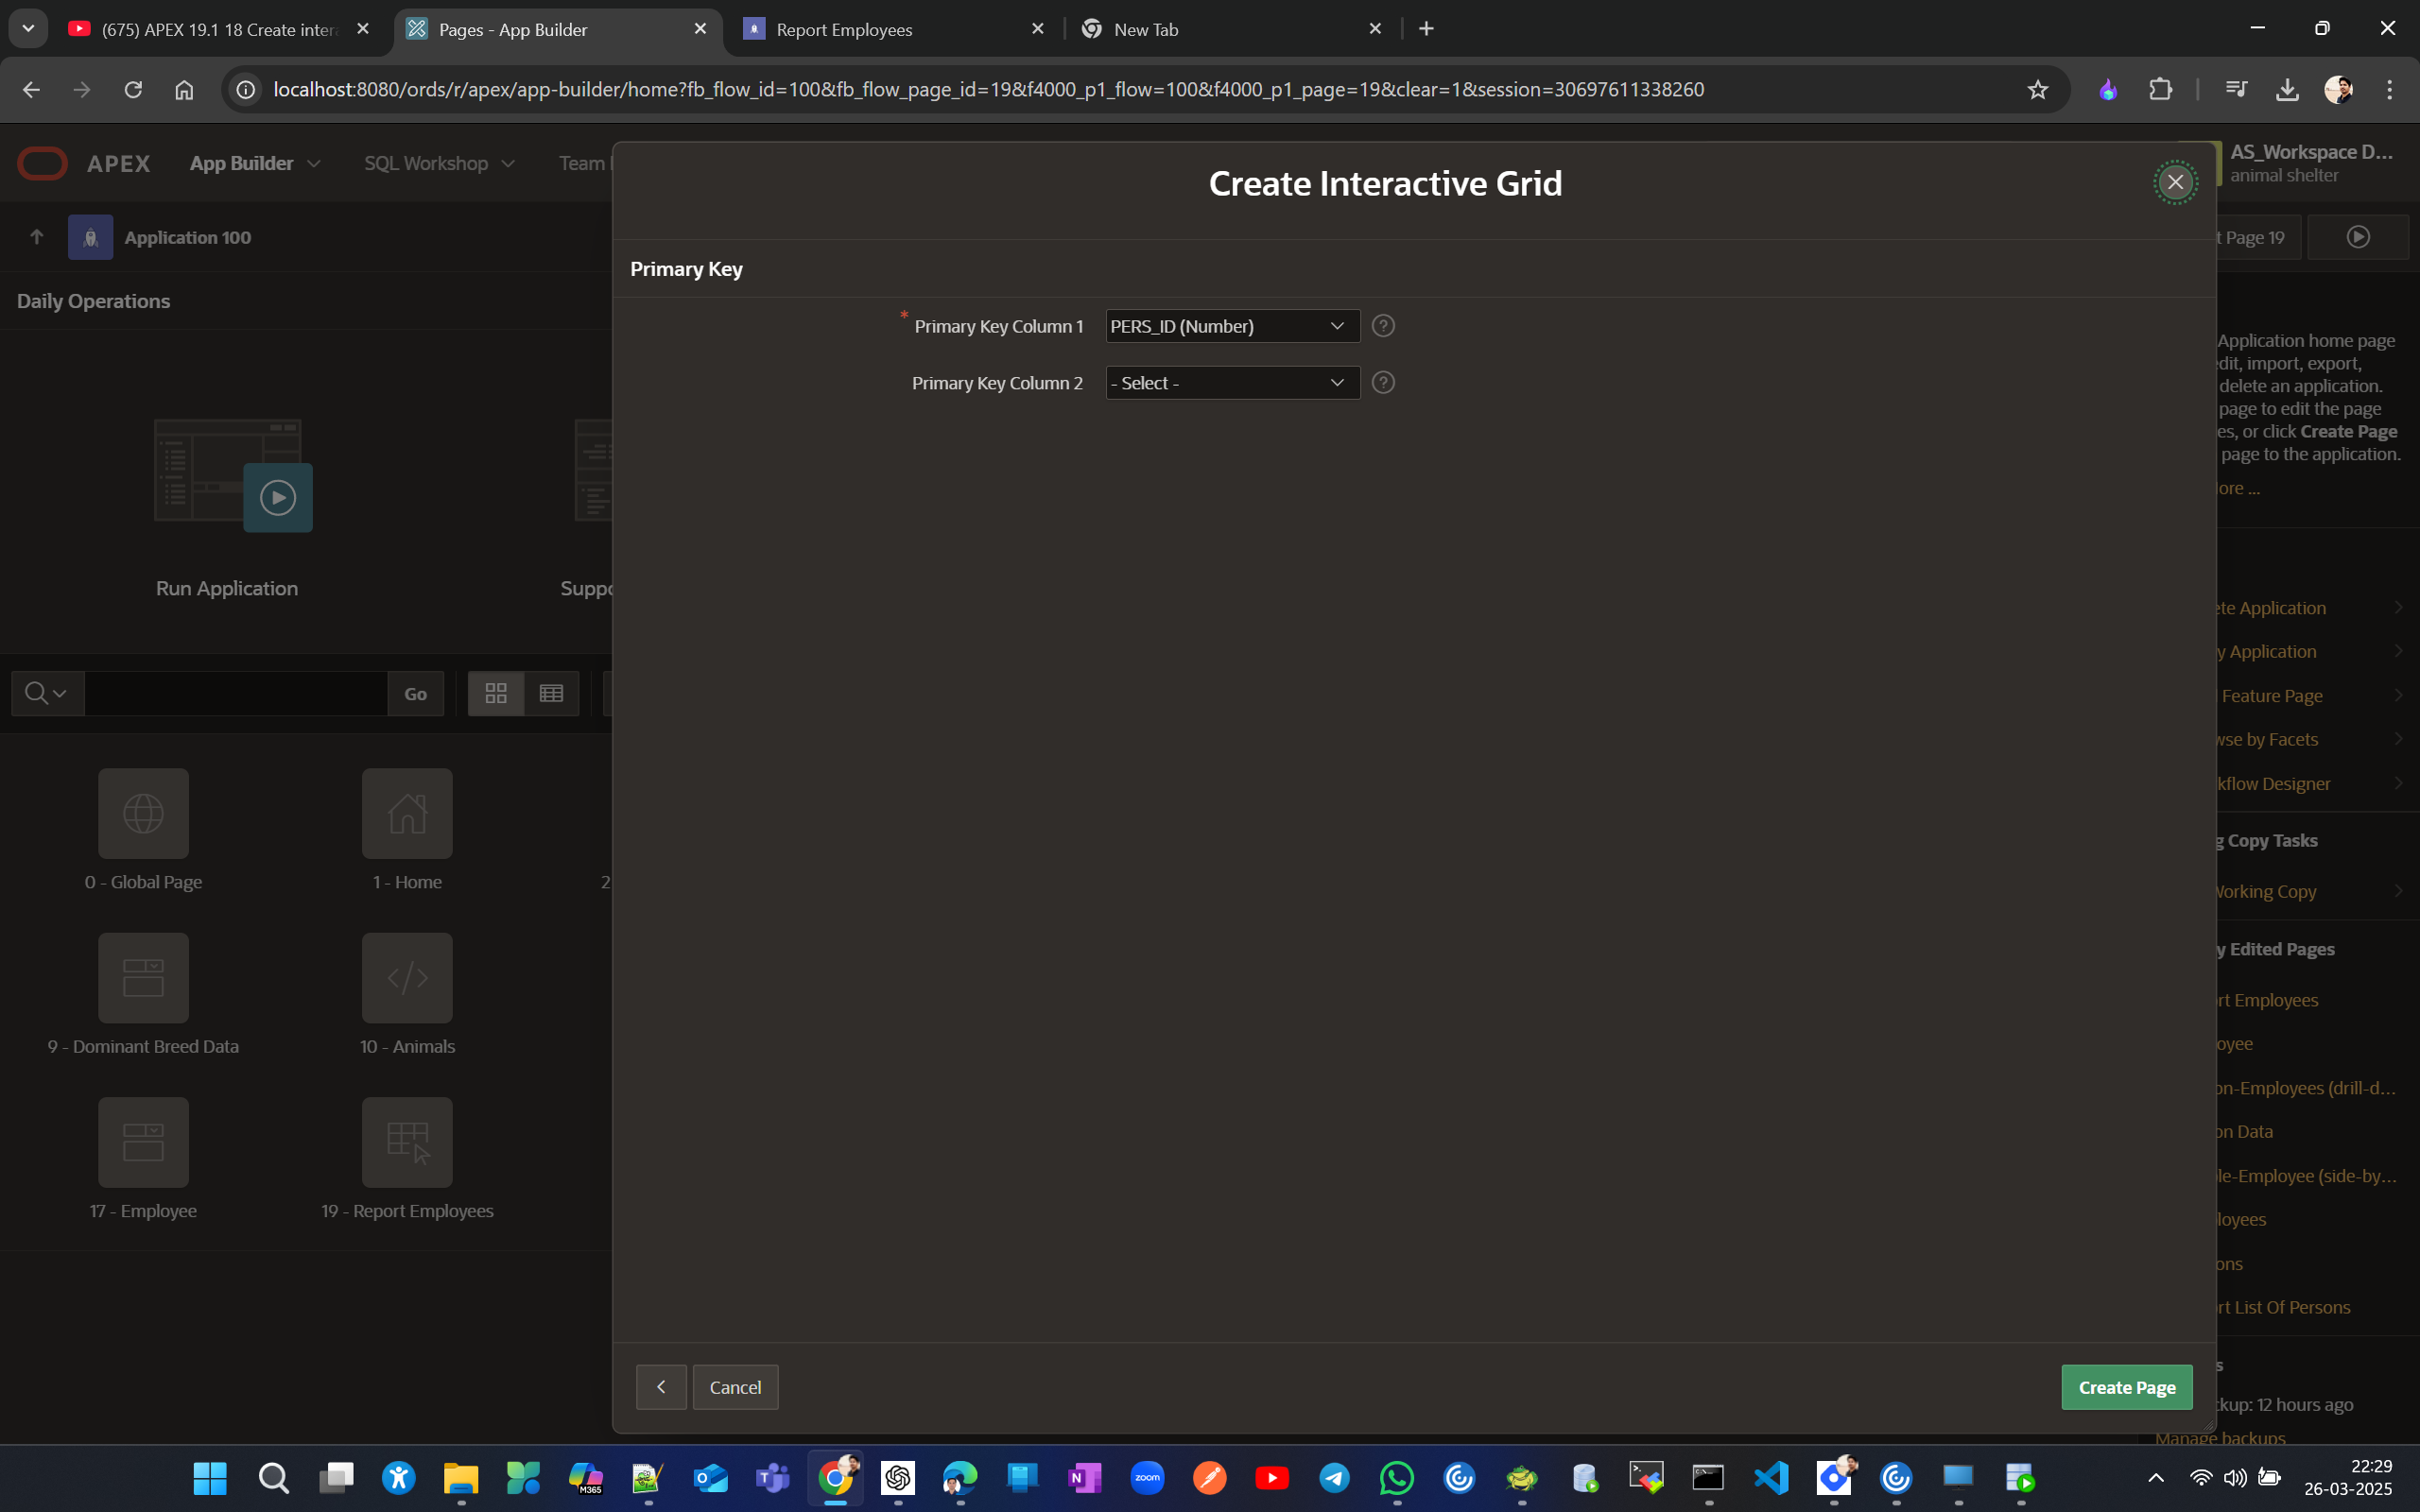
Now let's create an interactive Grid without using SQL, as updatable SQL is somewhat complex and an advanced topic.
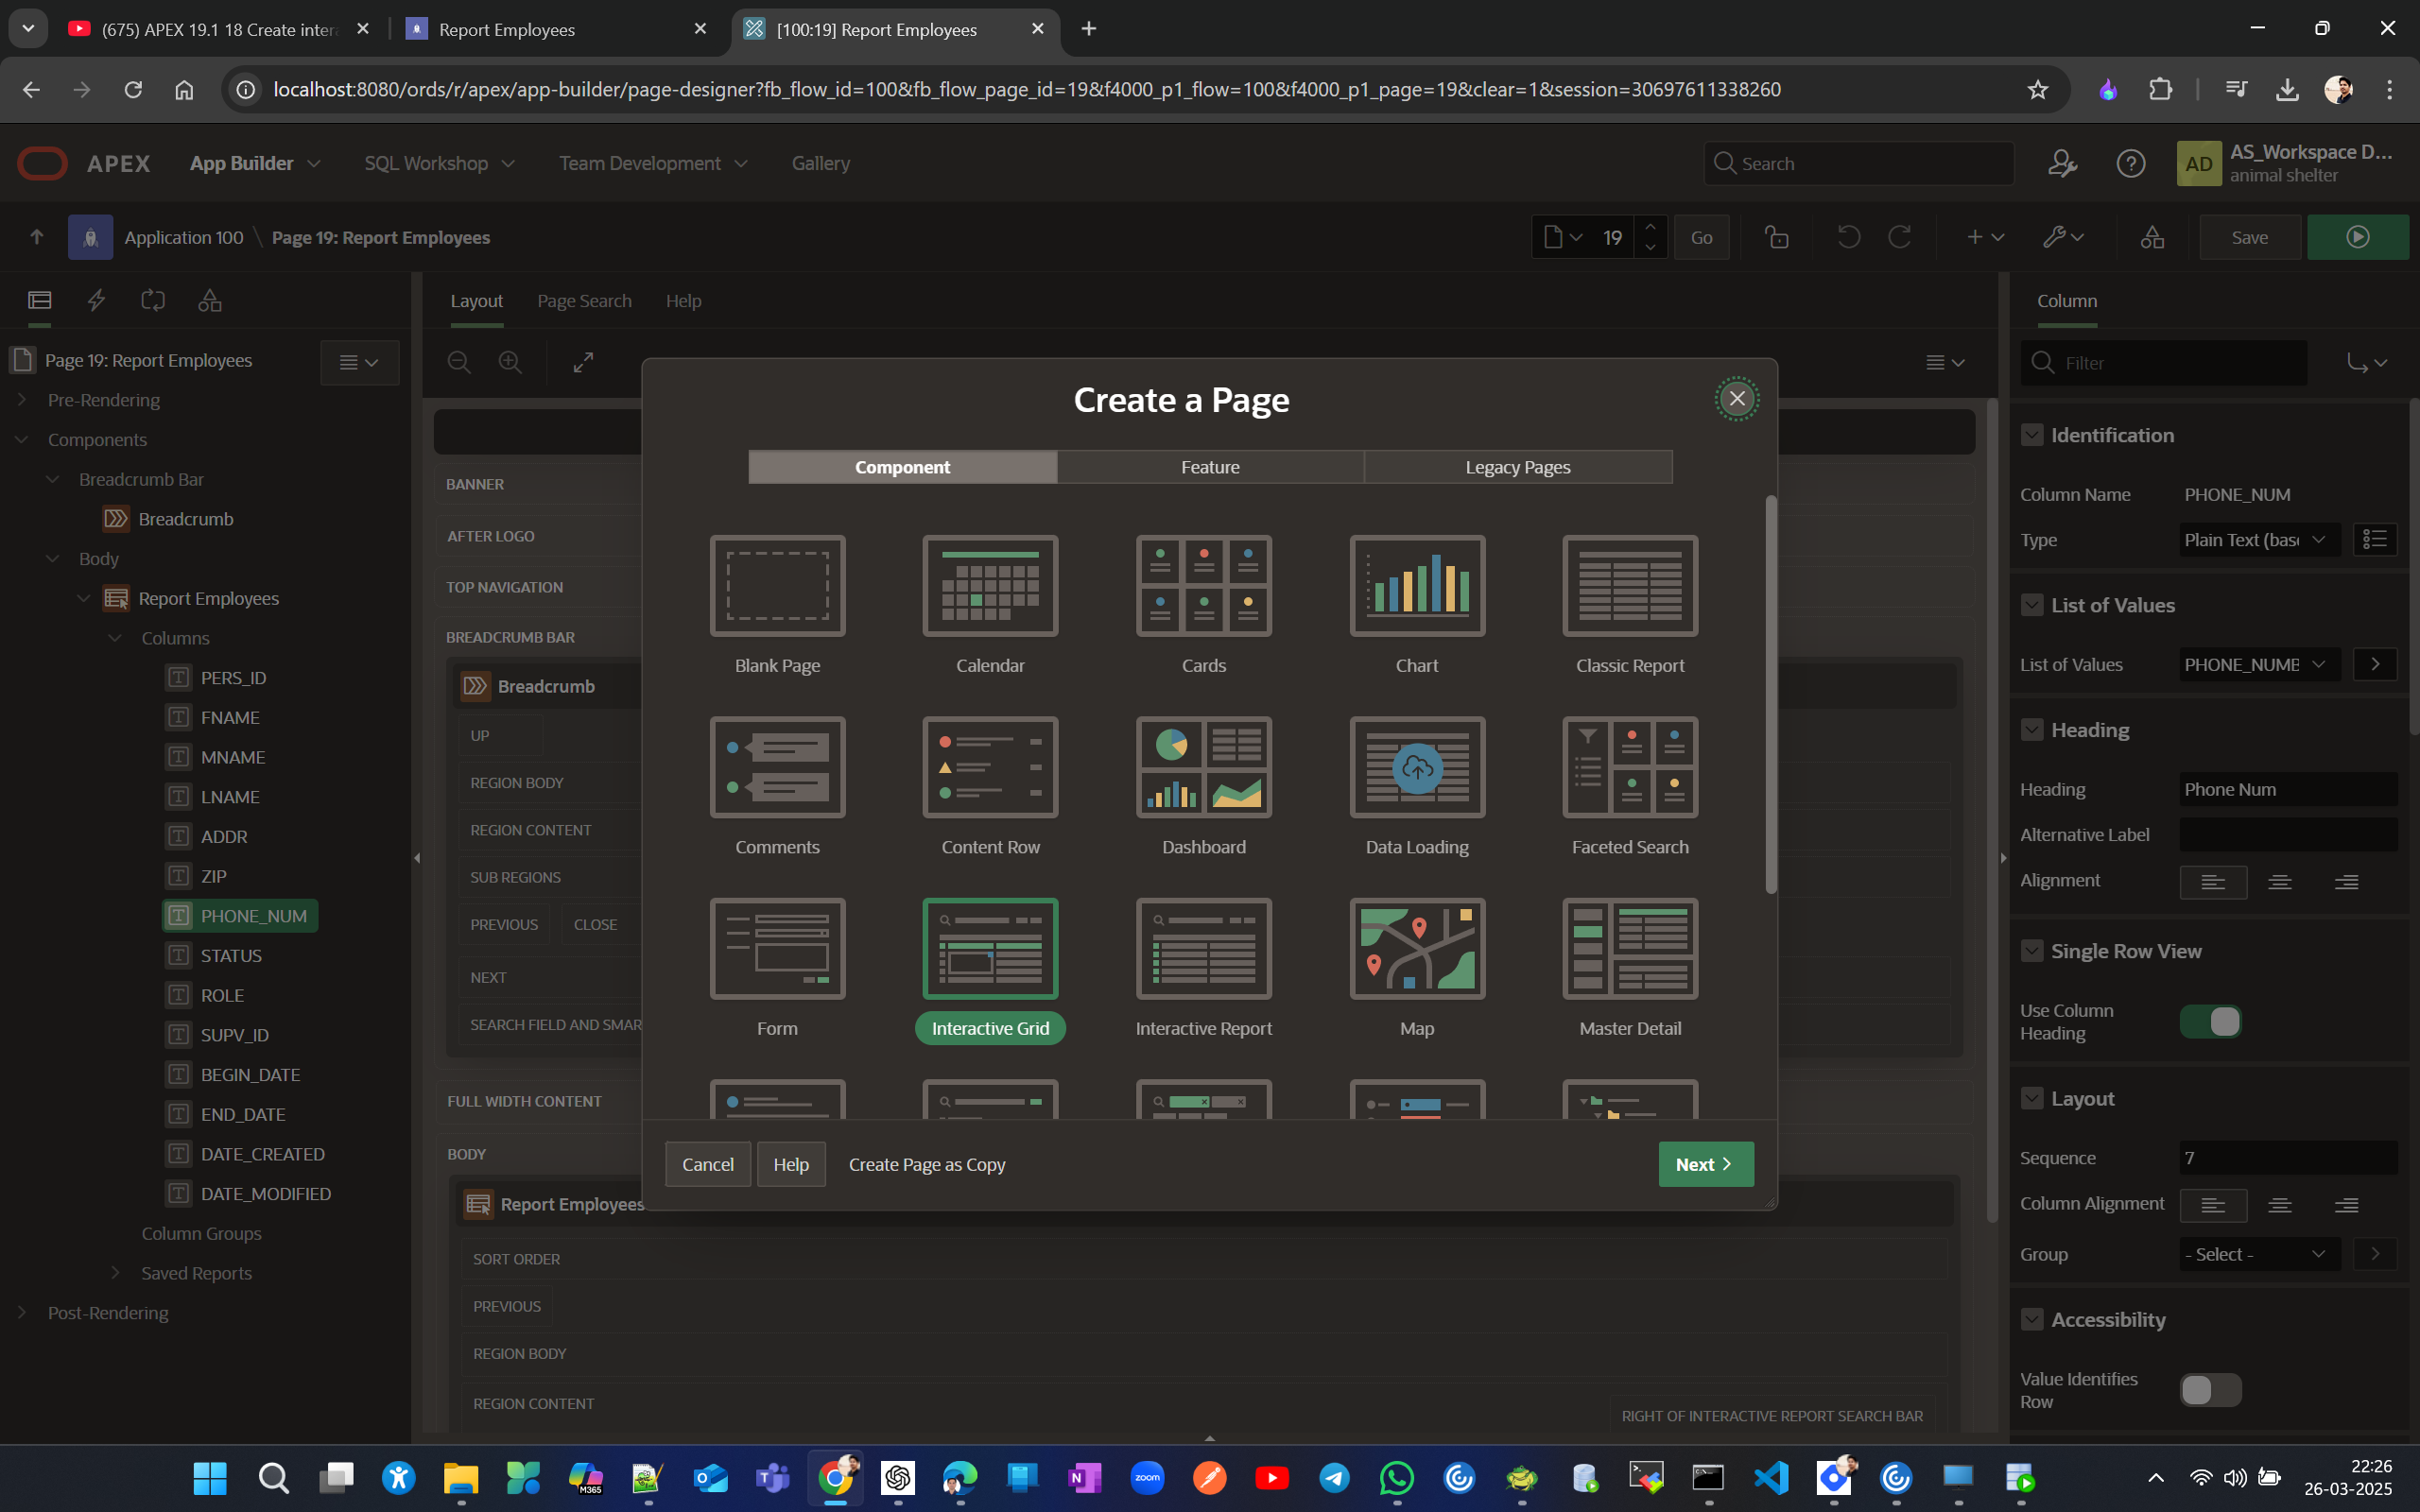
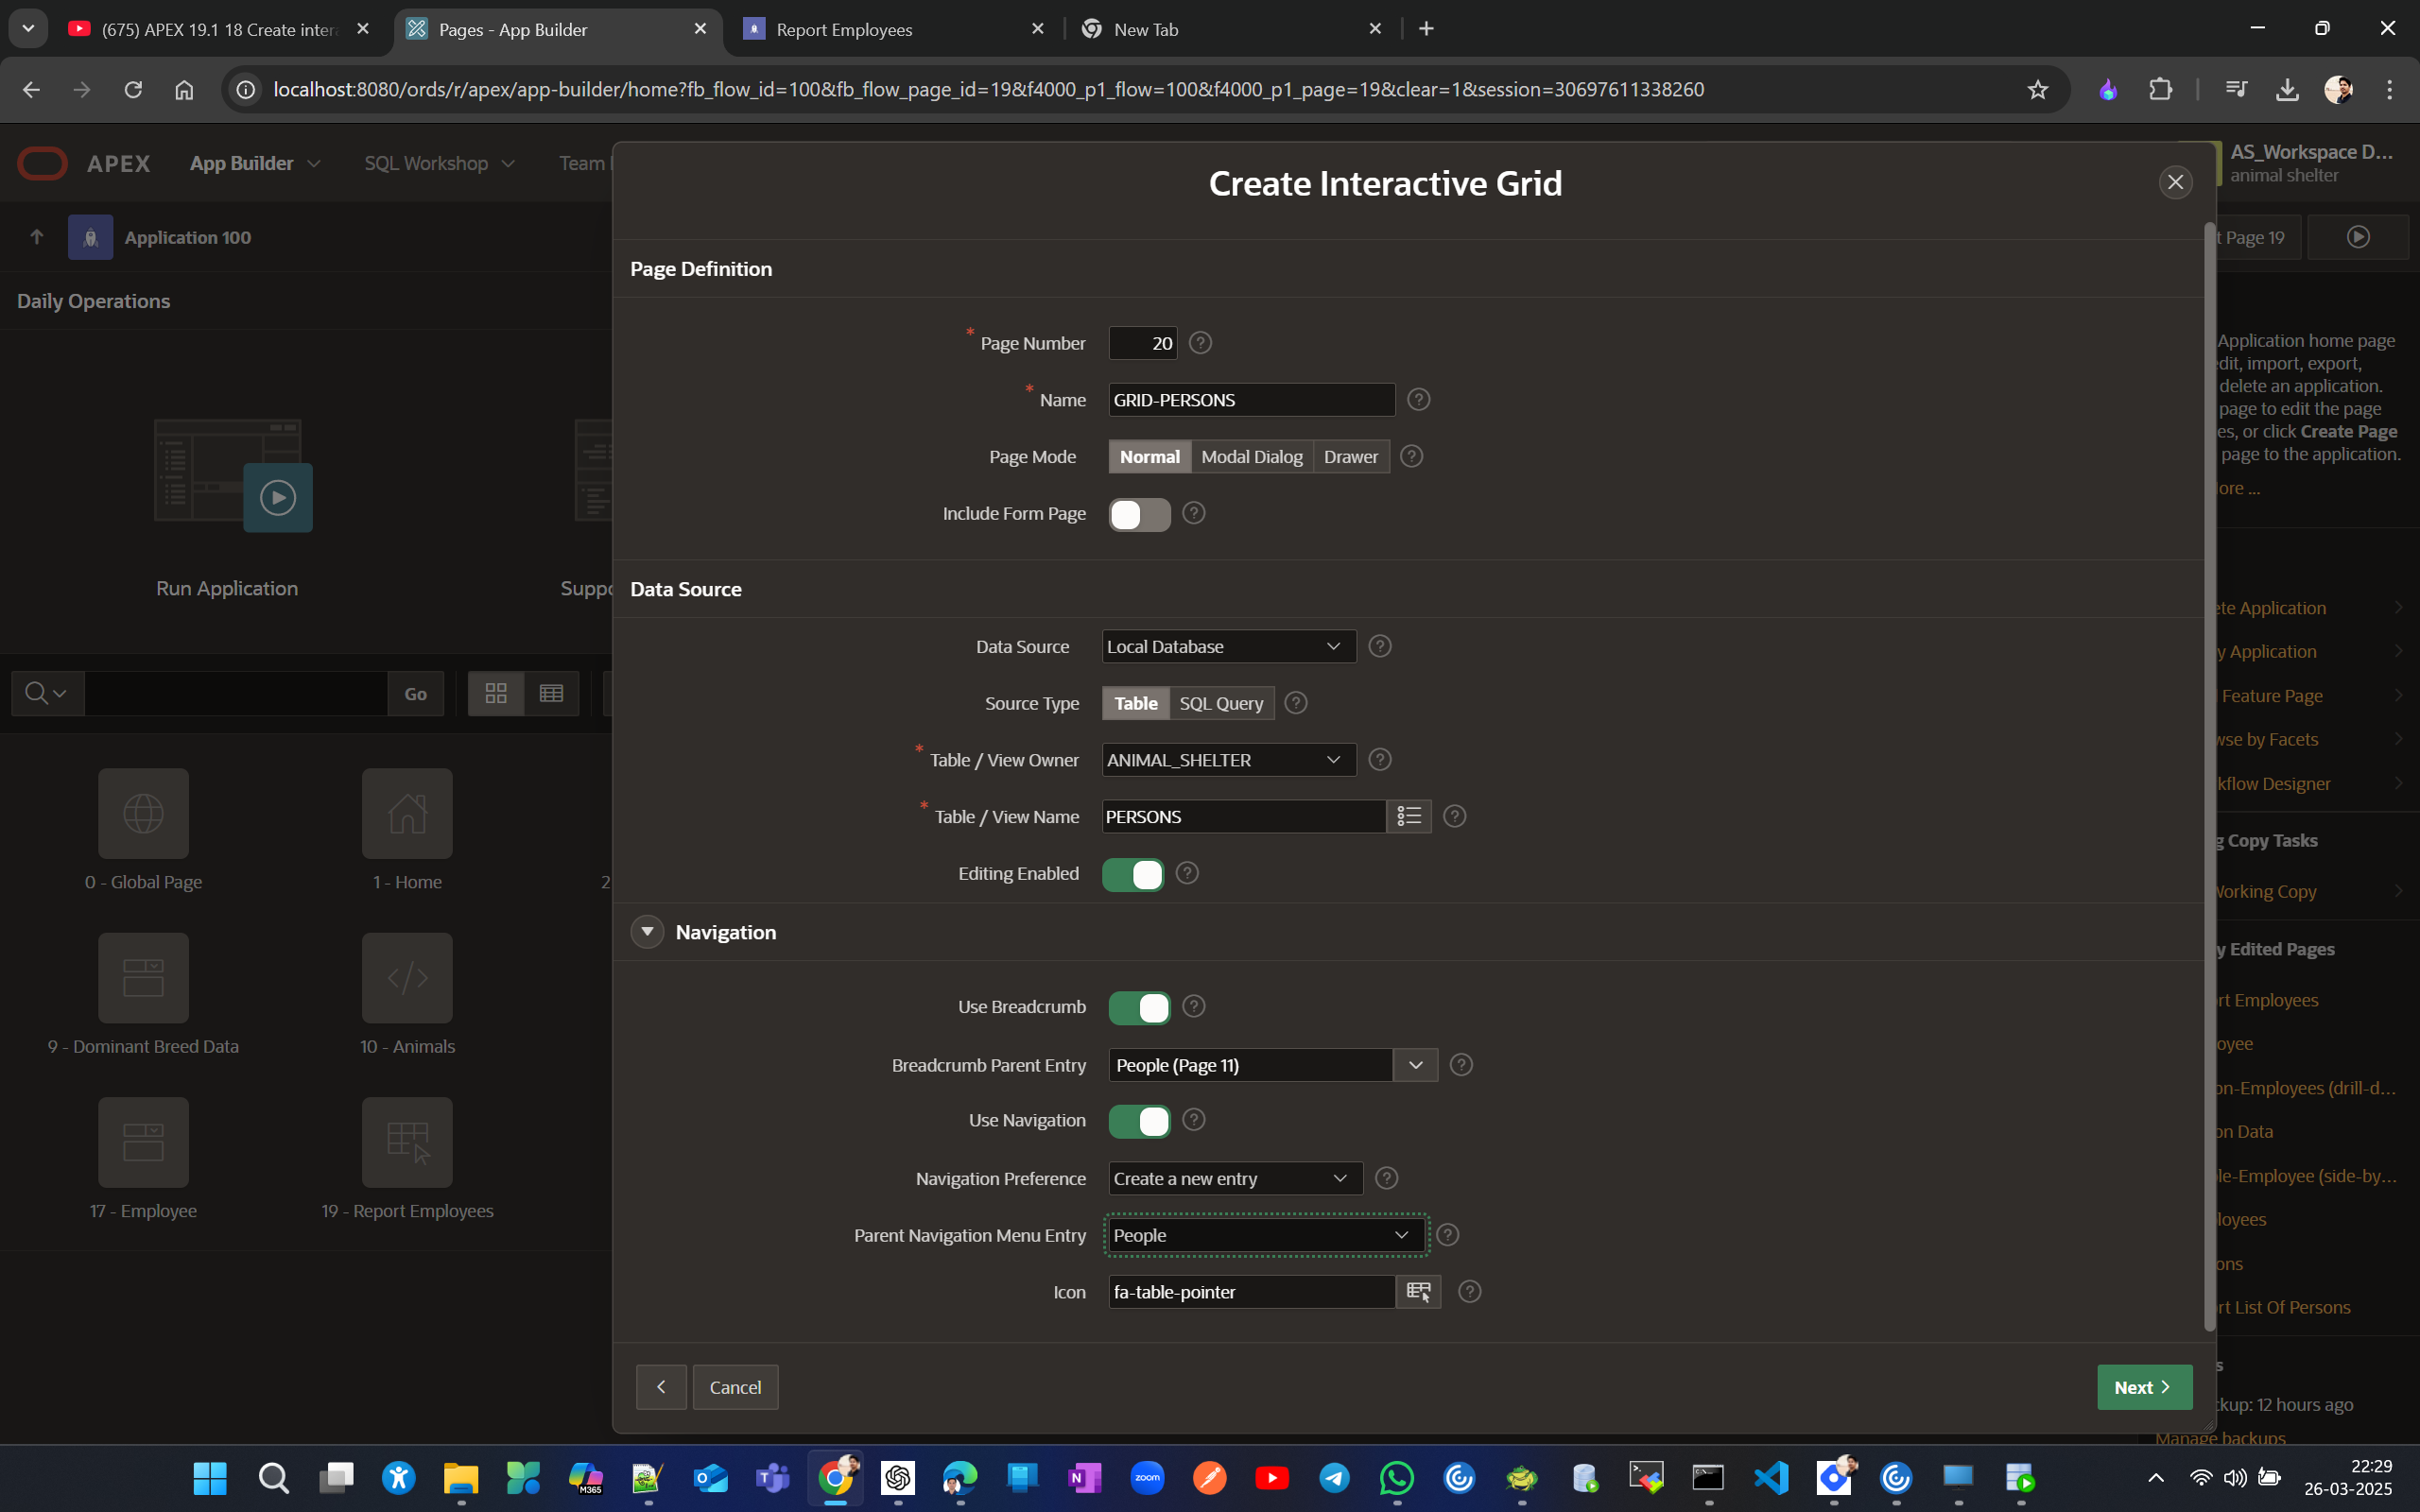
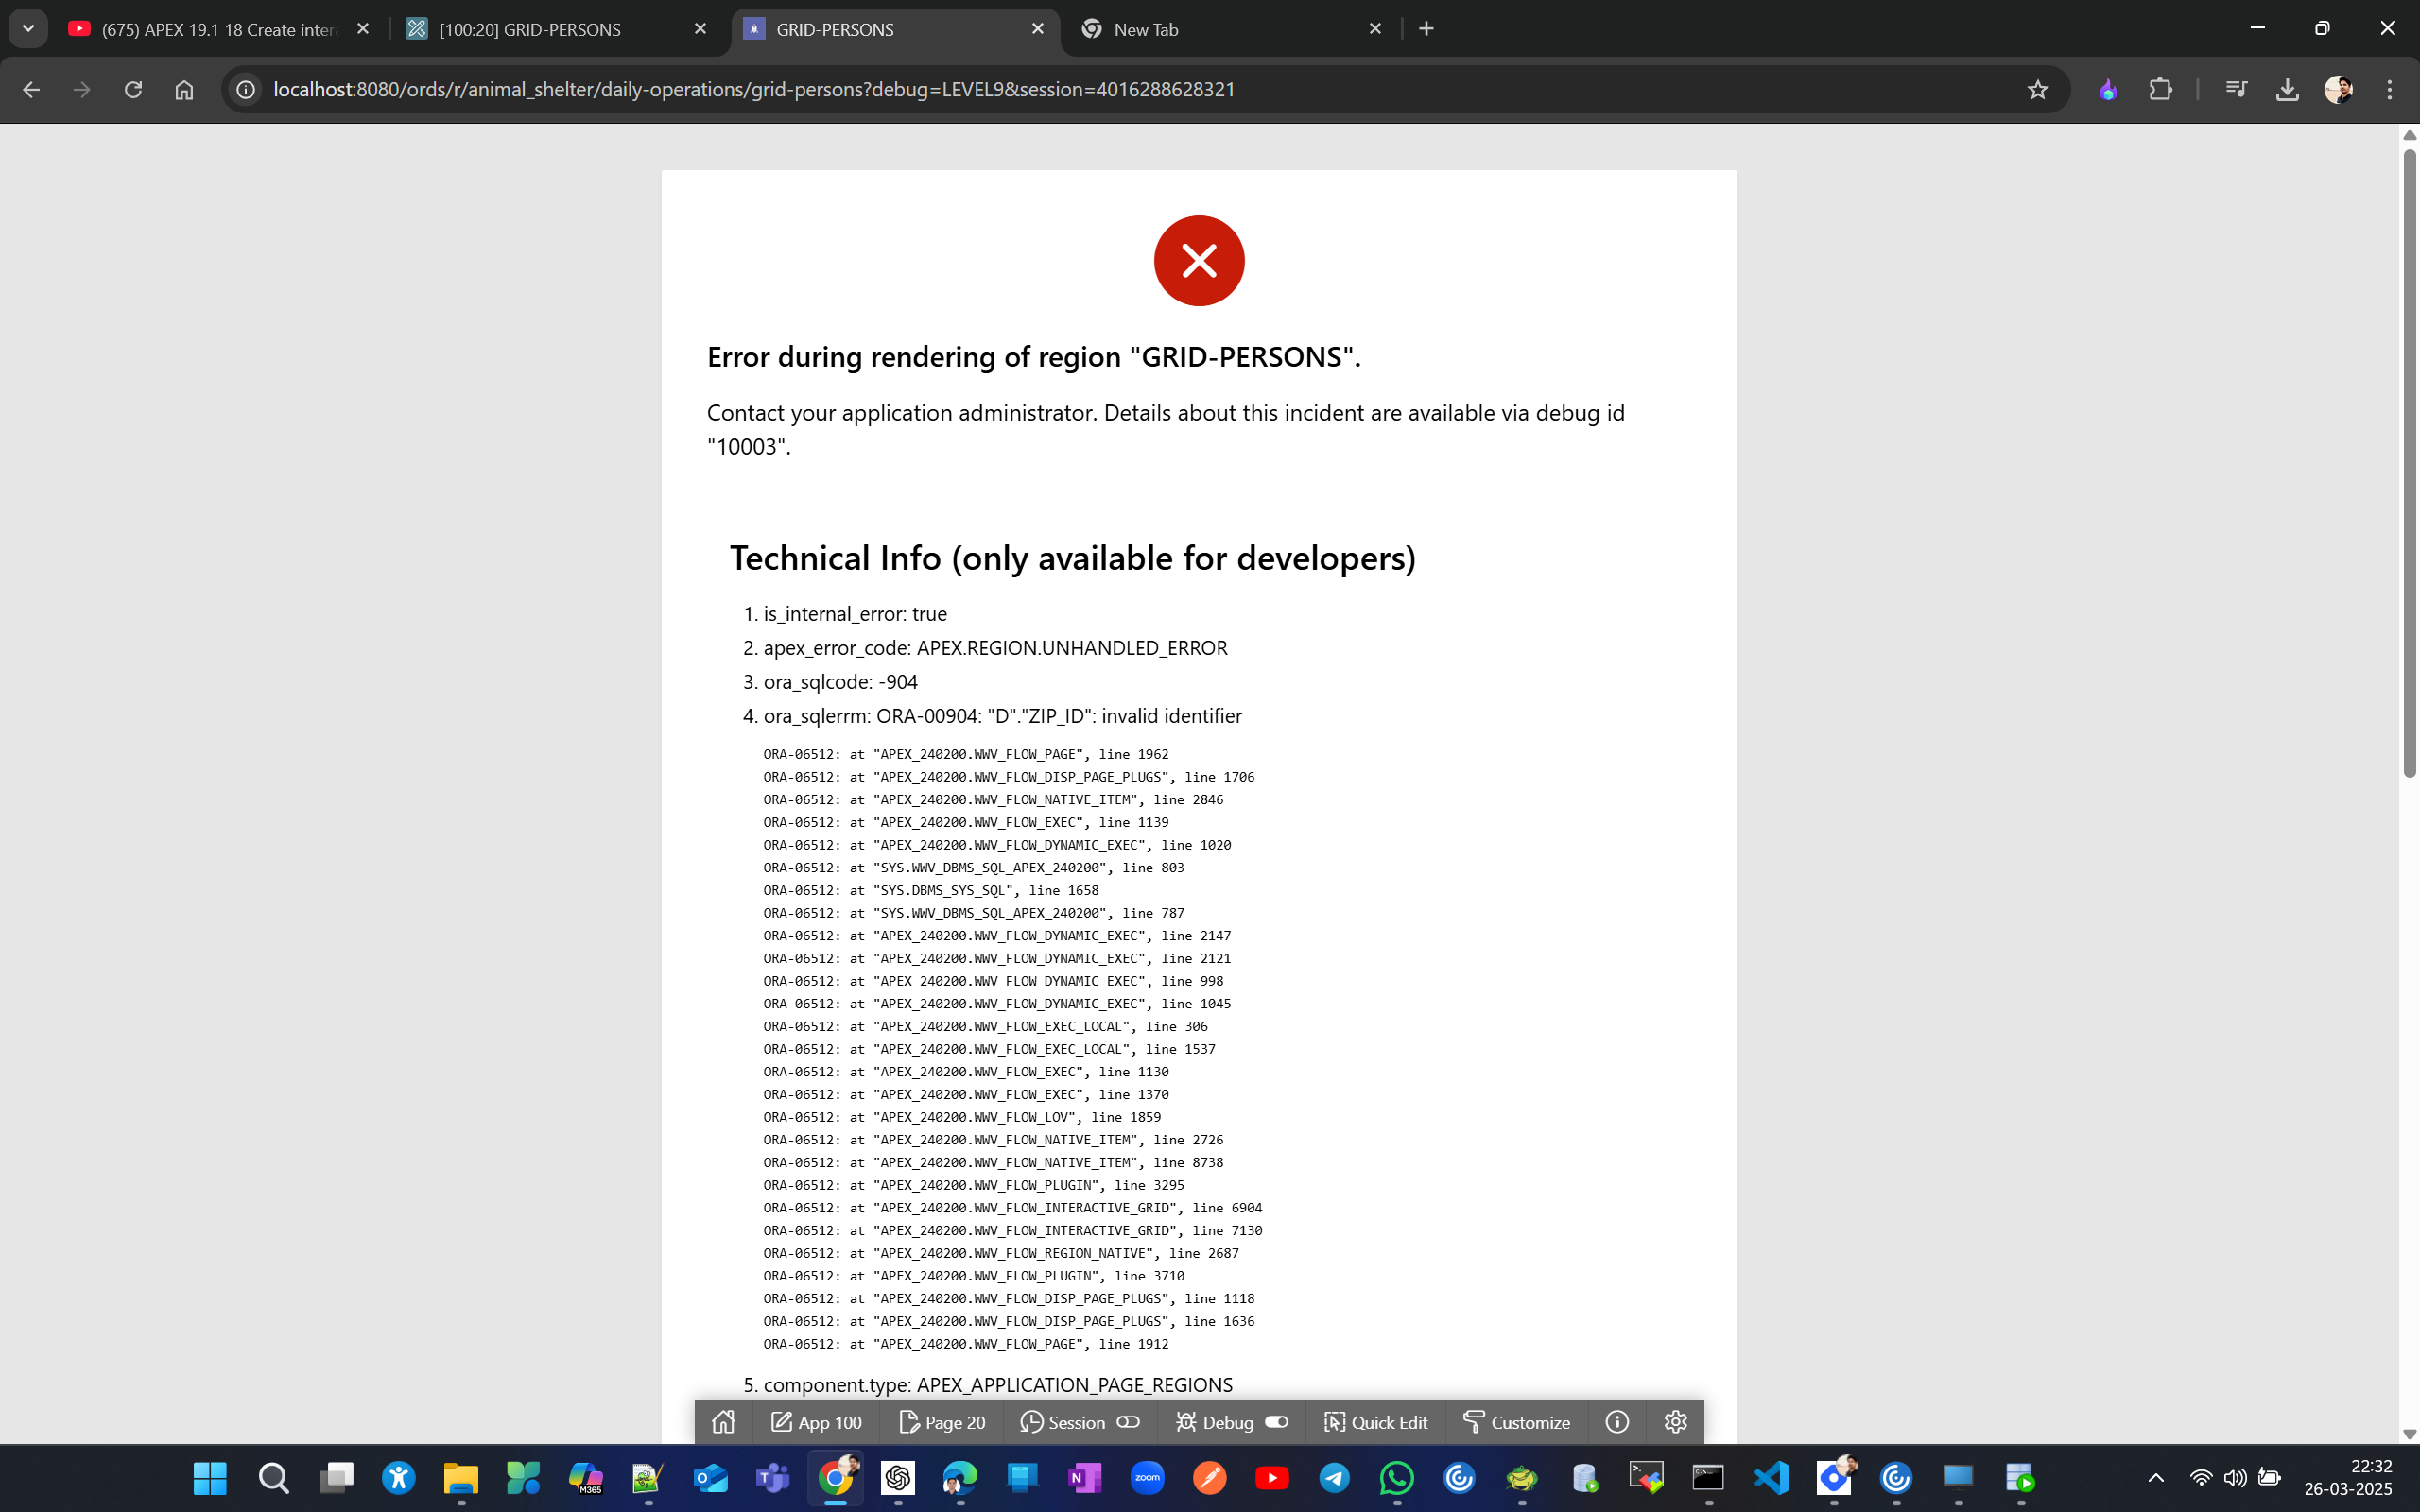
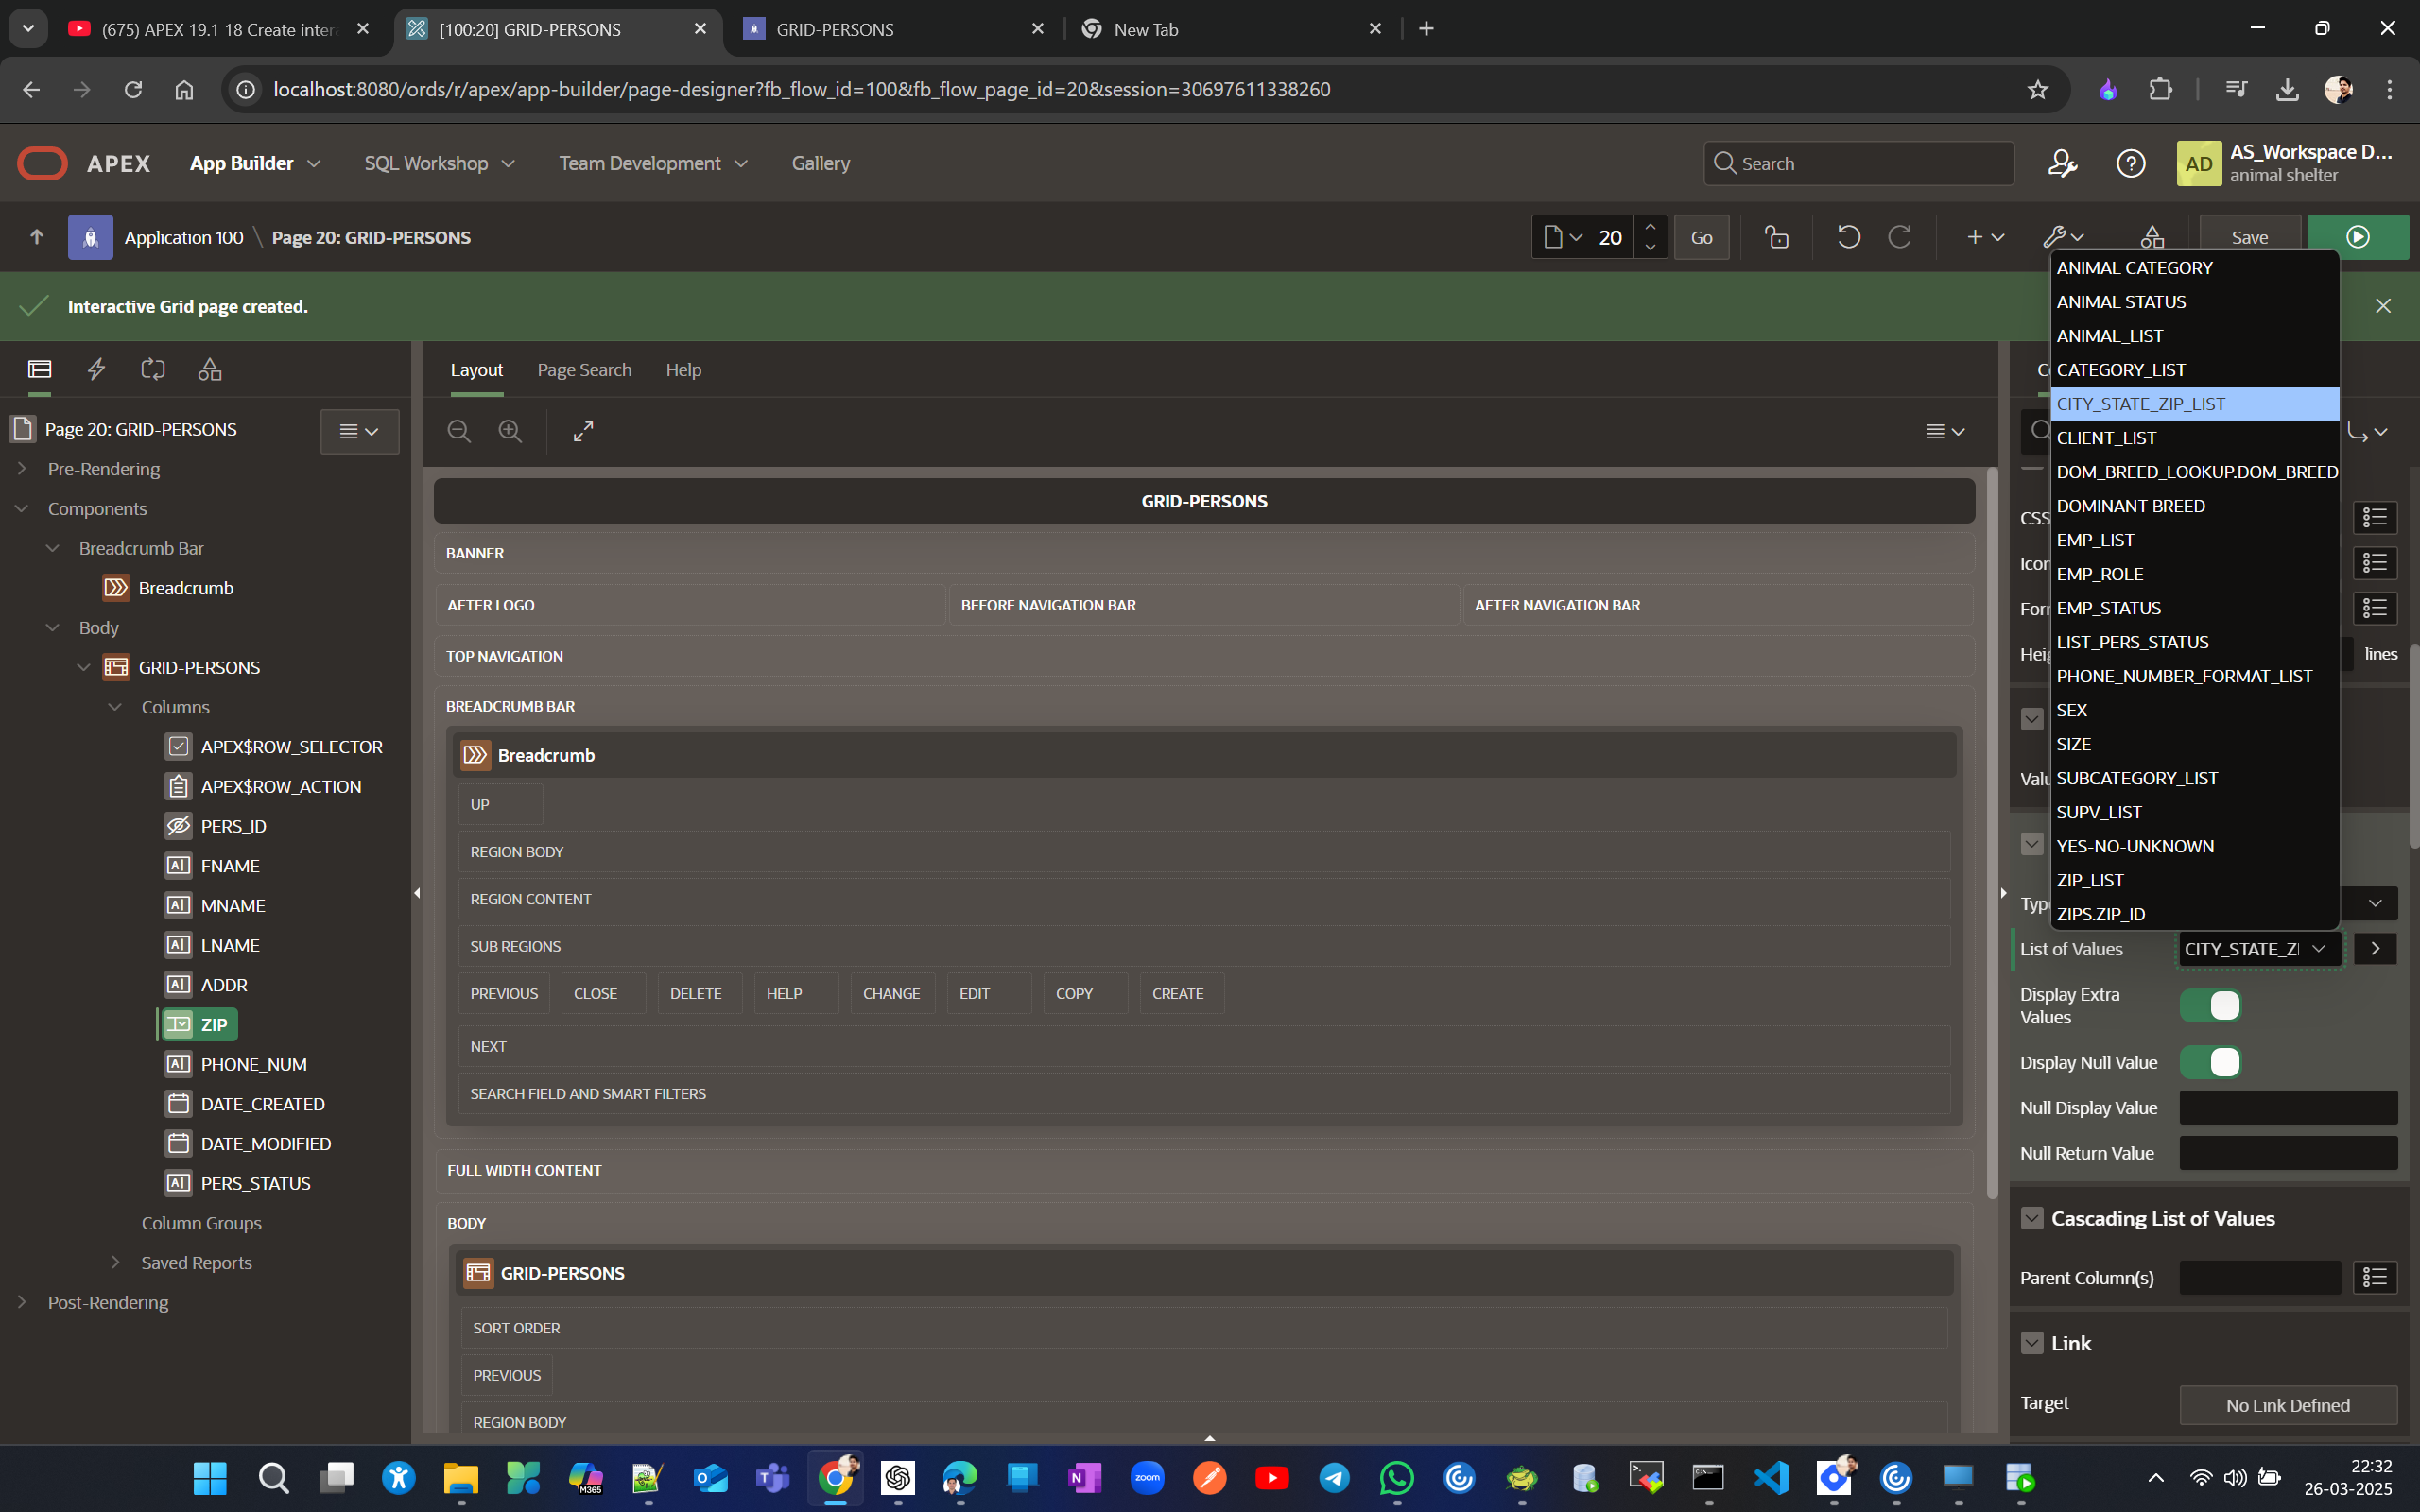
while running the app if you get below error then fix the reference of D.ZIP_ID lov
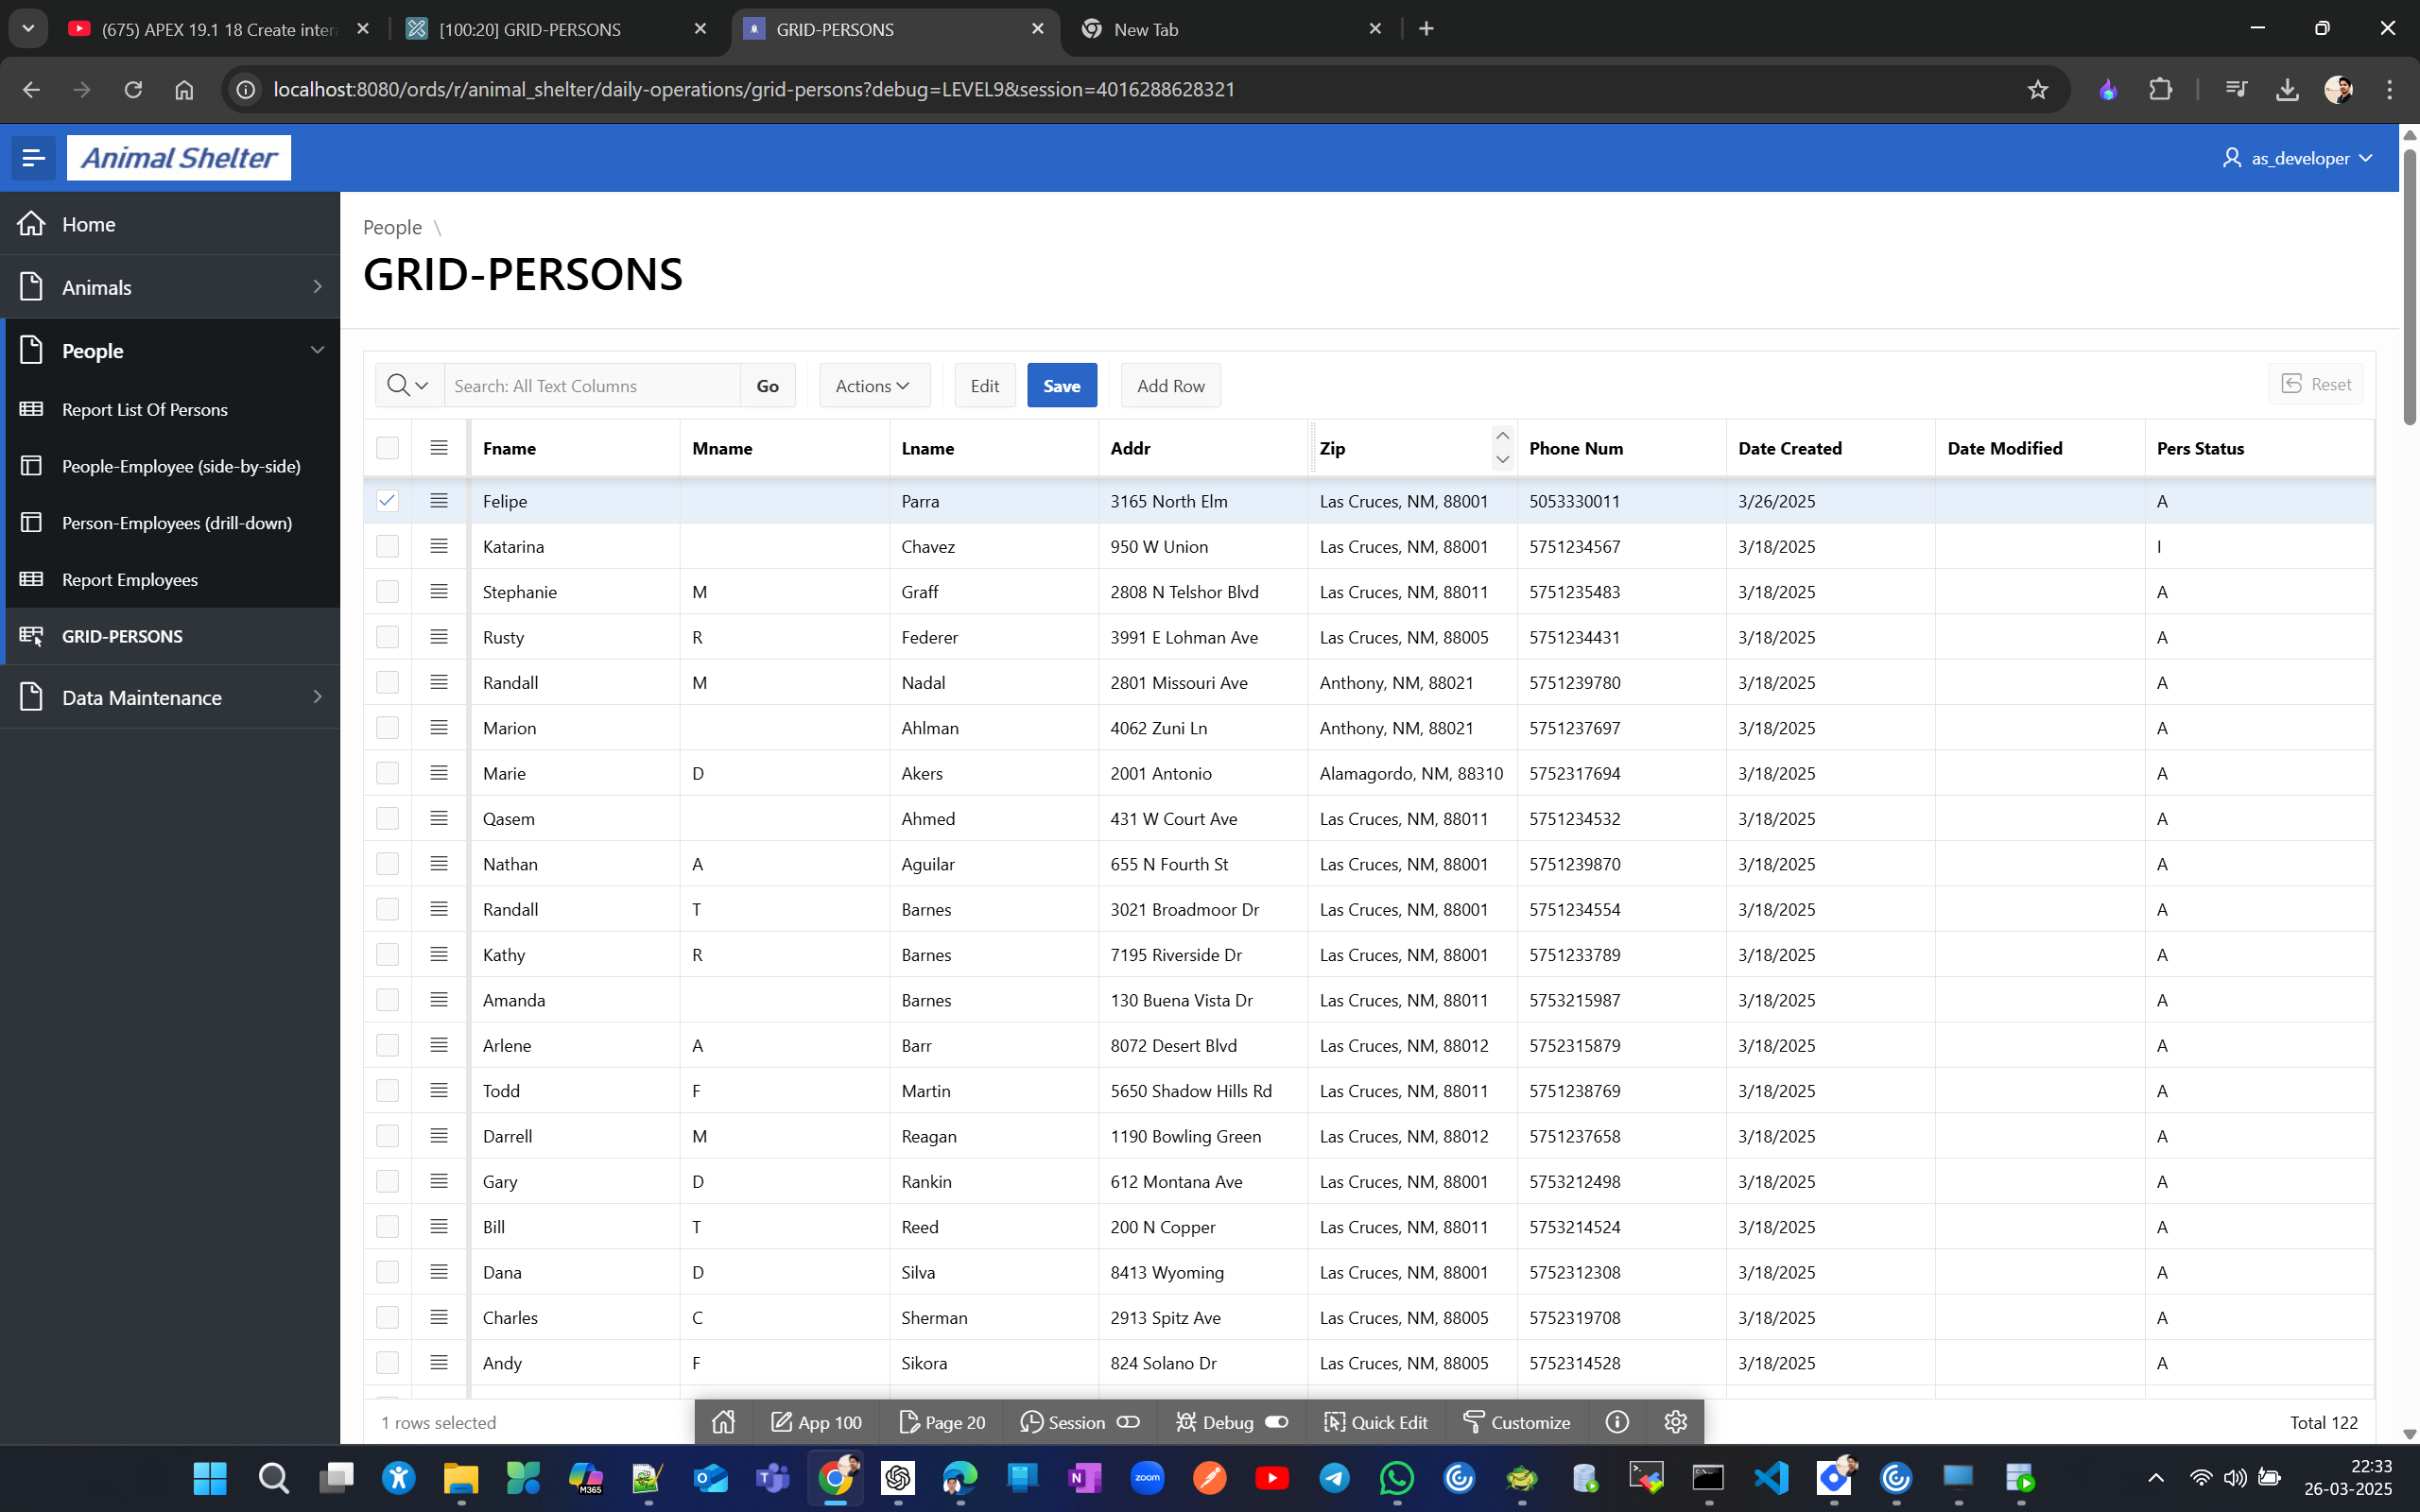
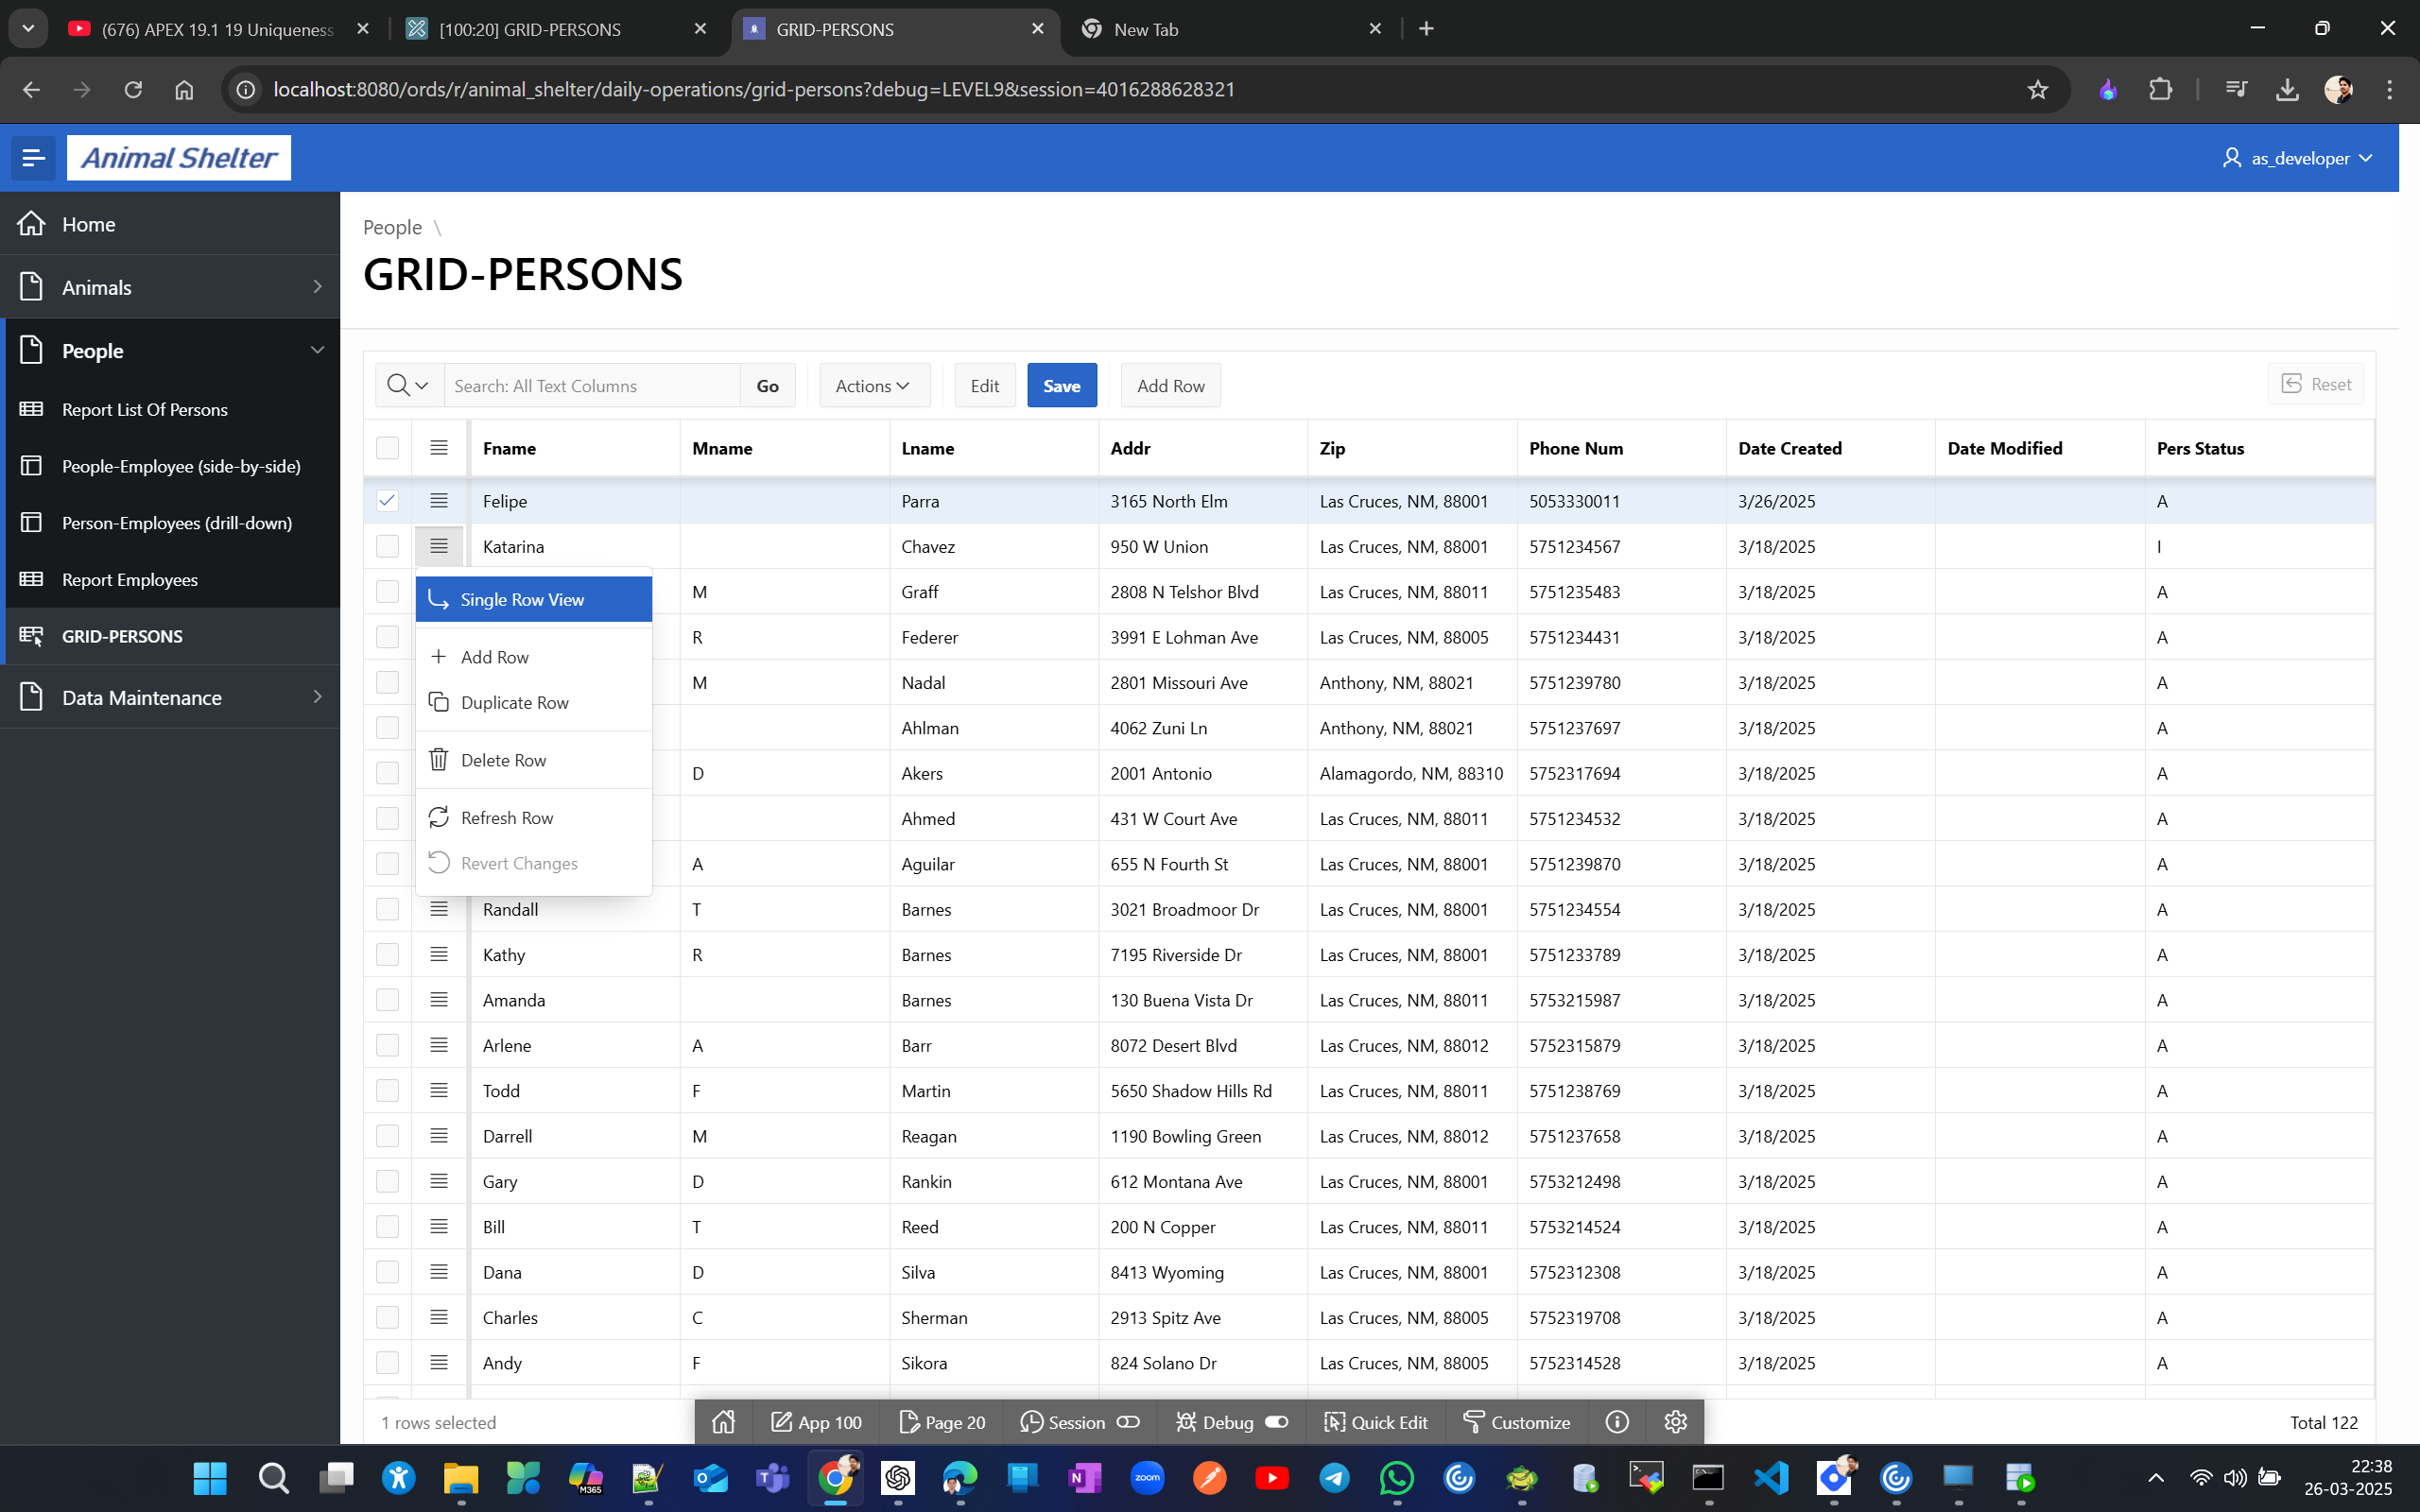
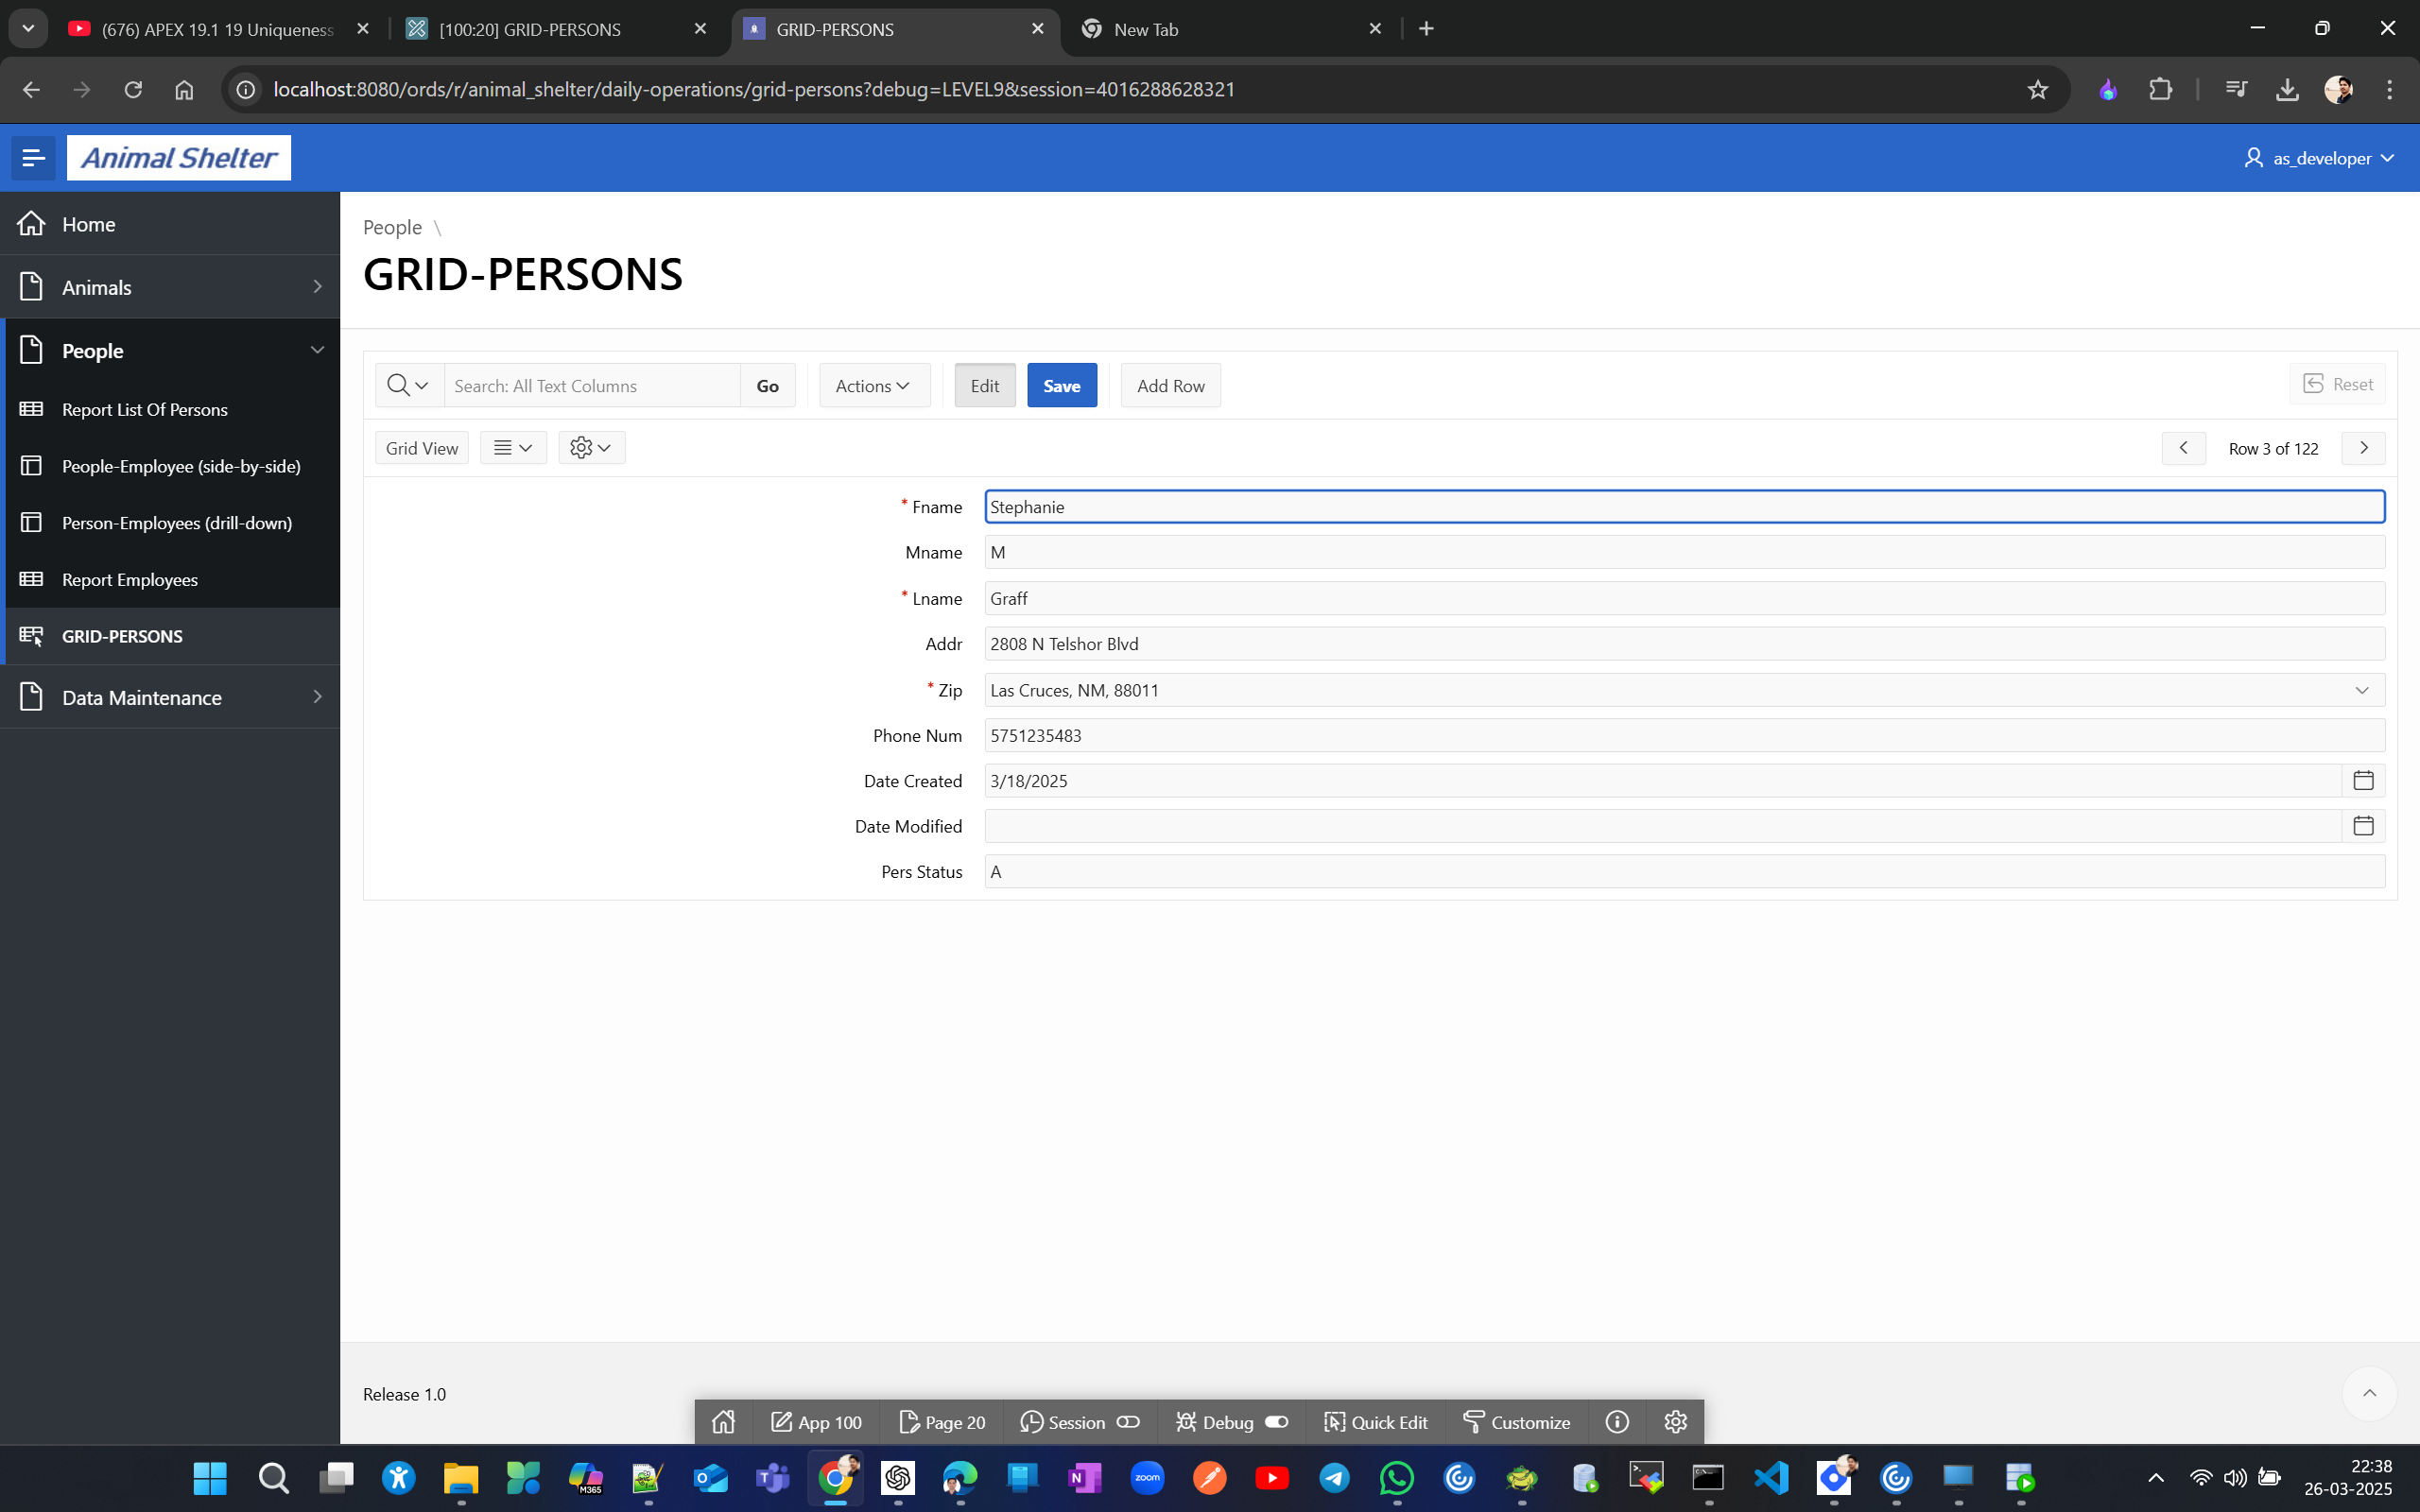
This IG is similar to IR but includes row actions on the left for adding and deleting rows, and allows inline field editing if the edit option was enabled during page creation; if not, you can edit by going to single row view → edit.
Unique constraint on 2 columns. Add computation to a page item in form.
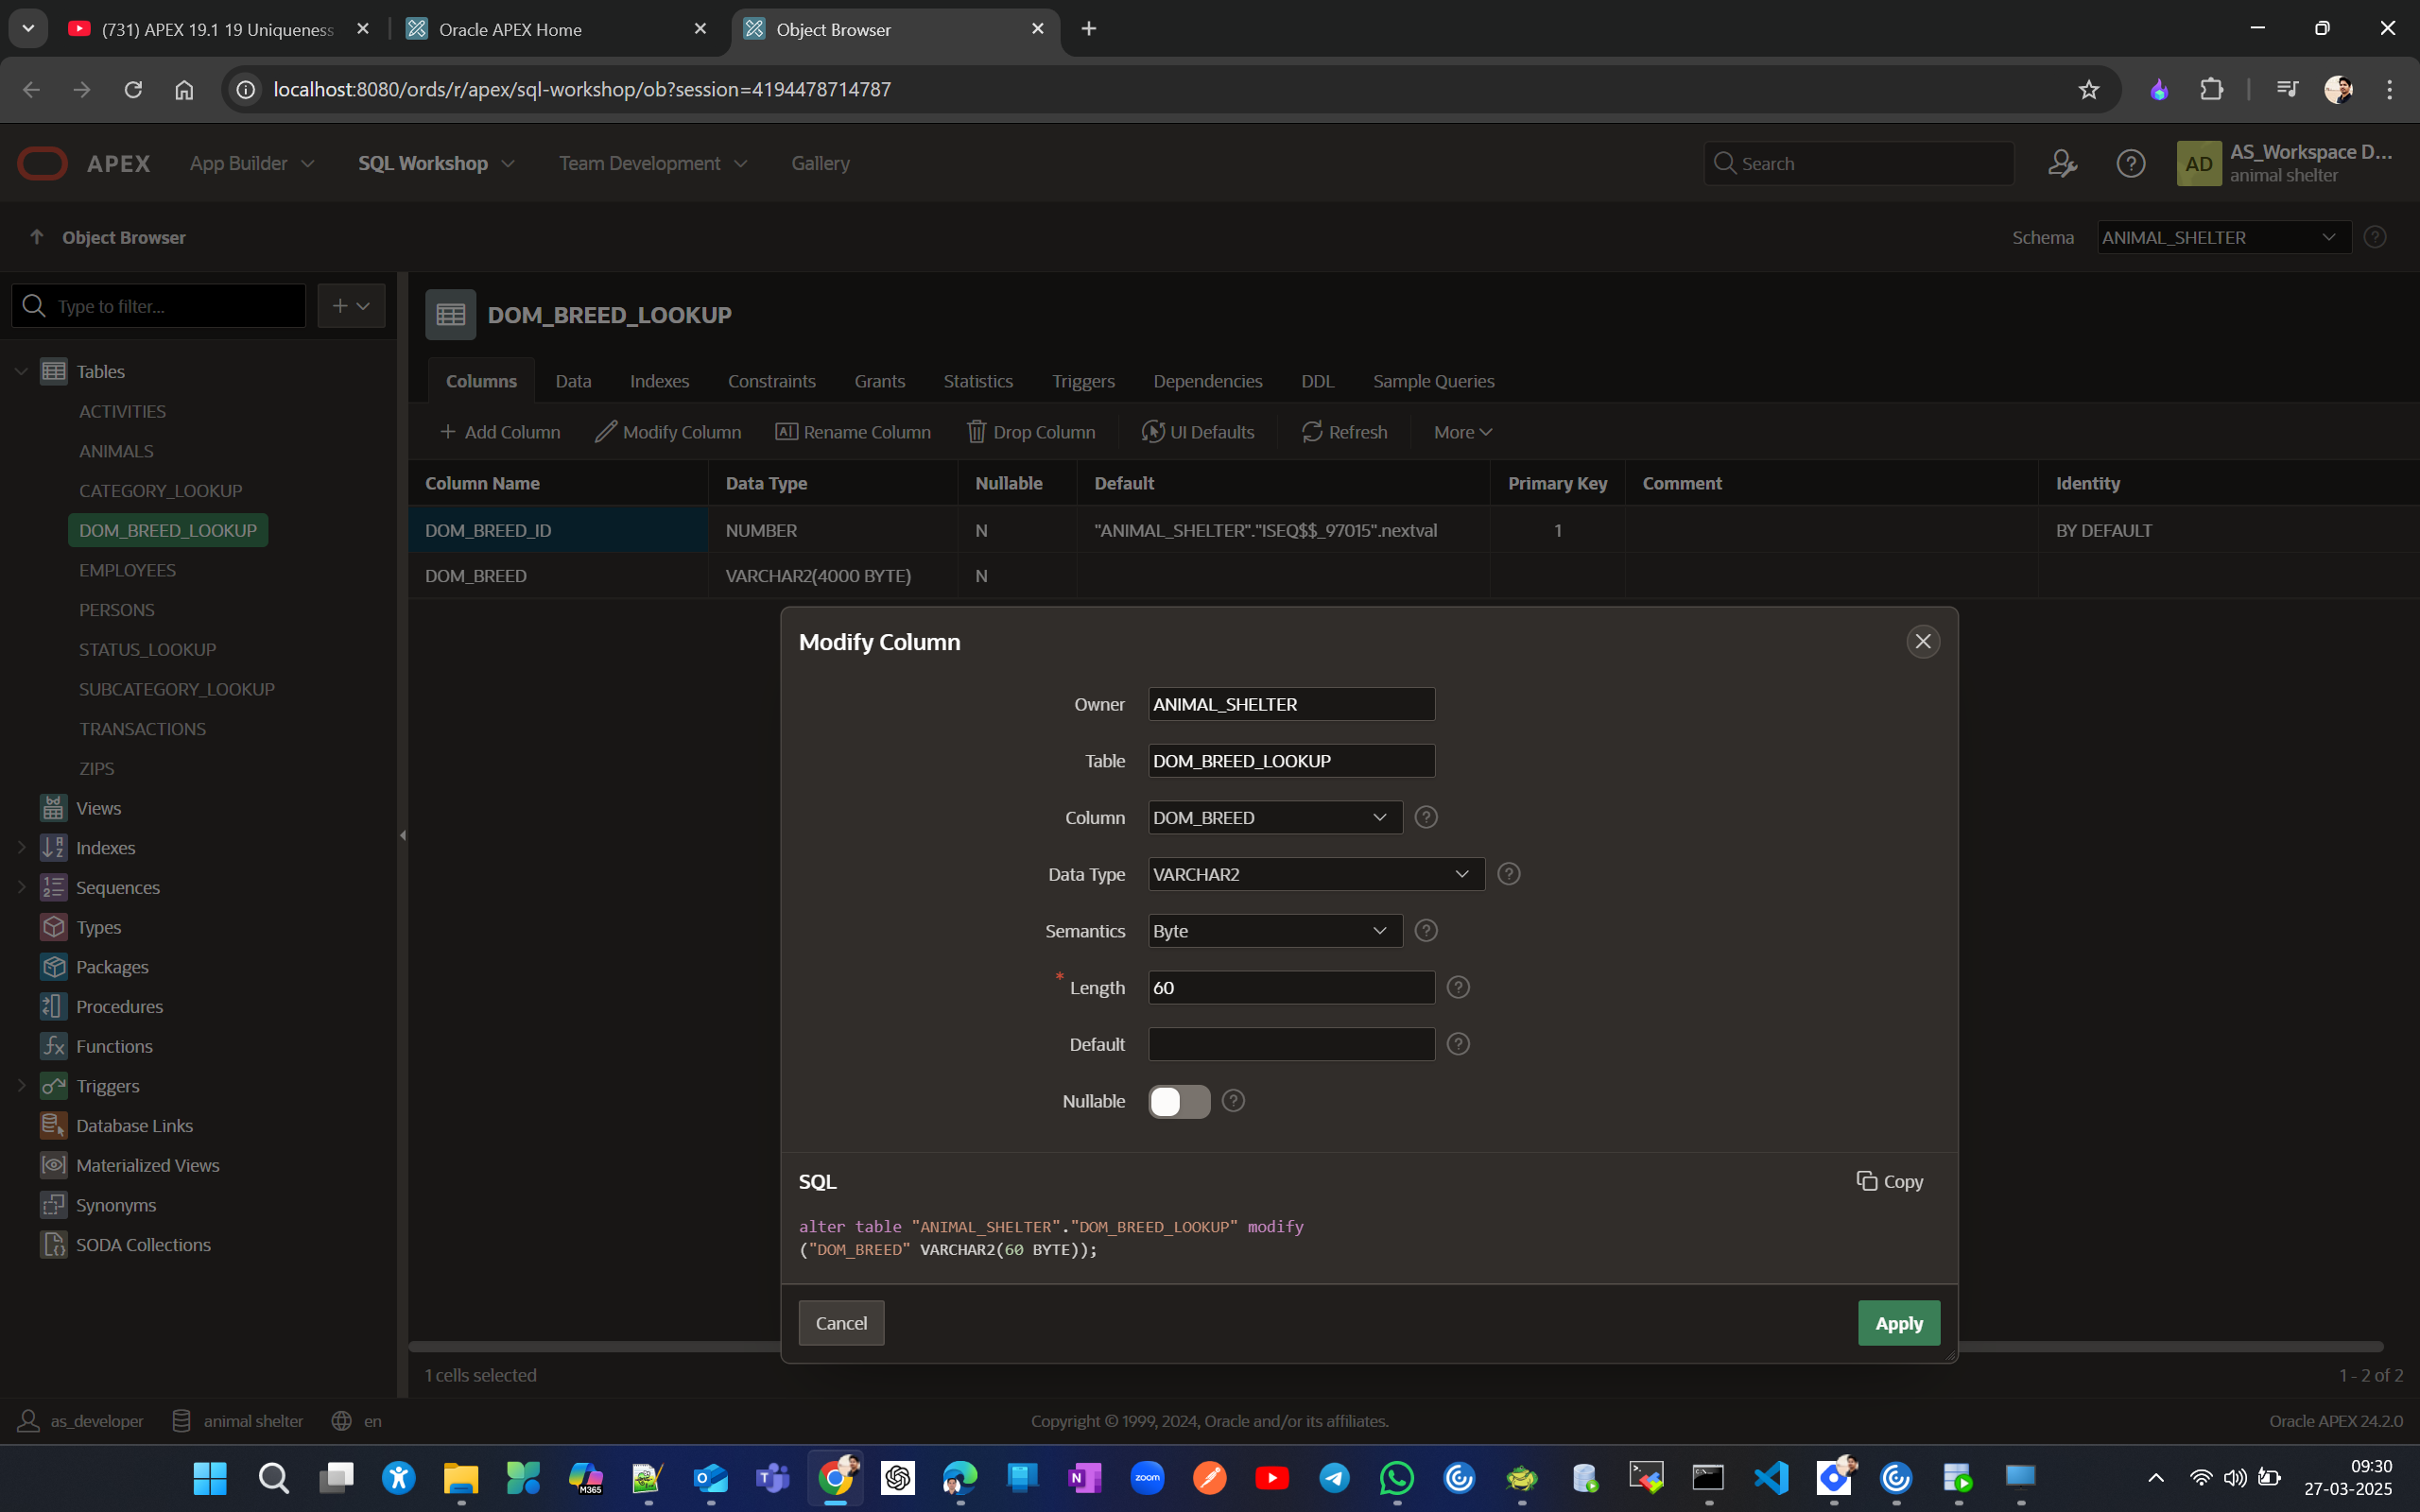
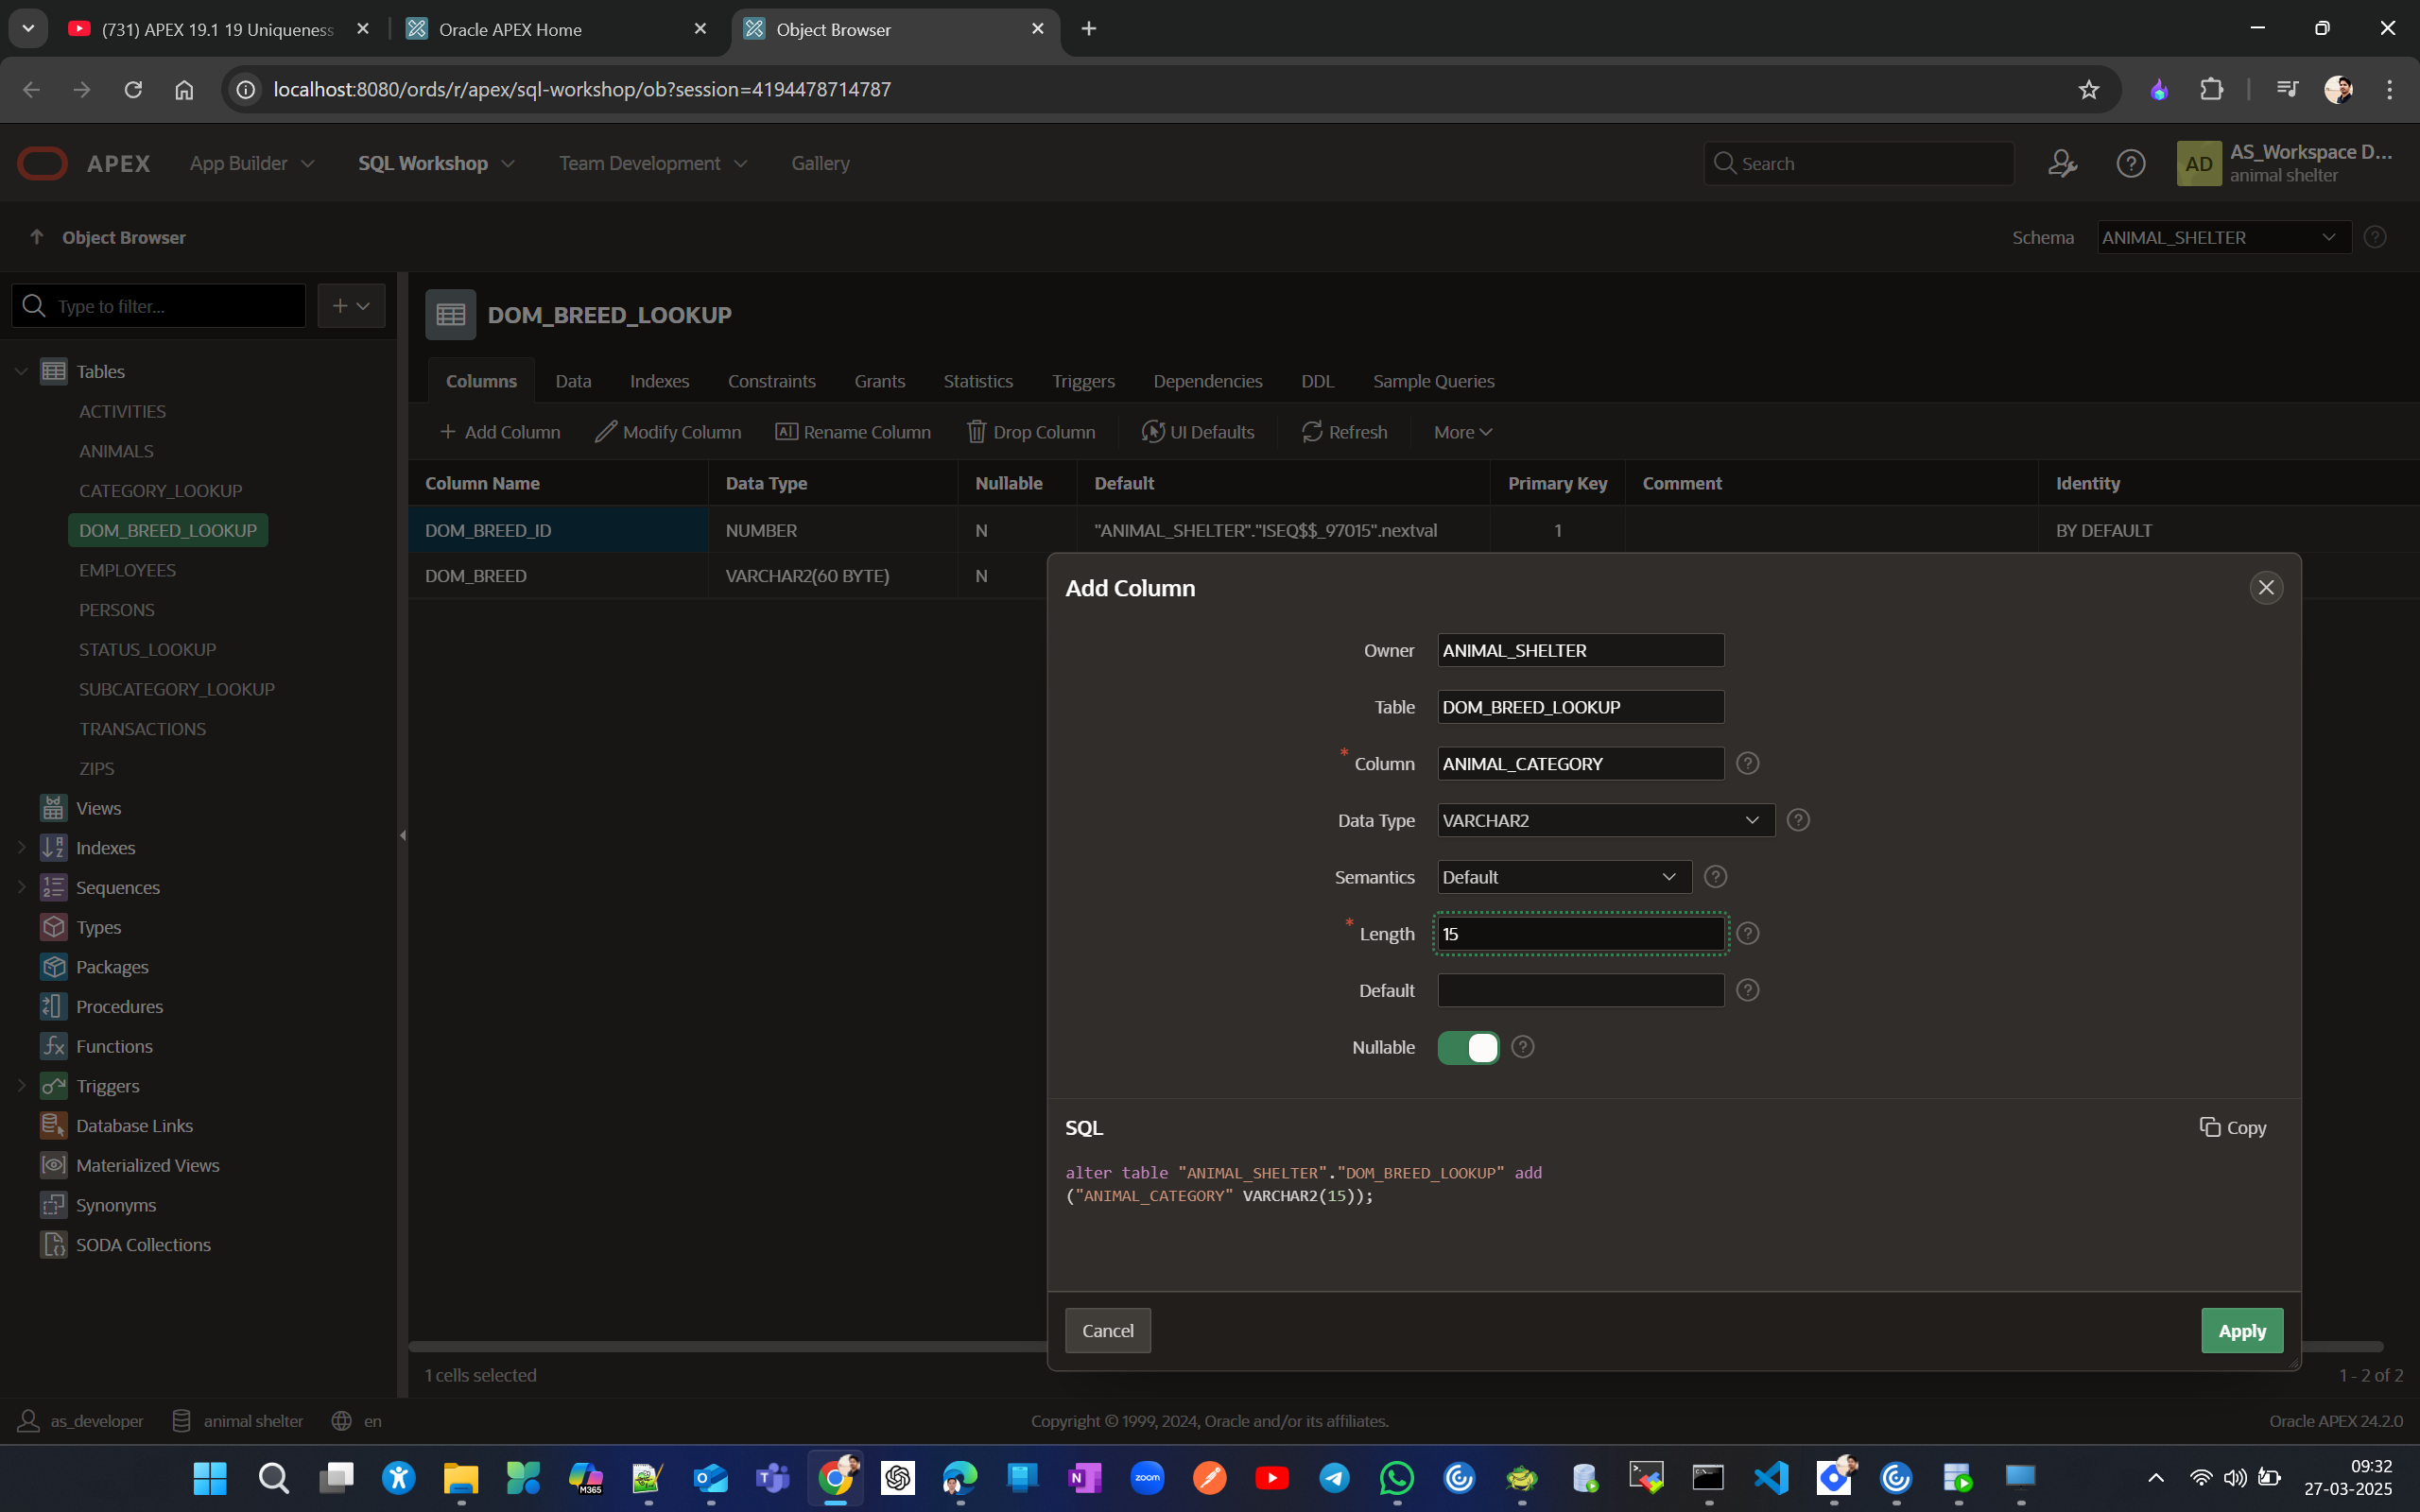
Let’s modify DOM_BREED column of lookup table DOM_BREED_LOOKUP and add a column ANIMAL_CATEGORY VARCHAR2(15)
Now lets drop constraint DOM_BREED_LOKKUP_UNIQ.
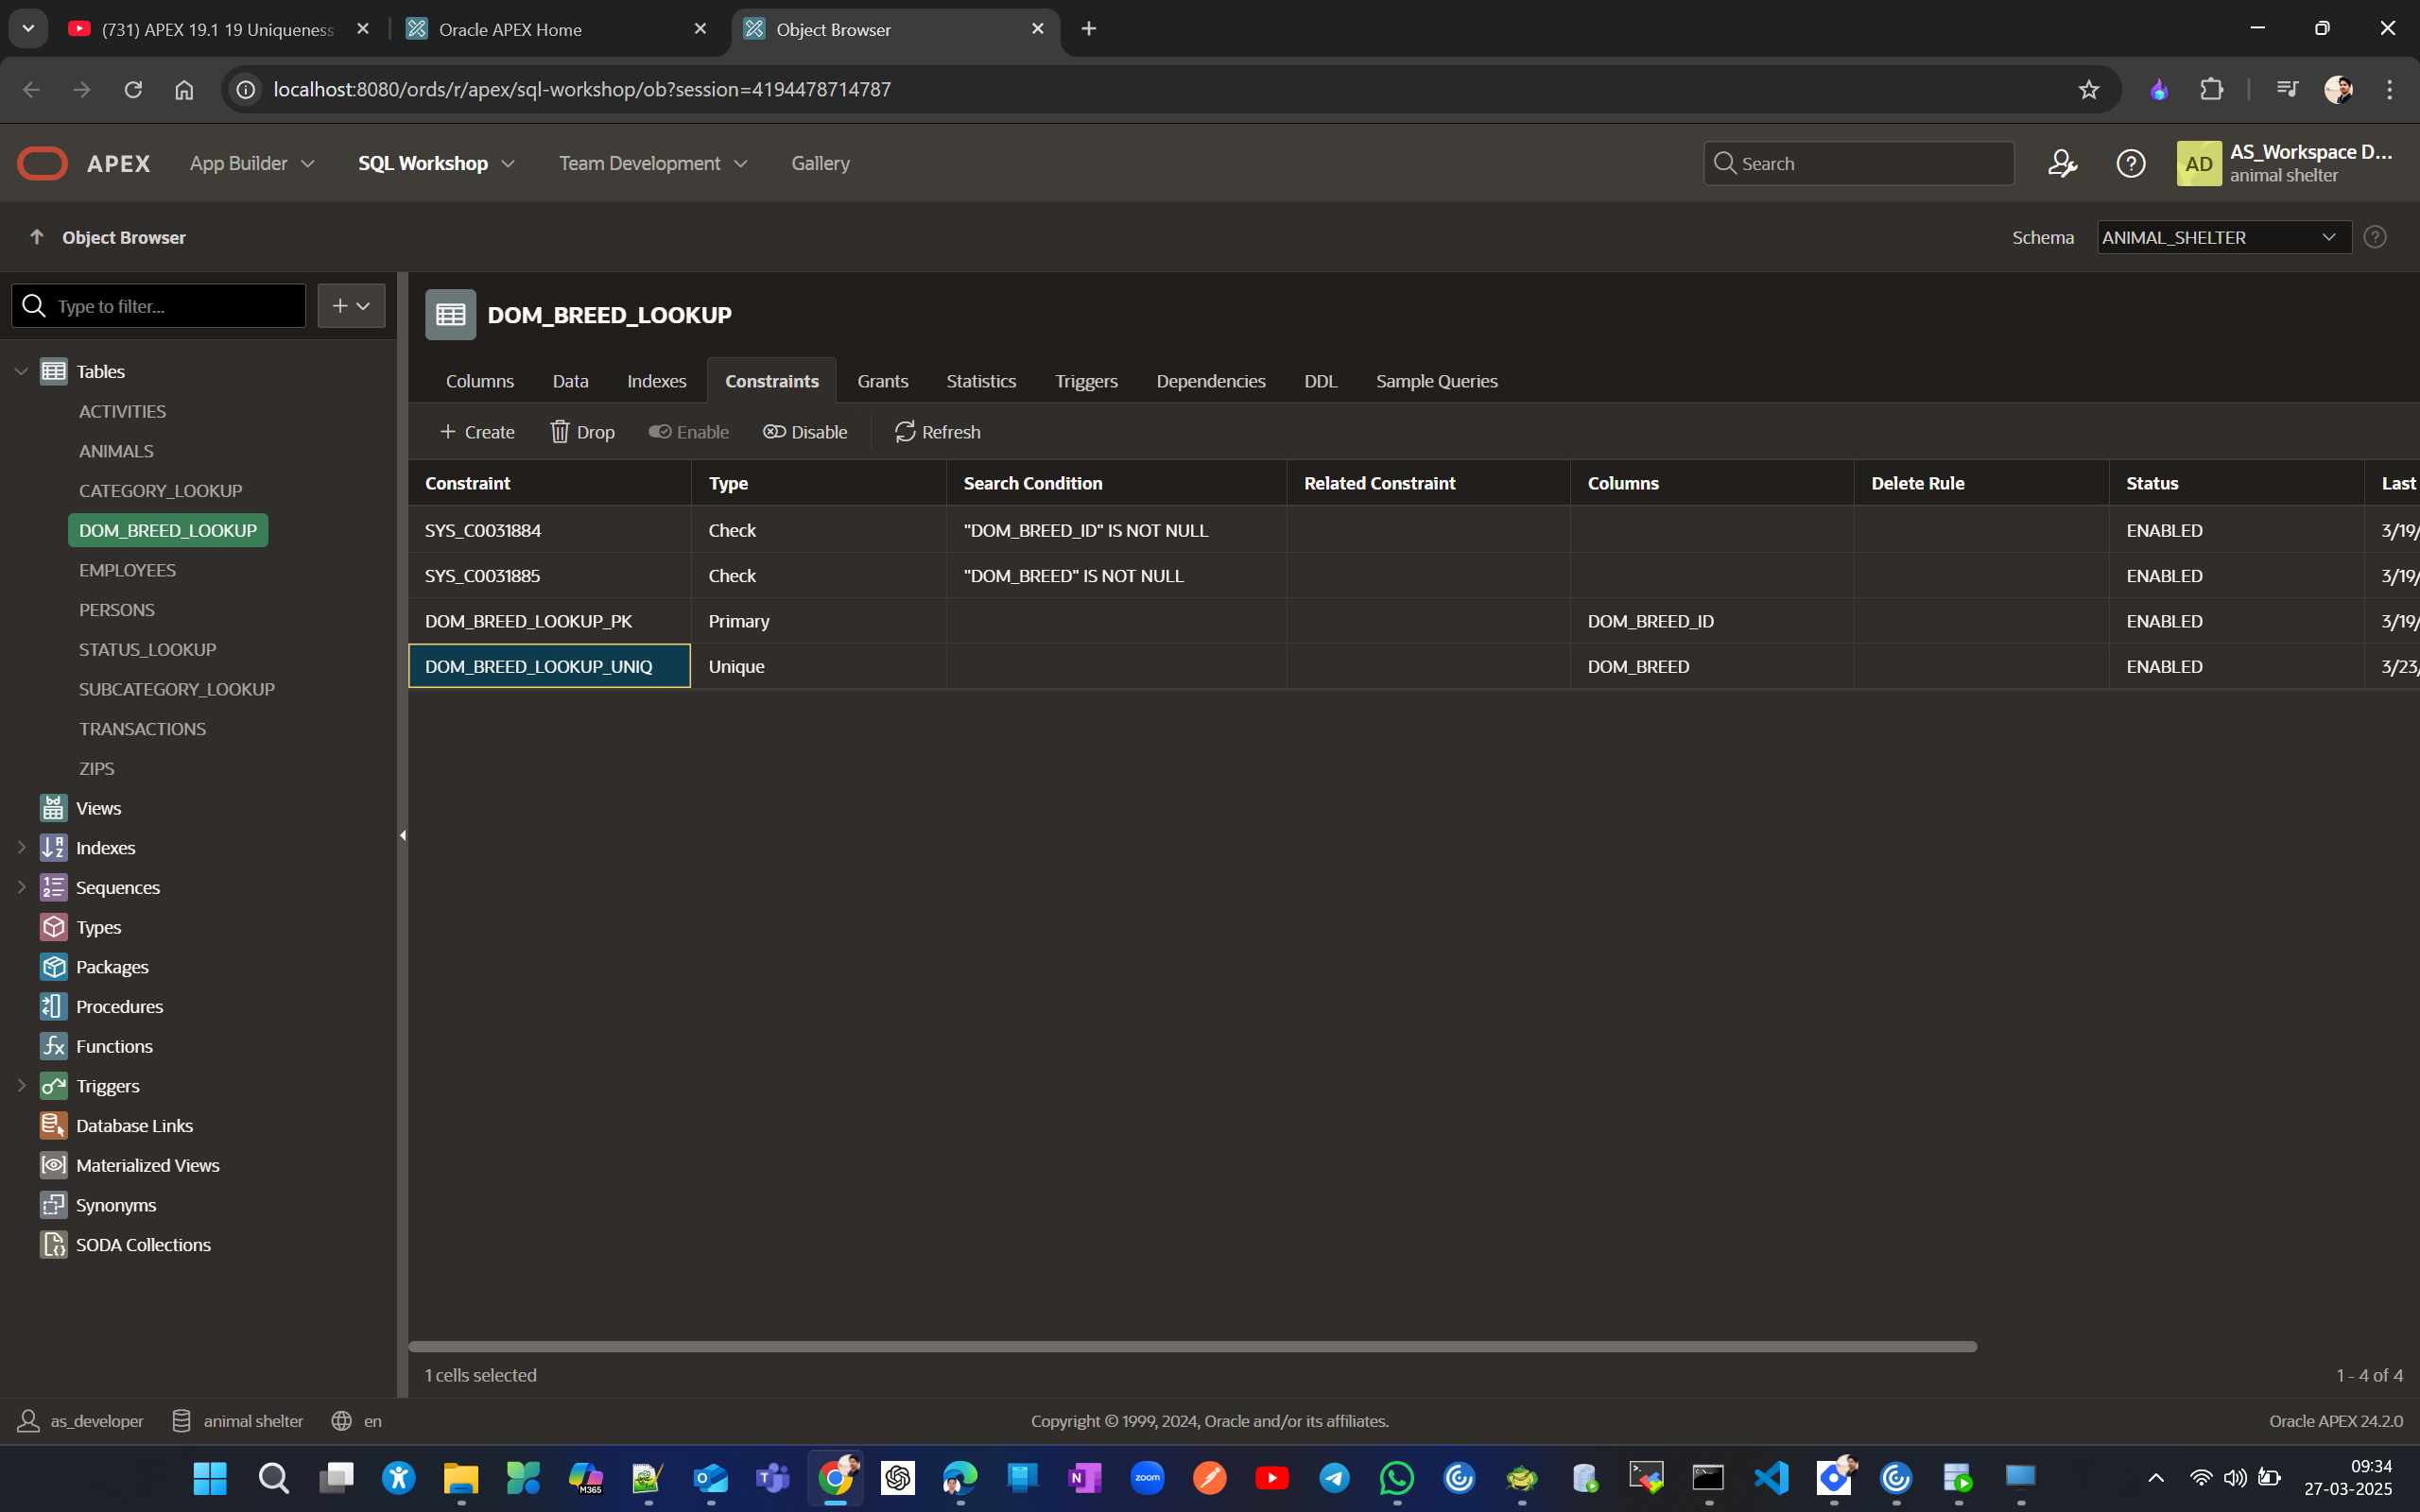
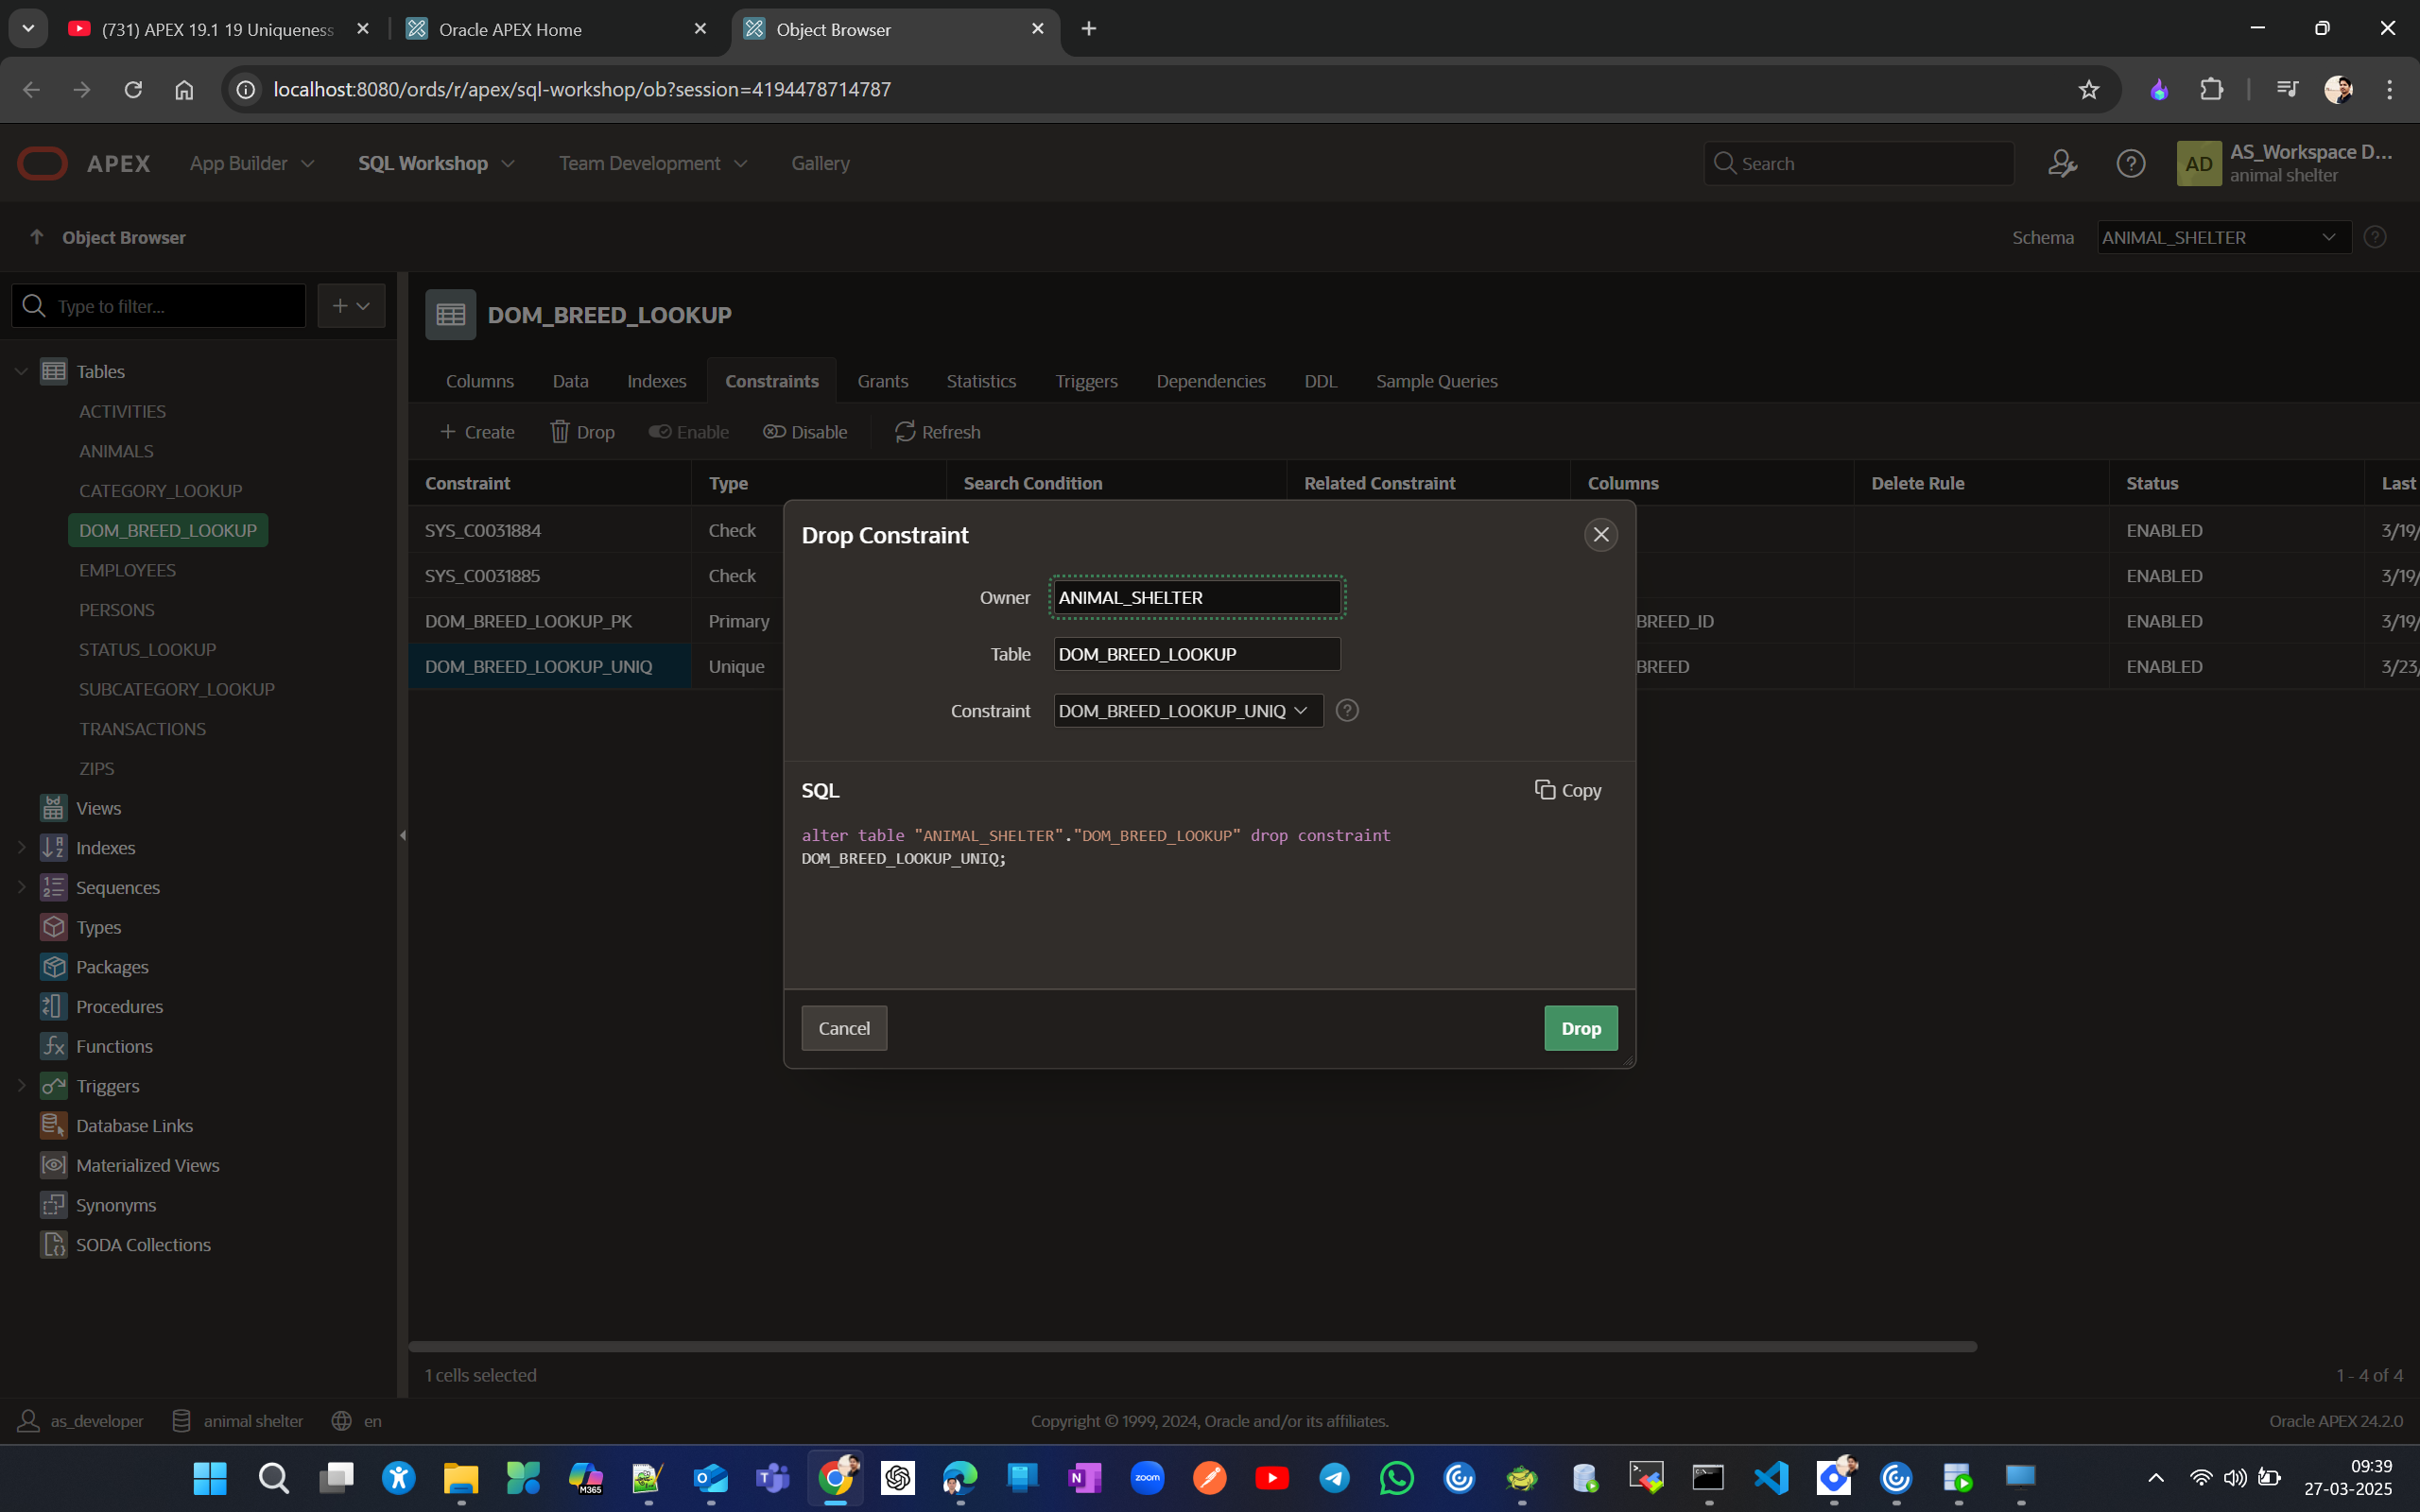
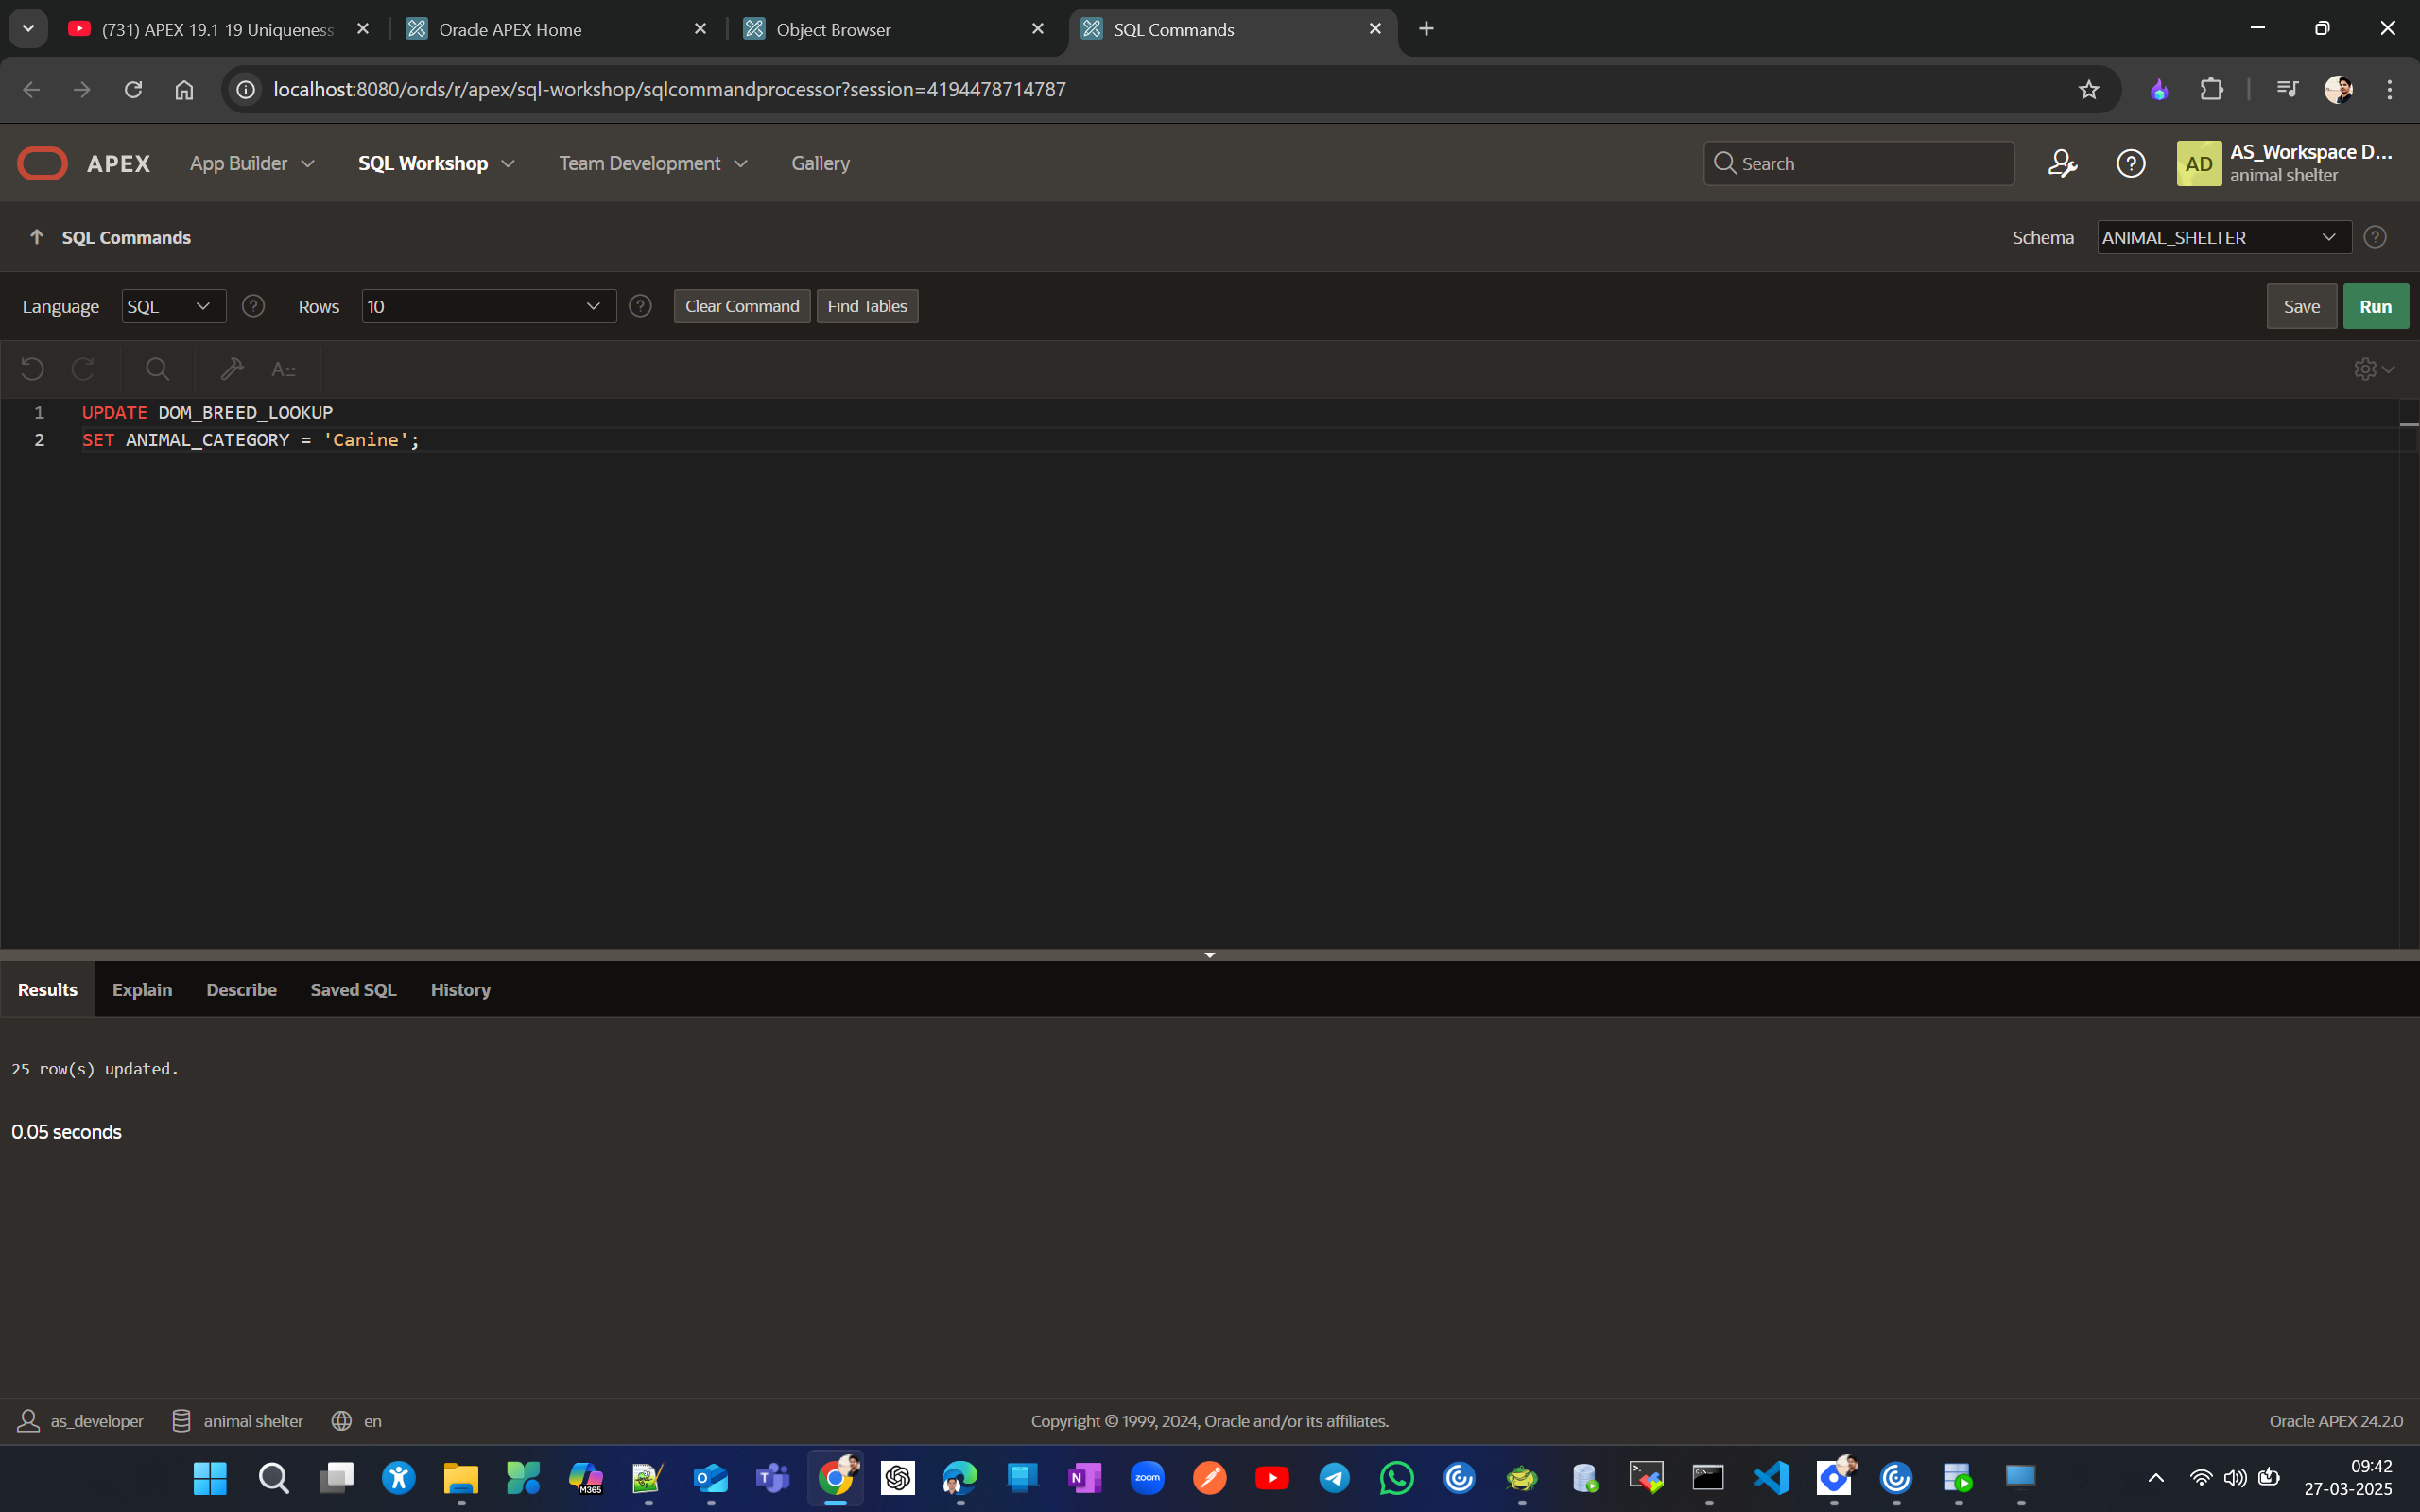
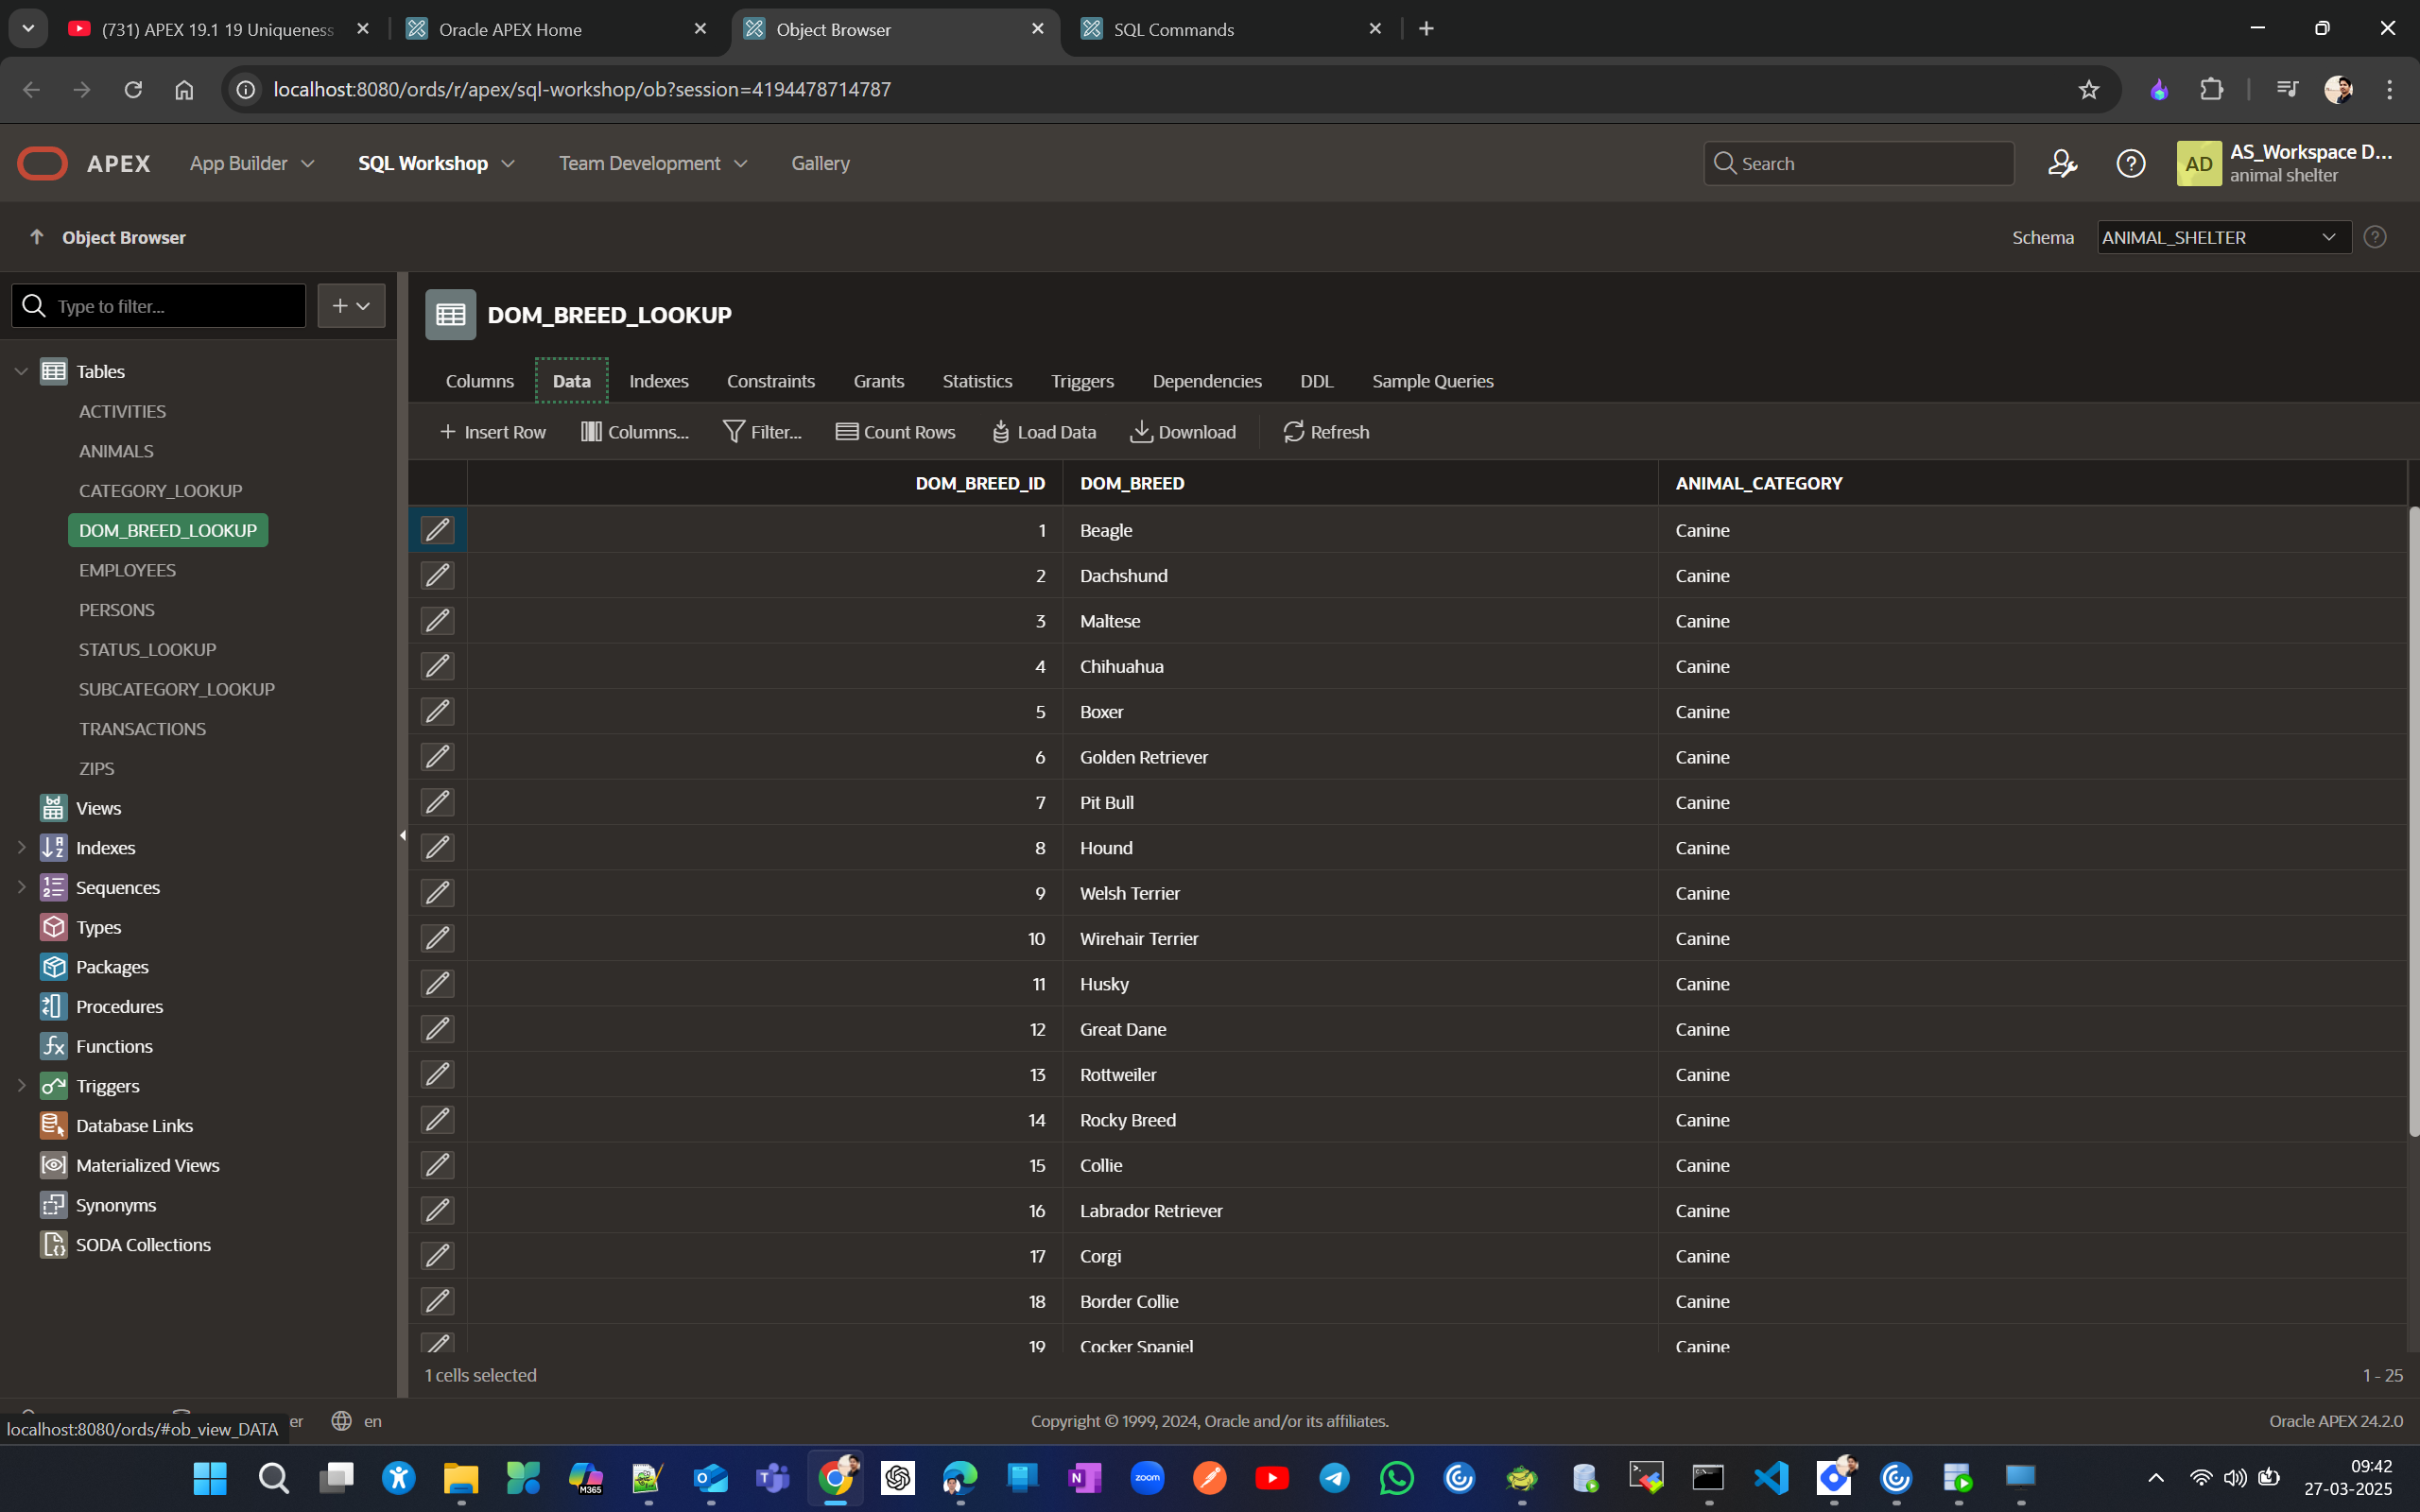
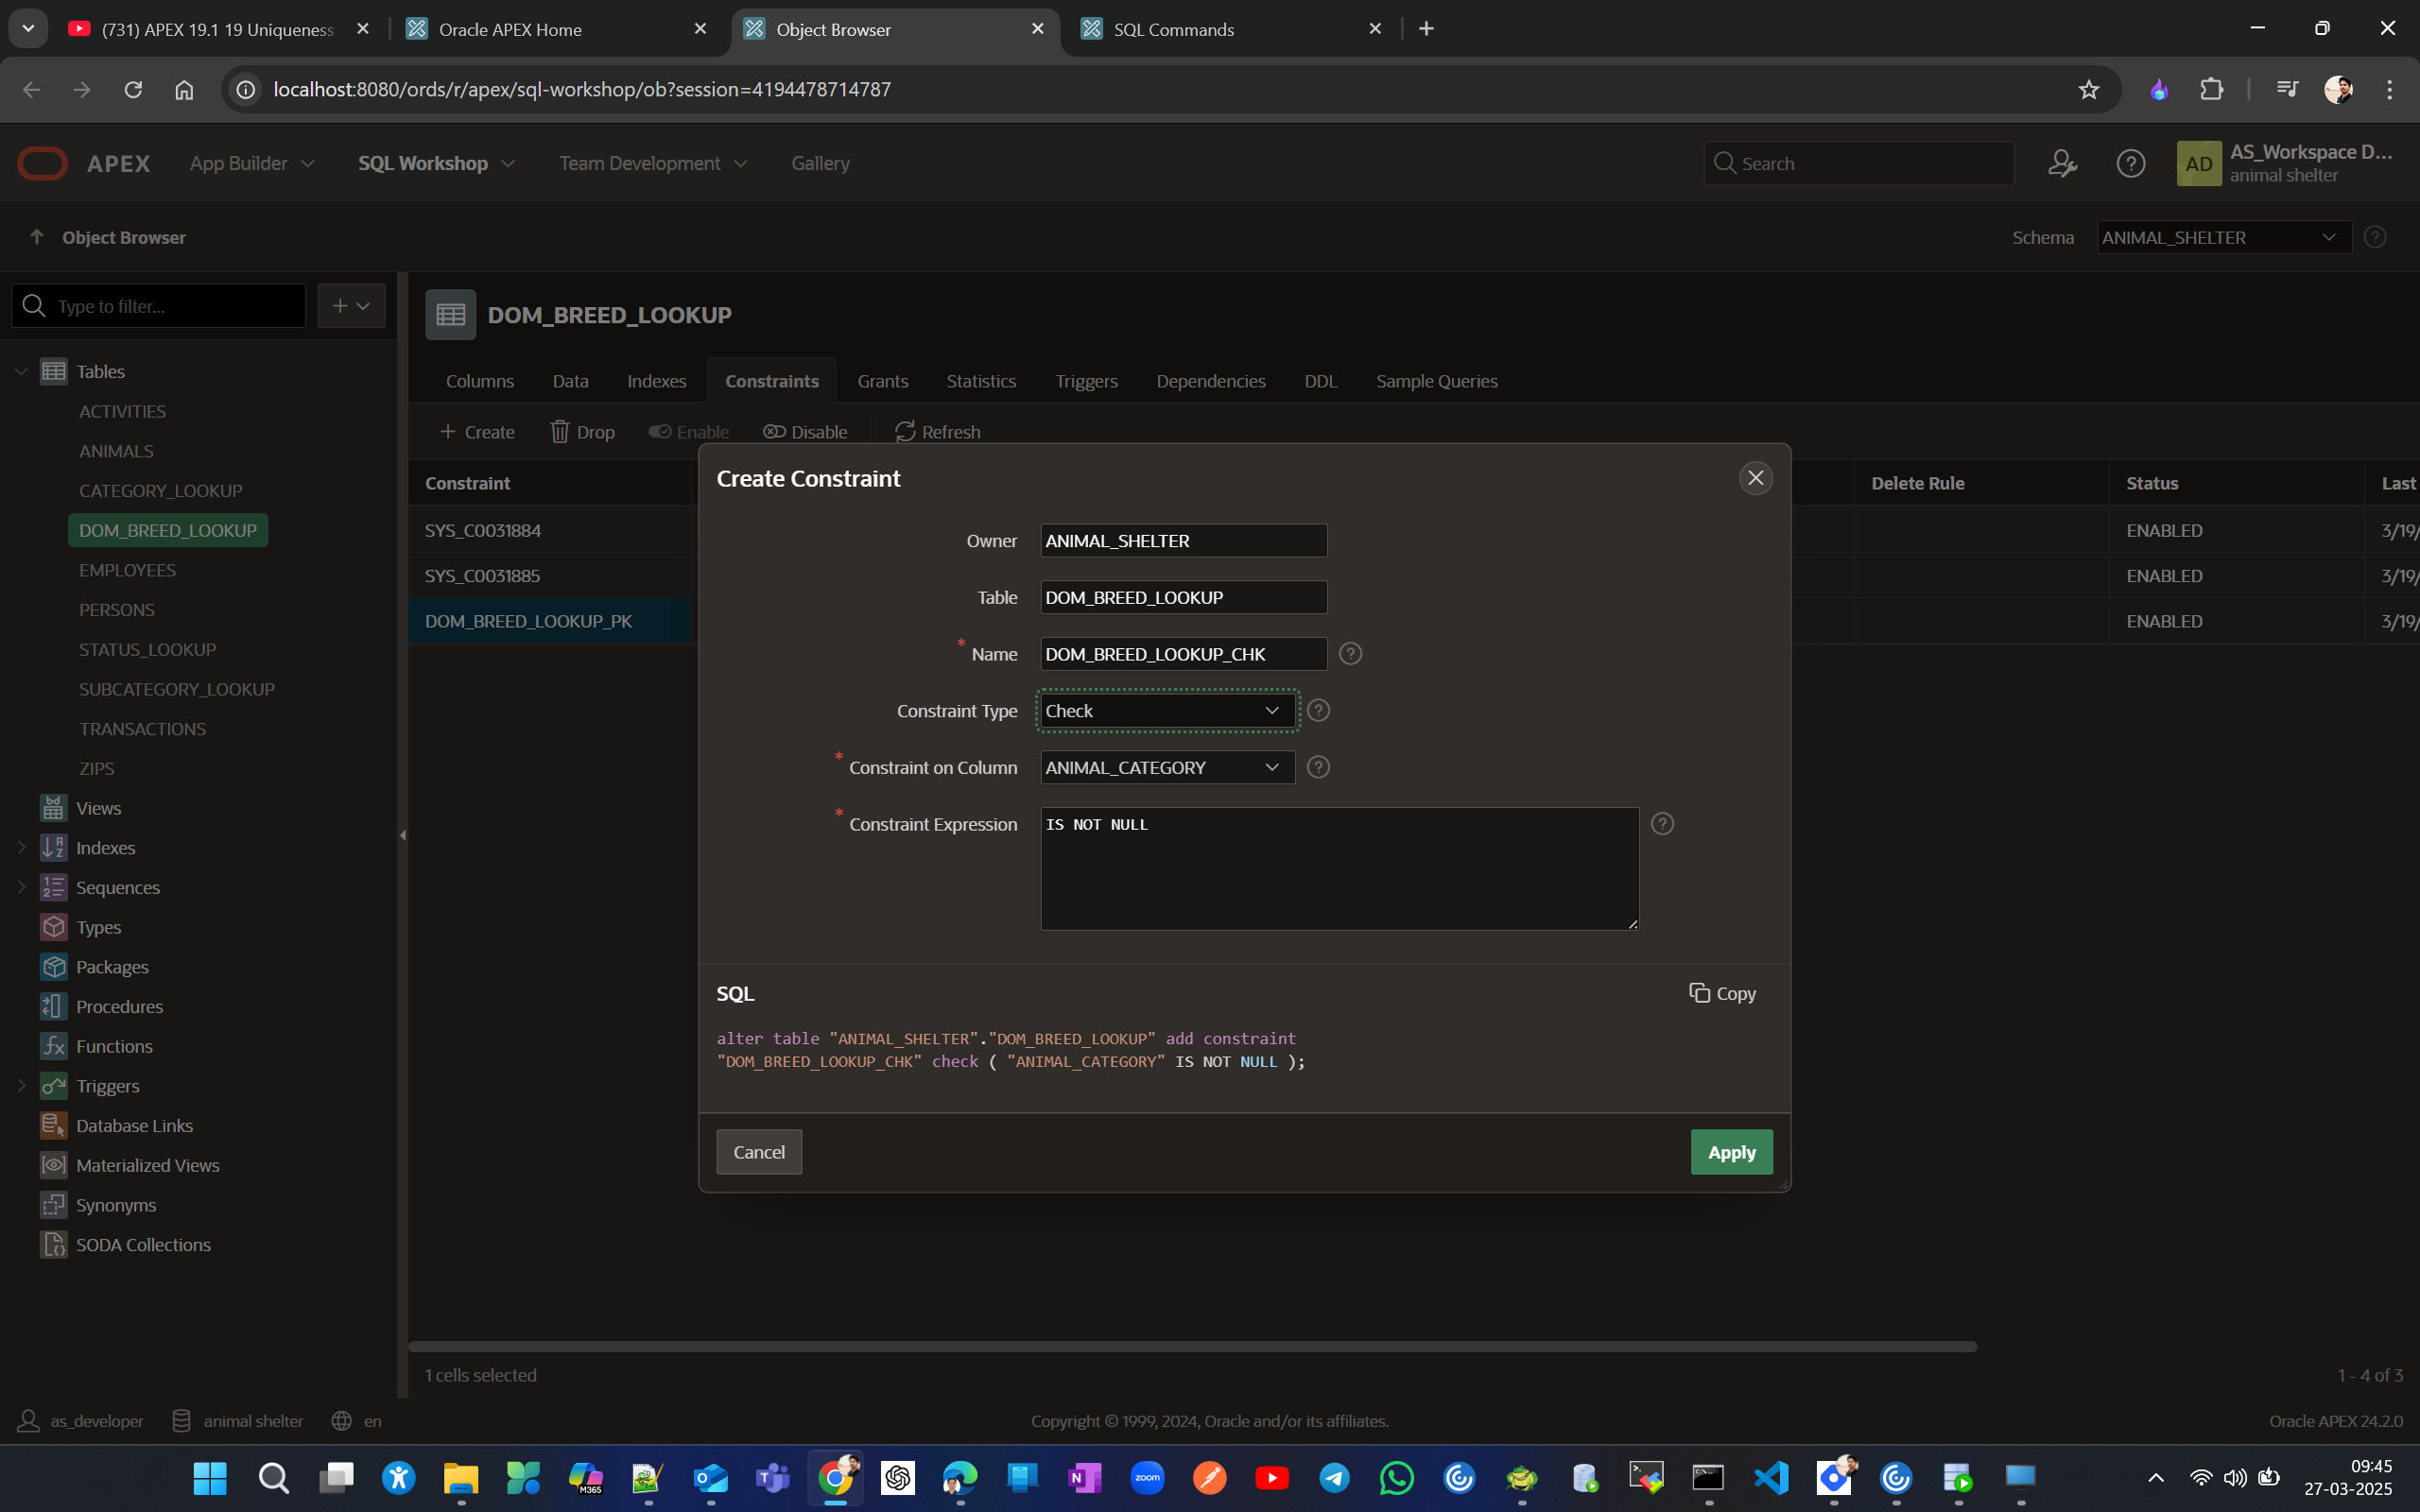
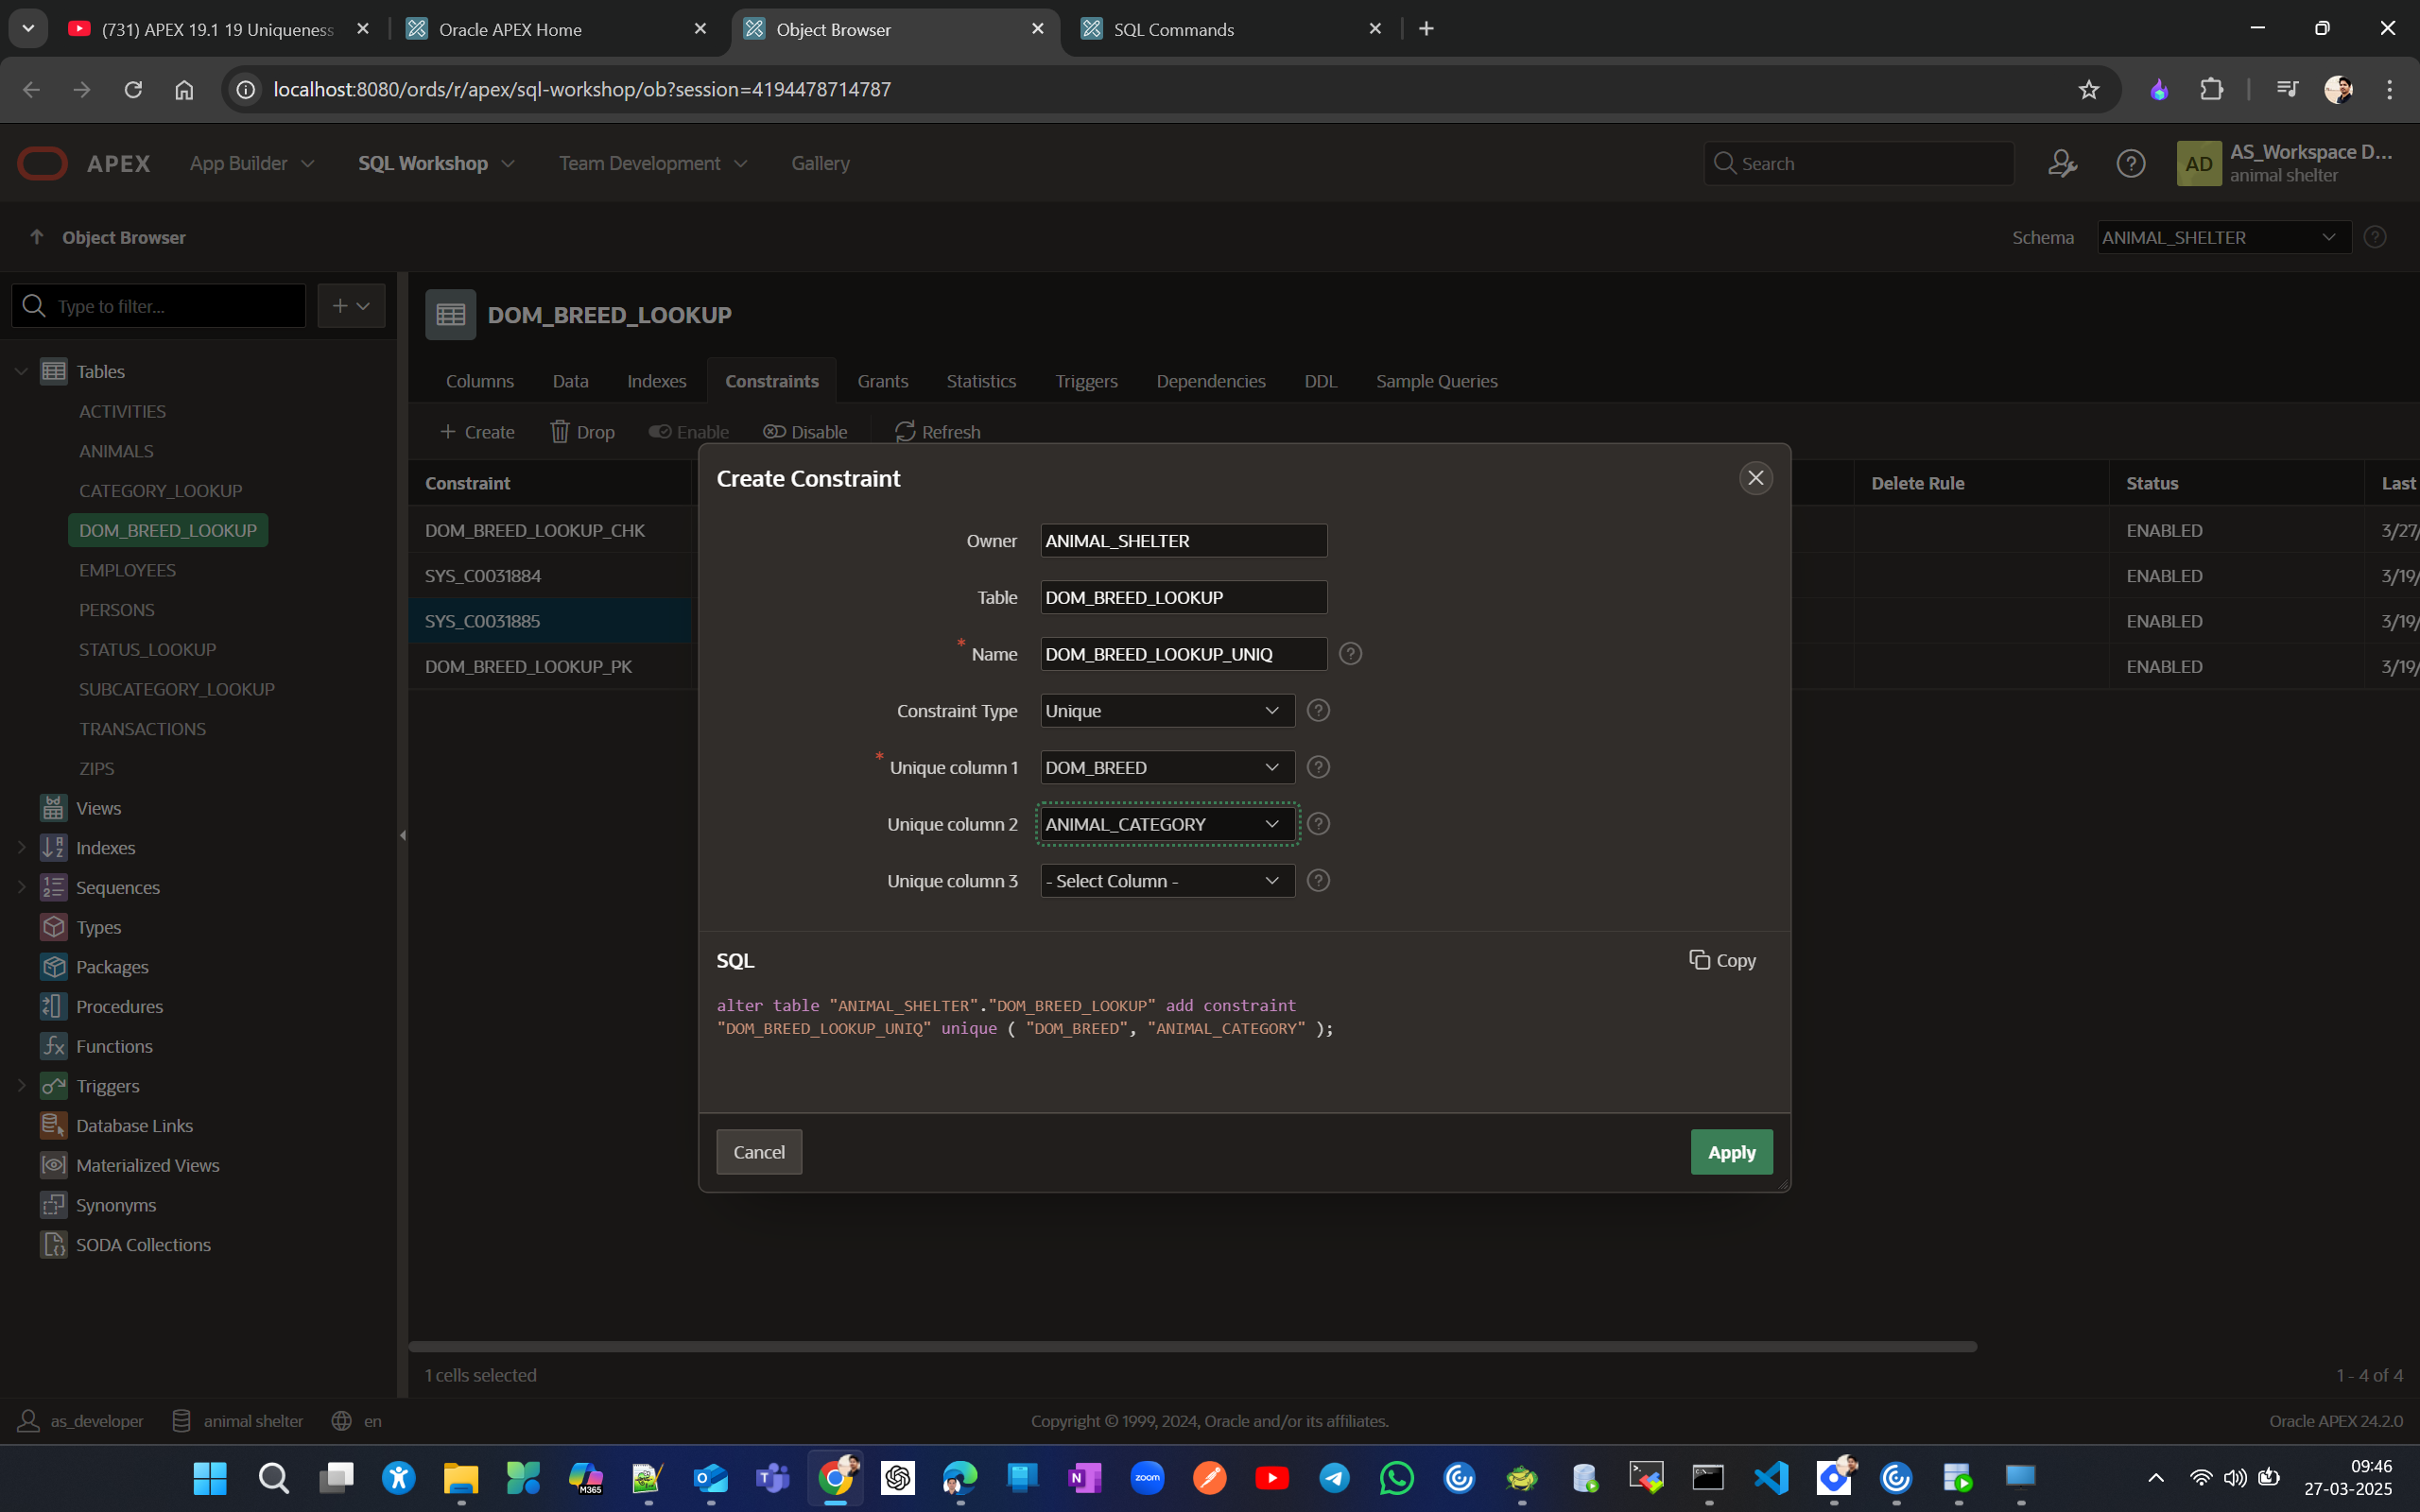
Now that we have populated animal_category column, lets create check constraint on animal_category saying column can’t be NULL and create composite unique key constraint for DOM_BREED and ANIMAL_CATEGORY.
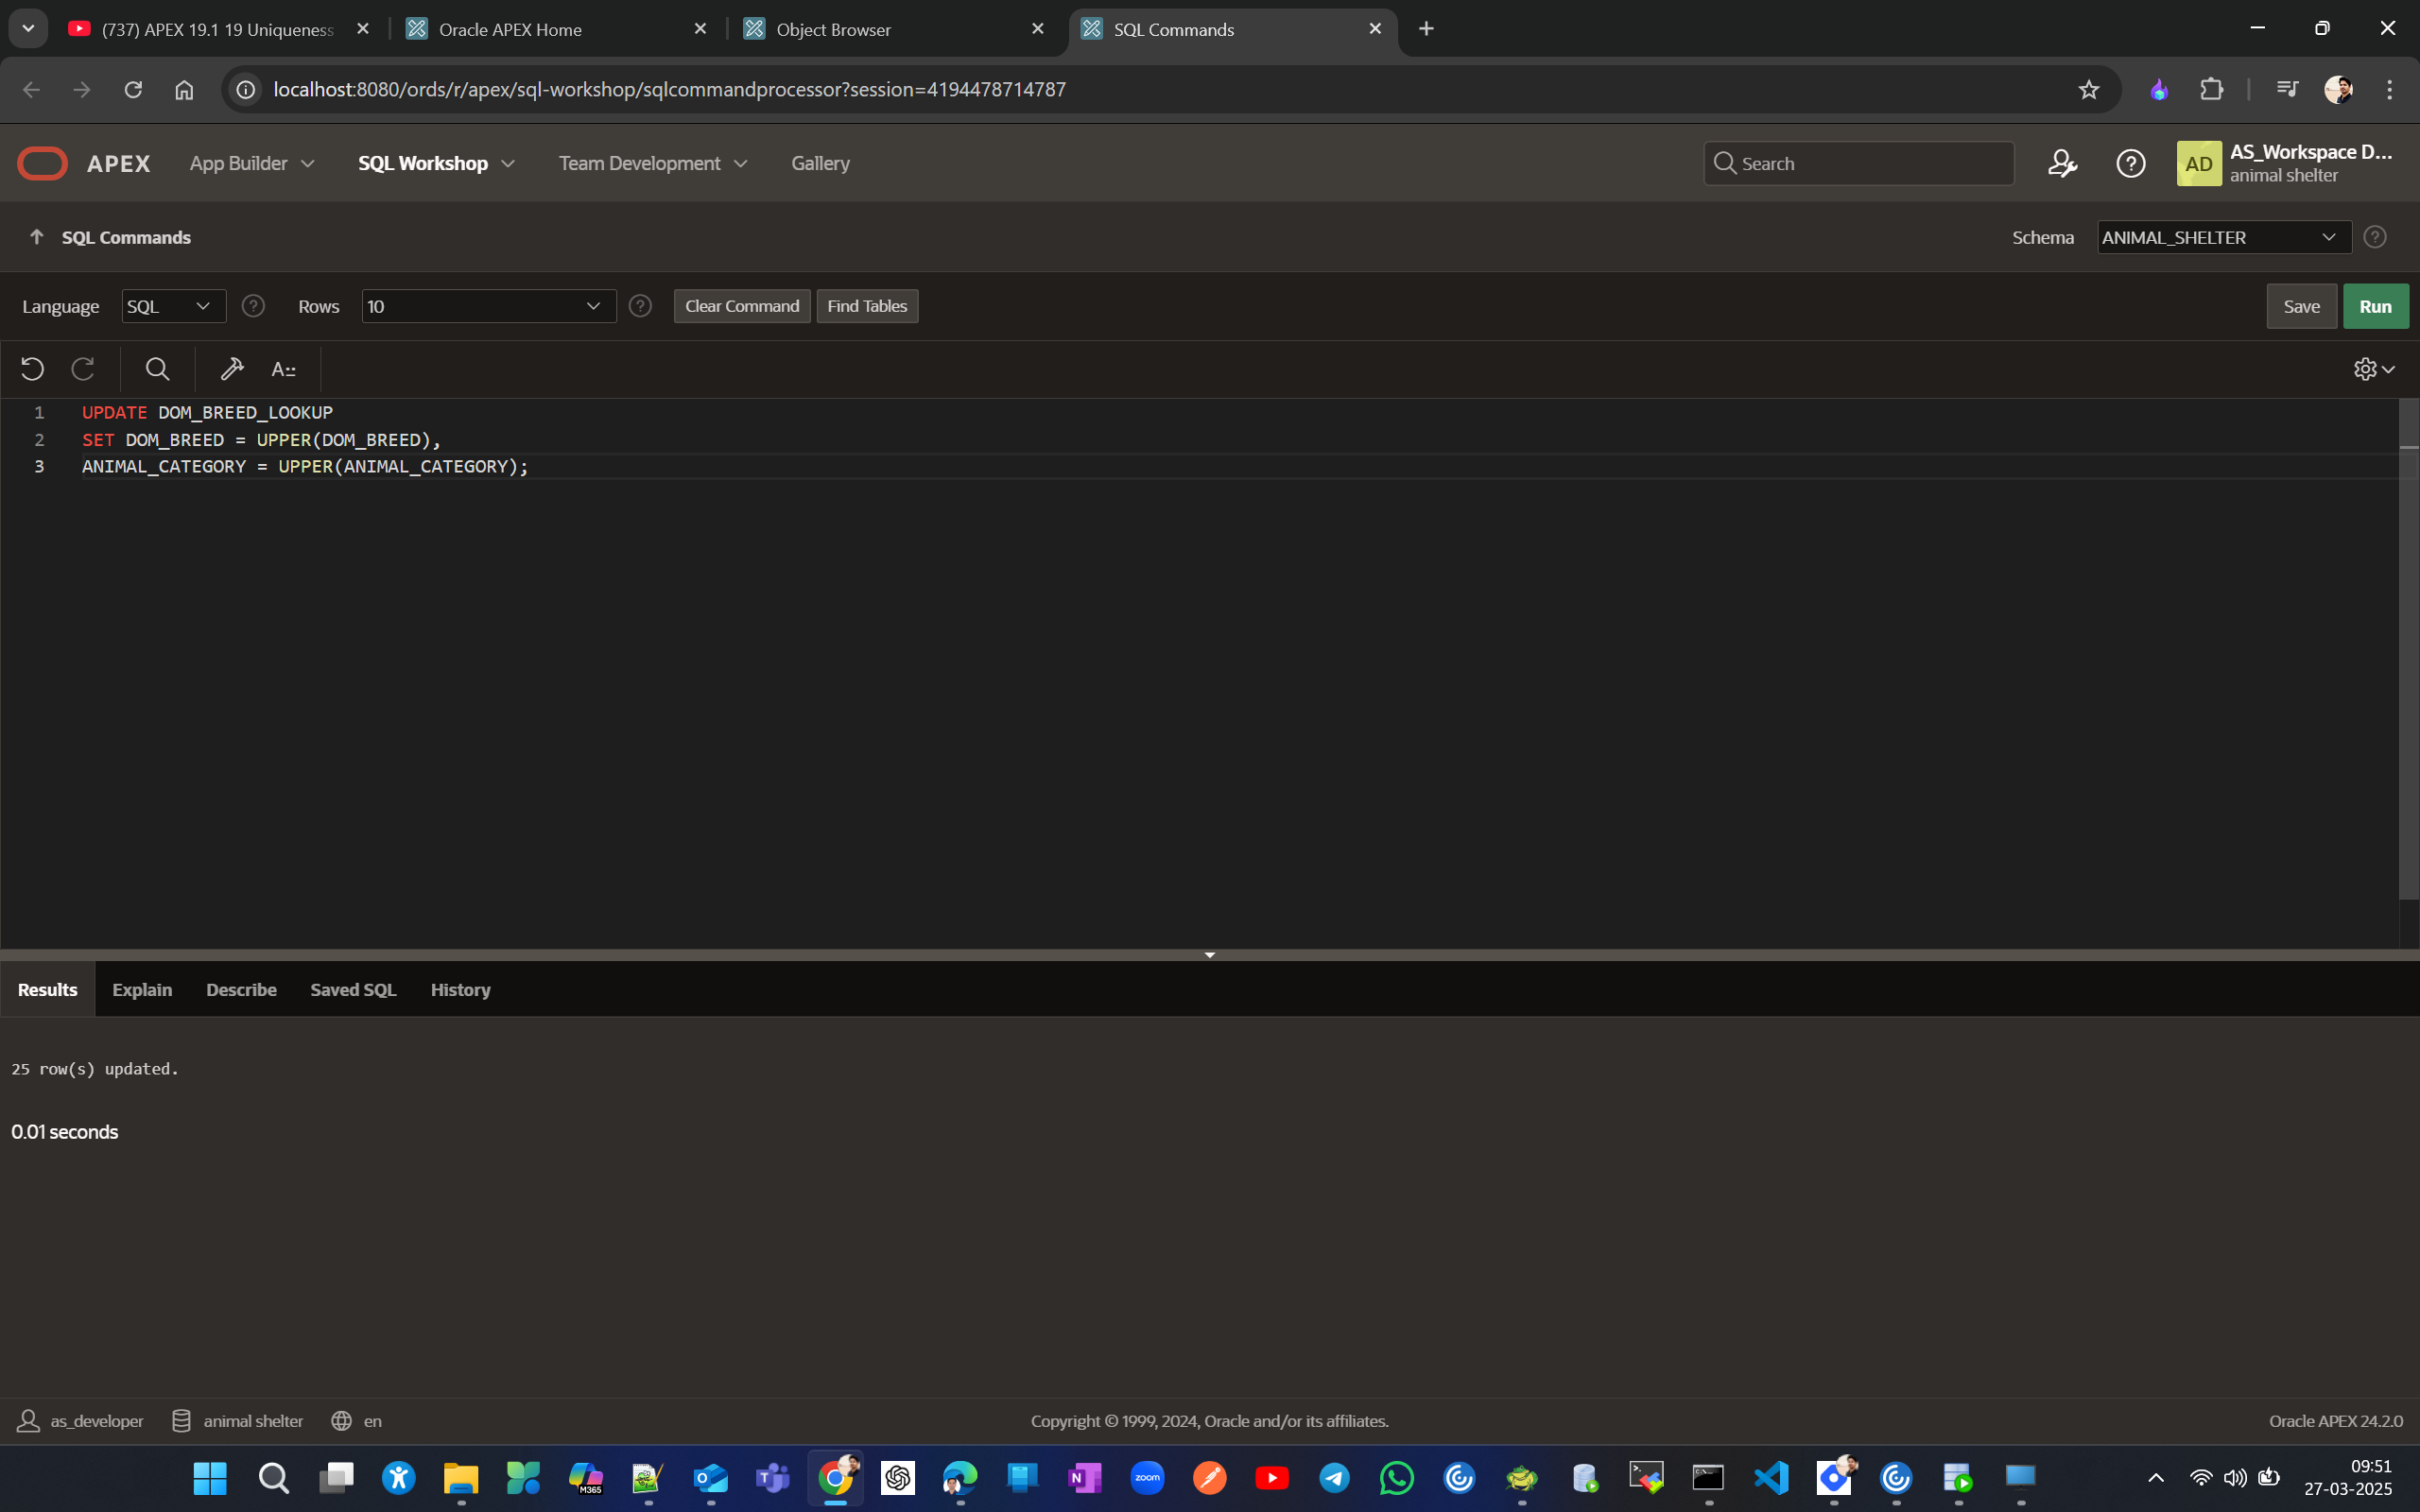
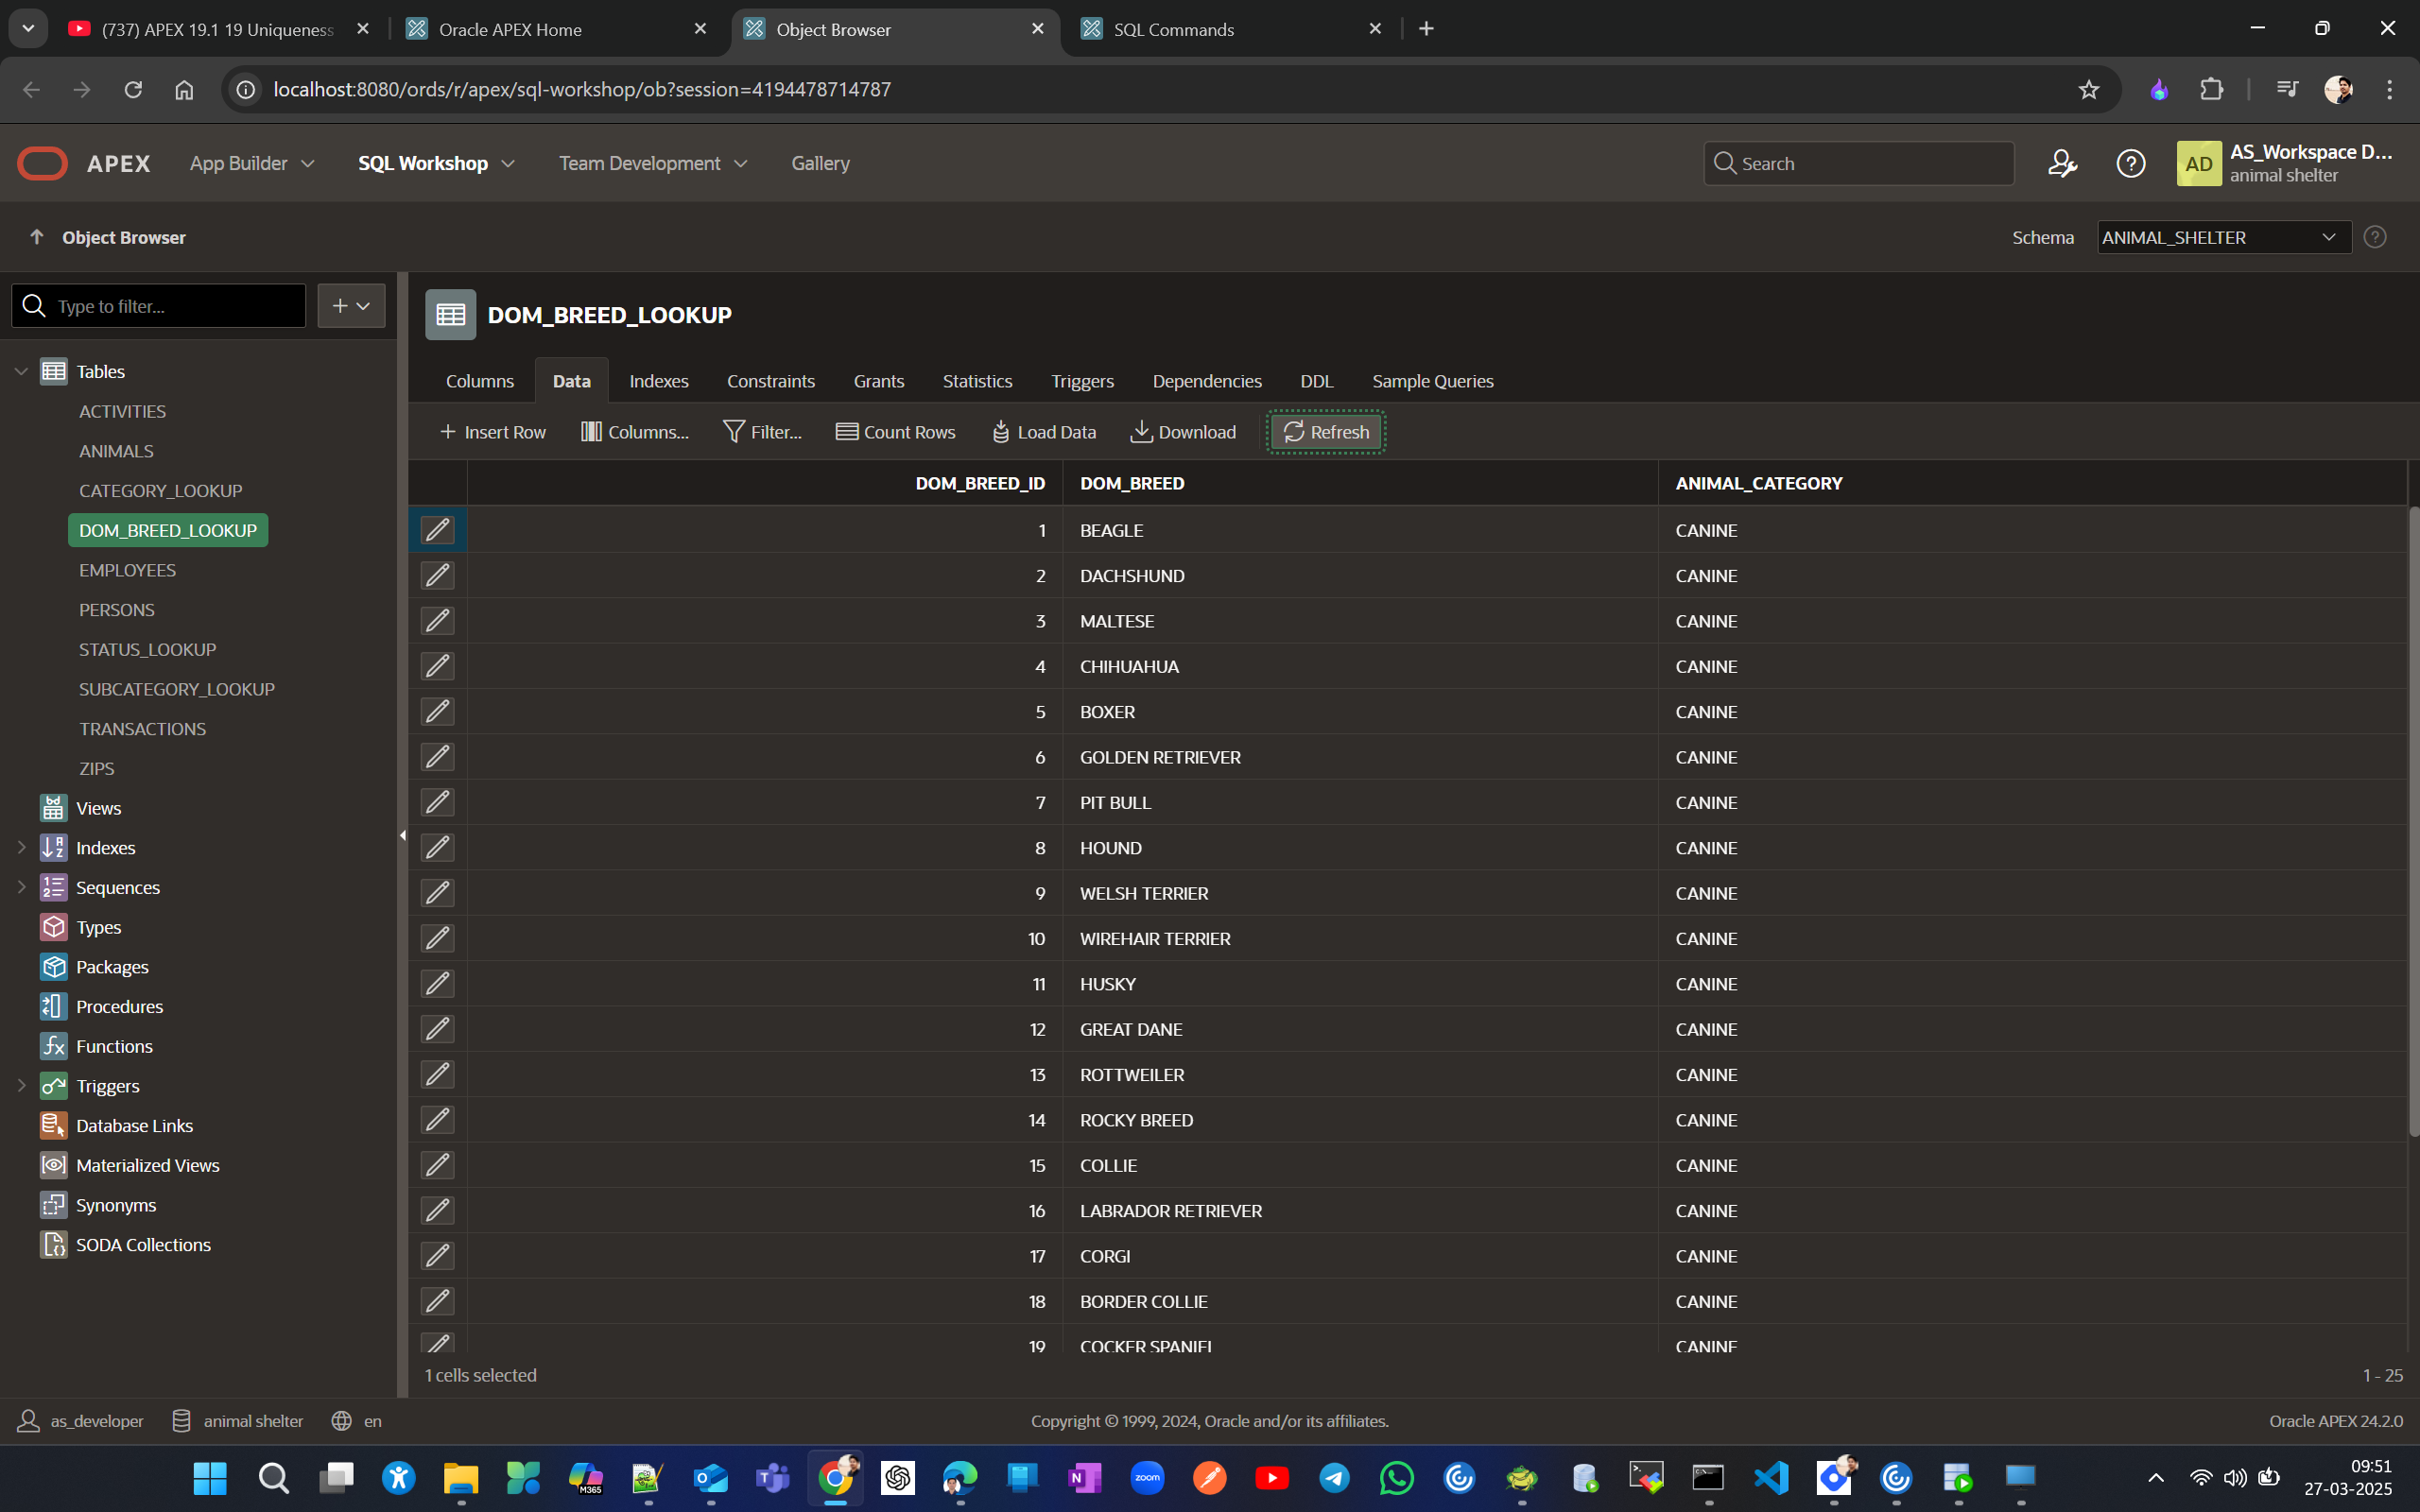
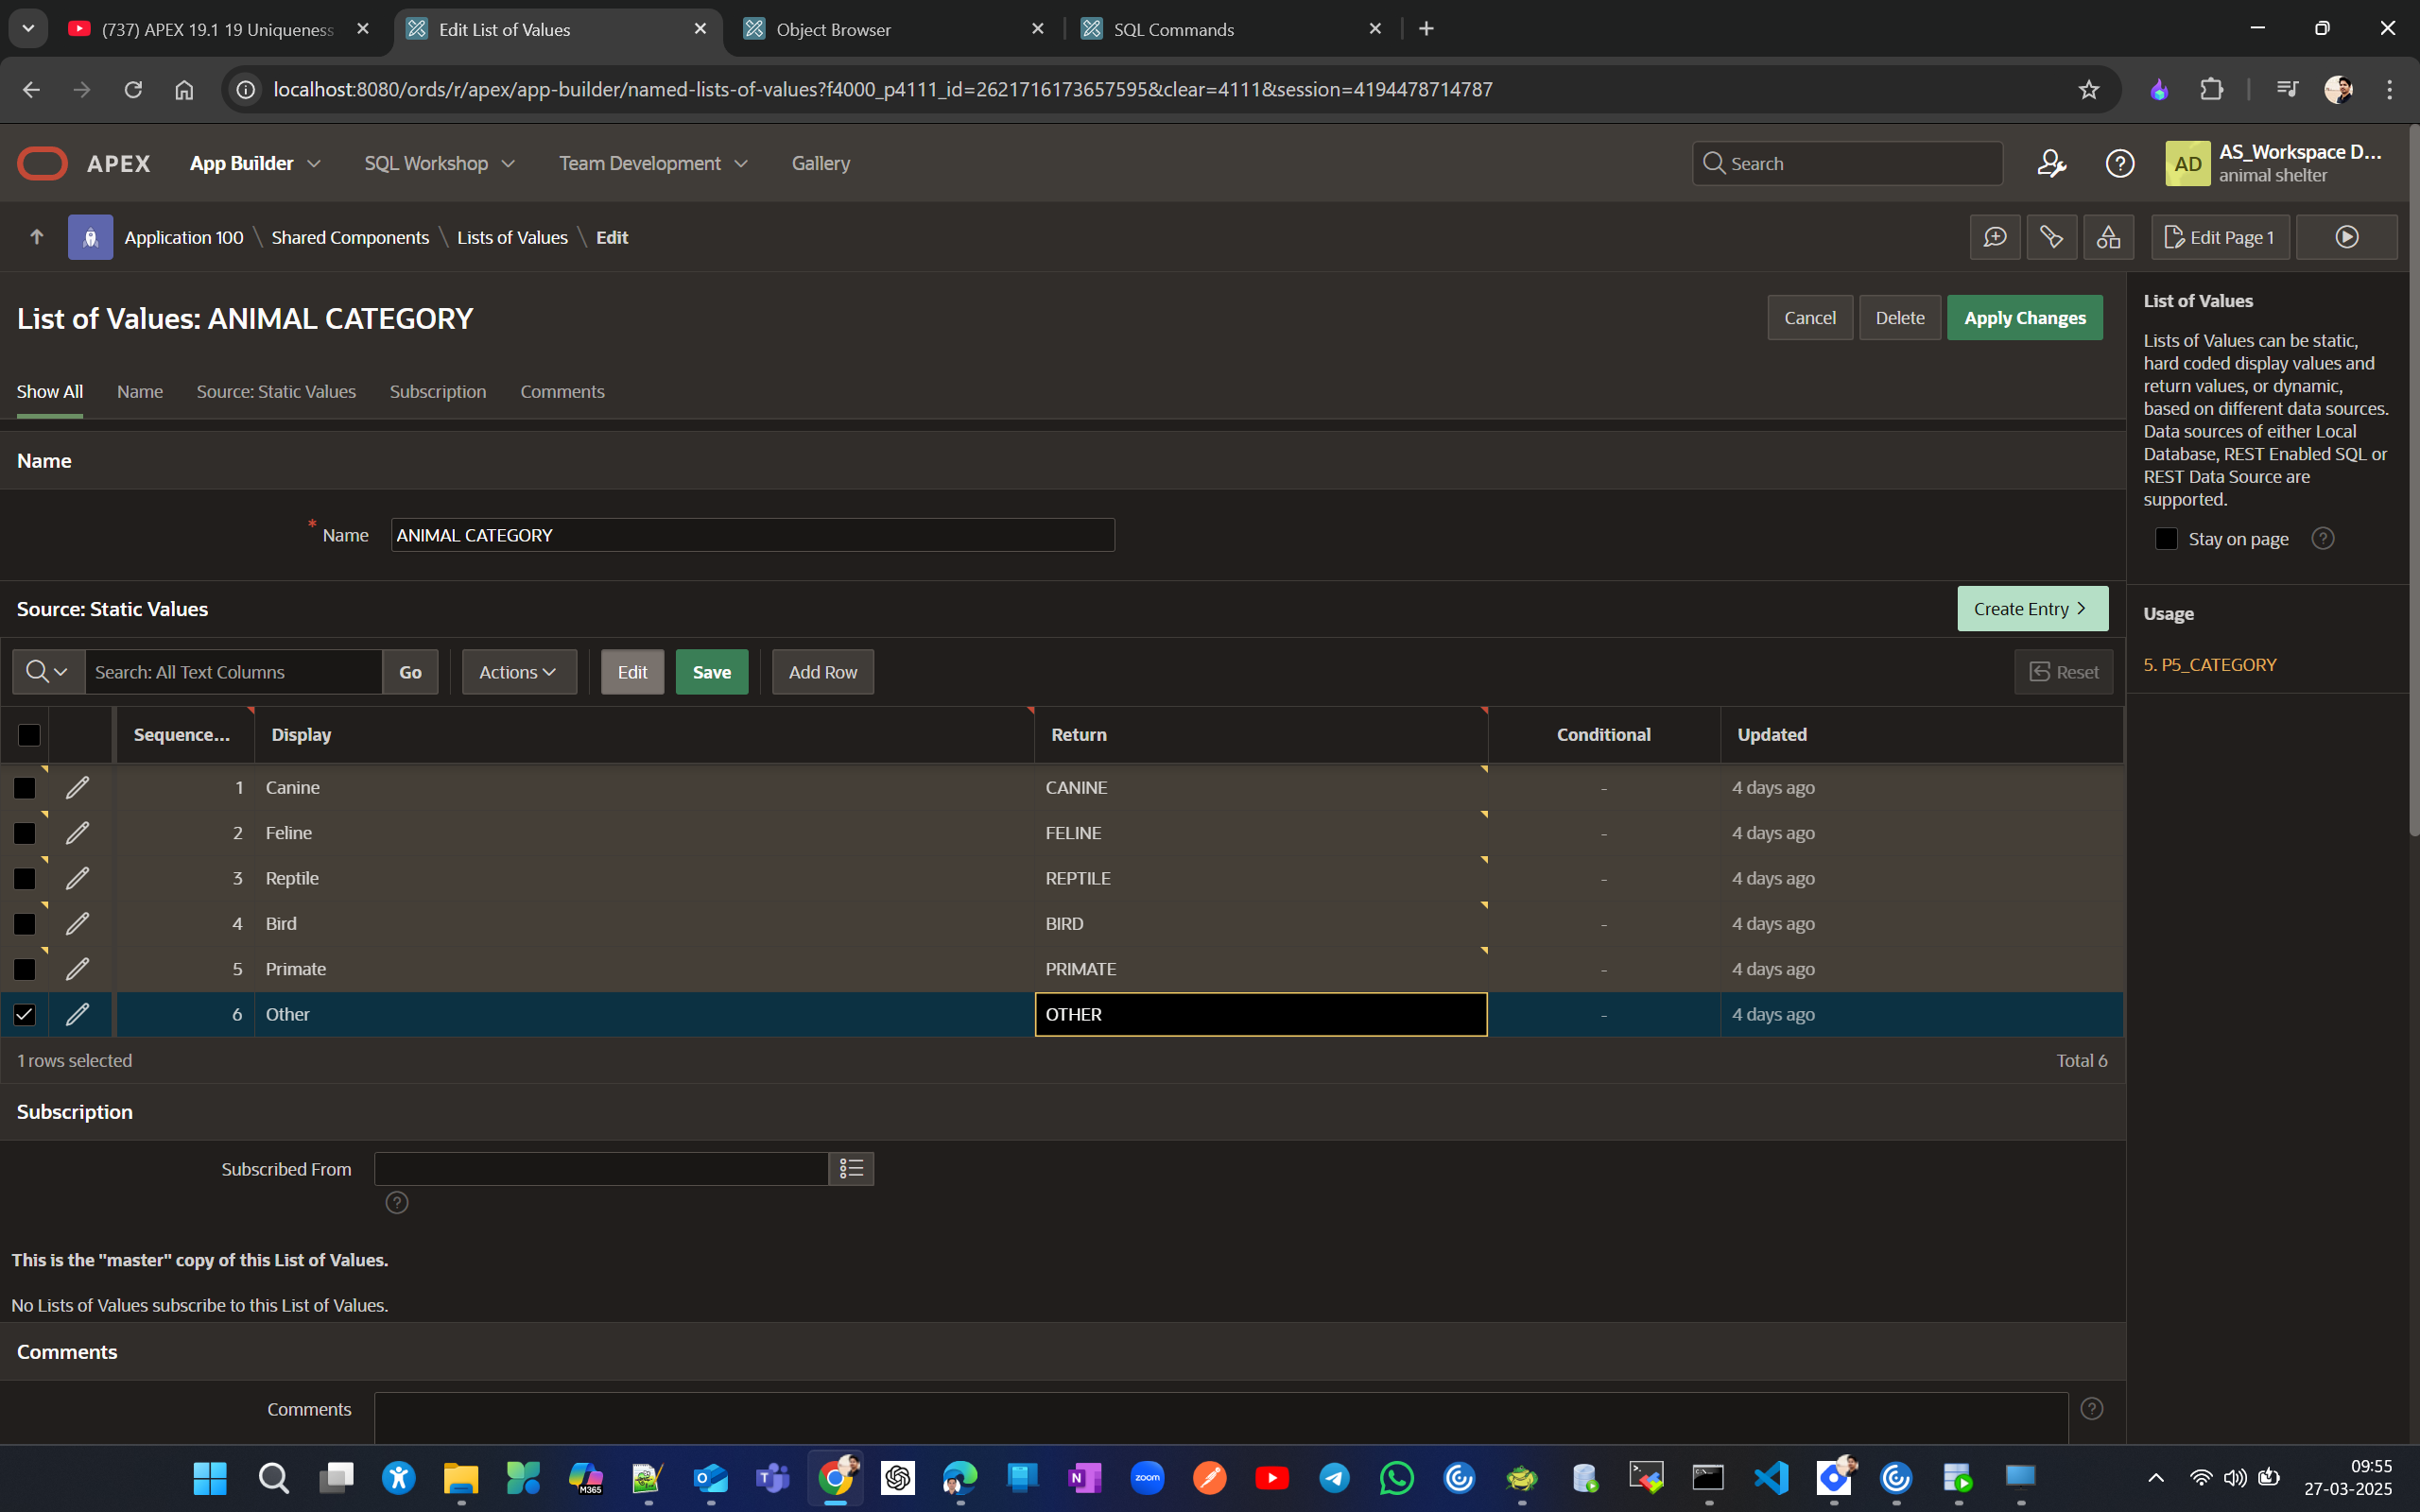
update DOM_BREED and ANIMAL_CATEGORY to UPPER case.
Now Change ANIMAL_CATEGORY LOV RETURN value to be in UPPER case(edited manually)
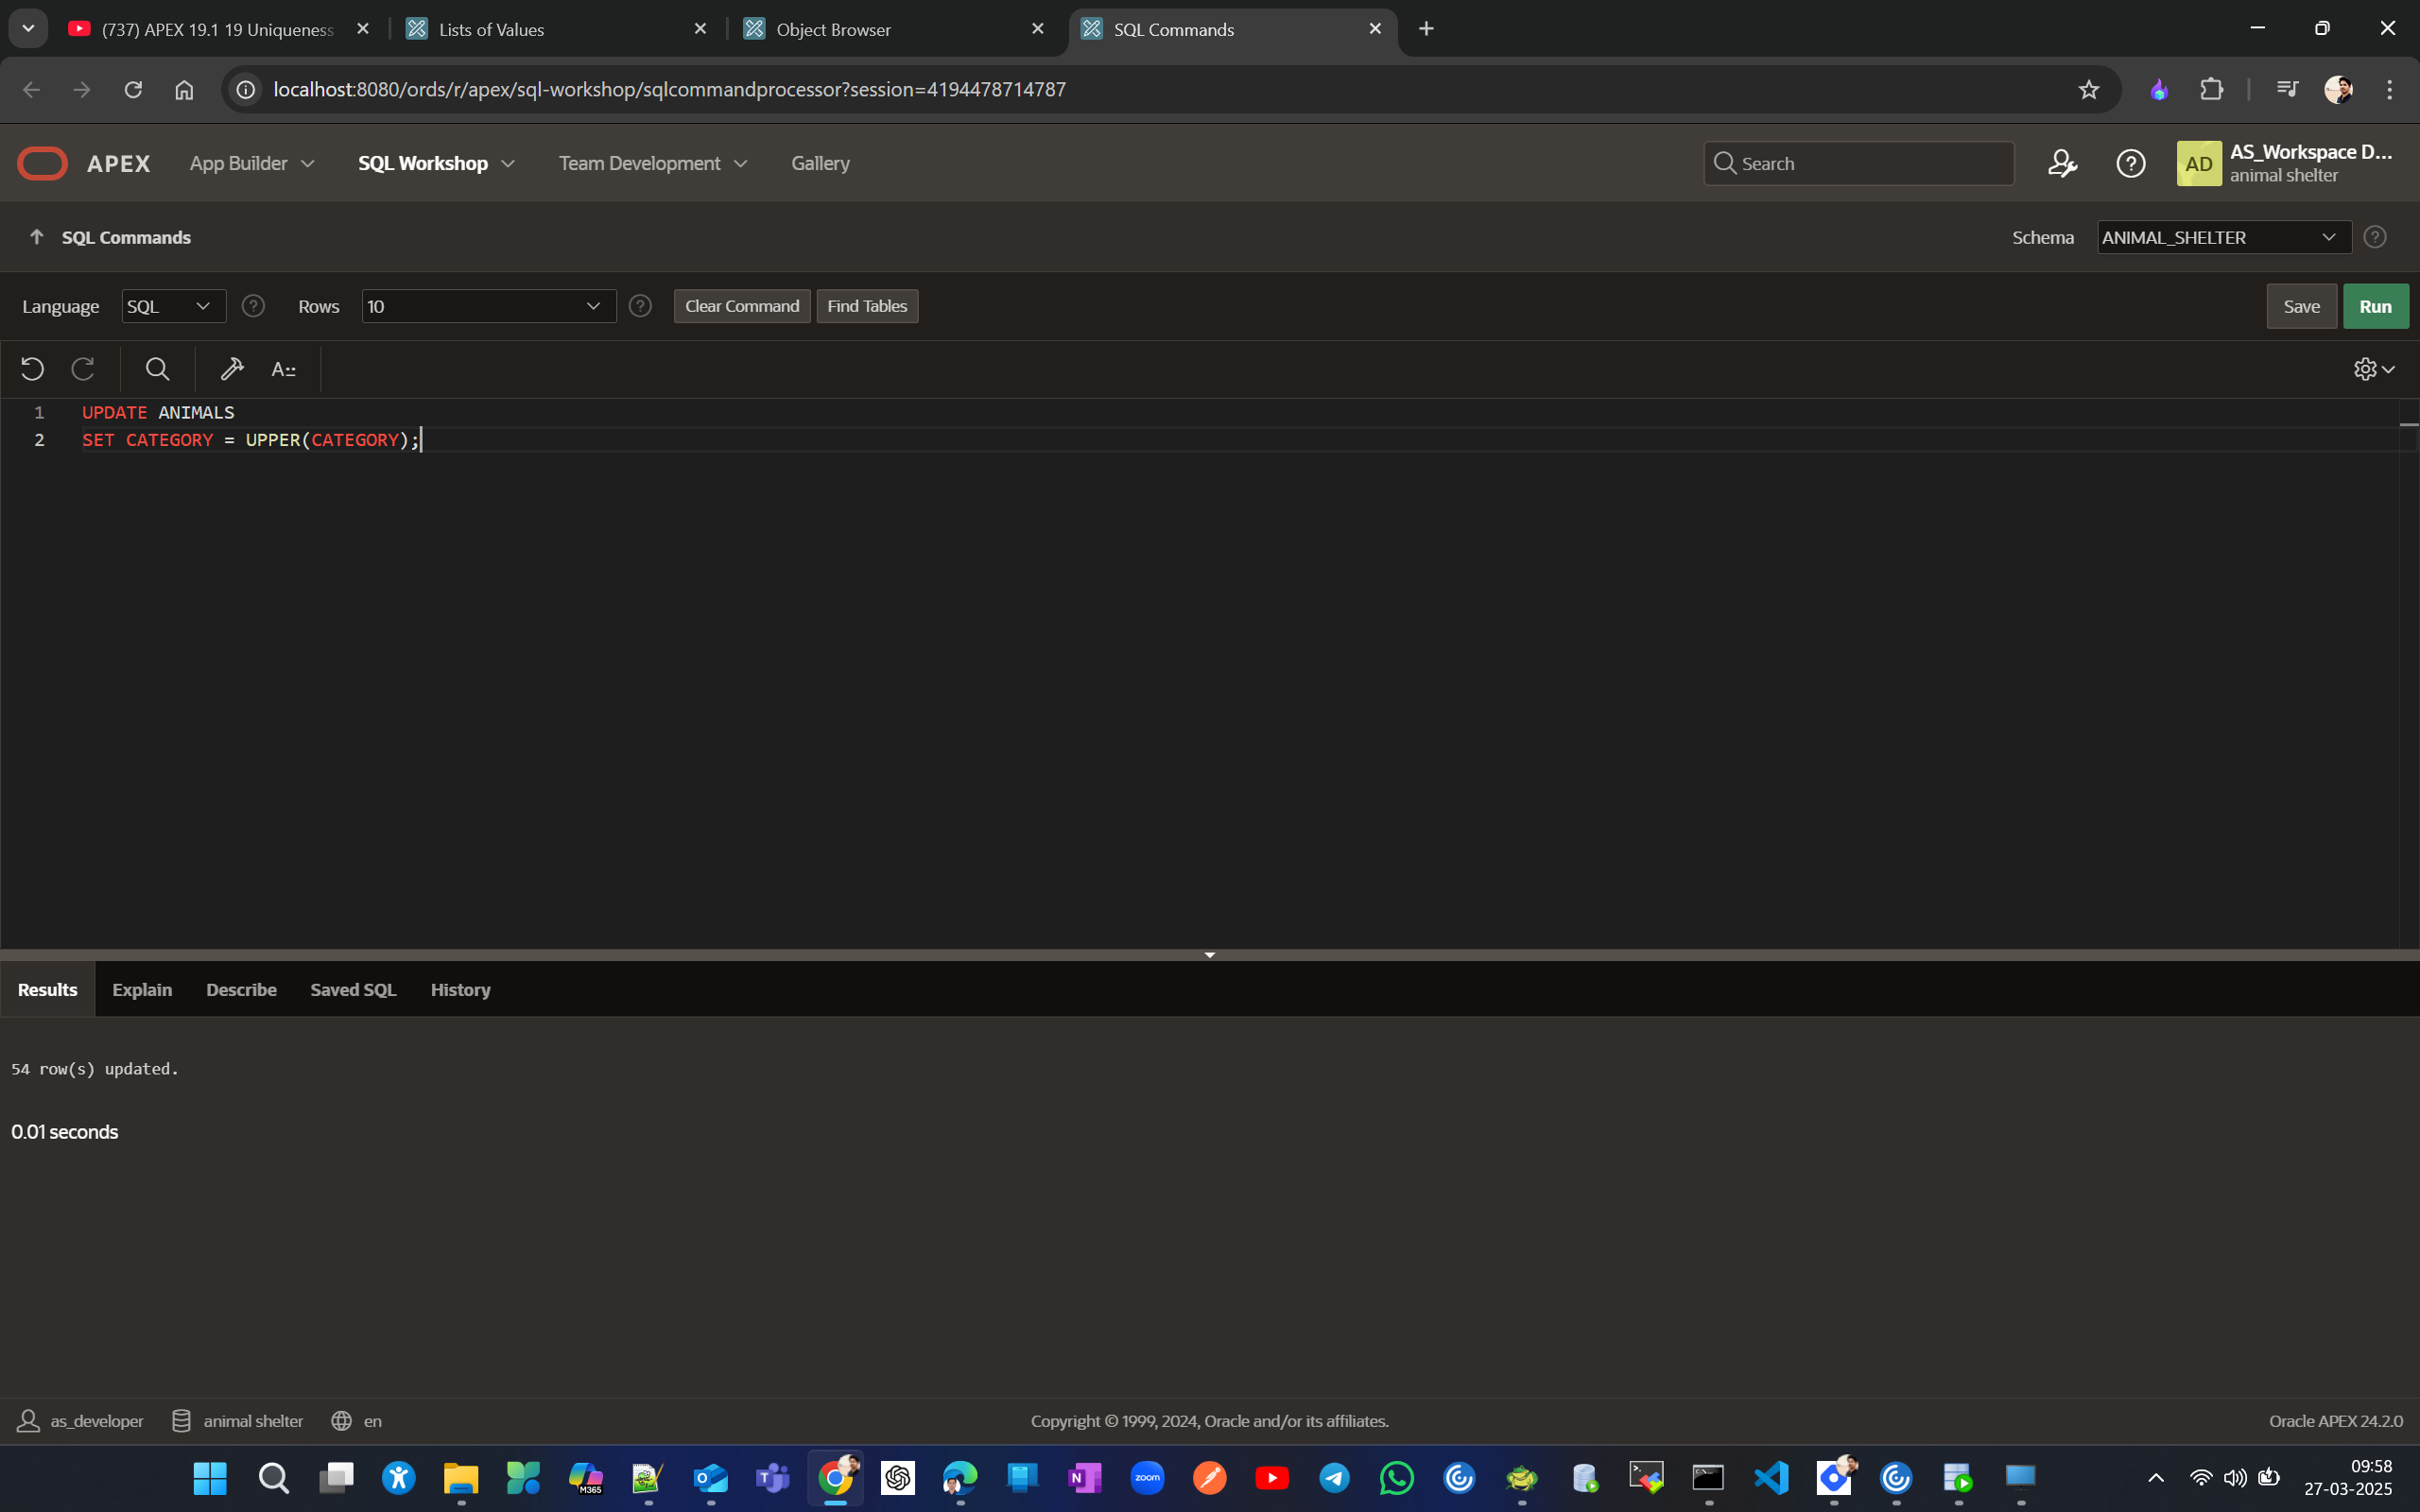
Now lets change case of CATEGORY to upper case to make things consistent

Lets delete page Dominant Breed Report and its corresponding form page (#8 and #9)
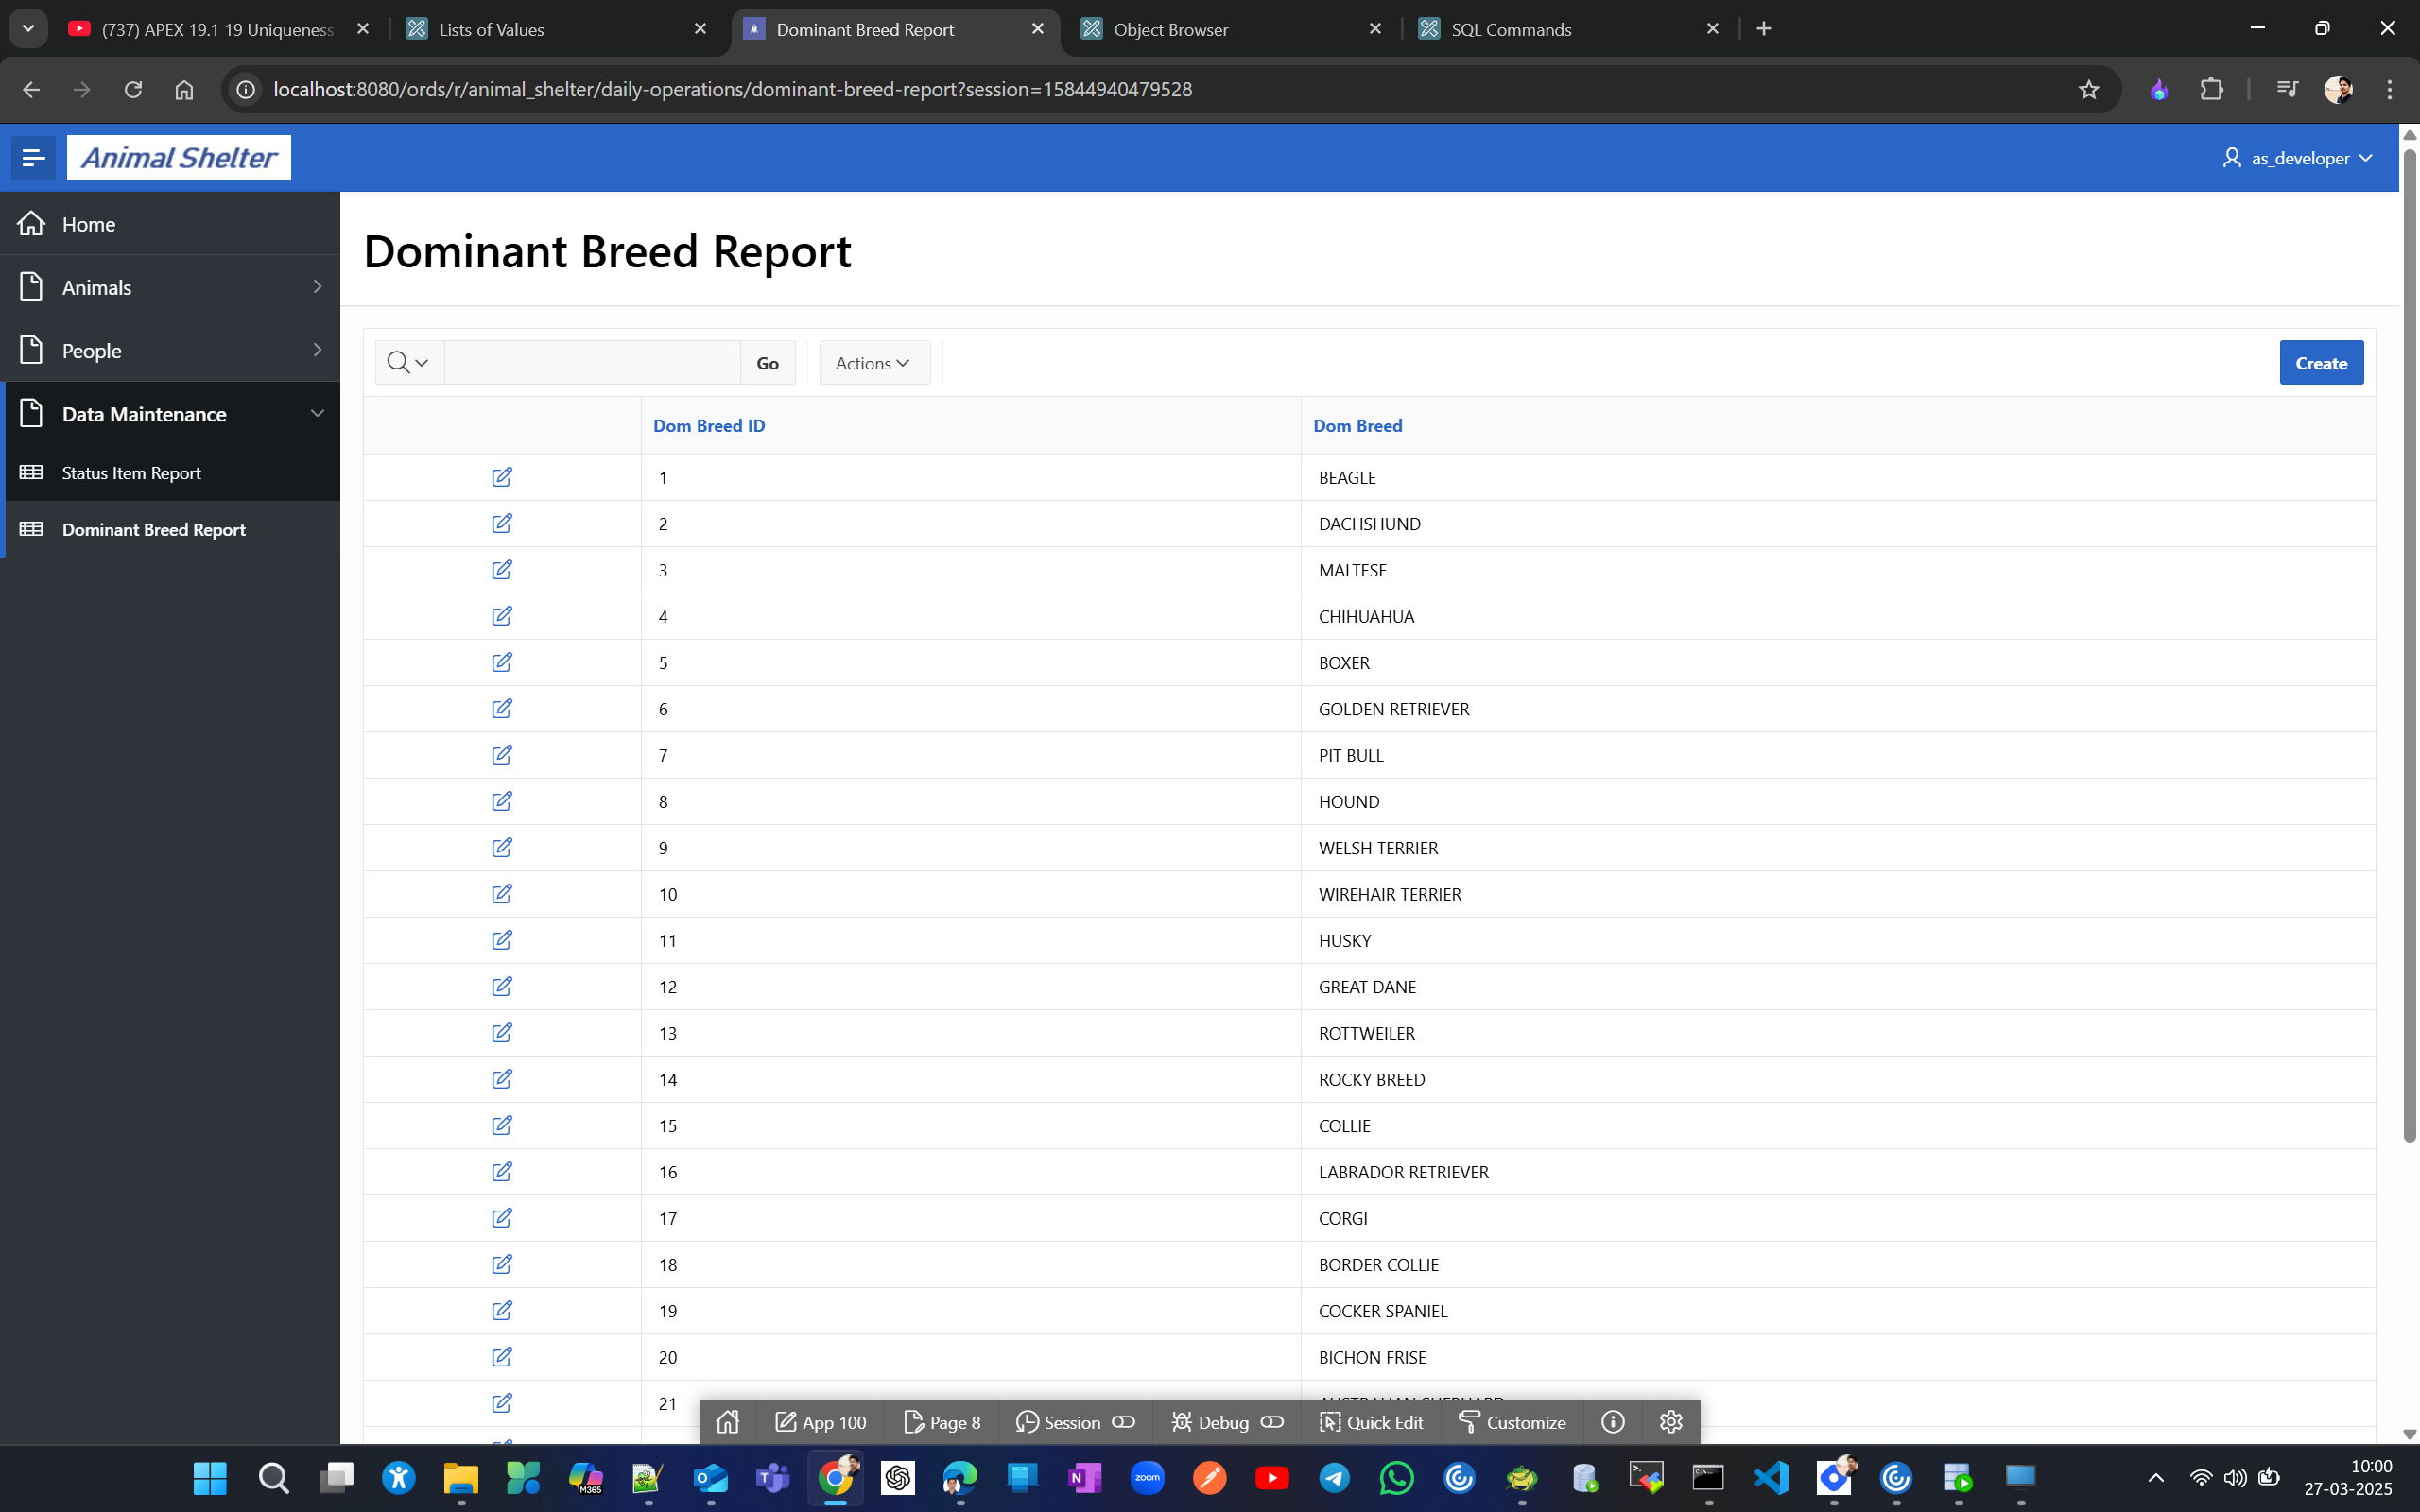
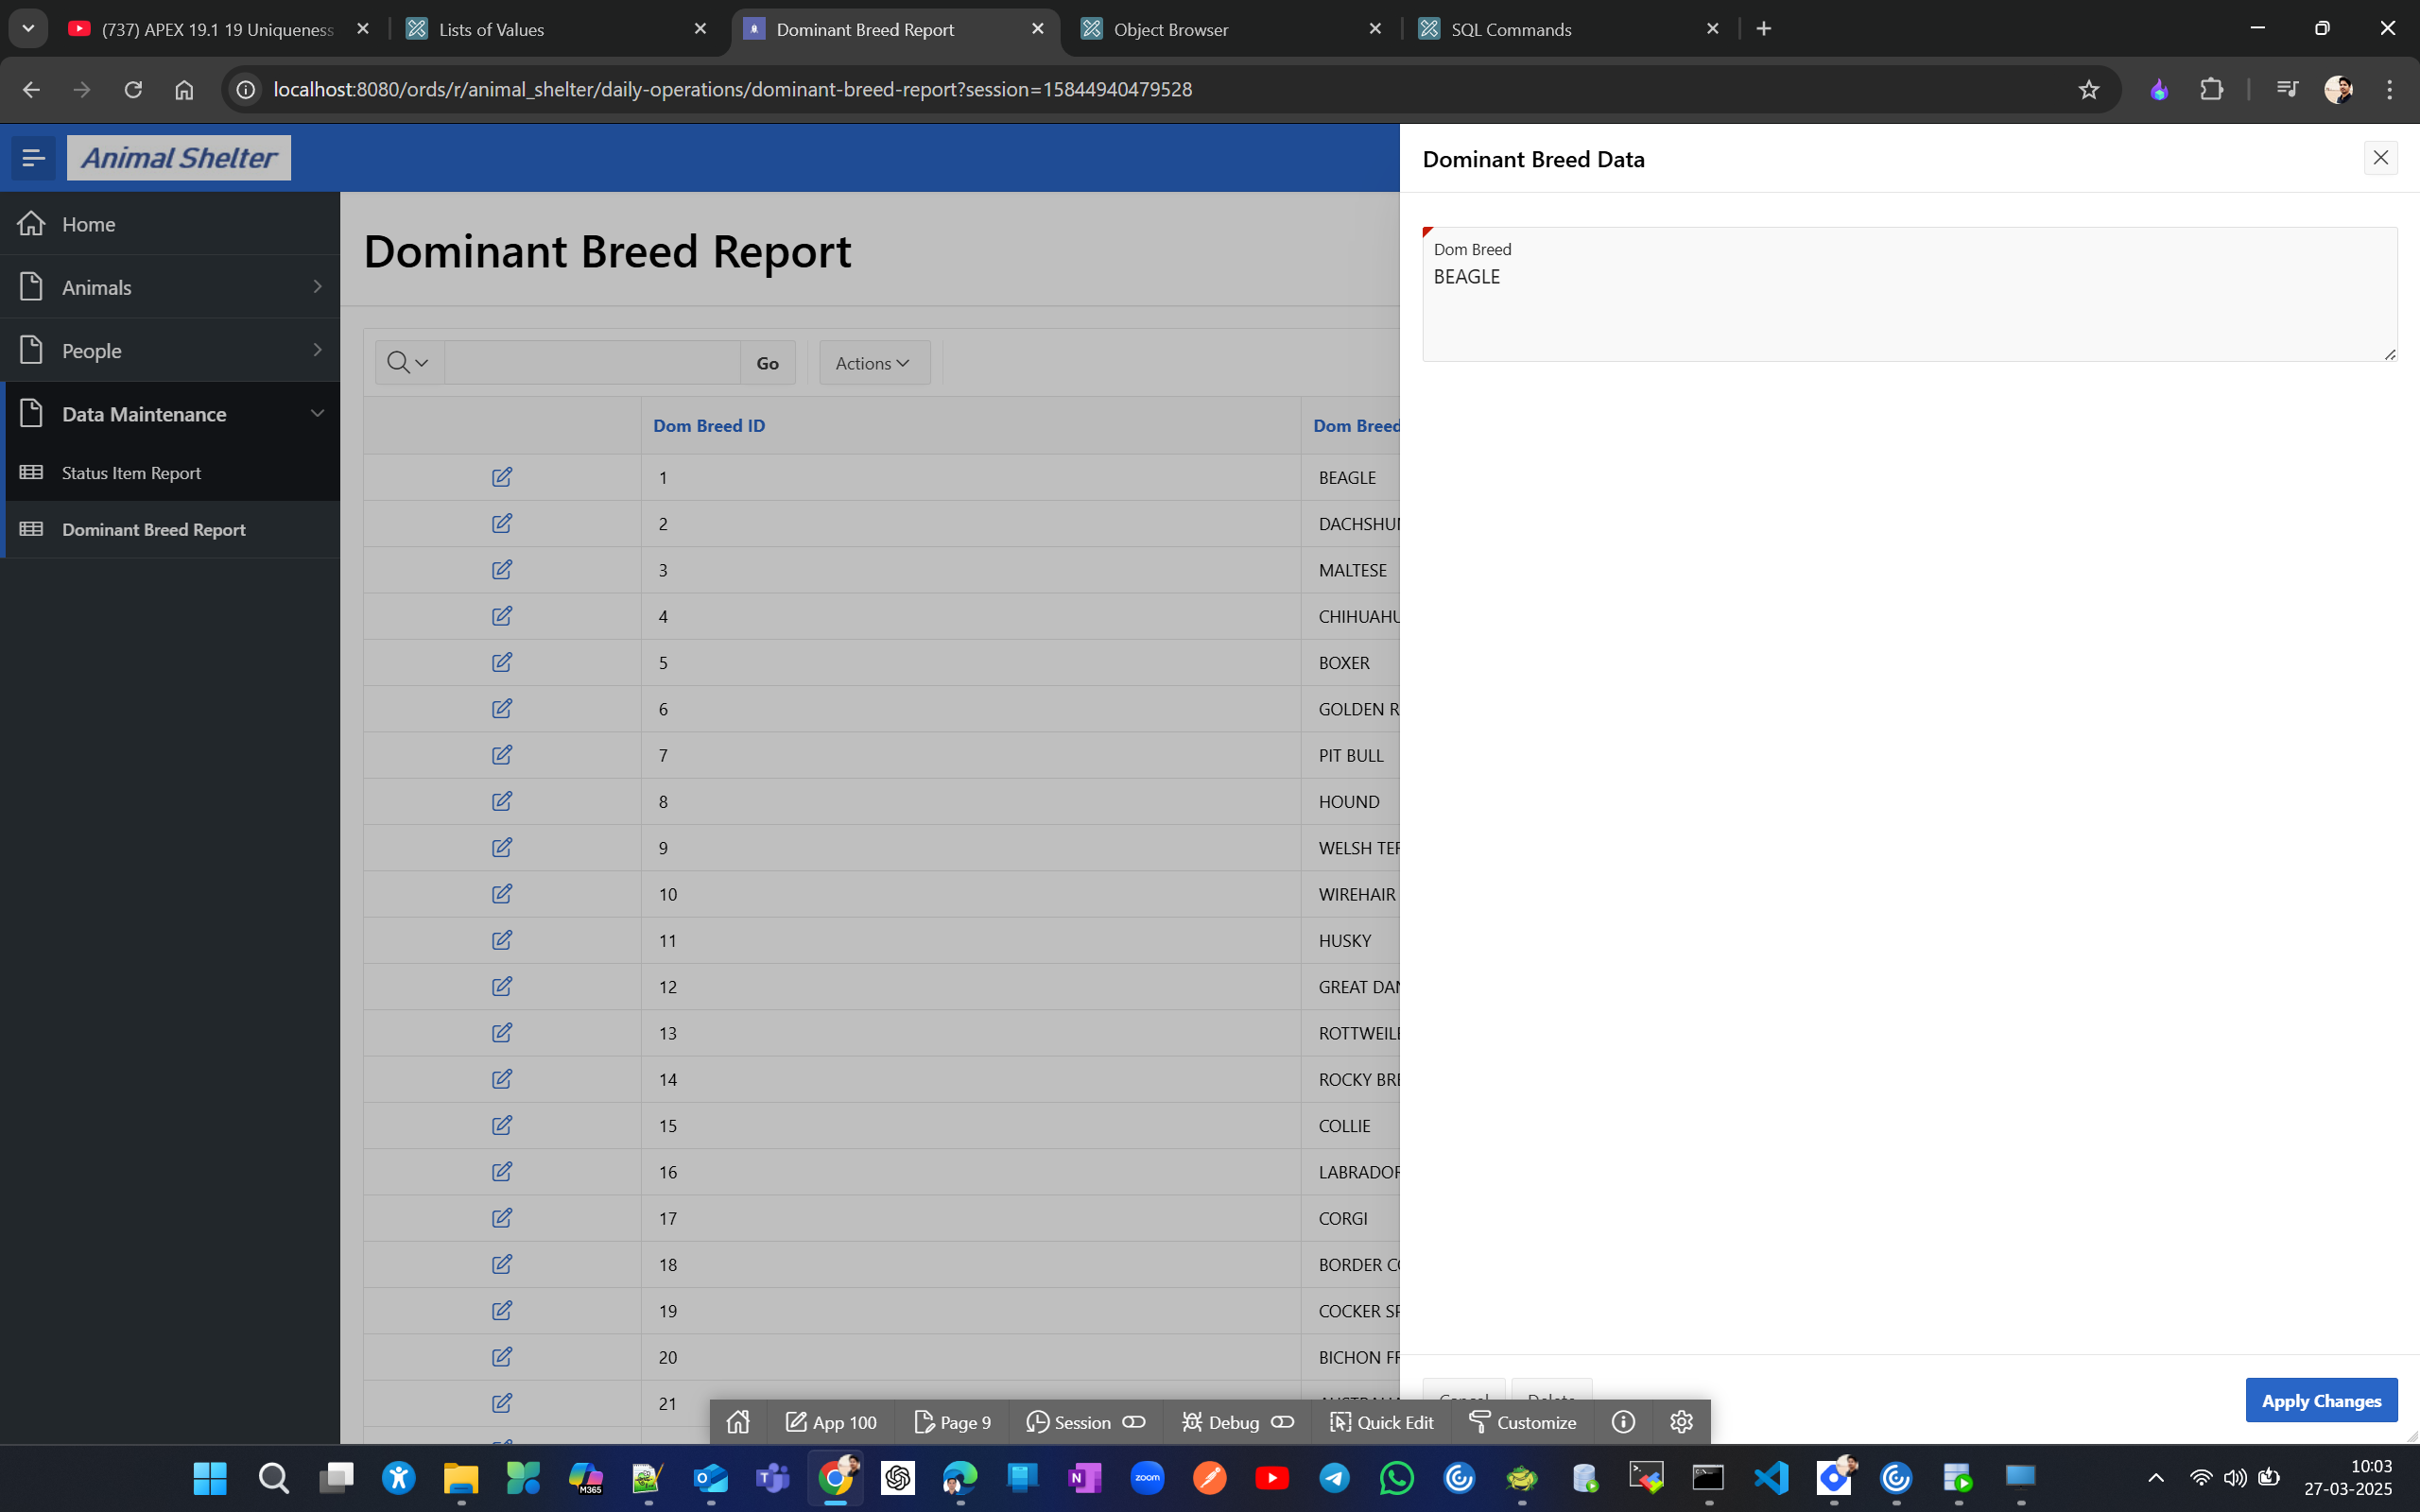
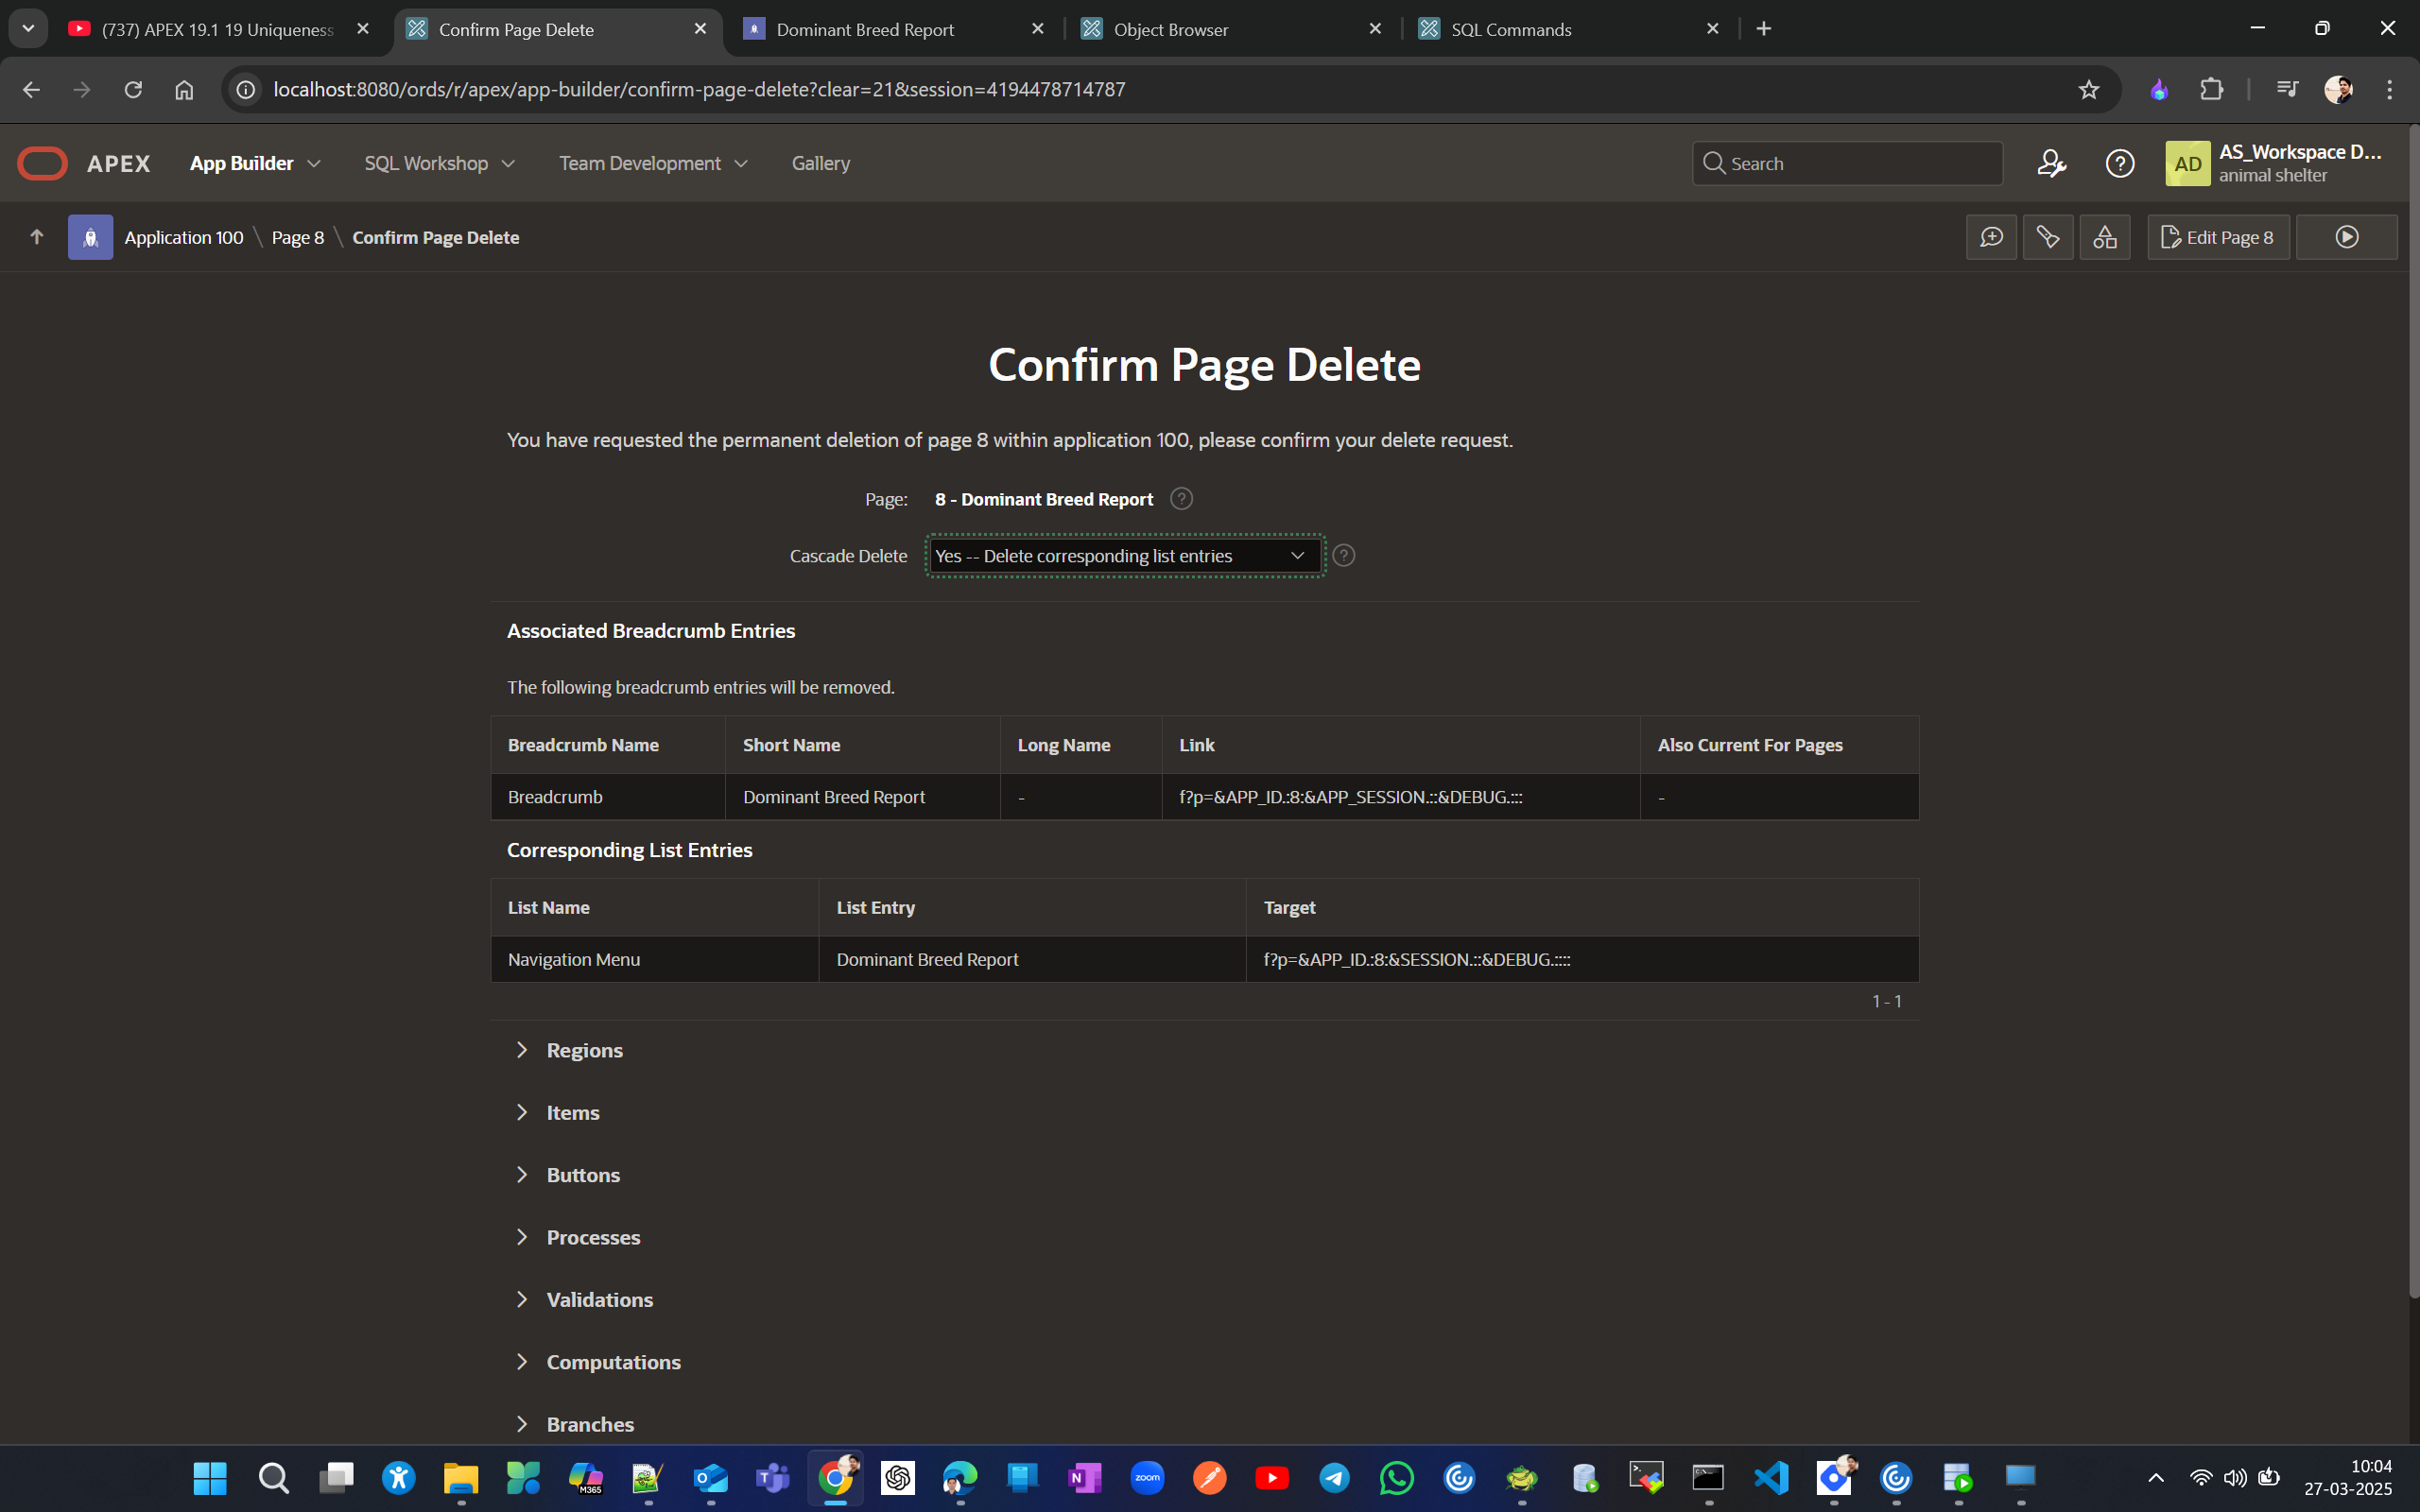
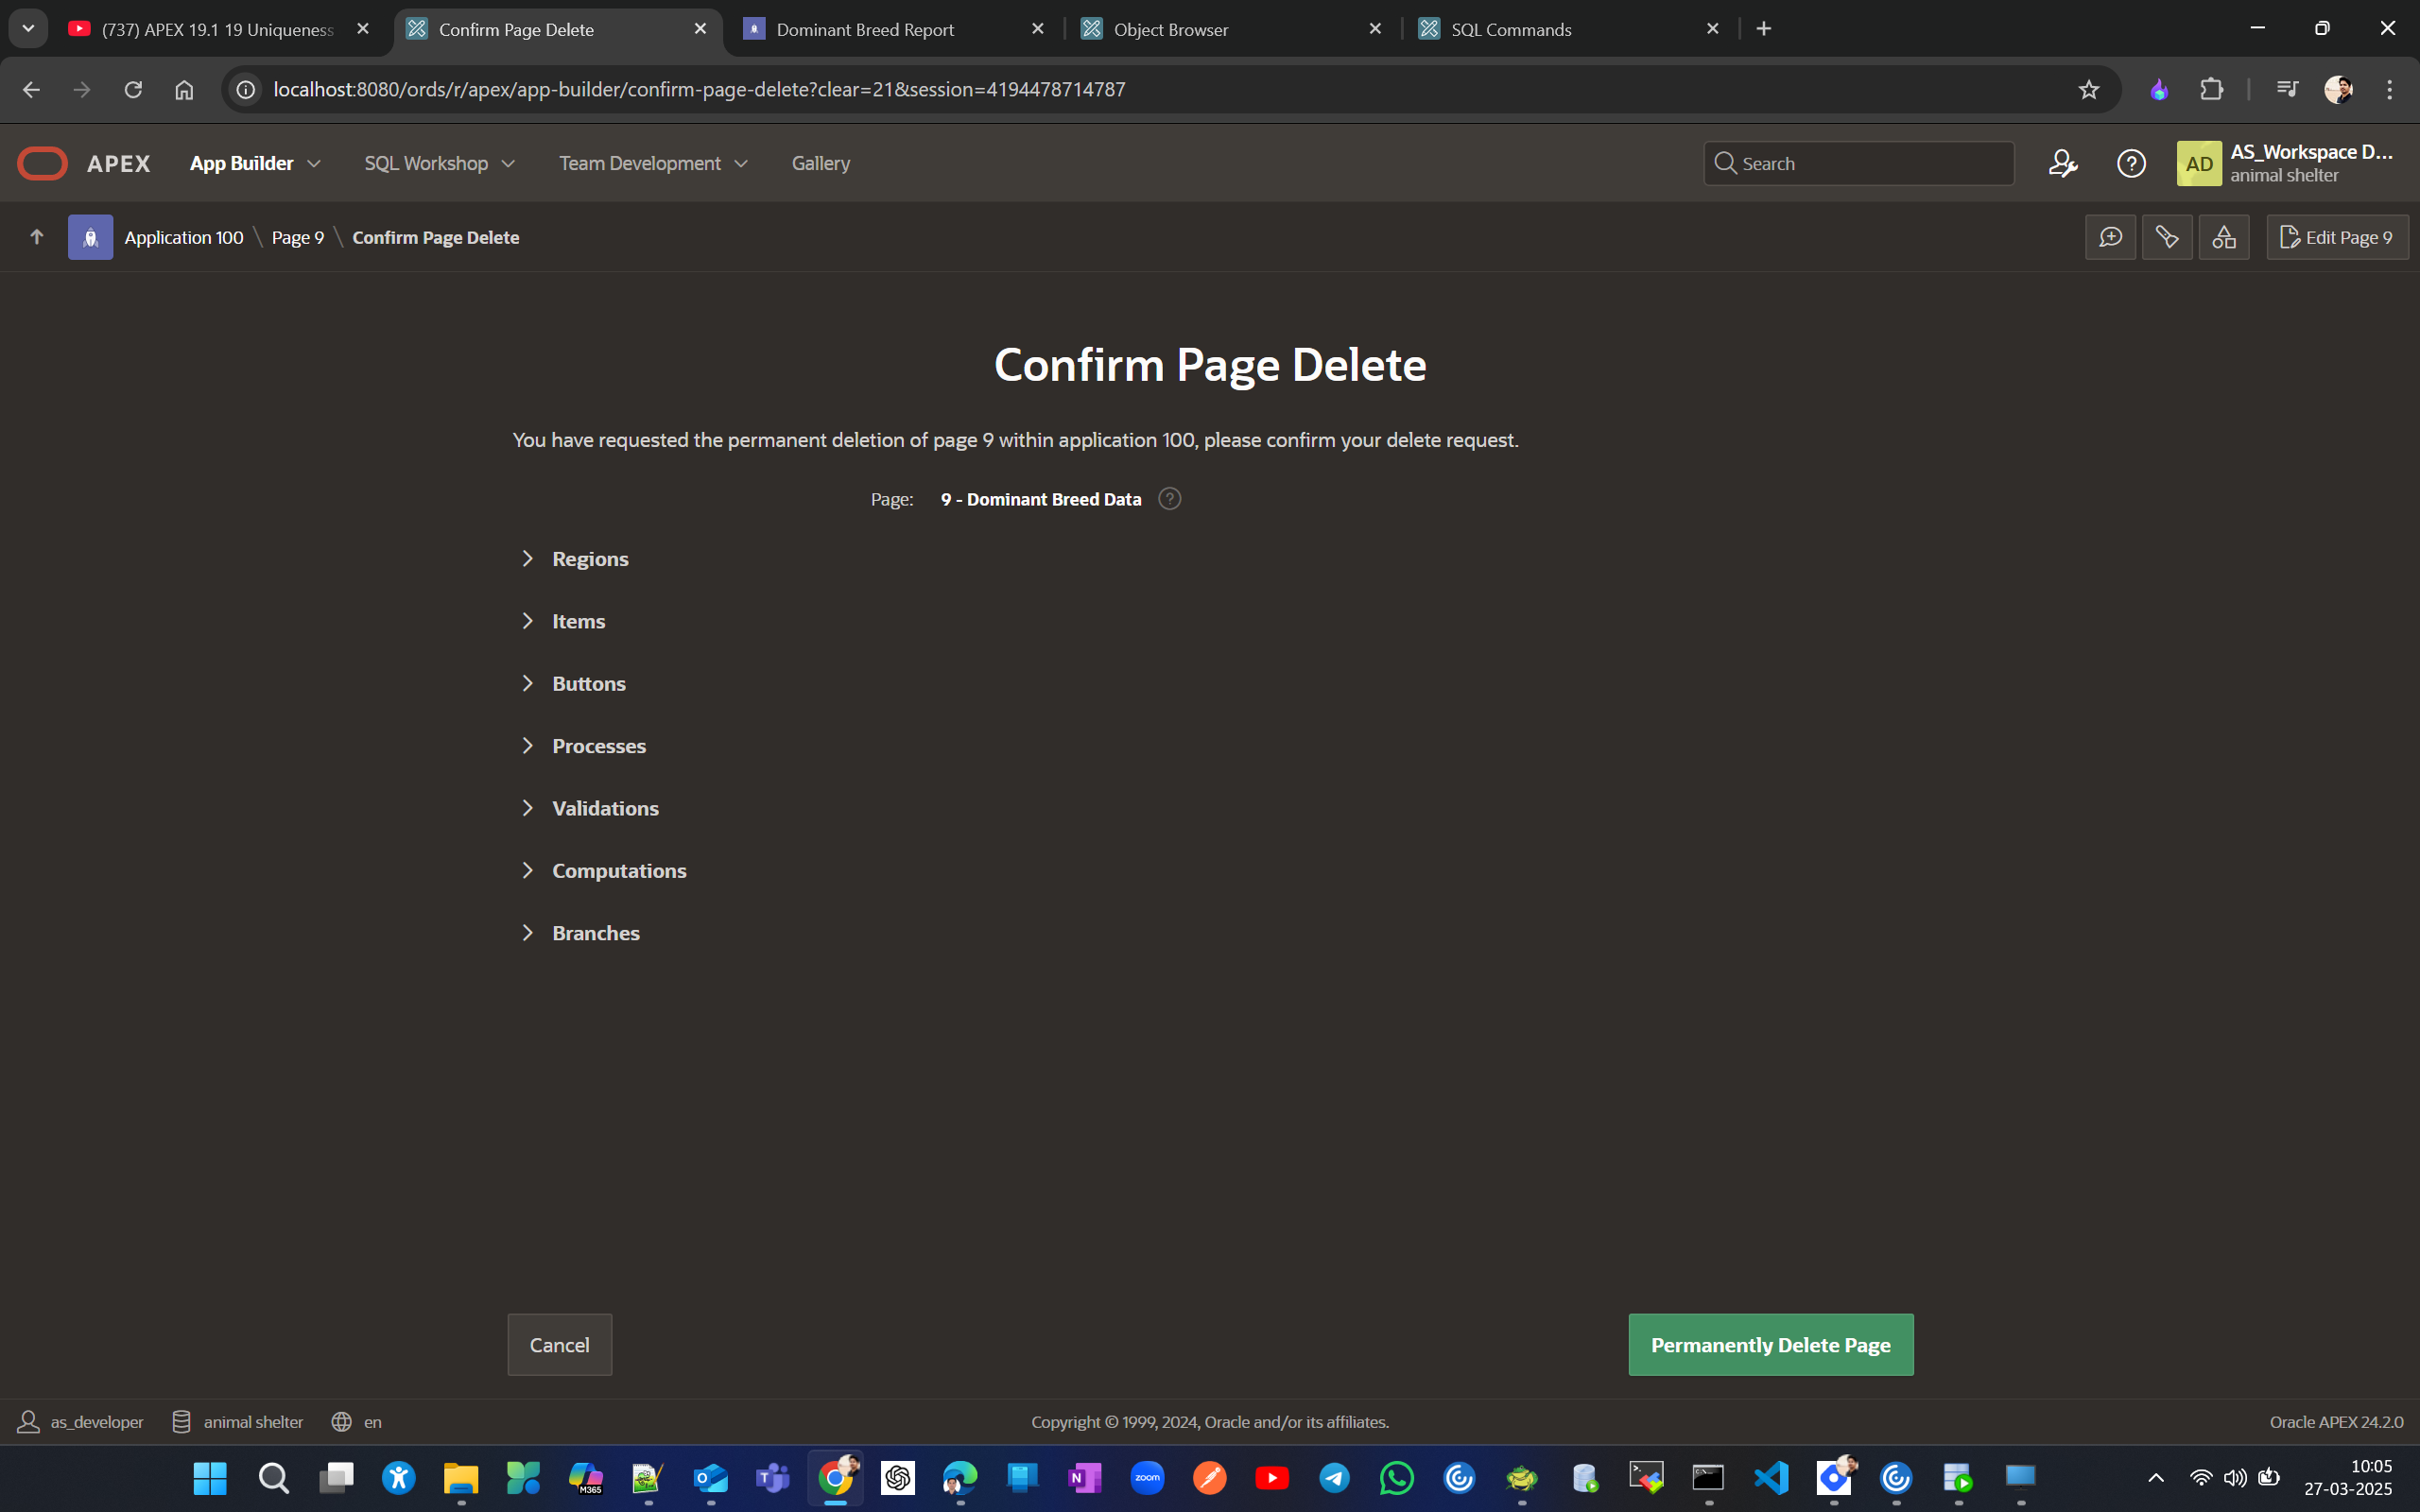
Now add the page from scratch
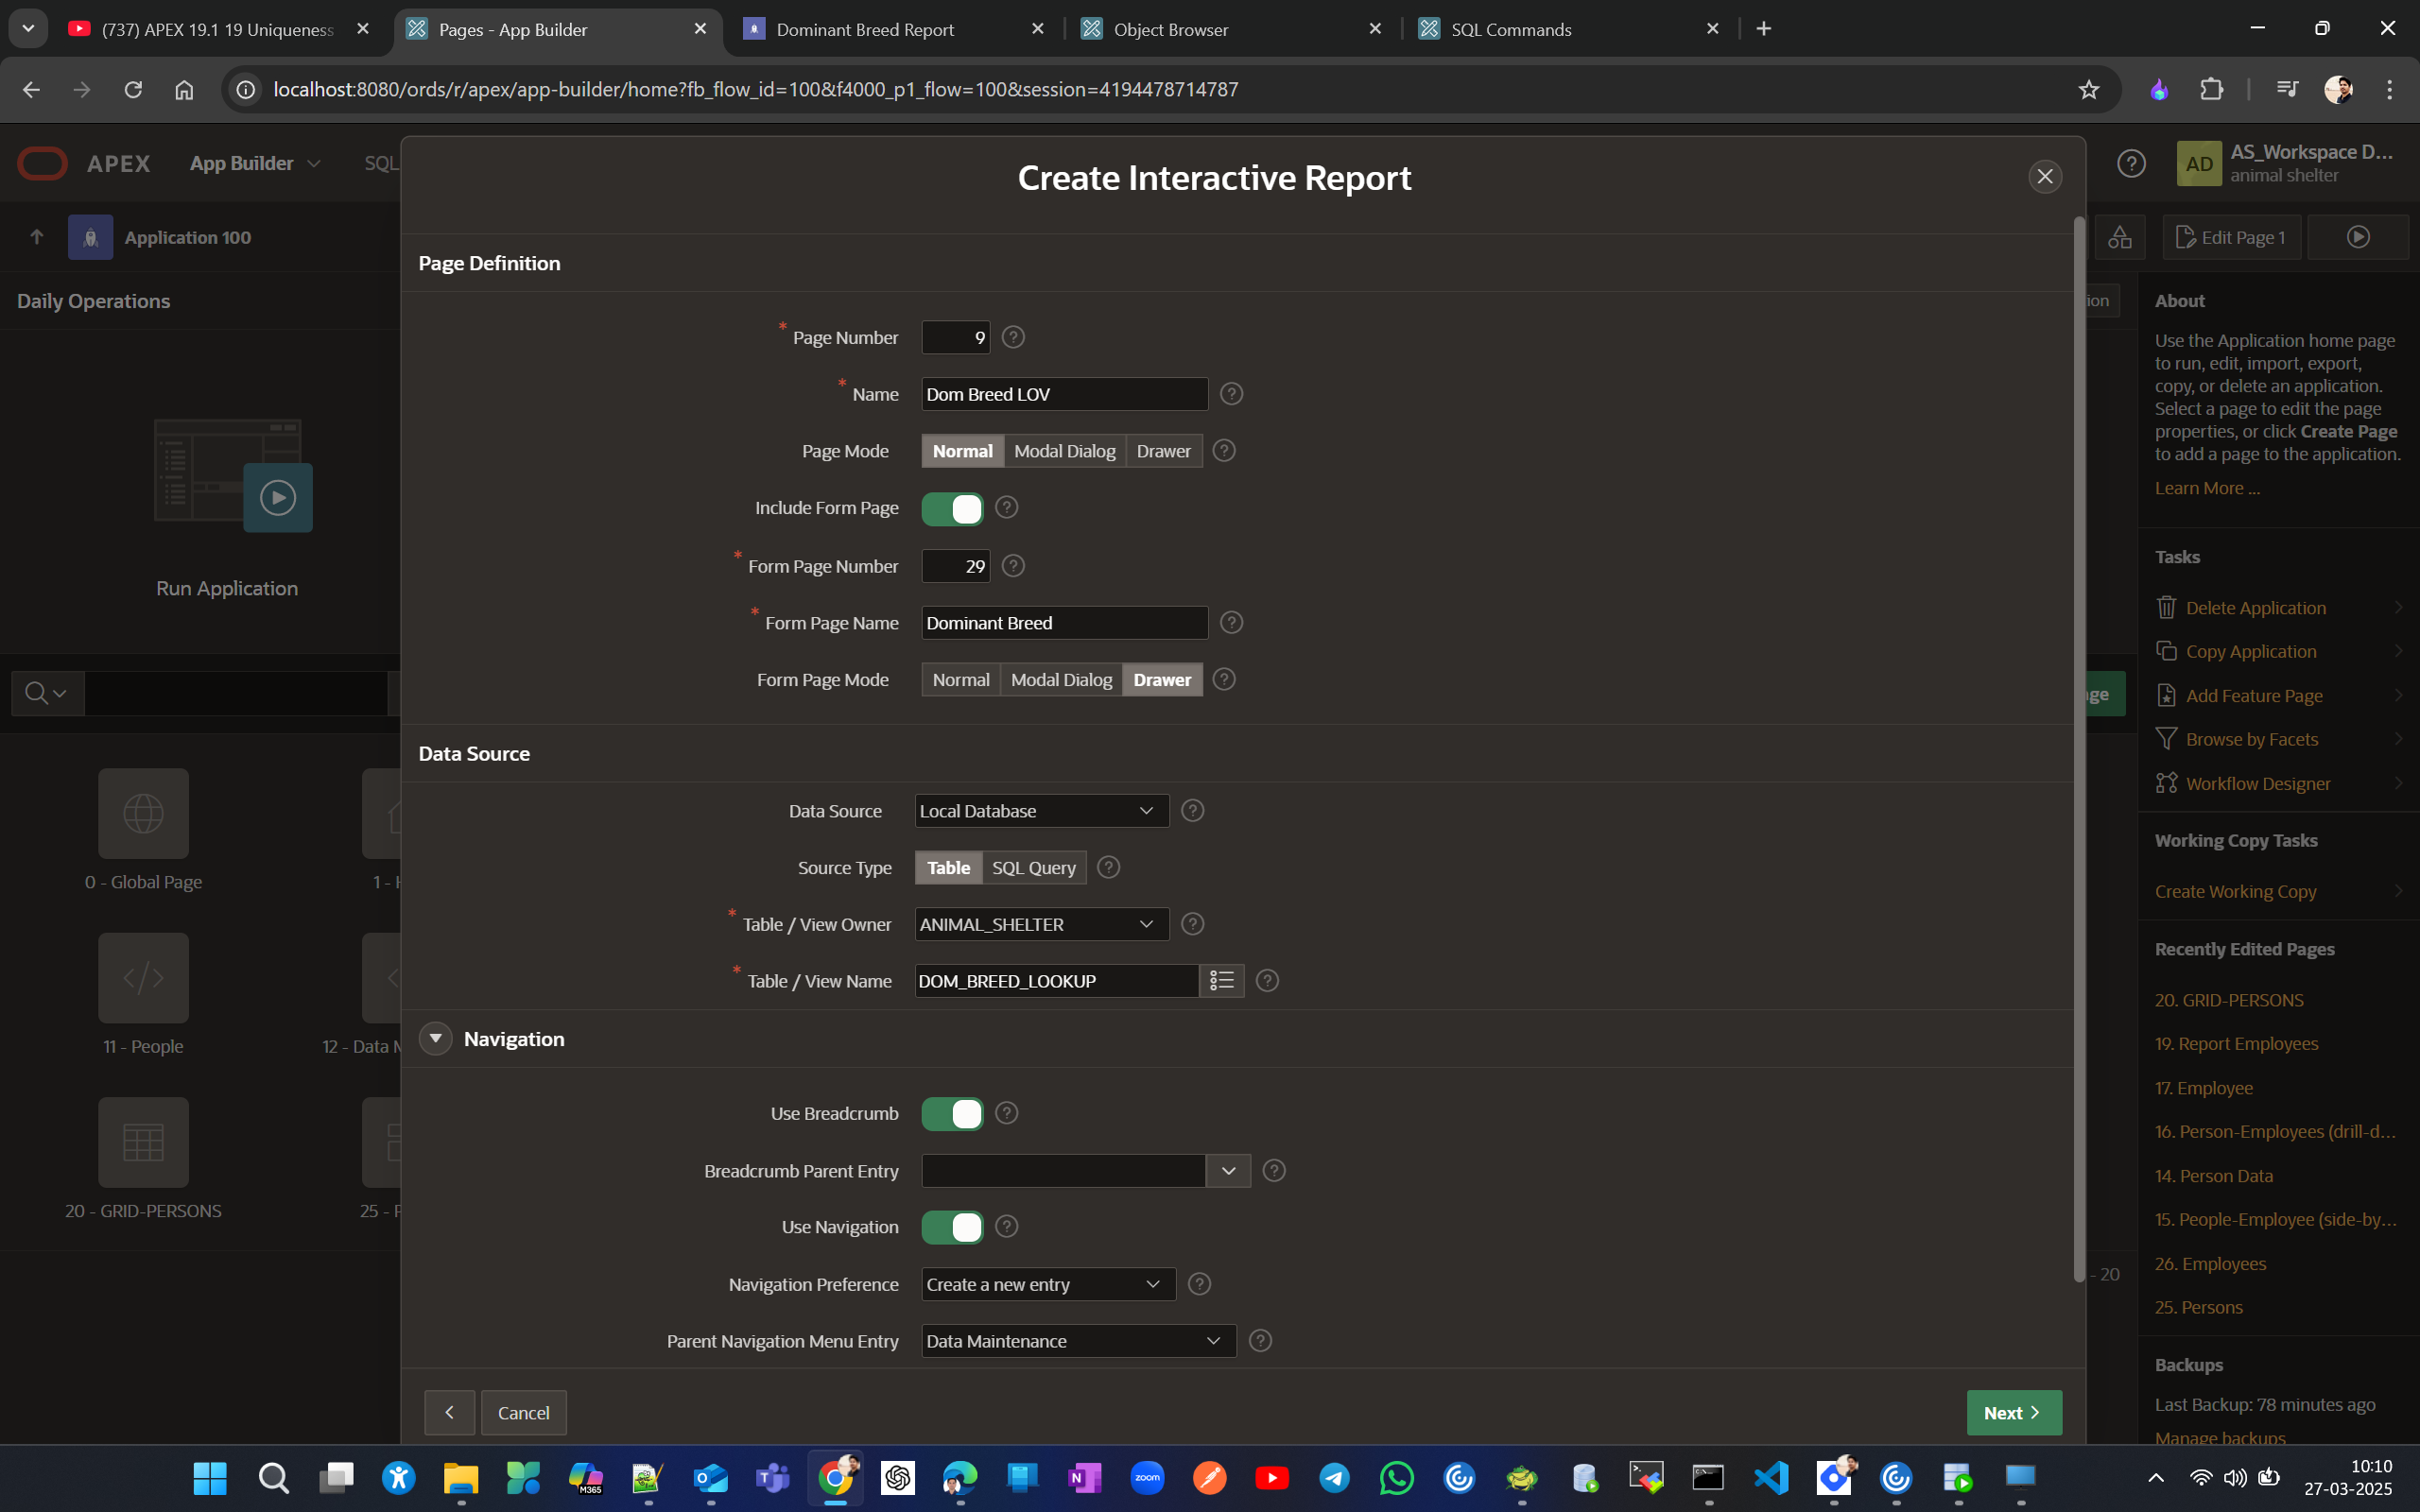
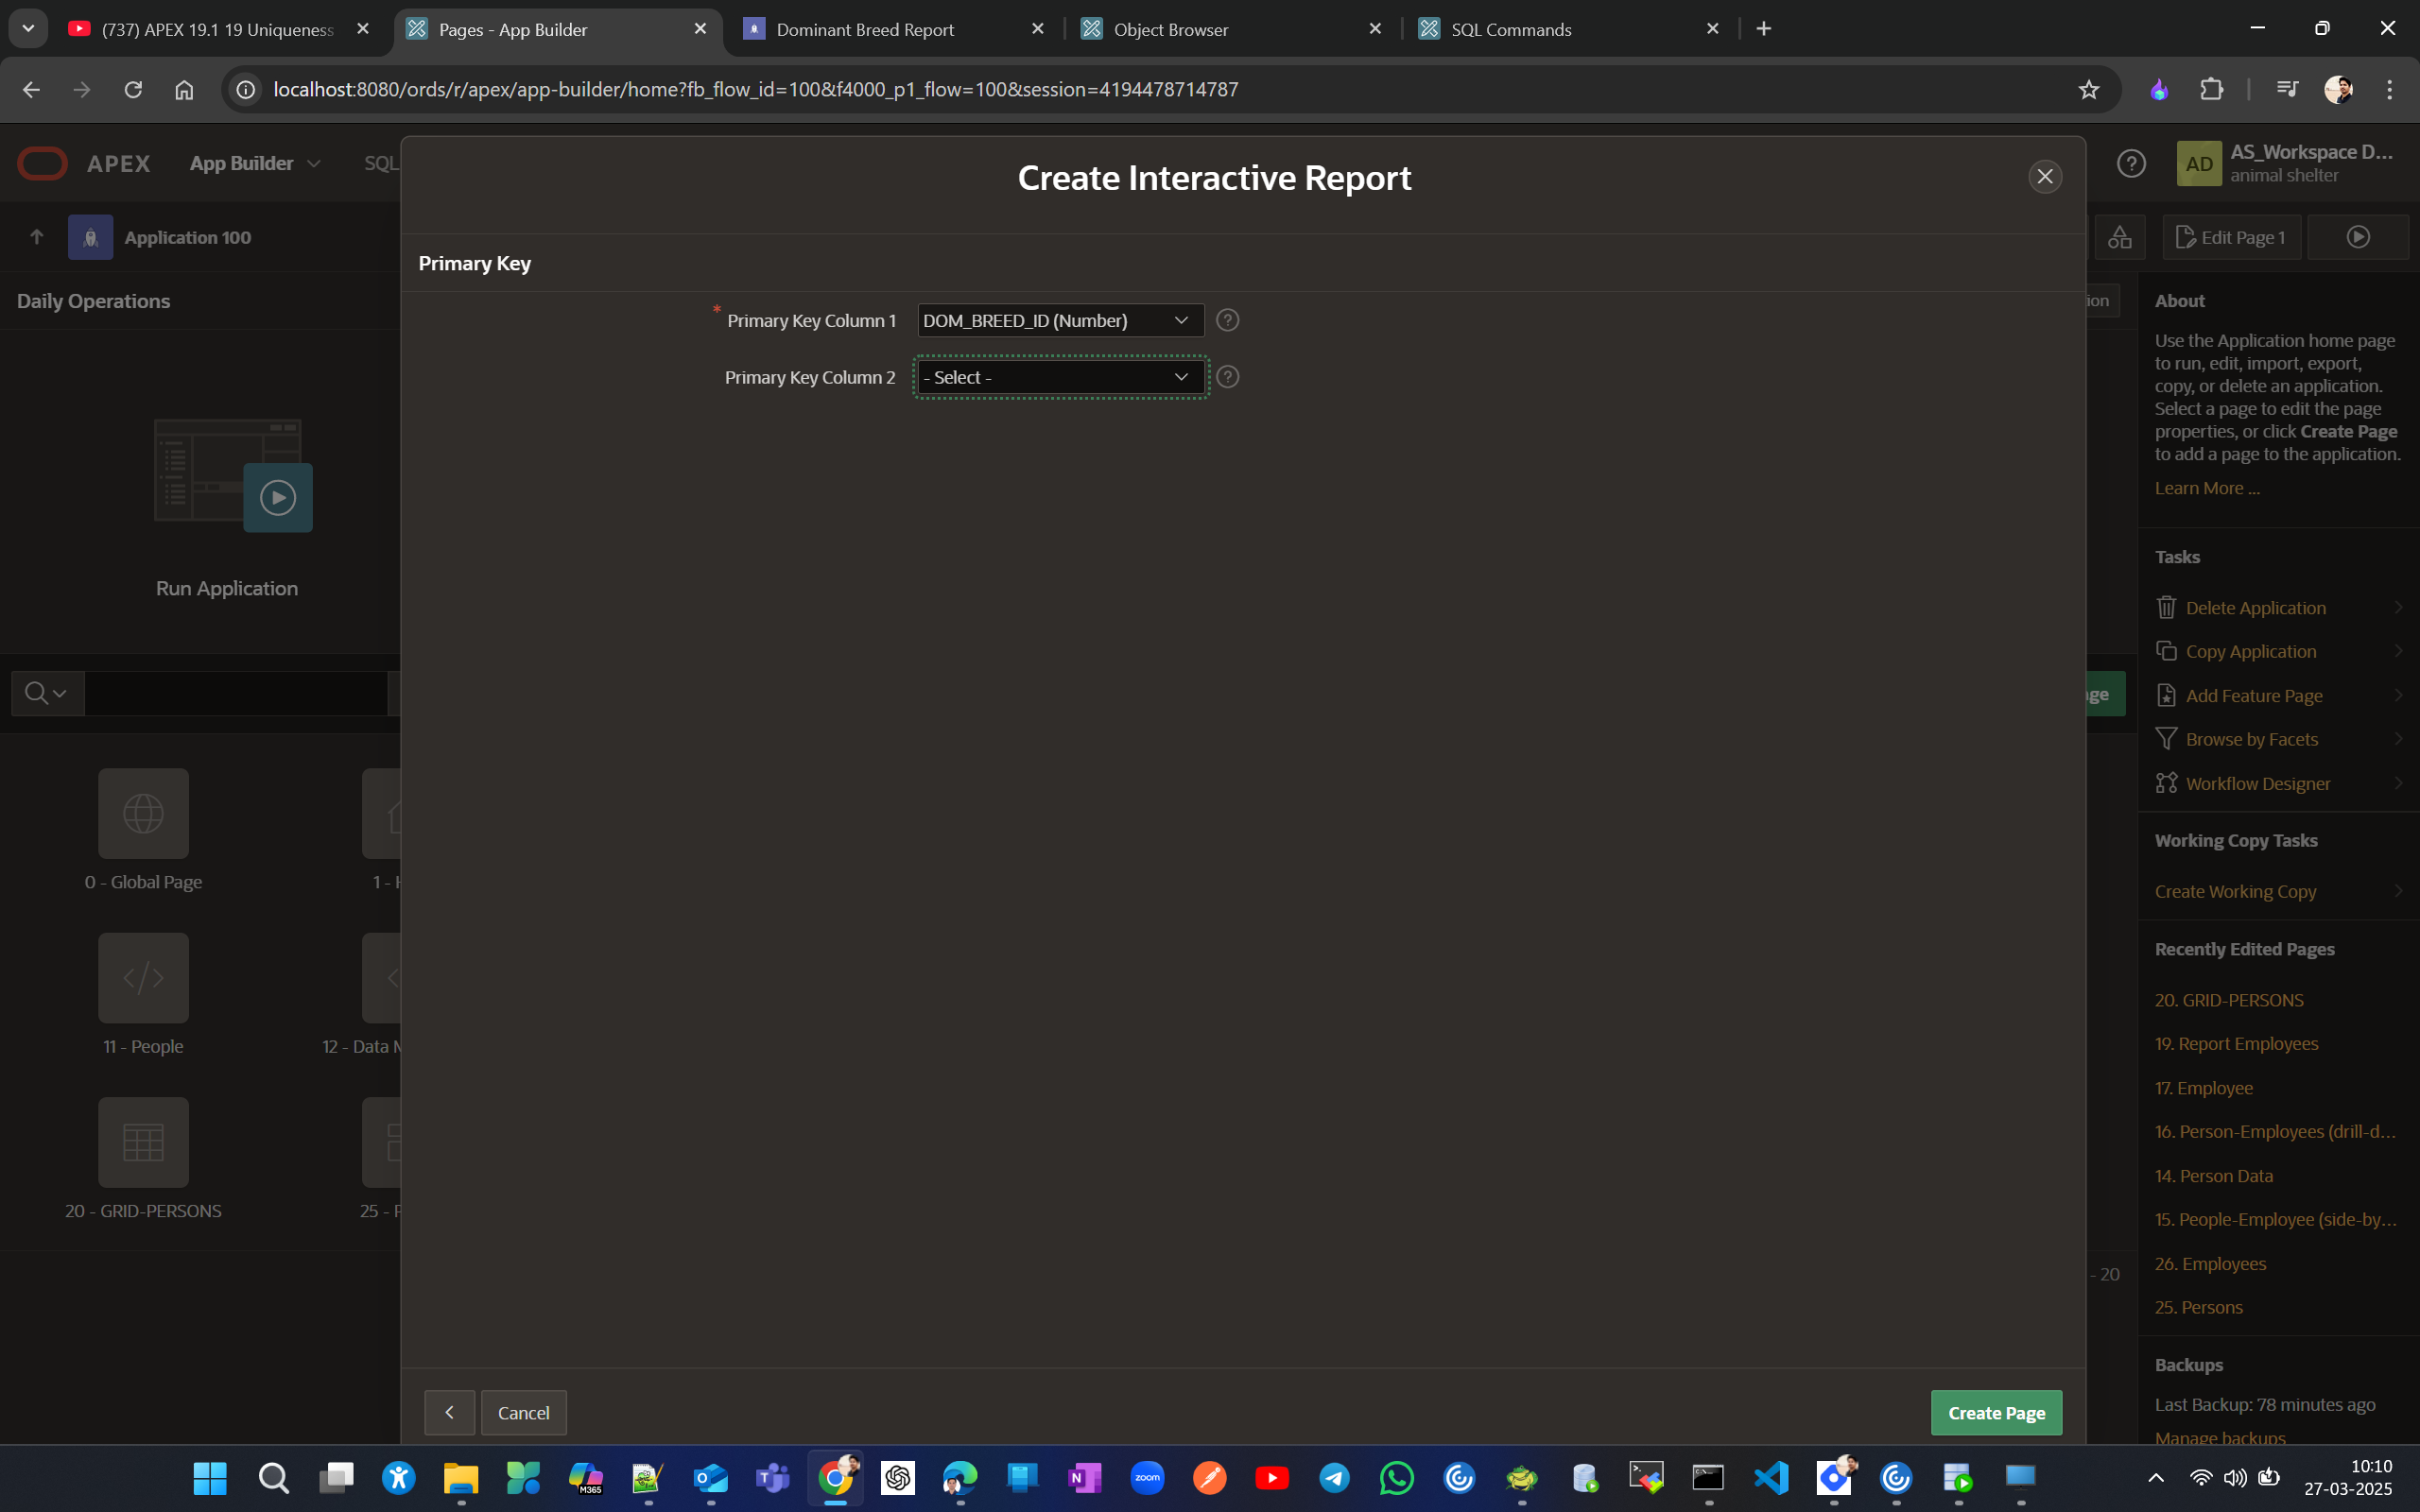
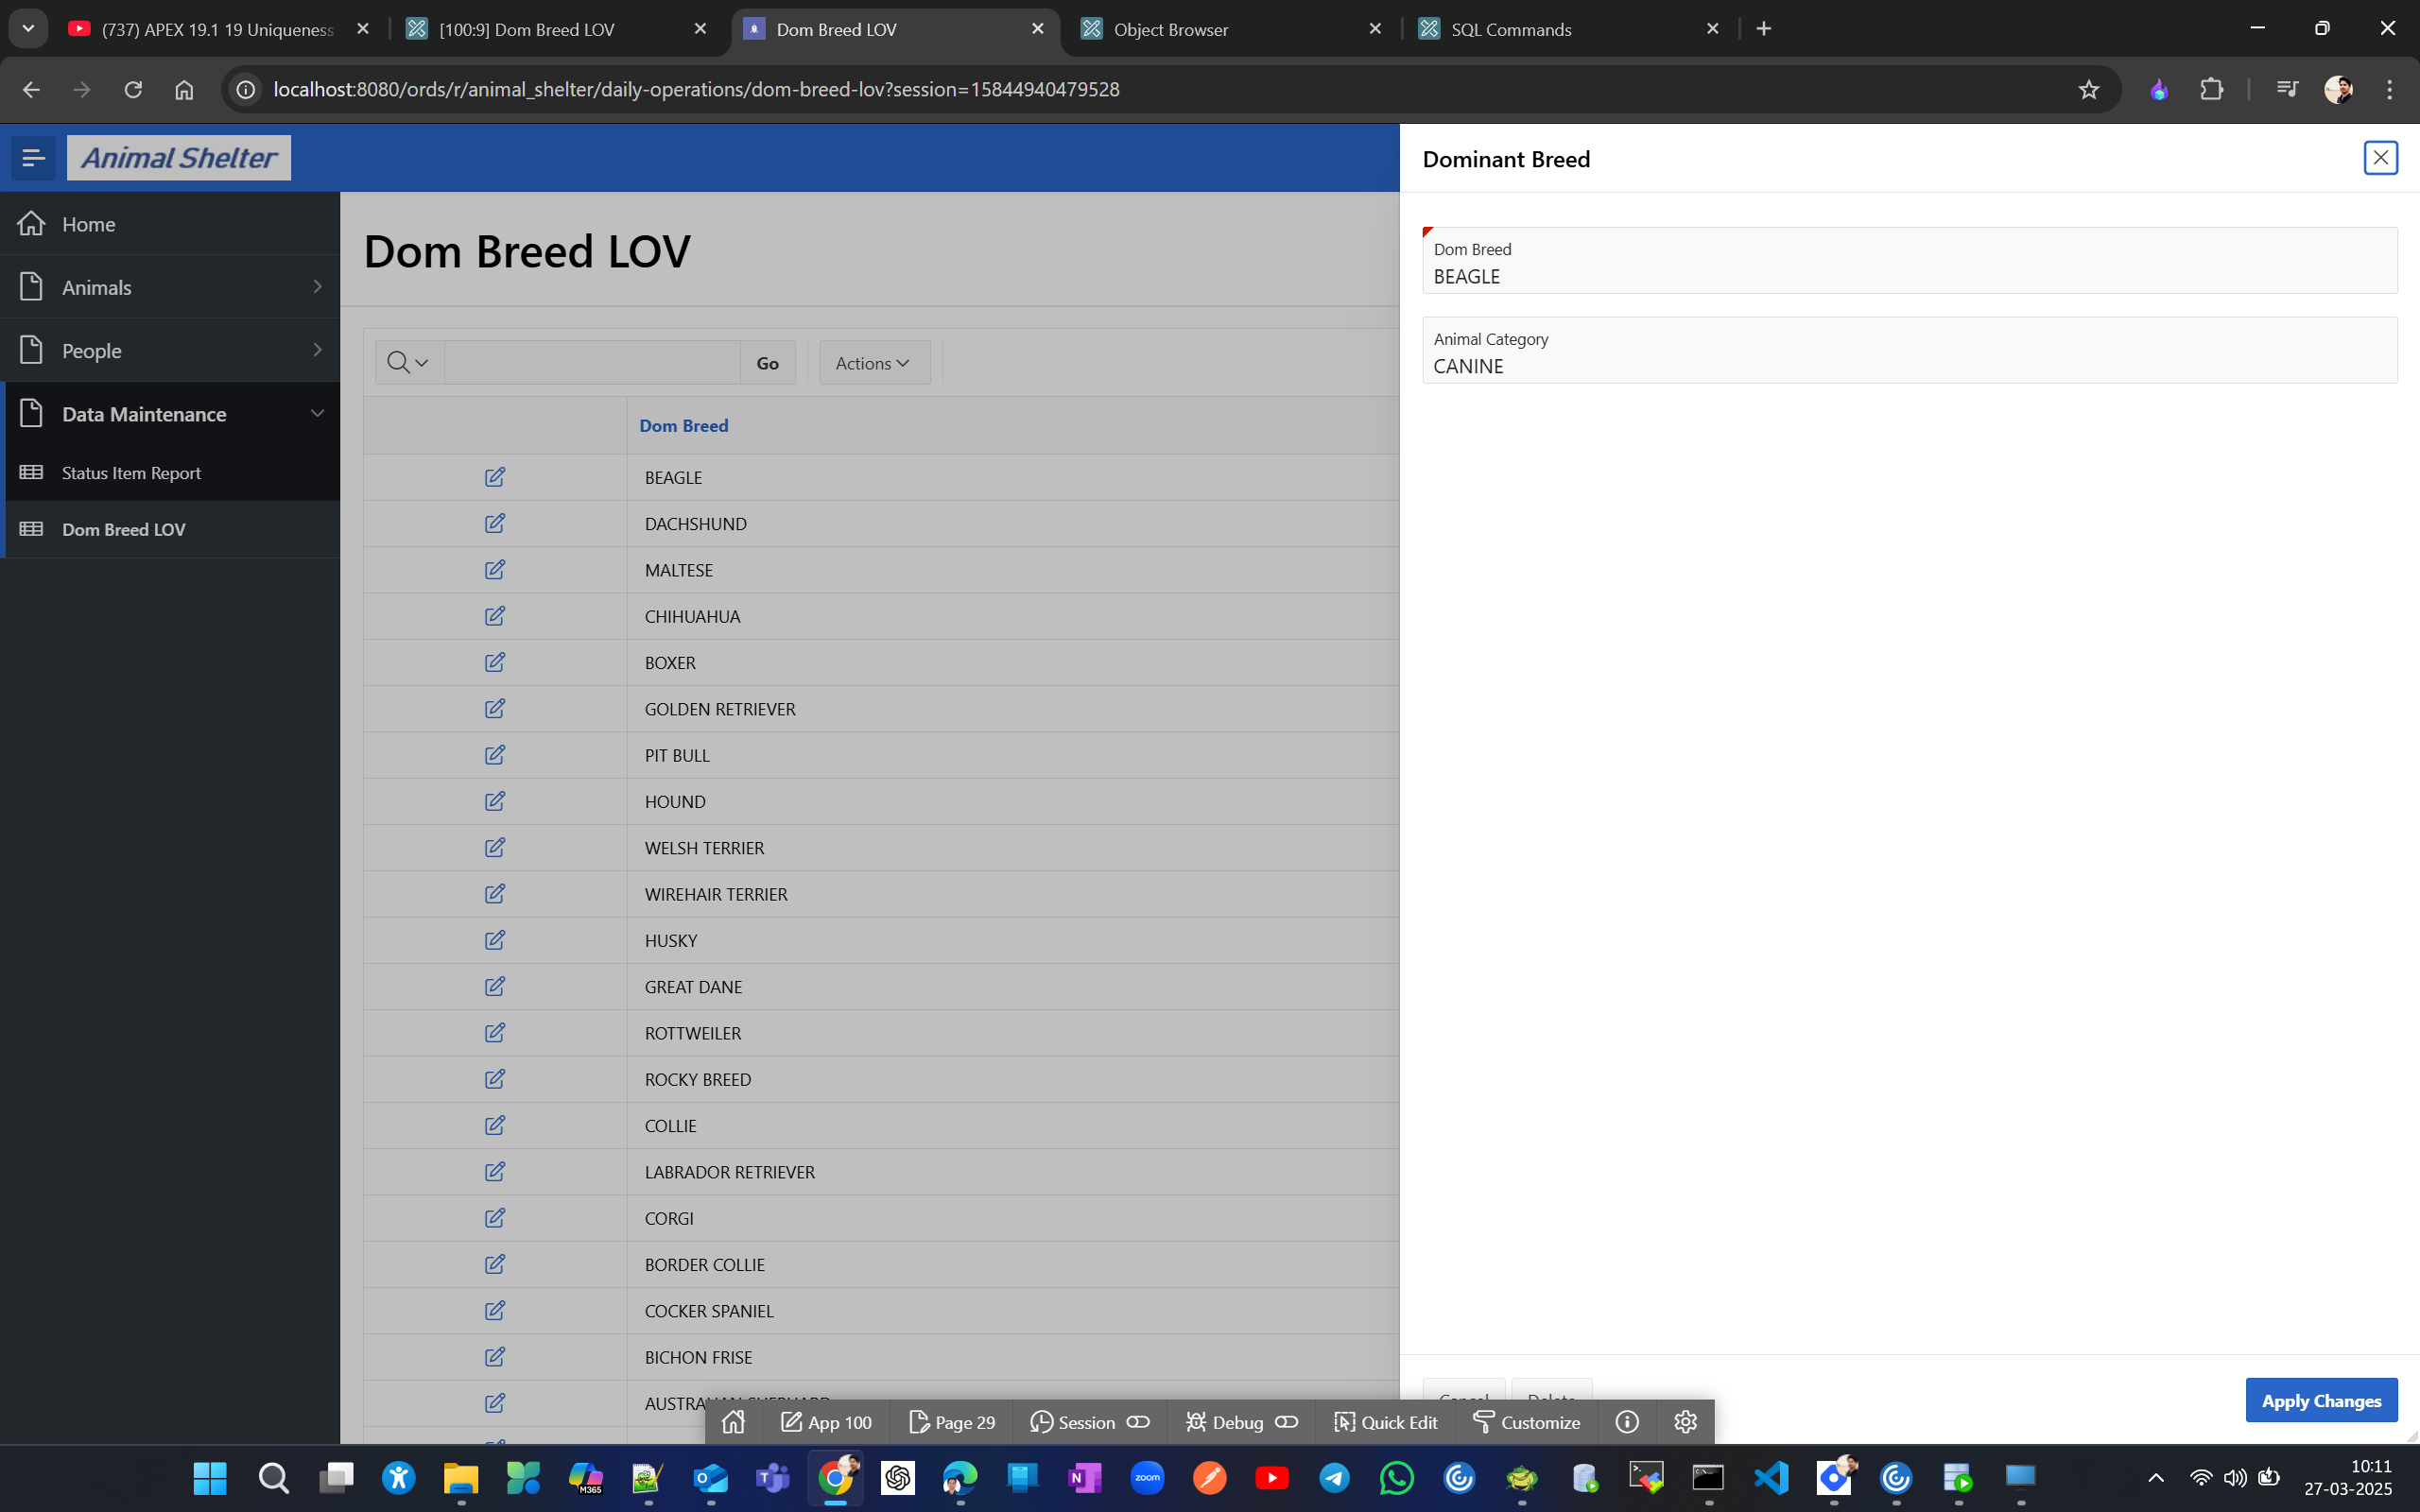
Please note that if you want to change the target of a menu item, you can do it from the shared component menu and update the target.
Now edit the form page layout to see and enter all field details in a single line.
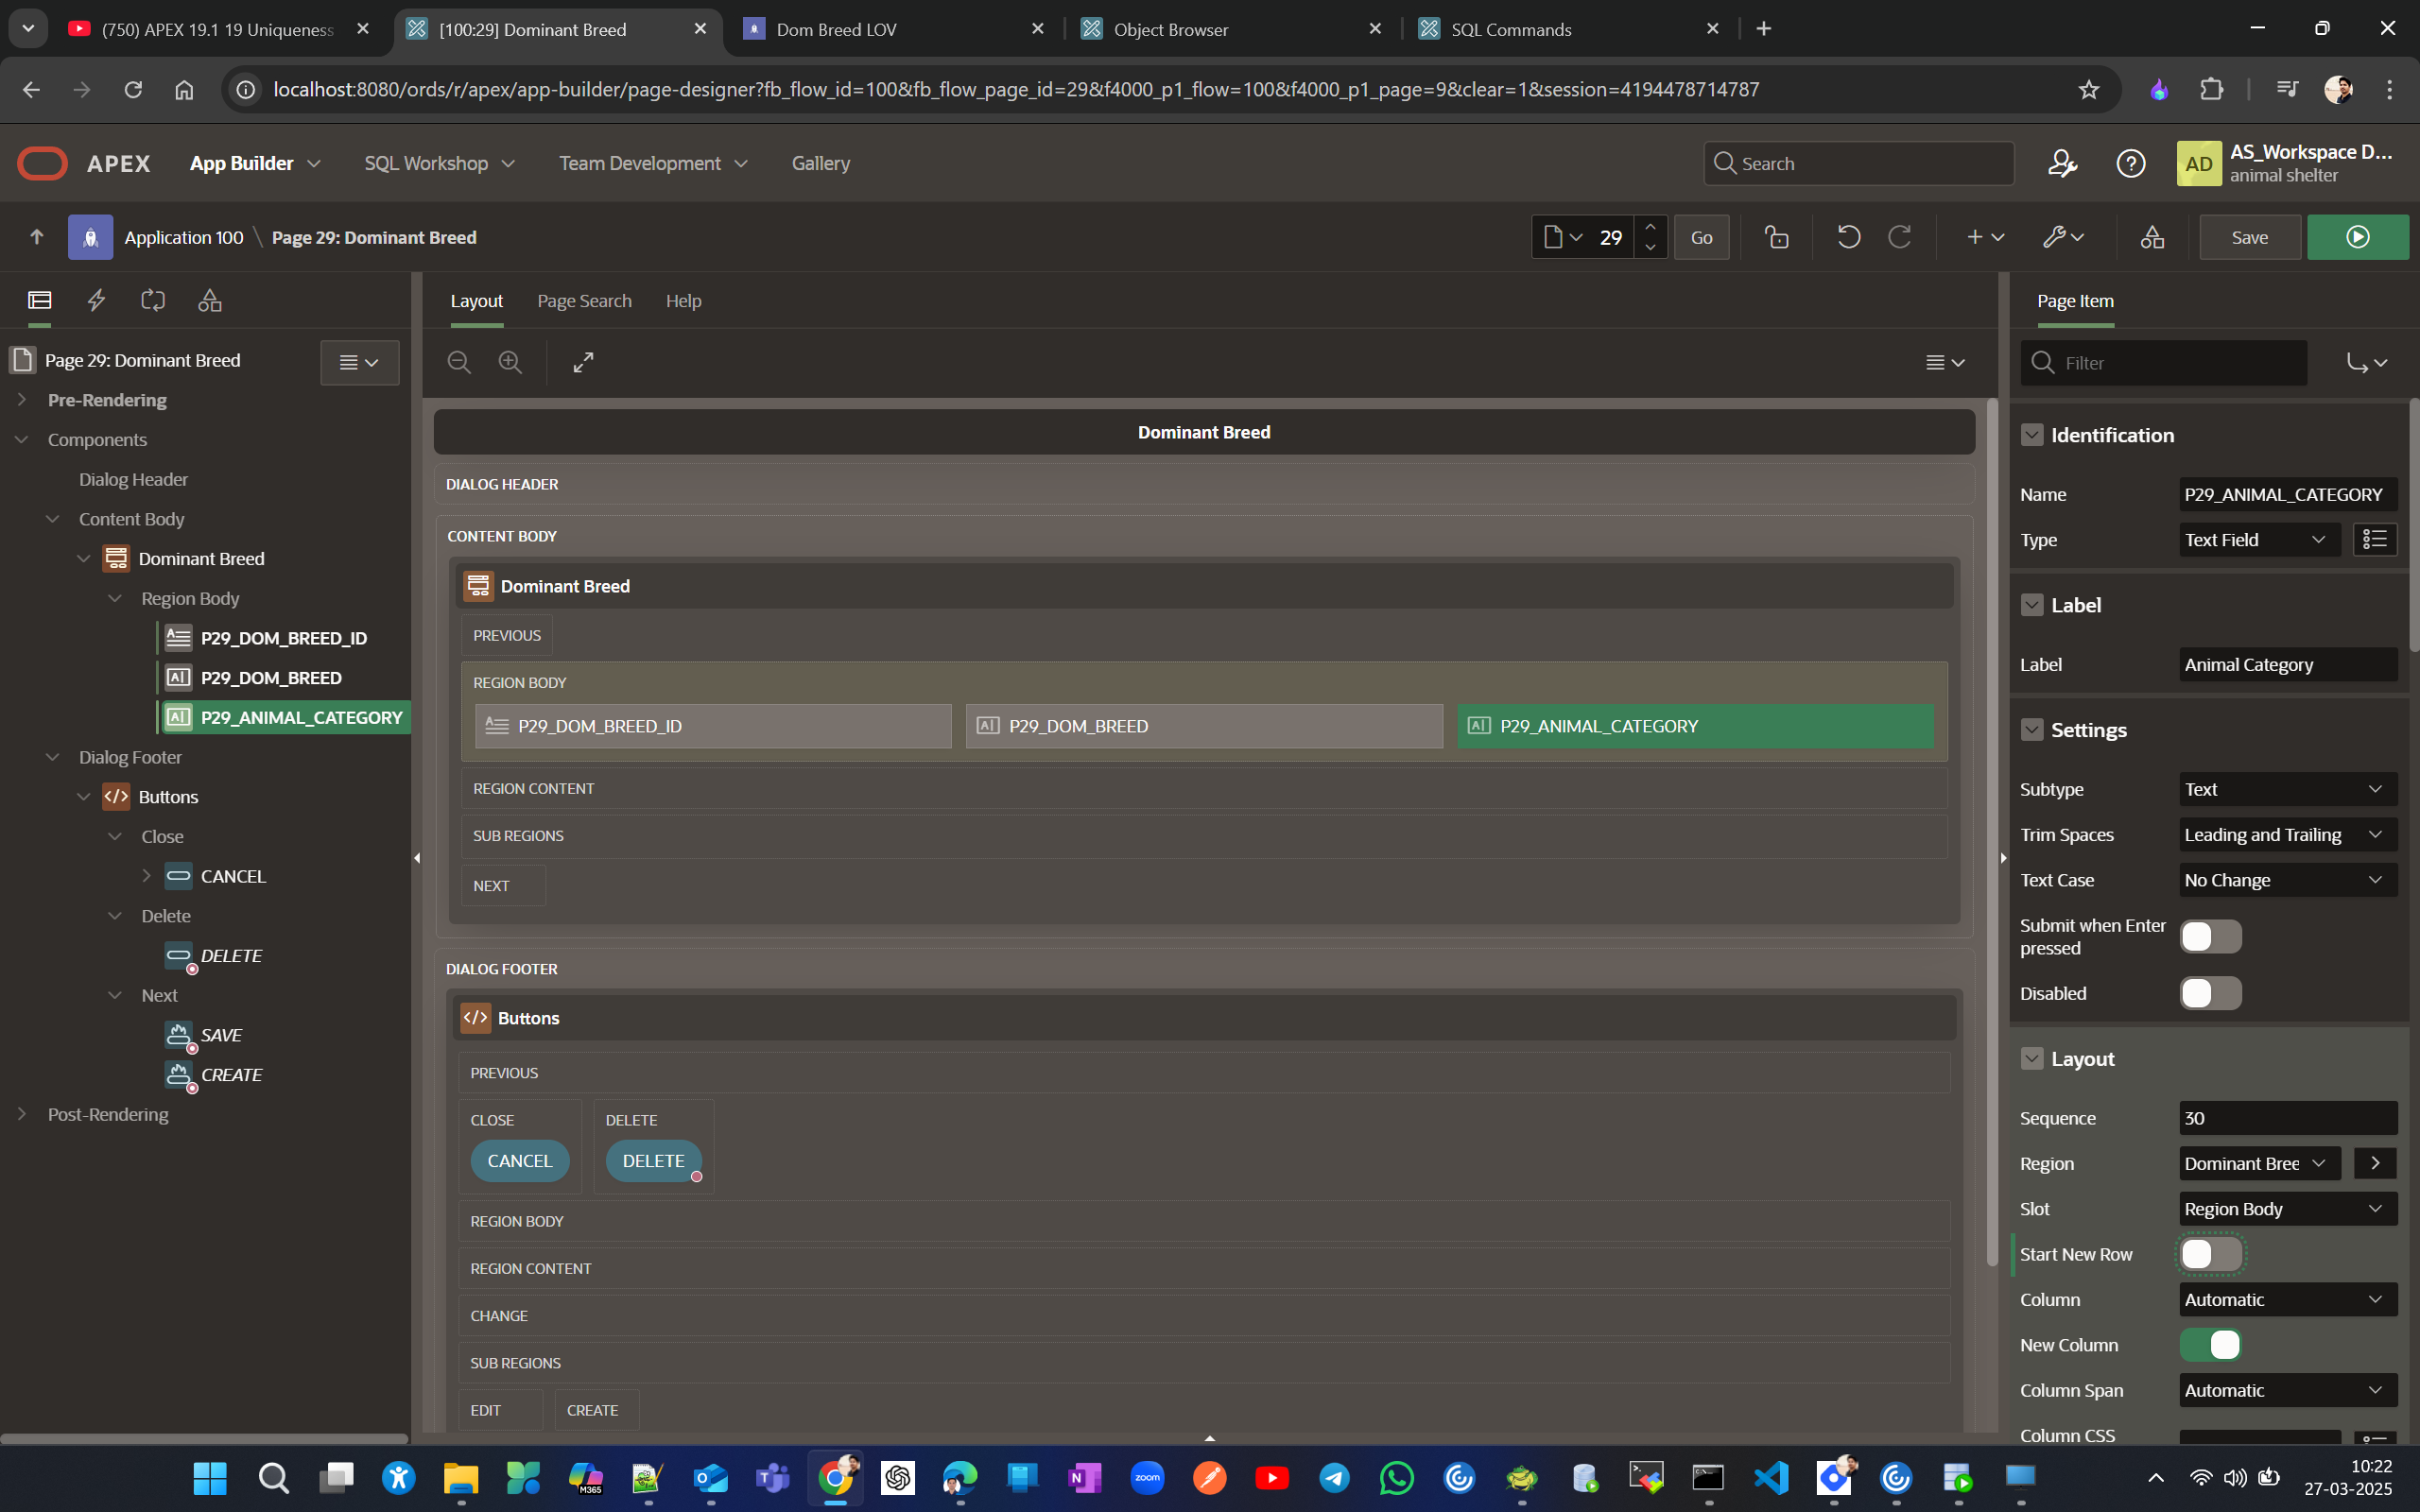
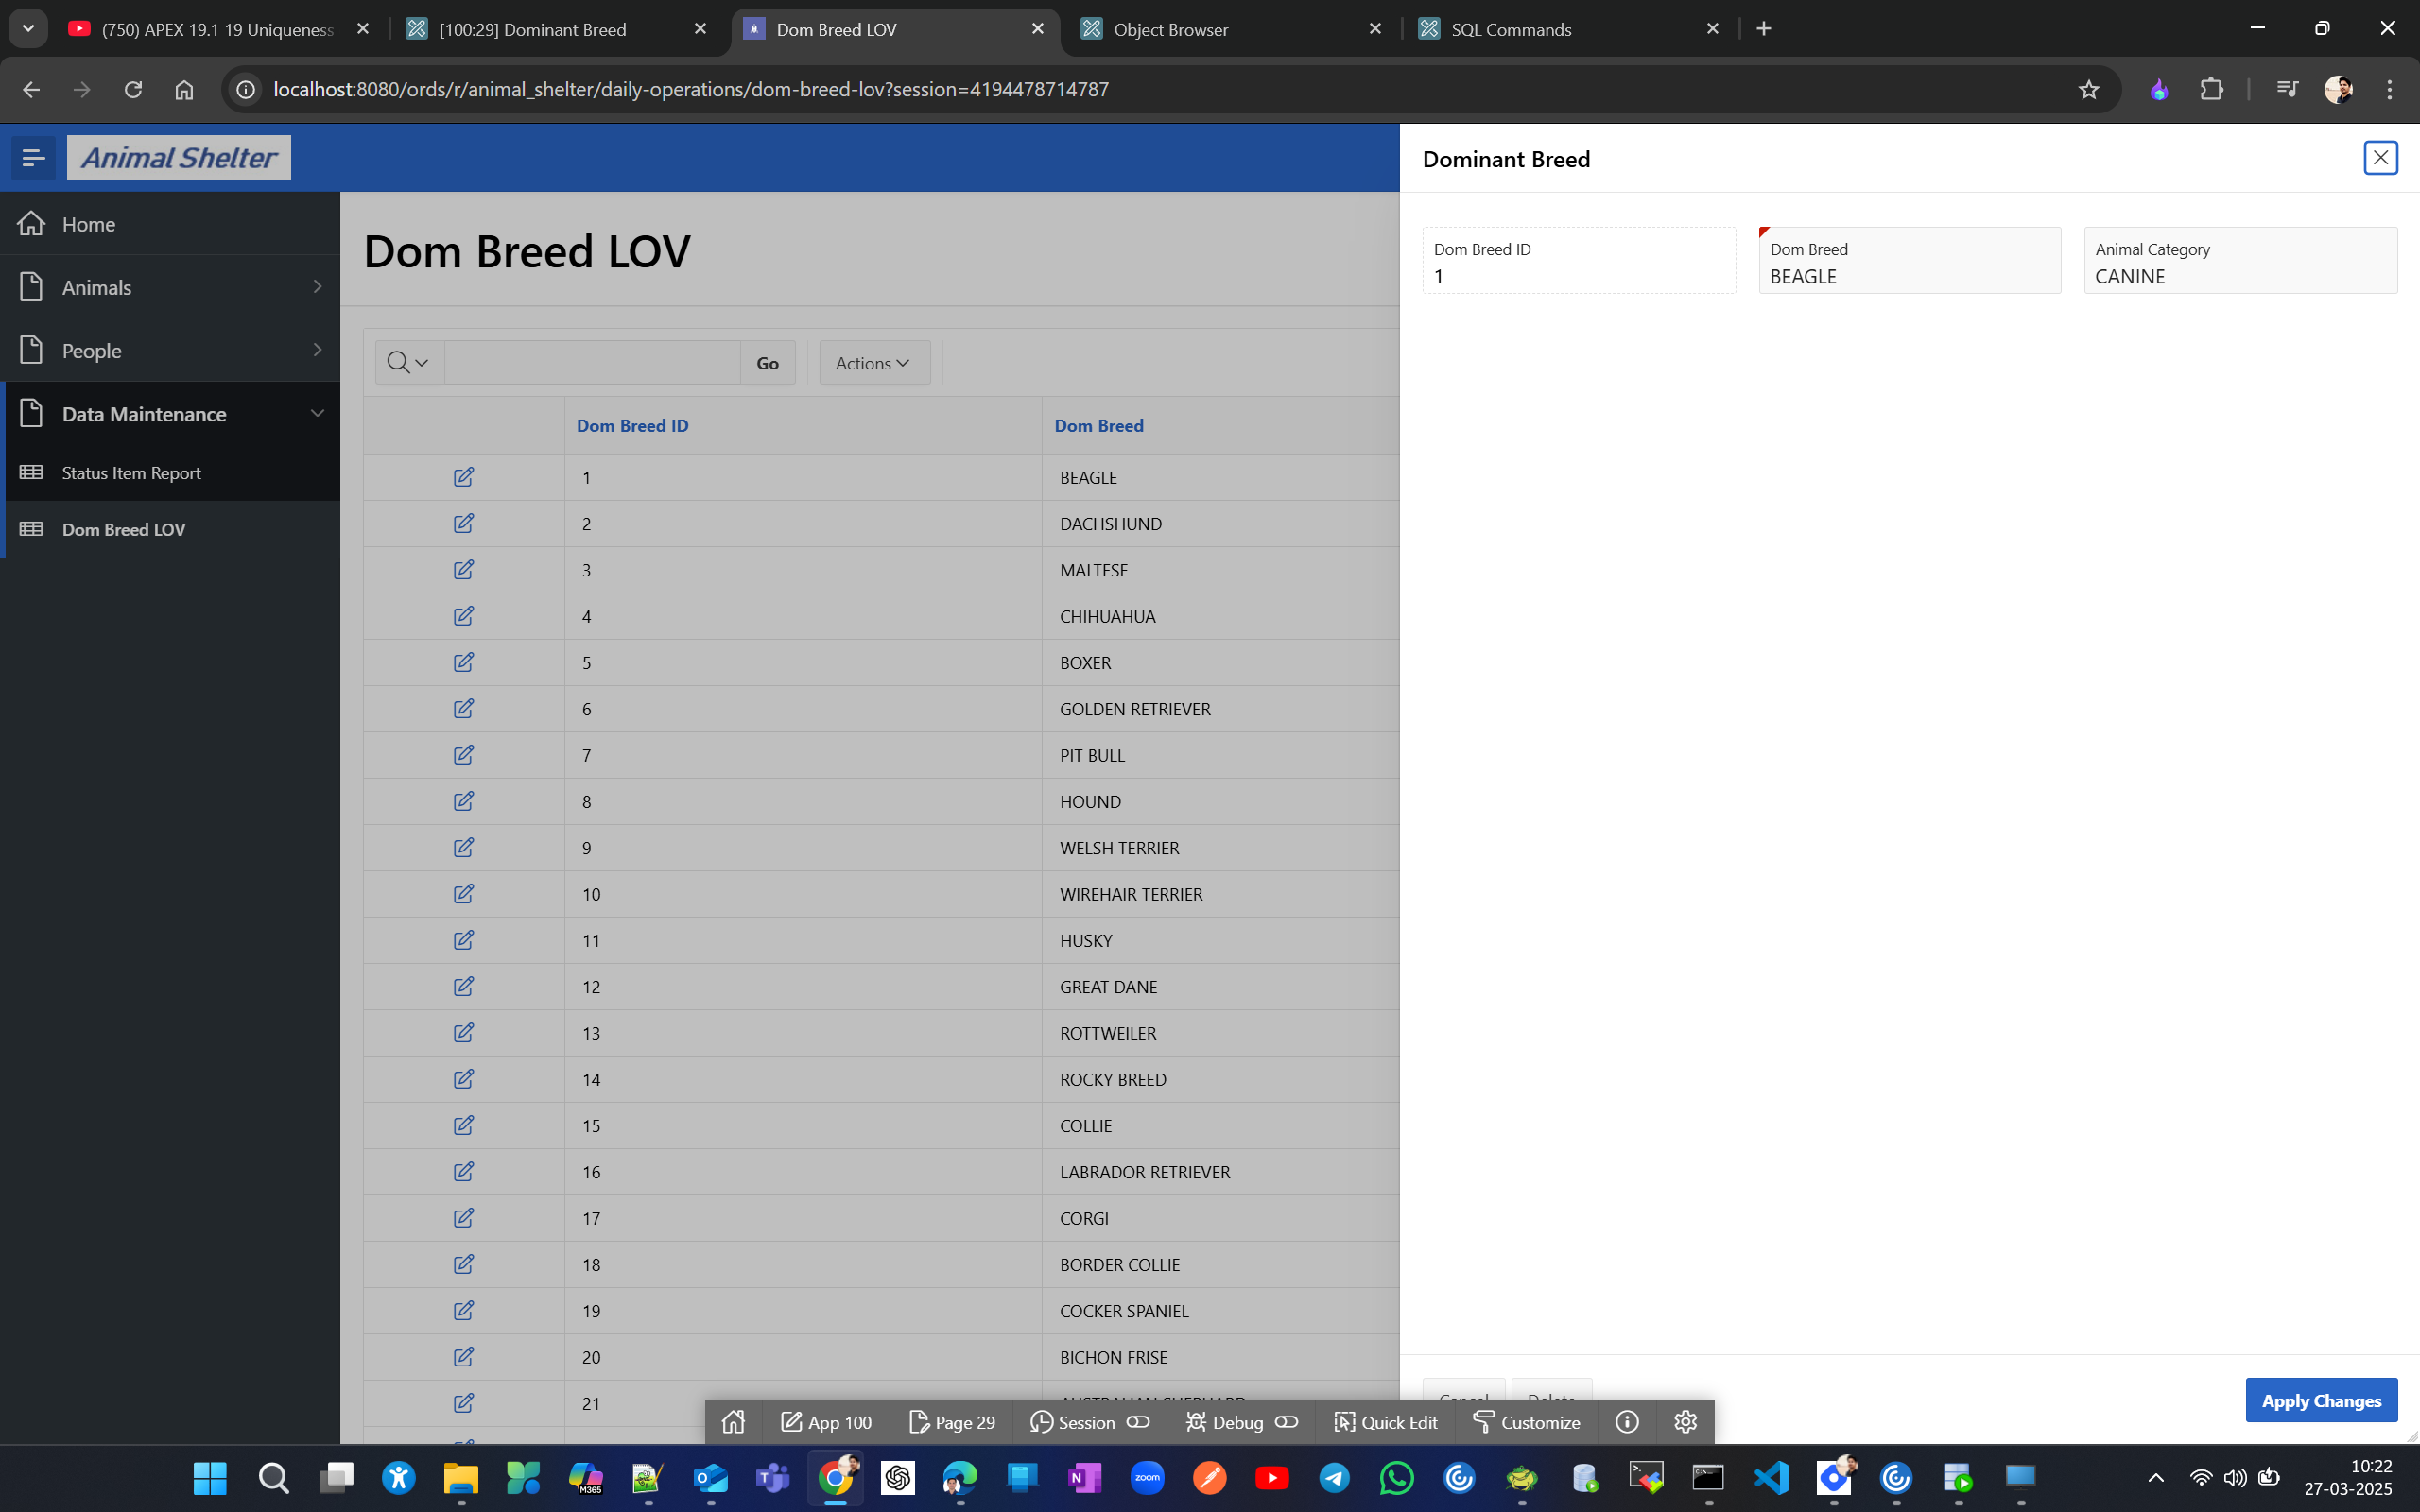
now bring Animal Category label before Dom Breed
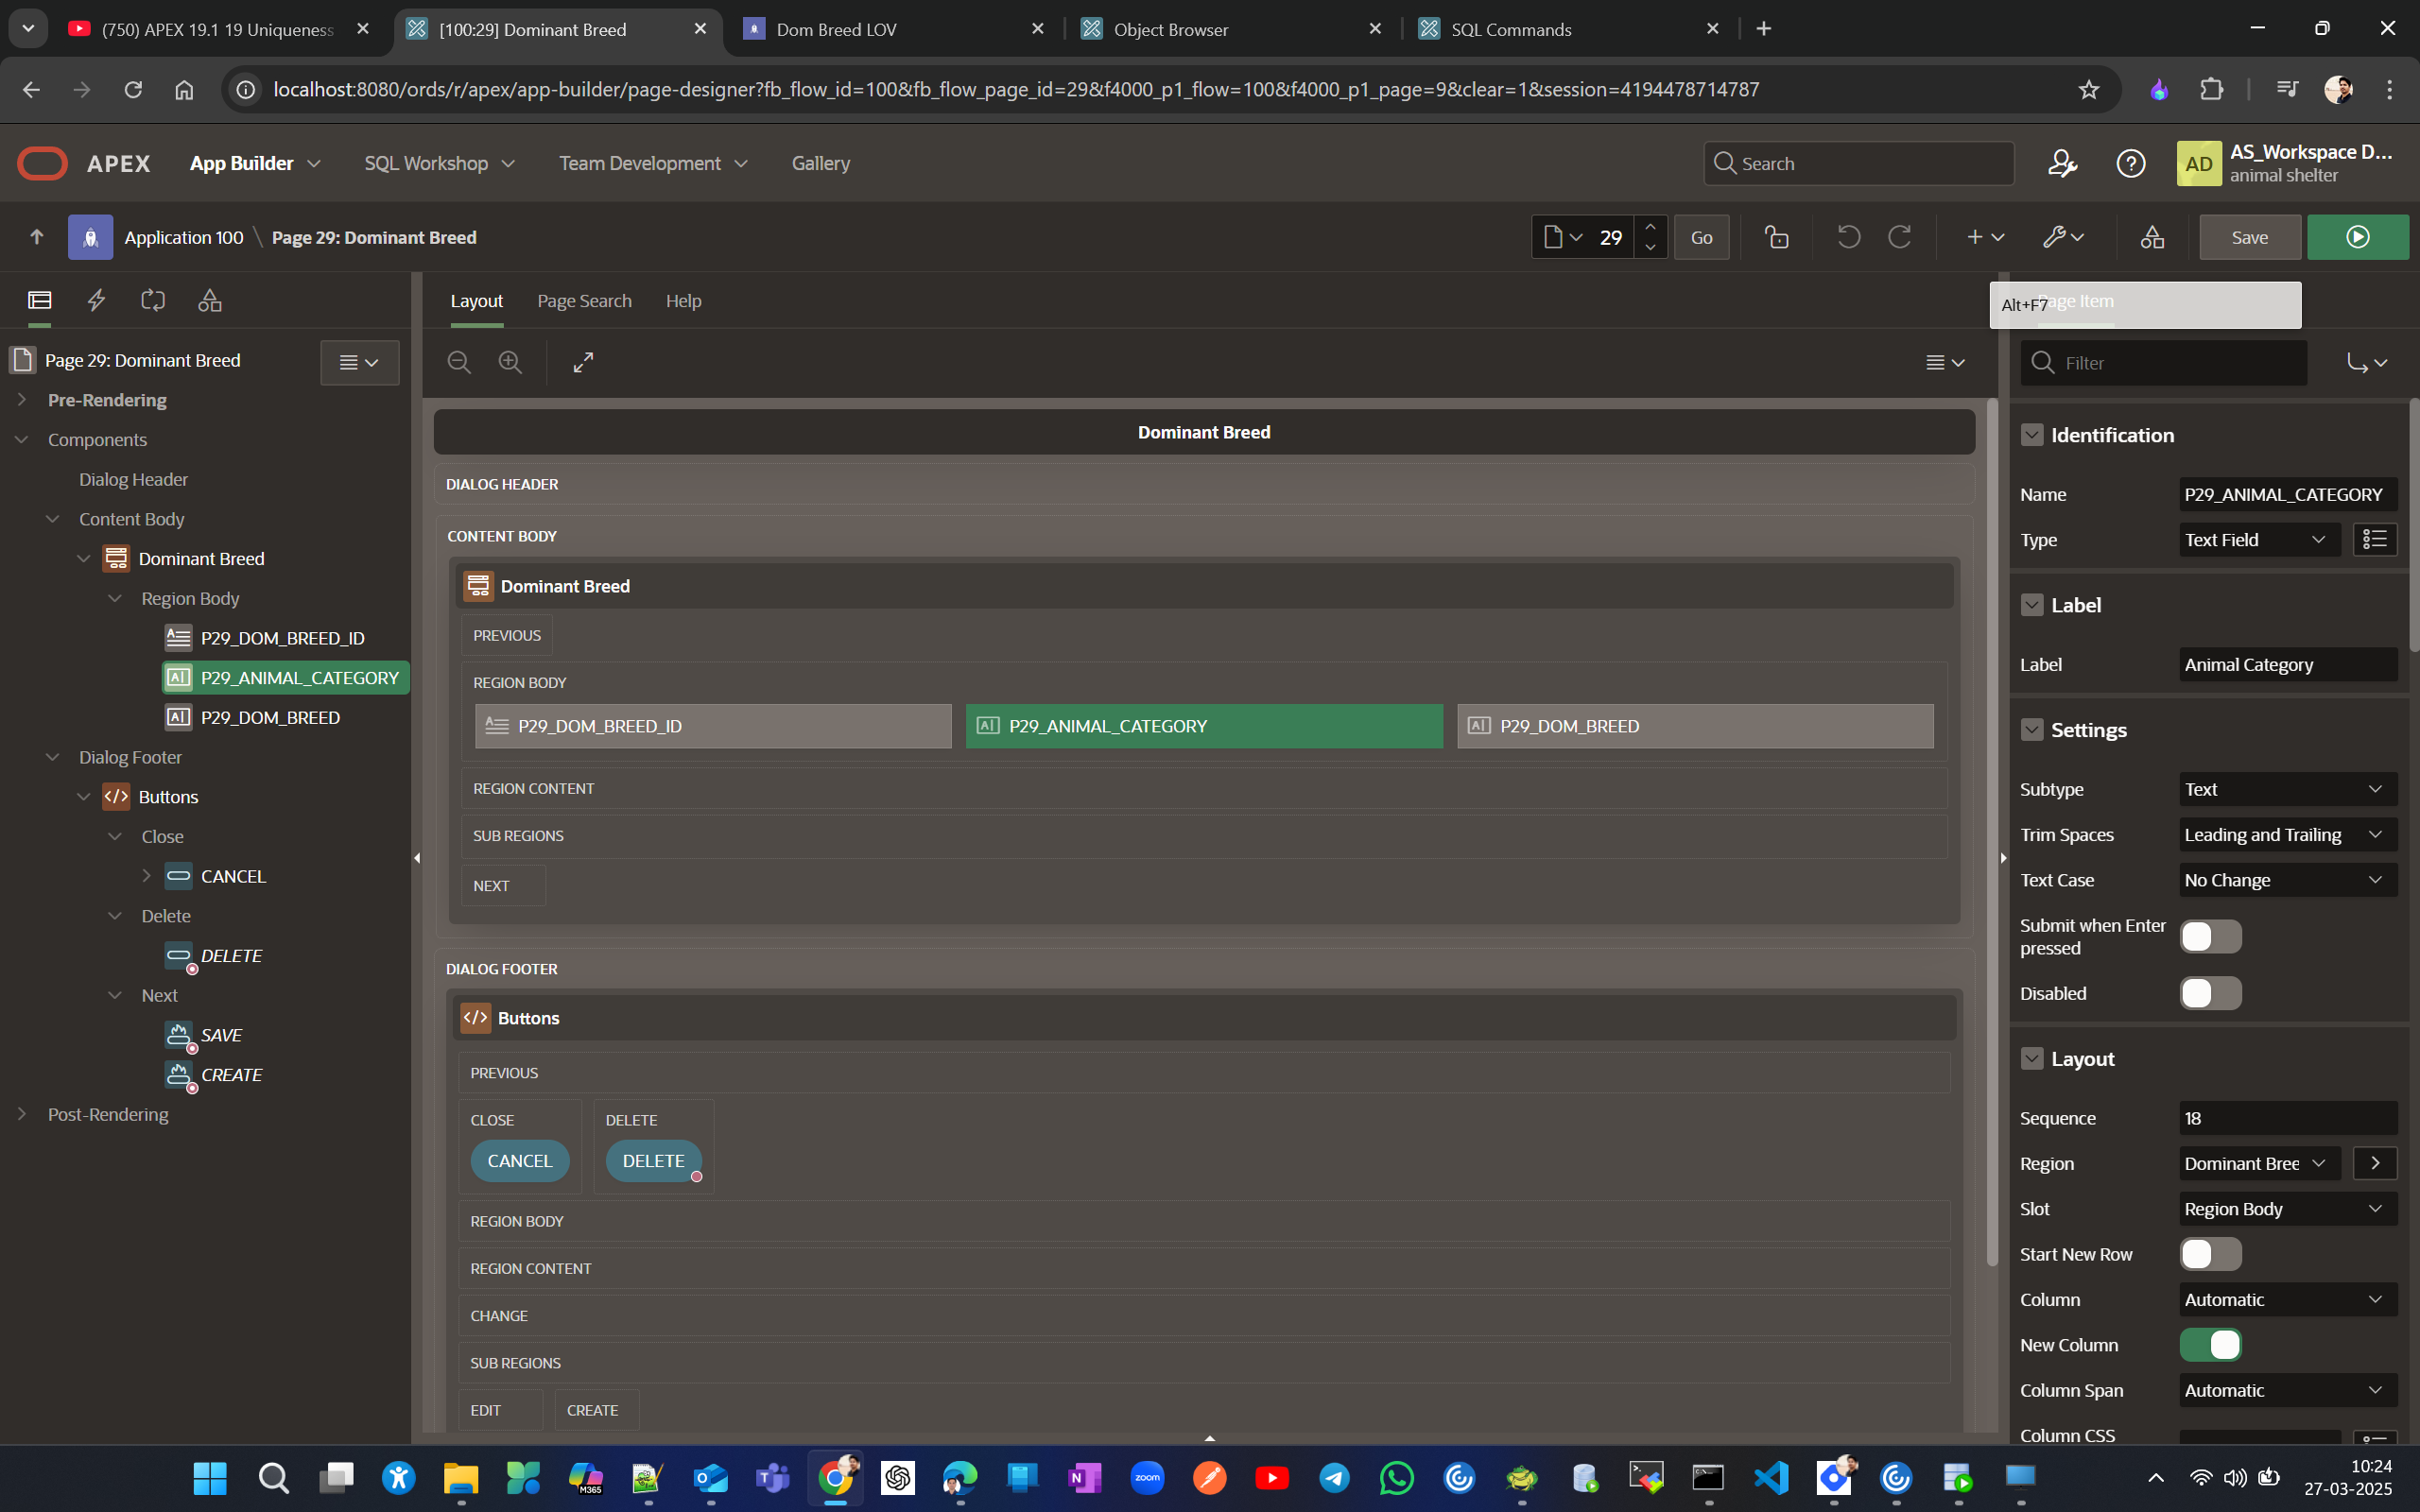
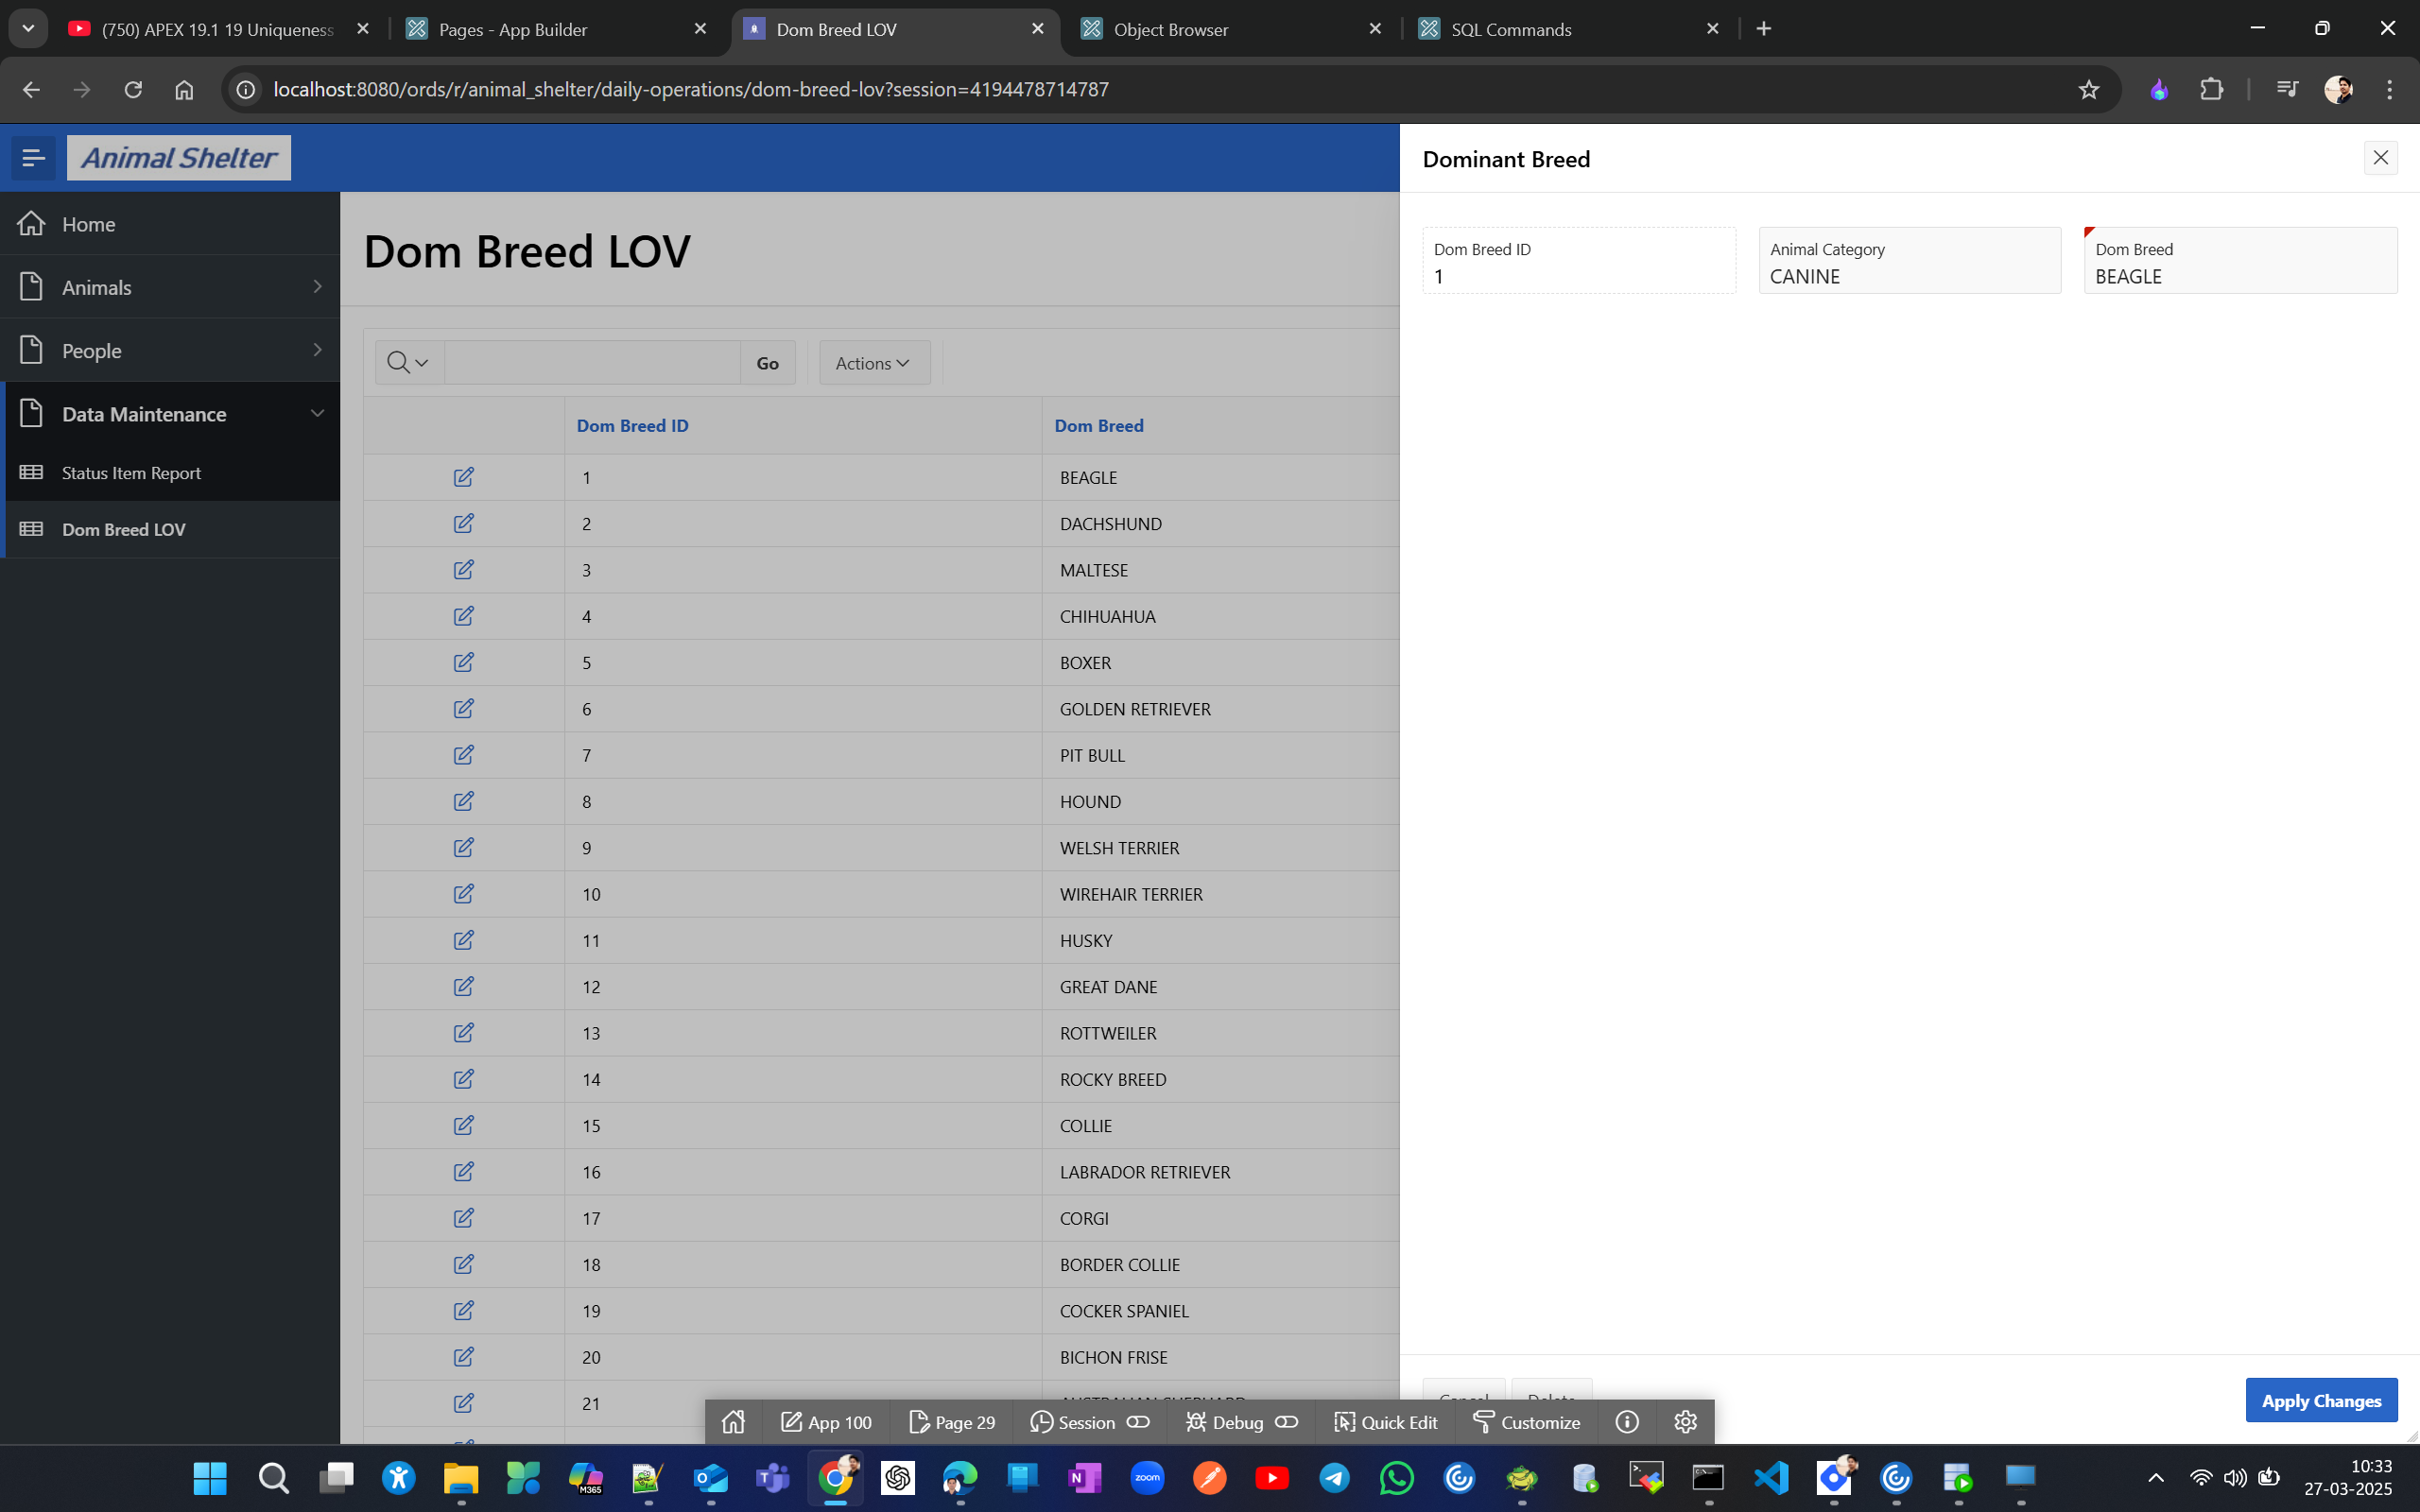
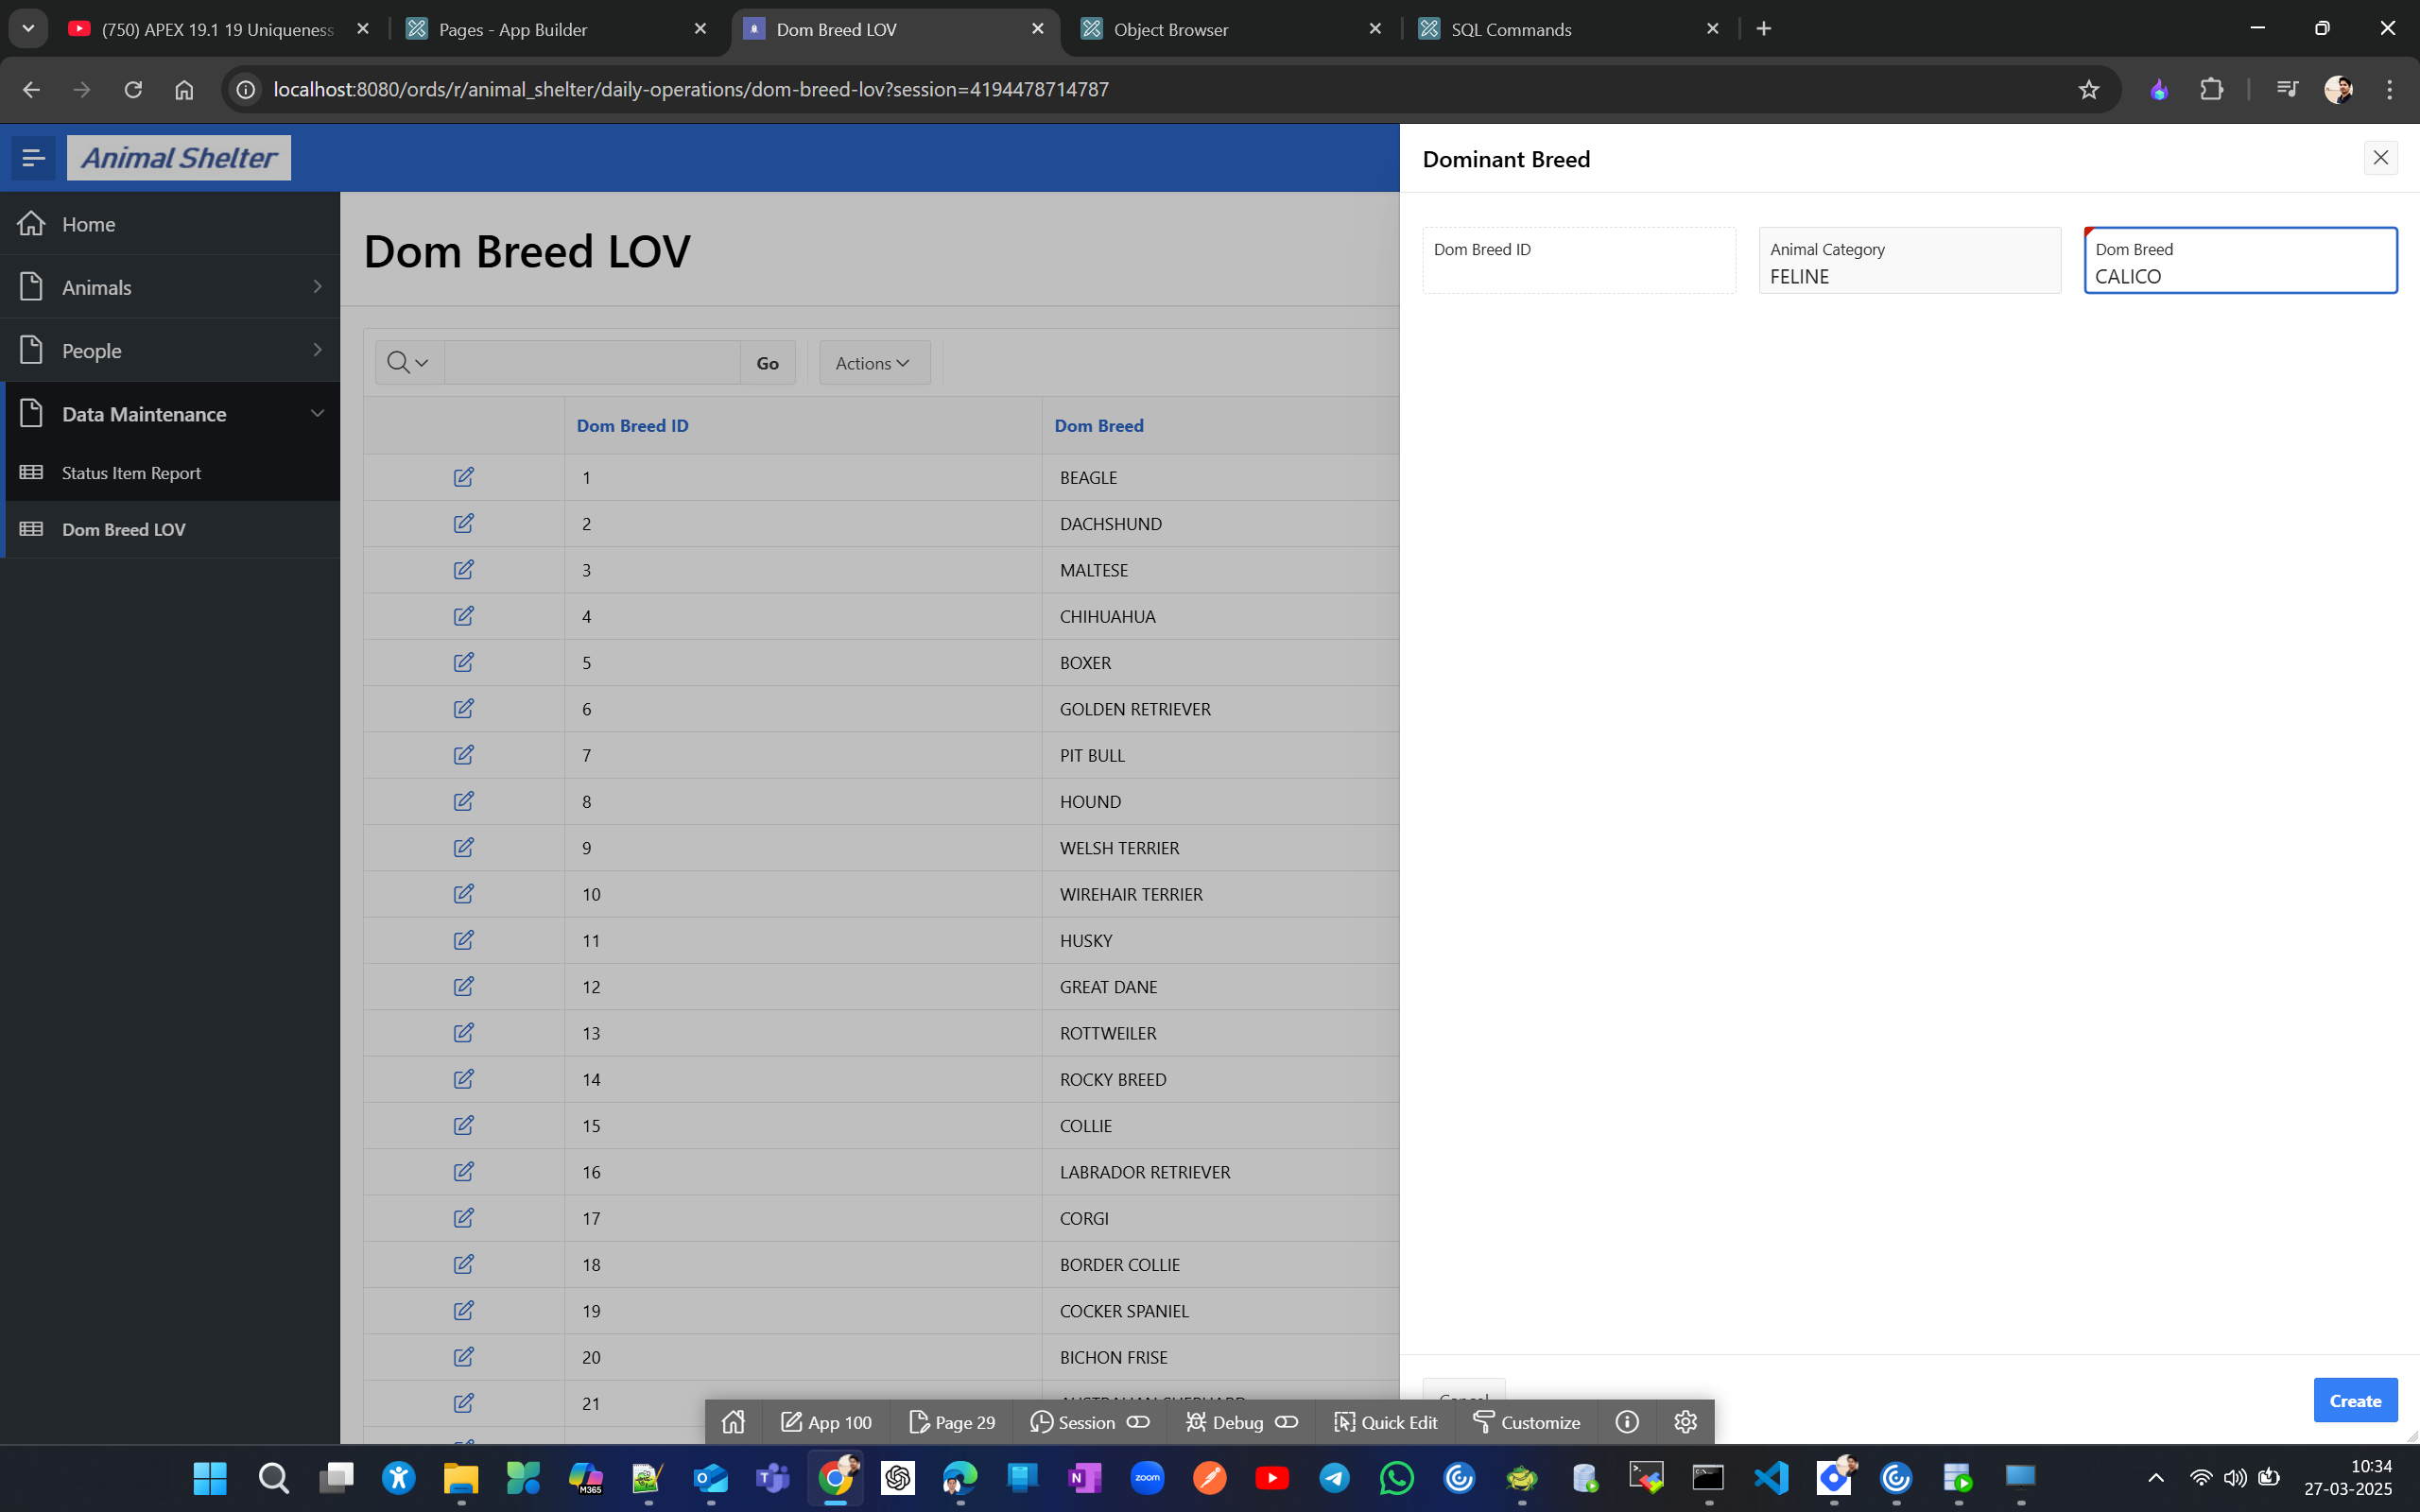
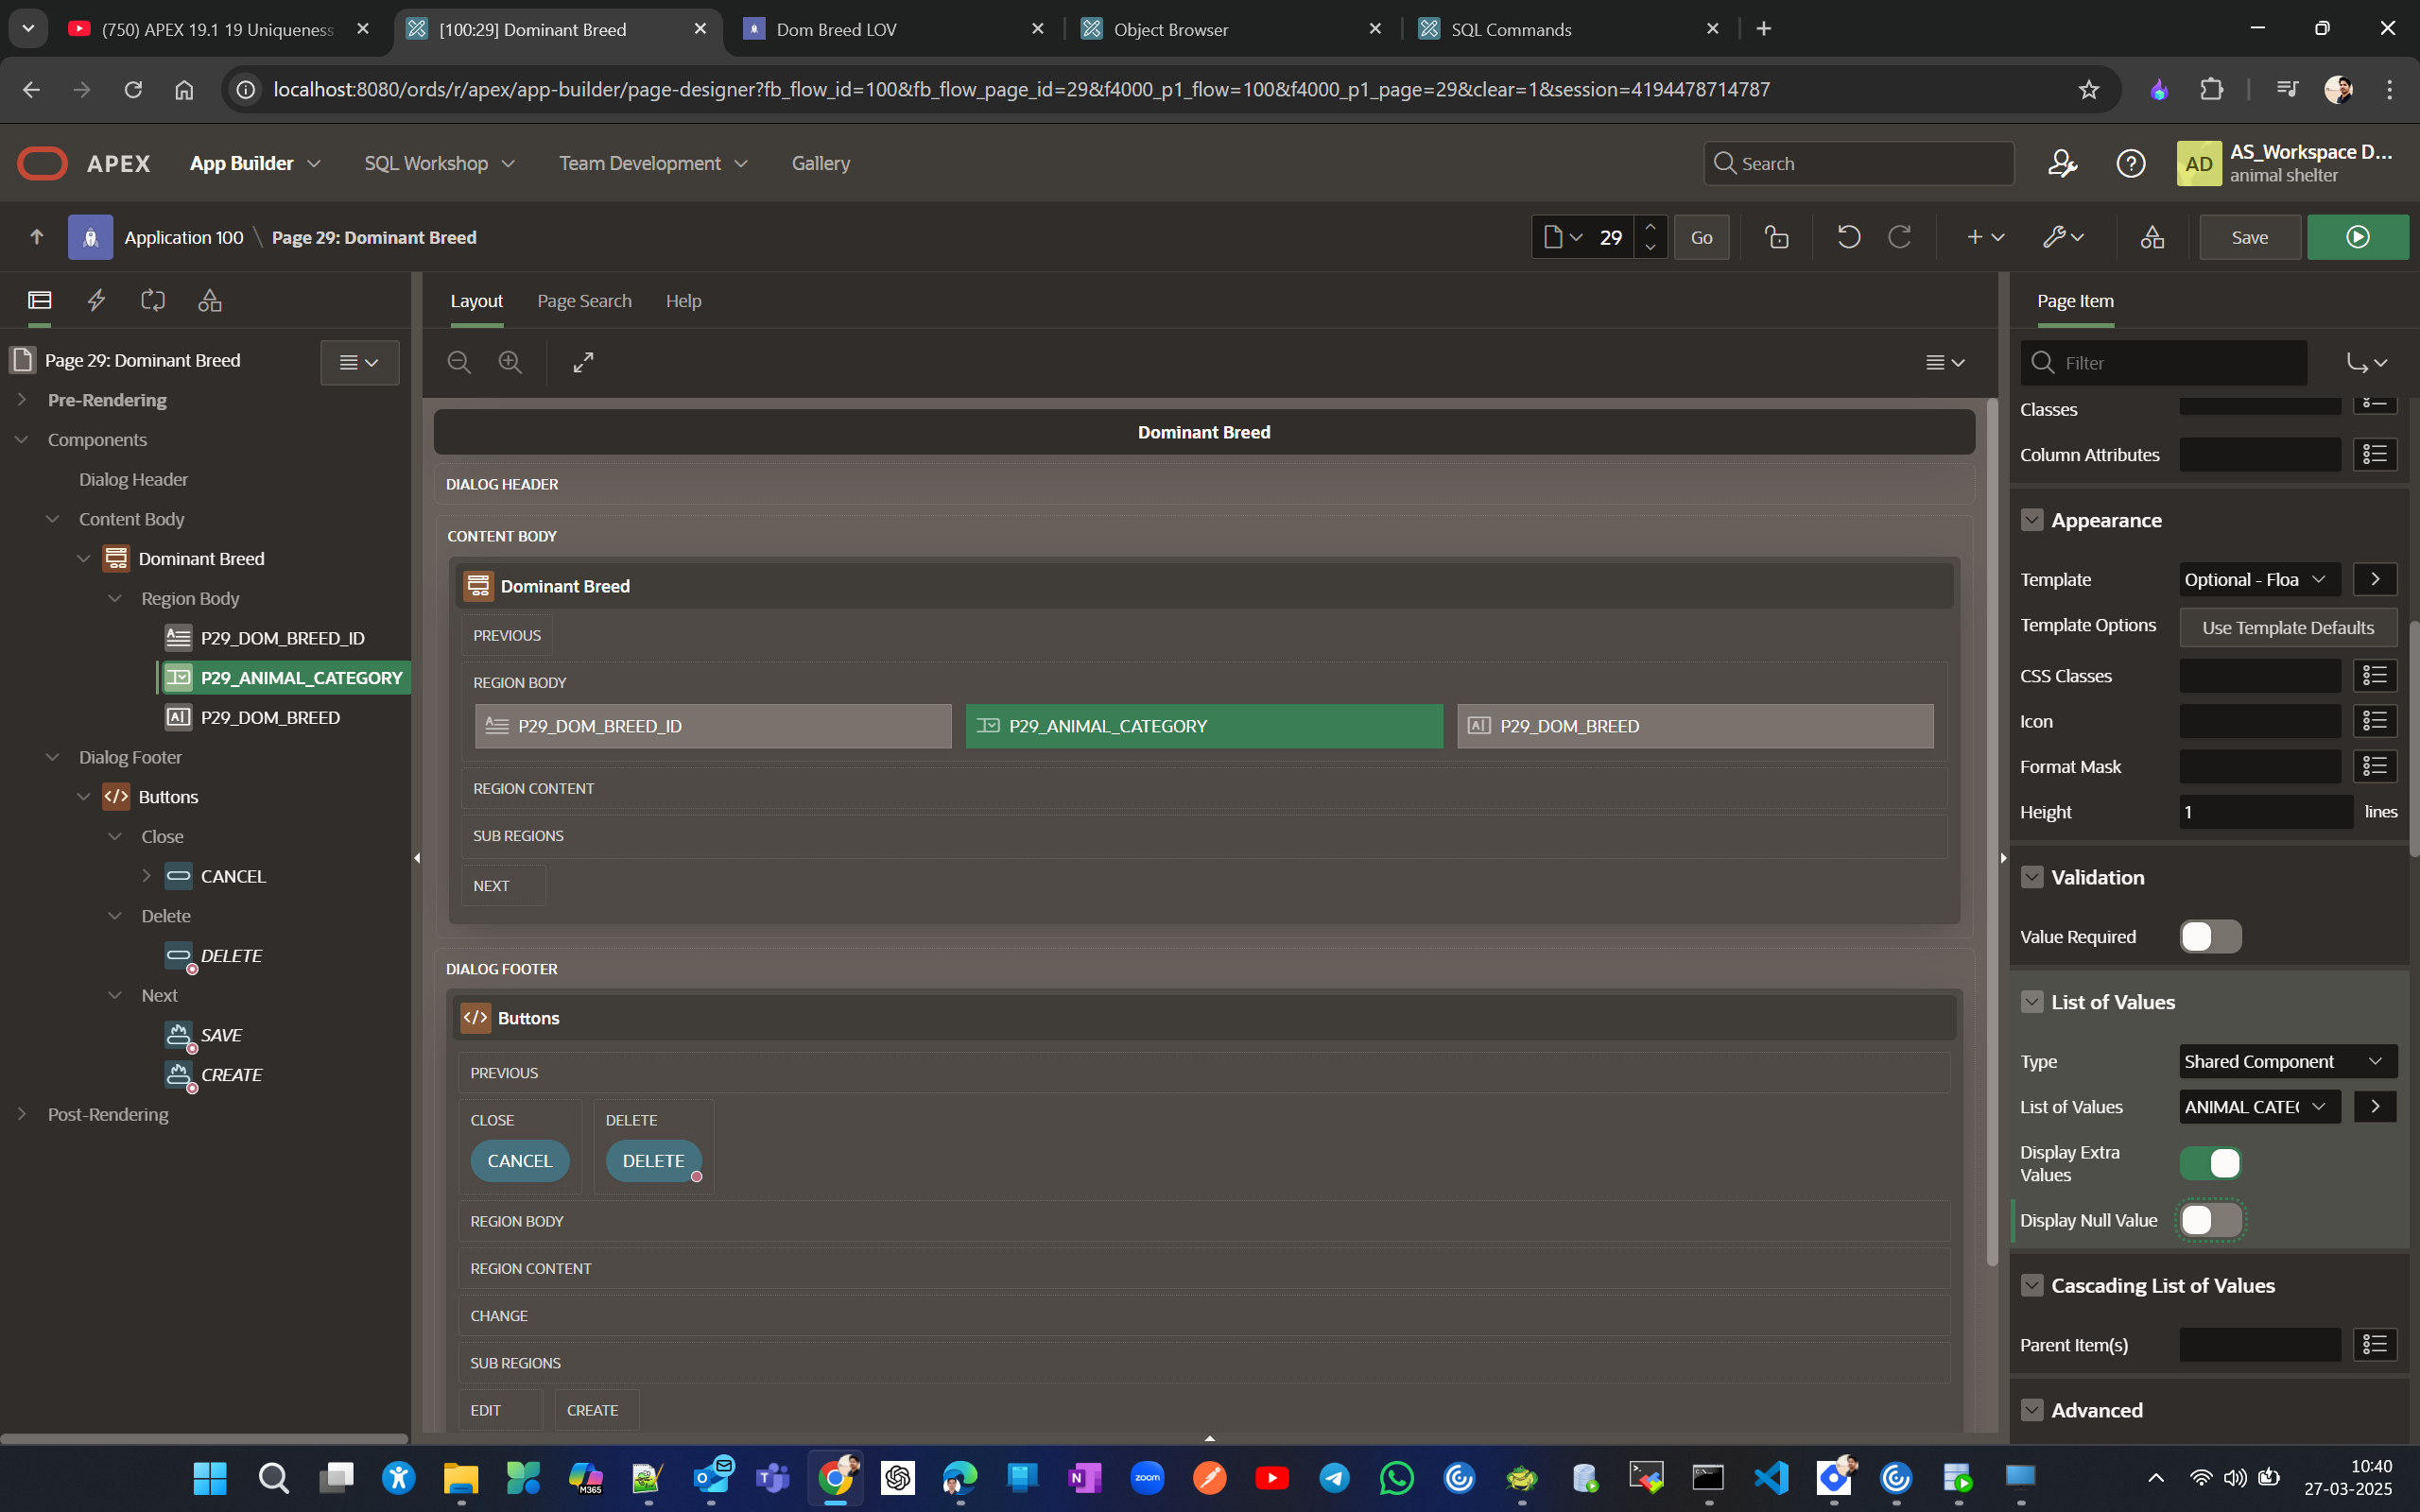
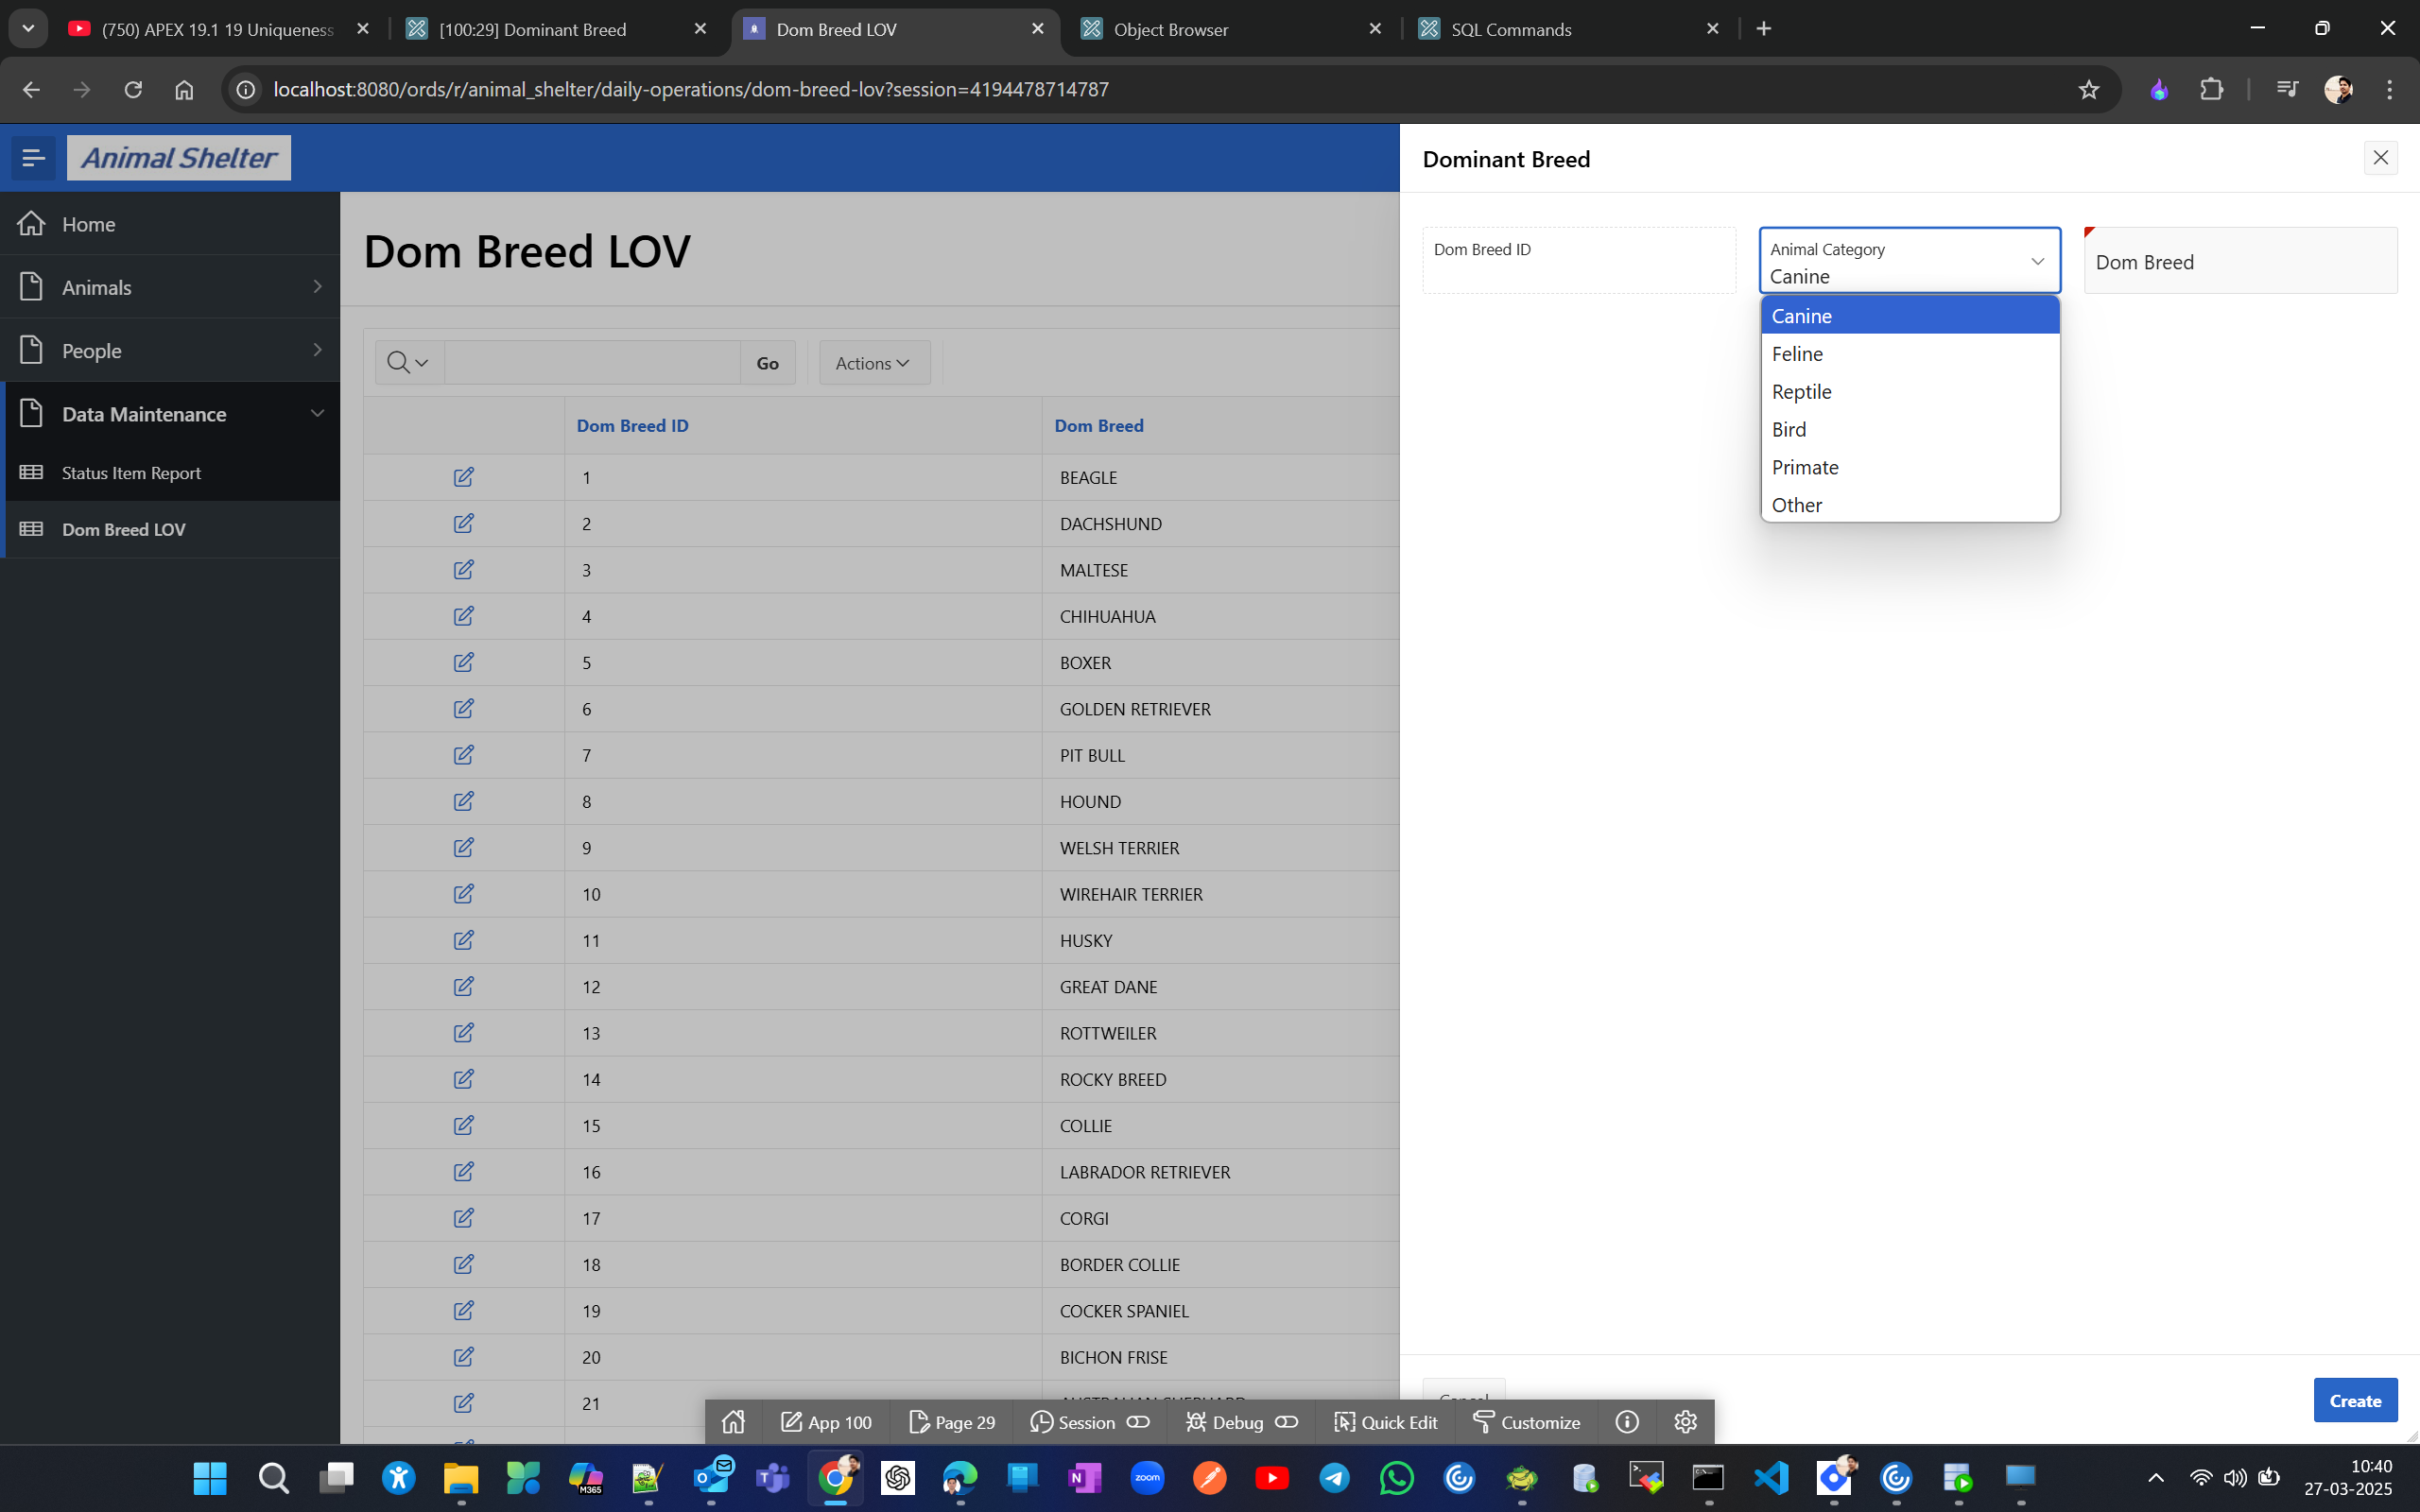
Entering the same values will cause a unique constraint violation error, but entering DOM BREED in lowercase will succeed incorrectly; to fix this, change the animal category to a select list and source it from the animal category LOV you created.
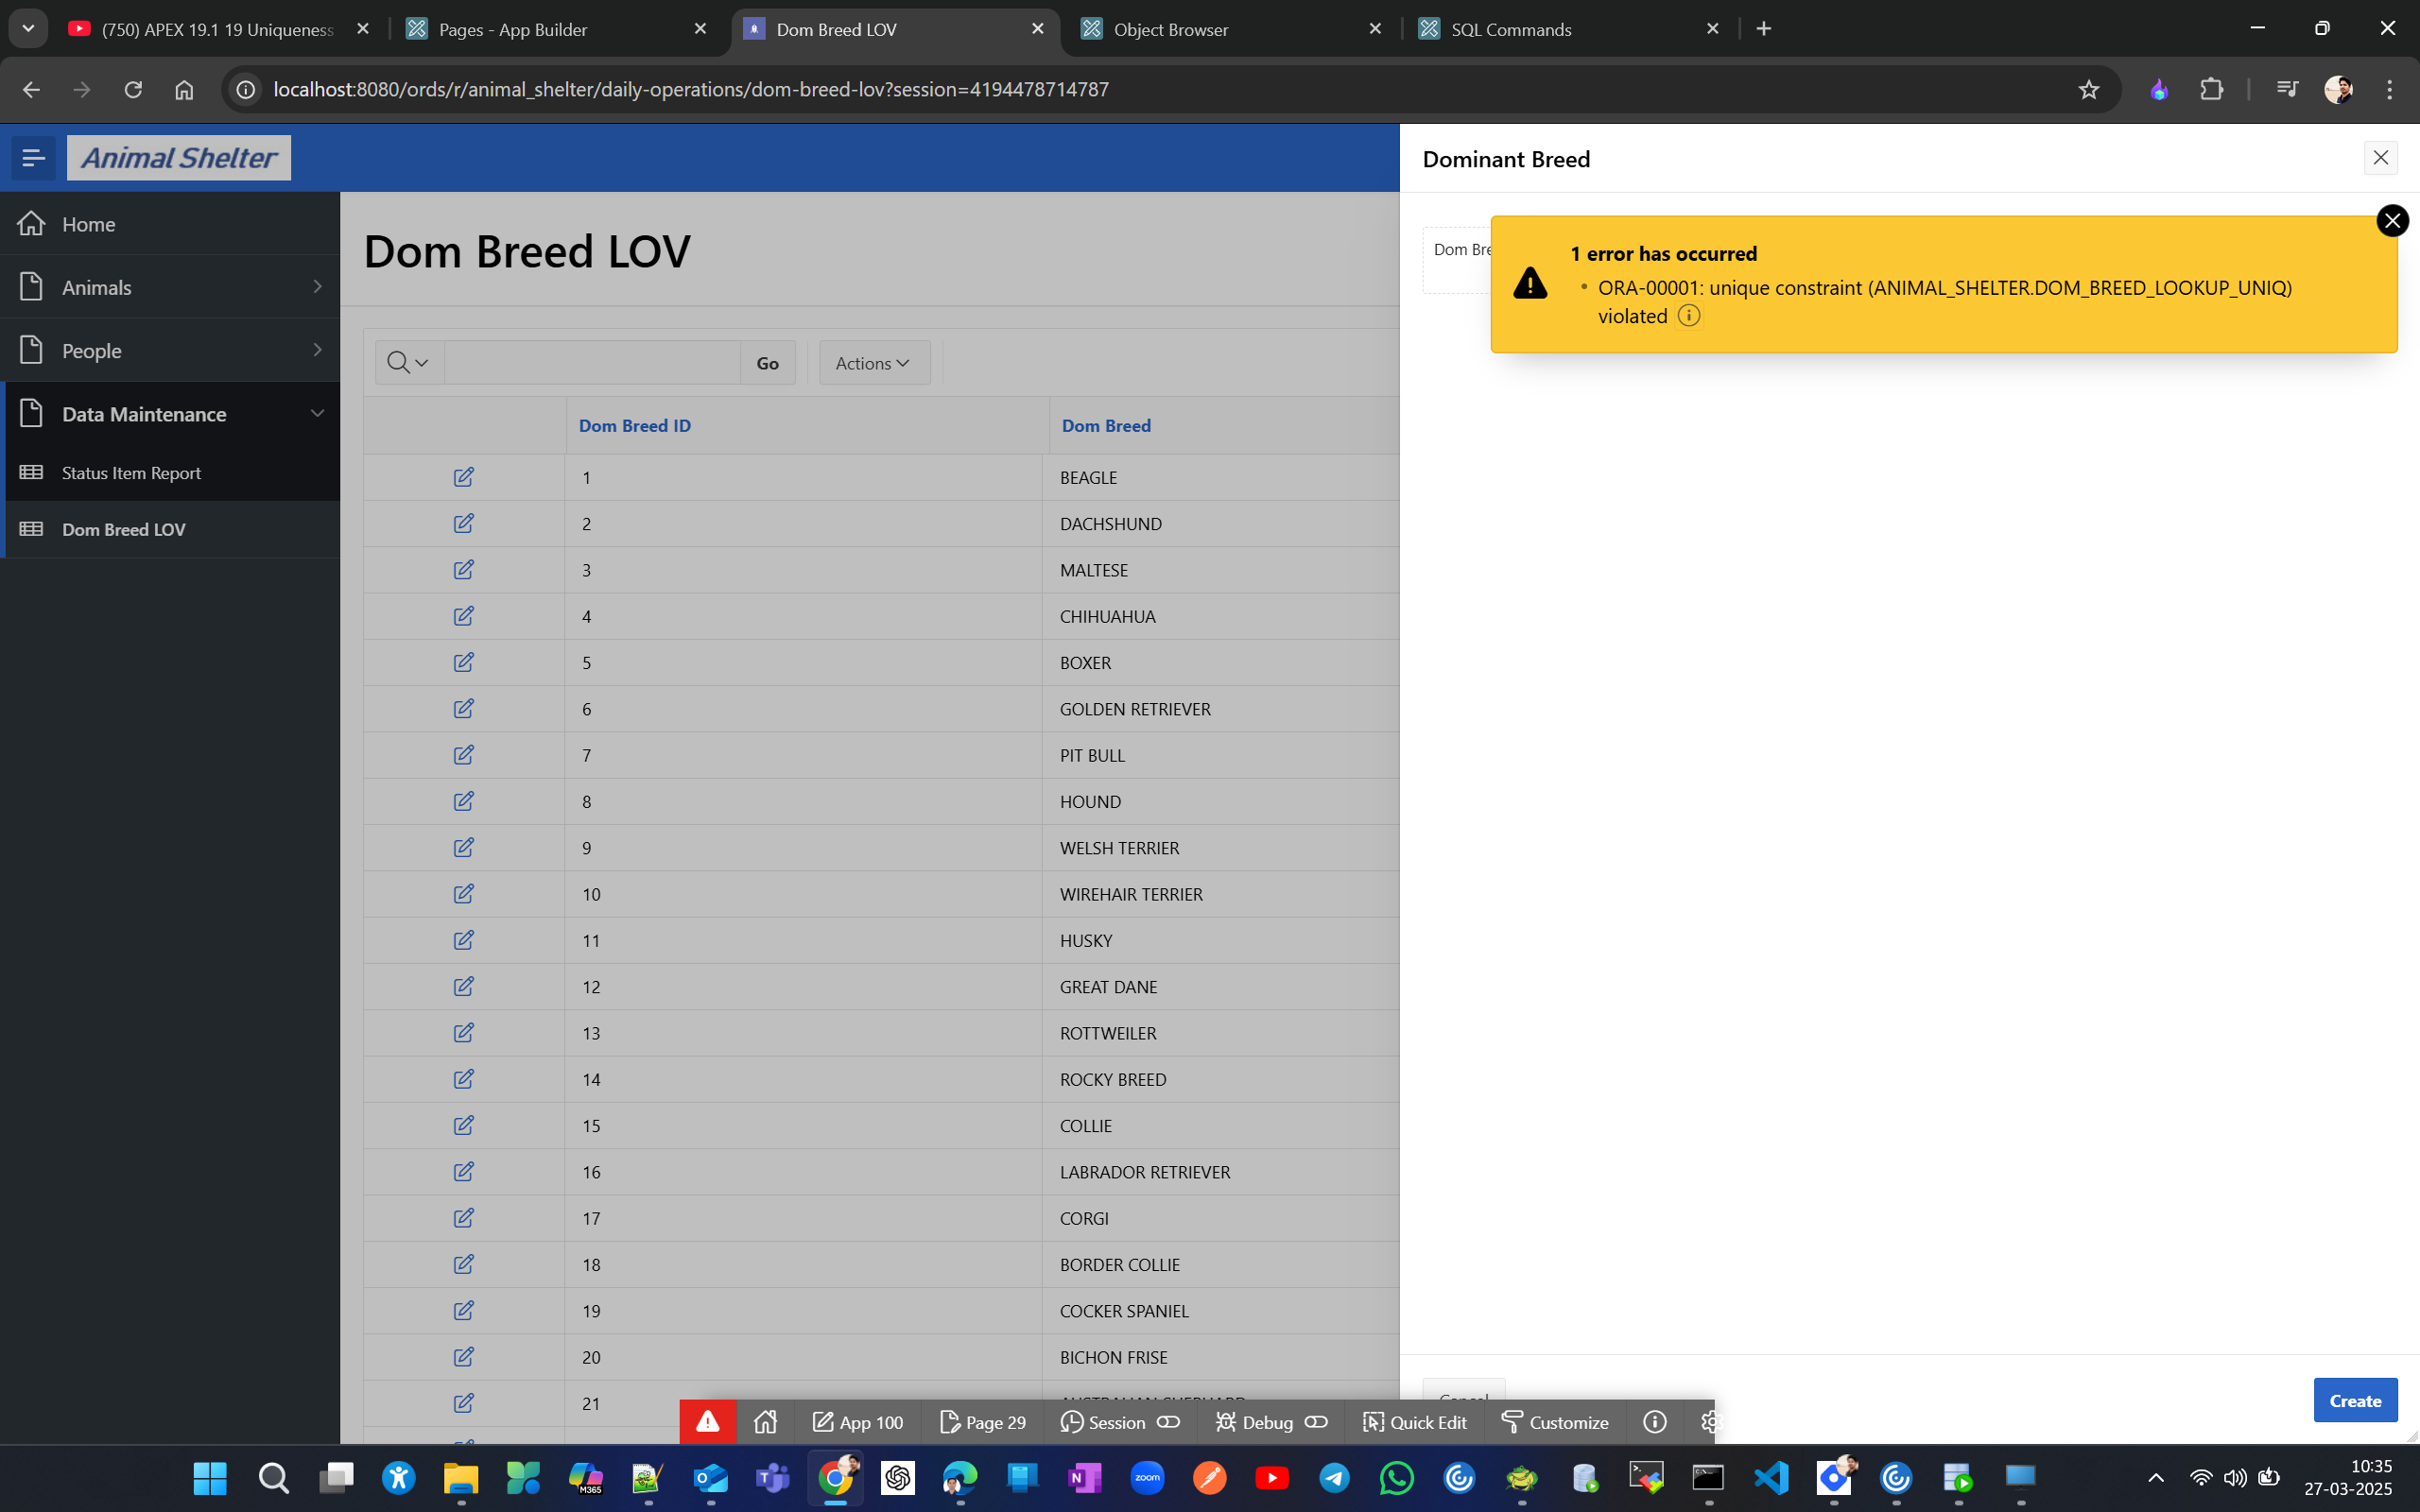
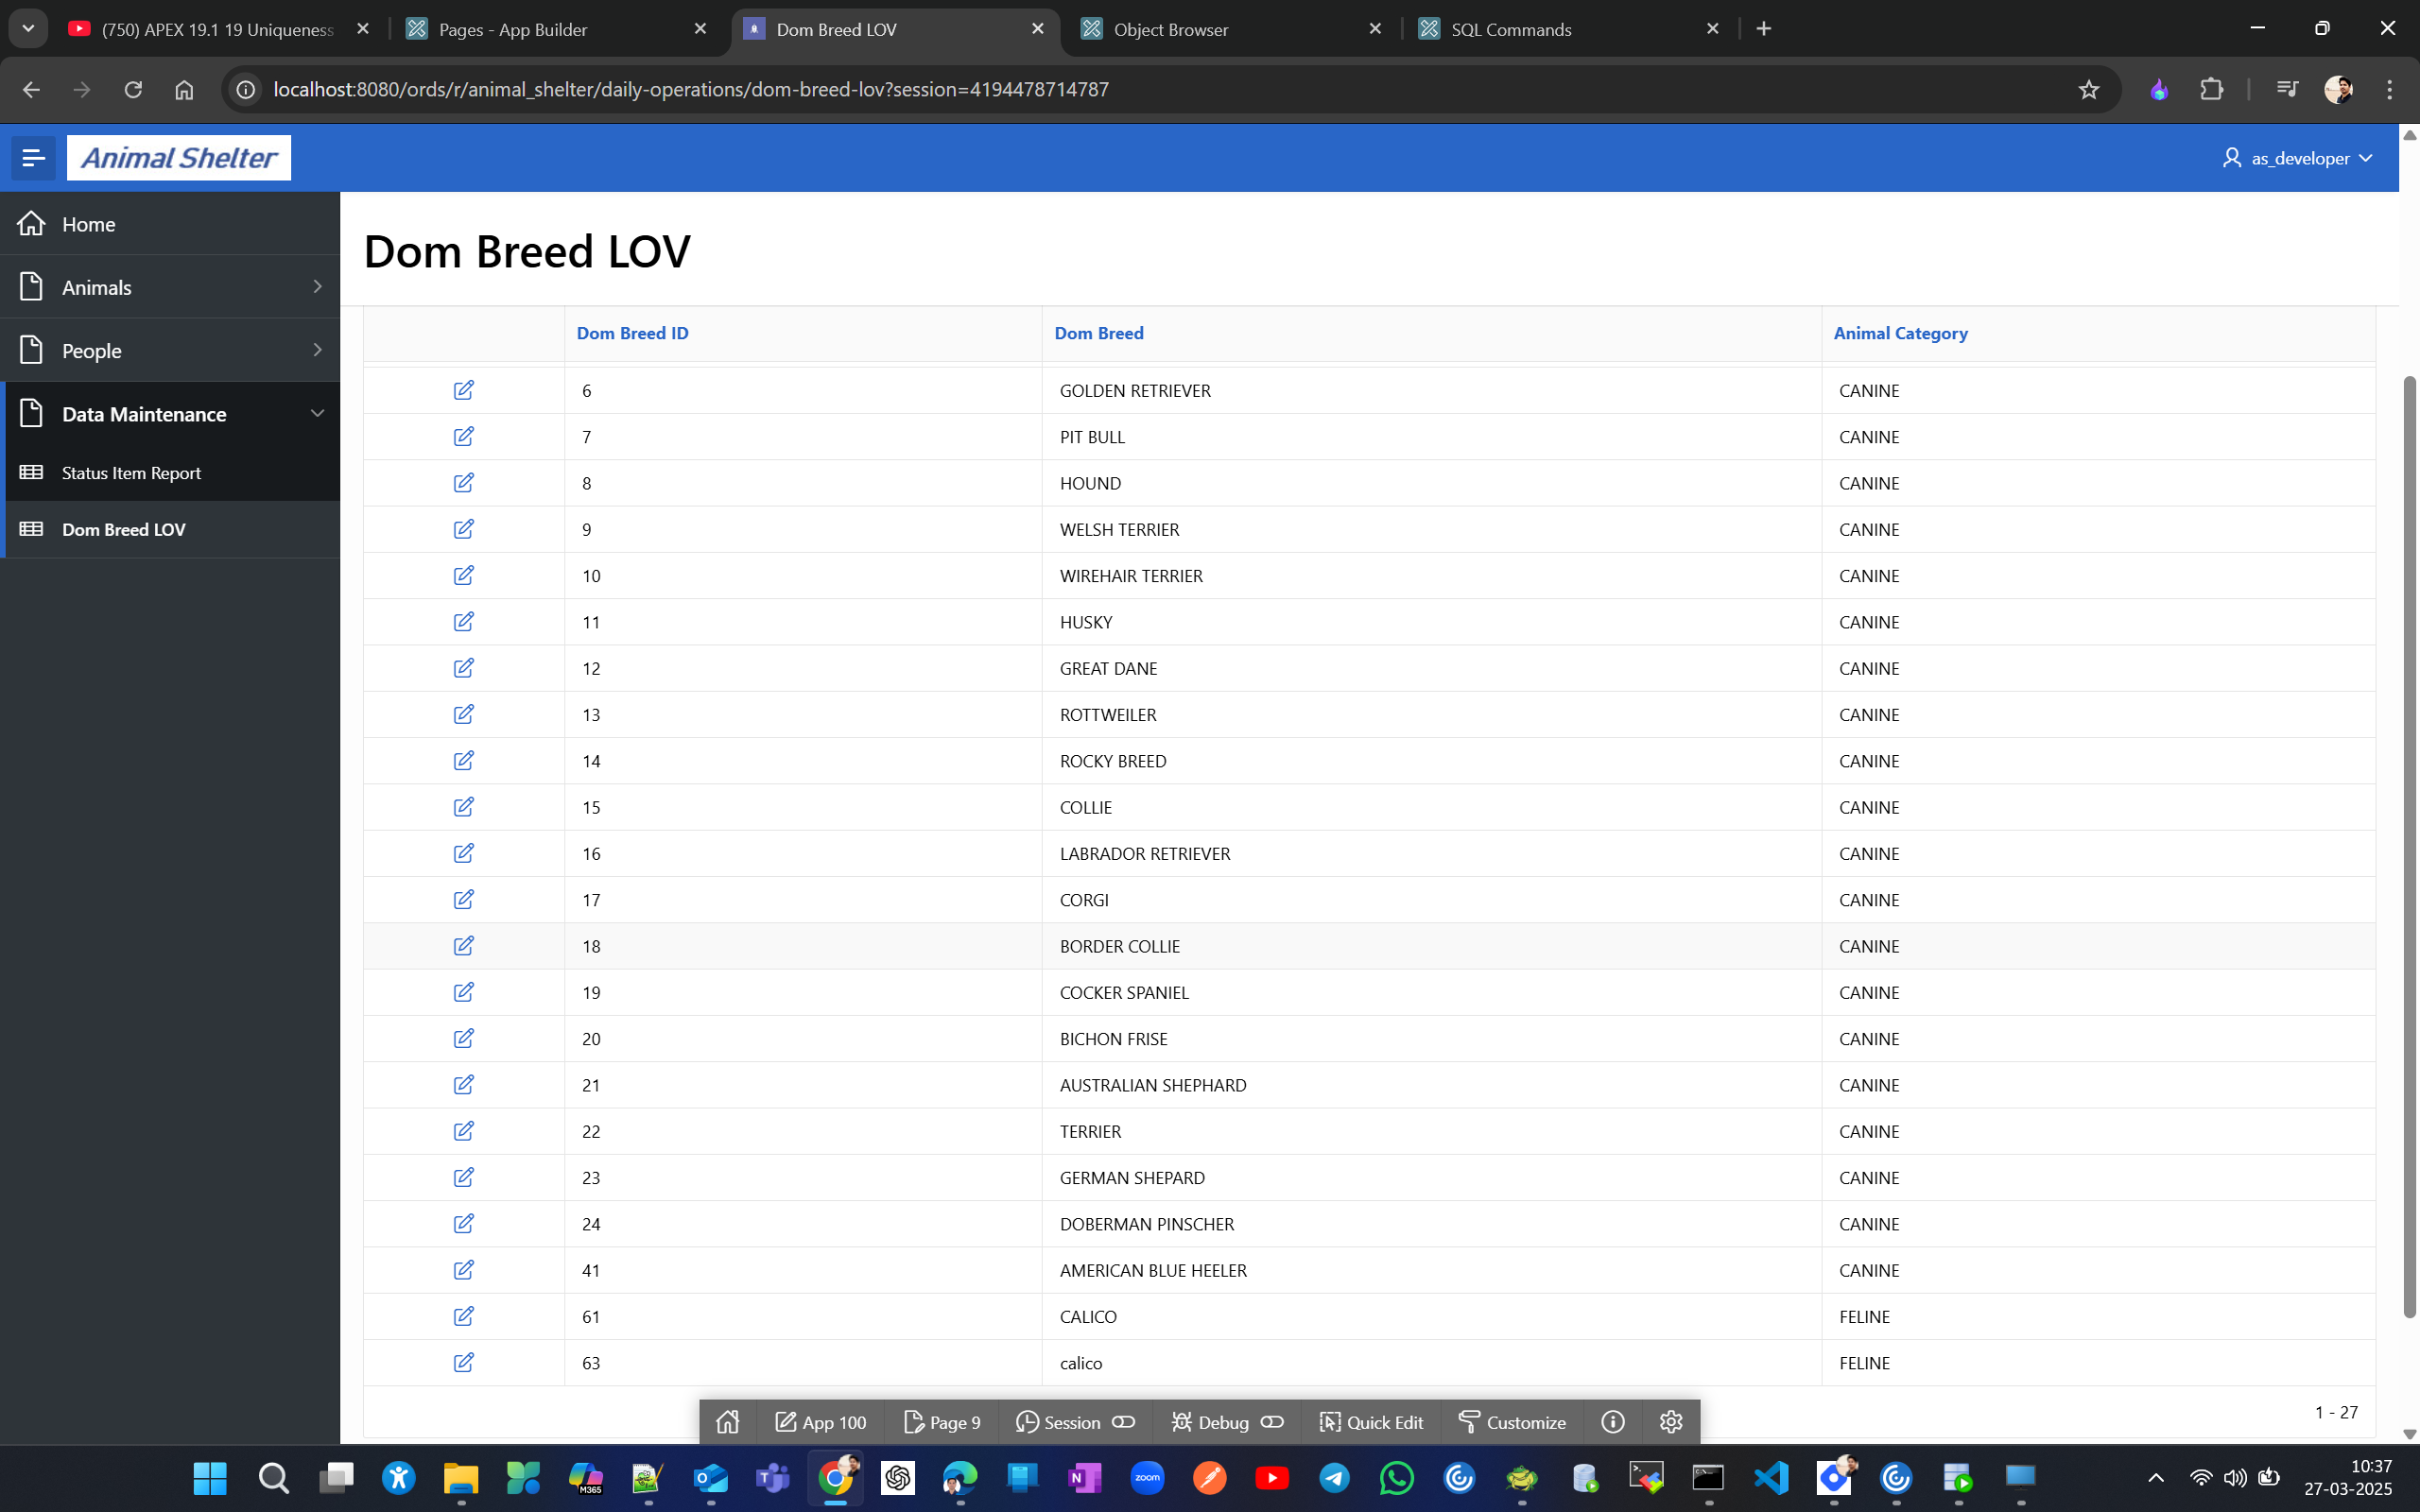
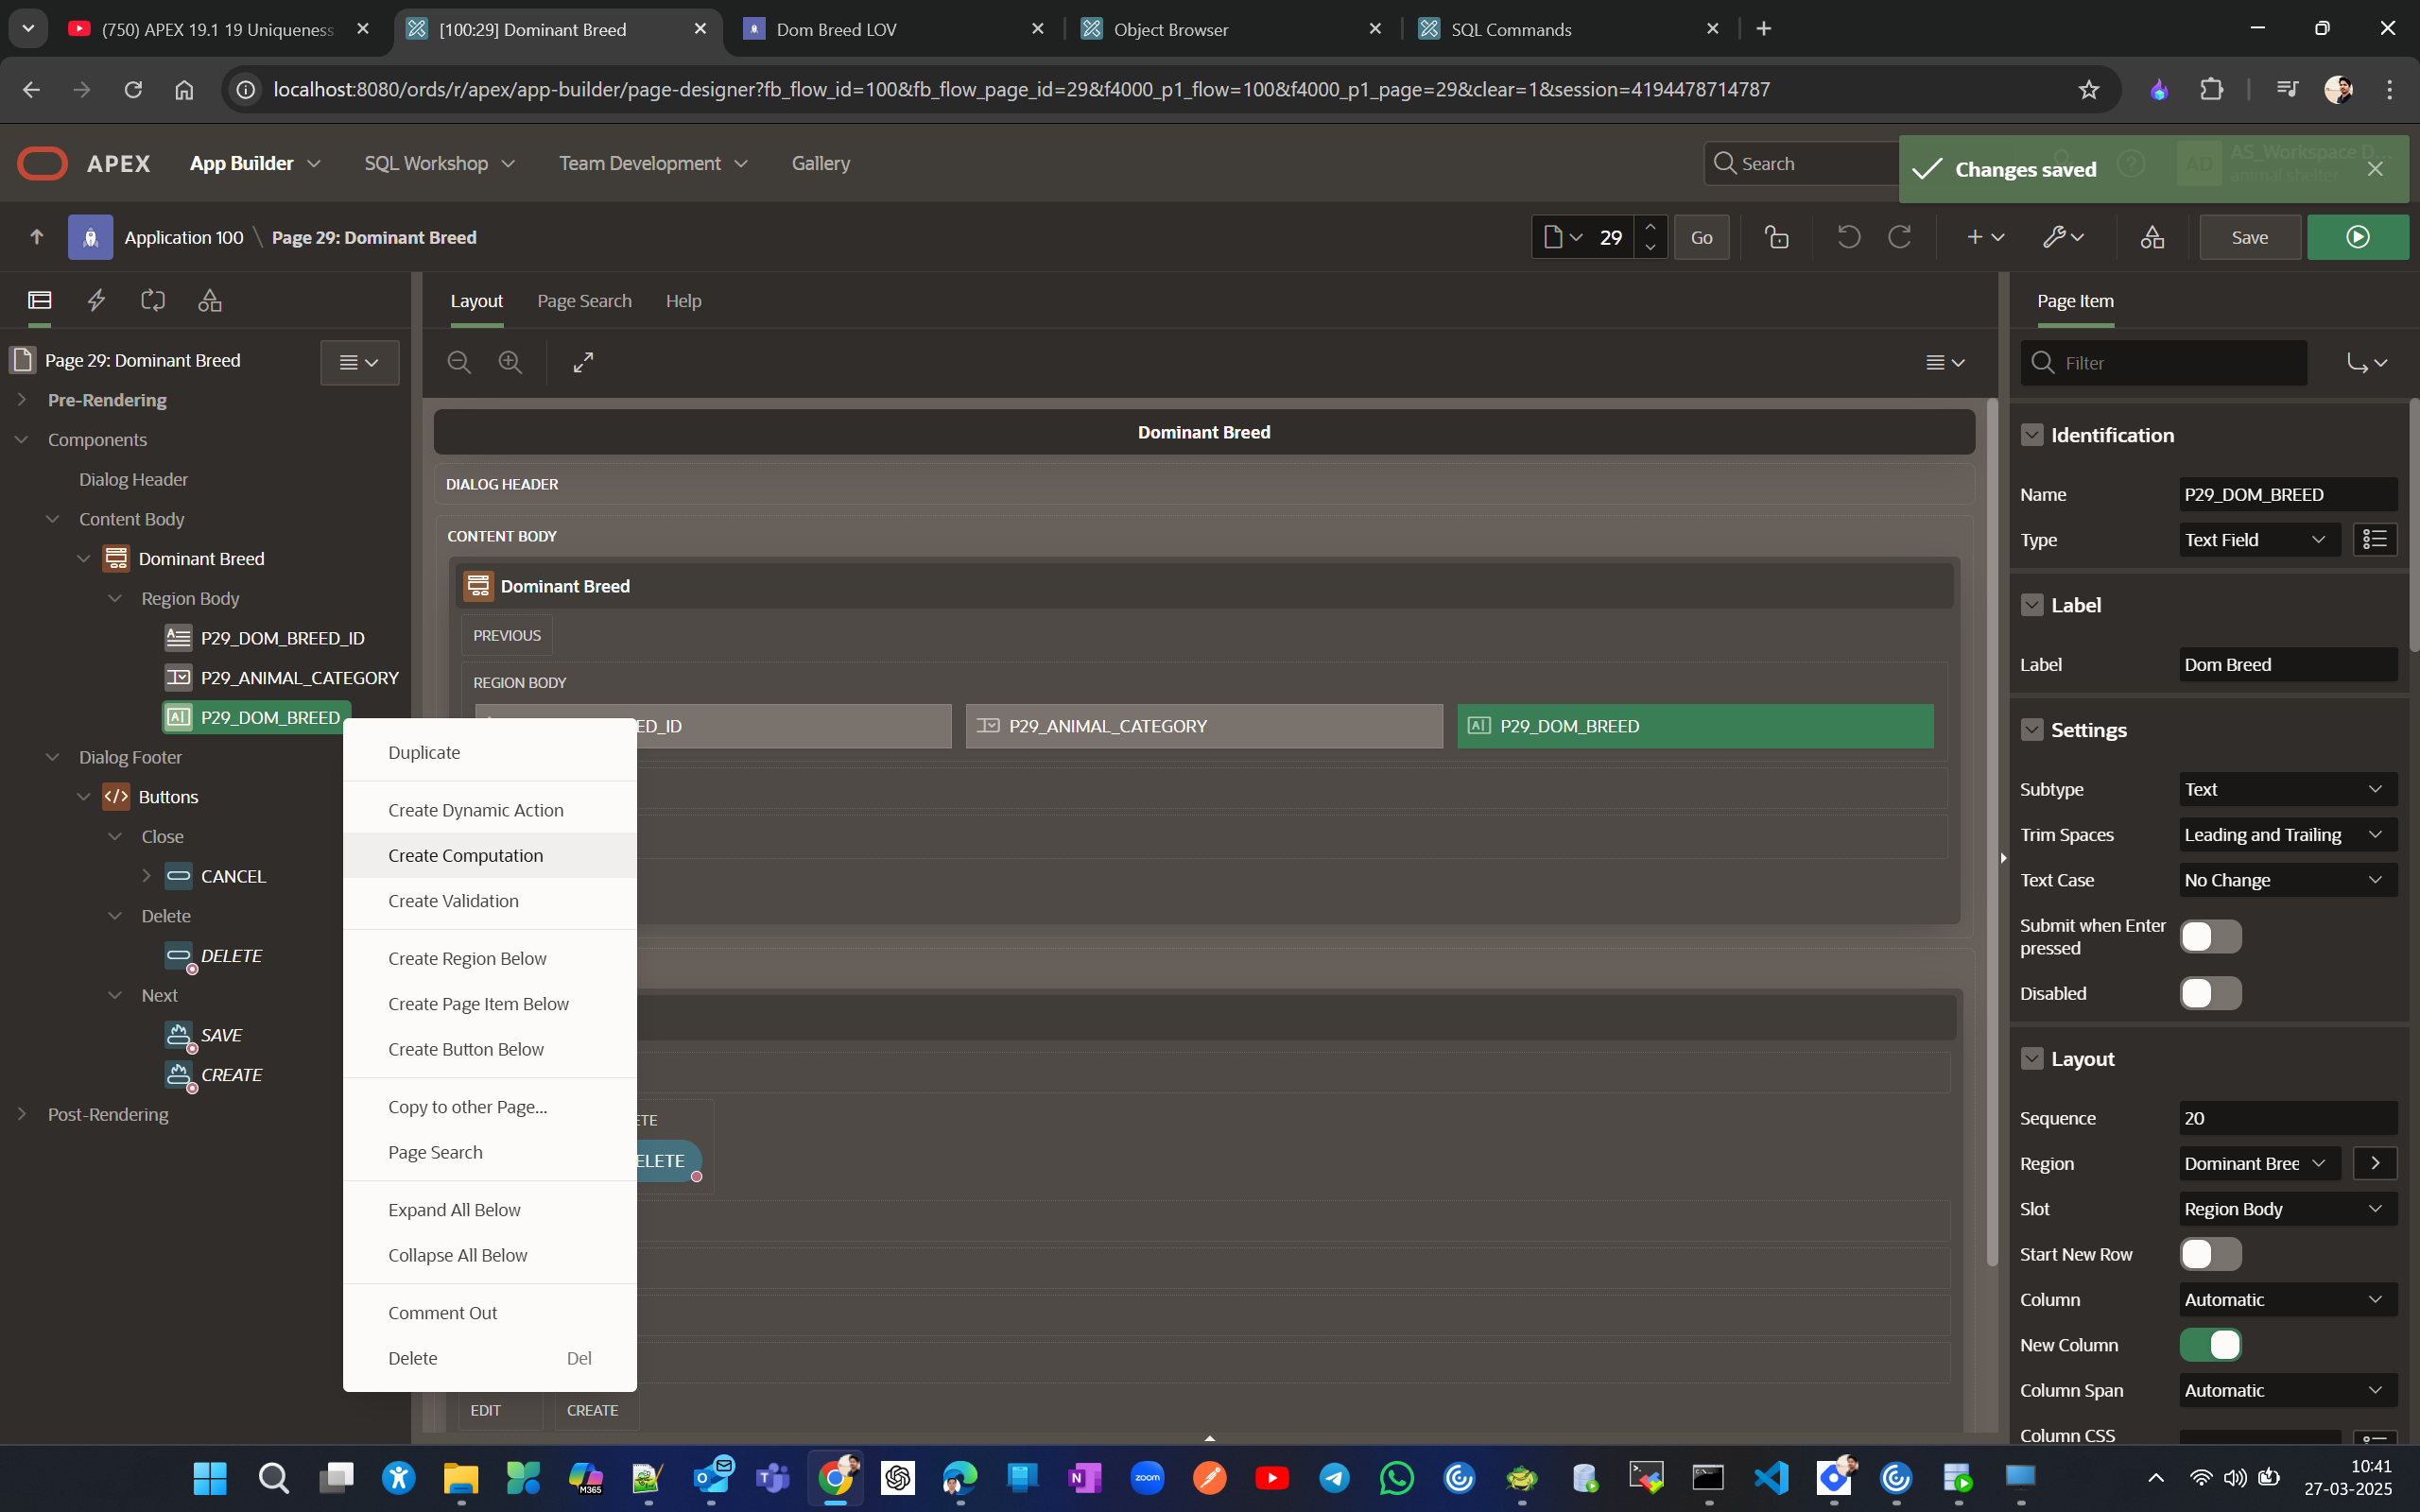
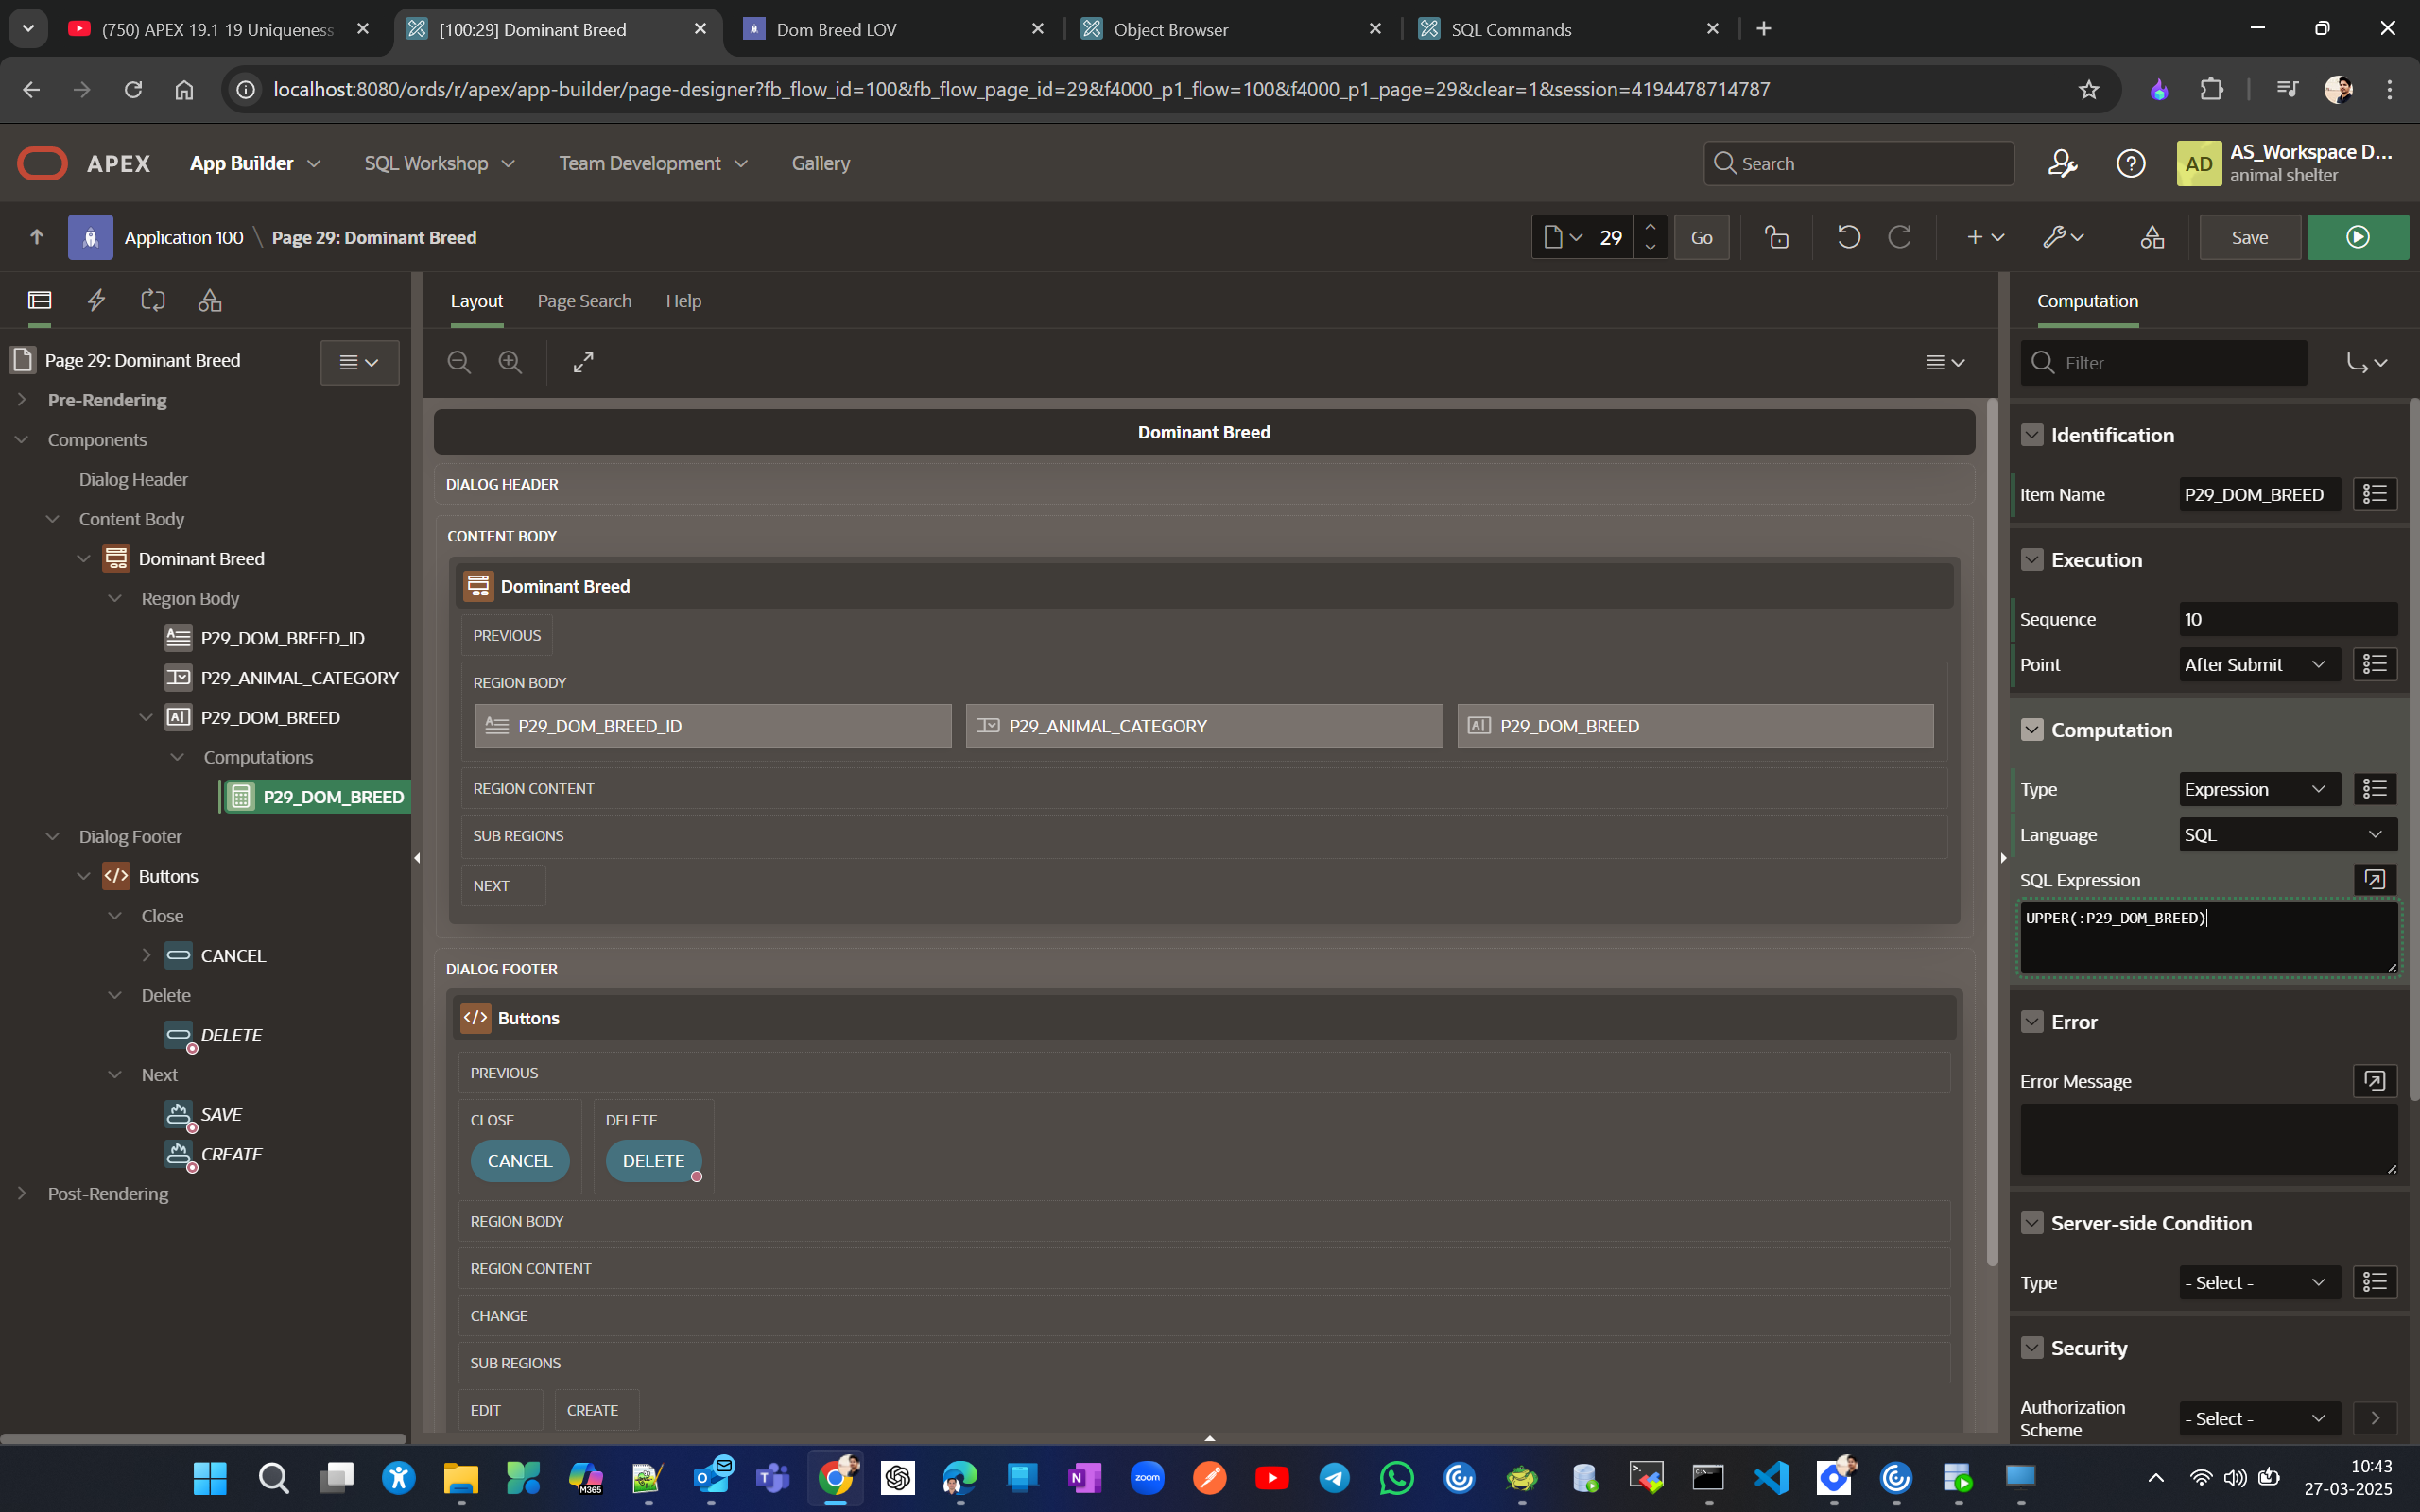
For DOM BREED lets create a computation
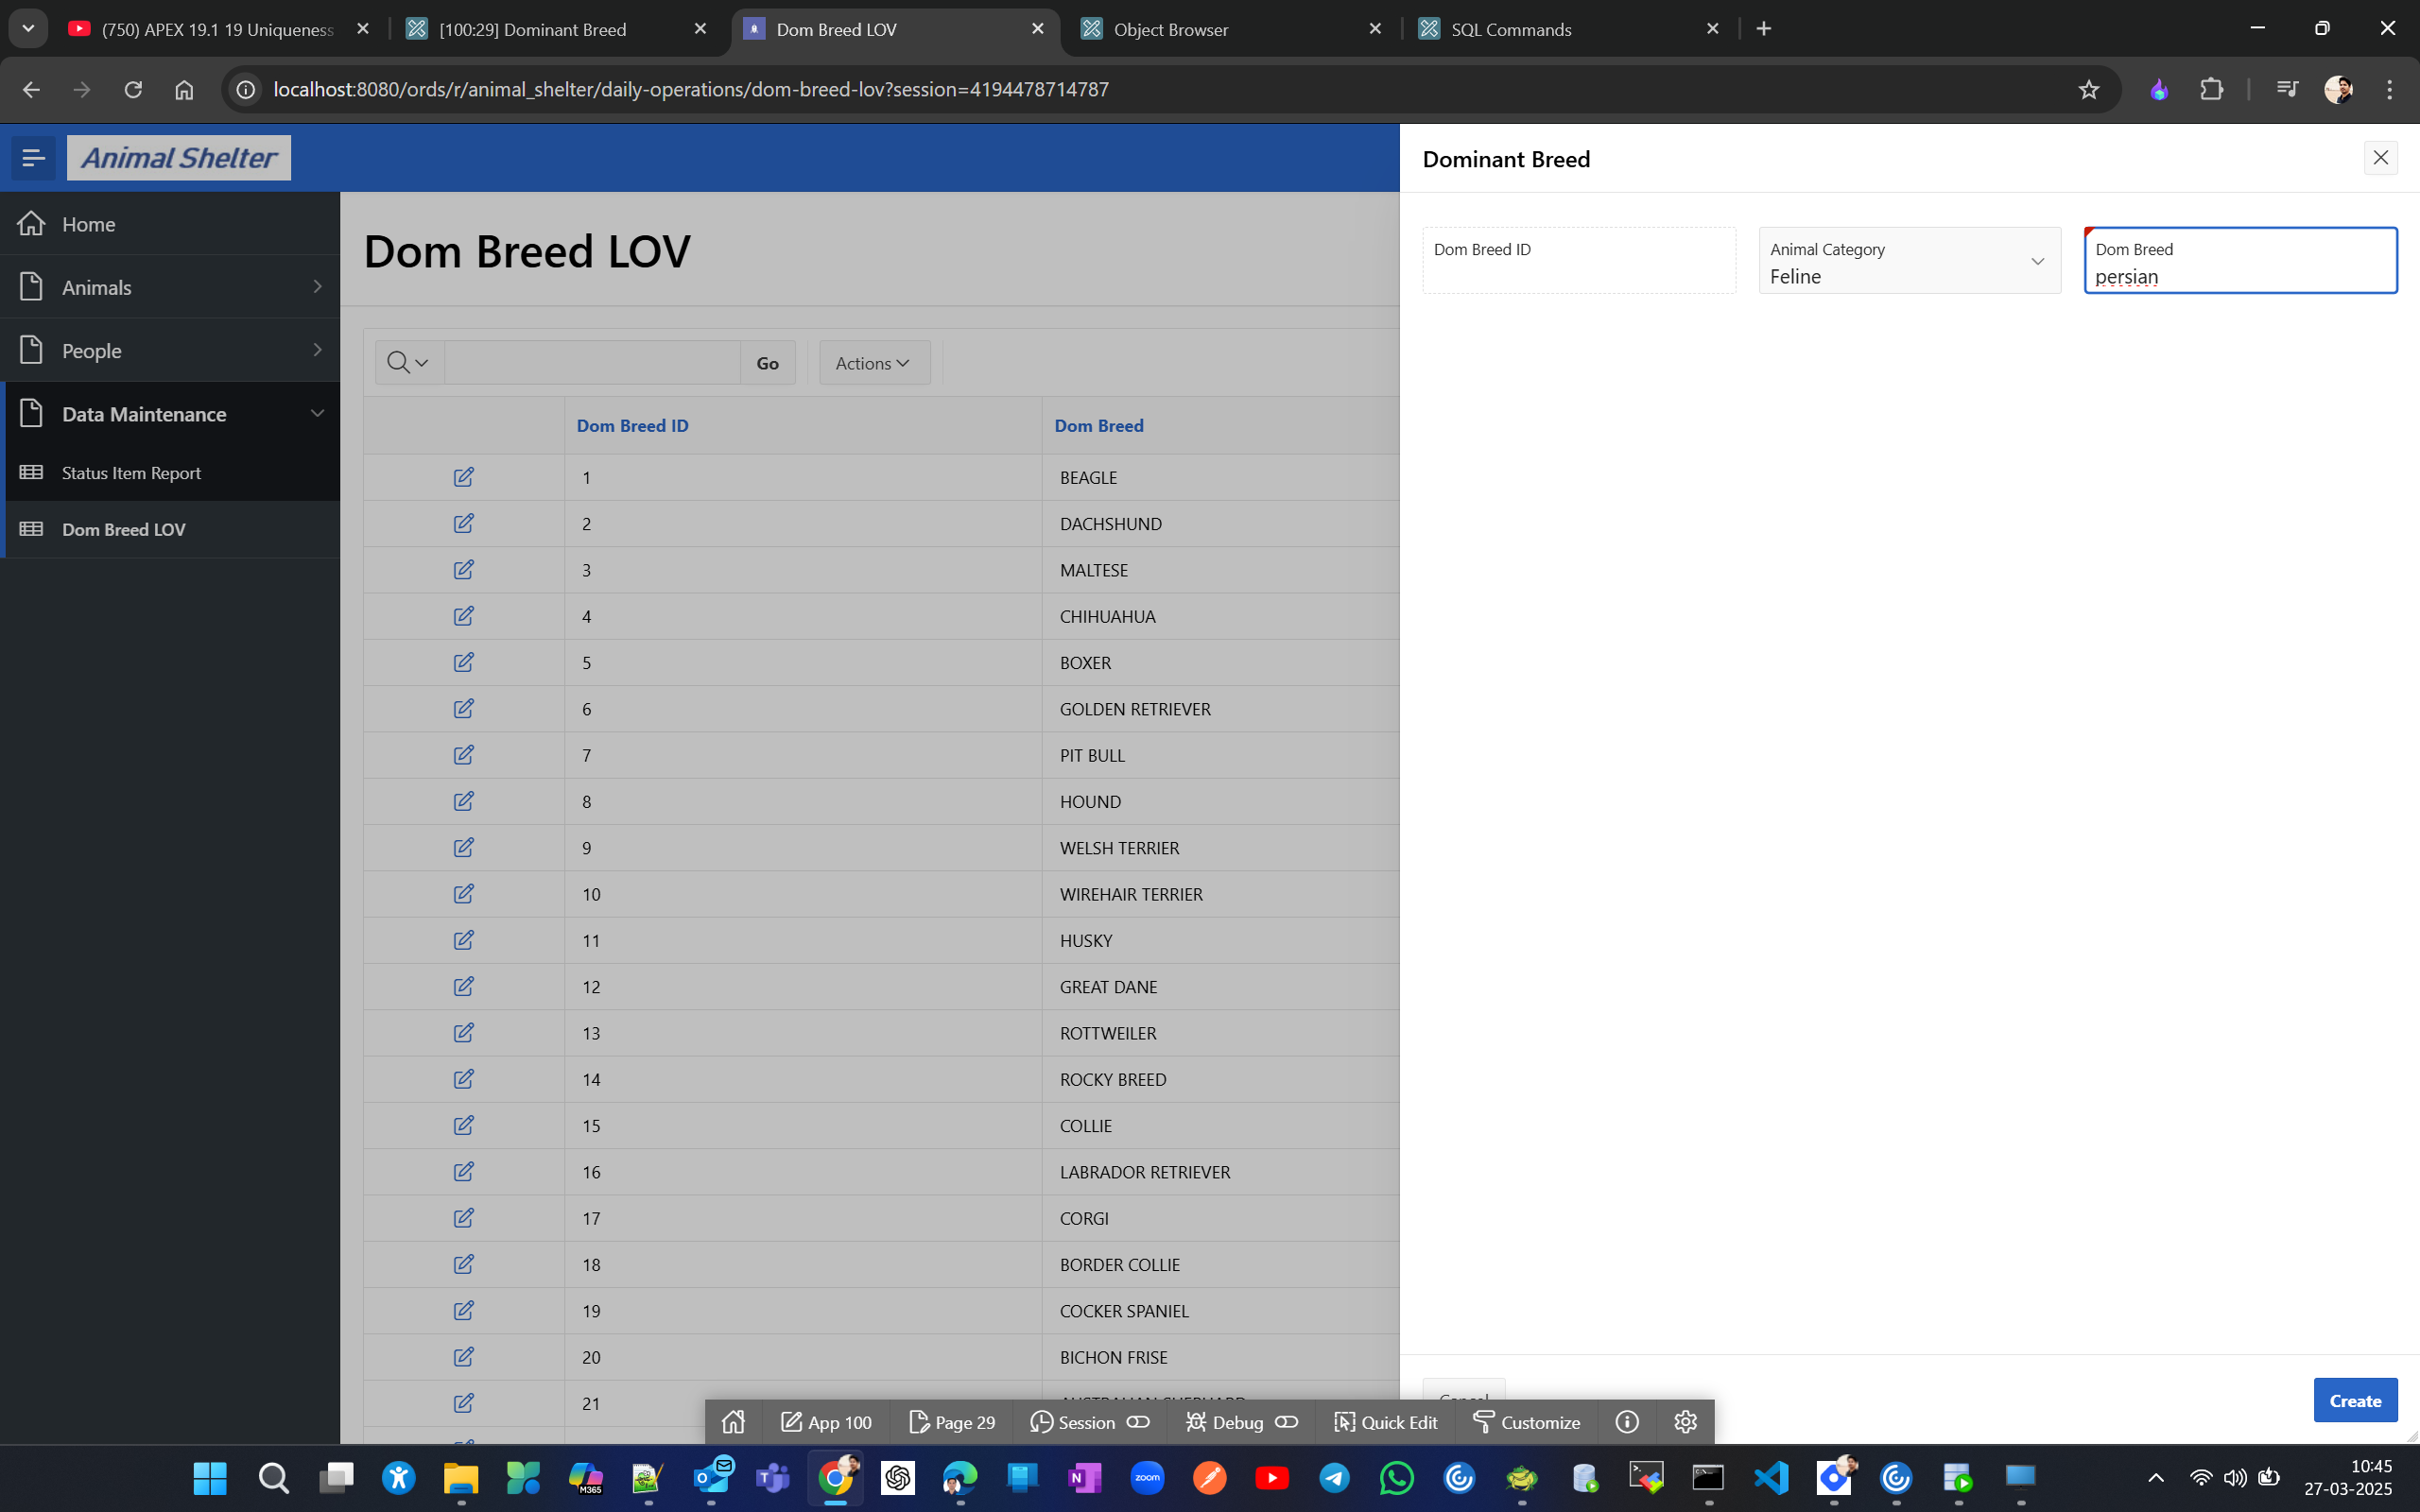
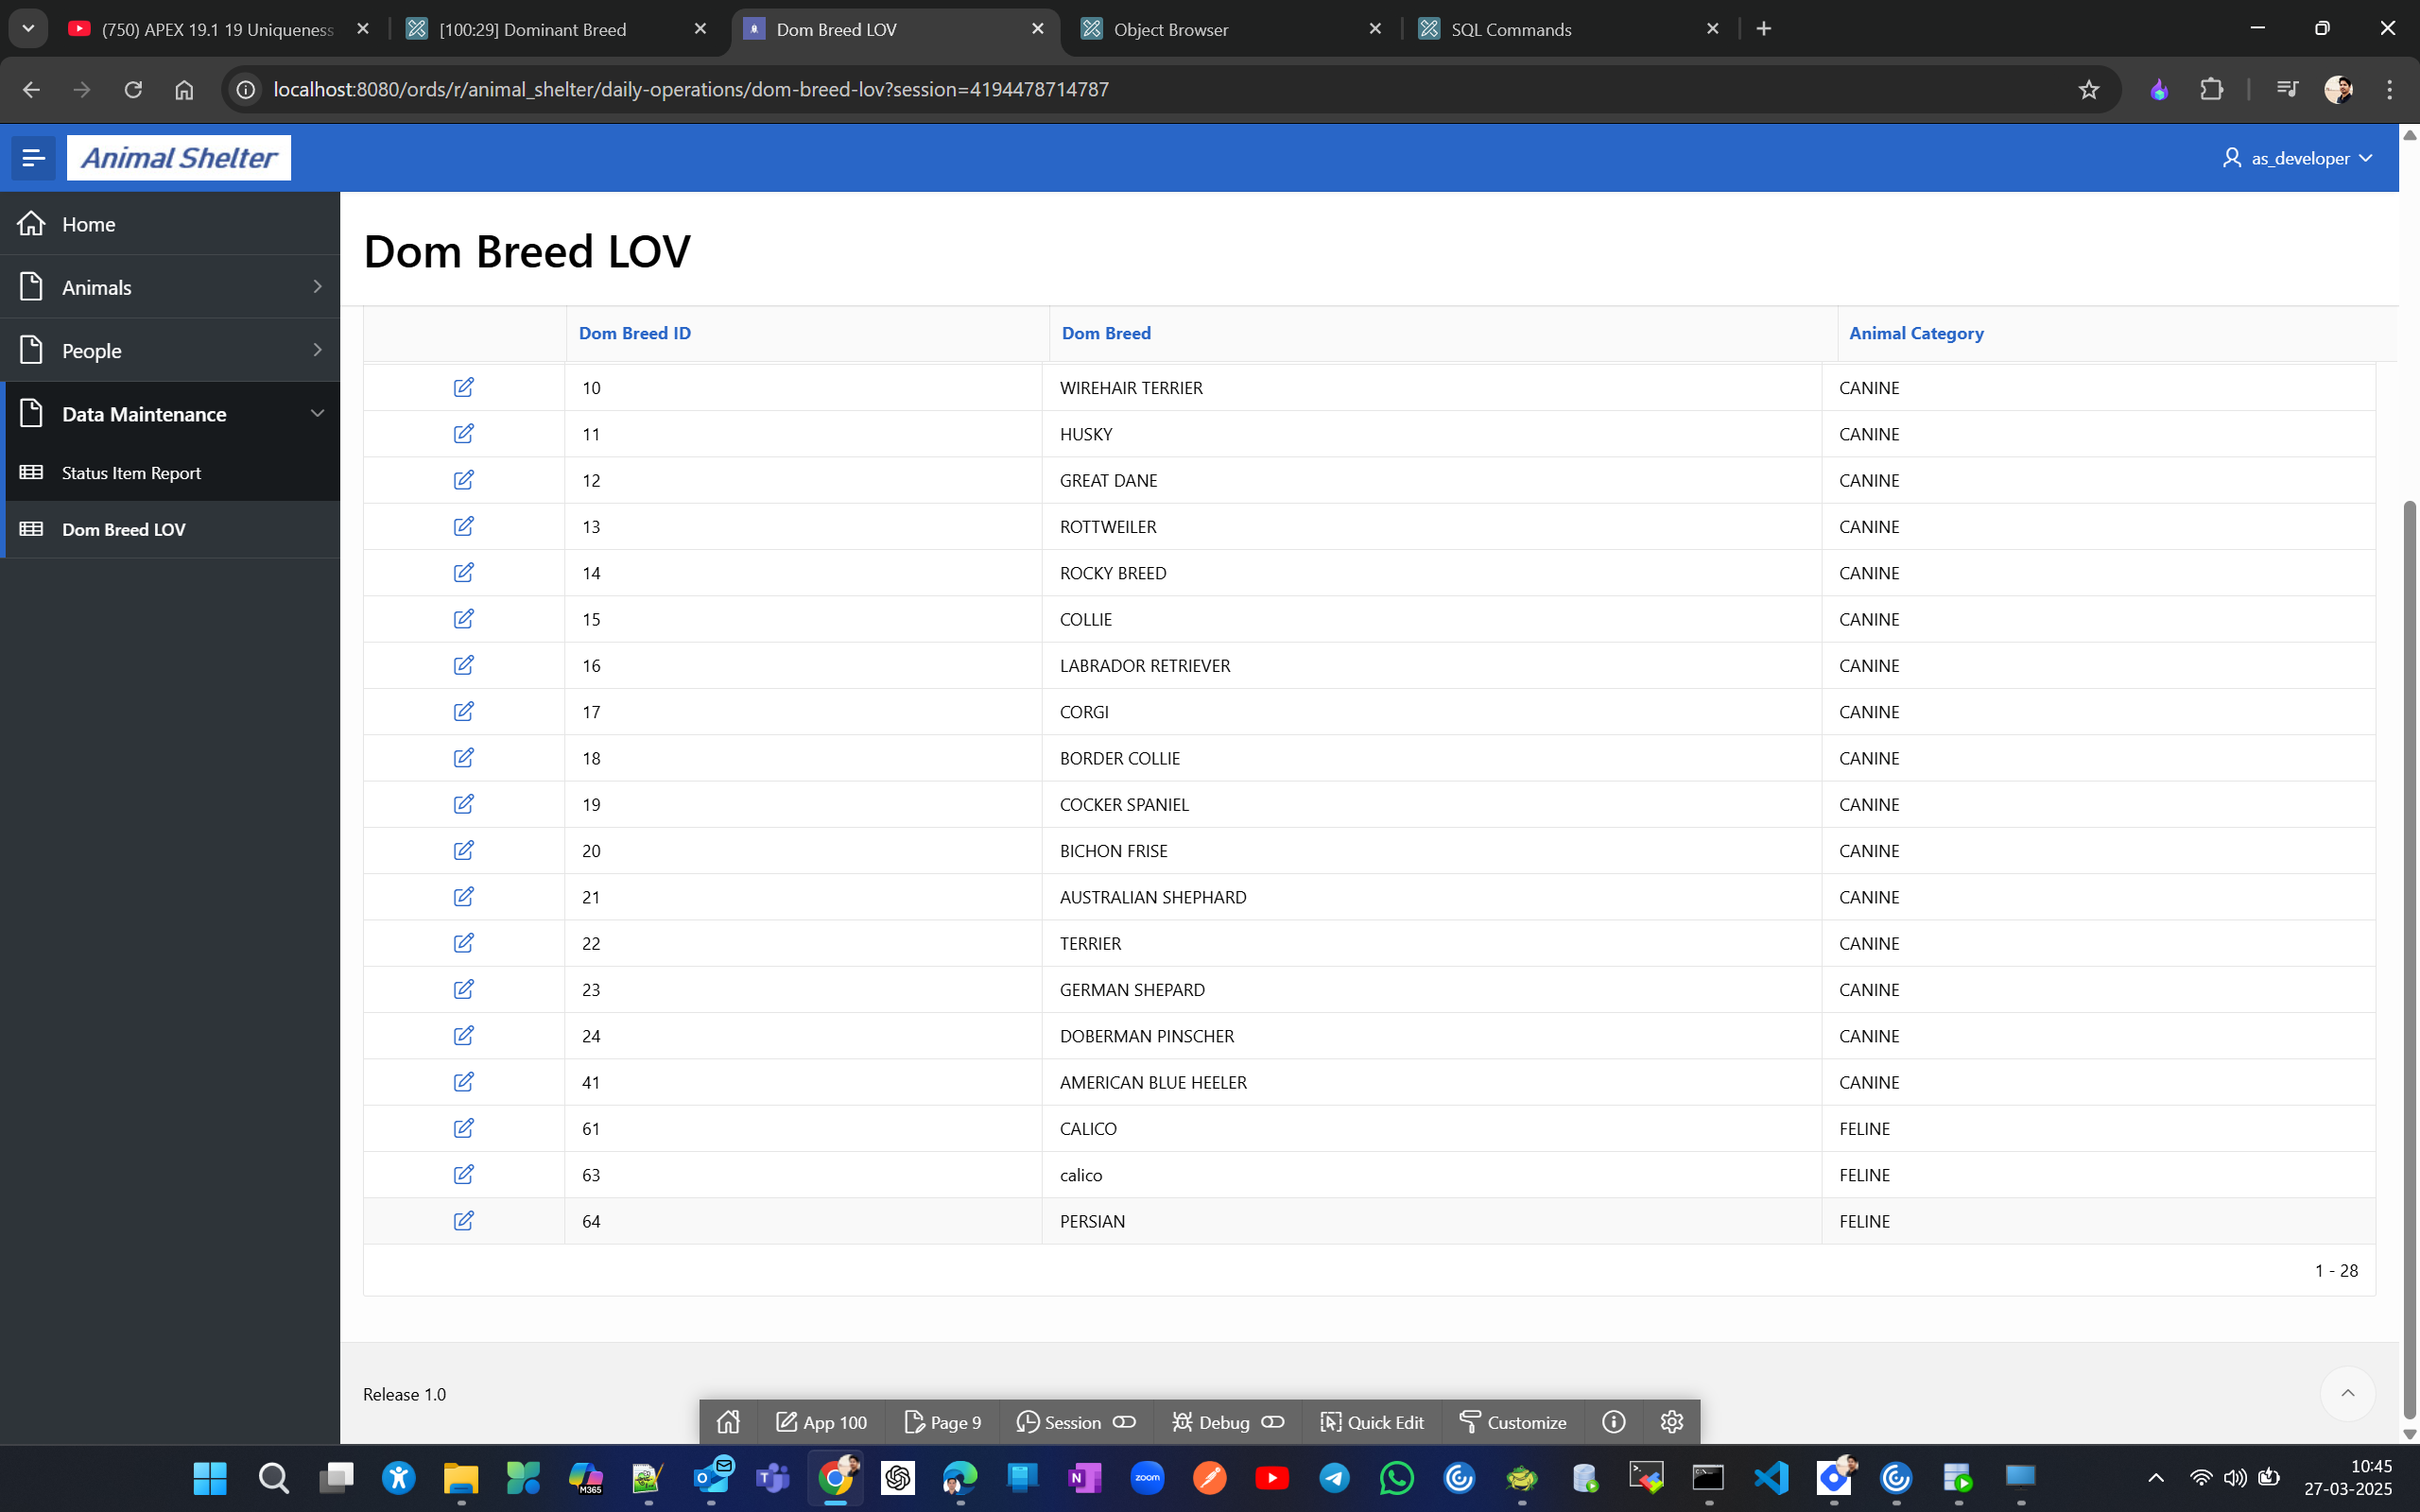
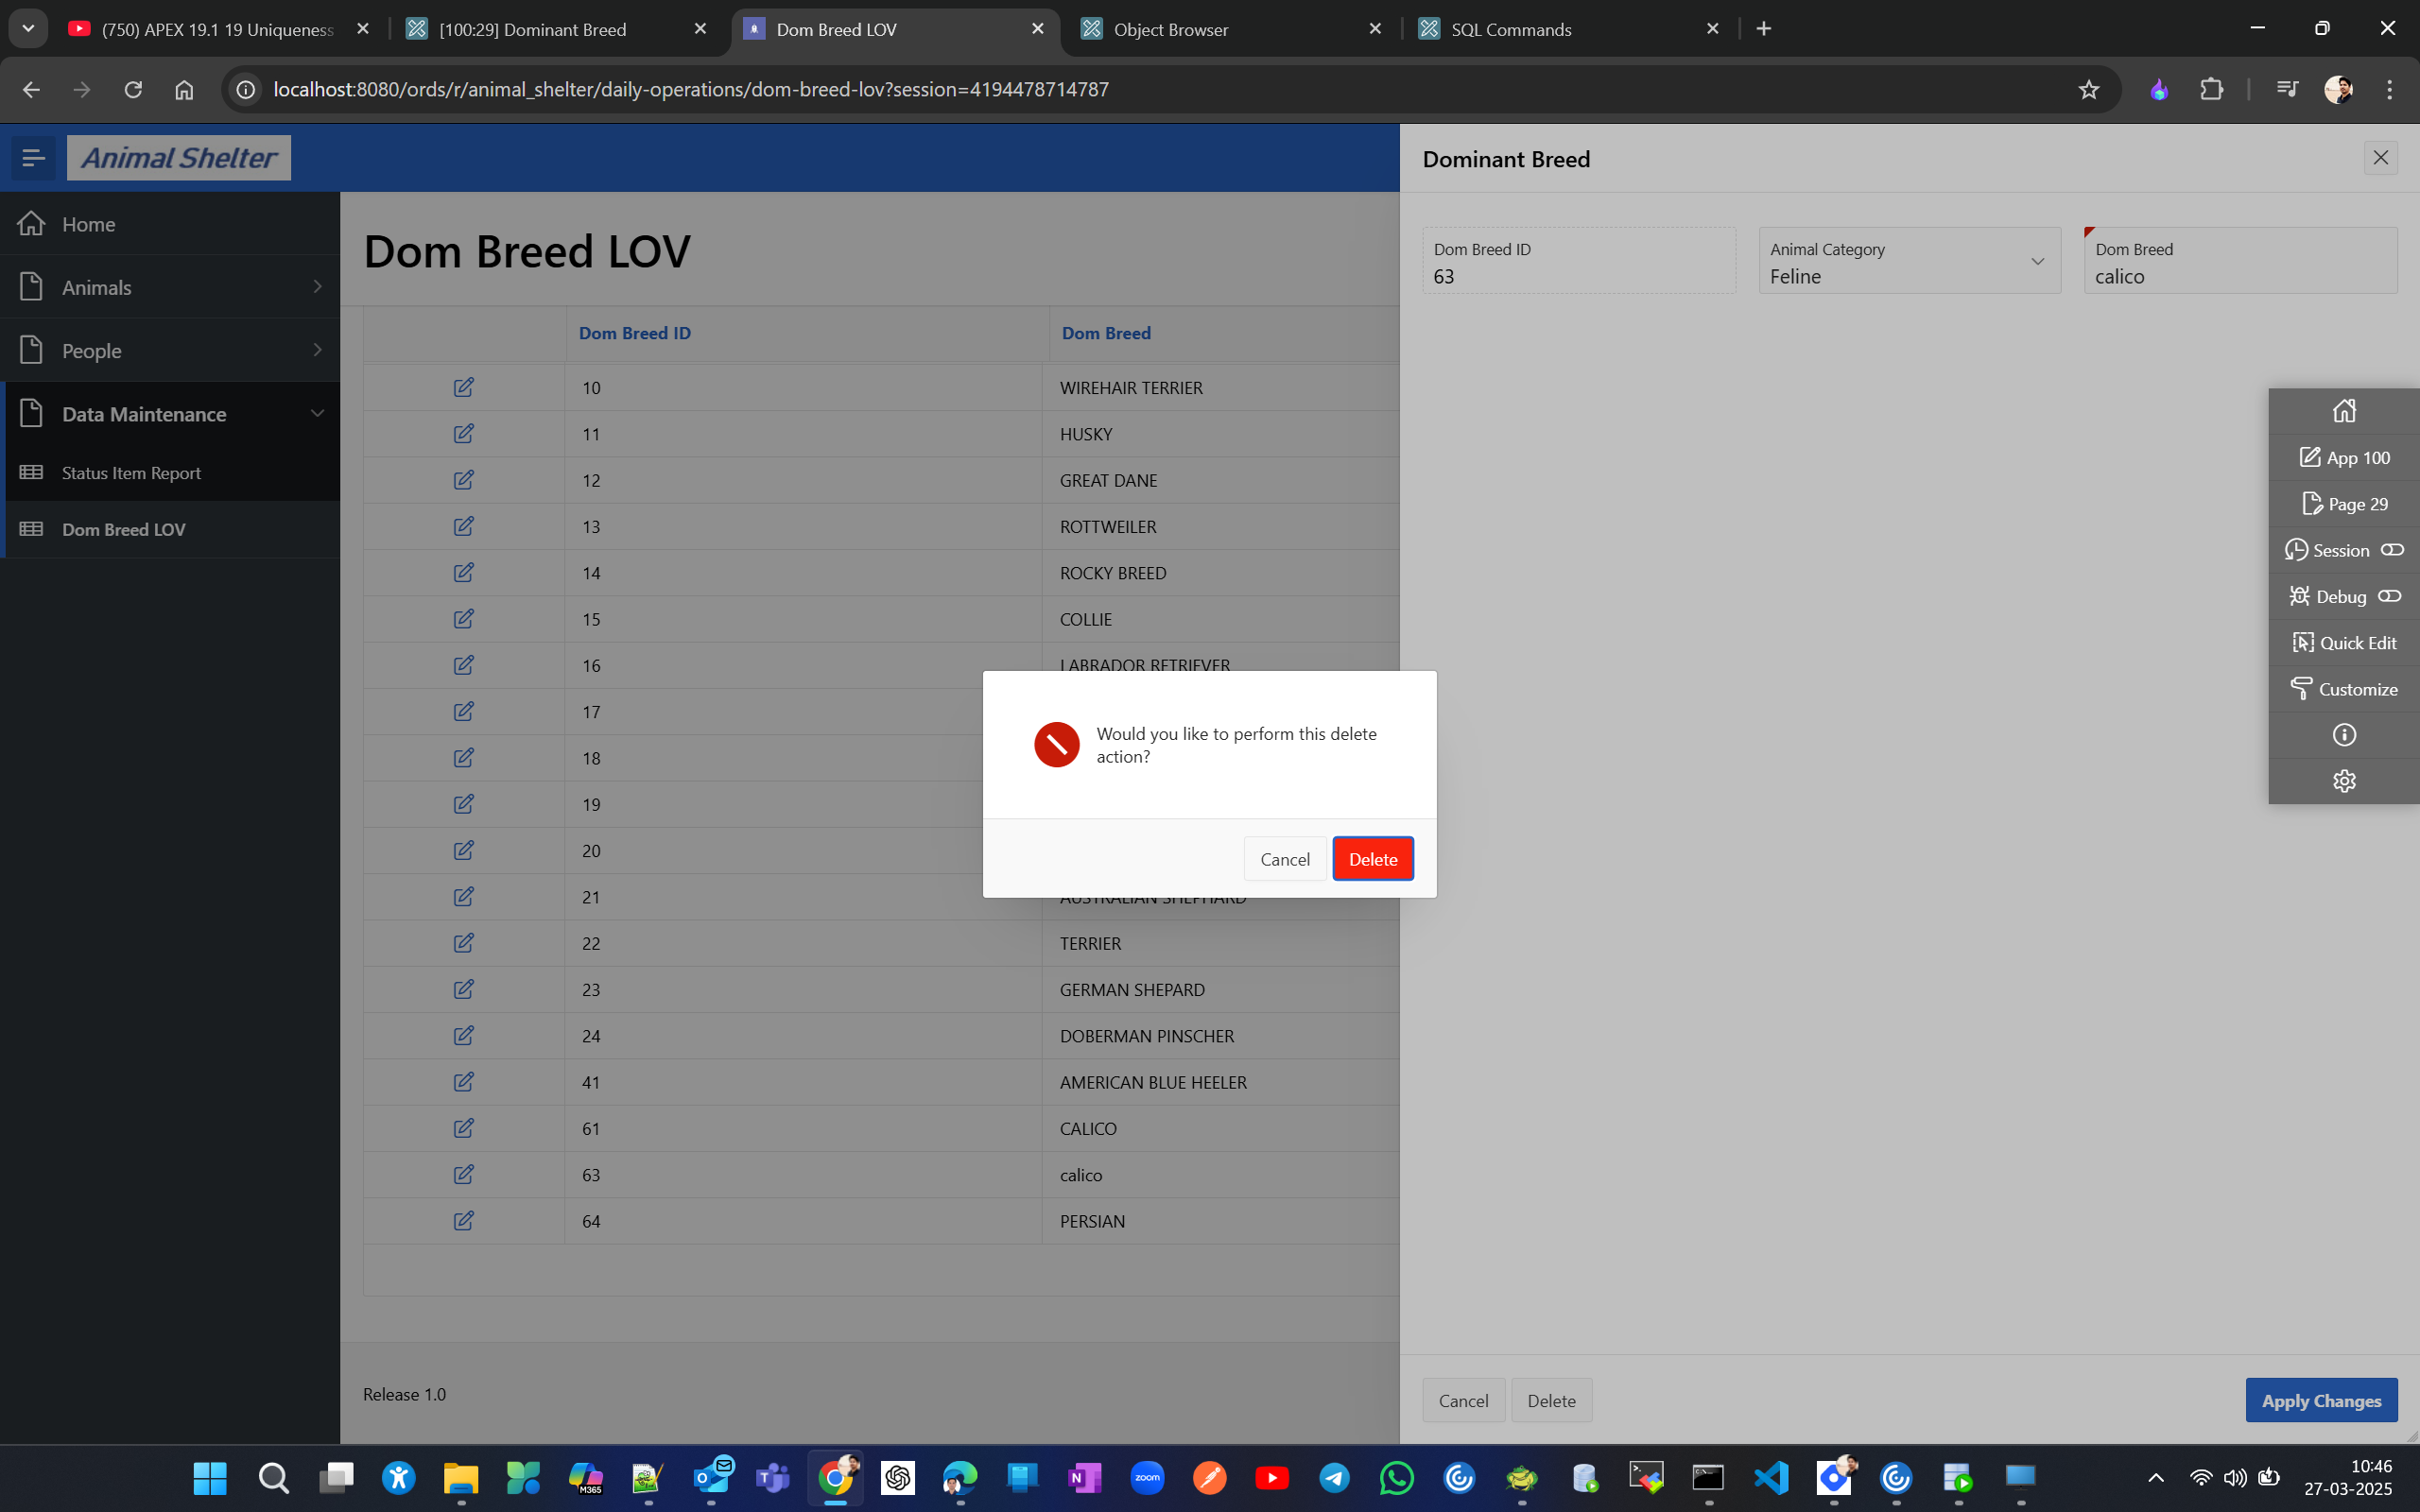
now delete old record for calico
Cascading LOVs: selection in one sets the list in other. Create after-update triggers.
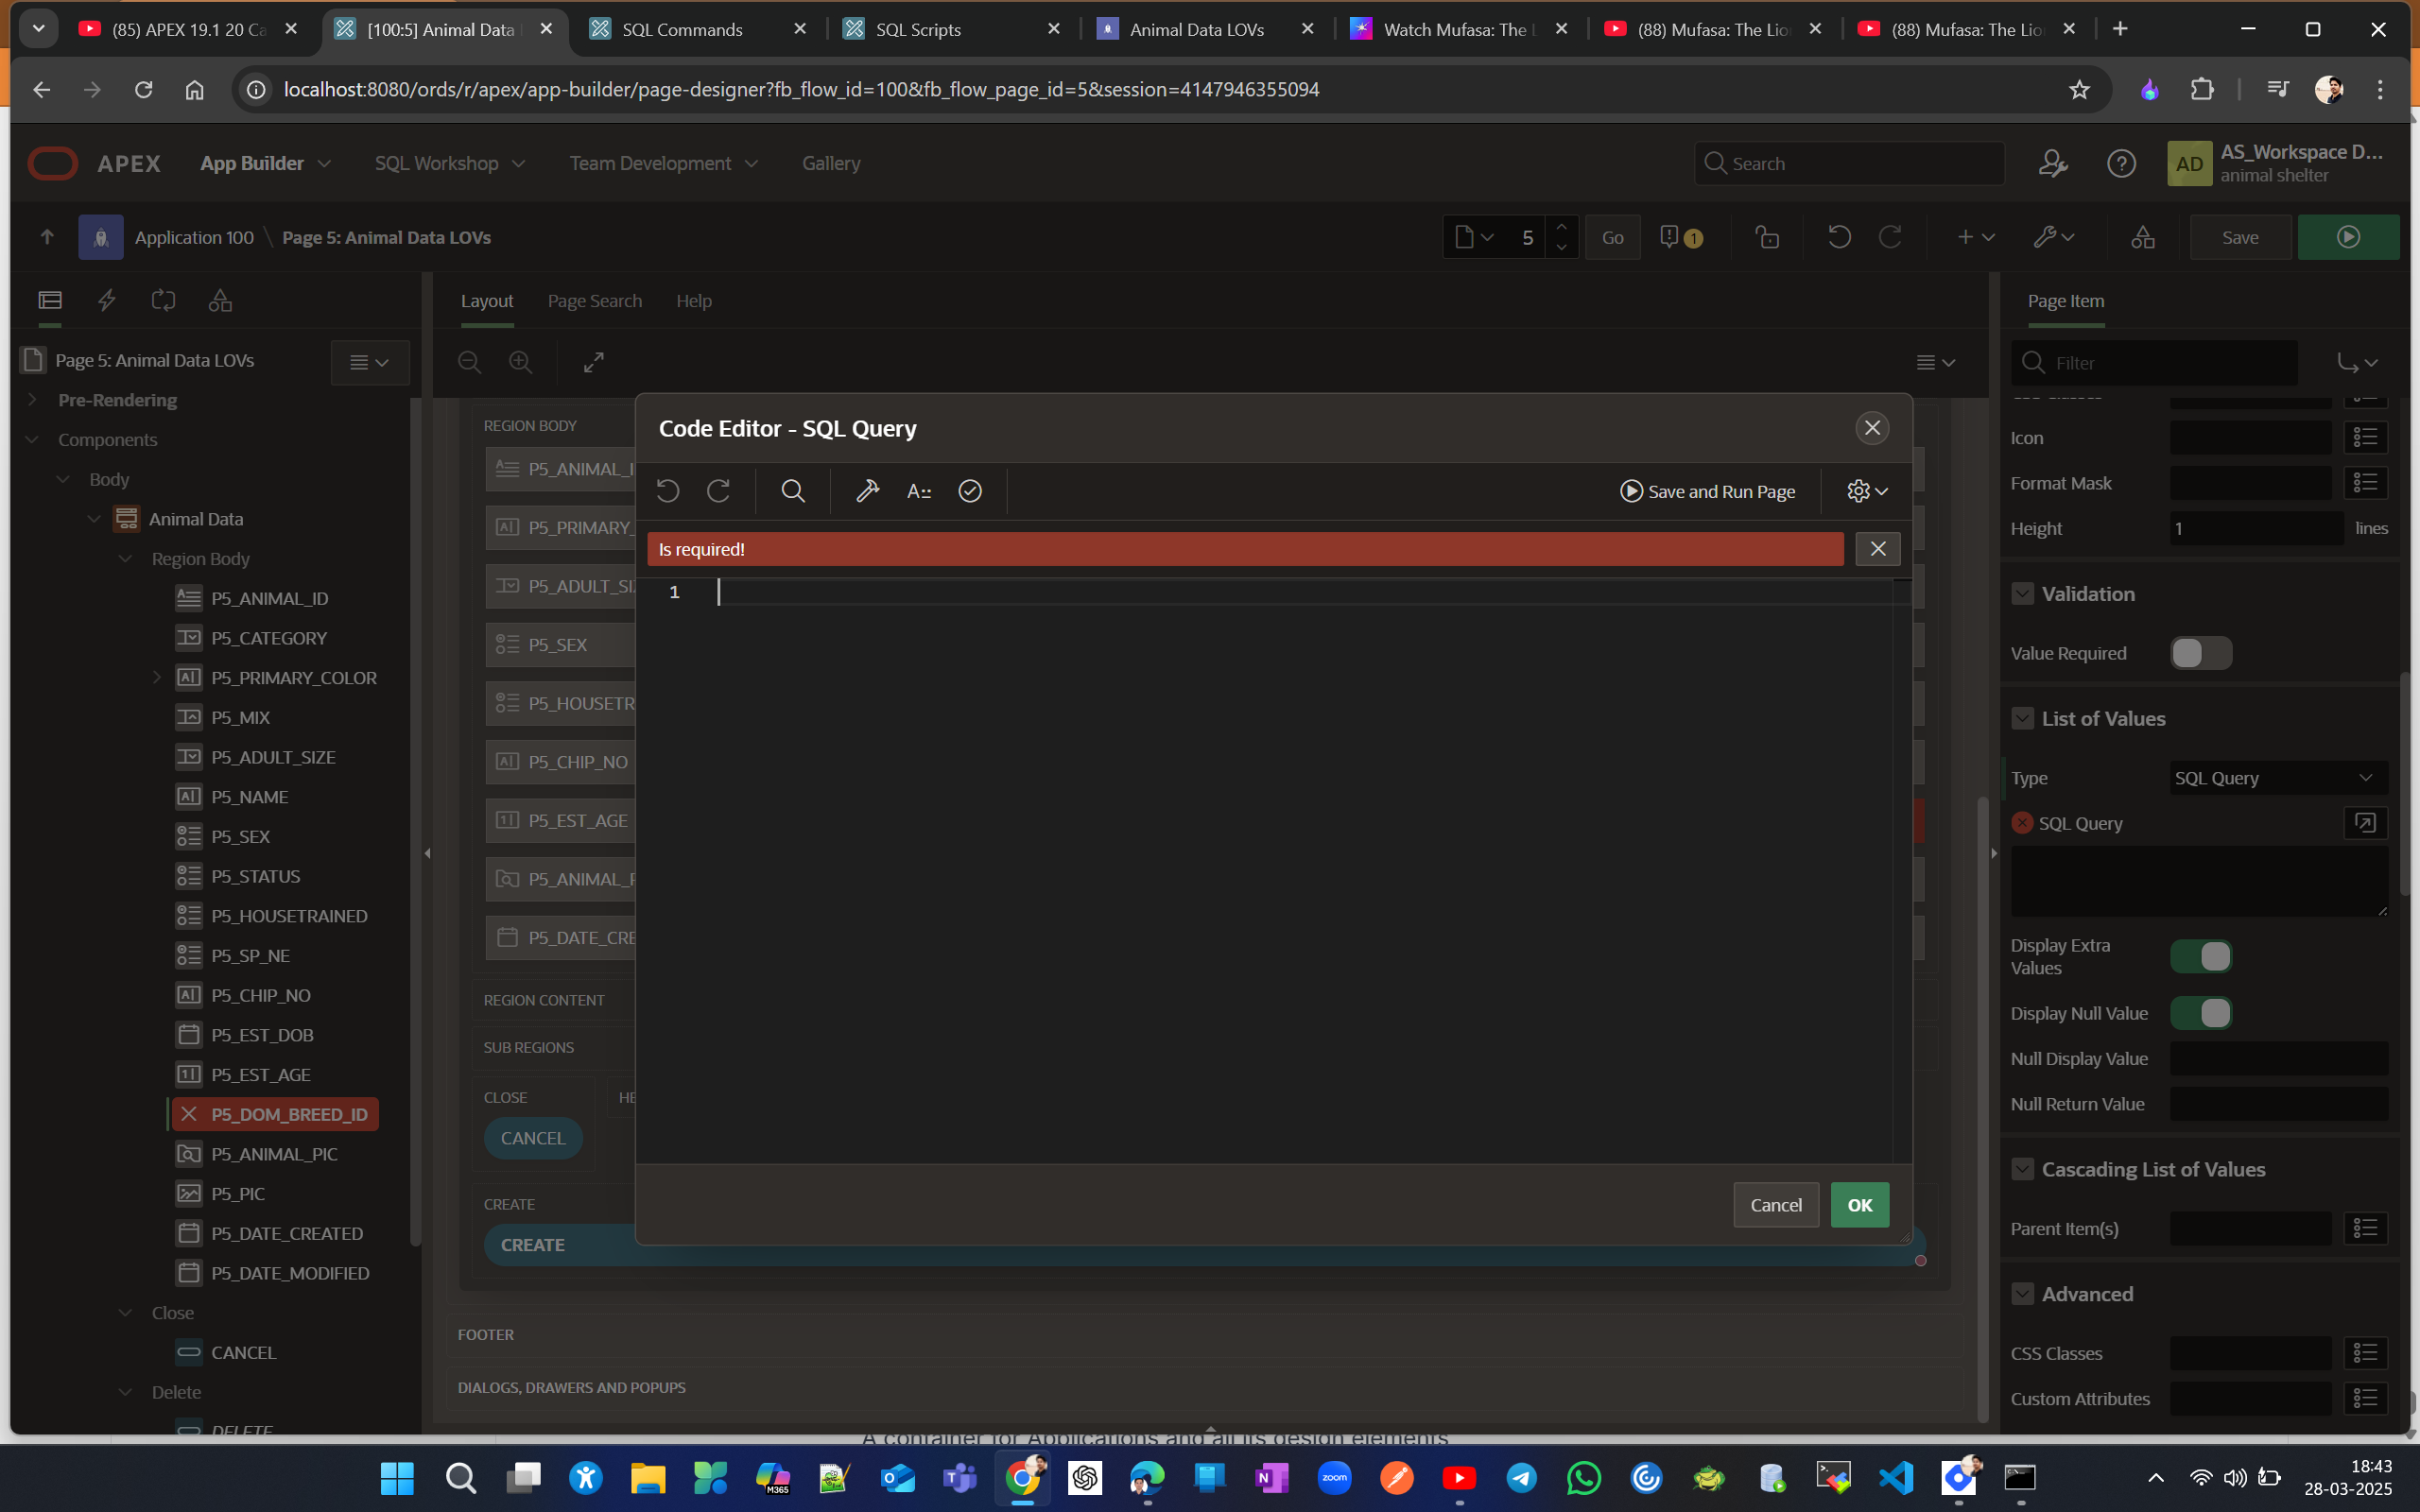
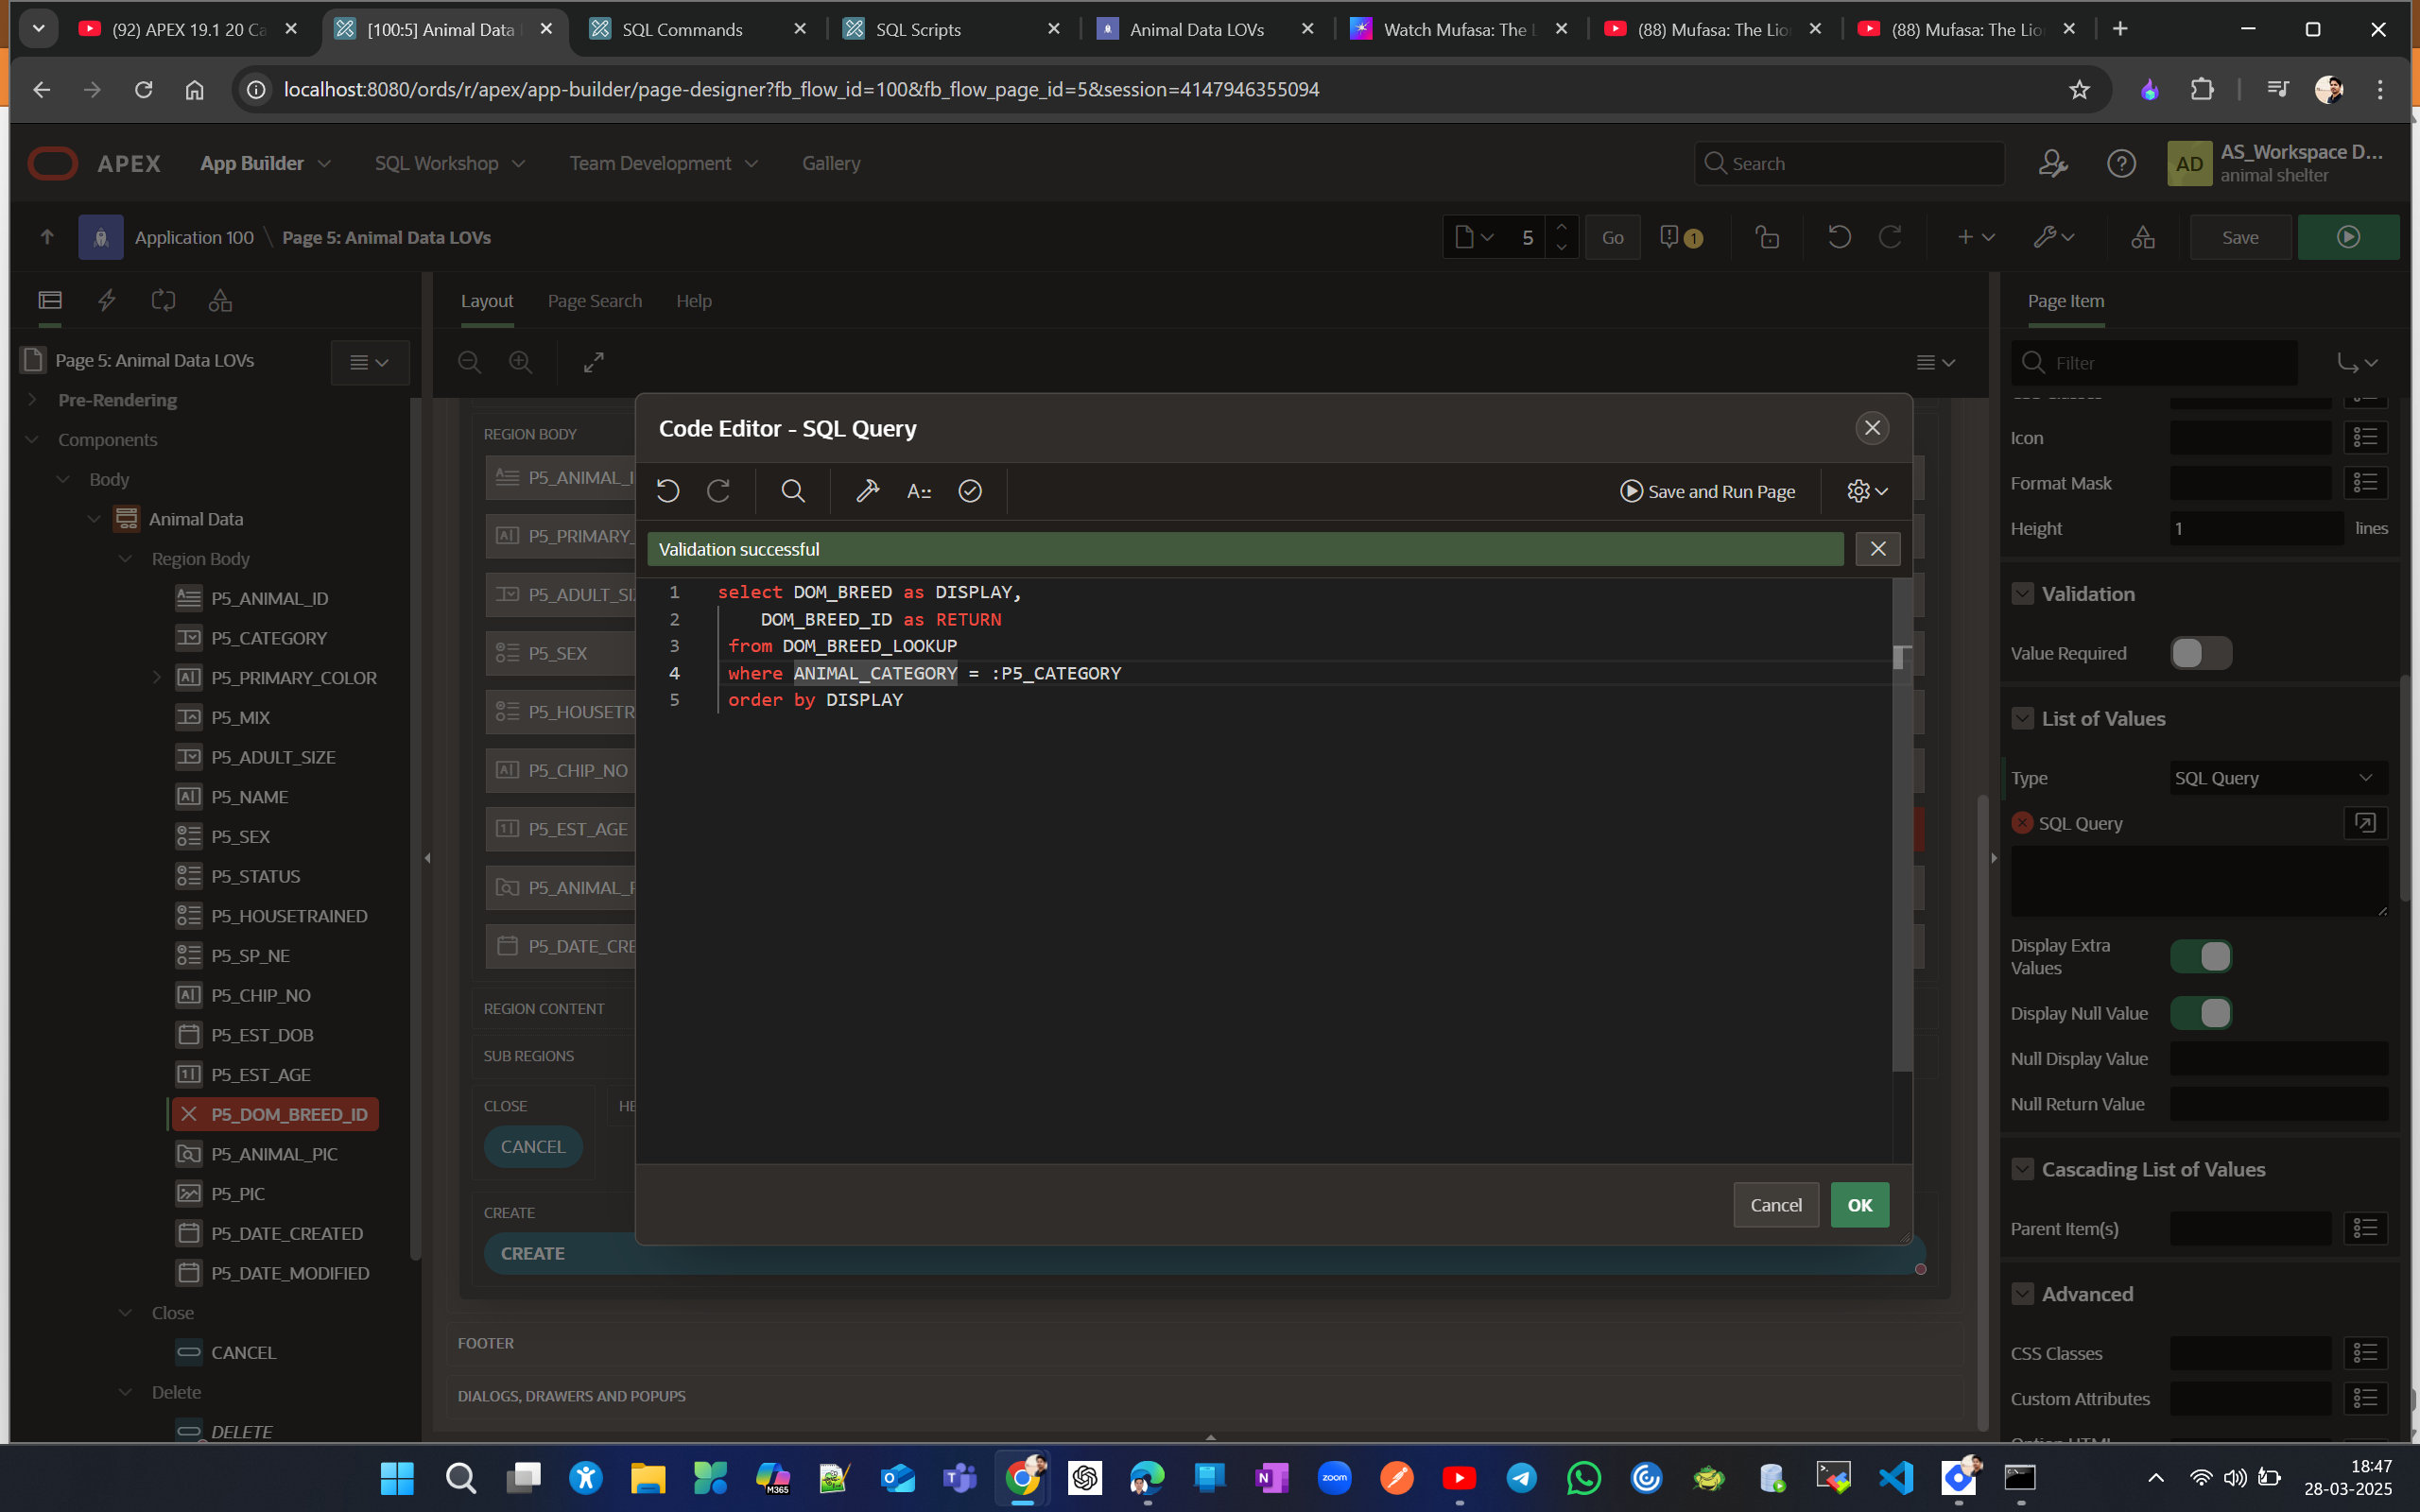
Lets edit the form page so that when category selected then corresponding Dom Breed should appear in Dom Breed Id field
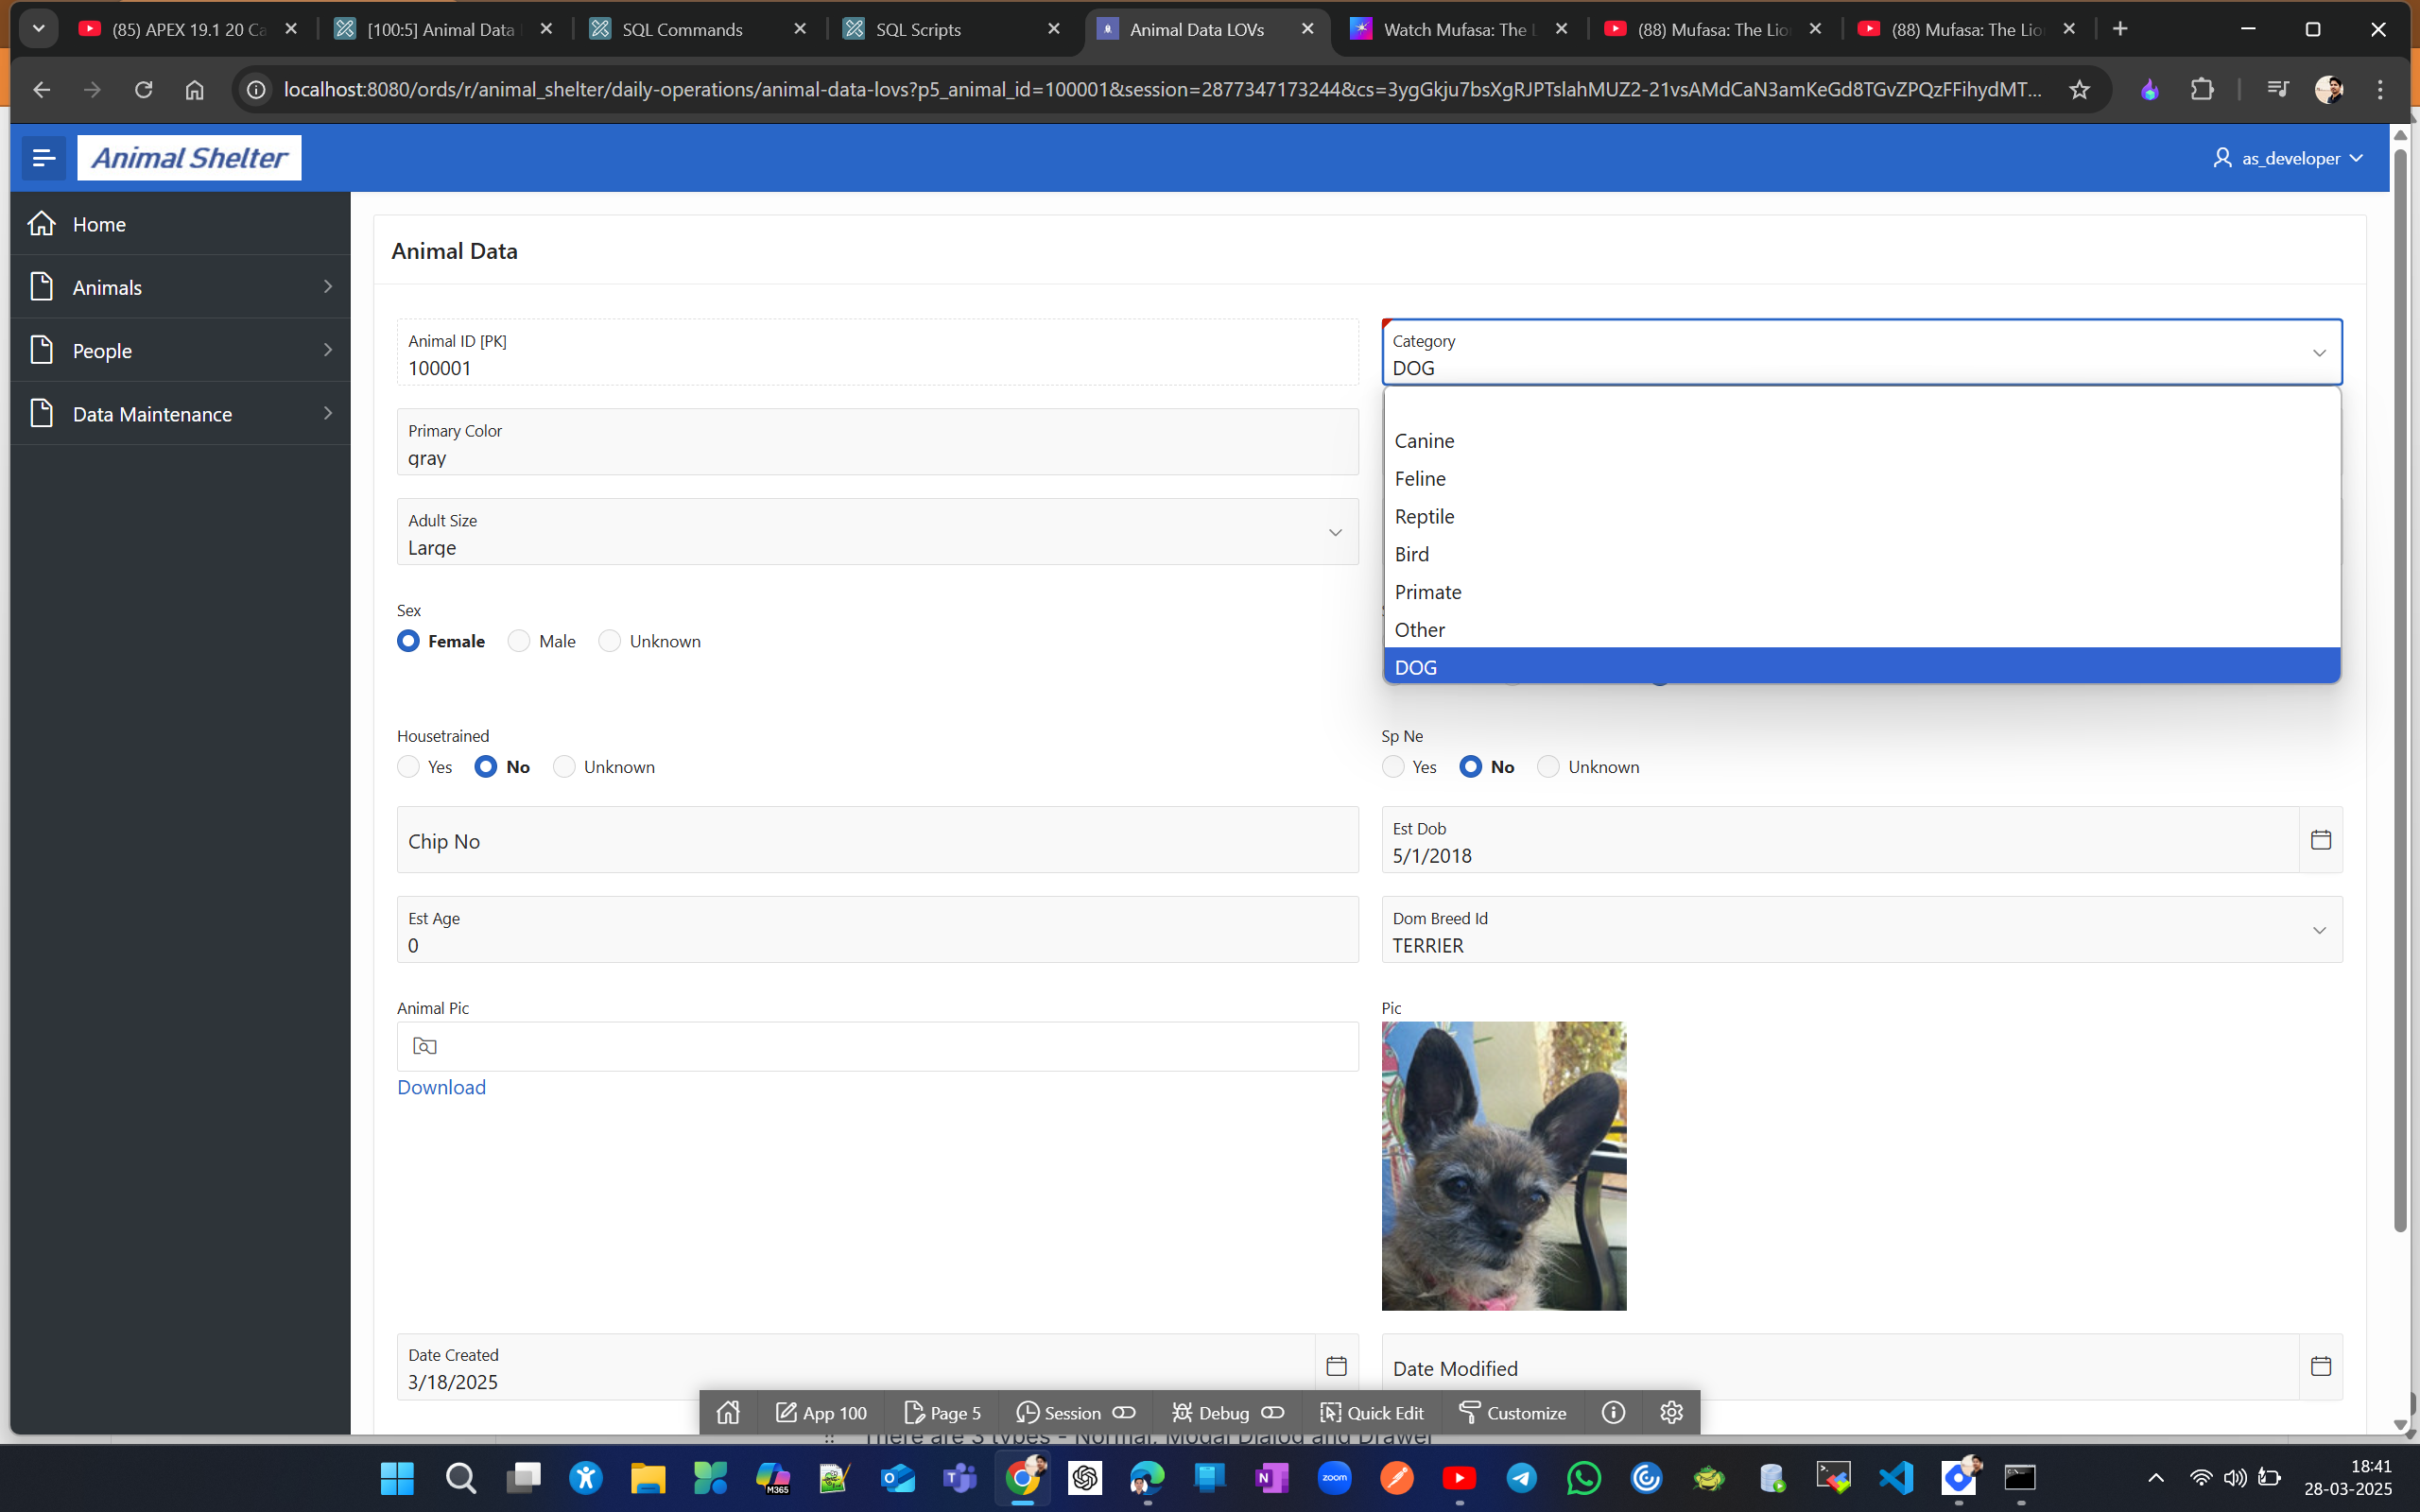
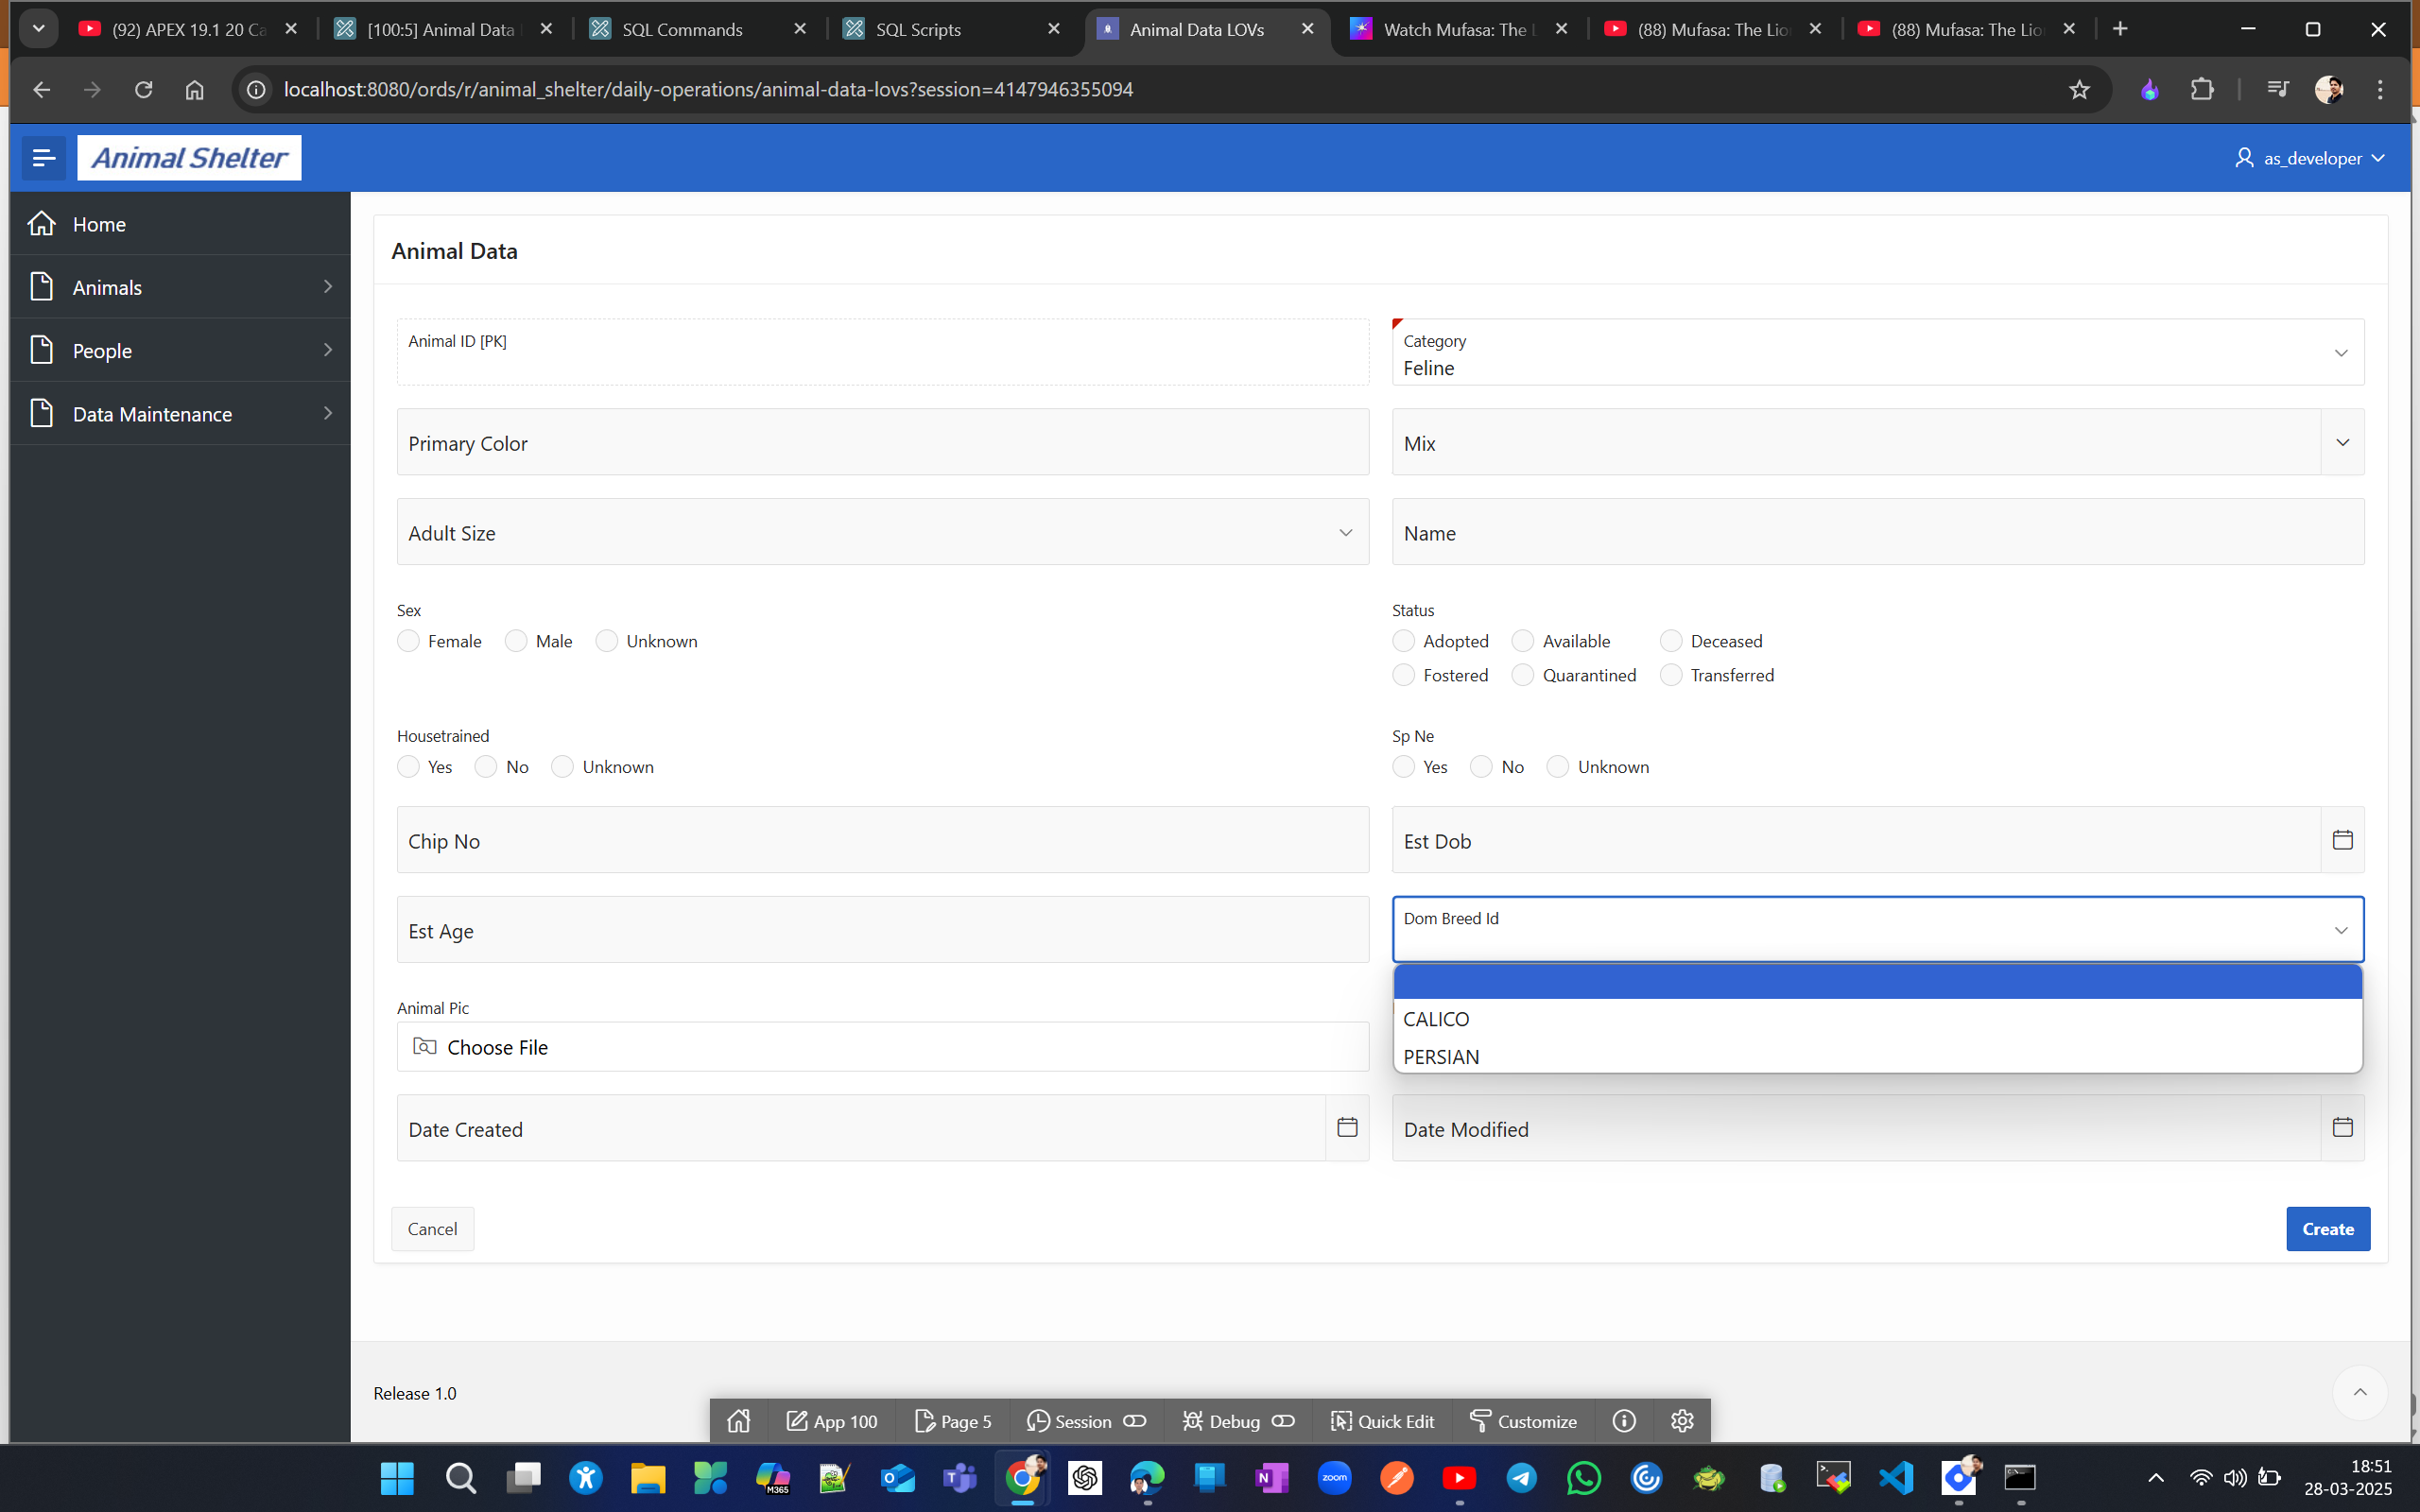
Now, if you run the application and select the category Feline, you will only see the DOM Breed that corresponds to FELINE, and it works the same for others.
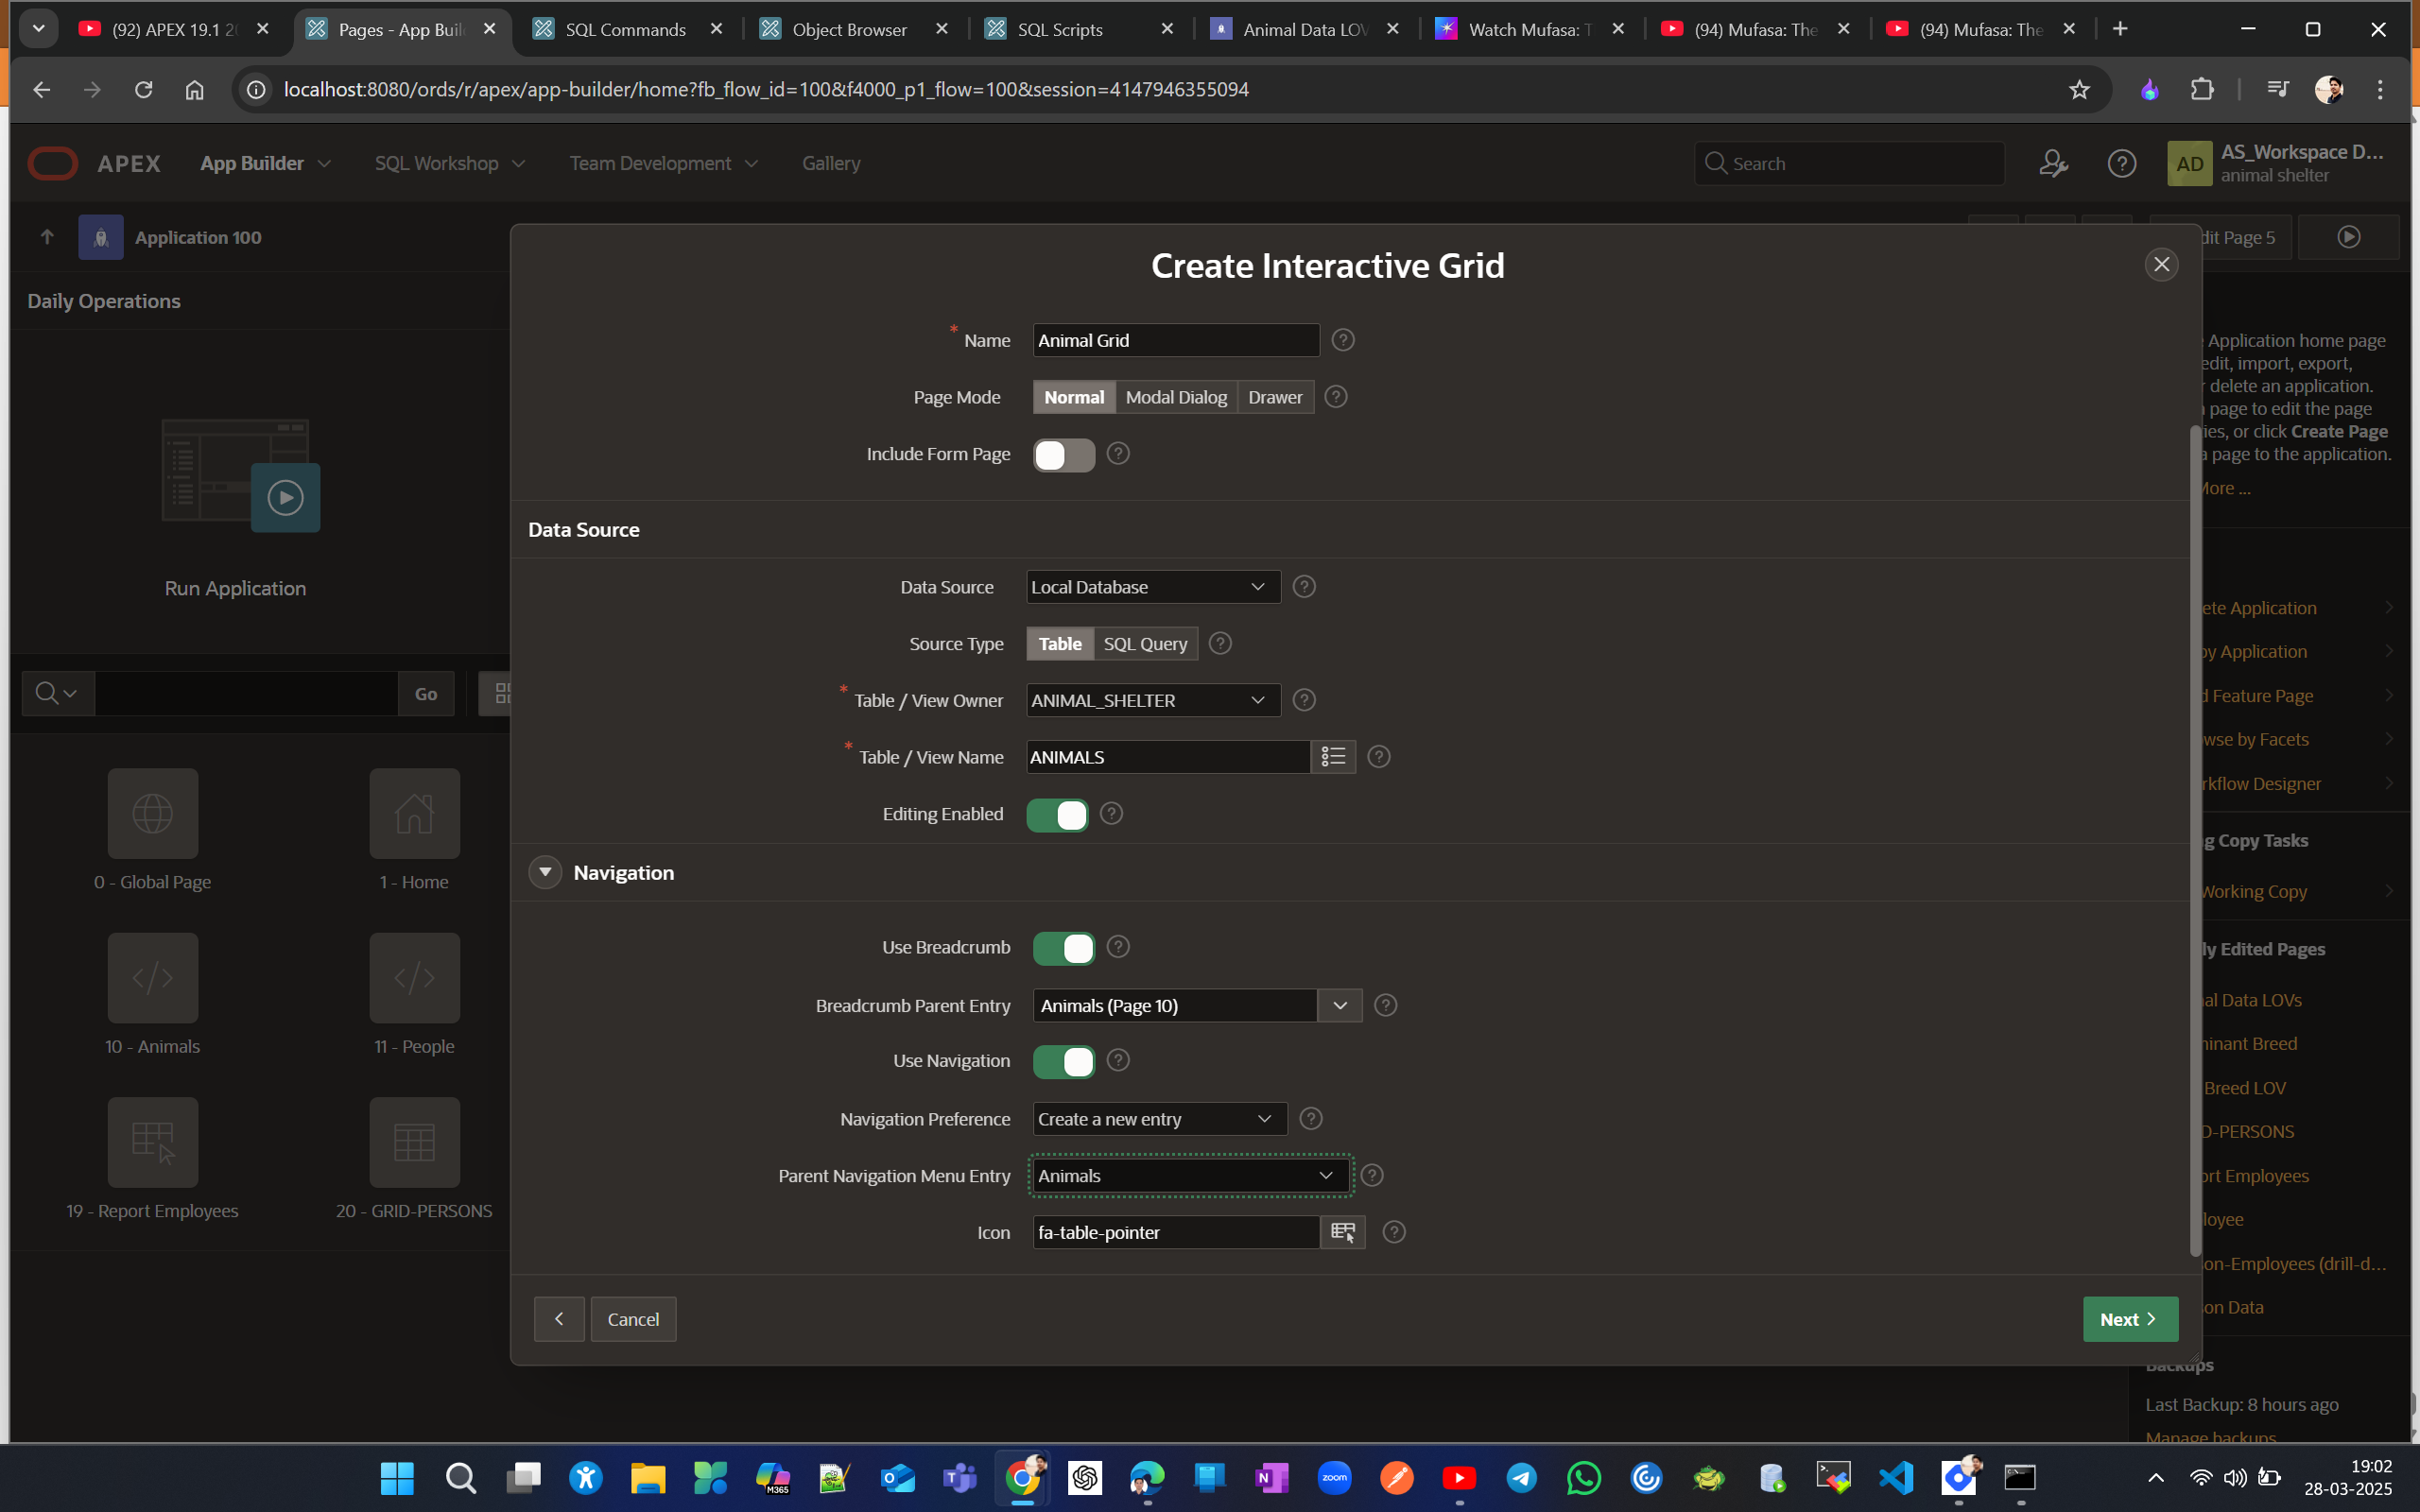
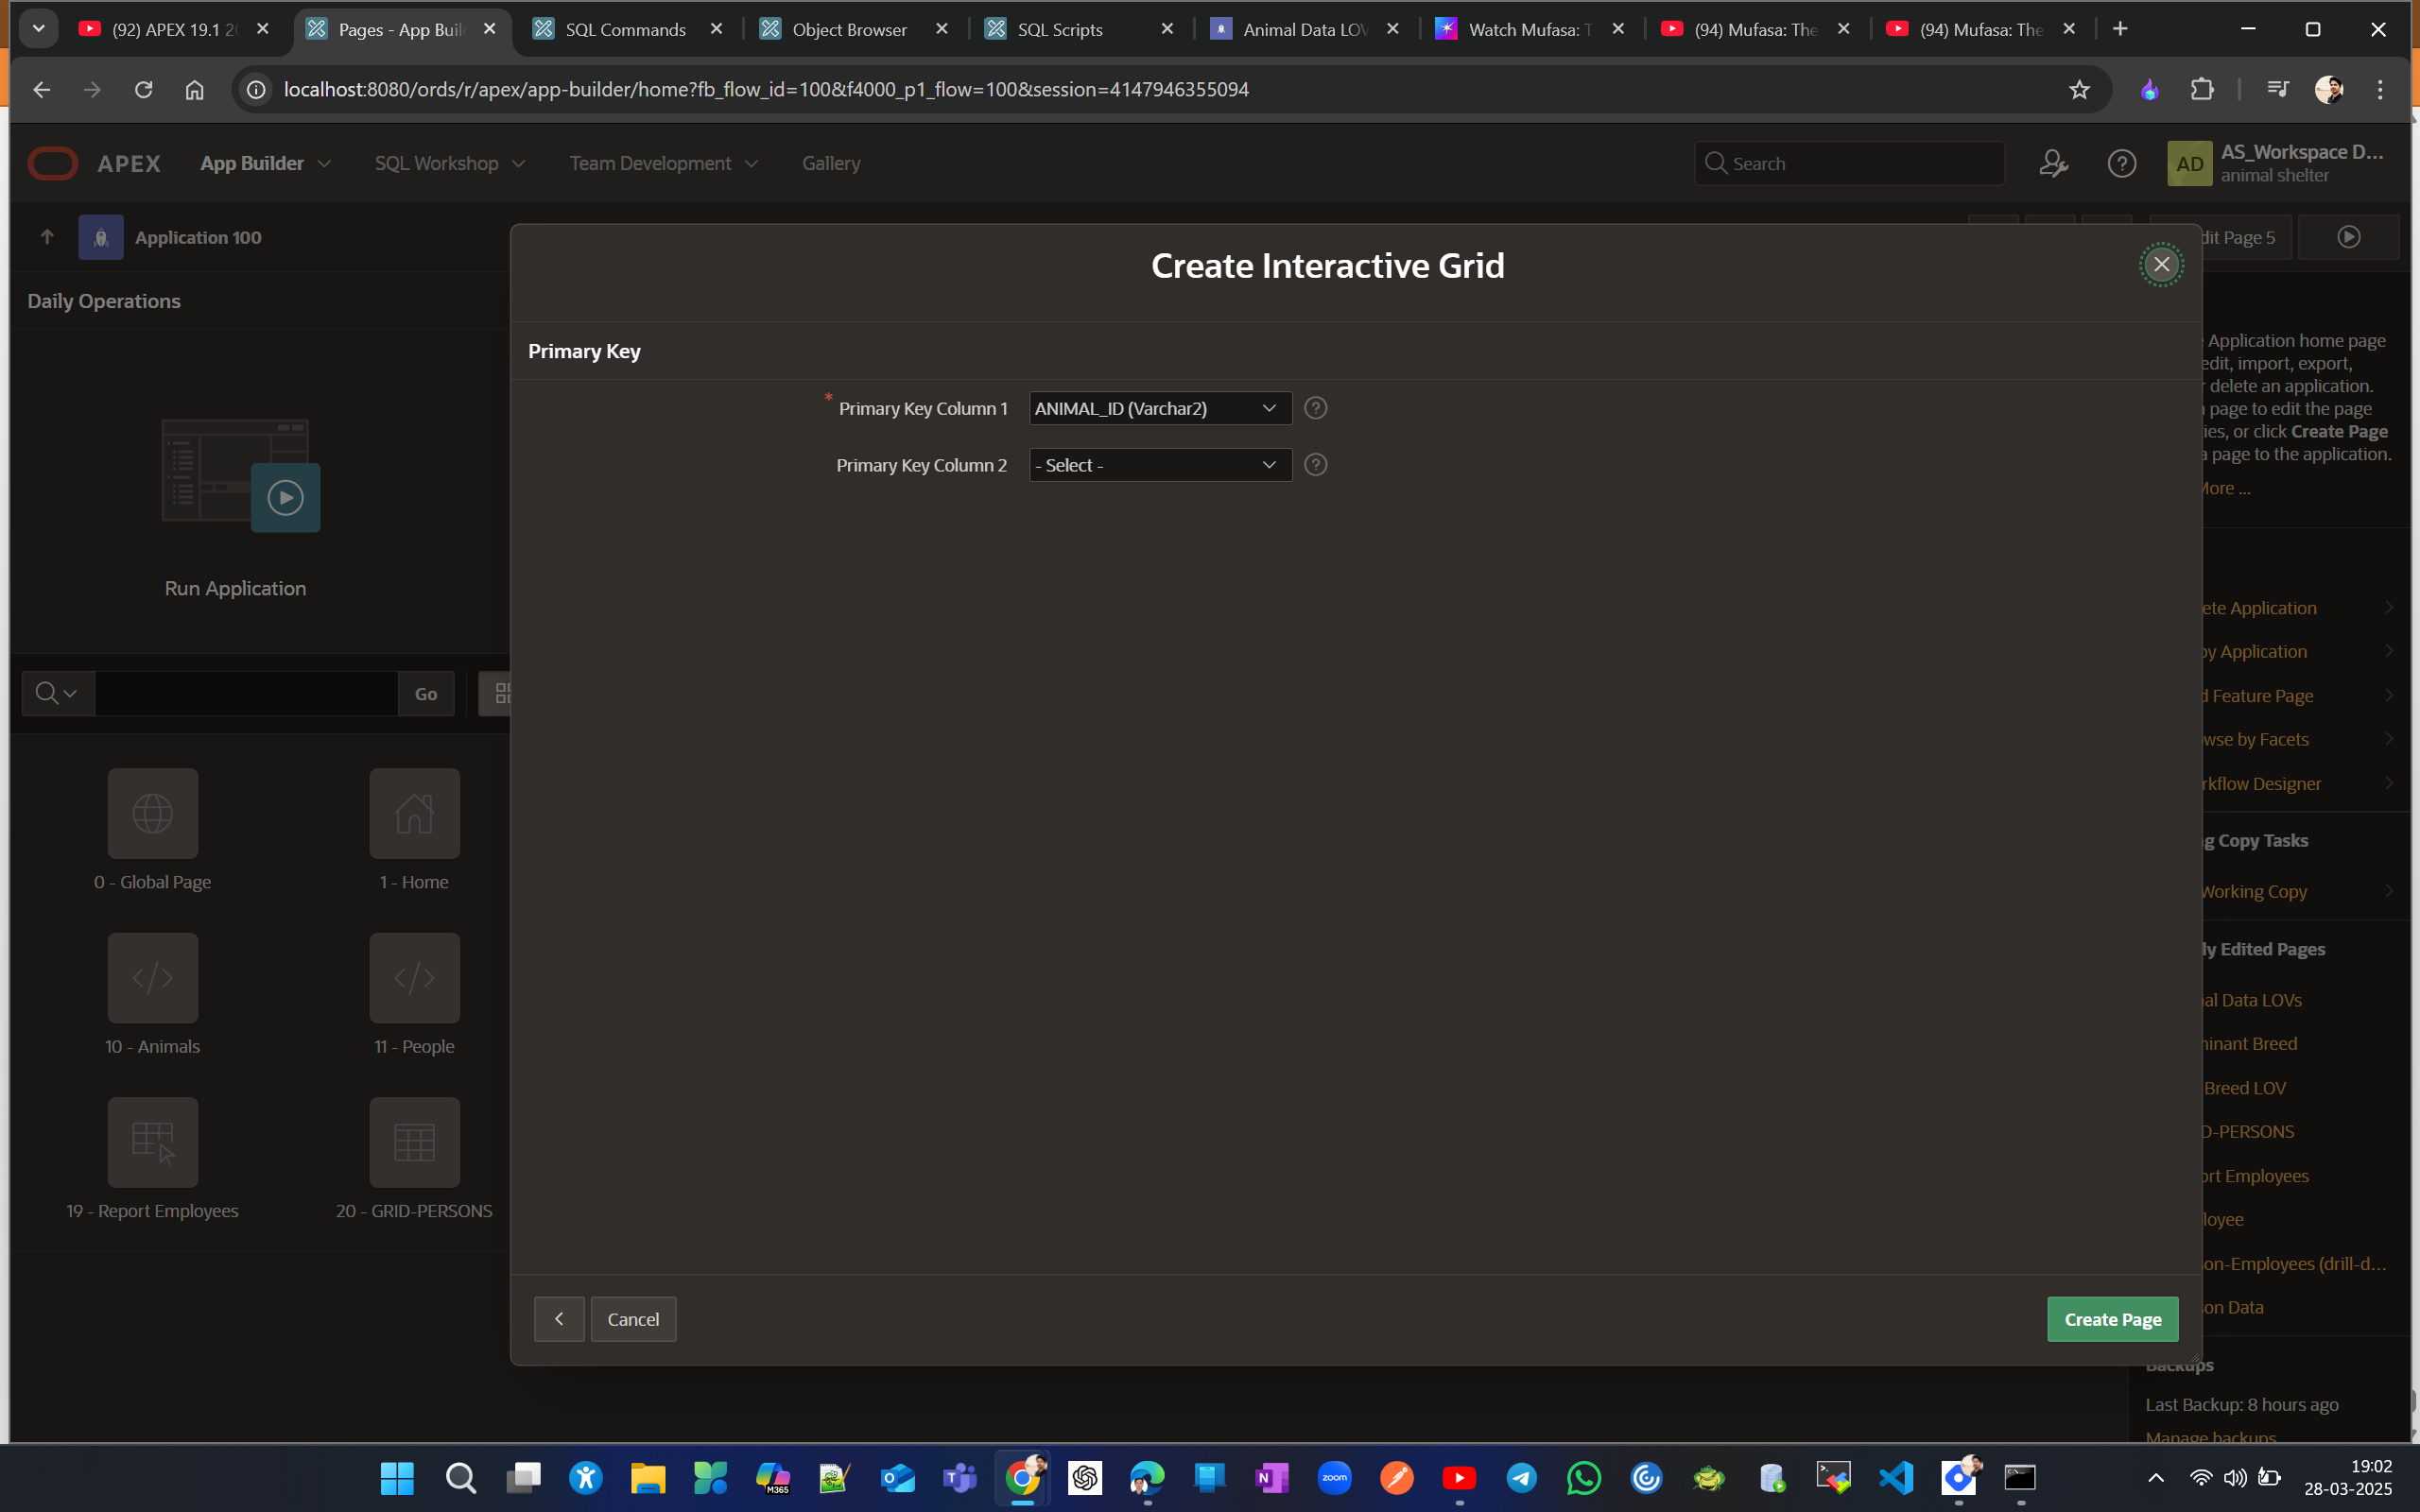
Now lets create a editable interactive grid Animal Grid
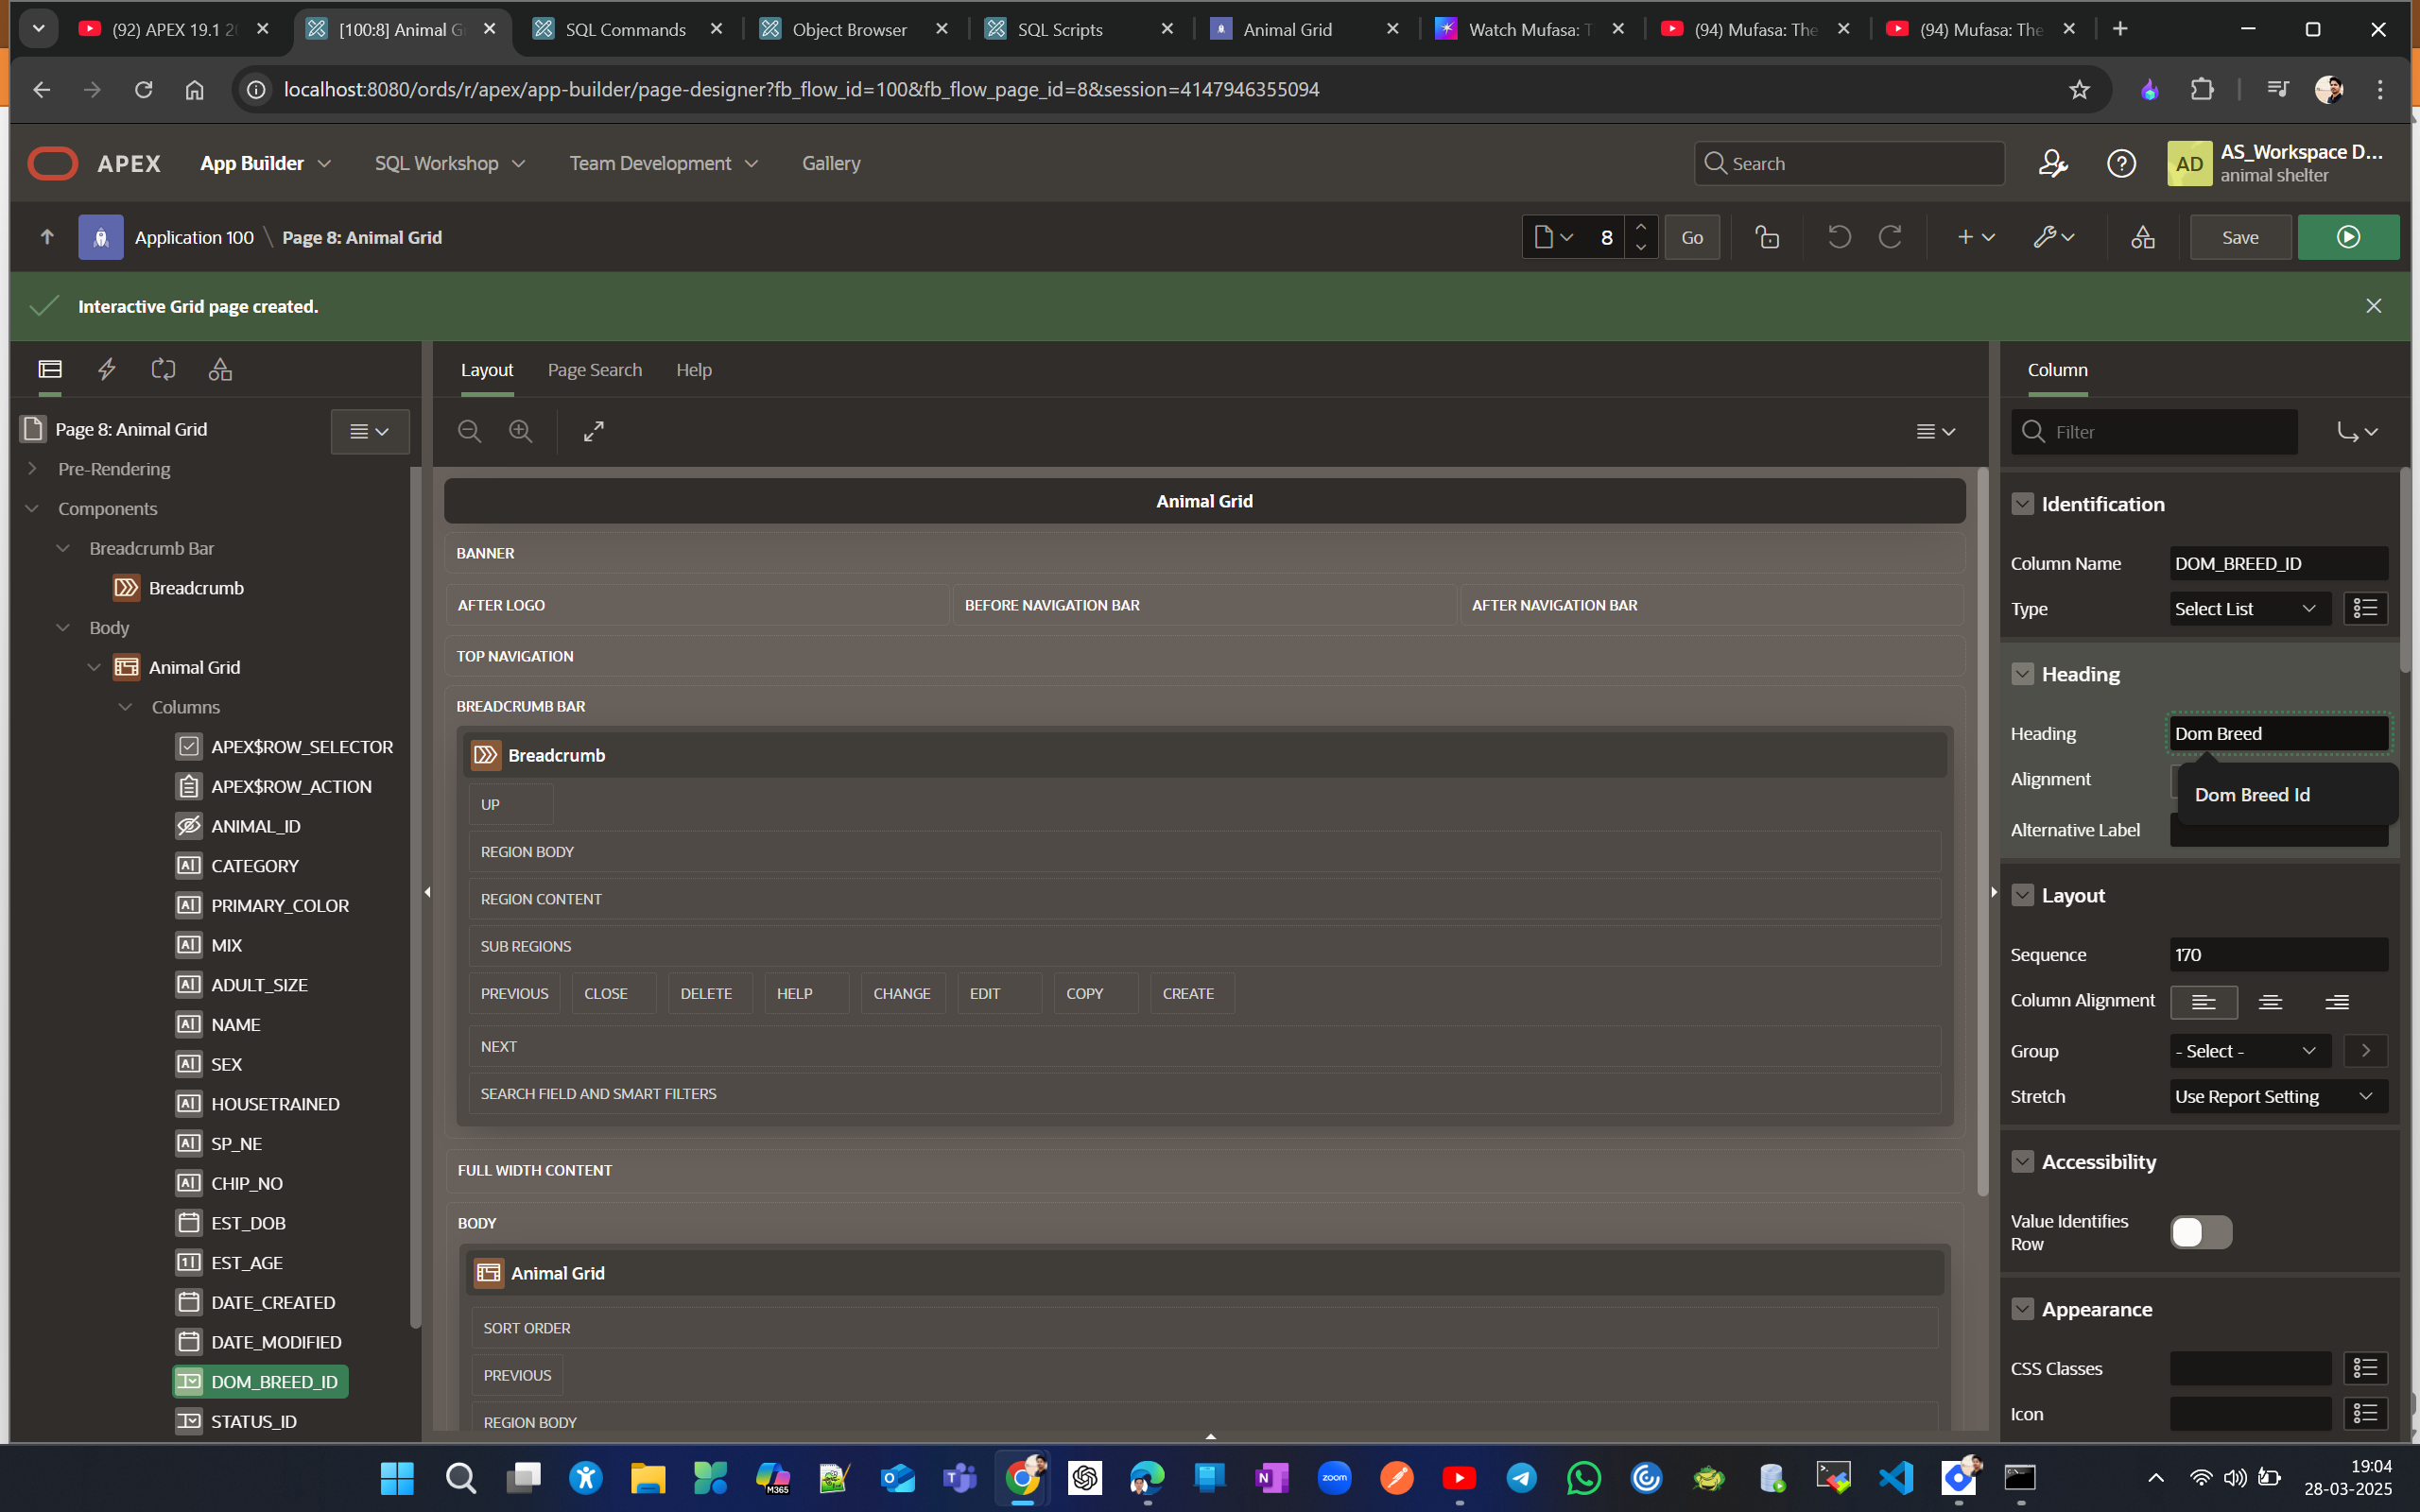
Now rename Dom Breed ID to Dom Breed and bring that to after Category column heading
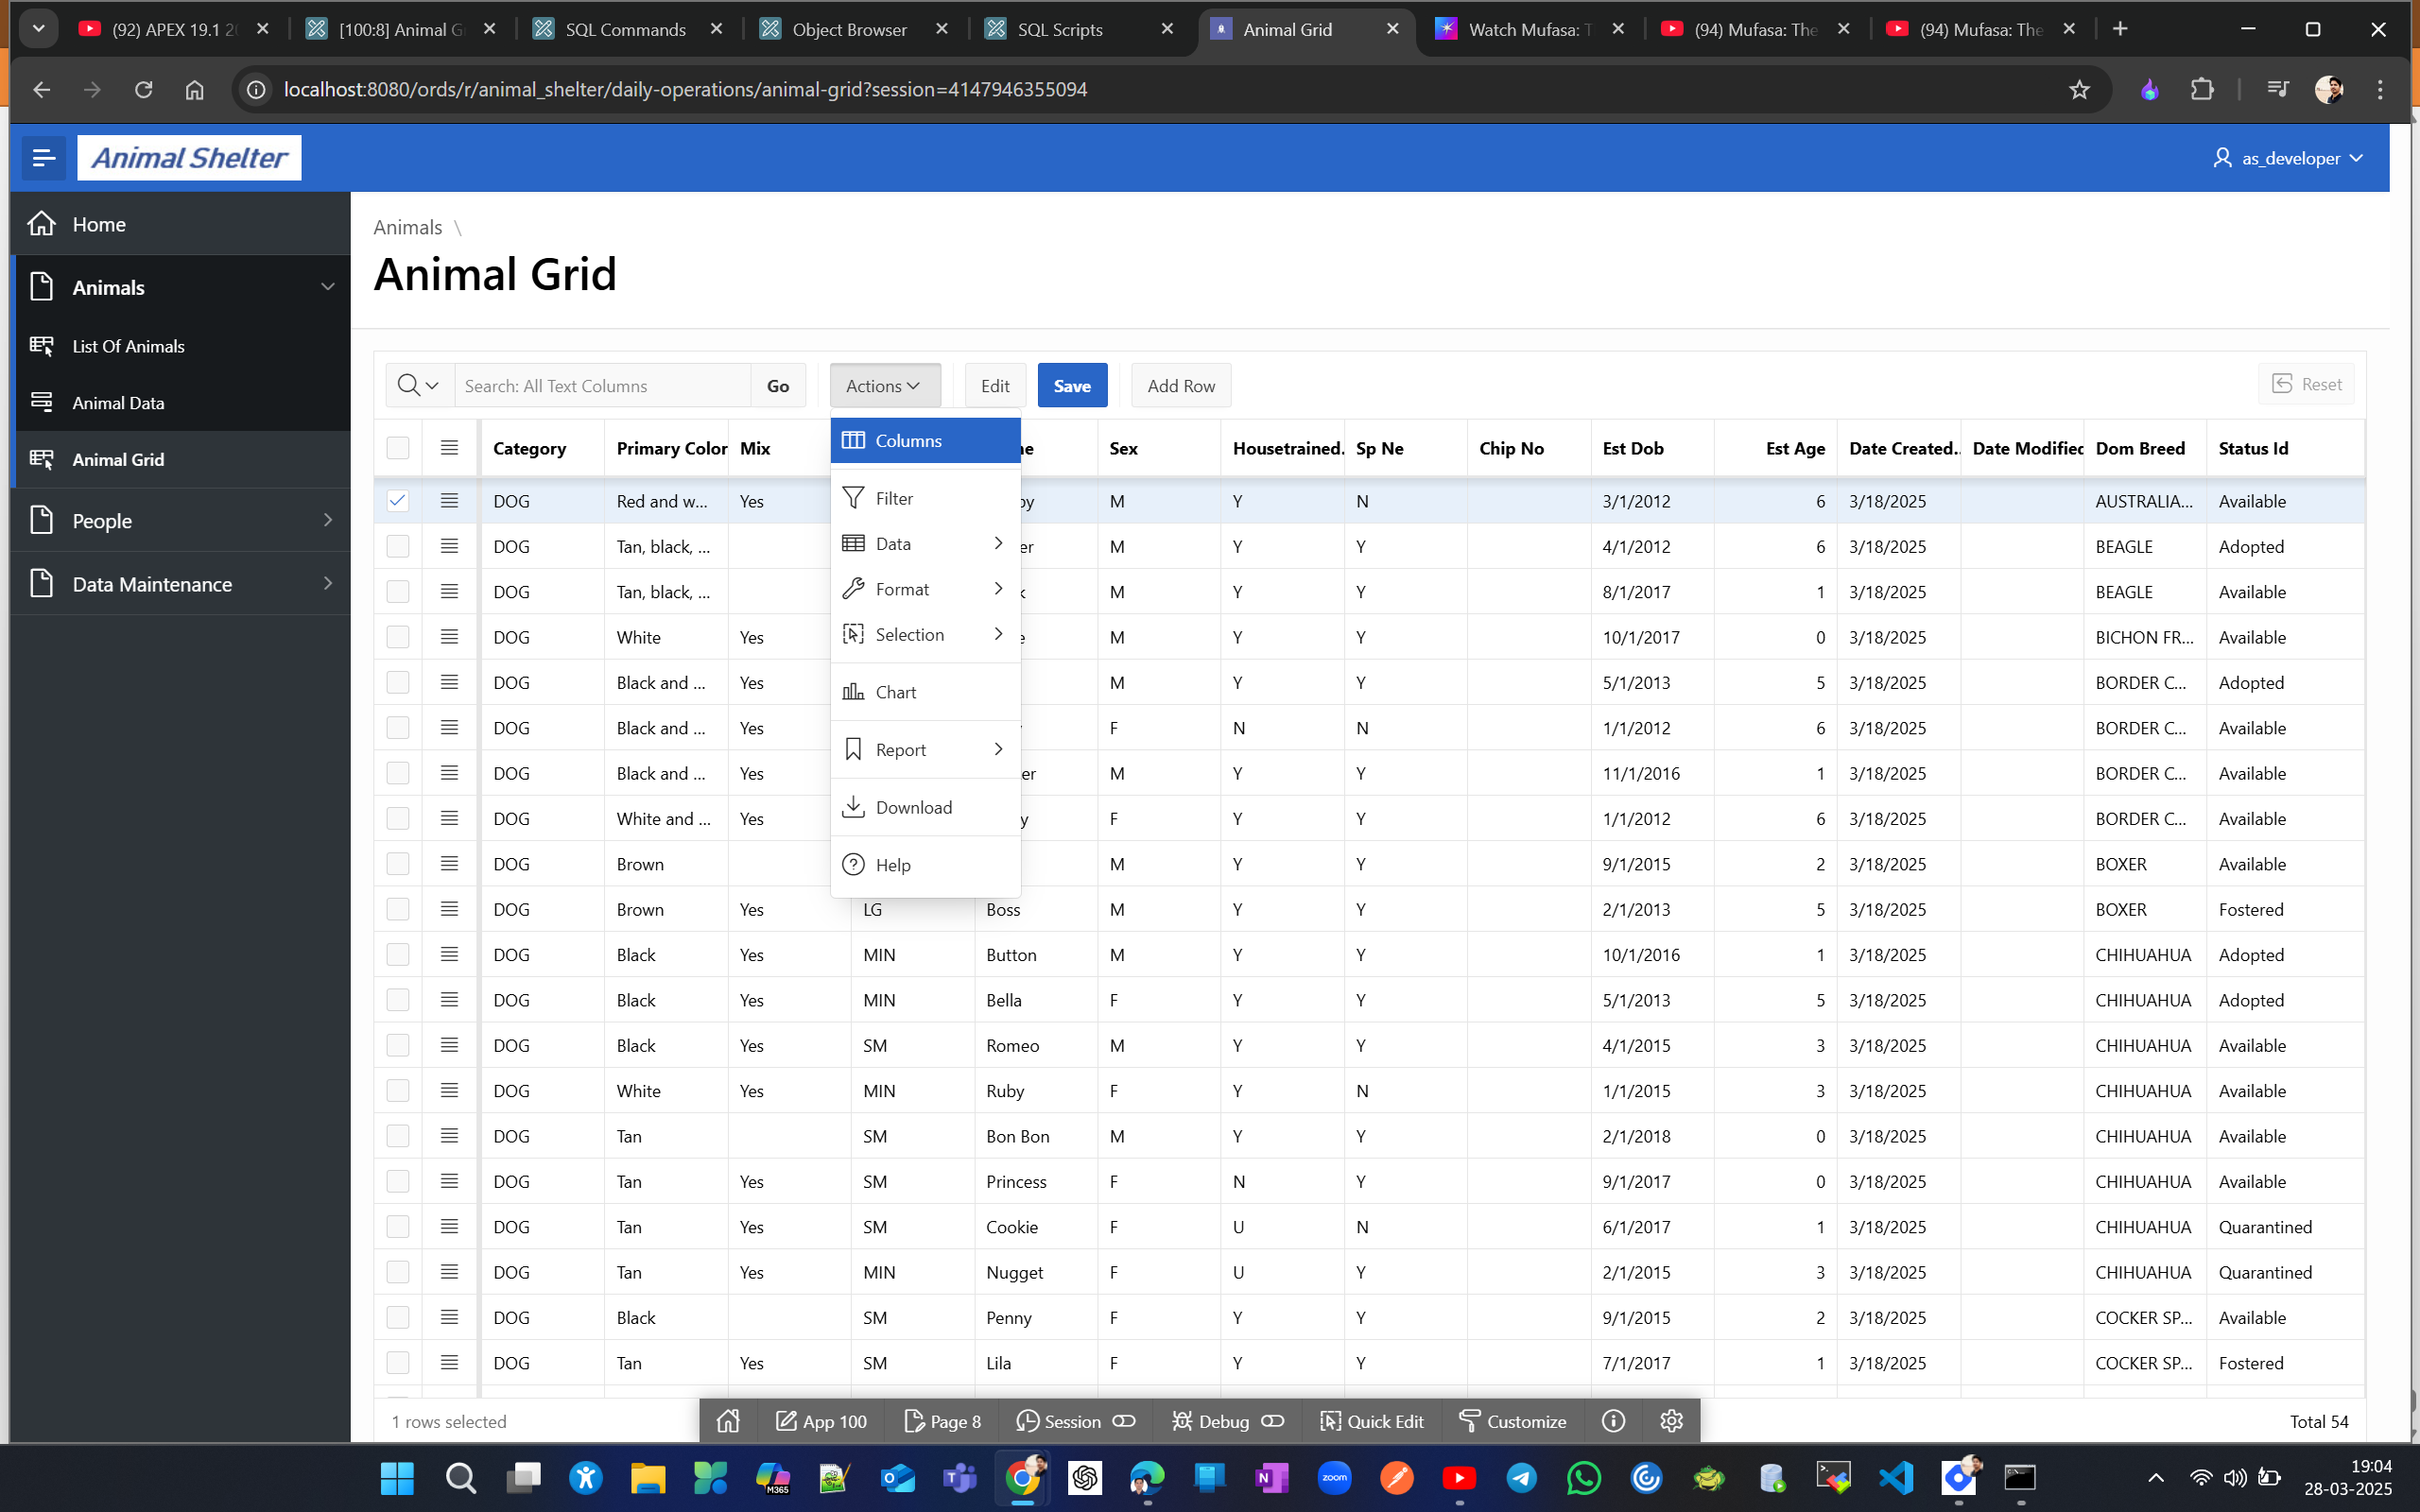
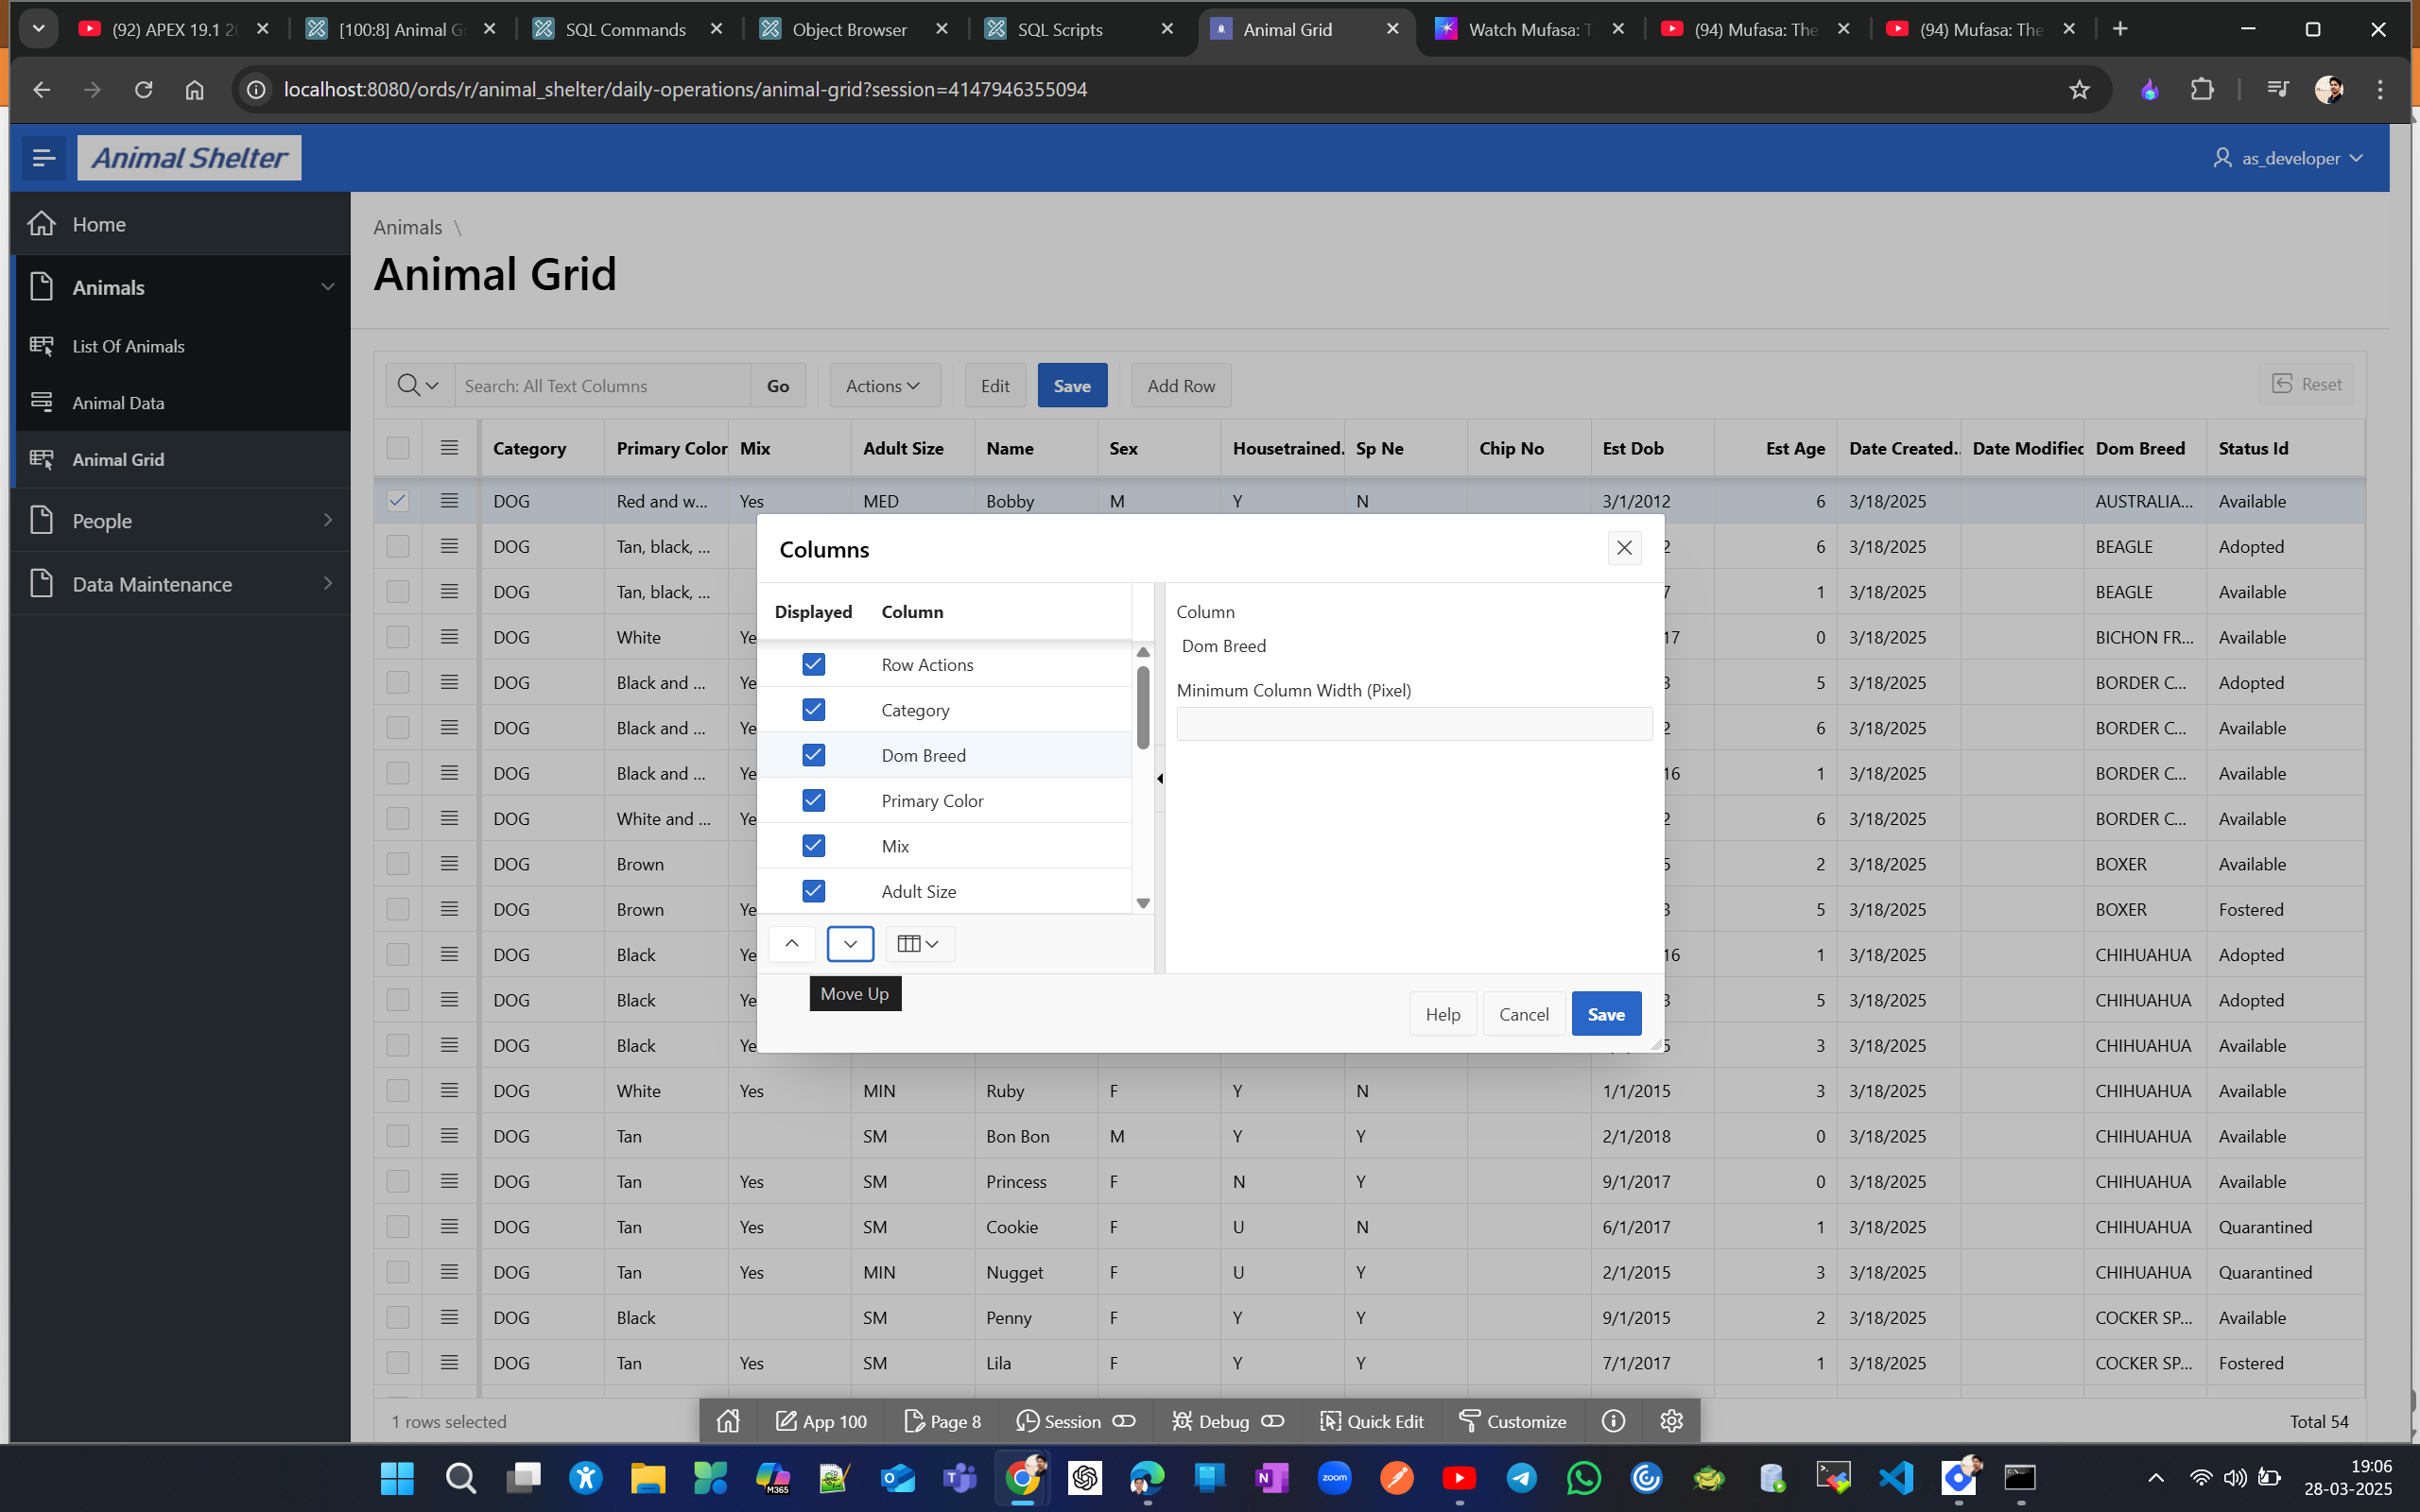
use up arrow in column section to get dom breed below category
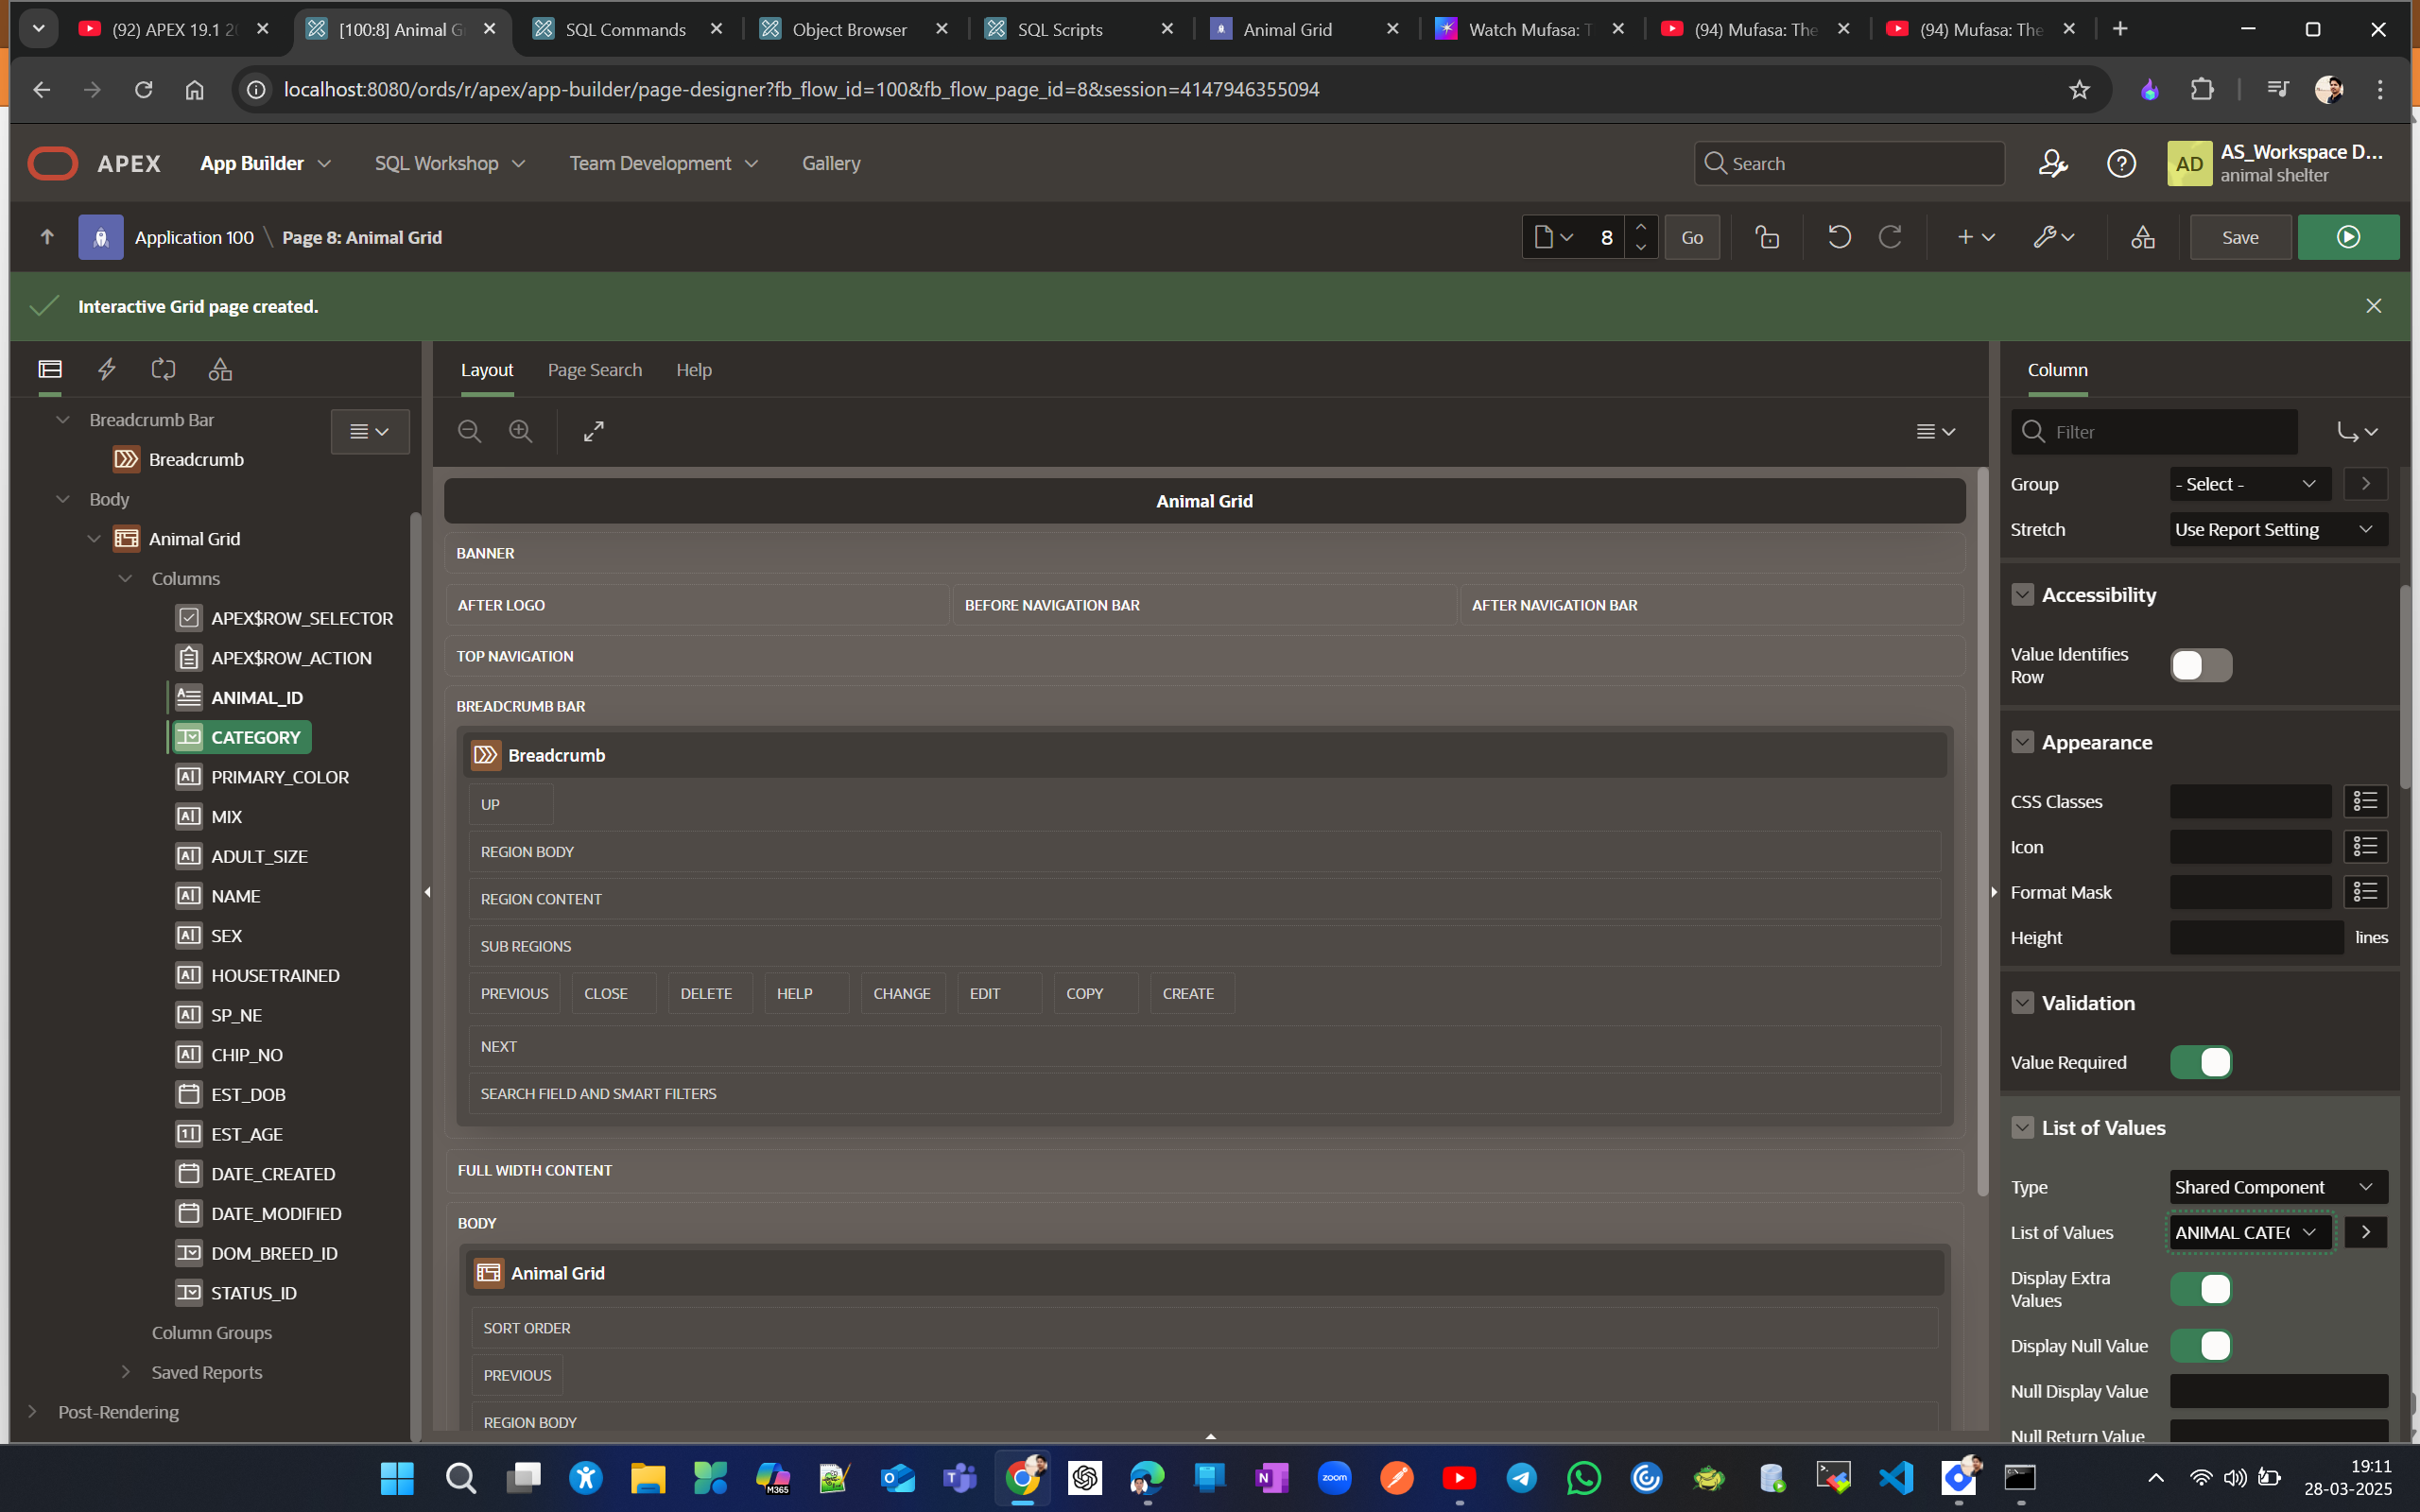
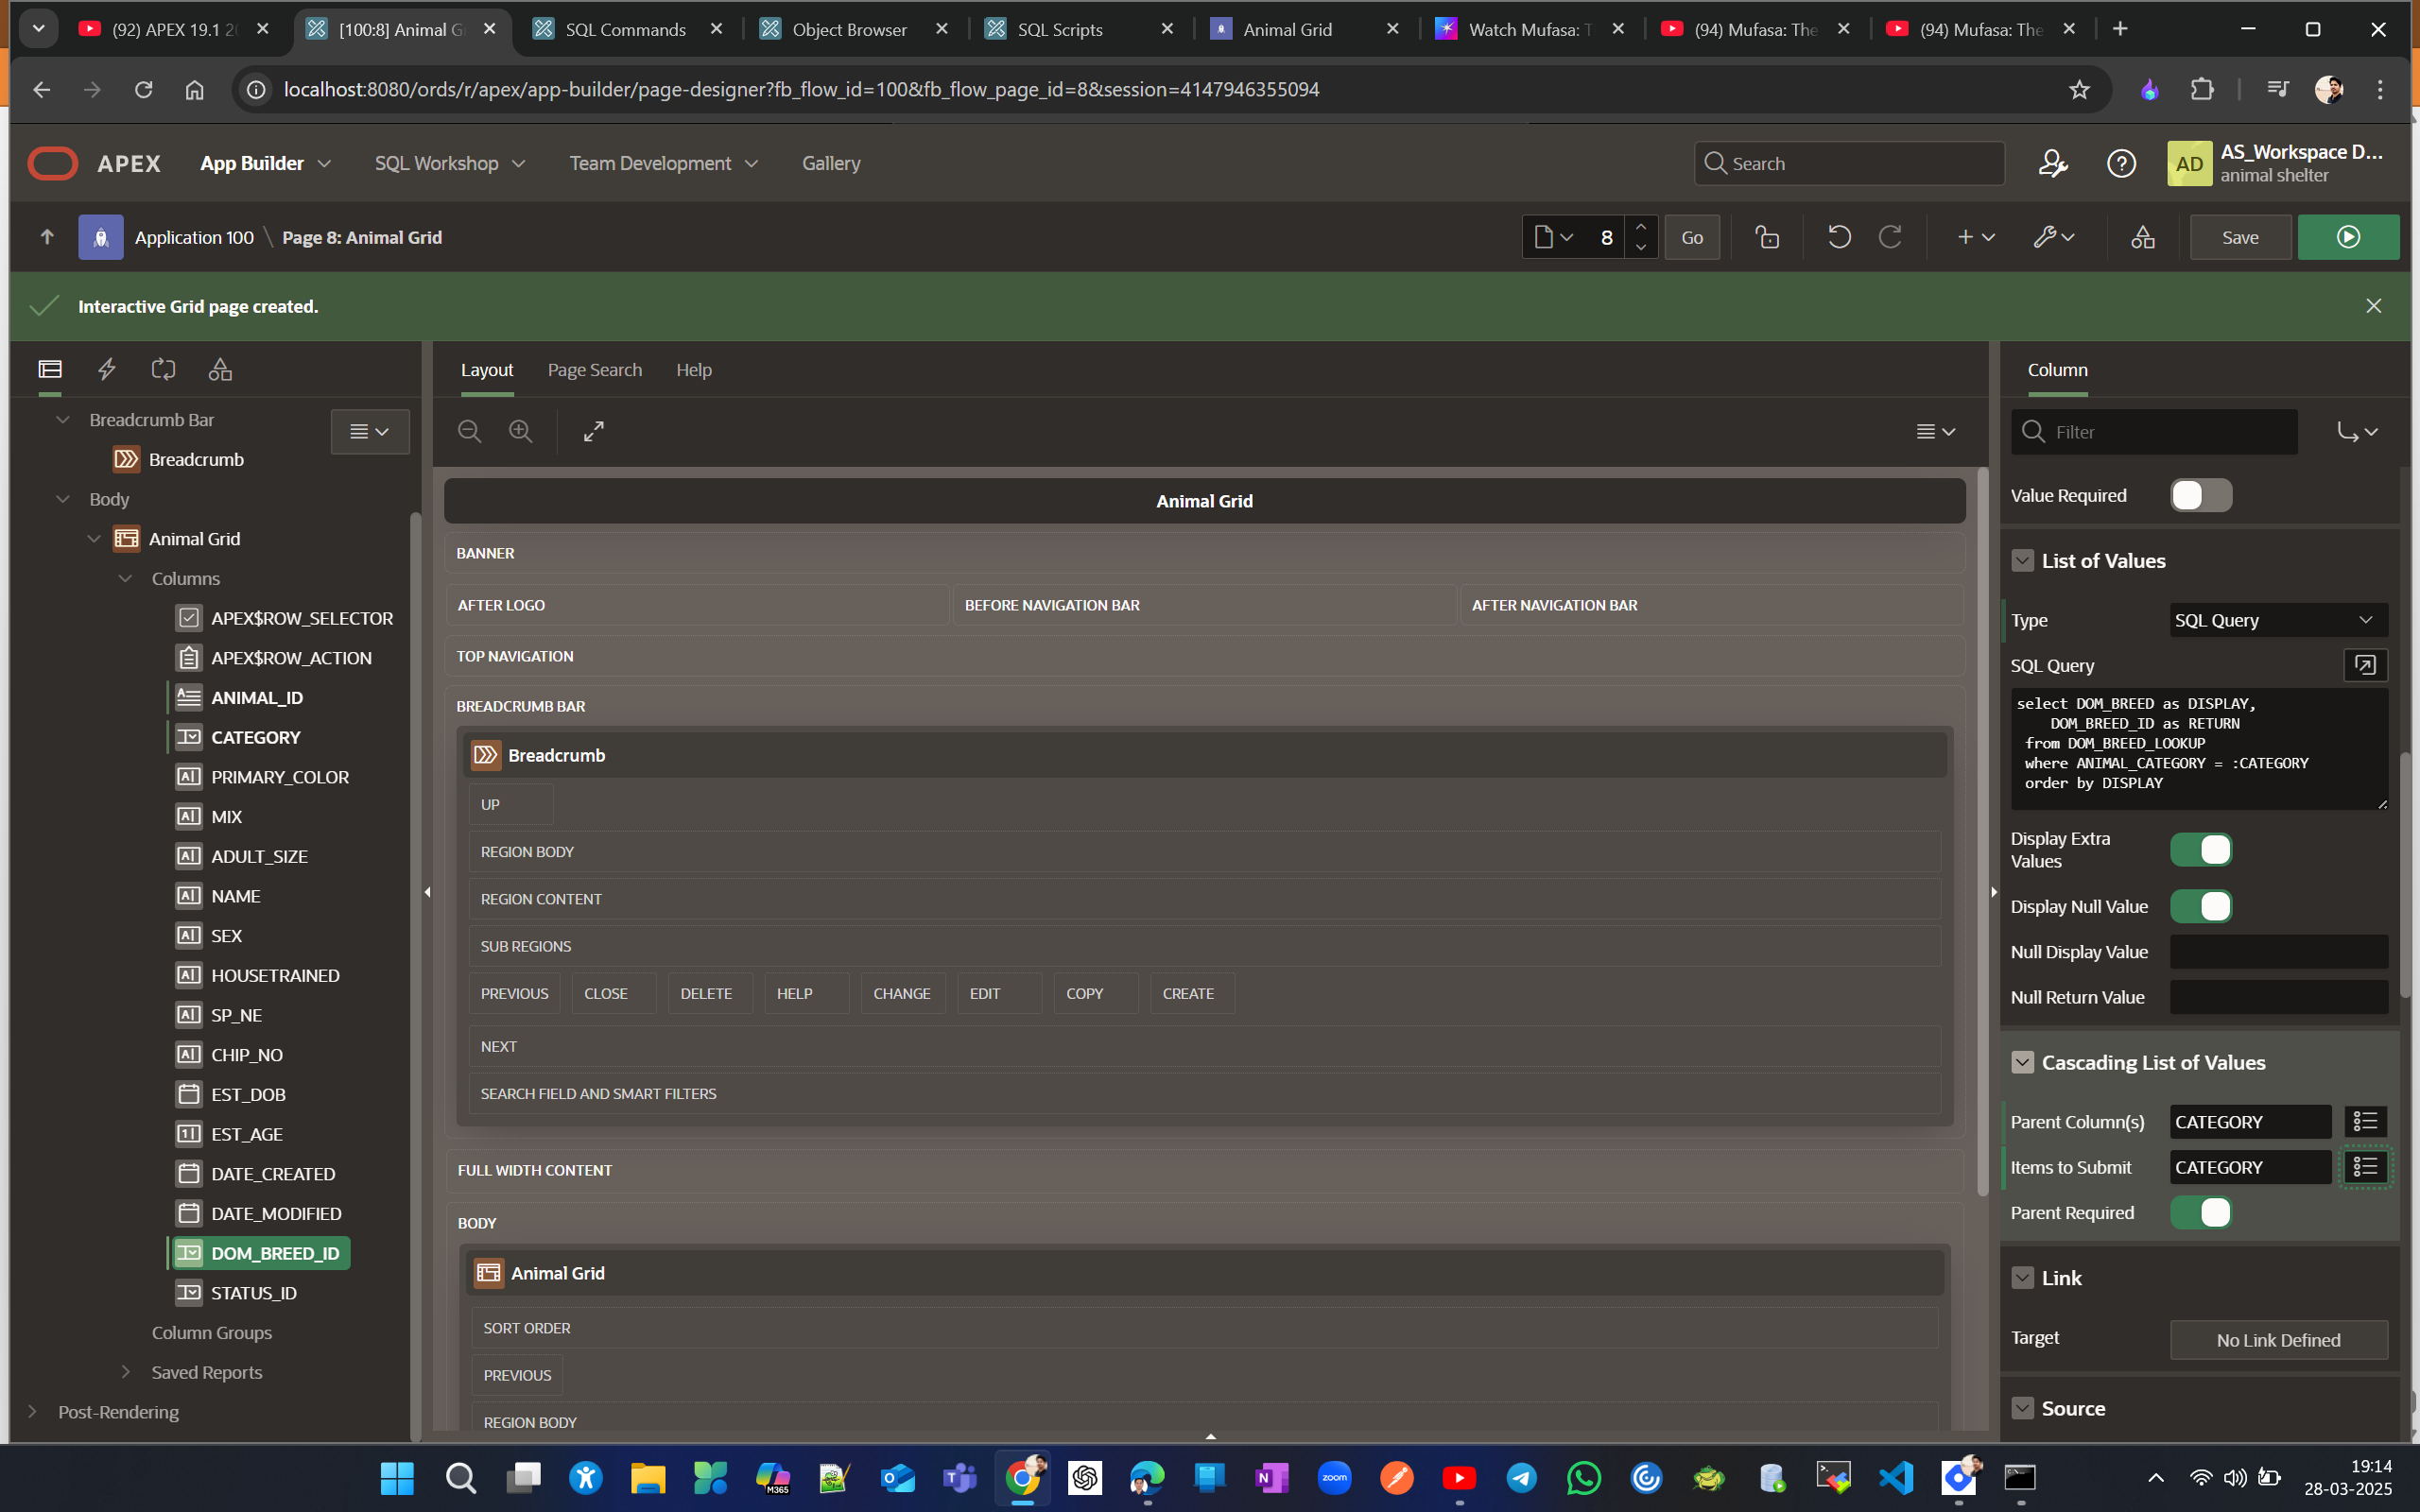
In the page designer, change the category type to a select list, source it from Animal_category LOV, use dom_breed as the source SQL statement, and update Parent columns and Items to submit under cascading List Of Values.
select DOM_BREED as DISPLAY,
    DOM_BREED_ID as RETURN
 from DOM_BREED_LOOKUP
 where ANIMAL_CATEGORY = :CATEGORY
 order by DISPLAY
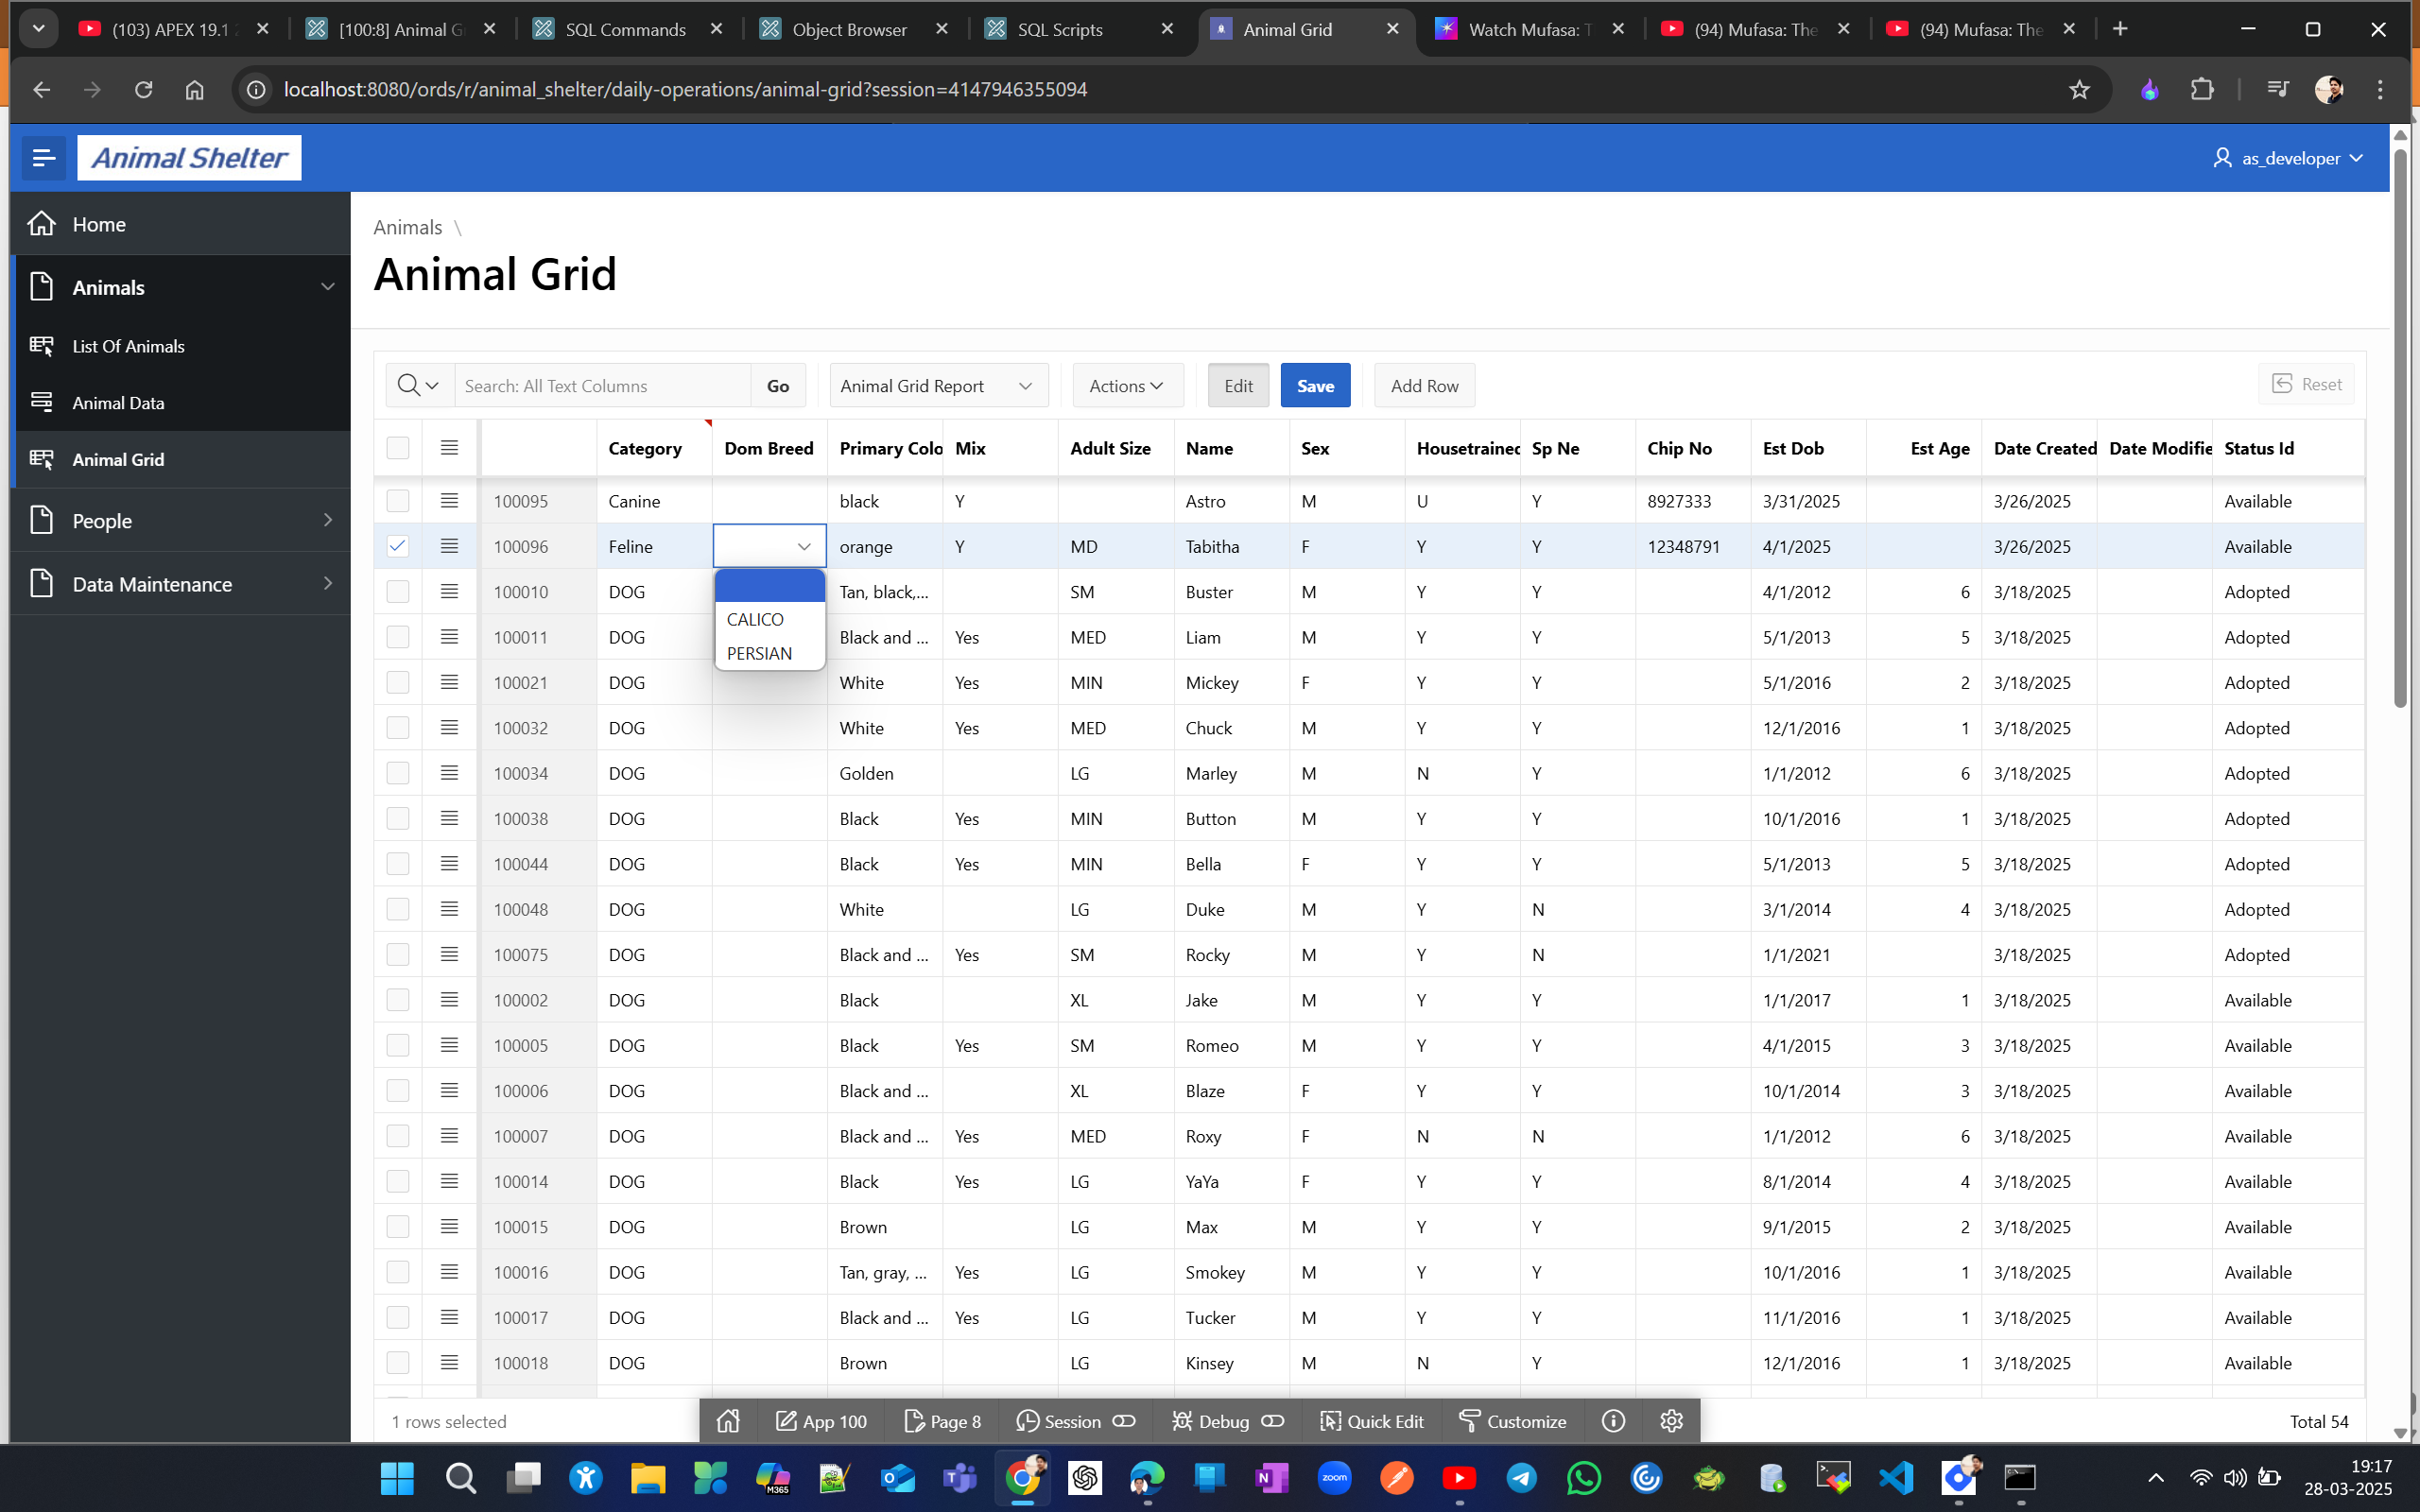
Now, in the grid report, when you click to populate Dom Breed, you'll only see the breeds that match the selected category, such as Feline.
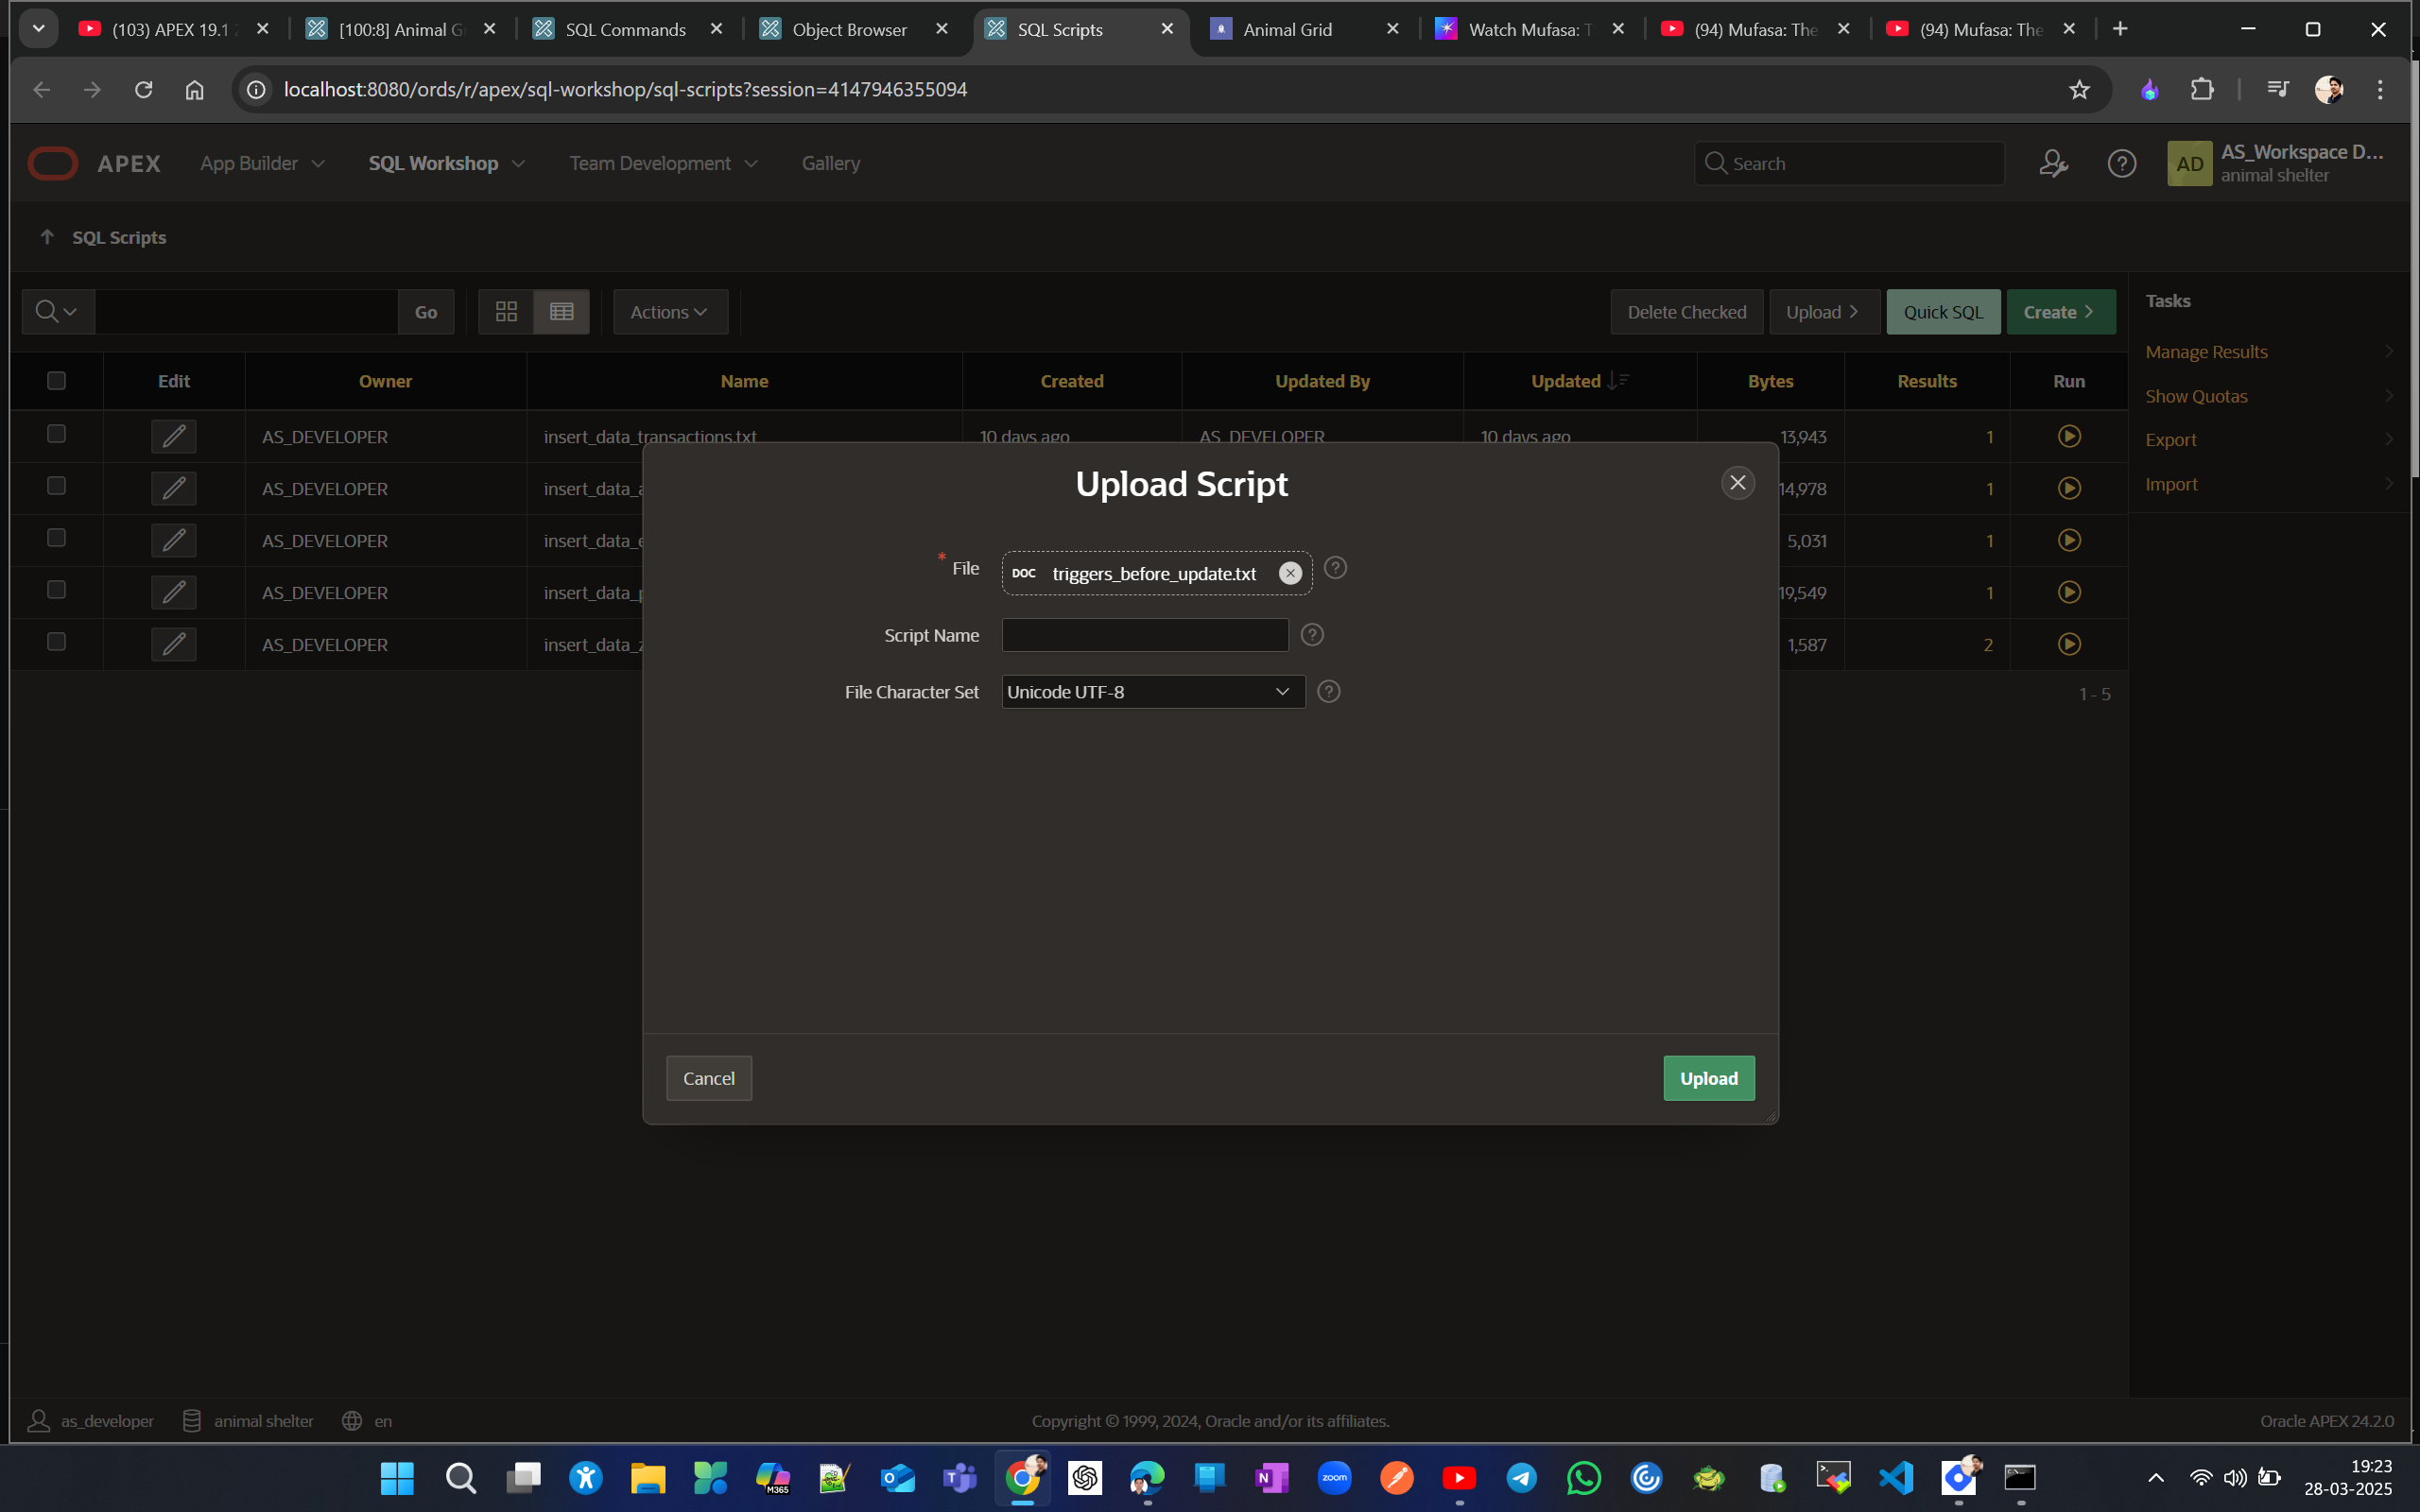
Now, let's execute the script triggers_before_update.sql from the downloaded folder to create before-update triggers for each table (except lookup tables) that will populate the date_modified audit column whenever these tables are updated.
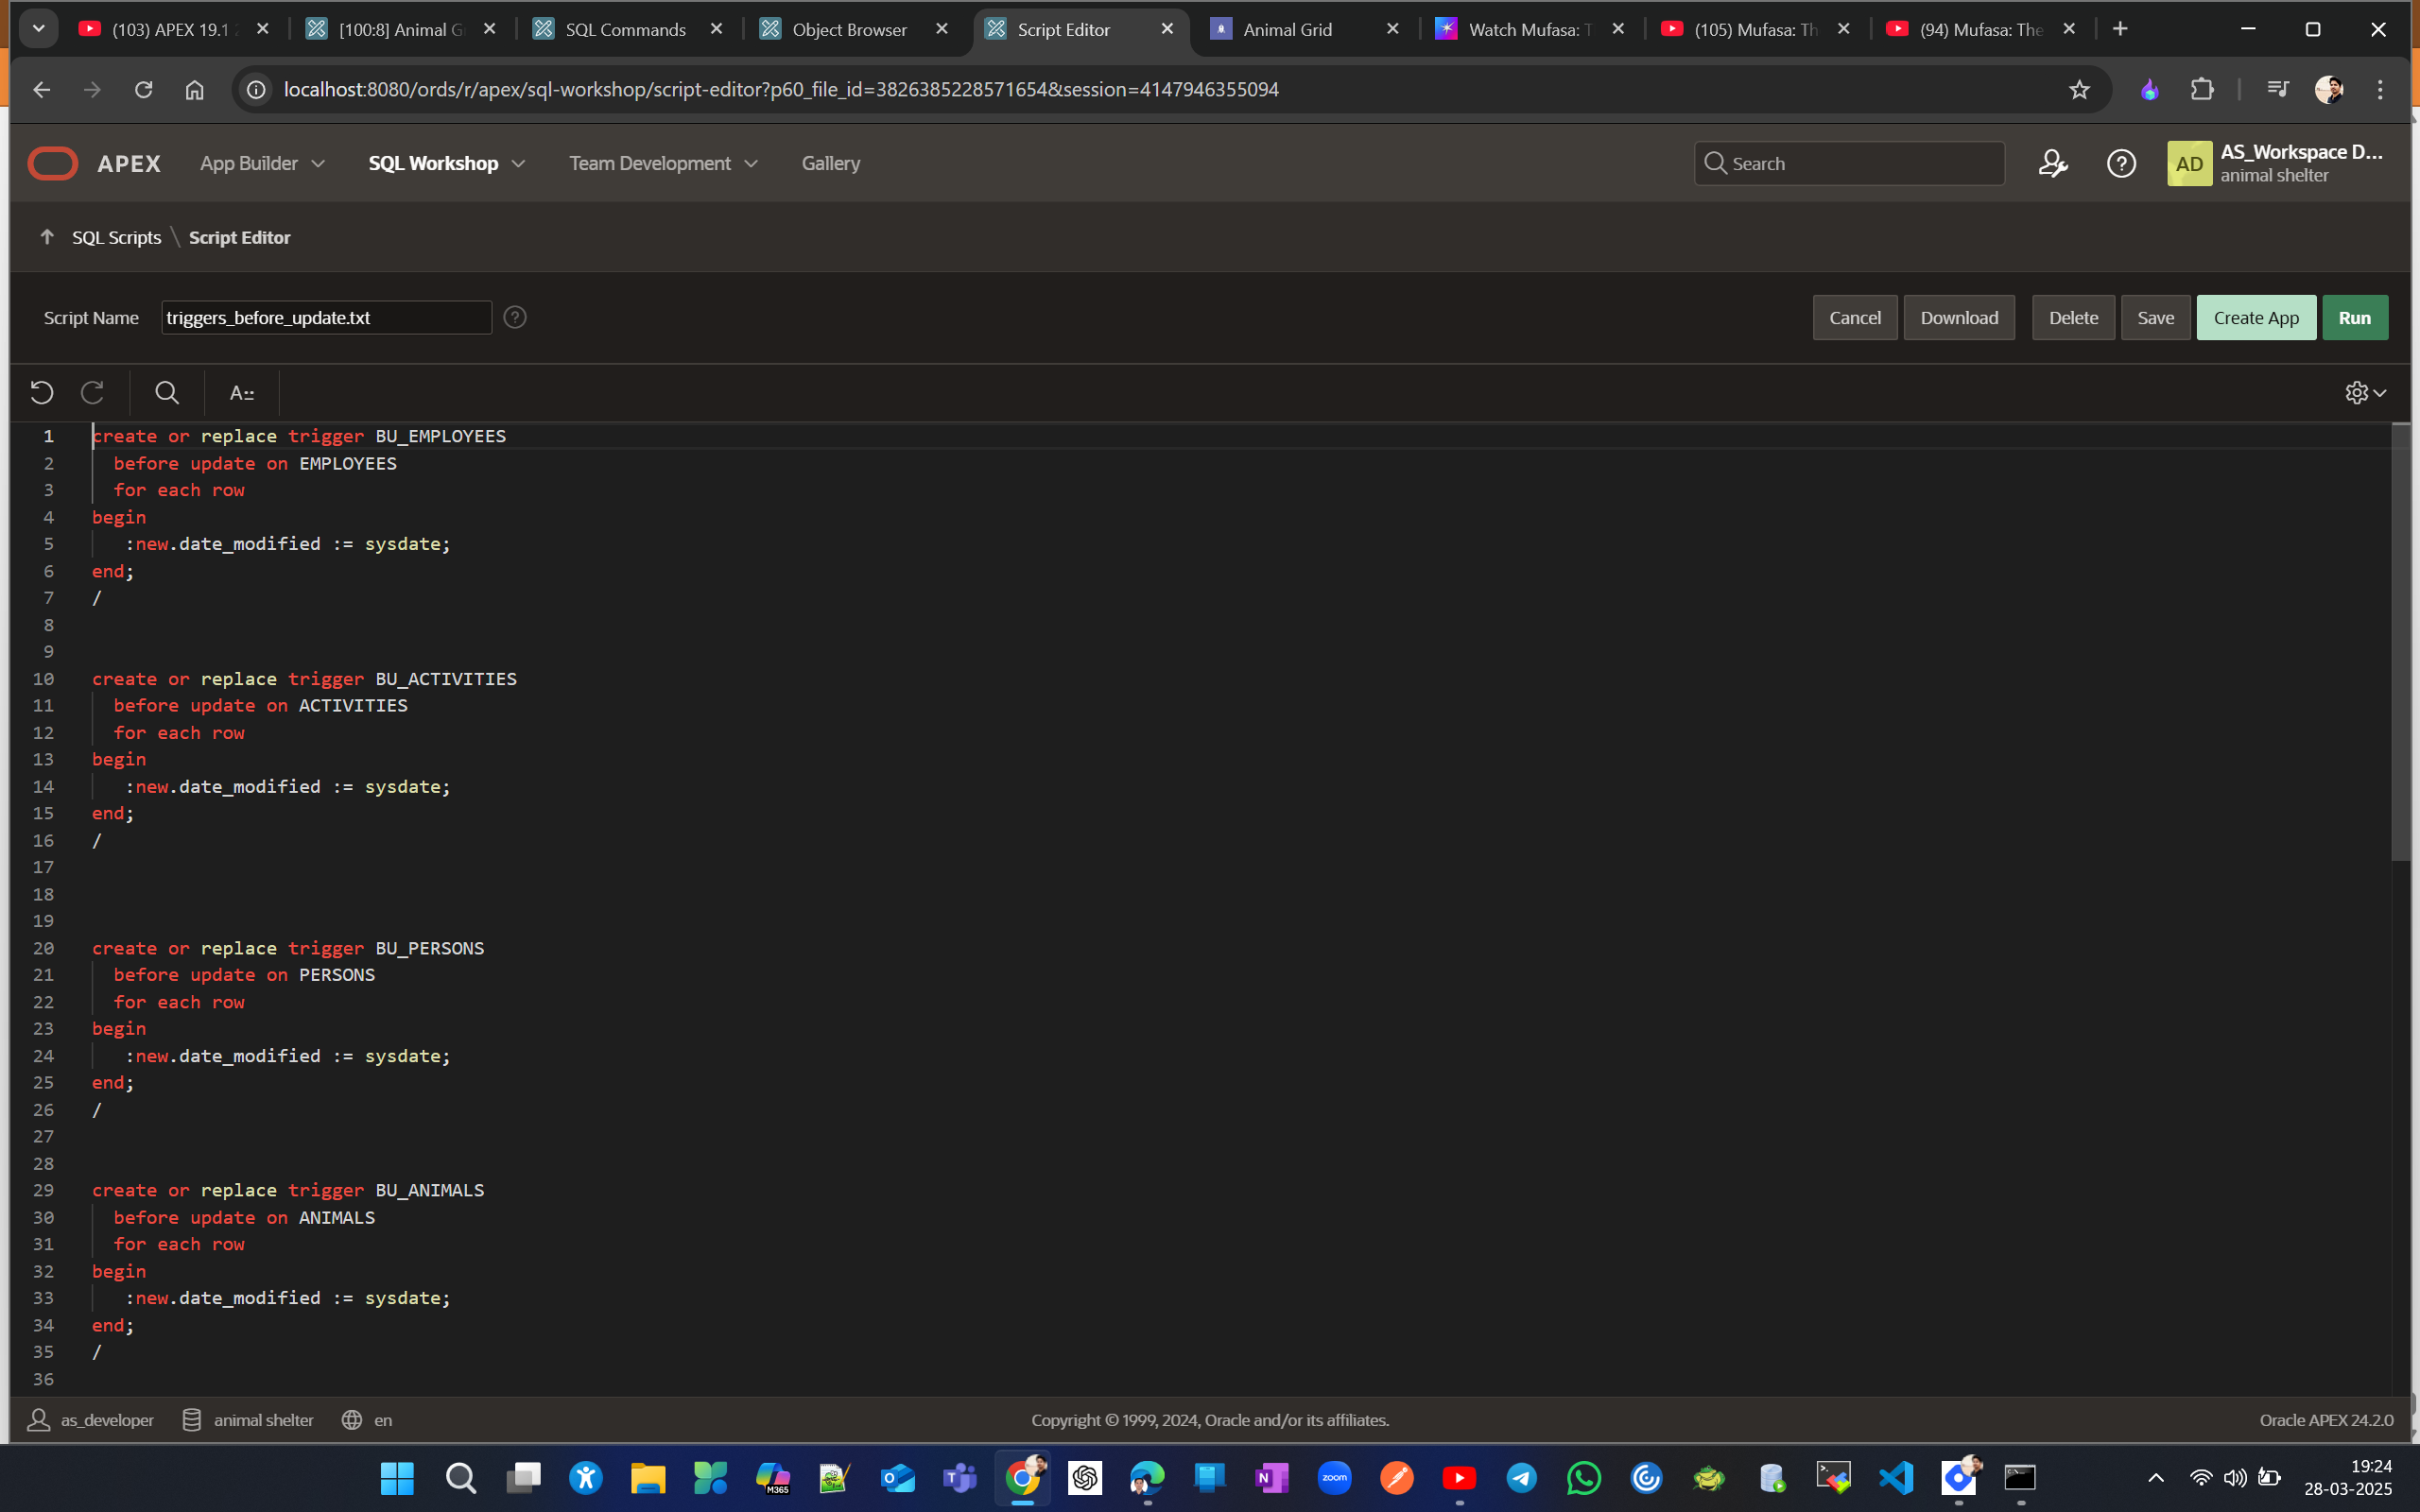
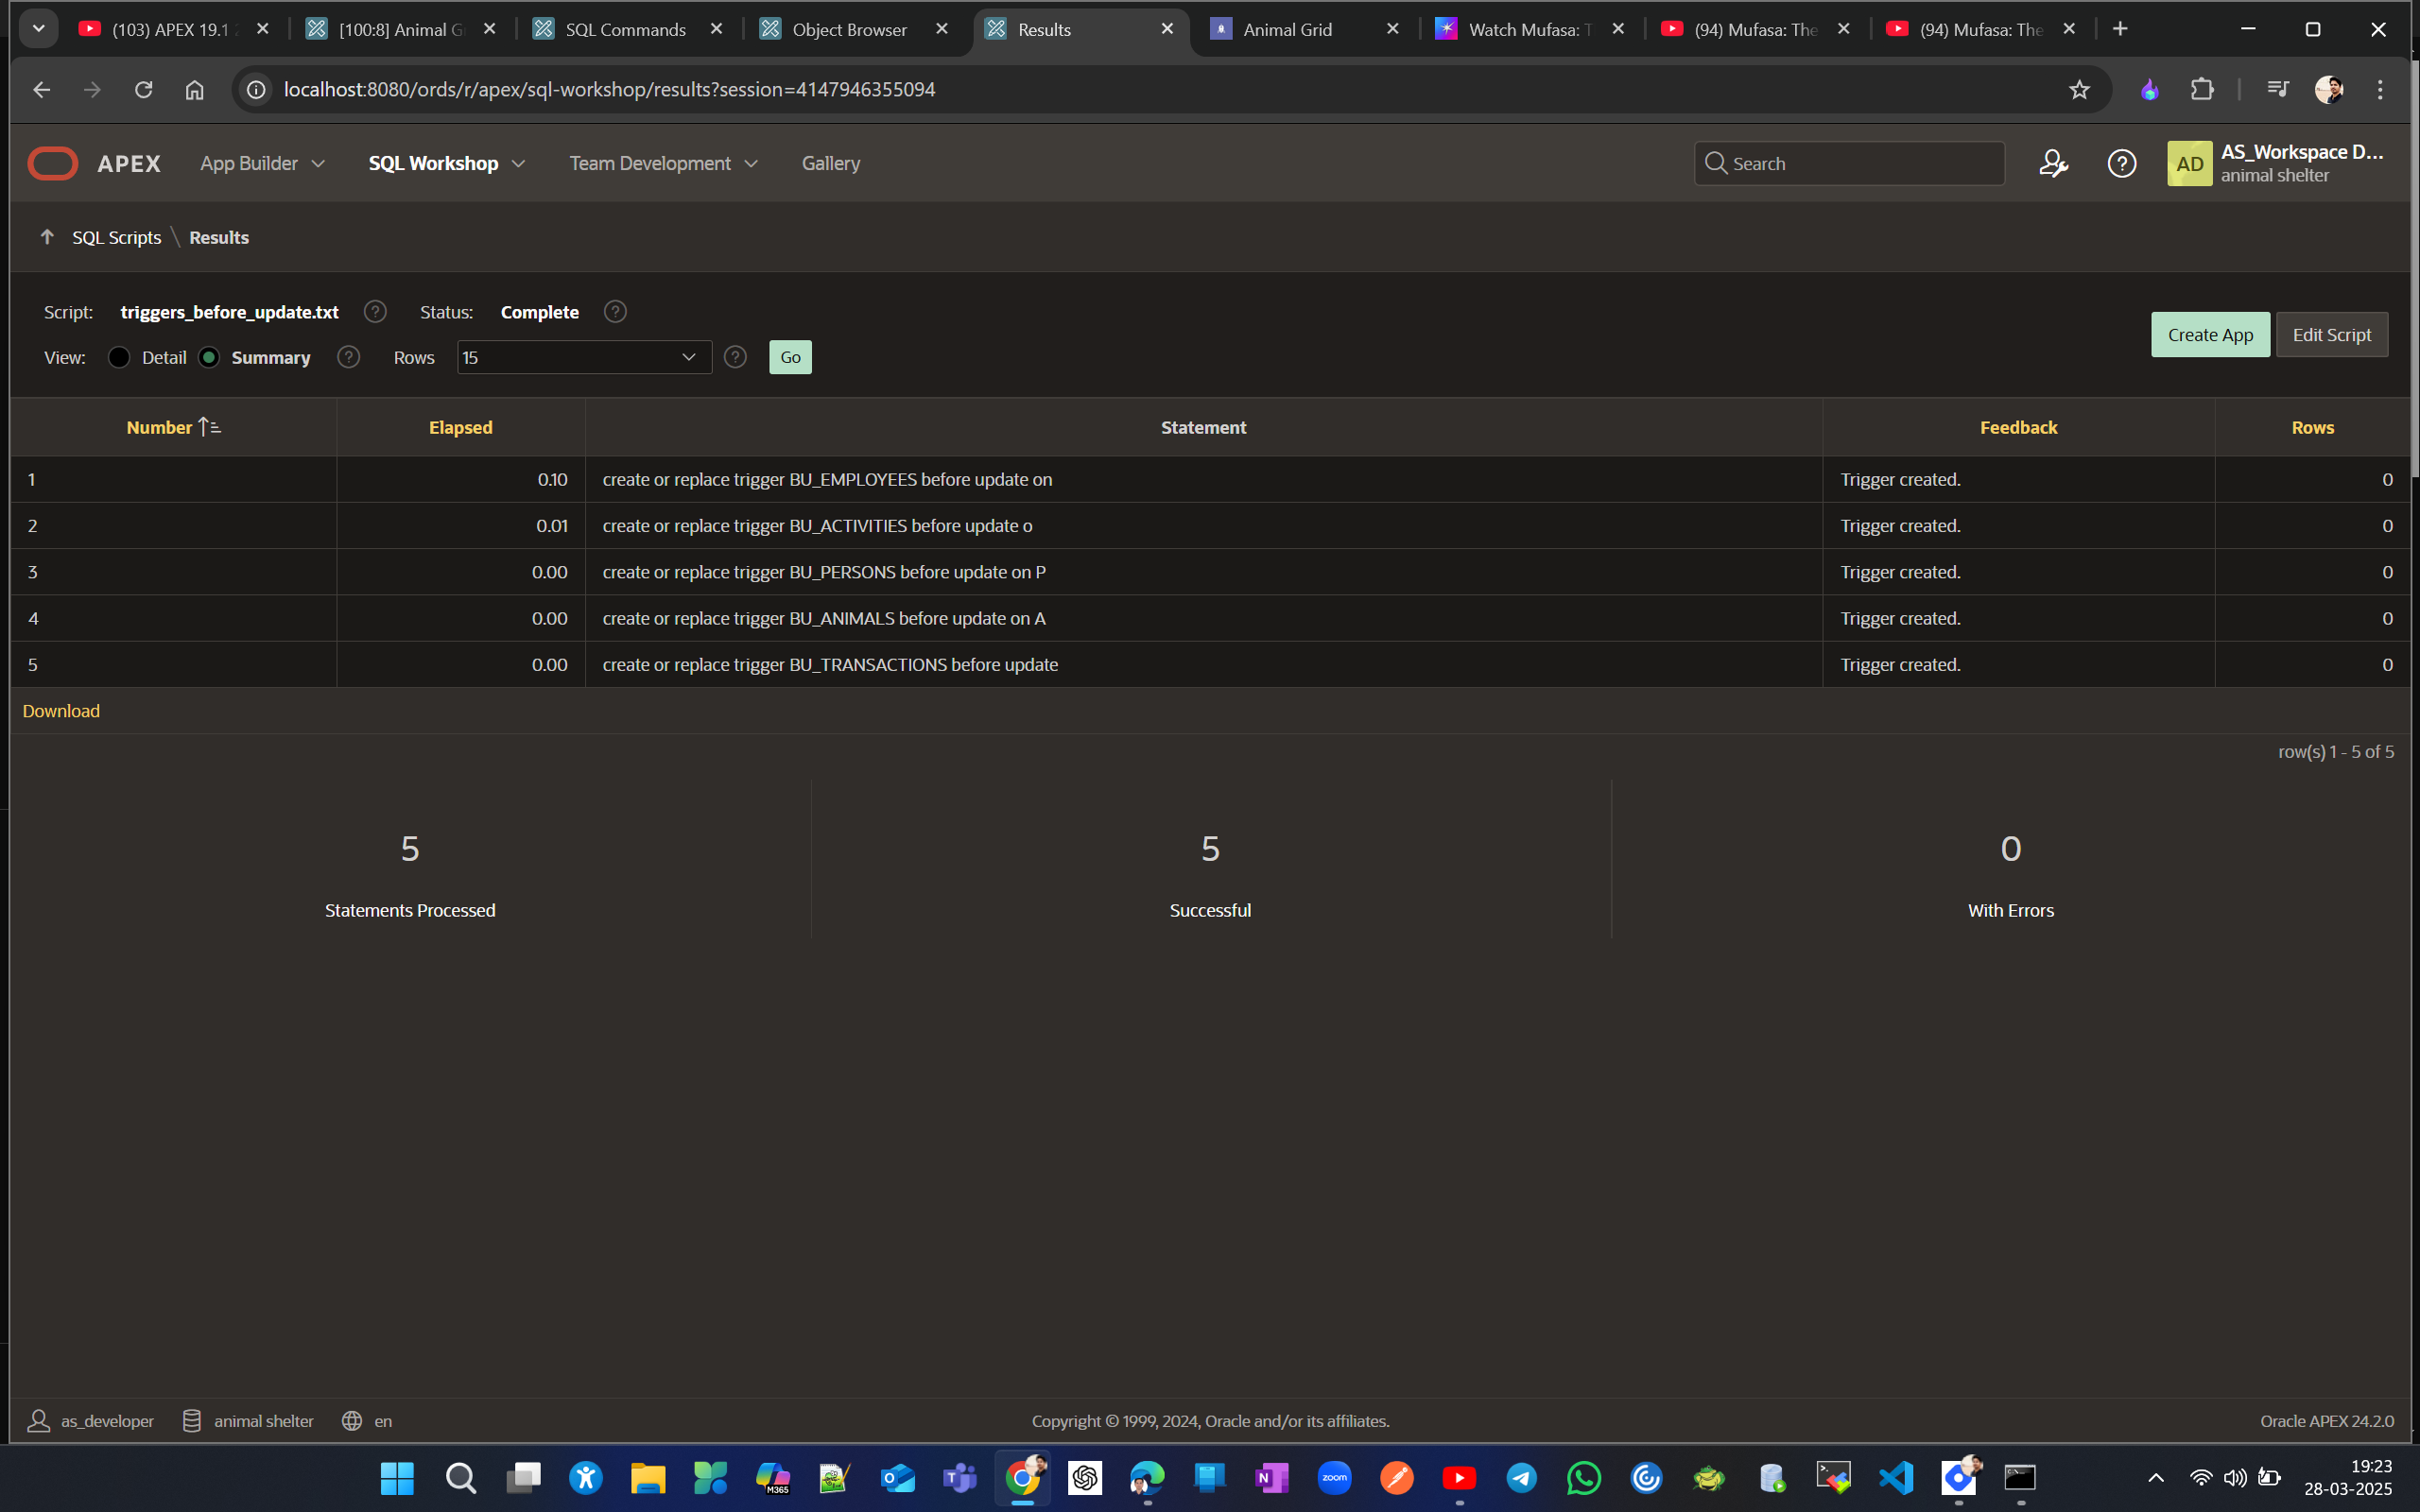
Now, when we edit anything, the DATE_MODIFIED column is automatically filled due to the before trigger action.
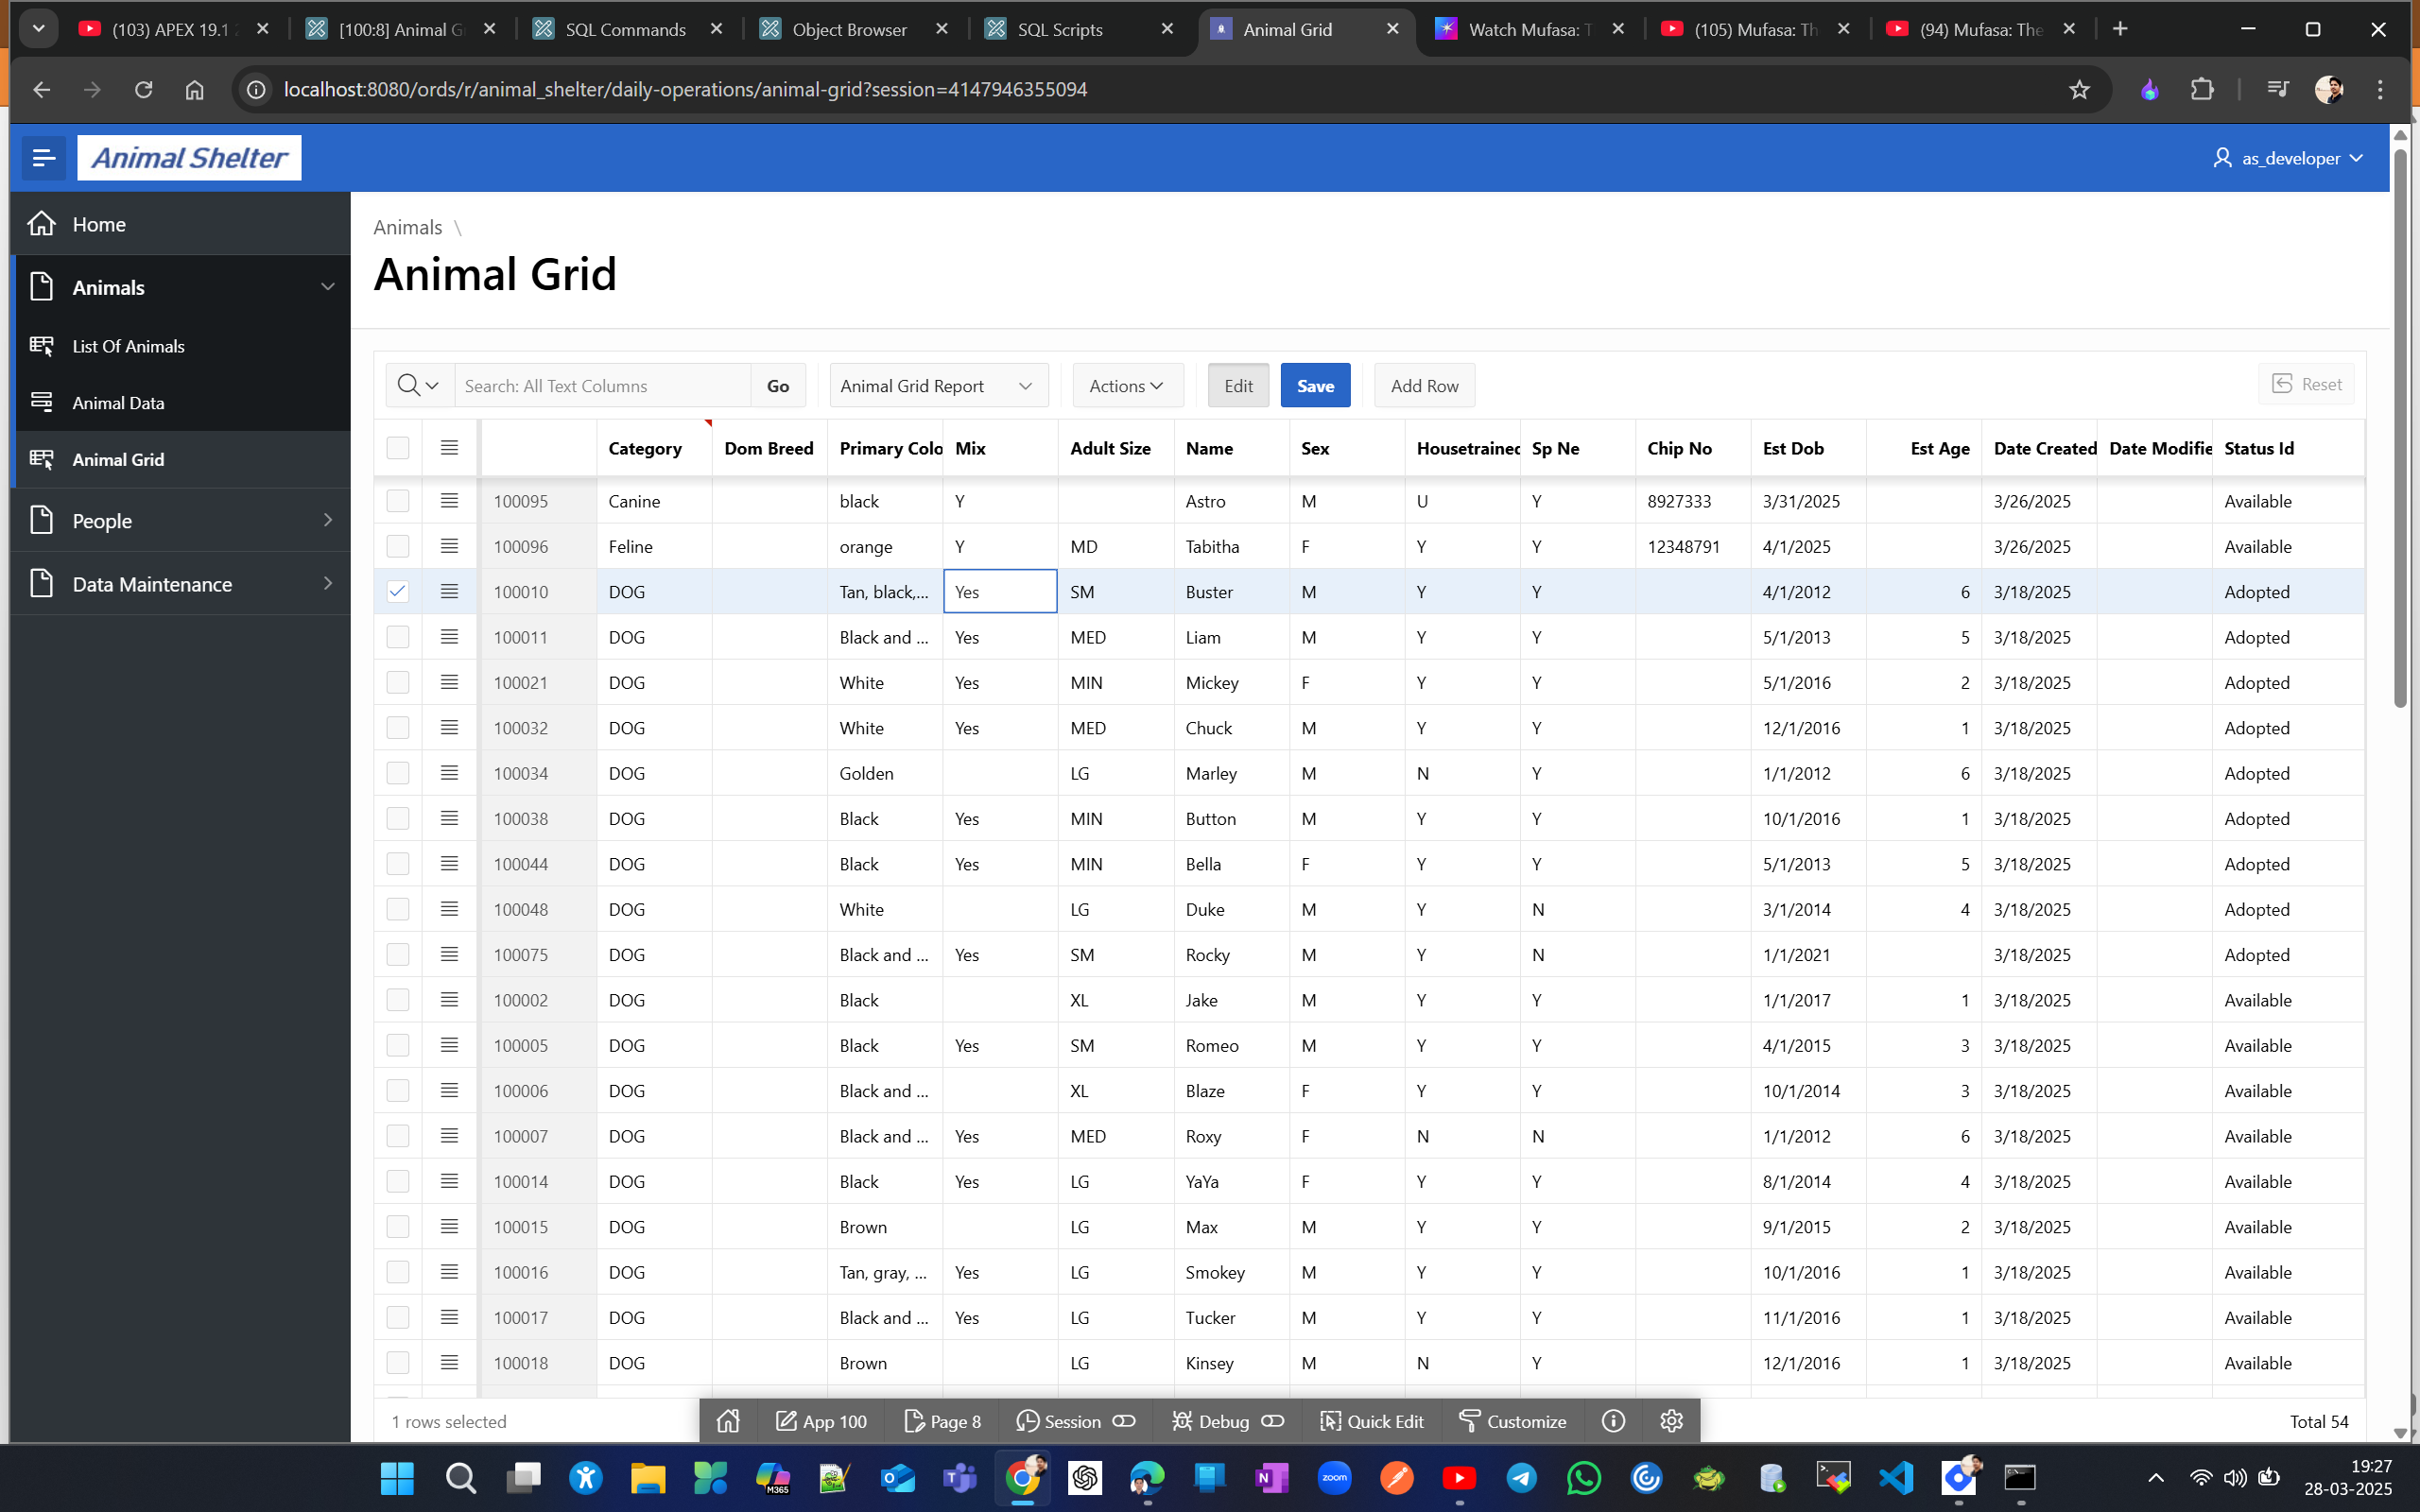
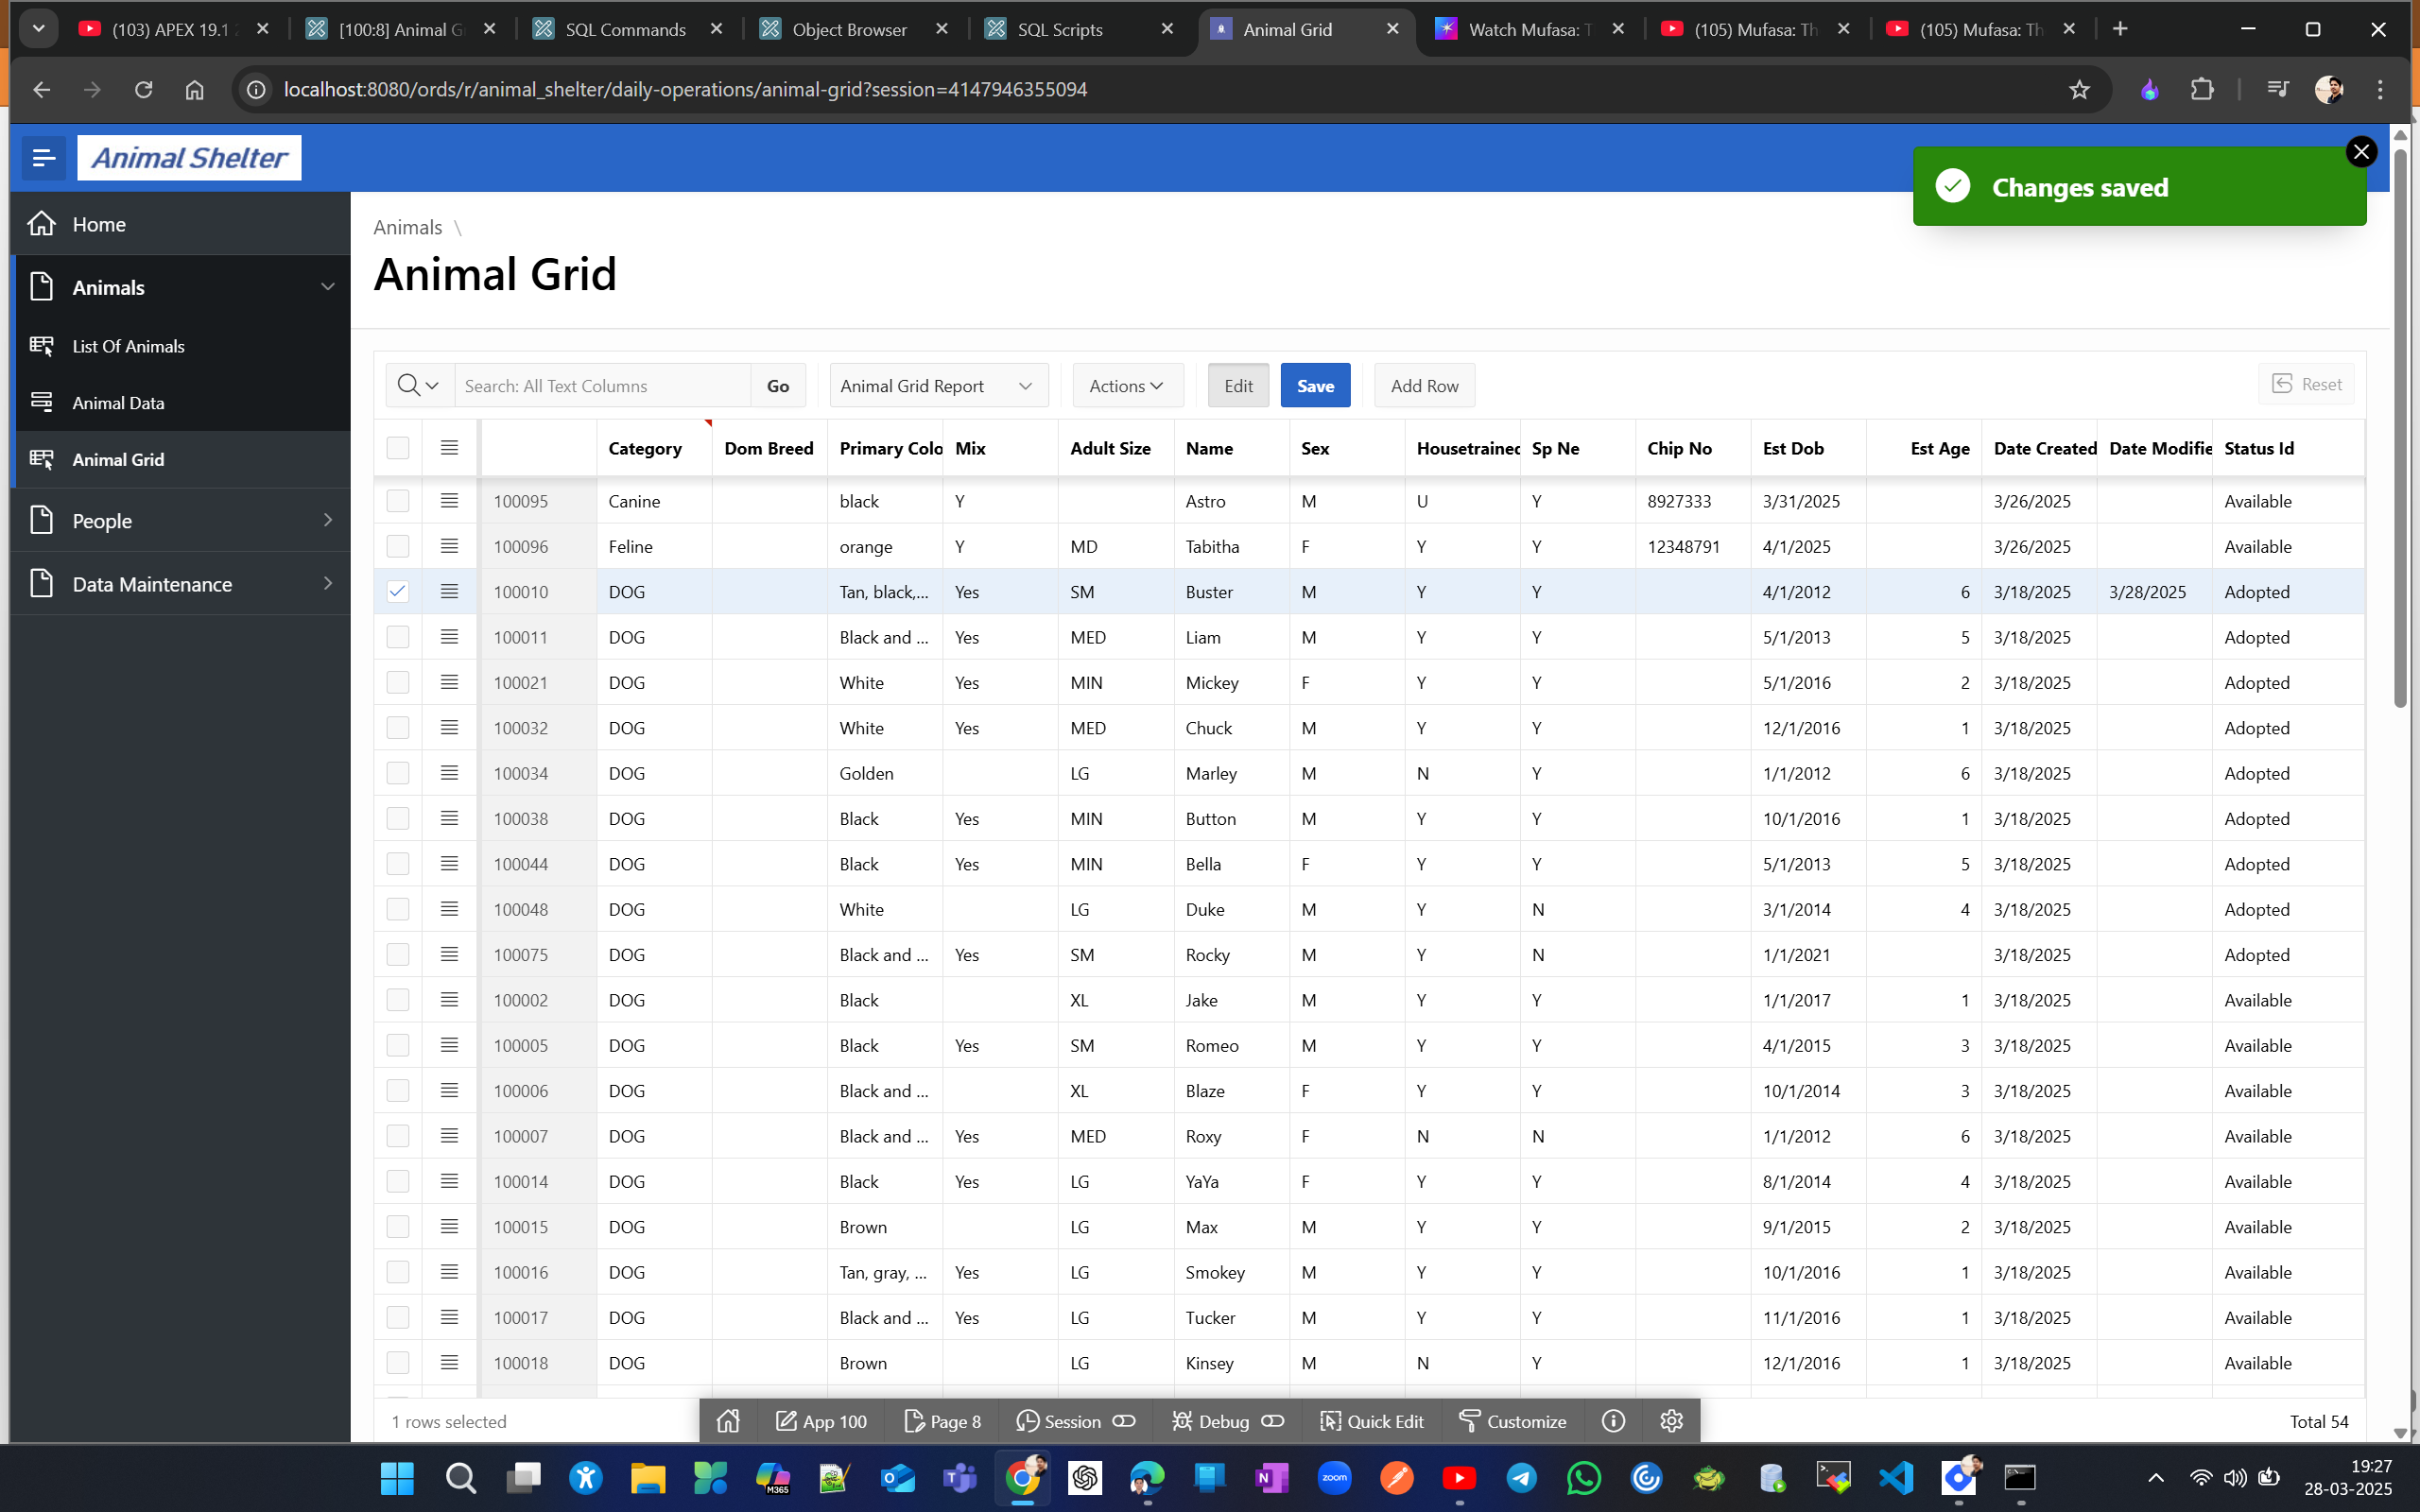
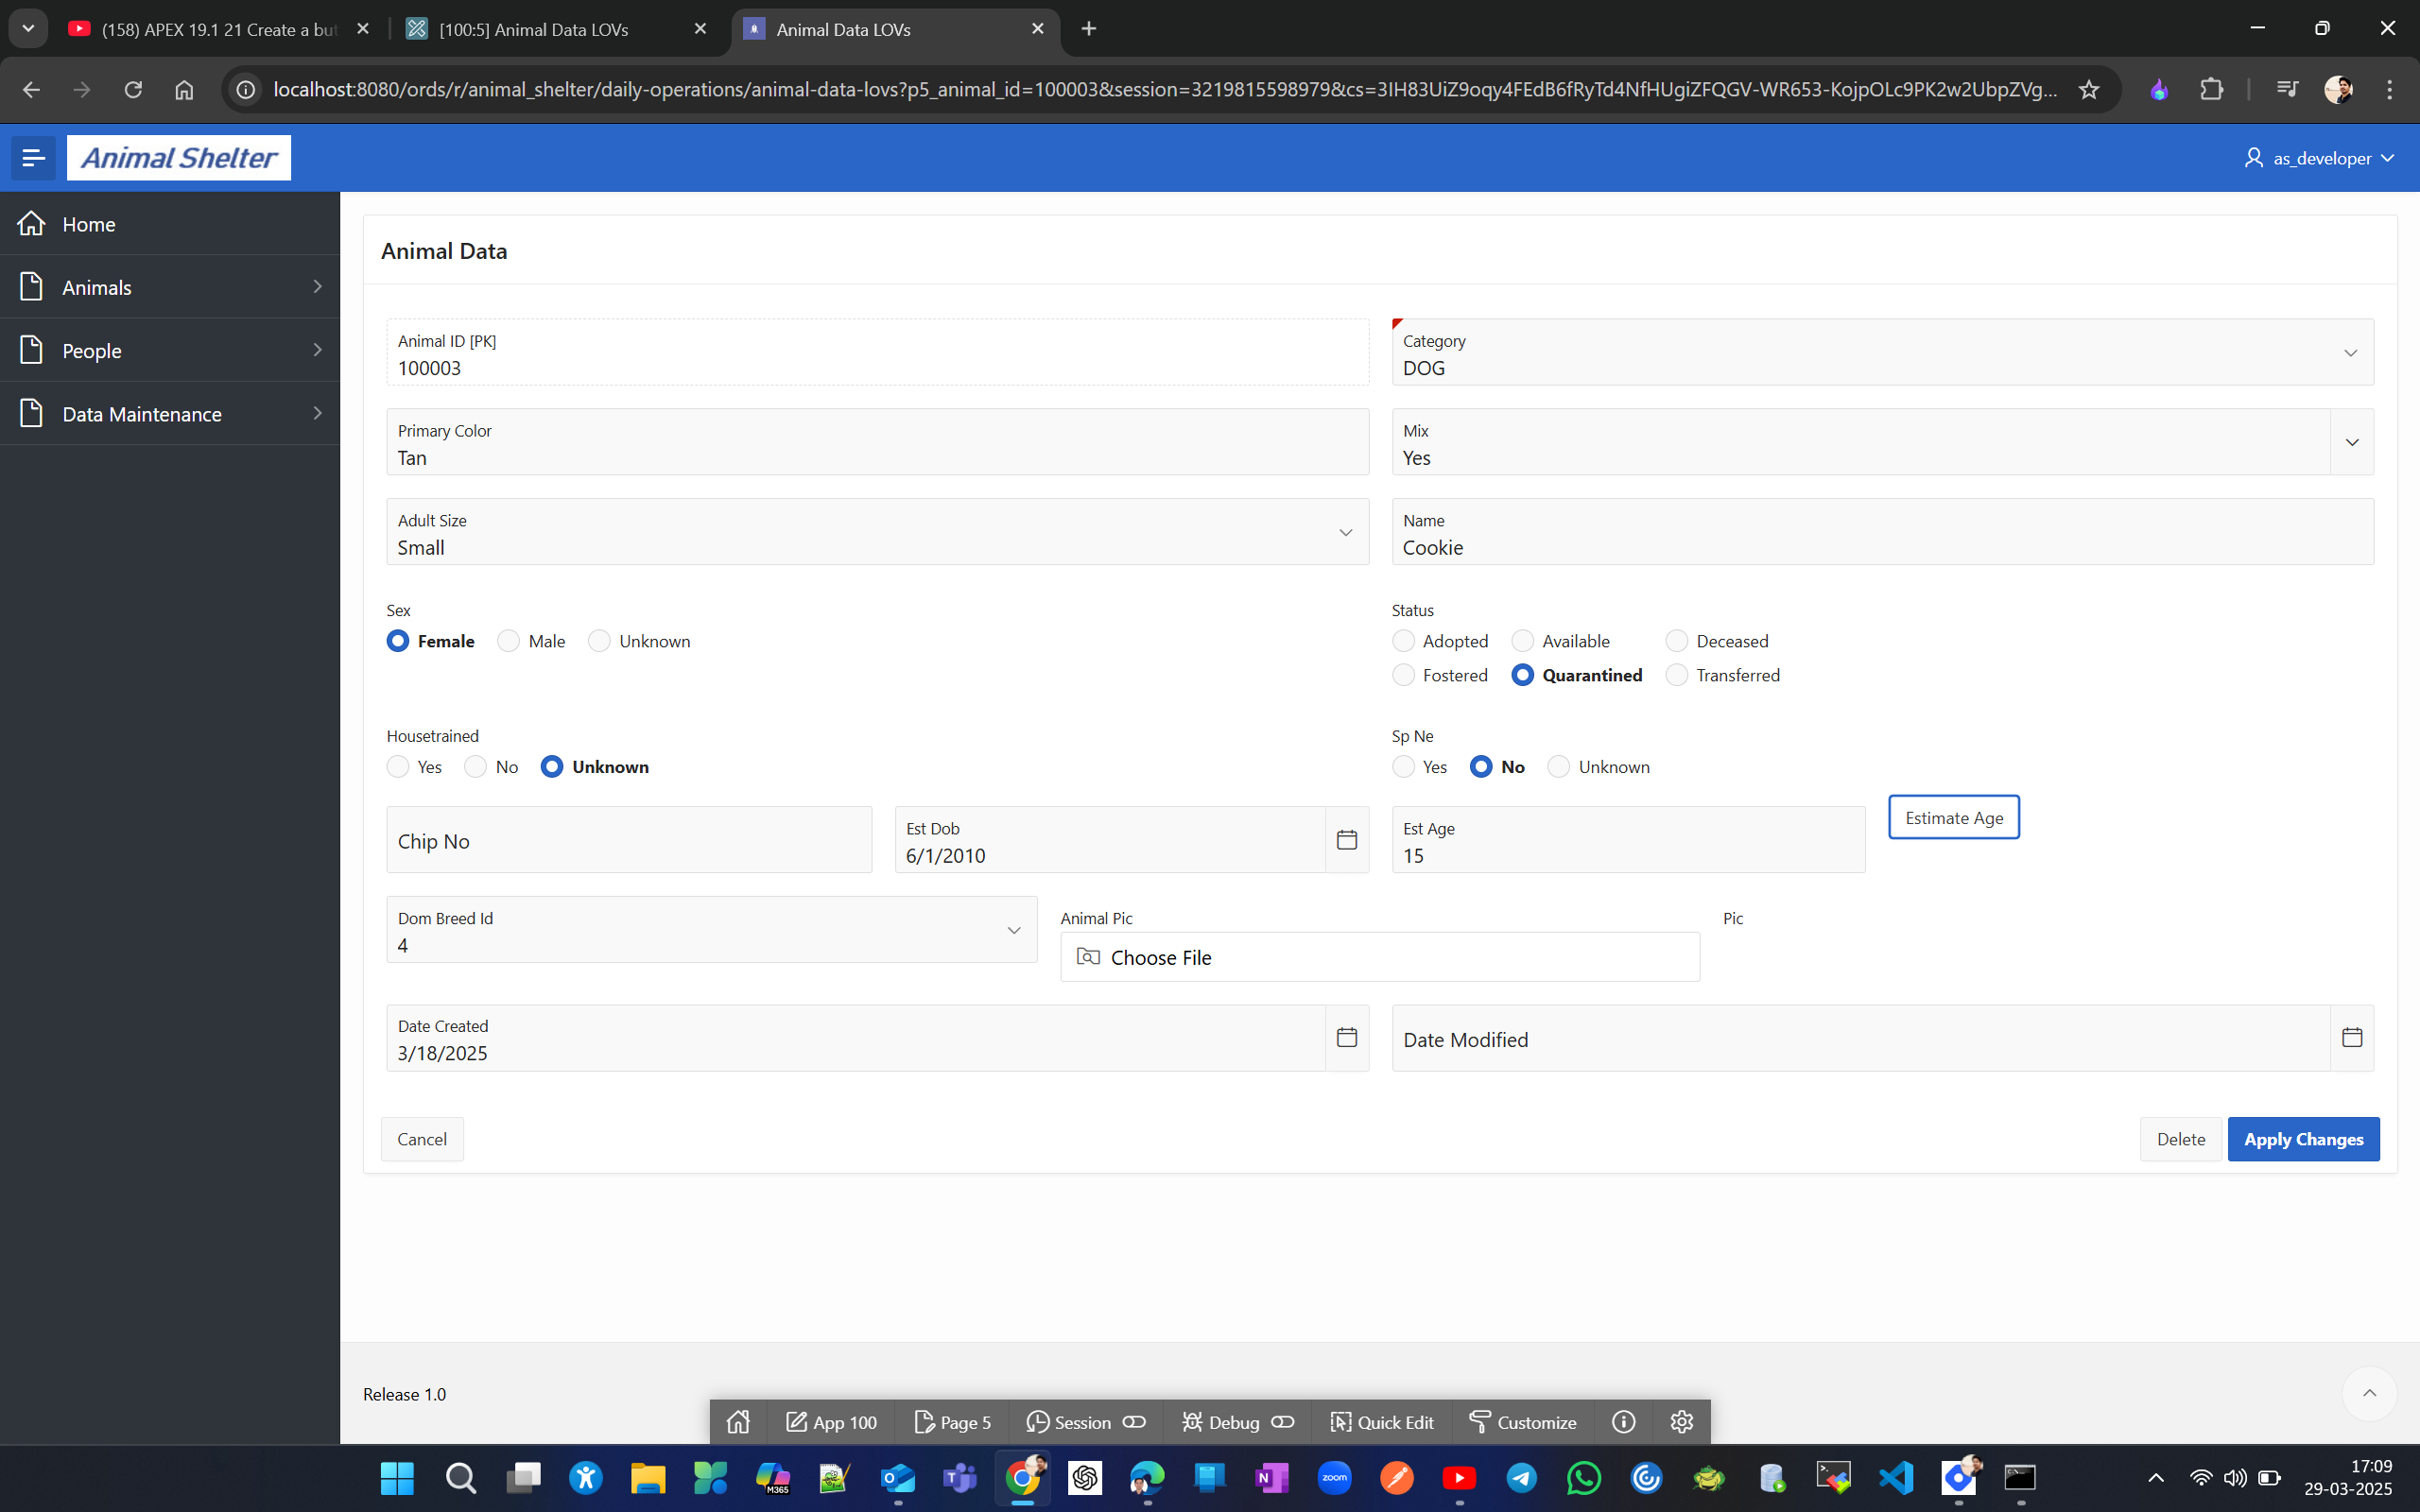
Create a button and dynamic action in a form to calculate age.
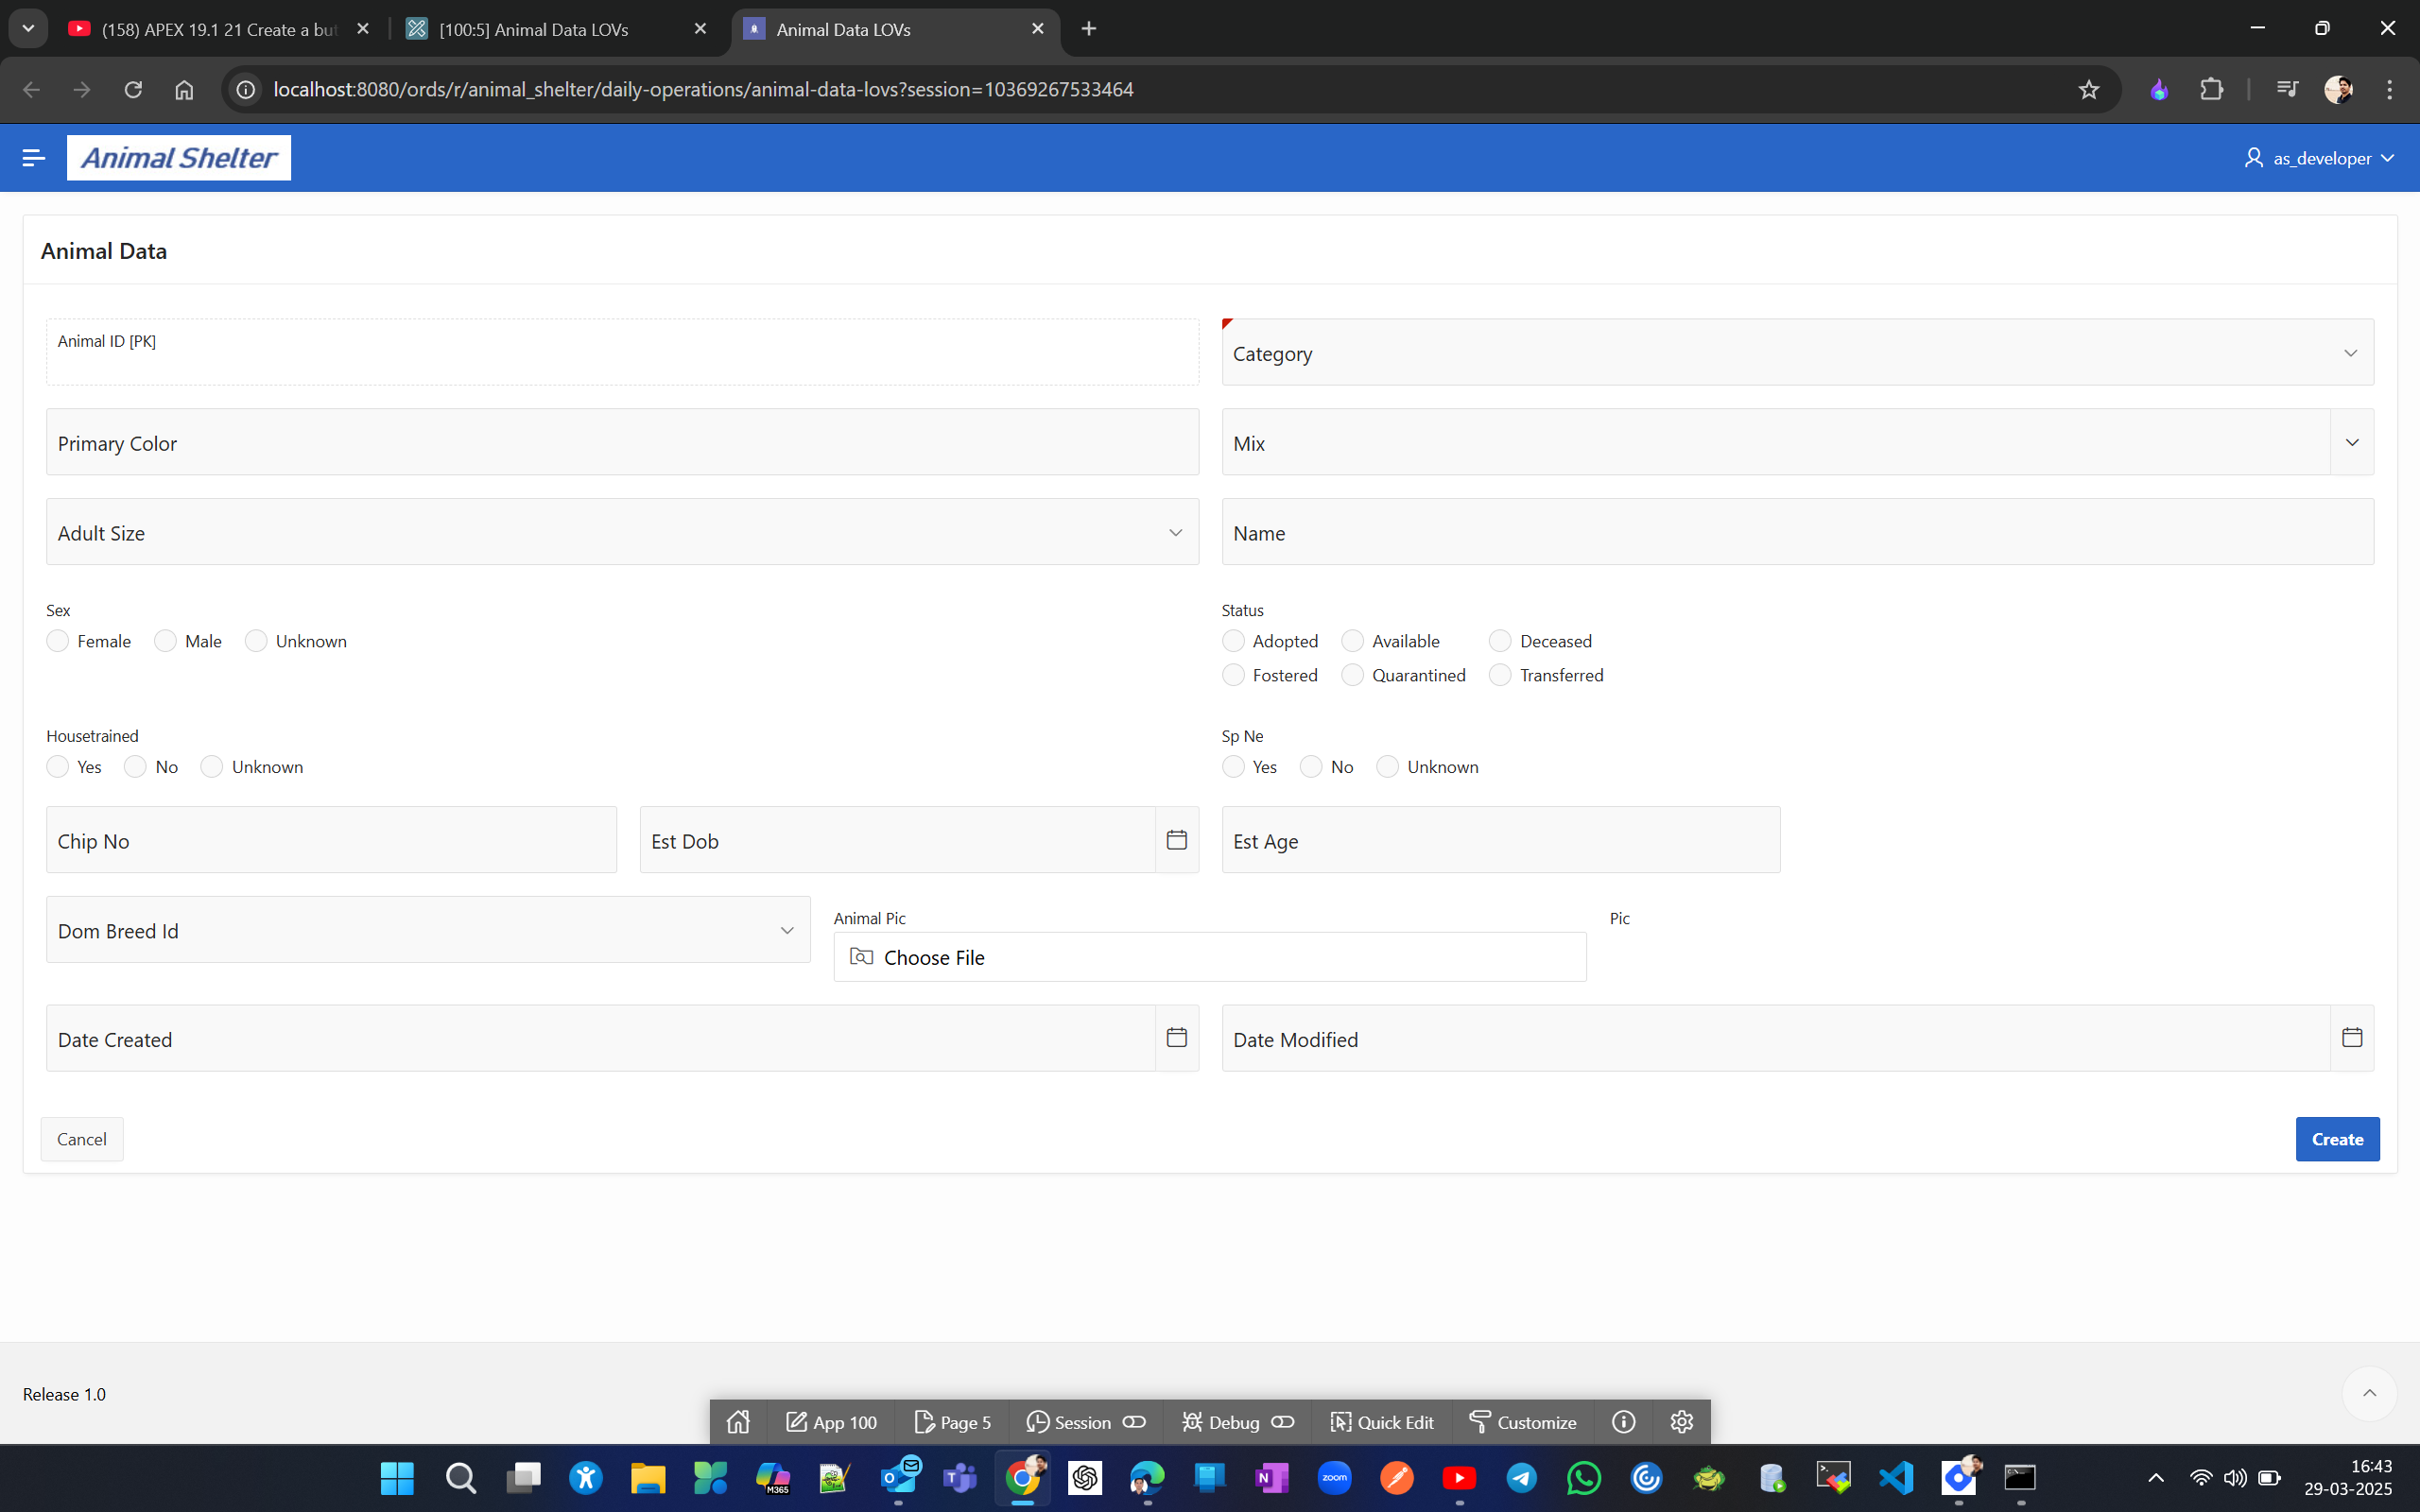
Lets bring Chip No, Est DOB, Est Age in one line in report so that some space will be there for a button to be created to calculate age.
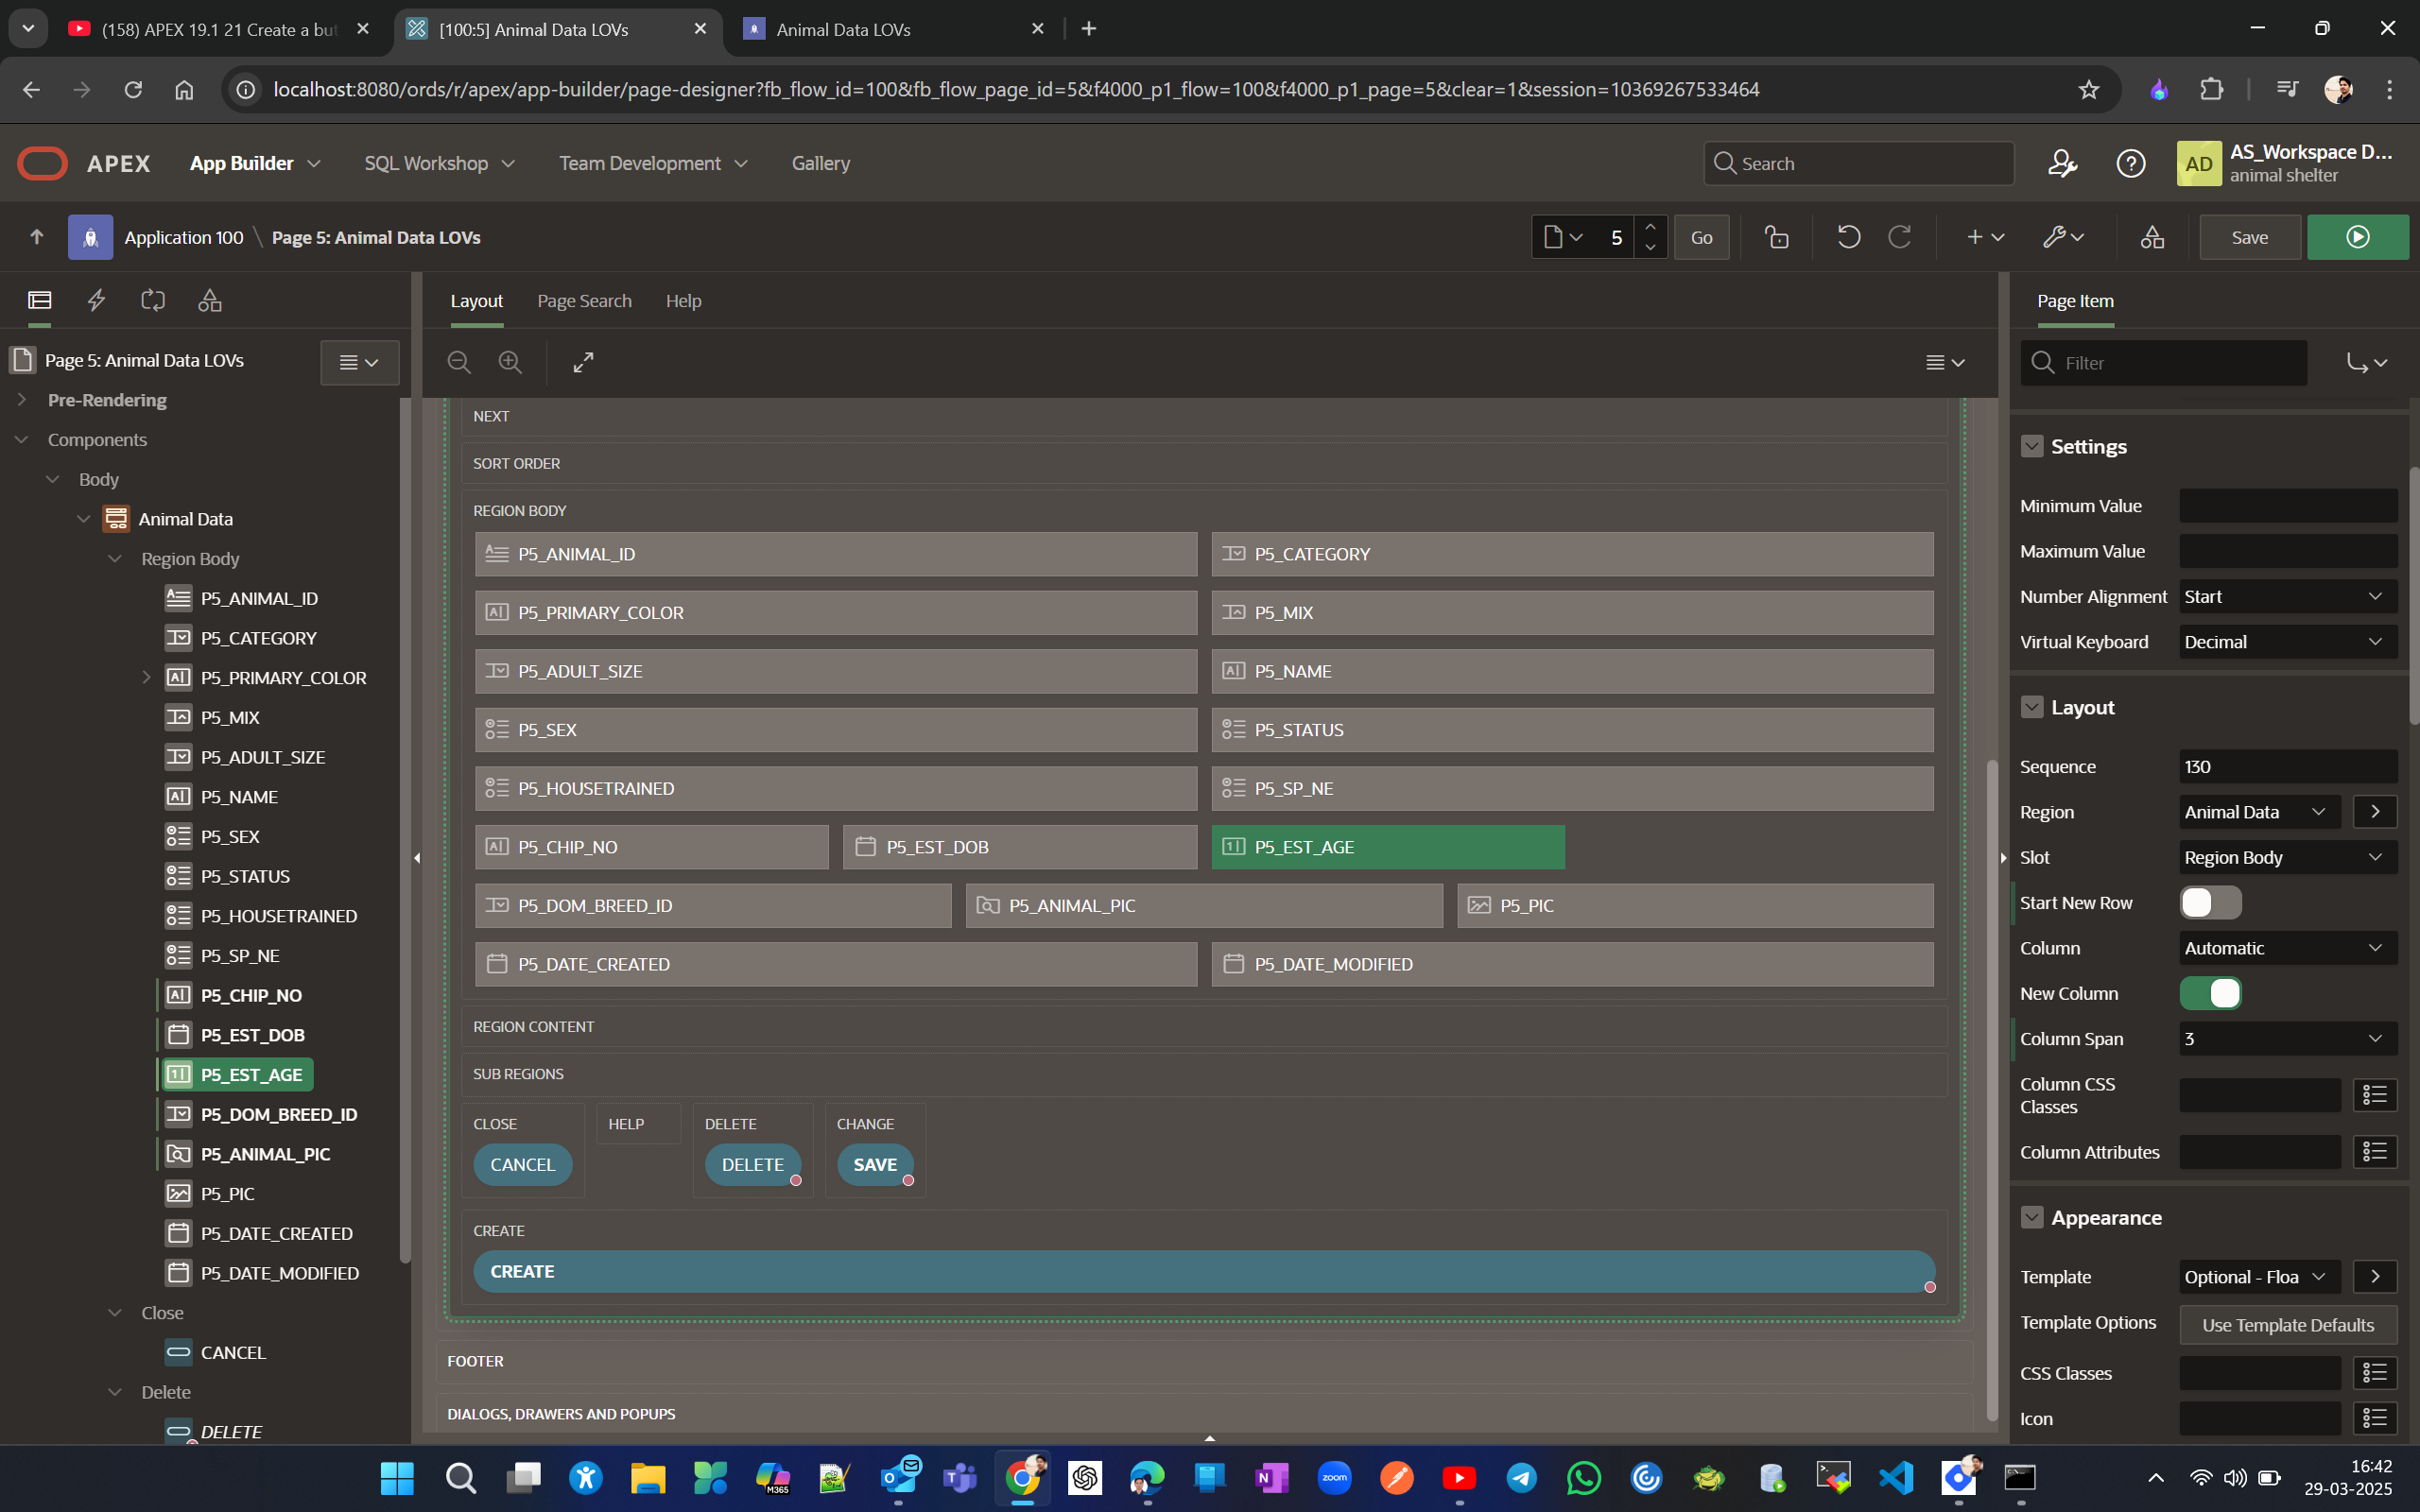
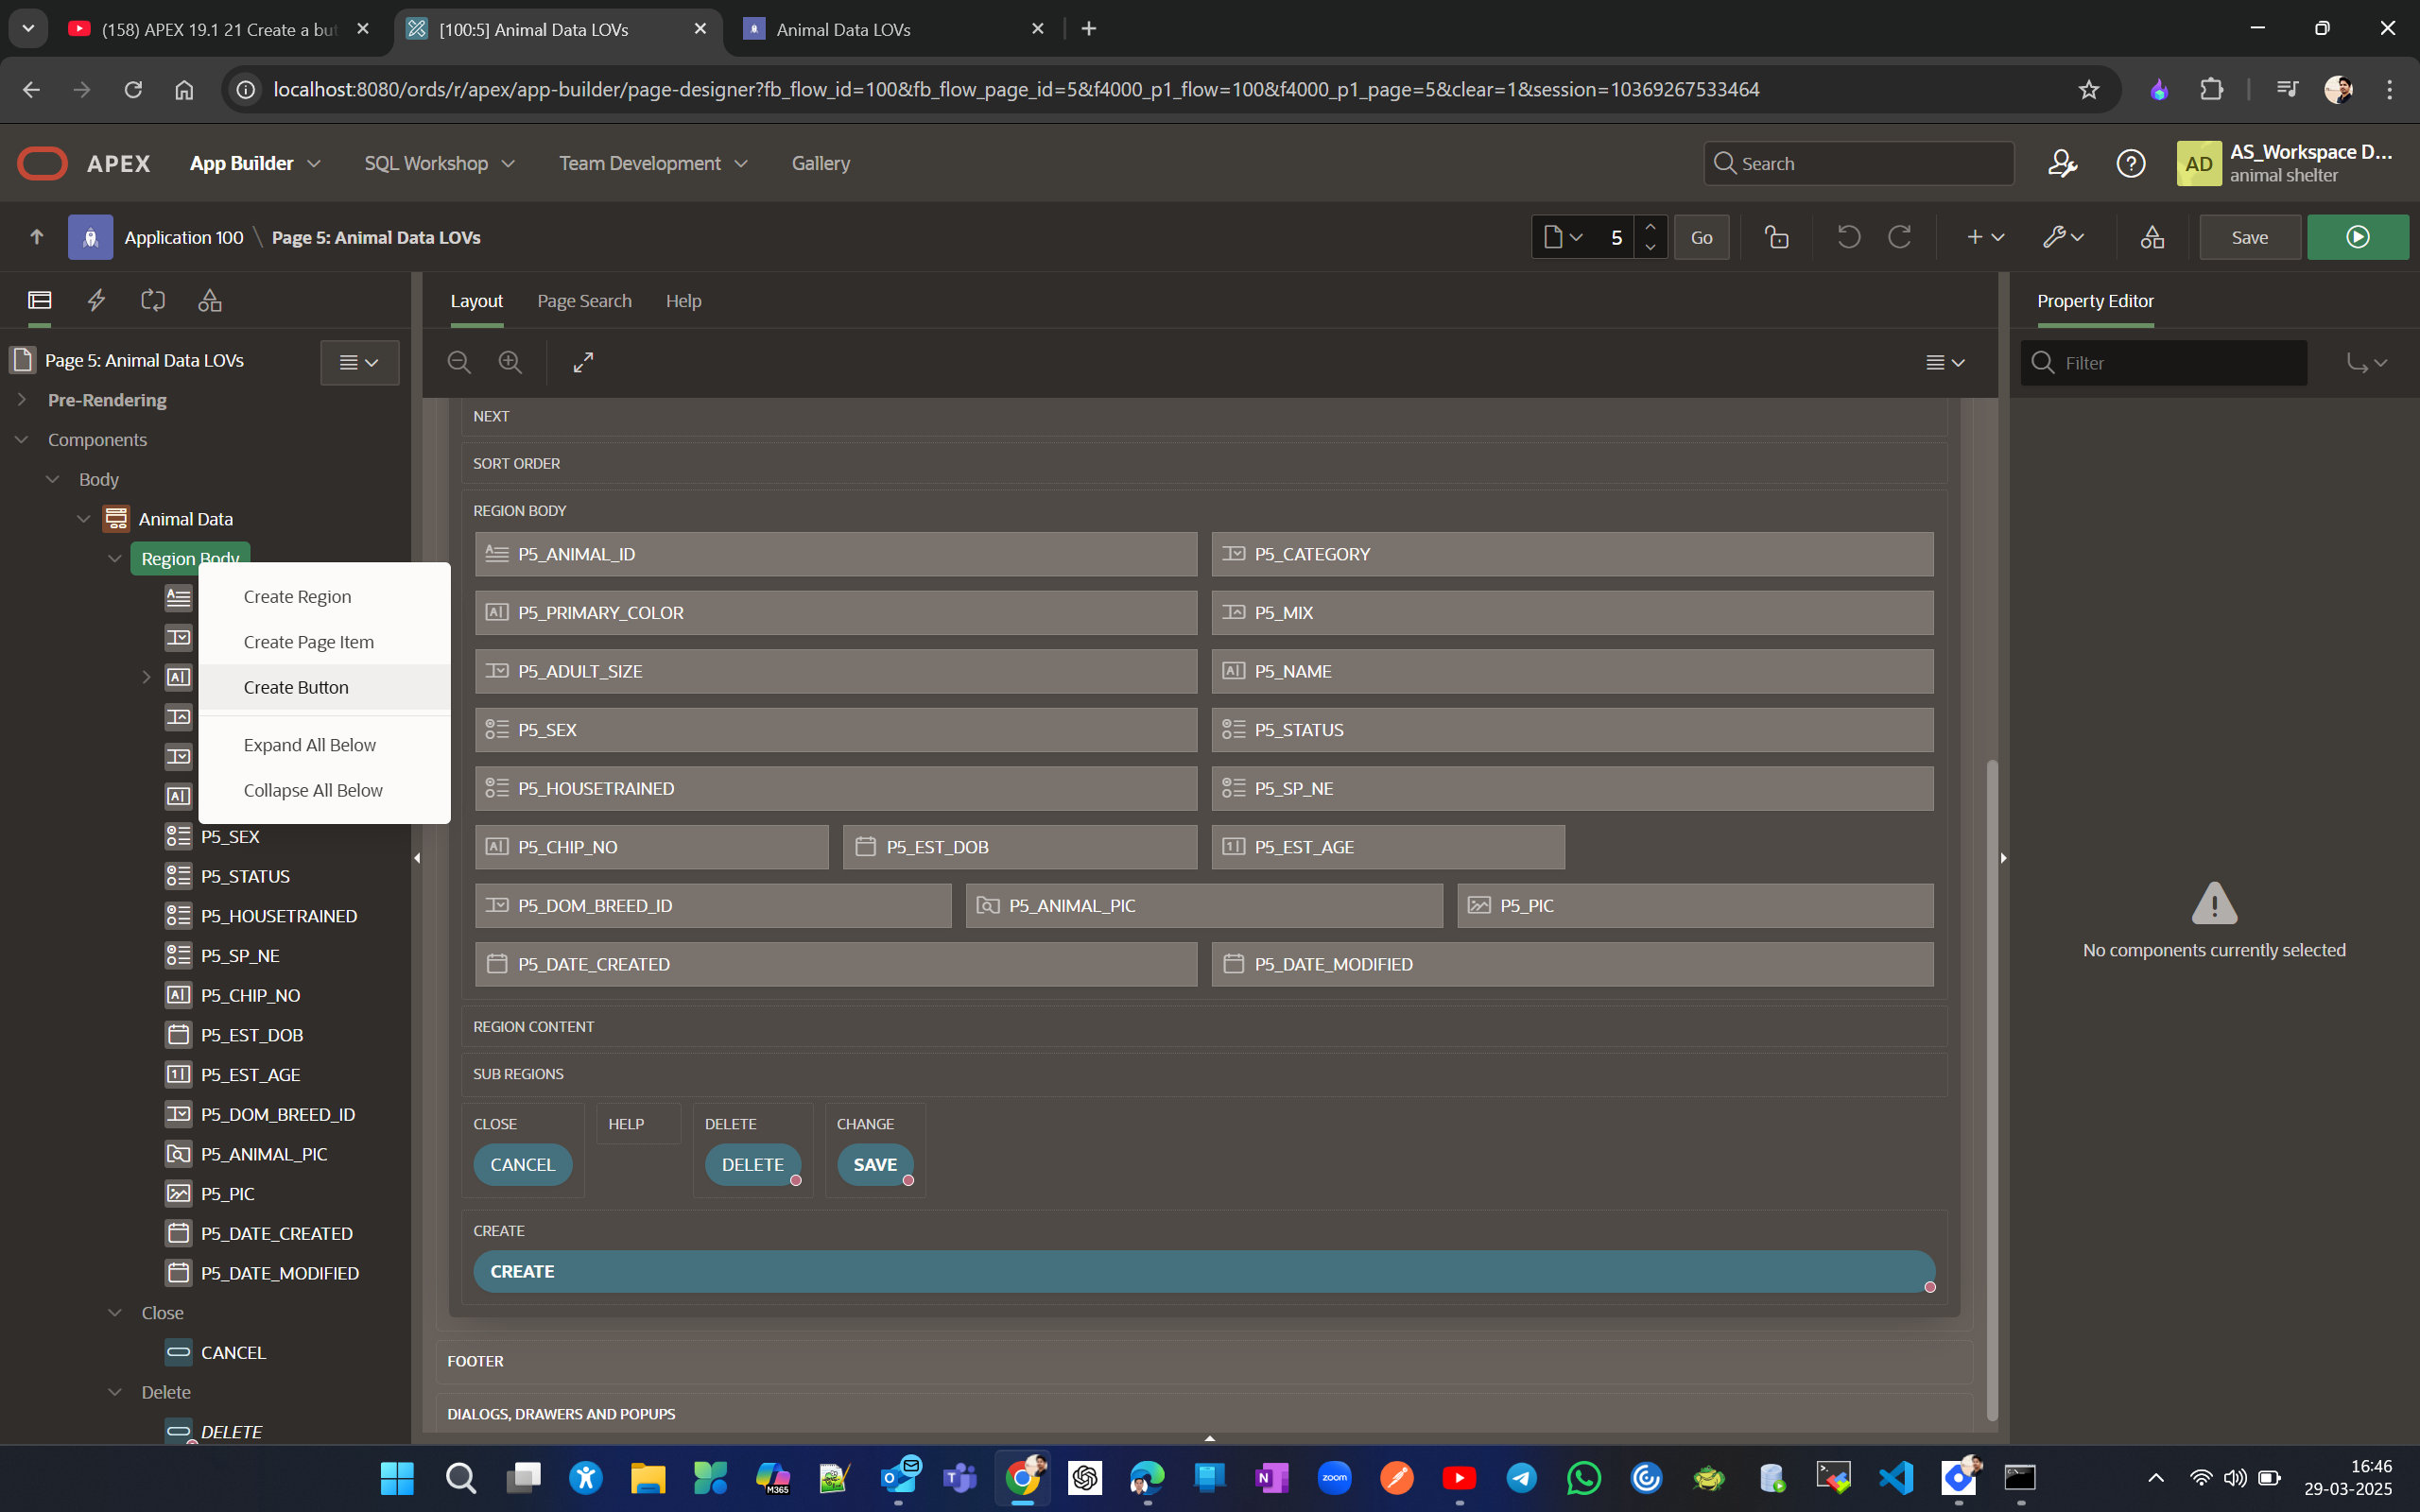
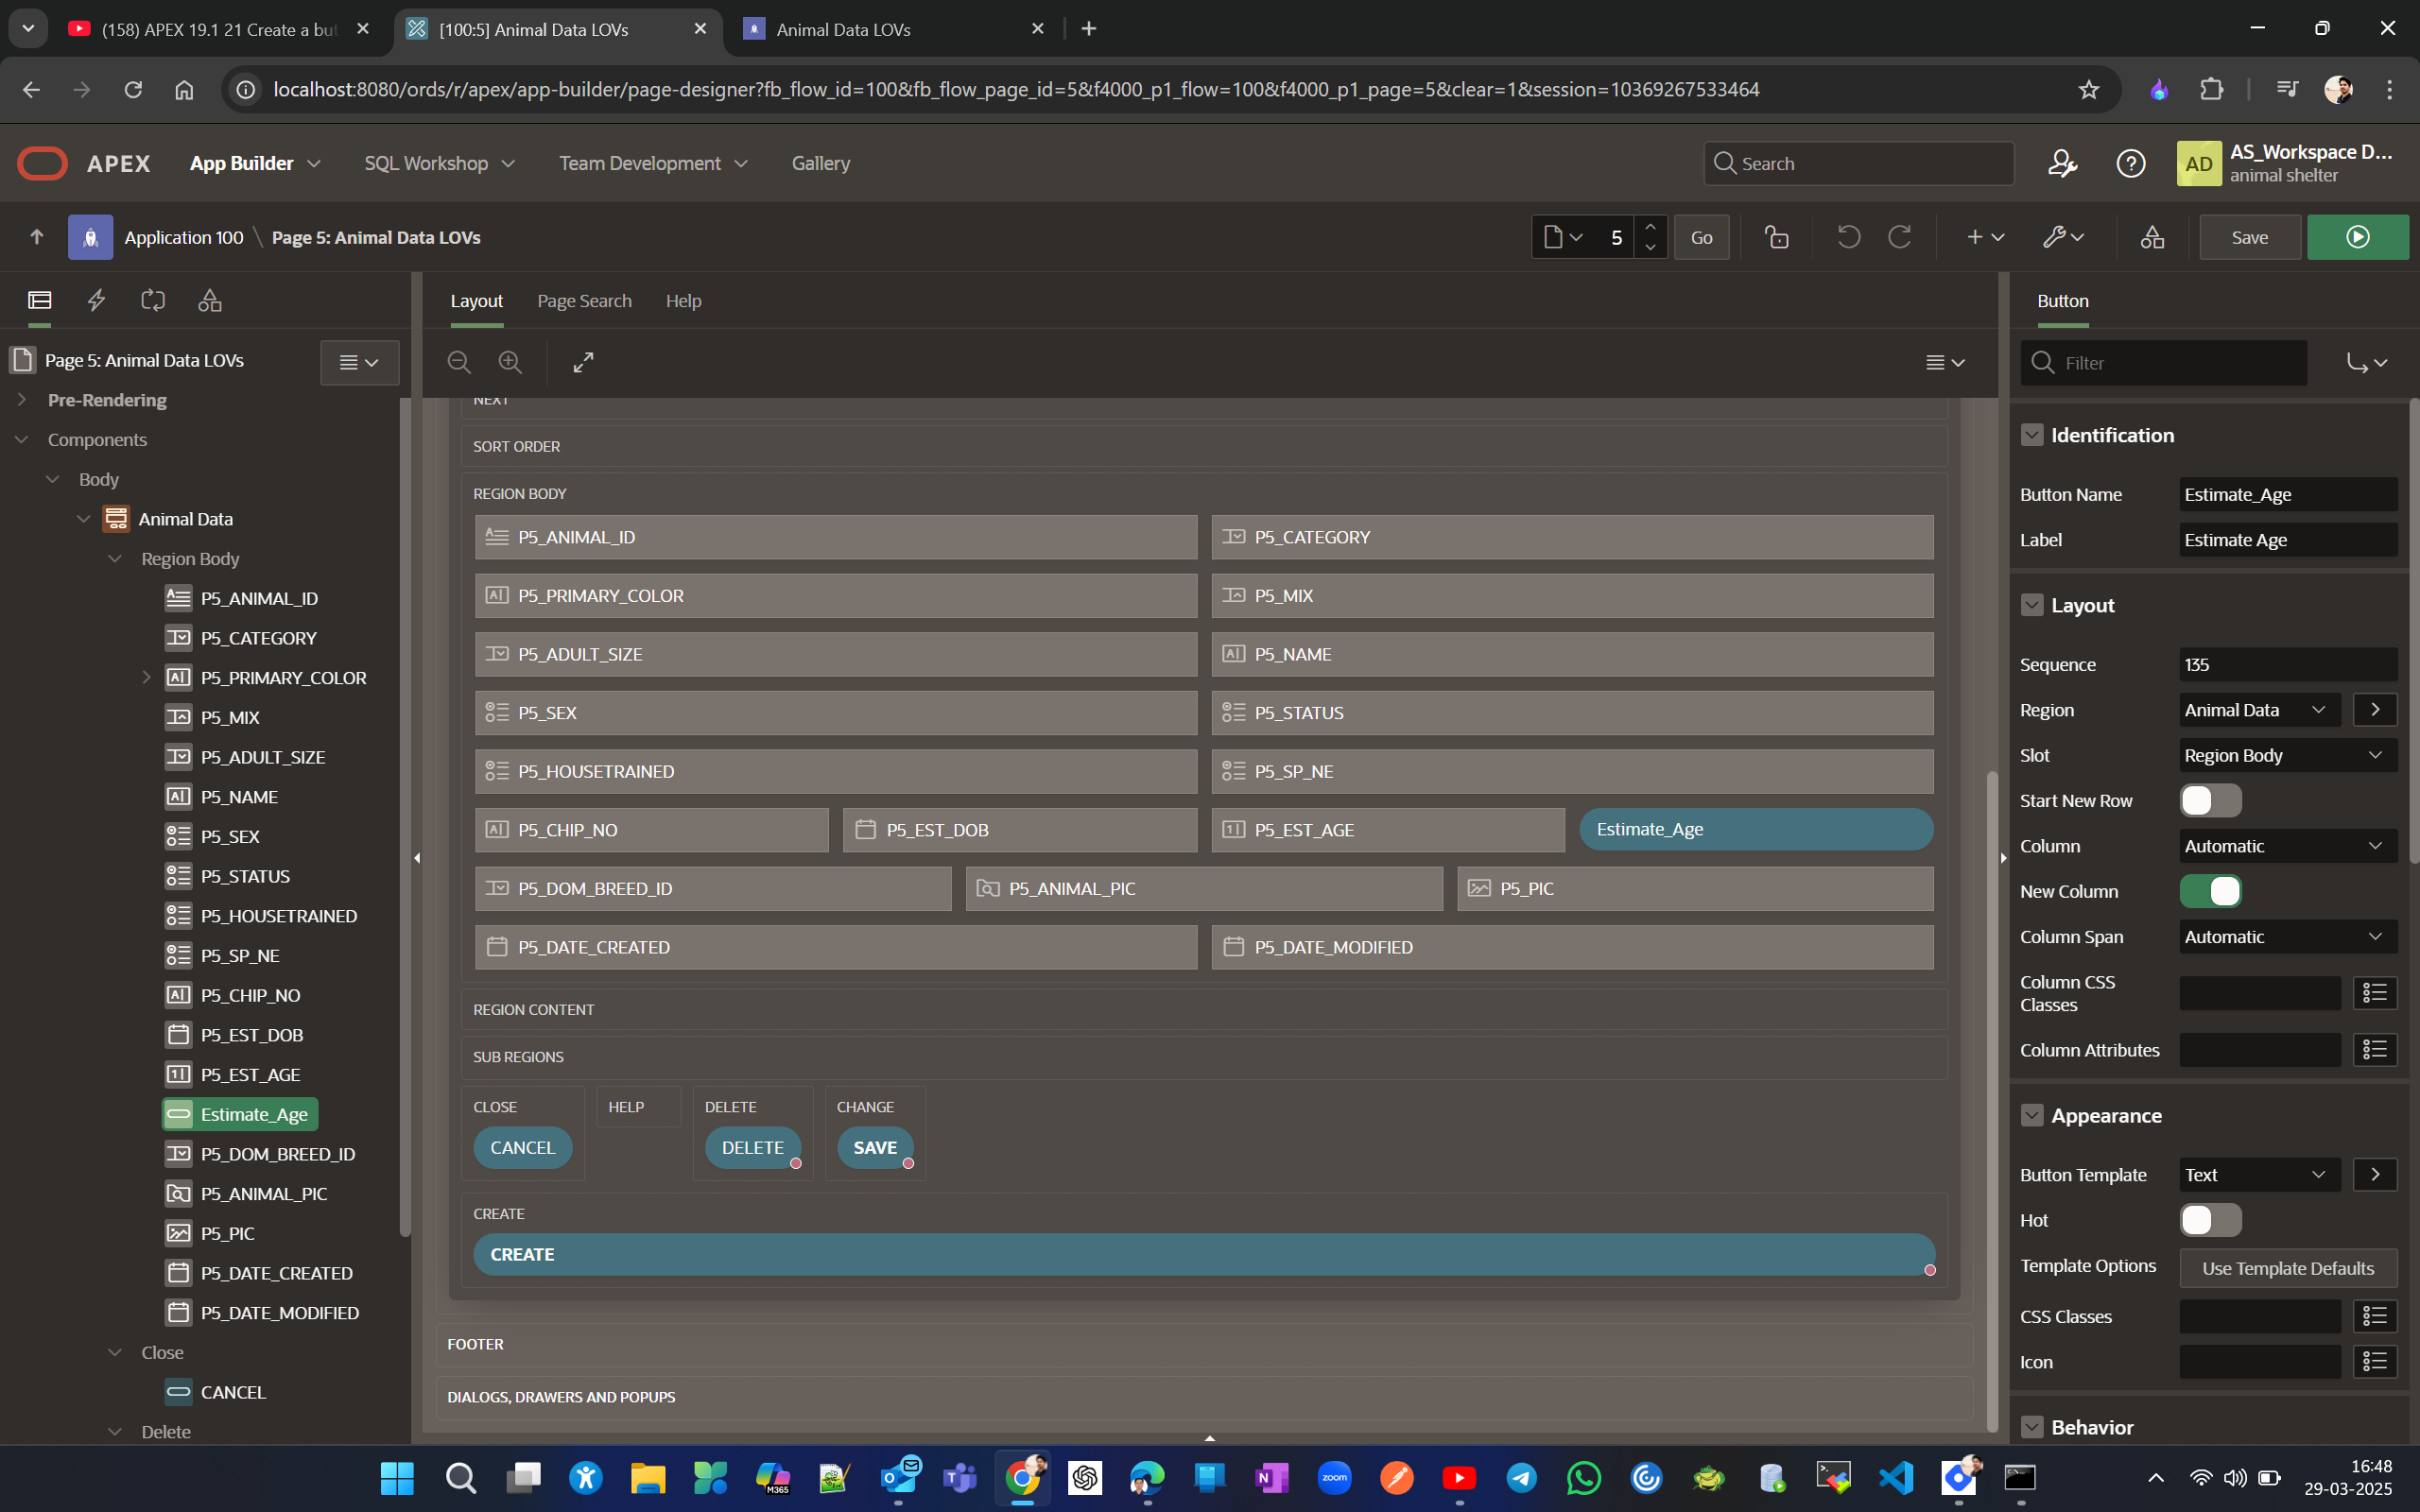
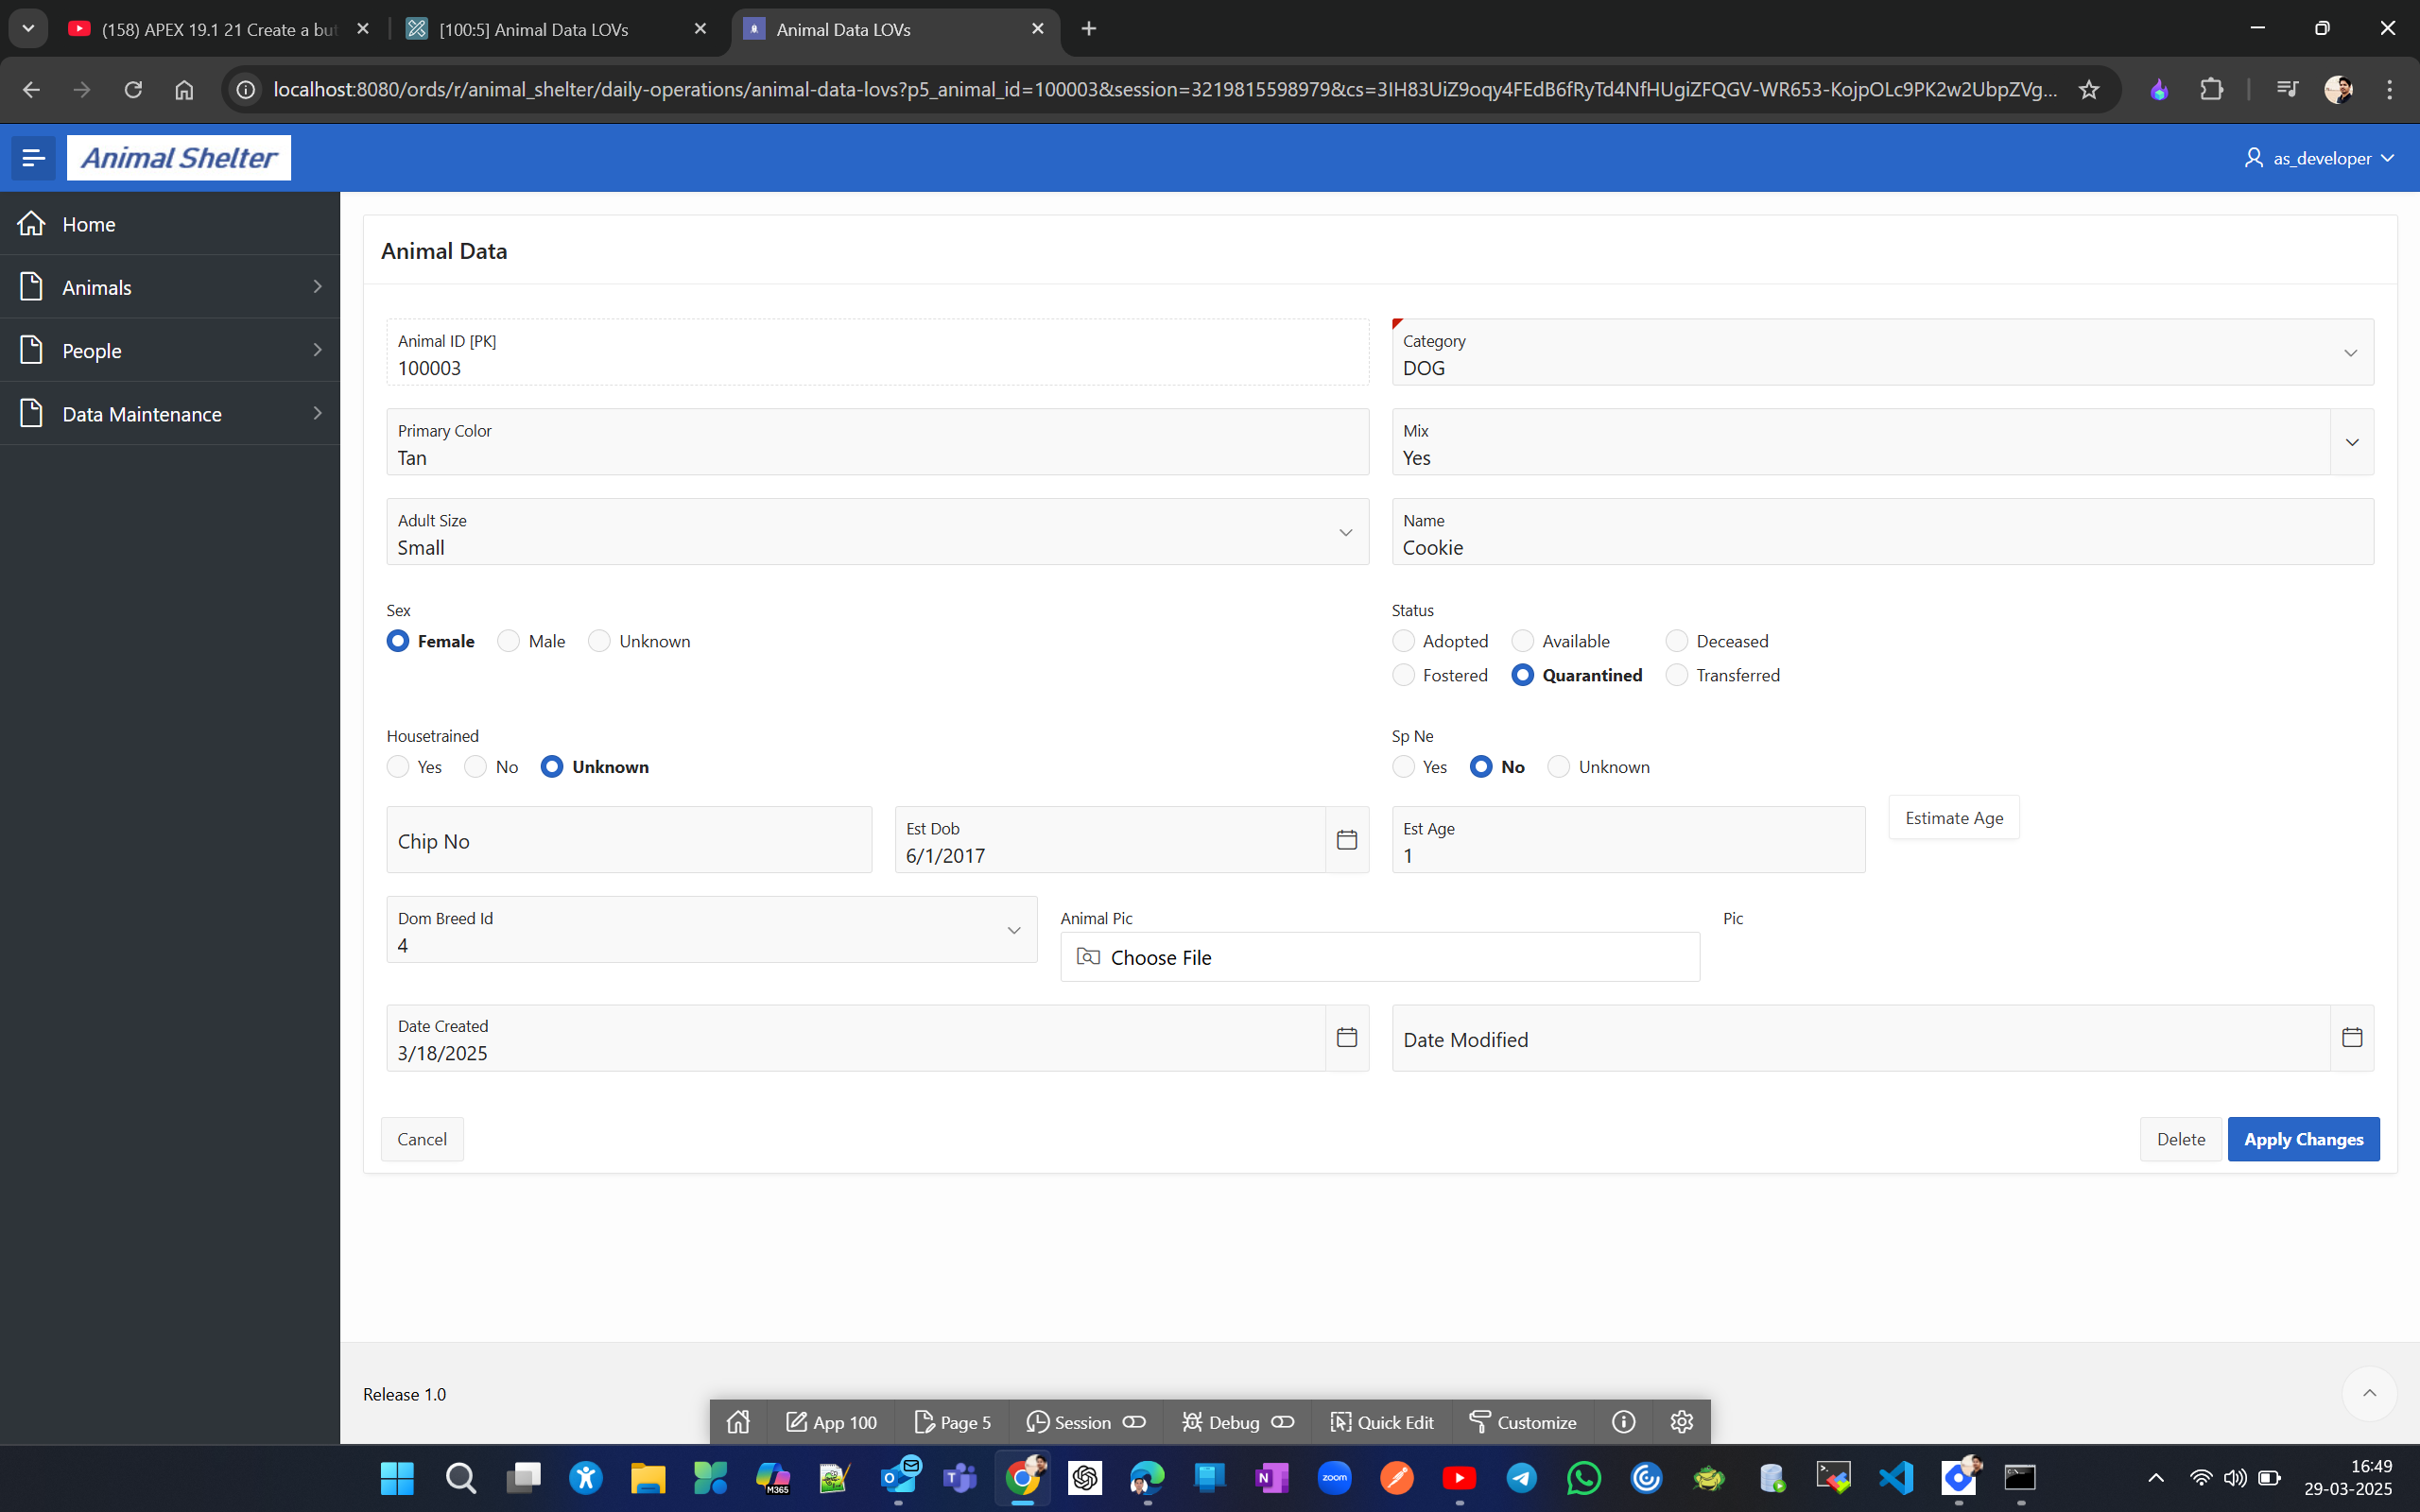
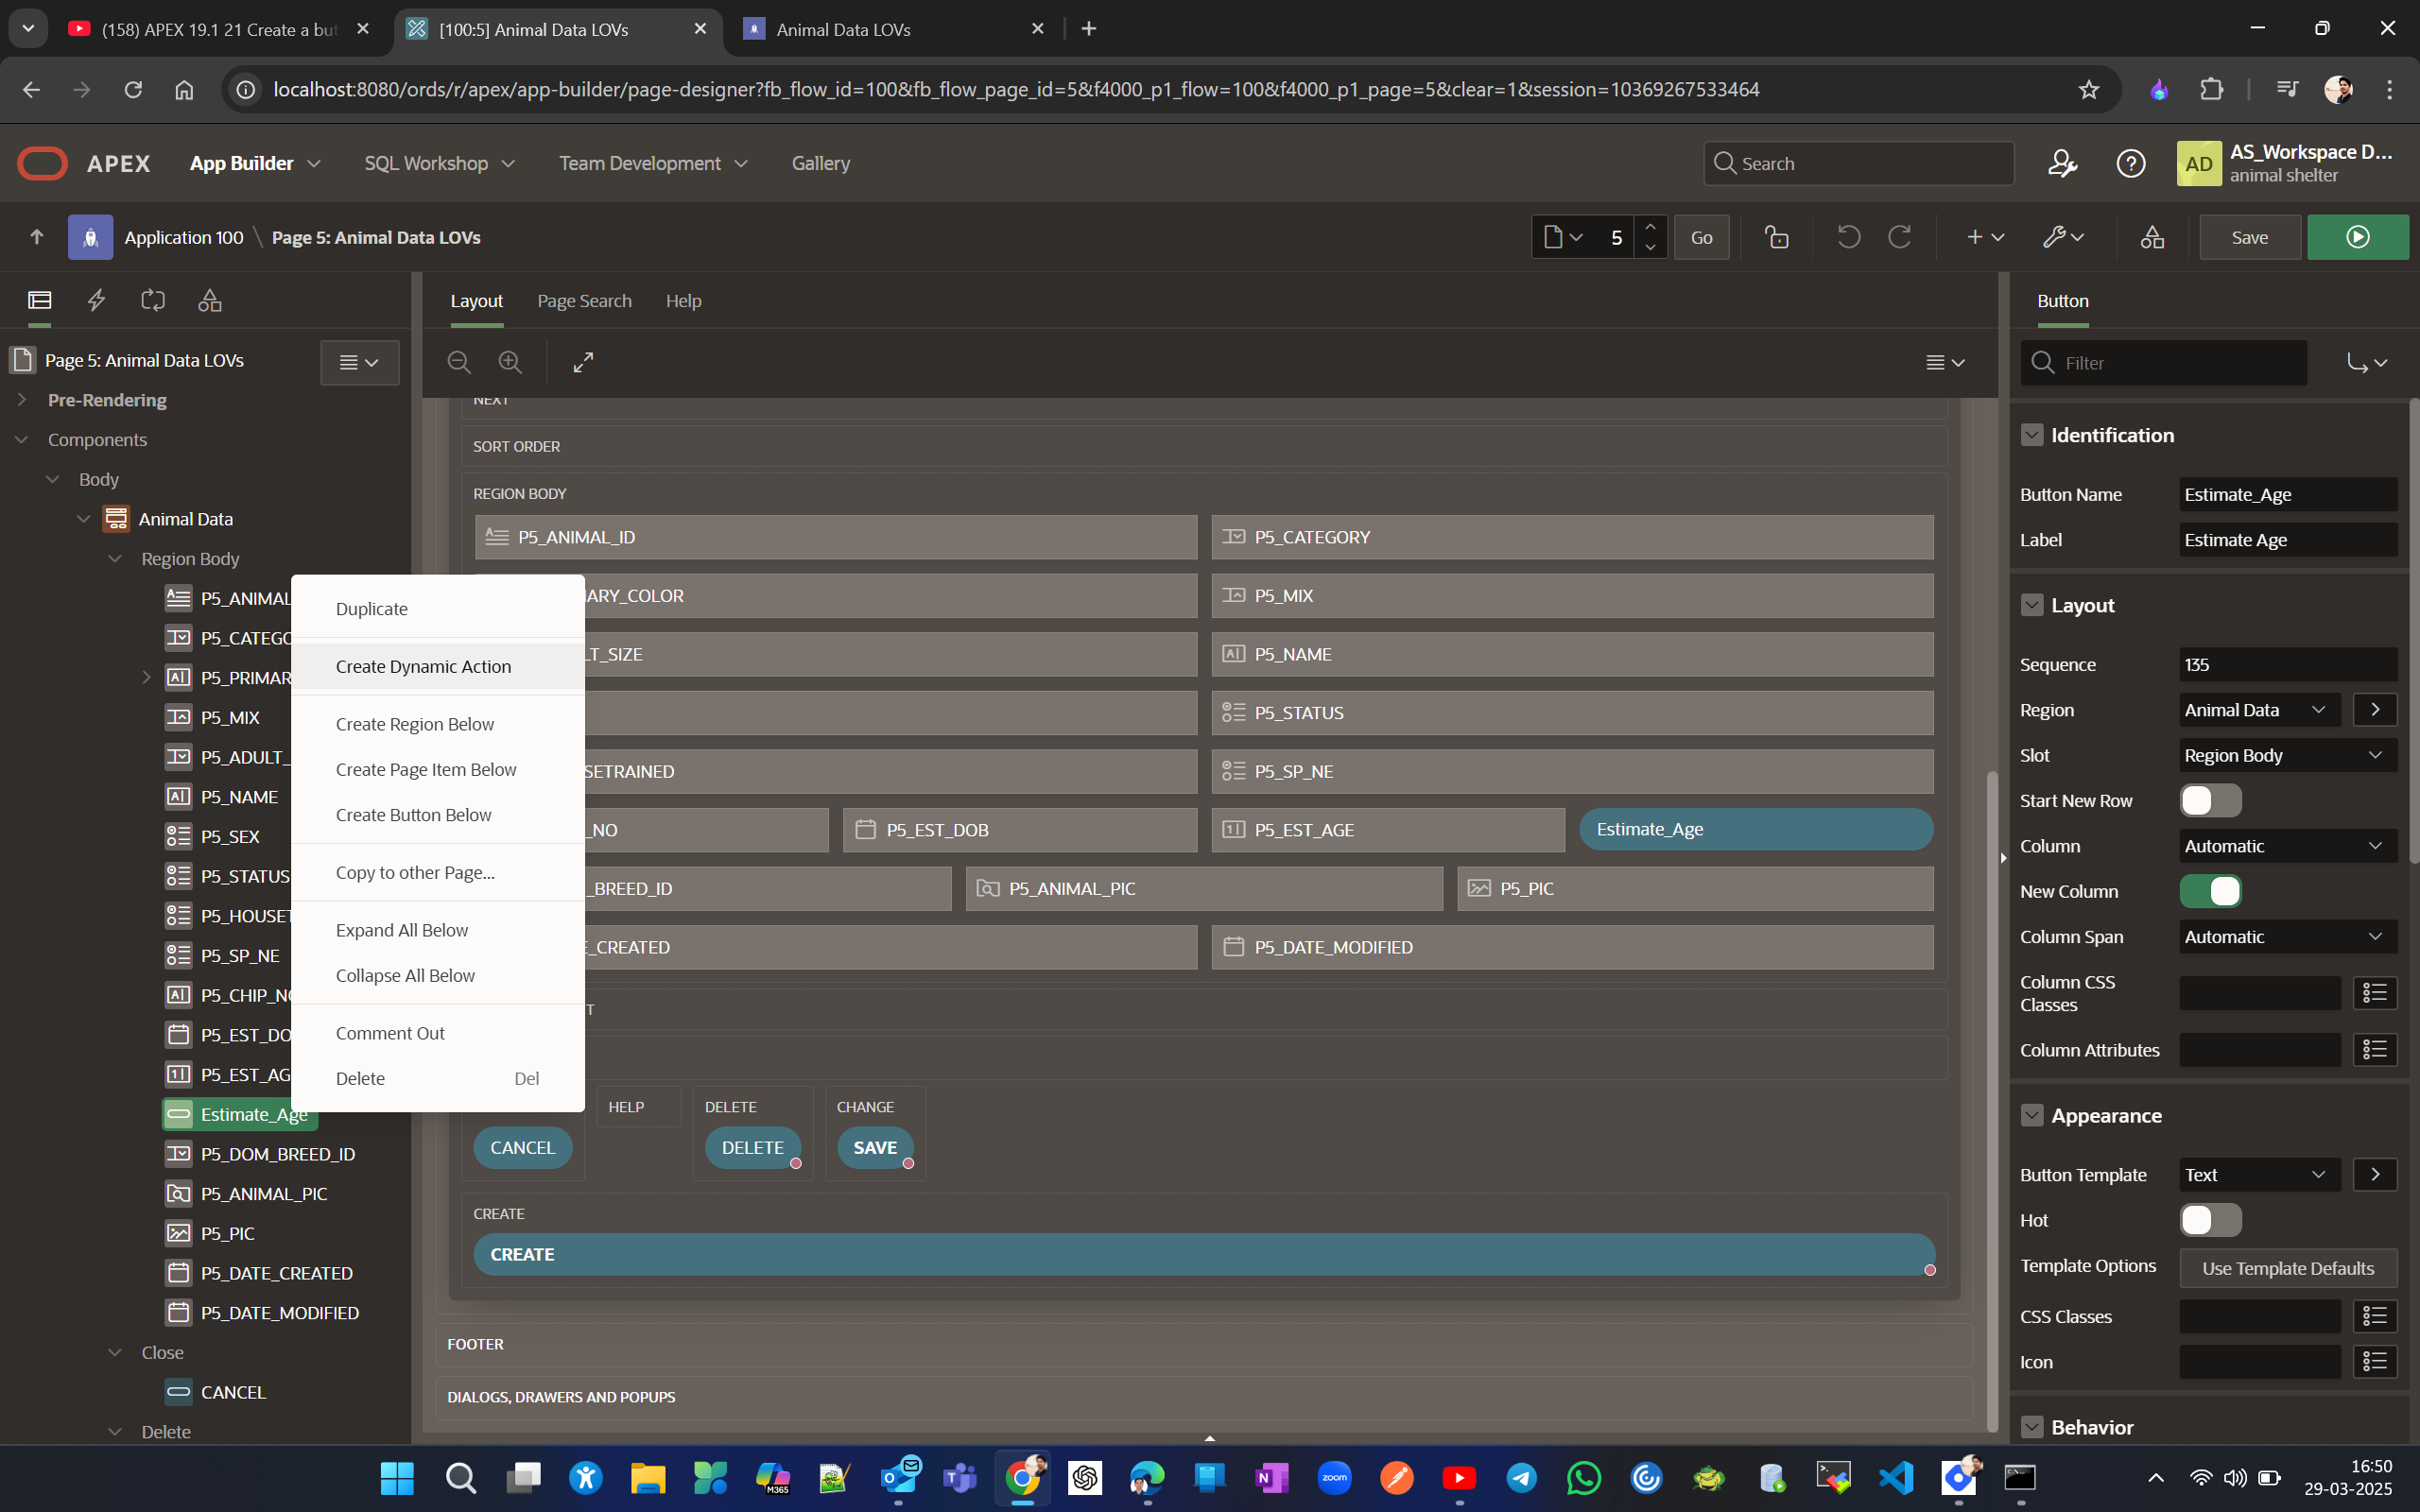
Now lets add a dynamic action for this newly created column.
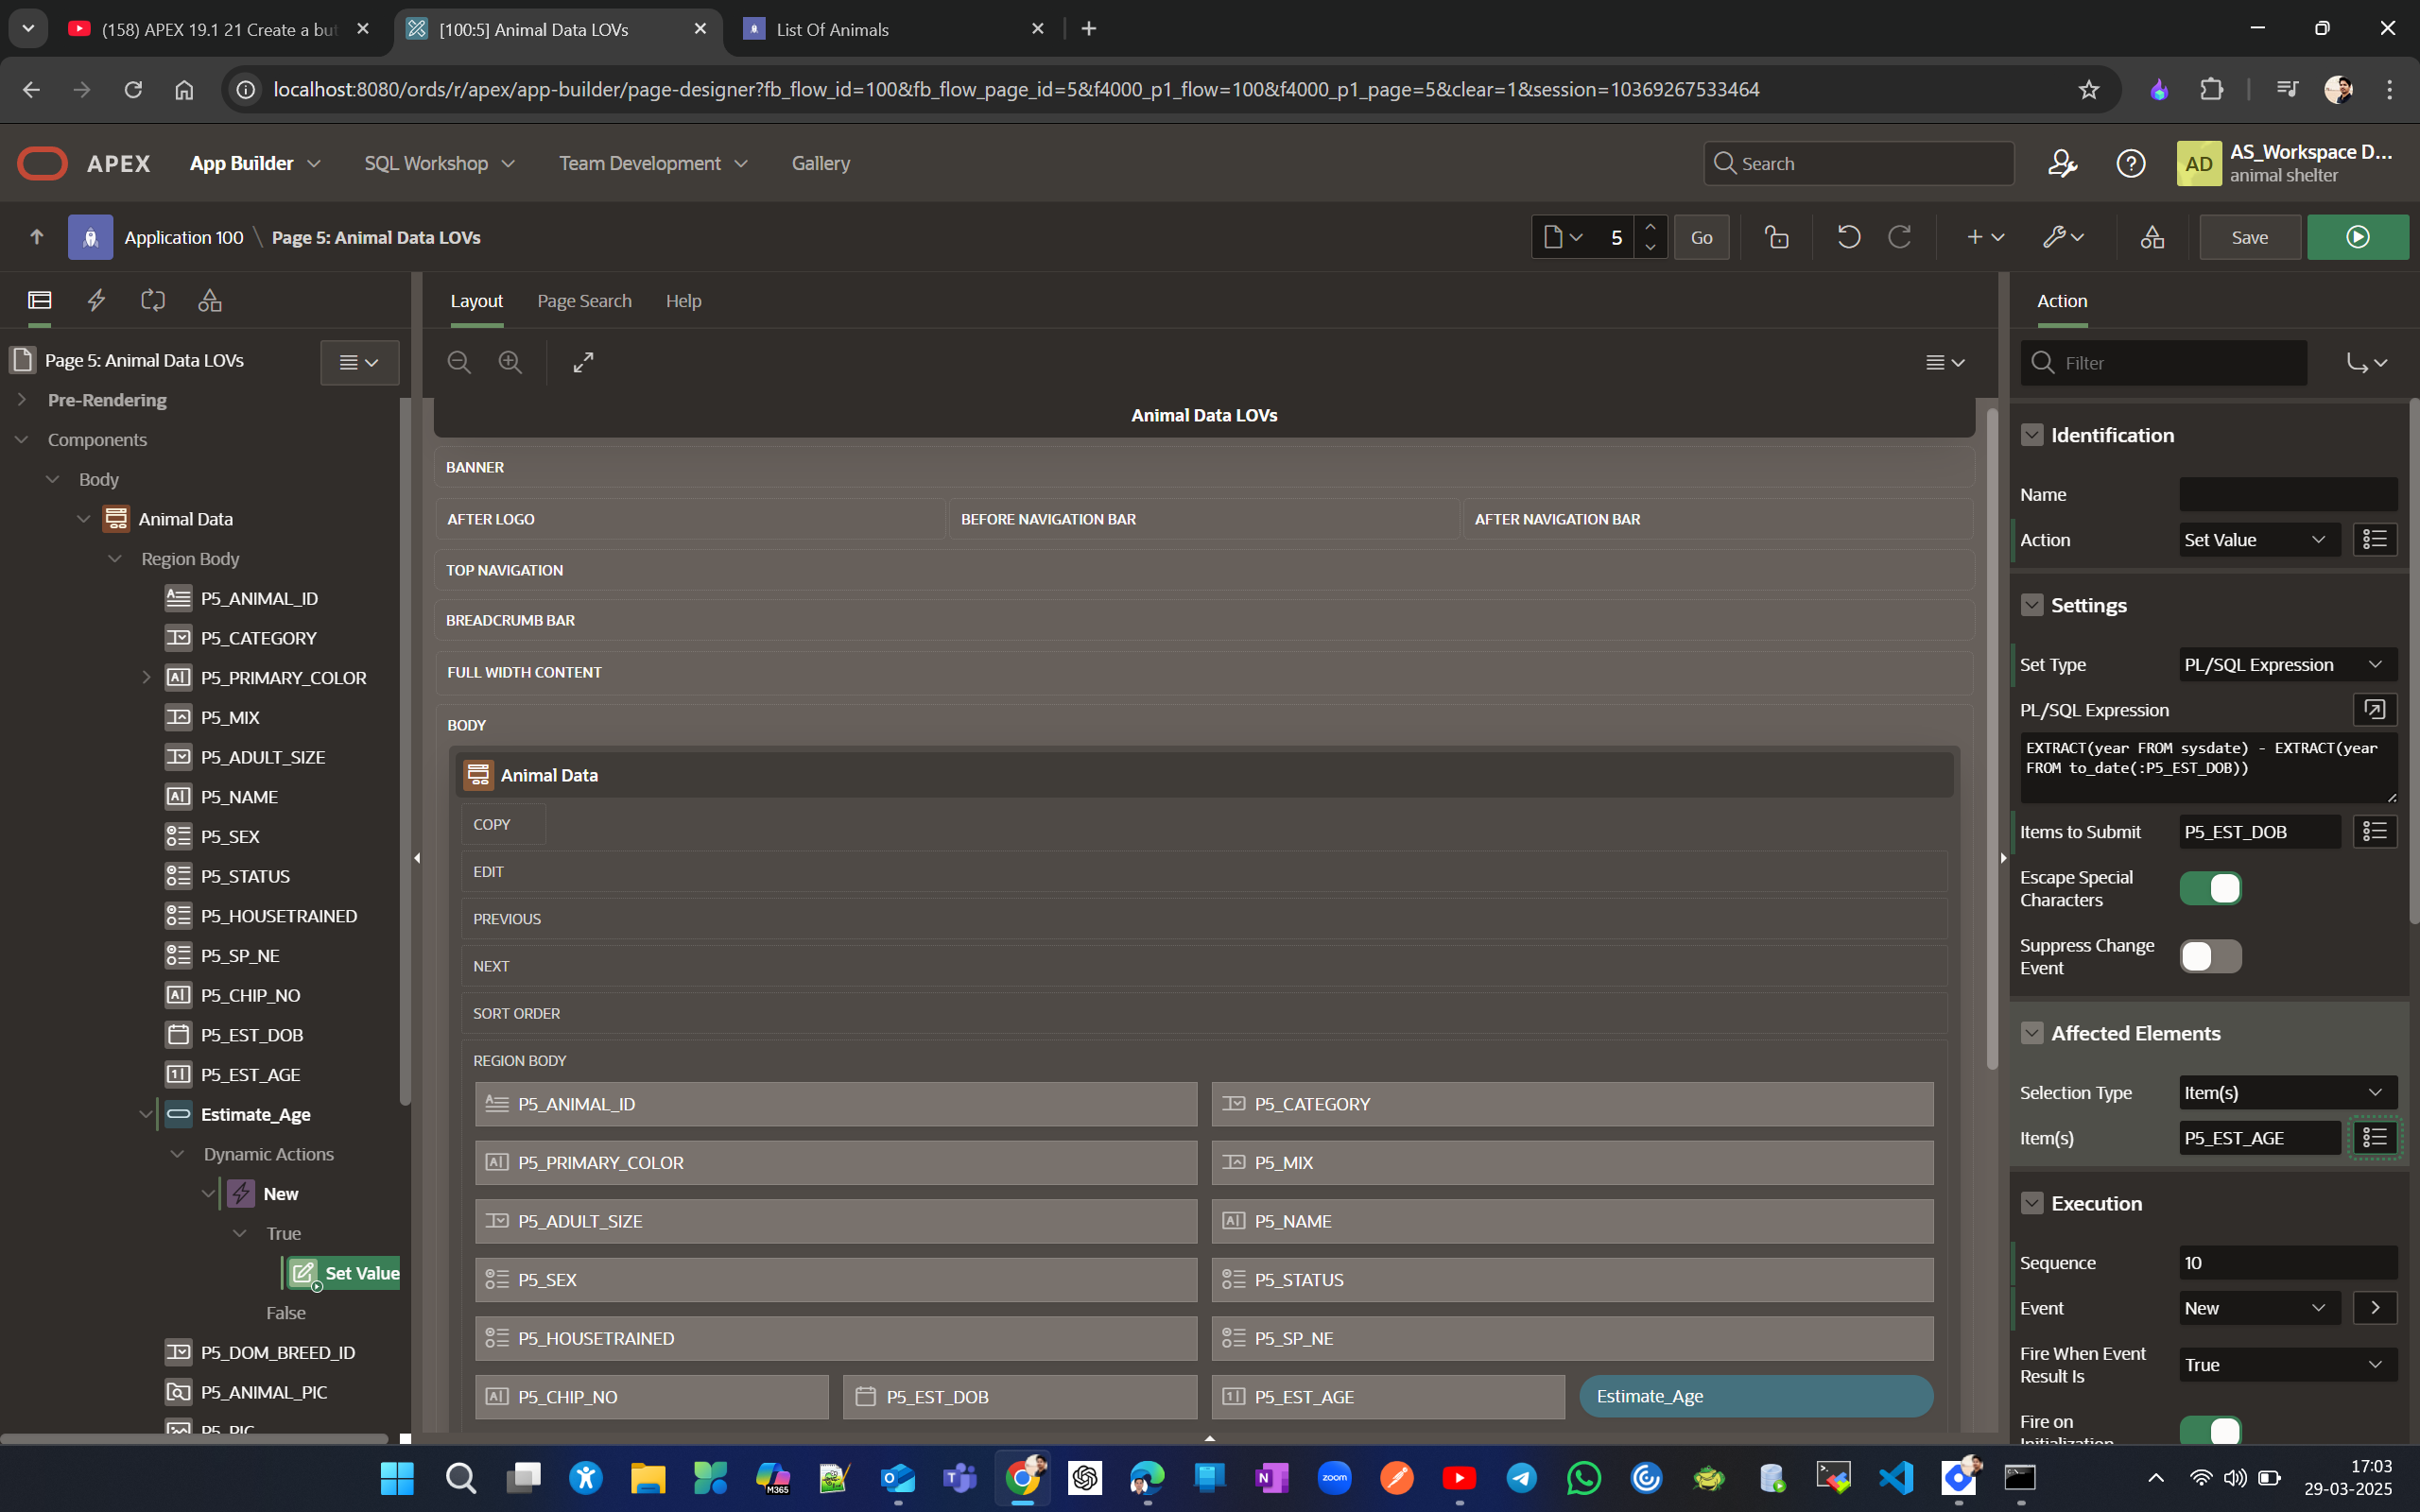
Do these require field value changes for the new button's dynamic action.
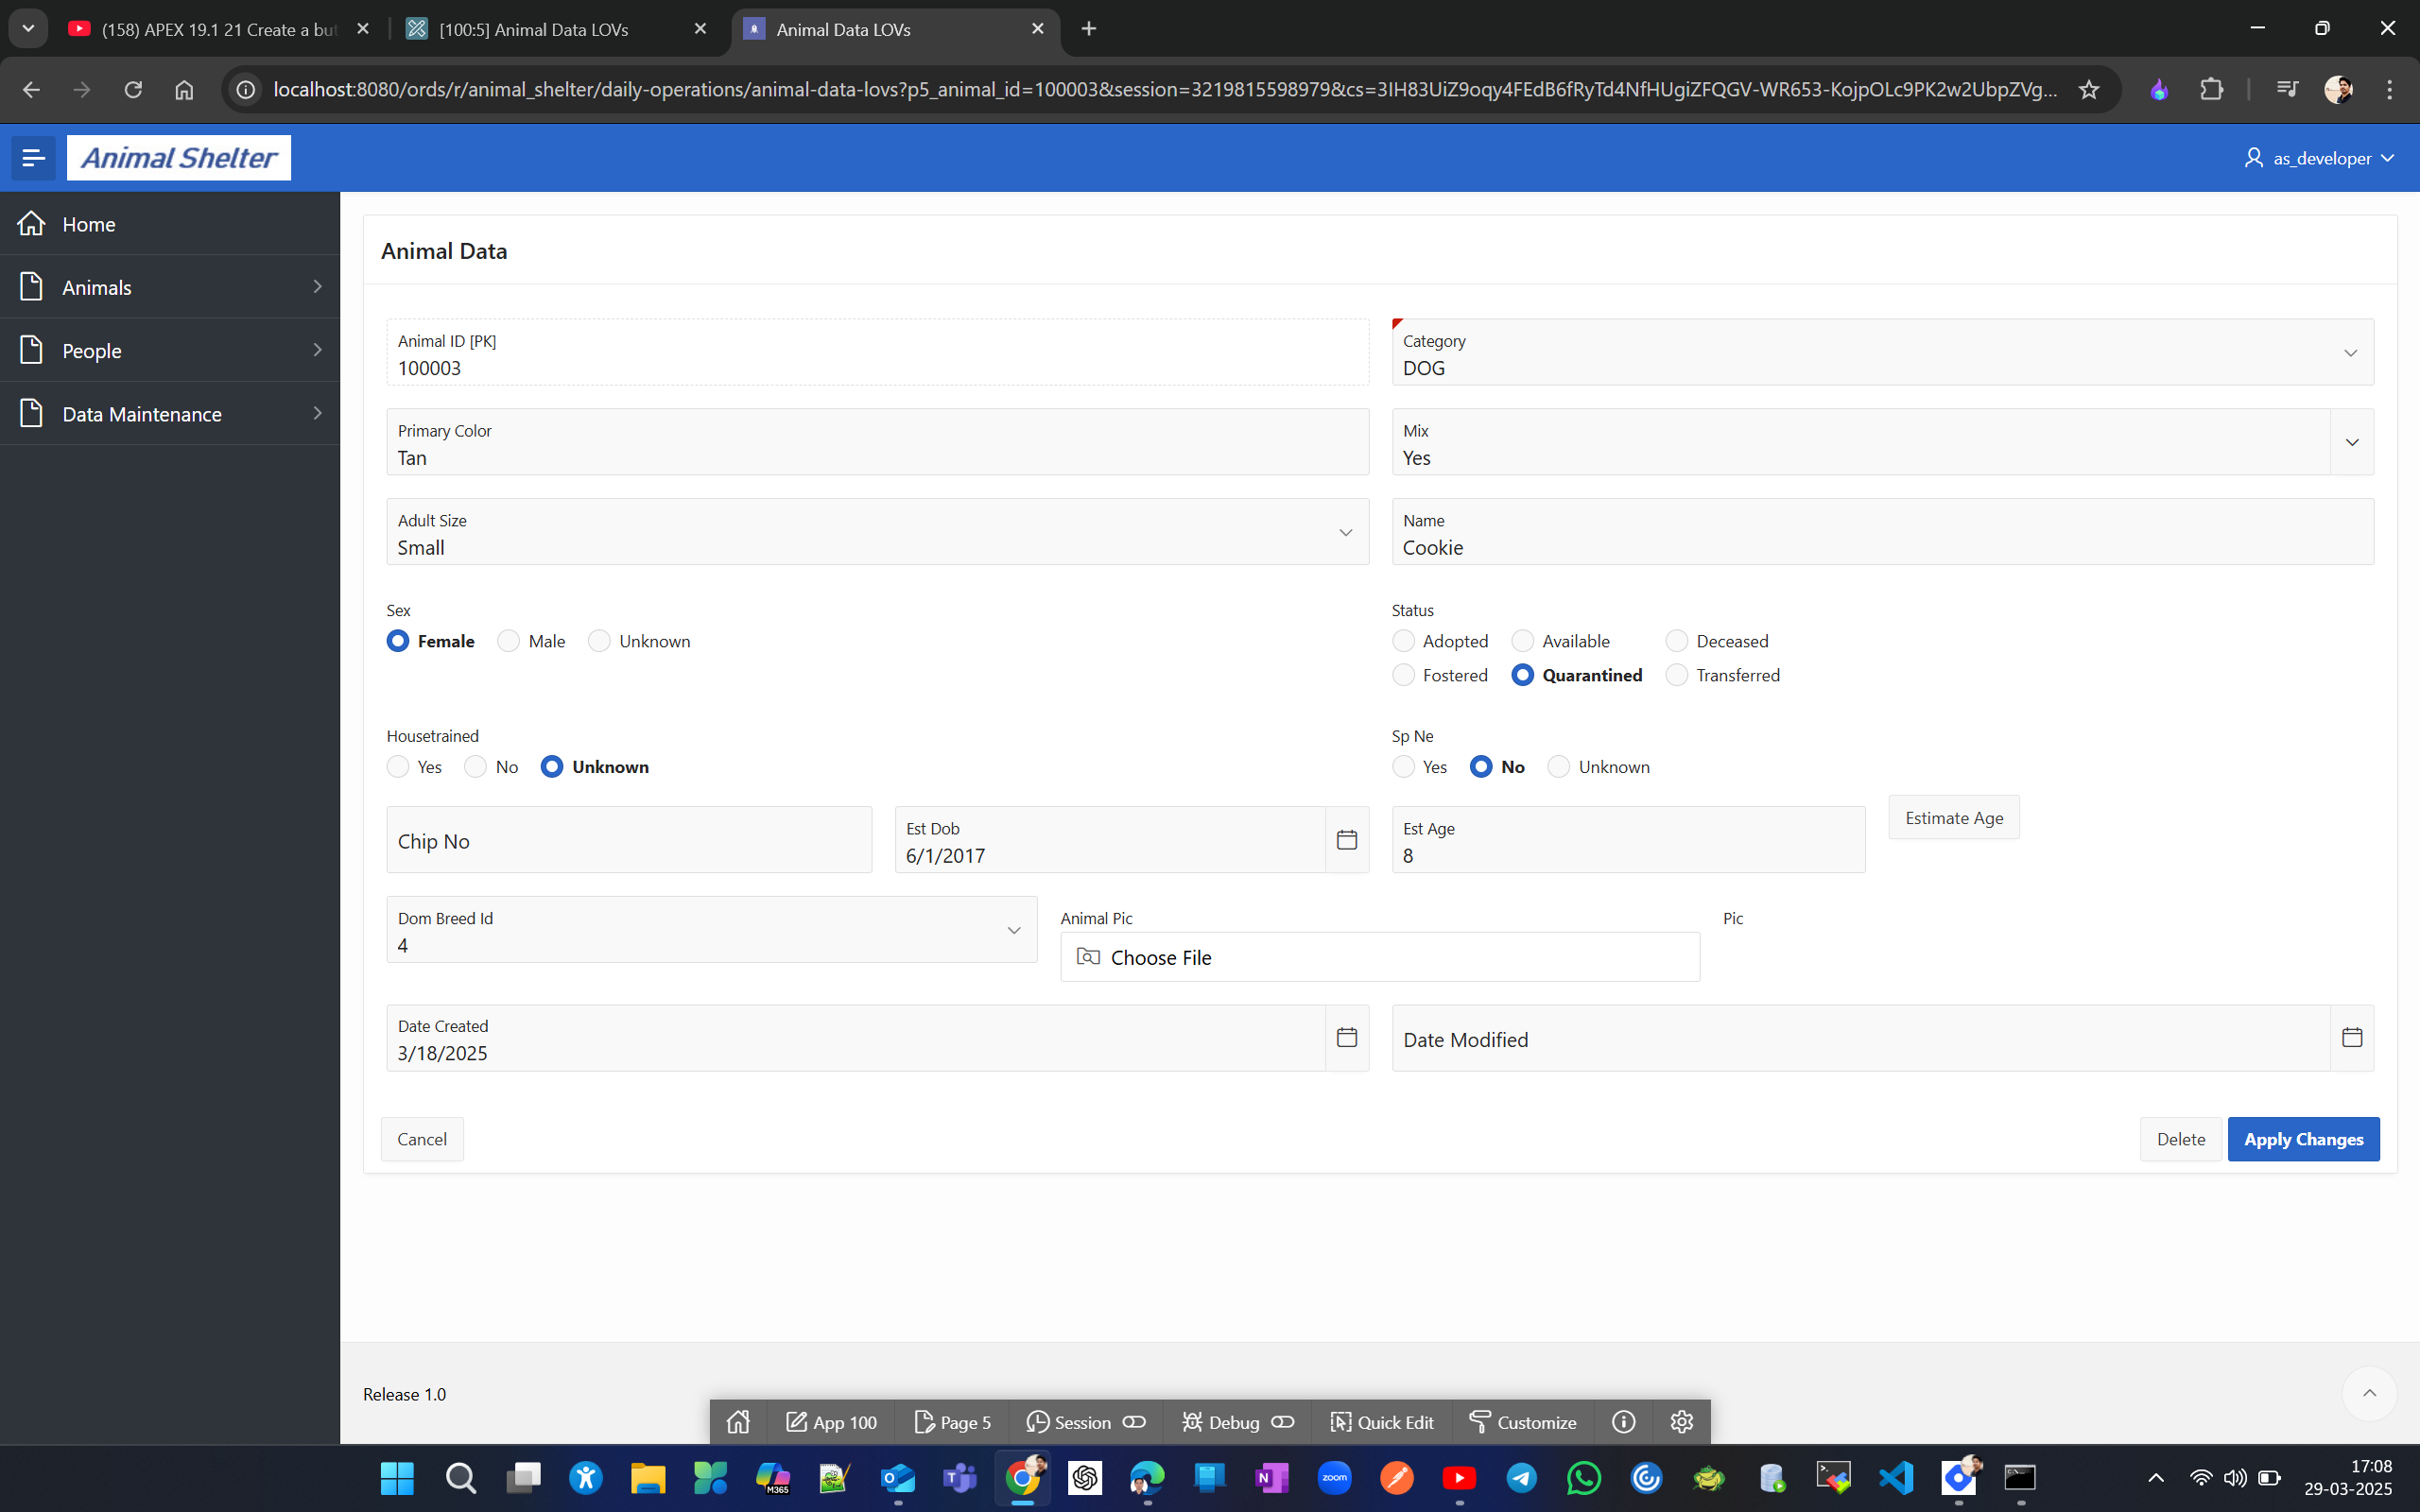
Verify this by changing Est DOB and notice that the change is reflected in the Est Age field, as we set the affected elements to P5_EST_AGE.
Create page groups to organize the application web pages.
Page groups used to organize pages, including a group for pages that may be deleted later.
We’ll group the web pages based on the purpose within the overall application. so we’re going to have groupings based on the parent pages those are just the landing pages that you see when you click on navigation area if you click on Animals then you see an introductory or parent page before you select a particular report or form for animals . so Lets have Group parent pages, Animals, People, Maintenance, Other.
We’ll start by creating another form and report for data maintenance. Lets create a Interactive Report.

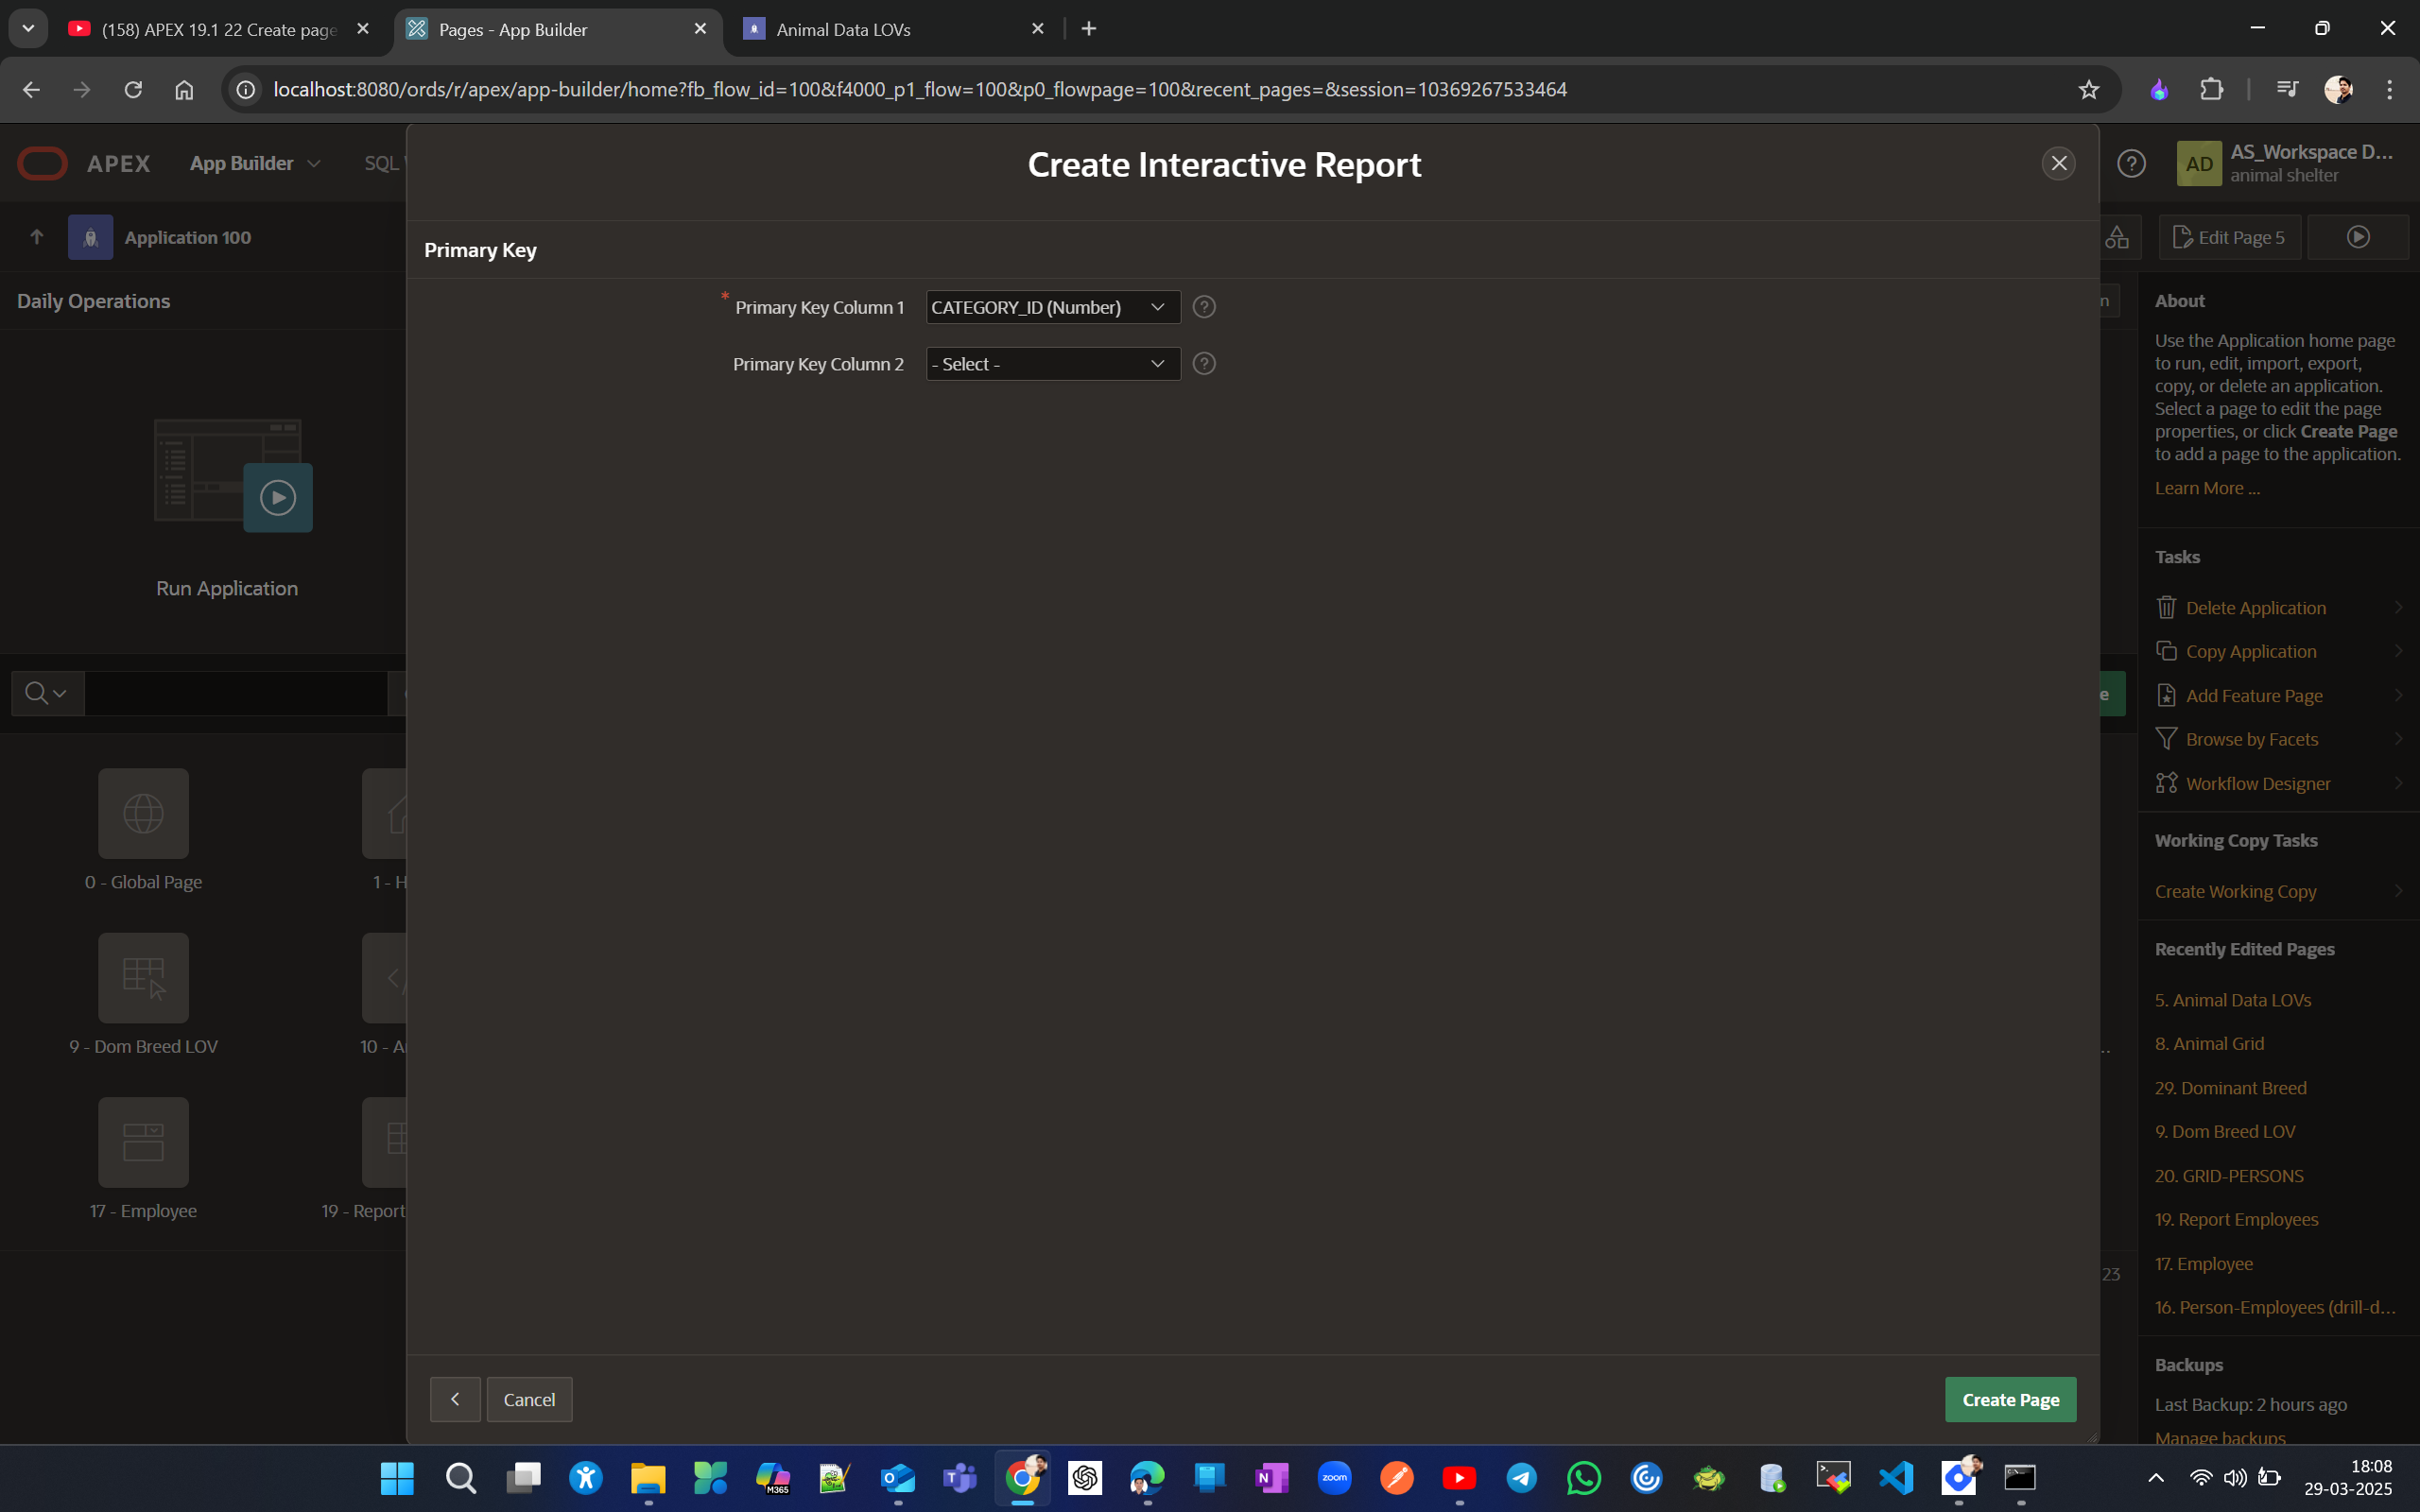
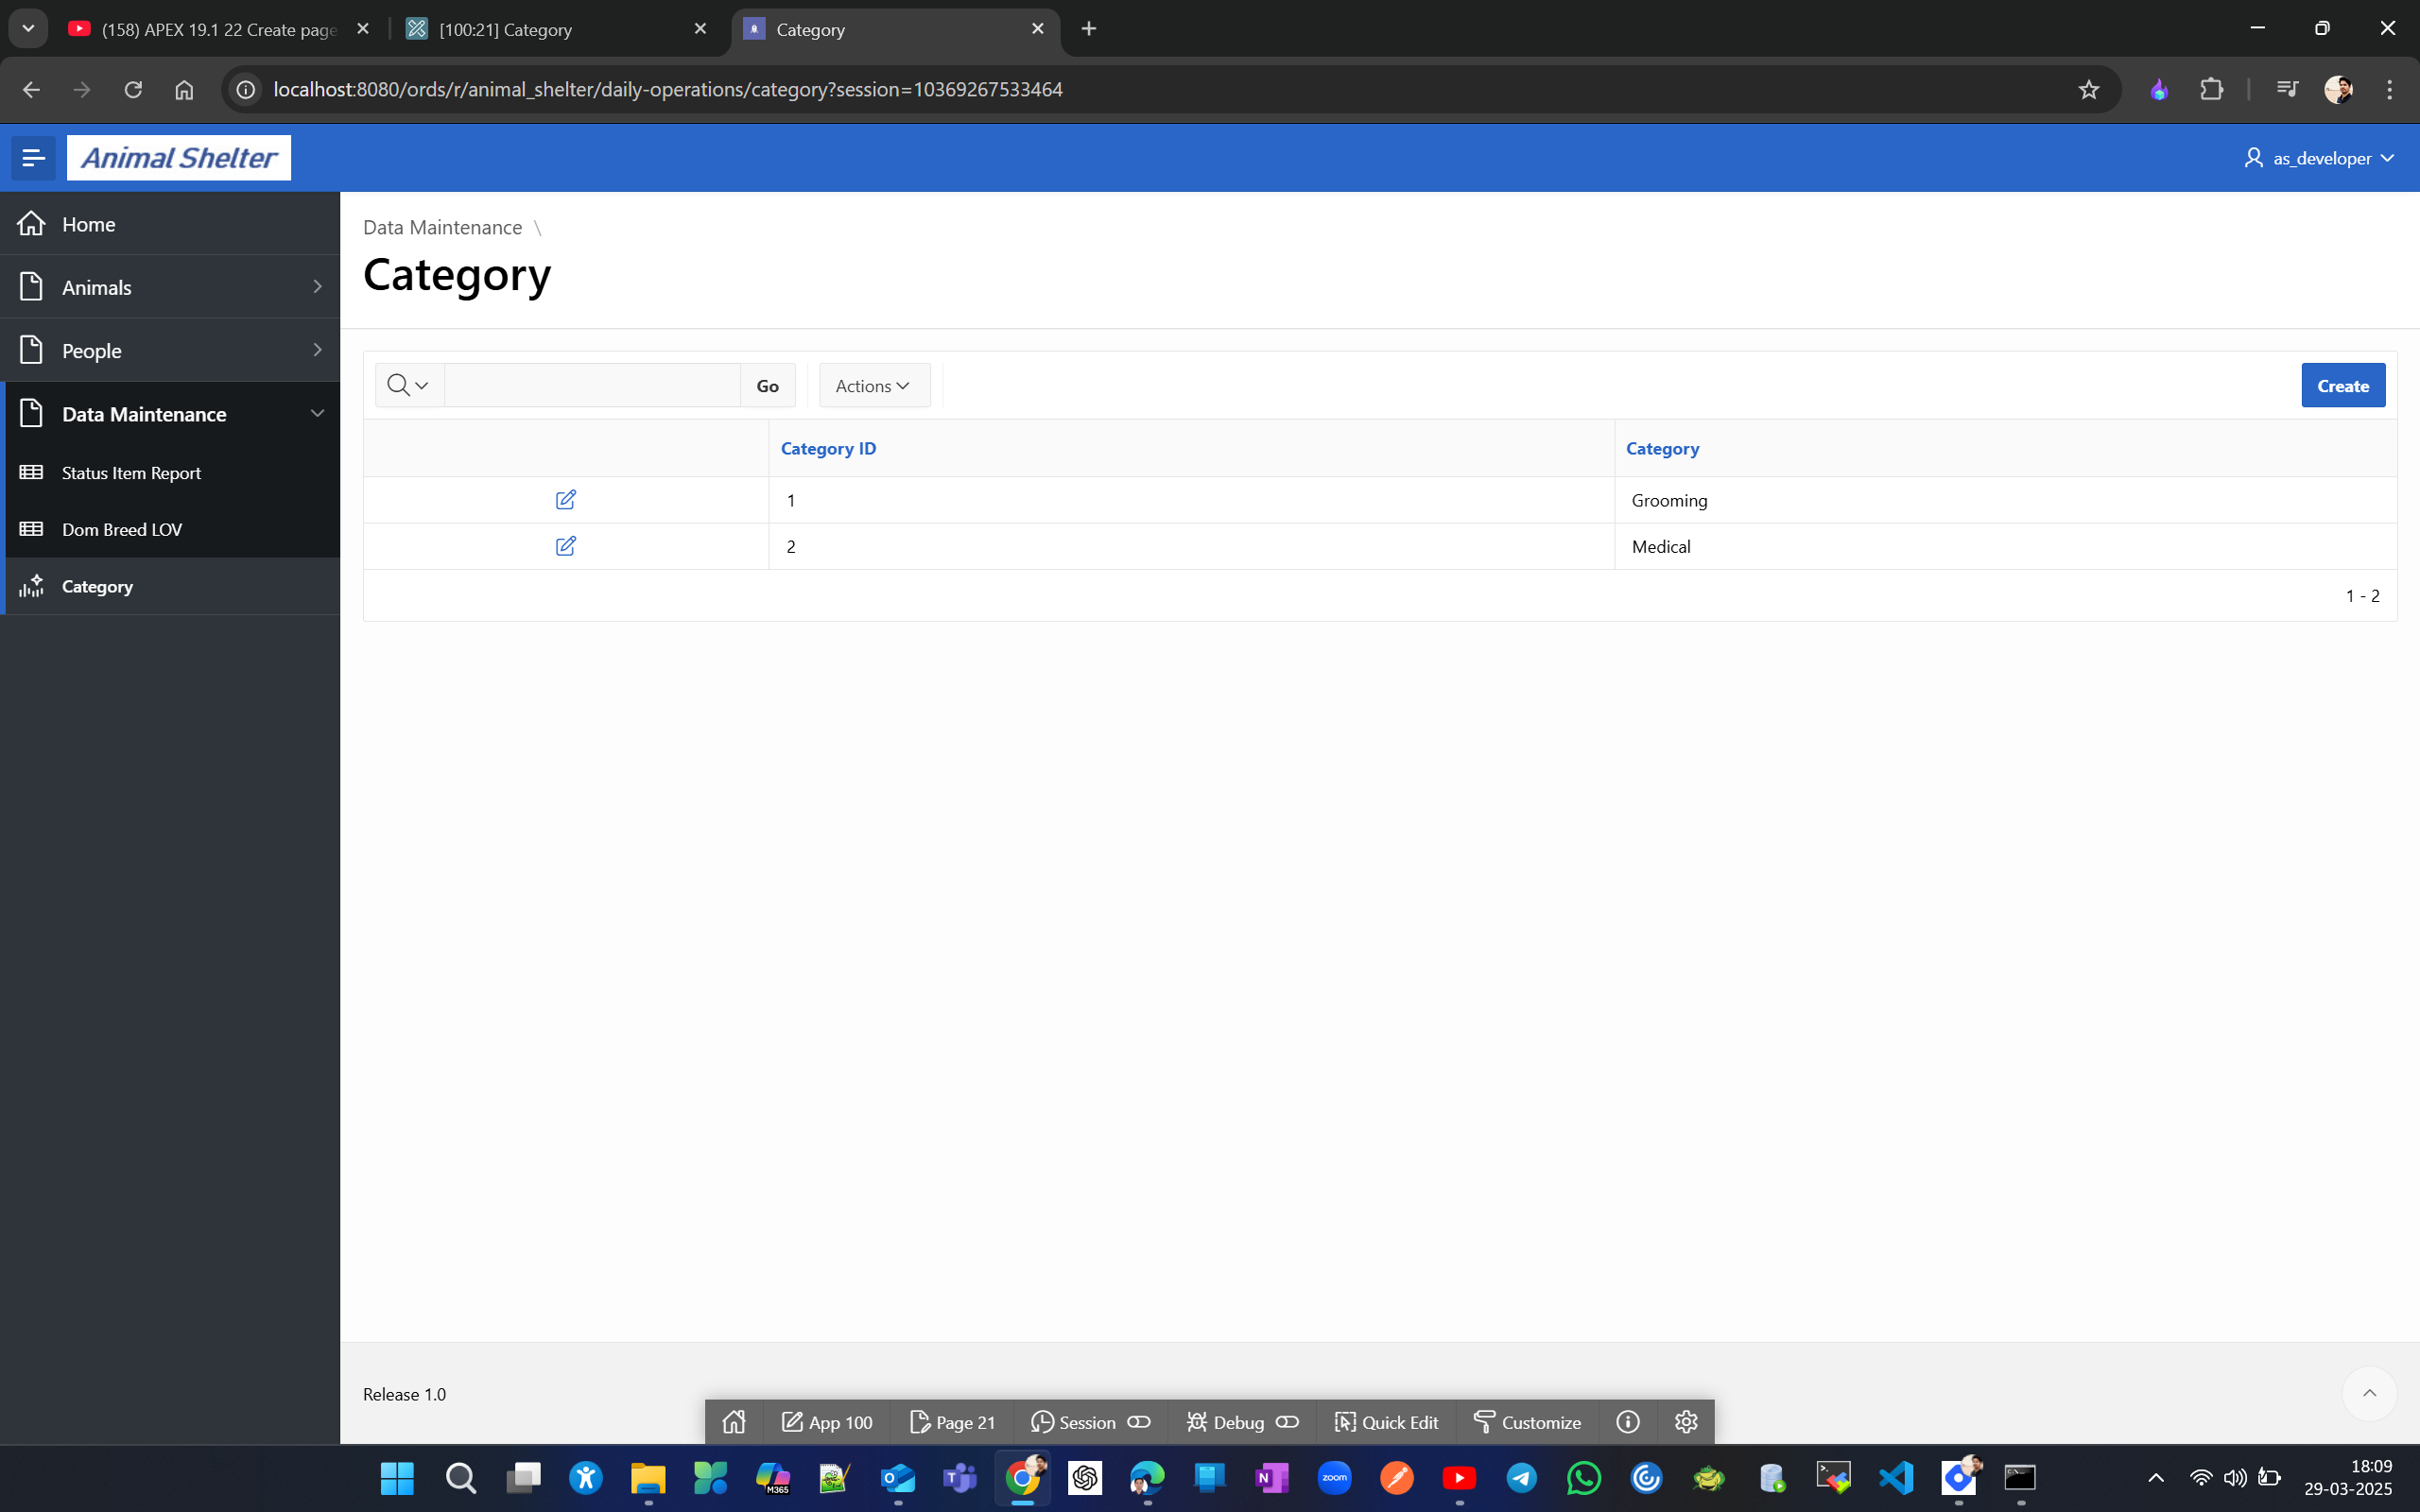
Now Lets create Interactive report page for subcategory.
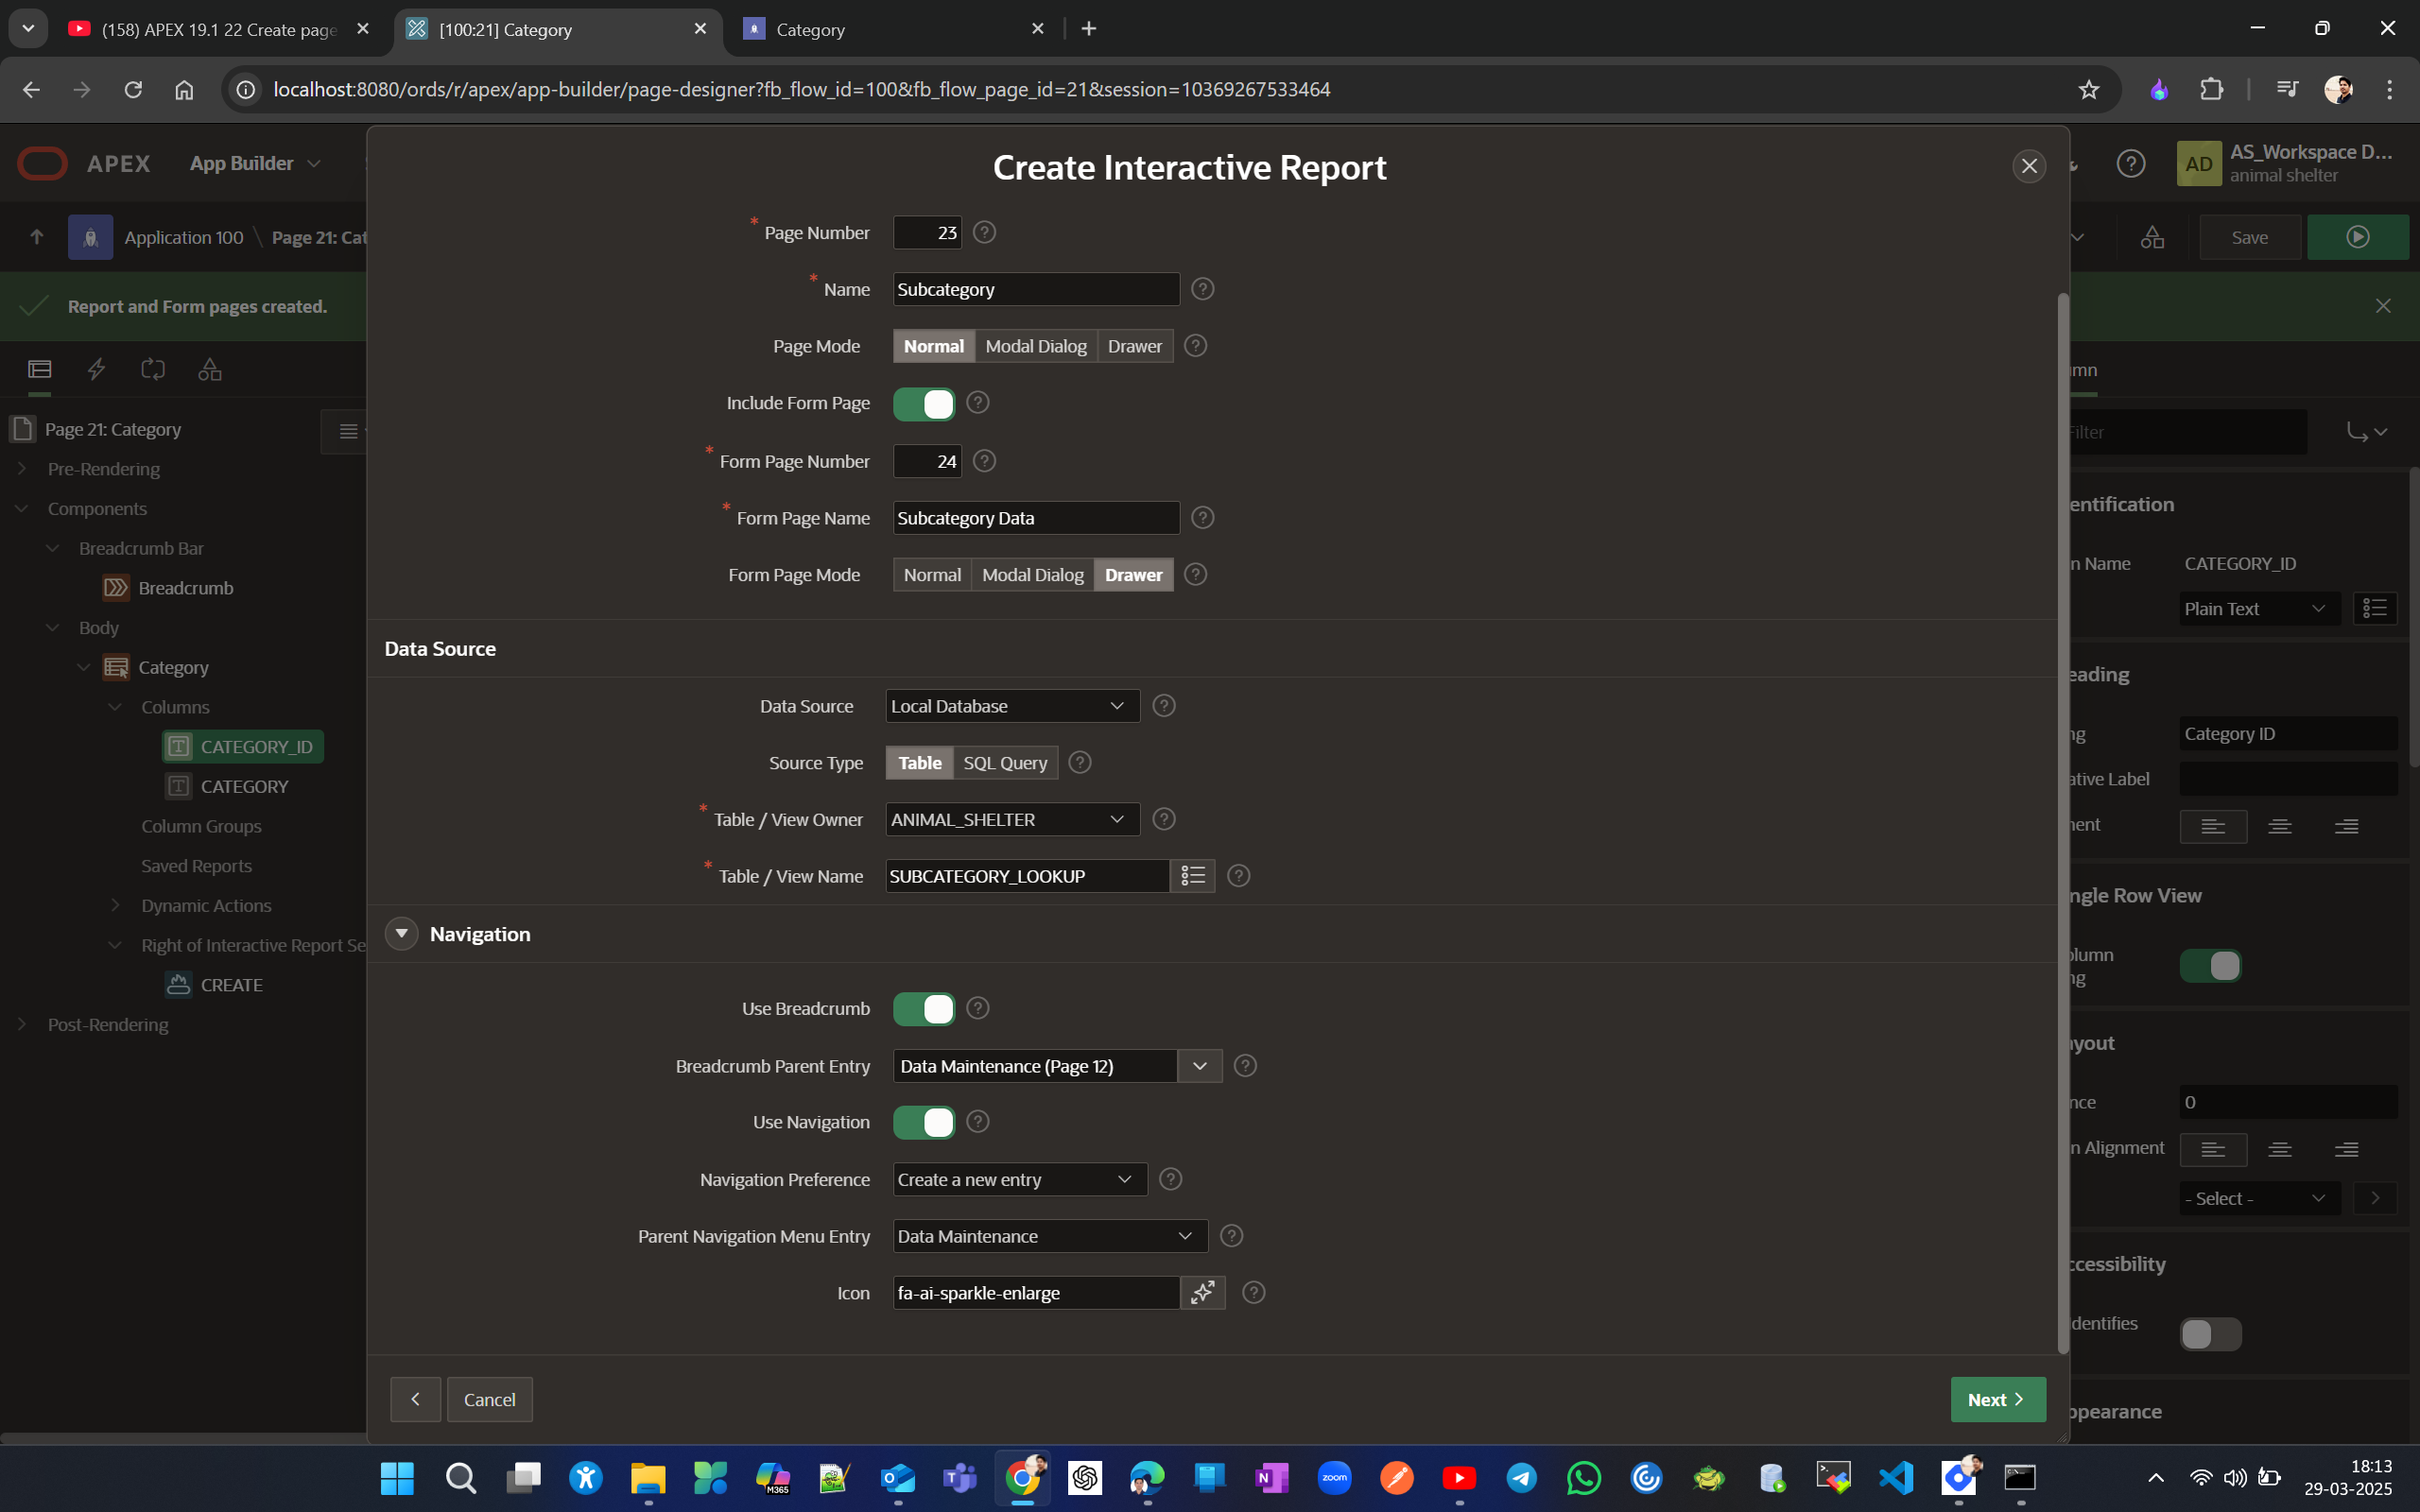
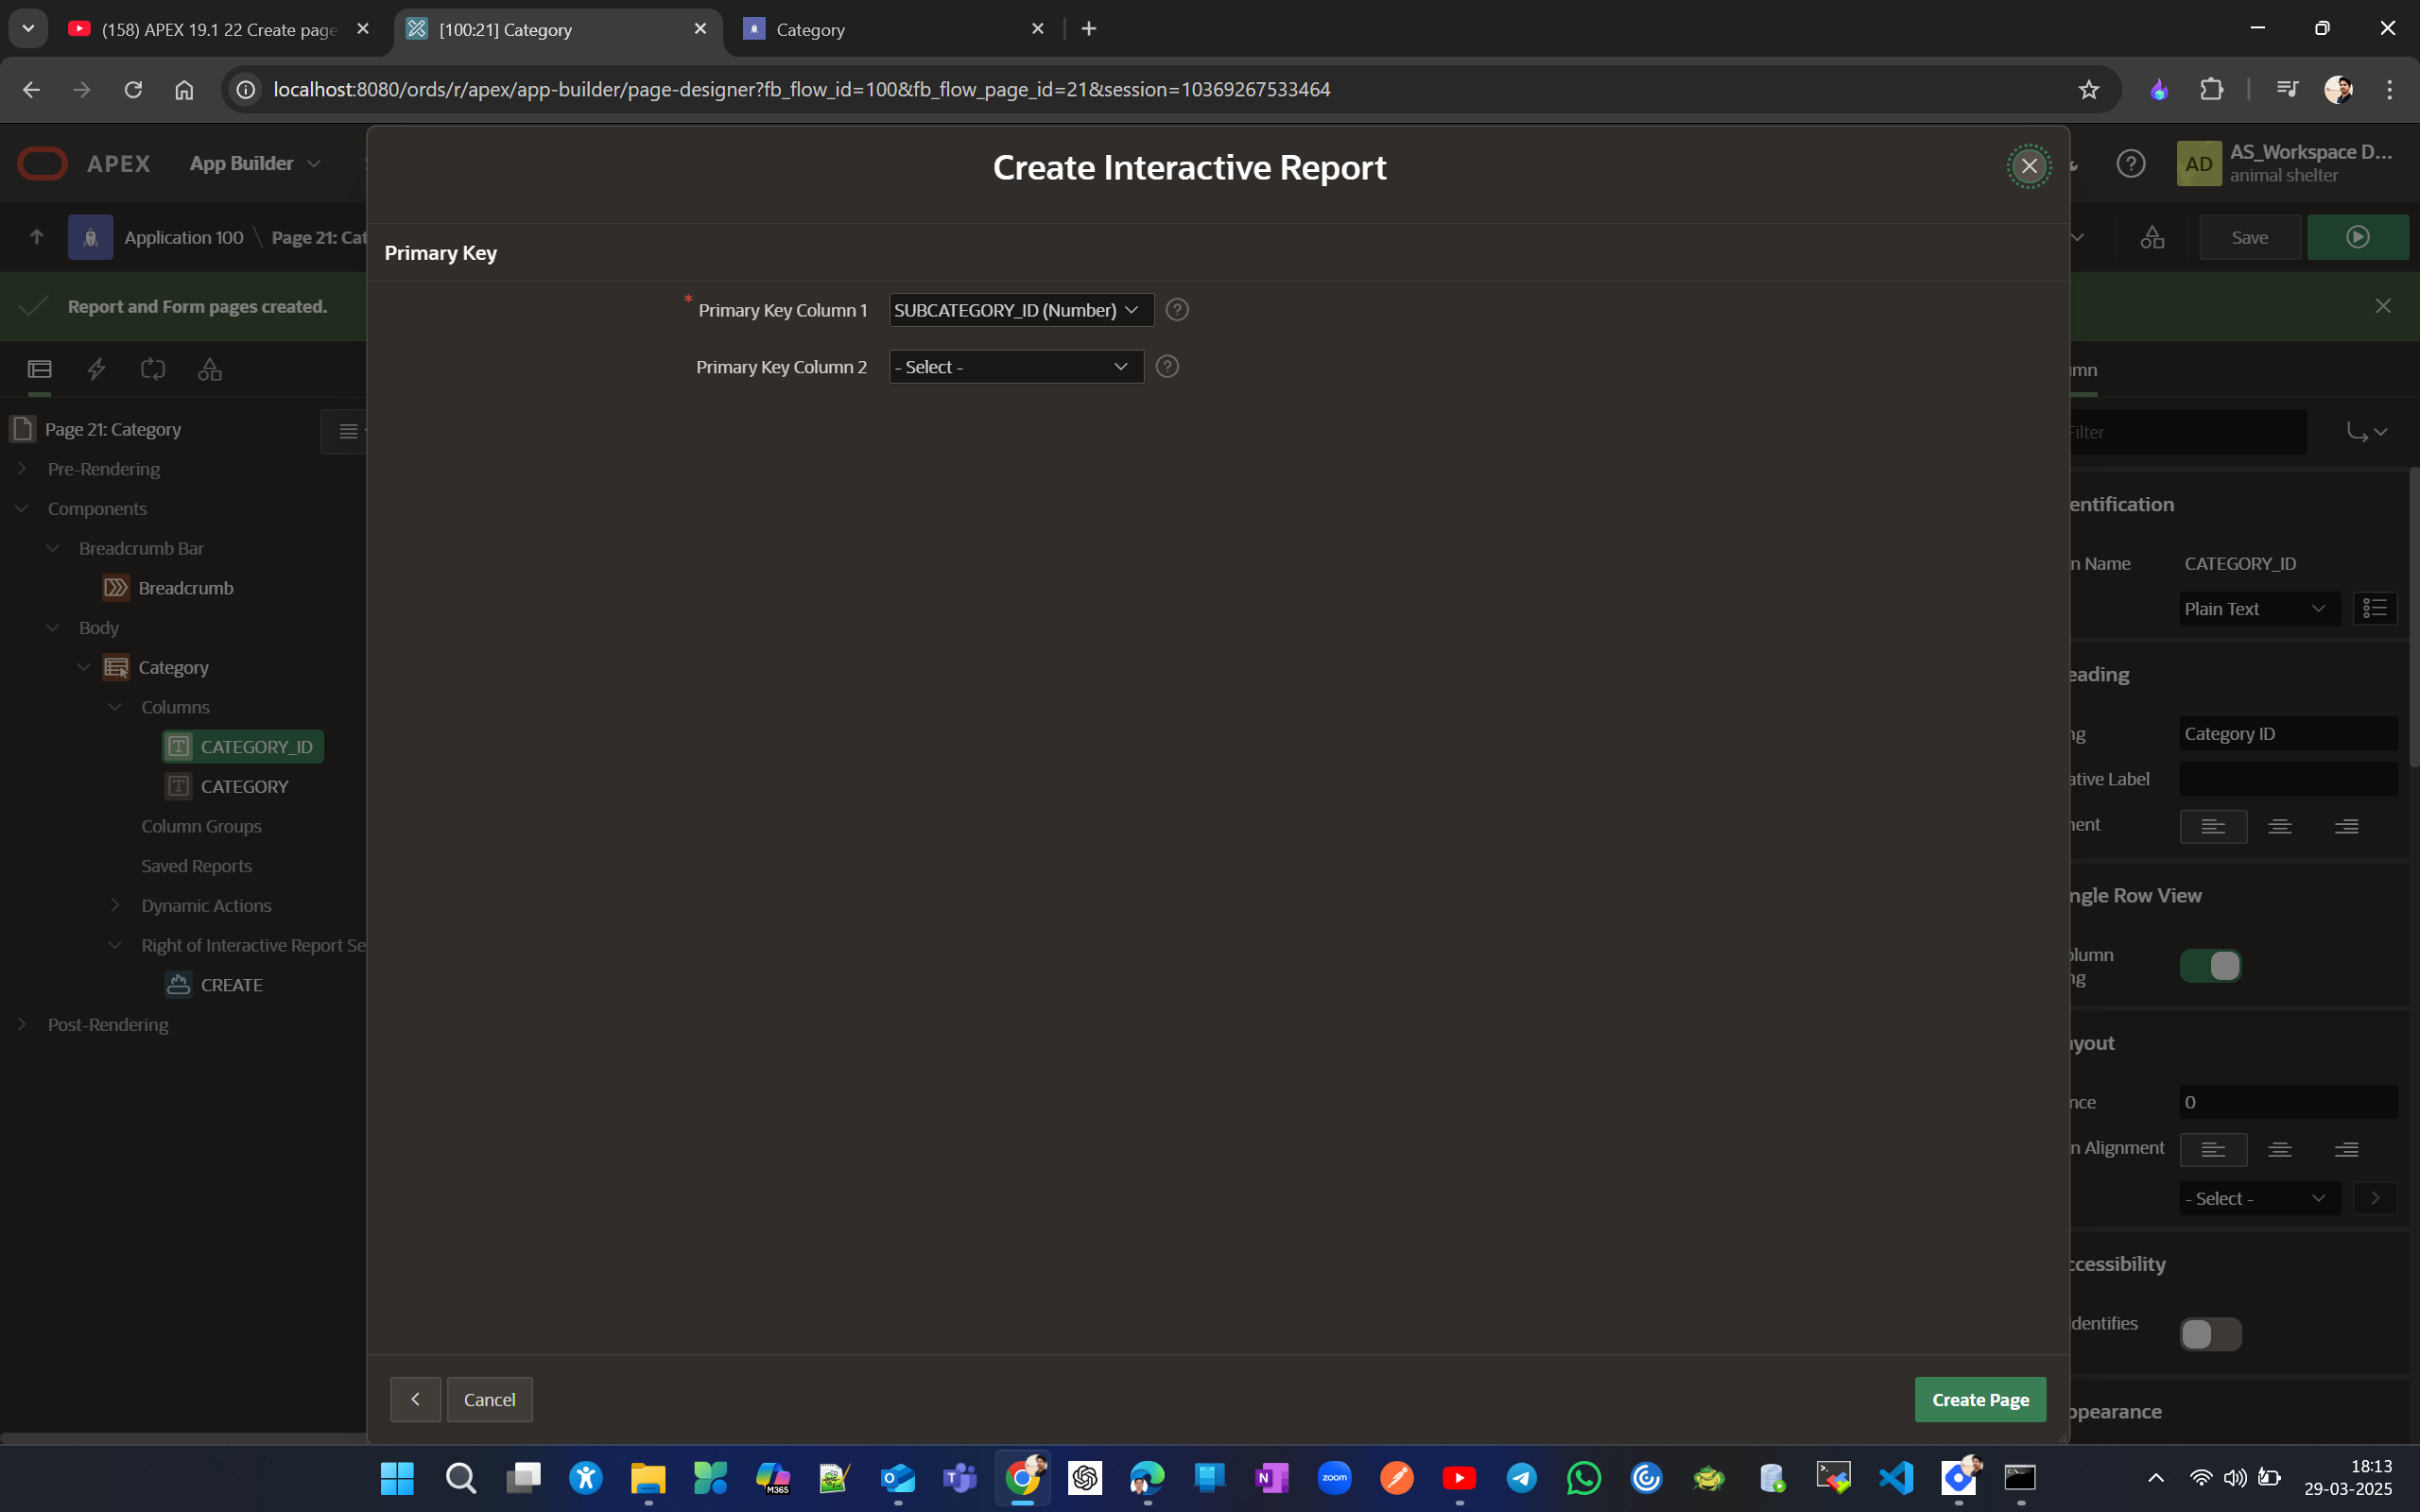
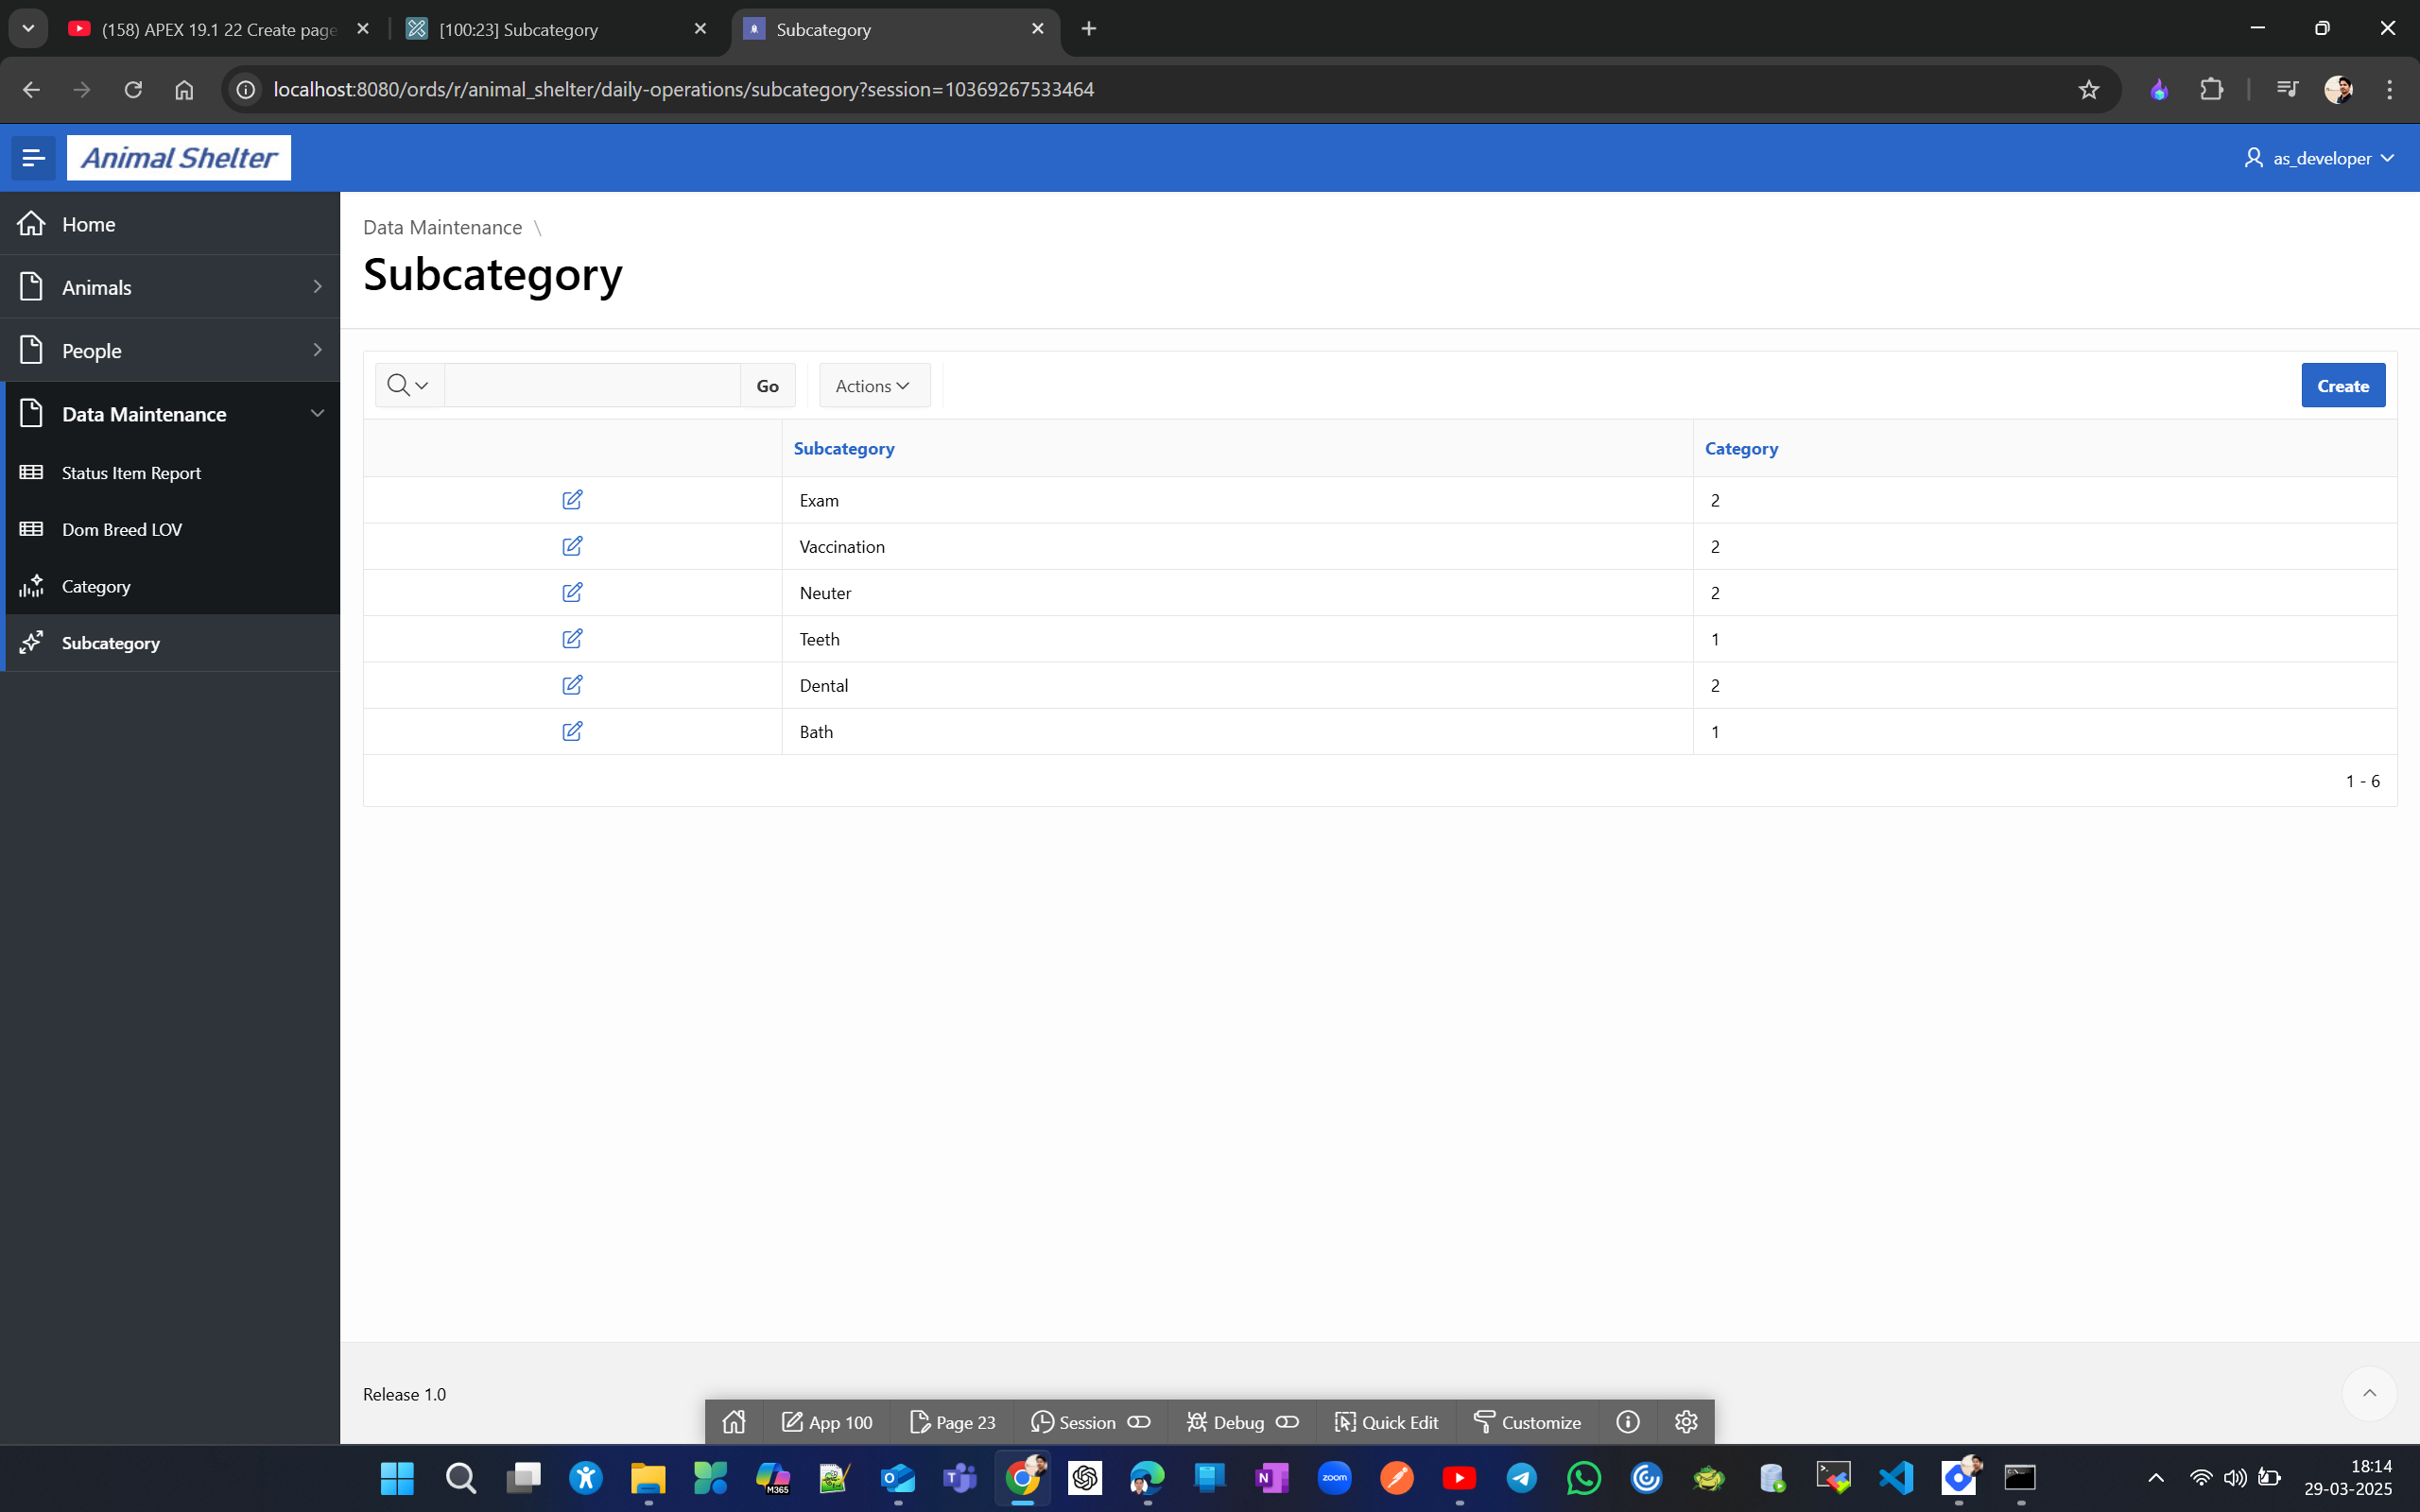
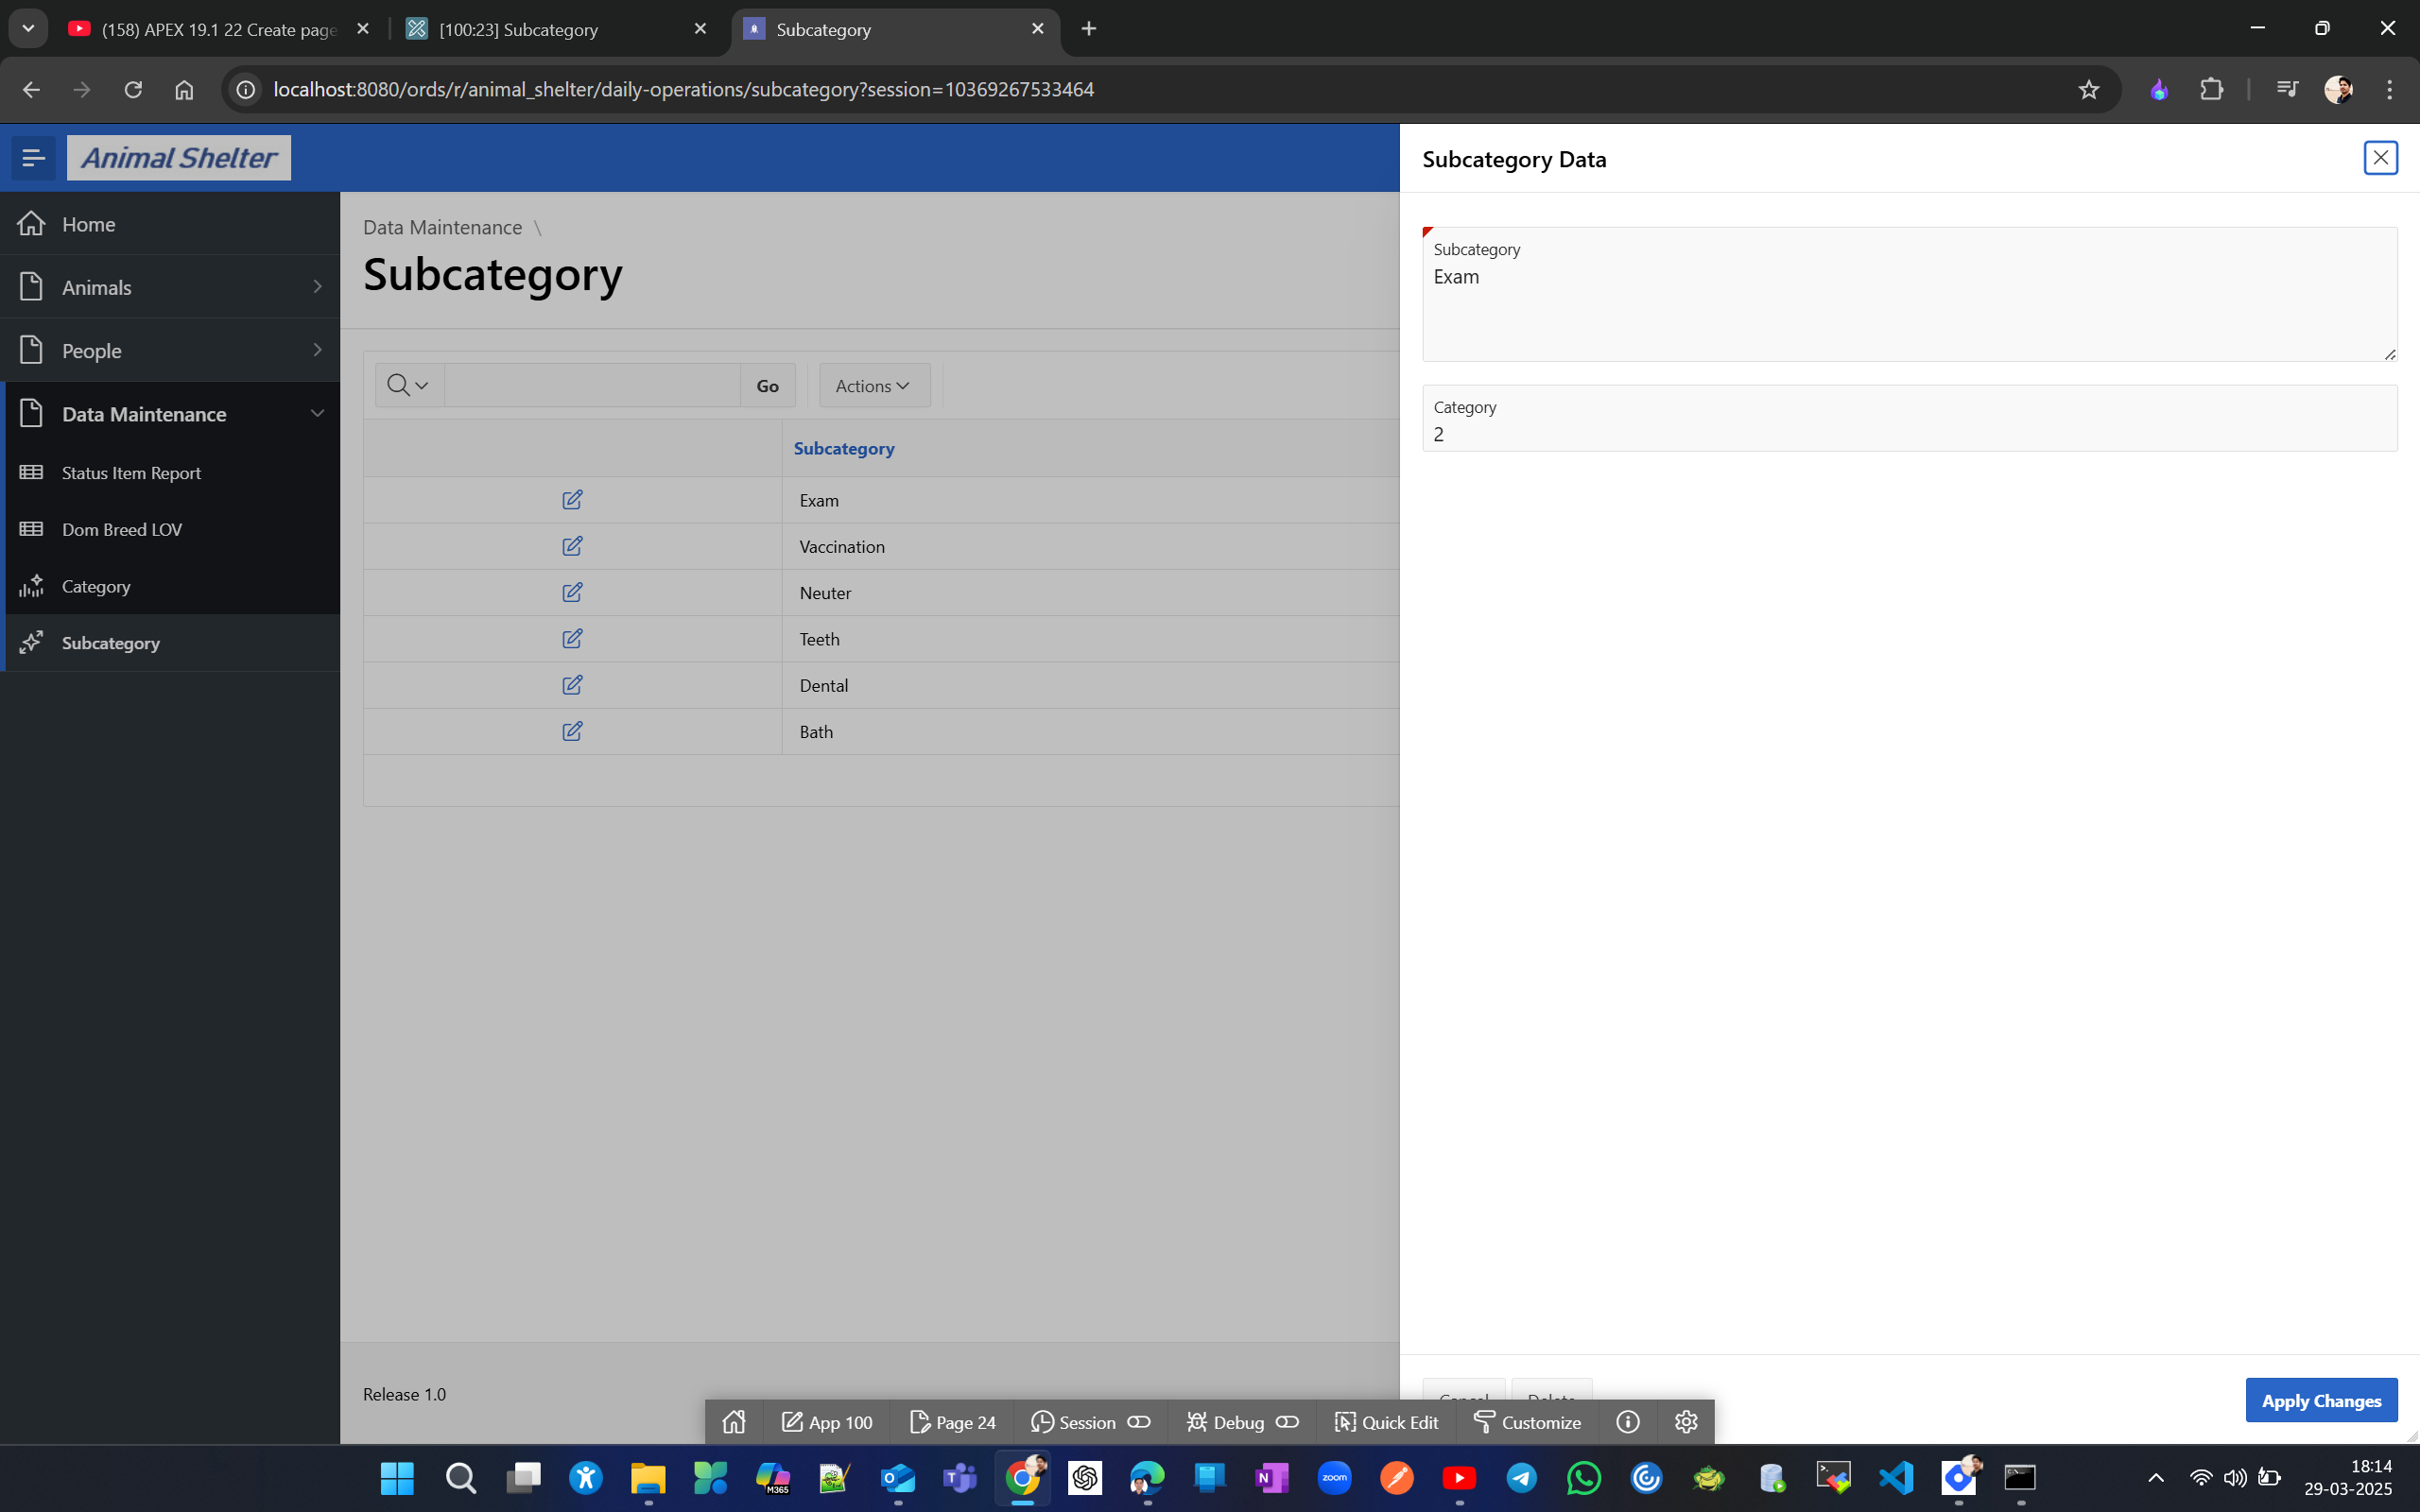
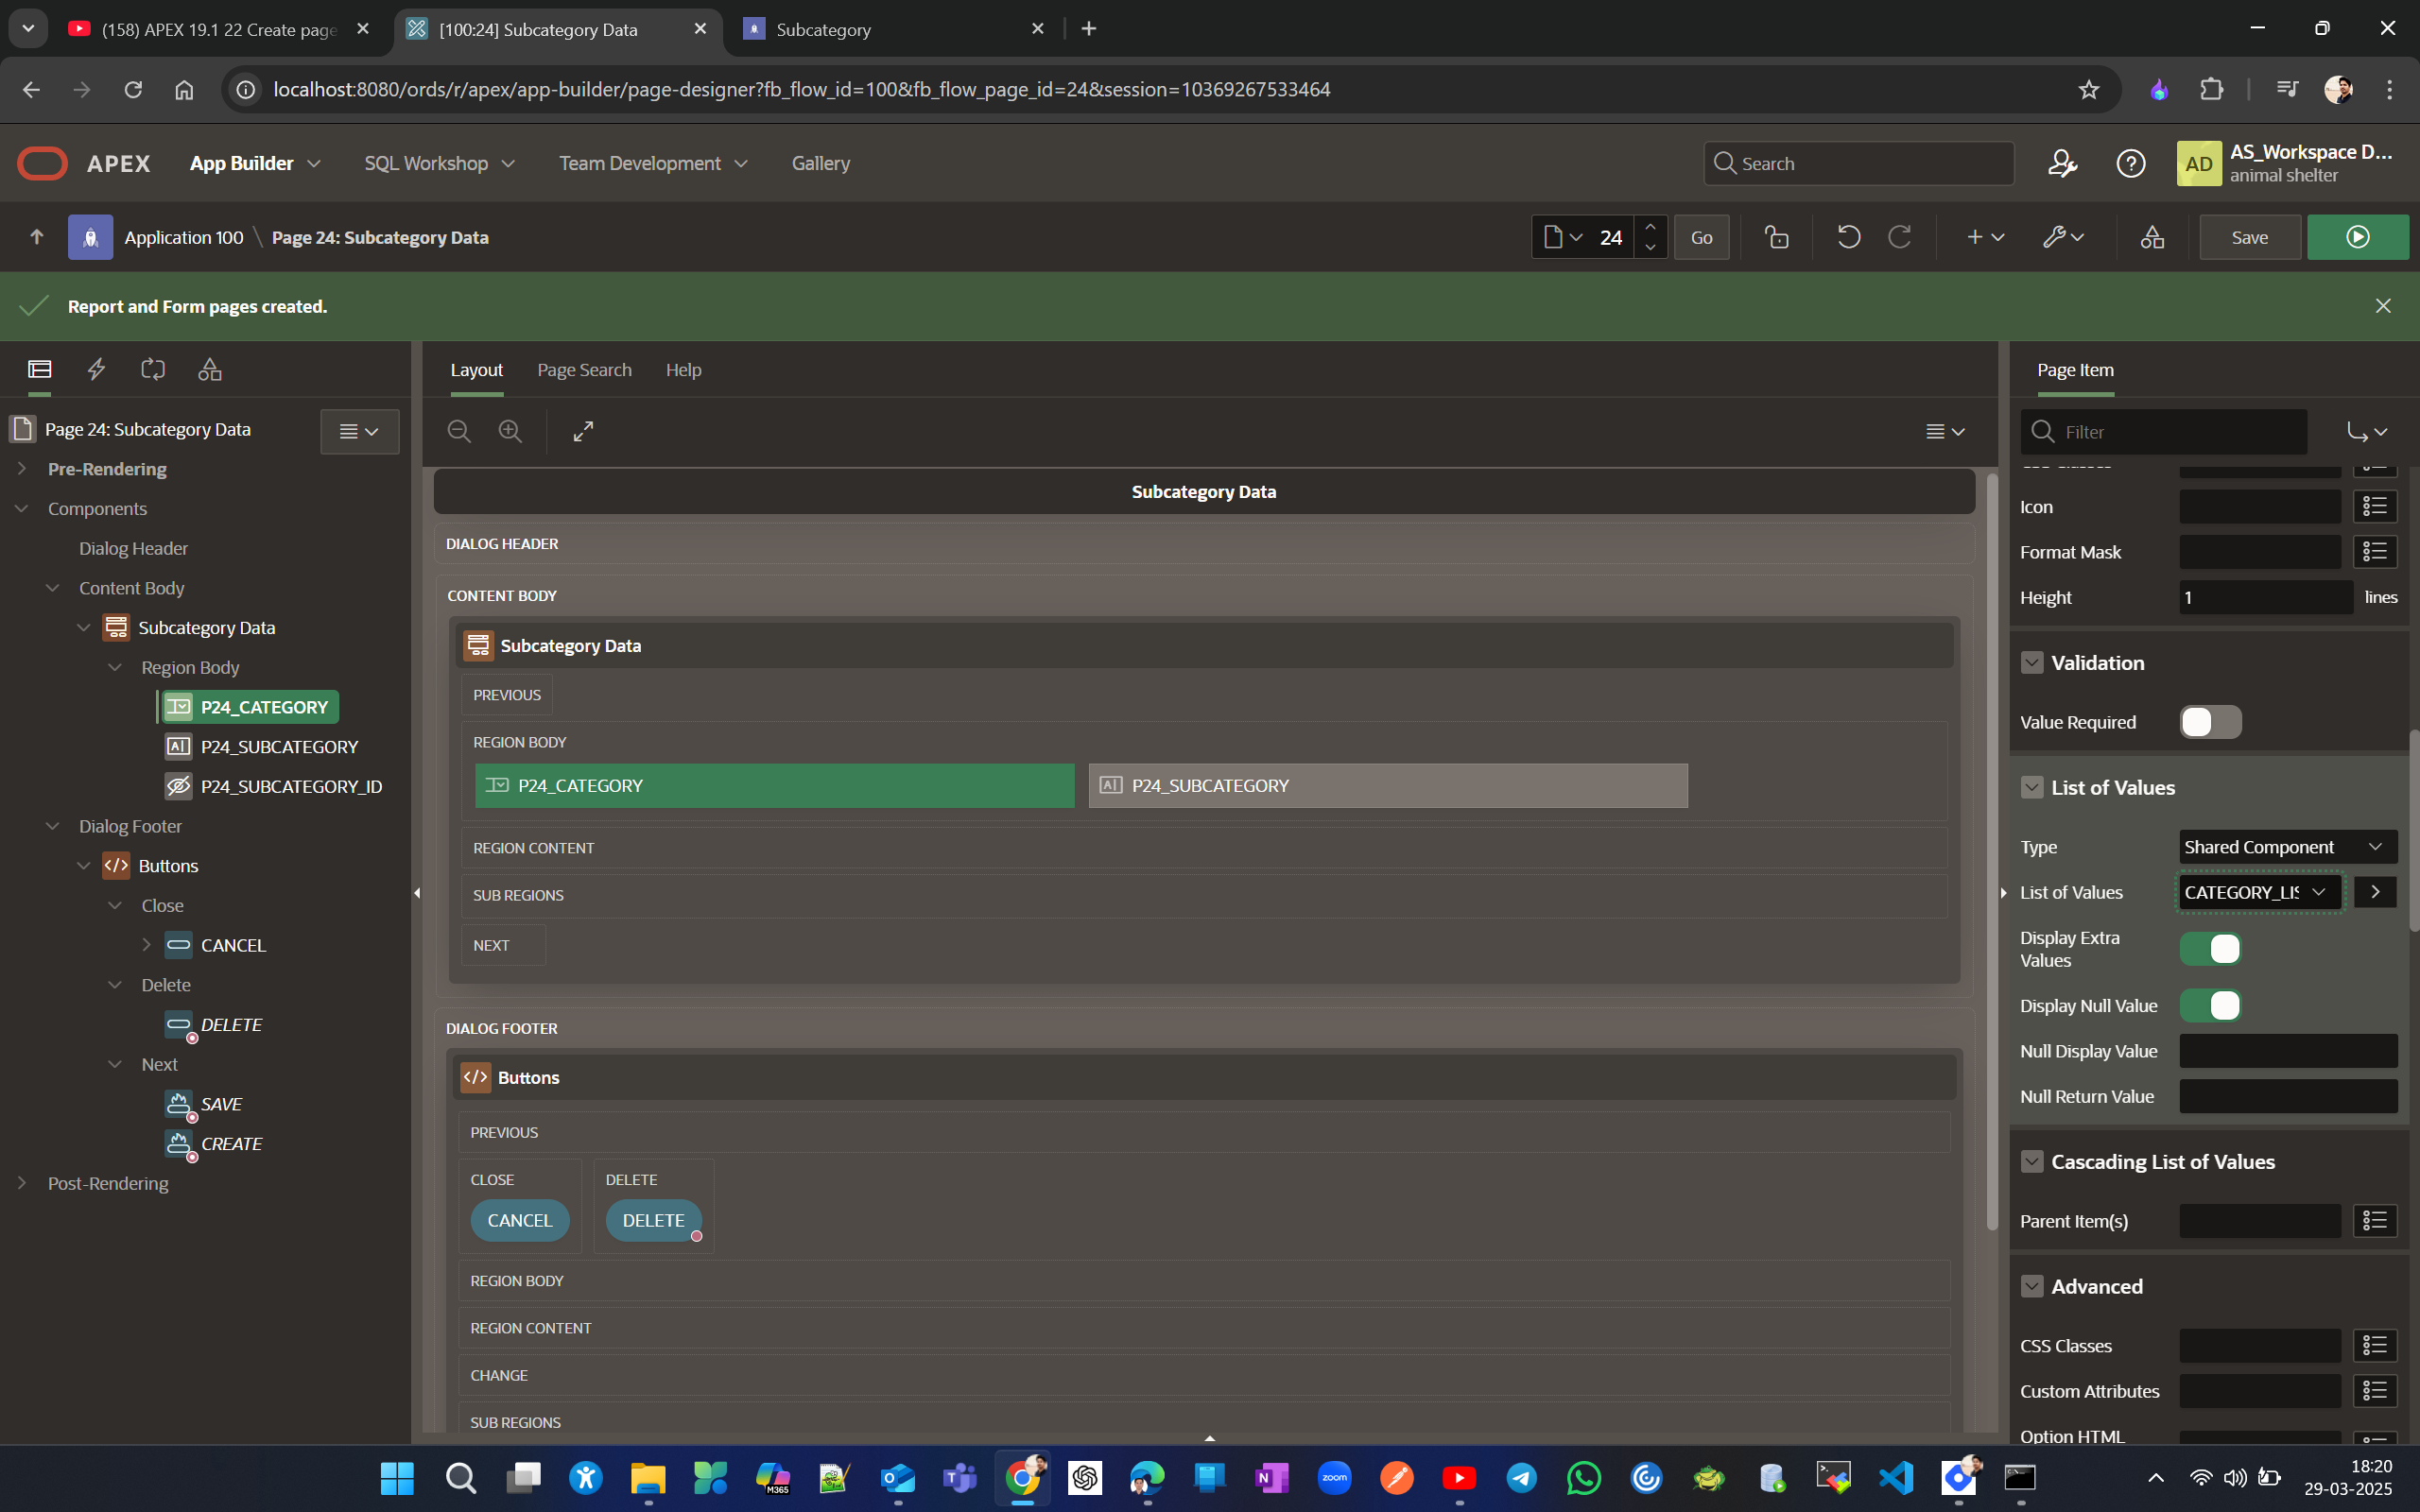
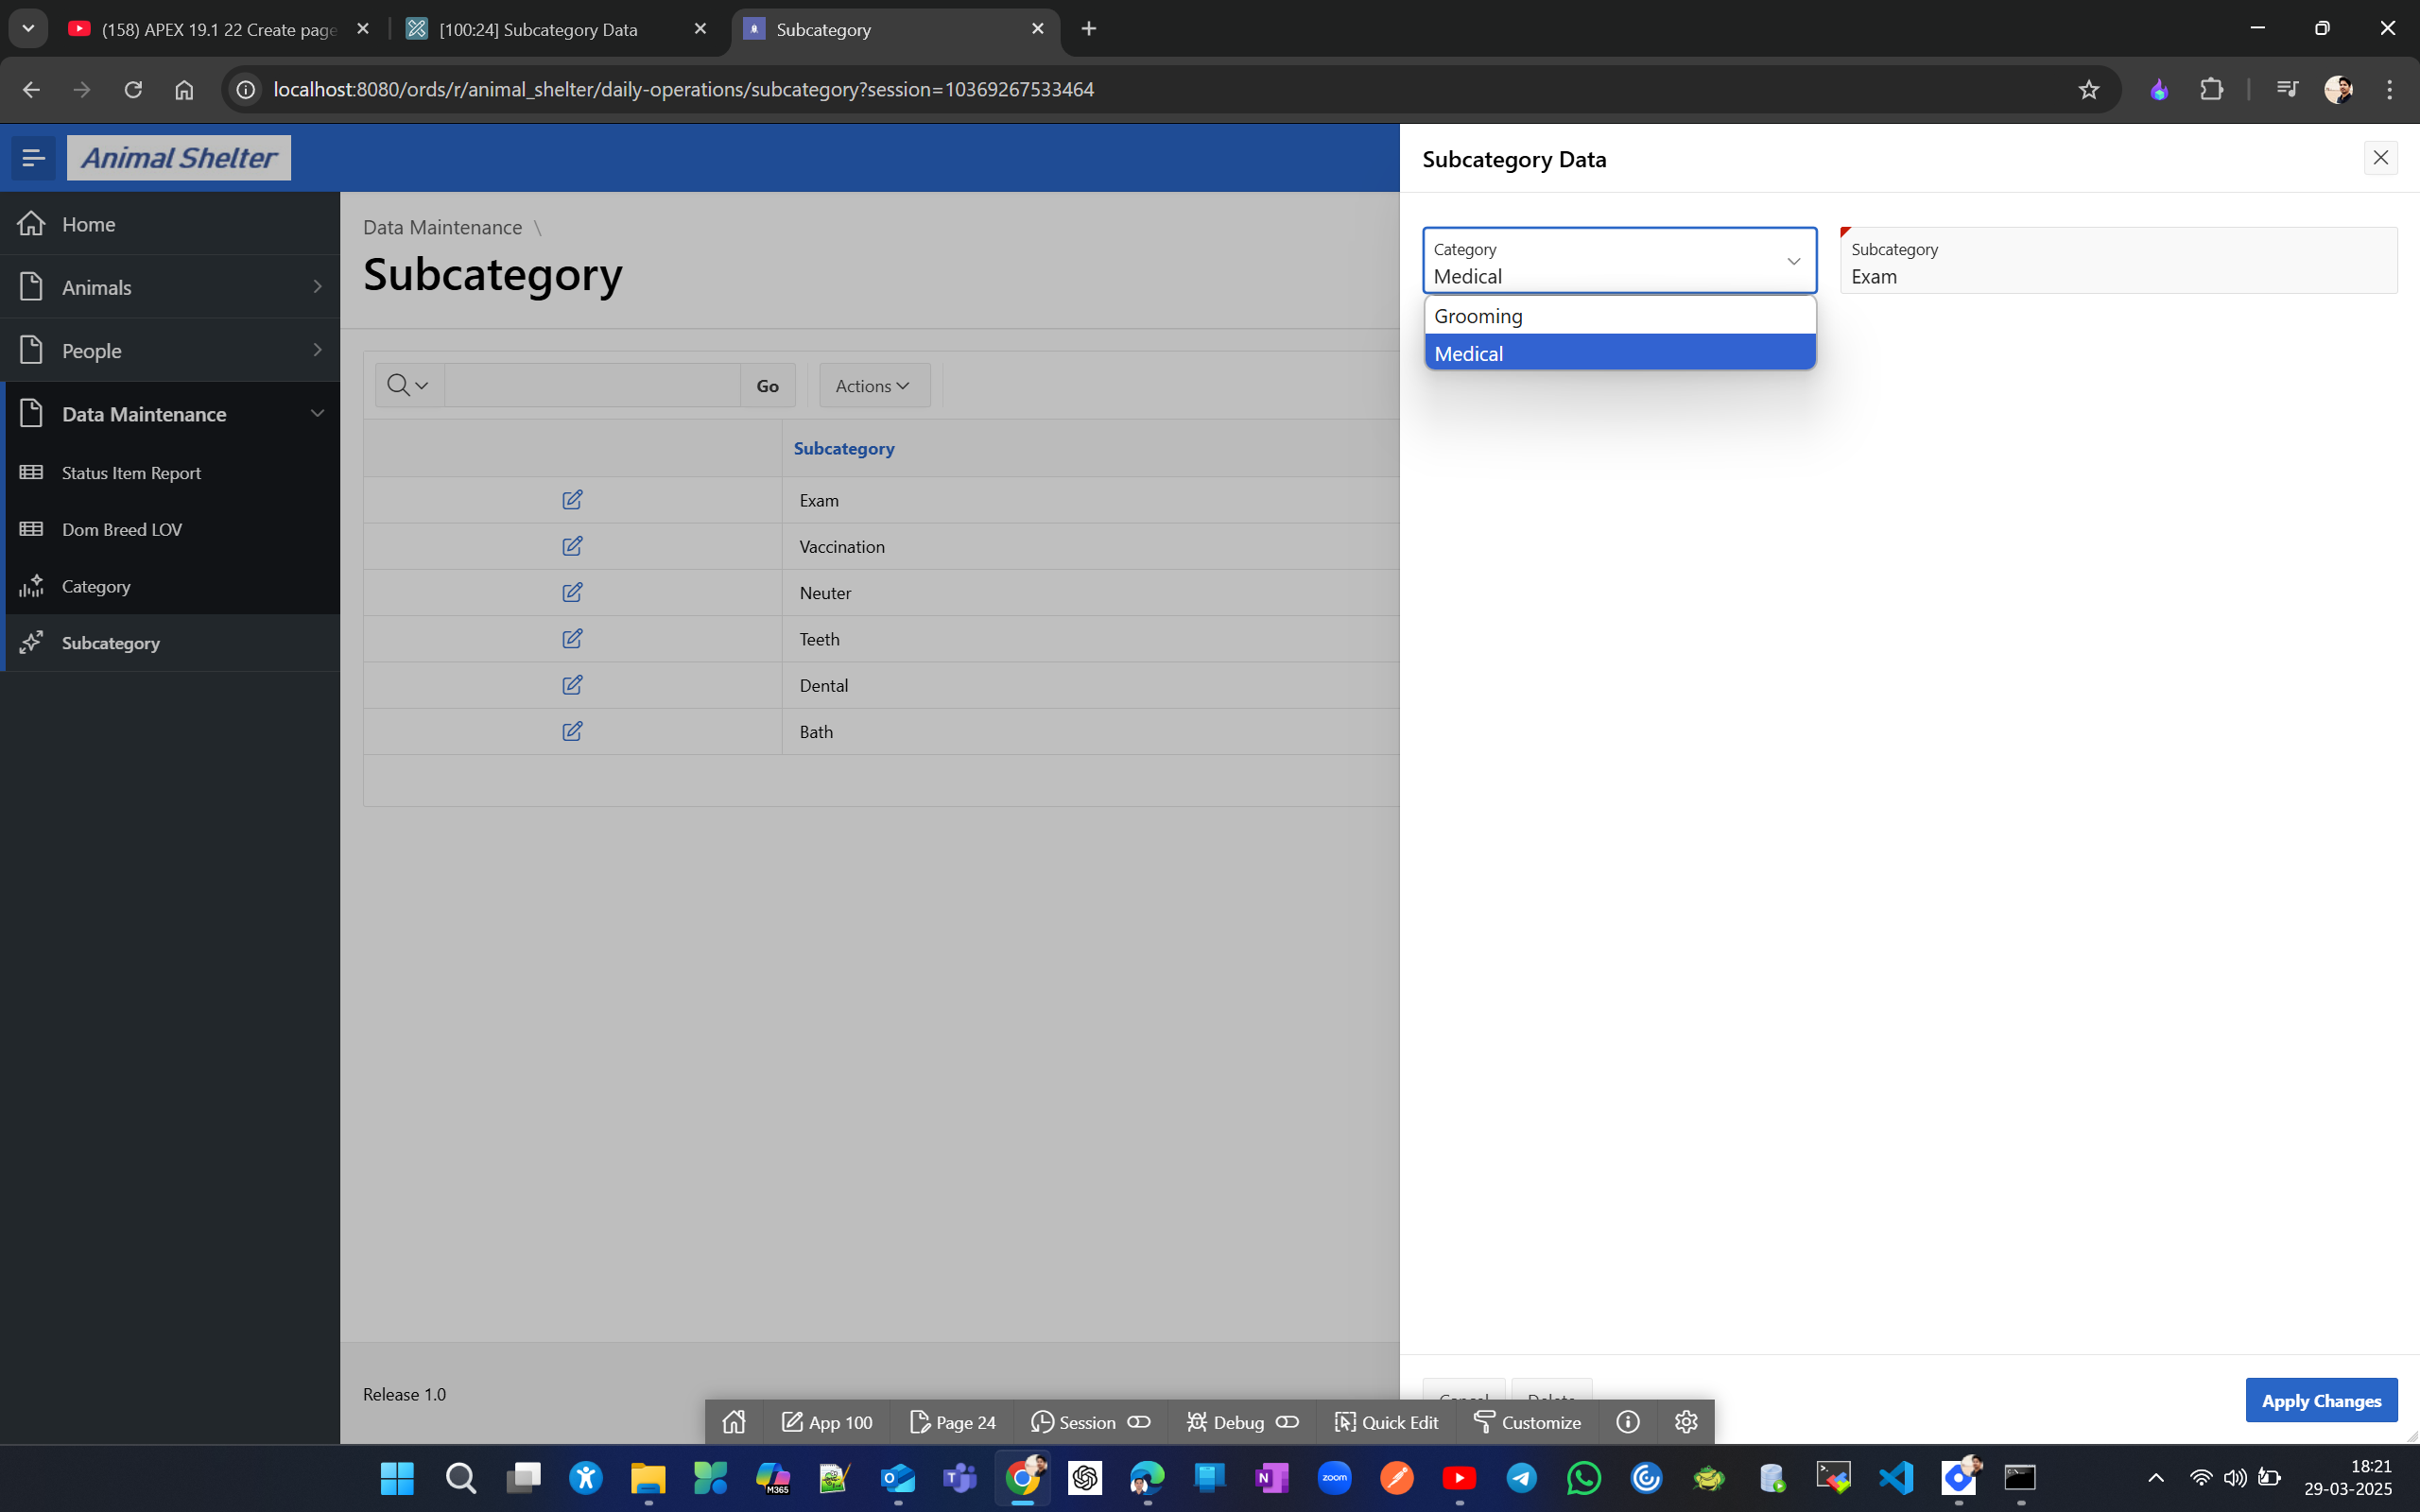
Now lets organize these pages. Goto Utilities → Page Groups → Create and then create groups based on requirement.
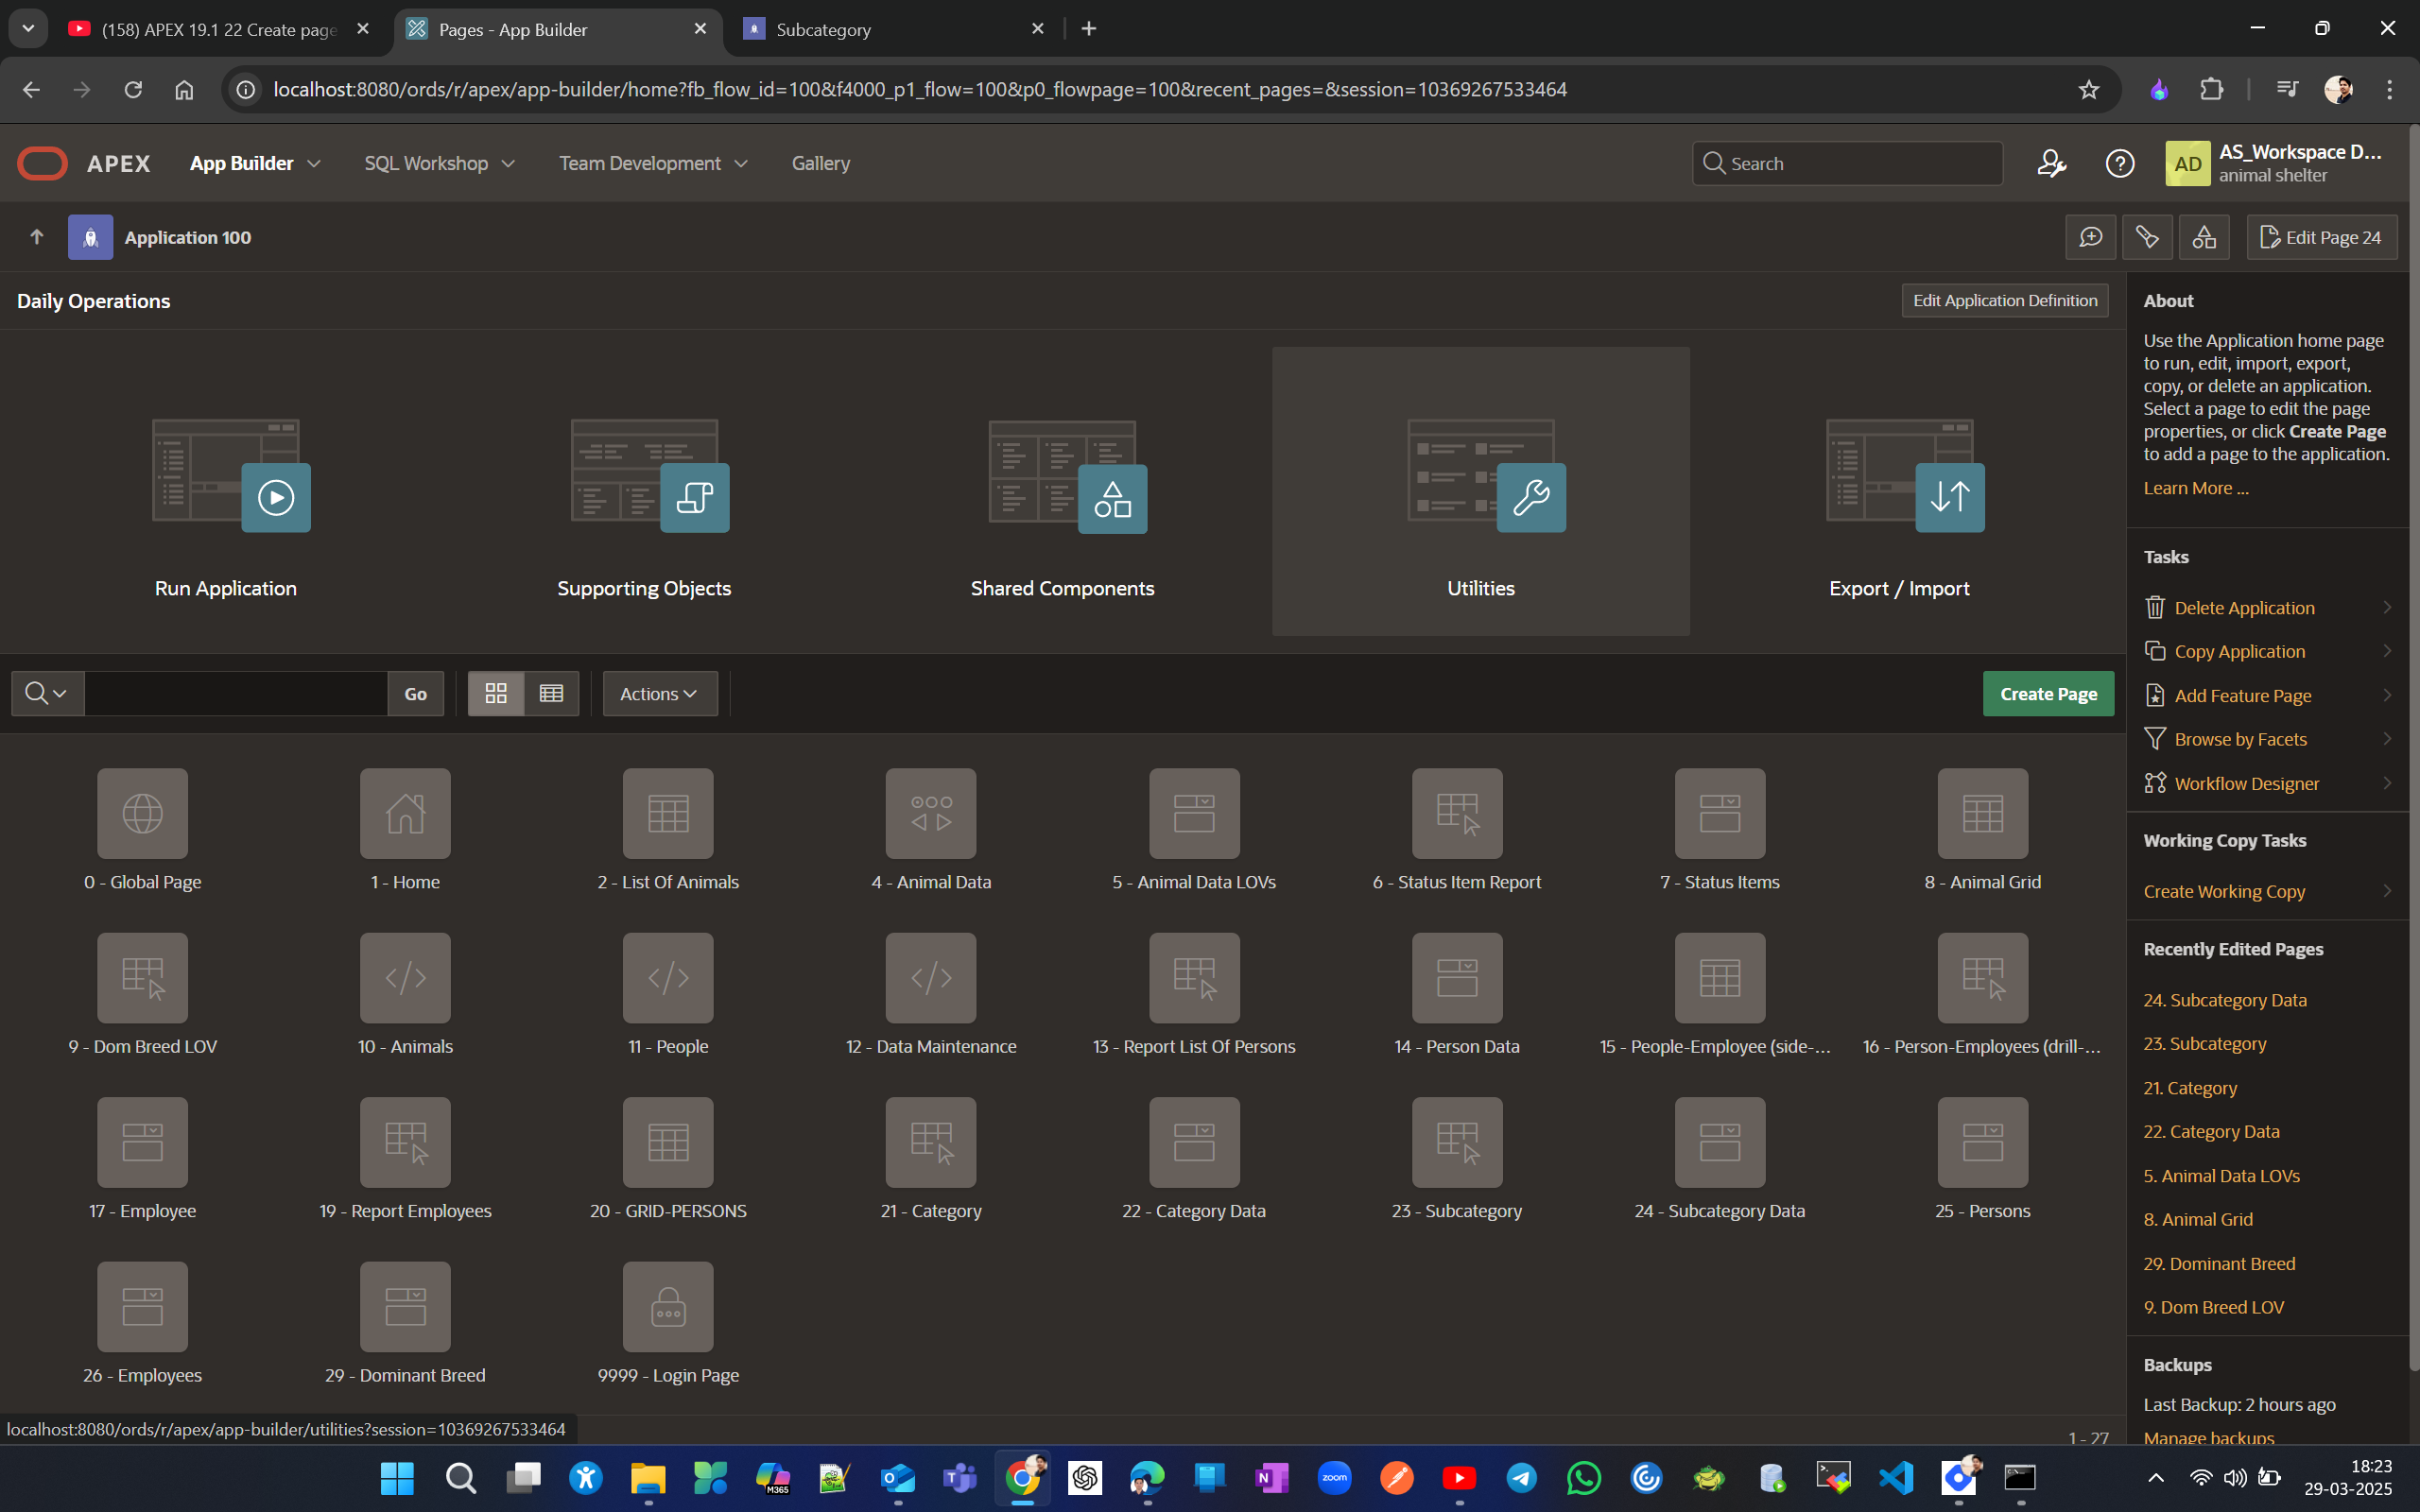
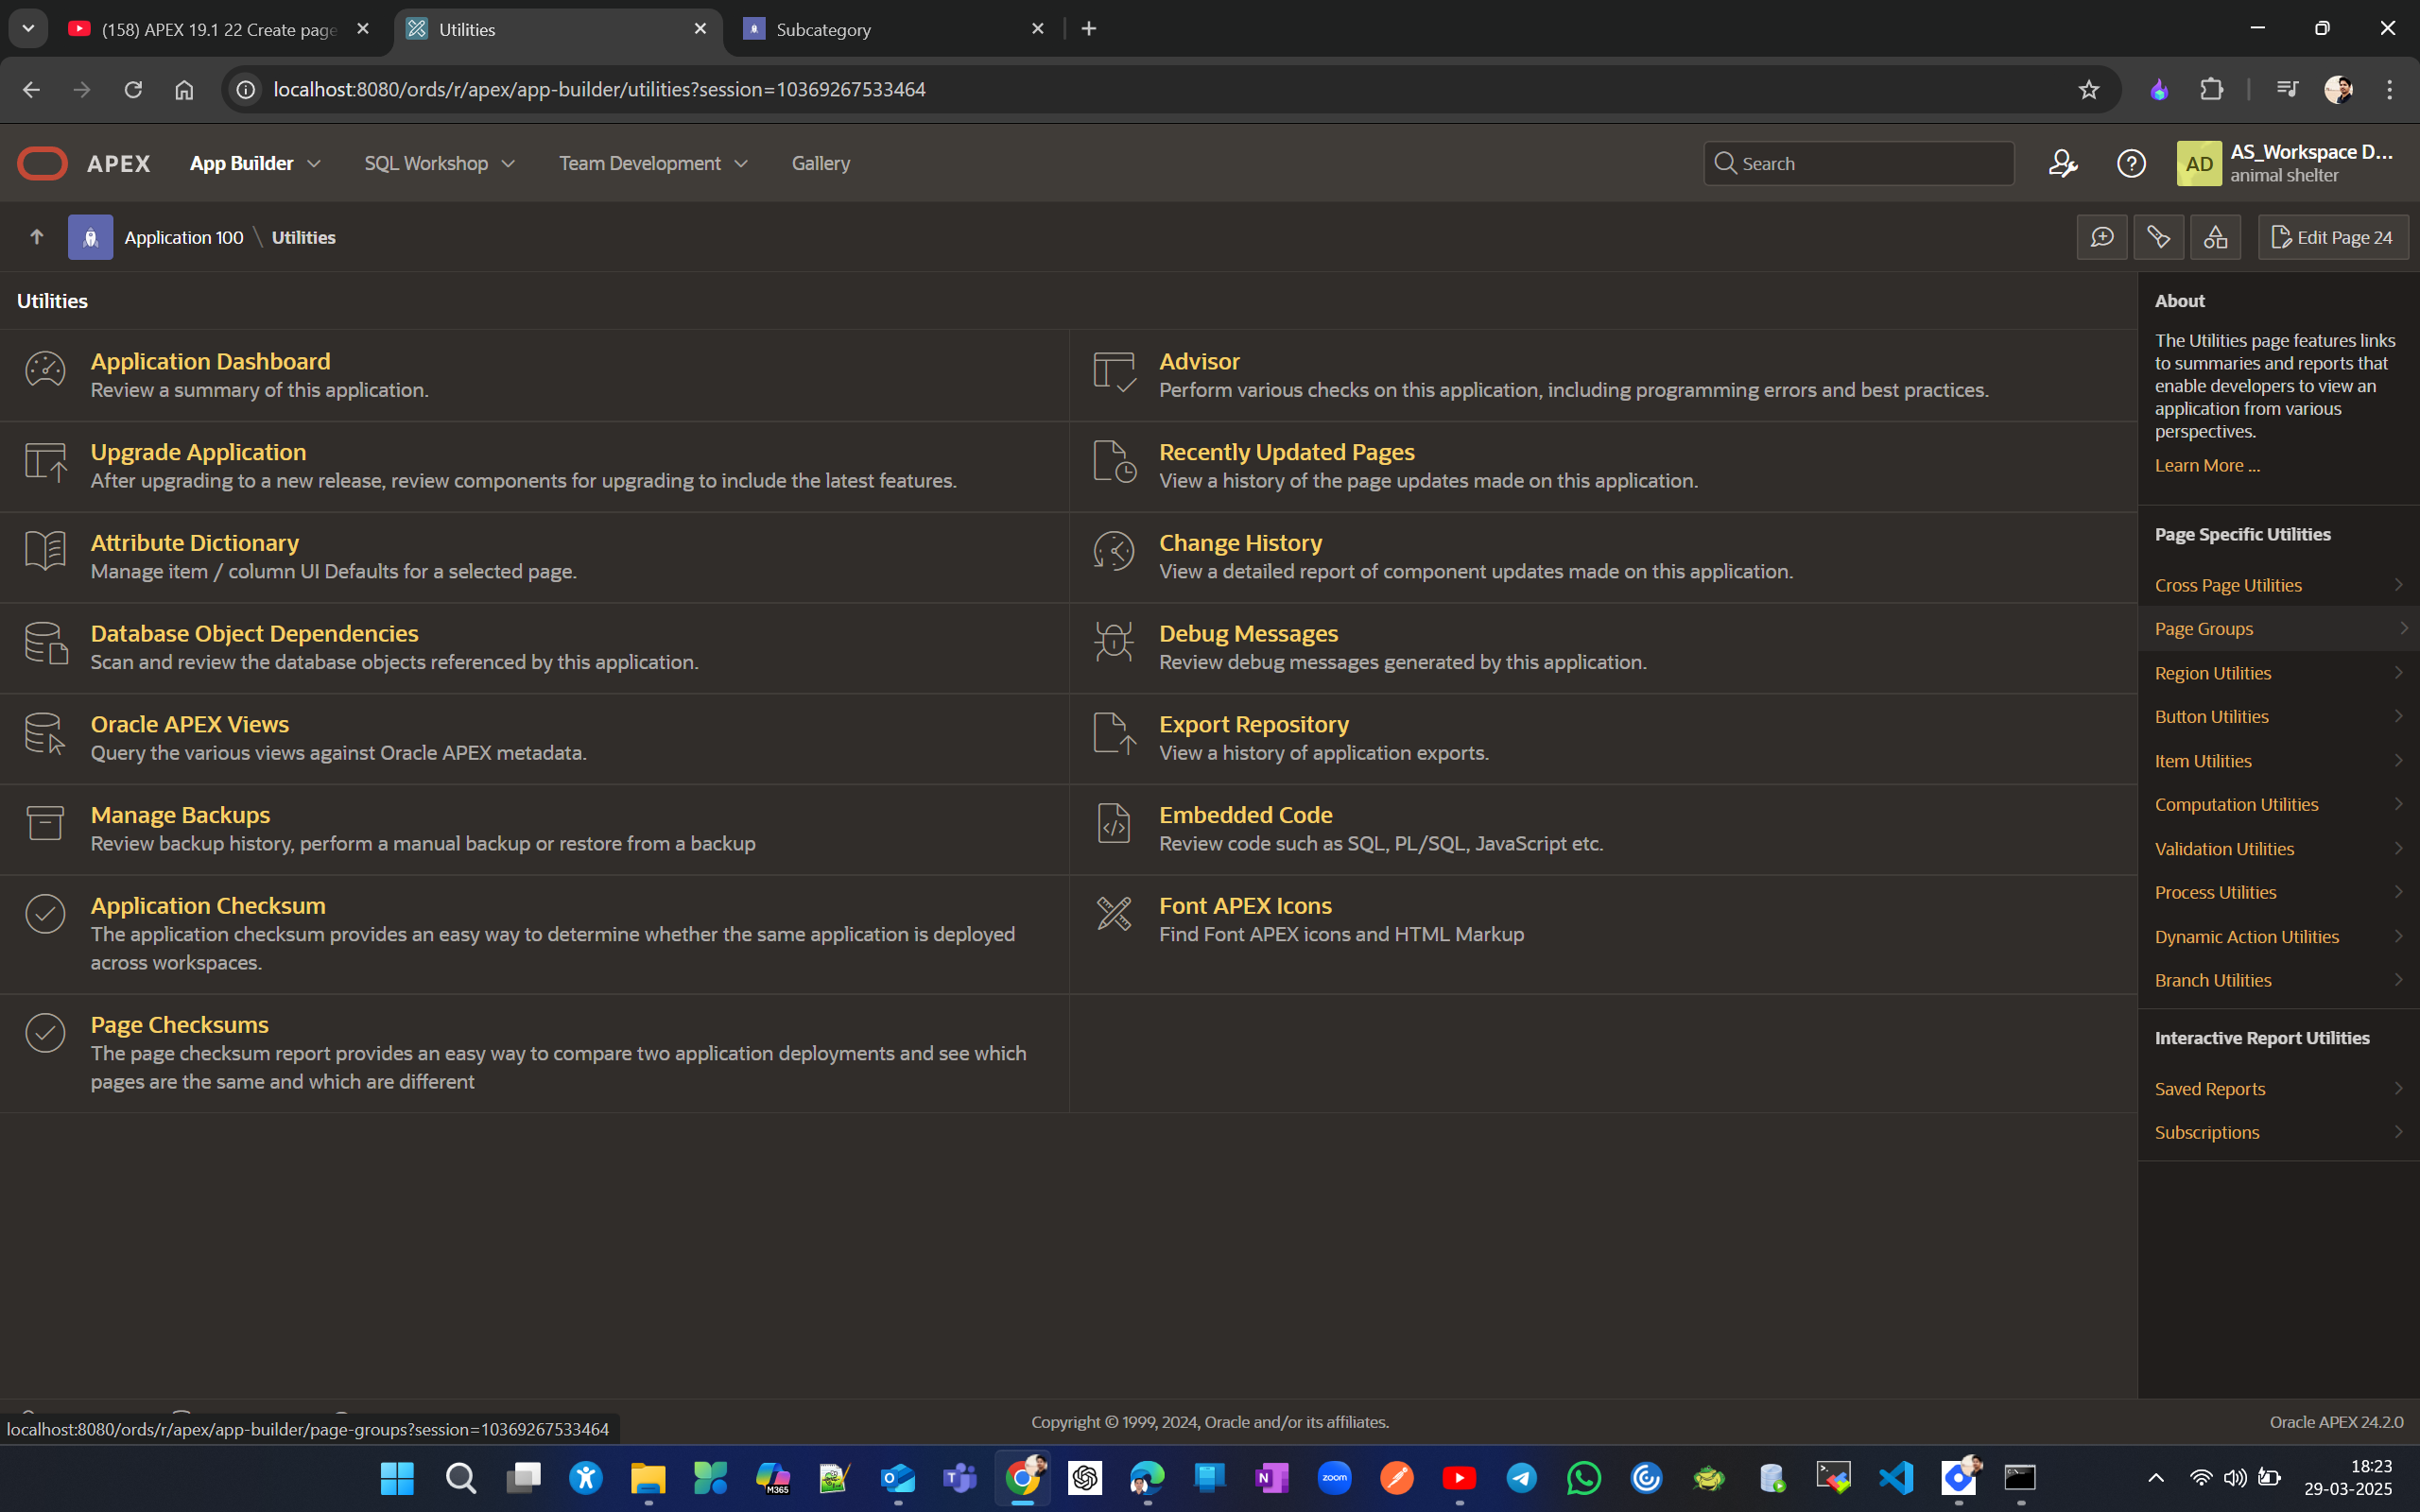
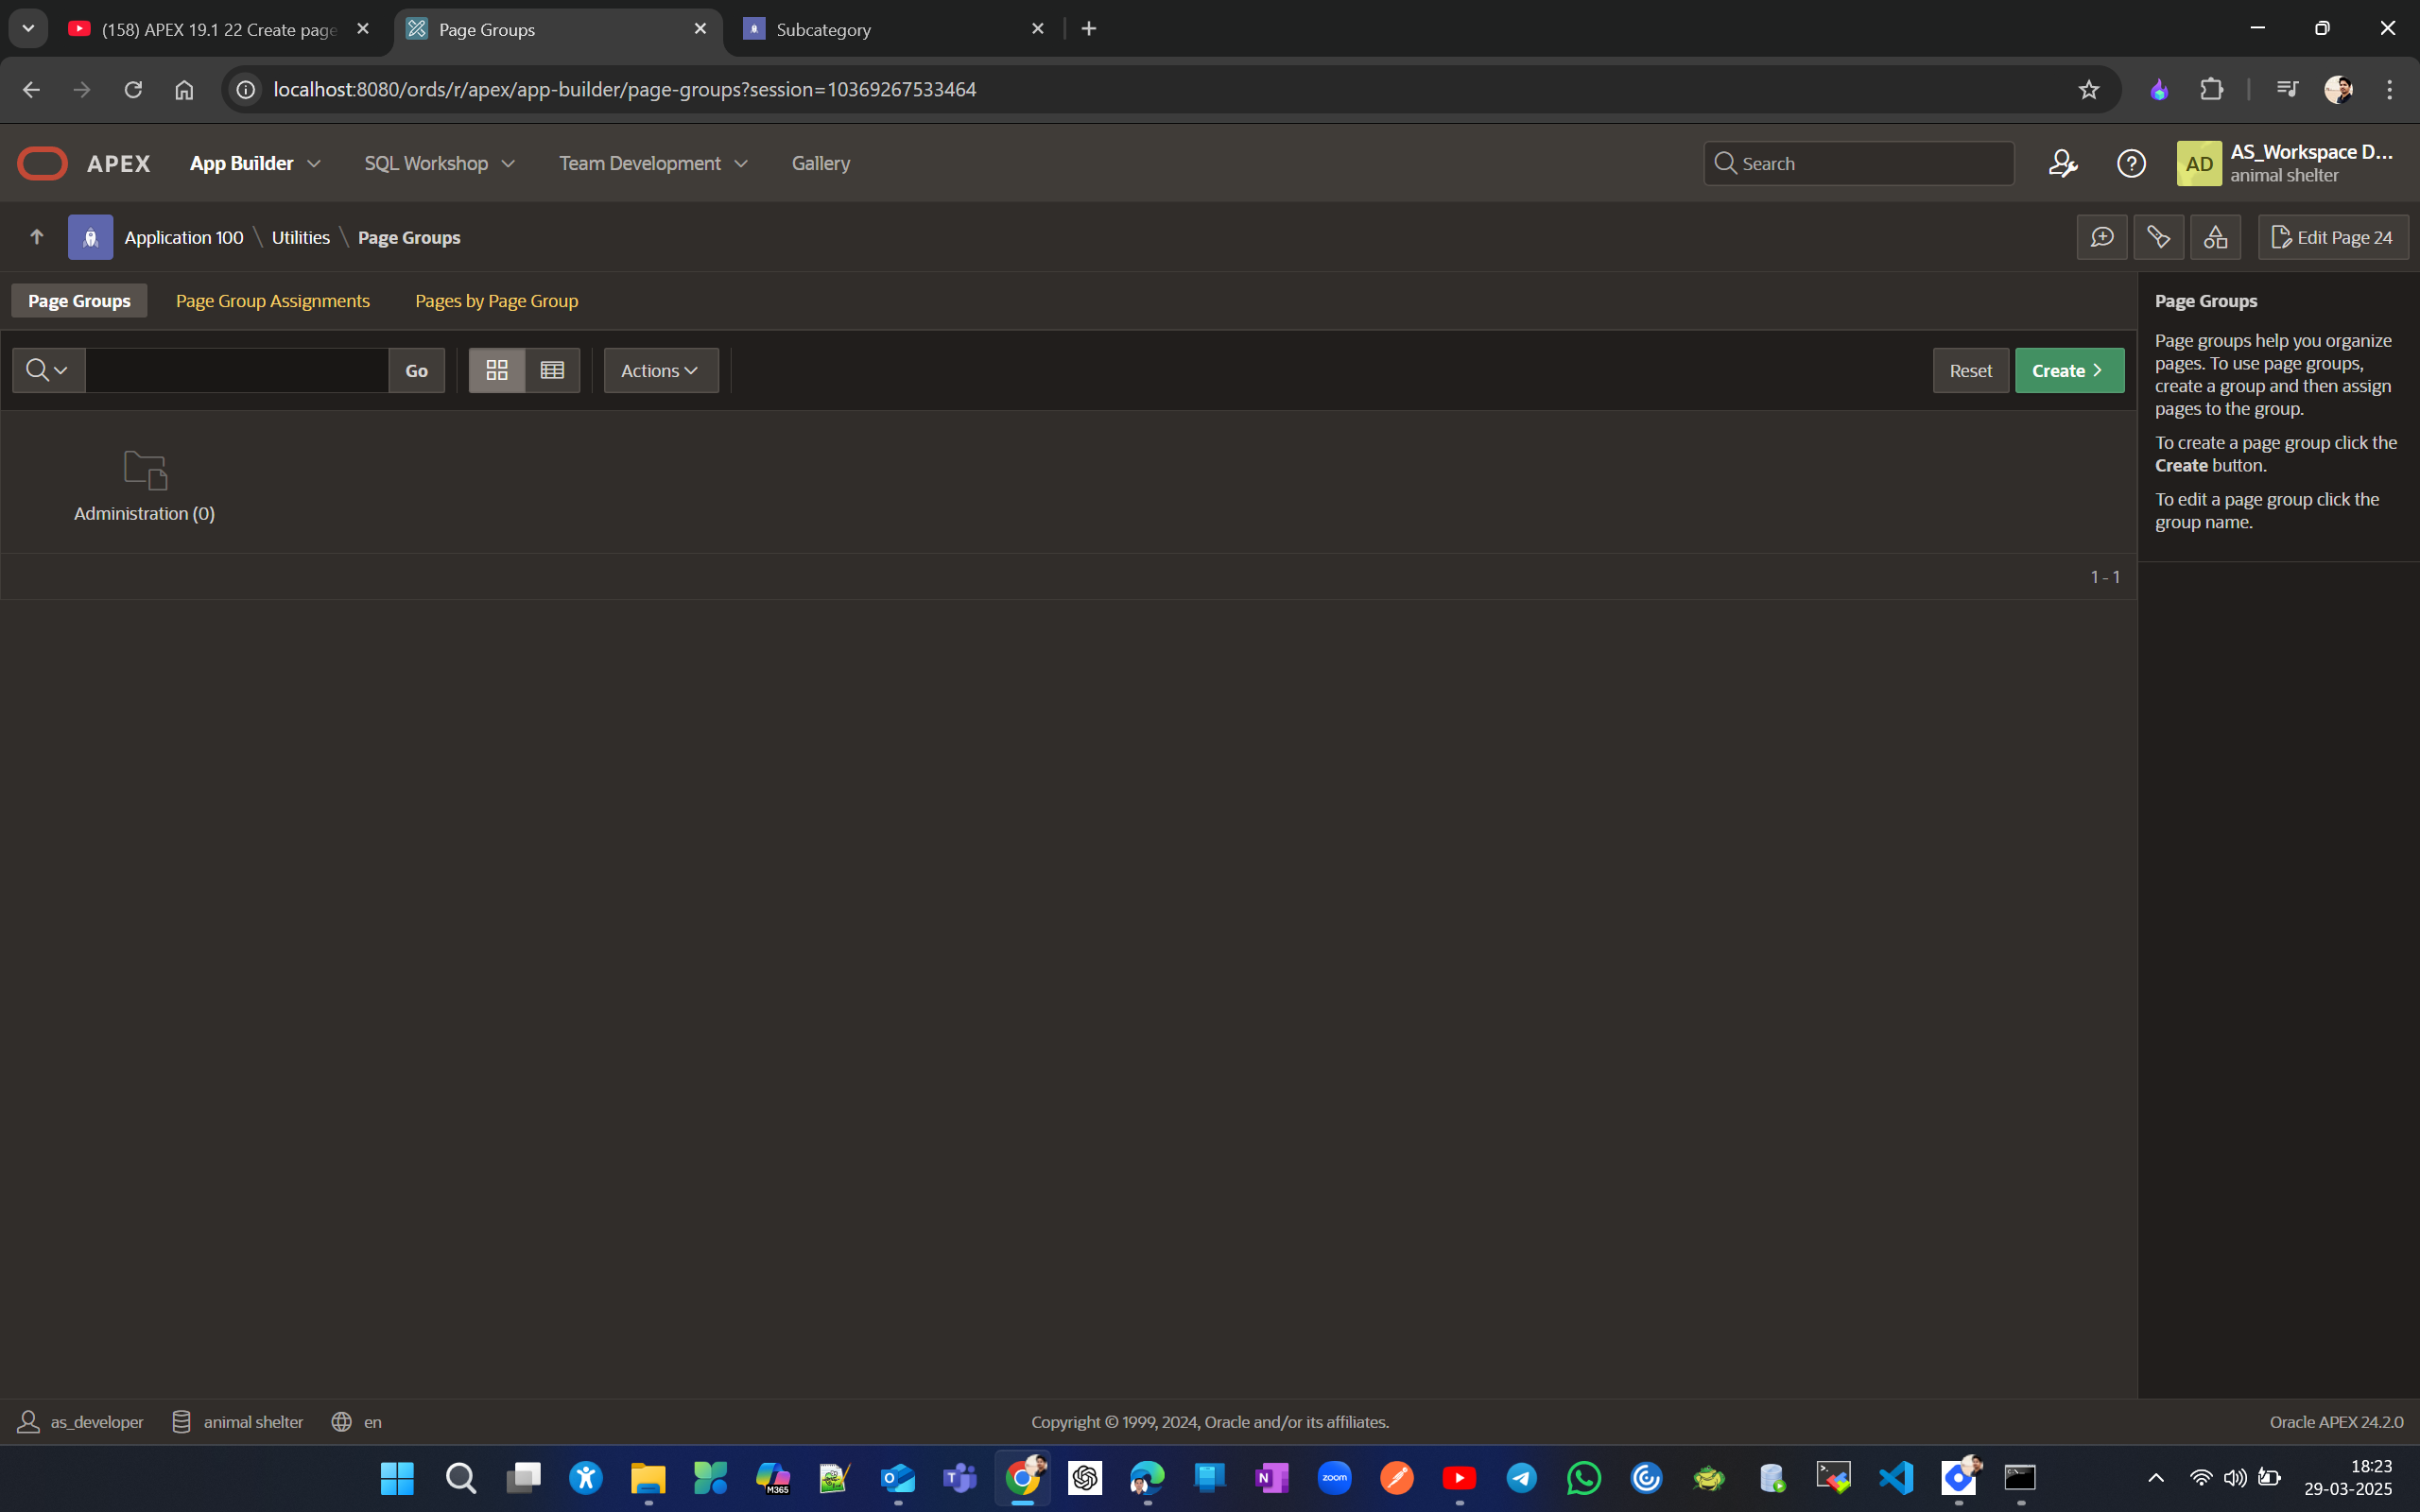
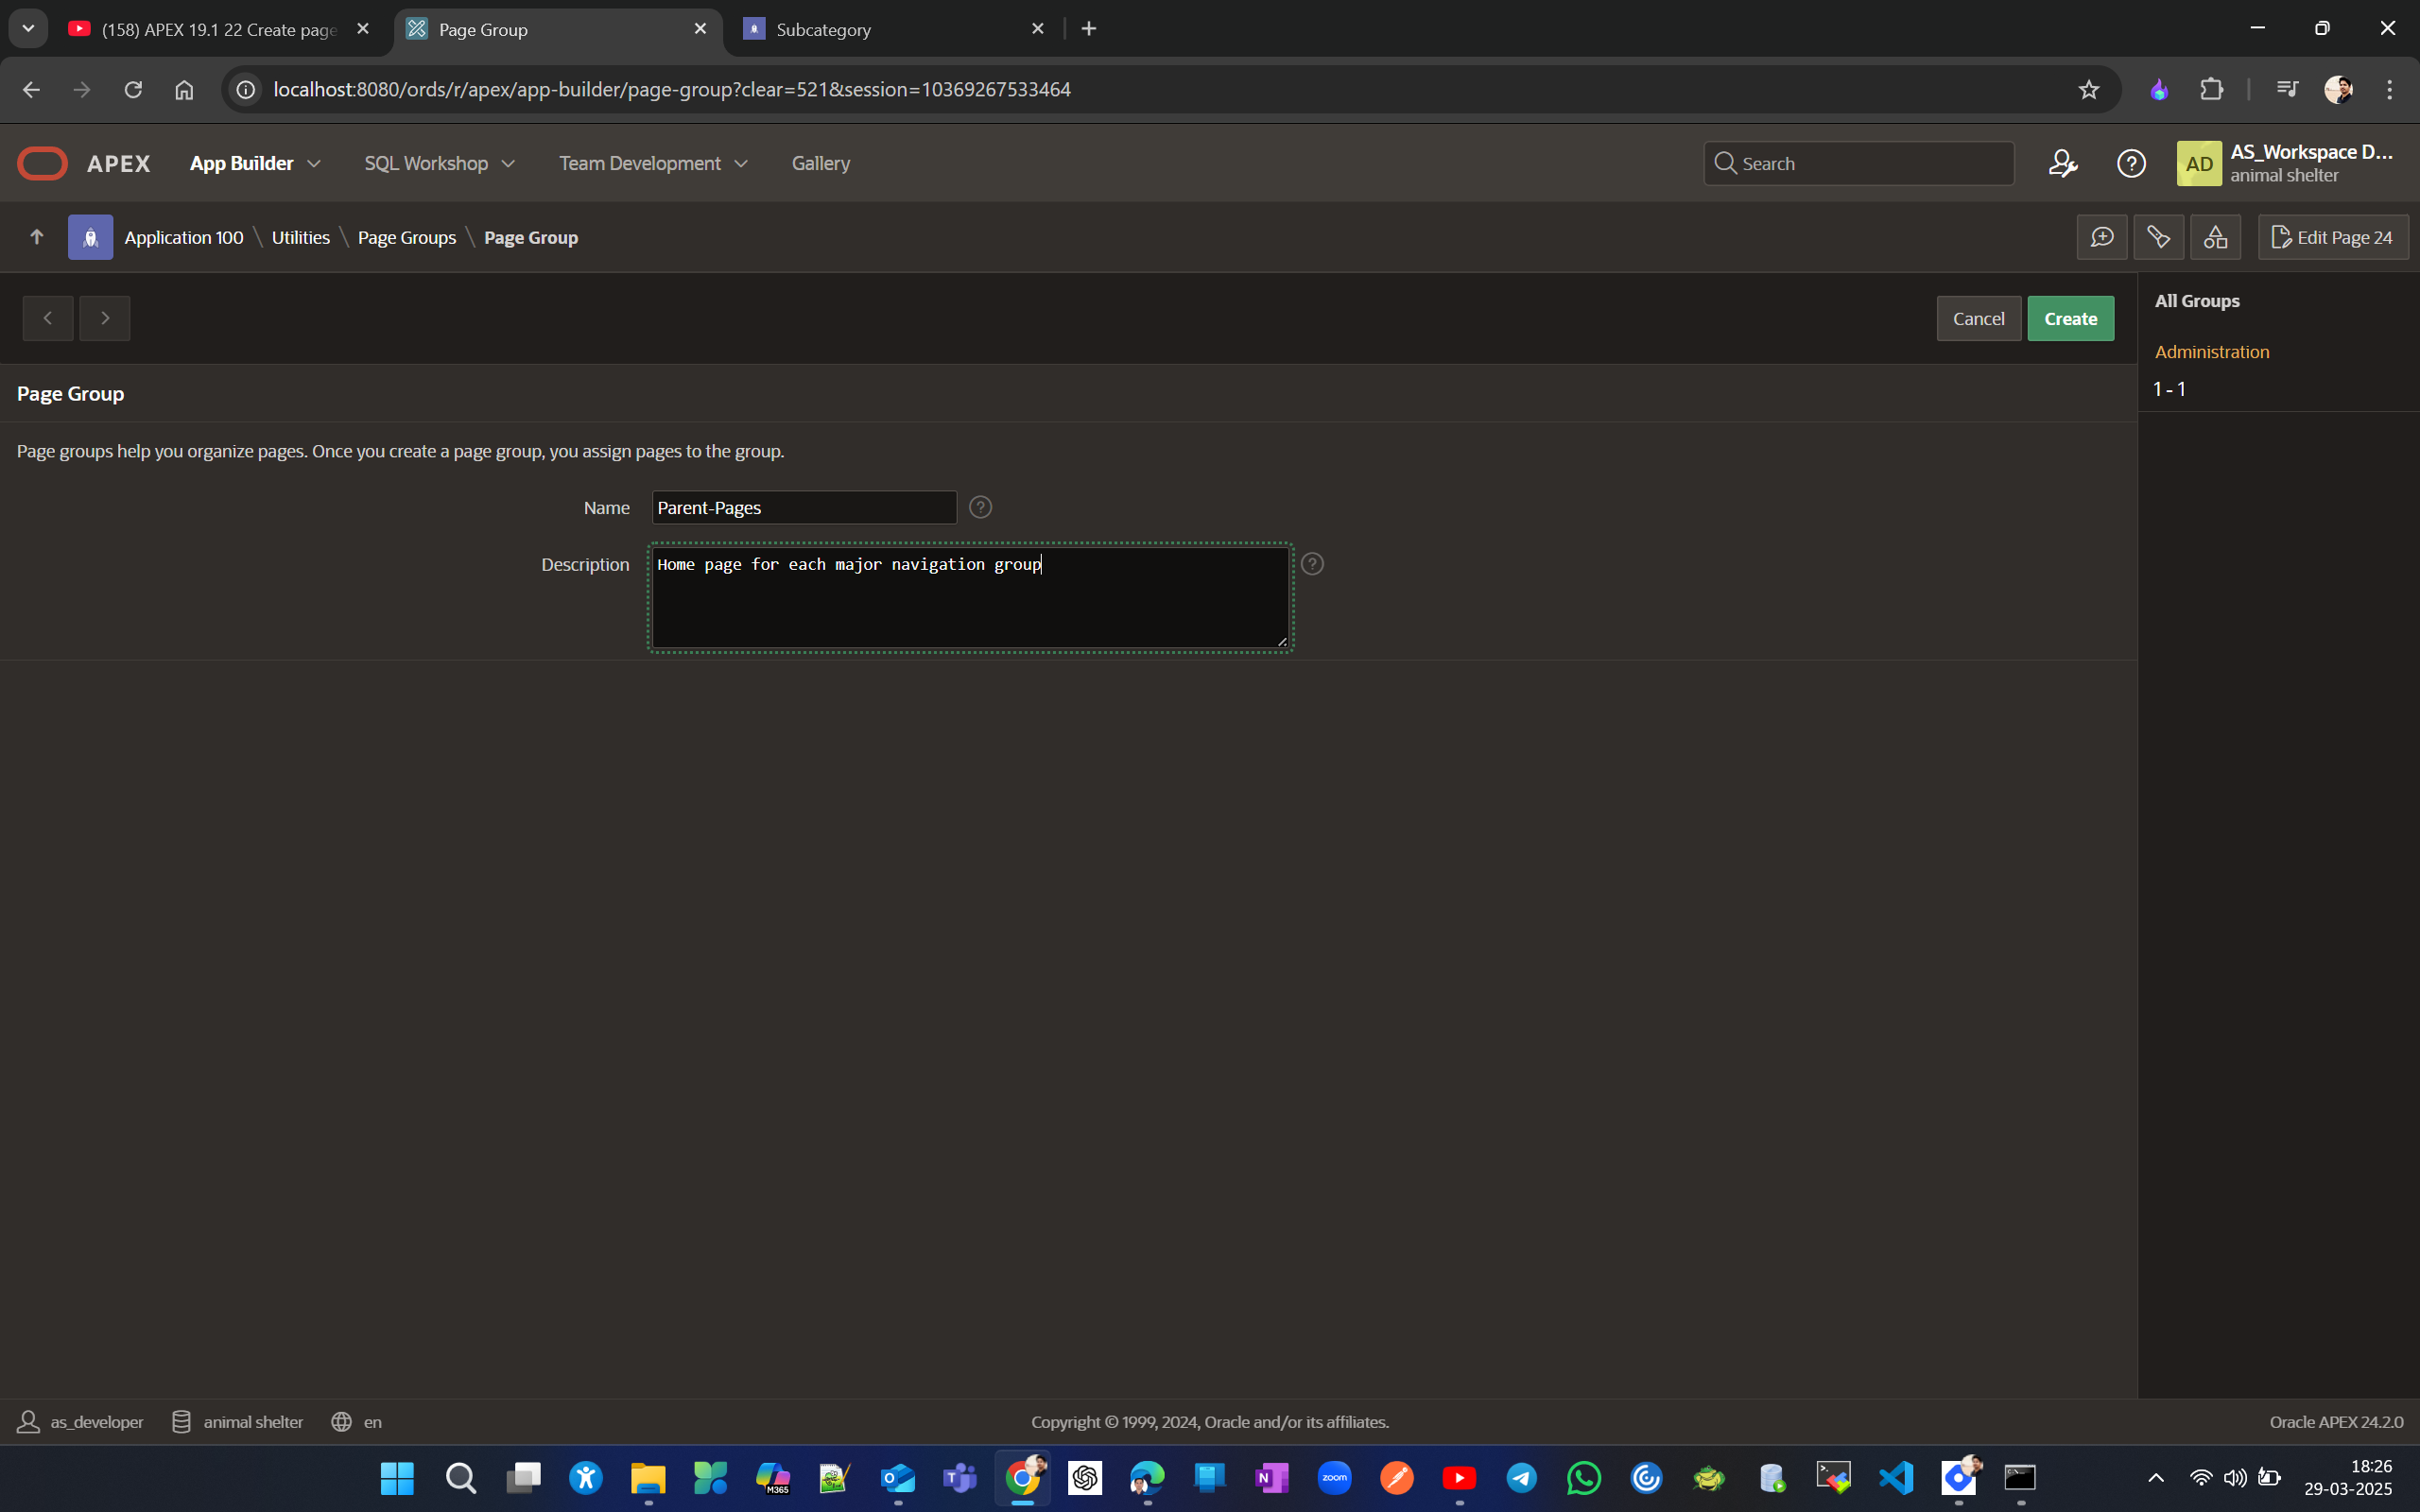
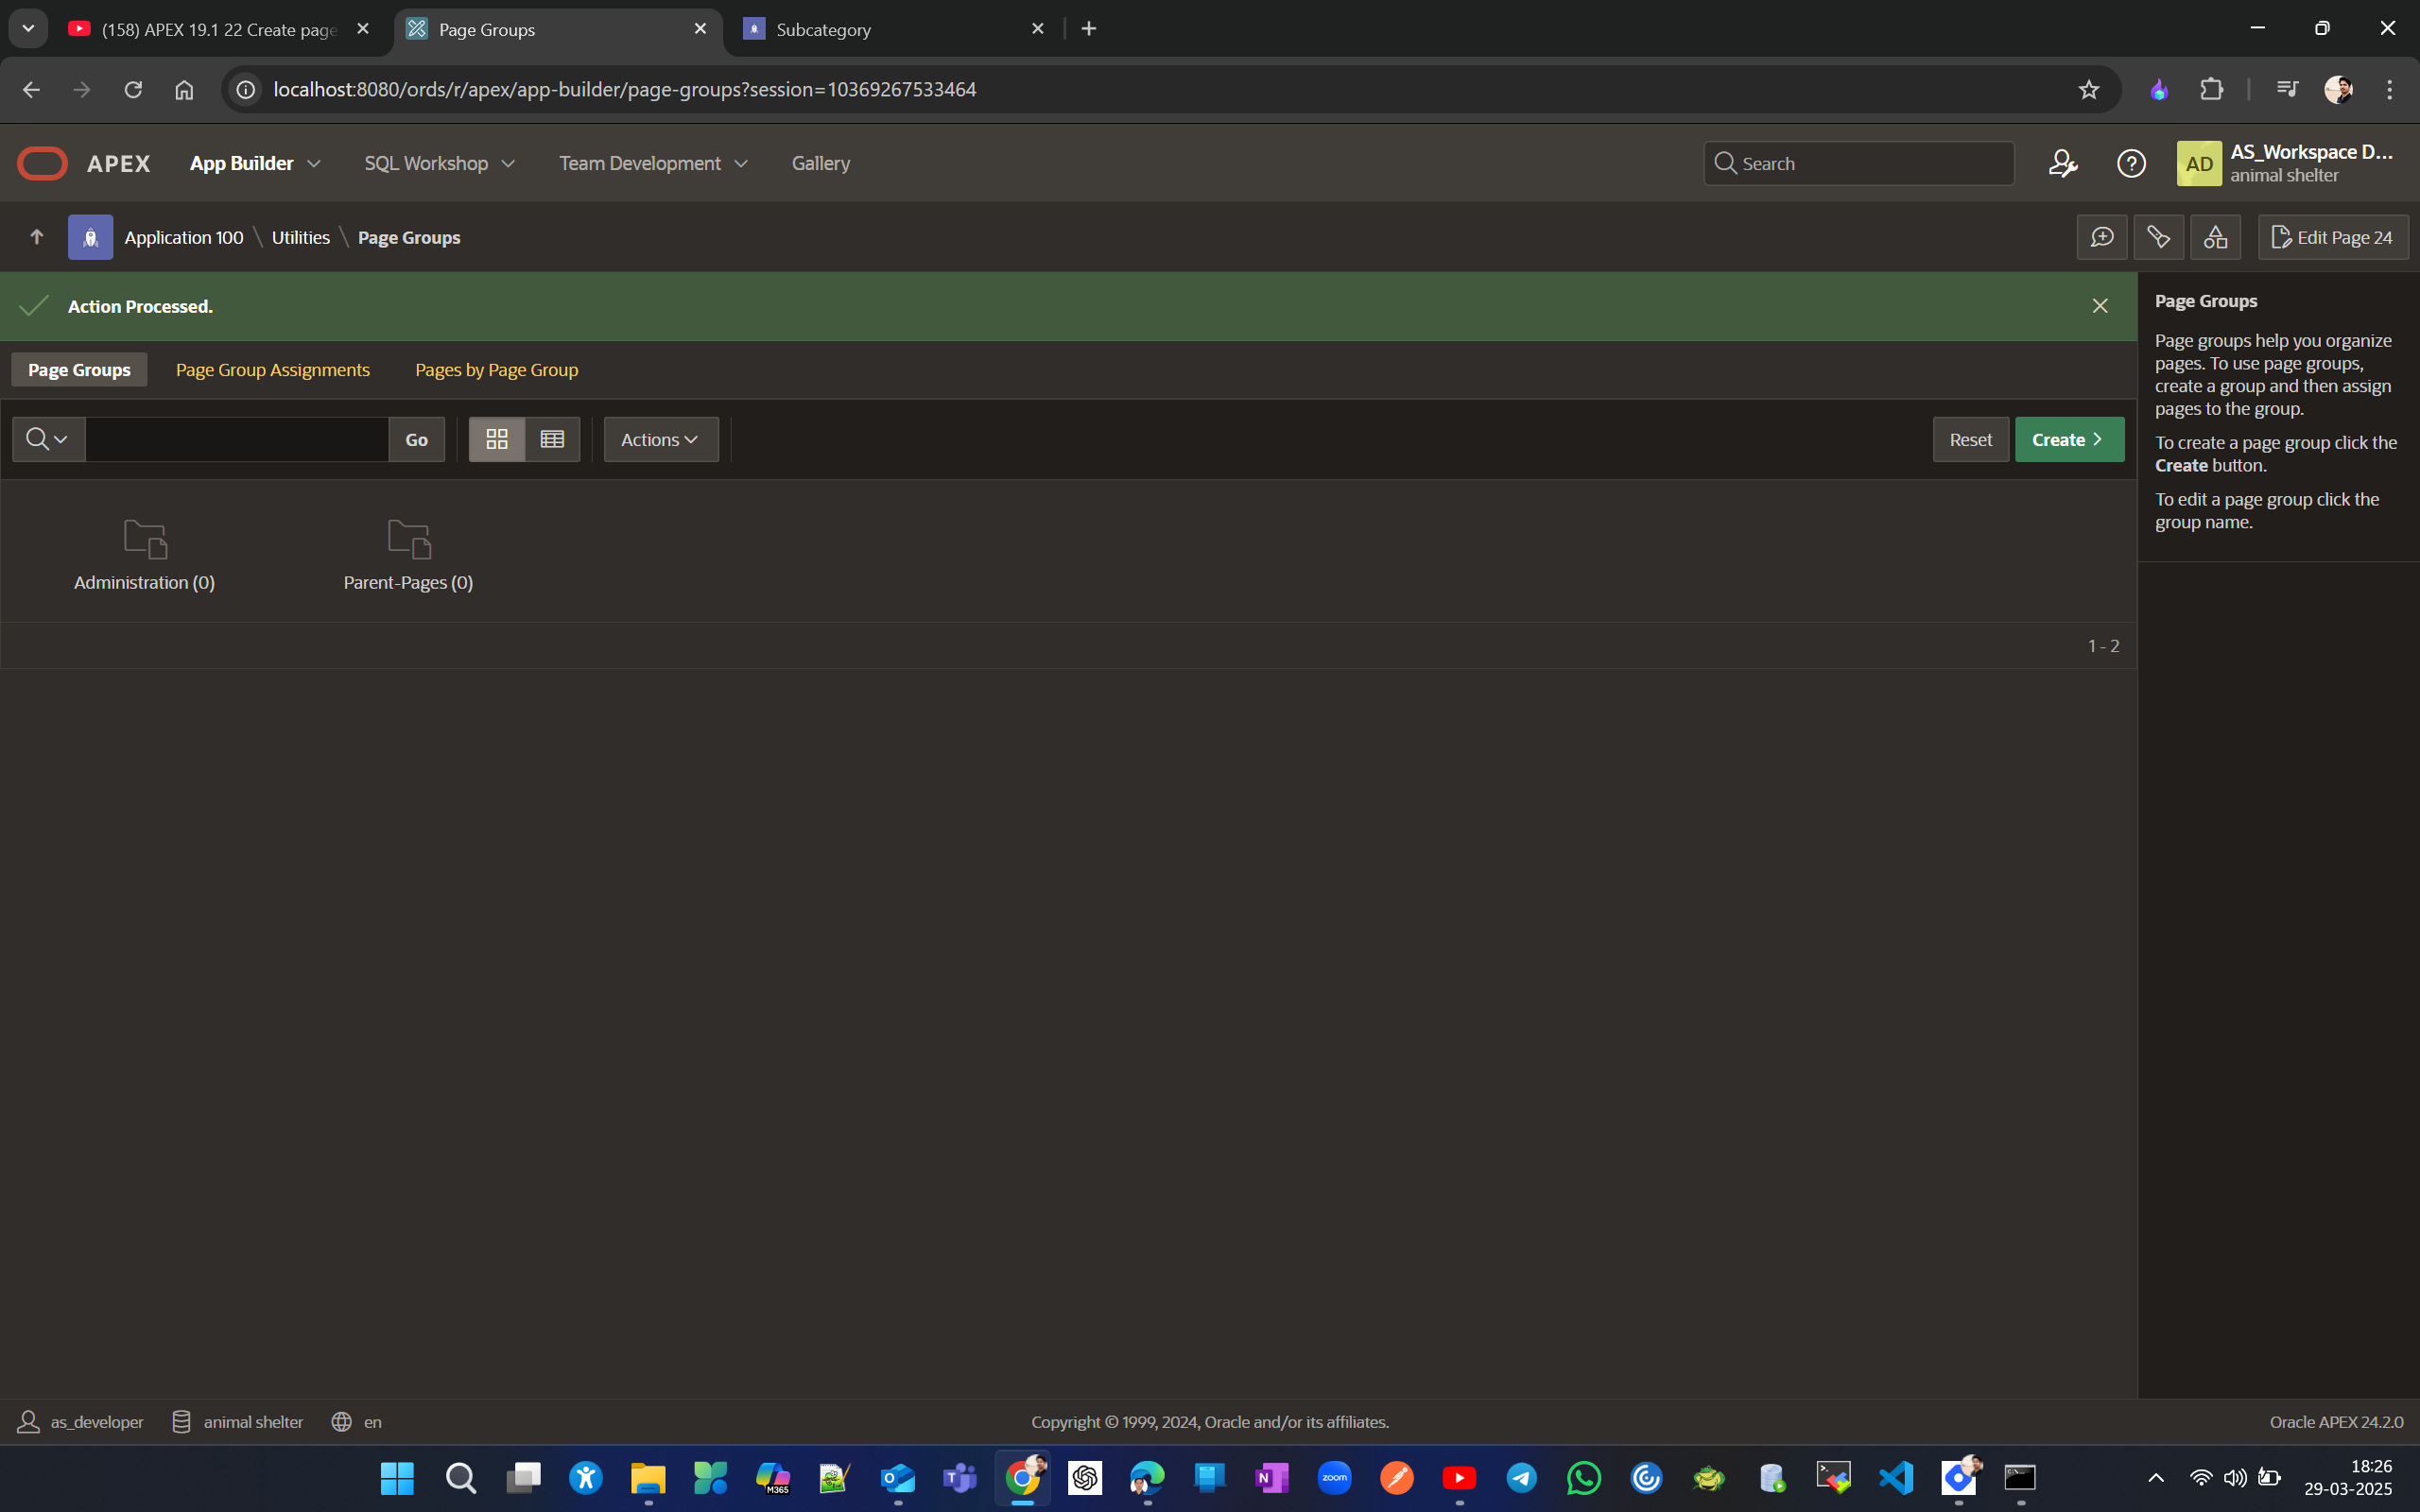
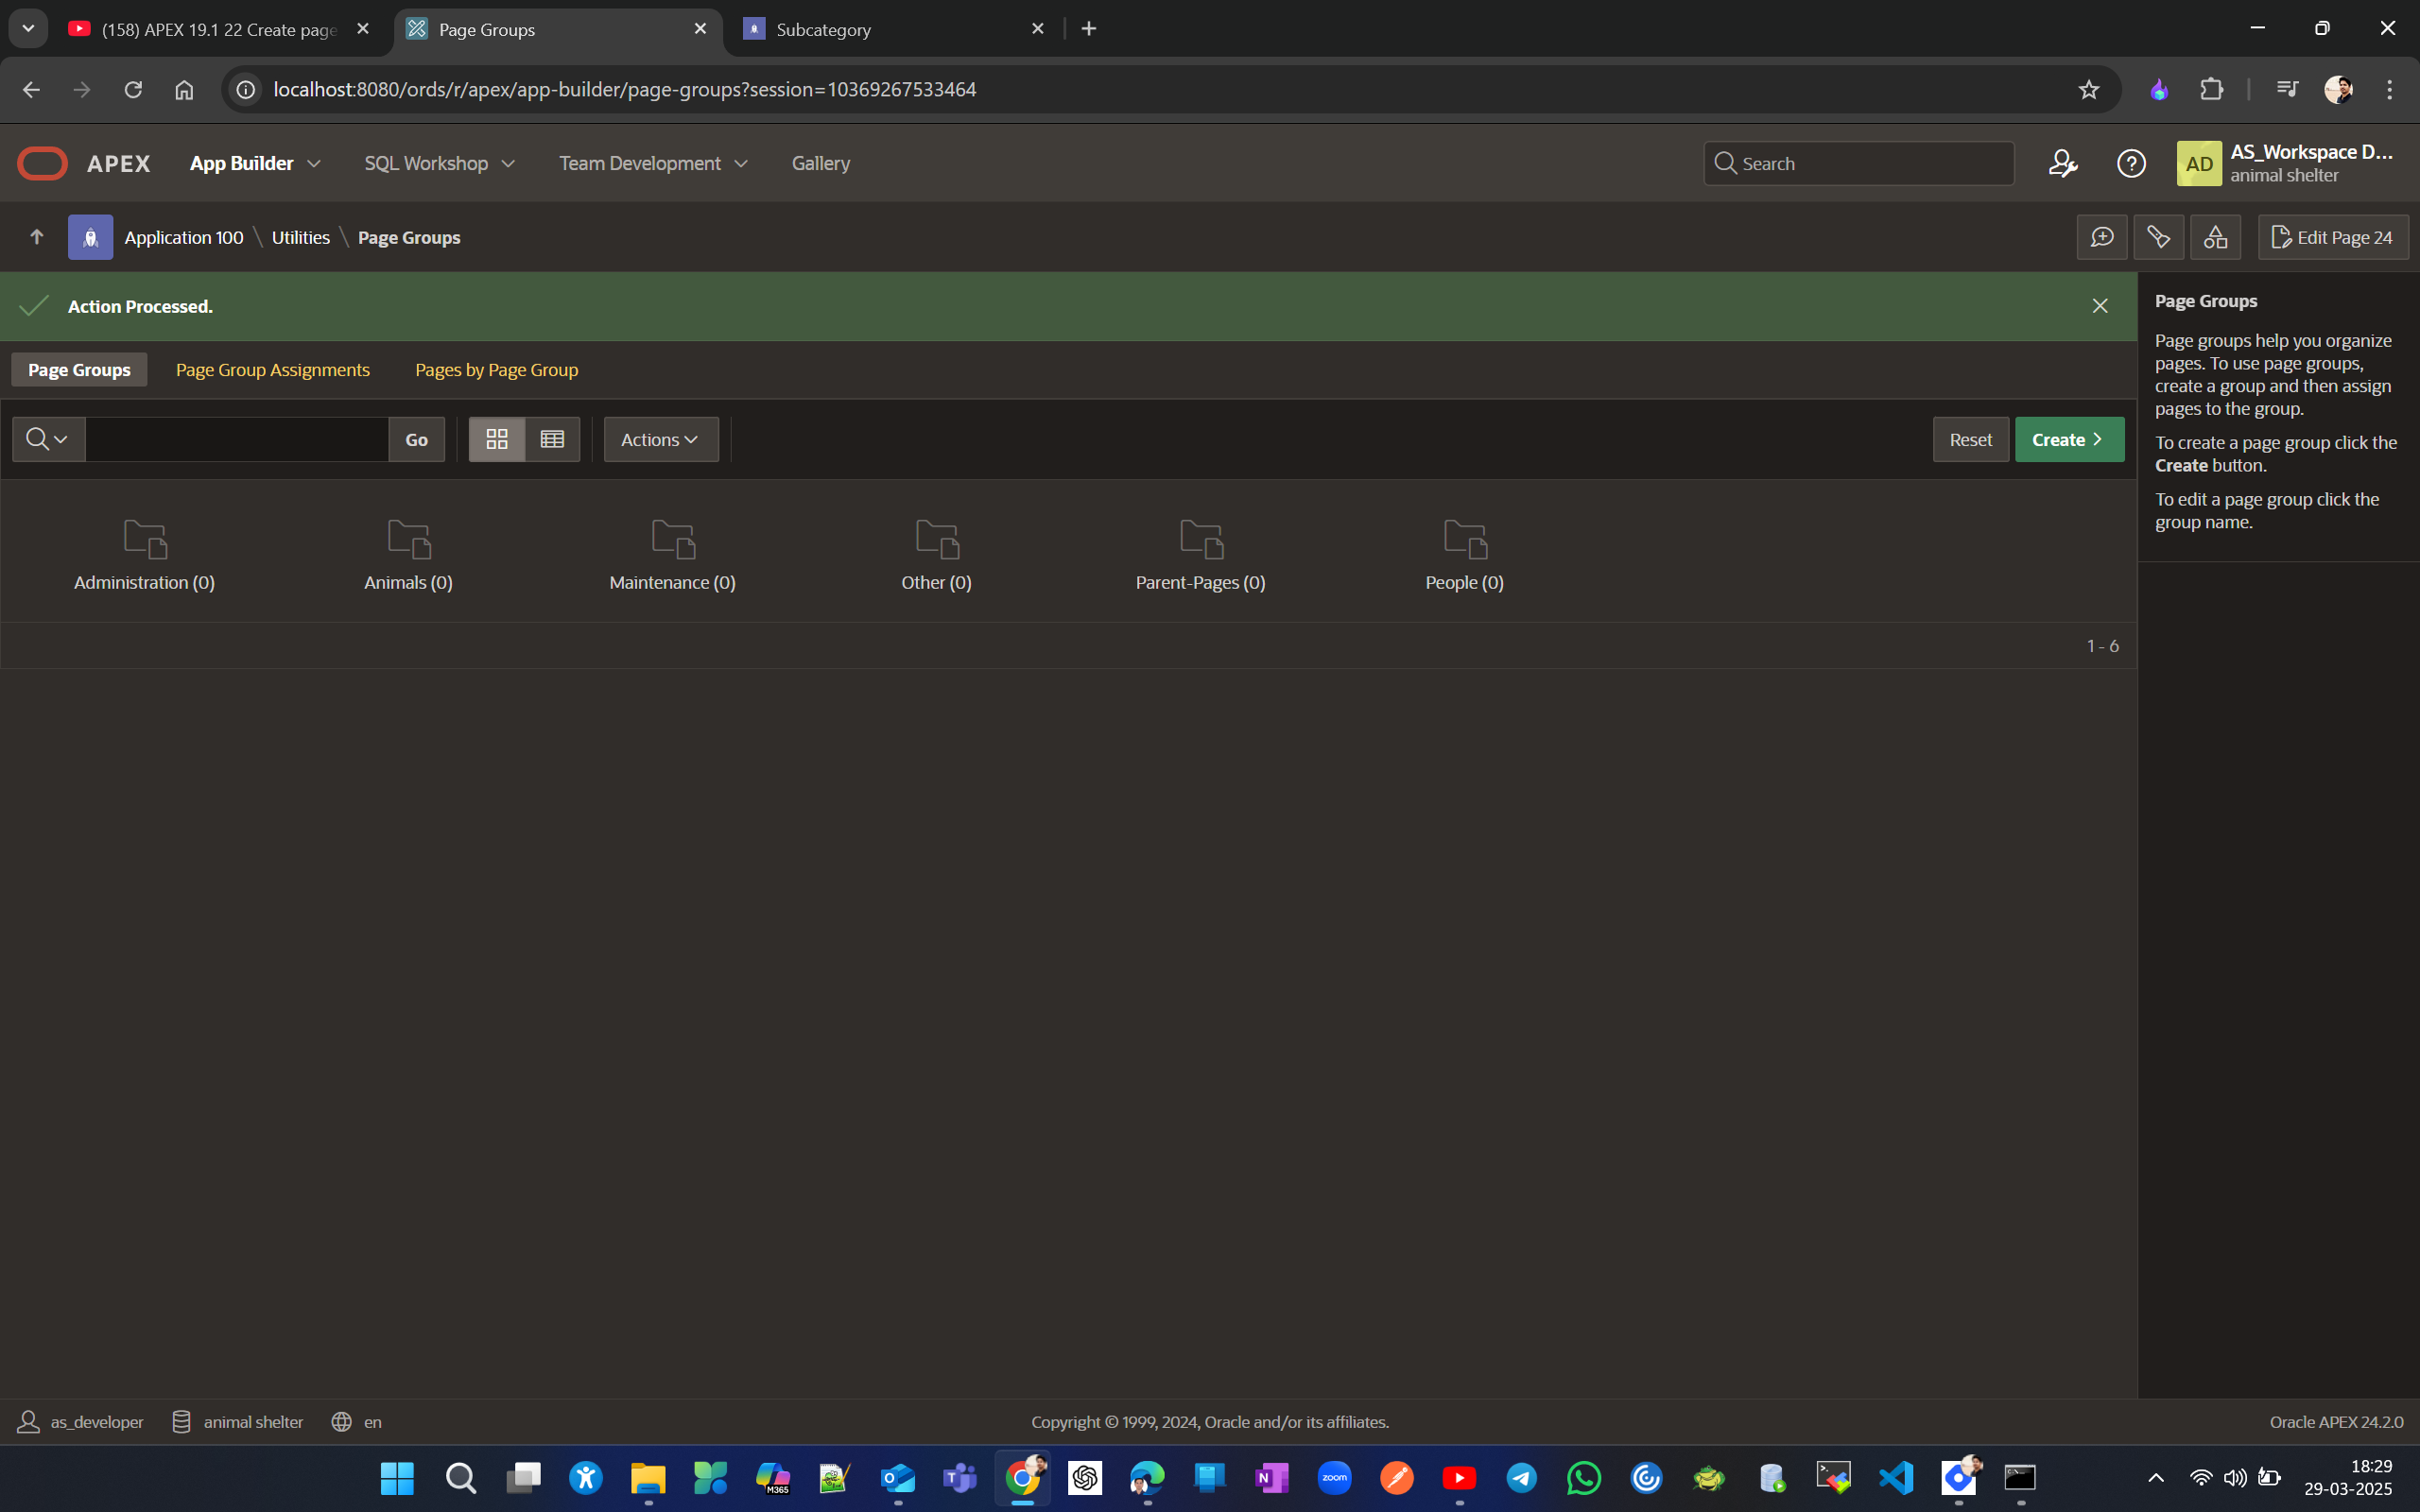
Similarly create other groups Animals, People, Maintenance, Other.
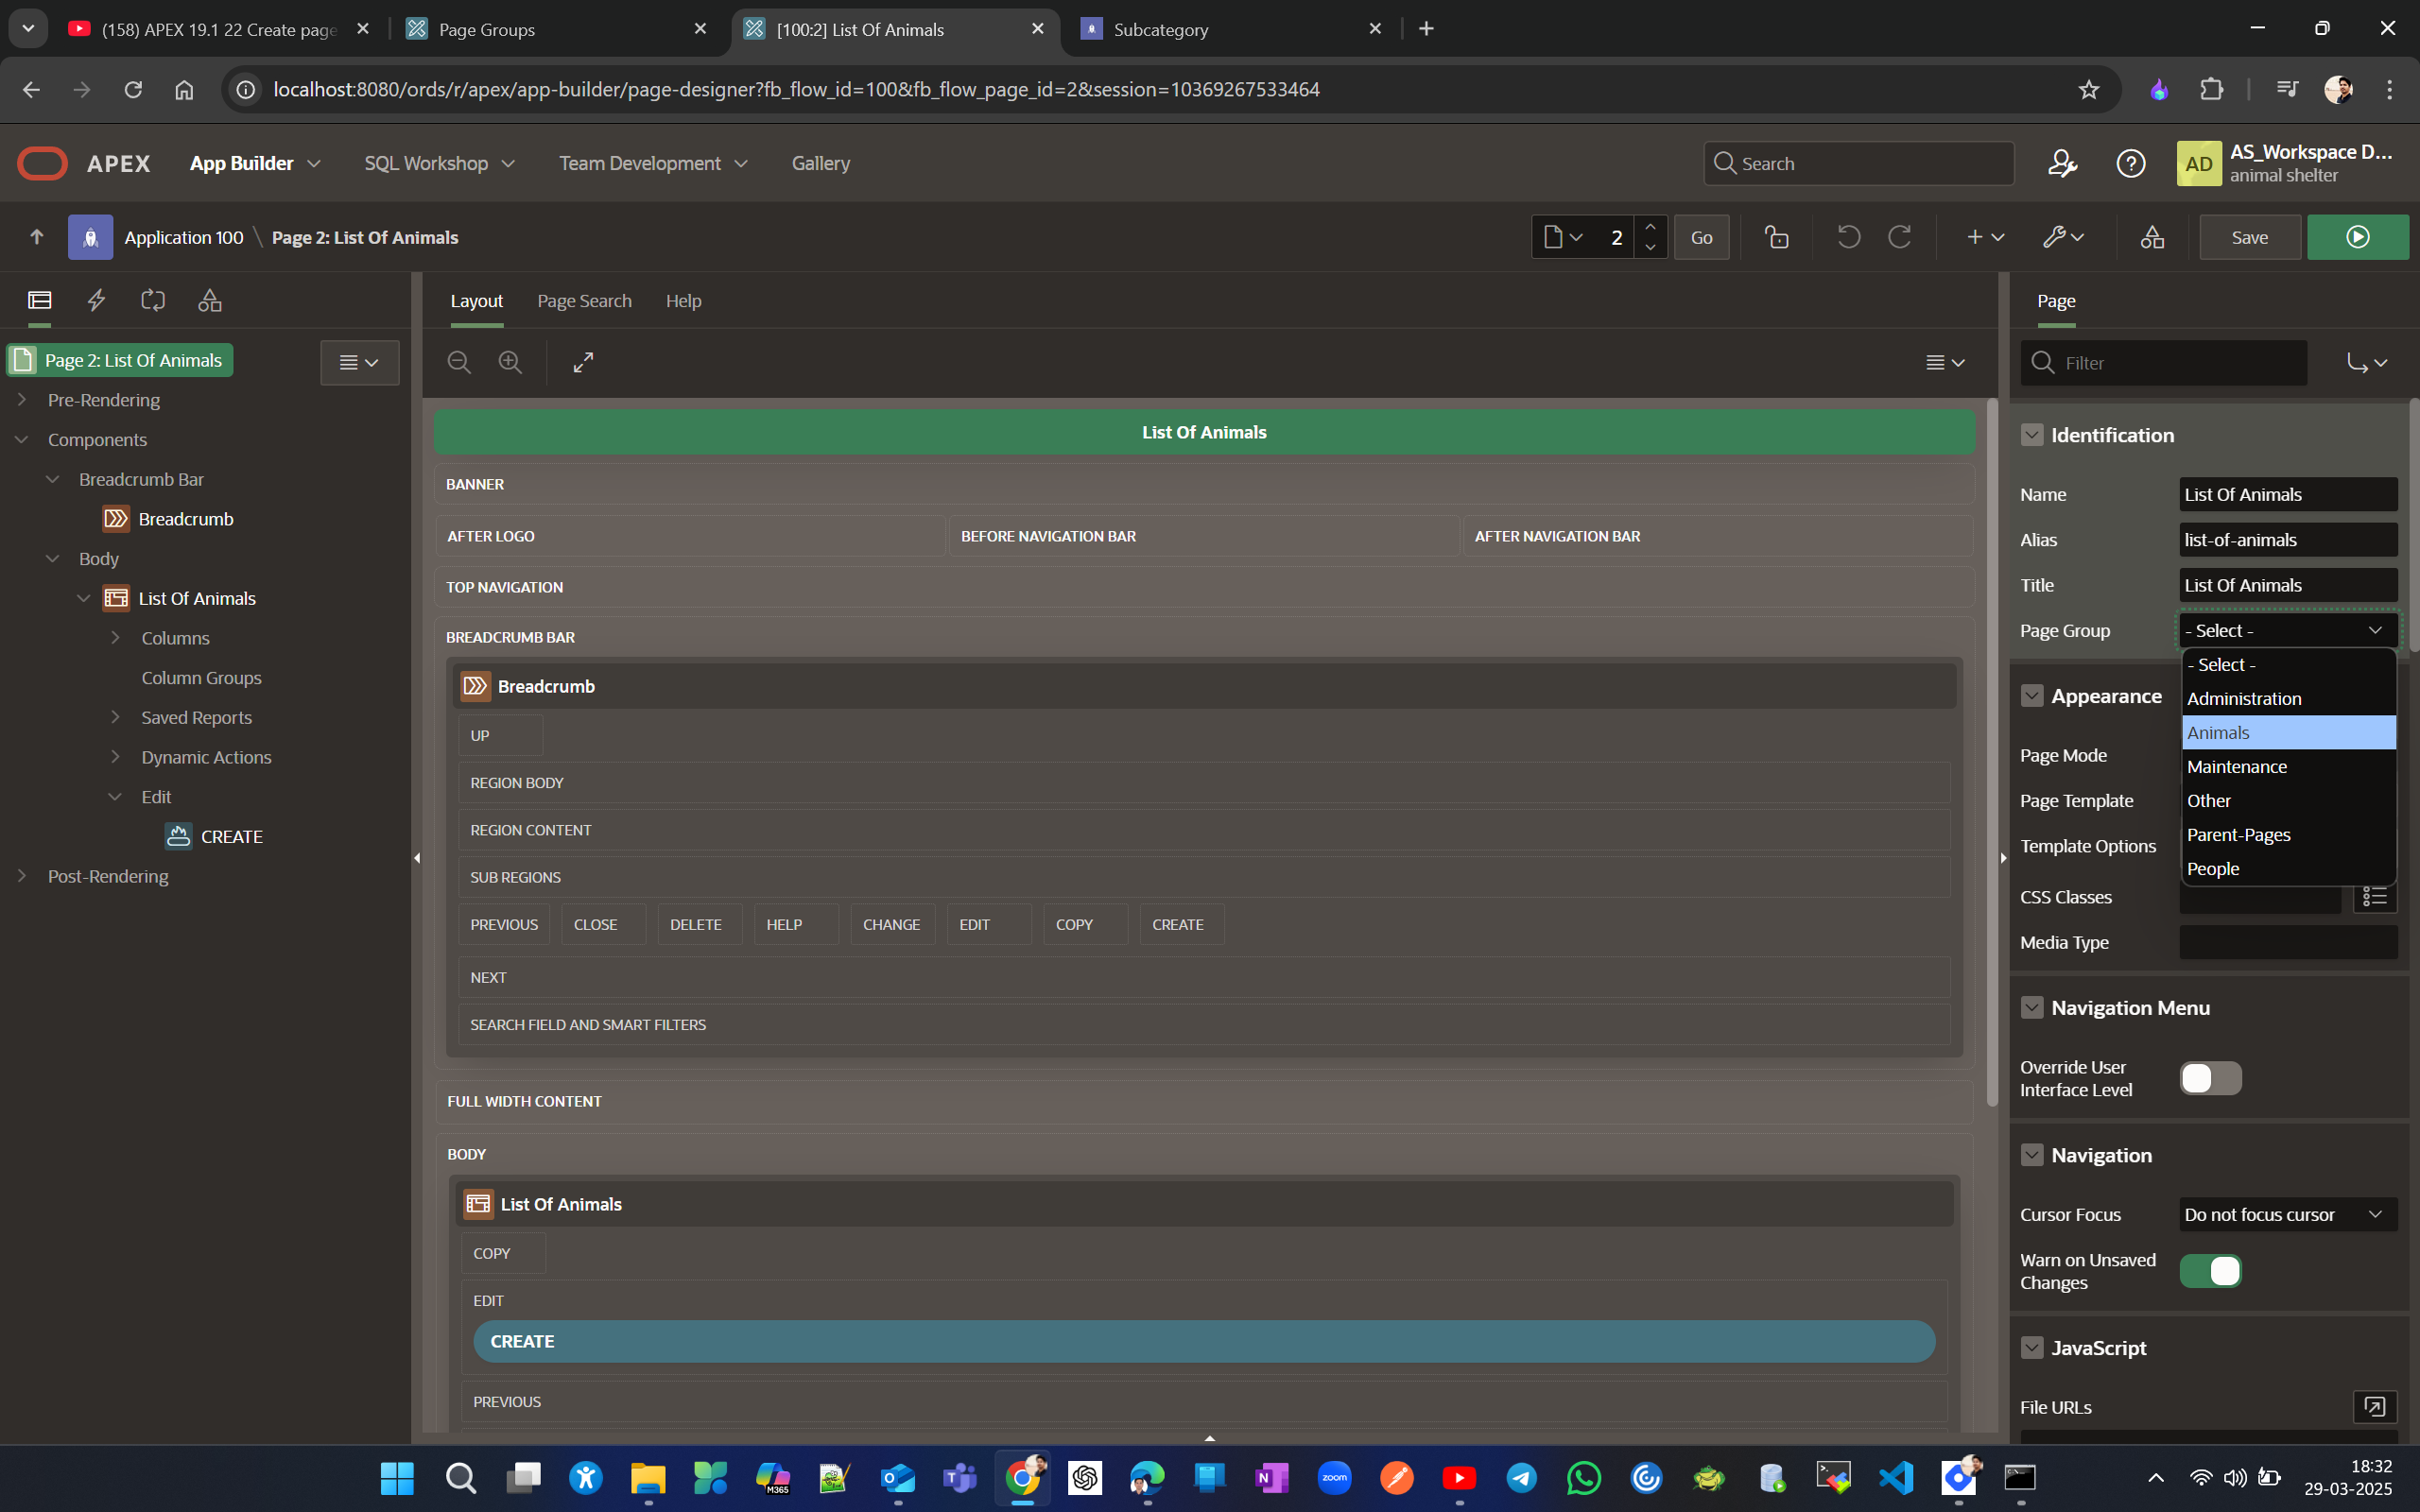
Now let’s do Page Group Assignments by clicking on Page Group Assignments or from page designer pages. In page designer assign page group for page List of Animals report page. save and verify same from Page Group Assignments section in Page Group.
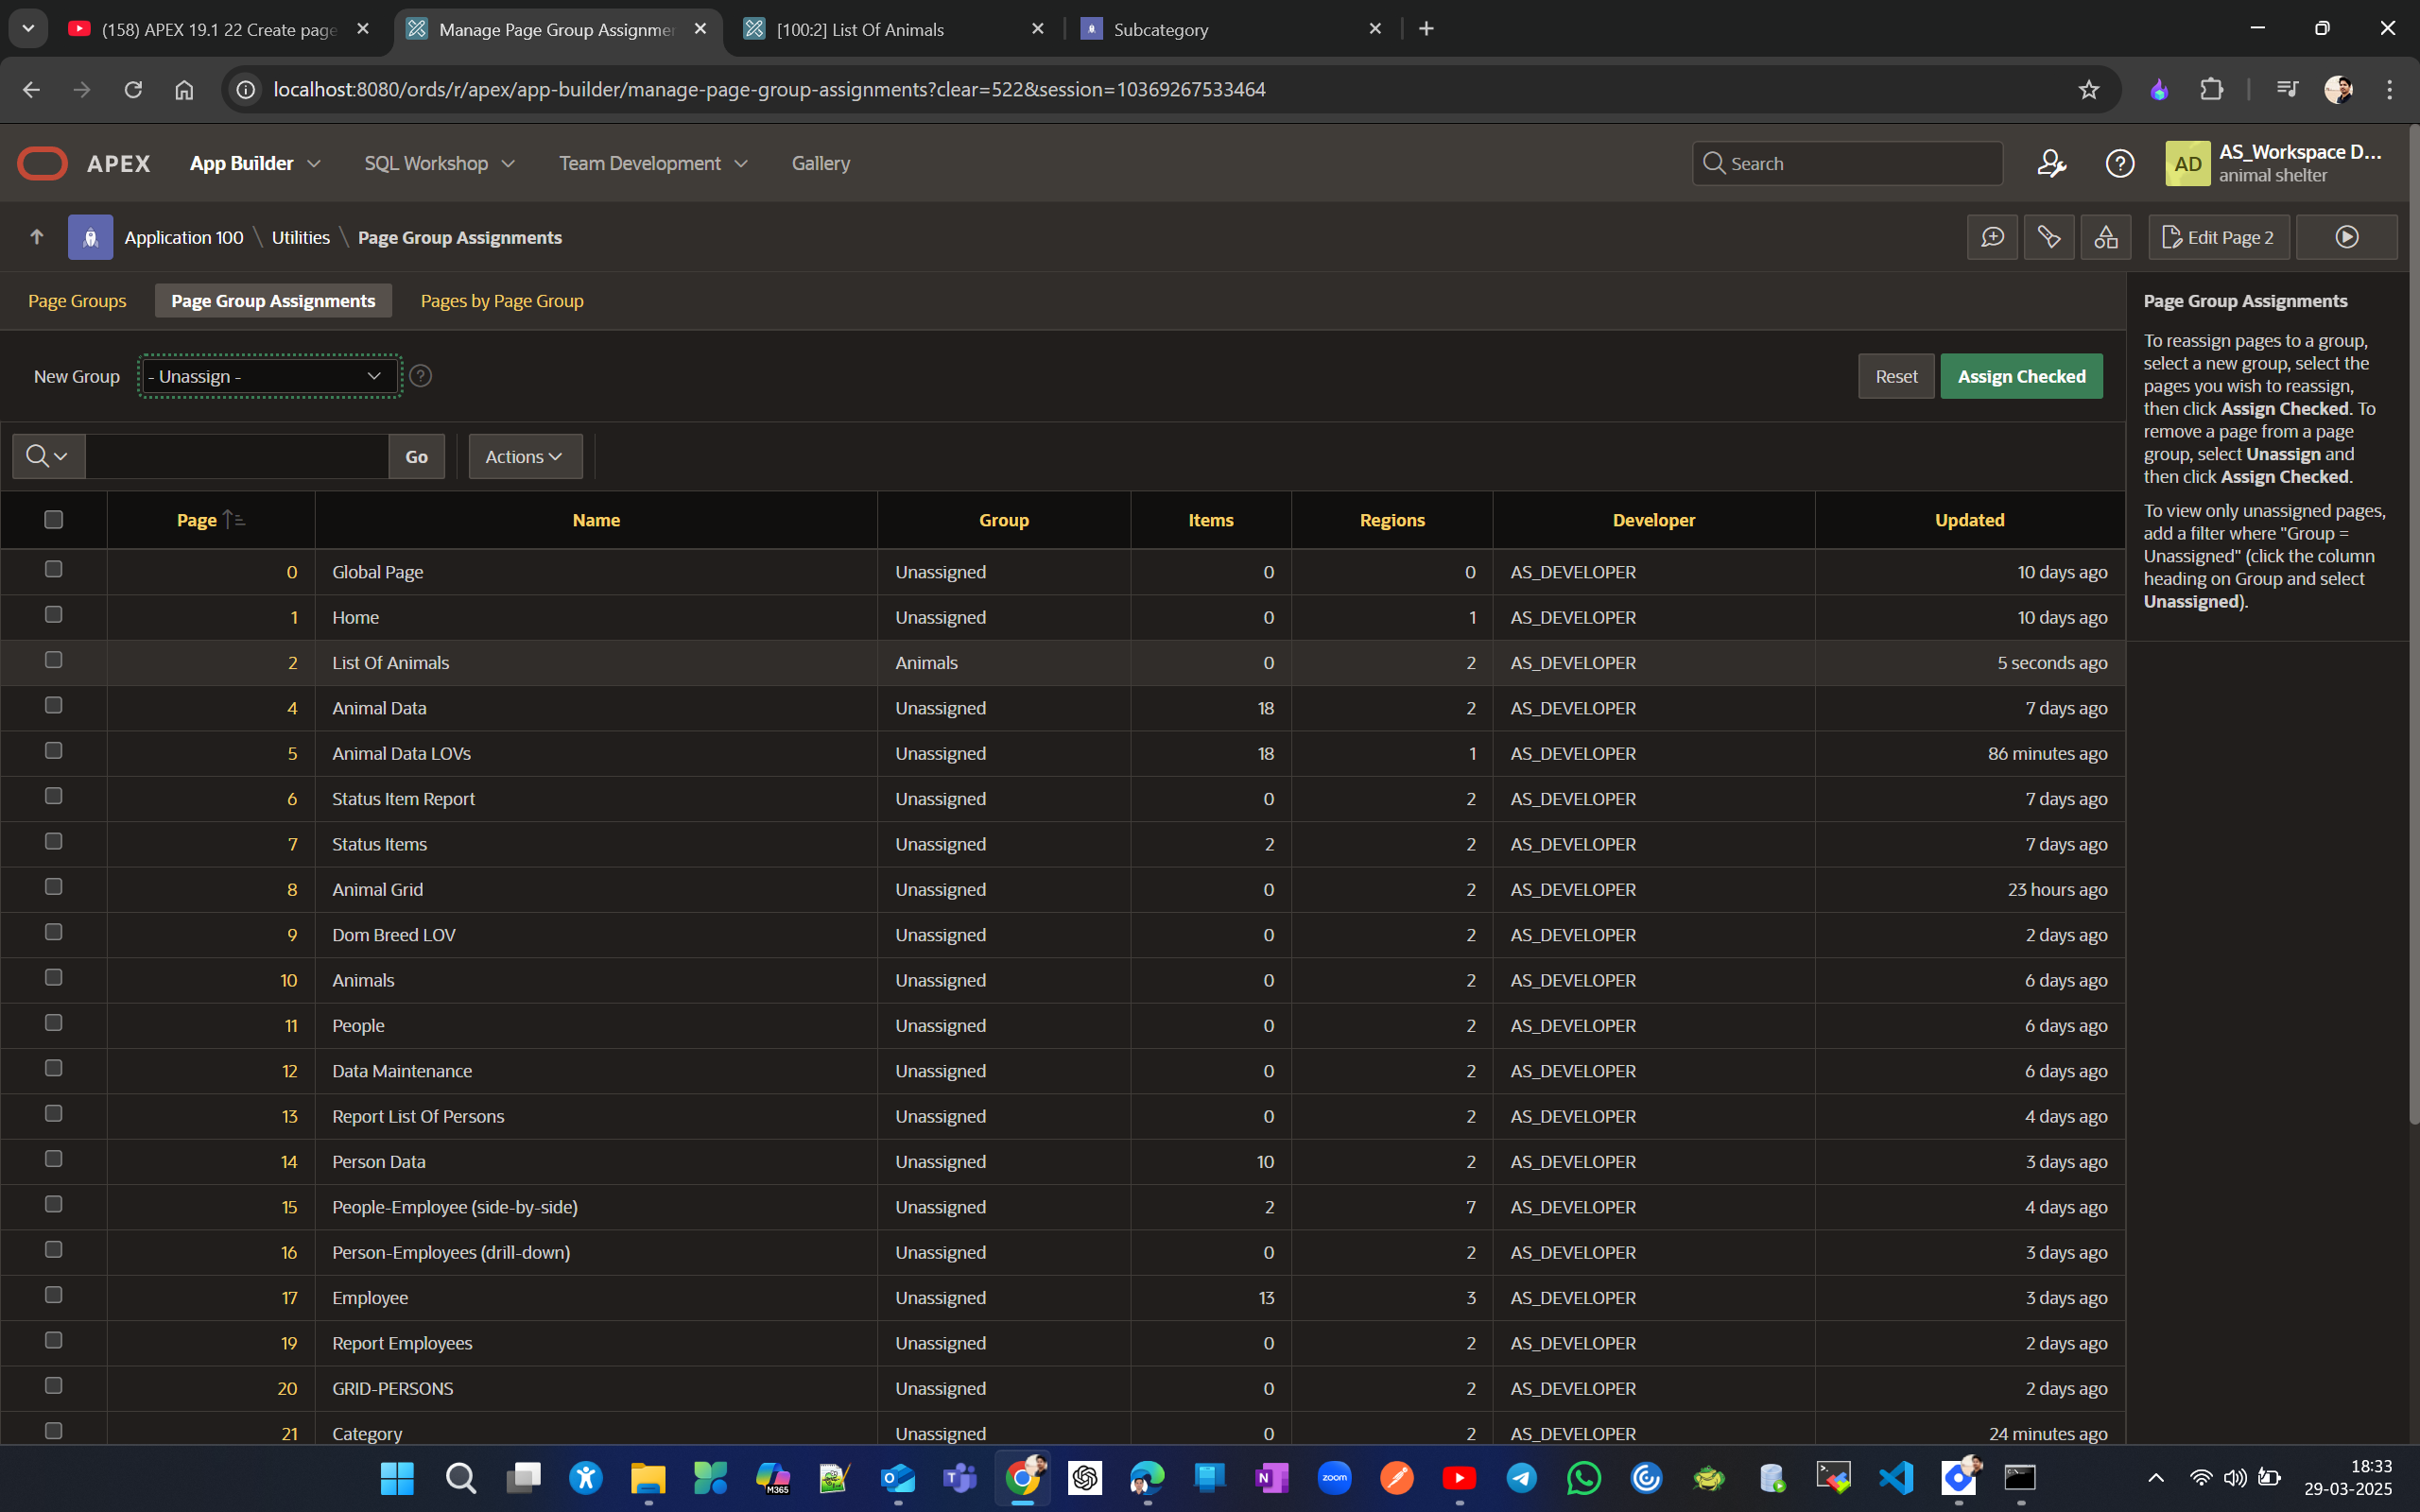
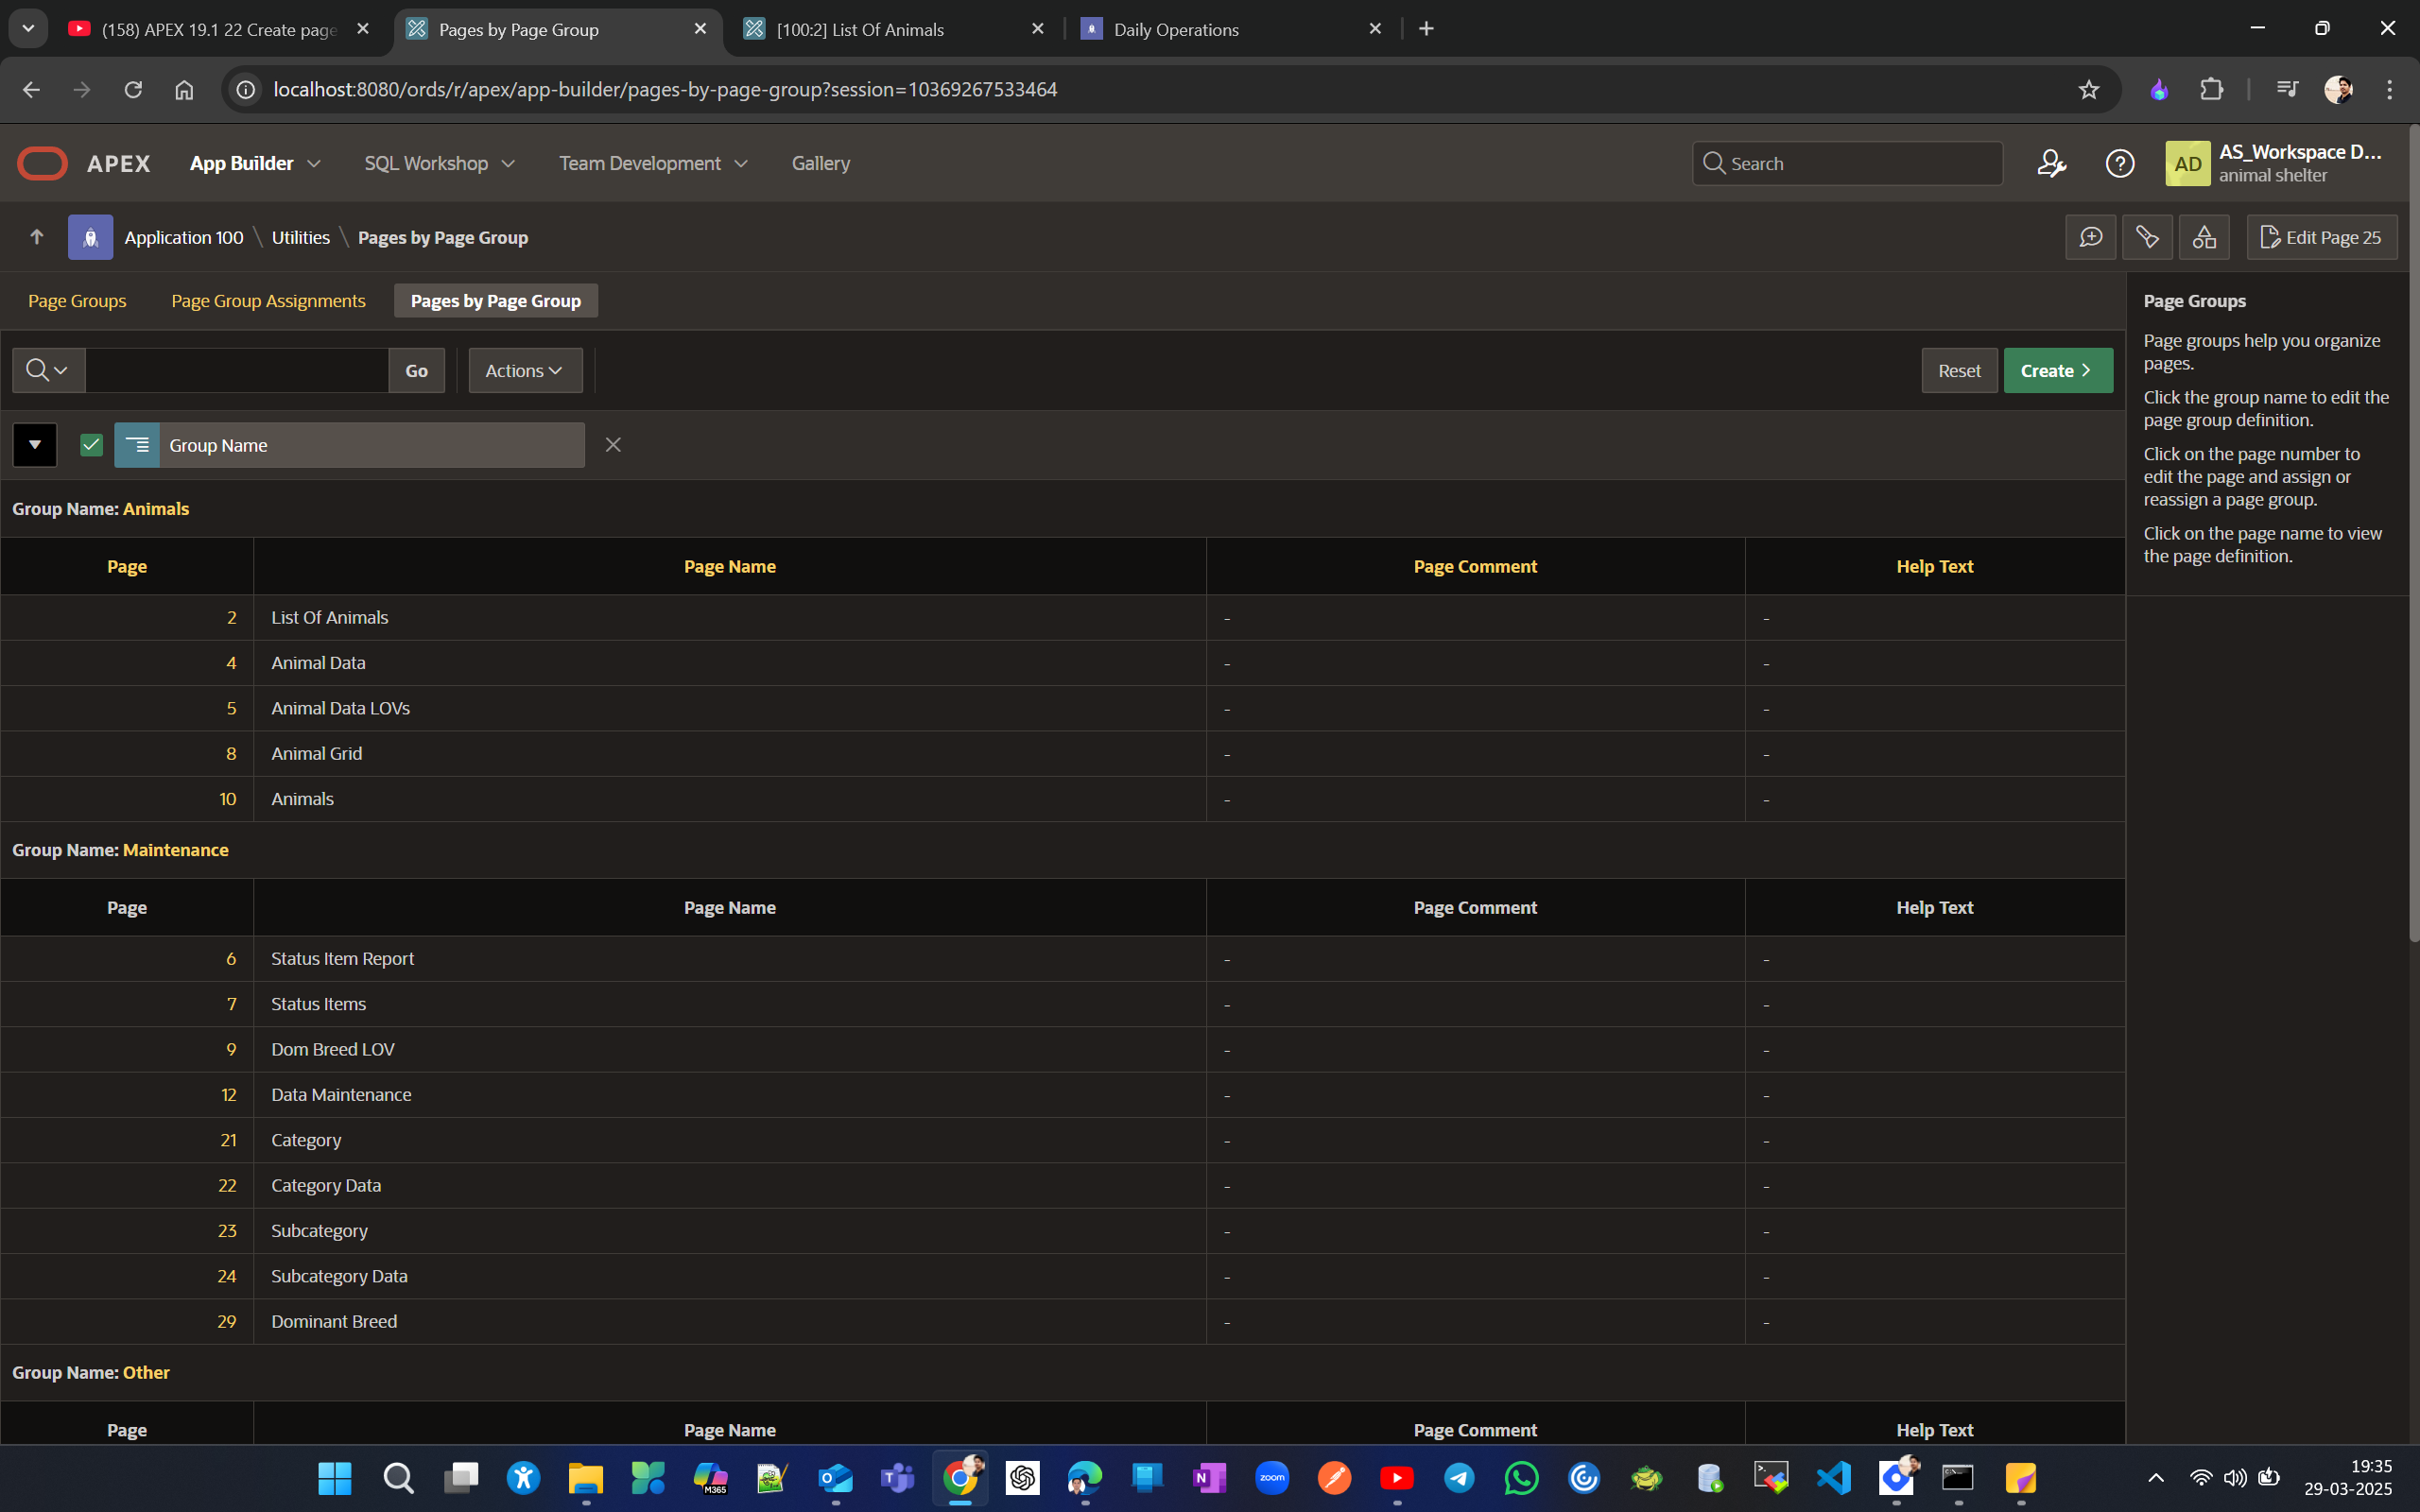
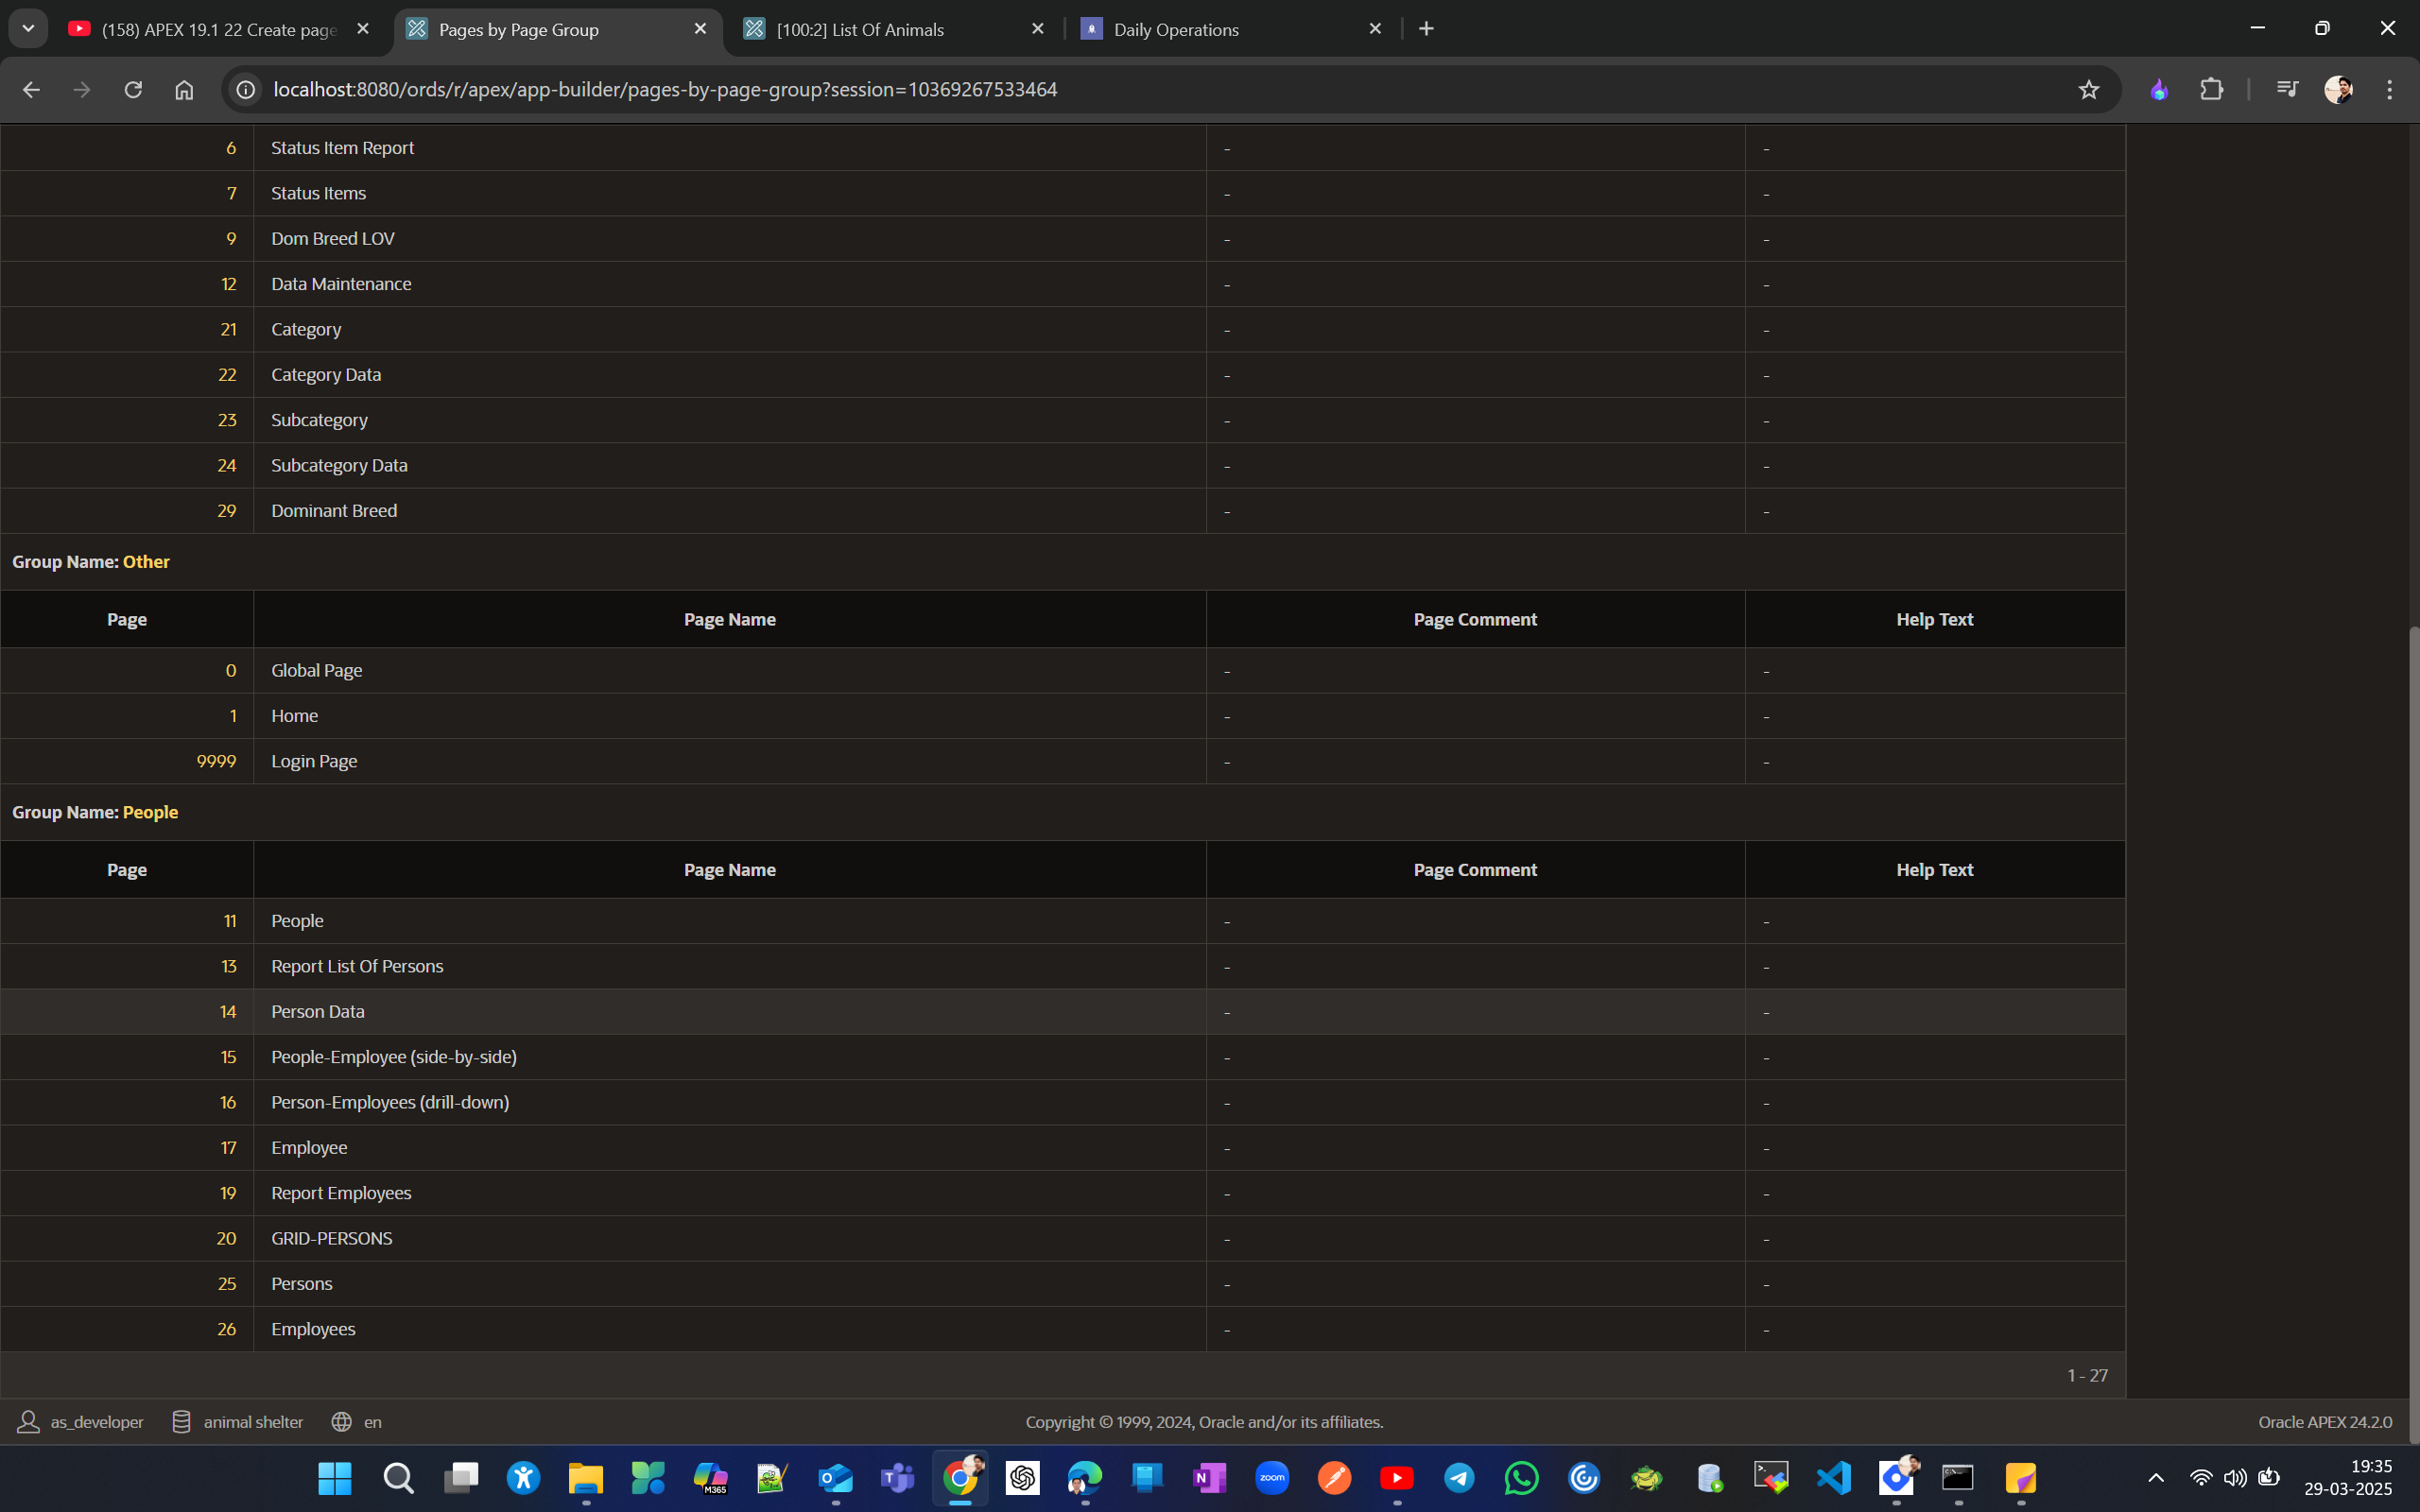
Now go to Up and note down each page number, then decide which pages you want to put under each page group. For Animals, use pages 10, 2, 5, 4, 8. For People, use pages 11, 13, 14, 15, 26, 16, 17, 19, 20, 25. For Data Maintenance, use pages 12, 6, 7, 9, 29, 21, 22, 23, 24. and rest all assign to Other Page Group.
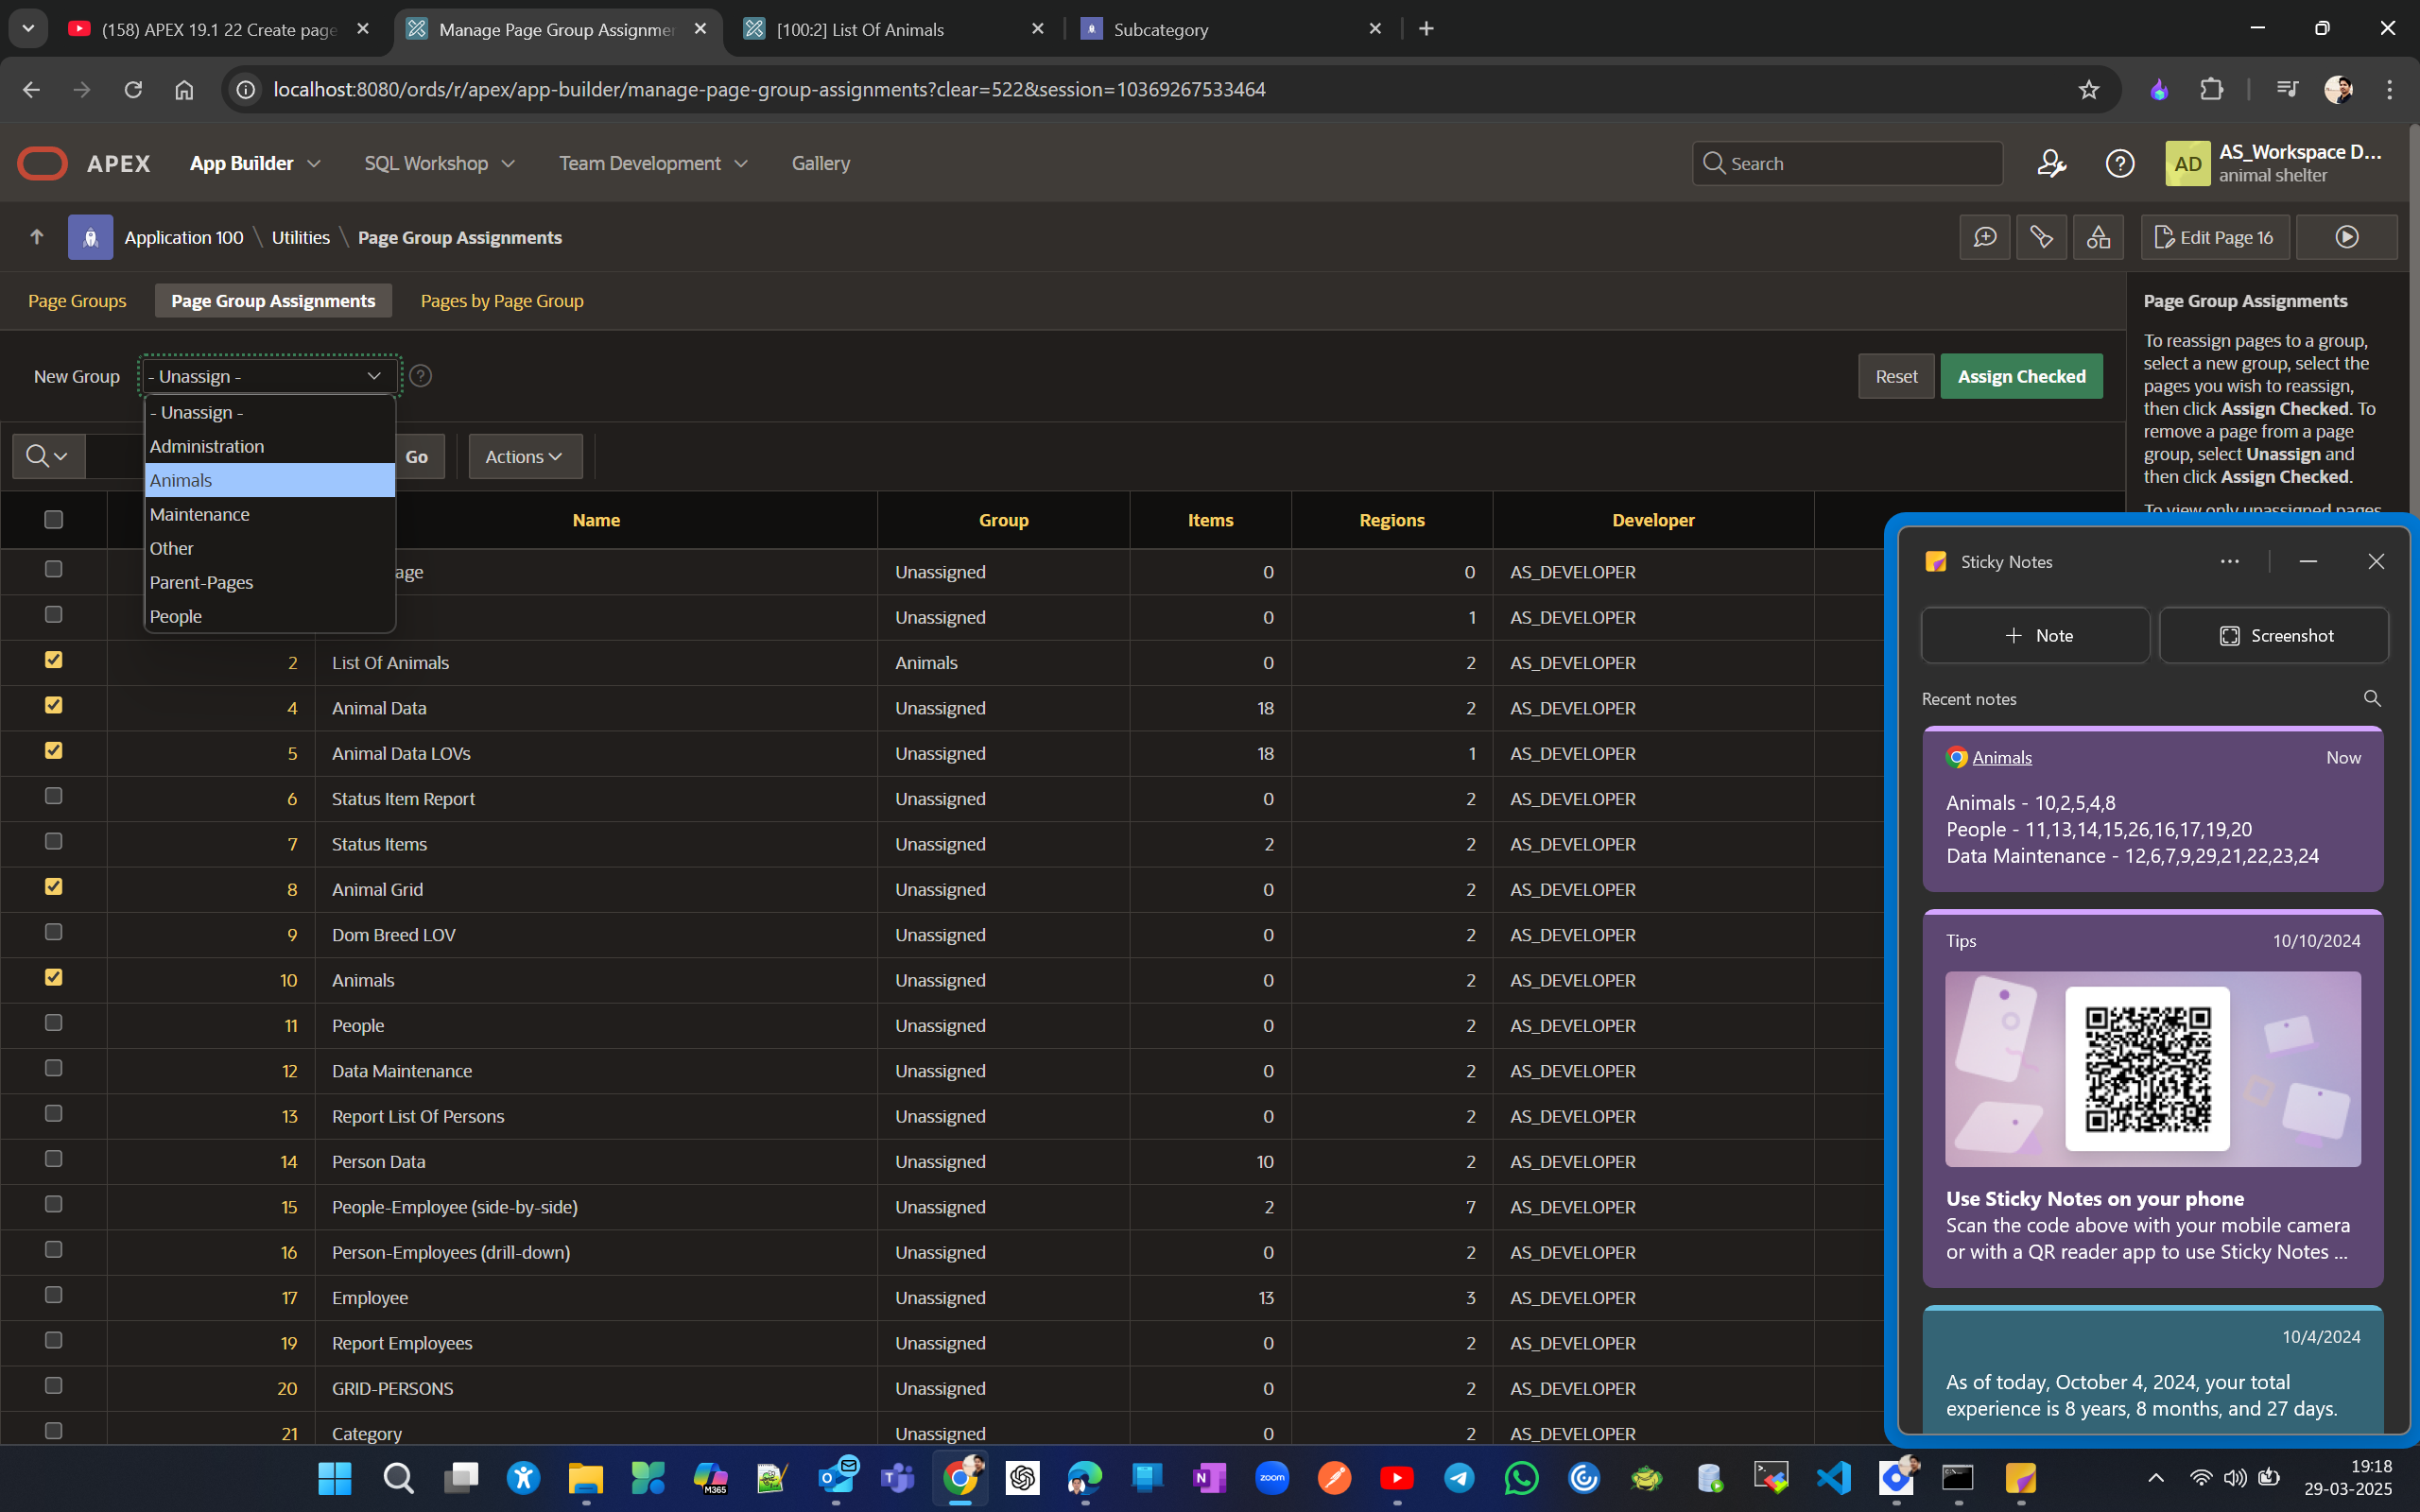
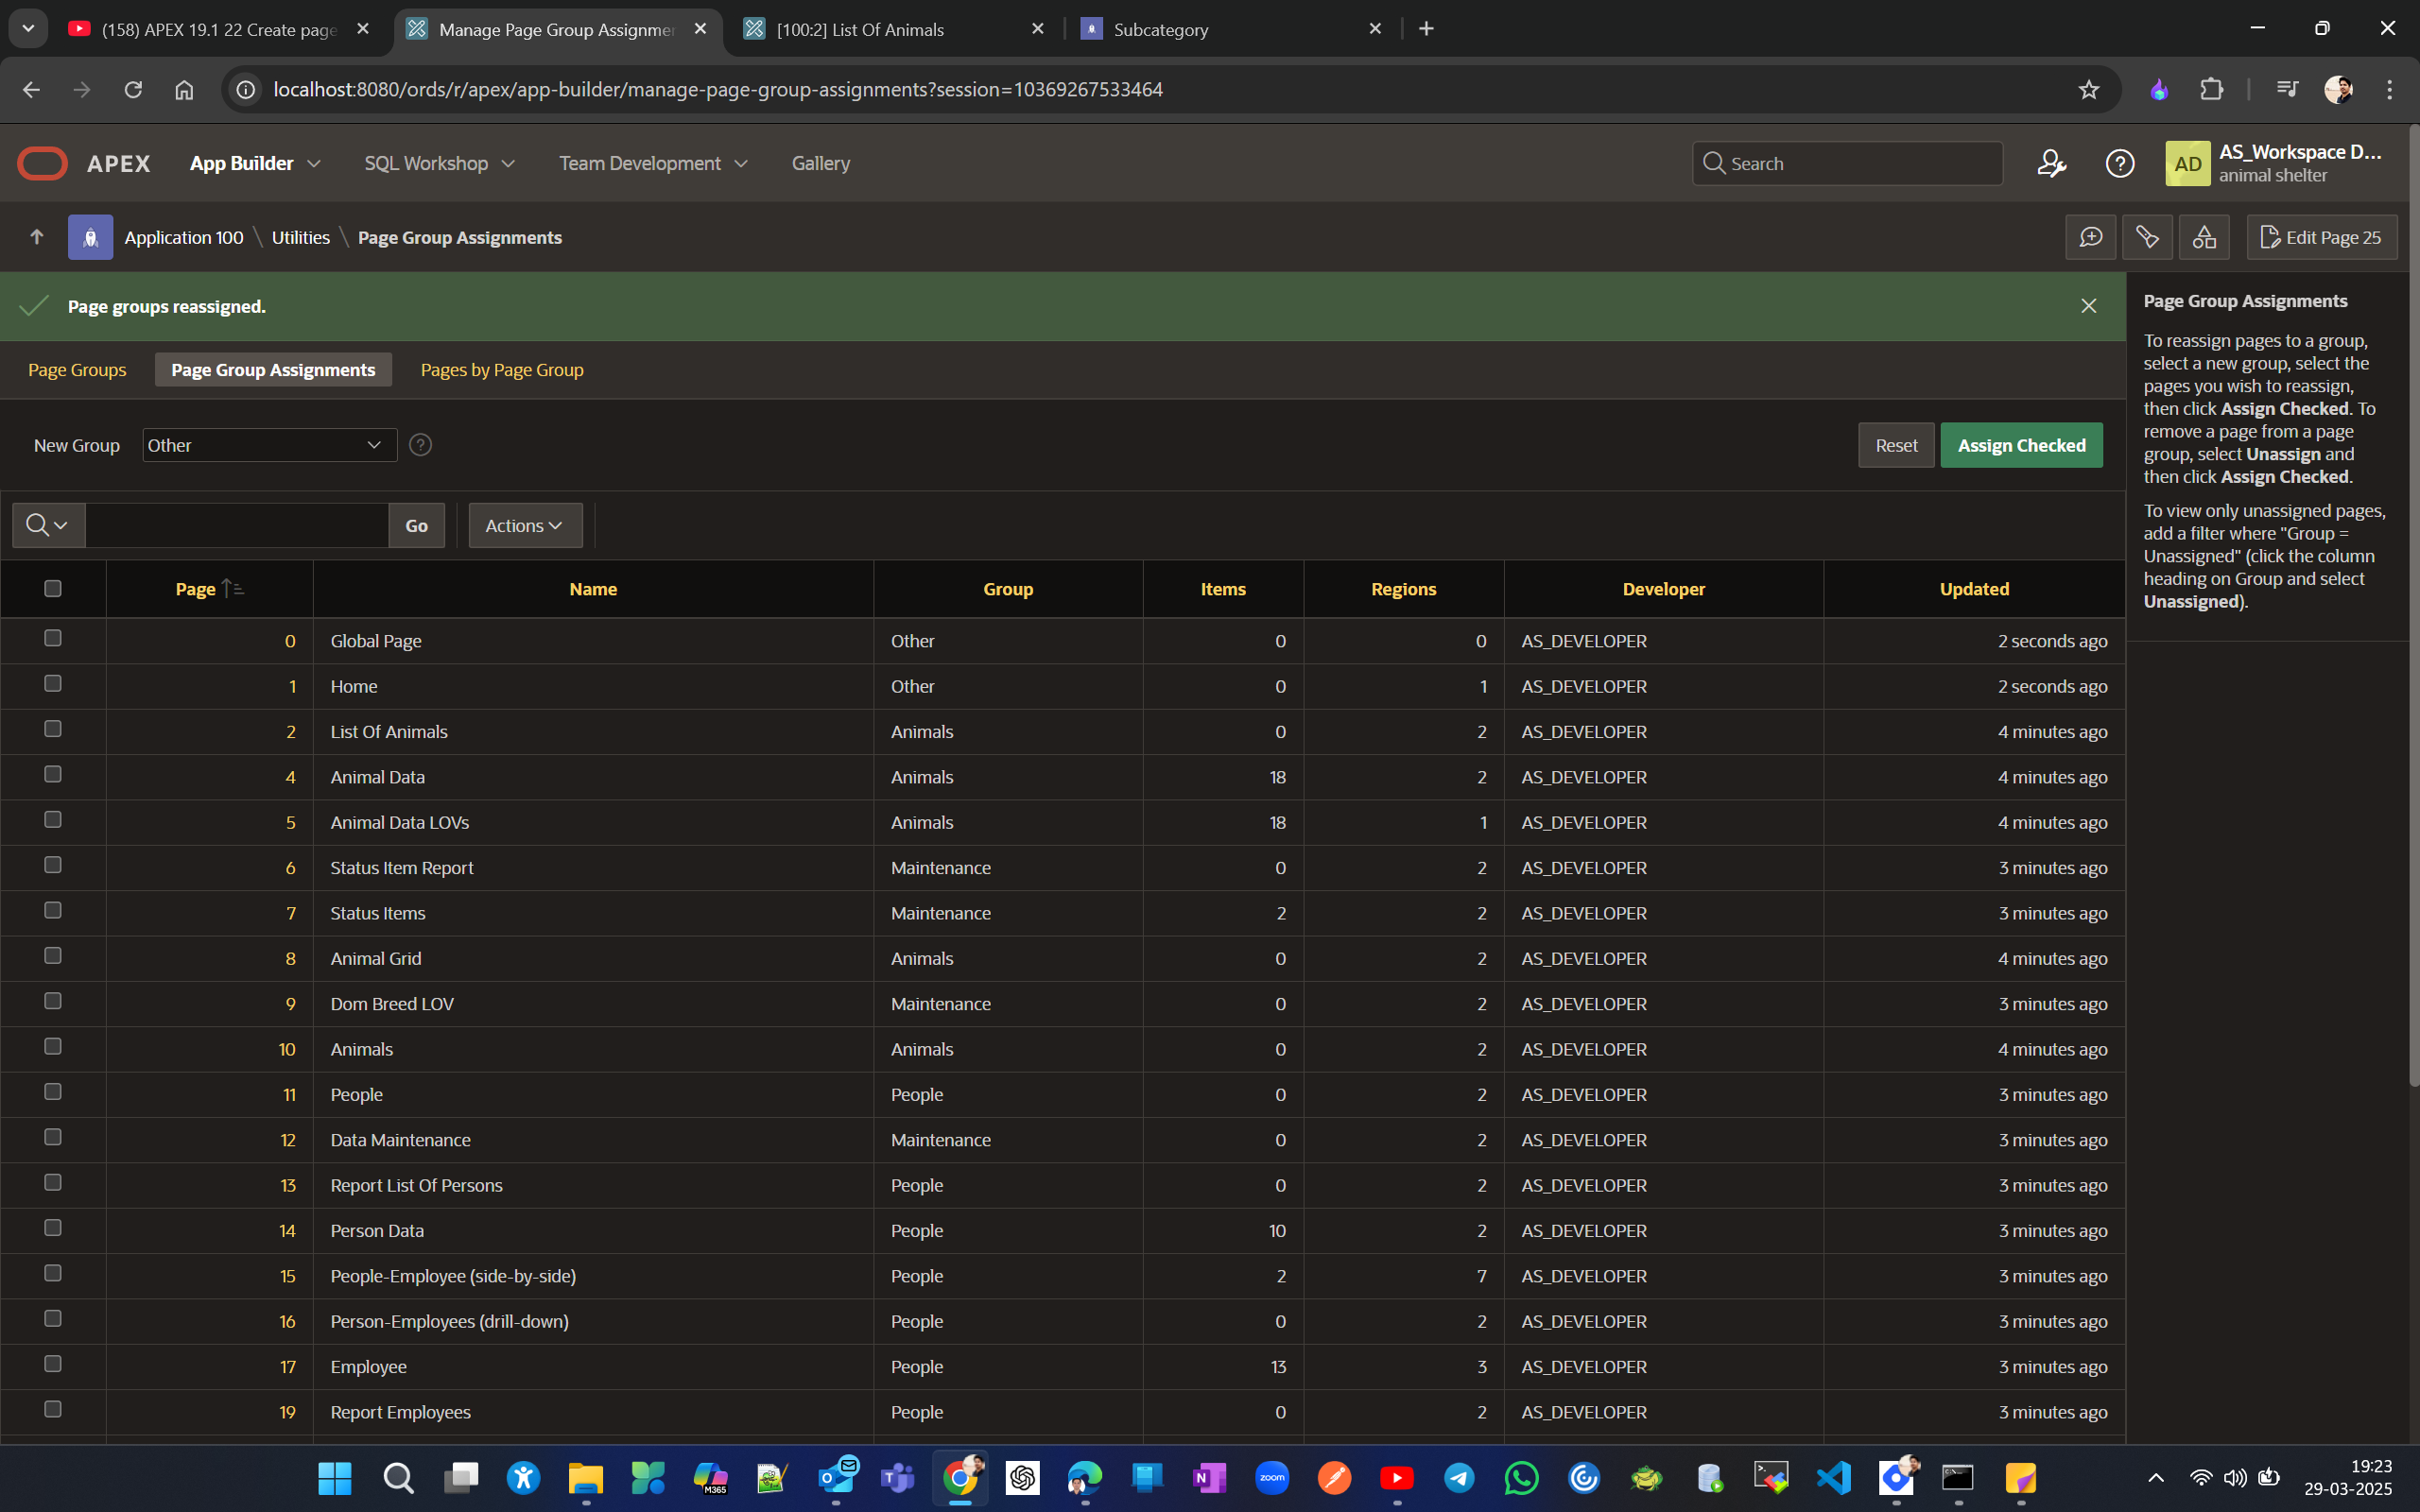
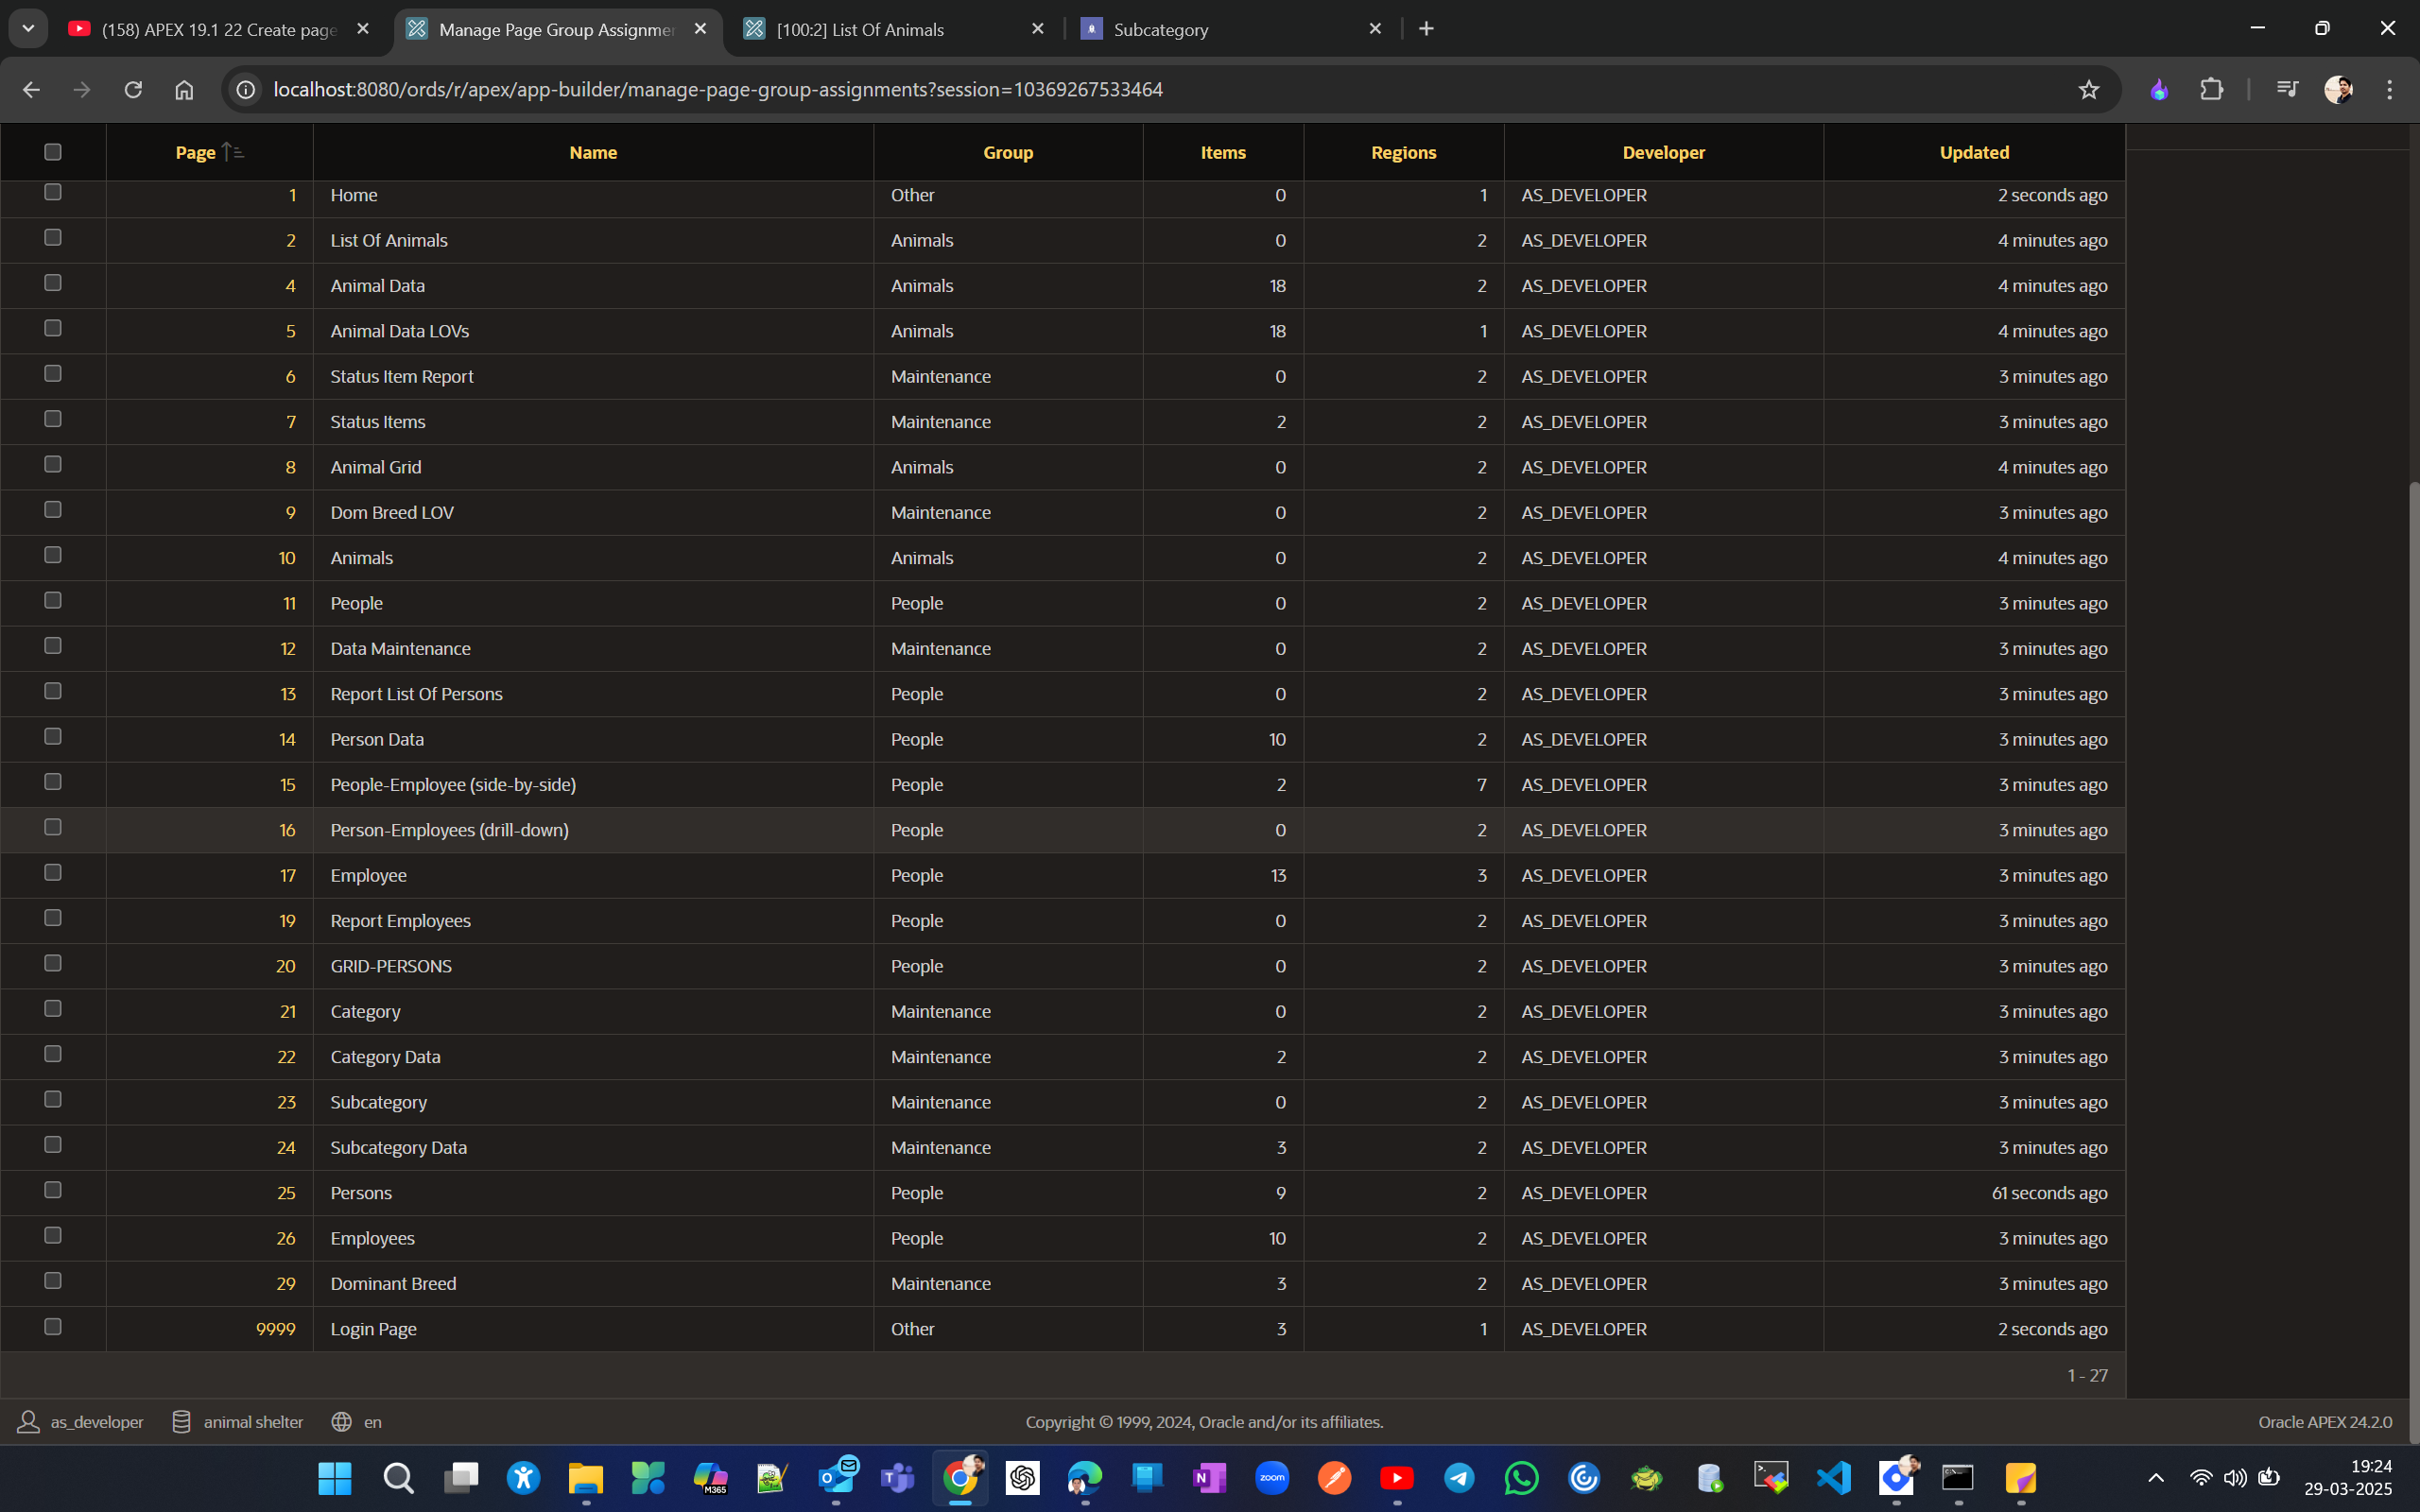
Now to see pages by groupings click on Pages by Page Group.
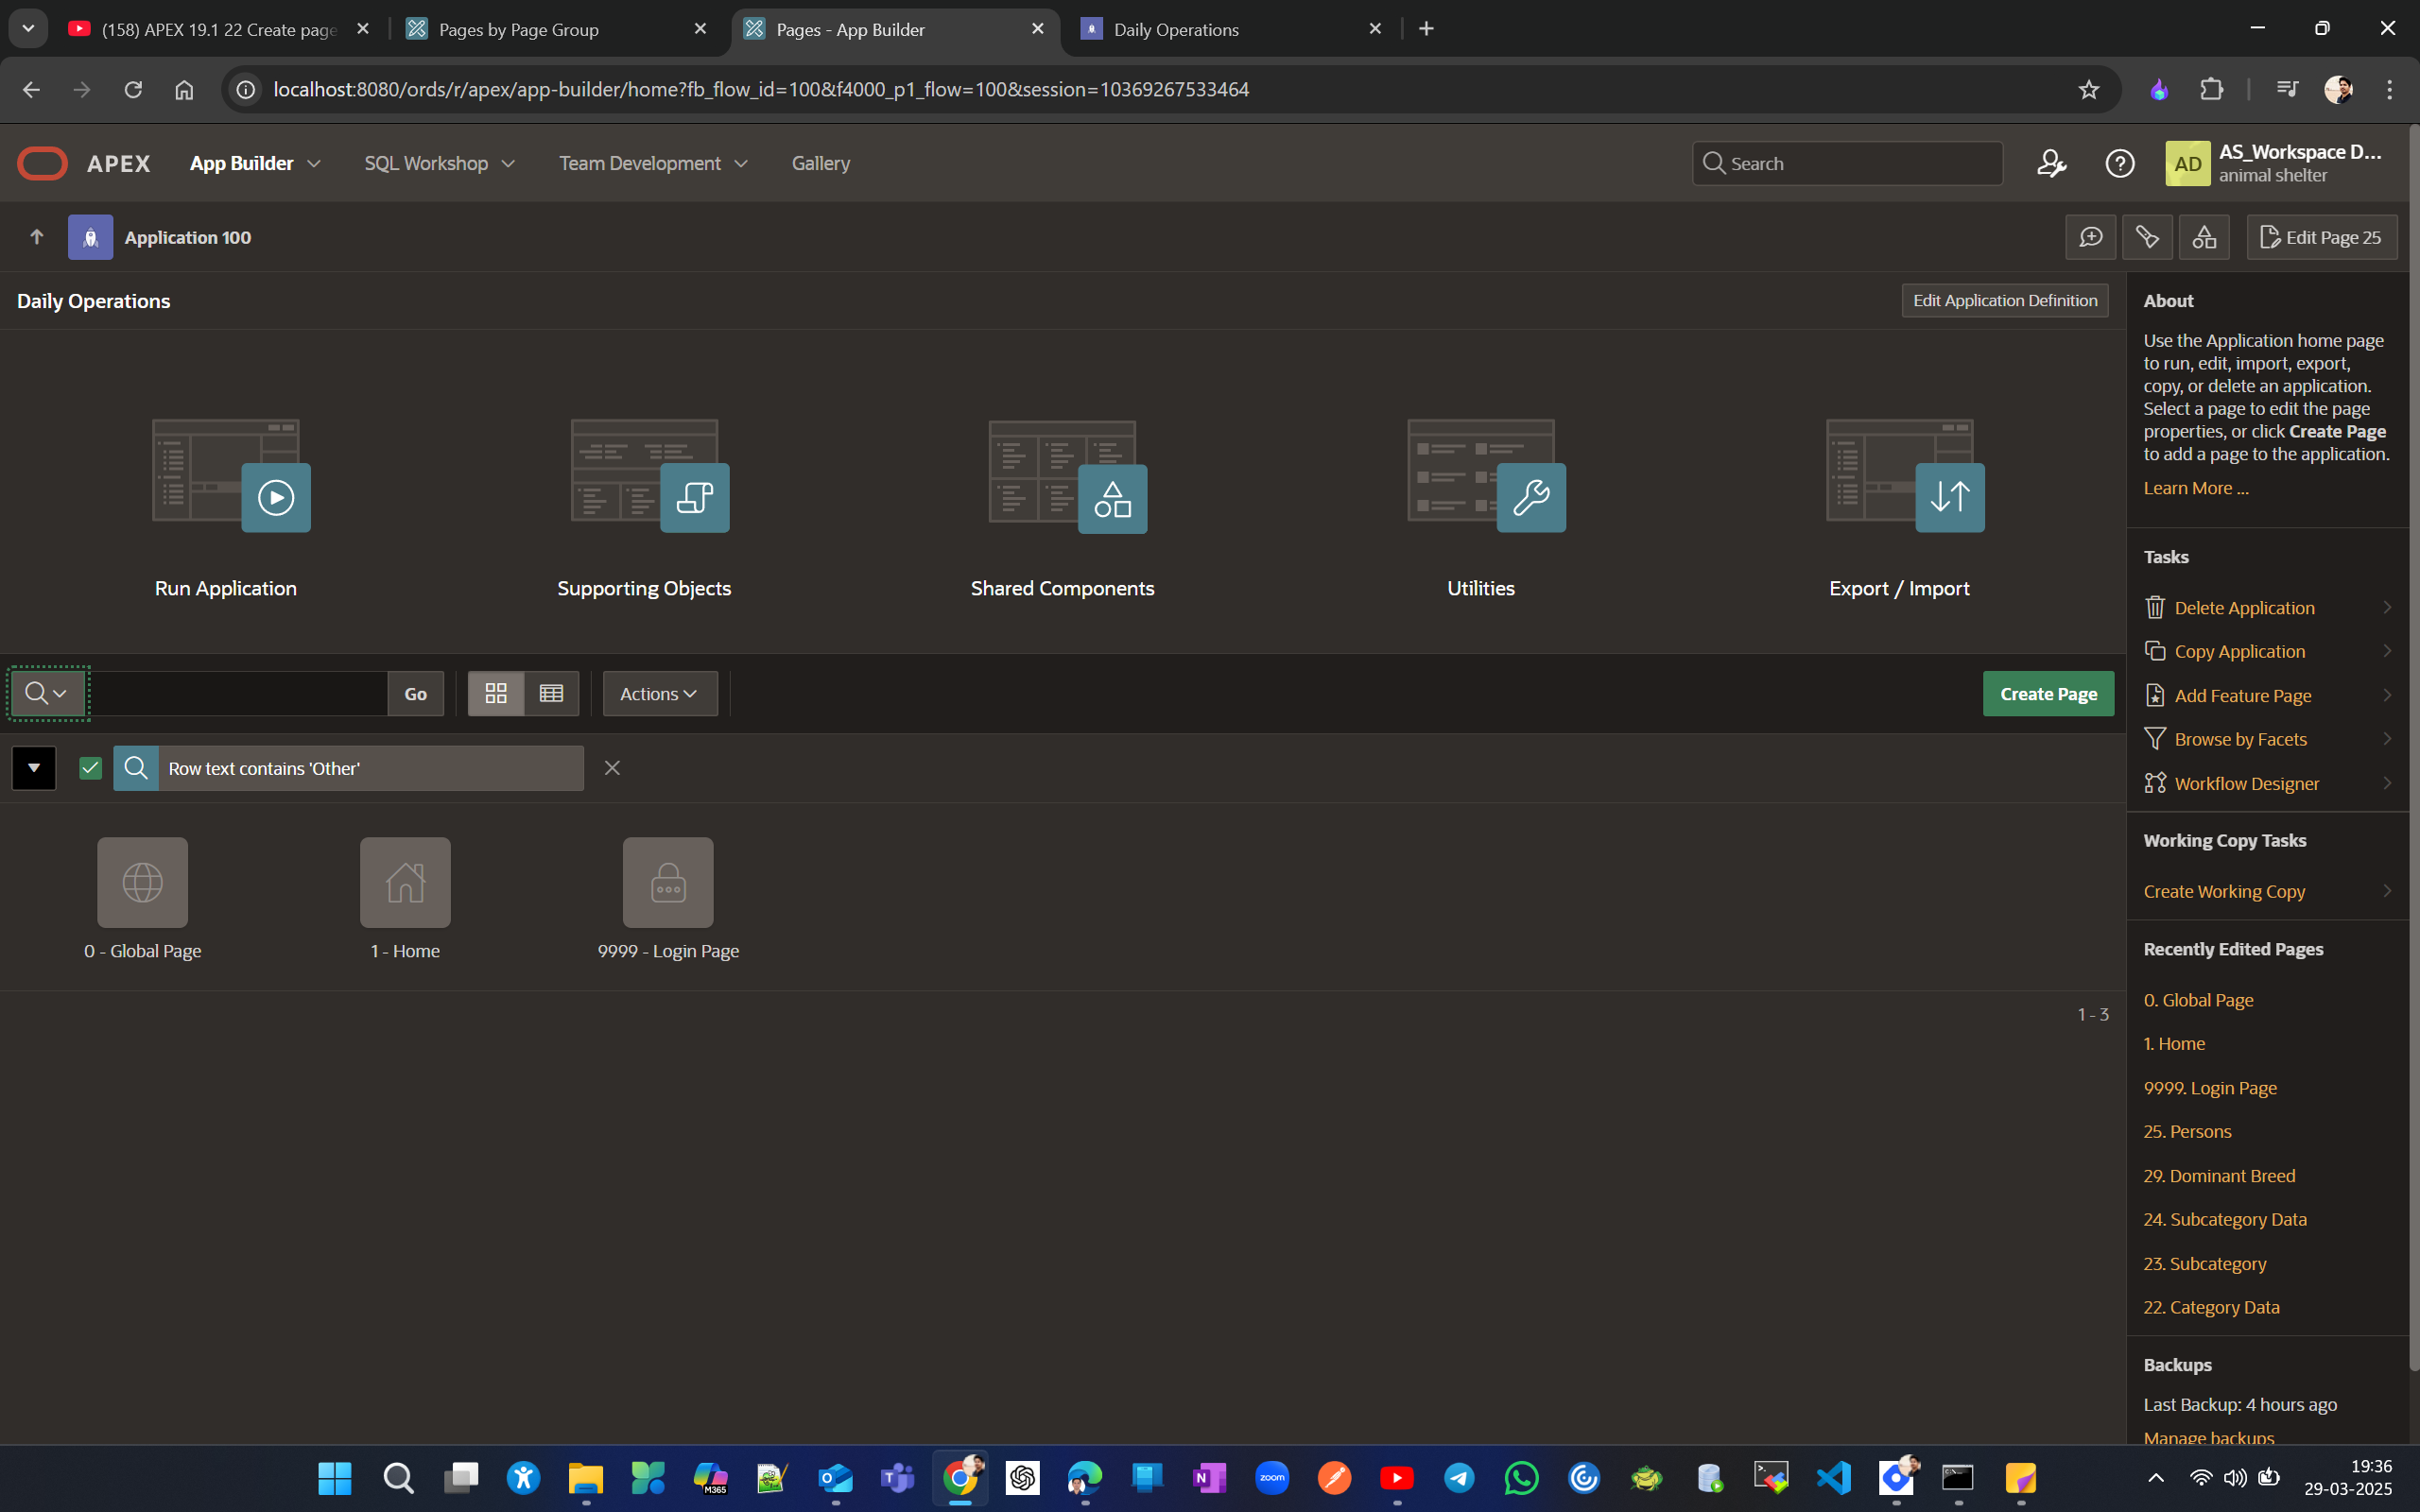
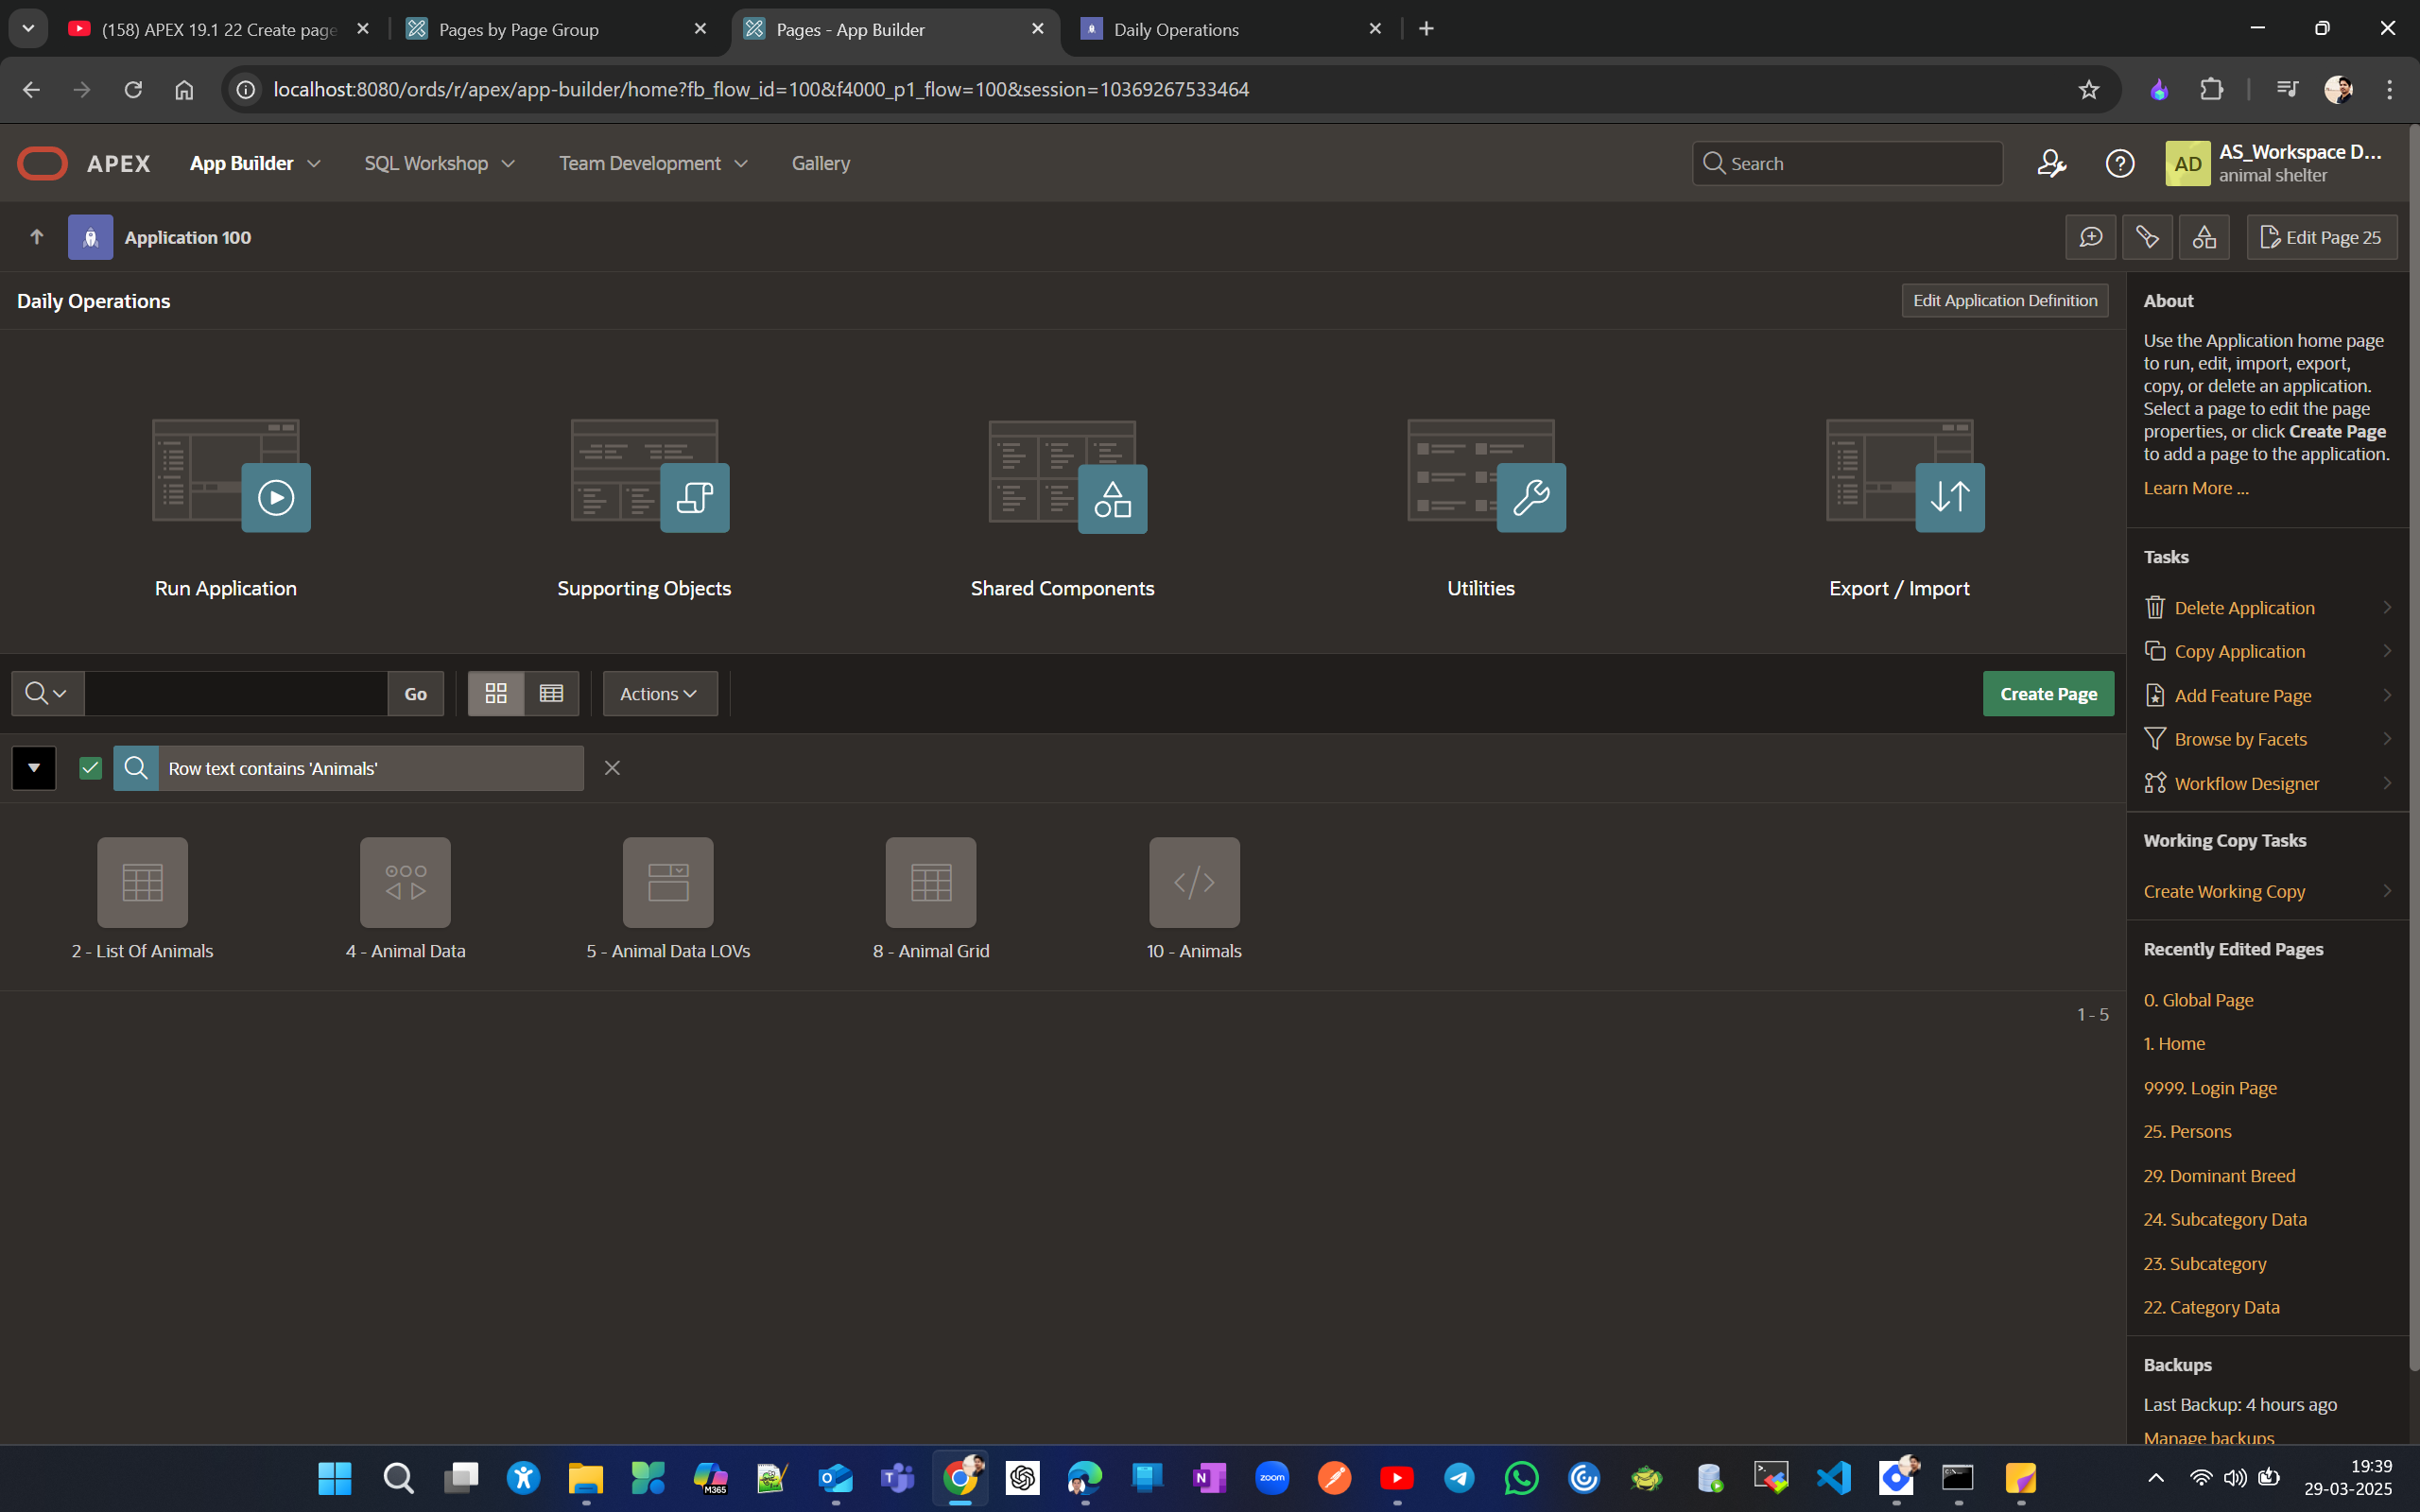
Now return to the application page and search by typing the page group, as shown in the example where we searched for Other.
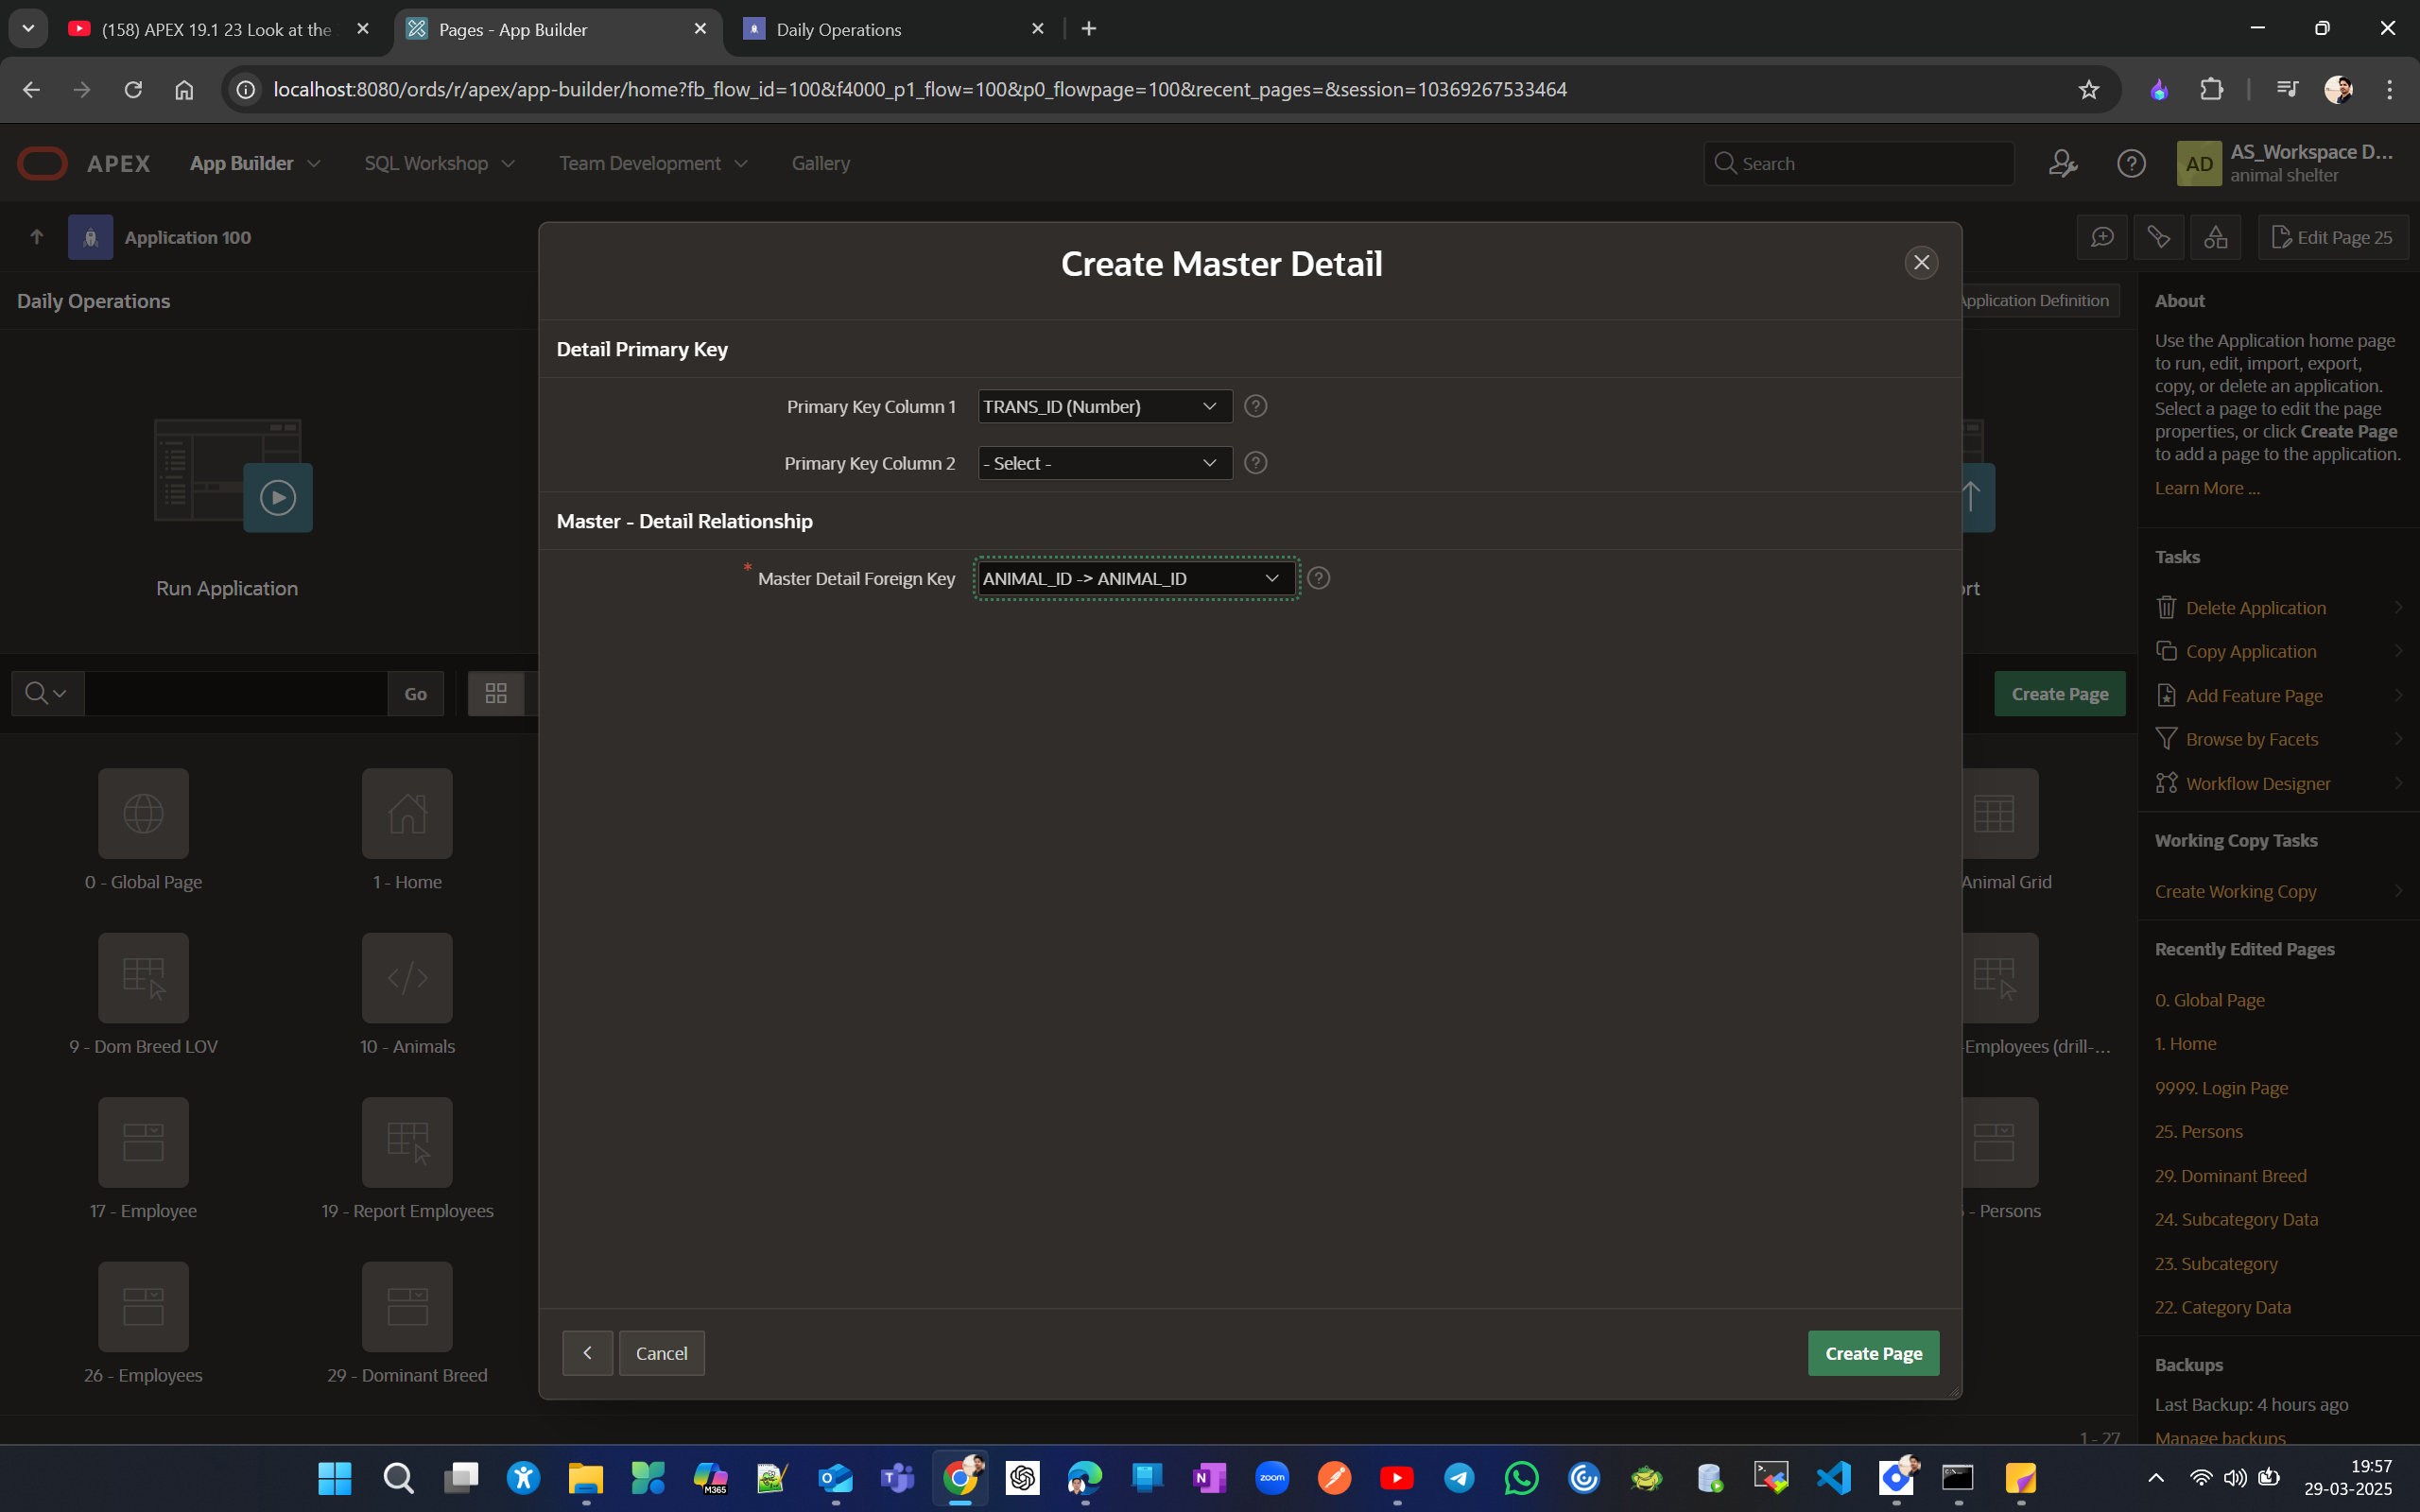
Look at the 3 layout options for master-detail forms.
We will create master-detail forms for Activities and transactions related to Animals.
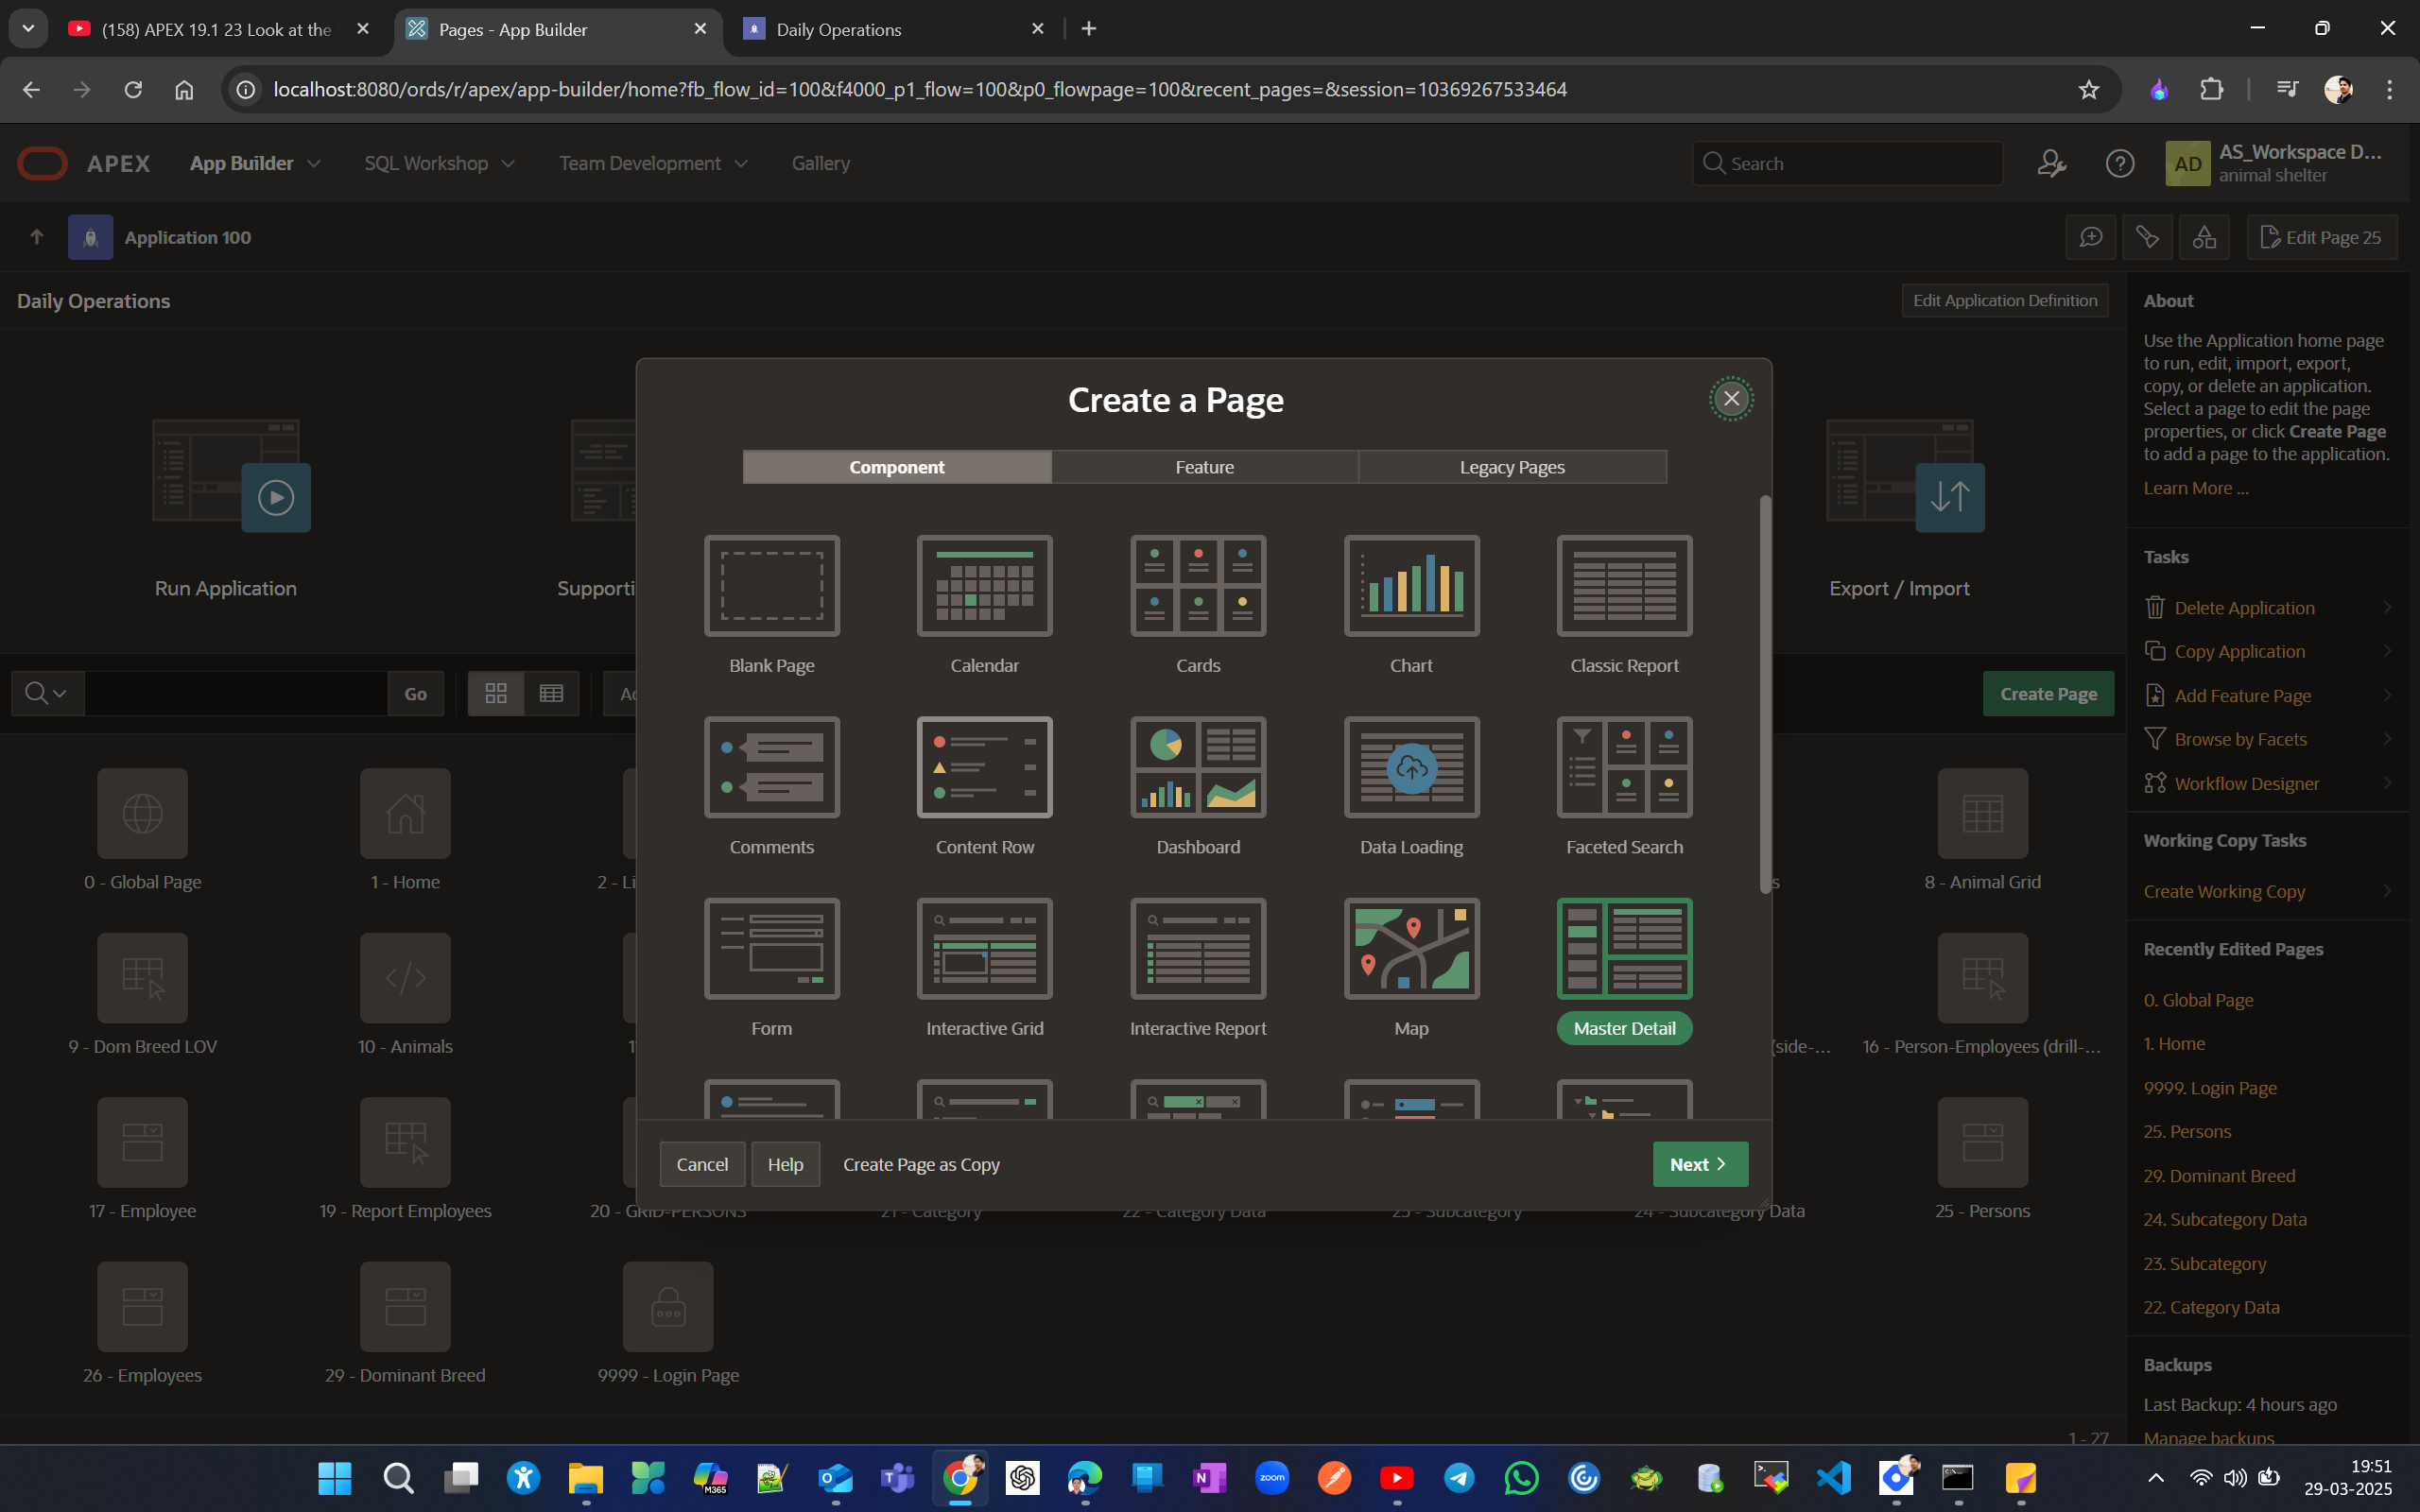

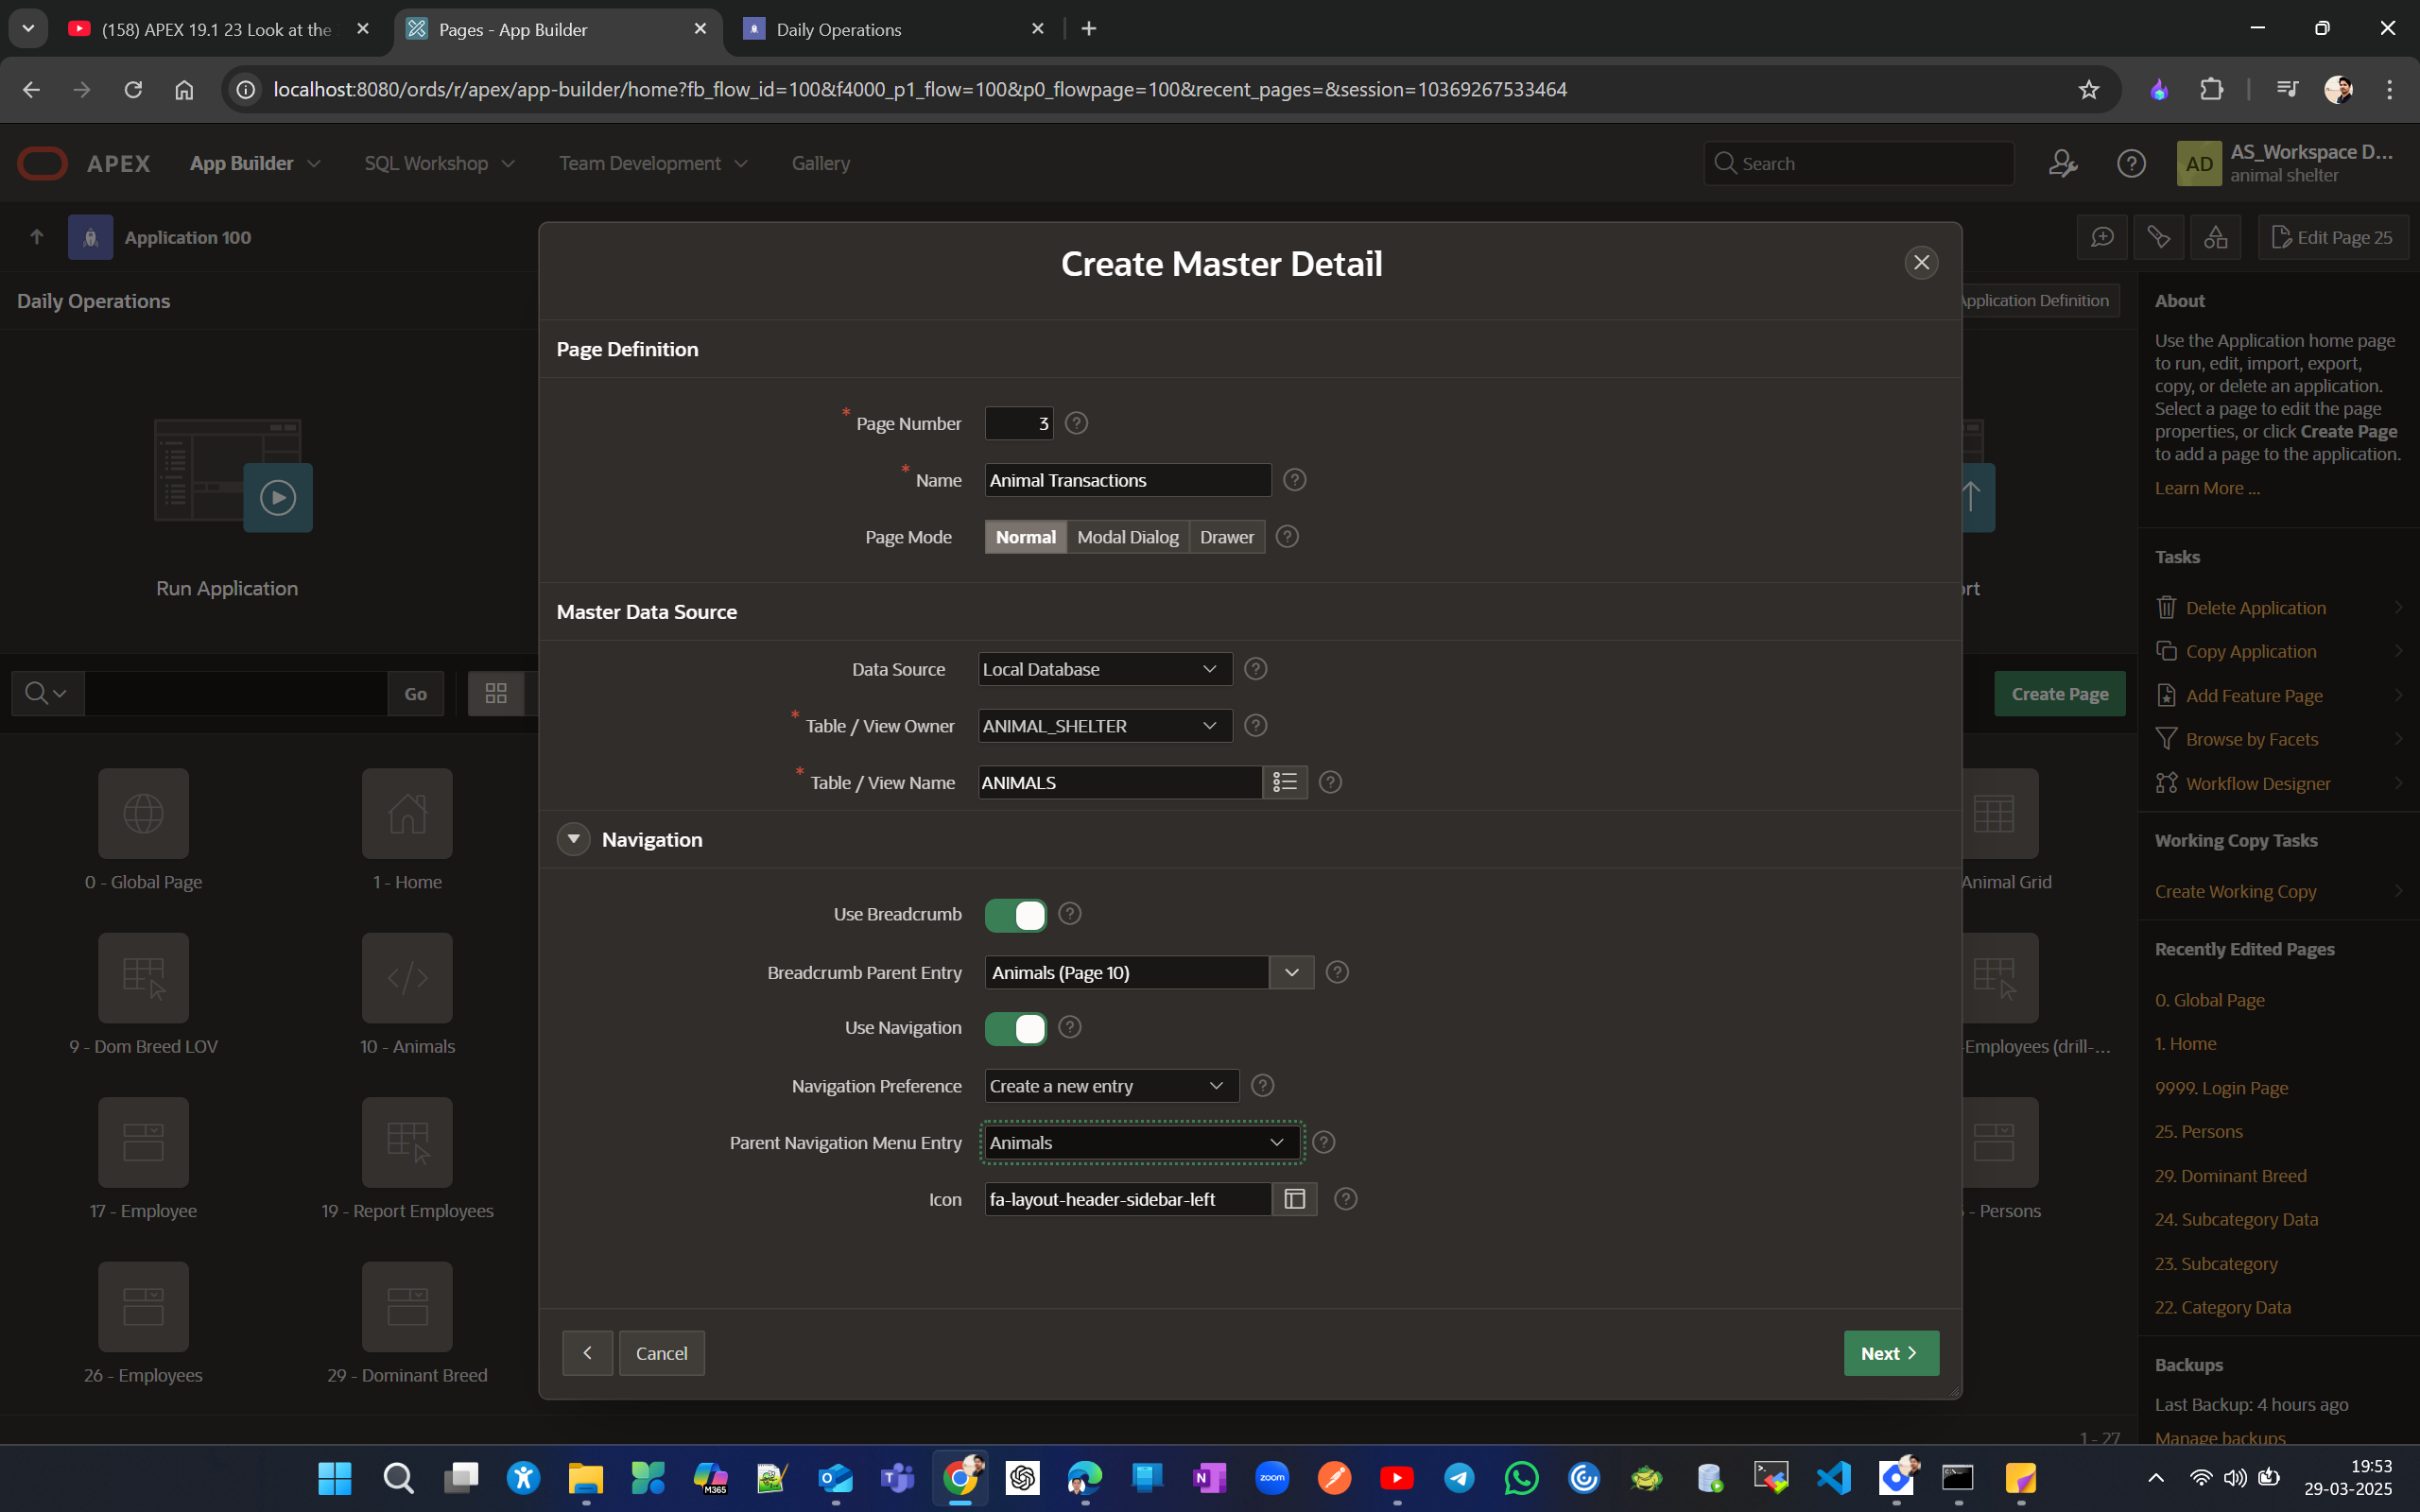
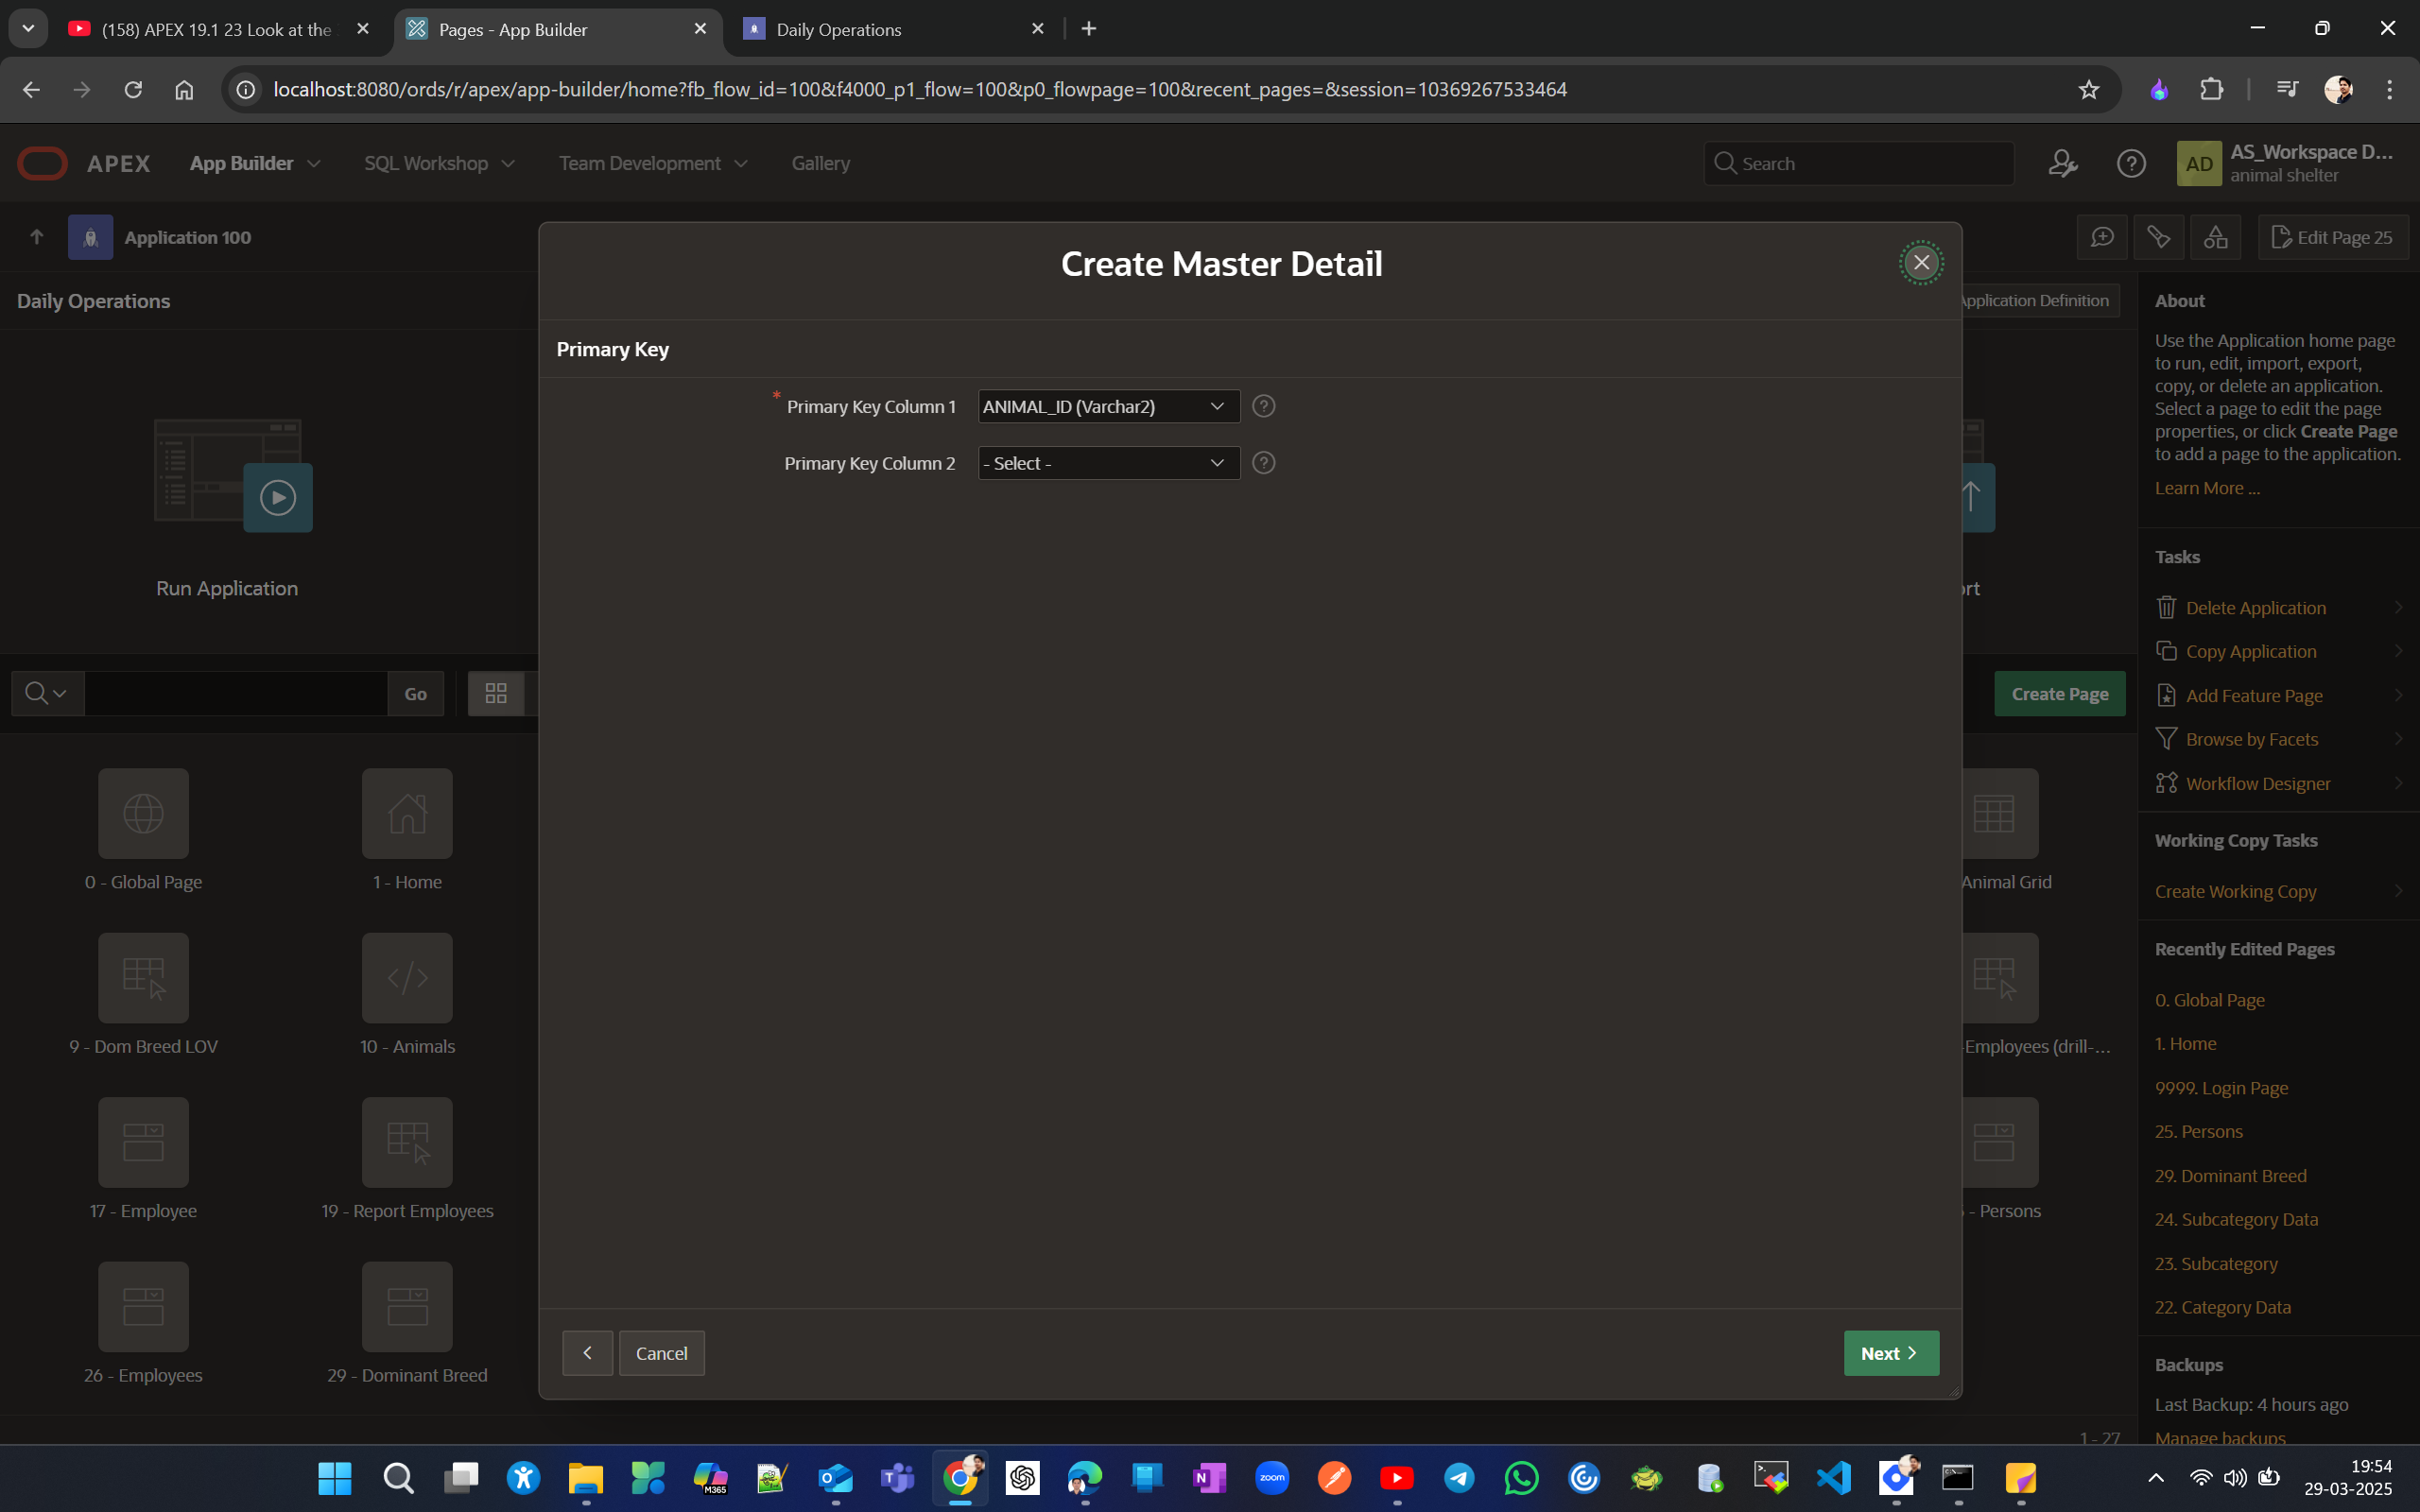
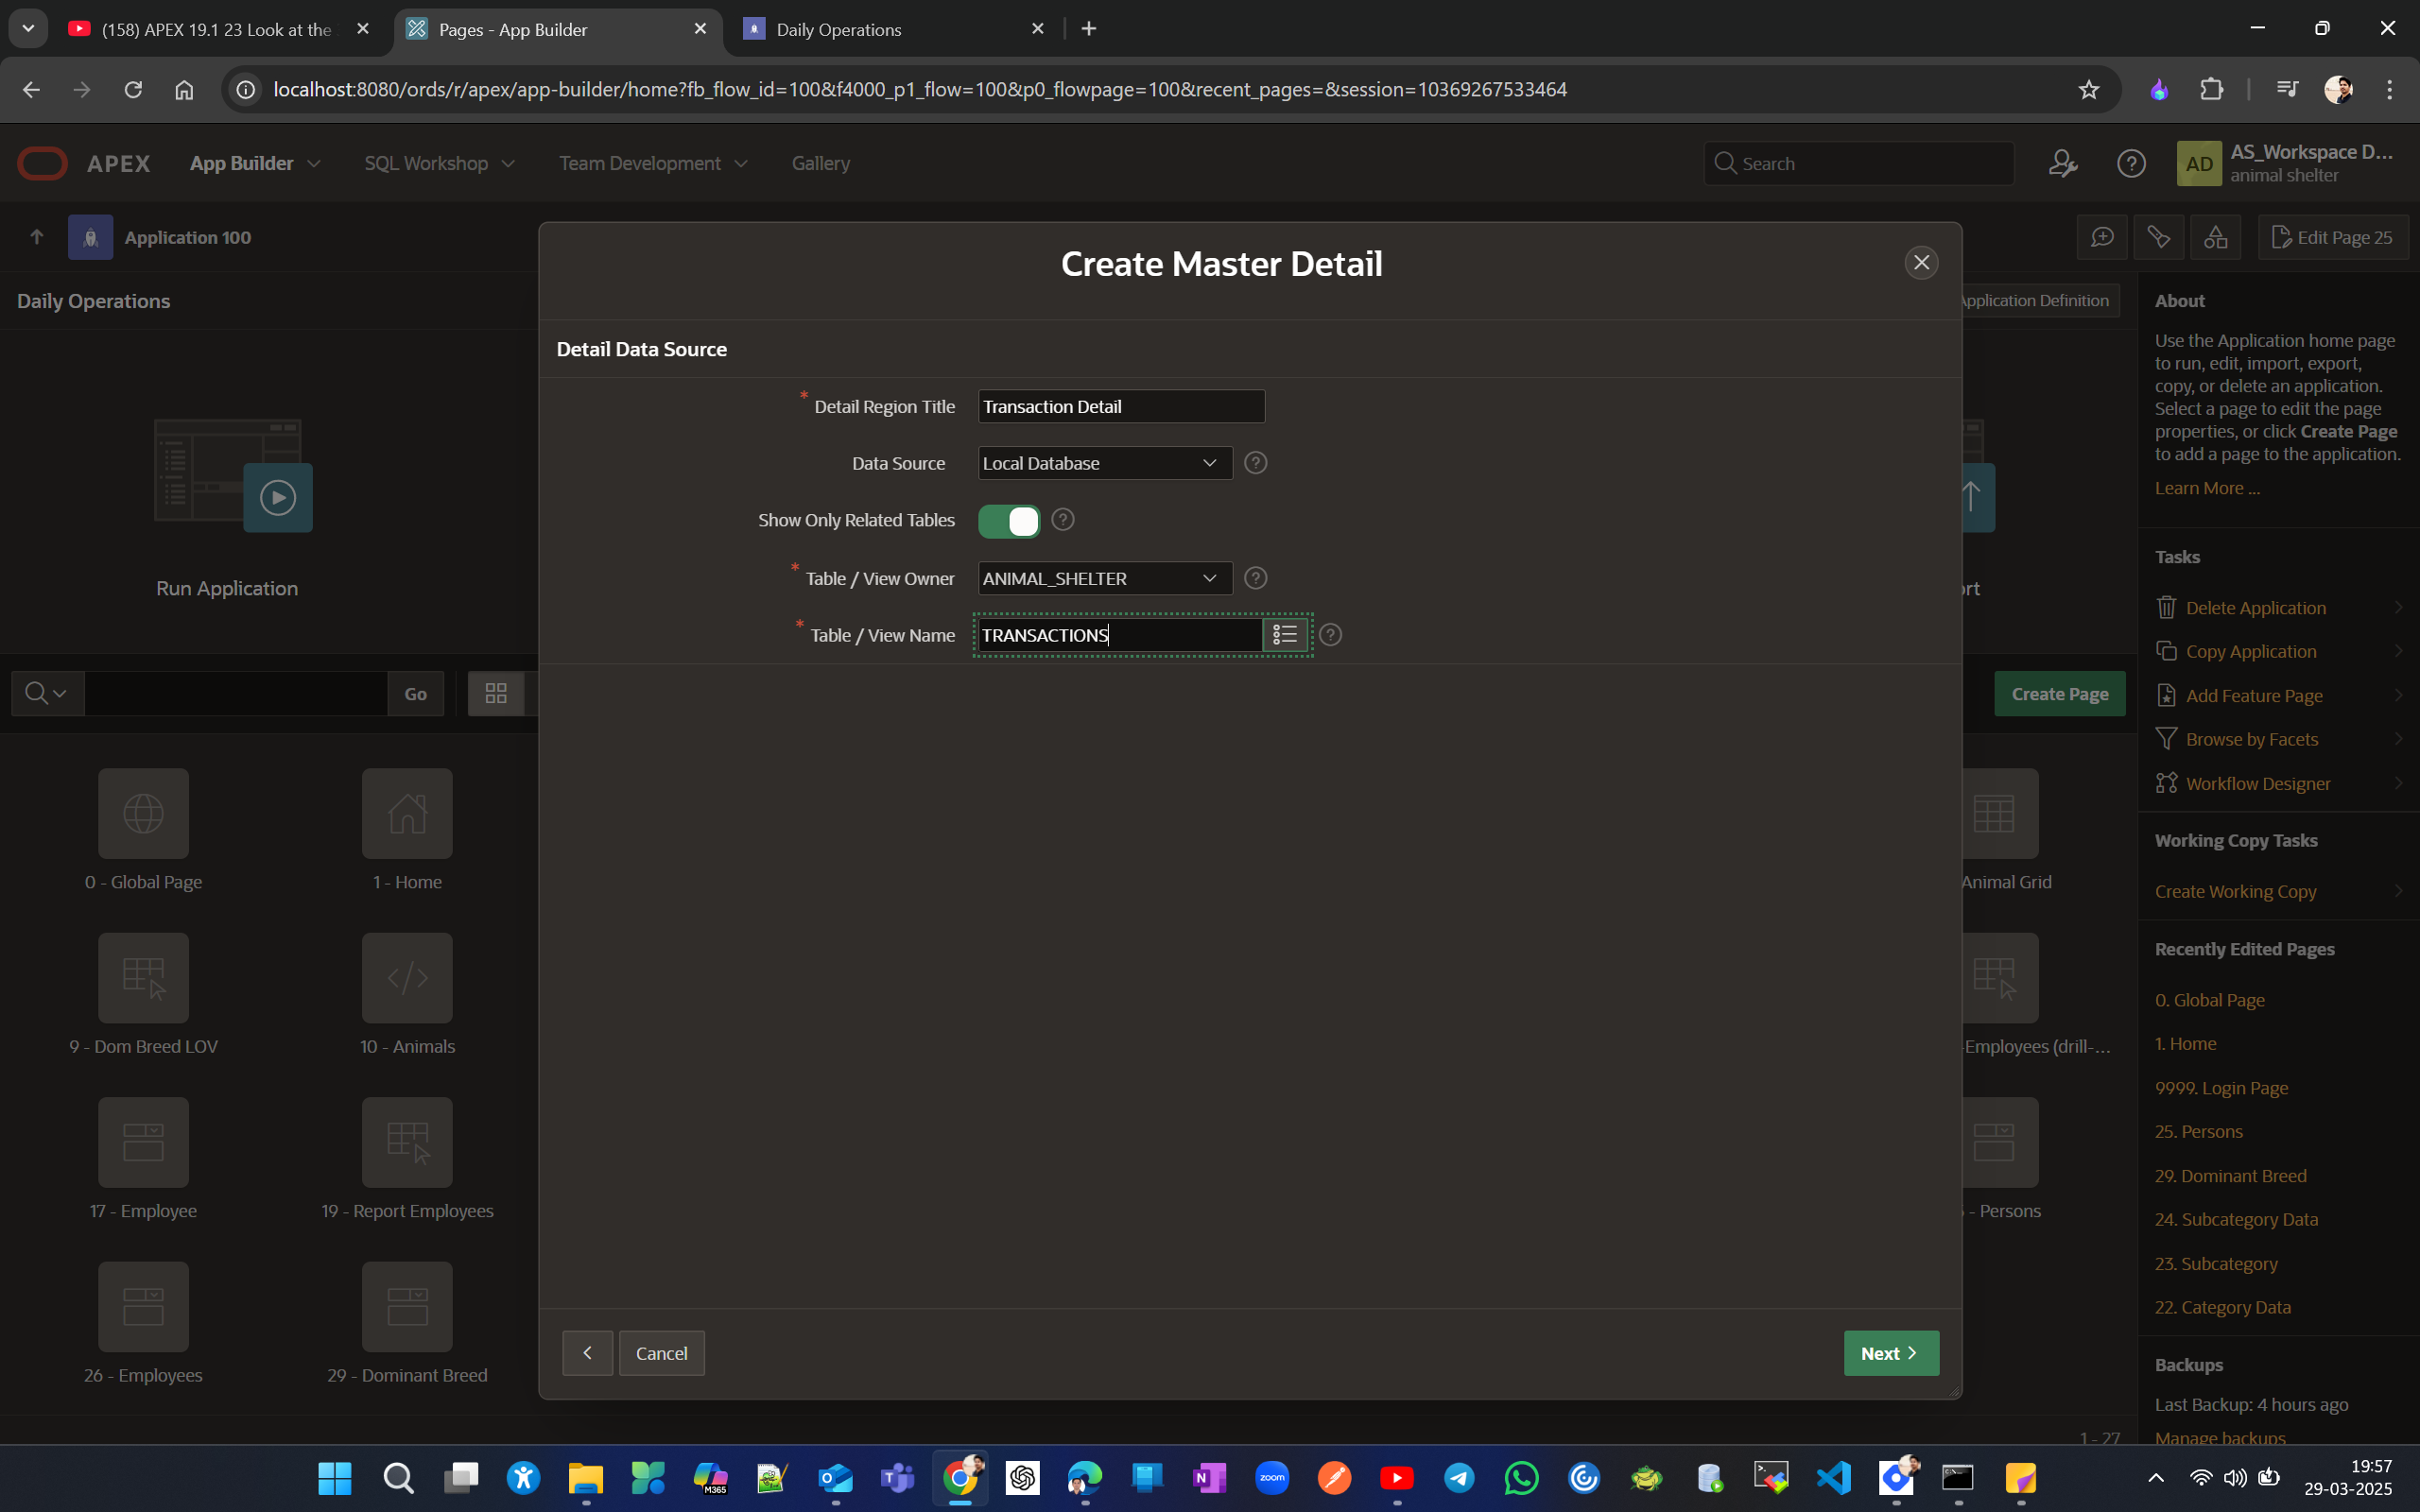

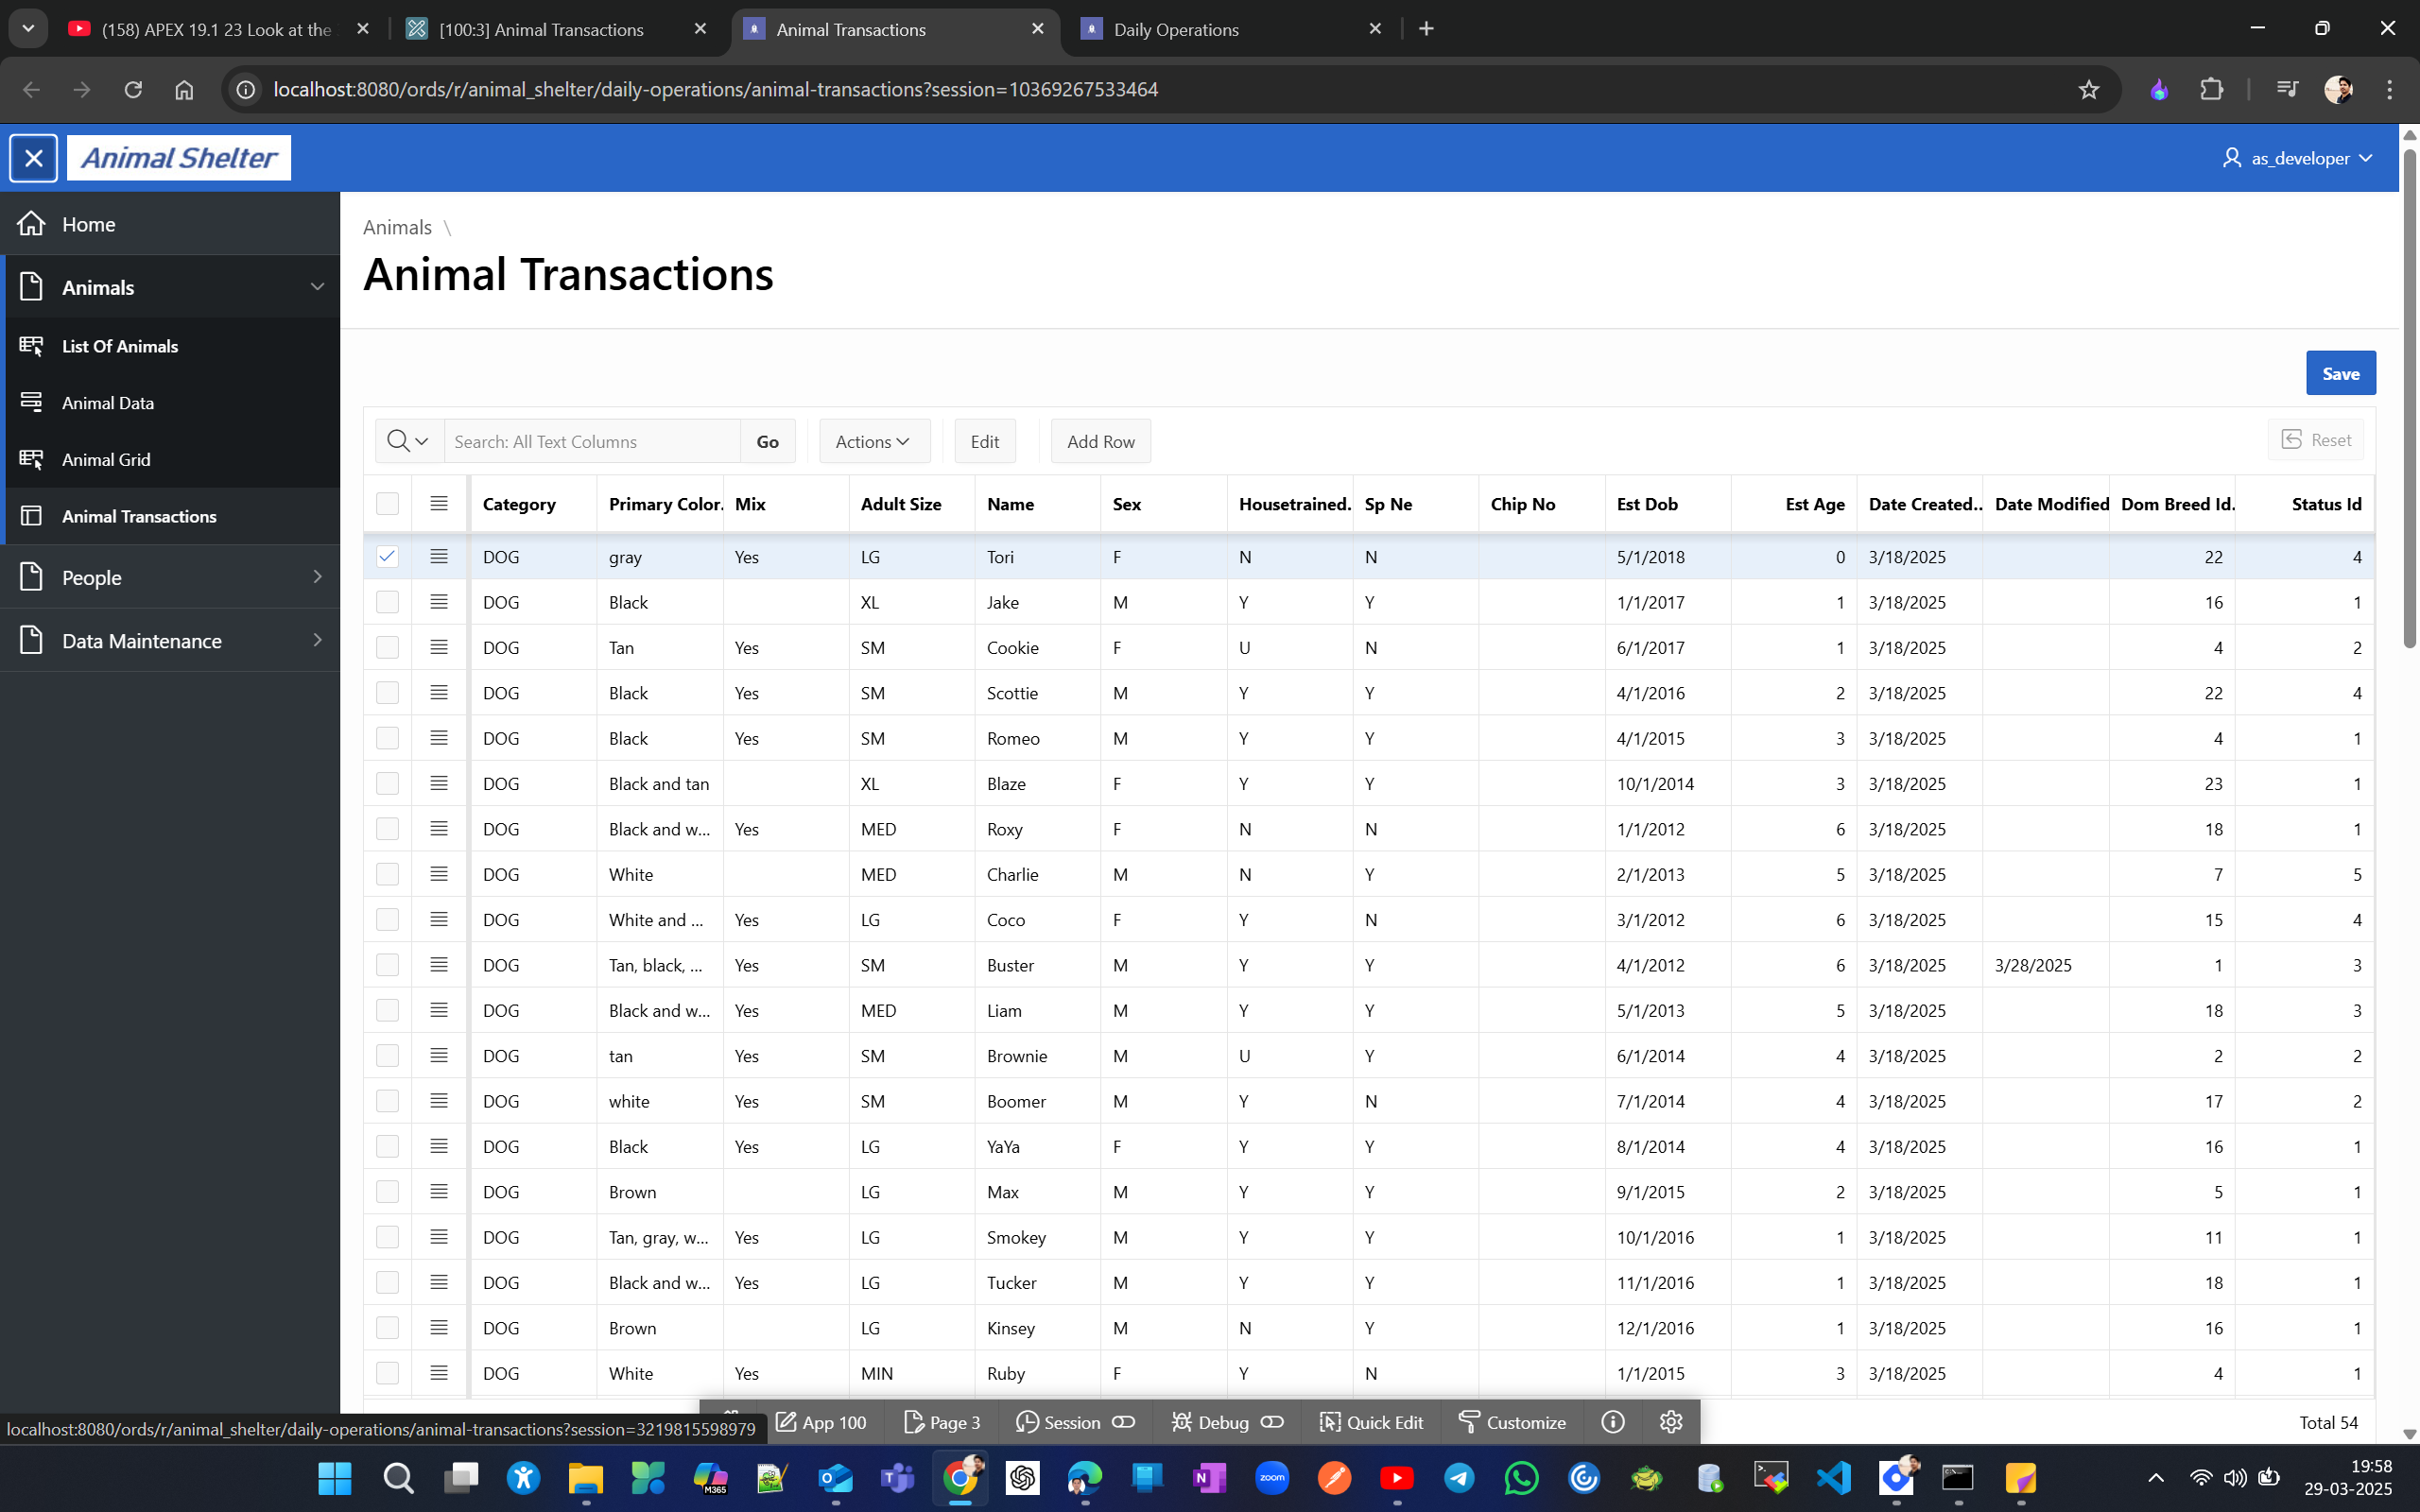
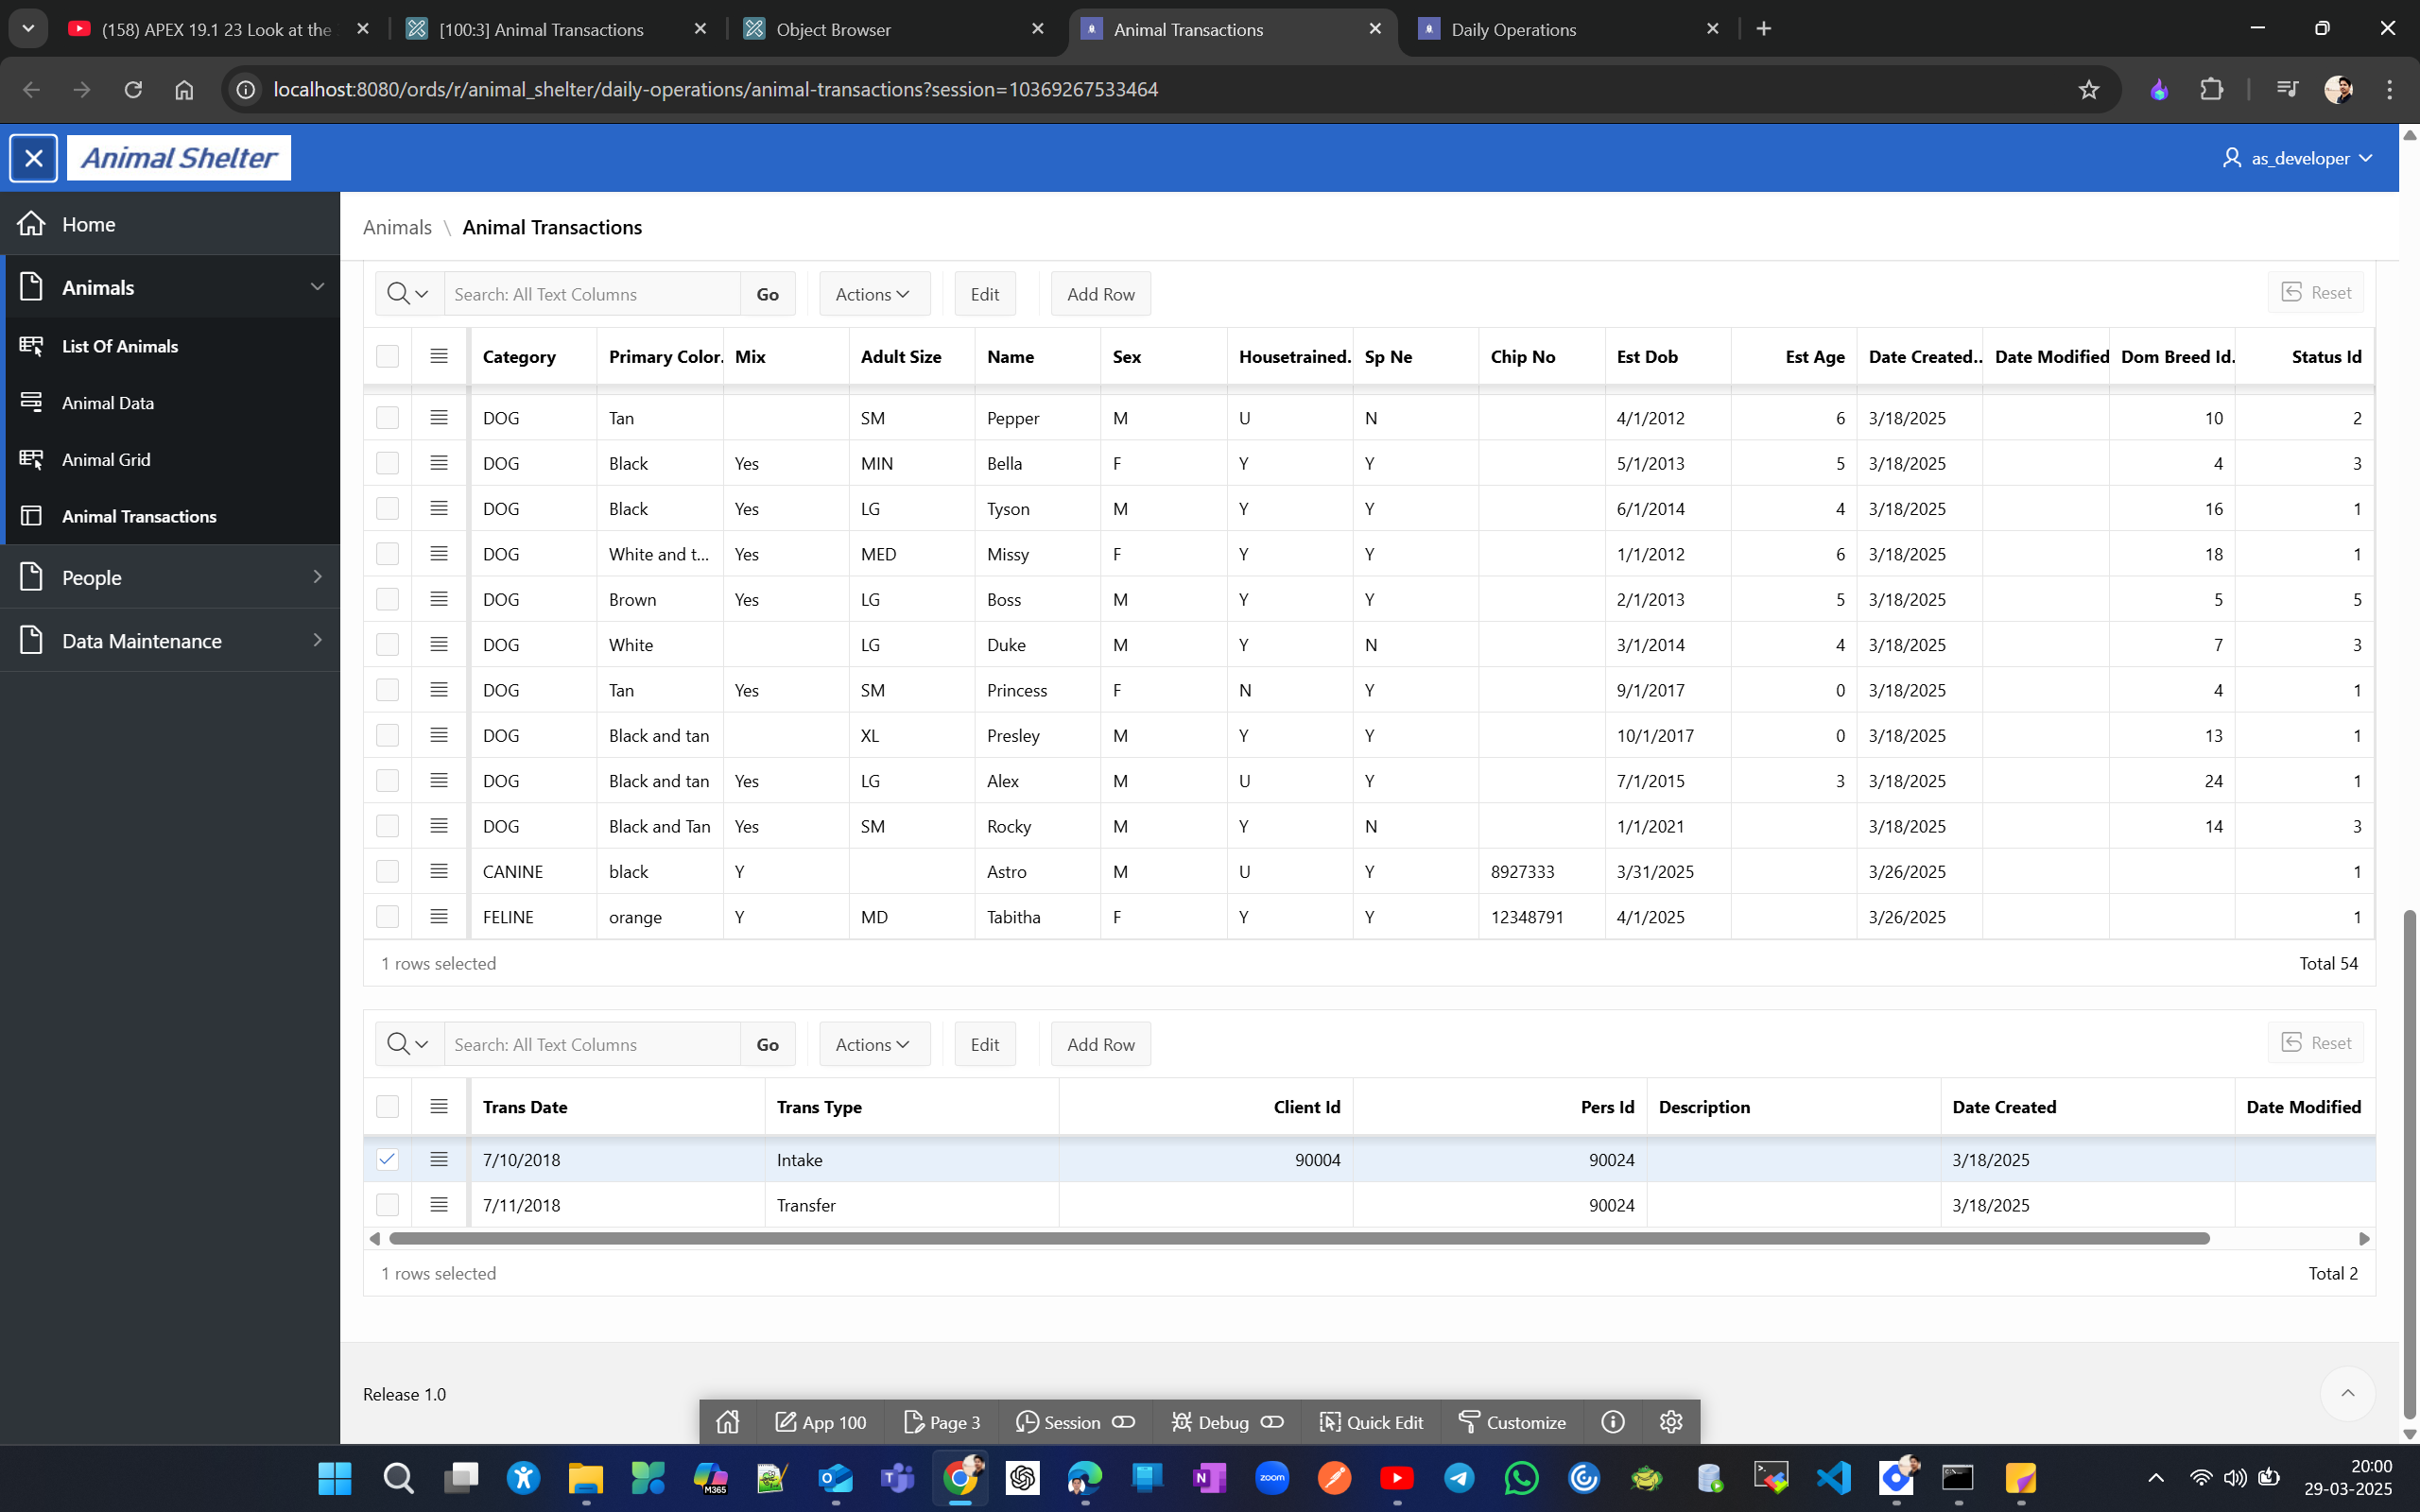
Selecting an animal from the master report shows the related transactions on the details page, and for a better view, we can change the Type attribute under pagination to Page and set rows per page to 5 to see both master and details on one page.
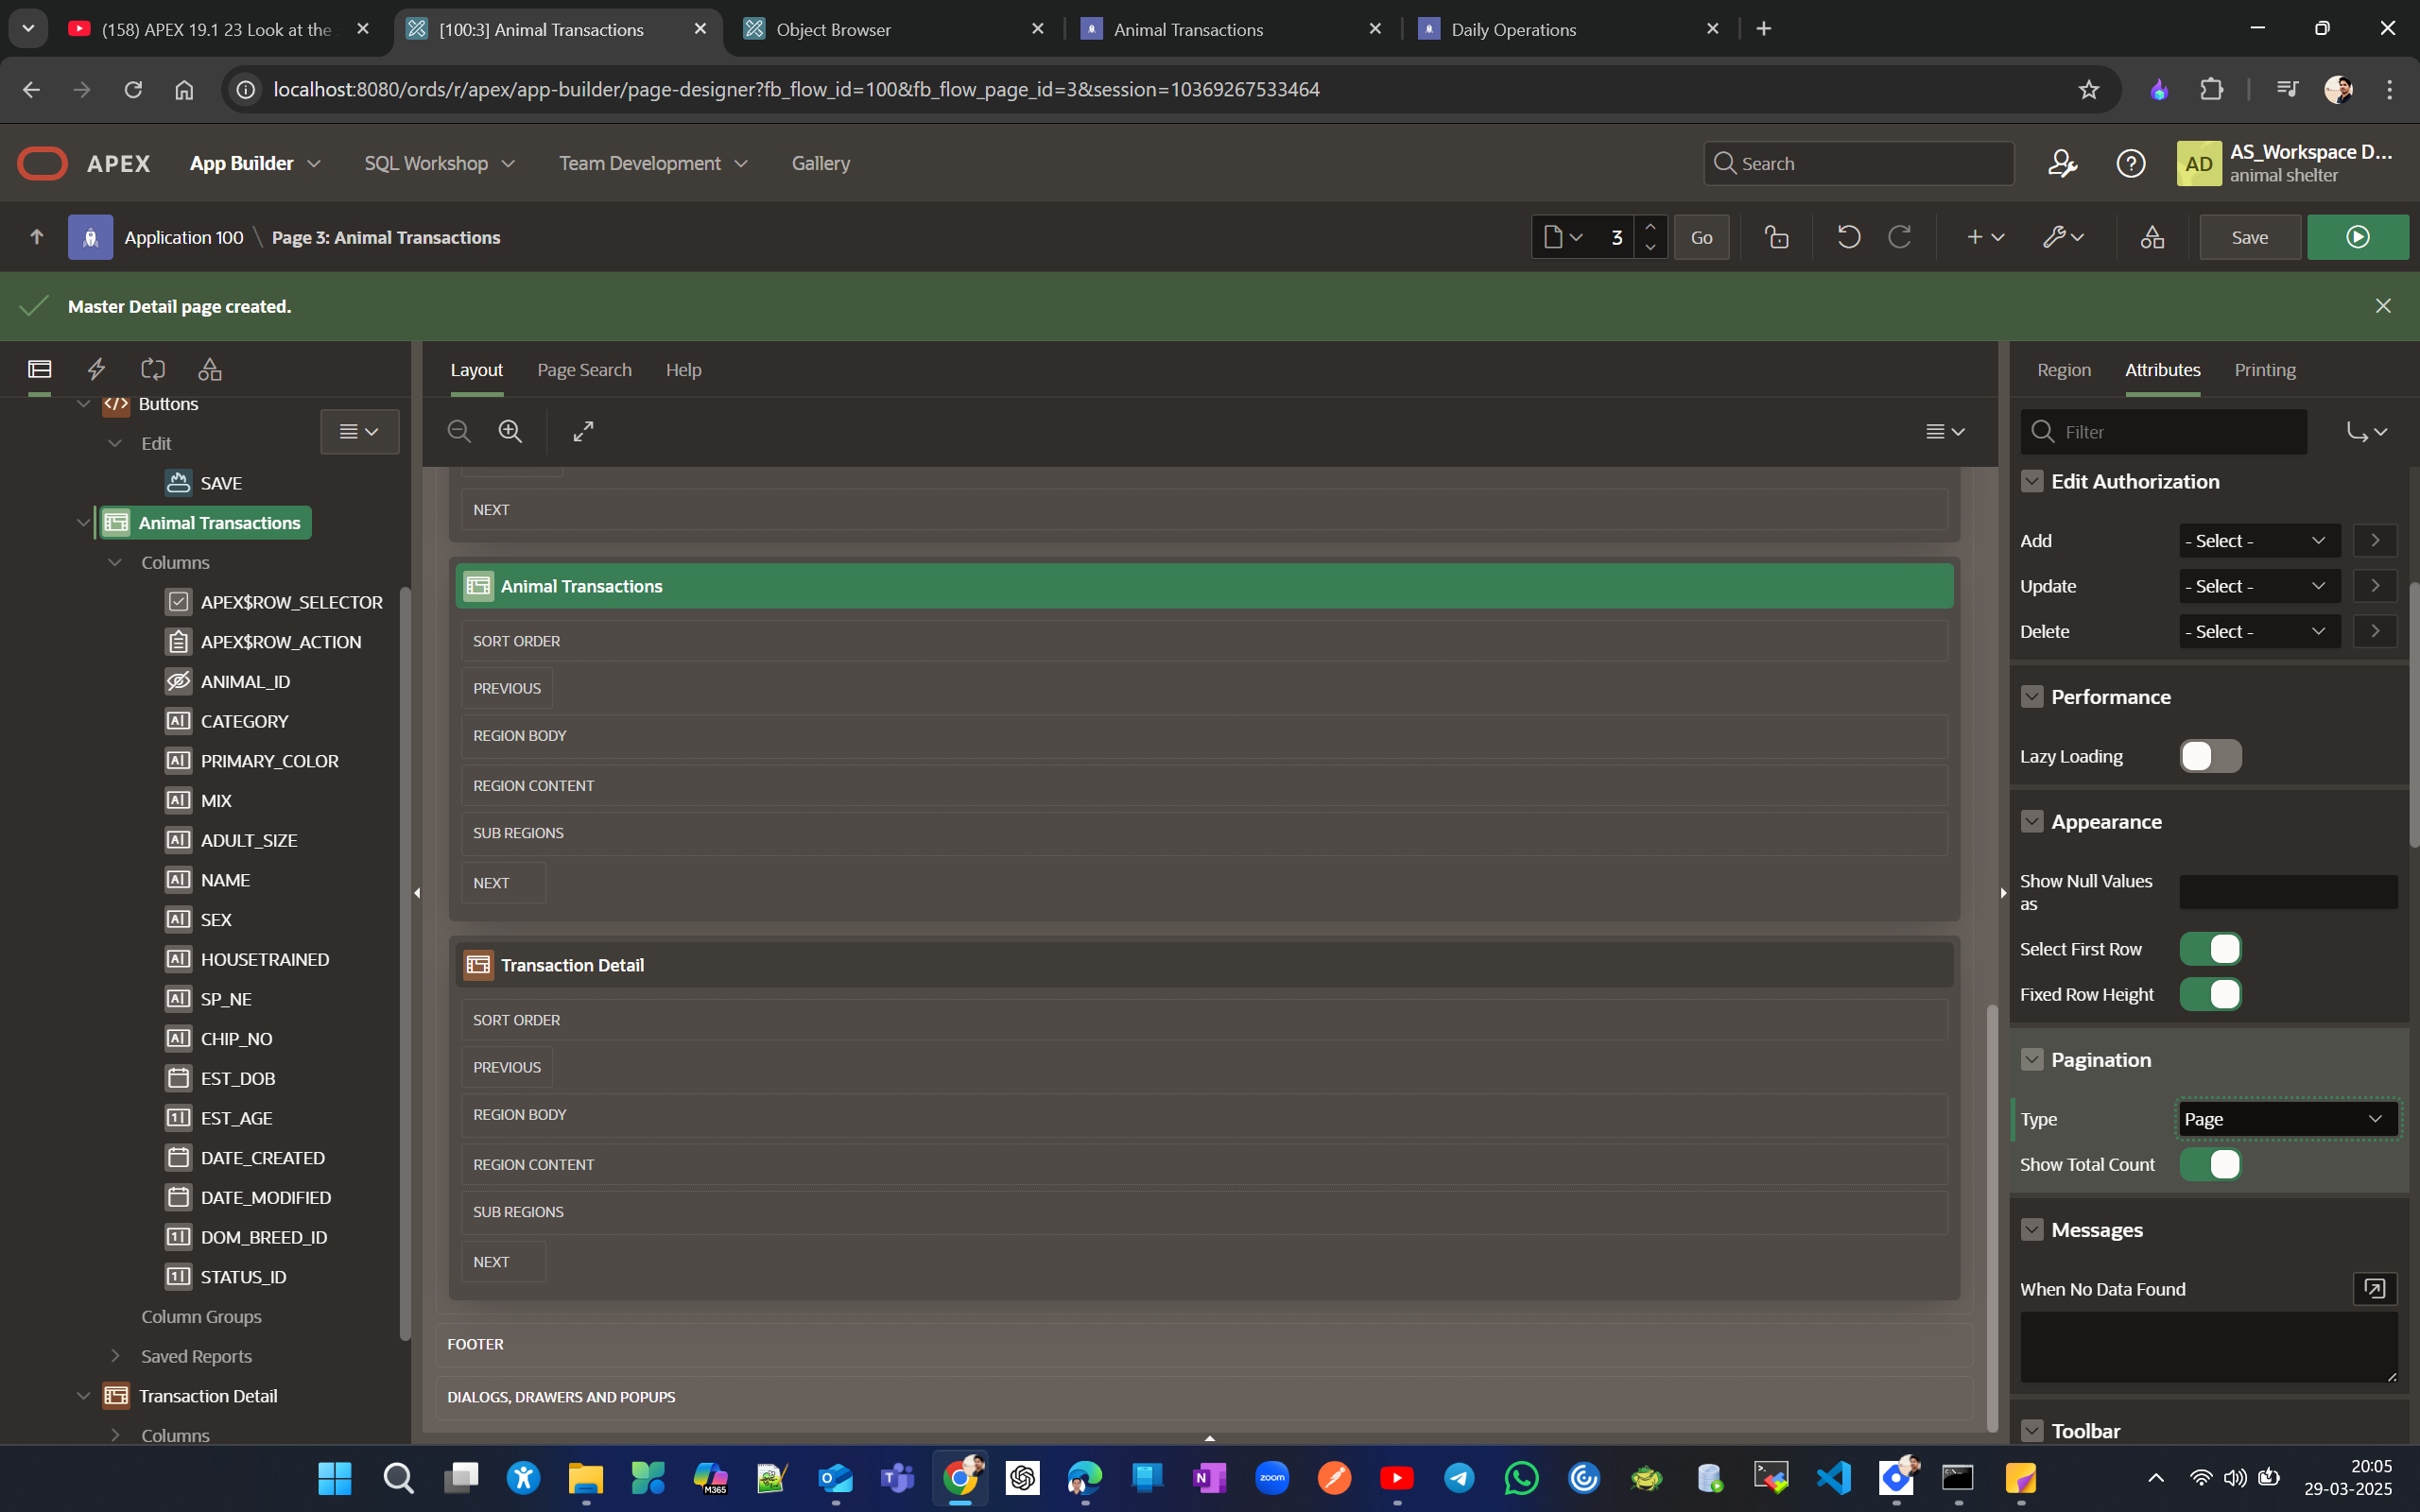
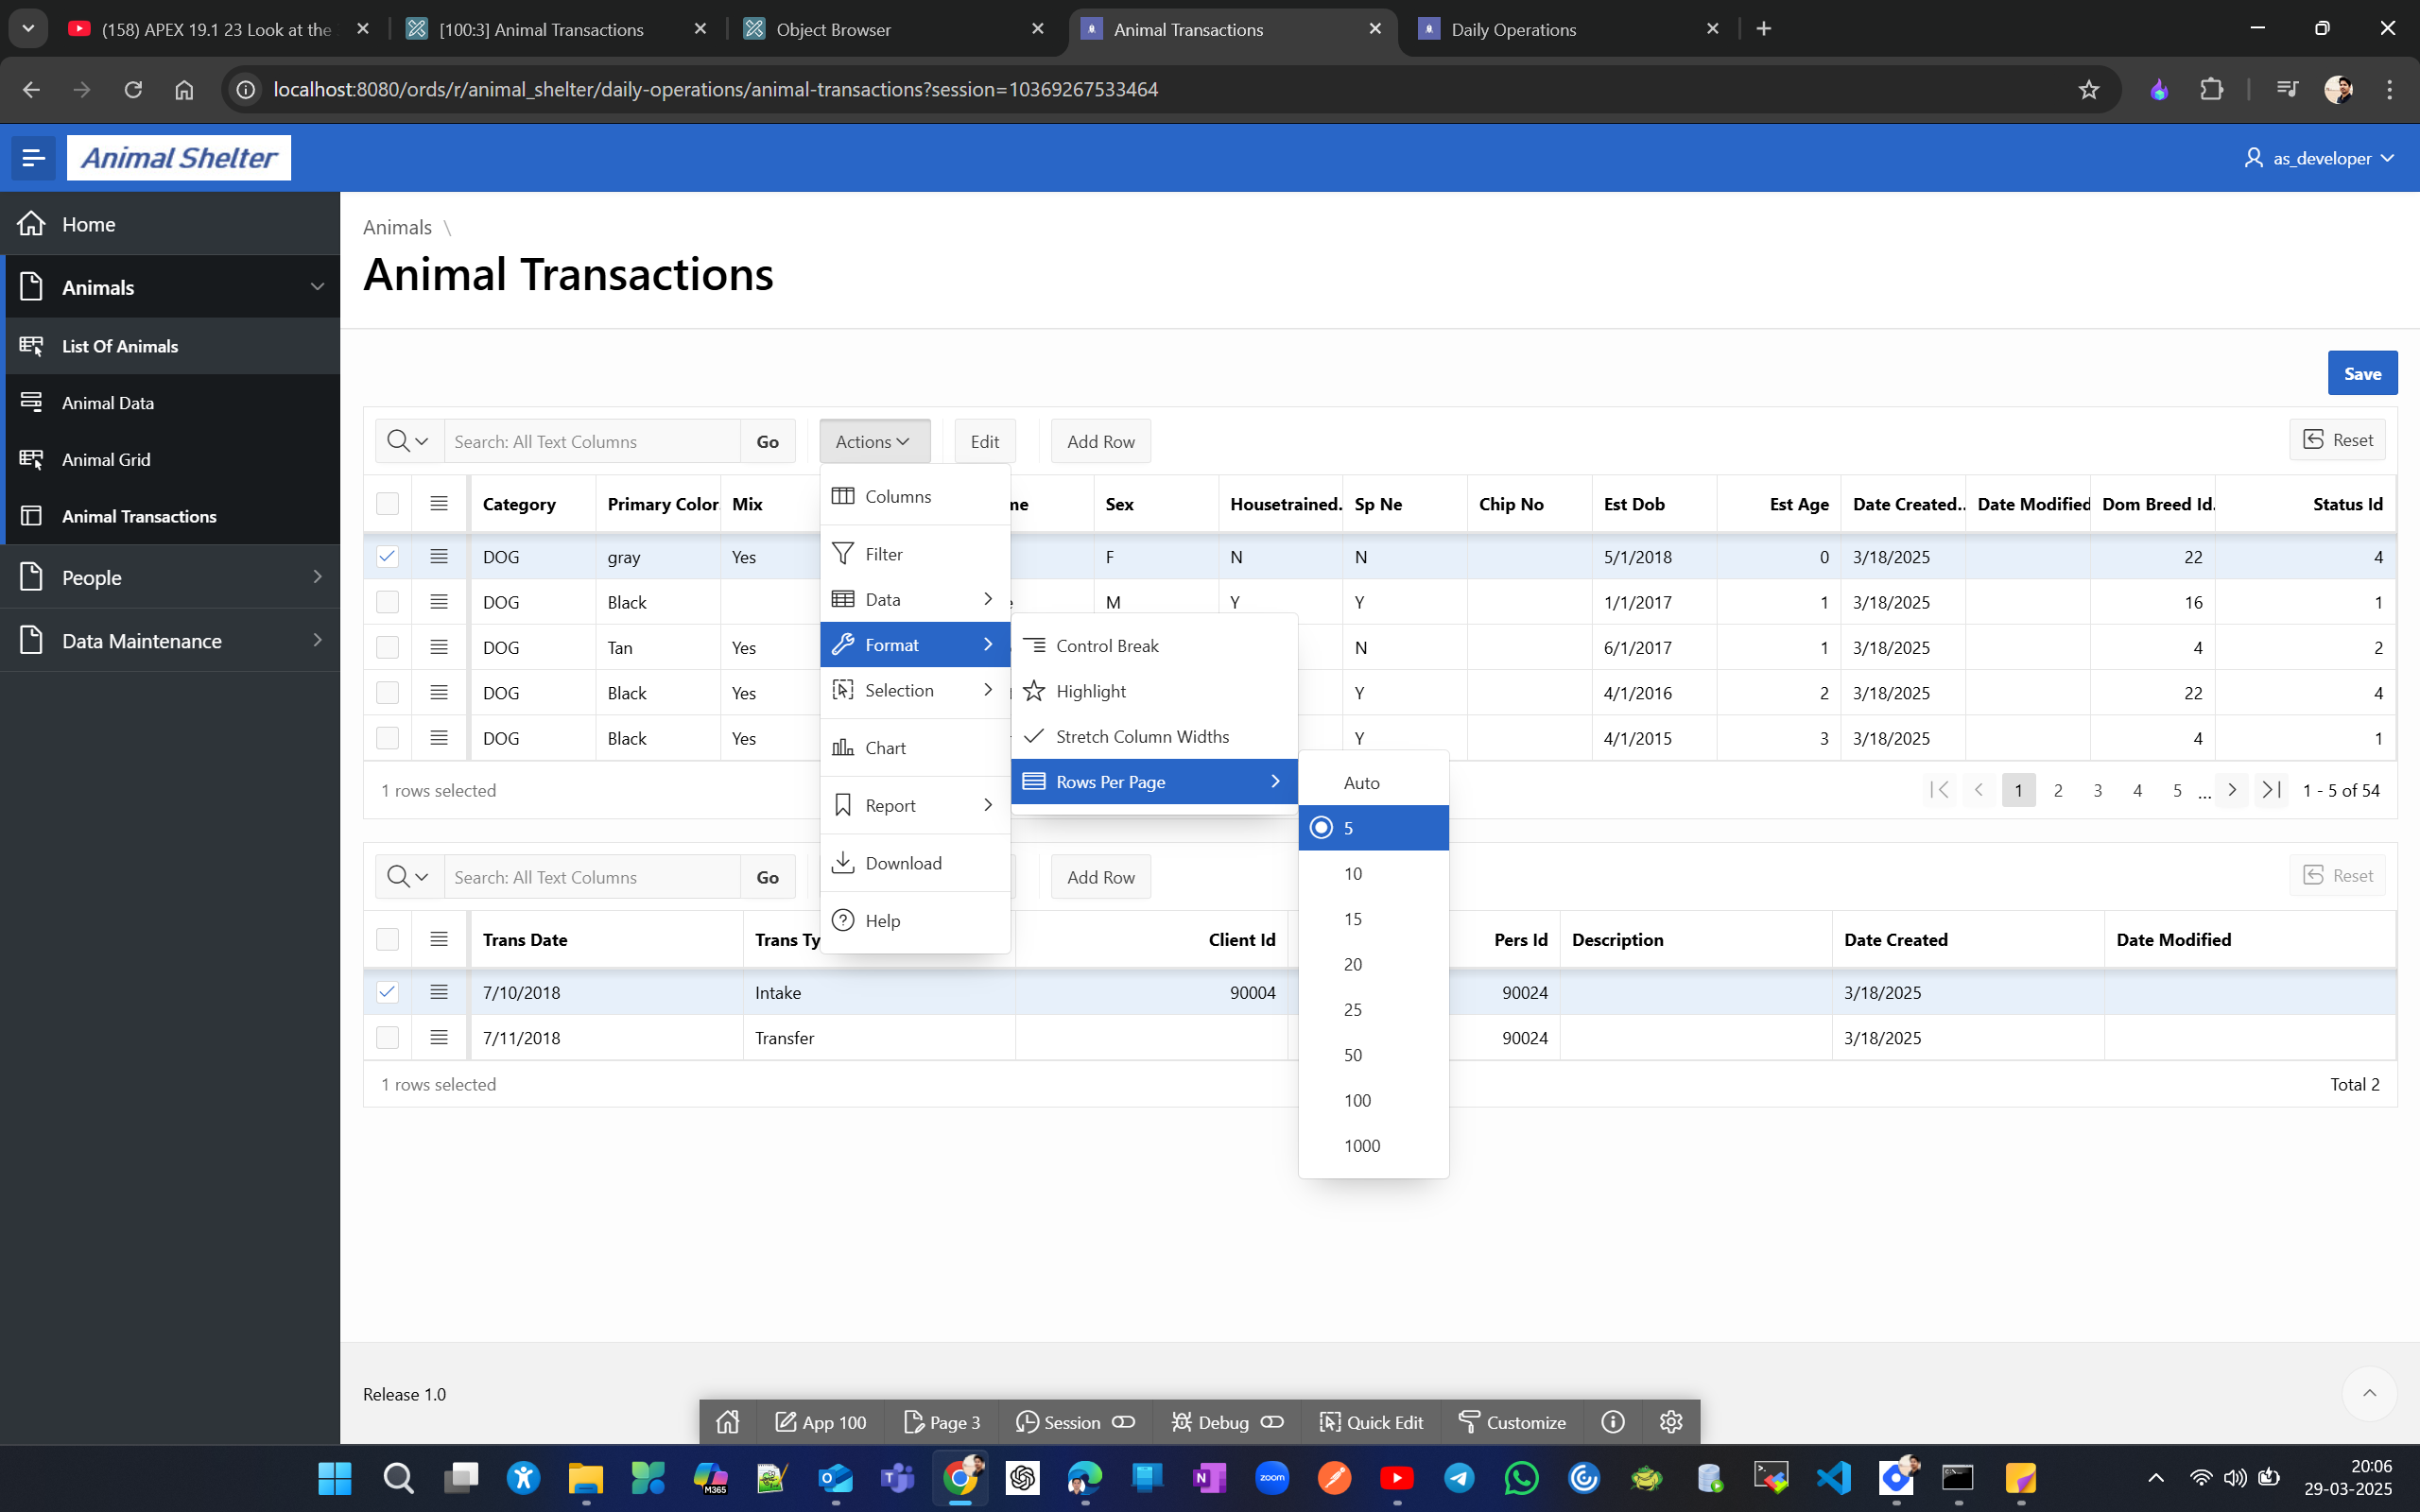
Let's change the headings and identification type of Dom Breed Id and Status ID to select lists.
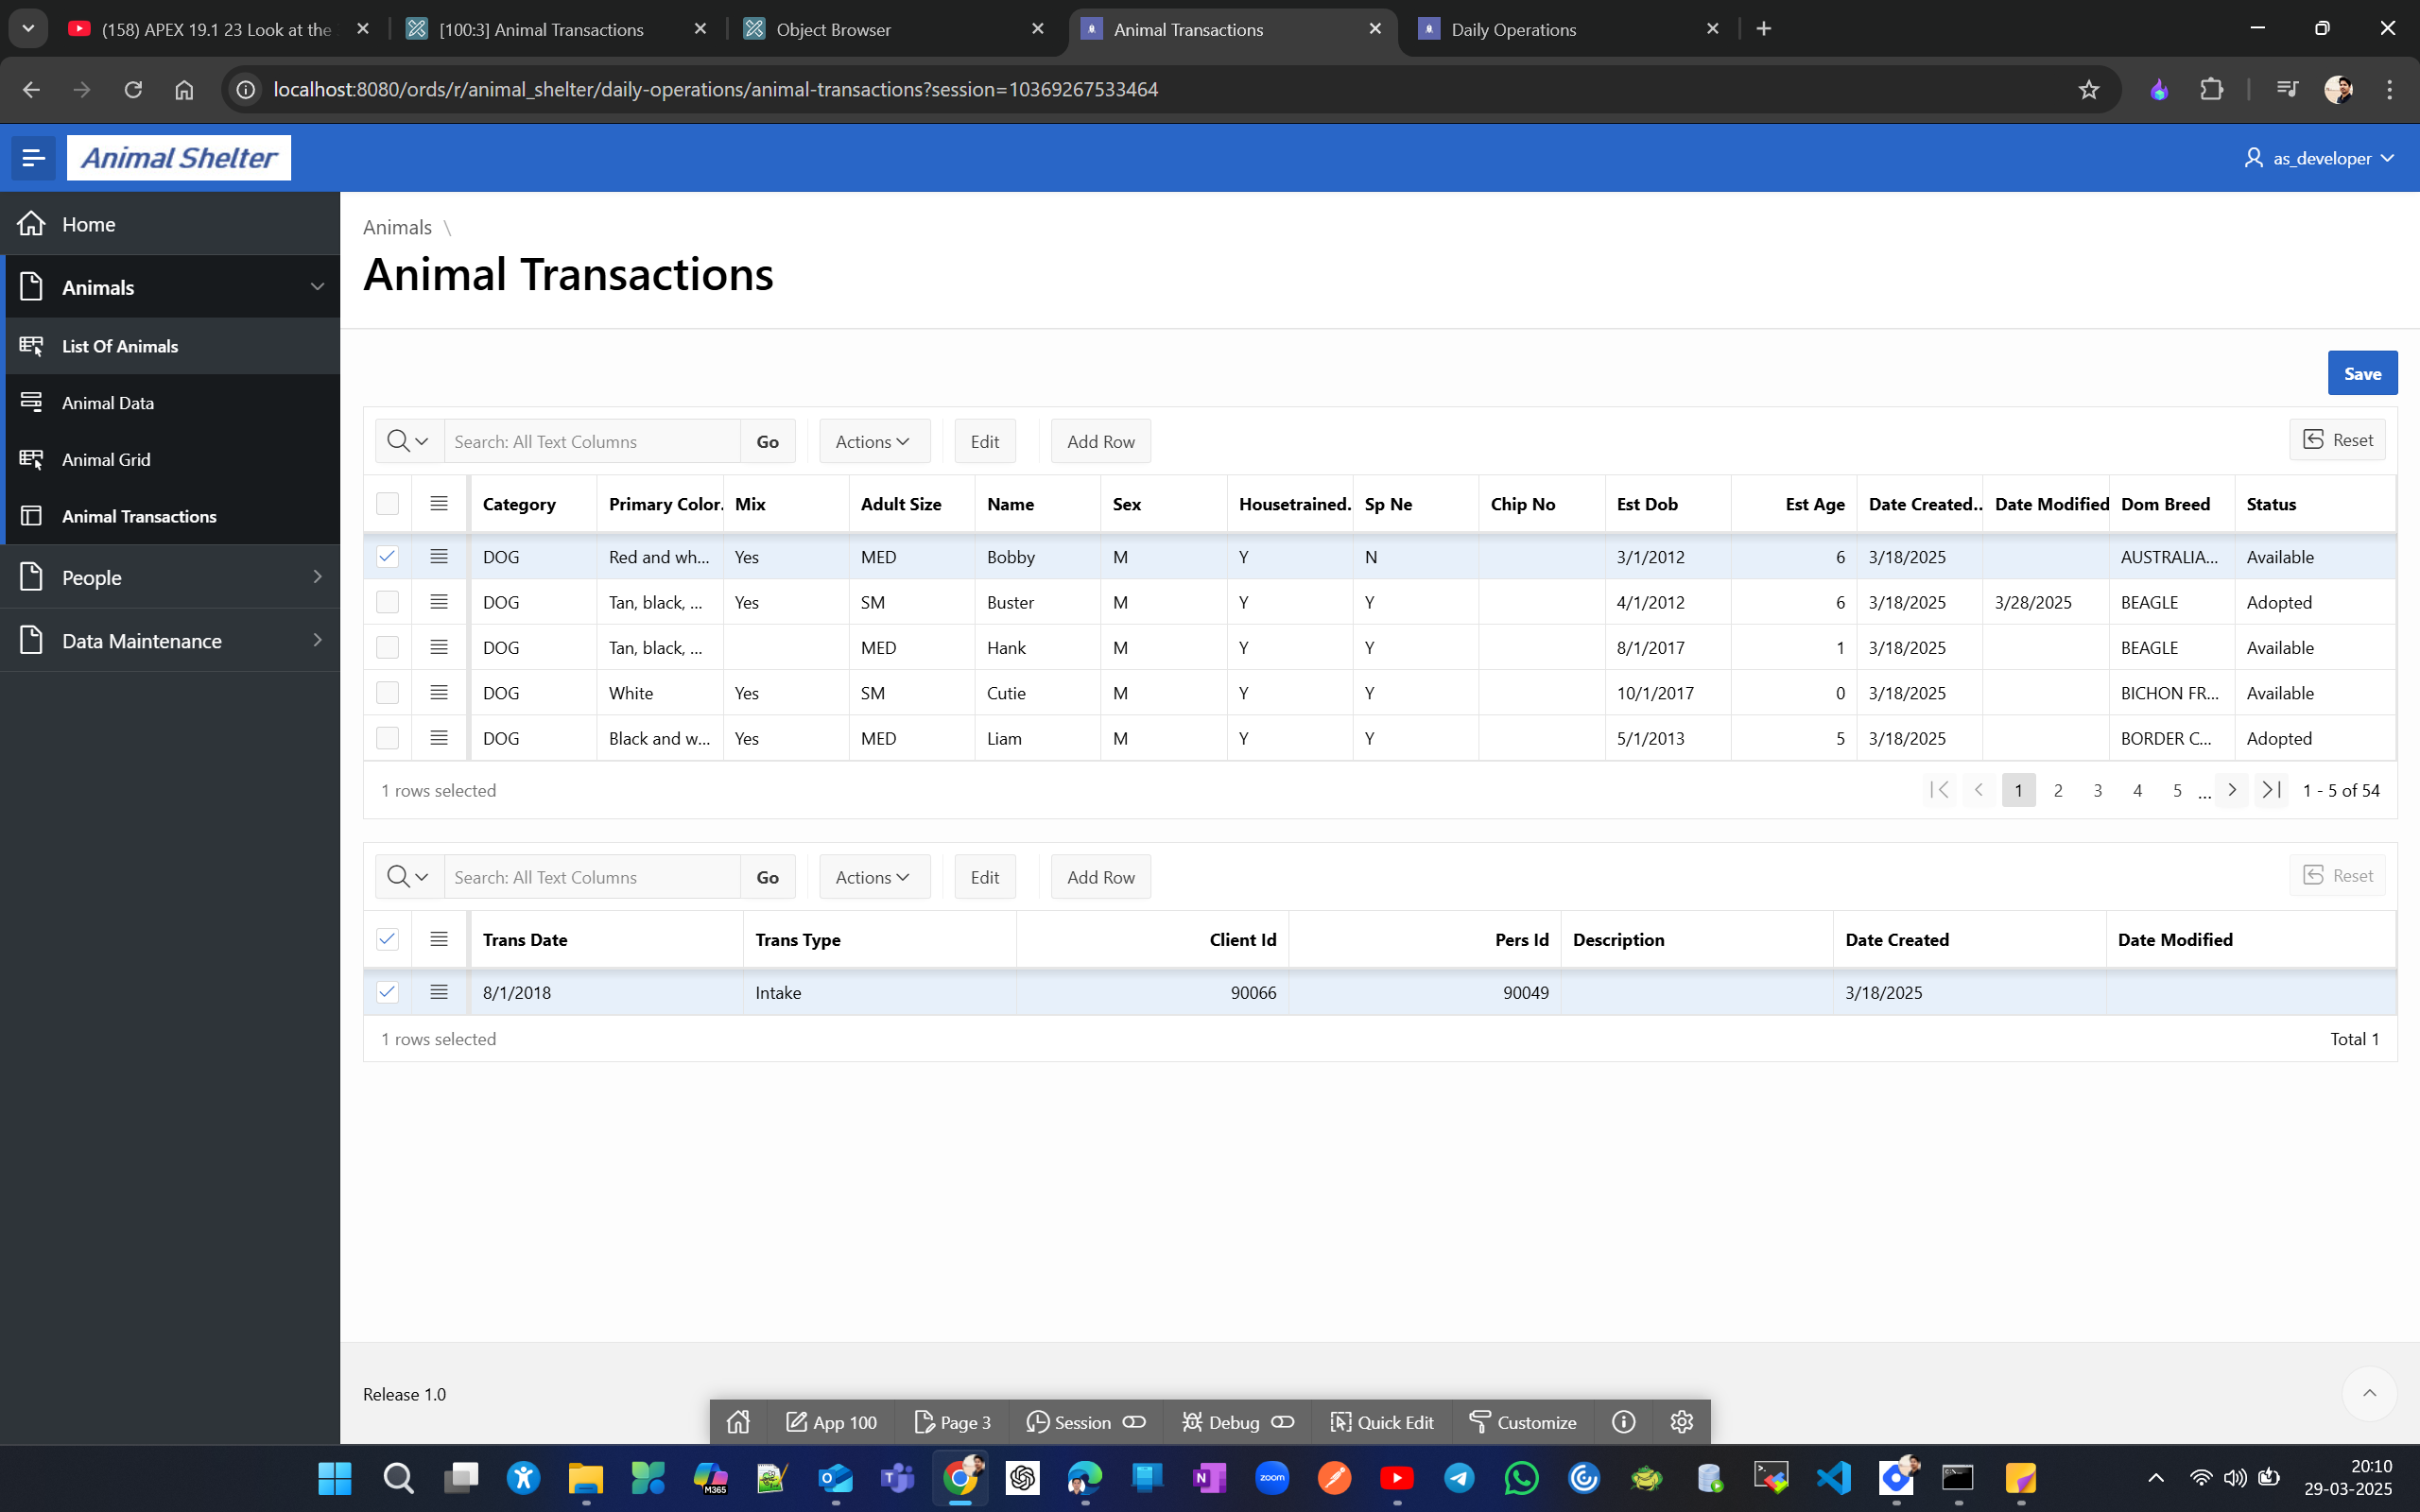
Now lets create a master-details report for Animal Activities. Plan is to see both transactions and activities for selected Animals.
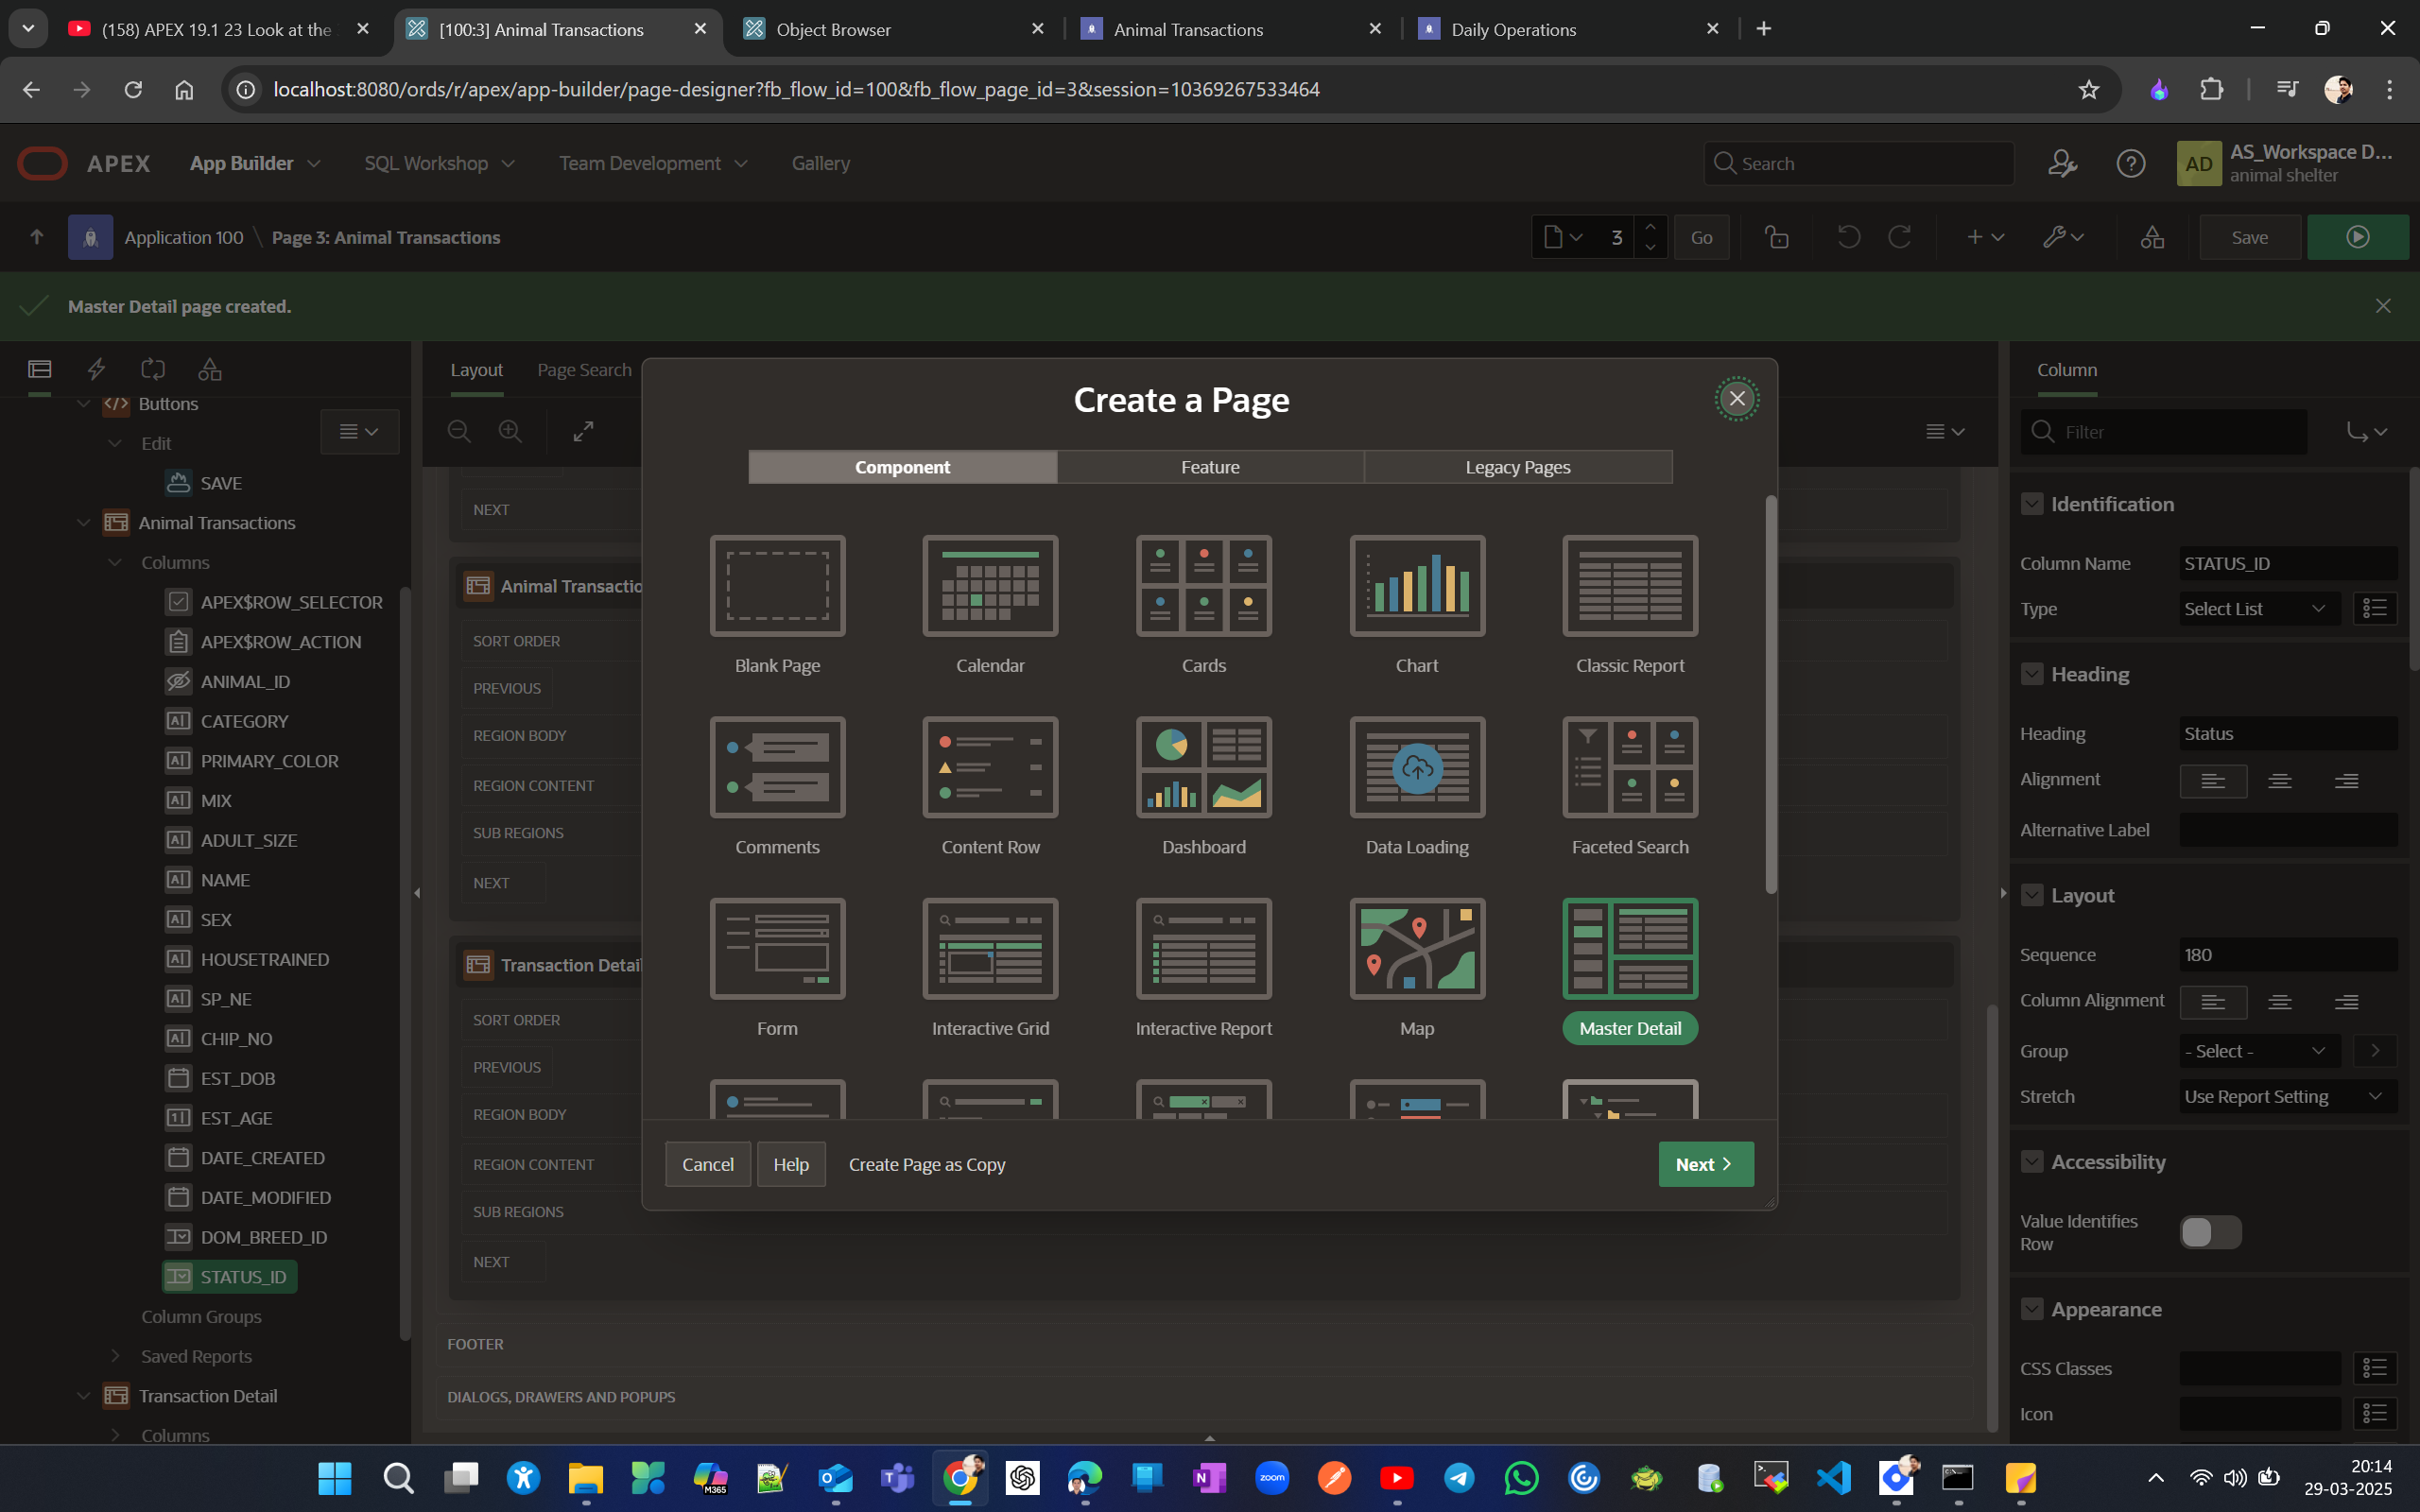

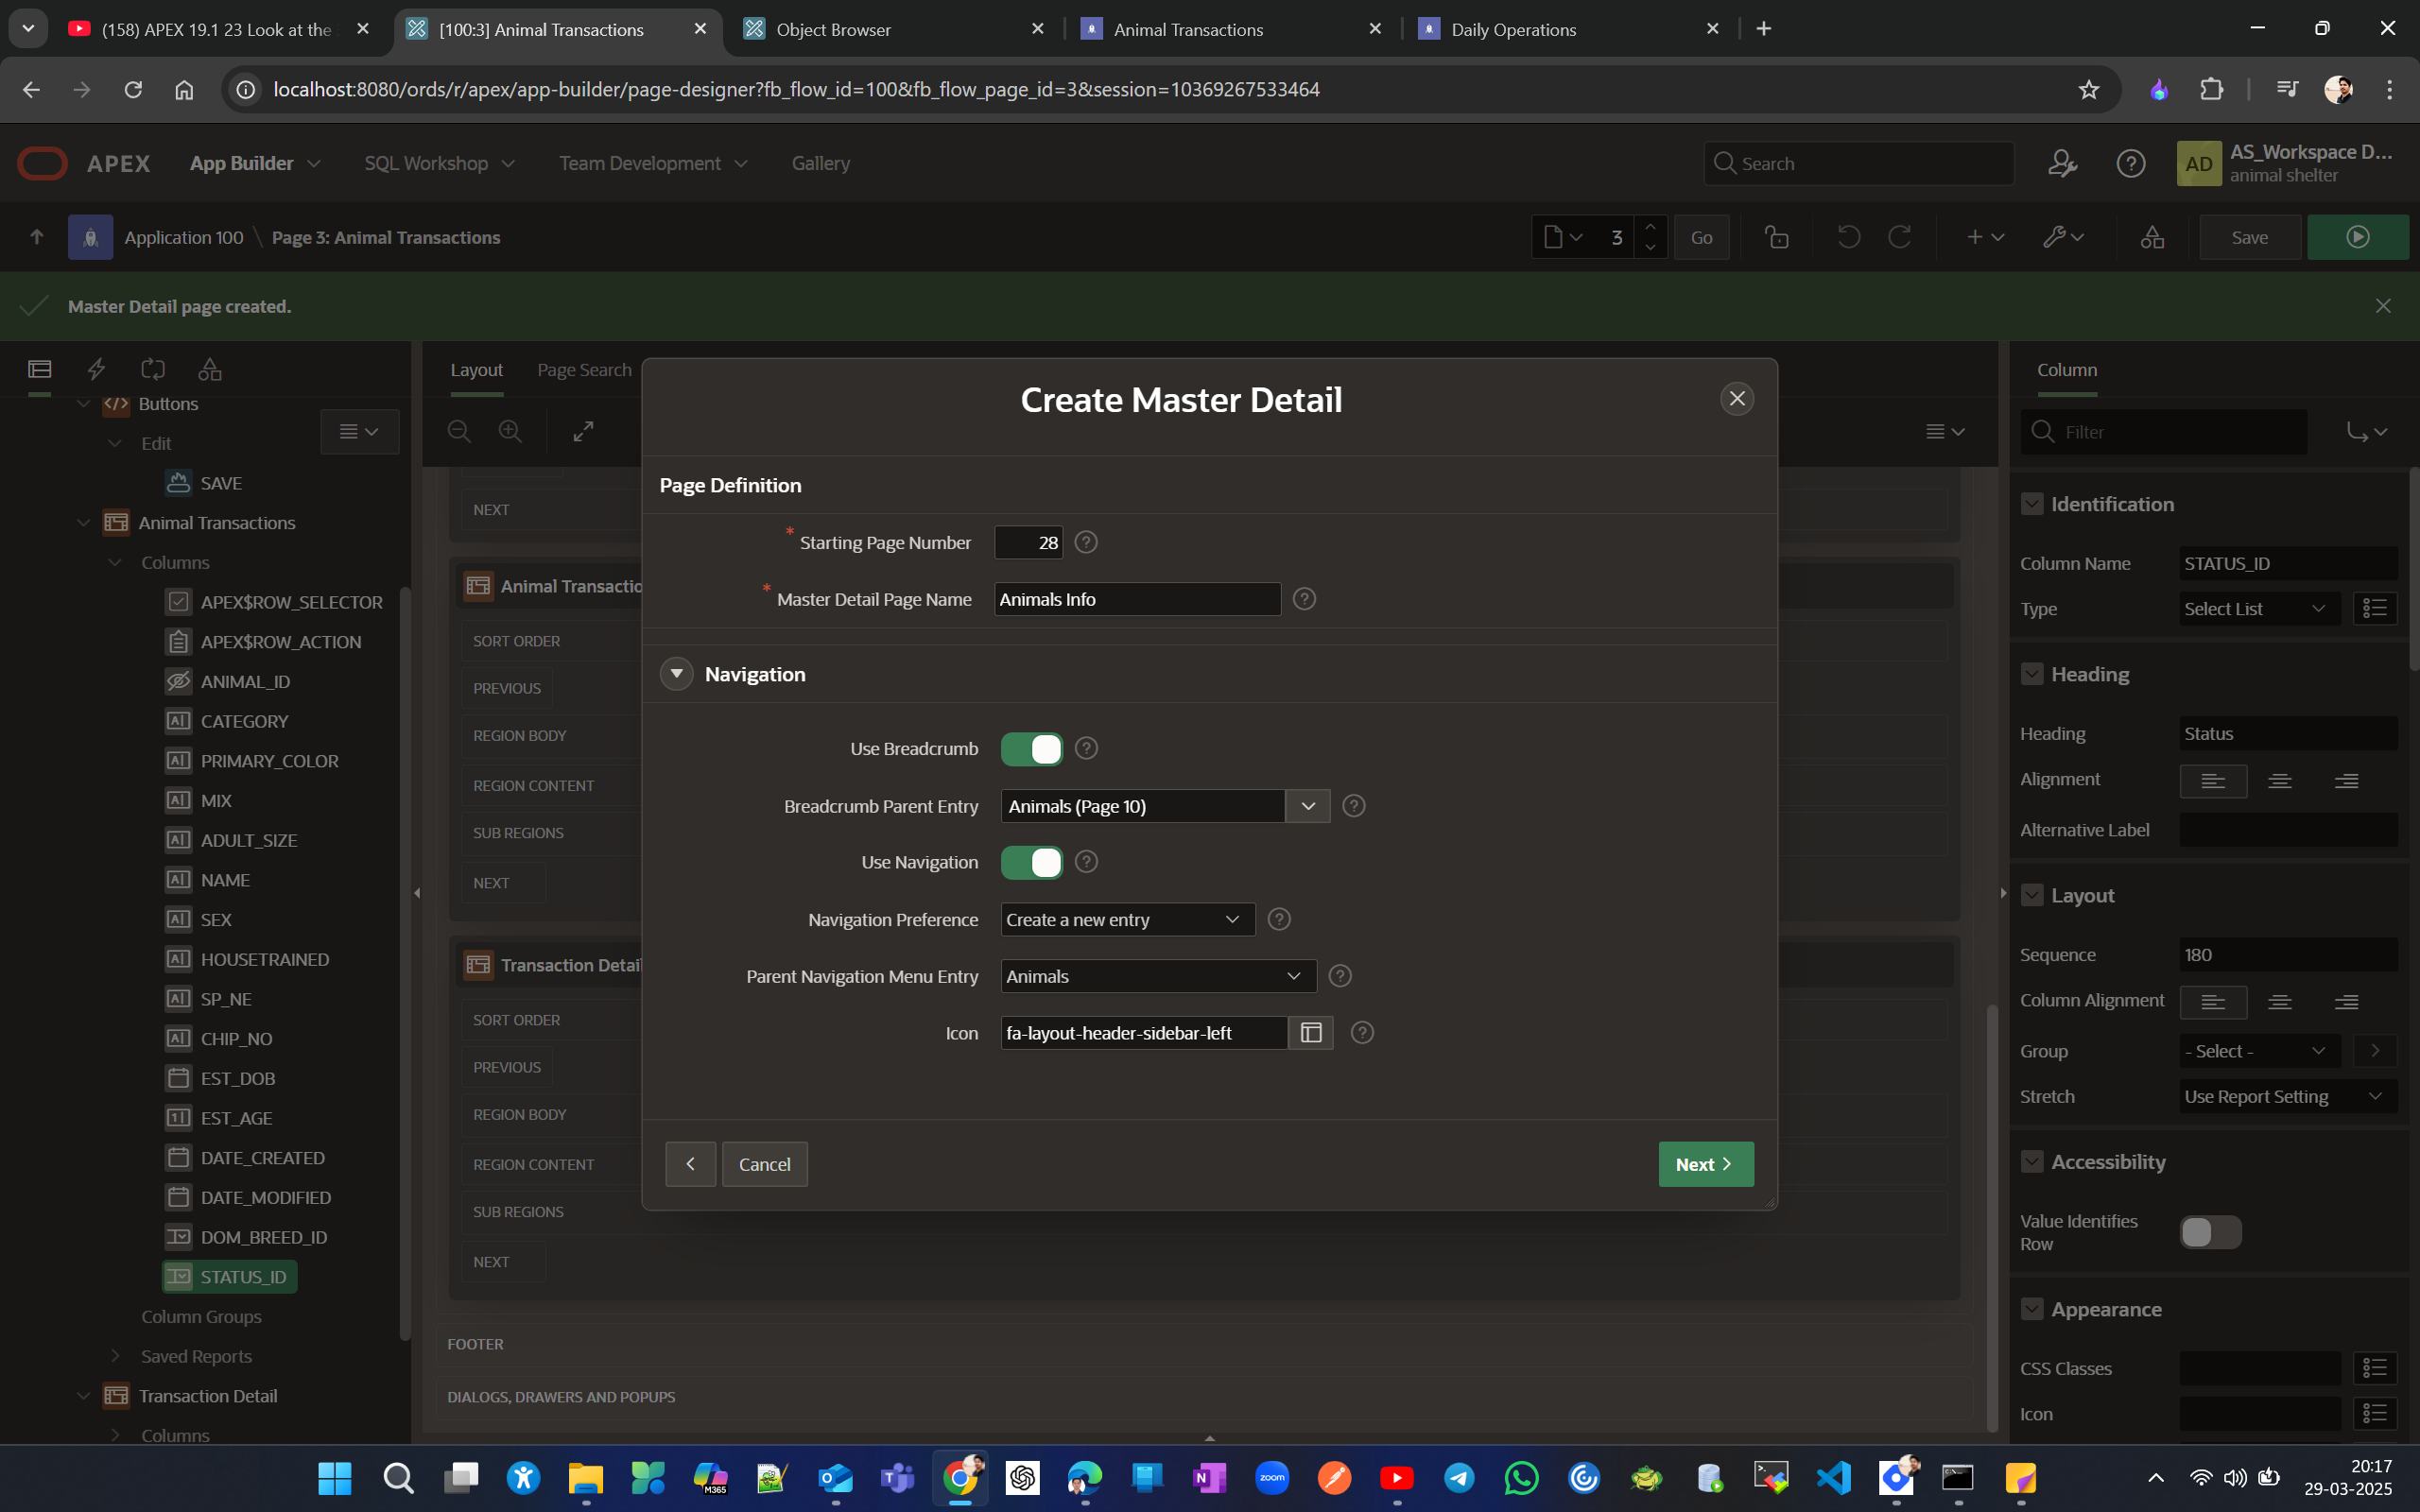
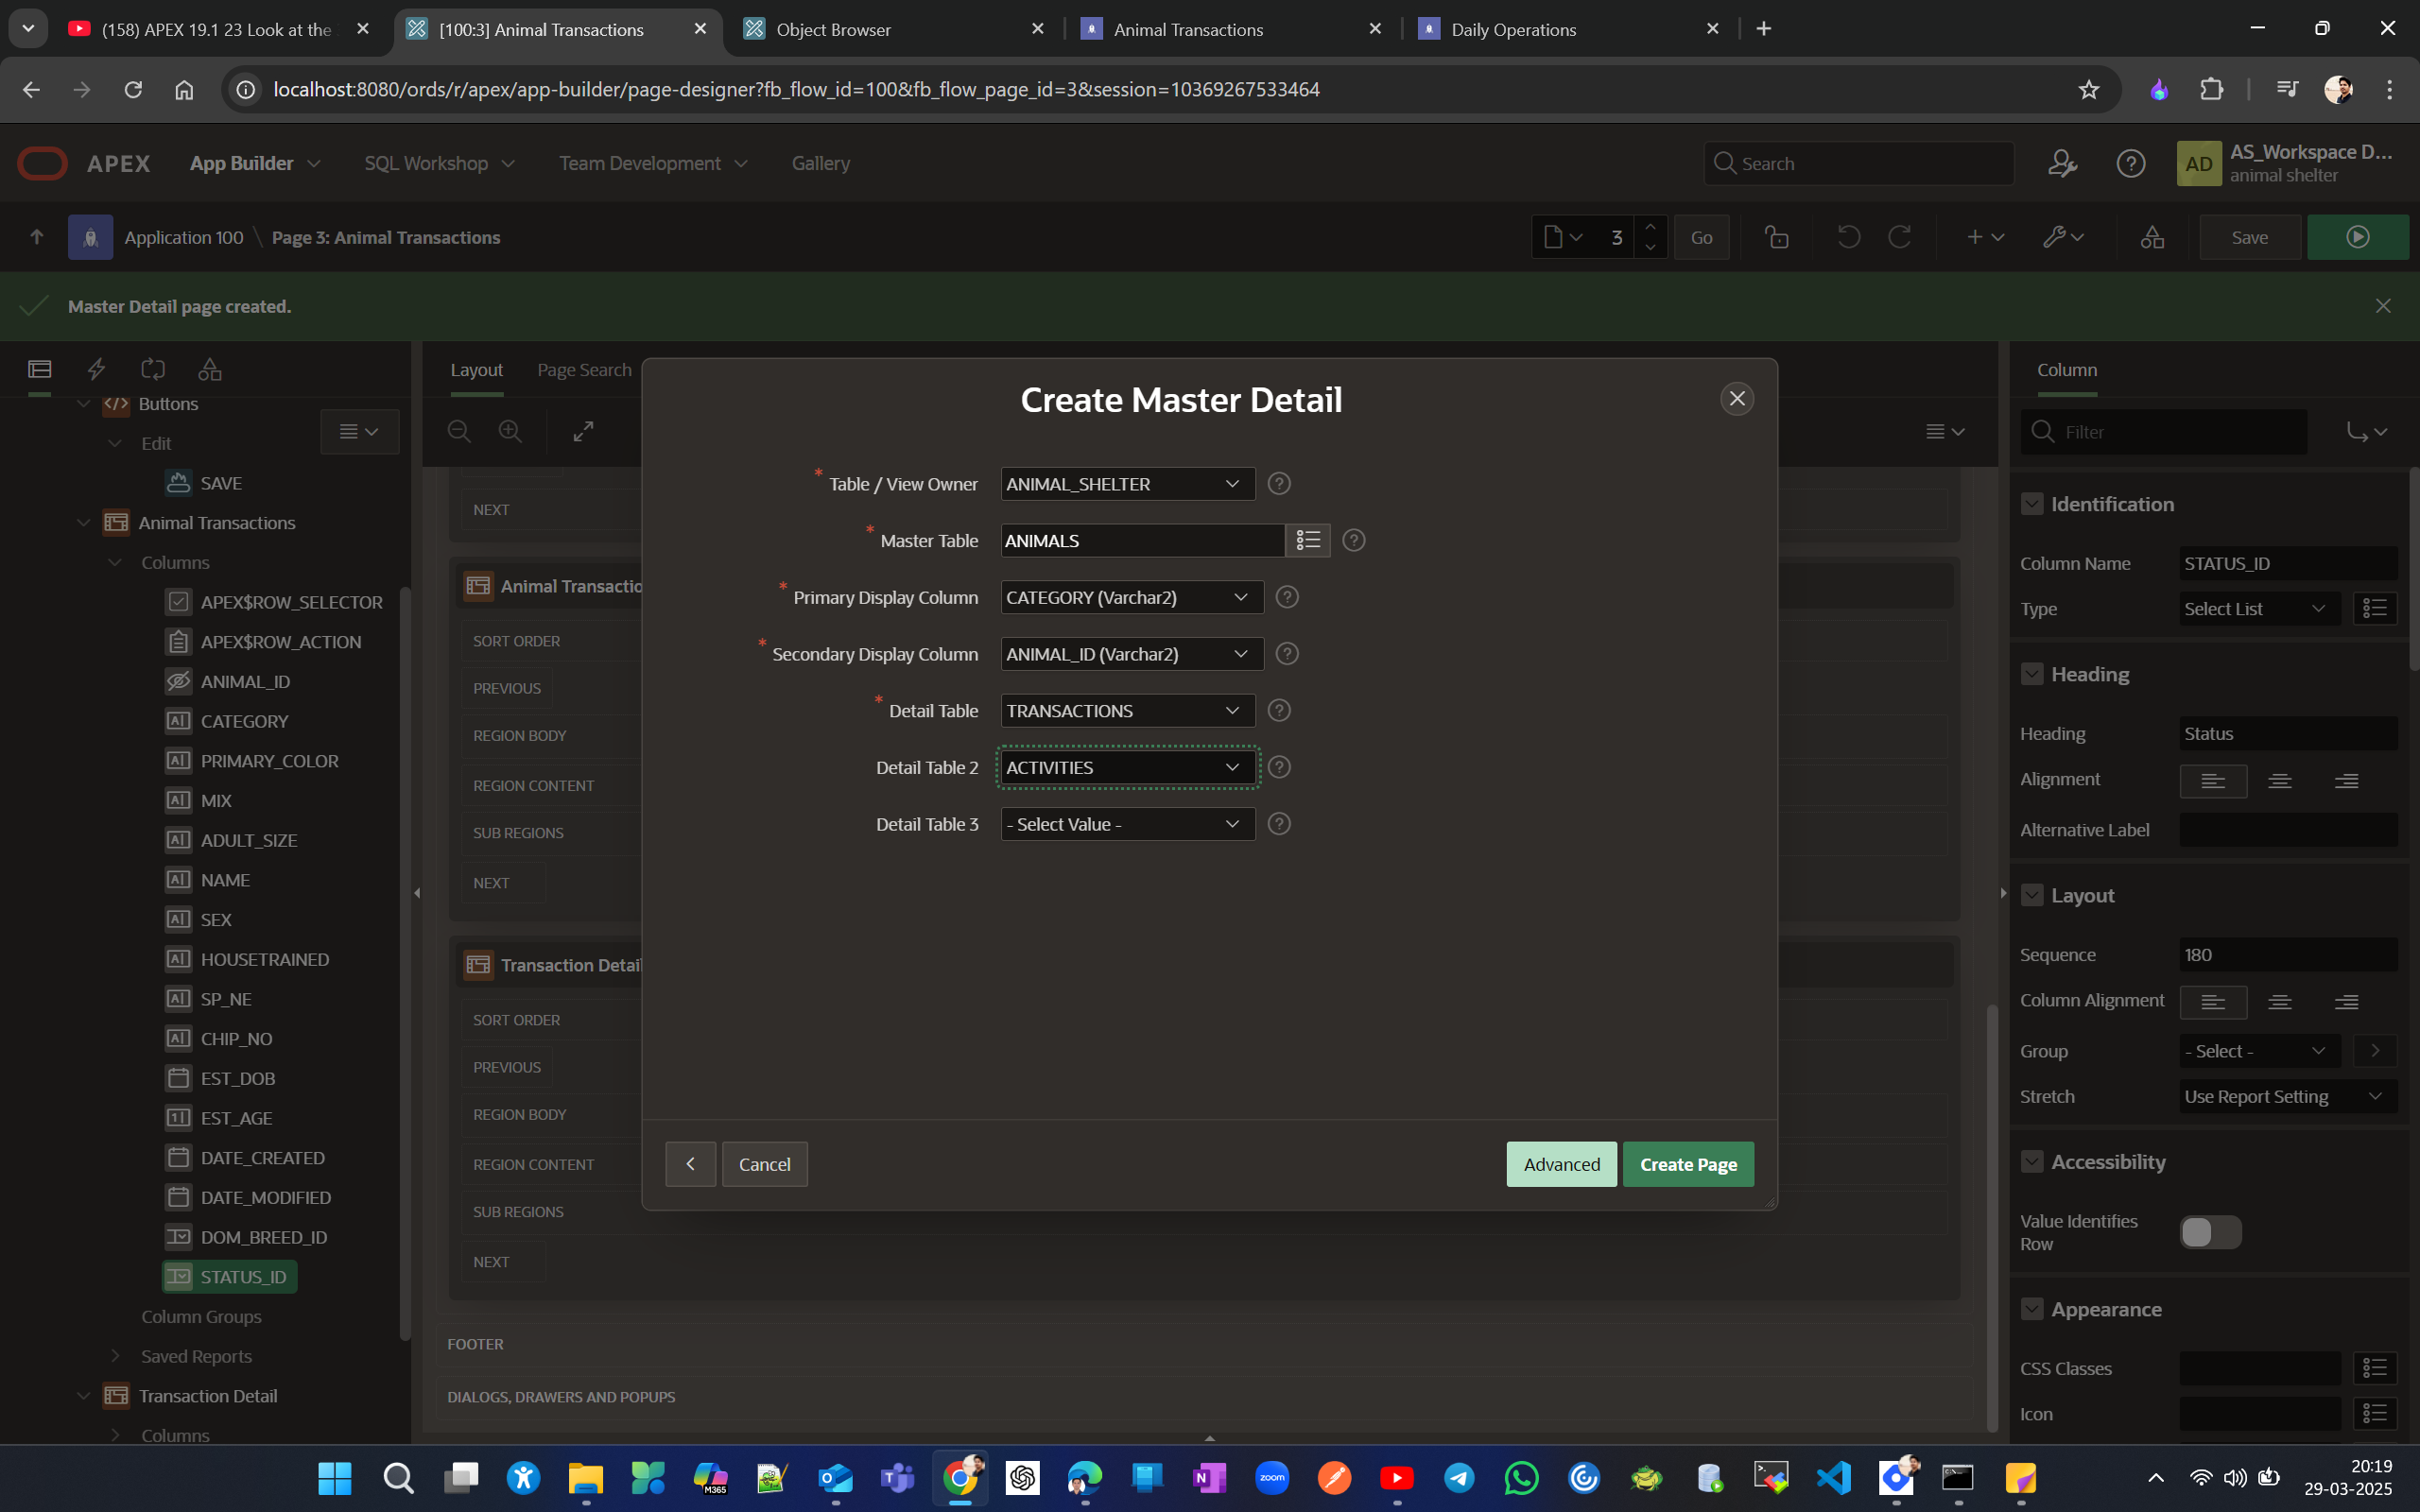
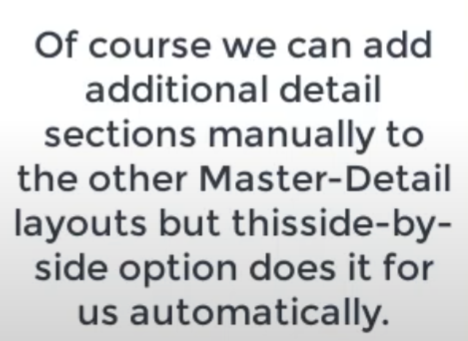
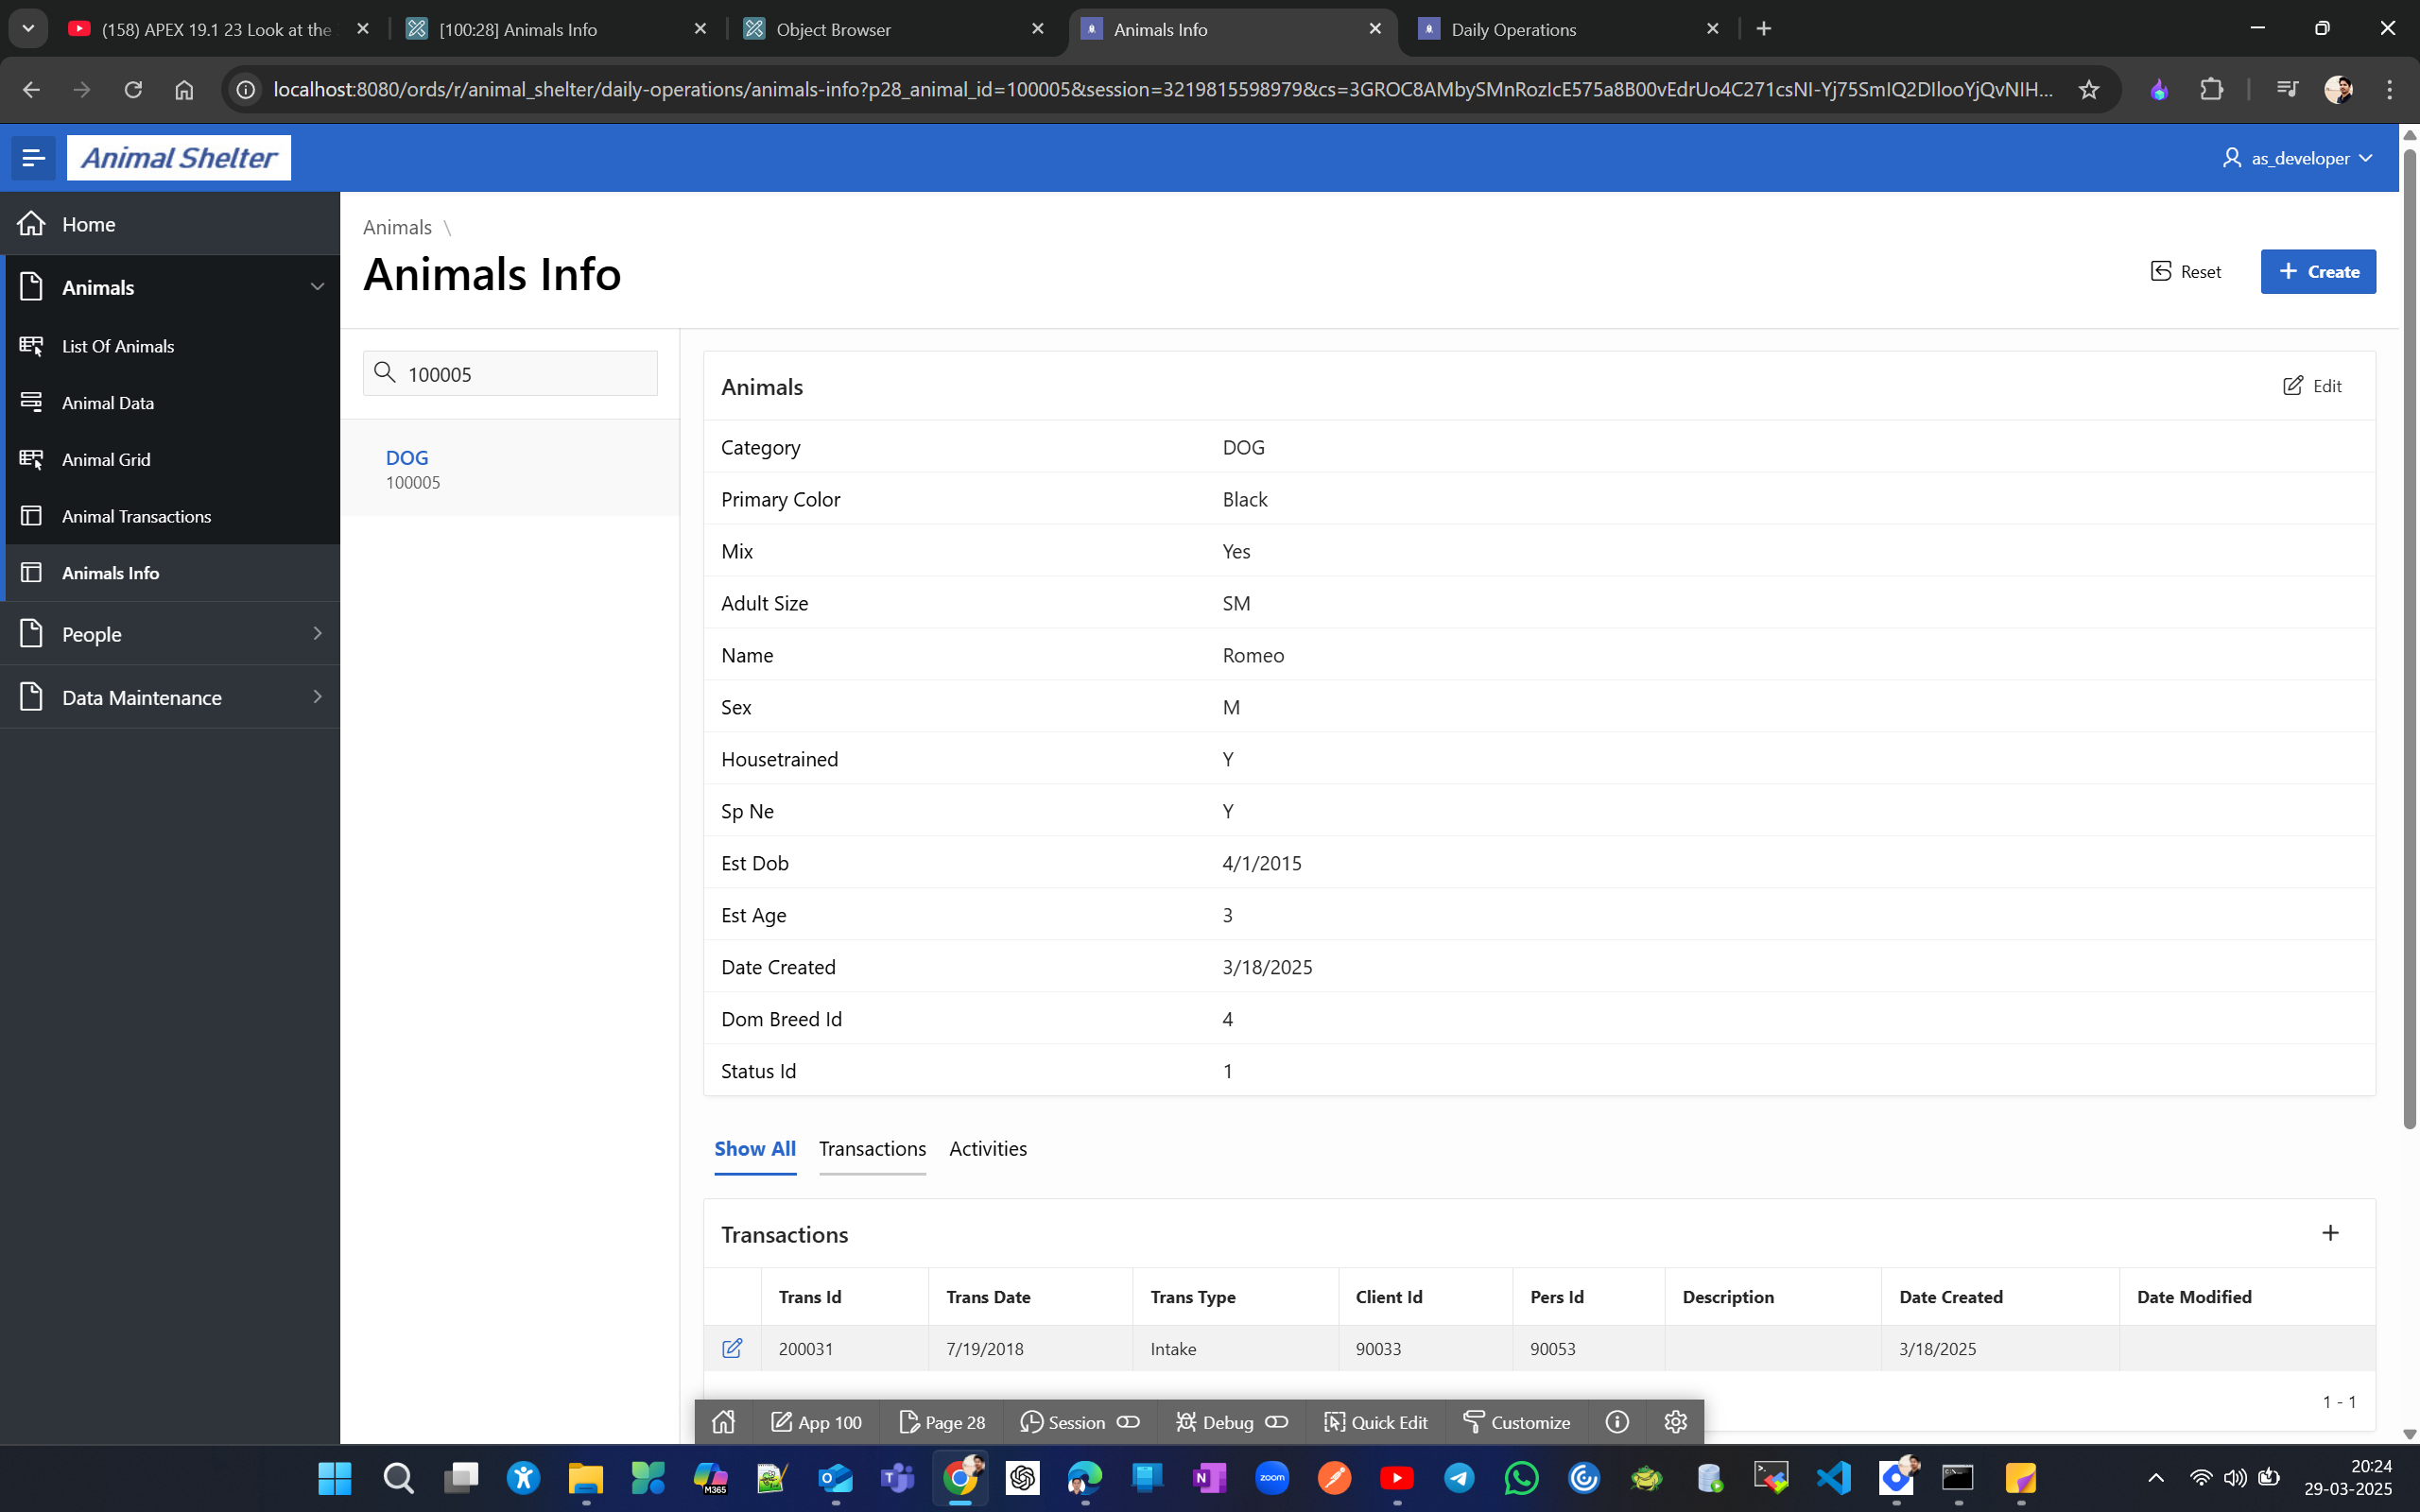
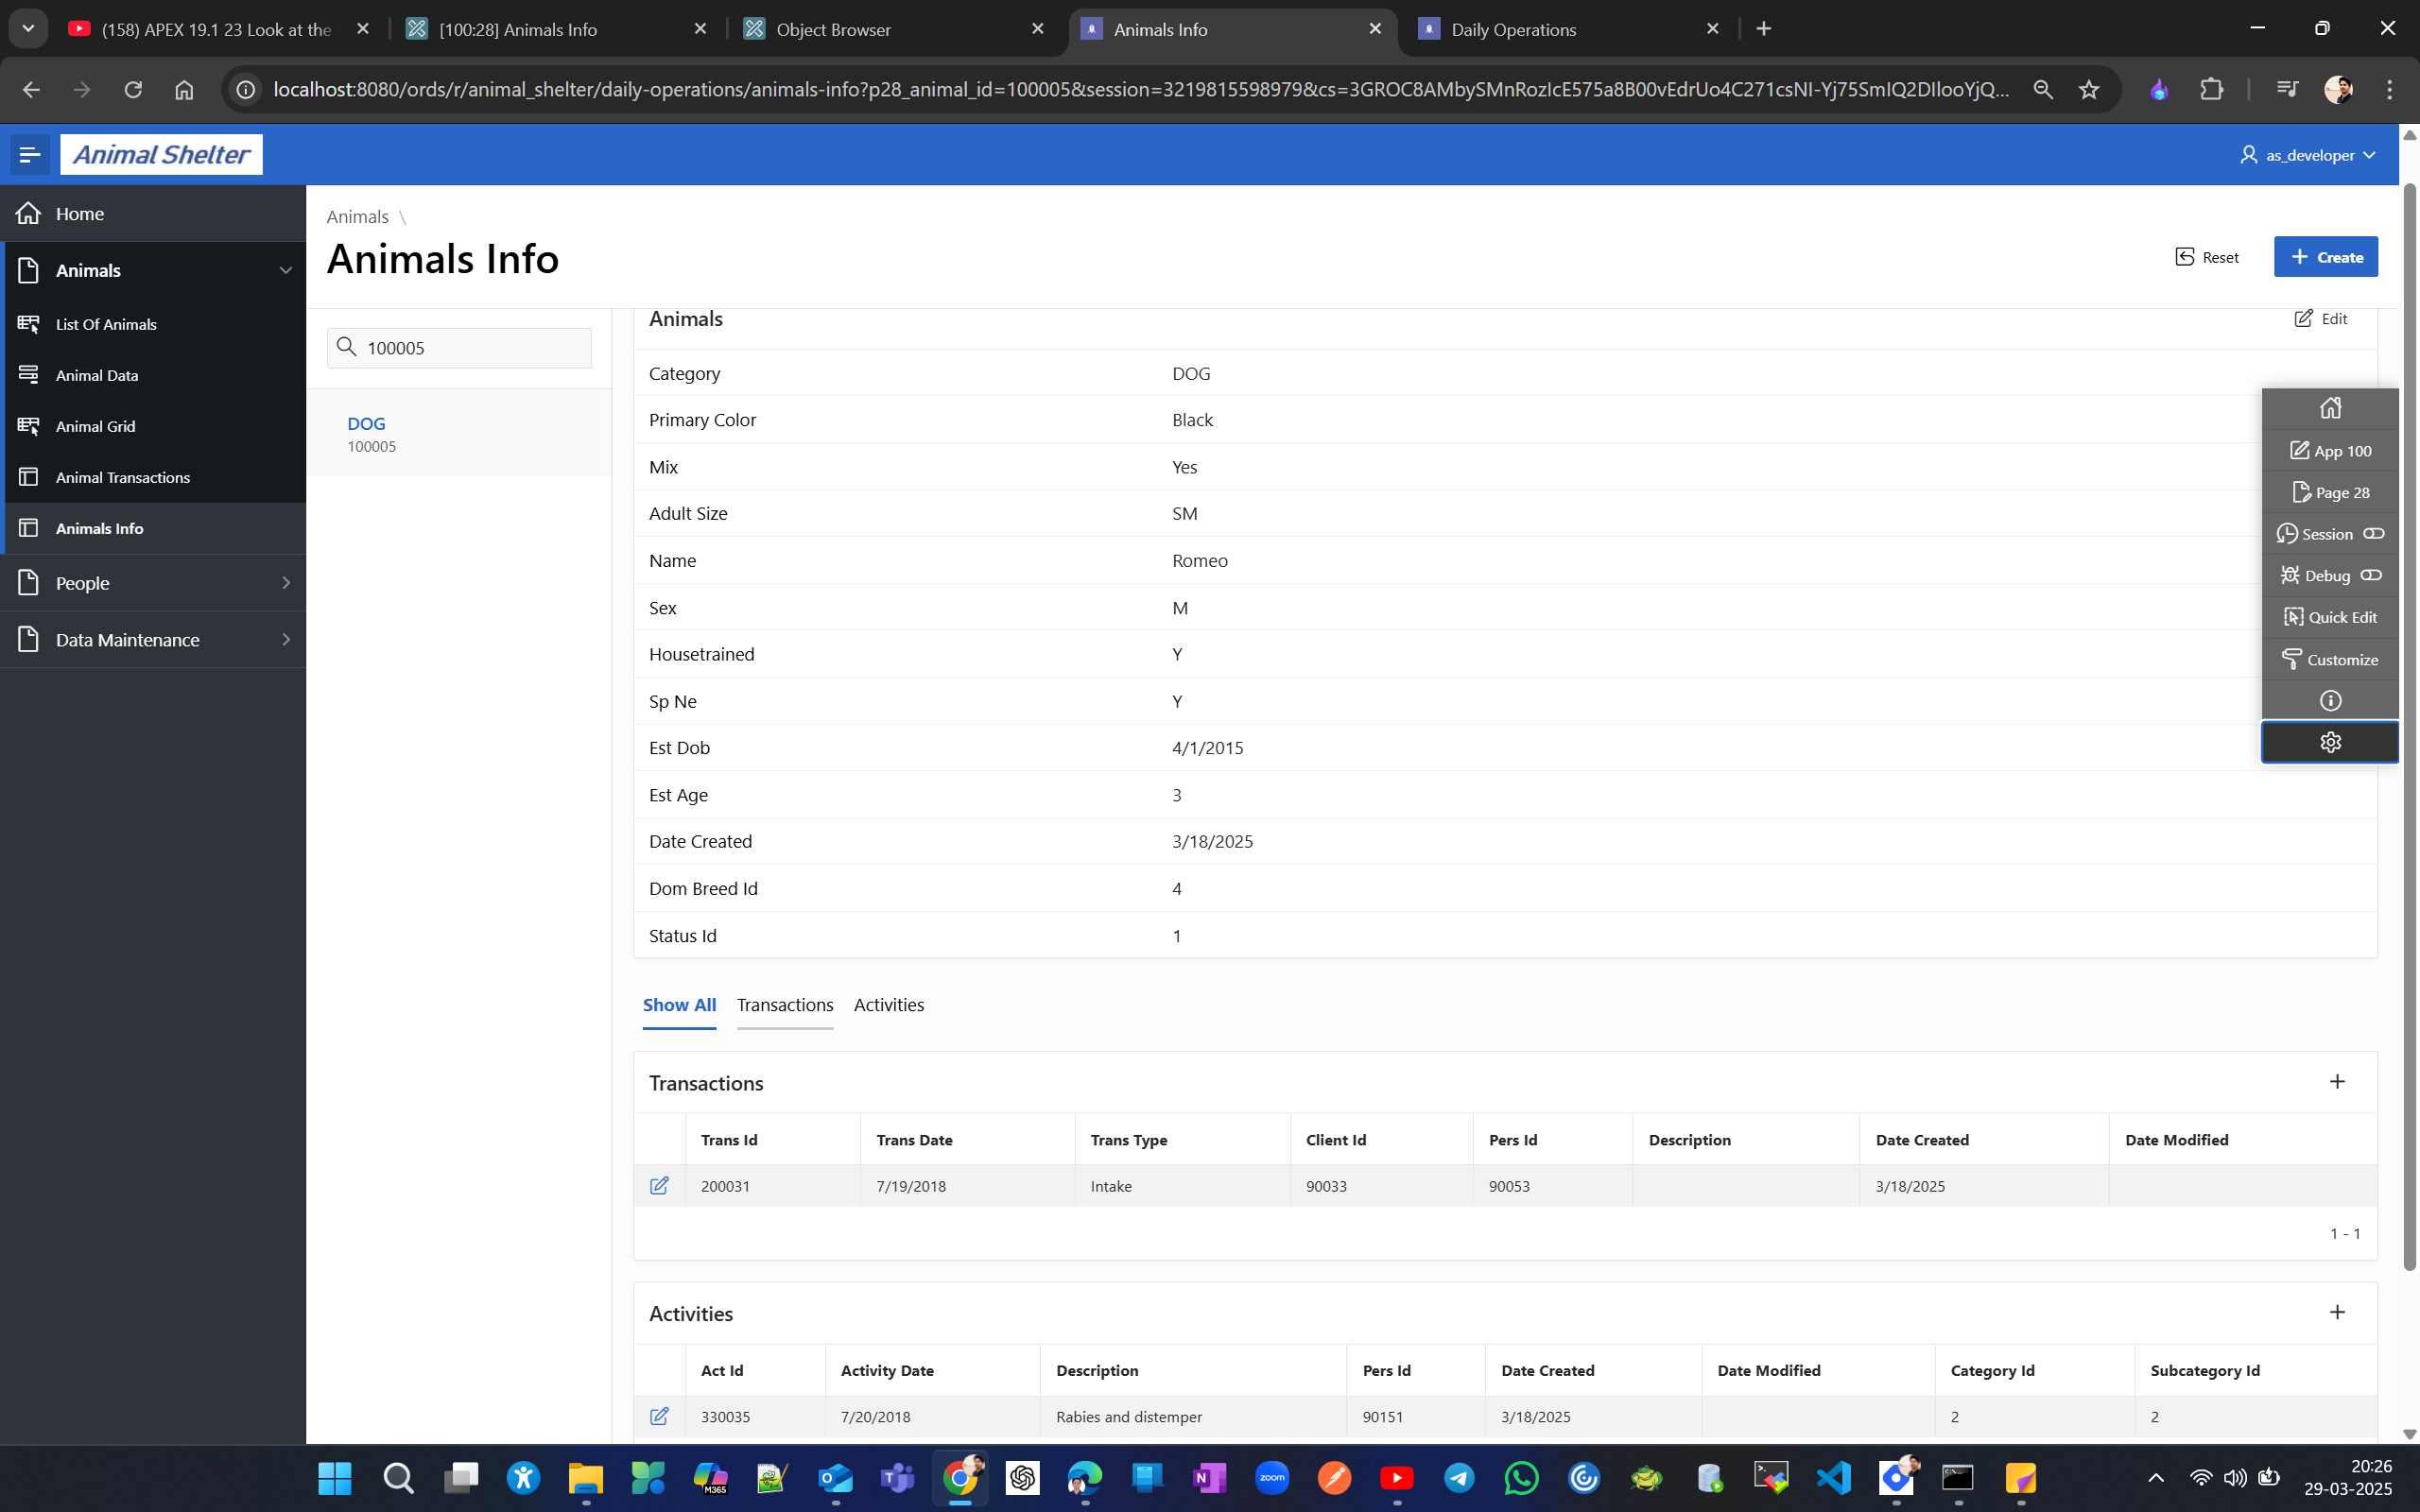
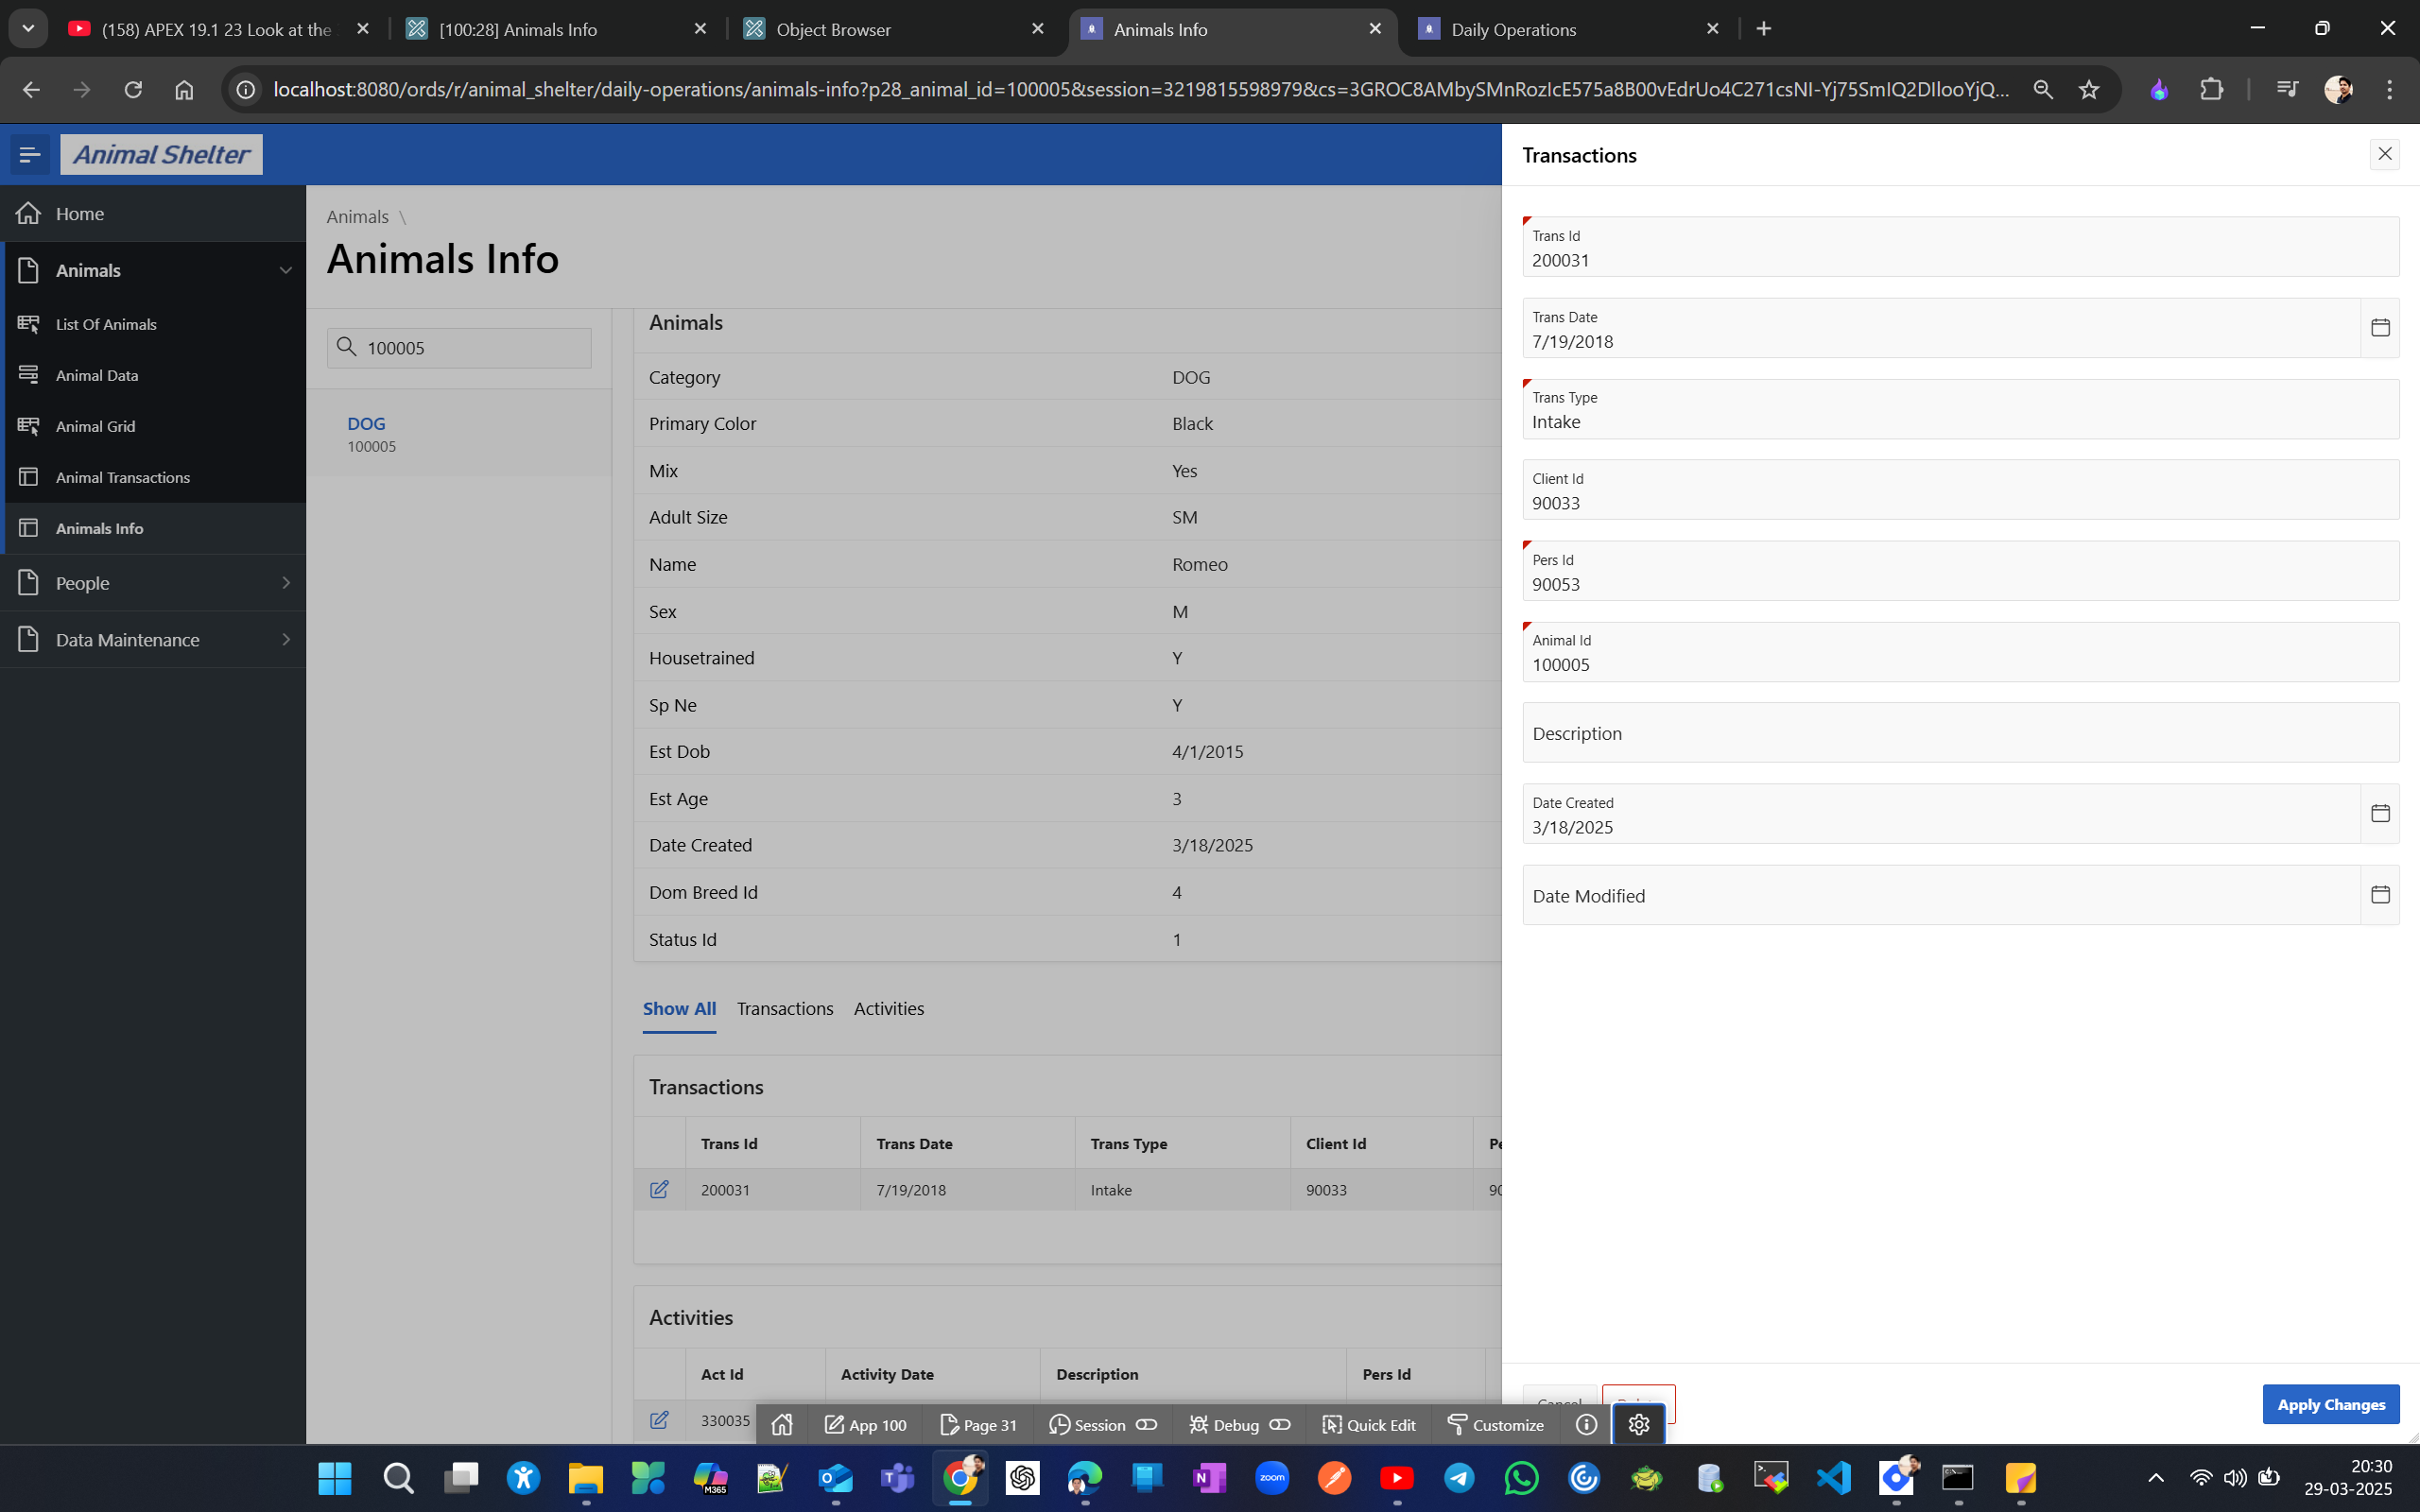
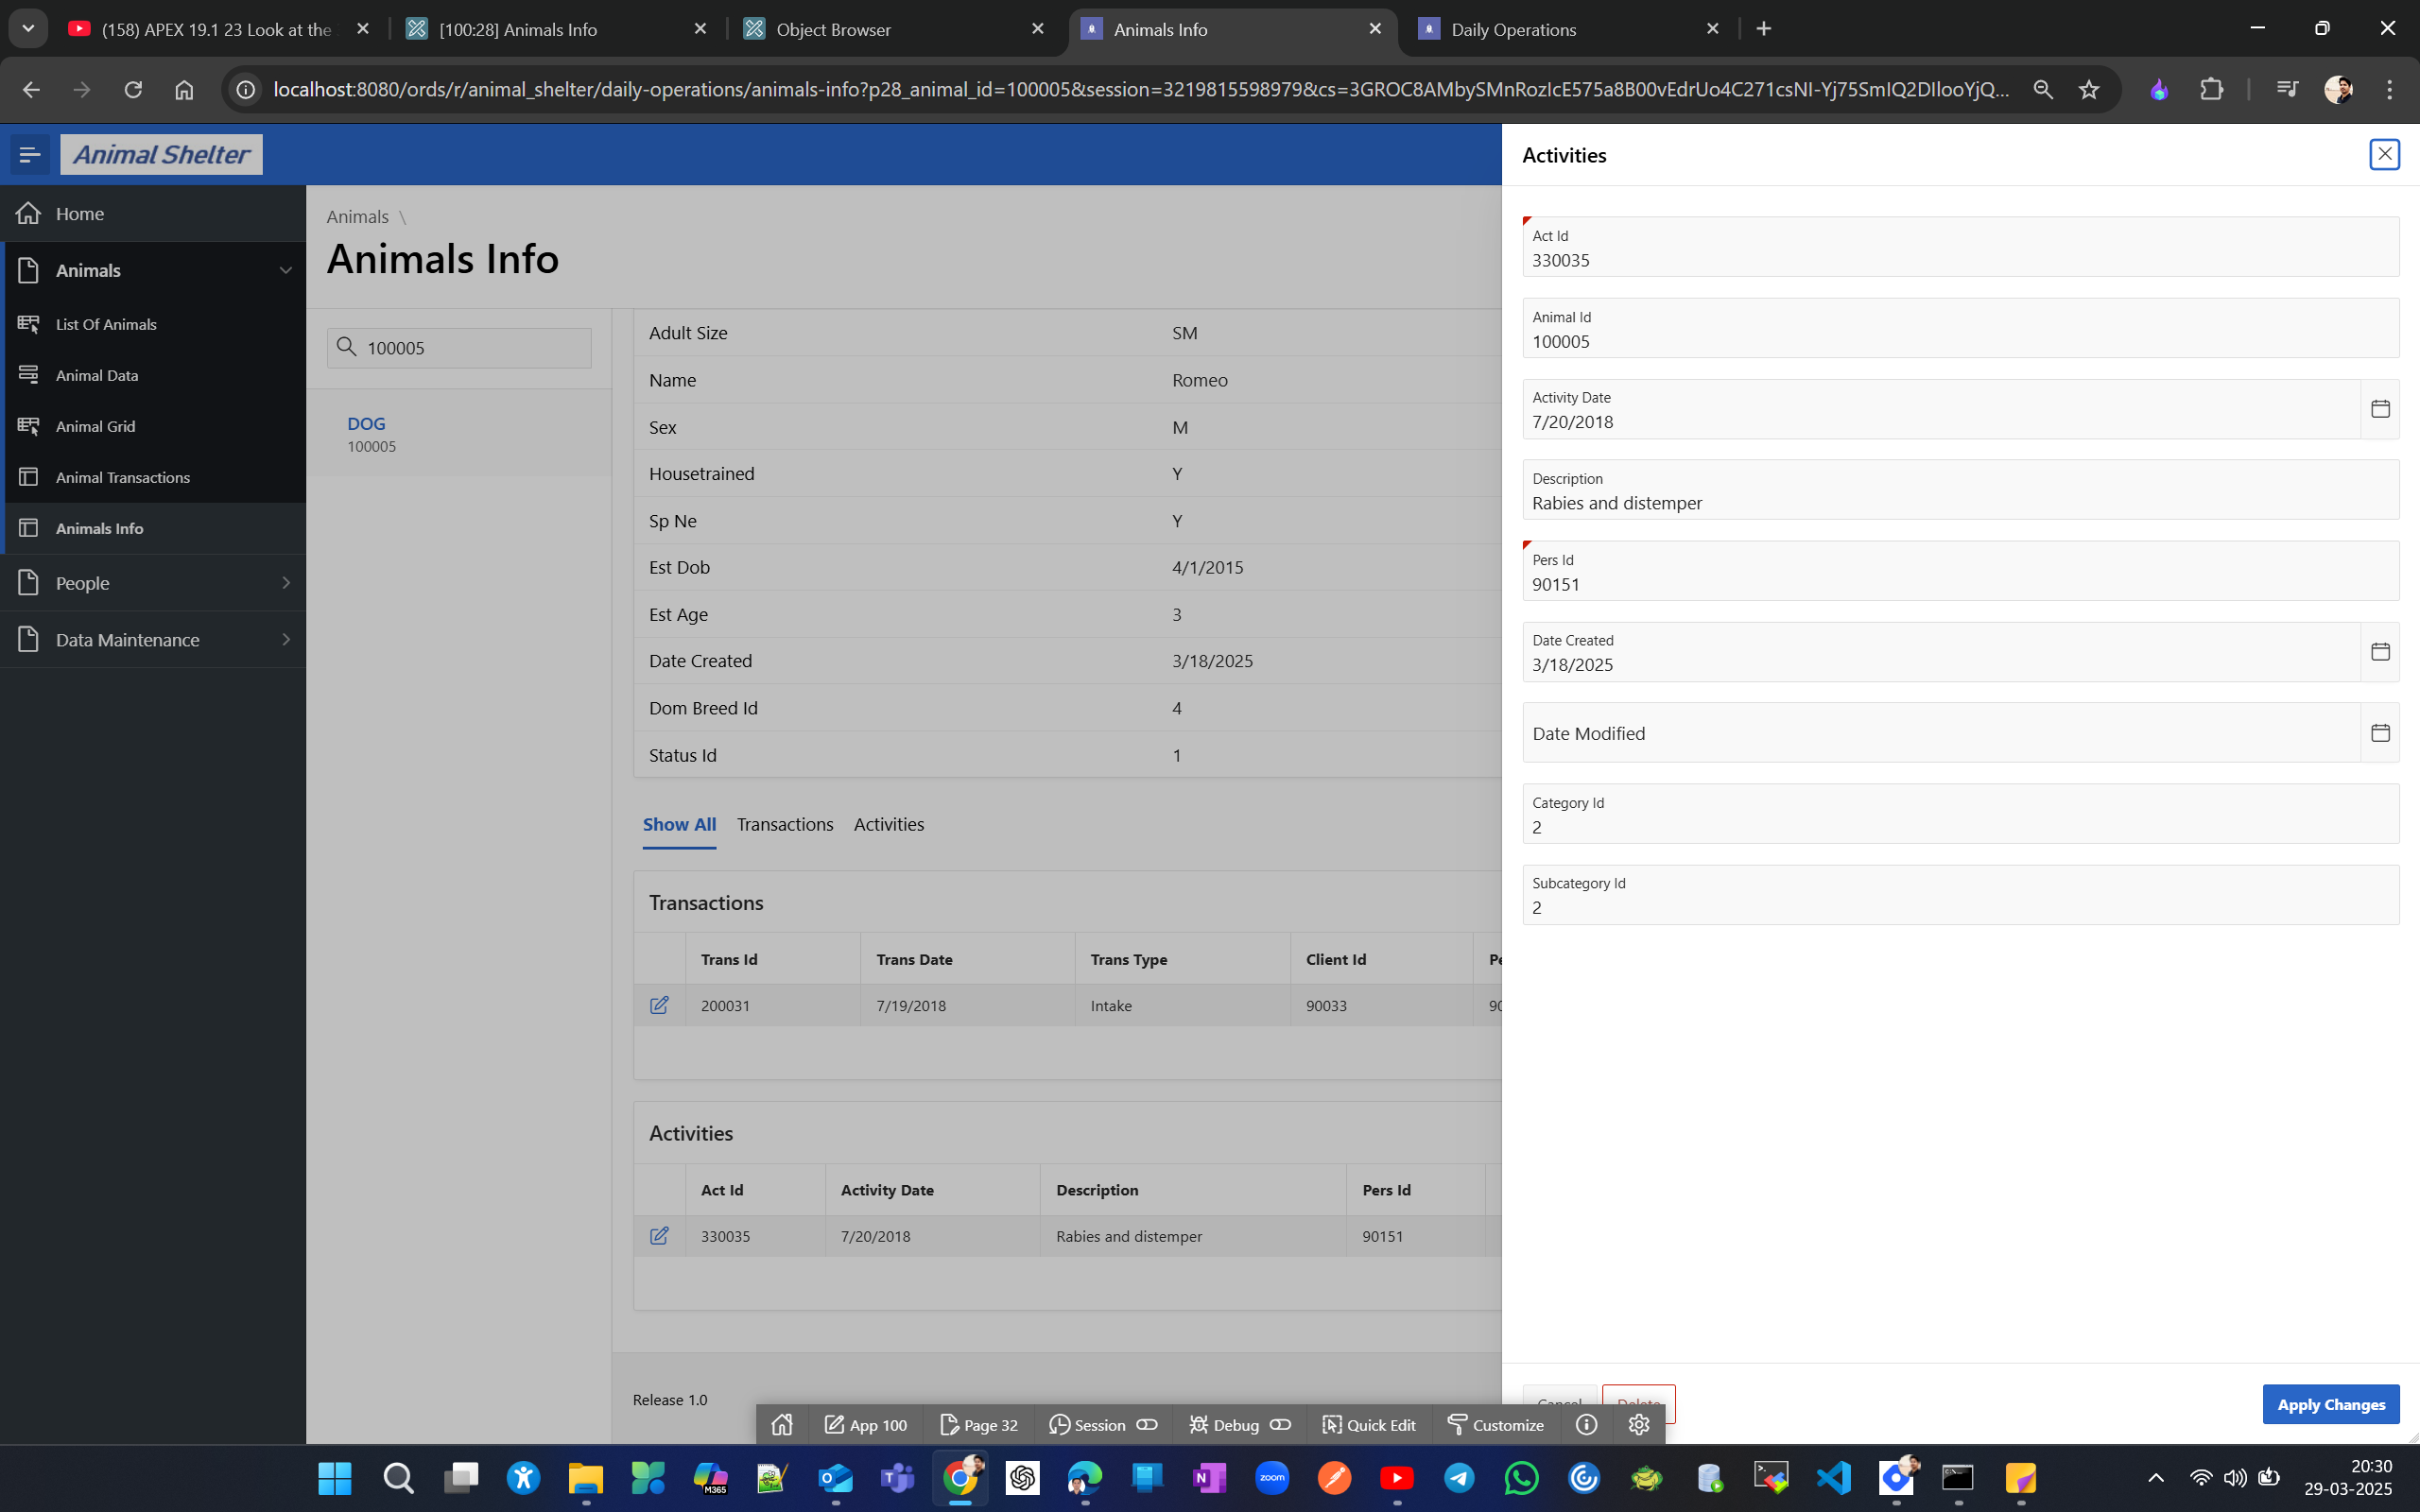

Now let's create a drill-down master-details report page.
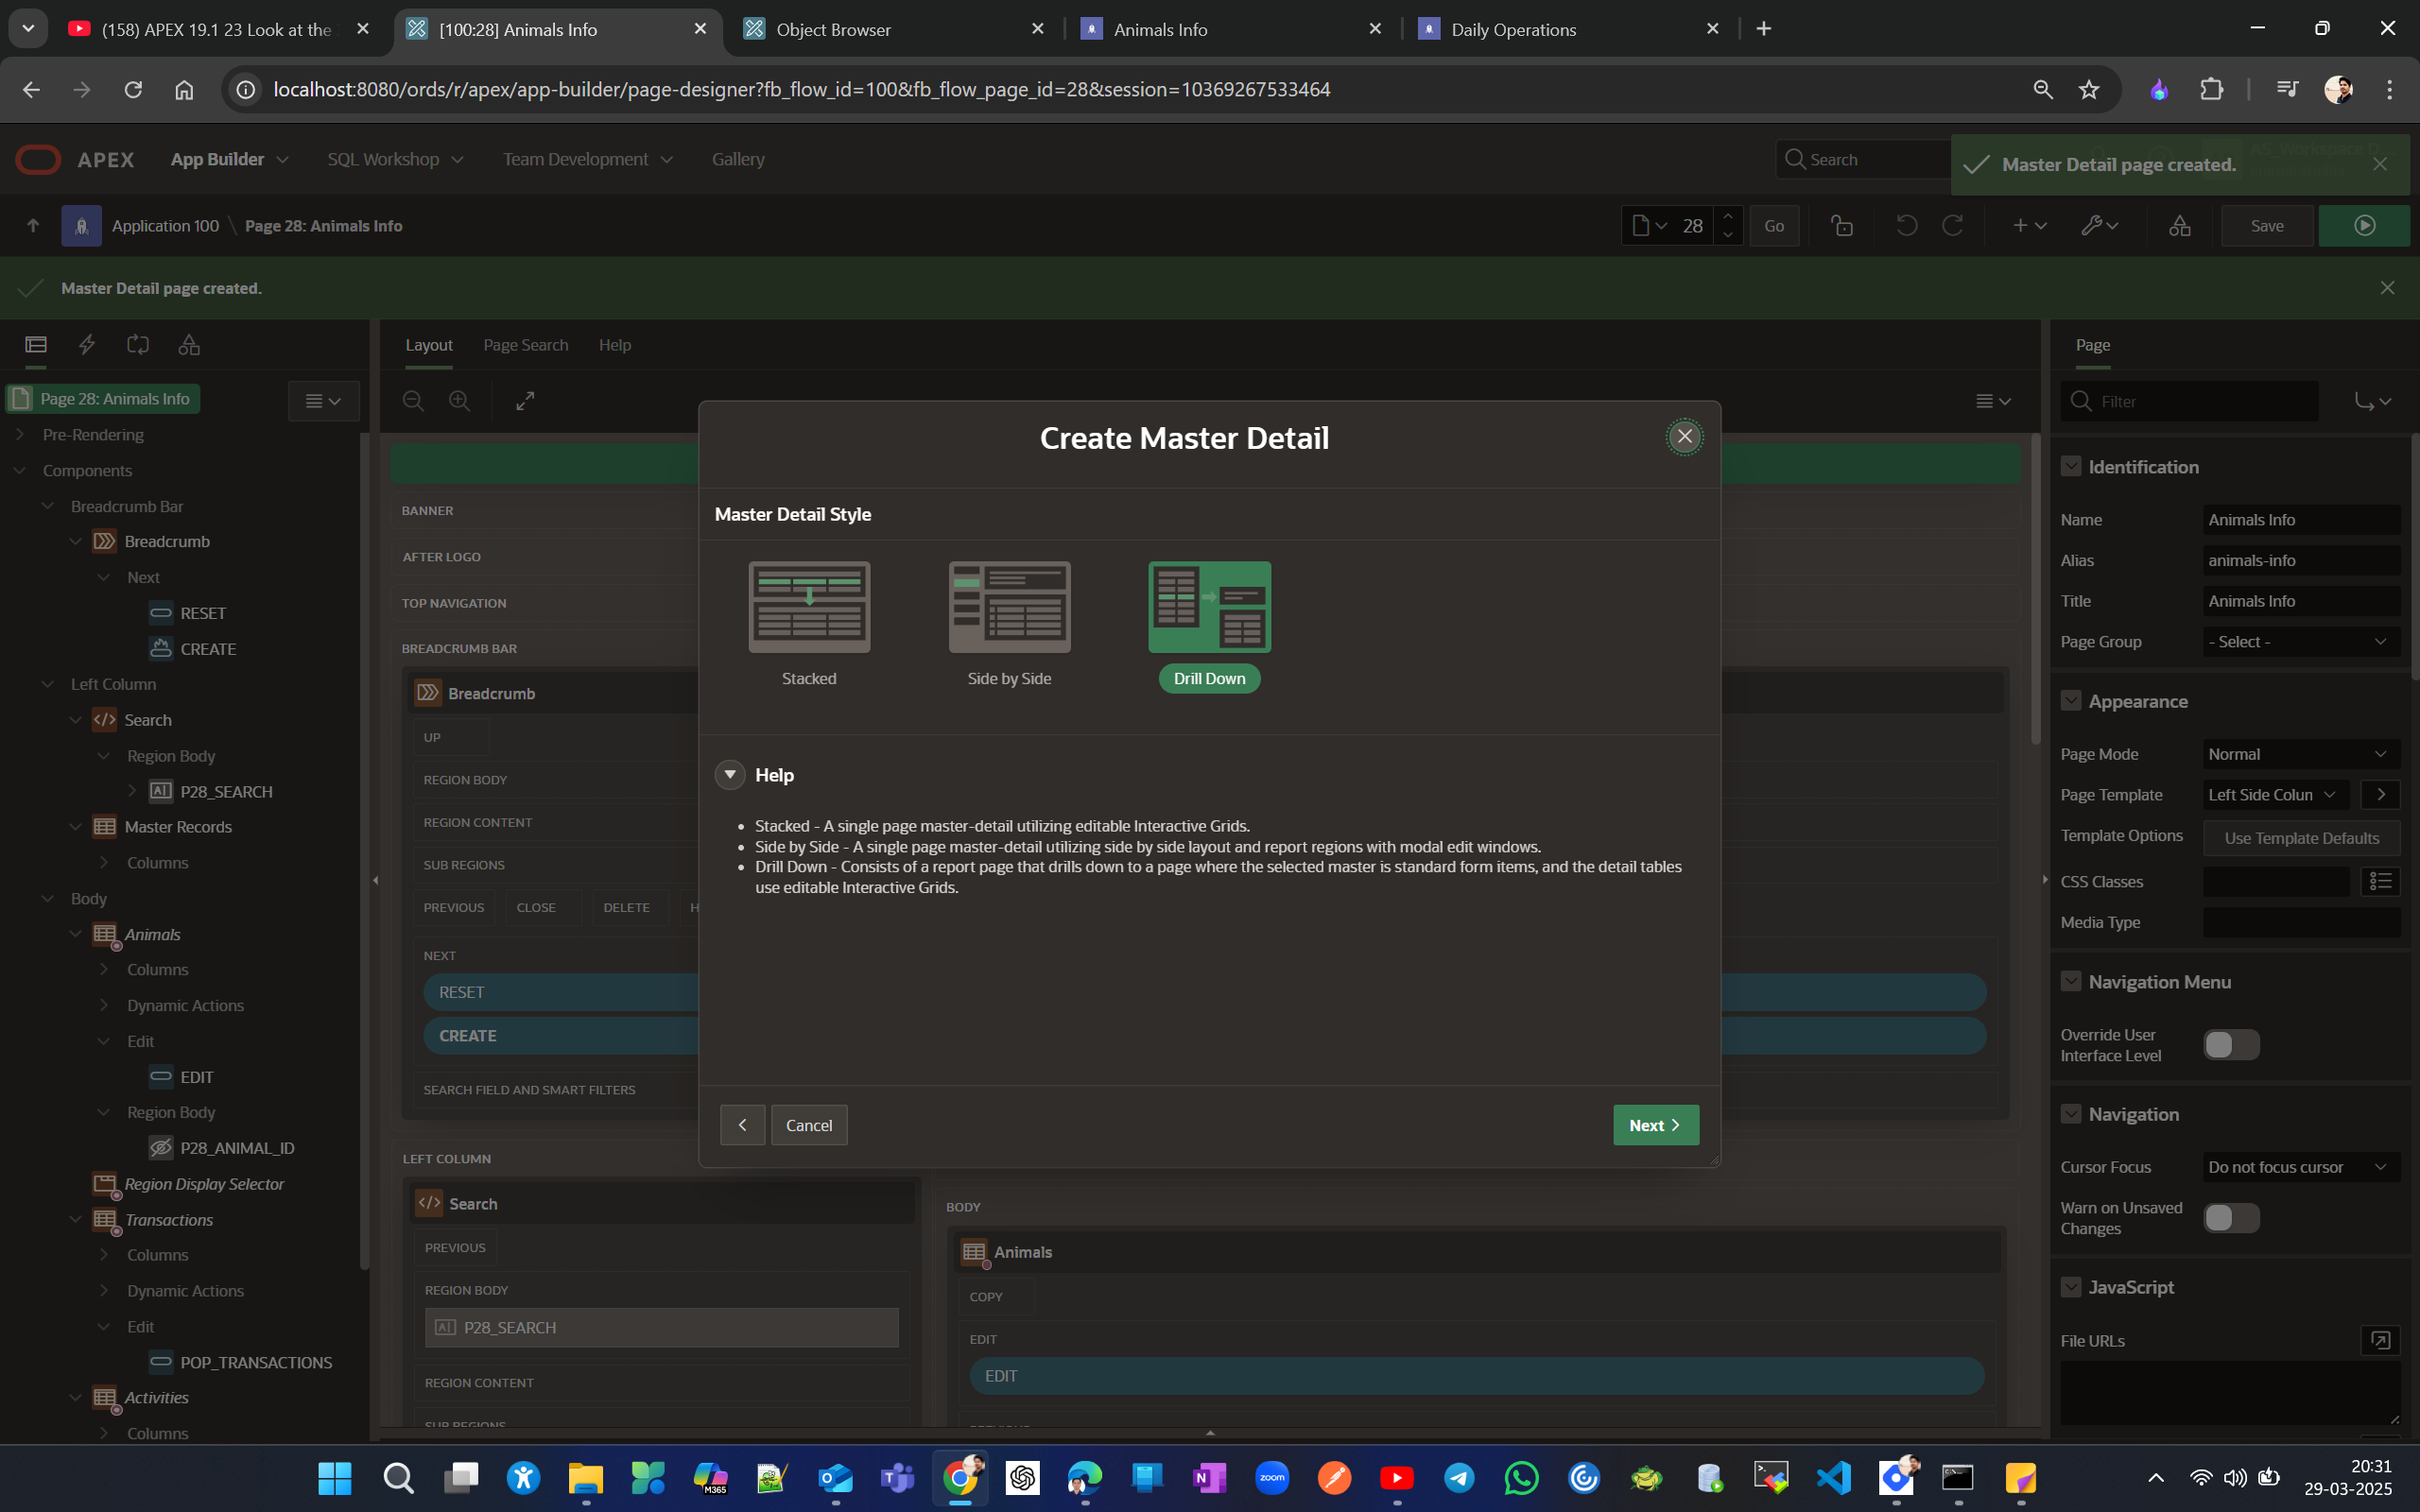
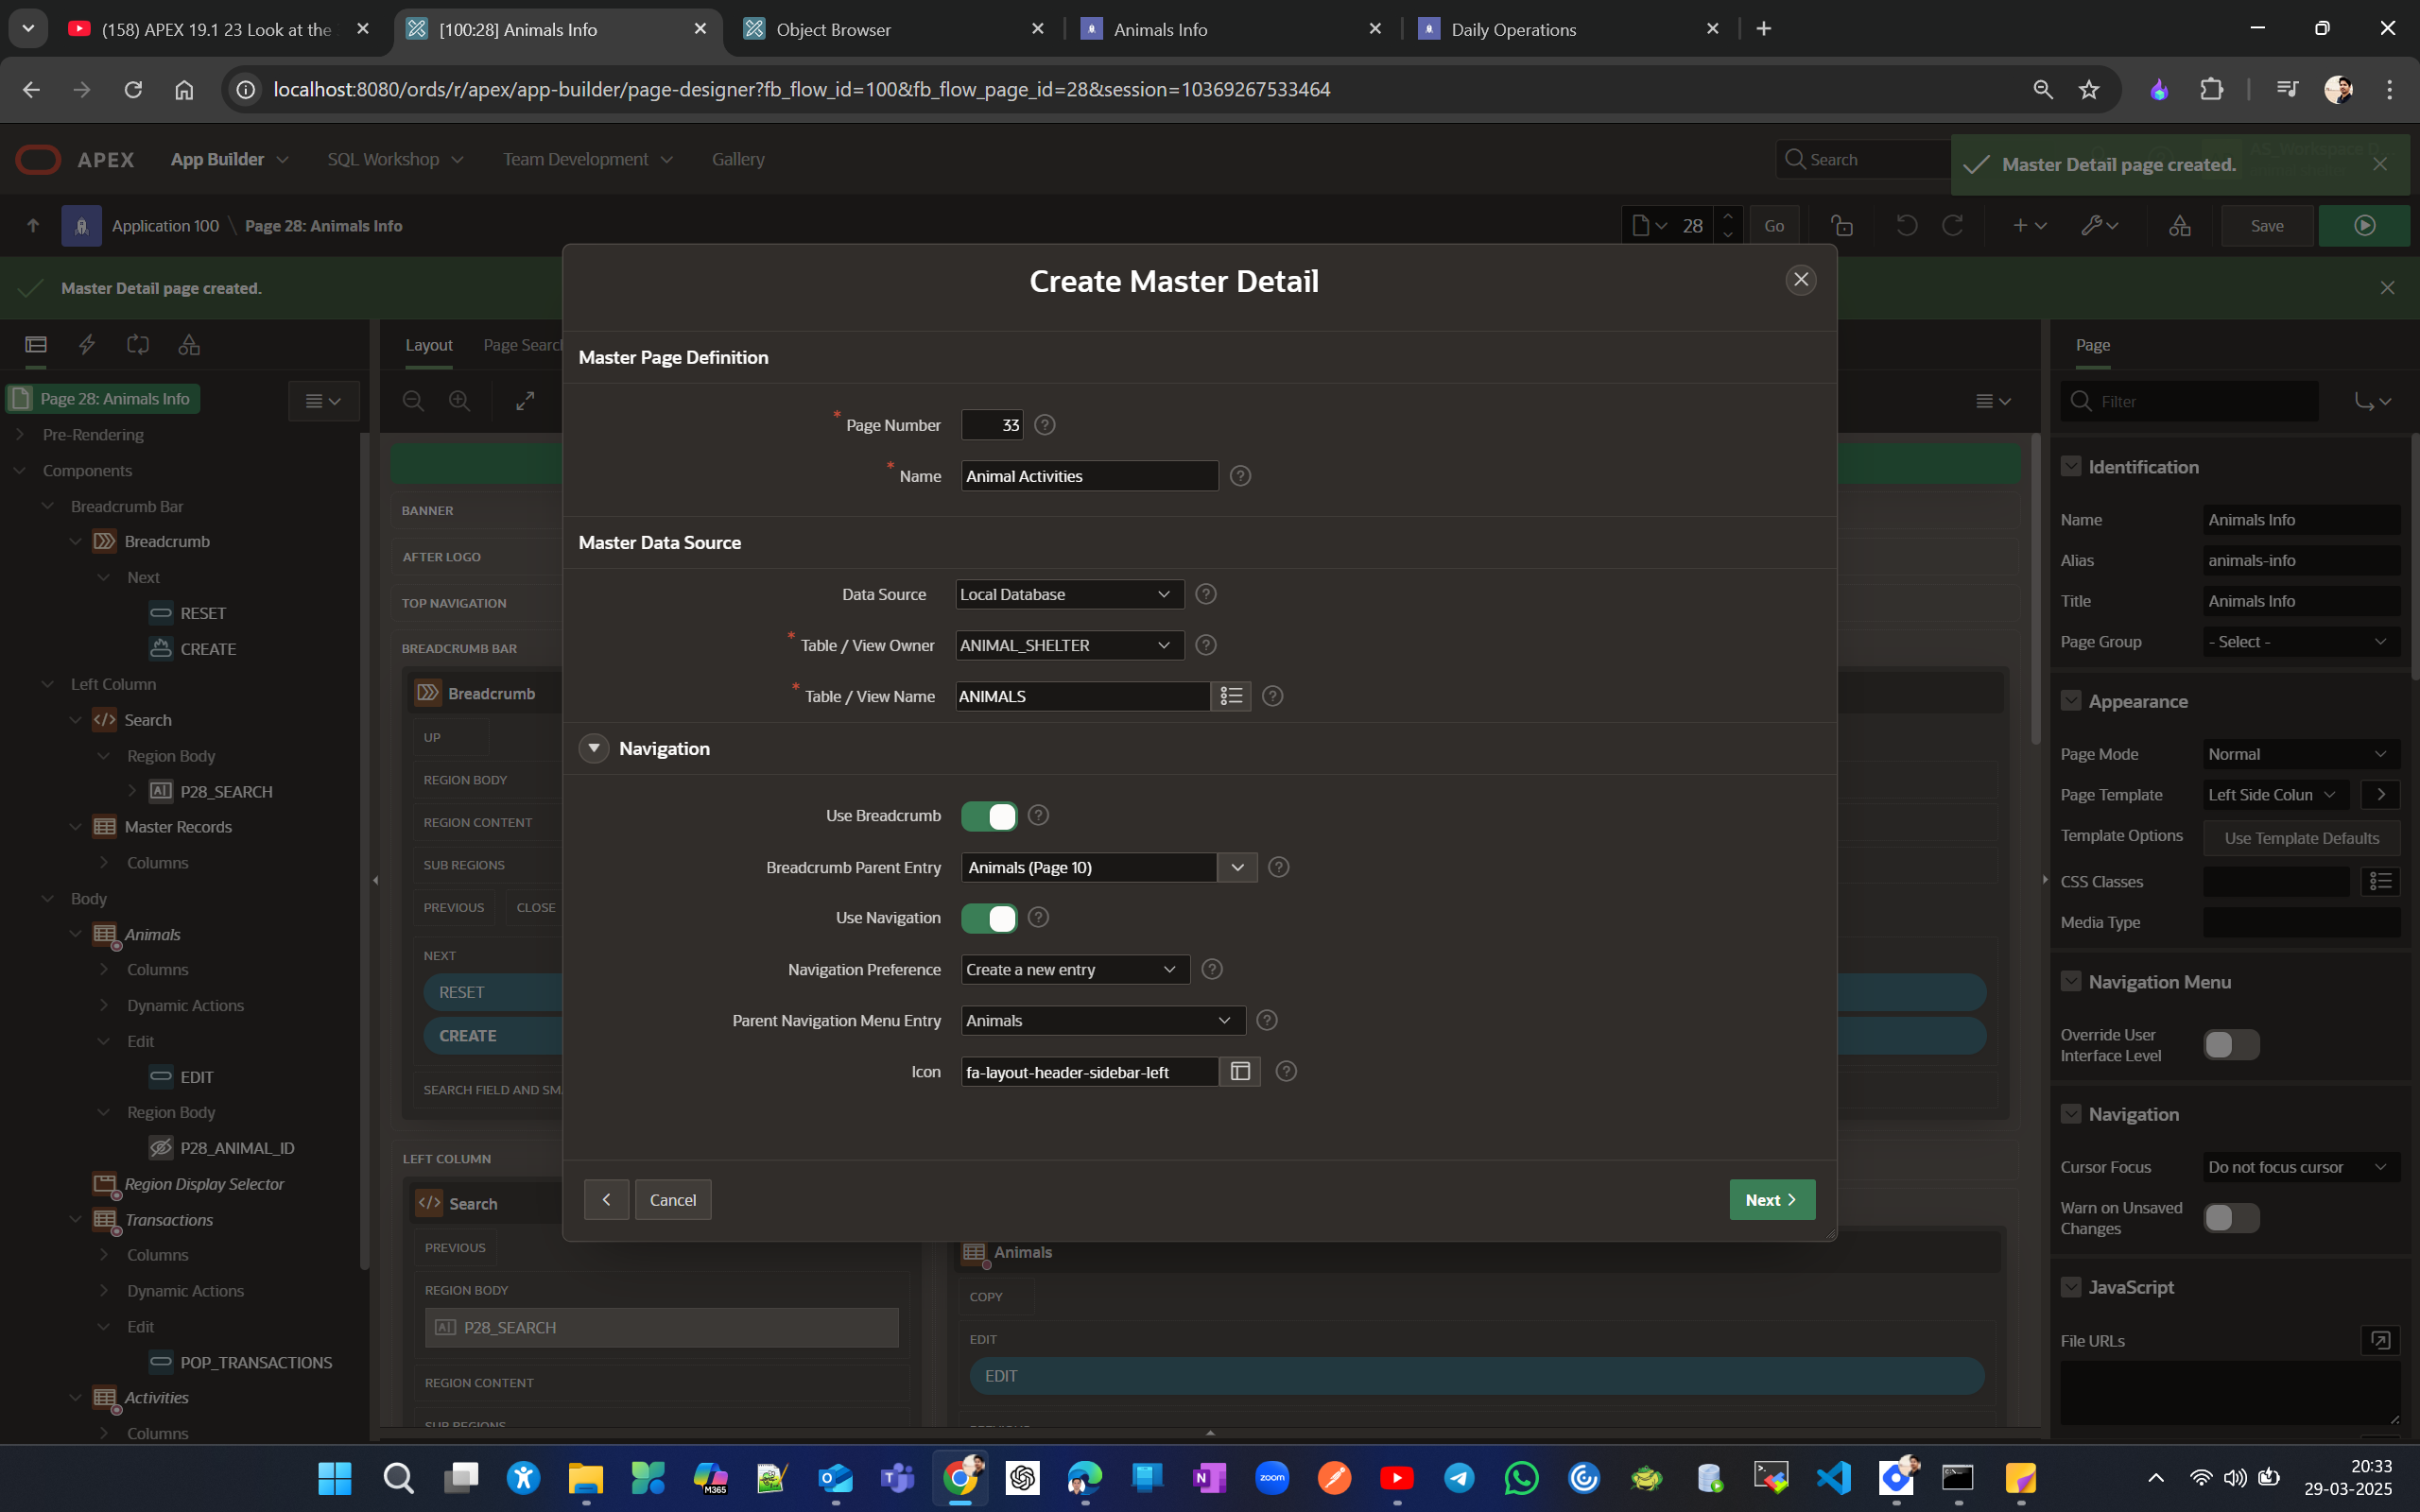
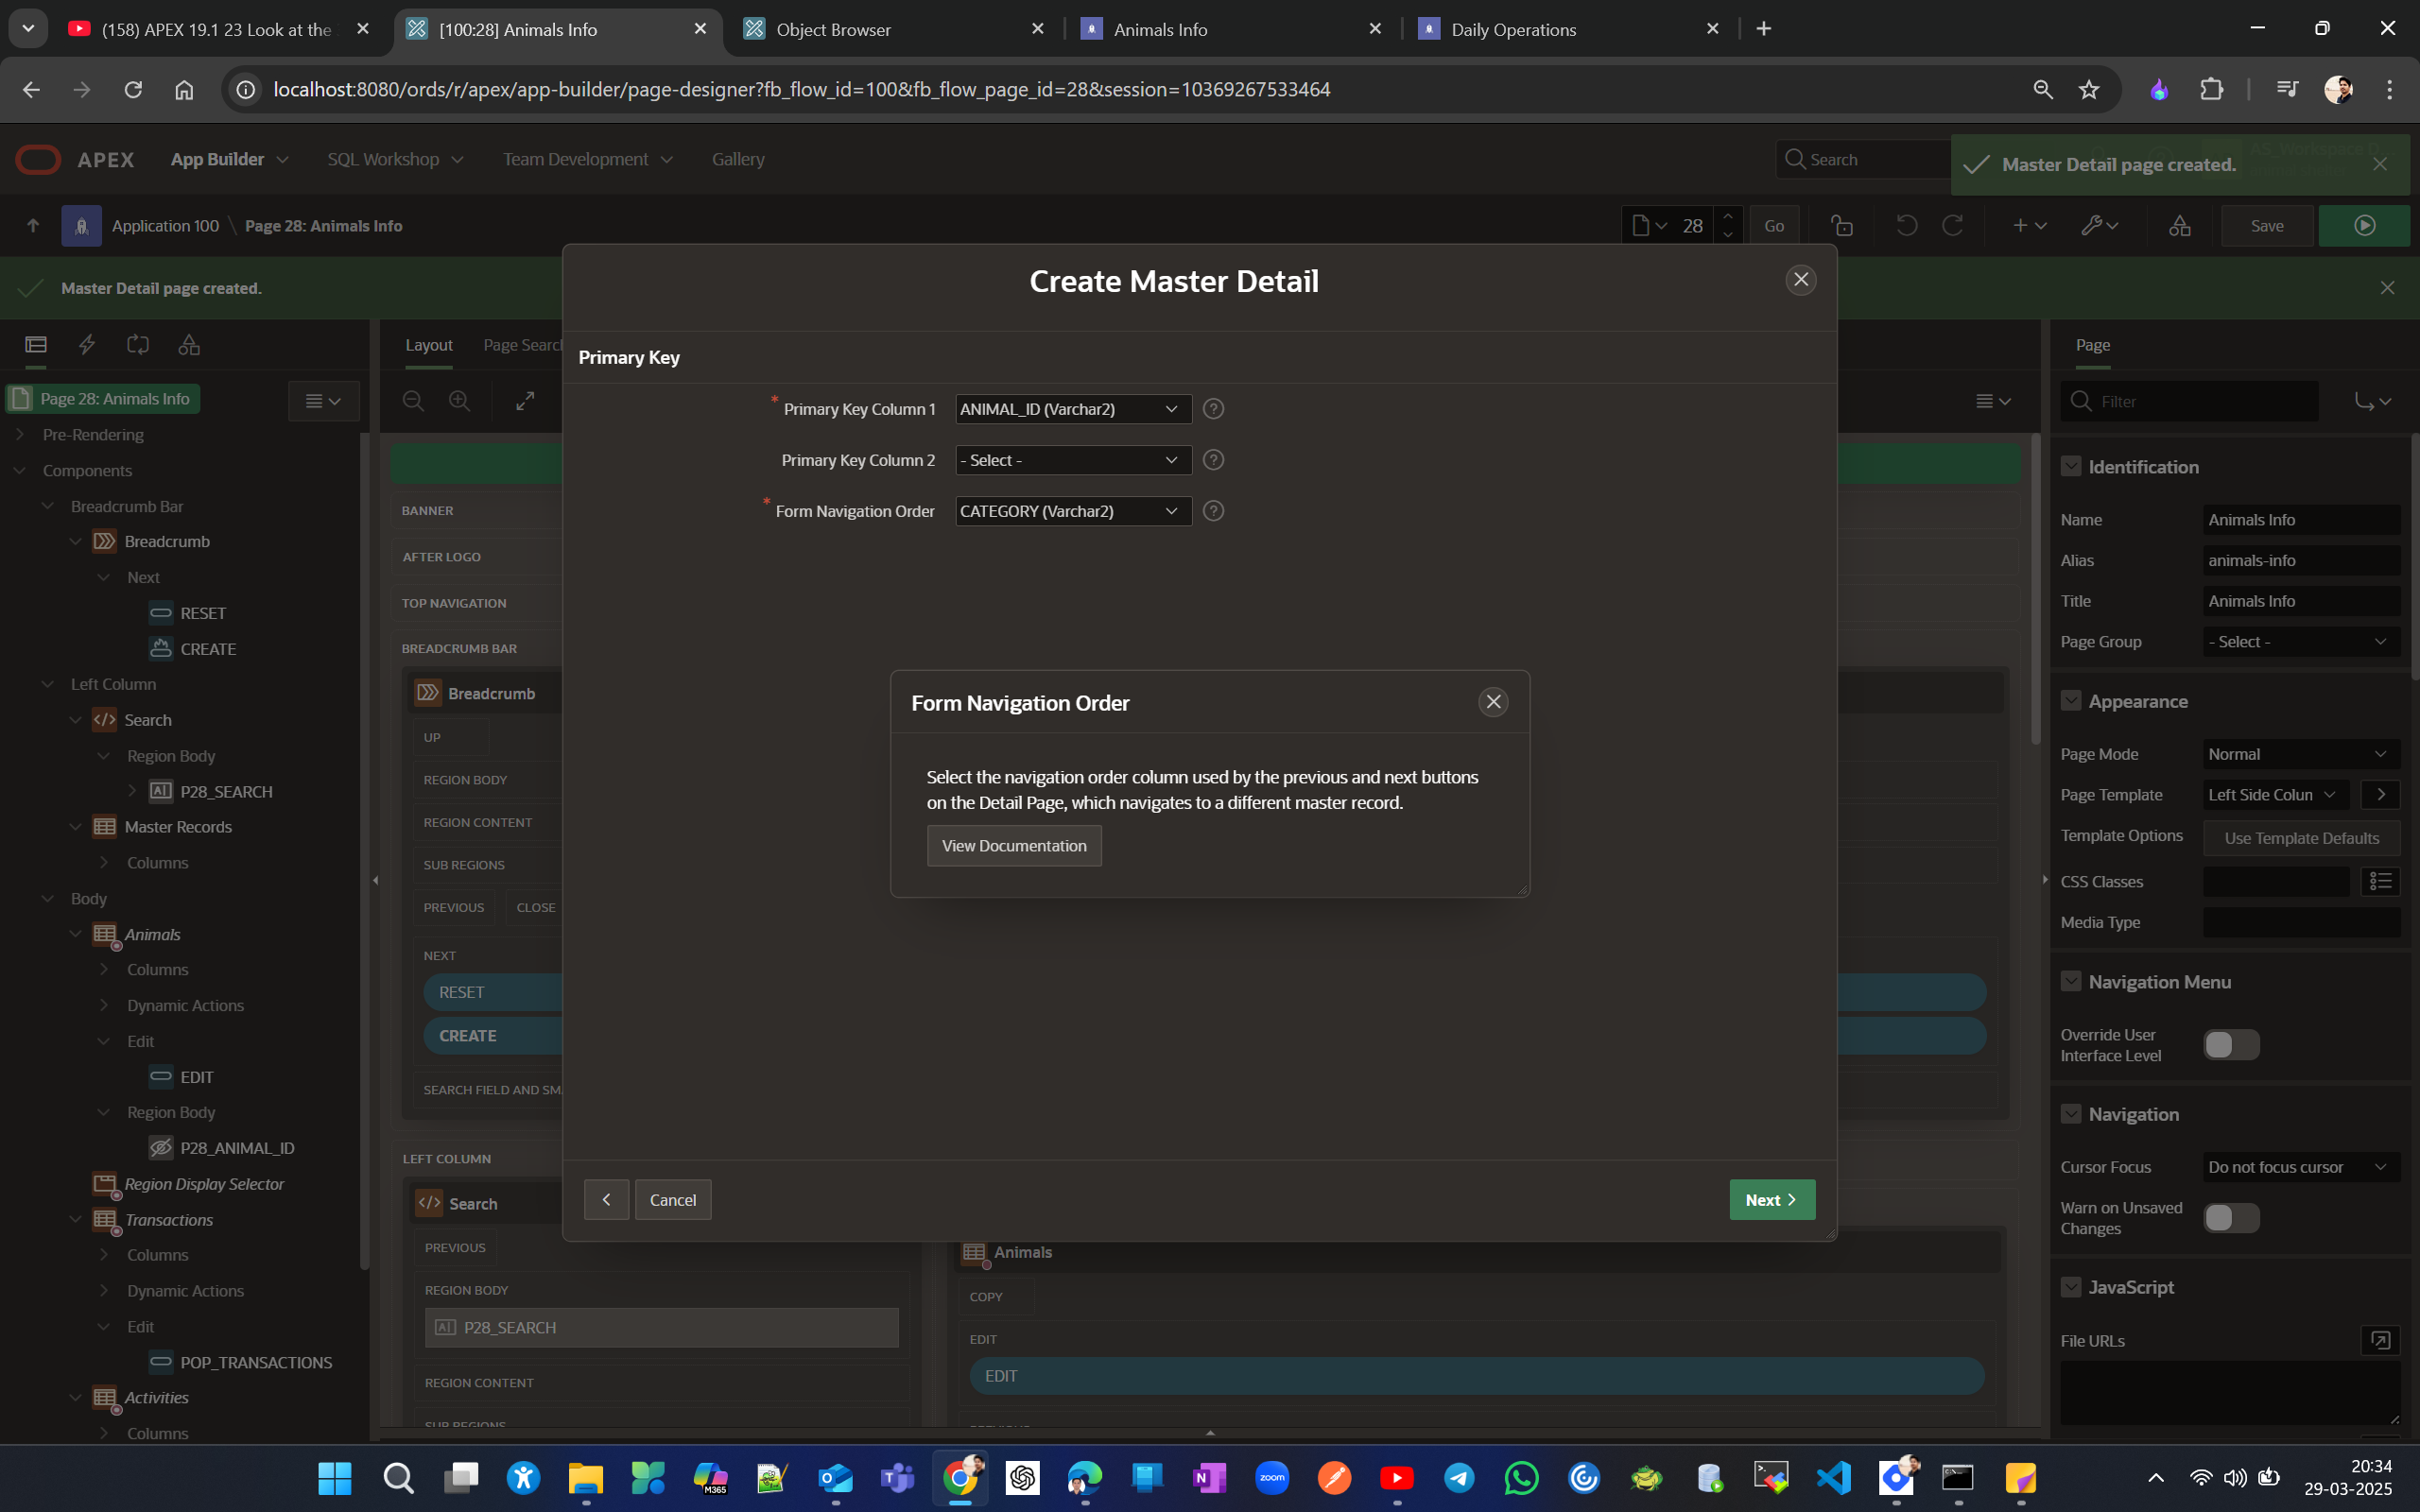
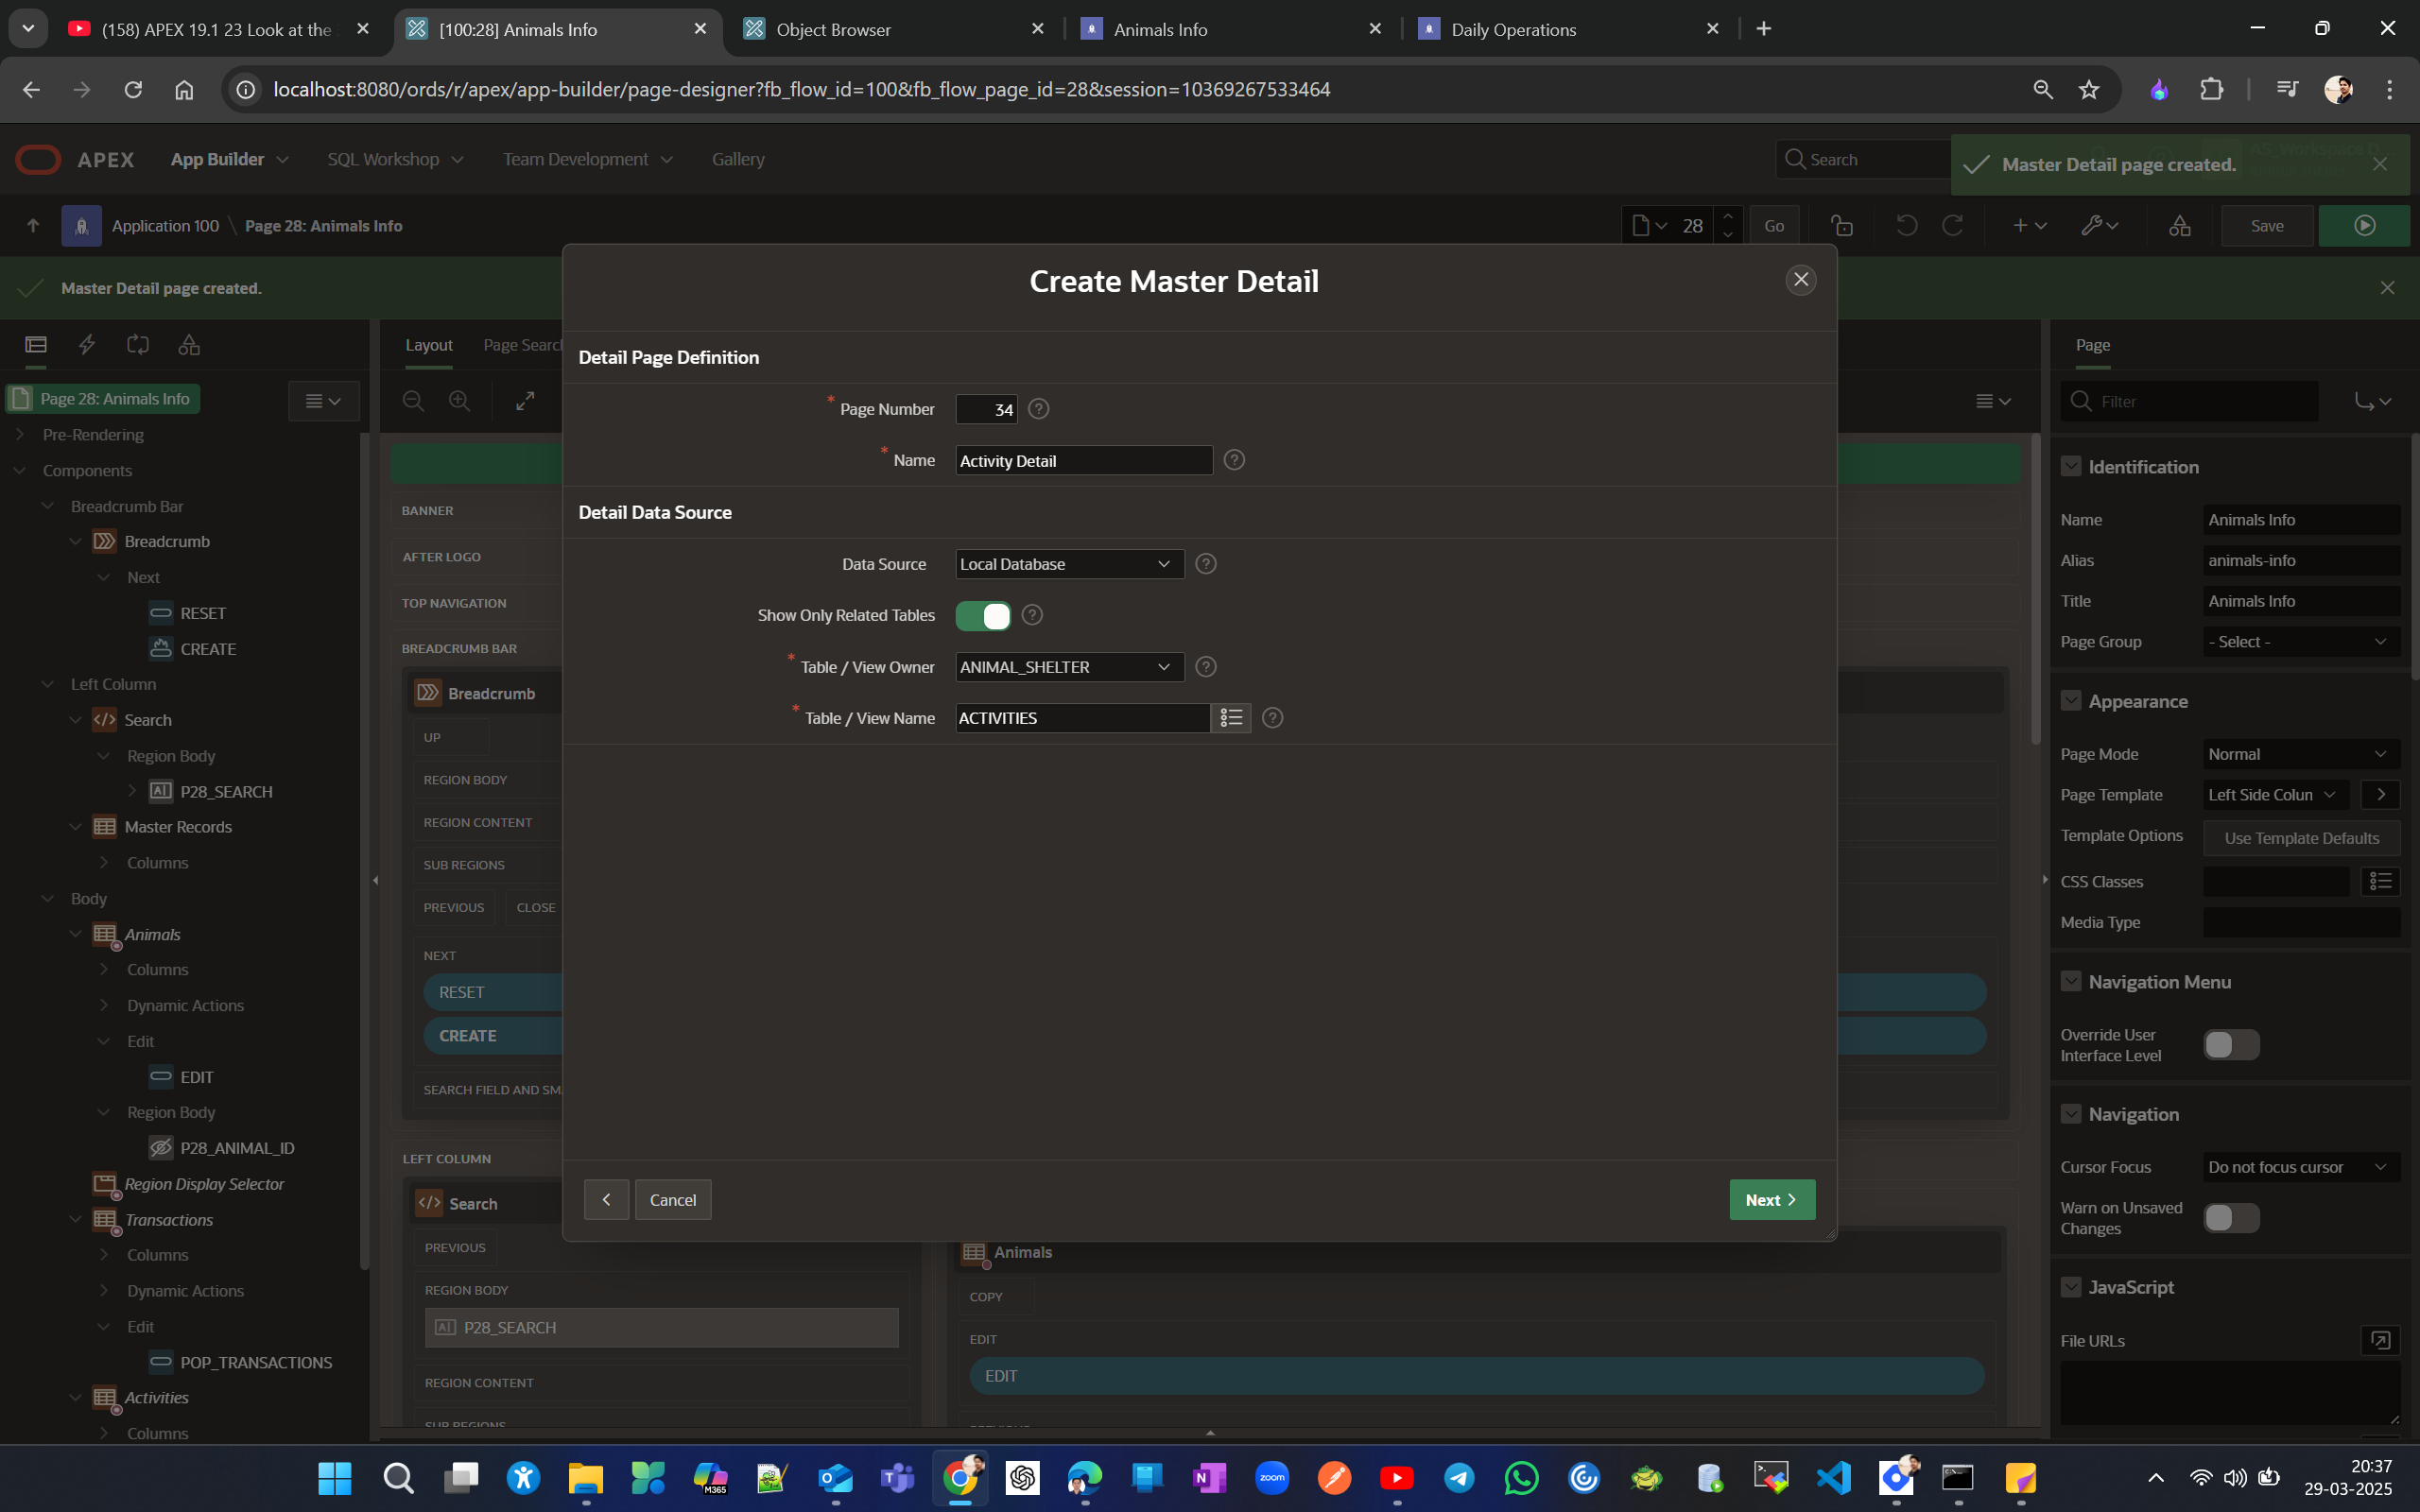
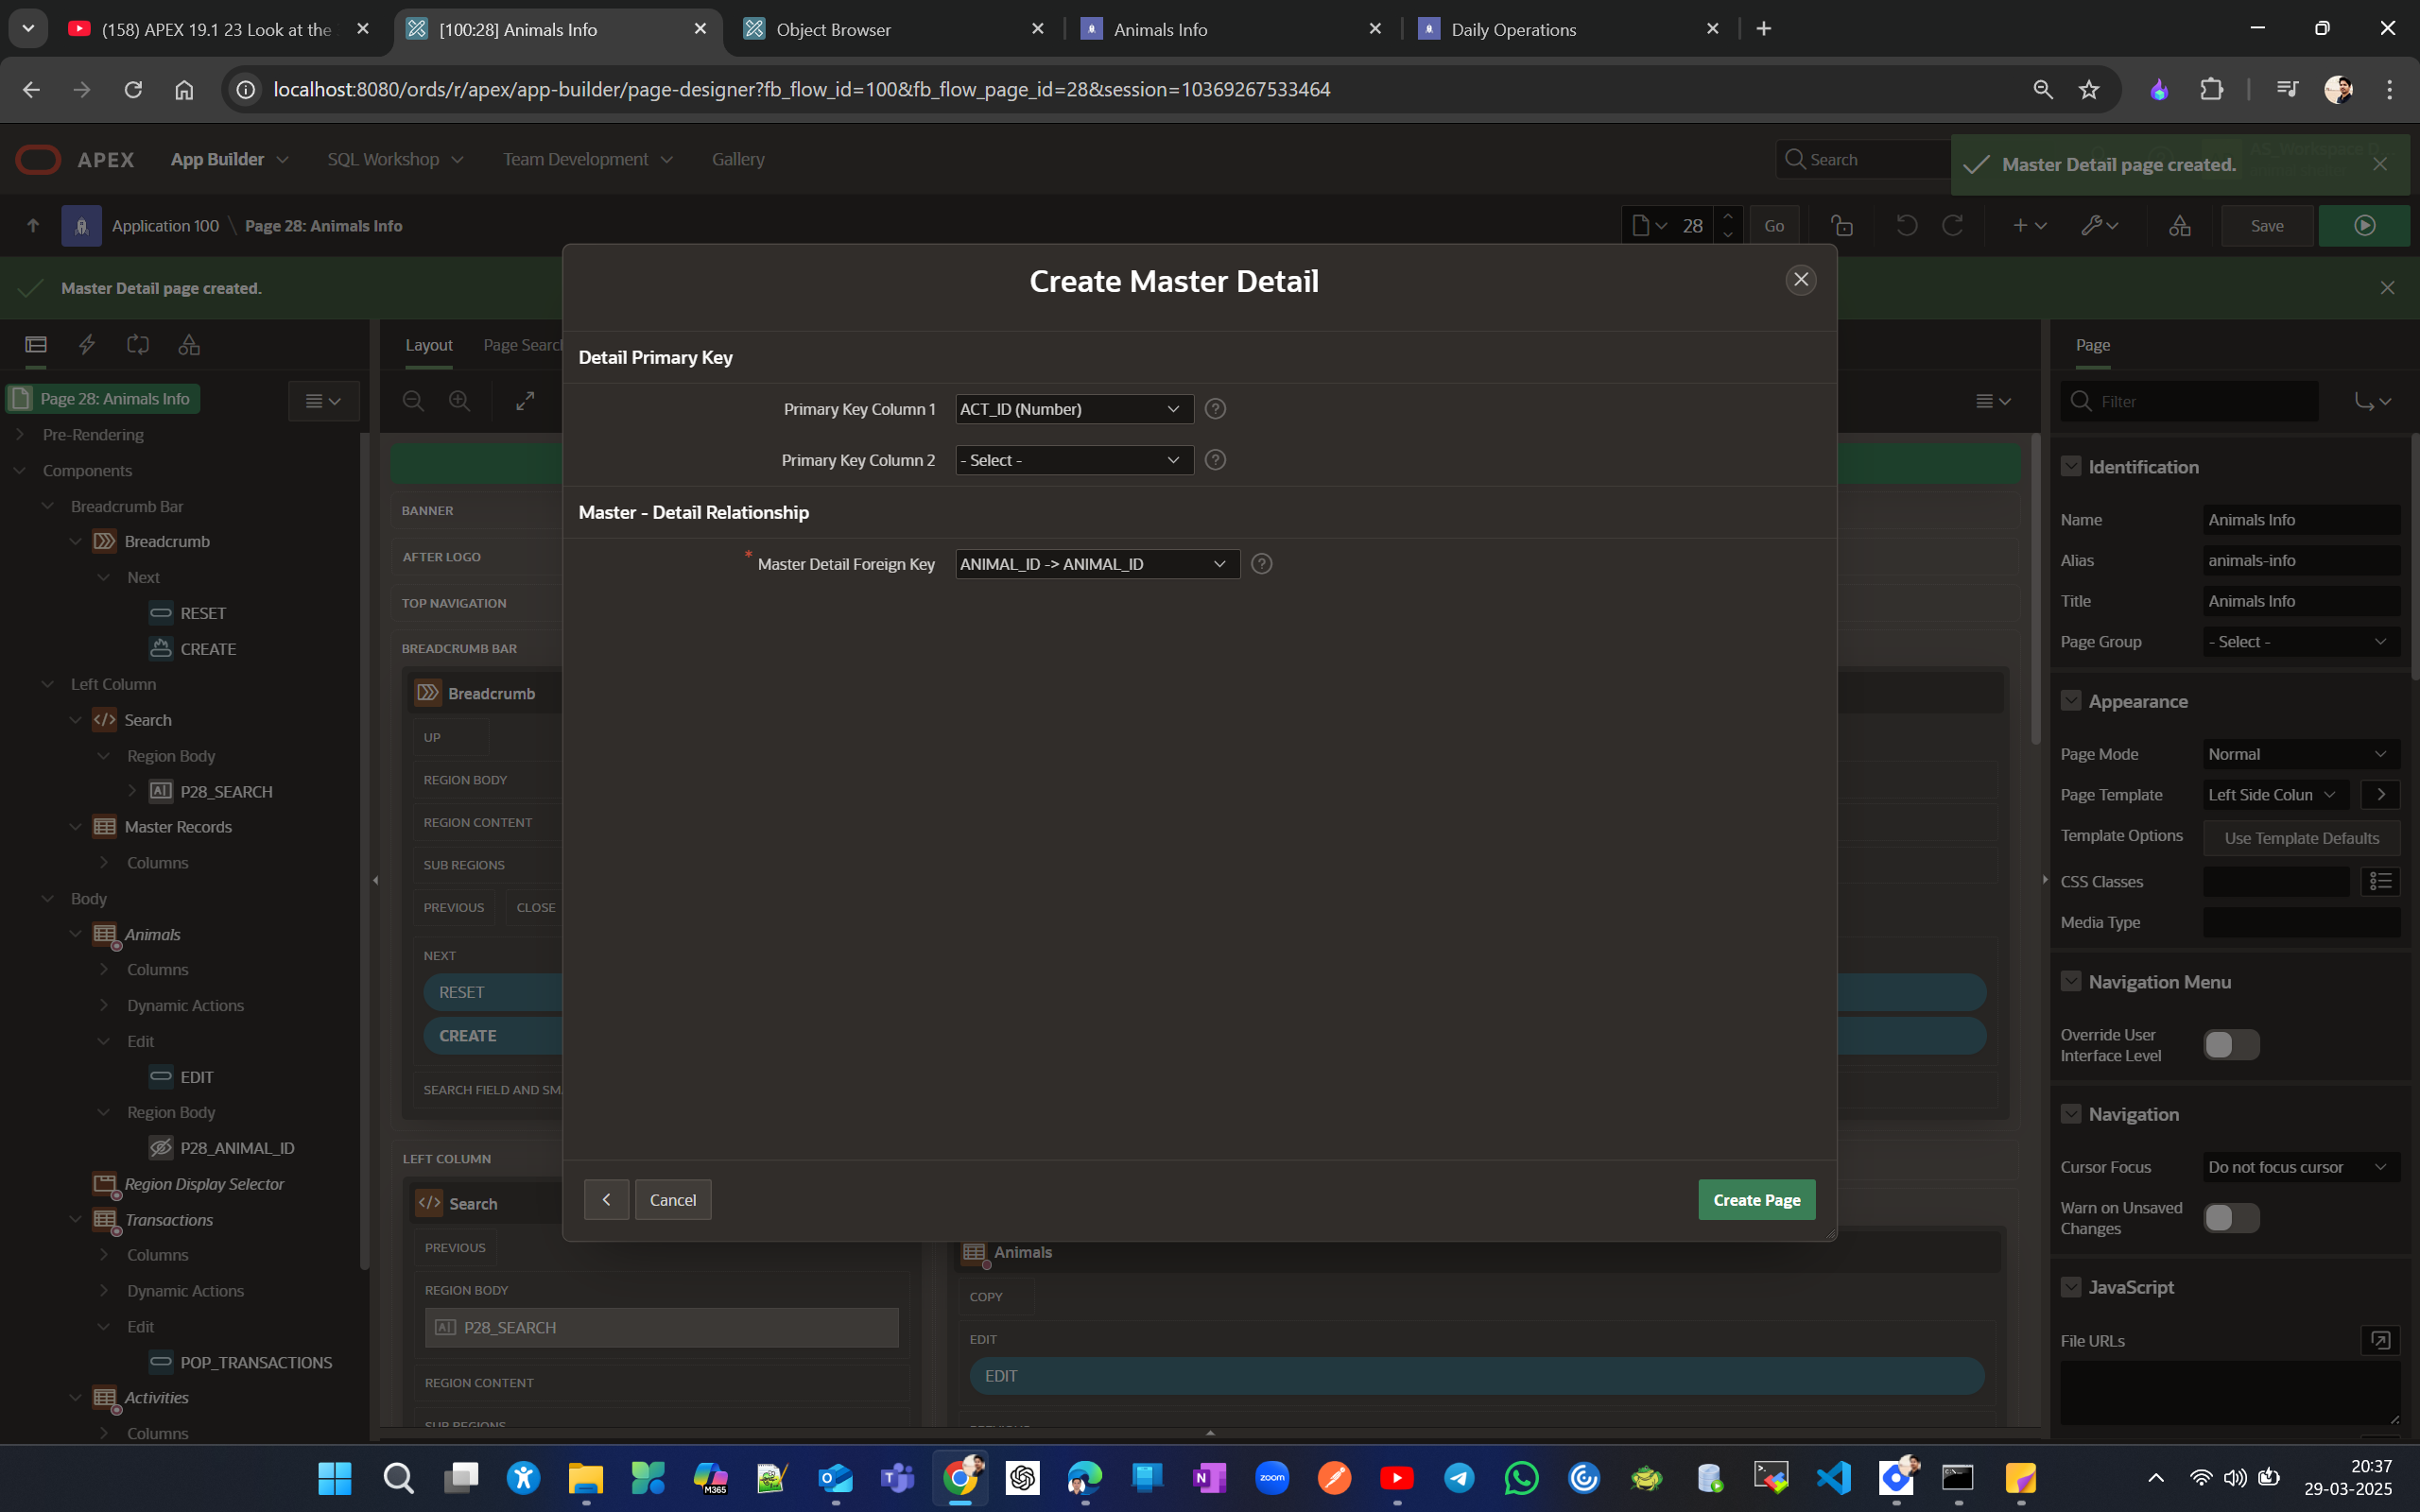
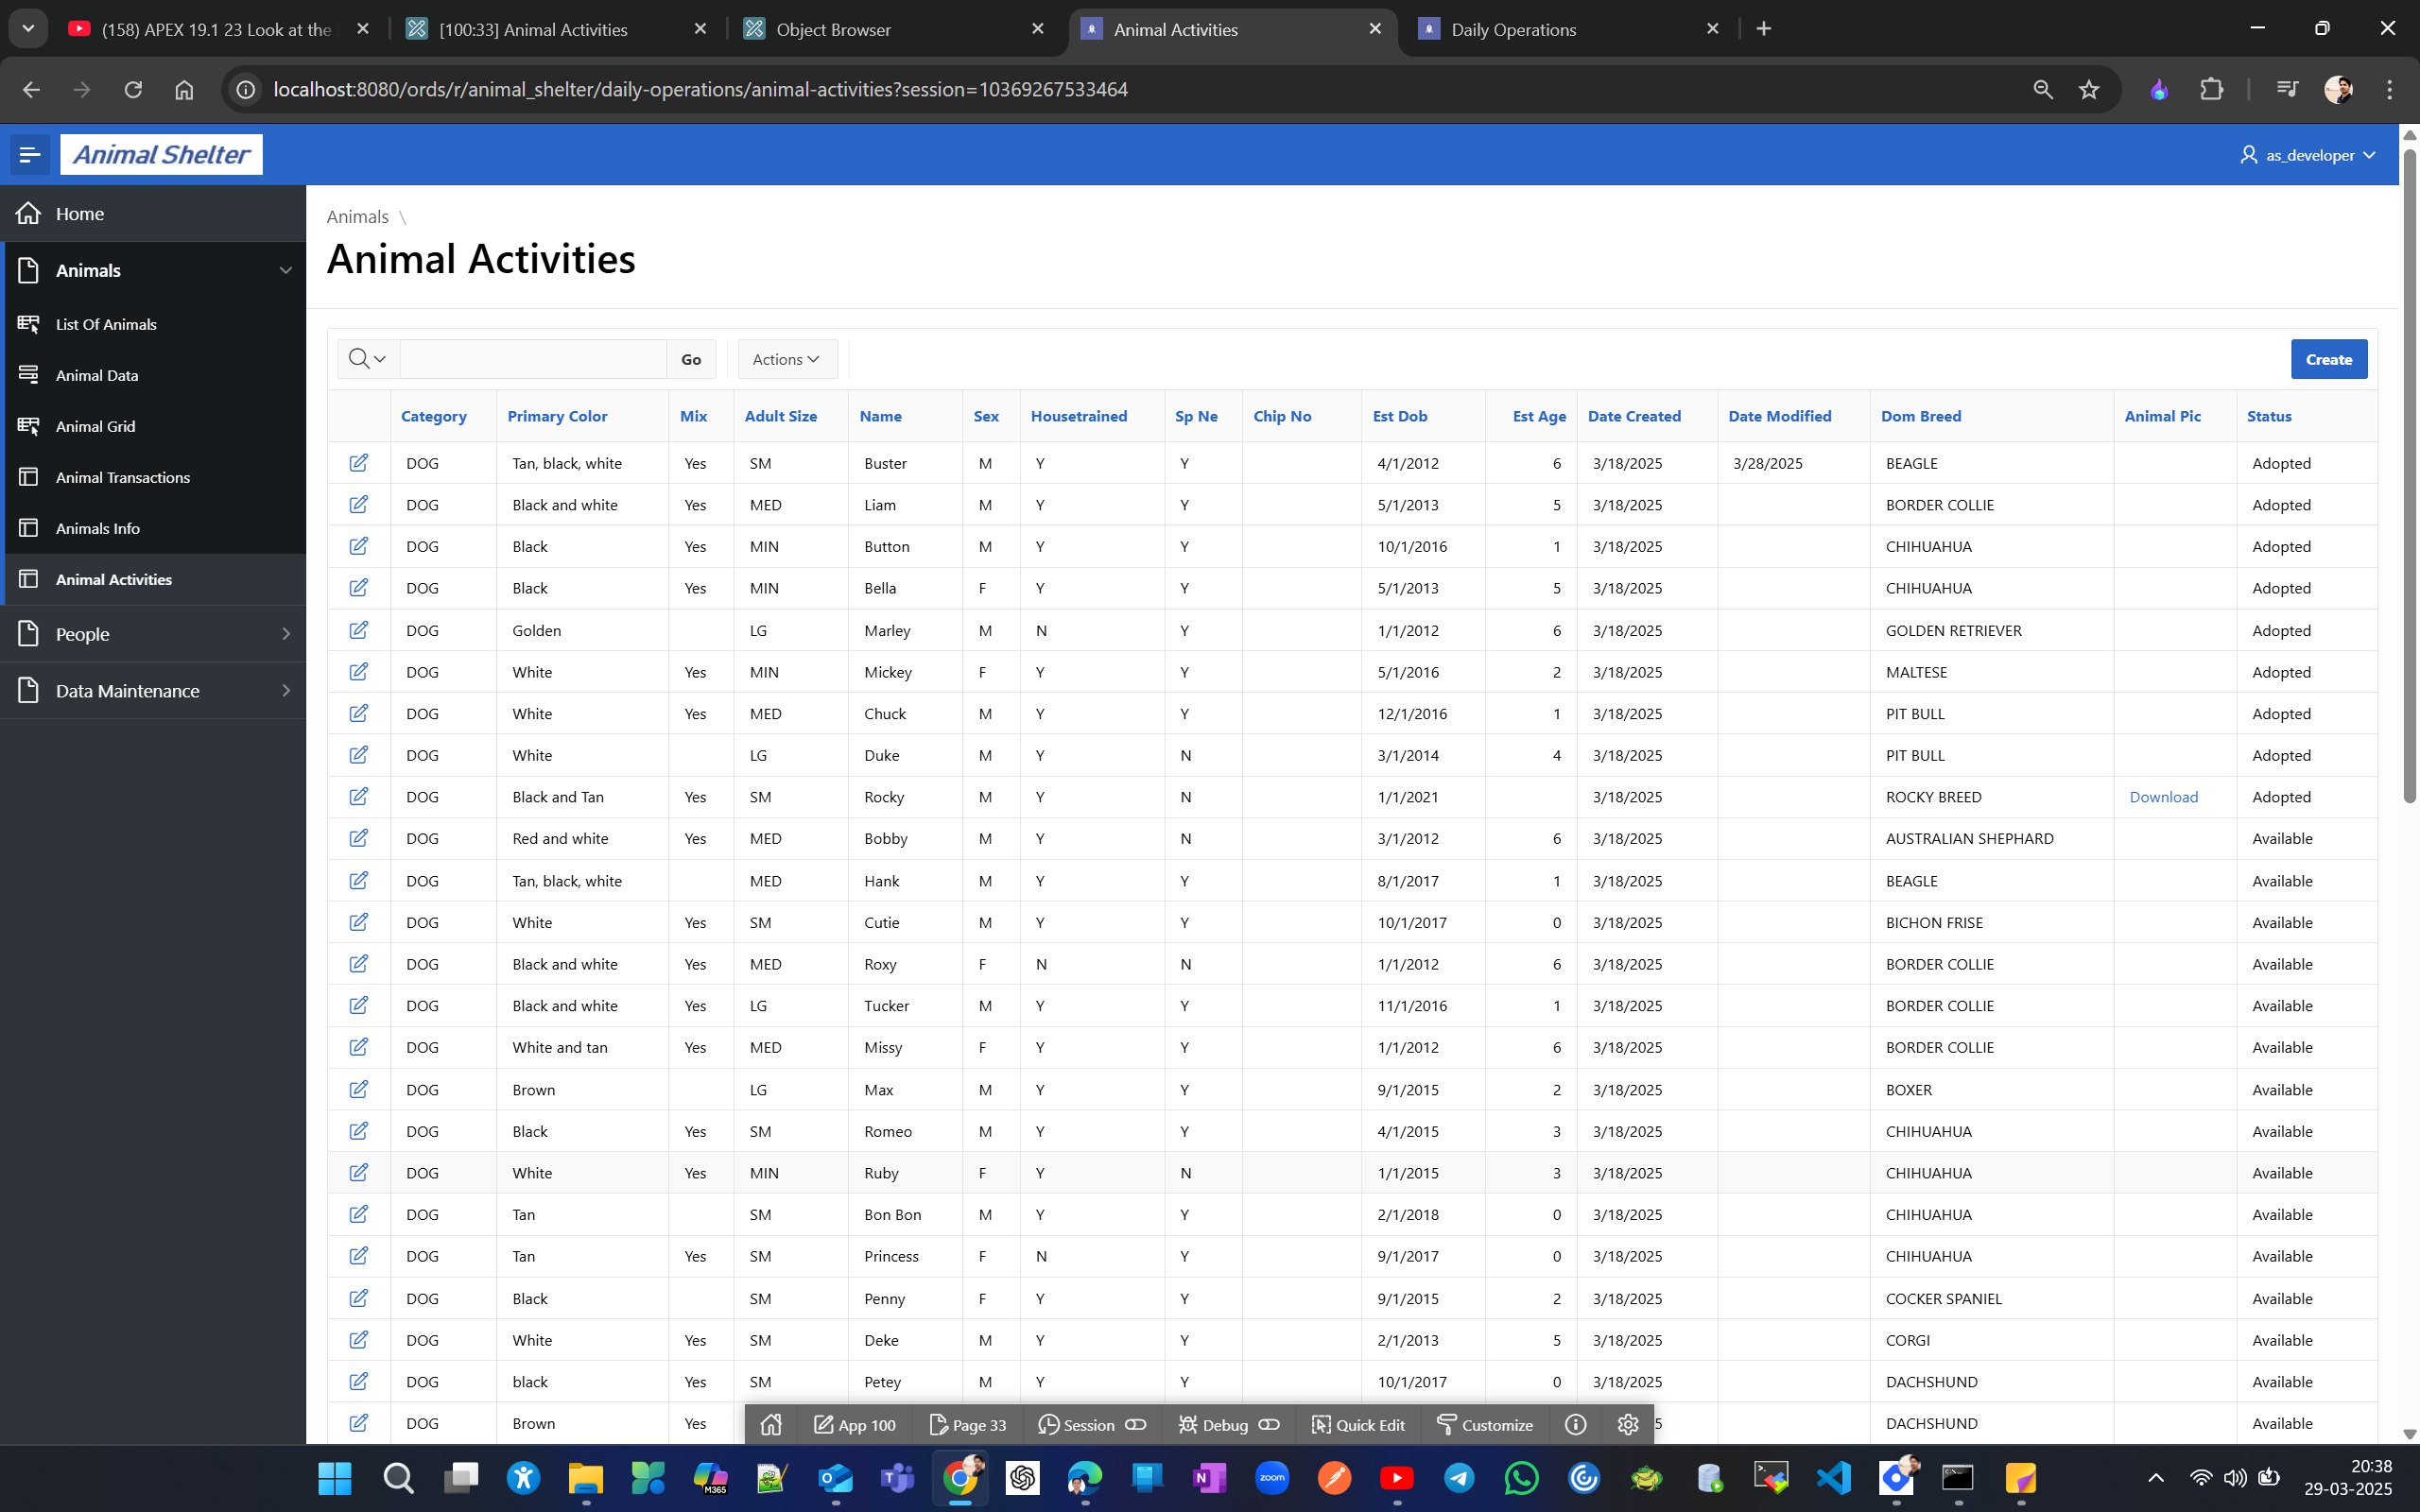
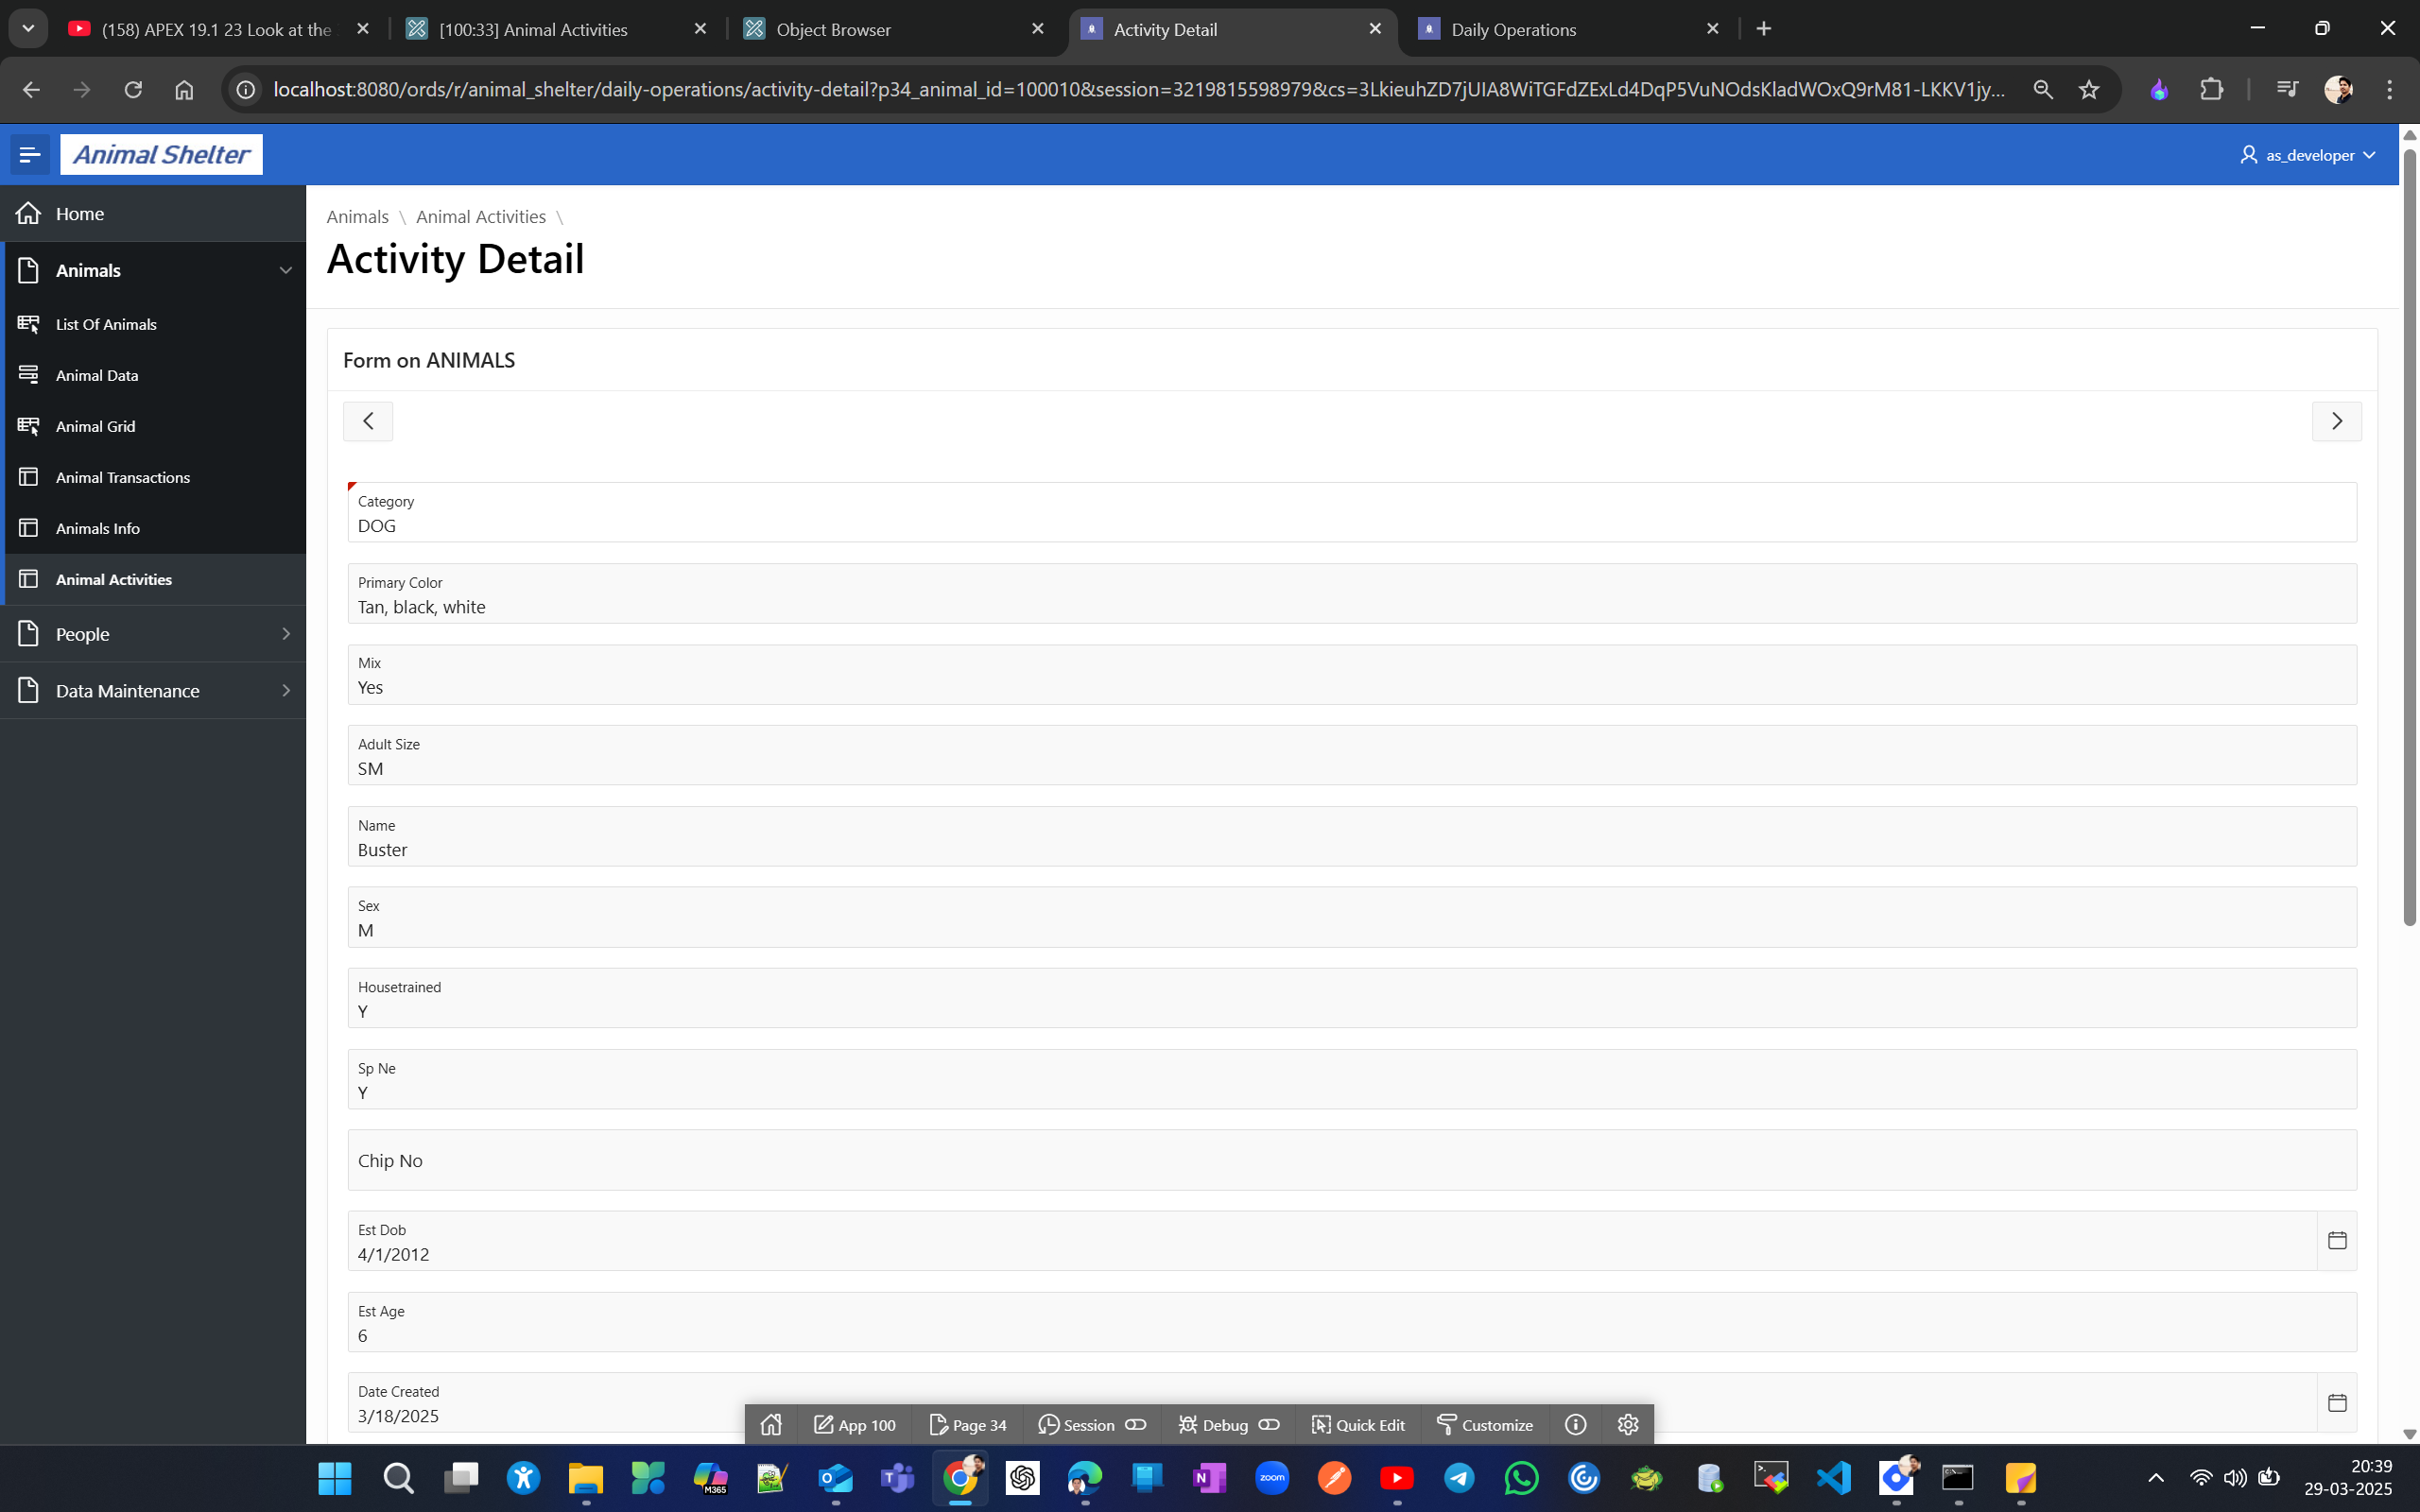
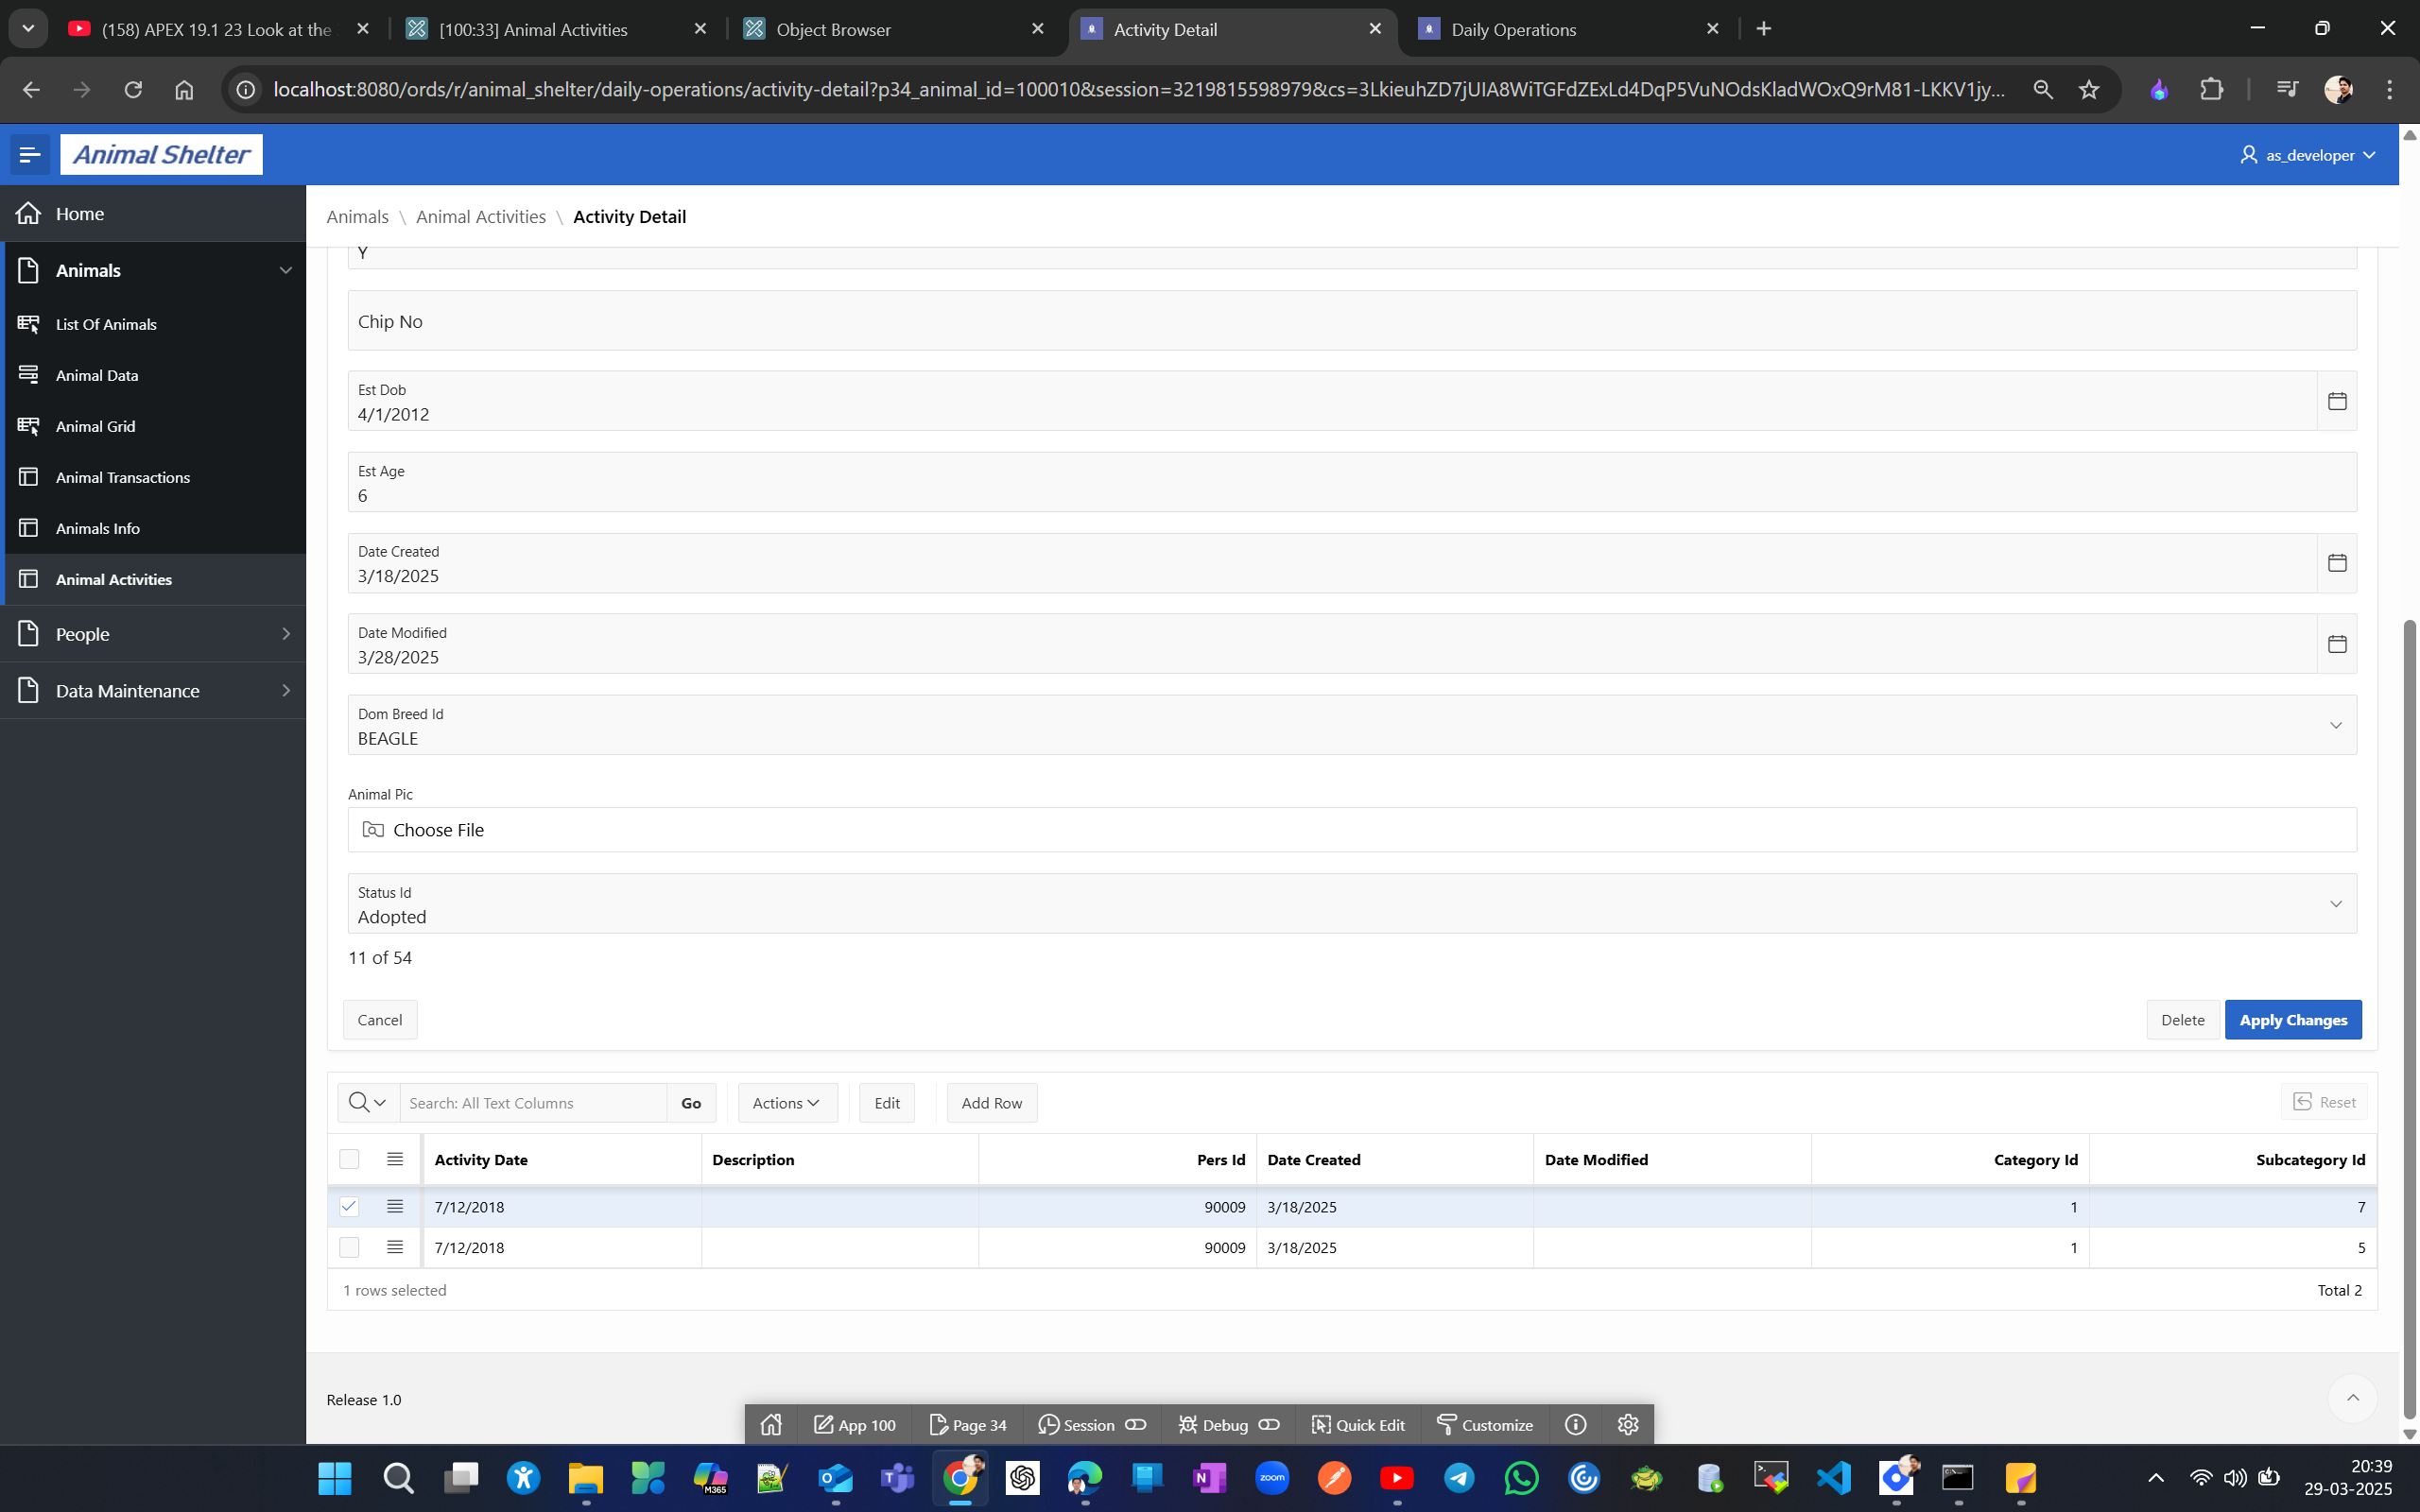
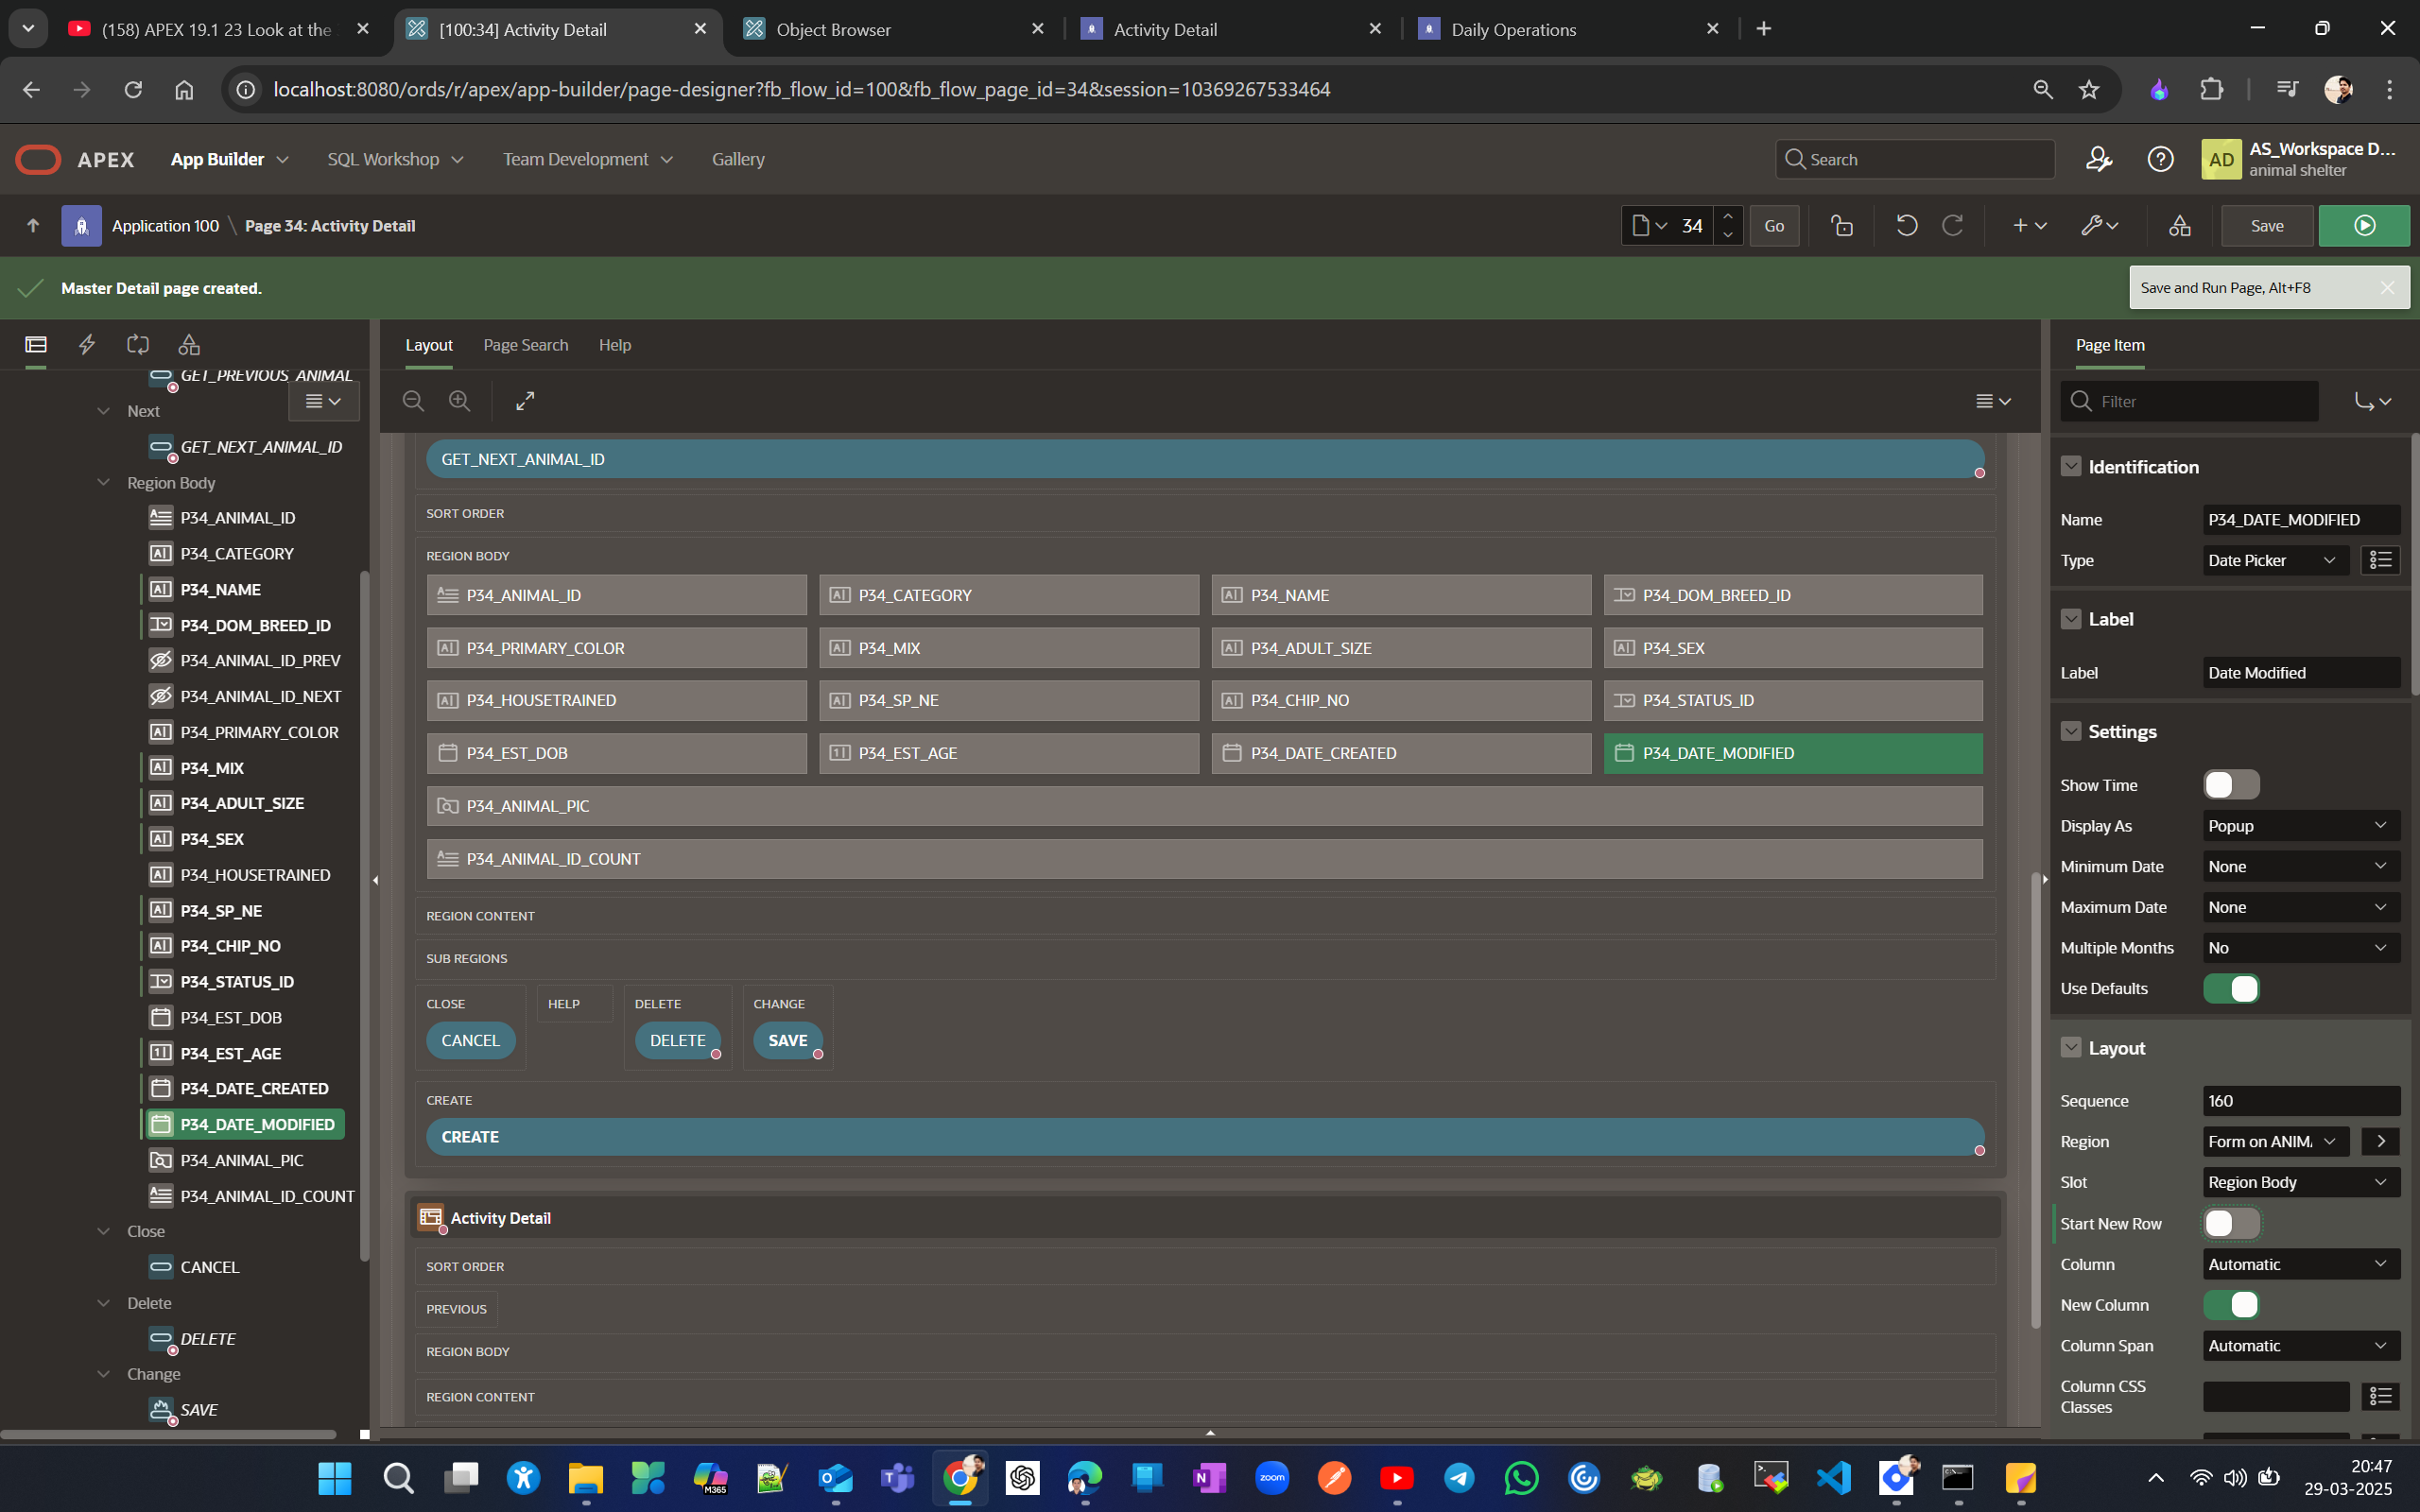
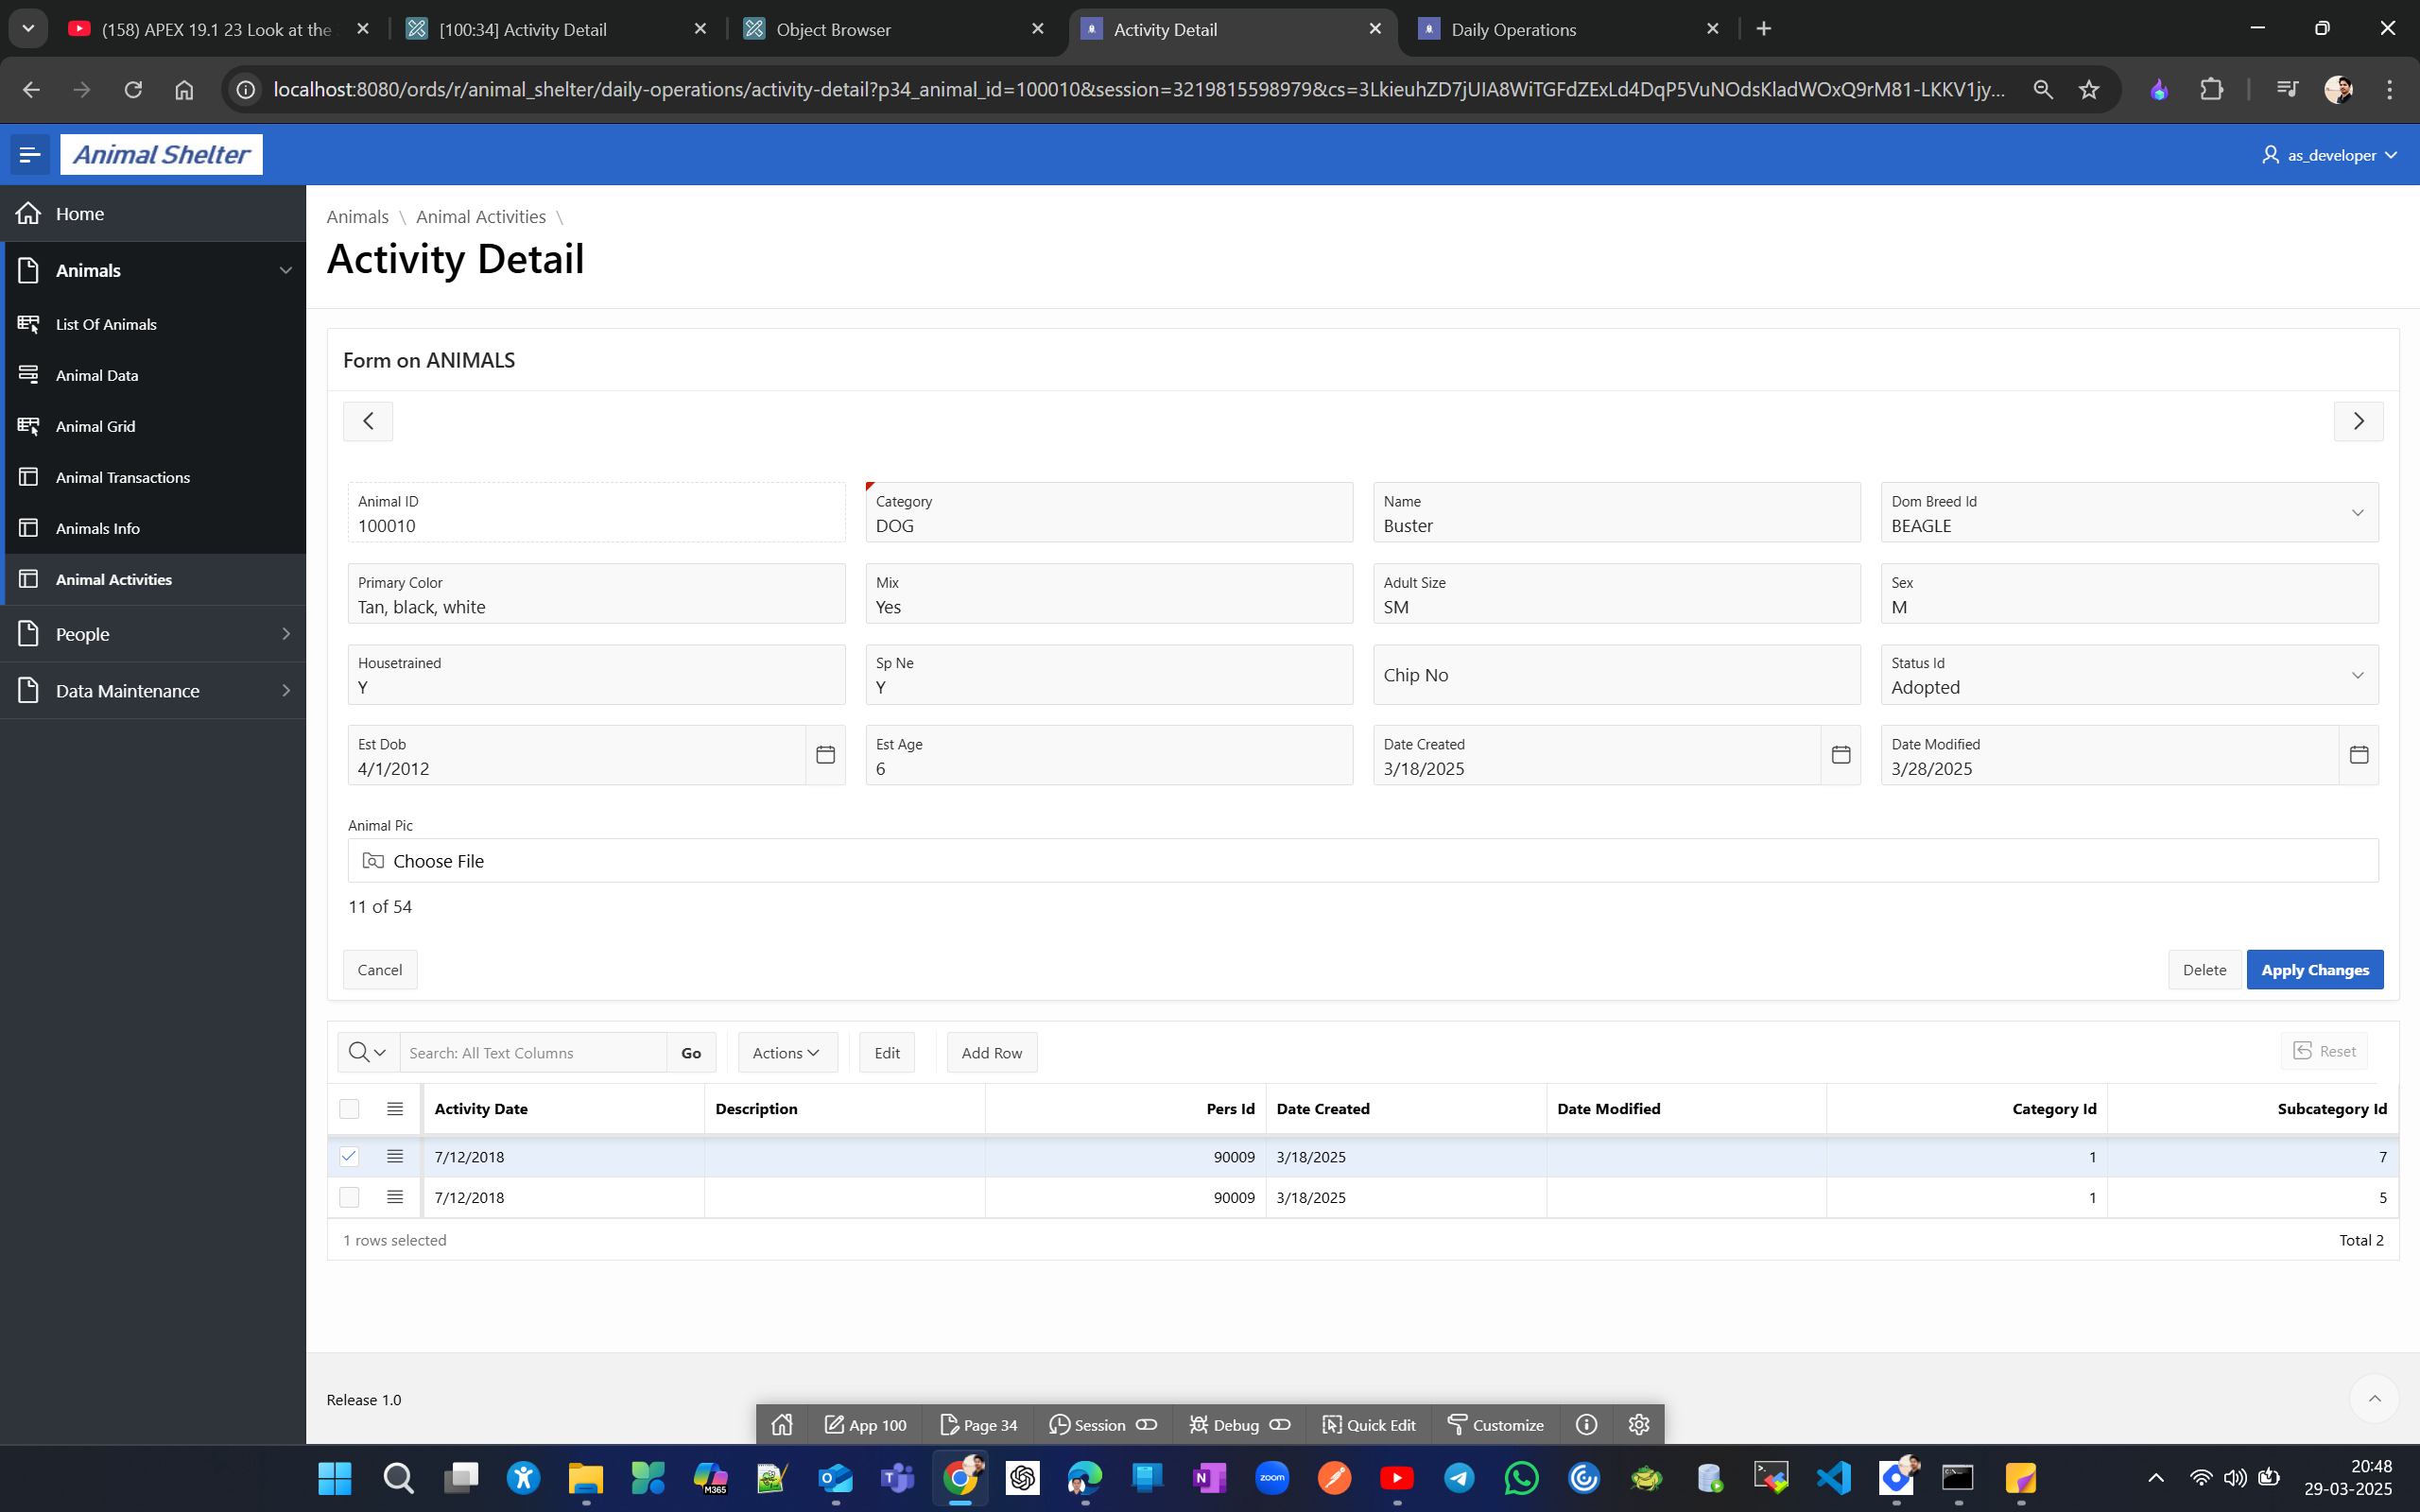
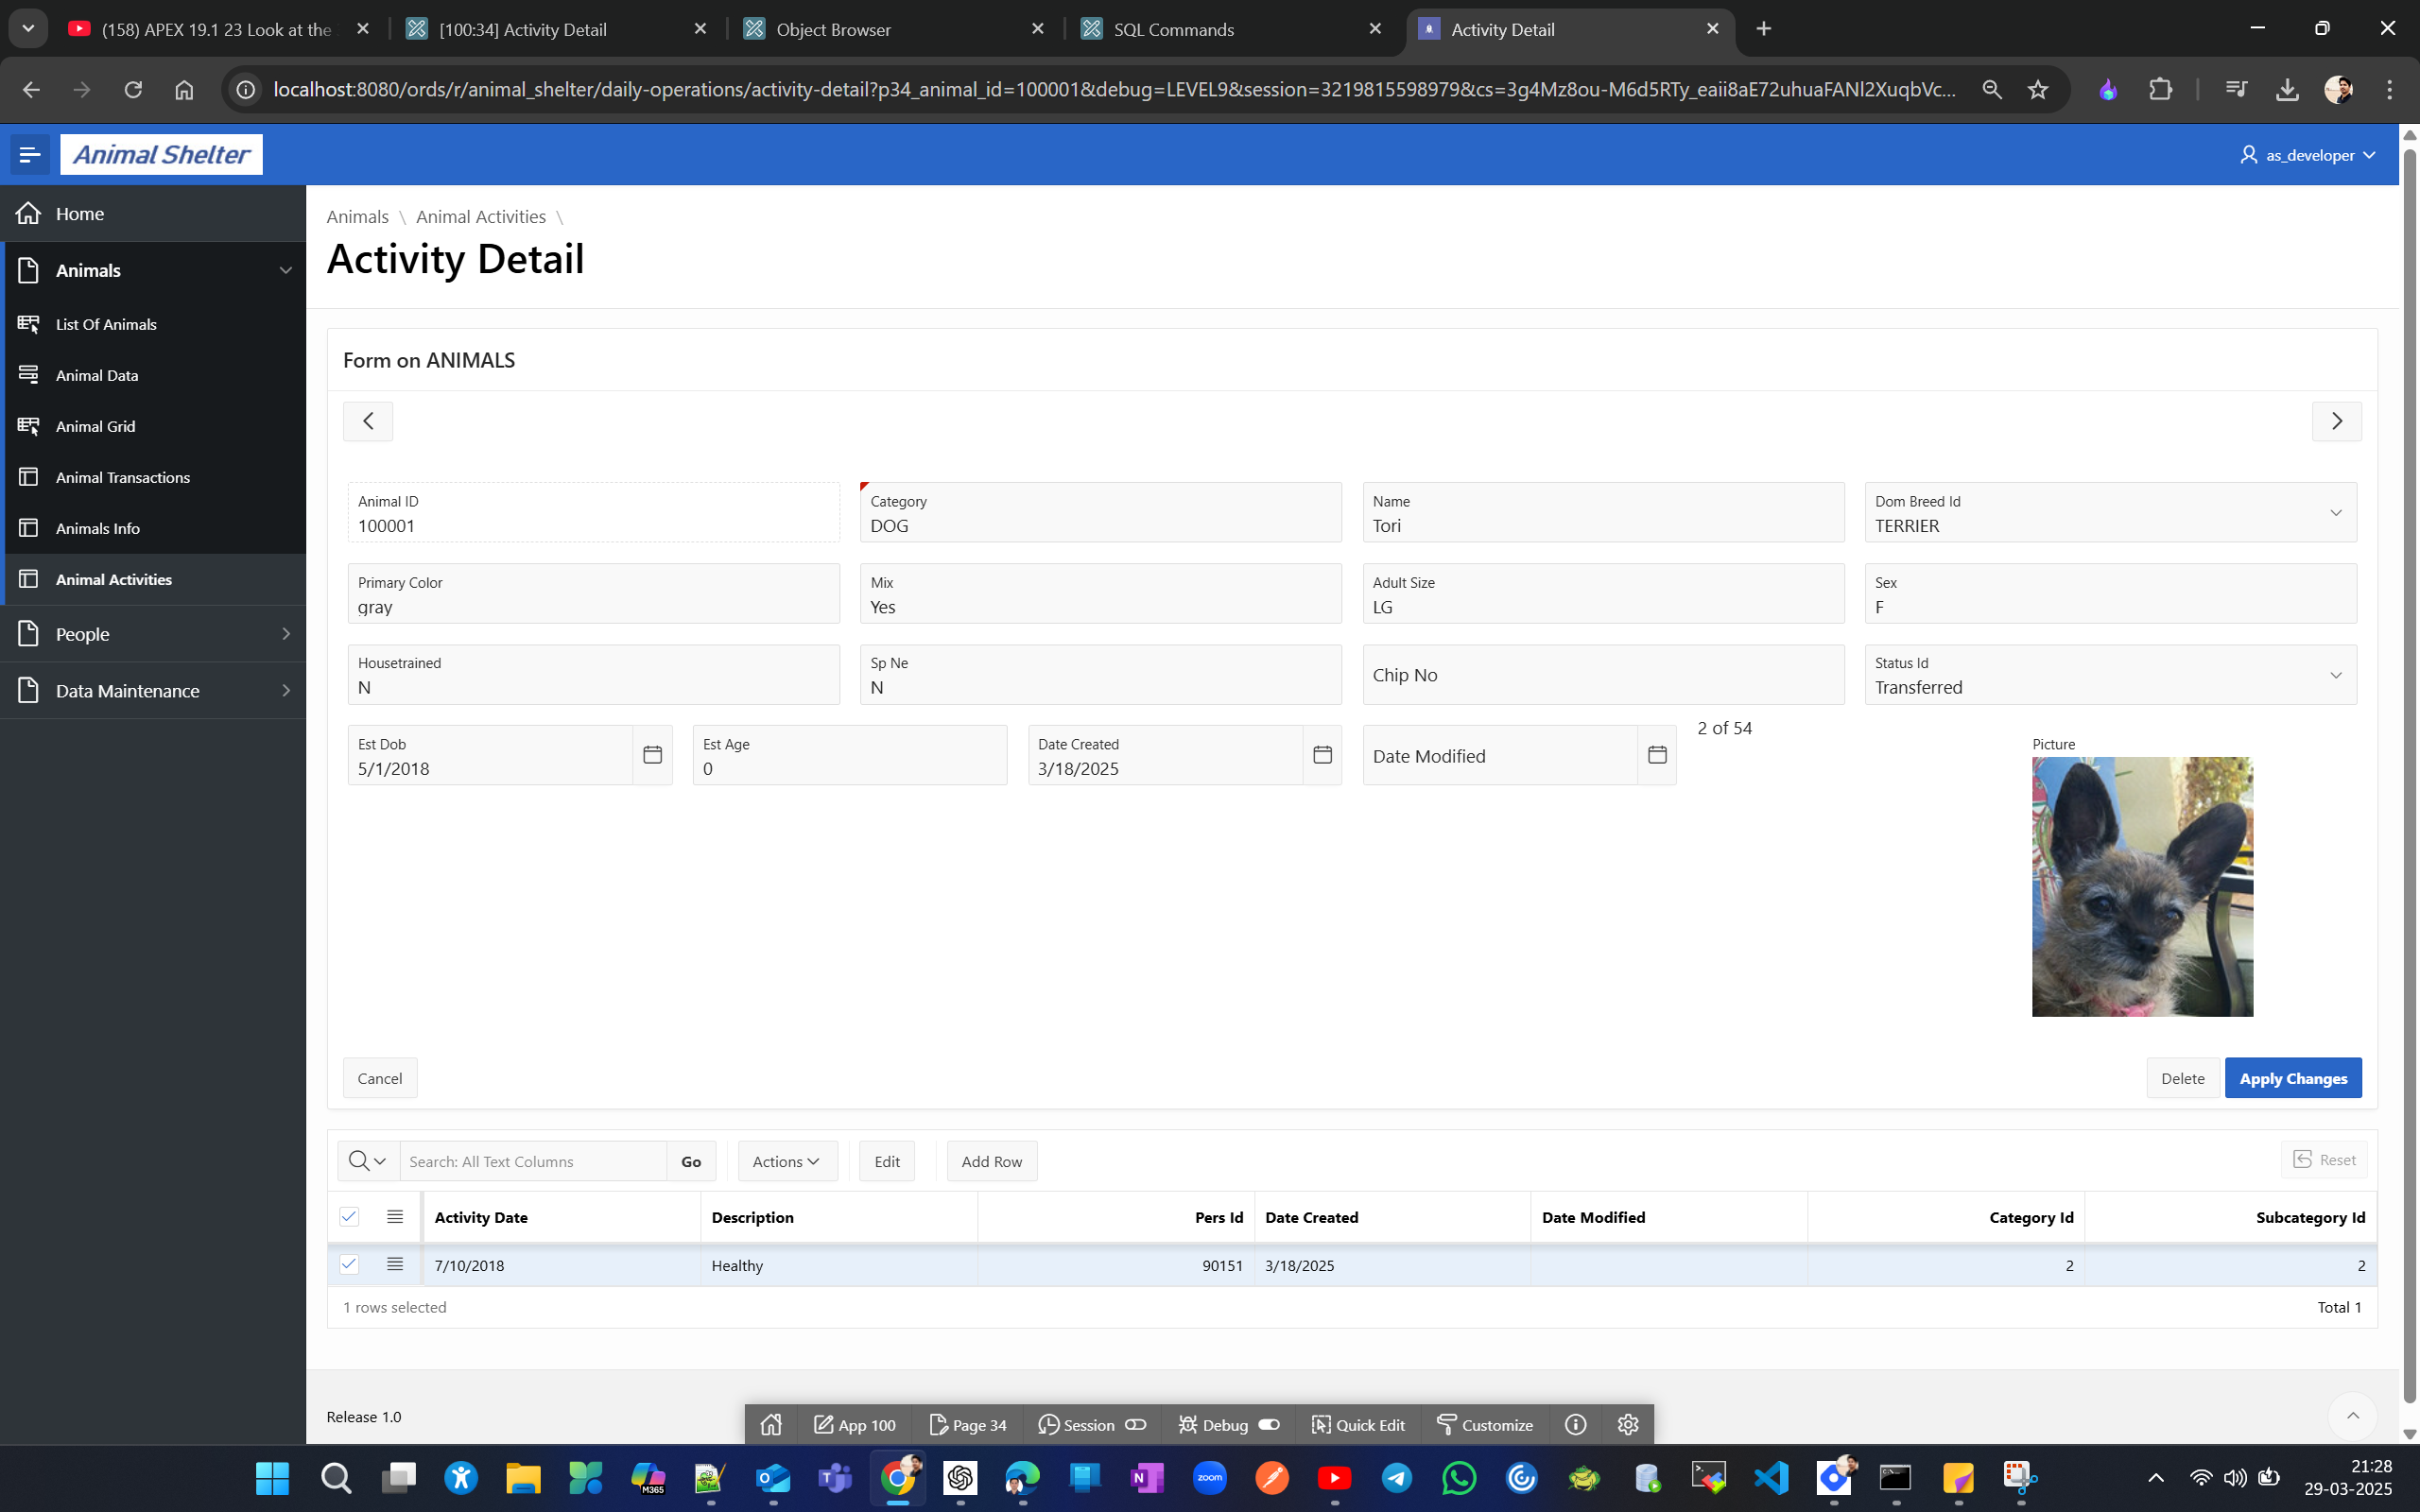
Lets add a page item to see animal pic which will enhance visibility for single row edit for.
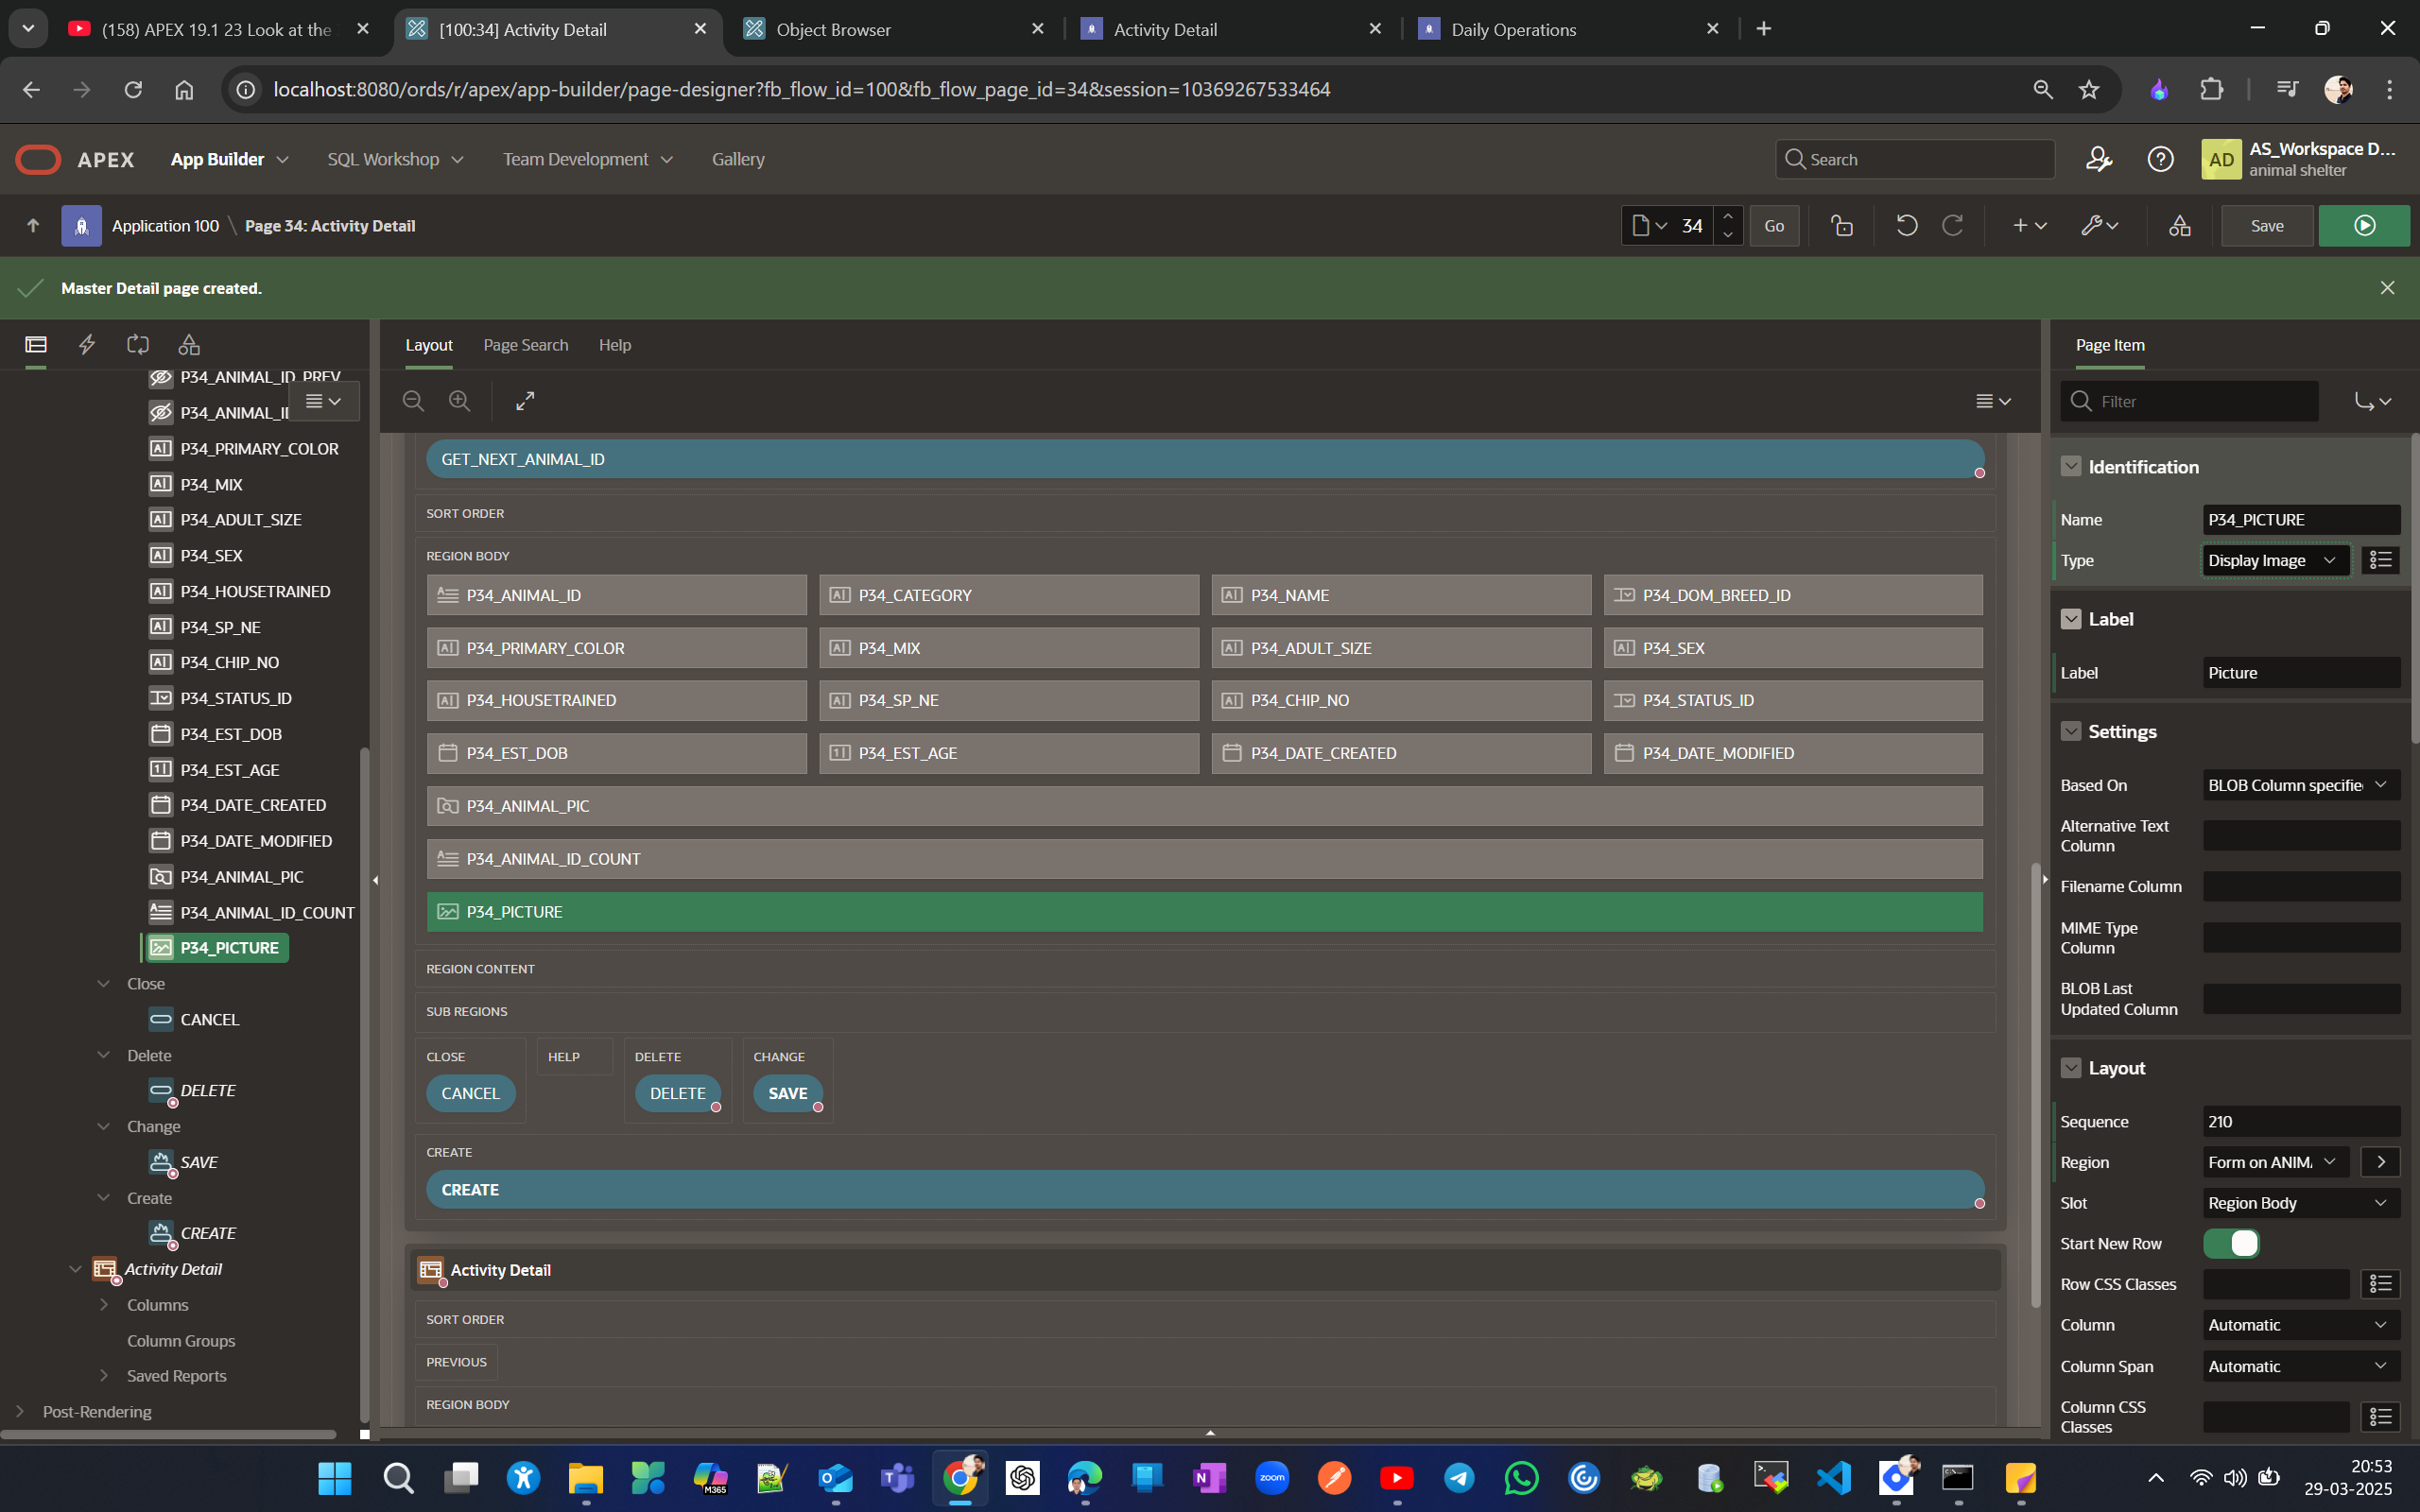
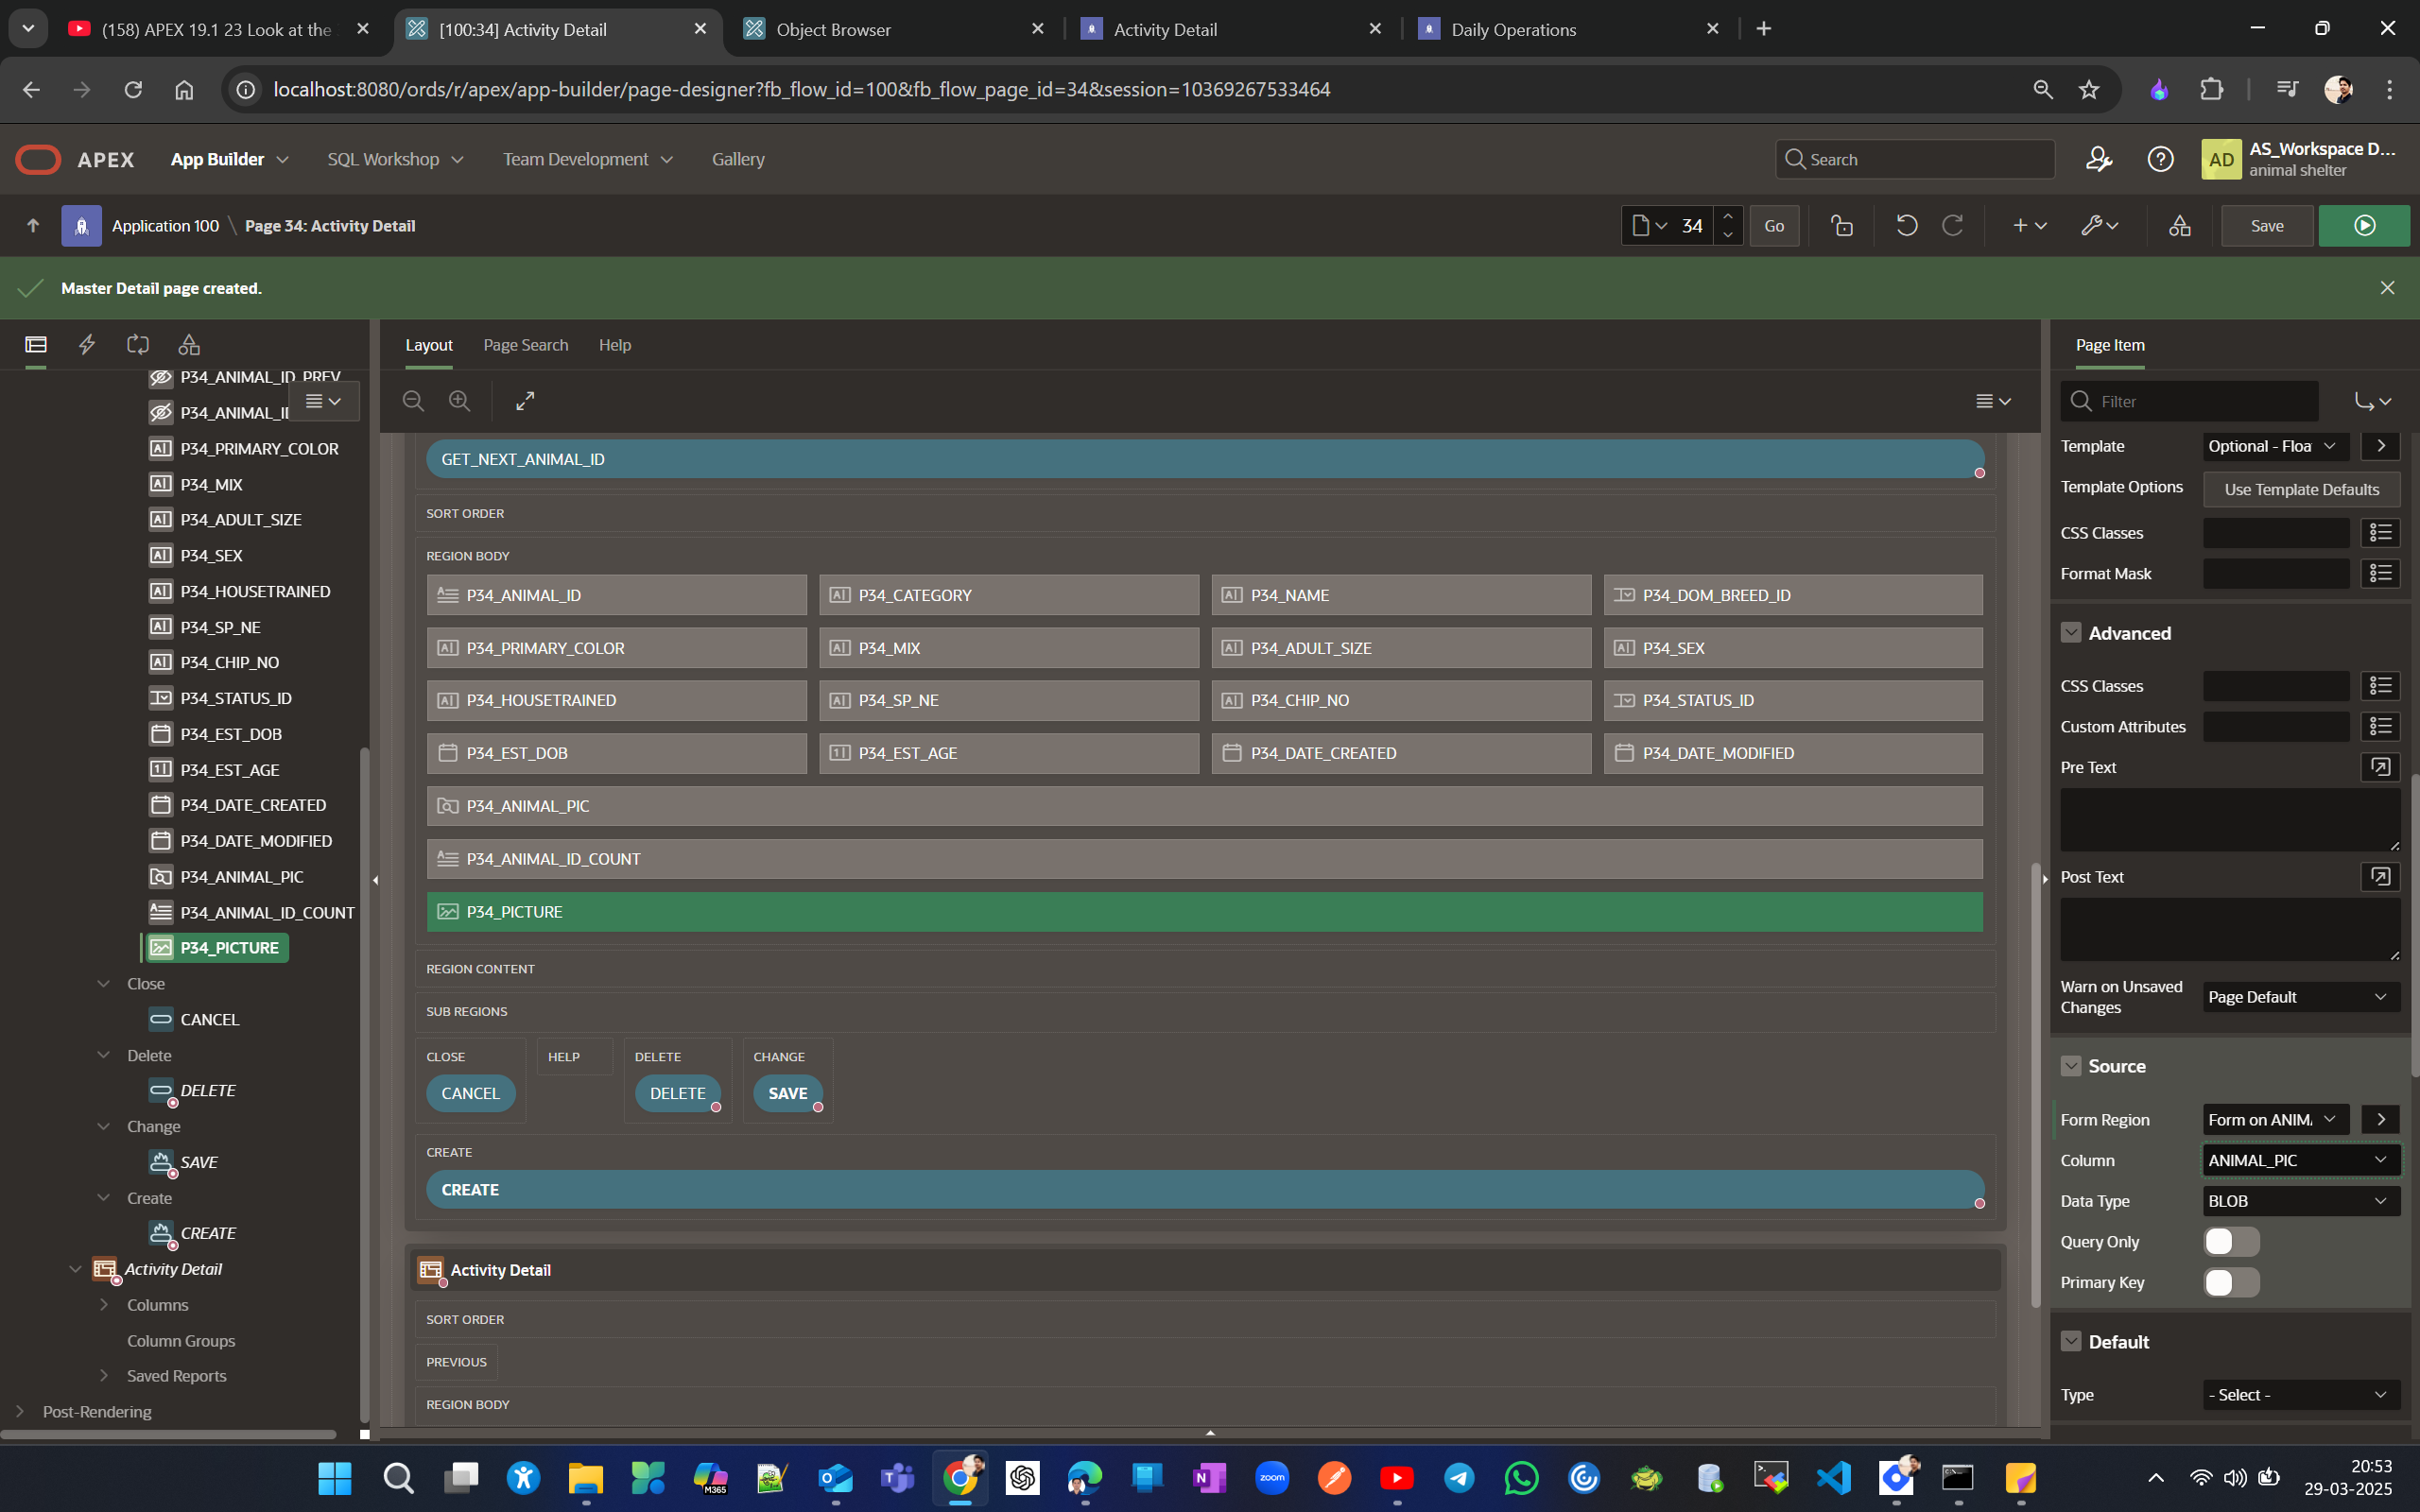
If you get an error saying "column ambiguously defined," try debugging by enabling debug mode to check the debug info, or delete the ANIMAL_PIC item as it might duplicate the newly created item P34_PICTURE.
THE END
FAQ
How to enable RESTful services in ORDS?
You can refer to this blog for the answer.How can you debug an Apex app?
Enable debug mode from the dev toolbar to view debug info, or add a message and check the SQL right after it in the debug info to help, as shown in the example below.
APEX_DEBUG.ENABLE(apex_debug.c_log_level_info);
apex_debug.message(p_message => 'Santosh Panigrahi enabled Debug. SQL below:');
apex_debug.message(p_message => v_sq1) ;|
You can also refer this video APEX_DEBUG from ERPStuff
Subscribe to my newsletter
Read articles from Santosh Panigrahi directly inside your inbox. Subscribe to the newsletter, and don't miss out.
Written by

Santosh Panigrahi
Santosh Panigrahi
Database Developer with over 10 years of experience in designing, developing, and delivering optimized solutions across diverse business functions. Proficient in Oracle SQL, PL/SQL, Performance Tuning, Oracle APEX, ORDS, Unix Shell Scripting, and Python Fundamentals. With extensive expertise in development, maintenance, and optimization, I possess strong skills in coding, debugging, testing, and troubleshooting complex systems. I have worked across domains such as Finance and Risk, Ratings, Wealth Management, SOX Compliance, and Fleet - Fuel Management. Passionate about leveraging my technical expertise and domain knowledge to deliver efficient, data-driven solutions that enhance business performance and foster growth.