How to Use the CUDO Compute CLI for Virtual Machine Lifecycle Management
 Yoma Okobiah
CUDO Compute is a decentralised cloud computing platform that provides scalable and cost-effective computing power by utilising underutilised hardware resources from data centers, enterprises, and individual contributors. It allows users to deploy and manage virtual machines (VMs) and workloads on a distributed network of compute nodes.
In this tutorial, you will learn how to integrate Cudo Compute into your workflow for scalable, cost-effective computing.
Objectives
Create virtual machines (VMs) with CUDO’s CLI
SSH into these VMs to run a benchmark test via the CLI
Destroy the VMs via the CLI
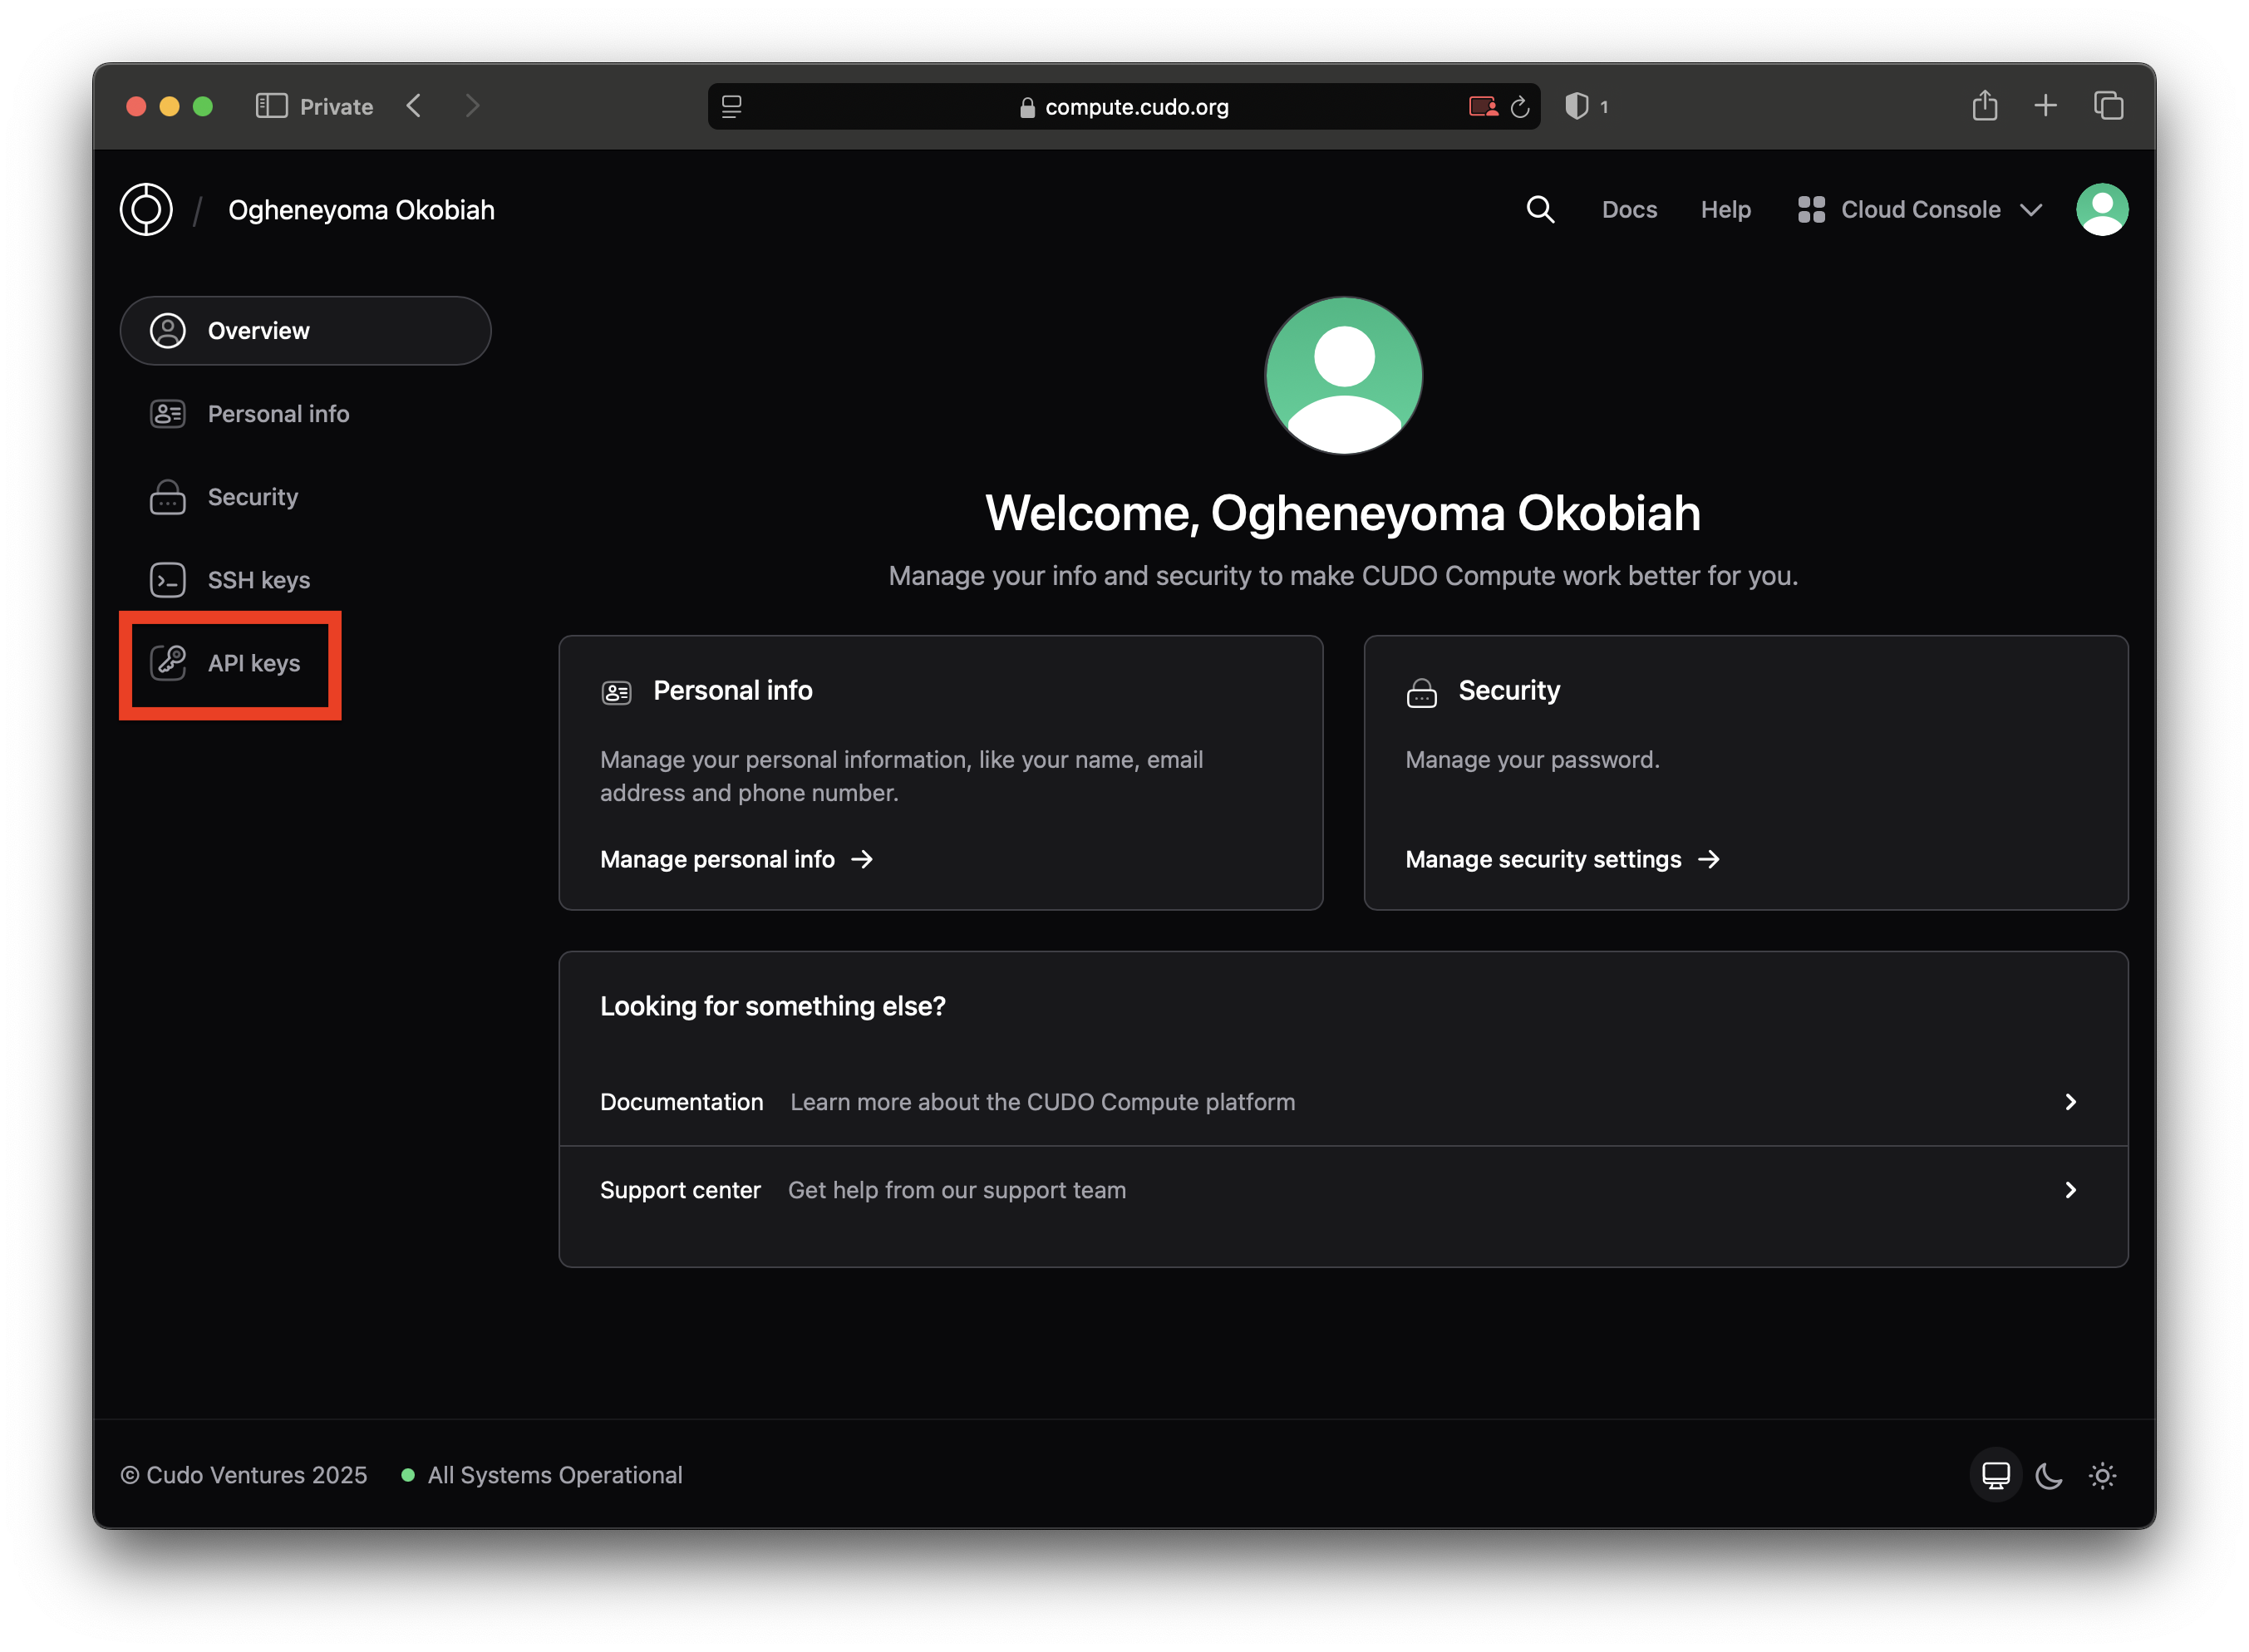
Get your API key
You will need to obtain your API keys from the API Keys section on your CUDO dashboard.
Click on the “Create an API Key” button and assign a name to your API key. Your chosen API key name must be in lowercase and can be hyphenated for readability.
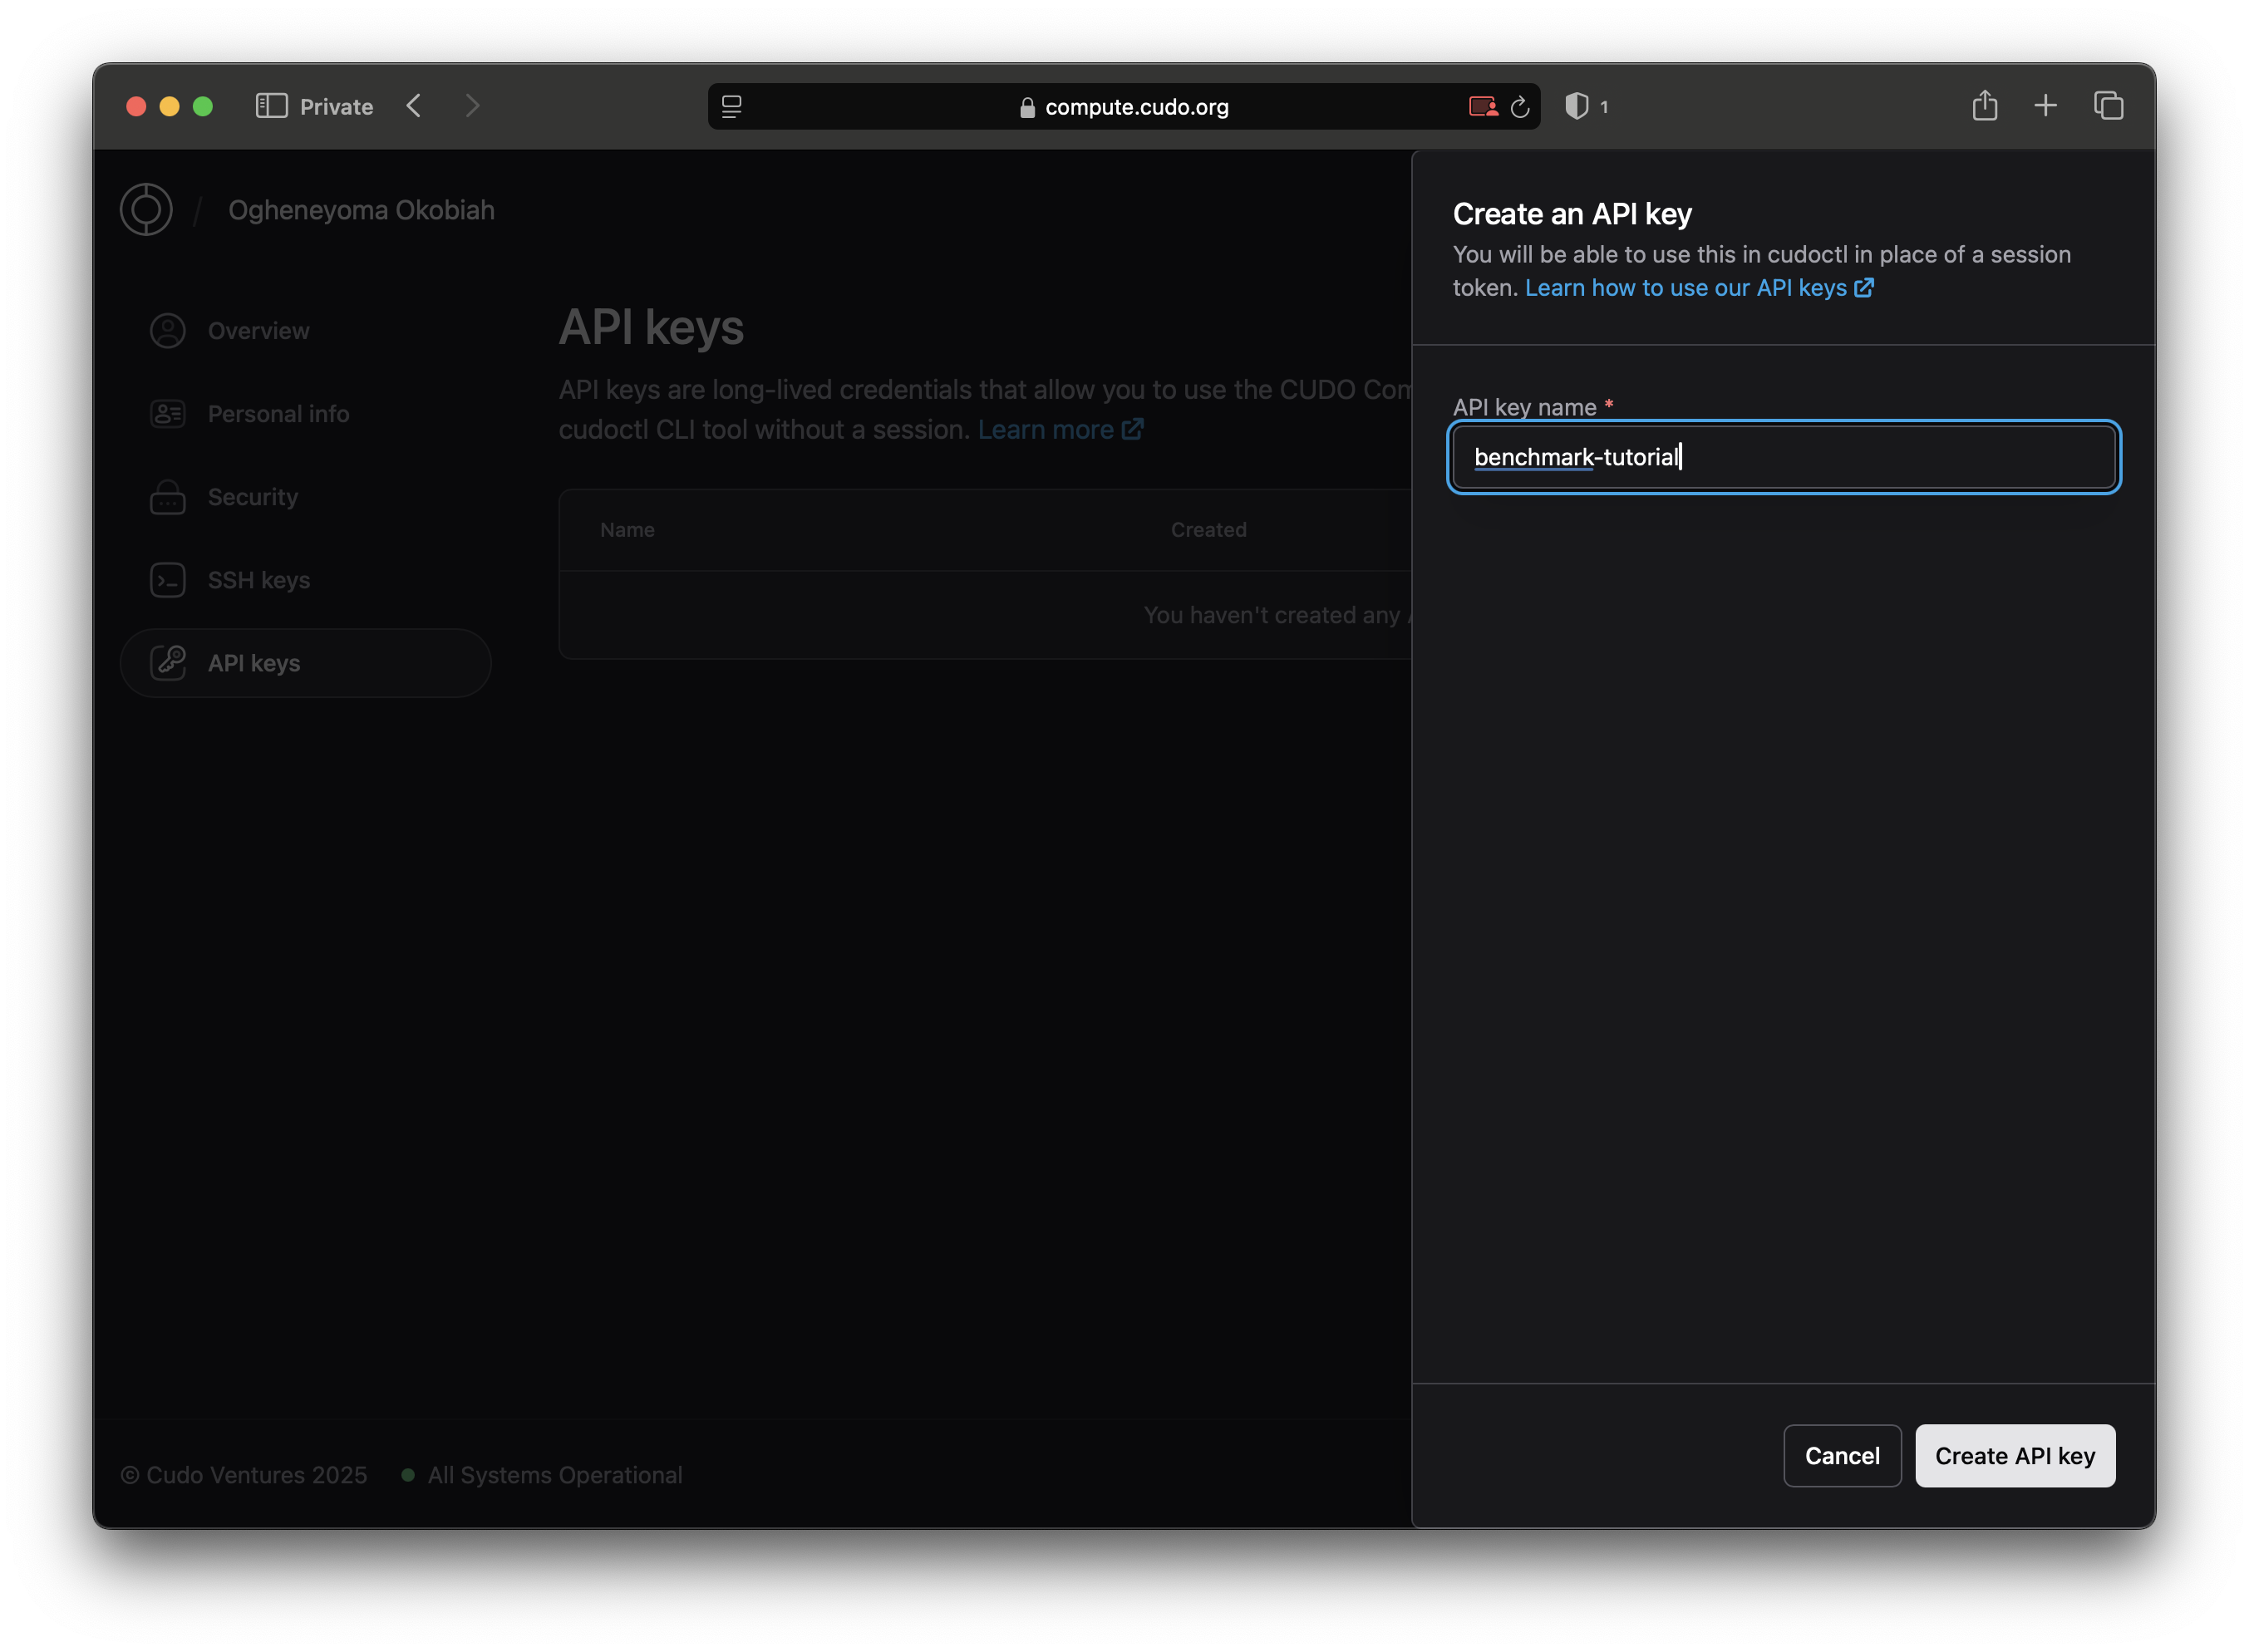
On doing this, you’ll be given an API key. Take note of this section of the app, as you’ll need to copy your API key and use it in your CLI.

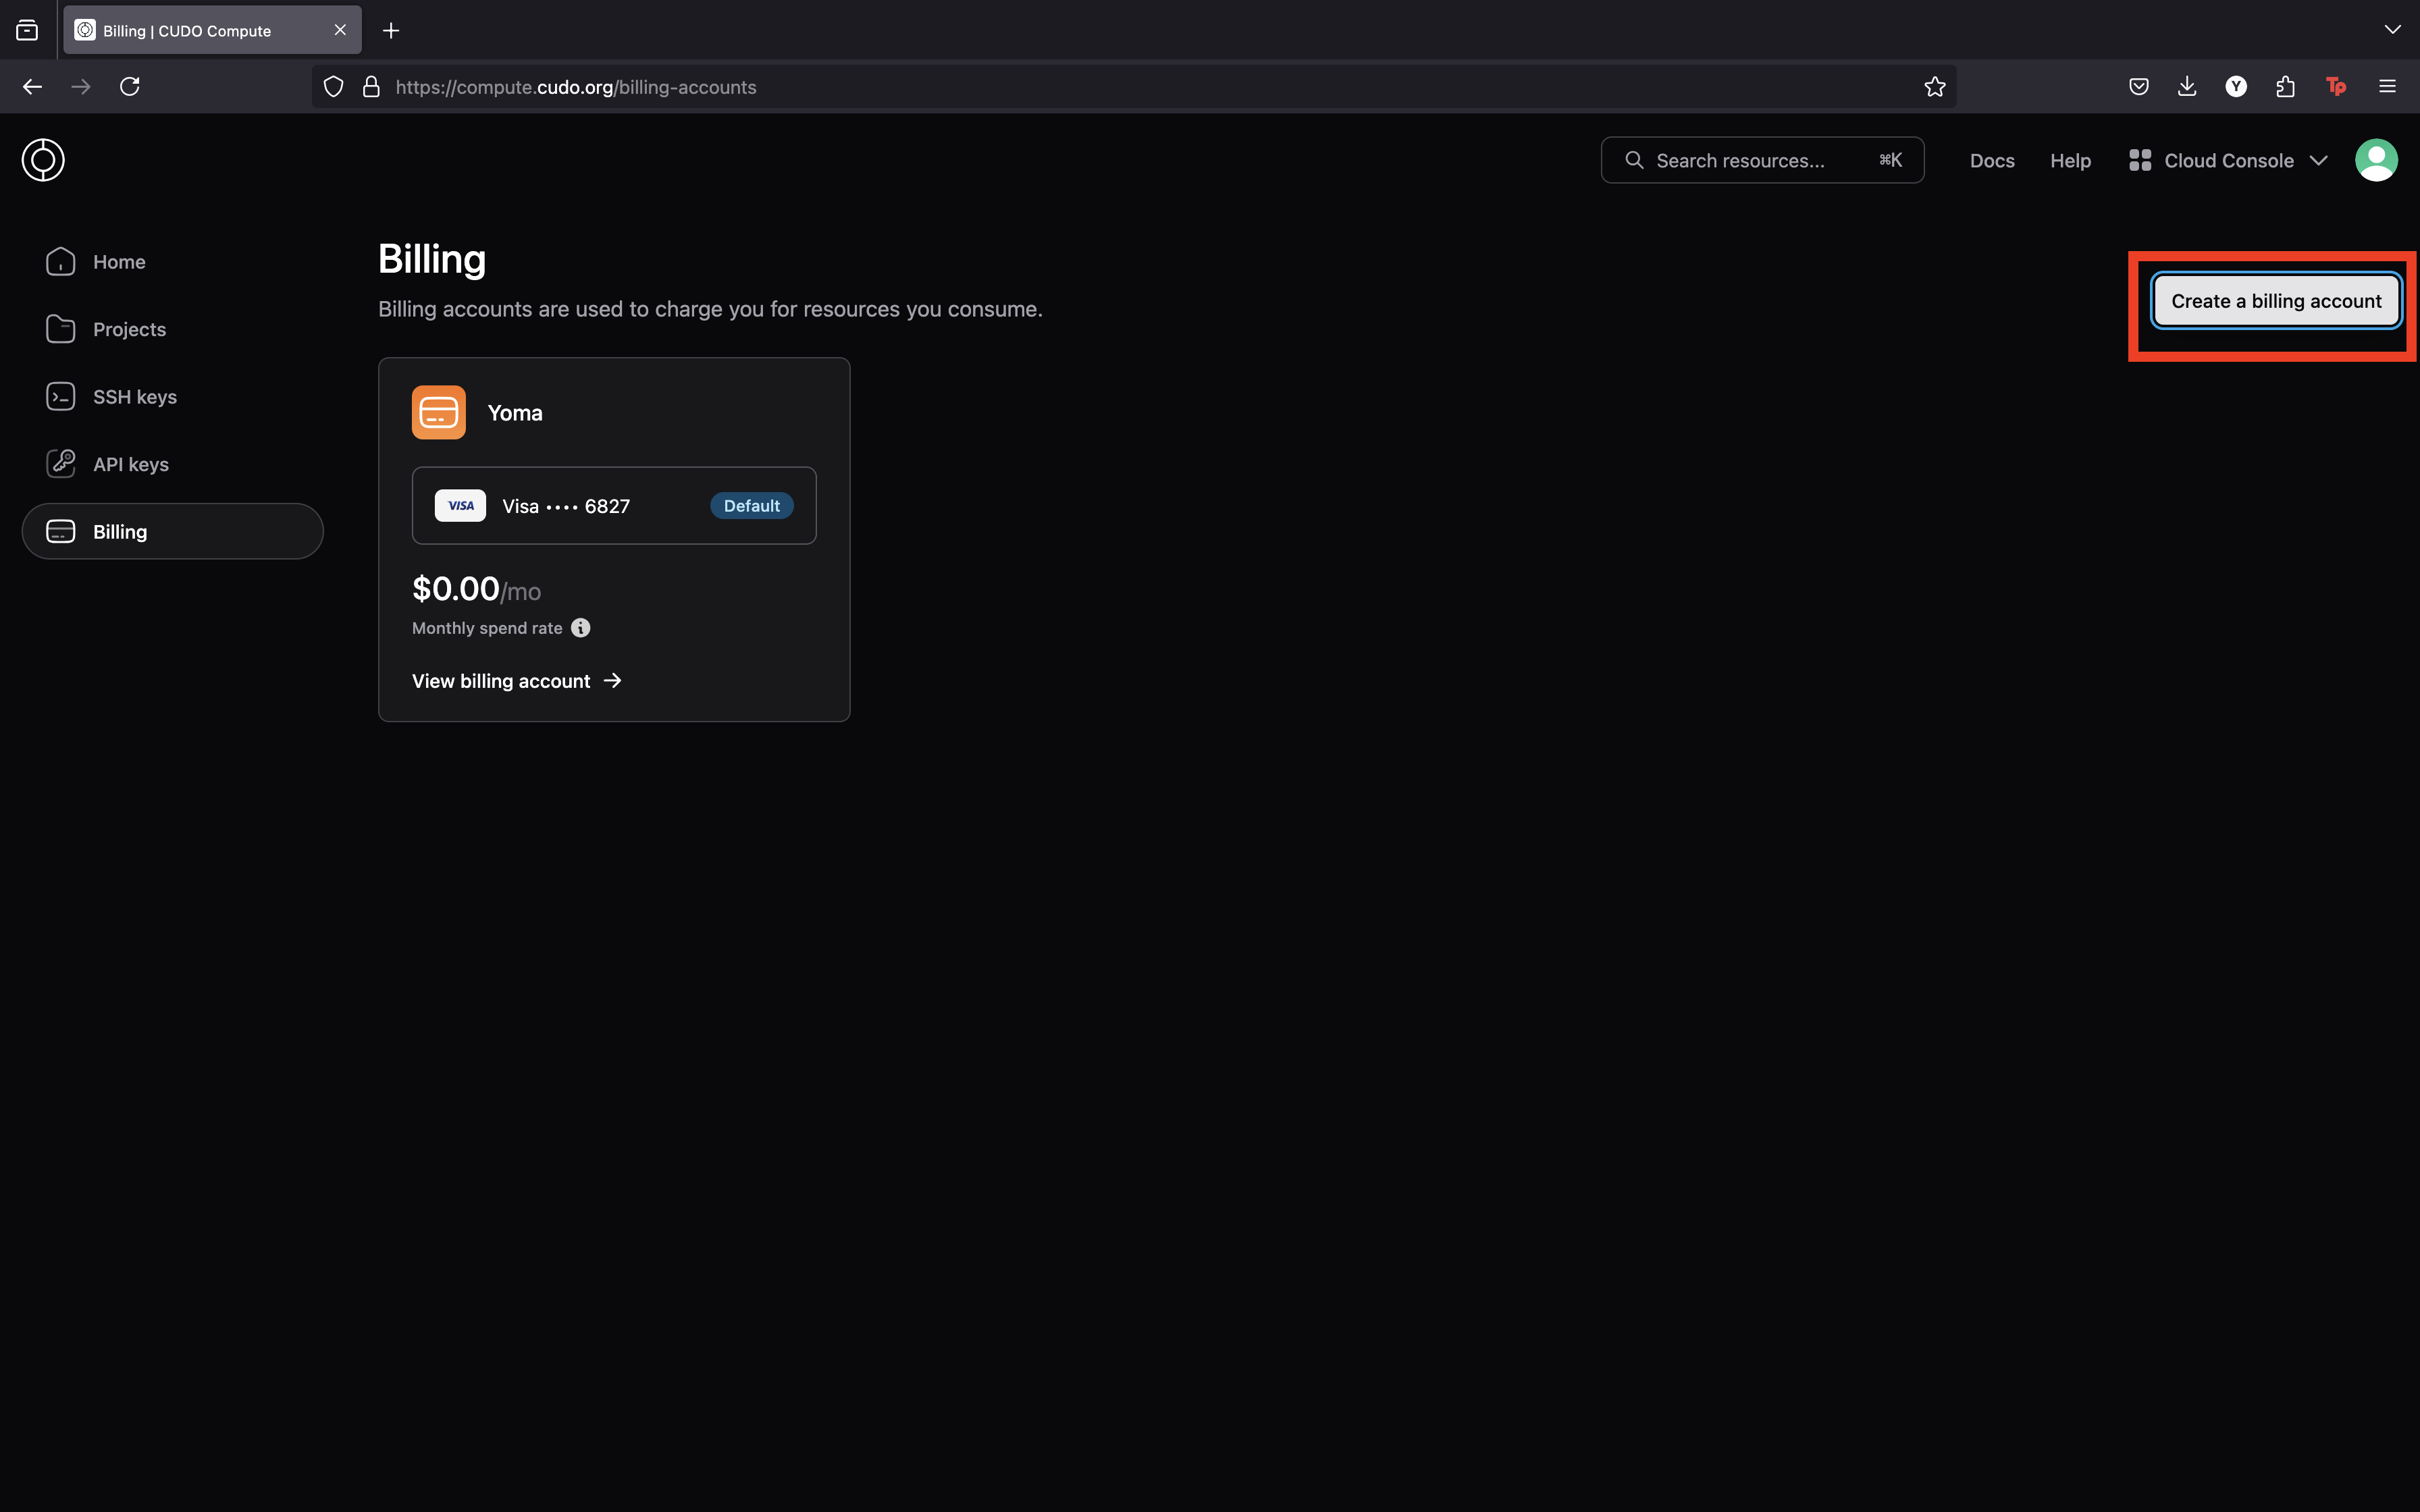
Create your billing account
Billing accounts pay for the use of resources in Cudo Compute. To use the cloud resources in a project, the project must be linked to an active billing account. An active billing account has a credit balance; the minimum deposit is $10.
Setup CUDO CLI
CUDO Compute has a CLI tool called cudoctl to manage all of your resources within the platform. Follow the steps below to get started.
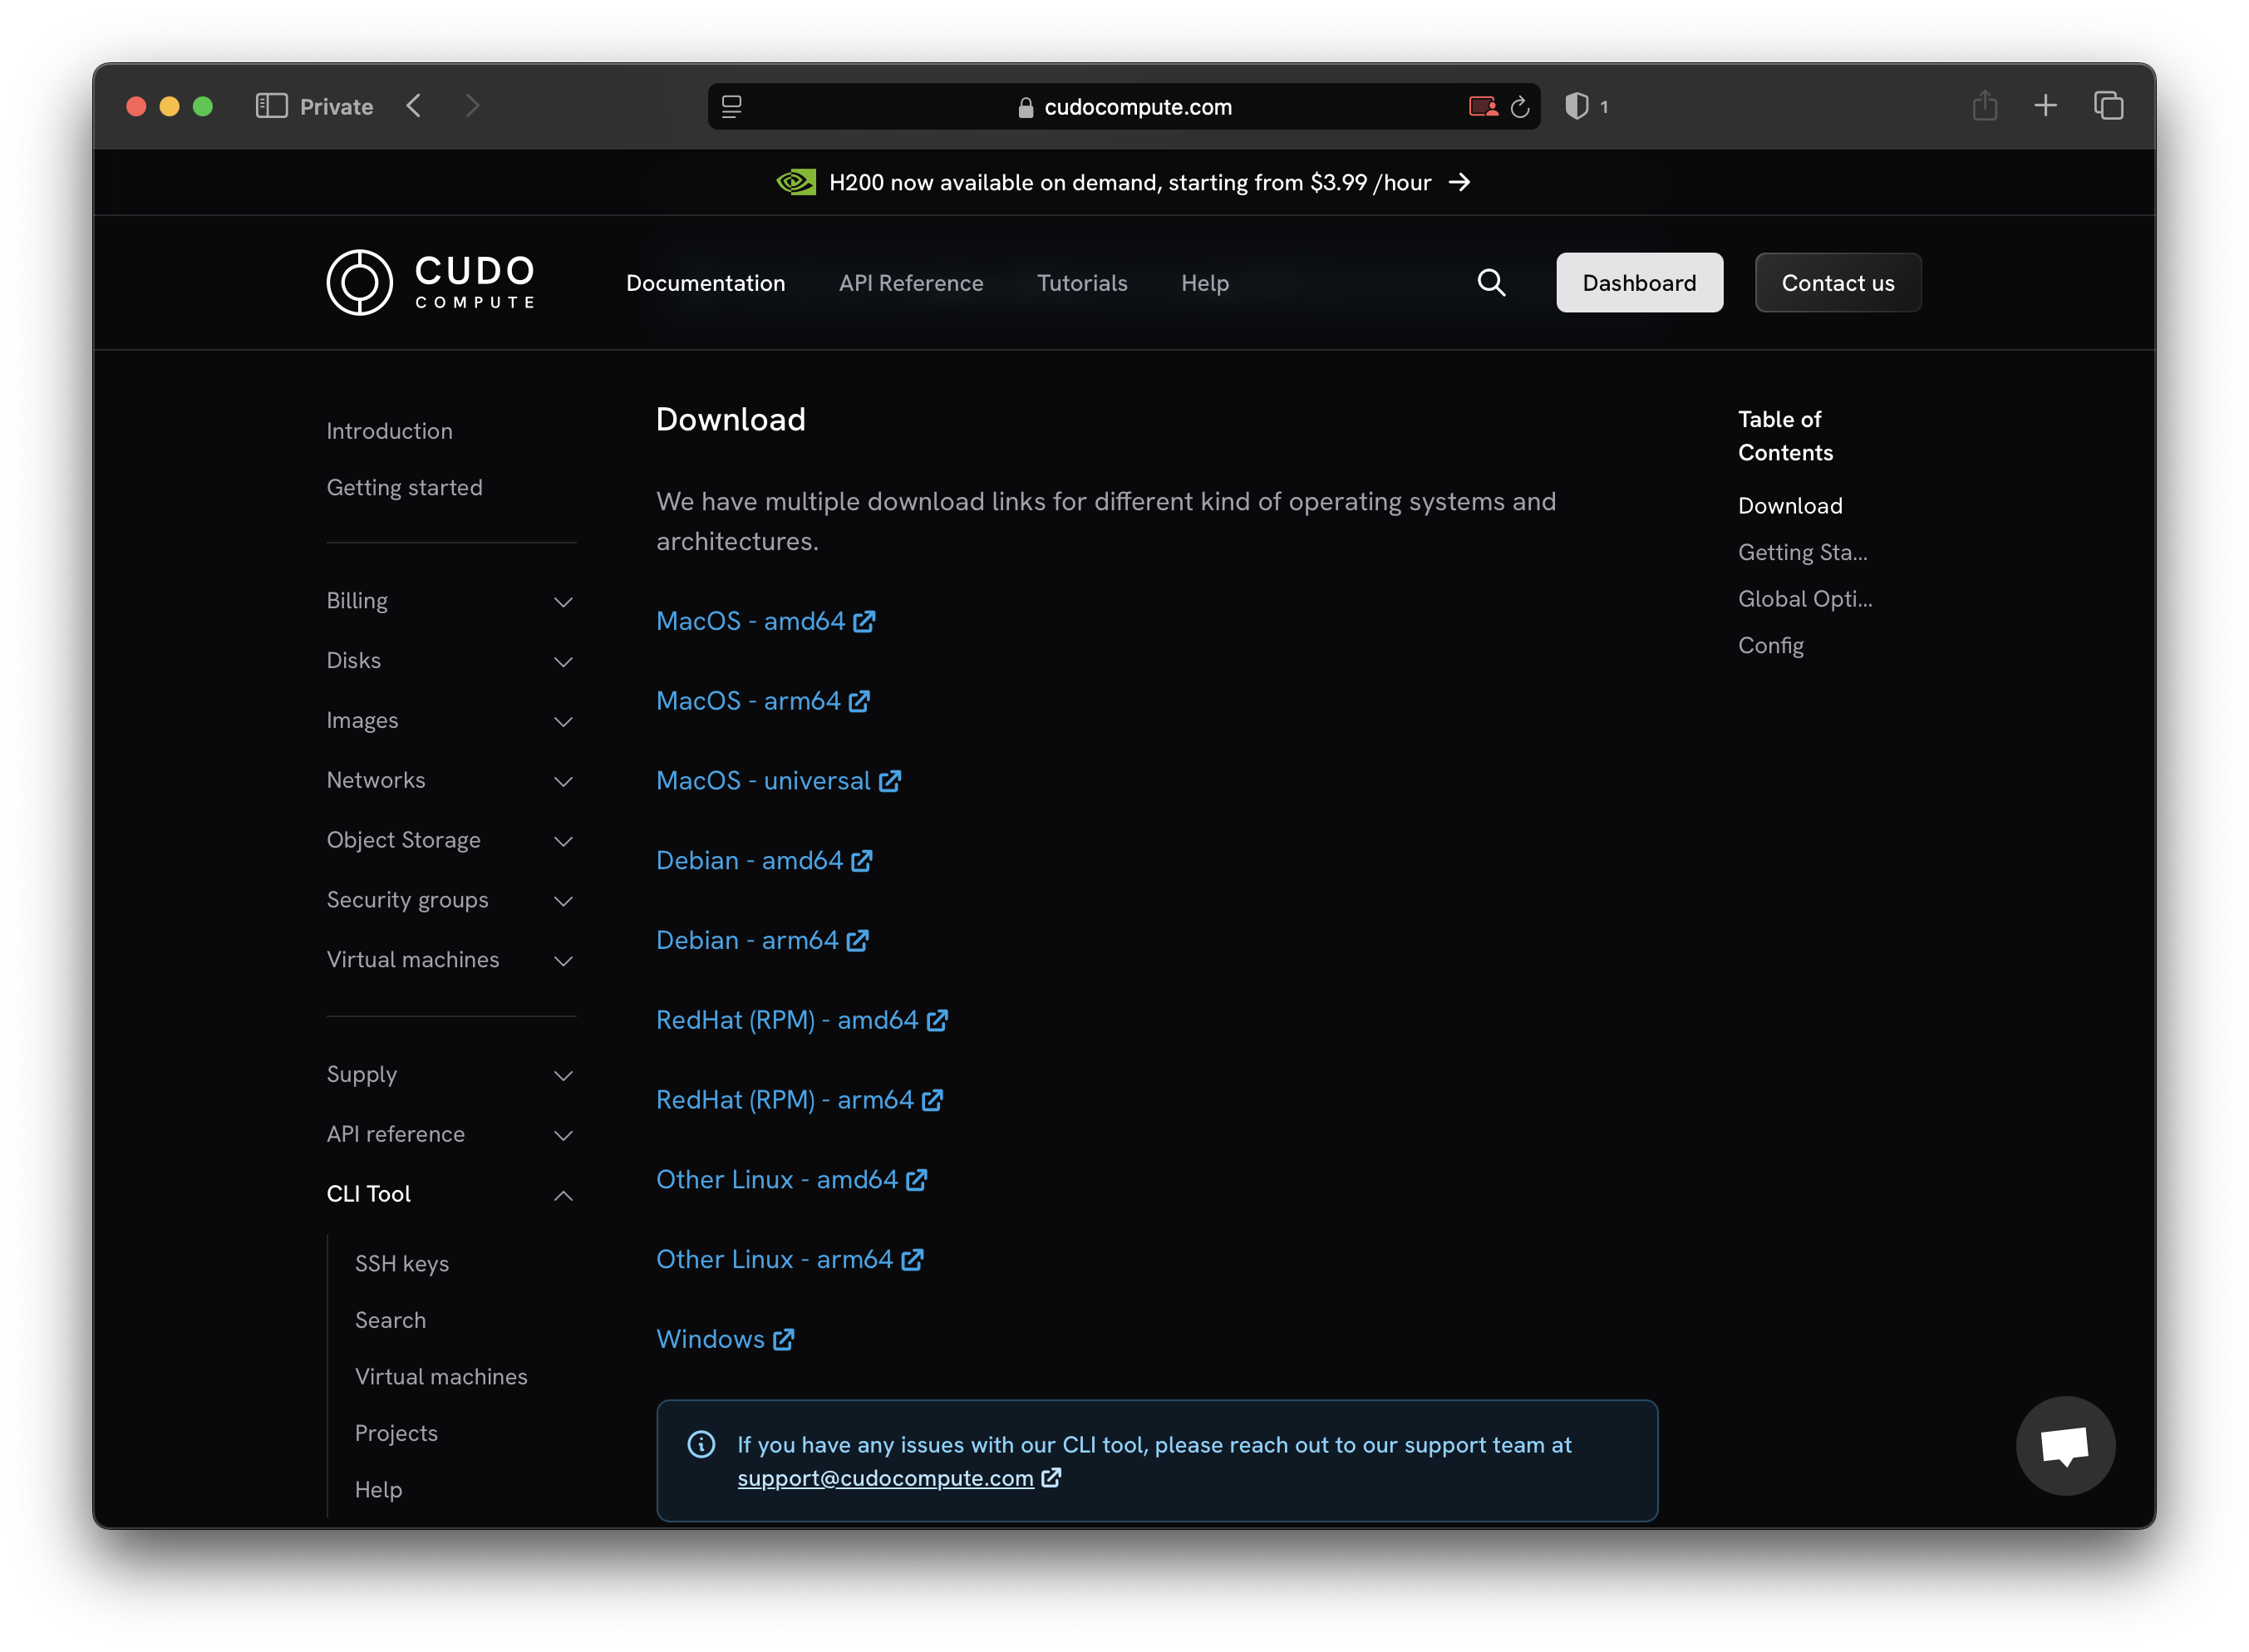
Step 1: Download the binary file
To access the CLI’s functionality, you must download the binary file onto your local machine. To do this, go to the download page.
Step 2: Install the binary file
After successfully downloading the binary file, you have to move it to the right path on your machine.
chmod +x <filepath>
sudo mv <filepath> /usr/local/bin/
sudo mv /usr/local/bin/<filename> /usr/local/bin/<newname>
Replace <filepath> with the path to the downloaded binary and <newname> with cudoctl.
Step 3: Initialise the installation
Run cudoctl init and follow the steps.
cudoctl init
   ✔ api key: my-api-key
   ✔ project: my-project
   ✔ billing account: my-billing-account
   ✔ context: default
   config file saved ~/.config/cudo/cudo.yml
A config file will be maintained in $HOME/.config/cudo/cudo.yml.
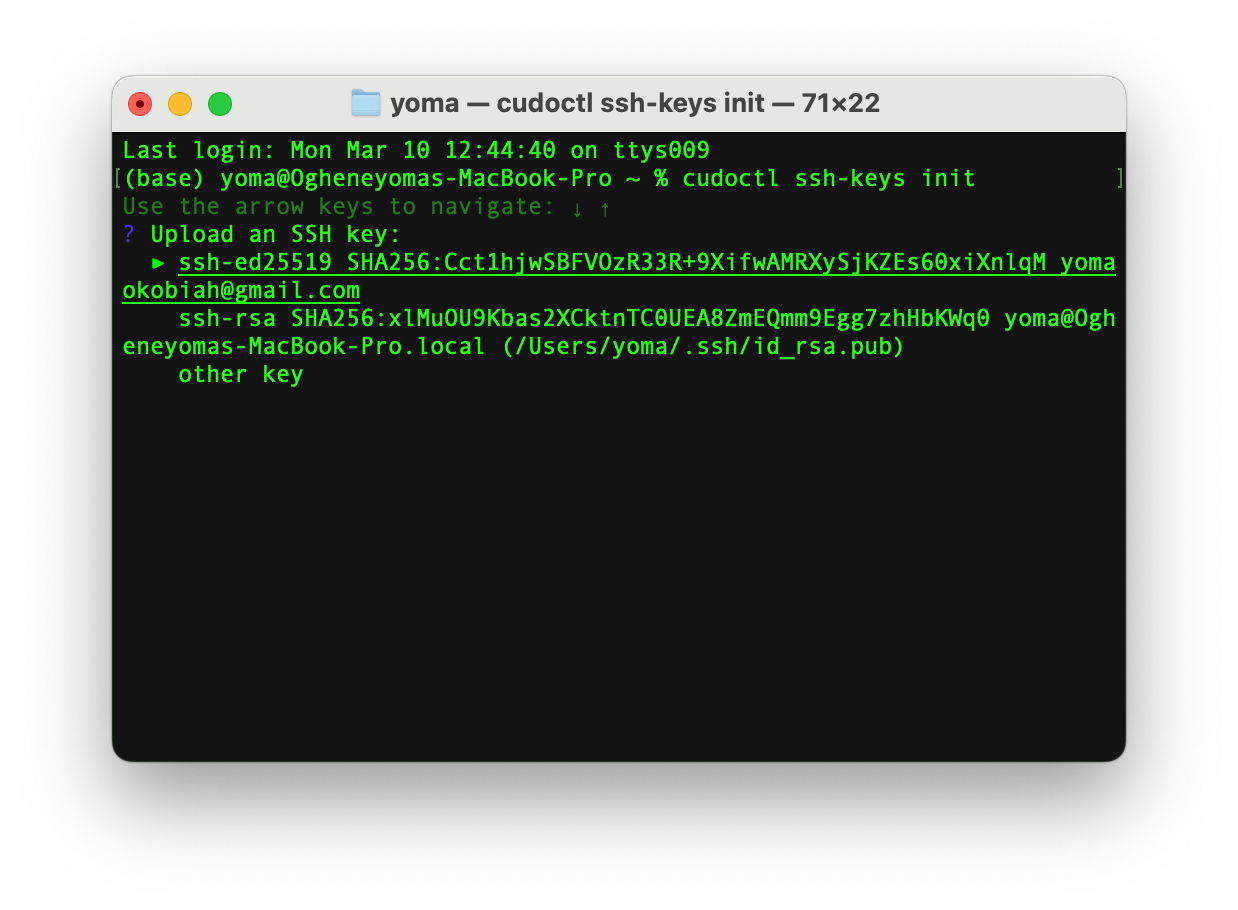
-h e.g cudoctl -hStep 4: Add SSH Key
An SSH key is used to securely access a VM over the Internet or a private network. If you don’t have an existing SSH key, follow the instructions here to generate a new one on your local machine.
Run the following to initialise CUDO with your SSH key:
cudoctl ssh-keys init
Select your desired SSH key and proceed with <enter/return
Executing the Bash Script
Here’s a Bash script that uses only the Cudos CLI to meet the objectives of this tutorial:
We begin with the script shebang (#!/bin/bash), which specifies that the script should be executed using Bash. The set -e command ensures that the script exits immediately if any command fails. Next, the user is prompted to enter a project name, which is used to create a project. Since all resources in Cudo Compute must be associated with a project, a VM cannot be made without first setting up a project.
#!/bin/bash
set -e
read -p "Enter the project name: " project_name
cudoctl projects create $project_name
...
The CONFIGS array stores multiple VM configurations, with each entry following a structured format: VM name, data center, machine type, OS image, number of vCPUs, memory size, and disk size. Additional configuration parameters can be found in the documentation if needed.
...
CONFIGS=(
  "benchmarkvm1 us-santaclara-1 intel-broadwell ubuntu-2204-nvidia-535-docker-v20241017 1 1 10"
  "benchmarkvm2 us-santaclara-1 intel-broadwell ubuntu-2204-nvidia-535-docker-v20241017 2 2 15"
  "benchmarkvm3 us-santaclara-1 intel-broadwell ubuntu-2204-nvidia-535-docker-v20241017 4 4 20"
)
...
We create a file (benchmark_results.txt) to store the benchmark results and add a header row (VM Name, VCPU, Memory, Disk_Size, CPU Events/sec) to ensure the data is easily identifiable.
...
RESULTS_FILE="benchmark_results.txt"
echo "VM Name, VCPU, Memory, Disk_Size, CPU Events/sec" > $RESULTS_FILE
...
We define the Bash function create_vm() using local variables to store the function arguments, representing the array’s VM configuration details. The function uses echo to display status messages, providing feedback on the VM creation process. The VM_ID variable captures the output of the cudoctl vm create command, allowing us to verify whether the VM was successfully created.
...
create_vm() {
  local vm_name=$1
  local data_center=$2
  local machine_type=$3
  local image=$4
  local vcpu=$5
  local memory=$6
  local disk_size=$7

  echo "Creating VM: $vm_name ($vcpu CPUs, $memory RAM, $disk_size Disk) in $data_center..."

  VM_ID=$(cudoctl vm create -project "$project_name" -id "$vm_name" -data-center "$data_center" -machine-type "$machine_type" \
          -image "$image" -vcpus "$vcpu" -memory "$memory" -boot-disk-size "$disk_size")

  if [[ $VM_ID -gt 0 ]]; then
      echo "Failed to create VM: $vm_name"
      exit 1
  fi

  echo "creating vm"
  echo $vm_name
}
...
The run_benchmark() function automates the benchmarking process for a VM by using local variables to store the necessary parameters. It retrieves the list of VMs using cudoctl vm list and extracts the VM’s external IP address using grep and awk. If no IP is found, the function waits and retries once. If the IP is still not found, it returns 1, indicating a failure.
...
run_benchmark() {
  local vm_id=$1
  local vcpu=$2
  local memory=$3
  local disk_size=$4

  echo "Running benchmark on (VM ID: $vm_id)..."

  IPS=($(cudoctl vm list | grep -A 2 "$vm_id" | grep externalIP | awk '{print $2}'))

  if [[ ${#IPS[@]} -eq 0 ]]; then
    echo "No IPs found for VM $vm_id, waiting 30 seconds and trying again..."
    sleep 30
    IPS=($(cudoctl vm list | grep -A 2 "$vm_id" | grep externalIP | awk '{print $2}'))

    if [[ ${#IPS[@]} -eq 0 ]]; then
      echo "Still no IPs found for VM $vm_id"
      return 1
    fi
  fi
...
If an IP is found, the next part of the run_benchmark() function checks whether SSH access is available. If SSH is accessible, it connects to the VM, updates system packages, installs sysbench (a benchmarking tool), and runs a CPU stress test with four threads. The function extracts the benchmark result and saves it to the results file.
...
  echo "Found ${#IPS[@]} IP(s) for VM $vm_id"

  for ip in "${IPS[@]}"; do
    echo "Attempting to connect to IP: $ip"

    if ssh -o ConnectTimeout=5 -o StrictHostKeyChecking=no -o BatchMode=yes root@$ip echo "SSH Ready" &>/dev/null; then
      echo "SSH connection to $ip successful"

      OUTPUT=$(ssh -o StrictHostKeyChecking=no -o ConnectTimeout=30 root@$ip -v << 'EOF'
export DEBIAN_FRONTEND=noninteractive
sudo apt-get update -y
sudo apt-get install -y sysbench
sysbench cpu --threads=4 run
EOF
      ) || { echo "Benchmark failed on $ip"; continue; }

      CPU_EVENTS=$(echo "$OUTPUT" | grep "events per second" | awk '{print $4}')

      if [[ -n "$CPU_EVENTS" ]]; then
        echo "$vm_id, $vcpu, $memory, $disk_size, $CPU_EVENTS" >> $RESULTS_FILE
        echo "Benchmark completed successfully: $CPU_EVENTS events/sec"
        return 0
      else
        echo "Failed to extract benchmark results from $ip"
      fi
    else
      echo "SSH connection to $ip failed, trying next IP if available..."
    fi
  done

  echo "Failed to run benchmark on any available IP for VM $vm_id"
  return 1
}
...
The destroy_vm() function is responsible for deleting a virtual machine (VM). It takes a single argument, vm_id which represents the unique identifier of the VM, to be deleted. This function helps prevent resource wastage.
...
destroy_vm() {
  local vm_id=$1
  echo "Destroying VM: (VM ID: $vm_id)..."
  cudoctl vm delete "$vm_id"
}
...
We iterate through each configuration in the CONFIGS array to create the corresponding VM.
...
for CONFIG in "${CONFIGS[@]}"; do
  set -- $CONFIG
  VM_NAME=$1
  DATA_CENTER=$2
  MACHINE_TYPE=$3
  IMAGE=$4
  VCPU=$5
  MEMORY=$6
  DISK_SIZE=$7

  create_vm "$VM_NAME" "$DATA_CENTER" "$MACHINE_TYPE" "$IMAGE" "$VCPU" "$MEMORY" "$DISK_SIZE"
  echo "Waiting for VM to initialize..."

  echo "---------------------------------------"
done
...
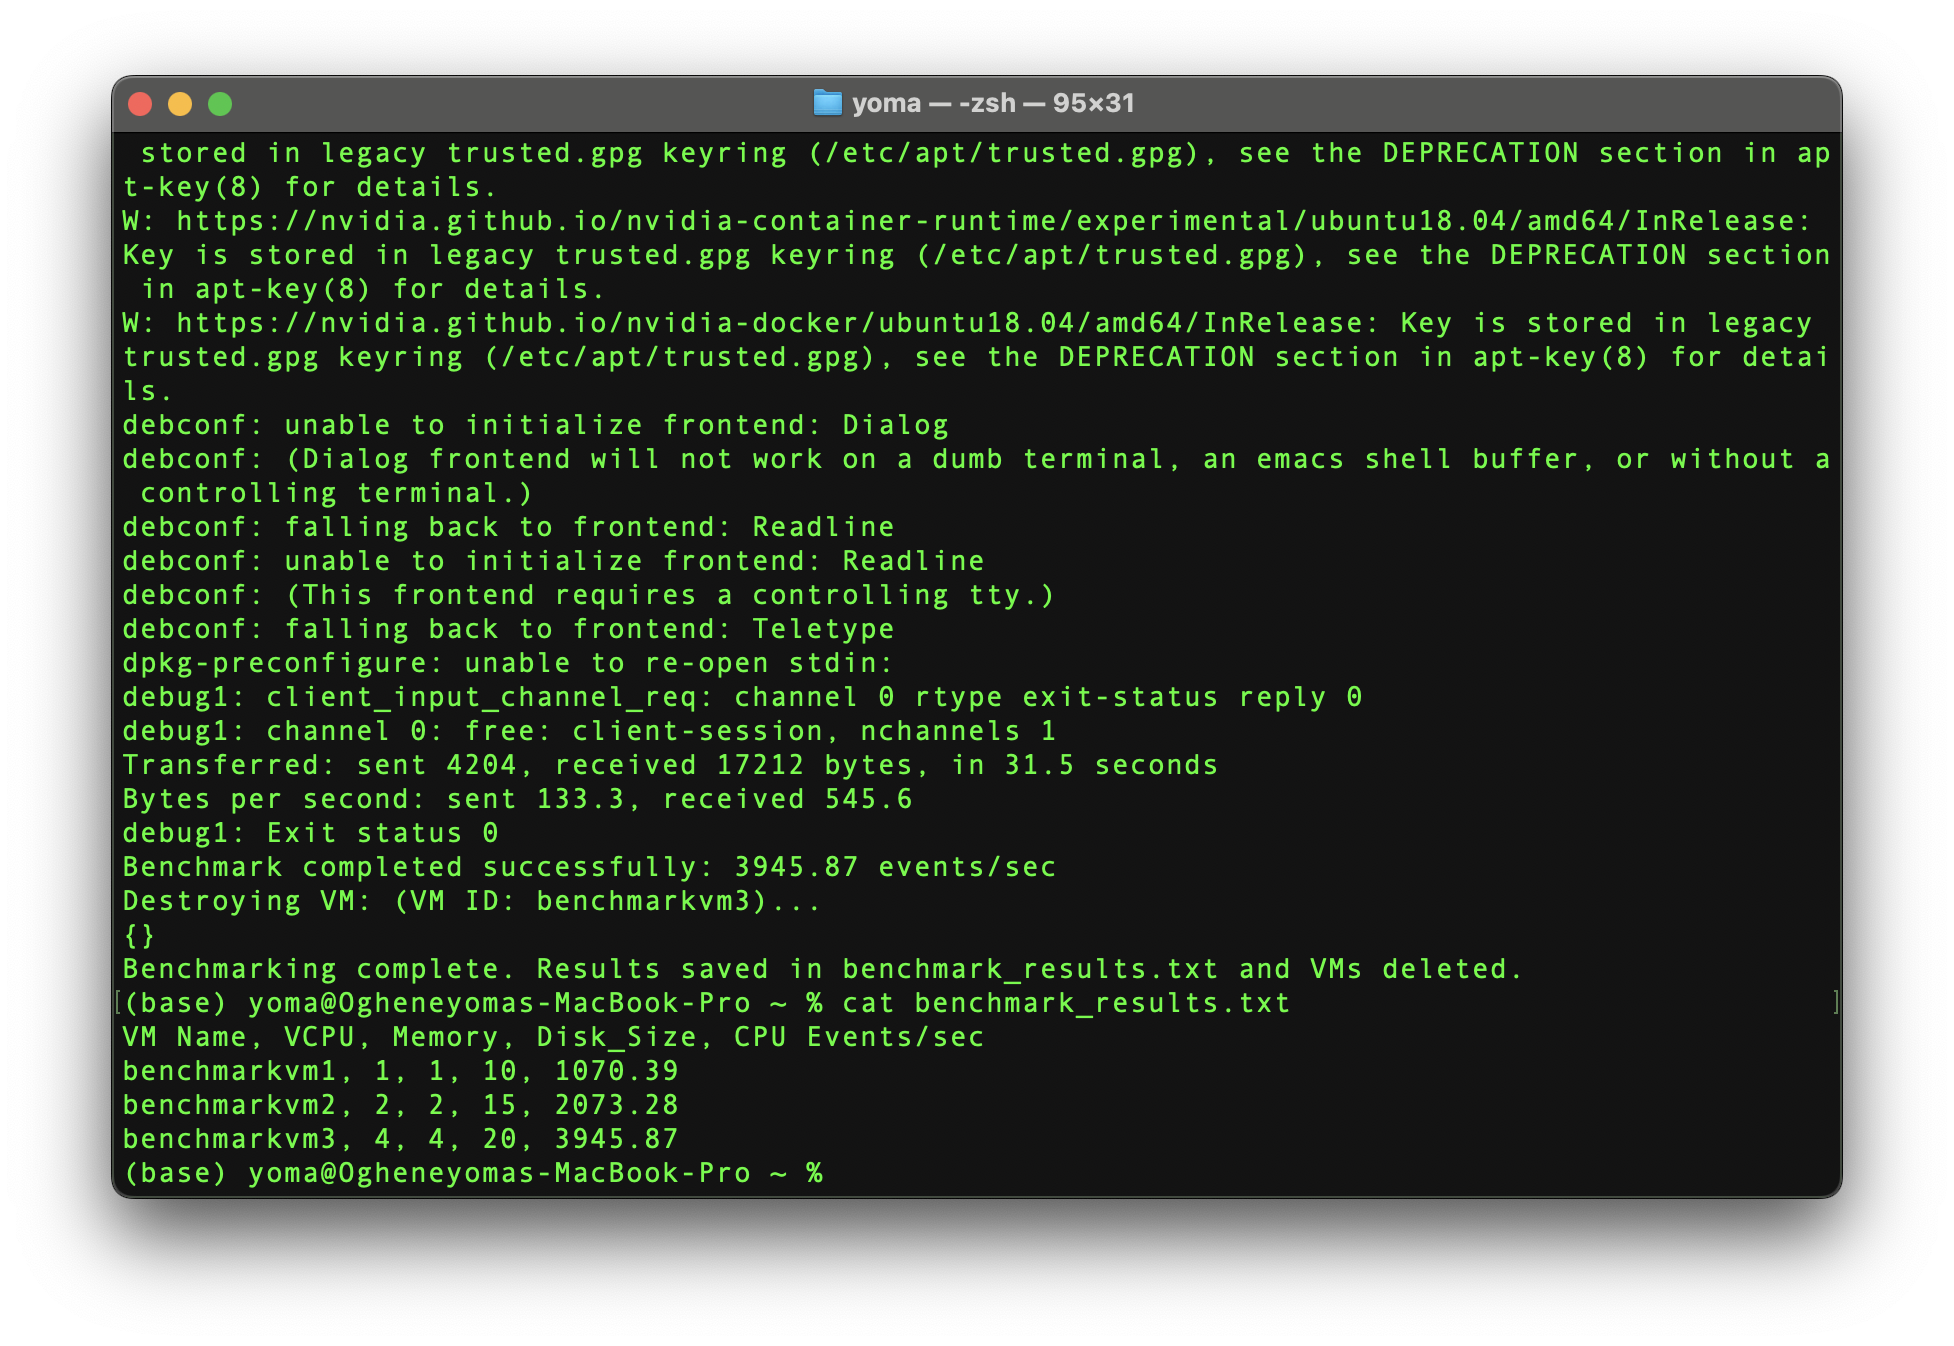
We wait 60 seconds to ensure the VMs have fully booted, preventing benchmarking failures due to uninitialised instances. The SSH known hosts file is cleared to avoid connection mismatches. The script then loops through each configuration in the CONFIGS array, runs the benchmark using the specified parameters, and saves the results. After benchmarking, each VM is deleted to free up resources. Finally, a confirmation message is displayed to indicate successful completion.
...
sleep 60
echo '' > ~/.ssh/known_hosts

for CONFIG in "${CONFIGS[@]}"; do
  set -- $CONFIG
  VM_NAME=$1
  VCPU=$5
  MEMORY=$6
  DISK_SIZE=$7

  run_benchmark "$VM_NAME" "$VCPU" "$MEMORY" "$DISK_SIZE"
  destroy_vm "$VM_NAME"
done
echo "Benchmarking complete. Results saved in $RESULTS_FILE and VMs deleted."

exit 0
To run the entire script using the GitHub gist, run the following:
#save the script
curl -sSL https://gist.github.com/yomaokobiah/5da837f38fe9d1d9423ce55d34a034f9/raw > cudobenchscript.sh
#make the script executable
chmod +x cudobenchscript.sh
#run the script
./cudobenchscript.sh
Here’s what it looks like upon successful execution:
Using the Cudo Compute CLI enables you to efficiently manage the entire lifecycle of virtual machines, from creation to benchmarking and deletion. Start experimenting today and unlock the full potential of decentralised cloud computing with Cudo Compute!
Subscribe to my newsletter
Read articles from Yoma Okobiah directly inside your inbox. Subscribe to the newsletter, and don't miss out.
Written by
Yoma Okobiah
Yoma Okobiah
I’m a community programs manager who is skillful at building vibrant local and global communities and has a proven track record of driving engagement and fostering collaboration. I am committed to empowering students and individuals and achieving impactful results.