Creating your Custom Docker Image on Azure Container Registry and Deploying with Container Instances
 Adekunle Fatunde
In the field of modern application development, containerisation has become an essential part of the deployment process. Docker is a popular containerisation solution that developers can use to package applications and their dependencies into portable containers.
Azure Container Registry (ACR), a fully managed Docker registry service from Microsoft Azure, allows you to securely store and manage your container images.
In this blog post, we'll show you how to create your own Docker image, deploy it using Azure Container Instances, and upload it to the Azure Container Registry.
BASIC REQUIREMENTS
Make sure you have the following before beginning the tutorial:
1. Open an Azure account (you can create a free one if you don't already have one on www.portal.azure.com).
2. Your local computer has the Azure CLI installed. It is available here
3. Docker installed locally: Docker Desktop is available for download from the official Docker website.
- Download Visual Studio Code here. You can install your Azure CLI in Visual Studio Code.
PROCEDURES
- Create Dockerfile and hostname.sh file.
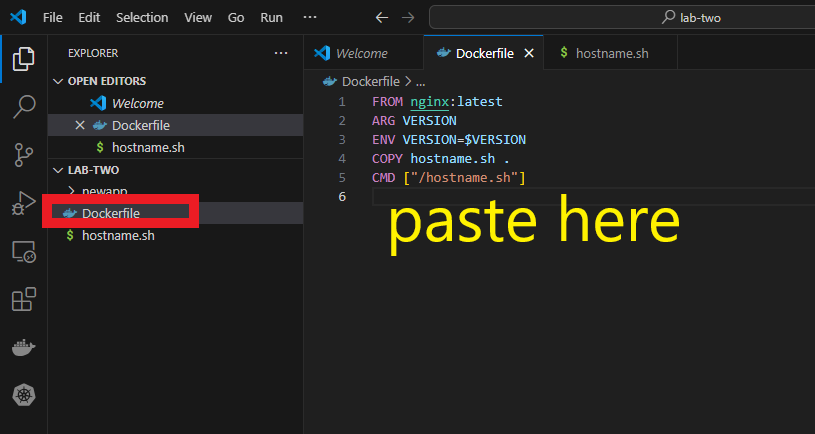
Copy this Dockerfile script and paste in a text format in your workspace. Save text as Dockerfile (no extension)
FROM nginx:latest
ARG VERSION
ENV VERSION=$VERSION
COPY hostname.sh .
CMD ["/hostname.sh"]
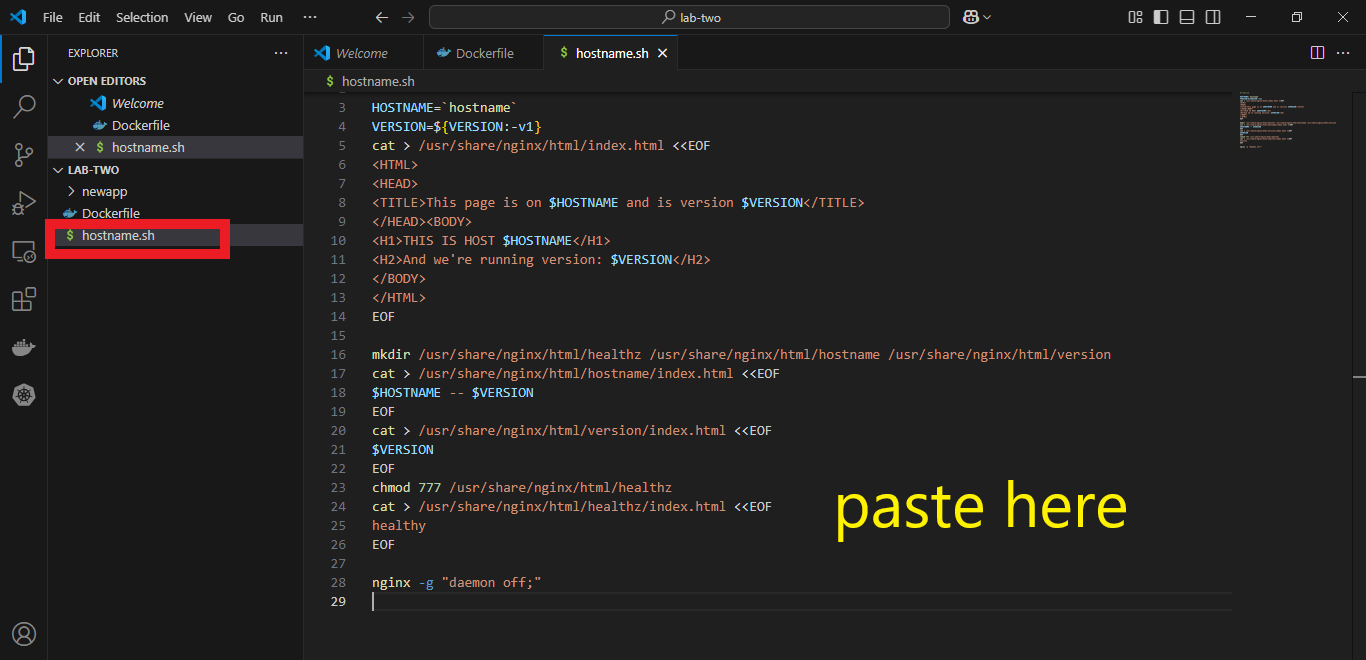
Copy this hostname.sh script and paste in a text format in your workspace. Save text as hostname.sh
#!/bin/sh

HOSTNAME=`hostname`
VERSION=${VERSION:-v1}
cat > /usr/share/nginx/html/index.html <<EOF
<HTML>
<HEAD>
<TITLE>This page is on $HOSTNAME and is version $VERSION</TITLE>
</HEAD><BODY>
<H1>THIS IS HOST $HOSTNAME</H1>
<H2>And we're running version: $VERSION</H2>
</BODY>
</HTML>
EOF

mkdir /usr/share/nginx/html/healthz /usr/share/nginx/html/hostname /usr/share/nginx/html/version
cat > /usr/share/nginx/html/hostname/index.html <<EOF
$HOSTNAME -- $VERSION
EOF
cat > /usr/share/nginx/html/version/index.html <<EOF
$VERSION
EOF
chmod 777 /usr/share/nginx/html/healthz
cat > /usr/share/nginx/html/healthz/index.html <<EOF
healthy
EOF

nginx -g "daemon off;"
Paste Dockerfile script here
Paste hostname.sh script here
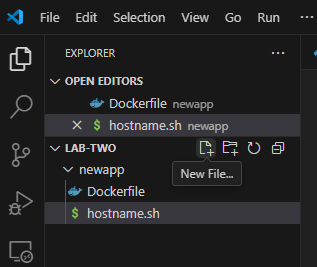
You can create both Dockerfile and hostname.sh files using the New Fle in Visual Studio Code. Make sure your Dockfile and hostname.sh files are in the same folder.
In this article, they are both in the “newapp folder“ while the “newapp folder” is in the “LAB-TWO folder“
- Build the Docker Image
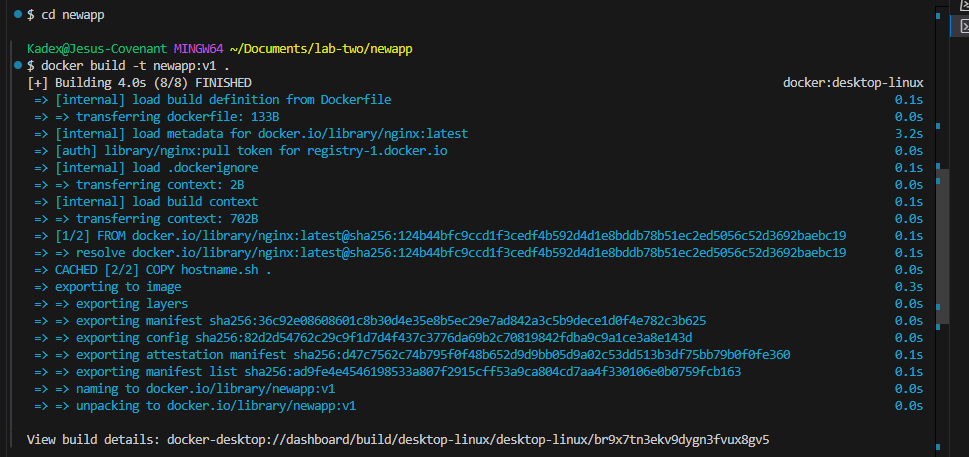
Before building the Docker image, make sure you are in the right directory where your Dockerfile is located. If you are not there, you can use the Change Directory (cd) to do so.
for this article, a cd newapp command will change directory from lab-two to newapp.
You can now build your Docker image with the command docker build -t your-image-name:tag .
ild -t your-image-name:tag . is used to build a Docker image from a Dockerfile and the files in the specified directory (known as the build context). Here's a breakdown of the command:
docker build:- This is the command to create a new Docker image based on the instructions in a
Dockerfile.
- This is the command to create a new Docker image based on the instructions in a
-t your-image-name:tag:The
-tflag is used to tag the image with a name and optionally a version or tag.your-image-nameis a placeholder for the name you want to give your image. For the sake of this article, it is newapp.:tagis optional but is used to specify a version or tag for your image. For example,:1.0or:latest.
Example: myapp:1.0 or myapp:latest.
If no tag is provided, Docker will default to using :latest.
.:- The
.at the end represents the build context. It tells Docker to look for theDockerfileand other necessary files in the current directory.
- The
docker build -t your-image-name:tag .
docker build -t newapp:v1 .
The result of the command is below it.
- Setup your Azure Container Registry
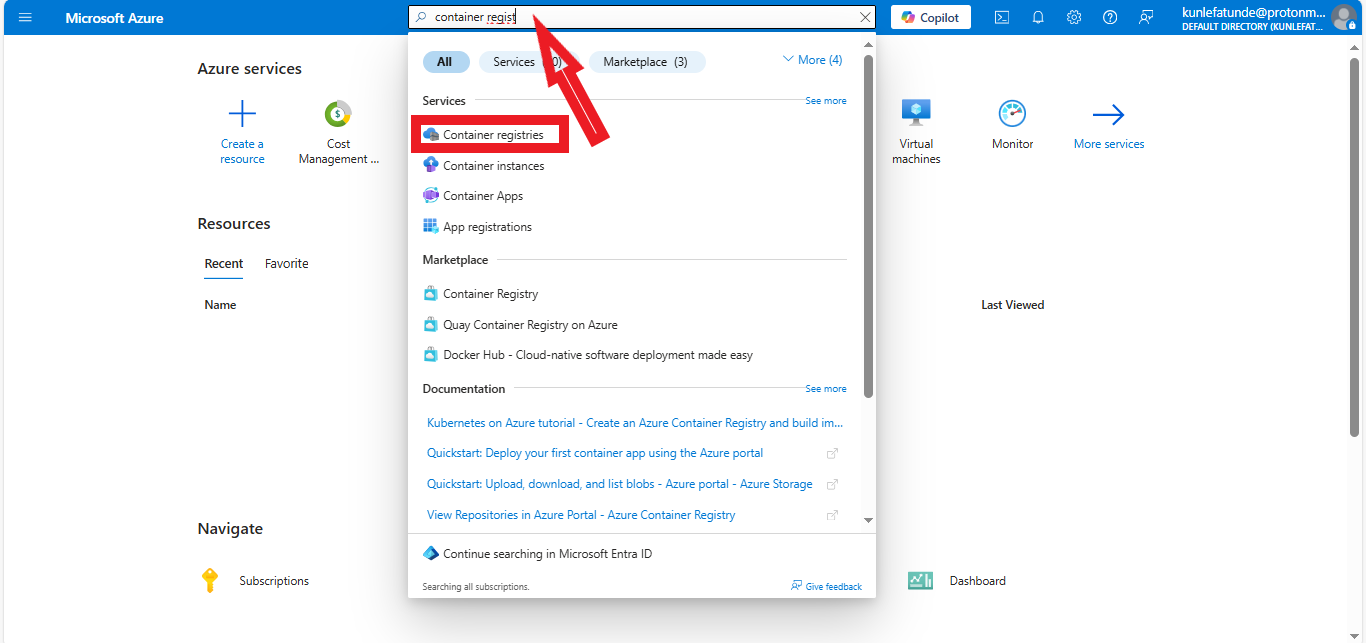
Go to your Azure Portal Account and search for Container Registry.
Click on Create
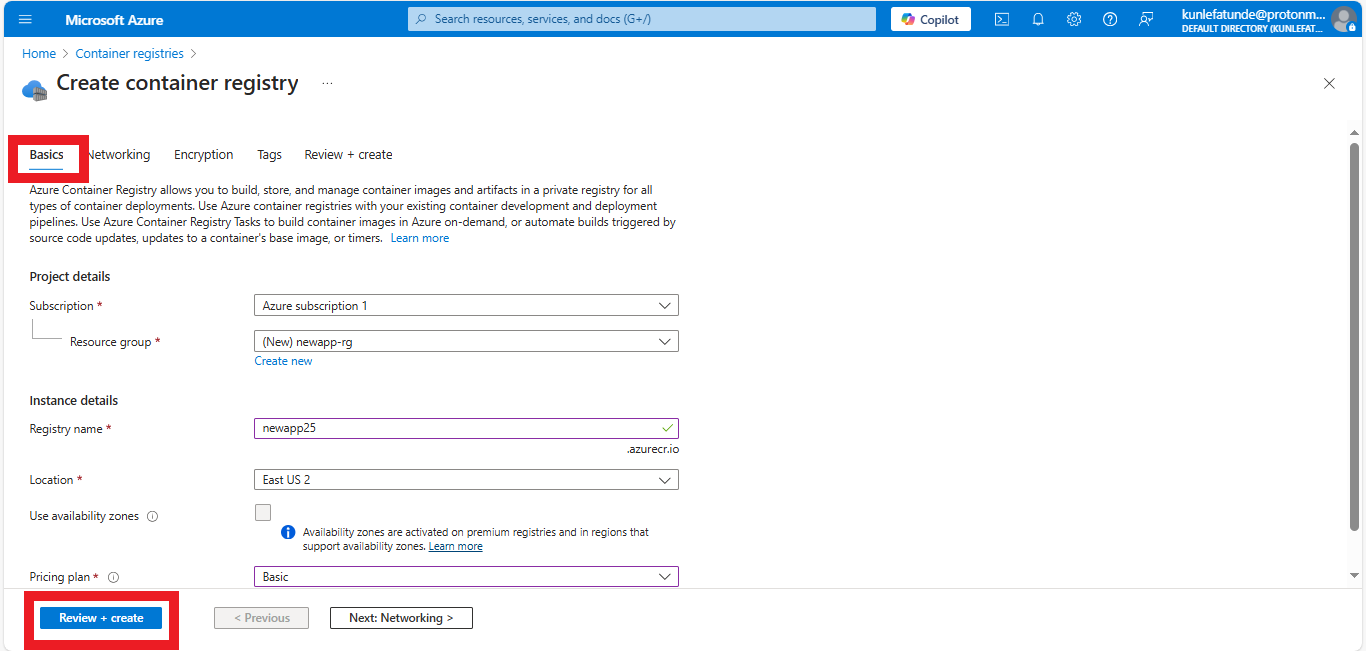
On the Basic tab, fill necessary details such as: choose a subscription, resource group, registry name, location and pricing
Click on Review + Create
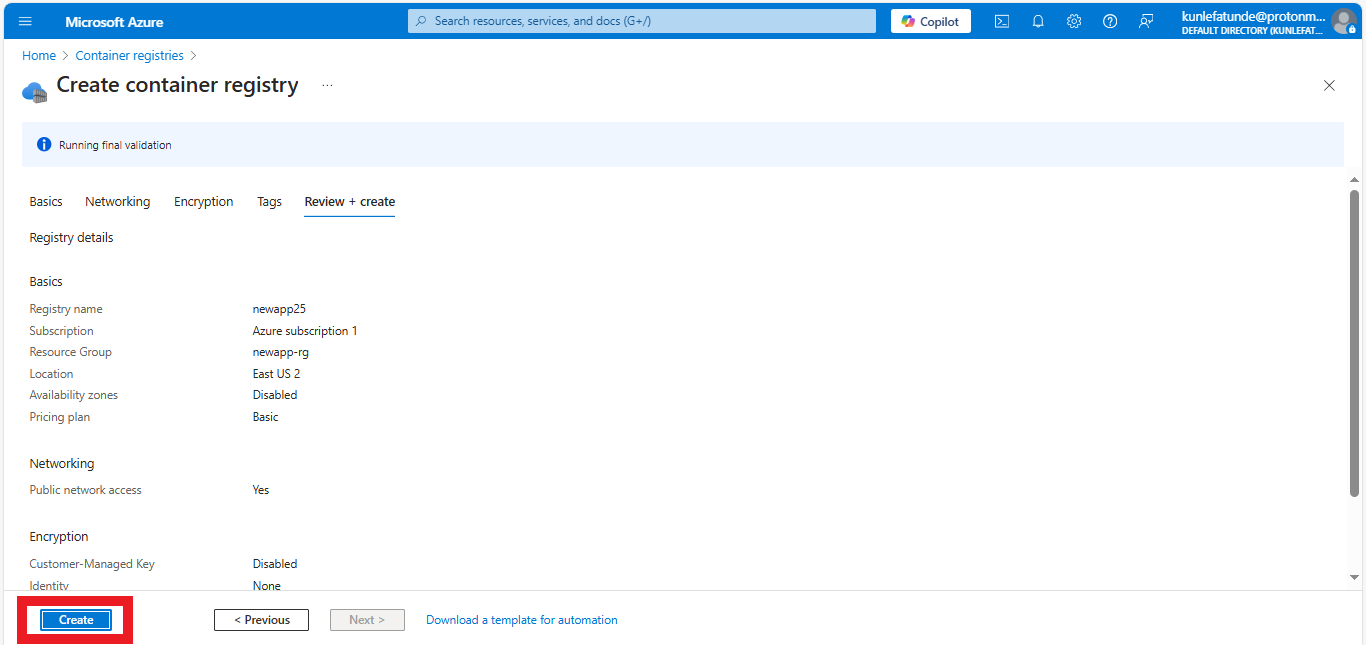
Click on Create after validation is passed
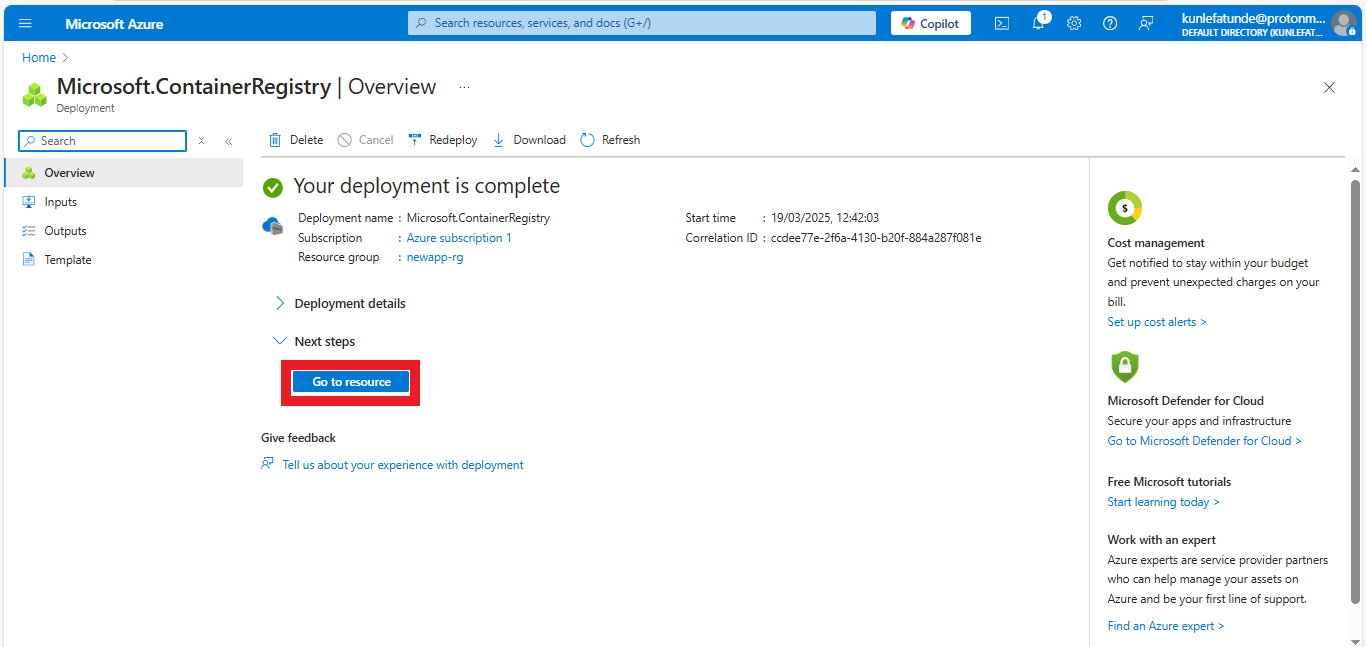
Click on Go to Resource
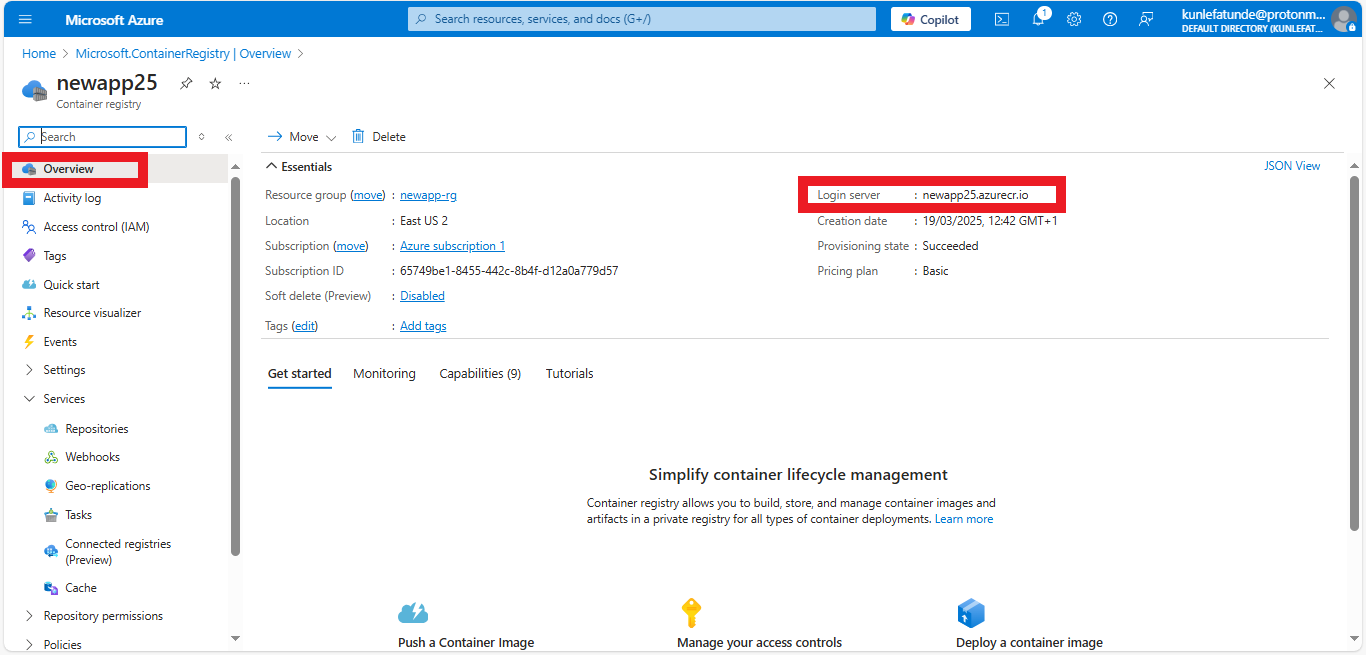
In the Overview page of the resource, take not of the Login Server.
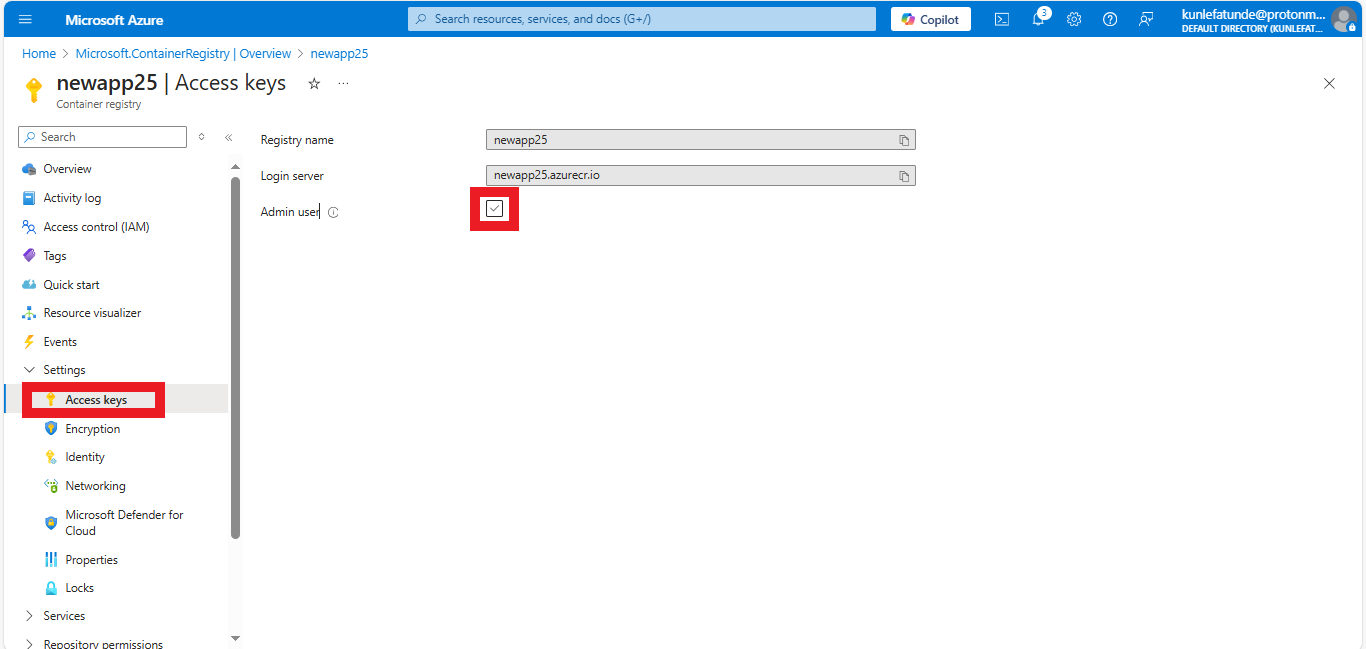
Alos, go to the Access Key blade in the Settings menu on the left pane and activate Admin user by checking the box next to it.
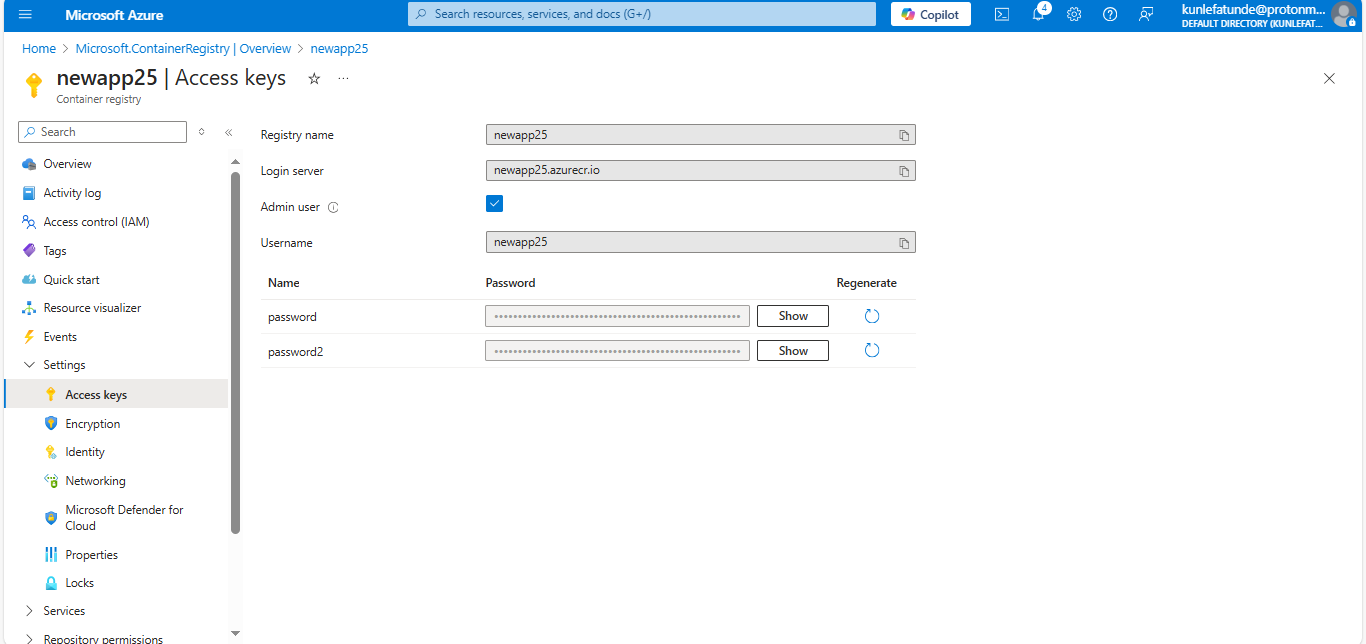
It will reveal the Username and two passwords
- Push the Docker Image to Azure
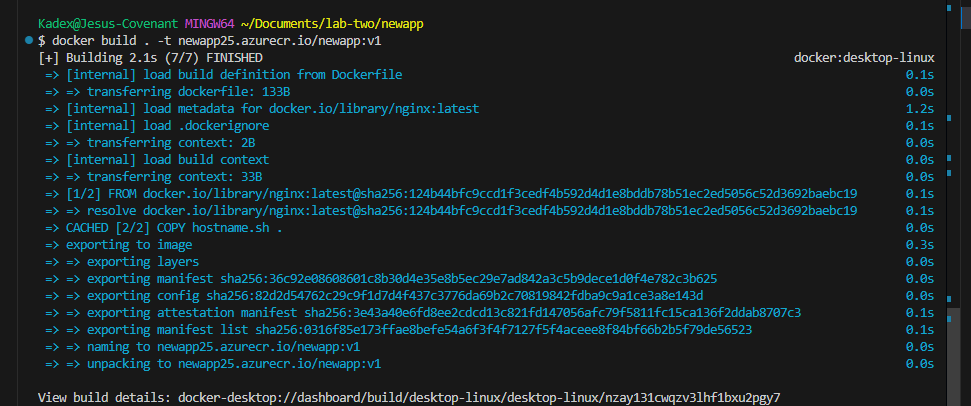
In your terminal on Visual Studio Code, type this code: docker build . -t youracr.azurecr.io/your-image-name:tag
docker build:- This initiates the process to build a Docker image based on the instructions in a
Dockerfile.
- This initiates the process to build a Docker image based on the instructions in a
.(Dot):- This specifies the build context, meaning Docker will look for the
Dockerfileand any necessary files in the current directory.
- This specifies the build context, meaning Docker will look for the
-tyouracr.azurecr.io/your-image-name:v1:The
-tflag is used to tag the image with a name and optional version (or tag).youracr.azurecr.iorepresents the Azure Container Registry (ACR) where the image is intended to be stored or pushed.your-image-nameis the name of the image you are creating.:v1is the tag for this version of the image (version 1, in this case). If you don’t specify a tag, Docker will default to:latest.
youracr.azurecr.io - your login server in your container registry
your-image-name - name of your image
tag - version of your image. If version is not specified, it will make use of the latest version.
For this article, here is the exact code: docker build . -t newapp25.azurecr.io/newapp:v1
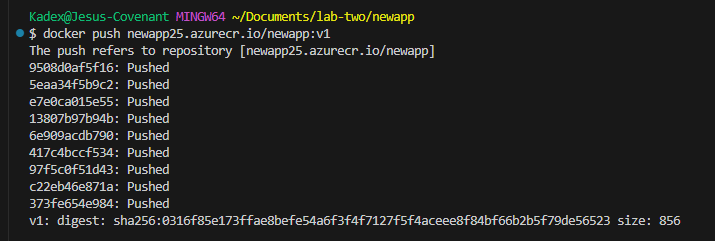
docker push:- This command is used to upload (or "push") a Docker image to a container registry.
-
- This specifies the Azure Container Registry (ACR) where the image will be stored. It's the endpoint for your ACR.
your-image-name:- This is the name of the image you're pushing to the registry.
:tag:- The tag specifies the version of the image being pushed. For instance,
:v1could indicate version 1, while:latestmight indicate the most recent version. If you don’t provide a tag, Docker defaults to using:latest.
- The tag specifies the version of the image being pushed. For instance,
docker push newapp25.azurecr.io/newapp:v1
- Deploy the container to Azure Container Instances
Search for Container Instances in Azure
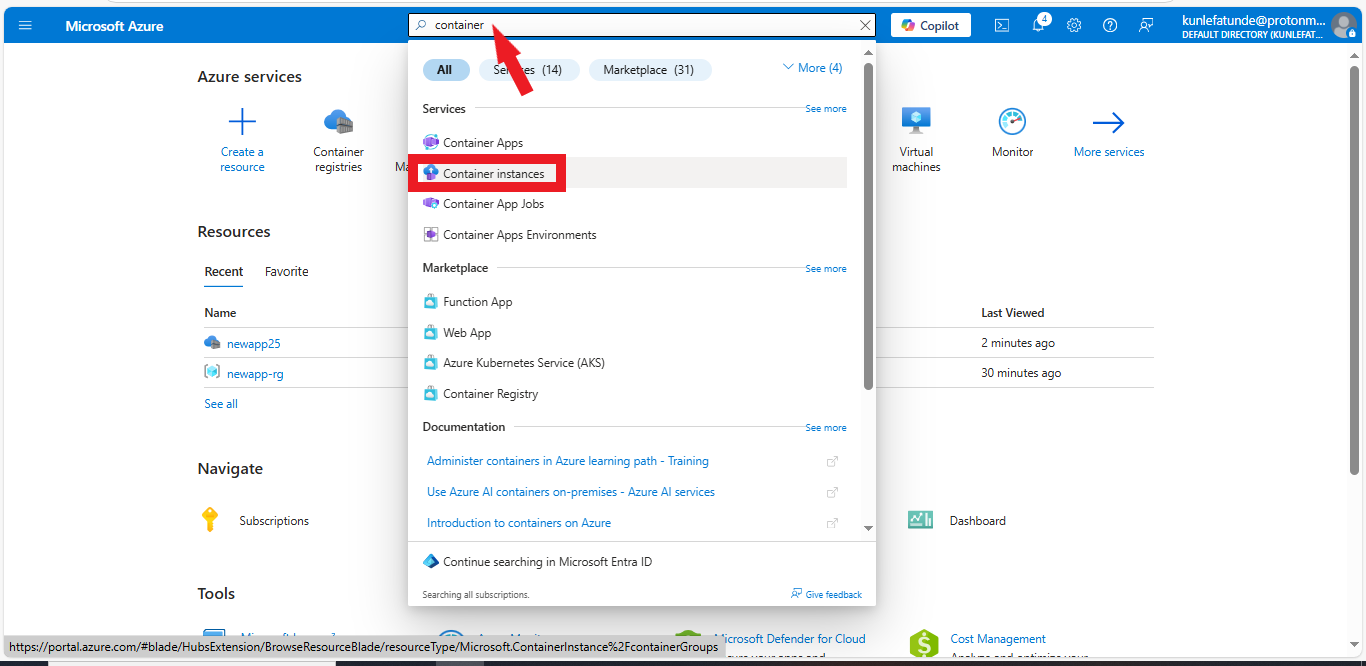
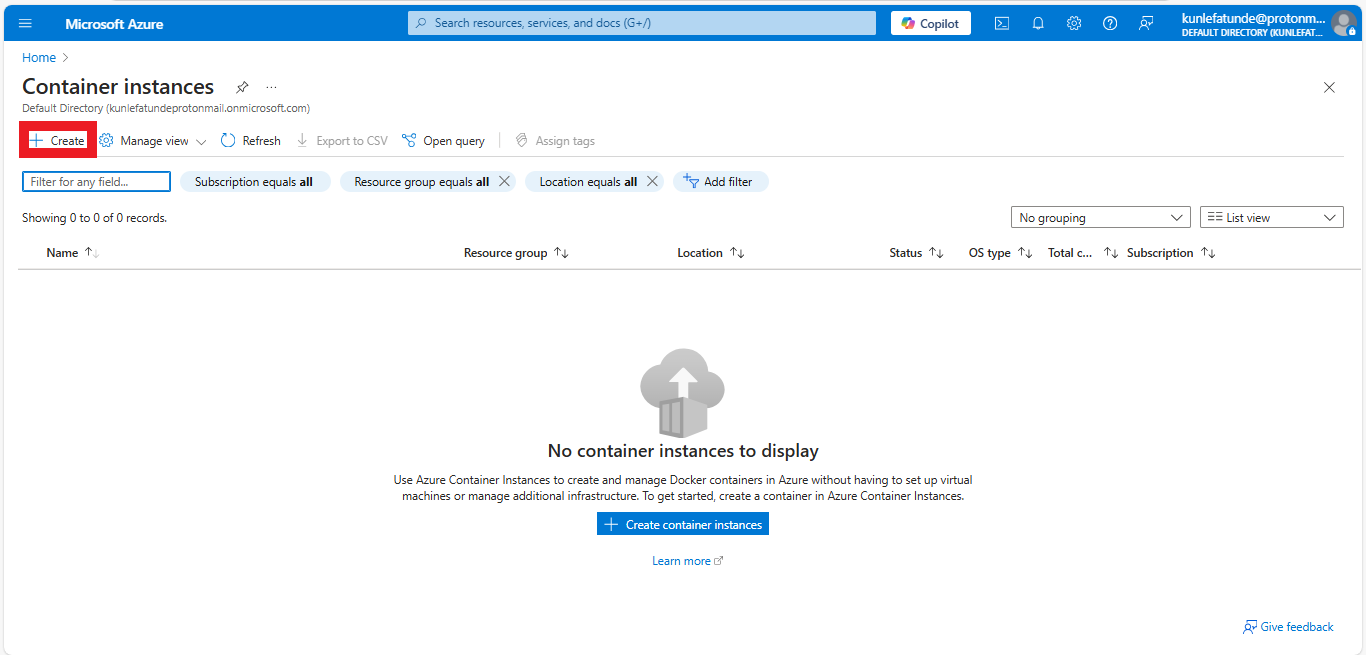
Click on Create
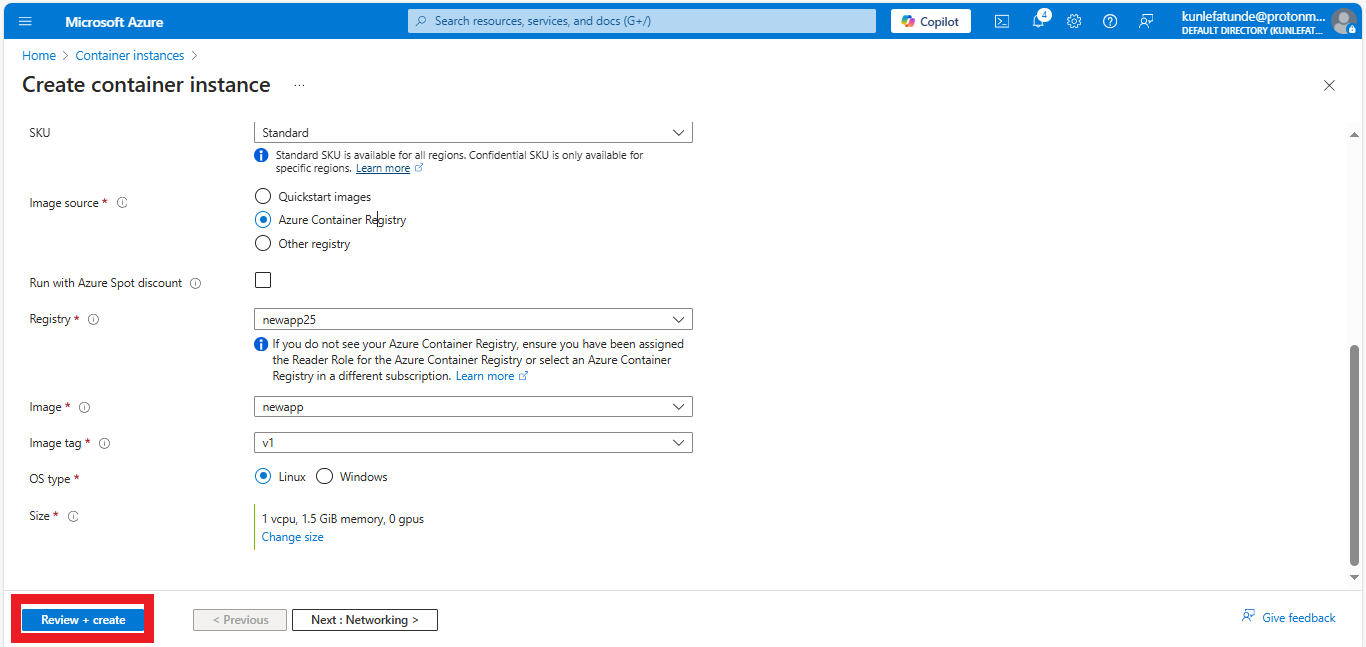
Fill the Basic tab
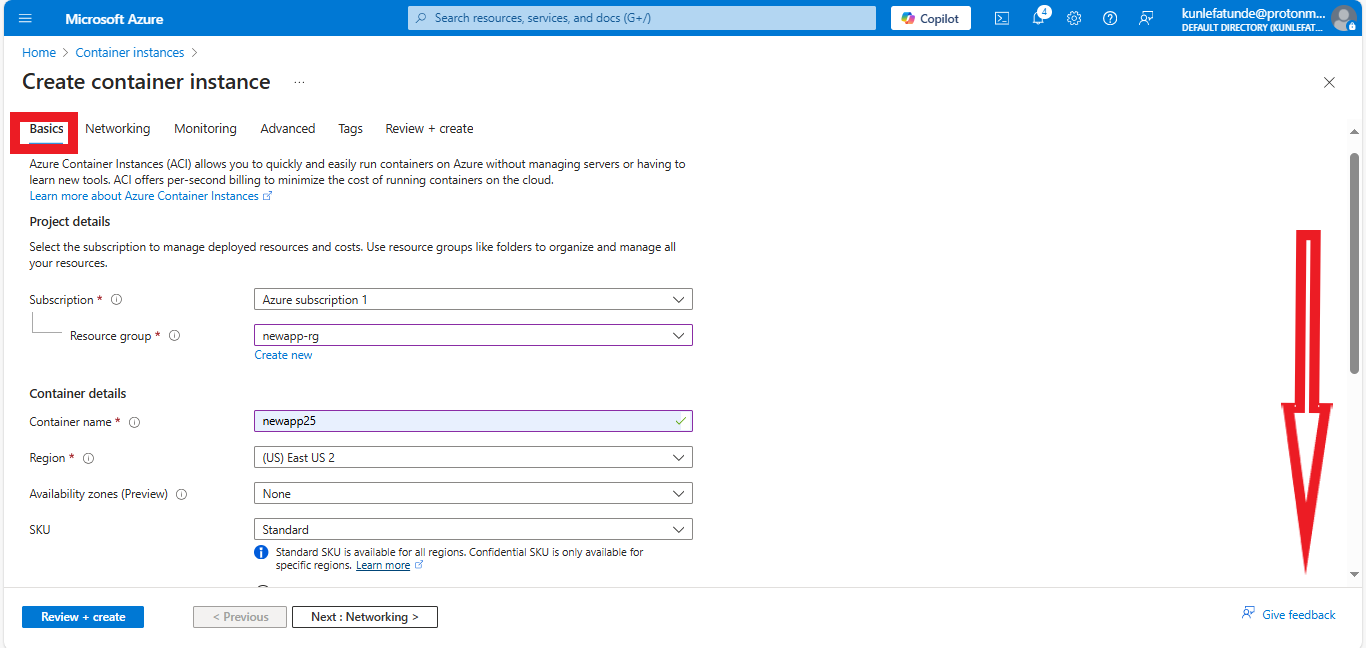
Click on Review + Create
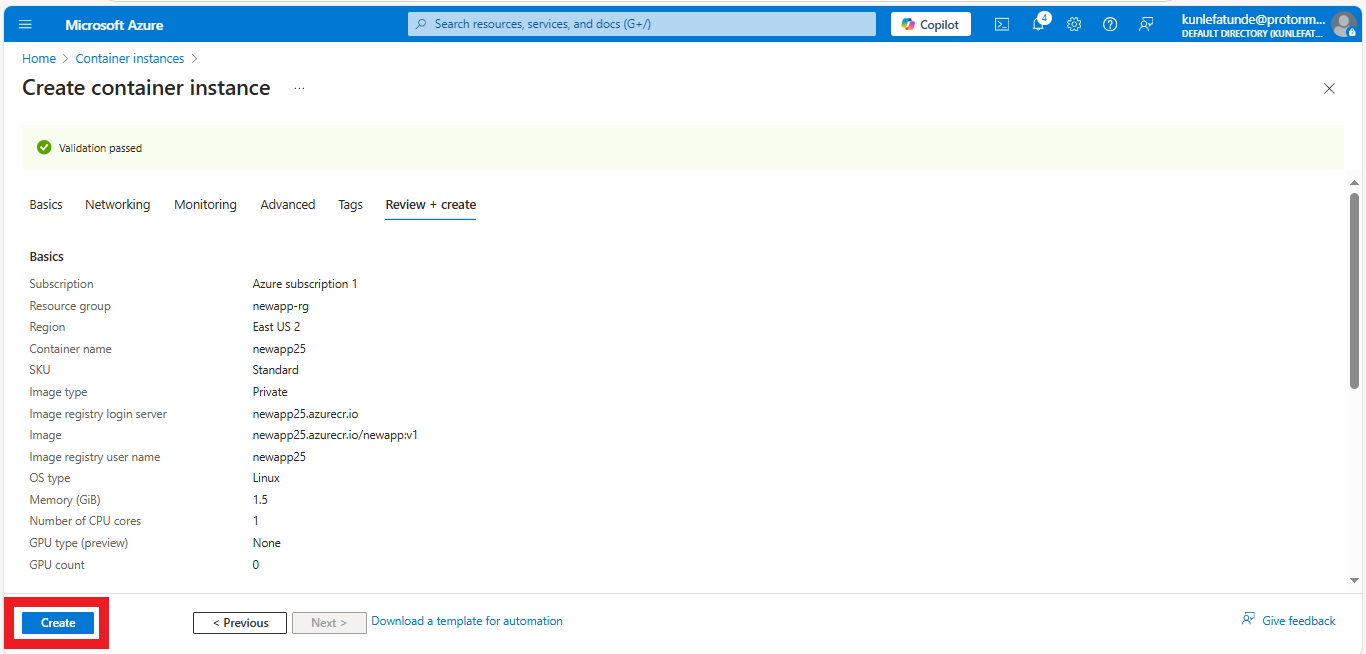
Click on Create after validation is passed
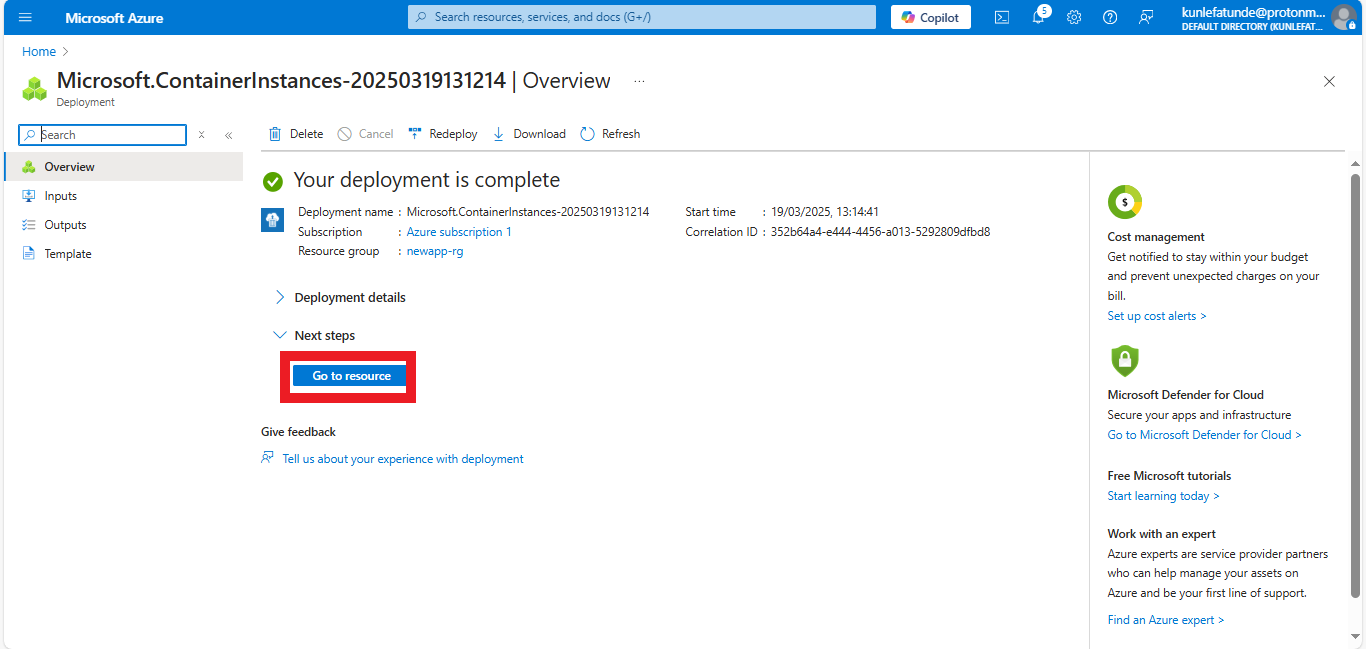
Click on Go to Resource
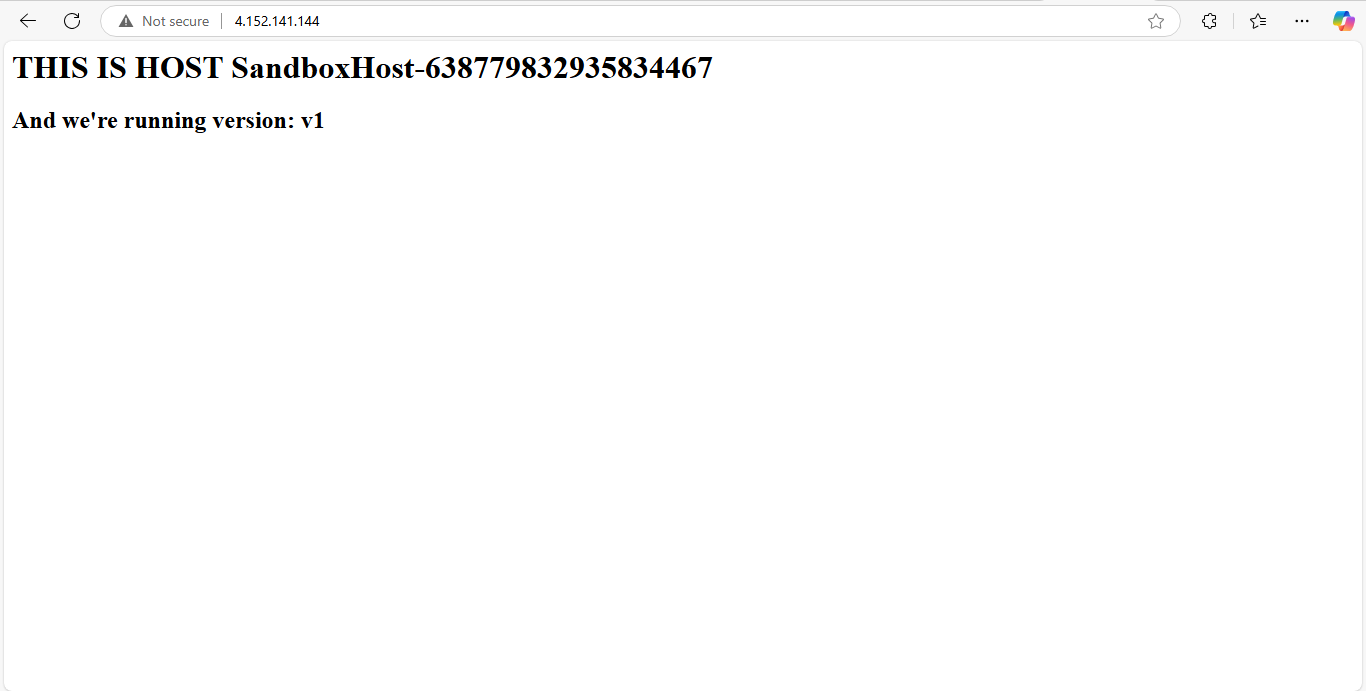
In the Overview section of the resource, copy the Public IP Address
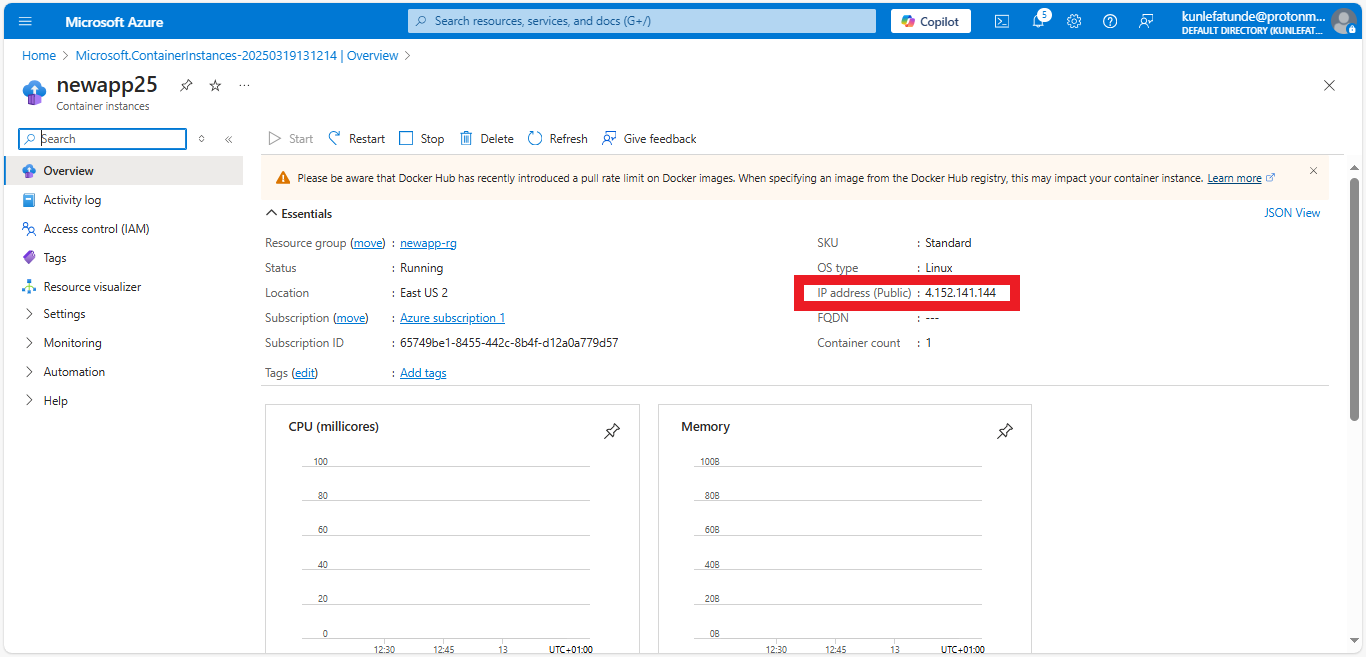
Paste in a new tab on your browser or a new browser entirely to see your app.
Subscribe to my newsletter
Read articles from Adekunle Fatunde directly inside your inbox. Subscribe to the newsletter, and don't miss out.
Written by
