My Journey of Building My First Project
 Siddharth Roy
Project Topic:
"Mood Tracker"
Requirements:
Users select a mood emoji (happy, sad, neutral, excited, etc.) for the day.
Store mood logs in Local Storage for persistent data.
Display a timeline view of past moods with day, week, and month filters.
Overview of My Project
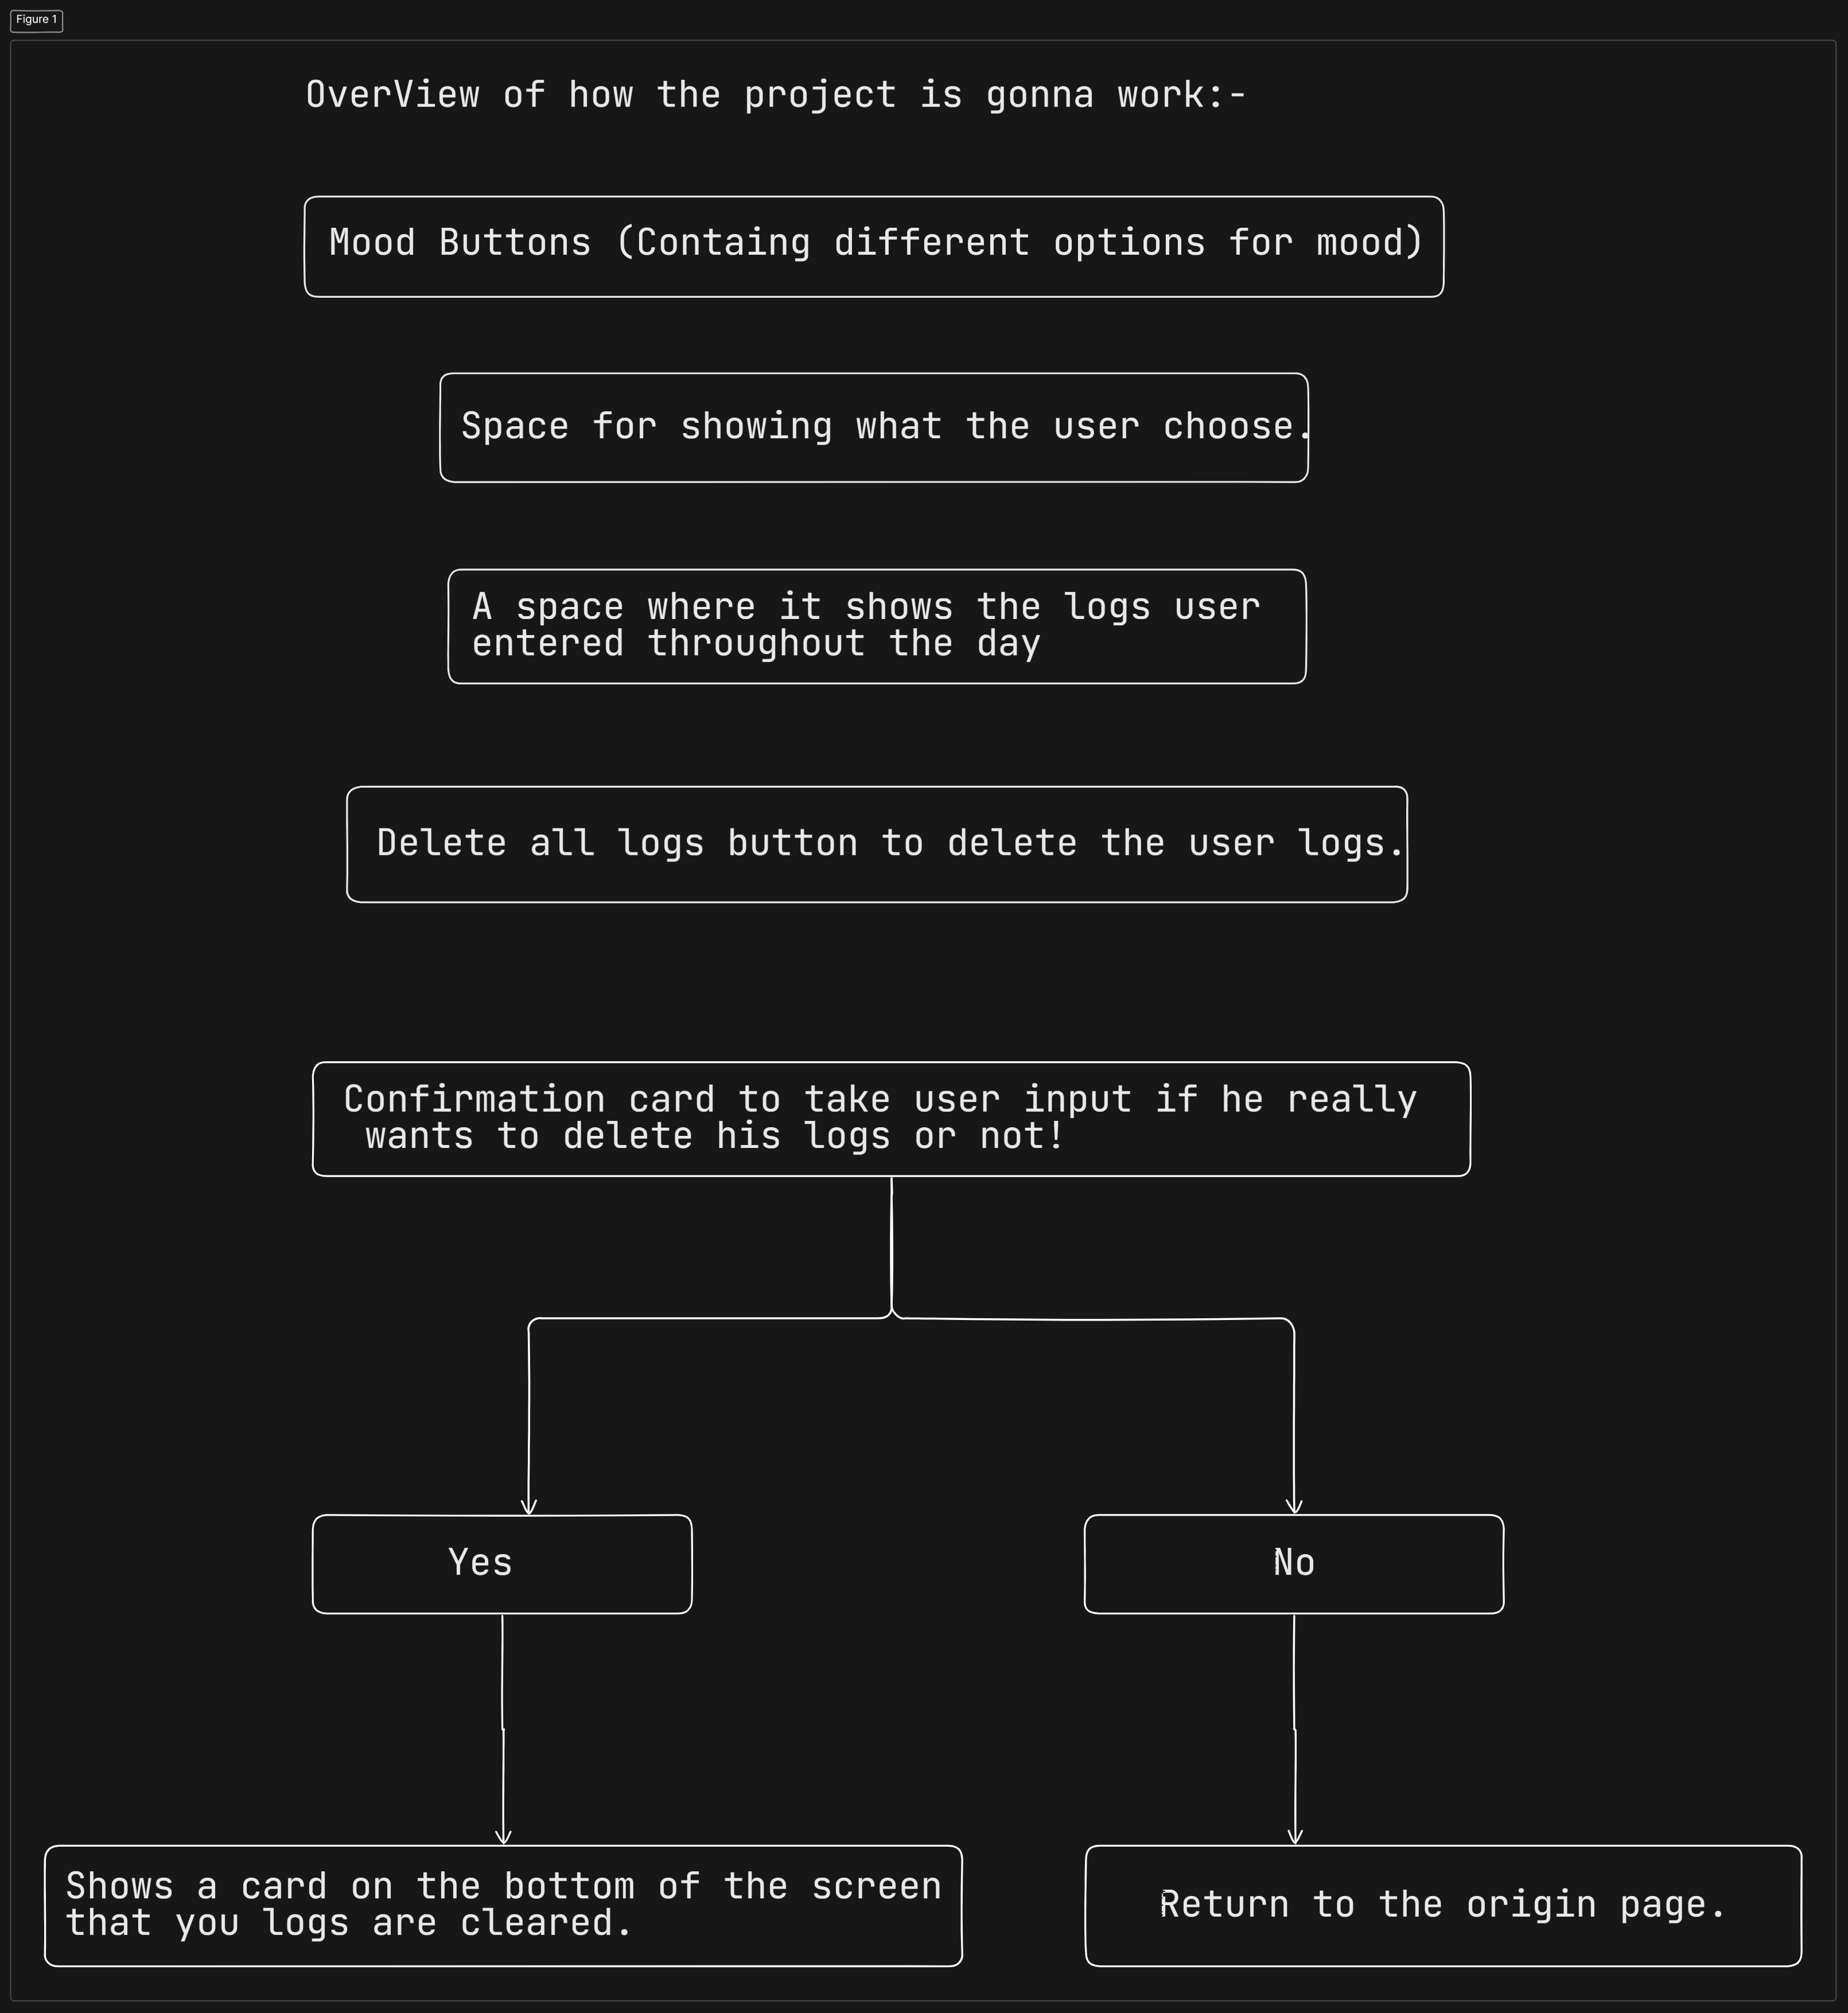
It is crucial to understand the functionality of our projects, along with their requirements. Creating an overview or layout helps ensure we gather the necessary information correctly and minimize mistakes. Here is how I visualized my project at first.

HTML
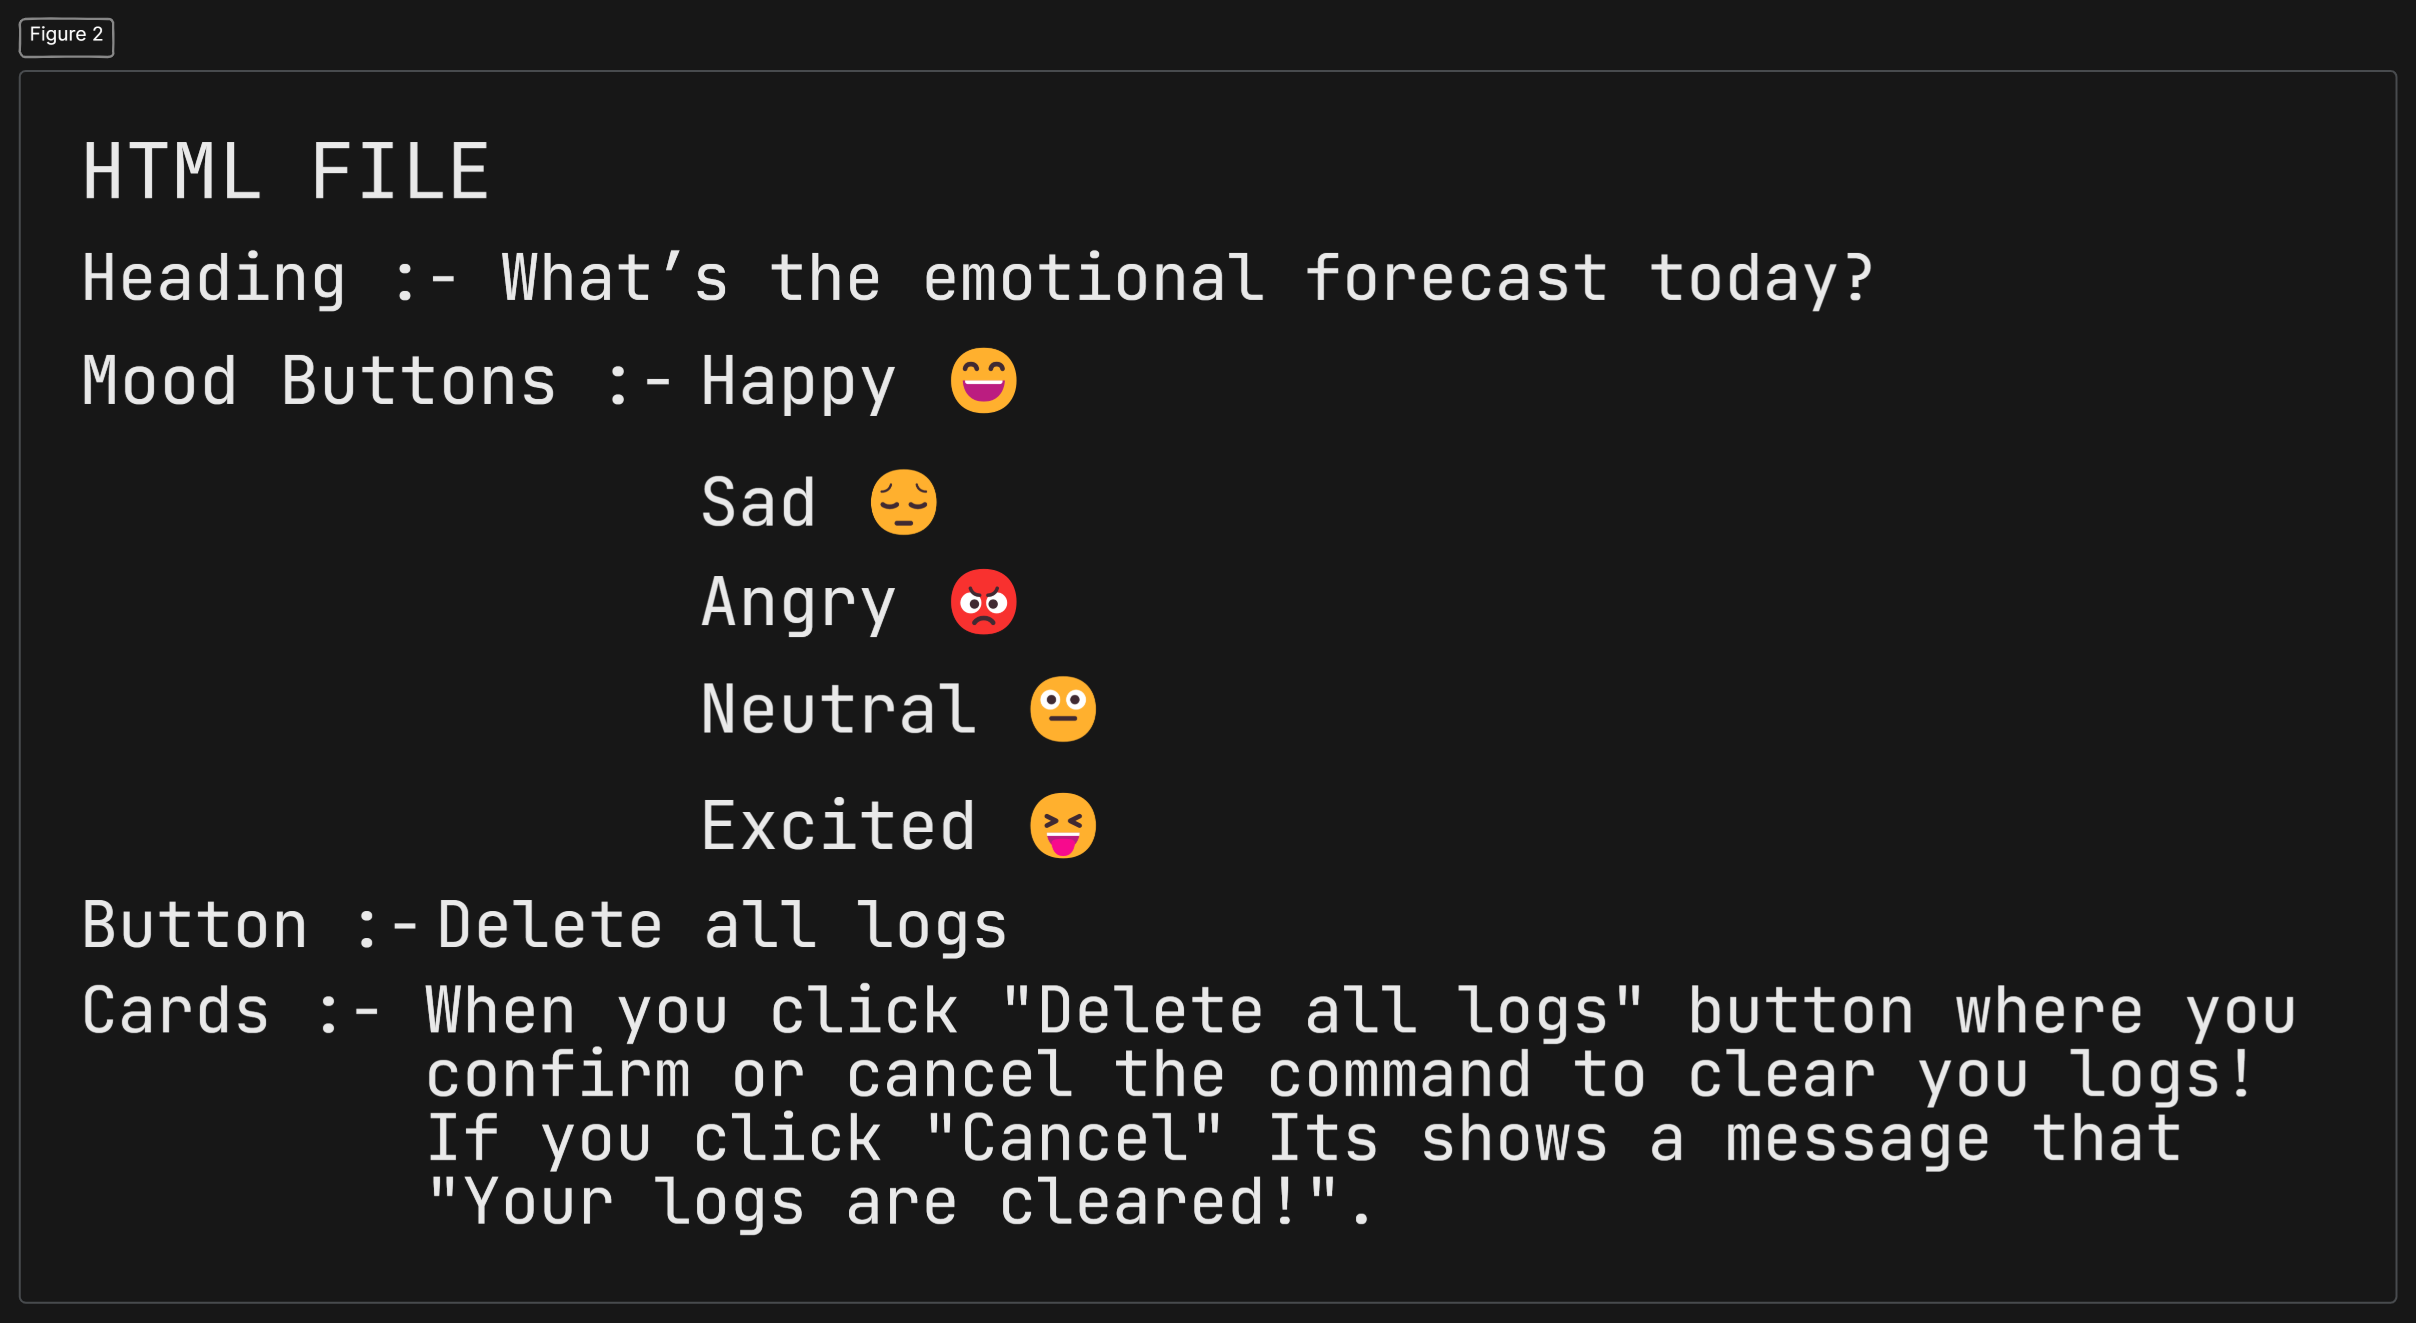
HTML is a fundamental part of our project as it acts as the skeleton of the web page. It helps structure and organize elements based on project requirements, ensuring proper alignment and layout. With HTML, we define the placement of buttons, text fields, images, and other components necessary for the Mood Tracker interface.

CSS
CSS plays a crucial role in designing and styling our project, making the interface visually appealing and well-structured. It helps in aligning elements, setting colors, fonts, and spacing to enhance the user experience.
To ensure the website is responsive, I used media queries, which adjust the layout based on different screen sizes. Here’s an example of how I implemented responsiveness:
@media (max-width: 768px) {
    .container {
        width: 95%;
        padding: 30px;
    }

    .moods {
        flex-direction: column;
        align-items: center;
    }

    .moods div {
        width: 150px;
    }

    #confirmation-card {
        width: auto; /* Ensuring it adapts to the screen */
    }
}
With this, the website adapts well to smaller screens, improving usability across devices. 📱💻

JavaScript
This JavaScript code makes the Mood Tracker interactive by allowing users to log their moods, store them, and view past entries. Let’s break it down!
1️⃣ Selecting Elements
We first grab key elements from the HTML to interact with them in JavaScript.
const moods = document.querySelectorAll(".moods .button");
const delButton = document.querySelector("#delete-logs");
const container = document.querySelector(".container");
These elements help us detect user actions like clicking mood buttons or deleting logs.
2️⃣ Creating UI Elements Dynamically
We create elements to display the selected mood and past logs.
const moodDisplay = createElement("p", { class: "moodDisplay" });
container.appendChild(moodDisplay);

const logContainer = createElement("div", { class: "logContainer" });
container.appendChild(logContainer);
This ensures moods are displayed properly in the UI.
3️⃣ Retrieving Past Moods from Local Storage
To keep mood logs even after refreshing, we fetch stored data.
let moodLogs = JSON.parse(localStorage.getItem("moodLogs")) || [];
updateMoodDisplay(localStorage.getItem("selectedMood"));
updateLogDisplay();
This allows users to continue tracking moods seamlessly.
4️⃣ Logging Moods and Storing Data
When a user clicks a mood, we capture the date & time and save it.
moods.forEach(mood => {
    mood.addEventListener('click', () => {
        const now = new Date();
        const date = now.toLocaleDateString("en-IN", { day: "2-digit", month: "2-digit", year: "numeric" });
        const time = now.toLocaleTimeString("en-IN", { hour: "2-digit", minute: "2-digit", hour12: true });

        saveMood(mood.textContent, date, time);
    });
});
This ensures accurate tracking of emotions over time.
5️⃣ Displaying Mood History in a Structured Way
We organize logs by date and show timestamps.
function updateLogDisplay() {
    logContainer.innerHTML = "<h3>Your Mood swings throughout the day 🫣:</h3>";

    if (!moodLogs.length) {
        logContainer.innerHTML += "<p>Please enter your mood :</p>";
        return;
    }

    let lastDate = "";
    moodLogs.forEach(log => {
        if (log.date !== lastDate) {
            const dateEntry = document.createElement("h4");
            dateEntry.textContent = log.date;
            logContainer.appendChild(dateEntry);
            lastDate = log.date;
        }

        const logEntry = document.createElement("p");
        logEntry.textContent = `${log.time} - ${log.mood}`;
        logContainer.appendChild(logEntry);
    });
}
This keeps mood logs clear and easy to read.
6️⃣ Deleting Logs with Confirmation
Users can clear their mood history, but we ask for confirmation first.
function confirmation() {
    document.getElementById("confirmation-card").style.display = "block";

    document.getElementById("confirm").addEventListener('click', clearLogs);
    document.getElementById("Cancel").addEventListener("click", function () {
        document.querySelector("#confirmation-card").style.display = "none";
    });
}
This prevents accidental deletions.
7️⃣ Showing a Success Message After Deletion
Once logs are cleared, we notify the user.
function messageDeleted() {
    document.querySelector(".alert-card").style.display = "block";

    setTimeout(() => {
        document.querySelector(".alert-card").style.display = "none";
    }, 3000);
}
This enhances the user experience by providing feedback.
Why This Code?
✅ Saves data – Uses local Storage to retain logs.
✅ Organized tracking – Groups logs by date.
✅ Interactive & responsive – Updates UI in real-time.
✅ User-friendly – Includes confirmation & clear display of moods.
This code ensures a smooth and engaging mood-tracking experience.
How the Mood Tracker Works?
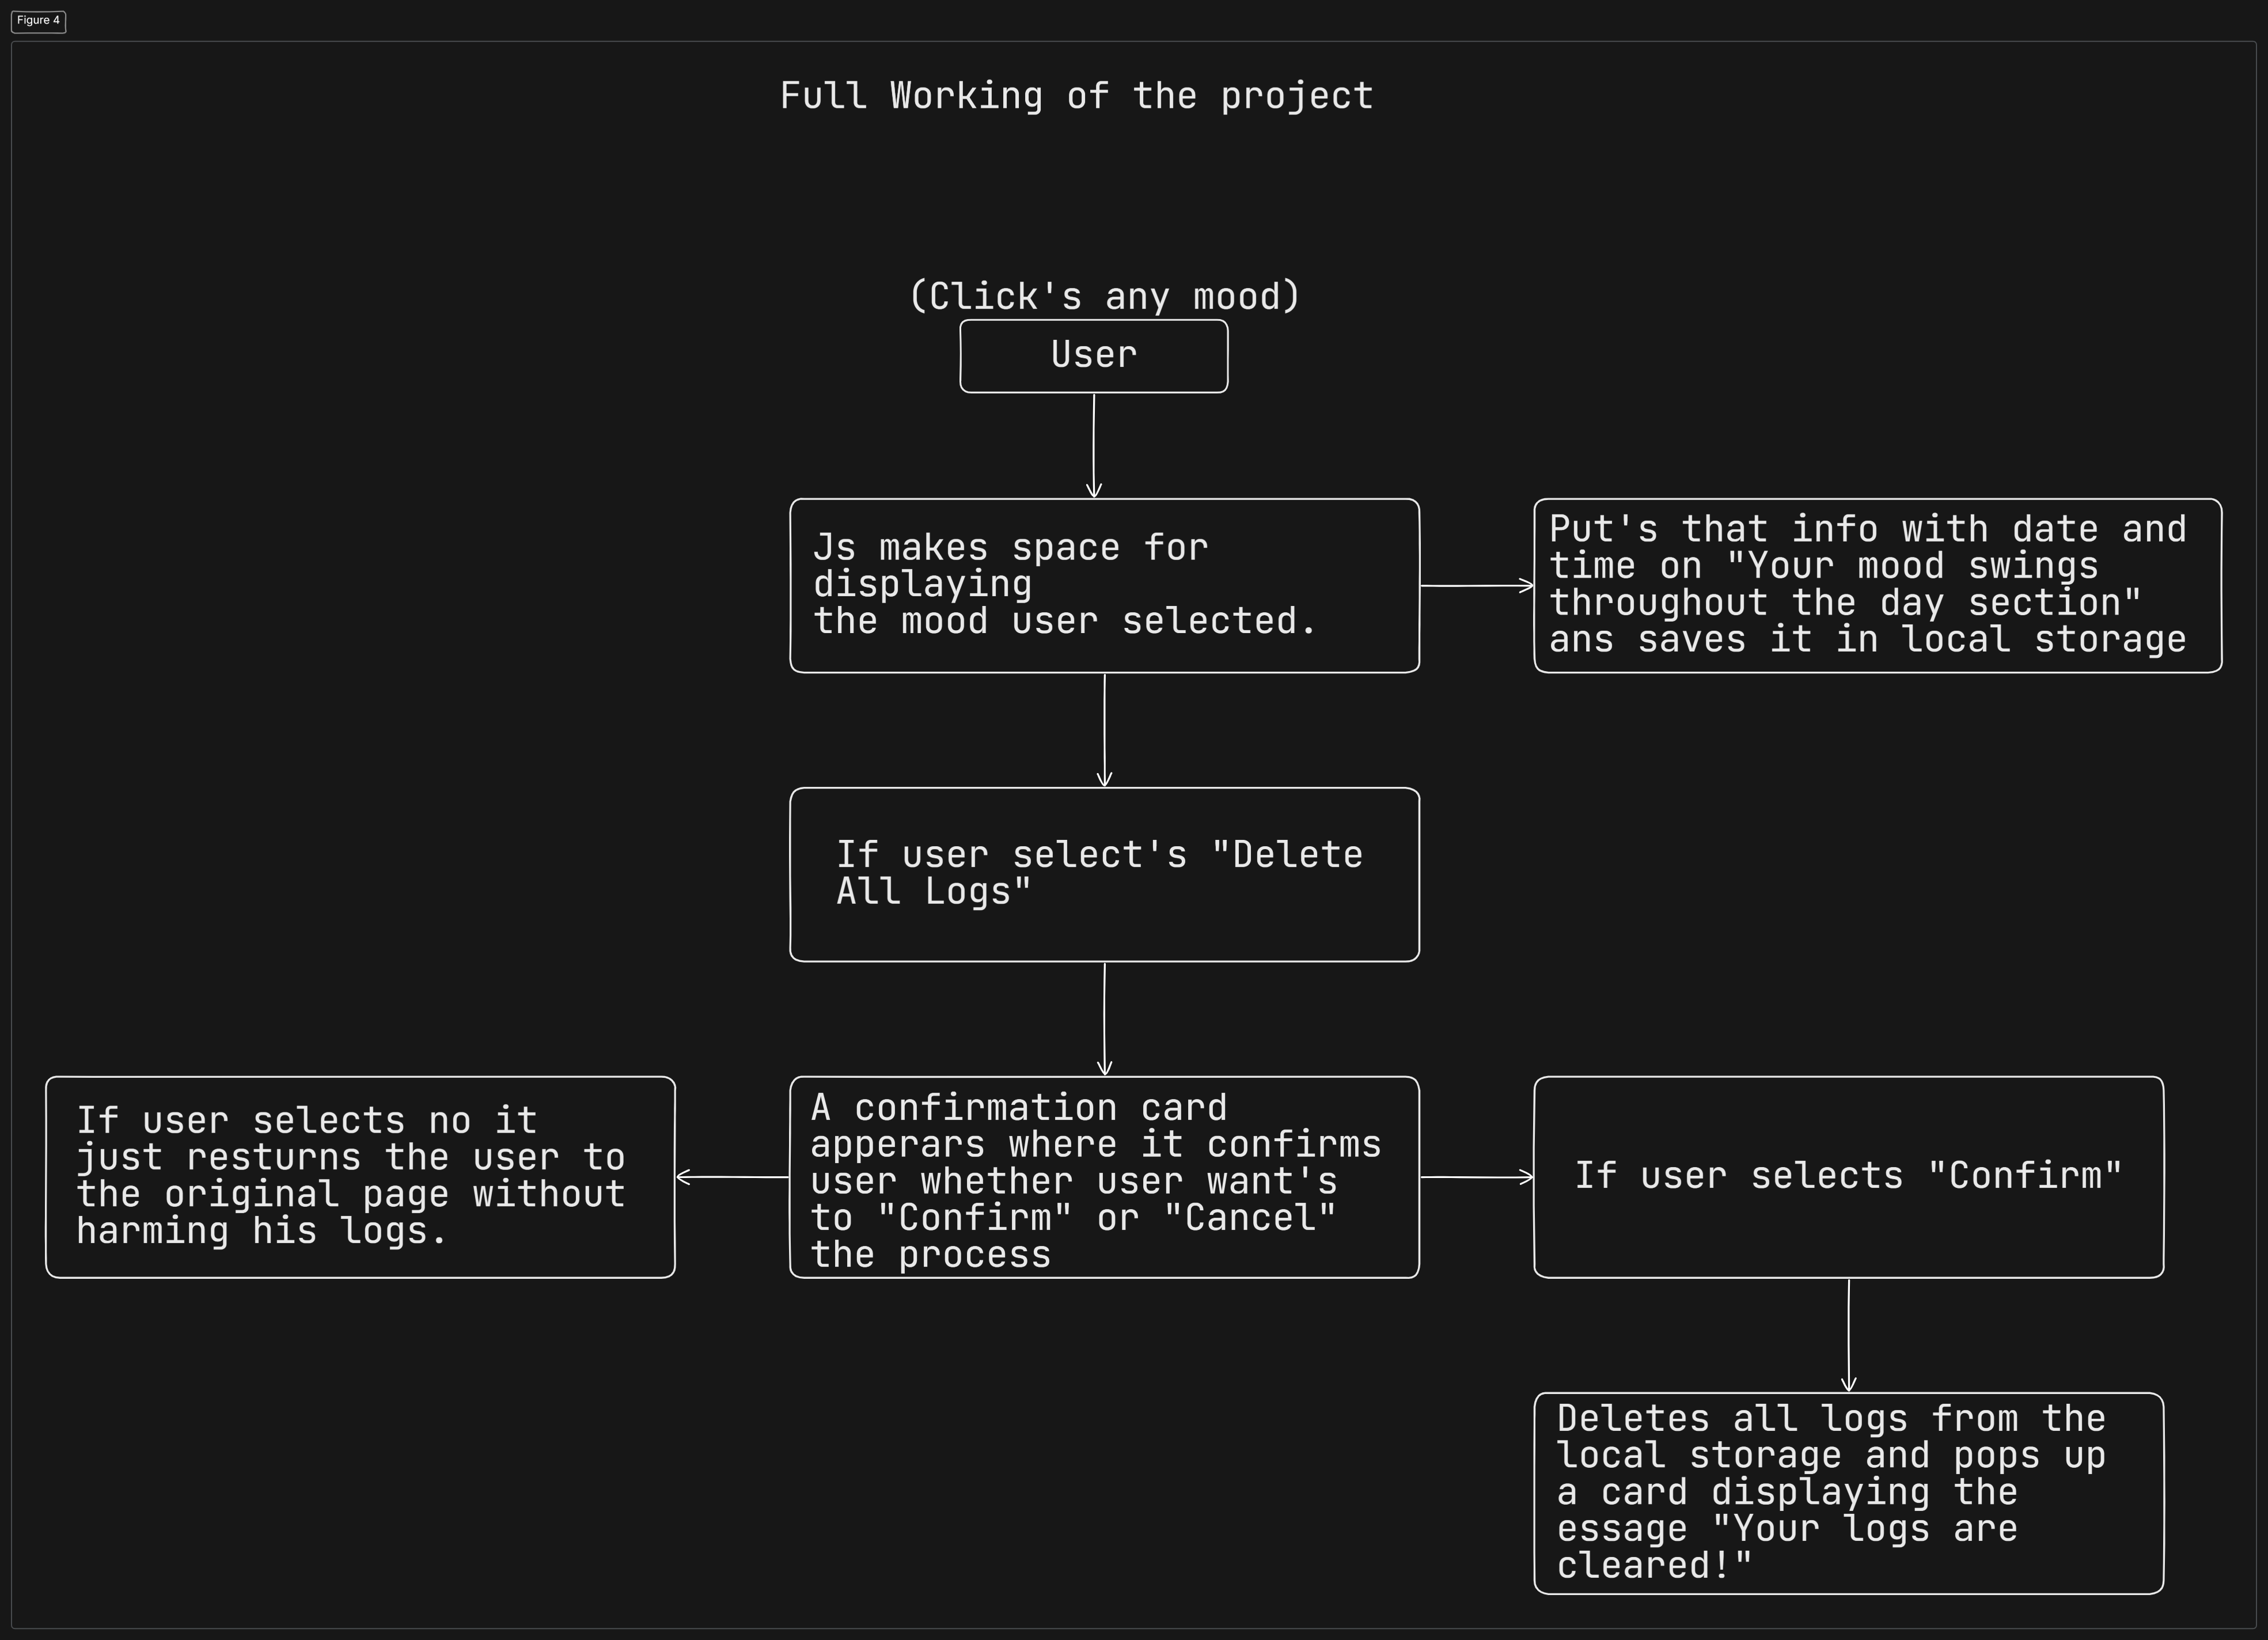
1️⃣ User selects a mood using the available mood buttons (😊 😢 😐 😍 😝).
2️⃣ The selected mood is displayed on the screen for the user.
3️⃣ The app maintains a log of past moods, showing what the user has selected throughout the day.
4️⃣ A "Delete All Logs" button allows users to clear their recorded moods.
5️⃣ When the delete button is clicked, a confirmation card appears, asking if the user really wants to delete their logs.
If the user selects "Yes" → The logs are cleared, and a message appears at the bottom confirming the deletion.
If the user selects "No" → The action is canceled, and the user returns to the main page.
This simple workflow ensures users can track their emotions daily and manage their mood history easily.

Website Overview 🚀
After implementing HTML, CSS, and JavaScript, we have finally built our Mood Tracker! Below is a video showcasing the final result:
Hope my Blog helps you in any way. Thanks for reading <3 !
you can check the code on my GitHub repo: - Siddharth8509 (Siddharth Roy)
Subscribe to my newsletter
Read articles from Siddharth Roy directly inside your inbox. Subscribe to the newsletter, and don't miss out.
Written by
