Generate Apk using Github Actions
 Ijlal Ahmad
Overview
When developing Android apps, it's easy to overlook the fact that the APK installed via Android Studio is specific to your device. While Android Studio provides an option to manually generate an APK for distribution, sharing it with others can be cumbersome—especially for personal projects or portfolio apps that you want to showcase alongside your GitHub repository.
Web developers can conveniently share their hosted projects via a simple link in their README or sidebar. But for Android developers, the process of manually generating an APK, uploading it to GitHub Releases, and writing release notes every time you update your project can be tedious and time-consuming.
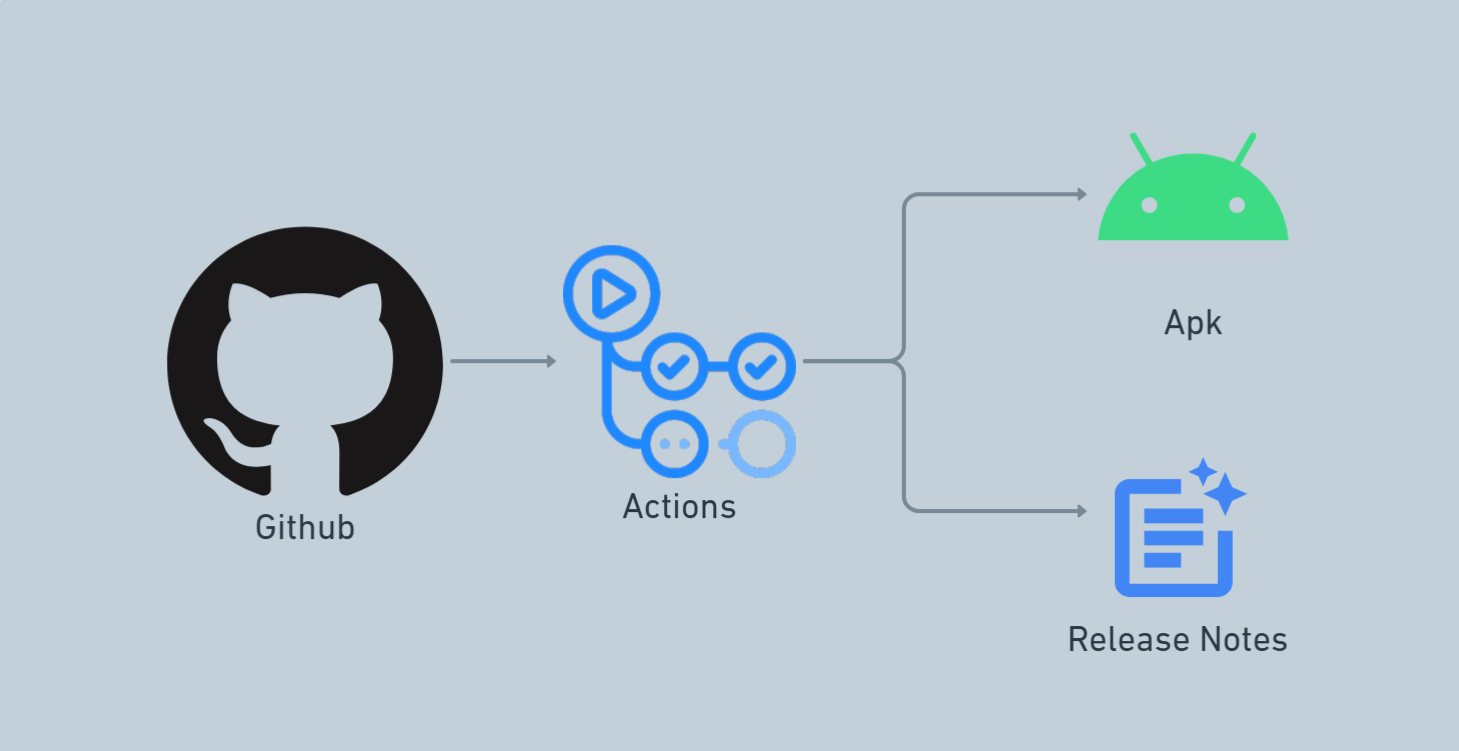
What if I told you this entire process could be automated? Imagine just pushing your code to GitHub, and everything else—APK generation, release creation, and release notes—happens automatically.
In this article, we’ll explore how to achieve this using GitHub Actions, a built-in automation tool within GitHub. No additional tools are required—just pure automation.
Let's get started! 🚀
What is Github Actions?
GitHub Actions is a CI/CD (Continuous Integration/Continuous Deployment) platform that enables you to automate your software development workflows—right from your GitHub repository. With GitHub Actions, you can automate tasks such as building, testing, and deploying your code without relying on external CI/CD tools.
It provides full-fledged virtual machines where you can run virtually any automation script, making it highly flexible and easily integrable with various tools and services. Whether you need to build an APK, deploy a website, or run scheduled tasks, GitHub Actions allows you to streamline your workflow efficiently.
Maintaining a Constant App Fingerprint for OAuth (Google Sign-In, etc.)
If our Android app integrates with services like Google OAuth, we’re required to provide the SHA1 fingerprint of our app’s signing key. When running the app in debug mode, this fingerprint is generated from our local debug keystore.
However, when the app is built on a different machine—such as a GitHub Actions CI runner—a new debug keystore is created, resulting in a different SHA1 fingerprint. This mismatch can cause OAuth-based authentication (like Google Sign-In) to fail on CI-generated APKs.
Solution: Use a Dedicated Release Keystore
To ensure a consistent SHA1 fingerprint across all builds (local, CI, production):
Create a dedicated release keystore.
Use this keystore to sign our release builds, both locally and in CI.
Share the keystore securely with GitHub Actions (e.g., use GitHub Secrets and encode it in base64).
Register the SHA1 fingerprint of this keystore with our OAuth providers (Google, Facebook, etc.).
Important: The keystore is a critical asset. It’s used to sign APKs for the Google Play Store, and losing access can prevent future updates. If leaked, attackers could impersonate our app.
We must never commit it to our repository. It should be stored securely.
Create a Signed Release Build
To generate a signed release build, follow these steps:
Step 1: Create a Keystore
Open Android Studio.
Go to Build → Generate Signed Bundle / APK.
Choose APK or App Bundle, then click Next.
Click Create new to generate a new keystore.
Save the keystore file (
.jks) securely.Set a key alias, key password, and keystore password — and make sure to remember them.
Step 2: Configure build.gradle
In your module-level build.gradle file, add the signingConfigs and buildTypes blocks inside the android {} section:
signingConfigs {
    release {
        def localProps = new Properties()
        def localPropsFile = rootProject.file("local.properties")
        if (localPropsFile.exists()) {
            localProps.load(localPropsFile.newDataInputStream())
        }

        def getEnvOrLocalProp = { key ->
            System.getenv(key) ?: localProps.getProperty(key)
        }

        def keystorePath = getEnvOrLocalProp("RELEASE_KEYSTORE_PATH") ?: file("./keystore.jks")
        if (keystorePath != null) {
            storeFile file(keystorePath)
            storePassword getEnvOrLocalProp("RELEASE_STORE_PASSWORD")
            keyAlias getEnvOrLocalProp("RELEASE_KEY_ALIAS")
            keyPassword getEnvOrLocalProp("RELEASE_KEY_PASSWORD")
        } else {
            println("⚠️ RELEASE_KEYSTORE_PATH is missing — skipping release signing")
        }
    }
}

buildTypes {
    debug {
        versionNameSuffix "-debug"
        minifyEnabled false
        signingConfig signingConfigs.debug
        proguardFiles getDefaultProguardFile('proguard-android-optimize.txt'), 'proguard-rules.pro'
    }
    release {
        minifyEnabled false
        signingConfig signingConfigs.release
        proguardFiles getDefaultProguardFile('proguard-android-optimize.txt'), 'proguard-rules.pro'
    }
}
Securely Handle Credentials
Instead of hardcoding sensitive credentials like keystore passwords in build.gradle, we load them from:
Environment variables (CI/CD pipelines)
Or from a
local.propertiesfile (for local development)
Important: Never commit
local.propertiesto version control. It contains sensitive data.
Step 3: Add Keystore to GitHub Actions
Since the keystore is a binary file, we can't directly store it in GitHub Secrets. Instead, we:
Convert Keystore to Base64
base64 -w 0 keystore.jks > keystore.jks.base64
On macOS (or if
-wflag fails), use:base64 keystore.jks > keystore.jks.base64
Add to GitHub Secrets
Go to your repository on GitHub.
Navigate to Settings → Secrets → Actions.
Create a new secret called
RELEASE_KEYSTORE_BASE64.Paste the contents of
keystore.jks.base64.
Convert Base64 Back to Keystore in CI
In your GitHub Actions workflow, decode the base64 back into a .jks file:
echo "${{ secrets.RELEASE_KEYSTORE_BASE64 }}" | base64 -d > app/keystore.jks
Now, your CI/CD pipeline can generate signed APKs or App Bundles with a consistent fingerprint and secure key management.
Setting Up Your Workflow
Workflows are automation scripts that allow us to define and execute specific tasks automatically. In GitHub, these workflows are stored inside a special folder called .github/workflows at the root level of your repository.
Workflows are written in YAML, a widely used language for CI/CD pipelines. In this section, we’ll create a workflow file to automate the APK generation process.
Creating the Workflow File
To get started, create a new file named build.yml inside the .github/workflows folder of your repository.
Overview of the Workflow File
# Name of the workflow
name: Build APK

# Triggers
on:
  push:
    branches:
      - main
  workflow_dispatch:

# Permissions for this workflow
permissions:
  contents: write
  pull-requests: write
  packages: write

# Task jobs
jobs:
  setup:
    name: Setup
    runs-on: ubuntu-latest
    steps:

  build:
    name: Build APK
    runs-on: ubuntu-latest
    needs: setup
    steps:

  create-release:
    name: Create Release
    runs-on: ubuntu-latest
    needs: [setup, build]
    steps:
This workflow is configured to run on two triggers:
Push to the
mainbranchManual trigger (
workflow_dispatch)
If you’re unfamiliar with these configurations, don’t worry! The key part to focus on is the jobs section. These jobs define the different tasks that will be executed on a virtual machine (in this case, ubuntu-latest). We will use artifacts to share the context of one job to the next one
Each job consists of steps, where we write Linux terminal commands to perform specific tasks.
Defining Task Jobs
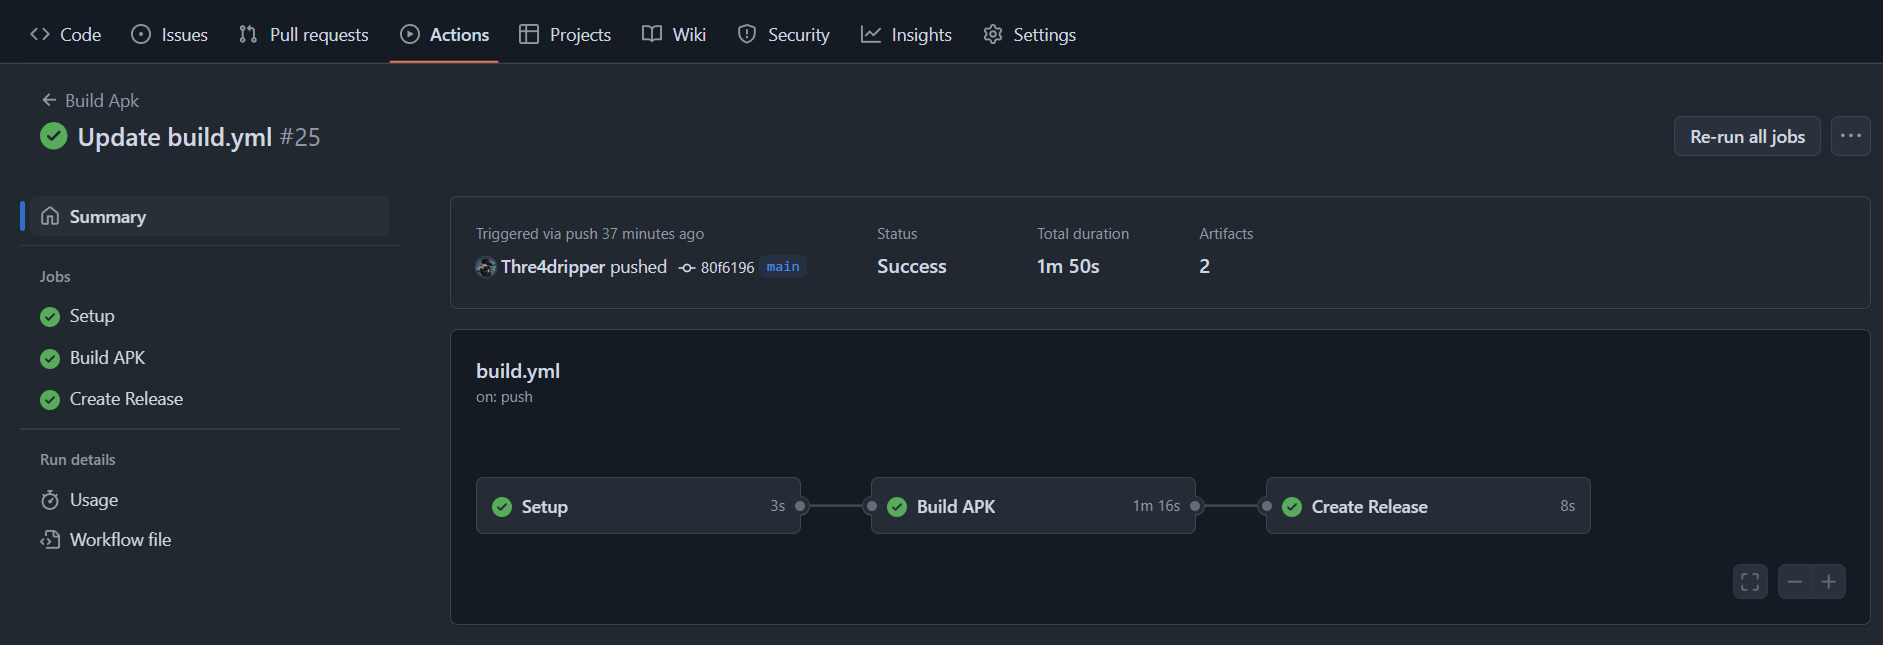
To automate the APK generation and release process, we’ll define three jobs:
1. Setup
- Generates required secret files inside the workflow (such as
google-services.jsonfor Firebase) and (keystore.jksfor keystore for signing release version of application).
2. Build
Prepares the release keystore and its secrets in the current session.
Compiles and builds the APK using Gradle.
3. Create Release
Generates release notes.
Uploads the generated APK to GitHub Releases automatically.
By structuring our workflow this way, we ensure a smooth and automated process for generating, managing, and publishing APK files—without manual intervention! 🚀
Configuring Secrets for Secure Builds
To keep sensitive information safe, GitHub provides a way to store secrets securely within your repository. These secrets can then be accessed within your workflows without exposing them in your code.
Adding Secrets to Your Repository
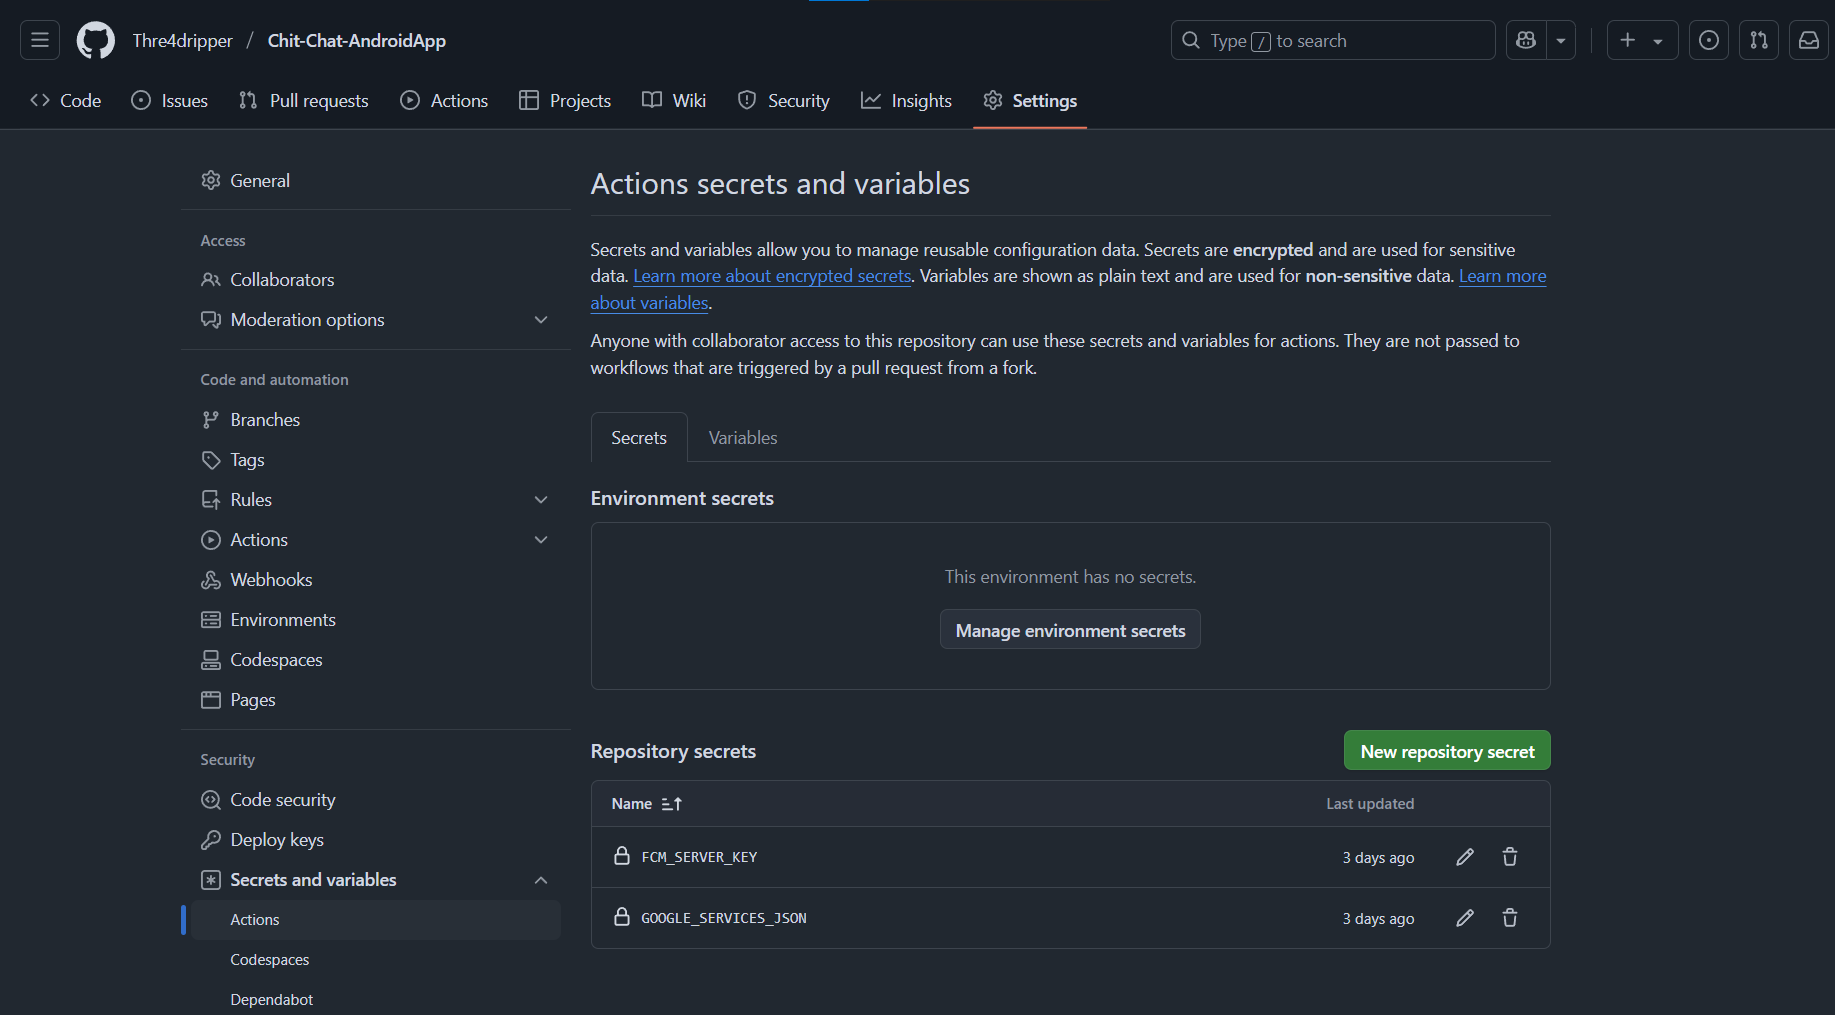
Navigate to your repository settings:
Go to Settings → Secrets and Variables → Actions.

Create a new secret:
Under Repository Secrets, click New repository secret.
Enter a name for the secret (e.g.,
GOOGLE_SERVICES_JSON).Paste the content of your secret (e.g., the entire
google-services.jsonfile) into the Value field.Click Add secret.
Repeat for other secrets:
You can store API keys, authentication tokens, or any other sensitive data using the same process.
Give each secret a meaningful name, as we’ll refer to them later in the workflow.
Accessing Secrets in the Workflow
Once secrets are stored, they can be accessed inside the workflow using the following syntax:
${{ secrets.SECRET_NAME }}
For example, to use the GOOGLE_SERVICES_JSON secret inside a GitHub Actions workflow, you can write:
- name: Create google-services.json
  run: |
    mkdir -p app
    echo '${{ secrets.GOOGLE_SERVICES_JSON }}' > app/google-services.json
This ensures your secrets are securely injected into the build process without being hardcoded in your repository. 🚀
Setup and Build APK with Gradle
Setup Job
The setup job is responsible for preparing the environment, generating necessary configuration files, and handling secrets securely.
  setup:
    name: Setup
    runs-on: ubuntu-latest
    outputs:
      short_sha: ${{ steps.sha.outputs.sha }}
    steps:
      - name: Create google-services.json
        run: |
          mkdir -p app
          echo '${{ secrets.GOOGLE_SERVICES_JSON }}' > app/google-services.json

      - name: Create secrets.xml
        run: |
          mkdir -p app/src/main/res/values
          cat << EOF > app/src/main/res/values/secrets.xml
          <?xml version="1.0" encoding="utf-8"?>
          <resources>
              <string name="fcm_server_key">${{ secrets.FCM_SERVER_KEY }}</string>
          </resources>
          EOF

      - name: Get short SHA
        id: sha
        run: echo "sha=${GITHUB_SHA::7}" >> $GITHUB_OUTPUT

      - name: Create keystore
        run: |
          echo "${{ secrets.RELEASE_KEYSTORE_BASE64 }}" | base64 -d > app/keystore.jks

      - name: Upload config files
        uses: actions/upload-artifact@v4
        with:
          name: config-files
          path: |
            app/google-services.json
            app/src/main/res/values/secrets.xml
            app/keystore.jks
          retention-days: 1
This job ensures that all required secret files and metadata are created within the GitHub worker before the build process begins. You can add more secrets as needed, making this job the central place for managing them dynamically.
Setting Up Java and Gradle in GitHub Actions
Before building the APK, we need to set up Java and Gradle in the GitHub Actions environment.
build:
    name: Build APK
    runs-on: ubuntu-latest
    needs: setup
    steps:
      - name: Checkout code
        uses: actions/checkout@v4

      - name: Set up JDK
        uses: actions/setup-java@v4
        with:
          distribution: 'oracle'
          java-version: '17'
          cache: gradle

      - name: Download config files
        uses: actions/download-artifact@v4
        with:
          name: config-files
          path: ./app

      - name: Change Gradle Wrapper Permissions
        run: chmod +x gradlew
This step ensures that the environment is ready with the correct Java version and Gradle configuration.
Set Keystore Env Variables in Github Environment
      - name: Export signing env vars
        run: |
          echo "RELEASE_STORE_PASSWORD=${{ secrets.RELEASE_STORE_PASSWORD }}" >> $GITHUB_ENV
          echo "RELEASE_KEY_ALIAS=${{ secrets.RELEASE_KEY_ALIAS }}" >> $GITHUB_ENV
          echo "RELEASE_KEY_PASSWORD=${{ secrets.RELEASE_KEY_PASSWORD }}" >> $GITHUB_ENV
Running the Gradle Build Process
Once the environment is set up, we can proceed with building the APK using Gradle.
      - name: Build with Gradle
        run: ./gradlew assembleRelease
To ensure that the generated APK can be accessed in the next job, we upload it as an artifact.
      - name: Upload APK
        uses: actions/upload-artifact@v4
        with:
          name: app-debug
          path: app/build/outputs/apk/debug/app-debug.apk
          retention-days: 1
This ensures that the APK is stored temporarily and can be used in subsequent jobs, such as creating a GitHub release.
Automating GitHub Releases
Once the APK is built, the next step is to automate the release process on GitHub. This includes dynamically generating version tags, uploading the APK as a release asset, and automatically generating release notes.
Generating Version Tags Dynamically
To track versions effectively, we generate a new tag based on the latest commit.
- name: Get Last Tag
  id: get_last_tag
  run: |
    git fetch --tags
    LAST_TAG=$(git describe --abbrev=0 --tags || echo "none")
    echo "last_tag=${LAST_TAG}" >> $GITHUB_OUTPUT

- name: Generate New Tag
  id: generate_new_tag
  run: |
    echo "new_tag=1.0-${GITHUB_SHA::7}" >> $GITHUB_OUTPUT
This retrieves the last version tag (if any) and generates a new tag based on the latest commit SHA.
Uploading the APK to a GitHub Release and Generating Release Notes
After generating the APK, we create a GitHub release, attach the APK, and automatically generate release notes.
- name: Create Release
  id: create_release
  uses: softprops/action-gh-release@v2
  env:
    GITHUB_TOKEN: ${{ secrets.GITHUB_TOKEN }}
  with:
    tag_name: ${{ steps.generate_new_tag.outputs.new_tag }}
    name: "Release ${{ steps.generate_new_tag.outputs.new_tag }}"
    body: |
      ## What's Changed
      **Full Changelog**: https://github.com/${{ github.repository }}/compare/${{ steps.get_last_tag.outputs.last_tag }}...${{ steps.generate_new_tag.outputs.new_tag }}
    draft: false
    prerelease: false
    files: |
      app/build/outputs/apk/debug/app-debug.apk
Here’s what’s happening:
Tagging the release with the newly generated version.
Attaching the APK file to the release.
Generating a changelog using GitHub’s comparison link between the last release and the new one.
If you want more detailed release notes, you can integrate an LLM API to generate a summary of changes dynamically.
Enhancing the Workflow
Signing the APK for Production
For production builds, the APK must be signed before uploading to Google Play. To do this, store your keystore file as a GitHub secret (Base64 encoded) and use the following steps in your workflow:
- name: Decode Keystore
  run: |
    echo "${{ secrets.RELEASE_KEYSTORE_BASE64 }}" | base64 --decode > app/keystore.jks

- name: Sign APK
  run: |
    jarsigner -verbose -sigalg SHA256withRSA -digestalg SHA-256 \
    -keystore app/keystore.jks -storepass ${{ secrets.KEYSTORE_PASSWORD }} \
    app/build/outputs/apk/release/app-release-unsigned.apk my-key-alias
This will sign the APK using the keystore stored in GitHub Secrets.
Uploading the APK to Google Play (Optional)
If you want to automate the deployment to Google Play, you can use Google Play Developer API along with the r0adkll/upload-google-play GitHub Action.
- name: Upload to Google Play
  uses: r0adkll/upload-google-play@v1
  with:
    serviceAccountJson: ${{ secrets.PLAY_STORE_SERVICE_ACCOUNT }}
    packageName: com.example.app
    releaseFiles: app/build/outputs/apk/release/app-release.apk
    track: production
    status: completed
This will upload the signed APK directly to Google Play’s internal testing or production track.
Full Workflow File
name: Build Apk

on:
  push:
    branches:
      - main
  workflow_dispatch:

concurrency:
  group: ${{ github.workflow }}-${{ github.ref }}

permissions:
  contents: write
  pull-requests: write
  packages: write

jobs:
  setup:
    name: Setup
    runs-on: ubuntu-latest
    outputs:
      short_sha: ${{ steps.sha.outputs.sha }}
    steps:
      - name: Create google-services.json
        run: |
          mkdir -p app
          echo '${{ secrets.GOOGLE_SERVICES_JSON }}' > app/google-services.json

      - name: Create secrets.xml
        run: |
          mkdir -p app/src/main/res/values
          cat << EOF > app/src/main/res/values/secrets.xml
          <?xml version="1.0" encoding="utf-8"?>
          <resources>
              <string name="fcm_server_key">${{ secrets.FCM_SERVER_KEY }}</string>
          </resources>
          EOF

      - name: Get short SHA
        id: sha
        run: echo "sha=${GITHUB_SHA::7}" >> $GITHUB_OUTPUT

      - name: Create keystore
        run: |
          echo "${{ secrets.RELEASE_KEYSTORE_BASE64 }}" | base64 -d > app/keystore.jks

      - name: Upload config files
        uses: actions/upload-artifact@v4
        with:
          name: config-files
          path: |
            app/google-services.json
            app/src/main/res/values/secrets.xml
            app/keystore.jks
          retention-days: 1

  build:
    name: Build APK
    runs-on: ubuntu-latest
    needs: setup
    steps:
      - name: Checkout code
        uses: actions/checkout@v4

      - name: Set up JDK
        uses: actions/setup-java@v4
        with:
          distribution: 'oracle'
          java-version: '17'
          cache: gradle

      - name: Download config files
        uses: actions/download-artifact@v4
        with:
          name: config-files
          path: ./app

      - name: Change Gradle Wrapper Permissions
        run: chmod +x gradlew

      - name: Export signing env vars
        run: |
          echo "RELEASE_STORE_PASSWORD=${{ secrets.RELEASE_STORE_PASSWORD }}" >> $GITHUB_ENV
          echo "RELEASE_KEY_ALIAS=${{ secrets.RELEASE_KEY_ALIAS }}" >> $GITHUB_ENV
          echo "RELEASE_KEY_PASSWORD=${{ secrets.RELEASE_KEY_PASSWORD }}" >> $GITHUB_ENV

      - name: Build with Gradle
        run: ./gradlew assembleRelease

      - name: Upload APK
        uses: actions/upload-artifact@v4
        with:
          name: app-release
          path: app/build/outputs/apk/release/app-release.apk
          retention-days: 1

  create-release:
    name: Create Release
    runs-on: ubuntu-latest
    needs: [ setup,build ]
    steps:
      - name: Checkout code
        uses: actions/checkout@v4
        with:
          fetch-depth: 0

      - name: Download APK
        uses: actions/download-artifact@v4
        with:
          name: app-release
          path: app/build/outputs/apk/release

      - name: Get Last Tag
        id: get_last_tag
        run: |
          git fetch --tags
          LAST_TAG=$(git describe --abbrev=0 --tags || echo "none")
          echo "last_tag=${LAST_TAG}" >> $GITHUB_OUTPUT

      - name: Generate New Tag
        id: generate_new_tag
        run: |
          echo "new_tag=1.0-${GITHUB_SHA::7}" >> $GITHUB_OUTPUT

      - name: Create Release
        id: create_release
        uses: softprops/action-gh-release@v2
        env:
          GITHUB_TOKEN: ${{ secrets.GITHUB_TOKEN }}
        with:
          tag_name: ${{ steps.generate_new_tag.outputs.new_tag }}
          name: "Release ${{ steps.generate_new_tag.outputs.new_tag }}"
          body: |
            ## What's Changed
            **Full Changelog**: https://github.com/${{ github.repository }}/compare/${{ steps.get_last_tag.outputs.last_tag }}...${{ steps.generate_new_tag.outputs.new_tag }}
          draft: false
          prerelease: false
          files: |
            app/build/outputs/apk/release/app-release.apk

I have omitted the signing and deployment part from this since they are use-case specific and do not apply to every hobbyist Android developer.
Conclusion
With this fully automated workflow, building, releasing, and publishing your APKs becomes effortless using GitHub Actions. This setup is perfect for hobby developers and students who want to showcase their projects without the hassle of manually generating and sharing APKs. Now, instead of scrambling to find the latest build on your PC when someone asks for your app, you can simply share a GitHub release link—just like web developers share their hosted sites.
Embrace automation and let GitHub Actions handle the heavy lifting, so you can focus on what truly matters—building great Android apps! 🚀
Subscribe to my newsletter
Read articles from Ijlal Ahmad directly inside your inbox. Subscribe to the newsletter, and don't miss out.
Written by

Ijlal Ahmad
Ijlal Ahmad
Android enthusiast turned full-stack web & Android dev! My 6+ years journey started with Android, but curiosity led me to backend & DevOps via an internship. There, I built email/push services & a cloud storage solution, fueling my passion for web dev. Landing the Smart India Hackathon win for an AI-powered proctored exam tool solidified my expertise. Now, I'm embracing cross-platform development & DevOps tools like Docker & CI/CD, while expanding my AWS knowledge to make a bigger impact. Always learning, always growing, always seeking new challenges!