A Comprehensive Guide to Writing Your First ABAP Program (Part 1)
 Fahim Al Jadid
Welcome to the world of ABAP (Advanced Business Application Programming), the programming language that powers SAP applications. In this tutorial, we will embark on a journey to create your very first ABAP program. This guide is designed to be both informative and engaging, ensuring that you not only learn the technical aspects but also enjoy the process. Let’s dive in!
Understanding the ABAP Editor
Before we start coding, it’s essential to familiarize ourselves with the ABAP editor. The editor is where all the magic happens, and knowing how to navigate it is crucial for your success.
Accessing the ABAP Editor
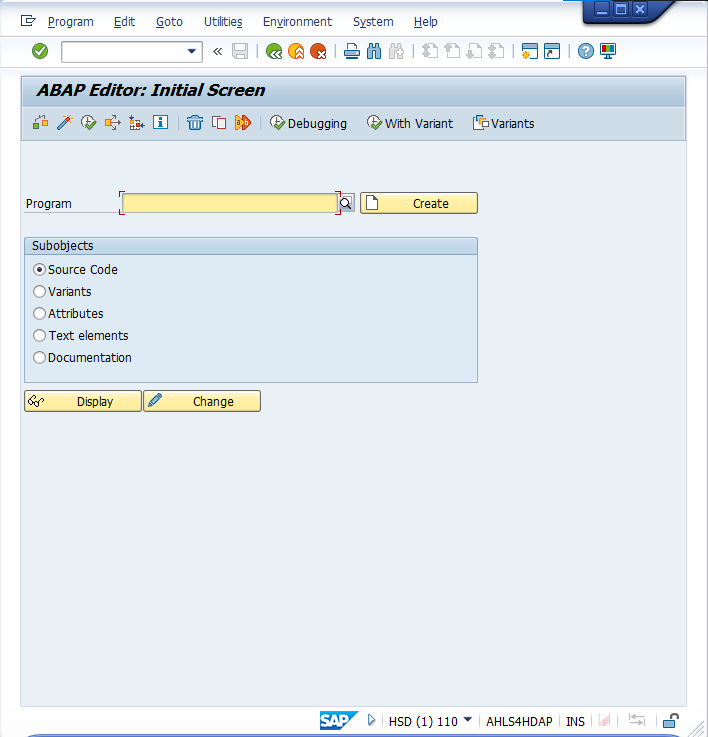
To access the ABAP editor, you can use transaction codes SE38 or SE80. Simply enter one of these codes in the command field after logging into your SAP system. If you prefer a graphical approach, you can navigate through the menu:
- Tools > ABAP Workbench > Development > ABAP Editor.

Naming Conventions
In ABAP, naming conventions are vital for maintaining clarity and organization. Custom programs must start with either Z or Y, while standard SAP objects can begin with any letter or number except these. For example, if you want to create a program named "My First Program," you would name it Z_MY_FIRST_PROGRAM.
Creating Your First Program
Open the ABAP Editor: Enter
SE38in the command field.Create a New Program: Type your program name (e.g.,
Z_MY_FIRST_PROGRAM) and click on the "Create" icon.Fill in the Details:
Title: Enter a descriptive title, such as "My First ABAP Program."
Type: Select "Executable Program" to allow direct execution from the editor.
Writing Your First ABAP Code
Now that we have set up our program, it’s time to write some code. The first line of code we will write is a simple output statement.
WRITE 'Hello, World!'.
In ABAP, all strings must be enclosed in single quotes, and every statement must end with a period.
Saving and Activating Your Program
After writing your code, it’s crucial to save and activate it:
Save: Click the save icon or press
Ctrl + S.Syntax Check: Before activating, perform a syntax check by clicking the syntax check icon or pressing
Ctrl + F2. Ensure there are no errors.Activate: Click the activate icon or press
Ctrl + F3. This step is necessary to run your program.
Executing Your Program
To see your program in action, execute it by clicking the "Execute" button or pressing F8. You should see the output "Hello, World!" displayed on the screen.
Enhancing Your Program
Now that you have a basic program running, let’s enhance it by adding more features.
Adding Multiple Lines of Output
To print multiple lines, you can use the NEW-LINE command or simply add multiple WRITE statements:
WRITE 'My First ABAP Program'.
NEW-LINE.
WRITE 'Welcome to ABAP!'.
Using Variables
You can also introduce variables to make your program dynamic. For example:
DATA: lv_message TYPE string.
lv_message = 'Hello, ABAP World!'.
WRITE lv_message.
Comments in ABAP
Adding comments to your code is a good practice for documentation. Use the following syntax for comments:
Single-line comment:
* This is a commentMulti-line comment:
"/" "This is a multi-line comment"
Error Handling
As you code, you may encounter syntax errors. ABAP provides helpful error messages that indicate the line number and type of error. For instance, if you forget to end a statement with a period, the editor will highlight the error and suggest corrections.
Real-World Application: Creating a Transaction Code
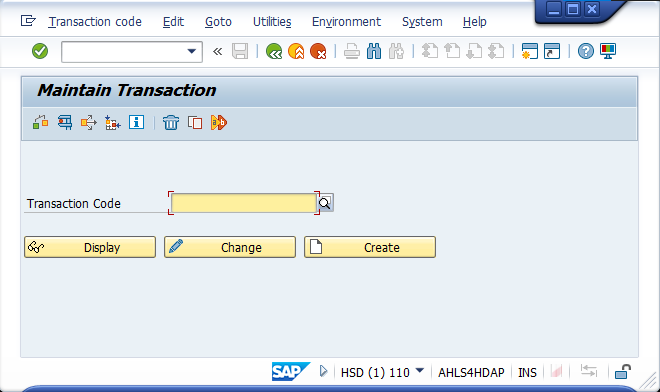
To make your program easily accessible, you can create a transaction code for it. Here’s how:
Go to Transaction Code: Enter
SE93in the command field.
Create a New Transaction: Click on "Create" and enter your transaction code (e.g.,
Z_MY_FIRST_TCODE).Link to Your Program: Specify the program name and select the appropriate options.
Save: Click the save button.
Now, you can execute your program directly using the transaction code you created!
Conclusion
Congratulations! You have successfully created your first ABAP program and learned essential concepts such as navigating the ABAP editor, writing code, and creating transaction codes. As you continue your journey in ABAP programming, remember that practice is key.
Subscribe to my newsletter
Read articles from Fahim Al Jadid directly inside your inbox. Subscribe to the newsletter, and don't miss out.
Written by
