Kubernetes End-to-End project: Using EKS to deploy an app with Ingress
 Kene Ojiteli
Table of contents

Introduction
This article provides a step-by-step guide on deploying an application to Kubernetes using AWS Elastic Kubernetes Service (EKS), including an overview of EKS.
Kubernetes is an open-source container orchestration platform that helps deploy, scale, and manage containerized applications automatically. For this tutorial, I will be using AWS Elastic Kubernetes Service, a fully-managed Kubernetes service offered by AWS (using this service implies I do not have to set up everything manually and AWS handles scalability, security, and updates).
Prerequisites
AWS account - to deploy an application on its fully managed Kubernetes service (AWS EKS).
Kubectl- a Kubernetes command line tool for interacting with the Kubernetes cluster's control plane.
Eksctl- a CLI tool for Amazon EKS to create and manage clusters.
AWS CLI, Command line or Terminal - to manage AWS services via the command line.
Knowledge of Kubernetes and Ingress - to deploy apps and create and enforce rules to make the application accessible externally.
Steps taken
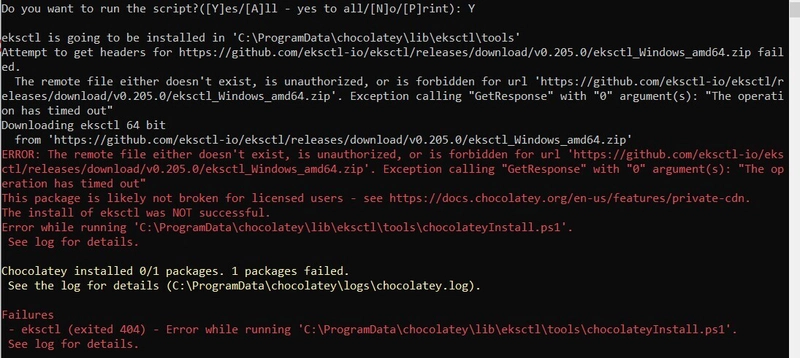
First and foremost is to install all the necessary command line tools on the terminal of your local machine (I am using a windows machine and I had issues installing eksctl on windows, so I went ahead to utilize AWS cloudshell); Cloudshell already has AWS CLI pre-installed, I only had to install kubectl and eksctl, this approach was easier because cloudshell runs on a compute environment based on Amazon Linux.
Ensure you're logged into your AWS account and have configured the CLI using:
aws configure.
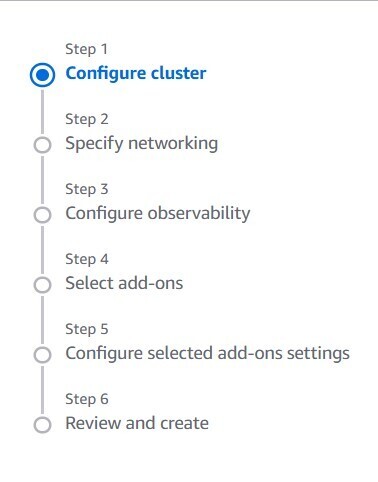
- The AWS Management Console requires manual configurations, which isn't ideal for automation (imagine having to do a 5-step configuration to create a cluster manually). Therefore, I used eksctl to create the cluster and its dependencies with a single command. This process takes approximately 20 minutes, so ensure you have a stable internet connection.
Notice that while creating my cluster, it needs a name, region and a node type; there are 3 available node types namely - Fargate (fully managed by AWS), Managed nodes (Semi-managed; user-configured, but AWS handles instance creation and deletion) and EC2 instances (Self-managed; the user is responsible for managing infrastructure nodes). I will be using the fargate option:
eksctl create cluster --name <cluster-name> --region <your-region> --<node-type>.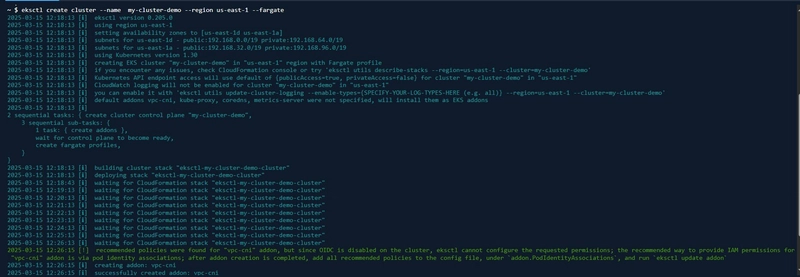
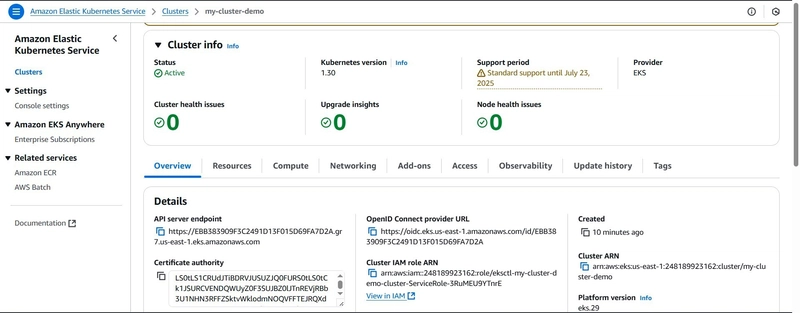
- After creating and activating the cluster, I verified its status on the EKS dashboard.
- I explored other features of my EKS cluster, such as the resources and compute options. As a fully managed service, I can view all my cluster resources on the dashboard, equivalent to using
kubectl.
There is a Fargate profile on the compute tab, this allows Kubernetes pods to be run on Fargate, at the moment the application can only be deployed on the namespaces shown below (as a best practice, a new fargate profile will be created so the application will be deployed in a different namespace, this is to have a more fine-grained capability to manage the interaction between pods deployed on to EKS).
I updated the local Kubernetes configuration file (~/.kube/config) to use my specified Amazon EKS cluster:
aws eks update-kubeconfig --name <cluster-name> --region <region-name>.
- Then I created a new fargate profile in a new namespace (this is where my Kubernetes resources will be created).
eksctl create fargateprofile \ --cluster <cluster-name> \ --region <region> \ --name <fargateprofile-name> \ --namespace <namespace>
My new profile is active, and I can start creating my resources
I went ahead and created my resources on the new namespace game-2048; A namespace(used to isolate groups of resources within a single cluster), deployment(manages a set of Pods to run an application workload), service(exposes an application) and ingress resource (a standard configuration object for an ingress controller) were created.
kubectl apply -f https://raw.githubusercontent.com/kubernetes-sigs/aws-load-balancer-controller/v2.5.4/docs/examples/2048/2048_full.yaml
Also the nodes (a virtual or physical machine that one or more Kubernetes pods run on) on the EKS cluster.

From the image below, the ingress resource does not have an address (which is necessary to access the deployed application externally), For the Ingress resource to work, the cluster must have an ingress controller running:
kubectl get ingress -n <namespace>.To assign IAM roles to Kubernetes service accounts, I will associate my EKS cluster with an OIDC provider (this allows Kubernetes to authenticate using AWS IAM roles) after which I create IAM roles with policies that allow specific Kubernetes service accounts to access AWS resources securely.
eksctl utils associate-iam-oidc-provider --cluster <cluster-name> --approve
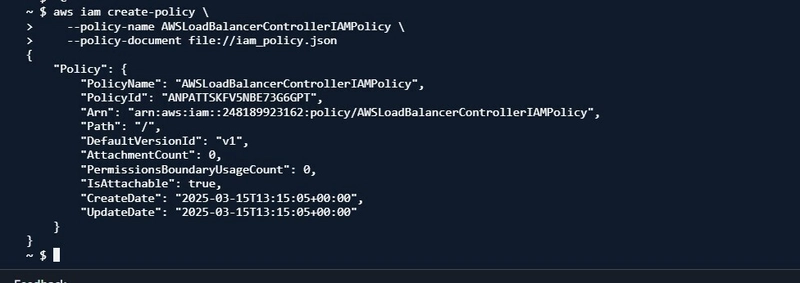
curl -O https://raw.githubusercontent.com/kubernetes-sigs/aws-load-balancer-controller/v2.11.0/docs/install/iam_policy.json
aws iam create-policy \ --policy-name <policy-name> \ --policy-document file://iam_policy.json
- I created a service account (in the kube-system namespace, where Kubernetes system components run) in my EKS cluster and linked it to an IAM role with permissions for managing AWS Load Balancers.
eksctl create iamserviceaccount \ --cluster=<cluster-name> \ --namespace=kube-system \ --name=aws-load-balancer-controller \ --role-name AmazonEKSLoadBalancerControllerRole \ --attach-policy-arn=arn:aws:iam::<your-aws-account-id>:policy/AWSLoadBalancerControllerIAMPolicy \ --approve
- To make the ingress resource active, an ingress controller is required (an ingress resource is useless without the ingress controller), I will be using the AWS ALB controller as it integrates with AWS Application Load Balancer (ALB) and Network Load Balancer (NLB).
Verify the resources are created based on specifications.

Now, the ingress has an address because of the ingress controller.
The ingress controller is of ALB type, it automatically created a Load balancer; I navigated to the ELB service to copy the DNS name to access via a browser (note that the status of the load balancer has to be active before it can be accessed on a browser).
- Voila! The application is accessible.
- Don't forget to delete your resources to avoid incurring costs
eksctl delete cluster --name <cluster-name> --region <your-region>.
Challenges encountered during this project
Understanding Ingress resources and controllers.
Installing eksctl locally on my Windows machine.
Conclusion
This tutorial shows how to:
Deploy an application on a fully managed Kubernetes cluster with AWS.
Create rules with ingress resources and enforce the rule with the ingress controller.
Assign IAM roles to Kubernetes service account with an OIDC provider.
The End.
Thank you for reading.
Subscribe to my newsletter
Read articles from Kene Ojiteli directly inside your inbox. Subscribe to the newsletter, and don't miss out.
Written by

Kene Ojiteli
Kene Ojiteli
I have experience building highly accessible, scalable, and reliable cloud infrastructure and have experience with AWS, Linux, Git, Docker, and Kubernetes. S3, EC2, CloudFormation, CloudFront, Auto-Scaling Group, Elastic Load Balancer, IAM, Cloud9, VPC, RDS, Route53, and other AWS services are just a few of the ones I am familiar with. I have experience building CI/CD pipelines, high-availability web apps, and websites. I'm excited about designing, implementing, and automating cloud-based apps while utilizing best practices like configuration management, continuous integration, and deployment.


