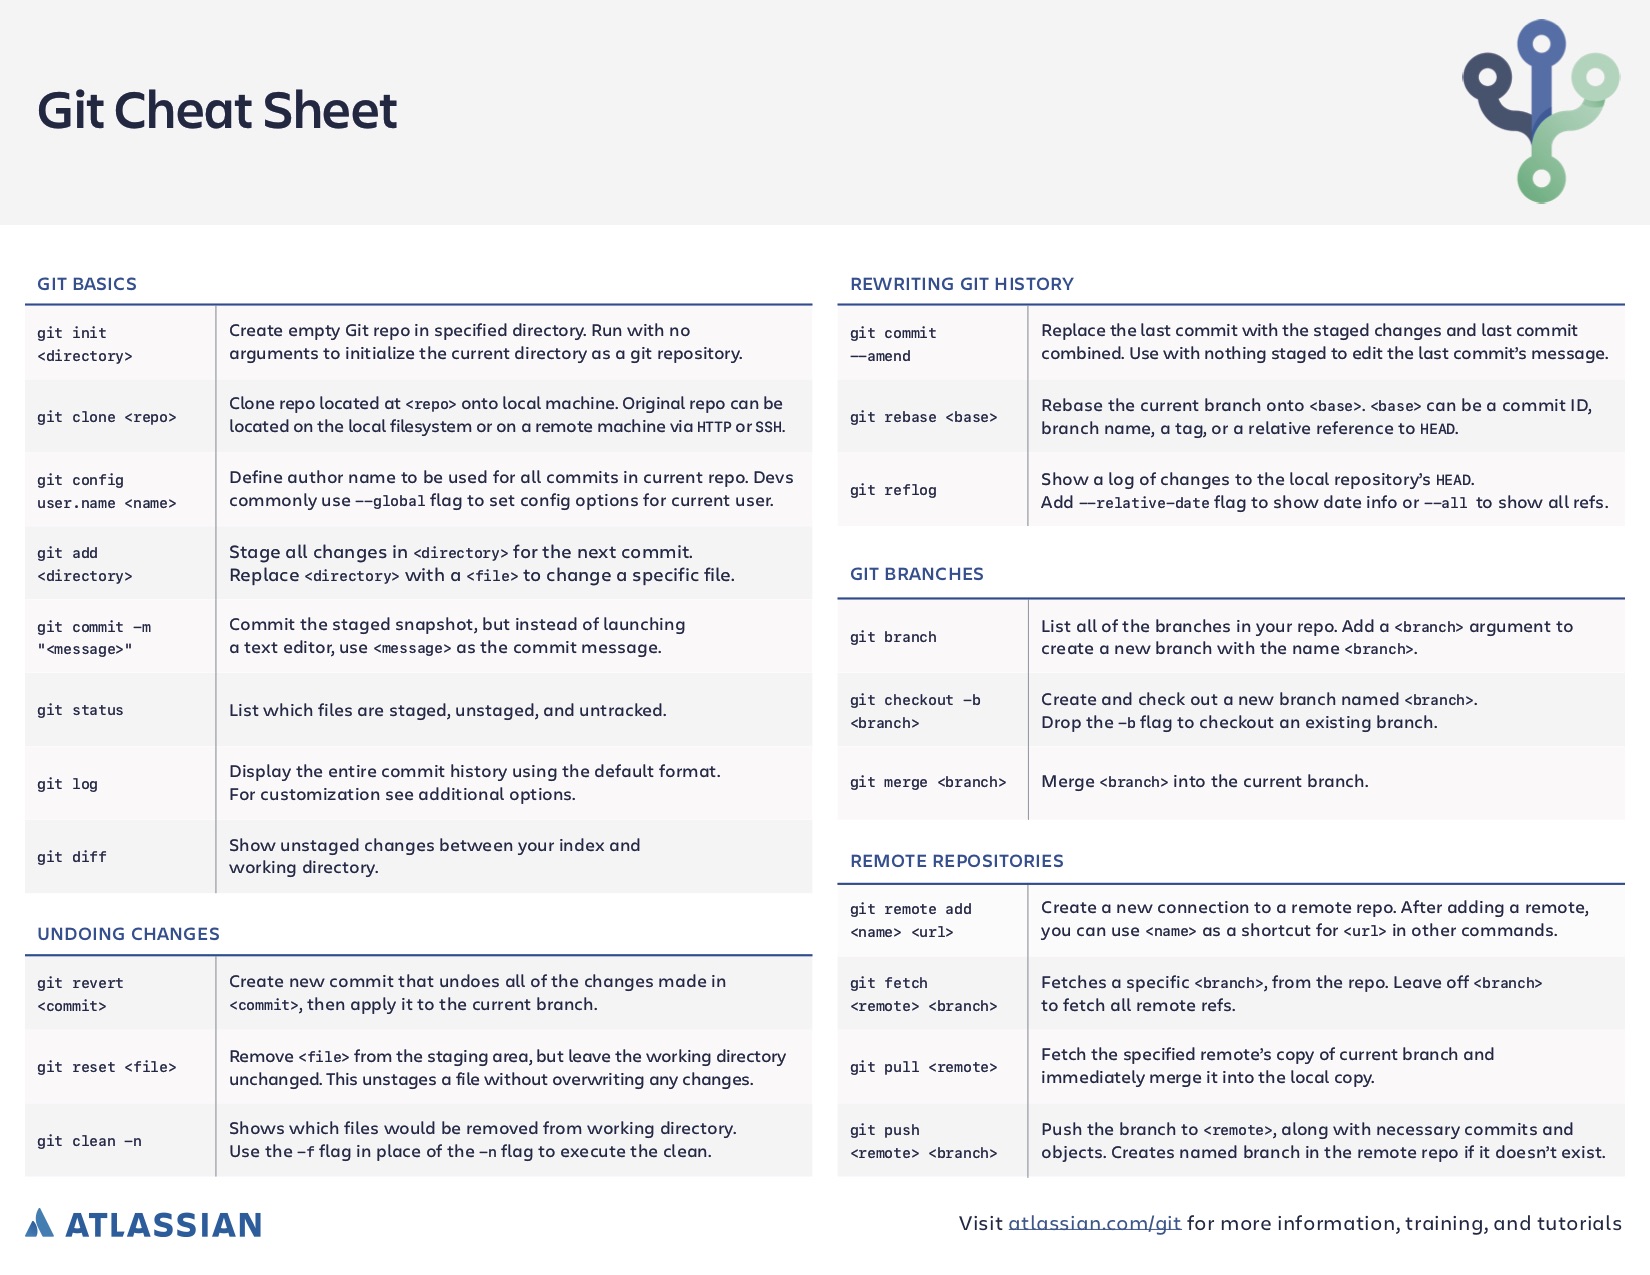
Git - Master Merging & Cherry Picking
 Amit Sangwan
The Big Picture: What Are We Doing?
In this blog, you’ll walk through a real-world Git workflow designed for efficient branch management in collaborative projects. The goal is to bring an outdated release branch in sync with the latest production code, cleanly apply the changes, and push it to Gerrit for review.
Thinking Like a Pro
When working with Git, a tech professional’s workflow typically follows a logical and structured process. Here’s how you’d naturally approach this in your day-to-day work:
You realize your branch is outdated → Switch to your working branch.
You ensure everything is in sync → Fetch and pull the latest changes.
You apply production updates to your branch → Rebase it on top of
master.You face conflicts (possibly) → Resolve them cleanly.
You push the rebased branch → With force but safely.
You verify everything works → Build and test your project.
You merge it into
master→ Consolidate your branch into production.You push to Gerrit for review → Use the
ptgalias for simplicity.You visualize and verify the history → Use Git logs and diffs to confirm everything.
This step-by-step flow reflects how tech professionals intuitively handle Git operations in real-world scenarios.
Scenario 1: Real-World Scenario
Imagine you're working on a project called Automation, which has the following branches:
master: The production-ready branch with stable code.r1: A release branch containing new features in development.r2andr3: Release branches that have already been merged intomaster.
Current Situation
r2andr3have been merged intomaster, making it fully updated.However,
r1still contains unmerged features and is now outdated compared tomaster.
Goal
Bring
r1up to date withmasterby applying the latest production changes.Rebase
r1onmasterfor a cleaner and linear history.**Merge
r1intomaster**to include its new features.Use the
ptgalias to automatically push the current branch to Gerrit for review.
The Workflow – Step by Step
1. Switch to the Release Branch
The first step is to switch to the working branch (r1) where you’ve been making changes.
git switch r1
Why?
Ensures you are working on the correct branch.
If
r1doesn’t exist locally, create it from remote:
git checkout -b r1 origin/r1
2. Sync with the Remote Repository
Before making any changes, fetch the latest remote updates to avoid conflicts.
git fetch origin       # Fetches the latest changes without merging
git pull               # Syncs your local branch with the remote
Why?
Keeps your local branch updated with the remote version.
Prevents conflicts during rebasing.
3. Rebase r1 on Top of master
Now, bring r1 in sync by rebasing it on top of master. This applies the latest production changes over your current r1 work, creating a clean and linear history.
git rebase origin/master
Why?
Rebase applies your branch commits on top of
master, keeping the history clean.It avoids unnecessary merge commits.
Conflict Resolution During Rebase:
If you encounter a conflict:
git status               # Check conflicting files
git add .                # Stage resolved files
git rebase --continue    # Continue the rebase process
If you want to cancel the rebase:
git rebase --abort
4. Push the Rebasing Changes
After a successful rebase, verify the status and push the updated branch.
git status                            # Verify current branch status
git push origin r1 --force-with-lease  # Push rebased branch safely
Why?
--force-with-lease:Safer than
--forcebecause it only pushes if no one else has made changes.Prevents accidental overwriting of remote changes.
5. Build the Project
Once the rebasing is complete, build your project to verify that everything works properly.
mvn clean install -DskipTests=true
Why?
- Ensures that your rebased code compiles and runs without issues.
6. Switch to master and Pull the Latest Changes
Before merging, make sure master is up to date.
git checkout master       # Switch to master
git pull                  # Pull the latest changes
Why?
- Ensures you’re merging into the latest
masterversion.
7. Merge r1 into master
Now, bring the r1 features into master.
git merge --no-ff r1
Why?
--no-ff:Creates a merge commit even if a fast-forward is possible.
Preserves the branch history, making it easier to track.
8. Visualize the Git History
After merging, view the branch structure and commits to verify everything.
git log --all --graph --pretty=format:'%h %ad | %s%d [%an]' --date=short
What Happens Internally with Rebase, Merge, Fetch, and Cherry-Pick?
Rebase: Moves your branch’s commits on top of another branch (like master), creating a cleaner and linear history.
Merge: Combines the history of two branches, creating a merge commit that contains both histories.
Fetch: Downloads the latest changes from the remote repository but does not apply them to your current branch.
Cherry-Pick: Selectively applies specific commits from one branch into another.
Scenario 2: Cherry-Picking | Techie's Mindset: A Real-World Scenario
Imagine you're working on the r1 branch, and you realize that a specific bug fix or feature from the r2 branch needs to be applied to r1 without merging the entire r2.
The Process:
Identifies the Need:
Notices that a recent commit in
r2contains the bug fix they need.Wants to bring only that specific commit to
r1without merging the full branch.
Fetches the Latest Changes:
# On `r1` branch
# Fetch remote changes

git fetch origin
- Identifies the Commit to Cherry-Pick:
# On `r1` branch
# Check log to find the commit hash from `r2`

git log origin/r2 --oneline
Finds the required commit hash (e.g., abc123).
- Cherry-Picks the Commit:
# On `r1` branch
# Apply the specific commit from `r2`

git cherry-pick abc123
This brings the specific changes from r2 into r1.
- Handles Potential Conflicts:
- If conflicts arise, the tech pro resolves them manually:
# On `r1` branch
# Resolve conflicts

git status   # Identify conflicting files
# Manually resolve conflicts, then stage the changes

git add .

git cherry-pick --continue
- Verifies and Pushes:
# On `r1` branch
# Verify and push changes

git status

git push origin r1
The specific bug fix or feature is now applied to r1 without merging the full r2 branch.
Some Answers To Some Questions:
What is the difference between
git rebaseandgit merge?merge: Combines branches, preserving history.rebase: Moves branch commits to the tip of another branch for a cleaner history.
How do you resolve conflicts during a rebase?
Use
git statusto identify conflicts.Manually resolve conflicts, stage them, and continue with
git rebase --continue.
What is
--force-with-lease, and why is it safer?- It force-pushes only if no remote changes exist, preventing accidental overwrites.
How do you revert a faulty merge or rebase?
Use
git reset --hard HEAD~1to undo a merge.Use
git reflogandgit resetto revert a rebase.
How do you squash multiple commits into one?
- Use
git rebase -i HEAD~<n>and mark extra commits withsquash.
- Use

Subscribe to my newsletter
Read articles from Amit Sangwan directly inside your inbox. Subscribe to the newsletter, and don't miss out.
Written by

Amit Sangwan
Amit Sangwan
Software Engineer | AI Enthusiast | Tech Blogger Passionate about tech, automation, AI agents, and Security. Exploring innovations in tech while sharing insights on technology and career growth. Always learning, always evolving.