Practical Guide to Azure OpenAI Service Integration – From Setup to Production
 Priyanka Sharma
Hey TechScoop readers! 👋
I'm excited to walk you through the world of Azure OpenAI Service today.
Whether you're just starting to explore AI or already have some experience, this guide will help you understand how to effectively integrate OpenAI's powerful models into your enterprise applications using Microsoft Azure.
Enterprise Integration Patterns for Azure OpenAI Service
Let me start by breaking down some common patterns I've seen work well for enterprise integration with Azure OpenAI Service:
1. Direct API Integration
The simplest approach is connecting your applications directly to Azure OpenAI endpoints. This works great for:
Quick prototyping
Applications with moderate traffic
Scenarios where you need immediate results
However, for production environments, I recommend implementing a middleware layer to handle rate limiting, retries, and token management.
2. Asynchronous Processing Pattern
For high-volume scenarios, consider using:
Azure Functions to receive requests
Azure Service Bus for queuing
Dedicated worker services to process the queue
This pattern helps manage costs and handles traffic spikes effectively.
3. Caching Layer Pattern
Since OpenAI models can be expensive to call repeatedly:
Implement Redis Cache or Azure Cache for frequently asked questions
Use semantic caching for similar queries
Consider vector databases for embedding-based retrieval
4. Hybrid Intelligence Pattern
Combine Azure OpenAI with your existing systems:
Use traditional algorithms for deterministic tasks
Leverage Azure OpenAI for natural language understanding
Implement human-in-the-loop for critical decisions
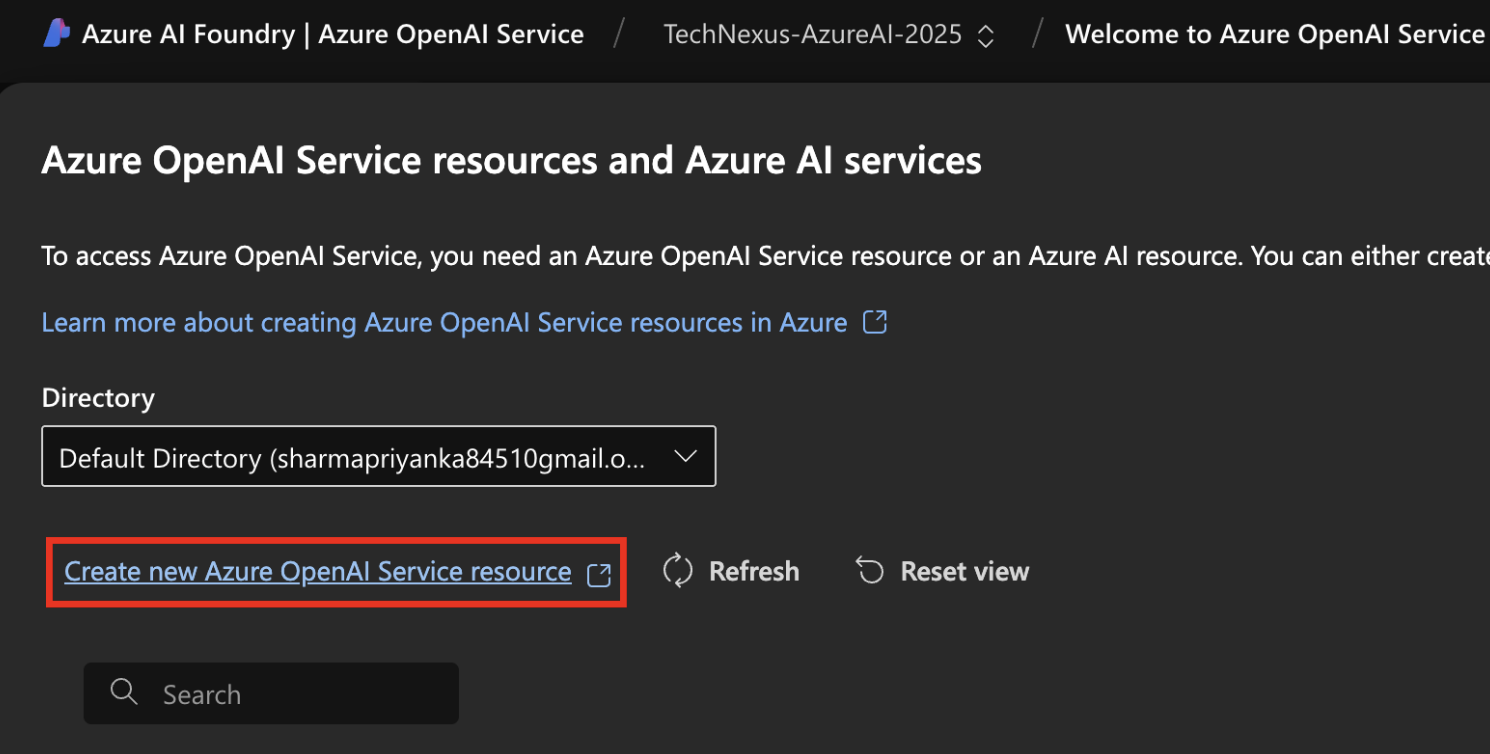
Creating an Azure OpenAI Service using AI Foundry and Deploying Your Azure OpenAI Model
Creating
Azure AI Foundry is Microsoft's newer platform for AI services, replacing the older portal experience. Here's how to get started:
Access AI Foundry: Navigate to https://ai.azure.com
Create a new project:
Click "Create new"

Select "Azure OpenAI" from the available options
Name your project something meaningful (I usually include the department and use case)
Choose your subscription and resource group:
Select your Azure subscription
Either create a new resource group or use an existing one
Choose a region close to your users for lower latency (East US and West Europe typically have good availability)
Configure your deployment:
Select a pricing tier (Standard S0 is good for starting)
Enable content filtering appropriate for your use case
Enable logging if you need to track usage
Review and create:
Double-check all settings
Click "Create" and wait for deployment (usually takes 5-10 minutes)
Pro tip: If you're getting started, request a quota that's reasonable but not excessive. You can always increase it later as your usage grows.
Deploying
Once your Azure OpenAI Service is created, it's time to deploy a model:
Navigate to your AI Foundry project:
Open your project in AI Foundry
Go to the "Models" section
Select a model:
For general text tasks, GPT-4 or GPT-3.5-Turbo are excellent choices
For embeddings, text-embedding-ada-002 works well
DALL-E models are available for image generation
Configure deployment settings:
Name your deployment (use a consistent naming convention)
Set your token rate limits based on expected traffic
Configure content filtering levels
Advanced settings:
Consider adjusting temperature (lower for more deterministic outputs)
Set maximum token limits
Enable dynamic quota if available
Deploy and verify:
Click "Deploy" and wait for confirmation
Test your deployment using the quick test feature
Remember that each model type has different capabilities and pricing. For production, I recommend deploying at least two models - your primary model and a fallback model for redundancy.
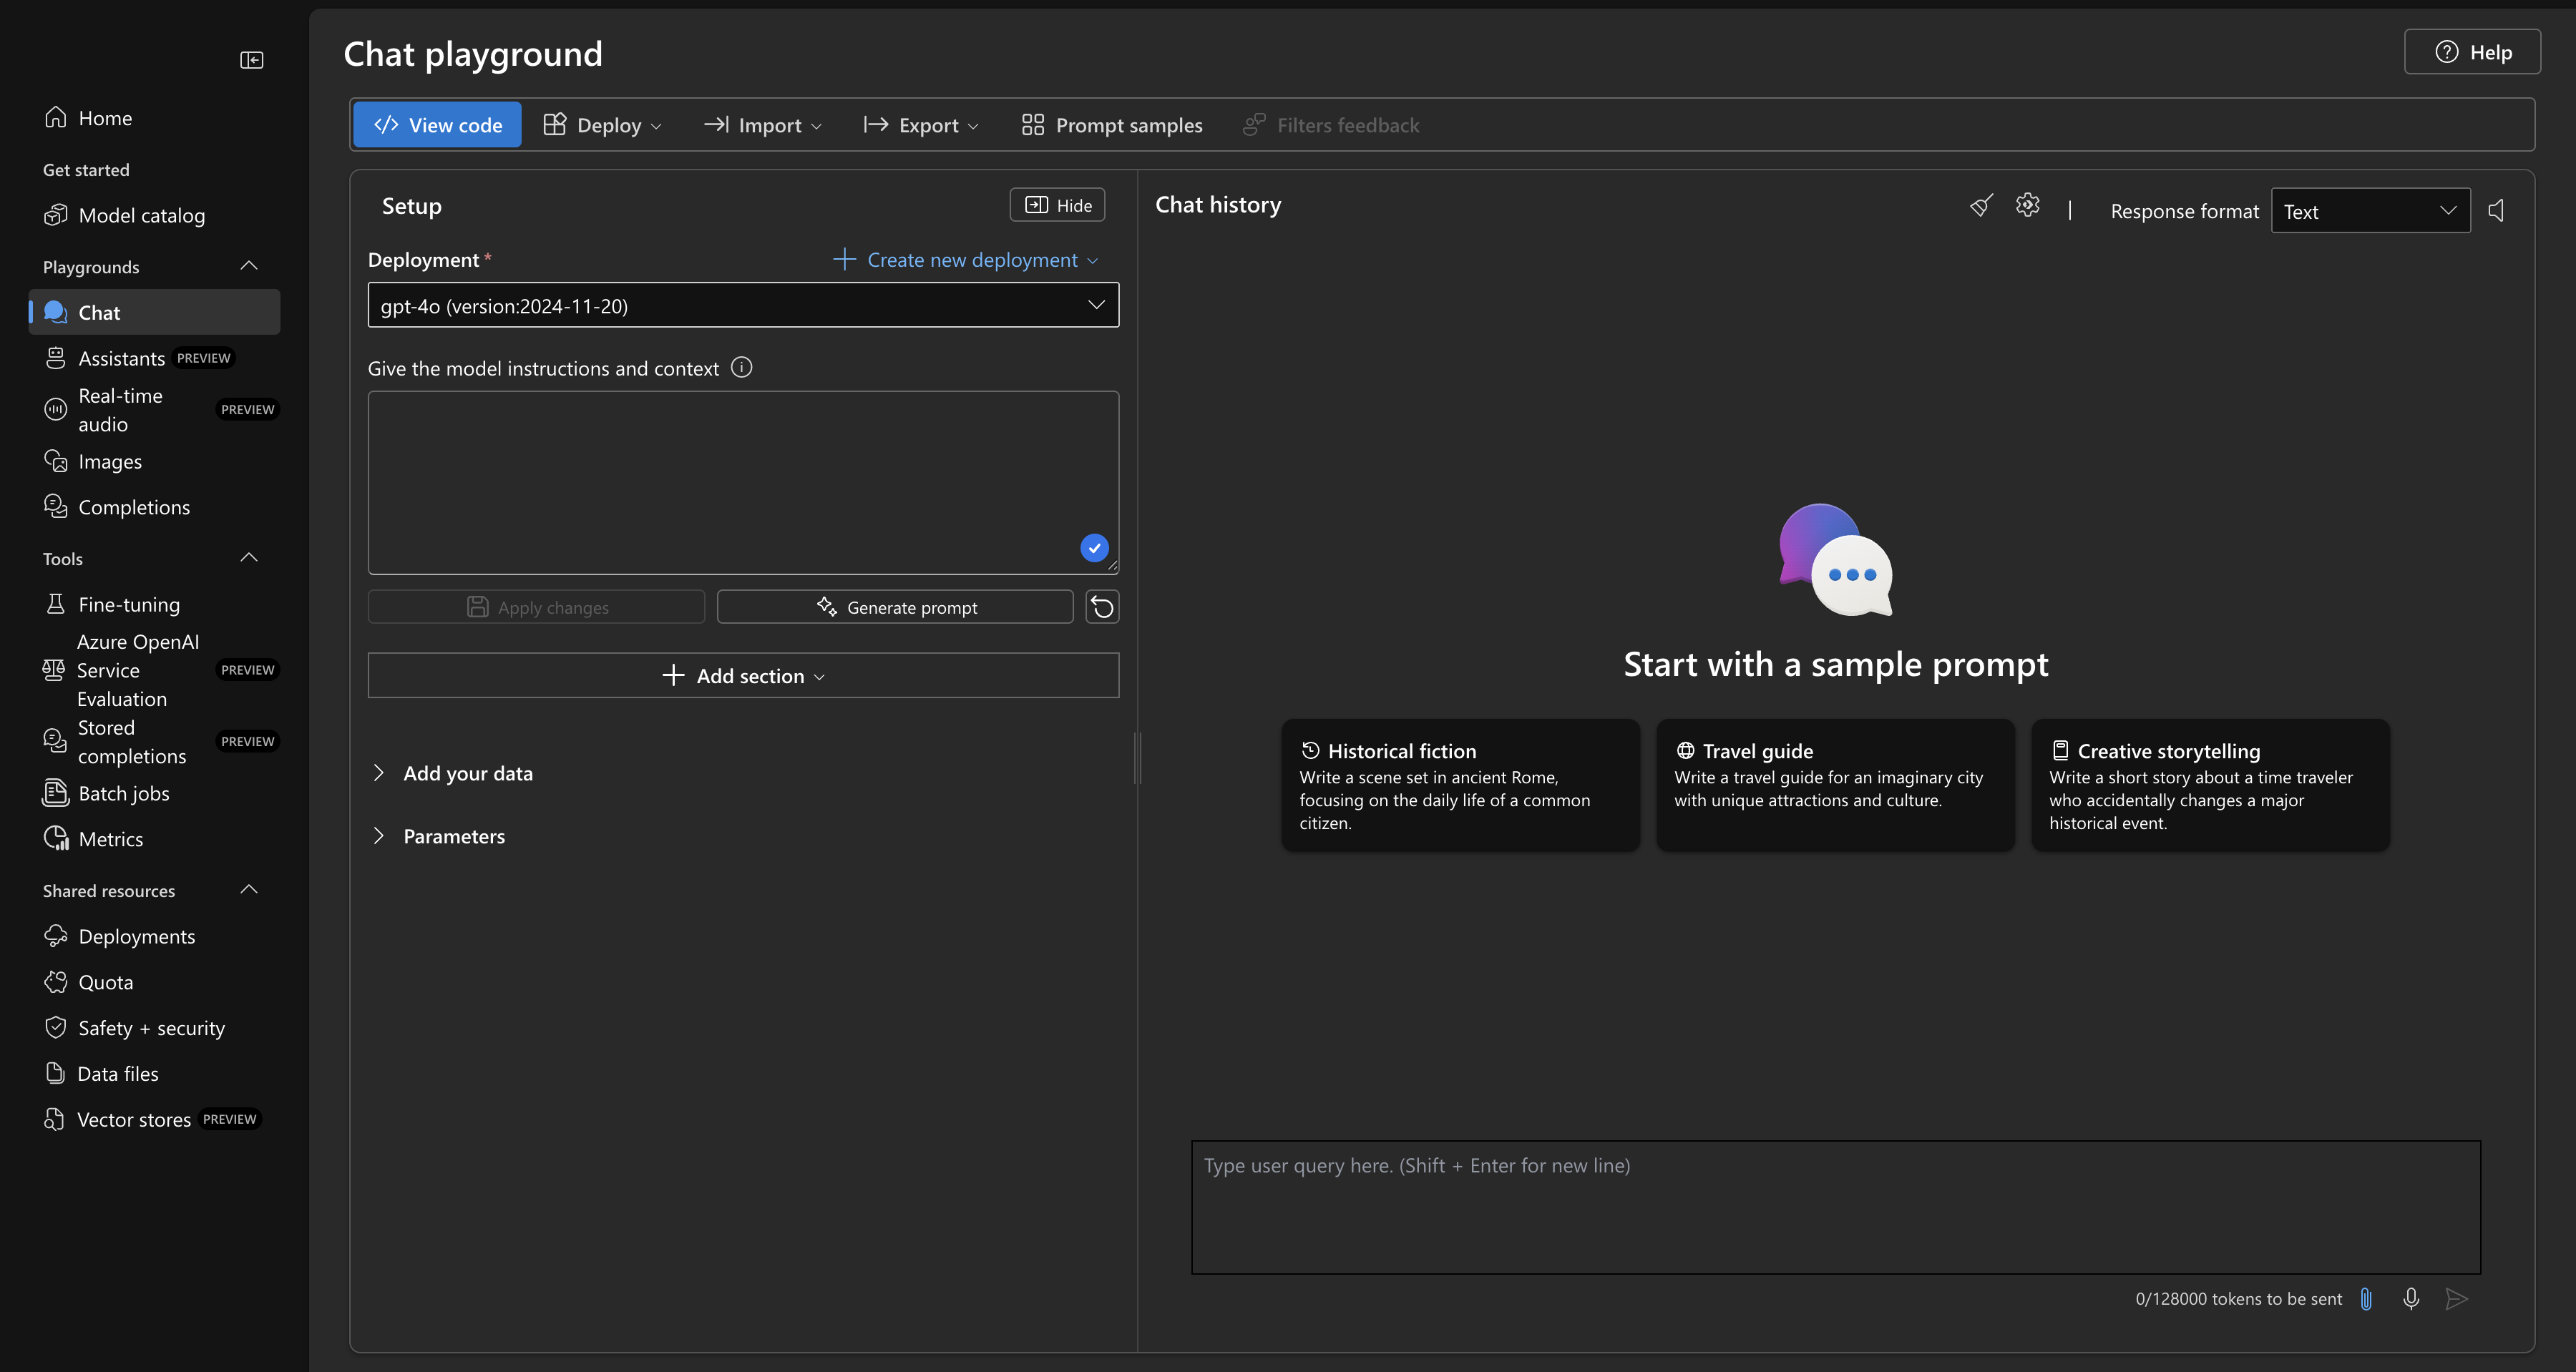
Exploring the Azure OpenAI Playground post Deployment
The AI Foundry playground is one of my favorite features - it lets you experiment with your models before writing any code:
Access the playground:
From your AI Foundry project, click on "Playground"
Select your deployed model

Chat completions:
Try simple prompts to test responses
Experiment with system messages to set context
Adjust parameters like temperature and max tokens
Structured output:
Test JSON responses by requesting specific formats
Try function calling capabilities if your model supports it
Save your prompts:
Create a library of effective prompts
Export prompts for use in your code
Track token usage:
Monitor how many tokens each request uses
Estimate costs for production usage
The playground is incredibly valuable for prompt engineering before you commit to code implementation. I recommend spending sufficient time here to understand how your prompts affect results.
Live Demo Implementation
Let me walk you through a simple implementation I've built that you can adapt for your own projects:
import os
import openai
from dotenv import load_dotenv

# Load environment variables from .env file
load_dotenv()

# Azure OpenAI configuration
openai.api_type = "azure"
openai.api_base = os.getenv("AZURE_OPENAI_ENDPOINT")
openai.api_key = os.getenv("AZURE_OPENAI_API_KEY")
openai.api_version = "2023-07-01-preview"  # Use the latest available version

def get_completion(prompt, deployment_name="your-deployment-name"):
    try:
        response = openai.ChatCompletion.create(
            deployment_id=deployment_name,
            messages=[
                {"role": "system", "content": "You are a helpful assistant."},
                {"role": "user", "content": prompt}
            ],
            temperature=0.7,
            max_tokens=800,
            top_p=0.95,
            frequency_penalty=0,
            presence_penalty=0,
        )
        return response.choices[0].message.content
    except Exception as e:
        print(f"An error occurred: {e}")
        return None

# Example usage
if __name__ == "__main__":
    user_prompt = "Explain microservices architecture in simple terms"
    response = get_completion(user_prompt)
    print(response)
For a more robust implementation, I would recommend:
- Adding retry logic:
from tenacity import retry, stop_after_attempt, wait_random_exponential

@retry(wait=wait_random_exponential(min=1, max=60), stop=stop_after_attempt(5))
def get_completion_with_retry(prompt, deployment_name="your-deployment-name"):
    # Same function as above
    pass
- Implementing caching:
import hashlib
import redis

redis_client = redis.Redis(host='localhost', port=6379, db=0)

def get_cached_completion(prompt, deployment_name="your-deployment-name"):
    # Create a cache key
    prompt_hash = hashlib.md5(prompt.encode()).hexdigest()
    cache_key = f"openai:{deployment_name}:{prompt_hash}"

    # Check cache
    cached_response = redis_client.get(cache_key)
    if cached_response:
        return cached_response.decode()

    # Get new response
    response = get_completion(prompt, deployment_name)

    # Cache the response (expire after 24 hours)
    if response:
        redis_client.setex(cache_key, 86400, response)

    return response
RAG Concepts and Use Cases with Live Examples
Retrieval Augmented Generation (RAG) is a game-changer for enterprise applications. Let me explain how it works and why you should consider it:
What is RAG?
RAG combines the power of:
Retrieval: Finding relevant information from your data
Augmentation: Adding this information to the context
Generation: Using Azure OpenAI to generate accurate responses
This approach helps overcome the knowledge cutoff limitation of models and ensures responses are grounded in your organization's specific information.
Implementing RAG with Azure OpenAI
Here's a simplified RAG implementation using Azure services:
import openai
import os
from azure.search.documents import SearchClient
from azure.core.credentials import AzureKeyCredential

# Azure OpenAI setup
openai.api_type = "azure"
openai.api_base = os.getenv("AZURE_OPENAI_ENDPOINT")
openai.api_key = os.getenv("AZURE_OPENAI_API_KEY")
openai.api_version = "2023-07-01-preview"

# Azure Cognitive Search setup
search_endpoint = os.getenv("AZURE_SEARCH_ENDPOINT")
search_key = os.getenv("AZURE_SEARCH_API_KEY")
index_name = "your-document-index"

# Initialize search client
search_client = SearchClient(
    endpoint=search_endpoint,
    index_name=index_name,
    credential=AzureKeyCredential(search_key)
)

def retrieve_documents(query, top=3):
    """Retrieve relevant documents from Azure Cognitive Search"""
    results = search_client.search(query, top=top)
    documents = [doc['content'] for doc in results]
    return documents

def generate_rag_response(query, deployment_name="your-deployment-name"):
    """Generate a response using RAG pattern"""
    # Step 1: Retrieve relevant documents
    documents = retrieve_documents(query)
    context = "\n".join(documents)

    # Step 2: Augment the prompt with retrieved information
    augmented_prompt = f"""
    Based on the following information, please answer the query.

    Information:
    {context}

    Query: {query}
    """

    # Step 3: Generate response using Azure OpenAI
    response = openai.ChatCompletion.create(
        deployment_id=deployment_name,
        messages=[
            {"role": "system", "content": "You are a helpful assistant. Use ONLY the information provided to answer the question."},
            {"role": "user", "content": augmented_prompt}
        ],
        temperature=0.5,
        max_tokens=500
    )

    return response.choices[0].message.content

# Example usage
if __name__ == "__main__":
    query = "What is our company's return policy for electronics?"
    response = generate_rag_response(query)
    print(response)
Real-World RAG Use Cases
I've seen RAG successfully implemented in several scenarios:
Customer Support Knowledge Base
Index your product documentation, FAQs, and support tickets
Generate accurate responses to customer inquiries
Reduce support ticket resolution time by up to 40%
Internal Documentation Assistant
Make company policies, procedures, and documentation searchable
Provide employees with accurate information about benefits, IT, etc.
Reduce time spent searching through internal wikis
Legal Contract Analysis
Extract and organize information from legal documents
Answer specific questions about contracts, agreements, etc.
Highlight potential issues or inconsistencies
Financial Research
Analyze earnings reports, market trends, and financial news
Generate summaries and insights
Support investment decision-making with relevant data
For each use case, the key is proper document chunking, effective embedding generation, and well-designed prompts that guide the model to use the retrieved information correctly.
Integrating Azure OpenAI Service into your enterprise applications doesn't have to be complex. Start small, experiment in the playground, and gradually move to more sophisticated patterns like RAG as you gain confidence.
The most important factors for successful implementation are:
Clear use cases — Identify where AI can add the most value
Well-engineered prompts — Spend time crafting effective instructions
Proper monitoring — Track usage, performance, and costs
Continuous improvement — Refine your implementation based on feedback
I hope this guide helps you on your Azure OpenAI journey! In future editions of TechScoop, I'll dive deeper into advanced patterns and showcase some real-world case studies.
Until next time,
lassiecoder
PS: If you found this newsletter helpful, don't forget to share it with your dev friends and hit that subscribe button!
If you found my work helpful, please consider supporting it through sponsorship.
Subscribe to my newsletter
Read articles from Priyanka Sharma directly inside your inbox. Subscribe to the newsletter, and don't miss out.
Written by

Priyanka Sharma
Priyanka Sharma
My name is Priyanka Sharma, commonly referred to as lassiecoder within the tech community. With ~5 years of experience as a Software Developer, I specialize in mobile app development and web solutions. My technical expertise includes: – JavaScript, TypeScript, and React ecosystems (React Native, React.js, Next.js) – Backend technologies: Node.js, MongoDB – Cloud and deployment: AWS, Firebase, Fastlane – State management and data fetching: Redux, Rematch, React Query – Real-time communication: Websocket – UI development and testing: Storybook Currently, I'm contributing my skills to The Adecco Group, a leading Swiss company known for innovative solutions.