Free Custom Email Setup with Gmail Using Porkbun’s Email Forwarding Feature
 Ash
AshFree email forwarding is included with every Porkbun domain purchase. This service lets you make a custom email for your domain. The emails sent to this custom address will forward to another email, like Gmail. But replying to emails from your custom domain is tricky because Porkbun doesn’t offer free full email hosting. Instead, they only forward emails for free.
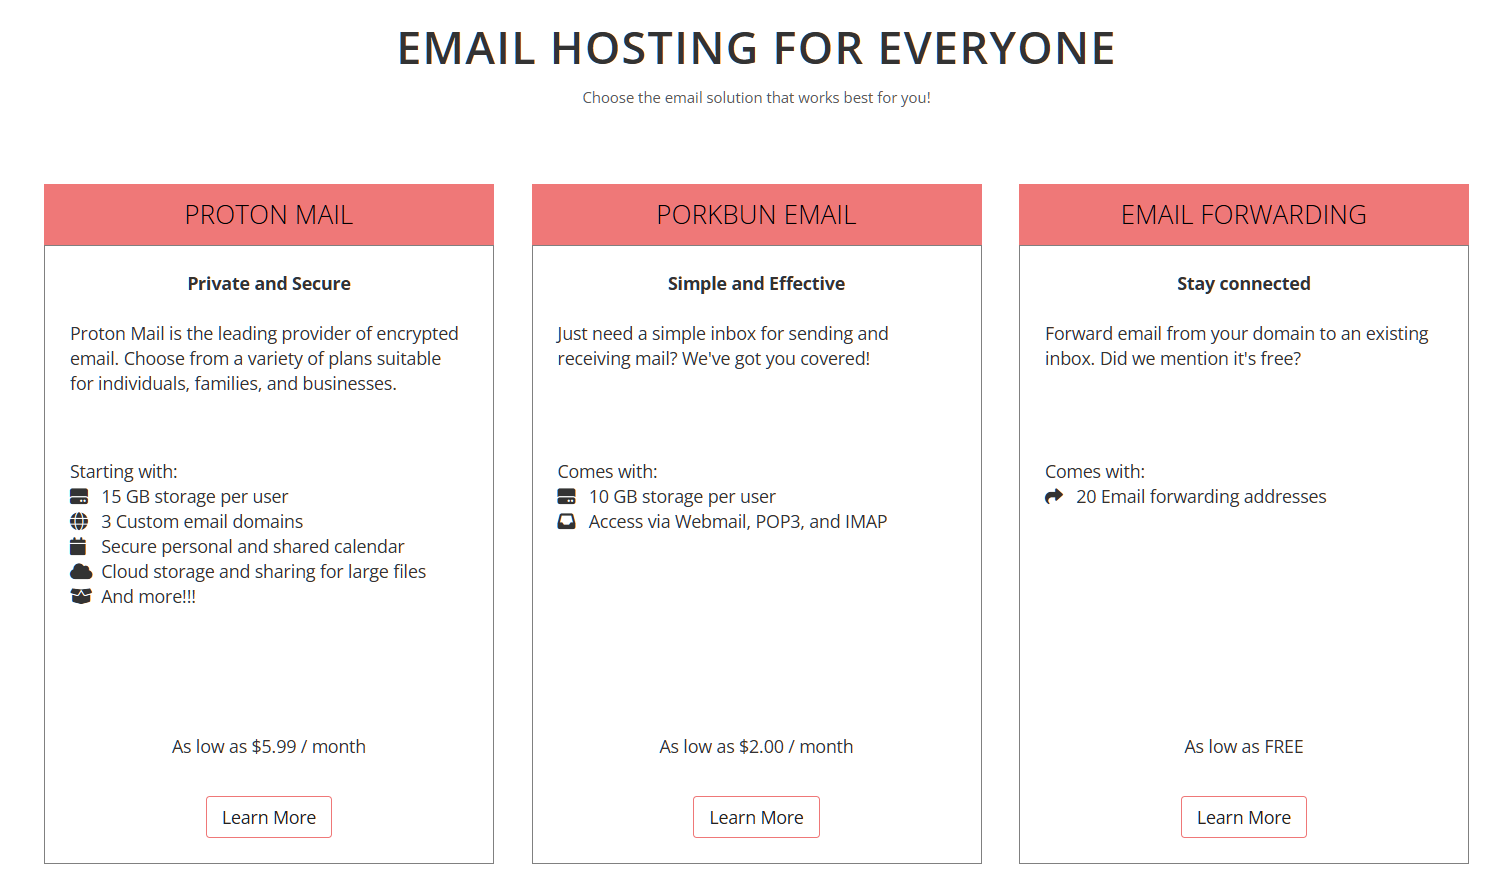
Here's how you can seamlessly integrate your custom domain with Gmail for sending and receiving emails. This guide will help you manage all your emails in one inbox, allowing you to respond from both your custom email and your regular Gmail with ease.
Step 1
Log in to Porkbun and click the email button on the domain management page.

Step 2
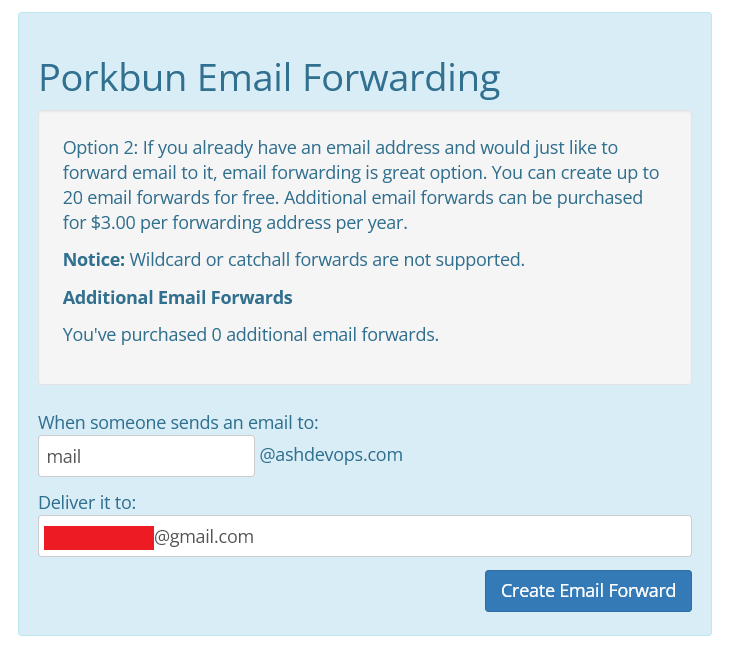
In the "Porkbun Email Forwarding" panel:
Enter your custom email name ("mail" in our case).
Enter the Gmail address where emails should go.
Click "Create Email Forward."
Step 3
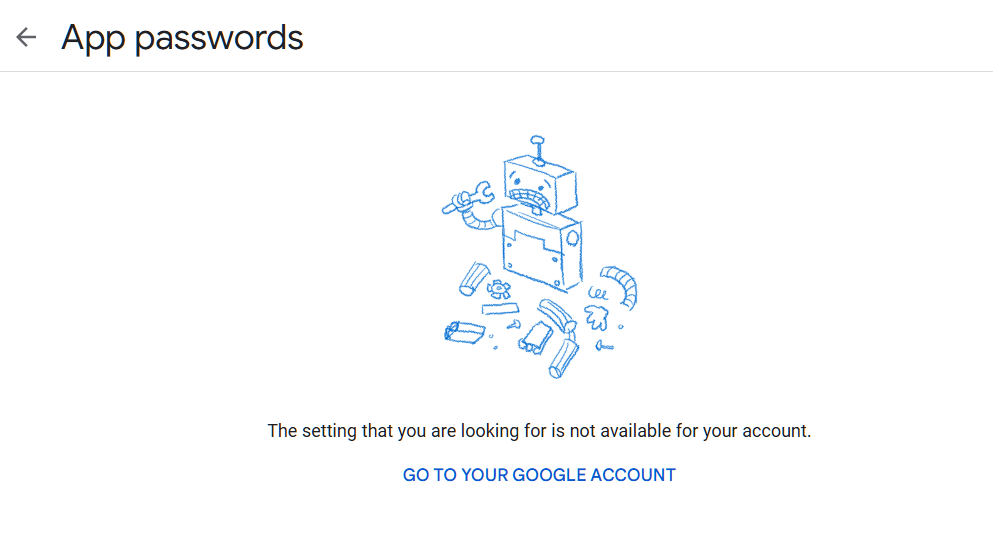
Open your Google account’s app password page here.
If this page won’t open, it means you need to enable 2-Step Verification.
Step 4
If 2-Step Verification is not enabled, go to your Google account settings page here.
On the left side, click "Security."
Click "2-Step Verification."

Step 5
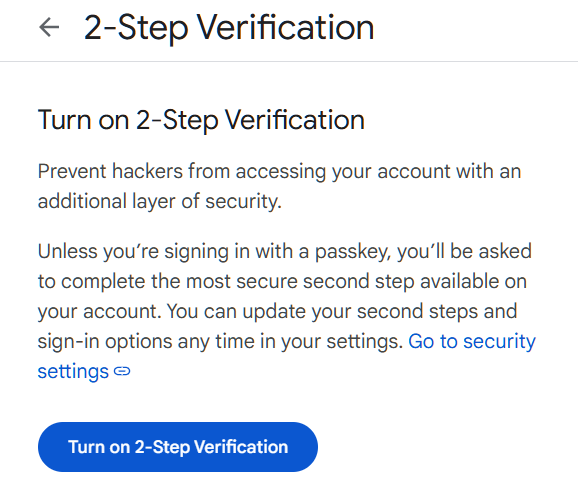
Click "Turn on 2-Step Verification."
Step 6
If you already have a phone number in your account, you’ll get an activation message. If not, you’ll be asked to add a phone number. Google will send a code to verify it. Enter the code to enable 2-Step Verification.
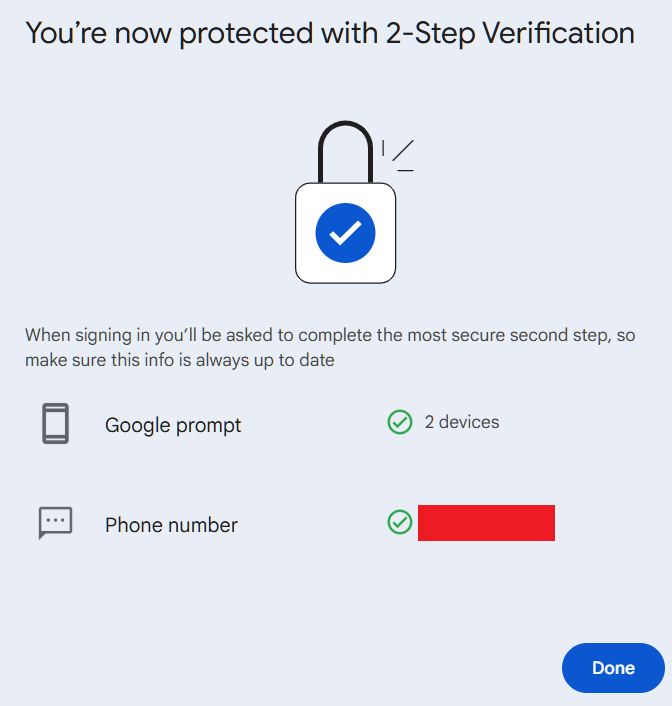
Step 7
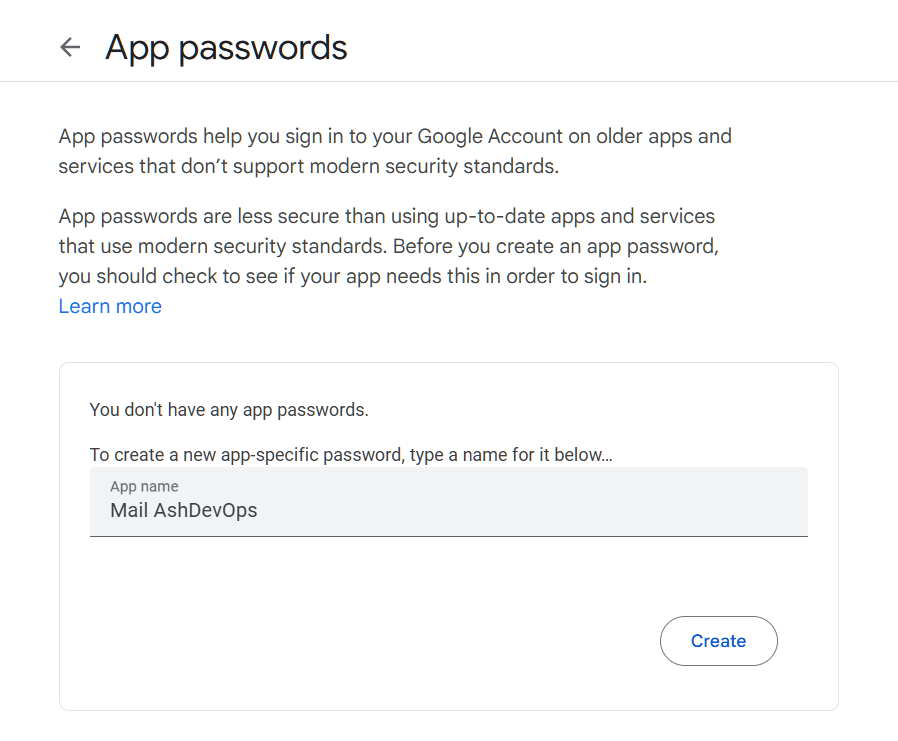
Go back to the app password page here. It should now open.
Enter any app name in the "App name" field.
Click "Create."
Step 8
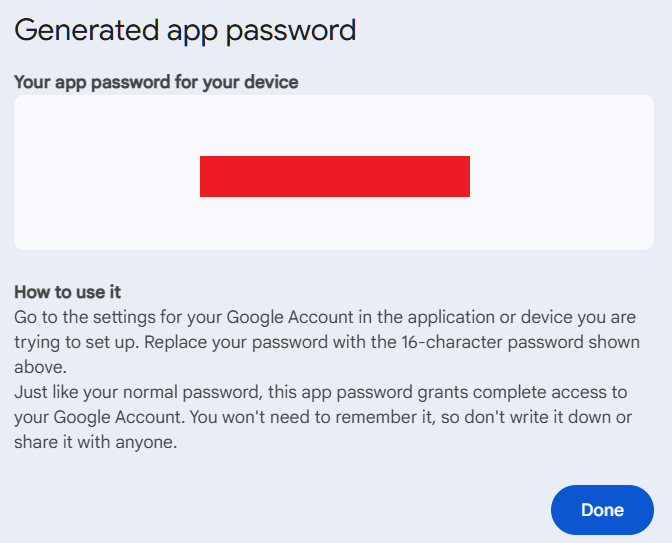
A 16-character app password will appear. Copy it for later use. You don’t need to remember this password after the setup is done.
Step 9
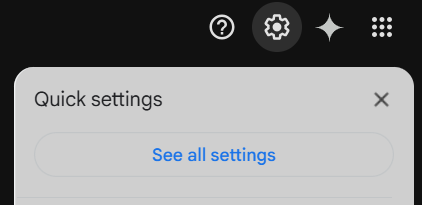
Open the Gmail account that receives forwarded emails from Porkbun.
In the Settings menu, click on "See all settings".
Step 10
In "Accounts and Import" tab, find the "Send mail as:" section.
Click "Add another email address".
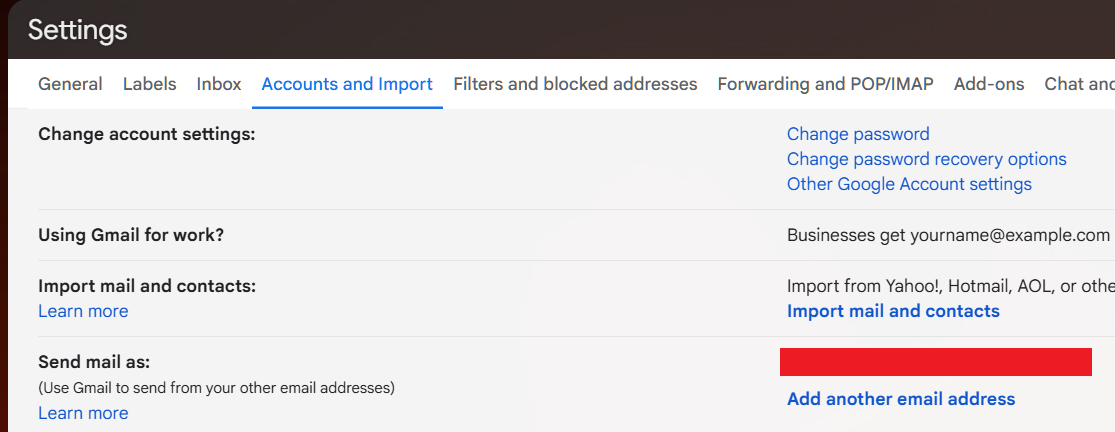
Step 11
A new window with a classic interface will open:
Enter the name you want others to see in the "Name:" field.
Enter your custom email address in the "Email address:" field.
Uncheck the "Treat as an alias" box.
Click "Next Step."
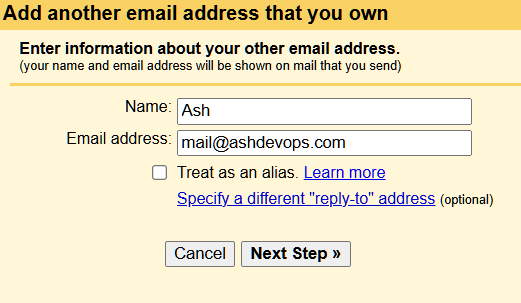
Step 12
Enter SMTP details:
Server: "smtp.gmail.com"
Port: 587
Username: The Gmail address where emails forward.
Password: Enter the 16-digit app password you created earlier (not your Gmail password).
Choose "Secured connection using TLS."
Click "Add Account."
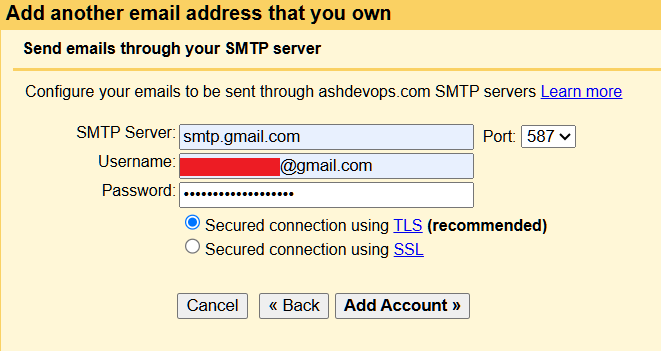
Step 13
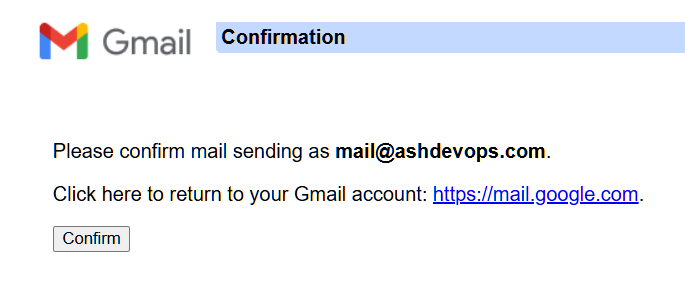
Gmail will verify the details. A confirmation link will arrive in your Gmail inbox due to email forwarding.
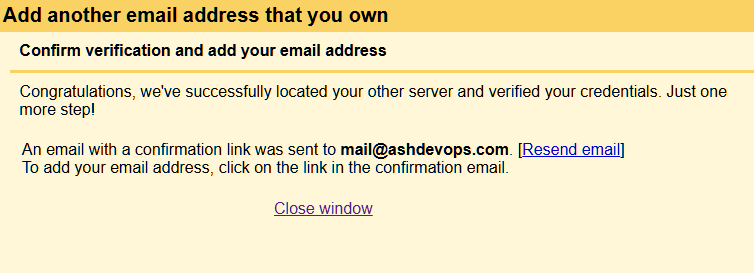
Step 14
Open the link from "Gmail Team" in your inbox.
Click "Confirm." You’re done!
How It Works
Now, emails sent to your custom email will arrive in Gmail.
But when you reply, Gmail uses your normal Gmail address by default. Therefore, it’s important to double-check which email account Gmail is using to send your messages, as it doesn’t always clearly indicate which account is being used to send the email.
To reply to an email received at your custom address:
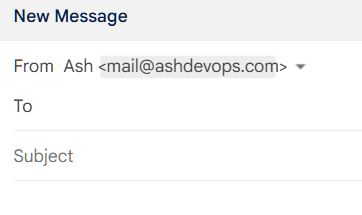
In the reply window, click the sender’s email.
You will see "From" and "To" fields.
Choose your custom email (mail@ashdevops.com) from the "From" dropdown.
Similarly, when sending a new email, in Gmail’s compose window, select your custom email from the "From" dropdown.
You can now send and receive emails with your custom domain directly in Gmail for free!
Subscribe to my newsletter
Read articles from Ash directly inside your inbox. Subscribe to the newsletter, and don't miss out.
Written by

Ash
Ash
DevOps Automation Engineer with around 7 years of experience in CI/CD pipeline automation, cloud deployments, and process optimization. Specializing in Harness CD, I have streamlined deployments, automated processes, reduced manual efforts, and improved release workflows.