Flutter. How to PIN code
 Yuriy Novikov
I need a page with a PIN code for one of my apps. The use case is very simple: the user just unlocks the web app with a PIN code which I send him over WhatsApp.
The pub.dev has several packages exactly for that with clear winner—pinput.
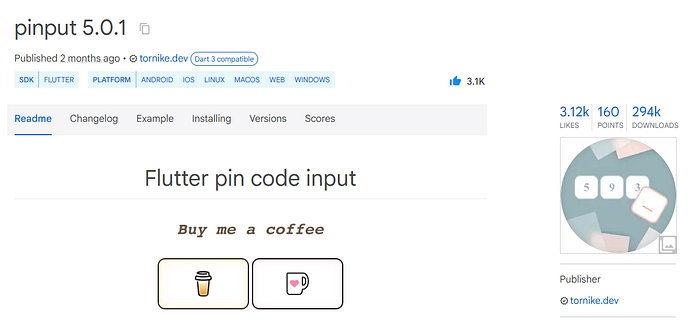
I like those coffee buttons.
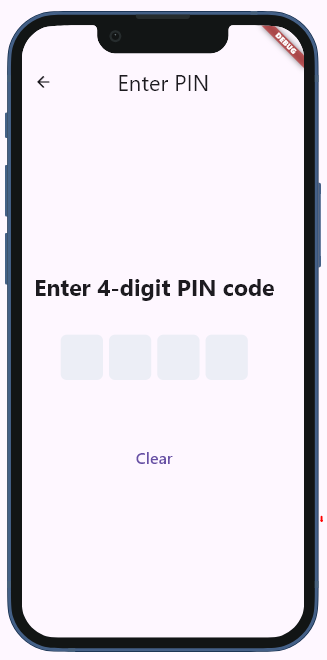
The package is easy to use. Here is the basic working flow:
In case the PIN is wrong, the error message is displayed, in case the PIN is correct, the user is redirected to the Welcome page.
Here is our controller:
import 'package:flutter/cupertino.dart';
import 'package:get/get.dart';
import 'package:getx_miscellanous/app/routes/app_pages.dart';

class PinCodeController extends GetxController {
  String secretPin = '1234';
  bool isWrong = false;
  final pinController = TextEditingController();
  final focusNode = FocusNode();

  void onCompleted(String pin) {
    pinController.value = TextEditingValue.empty;
    update();

    if (pin == secretPin) {
      pinController.value = TextEditingValue.empty;

      Get.toNamed(Routes.WELCOME);
      return;
    }
    isWrong = true;
    update();
  }

  void onChange(val) {
    isWrong = false;
    update();
  }

  void clearPin() {
    pinController.value = TextEditingValue.empty;
    update();
  }

  @override
  void onClose() {
    pinController.dispose();
    focusNode.dispose();
    super.onClose();
  }
}
I just hardcoded the secret code for simplicity.
And here is the View:
import 'package:flutter/material.dart';
import 'package:get/get.dart';
import 'package:pinput/pinput.dart';
import 'pin_code_controller.dart';

class PinCodeView extends GetView<PinCodeController> {
  const PinCodeView({super.key});

  @override
  Widget build(BuildContext context) {
    return Scaffold(
      appBar: AppBar(
        title: const Text('Enter PIN'),
        centerTitle: true,
      ),
      body: Padding(
        padding: const EdgeInsets.all(16.0),
        child: Column(
          spacing: 10,
          mainAxisAlignment: MainAxisAlignment.center,
          children: [
            const Text(
              'Enter 4-digit PIN code',
              style: TextStyle(fontSize: 20, fontWeight: FontWeight.bold),
            ),
            const SizedBox(height: 22),
            GetBuilder<PinCodeController>(builder: (controller) {
              return Column(
                spacing: 5,
                children: [
                  Pinput(
                    length: 4,
                    onCompleted: (pin) => controller.onCompleted(pin),
                    onChanged: (value) => controller.onChange(value),
                    obscureText: true,
                    showCursor: true,
                    controller: controller.pinController,
                    focusNode: controller.focusNode,

                  ),
                  Text(controller.isWrong ? 'wrong pin' : '',
                      style: TextStyle(
                        color: Colors.red,
                      ))
                ],
              );
            }),
            const SizedBox(height: 32),
            TextButton(
              onPressed: controller.clearPin,
              child: const Text('Clear'),
            ),
          ],
        ),
      ),
    );
  }
}
When the user finishes entering the PIN, the controller’s onCompleted method is called:
void onCompleted(String pin) {
    pinController.value = TextEditingValue.empty;
    update();

    if (pin == secretPin) {
      pinController.value = TextEditingValue.empty;

      Get.toNamed(Routes.WELCOME);
      return;
    }
    isWrong = true;
    update();
  }
First, we clear the PIN field, then we check if PIN is correct and or redirect the user to the Welcome page or show the wrong pin message.
Everything works and we can stop here, but the pinput package offers several templates that make it more visually appealing.
Let’s add one of them to our example:
import 'package:flutter/material.dart';
import 'package:pinput/pinput.dart';

mixin PinThemeHelper {
  final defaultPinTheme = PinTheme(
    width: 56,
    height: 60,
    textStyle: TextStyle(
      fontSize: 22,
      color: const Color.fromRGBO(30, 60, 87, 1),
    ),
    decoration: BoxDecoration(
      color: Color.fromRGBO(222, 231, 240, .57),
      borderRadius: BorderRadius.circular(8),
      border: Border.all(color: Colors.transparent),
    ),
  );

  final focusPinTheme = PinTheme(
    height: 68,
    width: 64,
    textStyle: TextStyle(
      fontSize: 22,
      color: const Color.fromRGBO(30, 60, 87, 1),
    ),
    decoration: BoxDecoration(
      border: Border.all(color: Colors.blue.shade200),
    ),
  );

  final cursor = Column(
    mainAxisAlignment: MainAxisAlignment.end,
    children: [
      Container(
        margin: const EdgeInsets.only(bottom: 9),
        width: 22,
        height: 3,
        color: Colors.blue,
      ),
    ],
  );
}
To keep things object-oriented I created a mixin PinThemeHelper.
We cannot make our PinCodeView a const anymore, but this is not a big problem.
class PinCodeView extends GetView<PinCodeController> with PinThemeHelper{
    PinCodeView({super.key});
Now we can just add several properties to our PinPut widget:
                 Pinput(
                    length: 4,
                    defaultPinTheme: defaultPinTheme,  //<-
                    focusedPinTheme: focusPinTheme,    //<-
                    cursor: cursor,                    //<-
                    onCompleted: (pin) => controller.onCompleted(pin),
                    onChanged: (value) => controller.onChange(value),
                    obscureText: true,
                    showCursor: true,
                    controller: controller.pinController,
                    focusNode: controller.focusNode,
                    pinAnimationType: PinAnimationType.rotation,

                  ),
Here is the result:
To customize the PinPut widget, all we need to do is make defaultPinTheme and focusedPinTheme (and optionally the cursor), and the package creates smooth animated transitions.
That’s all about the basic usage. The package can be used for an OTP (One-time Password) scenario, but this is the subject of another article.
Thank you for reading!
Subscribe to my newsletter
Read articles from Yuriy Novikov directly inside your inbox. Subscribe to the newsletter, and don't miss out.
Written by