Deploying an Amazon EKS Cluster with Terraform
 Aditya Dubey
Table of contents
Introduction
In today's cloud-native world, Kubernetes (K8s) is the top choice for managing containers, helping developers run and grow applications smoothly. But setting up a ready-to-use Kubernetes cluster on AWS with Amazon Elastic Kubernetes Service (EKS) requires a solid, repeatable, and secure infrastructure.
In this blog, we will look at how to use Terraform to set up and manage an AWS EKS cluster, including important networking, IAM roles, security policies, and add-ons like AWS Load Balancer Controller and EBS CSI Driver.
Github: https://github.com/adityawdubey/terraform-eks-infrastructure
Project Overview
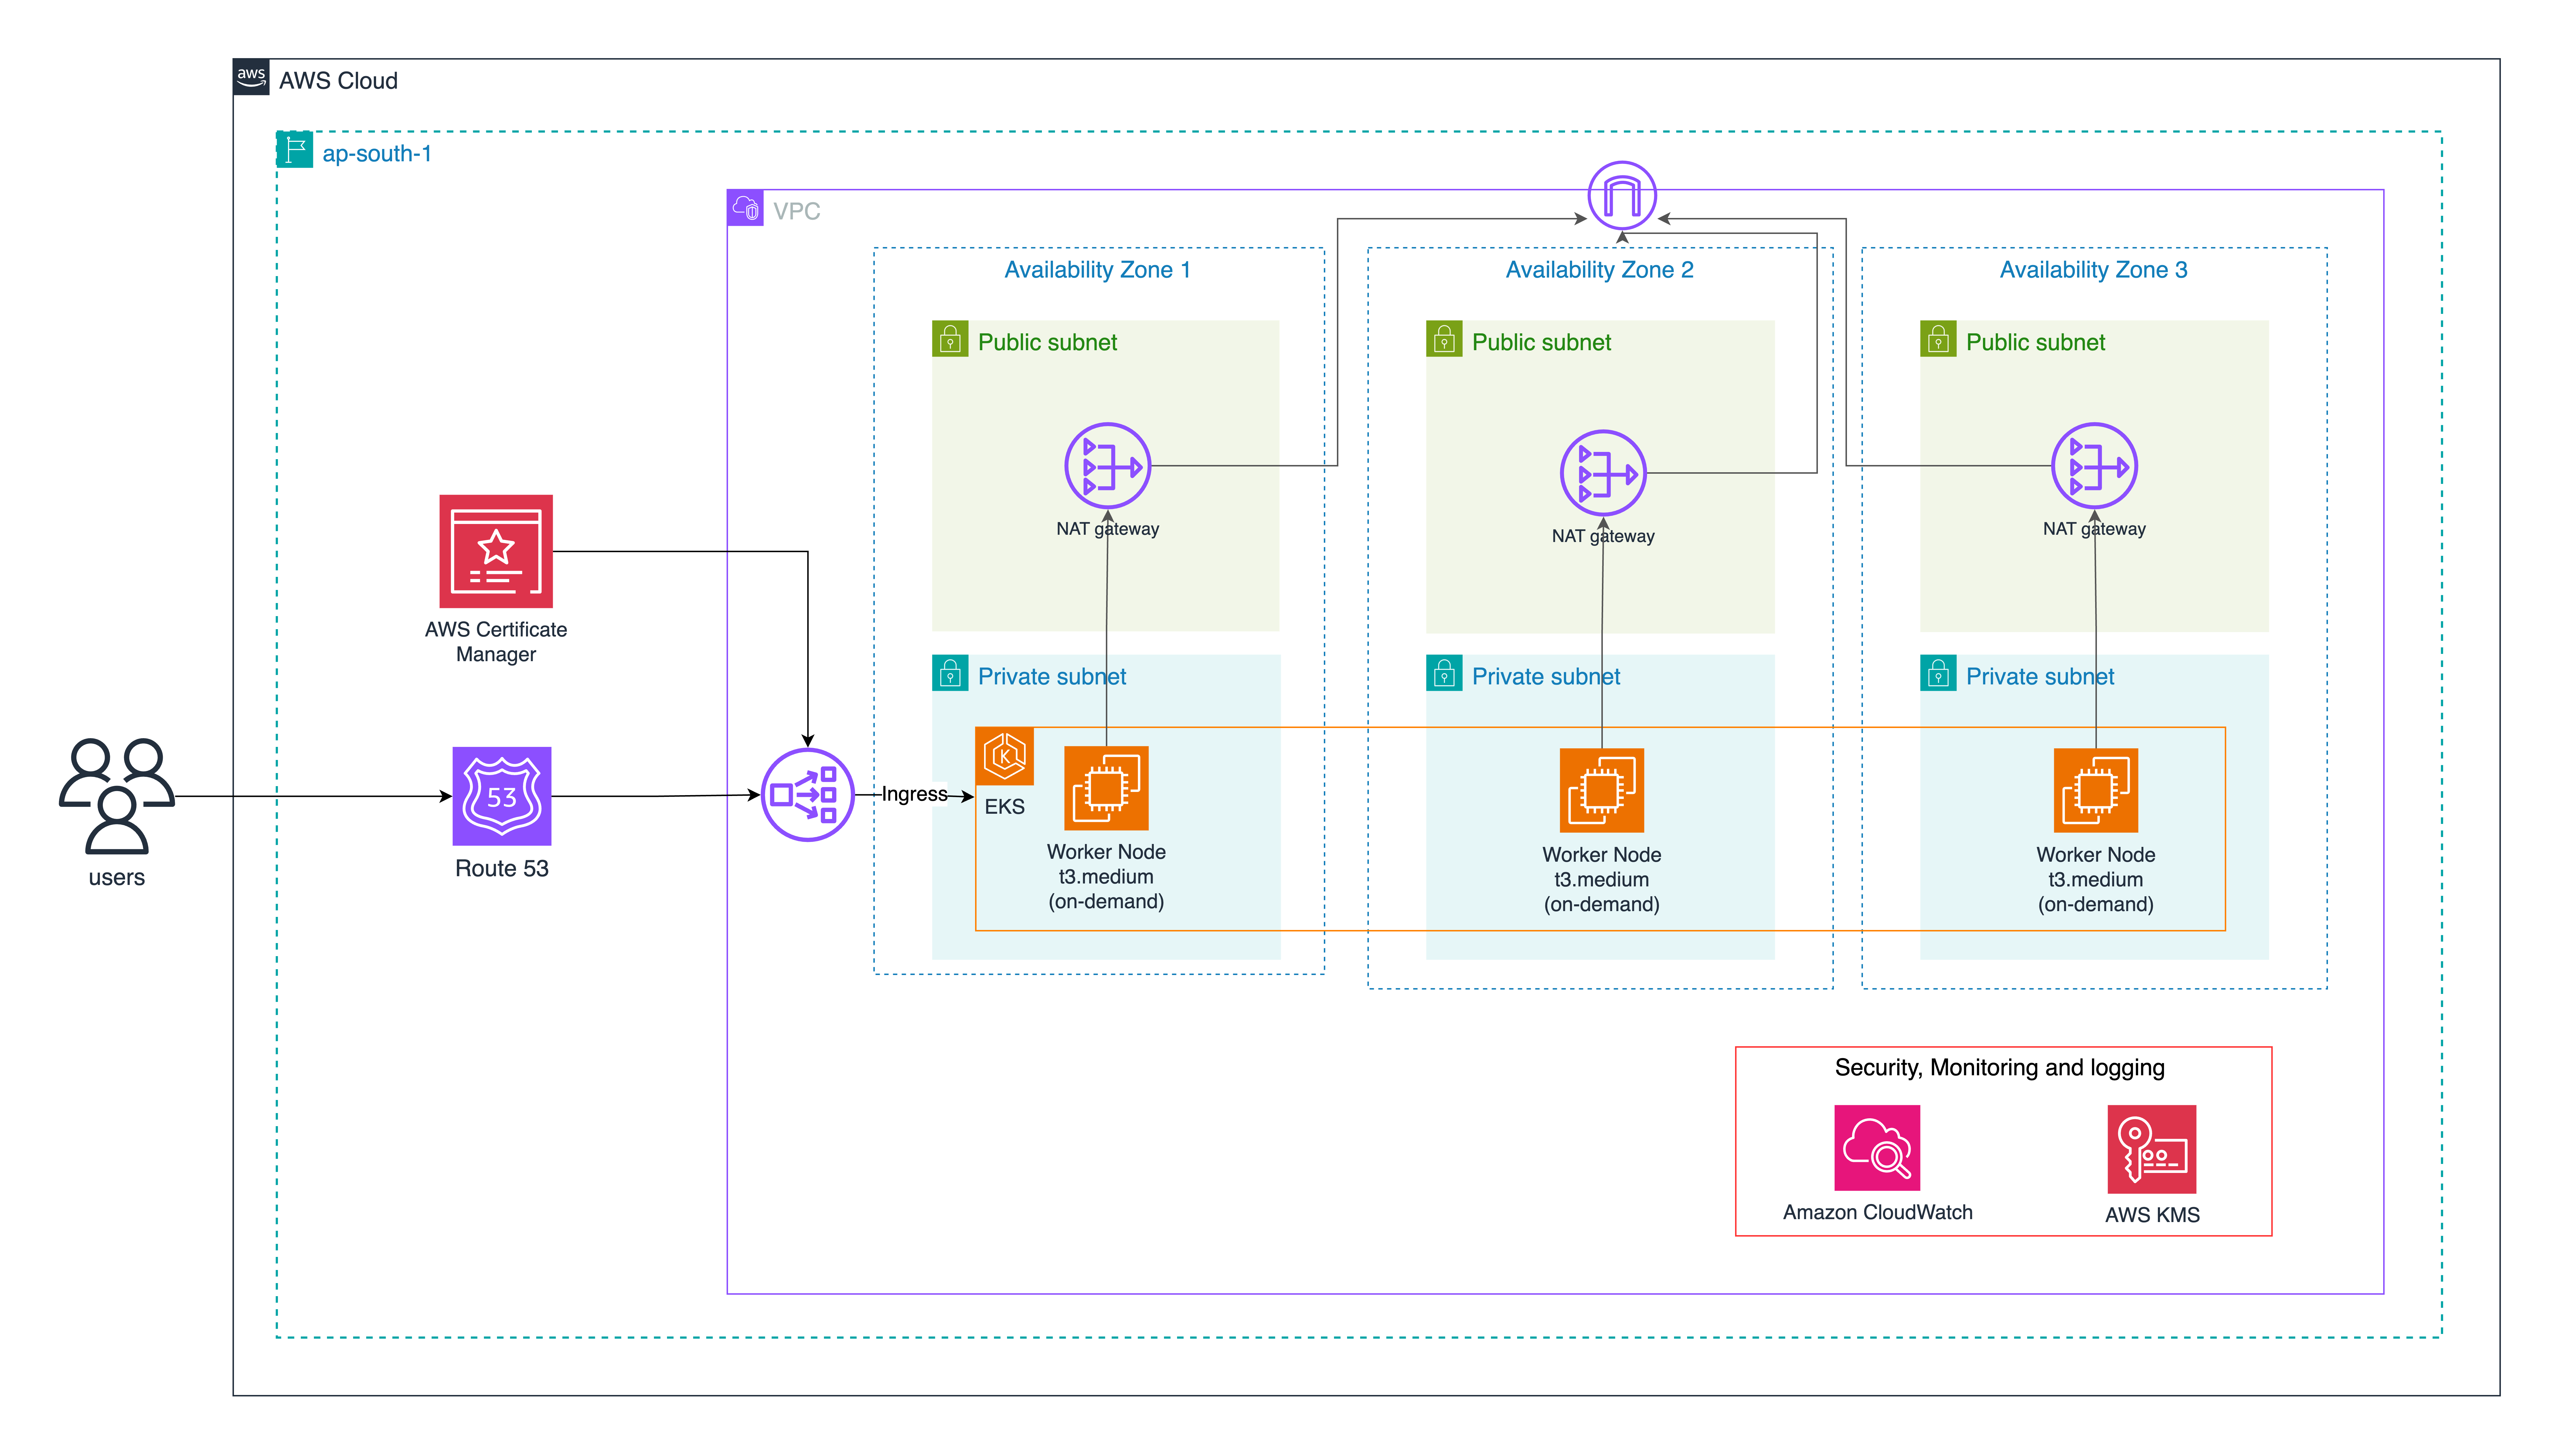
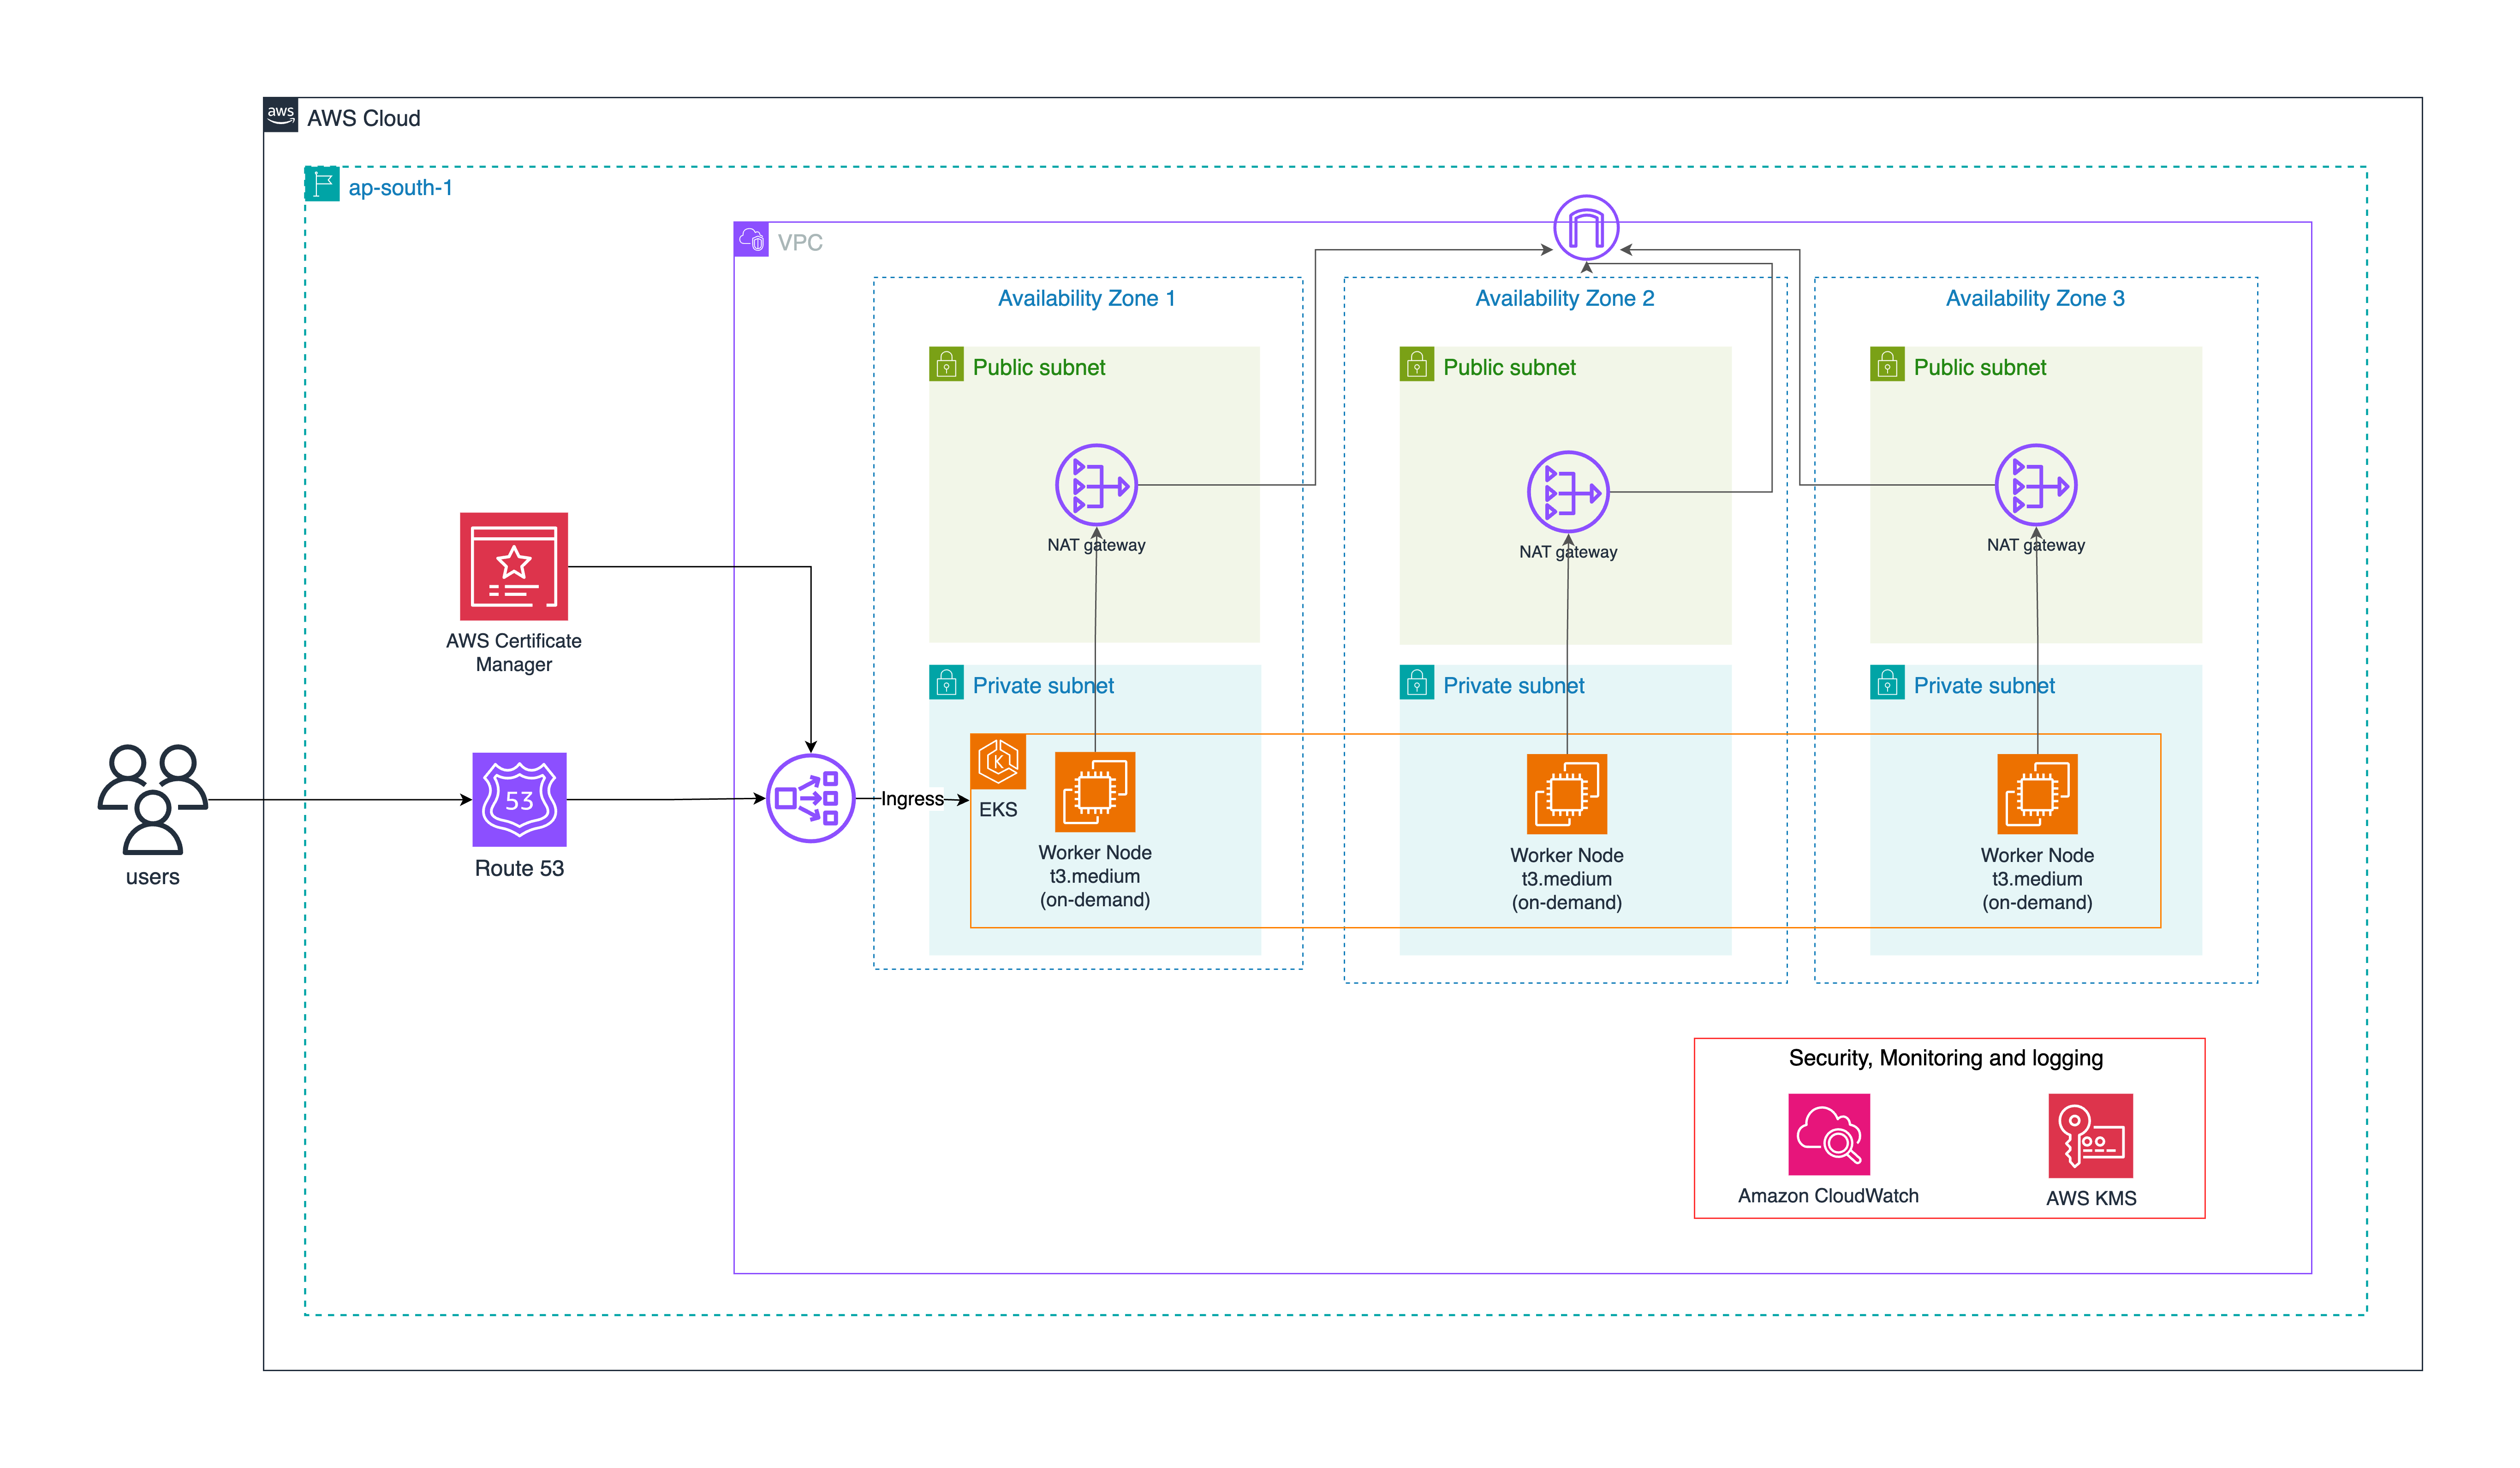
This project follows a multi-AZ high-availability architecture that includes a custom VPC with public and private subnets, NAT gateways, and DNS configurations, EKS CLuster, Dedicated IAM roles for the EKS nodes and the AWS Load Balancer Controller.
VPC with Multi-AZ Design
The infrastructure uses a carefully designed Virtual Private Cloud (VPC) that follows AWS best practices for security, scalability, and high availability:
Public Subnets: These subnets have direct routes to an Internet Gateway and are used for resources that need to be internet-facing, such as NAT Gateways and load balancers.
Private Subnets These subnets don't have direct internet access and are used for the EKS worker nodes, providing an additional security layer. They're tagged with kubernetes.io/role/internal-elb = 1 to indicate where internal load balancers should be provisioned(check below)
NAT Gateways: One NAT Gateway per AZ is deployed in the public subnets, allowing resources in private subnets to initiate outbound connections to the internet (for updates, package downloads, API calls) while preventing direct inbound access from the internet. This per-AZ design eliminates single points of failure that would exist with a single NAT Gateway.
Route Tables: Separate route tables are maintained for public and private subnets. Public subnet route tables direct traffic to the Internet Gateway, while private subnet route tables route internet-bound traffic through the NAT Gateways.
EKS Control Plane
The EKS control plane is the brain of the Kubernetes cluster and is fully managed by AWS:
High Availability: AWS automatically deploys the Kubernetes control plane (API server, etcd, controller manager, and scheduler) across multiple AZs for high availability.
Public Endpoint Access: The cluster is configured with cluster_endpoint_public_access = true, allowing cluster administration from outside the VPC. In production environments, this could be restricted to specific CIDR blocks or disabled entirely in favor of private access through VPN or Direct Connect.
OIDC Provider Integration: An OpenID Connect (OIDC) provider is automatically configured, enabling the IAM Roles for Service Accounts (IRSA) feature, which provides fine-grained access control for Kubernetes pods.
Cluster Add-ons: The control plane is configured with several essential add-ons:
CoreDNS: Provides DNS-based service discovery for pods within the cluster
kube-proxy: Manages network rules on each node to enable pod-to-pod communication
vpc-cni: AWS VPC CNI plugin that provides native VPC networking for pods
aws-ebs-csi-driver: Enables persistent storage using Amazon EBS volumes
You can read more about these in the sections below.
IAM Integration (IRSA)
IRSA (IAM Roles for Service Accounts) is a sophisticated security feature that bridges Kubernetes service accounts with AWS IAM roles:
Fine-grained Access Control: Rather than attaching broad permissions to the EC2 instances running as worker nodes, IRSA allows specific permissions to be granted to individual Kubernetes pods through their service accounts.
OIDC Trust Relationship: The EKS cluster's OIDC provider is used to establish a trust relationship between AWS IAM and Kubernetes service accounts. This allows pods to assume IAM roles through their associated service accounts.
Dedicated Roles: The infrastructure includes dedicated IAM roles for specific components:
EBS CSI Driver Role: Provides permissions to create, attach, and manage EBS volumes
Load Balancer Controller Role: Grants permissions to create and manage AWS load balancers
AWS Load Balancer Controller
The AWS Load Balancer Controller is a crucial component for exposing services from the Kubernetes cluster:
Kubernetes Integration: The controller watches for Kubernetes Ingress resources and Service objects of type LoadBalancer, and provisions the corresponding AWS load balancer resources.
Application Load Balancer (ALB) Support: For Ingress resources, the controller creates and configures ALBs with appropriate target groups, listeners, and rules based on the Ingress specifications.
Network Load Balancer (NLB) Support: For Service resources of type LoadBalancer, the controller can provision NLBs for Layer 4 load balancing.
Security Groups and Permissions: The controller automatically manages security groups for load balancers and target groups, and uses its dedicated IAM role (created via IRSA) to interact with AWS APIs.
SSL/TLS Termination: Supports SSL/TLS termination at the load balancer level through integration with AWS Certificate Manager.
Together, these architectural components create a resilient, secure, and scalable foundation for running containerized applications in AWS. The modular design allows for each component to be updated or replaced independently, and the infrastructure-as-code approach ensures consistency and reproducibility across environments.
Understanding the Modules
VPC
The VPC module is the foundation of our infrastructure, providing the necessary networking components for the EKS cluster.
❏ vpc/main.tf
module "vpc" {
  source  = "terraform-aws-modules/vpc/aws"
  version = "5.0.0"

  name = var.vpc_name
  cidr = "10.0.0.0/16"

  azs             = var.azs
  private_subnets = ["10.0.1.0/24", "10.0.2.0/24", "10.0.3.0/24"]
  public_subnets  = ["10.0.101.0/24", "10.0.102.0/24", "10.0.103.0/24"]

  # NAT Gateways - Outbound Communication
  enable_nat_gateway = true
  one_nat_gateway_per_az = true

  # DNS Parameters in VPC
  enable_dns_hostnames = true
  enable_dns_support   = true

  public_subnet_tags = {
    Name = "Public Subnet"
    "kubernetes.io/role/elb" = 1
  }

  private_subnet_tags = {
    Name = "Private Subnet"
    "kubernetes.io/role/internal-elb" = 1
  }

  tags = {
    terraform   = "true"
    env = "dev"
  }
}
We're using the community-maintained terraform-aws-modules/vpc/aws module which provides a comprehensive way to set up AWS VPC resources according to best practices.
NAT Gateway Configuration:
enable_nat_gateway = true: This enables Network Address Translation (NAT) gateways, which allow instances in private subnets to initiate outbound traffic to the internet while preventing inbound traffic from the internet.one_nat_gateway_per_az = true: This creates a NAT gateway in each availability zone, ensuring high availability for outbound internet access. While this increases costs compared to using a single NAT gateway, it eliminates a single point of failure and is recommended for production environments.
DNS Configuration:
enable_dns_hostnames = true: Enables DNS hostnames in the VPC, allowing instances to have automatically assigned DNS hostnames.enable_dns_support = true: Enables DNS resolution in the VPC, which is required for various AWS services and for resolving DNS hostnames within the VPC.
Subnet Tags: The subnet tags are particularly important for EKS integration:
kubernetes.io/role/elb = 1for public subnets: This tag tells the Kubernetes AWS cloud provider to use these subnets for external load balancers.kubernetes.io/role/internal-elb = 1for private subnets: This tag marks subnets for internal load balancers.
These tags are required for the EKS cluster to properly identify which subnets to use when creating AWS resources like load balancers.
EKS Module
The EKS module provisions the Kubernetes cluster and its node groups.
❏ eks/main.tf
module "eks" {
  source  = "terraform-aws-modules/eks/aws"
  version = "~> 20.0"

  cluster_name    = var.cluster_name
  cluster_version = "1.31"

  enable_irsa = true

  cluster_endpoint_public_access = true

  create_kms_key              = false
  create_cloudwatch_log_group = false
  cluster_encryption_config   = {}

  cluster_addons = {
    coredns = {
      most_recent = true
    }
    kube-proxy = {
      most_recent = true
    }
    vpc-cni = {
      most_recent = true
    }
    aws-ebs-csi-driver = {
      service_account_role_arn = var.ebs_csi_irsa_role_arn
      most_recent = true
    }
  }

  vpc_id                   = var.vpc_id
  subnet_ids               = var.subnet_ids


  # EKS Managed Node Group(s)
  eks_managed_node_group_defaults = {
    instance_types =  ["m5.large", "t3.medium"]

    iam_role_additional_policies = {
      AmazonEBSCSIDriverPolicy = "arn:aws:iam::aws:policy/service-role/AmazonEBSCSIDriverPolicy"
    }
    disk_size = 30

  }

  eks_managed_node_groups = {

    general = {
      desired_size = 3
      min_size     = 1
      max_size     = 10

      instance_types = ["t3.medium"]
      capacity_type  = "ON_DEMAND"
    }
  }

  enable_cluster_creator_admin_permissions = true

  tags = {
    env       = "dev"
    terraform = "true"
    }
}
IRSA (IAM Roles for Service Accounts):
enable_irsa = true: This enables IAM Roles for Service Accounts, a key security feature that allows Kubernetes service accounts to assume IAM roles. This is a significant improvement over the traditional approach of attaching IAM roles to EC2 instances, as it provides more granular control over permissions at the pod level.
Cluster Endpoint Access:
cluster_endpoint_public_access = true: This makes the Kubernetes API server accessible from the internet. In production environments, you might want to restrict this access to specific CIDR blocks or disable it entirely and use a bastion host or AWS VPN/Direct Connect for cluster management.
Cluster Addons
The EKS module configures several essential cluster addons that provide core functionality for the Kubernetes cluster. These are not optional components but rather fundamental services that enable the cluster to function properly.
1. CoreDNS
CoreDNS serves as the backbone of service discovery within the Kubernetes cluster:
Service Discovery: CoreDNS translates Kubernetes service names into IP addresses, allowing pods to communicate with each other using consistent DNS names rather than ephemeral IP addresses. For example, a pod can reach the
databaseservice in thebackendnamespace using the DNS namedatabase.backend.svc.cluster.local.DNS Resolution: It provides both forward and reverse DNS lookups within the cluster, handling the dynamic nature of Kubernetes where pods are constantly being created, destroyed, and moved.
Scalability: CoreDNS is deployed as a horizontally scalable deployment, allowing it to handle DNS queries for even the largest Kubernetes clusters.
Configuration: In EKS, CoreDNS is configured through CoreFile ConfigMaps, allowing for customization of DNS behavior when needed.
2. kube-proxy
Kube-Proxy is a networking component that ensures pod-to-pod and external communication. It is responsible for maintaining network rules (iptables/IPVS) that route traffic between Kubernetes services and their associated pods.
Kube-Proxy plays a crucial role in load balancing across all pods of a service, ensuring high availability and scalability. It also supports NodePort services, which allow external traffic to reach Kubernetes applications via exposed node ports. In EKS, Kube-Proxy typically runs in iptables mode, but can be configured to use IPVS mode for improved performance in large-scale clusters.
3. vpc-cni (AWS VPC CNI Plugin)
The AWS VPC CNI (Container Network Interface) plugin provides seamless integration between Kubernetes networking and the AWS VPC. Unlike traditional Kubernetes networking solutions that use overlays (like Flannel or Calico), VPC CNI assigns real AWS VPC IP addresses to pods, allowing them to communicate natively with other AWS services.
With VPC CNI, security groups can be directly applied to pods, enabling fine-grained network security policies. The plugin also manages Elastic Network Interfaces (ENIs) on worker nodes, ensuring efficient IP address allocation. Advanced features like Prefix Delegation further optimize IP address usage, increasing the number of pods that can run per node.
4. aws-ebs-csi-driver
The Amazon EBS CSI (Container Storage Interface) driver enables dynamic provisioning of persistent storage in Kubernetes using Amazon Elastic Block Store (EBS). This ensures that application data persists even when pods are rescheduled or restarted.
The EBS CSI driver supports different storage classes, allowing applications to request storage optimized for specific workloads, such as gp3 (General Purpose SSD) for cost-effective storage or io1 (Provisioned IOPS SSD) for high-performance applications. Additionally, the driver supports volume resizing, snapshot backups, and encryption via AWS KMS, ensuring data security and operational flexibility.
A key advantage of using EBS CSI with IAM Roles for Service Accounts (IRSA) is that it eliminates the need for broad permissions at the node level, providing fine-grained security controls by granting storage-related permissions only to pods that need them.
Setting most_recent = true for these addons ensures that the latest compatible versions are used.
Access Management
enable_cluster_creator_admin_permissions = true: This grants the IAM entity creating the cluster admin permissions in the cluster's RBAC configuration. This is convenient for setup but should be restricted in production environments.
aws-auth vs EKS Access Entries
The primary method for managing access to EKS clusters has traditionally been through the aws-auth ConfigMap. This Kubernetes resource maps AWS IAM principals (both users and roles) to Kubernetes identities, essentially creating a bridge between AWS's authentication system and Kubernetes' authorization system.
The aws-auth ConfigMap is implemented as a standard Kubernetes resource that resides in the kube-system namespace. Its configuration typically includes mappings for node IAM roles, users, and nodes, allowing them to interact with the cluster based on defined permissions
But this way of doing things has some big downsides. If you delete the account that owns the cluster, you might lose access to the whole thing. The default person who sets up the cluster gets full admin rights, so if you remove them, you could end up locked out. Plus, even small mistakes in the ConfigMap's syntax could mess up access control for the entire cluster.
Furthermore, since the ConfigMap is itself a Kubernetes resource, you already need cluster access to update it—creating a potential access lockout scenario that can be difficult to recover from. This circular dependency created serious operational risks for many organizations.
AWS now offers a simpler and better way to manage access to EKS clusters. We can handle access directly through the EKS API using AWS IAM for authentication. This means AWS checks who the user is when they log in, and Kubernetes checks what they can do in the cluster. This new method works well with Kubernetes' RBAC (Role-Based Access Control), making access management stronger and more flexible.
By using a dedicated infrastructure as code, we can manage access more easily and safely. In the old system, deleting the cluster owner could lock you out. Now, other users can add IAM principals to access the cluster through APIs, making it simpler to manage access with Infrastructure as Code (IaC) tools like Terraform, CloudFormation, and other automation frameworks.
The commented access_entries block in eks/main.tf represents the newer approach to EKS access management, which is gradually replacing the aws-auth ConfigMap method. Access entries provide a more declarative and manageable way to define who can access the cluster and what permissions they have. With access entries, you can:
Define fine-grained access at the namespace level
Apply specific access policies to users or roles
Manage access through the AWS API rather than Kubernetes ConfigMap
Load Balancer Controller
The AWS Load Balancer Controller is essential for managing AWS Application Load Balancers and Network Load Balancers for Kubernetes services and ingresses.
❏ load_balancer_controller/main.py
# Deploy AWS Load Balancer Controller using Helm
resource "helm_release" "aws_load_balancer_controller" {
  name = "aws-load-balancer-controller"
  repository = "https://aws.github.io/eks-charts"
  chart      = "aws-load-balancer-controller"
  namespace  = "kube-system"
  version    = "1.4.3"


  set {
    name  = "vpcId"
    value = var.vpc_id
  }

  set {
    name  = "clusterName"
    value = "eks-cluster"
  }

  set {
    name  = "serviceAccount.name"
    value = "aws-load-balancer-controller"
  }

  set {
    name  = "serviceAccount.annotations.eks\\.amazonaws\\.com/role-arn"
    value = var.load_balancer_controller_irsa_role_arn
  }

  set {
    name  = "region"
    value = var.aws_region
  }

}
Why the AWS Load Balancer Controller is Important ?
The controller watches for Kubernetes Ingress or Service resources. In response, it creates the appropriate AWS Elastic Load Balancing resources.
Kubernetes Ingress
The LBC creates an AWS Application Load Balancer (ALB) when you create a Kubernetes Ingress. Review the annotations you can apply to an Ingress resource.
Kubernetes service of the LoadBalancer type
The LBC creates an AWS Network Load Balancer (NLB) when you create a Kubernetes service of type LoadBalancer.
Official doc: https://docs.aws.amazon.com/eks/latest/userguide/aws-load-balancer-controller.html
The controller is configured with:
The VPC ID and cluster name to operate within the correct environment
A service account with proper IRSA annotations to assume the IAM role created in the IAM module
The AWS region for API calls
Setup and Deployment
Ensure you have AWS CLI, Terraform (≥1.0.0), and kubectl installed and configured with the necessary IAM permissions.
aws configure  # Set AWS credentials
terraform --version  # Verify Terraform installation
kubectl version --client  # Check kubectl installation
Clone the repository and configure Terraform variables:
git clone https://github.com/yourusername/eks-terraform-project.git
cd eks-terraform-project
cp terraform.tfvars.example terraform.tfvars  # Customise your settings
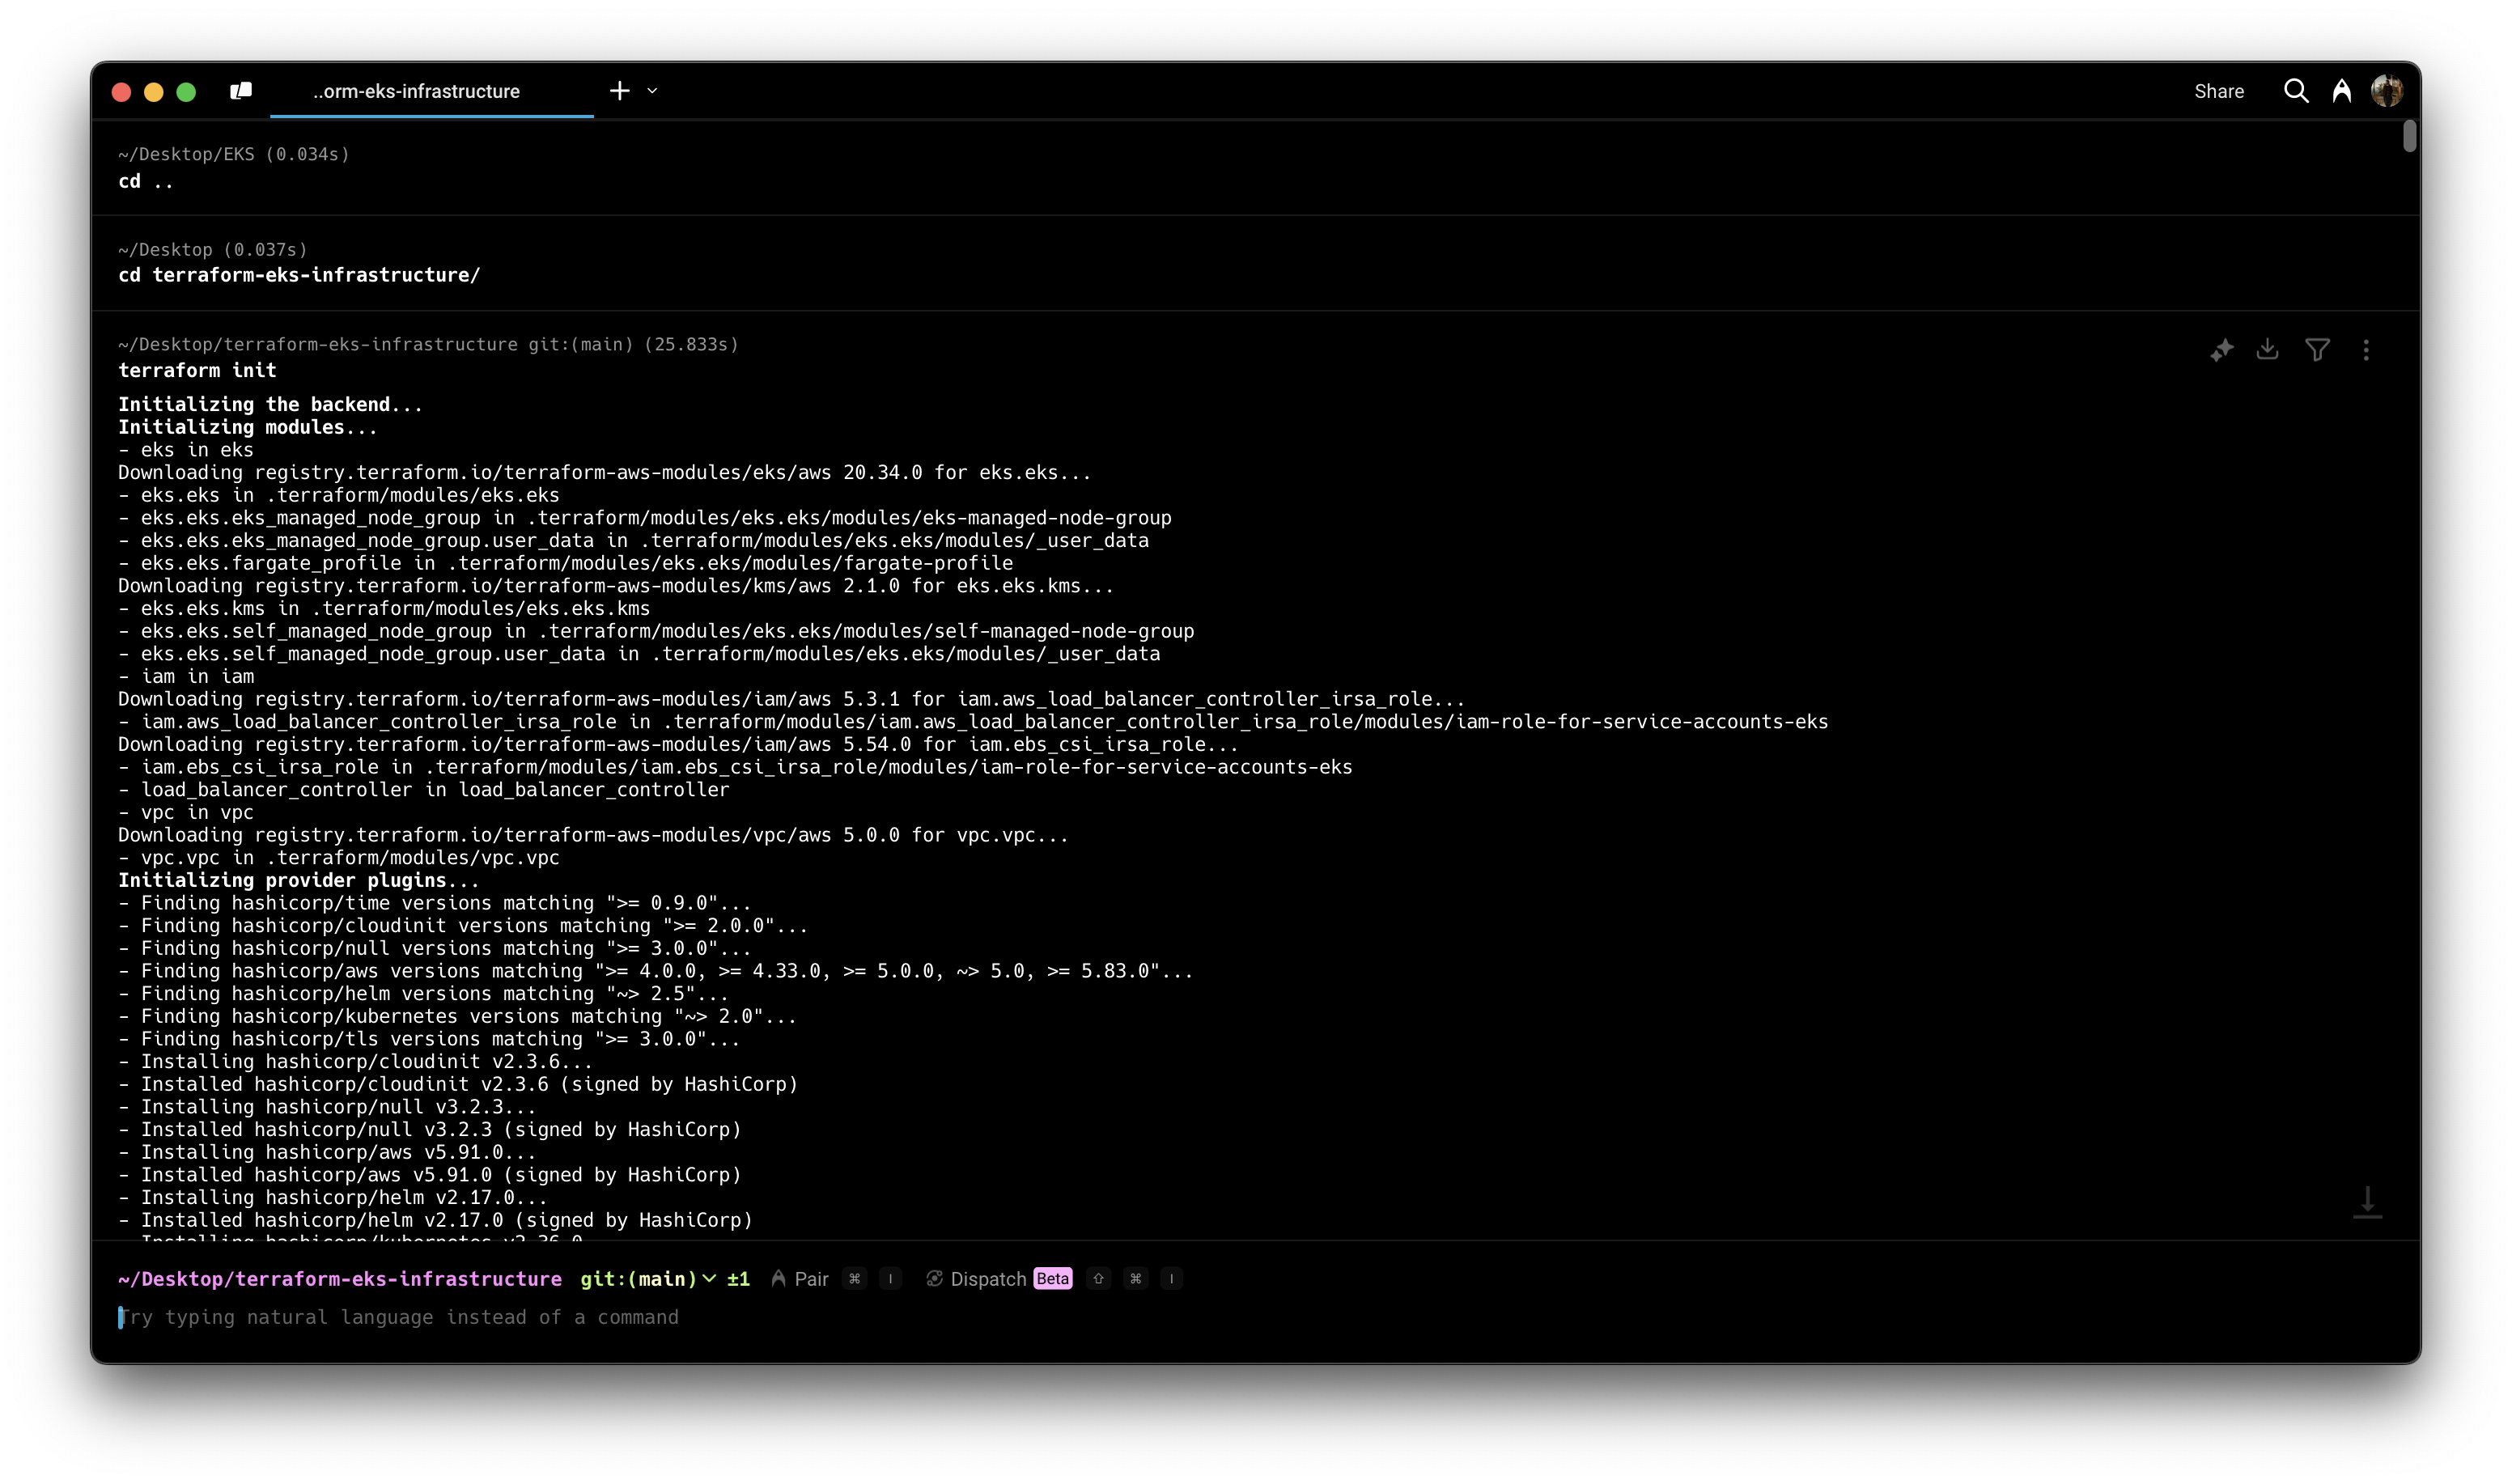
Initialize Terraform Initialize Terraform to download required providers and modules:
terraform init
Generate a Plan Create an execution plan to preview the changes
terraform plan -out=tfplan
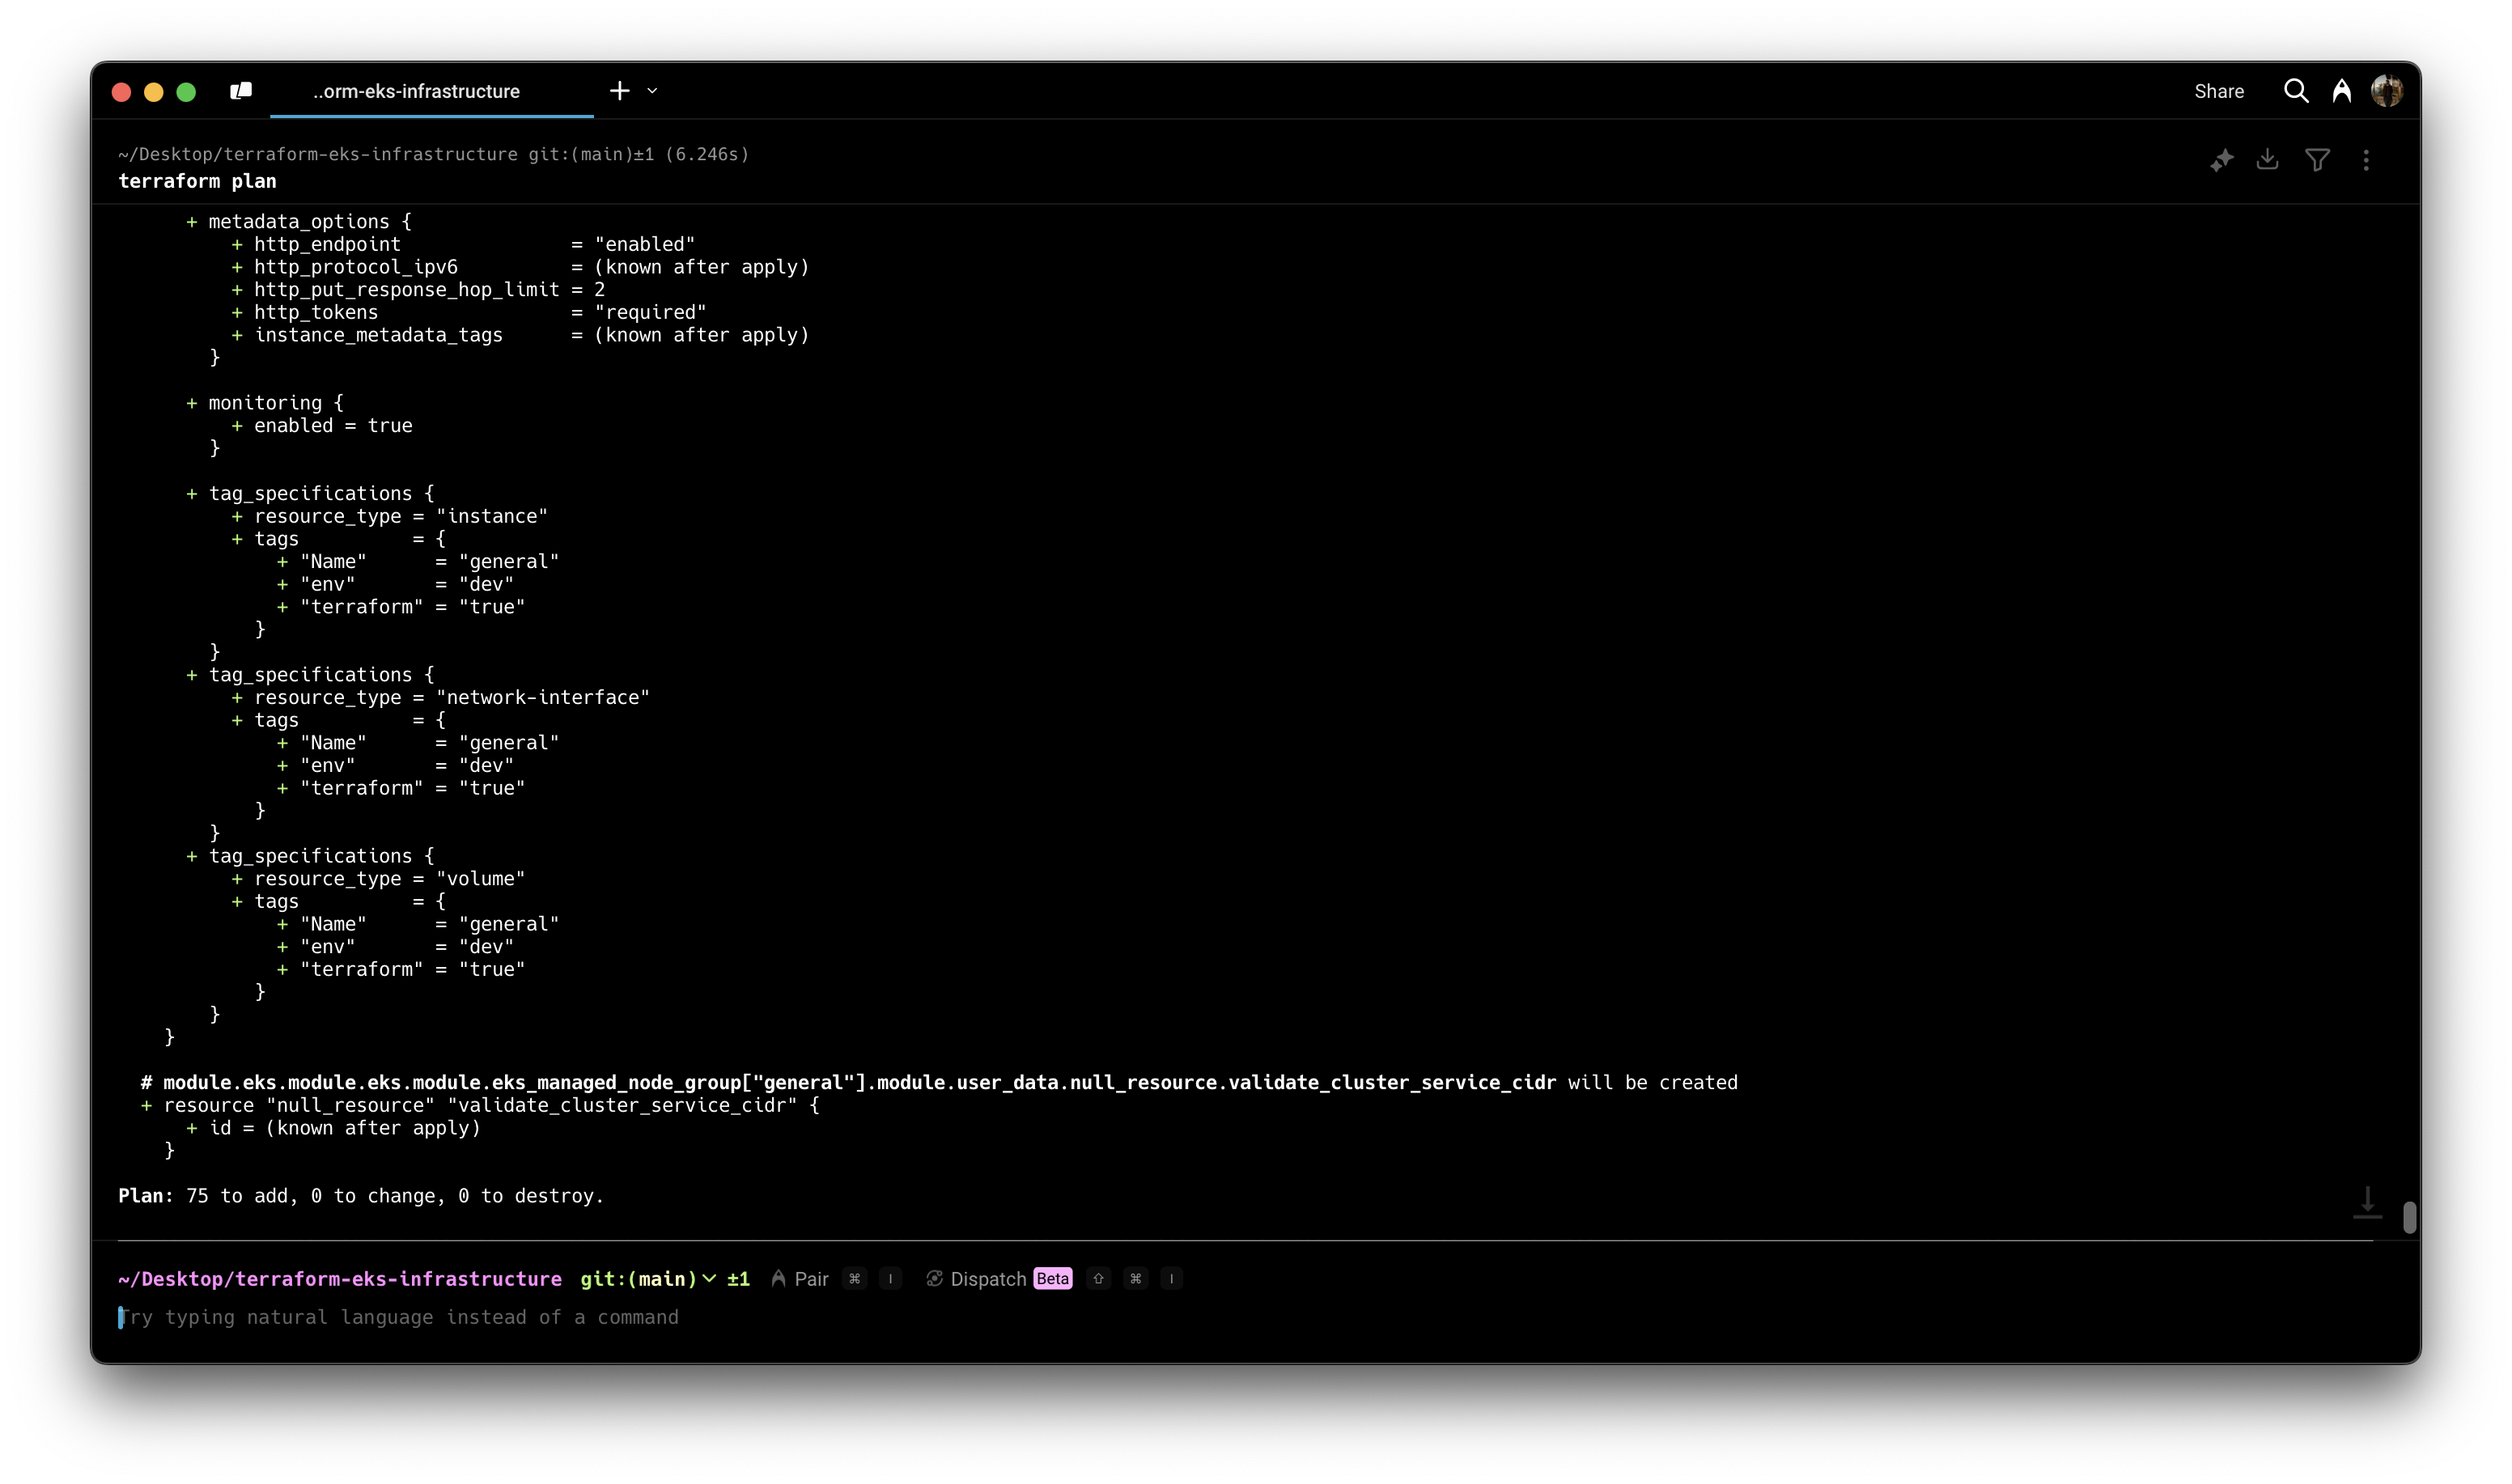
Review the plan carefully to ensure it will create the expected resources.
Apply the Configuration
terraform apply tfplan
The deployment process typically takes 15-20 minutes, primarily due to the EKS cluster creation.
Usage
Once you've deployed the infrastructure using Terraform, you can start using your EKS cluster. Here's how:
Accessing the Cluster
After successful deployment, configure your local kubectl to communicate with the new cluster:
aws eks update-kubeconfig --name <your-cluster-name> --region <your-region>
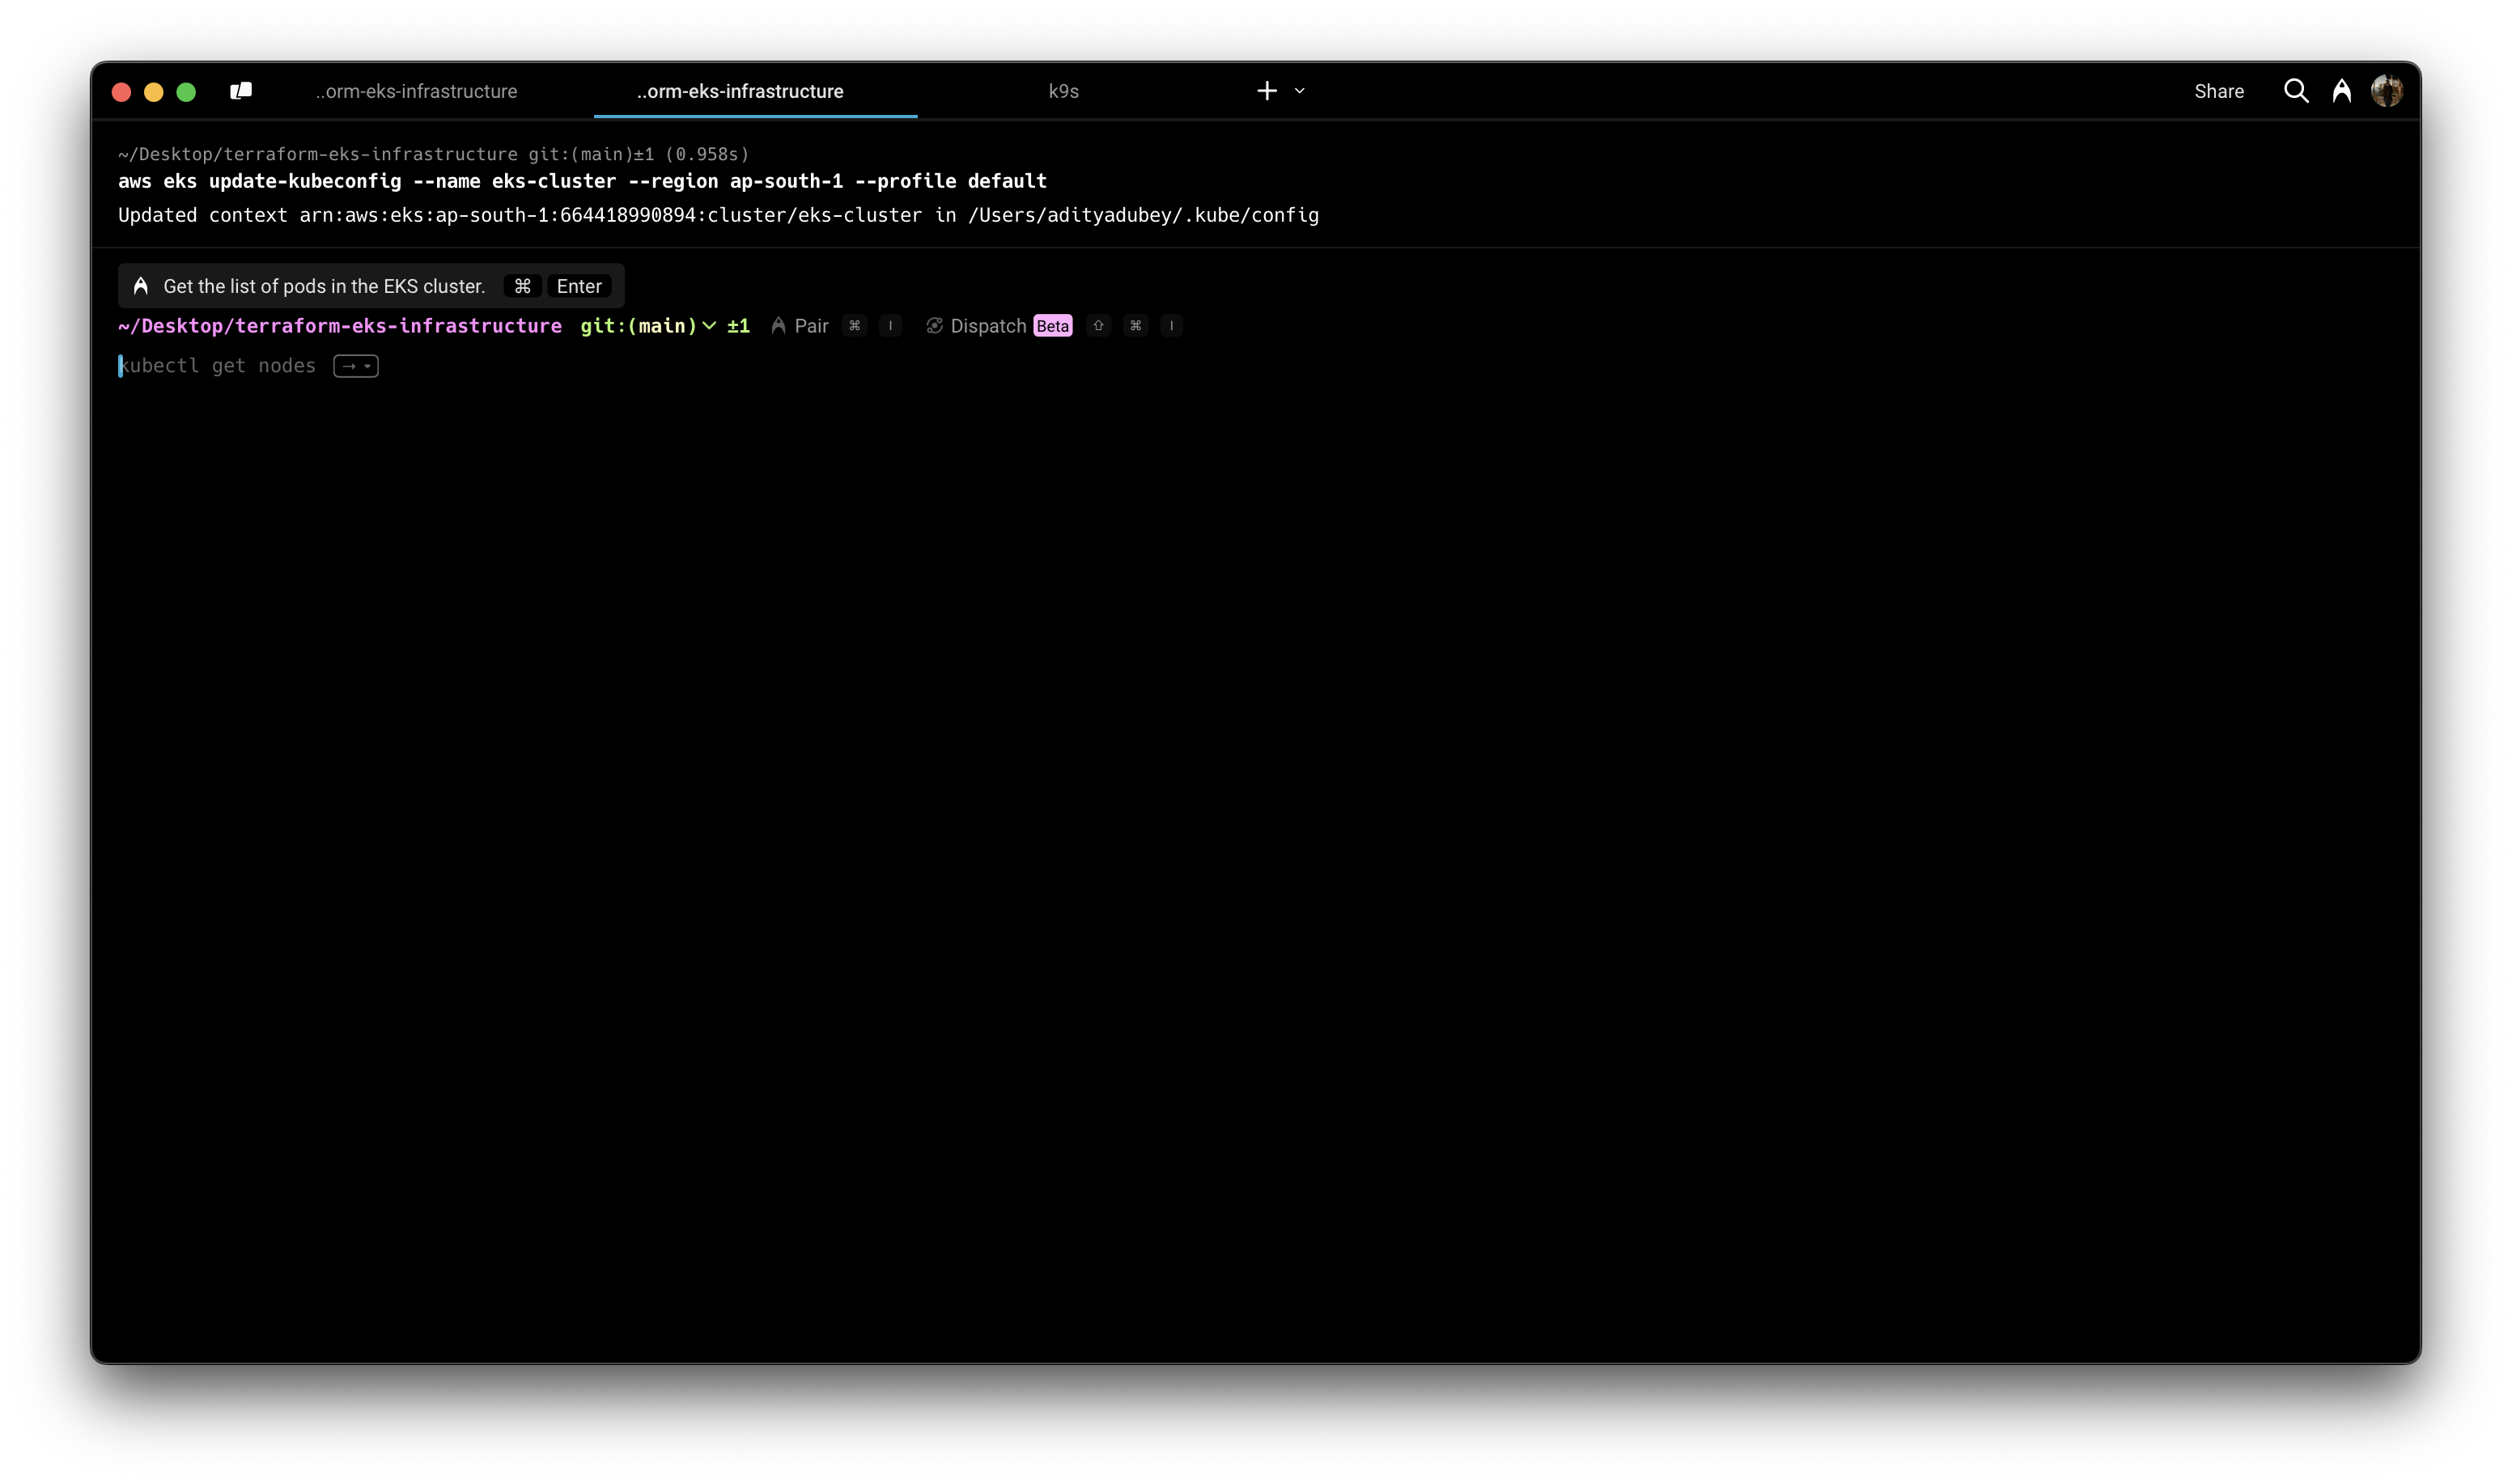
Verify the connection:
kubectl get nodes
You should see the nodes from your managed node group.
Deploying a Sample Application
Lets try deploying the popular 2048 game, exposing it via a service, and making it accessible through an AWS Application Load Balancer (ALB) using Ingress.
Step 1: Create a Namespace
First, let's create a dedicated namespace for our game application:
kubectl create namespace game-2048
Creating a namespace helps with organization and resource isolation, making it easier to manage permissions, quotas, and cleanup.
Step 2: Deploy the Application
Now, we'll deploy the 2048 game application using the following manifest file,
❏ game.yaml
apiVersion: apps/v1
kind: Deployment
metadata:
  namespace: game-2048
  name: deployment-2048
spec:
  selector:
    matchLabels:
      app.kubernetes.io/name: app-2048
  replicas: 2
  template:
    metadata:
      labels:
        app.kubernetes.io/name: app-2048
    spec:
      containers:
      - image: public.ecr.aws/l6m2t8p7/docker-2048:latest
        imagePullPolicy: Always
        name: app-2048
        ports:
        - containerPort: 80
---
apiVersion: v1
kind: Service
metadata:
  namespace: game-2048
  name: service-2048
spec:
  ports:
    - port: 80
      targetPort: 80
      protocol: TCP
  selector:
    app.kubernetes.io/name: app-2048
This manifest includes:
Deployment: Creates two replicas of the 2048 game pod, pulling the image from a public Amazon ECR repository.
Service: Creates a ClusterIP service (the default type) that exposes the application on port 80 within the cluster.
Apply the manifest with:
kubectl apply -f game.yaml
Verify that the deployment and service were created successfully:
kubectl get deployment -n game-2048
kubectl get service -n game-2048
kubectl get pods -n game-2048
You should see the deployment with 2 replicas, the service, and 2 running pods.
Step 3: Create an Ingress Resource
Now that our application is running, we need to expose it to the outside world. We'll use an Ingress resource that will be managed by the AWS Load Balancer Controller we deployed earlier. Create the following file
❏ ingress-all.yaml
apiVersion: networking.k8s.io/v1
kind: Ingress
metadata:
  namespace: game-2048
  name: combined-ingress
  annotations:
    alb.ingress.kubernetes.io/scheme: internet-facing
    alb.ingress.kubernetes.io/target-type: ip
spec:
  ingressClassName: alb
  rules:
    - host: game.adityadubey.tech
      http:
        paths:
        - path: /
          pathType: Prefix
          backend:
            service:
              name: service-2048
              port:
                number: 80
Key components of this Ingress resource:
Annotations:
alb.ingress.kubernetes.io/scheme: internet-facing: Creates a public ALB accessible from the internet.alb.ingress.kubernetes.io/target-type: ip: Directs traffic directly to pod IPs rather than node IPs, which works well with our VPC CNI setup.
IngressClassName: Specifies
albto use the AWS Load Balancer Controller.Rules: Defines how traffic should be routed. In this case, requests to
game.adityadubey.techwill be forwarded to theservice-2048service on port 80.
Apply the Ingress manifest:
kubectl apply -f ingress-all.yaml
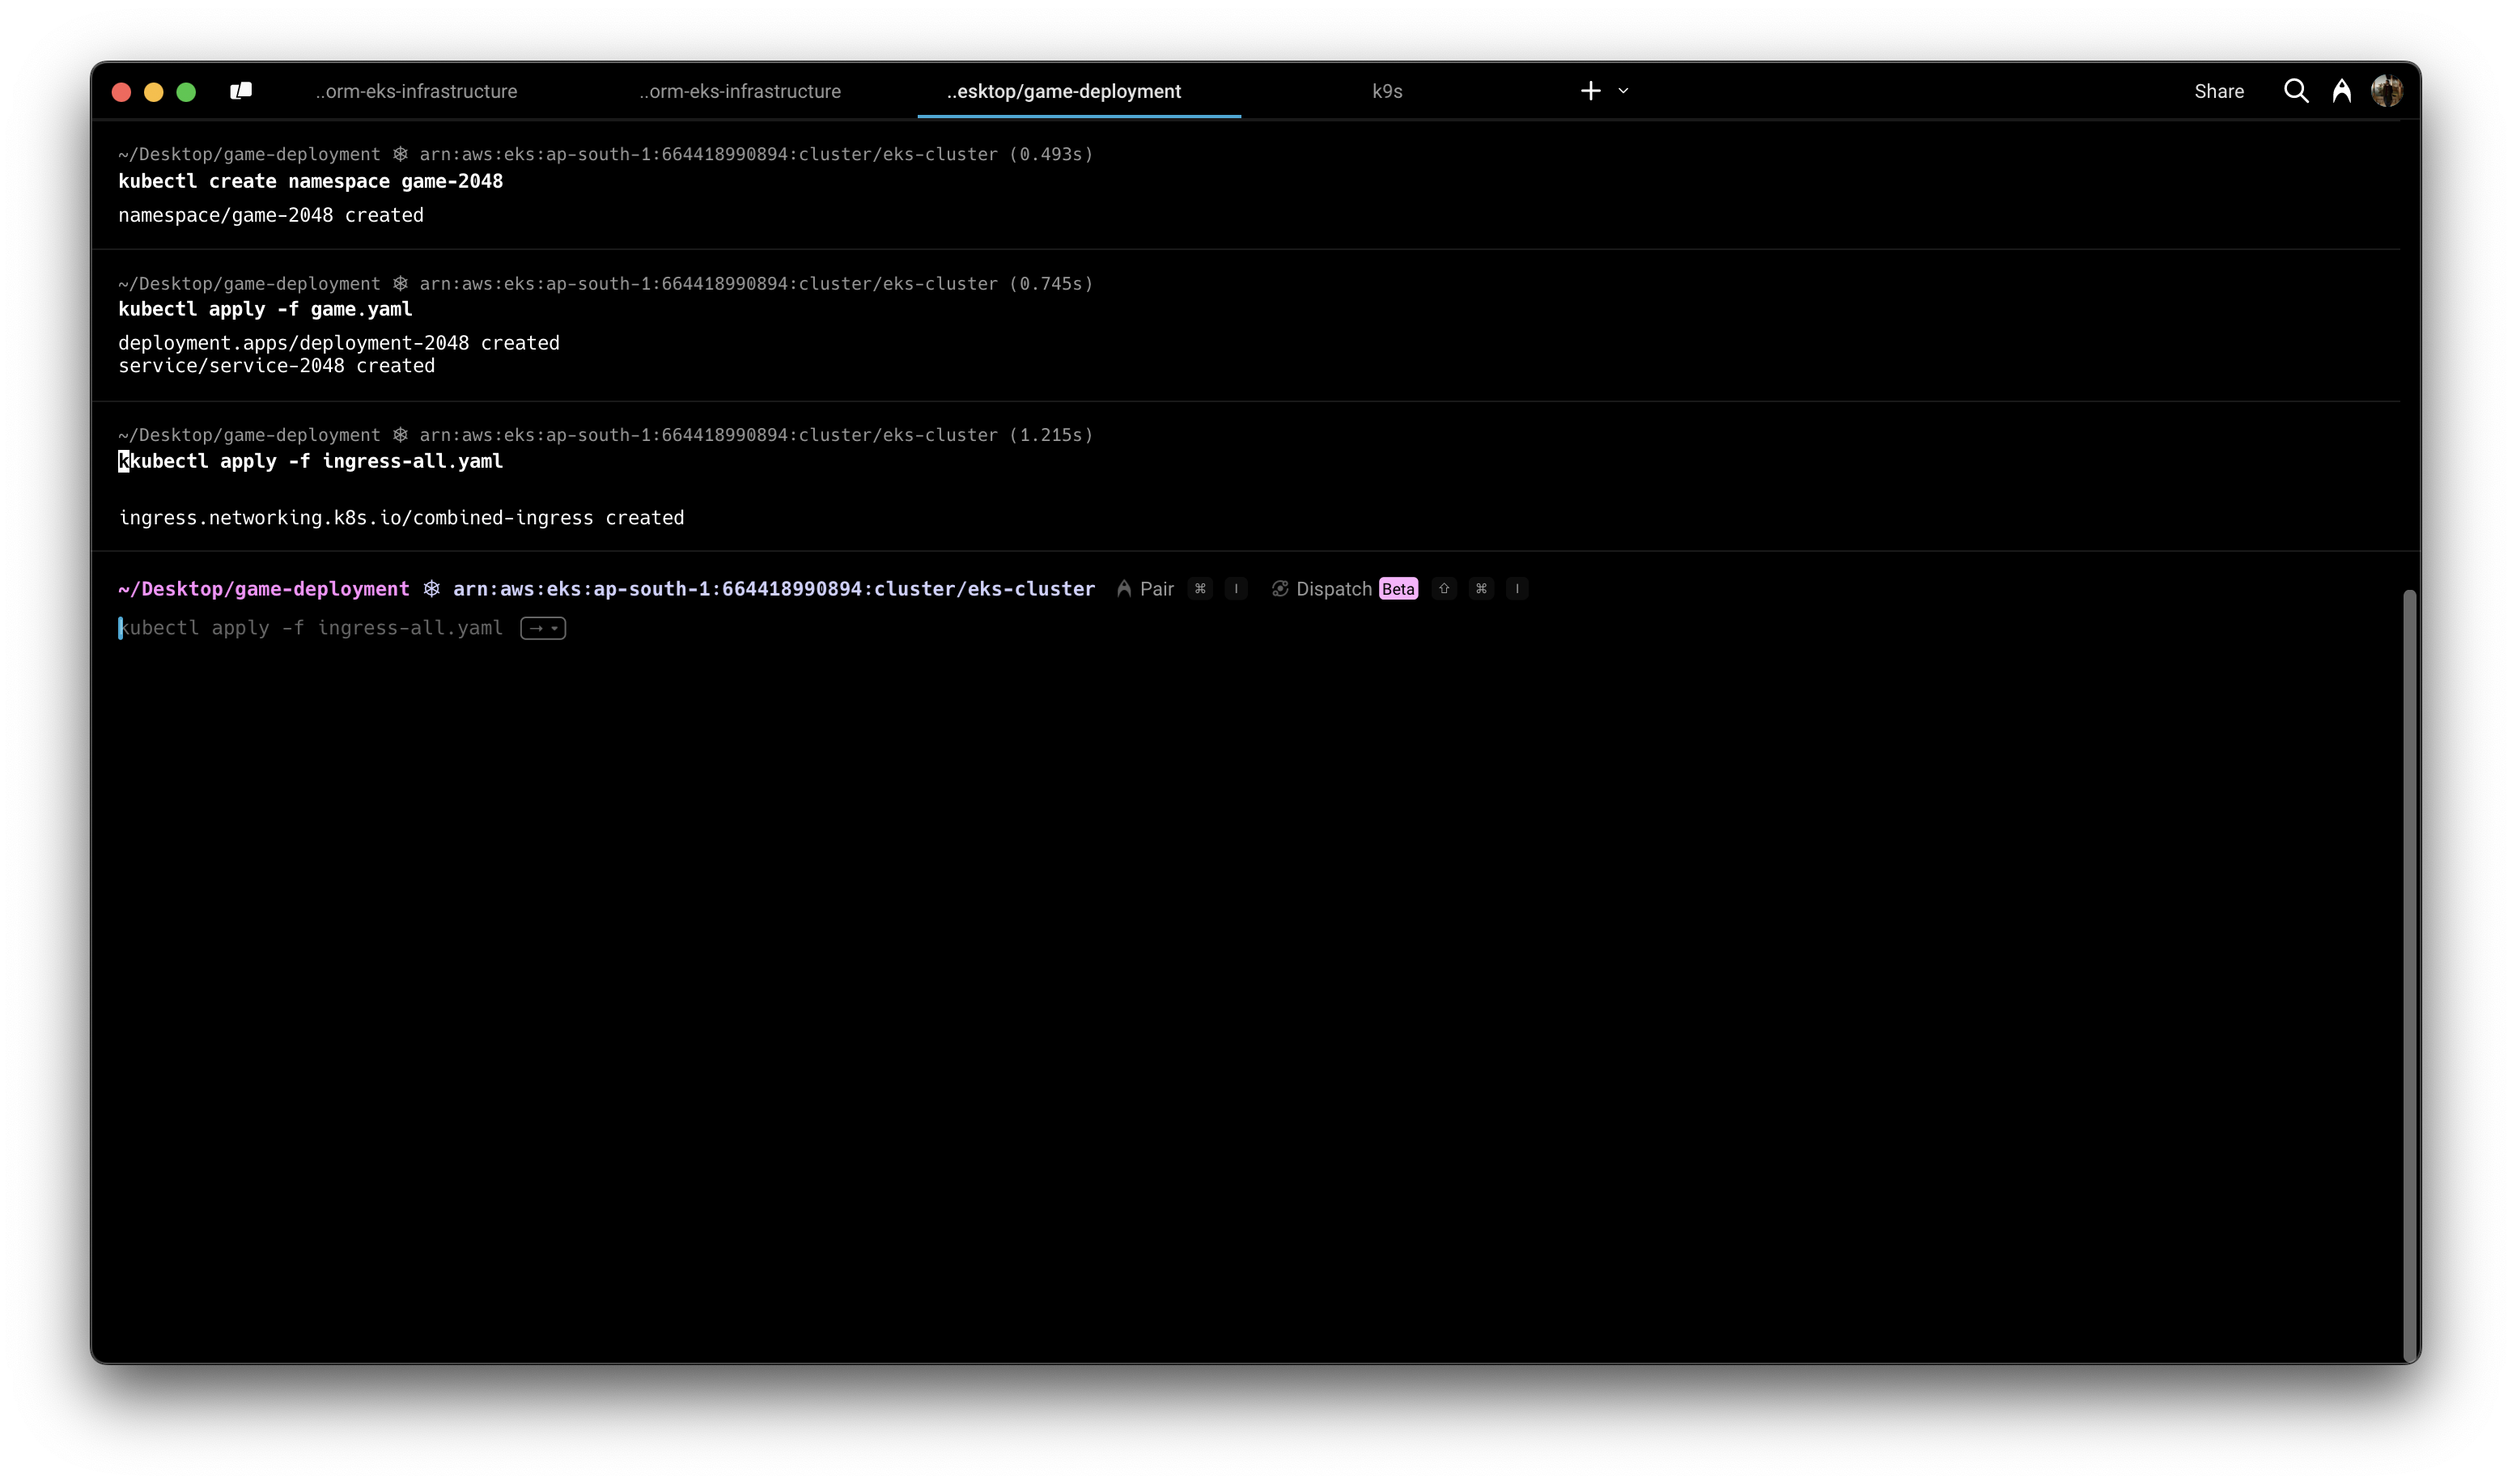
Initially, the ADDRESS field will be empty. Once the ALB is provisioned, you'll see an address like k8s-game2048-combined-1a2b3c4d.us-west-2.elb.amazonaws.com.
Step 5: Configure DNS (Optional)
If you want to use the domain specified in the Ingress rules (game.adityadubey.tech), you'll need to configure DNS to point to the ALB. In Route 53 or your DNS provider (Hostinger in my case), create a CNAME record:
Name: game.adityadubey.tech
Type: CNAME
Value: k8s-game2048-combined-1a2b3c4d.us-west-2.elb.amazonaws.com
Alternatively, you can access the application directly using the ALB's DNS name.
Once the ALB is provisioned and DNS is configured (if applicable), you can access the 2048 game application at http://game.adityadubey.tech

Understanding What Happened Behind the Scenes
When we applied the Ingress resource, several AWS resources were automatically created:
Application Load Balancer: A new ALB was provisioned in the public subnets of our VPC, with security groups automatically configured.
Target Group: A target group was created and configured to forward traffic to the pods running our game application.
Listeners and Rules: HTTP listeners and rules were set up according to our Ingress specification.
Security Groups: Security groups were configured to allow traffic on port 80 to the ALB and from the ALB to the pods.
This automation is the key benefit of the AWS Load Balancer Controller - it translates Kubernetes Ingress resources into AWS-native load balancing infrastructure, handling all the complex configuration details automatically.
Conclusion
In this blog, we have covered the end-to-end setup of an Amazon EKS cluster using Terraform, from networking (VPC, subnets, NAT gateways), cluster provisioning, IAM integration (IRSA), and essential cluster add-ons, to load balancing and ingress configuration. By leveraging Infrastructure as Code (IaC), we have ensured a repeatable, scalable, and secure Kubernetes environment on AWS.
References
https://docs.aws.amazon.com/eks/latest/userguide/lbc-helm.html
https://docs.aws.amazon.com/eks/latest/userguide/iam-roles-for-service-accounts.html
Explore Further
Explore serverless Kubernetes by running workloads on AWS Fargate, eliminating the need for managing worker nodes.
Learn how to configure HTTPS/TLS termination on ALBs using ACM-managed SSL certificates.
Proper Resource Cleanup & Tear Down: Avoid orphaned resources when destroying Terraform-managed infrastructure to prevent unnecessary costs.
Explore Trunk-Based Development for infrastructure code https://www.atlassian.com/continuous-delivery/continuous-integration/trunk-based-development
Subscribe to my newsletter
Read articles from Aditya Dubey directly inside your inbox. Subscribe to the newsletter, and don't miss out.
Written by

Aditya Dubey
Aditya Dubey
I am passionate about cloud computing and infrastructure automation. I have experience working with a range of tools and technologies including AWS- Cloud Development Kit (CDK), GitHub CLI, GitHub Actions, Container-based deployments, and programmatic workflows. I am excited about the potential of the cloud to transform industries and am keen on contributing to innovative projects.