Build a robust CI process for your applications
 jd
jdTable of contents
In the world of devops, there is a lot of practices or standards that are everywhere, one of them you may already heard of is “CI/CD” which stands for Continuous Integration and Continuous Delivery.
In this case I’m only going to cover the CI one, but with a lot of things, let’s start and see what we can do :)
Disclaimer: I’m going to use Github as platform to explain most of the things, but concepts are general and can be applied anywhere.
Testing
Here we have a lot of categories, depending on your need you could add
Unit
Integration
End to end
Performance
To read more about each one of these types (and more) I suggest you read about them here
https://www.geeksforgeeks.org/types-software-testing/
https://martinfowler.com/articles/practical-test-pyramid.html
Now let’s show a basic example on github actions
name: Docker Publish

on:
  workflow_dispatch:
  pull_request:
    branches: [ "develop", "master" ]
    paths:
      - 'src/**'
      - 'infra/docker/**'
      - 'infra/kubernetes/**'
      - '.github/workflows/publish.yml'
      - 'tests/**'
  push:
    branches: [ "develop", "master" ]
    paths:
      - 'src/**'
      - 'infra/docker/**'
      - 'infra/kubernetes/**'
      - '.github/workflows/publish.yml'
      - 'tests/**'

env:
  BRANCH_NAME: ${{ github.ref_name }}
  APP_NAME: infobae_api
  APP_VERSION: latest
  APP_DEV_VERSION: unstable
  AWS_ECR_REGISTRY: ${{ secrets.AWS_ECR_REGISTRY }}

jobs:

  test:
    permissions:
      contents: read

    name: test
    runs-on: ubuntu-latest
    steps:

      - name: Checkout
        uses: actions/checkout@85e6279cec87321a52edac9c87bce653a07cf6c2

      - name: Set up Go
        uses: actions/setup-go@5a083d0e9a84784eb32078397cf5459adecb4c40
        with:
          go-version: 1.23.2

      - name: Test
        run: go test -v ./tests
Here I’m running a suite of tests each time there is a pull request at the develop/master branch, or at each push to develop/master
This is running these tests
https://github.com/jd-apprentice/infobae-api/blob/master/tests/main_test.go
A larger collection of tests can be seen here
https://github.com/jd-apprentice/waifuland-api/tree/master/tests
Audit
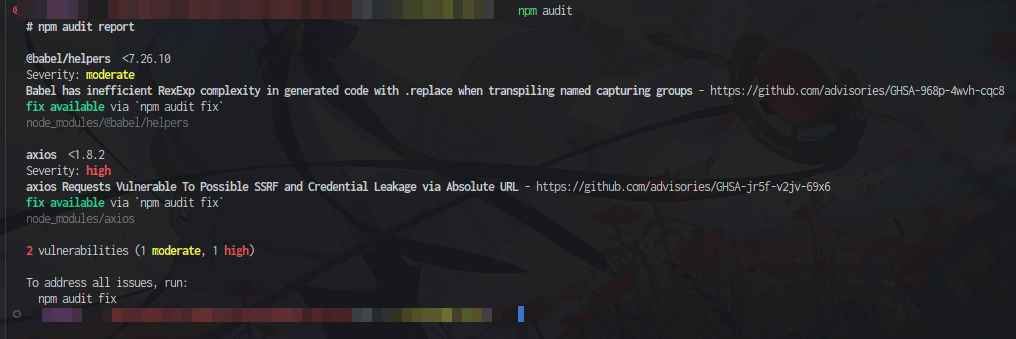
Now here it depends on the language or platform but we can use/see a few things, for example if we are using nodejs we can see a command like npm audit which may not be the best (https://overreacted.io/npm-audit-broken-by-design/) but is better than nothing in some cases.
In the case of github we can also use dependabot
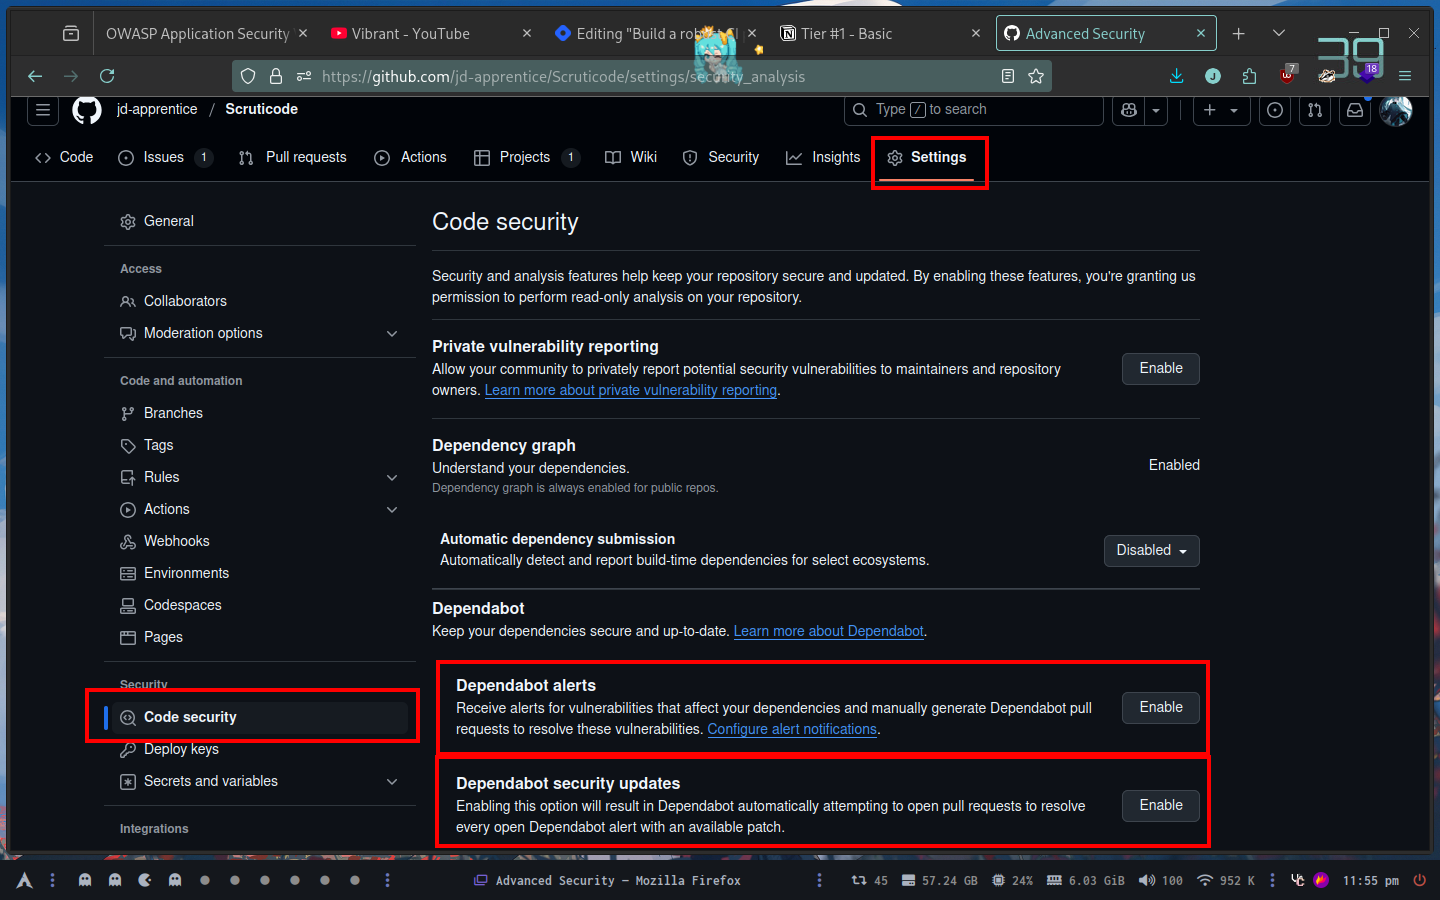
We can use the manual one or automatic one
Sast
Sast comes from https://en.wikipedia.org/wiki/Static_application_security_testing
Same as DAST there is a LOT of tools so I’m only going to cover you, is up to you to investigate which one fits more your business needs.
A popular one could be https://snyk.io/
We can login with github and add a new project there
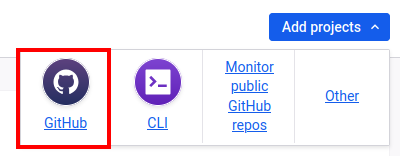
I’m going to use github to add the project

Once repository is selected

We should see our project there (I know it’s destroyed, I just started with this one sob sob)
It’s useful to set automatic fix pull request to C/H
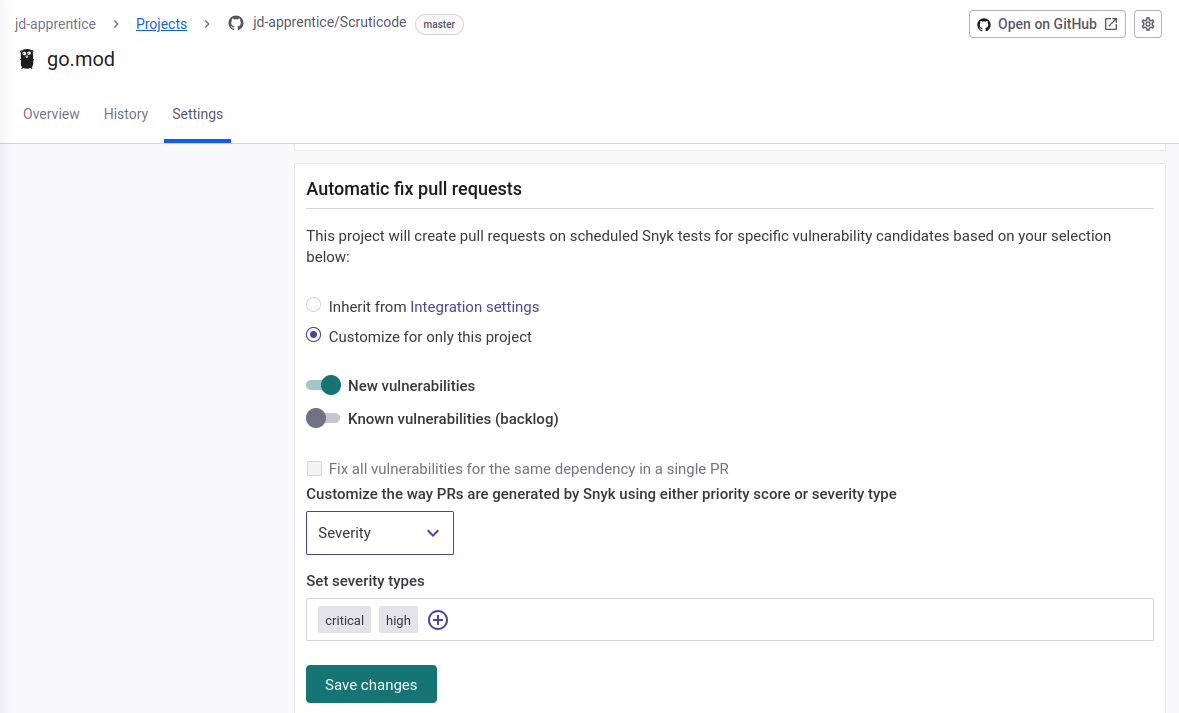
It can be done in the Github integration section for the project itself.
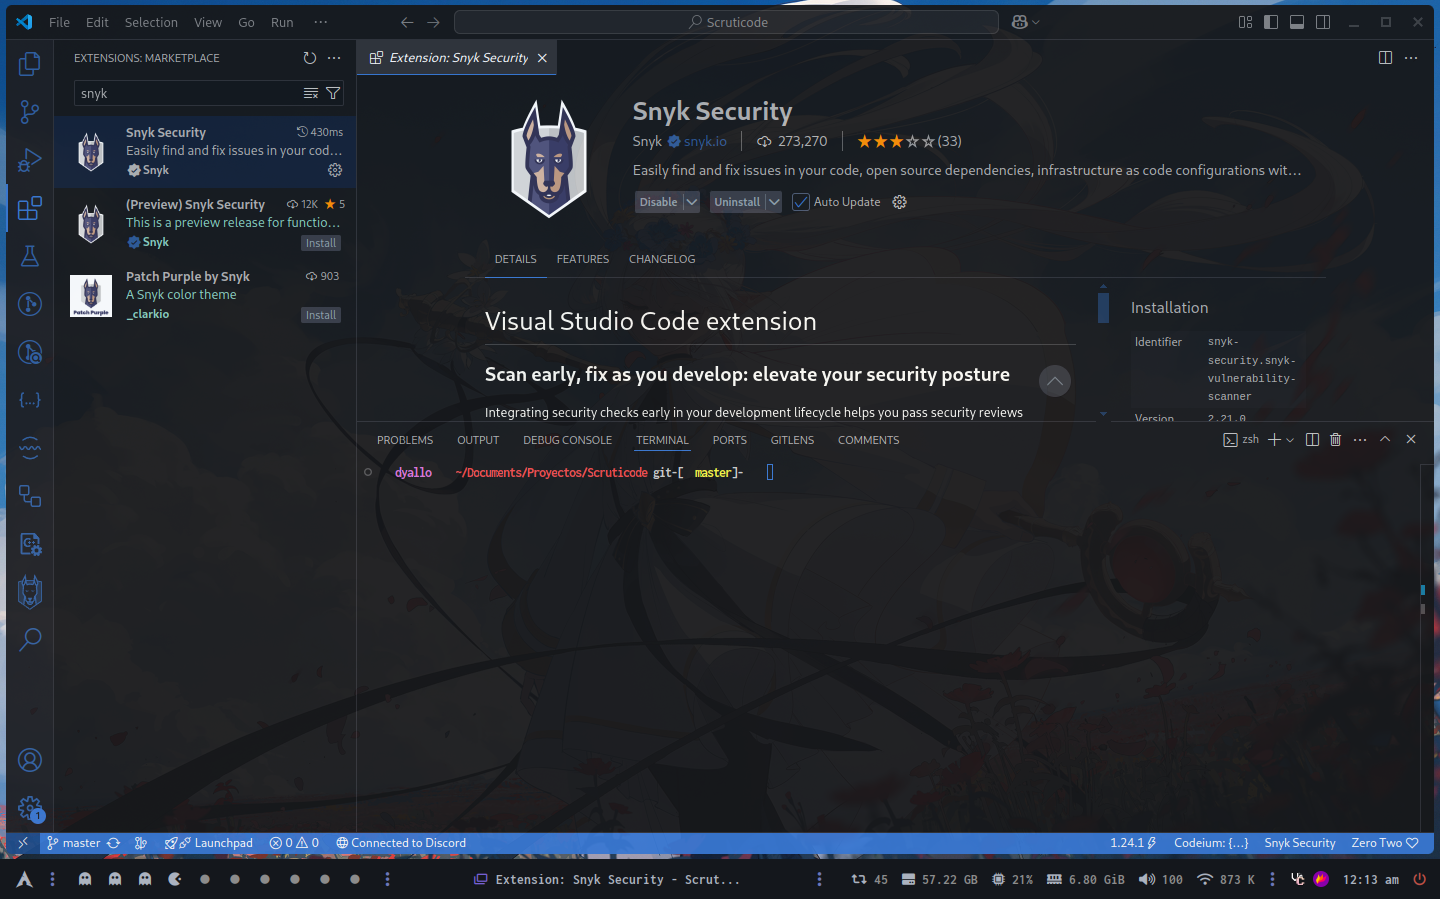
We can use their extension to be able to see things earlier
Connect to your account
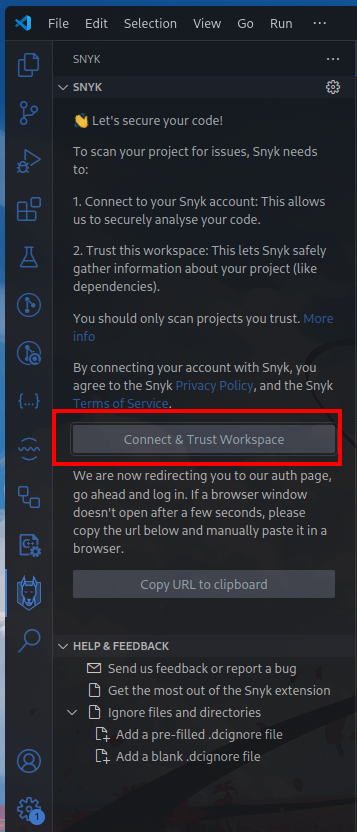
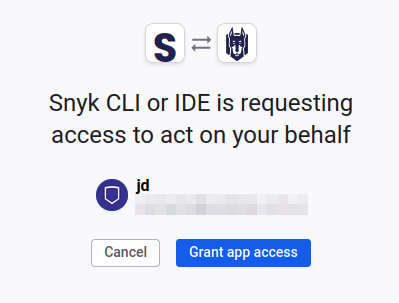
Now let’s say we want to add the scan process into our pipeline, with github we can find in the marketplace the github action for it
# This workflow uses actions that are not certified by GitHub.
# They are provided by a third-party and are governed by
# separate terms of service, privacy policy, and support
# documentation.

# A sample workflow which sets up Snyk to analyze the full Snyk platform (Snyk Open Source, Snyk Code,
# Snyk Container and Snyk Infrastructure as Code)
# The setup installs the Snyk CLI - for more details on the possible commands
# check https://docs.snyk.io/snyk-cli/cli-reference
# The results of Snyk Code are then uploaded to GitHub Security Code Scanning
#
# In order to use the Snyk Action you will need to have a Snyk API token.
# More details in https://github.com/snyk/actions#getting-your-snyk-token
# or you can signup for free at https://snyk.io/login
#
# For more examples, including how to limit scans to only high-severity issues
# and fail PR checks, see https://github.com/snyk/actions/

name: Snyk Security

on:
  push:
    branches: ["master" ]
  pull_request:
    branches: ["master"]

permissions:
  contents: read

jobs:
  snyk:
    permissions:
      contents: read # for actions/checkout to fetch code
      security-events: write # for github/codeql-action/upload-sarif to upload SARIF results
      actions: read # only required for a private repository by github/codeql-action/upload-sarif to get the Action run status
    runs-on: ubuntu-latest
    steps:
      - uses: actions/checkout@v4
      - name: Set up Snyk CLI to check for security issues
        # Snyk can be used to break the build when it detects security issues.
        # In this case we want to upload the SAST issues to GitHub Code Scanning
        uses: snyk/actions/setup@806182742461562b67788a64410098c9d9b96adb

        # For Snyk Open Source you must first set up the development environment for your application's dependencies
        # For example for Node
        #- uses: actions/setup-node@v4
        #  with:
        #    node-version: 20

        env:
          # This is where you will need to introduce the Snyk API token created with your Snyk account
          SNYK_TOKEN: ${{ secrets.SNYK_TOKEN }}

        # Runs Snyk Code (SAST) analysis and uploads result into GitHub.
        # Use || true to not fail the pipeline
      - name: Snyk Code test
        run: snyk code test --sarif > snyk-code.sarif # || true

        # Runs Snyk Open Source (SCA) analysis and uploads result to Snyk.
      - name: Snyk Open Source monitor
        run: snyk monitor --all-projects

        # Runs Snyk Infrastructure as Code (IaC) analysis and uploads result to Snyk.
        # Use || true to not fail the pipeline.
      - name: Snyk IaC test and report
        run: snyk iac test --report # || true

        # Build the docker image for testing
      - name: Build a Docker image
        run: docker build -t your/image-to-test .
        # Runs Snyk Container (Container and SCA) analysis and uploads result to Snyk.
      - name: Snyk Container monitor
        run: snyk container monitor your/image-to-test --file=Dockerfile

        # Push the Snyk Code results into GitHub Code Scanning tab
      - name: Upload result to GitHub Code Scanning
        uses: github/codeql-action/upload-sarif@v3
        with:
          sarif_file: snyk-code.sarif
It looks like this, in my case I’m only going to use code scan so everything else if going to be deleted.
# This workflow uses actions that are not certified by GitHub.
# They are provided by a third-party and are governed by
# separate terms of service, privacy policy, and support
# documentation.

# A sample workflow which sets up Snyk to analyze the full Snyk platform (Snyk Open Source, Snyk Code,
# Snyk Container and Snyk Infrastructure as Code)
# The setup installs the Snyk CLI - for more details on the possible commands
# check https://docs.snyk.io/snyk-cli/cli-reference
# The results of Snyk Code are then uploaded to GitHub Security Code Scanning
#
# In order to use the Snyk Action you will need to have a Snyk API token.
# More details in https://github.com/snyk/actions#getting-your-snyk-token
# or you can signup for free at https://snyk.io/login
#
# For more examples, including how to limit scans to only high-severity issues
# and fail PR checks, see https://github.com/snyk/actions/

name: Snyk Security

on:
  push:
    branches: ["master" ]
  pull_request:
    branches: ["master"]

permissions:
  contents: read

jobs:
  snyk:
    permissions:
      contents: read # for actions/checkout to fetch code
      security-events: write # for github/codeql-action/upload-sarif to upload SARIF results
      actions: read # only required for a private repository by github/codeql-action/upload-sarif to get the Action run status
    runs-on: ubuntu-latest
    steps:
      - uses: actions/checkout@v4
      - name: Set up Snyk CLI to check for security issues
        # Snyk can be used to break the build when it detects security issues.
        # In this case we want to upload the SAST issues to GitHub Code Scanning
        uses: snyk/actions/setup@806182742461562b67788a64410098c9d9b96adb

        # For Snyk Open Source you must first set up the development environment for your application's dependencies
        # For example for Node
        #- uses: actions/setup-node@v4
        #  with:
        #    node-version: 20

        env:
          # This is where you will need to introduce the Snyk API token created with your Snyk account
          SNYK_TOKEN: ${{ secrets.SNYK_TOKEN }}

        # Runs Snyk Code (SAST) analysis and uploads result into GitHub.
        # Use || true to not fail the pipeline
      - name: Snyk Code test
        run: snyk code test --sarif > snyk-code.sarif # || true

        # Push the Snyk Code results into GitHub Code Scanning tab
      - name: Upload result to GitHub Code Scanning
        uses: github/codeql-action/upload-sarif@v3
        with:
          sarif_file: snyk-code.sarif
Remember to add the SNYK_TOKEN to the secrets.
A simpler option could be CodeQL if you are using Github

Dast
Disclaimer: DAST can affect the current system integrity y/o app, so add it at your own risk or make sure to have monitors for it.
Like mentioned before, for DAST there is a lot of things.
The one that I’m using right now is https://github.com/marketplace/actions/zap-baseline-scan
You can also use https://github.com/marketplace/actions/zap-full-scan
They give a full example on how to run it
on: [push]

jobs:
  zap_scan:
    runs-on: ubuntu-latest
    name: Scan the webapplication
    steps:
      - name: Checkout
        uses: actions/checkout@v4
        with:
          ref: master
      - name: ZAP Scan
        uses: zaproxy/action-full-scan@v0.12.0
        with:
          token: ${{ secrets.GITHUB_TOKEN }}
          docker_name: 'ghcr.io/zaproxy/zaproxy:stable'
          target: 'https://www.zaproxy.org/'
          rules_file_name: '.zap/rules.tsv'
          cmd_options: '-a'
But here you can check out a lot of them
https://www.acunetix.com/blog/web-security-zone/10-best-dast-tools/
Quality Gates
Our beloved Sonarqube could enter here (not the only one) but one reliant and good tool to cover this section since we can use it cloud or self hosted.
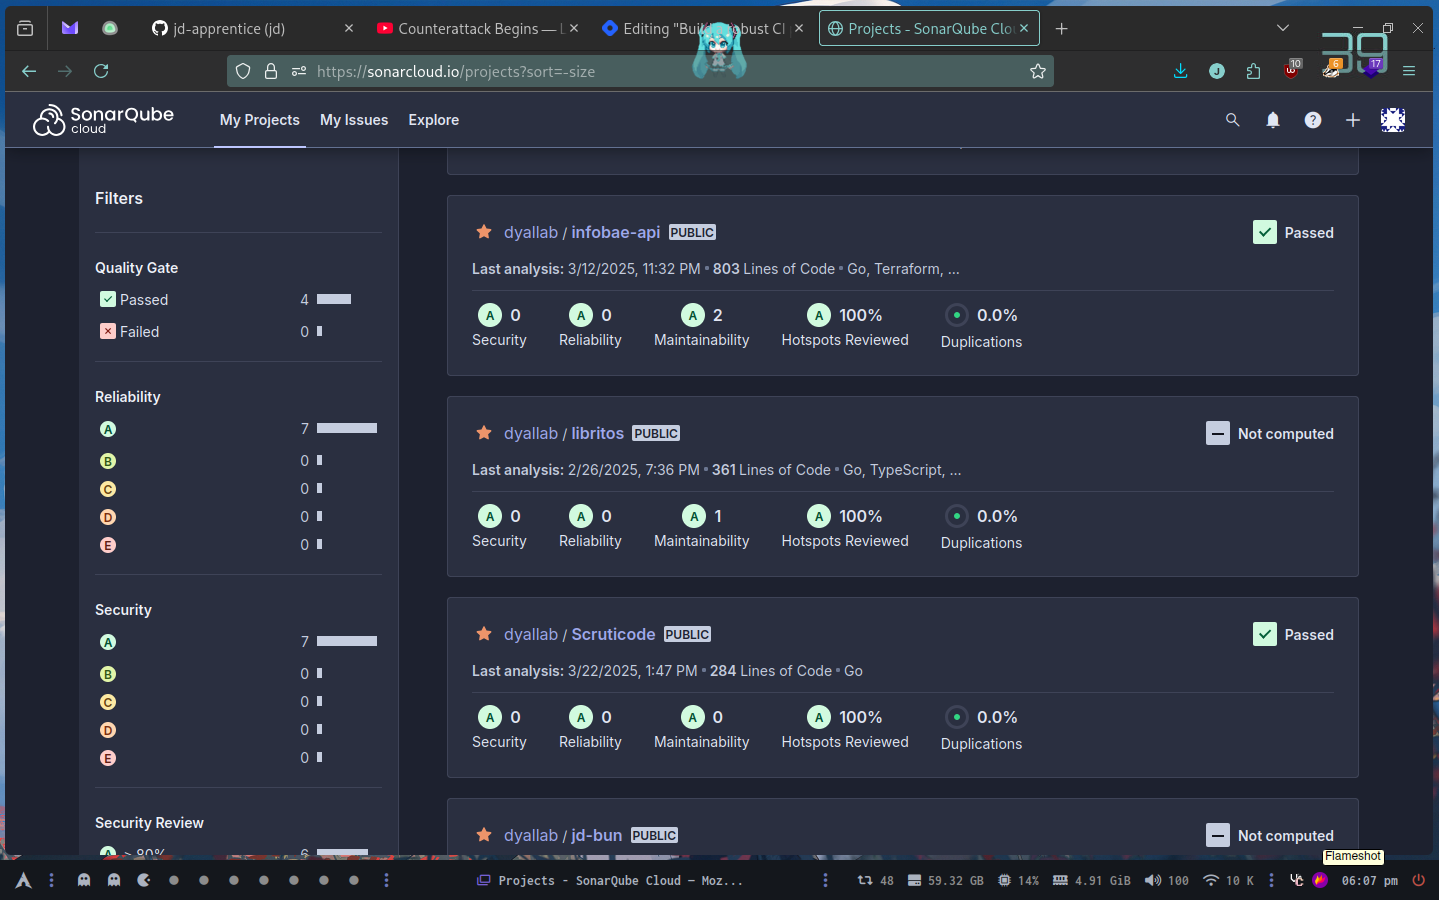
To add a project into sonarqube cloud, we need to have an organization

Both creating an organization or adding a project could be found in the same place
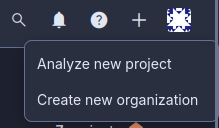
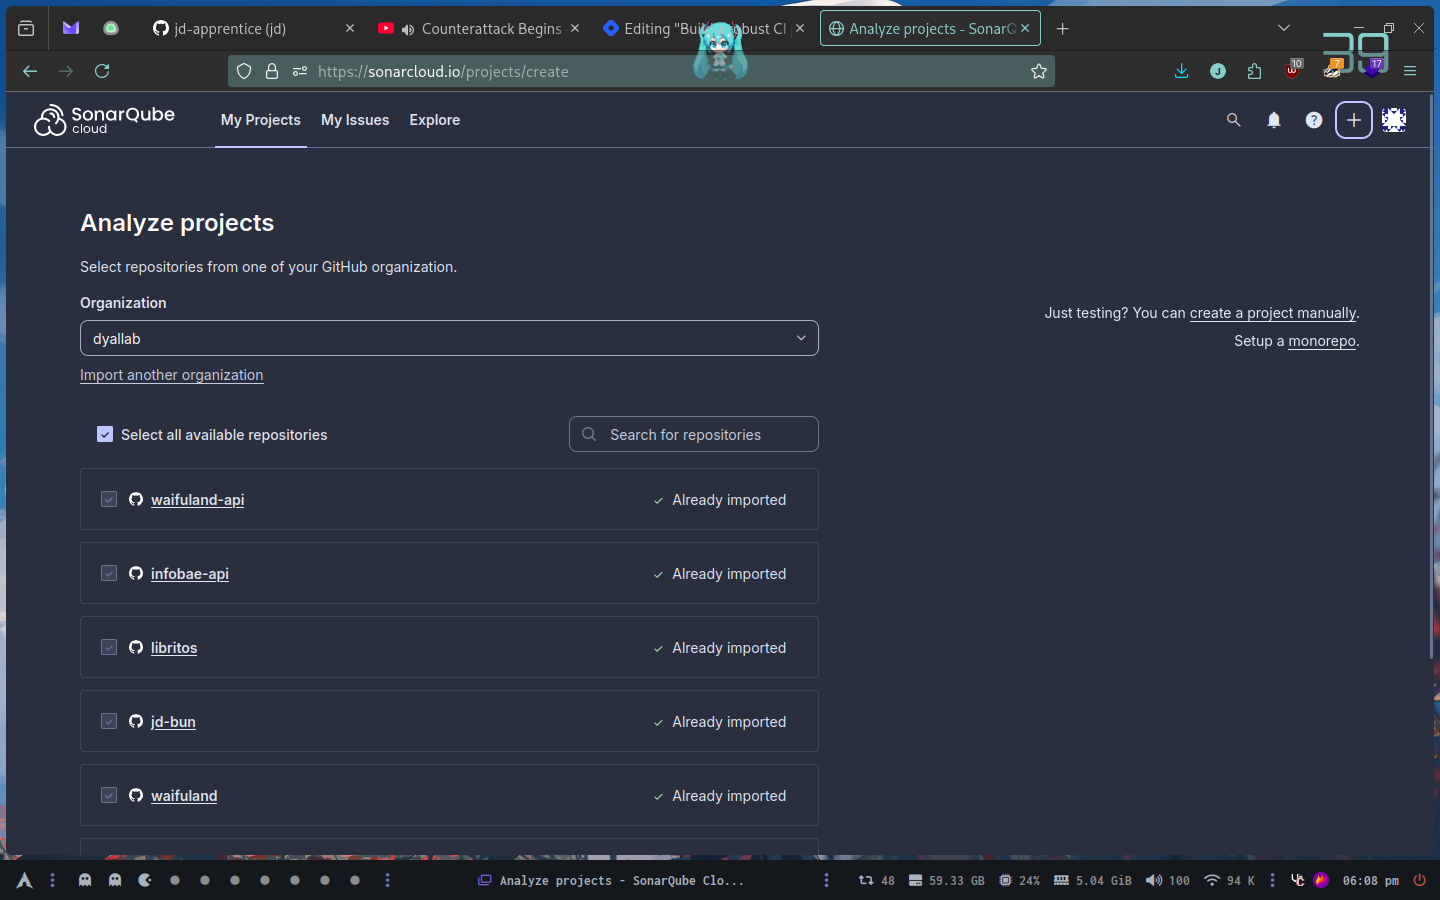
Once we select our organization, we can select a repository to import. Sonarqube is going to ask us about the method of scan on new code
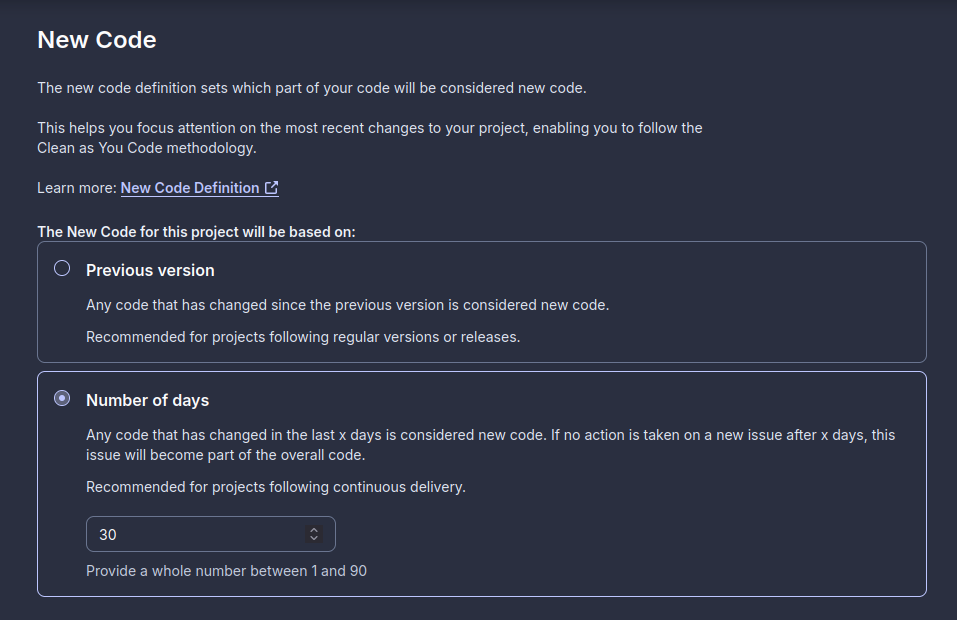
In my case since I’m not doing releases on my personal projects I’ve selected the second option
Also I’m using the automatic analysis (works quite well even tho sonar itself says not recommended)

With this option enabled whenever you open a pull request it will leave a comment with the status of that new code
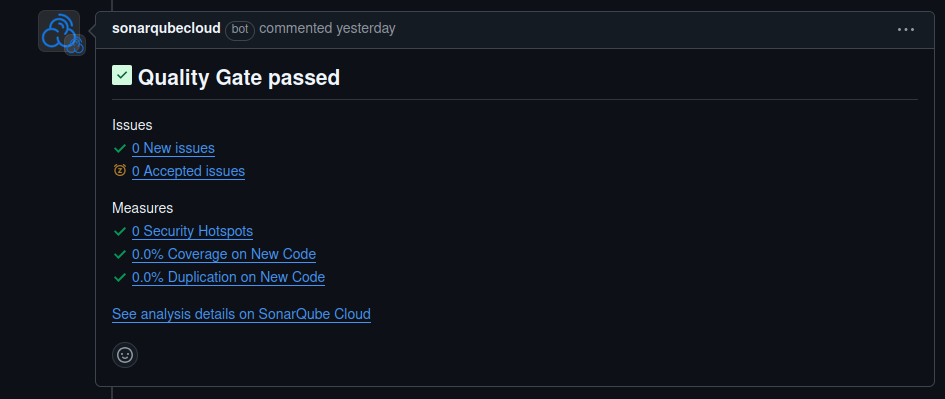
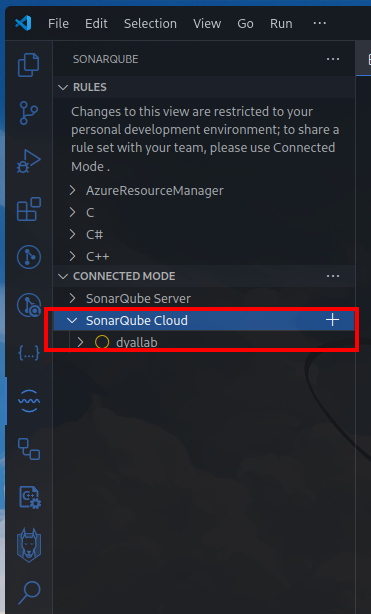
From there we can follow and see the issues mark by sonarqube. You can also use their extension in VSCode to track things earlier before they appear on a PR

With this installed we could add a sonar server (self hosted) or the cloud one (my case)
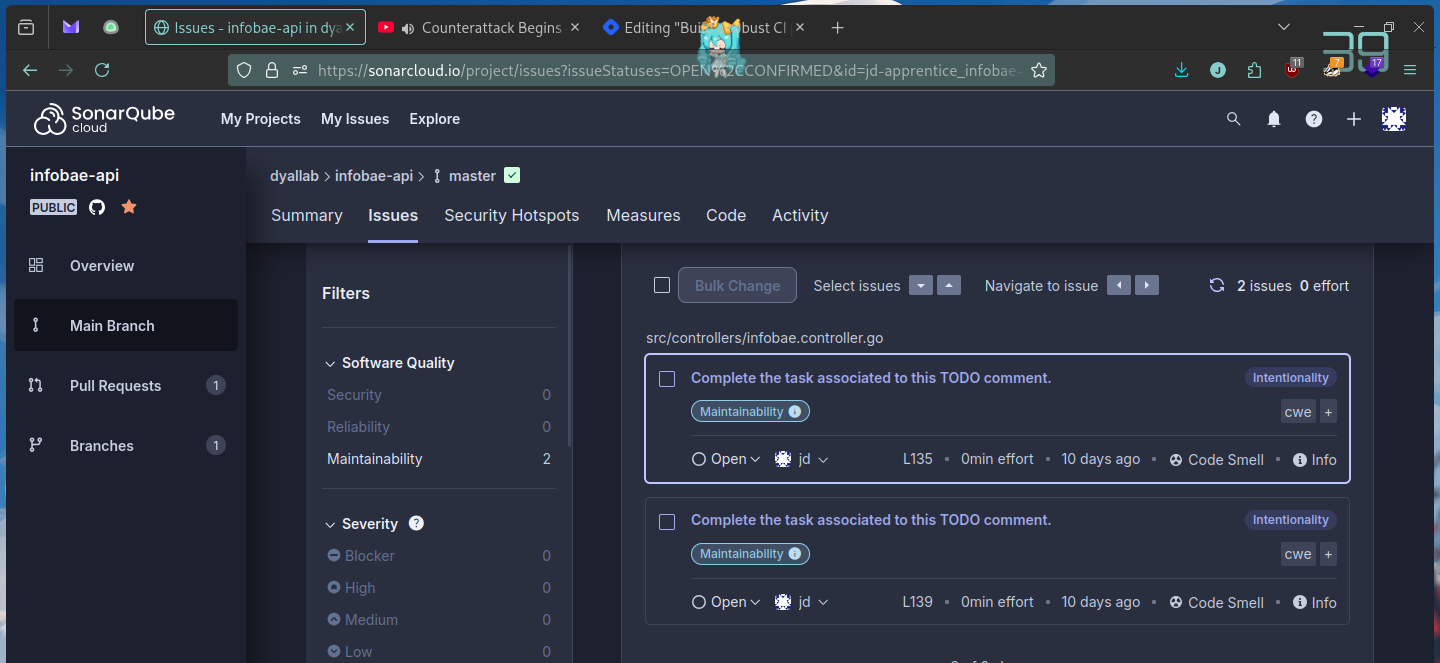
We could also manually check the issues in their webpage if needed
Linter
In the linter section we should evaluate if this needs to run either at pre-commit level or CI one, since it can be tedious for the developers in some cases (mostly because of their gitflow)
Also depending on the lang you are working on you may need a different tool. In this example I’m going to use https://golangci-lint.run/ in a golang project.
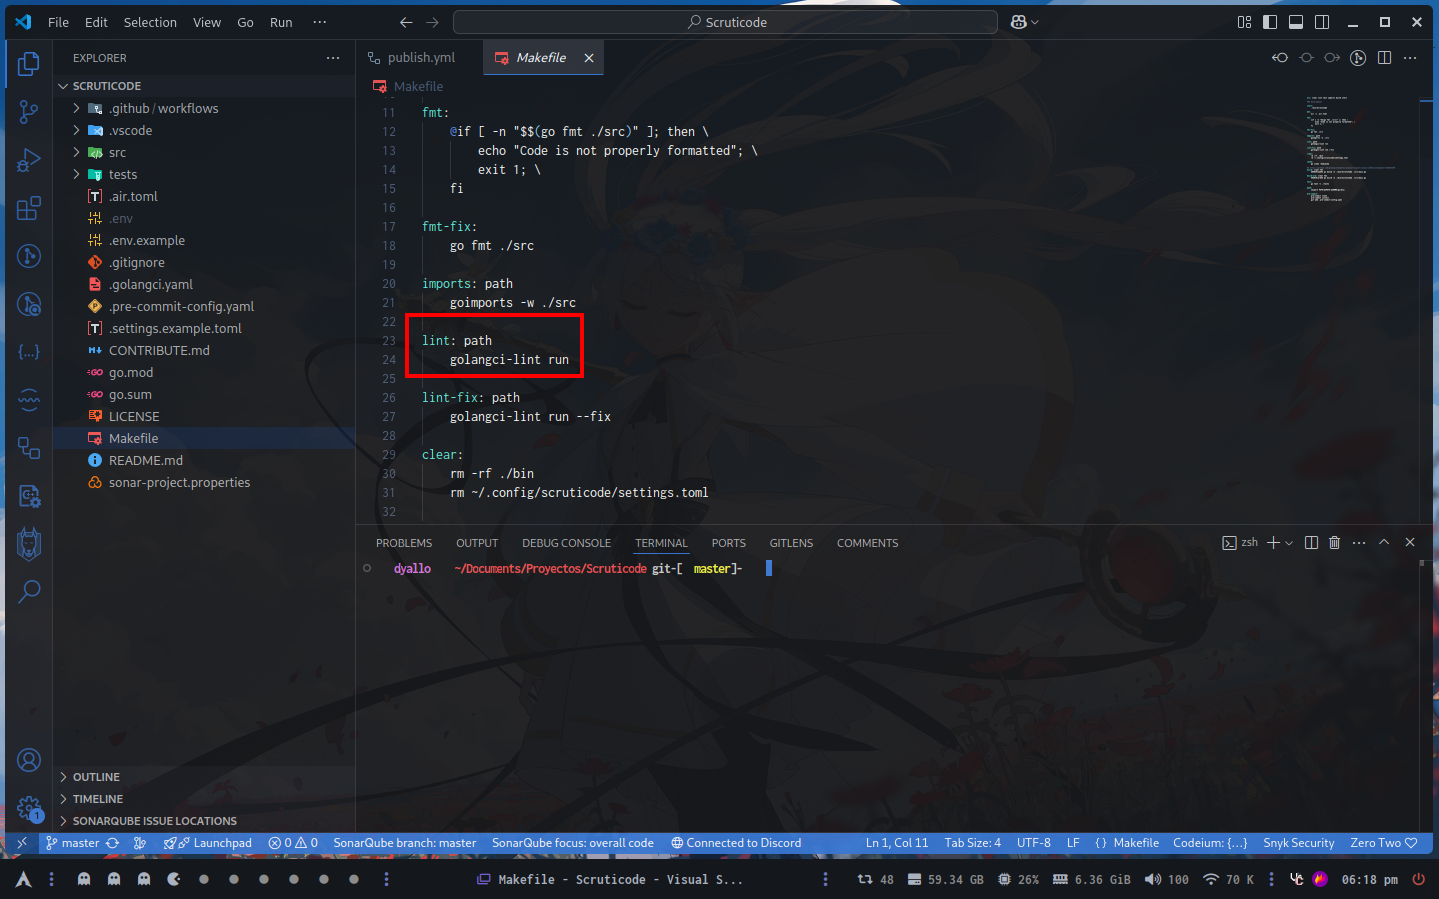
In the root of my project I have a Makefile which I mostly use it to have shortcuts for commands (so I don’t have to remember them) or just to add a dependency (another command) previous to run that one.
In the case I’m highlighting here I’m running path before lint. To run this I have to type make lint and it will check these things (that are defined in my .golangci.ymal
# yaml-language-server: $schema=https://golangci-lint.run/jsonschema/golangci.jsonschema.json
## Copied from https://github.com/microsoft/typescript-go
### https://golangci-lint.run/usage/linters/

run:
  allow-parallel-runners: true
  timeout: 180s

linters:
  disable-all: false
  enable-all: true
  disable:
    - tenv
    - godox
    - gci
    - gofumpt
    - godot
    - gofmt
    - wsl

linters-settings:
  depguard:
    # Rules to apply.
    #
    # Variables:
    # - File Variables
    #   Use an exclamation mark `!` to negate a variable.
    #   Example: `!$test` matches any file that is not a go test file.
    #
    #   `$all` - matches all go files
    #   `$test` - matches all go test files
    #
    # - Package Variables
    #
    #   `$gostd` - matches all of go's standard library (Pulled from `GOROOT`)
    #
    # Default (applies if no custom rules are defined): Only allow $gostd in all files.
    rules:
      # Name of a rule.
      main:
        # Defines package matching behavior. Available modes:
        # - `original`: allowed if it doesn't match the deny list and either matches the allow list or the allow list is empty.
        # - `strict`: allowed only if it matches the allow list and either doesn't match the deny list or the allow rule is more specific (longer) than the deny rule.
        # - `lax`: allowed if it doesn't match the deny list or the allow rule is more specific (longer) than the deny rule.
        # Default: "original"
        list-mode: lax
        # List of file globs that will match this list of settings to compare against.
        # Default: $all
        files:
          - "!**/*_a _file.go"
        # List of allowed packages.
        # Entries can be a variable (starting with $), a string prefix, or an exact match (if ending with $).
        # Default: []
        allow:
        - Scruticode/src/config
        - Scruticode/src/constants
        # List of packages that are not allowed.
        # Entries can be a variable (starting with $), a string prefix, or an exact match (if ending with $).
        # Default: []
        deny:
          - pkg: "math/rand$"
            desc: use math/rand/v2
          - pkg: "github.com/sirupsen/logrus"
            desc: not allowed
          - pkg: "github.com/pkg/errors"
            desc: Should be replaced by standard lib errors package

issues:
  max-issues-per-linter: 0
  max-same-issues: 0

  exclude:
    - '^could not import'
    - '^: #'
    - 'imported and not used$'
Since I’m using the enable-all rule everything is enabled and in the disable section I’m discarding some of them.
The full list of linters available for this tool are here https://golangci-lint.run/usage/linters/ each one checks something different and can be customized
In my case in addition to golangci I’m using https://pre-commit.com/ that works as a general rule for pre-commit rules (hooks/wrappers for the ones in .git)
To start a pre-commit project we need to ofc installed, then once we have it available globally on our system we can
pre-commit:
    pre-commit clean
    pre-commit install
    git add .pre-commit-config.yaml
We also need a .pre-commit-config.yaml
## https://golangci-lint.run/usage/configuration/

repos:
  - repo: https://github.com/tekwizely/pre-commit-golang
    rev: v1.0.0-rc.1
    hooks:
      - id: go-imports ## go install golang.org/x/tools/cmd/goimports@latest
      - id: golangci-lint ## yay -S golangci-lint
        args: ["--fix"]
Here I’m saying which hooks I want to run on each commit, since most of the things are being part of my linter I only use these two.
New if the hooks run and I had something that won’t pass their validations it will be displayed like this
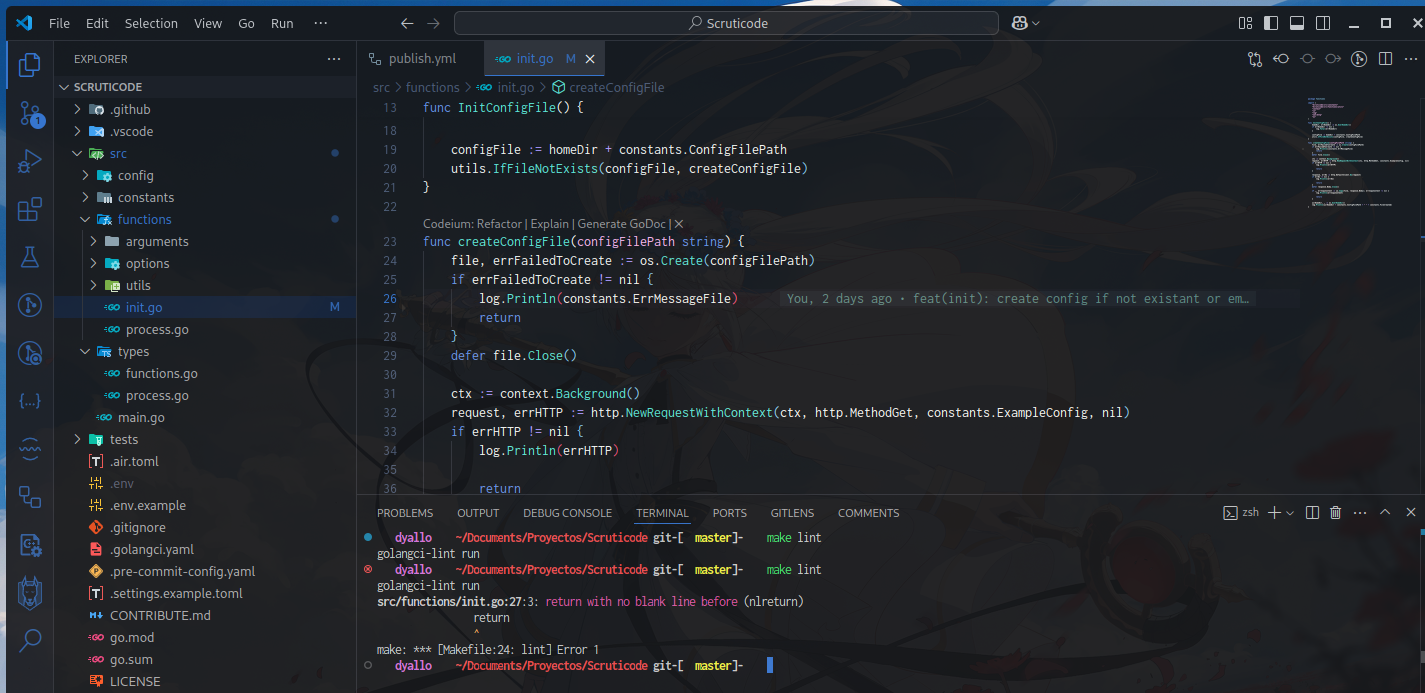
Like mentioned before, this could be run it pre-commit level or CI level. If we decided to run it at CI level we should need to install golangci at the pipeline. I’ll suggest using their binary
https://golangci-lint.run/welcome/install/#binaries
Then export the golang path with export PATH="$PATH:$HOME/go/bin" this will make the binary available for the shell that is running.
Format
In the case of format I’m gonna explain using the JS ecosystem, one popular tool there is Prettier.
To install prettier we should follow their guide https://prettier.io/docs/install/
Also think this, if everyone in the team uses prettier, consider not using a extesion and have configuration at VSCode level and repository level, only use the one in the repository since is the one that follows your company needs.
One pretter.config.js could look like this
export default {
    "arrowParens": "avoid",
    "bracketSpacing": true,
    "htmlWhitespaceSensitivity": "css",
    "insertPragma": false,
    "printWidth": 80,
    "proseWrap": "always",
    "quoteProps": "as-needed",
    "requirePragma": false,
    "semi": true,
    "singleQuote": true,
    "tabWidth": 2,
    "trailingComma": "all",
    "useTabs": false
};
And your package.json like this
  "scripts": {
    "lint": "eslint ./src/**/*.ts",
    "lint:fix": "eslint ./src/**/*.ts --fix",
    "format": "prettier --check ./src/**/*.ts",
    "format:fix": "prettier --write ./src/**/*.ts",
  },
Now same here as the linter one, we could add with husky a step for pre-commit or added into the CI process.
For prettier in the github actions you could use https://github.com/marketplace/actions/prettier-action
Which contains an example
name: Continuous Integration

# This action works with pull requests and pushes
on:
  pull_request:
  push:
    branches:
      - main

jobs:
  prettier:
    runs-on: ubuntu-latest

    steps:
      - name: Checkout
        uses: actions/checkout@v3
        with:
          # Make sure the actual branch is checked out when running on pull requests
          ref: ${{ github.head_ref }}

      - name: Prettify code
        uses: creyD/prettier_action@v4.3
        with:
          # This part is also where you can pass other options, for example:
          prettier_options: --write **/*.{js,md}
Secrets
In the case of secrets we could check if someone uploaded sensitive information to alert the team about it.
(In the case of a git workflow in github, gitlab, azure, blabla) it could be that the portion of code remains there (azure won’t delete abandoned pull requests for example)
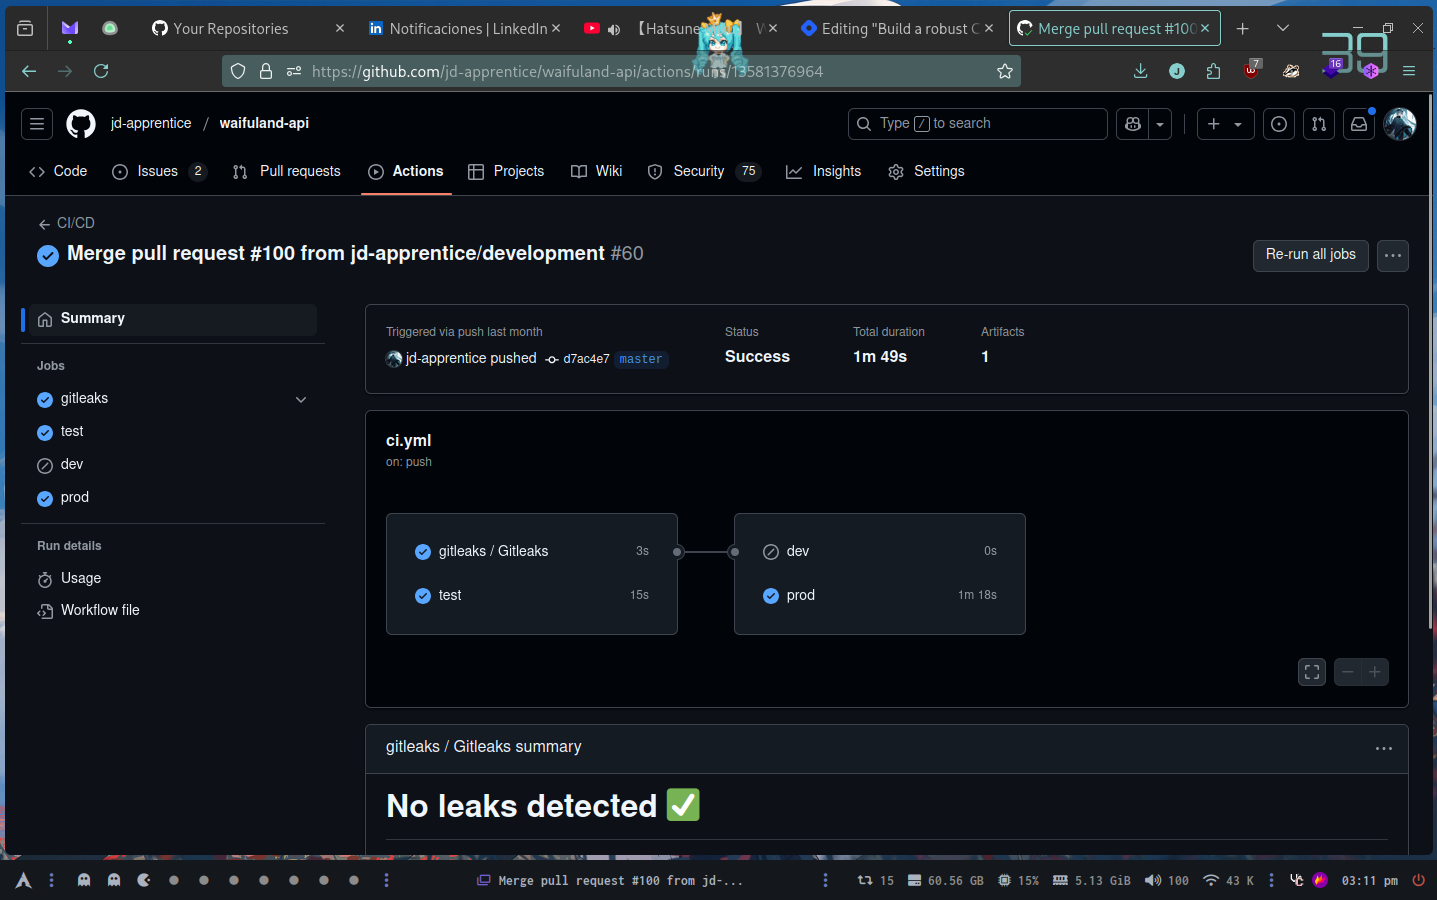
In the case of gitleaks I’m using a reusable workflow that I’ve built myself
name: CI/CD

on:
  workflow_dispatch:
  push:
    branches:
      - master
      - development
    paths:
      - "src/**"
      - "Dockerfile"
      - ".github/workflows/*.yml"
  pull_request:
    branches:
      - master
      - development
    paths:
      - "src/**"
      - "Dockerfile"

env:
  BRANCH_NAME: ${{ github.ref_name }}
  APP_NAME: waifuland_api
  APP_VERSION: latest
  APP_DEV_VERSION: unstable

jobs:
  gitleaks:
    uses: jd-apprentice/jd-workflows/.github/workflows/gitleaks.yml@main
    with:
      runs-on: ubuntu-latest
      name: Gitleaks
    secrets:
      gh_token: ${{ secrets.GITHUB_TOKEN }}
The origin of that workflow comes from https://github.com/jd-apprentice/jd-workflows
Conclusion
Now like I mentioned in some of the points, a few steps can be done at pre-commit level and not in the pipeline itself, that’s up to you or your team. But if you want to enforce everything you can do it here without interfere with the code in their projects.
Subscribe to my newsletter
Read articles from jd directly inside your inbox. Subscribe to the newsletter, and don't miss out.
Written by
