Understanding Build Tools: Maven, Gradle, and npm
 Yash Patil
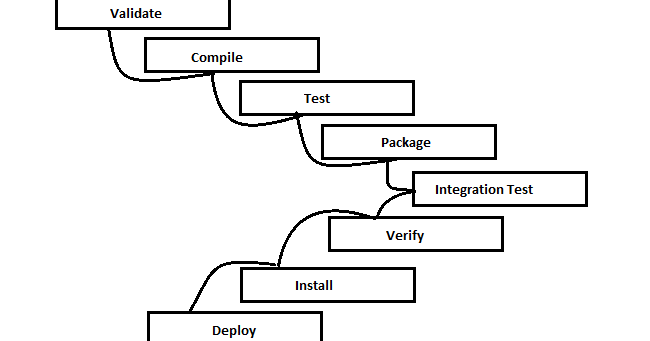
In our last-blog we have already covered what Build Tools are, what are application artifacts, what is Maven and a thorough hands on demo to understand maven lifecycles so do check it out if you dont want to miss out.
But in this Blog post lets get an overview about what Gradle is? What is it, what is it used for….? And also we will take a look at npm(Node Package Manager), is it a build tool? Perhaps not. Lets find out, shall we?
Gradle
Gradle is an open-source build automation tool that's primarily used for Java projects but can handle projects in other languages as well. It uses a Groovy-based domain-specific language (DSL) or Kotlin for scripting, which makes it highly flexible and powerful for managing dependencies, tasks, and builds.

So similarly like Maven, Gradle is also a powerful project management tool which can be used for project management, dependencies resolution and application builds.
But what makes it different from Maven? Why have two build tools providing the same function right?
Maven vs. Gradle: Key Differences
Language and Configuration:
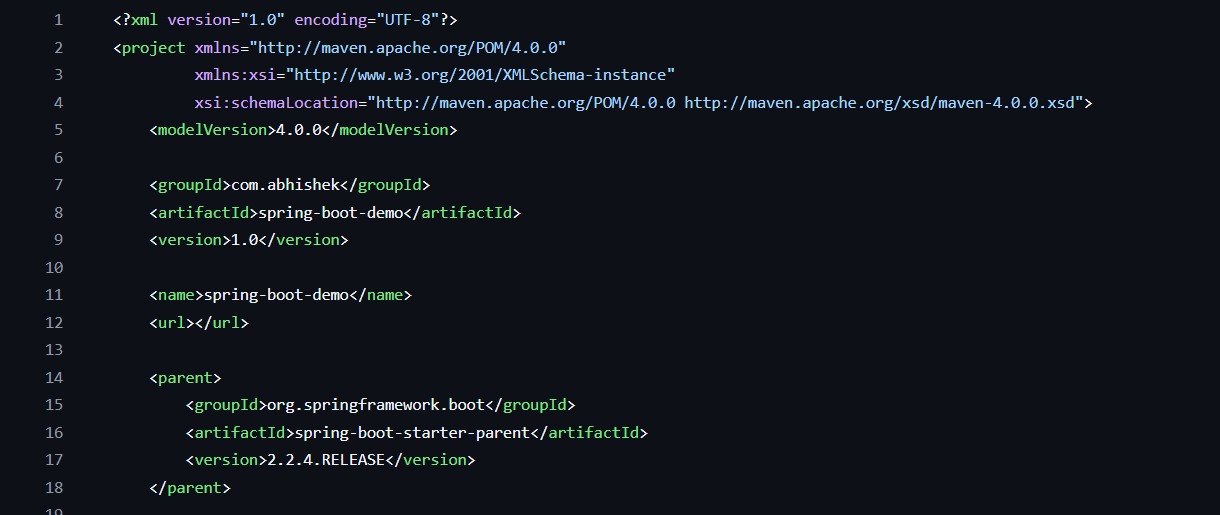
Maven: Utilizes XML for configuration, leading to a standardized but sometimes verbose setup.
Gradle: Employs a Groovy-based DSL (Domain-Specific Language) or Kotlin for configuration, offering a more concise and expressive syntax.
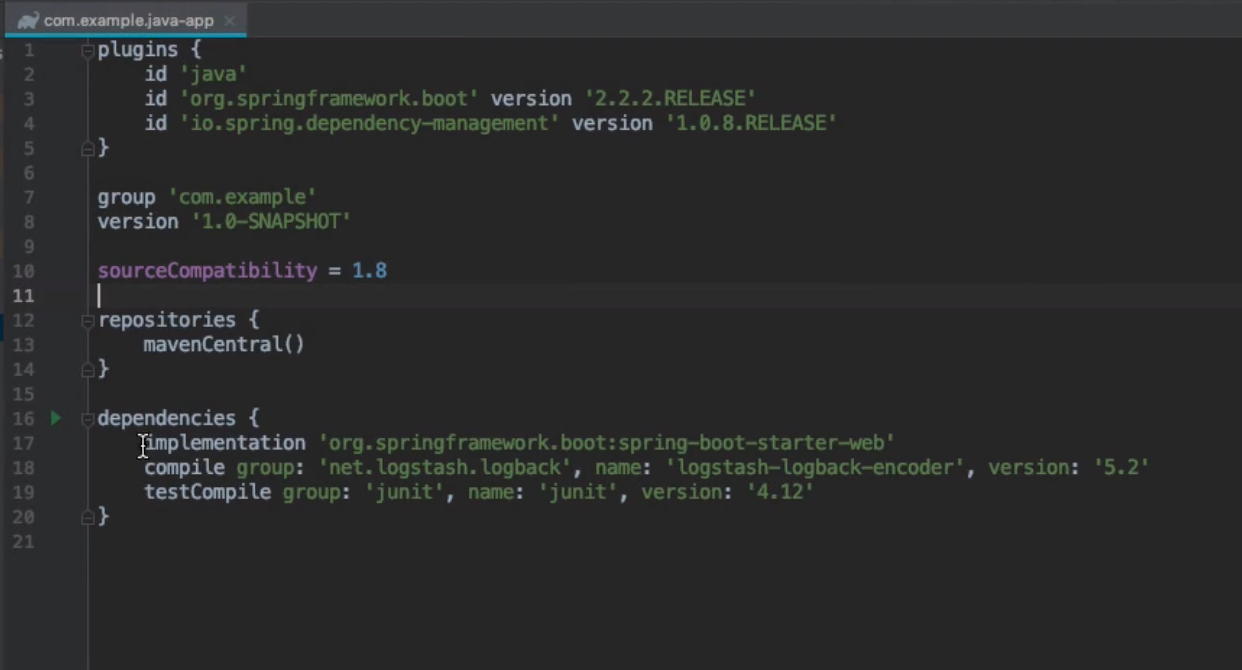
Doesn’t this look much cleaner and flexible to write?
Flexibility vs. Convention:
Maven: Emphasizes convention over configuration, providing a uniform project structure and build lifecycle, which simplifies onboarding but may limit customization.
Gradle: Offers greater flexibility, allowing extensive customization of build processes, which is beneficial for complex projects requiring tailored build logic.
Performance:
Maven: Performs well but may experience longer build times as project complexity increases.
Gradle: Designed for high performance with features like incremental builds and build caching, resulting in faster build times, especially for large projects.
Thing here to understand is that, this doesn’t mean one is better than the other. Use either one based on project needs.
Multi-Language Support:
Maven: Primarily focused on Java projects.
Gradle: Supports multiple programming languages, including Java, C++, and Python, making it versatile for polyglot projects.
I guess that give you a good idea how Maven and Gradle are different from one another. But now let us understand what are Incremental Builds and Caching in Gradle.
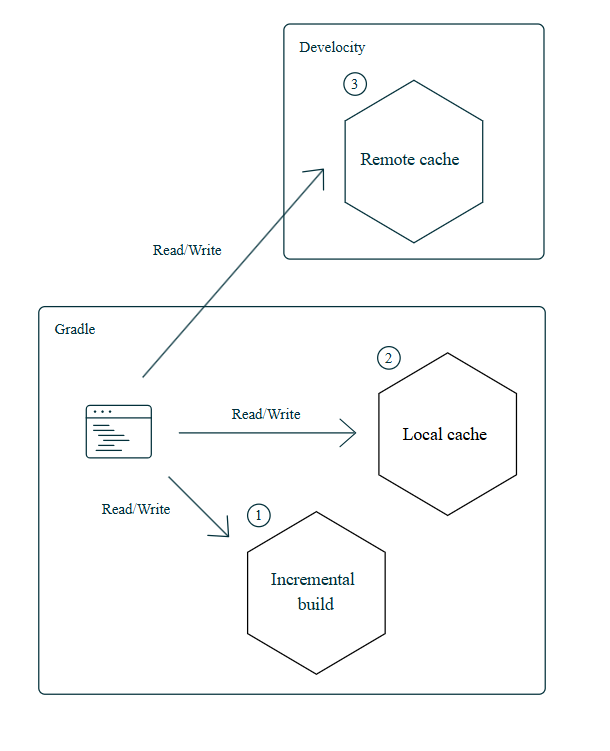
1. Incremental Builds
Gradle performs incremental builds by detecting what has changed since the last build and only executing necessary tasks instead of rebuilding everything from scratch.
How It Works:
Gradle tracks task inputs and outputs (e.g., source files, dependencies, configurations).
If inputs haven't changed, the task is skipped because the output is already up to date.
If a file changes, Gradle rebuilds only the affected components, reducing overall build time.
✅ Example:
If you modify a single Java class in a project, Gradle recompiles only that class instead of rebuilding the entire project.

2. Build Cache
Gradle uses a build cache to store outputs of previously executed tasks and reuse them later, even across different builds or machines.
Types of Caching:
Local Cache:
Stores task outputs on the same machine.
If a task runs with the same inputs as a previous execution, Gradle reuses the cached output.
Remote Cache:
Enables teams to share build outputs across different machines.
Useful in CI/CD pipelines, where different agents can reuse cached results instead of rebuilding.
✅ Example:
If a CI server builds a project once and caches the results, subsequent builds on other agents can fetch the cached outputs instead of rebuilding everything.
Benefits of Incremental Builds & Caching
✔ Faster builds – Reduces compilation time by skipping unnecessary work.
✔ Efficient CI/CD pipelines – Saves resources by reusing existing build outputs.
✔ Better scalability – Works well in large codebases where full rebuilds are expensive.
Gradle Project Structure
In a typical Gradle-based Java project, the structure often follows conventions, but it's customizable based on project needs. Here’s a simplified example structure:
cssCopyEditmy-java-project/
│
├── build.gradle       (Project-wide build script)
├── settings.gradle    (Settings for the Gradle project)
│
├── src/
│   ├── main/
│   │   ├── java/      (Main Java source code)
│   │   └── resources/ (Resources like properties files)
│   │
│   └── test/
│       ├── java/      (Test source code)
│       └── resources/ (Test resources)
│
└── build/              (Generated build output)
You can see how similar the project structure is compared to a Maven project. The only observable difference is the final build out folder (for maven it was the target folder) and the main configuration script build.gradle file (for maven it was the pom.xml file).
Important Files in Gradle Projects
build.gradle:
This is the core build script for the entire project.
It defines dependencies, plugins, tasks, and other configurations.
You'll specify things like Java version, plugins (e.g., Java plugin), dependencies (libraries your project relies on), and custom tasks.
settings.gradle:
This file includes settings for the Gradle project.
It can define which subprojects are part of the build and other global settings.
To initialize a Gradle project use :
gradle init
Make sure Gradle is installed on your system. Executing this command on the CLI will show you a bunch of options such as type of the project, programming language of implementation, type of build script, etc.
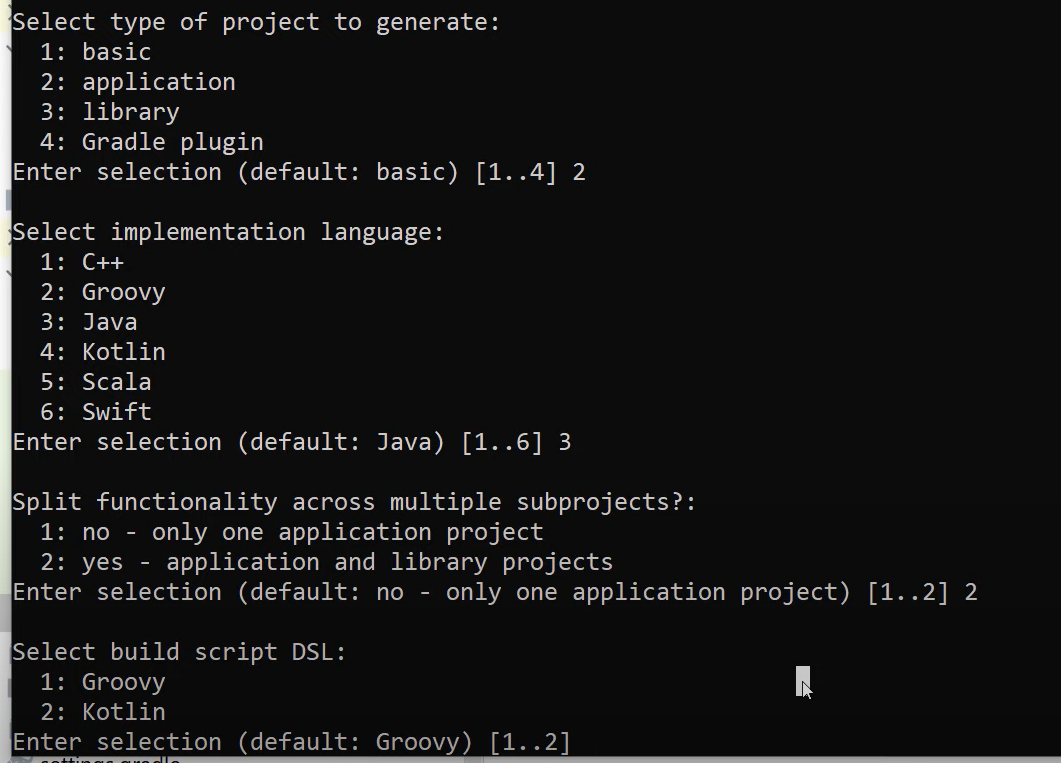
And there you go, a Java-Gradle project is has been successfully initialized.
NOTE : A very important thing here to note is that both Maven and Gradle use the same Maven central repository for dependencies resolution!
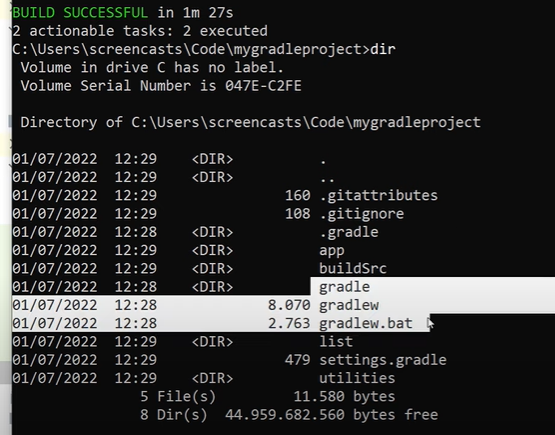
Gradle Wrapper
gradlew and gradlew.bat:
These are shell scripts (Unix) and batch scripts (Windows), respectively.
They bootstrap the Gradle environment for the project without requiring a pre-installed Gradle distribution on each developer's machine.
Purpose of Gradle Wrapper
The Gradle Wrapper ensures that everyone working on the project uses the exact version of Gradle specified by the wrapper configuration. This consistency helps avoid issues caused by different Gradle versions across developers' environments. It also simplifies setup for new developers joining the project, as they only need Java installed, and Gradle will be automatically downloaded as needed by the wrapper scripts.
To build a Gradle project and create the application artifact we use the gradle wrapper command :
./gradlew build
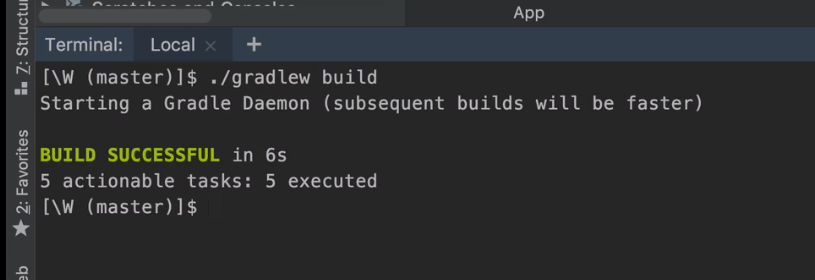
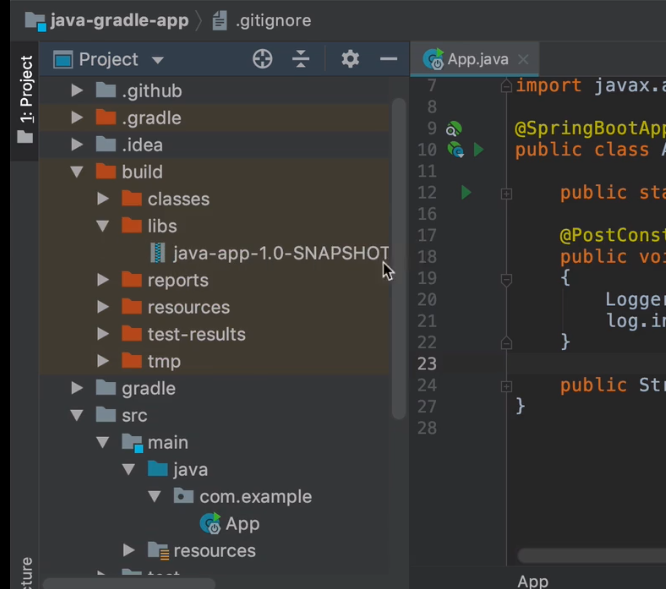
And there you go, application artifact is successfully built under ./build/libs folder. The ./build folder also contains folders such as classes, resources, test-results which store compiled classes and executed unit test results in form of a HTML file.
Now this .jar artifact can we used to distribute and run the application on the server similar to Maven!
And that’s all about Gradle you need to know to begin with! Get going on your own Gradle or Maven projects right now!
npm ( Node Package Manager)
So we studied build tools for Java based applications, but what if you are developing an application using JavaScript ?
JavaScript Applications do not have special artifact types, they can just be packed into a .zip or a .tar file.
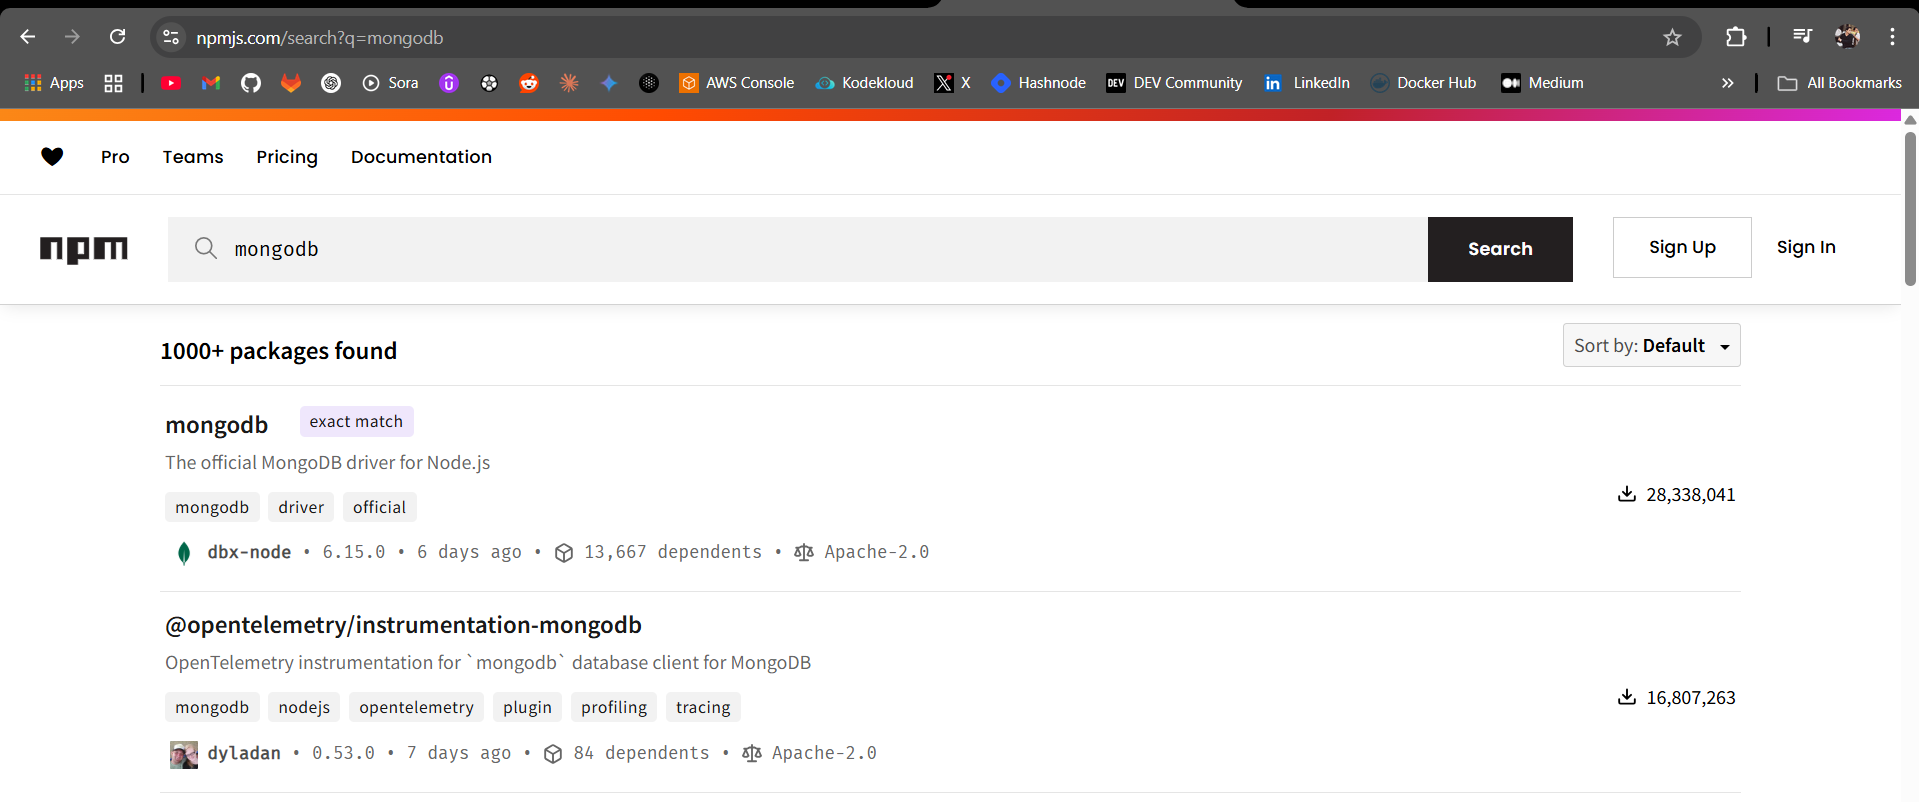
What is npm?
npm stands for Node Package Manager. It is primarily a package manager for JavaScript, and it comes bundled with Node.js installation. npm allows developers to discover, share, and reuse packages of code from hundreds of thousands of developers — and assemble them in powerful new ways.
Is npm a Build Tool or a Package Manager?
npm is primarily a package manager rather than a build tool. Its primary function is to manage dependencies and package distribution rather than transpiling, compressing and building the application artifact.
Applications of npm
npm is used primarily for managing dependencies in JavaScript applications, including Node.js applications, front-end web development projects, and even in some cases, in backend services built with Node.js. npm uses the npm central repository to handle installation of dependencies unless specified anything else.
Handling Dependencies
npm handles dependencies by defining them in a package.json file. This file lists all dependencies (both direct and indirect) required for the project. When you install a package using npm install, it reads the package.json and installs the required dependencies recursively.
The package.json file which is written using JSON is equivalent to the pom.xml or build.gradle file.

package.json vs package-lock.json
package.json: This file is where the metadata about a project and its dependencies are stored. It includes information such as project name, version, description, entry points, and most importantly, dependencies.
package-lock.json: Introduced in npm 5, this file is automatically generated for any operations where npm modifies either the
node_modulestree orpackage.json. It locks down the versions of dependencies to ensure consistent installs across different machines.
node_modulesfolder is created in your project directory having installed all the dependencies mentioned in the package.json file once we execute the npm install command.
So you might be wondering what will be the workflow of the JavaScript applications if npm does not produce a application artifact?
We can either use npm pack command. When you run npm pack, it creates a compressed tarball (.tgz file) of your package. This tarball includes the source code, package.json, and other necessary files, but it does not include dependencies unless explicitly included in your project. To run the application of the server you must install the dependencies first, unpack this zip or tar file and then run the application using the appropriate script command!
Let me show you an example of how npm can be used in containerized environments:

So basically here is a Dockerfile I wrote for a frontend microservice of a MERN stack application, similarly as mentioned above what I did is :
Created a
/appdirectory inside the Docker containerCopied my
package.jsonfile inside the container in the /app folderInstalled the dependencies first
Then copied the source code of the application inside the
/appfolder.And then finally executed the script command to run the application!
And well that’s it, your JavaScript application is running inside your container on the specified port.
npm Scripts (npm start, npm stop, npm test, npm publish)
These commands are defined in the scripts section of package.json:
npm start: Typically used to start the application. It is customizable and can run any Node.js command.npm stop: Can be used to stop a running application or server.npm test: Executes tests defined in thescriptssection.npm publish: Publishes the package to the npm registry, making it available for others to install.
And this is just for your additional information but :
Using webpack to Bundle
webpack is a module bundler for JavaScript applications. It takes modules with dependencies and generates static assets representing those modules. webpack bundles all your assets, including JavaScript, CSS, images, and fonts, into a smaller number of bundles (usually one) to be served to the browser. It helps in optimizing performance by reducing the number of requests made to the server.
Conclusion
Alright we have explored build tools such as Maven and Gradle used to build and manage Java based projects and npm which is package management tool used for Java-Script based applications. I think this is more than enough for you to get started on using Build tools and Package Managers!
Connect with me on LinkedIn.
##
Subscribe to my newsletter
Read articles from Yash Patil directly inside your inbox. Subscribe to the newsletter, and don't miss out.
Written by